Overworked724
-
Posts
1,266 -
Joined
-
Last visited
Content Type
Profiles
Forums
Gallery
Events
Everything posted by Overworked724
-
 Very nice jig! 👍🏽
 -
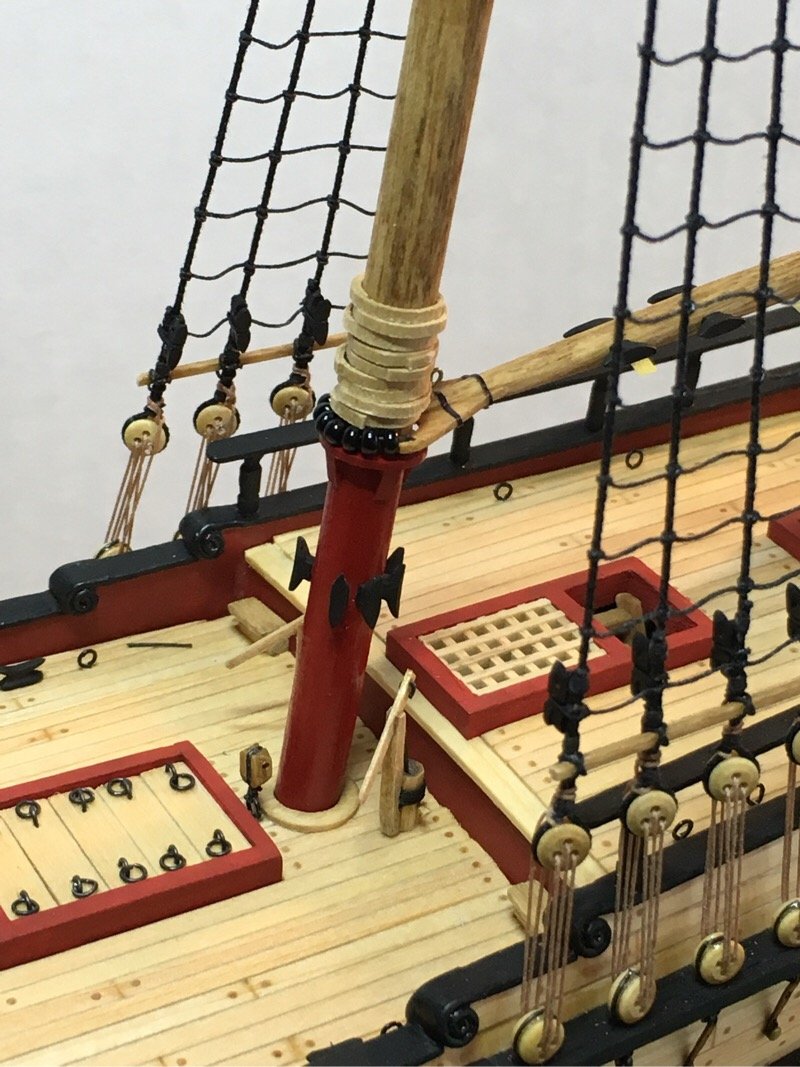
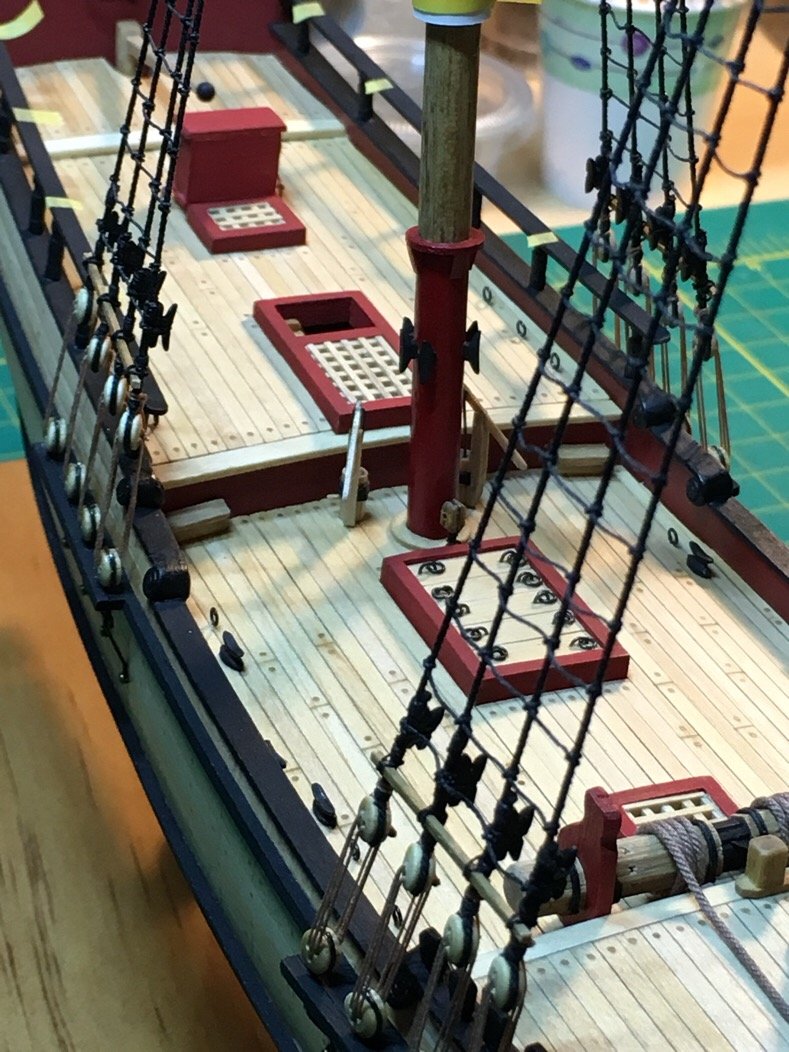
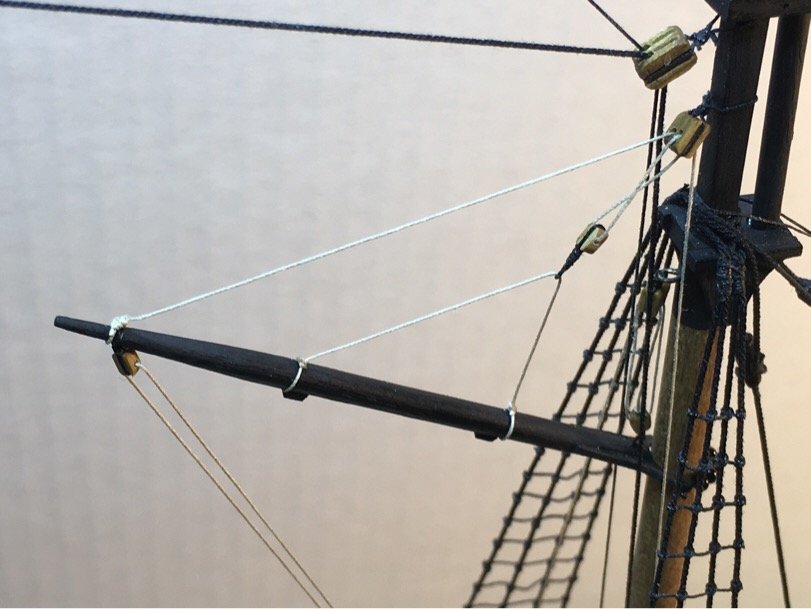
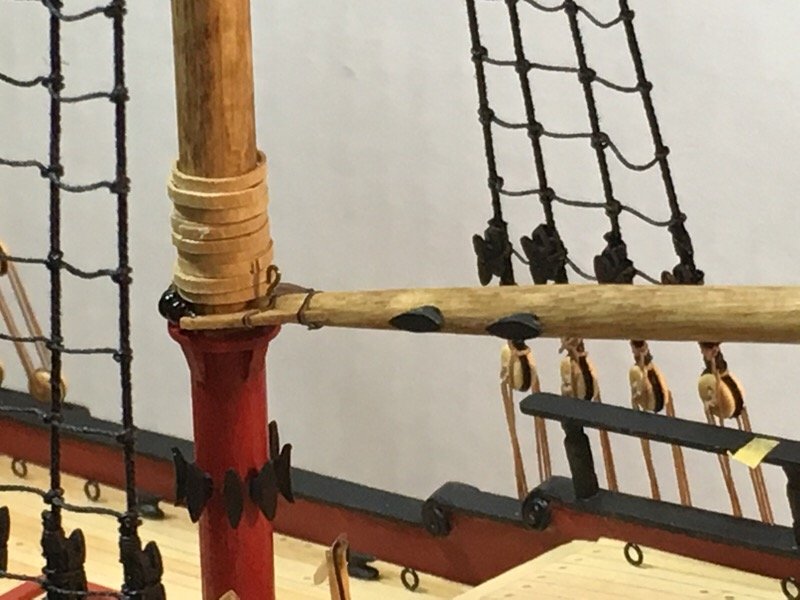
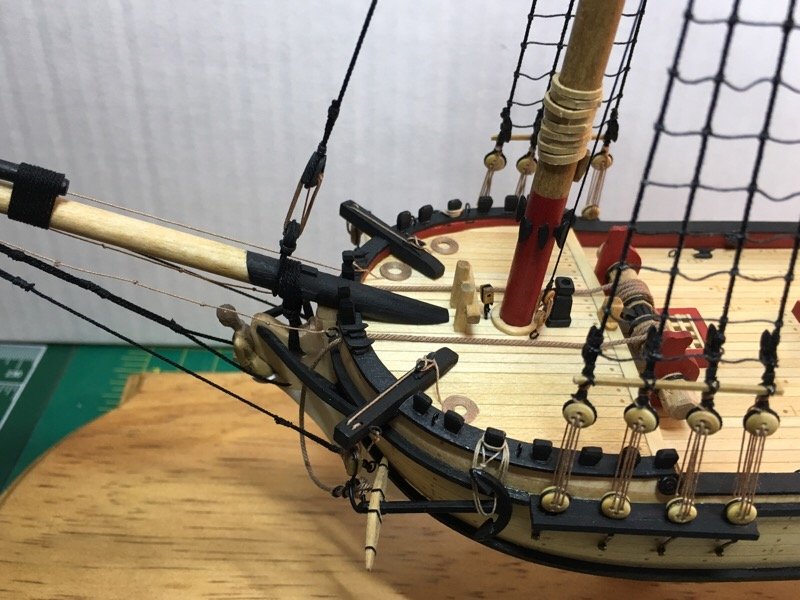
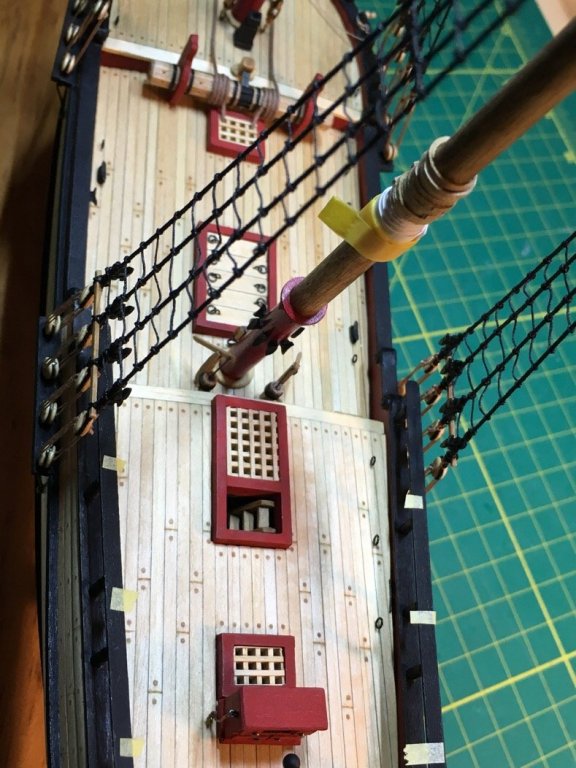
Added some rope details. Also made up the tackle and installed the Fore gaff. Slow going. But result was pretty good. Trying to take my time. Moving on!


- 449 replies
-
- 7
-

-
- sultana
- model shipways
- (and 2 more)
-
Absolutely fantastic! You created something beautiful there, mate! Awesome job.
-
If I could do it over, I think I’d have made the scupper holes early...before I built up the planking to create the bulkheads. Part of my hesitation in putting in scuppers was that I had a strong suspicion I’d have wrecked my deck planking in the process. Just FYI in the event you wanted to put in authentic scuppers vs the ‘show’ scuppers. Watching with great interest!!!!
- 222 replies
-
- 1
-
-
- sultana
- model shipways
- (and 1 more)
-
Not sure. You could look at the Schooner Sultana education ship and see if they have pics of her without people on it...I know she isn’t hauling much.
-
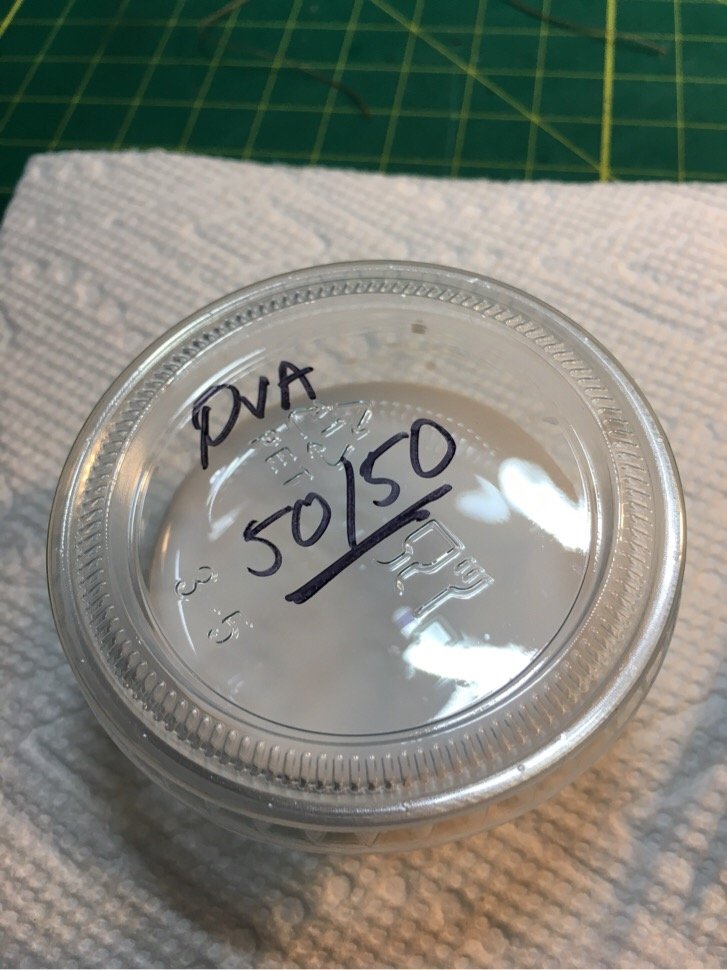
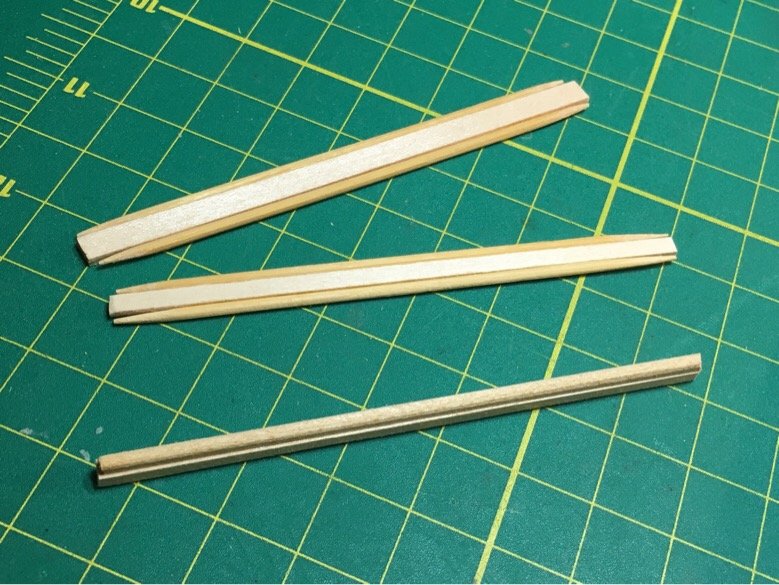
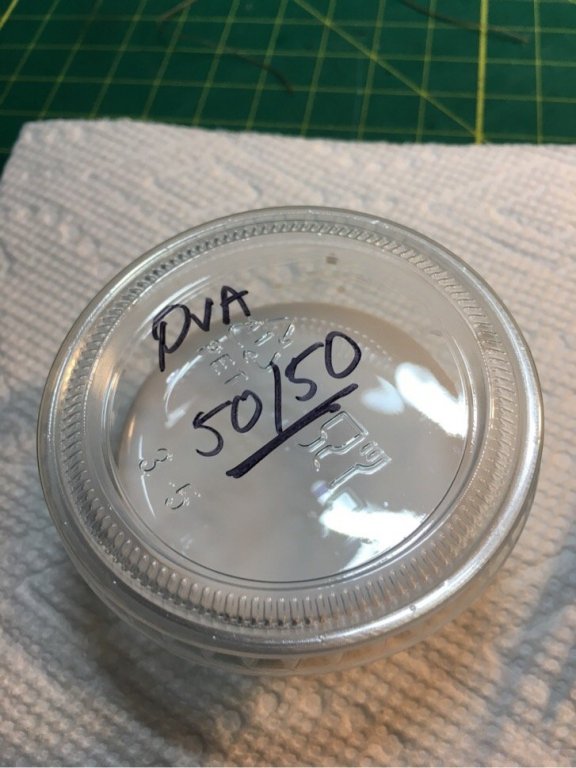
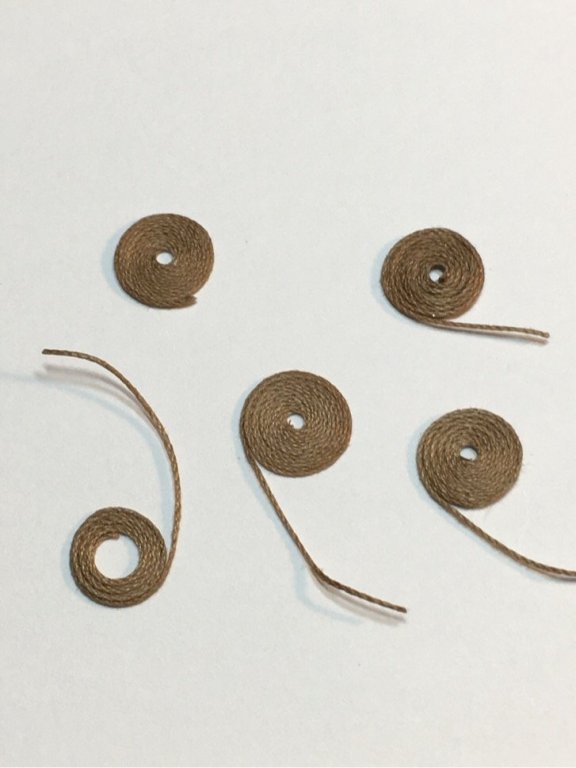
Ok...I tried my idea for making some suitable and reproducible rope coils which will fit on the main boom, mast cleats and shroud cleats! This is going to sound stupid, but it worked. For the jigs, I fashioned (glued) some suitable sized wood strips using toothpicks to fashion the rounded edges. The jig for the main boom cleats were made out of two square strips which were rounded on the edges...those cleats are hung sideways and I wanted the rope coil to look triangular. Next, I wrapped them with thin tin foil. Then...I saturated the rope with 50:50 PVA and wrapped a series of 5 turn wraps, then I’d shift over a bit on the last turn and start a new set of 5 turns....rinse and repeat until you run out of rope. Set to dry. This is the fun part...the foil slides off like quicksilver and retains its shape!!! At this point, I just took scissors and clipped between each section. The foil drops out easy!! Then I test fit it on the ship. Nice thing is that you can squeeze and fiddle with them but the coils hold their shape. I will call that a win and move on to the gaffs now!!! Moving on!!!
- 449 replies
-
- 7
-
-
- sultana
- model shipways
- (and 2 more)
-
Had to stop and consider appropriate jigs for the rope coils which go on the cleats. 🧐 Think I’ve got a couple ideas worth trying. Simple is always good.
- 449 replies
-
- 2
-
-
- sultana
- model shipways
- (and 2 more)
-
It's strange...the main boom was stained, but the stain did not soak in evenly. The back end looks darker (almost dirty) compared to the rest of the boom. I like the wood color, but the fact the masts, boom, and planks, all accepted staining differently makes me realize how important the consistency and understanding of the woods used affect the final look of the ship. I still like the final look of the boom - I had originally considered painting it - but my zeal for 'exposed wood grain' won out. Now working on the gaffs. Moving on...
- 449 replies
-
- 2
-
-
- sultana
- model shipways
- (and 2 more)
-
Seriously considering trying to make my own rope. I find I waste more than is what actually ends upon the ship!
- 449 replies
-
- 1
-
-
- sultana
- model shipways
- (and 2 more)
-
Oh...and the Admiral is the smartest, cleverest, most awesome lady I ever met. I definitely married ‘up’. And she is very proud, as am I, of her AA Degree. 👍🏽
- 449 replies
-
- 1
-
-
- sultana
- model shipways
- (and 2 more)
-
Your son is a doctor!! Congrats!! Best and most reliable free healthcare anywhere!! 😁 True, I qualify for little letters after my name (very little!). But the document I’m most proud of is not a graduate degree, it’s my DD214! I’ll stack my years of service and my VFW life membership against any PhD.! Sadly, being a veteran gives you no letters after your name! I agree, Lou...take pride in who you are ...life isn’t about collecting letters. God isn’t going to ask for your business card at the end of this ride. 😎 I just hope I can finish my Sultana before my ride stops!!!!l
- 449 replies
-
- 2
-
-
- sultana
- model shipways
- (and 2 more)
-
I agree with Lou. Speaking as someone who is constantly too hard on himself!!!
- 222 replies
-
- 1
-
-
- sultana
- model shipways
- (and 1 more)
-
My degrees are in chemistry...not English!! Why do you think the elements in periodic table only have 1-2 letters? Chemists can’t spell worth a darn. But...we do have all the solutions. 😆 (Bad pun)
- 449 replies
-
- 2
-
-
- sultana
- model shipways
- (and 2 more)
-
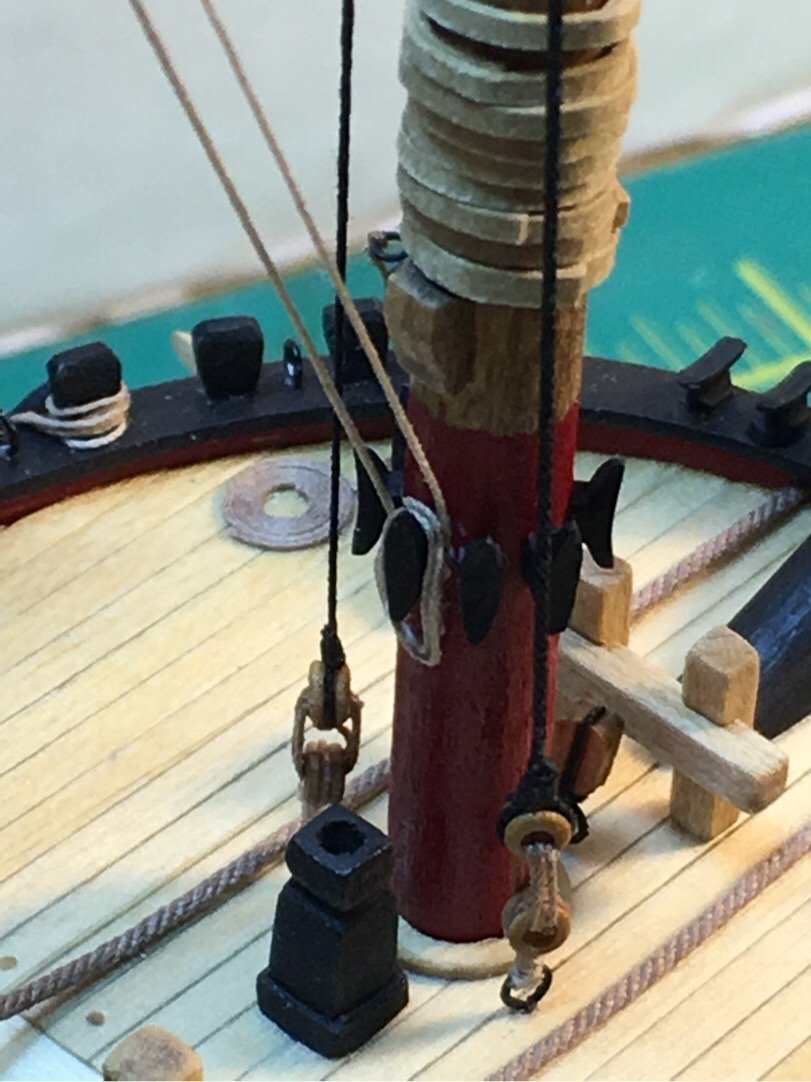
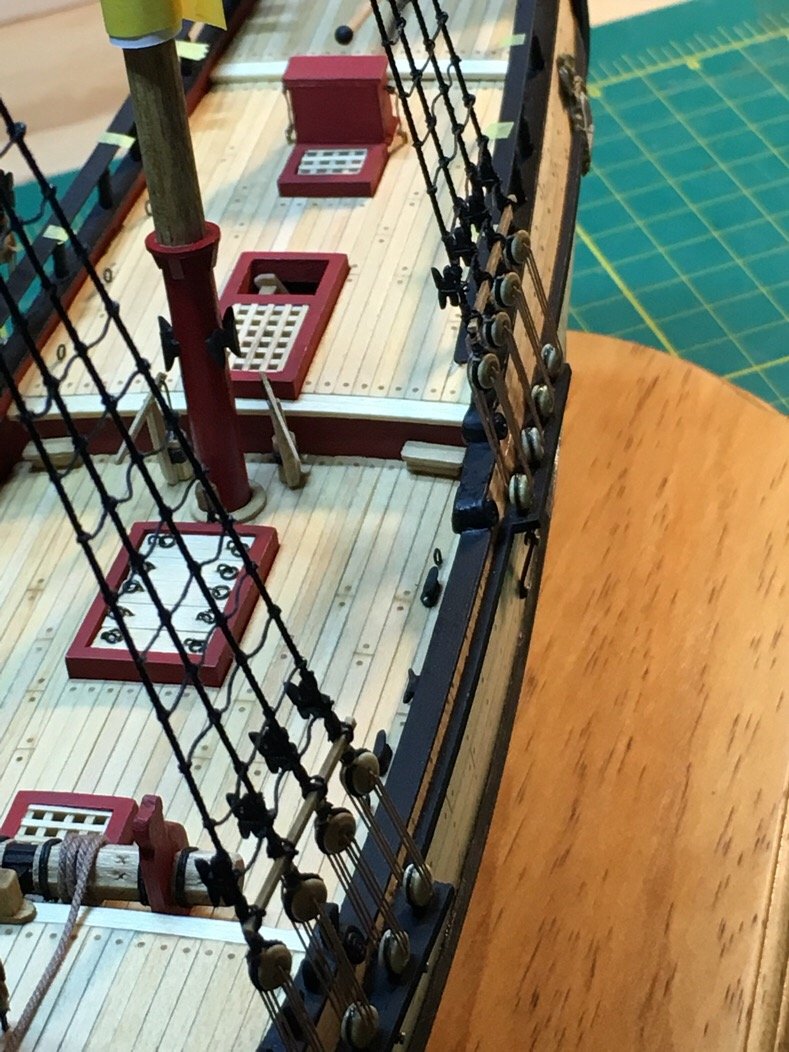
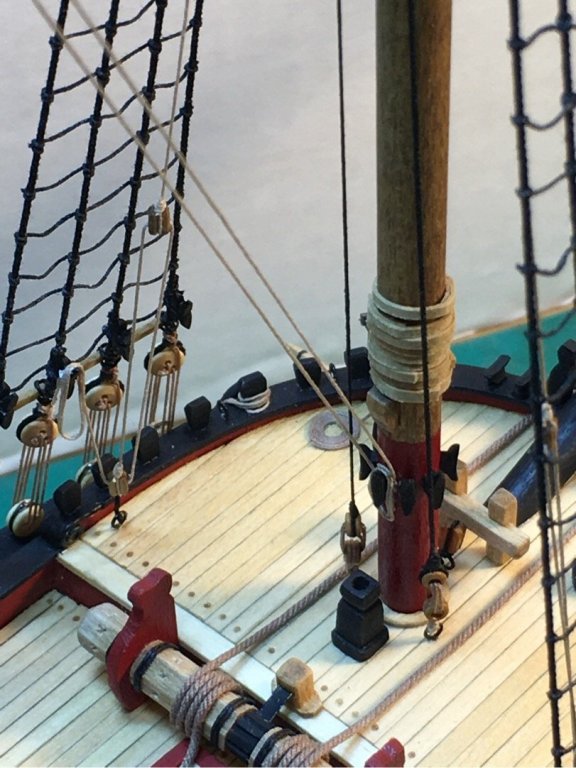
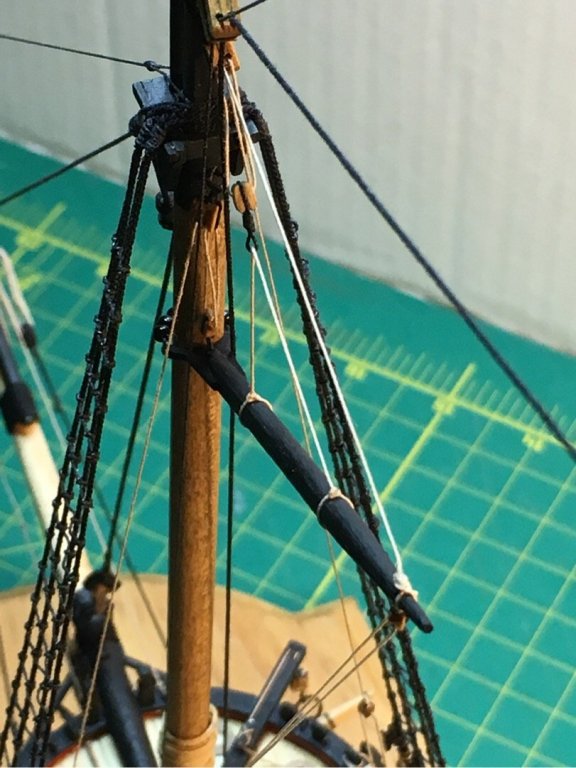
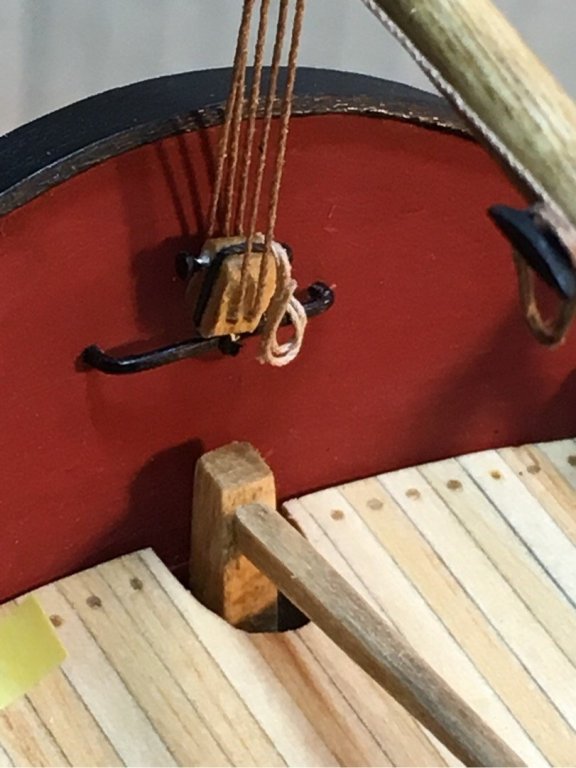
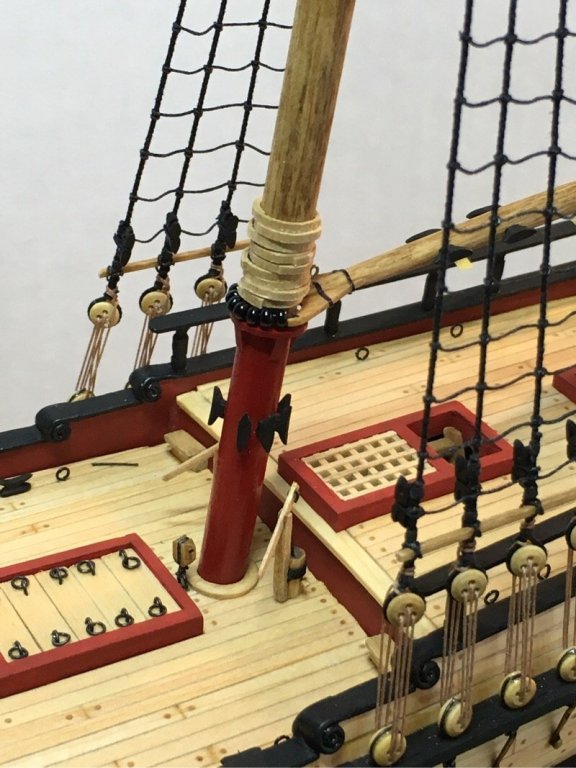
Main boom is in. Realized the block I used for the traveller rod on the transom is too big...something to remember for my next build. Not a surprise, really. I had noticed that my inner stay for the jib boom was the wrong dimension as well...used too small diameter rope. But I’ll live with it...I still like the look. 😁 Beads for the collar I got from Hobby Lobby. See below for courtesy pics. I’ll add ropes later on the cleat and traveler. And a bit of detail using my newly made rope coils on the foredeck. Moving on...!!!!
- 449 replies
-
- 4
-
-
- sultana
- model shipways
- (and 2 more)
-
Precisely! Simulating that look is ideal. But the two ways to achieve it are to bevel the edges of the planks before you lay them, or score the groove after planking/sanding...I think you’d be doing the latter. I was too nervous to try that when I first started the build for fear of making uneven or ragged grooves. But as woodfiller is my new best friend, I think I would be more confident to try it now. Following with interest!
- 222 replies
-
- 1
-
-
- sultana
- model shipways
- (and 1 more)
-
I think you are doing a brilliant job, mate! If you are going to paint the hull (which I think would be a sin when the work looks so clean), you may want to ensure you leave some grooves between the planks after you’ve sanded the hull. This will ensure the planks stand out even after paint. Think I saw someone do that after sanding but before sealing and painting. The effect was really authentic. Your stern is looking damned good, too!! Pat
- 222 replies
-
- 1
-
-
- sultana
- model shipways
- (and 1 more)
-
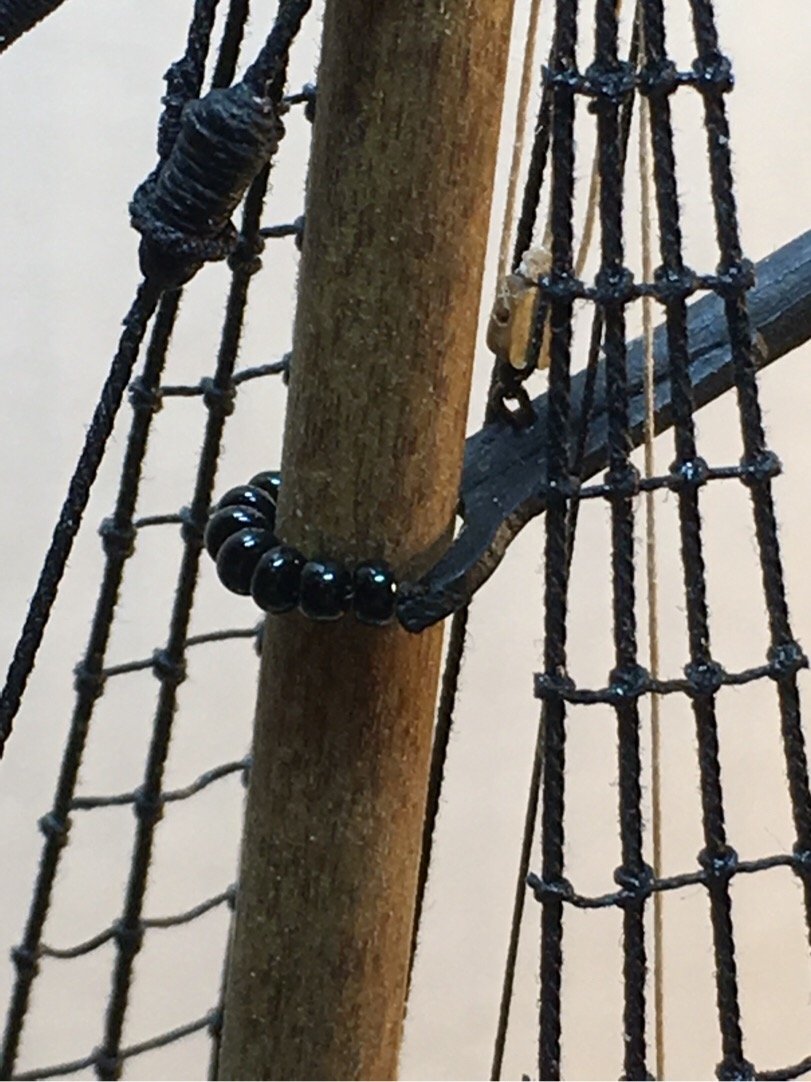
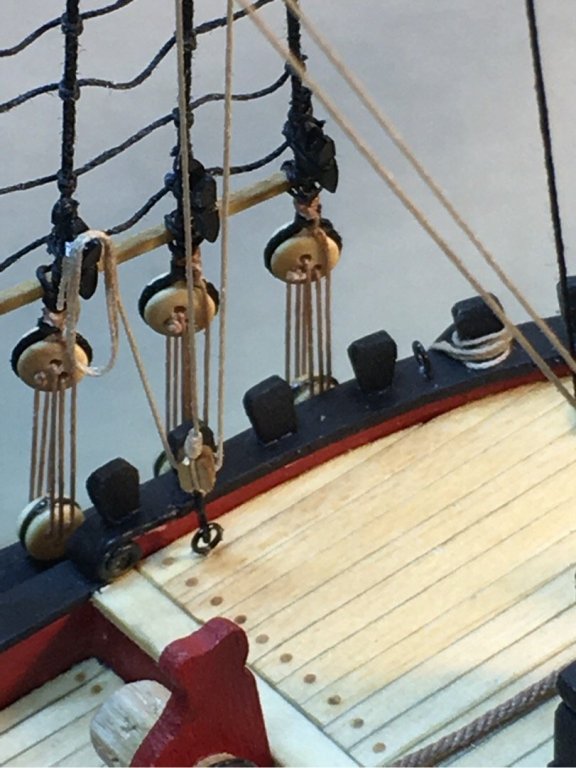
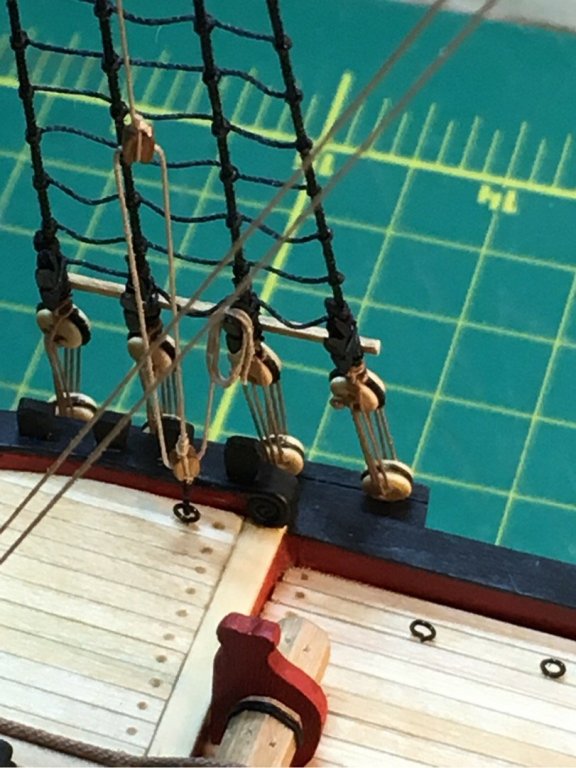
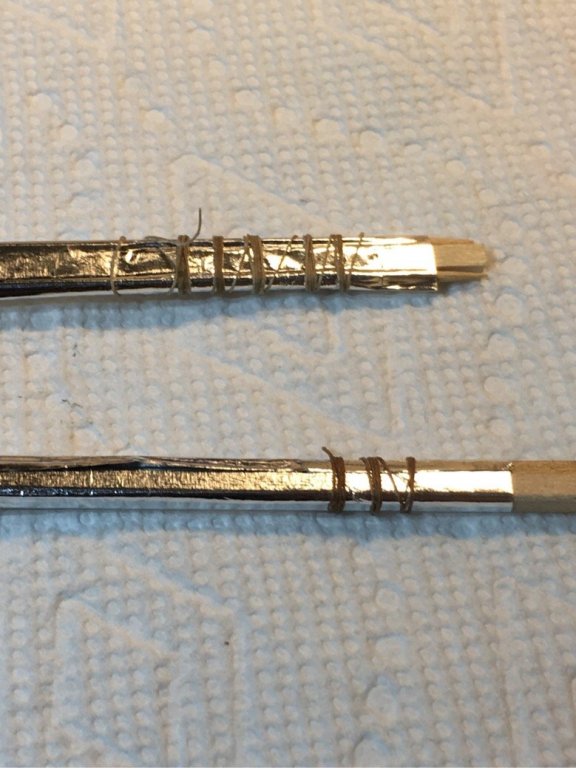
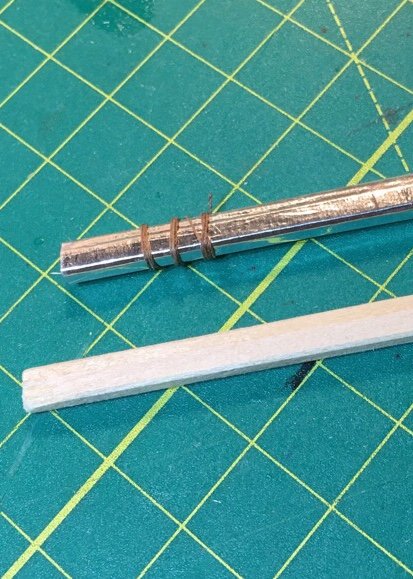
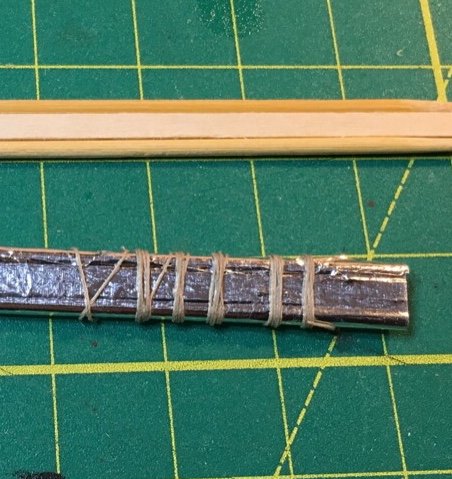
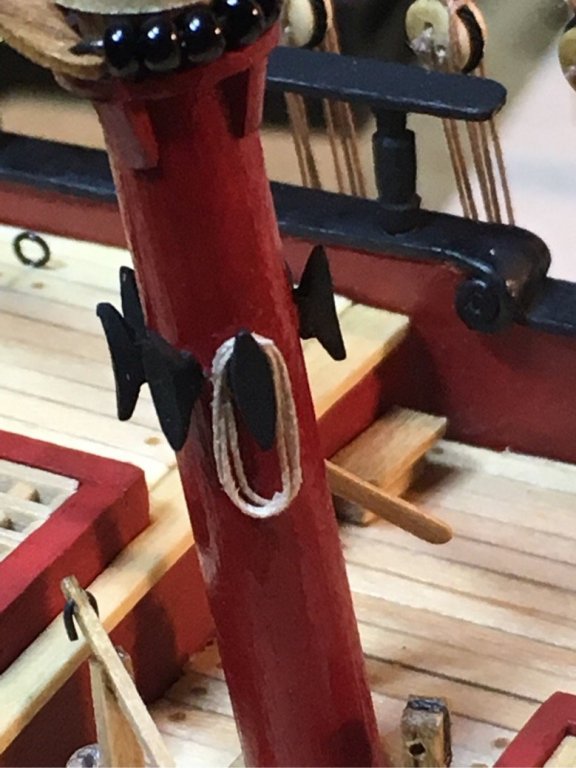
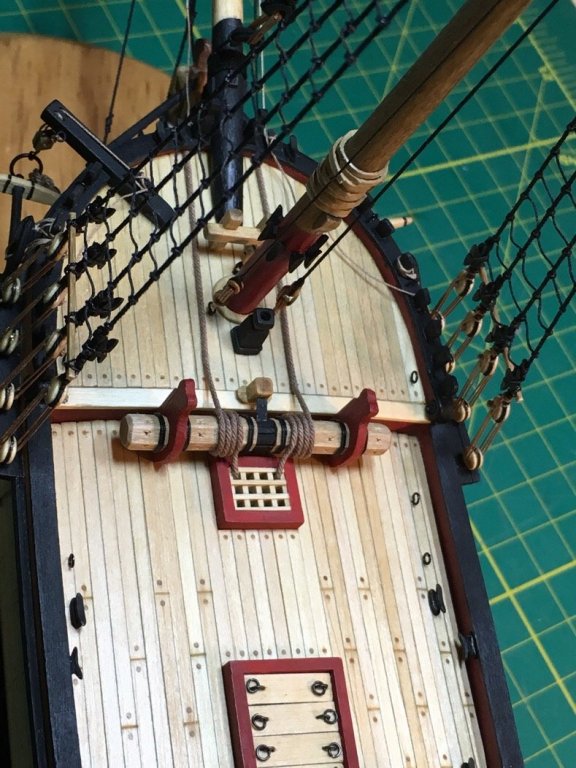
Today was shroud cleat installation day. Chuck’s practicum mentions glueing then tying them in...not certain how the heck he did it. I opted for a more straightforward method...I glued the cleat to the line, then lined up the cleat on the shroud, and used a touch of CA to lock it in place. I then tied a simple slip knot which was also dabbed with CA. It gave a passing result, but next time I will research this part a bit more and open up some options for me...because this was no easy task. Little bastards are hard to get on lined up correctly. Heres a few photos. Moving on to main boom.


- 449 replies
-
- 4
-
-
- sultana
- model shipways
- (and 2 more)
-
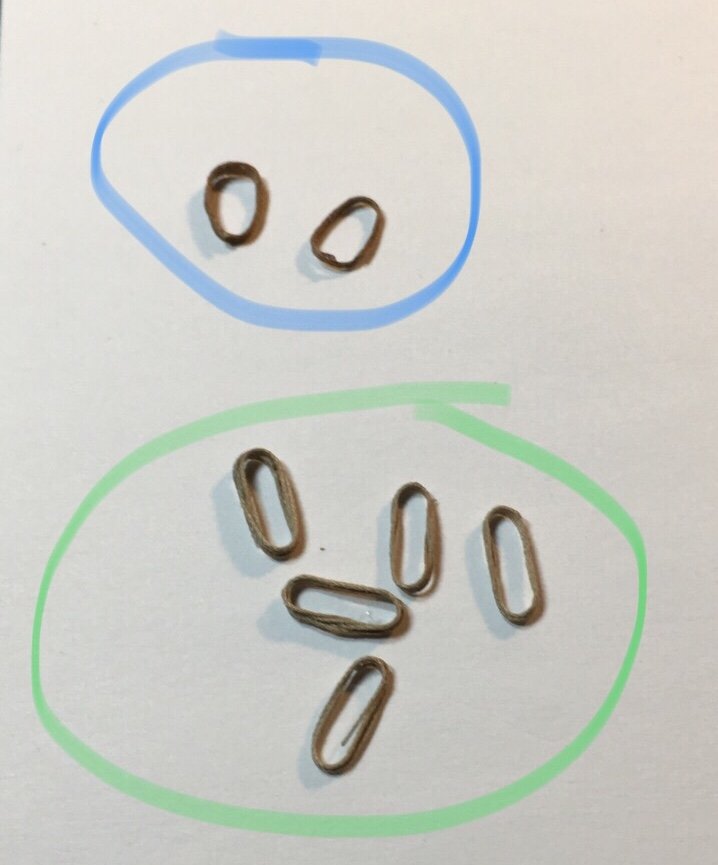
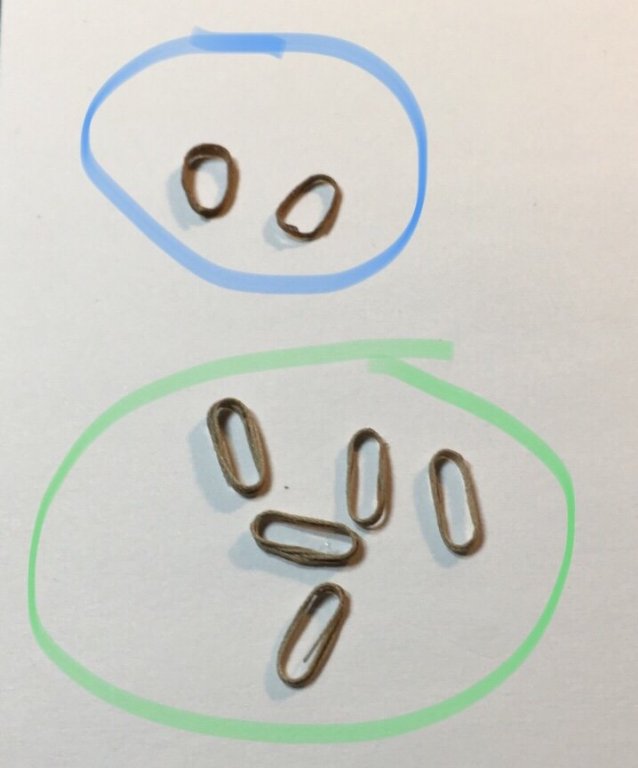
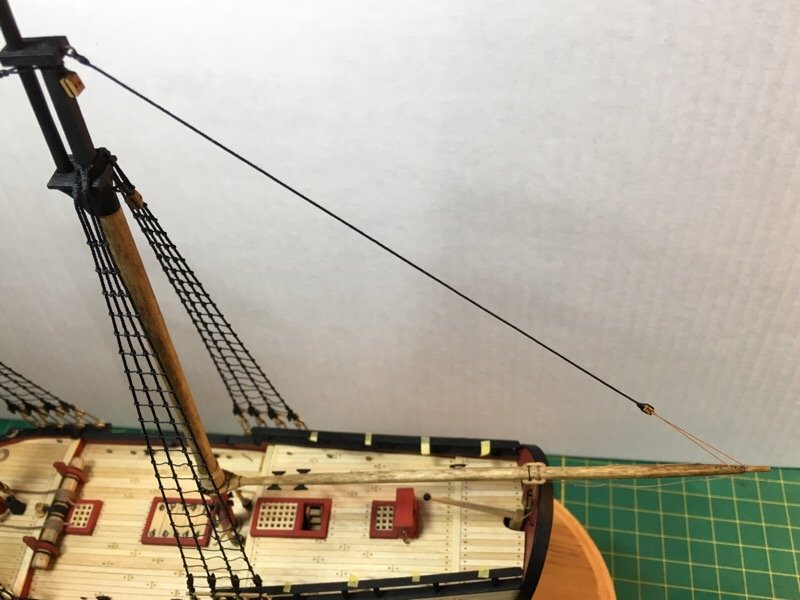
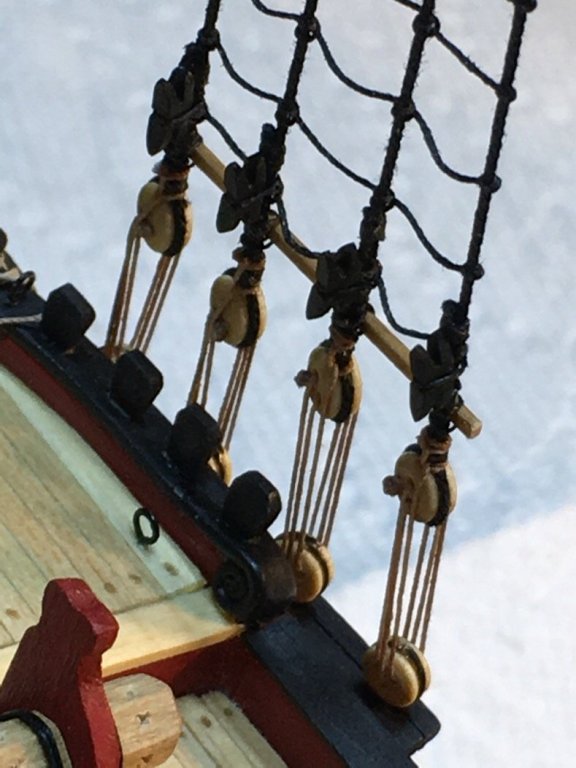
Found a great idea from another forum member here...using kindergarten counters to make nice rope coils. Worked like a charm. Fun stuff!!! (If I find the link I’ll post it) Also got my outer jib stay and fore top mast stay in place. Traveller looks good. Moving on...!!!

- 449 replies
-
- 4
-
-
- sultana
- model shipways
- (and 2 more)
-
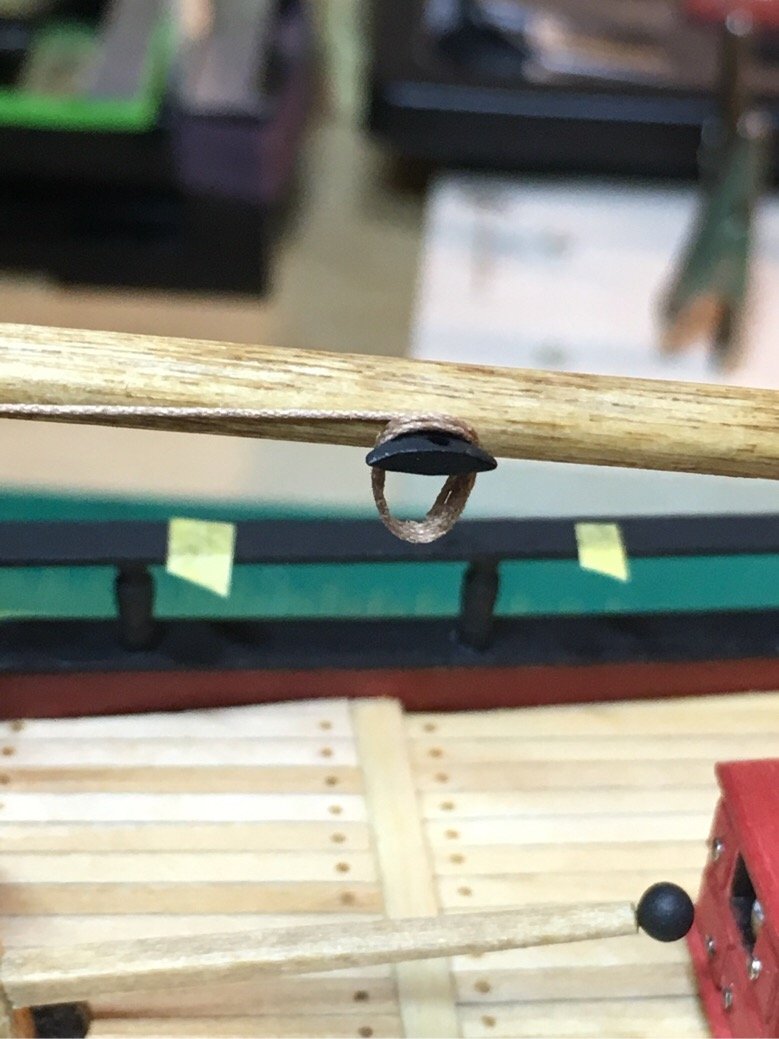
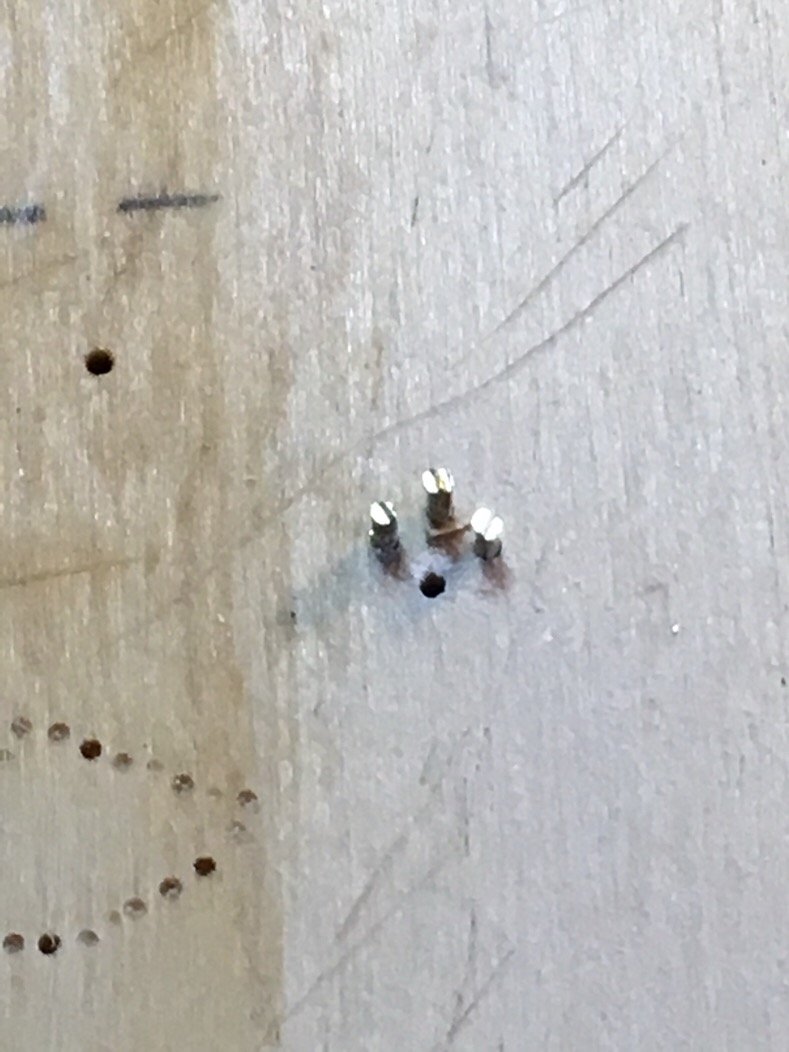
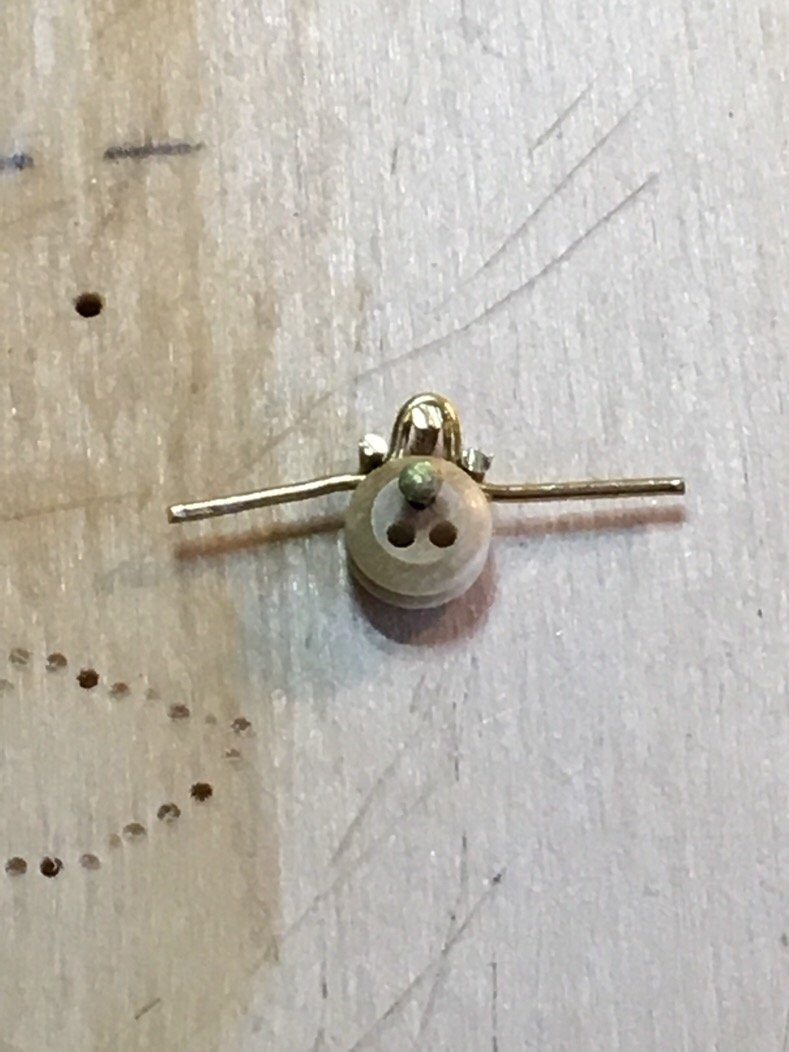
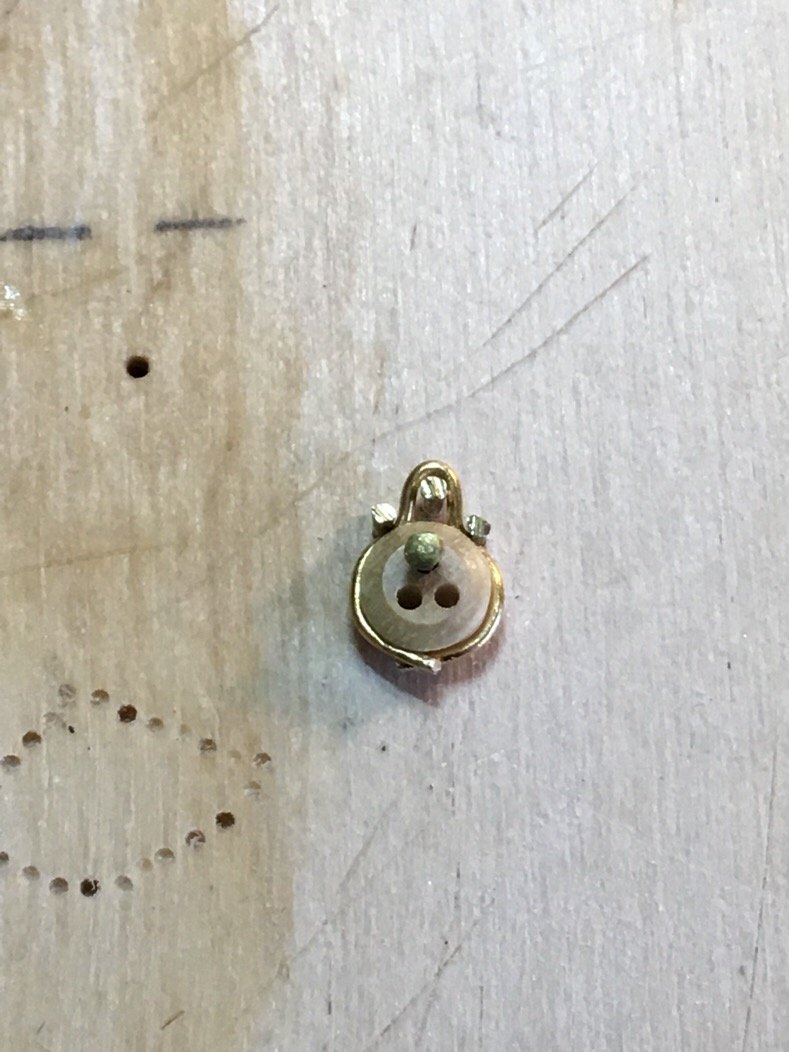
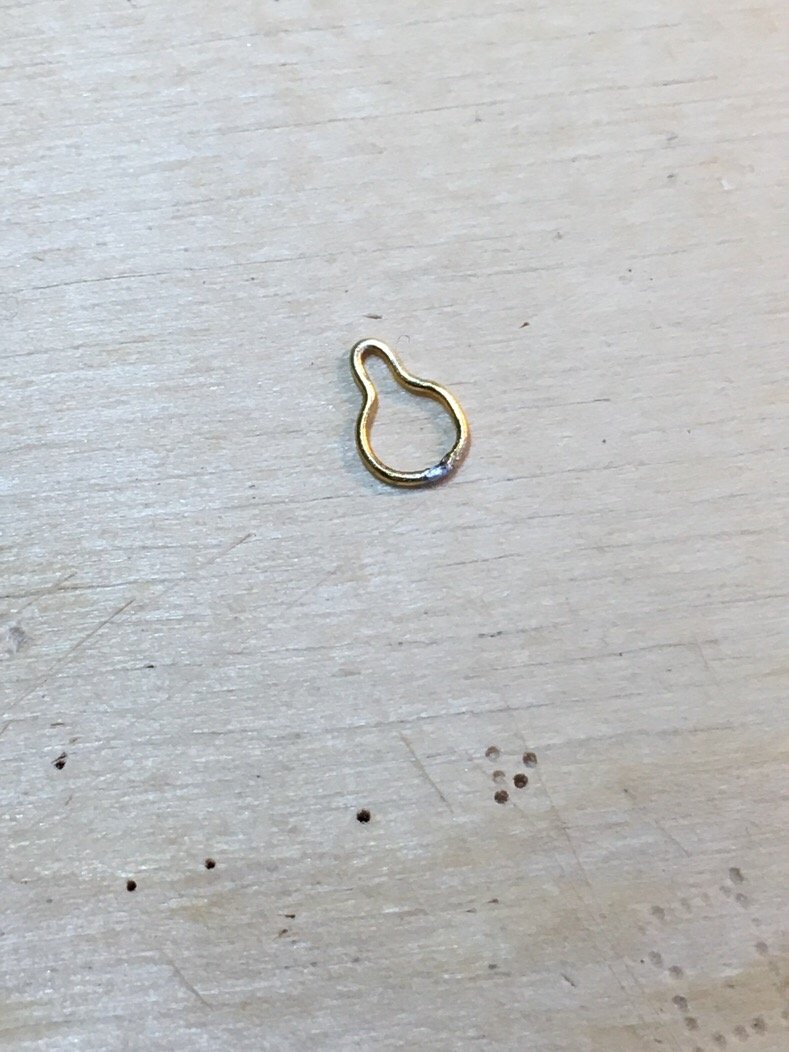
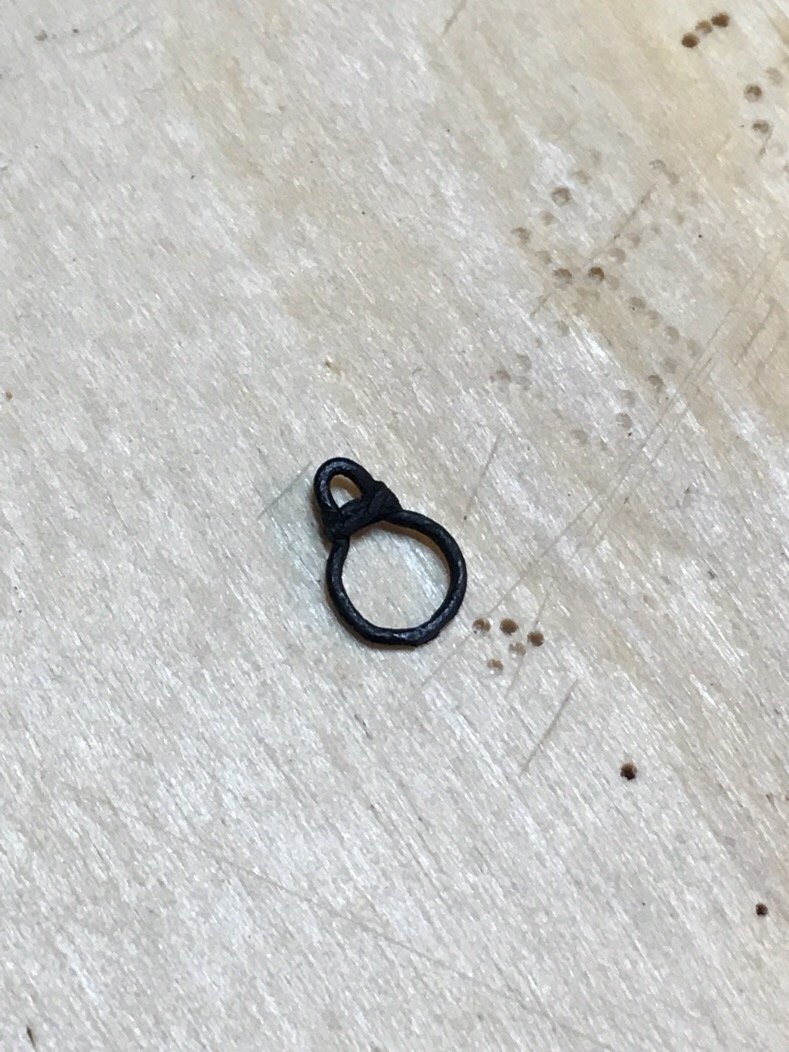
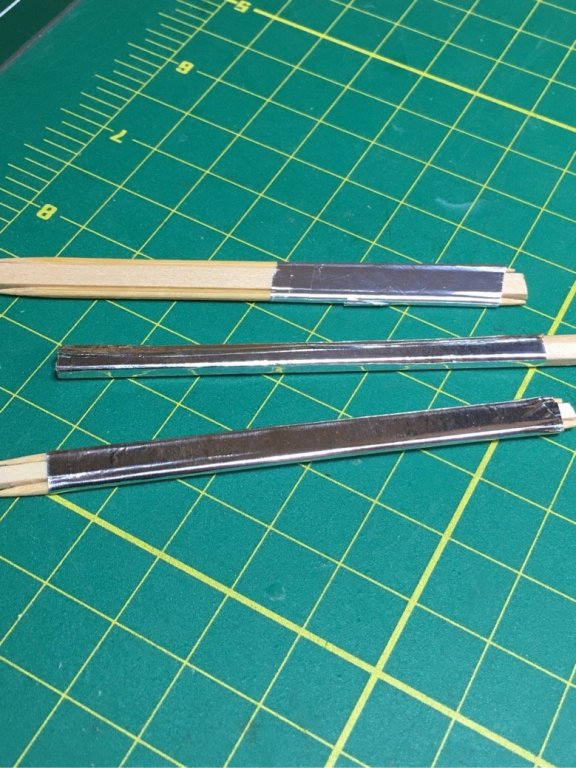
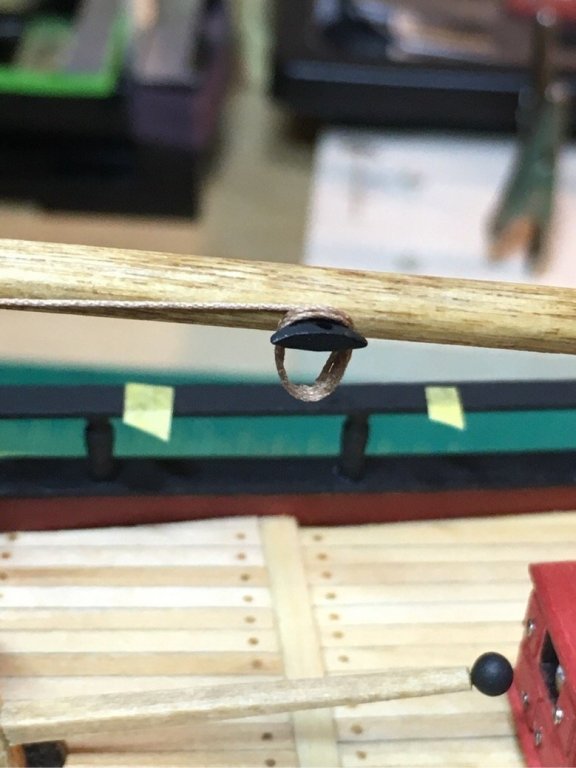
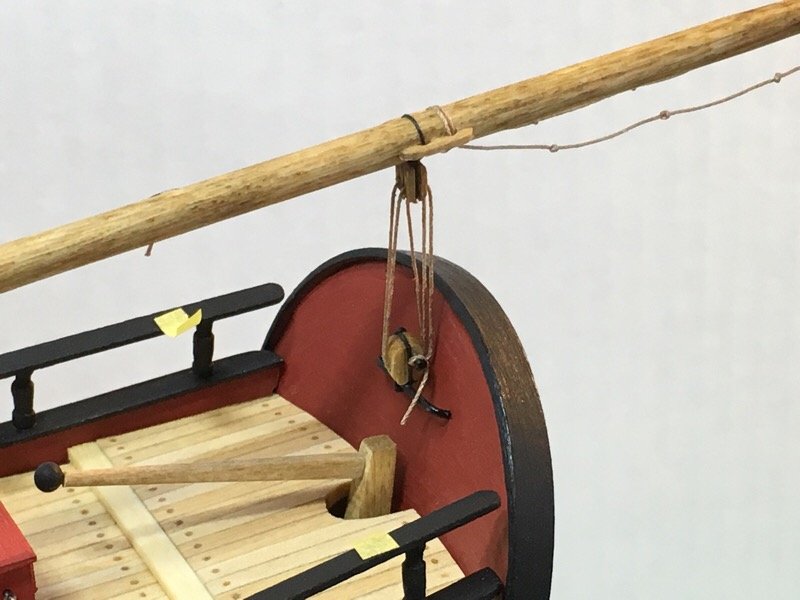
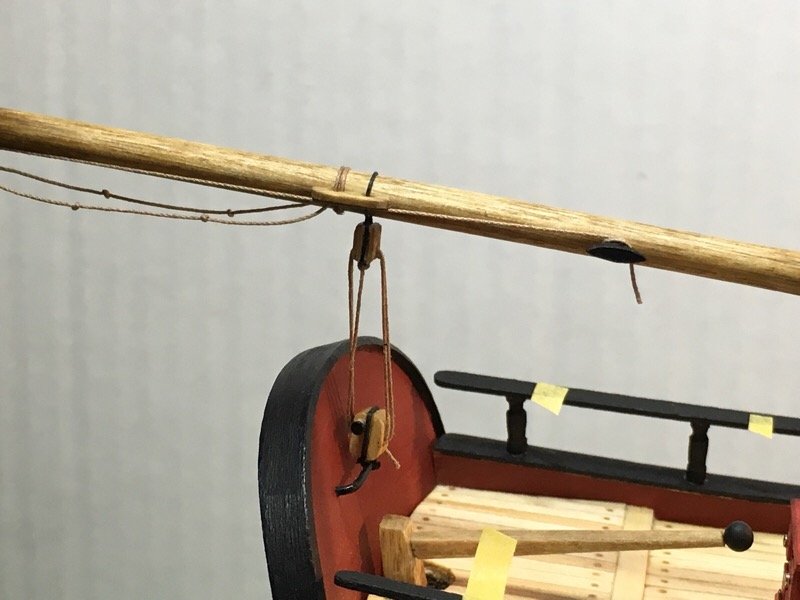
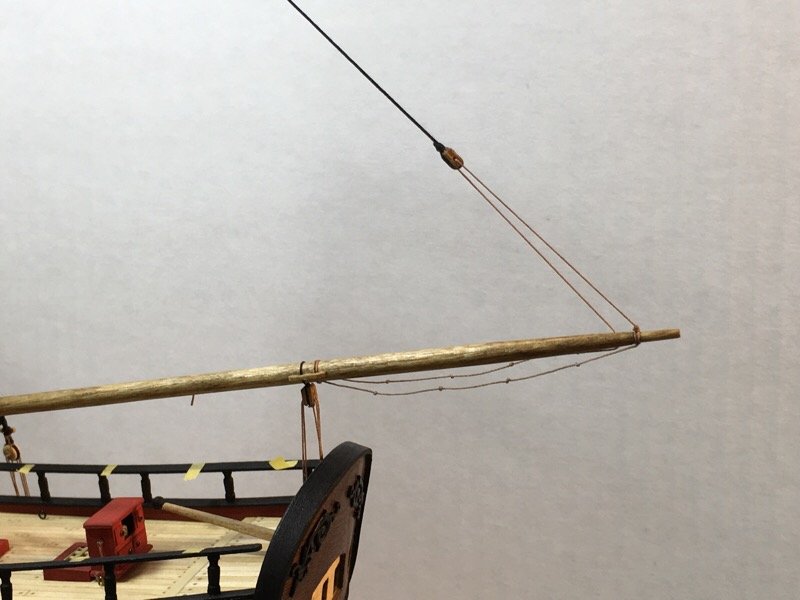
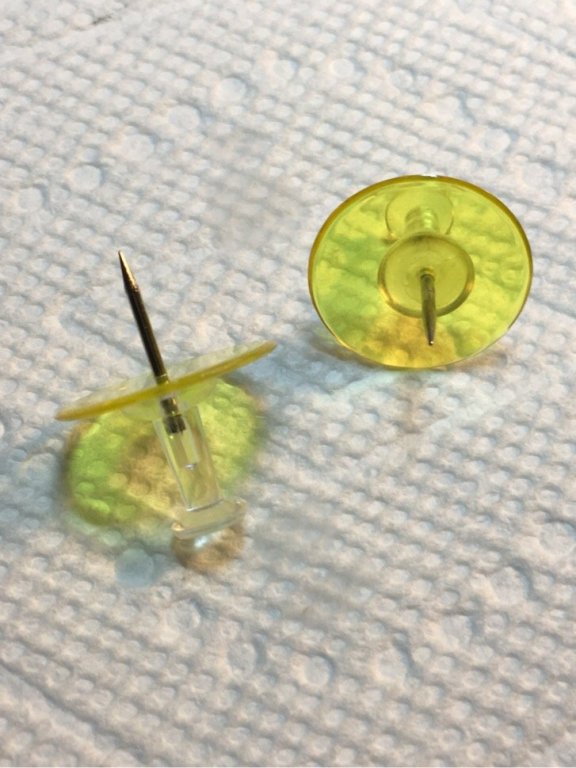
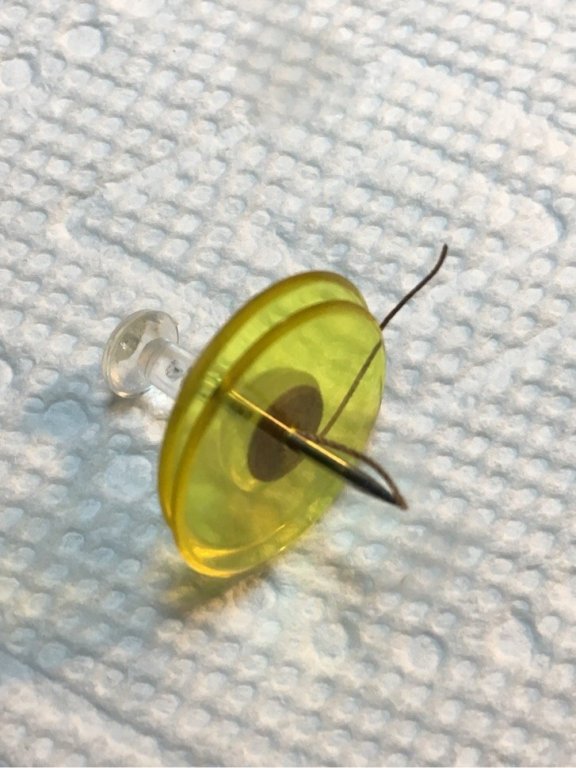
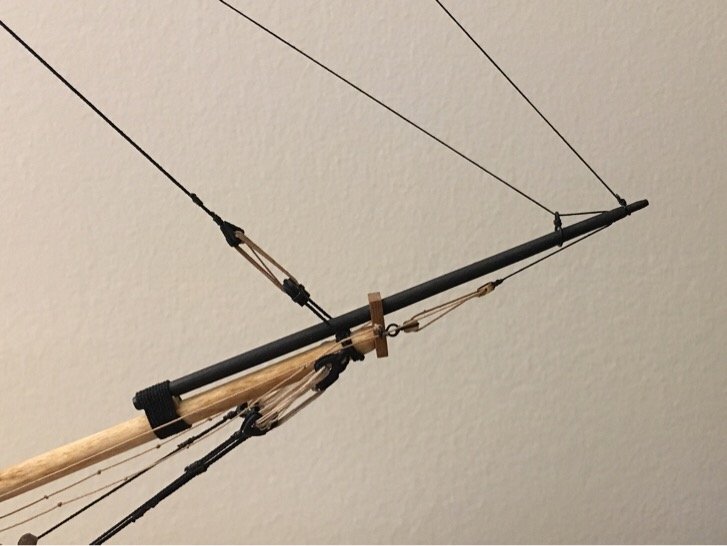
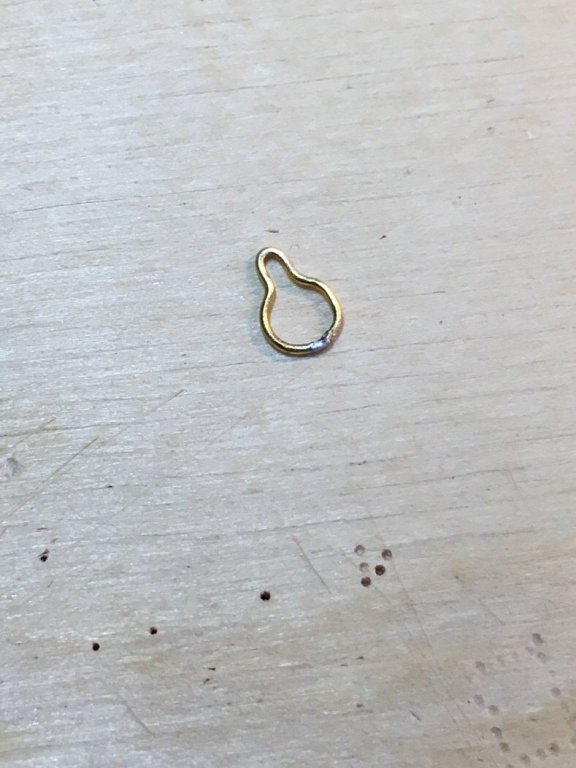
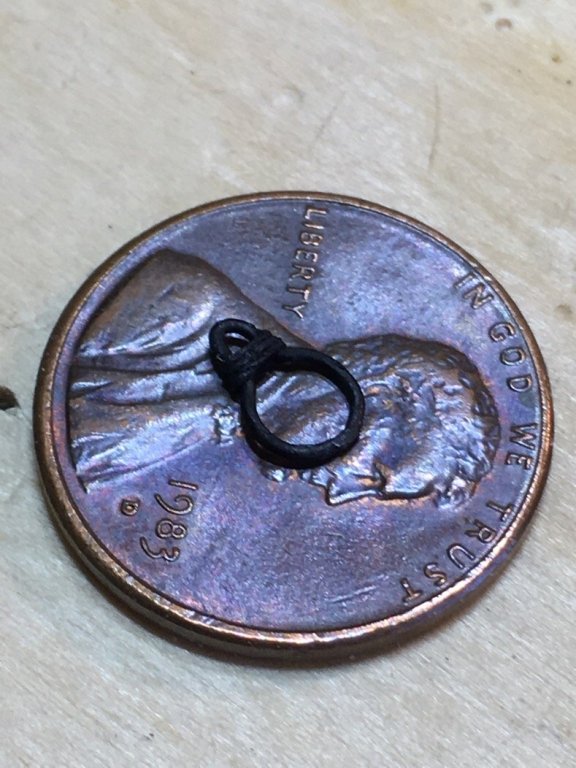
Today was the traveller construction that goes on the jib boom. Chuck’s practicum describes this really clearly. However, I used a brass pin so I could blacken it...also, I did not seal the loop with CA. Instead, I soldered it together and smoothed it off with needle files. Pics below. Straightforward process but it took a while because I dropped a few attempts!!! Moving on!!


- 449 replies
-
- 4
-
-
- sultana
- model shipways
- (and 2 more)
-
Brilliant! I would never have thought you would introduce 3D printing in this blog. Wow! You are taking the hobby to the 21st century! Nicely done!
- 222 replies
-
- 2
-
-
- sultana
- model shipways
- (and 1 more)
-
Not sure if you need this advice but...Whatever you do...stay away from CA when doing your planking — like it’s the plague! Only use white/carpenters glue so you can always correct a mistake. Water soluble glue is a life saver!! I used basswood from Hobby Lobby to good effect. Harder woods aren’t as ‘thready’. But I used Tung Oil and sanding with fine grain sandpaper to get a smooth finish on both the exterior and deck planking. Words of wisdom from a novice.
- 222 replies
-
- 2
-
-
- sultana
- model shipways
- (and 1 more)