Overworked724
-
Posts
1,266 -
Joined
-
Last visited
Content Type
Profiles
Forums
Gallery
Events
Everything posted by Overworked724
-
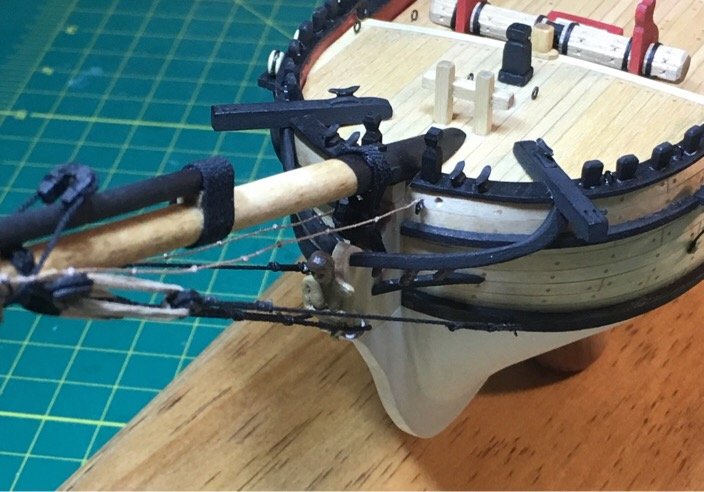
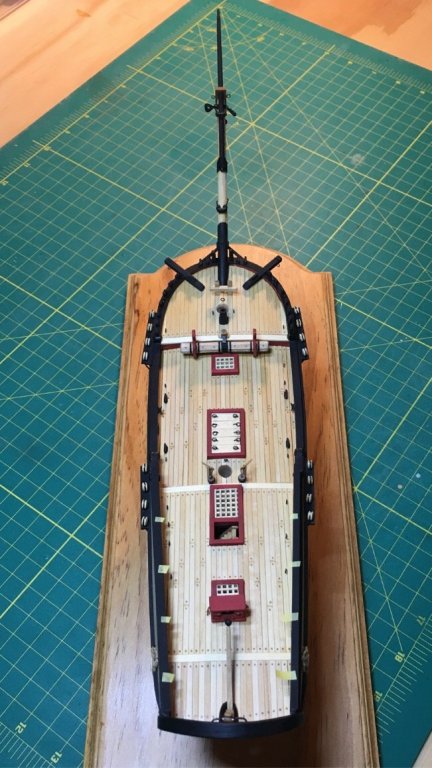
 And....shrouds and footropes installed. Going to call this a win and move on!! 😁
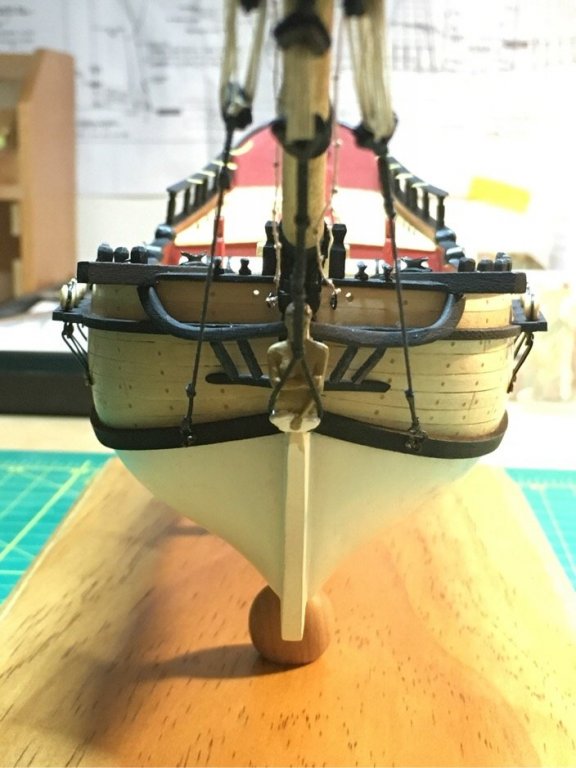
- 449 replies
-
- 4
-

-
- sultana
- model shipways
- (and 2 more)
-
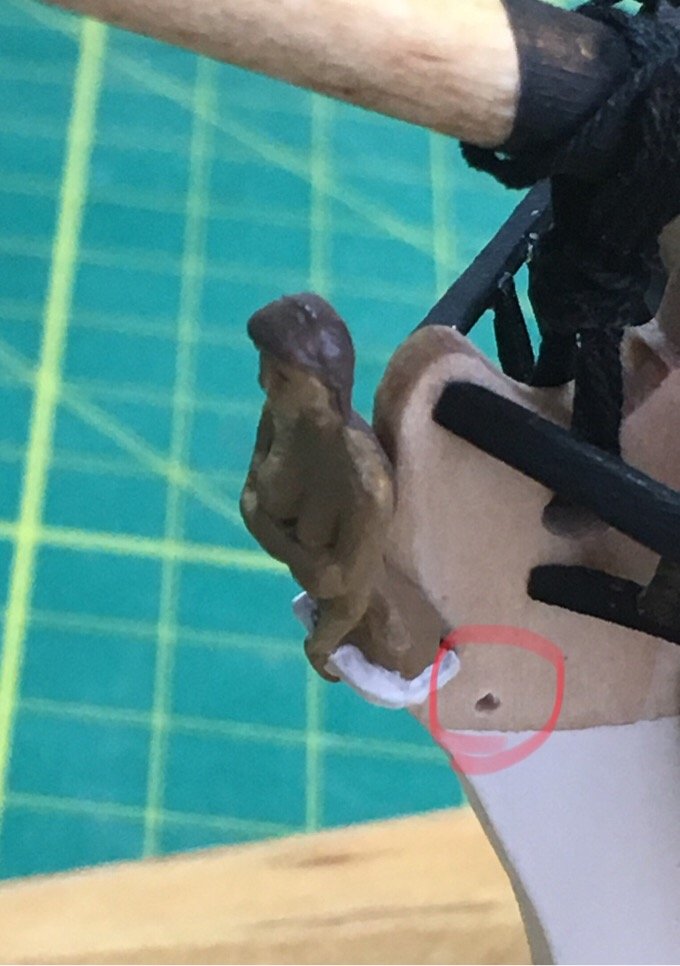
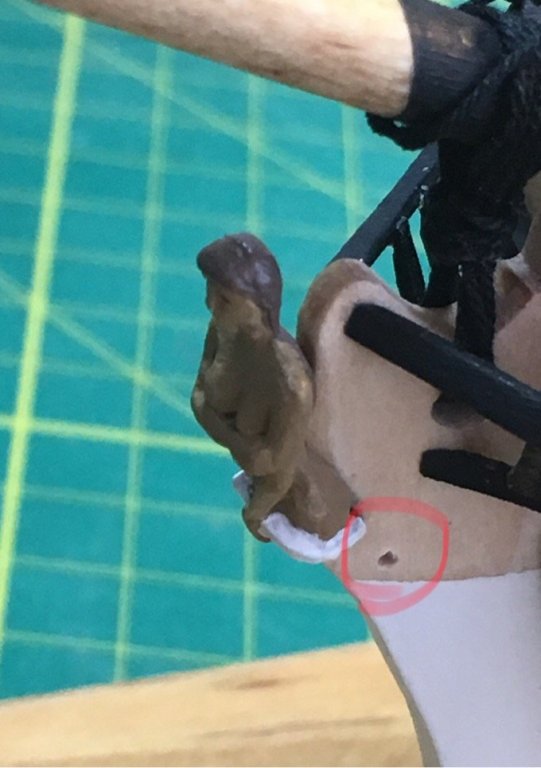
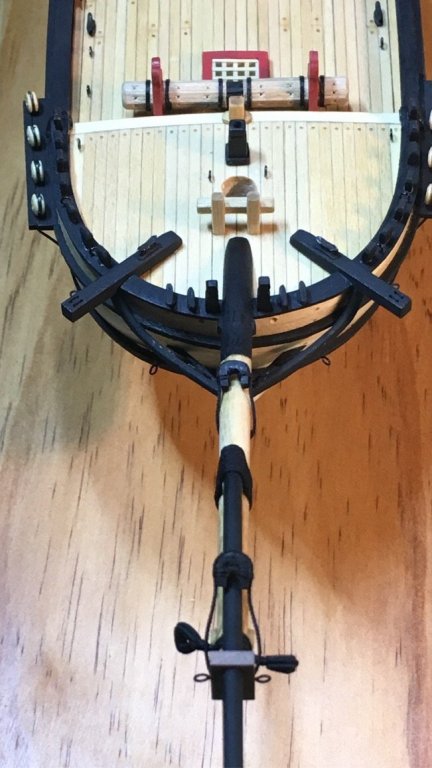
Thanks, Lou. The toothpick plug and bobstay hole reset was a pretty close second. I have been thinking about this for about a year (No joke). I will consider this (and other) aspects in my next build. In truth, I would have had to redrill the hole about 1cm below the current position to allow unimpeded access to the collar. This would have put it below the waterline per the ship plans...and would be equally incorrect. So...by modifying the stem design to remove the front portion of the stem...which would have (in my opinion) blocked the front view of the figurehead (why block to view of a beautiful bosom?...yeah...I said it)...I ended up compromising where the bobstay would have to be positioned to have clear access to the collar. I checked the plans, and the bowsprit is angled correctly. So this was my fault by deviating from the plans...since I had to set the bobstay hole farther back (towards the bulkhead). My bad.
- 449 replies
-
- 3
-
-
- sultana
- model shipways
- (and 2 more)
-
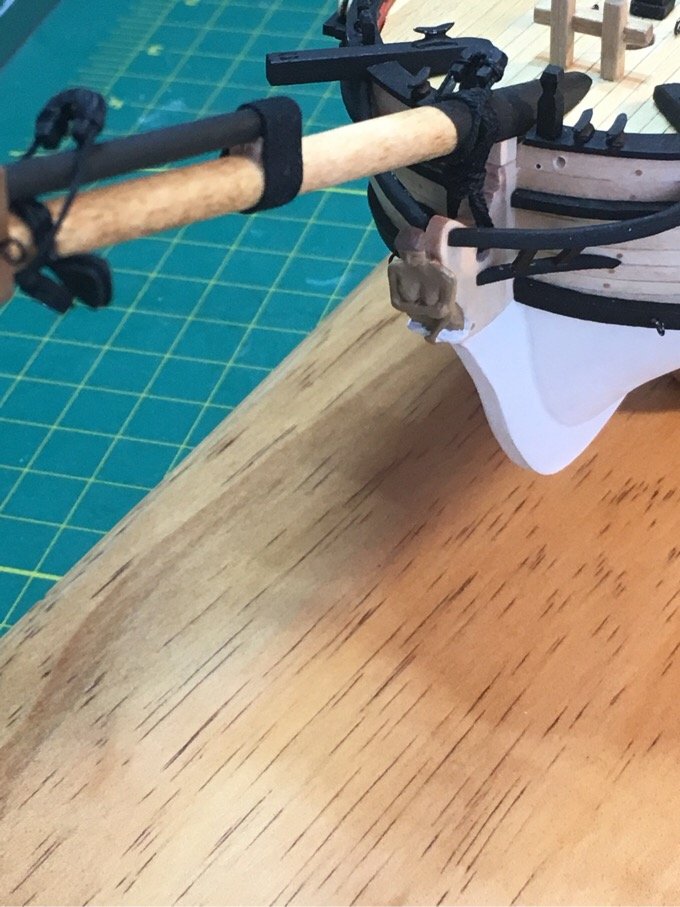
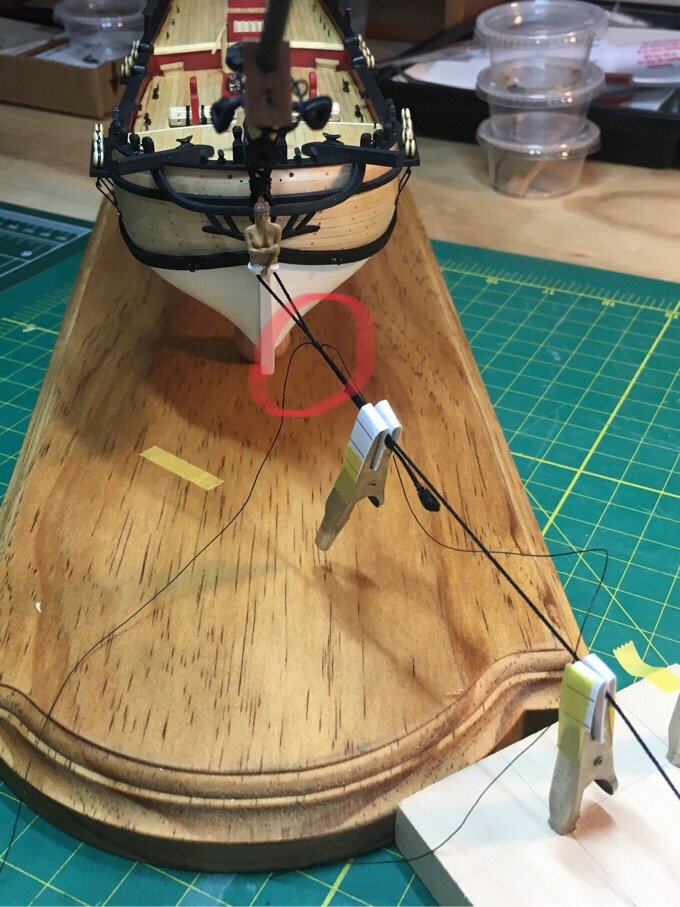
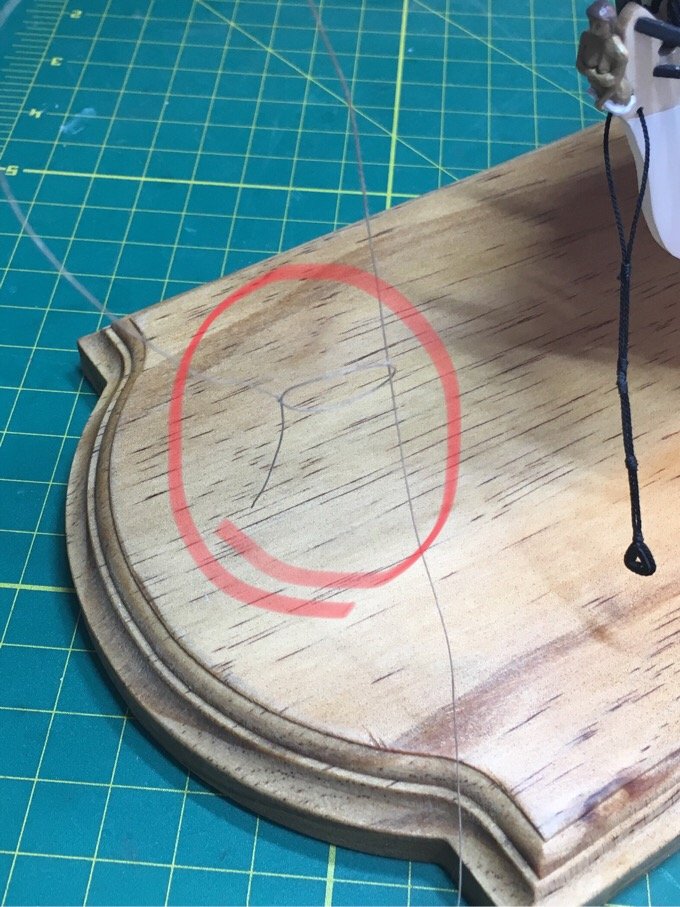
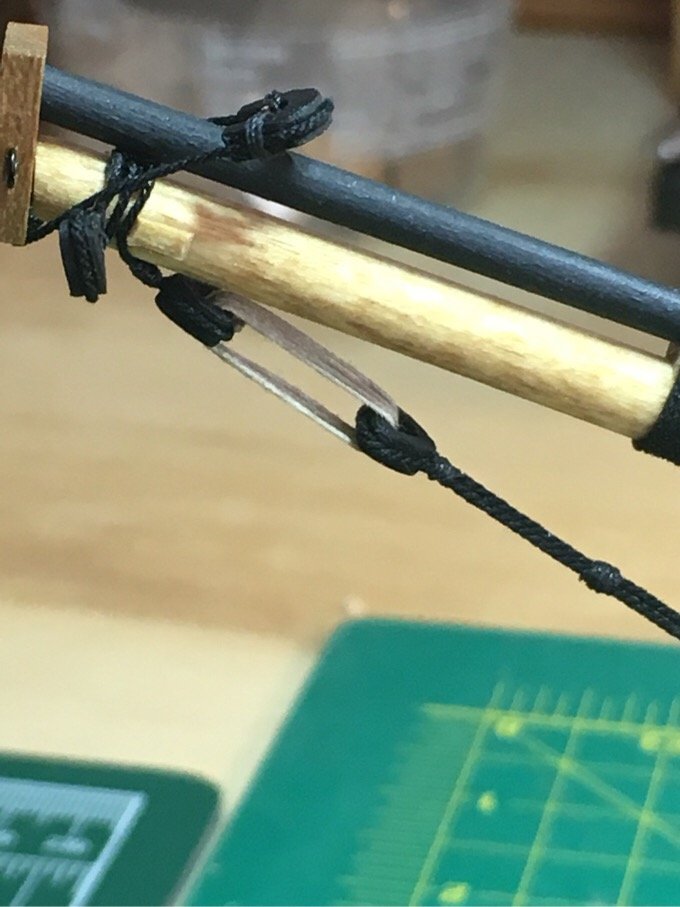
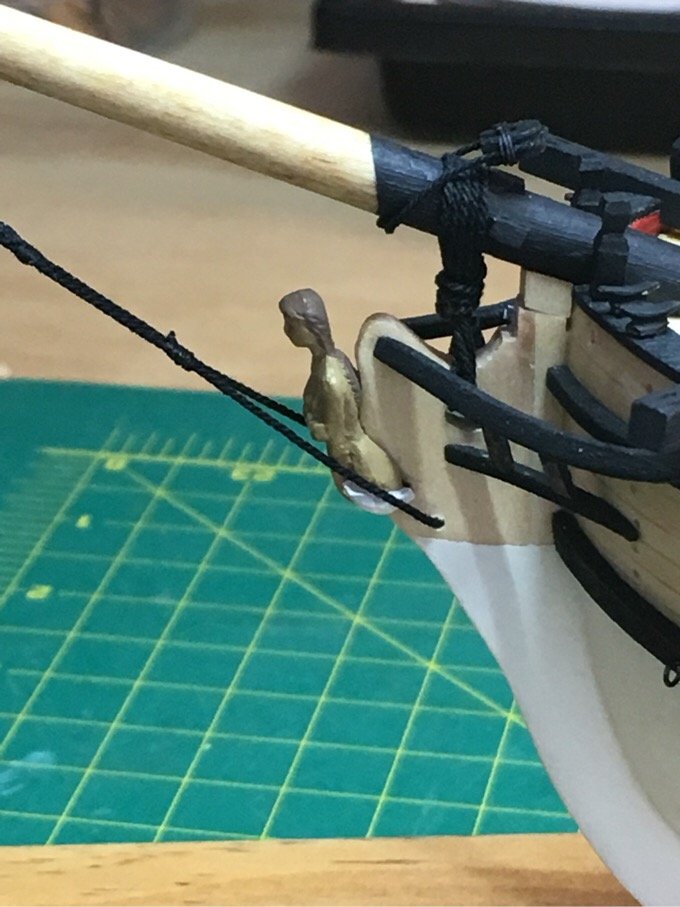
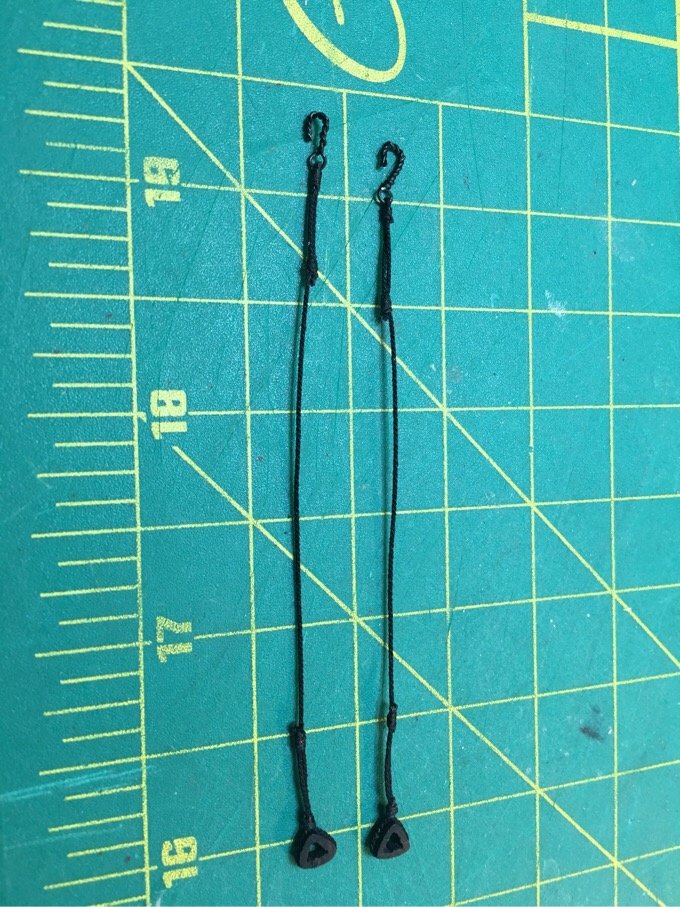
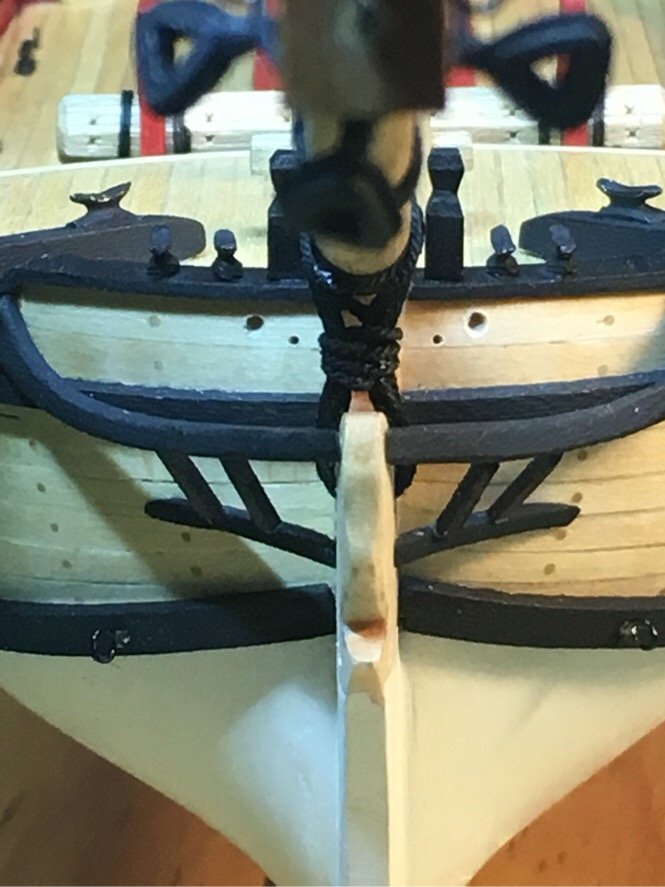
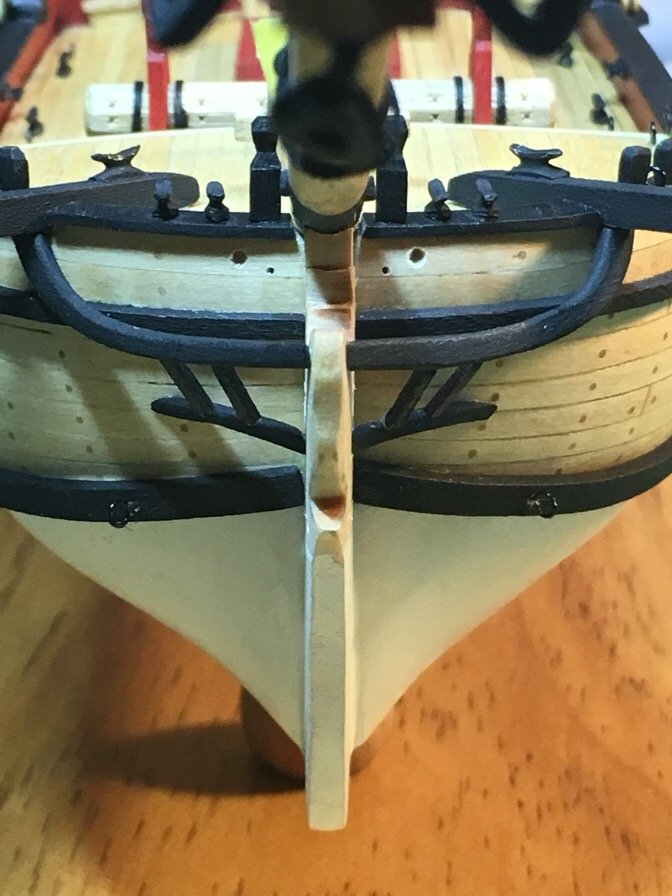
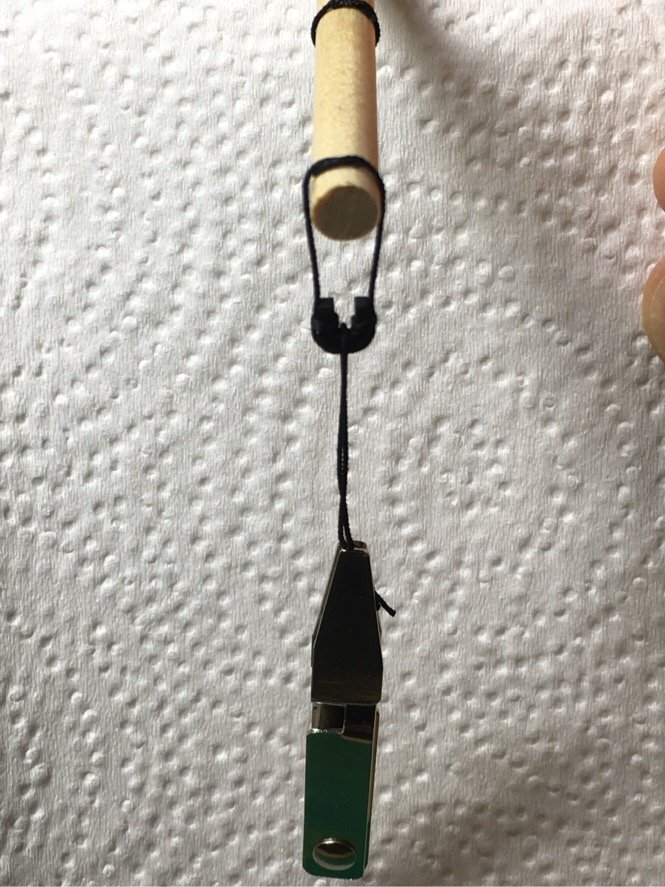
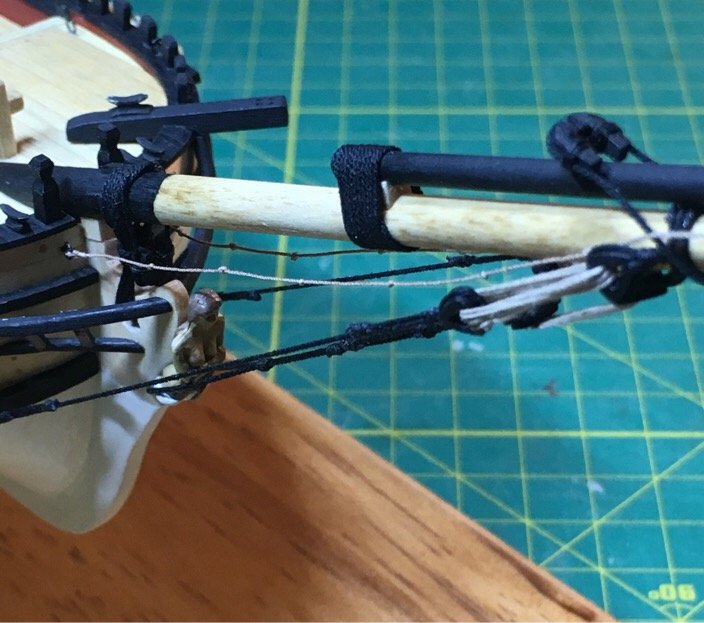
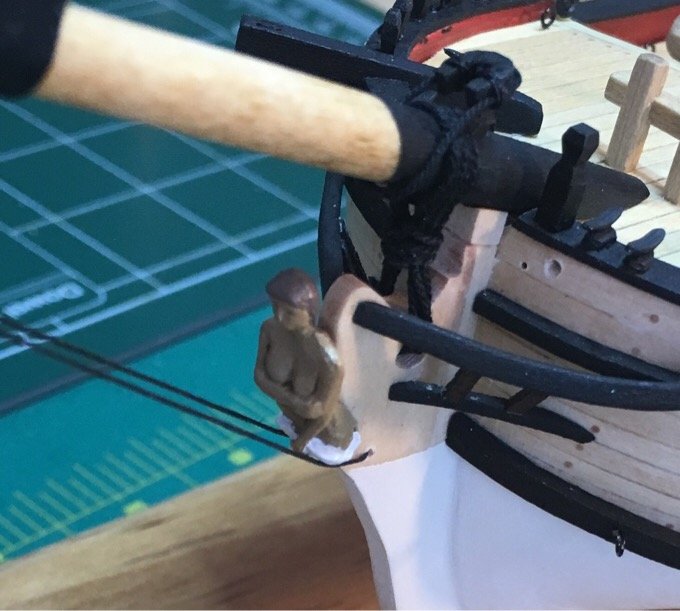
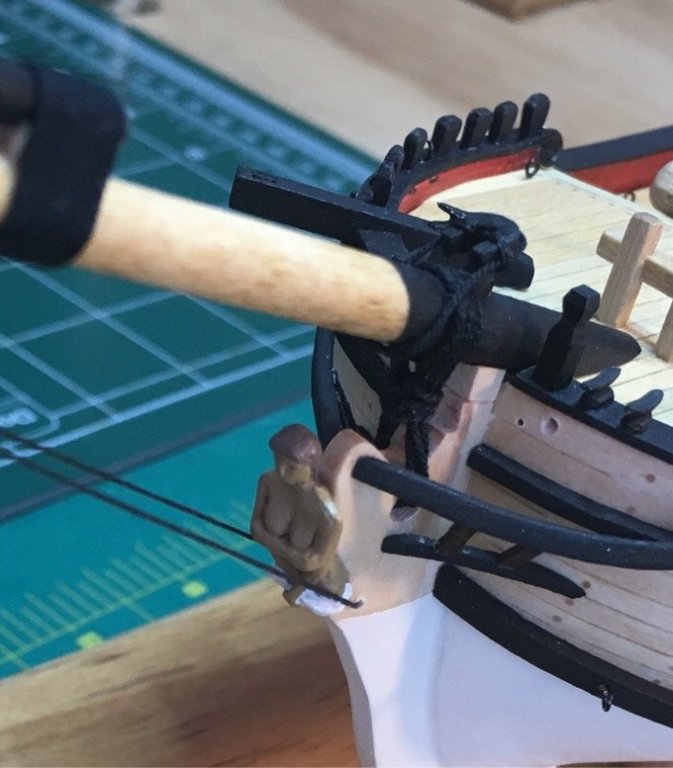
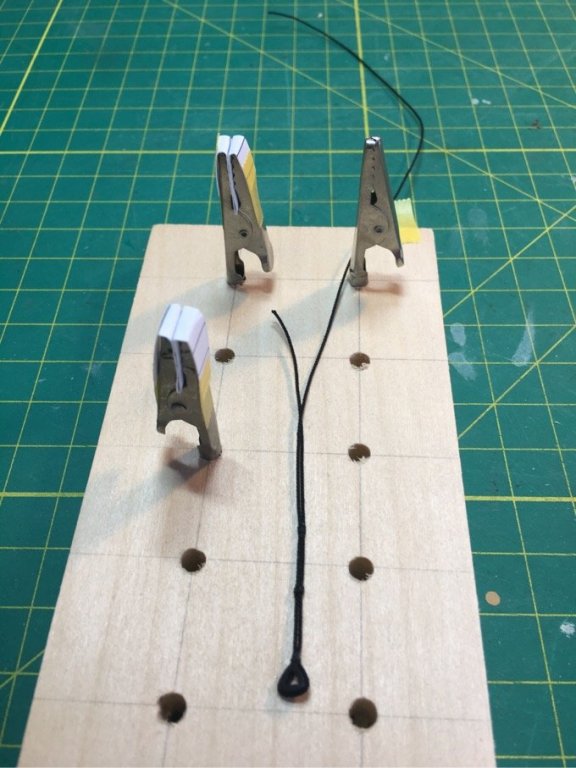
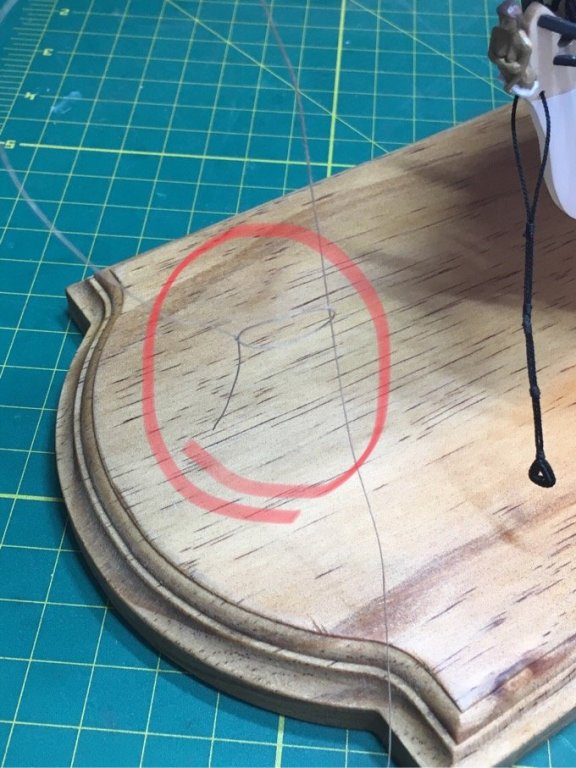
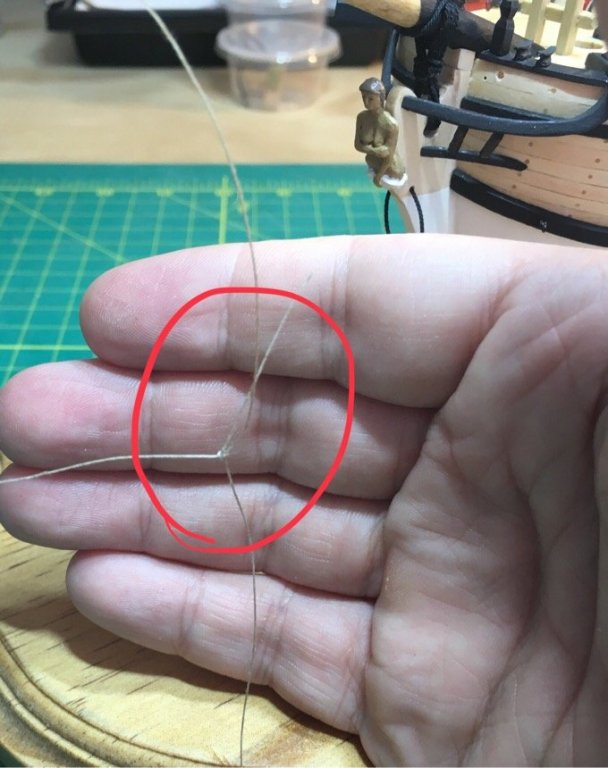
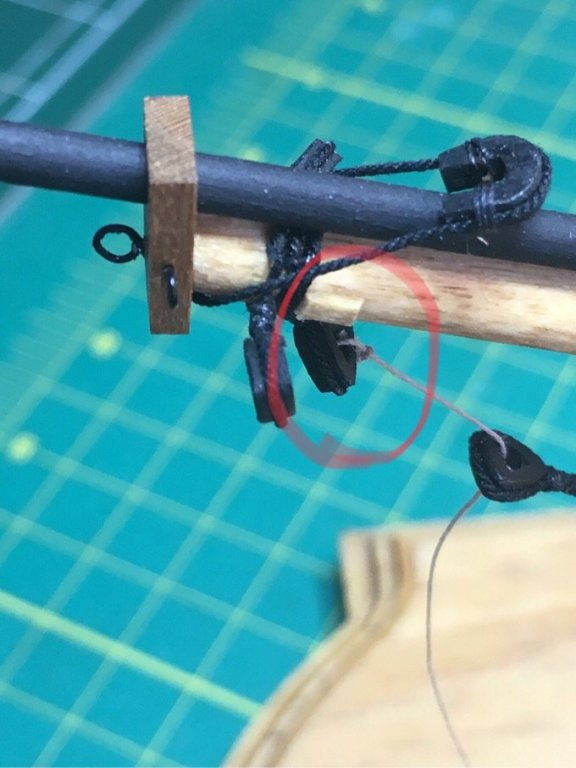
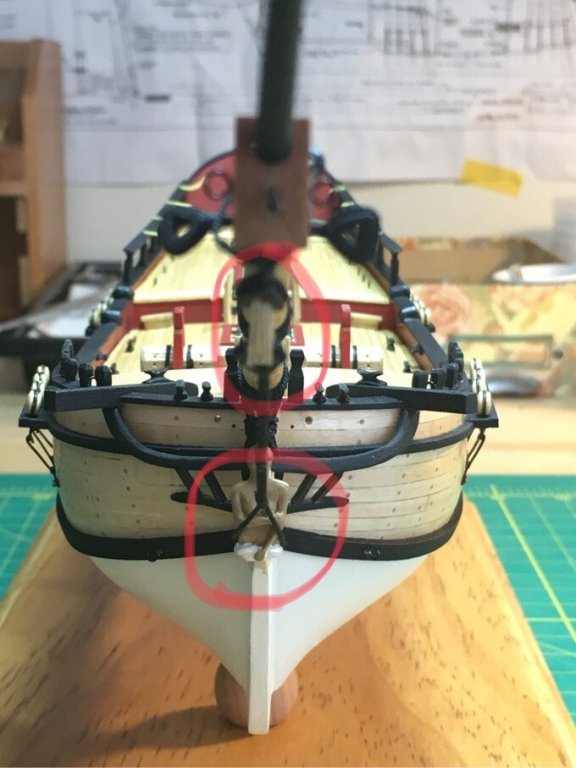
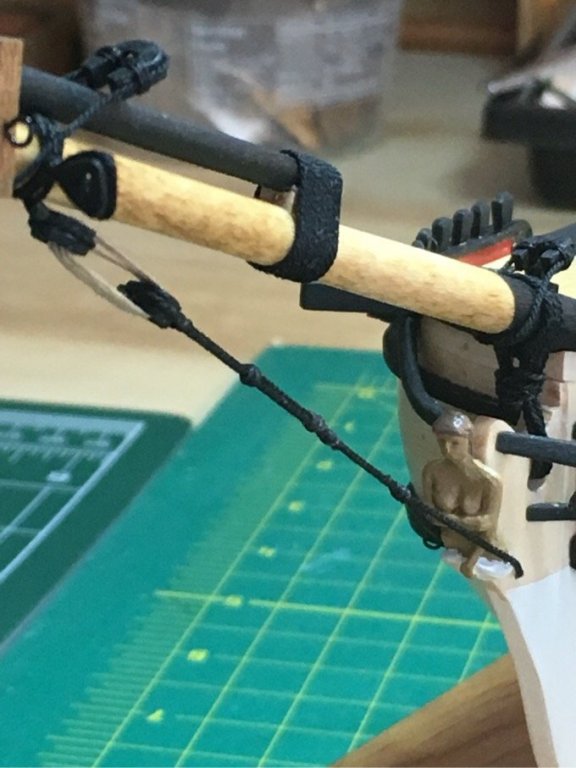
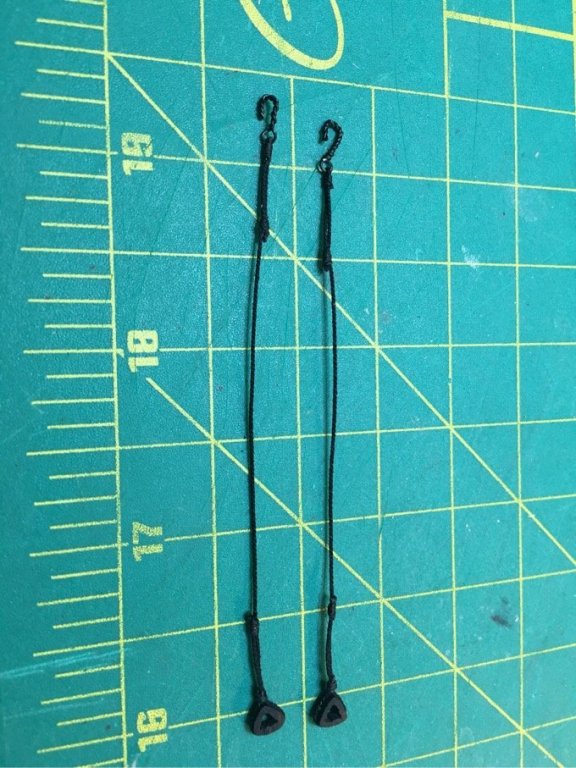
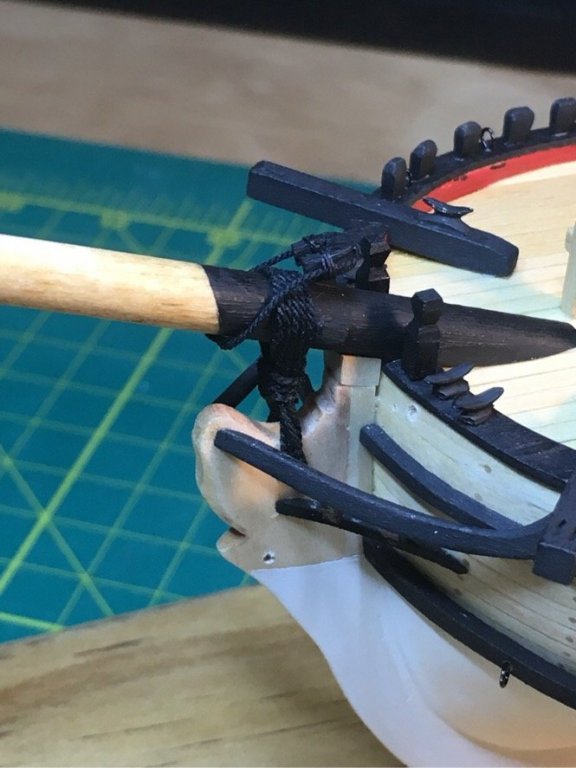
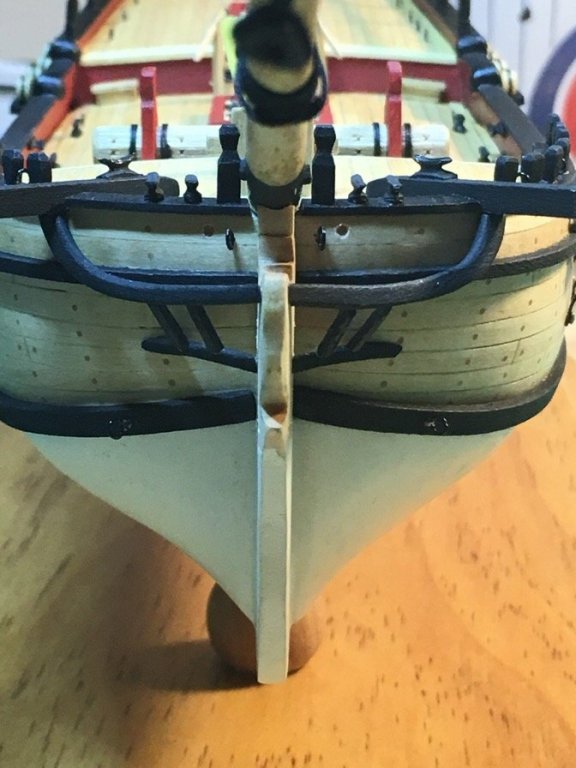
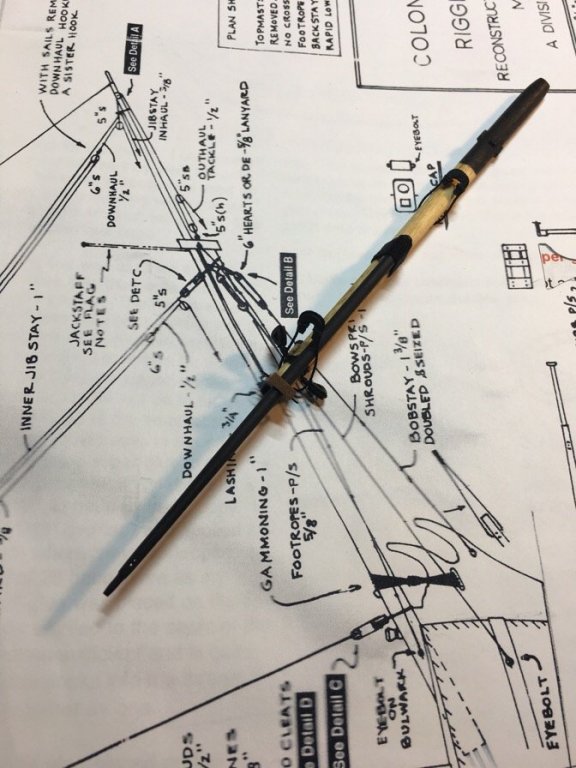
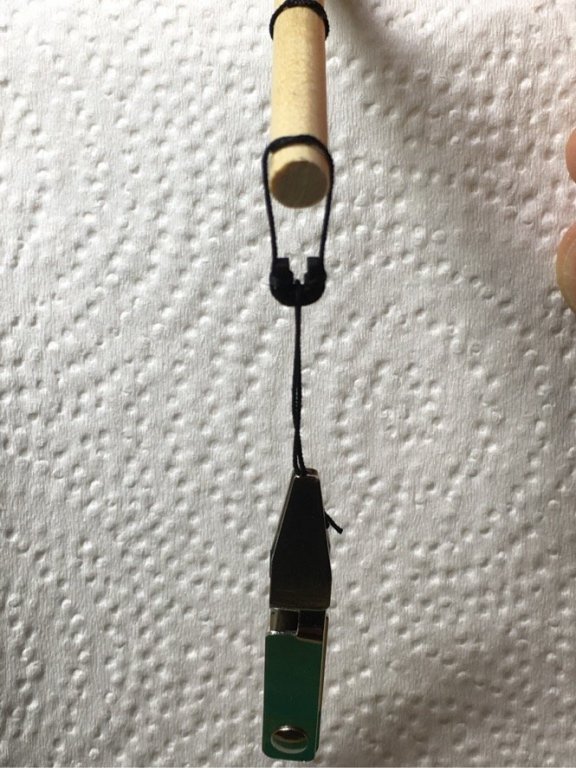
This was Bobstay Day!!! Finally stopped analyzing and made progress. The bobstay is as complicated as I’d thought. That laniard between the hearts is just as confusing to me. The technique to tie this thing was a process unknown to me. So...I decided to stop looking for good modeling techniques to tie lanyards and just did it. Below was my process. Rather than focus on whether it was correct, I focused on clean work. Slow. Methodical. In truth, I think the result was a good one...and I’m sure others have some education to impart for improving my technique for future ships! First, I knew the bobstay hole in the stem was too high (or the figurehead too low). I needed to mount the figurehead to get a feel for how to manage the misalignment. So....I did. The position of the bobstay hole was going to impede clean reach to the corresponding bowsprit collar. Leaving me three options...redrill a new bobstay hole, rig the bobstay so the lines run under the figurehead, or rig it so the each side of the doubled bobstay runs along either side of the figurehead. I opted for the latter. The lines running along the ‘hips’ of the figurehead might not be historically accurate, but give the subtle illusion of the ship’s lines ‘holding’ or supporting the lady figurehead. Frankly, I think it’s a nice look. I started with tying the heart and siezing done off the model. I left a long length of line like Chuck did so I double up along the length after attaching to the bobstay hole. After winding the length through the bobstay hole, I used an alligator clip to hold it st the appropriate length. Chuck’s practicum really helps here!!! Notice that since I was running the sides of the bobstay along either side of the figurehead, I siezed far enough away to ensure I had some wiggle room to fit it around the figurehead. After I completed the last siezing, I ensured my last knot (siezing) was slipped close enough to allow the remnant ends of the bobstay line to be clipped off and result in a doubled bobstay with knots equally spaced along its length. Actually, it’s not as hard as I’d thought it would be! The tying board helped a lot. I then attached one end of the laniard to the collar heart. I used a simple slip not to simulated a bullseye. Then just cinched it up to the collar heart. From here I ran it back and forth under light tension about 7-8 times as Chuck mentioned. I simply tucked in the last wind after applying a tiny drop of CA glue on the line. Clip and snip...then sat back and looked at the effect. Laniard was even. The collars were fairly well aligned. The bobstay wrapped around the figurehead. Not a bad effect and some nice progress. Up next...shrouds...which are already prepped with hooks and hearts. Slow and steady!!! Damn the torpedoes!!!!


- 449 replies
-
- 4
-
-
- sultana
- model shipways
- (and 2 more)
-
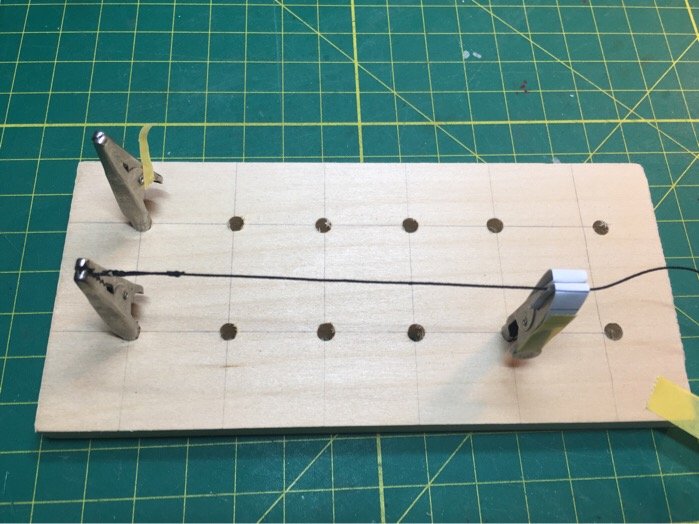
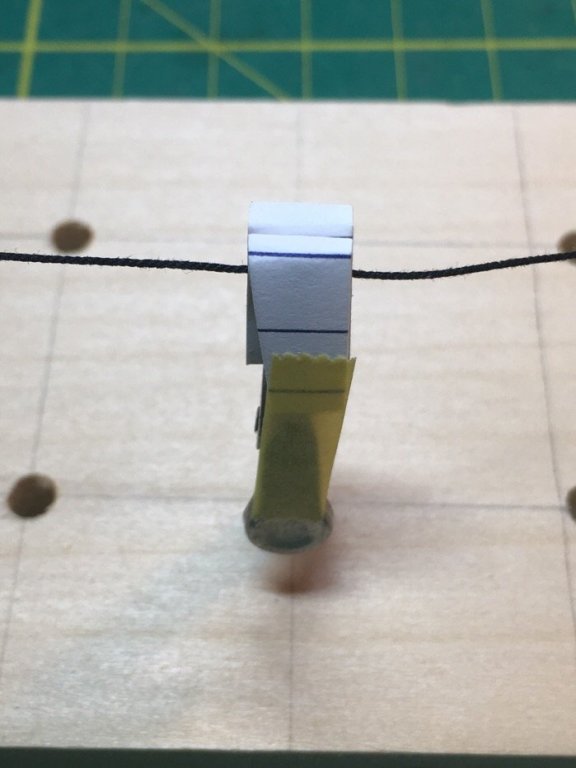
Made a simple tying jig. The alligator clip jaws bruise the line (especially after waxing). Made a simple workaround by cutting a little section of a 3x5” note card and trimming it to fit inside the jaws. TaDaaa!!! No more line bruising. Got it started on the bowsprit shrouds. Minor progress but it’s progress!!
- 449 replies
-
- 4
-
-
- sultana
- model shipways
- (and 2 more)
-
Welcome! Hope you find you way to one of the tri-club meetings. Great guys...lots of fun...great learning from the 'pros'. Best Pat
-
Time for some touch up paint in the bow section before fiddling with the shrouds, bobstay, and foot ropes! Also, I just realized I need to make a few more open hearts - which won't be a problem now that I've made quite a few and have some practice making them. I could use the ones I purchased from Syren, but where's the pride in that! My little Sultana is filled with errors, but she still looking quite handsome! More to follow...meeting cancelled for this evening, so I'll be working in the shipyard --- staring at the snow.
- 449 replies
-
- 3
-
-
- sultana
- model shipways
- (and 2 more)
-
Going to call this attempt a win and move on! Gammoning turned out pretty good. Lesson for future is don’t make the gammon hole in the stem rounded! Moving on...


- 449 replies
-
- 5
-
-
- sultana
- model shipways
- (and 2 more)
-
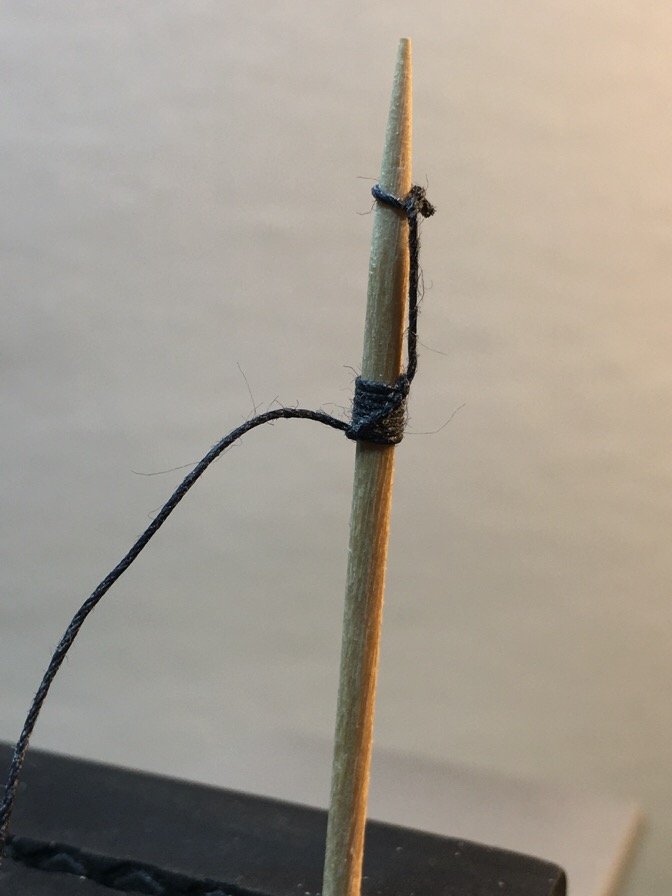
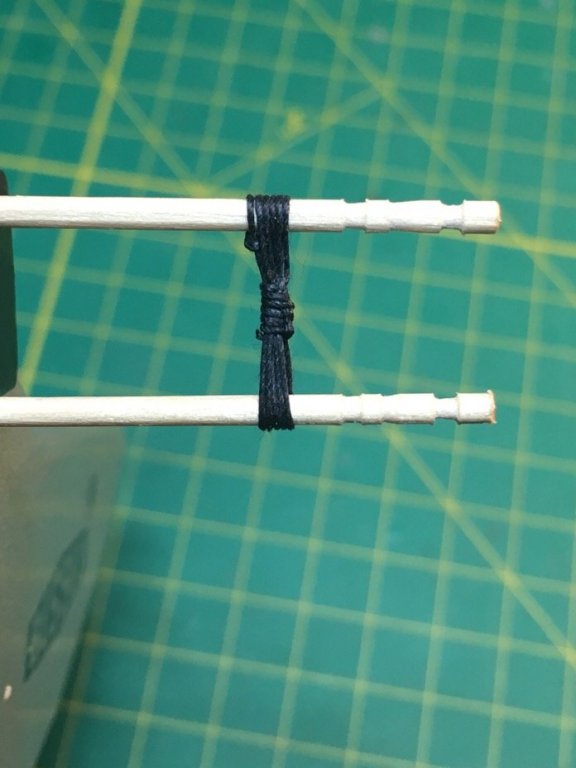
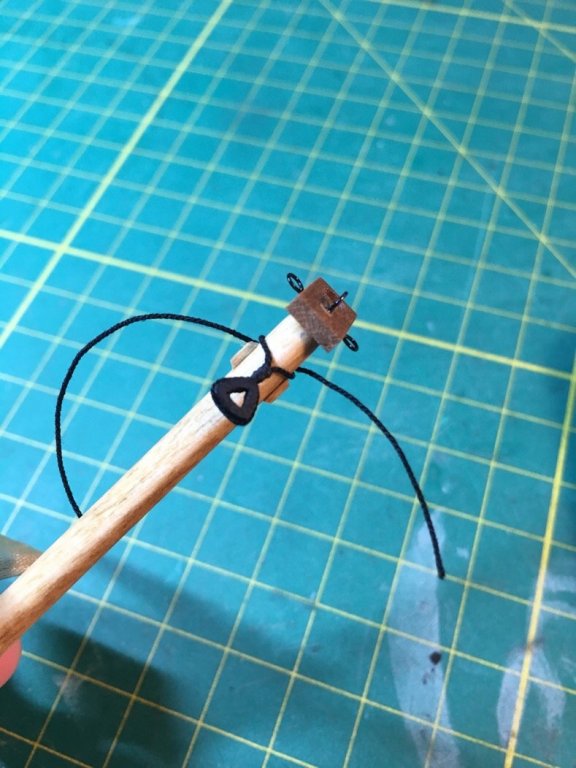
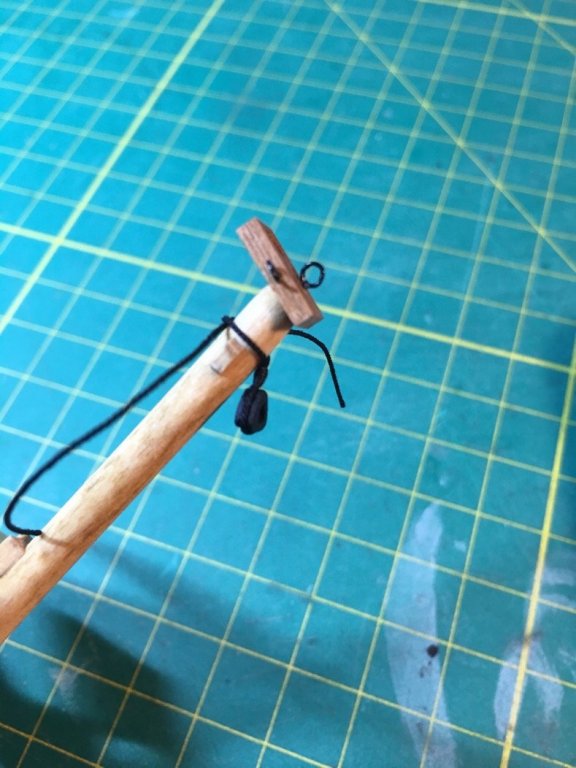
Now that the bowsprit is solidly mounted (checked again this morning), I can get the gammoning done this evening. Since this is the first time I’ve rigged a ship, I’m taking my time to practice my knots/etc. It pays off - since I have a better impression in my mind what I should expect when applying it to the model. Below was my my recent attempt tying the gammoning using some old line and toothpicks mounted in my vice. The initial siezing to make an eye, the waxing, tying the gammoning, the repeated half hitches, and finally burying the loose end...a lot going on in this one rigging step. Besides that, you want it to look decent!!! Practice makes perfect (or in my case...acceptable! ) Moving on...
- 449 replies
-
- 3
-
-
- sultana
- model shipways
- (and 2 more)
-
Had some time this evening to practice some knots to lash blocks to spars. My initial attempts turned out decent. Finished rigging up the fore and main top masts. Just a single block on each end of each spar...but a good result for a newbie like me. Was going to try to attack the gammoning when I realized I missed something. The footropes which lead from either side of the bowsprit cap connect to an eyebolt at either side of the bow near the haus holes (anchor rope holes). Only problem is I forgot to drill the holes for those eyebolts! Amazing enough...the bowsprit wasn’t glued on as tightly as I’d expected, and I accidentally knocked it off! No damage but glad this happened because it could have popped off when I was tying the gammoning!! So...I had some extra room and drilled the foot rope eye bolt holes, then reattached the bowsprit...and it’s pretty solid now! Moving on!!!


- 449 replies
-
- 4
-
-
- sultana
- model shipways
- (and 2 more)
-
In a pique of incredible courage...screaming “Damn the TORPEDOES!” (And scaring the Admiral in the process)...I decided to mount the bowsprit. Turned out pretty decent! I am deciding to deviate from the plans and not include the wooden boarder (toe stubber) where the bowsprit intersects the deck. I like the seamless way it looks as it merges with the deck planking. See you all all next weekend...busy workload the next week. Moving on...
- 449 replies
-
- 8
-
-
- sultana
- model shipways
- (and 2 more)
-
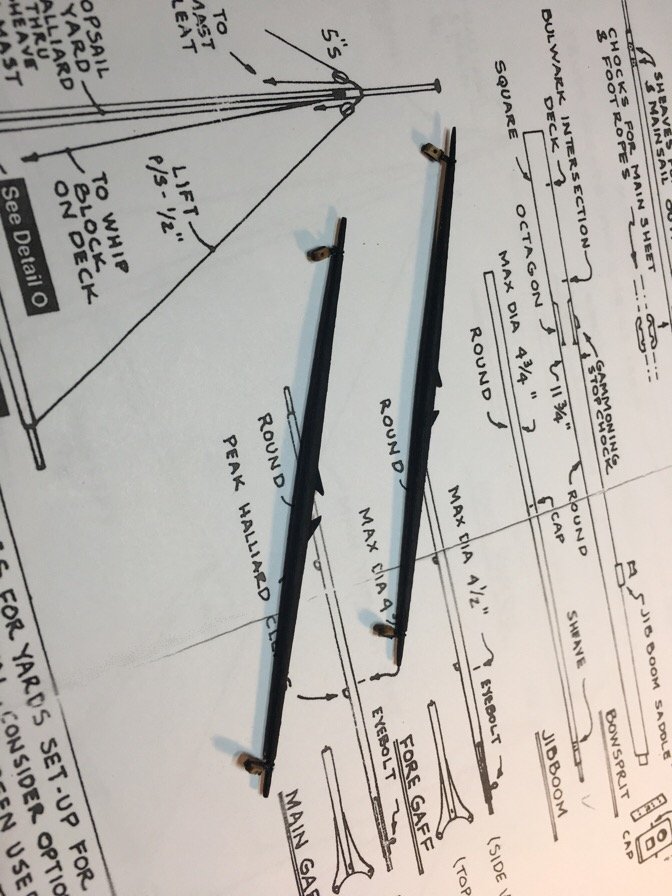
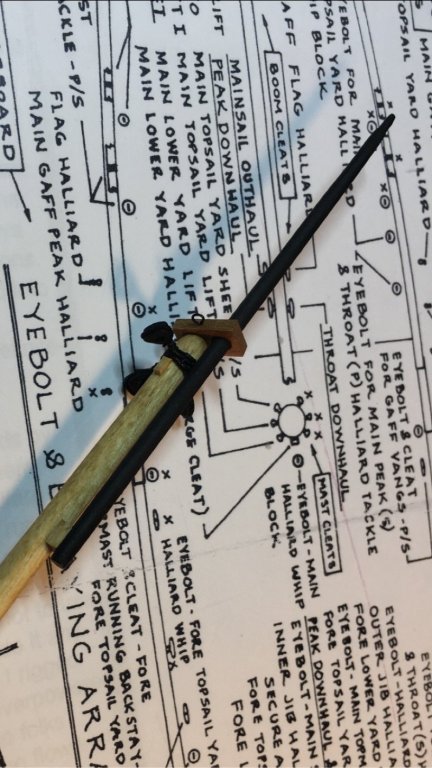
Celebrated too soon. I was practicing my repeated half hitches (used in the bowsprit gammoning...was practicing on a toothpick to simulate my rigging bundle which forms between the sprit and the stem)...when I realized.... ...that I put my bloody JIB-Boom on sideways!!! Yep...I looked down as I was dry fitting the bowsprit and realized I’d botched the job...the shreaves at the tip of the boom were pointing sideways. But wood is forgiving...wood glue even more so. Luckily I used CA glue very modestly in setting up the wrapping around the boom and bowsprit. Was able to completely unwrap, unglue, reglue, and rewrap the boom with the right orientation. This time I ended up with both the leading and trailing end terminating on one side. sigh...Moving on...

- 449 replies
-
- 5
-
-
- sultana
- model shipways
- (and 2 more)
-
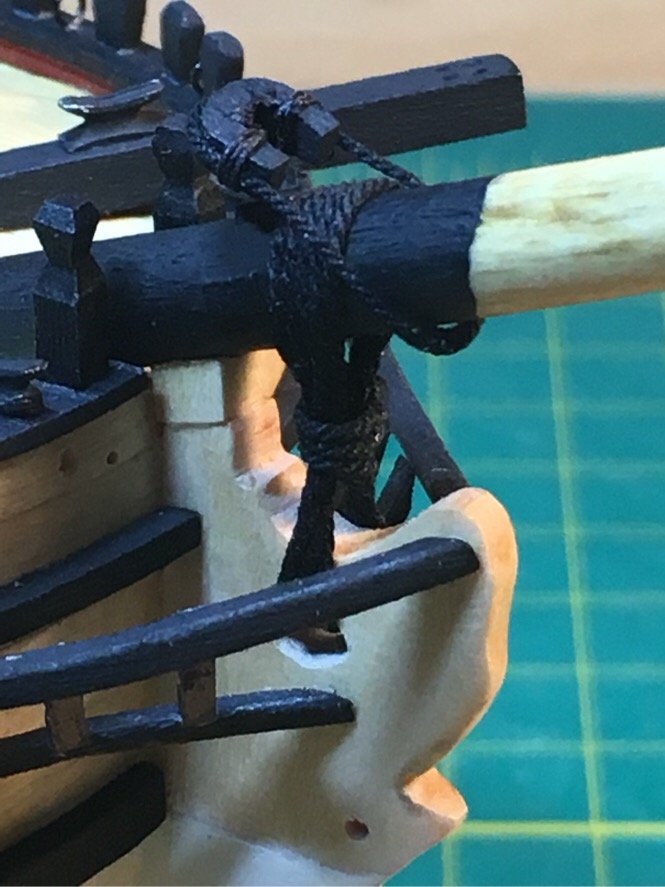
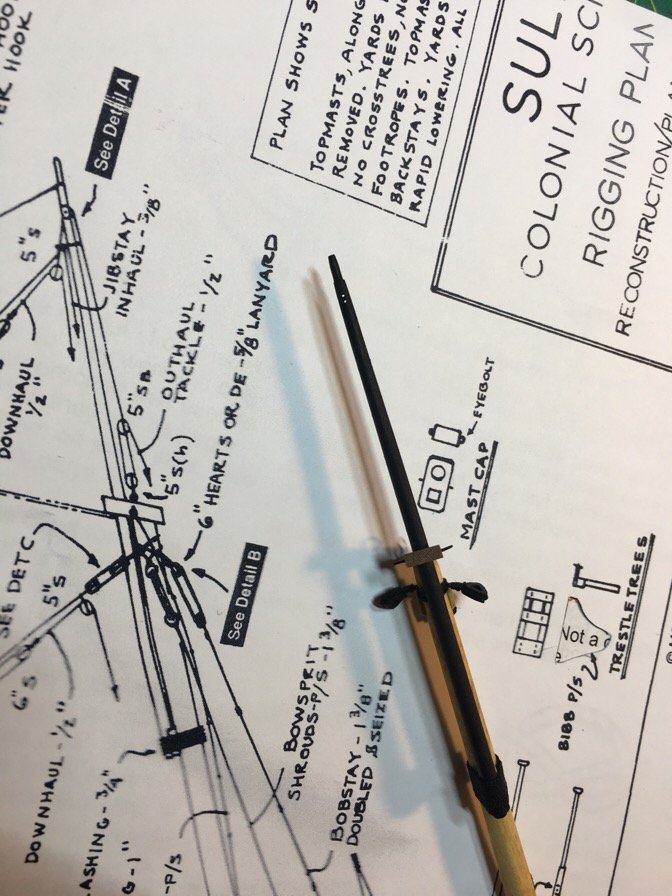
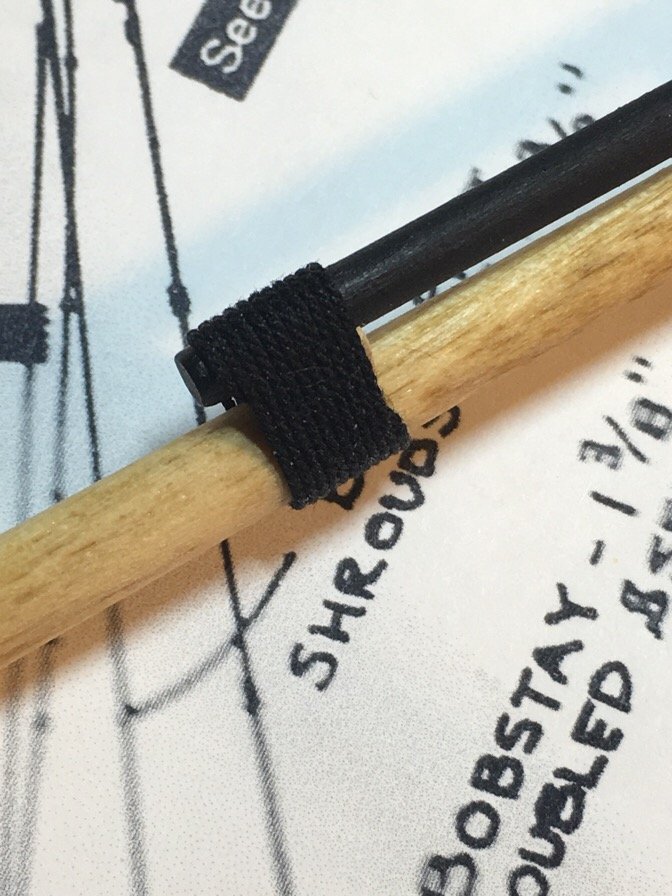
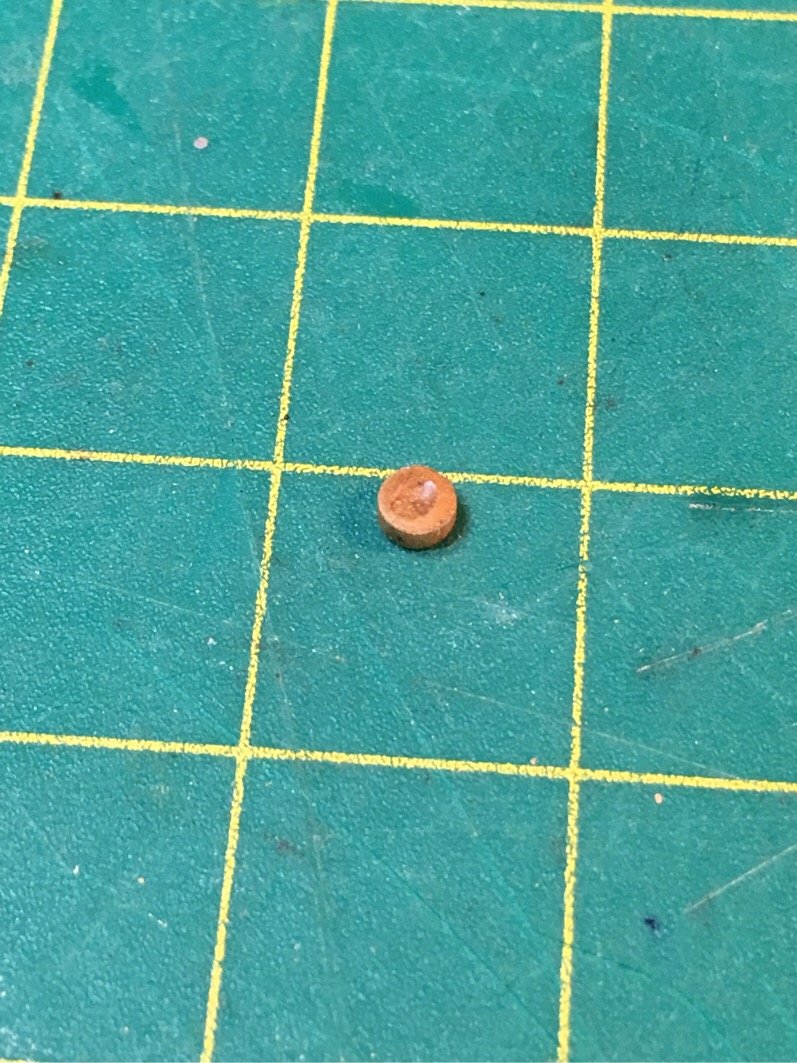
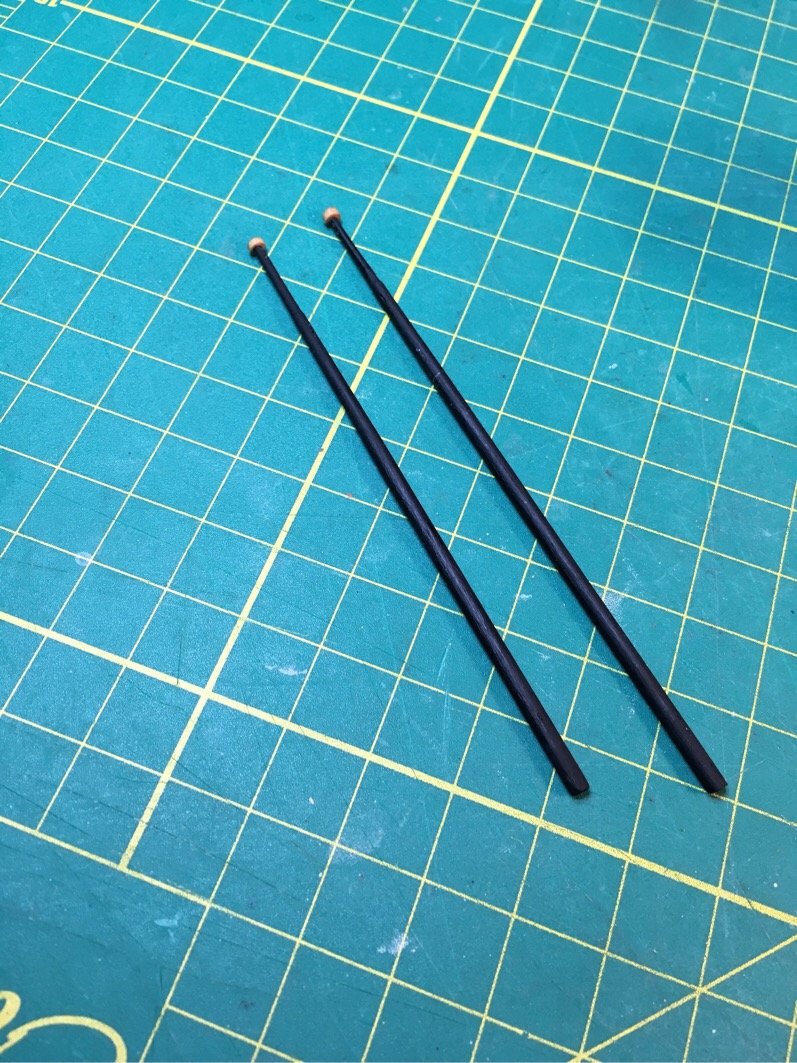
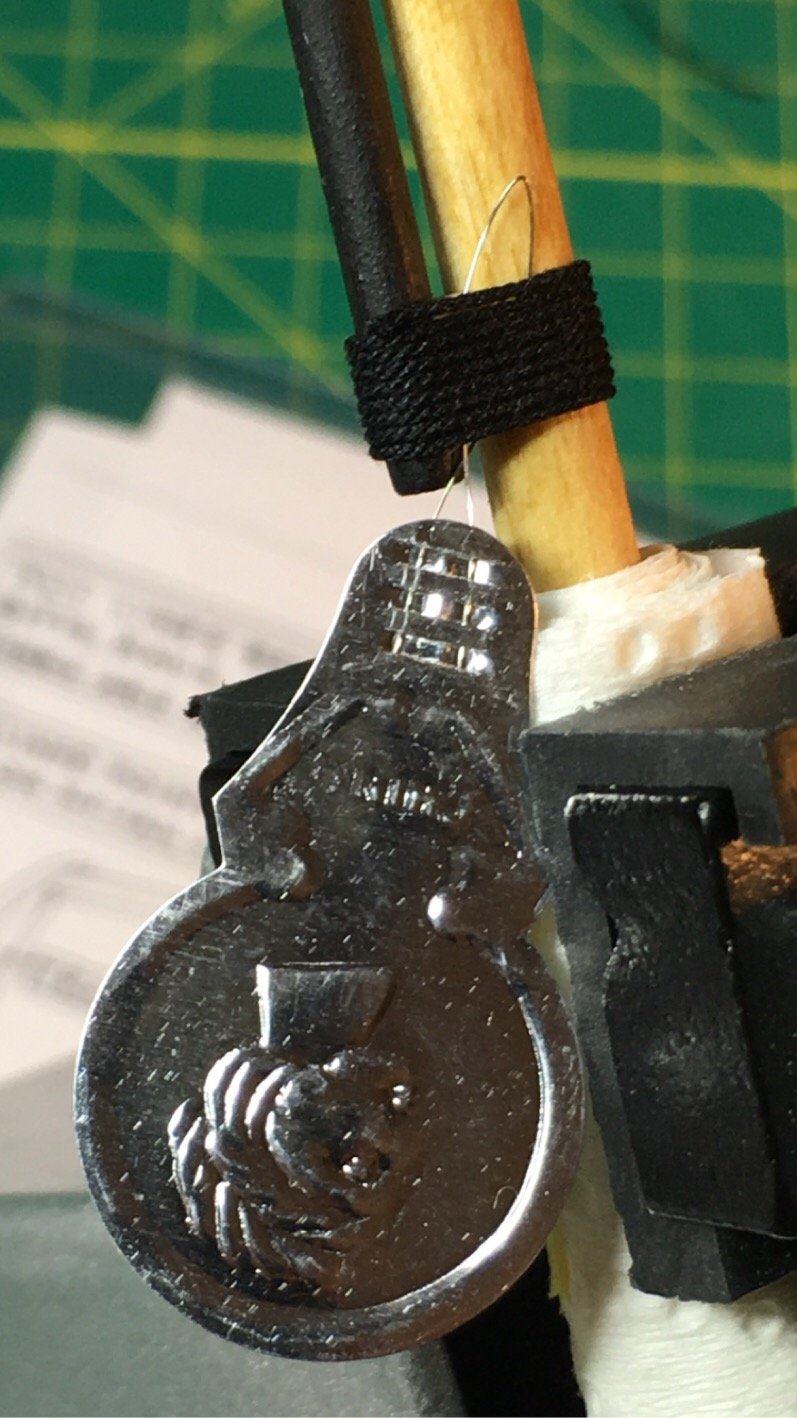
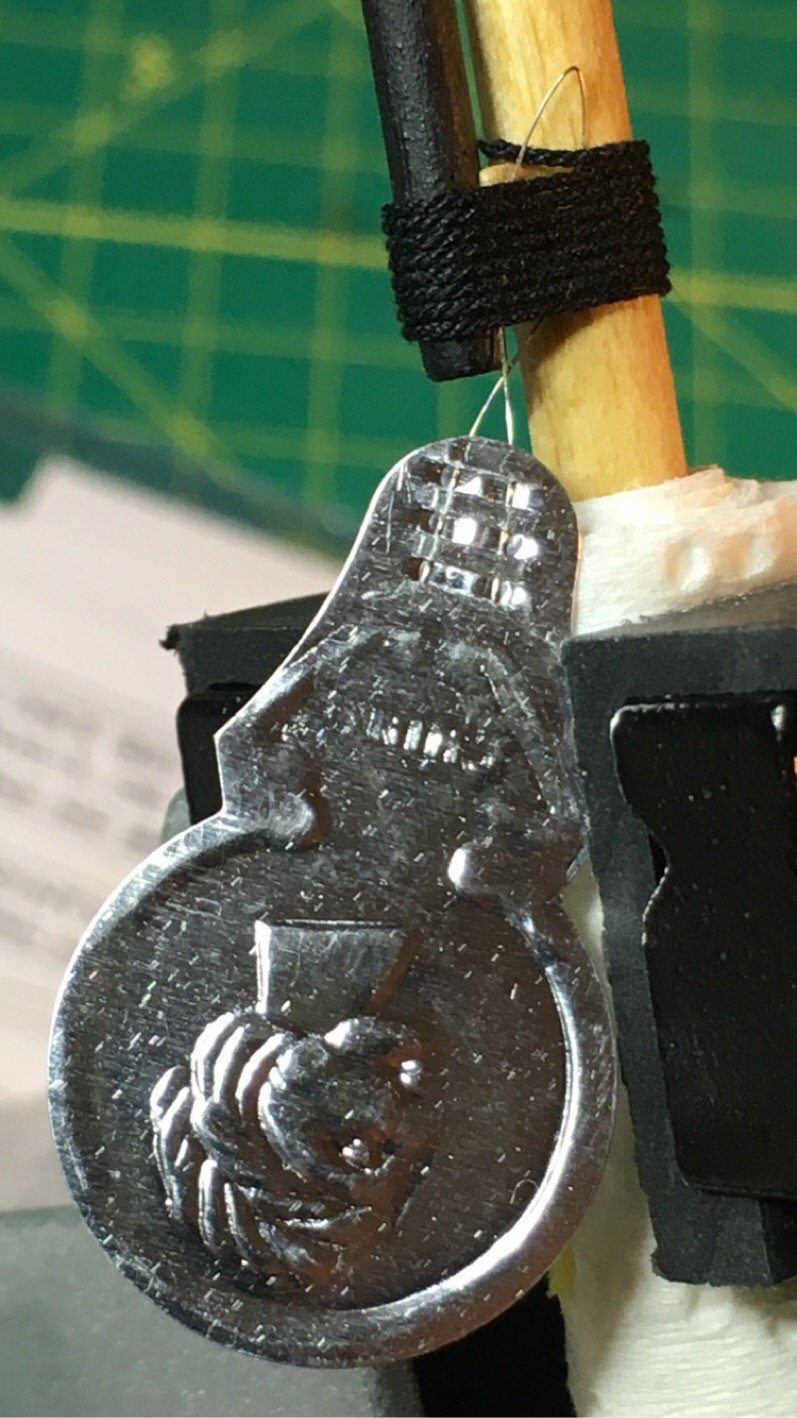
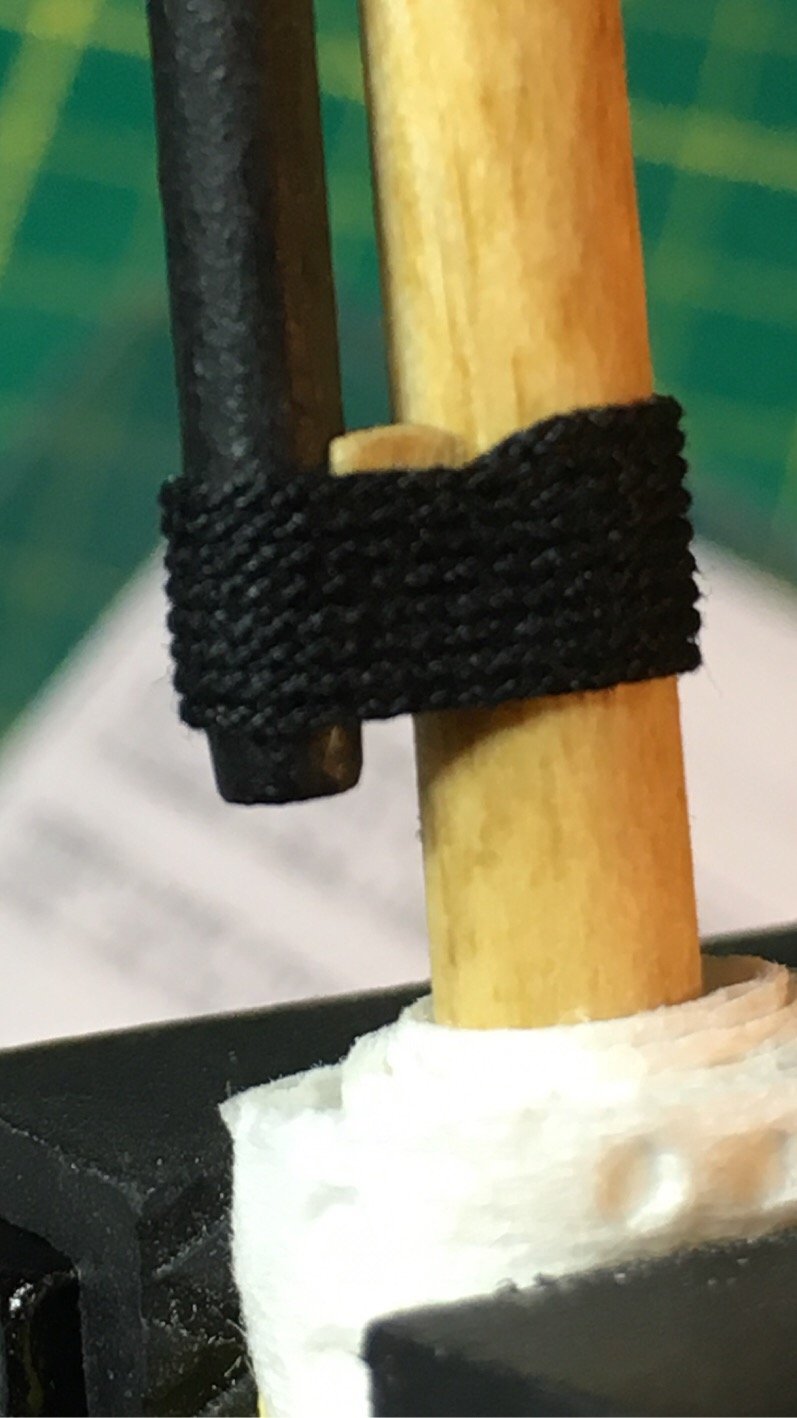
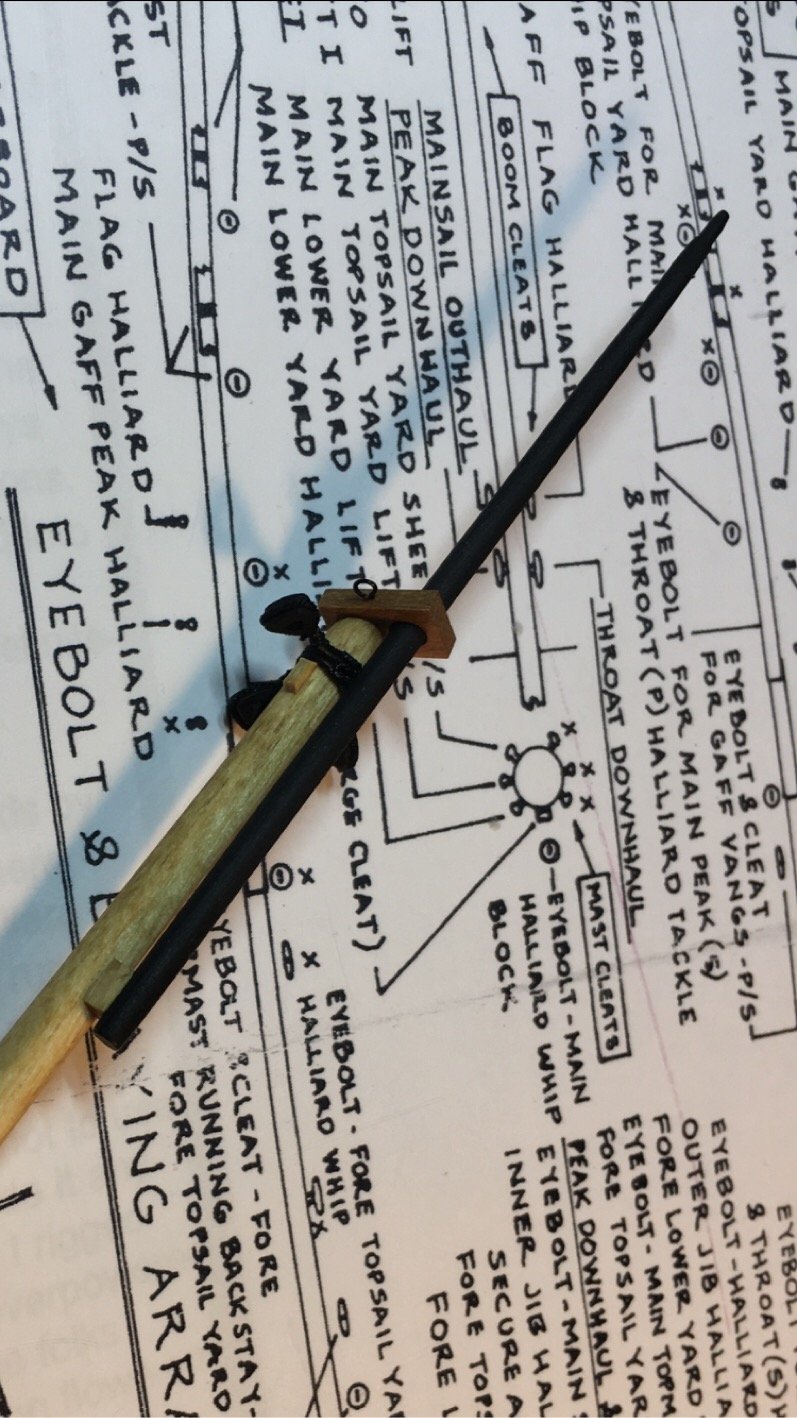
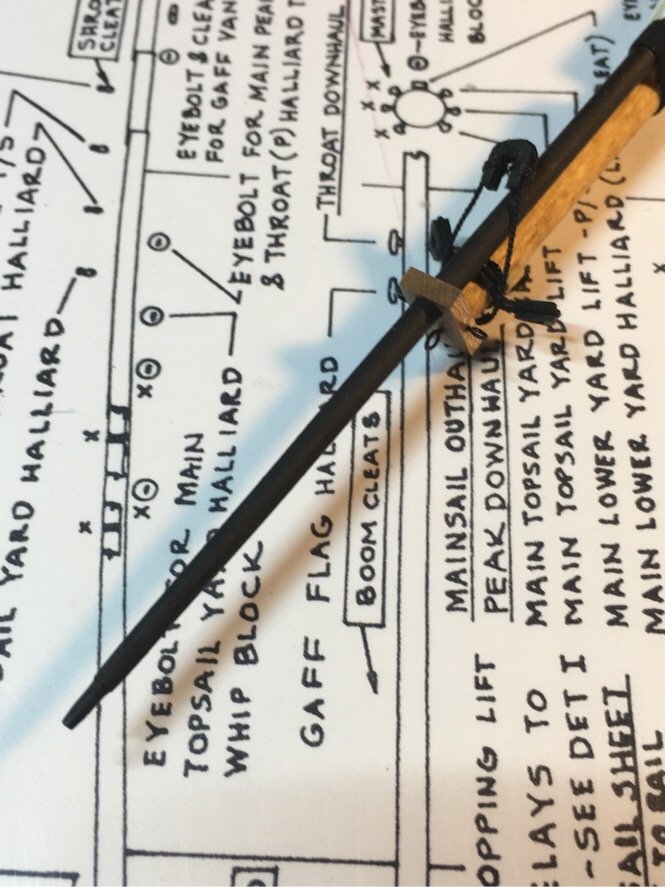
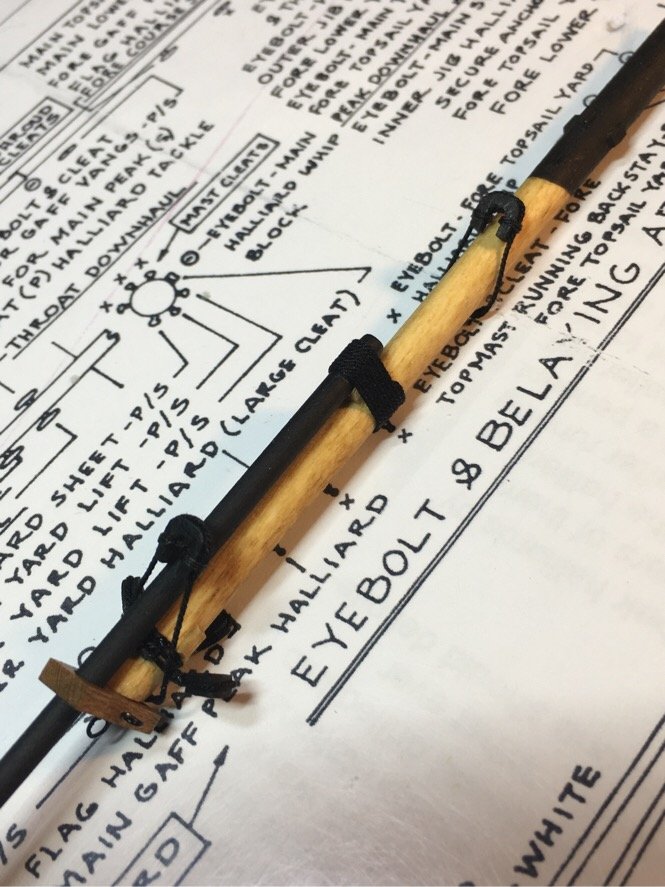
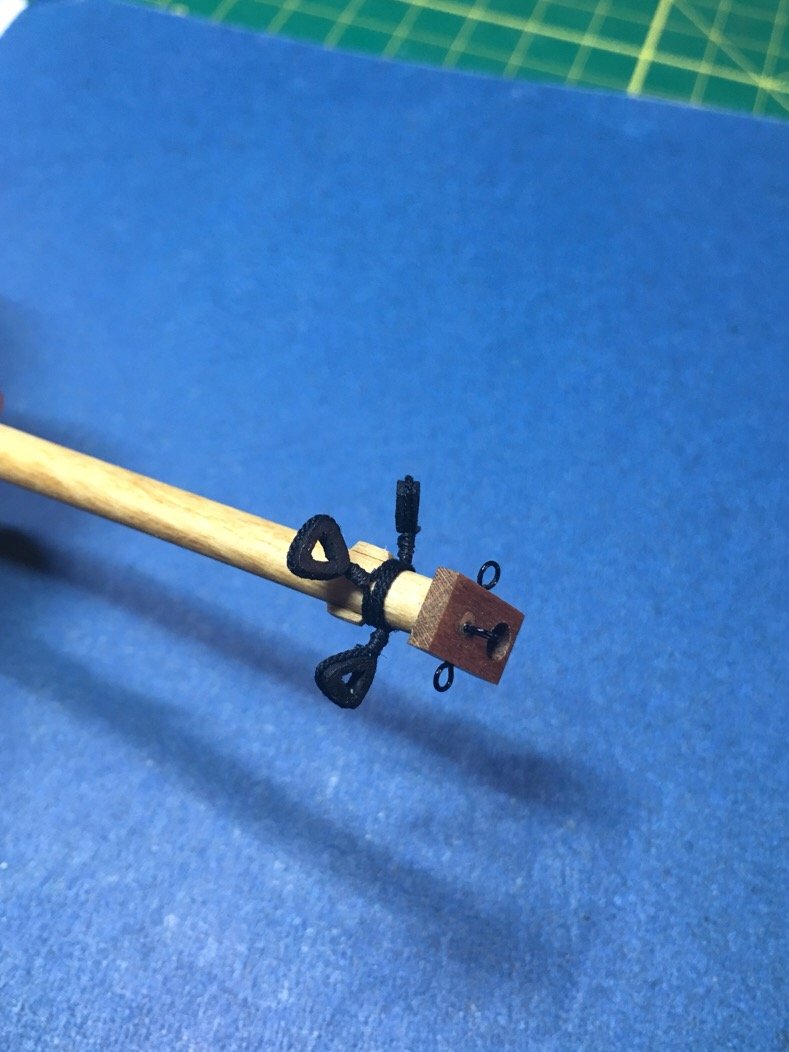
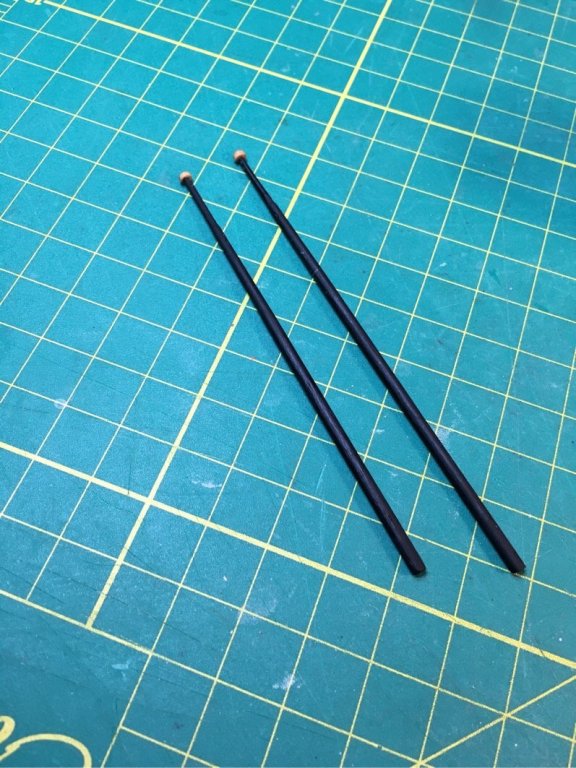
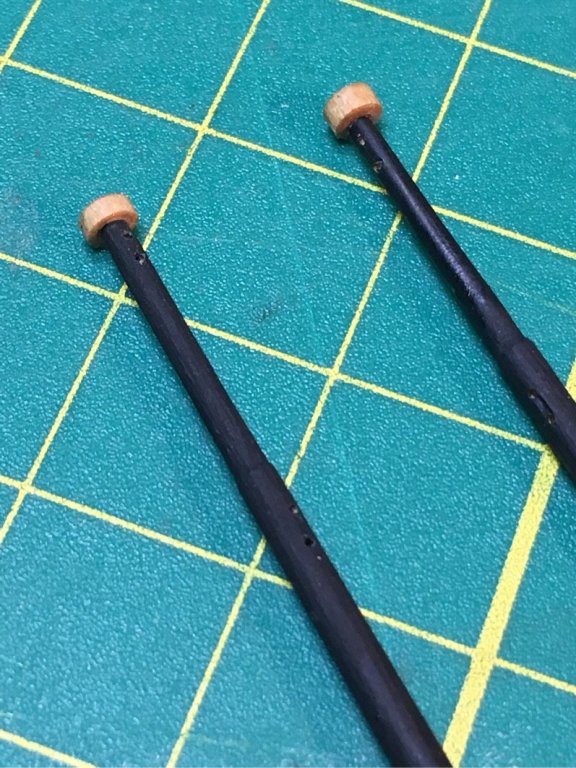
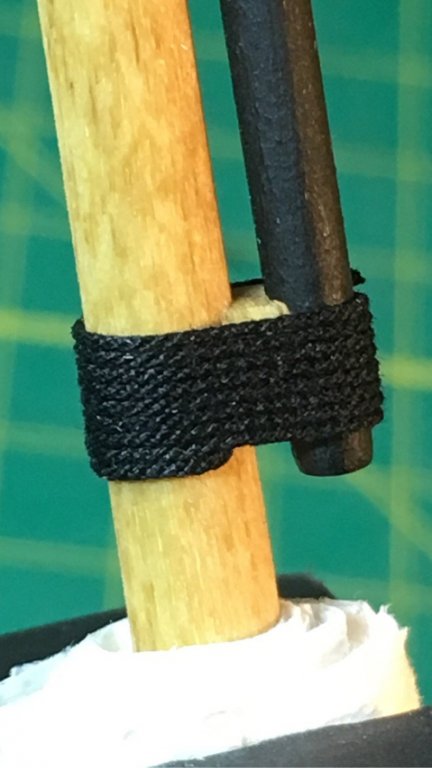
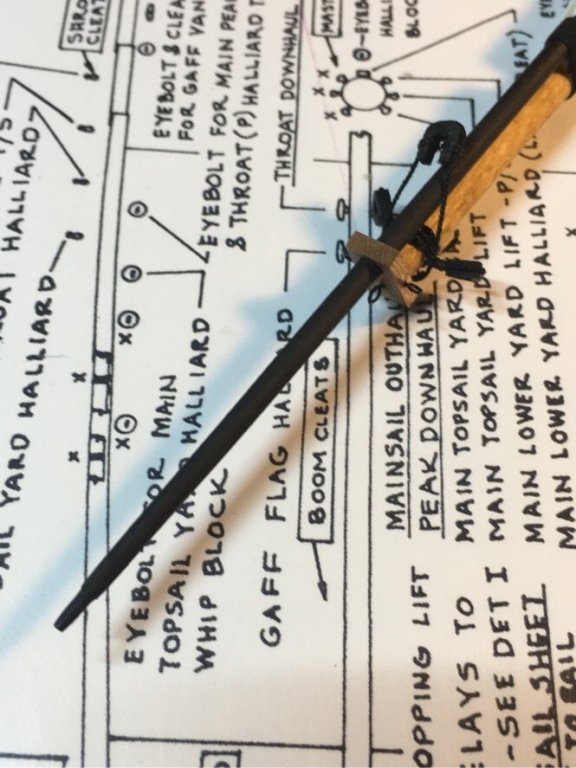
Nothing like working in the shiproom during a Midwest snowstorm! Today I decided to fiddle with ball trucks and the closed heart collars. The plans call for blocks below the ball trucks (topmast caps). Chuck mentioned that to put a hole in them for the flag halliards would split the wood. I took a few swings at bat with a #37 drill bit in my little dremel and found I could drill them out. However, decided to put them in the top masts as he did...same process with no problem. Glued the little guys on top of the masts but made a little depression to hold some glue and align them in the mast tops. The ball trucks were made by cutting small cross sections from a dowel of appropriate size. Attaching the jib boom to the bowsprit took some thinking. No novice level references out there with step by step directions I could find...so others may find my pics helpful. As Chuck advises in the practicum, 0.018” thread used to attach the jib boom. Glued the jib boom to the wooden saddle first. Then used a tiny touch of CA glue applied to the rigging line to secure the thread on the bottom of the bowsprit on each successive wrap. ‘Hiding’ the terminating ends of the rigging was done using a threader as shown. Made sure the length of remaining rigging would be buried under the wrapping and not hang out the other side once I pulled it through. I have to say...it turned out looking pretty clean. I buried one hanging end on either side of the jib boom. Next was the closed heart collars. Two were made for the bowsprit using Chuck’s ‘easy’ way of tiring them off...CA glue touched to a simple slip knot. Pics are self explanatory. I made the closed loops off the bowsprit and slid them on once they were finished. Not a bad day’s work. Step by step. Moving on!!!


- 449 replies
-
- 4
-
-
- sultana
- model shipways
- (and 2 more)
-
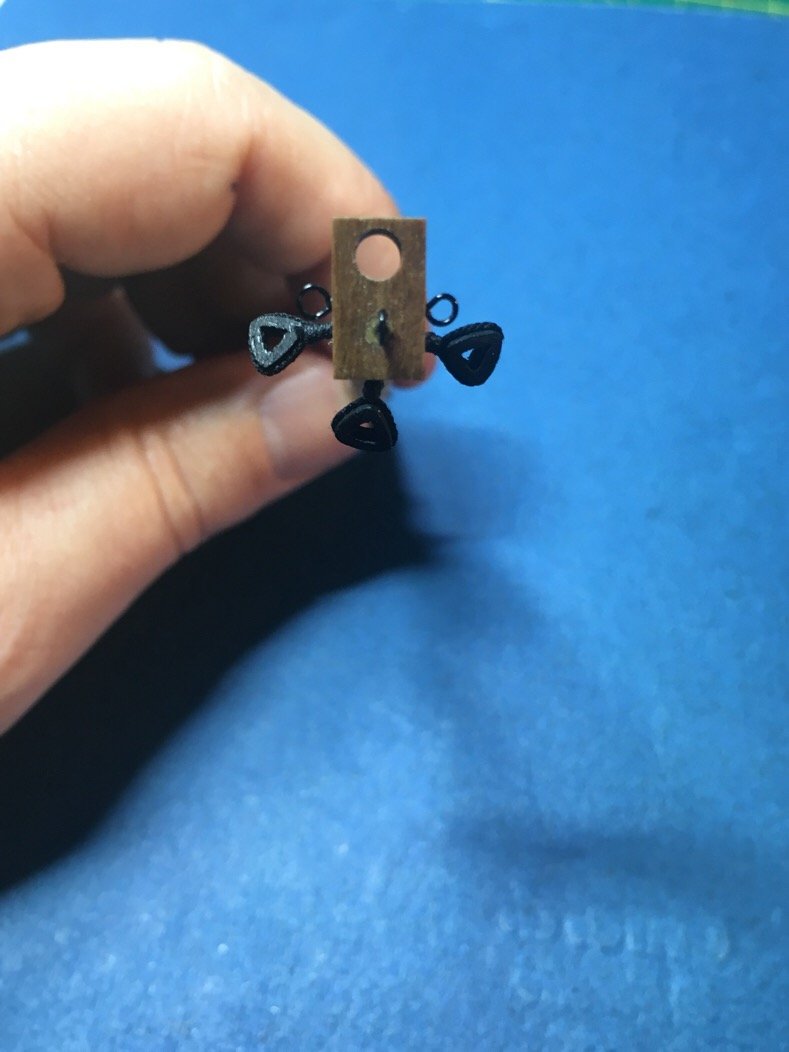
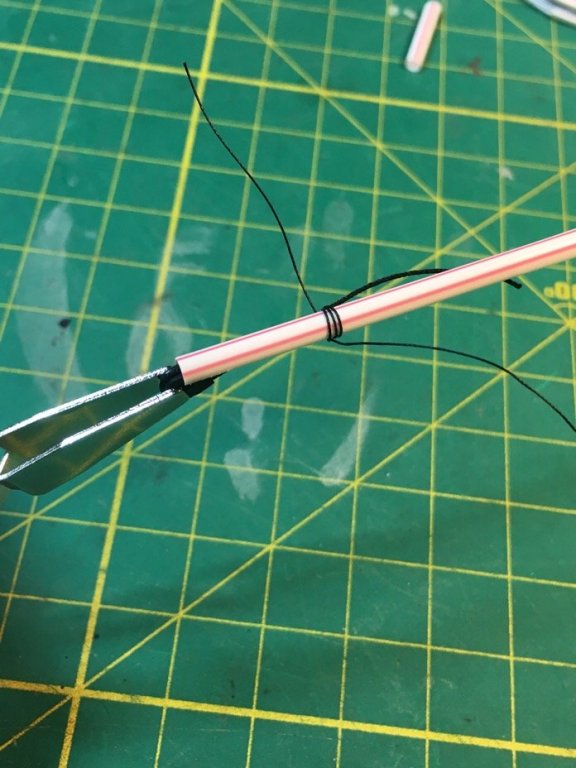
just thought I’d share...trying to tie the siezing around each leg of the open heart with my big fingers was tough! Figures a workaround using a straw! Then just pushed the wrapping off the straw onto the leg of the open heart with tweezers, cinched it up, and a touch of CA on the inside. Not a bad result. I call it...the Straw Jig!
- 449 replies
-
- 3
-
-
- sultana
- model shipways
- (and 2 more)
-
Closed hearts are done and ready to put on the bowsprit. I can’t say they are perfect. But...I made them, and they turned out better than I’d hoped! Taking some trial swings at the gammoning before I try on the Sultana. Moving on...

- 449 replies
-
- 4
-
-
- sultana
- model shipways
- (and 2 more)
-
OMG...have I got stories on the center line....especially when you need to trace it on the keel! Good luck moving...and I'm happy to lend any historical experience your way I can send to aid you in your build! Cheers Pat
-
Hi Anreak Gotta tell you...being referred to as knowledgeable was a shock! The Sultana is my first wooden model ship. If my model looks good so far, it's because I've got some great shipmates on this site, and a ship club I visit once a month which helps me be 'brave'. My Sultana is a patchwork of corrected mistakes! Mistakes are the best teacher...and so my, what little knowledge I have is from screwing up! LOL Rigging scares the bejeezuz out of me! I'm following Chuck Passarro's practicum (I hope you have it...if not, I can point you to where to download it) for the most part, and simply having fun. Between you and me...sanding and shaping the hull was the most challenging. I inhaled half the ship! Hope you continue with your build!!! Pat
-
Question for the forum. I’m trying to find simple knots/techniques for the following: 1. Lanyards: where does it start and how does it end. Pics just show symmetric wraps between two hearts. Does someone have a technique? 2. Tying a line to a hook or an eyebolt: I see no simple instruction to do this. 3. Simplest knot to terminate an single loose end: the gammoning has no clear termination point. Any links to good material would be appreciated! Cheers!
- 449 replies
-
- 2
-
-
- sultana
- model shipways
- (and 2 more)
-
Okay. Happy New Year! Made a bit of slow progress. Although I can make some nice round bullseyes (closed collars) for the bowsprit, decided to use the closed hearts I made. It was my first attempt at seizing and they turned out nicely. Tied them onto the sprit in front of the chocks as Chuck does in the practicum. Not bad. Maybe oversized but I was focusing on doing a clean job. Also took time to stain some blocks for later. The stain really helps weather them and adds depth. Deep breaths...deep breaths...DEEeeeep breeeeaths...now for the open hearts. Moving on...


- 449 replies
-
- 5
-
-
- sultana
- model shipways
- (and 2 more)
-
Well...I’m off to Japan for the Holidays with the Admiral. Wishing you all a joyful Christmas and Happy New Year! Will be eager to finish the rigging on my return!
- 449 replies
-
- 2
-
-
- sultana
- model shipways
- (and 2 more)
-
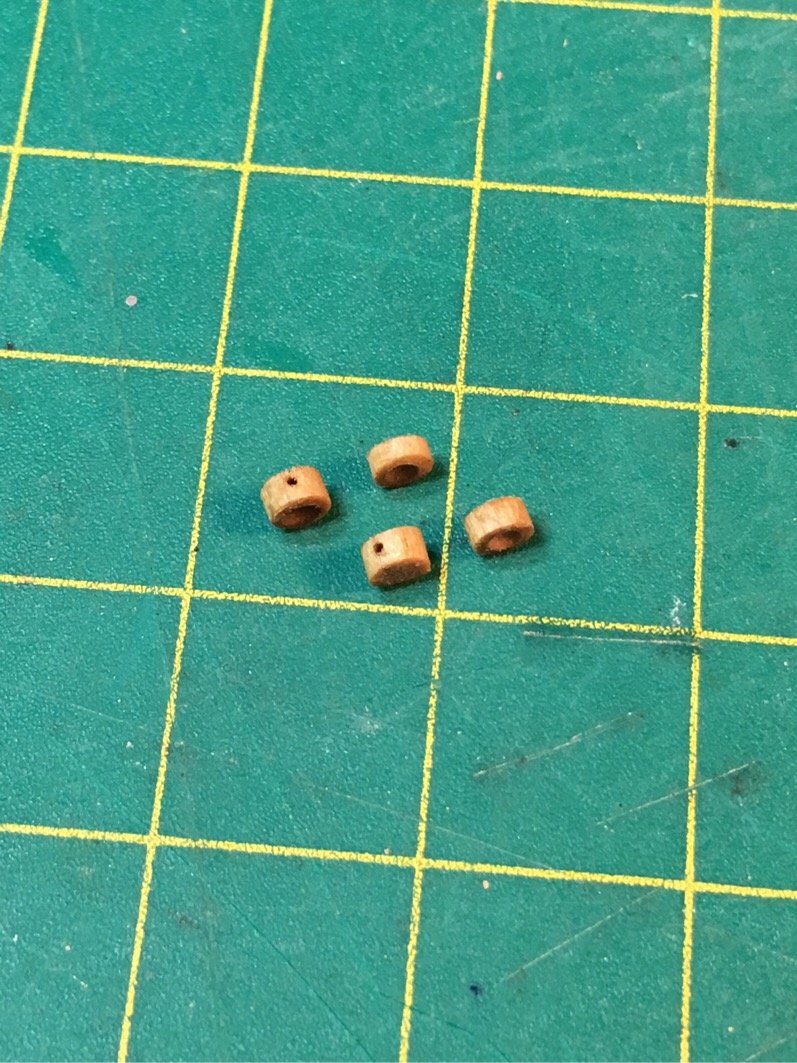
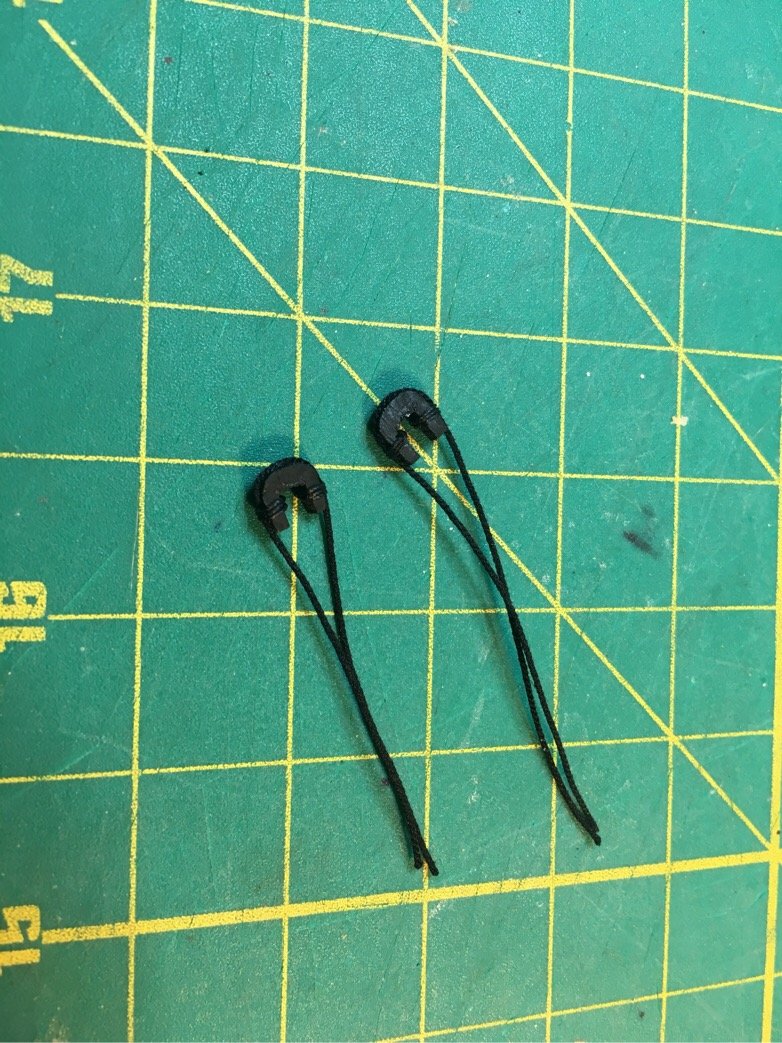
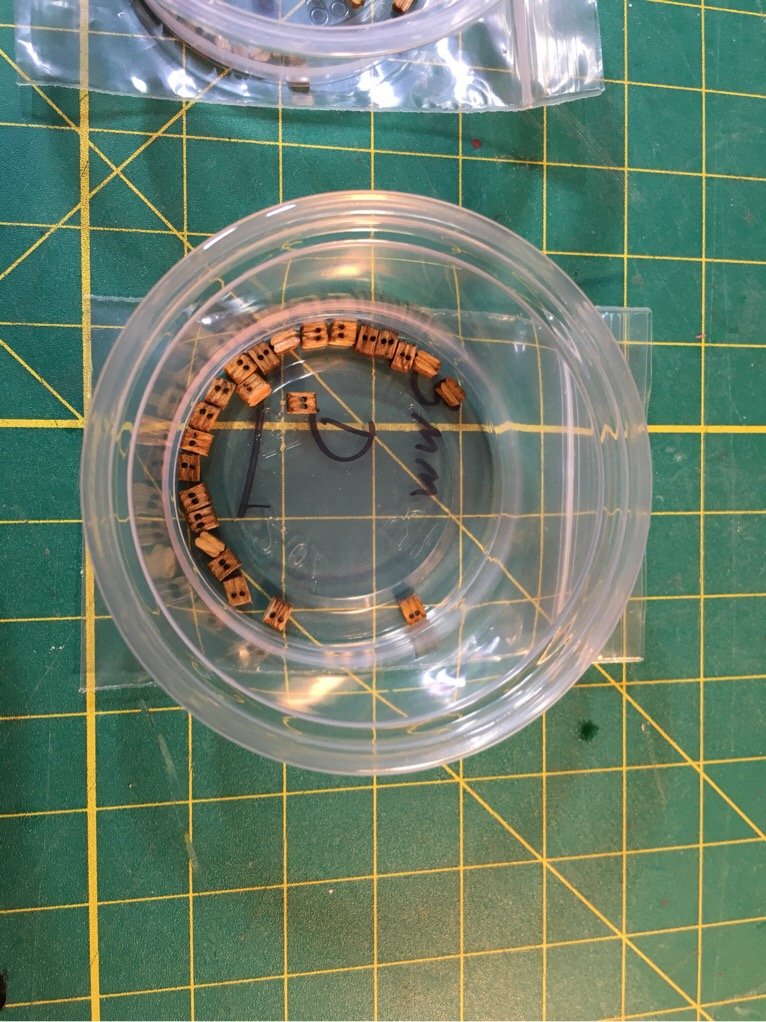
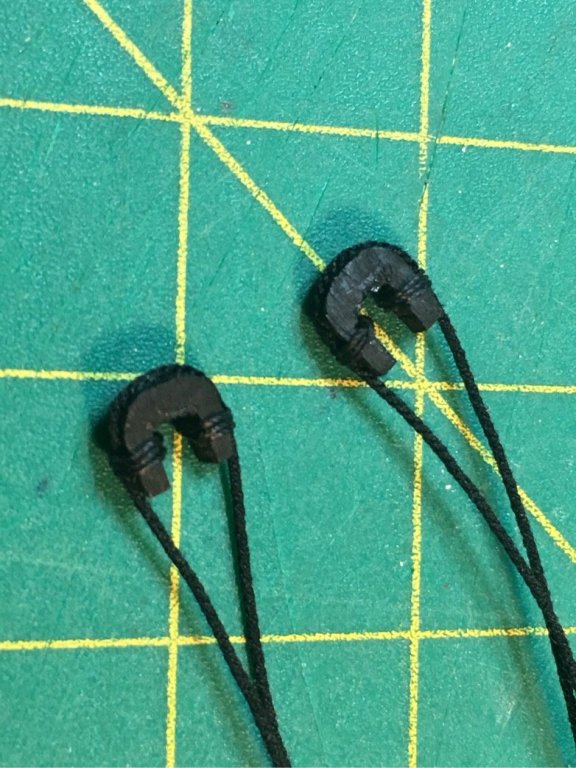
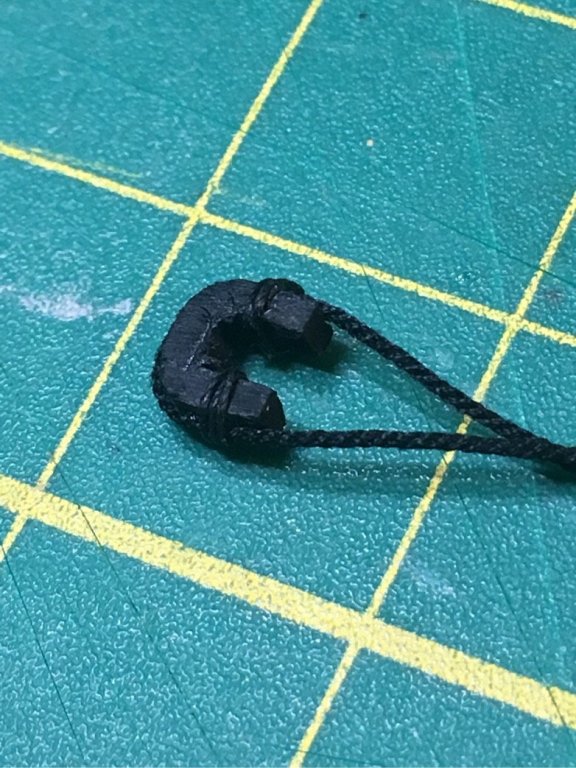
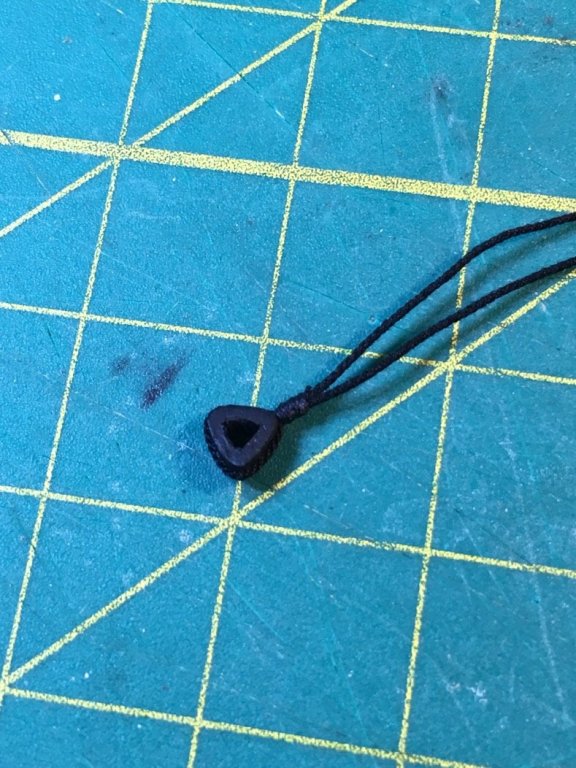
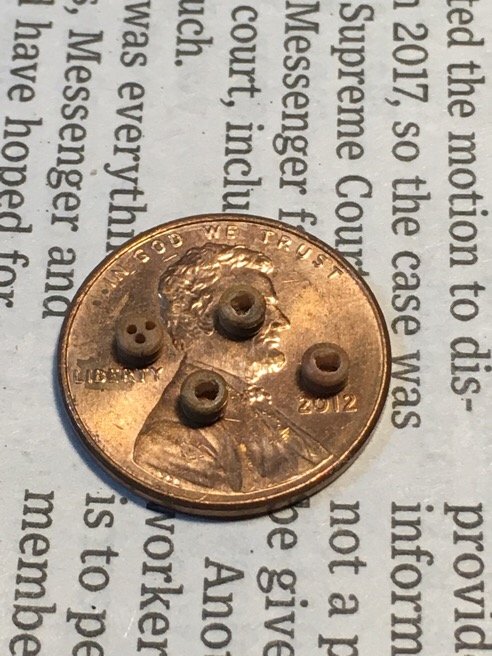
Well, tales of my demise are still exaggerated!! I painted the open and closed hearts I made. Have the Syren spares if needed but pressing on. One bit of progress was noodling over the thimbles. Chuck made his out of thin rigging line. I decided to try and hollow out a tiny deadeye. Was tricky but it worked - so I made a few. These will be fastened to the eye bolts on either side of the fore mast to secure the lanyards for the mast stays. I think these are small enough, so I’ll give it a go...no painting these guys. Was a trial to get them made so I’ll let them stand out from the black rigging line. Moving on! Merry Christmas and Happy Holidays!!!
- 449 replies
-
- 3
-
-
- sultana
- model shipways
- (and 2 more)
-
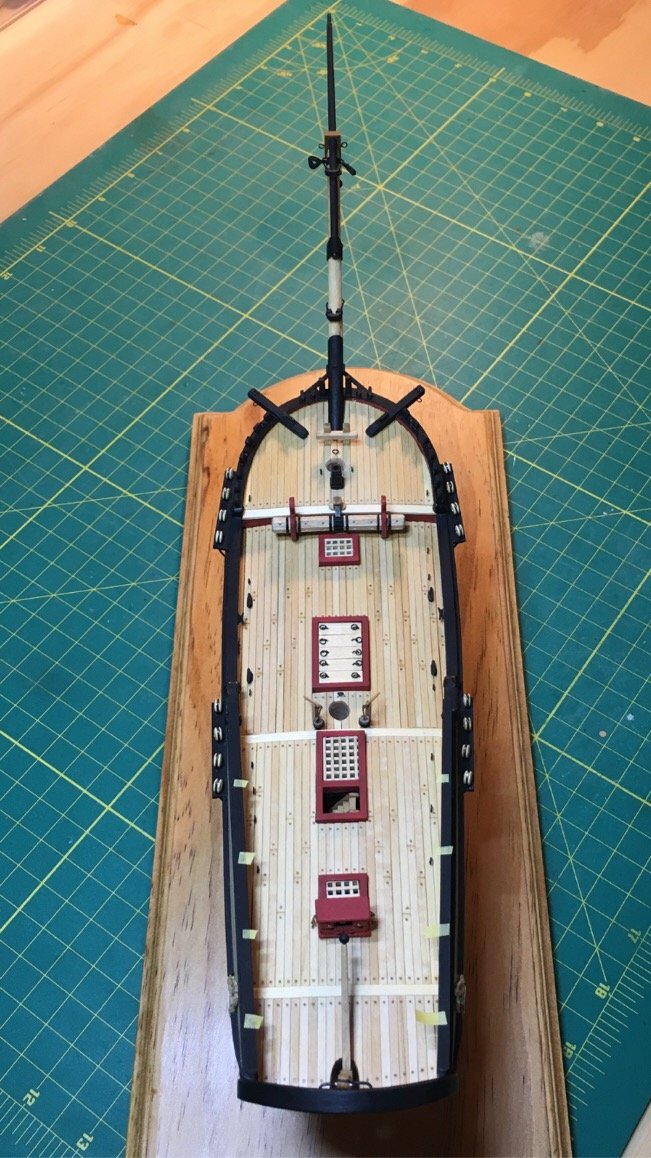
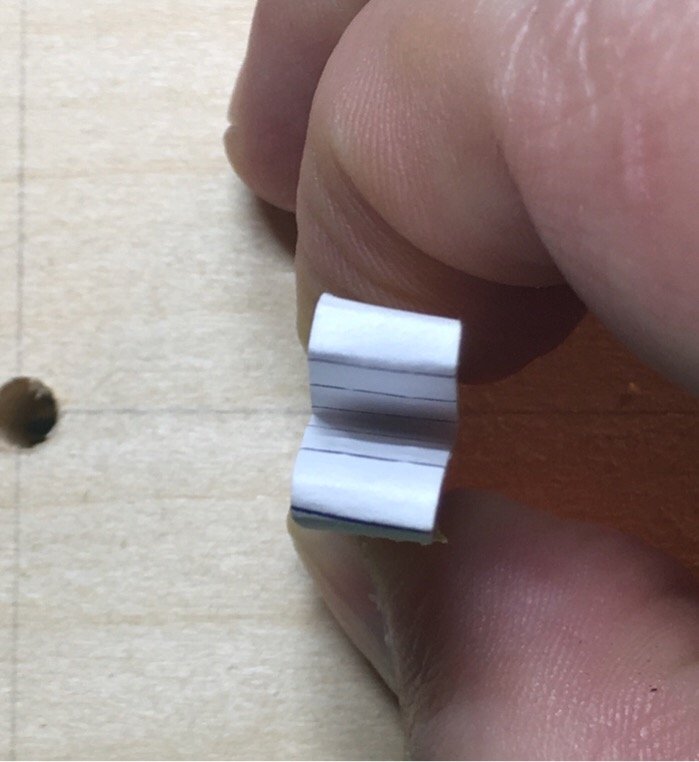
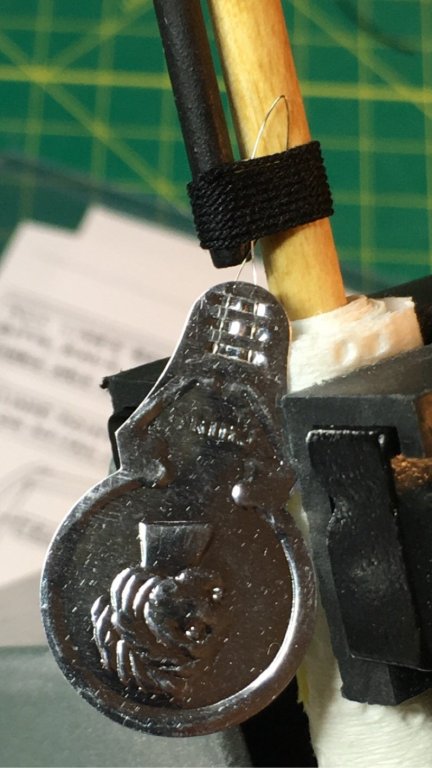
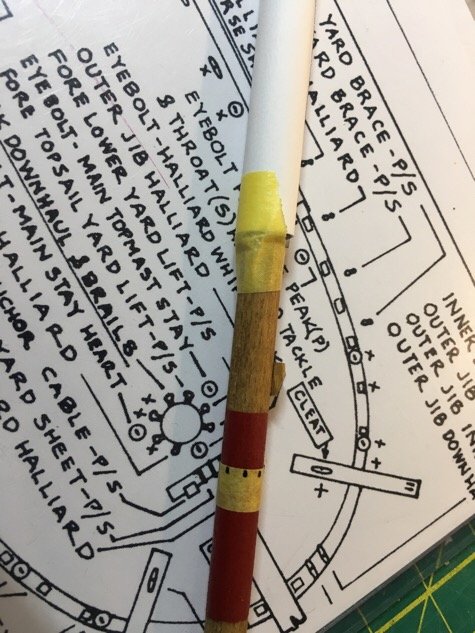
...by the way...the paper wrapped around the shaft of the masts is there to prevent oil from my hands getting all over the masts. (I was a messy baby, too.)
- 449 replies
-
- 4
-
-
- sultana
- model shipways
- (and 2 more)
-
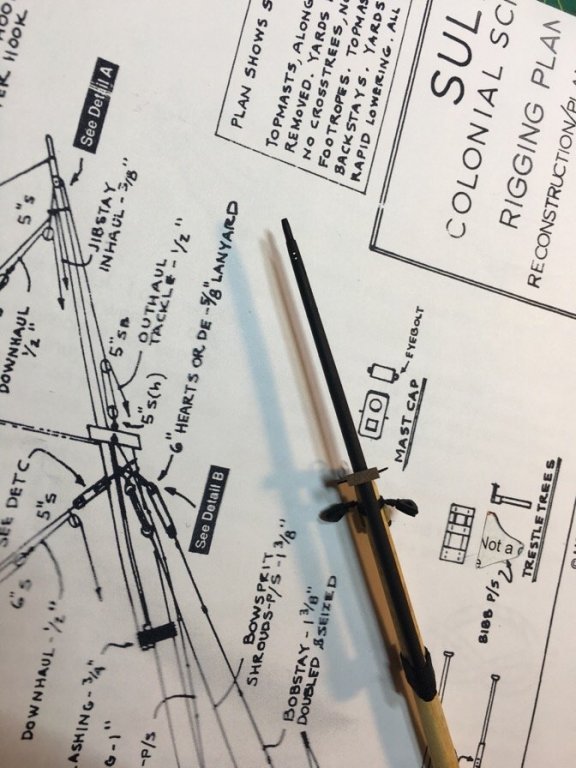
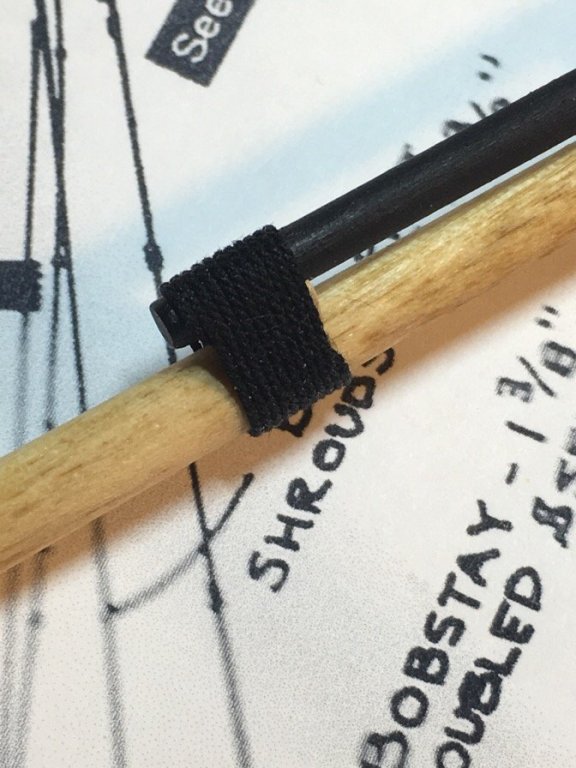
Trestle trees painted. As are the bases of my main and foremast. Glued on the cleats at the base of each. Aligned by simply marking a piece of masking tape...taaadaa! Moving on!...
- 449 replies
-
- 4
-
-
- sultana
- model shipways
- (and 2 more)