Overworked724
-
Posts
1,266 -
Joined
-
Last visited
Content Type
Profiles
Forums
Gallery
Events
Everything posted by Overworked724
-
 Thanks, Steve! Actually, I’m learning from Chuck’s practicum, folks who visit this blog with constructive criticism and ideas, my mistakes, doing things outside the instructions and the practicum, reading other people’s builds (and their mistakes and learnings), and reading outside references...etc. So many places to learn. It dawned on me that the joy in this hobby is manifold...the joy of creating something you can take pride in, the community of support who also build, overcoming problems and mistakes with success, the continual learning of new skill sets, learning fascinating maritime history, and simply getting lost in a great and wholesome hobby!
- 449 replies
-
- 3
-

-
- sultana
- model shipways
- (and 2 more)
-
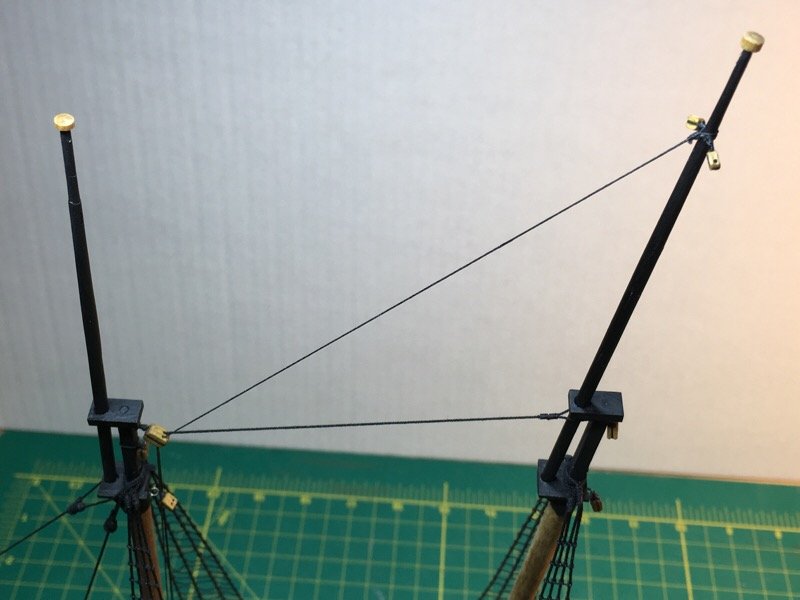
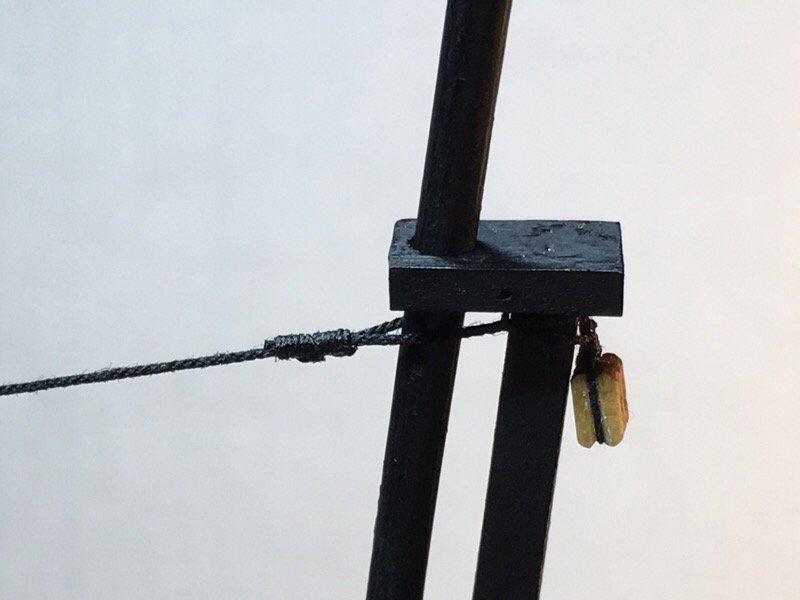
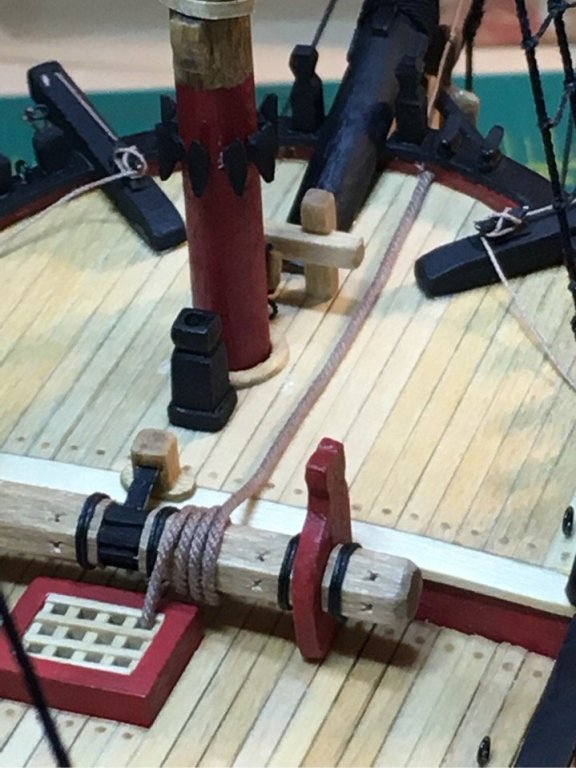
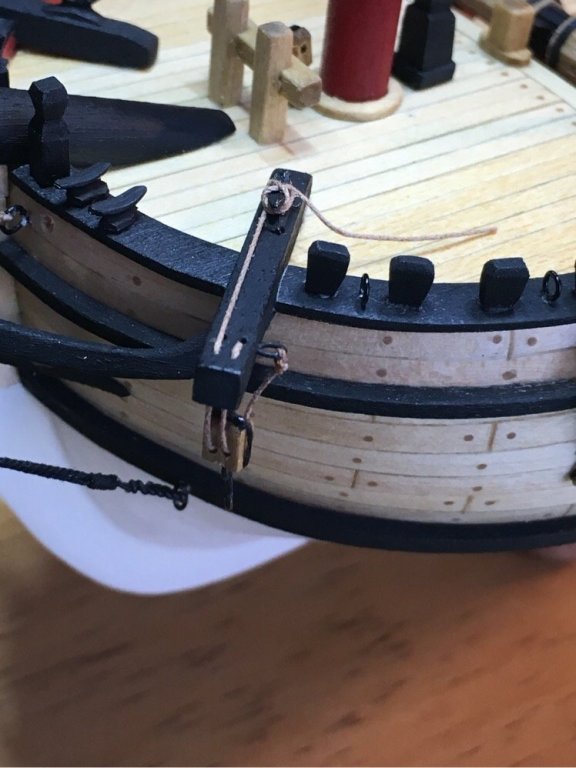
Happy St Paddy’s Day! Well, back from Ireland...windy and raining the whole time. 🇮🇪❤️ Gotta love the Emerald Isle. Well, I used my drilled out deadeyes to make bullseyes for the main stay and main top mast stay. They might be oversized as Chuck was cautious to avoid...but I think it turned out pretty nice. I tied them to the bullseyes attached to the deck eyebolts, then glued them on afterwards. Left myself enough slack to sieze at the main mast and main top mast while slightly increasing tension. Might be backwards, but seemed the best way to assure the lanyards on both bullseyes were of equal length. I threaded the block and then rigged the attachments to the main and top masts. And on the culinary side, my wife made cheesecake muffins and said she found deadeyes again!!! 🤣


- 449 replies
-
- 6
-
-
- sultana
- model shipways
- (and 2 more)
-
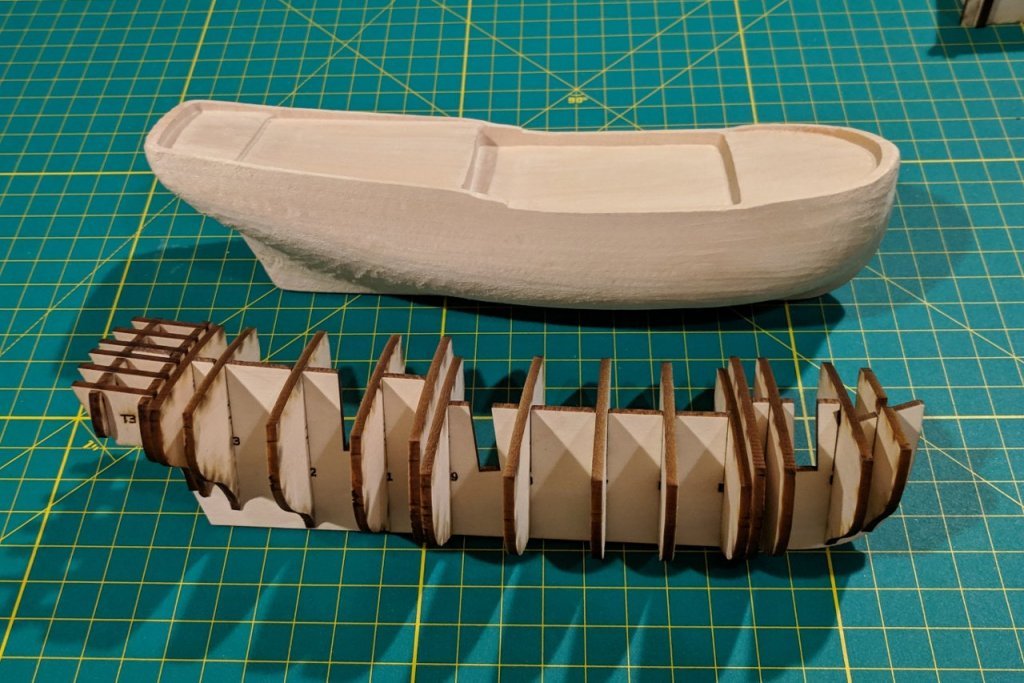
Hey...I thought you threw the solid hull away??? LOL
- 222 replies
-
- 2
-
-
- sultana
- model shipways
- (and 1 more)
-
Outstanding! I agree....your hull should come together nicely! I’m looking forward to your progress, Peter. Your ‘kit’ already paints how lazy and delinquent MS has been in updatingtheir kit! Looking forward to your progress.
- 222 replies
-
- 1
-
-
- sultana
- model shipways
- (and 1 more)
-
Ok. Firstly I’m really amazed at how this short blog has changed my perspective. Really great to see the progression here, Peter. Amazing!! I’m drooling! A couple questions. Where did you get the pieces cut? Did your plans consider the type of wood you would use for your frames? Are you going to build the Sultana? I would love to this frame fully planked! And if I get my hands on the plans and the know how to turn them into laser cut pieces I will begin building her (again) ASAP! 👍🏽👍🏽👍🏽
- 222 replies
-
- 1
-
-
- sultana
- model shipways
- (and 1 more)
-
I agree with removing the timber heads from the transom. Will you be offering a laser cut pattern for the window shutters off the transom? Yiur work is truly inspiring, Peter. And if you share the finished file, I’ll try to find a way to get the laser cut pieces and put it into a build! I’m getting tons of practice on the Old kit...would love to compare to a New kit! keep up the great blog....looks like you are almost done!
- 222 replies
-
- 1
-
-
- sultana
- model shipways
- (and 1 more)
-
Hehe. Yes...well...my wife is still shell shocked 😮.
- 449 replies
-
- 4
-
-
- sultana
- model shipways
- (and 2 more)
-
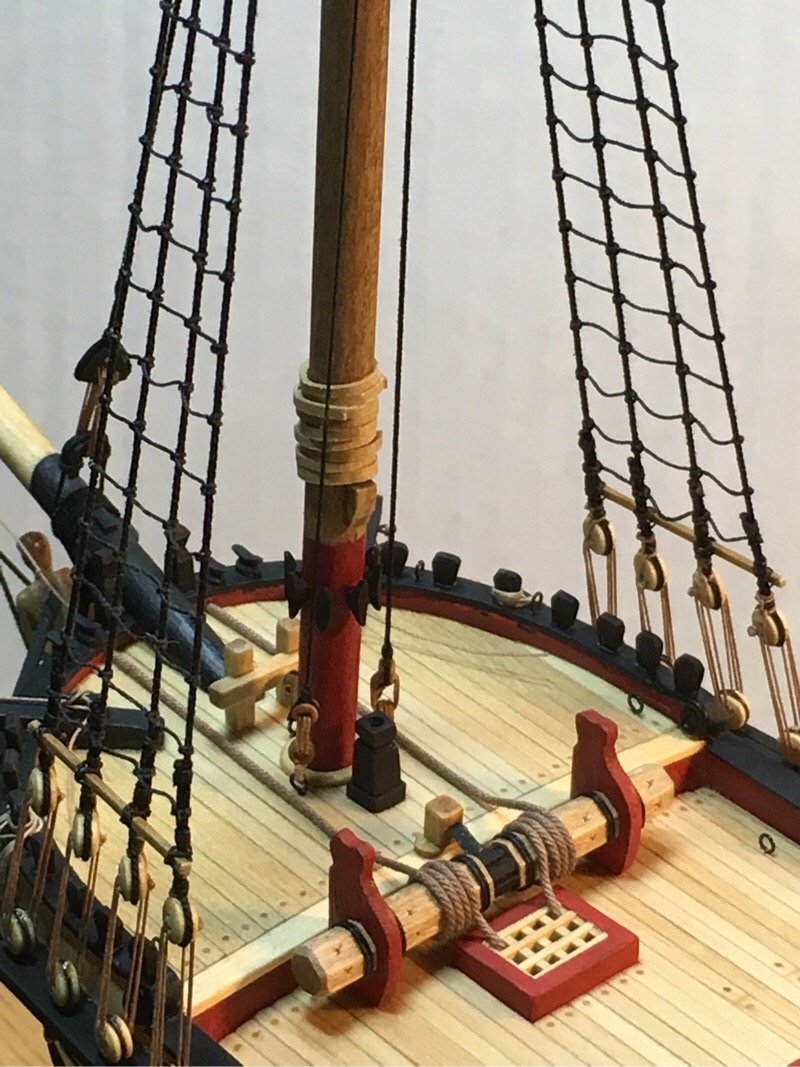
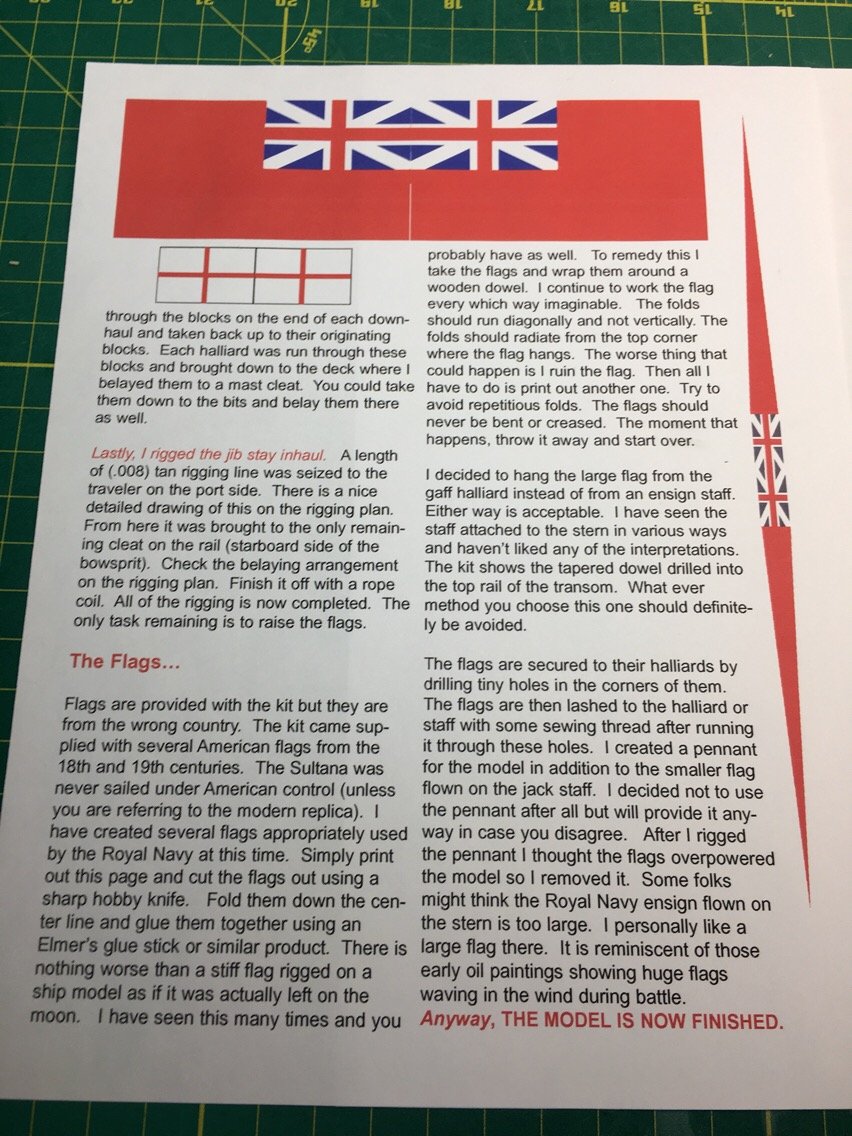
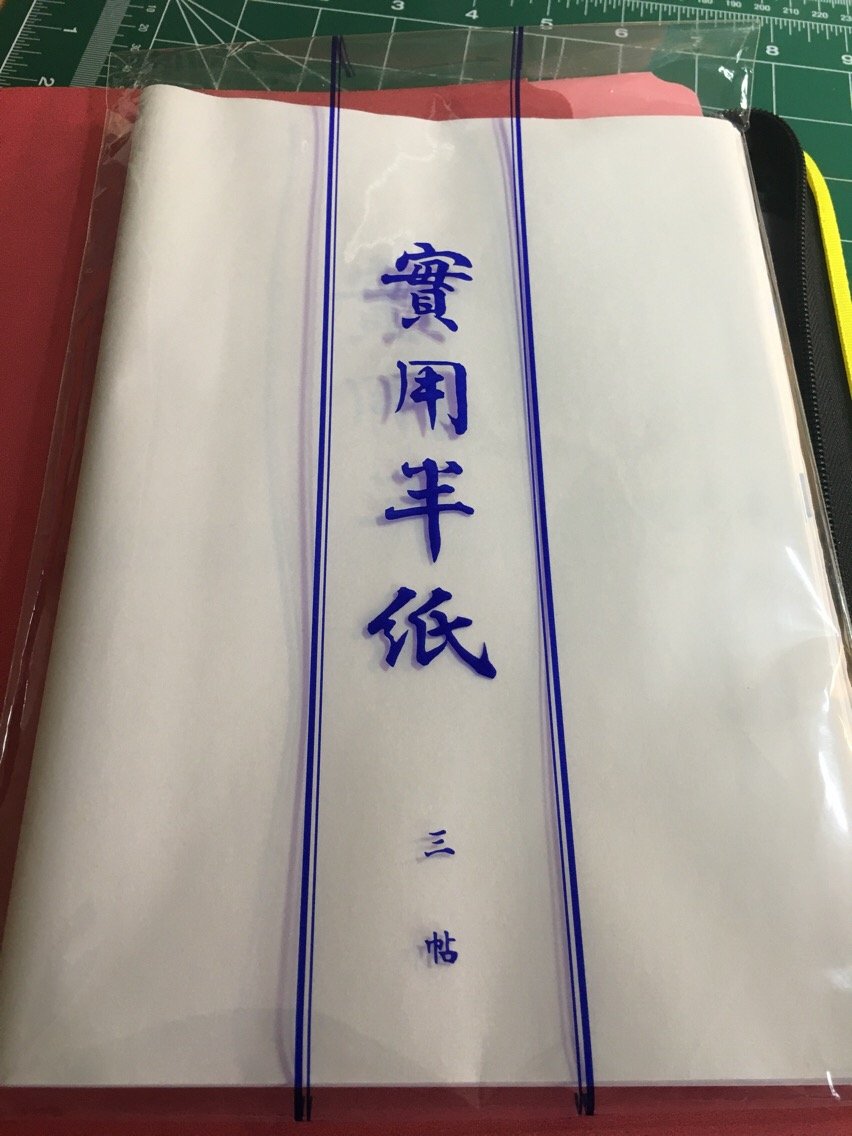
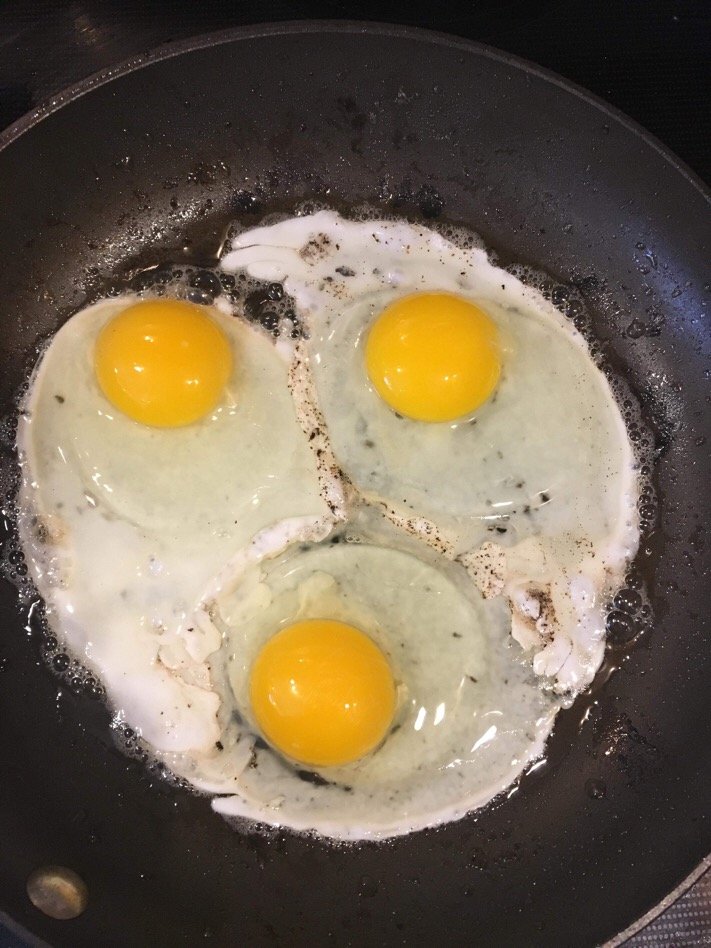
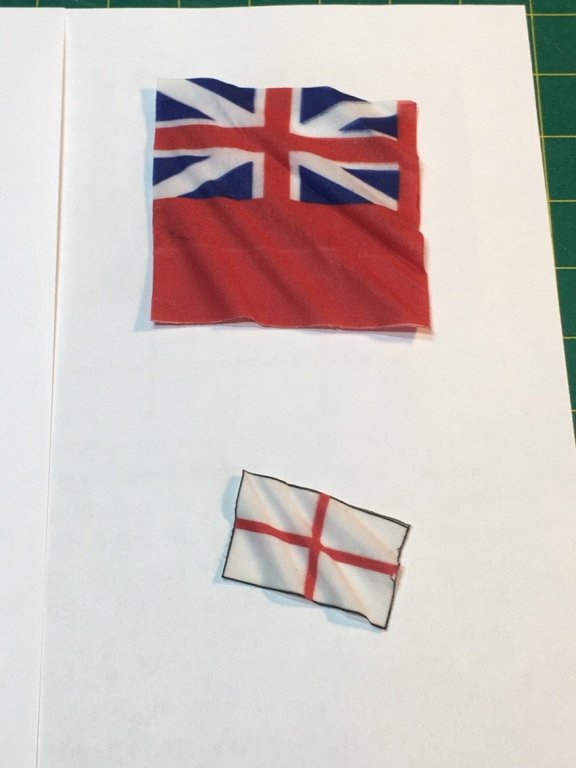
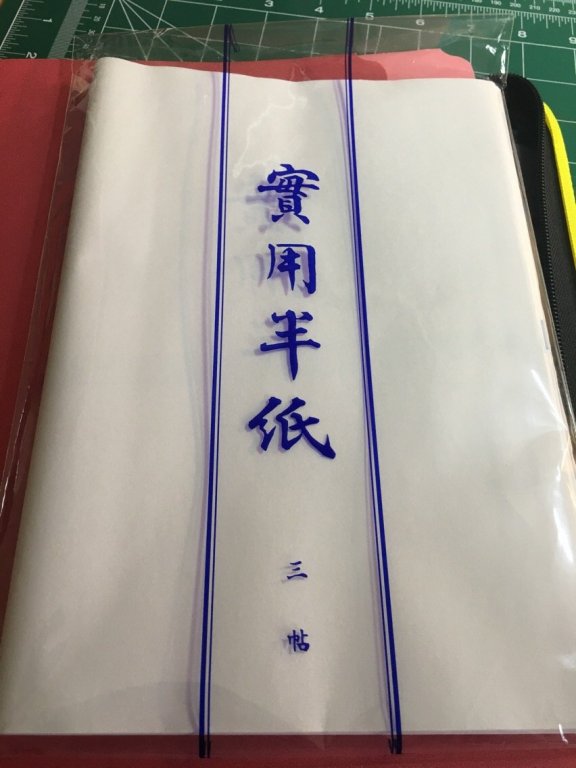
Off to the Emerald Isle for business the next week. In between church and packing...I printed out my itinerary on our inkjet. Decided I would fuss with the idea of flags for a few minutes! Took some washi paper my wife bought for me during our last visit to Japan and taped it to a clean sheet of paper. Then, I printed out the page from Chuck’s practicum to see what the paper did. Well, to my surprise, it held the ink well. Also, upon wetting, it’s very easy to shape as it is extremely thin. Just ran the trial flags under room temp water and 10min later had the shapes below. Ink did not run. I think I have a pretty clear and simple way to make my flags. On another note...the Admiral made breakfast this morning and said there’s a deadeye in her cooking pan. Confused, I went over to take a look...and sure enough, there was an egg-xact replica of a deadeye. Pun intended. Moving on...have a great week!


- 449 replies
-
- 4
-
-
- sultana
- model shipways
- (and 2 more)
-
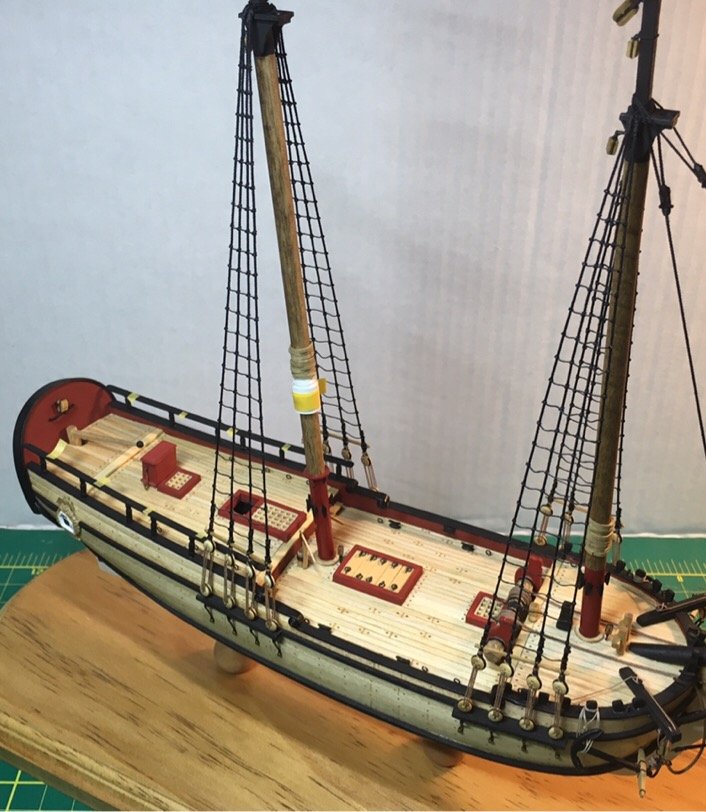
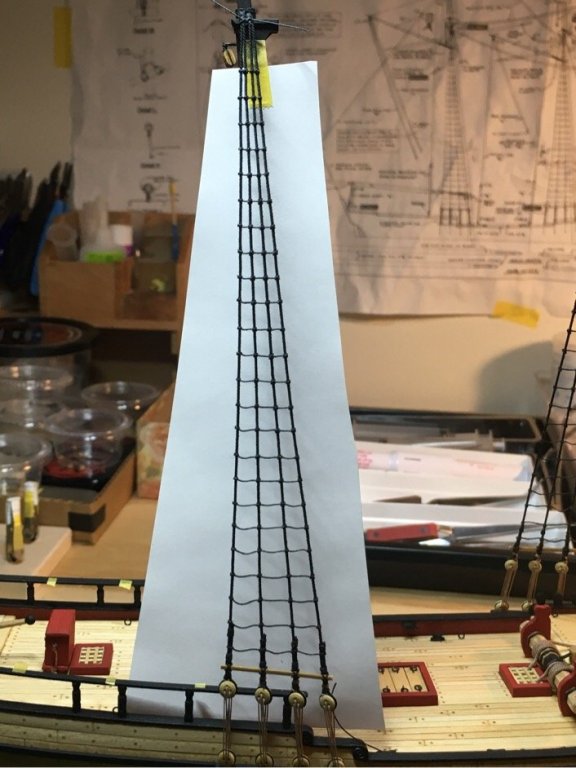
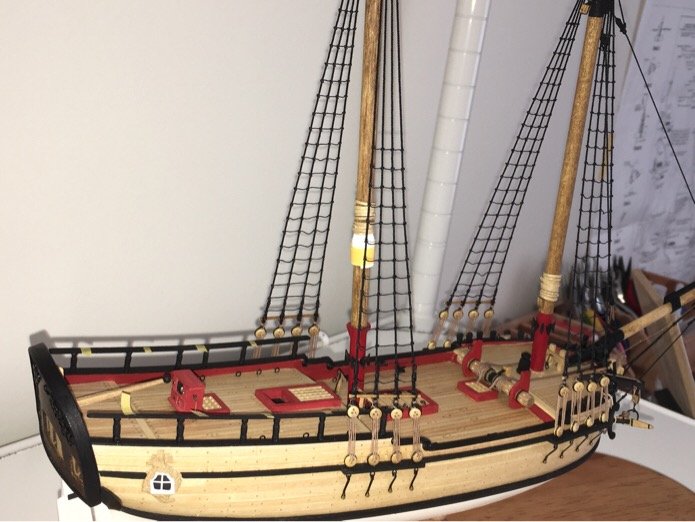
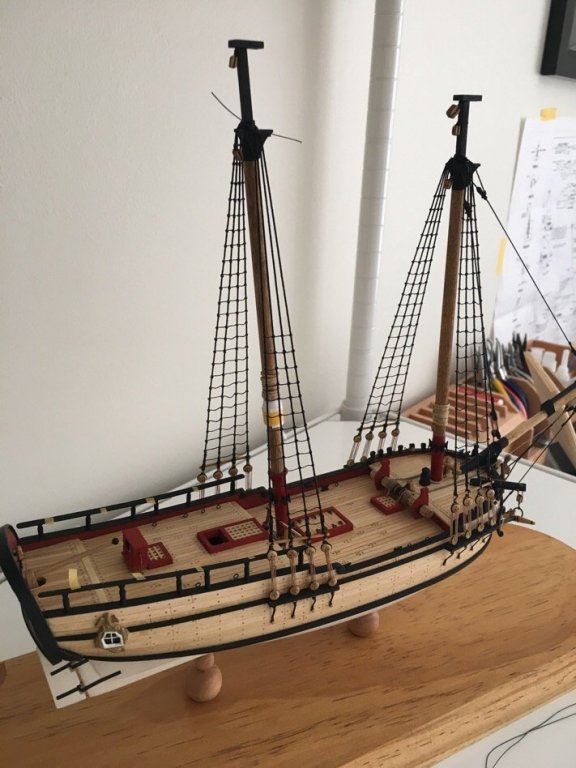
Ratlins are done. For my first time doing shrouds and ratlins, not a bad result. I learned a lot, and have a good idea of how to improve my result next time around. My little rigging tool I made from a dowel and needle I used extensively and actually found it more useful in helping to tighten up and position the knots. Here are are some photos. As mentioned, my last set of shrouds showed minor ‘hourglassing’ mid’way through...I decided to live with it...live and learn!!! Moving on!!!


- 449 replies
-
- 6
-
-
- sultana
- model shipways
- (and 2 more)
-
Thanks Lou/Ron. I’m probably being overly critical. I did some searching and the frustration of ‘hourglassing’ and dissymetry is not uncommon, especially as folks develop their own skill/technique. I’ll finish them up today and move on. The builder sees the mistakes magnified x10 over. The Admiral just shook her head and told me it looks awesome...then gave me a glass of wine. All better!
- 449 replies
-
- 2
-
-
- sultana
- model shipways
- (and 2 more)
-
Here are a couple pics. Hmmmm...well, when not looking at the shroud dead on, it still looks pretty good. These shots show the difference a bit better.


- 449 replies
-
- 6
-
-
- sultana
- model shipways
- (and 2 more)
-
Hi Lou --- this is exactly what I was thinking! Having a upper and lower 'stabilizer' to minimize the movement of the shroud as you tie your knots...it also keeps you from putting lateral stress on where the shroud crawl up and over the trestle trees. I'm not planning adding sails - only rigging. With that being said, I think I'll plan to move forward. This ship has been a great learning experience - time I started approaching it as such and stop expecting a perfect result. And perhaps you are correct - the impact of the shrouds will be minimized once everything else in place.
- 449 replies
-
- 2
-
-
- sultana
- model shipways
- (and 2 more)
-
Well - I'm 90% done with my ratlines. I'm not posting a photo, because the last shroud I've done seemed markedly different in appearance than the other three. I've been staring at it for a while, and it finally dawned on me why it seems so different...the fact is, my technique seems to have improved over the last three sets of shrouds. This final one seems to have less noticeable distortion of the side shrouds...giving it a more symmetrical, and narrow, appearance versus the other three sets that I've completed. Sigh...CRAP. My eye is magnifying the difference...and it's bugging me. So, the question is whether I redo it/them...which would require redoing both sides...or whether I live and learn, and simply move on with the next steps in the build? I don't know why I'm being so hard on myself...this is my first wooden ship...and it can't be perfect. (Perfect fell by the wayside a LONG time ago) But - a couple of things I might do different.... 1. The miniature rope seemed too heavy (at least for me with the tension I had on th shrouds - which might not have been enough to keep them from distorting as I tied the ratlins)...I used Chuck's recommendation of 0.008" rope....but I found that pulls or pushes the shrouds - depending on whether the ratlin is too taught or slack...it's a maddening balance of ratlin tensile strength versus the vertical taughtness/resistance in the two shrouds you are connecting. I would use smaller gauge rope/thread next time. 2. I was think of using a hairclip (flat duckbill clip) stylists use to hold curlers in ladies hair...I imagine putting these on the shrouds above and below the area you are applying the ratlins might help you keep them more aligned. Just a thought... Moving on...or am I? (conflicted...)
- 449 replies
-
- 3
-
-
- sultana
- model shipways
- (and 2 more)
-
75% complete on the ratlins...good grief, what a chore. A couple challenges: 1. I note that the shrouds over time have relaxed since the day they were initially installed. Not certain what this is from...perhaps the miniature rope relaxed over time. They did not relax to the point of being slack, just not as taught as the first day. The lines were waxed...if that means anything. In future, will plan to do the shroud/ratlins more closely to make the install of the ratlins a bit easier. Looser shrouds make ratlin install a MUCH longer chore...and not a fun chore since the shroud tends to kink, and the ratlins tend to more easily pull or distort the angle of the shroud. 2. Ratlins should be installed to be parallel to the ground (sea). This can be a bit of a problem as your eye tends to drift or tilt to be parallel to the deck. So I found myself really needing to focus the knot placement...and a little bubble level might be useful in future models!!! Moving on. Trying to be consistent!!!
- 449 replies
-
- 7
-
-
- sultana
- model shipways
- (and 2 more)
-
Please let me know when your taking orders!!!!!!! looks awesome!!!!
- 222 replies
-
- 1
-
-
- sultana
- model shipways
- (and 1 more)
-
Awesome! If you can throw in a cutaway for a pipe holder, that would be great!!! (Kidding - I don't smoke)
- 222 replies
-
- 2
-
-
- sultana
- model shipways
- (and 1 more)
-
Hehe! Well, I’m out of the country for business next week, so maybe I’m starting to miss the shipyard in advance! And thanks for for the kind words, Lou! It’s certainly been a learning experience!
- 449 replies
-
- 2
-
-
- sultana
- model shipways
- (and 2 more)
-
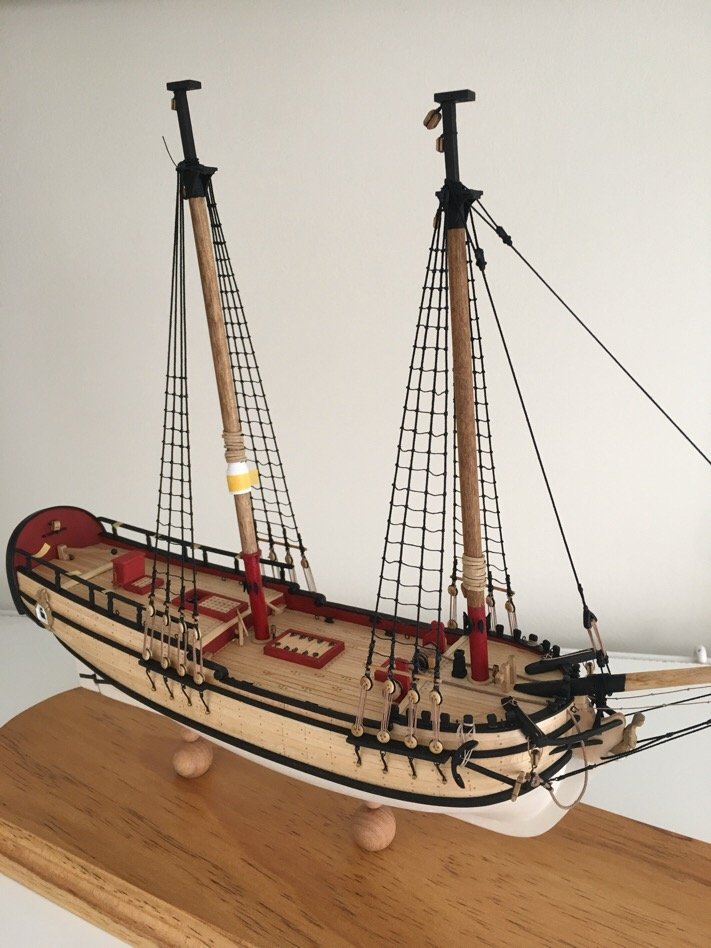
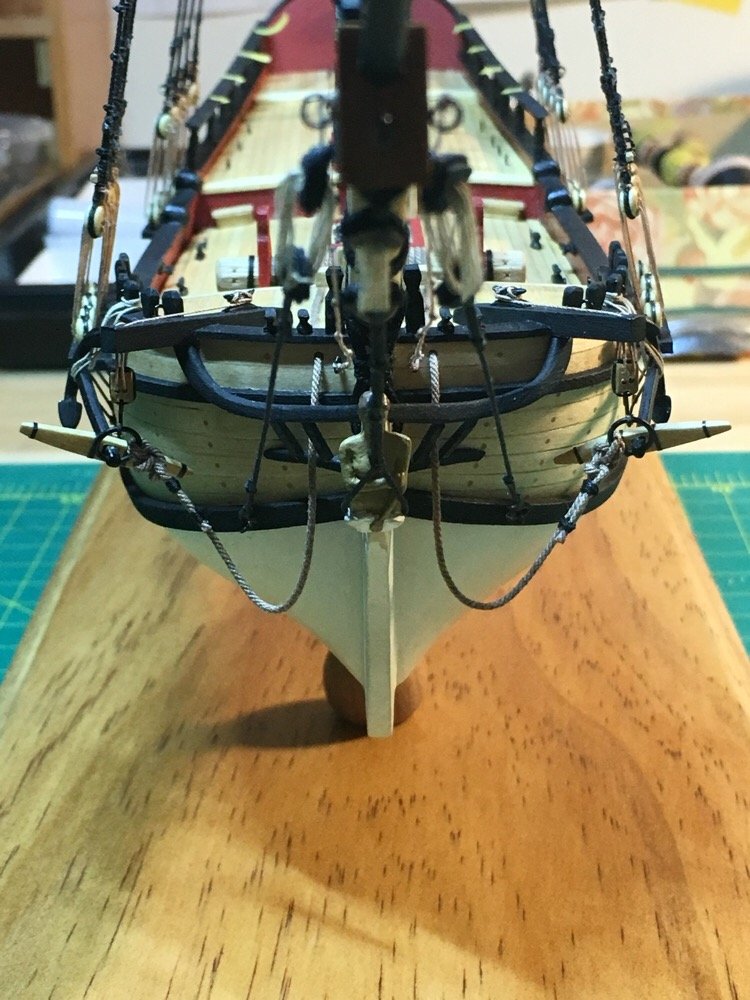
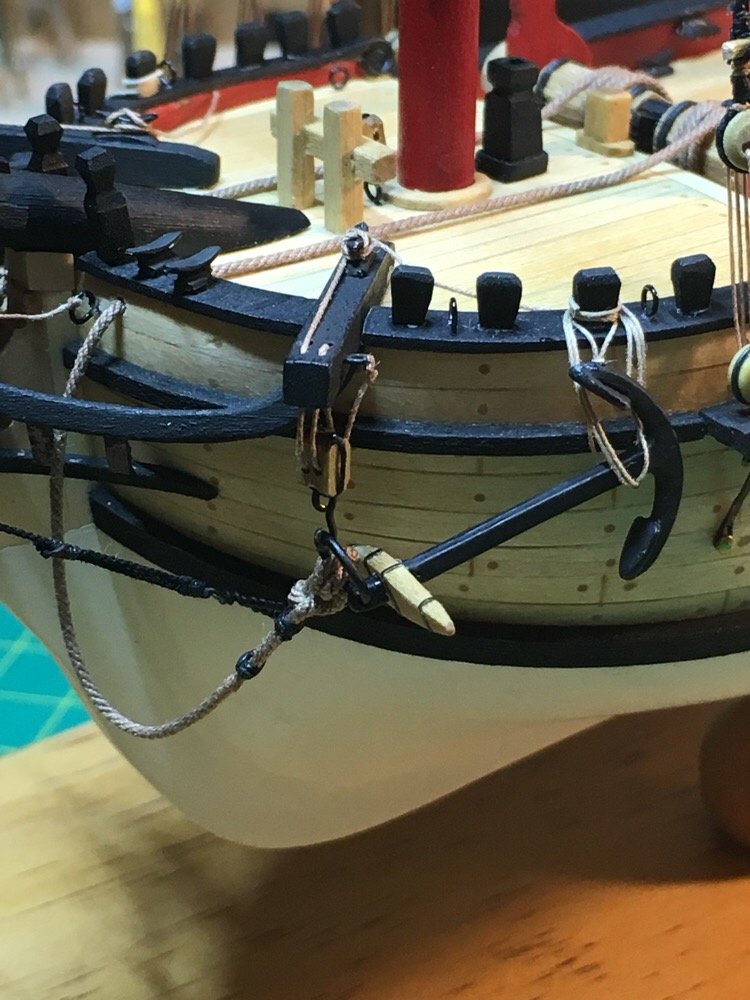
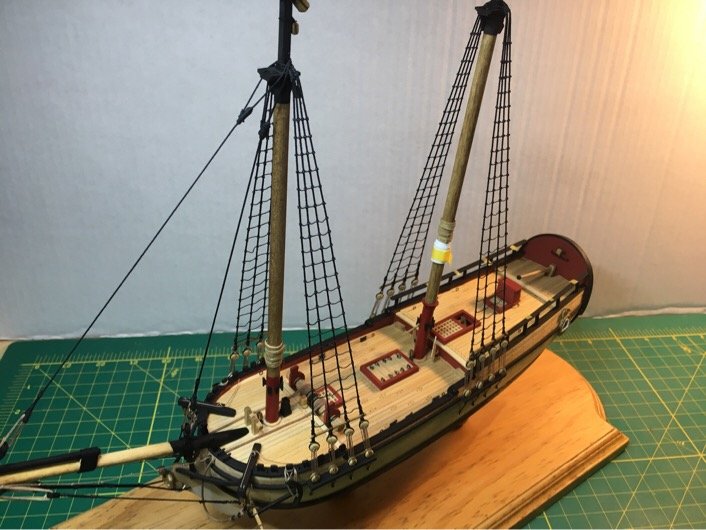
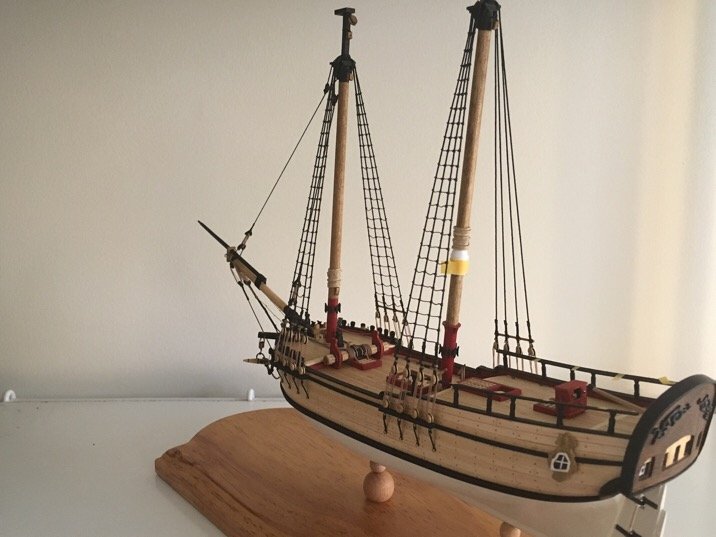
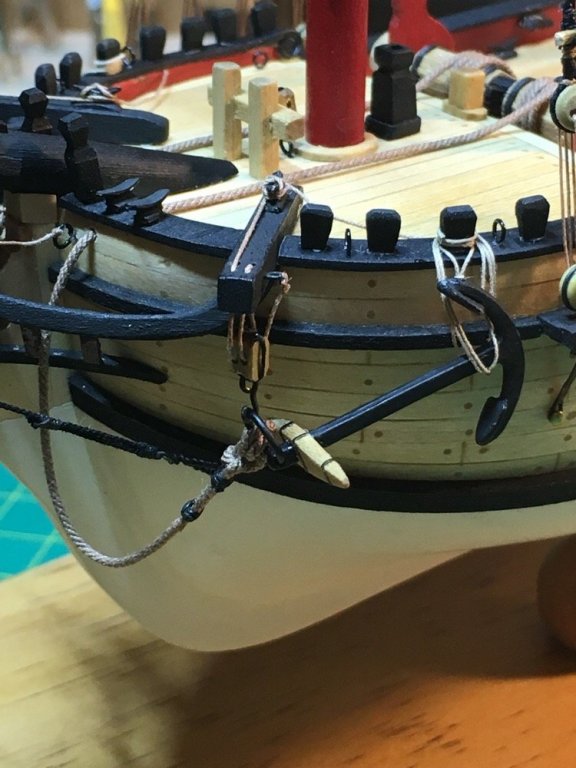
Anchors are on! Don’t care about historical accuracy! I love the look!!! Moving on to main mast ratlins!!!


- 449 replies
-
- 3
-
-
- sultana
- model shipways
- (and 2 more)
-
NOOOOO! Why ruin it by putting in a propeller? Are you going to offer the plans both with and without the propeller? =-)
- 222 replies
-
- 1
-
-
- sultana
- model shipways
- (and 1 more)
-
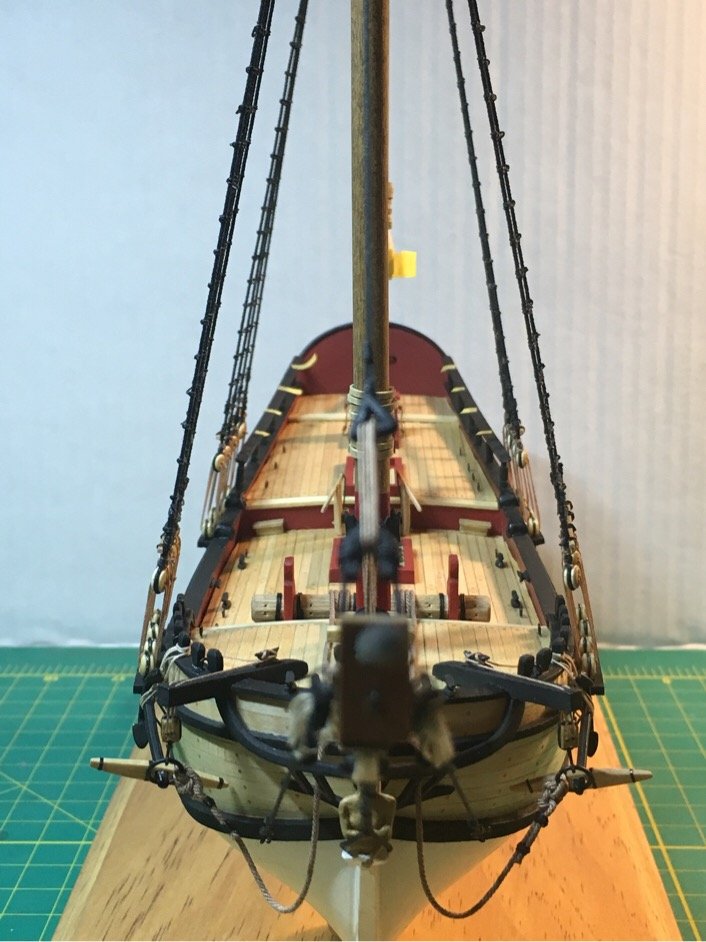
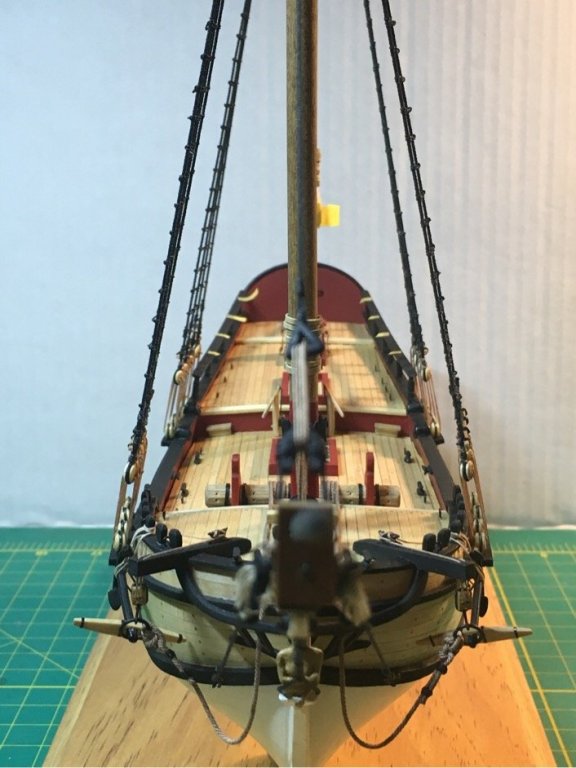
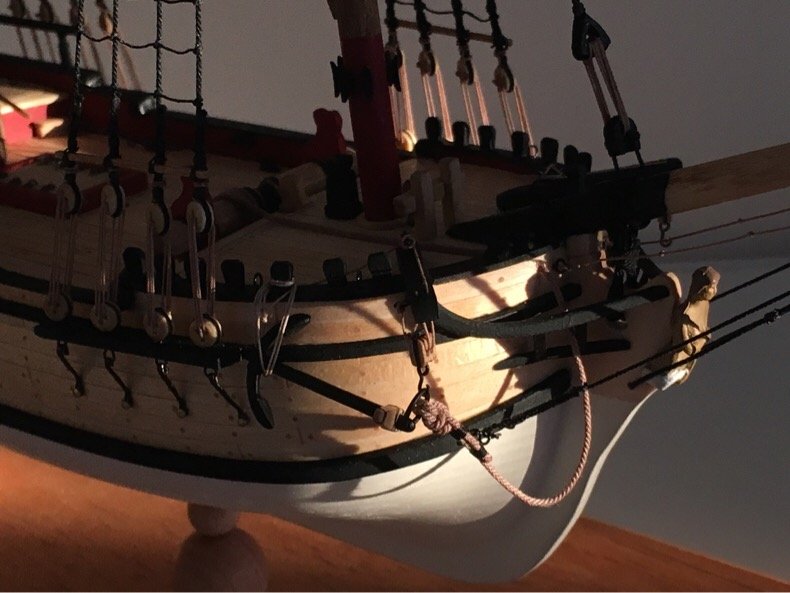
Just a fun pic. Went to the shipyard with my coffee this morning as I was getting ready for work and saw the morning sun lighting up the bow of my ship model. Was so so relaxing....ahhhh...Java!!! Moving on!
- 449 replies
-
- 4
-
-
- sultana
- model shipways
- (and 2 more)
-
OK...it's spelled 'hawser'. However, I think the appropriate term I should be using is 'anchor rope' or 'anchor cable'. Not certain! But it is a bit confusing since it comes out of a 'hawshole' in the ship's bow. A hawser is a rope used to tow, secure, or moor a ship. So...I'm not certain if this applies to anchor cables.
- 449 replies
-
- 2
-
-
- sultana
- model shipways
- (and 2 more)
-
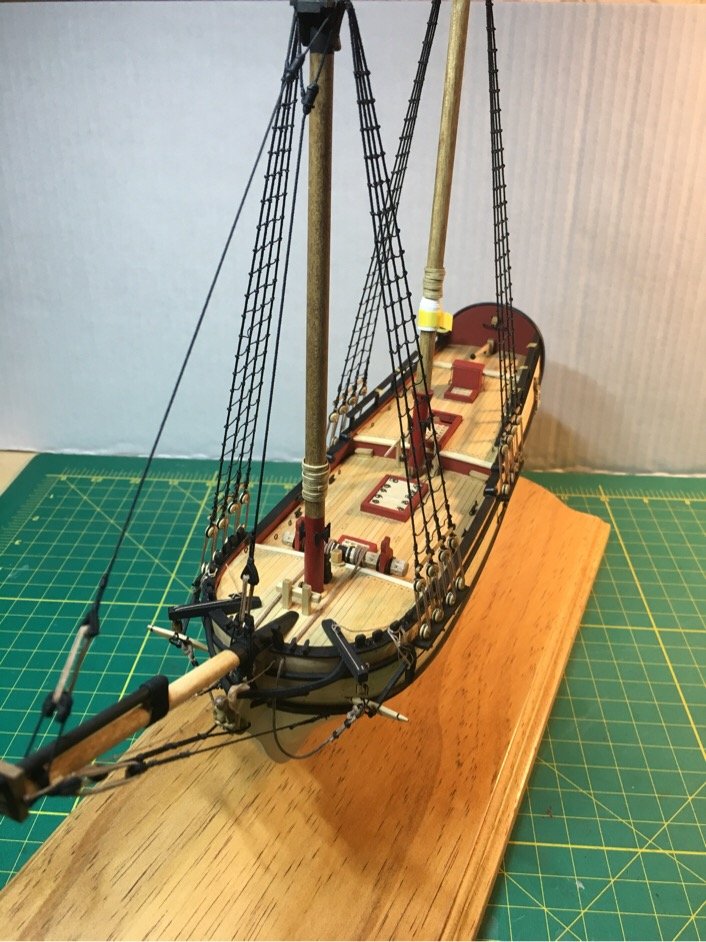
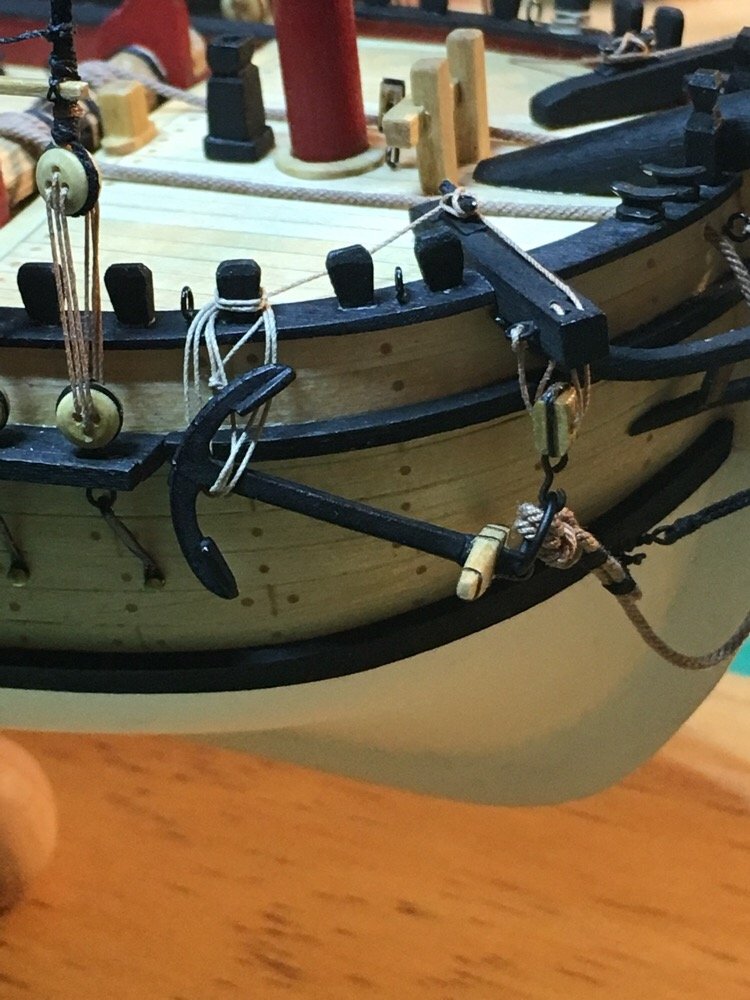
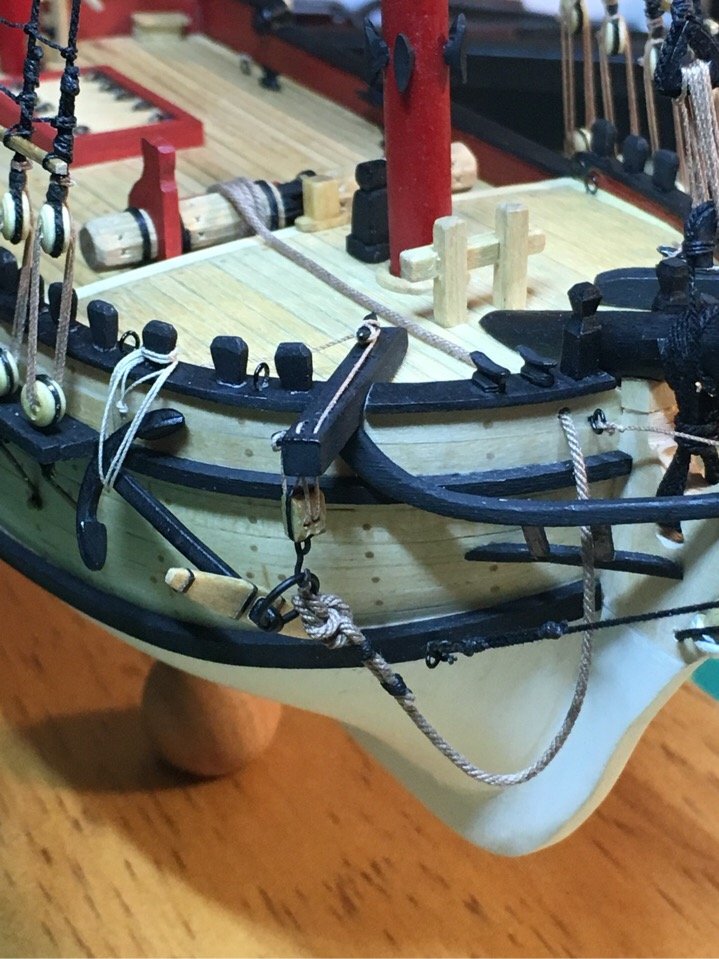
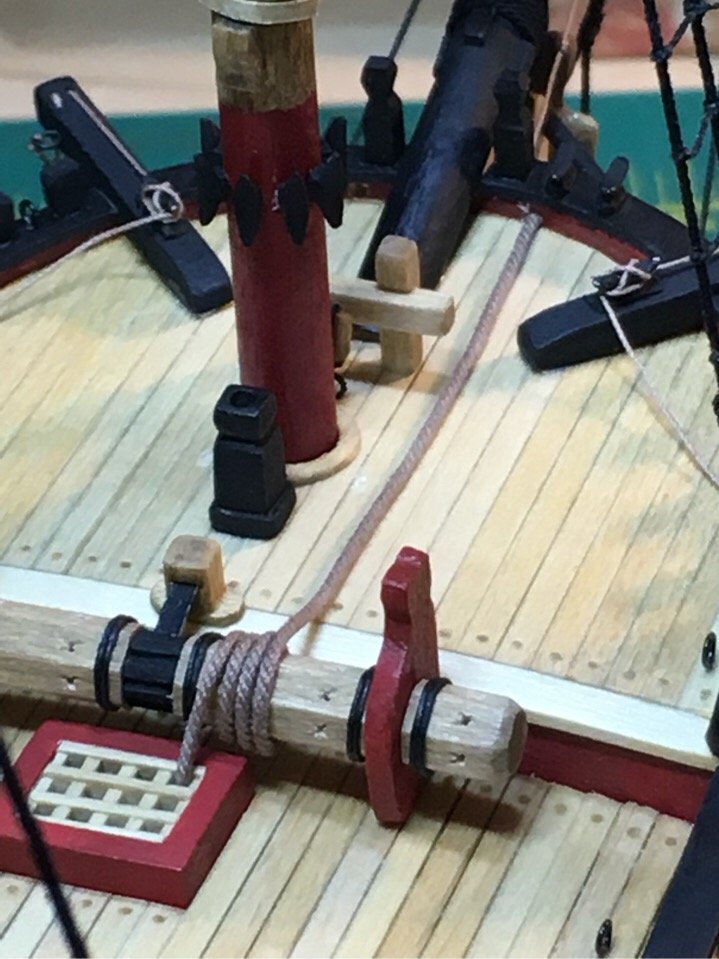
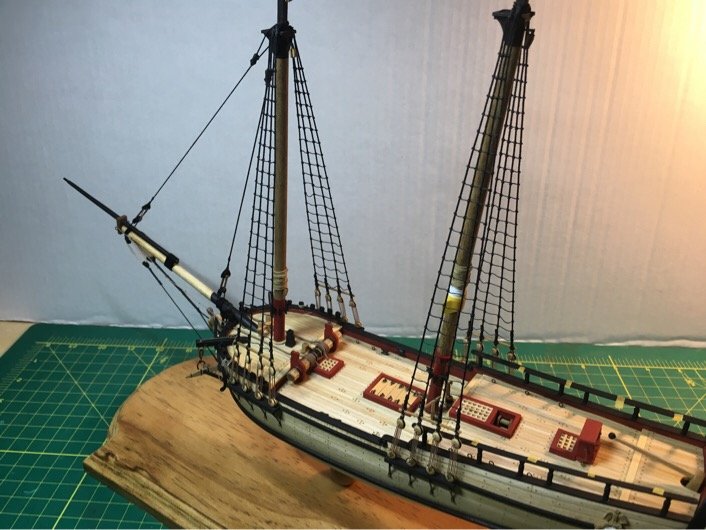
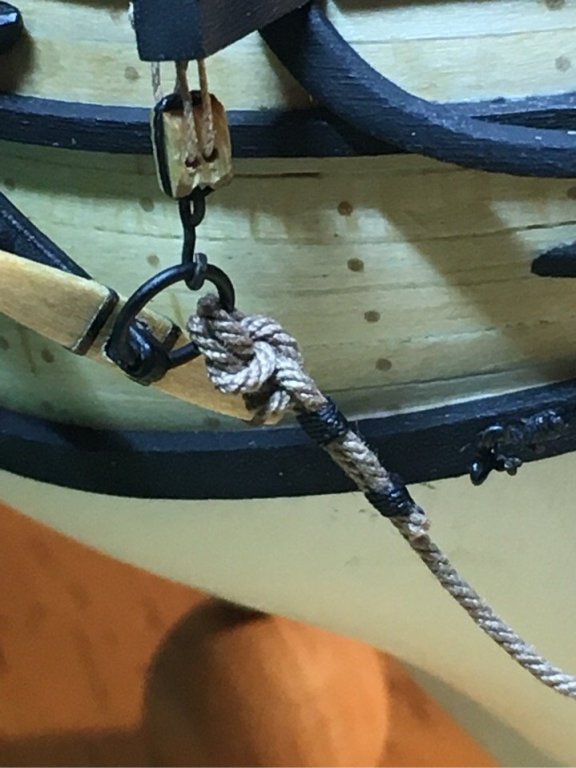
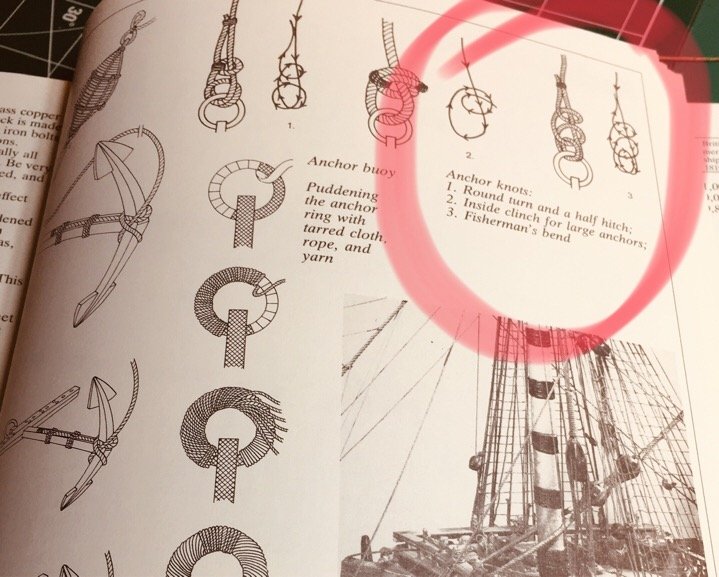
Having fun with the anchors after the catheads led me in that direction. Decided I’ll forego the bouys that we’re typical (and mandatory in many cases) in those days. I can always add them later, like the jolly boat. Found a nice reference in Mondfled’s book on how hausers were tied to the anchor. May not be perfectly historically accurate for this class of ship, but it gave me a good reference point and got me past the builder’s block! Decided I’d set one side up to see how it looked. I am using the cathead as one point of attachment and a knighthead for the flukes as the other point. I liked the end result. Trying to get the hawser to lay down was fun. A couple of tiny touches of CA was the ticket... Out for the evening. It was a fun weekend!!!

- 449 replies
-
- 4
-
-
- sultana
- model shipways
- (and 2 more)
-
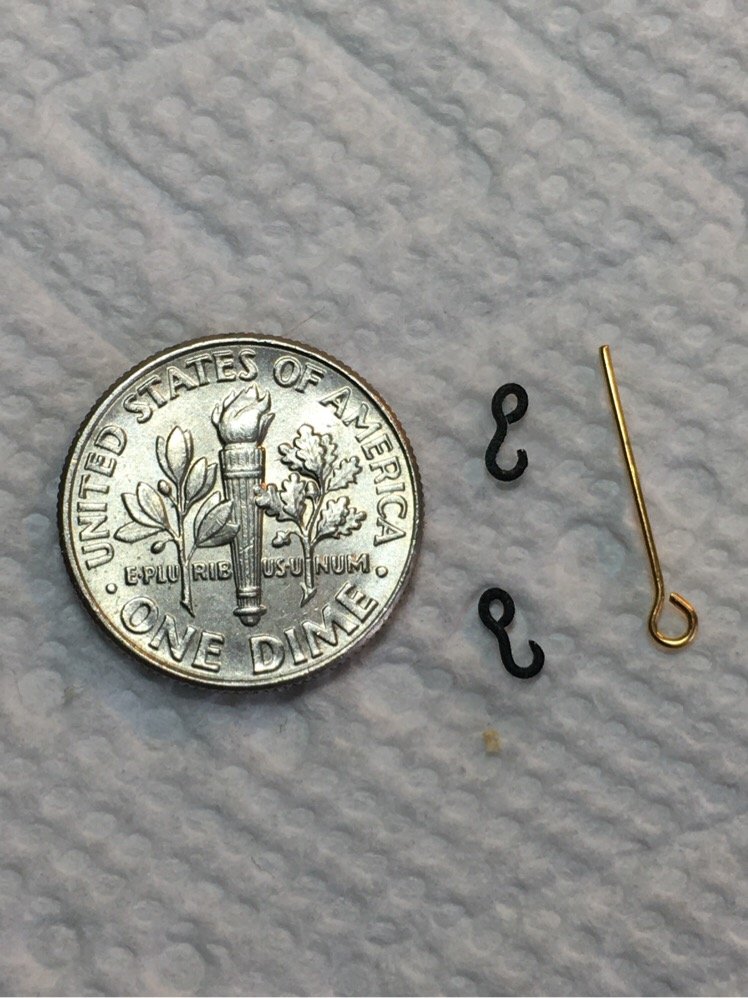
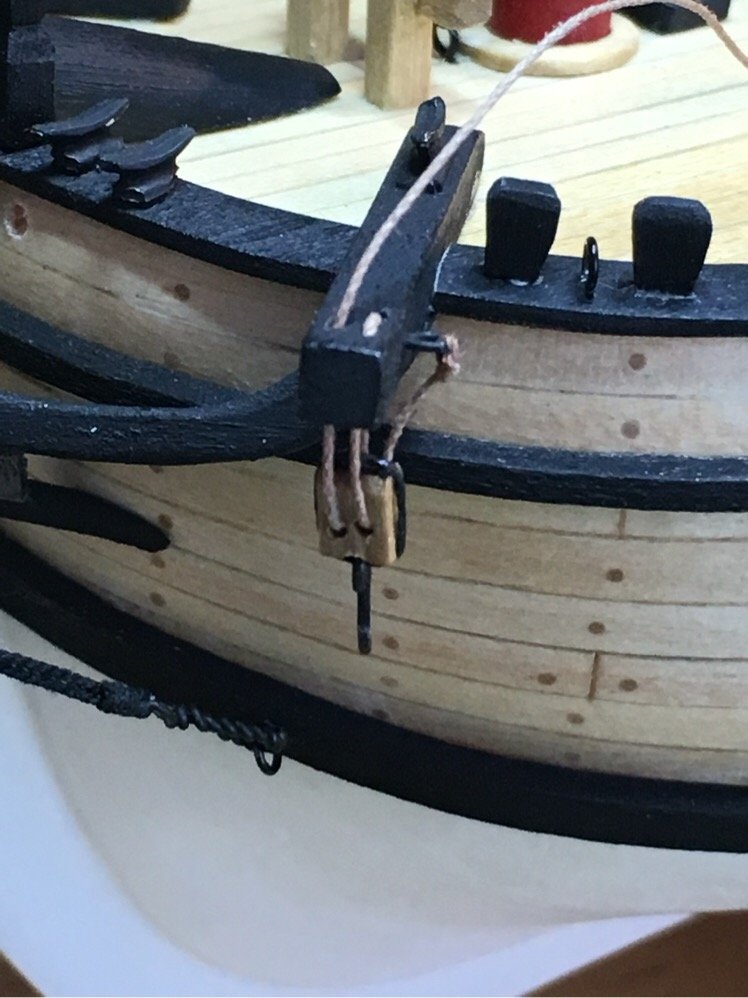
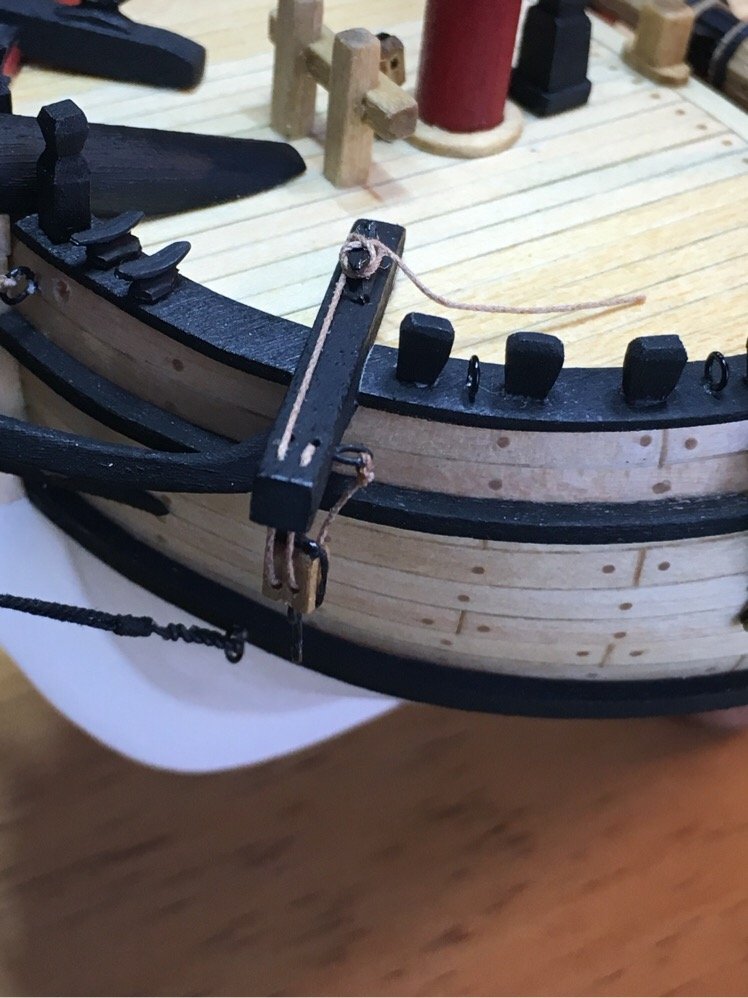
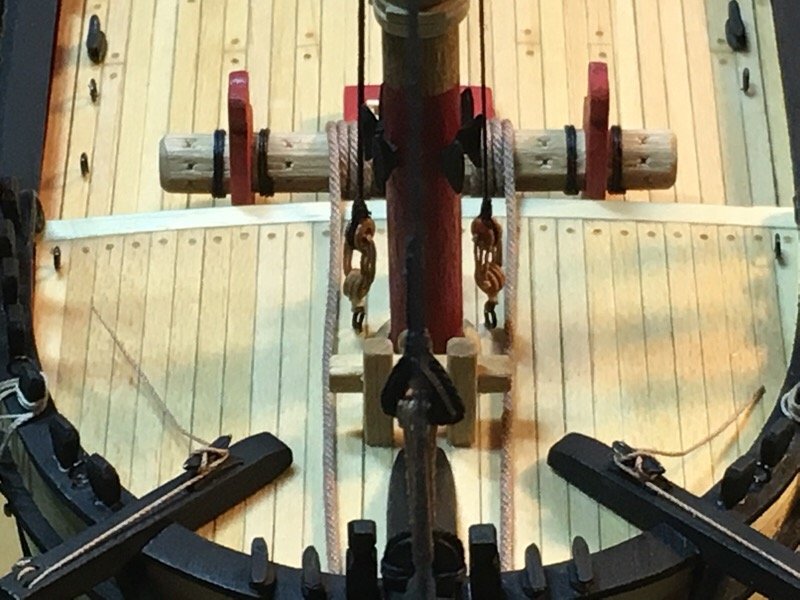
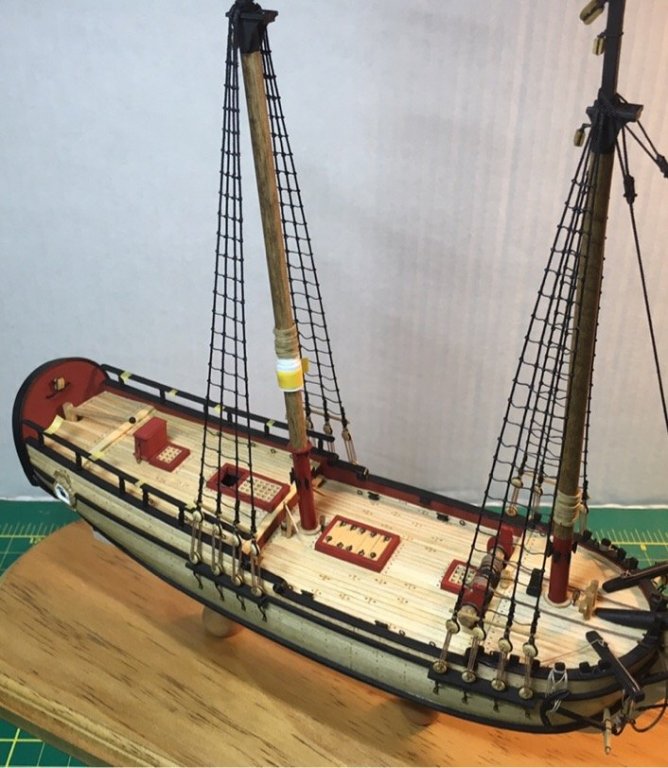
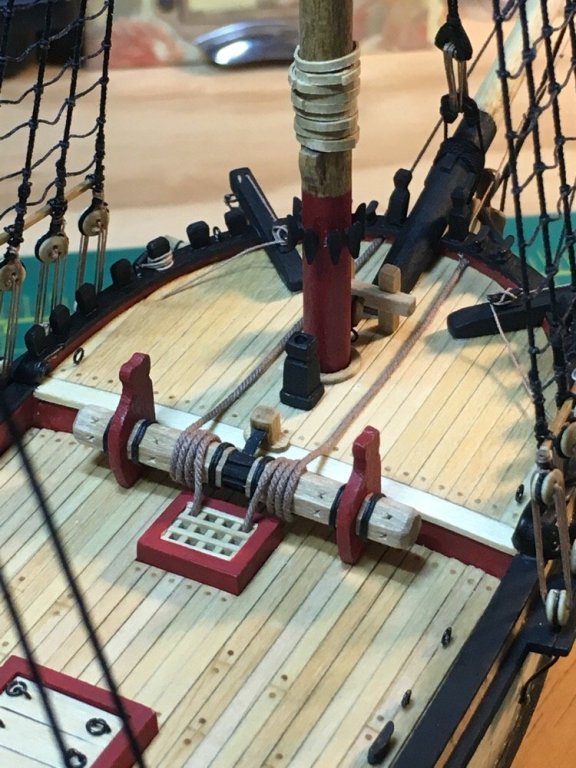
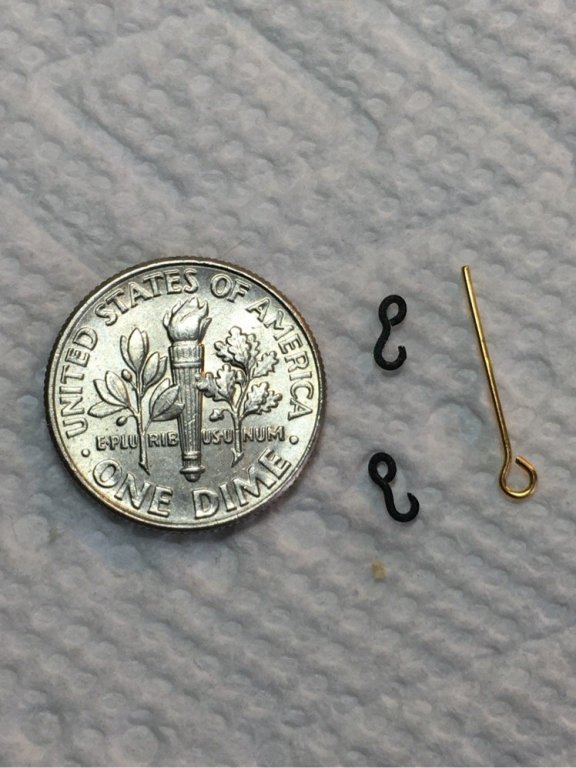
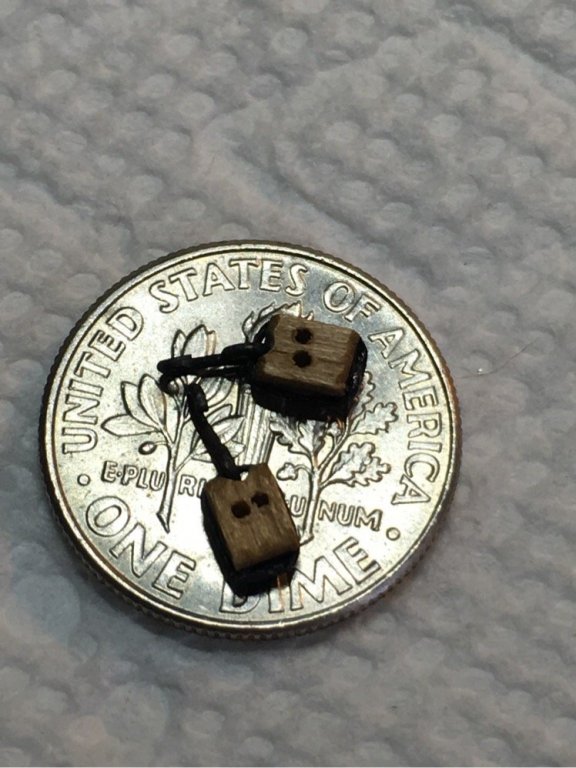
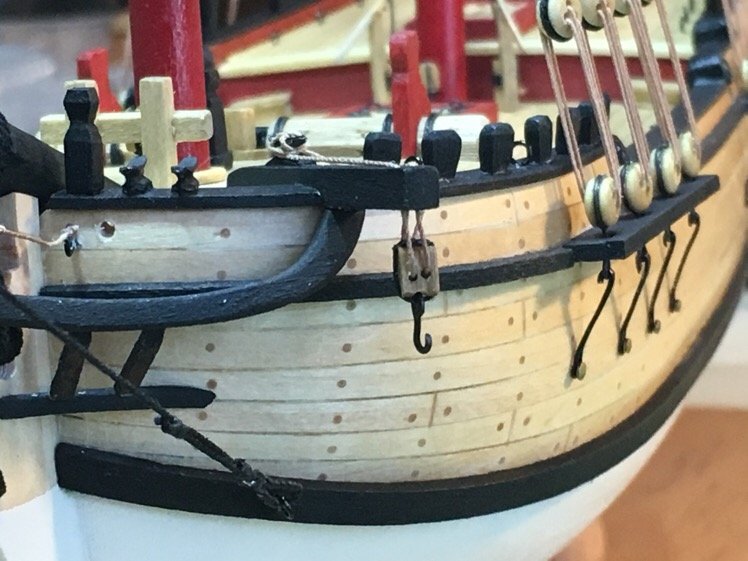
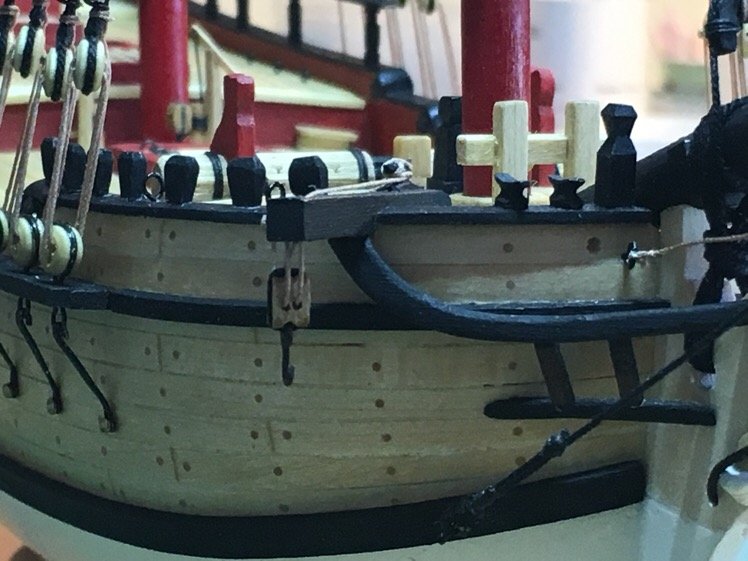
Experimented with making blocks with hooks. 😁 The brass pins in the kit are easily bent and shaped to form a nice hook With an eye. A bit of blackening and they turn out pretty decent. (SAND YOUR BRASS BEFORE BLACKENING!!!). Invest in a really small gauge wire bender...it makes making tiny hooks a breeze. I used quilting thread (heavy gauge black nylon) to form the strop...experiments are fun...and made sure there was a friendly groove in the bottom of the block to allow room for the hook. Voilaaaa!!! Decided to go ahead and set up the catheads. A needle threader made things easy here...just moved very slow. Before threading the blocks, I double checked that the hooks comfortably fit into the ring on the anchors. Also, I double checked that I can easily thread the 0.035” rope I bought from Syren which I’ll use to rig the anchor into the haus holes...and it does...no problem. So I can run my anchors after I’ve set up the other two stays which attach to the bullseyes on either side of the foremast. Moving on to the main mast shrouds!!! Shipyard weekends are fun!!!

- 449 replies
-
- 5
-
-
- sultana
- model shipways
- (and 2 more)
-
Just out of curiousity...plank on bulkheads are always a bit of a challenge around the rabbit. Is the keel wide enough trim down to allow a single plank to fit nicely into the rabbit that needs to be shaped without making the keel piece overly thin?? I had this problem when I started the Amati kit for the Lady Nelson. Not certain if it was just me, but a few shipmates at my club said it was a bit of a problem with the kit.
- 222 replies
-
- 1
-
-
- sultana
- model shipways
- (and 1 more)
-
Hi Ron, Many thanks! You are absolutely right. I see the errors, rather than the impression from a first time viewer. The admiral was stunned at how nicely they turned out. But I did learn a lot on my first two shrouds...hoping the next two will turn out as nice. One key lesson is that ratlins can’t be rushed. They really are eye magnets, so getting them right is both a cumbersome task, and a patience marathon. I can’t imagine how the folks who make fully rigged first rates manage this task without going bonkers!
- 449 replies
-
- 1
-
-
- sultana
- model shipways
- (and 2 more)