Overworked724
-
Posts
1,266 -
Joined
-
Last visited
Content Type
Profiles
Forums
Gallery
Events
Everything posted by Overworked724
-
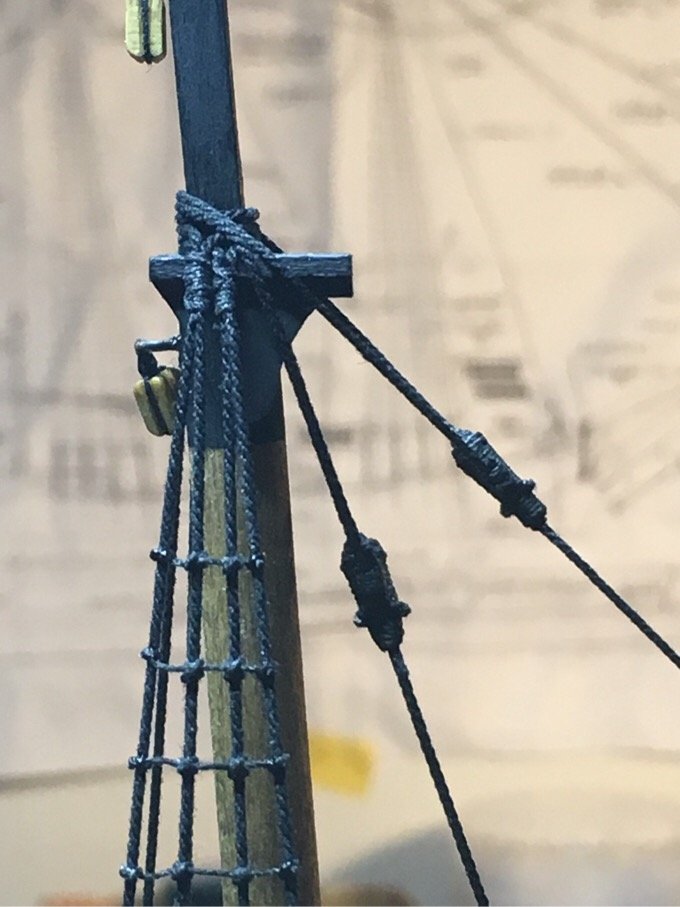
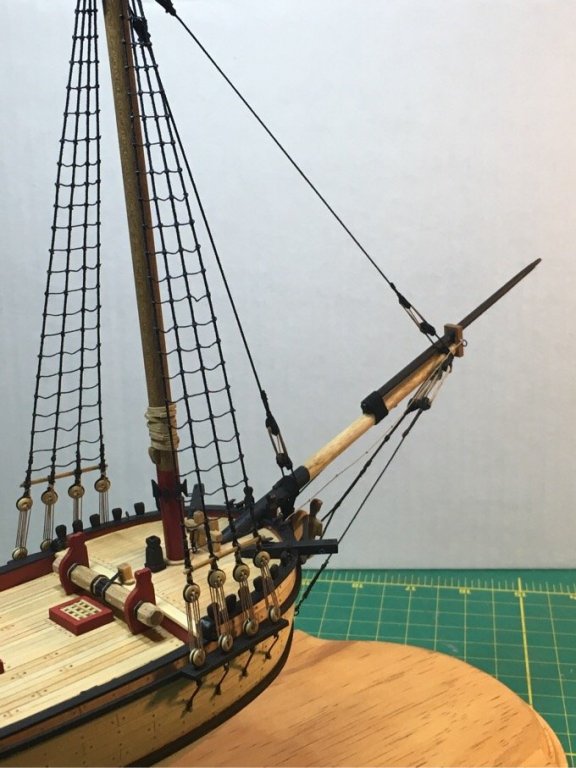
 Installed the Fore Stay and Inner Jib Stay. Nice result, I think. We shall see how the rest of the rigging goes! The shrouds are difficult. I did my best, but they do tend to pull out of alignment due to ratlin line tension. But overall, not bad for my first shrouds!!!! Moving on....!!!!
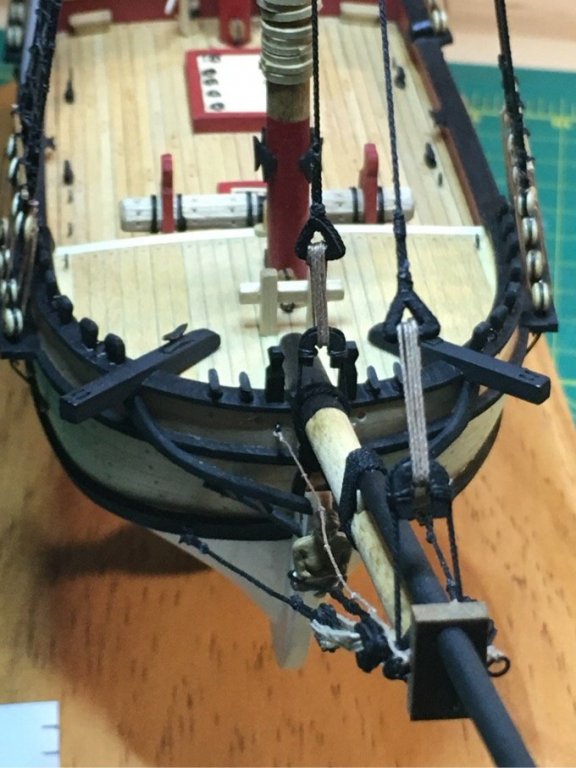


- 449 replies
-
- 3
-

-
- sultana
- model shipways
- (and 2 more)
-
Right!? Better yet...since the Sultana plans are open source, I would start your own company with a competitive kit. The MS kit is a piece of flotsam. The only way to do the MS kit is to ignore everything but the solid hull...I think a laser cut plank on bulkhead would be BRILLIANT!!! 👍🏽👍🏽👍🏽
- 222 replies
-
- 1
-
-
- sultana
- model shipways
- (and 1 more)
-
Well...my first attempt at ratlins was a moderate success. I was actually afraid to start for fear of screwing up. But I made a couple decisions to give me some leeway. The video above helps!! First, I didn’t put CA on any knots until I was done with the entire shroud. That allows for last minute adjustment and you will need it. Second, I found having a sheet of paper helps tremendously. I now have a better feel for how the ratlin thread (too much or too little) between the shrouds can impact the finished shape of the shrouds once the ratlins are installed. You can’t notice without the paper background, but the outer shrouds actually bulge out very very slightly from the ratlin thread tensile strength pushing very slightly outward. Something I’ll be careful of for the next three shrouds. Moving on...


- 449 replies
-
- 4
-
-
- sultana
- model shipways
- (and 2 more)
-
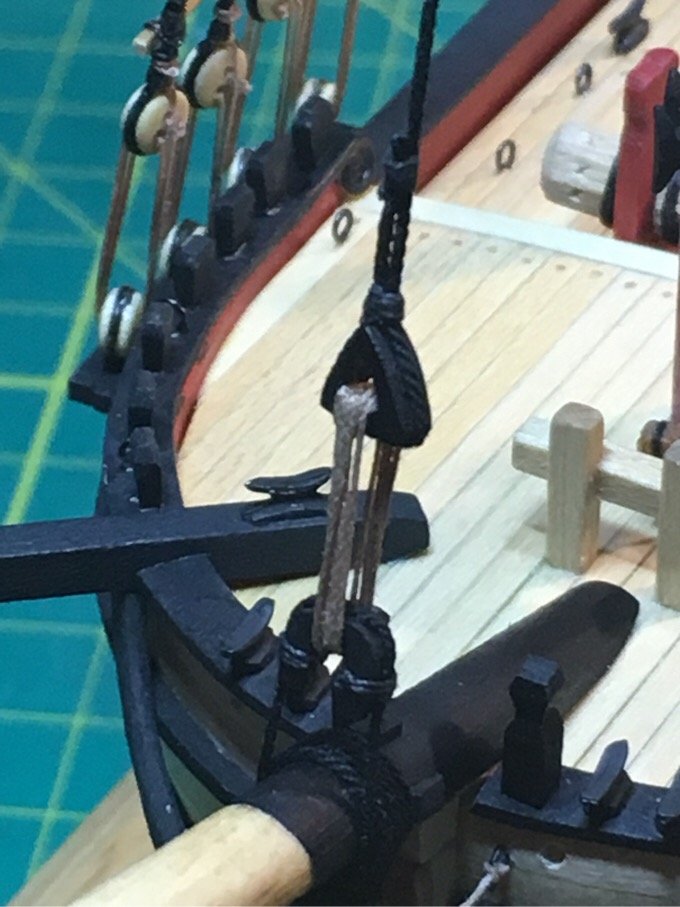
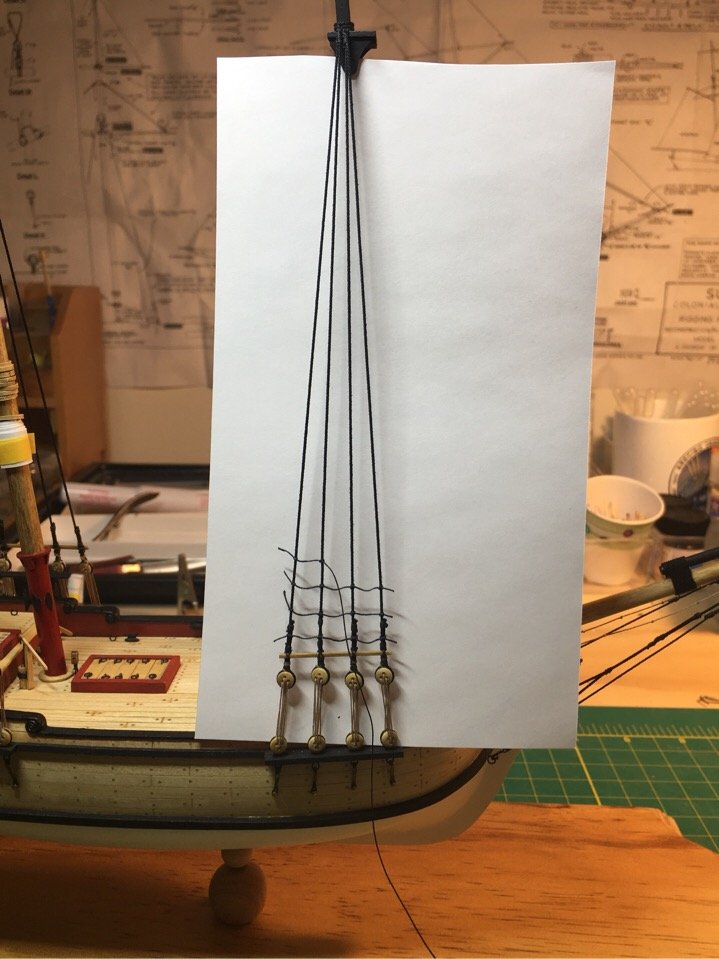
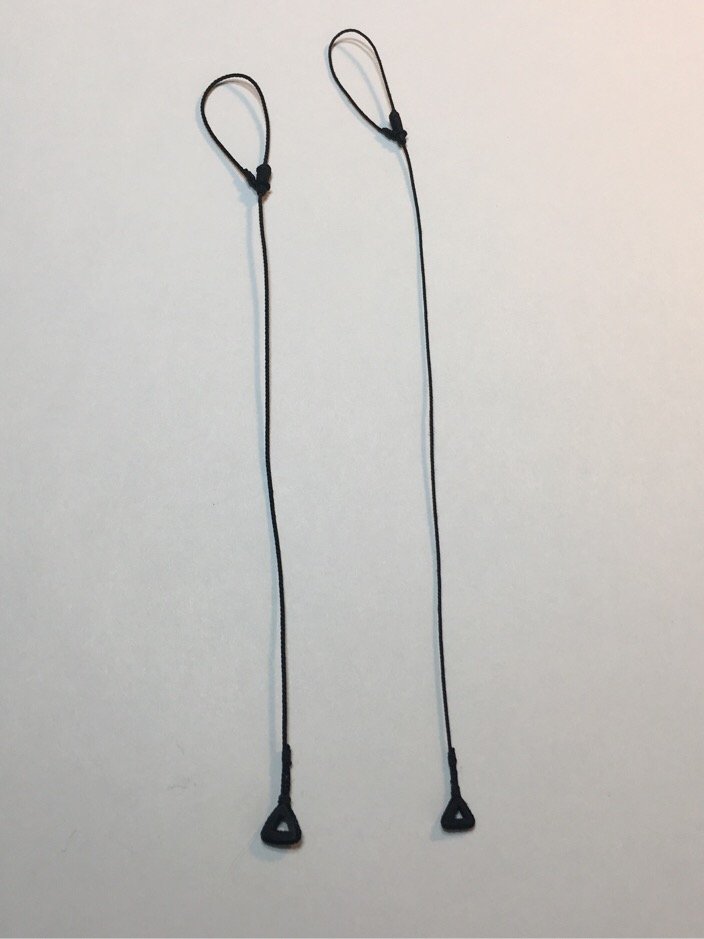
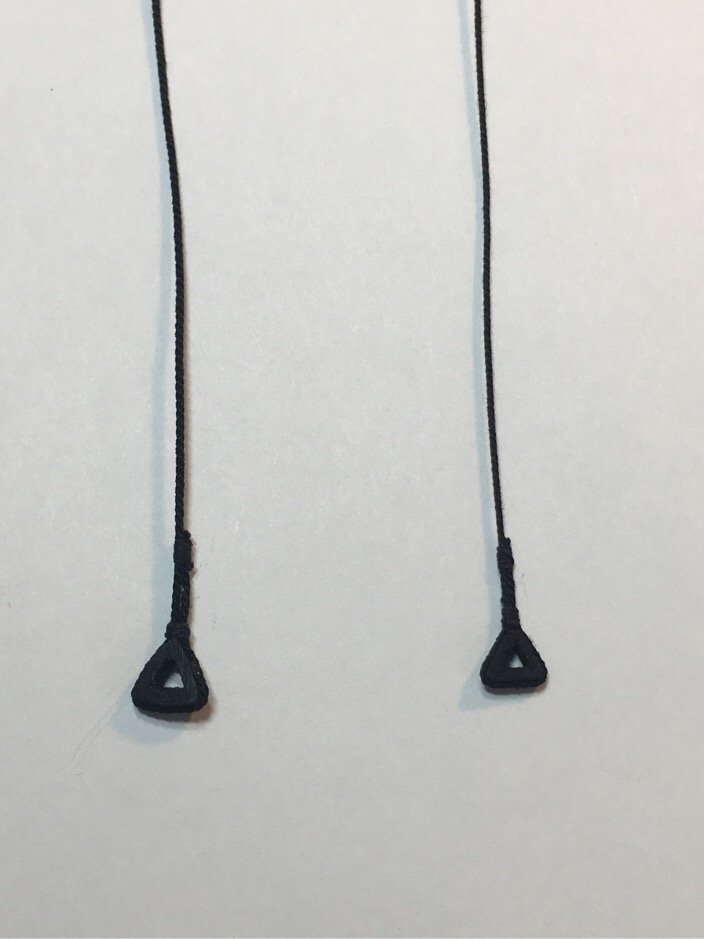
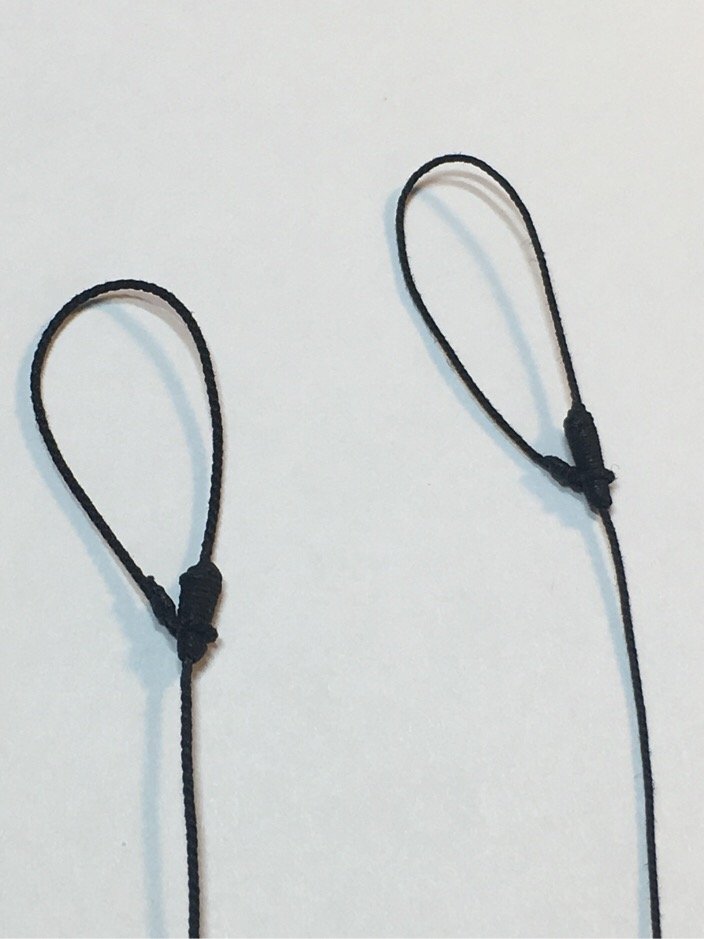
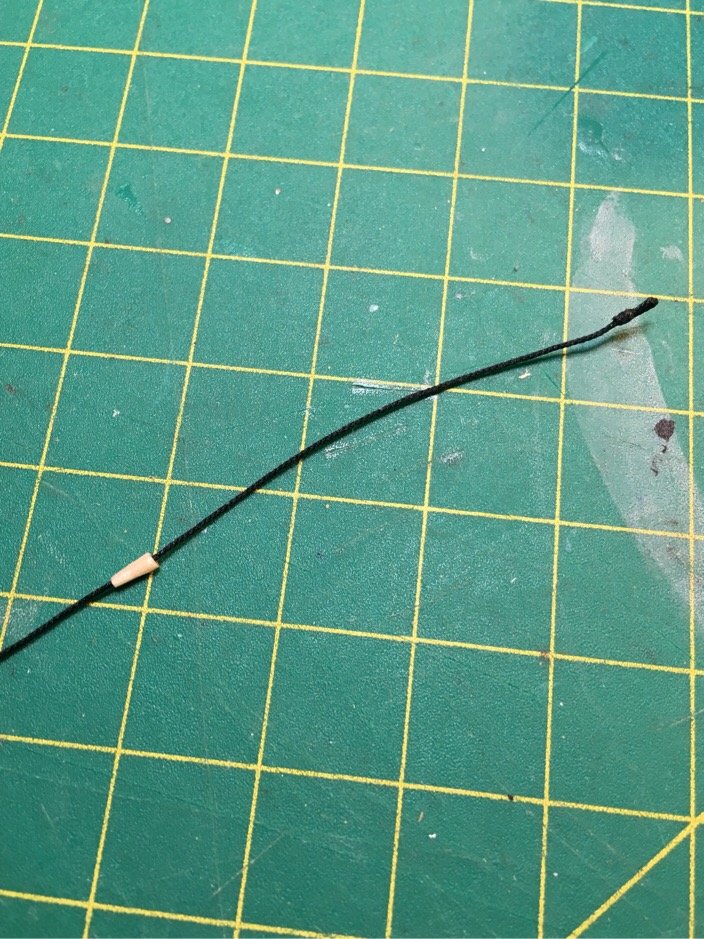
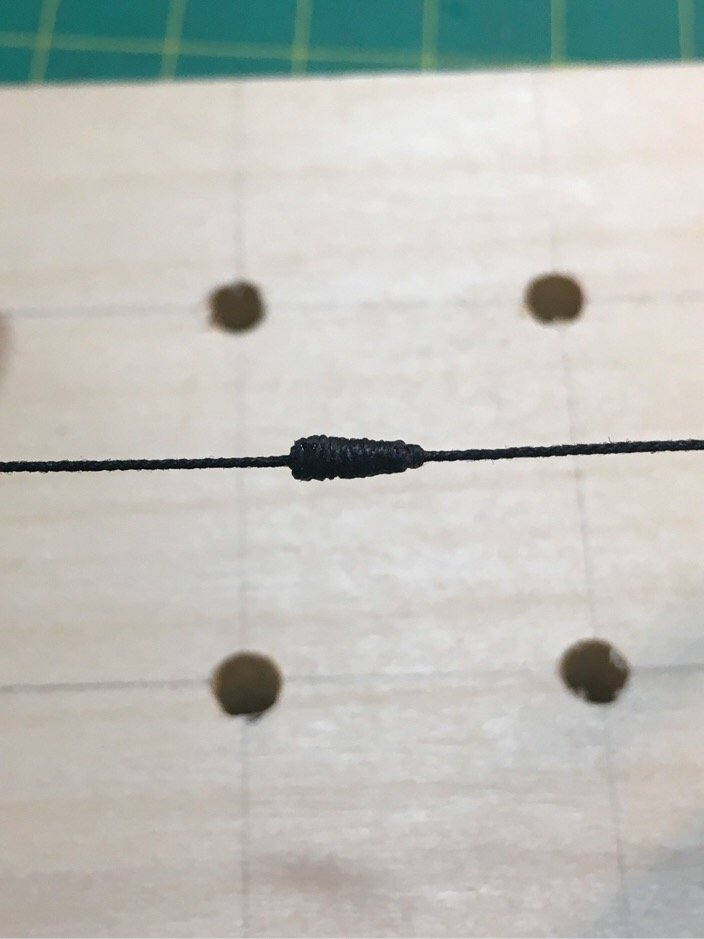
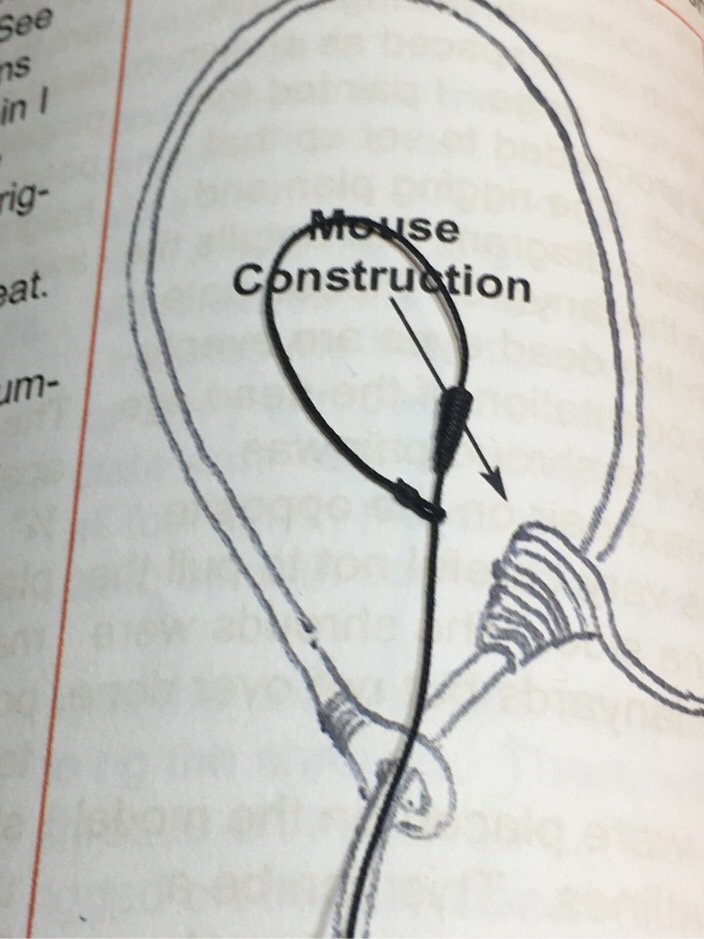
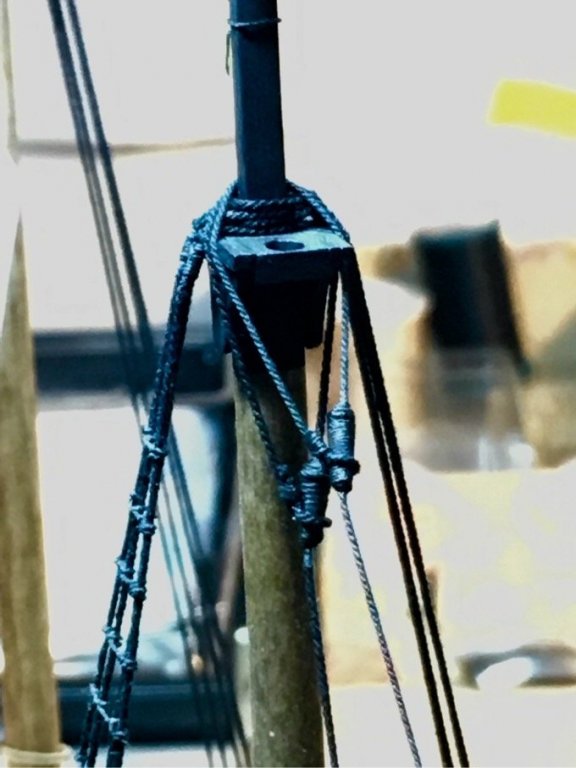
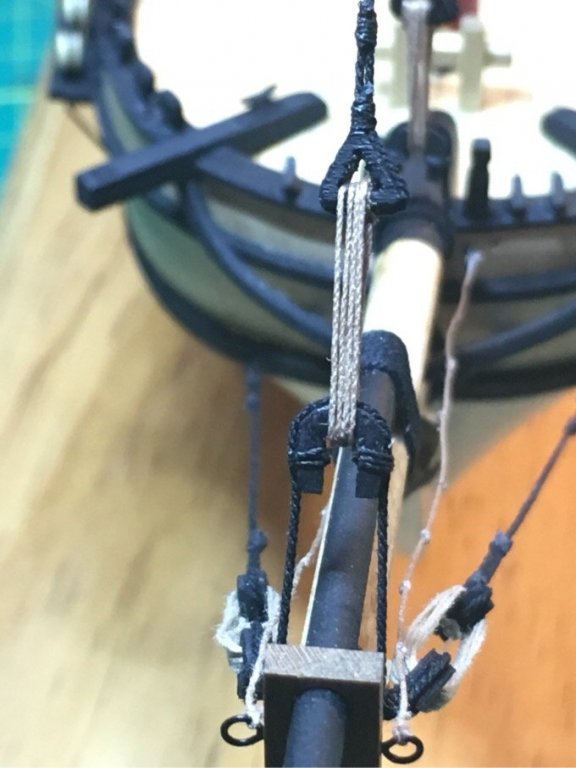
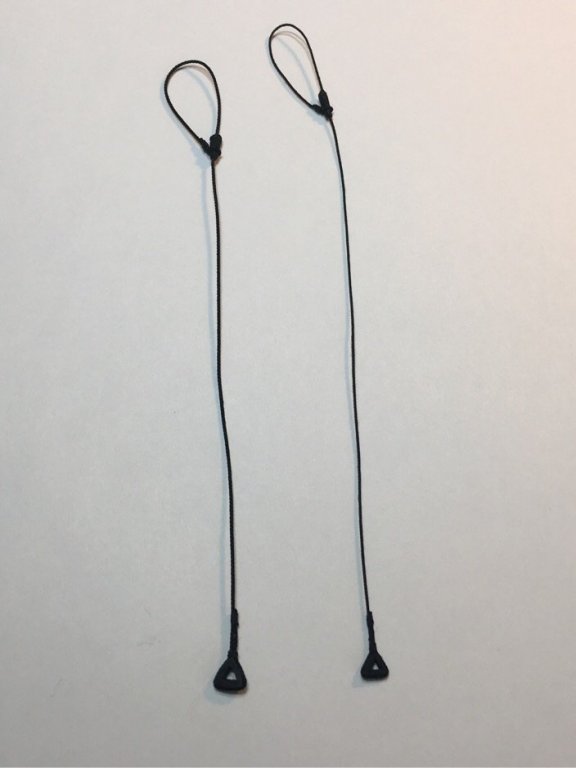
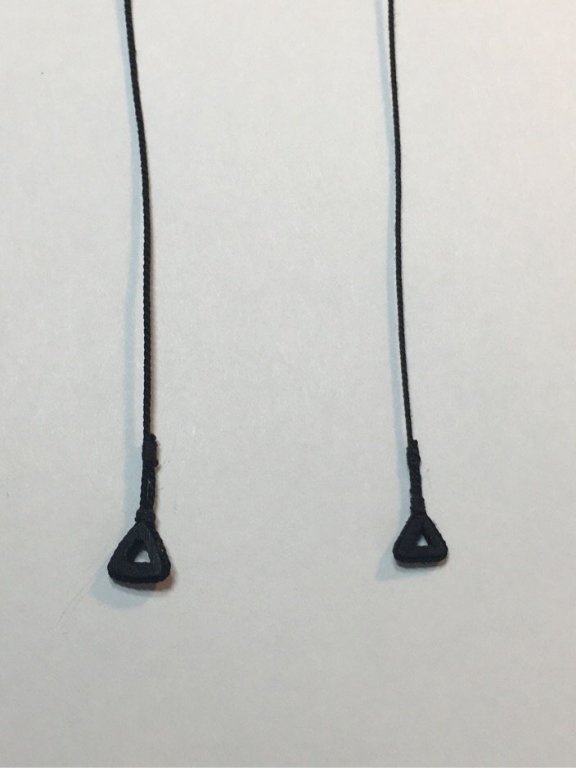
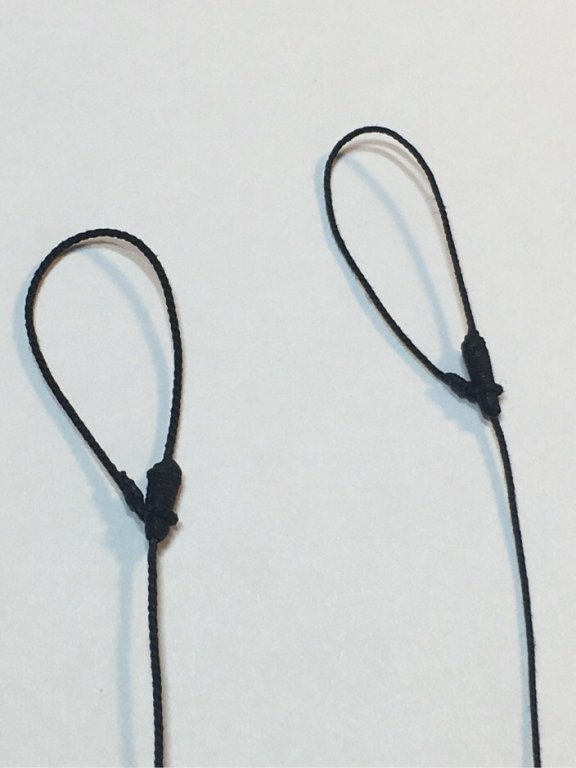
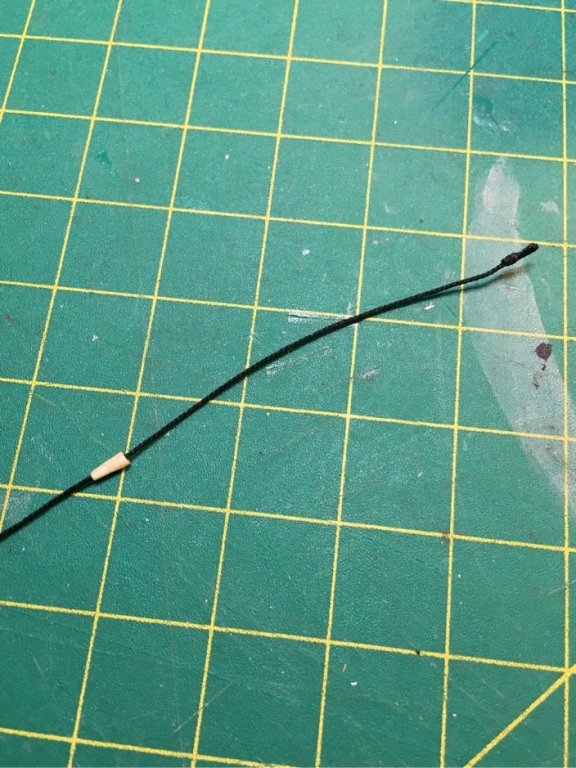
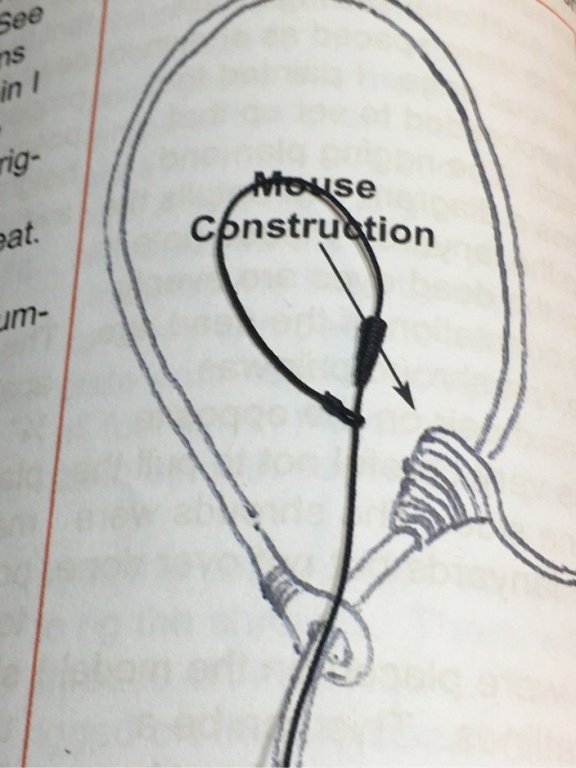
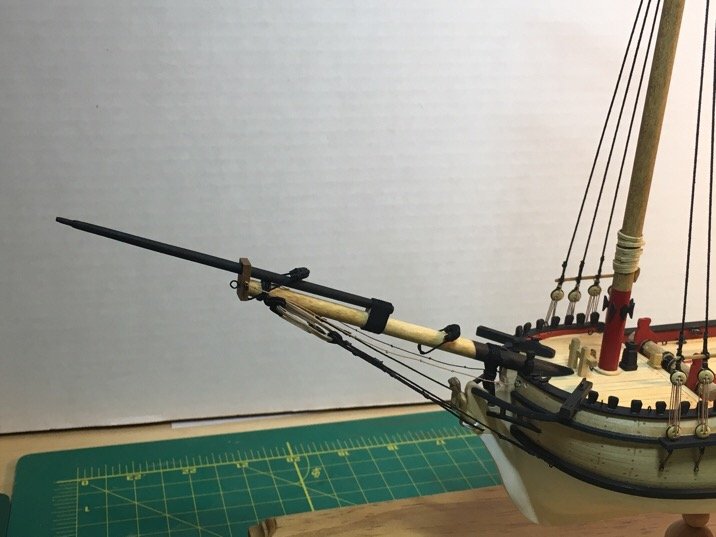
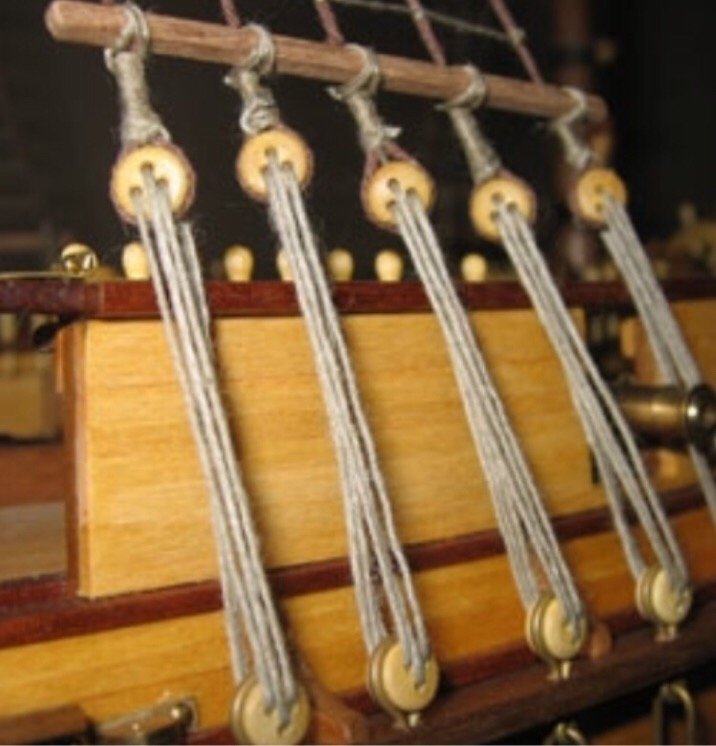
Ok. Word to those who may be doing this for the first time. The mouse needs to be threaded BEFORE you attach the close heart at the end of the Fore Stay!!! I stupidly unthreaded the bullseye and then attached the heart. Yeah...I was not happy...had to rinse and repeat. In doing so, found a good length of 0.025” rope so decided to make the Fore Stay per Chuck’s recommendation since I needed to start over anyway. Also, since I knew I could, I rigged a mouse for the smaller 0.018” rope for the Inner Jib Stay. That’s actually still historically accurate, and seemed to be a reasonable deviation. Below are the pics for the Fore Stay (thicker and shorter) and Inner Jib Stay as they should look BEFORE you put them on the ship. And make sure you thread the bullseye to the mouse BEFORE you measure and attach the closed hearts. You’ll note the closed heart for the Fore Stay is slightly larger than the heart for the Inner Jib Stay. This is because I had a few options for the hearts since I made extras. It seemed the slightly larger heart looked better (but maybe not completely historically accurate) on the thicker rope for the Fore Stay. Okay...time wasting. Time to suck it up and jump into the ratlins!!! Damn the torpedoes!!!
- 449 replies
-
- 3
-
-
- sultana
- model shipways
- (and 2 more)
-
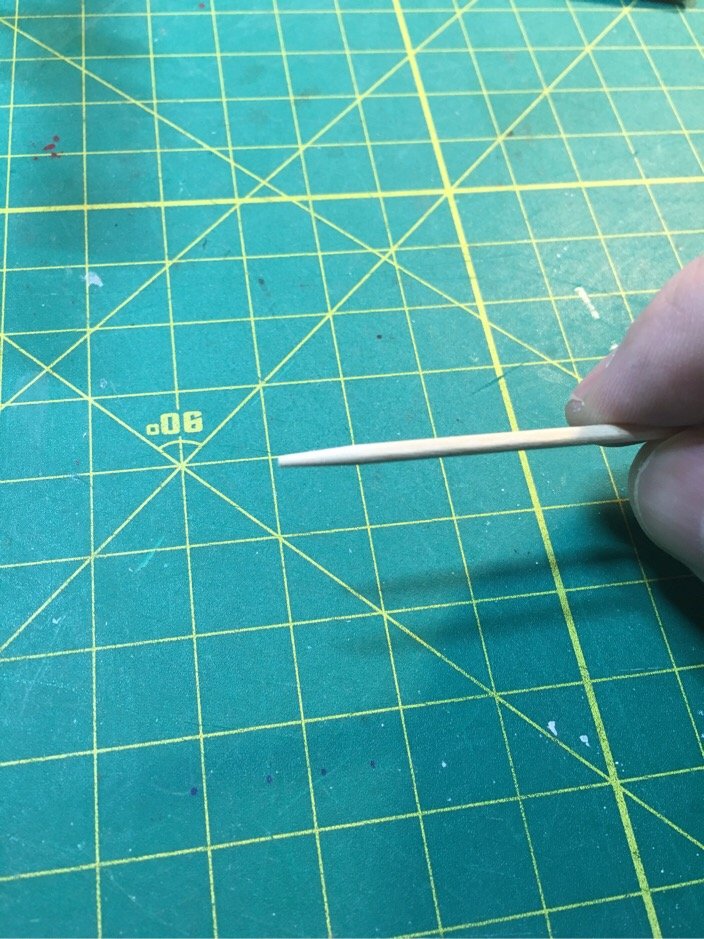
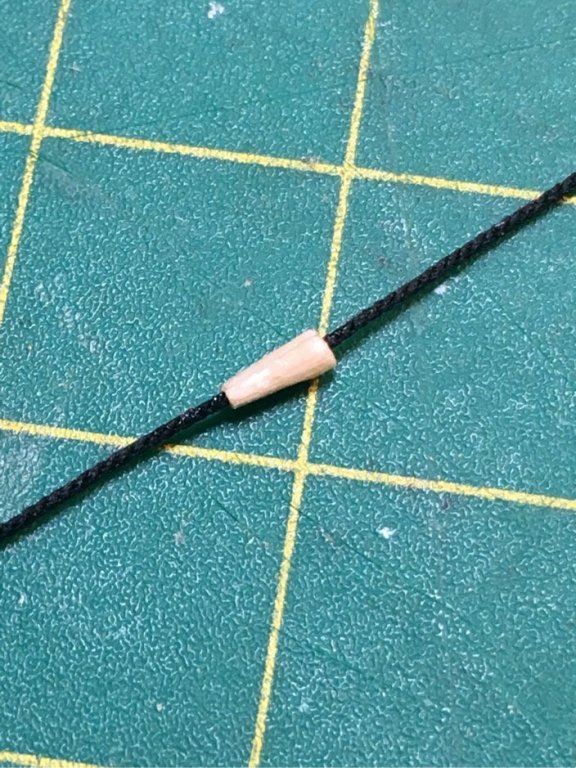
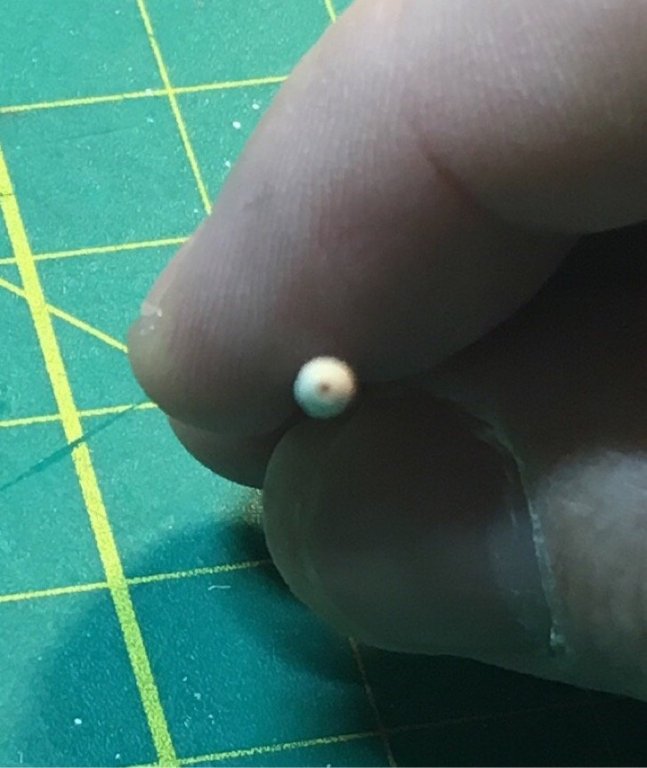
Ok. It’s been a long week and I’m ready to attack ratlins. However, I wanted to take my time with those over this weekend, so opted for a side project. Making the Fore Stay! Chuck’s practicum had him using 0.028” rope as was used for the shrouds. Well, I ran out and my alternate rope sucks. Besides, I checked against the 0.035” rope I plan to use for the anchors and I think the 0.018” rope will suit nicely and not overwhelm the look. Not historically accurate...but it’s my ship and I’ve deviated so much, what is one more deviation!!! The thinner thread make it more difficult to make the mouse...but I had a plan. I decided to use a toothpick!!! My favorite material.... I chopped off the top of a tooth pick with a razor blade, drilled in a hole into the top of the now shorter toothpick, chopped the hollowed piece off which seems to match the look of the mouse, threaded it (the right direction) onto the rope, siezed the bullseye at the other end, wrapped the wooden mouse skeleton in black thread...taaadaaaaa!!!! My fore stay awaits. I’ll sieze the closed heart tomorrow. Moving on...to bed. 😁


- 449 replies
-
- 5
-
-
- sultana
- model shipways
- (and 2 more)
-
I agree! That removes a ton of guesswork done by eyeballing. Also helps inexperienced modelers (me) from over shaping!
-
Now...if only I knew what a DXF file was...can I open this in Microsoft Office? 😕
- 222 replies
-
- 1
-
-
- sultana
- model shipways
- (and 1 more)
-
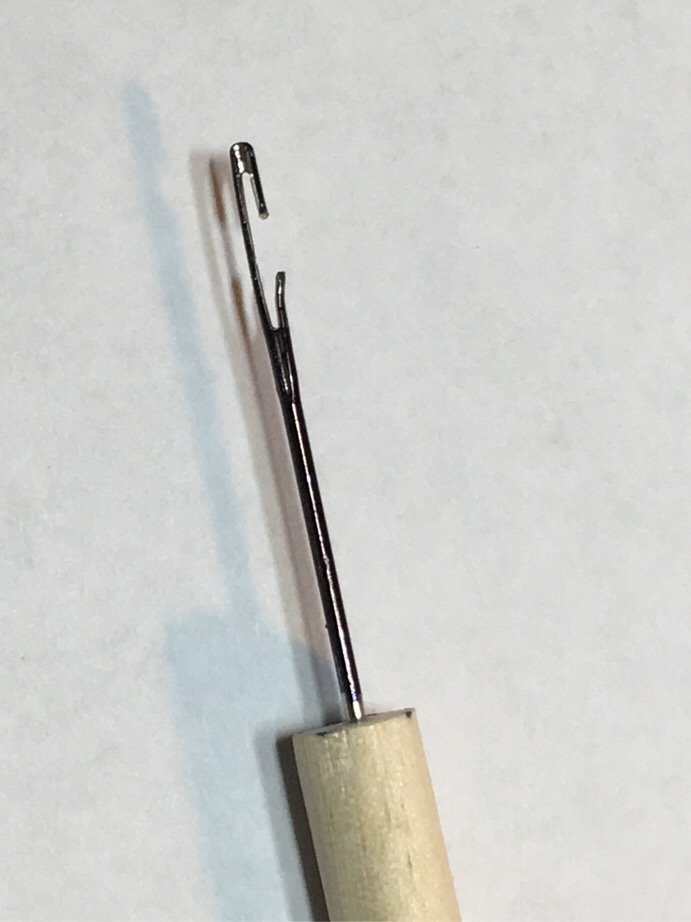
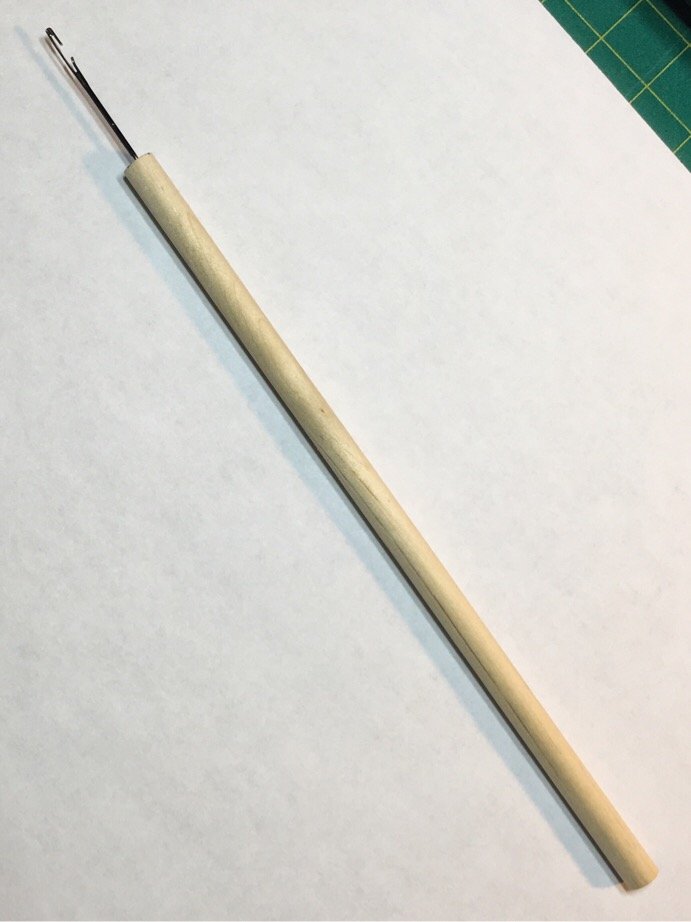
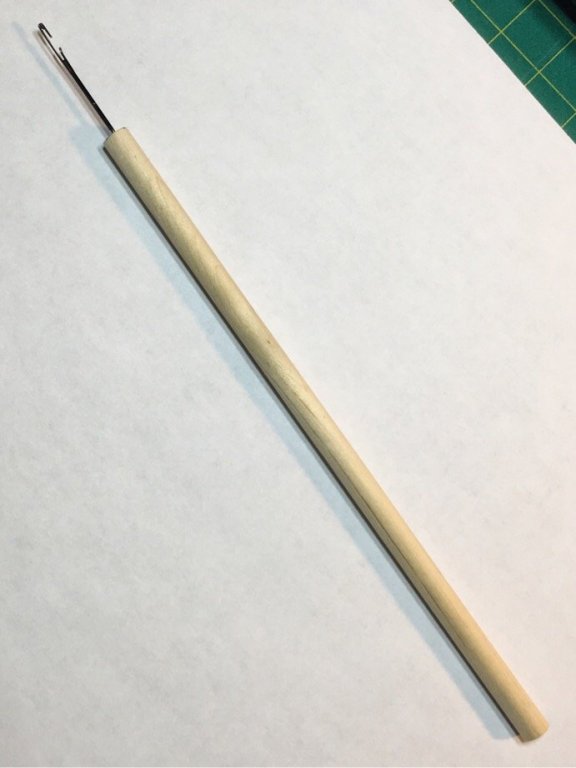
Made my own rigging pic tool based on a really good YouTube video on ratlins. No way am I sticking my fat fingers into the rigging again...time to start thinking like a surgeon!!! Thanks to David Kump! note: redid the tie on the sheer pole on the foremast starboard shroud. Muuuuch better.

- 449 replies
-
- 2
-
-
- sultana
- model shipways
- (and 2 more)
-
I think the idea ofusing a lateral piece to lock the angled frames in place is a interesting idea...it’s probably useful to do this anyway along the entire length of the ship. It would further reinforce the structure of the squaredframes. Really neat ideas! Enjoying this blog.
- 222 replies
-
- 1
-
-
- sultana
- model shipways
- (and 1 more)
-
I think the disadvantage to the angled frames is that it would not provide the same support and rigidity for both sides of the ship as a single piece frame. The single frame is also easily squared against the keel or center frame assuring symmetry on both sides. Another advantage to squared frames is they allow installation of filler blocks much more simply. The angled frames, once glued in place, could more easily slip or bend out of position, making filler blocks almost a necessity. Just my two cents. But agreed, they do look cool!
- 222 replies
-
- 1
-
-
- sultana
- model shipways
- (and 1 more)
-
You taking orders yet? I’m sold....
-
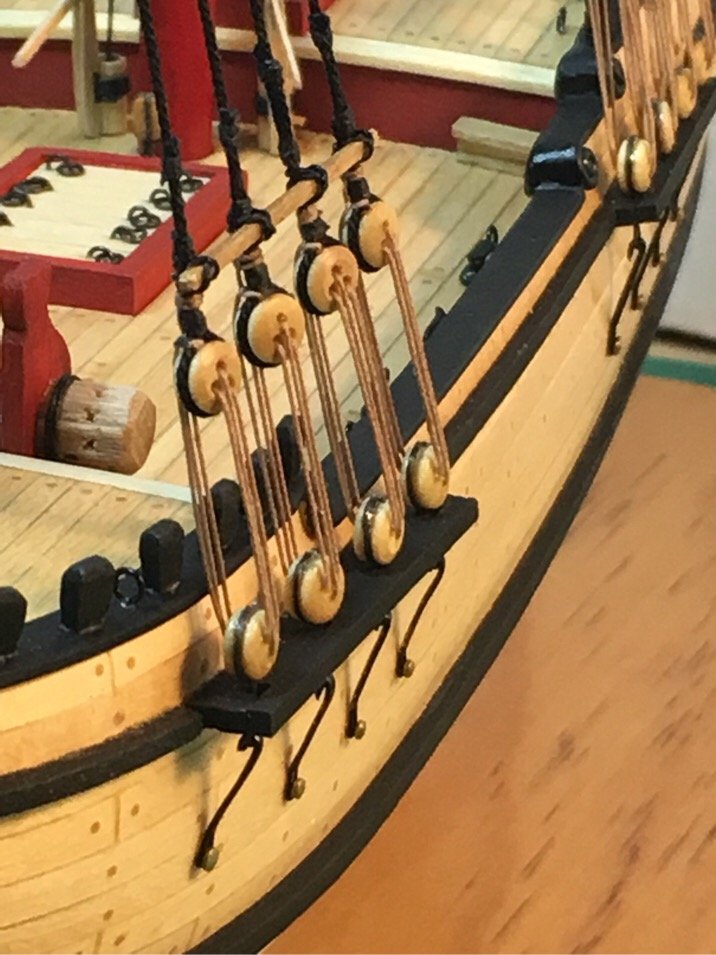
Photos always magnify imperfections. 😣 I need to redo one tie on the sheer pole for the starboard side foremast shrouds. Thing looks like it’s hanging by a thread...pardon the pun. 🤣
- 449 replies
-
- 3
-
-
- sultana
- model shipways
- (and 2 more)
-
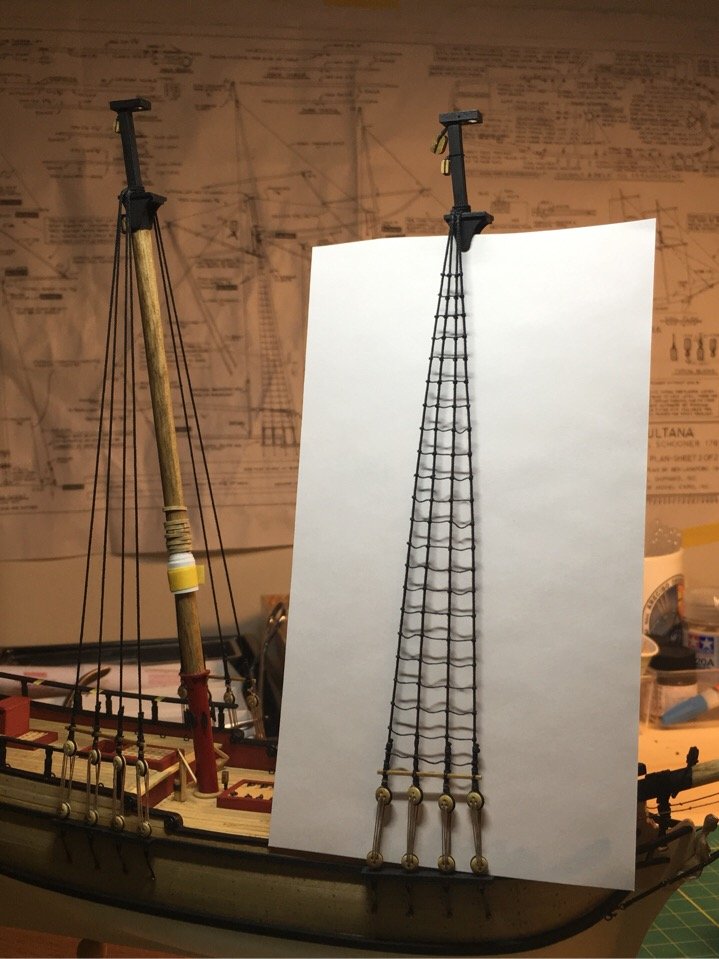
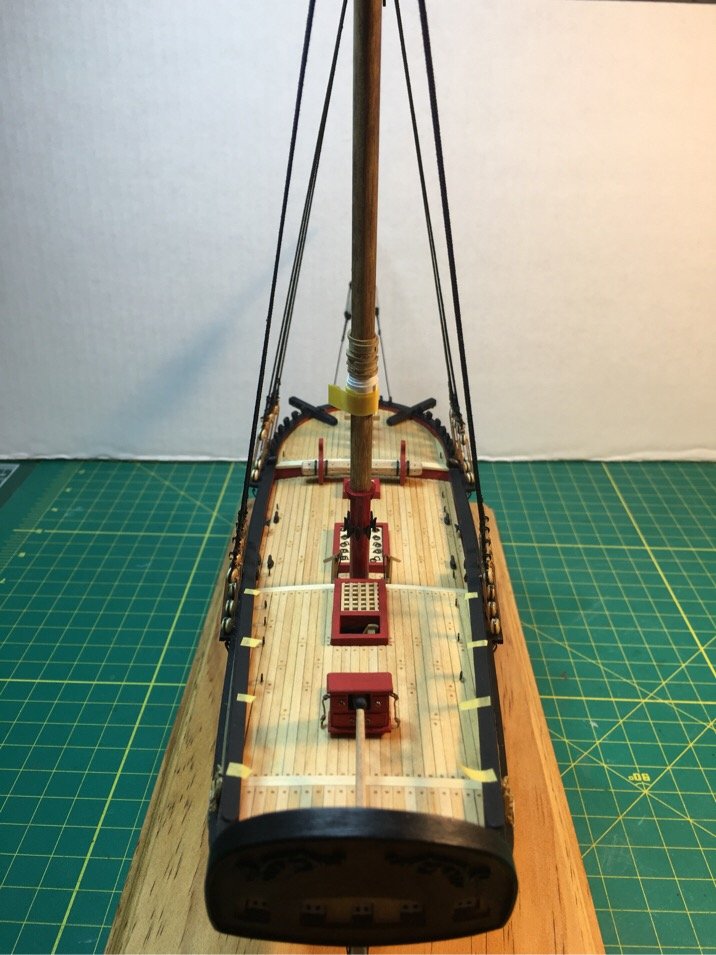
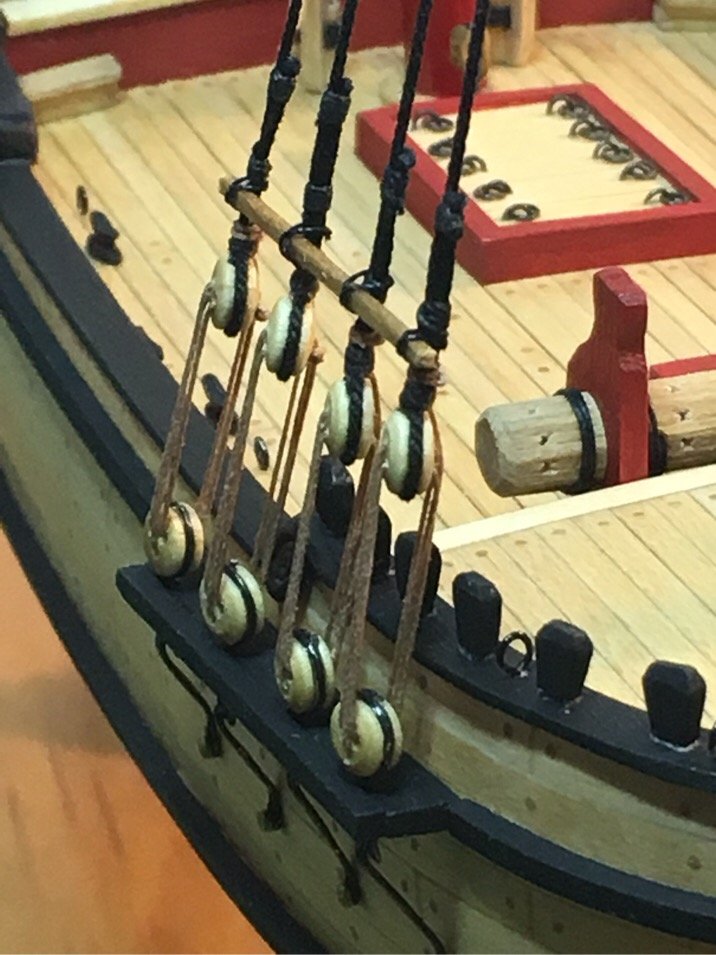
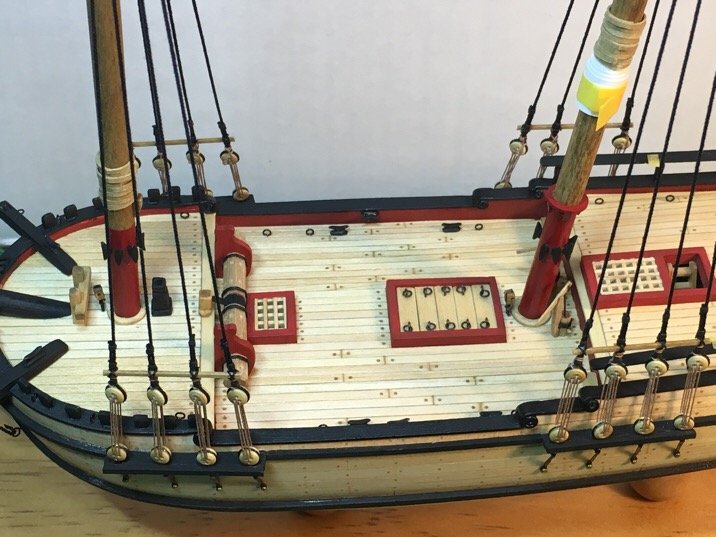
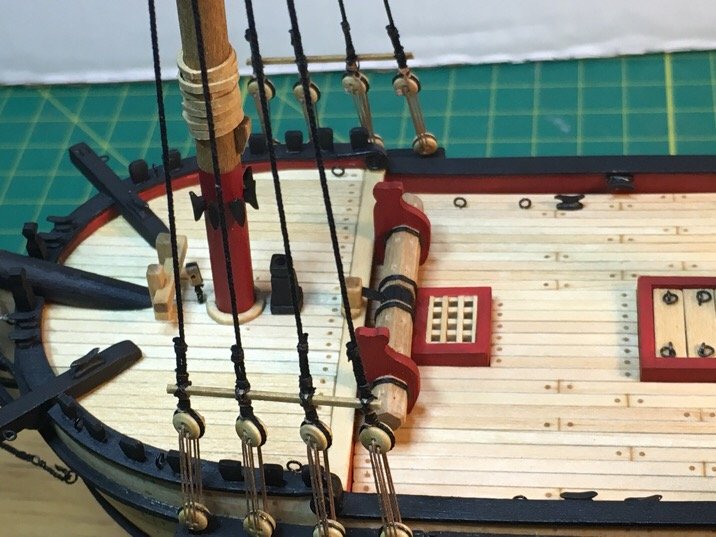
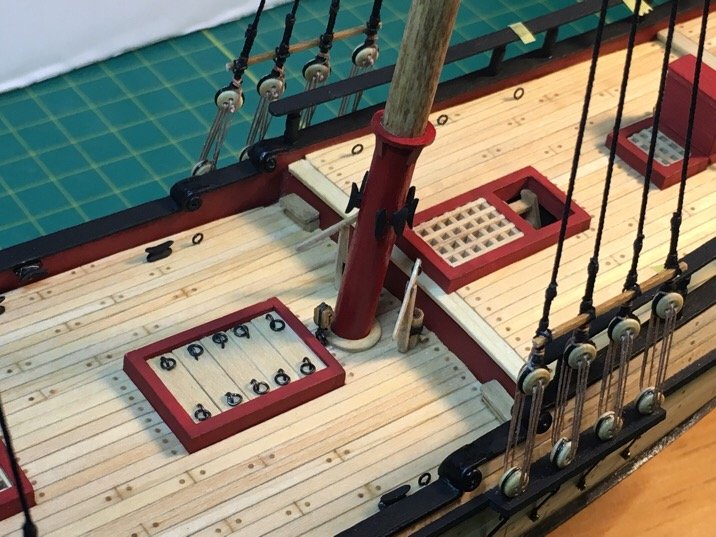
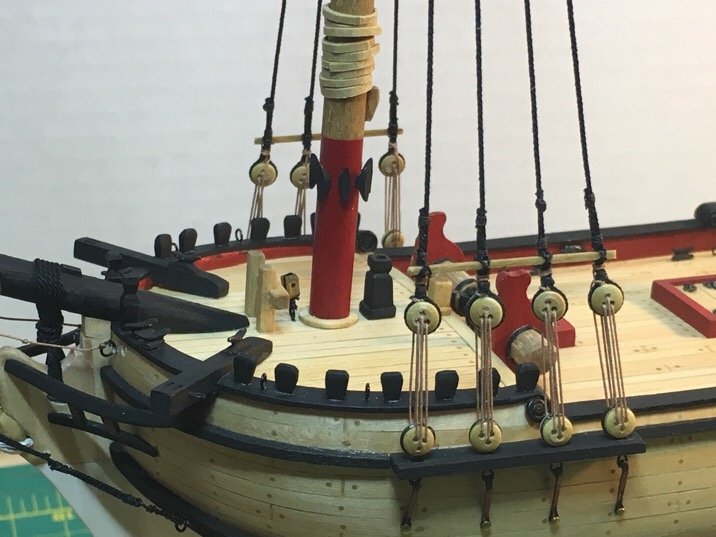
Mondays aren’t always bad! Got the sheer poles in...it is a bit scary manhandling the shrouds and deadeyes. I always think something will snap off. And yes...that fear is well founded. I’ve broken or snapped off bits and pieces here and there...including my entire bowsprit assembly. But I have to say, I’m pretty happy with this result! Getting the sheer poles on represented a big milestone for me!!! So, I’m going to bask in the glow a bit. I find find myself really trying hard to focus on symmetry. Proof is in the pudding...not perfect by pretty good. And yes...deadeyes come in uneven flavors too! But I found many references where deadeyes were not even and had some horizontal asymmetry. Not too shabby! Moving on!!!...to ratlins!

- 449 replies
-
- 7
-
-
- sultana
- model shipways
- (and 2 more)
-
After breaking off my rigged bowsprit last night....I can say that I am a 100% believer in have a solid base for the bowsprit! A fitted slot would be so much more stable and a tad more resistant to the occasional 'touch' by any unskilled craftsman (<-- me). =-)
- 222 replies
-
- 1
-
-
- sultana
- model shipways
- (and 1 more)
-
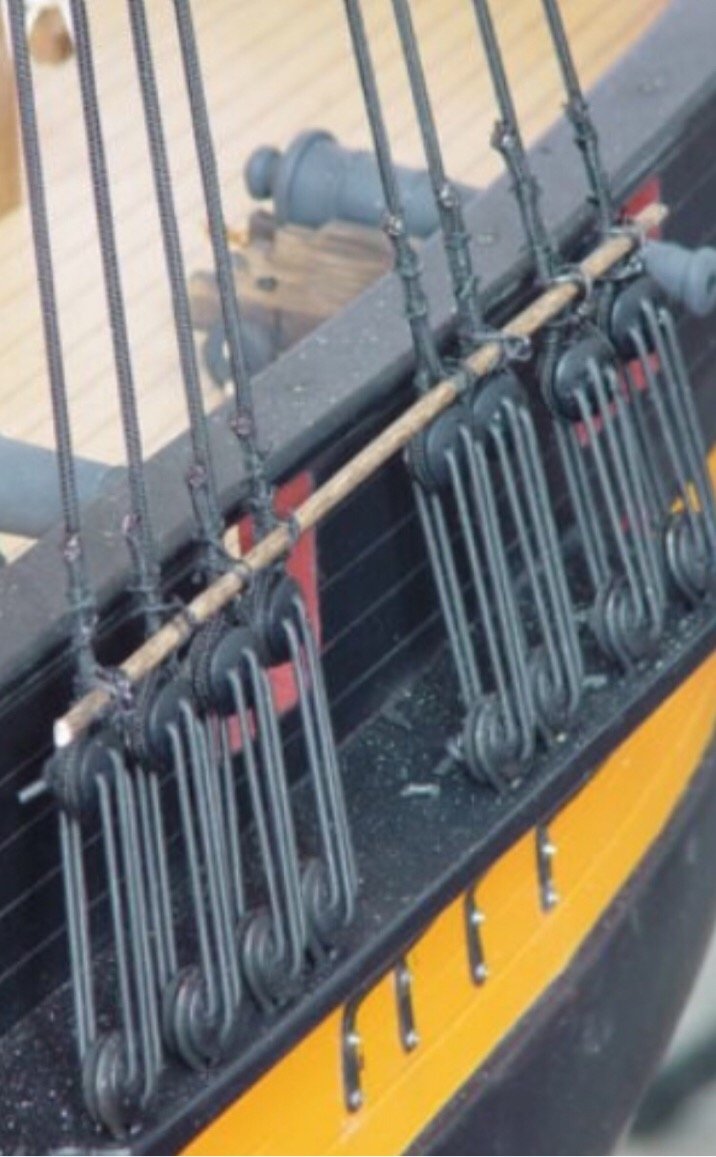
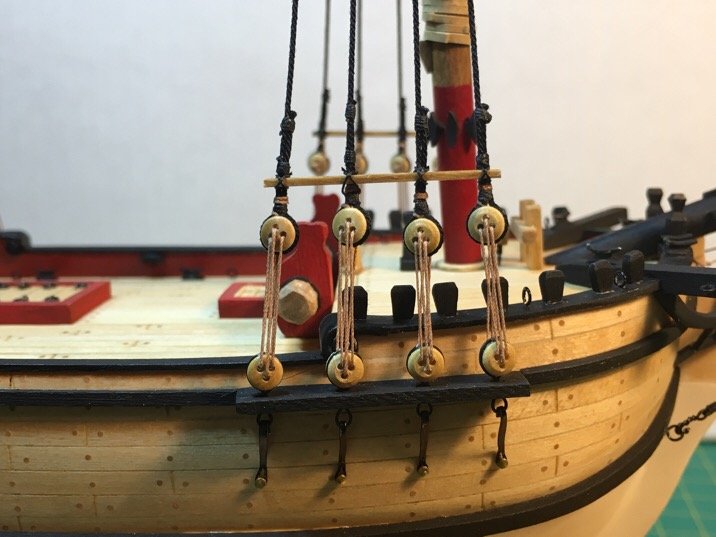
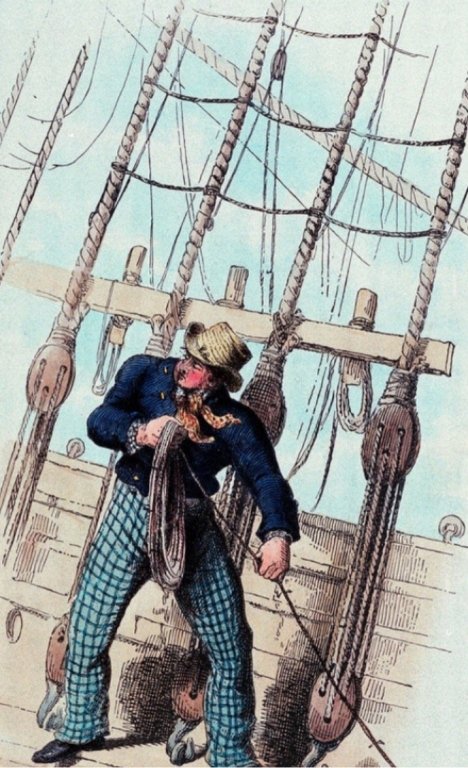
Just noticed that pic above I posted which I dug up from the internet shows the top deadeyes mounted upside down!! Makes you wonder when or if they were ever mounted in such a way. 🤔
- 449 replies
-
- 5
-
-
- sultana
- model shipways
- (and 2 more)
-
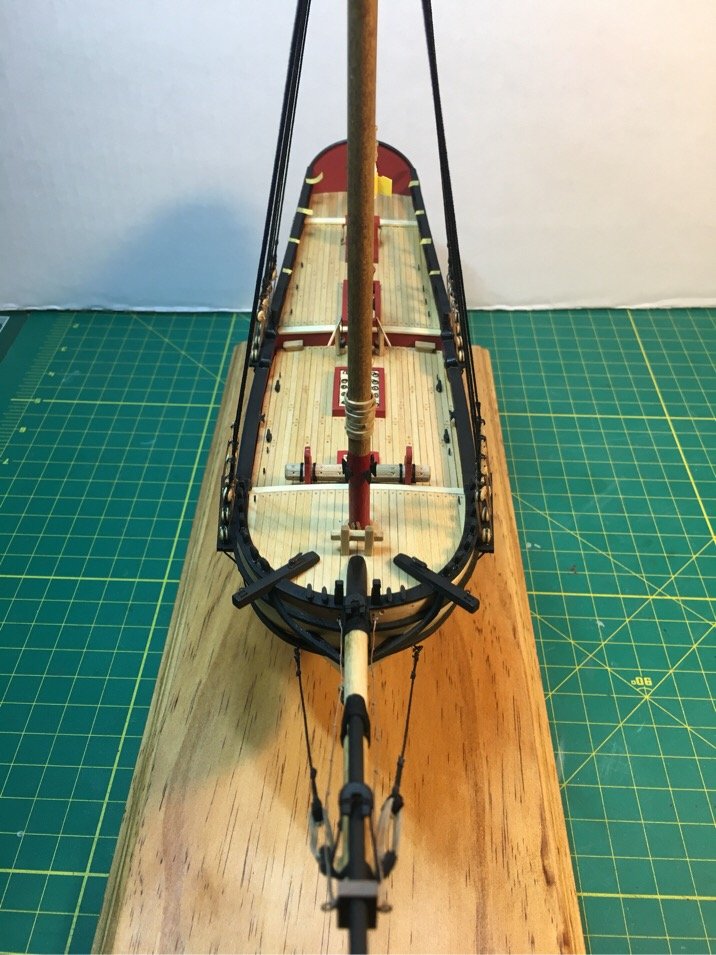
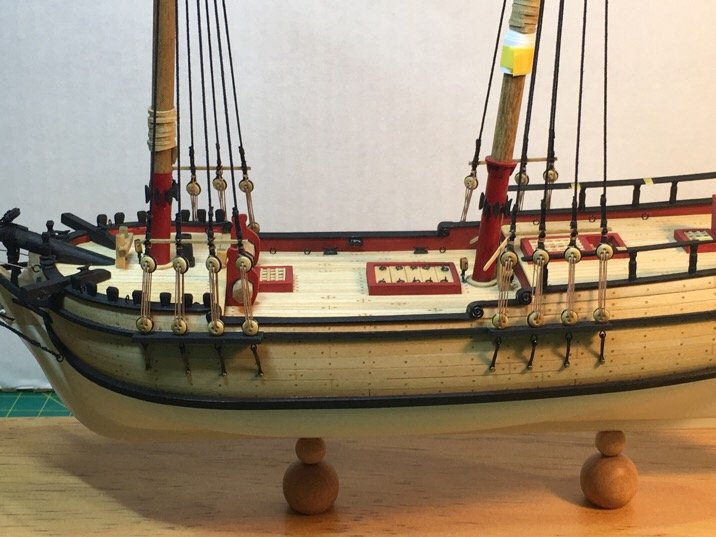
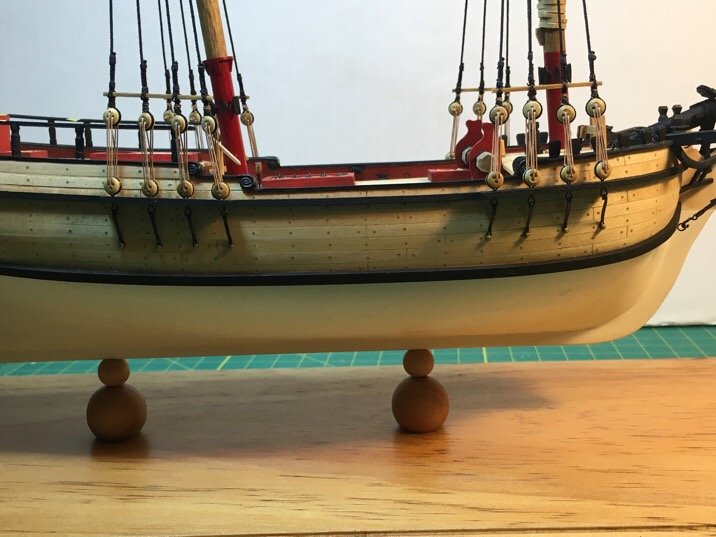
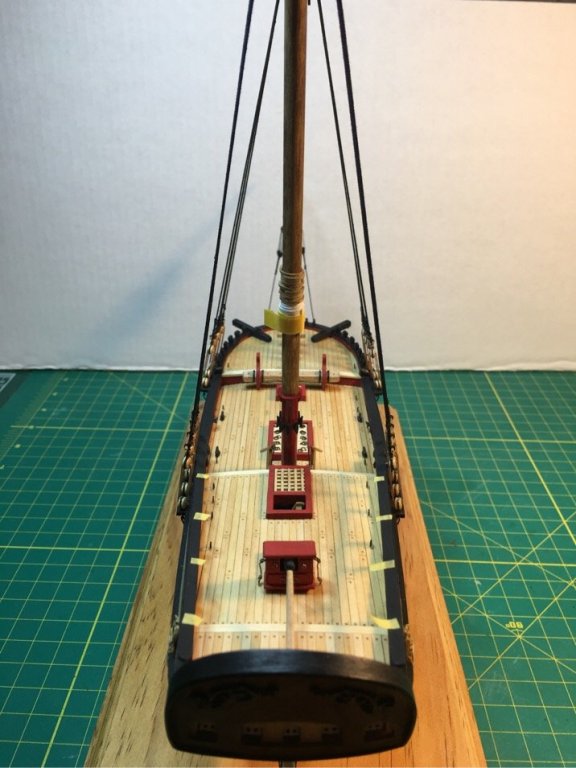
Foremast shrouds are up and sheer poles installed. The mainmast sheer poles are still pending but...Soon it will be ratline day!! In the process of installing the shrouds, I really messed up! Knocked my bowsprit clean off! But the gammoning stabilized it enough that I could simply glue it back without any noticeable damage...and was able to keep the same level of tension on the Bob-stay and bowsprit shrouds! 🍀 Lucky!!!!! Moving on....cautiously.


- 449 replies
-
- 8
-
-
- sultana
- model shipways
- (and 2 more)
-
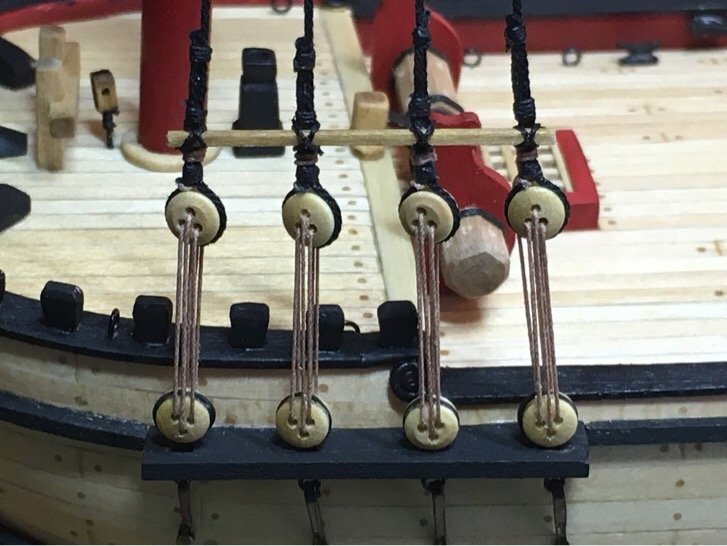
Okay. So here is my attempt at the sheer poles. I’ve only just completed the port side foremast shroud sheer pole, but got the rhythm for how to do the others. Long and slow slow stretch of work here...just plodding along!!!
- 449 replies
-
- 9
-
-
- sultana
- model shipways
- (and 2 more)
-
👍🏽 Awesome! I hope you will also consider a laser cutaway for the transom. (Badly needed in this kit!!)
-
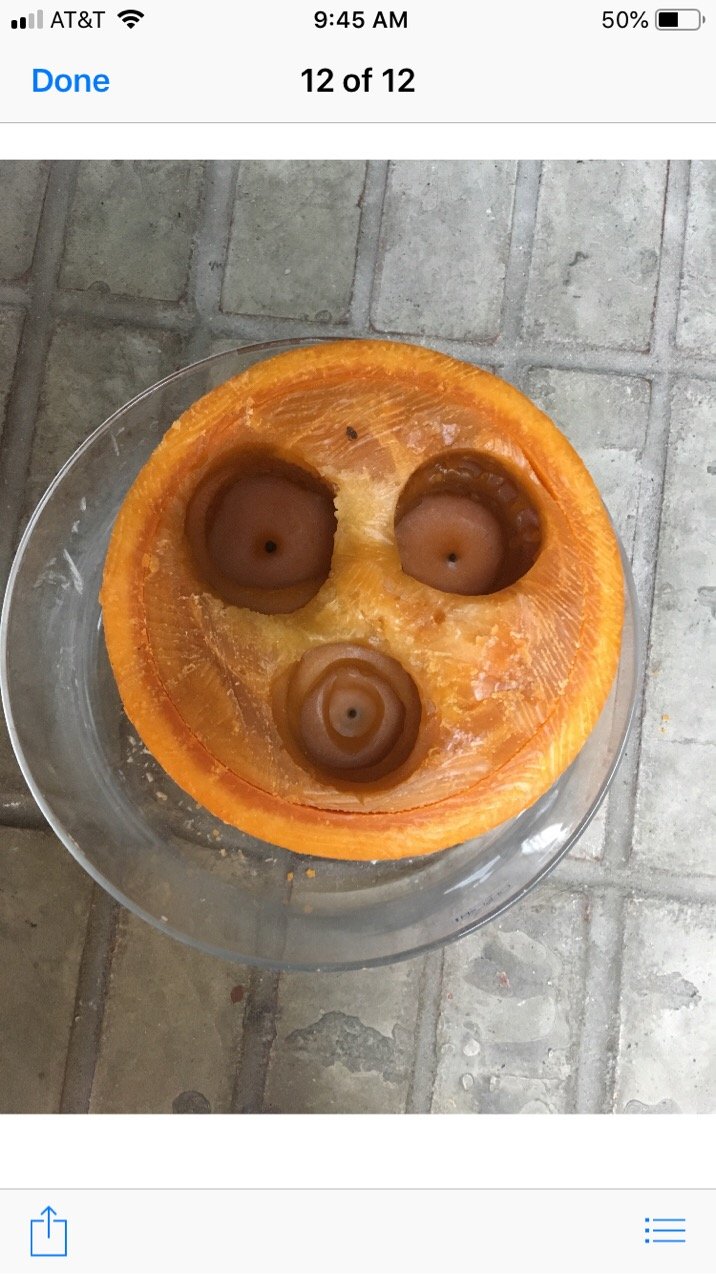
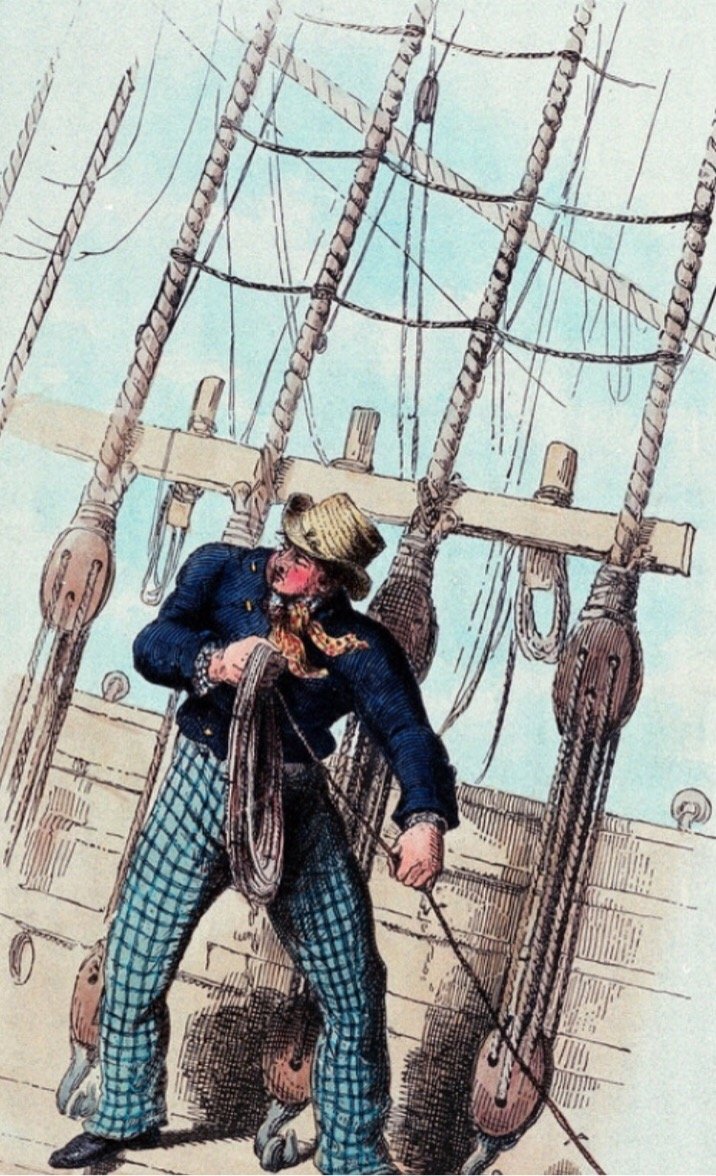
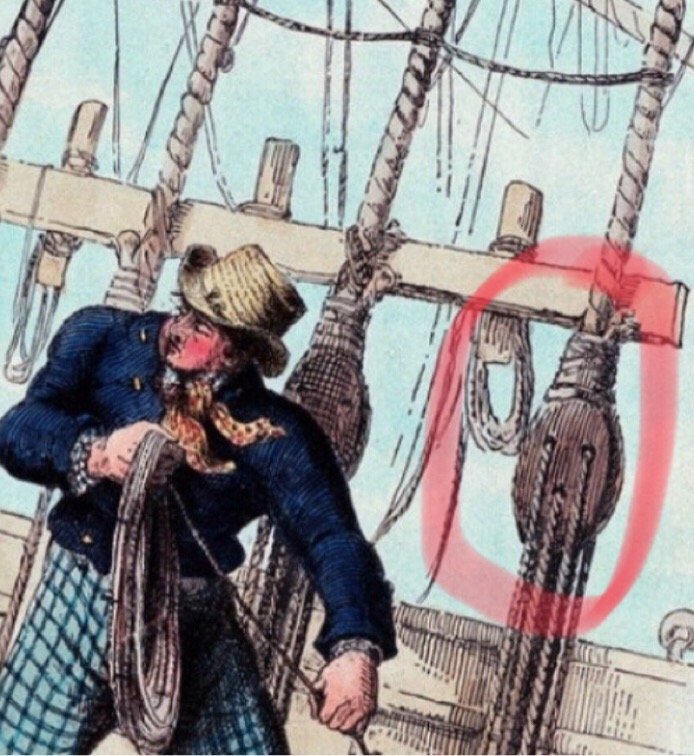
Looking at the way sheer poles are attached and finding some references. Most seem to show the rope attaching the pole to the shrouds cross-crossing as you look at them from the front. So...I’ll give it a shot using black thread (slightly smaller gauge than the 0.008” Rope) and crossing in front. On a side note...the admiral noted last night during a movie that one of the candles she lit looks like a deadeye! (I laughed so hard I coughed up my beer!) Moving on!!!


- 449 replies
-
- 6
-
-
- sultana
- model shipways
- (and 2 more)
-
Think you could at least print the frames for the bulkheads. But it looks the the bow is a bit blunted. Could be the angle of the previous picture. Would love to see a few more frames in the bow to give the curvature some more context. Hard to visualize without looking at the 3-D CAD presentation on a monitor. But it really really neat stuff!!!
-
Very neat stuff.... If you ever turn this into plans for a plank on bulkhead I'll invest in a copy!! (So much better than inhaling sawdust trying to shape a hull...never doing that again!)
- 222 replies
-
- 2
-
-
- sultana
- model shipways
- (and 1 more)
-
Right!!!!?? And you look in books and it seems so simple!!! But you’re right about my avatar...that pic makes me want to take a 😴 nap. Puts my brain to sleep.
- 449 replies
-
- 3
-
-
- sultana
- model shipways
- (and 2 more)
-
Just bought the book! (Amazon used books!!! Love it) Loved the quick link to the original plans, too! Thanks!
-
OMG! Awesome....I'm following. I'm going to get that book, too! Can't wait to see what you do with this!!!
- 222 replies
-
- 1
-
-
- sultana
- model shipways
- (and 1 more)