
HOLIDAY DONATION DRIVE - SUPPORT MSW - DO YOUR PART TO KEEP THIS GREAT FORUM GOING! (Only 24 donations so far out of 49,000 members - C'mon guys!)
×

Michiel
-
Posts
236 -
Joined
-
Last visited
Content Type
Profiles
Forums
Gallery
Events
Everything posted by Michiel
-
 NIce work, what kind of wood is that in the upper part of the frames? greetings, Also from HD
 -
as beautifull as ever. I'm also switching to pear, it's just increadible what the quality of the wood does. Best, Michiel
- 662 replies
-
- 1
-

-
- bonhomme richard
- frigate
- (and 1 more)
-
Over the weekend I finished two more hatches and the cover for the main hatch: I also made the piece of wood on which the capstan rests. The key from the previous picture is reshaped to fit later on in the capstan. Three more rows of nails to go..... Best, Michiel
-
thanks guys, The keys operate a switch for the lights. I will hide one in the capstan, the switch is placed exactly at that postition. Than, in the end lights can be switched on and of by turning the capstan. Best, Michiel
-
Slowly I'm making some progress on the dek.. Best, Michiel
-
I finally finished planking the deck ... now the treenailing has started.. Best, Michiel
-
another part finished for the lower deck. This time fully scratch in every sense: the wood is pear from the garden, saved from the firewood pile..
-
still one of my favorites... one can just spend hours looking at the pictures
- 662 replies
-
- 1
-
-
- bonhomme richard
- frigate
- (and 1 more)
-
ancre Le Fleuron 1729 by rekon54 - 1:24
Michiel replied to rekon54's topic in - Build logs for subjects built 1501 - 1750
it's just too good to say anything... but those wavy openings are really cool -
thanks for the info Erik: I put one between every other port, that give a reasonable amount of light
-
The voltage drop per led depends on the led/ led color I calculated with 2.2 have a look at the pdf linked on the first page.
-
I would say with a 9V battery you need 180 and 230 Ohm resitors. than you pull 18*0.02 230 mA so I would put a second battery in series. I only think it's a bit much light, where do you put your light? would half of them also work? @ mike: what do they cost?
-
a real beauty,
-
Some more progress on the planking of the gundeck... Wooden nails in the planks and iron bolds in the schaarstokken. Best, Michiel
-
Looking forward to you build..
-
Good to see you back Piet Michiel
-
I showed a picture before of a single musket, the rack is new. Next thing here will be a rack over the windows for dining plates. There will be an other bench on the aft side as well, eventually. I also finished the bed for the captain but it still needs sheets and a blanket. the wiring for the candle runs through one of the legs, I drilled a 0.5 mm hole through a toothpick.... Best, Michiel
-
In the meanwhile I also finished the rack of muskets, so that asks for new photo's of the cabin: Best, Michiel
-
you could also try the battery of an electrical tooth brush, they usually have these induction chargers. It should be possible to hide that completely in the ship and stand...
-
with the tooth picks: take a little metal plate and drill a hole in it with the same drill you use to make the holes in the planks. now look at the bottom side, the will be a little bit of metal sticking out. if you now push the toothpick in on that side and turn it round a bit you make, much faster than sanding, the axact right diameter for about 4 mm which is sufficient for sticking it in. I usually however don't even do that just stick the pick in as far as it goes with a little glue. for darker wood I often use chestnut thorns. Best, Michiel
-
Thanks Alex The nails in the hull (cherry planks) are made from chestnut thorns like this: I drill 0.5 mm holes, then I pull a thorn from a shell a dip it in some glue and stick it in. When it's dry I cut most of with a small pair of scissors and than sand it further. Finally a scrape the entire section and apply danish oil. For the deck planks I find the thorns to dark and I just use tooth picks, without any further processing, just pushing them in so that they fill the 0.5mm hole. Again after oiling you get a very nice contrast due to the grain direction difference. The planks I make black on the sides with shoe polish from a tube with sponge, (the sponge is attached to the tube). You get the best result if you sand the side just a bit as well, especially the short sides. The shoe polish is instantly sufficiently dry and does not get into the wood. The sanding does fill the space between the planks a bit which may seem to diminish the effect. However, after applying the oil they come out nicely again (not if you apply a lacker though! then the sand dust stays in there and makes the effort in vain.). Obviously for a bit more historically correct color you could use a dark brown polish...
-
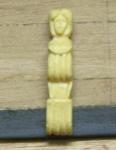
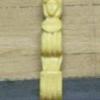
Thanks Alex, Yes I'm cutting them all from box wood, I only just started though there is an enormous amount of carving on this ship. So there's a lot to practive ;-) Best, Michiel
-
Thanks Jan, We just had a many page discussion on the schaarstokken... including comments from Ab, But I think your right in all drawings of pinas's they do, the thing is that the hatch is rather large here, I stick to Ketting and with the batteries there I can't make it smaller. The distance between the main schaarstokken is now ~7 feet, and with that is fits nicely around the other hatches and the anker spill. So it's a bit of a compromise.. Best, Michiel
-
The underwaterschip is now painted: I see now on the picture that some corrections are still in order :mellow: the bow: and the first work on the second gundeck: Have fun, Michiel
-
Well It has been quite a degradation for you,,