


gjdale
-
Posts
4,874 -
Joined
-
Last visited
Content Type
Profiles
Forums
Gallery
Events
Posts posted by gjdale
-
-
Nice going Mick. Those removable panels really add some extra interest to this build.
-
She's a real beauty Matt! Well done!
-
Goodness, that's a lot of fiddly painting! Good job!
-
Very nice Dan! Love the detail you've worked into this.
-
Nice work on the bow sprit Andy. As for a lathe - all I can say is "go for it", you won't regret it. Model ship building is a great excuse for accumulating all sorts of really cool power toys, er, I mean tools.
 I can highly recommend the Sherline lathes (and Mills, hint, hint,
  )
) -
That's disappointing for you Joachim, but I'm sure there are some Italian speakers on this forum who might be able to help you out with the translations.
-
That's some seriously nice joinery there Rusty!
-
Congratulations and Happy Anniversary Sherry! By coincidence, my wife and I will also celebrate our 31st this year (though not until Dec).
-
Nice "set-up" of the rabbet Rusty!
-
-
Augie,
Seems I neglected to post my admiration for your update a couple of pages back. Please accept my belated congratulations - the addition of the yards looks just fantastic! Can't wait to see the rest in place.

-
Ingenious Danny! Very, very clever indeed.
-
Thanks Joe and JP for your kind words.
-
Hi Grant,
Nice Tumbler - it seems to do the job very well indeed.
Post it in "Wooden Tips and Tricks" - that way it won't get "lost" in your Build Log.
 Danny
DannyI've done as Danny suggested and posted this as PDF file in Wooden Tips and Tricks. Here's a quick link:
http://modelshipworld.com/index.php?/topic/1978-block-tumbler/
-
Safe travels Gil. Will miss your log and guidance in the coming months. There's every chance that I will overtake you now, and that's not good! (I've been relying on you to show me the way.)
-
Welcome home Andy. Looking forward to some updates soon.
-
-
Well done Sarah. A very interesting little build. Good luck for the next project - I'll keep an eye out for it.
-
Very crisp and precise joinery there Danny!
PS. I sent you a PM the other day and its still showing as unread.
-
-
Congratulations Jim, you've done a wonderful job of her (or should that be him?) and you should be justifiably proud. What site will your stage coach be on?
Oh, and by the way, if those photos were taken at your house, I wanna come visit!
-
That's looking great Hec. Don't be afraid to be quite vigorous in rubbing back the copper if you want some of the green to show through. Alternatively, you can just go with a "fresh from the dockyard" look. Captain's choice as we say.
Did you manage to get a hold of a copy of Longridge?
-
Thanks everyone for your kind words and encouragement. It feels really good to be back in the shipyard and making sawdust.
Kevin - I wrote this Tumbler up in a word document, which wouldn't take much to tidy up. If you are interested I can post it here so you can download it for future reference.
-
Okay, as promised, here's the final instalment on the Block Tumbler.
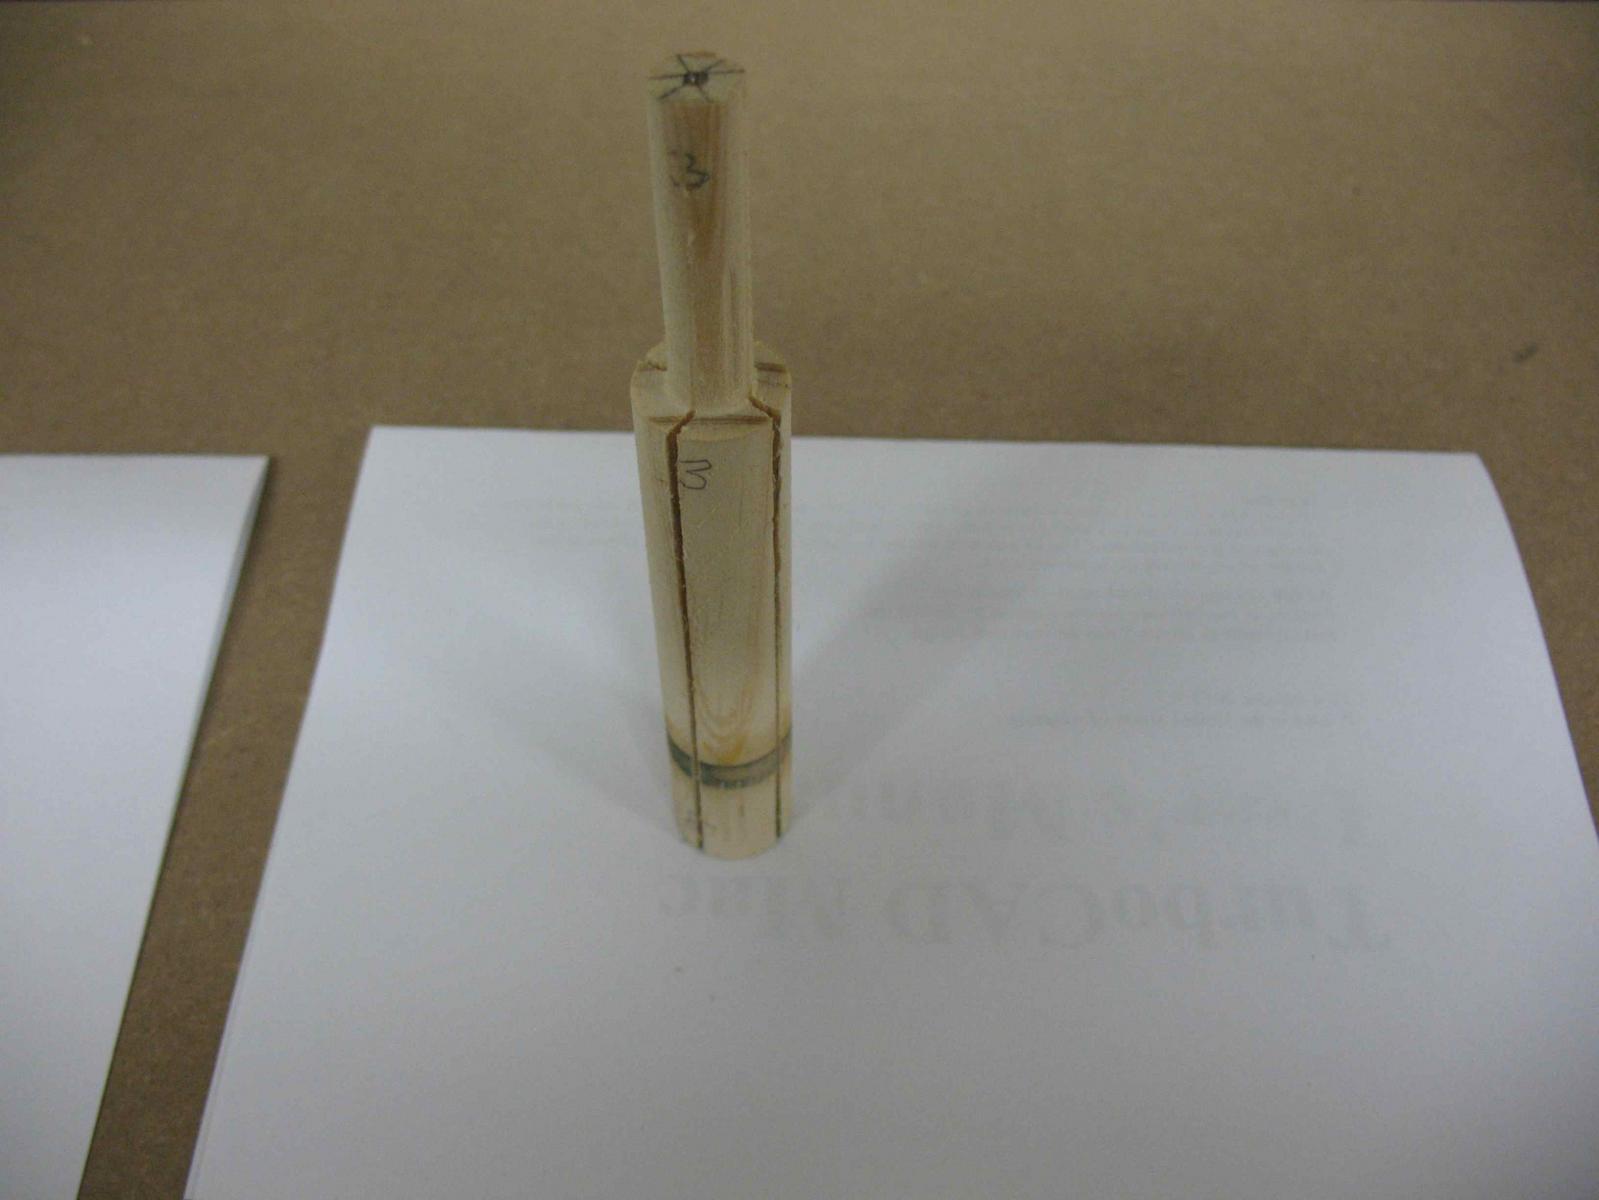
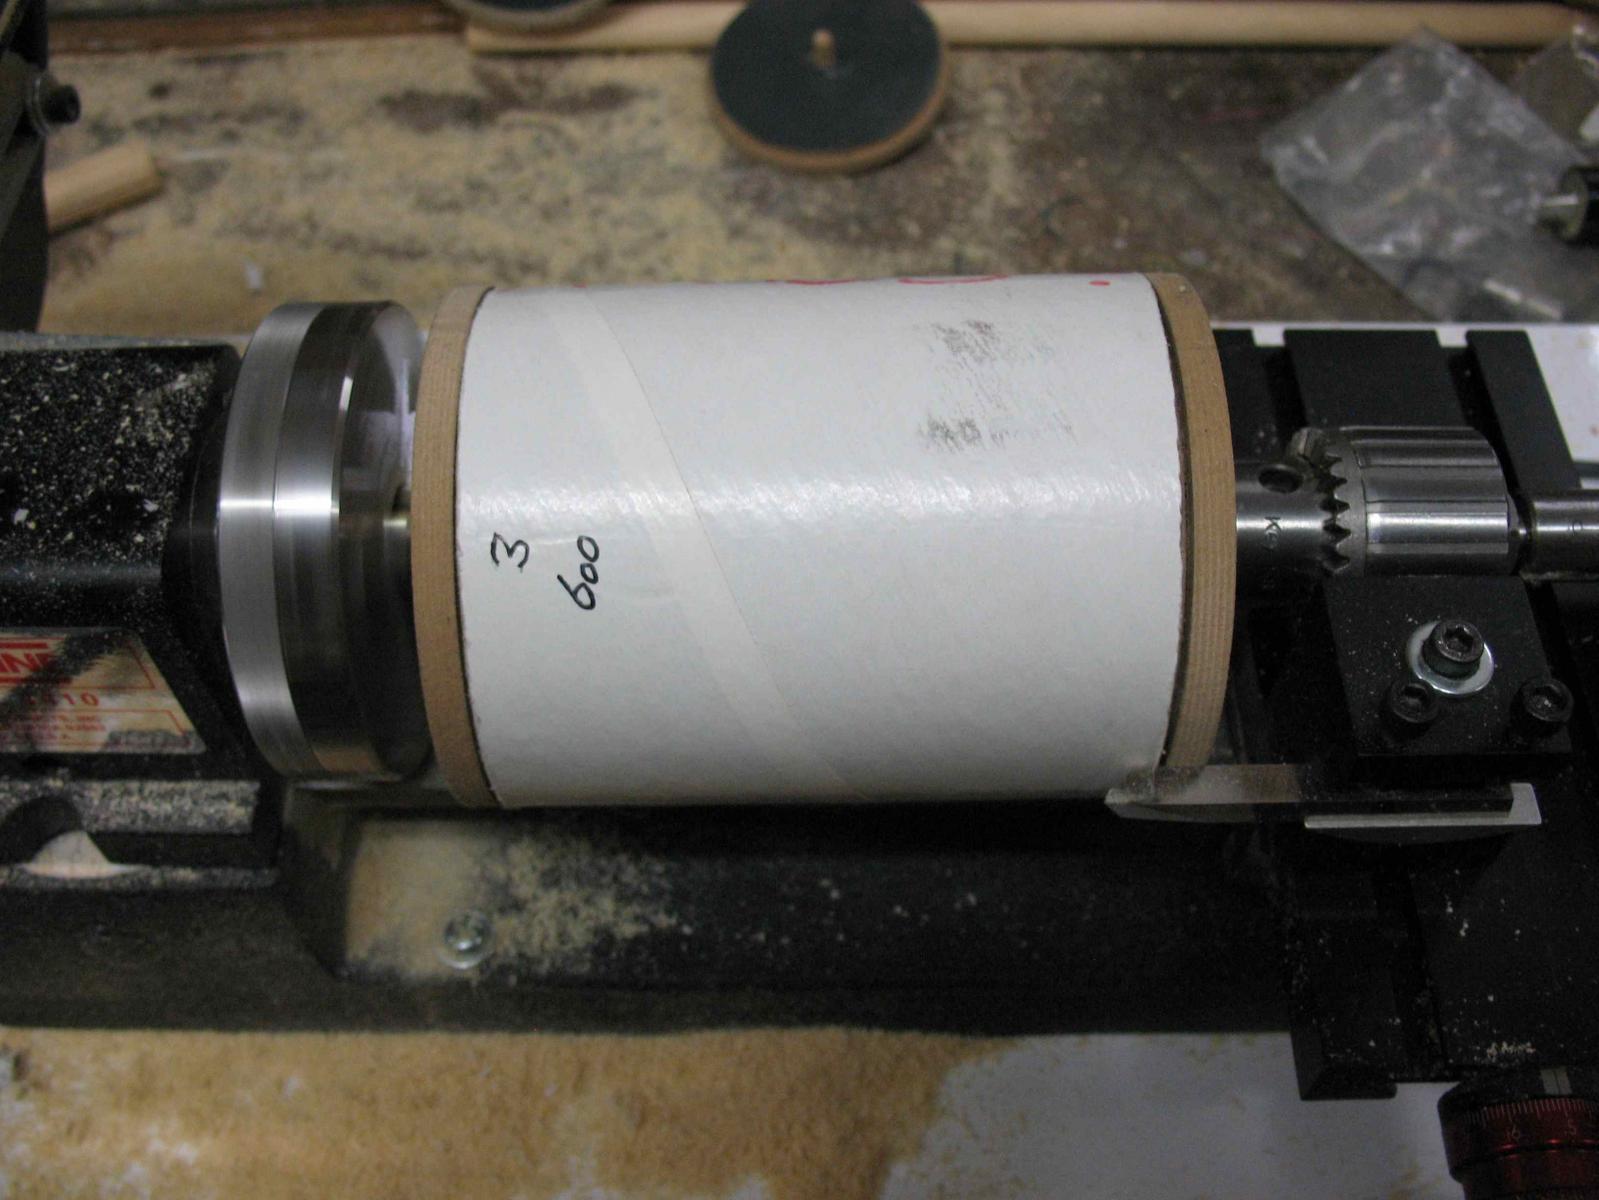
Mod 2: I had an epiphany while thinking about the drive shaft problem and decided that the only way it was going to work was for the drive shaft to be a single piece running through the top end cap. The limitation was that the “business” end needed to be no larger in diameter than 10mm in order to fit through the headstock spindle of the lathe. So new drive shafts were manufactured with the “business” end turned down to a 10 mm diameter.
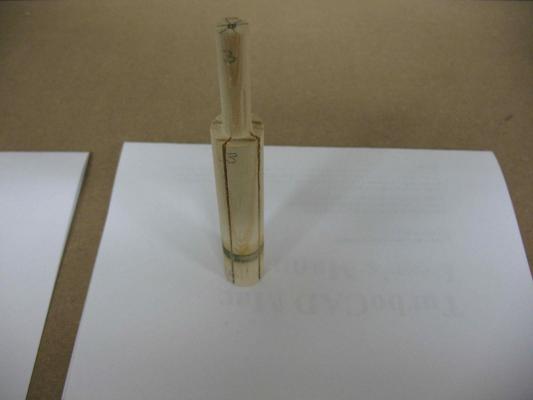
Here is the new setup running on the lathe. The cutting tool is lightly held agains the canister body to prevent it from turning. In this picture the lathe is actually running, with the drive shaft turning within the canister.
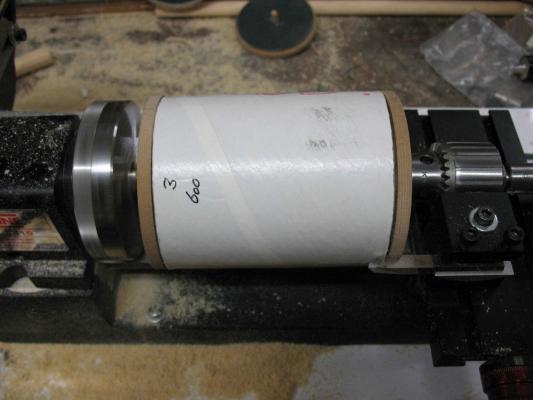
Functional Test No. 2
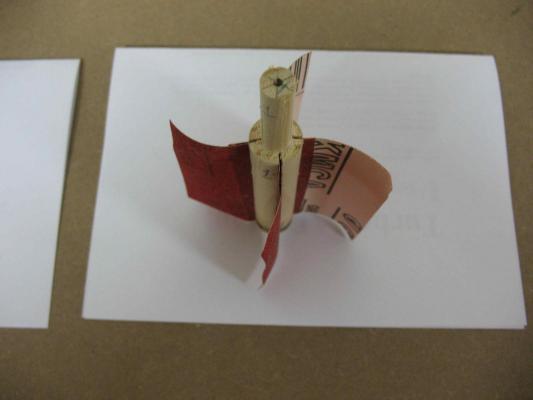
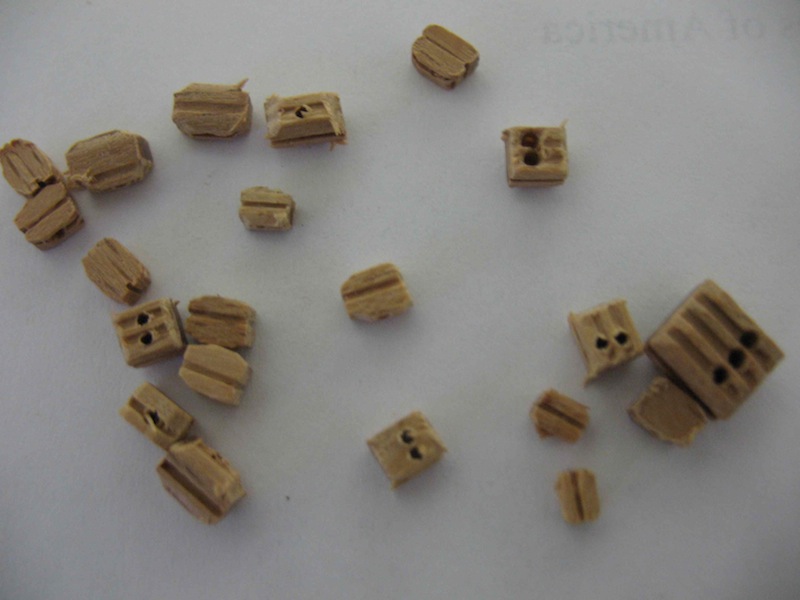
The functional test on the new design worked perfectly. To further the testing, a selection of kit blocks was put through a short spin in each of the grades of sandpaper. To begin with, this is how the blocks look “as provided” in the kit:
It’s pretty obvious from this picture why a block tumbler is needed. Up until now, I have been individually hand sanding all blocks prior to use - a very tedious process!
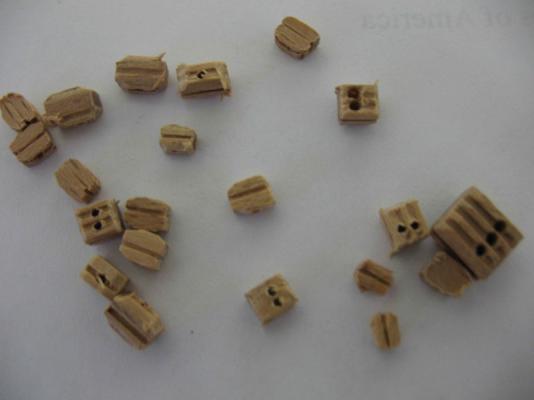
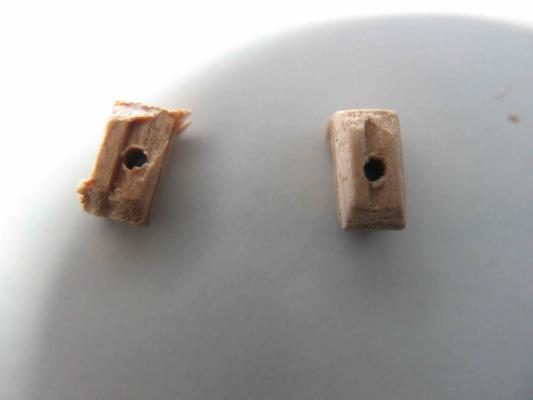
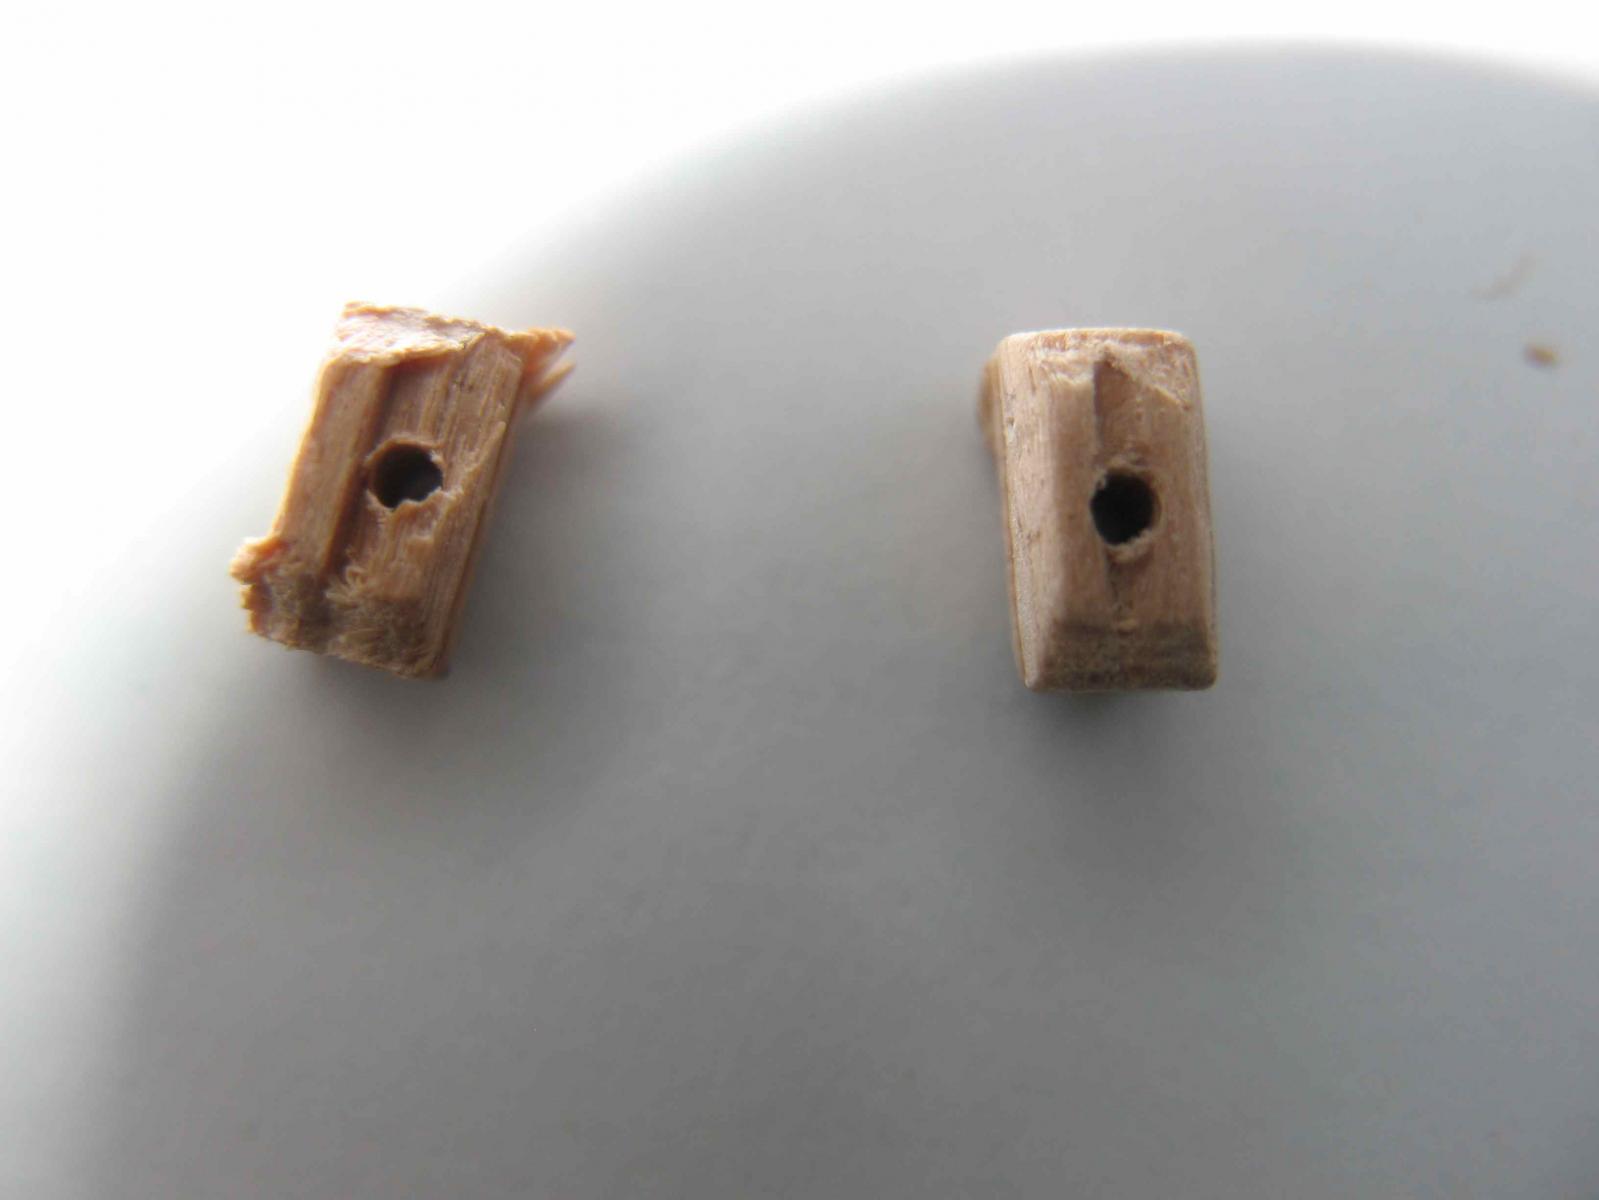
Here’s a comparison of an untreated block (on the left) with one that has had a very short tumble.
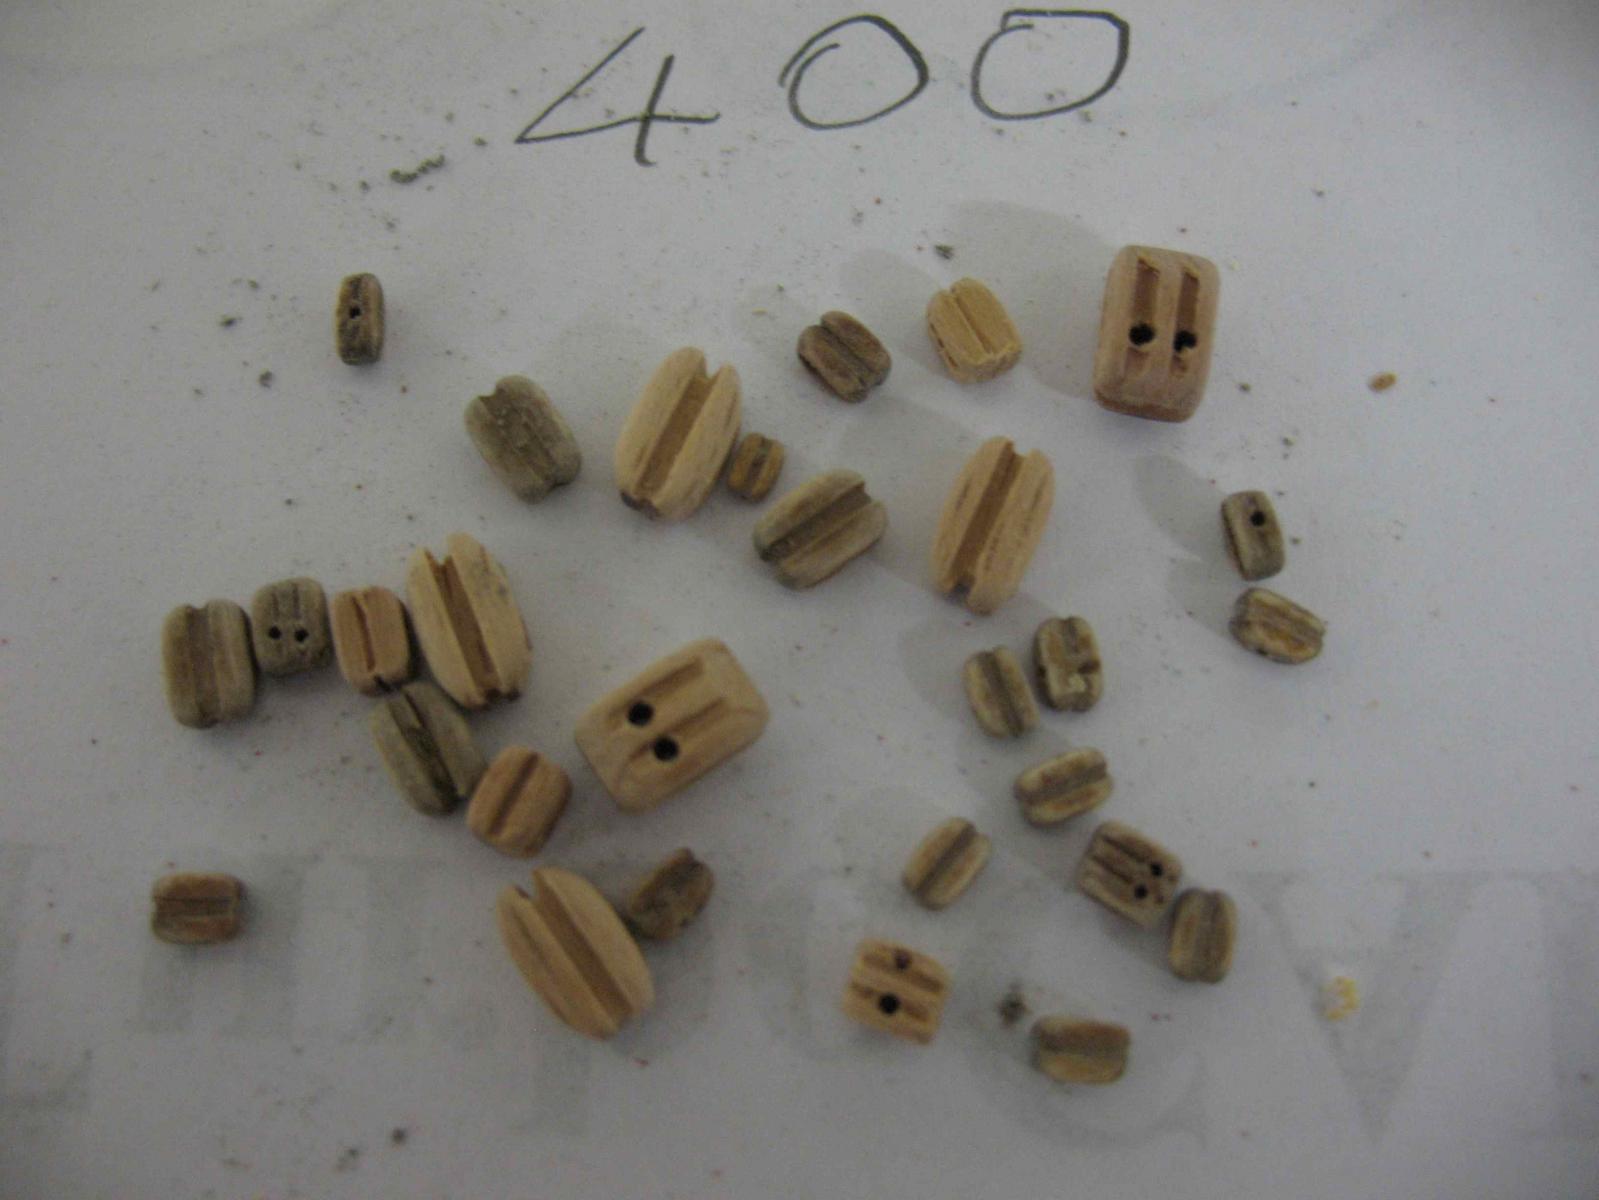
I then proceeded to a larger test with a range of block sizes. Time spent in the tumbler was very short for these tests - no more than 2 minutes in each grade of sandpaper.
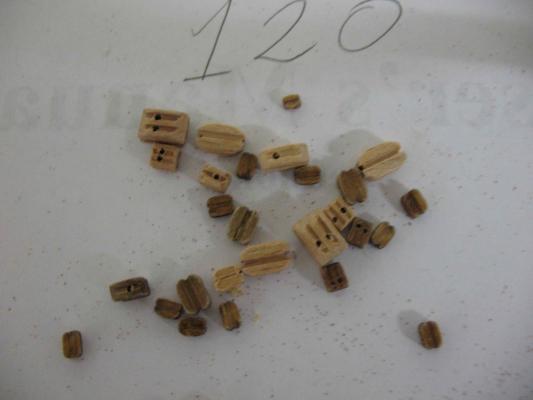
After Tumbling in 120 grit:
The same blocks after then Tumbling in 400 grit:

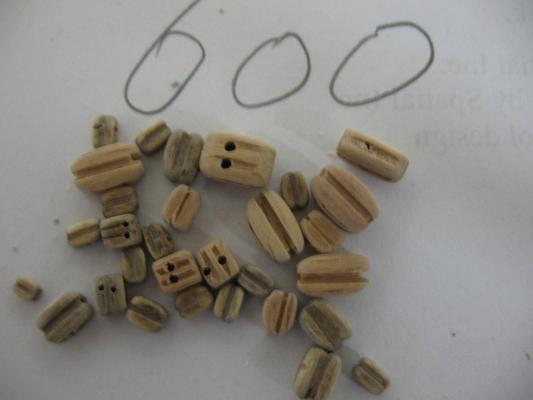
And after then Tumbling in 600 grit:
So just for comparison let’s look at a “before” and “after” shot side by side:
I think this proves the concept. Even better results should be achievable with a longer duration in the Tumbler. Finishing with 600 grit does seem to produce quite a nice end result that is ready to use.
Reflections / Observations
The Tumbler works well and is relatively simple to construct. If I were doing it again, I would reduce the size of the canister considerably. This canister I made is 100mm long with a diameter of about 85mm. I think a canister length of 50 mm, with a diameter of 50 mm would probably be quite larger enough for the purpose.
The drive shaft is key. It must be a single piece that runs through the top end-cap. Boring a 6.5mm hole in the tail end allows it to be located on a 6mm dowell spigot through the tail end cap. This both supports the end of the drive shaft and allows it to spin freely. The outer end of the tail end cap spigot is held in the lathe tail-stock chuck.
The whole assembly could be modified for hand held use. To do that, cut the tail stock spigot off flush with the outer end of the tail end cap. Then make and attach a “winding handle” to the drive shaft.
Happy Tumbling. May all your blocks be smooth!
- CaptainSteve, GTM, Mirabell61 and 1 other
-
 4
4


HMS Victory by EdT - FINISHED - 1:96 - POB
in - Build logs for subjects built 1751 - 1800
Posted
Ed,
Thanks for posting the extra information on making scrapers - both timely and very useful! Your description of making blocks, while a variation on a common theme, is still the best, most instructive, description I have read (and I've read a few!!!). Thank you.