Ian_Grant
-
Posts
2,156 -
Joined
-
Last visited
Content Type
Profiles
Forums
Gallery
Events
Everything posted by Ian_Grant
-
 An elegant hull, elegantly planked. Great work!
 -
Yes we have one nearby, called "McBead Creations". I first found them when I needed to make parrals for my Heller Victory. Worryingly, they recently went from two units to one unit in their building.
- 235 replies
-
- 4
-

-
- Banshee II
- Bottle
- (and 1 more)
-
Very interesting Keith; smallest I can find locally is 18/0 which is pretty tiny itself. \i planned to use beads instead of actual blocks higher in the rigging of Preussen, when I get back to it. And Glen, your Banshee is impeccable.
- 235 replies
-
- 5
-
-

-
- Banshee II
- Bottle
- (and 1 more)
-
Nice work! Yes, they're at 90 degrees, same as a steam locomotive. That way one or the other is near the top or the bottom of their cycle and can be pushed or pulled to keep the wheel turning.
-
But with sails raised, they wouldn't have the engine(s) active because of the fire danger! Right, Glen? 😉🤙 Seriously, she looks fantastic! I'm taking notes for my coming attempt at sails for my galley. "Kindergarten-level sewing skills".....LOL !!
- 235 replies
-
- 5
-
-
-
- Banshee II
- Bottle
- (and 1 more)
-
She is looking great! I set up the standing rigging on my Preussen from aft forward for the same reason. By the way, to add to your story about her foundering under Capt Sven, I read somewhere in my books that Mr Erikson was furious and poor Sven ended up leaving the sea to farm sheep in South Africa. Or maybe it's an apocryphal story......
-
From what I am reading now, Viper ESC quality seemed to decrease a few years ago and many people switched to MACK, which is what you bought originally. There's no way all four ESC's are bad; it's something else. By the way, I PM'ed you to say that the MACK spec sheet lists up to 12-cell NiMH so they should be ok with what you have.
-
Bruce, not to deluge you with messages and confuse you; I an not satisfied with input received about ESC input voltages so I have sent a query to the horse's mouth, Mtroniks, themselves. Response TBD.
-
Bruce, One further idea worth trying: return the Transmitter to factory settings to reverse anything you may have programmed that could lead to problems. Don't see anything about this in the manual, but googling it results in the following two pieces of advice. "Power on the TX, then simultaneously turn the wheel right and press the BACK button. This will clear all model memories." "Press the BACK and END buttons simultaneously for three seconds. This will reset the GT3B" You're welcome for my "help" such as it has been. The engineer in me wants to solve problems. Did you try powering from one battery pack?
-
Michael, 1) Your gammoning, indeed all your rigging, is phenomenal; is the rope from Syren or do you make it? 2) I've never seen bowsprit shrouds like that; interesting! 3) I'd swear this is a wood model. Excellent painting! 4) Just in passing, do the fore tacks not pass through sheaves in the bottom of the stem beneath, say, the shrouds? 5) From time to time I peek at my SoS in my stash, just to remind myself of the scale you're working at. Five stars! 6) I see a nice jointer in the background. Is there a table saw somewhere out of the picture?
- 324 replies
-
- 4
-
-
- Sovereign of the Seas
- Airfix
- (and 1 more)
-
Bruce That looks correct. In other news, I must apologize for my Viper recommendation. Although the datasheet says NiMH and NiCAD can be used, it is really designed for lead-acid batteries. I got the following feedback from Harbour Models: --------------------------------------------------------------------------------------------------------------------------------------------- Hi Ian, The Viper line of speed controls are only compatible with SLA (sealed lead acid) batteries and can handle the extra voltage when fully charged. The ViperHV line can handle 12-24V and is compatible with SLA, LiPO, NiMH, NiCad. The TIO line is made for 6-12V for use with LiPO, NiMH, NiCad. - This is the line you should be using for the description of your battery described. Sincerely, Nick Jacalone Harbor Models 626 963 4591 ------------------------------------------------------------------------------------------------------------------------------------------------------------------------------------------- A couple of RC club members that use Vipers use them with gel-cell lead-acid batteries. I think it would be worth a quick test with one battery to see if we're barking up the right tree.
-
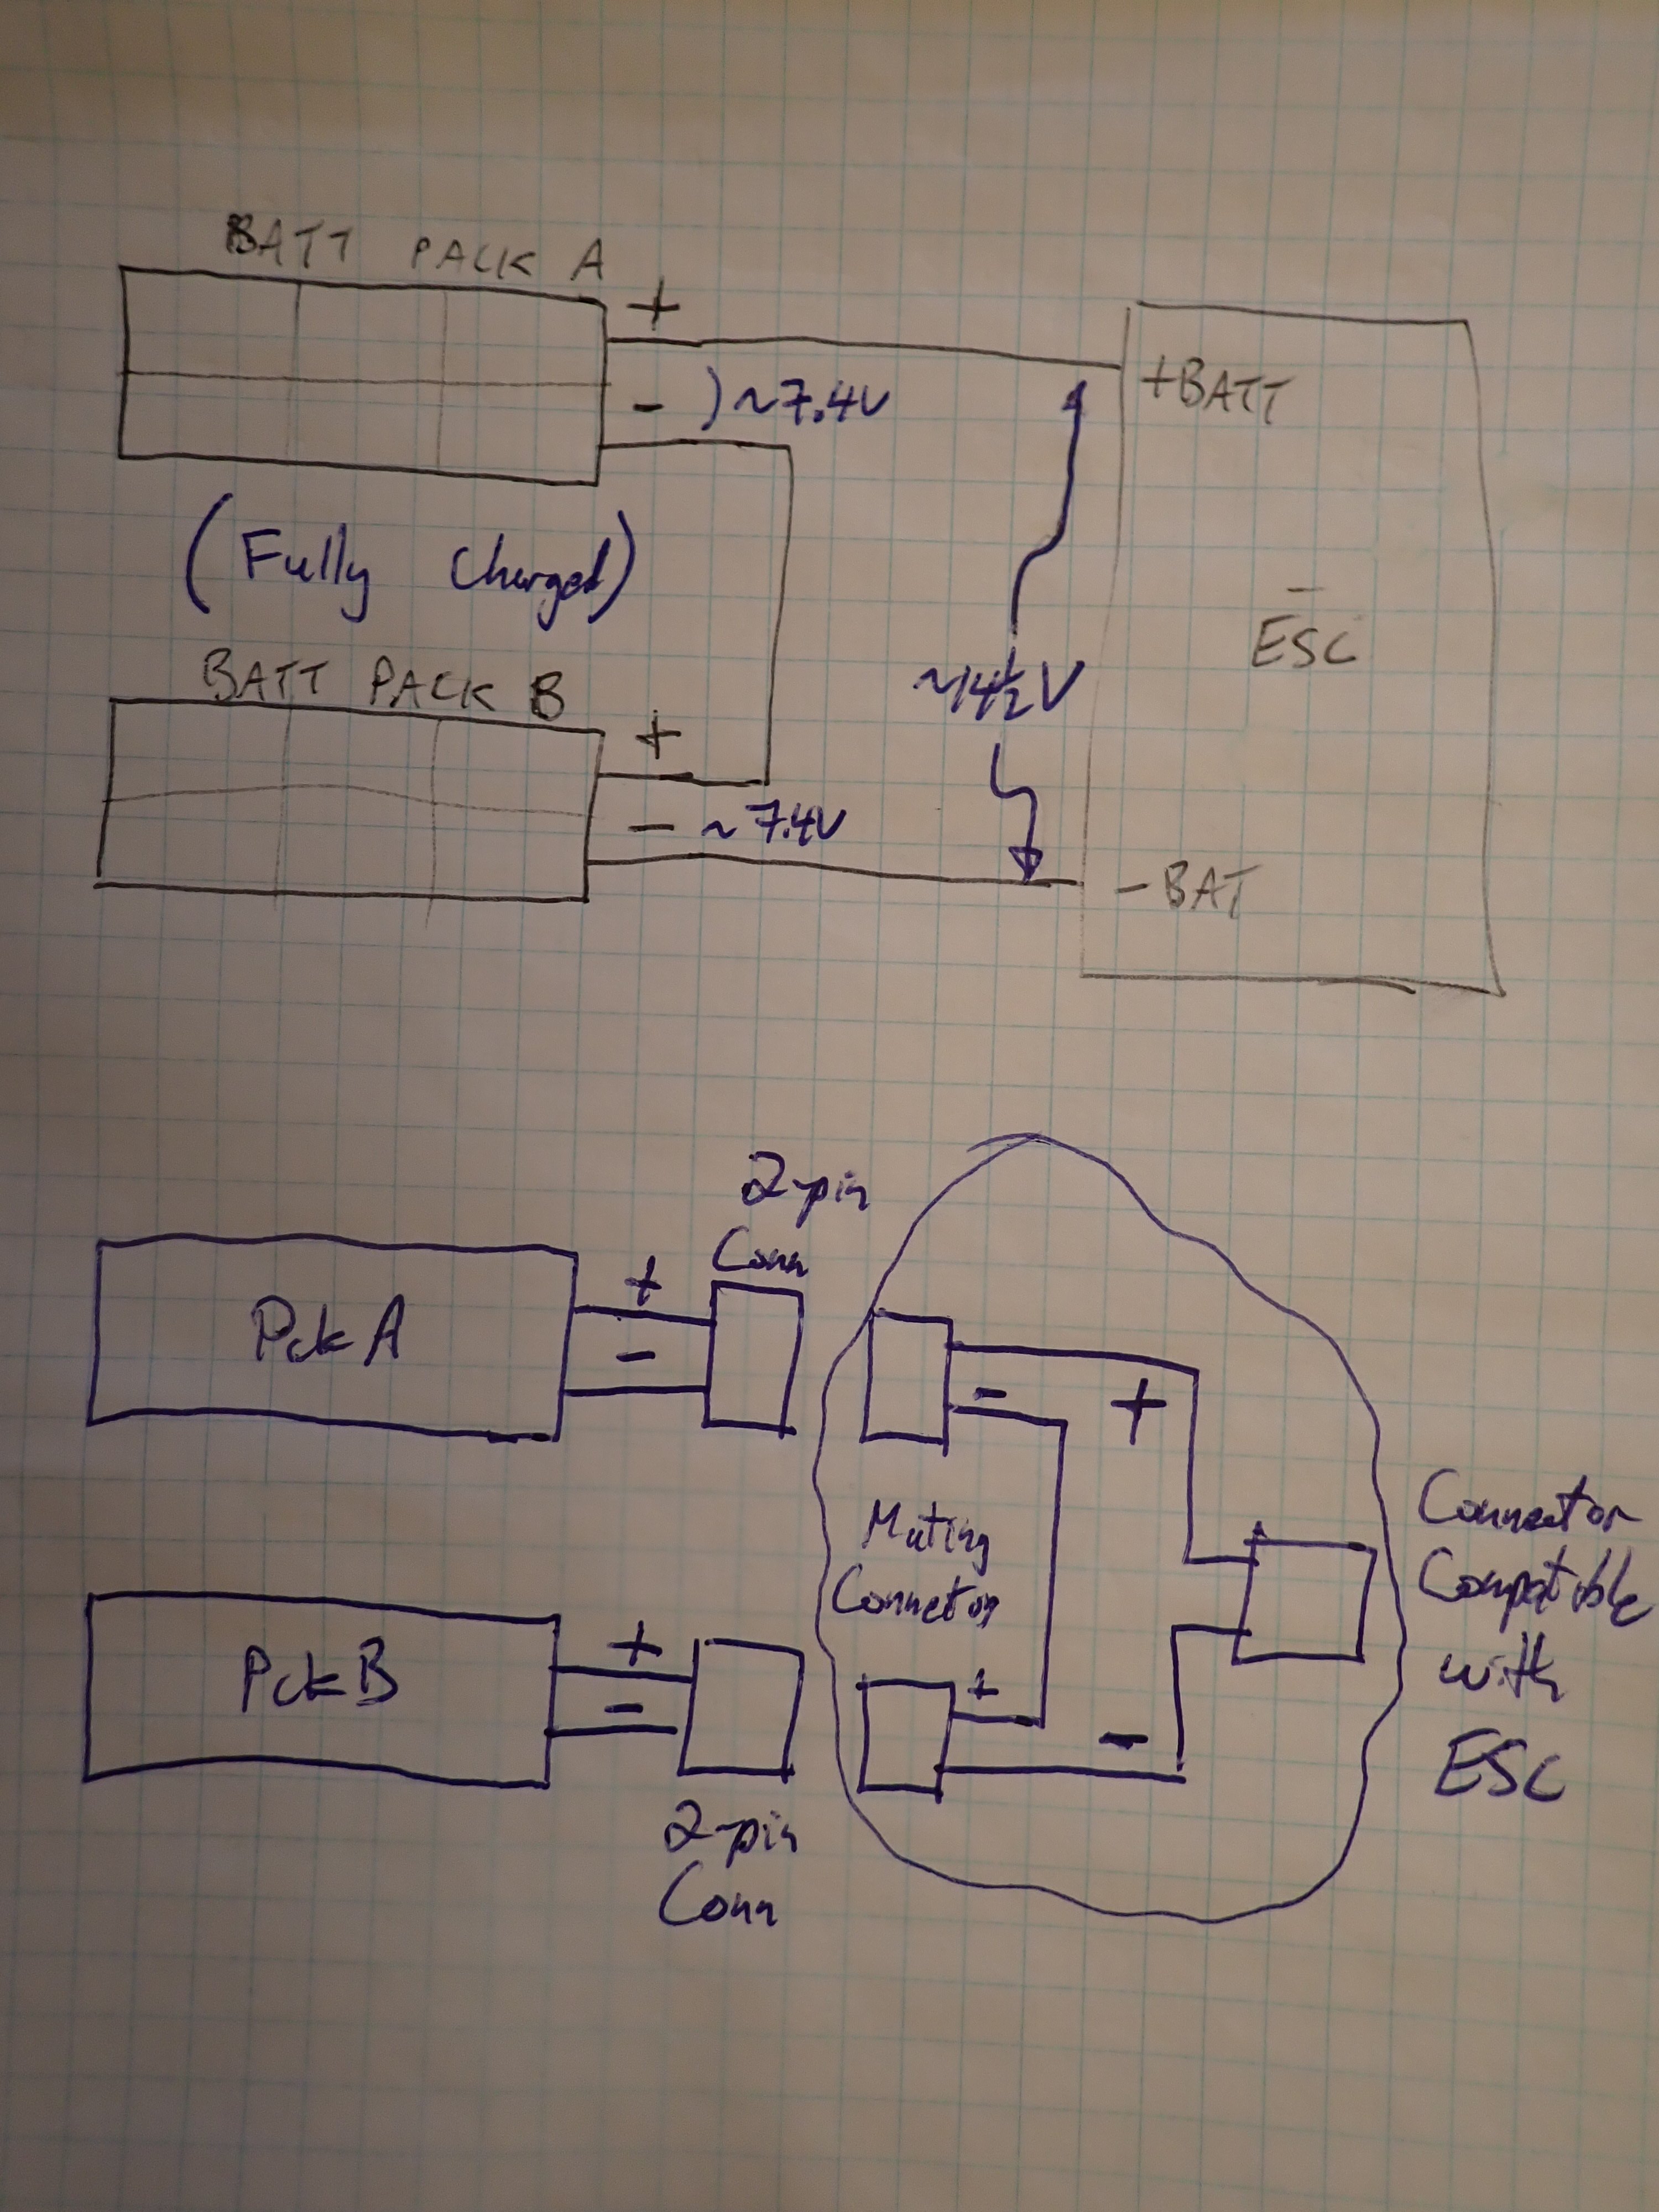
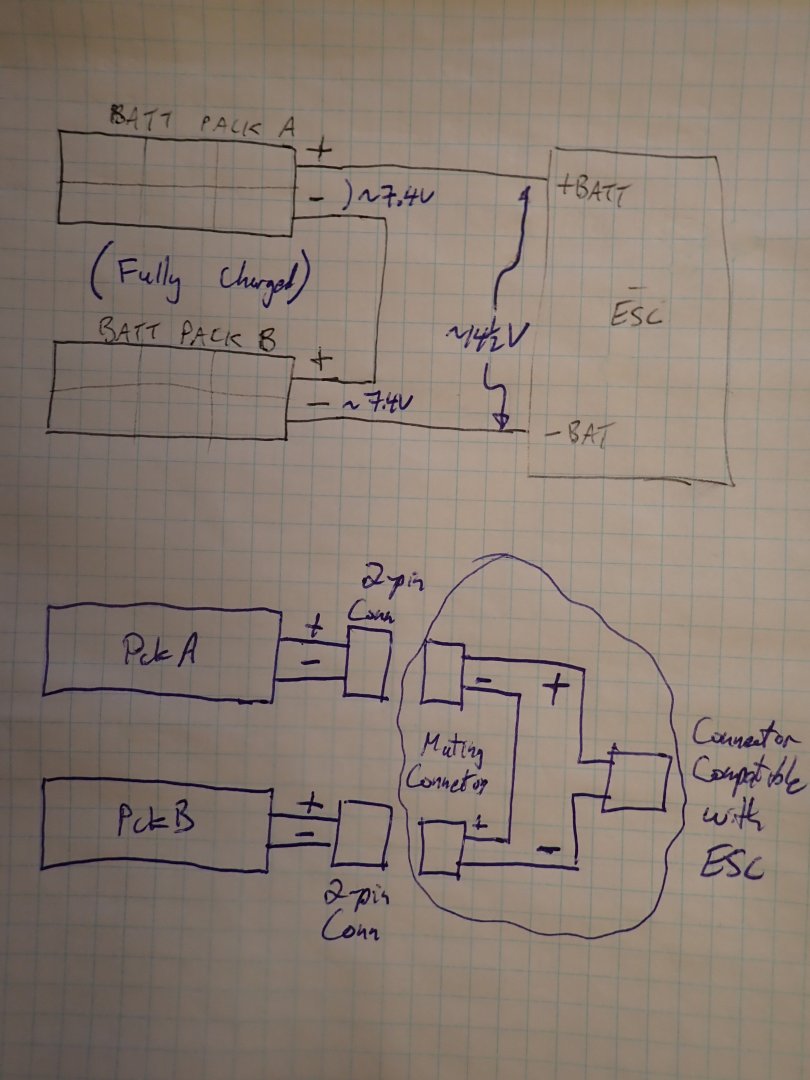
Bruce This makes me wonder how you are connecting your two batteries to ESC's. You want to have your batteries in series; I assume they each have a 2-pin connector? You need to have the +ve of one connected direct to the -ve of the other. The second pin on each connector should connect to the ESC. This would require some wire snipping and splicing, but you'll want to keep the 2-pin connectors on the battery leads whole for charging. Don't you need to make up a special harness to achieve this, or did Big Mack supply something? Here is a picture. Upper half shows the electrical connection you want. Lower half shows how to do it without cutting your battery wires - make up the harness circled. Do you have something like this?
-
No, it is not normal at all. It's going to be something silly. Can you take a photo of your wired connections out of the boat?
-
Bob, Looking way back in your post #7, your original ESC model can be powered by 6-12 cell NiMH so the ESC input voltage (of those original ESCs, not the Viper, should not be a problem. I will let you know what I find out about the Viper. I've asked the guys in my RC club, and Harbour Models. Also, look at pg 19 of your GT3B manual "D/R Function". By any chance could you have set the channel 1 and 2 outputs to 0% ie no servo travel, while playing around with programming? The factory default is 100% which might explain why everything originally worked. ?? Similarly, pg 17 programs "end point adjustment" which if accidentally changed to 0% could also set servo travel to none.
-
Bruce, A brushed ESC should be able to run two identical brushed motors in parallel as long as their combined current draw is within ESC limits. I still think the Viper ESC is a better part than those others. Did you follow the Viper ESC's calibration procedure? (given in the manual) Place voltmeter probes across the PWR/GND pins (centre pin and outer pin) of the Rcvr's BATT connector when the LED is on; do you read 6V supplied from the ESC? Your question about the 12V ESC range is interesting given that the NiMH packs will charge up to about 14.5V (hmmm). The ESC may be designed more for lead-acid batteries which are in fact 12V when charged. Try running with just one battery (6V) and see if it works. Meanwhile |I will do some more digging on this. Have you tried leaving the motors unconnected to see if the rudder works then? It bothers me that the ESC fan does not turn, unless it only runs when the ESC is getting warm, maybe? Again I urge you to try using a separate 6V battery to supply the Rcvr at the BATT terminal to see if the rudder then works. If so then pick one of your ESCs, cut the power wire on its Rcvr link, connect the motors, or just one motor at first if you like, and see if everything works now that RCVR supply is NOT the ESC.
-
Paddlewheels like that strike me as an ideal candidate for 3D printing. Then again I have 3D printing on the brain now. 🤪
-
....."next layer of piping"........Egad!!
-
Bob I wish I could help bit I have no idea why your rudder servo at least isn't working.
-
Thanks Keith. Hadn't heard of polycrylic before. Will read up on it and see if it's suitable outdoors by chance.
- 536 replies
-
- 3
-
-
- Quadrireme
- radio
- (and 1 more)
-
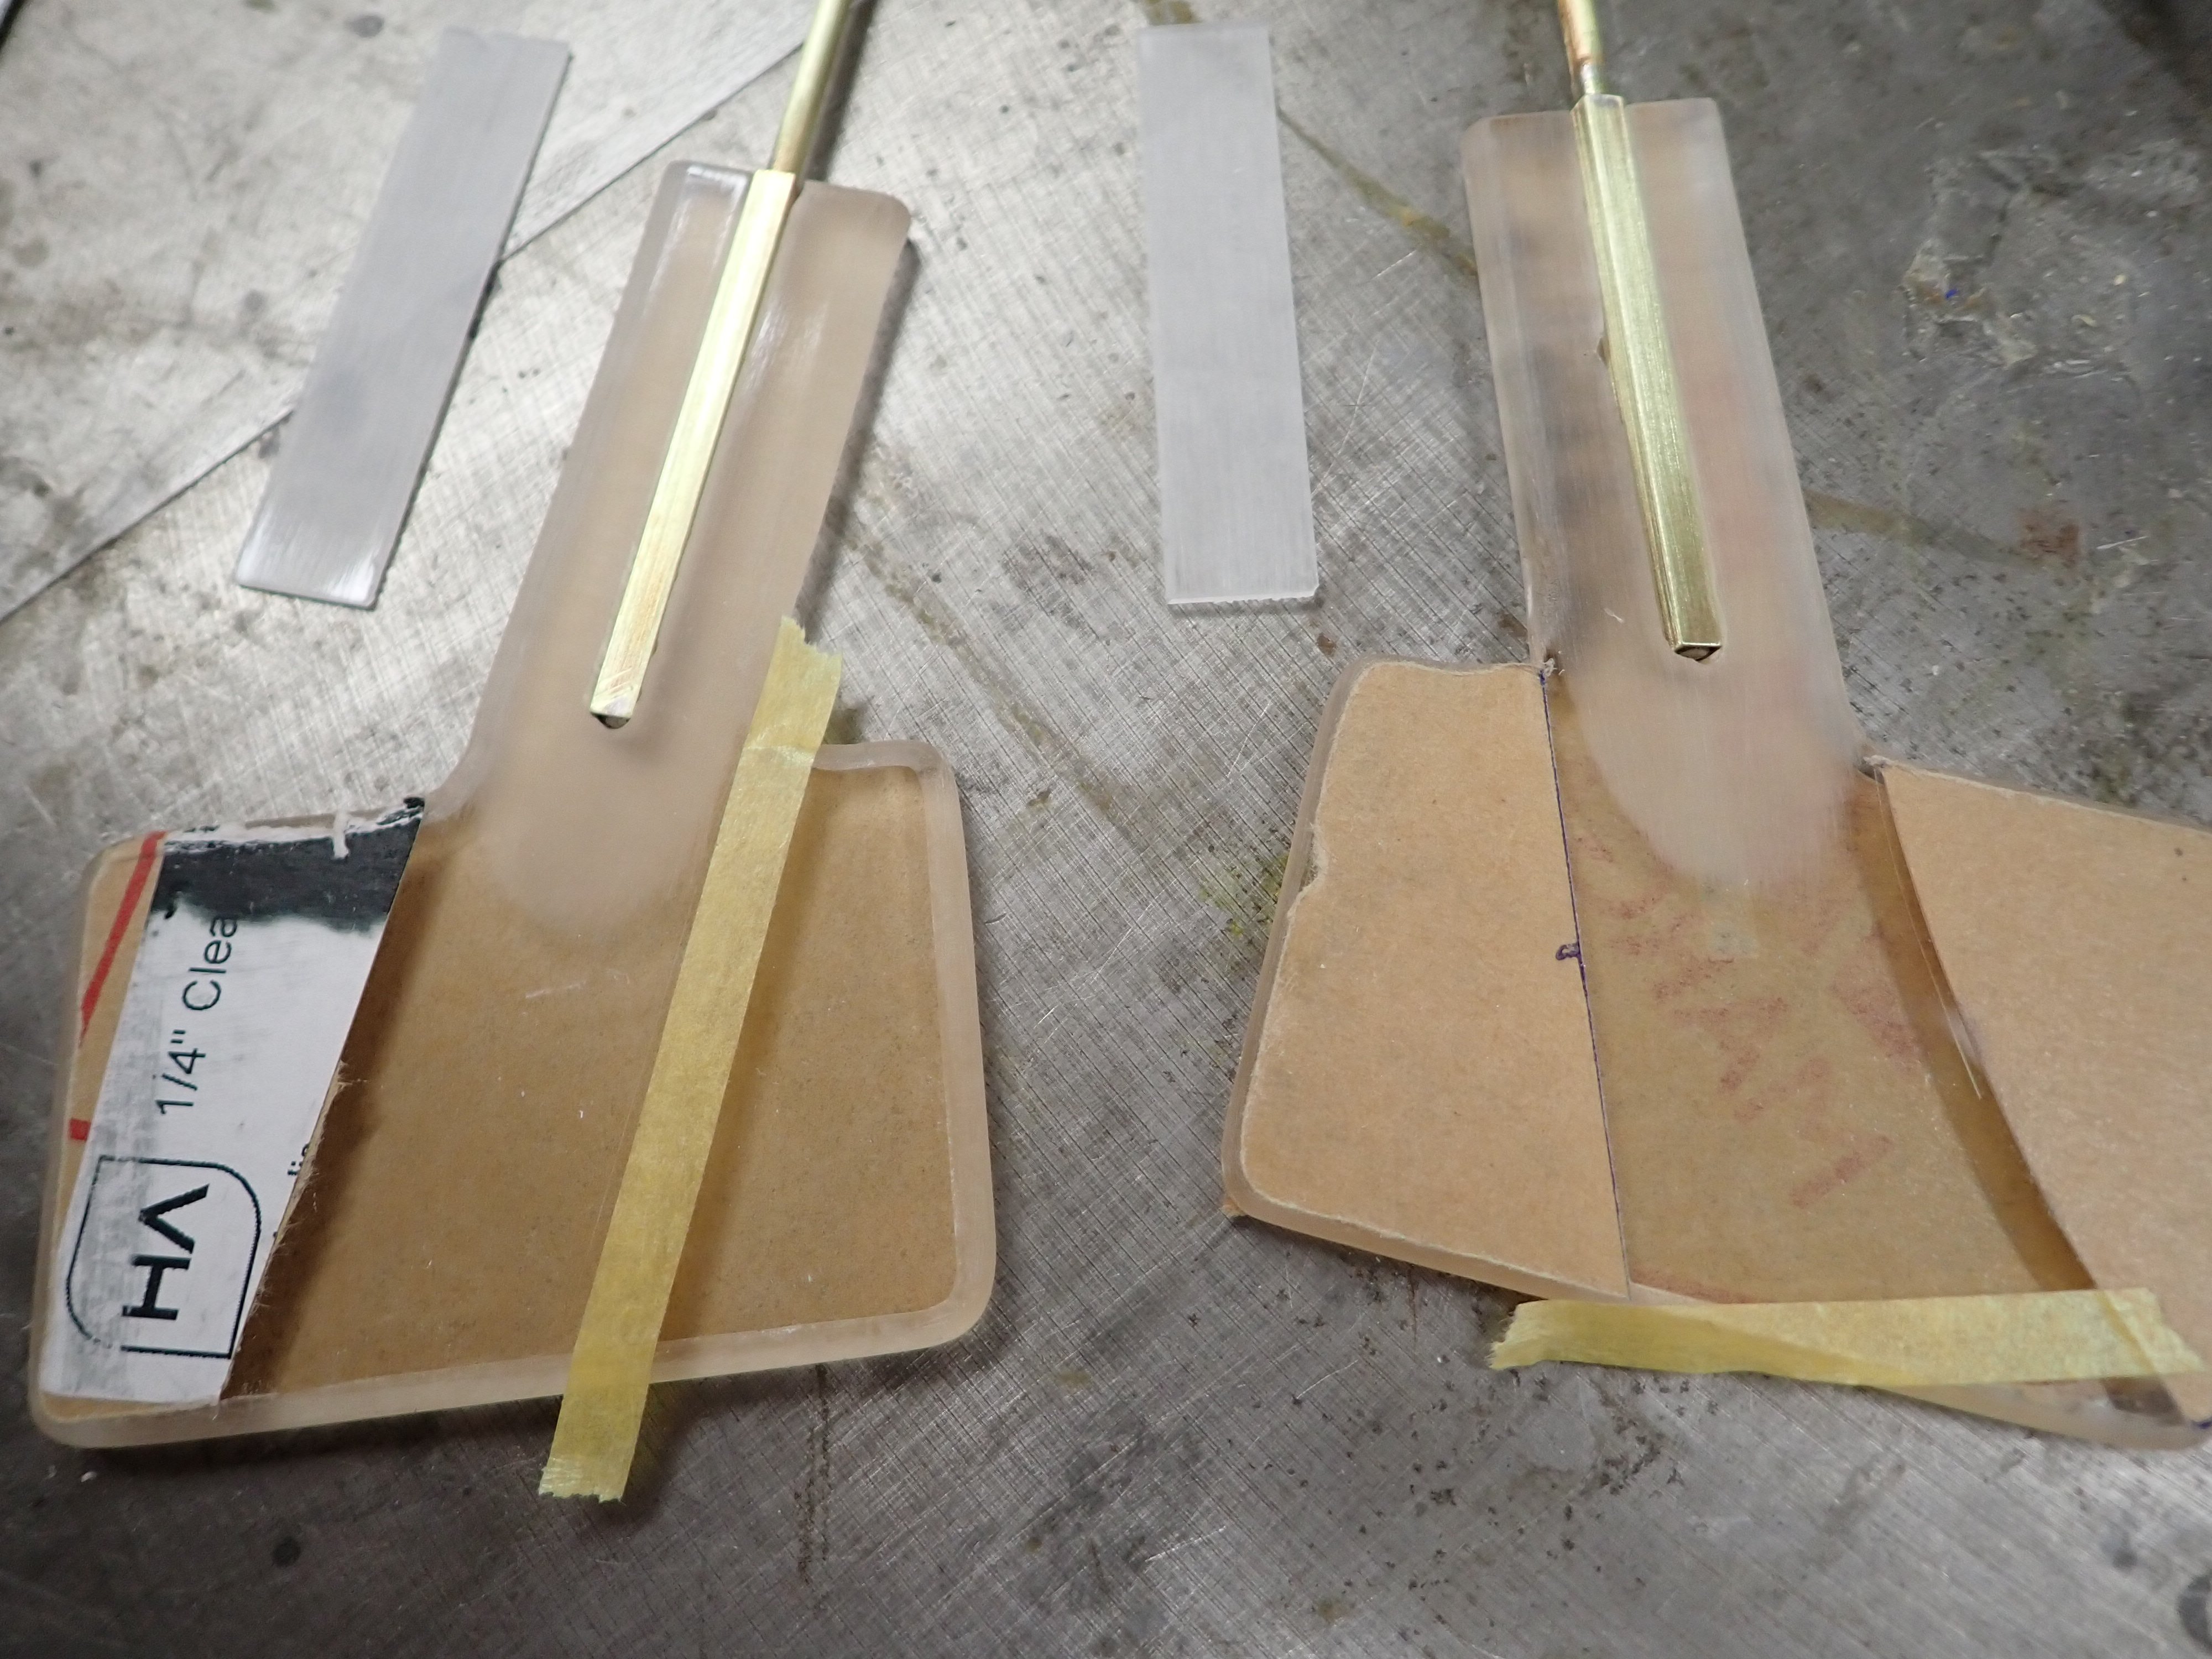
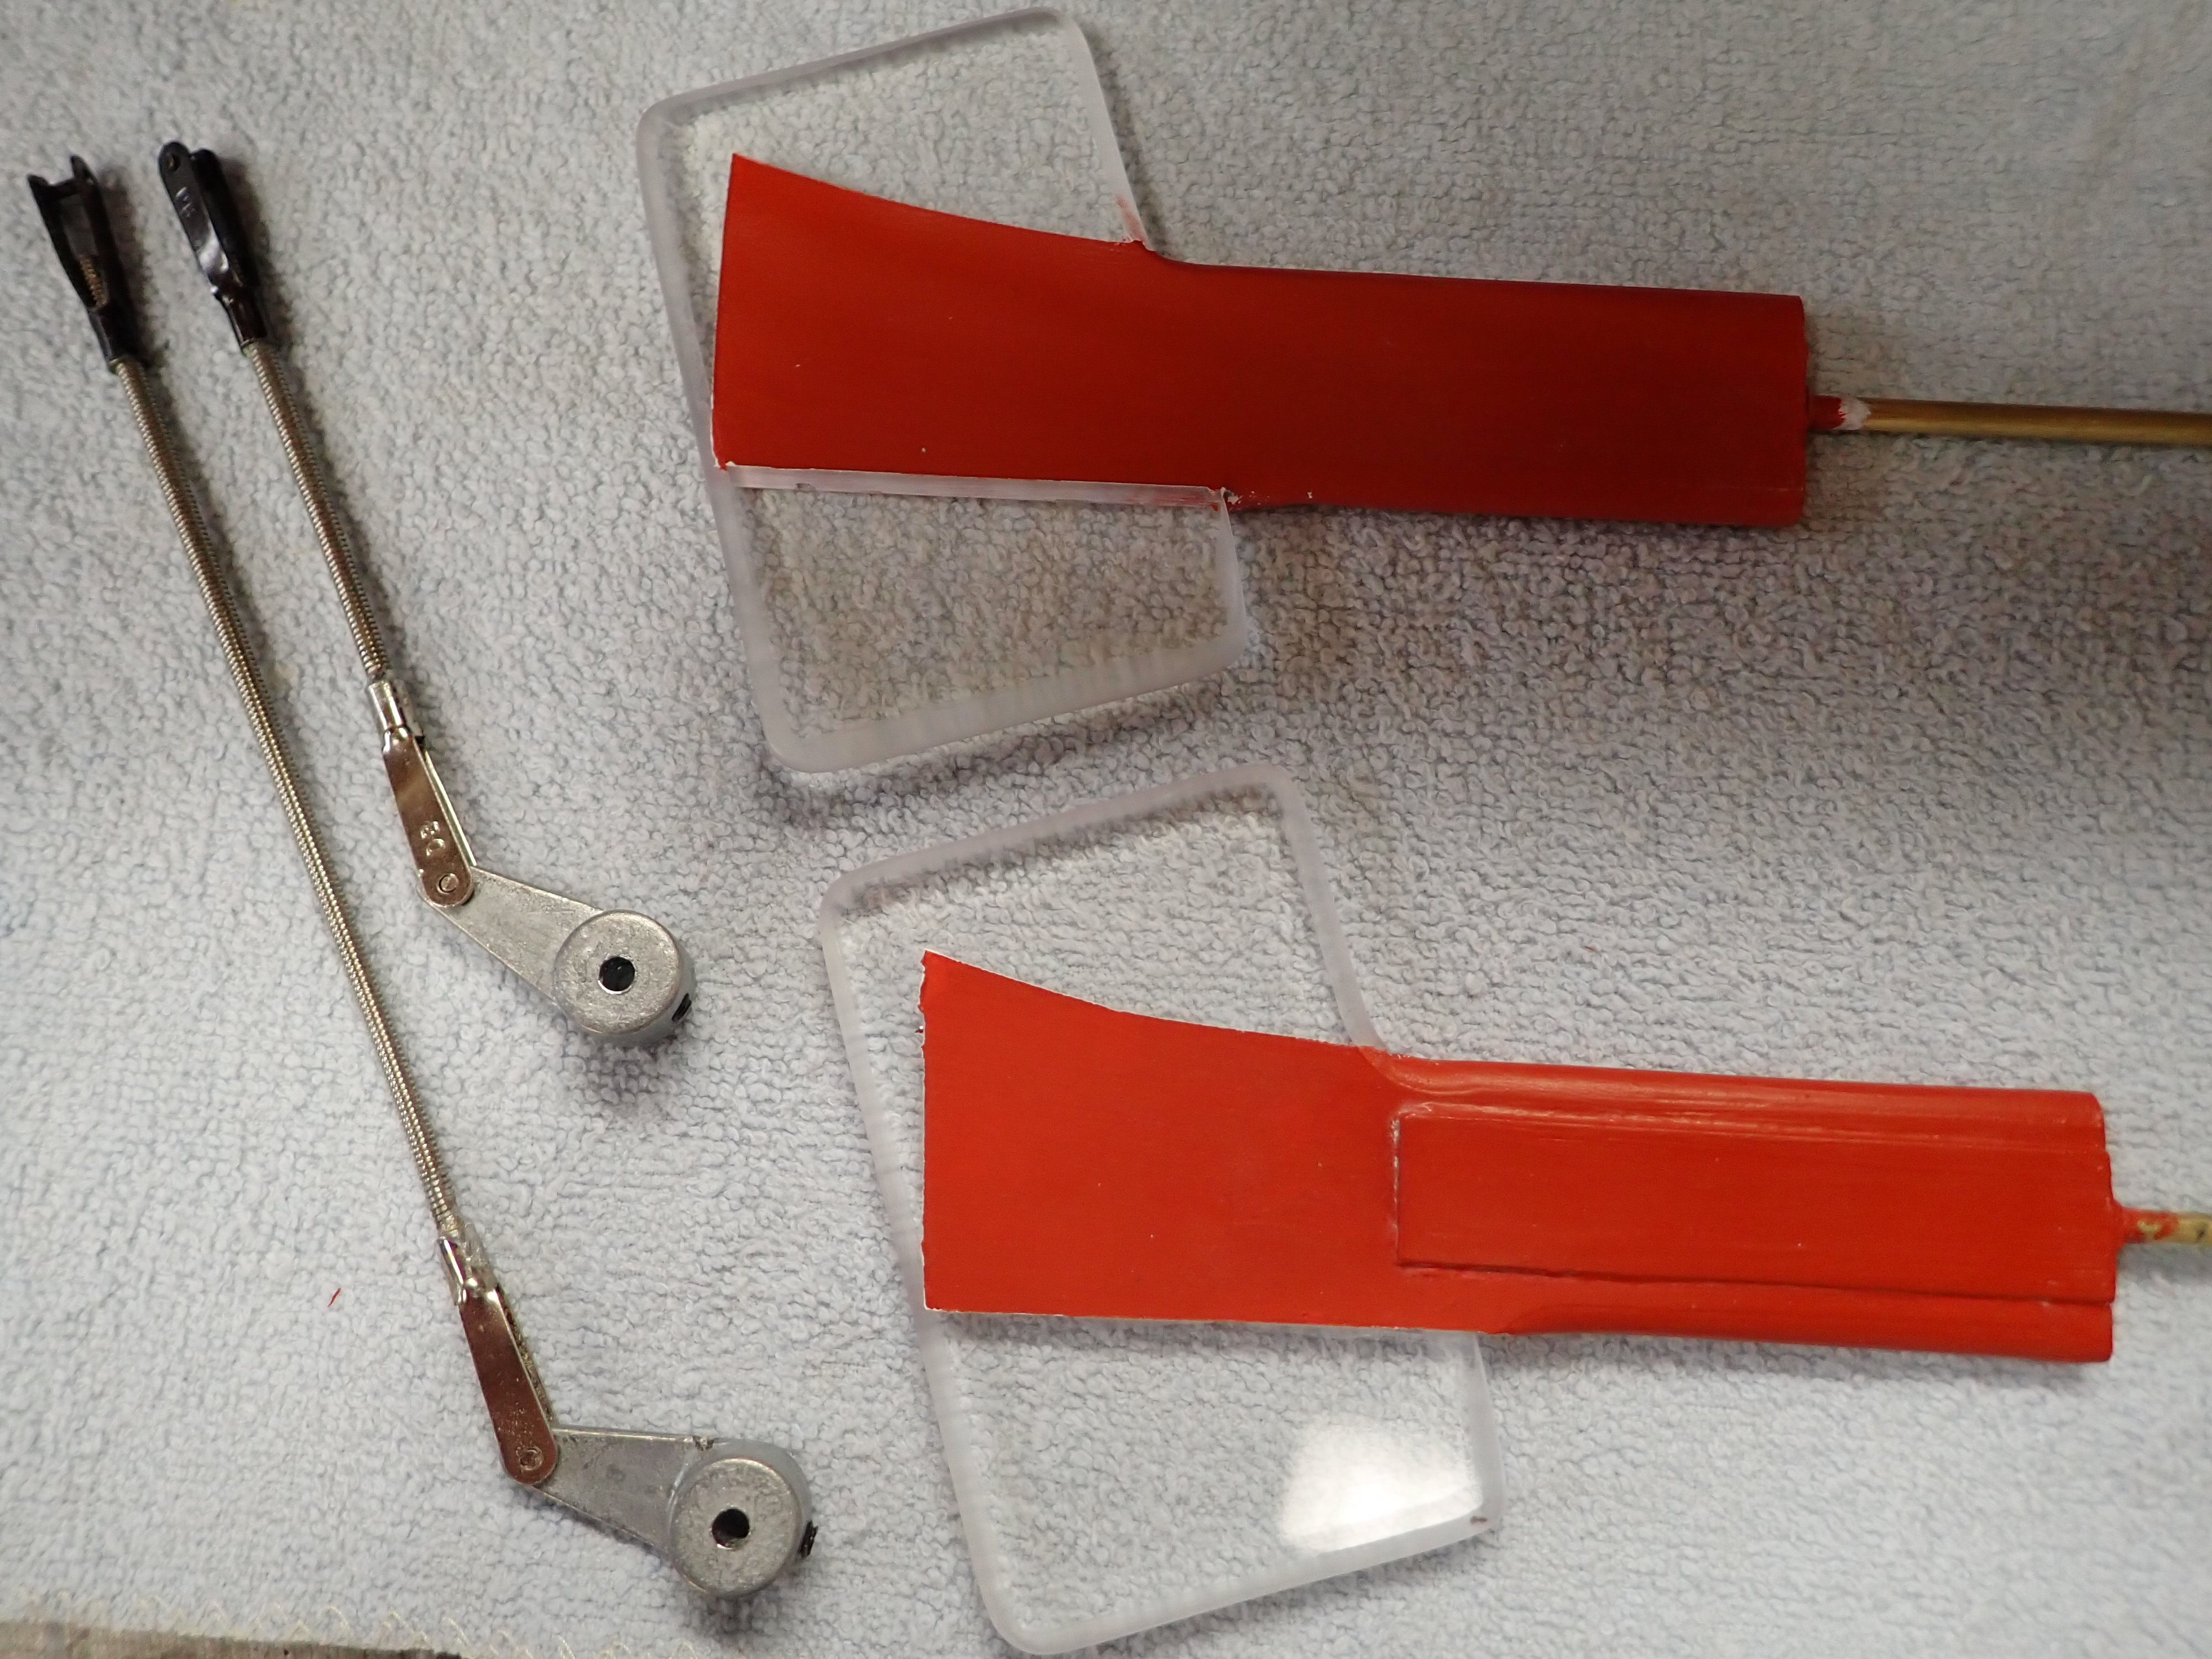
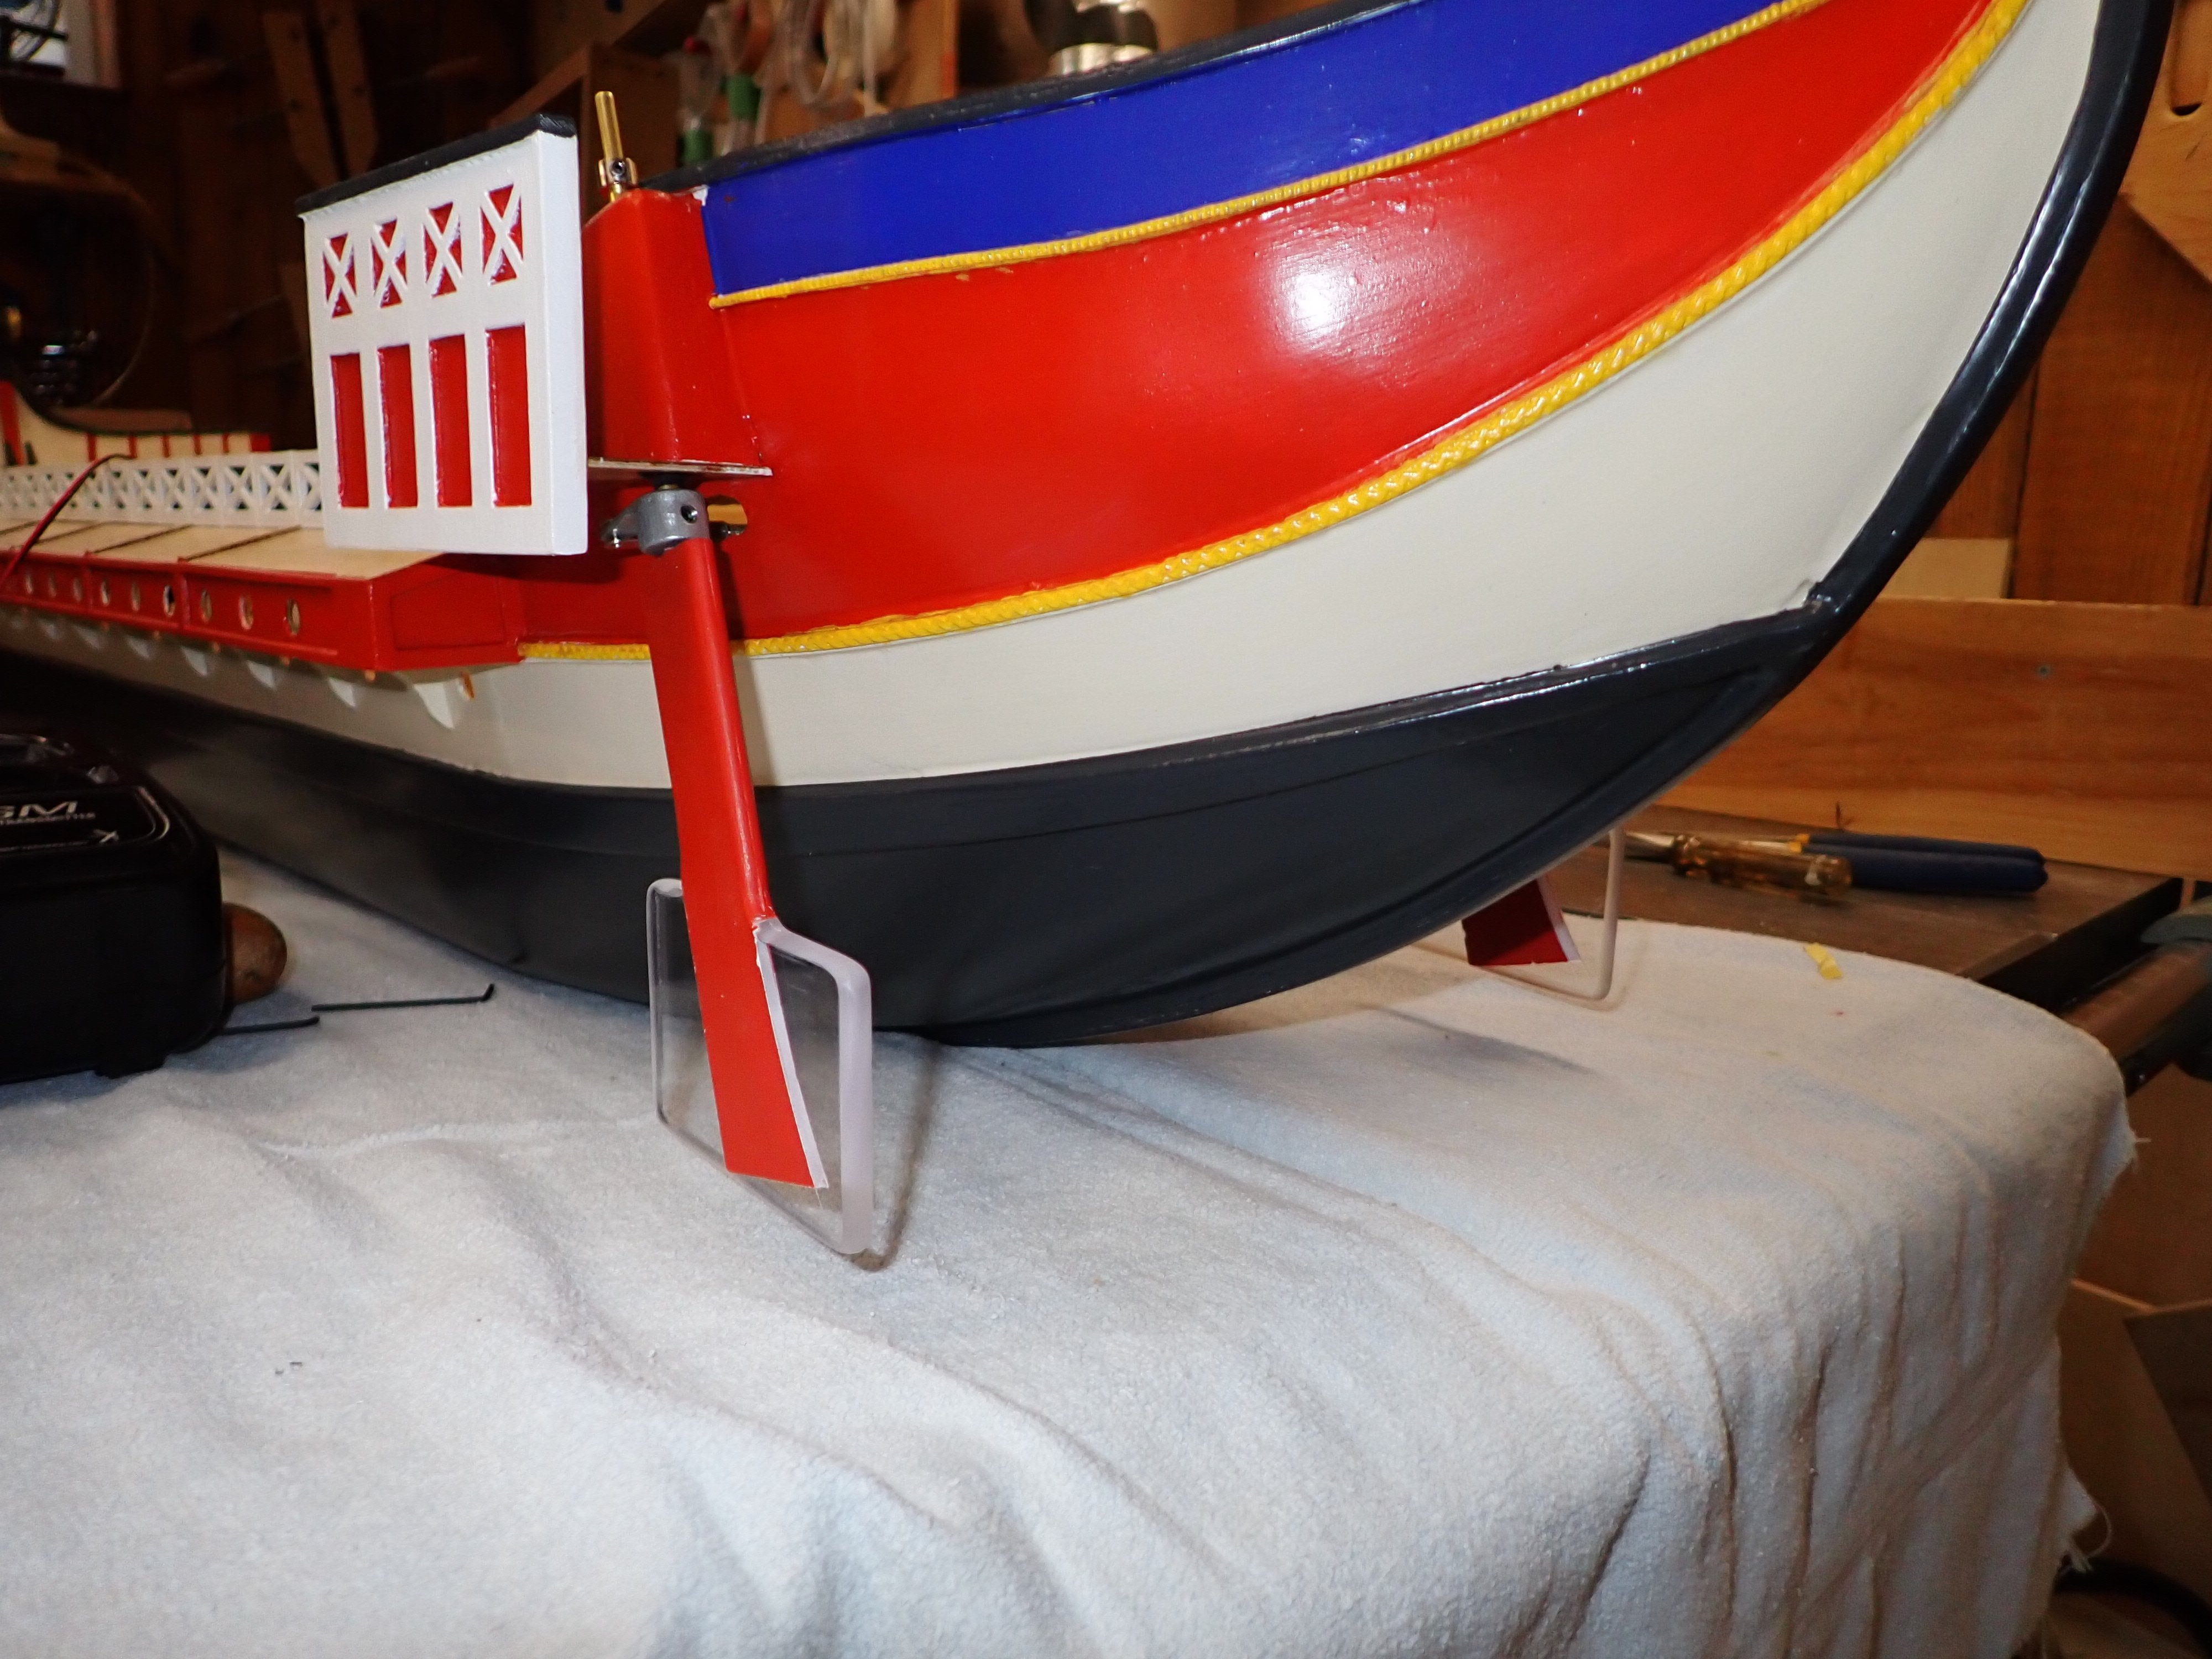
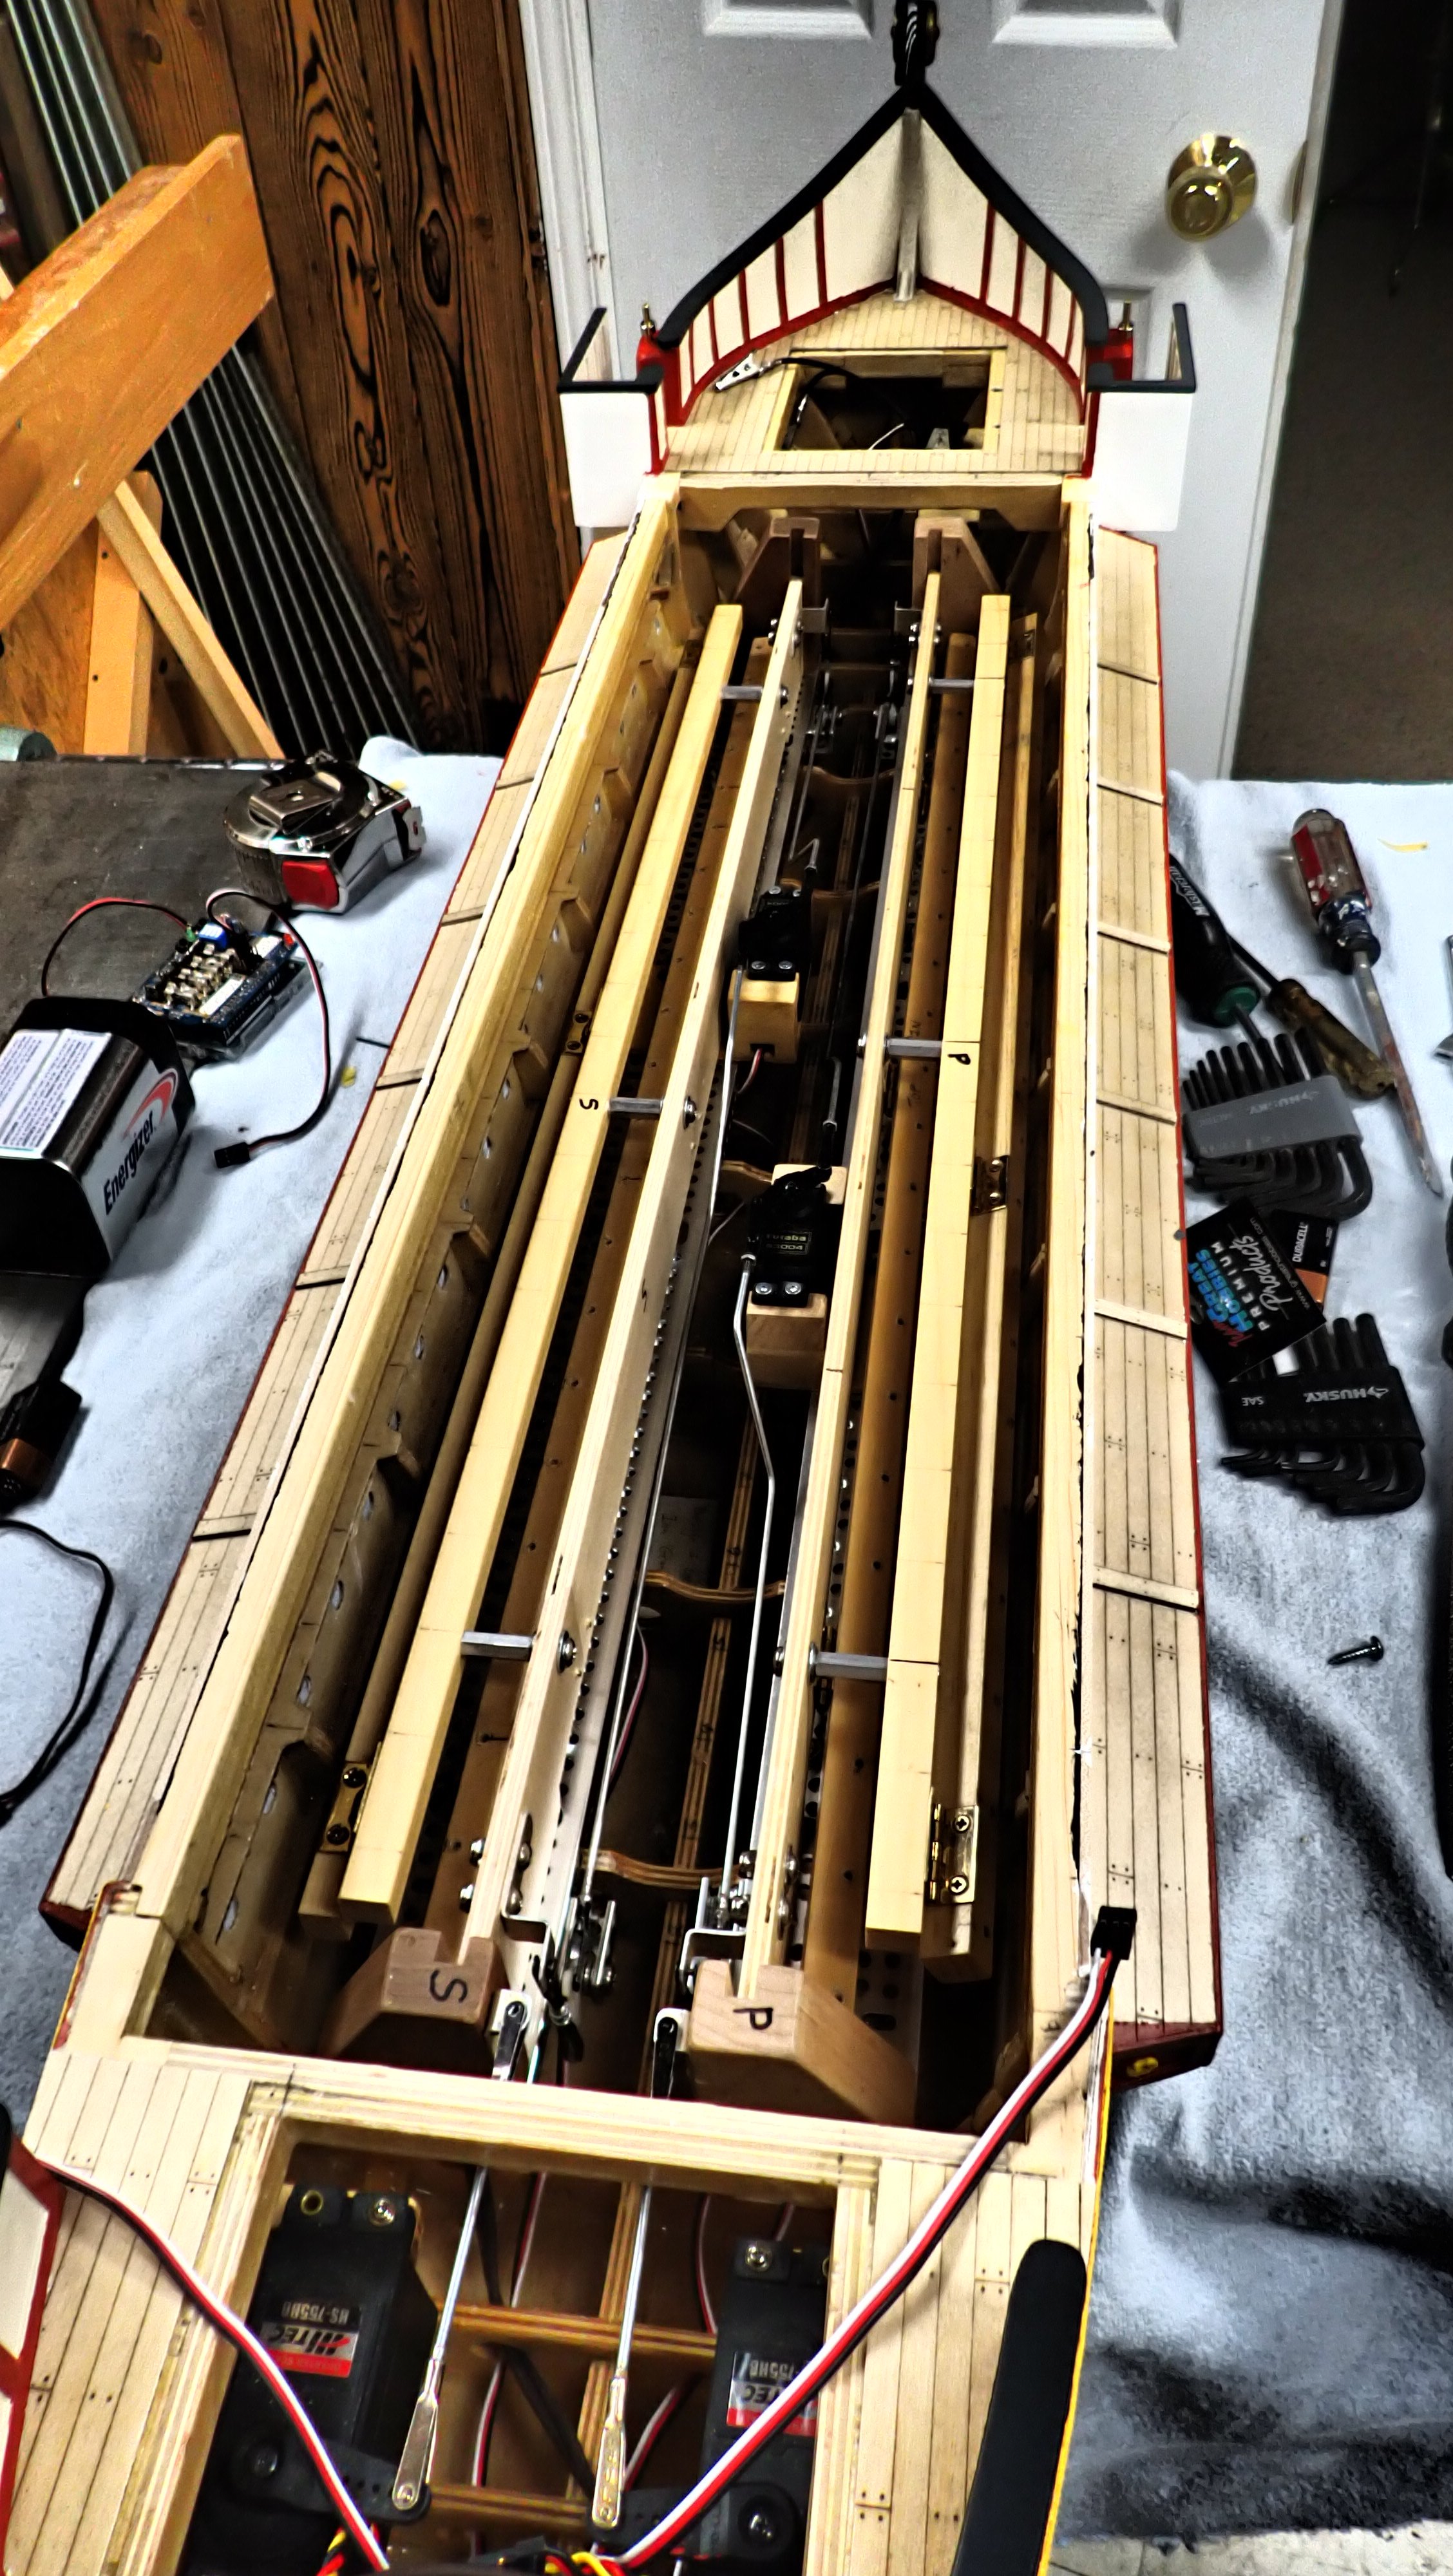
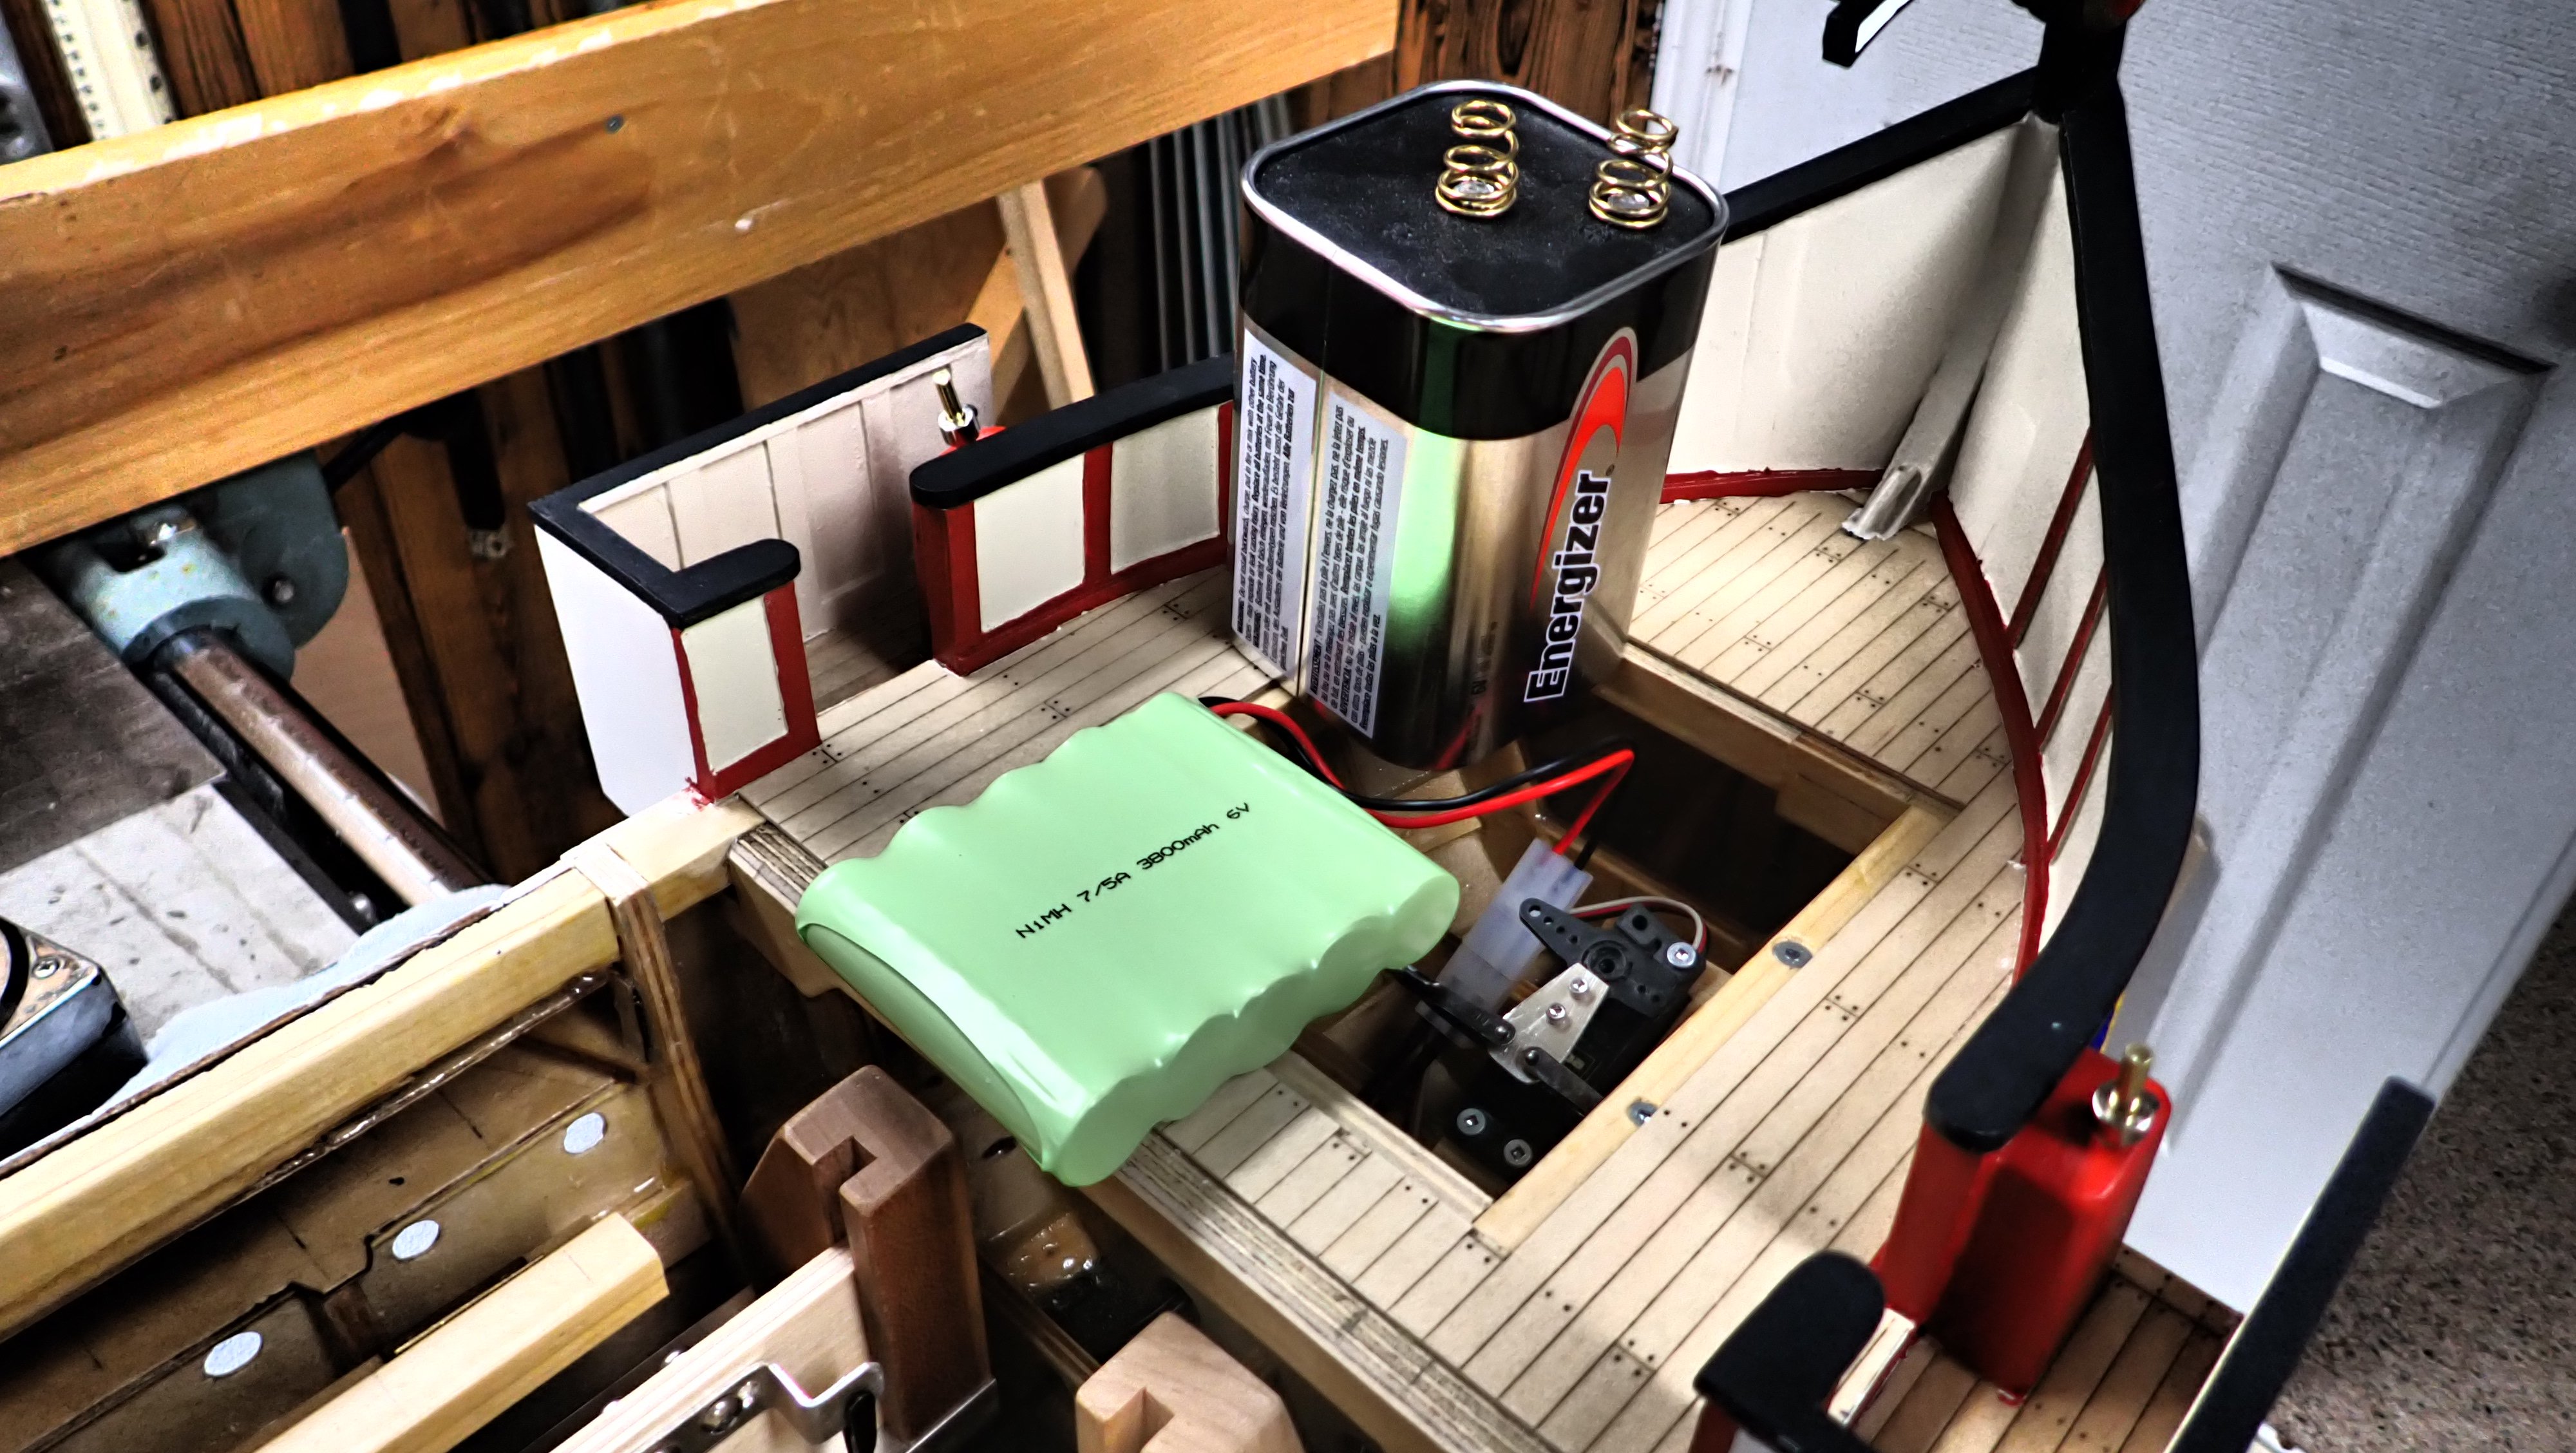
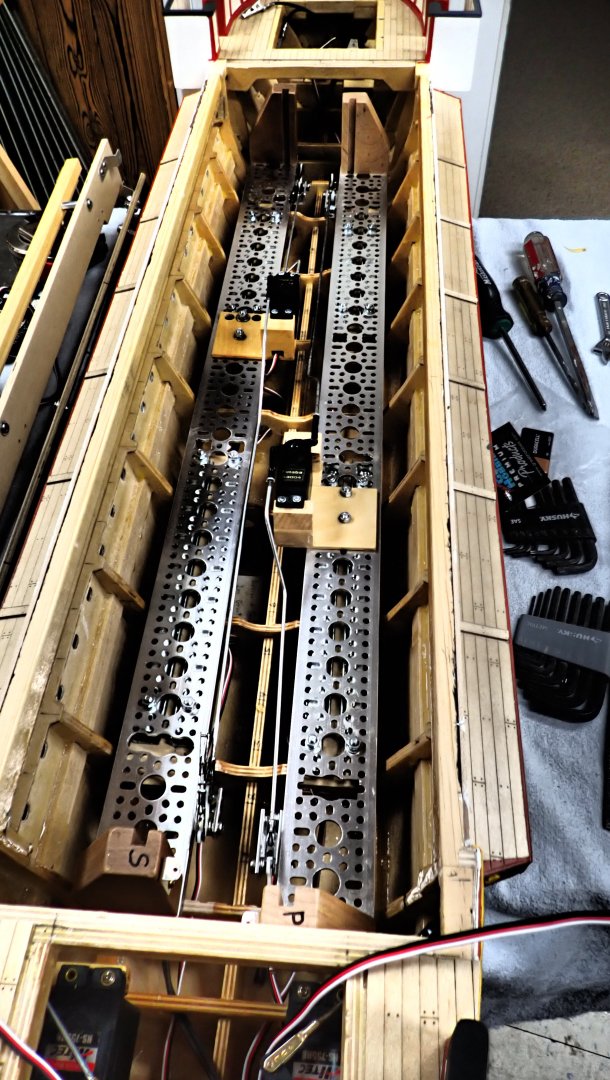
Routered a slot in each rudder blank for the square brass rudder post. This is a square tube into which a round rod is soldered; this rod passes through a brass tube at the steering platforms. Here is one left and one right rudder, with two little cover plates to be glued on. I roughed up the acrylic to give the glue some hook. Painted-on "scale" rudders and the linkages; they will be mounted with the cover plates on the inboard faces. I used "JB Weld" epoxy for the first time. Wow it really grabs stuff but it's a rather ugly dark grey when dry, not a worry here due to painting. I polished the acrylic cut edges down to 600 grit wet. We just pretend that the clear areas are not there. 🙂 Rudders mounted. By the way I clear-coated the hull paint in exterior UV satin finish. I could not find exterior in matt. I am thinking of applying an interior matt over that, above the waterline, and hoping that it will stick. A short video of the rudder action. P6270947.MOV Size comparison of the NiMH pack with the lantern battery. No contest. Then re-assemble the mechanisms. The sliding bases: The oar beams: After adding the oars I need to do a ballast test in the pool before taking her to the cottage tomorrow. It's supposed to rain all day Saturday so I will have more time to tweak it. Didn't have time to do much rigging, sadly. I will take the laptop too in case any software changes are needed. Video from on lake to follow............🤙👍


- 536 replies
-
- 13
-
-

-
- Quadrireme
- radio
- (and 1 more)
-
Glen, Banshee is truly beautiful......going to be a magnificent display when bottled.
- 235 replies
-
- 6
-
-
-
- Banshee II
- Bottle
- (and 1 more)
-
"mil"? Do you mean mAh? If so a 3300 can deliver 3.3A for one hour, or 1.0A for 3.3 hours; the 5000 can deliver 1.0A for five hours; in theory. In reality you can't drain all that stored energy out because you must not let a cell drop below about 1.0V to be safe. You can expect to get about 65% of the total stored energy. Battery size doesn't matter to the motors or the ESC, apart from the fact that the 3300 runs out more quickly, but it might to the charger. If you have a fast-charge type the 5000 mAh can tolerate a higher charge current. If it's a slow type it doesn't matter; the 5000 just takes longer to charge.
-
Looks like it. Harbour Models allows download of the ESC instructions, including the simple calibrate sequence to set up forward/reverse. They also mention blowing air over the cooling fins - it doesn't have a built-in fan like those others. First time run the motors for a few minutes and see if it's getting hot. The FET transistors they use have very low on-resistance so in theory they dissipate little power. If it is getting hot you might add a small external 12V fan also powered by the battery.
-
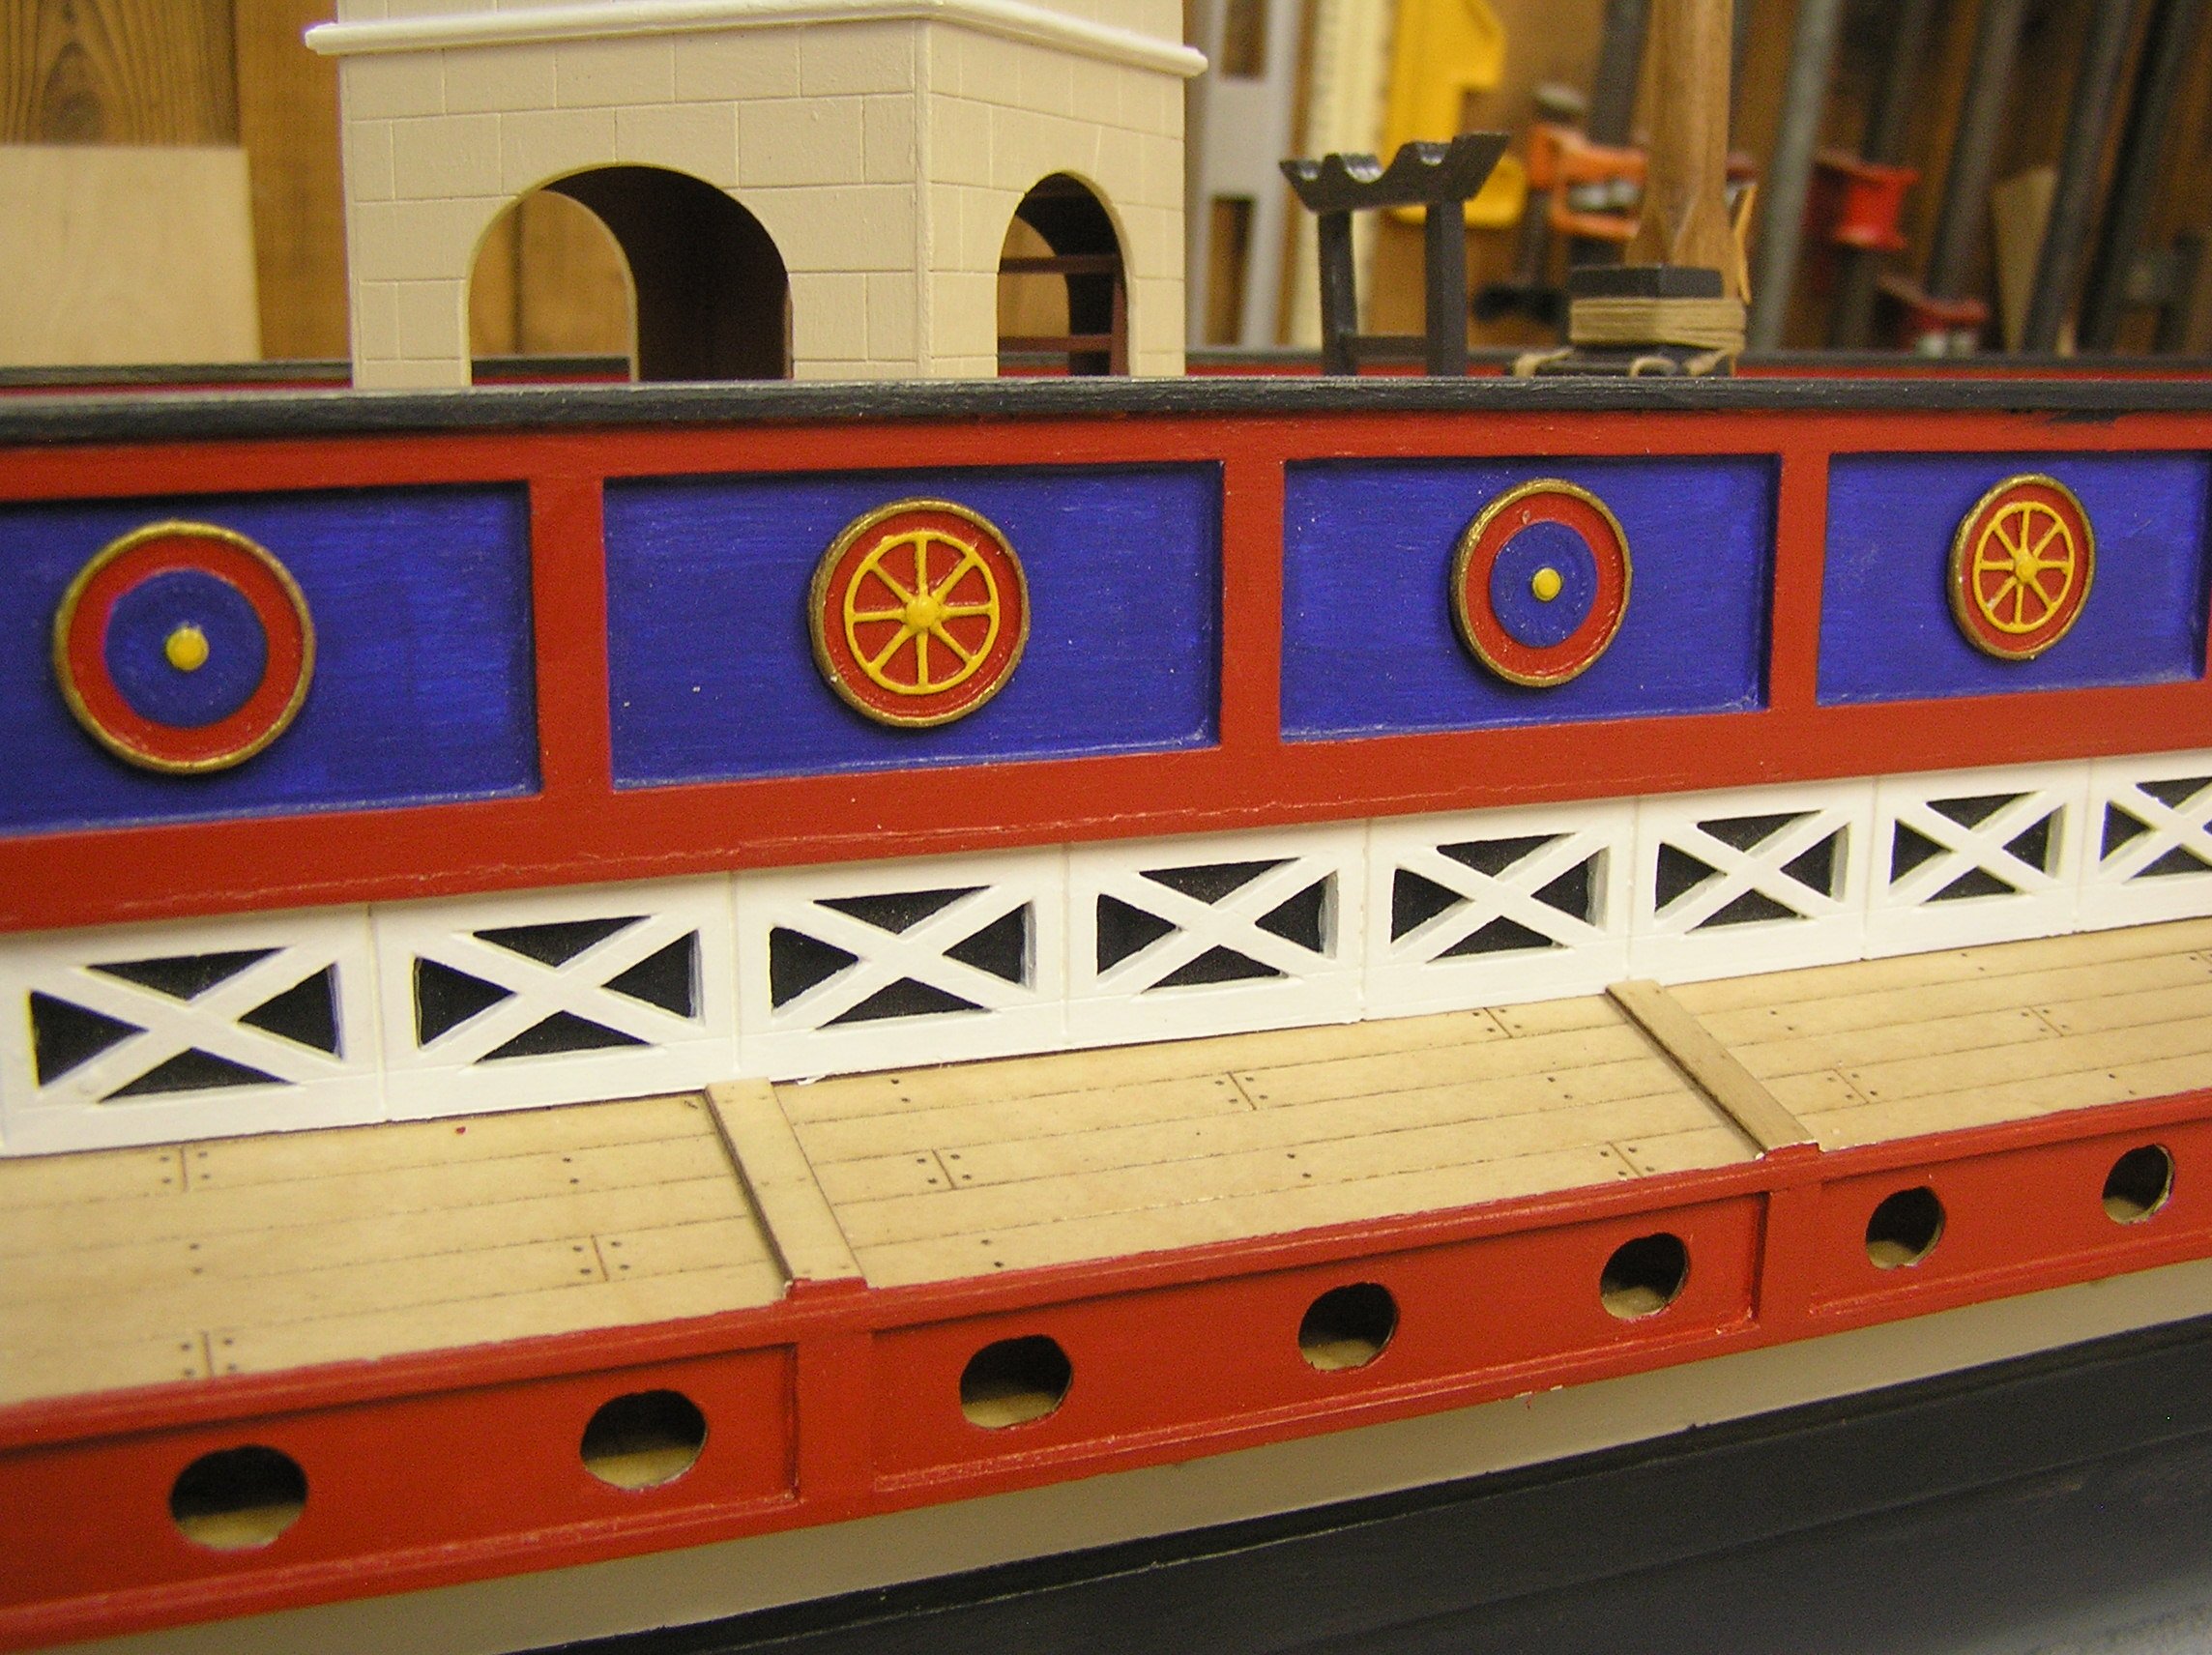
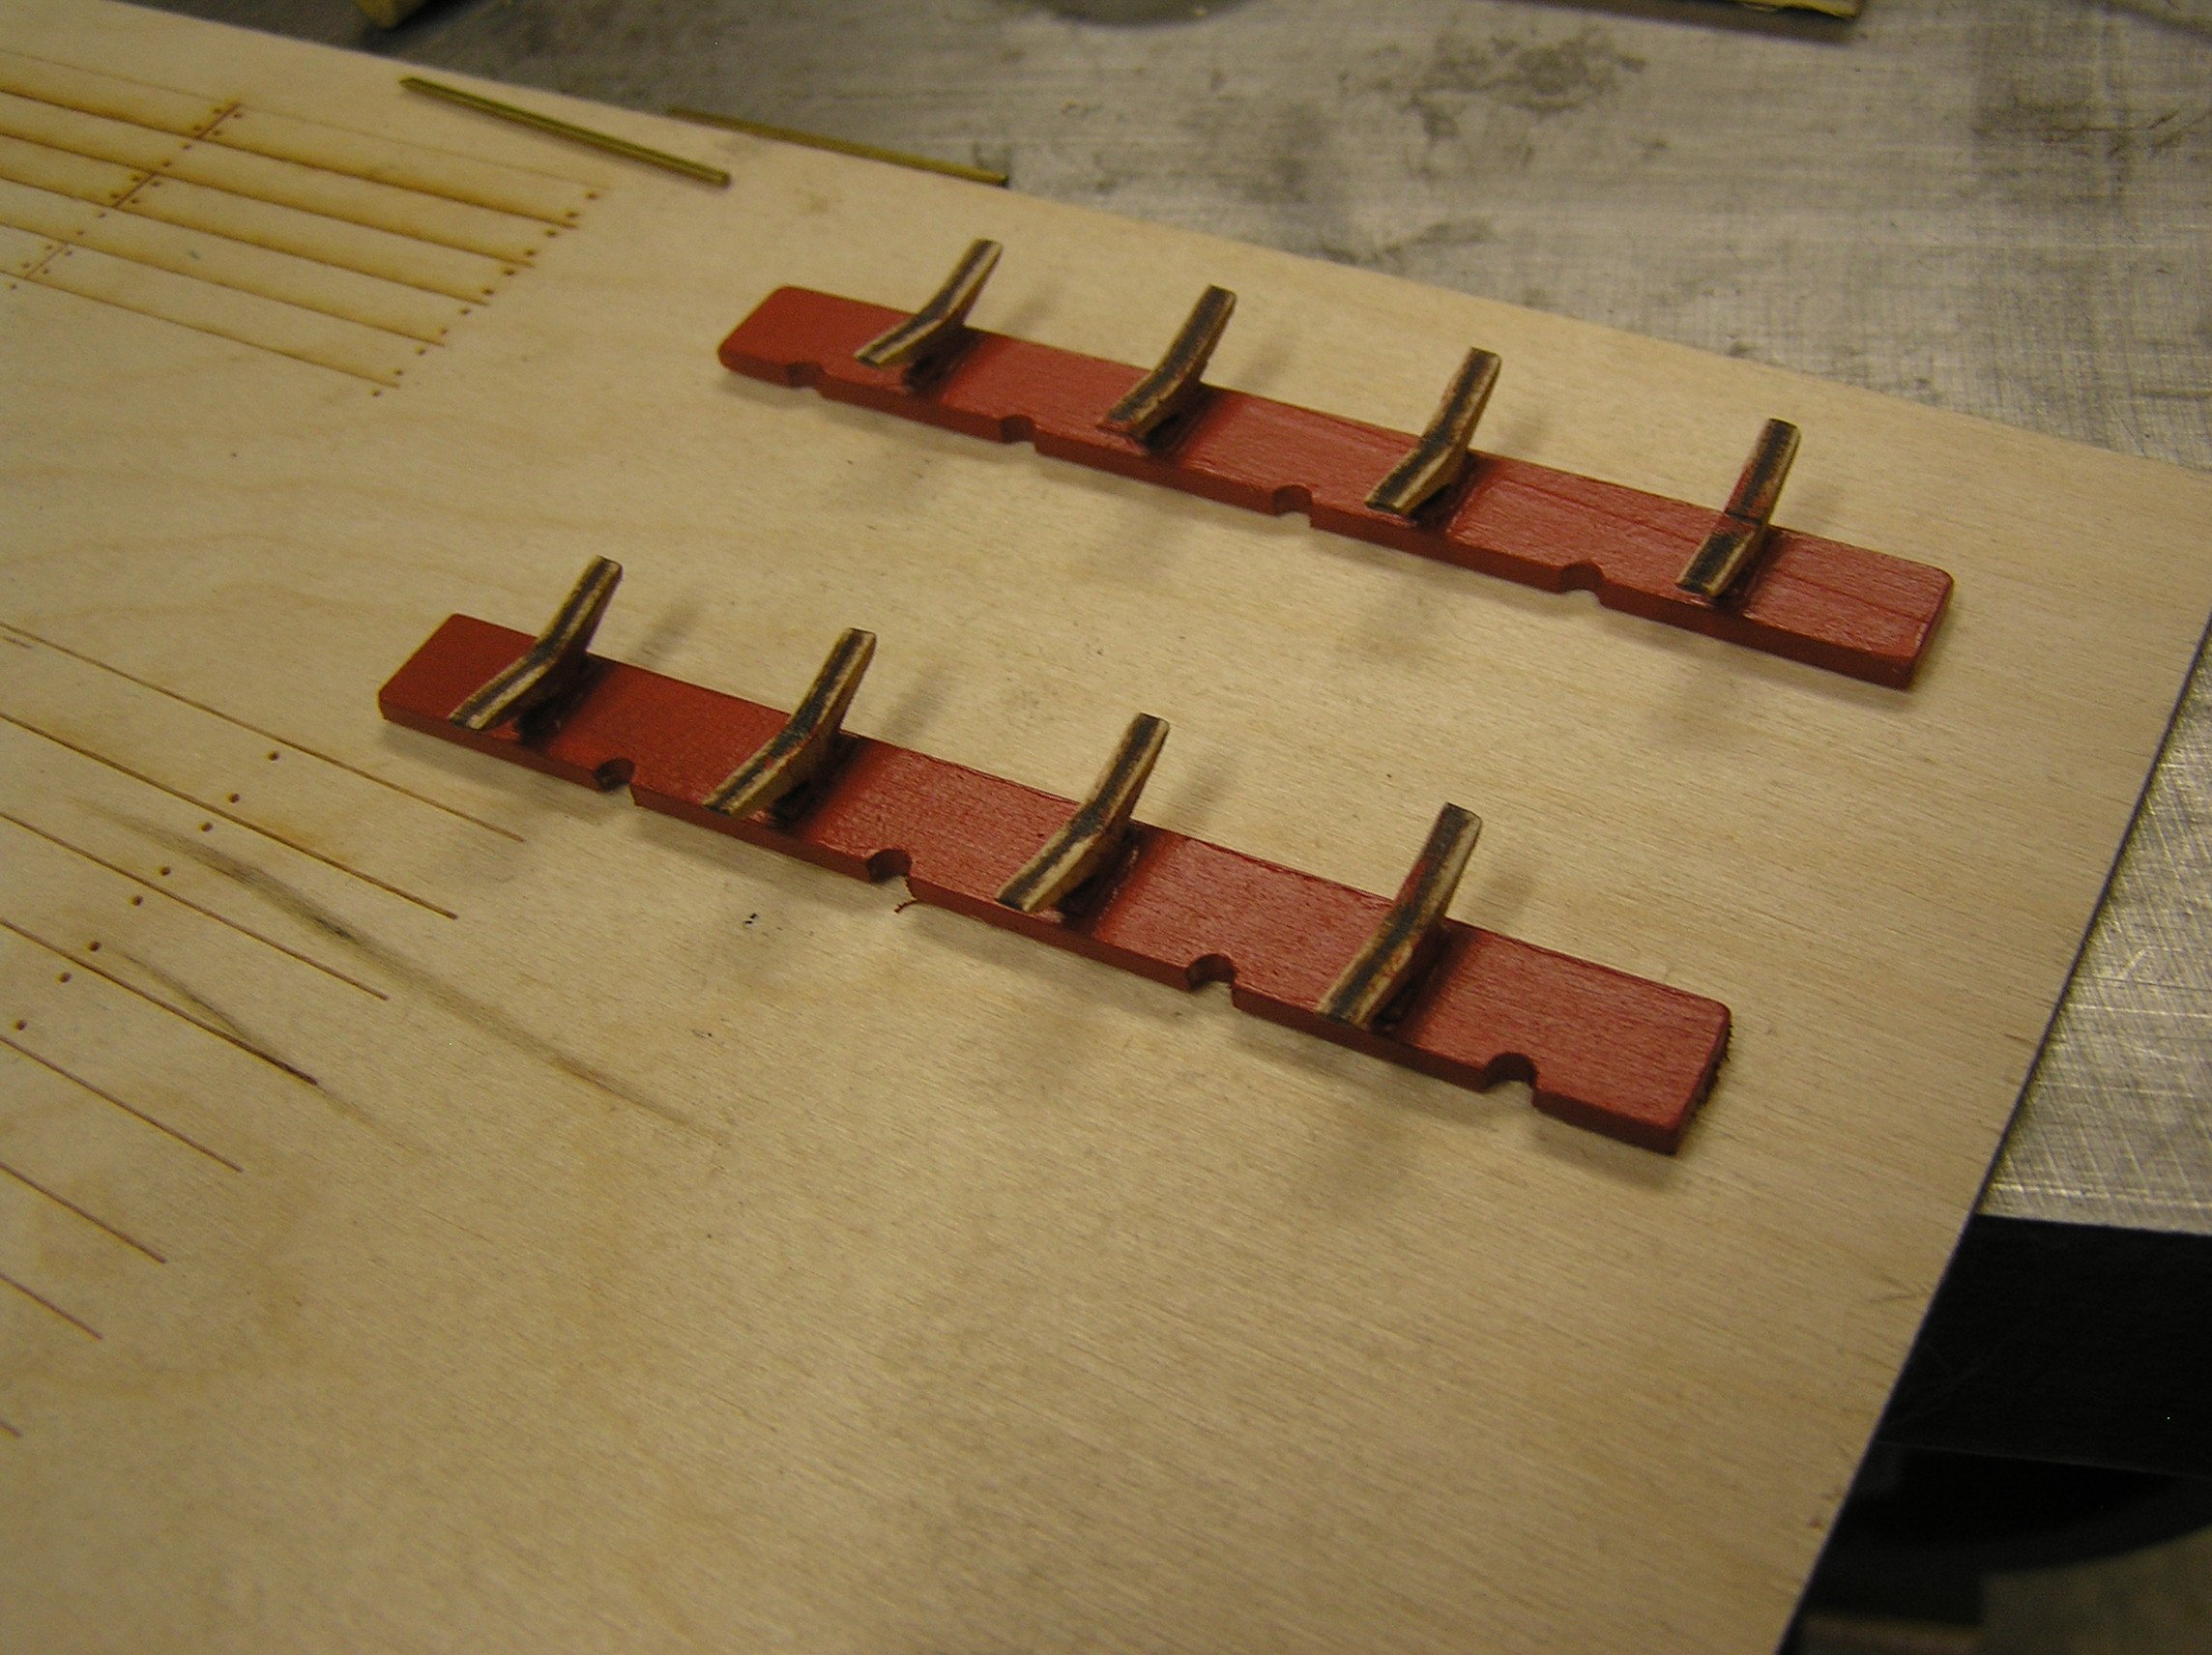
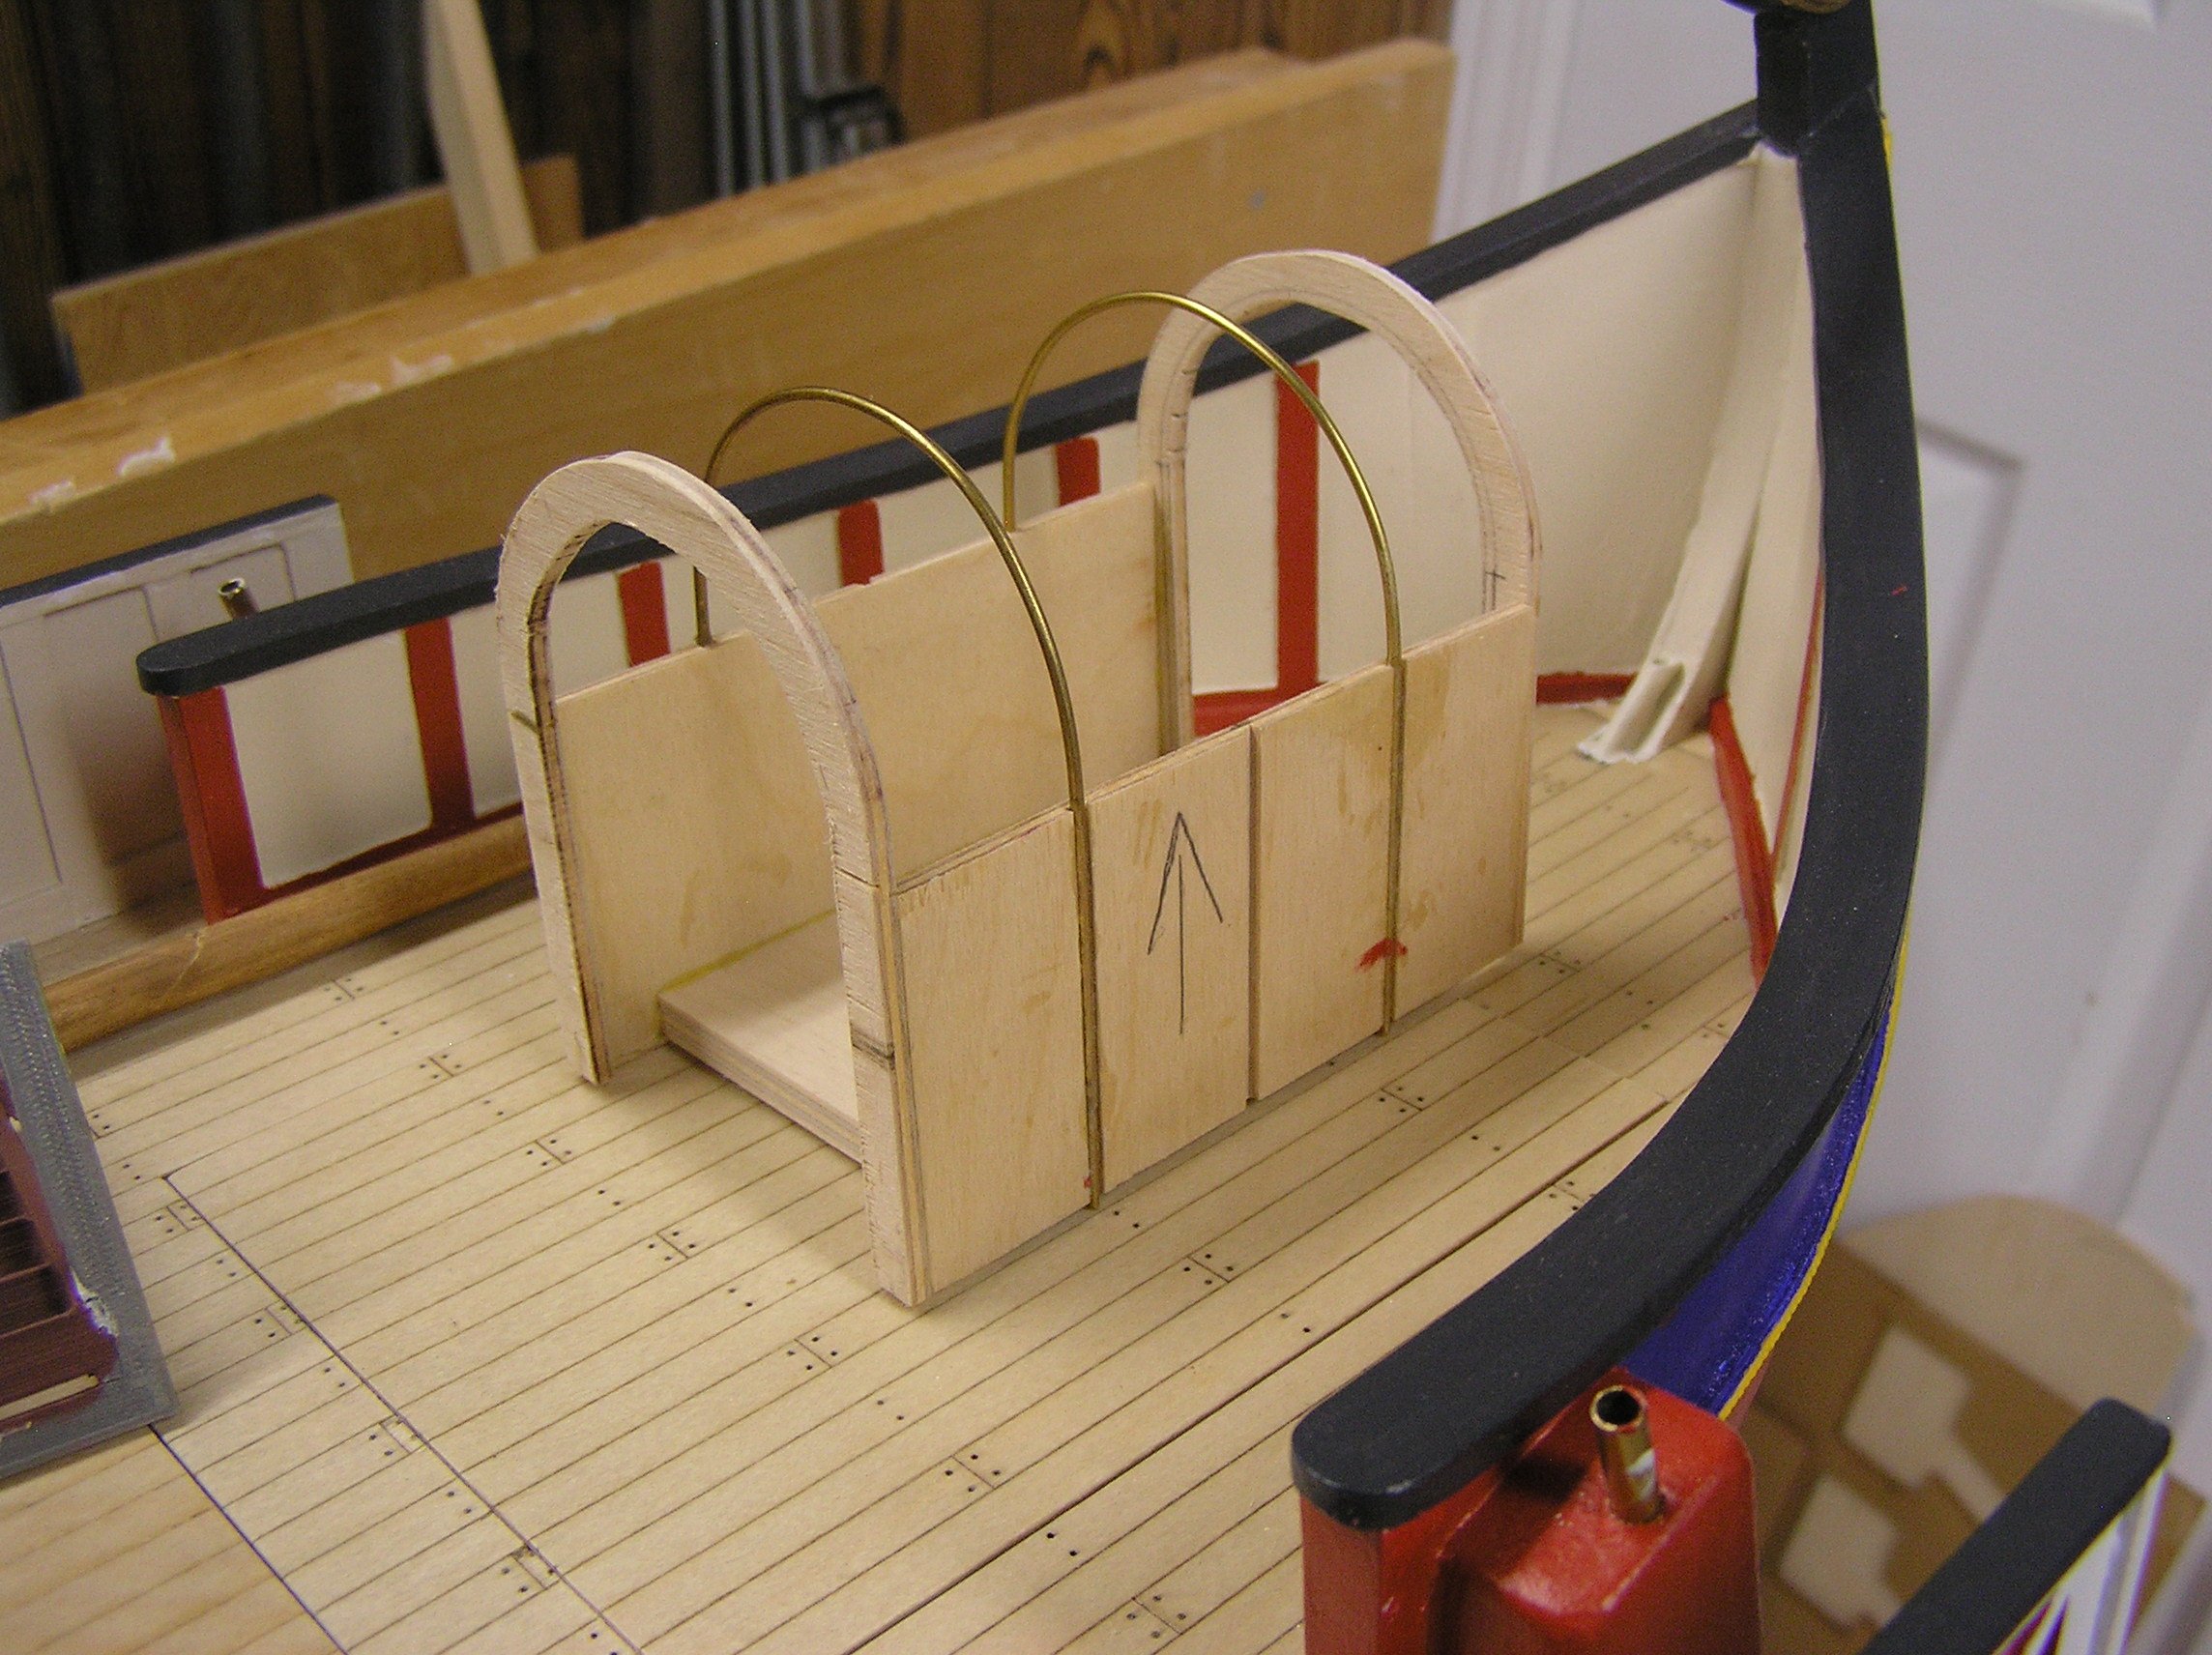
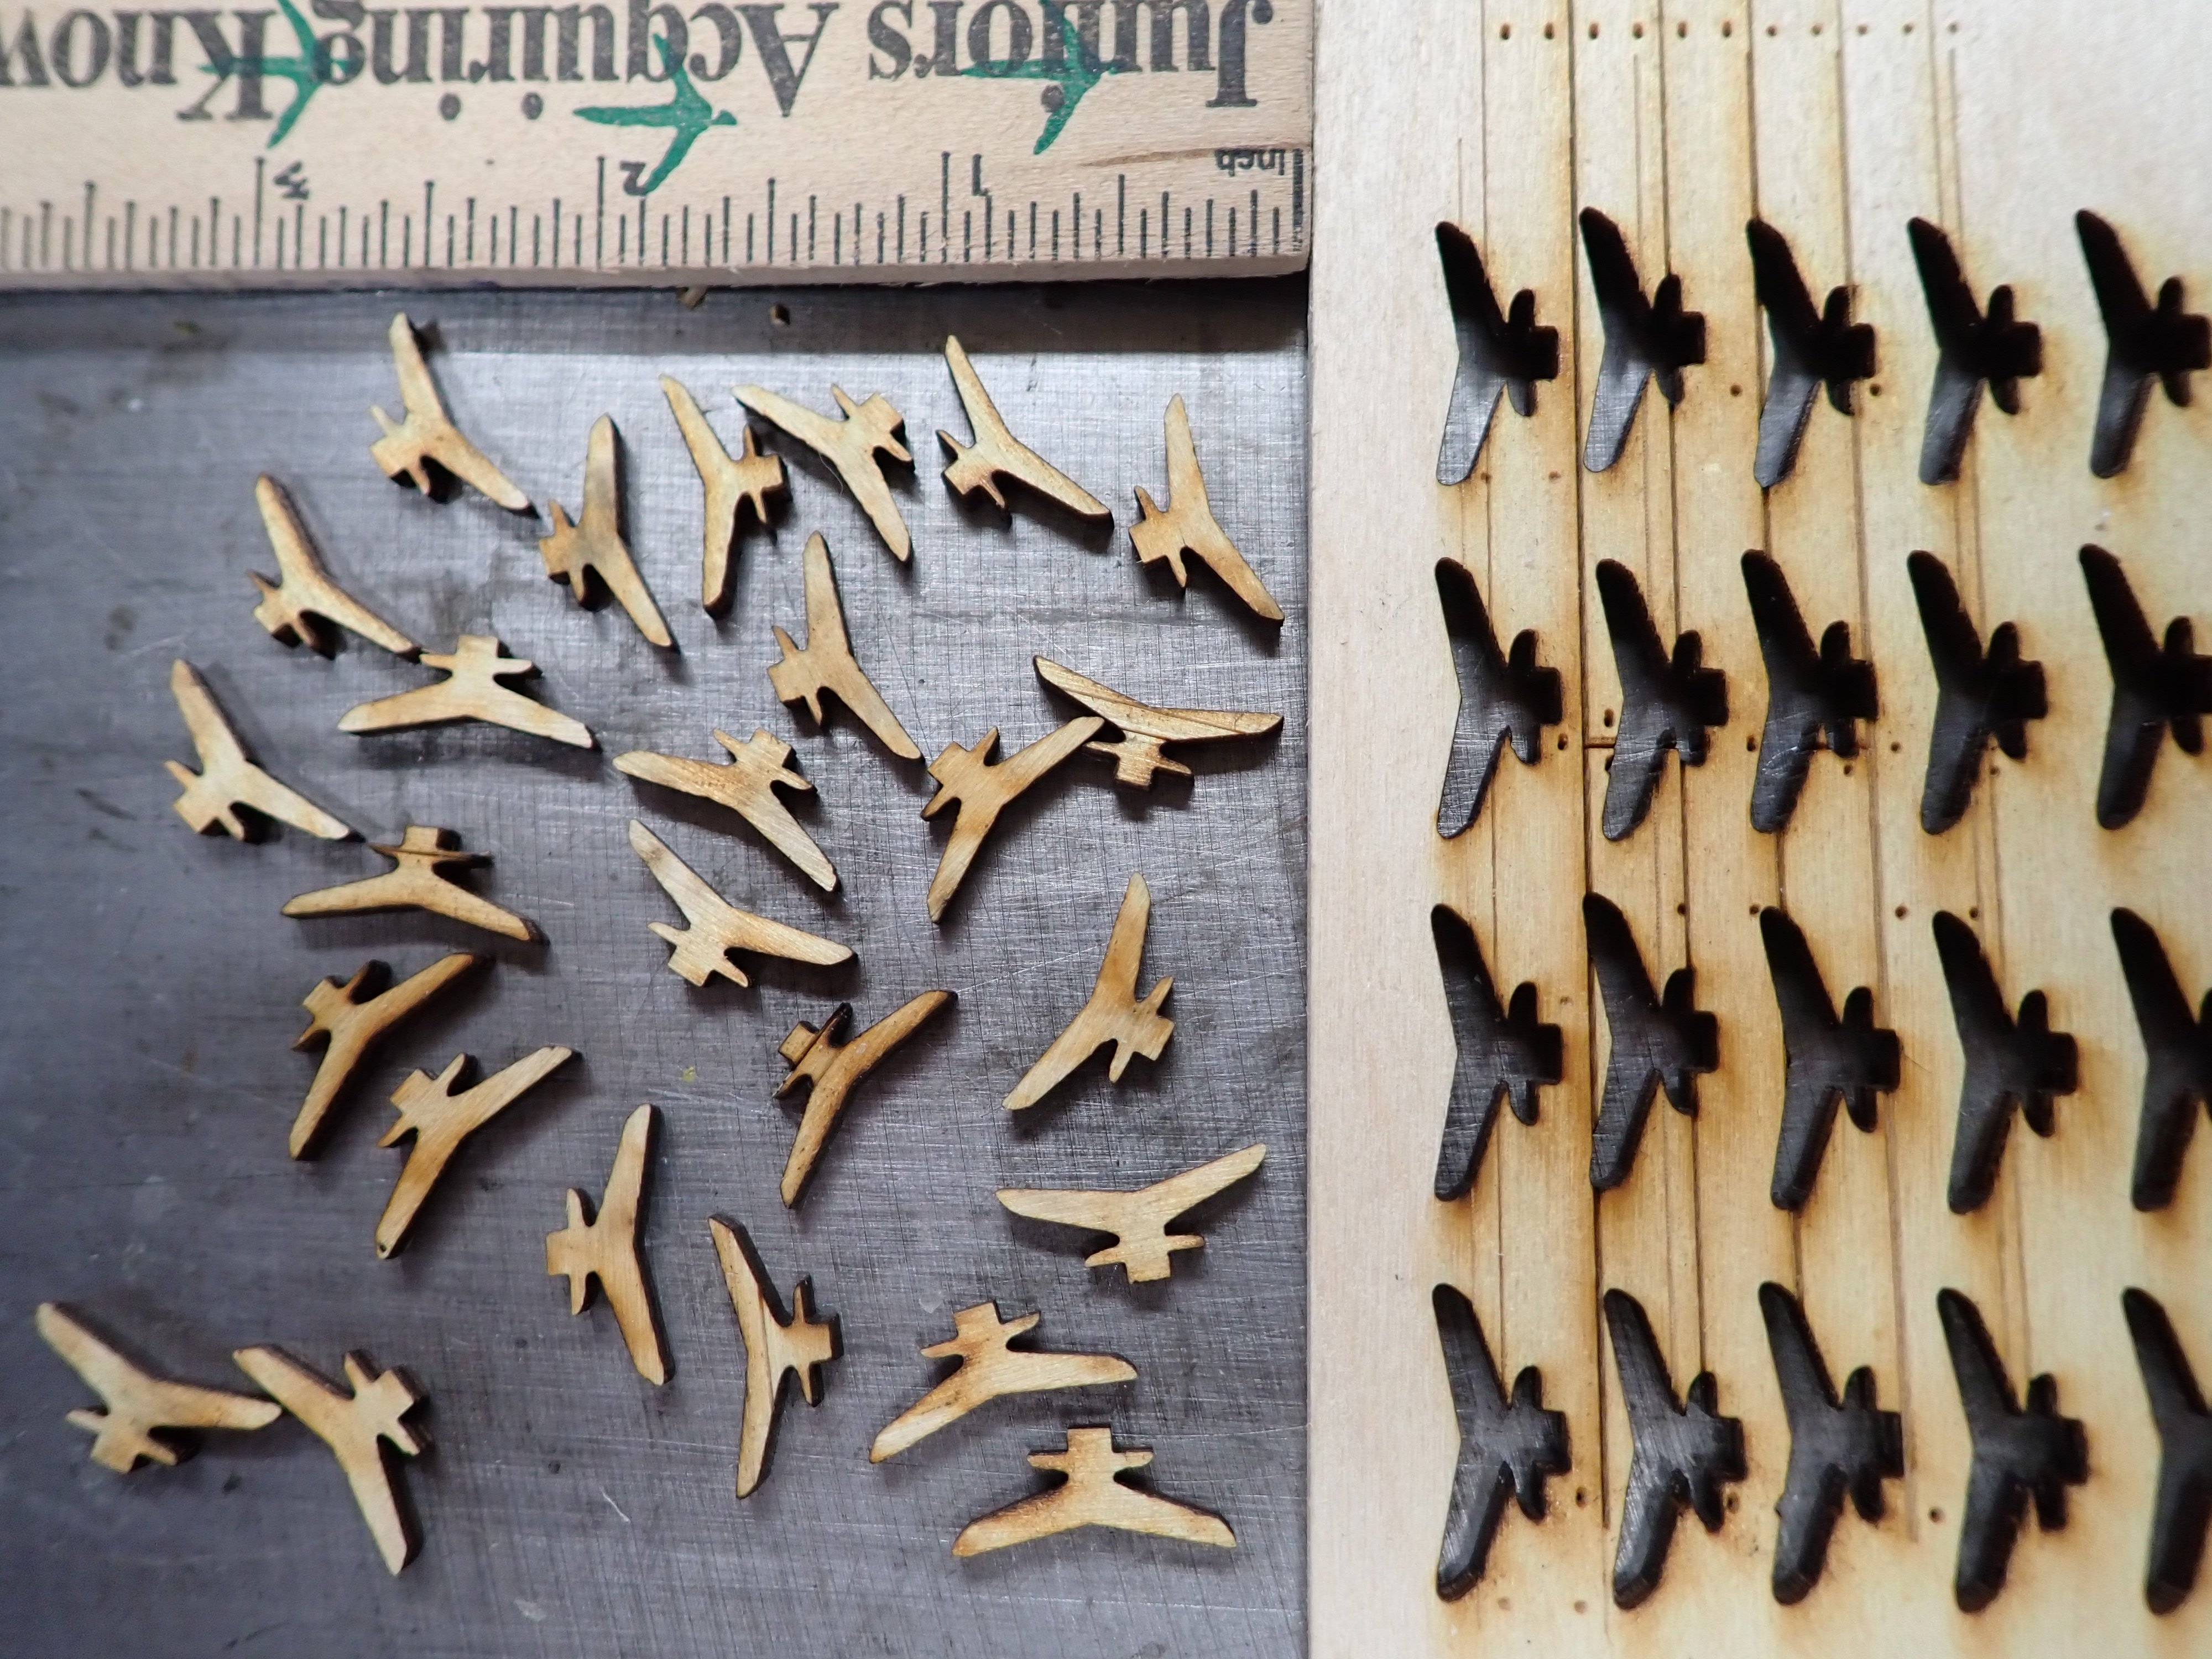
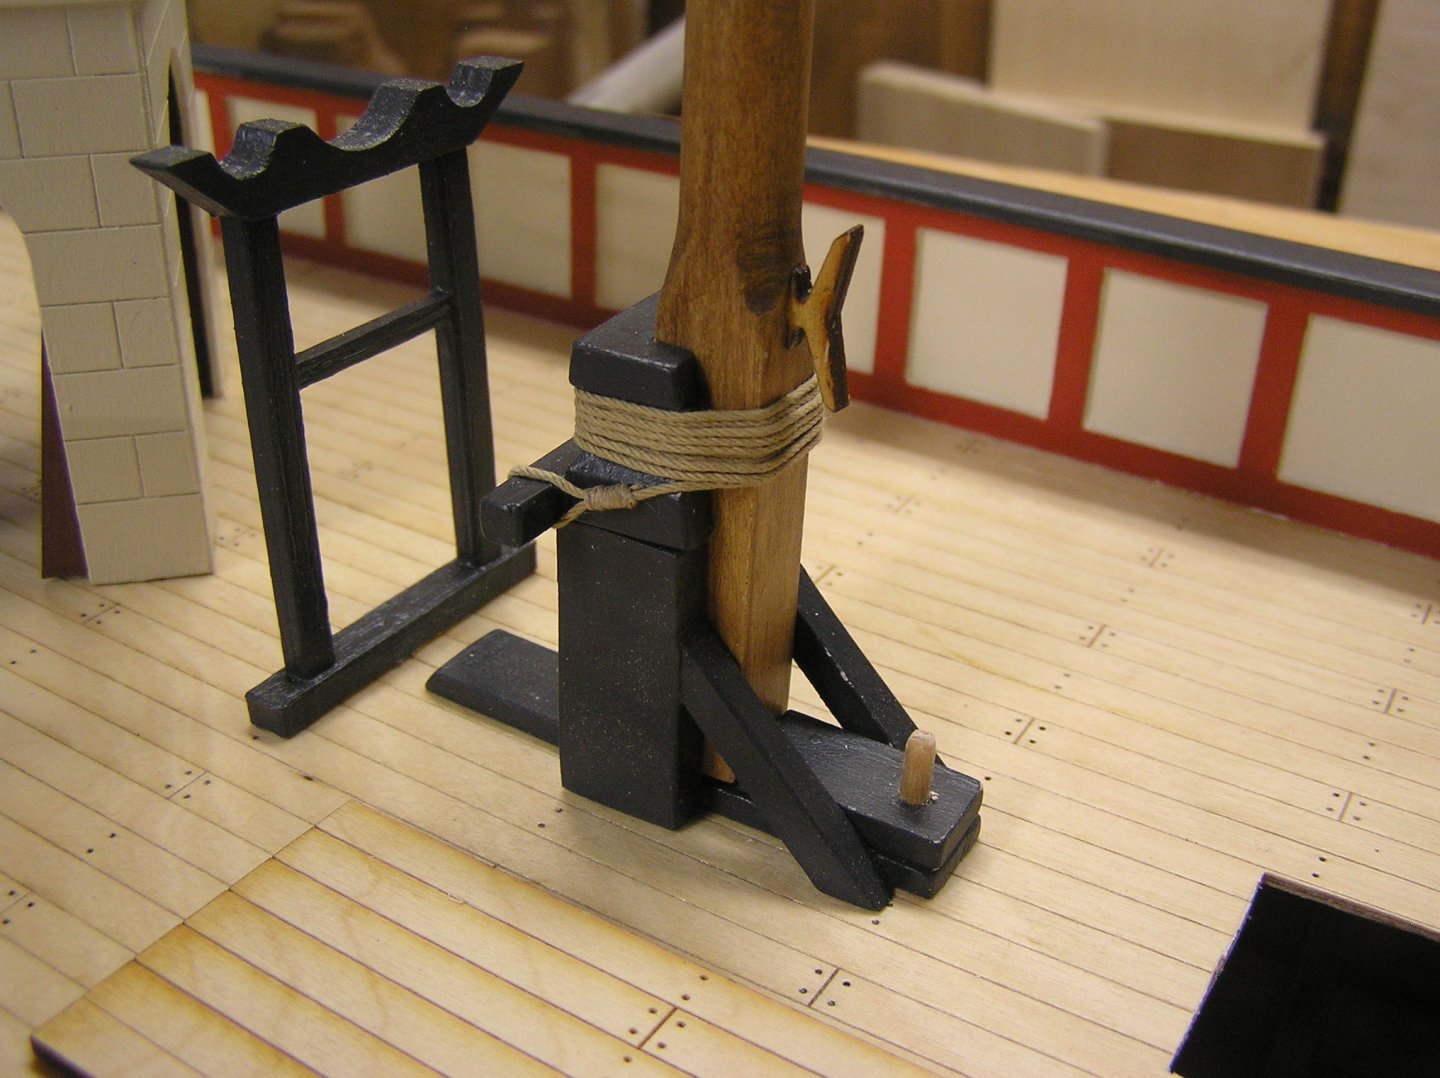
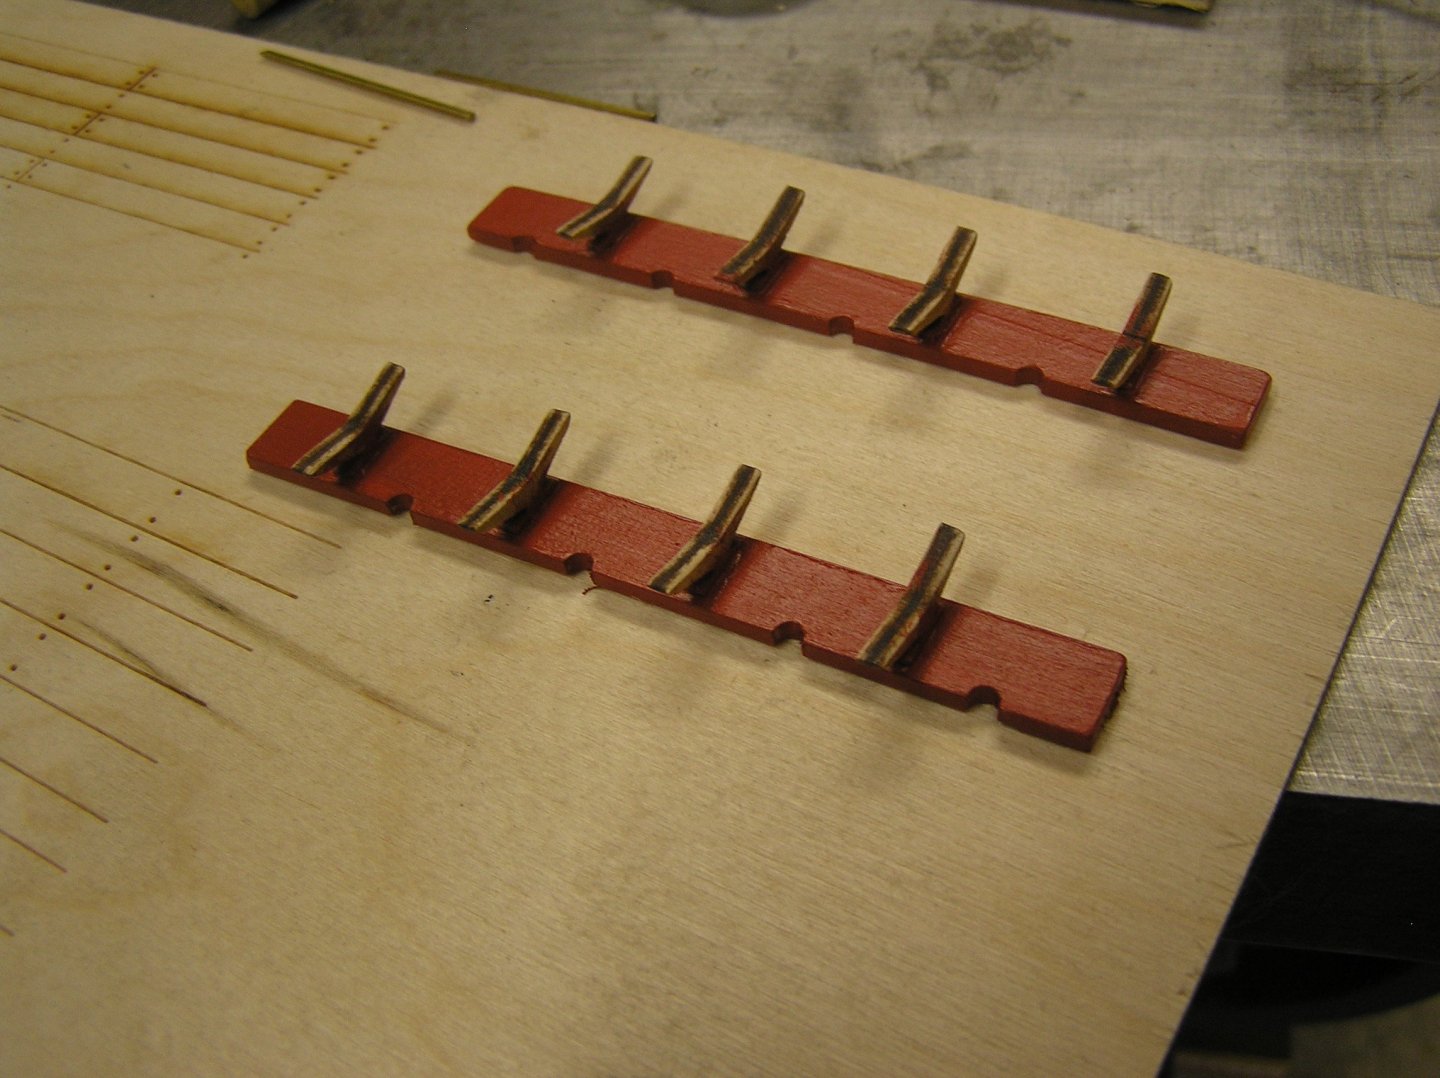
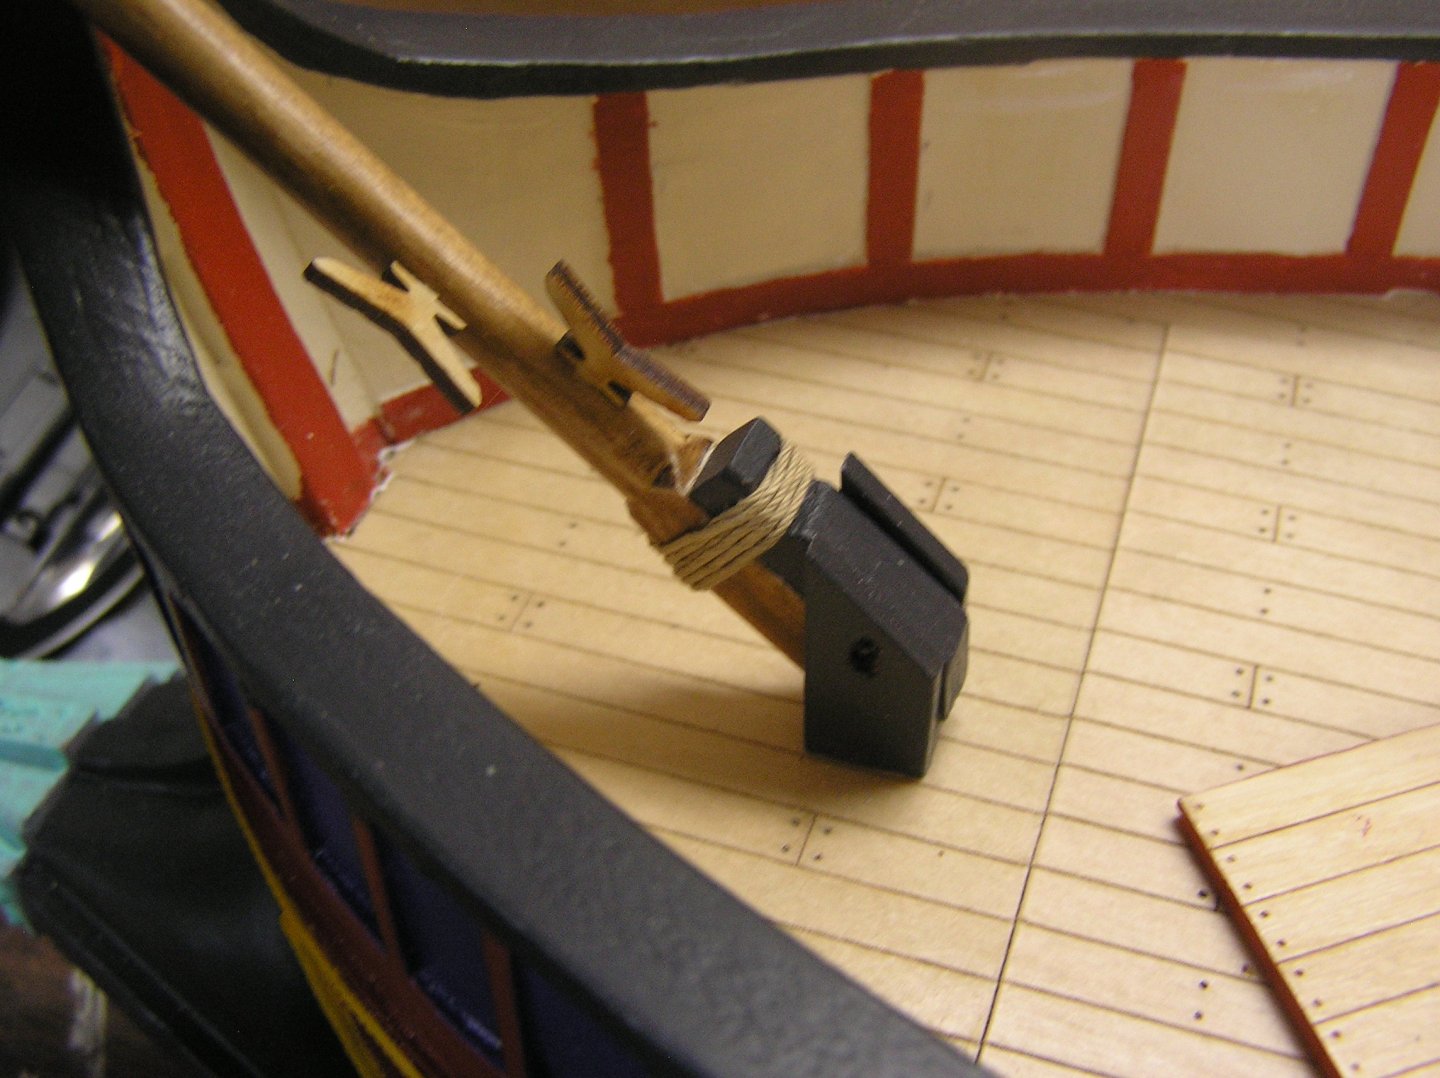
Here's what I've been working on........ Drew two patterns of shield motifs in CAD and 3D printed ten of each. Painted them up and attached to bulwarks. Drew some cleats and cut them out from 1/8" plywood using the laser cutter. Here are the cleat boards which will be inside the bulwarks to anchor the mast shrouds. Haven't yet painted the cleats. Lashing and halyard cleat at the mast foot. Recall that the part of the tabernacle lashed to the mast comes off with it. Cleats at base of artemon for yard inhaul/outhaul. While I had a laser cutter booking, I cut out two rudder blanks from 1/4" clear cast acrylic sheet. The etched stripes are where I need to cut a notch for the brass rudder posts. Idea is to paint a scale rudder blade and leave the oversized portions clear. Started work on the commander's shelter. It will be the handle for the rear hatch, bolted to it. Hoping that stretching fabric over it will show the "tentpole" arches. One more pole to add, in its slots. It crossed my mind to 3D print the end arches and slotted sides, but then I gave my head a shake; "How lazy am I getting?". 🙄 It would have taken a good while to print, too. Long weekend at the cottage a week tomorrow. I plan to debut it to all the inlaws and some friends, most of whom don't know I've been building it. It just never came up, HaHa......I'm the only one interested in building models or in RC.......Hope to have some rigging done, definitely the rudders, and of course use the new battery pack.


- 536 replies
-
- 13
-
-
-
- Quadrireme
- radio
- (and 1 more)