Modeler12
-
Posts
1,716 -
Joined
-
Last visited
Content Type
Profiles
Forums
Gallery
Events
Everything posted by Modeler12
-
 I agree. But at least now I have another source for some of the tooling and parts for my equipment. Here is another gripe I have. 'Shipping and Handling' charges. I can understand that companies charge me for shipping. But 'Handling' should be part of their overhead. I find it ridiculous when I receive a small part in the mail with $2 postage, but I was charged $6 for it. Those of you who live outside the US may then even have to pay 'import duties'. And I wonder how much that can add.
 -
Well done Steve. That is a lot of work, and like you said, each is a piece of art in itself. Yours certainly are. Good luck with your next project, but we want you to come back to this Connie also, ok?
-
Great series of vises from this company, Vic. I hate to mention this, but I asked the guy at Little Machine Shop about how, and why there is not a spring to push the bolt up. Kind of like the type 2 you mention. I have a whole bunch of springs and might just try this on the one I have. I am sure you could also. Just as a side line. When I looked into a mill, I also compared prices for vises. Hmmm, no rhyme intended. But even for a 2" wide Type 1 (as you call it), I would have paid $44.95 (plus our tax of 8%) by LMS. If I had ordered that from Micro Mark it would have been $69.50 (plus tax) for the same, identical item made in China.
-
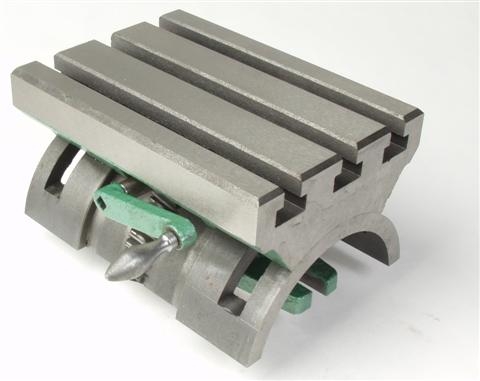
There is another way to tilt a part on the mill. It involves a tilting table. This one is available from Little Machine Shop (item 3878). But my guess is that it would be handy only if you do a lot of this kind of milling.
-
Clever Vic. I will have to remember this. That old vise I showed earlier may not be very accurate, but for a pinch this might work. PS I like the top of your work bench. Classy!!!
-
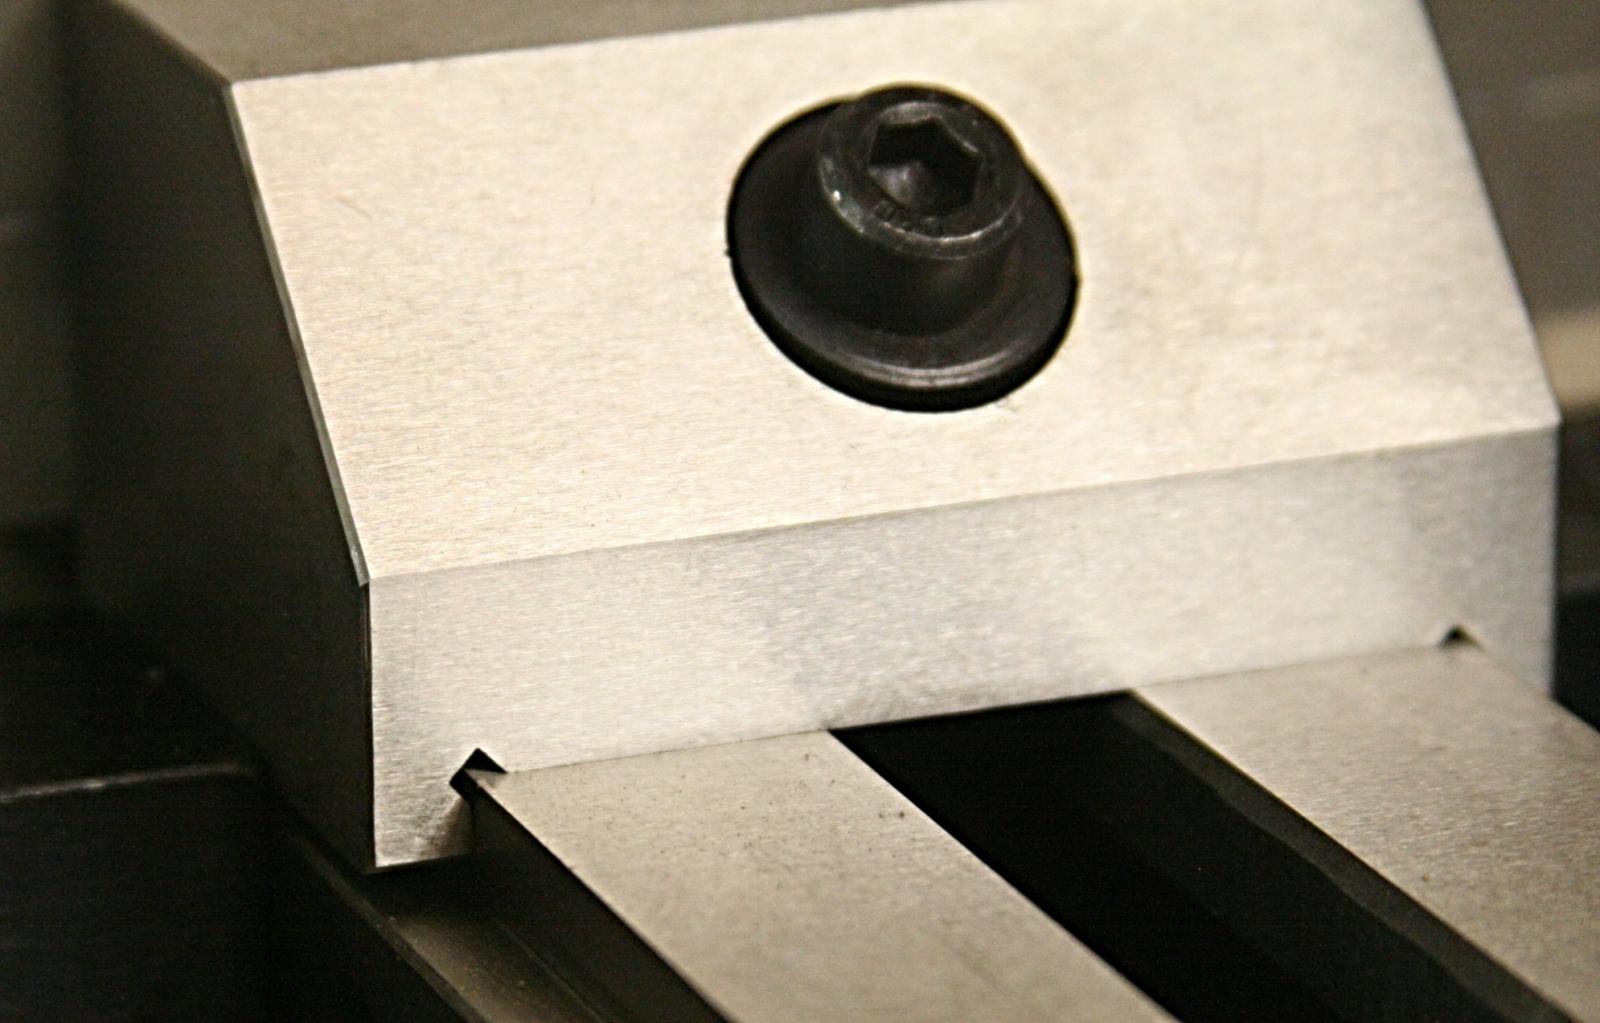
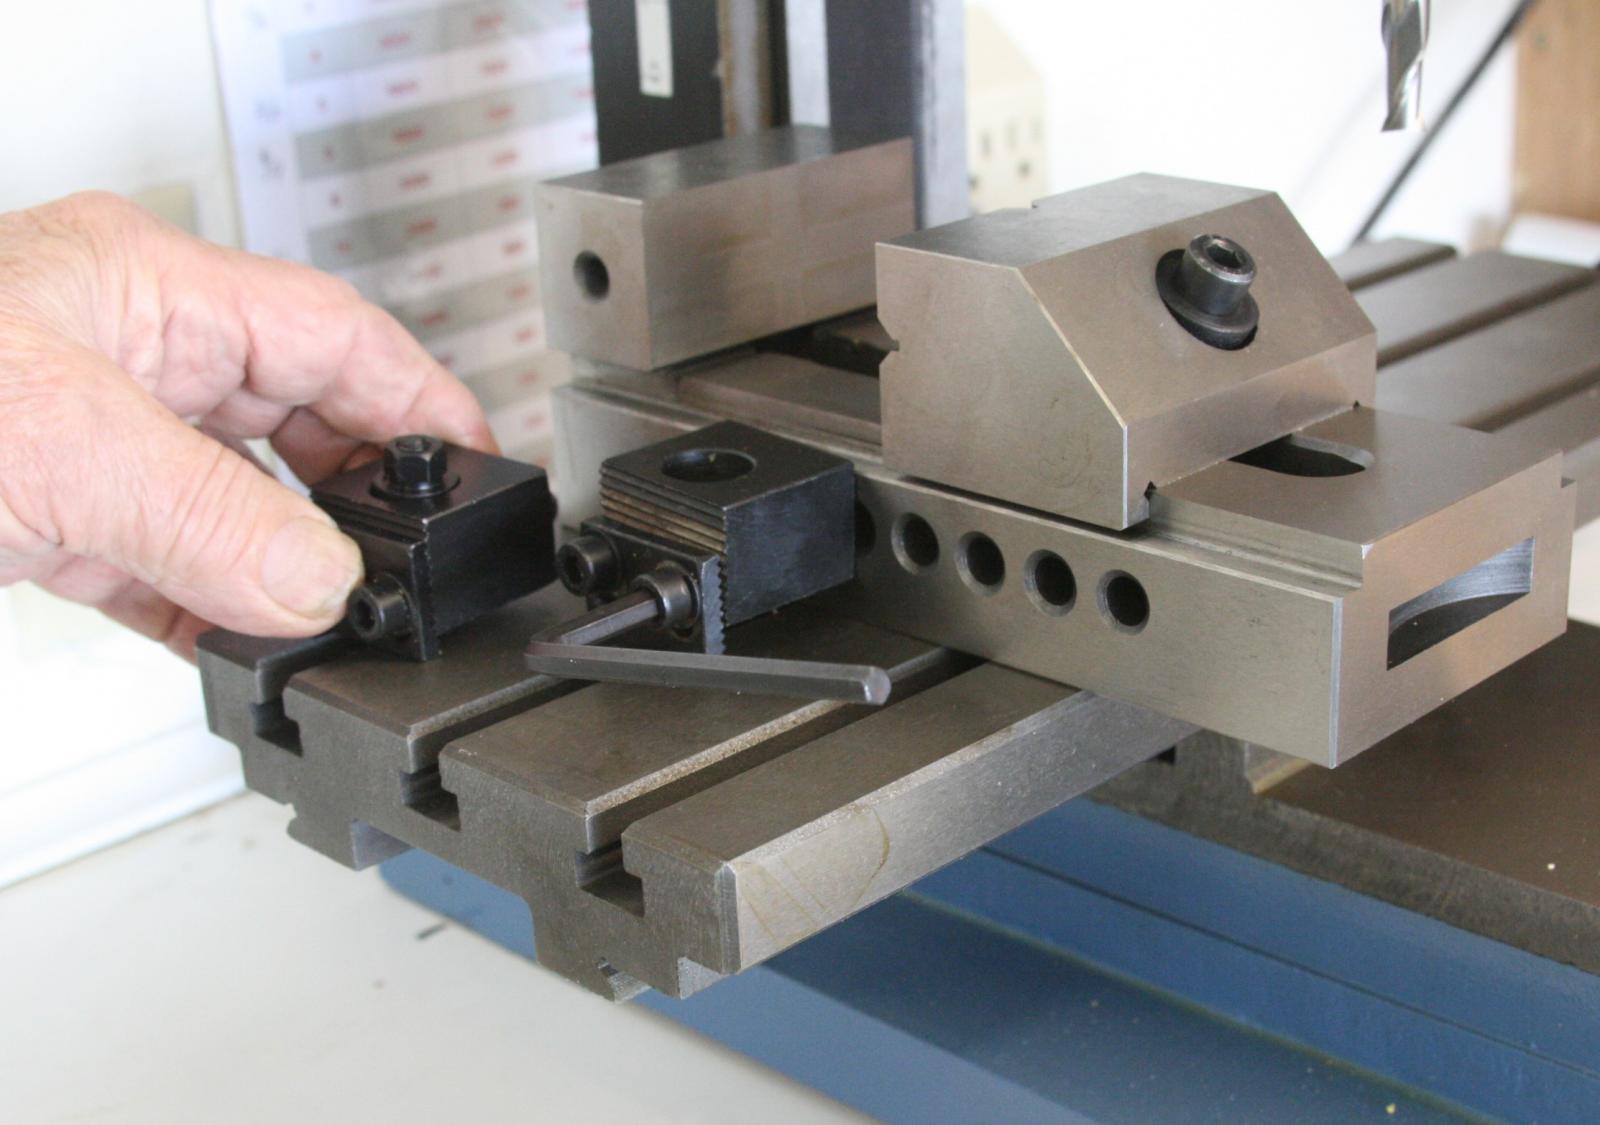
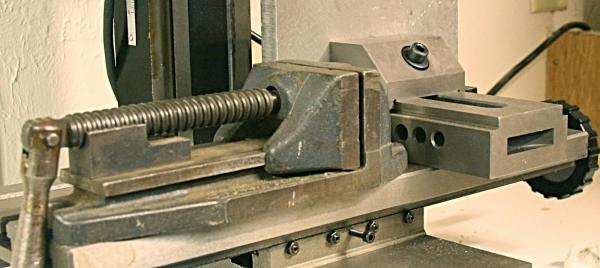
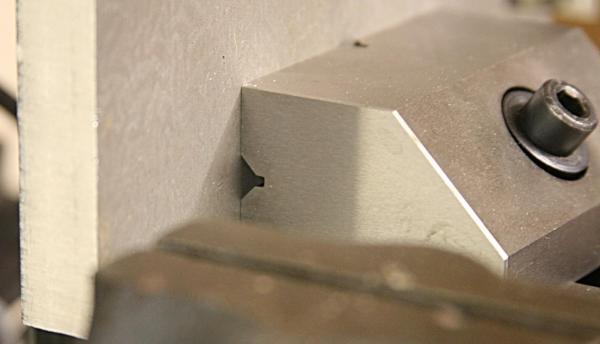
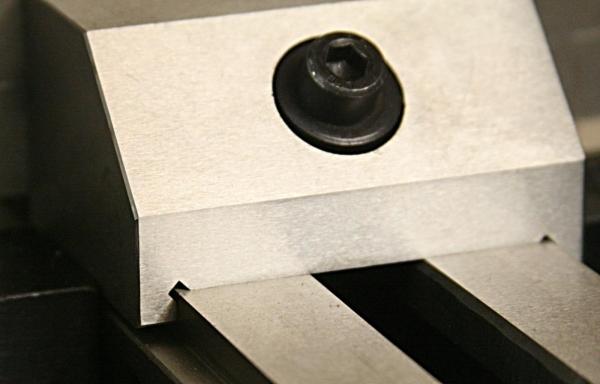
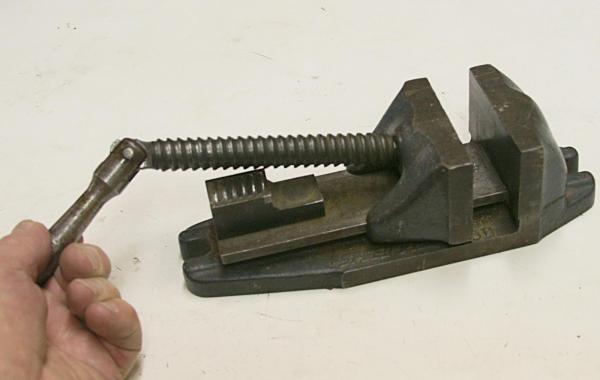
Sorry, I keep finding things that are of interest (at least to me). Vises, what kind do you have? I now have one more, and this one is for my mini mill. I am talking about the 'precision vise' that is listed as an option with all the other milling machines, but was included in my tooling package. It is the one to the right of my old vise shown. The one that came with my LMS package has a three inch width and one inch depth. It looks like it came out of a precision grinding lab. All surfaces are flat, smooth and claimed to be at right angles to each other. Looking at some of the details, such as the corners and where they mate the mill surfaces, I do not doubt that. The problem is that it really takes some getting used to how this thing works. Here are comments from Chis at Little Machine Shop when I asked him about how to tighten the vise: Those vises are a learning experience. It’s always a hassle to move between grooves. My trick is to use a hex (Allen) wrench without a ball on the end. Then you can lever the screw up and down to either move the jaw or fit the pin in a groove. . . . Nevertheless, the vise is great. Just look at the sharp edges and some of the corner details. . . . I am sure other sources besides LMS provide the same kind of vise (although smaller?). I have two other vises for this kind of work. But both are larger and more intended for 'quick action'. I really like the one that has an open saddle with unusual screw design. But it is too large for the mill and I will keep it on my old table drill press. I was just curious what vises means to others here. Bench vises, table top vises, . . . . . .

-
Thanks Jud. I might try something like that. Like I said though, I don't even know what the top speed of this thing is. I will have to go through some old records to see if I still have a manual. Haven't even looked at the model number yet. You do live in the 'dry' parts of Oregon. I had never heard of Lexington, Oregon and it looks like you probably know every body in town.
-
You are right, Tom. This foot switch is what is on my wife's sewing machine. I'll need to look into that. Maybe it is possible to use a potentiometer instead of the spring loaded pedal.
-
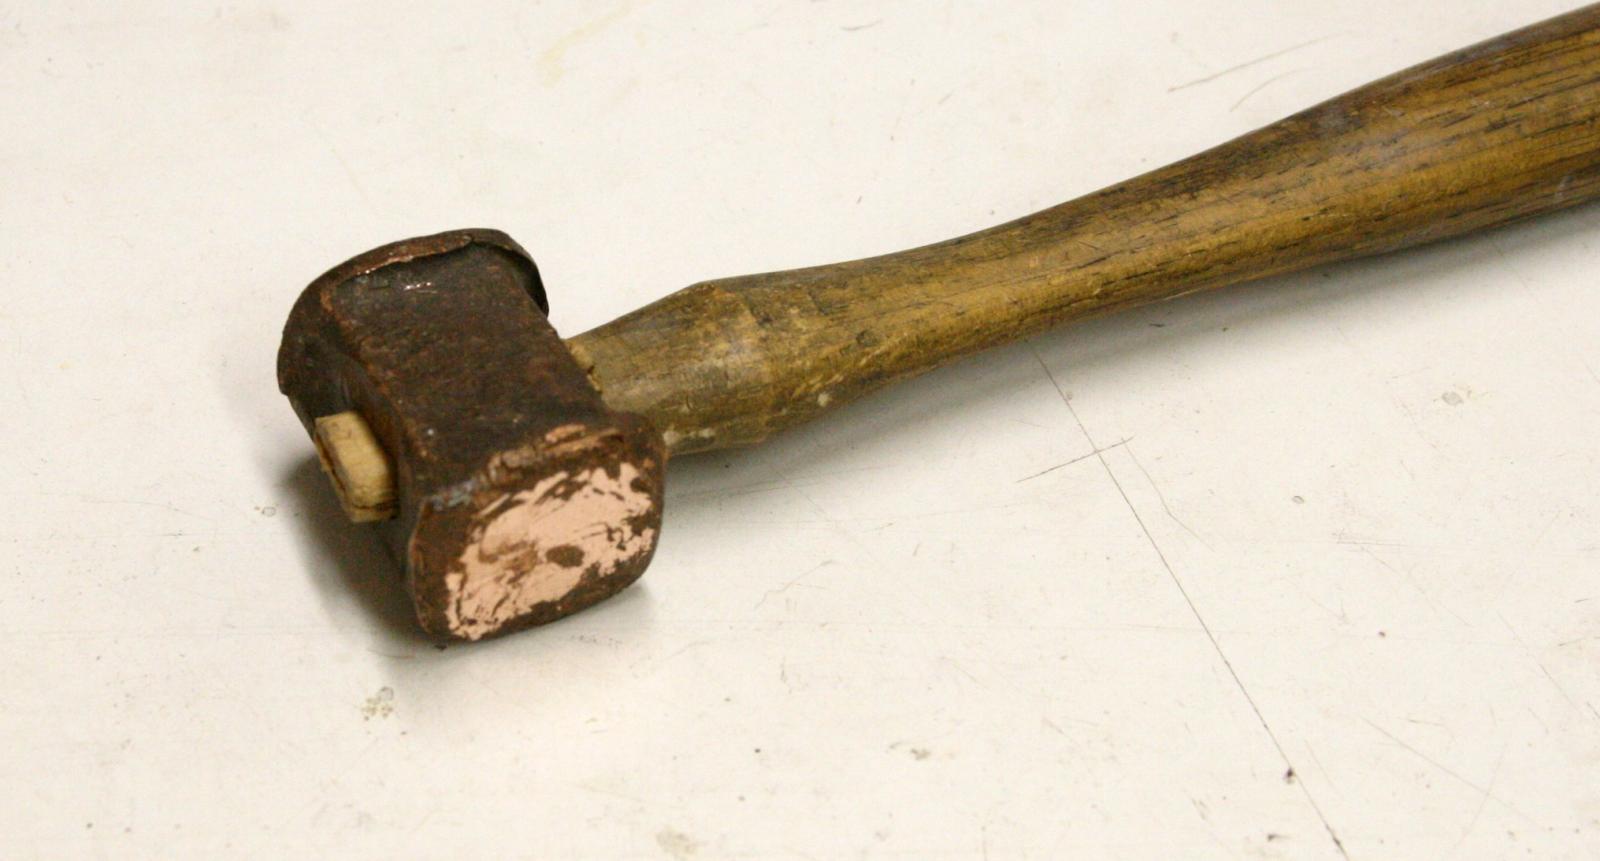
NIce hammer,Vic. The one I am using dates from the thirties. Part of my wife's inheritance, I think. I had to file one surface to make sure it was copper. But all I use it for is to hit the wooden plug on top of the draw bar and some gentle tapping to align the vise. A copy of your table is pinned to the wall next to the LMS mill.

-
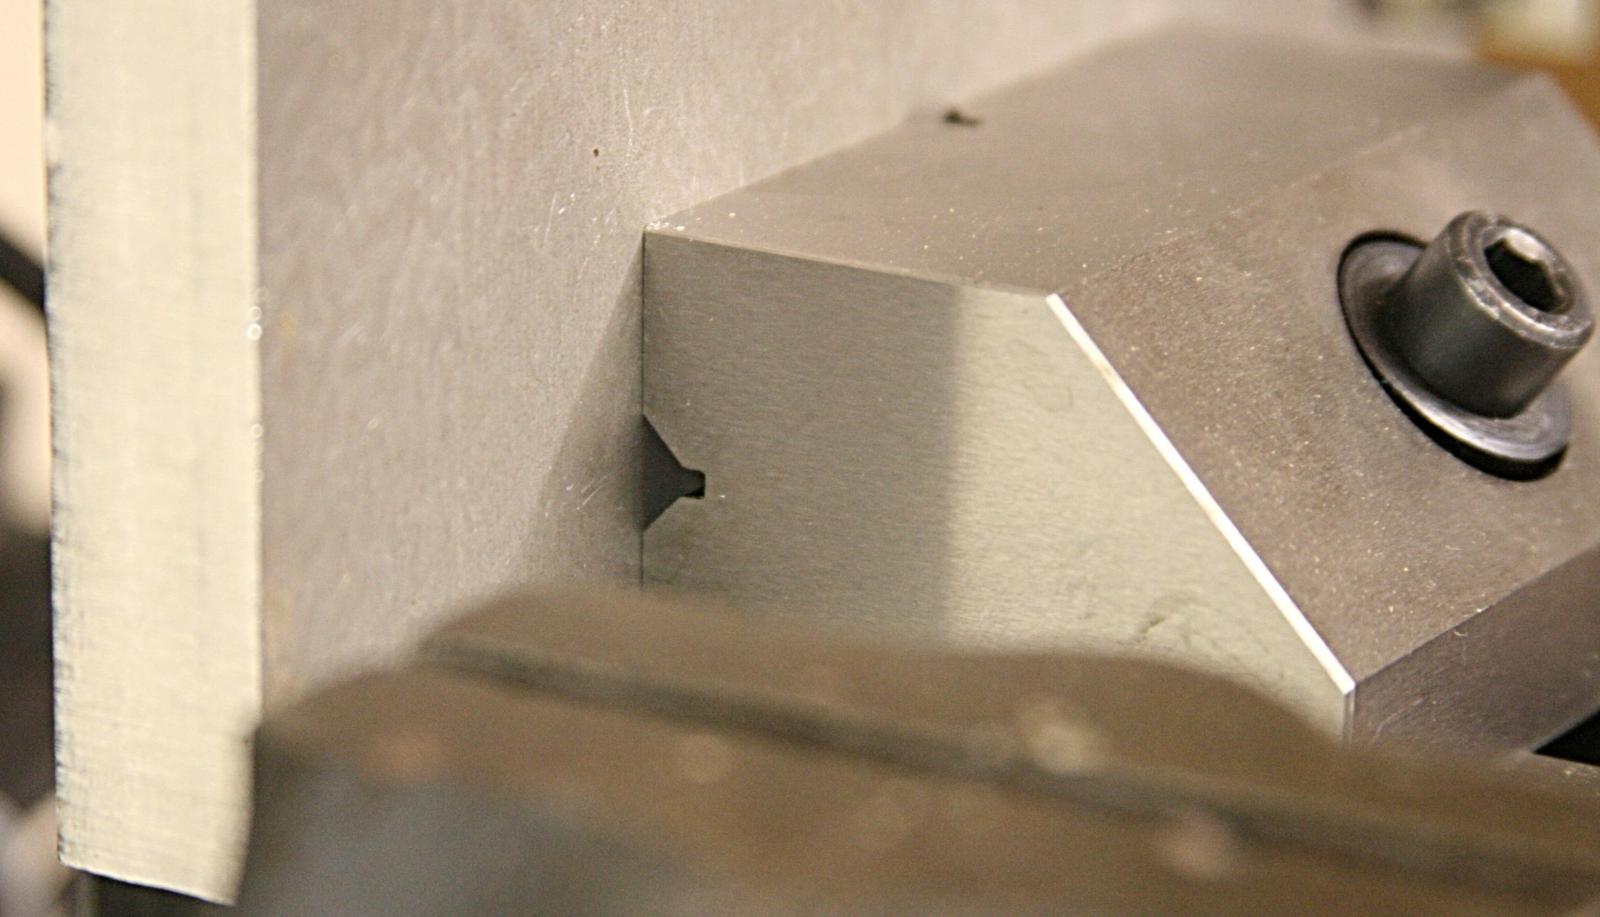
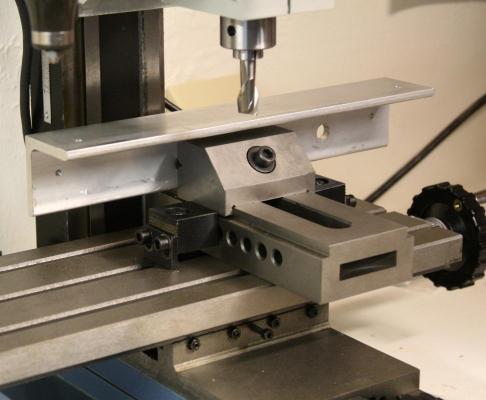
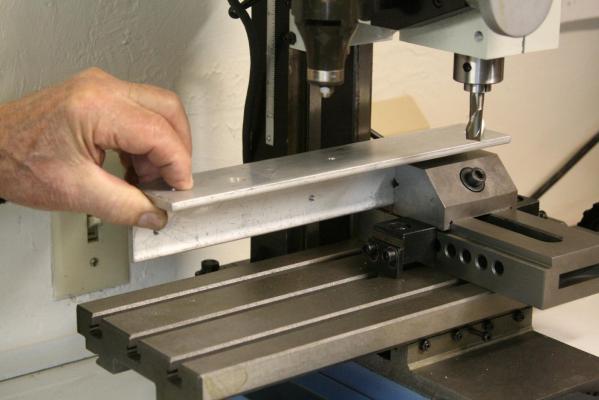
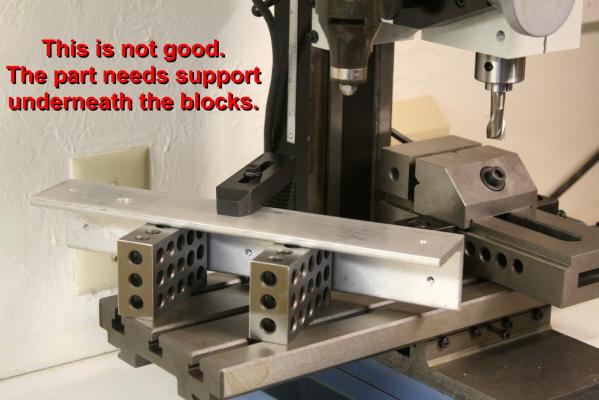
One more point I like to make about clamping parts to the table. I have this piece of 2 x 2 inch aluminum angle. I will be using this for a project I have in mind. It involves machining the end at 45 degrees (after I roughly hacksaw it to that shape). Here are some pictures of how it might work. The reason I show this is to try out the set of 50 clamping pieces that came with the tooling package and the 1-2-3 blocks. First I mounted the part on the vise. No problem of course, but I also wanted to find out how stiff it would be with a lot of overhang. Not that I would machine the left end this way, but even at that the vise held it very securely this way. Then I tried out the blocks and clamps. As you can see, the first attempt was no good. The second one was better. Finally, I have run the mill at various speeds and it is very quiet. The belt drive rather than gears makes the difference. But as yet I have not cut any material. I wanted to make sure I understood the various operations, controls, etc. My first project will involve a simple block with rough edges and then making some fixtures I have had in mind from the day I considered buying a mini mill. But that will be another topic perhaps later if anyone is interested. In conclusion to this evaluation, I like to mention that all and all I like the machine. It has several features that I think are better than other machines in this class (of course this is based on published information, not a first hand experience). I had a couple questions during these last couple days and my contacts with Chris Woods at Little Machine Shop were excellent. He offered good advise promptly. Plus I found the information they publish on the web as well as in the manual are very helpful. If any of you have further questions, let me know.

-
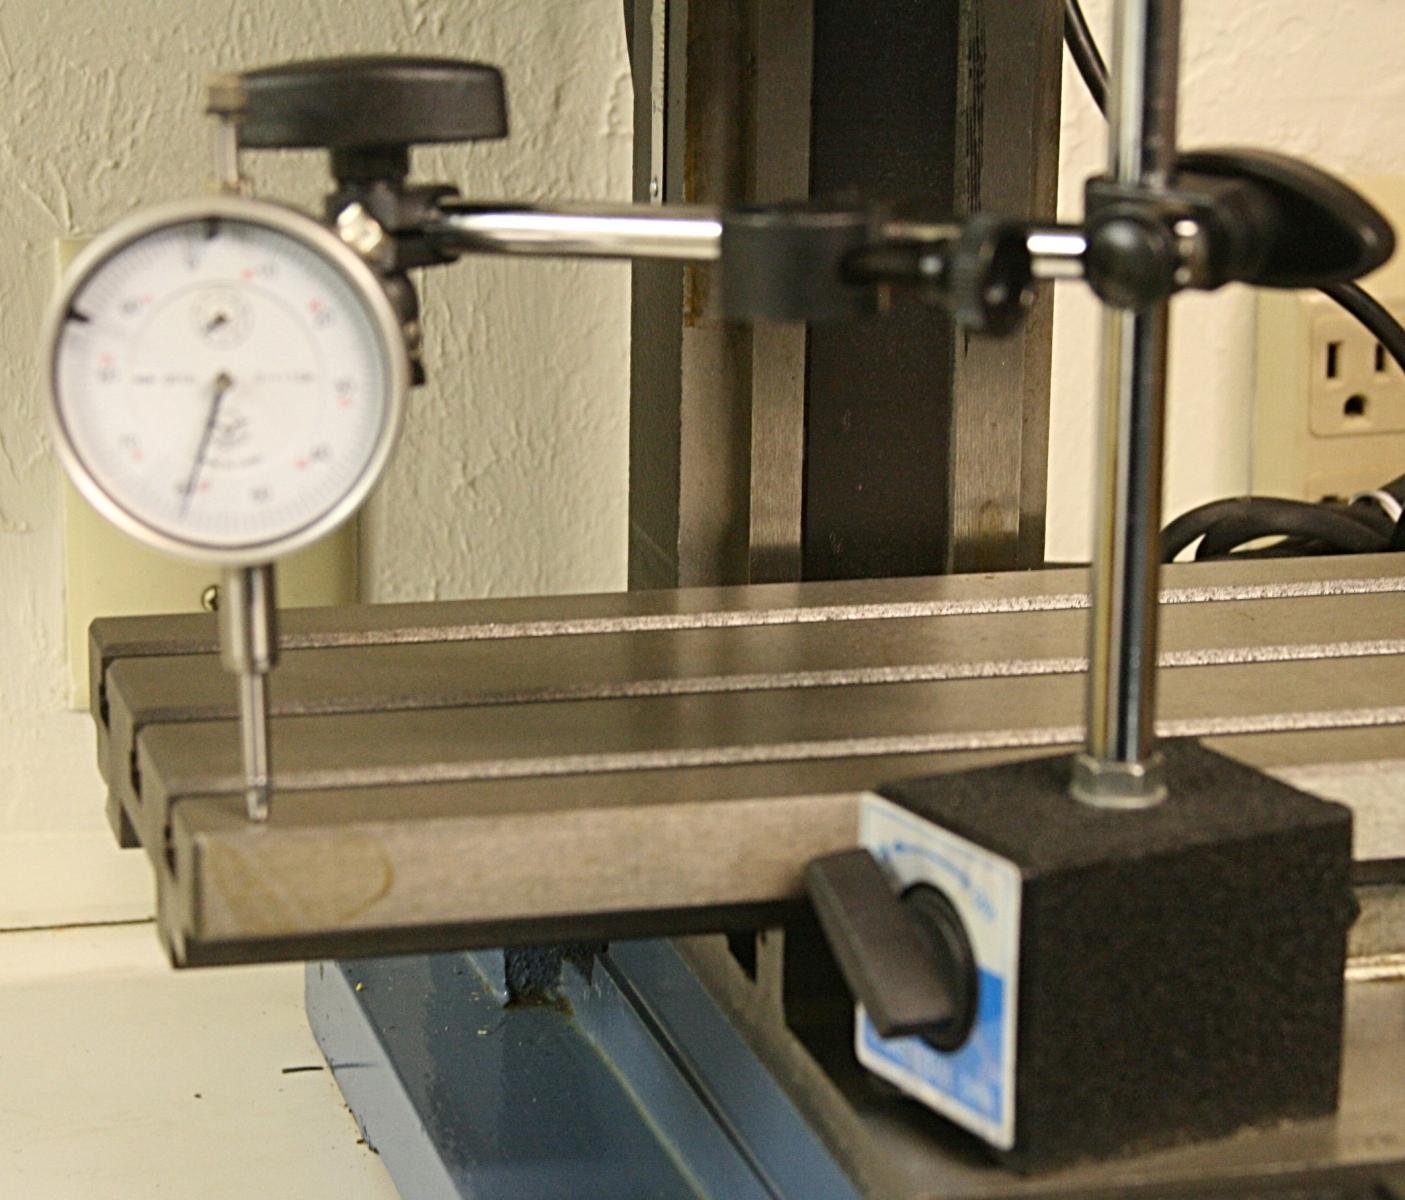
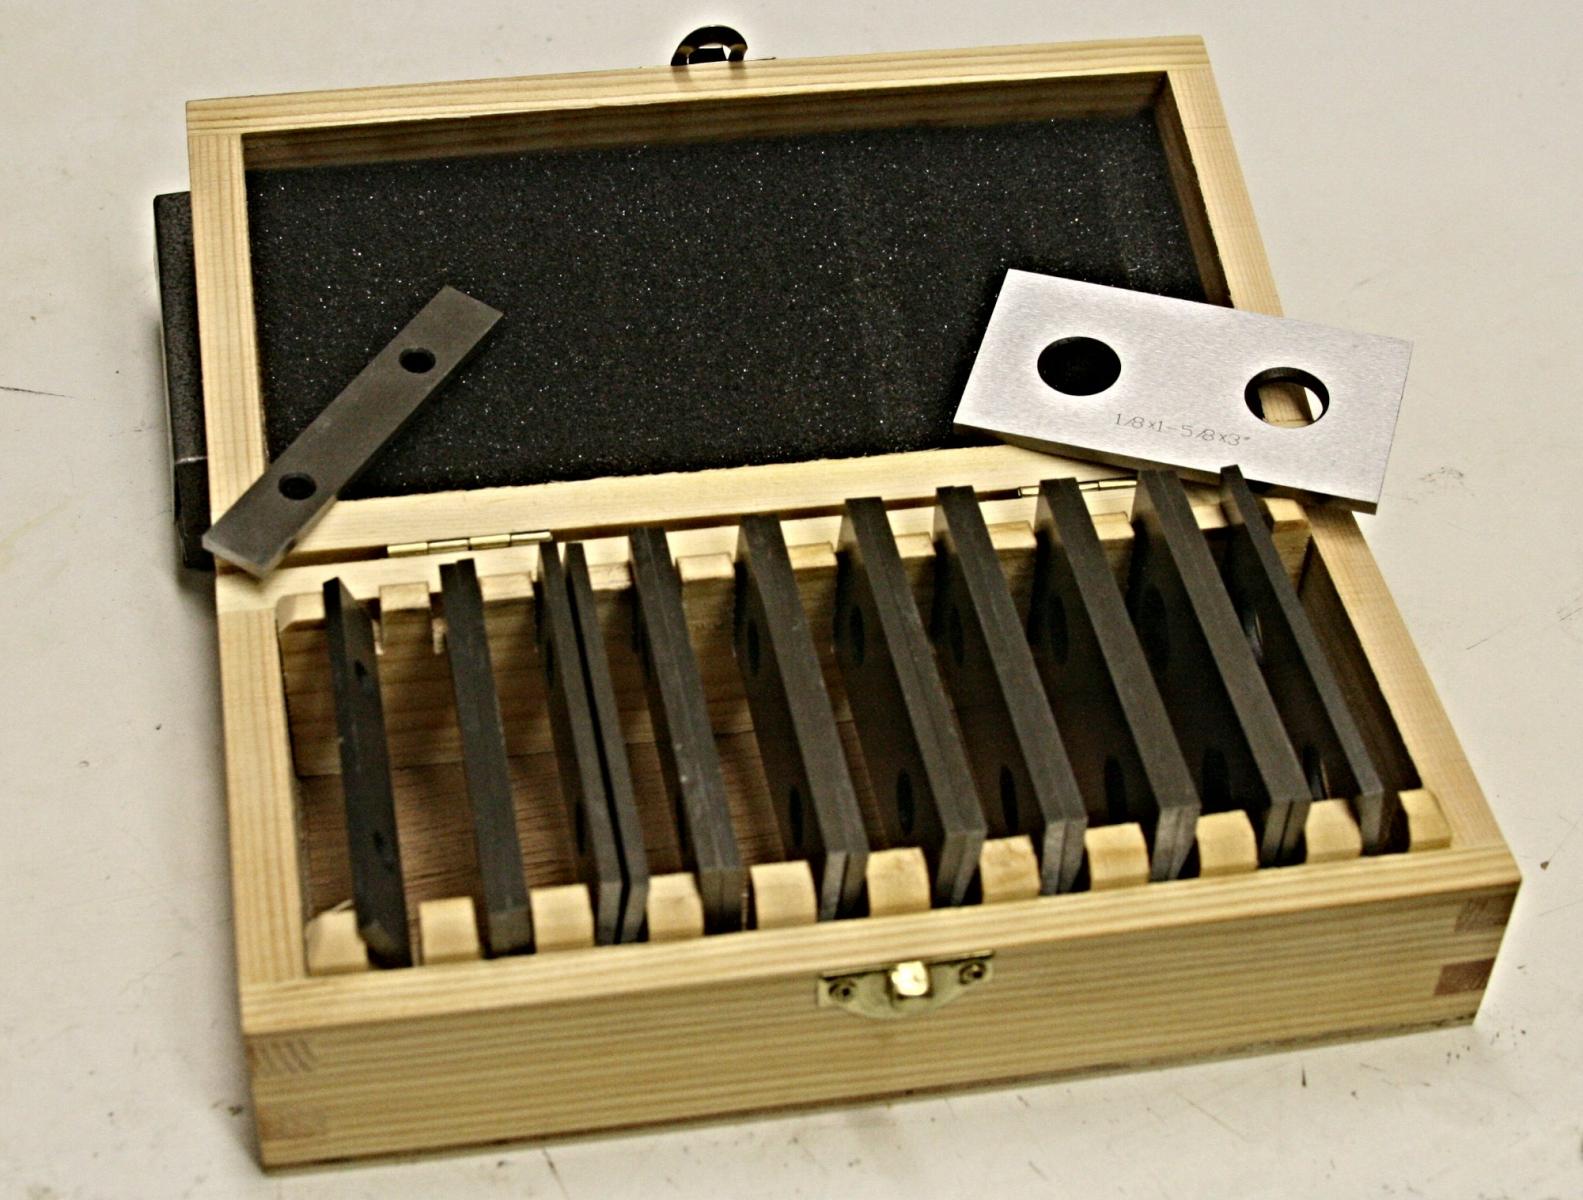
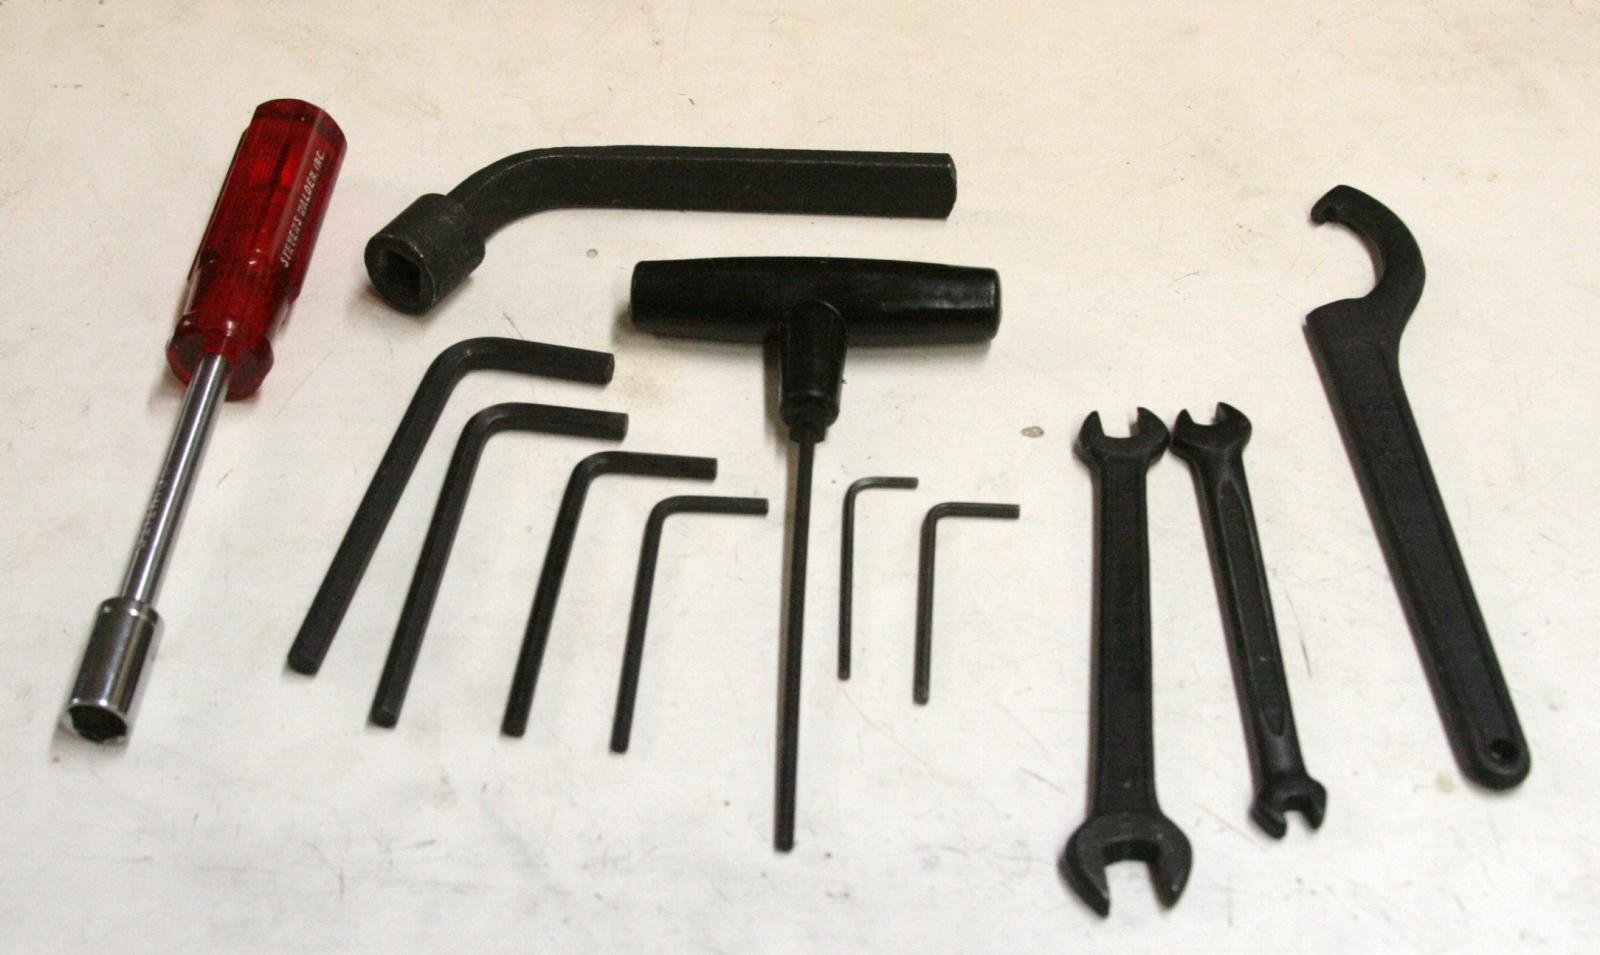
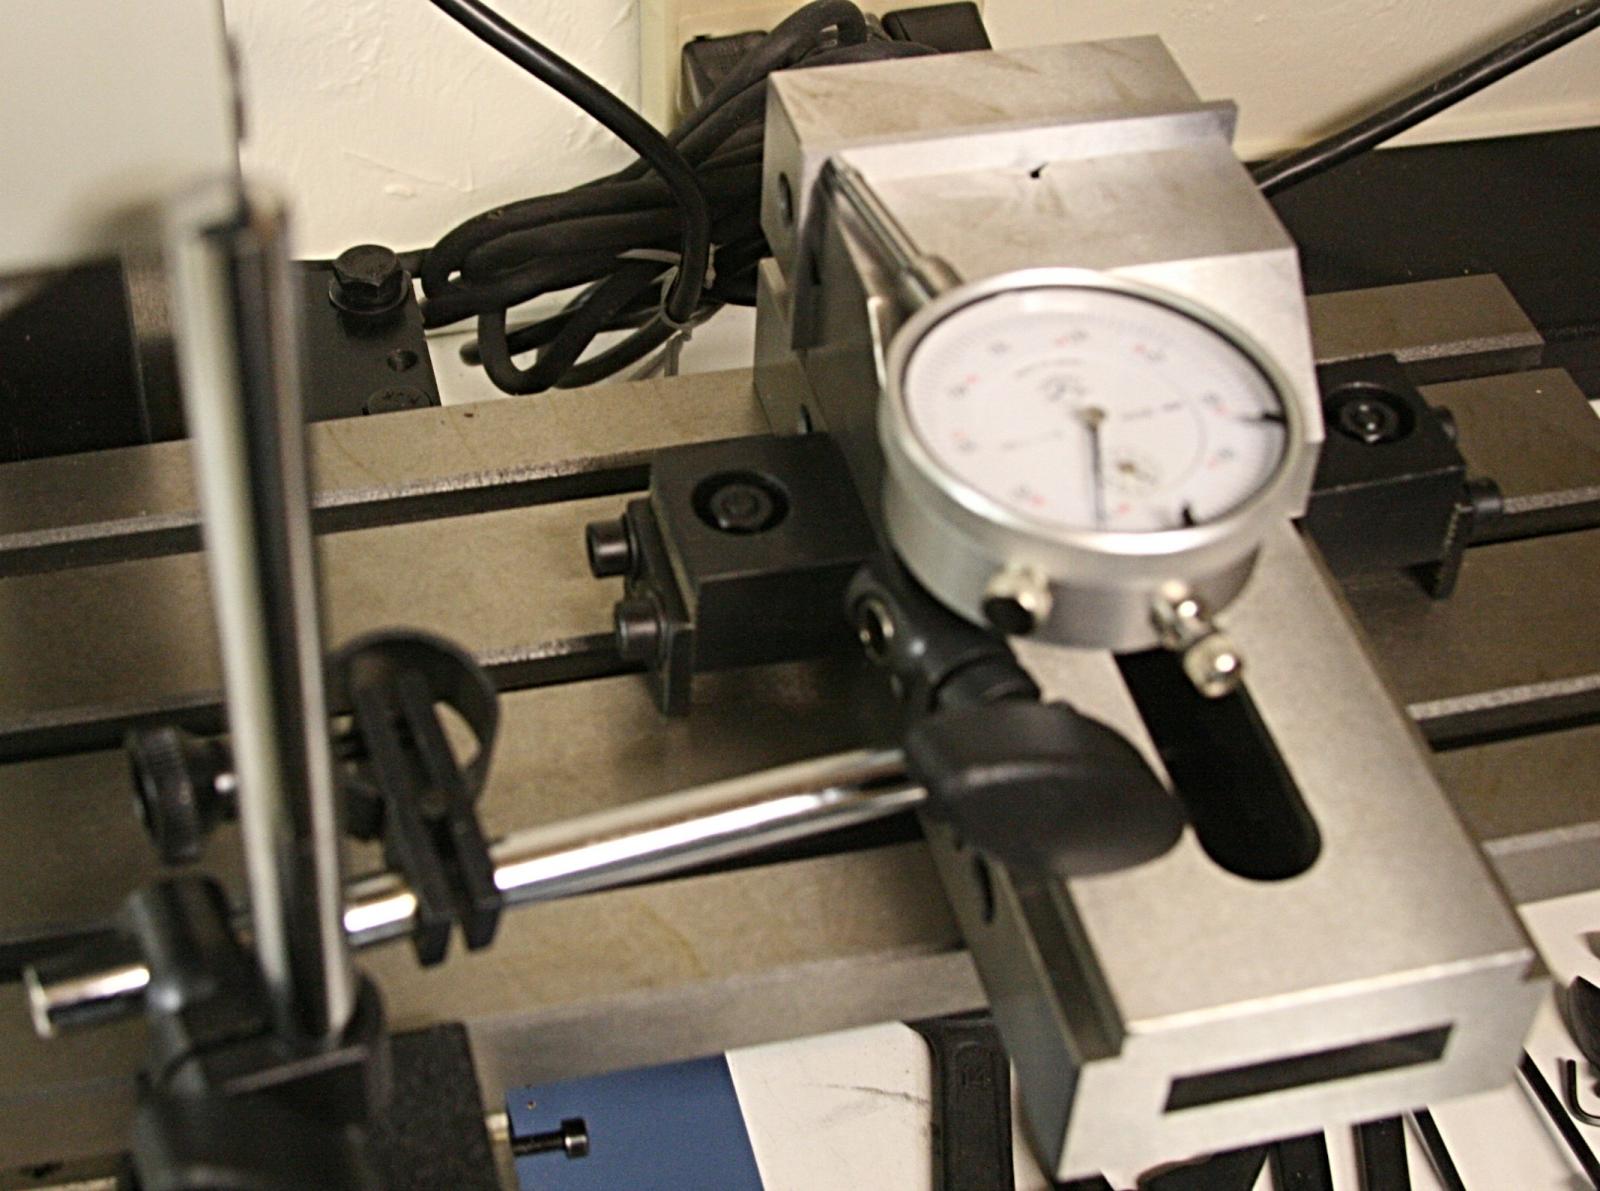
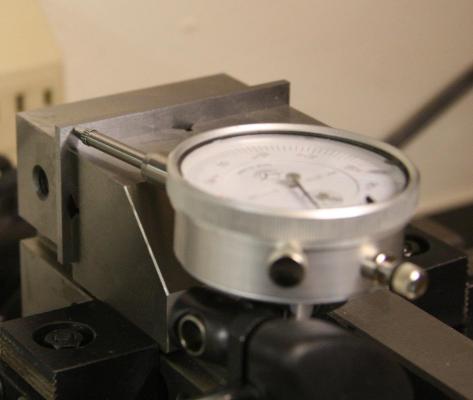
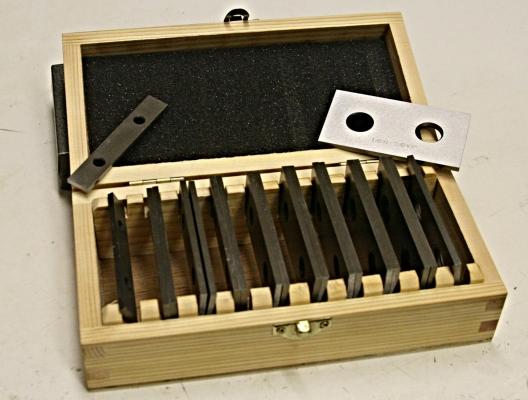
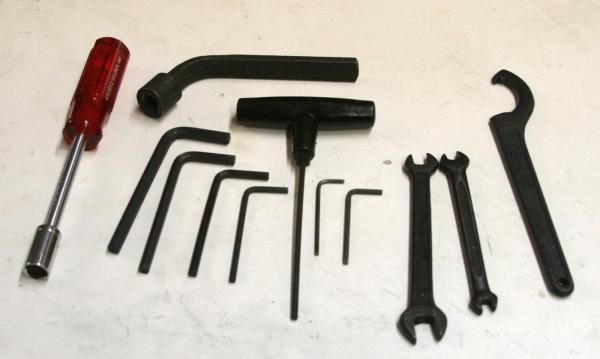
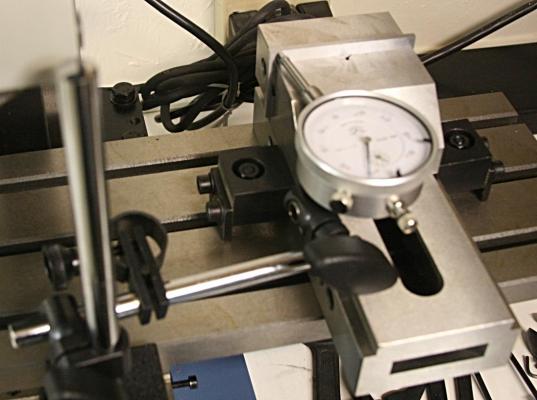
I hope you don't mind if I continue with a lot of details. But here are some more. I checked the table 'flatness' in the x direction by mounting a dial indicator as shown below. As you would expect there was virtually no difference in the readings as I moved the table back and forth. I have not yet checked the y direction nor the amount of back lash. I mounted the vise and for that I again used the dial indicator to make sure the clamping faces of the vise were parallel with the x-axis. I used one of the parallel plates, one of a nice set shown below also. It took a few runs back and forth and some slight movements of the vise to get it to be with 0.001 inch. After tightening the nuts (which are difficult to get to because it requires a socket head wrench), I verified the readings again. Here are some negatives: The mill comes with several wrenches but not all that I have used thus far. Below you see theirs plus mine. For example, to make adjustments of the gibs requires a 2mm Allen head wrench for the x and y direction, but a 2.5mm wrench for the z direction. Neither one was included. Then for the table locks the Allen head screw is 3mm. Here it would be nice to have a small handle, similar to the one for the z-axis. The nuts for the clamps used for the vise are recessed and difficult to reach unless you have a 10mm socket head wrench (which I have, but was not supplied). The little ring to set the depth of drilling has another Allen head screw which is also difficult to reach. A knurled knob would be better. The draw bar for the collets is hidden inside the motor casing. You reach it from the top with the bent wrench shown below. However it is a bit of hit and miss to use it. Then to loosen it with a small hammer, again it is a hit or miss. I made a small wooden block that fits through the hole on top so I can hit that to loosen the collet. If nothing else these are a few nuisances but not too important.

-
Harvey, as I am working with this little mill, I am finding other features that at first I did not consider important or at least did not think of. Here is one more example: the digital spindle speed indicator. On this model it is built in and right in front of my nose. The milling speed could be important and is related to the material being milled and the diameter of the cutting tool. On an other thread I saw a nice table of this and made a copy. To get the indicator for the MicroLux machine from Micro Mark you would have to shell out an additional $140 plus.
-
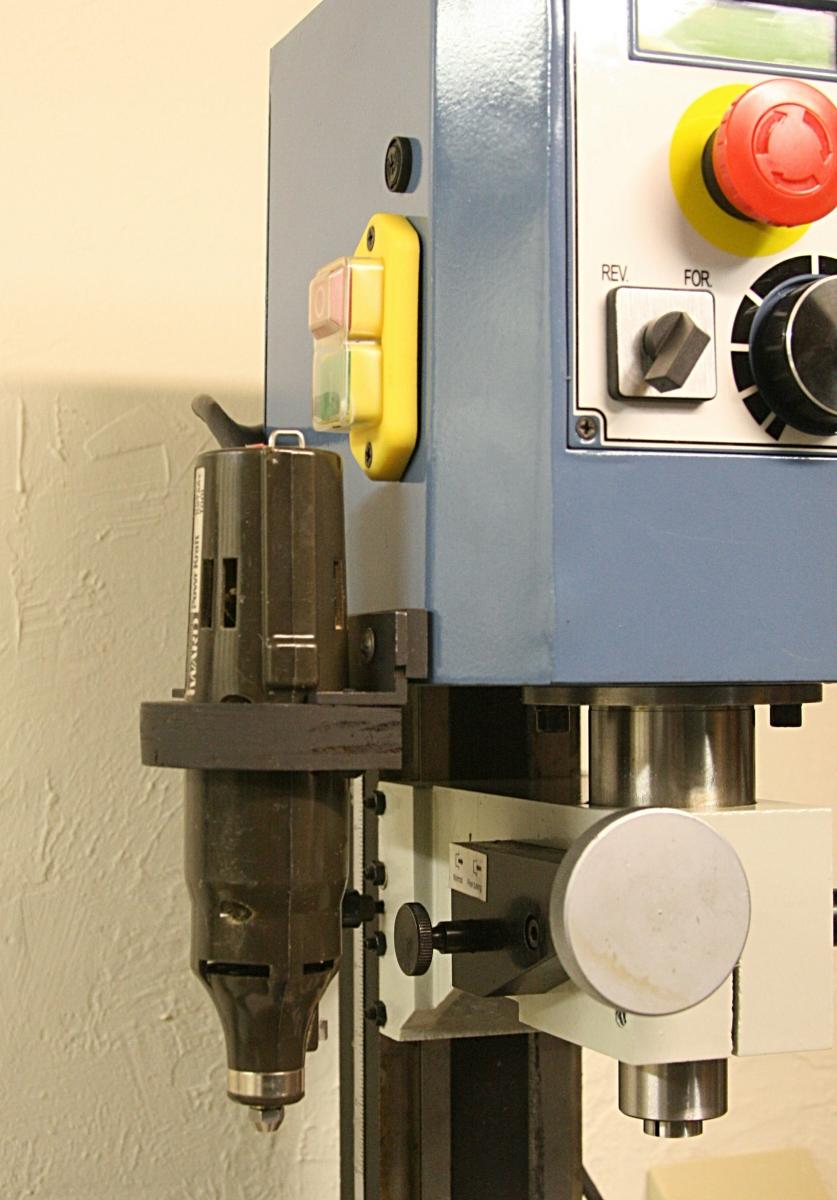
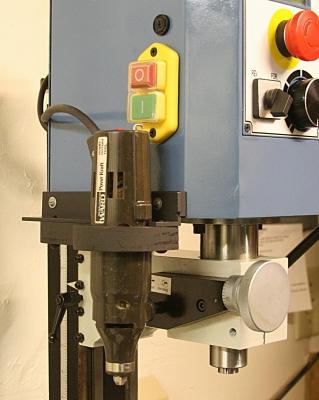
Here is Add #1. The mill has a top spindle speed of 5000 rpm. Not bad, but not fast enough for those tiny drills we use. On my old drill press I made a mod to adapt the old Dremmel-like tool that I have had for years. I did the same here. The mill's head (motor and all) moves up and down with the quill. So I made a simple bracket out of aluminum, drilled and tapped some holes and adapted it to the motor frame. Now I have not made any modifications to the mill. I simply took out two #8-32 screws and replaced them with two a bit longer. I still have the old screws should it be necessary to go back. The Monkey Wards tool fits snugly inside the wooden part that is bolted to the bracket and all is fairly stout. Not perfect, mind you, but good enough for this little motor that goes fast but does not need much force to spin a small tool. Now I can mount a work piece on the table and use the precise way of moving it x and y under the Monkey W tool. The fine control nob (the large disk in front) can help to control the z-axis should that be important. I don't even know how fast the Monkey W goes, but my guess is around 10,000 rpm or more. It has 120 vac input and I wonder if anyone knows of a simple way to control the speed of this thing.

-
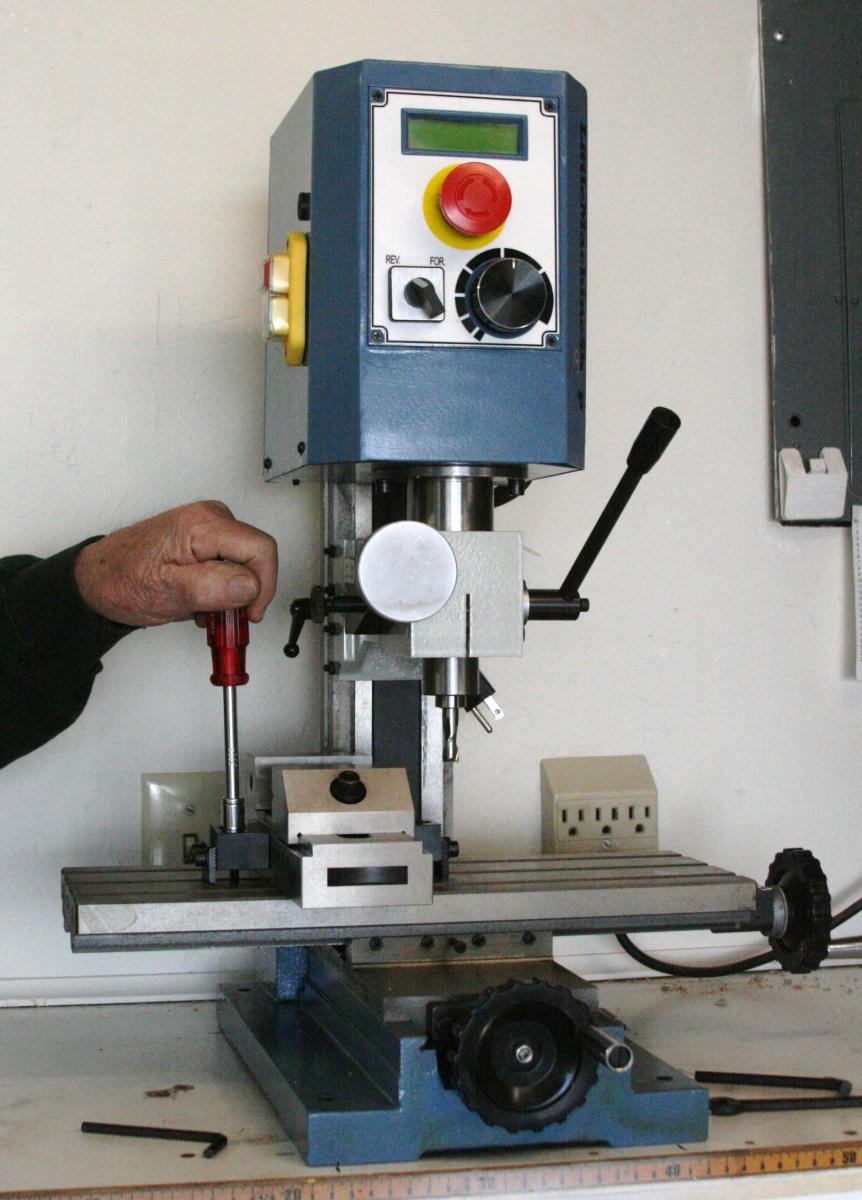
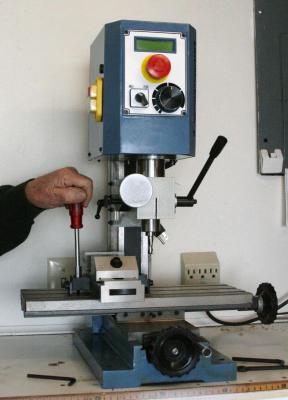
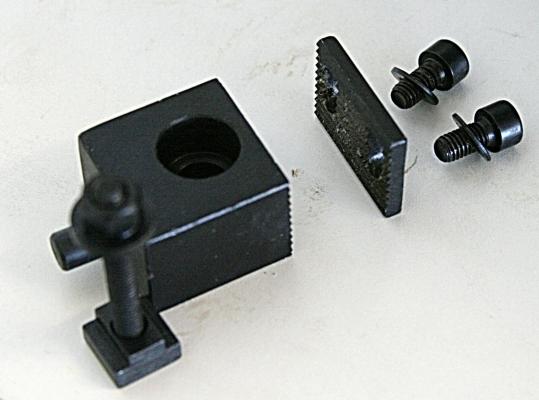
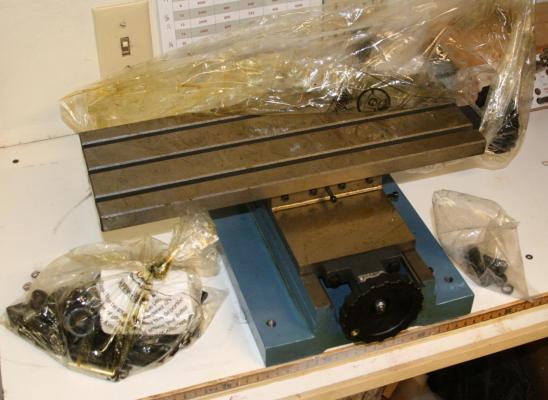
OK. Here is an update. And Vic I am doing this also for my own 'review'. As I take these pictures I often realize something that I could have skipped over and learned the hard way later. But first, here is the machine after cleaning it with some 'mineral spirits' or paint thinner. It was messy but not too bad. I then applied a thin coating of special oil designed for just that purpose. Then I started to assemble the various parts and learn what the controls and some of the features are. My admiral helped me steady the top when we mounted the top to the base with four screws. Note this is a rigid base model, not the type that you can rotate 45 degrees in both direction. Ones the unit is secured and checked for squareness, it should stay that way. You can see that the overall design is simple and compact. The controls in front include a digital readout of the spindle speed, a forward/reverse switch (something I may never use), an emergency stop button and the speed control potentiometer. The large round disk you see to the left is the fine adjustment knob for the z-axis movement. The coarse adjustment is with a wheel similar to what you see for the x and y. The z wheel is in the back. The start/stop buttons are along the left side. The table is 15.7 x 5.7 inches, a lot larger than the other machines I looked into when I did my search. Likewise the x travel is 11.8 inches, the y =5.9 inches and the z=8.7 inches. What I like also is that the screws and the wheels you see are in decimal inches (not fractions such as the Grizzly mini mill). You can also get the machine with mm, I believe. There were a couple strange things while assembling some of the parts. The draw bar that pulls the collets up into the quill was loose inside the quill and not visible. When I tried to insert a collet, it would not work. I climbed on top and found the drawbar sitting loose but upside down. Then when I tried to mount the vise (a nice 3" precision type) the two special pieces, that fit into the holes of the vise, would not make proper contact. The feet of the serrated plates would not go down further. I had to take them apart and flip the feet over to let me make the correct adjustment. But these were just little things that is part of my learning lessons. The next step I want to take is to make some adjustments of the gibs, the thin strips of steel in the dovetail beds in all three axis. There are some set screws along each direction that can be loosened or tightened to reduce the backlash and stiffness of the bed. In addition I want to check the squareness of the table and mount the vise so that it is parallel with the x-axis. It involves using a good dial indicator and a magnetic holder that I happen to have. All of this is described in the manual that is included, of course. So more later.

-
The idea of using saw blades for this kind of tooling is not mine. There were some other threads about making moulding using razor blades carved with a grinding wheel. Then Lad ? in Australia, used this technique to make spindles for a wheel. All you have to do is remember, but then it becomes difficult to remember where it was that you saw or heard it before. This approach should be good to make many (several) barrels of the same size.
-
Ok Jud, please help me with the grease stuff. Don't hold your breath, please.
-
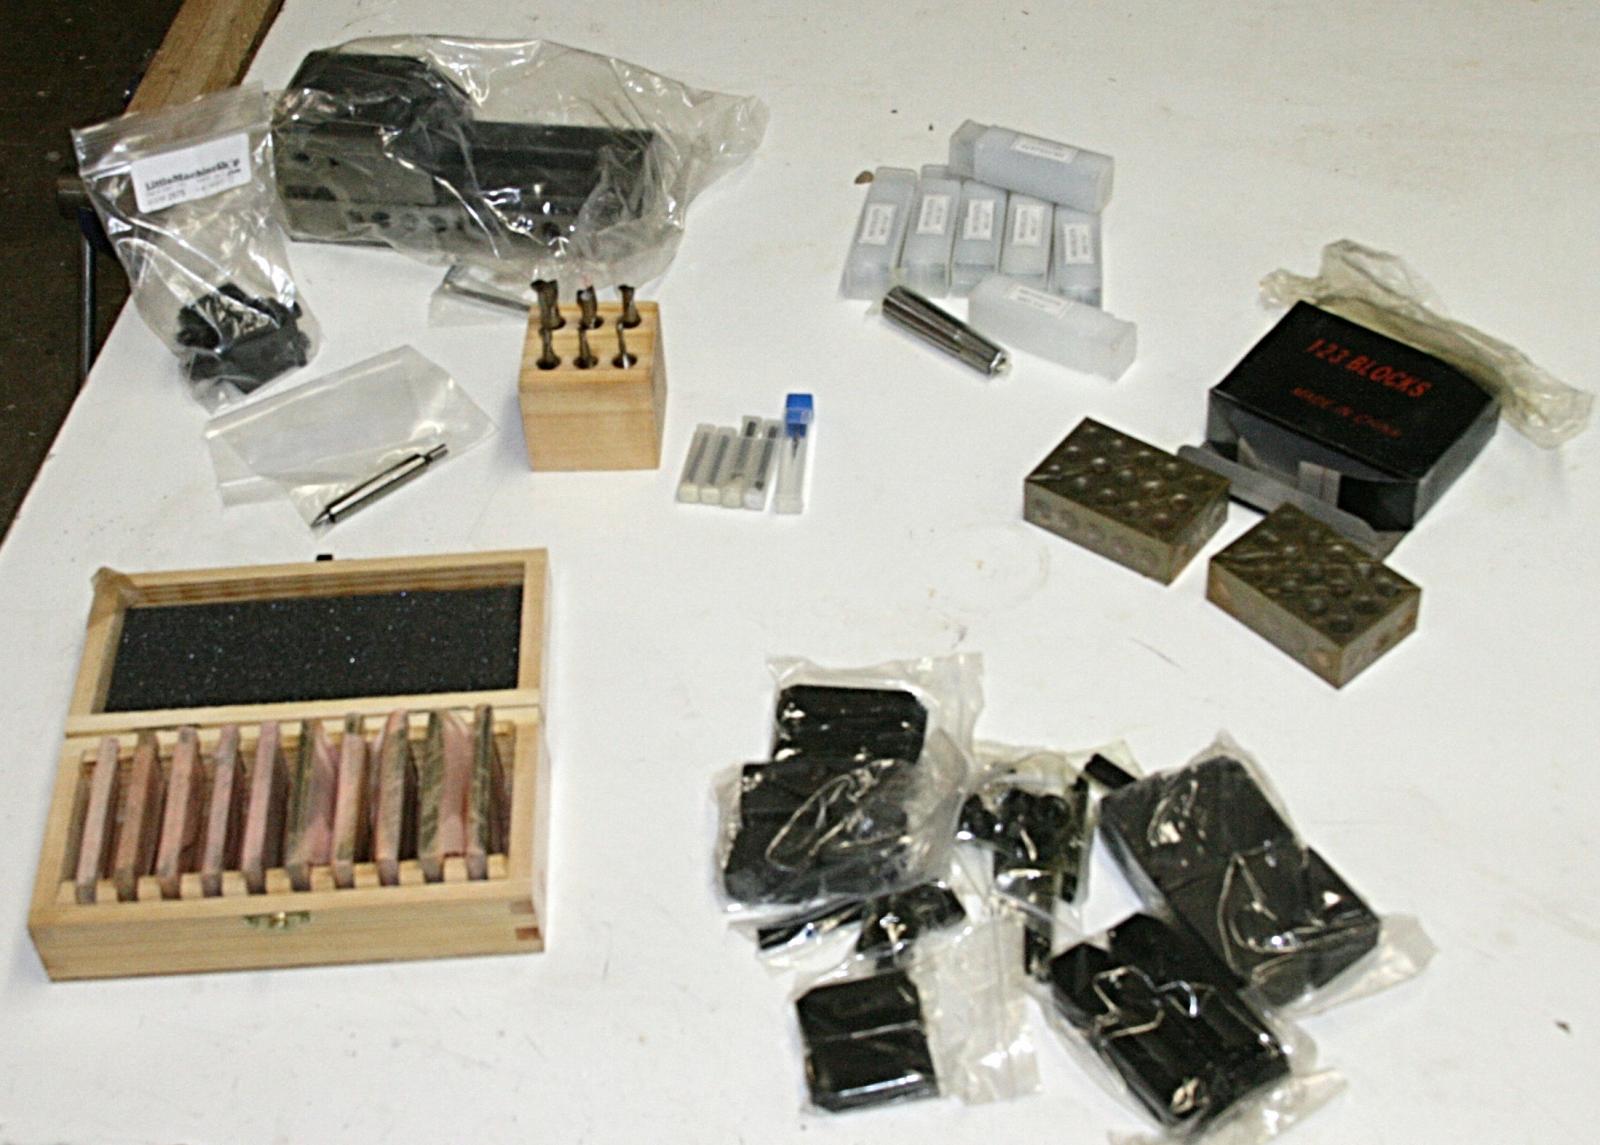
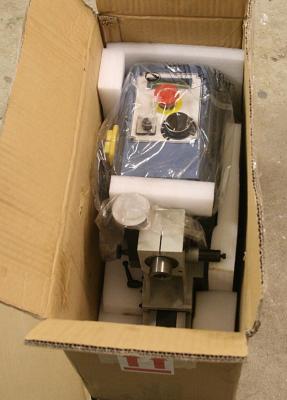
Earlier I mentioned this little mill from Little Machine Shop and got several responses including a request to review this mill when I received and tried it out. Here is the start of this (perhaps ongoing) subject. I will explain why I chose this model a bit later, but let me mention now that I had ordered the machine and tooling kit last Thursday. Today, Monday, it was at my front door. Not bad for a weekend delivery. When I opened the smaller package of accessories I found the parts were all there as ordered. However, the first thing I noticed is that most metal parts were liberally coated with grease. Nothing new, of course, and perhaps necessary since all (or most) parts are made and shipped this way from China. I will be spending some time tomorrow 'degreasing'. The same applies, of course, to the base and to a smaller extend to the top with its motor etc. Overall, things are OK. The instruction manual, I am reading now, included a spare fuse on top. Not sure yet where it goes, if needed. I am going to skip over a lot of details later on and get into the guts of this thing (including why I think it is a neat little item for modeling work).


-
Anthony, my thanks also. I have not yet digested all the information but it will be of great use to me later. Lots of barrels coming up in my next built and it will involve lowering a boat.
-
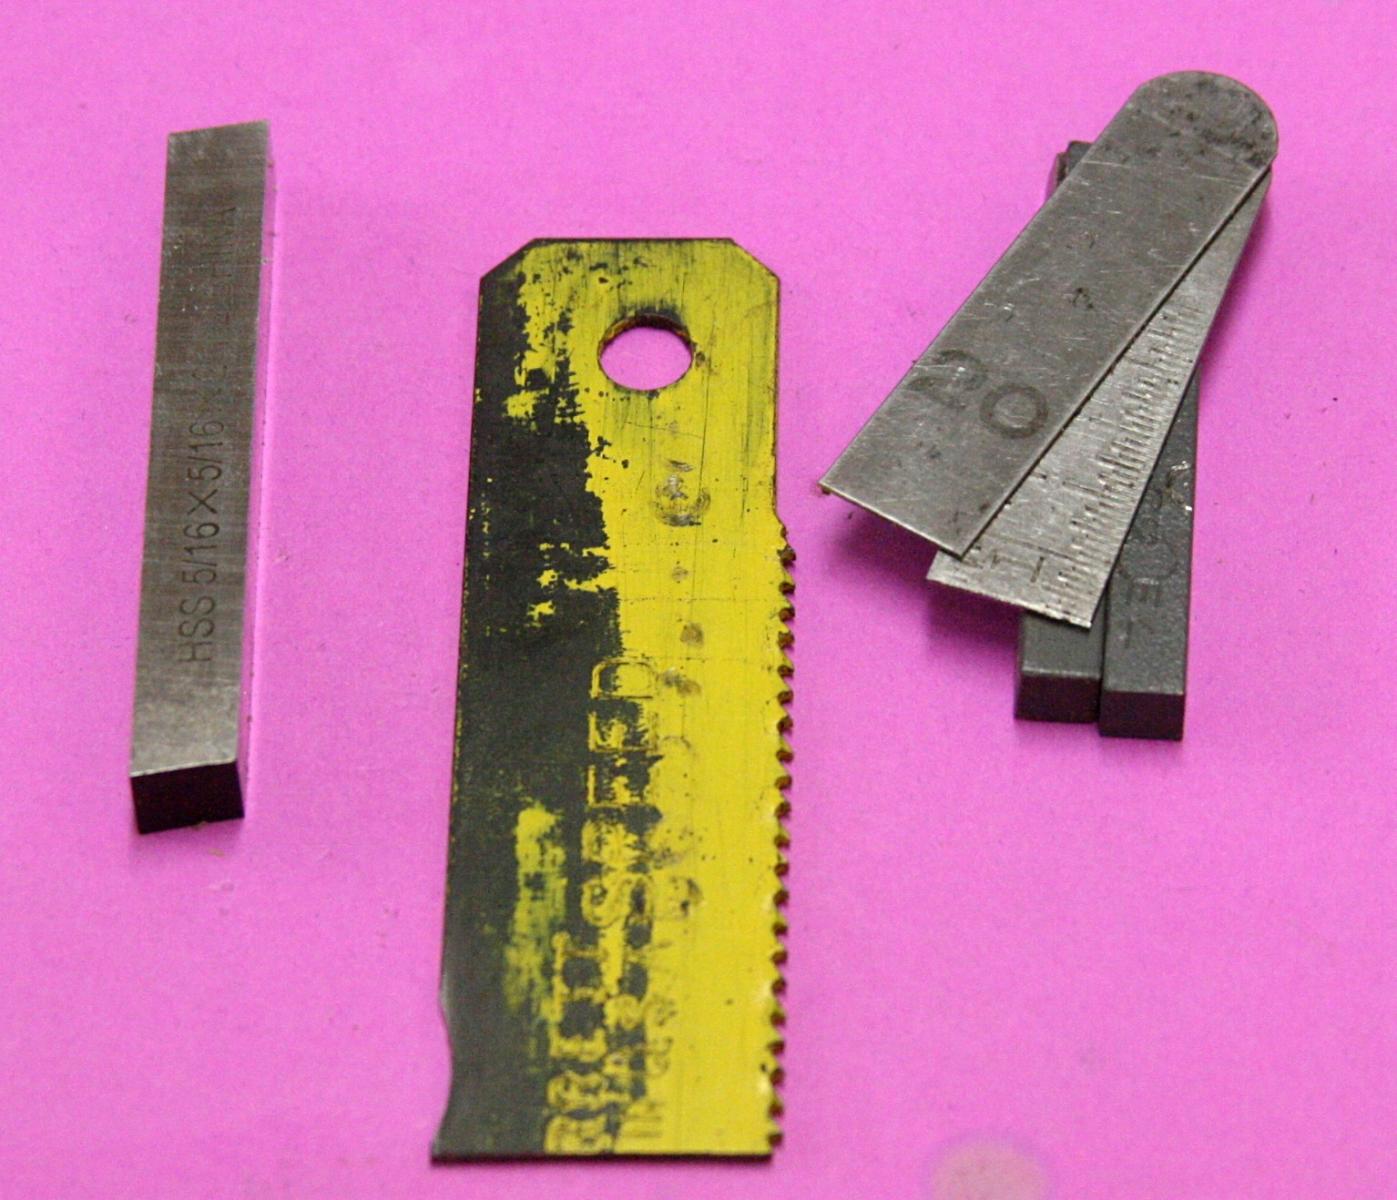
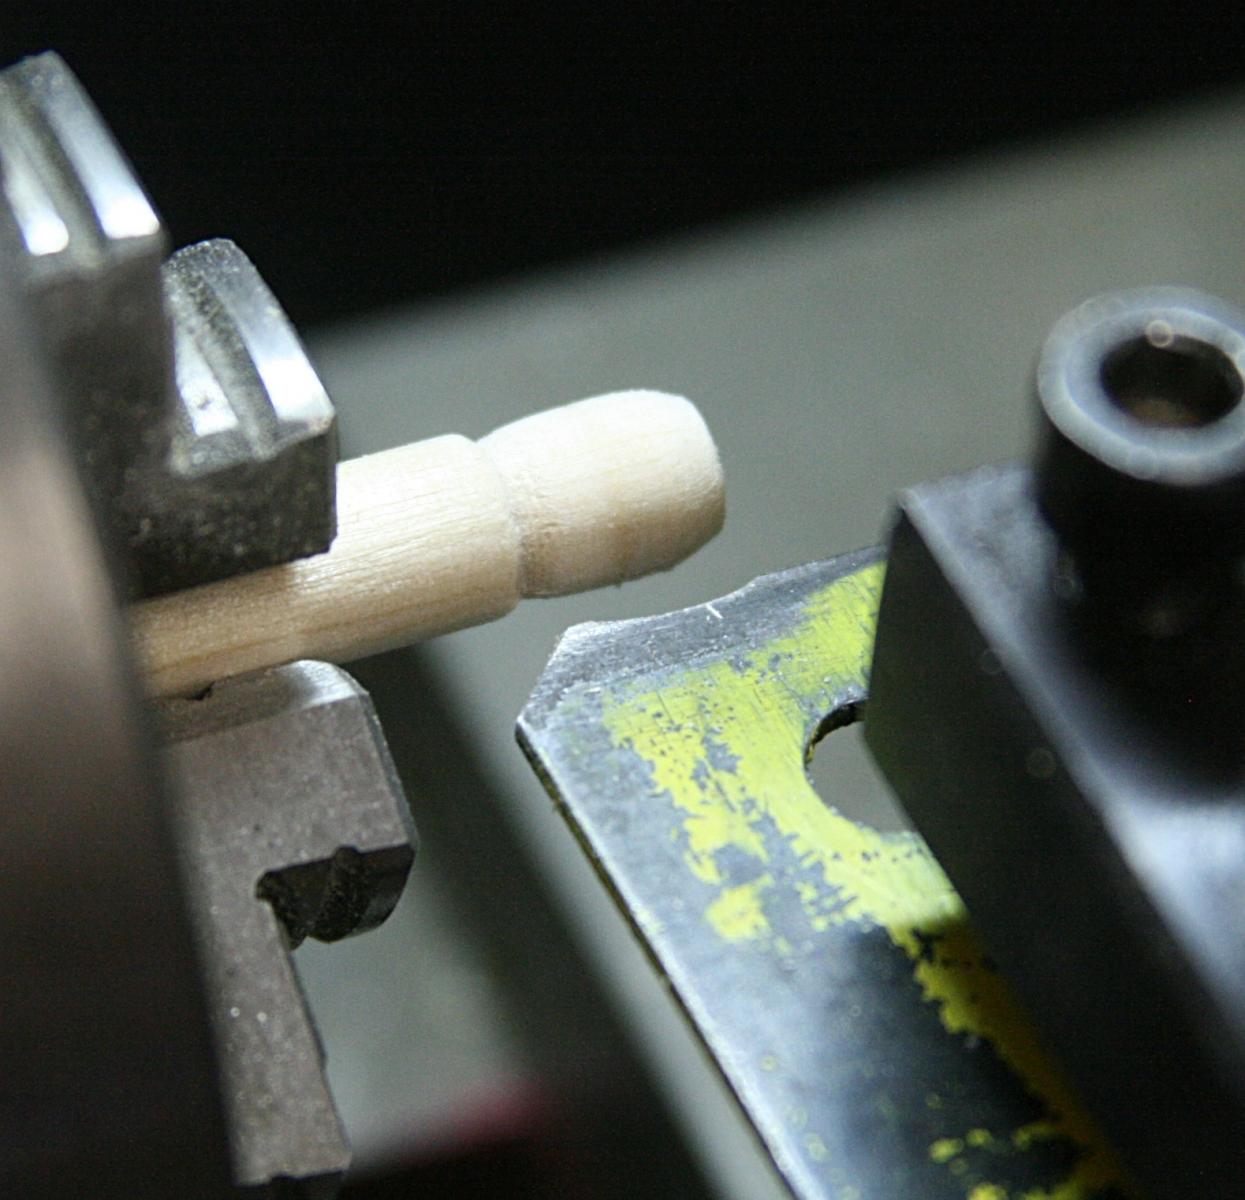
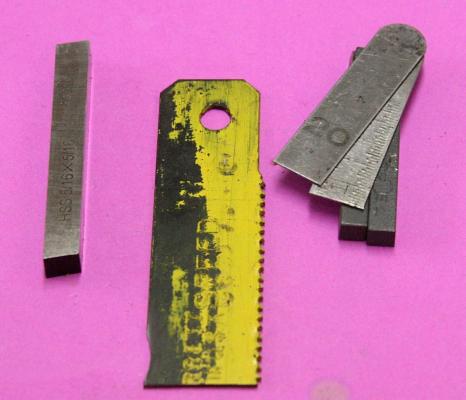
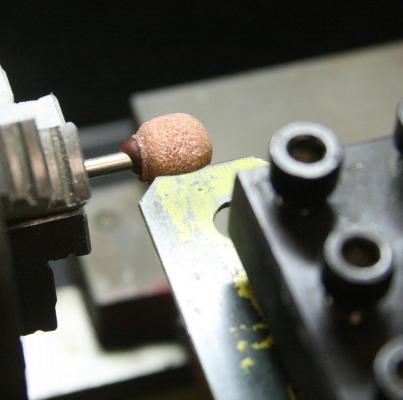
I am getting away from my model, but this is a barrel of fun. For my next project I need a lot of barrels. So here is what I intend to do: I took a piece of old but thick saw blade (0.053 inch thick). Put it in the tool holder of my mini lathe and some shims so that the top edge of the saw blade was above the centerline. I then used a round Dremmel grinding stone to cut the contour of a barrel shape in the front edge of the saw blade. Then I put the blade back in the tool post with a thinner support. That way the front edge is now close to the centerline and there is a slight clearance below this edge. A piece of dowel and there is a barrel in the making. Earlier I have tried this and included two small grooves for the bands. It worked but I like the result of using the black pin striping tape better. I have ordered some from Model Expo in three widths, including the 0.010, 1/64 and 1/32 inch wide. The plan is to put this on the dowel before I cut the barrel loose. I might also put a dab of Verathane on it.

- 732 replies
-
- 5
-

-
- constitution
- model shipways
- (and 1 more)
-
The closest I ever came to knitting was doing some macrame and tying a Turkish knot for the tiller on my little sailboat many years ago. Here is one on the deck of the USS Constitution in Boston. It fits around one of the eyebolts. I made mine to go around a bar, or actually the handle of the boat's tiller.

-
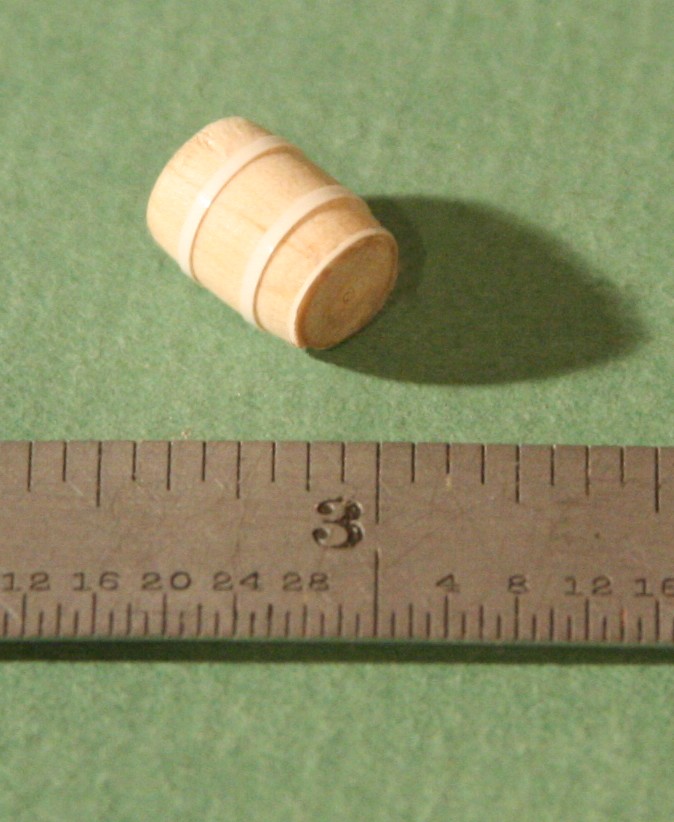
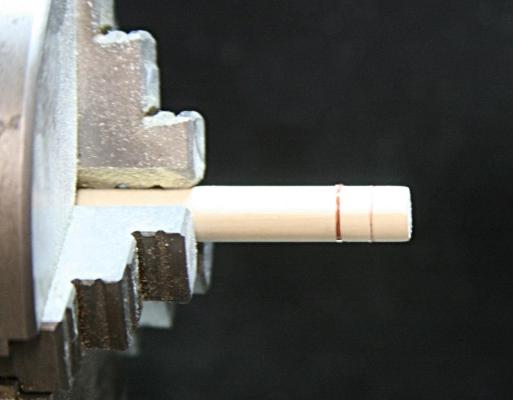
More about barrels. I tried it one more time with the white tape. I think with black this could work out ok. The 'barrel' is not quite the right shape, but for this try I didn't care too much. The 2.5 inch width in two places and the .75 inch at the top. I could have added the bottom also, but got lazy. When I am going to order more tape I might see if they have .020 inch width in black.

- 732 replies
-
- 2
-
-
- constitution
- model shipways
- (and 1 more)
-
Looking at all of these web sites with the carving tools, I wonder why anyone would pay $45 to $70 for one of those chisels (unless you are a real pro). It also seems that there is a mix-up here between 'carving' and 'turning' chisels. I am sorry, but I think that when it comes to carving, I would want to get some 'cheapies', learn how to use them and, perhaps then, buy some good ones. I don't recall the thread, but I thought there was one that explained how you can make your own using good steel. I have briefly tried it, but decided I am no good at it and not an artist like some of us here. Any one? Janus??
-
Your quote: Fortunately, many, many years ago, my mother insisted that her sons should learn to sew - tho' how she ever knew that I'd one day need to sew miniature sails, I have no idea !!! BTW ... here's a great link showing how to make those Flemish coils easily. (Yes, Jay, it most probably does look very familiar to you !!) My mother did not teach me how to sew, but I was always curious how a sewing machine worked. No I did not take her machine apart to find out, but I did learn how to sew on my wife's machine. I even made a quilt (but don't tell anyone, ok). I now also know how that bobbin and feed thread get together like a pair of dogs in heat. Again these little things we learned did come to good use these days (or may be haunt you amongst male friends). I tell people that this hobby has so many facets and interesting trials and errors, that it is never boring. Keep up the good work, mate. Some day soon I will have to follow suite and make my boats for the Connie.
-
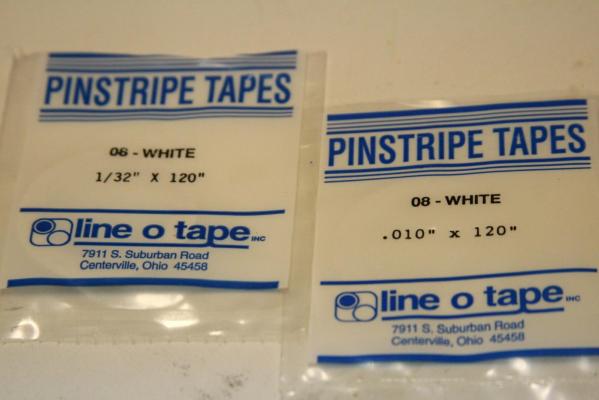
Hi Geoff, I don't have the mill yet. I just ordered it on Thursday. About making barrels and those bands. Here is a possibility in addition to the shrink tape Lambsbk used. I have some pin striping tape that I was going to use for window panes, but never got around to using it. Sorry, the picture is not very clear, but the tape I have is white, but it is available in black and other colors. The one to the right is 0.010 inches wide which translates to 0.75 inches actual. The other one is 1/32 inch wide (about 2.5 inches). I tried to add some 'rust' and that is questionable. Any way you get the idea.
-
Thank you David. All it takes is time and patience. Lambsbk I like your barrels. There was an earlier discussion about the sizes of barrels. If you are interested go to http://modelshipworld.com/index.php?/topic/2151-barrel-sizes/?hl=barrels#entry55441 When I find time I'll have to make some more out of dowel like I did before (in the post above) and forget about those dumb castings. In fact, I am sorry I even showed them and wasted my time trying to put those bands on by hand.