HOLIDAY DONATION DRIVE - SUPPORT MSW - DO YOUR PART TO KEEP THIS GREAT FORUM GOING! (Only 72 donations so far out of 49,000 members - Can we at least get 100? C'mon guys!)
×


Modeler12
-
Posts
1,716 -
Joined
-
Last visited
Content Type
Profiles
Forums
Gallery
Events
Everything posted by Modeler12
-
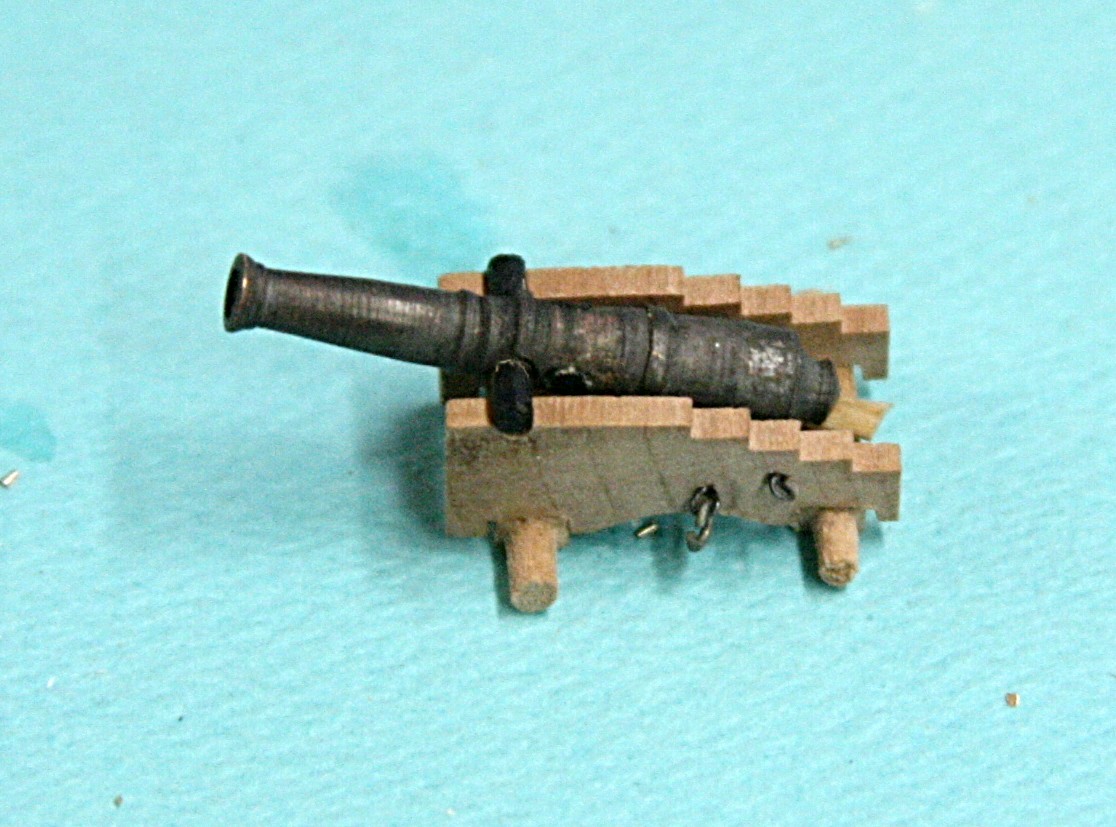
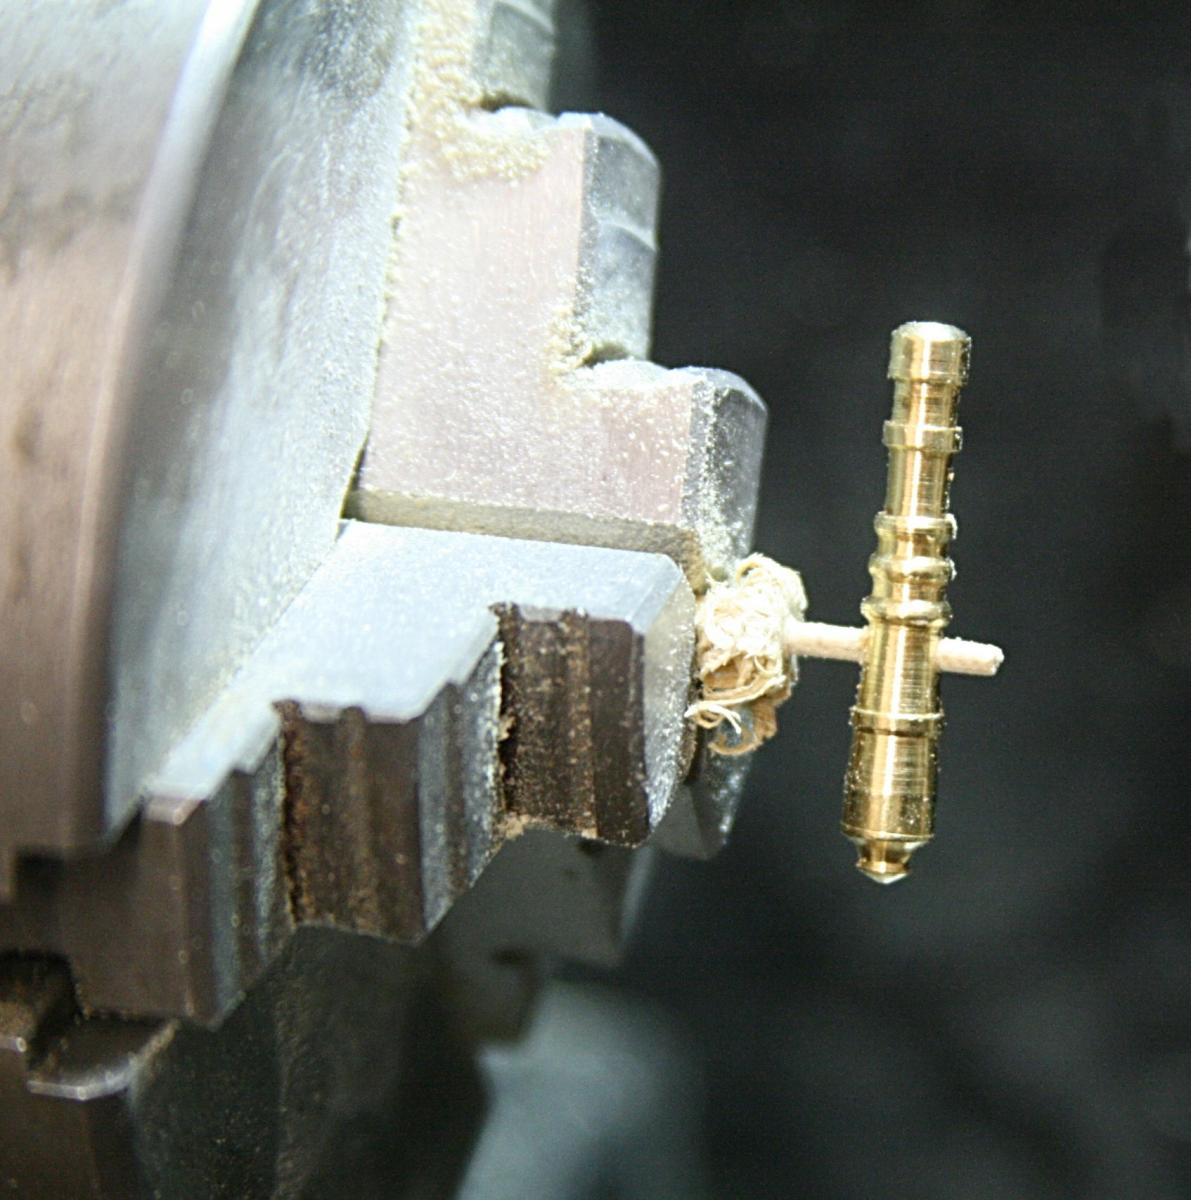
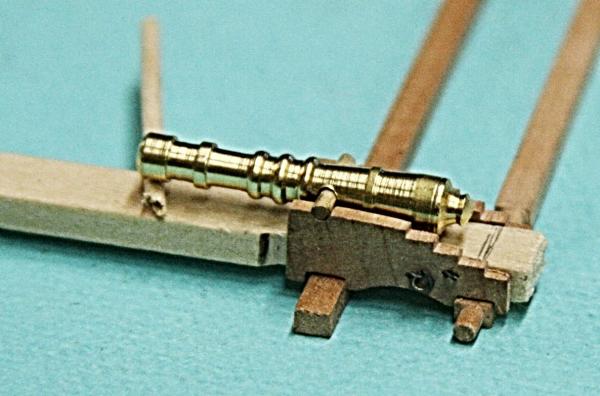
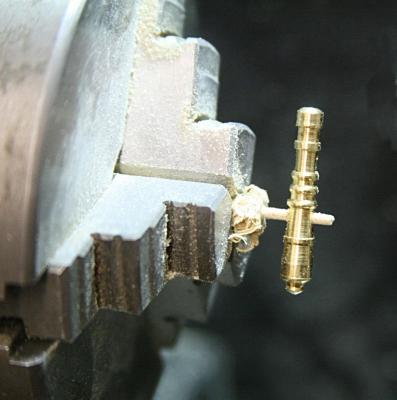
 Back to the question about the trunnion location in the barrels. I took Mark's suggestion and relocated the hole in my 'prototype' barrel. I first turned the bands down and then drilled a new hole (which was not easy in this tiny piece). After I blacked the barrel again, I plugged the hole, inserted the trunnion in its new location and added a touch of black paint. However, when I tried this on one of the carriages I found that I had moved the hole too far forward. It was actually less than 1/8 inch but too much. Now I know what to do on the 'standard' barrels. I will still keep this one and considered a 'steal'. After all, the Pelican had been a privateer and stealing was the norm, including gun barrels.
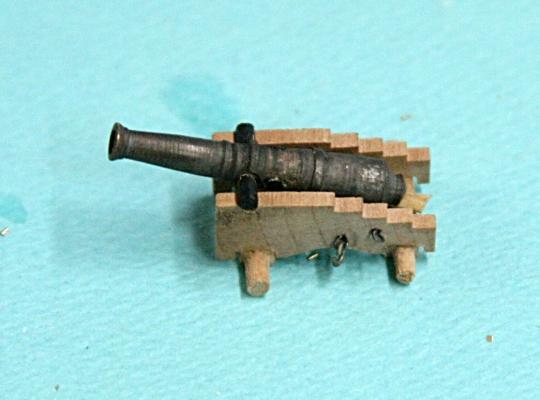
-
Martin, go to the web site for Little Machine Shop. There is a section 'learning center' that gives some good advice and instruction on how to use a mini mill. They also are not picky about mentioning several other mills (and lathes) and I found them to be an excellent source for replacement parts for all sorts of machines. In addition I found that their tooling is a lot cheaper than Micro Mark's. I am sorry if this sounds like a sales pitch, but I have had some good experiences with them for my mill and an old Harbor Freight lathe. http://www.littlemachineshop.com/default.php?Source=Google&gclid=CKfPtMS1x70CFZNqfgodAyUAPw BTW the 'instruction manual' is for an older model than the one I have now, but most of what is there applies to several other mills of this caliber. Revenge, you helped me a lot when I decided to buy this mill. Thanks again.
-
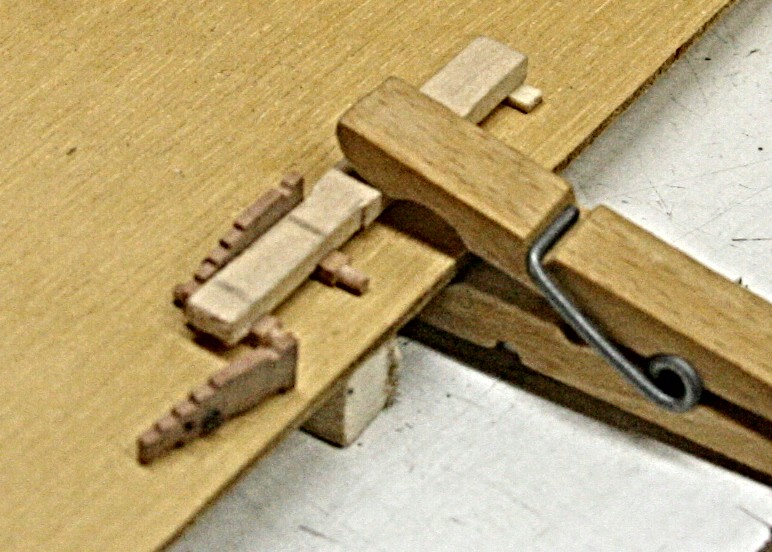
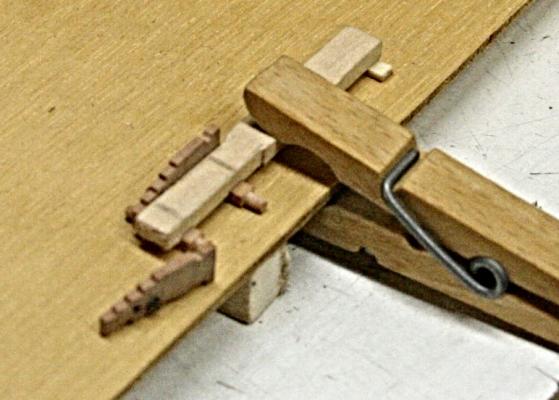
Here is what I meant about the 'bonding fixture'. It was well coated with wax before use. Meanwhile I am cutting corners and making the axles all the same length. That means that the wheels should be in line, rather than offset; or the shafts will stick out a bit more . . . . Likewise, when it comes to the saddles I am going to use them straight up and down rather than slanted as the drawing shows. They are underneath the trunnion and both would take the weight of the gun as it sit there. Besides, it is easier for me.
-
Thank you fellows. I will follow up on that. The problem with the McMaster Carr Item 9666K11 wire is that it is very stiff. It is used for piano wire and does not bend easily. I could temper it, probably. But I will get some of the brass wire. Looking further down the page of the McMaster catalogue I noticed tin coated copper wire down to .003 inch. That might be interesting.
-
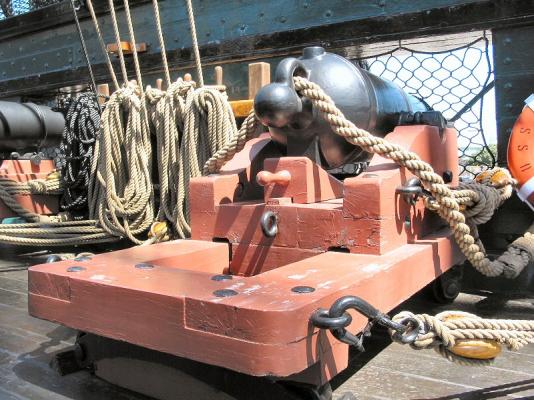
Chuck, at least on the Constitution, the second eyebolt was used for the second set of tackles. One was for the barrel as it slides on the carriage frame and the second was to pull the carriage back and forth (or even somewhat sideways for aiming).
-
Batavia by *Hans* - FINISHED
Modeler12 replied to *Hans*'s topic in - Build logs for subjects built 1501 - 1750
Hans, what you called "het holle wulf" is probably the 'counter' in English. Yours is concave, but most others are convex. What is the origin for the word 'wulf'? Would this translate to 'the hollow . . . . .'? -
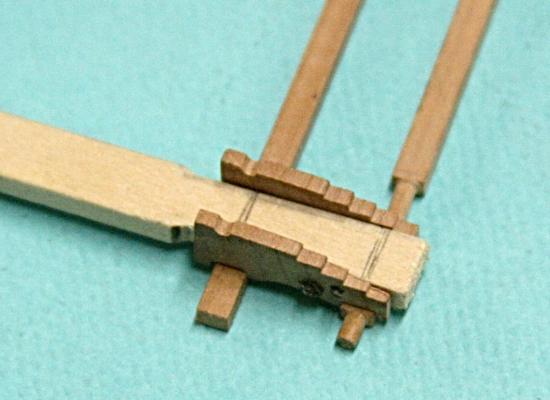
Here is the first carriage without the saddle (or transom as Harold calls it). I also have to add the bolster, stool bed and the rod that goes across. The shape of the saddle will depend on what I do with the gun barrels Because of that the wheels are still loose (and perhaps they will remain so). I also improved the bonding fixture by clamping the fixture to the axles and then gluing the sides to that.

-
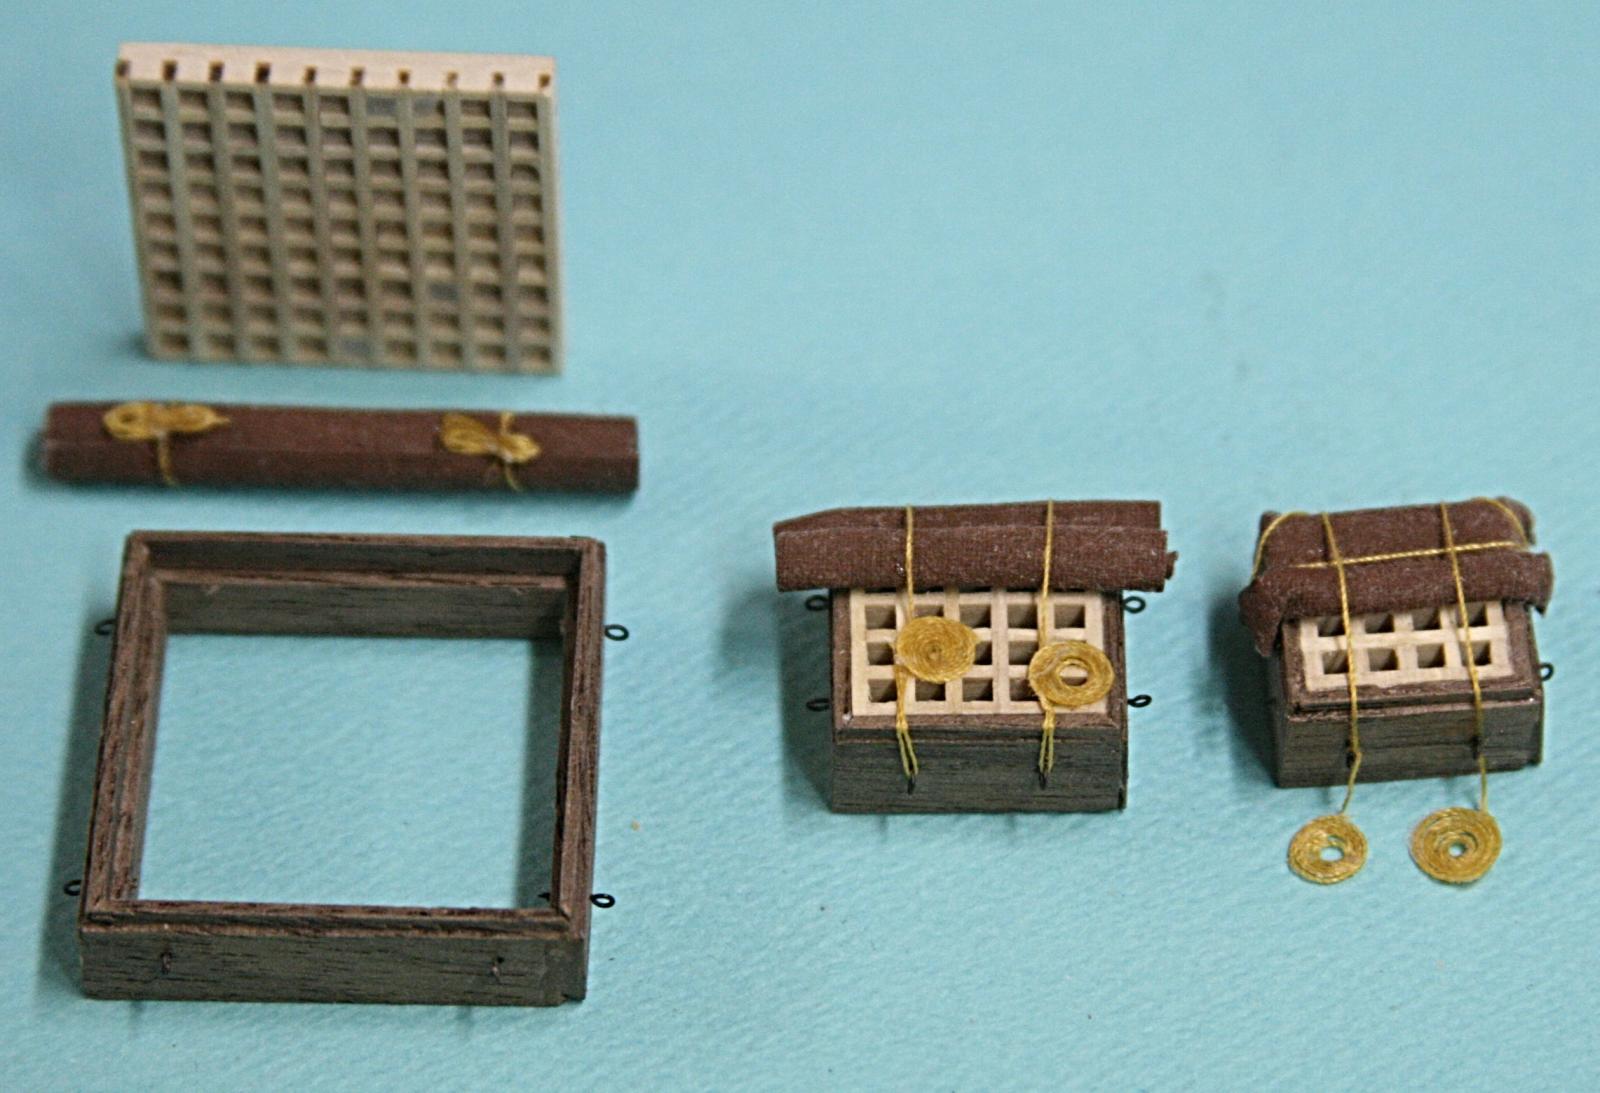
The grating came as a laser cut parts in the kit. What I did was to cut away the perimeter and substituted walnut strips that I bought from Hobby Mill. I used three pieces that mated together to give me the lip on the outside and a recessed ridge on the inside. I am sure you can do that as well.
-
Batavia by *Hans* - FINISHED
Modeler12 replied to *Hans*'s topic in - Build logs for subjects built 1501 - 1750
I agree Hans. The painting looks fine and as far as 'impressionism' is concerned, it looks like the original has that also when you look at the waves for example. Is it possible that the heads on the bowsprit were some of the owners of the Oost India Company? They do look a bit 'modern' though. -
That is another solution, Mark. Thanks for the suggestion. If I do that, I may also redo the bands on the barrel. There is definitely one too many and they are all too large and wide. It is the same comment that Aliluke made earlier. For now I am going to hold off and finish the carriages first, It is becoming a matter of fitting the barrel to the carriage instead of the other way around.
-
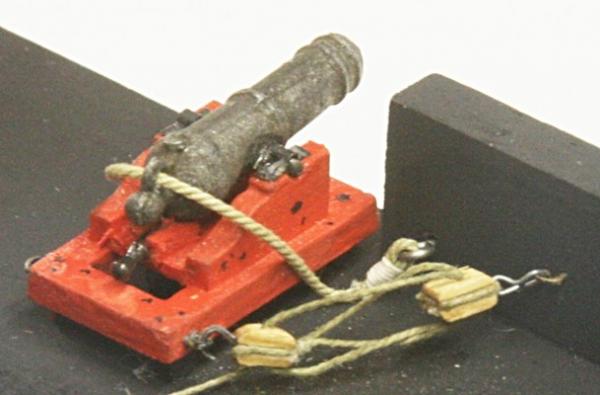
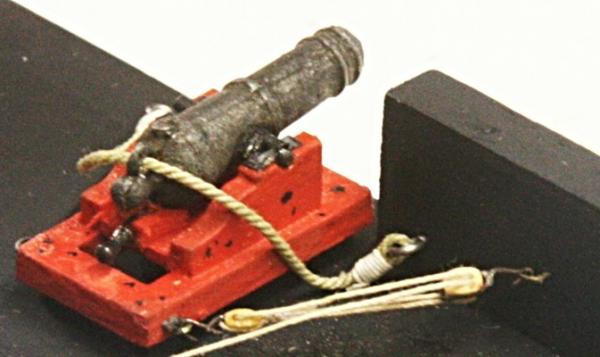
The next step was to make a fixture that allows me to assemble the carriage. The axles dictate where the side walls are going to be (at least that is my interpretation). Yet, the gun barrel needs clearance as it protrudes forwards, which results in a tapered carriage. To account for this I measured the diameters of the guns at two places and drew the tapered section I needed. The first picture below shows the 'bonding fixture' that resulted. As it turned out those dimensions are almost what Harold's plans call for. Pear is still the order for the axles and it turned out nicely when I filed the round parts on the lathe. I took a short cut from the plans and used 1/8 inch width for both front and rear axle beams. But both had to be turned to the shaft diameter, as shown The upper beam needs to be turned yet. I also intend to use the same wheels front and back. Pardon me Harold. The basswood fixture has two 1/8 inch wide grooves milled in the bottom. They help to align the axles as I dry assembled one of the sides. I still think this will work, BUT>>>>>>> I really don't like the way the barrel sits on the carriage. It is too far forward. And, of course, the original is way too heavy near the end. I actually had to prop it up for the picture you see above. Of course I remedied some of this by machining the end, but now this new problem. So . . . redo the sides and move the trunnion support slots further back . . . or make new gun barrels from scratch????? . . . .but, Jay, these are only tiny guns!!!!!!! And who is going to notice????? . . . .Where are you going to buy brass to make those things? Besides you don't have time, remember?? . . . . . . . .BUT WITH THE MODIFIED BARREL . . . . The barrel still sits too far forward. And those rings are too big and in the wrong places. Perhaps the brass barrels you bought are not really good for anything????
-
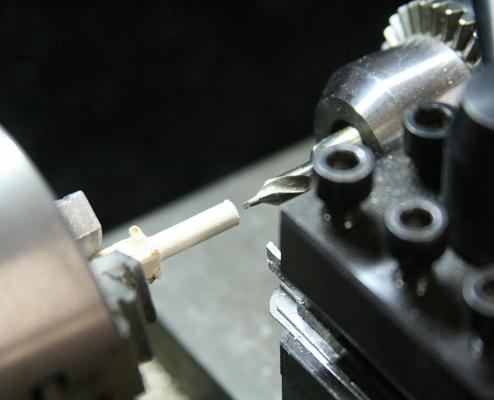
Making wheels got better after I took the approach I should have used to start with. 1. Use a center drill to locate and start a hole!!! 2. Use the dial indicator setup, I had previously installed on my lathe, to cut the wheels to the right width. When I drilled holes without using the center drill, the result was a small wobble as the drill entered the wood. Obviously it got worse as the drill went deeper and the hole became eccentric. Hence, a good start means everything, even here. The final holes were a lot more to my liking. I used a 'cut-off' bit to part the wheels from the turned wood. I added up the thicknesses of the bit and wheel and spaced the next turnoff accordingly. Both methods gave me much better wheels (although I still had some cleaning up to do).
-
Now that is the fun part. It could be hexagonal, rectangular, but not round. It probably should have slanted 'glass' and even some brass rod to protect that. HMMMM. fun. I might add though that glass was not made very flat and probably only available in rectangles no bigger than 8 x 12 inches (more likely 6 x 8). Have a look at paintings by the 'master' of that era.
-
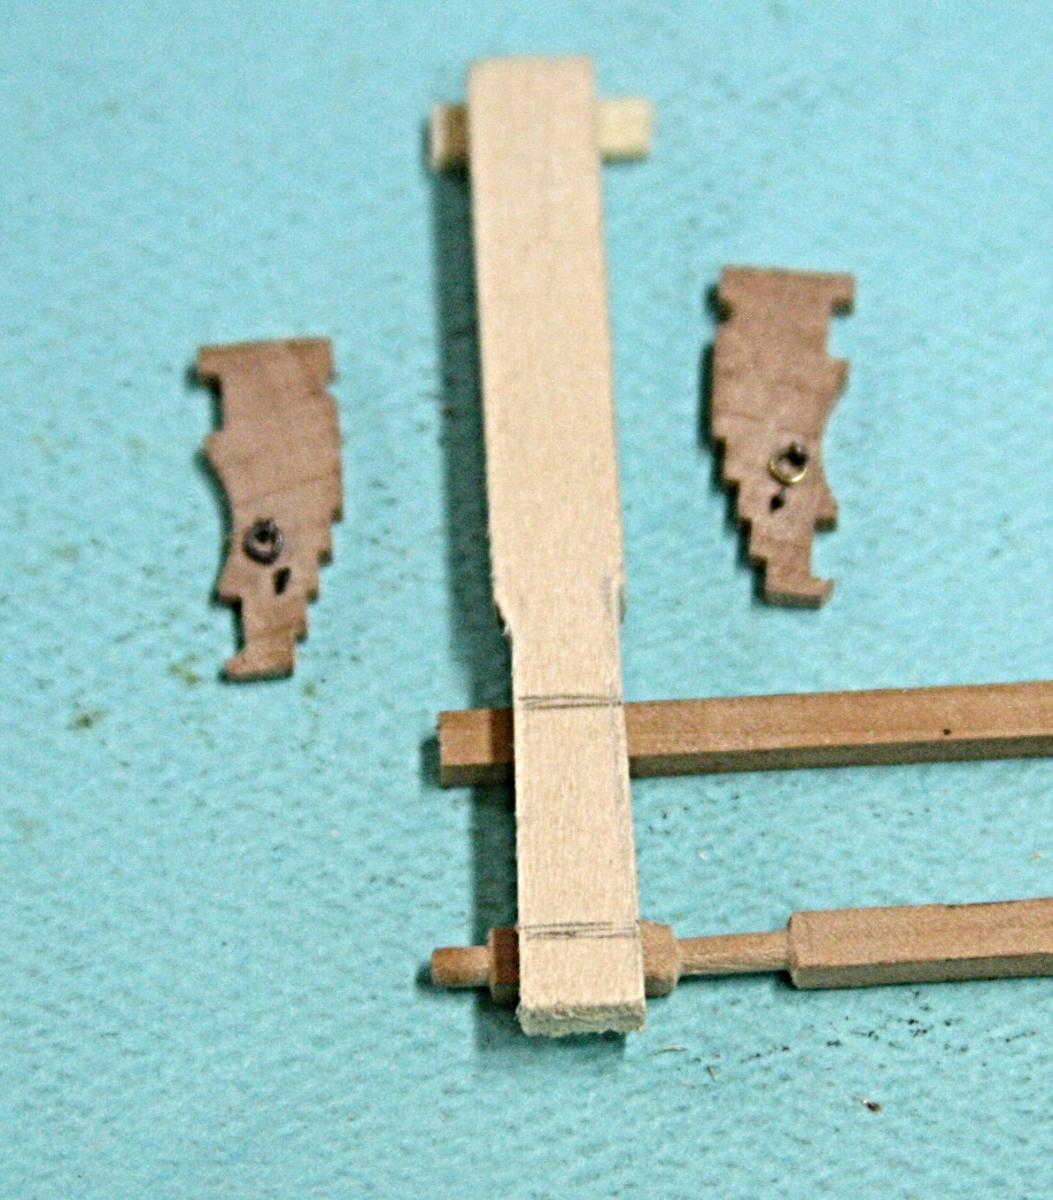
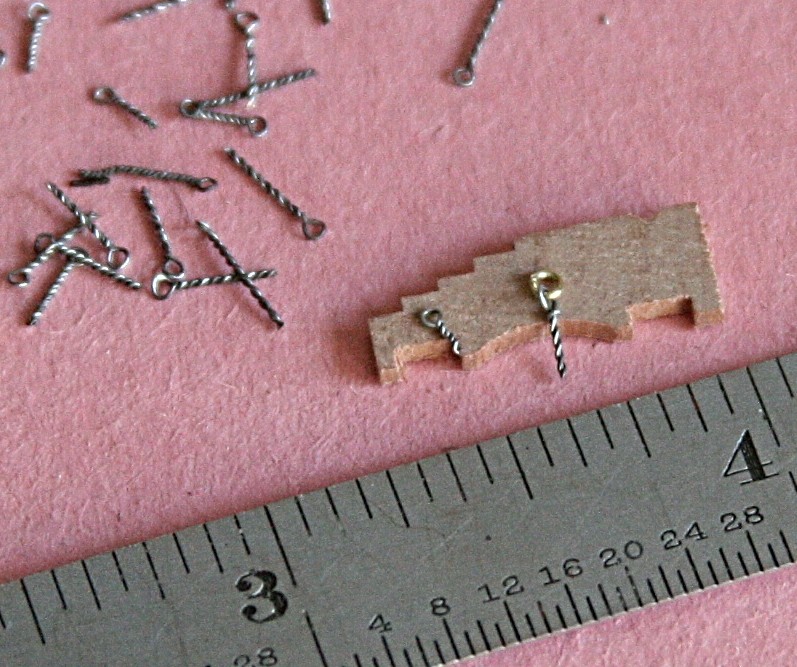
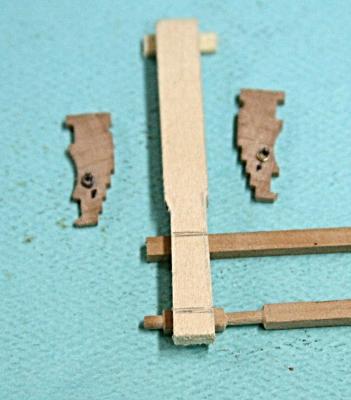
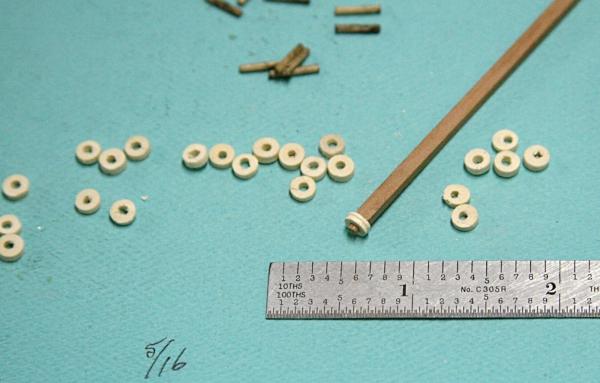
When I look at your build past and present, I think you are too modest to say that you are not quite up to doing a scratch build. I am willing to bet that the next project will be just that. Any way, back to making wheels for the gun carriages. I am finding that the kind of wood to use for a lot of machining makes a world of difference. I started making the wheels out of birch dowel and had a heck of time keeping it from splintering. I had bought some samples of different kind of woods from Hobby Mill, used the pear for the carriage frames (milled just great) and then cut a square log out of the boxwood. Turning the square into 0.177 inch round, drilling a small hole in the center and then cutting the thing to 0.053 inch lengths is tricky but doable with the boxwood. I am encountering a lot of rejects and need to improve on my method of drilling the holes and cutting the wheels to length. Below is a sample. The pear rod will be one of the axles but, because I am using a different size barrel, I need to redraw Harold's plan for the carriage width. The little rods on top are some of the trunnions. They are tarnished with the selenium oxide from the barrels and I have to be careful not to get that all over the carriage parts. The trunnions will be painted black after I install them.
-
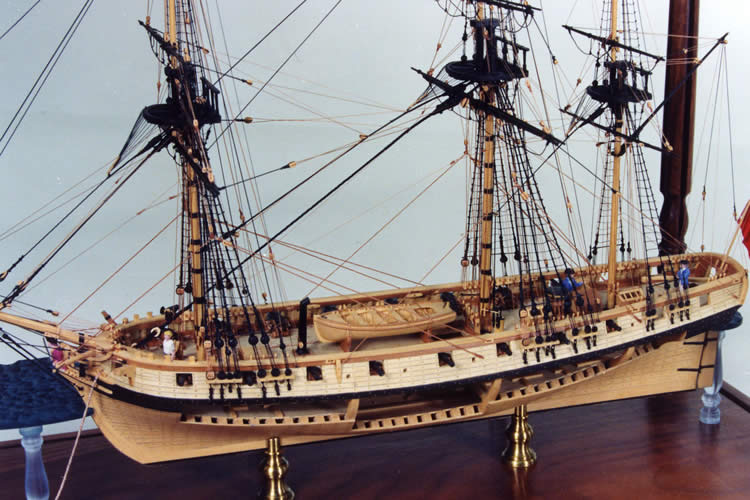
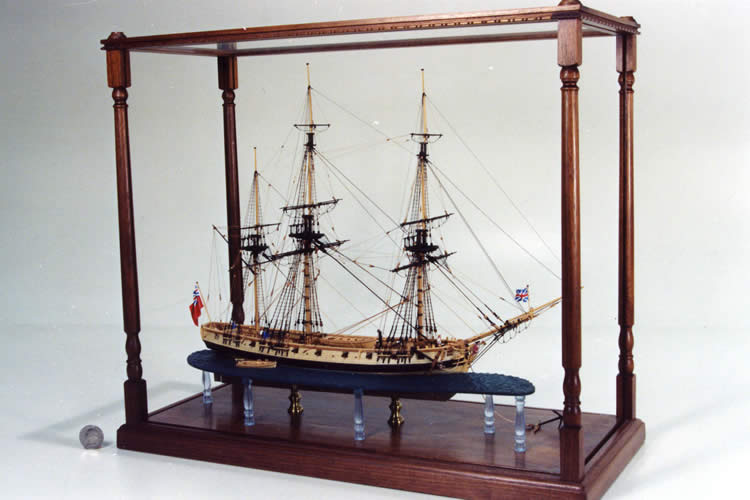
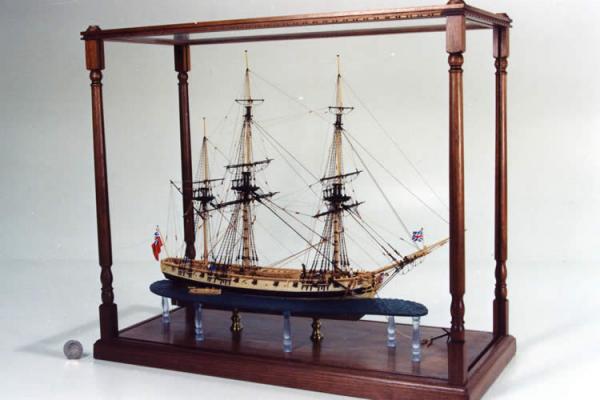
Hi Alistair, As you know I have a long way to go on the USS Constitution, but I could not help but start using my new toys on the next project. The Pelican was a French privateer, captured by the British and converted for 'shore patrol'. Below are two more pictures of the model that Harold Hahn built. I like his idea of cutting the hull planking and part of the frames so you can see the below deck details. His was very small (1/8 scale) and I increased that to 3/16 so I could concentrate a bit more on the details (hopefully). For my modeling, I like to 'improvise' and make the whole thing look interesting if I can. That may mean taking some liberties if I don't know better. In this case, I may have to do that also and consider the Pelican to be a British ship with a French birthplace. Meaning, some of this and some of that. For example, the whole thing about the French and British way of framing does not matter to me. I am going ahead like Harold showed on his model and plans. The stairs aft for the officers is one example and the partly covered hatch may not be at all like it was for the French, but I was able to put it together the way I remember from my old sailing days. I have been intrigued about the tiny LEDs and have planned to use some in the cut-away view. I also want to have the 'scene' to be one of the ship at anchor, loading barrels and other goods. That means the main hatch is open, the boat is along sides and the spars and tackles are in position to be used for all of this. The sails may be furled on most spars, etc. etc. I am learning a lot from even this simple start and constantly add more thought to 'how and what'. I never knew what a 'bread room' was until a couple weeks ago. Now I am looking for details of stoves for a small ship like this. The display below is where Harold had the Pelican at anchor with a section of 'water' partly surrounding the model (the starboard side). I may not do that quite like he did, but it is part of the fun to consider. I have noticed your beautiful work on the Fly. The coppering worked wonderfully and your painting skills are terrific. Are you sure you would not rather be an artist rather than an architect (come to think of that, it really is the same thing. NO?). It would take the earthquakes out of your concerns. Say hello to Sharon

-
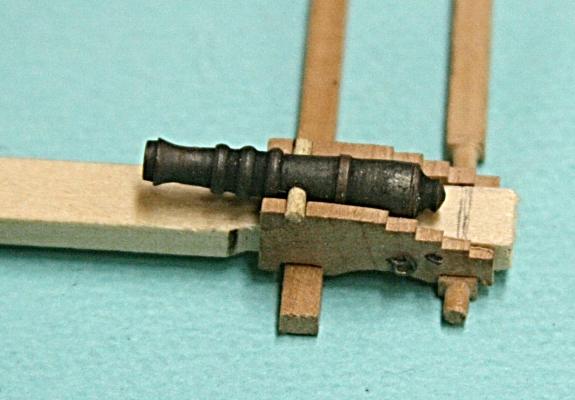
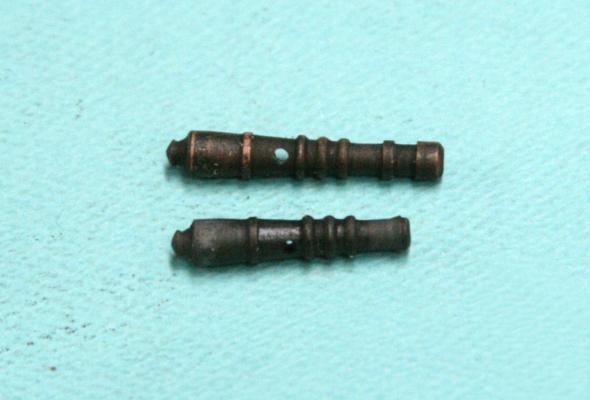
If I don't like it now, I will like it worse in the future. The barrels were too long. In fact when I suspended one from the trunnion it rotated towards the front. The front end was too heavy and bulky. So, I re-drilled the bore and machined the end as shown below. It is still not perfect, but a lot better.
-
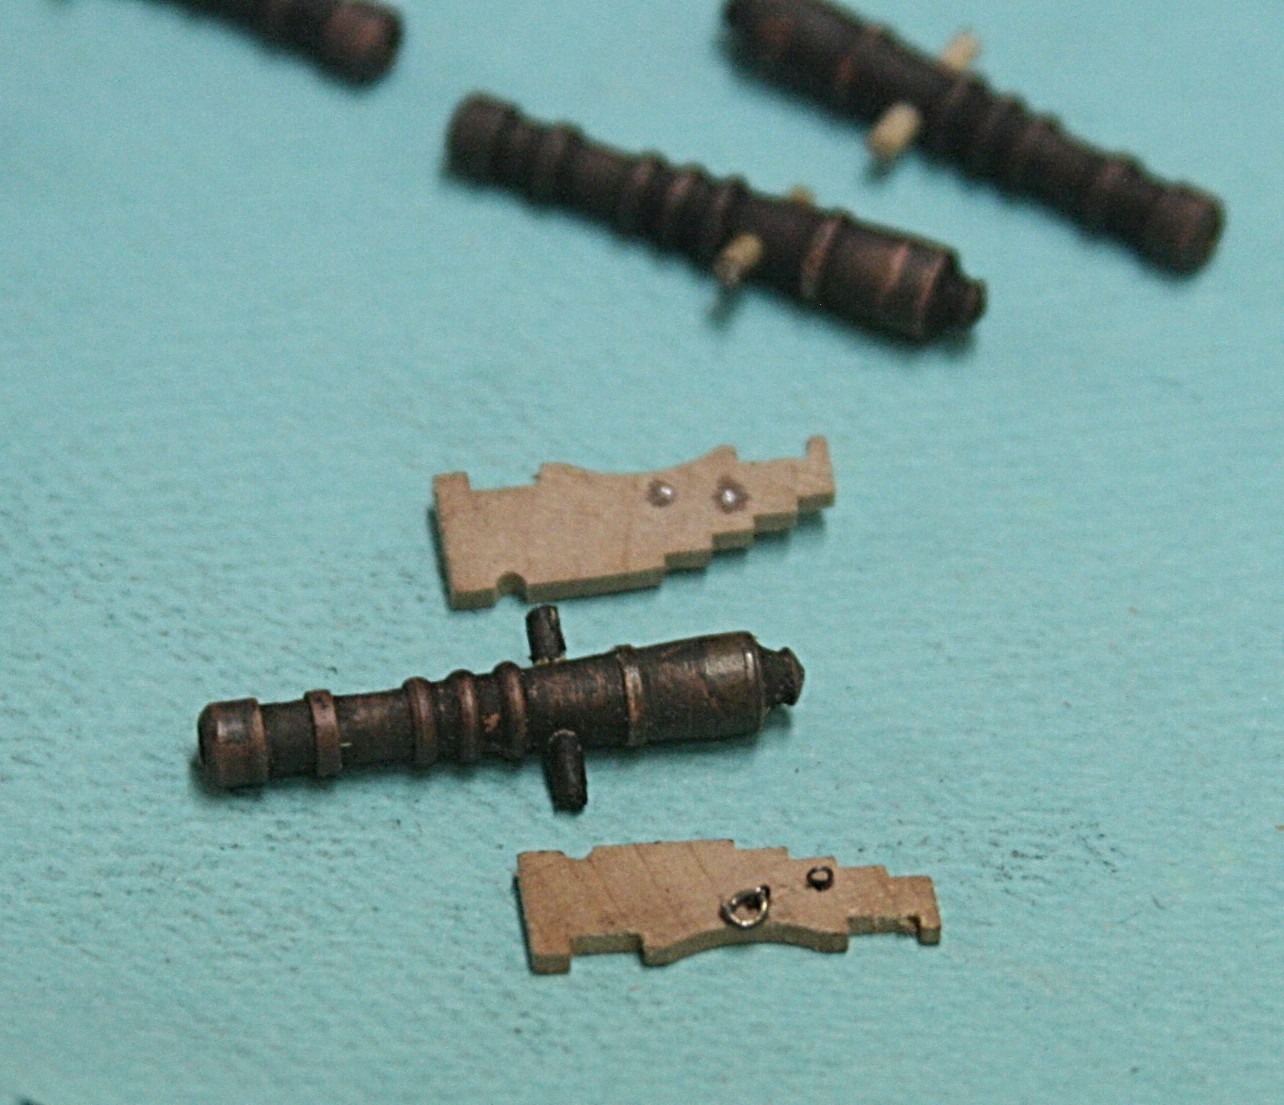
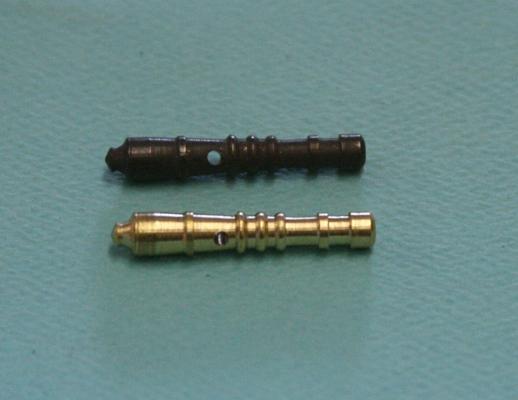
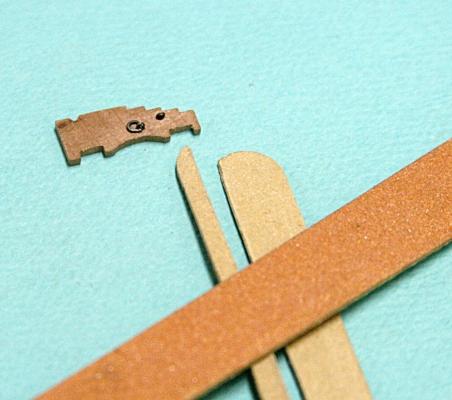
Harvey, I know what you mean about 'some day'. I still have tons of work to do on my Connie and here I am working on my second ship. But I am having fun. The epoxy from West Systems has never been a real problem for me. There have been times when I did not add enough hardener, but that was my fault, of course. I do like the longer pot life and this is the first time I have used it in tiny quantities. I just eye balled the ratio and it set up fine after about six to eight hours. Let me continue. I am using brass cannons made by Constructo. I like them a lot better than the cast ones in my Connie kit, but still don't like the profile they used to make them. The barrel is a bit long and the end too bulky. I thought about turning them down on my lathe and decided to hold off. So, I went ahead and blackened them. I also had to make the trunnions for them. I did not have any brass or steel of the right diameter (0.053 inch) and simply made them out of wood. That will be painted black and trimmed after mounting the barrels later on. I used a small rat file to hollow out the side panels for the trunnions. I should add here that the black oxide on the barrels rubs off a bit and, with all the handling, the brass is stating to show through on the ridges. Again I will hold off doing anything about that now. The black selenium oxide ended up on my fingers and I had to thoroughly scrub them afterwards. The next step is to make the wheels, shafts and other parts of the carriage.

-
Gary, if you have to order the blocks be sure to keep in mind that most blocks really look terrible as they come from the suppliers of kits. I used the blocks that way on my USS Constitution and later replaced all of the rigging with blocks I bought separately from Warner Woods West in Utah. Here is the difference: Ignore the hook in the second picture. It was also replaced.
-
Harvey, it is an old can of epoxy that I bought several years ago at a boat supply store here in Alameda. I got a gallon of resin and a quart of hardener. It is called West System 105. I have used it on all sorts of wood working projects, just recently glued a loose tile on our patio and all sorts of other things. Of course, you also need the hardener. It comes in different formulations. For details go to http://www.westsystem.com/ss/hardener-selection-guide/ PS. The resin comes in quart cans as well as the gallon size I happen to have. One thing I never tried is to use the epoxy resin from Locktite or others and the slow curing hardener. It is really the catalyst or hardener that dictates how fast the resin kicks over.
-
After the epoxy had cured enough to be handled (in this case about six hours), I sanded the back sides. I also noticed that the thin epoxy had migrated through the hole and in between the part, It showed a little bit on the front sides. However, it was not as bad as if I had tried to apply epoxy to the front to start with. Below are two front and two back views. Next I cleaned up the edges with a sanding board. Instead of the ones you can buy, I simply cut a standard nail file board . . and you can go from there.
-
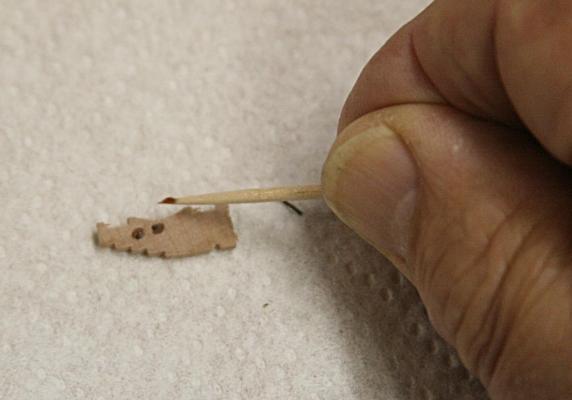
I did not want the front surface of the wood to show the adhesive, so I decided to add a tiny drop of epoxy to the back side (after I snipped off the extra twisted wires. The epoxy I used has a long pot life. It has a mix ratio of 1:5 but I usually add a bit more hardener than the stoicometric optimum. Less is worse than a bit more.
-
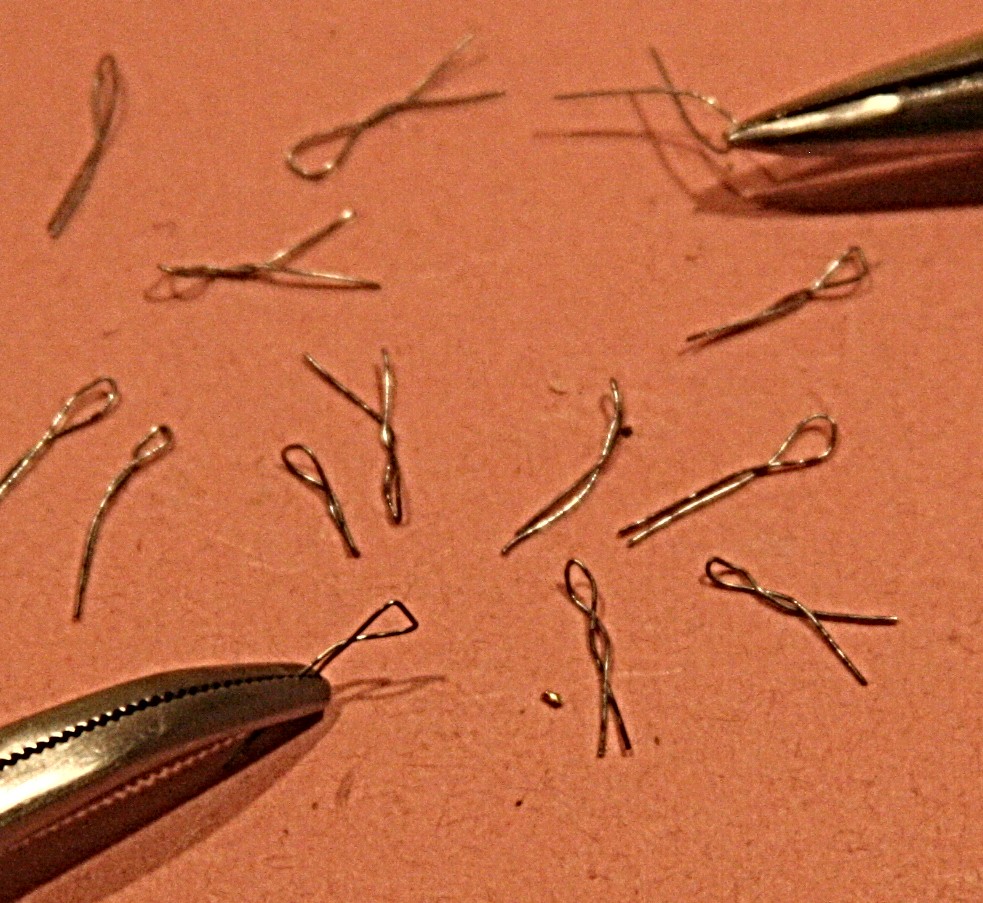
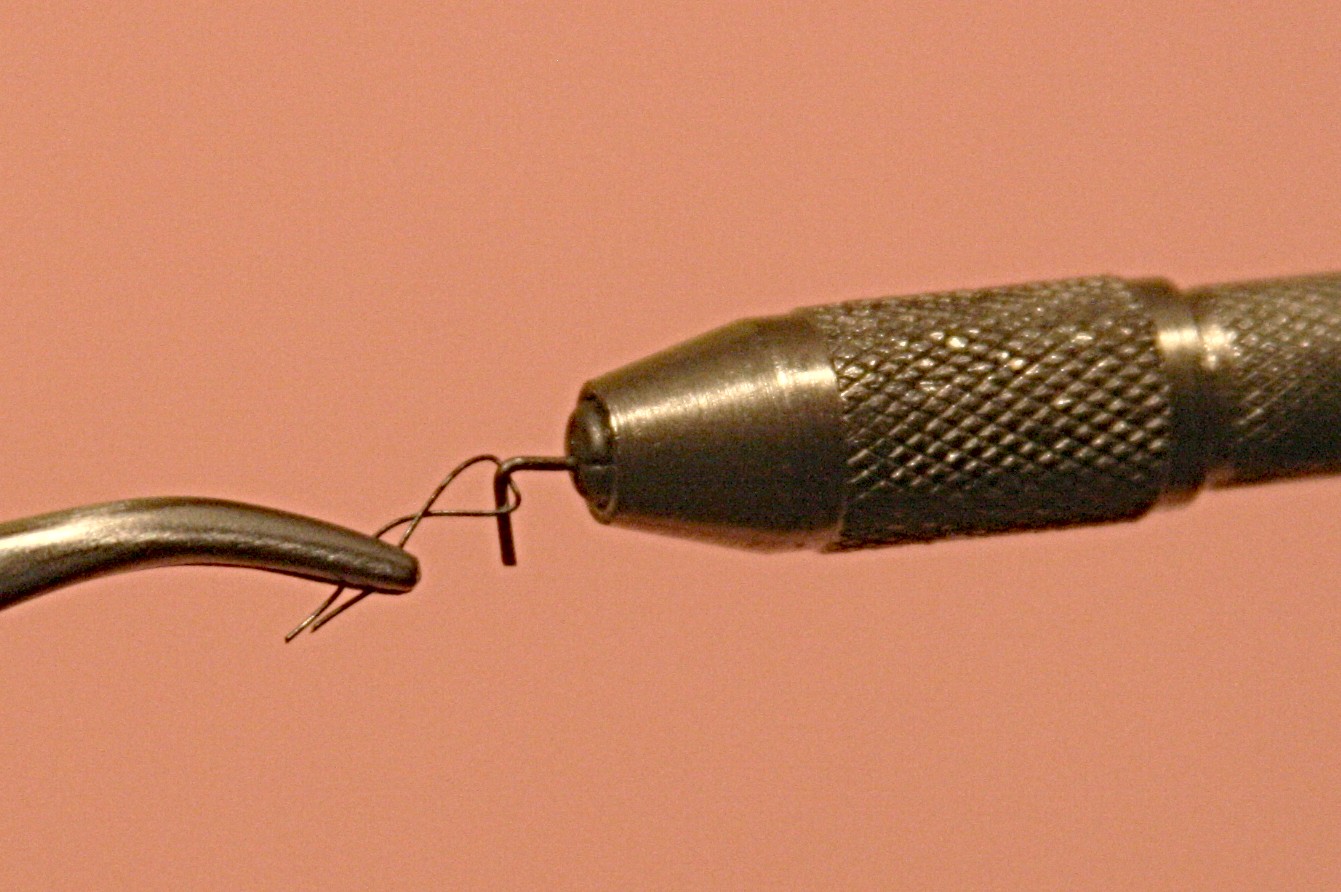
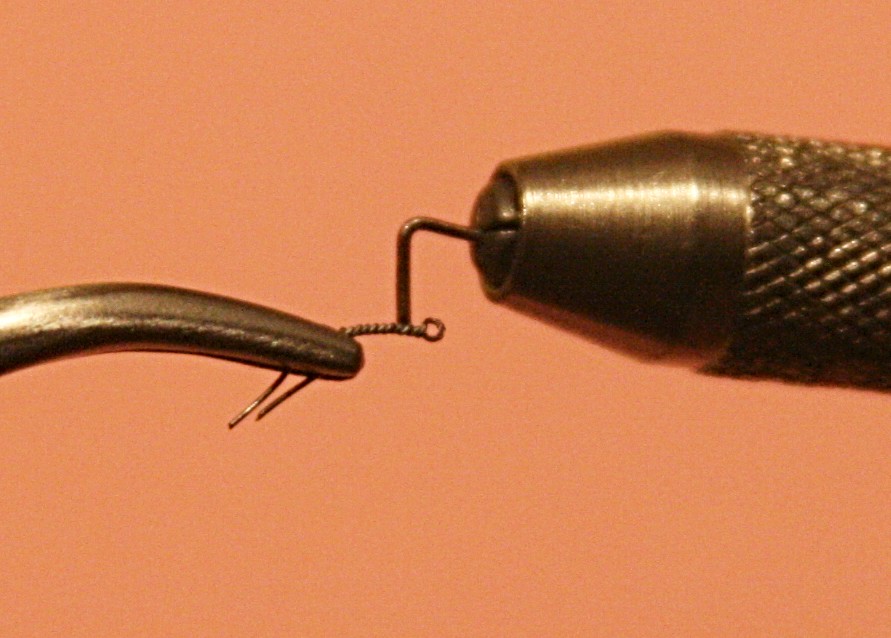
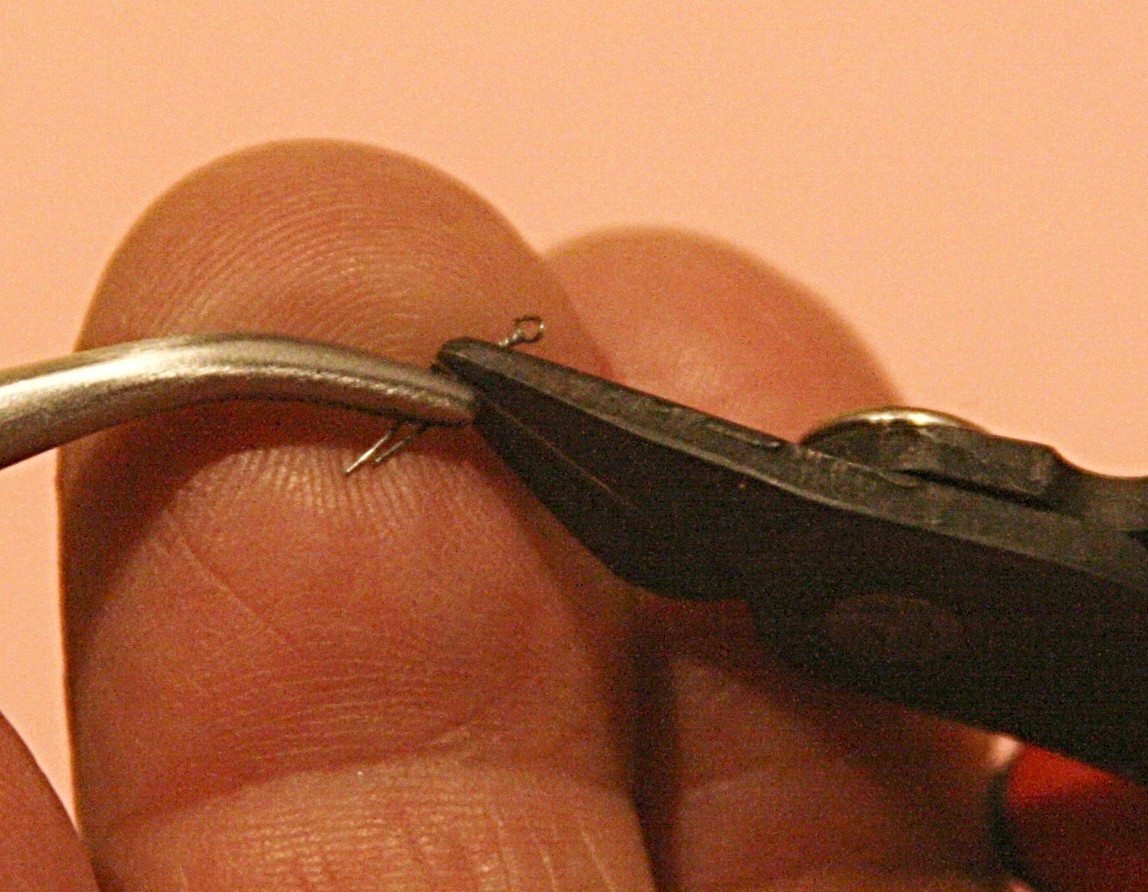
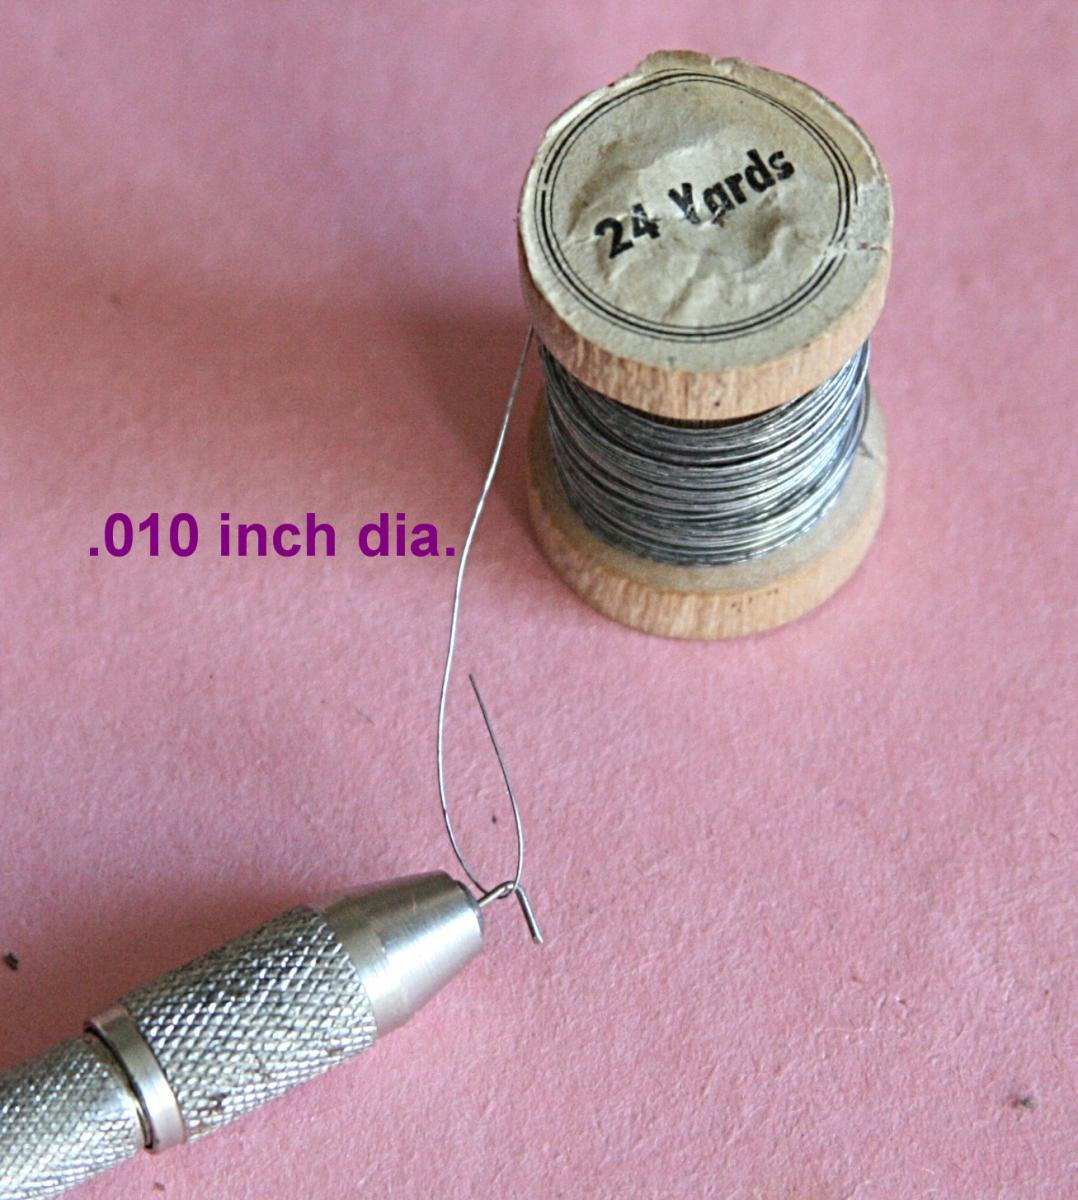
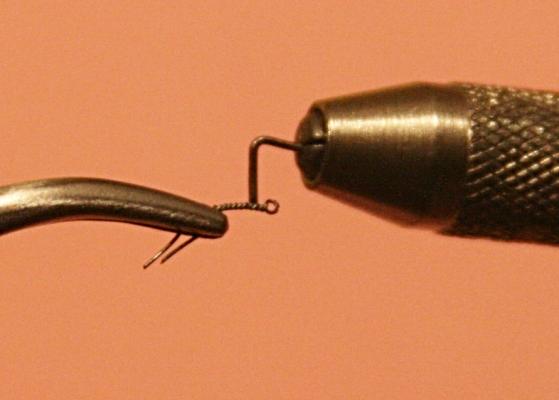
For the eyebolts I am using steel wire that is 0.010 inch in diameter. The rings were made with brass wire .016 inch diameter. When assembled, I blackened them with my patina (Novacam). To start, I cut the wire to about one inch length. Then made a loop, clamped each one with a hemostat and used the pinvise with the hook to twirl the wire. I visually judged when the twisting was done and then cut the part to eliminate the ends held in the hemostat. Here is a sampling of the eyebotls: The next step was to add these parts to the carriage sides. Next post


-
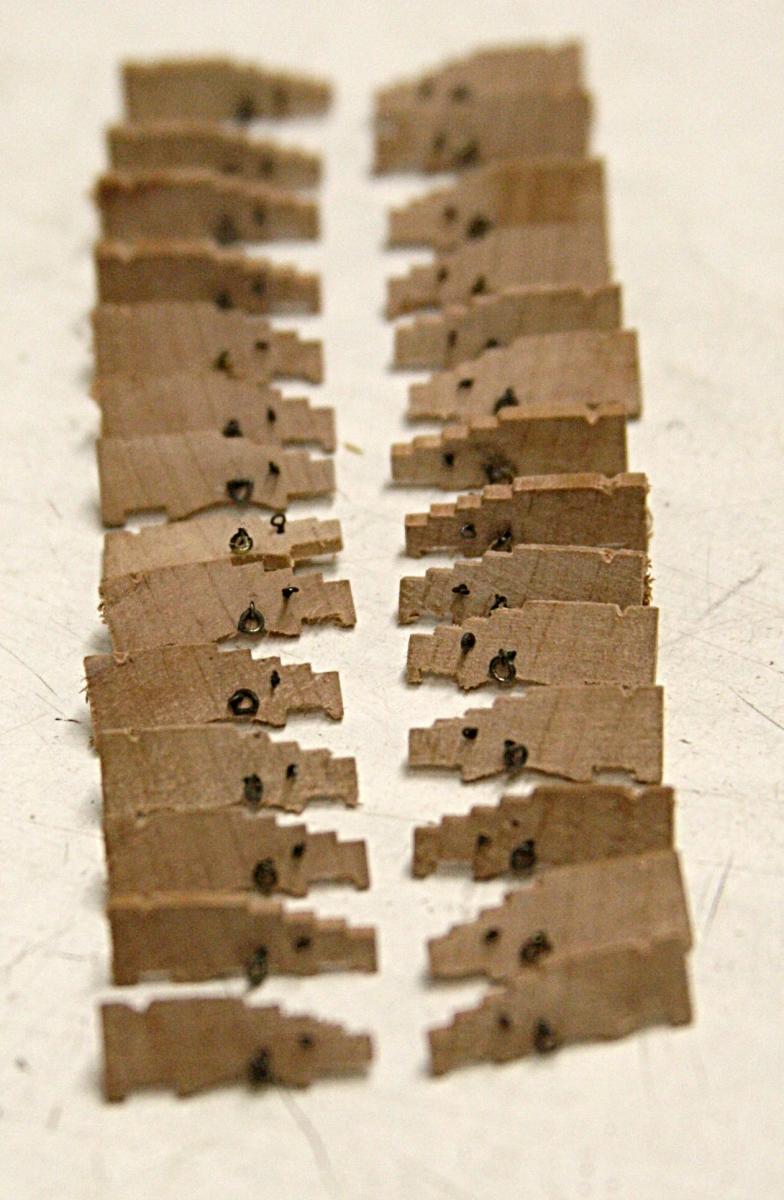
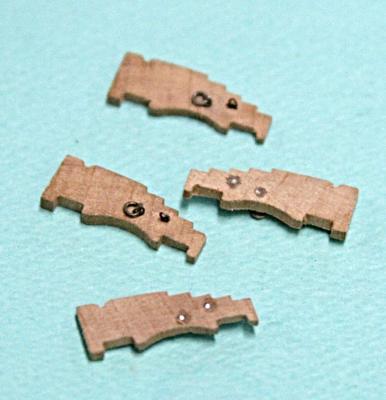
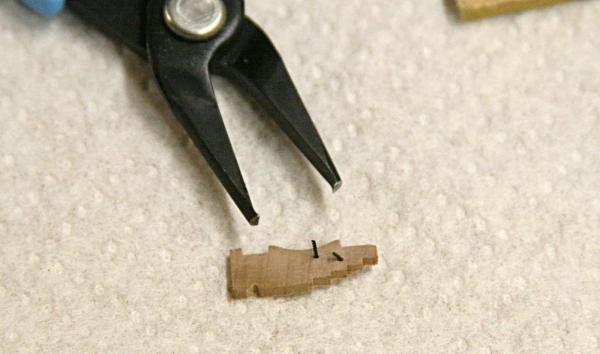
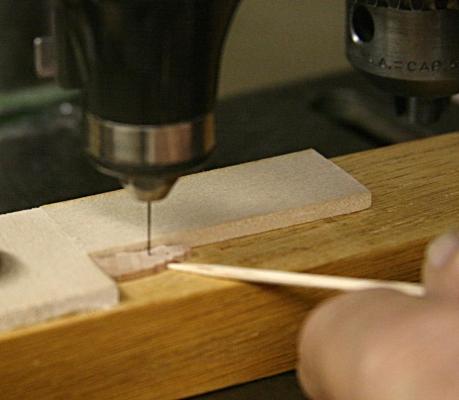
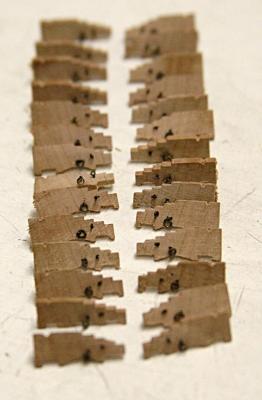
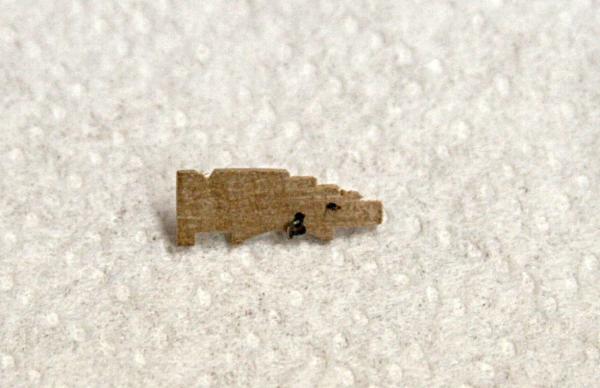
Cannons There are two other threads dealing with the cannons I am making for the Pelican. The first shows how I made the sides of the gun carriage using my mini mill: http://modelshipworld.com/index.php?/topic/6059-making-gun-carriages/ And the second was a request to find a supplier of thin steel wire that I used for making the tiny eyebolts. http://modelshipworld.com/index.php?/topic/6185-in-need-of-very-thin-steel-wire-0010-inch-or-less/ Here I want to continue and show some more pictures. I want to do that for my own record of this build, my log, if you please. After milling the block of pear to the shape of the carriage sides, I cut the individual pieces to a thickness of 0.050 inches. I need 32 of those (16 guns) but was able to get only 28 pieces. I do have another block that was not milled, but I decided to go ahead with what I have. The next step was to drill the two holes for the eyebolts. One of those has a small ring for the breach rope. I used a small fixture and my Dremmel-like tool to drill the #75 holes. Later I enlarge those with a pinvise and a #74 drill. In the next post I will show a few more pictures of how I made the eyebolts.
-
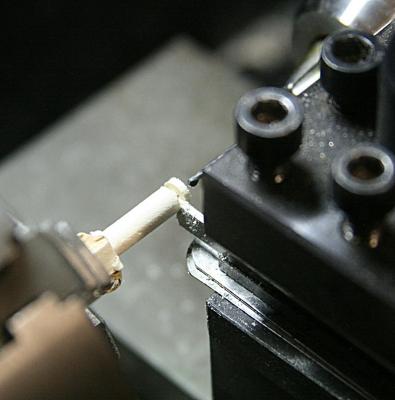
In an earlier thread Chuck and Ulises Victoria mentioned how to make very small eye bolts with very thin wire. I have done some, need more wire and here is the story. I have this spool of old steel (magnetic?) wire, but have no idea where it came from. It is getting smaller and I would like more, but don't know where to get it. It is 0.010 inch in diameter, very easy to twist and has been great to make some tiny eye bolts (as shown below). I would use other than steel but (again) it has to be 0.010 inch or thinner. In Sweden there is a company that makes special tungsten wire, but I am afraid to go that far (or should I?). Here is why: The little adapter to the pin vise was one idea that was mentioned in the earlier thread and credit goes to Ulises Victoria for that great idea. Mucho gratias, mon amigo. All you have to do is make a loop of the wire and start twisting. The second picture is part of the gun carriage I discussed earlier. I hope it shows why I am interested in tiny eye bolts and rings. Does anyone know where I can get more metal wire that is .010 inch or less in diameter??