HOLIDAY DONATION DRIVE - SUPPORT MSW - DO YOUR PART TO KEEP THIS GREAT FORUM GOING!
×


Modeler12
-
Posts
1,716 -
Joined
-
Last visited
Content Type
Profiles
Forums
Gallery
Events
Everything posted by Modeler12
-
Sygreen, this whole hobby is about making models and have some fun in the process. I agree that you should start with a relatively 'simple' but interesting kit model. There are many available and I assume you already know that. The basic tools are those you might expect to see here and I am not going to enumerate them. However, the main thing is that you should have, or develop, some skills in handling small details, some small hand tools and not worry about large investments in lathes, milling machines, etc. As John asked, what is it that you want to do? I am sure you don't want to collect nice tools. Then go from there.
-
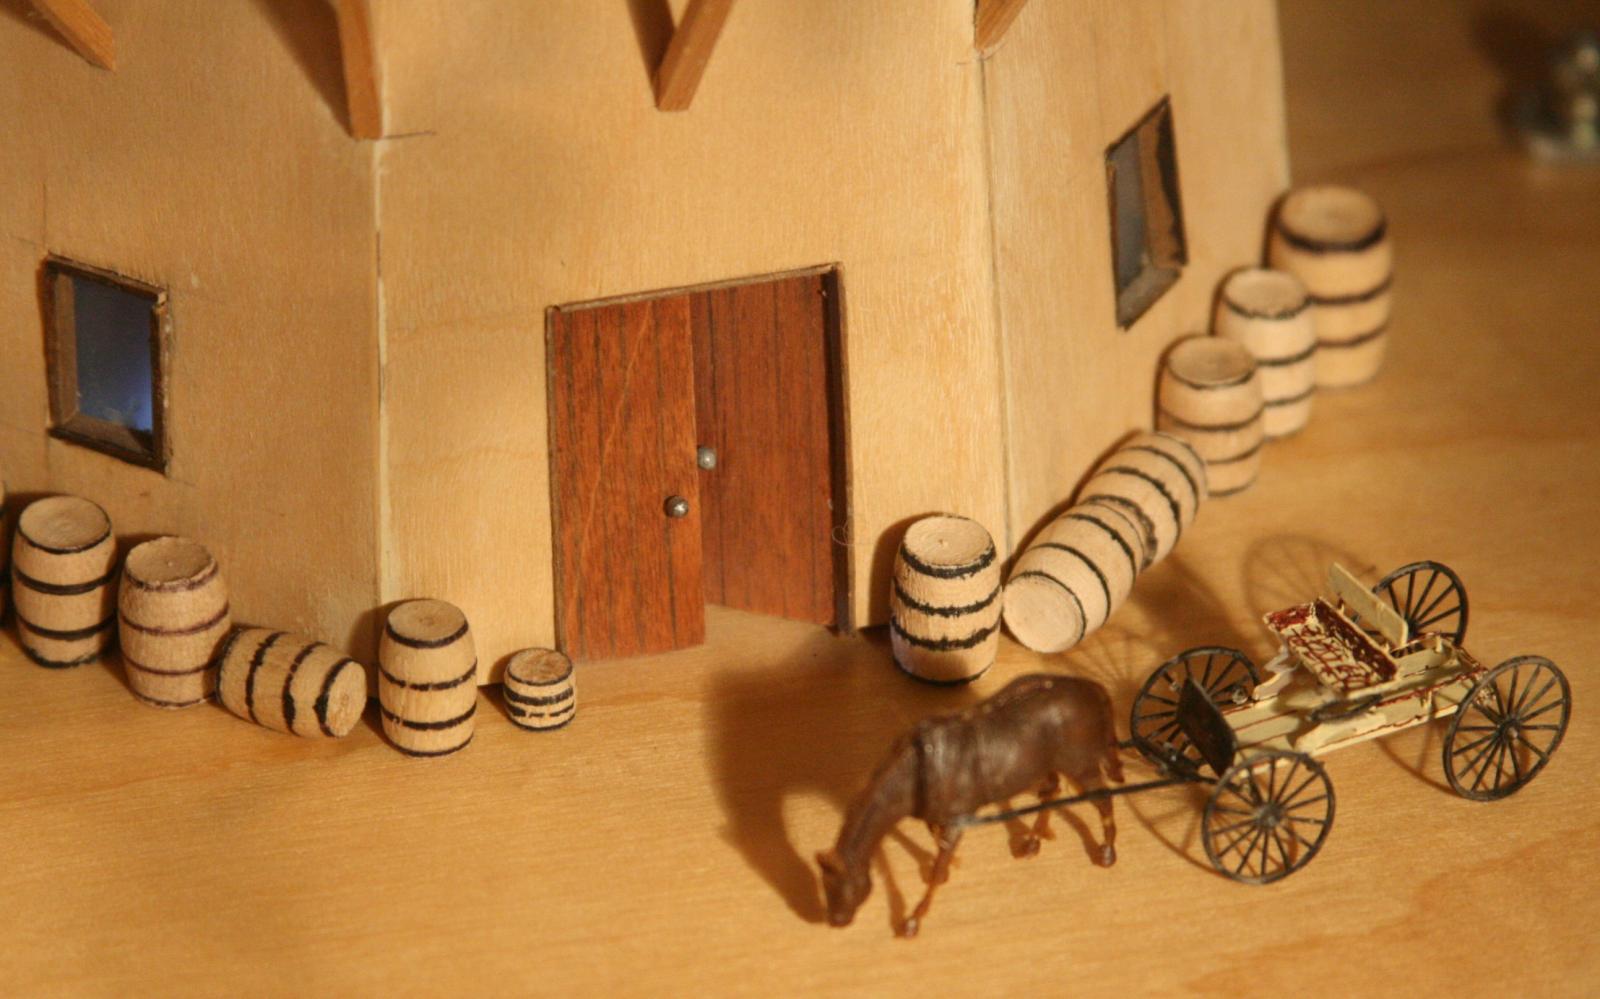
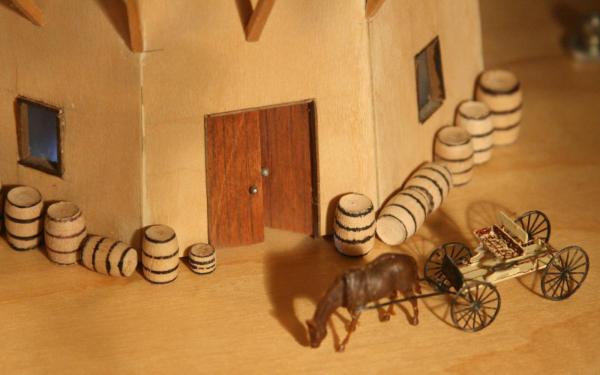
 Thanks again guys, but I will not be whizzing barrels that fast. I did make some, castings actually, but did not like the results. They were all lob-sided and were hard to control with all those trimmings such as the bands that go around each one. I still hate close-ups but here it is. Now I am also experimenting with making my own out of wood using a lathe. But that is another story.
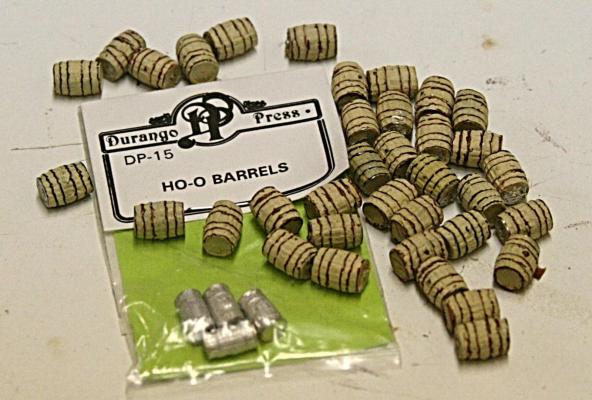
- 732 replies
-
- 1
-

-
- constitution
- model shipways
- (and 1 more)
-
Hi Alistair, I am not surprised about your reply regarding the mill. I just placed the order for one and found out that to ship this Micro Mill to New Zealand would add about $400 US to the price tag. I am sure you are aware of these costs because they can add up fast. The whole crate of this mill alone would weigh about 124 pounds (at least here in the US). LMS does not add a 'handling' charge, just the cost of the freight. The extra cost for me was about $66. I am anxious to try this baby out and have made room in the garage. More later about this when I get it next week.
-
Thanks Tex. As you can see from the above, right now I am trying to decide about a mill that fits our modeling 'needs'??? It is another 'toy' but will be useful to make some fixtures and do a lot of other things I have been thinking about for my 'next one'. Keep up the work on your Connies, my friend. It is a real challenge, but very interesting. Are you building both at the same time???
-
Curious about Amati ropewalk
Modeler12 replied to Shamrock's topic in Modeling tools and Workshop Equipment
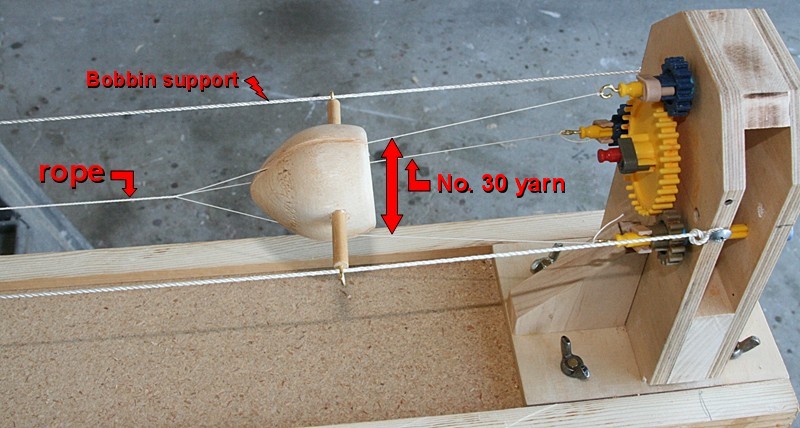
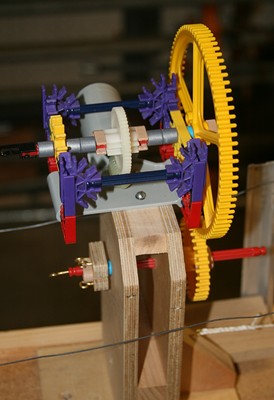
Great info here on rope making. I built mine out of 'toys' and it works fine. The problem is that I only made it on an eight foot base, so the pieces are fairly short. Need to find a place to make longer rope, perhaps move outside when the weather here in California gets better. Like Chuck's, my RW uses a motor at each end. I found it gives me better results. The whole trick, though, is to experiment. Every thread uses different tensions. Speed control at both ends is important. I even found it best that I start the motor at one end, let it run a bit to get the threads going, and then start the second motor. I love my grandson. He let's me play with his KNEX toys and I have fun making rope with the whole thing. I am not sure I want to make a mile of the stuff on a toy. Oh, in case you are not familiar with KNEX. Here are the two ends of my RW. Notice the 'variable speed hand motor' to the left and the KNEX motor with worm gear to the right. The speed of the little motor is set, so I have to adjust the other end accordingly.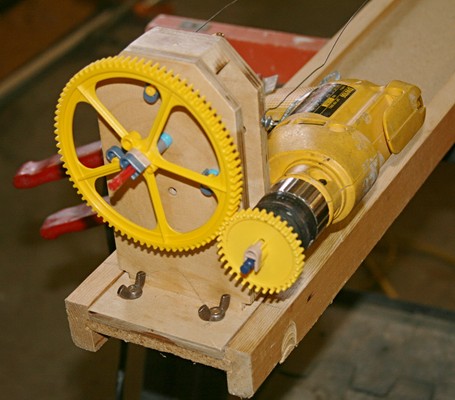

-
Try one of those calligraphy pens. Same idea. In the US you can get those at Micheals or any other craft shop. But you have to experiment because the viscosity of the glue has a lot to do with this. Gap filling CA does not work as well.
-
Display case wood
Modeler12 replied to Senior ole salt's topic in Painting, finishing and weathering products and techniques
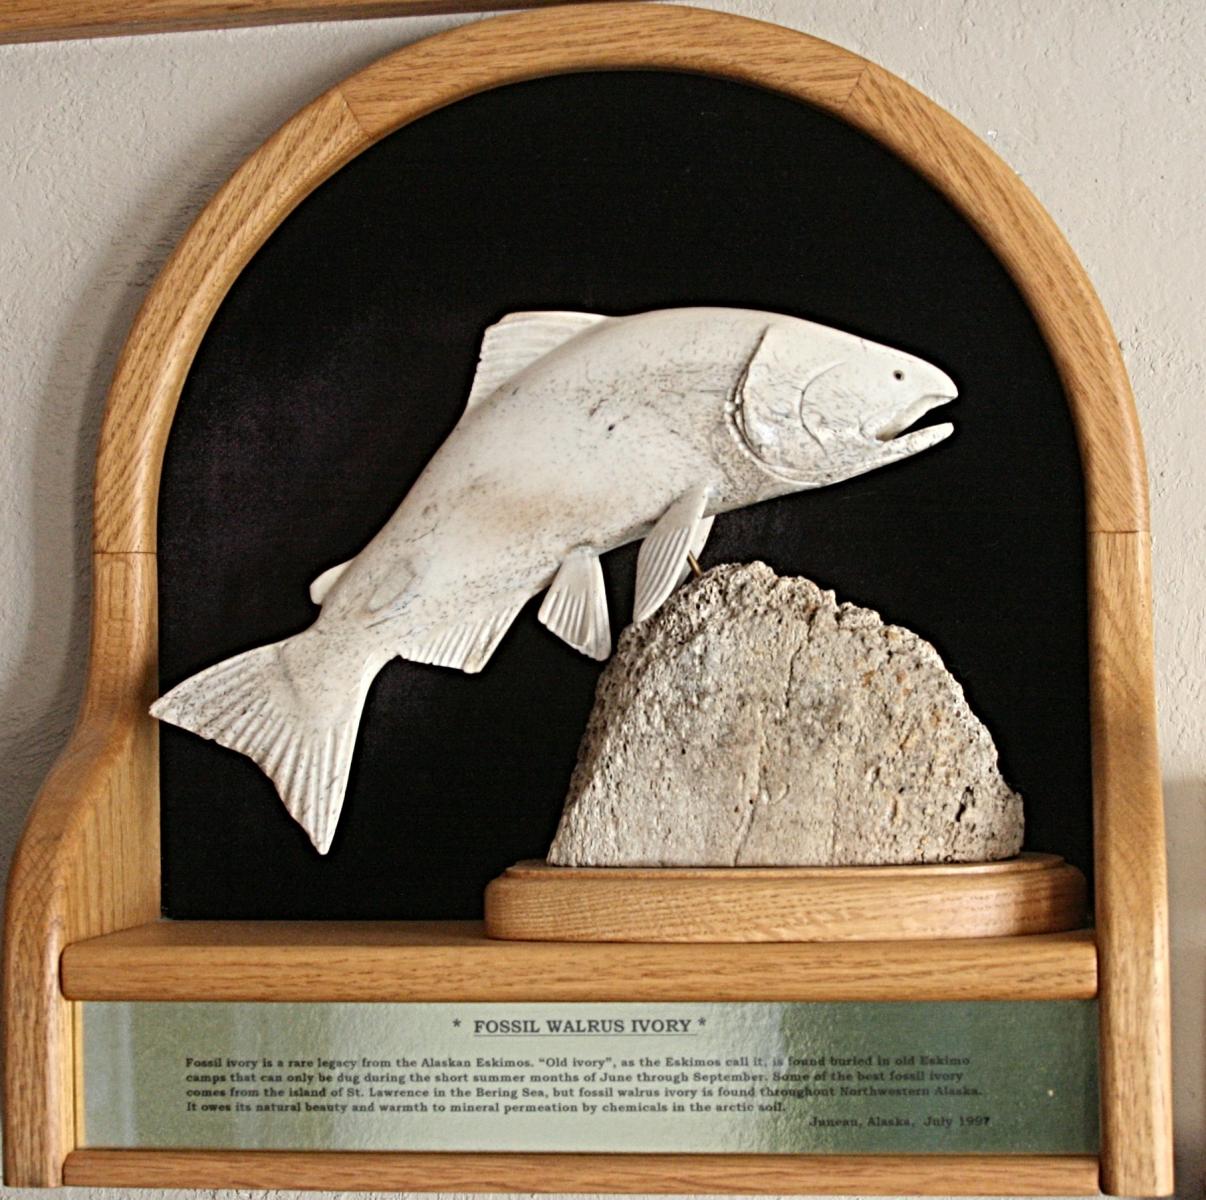
Sos, if you are wondering where to display this masterpiece, I have a suggestion: My office would more than welcome it. This could be a nice companion with the piece of whale bone (with a salmon mounted to it's top) that is hanging on my wall. It came from Juneau. Or do you have other ideas? In any case, WELL DONE MY FRIEND.
-
Sold. I am not going to use this for a production operation and to change from one collet to another should not be a big deal. I have done it several times on my lathe. The cutters I have (besides the router bits) are all 3/8 inch shaft, so that will be the mainstay.
-
Thanks again Revenge. Now this makes a lot of sense to go with the MR2 version. It seems that with this 'adapter' there are more options. I wonder if this takes up more Z axis space. I will have to look into this more.
-
Thanks again 'Revenge'. I live in the US and LMS also offers a tooling package that includes just about everything I will need. The drawback is that the maximum collet size is 3/8", so my 1/2 router bits won't fit. I do have several with a 1/4 inch shaft. Thanks Michael for your comment. One more comment about the Little Machine Shop. I have dealt with them before when I needed replacement parts for my mini lathe. The company specializes in that but also offer some mini lathes and mills. As a result they show lots of details on their web site about other manufacturer's products. They also have a great series of 'how to do' or teaching aids. The latter is the main reason I mention this.
-
Thanks you all with those comments. When I looked at 'various machines' I was comparing the MM Microlux with similar models from Harbor Freight and Grizzly. At least the LMS version has twice the speed of others, has the rigid column and larger table with more movement in the X and Y. I am aware of the small motor, but since this is not for 'production' and I know I will be taking small bites at a time, I think (and hope) that I can get by with it. I am going to raise this issue with LMS though. Reading about the spindle type and the difference in the Morse taper and ER016 design, it seems that the ER-16 is a more secure way to hold the tools and if I am going to run the machine mostly near the high speeds I am inclined to spend the extra $40. One of the first things I intend to do is design and make an adapter for my high speed Dremmel type tool. I did that on my old drill press and it worked fine but not with great accuracy. I would be able to use the table movement and the Z axis for the Dremmel without running the mill. So the very high speeds used for small drills and others could still be handled on a mill/drill-press. I cannot imagine that cutting grooves with end-mills smaller than 1/8 inch is practical, or is it??? There is always a possibility to do that with round jewelers saws. Now I am talking about wood and perhaps brass but not steel. Lots to learn, but I am still in favor of the machine from LMS. Q. I have a large assortment of router bits. Can I use those on a small mill? The shaft sizes are both 1/2 and 1/4 inch. I don't have a lot of space and a larger mill is out of the question. It has to be able to fit on an existing bench.
-
I am interested in getting a small mill. Looked at several and am favoring the LMS model 4660. Does anyone have experience with this relatively new mill? What I like about it is that it has a maximum speed of 5000 rpm, a wider table than others I have looked at, a solid fixed column, and other features that might be right for modeling projects. Having a high speed is important to me. Here is the web site https://littlemachineshop.com/products/product_view.php?ProductID=4660&category= Comments please . . . . Oh, the price is about $100 less than the Microlux from MM.
-
right Harv I am looking at the Micro Mill from Little Machine shop, Model 4660 with the ER-16 spindle. It can go up to 5000 rpm. Along with their Tooling Package it should set me back a grand or so. I wonder if anyone has one and what there thoughts are. Perhaps I will have to post the question elsewhere. I just played 'Mr. Electrician' this morning and now it is back to hang cabinets the right way. Earthquake proof them and keep the real heavy stuff lower to the ground (but not too low because then the termites can get to them).
-
Another hold up. My admiral and I noticed this morning that cabinets along the wall in My Garage were tilting, hanging awkwardly and needed some attention, might come crashing down on tools, etc. It was probably one of those earthquakes we have here, you know. But it is taking me a lot of time to re-do things in my 'Work shop'. I am even thinking of making space for a mill!!
-
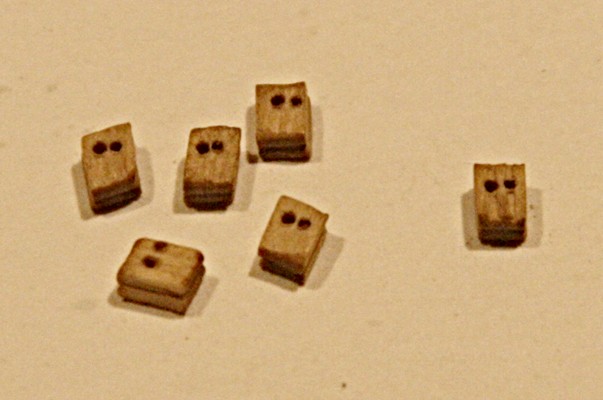
One more comment, if you please. The square blocks many times also have the hole off center. This is particularly true of double or triple blocks. So, be sure to sort the ones you want to keep. Furthermore, I don't understand that while machining the long straight rods of wood that generate the blocks have to be cut off at an angle. Let alone that the holes cannot be drilled the right way (Chinese or anywhere else for that matter). Just have a close look at these parallelograms with holes of different diameters. It would seem that even in large quantities this would be a simple thing to fix. Yet most or all kits still have them. I would think someone out there should listen to our concerns. I am sorry, but despite the extra cost, I am for using the more expensive type, unless I know that the blocks are not or hardly visible on my model.

-
Absolutely yes. The furled sails don't require a sewing machine if you simply use a pencil line for the seams. You don't have to add all those lines like the leech, bunt and clew lines (plus all the blocks that go with them), etc. The only line I used for the furled sails was the sheet which is attached to the little piece hanging down. The sheet goes down to the spar below and I simply tied it off underneath that. When I decided to add some of the flying sails I wanted to also include most of the lines that go with that. Hence all those blocks. The only lines I have not included are the lifts, the lines that allow the spars to be rotated vertically. They were used primarily in port. When you only use furled sails you can get by with having the halliards, the sheets, the braces and a couple more such as the jack jeers. It makes the rigging a lot less complicated.
- 732 replies
-
- 1
-
-
- constitution
- model shipways
- (and 1 more)
-
Your last word is not quite correct. I have rigged and in some cases 'rigged' the line in the wrong direction. As I mentioned earlier, I think I know the purpose of the various lines, but not where they are (or are supposed) to go. Many of those blocks and lines were installed when I didn't know any better and was too far along to correct my mistakes. There is always a 'next time'. Thanks Henry.
-
Painting fine details
Modeler12 replied to bill24's topic in Painting, finishing and weathering products and techniques
Just as David pointed out, cleaning the brass is important. But in my opinion, using a primer after cleaning is also necessary. I have used some very fine wet&dry 1000 grid paper and then sprayed the parts with primer before the final paint. Grant you, these were very flat pieces, but it worked well. The primer I used was a standard, off the shelf, spray can. -
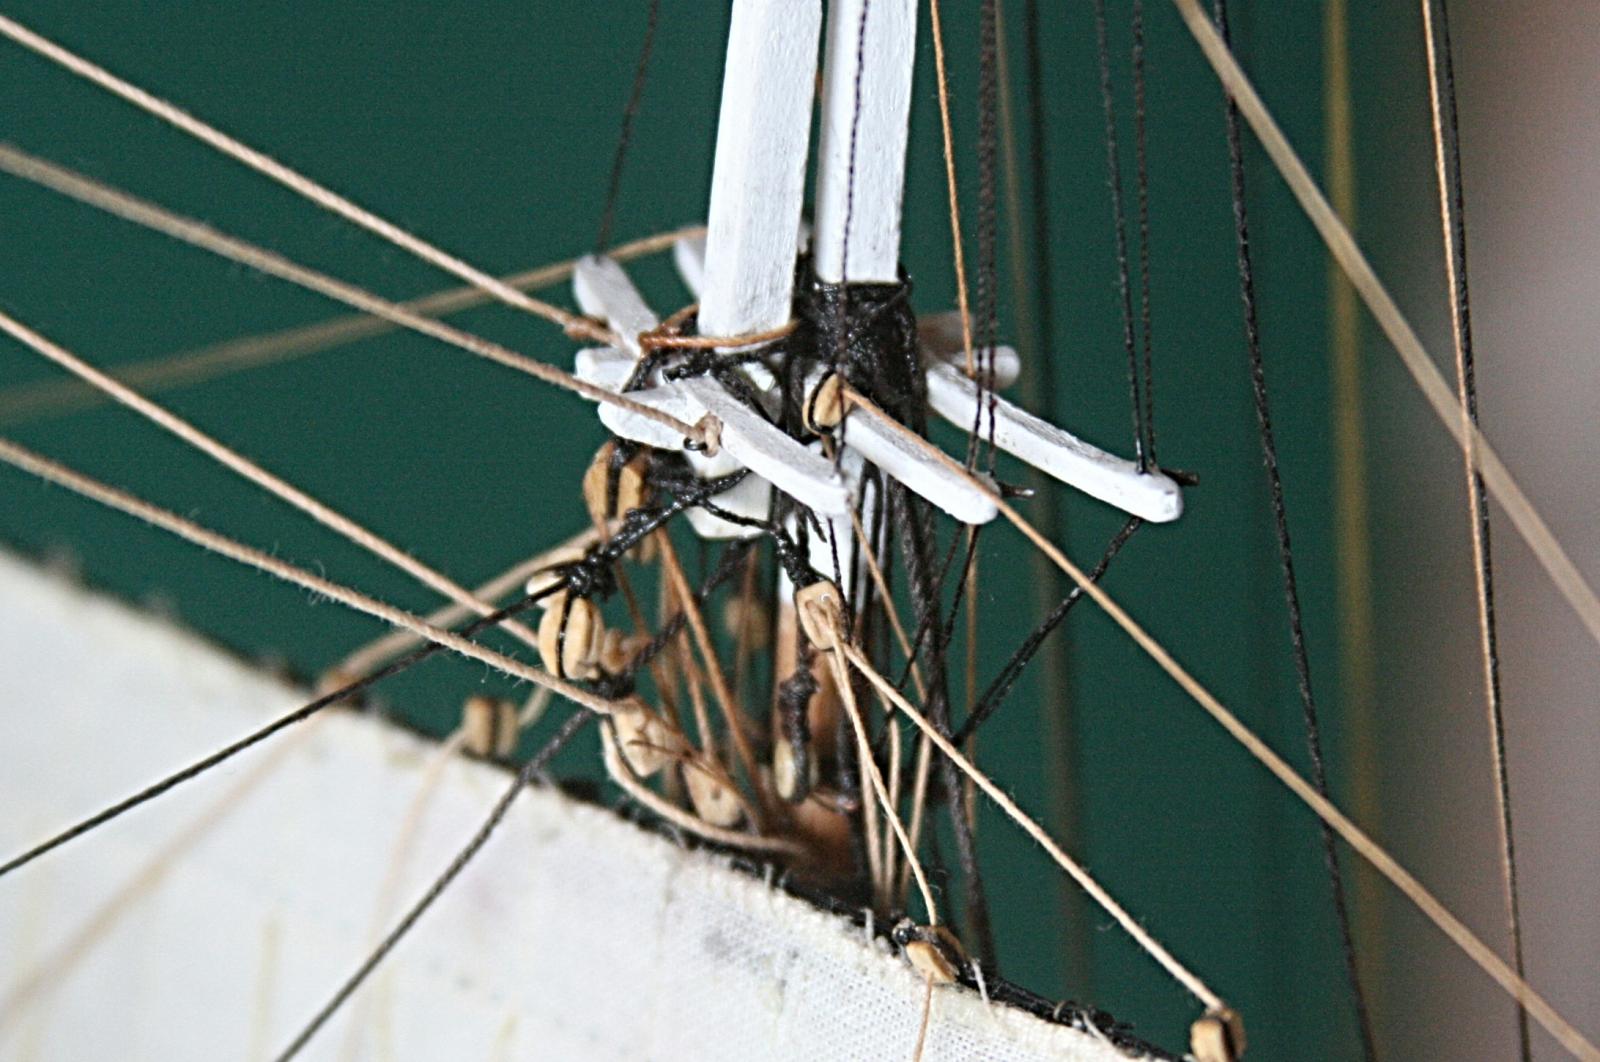
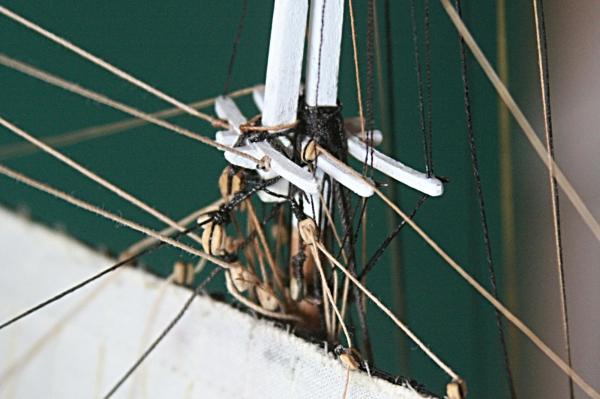
I just had to add two more blocks near the mizzen mastcap. It is a real jungle up there. Mind you, if you don't add sails things are a lot simpler, but not as much fun. In the picture below I counted 14 blocks, two of which are not yet rigged. Then there is one more hiding behind the mast. The main topsail braces come back here also and then down the mizzen mast. Now I know why I was confused and frustrated a few weeks ago. But I just try to take in stride. Of course, if I had taken the time to study all of this and put the blocks where they belong before mounting the sail . . . .? I hate these close-ups. They show all the mistakes and flaws.
- 732 replies
-
- 4
-
-
- constitution
- model shipways
- (and 1 more)
-
Right on Henry. If I were fifty years younger and knew what I know now, I might make a pretty good sailor on the real ship in Boston. Besides all the things you mentioned that I have learned, I actually am having fun doing and learning more. in the last year or so, I have honed my small wood working skills, learned how to braze and solder better, etc. etc. I even know how to run a sewing machine a tad better than my wife (so she tells me here on Valentine's Day).
-
Thanks, but what amazes me is that I finally know each of those lines I have attached, know what their names are and what they are used for. What I have to look up as I go along is where they are belayed on deck or the masts. When I stand back and think of where I was six months ago, I scratch my head but realize that each of those thin threads have a function. The only 'redundancy' are the preventer stays, which are there on war ships in case the main stay should be damaged in battle.
-
One of our members, Geoff, has done a lot with his ropewalk and the threads he used. Have a look at his build log: http://modelshipworld.com/index.php?/topic/945-constitution-by-geoff-176-scale-ms-2040/page-6 Be sure to go to the page before this one.
-
Great stuff, SoS. Never tried to make the eye-splice, but have made a couple Turkish heads and other decorative knots back when I had a sailboat in the SF Bay. Love your chest handles. Did you decide on how to display your beautiful model?
-
Funny you should say that, Gary. I used the ones I showed above to make door knobs for the windmill I built some time ago.
-
Passing ropes through blocks.
Modeler12 replied to Romanov's topic in Modeling tools and Workshop Equipment
Kind of like I showed above, Henry! The hole in the spar is not too visible, but it is there.