RGL
-
Posts
5,539 -
Joined
-
Last visited
Content Type
Profiles
Forums
Gallery
Events
Everything posted by RGL
-
 The plans are pretty much 1917, and England handed her to Australia in the 1930’s where she then went through various refits during ww2. If you open the drawing on page 1 it will have the date.
- 1,090 replies
-
- 8
-

-
- showcase models
- vendetta
- (and 2 more)
-
I ordered a railing set in 1/350 and proved it was 1/200; they acknowledged it was wrong and a manufacturing issue but said there was nothing they could do. They do sell direct but as they are Northern Europe it’s not worth it for Southern Hemisphere
- 122 replies
-
- 5
-
-
- tamiya
- King George V
- (and 2 more)
-
I’m on nightshift, then it has to arrive, I have to build it. The pressure!!
- 1,090 replies
-
- 7
-
-
- showcase models
- vendetta
- (and 2 more)
-
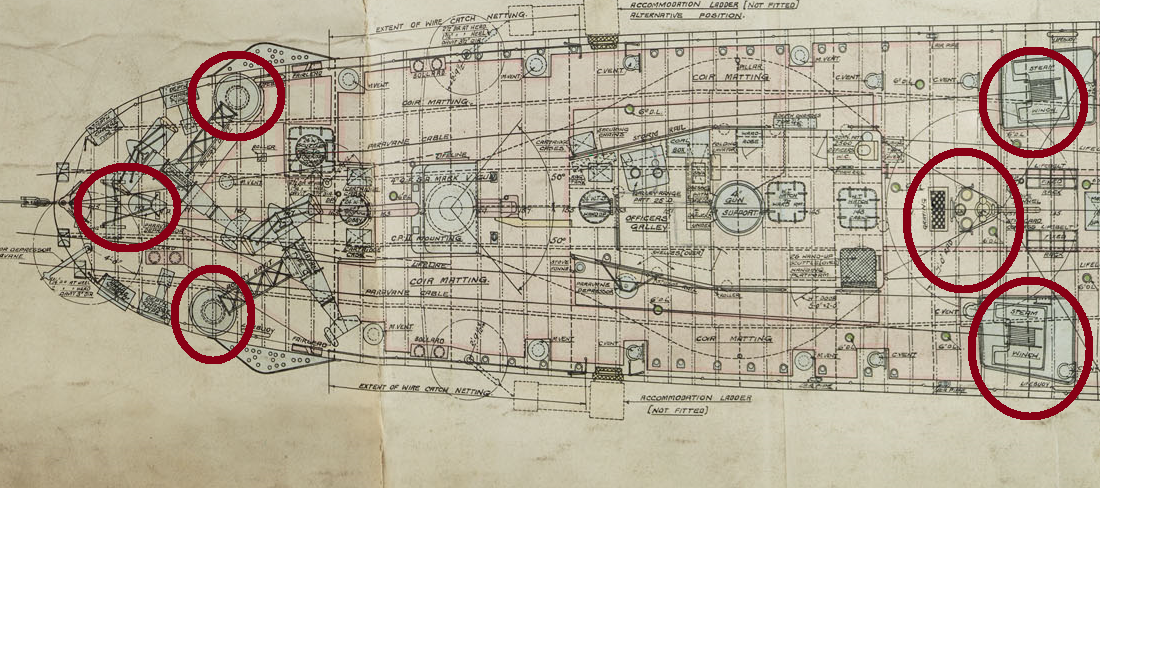
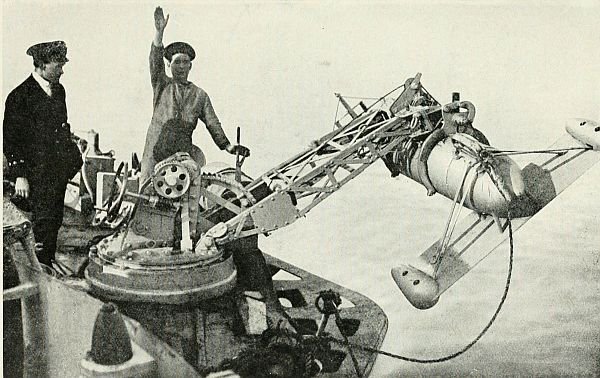
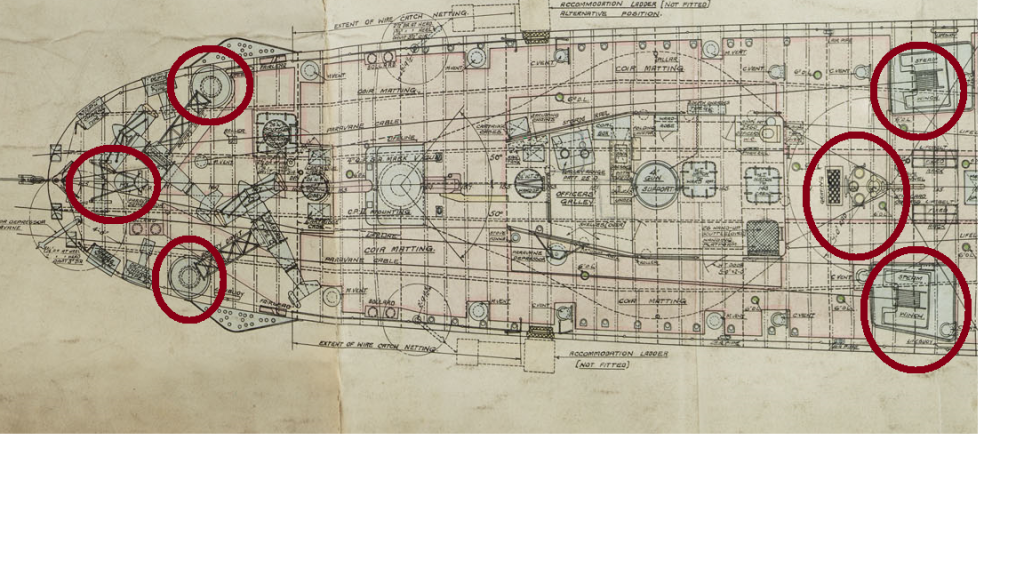
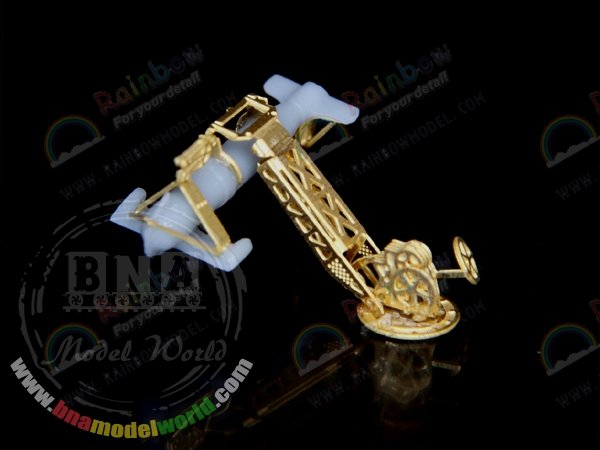
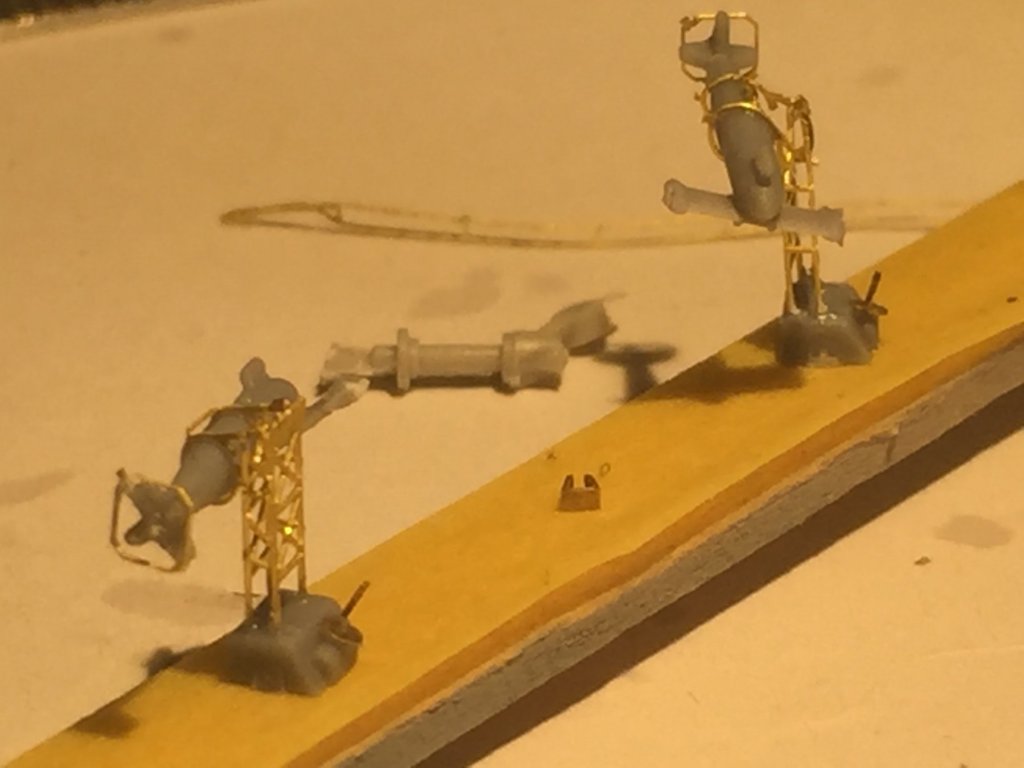
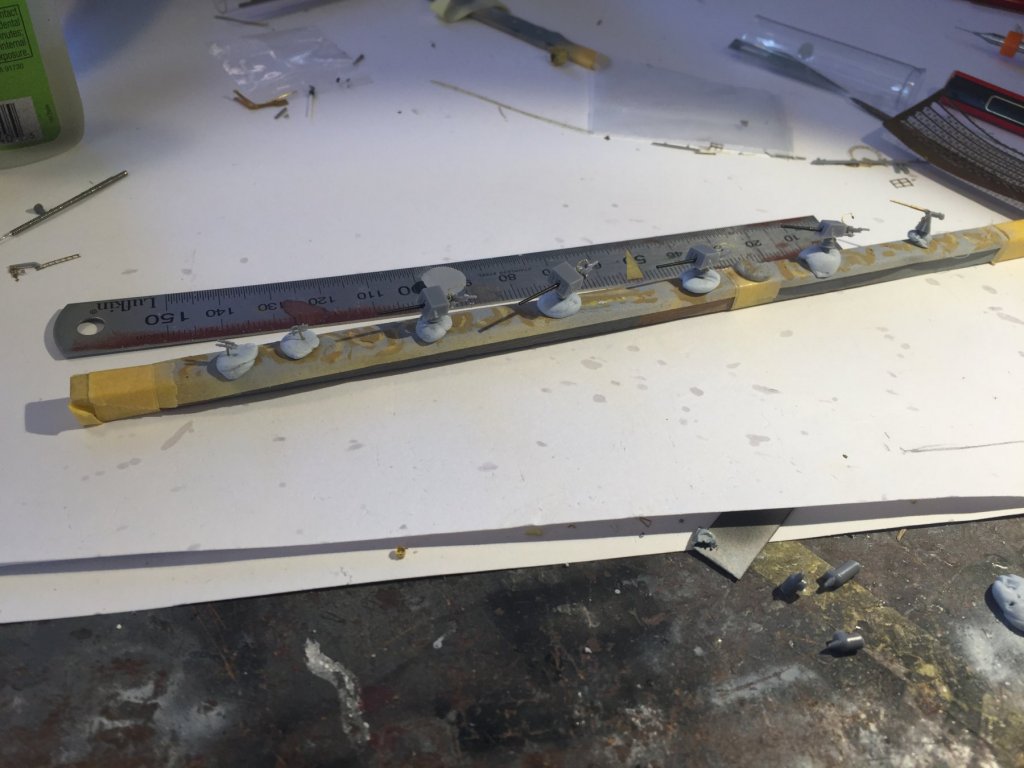
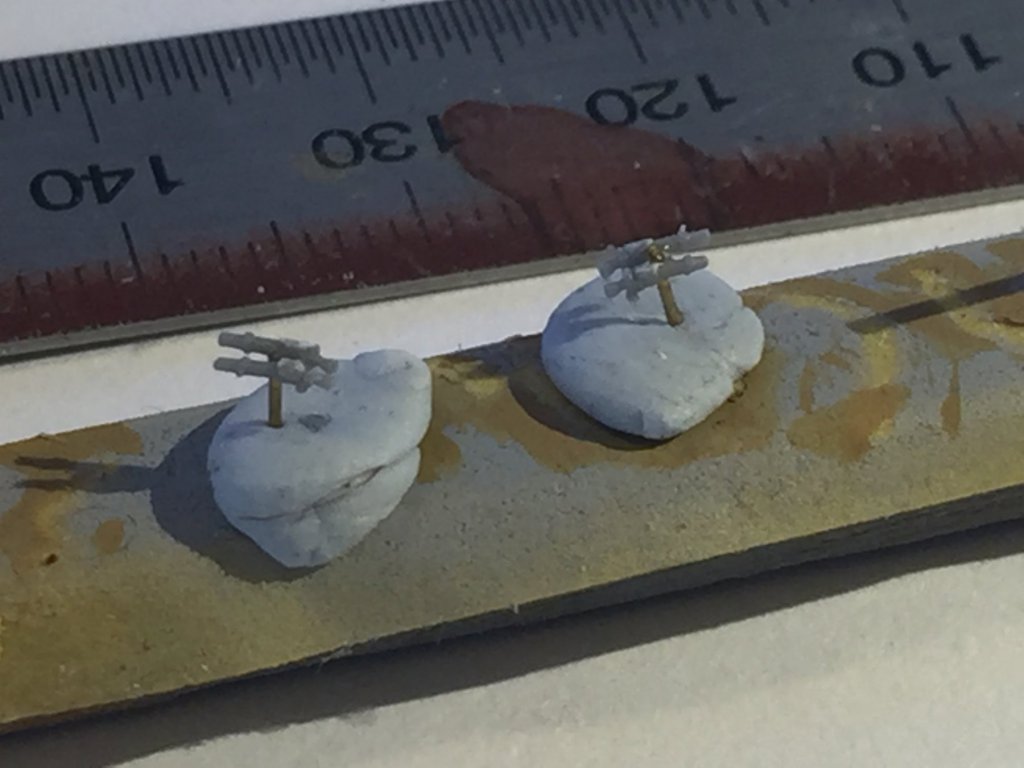
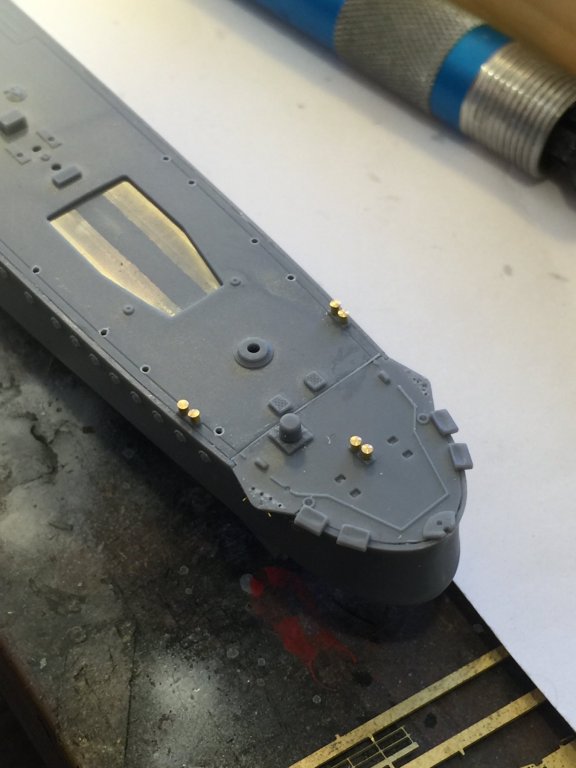
So the plans show (in red) the winches, the paravane depressor, the steam winches for the paravane cables, and the after or secondary ships wheel. I've added a photo of what the real thing looks like and what I may have ordered to replace the kit stuff.
- 1,090 replies
-
- 10
-
-
- showcase models
- vendetta
- (and 2 more)
-
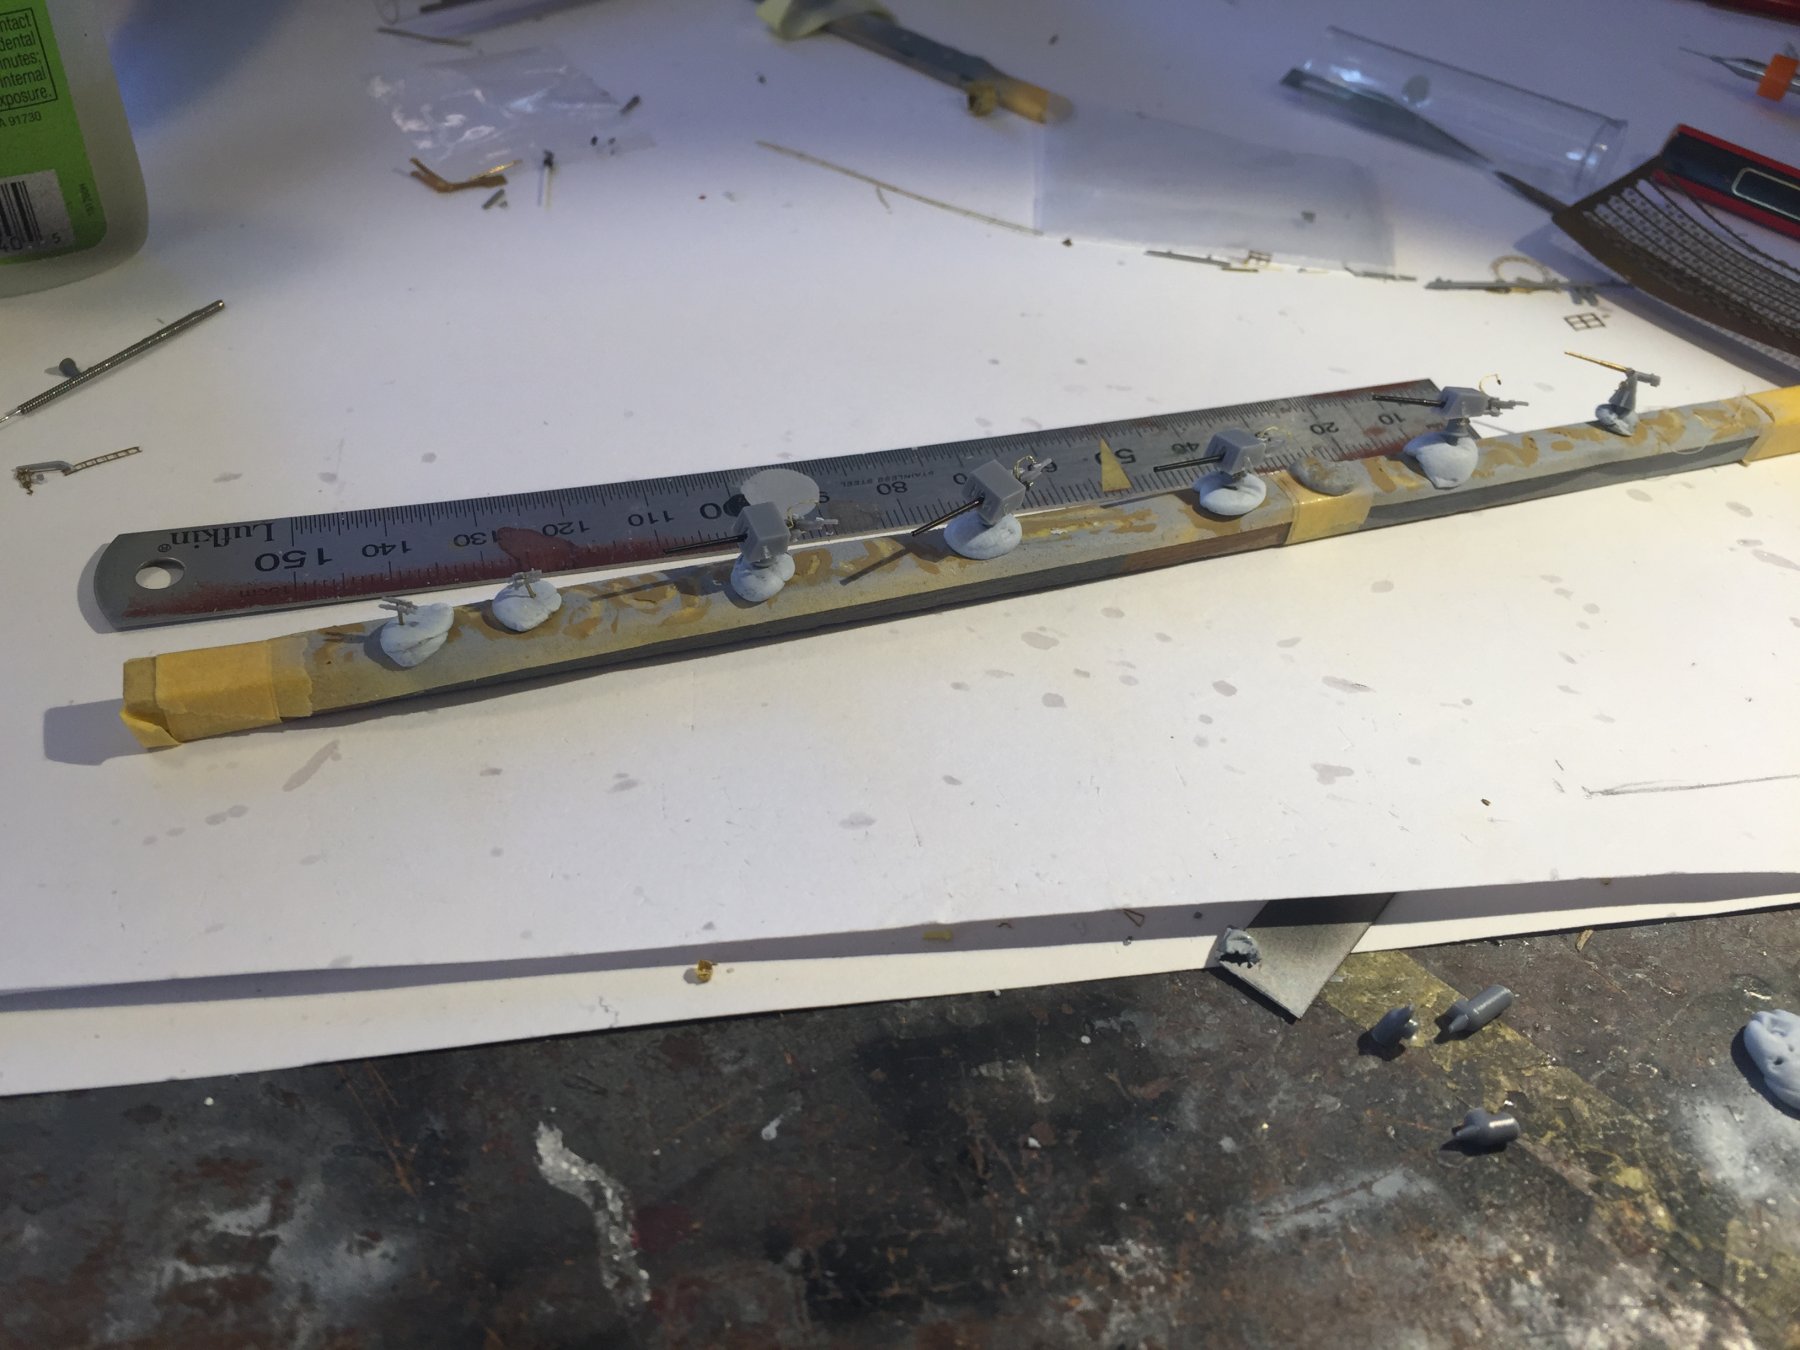
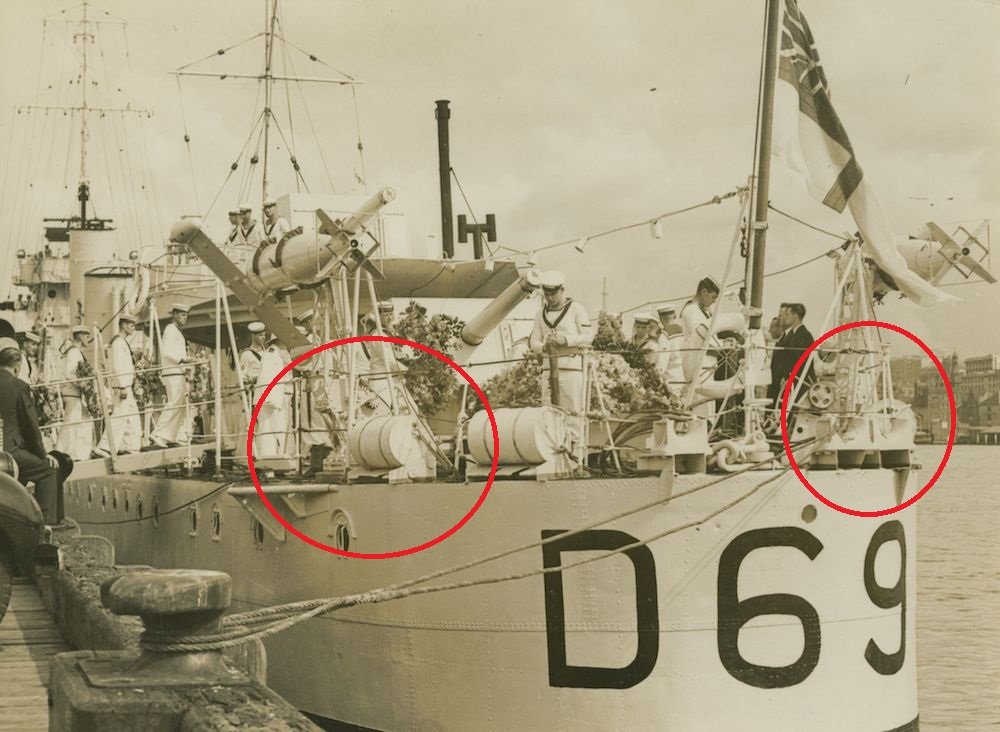
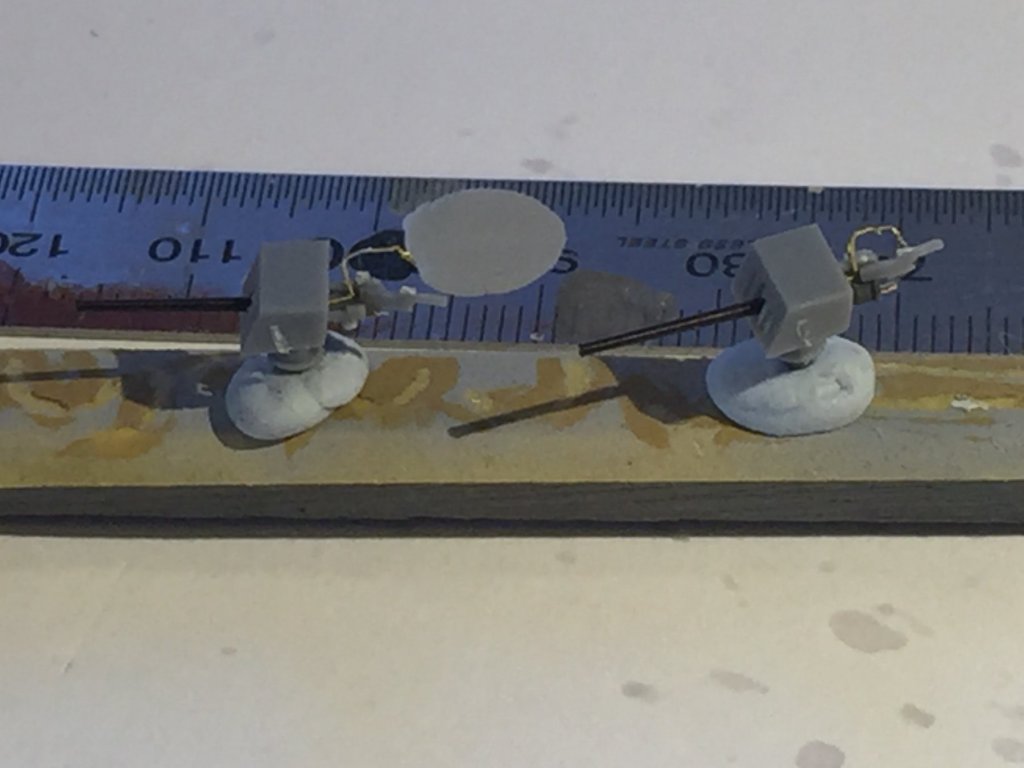
The Ships paravanes and the kits paravanes are somewhat different. The little blobs of plastic have nothing on what is available commercially for IJN Ships. The winch is a very fragile blob of plastic and some PE which looks nothing like the real thing.
- 1,090 replies
-
- 6
-
-
- showcase models
- vendetta
- (and 2 more)
-
Yes, and Eduard customer support does reply but don’t care.
- 122 replies
-
- 4
-
-
- tamiya
- King George V
- (and 2 more)
-
North Star have fabulous stuff, remember the figures are tiny and you will need a lot for a battleship
-
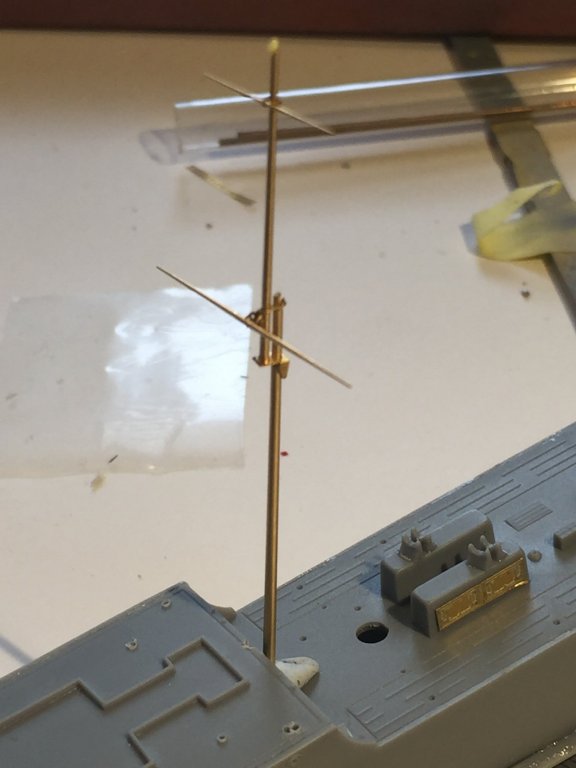
The fore mast is a tapered brass rod from a Master-Model set, the yardarms from another, and the other bits from Alliance model works mast set. The rear mast is just rod and a yardarm. Given they are going to be rigged they’re need to be quite strong as the plastic would just bend and the kit stuff would never survive the sanding required from the injection ports anyways.
- 1,090 replies
-
- 9
-
-
- showcase models
- vendetta
- (and 2 more)
-
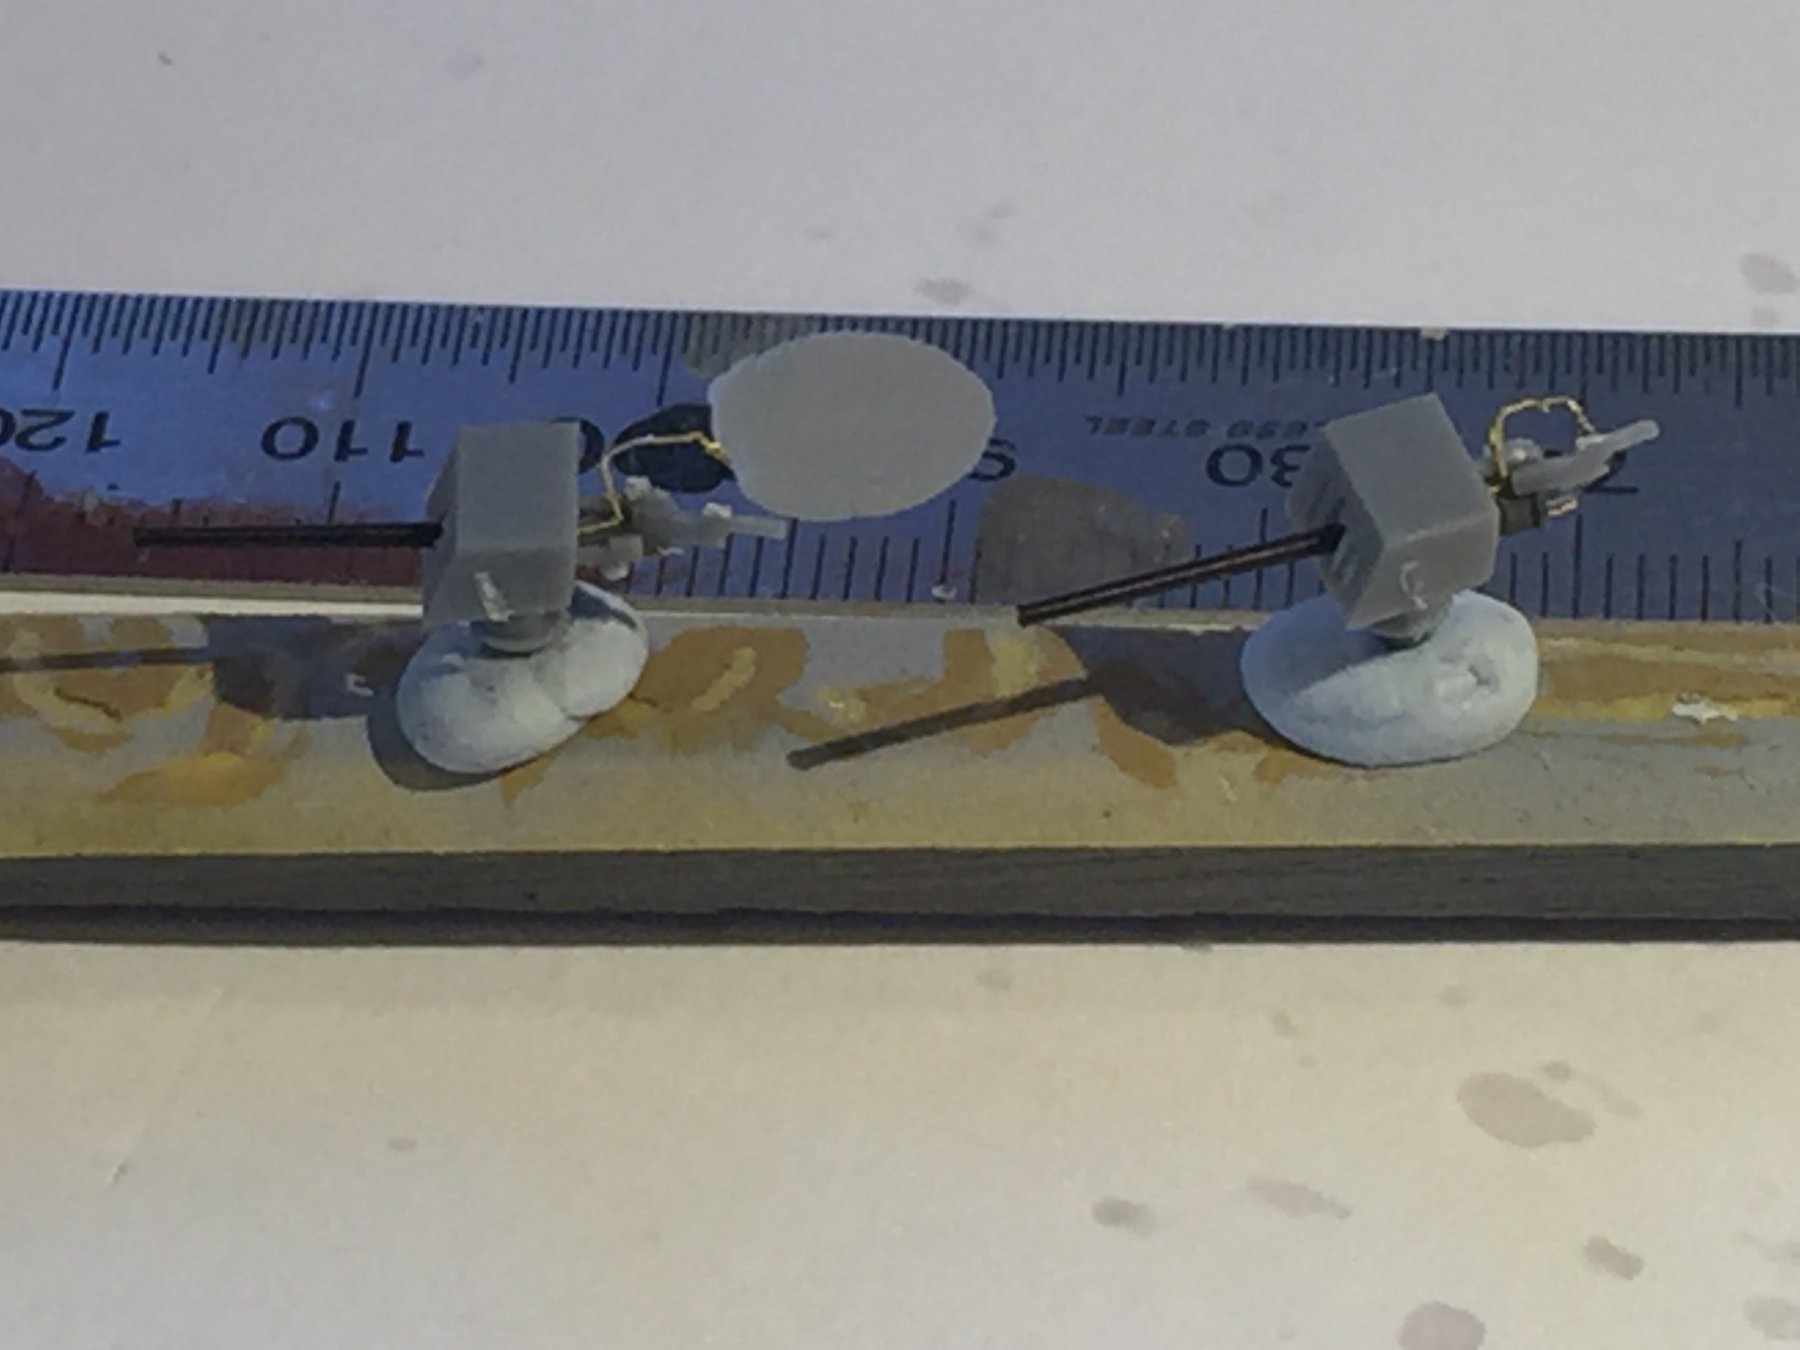
I just had visions of Tatoo from fantasy island, “The plane, The plane!”. Whilst no no where near the quality of Cog’s guns, the kits guns are a little bit complex, and as the sprue joined onto the barrel, so I swapped them out. The barrels were from spares and were blackened. The 12pdr is very plain and there are two twin Vickers machine guns which are about 2mm

- 1,090 replies
-
- 11
-
-
- showcase models
- vendetta
- (and 2 more)
-
No, I keep chasing rabbits down holes on tiny pieces which I never end up using. Cog has gotten paint on his. In answer to Ben, it’s just bluetack.
- 1,090 replies
-
- 8
-
-
- showcase models
- vendetta
- (and 2 more)
-
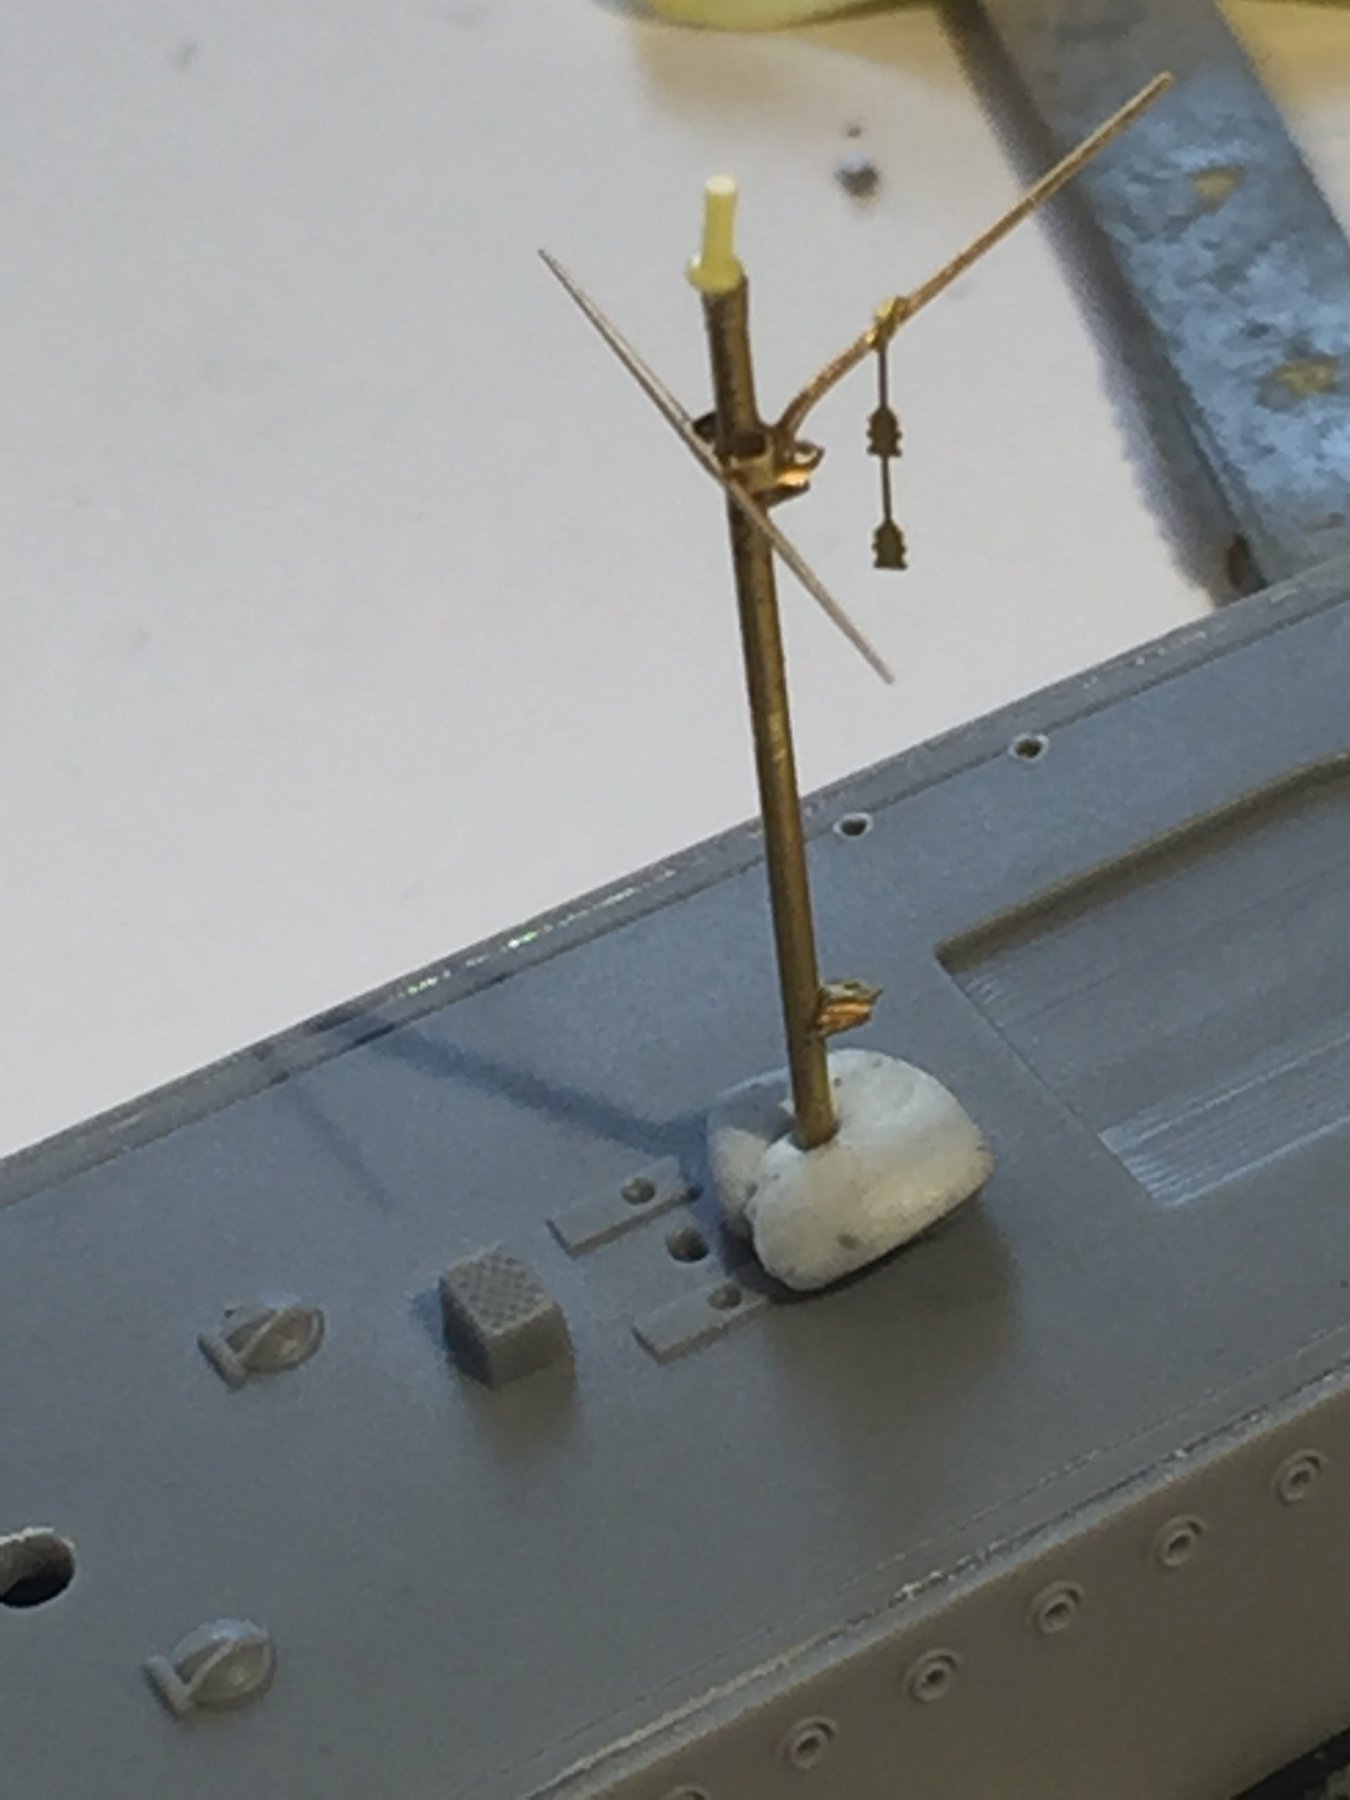
Morning work and the masts are done. Guns are next.


- 1,090 replies
-
- 14
-
-
- showcase models
- vendetta
- (and 2 more)
-
Obviously designed for a better modeller than me. I would love Pontos or the like come up with an aftermarket set. I just cannot find enough consistent references to do the 1945 build (yet), as she had several variations before she was scrapped.
- 1,090 replies
-
- 7
-
-
- showcase models
- vendetta
- (and 2 more)
-
Make sure you remove the feathers first. Im probably going to scratch build the davits as I’m just not happy with them. I accidentally cut too much off when I clipped it off the sprue and the real thing is very simple but not the rubbish provided in the kit.
- 1,090 replies
-
- 7
-
-
- showcase models
- vendetta
- (and 2 more)
-
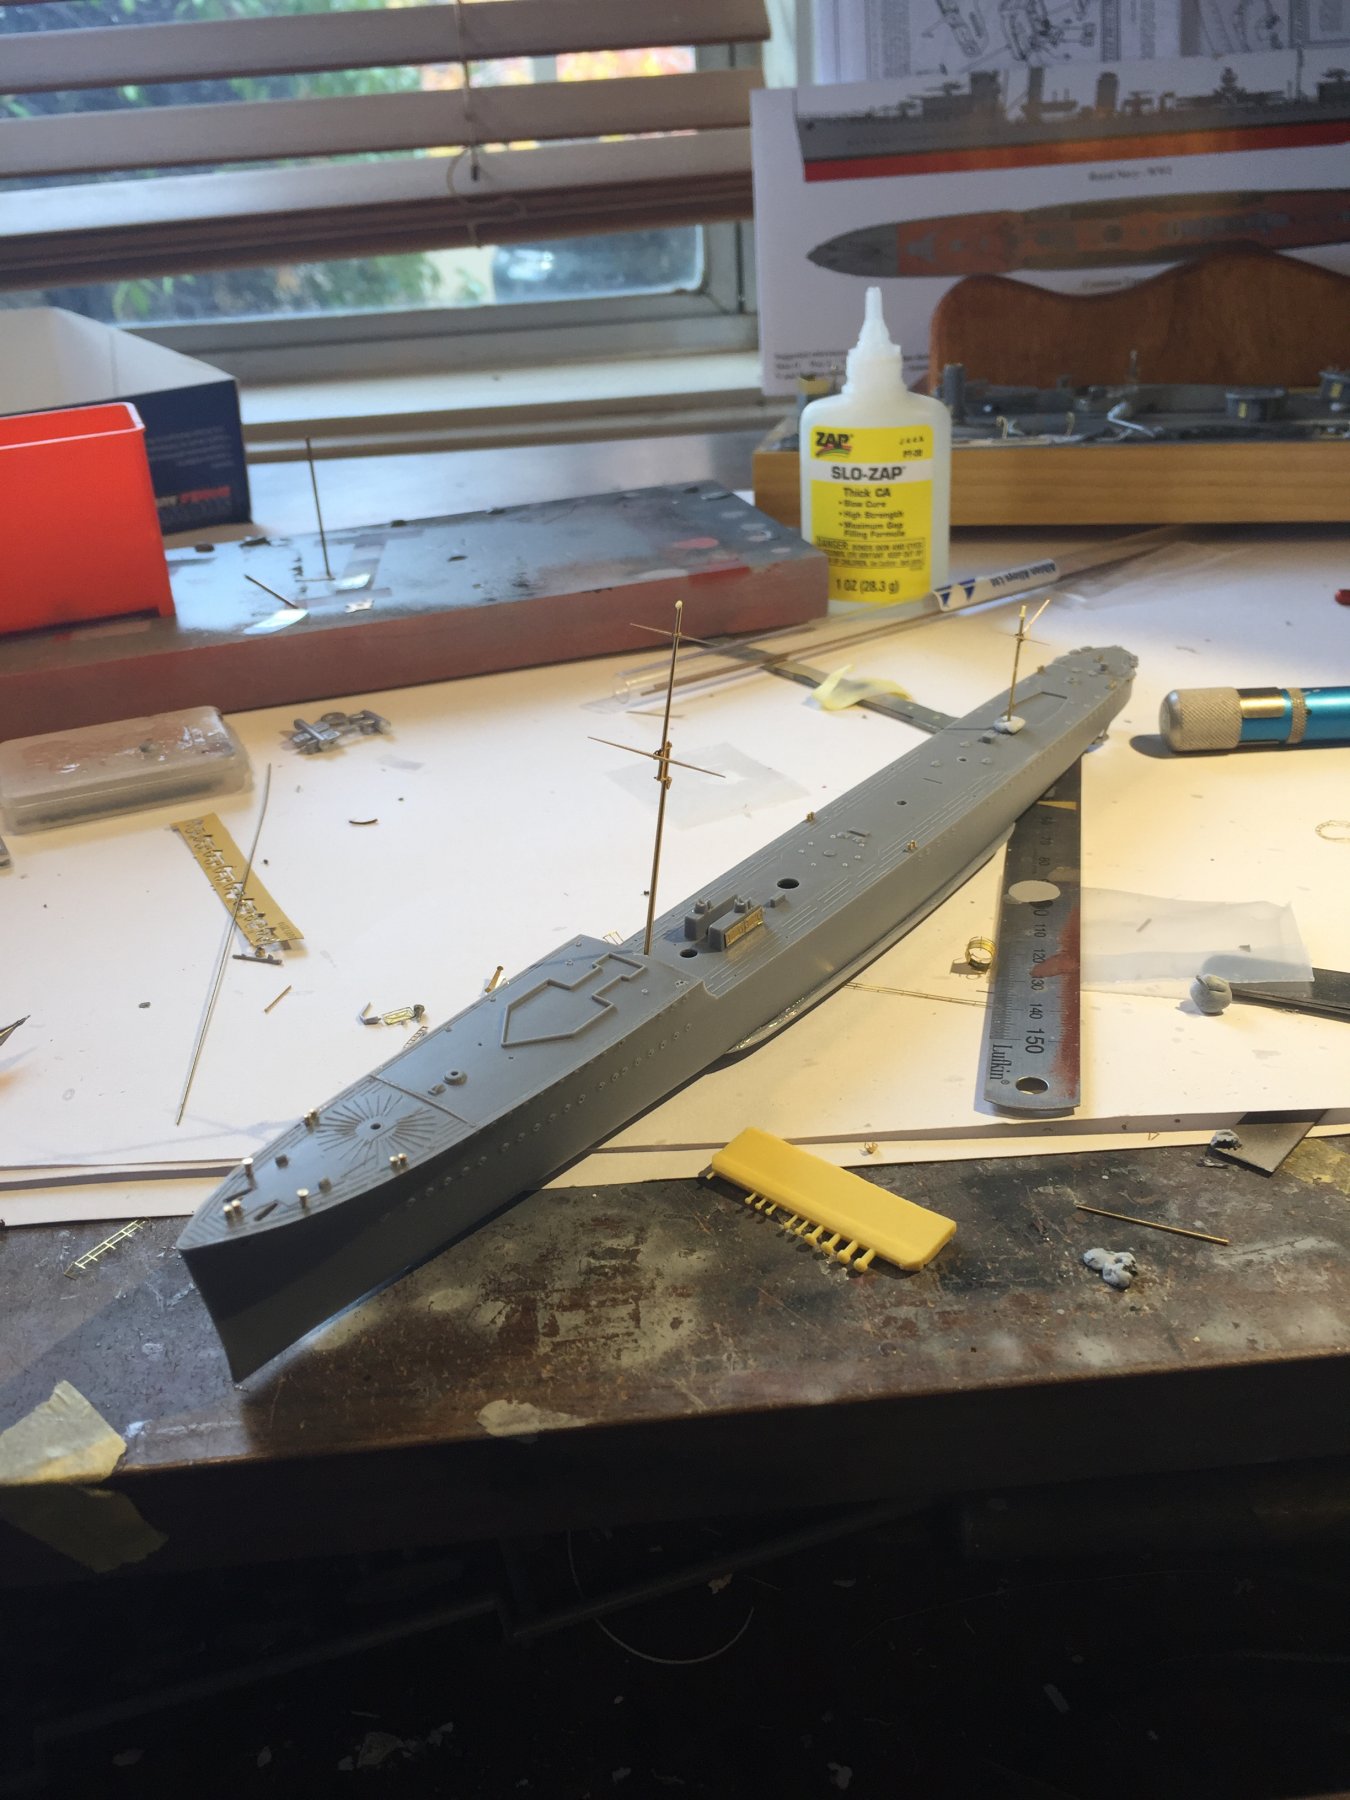
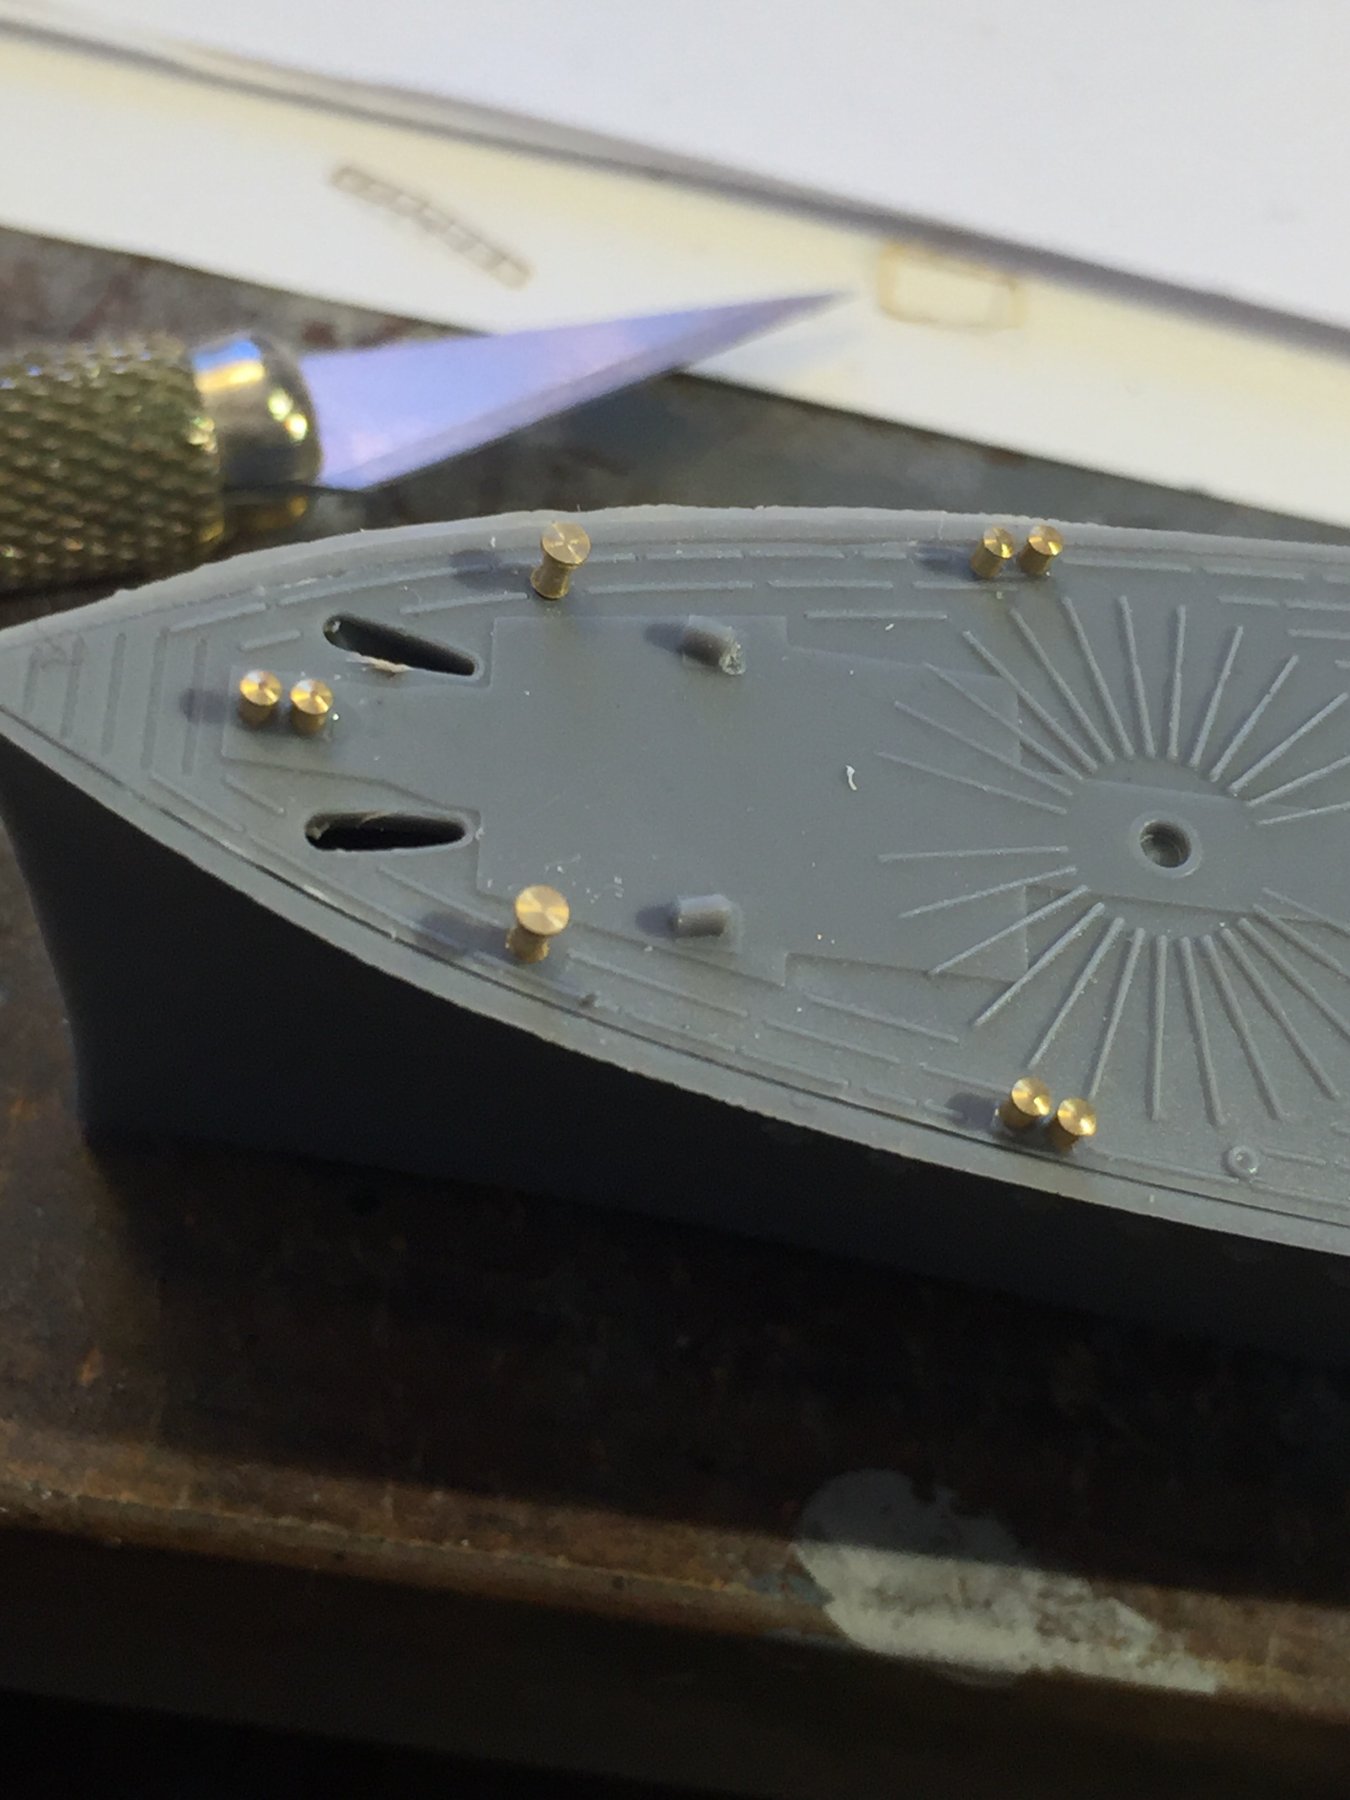
Well almost dinner here so honey mustard chicken it is. I’ve replaced all the bollards with 1/700 large vessel ones (they fit perfectly) and two larger ones on the front that were left over from the Spruance. Sliwly building up the paint cue. Tomorrow the masts in brass.


- 1,090 replies
-
- 13
-
-
- showcase models
- vendetta
- (and 2 more)
-
Marvellous work
-
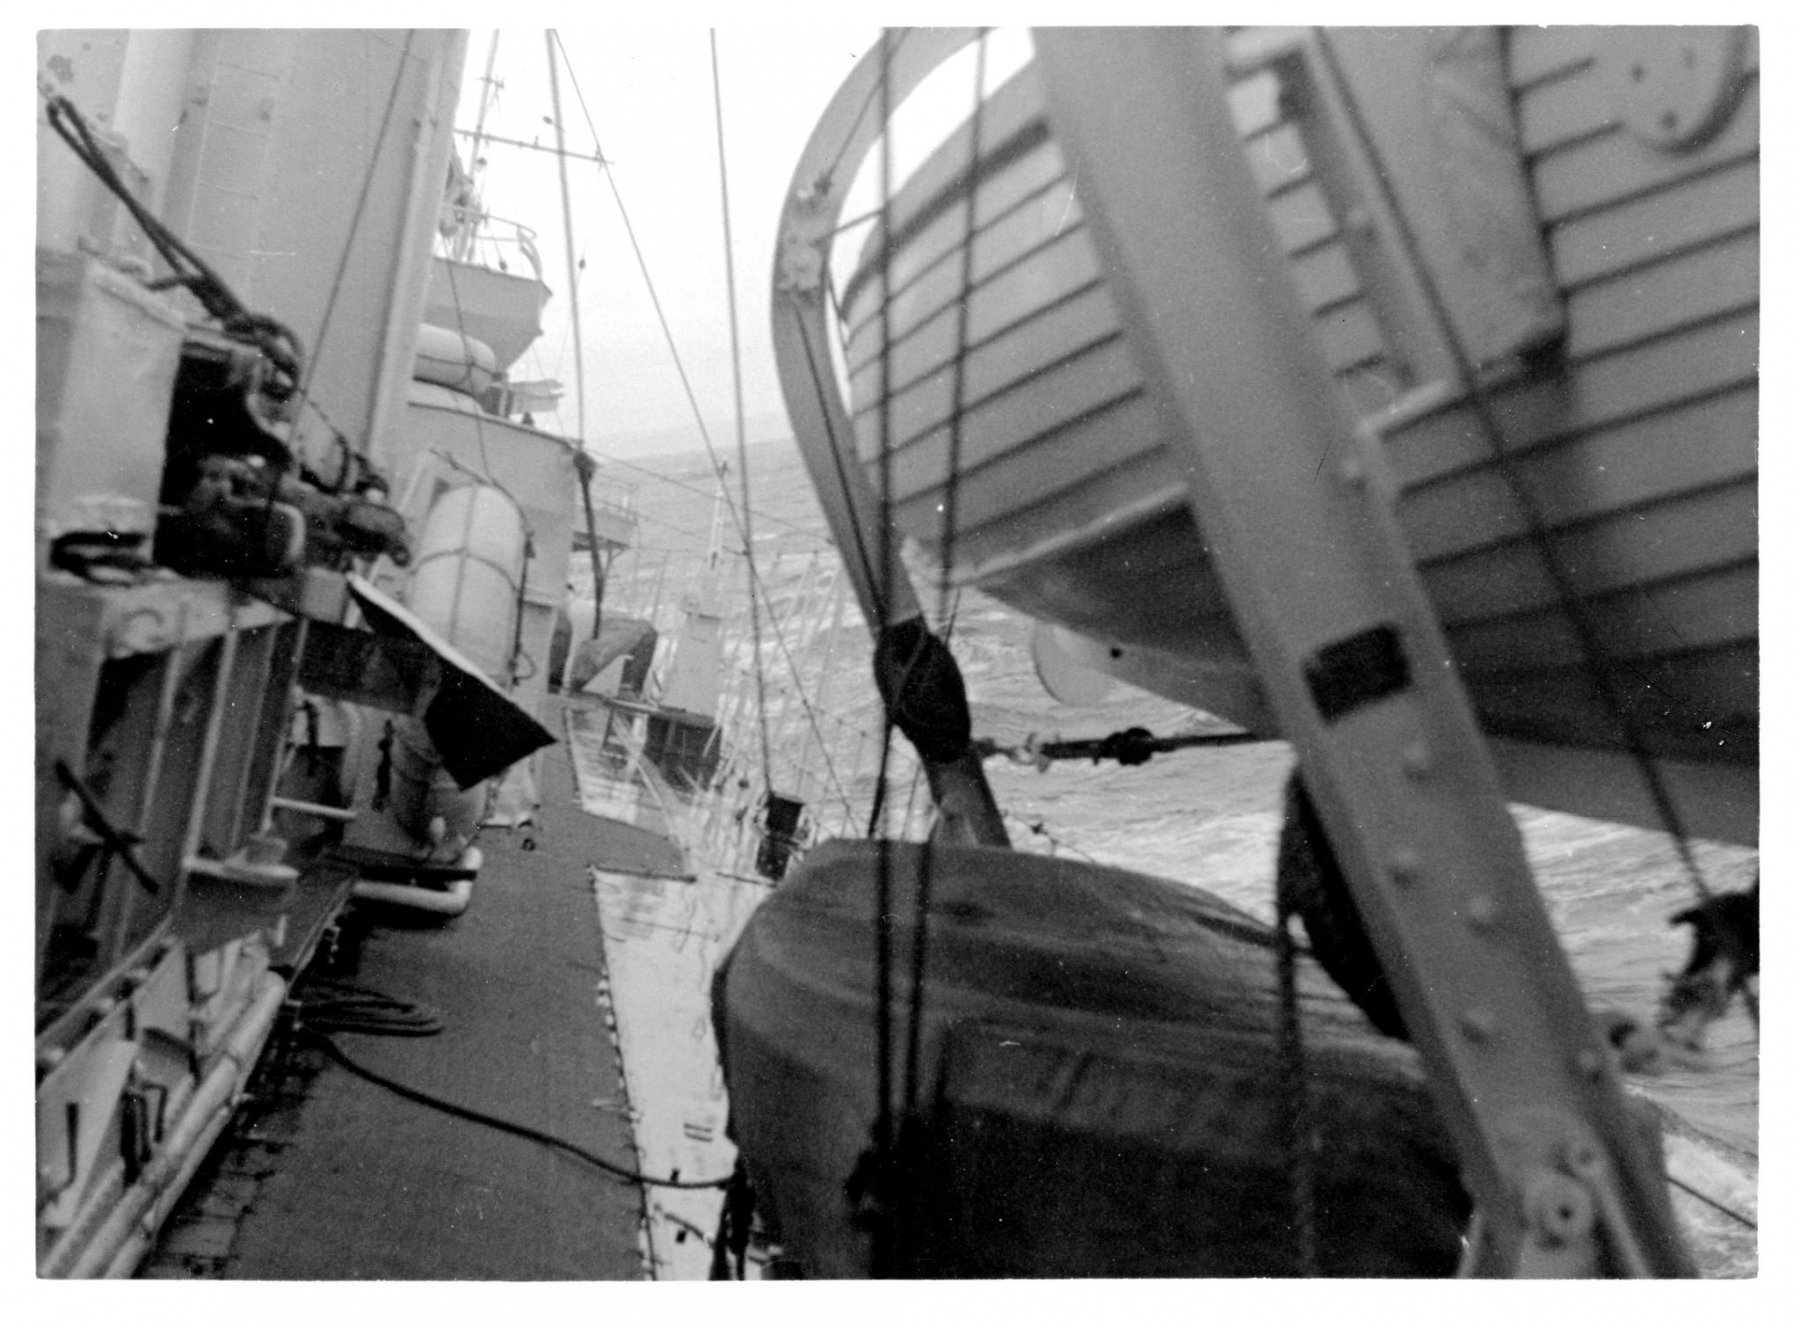
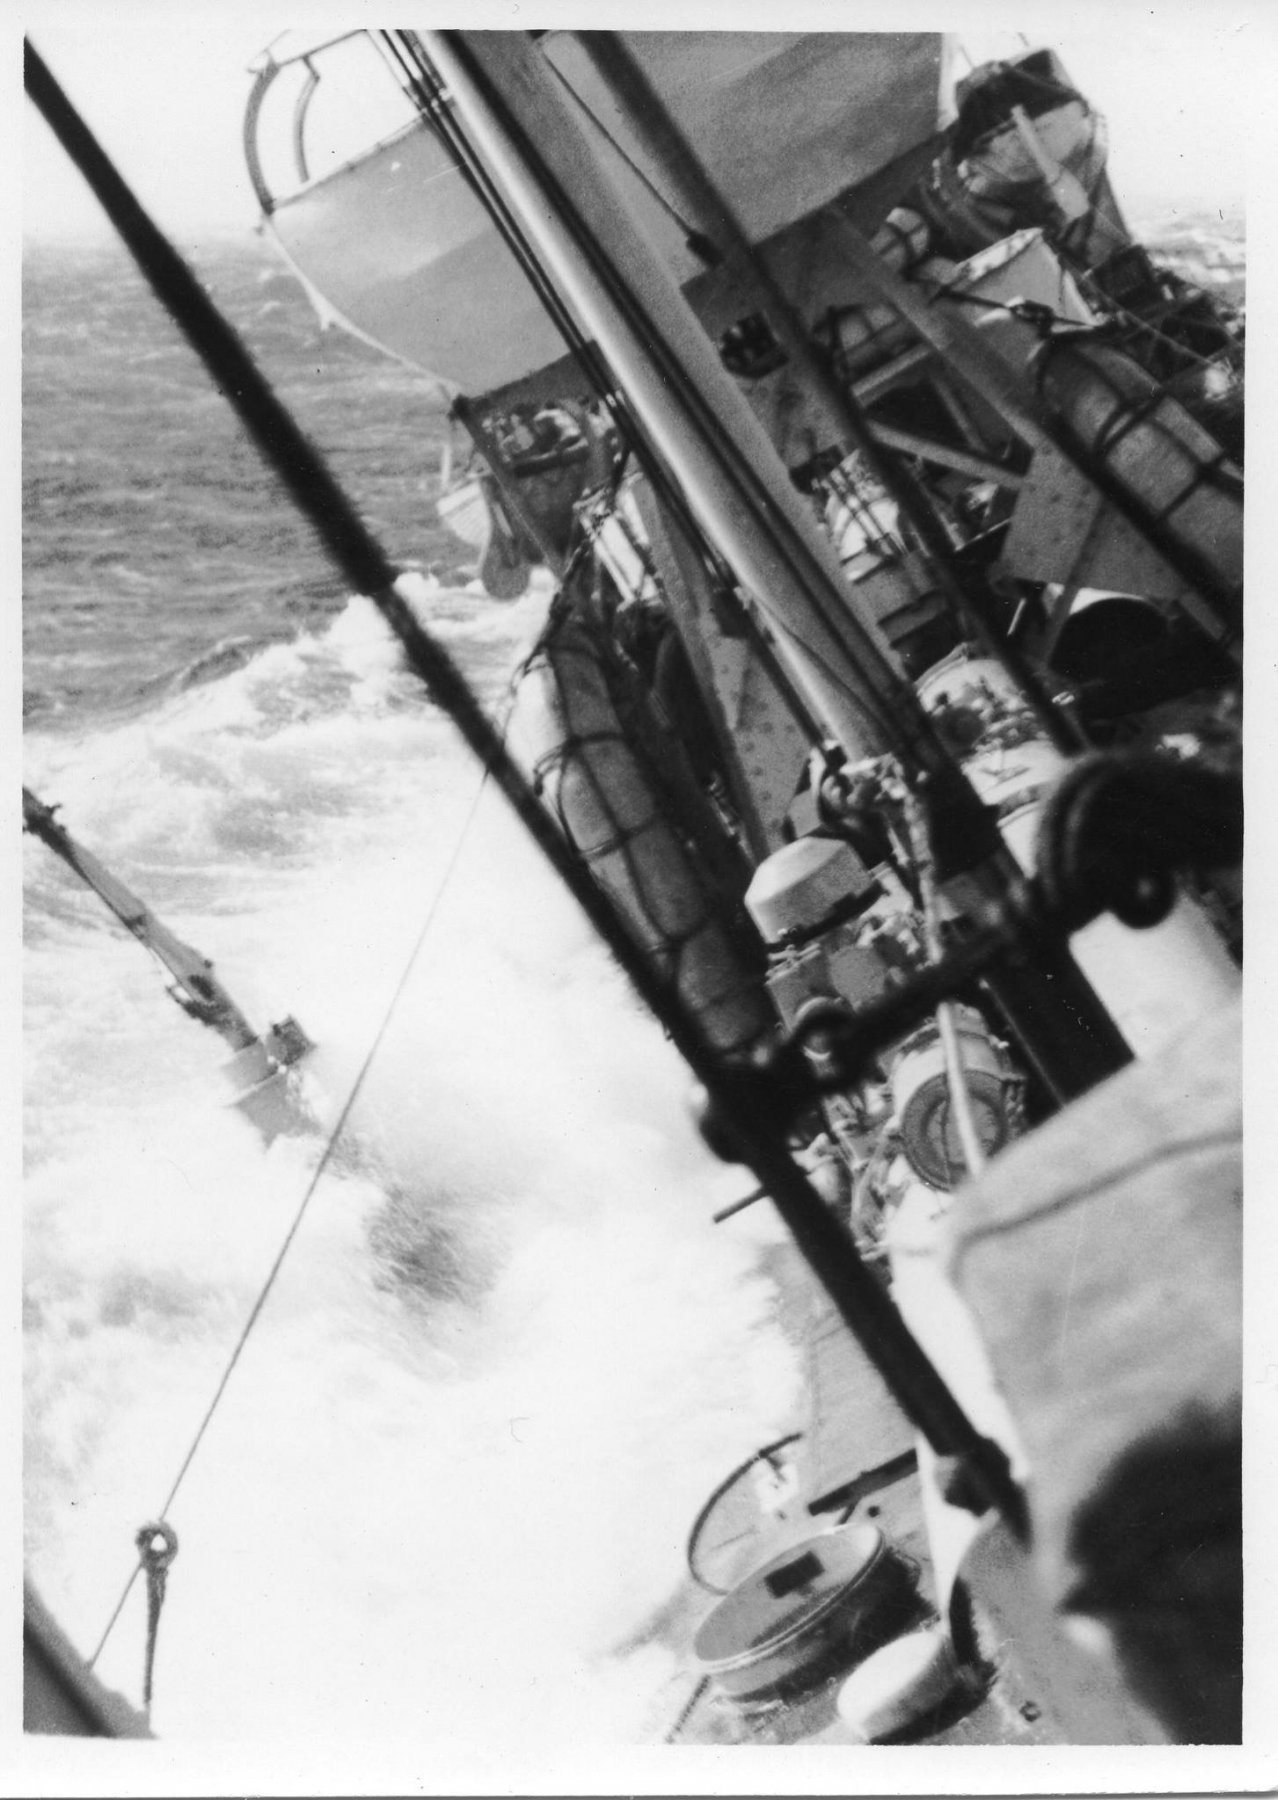
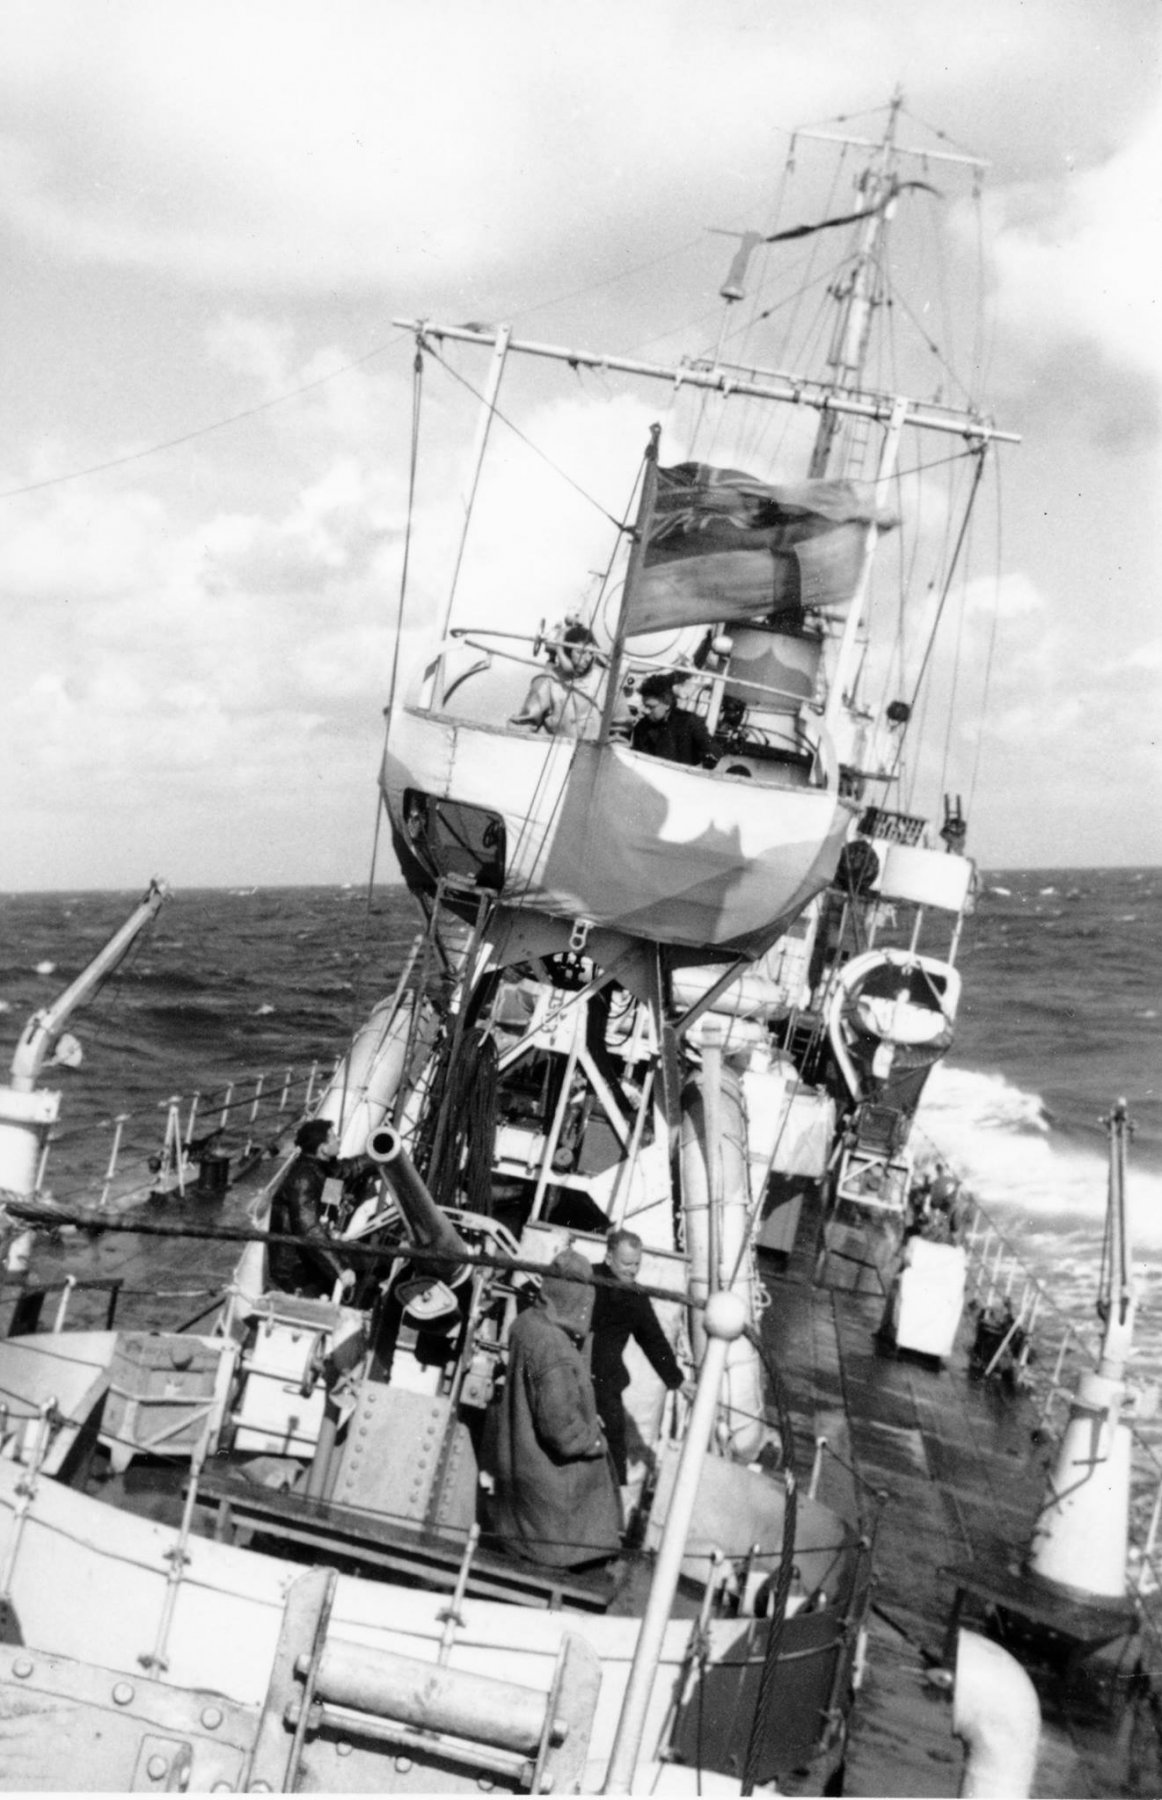
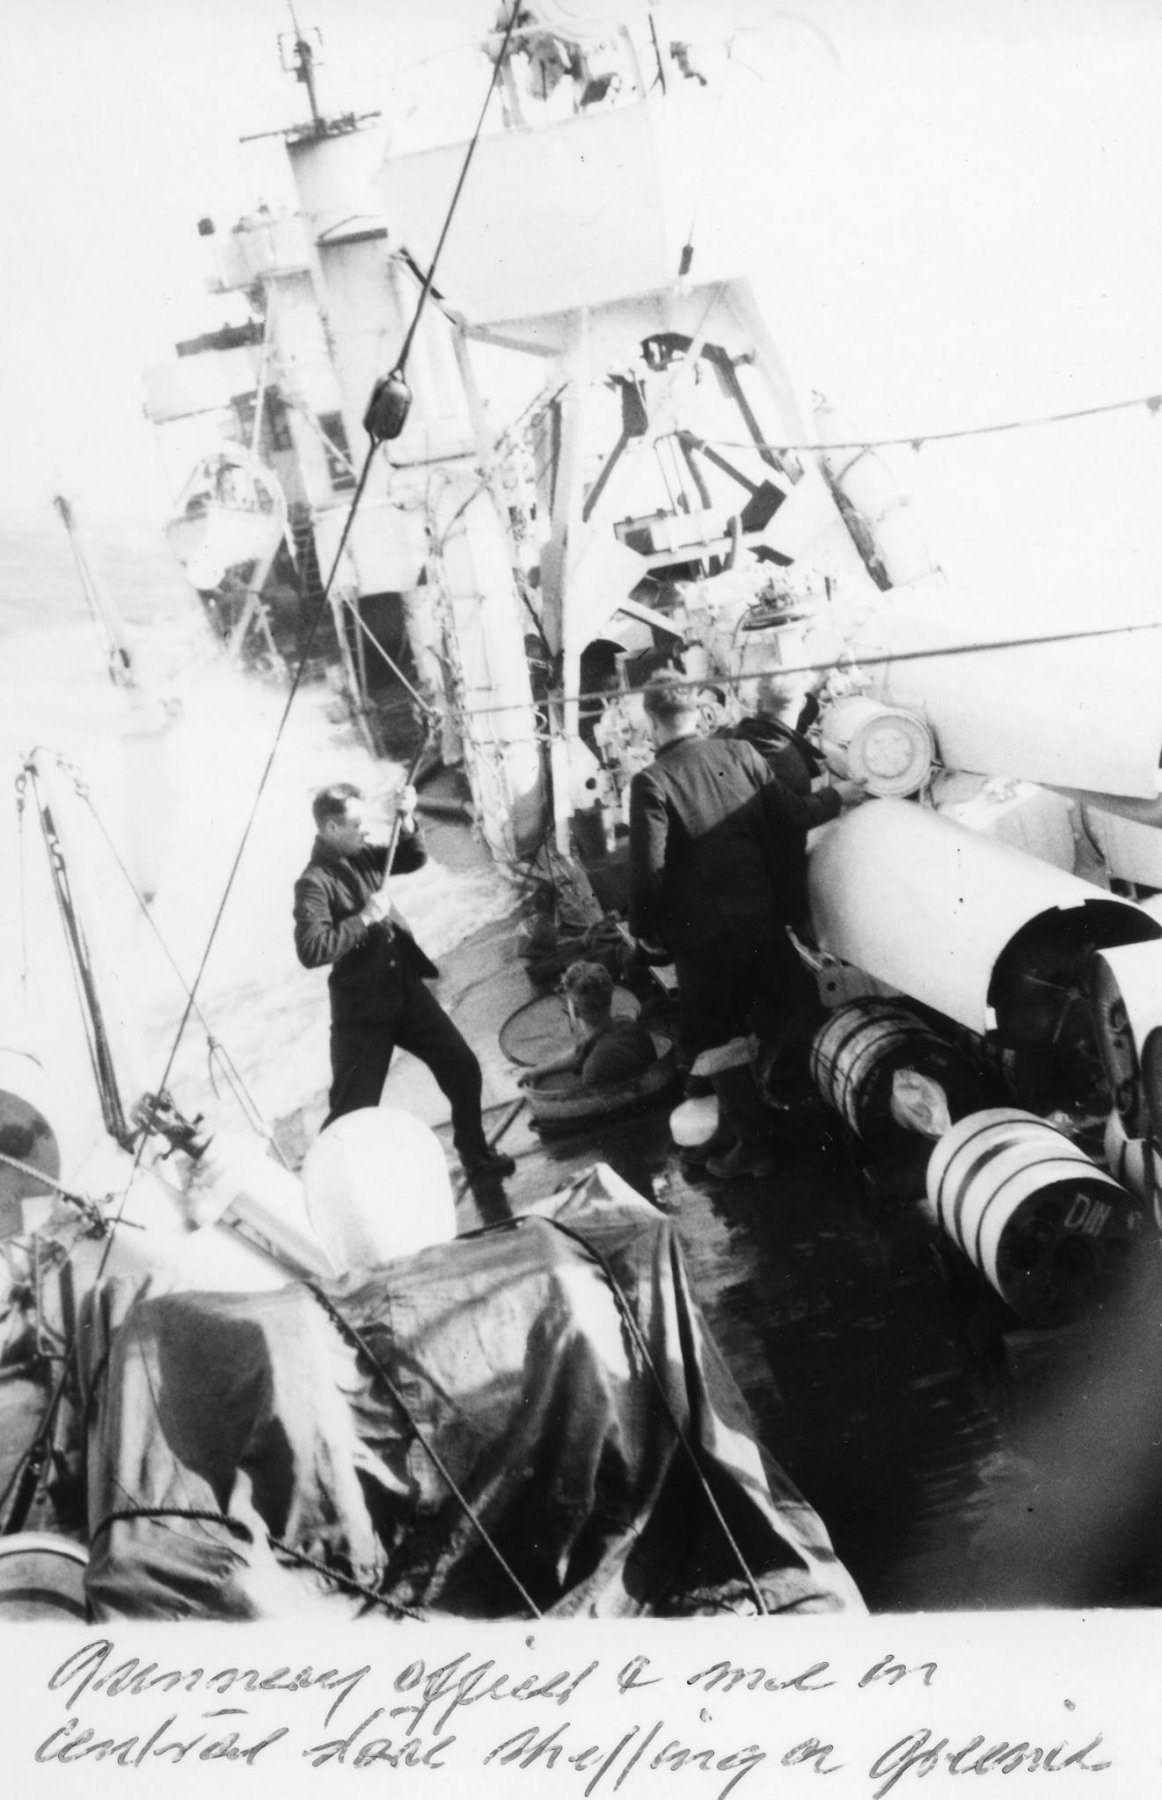
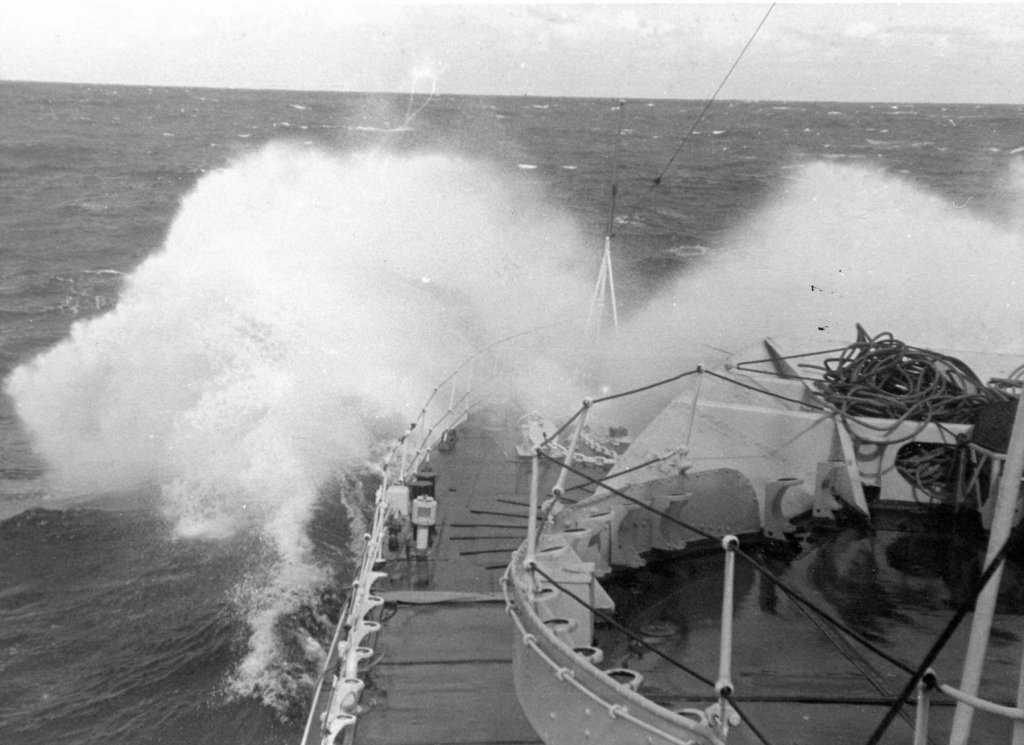
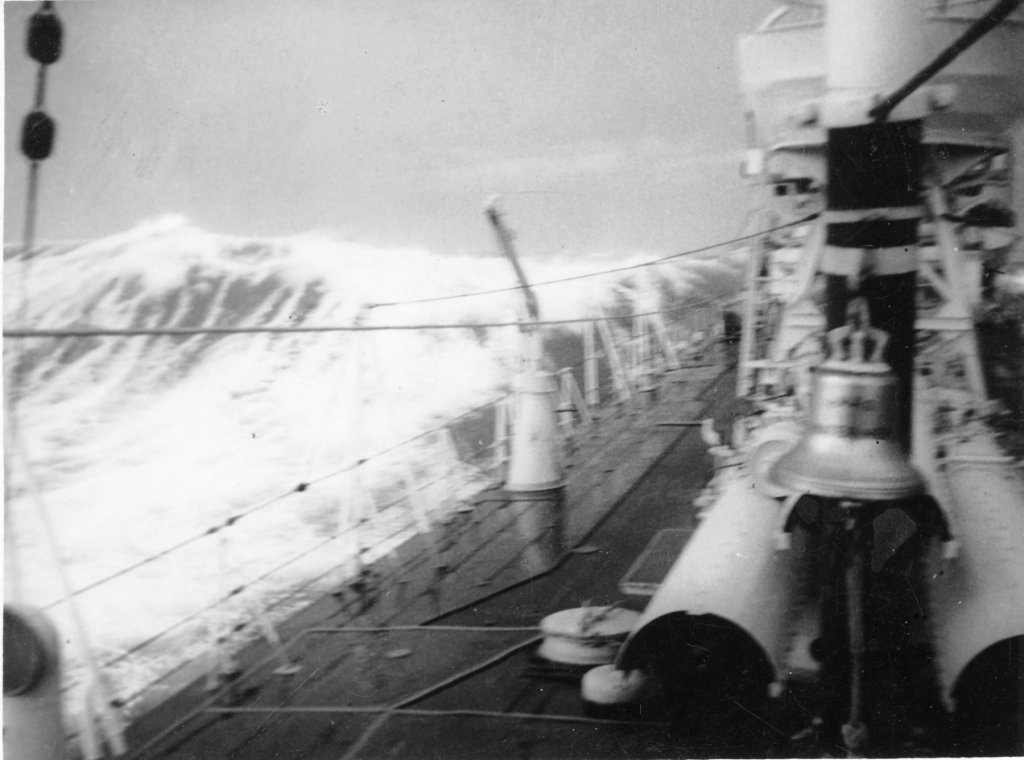
I wanted to add some rough weather shots of her...


- 1,090 replies
-
- 14
-
-
- showcase models
- vendetta
- (and 2 more)
-
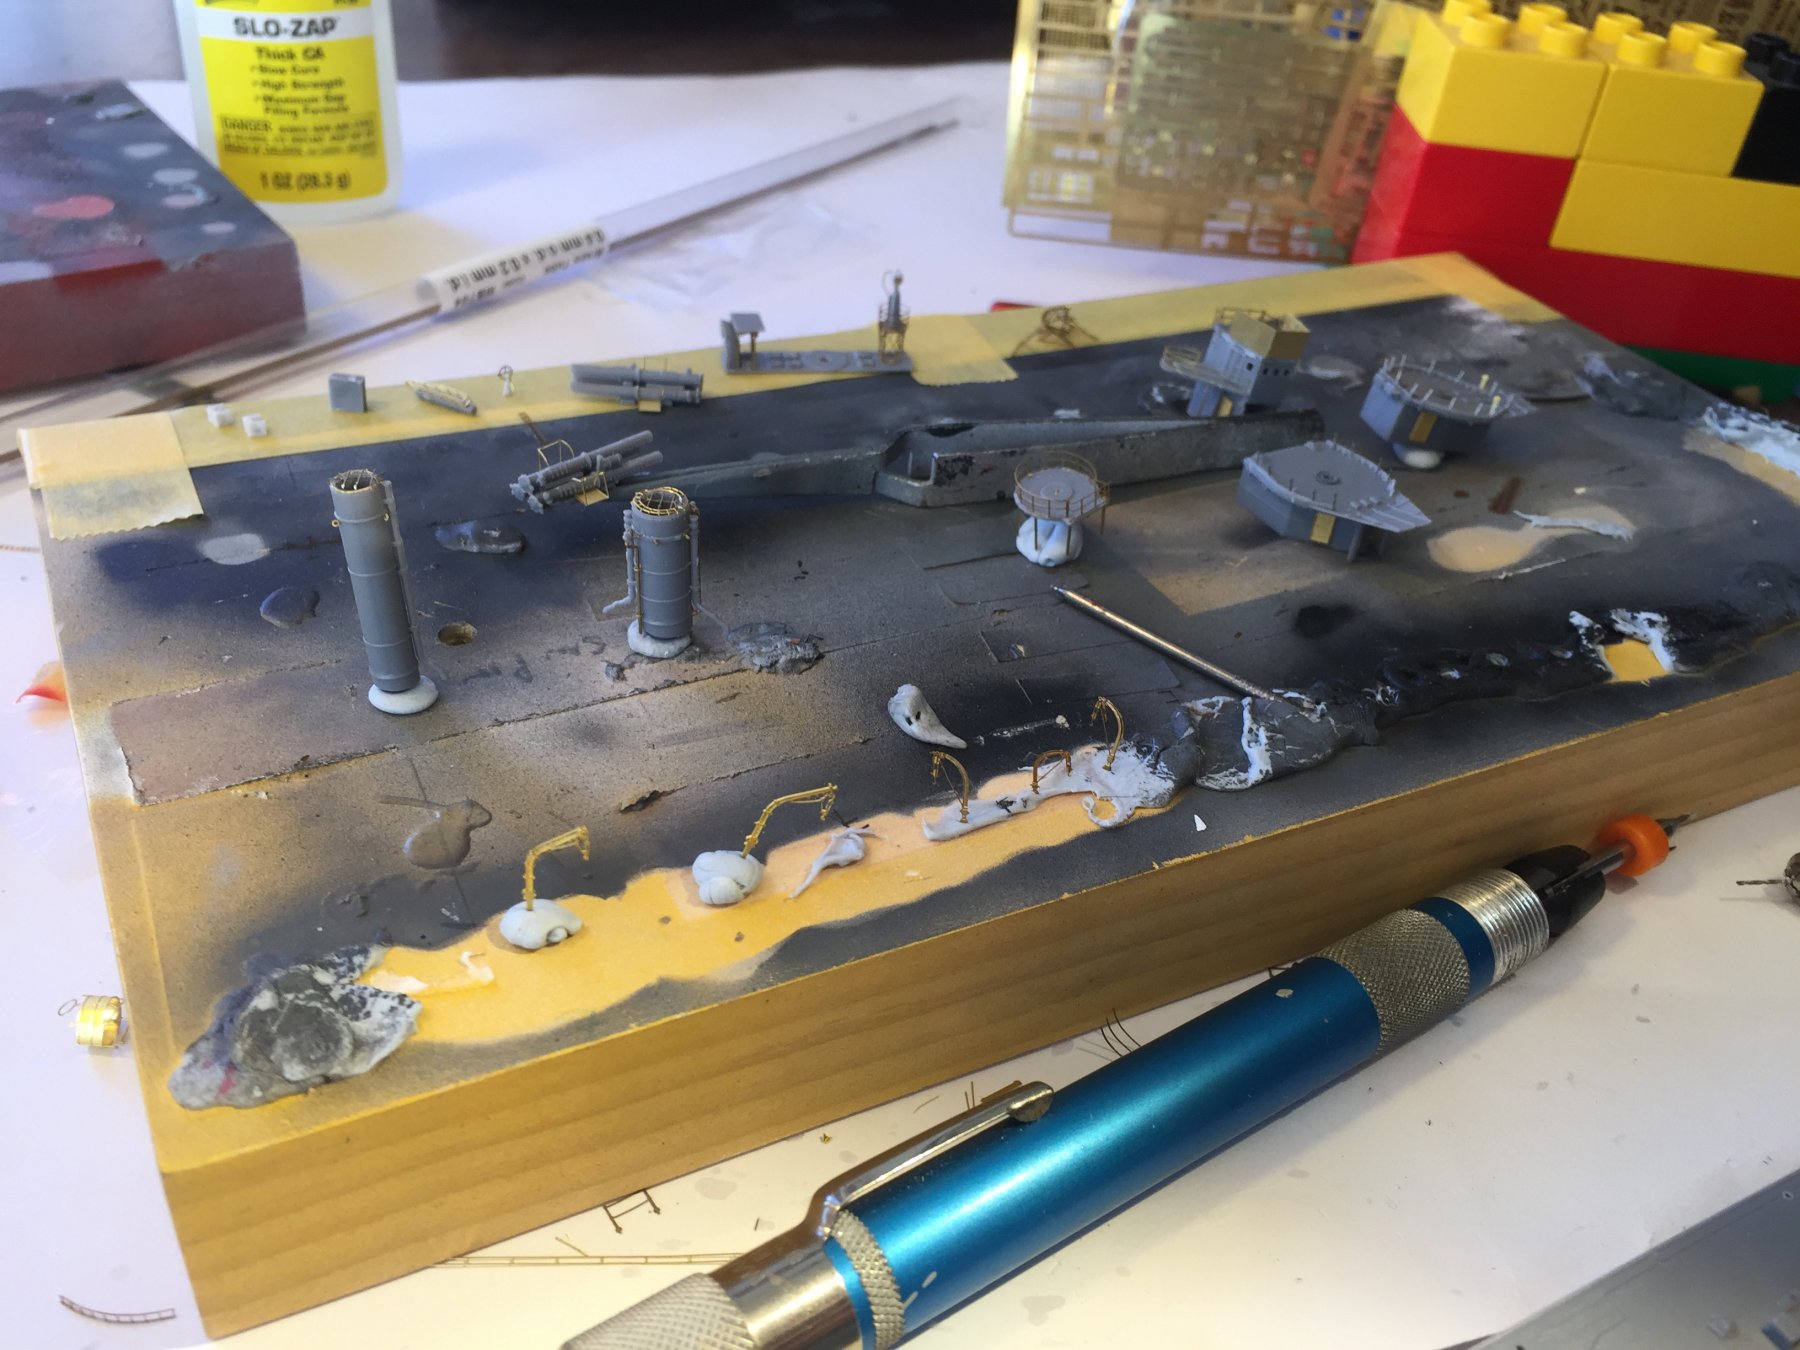
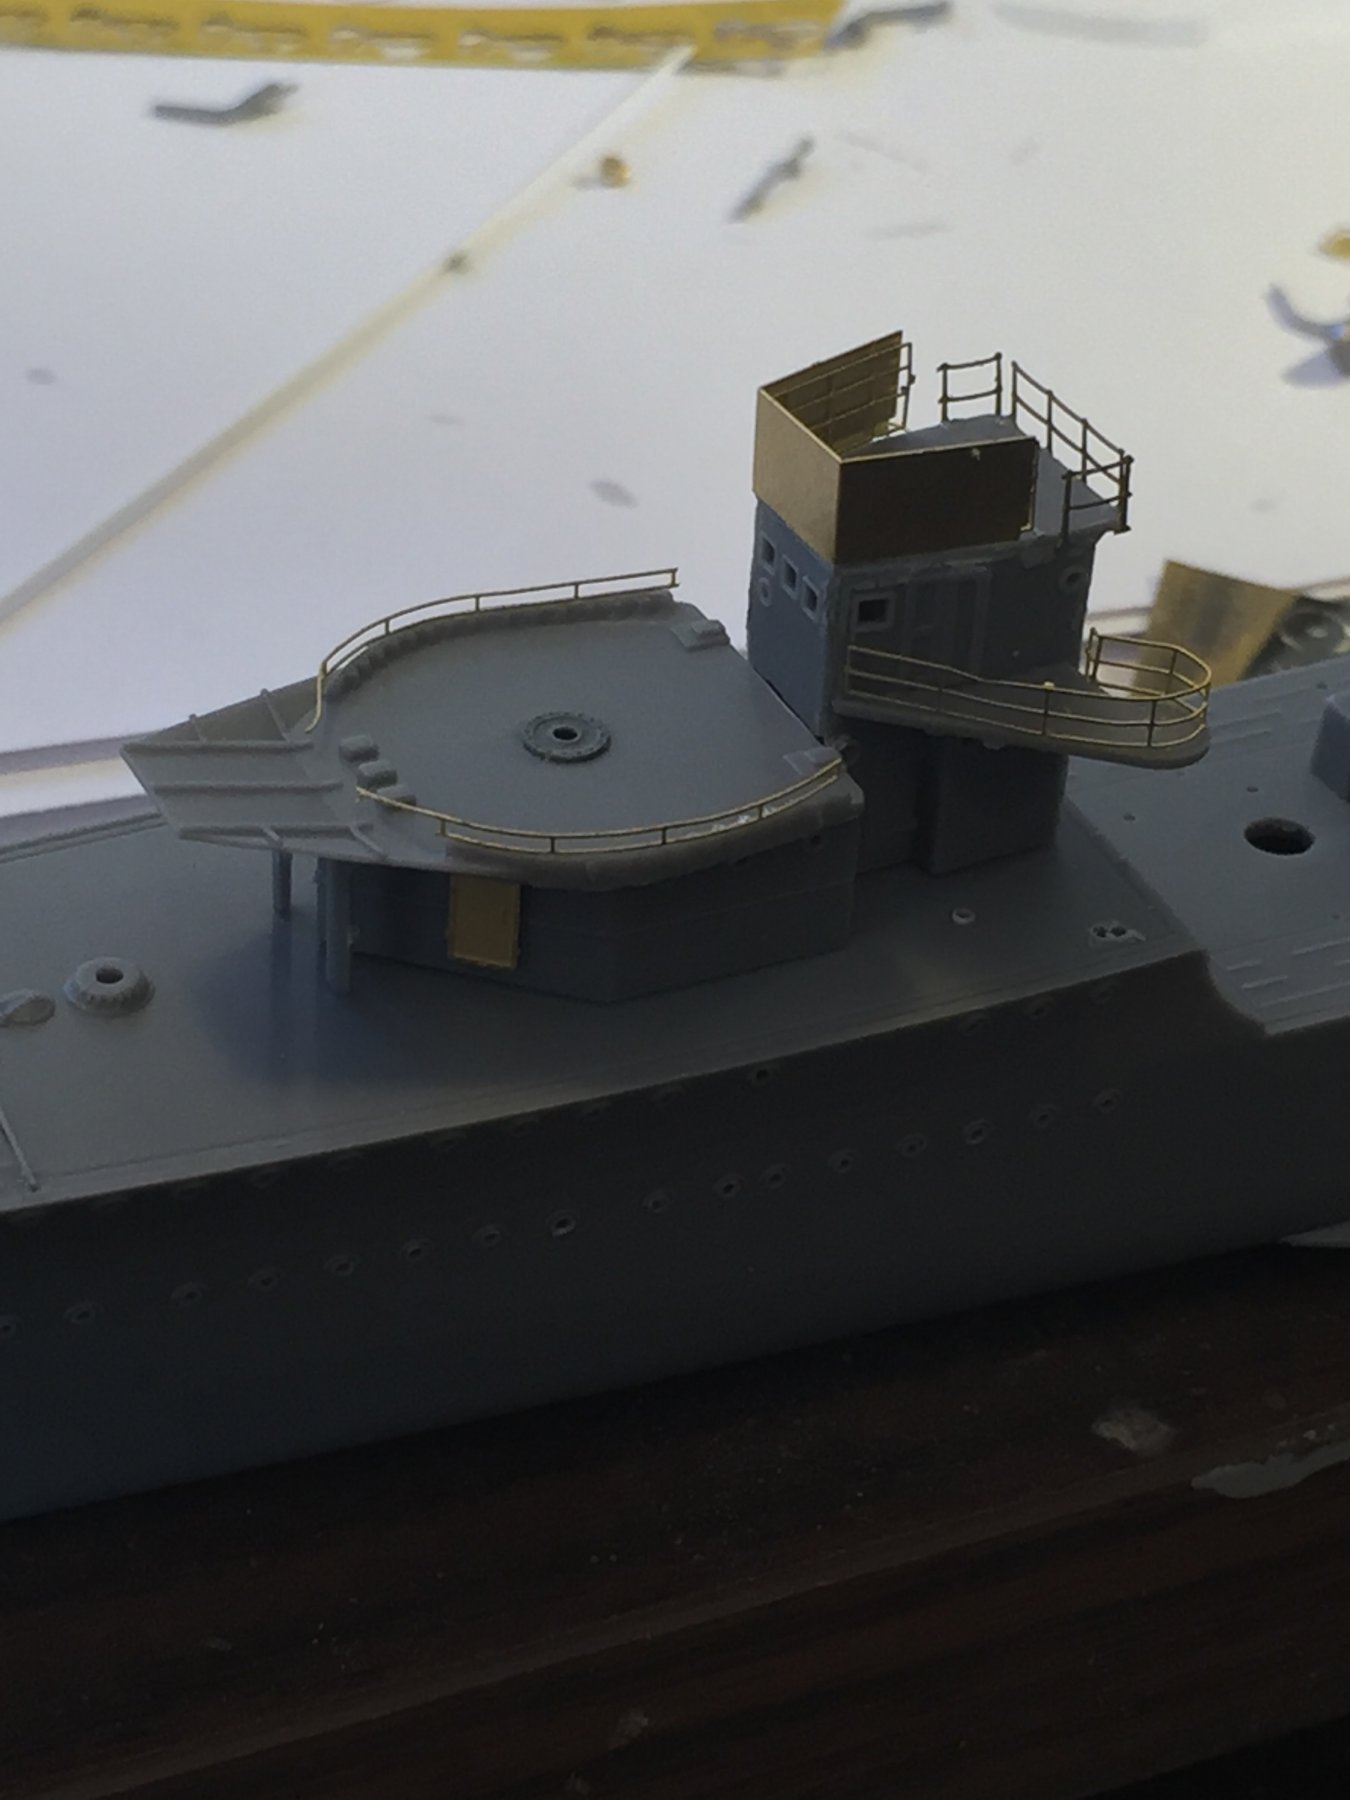
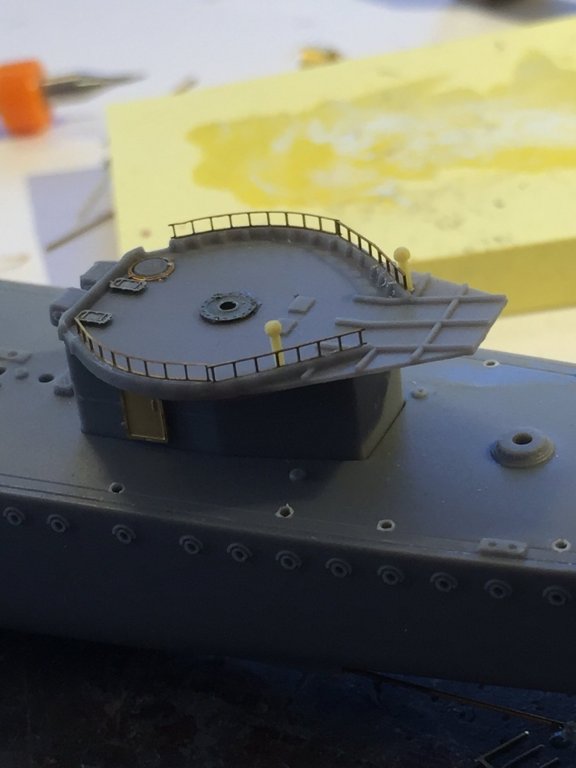
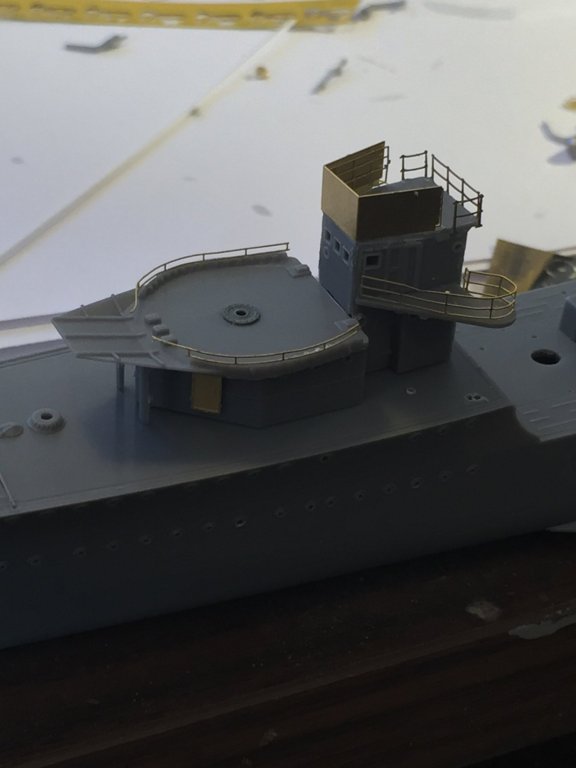
The bridge, forward gun platform and the rear platform. The reference photos and line drawings show little handrails around the platforms which I added. The bridge is a bit clunky and I had to do a bit of clipping so it sits flush on the deck meaning I’m going to have to put a few styrene stops to hide some sins. I’m not in love with the kits PE.
- 1,090 replies
-
- 9
-
-
- showcase models
- vendetta
- (and 2 more)
-
Hahaha, so true, it’s embarrassing how many TV channels were playing it.
- 1,090 replies
-
- 8
-
-
- showcase models
- vendetta
- (and 2 more)
-
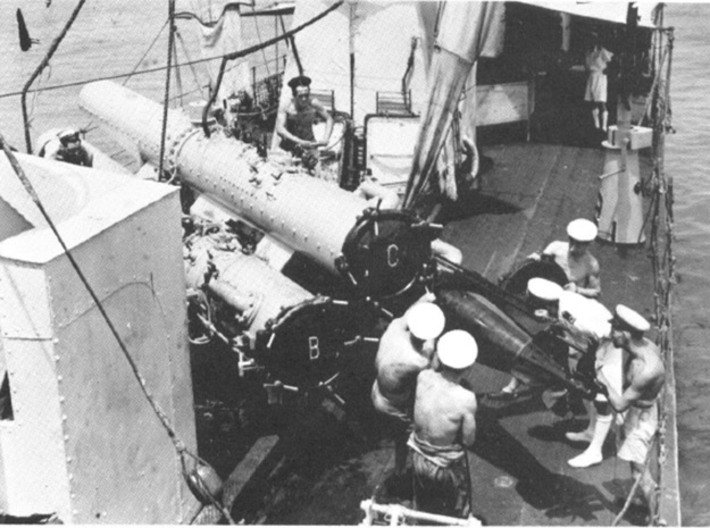
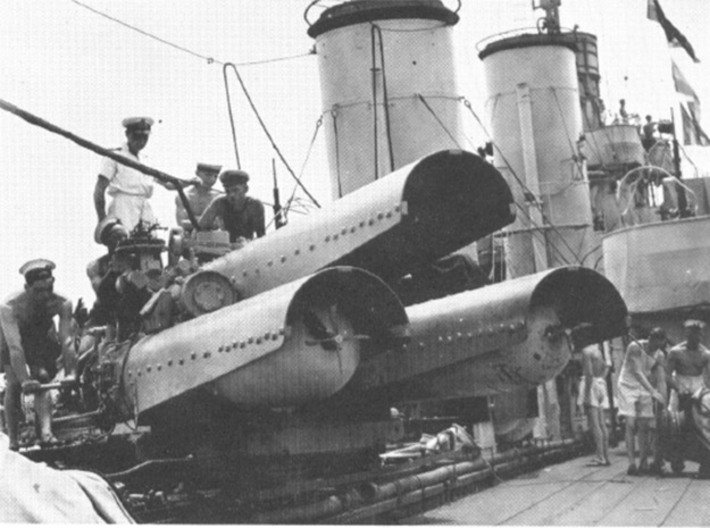
You’re motoring along, the cannons look very nice. The torpedo tubes?

- 1,090 replies
-
- 11
-
-
- showcase models
- vendetta
- (and 2 more)