


Pierretessier
-
Posts
97 -
Joined
-
Last visited
Content Type
Profiles
Forums
Gallery
Events
Everything posted by Pierretessier
-
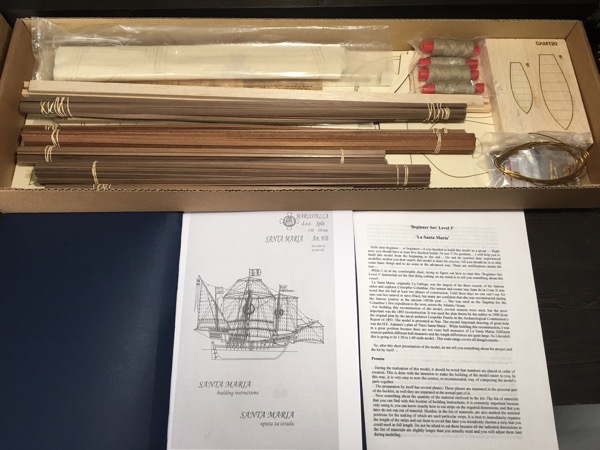
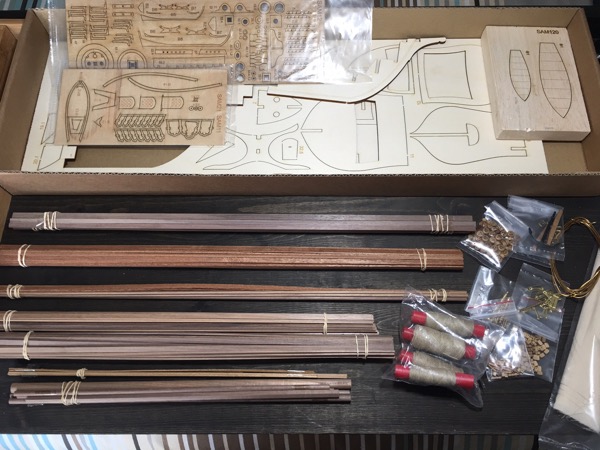
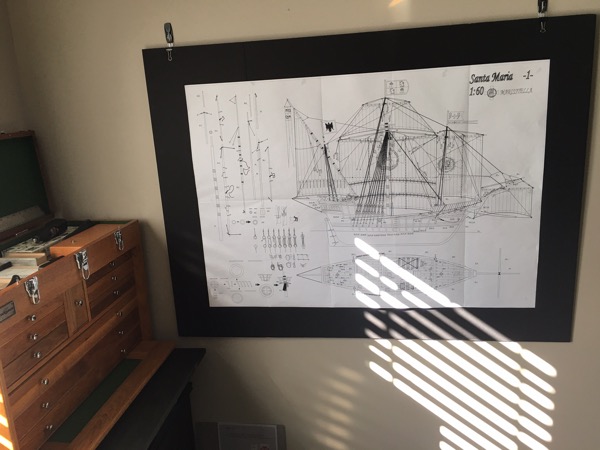
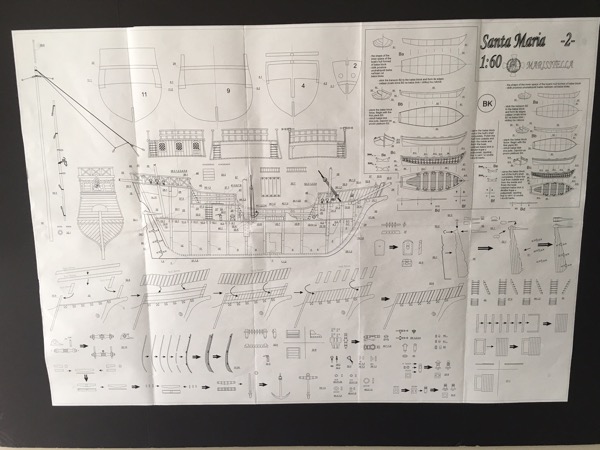
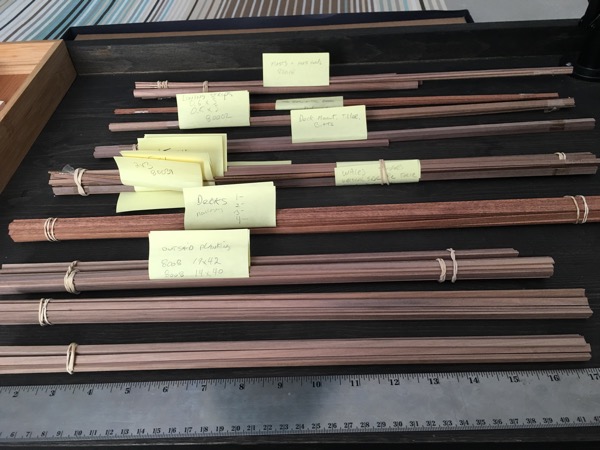
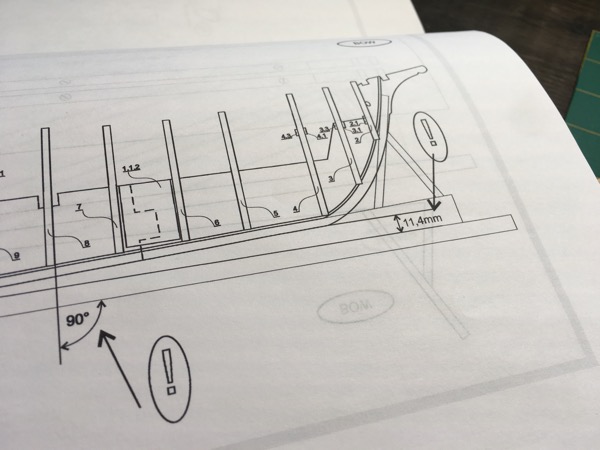
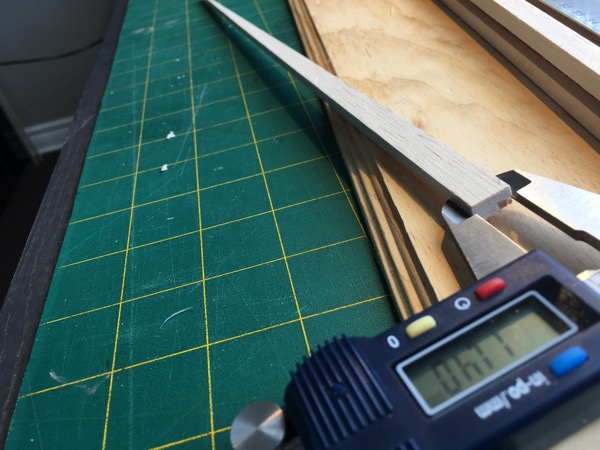
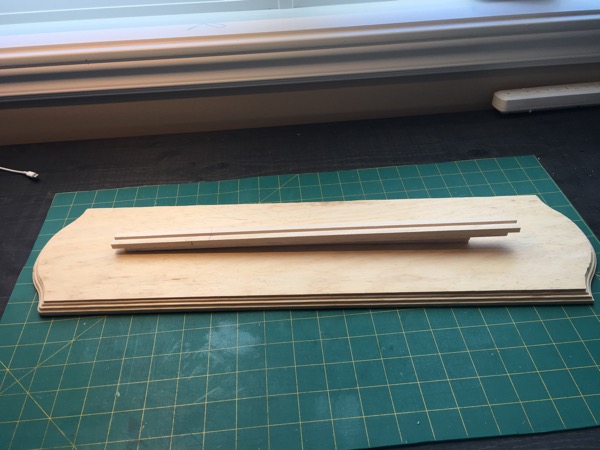
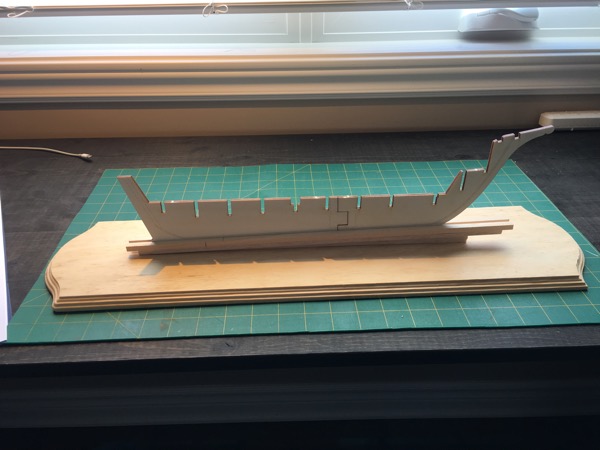
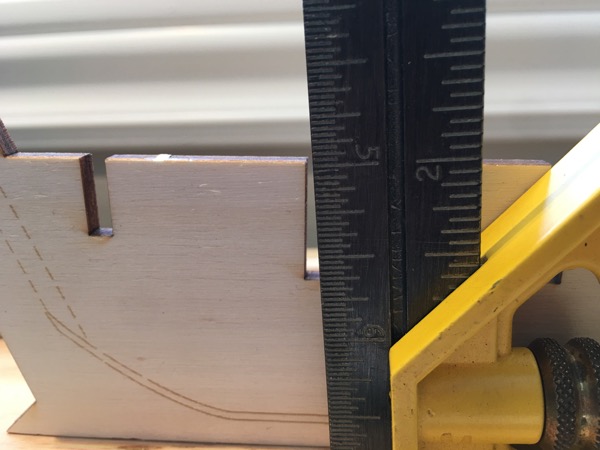
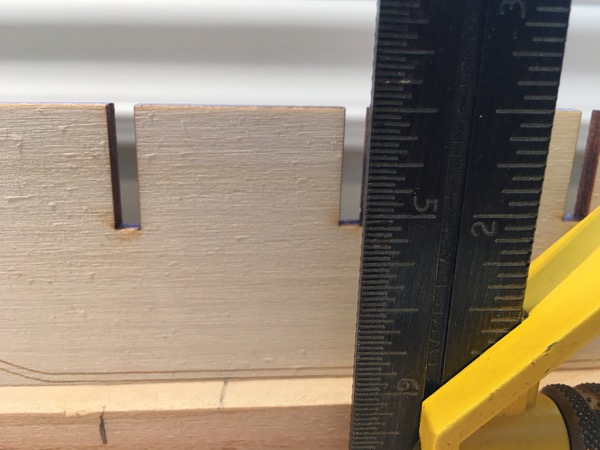
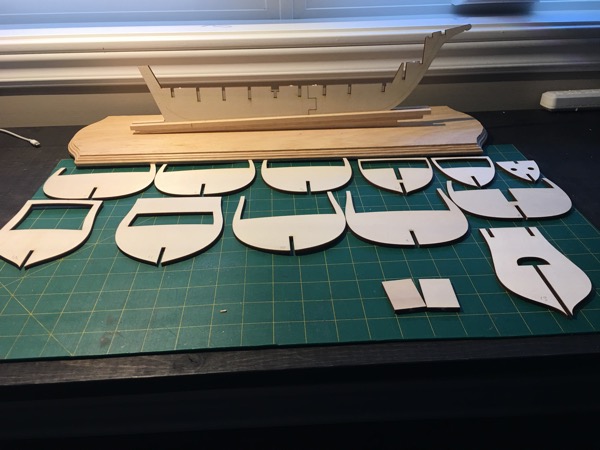
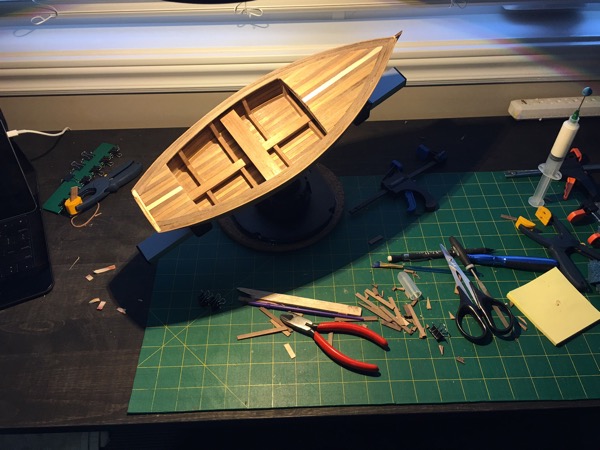
 Santa Maria by Pierre Tessier - Maris Stella - 1:60 This is a Christmas gift from my son, I promised myself I would finish the Batelina before starting this one. Now that my first build is complete and my shop is clean I can begin my second build and build log here on MSW. I must mention that I was pleasantly surprised when I met Zoran from MarisStella, here online. He saw that I was building the Batelina and noticed I posted that I had the Santa Maria on the shelf. He got in touch with me and mentioned that he was in the process of re-writing the build manuals for the latter, and offered his re-wright. This would allow, help, a beginner to go about the proper way of building this kit. Also must point out this is single layer POB construction. Maris Stella School of Model Ship Building has categorized this as a "Beginner Set: Level 3" which according to them should be your 5th build. I am in no way an expert nor do I feel I am better then others but thought this would be a great 2nd build as I do like challenges. Hopefully I did not bite off more then I can chew. (If I do I have Zoran to help....lol) Now about the box, two full size plan sheets, two plywood laser cut parts, two hardwood laser detailed bits and parts, full stock of beautiful walnut and mahogany wood planks, strips and dowels, bag of hardware including canons, guns, hinges, bags of wooden bits, anchor, rope, carving block for 2 small boats and pre sown embroidered sails, expert build manual. (Beginner manual being written as we speak) Kit box closed Kit box open Kit box stuff Plan 1 Plan 2 First step to do according to manual is to take inventory of supplied wood. Lumber yard (bundled as per material list.) Next I built the stand with an. 11.4mm incline at the bow. This is to allow proper alignment of the bulkheads when using a square. Stand plan Stand keel 11.4mm offset Stand 90' without offset --- 90' with offset Plywood Elements That's it for now, next I will post the work to be done to prepare the keel for the bulkheads. Did I say how much I am enjoying this hobby, So looking forward to building and learning more I'm like a kid learning to walk for the first time.....lol...anyway until next time. Cheers.
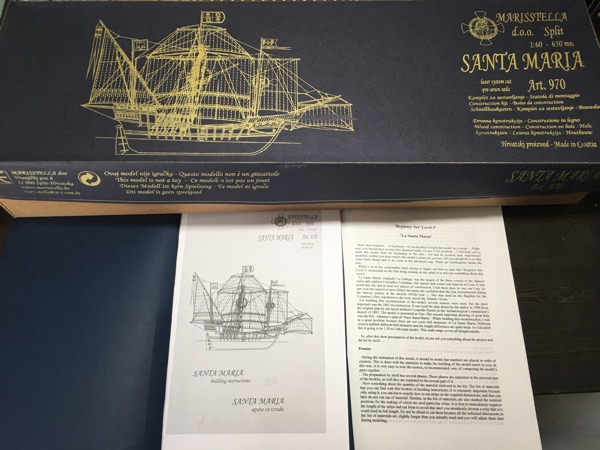
-
Tabernac c'est compliquez . Excuse my french. Loving the details and its just the beginning. So glad to be on board to see this build.
-
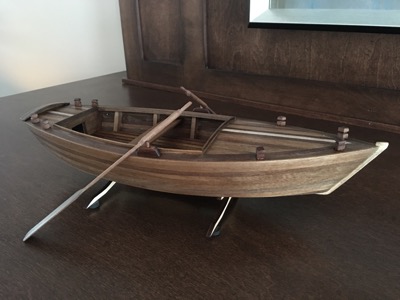
Officially finished my first build. Finished her with a Minwax wipe on poly, gave it a nice finish I was looking for. She is now proudly displayed on the mantel. Time to clean up the bench and get ready for my next build....
- 46 replies
-
- 8
-

-
- batelina
- marisstella
- (and 2 more)
-
Looking forward to this. High praise, I've pulled up a chair.
-
Rikon 70-100 woodworking mini-lathe
Pierretessier replied to Haliburton's topic in Modeling tools and Workshop Equipment
I do not see anything for the Dremel Lathe...?? -
Rikon 70-100 woodworking mini-lathe
Pierretessier replied to Haliburton's topic in Modeling tools and Workshop Equipment
Are these still available? I've seen a few used ones online but that's it? -
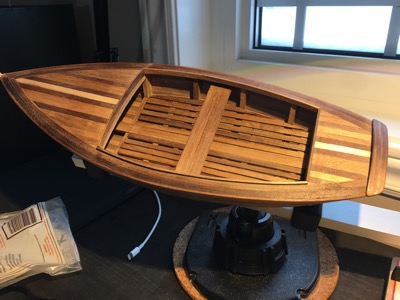
Agree 100 % Rick. :-) I was woried about doing a single layer plank for my first build. I think it turned out not bad. The precision lazer parts and the quality of the wood has a lot to do with it. I will redo the oar tholes "not a fan of exposed plywood" 3 bits and 2 oars a fine sanding and some finish and she will be done!
- 46 replies
-
- 6
-
-
- batelina
- marisstella
- (and 2 more)
-
Hey Rick, you hijacking my post....lol kidding. I was not sure what you meant by STAR and LIGHTNING , my personal lack of knowledge. Now that I know what you meant I think it's excellent that Zoran may be thinking of doing this. And the Idea of using your numbers is cool, we will need a 3d figure of yourself at the helm. Since we are talking about Zoran, may I add my personal gratitude to him. He is a true gentlemen and very helpful. I am glad to have connected with him on this forum, willing to help out in any way he can. My second build will be his Santa Maria kit and he has already agreed to help me out to make sure I go about it the proper way. Not sure how many other kit manufacturers go the extra mile like this but I for one strongly recommend MarisStella for quality and support. Now back to the shipyard, I have a floor to build for my Batelina.
- 46 replies
-
- 3
-
-
- batelina
- marisstella
- (and 2 more)
-
Thanks guy's
-
Thanks guy's, Did a bit more work on the tops, ready for rough sanding. I think I'm getting the hang of it. A few pieces on the interior and the floor left. Really enjoying this build looking forward to starting the Santa Maria, hopefully next week. Cheers.
- 46 replies
-
- 5
-
-
- batelina
- marisstella
- (and 2 more)
-
Had to take a few days shore leave. Back at it this morning. Got the first of the top gallant boards shaped and glued in place. Next I will install the seat before doing the second top galant, this will make it possible to slide the seat in easily ( Thanks Don, I almost forgot you mentioned to do the seat first.) I will post more images once seat and 2nd row of top gallants are in place..
- 46 replies
-
- 4
-
-
- batelina
- marisstella
- (and 2 more)
-
2 years in the making........Welcome, looking forward to seeing some of those builds.
-
Yet another great build log of the SantaMaria. Thanks for sharing. Will be using this log for my own reference.
- 274 replies
-
- 4
-
-
- Santa Maria
- Artesania Latina
- (and 2 more)
-
Just came across your log. This is a true work of art, beautiful, true wood working details. I will be using your log to help my own build of the Santa Maria. I could only hope!
- 71 replies
-
- 3
-
-
- Santa Maria
- Tehnodiktata
- (and 1 more)
-
Glad to have stumbled on your build log. I'm grabbing a stool and following along.
-
Thanks Don, Did a second soak and went a bit to far with one and it snapped. Arg! Anyway back on track, I also took out my heat gun and an Iron my wife had for wood burning. It has a nice large quarter size copper head and I use a dimmer to manage the heat...working good so far. Here's the hull ready for rough sanding.

- 46 replies
-
- 6
-
-
- batelina
- marisstella
- (and 2 more)
-
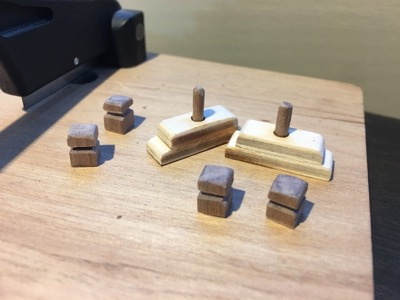
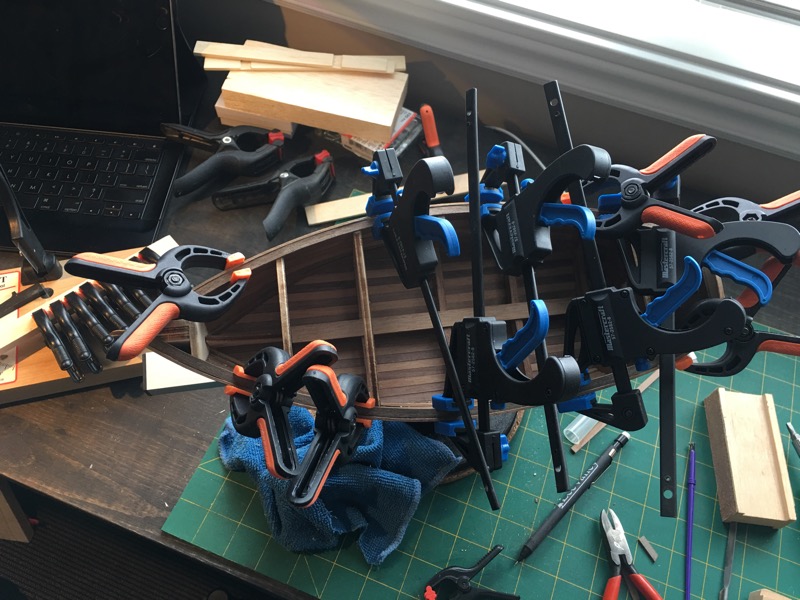
These are servo arms from my RC days. The thikness is just perfect to hold the planks flat on the surface. A bit of a complicated setup but I ran out of clamps...lol. Need more clamps...
- 46 replies
-
- 3
-
-
- batelina
- marisstella
- (and 2 more)
-
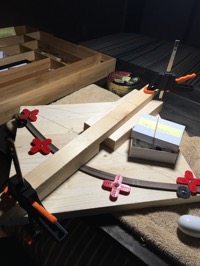
Did a bit more planking, taking my time, meanwhile thought I would start shaping the 4 pieces for the top gallant rails. Soaked for 1 hr then put them in a jig and added some heat. I'll leave them in the jig overnight and take them out in the morning. Will most likely have to do some fine tuning with more water and heat.
- 46 replies
-
- 5
-
-
- batelina
- marisstella
- (and 2 more)
-
Hi Jim and welcome to MSW. This site is in fact a Wonderful Site. A culmination of ship building history, help, tips, tricks, stories and opinions. This is my #1 site for sure.
-
Welcome BienVenu chez MSW!
-
Planking Clamp Use
Pierretessier replied to Worldway's topic in Modeling tools and Workshop Equipment
Nice jig Moxis! -
Loving it! The details! Your work is commendable. Windlass details down to the square peg holes are a nice added touch and that brass pot sitting on your stove is pretty nice too. Keep the pics coming mate....
- 653 replies
-
- 7
-
-
- trabakul
- marisstella
- (and 1 more)
-
Thanks guy's, although hesitant sometimes I'm really enjoying this so far, nice to have words of encouragement. Looking forward to seeing the new build logs for the SantaMaria, thanks Zoran. Soon I will be doing the 4 top gallant rails, this is my first edge bend job. I will be doing the soak in water method as described in the manual.
- 46 replies
-
- 3
-
-
- batelina
- marisstella
- (and 2 more)
-
Workshop Advice
Pierretessier replied to ChrisLBren's topic in Modeling tools and Workshop Equipment
Been following this thread for some time, great looking shops, great ideas. Dust collection as always been an issue for me, not so much the wood shop but the hobby shop I have set up in the spare bedroom. One trick I am using from my airplane building days, take a big fluffy beach towel and run it in the dryer without fabric softener then lay it on the bench and sand away. The static will attract the dust particles like magnet. Give it a try. It works!