flying_dutchman2
-
Posts
1,735 -
Joined
-
Last visited
Content Type
Profiles
Forums
Gallery
Events
Everything posted by flying_dutchman2
-
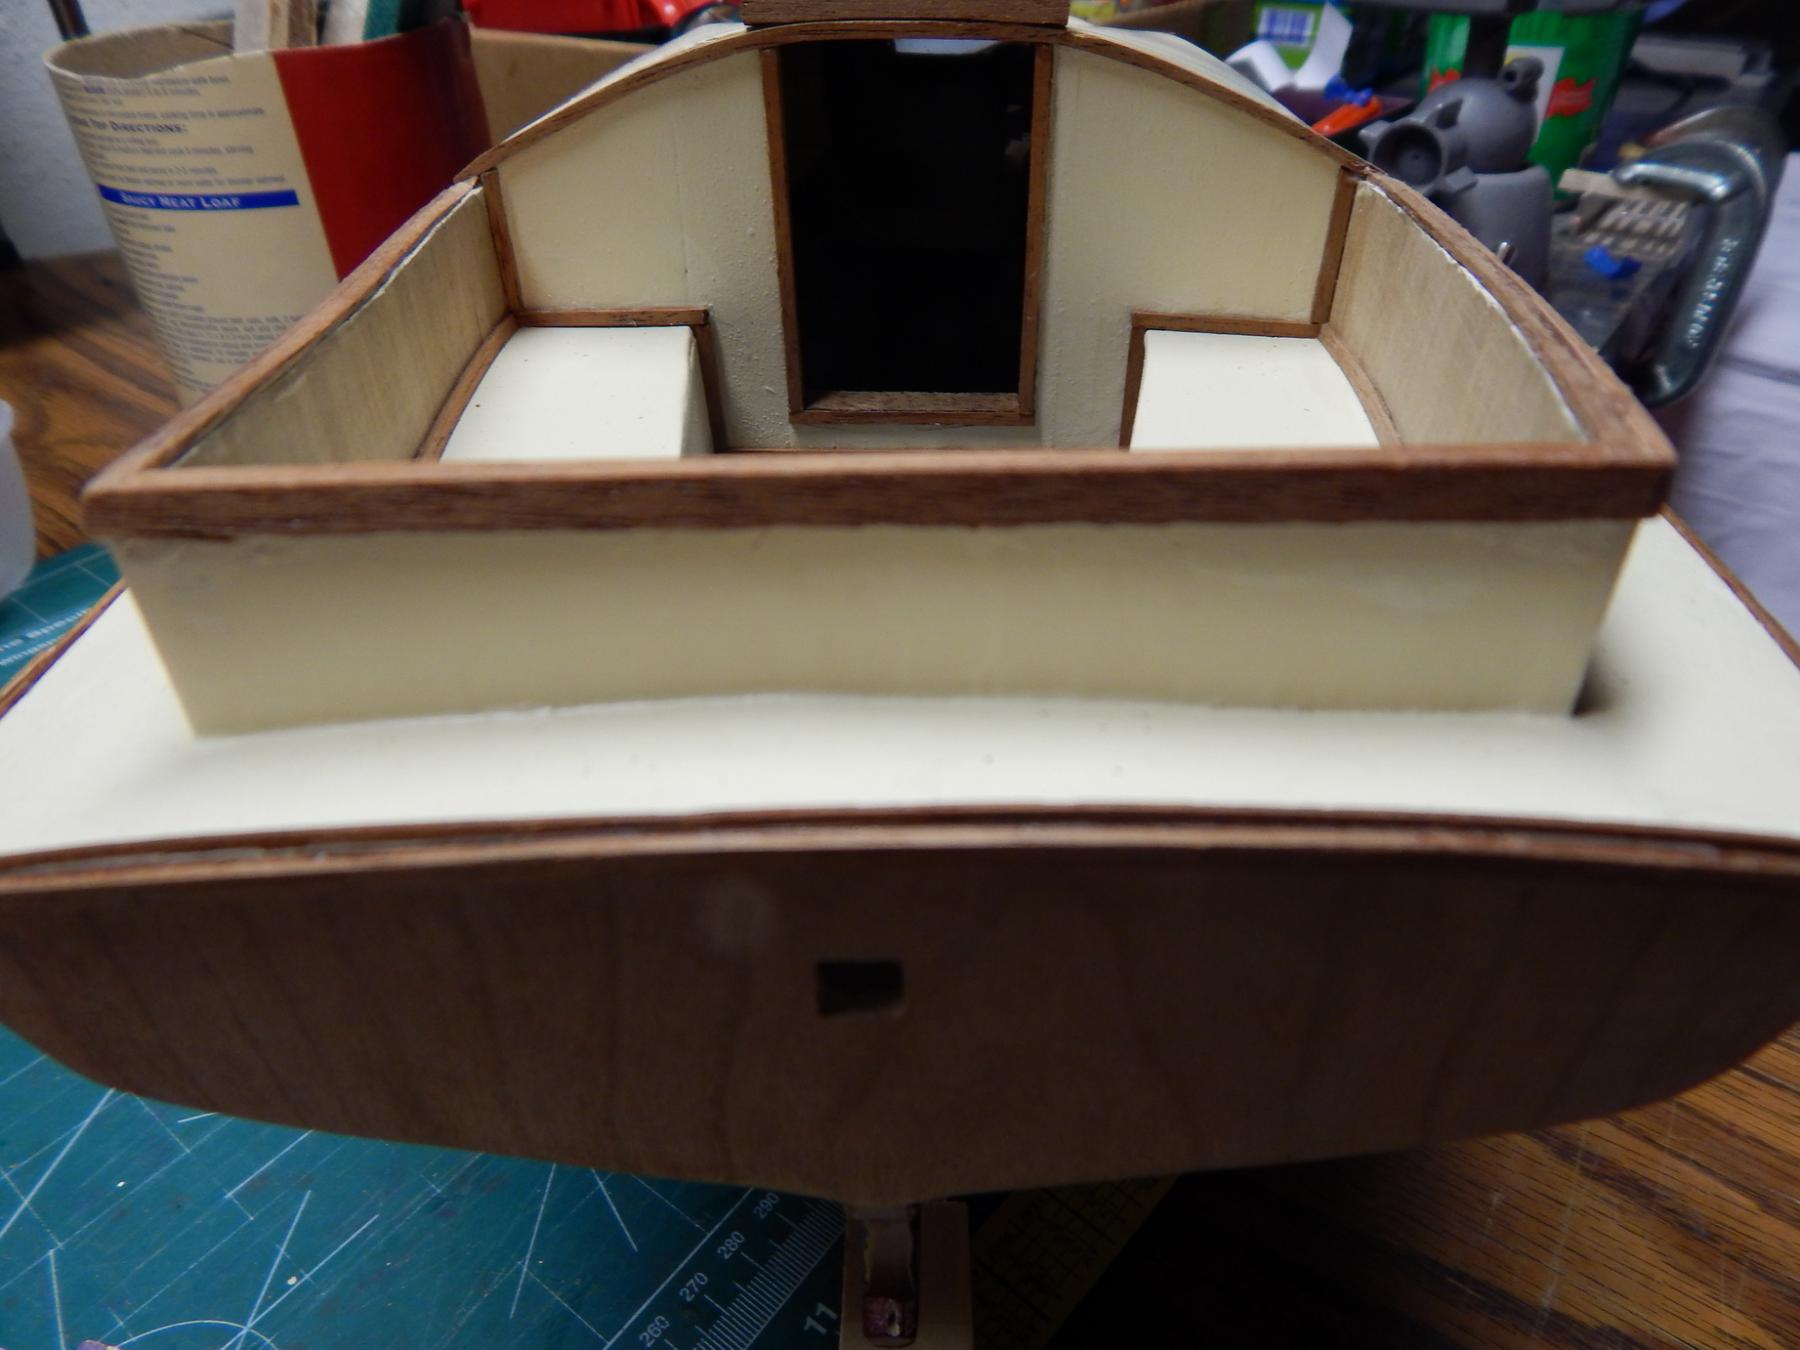
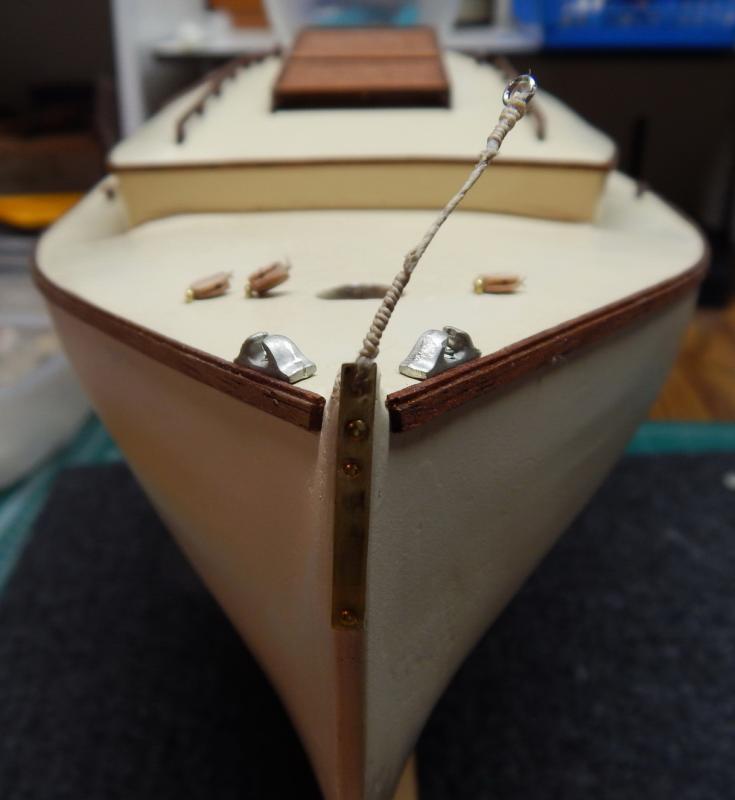
 The close up of the bow. There are three blocks attached to the deck (as it is on the real boat). On the kit there are eyelets made on the mast itself. That is one of the big differences in each of the design. I need to sharpen my sewing machine skills, so I can make the sail. Finish up the rigging, make the stand, get a display case, pack it and FedEx it to my sister. Marcus
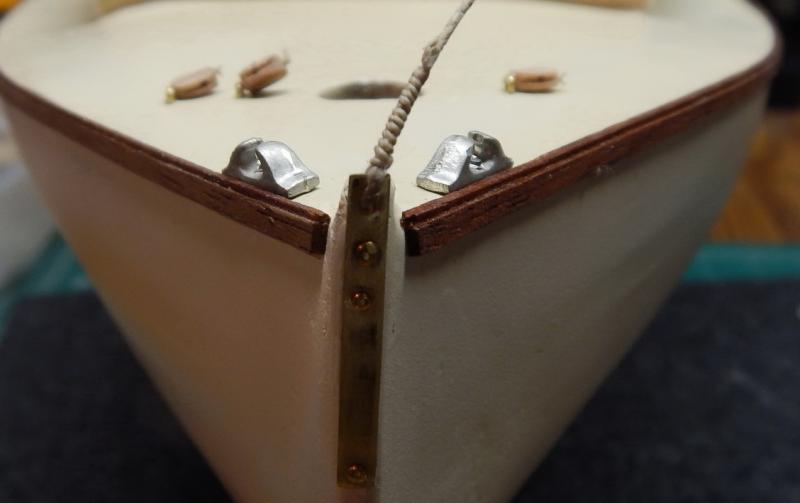
- 165 replies
-
- 9
-

-
- cape cod catboat
- Finished
- (and 1 more)
-
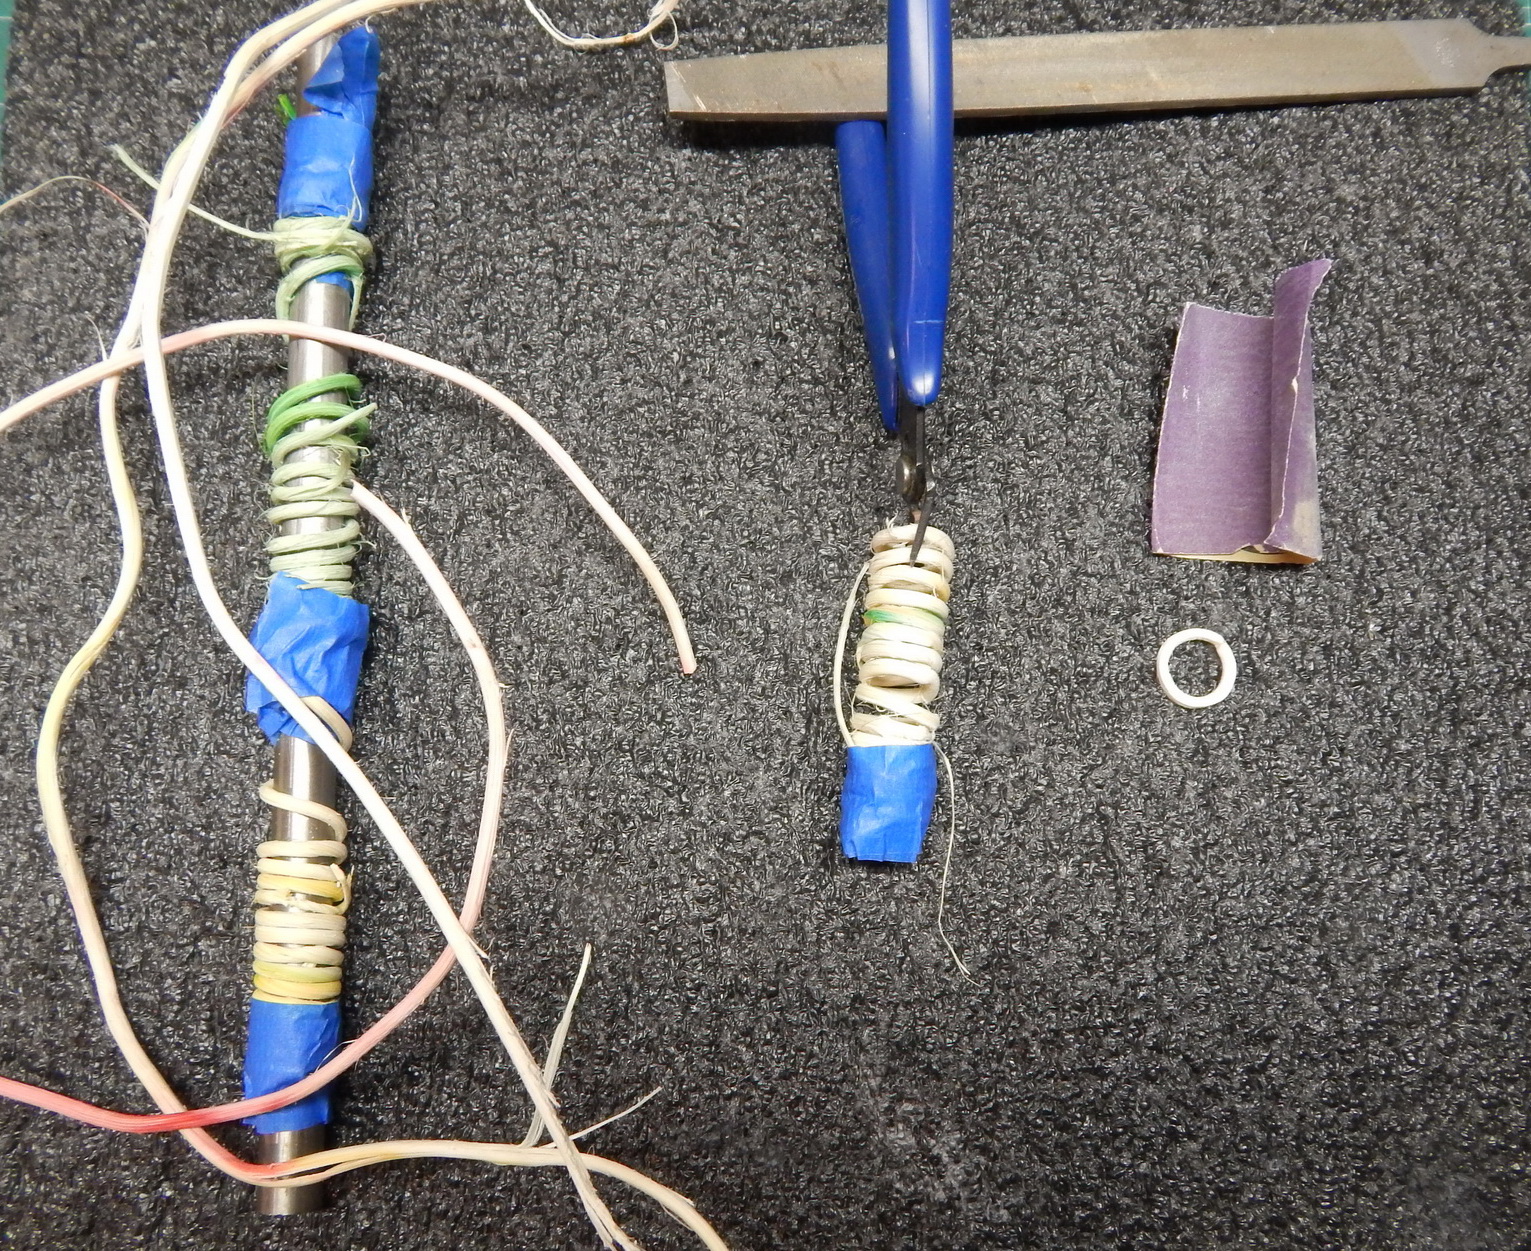
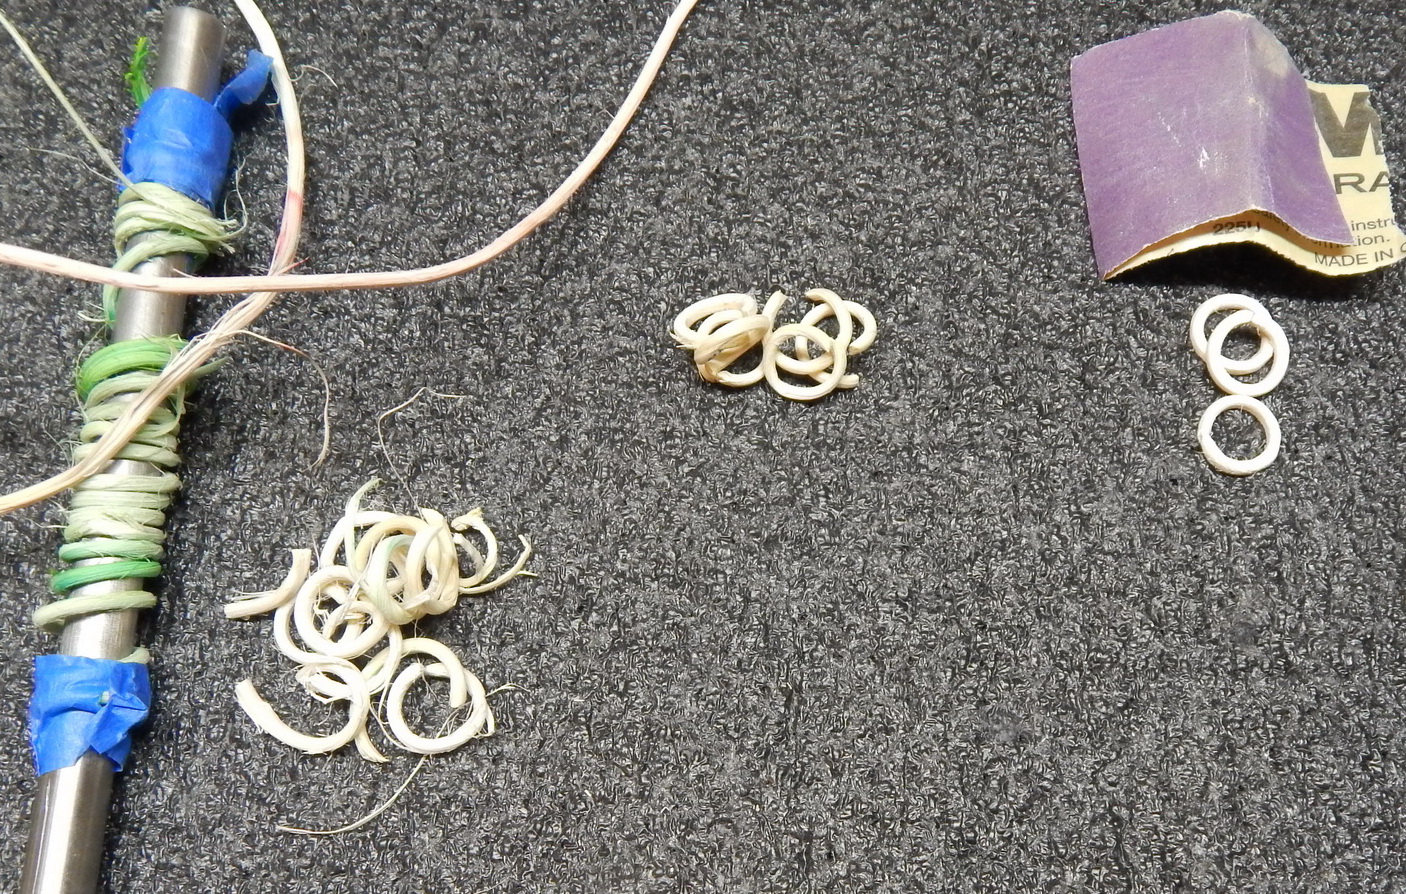
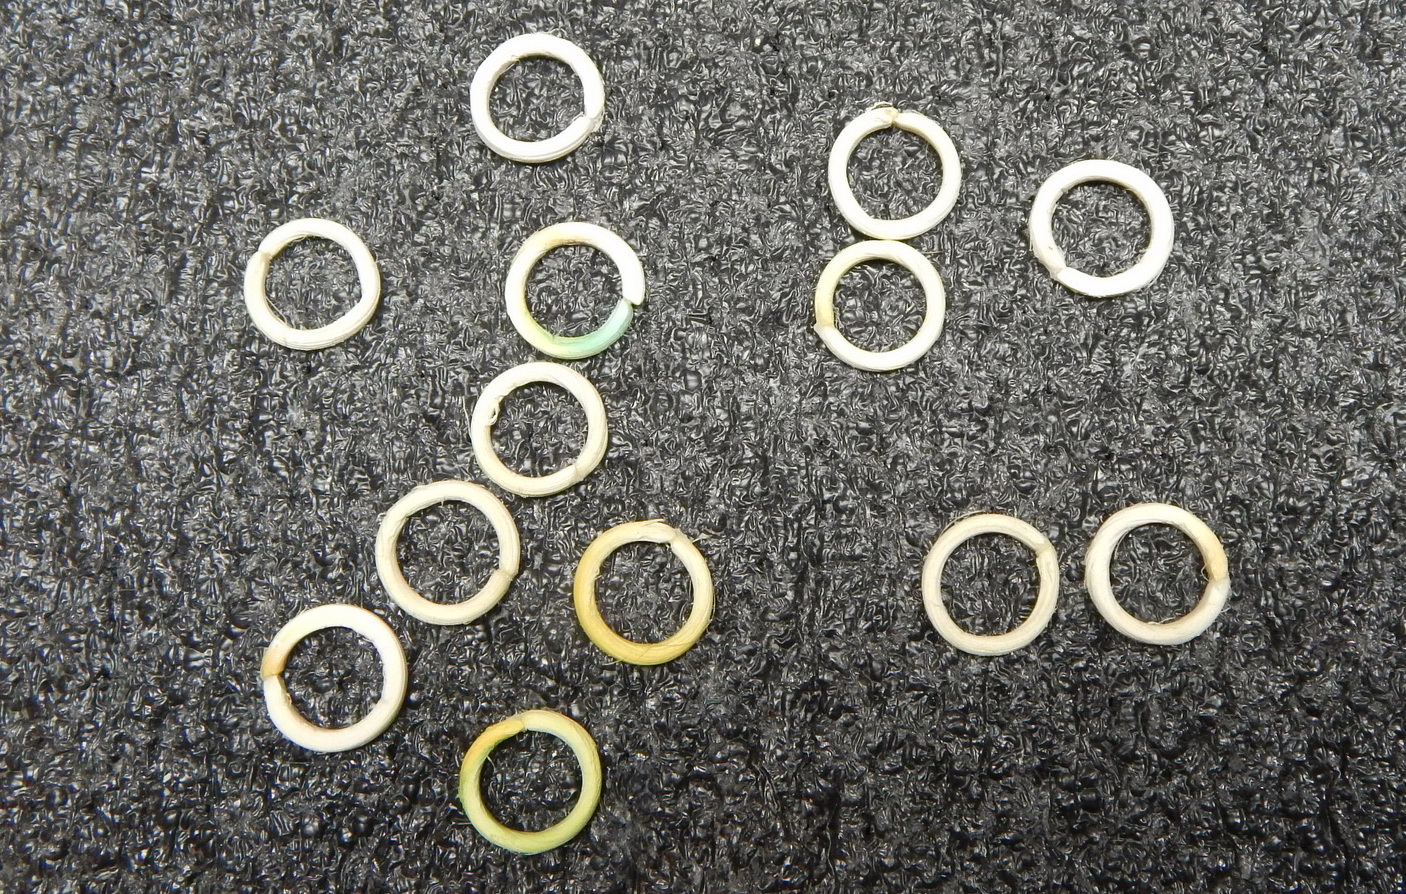
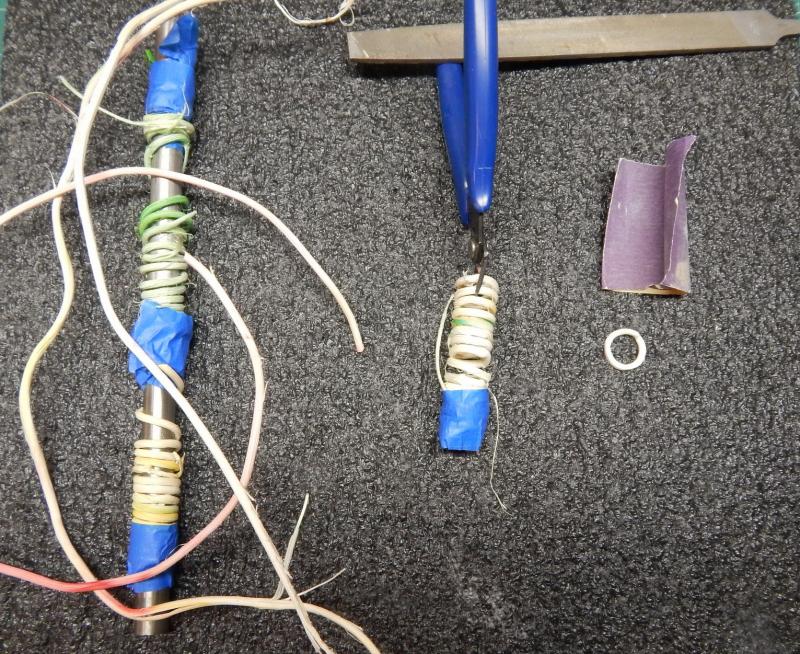
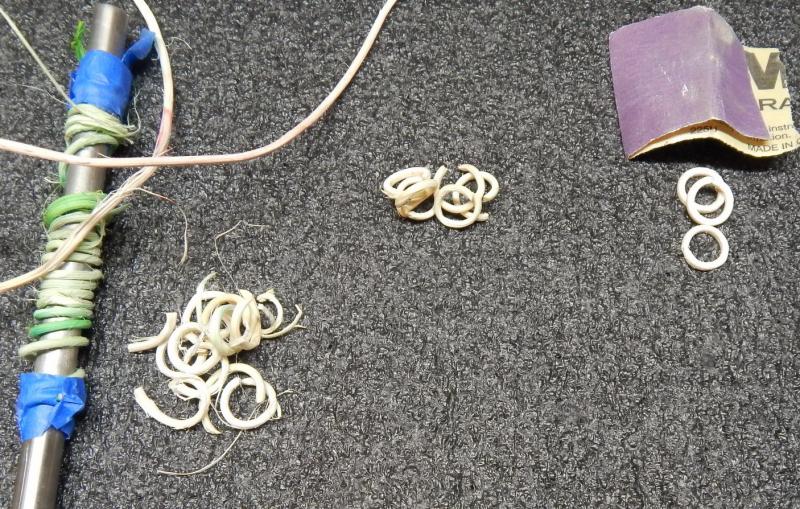
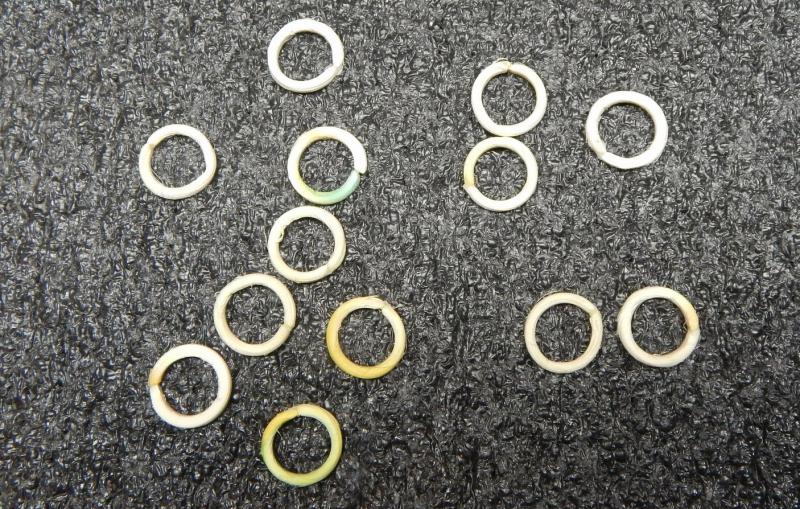
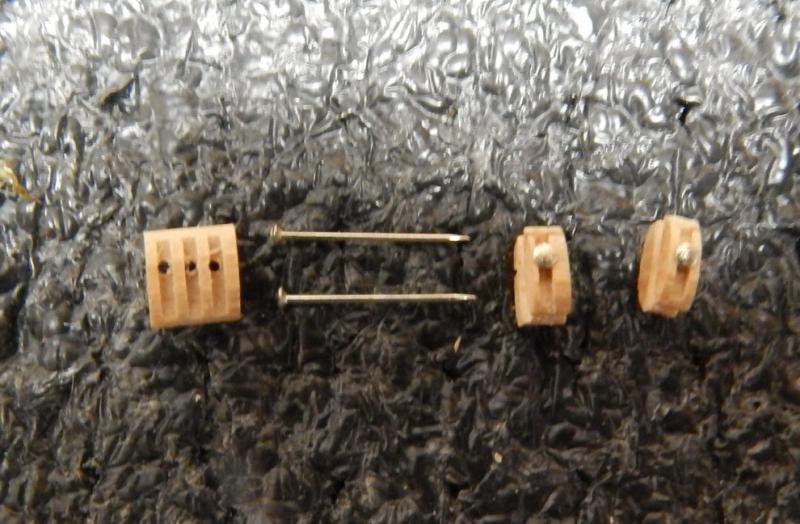
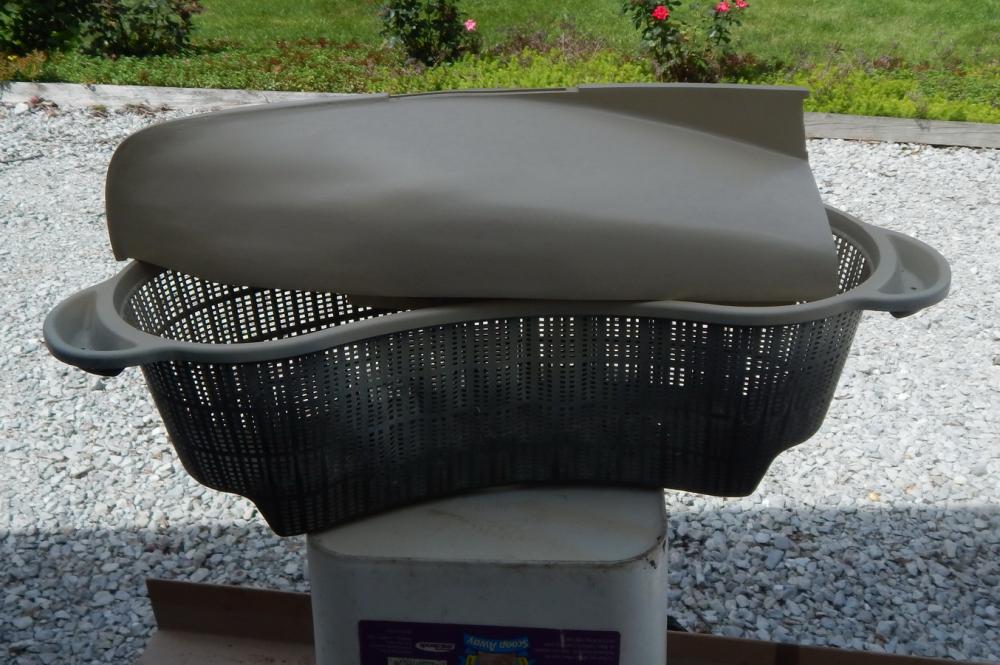
Re-did the hoops. First went to Hobby Lobby and looked for chair canning. They had none. Came home and looked in the parrot cage and one of her toys is made of chair canning. Removed it, took out all the treats and she was happy. I don't think she is going to miss this. Pulled the toy apart and put in bowl of water overnight. Removed the pliable canning and wrapped it around the metal cylinder (HP printer item). Tapped both ends and let the canning dry for a couple of days. Removed the tape and took the canning off the cylinder. On the left the canning wrapped and tapped to the cylinder. In the middle, cutting hoops. On the right, after gluing the ends with a drop of CA, sand it to thickness. Lots of hoops, very few good ones. Also I had a lot of colored ones as the canning for the parrot toy is dyed with different colors. I picked all the none dyed pieces, glued, sanded and stained them brown. These are the hoops. Only glued. I need single and double blocks, As I don't have single, but do have double and triple hole blocks, I cut the triple hole block in half and after a bit of sanding, one has two single hole blocks. Mast. Boom and gaff have all there blocks and attachments ready. Marcus

- 165 replies
-
- 11
-
-
- cape cod catboat
- Finished
- (and 1 more)
-
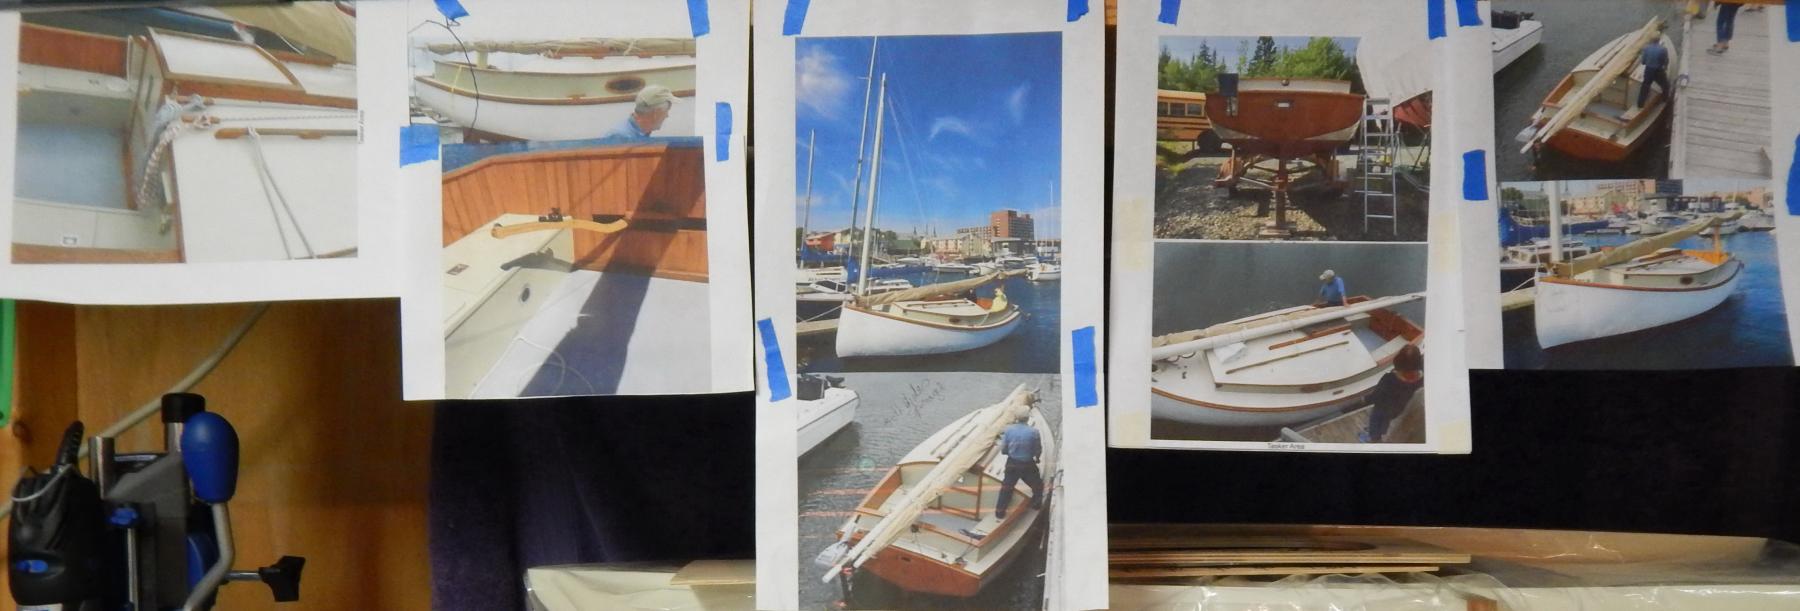
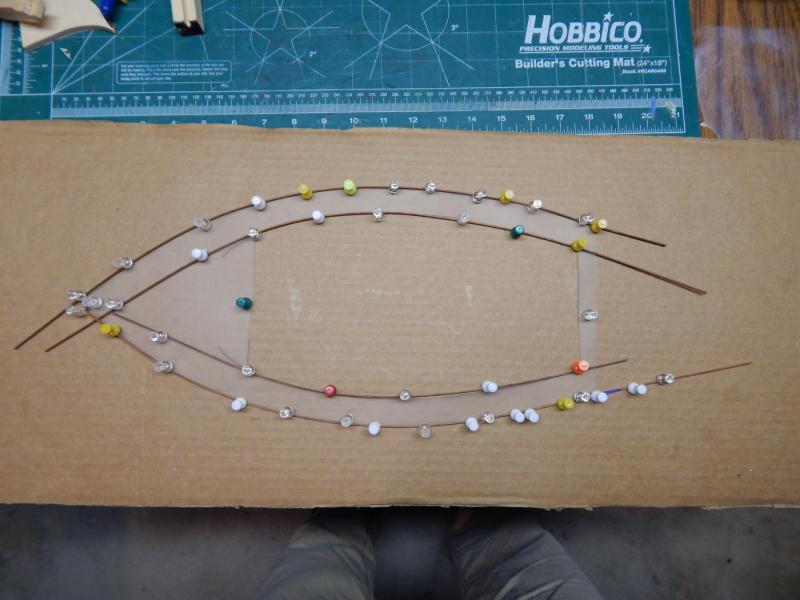
I am using the below picture as a guide of how my sisters Catboat looks like. It is very different from what the kit looks like. More trim. On the real boat, the bow has a metal strip attached, where as the model just has a pin in the bow.

- 165 replies
-
- 6
-
-
- cape cod catboat
- Finished
- (and 1 more)
-
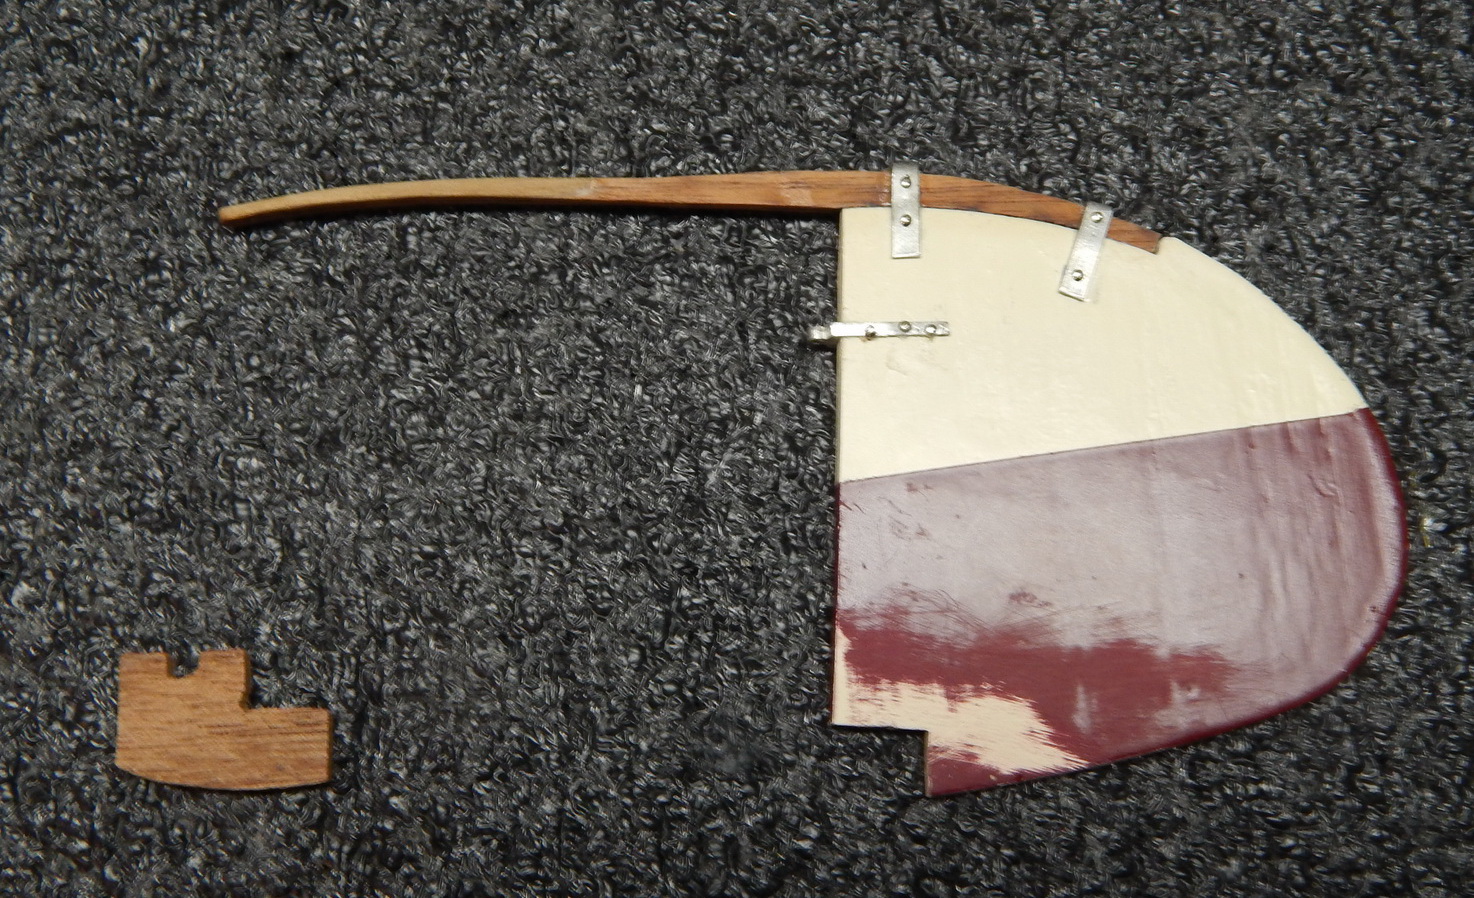
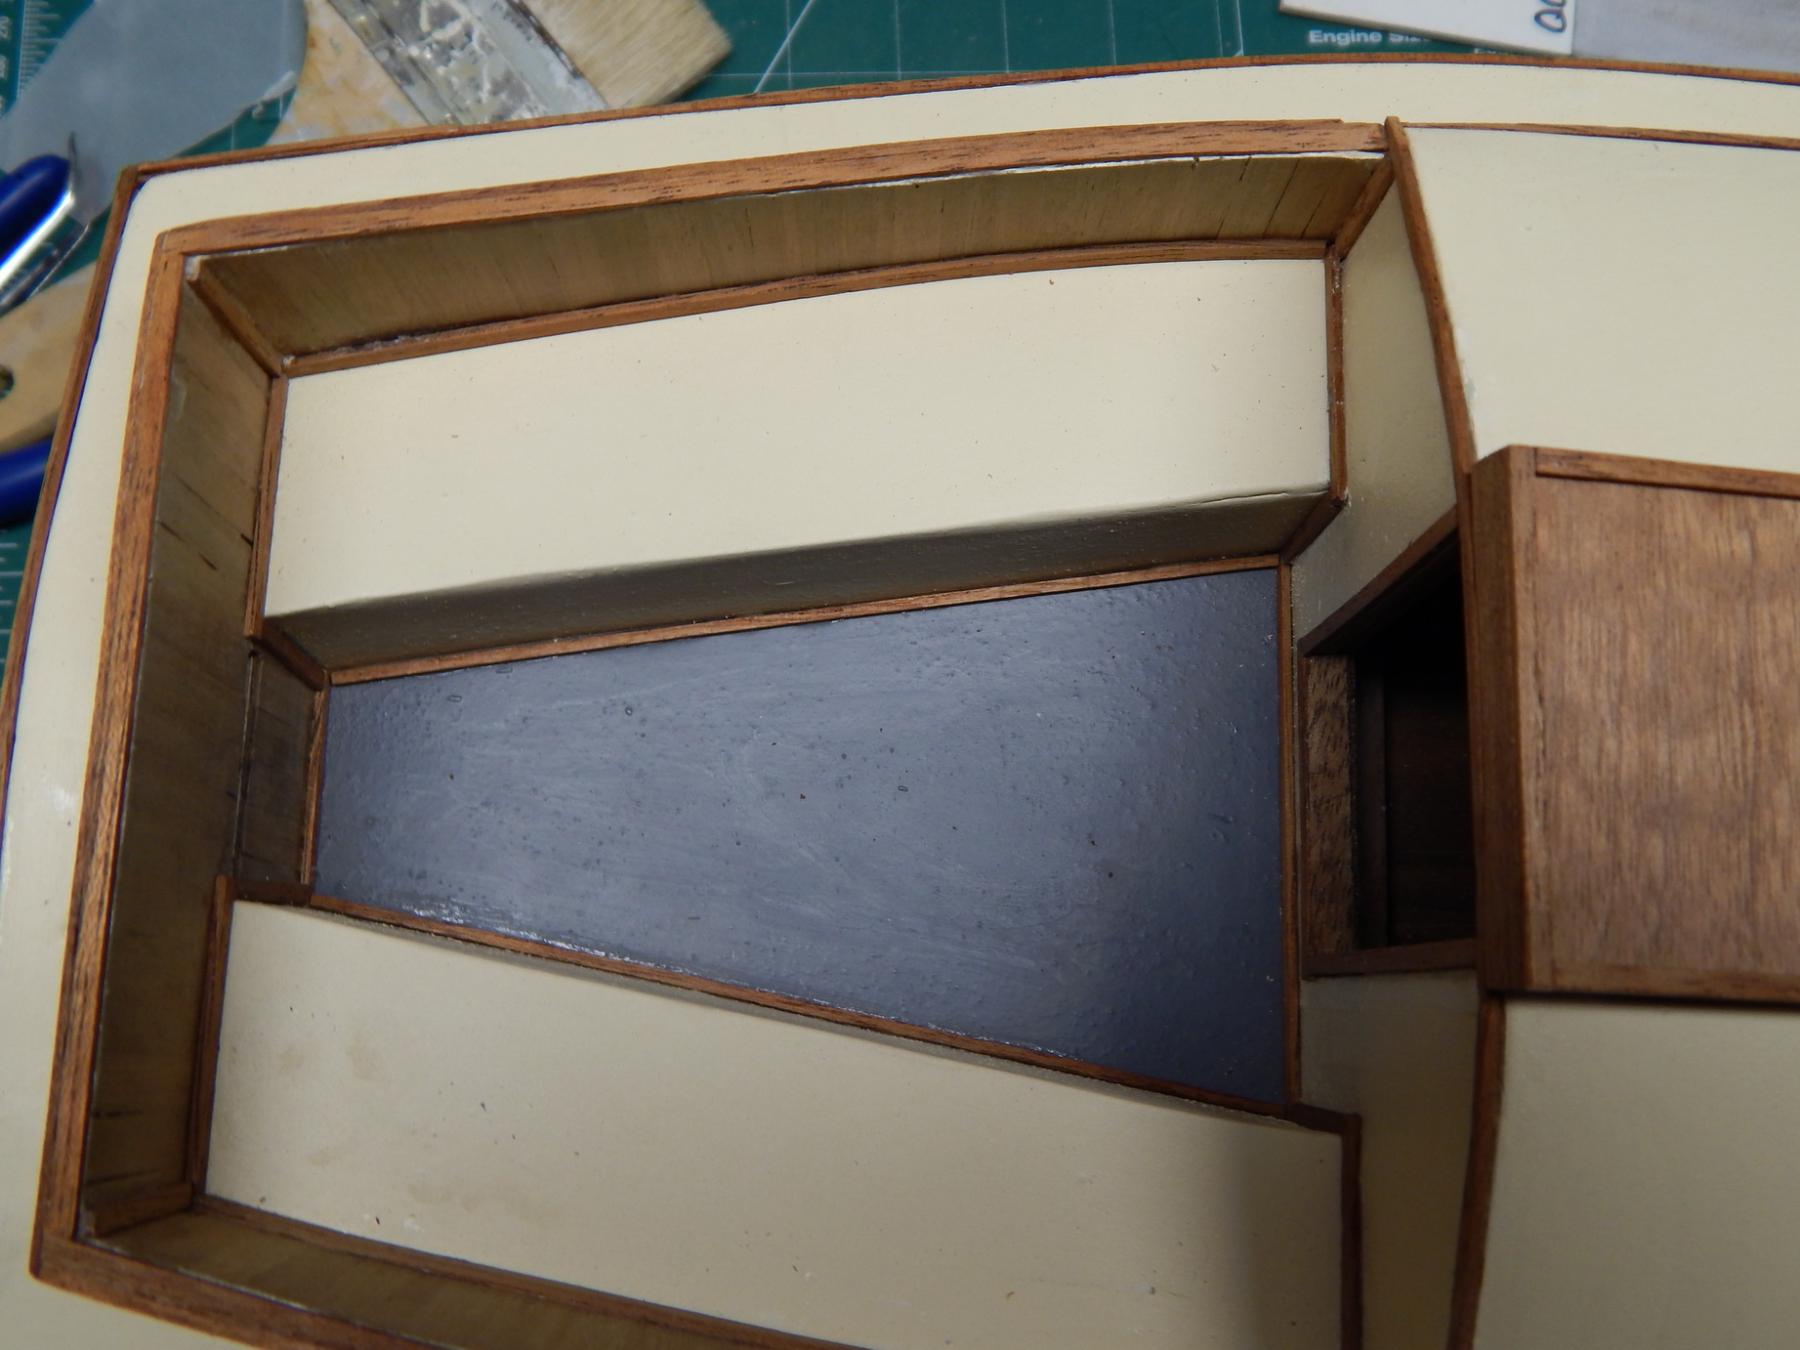
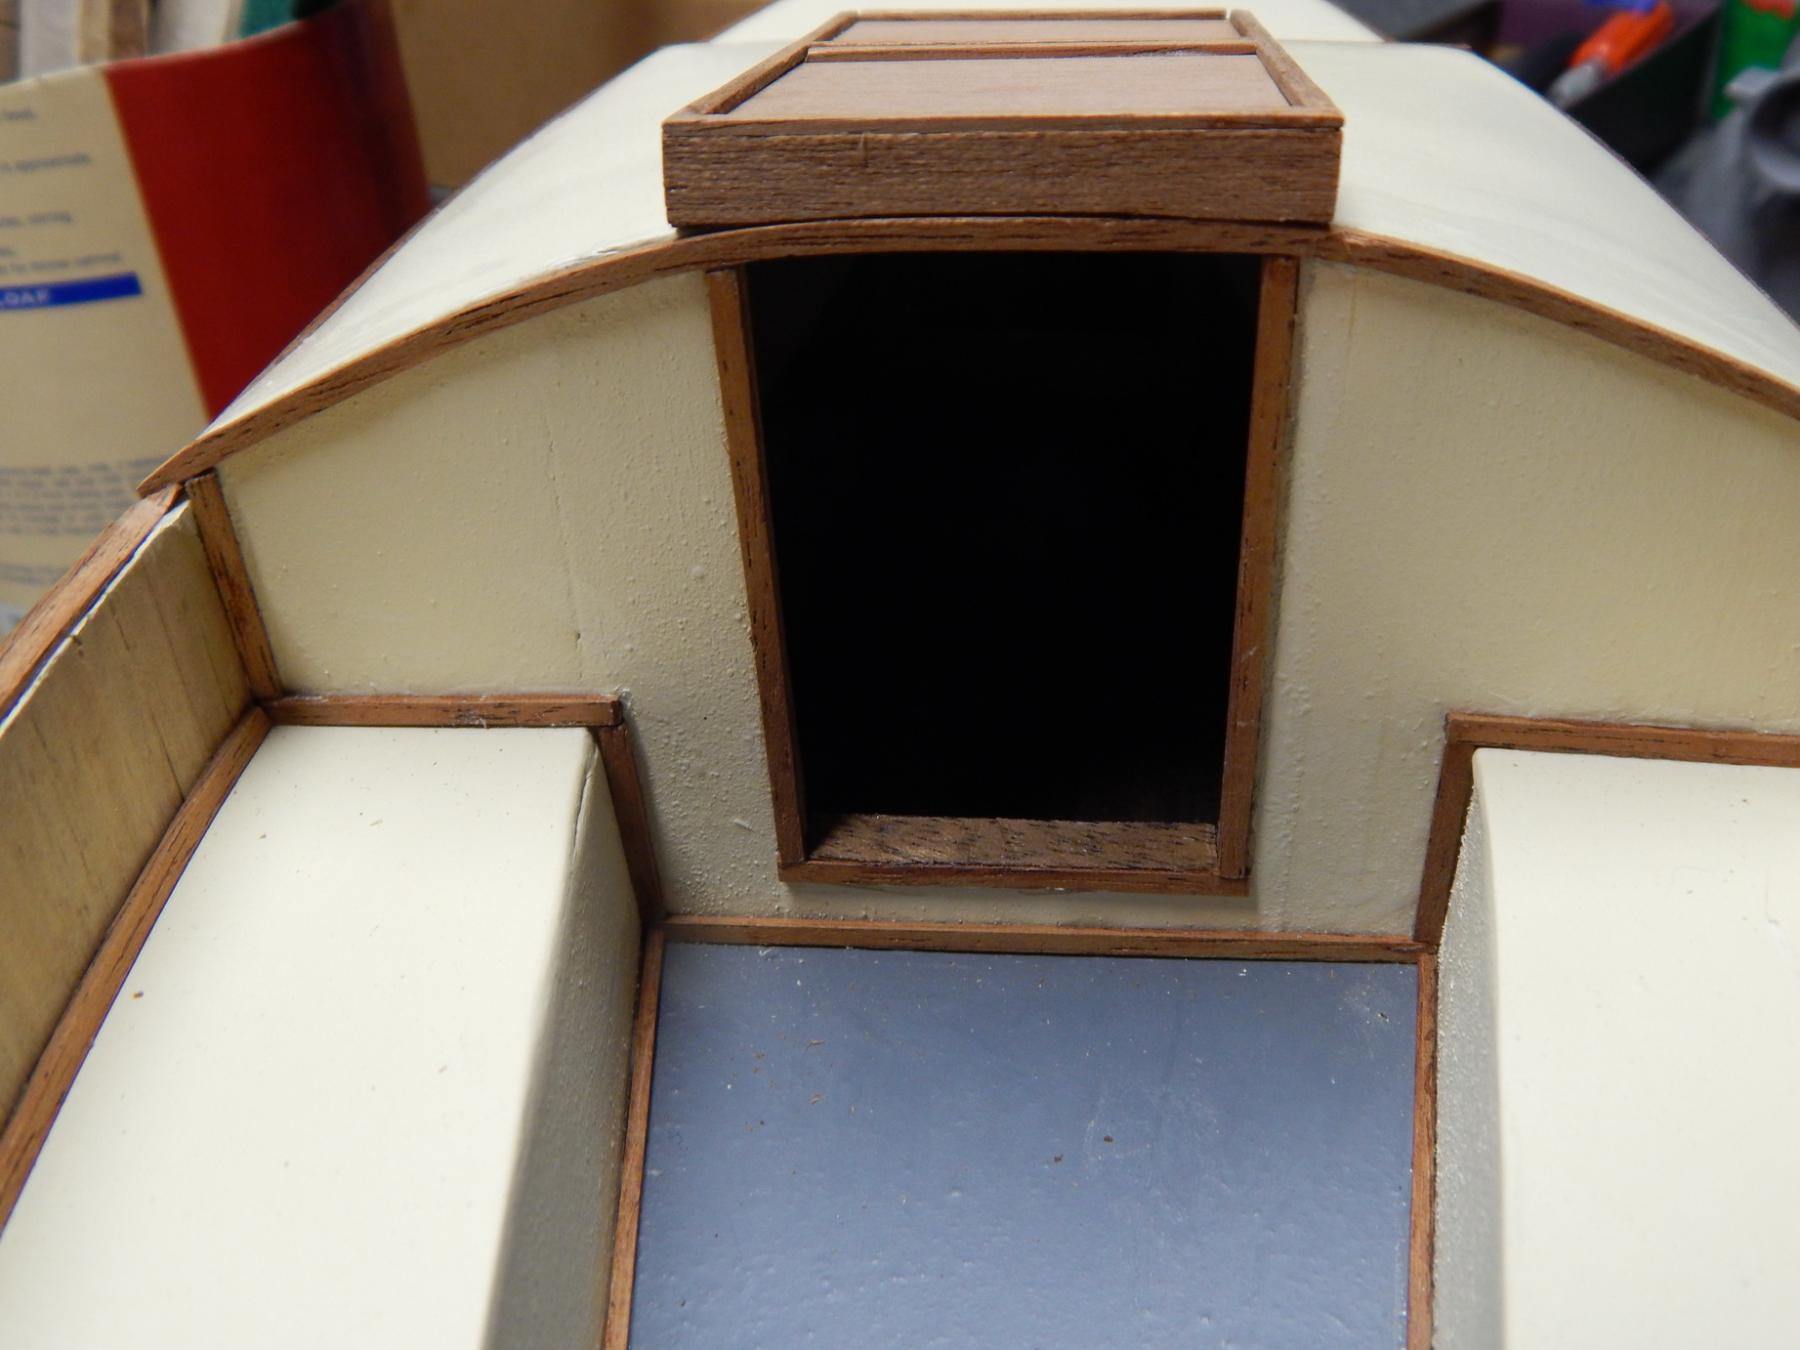
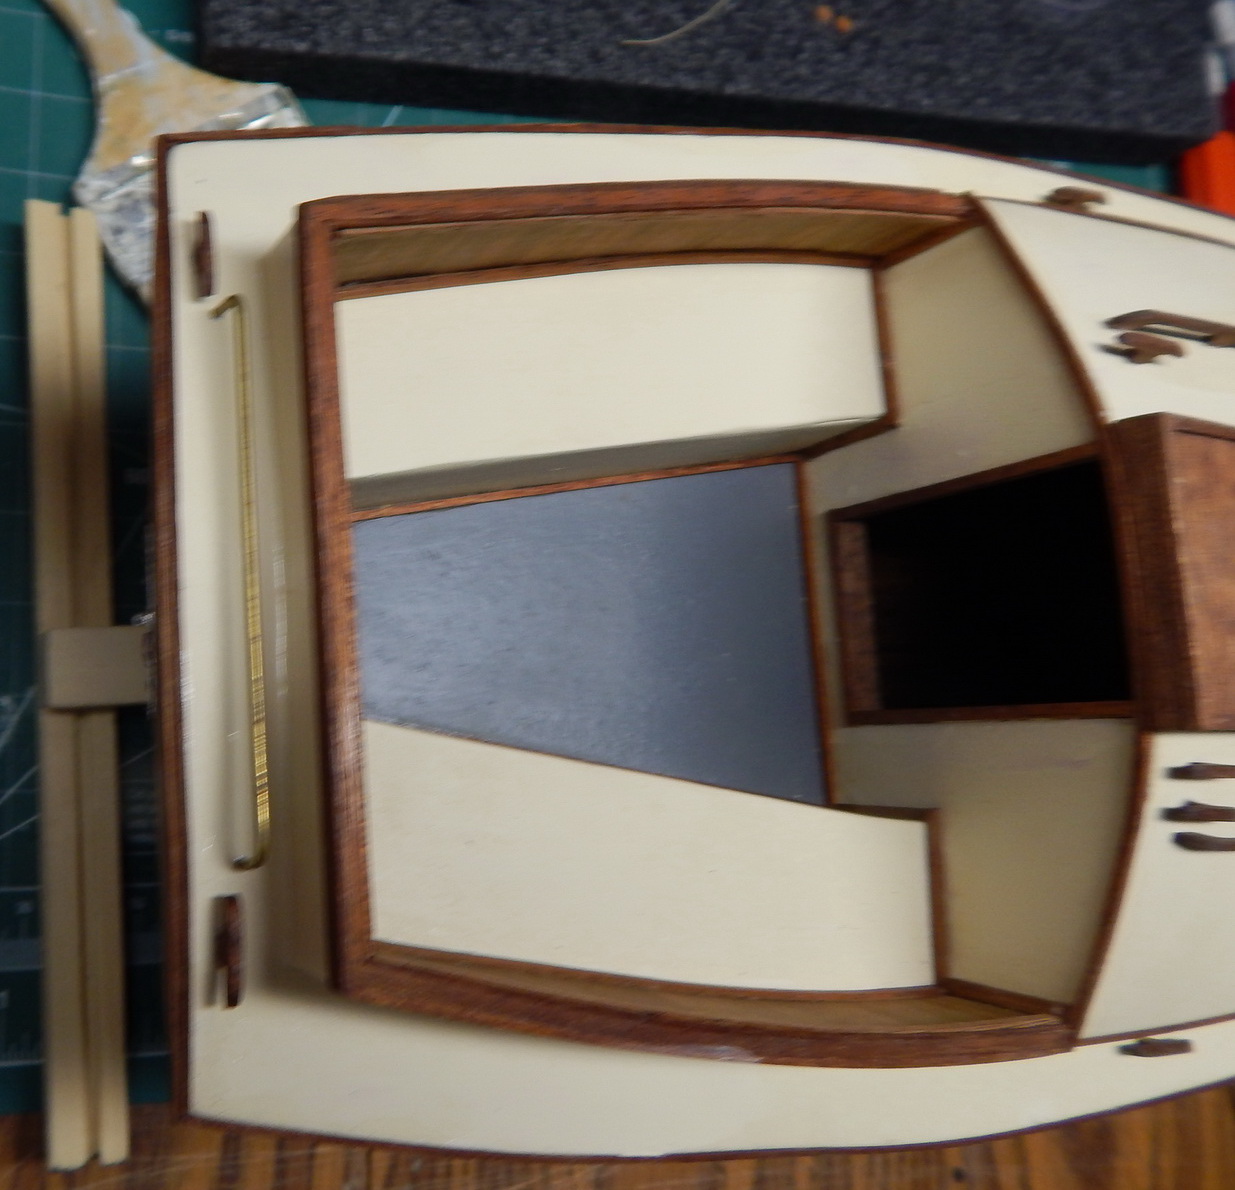
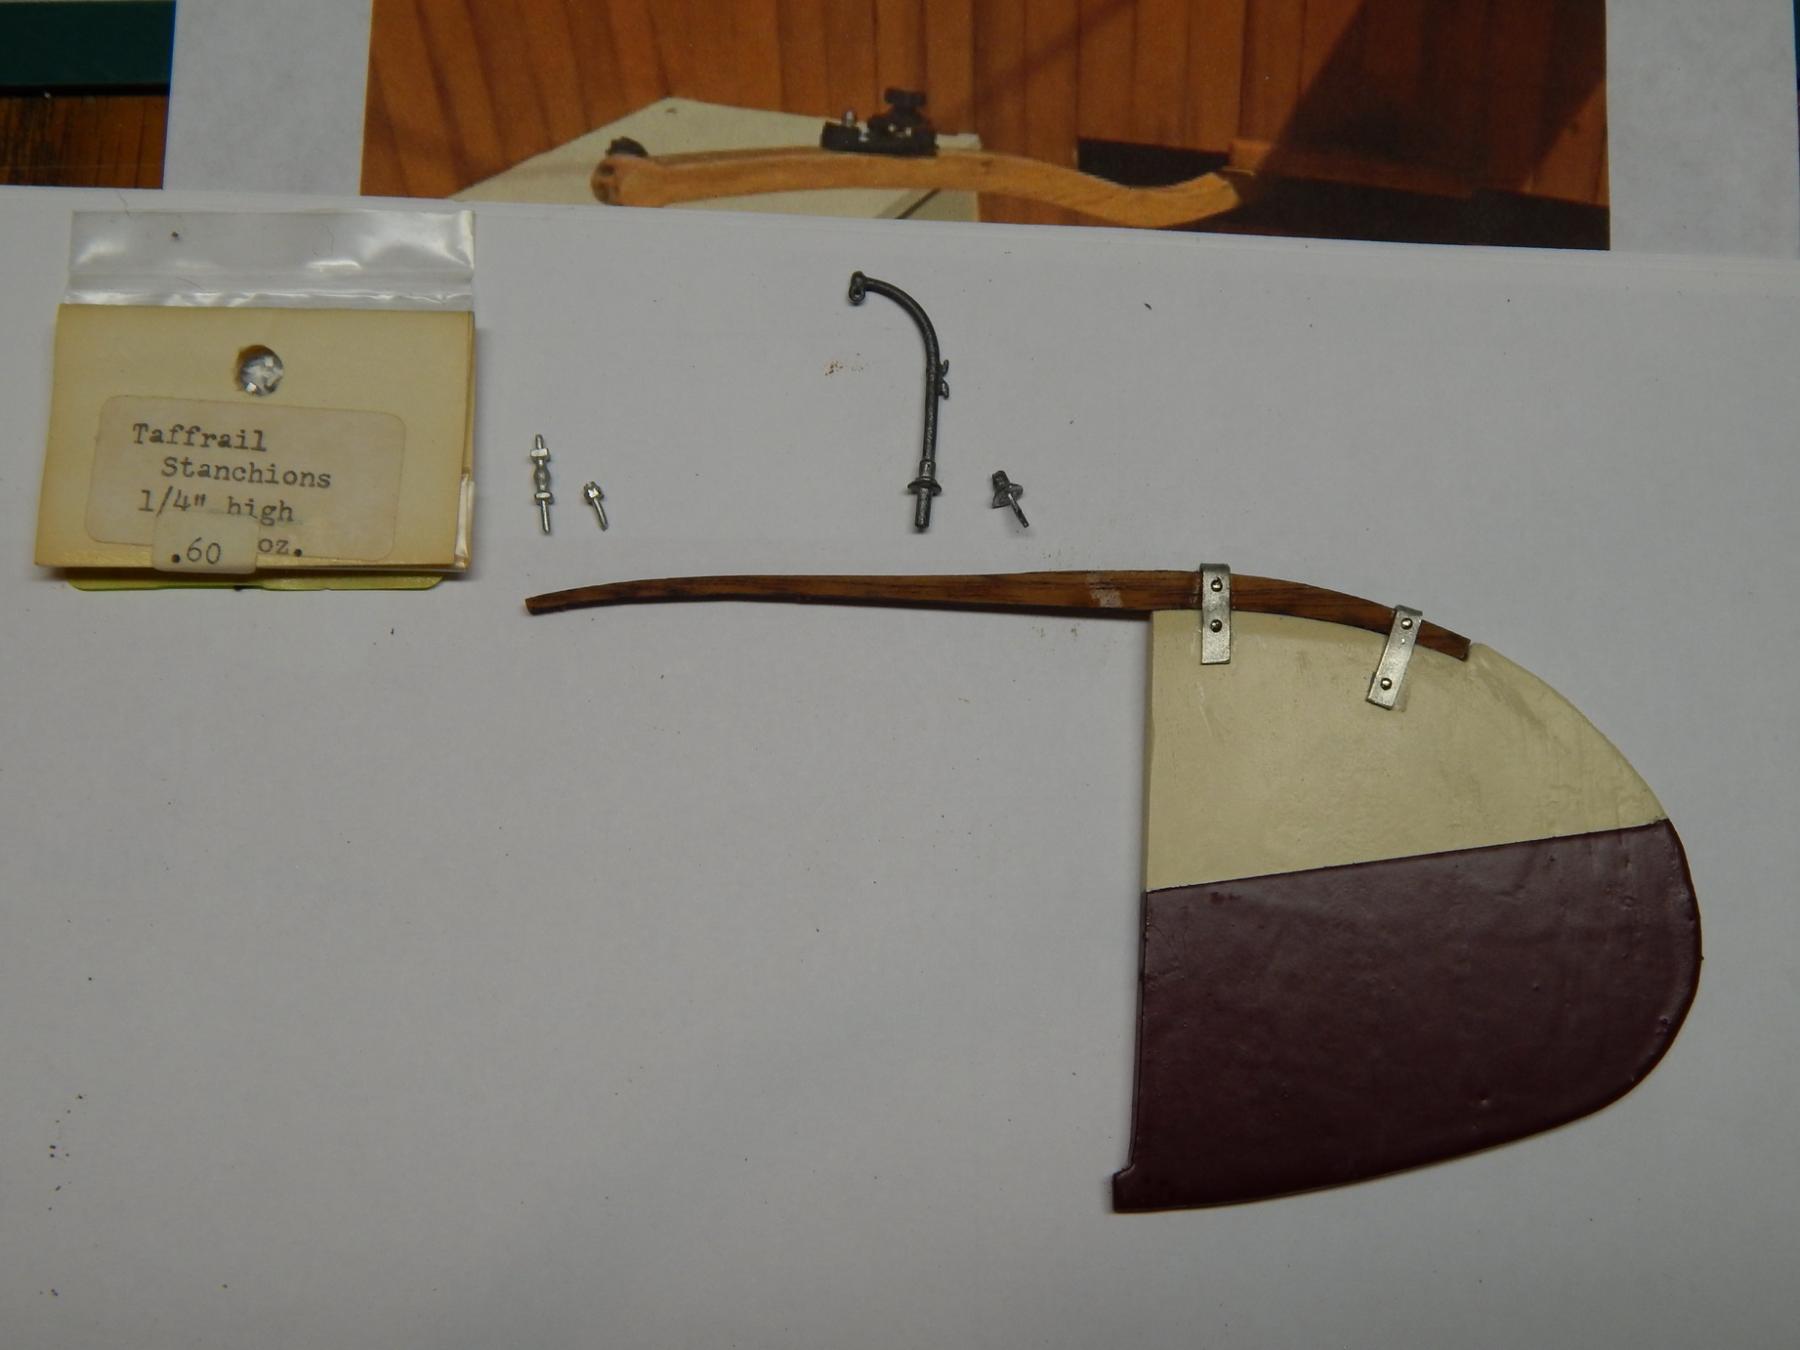
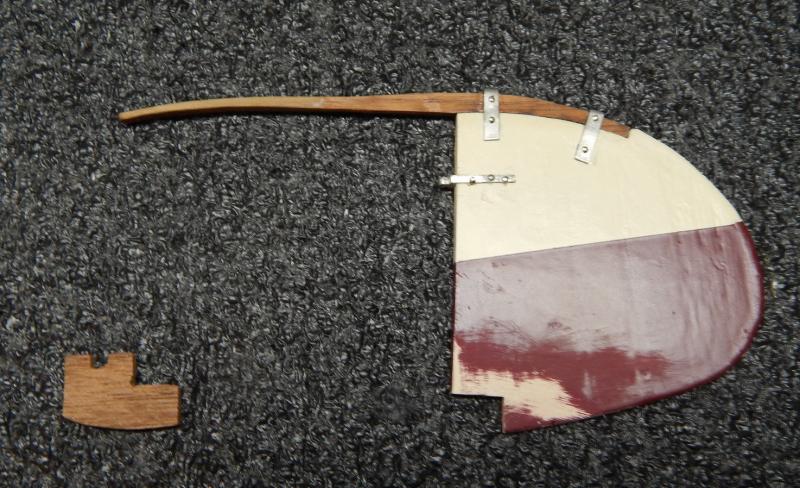
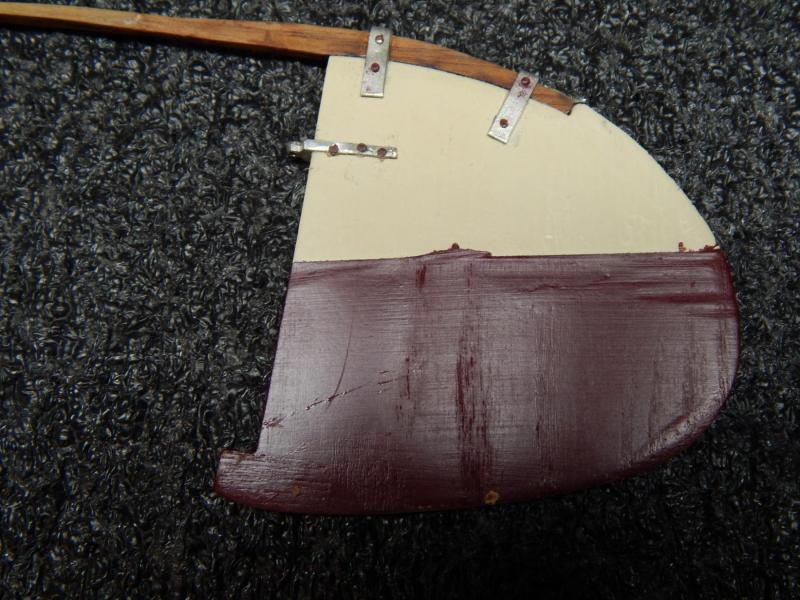
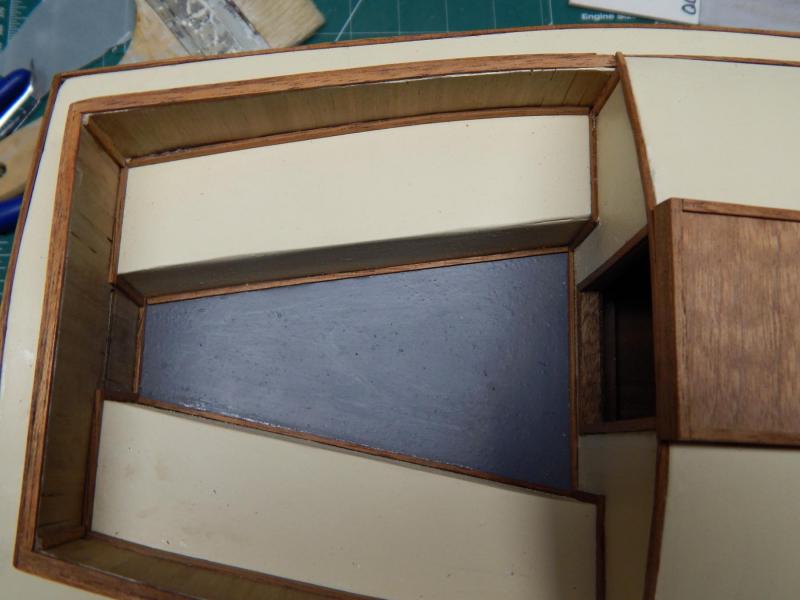
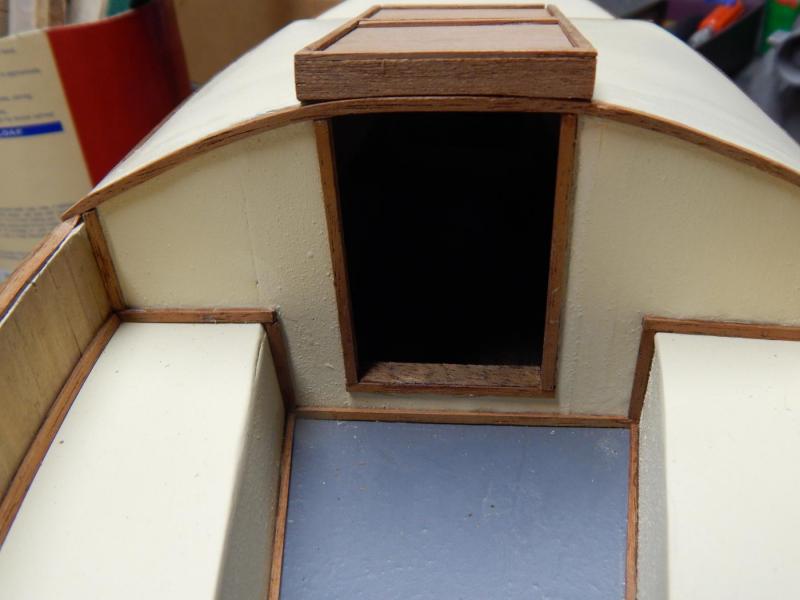
Have been doing lots of small things to finish up the boat. First of all, being a bit careless, I broke the bottom area of the rudder. Removed it and replaced it with another piece of wood. Painted it, but did not look right, so I pulled off all the hardware and will start from scratch. Next, finished up the trim work all around the boat. Added an open cabin door, (so you can see inside with a flash light).


- 165 replies
-
- 6
-
-
- cape cod catboat
- Finished
- (and 1 more)
-
Kees, Thanks. It is the mast in the back that got me confused. I do have several books in pdf form on flat and round boats. I know the name Petrejus and I think I can find something from him on Google. Another book I have 'Vlaamse Visserij en Vissersvaartuigen' book 2, by Gaston Desnerck, 1976, bought it a long time ago in Amsterdam at the book store 'de Slechte'. I paid 30 guilders for it and looked it up recently and it is now 330.00 Euros. I am missing Book 1., but I am not going to pay 330.00 Euros for that one. While I am on the subject there is a freebee floating around from before 1895-1905 called Ship Building from its beginnings by Emile van Konijnenburg, It is in 3 parts and in English. Nice plans, good descriptions and many boats and last but not least several German books on these types of boats. The Germans have written much on this subject. For the none Dutch people here; The Dutch had numerous types of flat and round bottom boats. Every town that has a wharf has a many types of these boats. For pleasure, for freight, passengers, etc. Several years ago I started writing an article on this for the Nautical Journal. It got huge as I was describing every boat possible with no end in sight. So I put it away. I can split it up in sections. Sorry for hijacking the thread......................... back to you.... Kees. Marcus
- 434 replies
-
- 4
-
-
- pelikaan
- beamtrawler
- (and 2 more)
-
Kees; Looking good. Question: in one of the pictures you have a large scale flat bottom boat (plat bodem KW 17), is that a haring buis? What scale is it? Kit or Scratch? Thanks, Marcus
- 434 replies
-
- 4
-
-
- pelikaan
- beamtrawler
- (and 2 more)
-
Ian; Cute little boat. I like it. So I am pulling up a chair and observe. You are coming along very well. Marcus
- 107 replies
-
- 2
-
-
- brazzera
- marisstella
- (and 1 more)
-
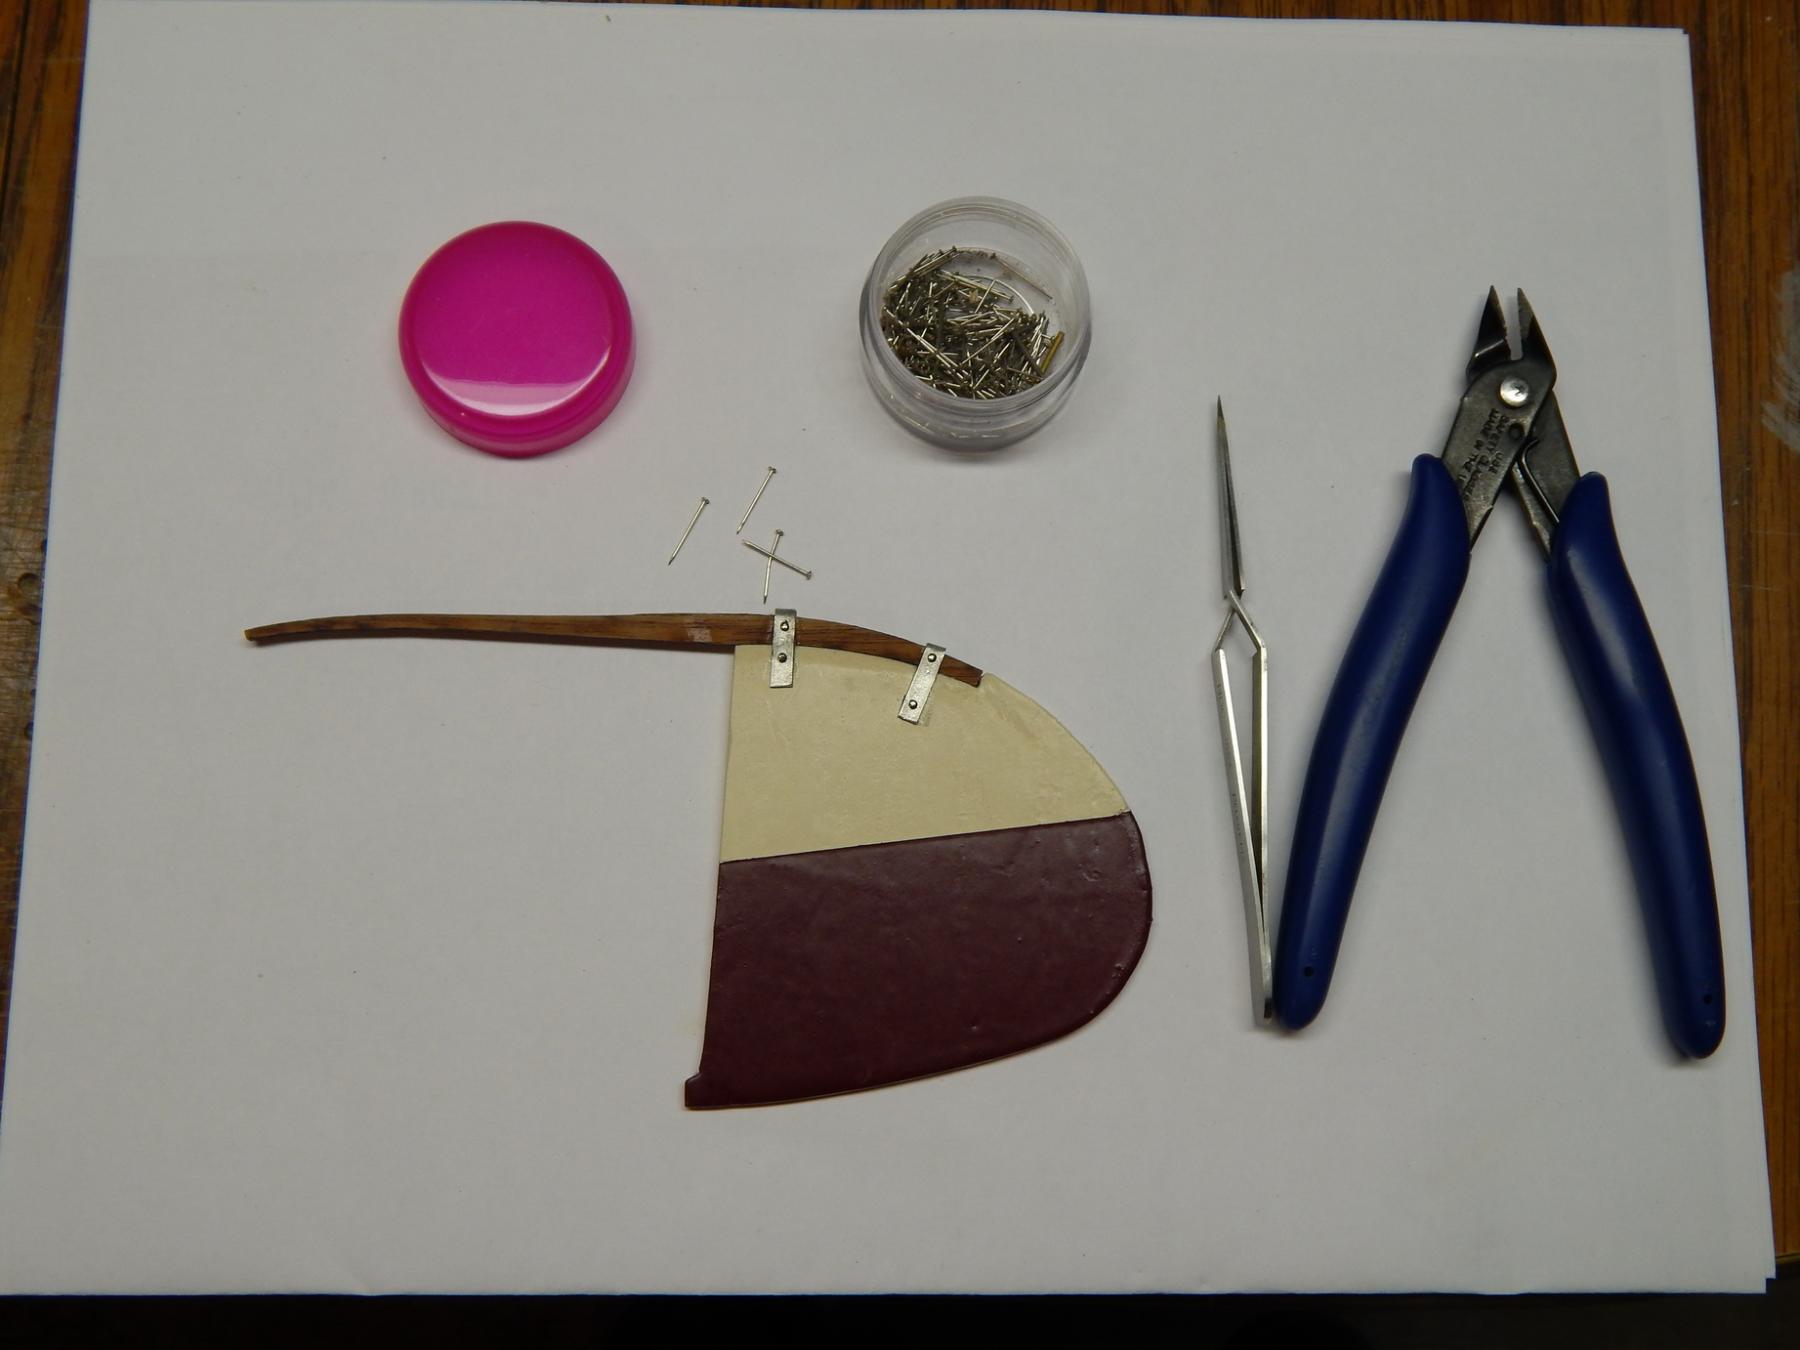
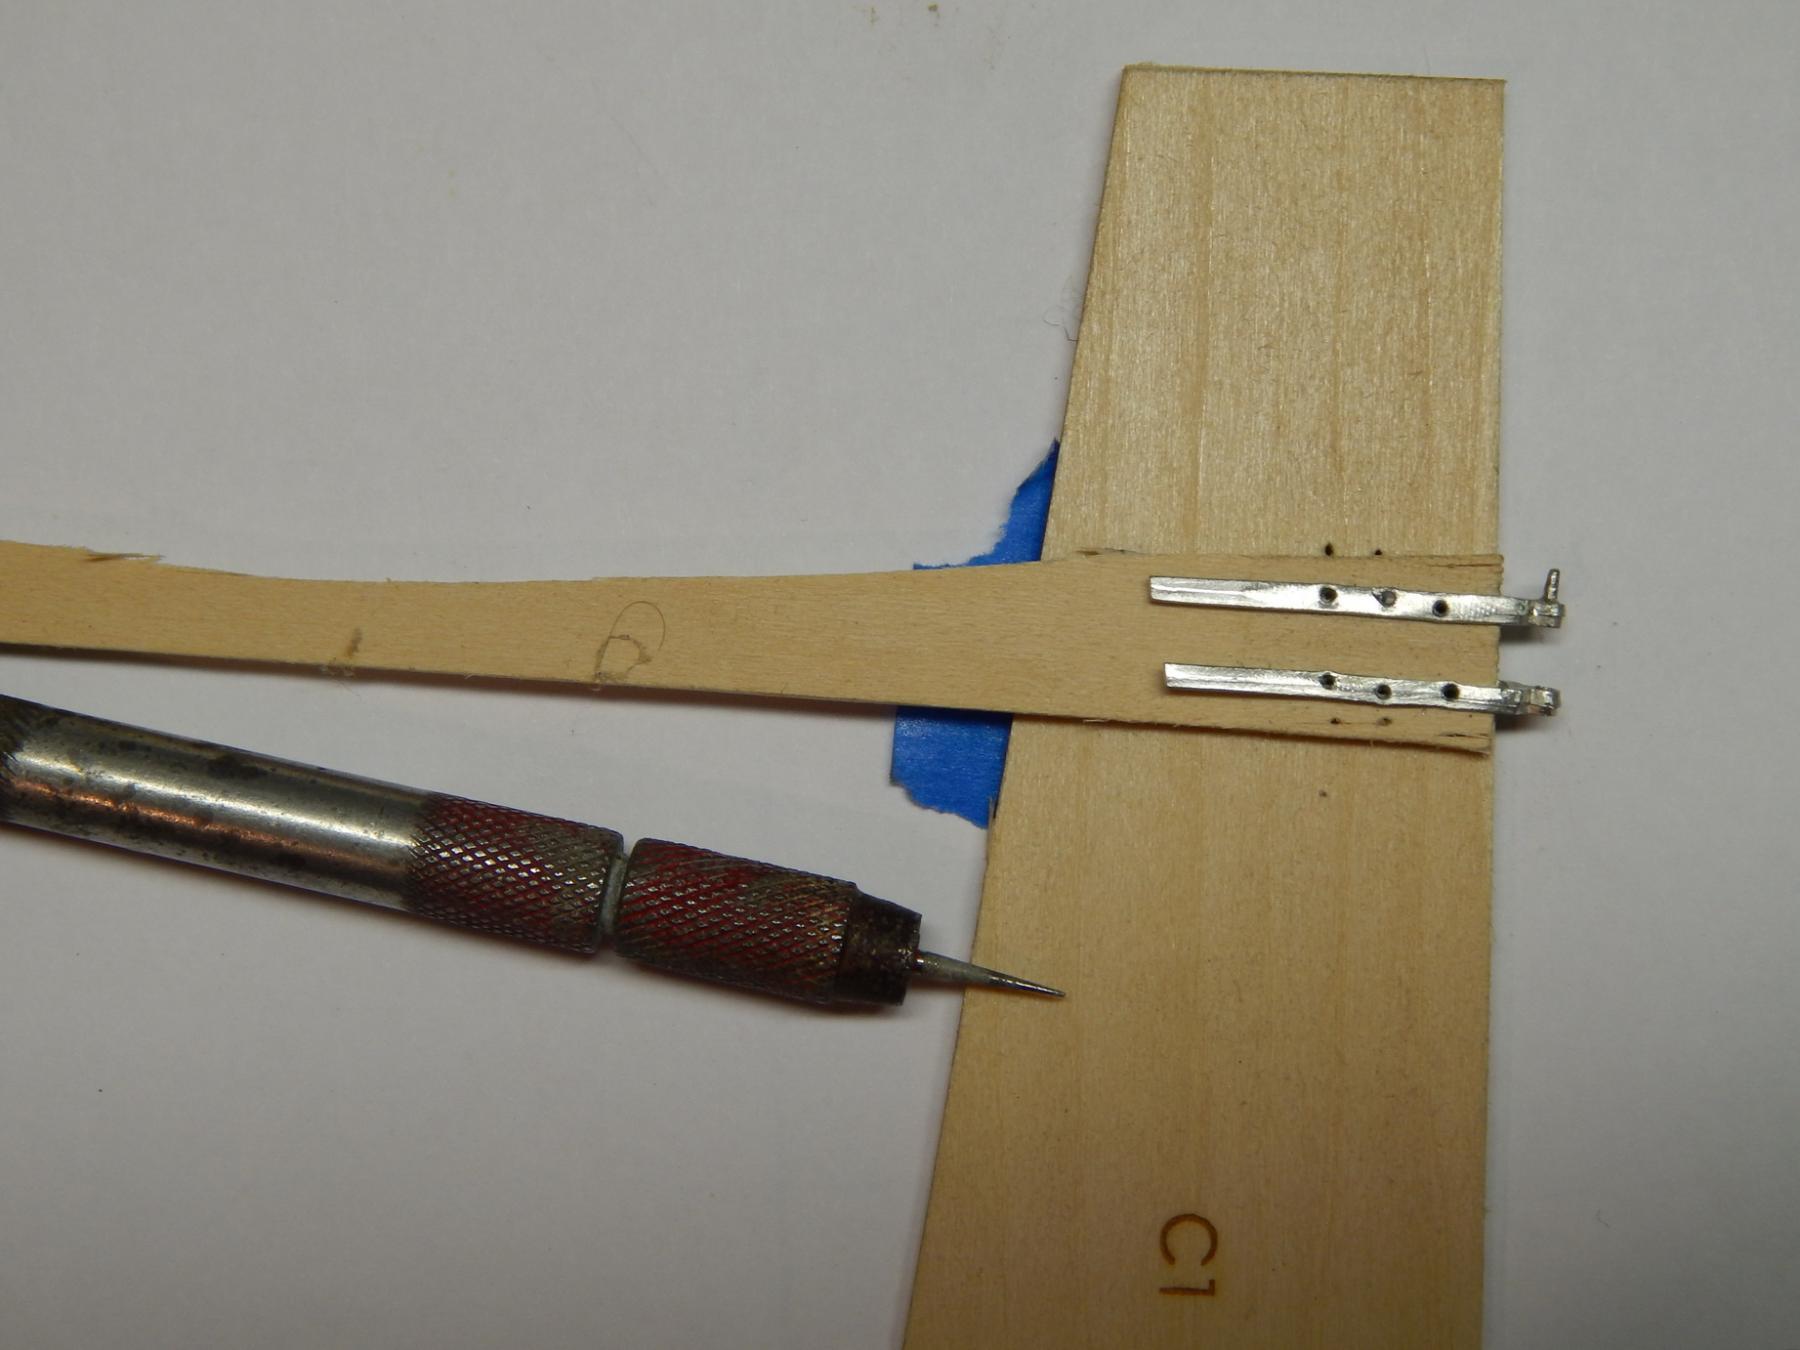
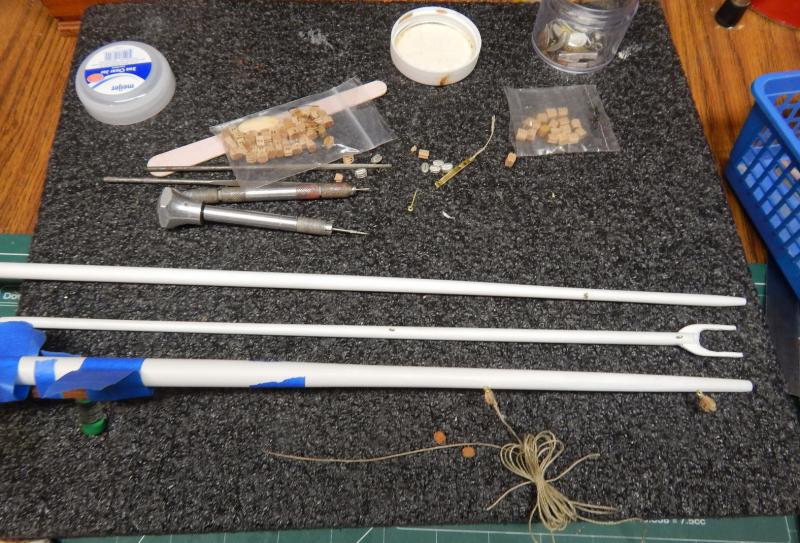
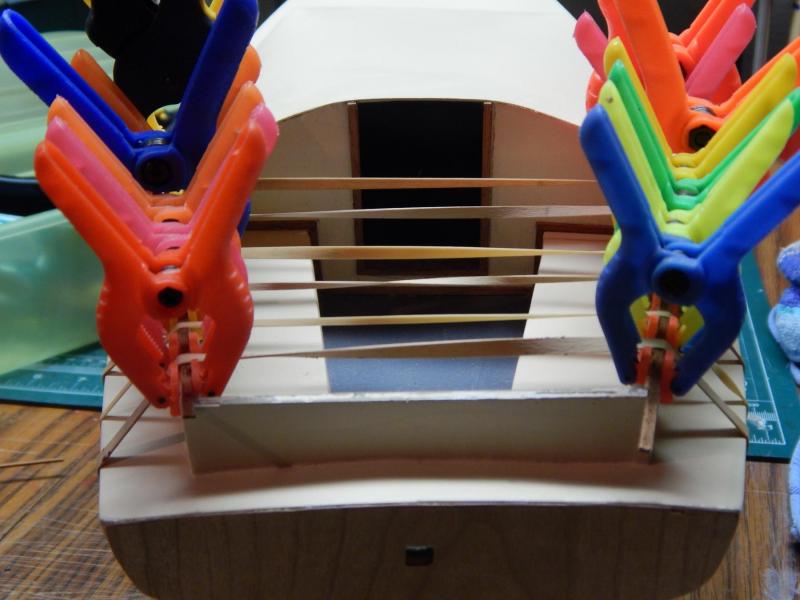
After the conference and a road trip (1200 mls) up the Pacific Highway and lets not forget a day in Tijuana, Mexico I am have been working on her again. This picture shows items I used and what I did with them. I have made small nails out of them. I didn't have any. Piercing holes with a dental drill. Forming the trim after soaking. Trim attached and waiting to be dried.


- 165 replies
-
- 11
-
-
- cape cod catboat
- Finished
- (and 1 more)
-
Pulling up a seat as well. Excellent choice for a build, such a majestic ship. Marc
-
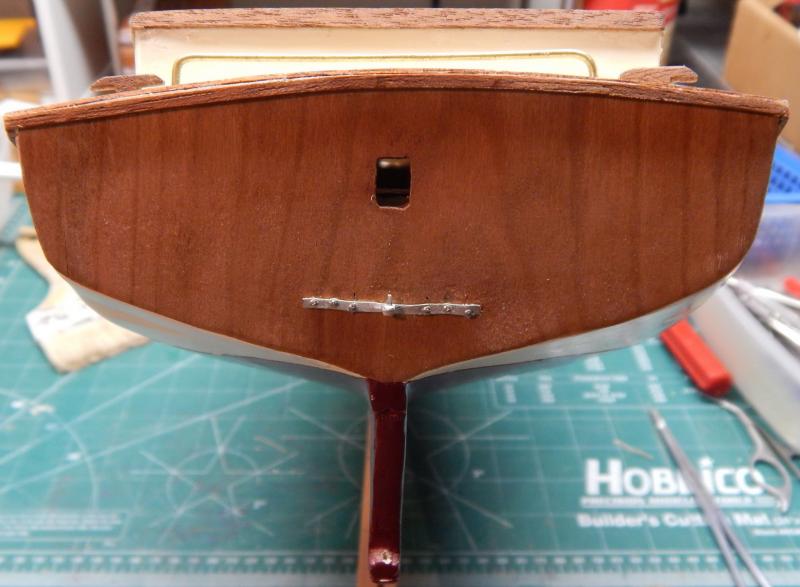
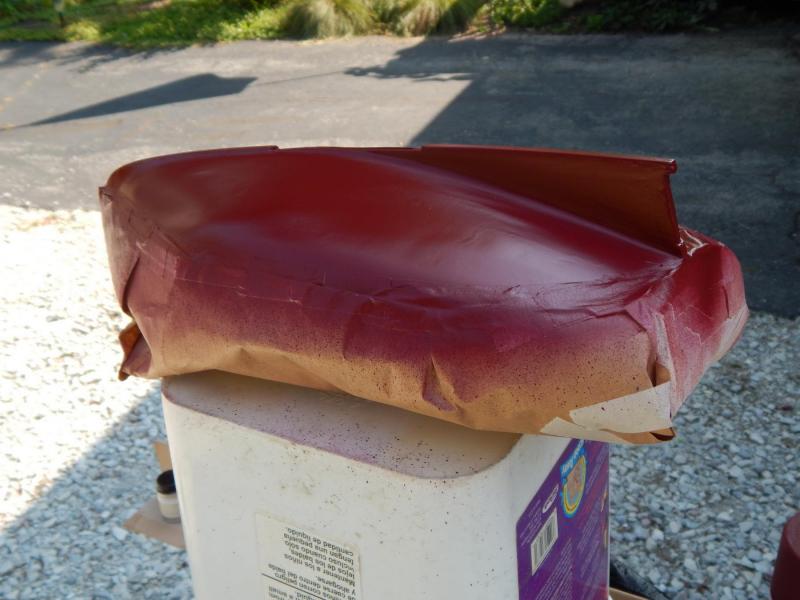
Prepped and painted the bottom - rust red. Came out pretty good. She is on a makeshift stand. I have already sanded the mast, boom and gaff according to size. They will all be painted white. Made some of the cleats and so on. The stern is covered with a piece of cherry veneer (donated by Kurt van Dahm). Marcus


- 165 replies
-
- 10
-
-
- cape cod catboat
- Finished
- (and 1 more)
-
I know, I am late pulling up a chair to this build. WOW, Looking very good. The real one looks as good as the model. You are doing an excellent job in building her. Marcus
-
Before anyone tries the hoop thing I have to go back to the drawing board as some of the strips of paper glued onto the rod and then heated do not come off. Marcus
- 165 replies
-
- 6
-
-
- cape cod catboat
- Finished
- (and 1 more)
-
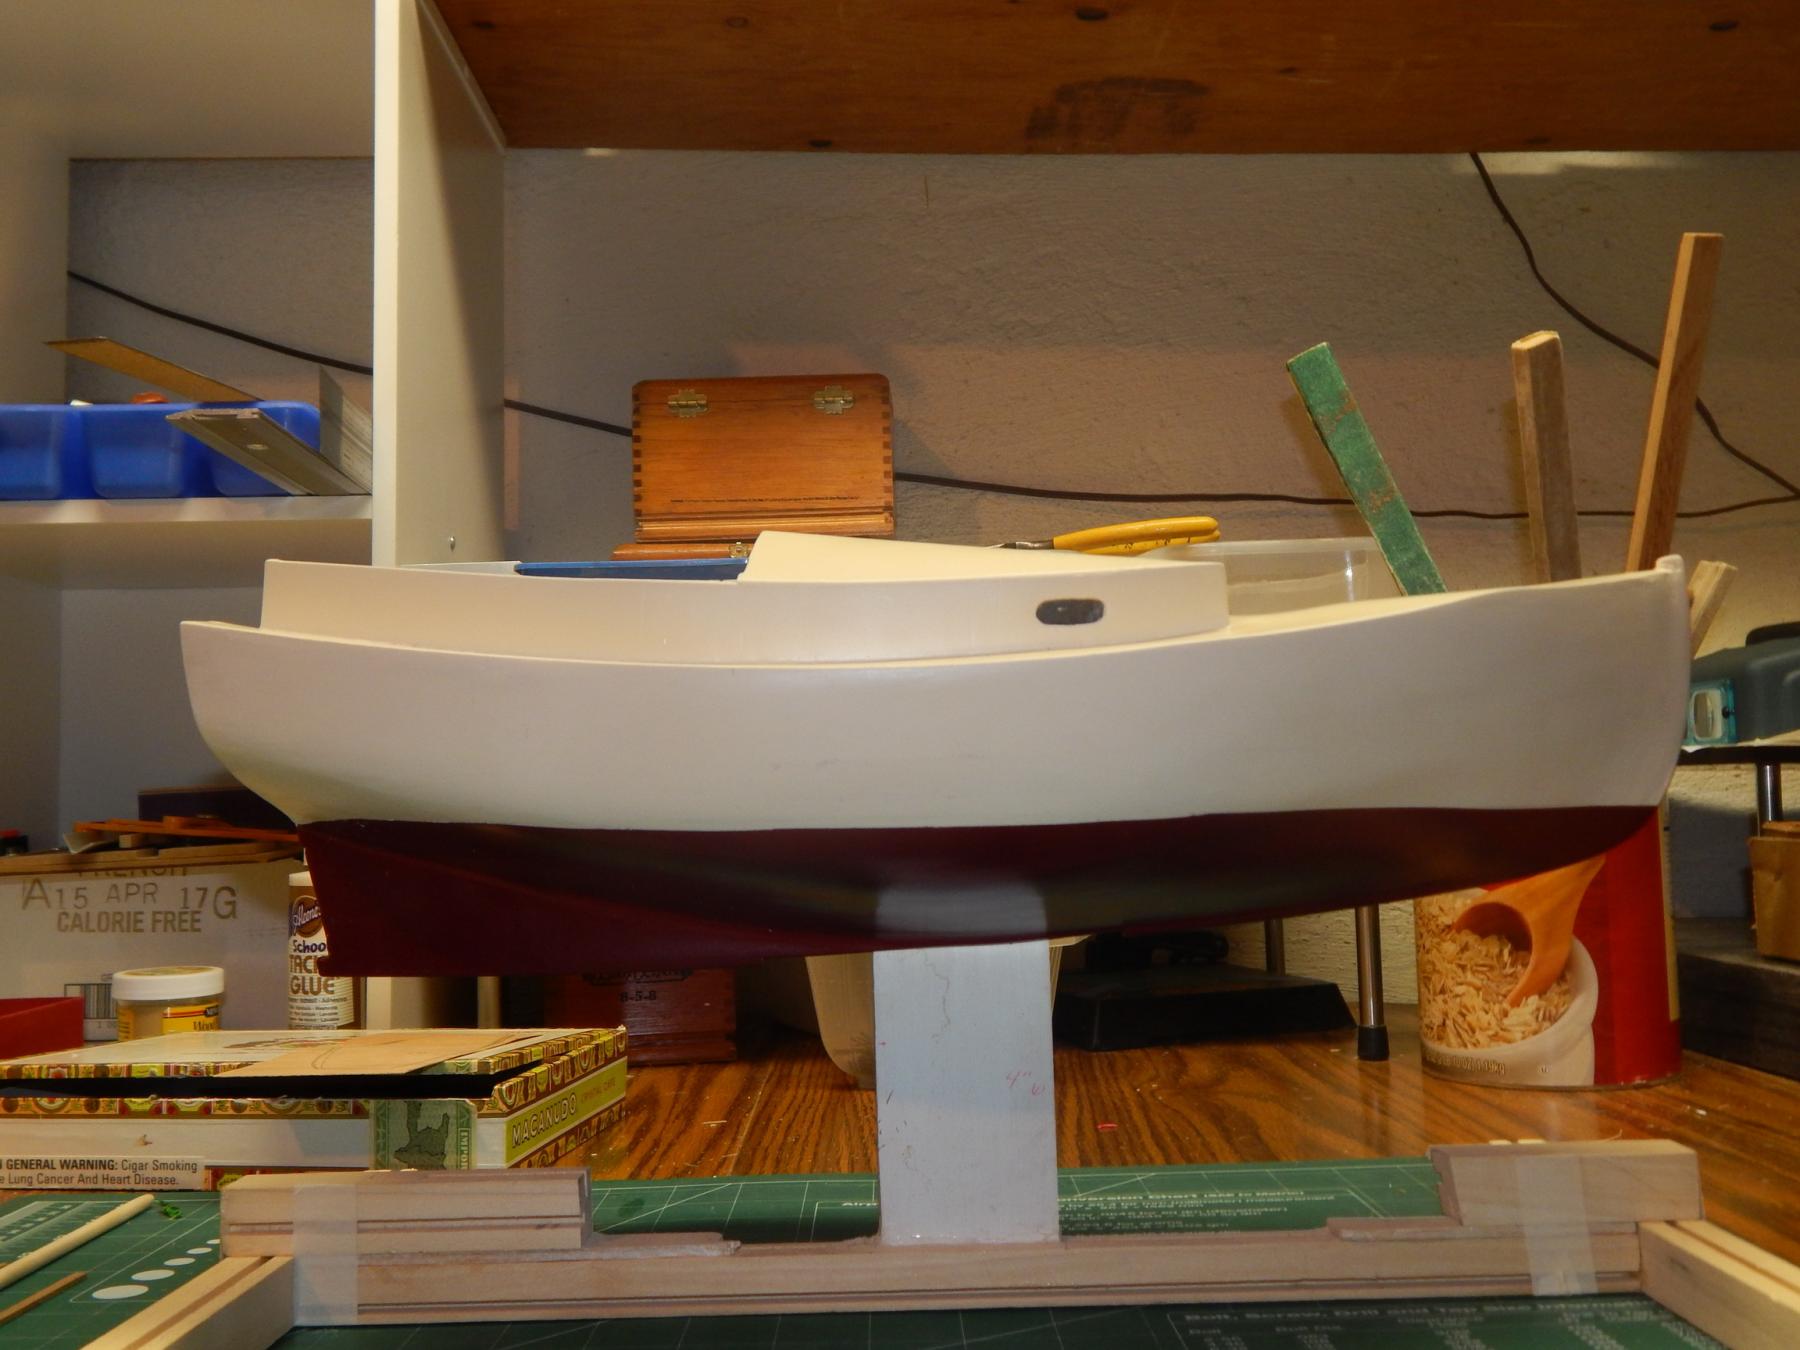
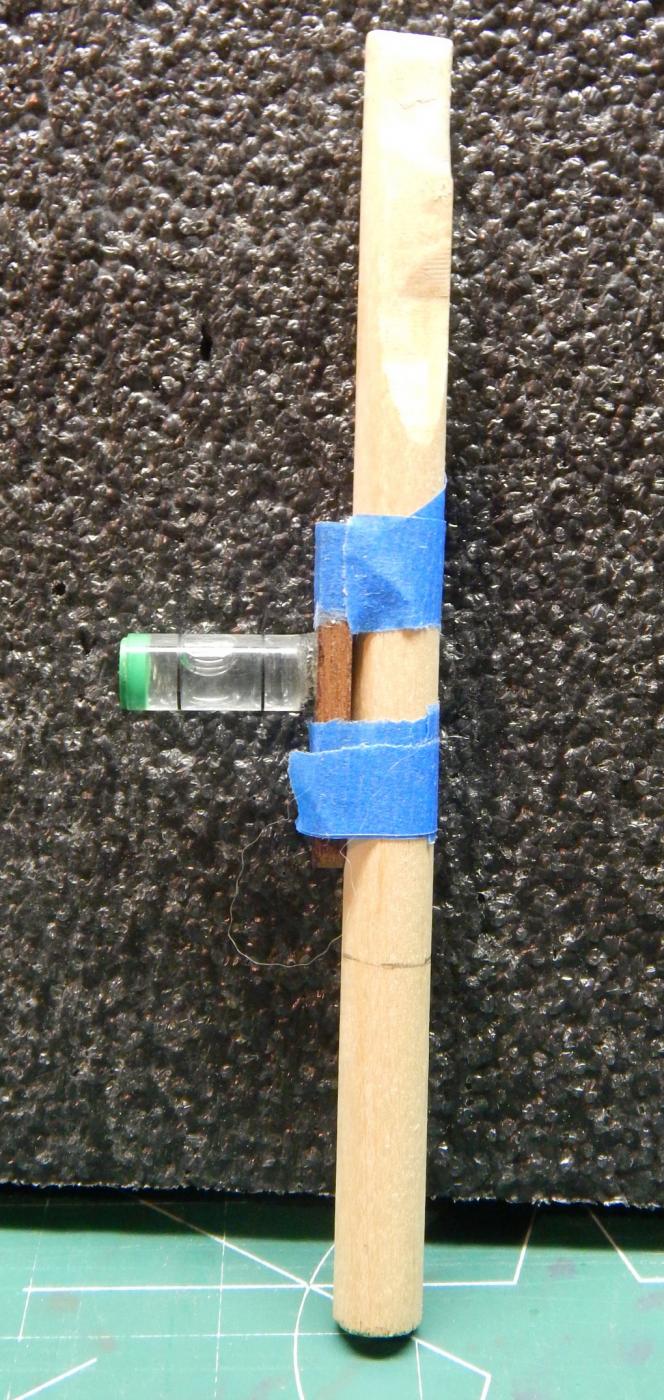
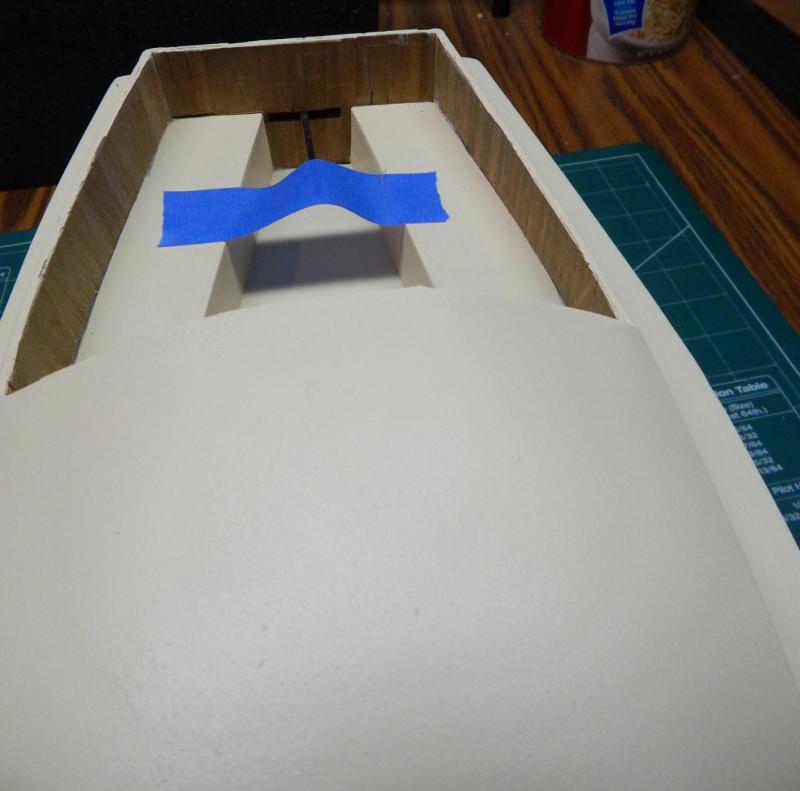
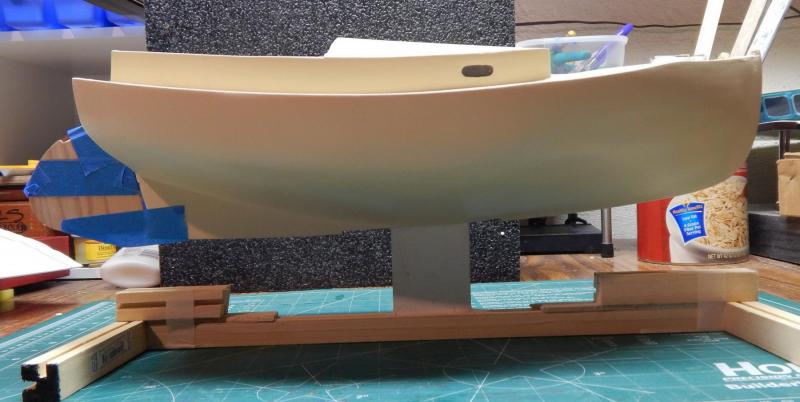
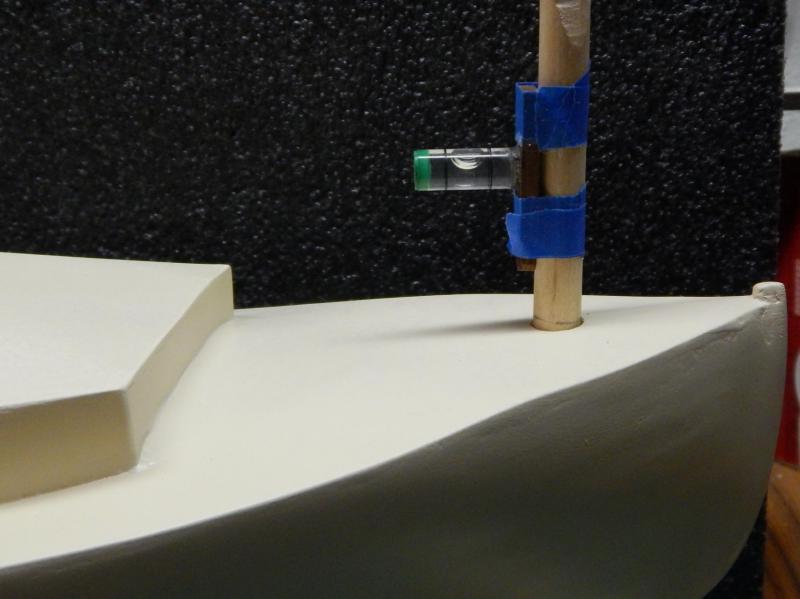
I am done painting-sanding-spackling. I have also removed the tape from the windows and the walnut veneer. Here I am prepping the boat for a rust red bottom and have marked the rudder with tape. I will first paint the rudder several coats of the same color as the rest of the boat and then the bottom of the rudder will be rust red. I taped the rudder to the benches to keep it straight and then to be able to draw a straight paint line. I taped a little level to a dowel which will go temporarily where the mast goes. Having the stand level on the table and part of the stand where the keel goes into, I can move the boat up and down and keep an eye on the bubble. This is where I need to keep the boat level to draw an accurate paint line. Marcus


- 165 replies
-
- 10
-
-
- cape cod catboat
- Finished
- (and 1 more)
-
Mike Y, As Yamsterman said; all wood oxidizes over time. Some slowly some fast. Example: If you had a block of Pink Ivory - 5cm x 20cm x 20cm. After about 10 years the outside layers have lost its pink lustre and the wood is light brown almost sand in color. If you sand off 2mm on all 6 sides the block will be light pink again. The more you sand off the darker the pink color. I have done this with walnut but the model I built with this wood has been in a display case for about 4 years and the light in the living room has somewhat faded the wood. If the wood has been properly dried the pink will last. But generally ALL wood fades. UV rays is the enemy of this. Most of this information comes from a book I have on Arboriculture. Marcus
- 504 replies
-
- 7
-
-
- washington
- galley
- (and 1 more)
-
WOW........AMAZING........ Such detail........ Excellent craftsmanship. I like it. Marc
-
I did the research on Pink Ivory and our club will get a mini-presentation on this. Pink ivory (Berchemia zeyheri), also called purple ivory, red ivory, umnini or umgoloty, is an African hardwood used to make a variety of products (for example: billiard cues and knife handles).[1] The pink ivory tree grows predominantly in Zimbabwe, Mozambique and South Africa. The tree is protected and sustainably maintained in South Africa, only felled by very limited permit.[2][3] The wood is extremely hard, with a density of 990 g/dm3. The specific name honors the German botanist and plant collector Carl (Karl) Ludwig Philipp Zeyher, 1799-1858 in South Africa. For the modelers in the US here are some places you can purchase this wood from. http://www.wood-database.com/pink-ivory/ http://www.exoticwood.biz/pinkivory.htm http://www.bellforestproducts.com/pink-ivory/MI http://www.righteouswoods.com/MA http://www.hearnehardwoods.com/hardwoods/exotic_hardwoods/exotic_wood/pink_ivory_lumber/pink_ivory_wood.htmlPA This is the general color. It has many variations Marcus

- 504 replies
-
- 7
-
-
- washington
- galley
- (and 1 more)
-
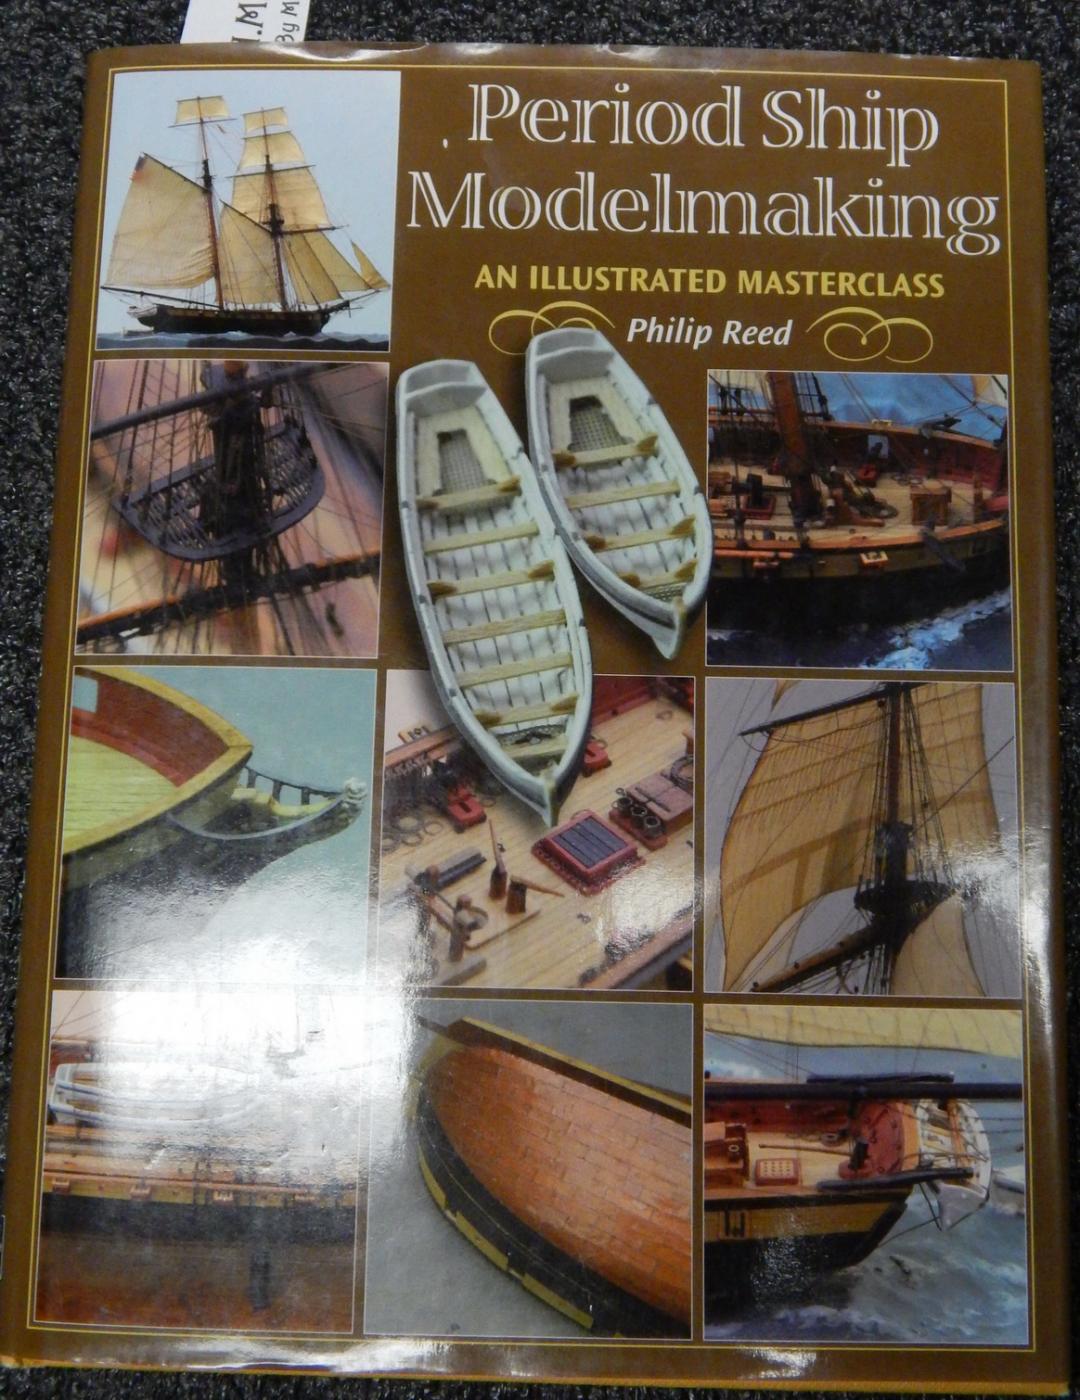
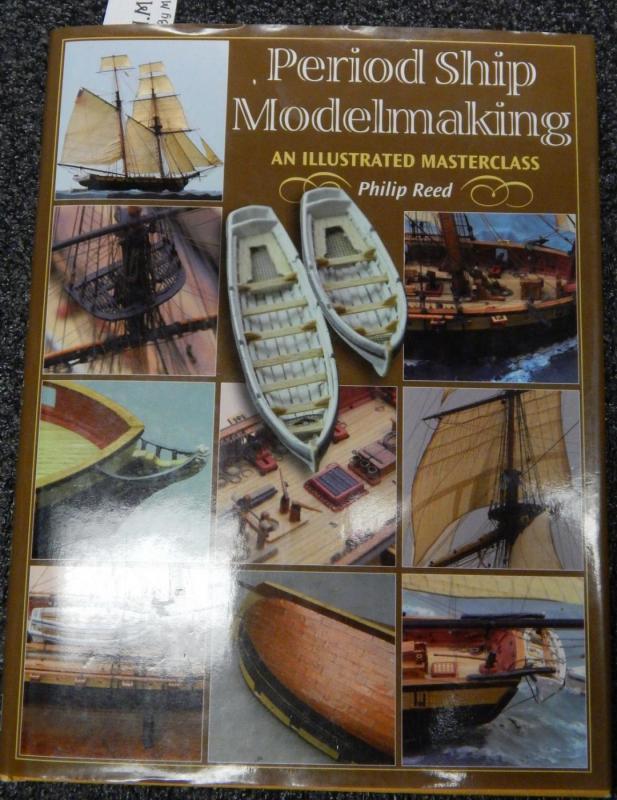
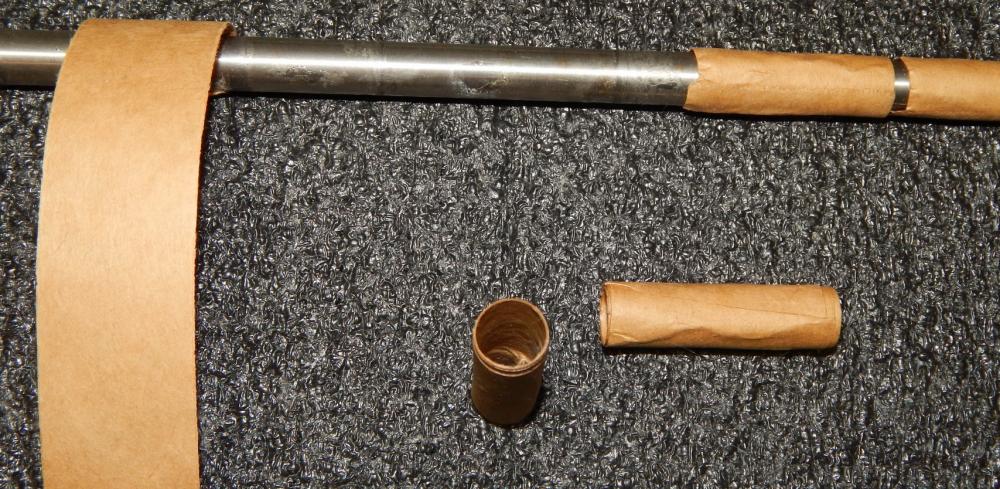
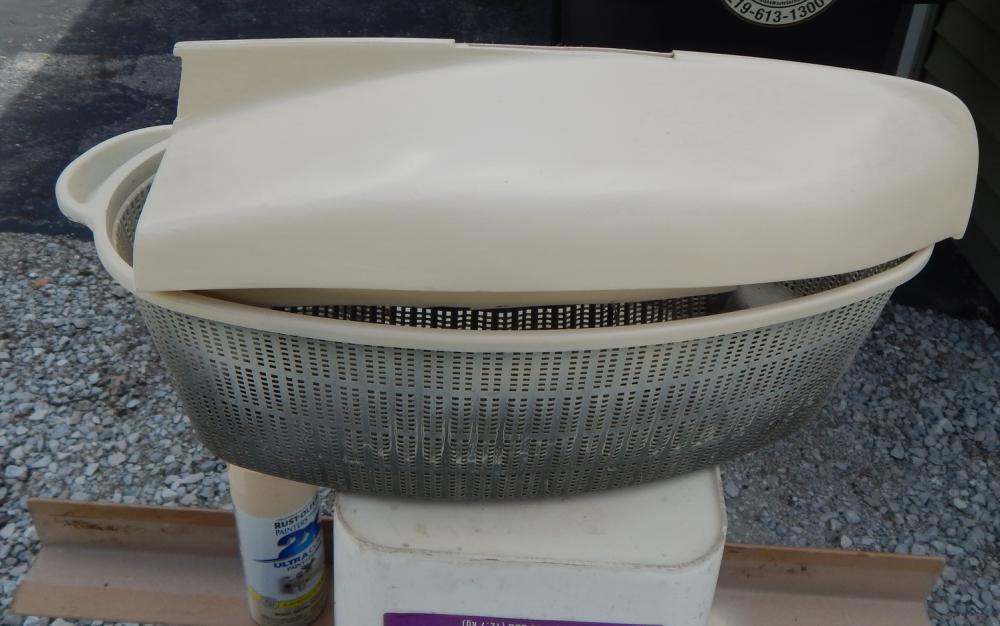
Here I am creating mast hoops. I use this excellent book a lot for ideas. The metal pipe is a roller which I scavenged out of a HP printer. The paper is from a paper bag. I start by rolling the paper to form. Attach one end of the paper with a drop of CA to the metal tube. Heavily coat the paper with Elmer's white glue and slowly roll wrap the paper around the tube. Remove excess glue. Once dry, heat tube and pull the paper off. I still have to cut it with a razor saw. Once done the book mentions to dilute CA and coat the hoop with it to strengthen it. I use the metal tube because when I heat it, the CA glue lets the paper go. Don't know the chemistry of it, but it works. Marcus

- 165 replies
-
- 12
-
-
- cape cod catboat
- Finished
- (and 1 more)
-
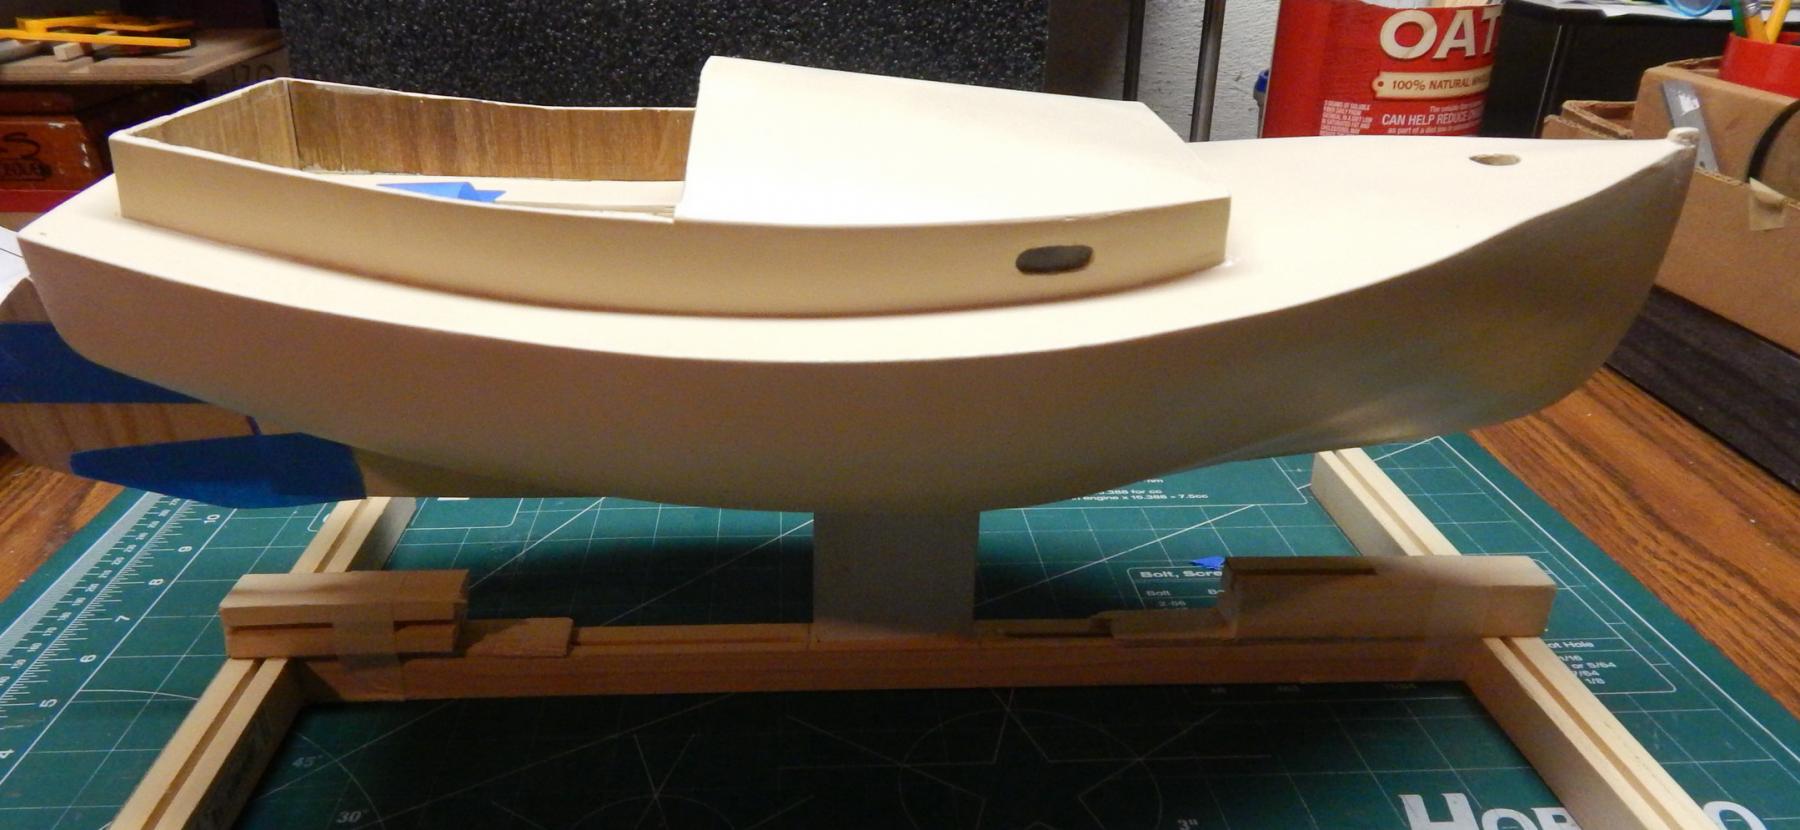
I have been sanding - spackling and painting. She is starting to look good. I have more than 10x thin coats on her. There are still some little depressions here and there but I am leaving it at that. I am pretty happy with the results. Planning to do a few more coats of this same color. It is a very light sand color. Could not get a darker sand color in a can. Maybe in the future I will invest in air-brush equipment but I don't do a whole lot of painting.

- 165 replies
-
- 15
-
-
- cape cod catboat
- Finished
- (and 1 more)
-
Love the details on the carvings and the VOC emblem on the canon. Excellent job. Marcus
-
online 3d CAD
flying_dutchman2 replied to Don9of11's topic in CAD and 3D Modelling/Drafting Plans with Software
Try DELFTship http://www.delftship.net/DELFTship/index.php/delftship/delftship-free There is a free version I've been using and there are paid versions. Marcus -
That is too cool. What type of sail boat do you have? Marcus
- 434 replies
-
- 3
-
-
- pelikaan
- beamtrawler
- (and 2 more)
-
Jack, Pulling up a chair waaaay in the back against the wall. (better late than never). That is a cute boat you are building and I like how you are putting the railing together. Looking good. Marcus
- 250 replies
-
- 4
-
-
- willie l bennett
- model shipways
- (and 1 more)
-
Very Nice. Your wood combination is very pleasing to the eye. I am going to copy your color for my mast, boom and gaff. I like what you did with your blocks. Now that I see the bright white color of the rigging, I am going to change that. I am going to see what my sister has on her real boat and then check my stash and see what I can come up with. I will add the sails. For the Catboat I will have my neighbor do all the stitching on the sails. She did them for the HMS Bounty, & Yacht Mary as well. I have been looking a lot at your built and have learned some things. THANKS. Marcus
-
Did the primer only once and sanded it somewhat. Should have done what you suggested. More layers of primer and sanding. So I did the painting already and I did notice the dips are disappearing. I don't want to paint to thick either. Many edges of the boat will be covered with 1x1mm dowels. Thanks for the tip which I will use in my next boat (I have a pond Yacht - Solingen 1 waiting). Marcus
- 165 replies
-
- 5
-
-
- cape cod catboat
- Finished
- (and 1 more)