flying_dutchman2
-
Posts
1,735 -
Joined
-
Last visited
Content Type
Profiles
Forums
Gallery
Events
Everything posted by flying_dutchman2
-
 I do this as well but use the foam that is used to protect computers. It is thicker and there are less air bubbles. At work there is always someone getting a new computer and last year some got new laptops. Marc
 -
Golden Hind as Kalmar Nyckel? (Kitbashing)
flying_dutchman2 replied to Brenticus's topic in Plastic model kits
Brenticus; If you need help with the translation of Dutch to English, let me know, I can help with that. I am a Dutchman living in the US. Marc -
Golden Hind as Kalmar Nyckel? (Kitbashing)
flying_dutchman2 replied to Brenticus's topic in Plastic model kits
Take a look at this thread http://modelshipworld.com/index.php/topic/9996-ships-of-the-late-16th-century/ I have many similar plans of that era. Abel Tasman's ships. Dutch 17th century merchant ships. Marc -
Hartstikke mooi. The weathering is absolutely gorgeous. It looks so real and the details are just amazing. The boat itself looks weird. It is all bow and stern and the mid section and what Jan B. wrote makes a lot of sense. On that same note is the way a Dutch Fluit looks, Skinny top and fat bottom. Small narrow deck because this was how the load was taxed. Marc
-
Some general interesting books on privateering. History of the American Privateers Coggeshall 1812 http://books.google.com/books/about/History_of_the_American_privateers.html?id=x6wAAAAAYAAJ Before you buy you can look here http://www.historicships.com/TALLSHIPS/Model%20Shipways/Rattlesnake/Rattlesnake%20Manual.pdf
-
Someone bought it for $46.00 Amazon has it for $80.00 Dutch website has it for $150.00 and the Dutch version is cheaper.
-
Ships of the late 16th century?
flying_dutchman2 replied to NAZGÛL's topic in Nautical/Naval History
Thanks for adding descriptions to the pictures. I should have done that. Lots of replica's being built. Seems the interest is on the increase. Marc -
Ships of the late 16th century?
flying_dutchman2 replied to NAZGÛL's topic in Nautical/Naval History
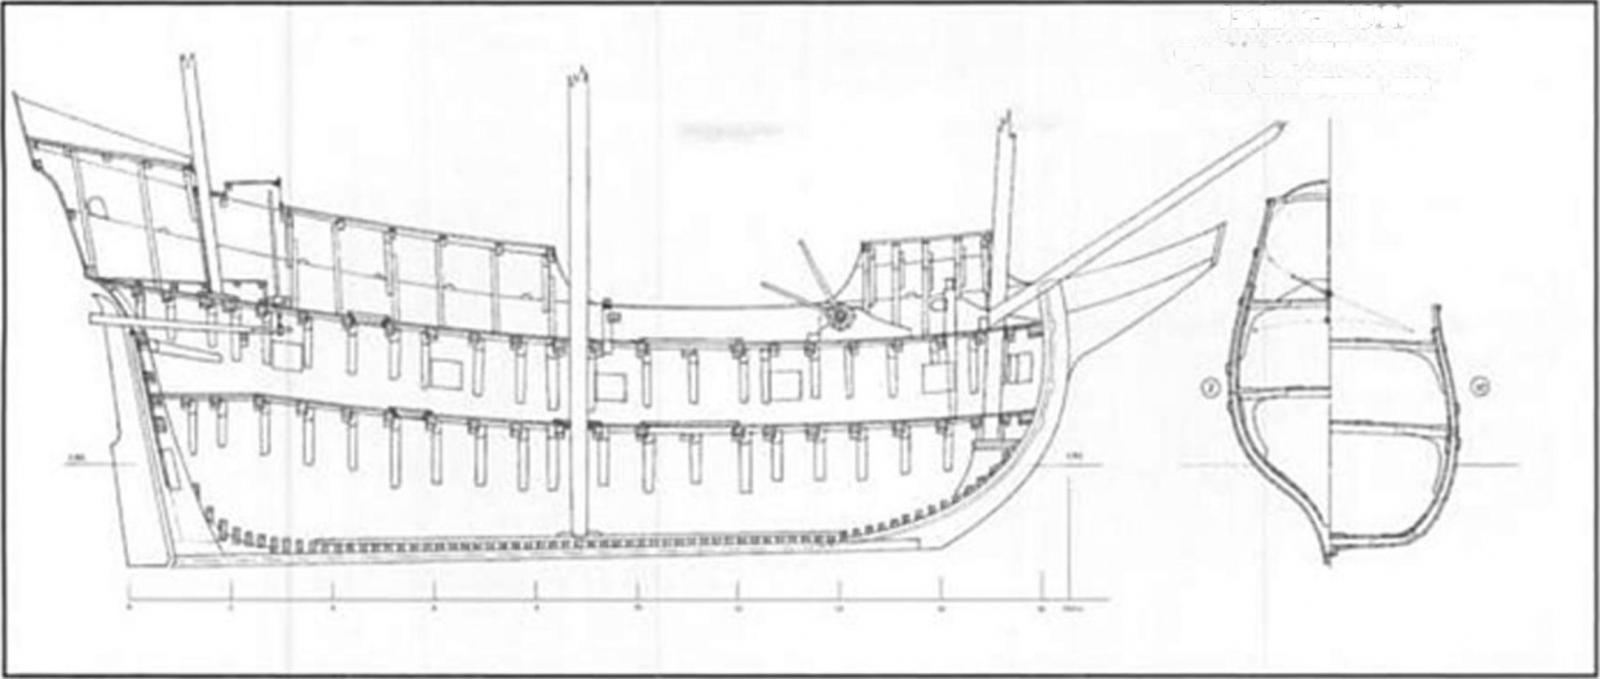
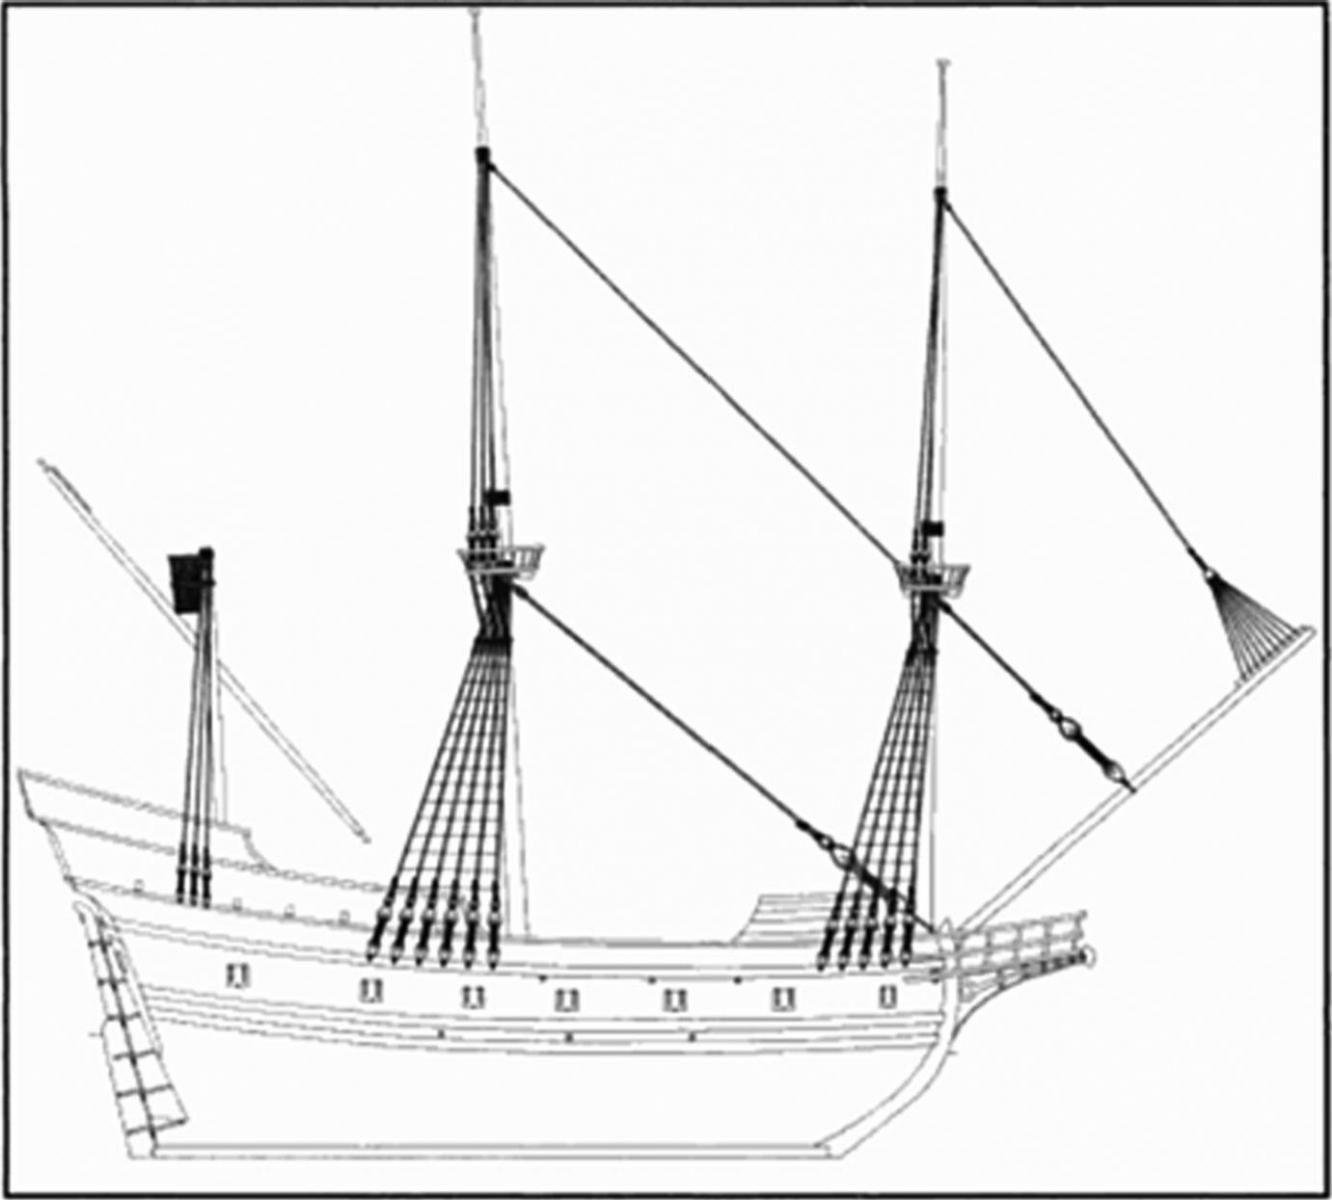
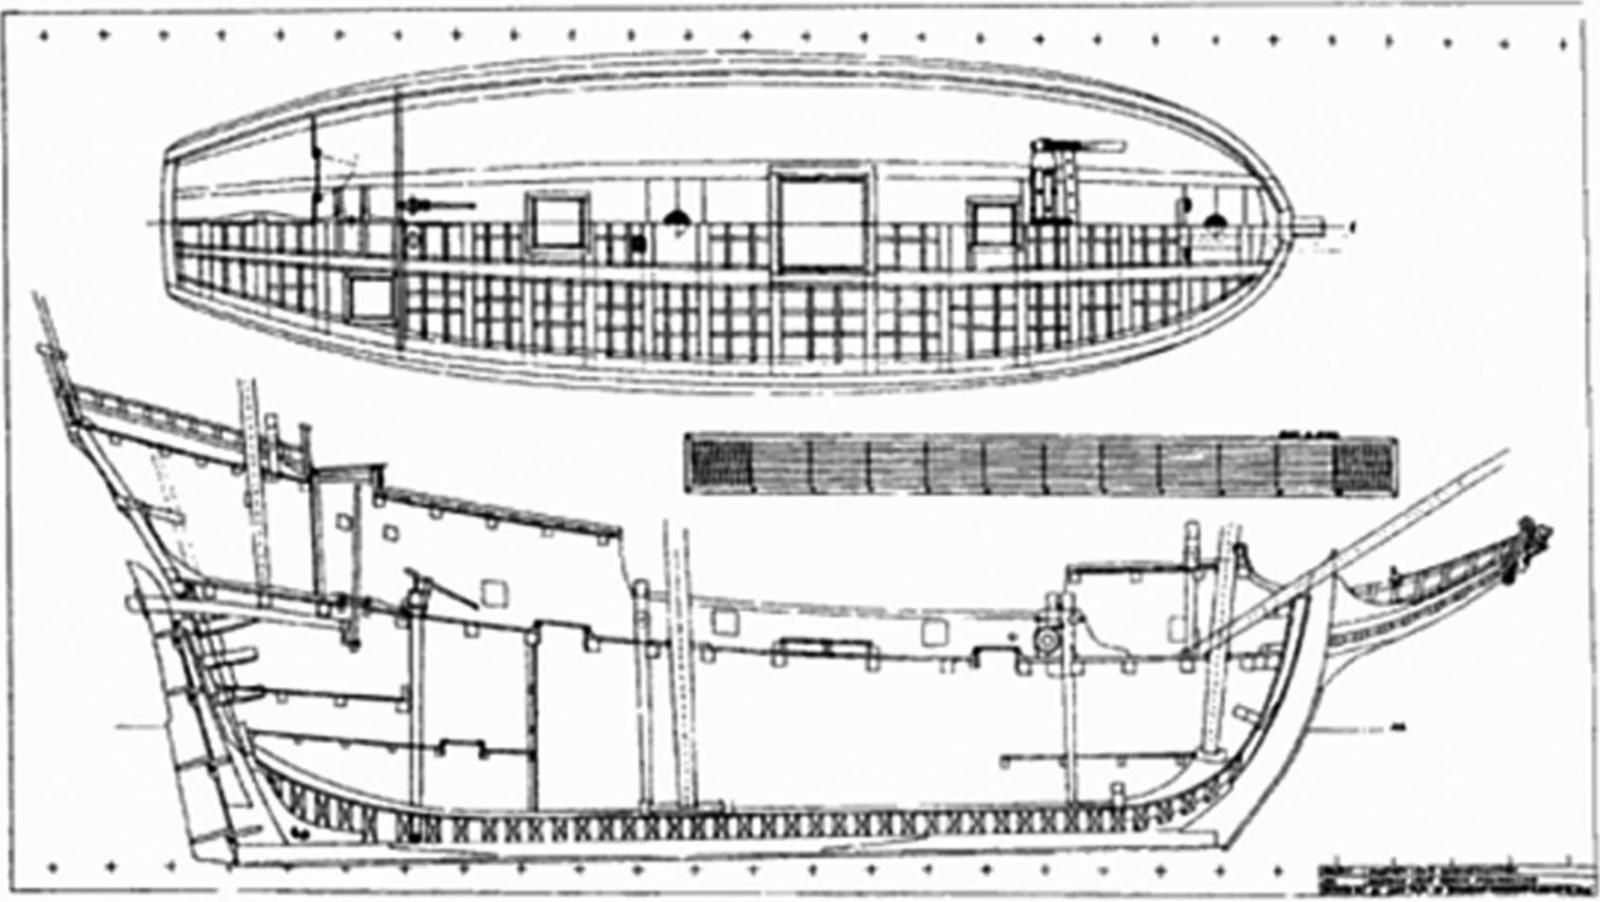
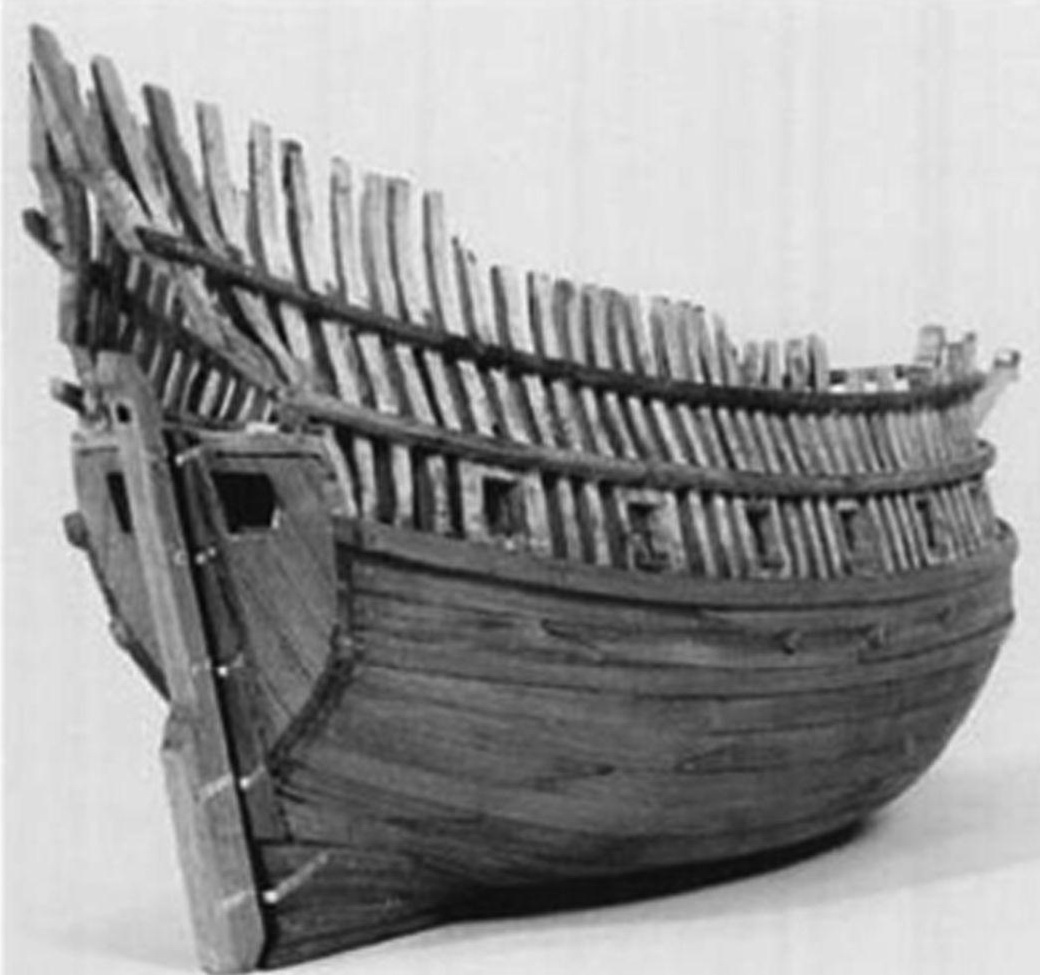
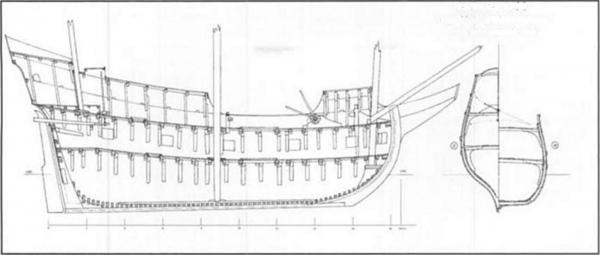
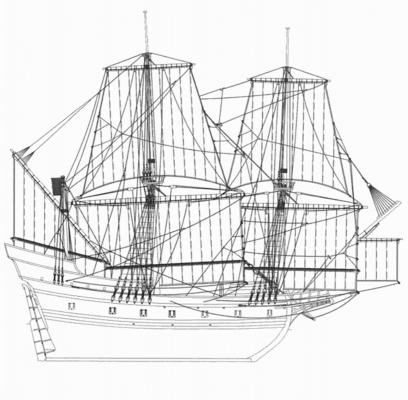
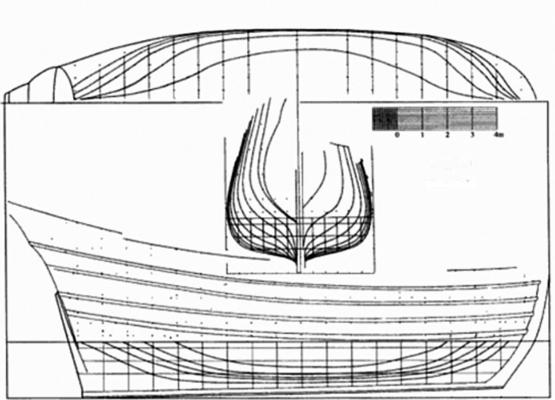
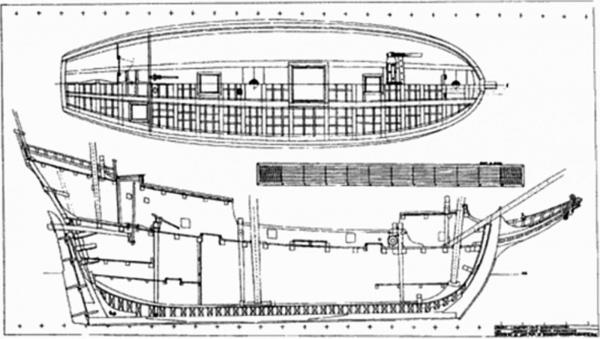
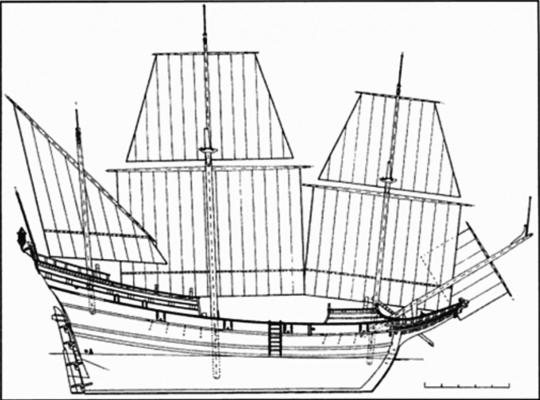
The last of the lines plans from this book.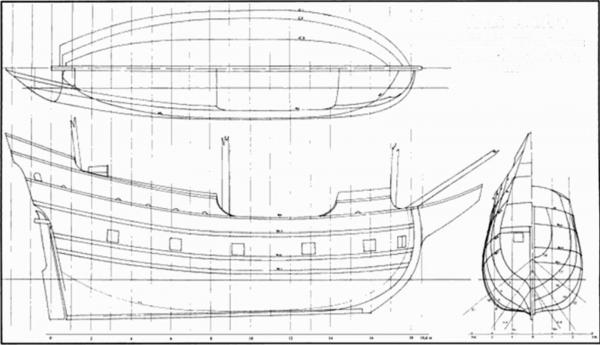
-
Ships of the late 16th century?
flying_dutchman2 replied to NAZGÛL's topic in Nautical/Naval History
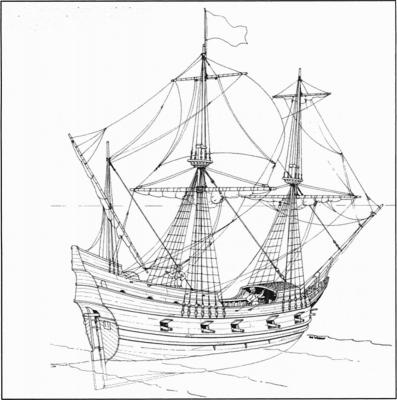
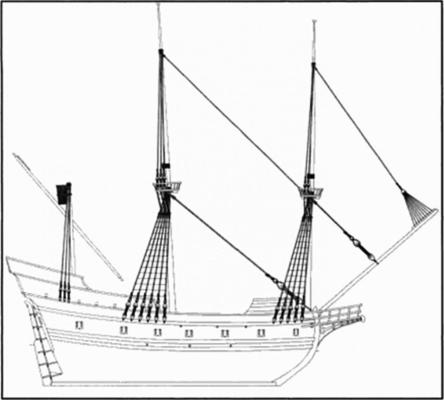
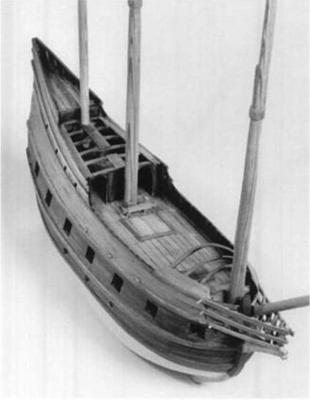
Some more Marc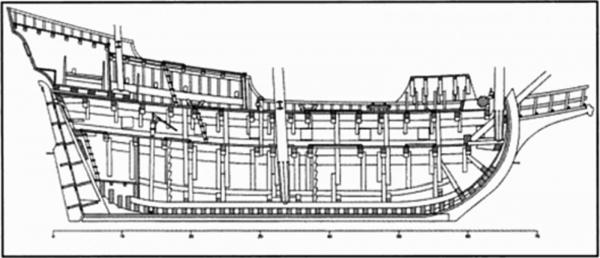
-
Ships of the late 16th century?
flying_dutchman2 replied to NAZGÛL's topic in Nautical/Naval History
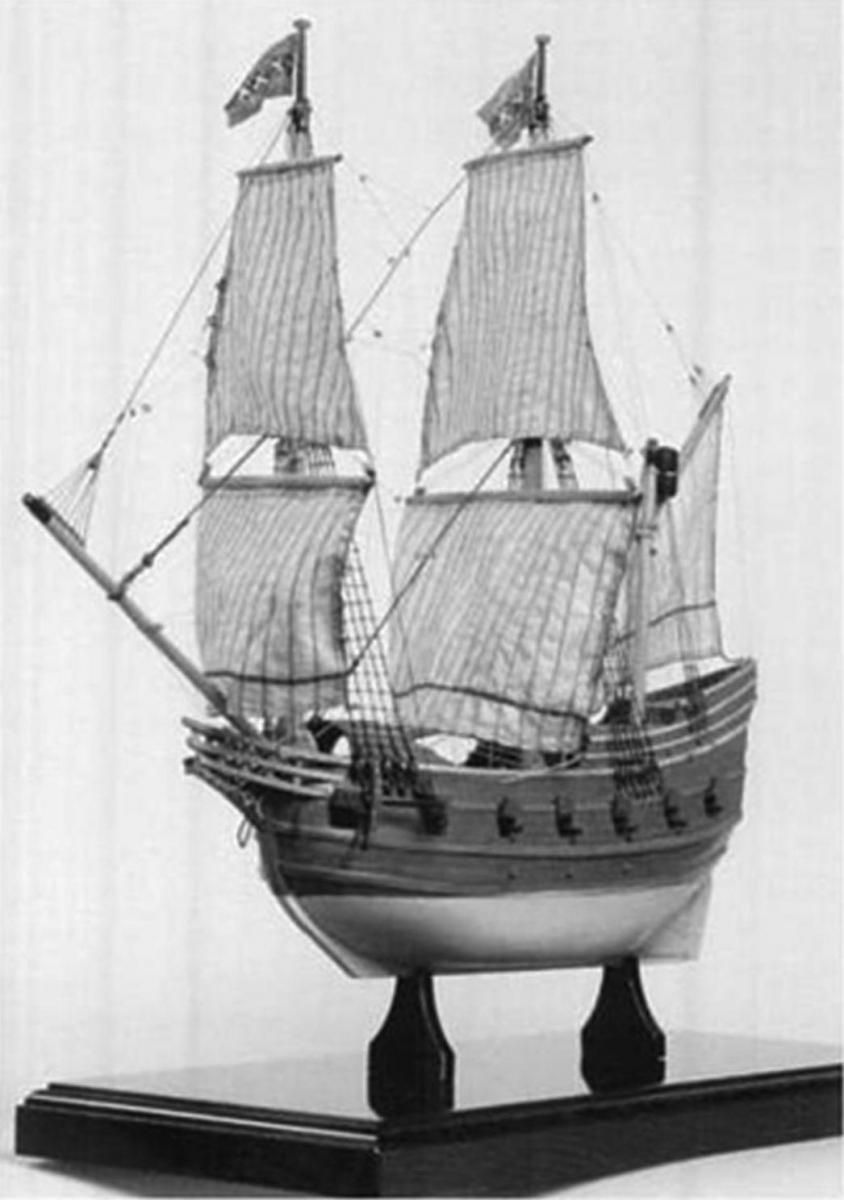
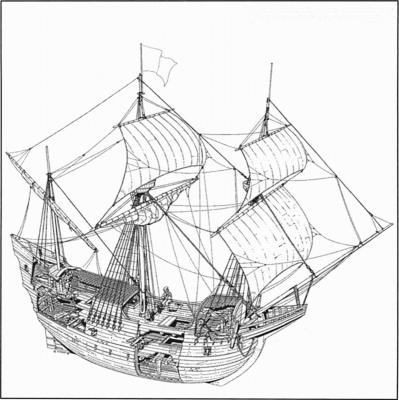
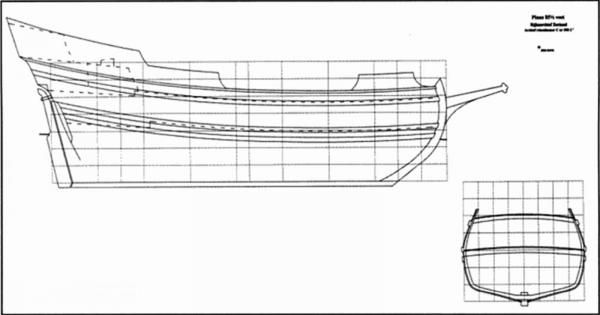
The following are some pictures from my book of W. Barents There are more line plans which will be next. Marc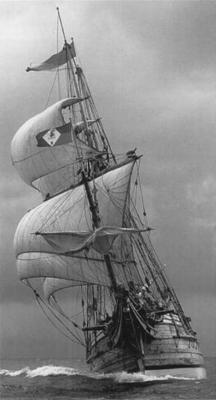


-
Ships of the late 16th century?
flying_dutchman2 replied to NAZGÛL's topic in Nautical/Naval History
Jan, Thanks for those links. Matti, Nice drawing which details what you are looking for. Marc -
Ships of the late 16th century?
flying_dutchman2 replied to NAZGÛL's topic in Nautical/Naval History
Jan, All those books of "Scheepshistorie" are great, and there are so many of them. Matti, I'll check through my library if I have any pictures of 1600 Dutch ships. Marc -
This should be a nice East Indies ship. I read somewhere that there were several ships by that name or was it all the same ship but different years. What kit manufacturer is this? Are you making your own kit? I am curious. Marc
-
Ships of the late 16th century?
flying_dutchman2 replied to NAZGÛL's topic in Nautical/Naval History
I was reading this post and it peeked my interest. Anything in Dutch ship building is always good. I then Googled this and came upon http://warshipvasa.freeforums.net/thread/78?page=1this page and what I was going to mention on here has already been answered on that page. Lots of stuff I did not know as well. Bookmarked the page and will be reading more. Also, Fredhocker decribed this subject very thorough. Most of the thesis and dissertations on the Texas AMU site are free for the taking. Lots of interesting material on ship building. Both books from Witsen and van Yk have good descriptions about Dutch ship building. The Nautical Research Guild had a 4 part article about Dutch ship building and it was by Hoving. He mentions all the important Shipbuilding literature in the Netherlands (1671-1838). Part 1 is in Volume 58 No.3 Part 2 is in Volume 58 No.4 Part 3 is in Volume 59 No.1 Part 4 is in Volume 59 No.2 If you want this article, I can probably get it for you. You probably know this already, the Kalmare Nyckel has a very interesting website. Forgot to mention the Book by the name of Ships of Abel Tasman by Hoving and Emke is also on this subject. Lots of pictures, plans and the CD-Rom with more plans. I have several books from Hoving and this are is what he knows best. I noticed that many chapters overlap each other in all of his books. Marc -
Interesting article. Lots of Dutch ship building involved in Denmark in those days. If you search the rest of that site one comes across all kinds of naval articles. I looked at the links on image processing/CAD software he uses and 'Photosynth is a very advanced app. that I can use in my landscape design. I presently have an app on an old Mac from the late 80's that does the trick as well but it is a wire frame. Marc
-
I use something called ReadCube. Great for research on any topic. Use it for work when I have a difficult problem to solve and use it on naval history as well. Marc
- 1 reply
-
- 2
-

-
About 3 years ago I found the original from Witsen on Google books. Then a month or so later there was the complete re-write from Hoving as pdf and epub. Finally they added the translated version to English as well. About a year later it was still there but there was a cost involved and I started seeing it on other sites as well. Many old manuscripts on ship building are to be found on Google books and archive.org. It is just a matter on what type of search words you use. The Mariners Mirror (UK) has had many articles of Hoving as well and for a while they were freely available on the Wiley site. Wiley is a huge publishing company. If any of you are affiliated with a University, your Univ. library probably has a subscription with these publishers as they do more than publish ship books. The "Pinas" has been extensively researched by Hoving. In Hoving's latest book "17th Century Dutch Merchant Ships by Seawatchbooks there are some nice plans available on this ship. That leads me to mention that this book and the included plans are only available in English. Hoving wrote this for the US market. But there are so many good Dutch ship books that have this particular book in many parts available. I think someone wrote about that as well on this site. On a different note, there was a famous Engineer (Emile van Konijnenburg, C.E.) of the Rijkswaterstaat of the Netherlands in the 1800's. He published 3 volumes on shipbuilding. He writes about the first ships ever built (Egypt), archeological digs, lots of pictures of paintings. Many pictures of models and plans. He mentions every type of ship/boat the Dutch have ever built and gives drawings as well. Best of all it is in English. (My main interest is in Dutch ships, mostly merchant ships/boats). Vol. 1 - Shipbuilding from its Beginnings - Types of Vessels Vol. 2 - Shipbuilding from its Beginnings - Plans of Vessels Vol. 3 - Shipbuilding from its Beginnings - Drawings of Vessels For those interested, go to archive.org and search "Konijnenburg". Last but not least there are several books in German describing in detail the Dutch Yacht in the 17th century (Die Niederlandische Jacht im 17.Jahrhundert) and a very good book 3 types of Dutch ships (Smakken Kuffen Galioten-1897). Both books have many pictures and great looking plans. Again, these books were free for the taking around the time when I got Witsen's book. ------------------- Wayne, That is an incredible write up and have not seen this one. Thanks. Houtenschepen. I tried to read the original manuscript and I agree, it is very difficult to understand. I like to read the old 'Dutch' language and when you compare it to present day Dutch, one notices that many words have less letters. Marc
-
I saw the proof as well and I am impressed with this issue. The front cover is awesome. Marc
-
I like the side view of the Stern and just gave me good idea how to develop/create and put together my stern on De Statenjacht Utrecht (first scratch). Thank you. Marc
-
Blockade Runner Ship, Available??
flying_dutchman2 replied to flying_dutchman2's topic in Wood ship model kits
Kurt v. D. Emailed me the following information. The only kit I found listed as a blockade runner is the USS Harriet Lane made by Model Shipways and sold by Model Expo - www.modelexpo-online.com - the kit is #MS2010 and sells for $129.99. There might be other Model Shipways kits that were used as blockade runners but my knowledge of this is subject very limited but you can check the kits against your list of blockade runners or search the history of the various ships. I would not recommend any of the foreign manufactured kits sold by Model Expo unless you are an expert builder who can correct the many errors found in these foreign origin kits. Bluejacket Shipcrafters - http://www.bluejacketinc.com/- sells quality kits (US made) that might include a blockade runner or two. Check their kits against your list or research the ships their kits are based on. There is a plastic kit by Revell and another by Lindburg that depict blockade runners. These might be basis for a model but again I would hesitate to recommend this path unless your skills and knowledge will allow you to correct the models to an accurate representation of the blockade runner - both manufacturers are know for "adapting" various existing kits to another named ship. Blockade runners like pirate ships as you have probably found in your research were not constructed to be blockade runners but were existing ships that fit the need. This might enable you to find a good, US made kit that can be adapted to accurately represent a specific blockade runner you might find that is very close. Marc -
Cool, thanks for the find. This is going to be interesting. Just dloaded it... 573 pgs? I am going to be busy. Marc
-
Blockade Runner Ship, Available??
flying_dutchman2 replied to flying_dutchman2's topic in Wood ship model kits
Ken, Thank you. Marc -
Ahoy, The following question email was sent to me from an NRG member and I don't know the answer to this. I am putting it up on MSW as we have such a large body of knowledge and figured I would get some type of answer. "I am interested in purchasing a kit to produce a Blockade Runner Ship that was commonly used to supply forces during the Civil War. Do you know where I might find one?" Kit, plans and/or references is good. For that matter anything will be helpful. Thank you in advance. Marc
-
Hans, Agreed with the rounding up and down of the money. In the US it cost more to produce a penny than what its worth. Like Europe, there is no need for pennies. Marc