flying_dutchman2
-
Posts
1,735 -
Joined
-
Last visited
Content Type
Profiles
Forums
Gallery
Events
Everything posted by flying_dutchman2
-
 I am a bit late, I just saw this thread and have a few comments. I built the Mary as well and working on the Utrecht (scratch). With flat bottom boats such as yachts and many other Dutch Ships planking the hull is a completely different ball game. It is not like the other models you see here on MSW. It is an exercise of extreme bending. I start with the wales first than a few planks below the lower wale. There isn't much of a garboard stake. I align the plank straight next to the keel and let it flow naturally, going straight up at the bow. You will install many steelers When you're facing the bow, your wales need to be straight. I know you cannot change that now. Your last picture shows that you are forced to start at the keel and work your way up. Just lay the planks and let them flow, don't force the curve. When you reach the completed planking there will be lots of measurements. Overall the planking that is completed is well done. With the Utrecht I used walnut as the second planking. I soak the planks for about 4 to 5 days and over bend them because walnut springs back a bit. When the are soaked I lay them down on the hull and use push puns, clamps and whatever I can find to hold it down. After they are formed I use Elmer's white glue to glue them in place. Wales are also walnut but I laminate them to get the thickness. This has worked well for me for several boats. Search for Utrecht and Mary under flying_dutchman2. The Utrecht built has many planking pictures. This would take a long written description. I built only Dutch Ships and have built several flat and round bottom boats. Similar ships of extreme plank bending would be the Endeavor. Marcus
 -
Patrick, Beautiful sleek boat. Excellent work. The details are amazing. I will say it again, you are the "king" of itty-bitty scale. Marcus
-
Beautiful model especially in scale you built it, well done. I especially like the figures you added on the deck, it makes the model come alive. The bigger the scale the more details and you did an excellent job at that. Marcus
-
Love the details, and as Nils said, beautiful self made blocks. The sails make the boat complete. Marcus
-
Roter Löwe 1597 by Ondras71
flying_dutchman2 replied to Ondras71's topic in - Build logs for subjects built 1501 - 1750
Beautiful work. Another bluff bow ship, just like my Utrecht yacht. I see that you did your planking the way I did it. Planking a bluff bow can be a challenge. Marcus -
I am pulling up a chair as well. This looks like a great kit to build. Dutch kit made by Dutch company. You know it will be accurate. Hans (one of the owners) has built a fantastic model the Batavia. Marcus
- 91 replies
-
- 3
-

-
- kolderstok
- duyfken
- (and 1 more)
-
Wow, looks really good and like the details as well Marcus
- 46 replies
-
- 6
-
-
- o16
- pacific crossroads
- (and 2 more)
-
Hi. I have been procrastinating about this but it is time that I start this. The yacht Utrecht has many carvings. I have practiced some simple items from wood but with the many mistakes I have made I am no longer using wood. Purchased 1 lbs. of Super Sculpey and I have the following questions. Is it possible that I make, say a rectangle piece of clay 1/4" by 2" by 1", bake that, and after it is cooled, carve it? As Chuck mentioned in an article in Ships and Scale is that you can bake a piece and keep adding to it. Does the new clay adhere to the baked clay just like that or how is it done? Thanks Marcus
-
Thank you very much for listening the colors. I will research them and will probably find them. What is your red, and a item number, if there is one. Marcus
-
Hartmut, I went through your complete built and she is beautiful. With the scale you are building her you can add lots of details. I will leave some of those details out with my scale. You mentioned the colors you used on her in the beginning of your built but later on you omitted that. I like the colors you used compared to what others builders have used on their jachts. Is it possible to list them here and what color you used for what part of the ship? I would like to use these colors on my jacht. Thanks in advance. Marcus
-
Hans, That is one awesome looking model. Excellent details as well. You are doing a great job putting in all the details. I have this book from Blom as well. It is a very detailed book with lots of diagrams. This is something I might build in about 10 years from now. Marcus
-
There are many Dutch books on VOC (Dutch East Indies Co.) history that have diaries of sailors and ship captains of day to day events such as explorations and shipwrecks. I know most of the members do not read Dutch. Some books have been translated in English and in German. Batavia by Peter Fitzsimons is a very thorough historical event of the shipwreck on the Australian Coast. There is a very good book about the events of the HMS Bounty by a female author. (best book I have read about the Bounty) Several Dutch and English books have been written about Abel Tasman and Willem Barentsz. Last but not least much has been written about the VOC in books, PhD thesis's and just general long detailed articles. Most of these reads are on various websites and free for downloading. I know that the above is specific towards Dutch history and not everyone is interested in that. Marcus
-
You did a great job on this ship with many details. I like the way you explain everything in the 'Show and Tell' session in our club meeting. Marcus
- 701 replies
-
- 6
-
-
- phantom
- model shipways
- (and 1 more)
-
Hi Chuck,
Do you scan every new journal once it is published and make it available as a PDF for purchase or do you wait until you have several years and create a CD?
I am interested in purchasing separate articles that are not on the CD's which are available on the NRG site.
I have gone completely digital when it comes to Journals. Das Logbuch (German) and a Dutch journal are available in both paper and digital format and I purchase from those sites , the articles I am interested in.
I am not interested in every article in every journal that I have subscriptions with.
Thank you in advance for answering.
Marcus
-
Here is part 2 of Carving from The German Nautical Journal, 'Das Logbuch'. The subject is a female and male figure. Again, worth a look. Be forewarned there are pictures of anatomically correct male and female drawings. (I hope no one will be offended). If you want the translation you can always use the translation add-on in Firefox and Chrome. http://www.arbeitskreis-historischer-schiffbau.de/mitglieder/themen/schnitzkurs-2/ Marc
-
Beautiful (Heel Mooi). I like how you did the little head carvings. Marcus
- 4 replies
-
- 2
-
-
- lantern
- ship lantern
- (and 1 more)
-
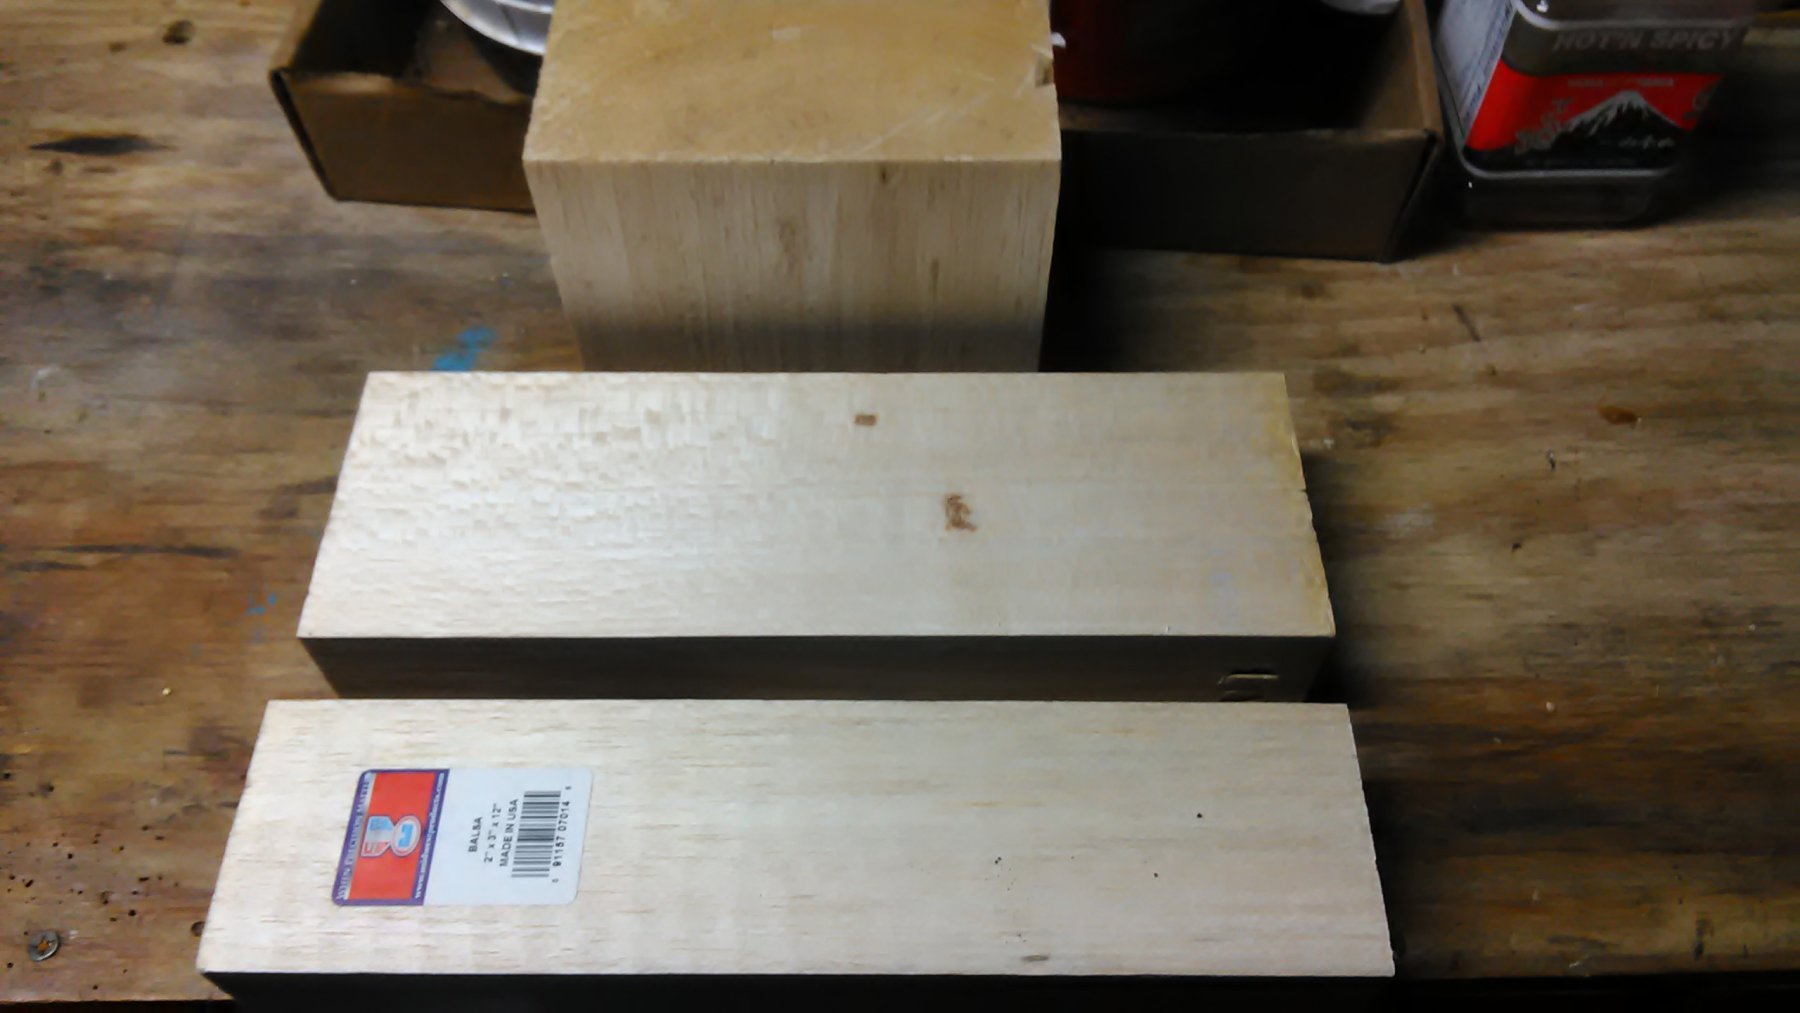
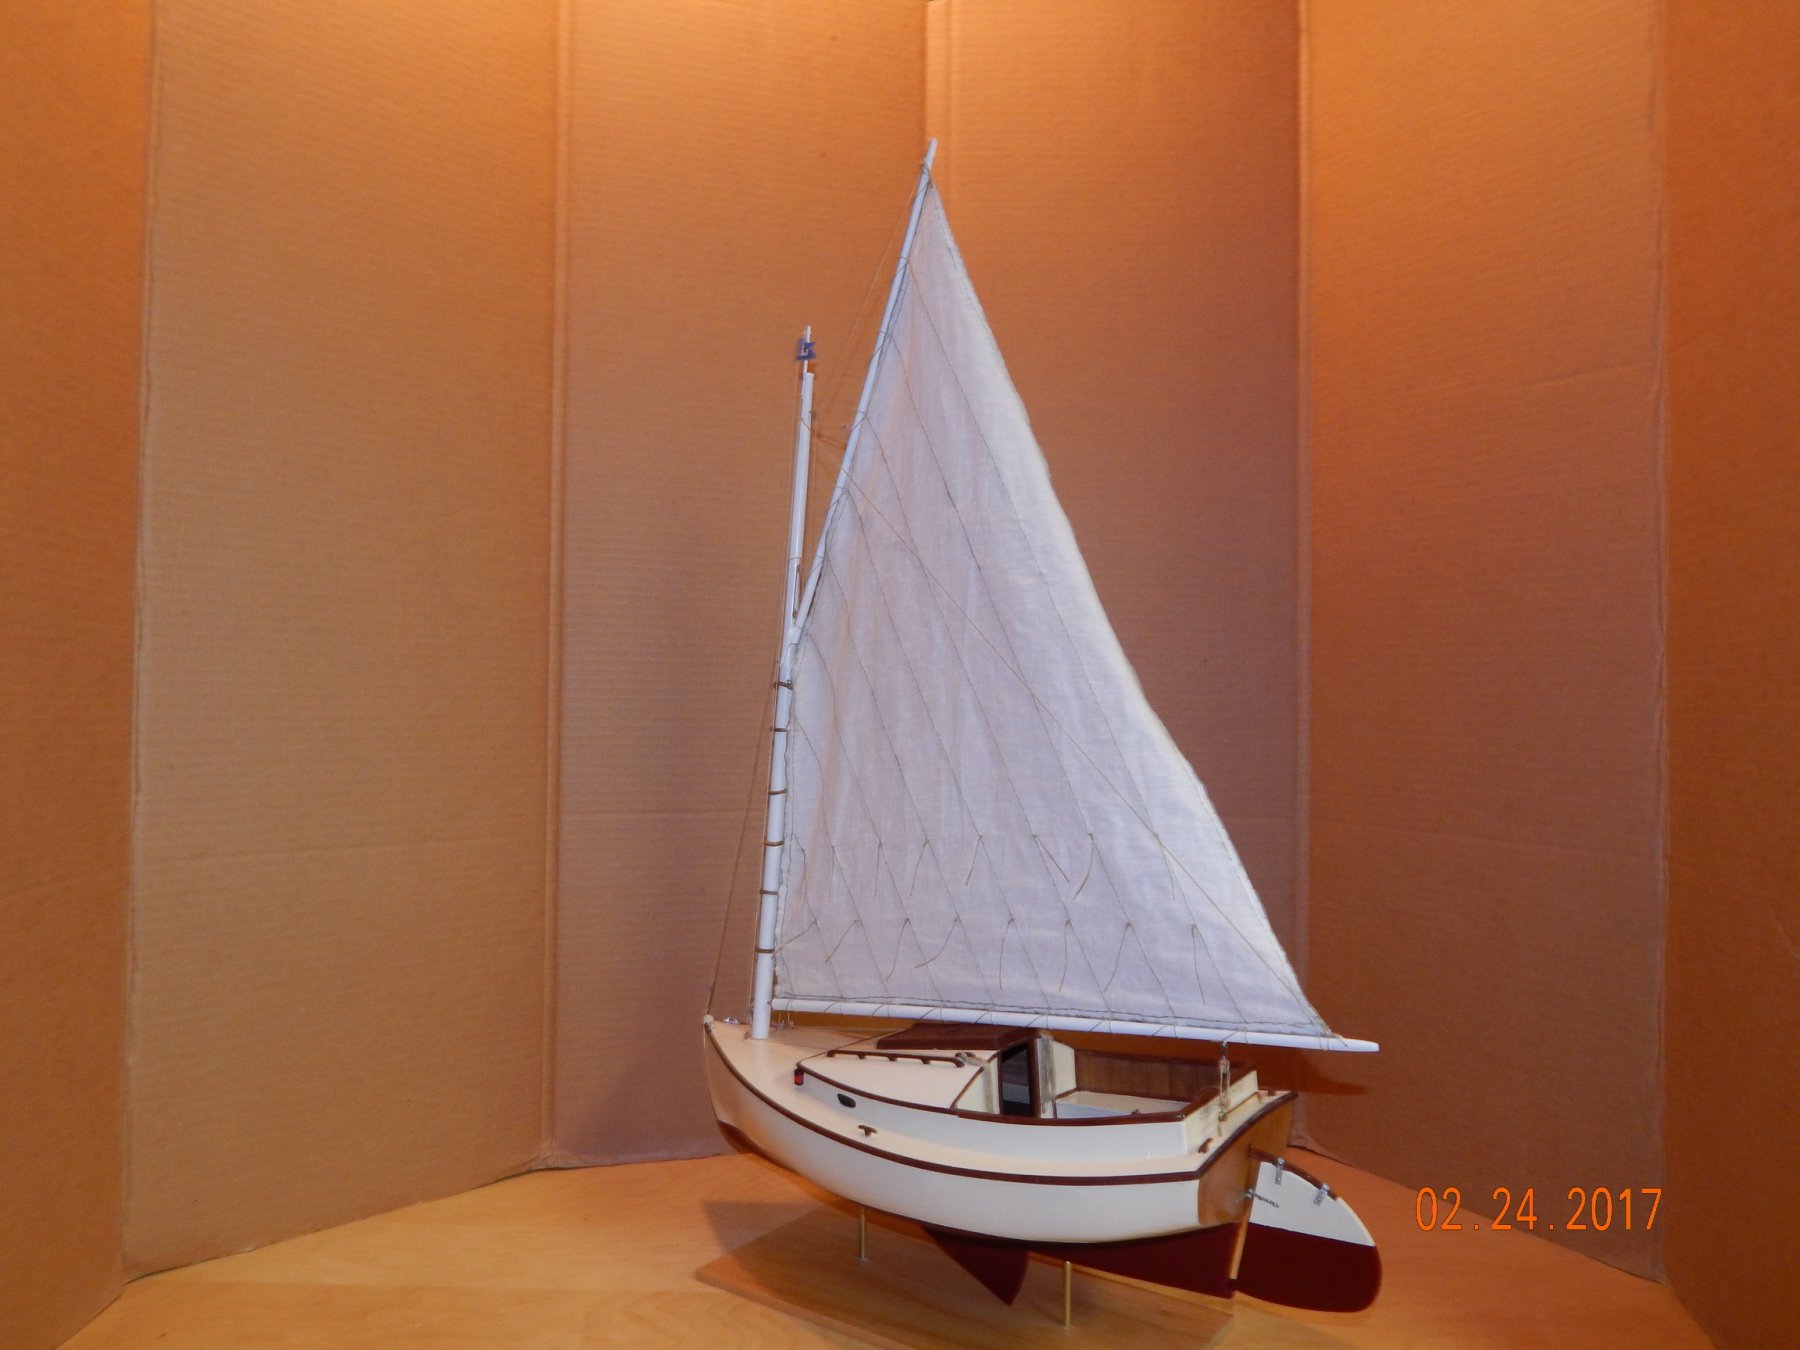
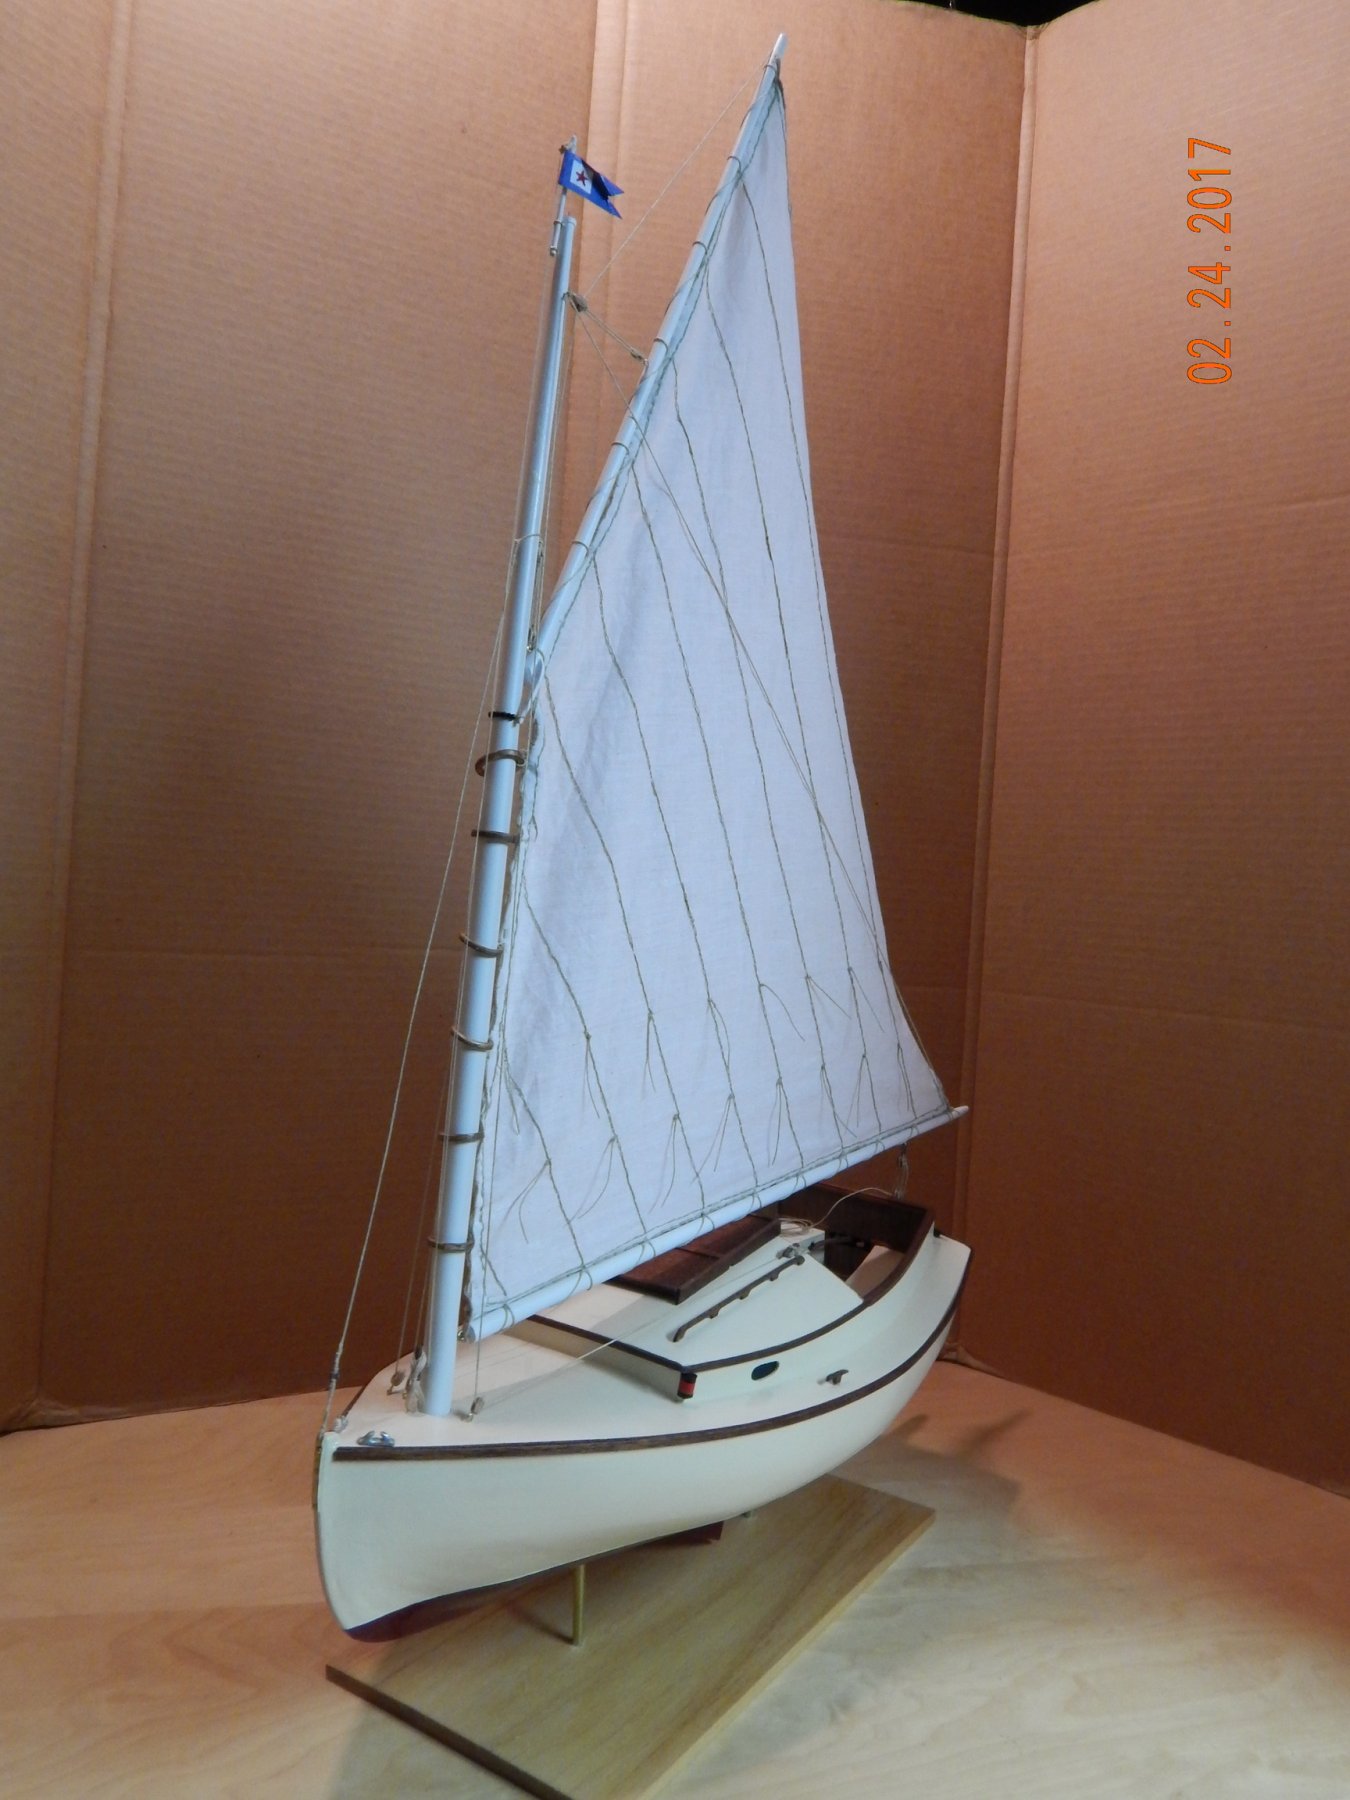
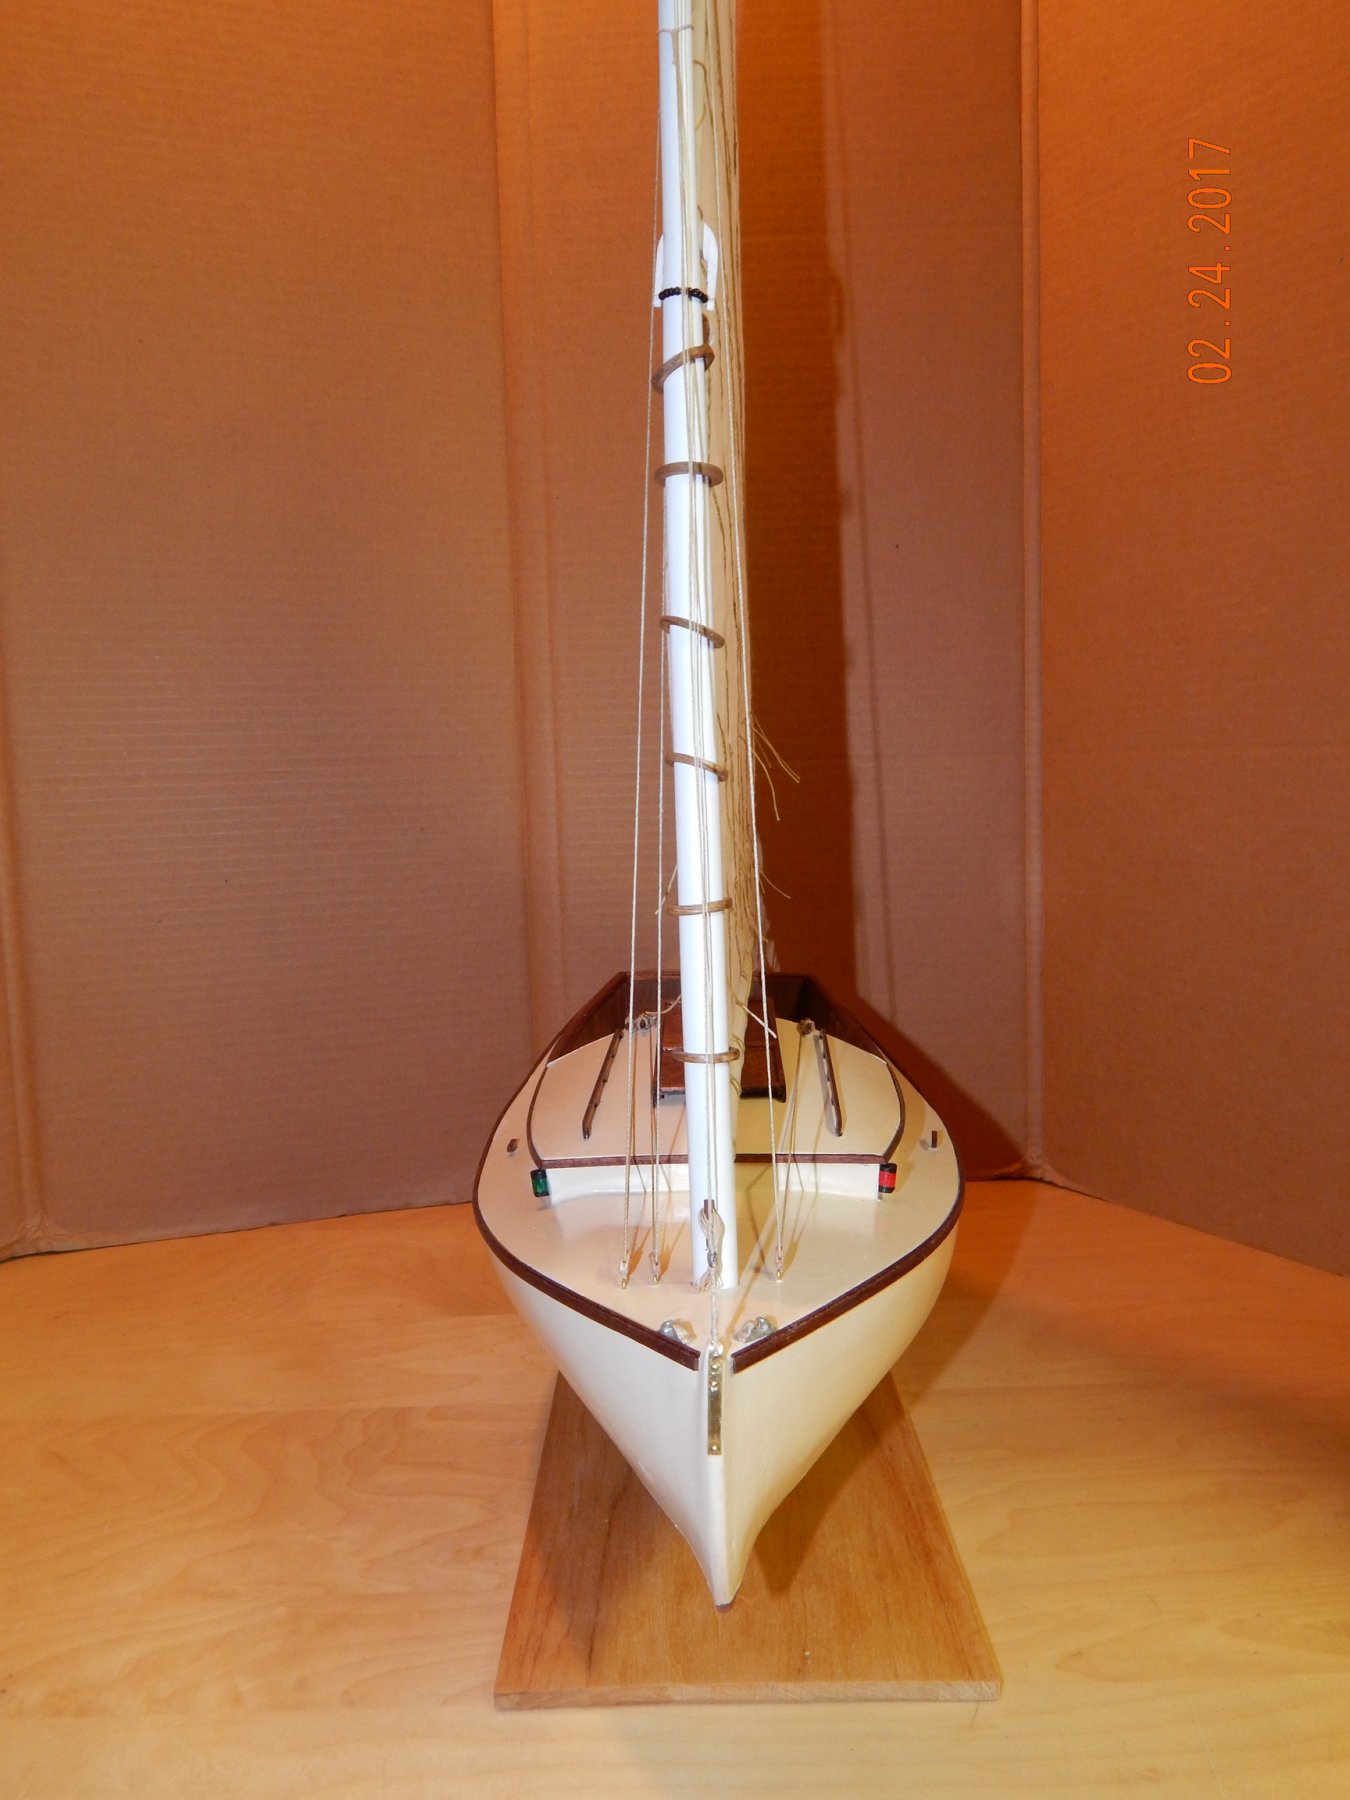
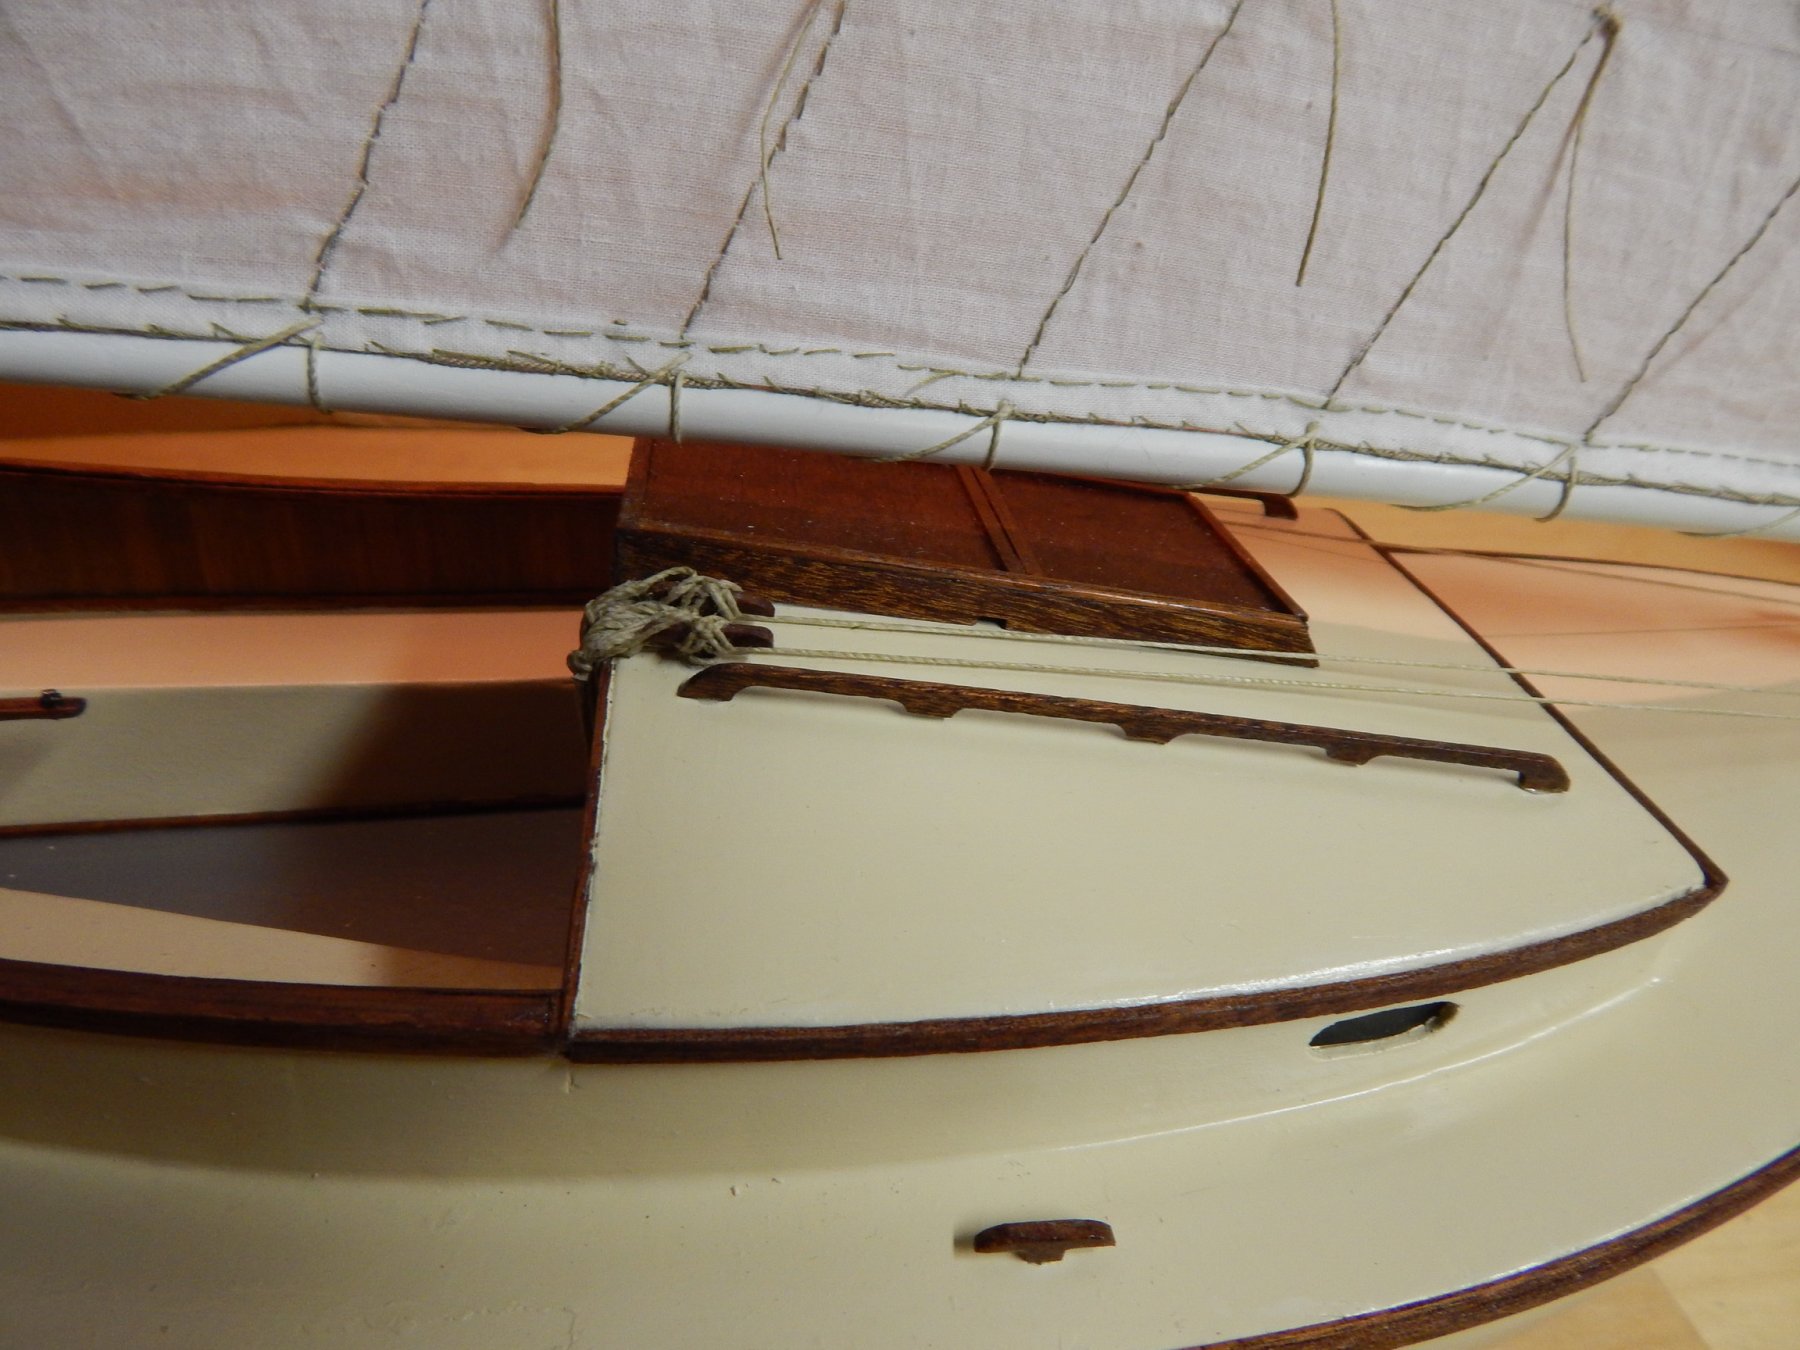
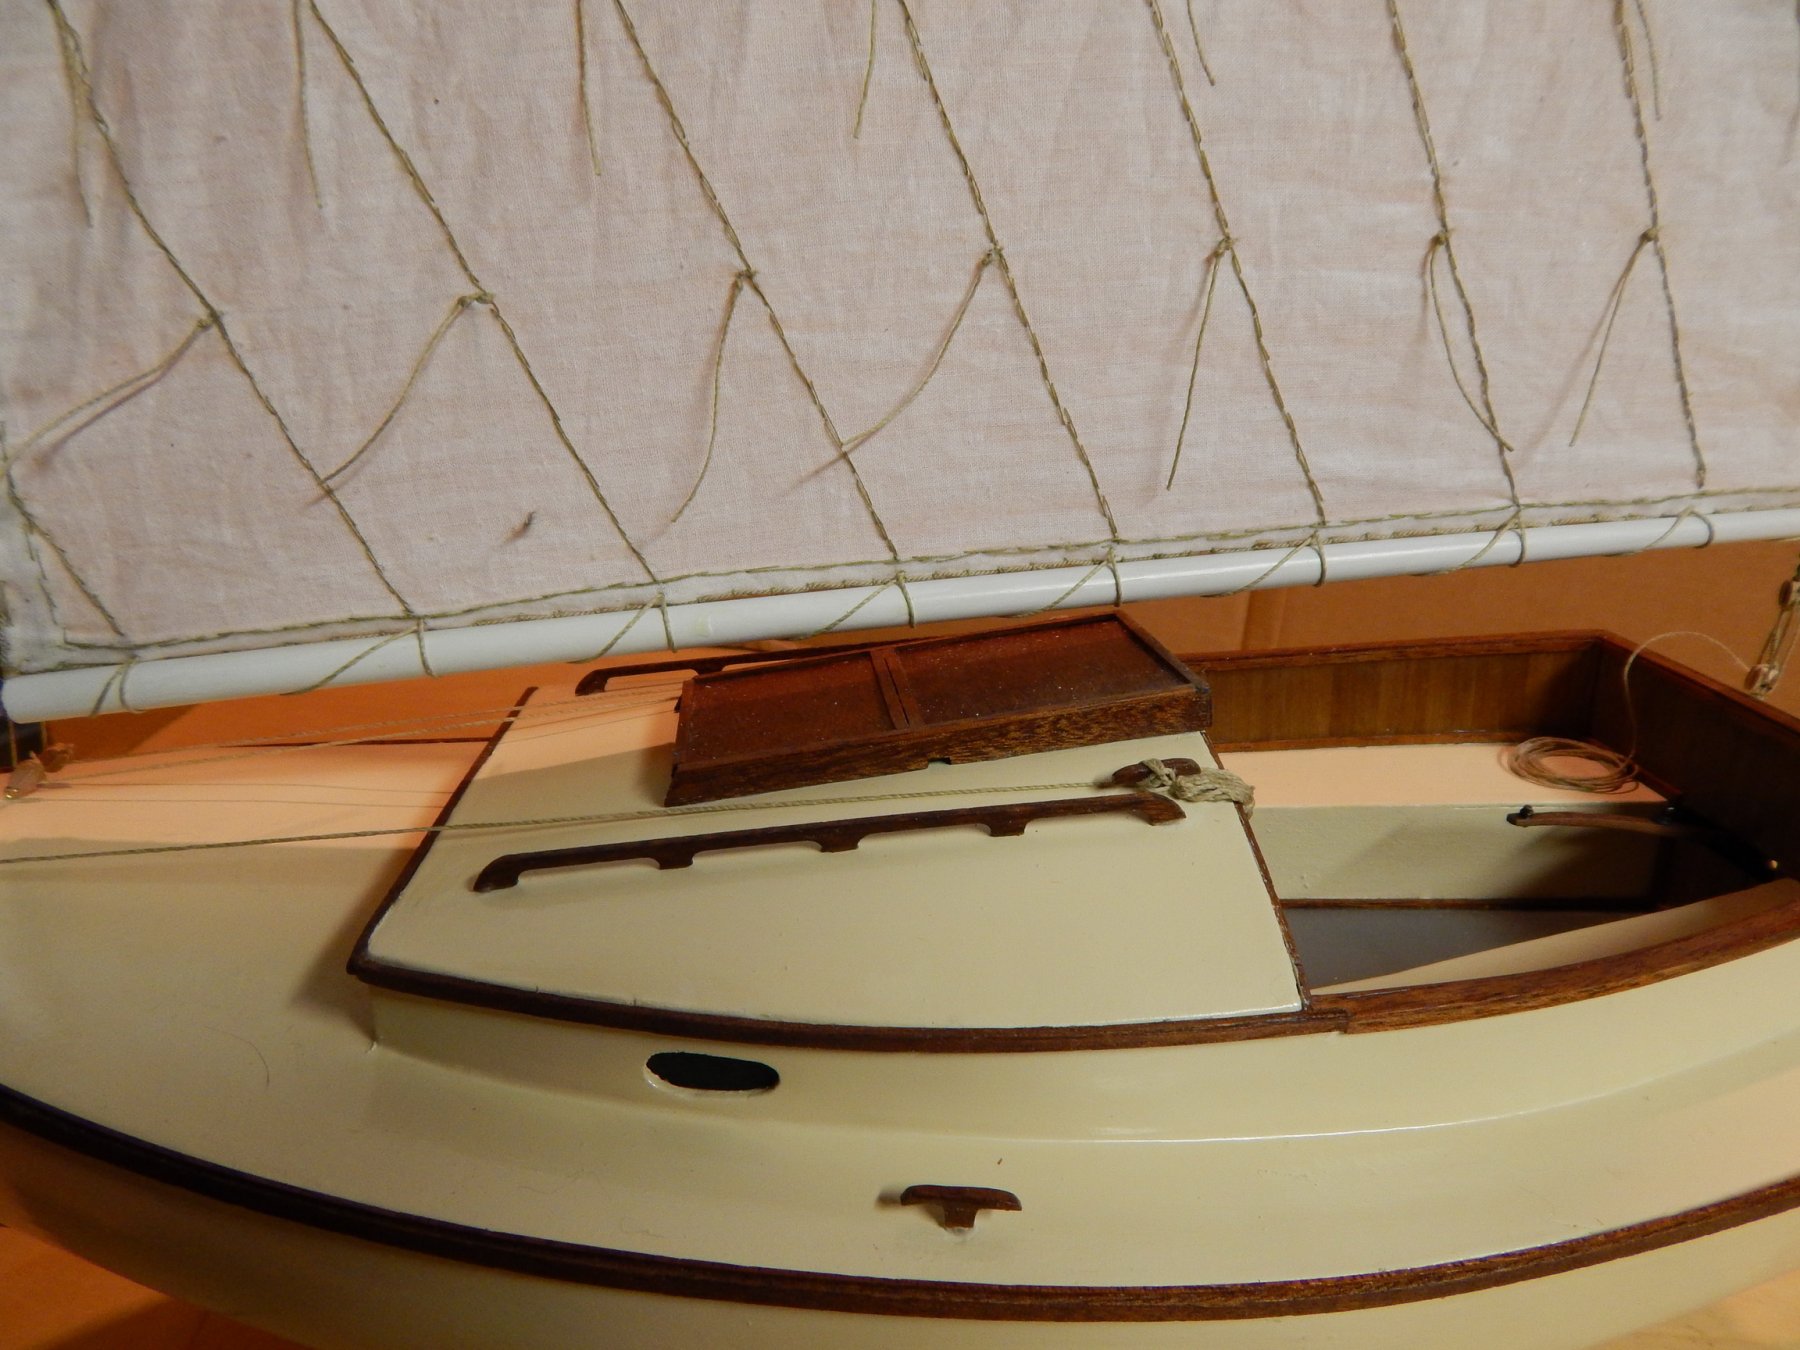
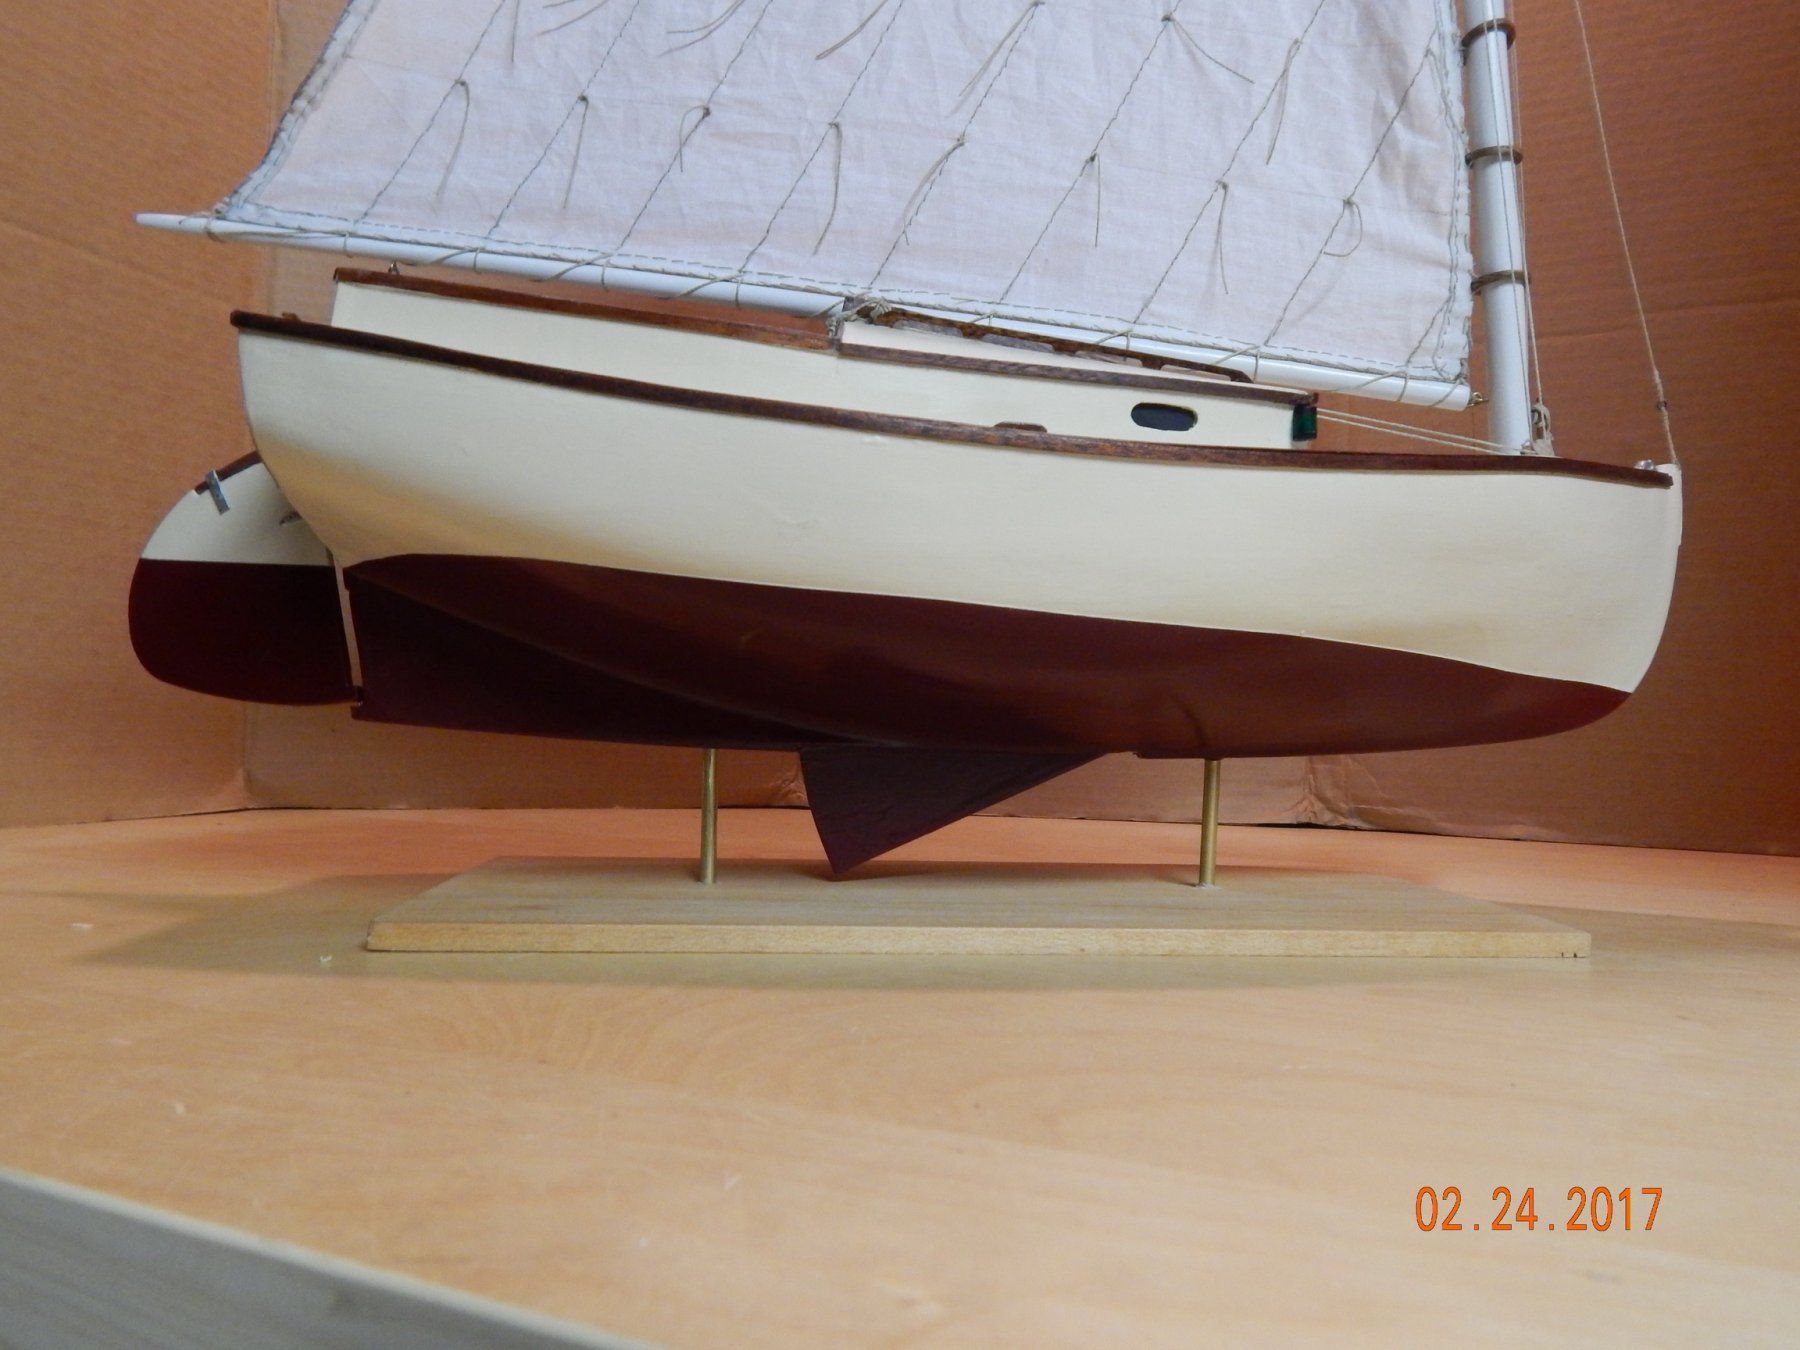
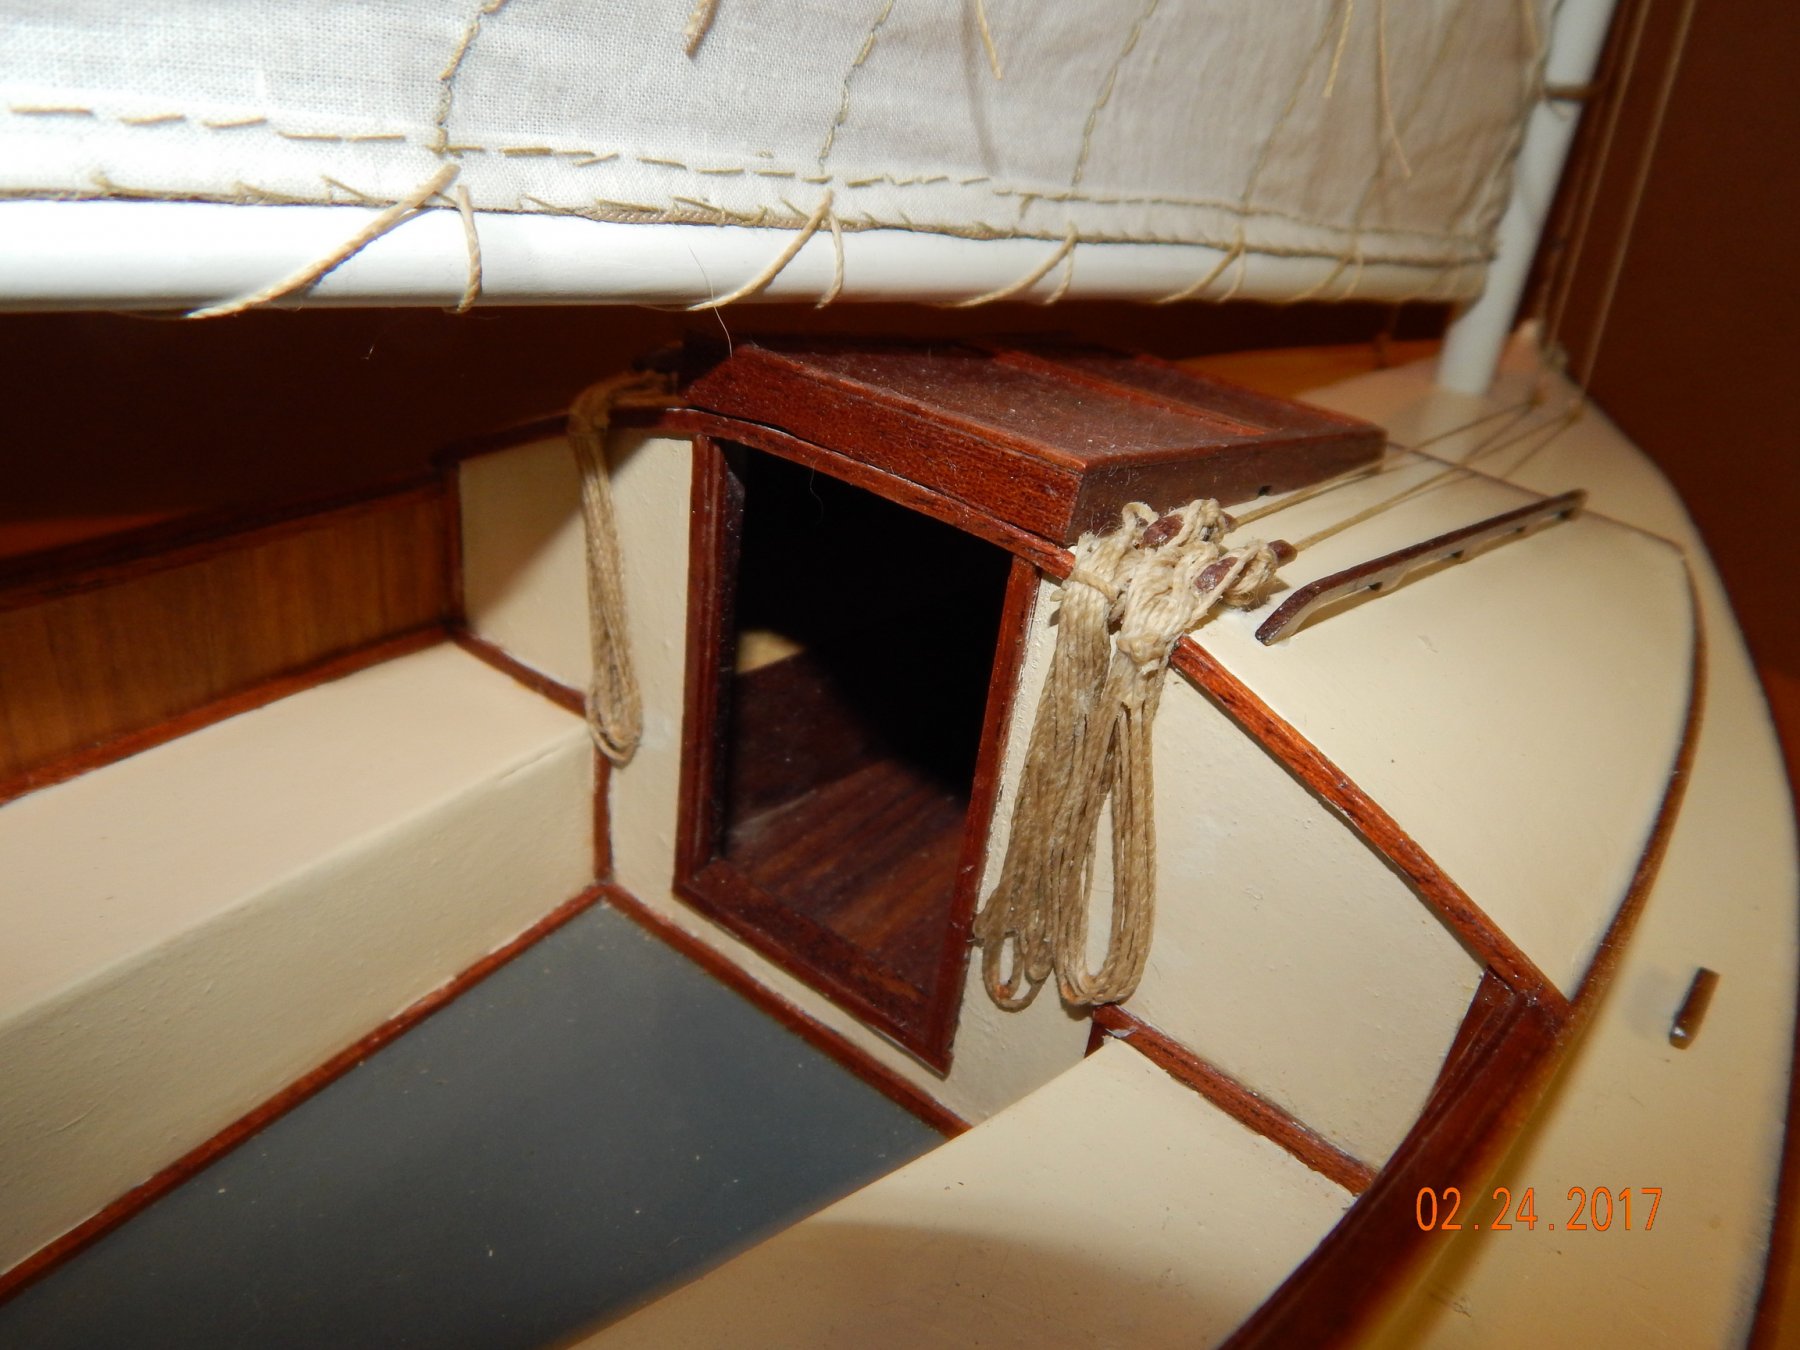
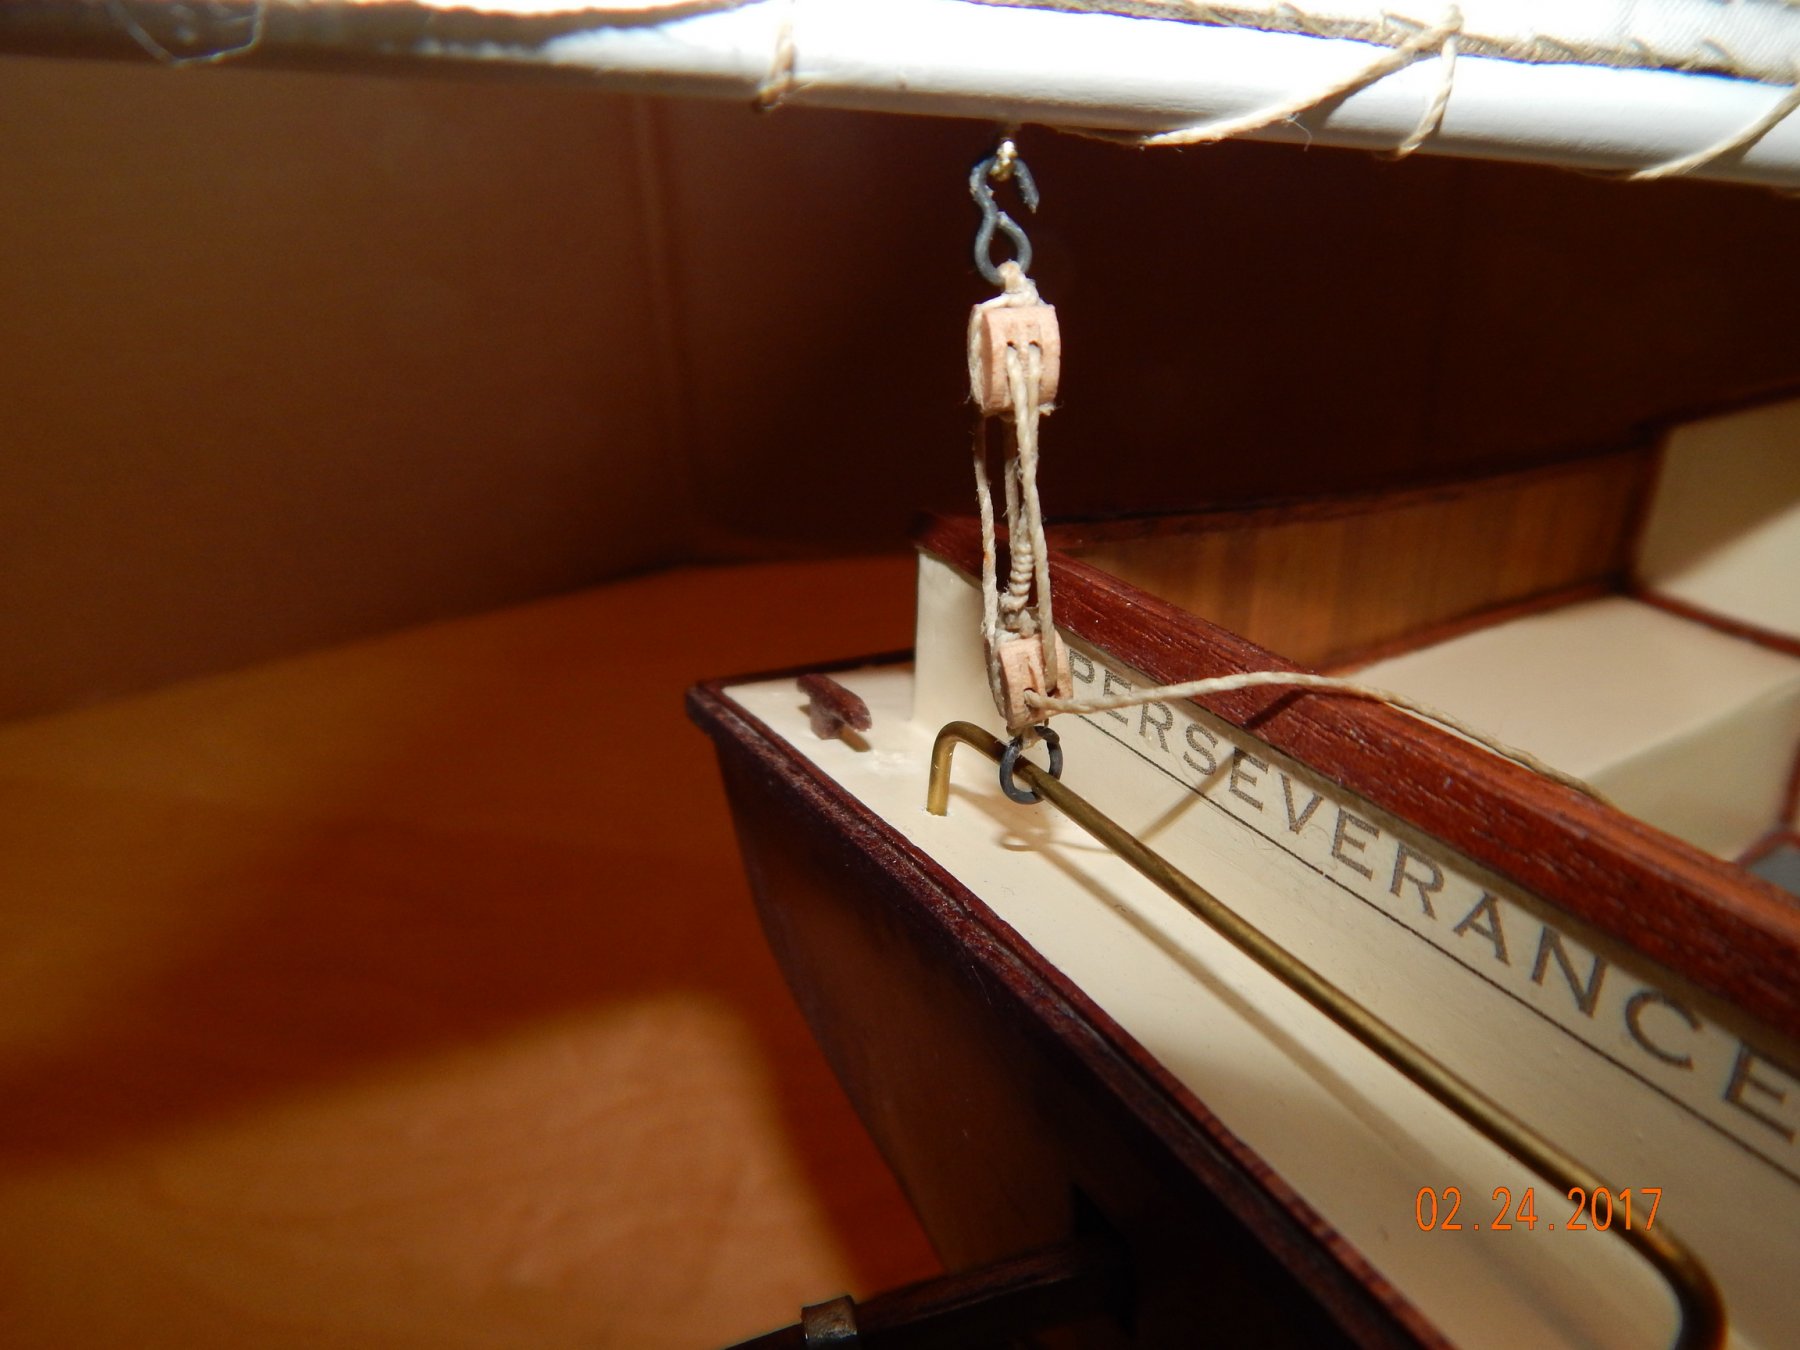
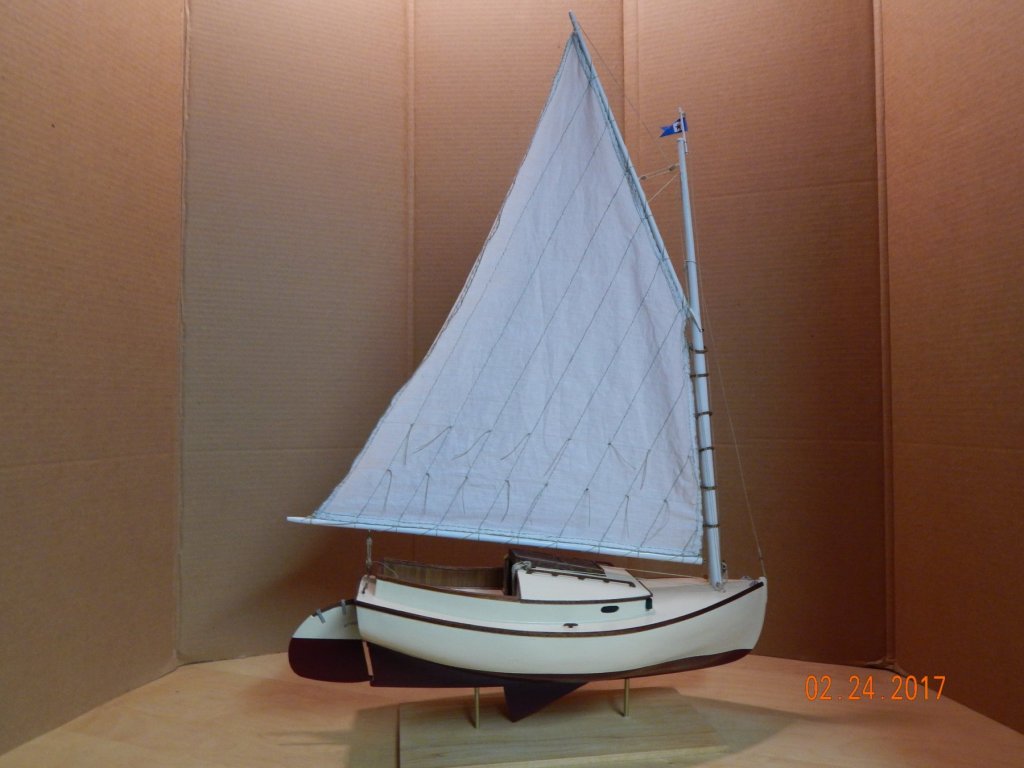
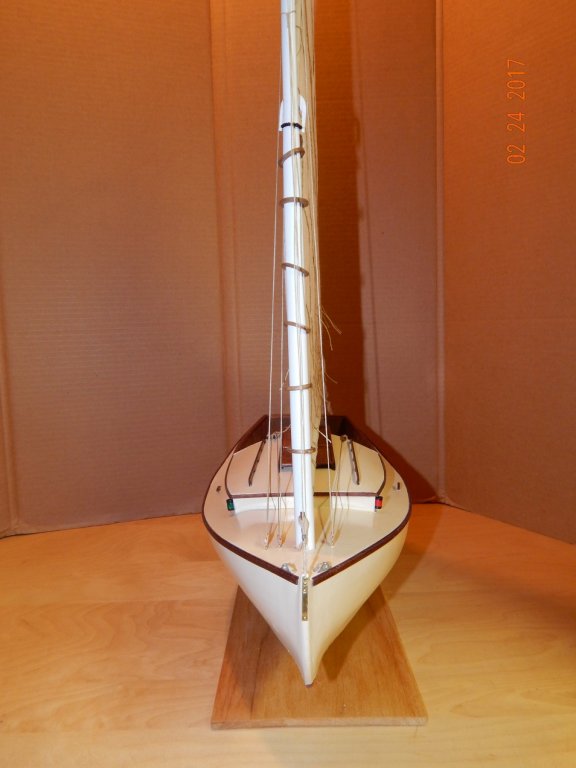
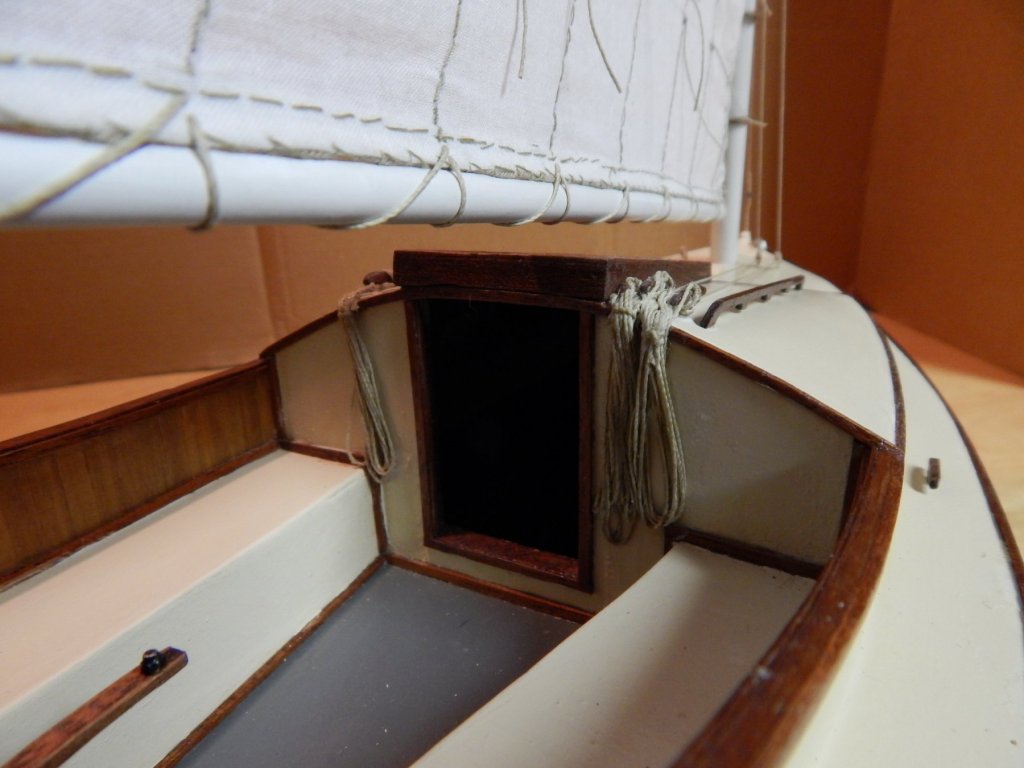
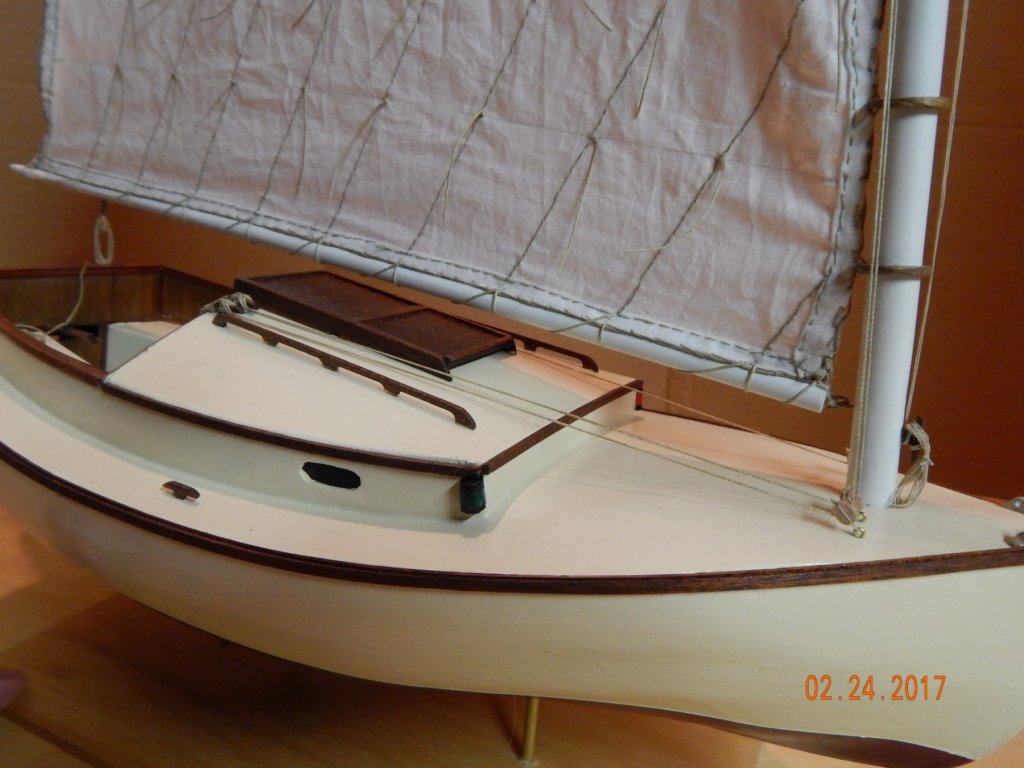
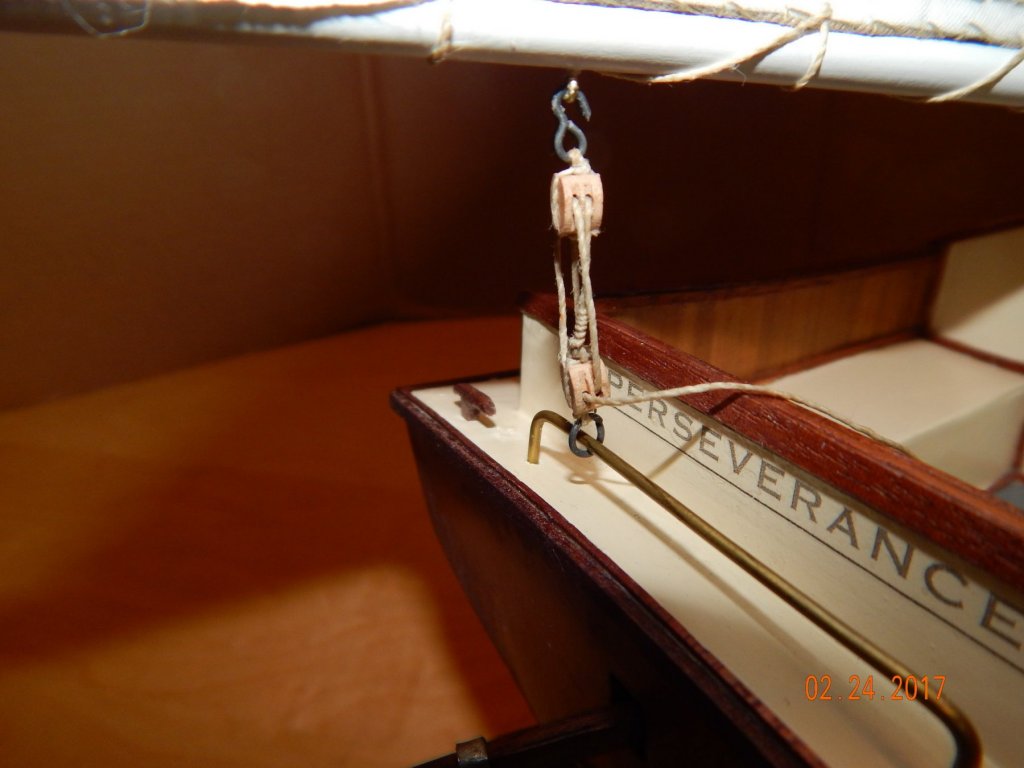
The Catboat is completed and waiting to be shipped to Prince Edward Island. Enjoyed building this kit. Next I will decide to either continue the Utrecht or build me a garden windmill. Thank for all the constructive suggestions everyone gave me in building this kit and thanks for watching. (Upon leaving the workshop, please put the chairs back and clean up after yourself) Marc


- 165 replies
-
- 19
-
-
- cape cod catboat
- Finished
- (and 1 more)
-
Michael and Carl, thank you for the suggestions. I need to hunt down the email I once got with the original font for the name and will compare it to the above. I haven't even finished the Catboat and I am already cutting out frames for the Utrecht and I did it outside. 60 degrees F????? on February 14th?????? What is going on????? Global warming????? I know the East coast is getting nuked but here it is nice and balmy. Marcus
- 165 replies
-
- 5
-
-
- cape cod catboat
- Finished
- (and 1 more)
-
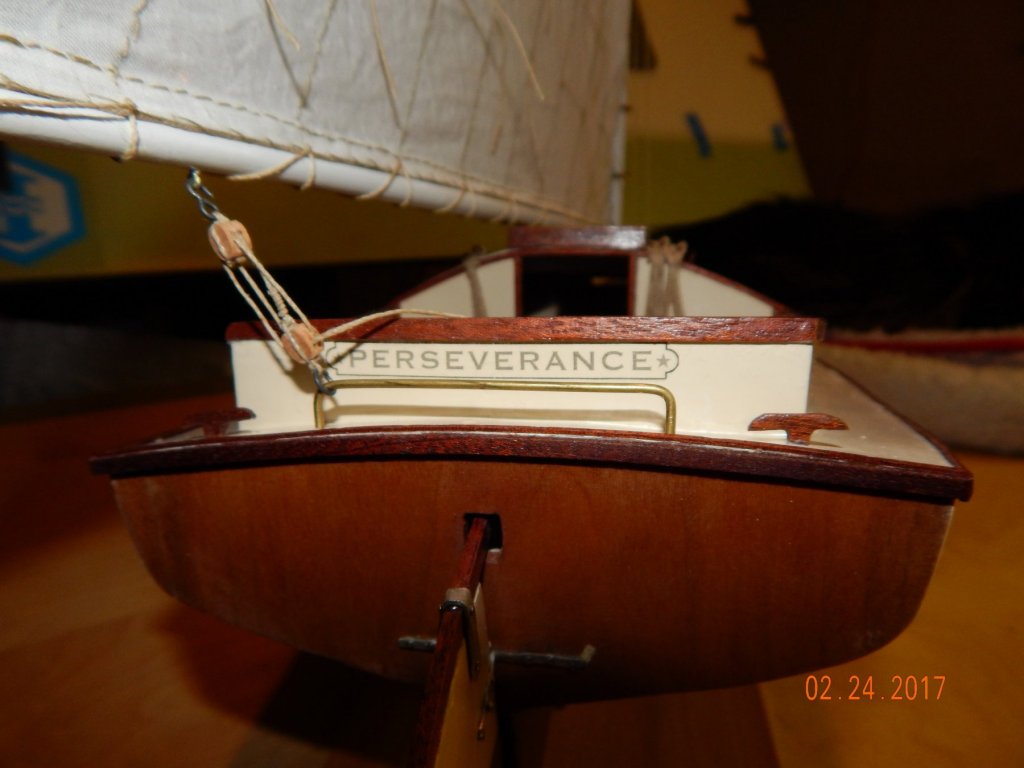
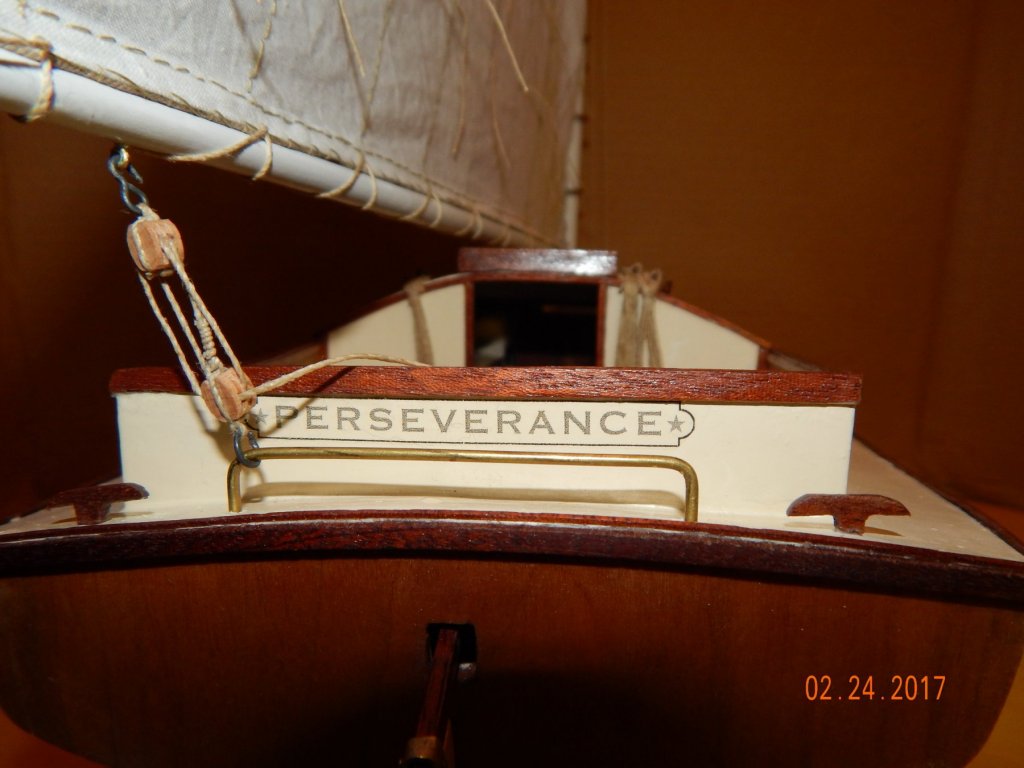
So what font type do you suggest? Have not started the decal yet, so I am interested in your thoughts. Thanks Marc
- 165 replies
-
- 4
-
-
- cape cod catboat
- Finished
- (and 1 more)
-
Looking good. Interesting shape, skinny at the bow getting fat and wide towards the stern. I like it. Marcus.
- 420 replies
-
- 4
-
-
- captain roy
- lugger
- (and 2 more)
-
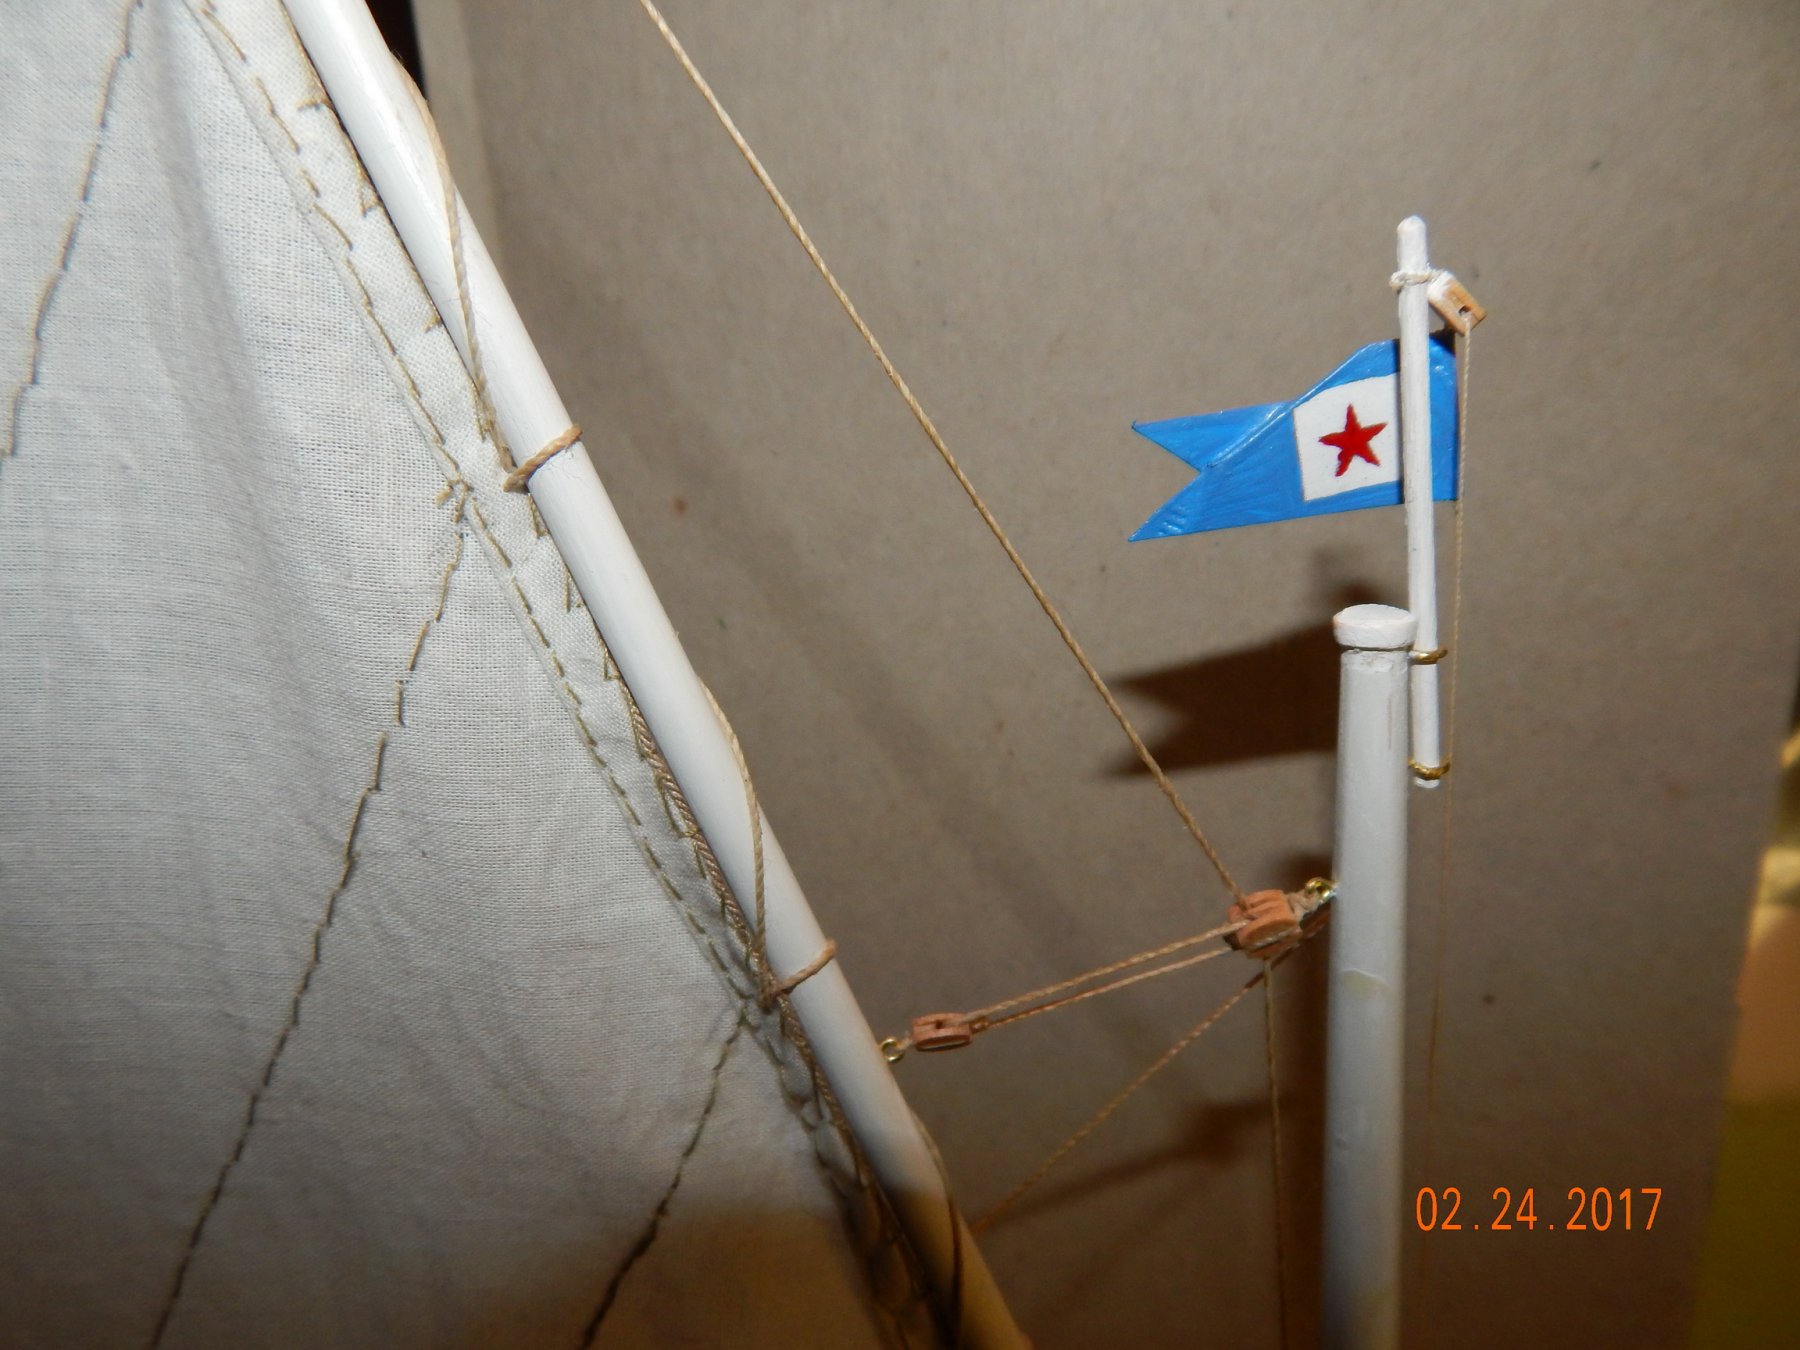
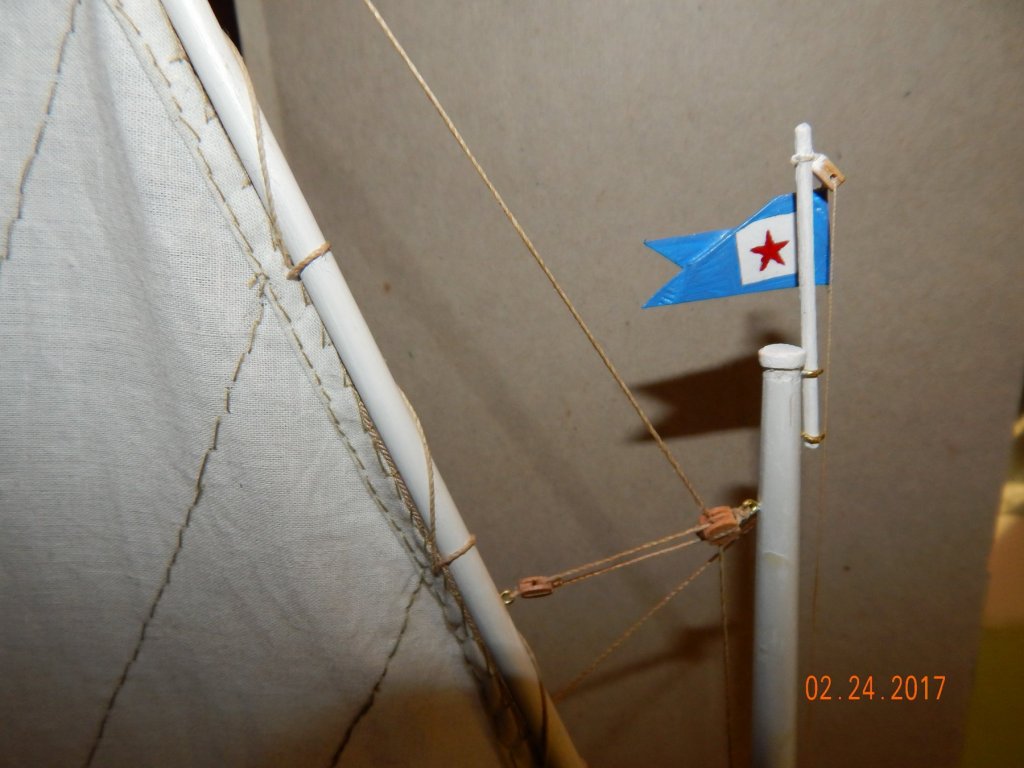
Piet, It is not so difficult to draw up plans for a windmill. Just make it tall enough so the wieken (I don't know the English word for this) do not touch the ground. Numerous examples on the NET as well. Thanks, Russ. I am going to finish up the boat by this week so I will do a Burgee and a decal. Jack and Popeye have been very helpful in the suggestions for decals Marcus
- 165 replies
-
- 5
-
-
- cape cod catboat
- Finished
- (and 1 more)
-
So Anja, someone stole the Halve Maen, or you just left her on the pavement when your friend drove off? That must have been a real disappointment. All that work for nothing. I have a nice word in Dutch for that, but I will hold my tongue. Good luck on this galleon. Marcus
-
I just checked how you did your decals and understand how to do it. I love how you put the decal on the sail itself, something I have to try myself. Beautiful built. Marcus
- 203 replies
-
- 4
-
-
- artesania latina
- marie jeanne
- (and 1 more)