


portchieboy
-
Posts
51 -
Joined
-
Last visited
Content Type
Profiles
Forums
Gallery
Events
Posts posted by portchieboy
-
-
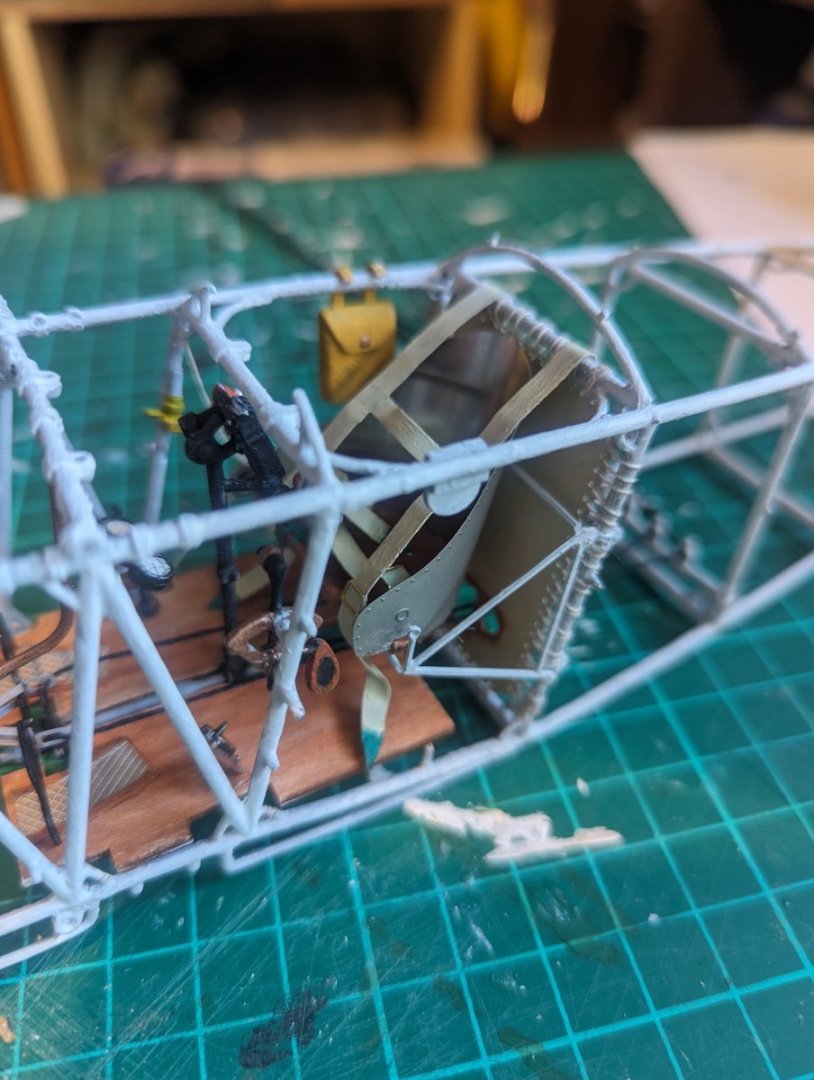
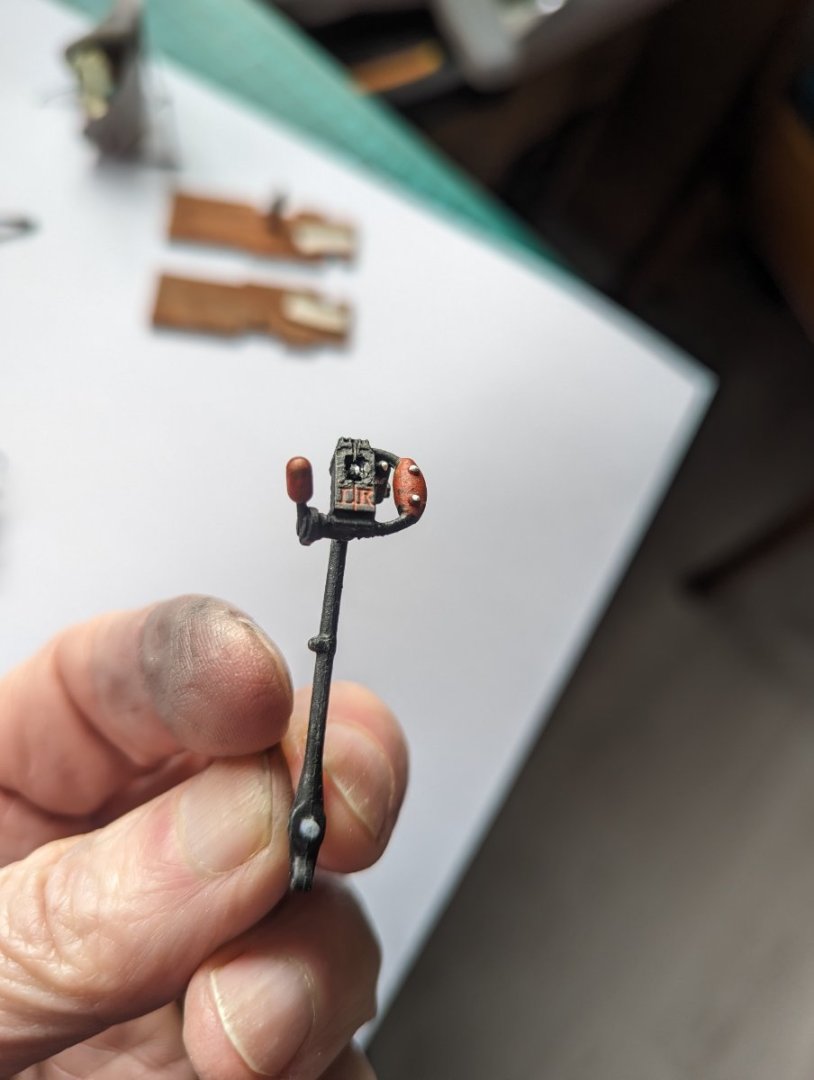
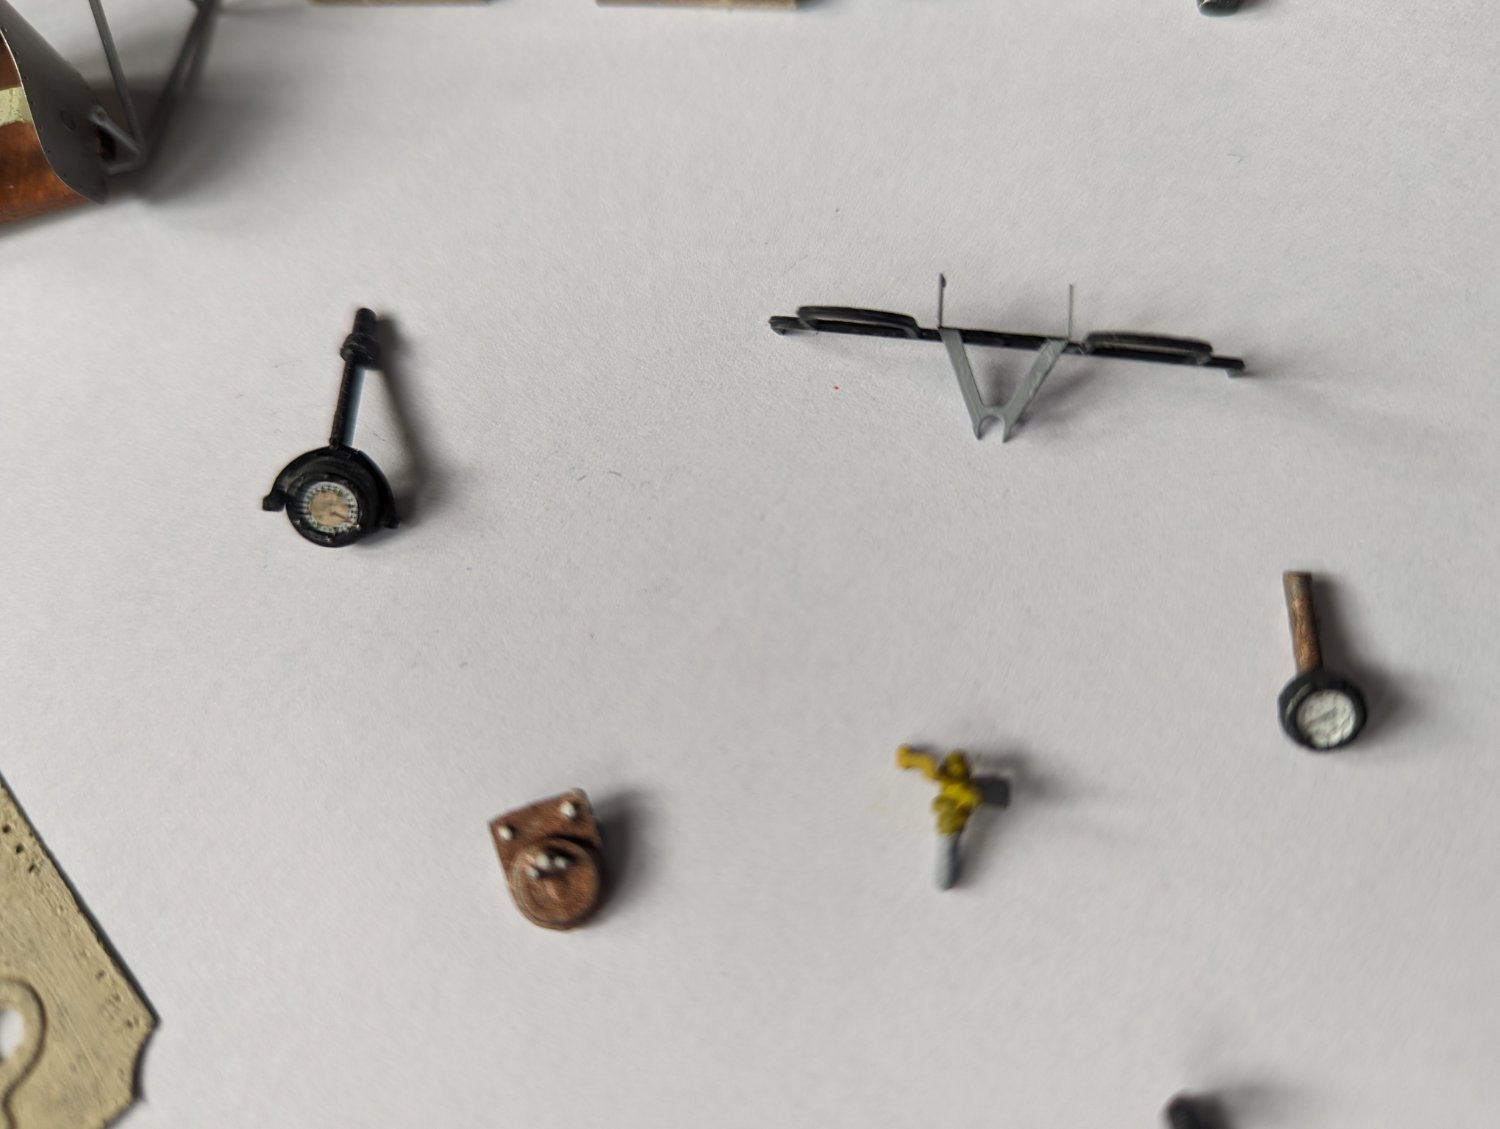
Thanks Mike, is that the tensors?
- Canute, Old Collingwood and mtaylor
-
 3
3
-
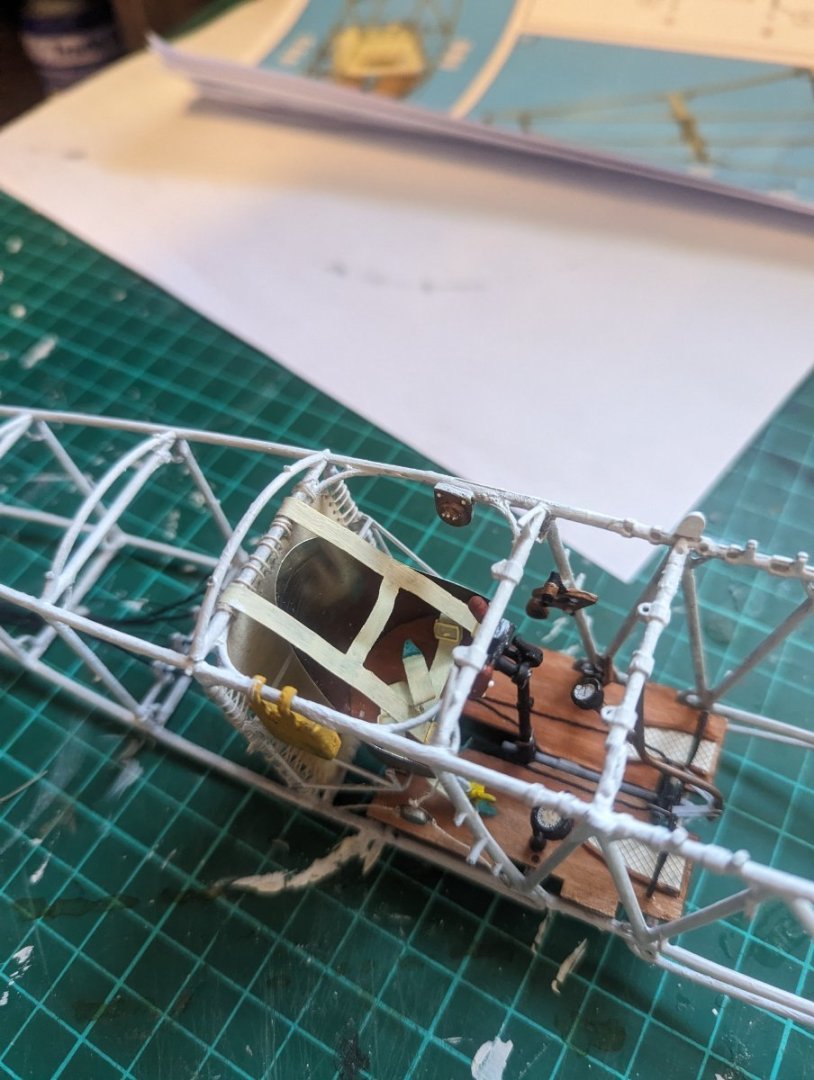
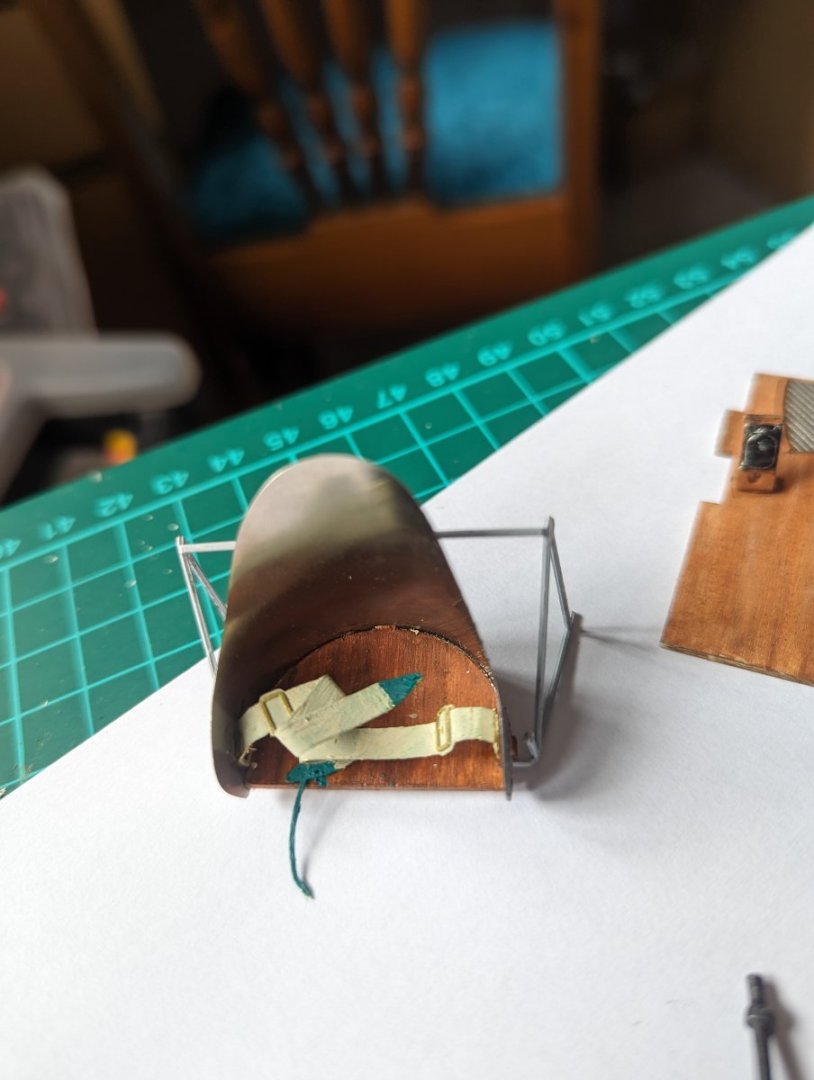
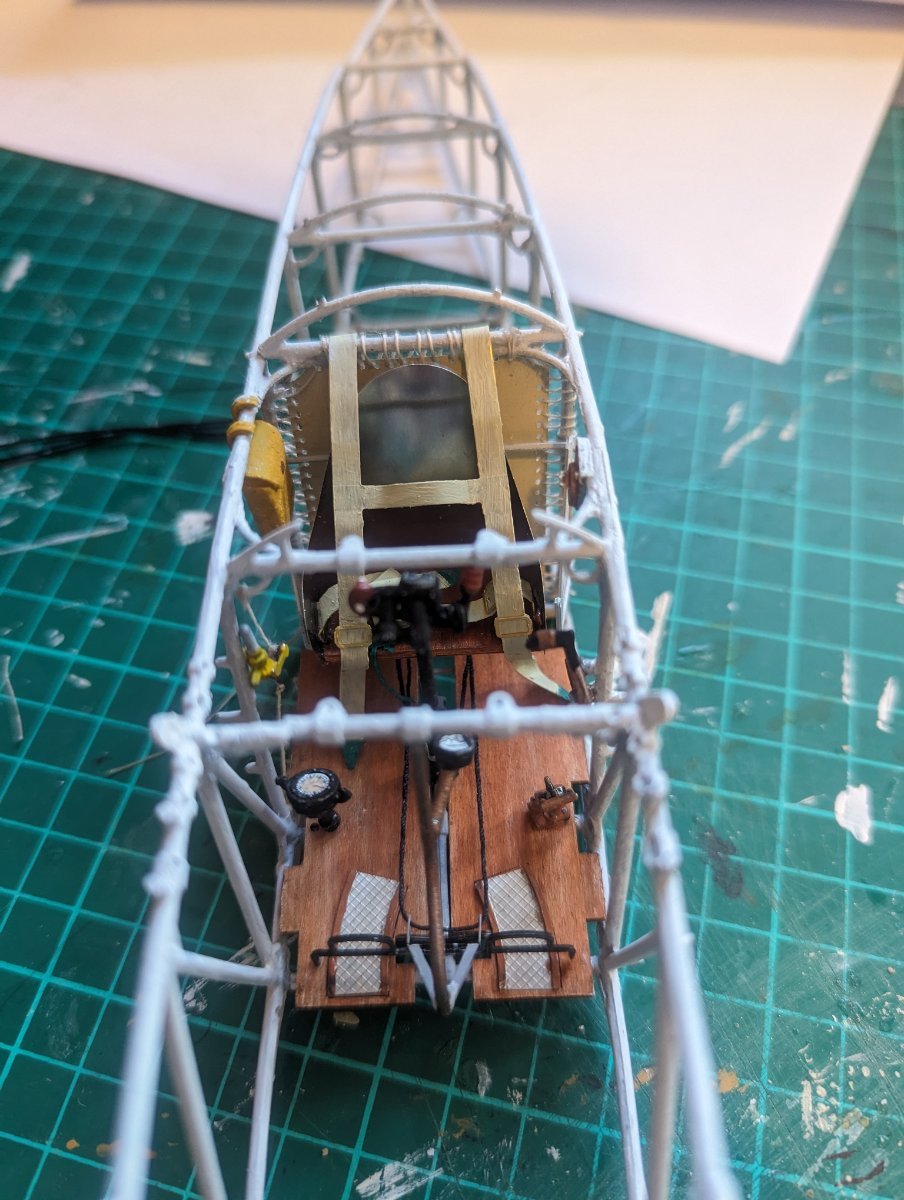
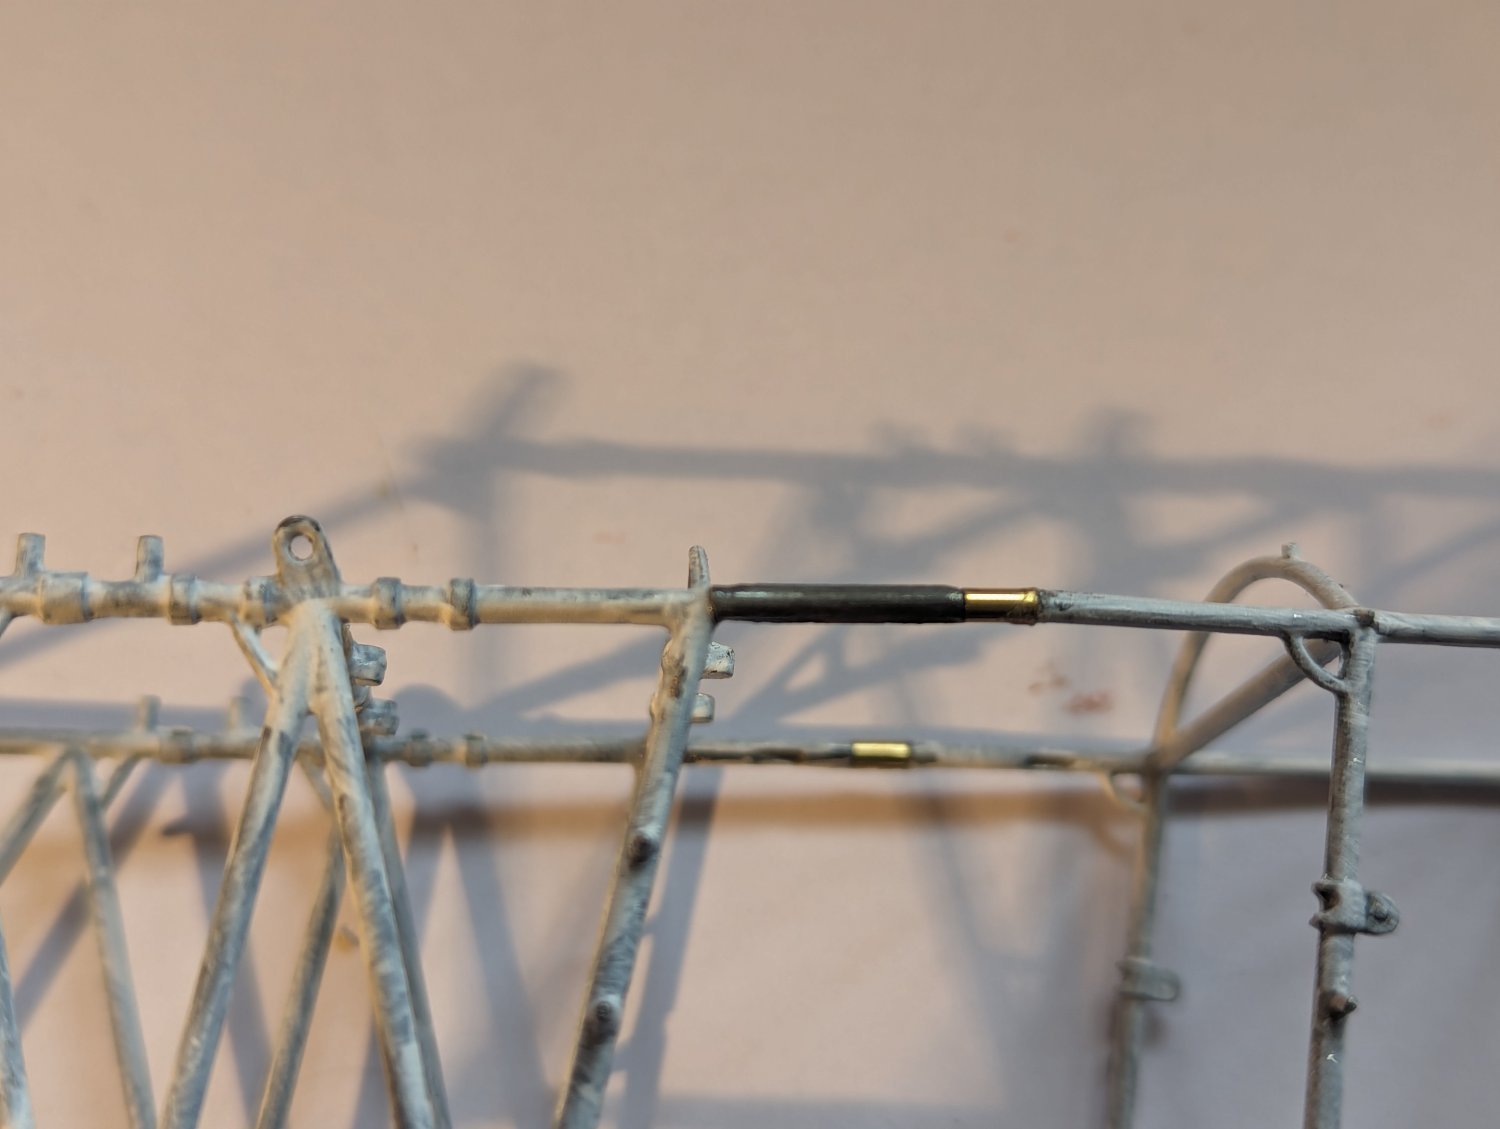
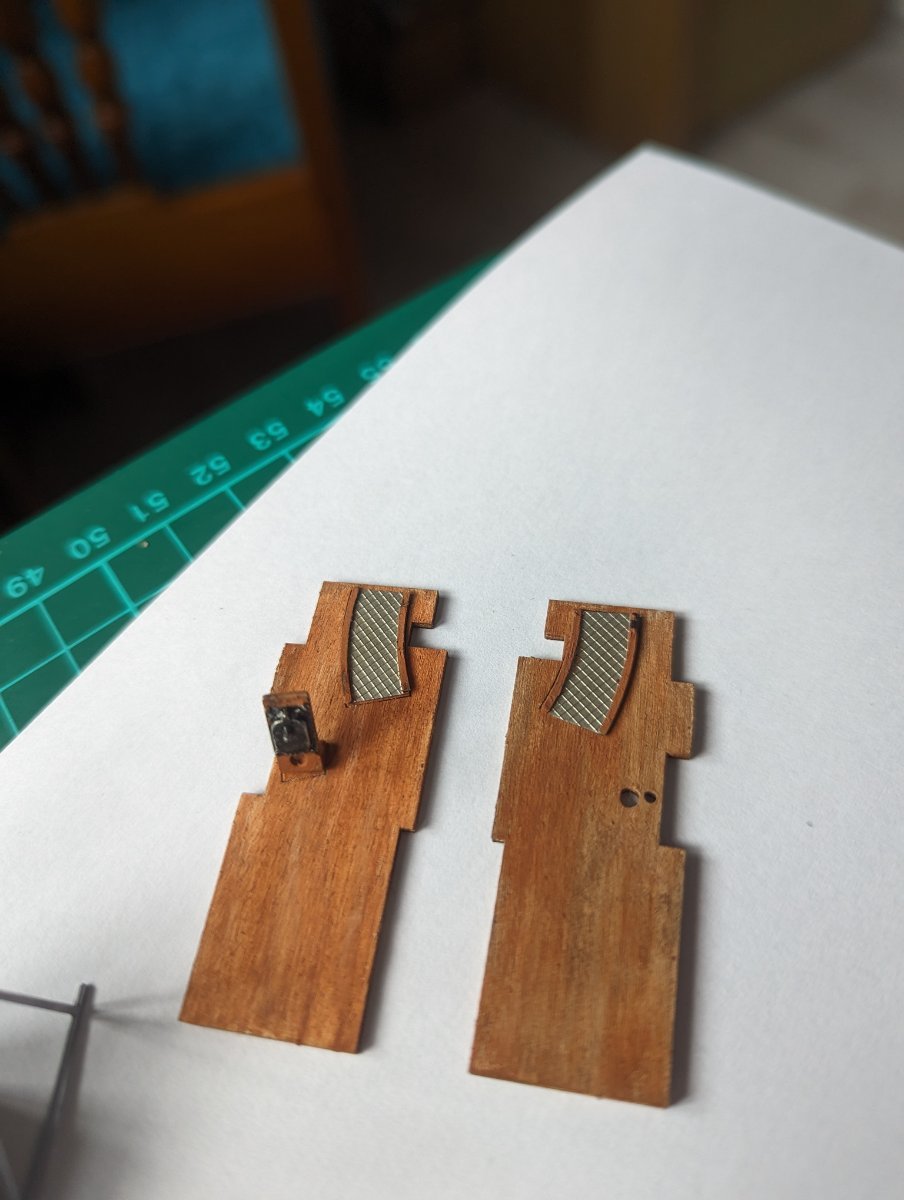
Cockpit complete, with control lines fitted. Have also repainted the fuselage, ready for the tensars.

- Egilman, Old Collingwood, mtaylor and 7 others
-
10
-
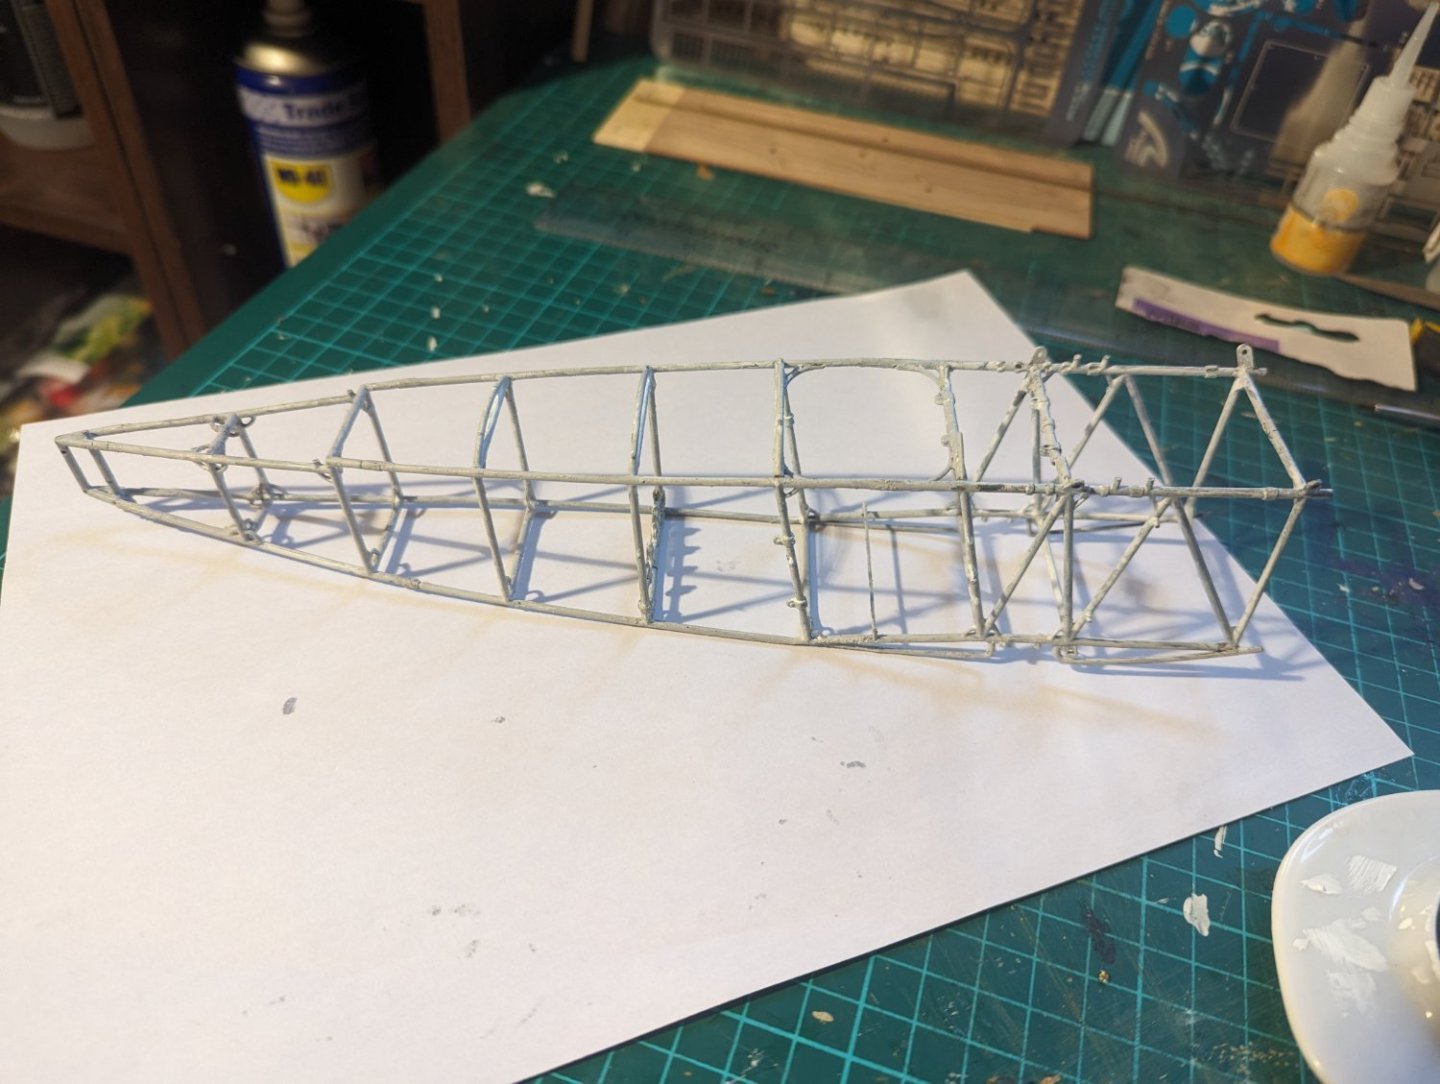
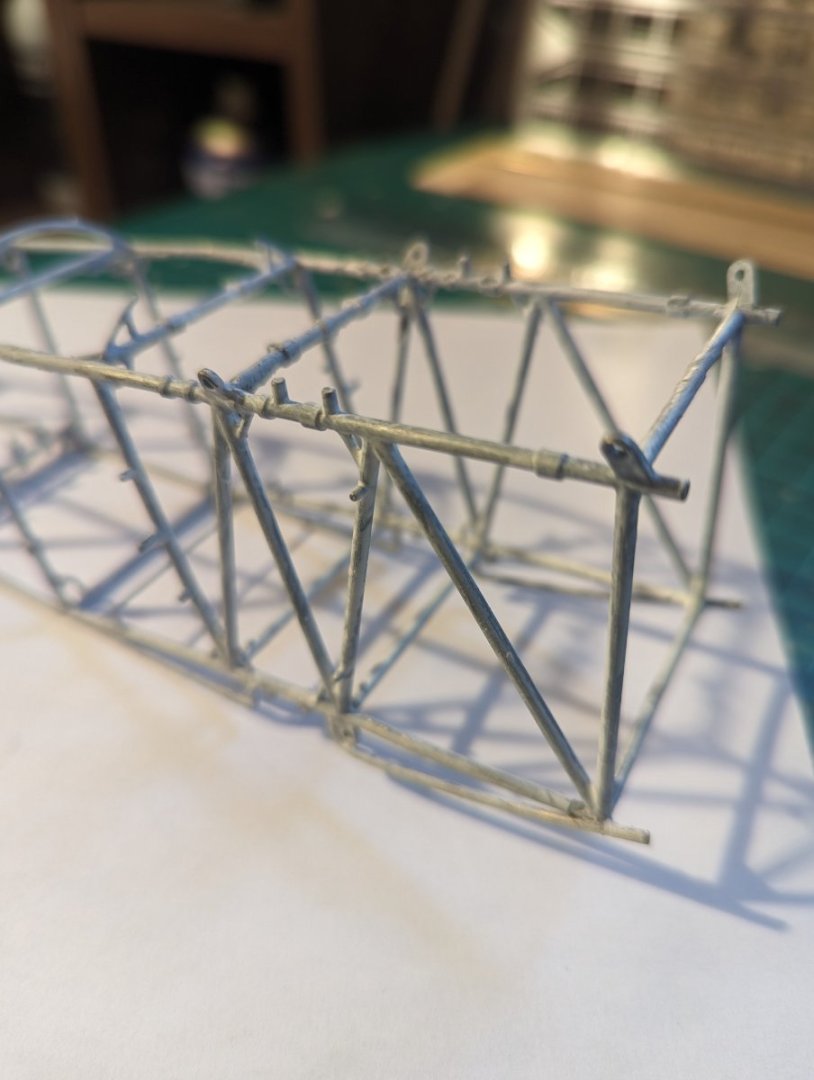
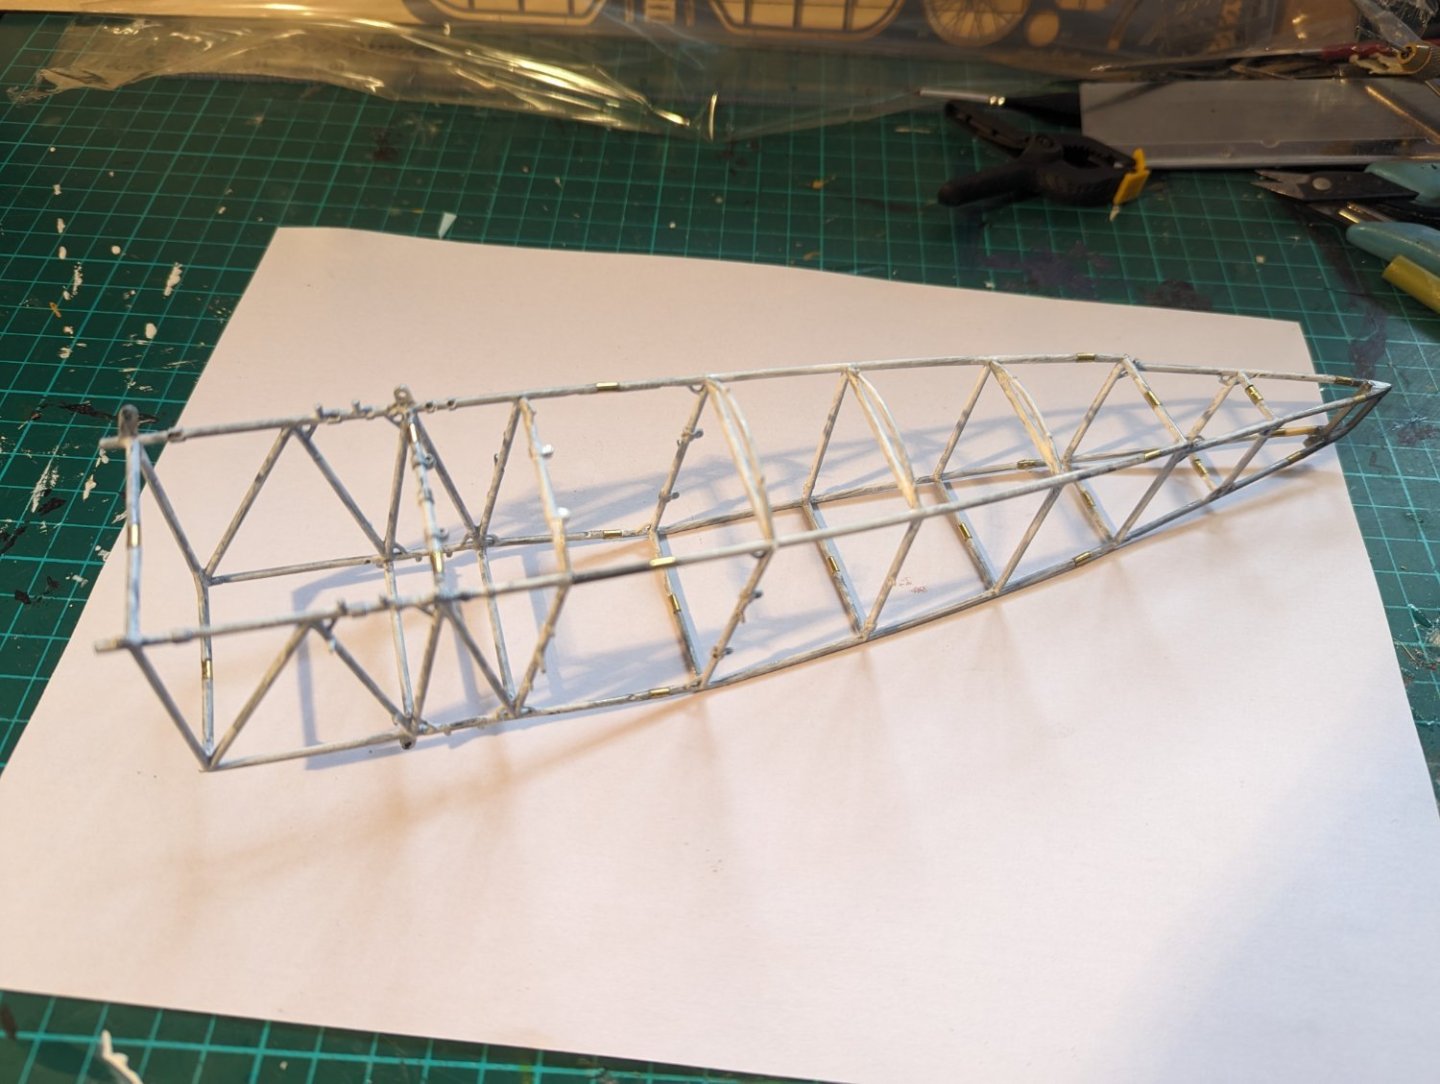
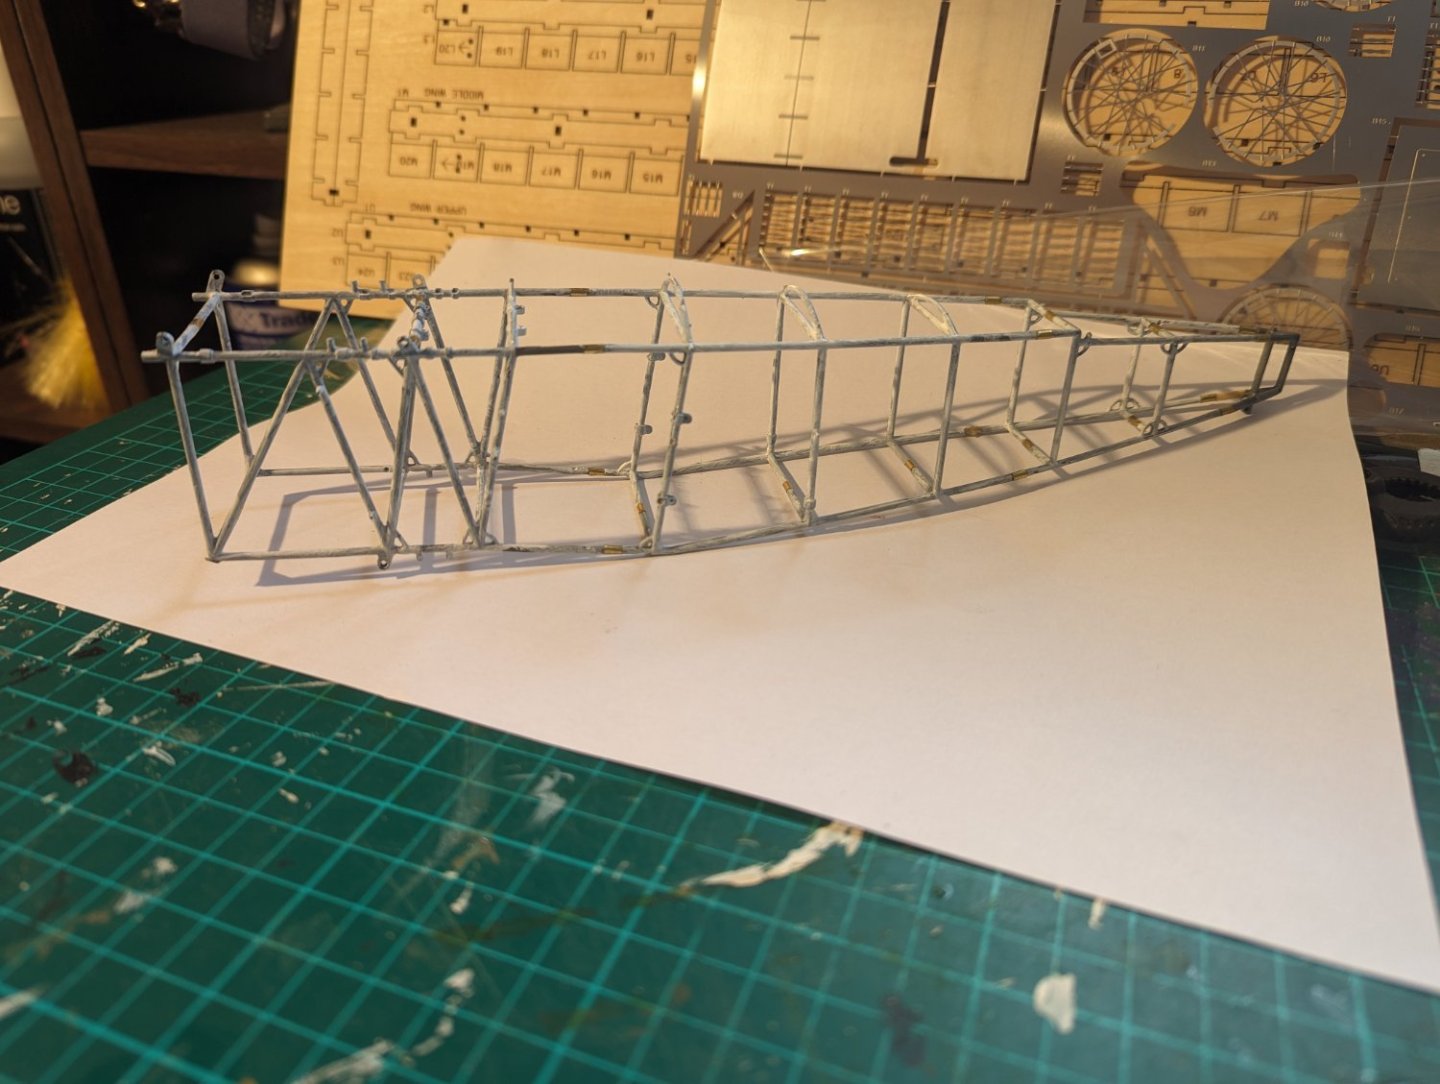
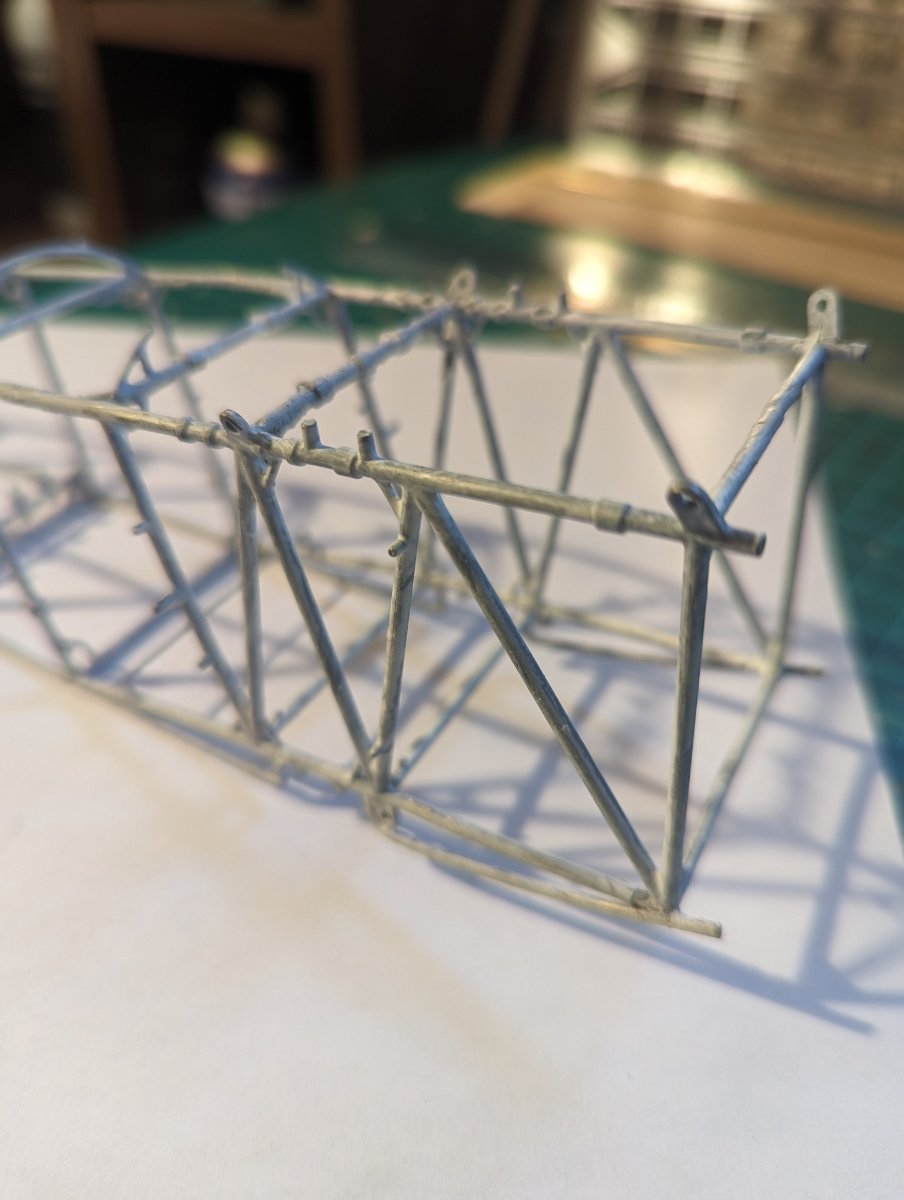
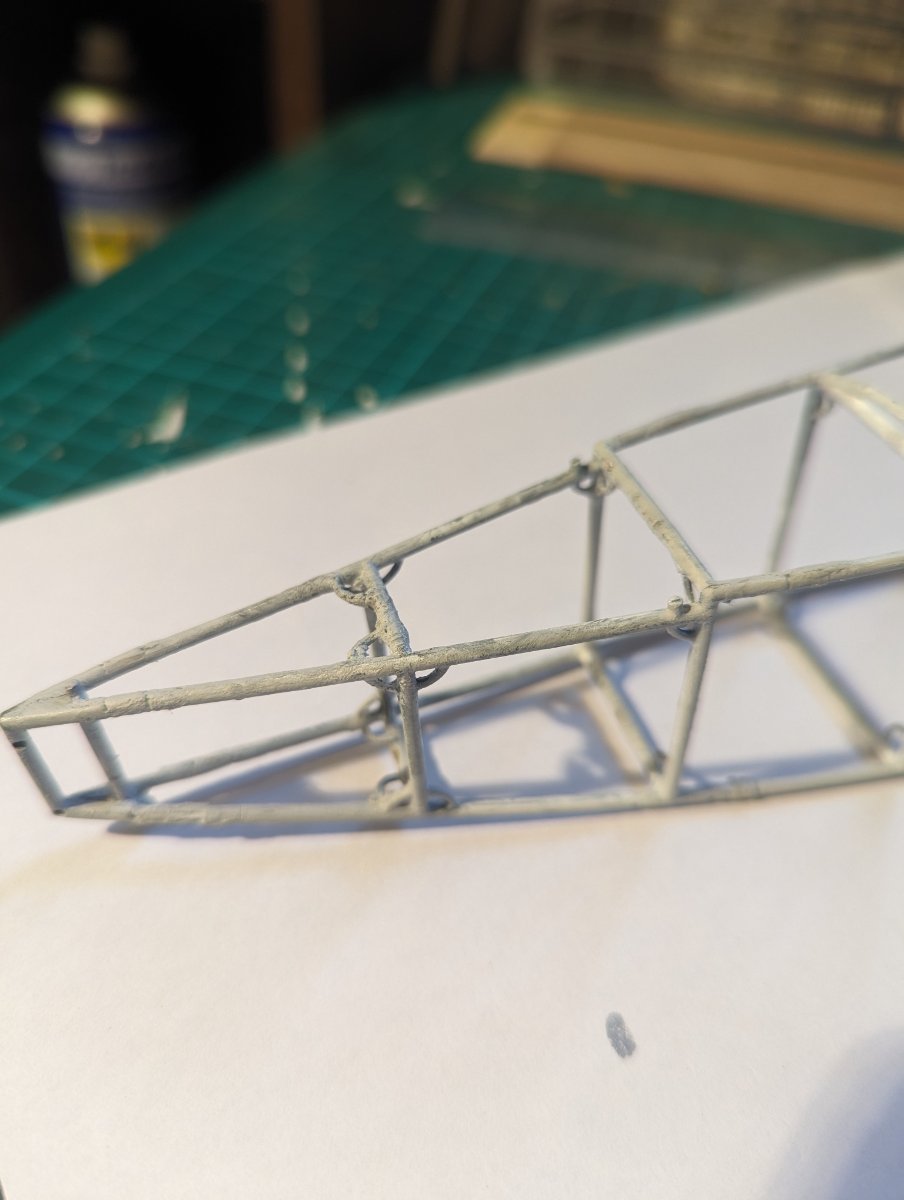
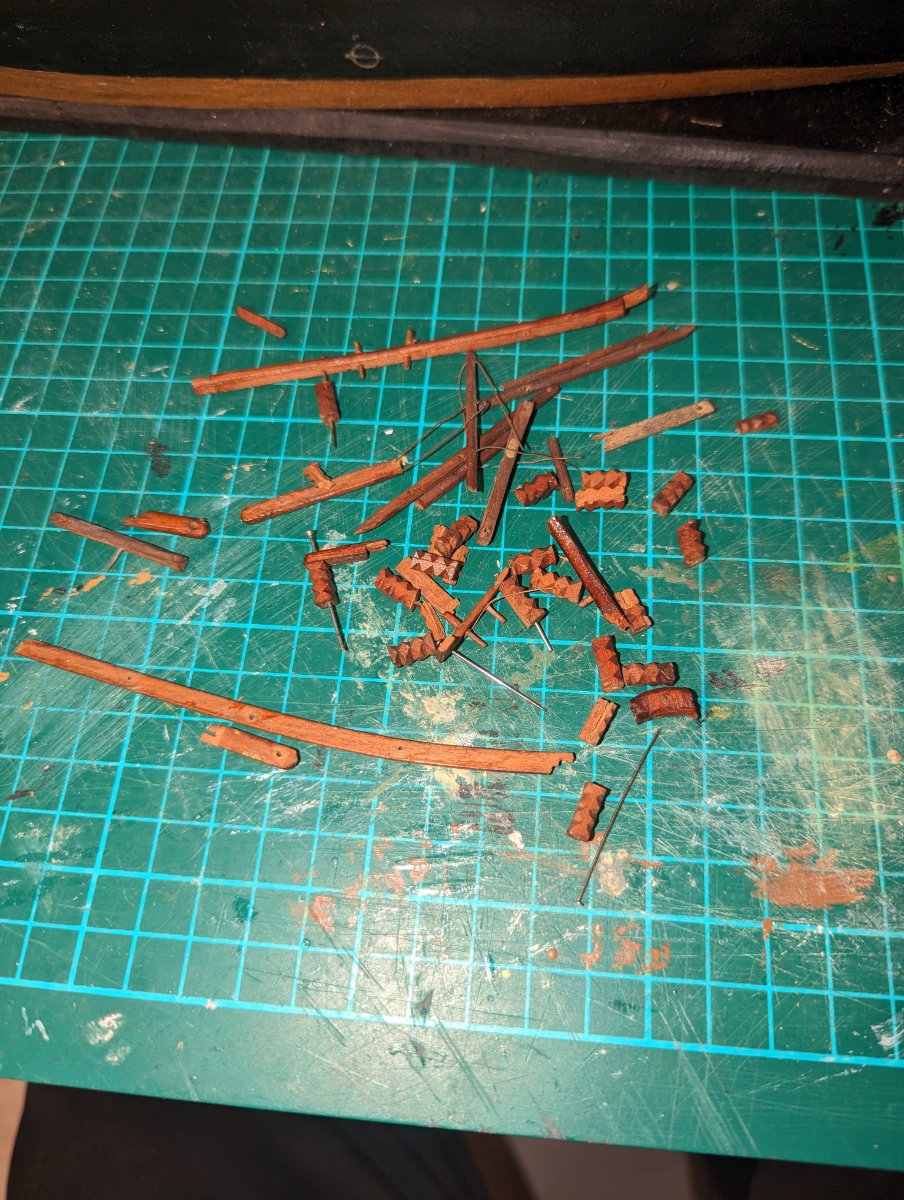
So, at last we moved on to the next stage. I must admit to some difficulties getting here. Firstly, the little 3mm brackets that go in the corners. What a nightmare.
There are 28 of them, and talk about fiddly. It took me a few days to work out a method. Problem is they are so small, have to be glued into a restricted area, and held whilst the glue dries. Even the best CA takes a while. Eventually I came up with using a tiny dot of Blue tack on the frame, sticking one end of the bracket in, then leaning the other end to touch the frame. Glue that on, leave 24 hours, then remove Blue tack and glue the 2nd end.
Once that was done, a few more spars to add, but again, I managed to break a couple in fitting. I must learn that cast pieces have absolutely no play in them whatever.
Never mind, all now fixed, and next job will be the seat bulkhead.

-
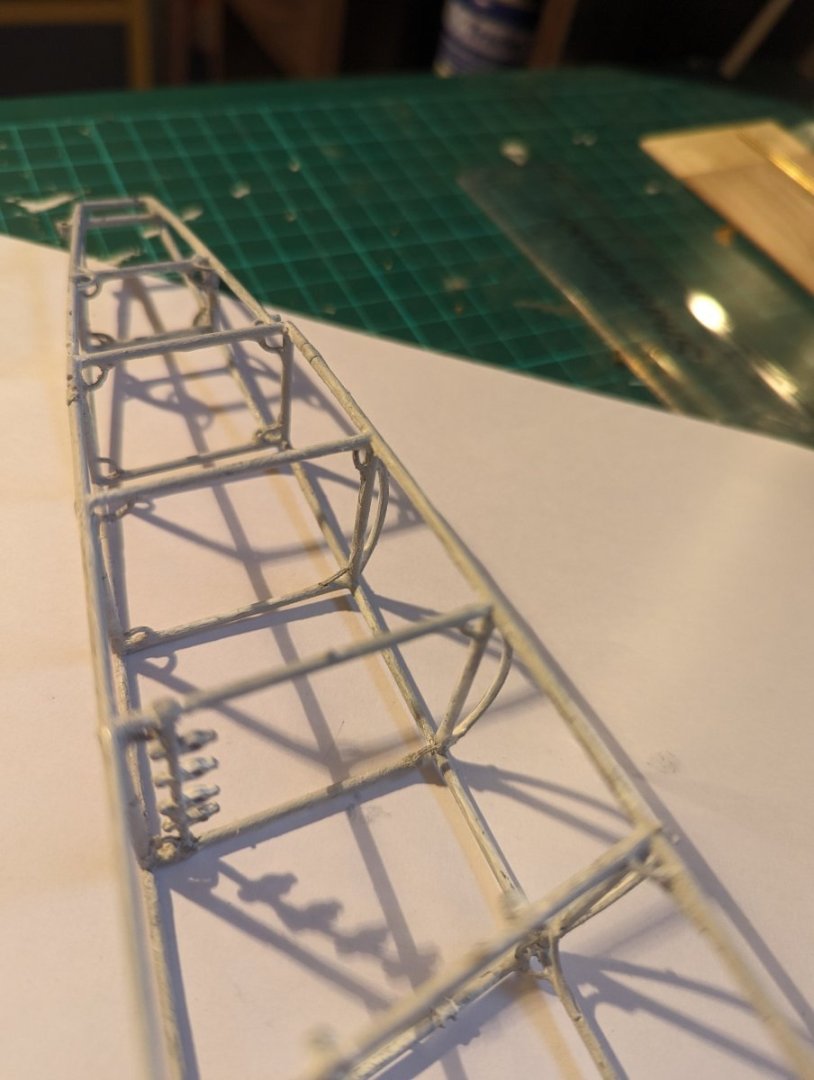
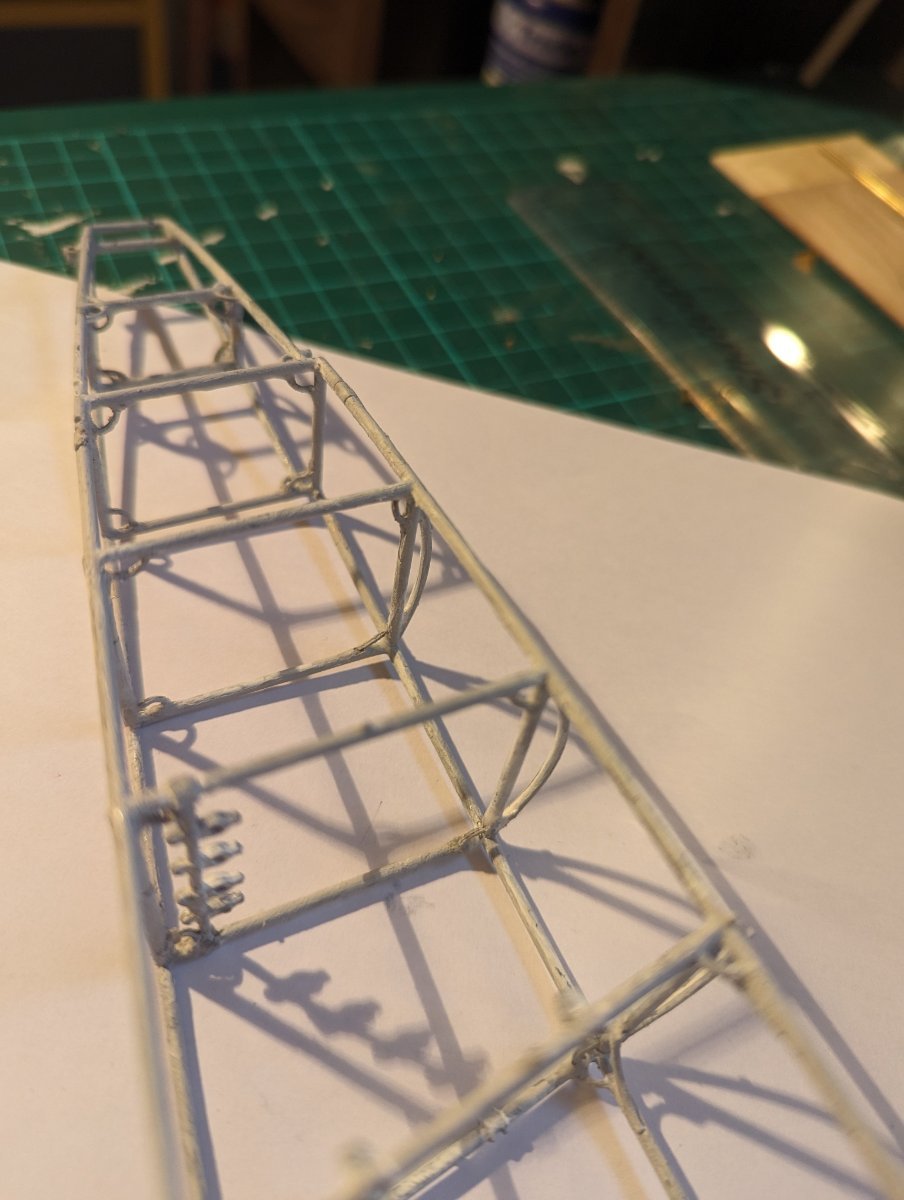
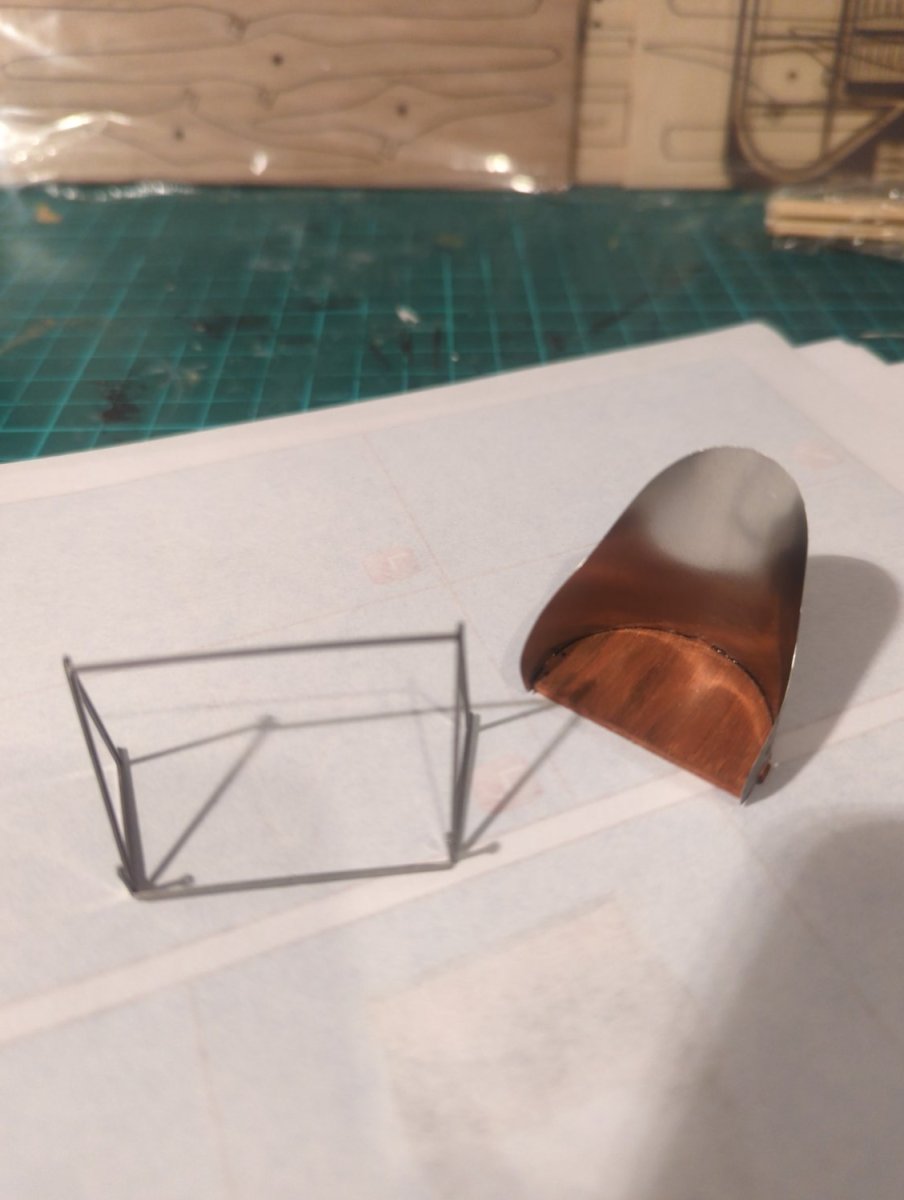
The fuselage is now largely together. It has, I must admit been taxing. Having spent several hours filing the moulding lines off, I then find that the lugs to which one affixes the brass joiners are mostly too large, and again need further, quite difficult shaping.
When it came to joining it all together, I am afraid I found that some of the shaping was 'off', and the frame needed very slight pressure on the joins. That is when I realised how brittle was the metal, and I am afraid some pieces snapped off. All I can say is thank heavens for CA glue, I really do not know how else it would have worked.
The other little tip is that the width of the frame is approximately the same as a wooden toothpick, which proved invaluable to mend a strut on the tail!
So, down to page 17 now, wish me luck.


-
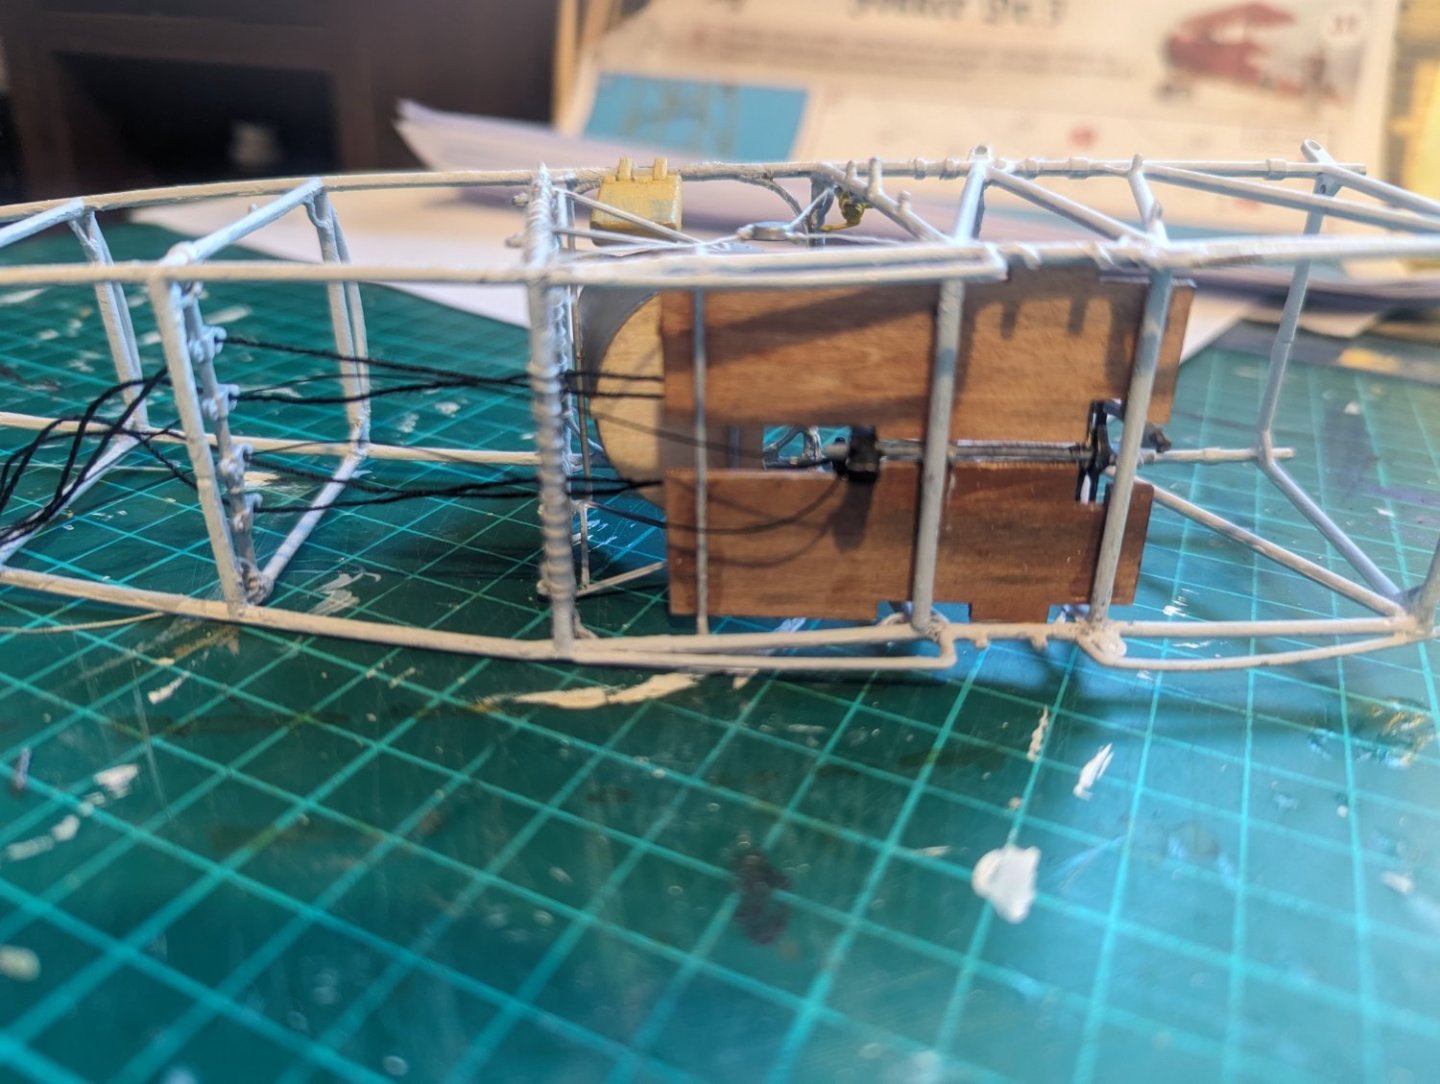
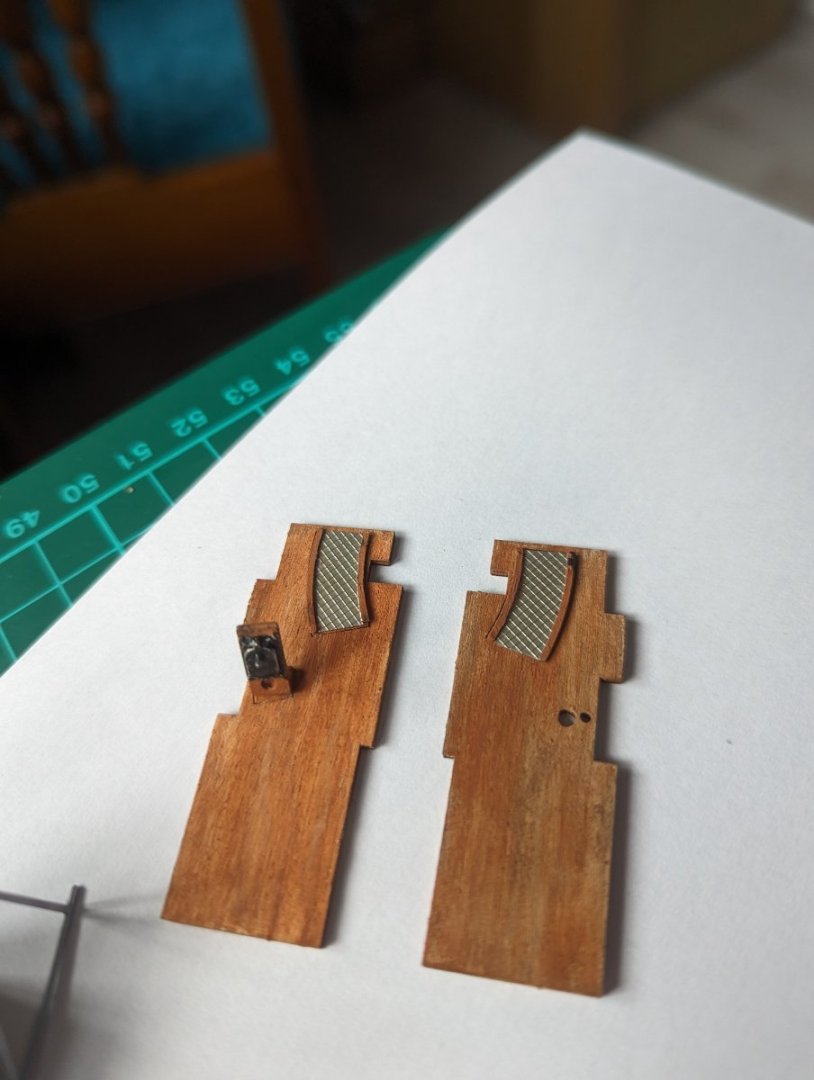
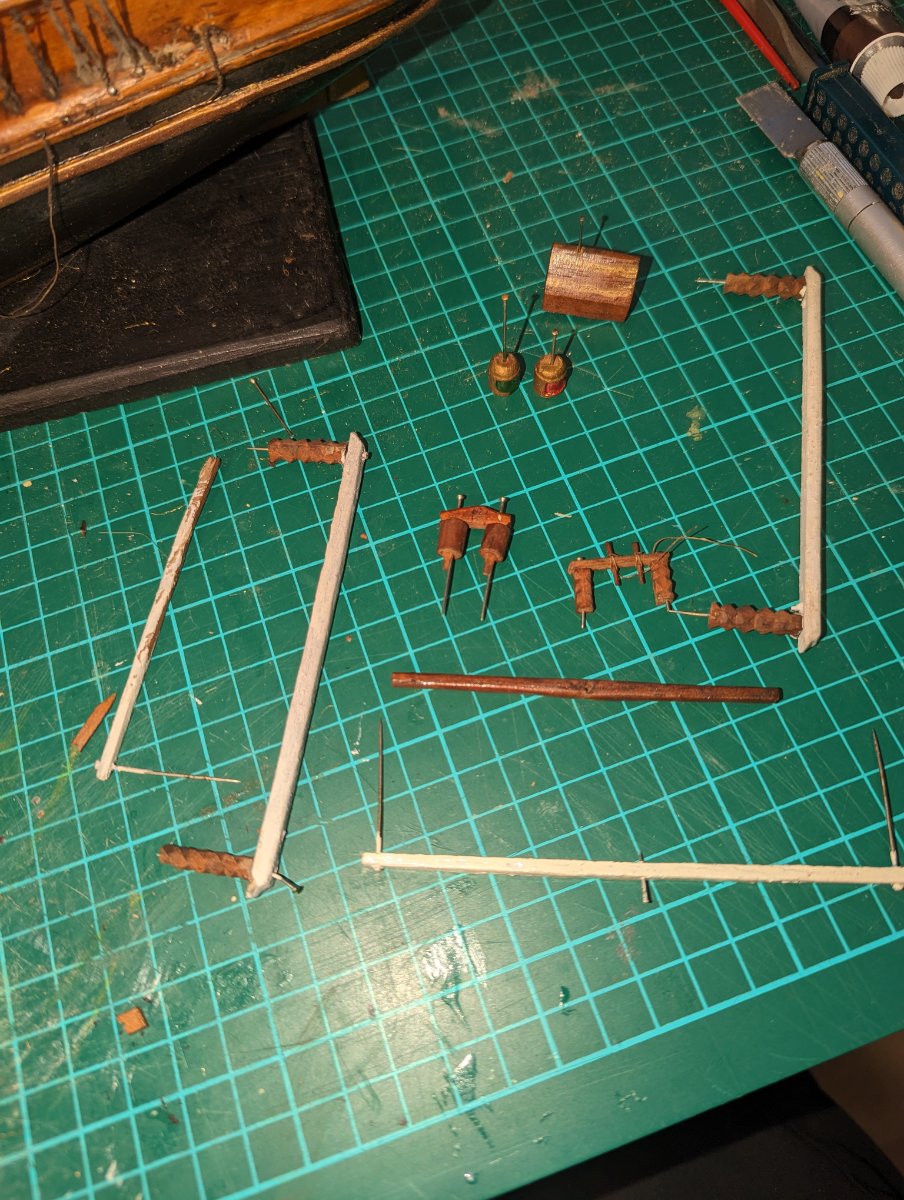
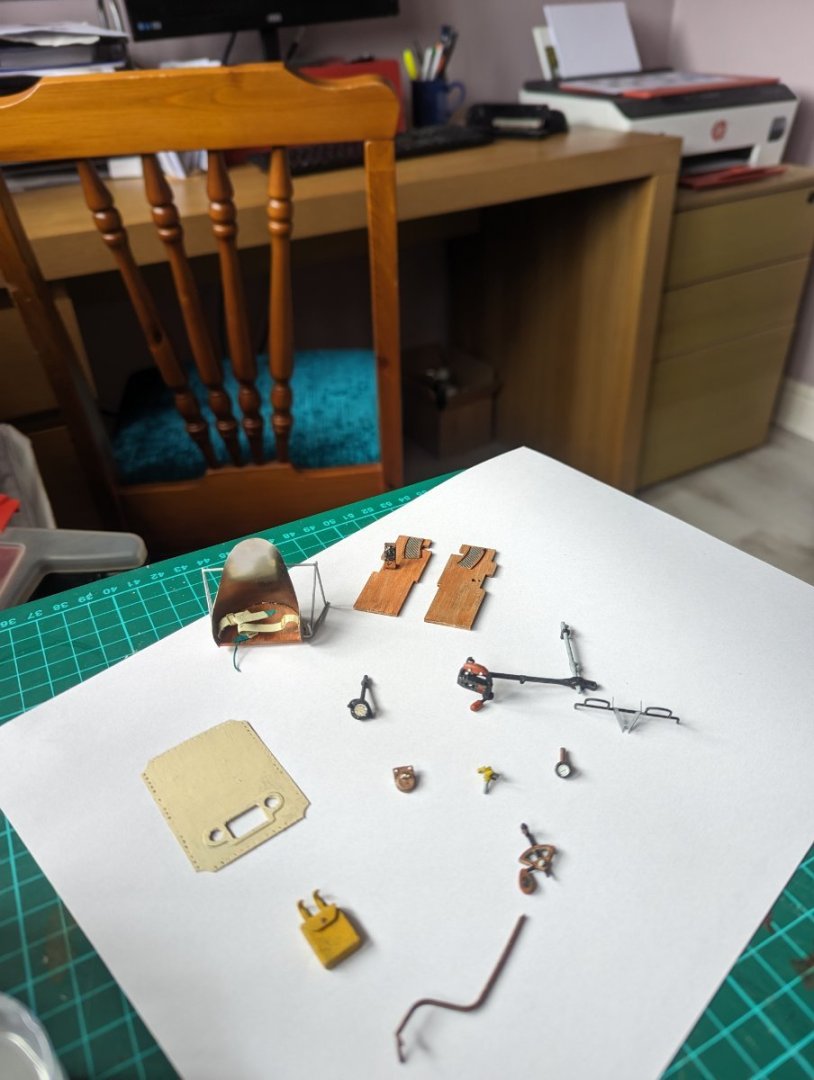 Progress so far. The painting is certainly fine, but very enjoyable. These parts are now set aside, whilst I file, and assemble the fuselage. I have noticed that instead of supplying parts M23 and M24, they have given me 2 x M23. No matter, the cockpit assembly sits on these spars, and instead of pinning the cockpit in, I will glue it to the spar instead. Hope that makes sense!
-
Well, that's the first 2 hours or so!
I love the comment on the box, easy to build. Hate to get a difficult one. Never mind, we all like a challenge, that's what makes it fun.
Very interesting the transition between wooden models, and metal. I am finding each bend a 'heart in the mouth ' moment. At least with wood, you can craft another piece. Let's just hope there aren't too many accidents.

- mtaylor, GrandpaPhil, chadwijm6 and 8 others
-
11
-
-
Having completed all projects, I am now to unbox and start on the Fokker. Not done an aeroplane since I was a boy in the ATC, so very different. Also, this is largely a metal kit, so new skills required. I am not generally good at keeping up with blogs, so I promise I will try and keep things up to date. So wish me luck, and speak soon!
-


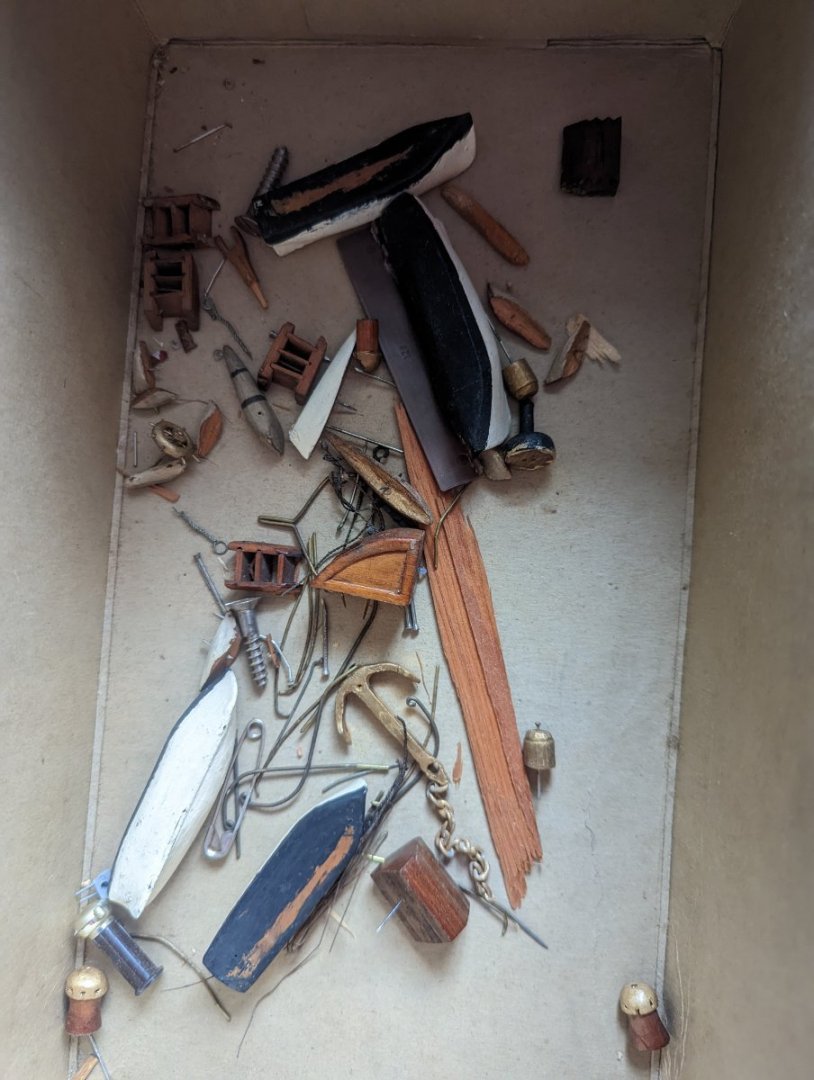
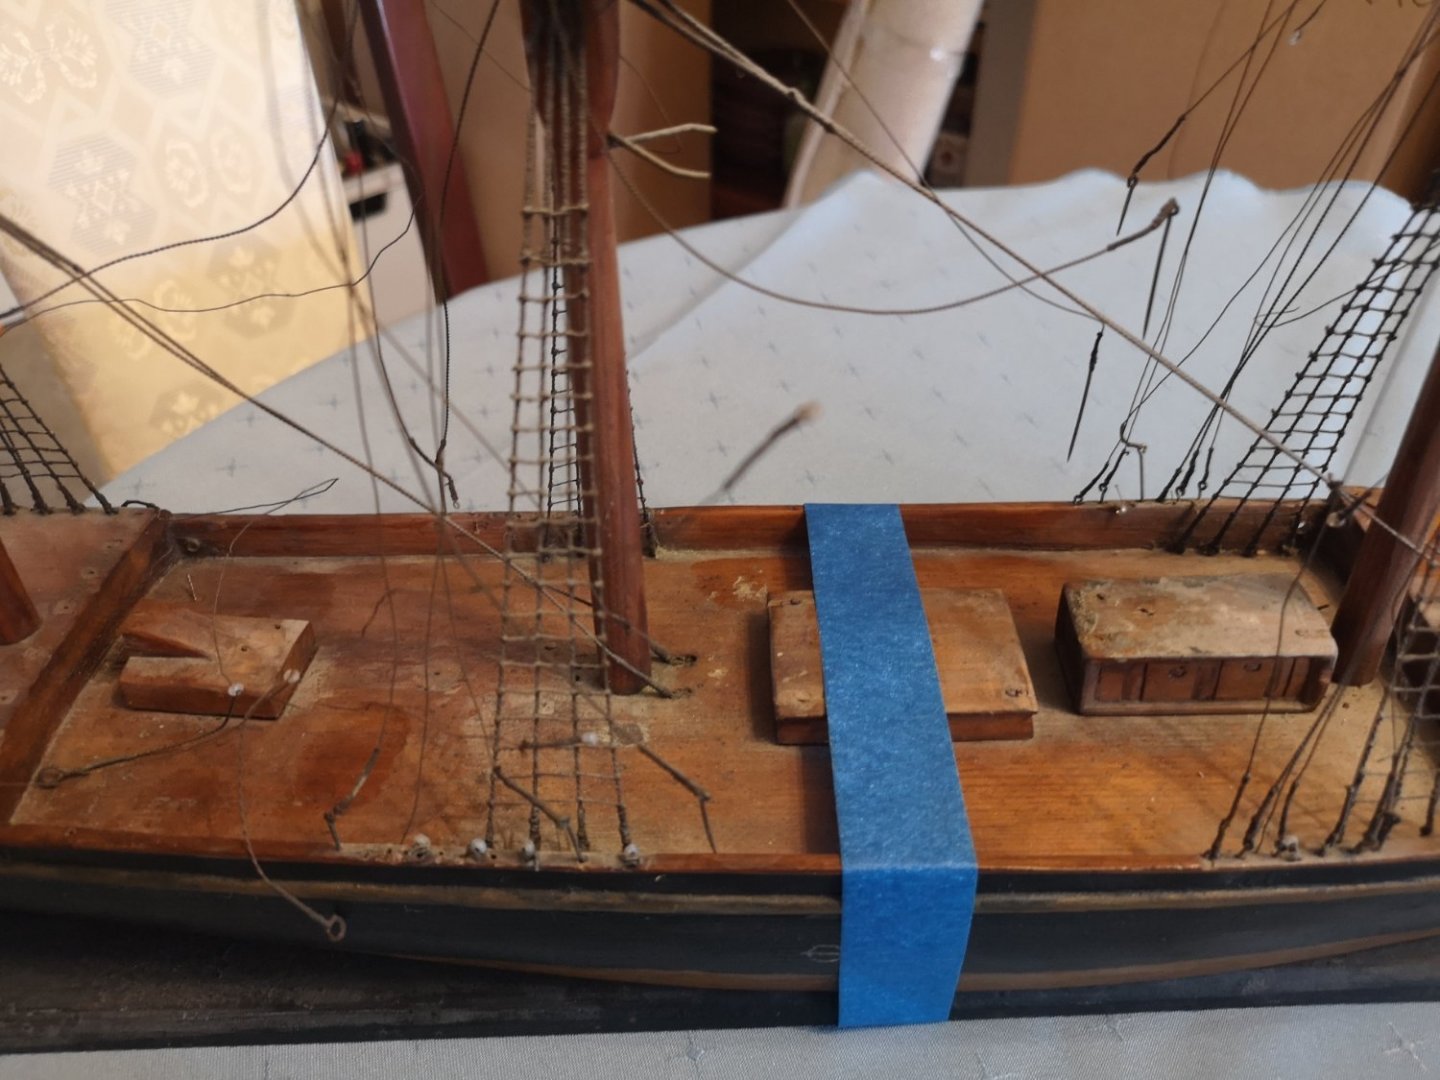
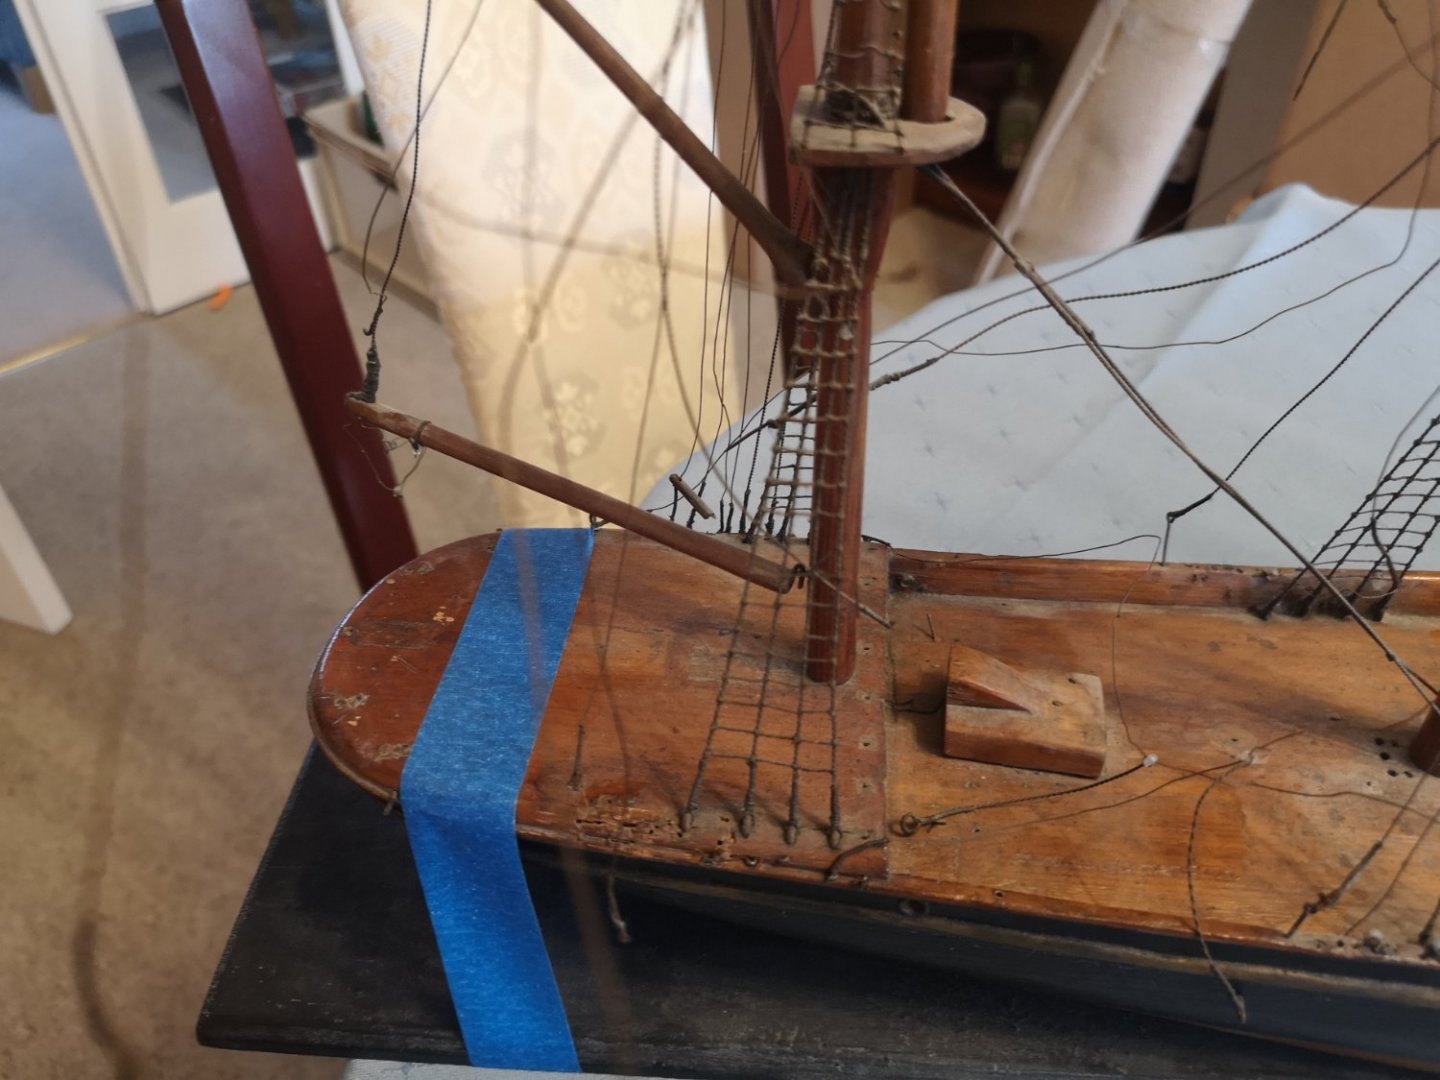
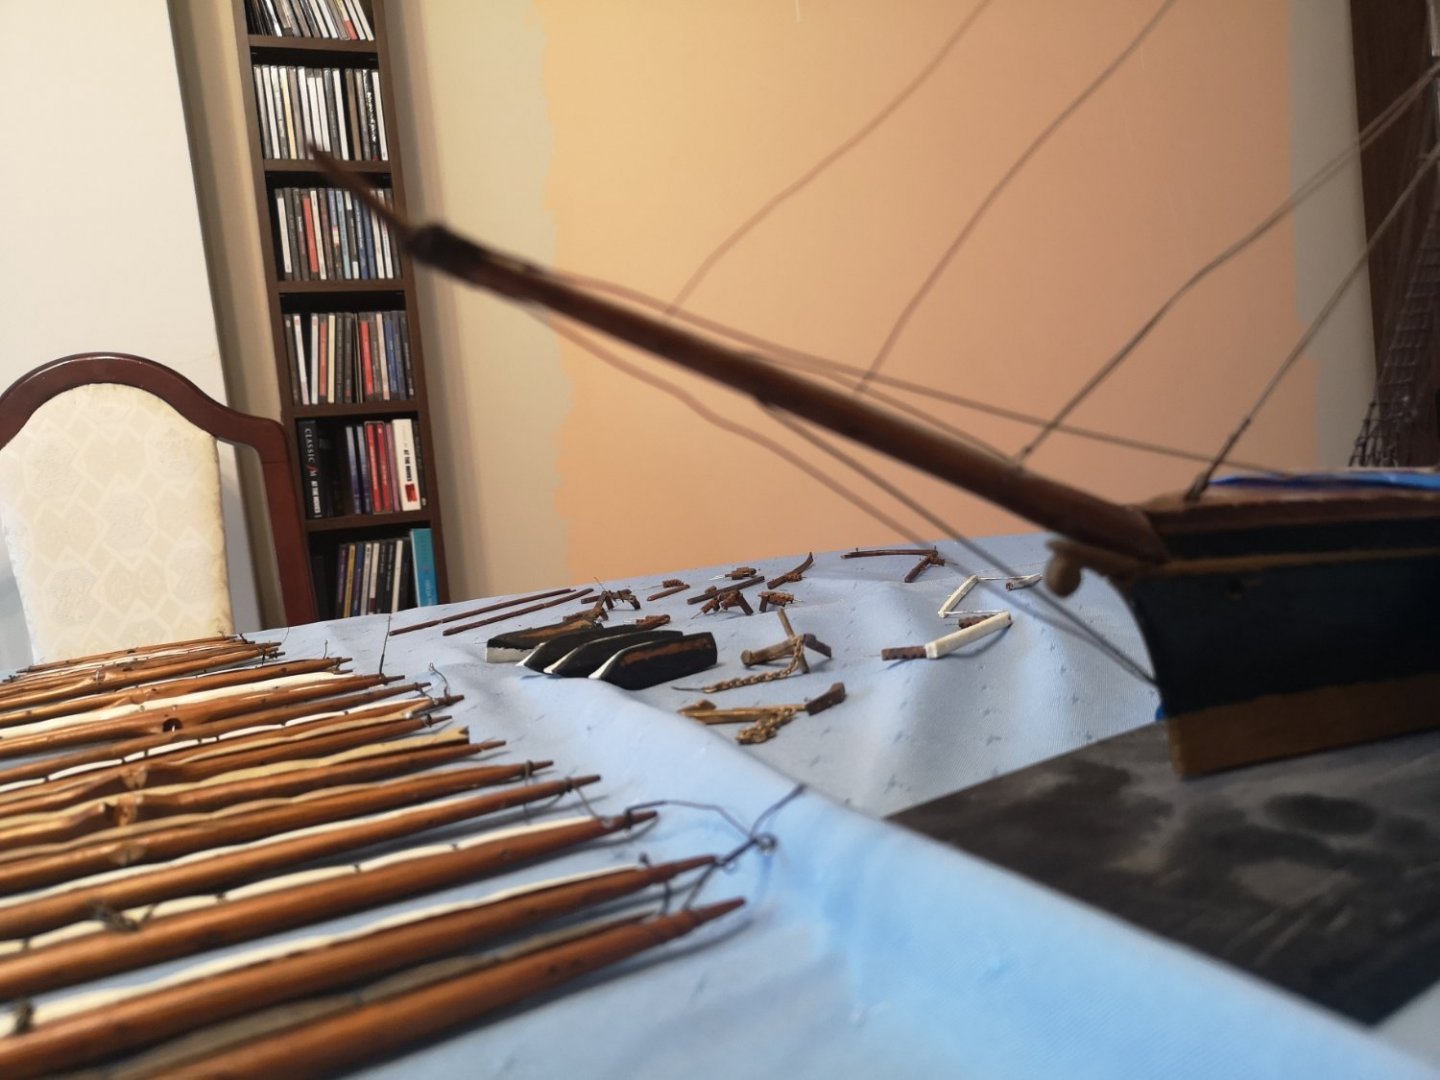
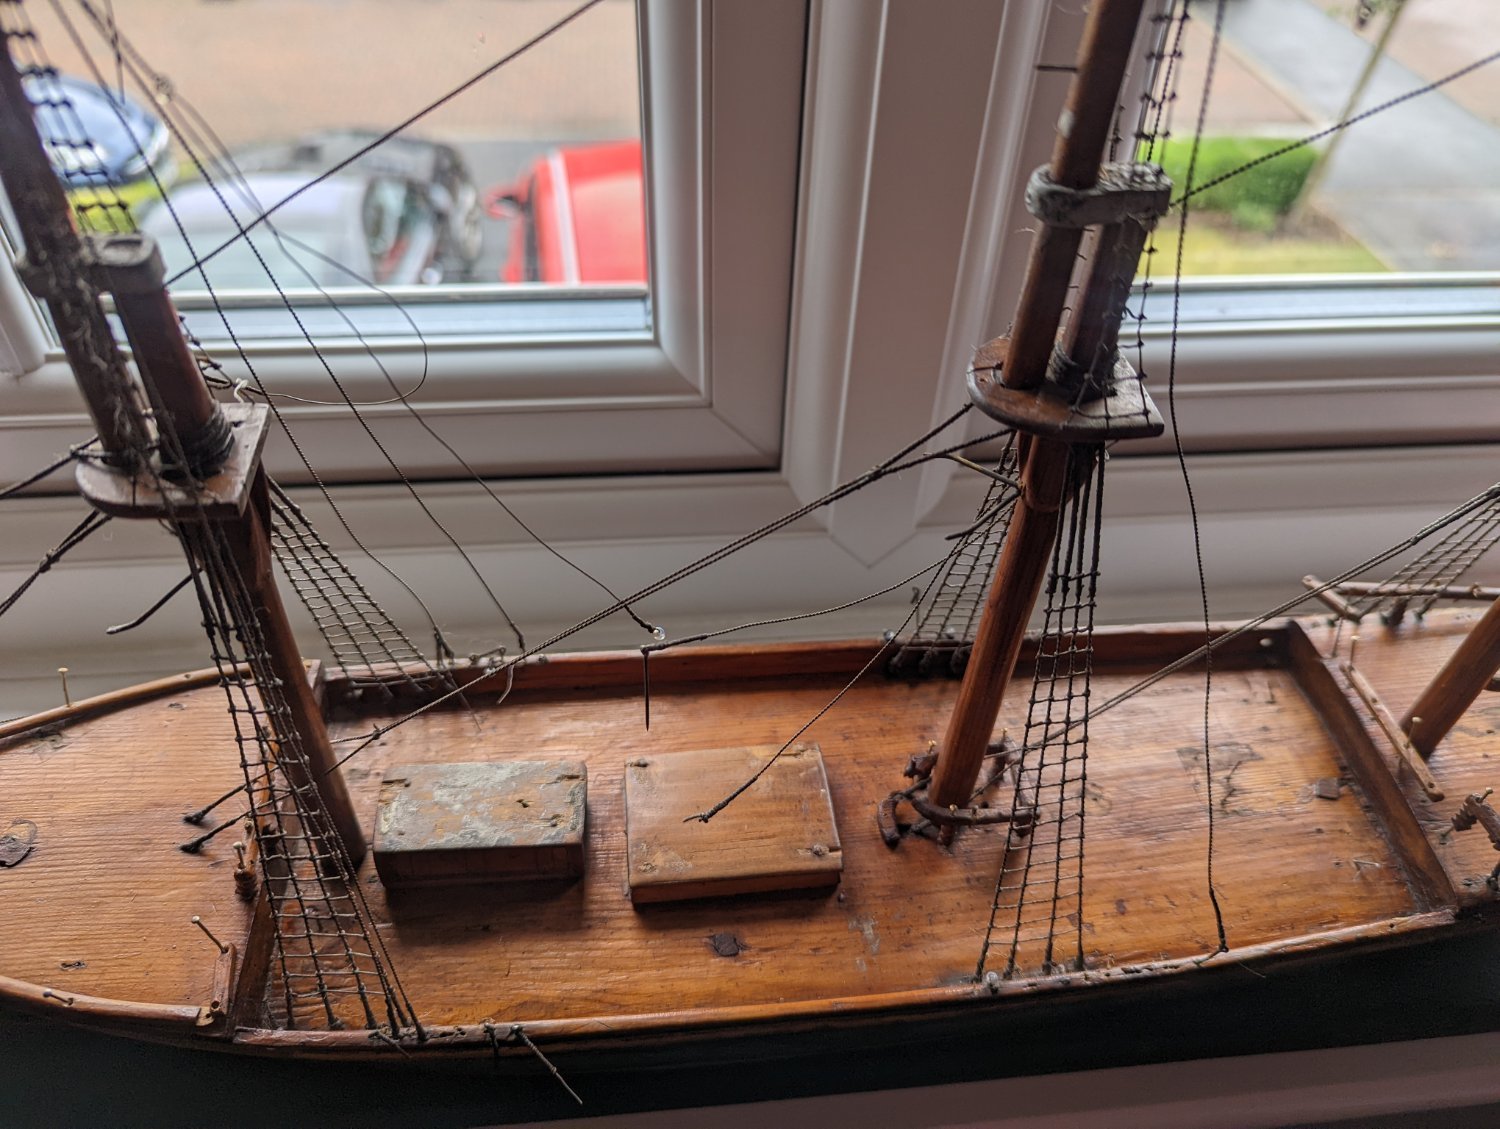
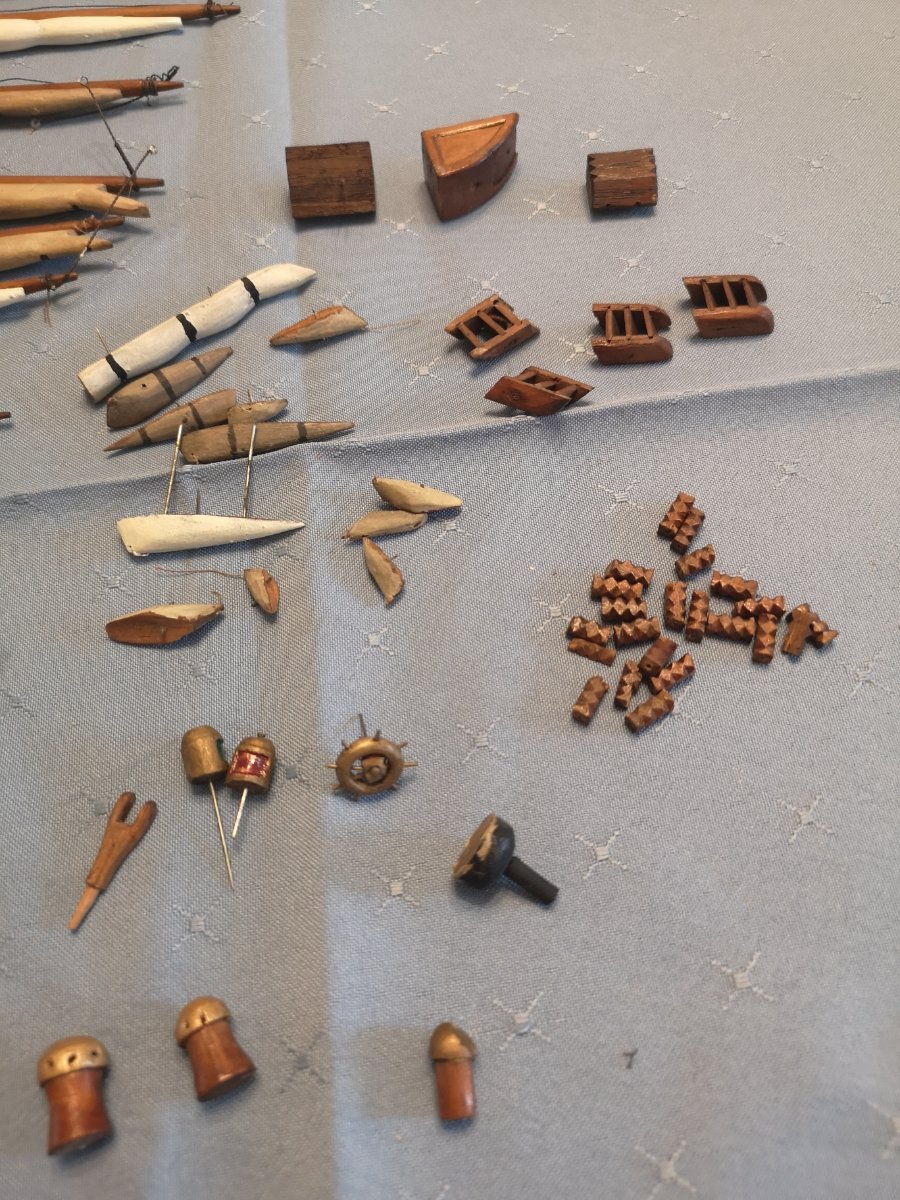
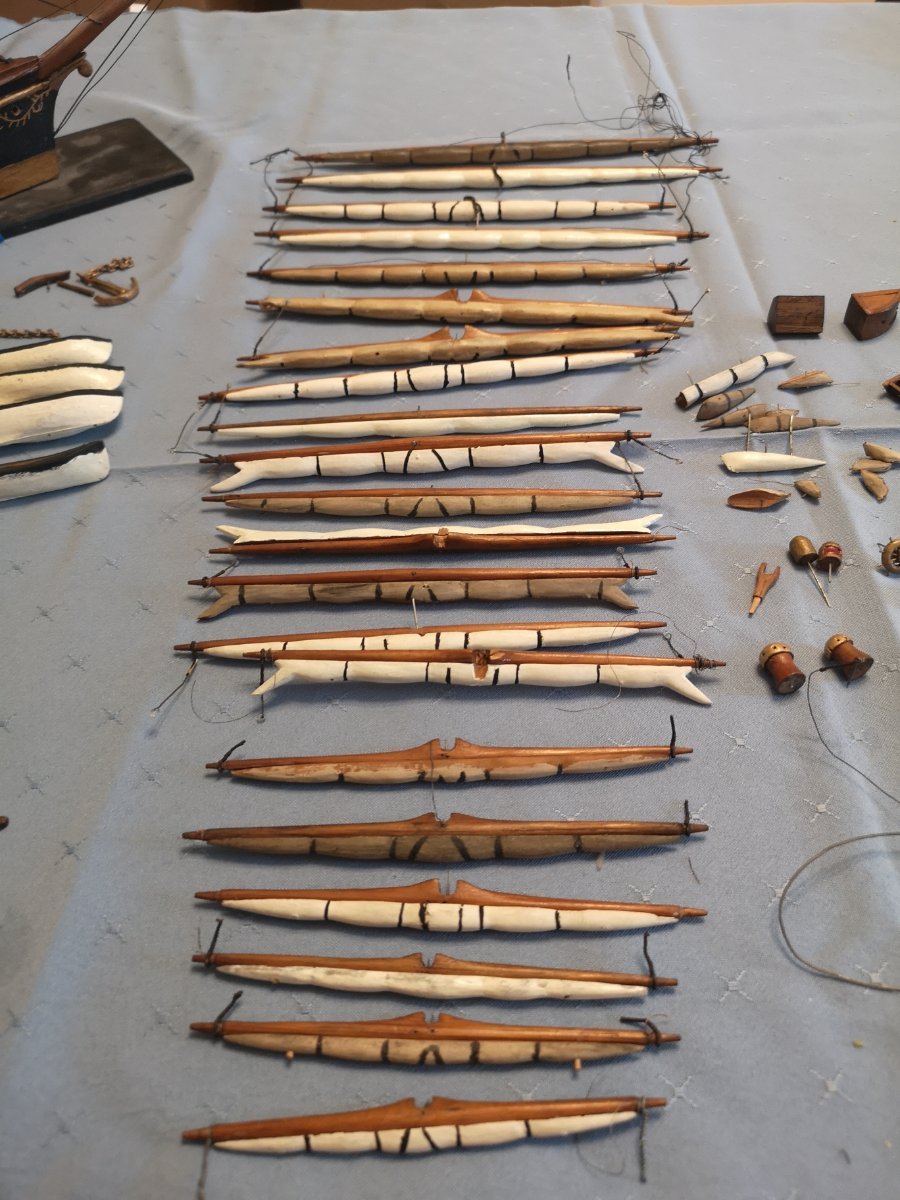
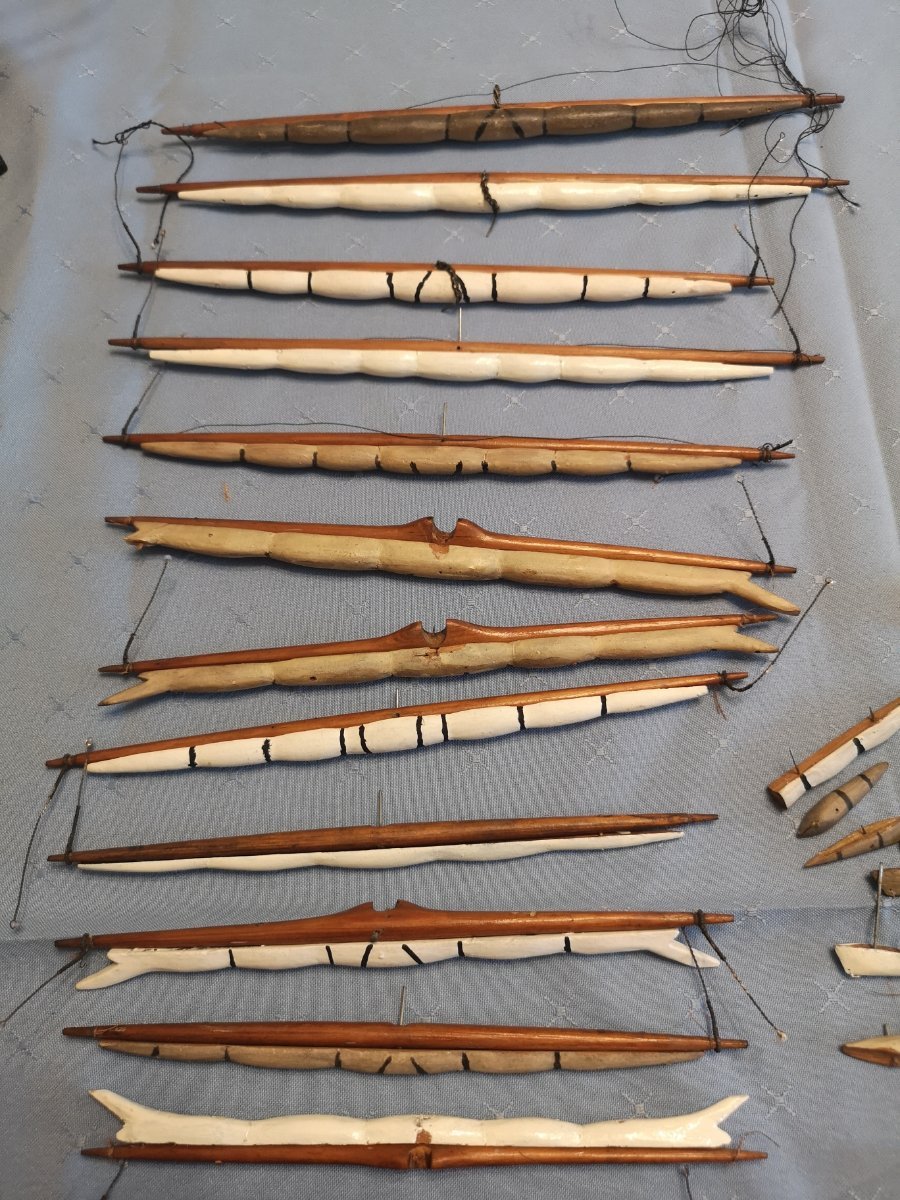
 Getting on, now looking for the correct placement of the deck. I have placed the parts I would think to be correct, and in pic 3 have those left over. On top of that, there are both the remaining rails, a lot of which will need re making.
I now would like please confirmation or otherwise of my thoughts, and any other comments.
- Keith Black, berhard, druxey and 3 others
-
6
-
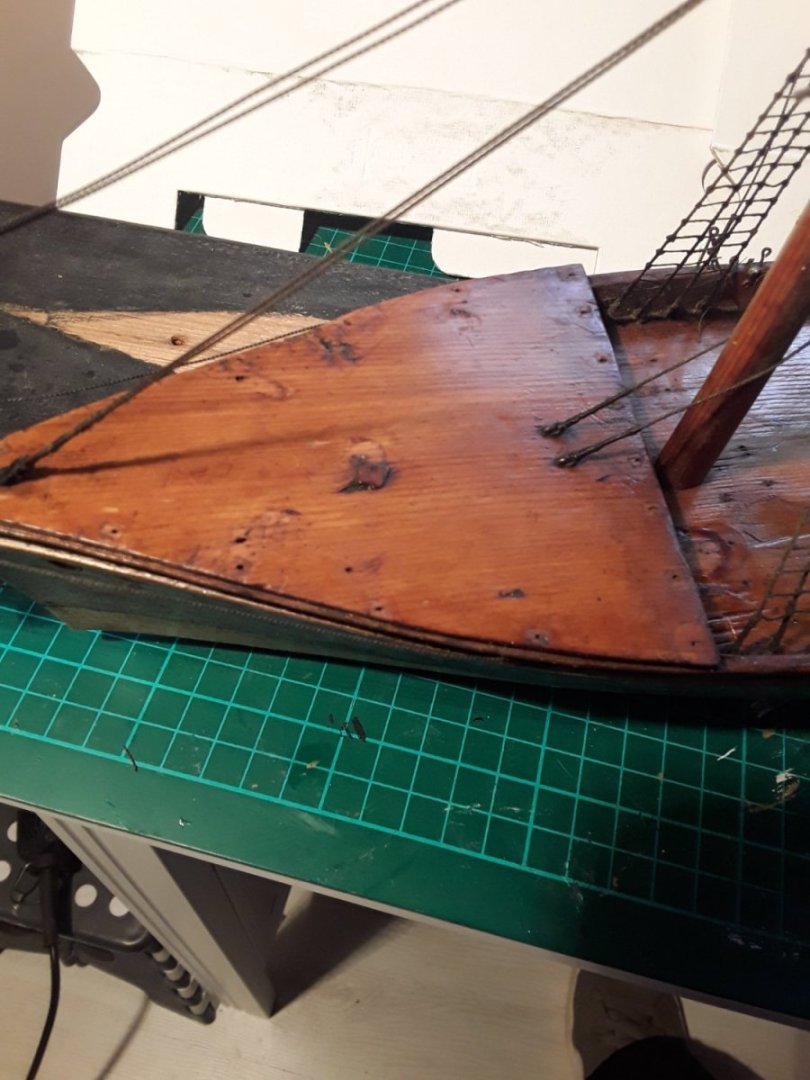
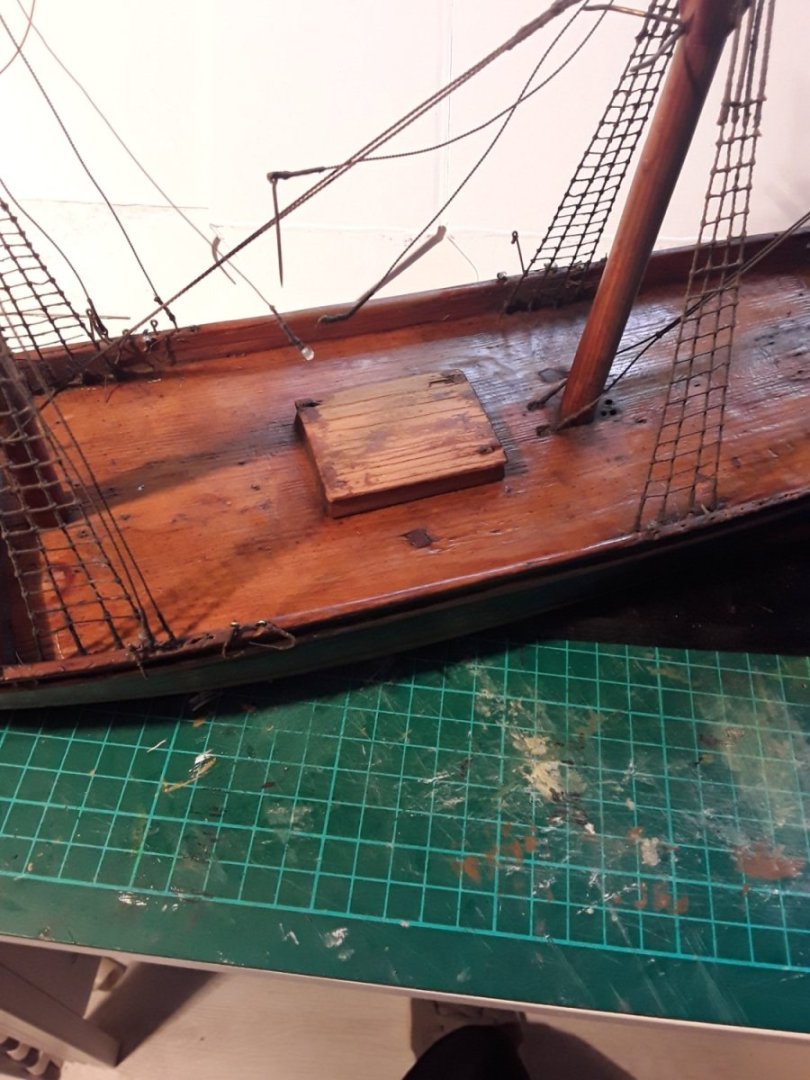
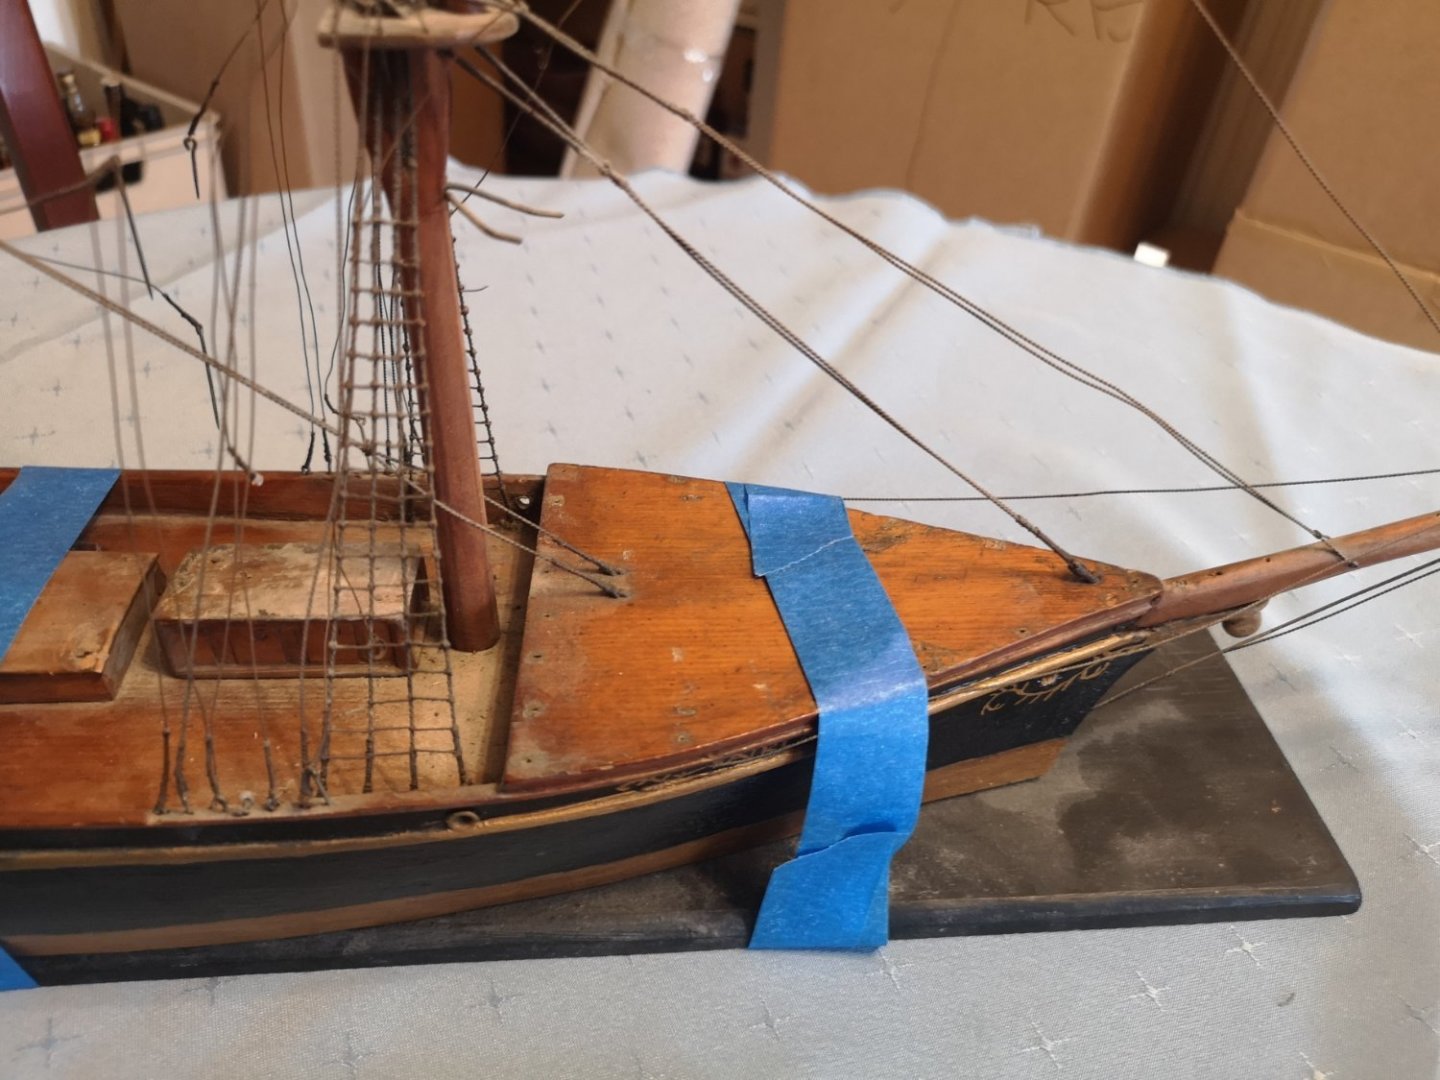
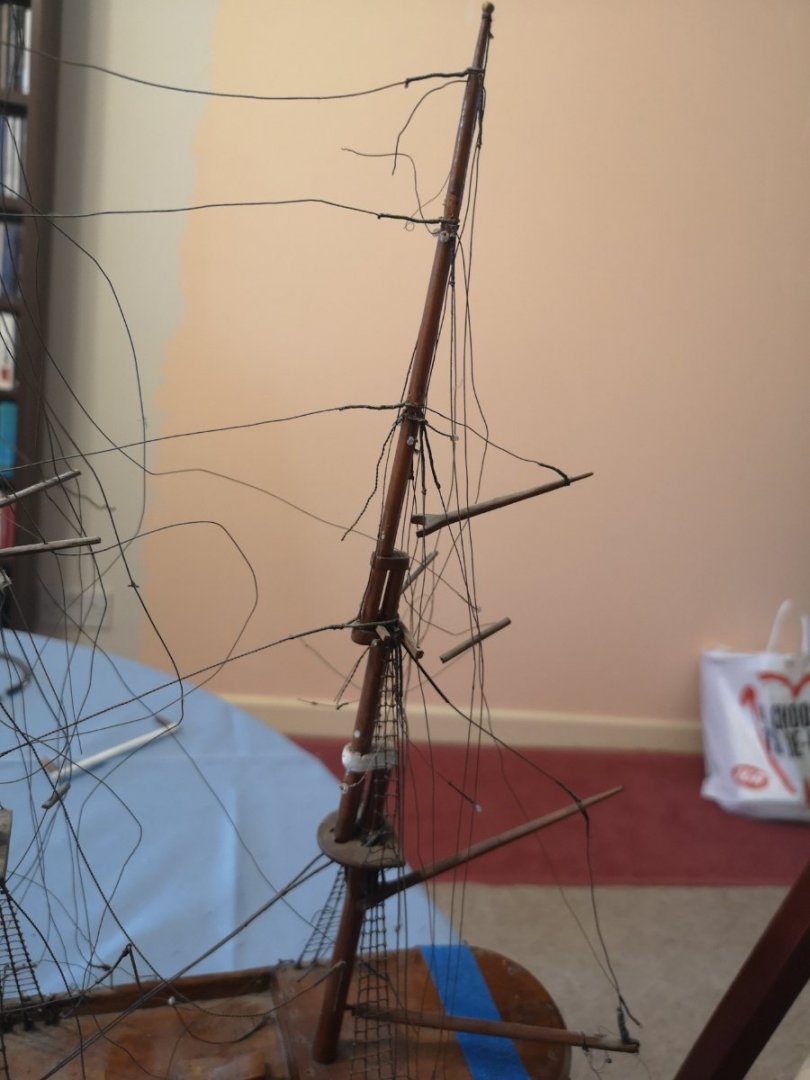
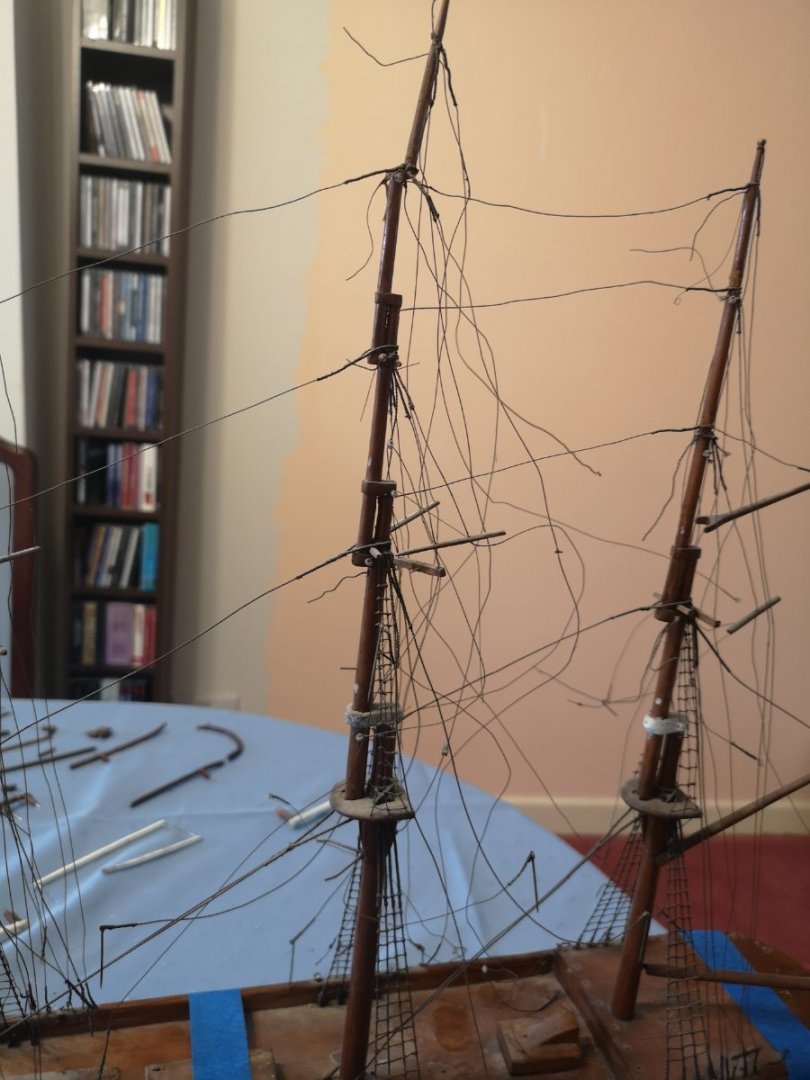
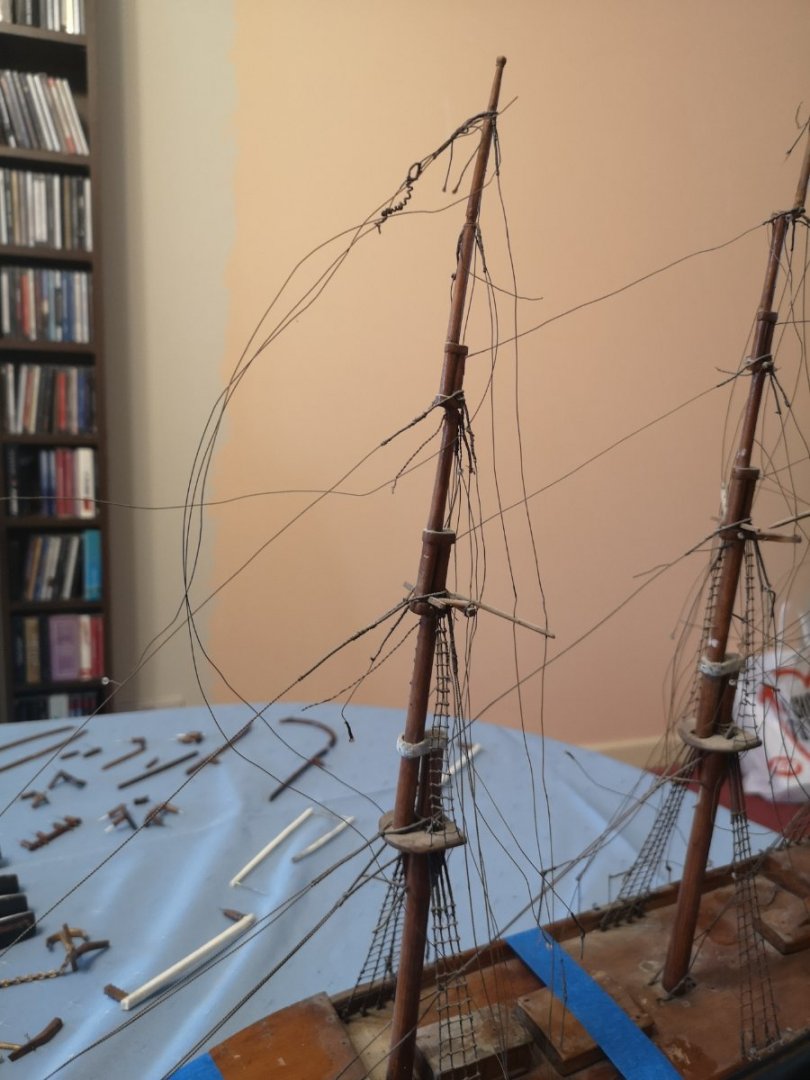
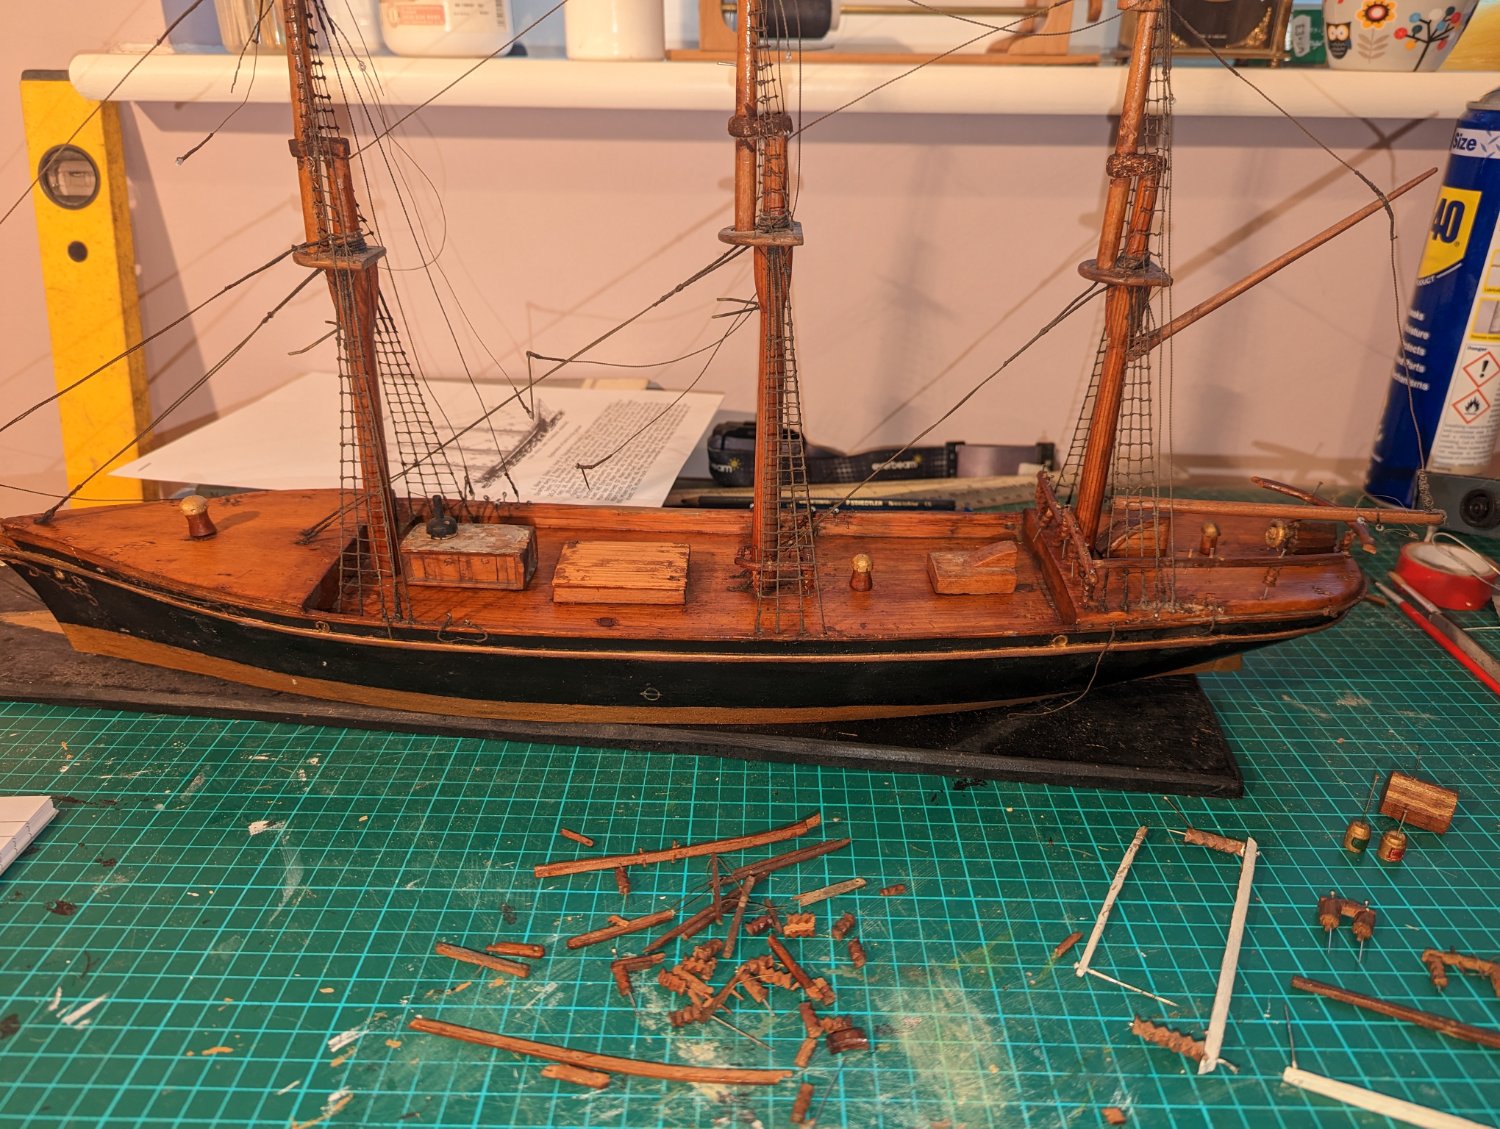
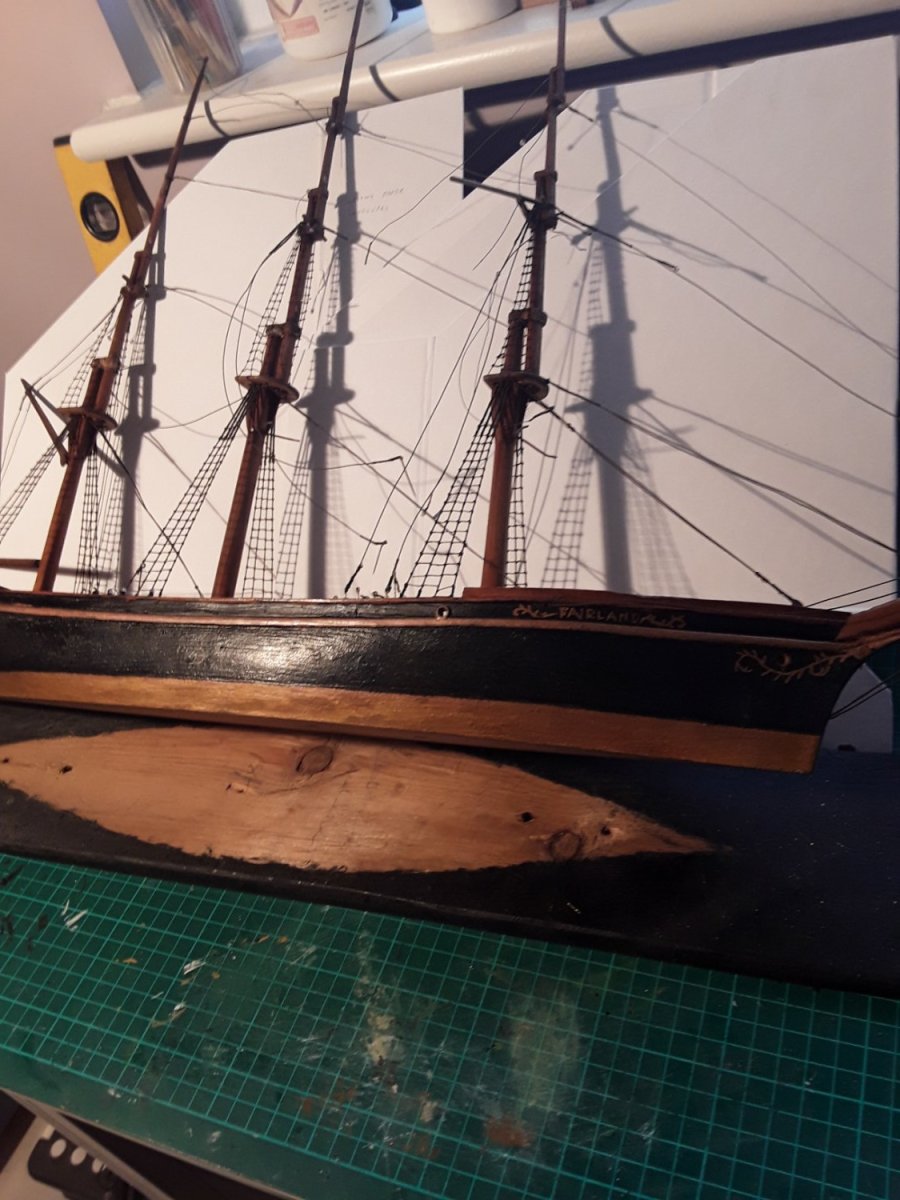
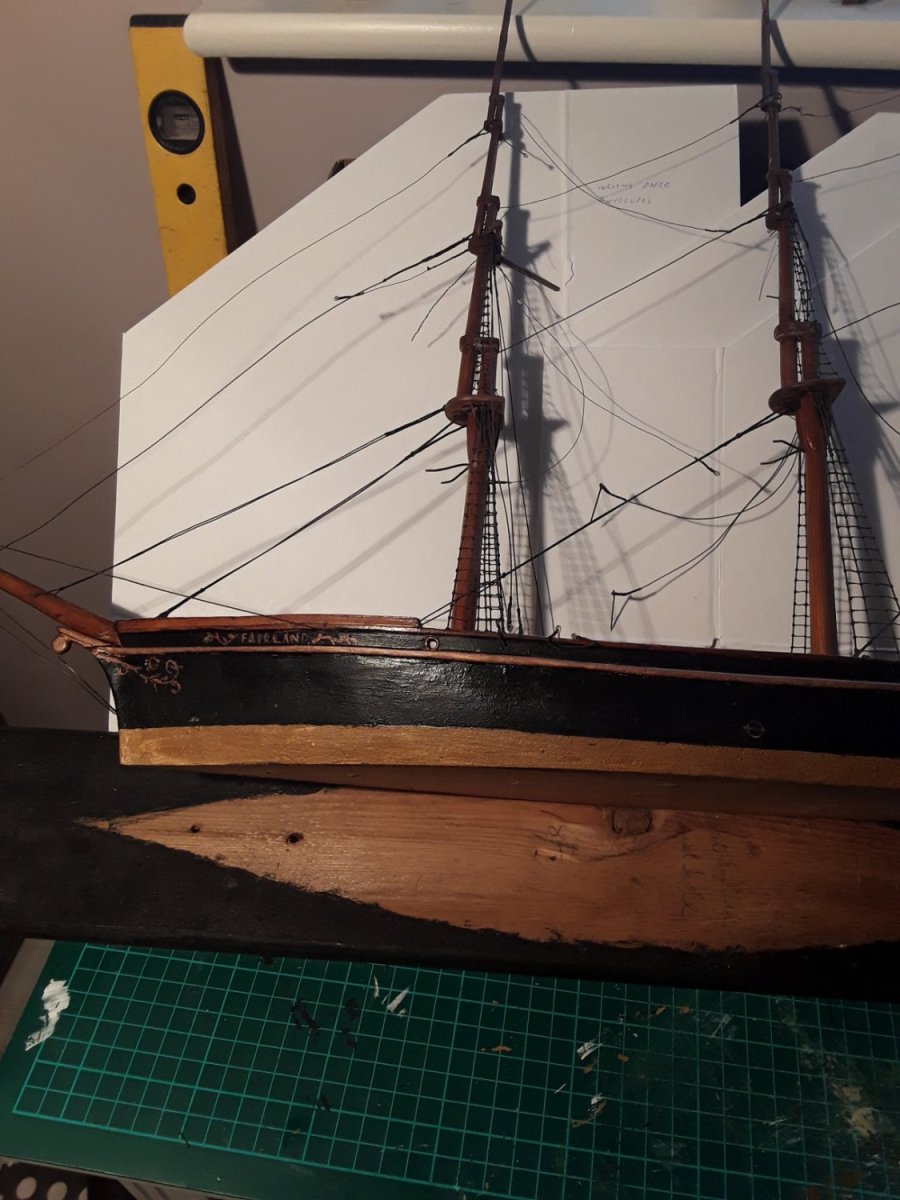
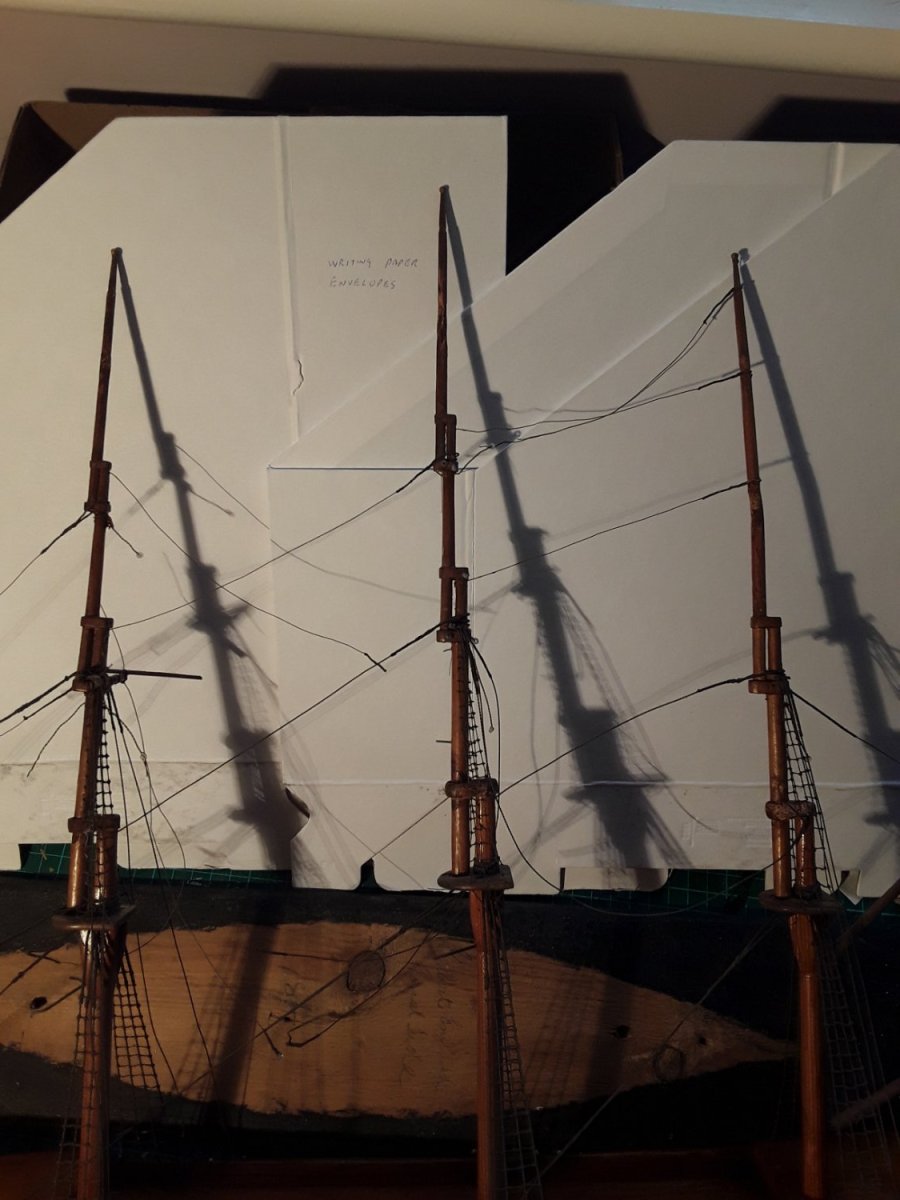
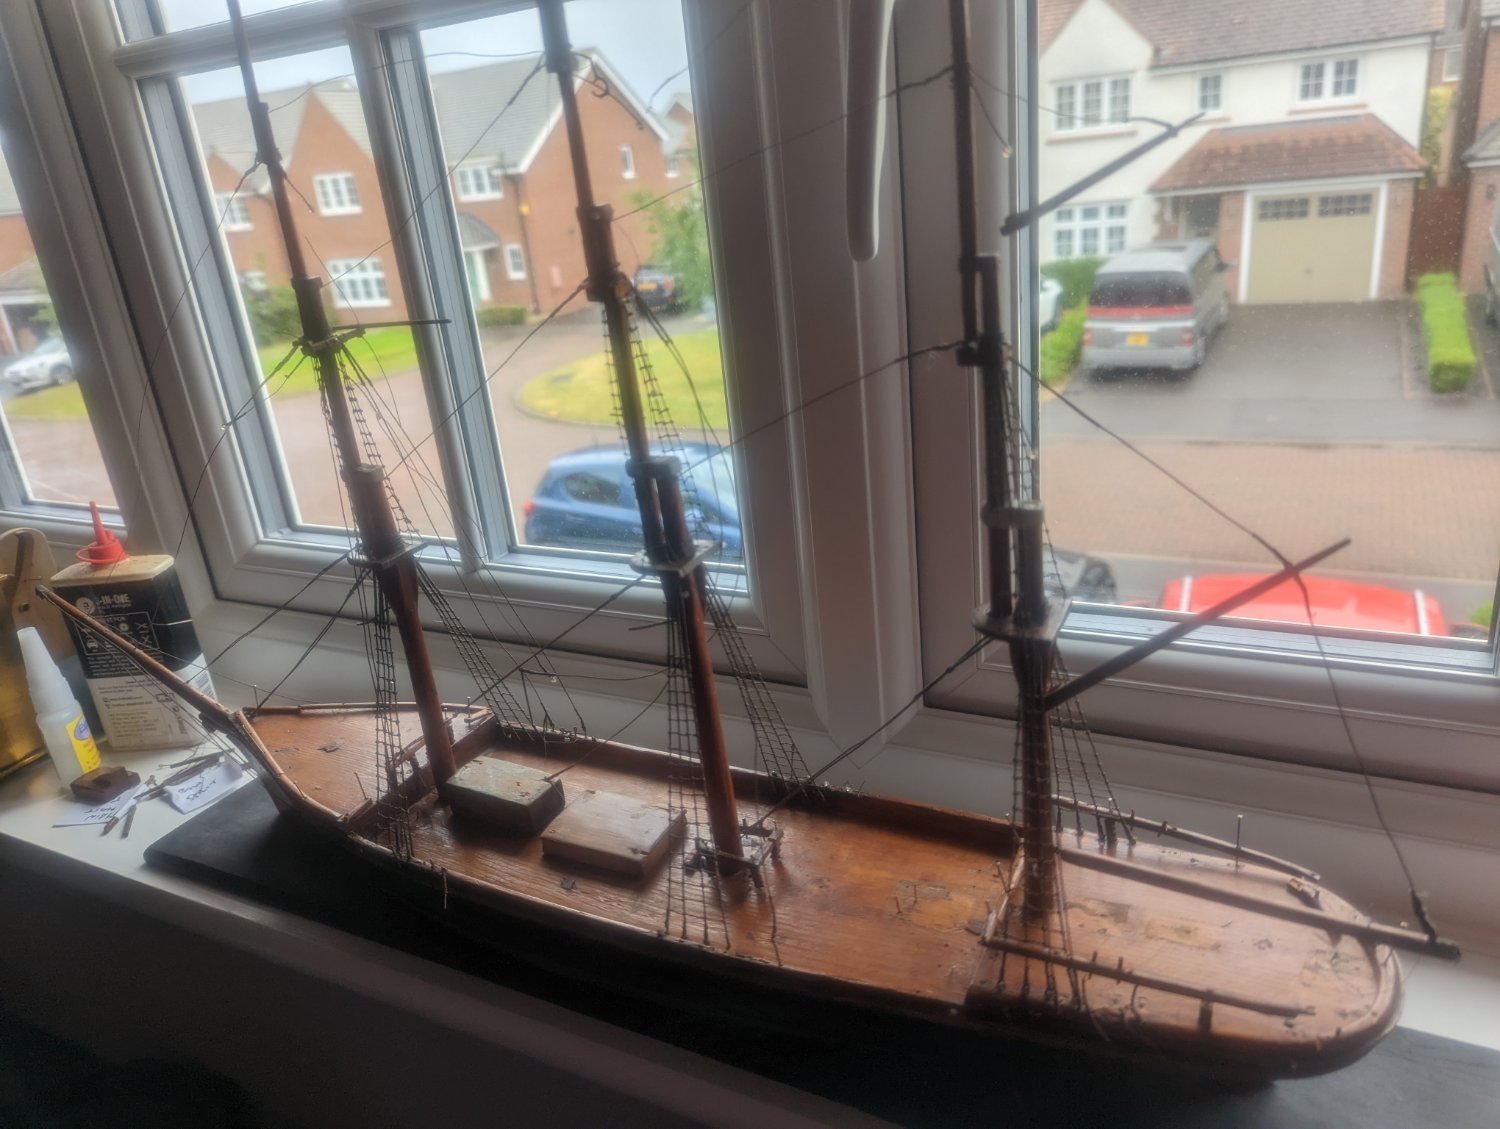
Some more work finished. I have tidied up the hull painting, I have filled and mended all 3 masts, though the mizzen mast has a slight kink. Nothing to be done, it will be hidden in due course by the 7 spars! Have cleaned up and re oiled the decks, again have not sanded right down so as to keep the spirit of the original.
I must now look at the deck furniture, rails and general bits and Bob's.


- berhard, ccoyle, Keith Black and 1 other
-
4
-
Thanks Keith. Totally appreciate what you say, and why. However, I am doing this on behalf of a friend of mine. We had a chat much along these lines, ie based on whether this was purely a restoration with minimal interference, or a rebuild. The ship has deep family and sentimental roots to him. If it were to be dismantled and completely rebuilt, he feels it would not hold the same memories. Also, I know from the general condition that by dismantling, the masts would not survive complete, neither for example the ratlines.
Hence why I am generally cleaning rather than sanding and repainting, and putting back the jigsaw puzzle 'along the lines' of a contemporary ship, but still with 21 spars for example, as supplied to me.
Thanks again, everyones comments and suggestions are valued.
- mtaylor and Keith Black
-
2
-
After a few months, I have now completed the Victory, so am ready to move on to the Fairland. I intend to clean up the decks and masts, tighten up the rigging and then restore the deck areas. I can then move up, add to the standing rigging and start the spars etc. Any ongoing help and comments much appreciated.

- ccoyle, mtaylor and Keith Black
-
3
-
Thought you were a'talking of my trouble and strife then, EZ!
-
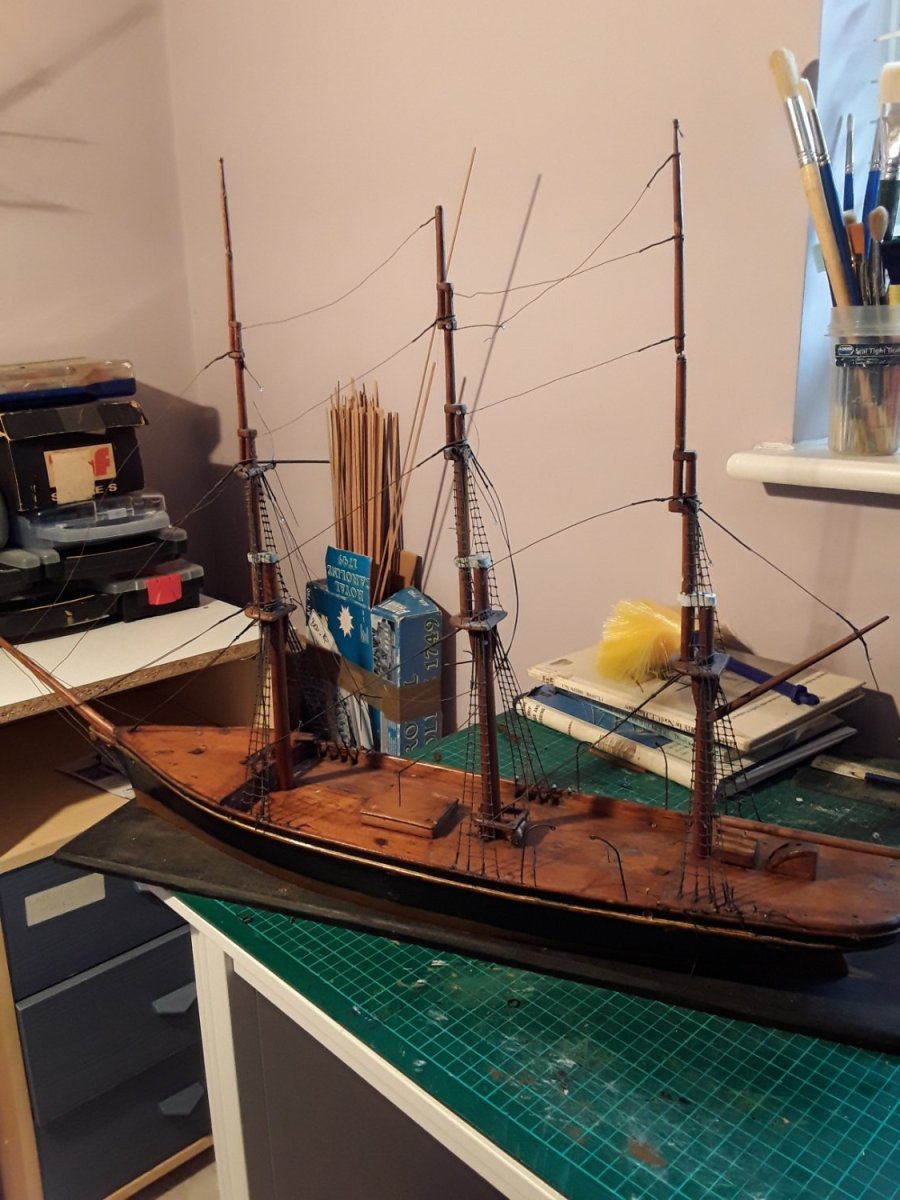
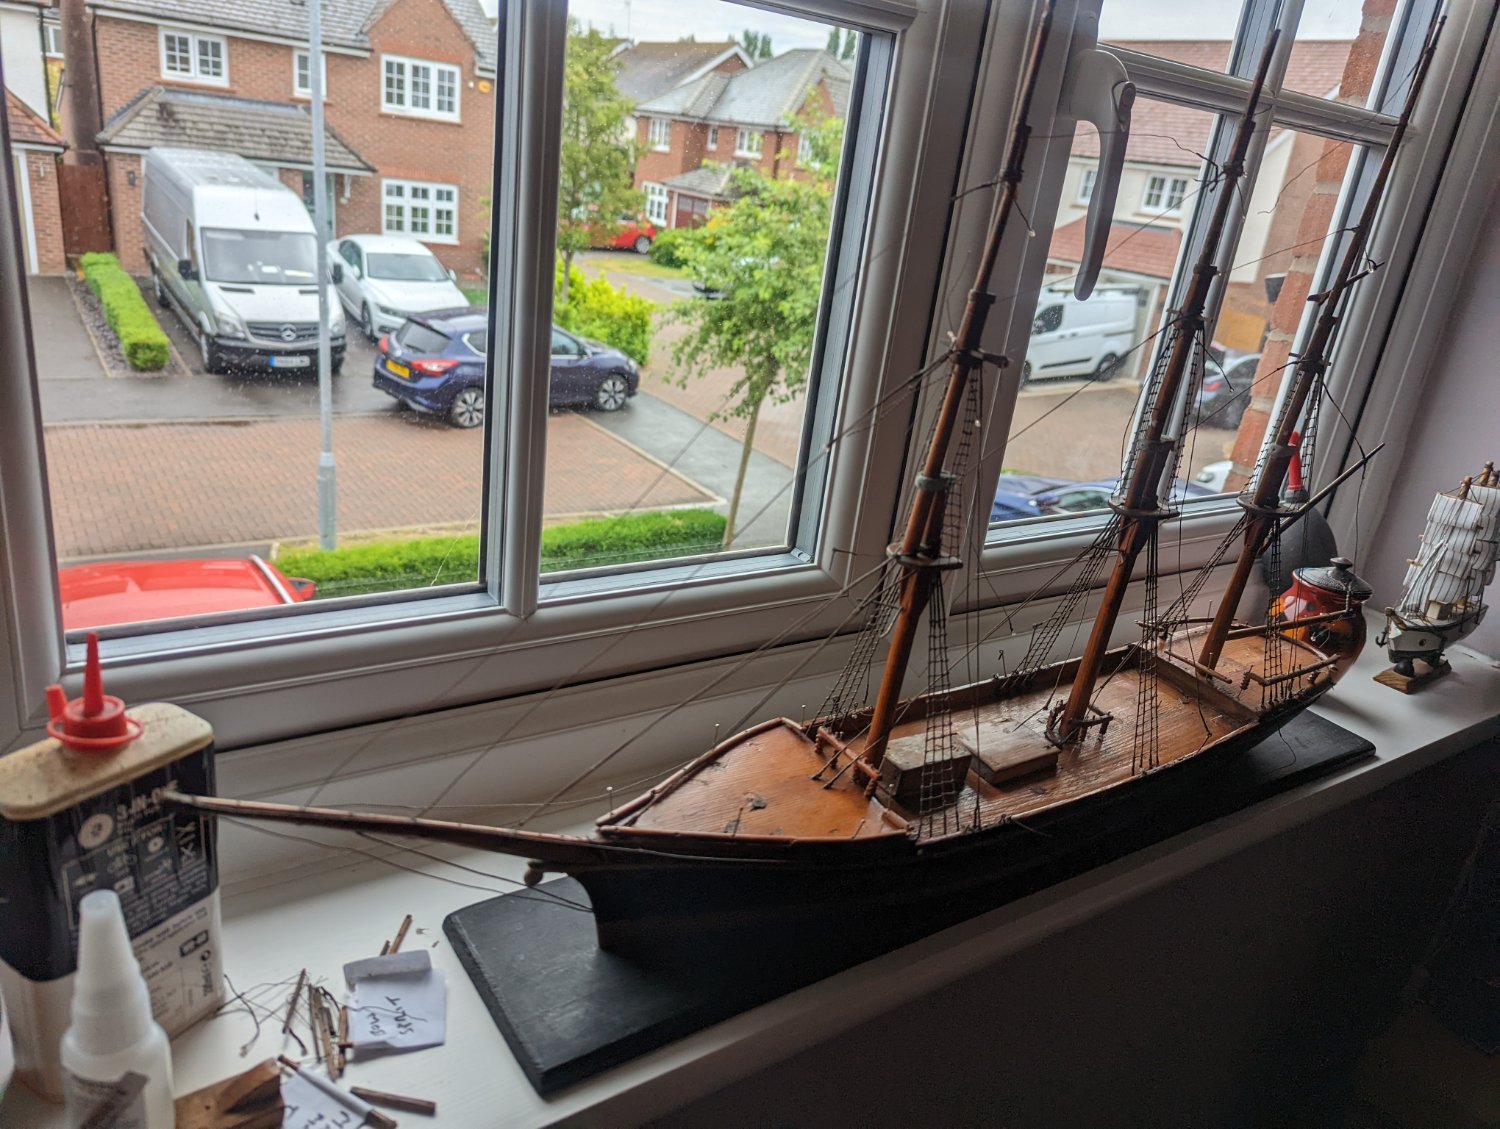
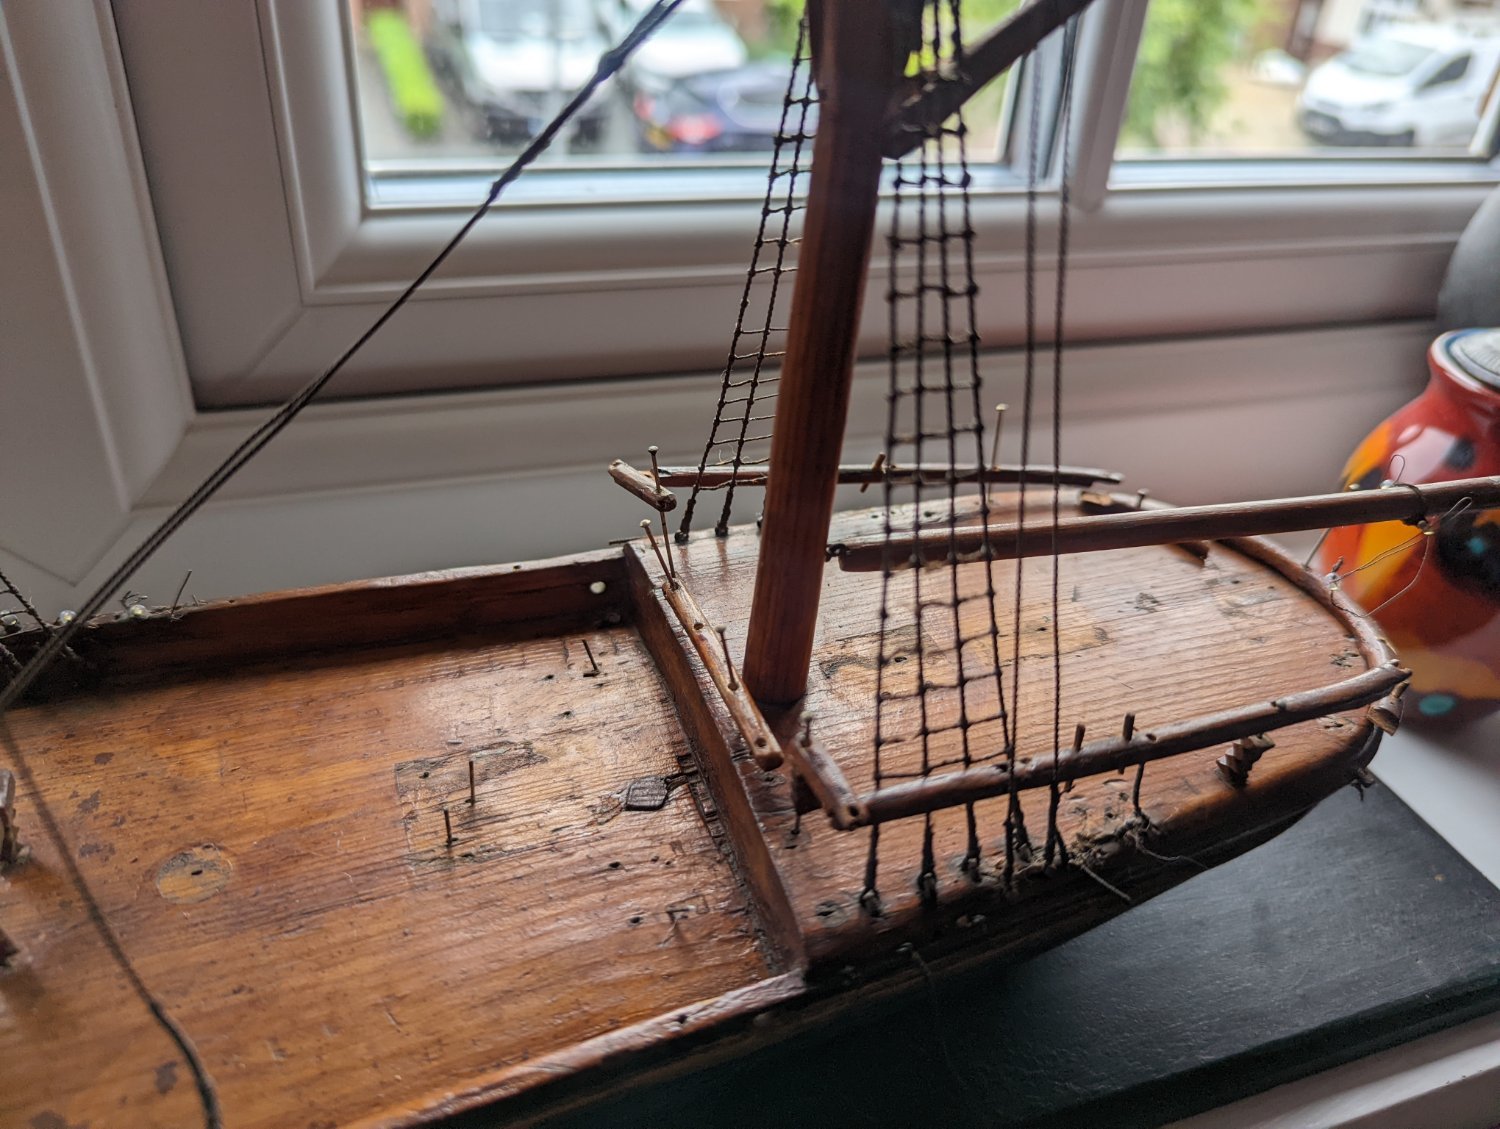
We have now settled in to the new house, and so I am starting to think about some more work on the Fairland. I have now removed the unworkable wires from the model, leaving a good representation from the original. I have kept the waste wire, and can use that in smaller runs if needs be. As you can see, I have started the clean up, and it is amazing what a difference a little spit on a cotton bud makes! Thanks for that tip. I do not think the hull will need a lot more work, just a little localised attention here and there.
I have loosely placed some of the railings in place, and am just awaitng some more pins to complete this. I think I have enough 'pillars' to put under the railings, but can make more if needs be. I can then identify, clean and add the rest of the deck furniture. It is my intent to finish that element before restoring and adding the 21 spars (yes, I will put them all on despite the historical inaccuracy), as that will restore things in a 'folk art' fashion.
Rigging, whether wire or 'rope' can then follow.
As ever, I shall be waiting with baited breath for your help and assistance.....please!!!!


- mtaylor, Paul Le Wol, KeithAug and 3 others
-
6
-
We have now settled in to the new house, and so I am starting to think about some more work on the Fairland. I have now removed the unworkable wires from the model, leaving a good representation from the original. I have kept the waste wire, and can use that in smaller runs if needs be. As you can see, I have started the clean up, and it is amazing what a difference a little spit on a cotton bud makes! Thanks for that tip. I do not think the hull will need a lot more work, just a little localised attention here and there.
I have loosely placed some of the railings in place, and am just awaitng some more pins to complete this. I think I have enough 'pillars' to put under the railings, but can make more if needs be. I can then identify, clean and add the rest of the deck furniture. It is my intent to finish that element before restoring and adding the 21 spars (yes, I will put them all on despite the historical inaccuracy), as that will restore things in a 'folk art' fashion.
Rigging, whether wire or 'rope' can then follow.
As ever, I shall be waiting with baited breath for your help and assistance.....please!!!!
-
-
Thanks boys. Afraid things are currently delayed. We have just moved house, a messy move that has taken 3 months or so. The house will be my priority, so no work maybe until the winter 😣. I will be in touch!
- mtaylor and Keith Black
-
2
-
All is good chaps, we are all working to the same end. Equal thanks to all contributors.
Mike
-
Still listening, taking everything in thanks. I have contacted Stewart, the owner and we are actively talking about the plans. Interesting comment the last one Rob, wasn't aware of the difference. Many thanks for the research.
- mtaylor and Keith Black
-
2
-
Thanks Rob, very illuminating.
Stewart, the ships owner is not certain about the provenance.It was his Great (I think) Grandfather who built the model, and S in unsure whether it was fictional or otherwise. He has tried Lloyds Register who can find nothing, but I think he would like it to be a 'real' ship. He does admit to an earlier intent to restore the model, hence its' deconstruction, but this was never continued. At that time he drew the model prior to its demise, but sadly those drawings have long since dissappeared.
I admit I am a total newbie to this kind of project, and not being a sailing man have to look up all these terms. So as to Howes rigging, I gather this is where the lower sail is in a fixed position and others can come down over it. Would this only apply to the 3 lower sails? Also, how can you tell this from the photos?
I must admit from my limited research, the only clippers that I could find with 7 yards werejust an occaisional mainmast on an older vessel, or maybe all 3 on these new cruise clippers. I am afraid again that the names of the sails....Moonsail etc maen nothing to me. When it comes to the rigging, I guess so long as I know how the yards were held, and then the sails set, then I can rig accordingly.
Thanks for your time, and as you will see when I have the ship cleaned up and stabilised I will be leaning very heavily on you!!!!!
Mike
- Keith Black and mtaylor
-
2
-
Thanks folk.
Keith....Yes indeed, some work to do! I am thinking that the wires are in such a state that I am tempted to leave the standing rigging, but lose all the elements of running rigging. Also leave the ratlines. I can then get to the masts and deck better to clean them. The masts need taking apart anyway, as there are several breaks. I can ultimately re rig using ropes instead, and proper blocks etc. I intend to get hold of a copy of Cutty Sark's rigging plans to get the gist of rigging a Clipper.
Roger.....Yes, the furled sails are carved wood. I am sure I can make a better job of the painting. There are also a number of loose pieces of the same carvings as shown on the photo's. Not sure yet where those go!
Out of interest I notice that the 'yoke' on the yards is in some cases on the aft of the yard, and some are on top? That is a little confusing I have to admit.
- mtaylor, druxey and Keith Black
-
3
-
-
I have the honour to have been asked to restore an old, and very tired model thought to date from the late 19th Century. Nothing is known about the ship, bar it's name, so I can only work with what I have been given. You will see that it is 3 masted, and there are 21 yards. The rigging that is left on the ship is wire, and some has been snipped off rather than undone.
I will follow advice given me so far and thoroughly record and clean the model first. I also will be measuring and recording the rigging to try to work out where it went, and what more is required. I have some experience of building, though minimal compared to many on this forum. I will therefore be very interested and grateful for any advice along the way.
Thanks Stewart for your faith in me, I will do my best.
Builds to date
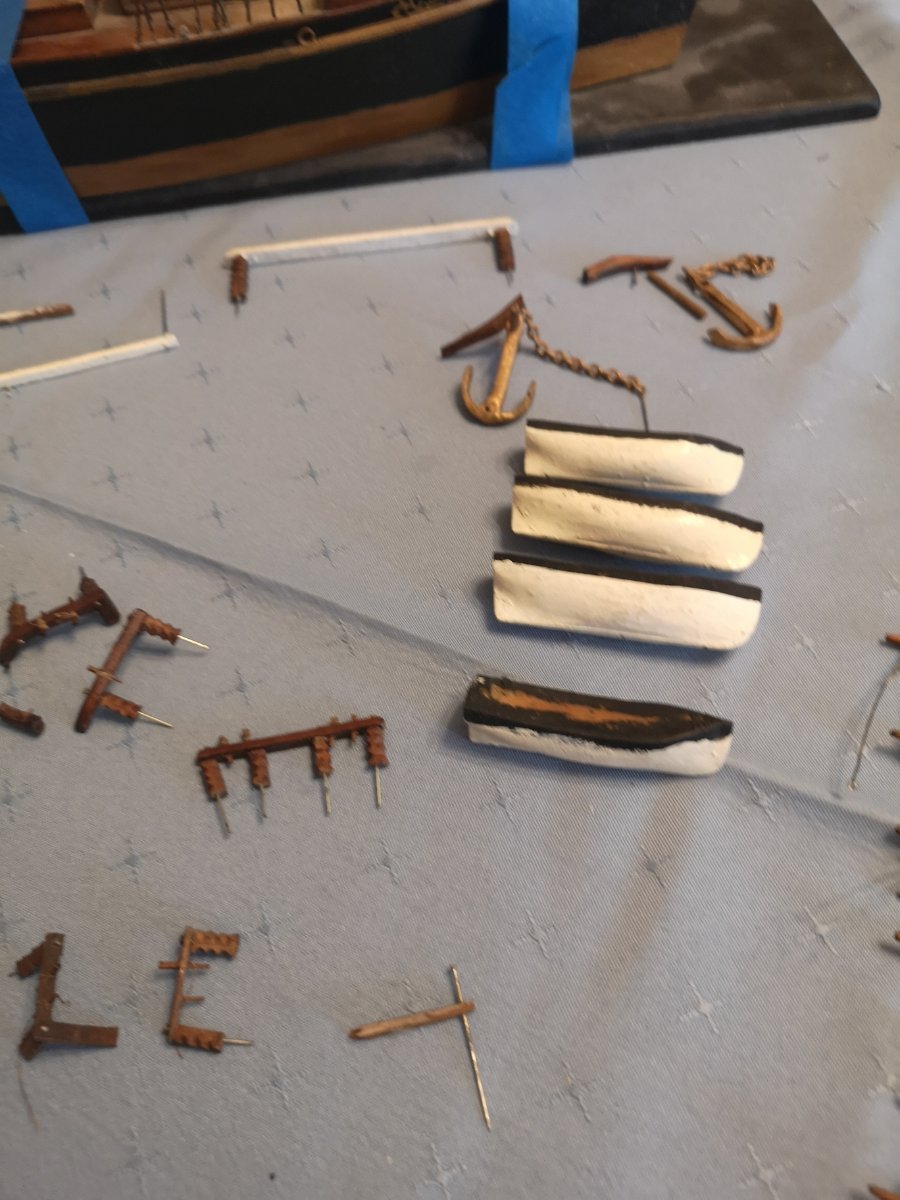
Panart Royal Caroline 1/47 Completed 2011
Jotika HMS Vistory 1/72 Started 2008, still to finish ships boats
- ccoyle, GrandpaPhil, Keith Black and 2 others
-
5
-
Couple of problems. Firstly, we simply do not have the space to walk round it! Houses in UK are not that big. TBH, it would cost as much as the original kit to get a suitable case. I can still foresee sealing thespace, and having LED lights around the perimeter. Be interested in seeing any other 'built in' cases? Thanks all for responding, keep 'em coming!


Fokker Dr.I by portchieboy - Artesania Latina - 1:16
in Non-ship/categorised builds
Posted
Cheers Mike, but if you recall, the Fokker does not have working controls. Appreciate your feedback though.