HOLIDAY DONATION DRIVE - SUPPORT MSW - DO YOUR PART TO KEEP THIS GREAT FORUM GOING! (Only 24 donations so far out of 49,000 members - C'mon guys!)
×


rwiederrich
-
Posts
5,518 -
Joined
-
Last visited
Content Type
Profiles
Forums
Gallery
Events
Everything posted by rwiederrich
-
I then flipper her over and prepped for the other side. That will have to wait most likely till I return from a visit to North Dakota. I'll be gone for a week....Till then enjoy and see ya !
- 3,560 replies
-
- 8
-

-

-
- clipper
- hull model
- (and 2 more)
-
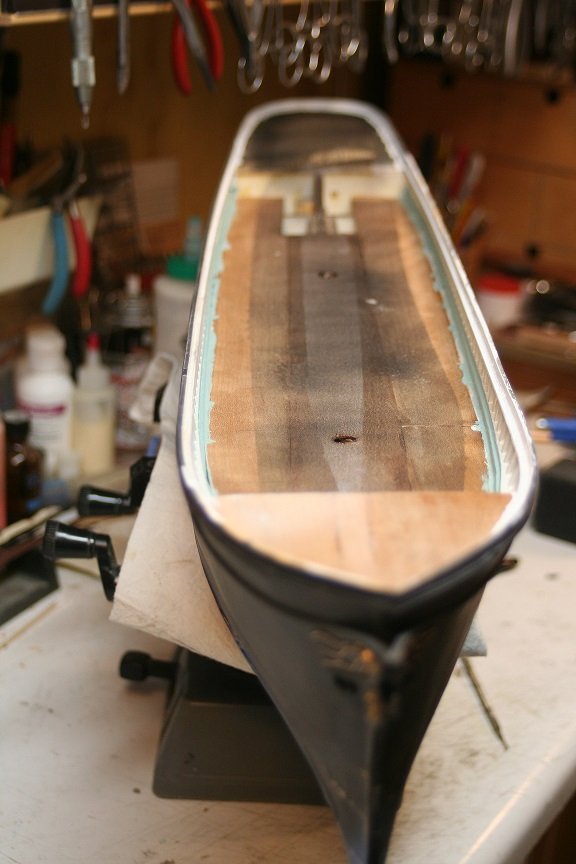
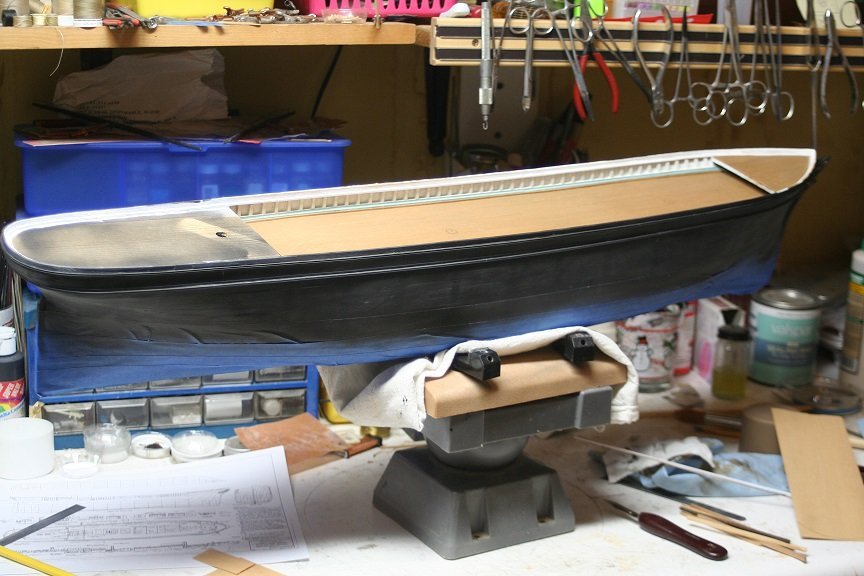
The deck was painted with a light brown..then the paint was rubbed off and then sanded. The paint remained in the deck pleats and gave the necessary aesthetics.
- 3,560 replies
-
- 6
-
-
- clipper
- hull model
- (and 2 more)
-
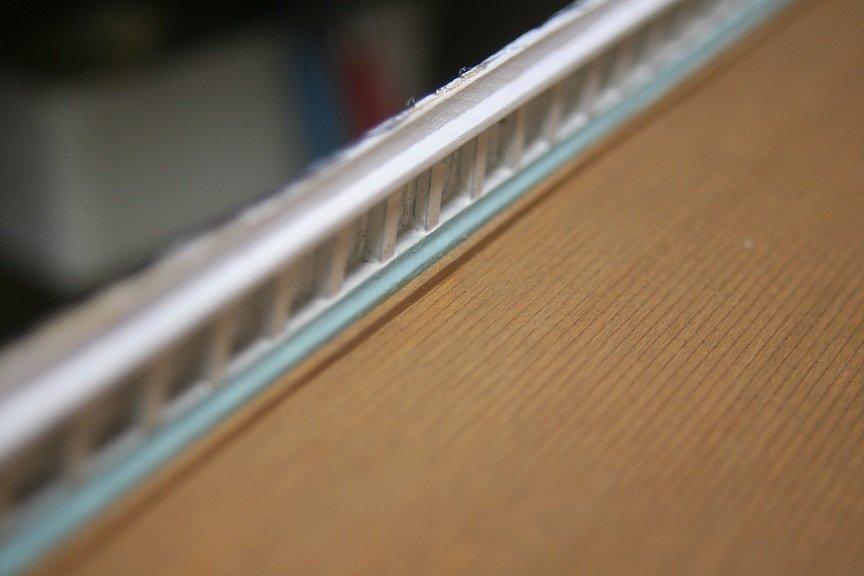
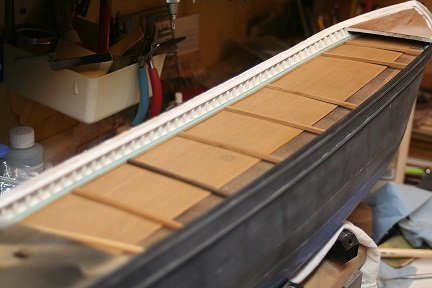
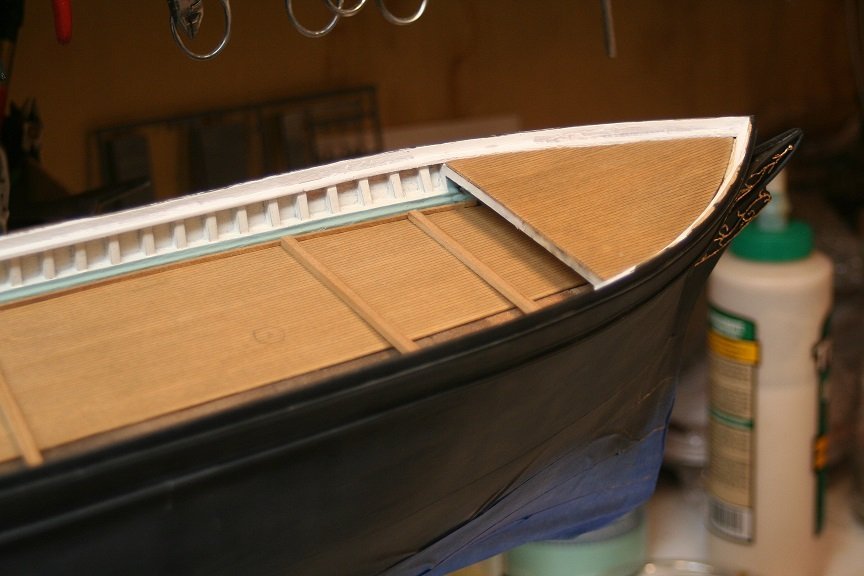
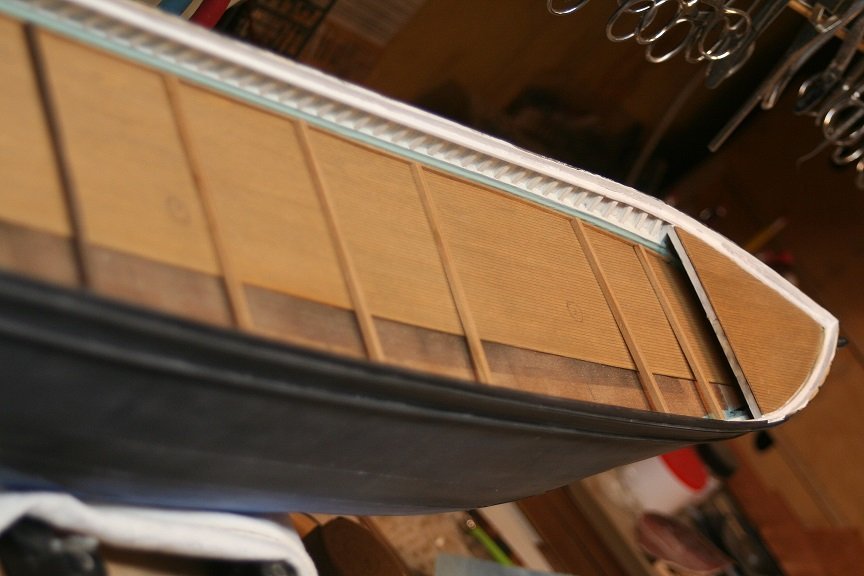
Spent a bit of time working on laying the deck. Here are some images with the support beams to hold the deck trim and snug...they will be removed when dry.
- 3,560 replies
-
- 4
-
-
- clipper
- hull model
- (and 2 more)
-
Personally I plan on replicating the cargo ports and the wash ports via scribe. They will not be open. It’s easiest that way but still accurate.
-
Thank Marcus. She was a fun project and I agree, I like modeling ships weathered. And this historical example was a premium subject. History most Cutty Sark enthusiasts are not familiar with. Thanks for posting. My new(remake) of Glory of the Seas will incorporate ample weathering as well.
-
Hi….. Medium doesn’t equate to size, but design. Extreme denotes the extreme clipper design, by a sharp entry and exit, focusing on speed qualities,Not cargo carrying ability. Medium implies more cargo carrying ability over speed.
- 3,560 replies
-
- 2
-
-
- clipper
- hull model
- (and 2 more)
-
Thanks Rich. I like to weather everything as I go. I don’t just like to build the time frame of the vessel but also depict the wear as well. I’m going to focus on the construction of the chain plates and channels next.
- 3,560 replies
-
- 1
-
-
- clipper
- hull model
- (and 2 more)
-
Yes they are........Good work. Rob
-
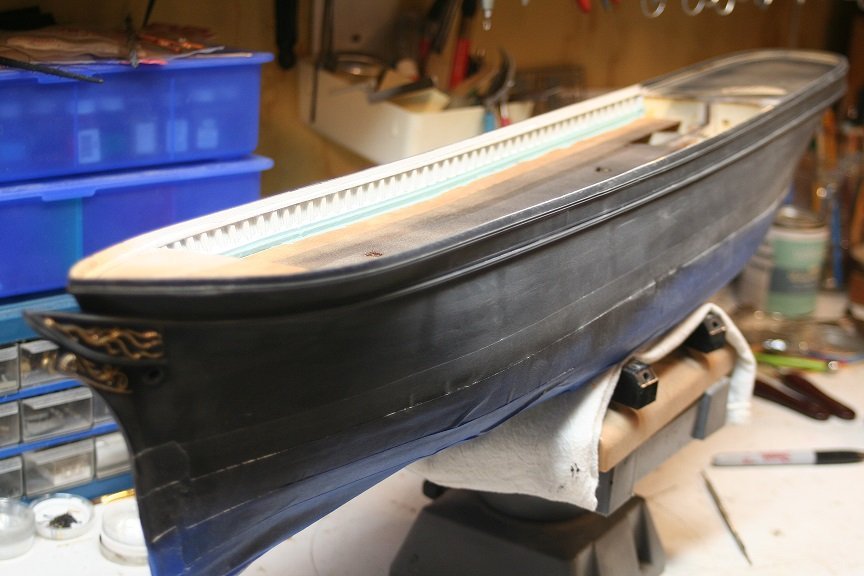
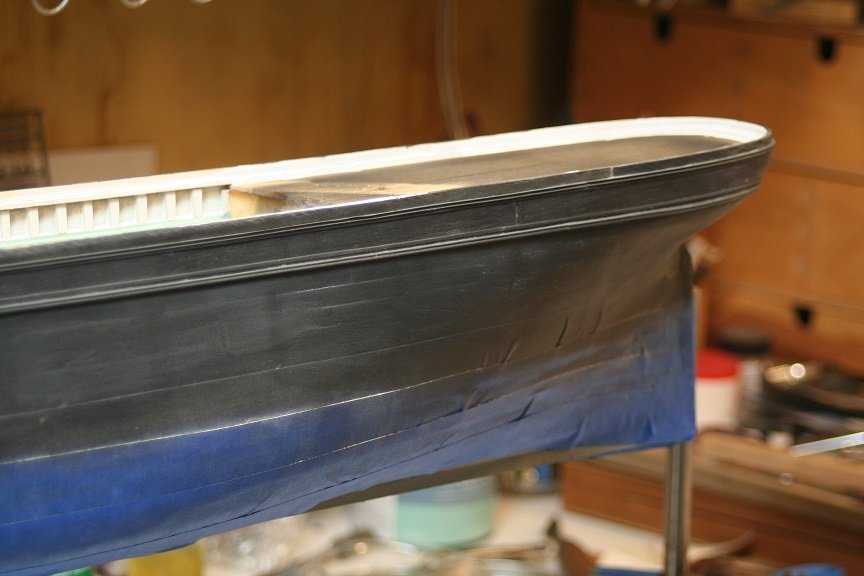
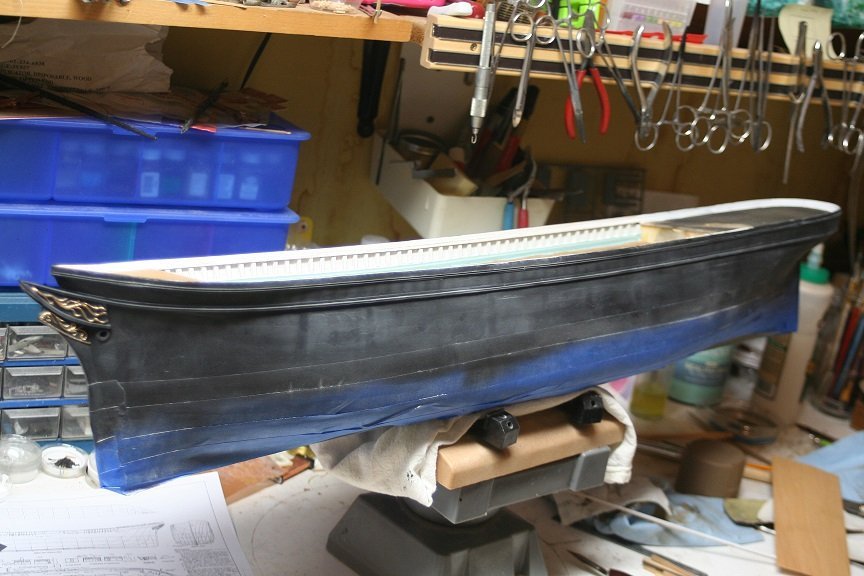
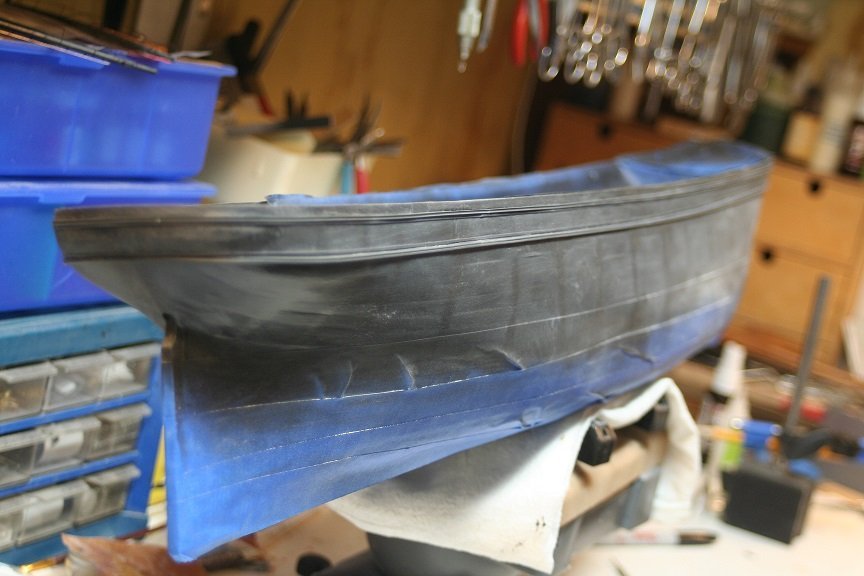
Spent a little time in the shop and I painted and began to weather the hull.


- 3,560 replies
-
- 5
-
-
- clipper
- hull model
- (and 2 more)
-
I misspoke......You are correct..there are 5 ports per side and the mooring hawsers as well. I was reviewing many images when I made that delusional statement. Rob
-
Wonderful job....... Rob
-
Yes...IF planking is thick enough to accommodate such sanding....that method can bee the easiest and fastest method. I'm all about that....... Rob
-
As I refine my model....I want to reiterate, that I am modeling Glory after her 1872 conversions...more precisely, based on her 1877 image of her in San Francisco. Several key notes: She was at the height of her glamor..... She is sporting her major overhauls items such as the new *boy* cabin and the chicken house. both items that rested over her existing main hatches, while she was under way. She enjoyed greater stability with the addition of several more backstays added beyond her existing fore and main channels. A guy boom was also added on her bowsprit to stabilize her head rigging. I won't even get into the rigging and masting changes at this time. All of these significant changes were a direct result of an evolutionary process that happens when real world experience demands the changes for betterment and ease. Structural and or esthetical. It is key to be diligent in replicating the changes in the era or time one wishes to model their vessel. I have seen far to many examples of models that interchange details of a vessel, not paying attention that one detail cannot be modeled, when that detail did not exist at the time of another specific detail. I ran into that plenty of times when researching the Great Republic. The Glory of the Seas had a varied long history and numerous mods to her structures. She has to be accurate according to the time you want to model her. Rob the Gr
- 3,560 replies
-
- 1
-
-
- clipper
- hull model
- (and 2 more)
-
Vlad...that is a unique method to create the effect. Great job. I have a feeling your hull will be magnificent. Greater detail can be incorporated in your scale. Rob
-
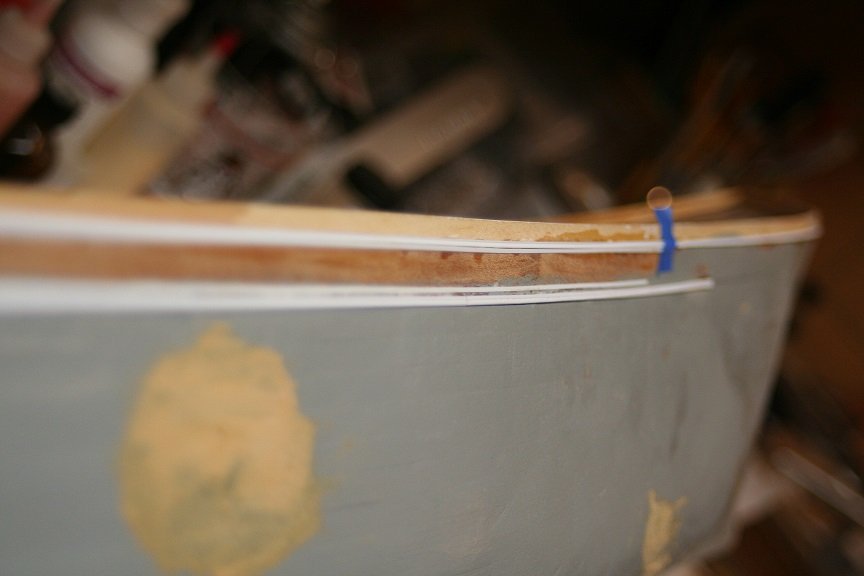
As usual more sanding and filling will follow.....before I add the channels, and chain plates, and the forecastle spray plate/trim. Rob
- 3,560 replies
-
- 1
-
-
- clipper
- hull model
- (and 2 more)
-
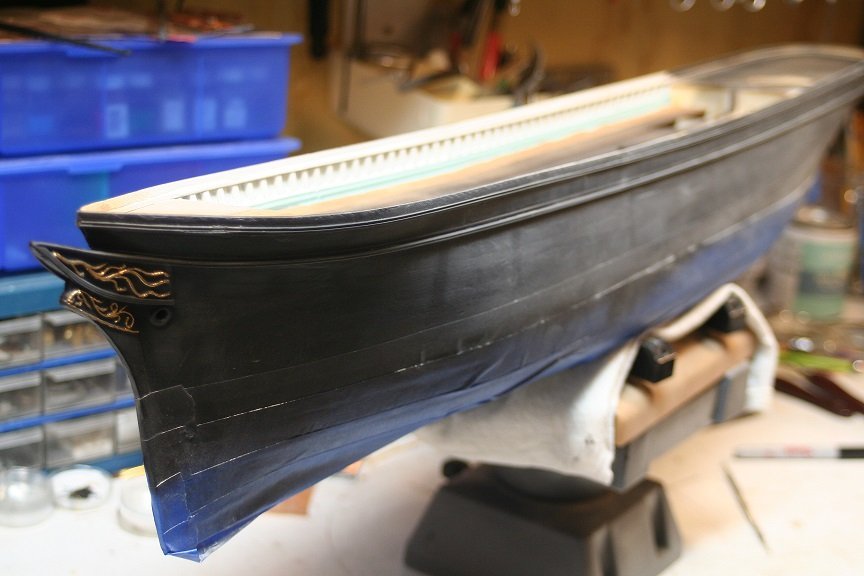
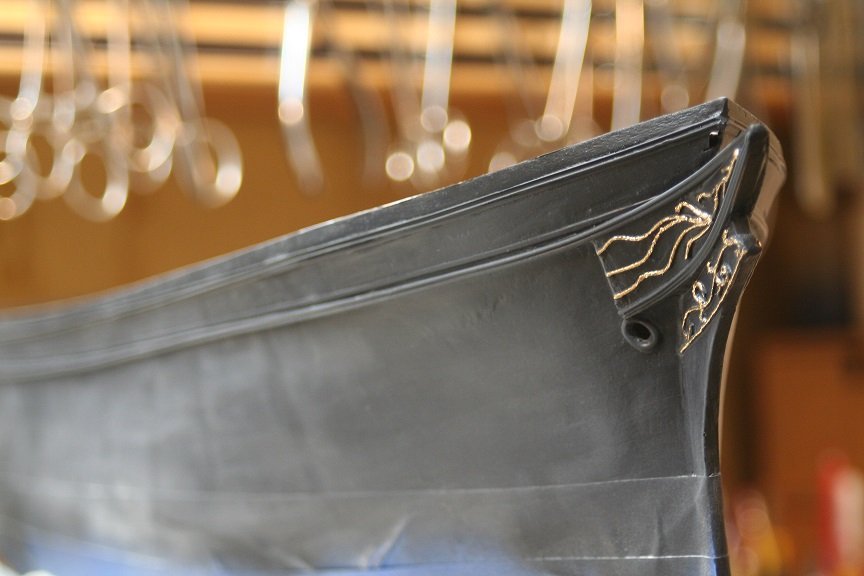
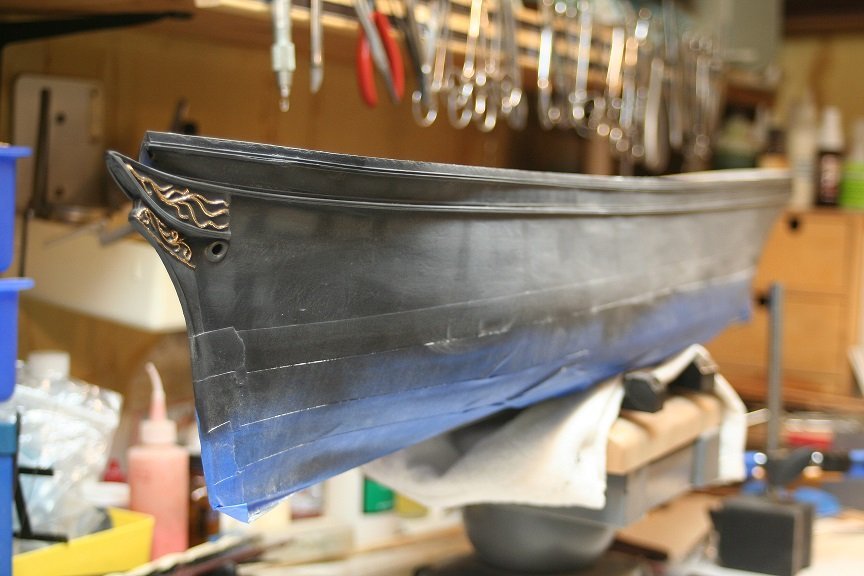
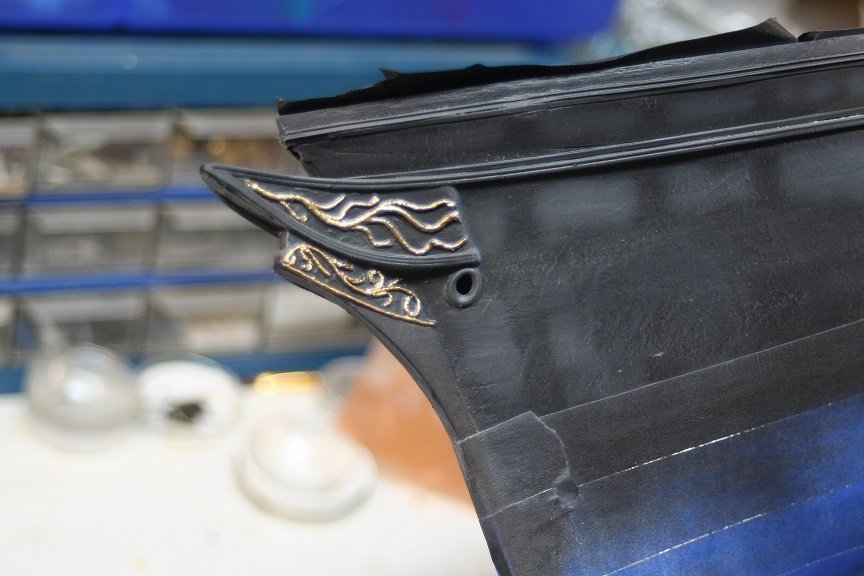
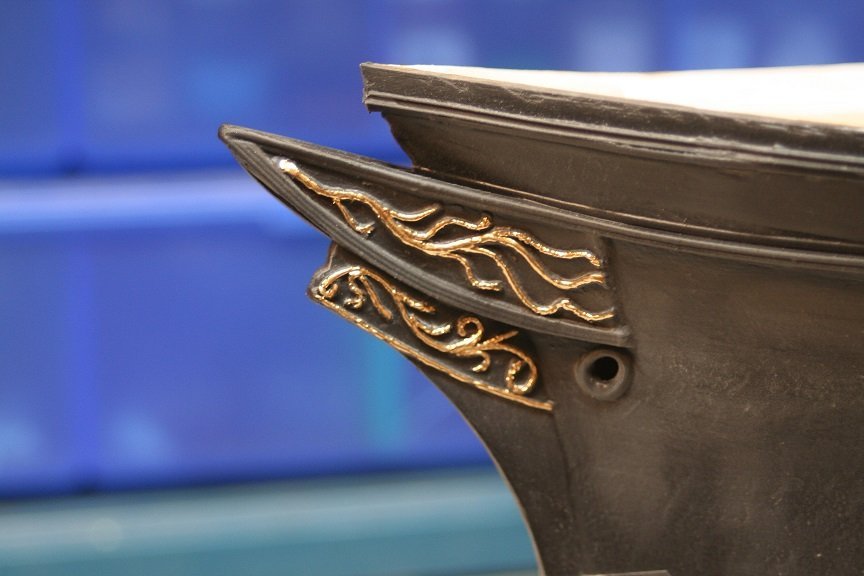
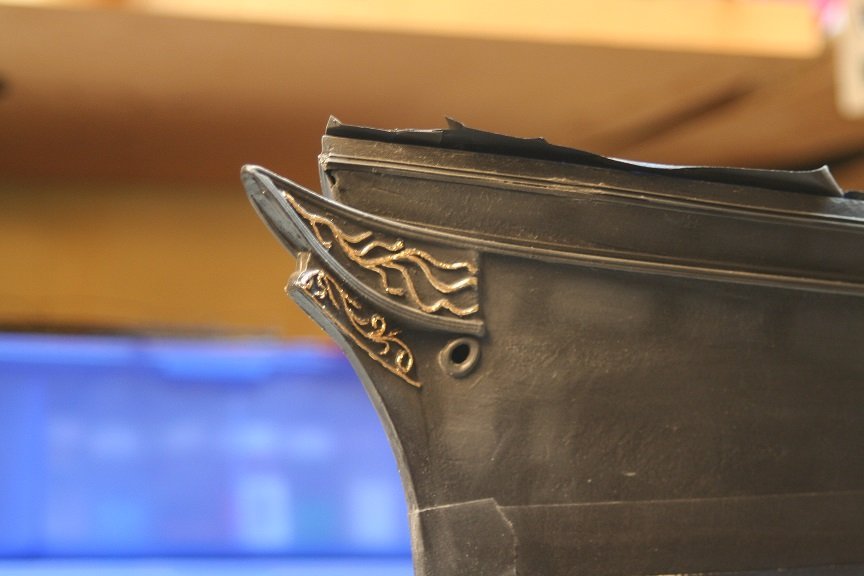
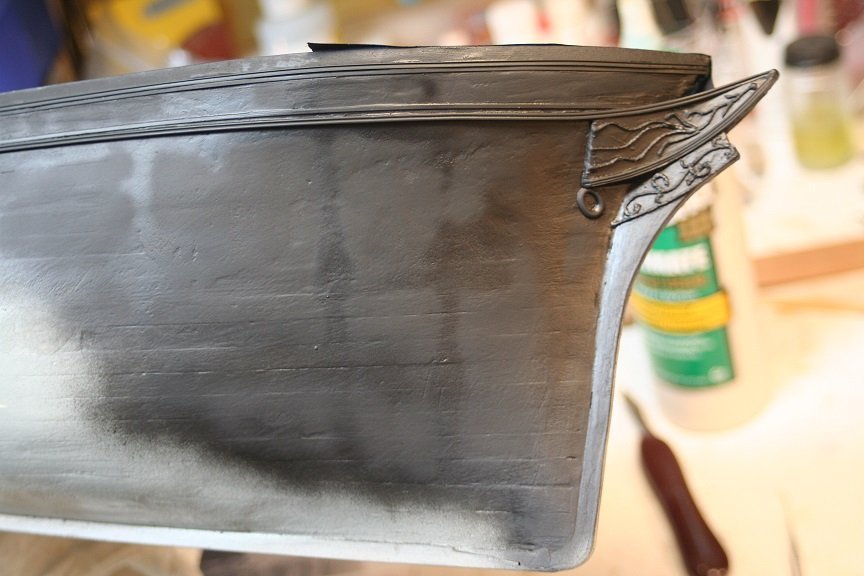
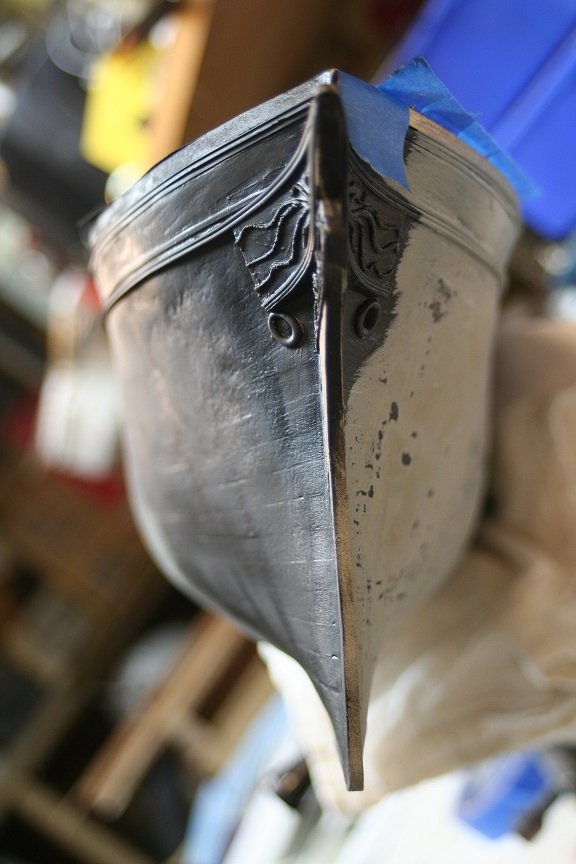
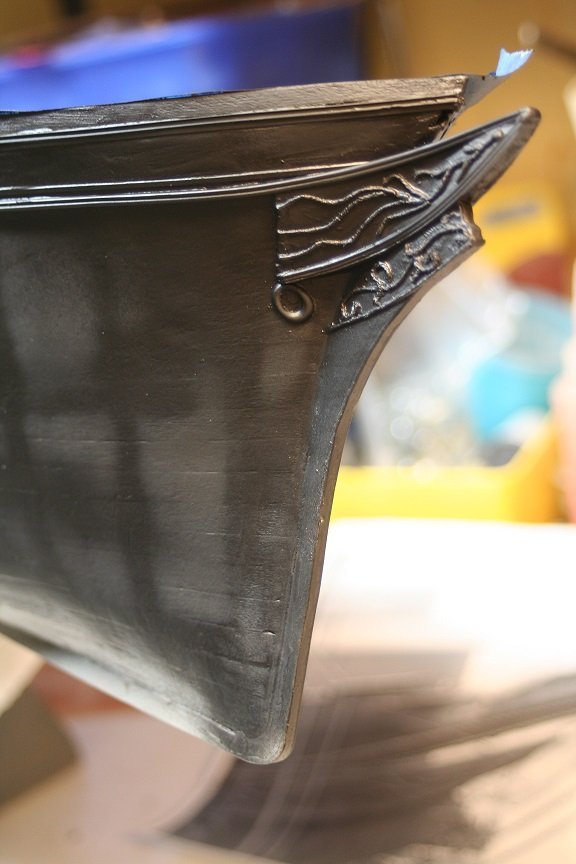
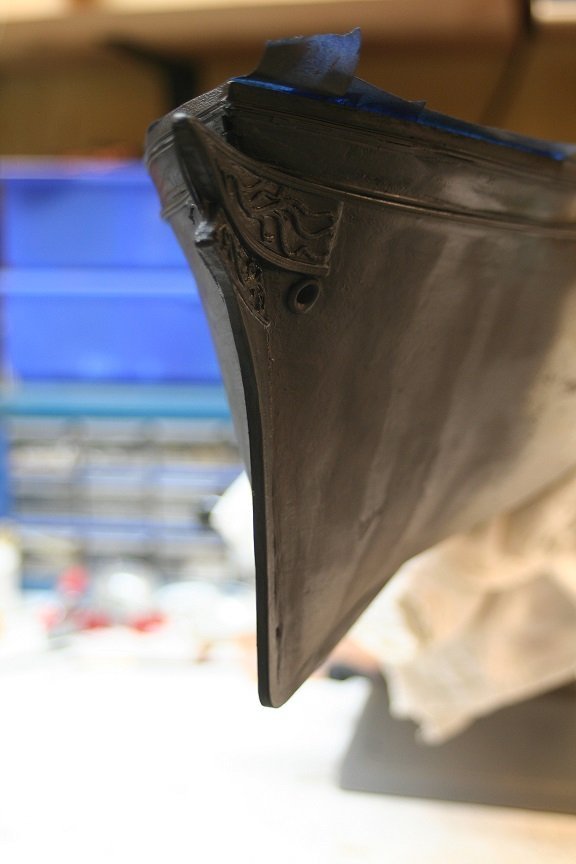
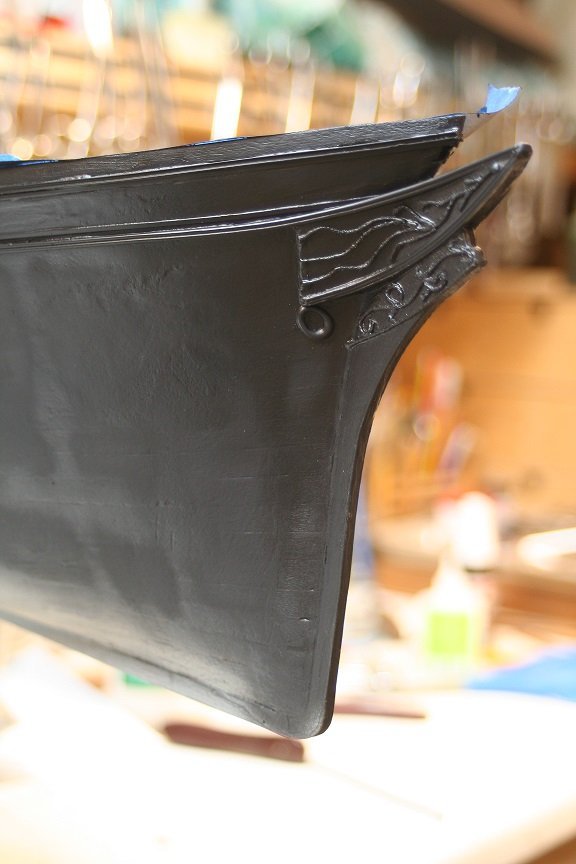
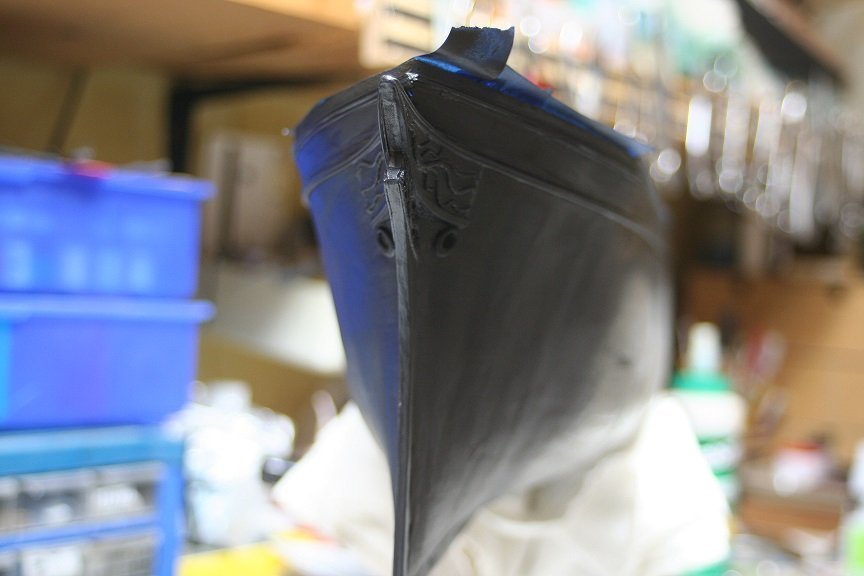
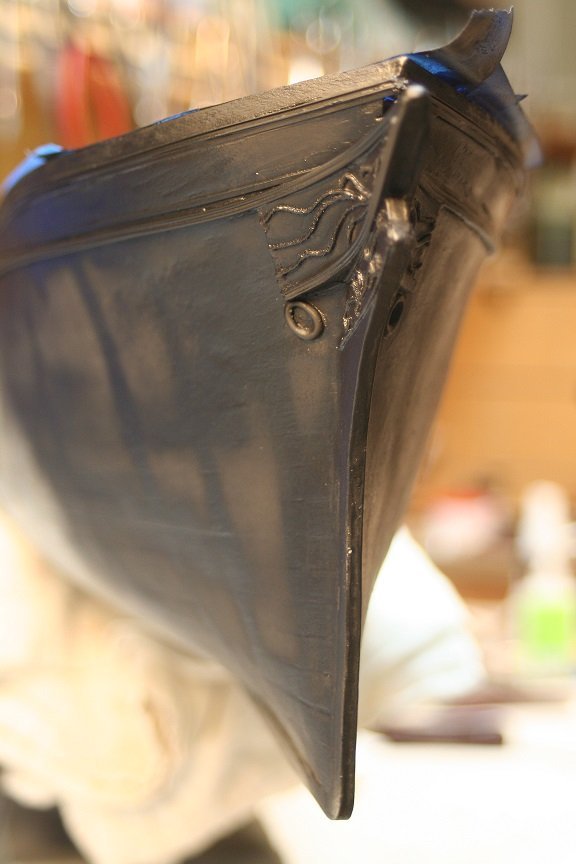
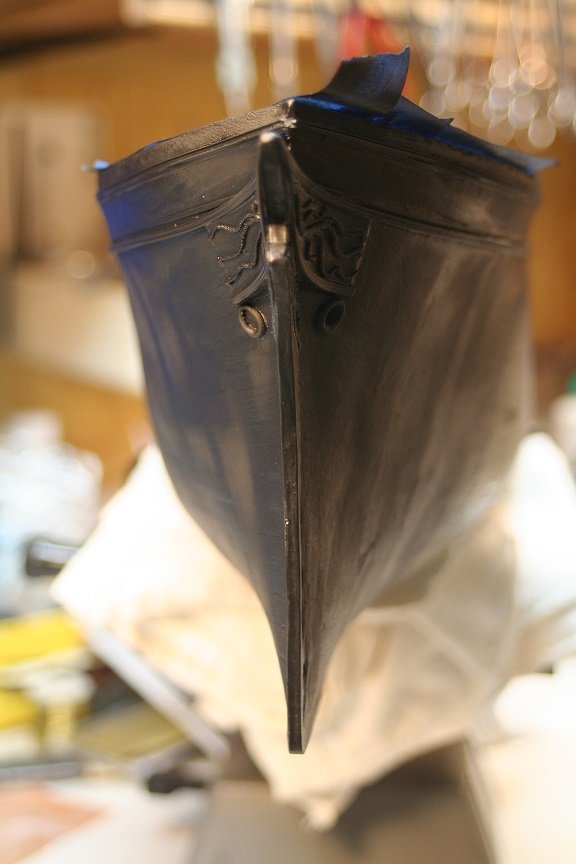
Then a bit of work on the starboard naval hood and scroll work below. I through on a bit of black to get the feel of her.. Enjoy.

- 3,560 replies
-
- 3
-
-
- clipper
- hull model
- (and 2 more)
-
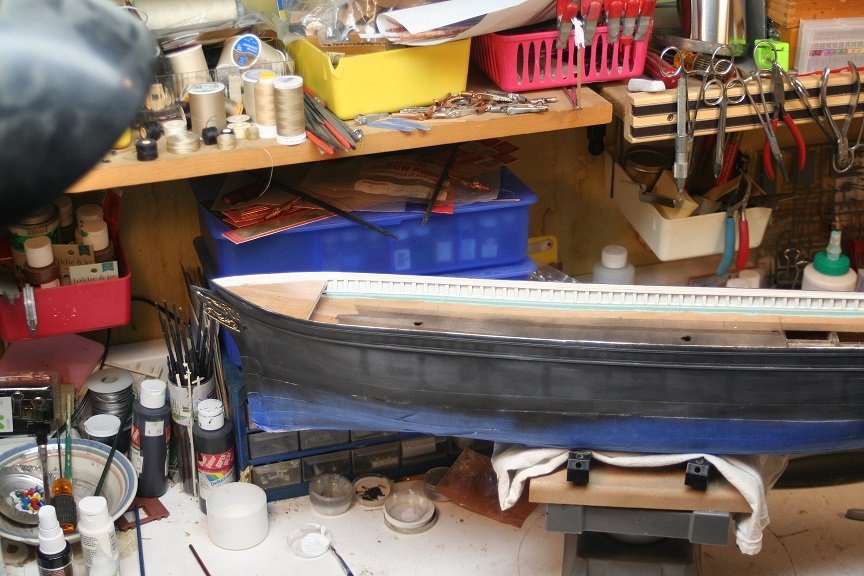
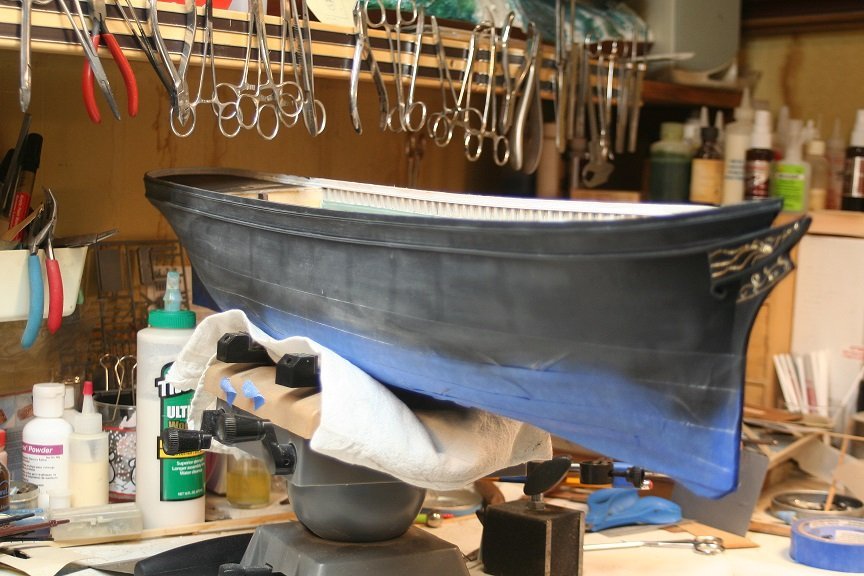
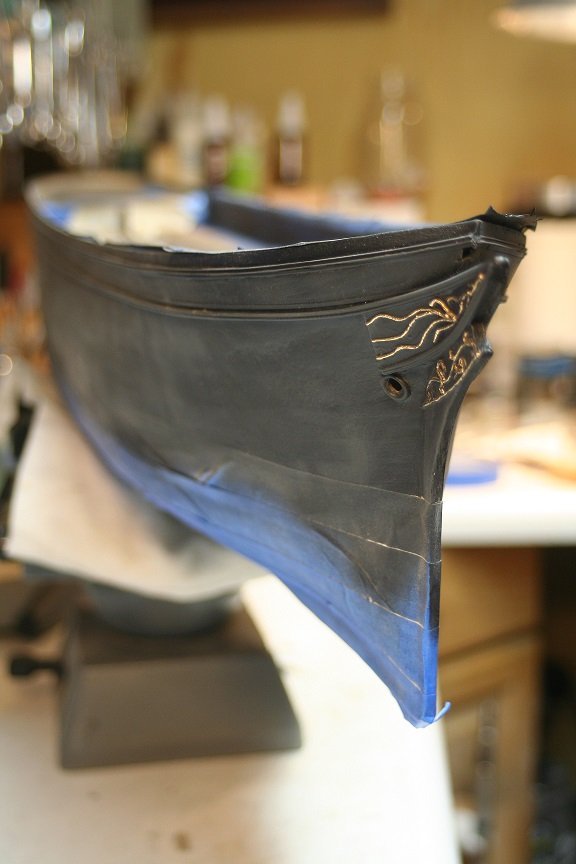
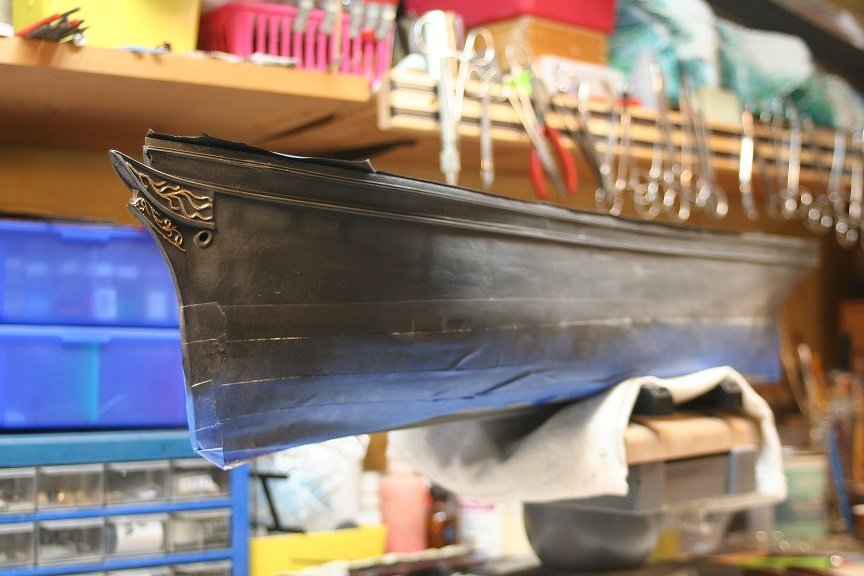
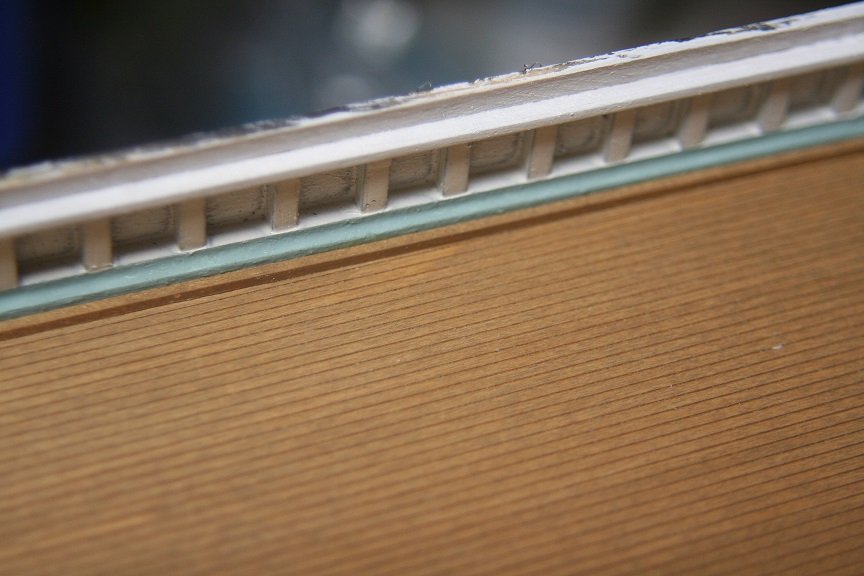
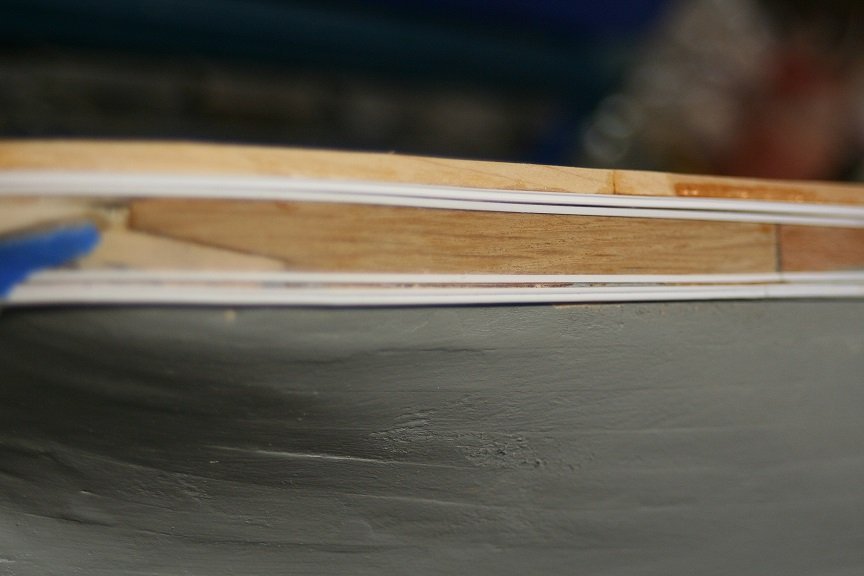
Well I spent a bit of time in the shop today and I finished up the addition of the planksheer trim and that of the main rail trim Rob

- 3,560 replies
-
- 2
-
-
- clipper
- hull model
- (and 2 more)
-
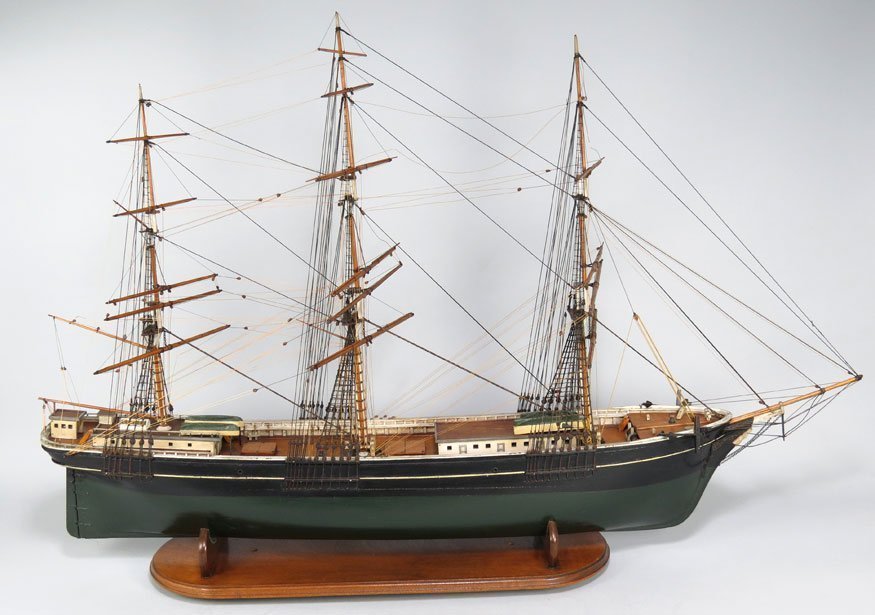
The chain plates(Iron bars) pass through the upper and lower channel and afix to the hull. I understand what you are addressing now. Yes the images of her at her refit dock, clearly show the muntz plates and the felt removed. I guess, they assumed she would only give them several years anyway...10 or so . She was doomed from the beginning of her conversion. It is now left to us....the adventurous model shipwright to resurrect her for posterity sake. I'm so thankful for the trove of fine quality images of her that Mike has graciously provided us. There are several other models of her floating around...but they all have her hull incorrectly replicated. Rigging is one thing...HOWES double topsails was well in practice and easily modeled...BUT her HULL is all together another matter...THAT is who she is. Note the stem errors in this contemporary model. Rob
-
I had originally thought you were talking about the chain plates...but I wanted for more clarity. The chain plates which extend down from the lower channel that is bolted to the waterway are themselves bolted to the hull via prevented plates. I'm sure the iron bolts used, pass through significant frames...such as the hull frames or a strake from of some kind.
-
Having this example we can see in this drawing the area in question. the item you are talking about is most likely the second deck area
.jpg.ec355aa1768494d74bf75531aac5bf4d.jpg)
- 3,560 replies
-
- 1
-
-
- clipper
- hull model
- (and 2 more)
-
Rich could you be more specific concerning these shrouds you speak of. Not quite sure I understand your usage of the work in this application. Also did you notice in this image of her stern the bumpkins are removed. I don't see them...since their function is no longer needed. Rob
- 3,560 replies
-
- 1
-
-
- clipper
- hull model
- (and 2 more)
-
The sheer line mentioned may indeed be a structural anomoly, representative of the second internal deck....where as the planksheer is representative of the main deck or more accurately the waterway. I wasn't being critical of your acute observation of my lack of representation of said structure. I was being critical of my own oversight. I wish to make a disclaimer now: I will, at times, omit or even *fudge*(accidently or intentionally) on certain details of this build. Either by way of keeping it simple (due to scale) , by sheer ignorance on my part or by blatant laziness, which may either be, because I wish not to redo an error or my own personal interpretation leads me in that direction. I've made it very clear, on many occasions....that I'm generally a lazy modeler...prone to stray from the pure path, apt to disguise poor workmanship, and tend to rely upon copious amounts of paint and gimicry to hide those faults. Thanks for allowing me the vent space. Hope it doesn't exacerbate my transparency. Rob
- 3,560 replies
-
- 3
-
-

-
- clipper
- hull model
- (and 2 more)
-
Indeed, I noticed the anomaly some time ago myself, but I gathered it was a structural issue and not a signature of the shipwright. Personally I wasn’t sure it was worth trying to replicate in this scale. I’m sorry I strayed from replicating this unique feature. I suppose our year of research has finally been breached by my lazy oversight. I hope Vladimir will include this detail on his model. Good eye.