


rwiederrich
-
Posts
5,091 -
Joined
-
Last visited
Everything posted by rwiederrich
-
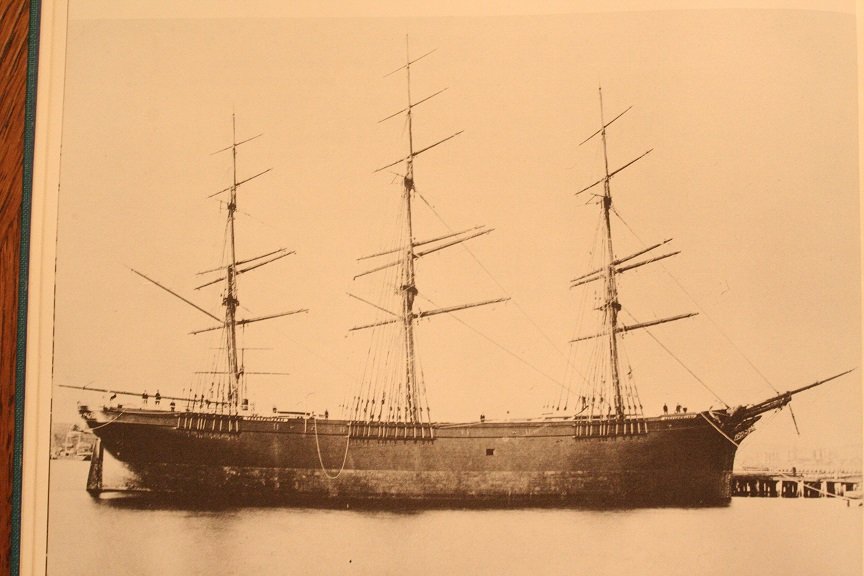
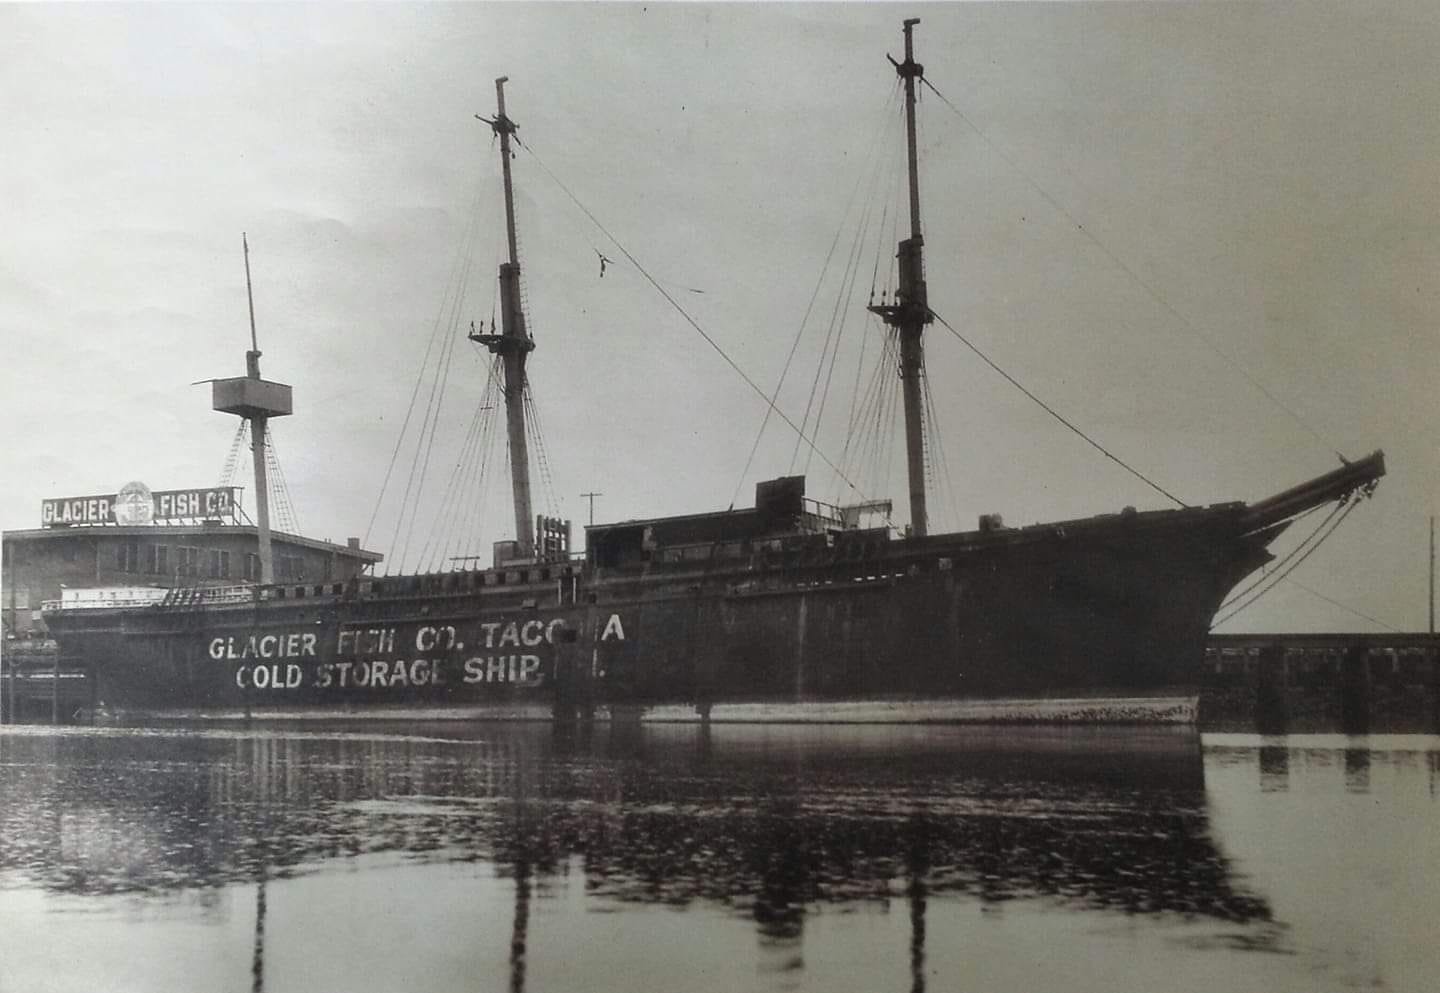
Great sleuthing Clipper fan. I had realized she had very tall sides...39 1/2 ft was my goal...but the new eval of 40' 10" makes sense. Just use deductive comparison analysis....look at these already posted images to see what I mean. Look at the height of her sides above the copper line and the height of her gunals from main deck level.
.jpeg.37e29255d37a0f23740223c73ffe069d.jpeg)
- 3,560 replies
-
- 9
-

-
- clipper
- hull model
- (and 2 more)
-
Oh my..no need to be apologetic....you just get better and we'll see you when you recover. Let your wife tend to you and take it easy...we'll still be here and roaring along. God bless you and for a quick full recovery. Rob
- 3,560 replies
-
- 3
-
-
- clipper
- hull model
- (and 2 more)
-
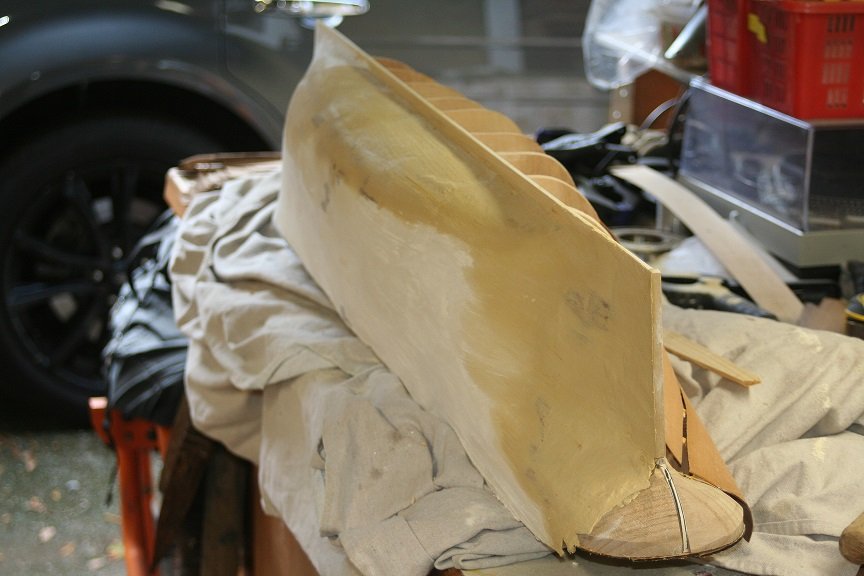
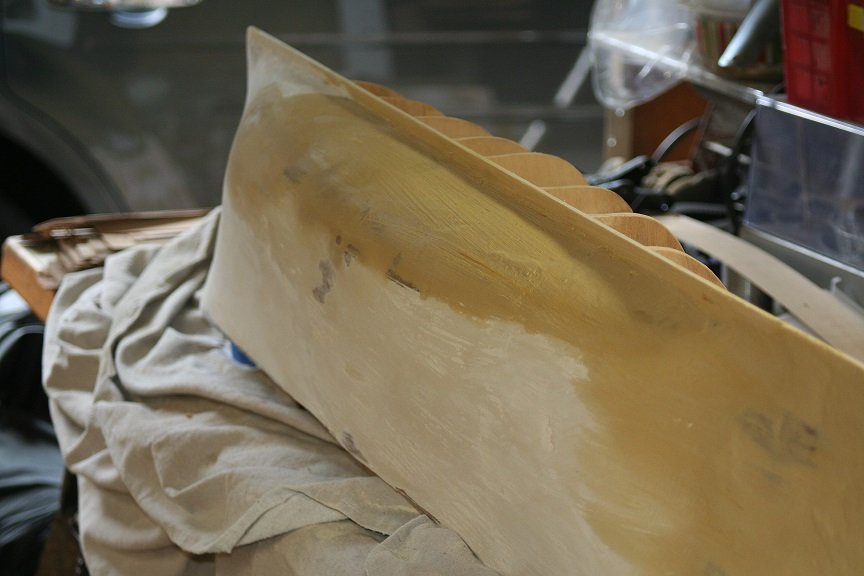
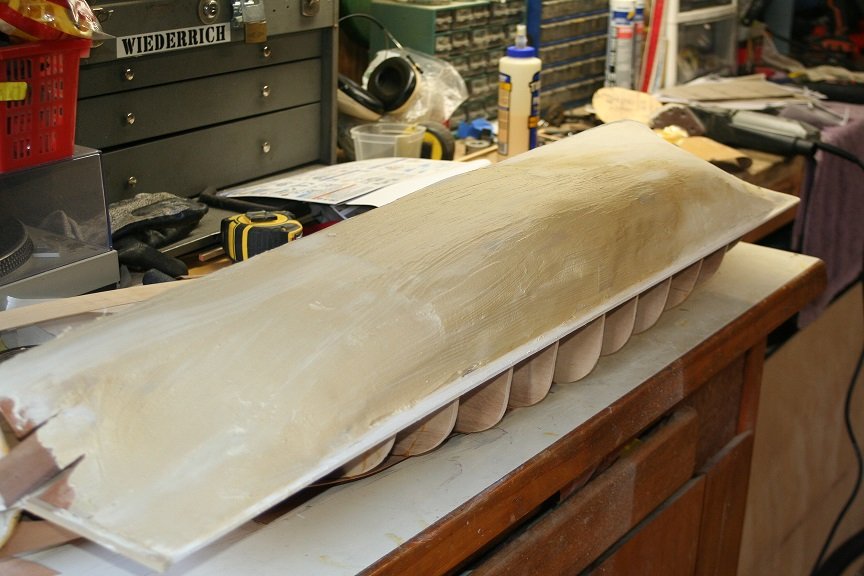
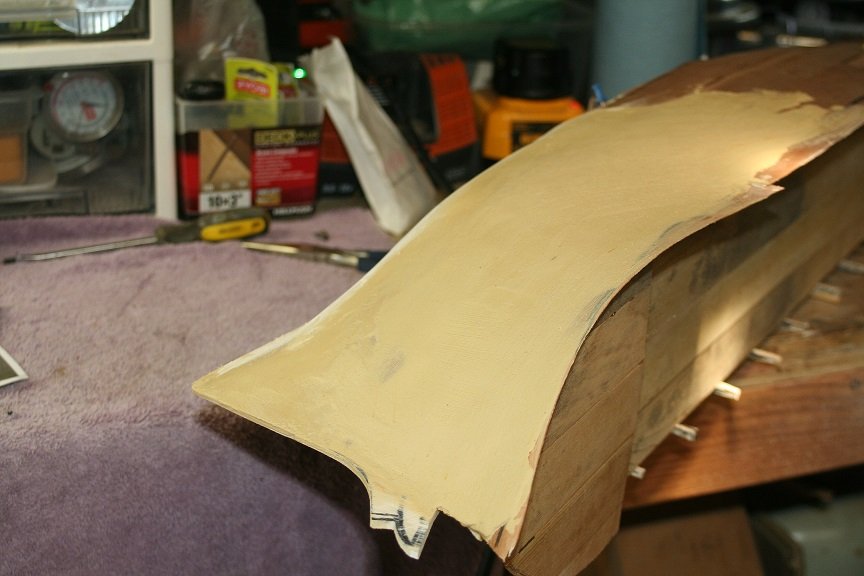
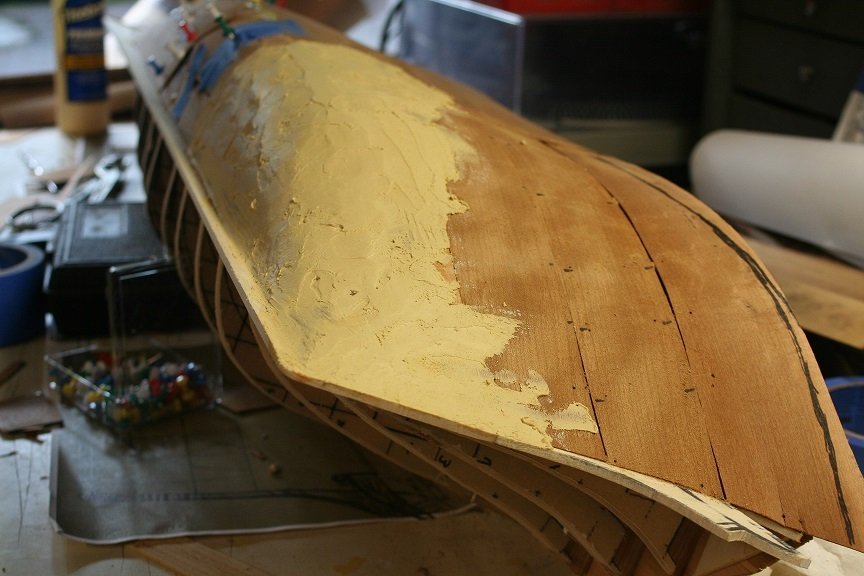
I applied a second coat of material today and worked on contouring the hull...paying close attention to the concaved entry and exit. I first build up...then I take down to the correct shape. I will let this session dry and then I will go back to the port side and finish up laying the sub planks and then begin adding the stone. I like working in these materials because I have enormous amounts of experience with then...knowing setting times and working times. Once final curves have been established and smoothed I will add a final wash to fill in any small inconsistencies. I will be coppering the hull too so many minor blemishes will disappear beneath the copper. A finishing coat of latex paint will seal any pores left in the stone. Here are some pics of todays work. Rob

- 3,560 replies
-
- 7
-
-
- clipper
- hull model
- (and 2 more)
-
Thanks for asking Roger. I sand laterally, so as not to create ribbes or washboarding. I do comparative work...by means of using known template dimensions and comparing to the actual hull..via photographs. She was a full tall hull...compared to that of a man of war. Rob
- 3,560 replies
-
- 2
-
-
- clipper
- hull model
- (and 2 more)
-
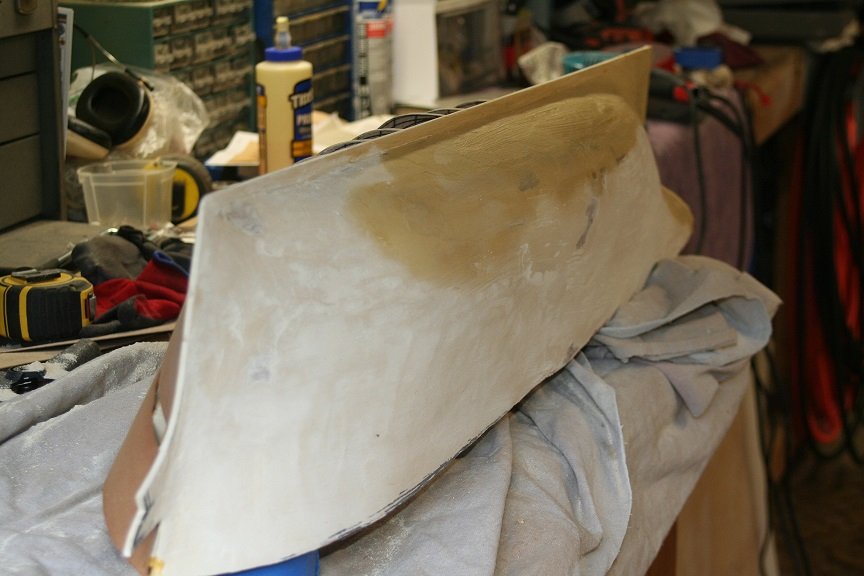
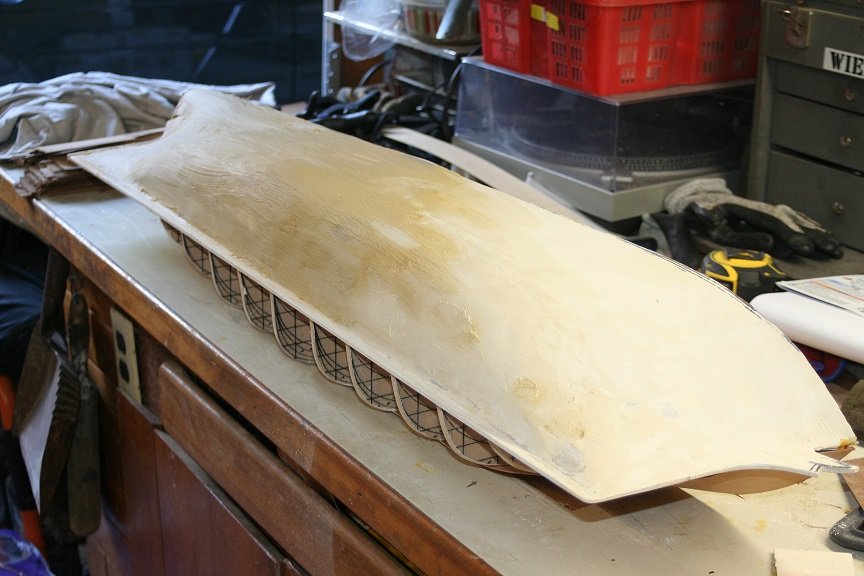
Removed pins and flipped the hull over to apply first coat of silicone stone on the starboard side. I'll let it all dry and tomorrow sand and apply correction filler. Rob
- 3,560 replies
-
- 8
-
-
- clipper
- hull model
- (and 2 more)
-
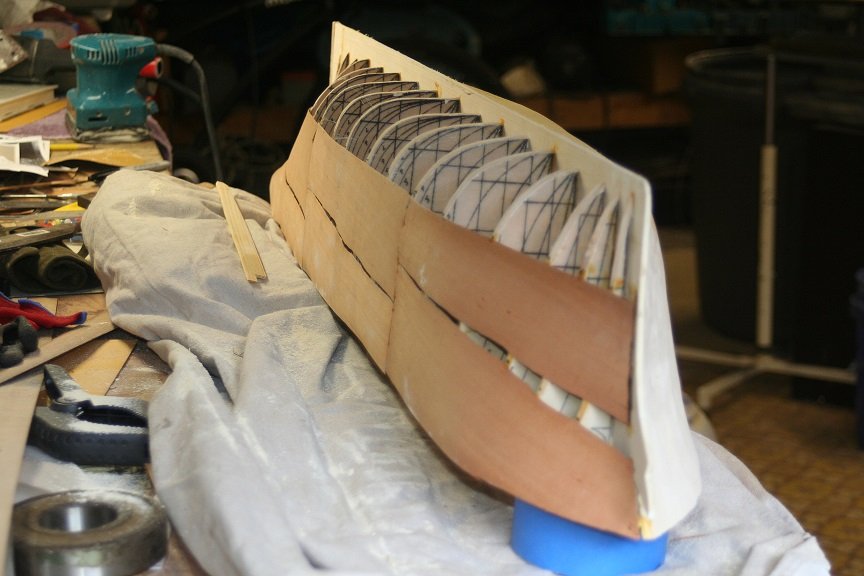
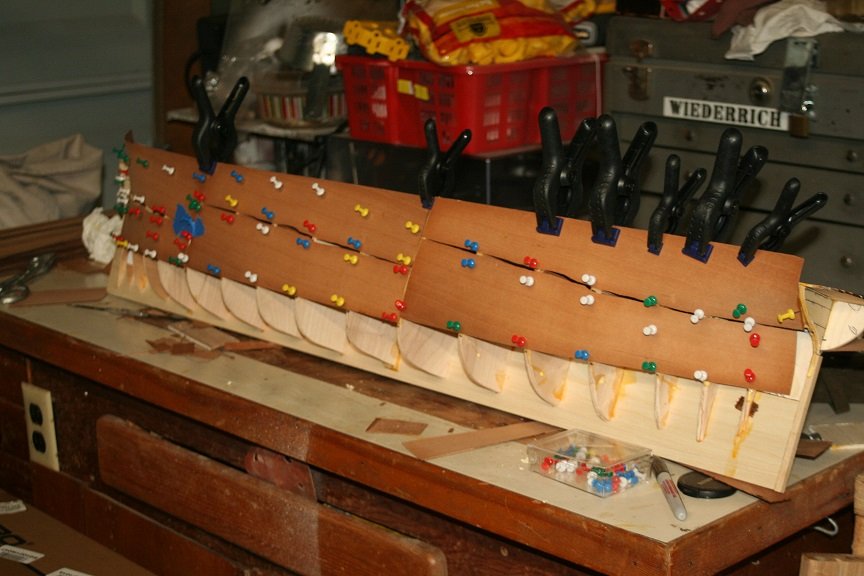
Spent some time adding the preplanks for the starboard side.
- 3,560 replies
-
- 7
-
-
- clipper
- hull model
- (and 2 more)
-
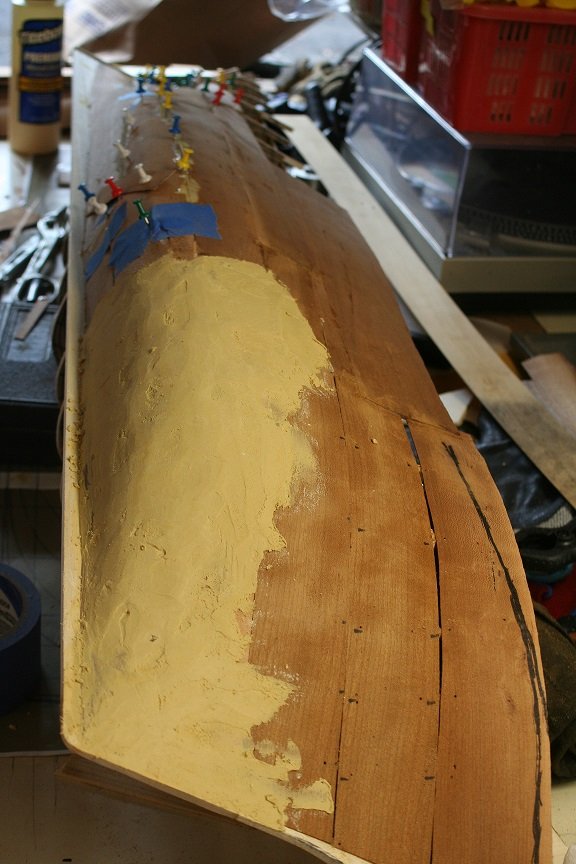
To everyone. The stone is rigid as stone, sand able and is formable. I wanted to try this method because it’s unique. Plus I’m very familiar with dental materials and their manipulation. Once finished it will paint well and will be un-noticeable as anything but a well formed hull. I challenge anyone to suggest my application will be anything less then what is expected. I love doing things Waaaay outside the box. Things so unorthodox and unexpected that the experienced are even betting against me. Stay tuned and be patient. I can feel a buckle coming loose on my straight jacket.
- 3,560 replies
-
- 7
-
-
- clipper
- hull model
- (and 2 more)
-
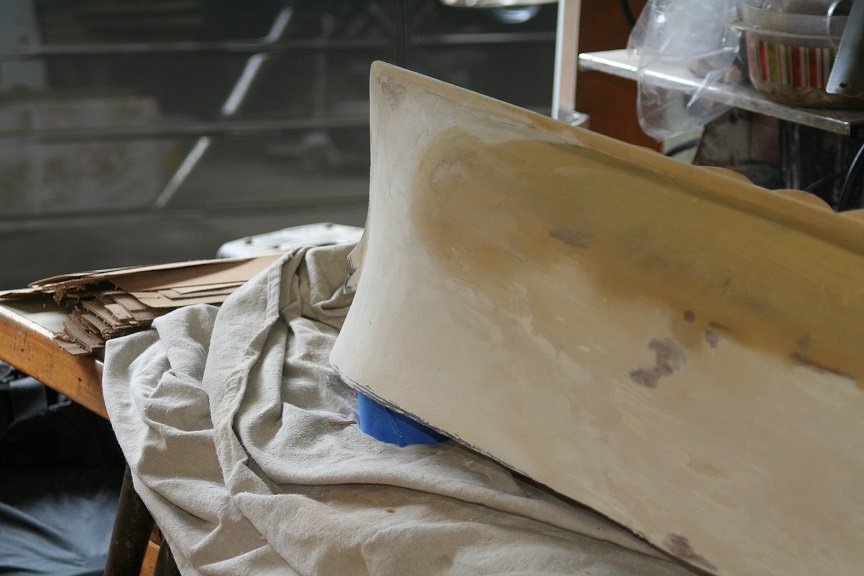
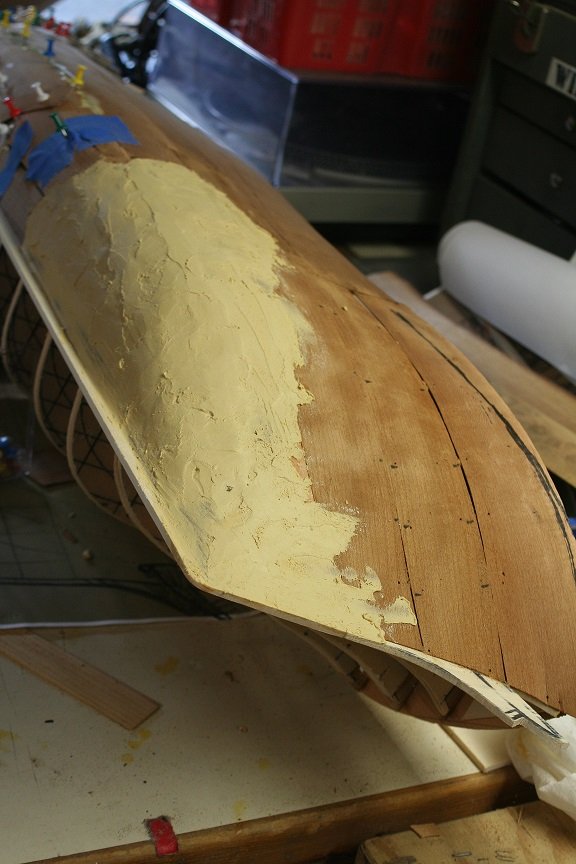
Today I spent some more time in the asylum and added a bit more stone to the hull. It is slow going because I wait for each application to dry before moving on. Rob
- 3,560 replies
-
- 7
-
-
- clipper
- hull model
- (and 2 more)
-
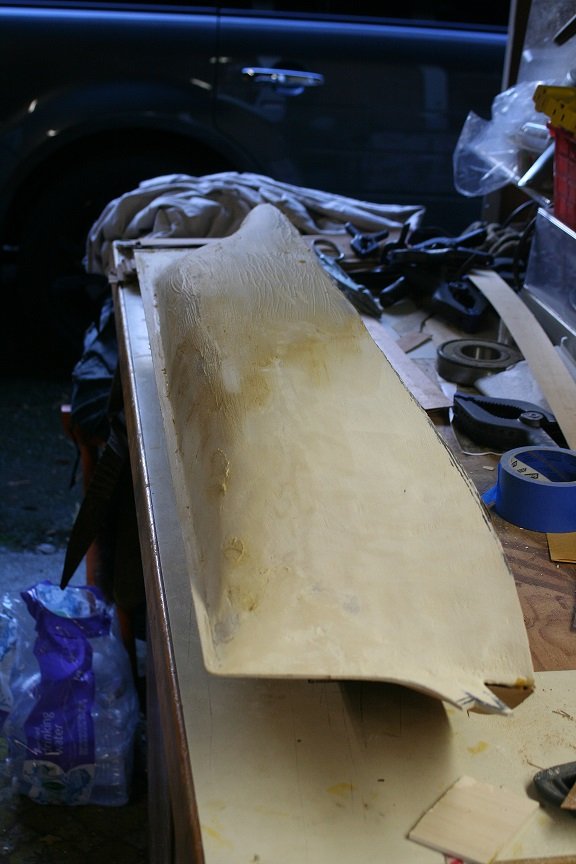
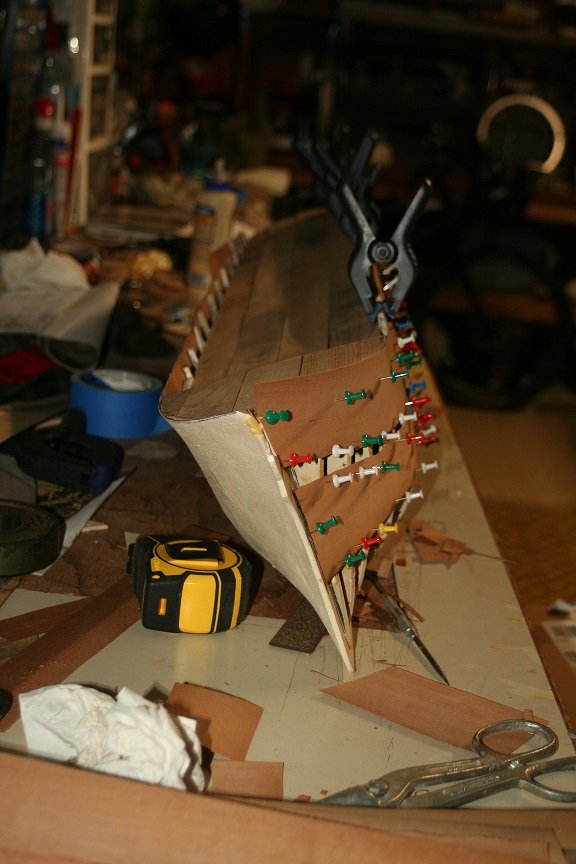
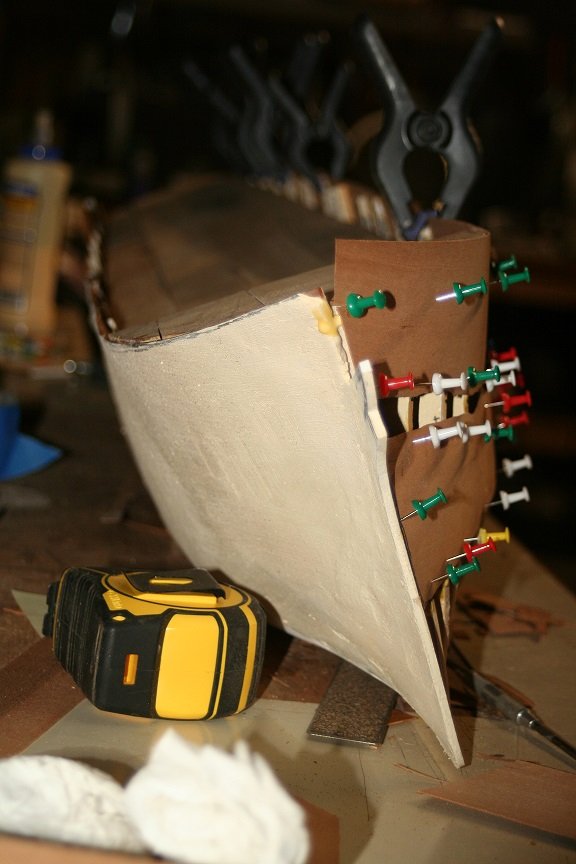
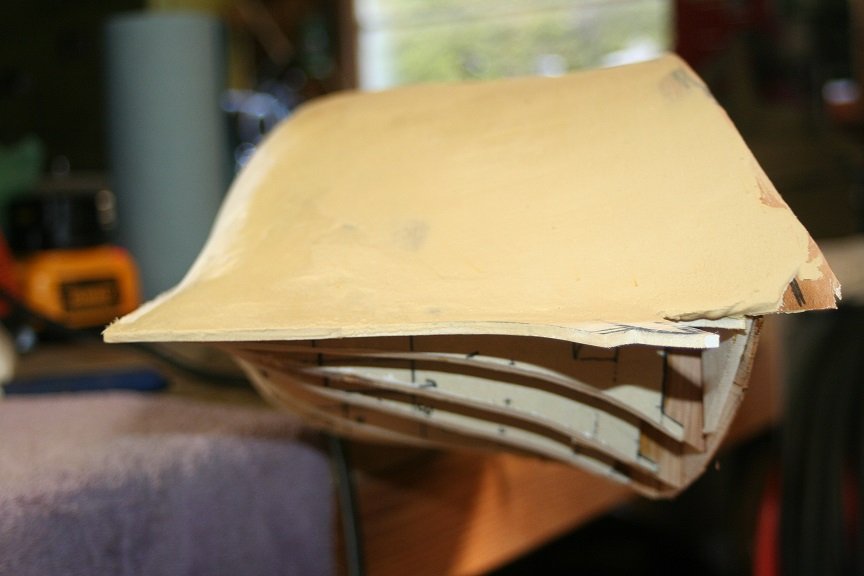
Now we're getting into weird territory. I've opted to begin covering the hull in silicone impregnated dental stone. I'll trawel it in slowly and when set and dry, sand and continue the process. I used this process once before and it works out nicely. the jull then can me smoothed and sanded and added to till I get a perfect smooth finish. Hang in there with me.....and let's see how this goes. I'm excited, because it eliminates hours if not tons of hours laying precision planking and accounting for the curves and flexes associated with planking. And so my insanity continues. Here are several pics of the first application of the silicone stone.... Rob
- 3,560 replies
-
- 8
-
-
- clipper
- hull model
- (and 2 more)
-
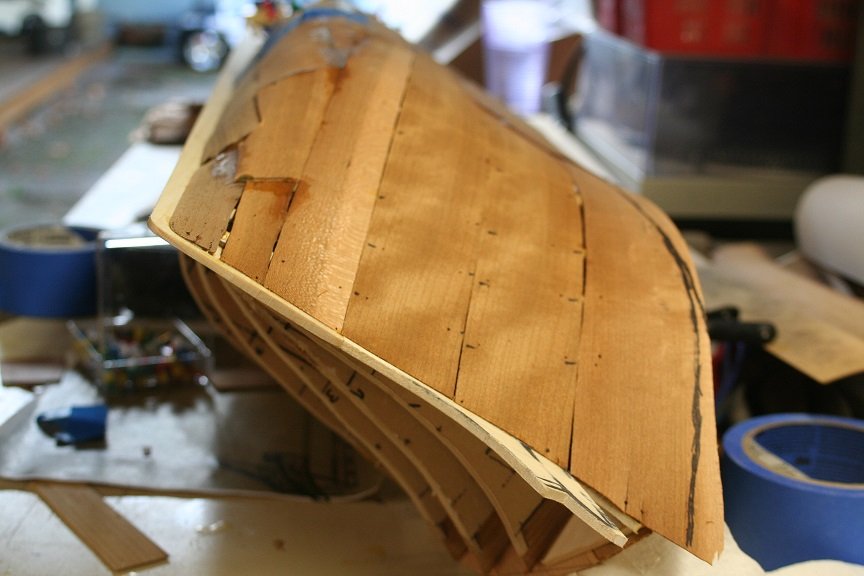
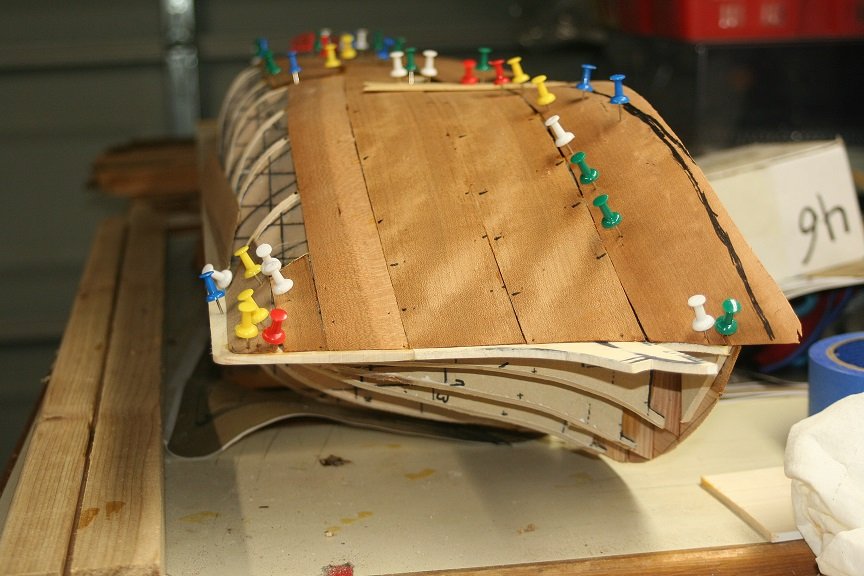
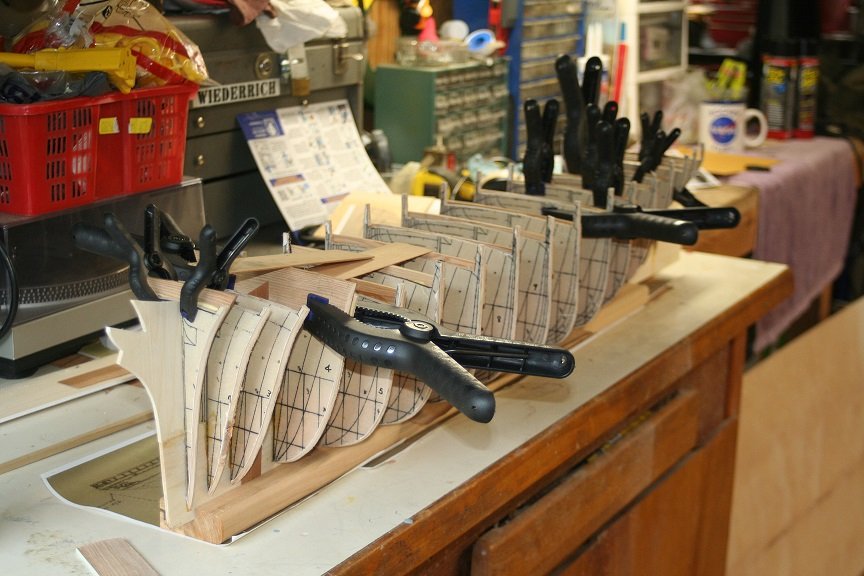
Working my way back with the initial planking and continuing along the keel
- 3,560 replies
-
- 5
-
-
- clipper
- hull model
- (and 2 more)
-
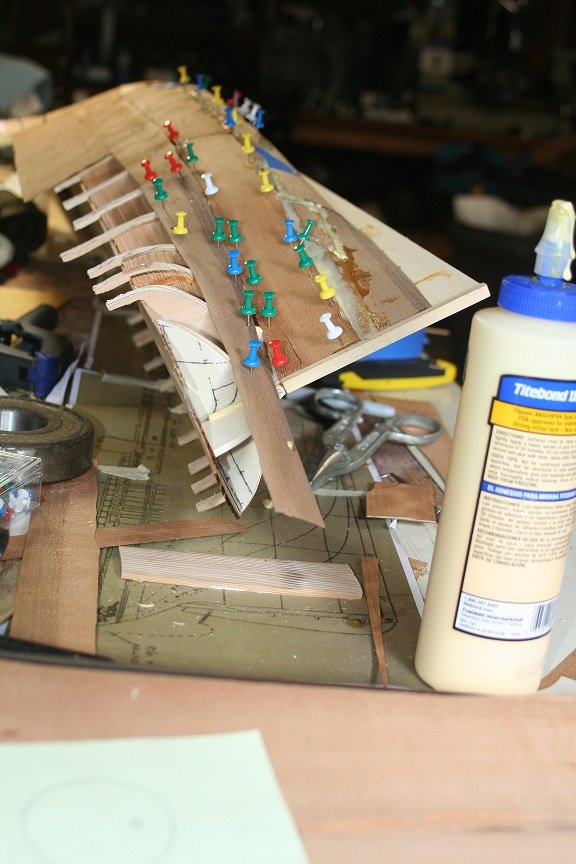
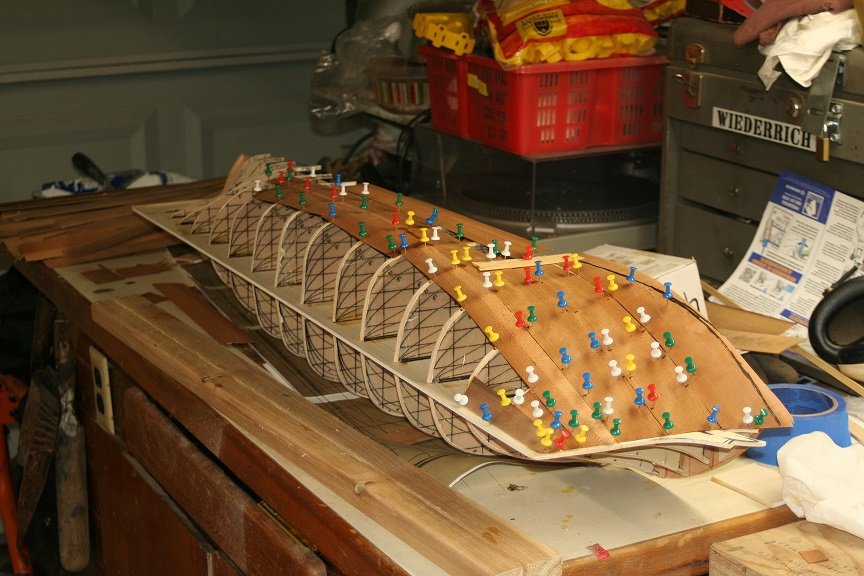
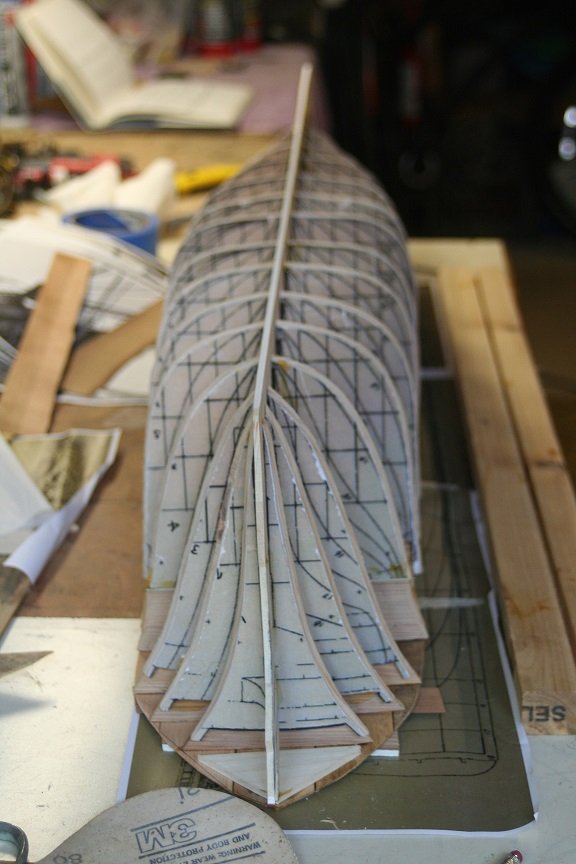
I began adding the initial maple planking.....her shape is coming to life. Rob
- 3,560 replies
-
- 11
-
-
- clipper
- hull model
- (and 2 more)
-
I'm not too concerned with the leading edges and the rail at this time...I will cut that all in later.....I'm concerned with the convex and concaved elements of the hull....so I will make sure I have good form...filling in the small pieces will follow....then the hull will get a good sanding and prepped for the final planking. Here we goooooo. Rob
- 3,560 replies
-
- 3
-
-
- clipper
- hull model
- (and 2 more)
-
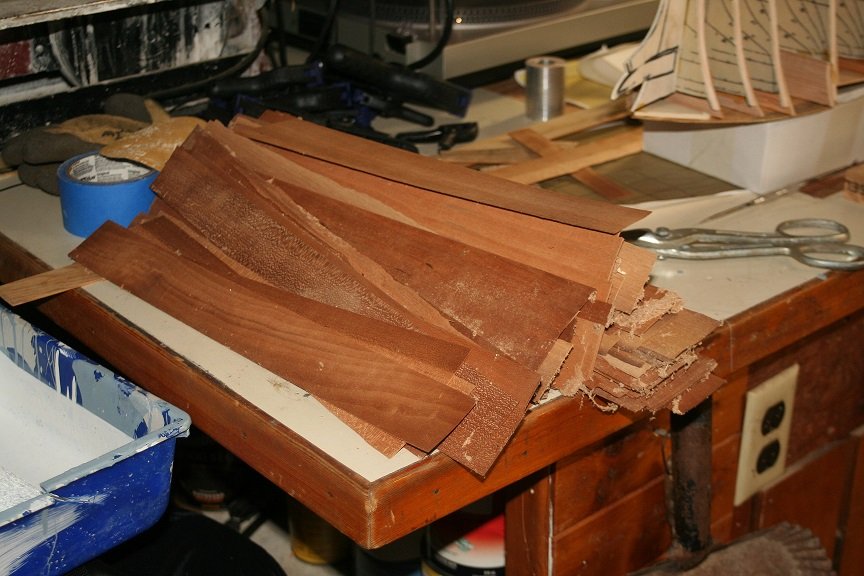
Dug up some of the veneer that I will use for the initial hull planking. It is maple and very flexible and malleable for the job. Rob
- 3,560 replies
-
- 7
-
-
- clipper
- hull model
- (and 2 more)
-
Spent a couple of hours working on the stern and prepping for the first layer of veneer planking to be added. Here are some pics of the hull flipped and some work being done to the stern. Rob
- 3,560 replies
-
- 6
-
-
- clipper
- hull model
- (and 2 more)
-
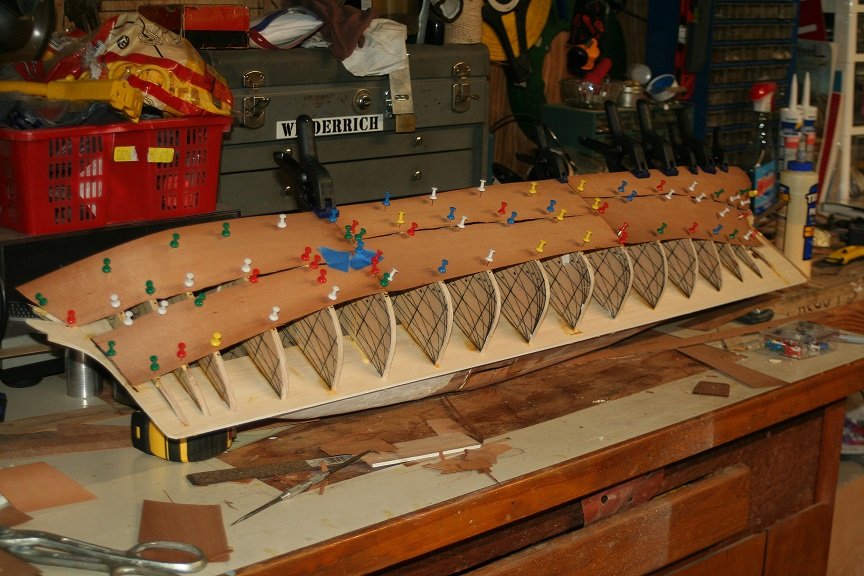
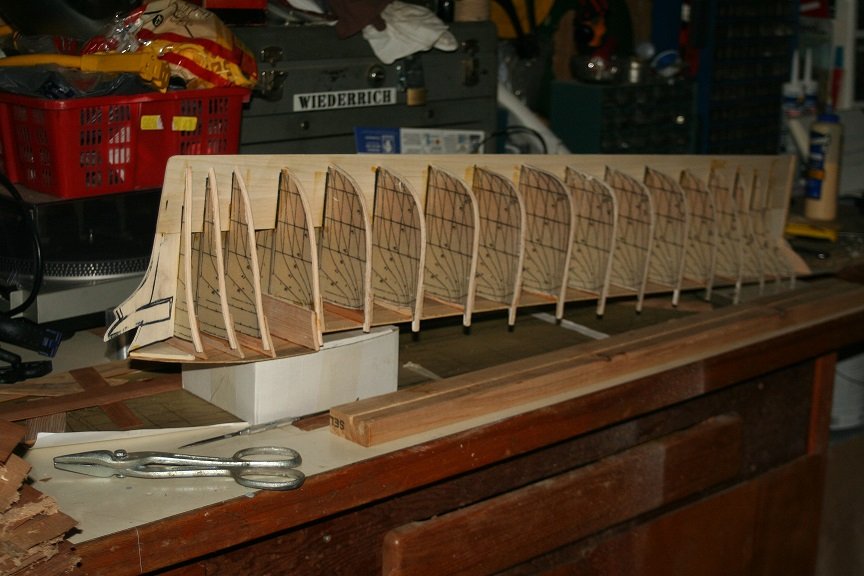
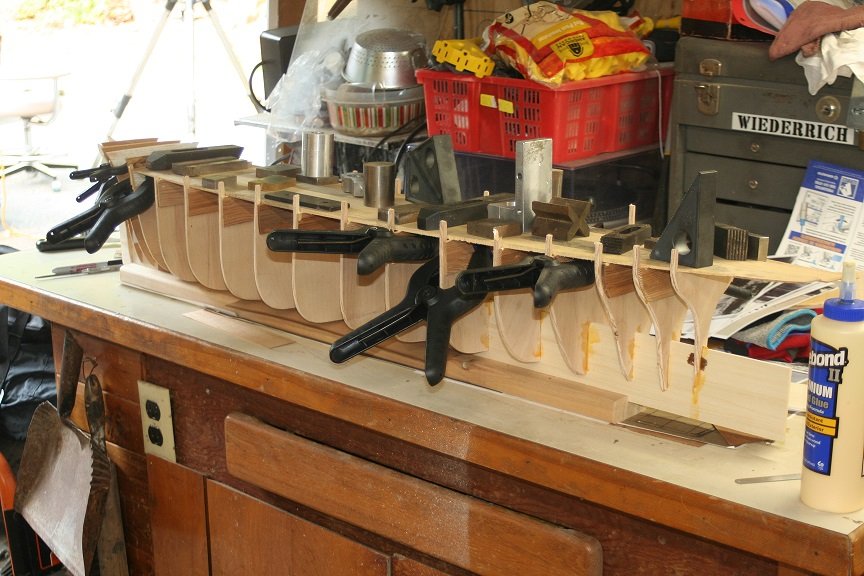
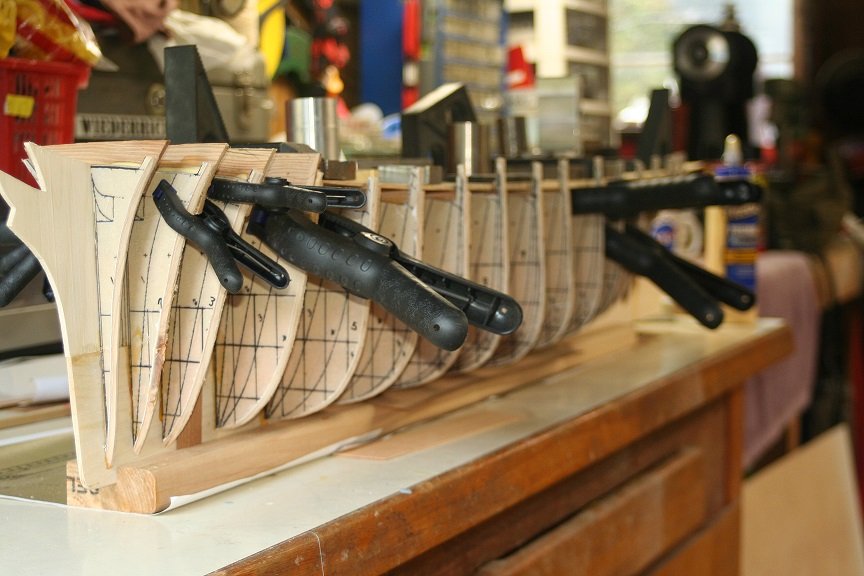
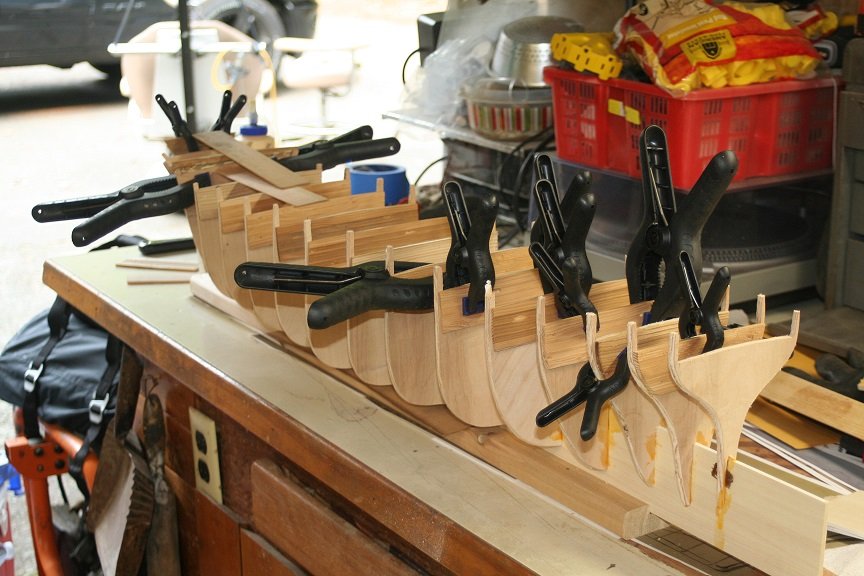
Once these were all installed....I opted to add(for reinforcement purposes) the subdeck. All this wood if from existing stock I have and is nice clear pine. It has some staining from storage for for 35 years...but it is good malleable wood and easy to work. I cut out the sub deck and glued it in place. I added weights to maintain proper contact with the new deck bulkheads. I will work up the fantail and the stern after I have this portion completed. It will provide a sturdy foundation for adding these elements. I plan on planking the hull in similar fashion...then plank it again with scale planks. Rob

- 3,560 replies
-
- 9
-
-
- clipper
- hull model
- (and 2 more)
-
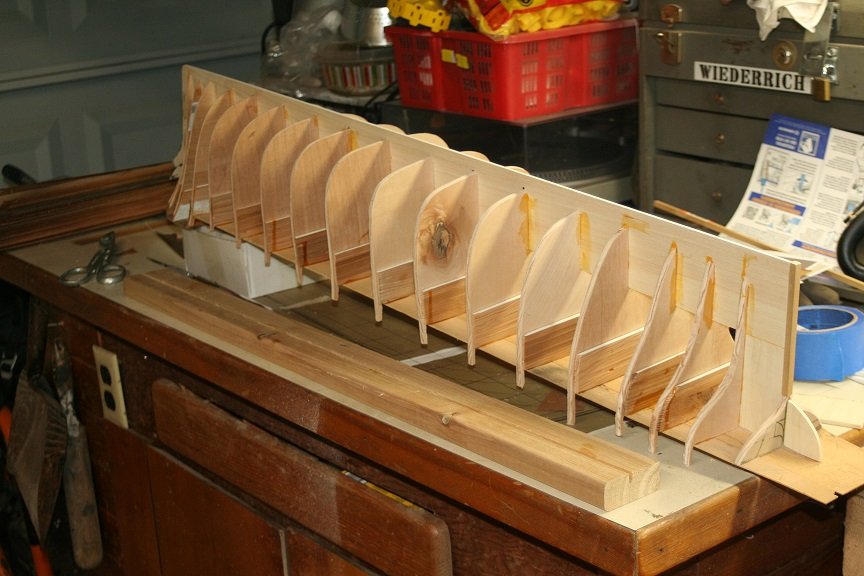
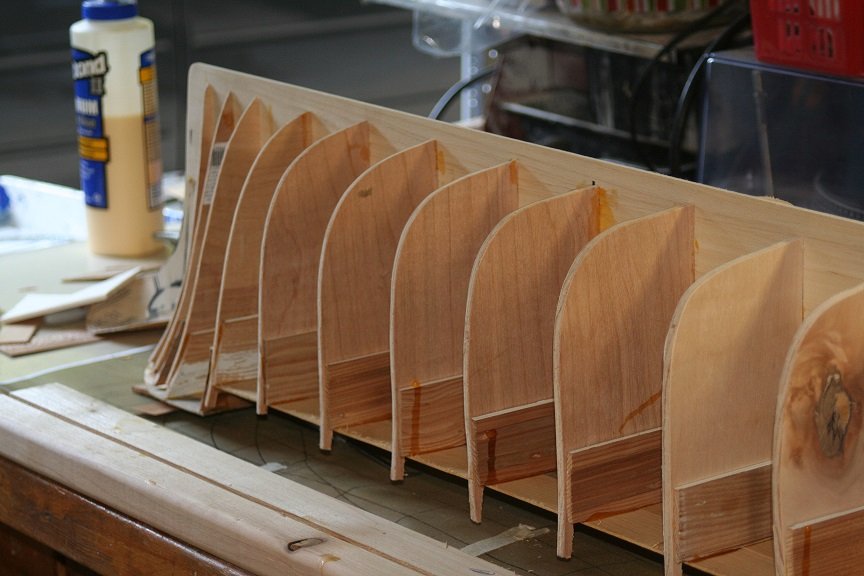
Returning to the shipyard after some time away.... Enjoyed a wonderful holiday away with the family...found and modified a nice 7" Mak Cass telescope, by de-forking it and removing its internal counterweight and mounting it on a German Equatorial mount..... Now its time to get to work on the Glory. I picked up where I left off by now adding the new deck beam bulkheads. To align and give the proper deck chamfer and inclination. Here are some pics of the addition of these members to the bulkheads. Rob

- 3,560 replies
-
- 8
-
-
- clipper
- hull model
- (and 2 more)
-
Vladamir. She is amazing and a real accomplishment. I wonder if you originally intended to complete her rigging? I might have contributed to enticing You to move onto Glory of the Seas. I’m quite impressed with what you have accomplished. She’s astounding
- 200 replies
-
- 1
-
-
- cutty sark
- clipper
- (and 1 more)
-
Well I'm now home from vacation and all caught up...hopefully I will be working on the Glory hull very soon. I'll need to cut and install all the internal bracing blocks next. Rob
- 3,560 replies
-
- 5
-
-
- clipper
- hull model
- (and 2 more)
-
That’s where I’ve seen that. I saw that when I was a kid. One of the motivating reasons why clippers are my favorite design.
- 3,560 replies
-
- 5
-
-
- clipper
- hull model
- (and 2 more)
-
I came across an old colorized version of the pre-launch photo. Interesting additions

- 3,560 replies
-
- 3
-
-
- clipper
- hull model
- (and 2 more)
-
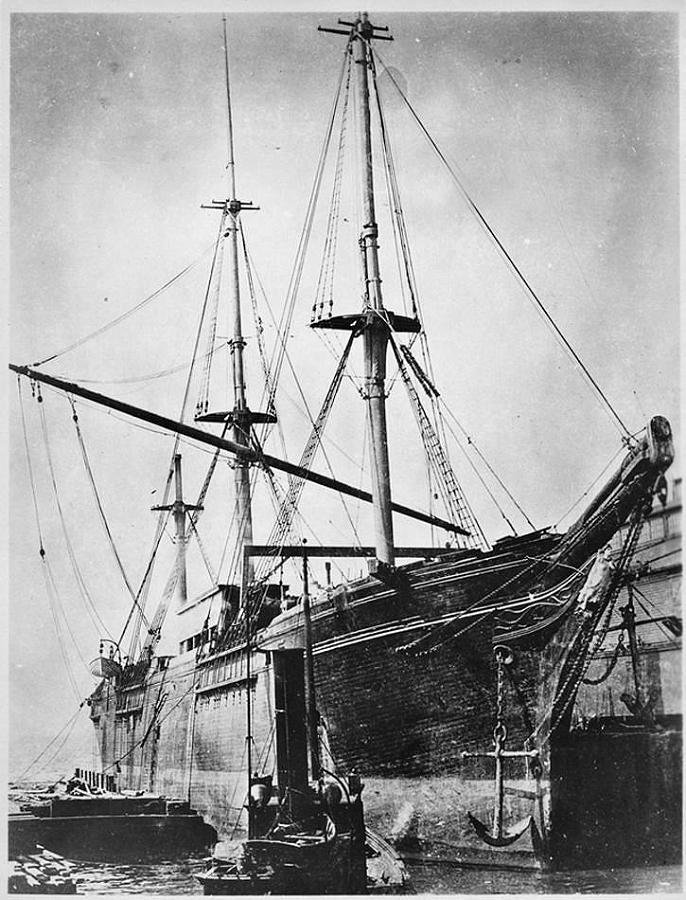
She's moved up the dock in this image I posted earlier. Her bow is nearly vertical.
- 3,560 replies
-
- 3
-
-
- clipper
- hull model
- (and 2 more)