
HOLIDAY DONATION DRIVE - SUPPORT MSW - DO YOUR PART TO KEEP THIS GREAT FORUM GOING! (Only 36 donations so far out of 49,000 members - C'mon guys!)
×


rwiederrich
-
Posts
5,518 -
Joined
-
Last visited
Content Type
Profiles
Forums
Gallery
Events
Everything posted by rwiederrich
-
How exciting....I'm full of anticipation. It's been quiet around here...I've been busy with lots of house projects and garden management things.. Spring! Have you received your book yet? It sure is taking its time....... Thank you so much....... Rob
-
Using the imagery of Glory....we can conclude and model her bulwarks pretty accurately. It is, however quite clear she did have an *extremely* high gunwale for typical clippers of the time. She definitely had wash gates...similar to British clippers and the iron windjammers. those will need to be fashioned between frames and apparently on top of the waterways. Good work...indeed Rob
-
Rich...this poor image gives us a really good look at where things are located...with humans to compare to. I'm a simple man...thus translating what I see here to a 1/96 model will be quite simple actually. Boy....they sure cut her open to make this access point...to her main deck. Rob
.jpg.aaaffbd8f73a39bf01d70eeb0a539931.jpg)
- 3,560 replies
-
- 1
-

-
- clipper
- hull model
- (and 2 more)
-
Definitely no problem Vlad. I'm so appreciative...and I can't wait to begin my build. Can't wait till you get your book...then we will know how long it actually takes to travel that distance. No apology necessary for working hard and making a living. Rob
-
Right.... Differentiating between inside and outside measurements can get mind boggling. Thanks for your timely attention and accurate description. I'll need to plot it all out for myself as well....so I can get my head around it as well. Good job. Rob
-
OK...if we know that the bulwark is 6ft from Duncan...and your measurements from the top trim of the hood to the forecastle rail is 6ft...then simply mark a piece of paper with lines denoting the distance(This is called oratering measurements). then project that distance down the hull(accomodating for decreased distance due to horizontal diminishing and you will see that the top monkey rail down to the lower channel is 6ft. This is why I said the planksheer is not the level of the deck but most likely the level of the top of the waterway....and accounting fo the waterway to be sitting on the deck....that places the gunwal at 6ft or there abouts. The top rail of the forecastle is not the top rail of the main rail amidships. See......? Rob
- 3,560 replies
-
- 1
-
-
- clipper
- hull model
- (and 2 more)
-
Confirmation, confirmation, confirmation. Looks like we are sittin pretty when it comes to these dimensions now. As far as the height of the bulwarks are concerned....and it remains a matter of translating known measurements to unknown to gain a full grasp of a pretty darn close hull of Glory. Good job everyone! I got another order of planking(deck and hull) in the mail and all my stanchions are made. I'll finish up some clamping ideas too. Figurehead is in hand and now I will begin on constructing the composite lower masts. But first I will build a miniature table saw to cut the 4 recesses in the stock dowel. I'm trying to build as much as I can prior to getting the bulkheads from Vladimir..such as constructing the house and cabin windows.....gathering the belaying pins/chain....trucks for the yards...etc..things like that. Rob
-
One last thing Keith...Dependent on the exact location of the jackstays(sometimes they were farther forward on the yard then directly on top), the stunsail boom irons would have been on top making them far from interfering with sail function....and if the jackstays were on top the boom irons would have been slightly forward...again keeping them far away from the jackstays and sails. From photographs, it appears your booms are slightly on top if not forward...making the jackstays forward or aft of them. Just account for them when you decide where you want to place your booms...or in your case(Now that your jackstays are placed), adjust the booms, forward or aft. Sall goood. Rob
-
I was referencing the dock side image. One thing may be noted: the Tennessee was a steamer and it isn’t beyond comprehension to gather she stowed her sails and stun sail booms in unregulater fashion. And if indeed her booms were forward......the boom irons would have held the boom far away from the jackstays.....hence the sails
-
Keith. If you notice the irons for the stunsails are above the jack stays. Not interfering with the sail. In your ship image the stunsail boom is above the jackstay.
-
I spent some time reducing the poop house stanchions a bit and refining its contours. Still at this scale it is tedious work. Rob
- 3,560 replies
-
- 2
-
-
- clipper
- hull model
- (and 2 more)
-
Rick....thank you for following along....I appreciate your contributions. I tend to agree about the light grey/pearl. In many pictures of Glory..you can see the highlights and augmented grey shades that trim her houses and railings/gunwales. I'm thinking we are on the same track. Rob
-
Thanks Rich. Yes...I've seen those(without the hair of course). Good possibility for sure.....I'll look into it. Rob
-
Keith...the typical practice was to either(there were two of them), Mount the stunsail spar on top of the yard or hang it from under the yard. It never was to interfere with the action of sail furling and or function of the sail. Sails were bent to the jackstay which was typically mounted on the top of the yard. Stunsails booms were stored in their run-in positions (Over the yard...or under) and were run-out..when light to moderate breezes required their use. Stunsails have been used on ships for centuries and up to and exceeding the time period you are modeling...they have changed little from their inception. My Great Republic model modeled them under the yards..where they hung out of the way, when not in use. Dependent on the rigging and any interference they may have induced upon the sheets....I think what ever was typical for the model of vessel you are building...you would be safe to bet it is correct.
-
Wonderful work Druxey. Adhering to the prototype is fun when you have a clean clear example to follow. Nice clean work...great little boat. Rob
- 433 replies
-
- 6
-
-
- open boat
- small boat
- (and 1 more)
-
Yeah...she is structurally sound and beautiful to behold....too bad color imaging wasn't around then. Rob
-
I'm now considering the *Era* I want to build her in....at what stage of her modifications do I want to namely focus on...and I'm thinking modeling her after her 1877 San Francisco bay dock image. So many things that are on her that are not present on later year images and so many items are excluded on her that she retains in later images. Just a short list......It is clear she had painted stanchions...and the helm house has been extended. She has stars on the ends of her catheads(be they painted or a fashioned plate...I do not know). One intriguing item is the iron support bars connecting her naval hood to her bow. Not quite sure when that was added..but she does not have them in the 1877 image. Plus they relocated her name board to make room for its installation. This can easily be seen from comparing her 1877 image with the recent installed image of her bow close-up at dock in Tacoma. In the 1877 image she shows her additional 2 backstays added aft of her Fore/main channels/chain plates....in addition she had her spreaders removed to accommodate this change. In her fitting out image at McKay's yard you can clearly see the spreaders. I have yet to determine if her boys cabin and animal/chicken house had been added by the 1877 image....I'll research this fully. You can clearly see her highlighted constructed lower masts. I think the 1877 image is the best one of Glory in her finest...the peek of her career physically. IMV
-
Tiny little buggers...... After looking at my first model of Glory of the Seas and concluding that the generic after market stanchions were just not right....I made it my goal to replicate the real ones as best as I could. At the time of my first build I didn't go that far in the capture of the true design and scale of the house and aft stanchions.....I just used what was available. Thanks again, for your fine comments and encouragement. Rob
-
Now that's an idea.....I never thought about. Making many cutters from so many blade stock. Cool idea Bob. I'll stow that idea away for another day...since I'm finished with the stanchion project. In retrospect, I made these all by hand...since the numbers where not too staggering. Plus cutting and manipulation by hand was faster then if I had done this on my lather. I could *feel* the cut and compensate for any issues with the wood grain...where as, on the lathe it is far less forgiving to such delicacies. As usual...thanks for the great advice. Rob
- 3,560 replies
-
- 2
-
-
- clipper
- hull model
- (and 2 more)
-
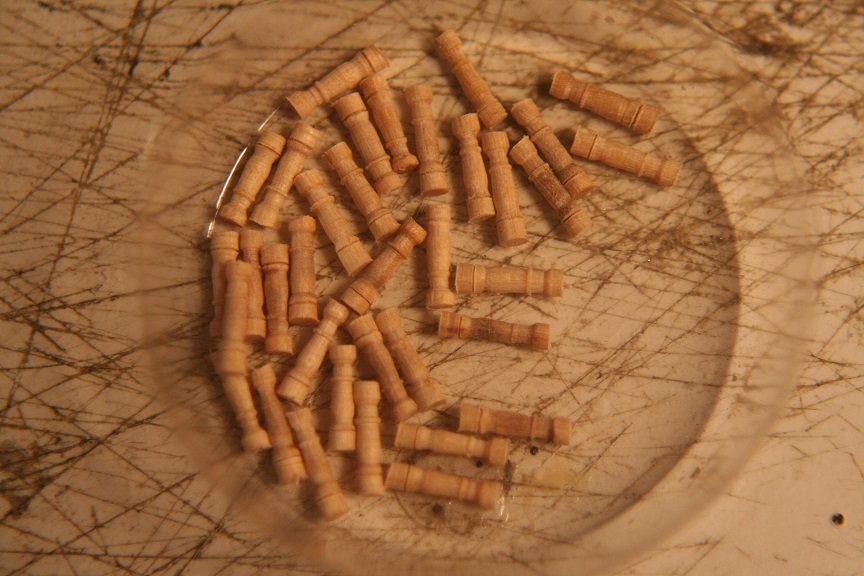
And the collection of all........ It took me about 3 hours to make all of these...to include fabrication of the tooling(Cutter and reducer) prior to making them. Rob
- 3,560 replies
-
- 2
-
-
- clipper
- hull model
- (and 2 more)
-
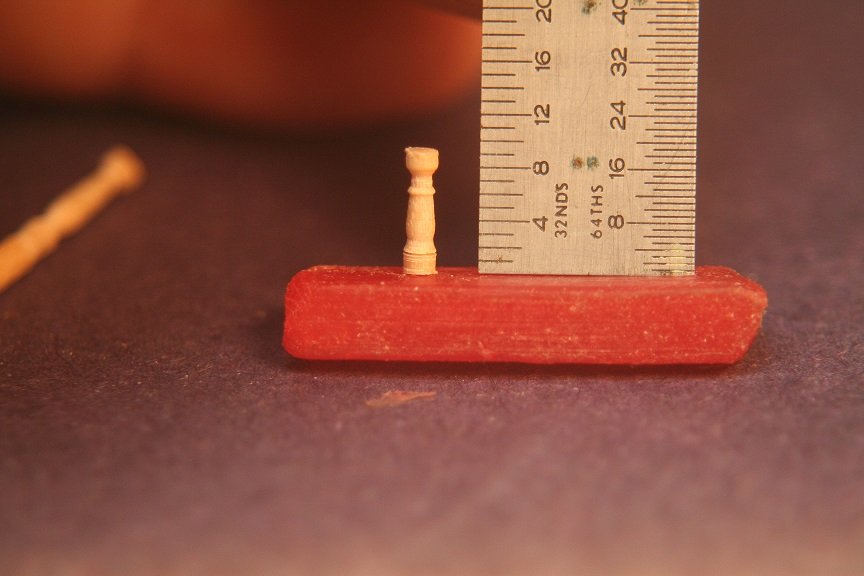
I measured to make sure they were the correct height. As the other stanchions...they are slightly bulkier then the prototype..but that is normal what one wants to prevent a fragile disaster from happening. Still they are a good representation of the originals.
- 3,560 replies
-
- 1
-
-
- clipper
- hull model
- (and 2 more)
-
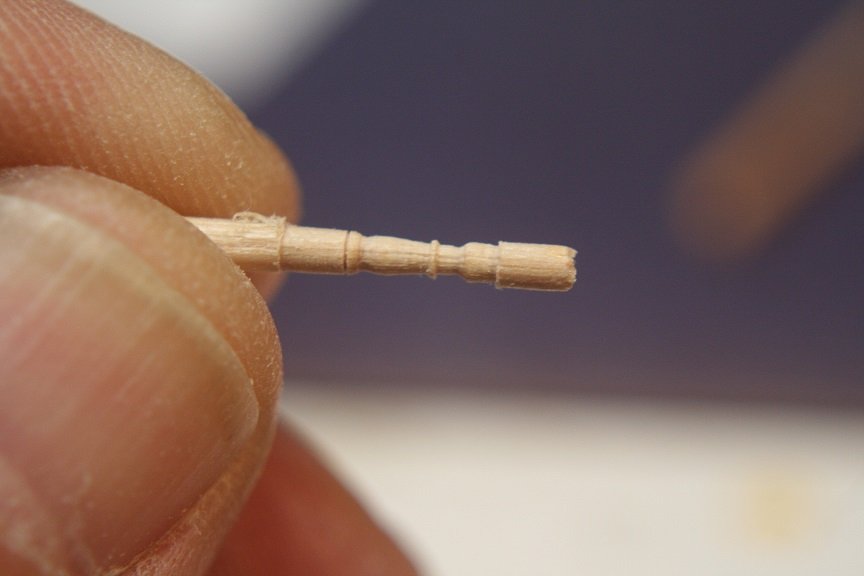
Next is an image of one stanchion still on its dowel.....note the reduced areas from the original dowel. I cut off the excess top and bottom.
-
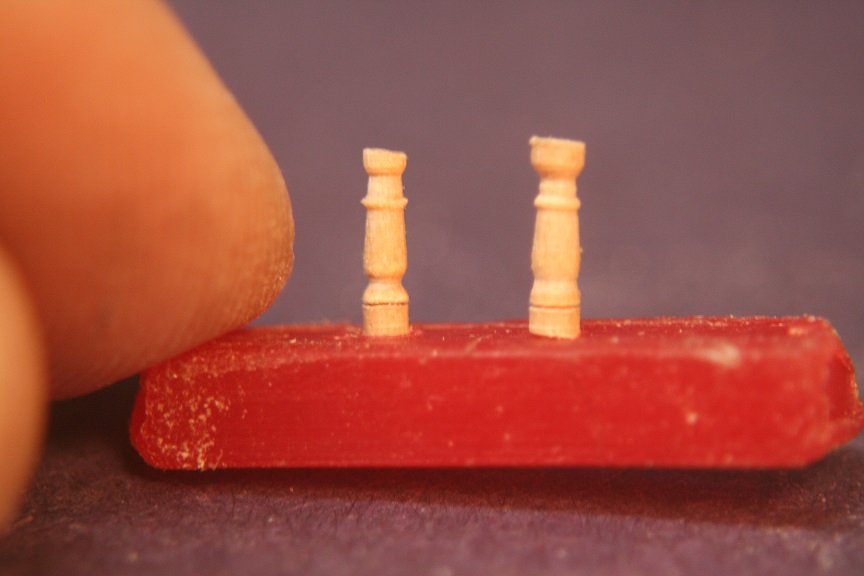
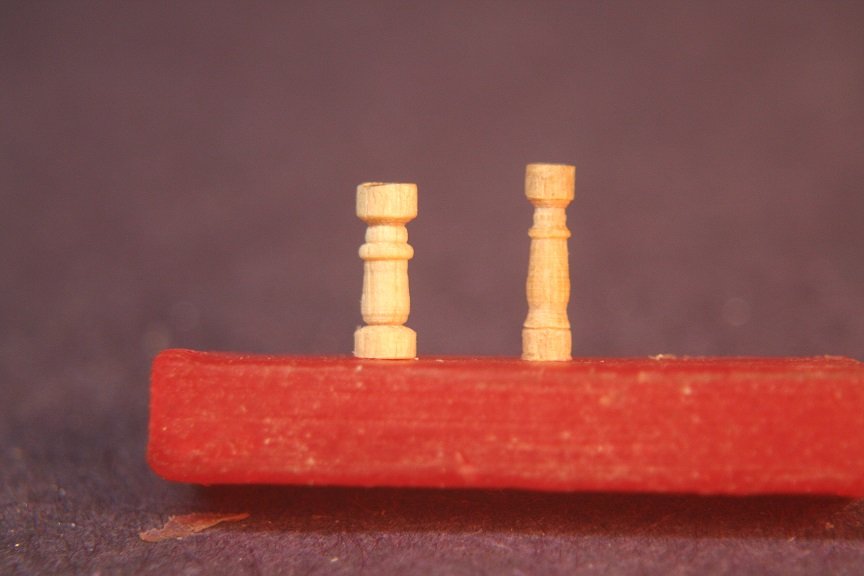
Spent some time today fashioning all the stanchions for the poop cabin rail. I first stripped the dowel stock I used for the aft rail stanchions, by making a dowel reducing draw plate....that I ran the dowel through after I cut them in 1" lengths..put them in my dental handpiece and and ran them first through the sizer...then I went quickly to the handmade scribe/cutter I made for this purpose(Like the other one for the other stanchions). Originally the dowel was too big and the joints broke...but once I reduced the dowel...it worked fantastic. Here is the days work. First the finished cabin stanchion in comparison to the fantail stanchion. A third of those will still need to be modified by way of cutting their head and feet to allow the proper cant to be achieved....then the rest will follow along vertically around the stern. Note the height and size difference....? Rob
-
Very interesting story and images. Looks like they removed most of her canary equipement to make room for cold storage. Very interesting indeed......She sure held up to all the mods she acquired over all the years. Rob
-
I read this somewhere else I believe. I might do a bit more research concerning this if it can be found. It might look super. Remember she also have varnished main masts with white recesses and red bands...... What an eye catcher.... Rob
