rwiederrich
-
Posts
5,520 -
Joined
-
Last visited
Content Type
Profiles
Forums
Gallery
Events
Everything posted by rwiederrich
-
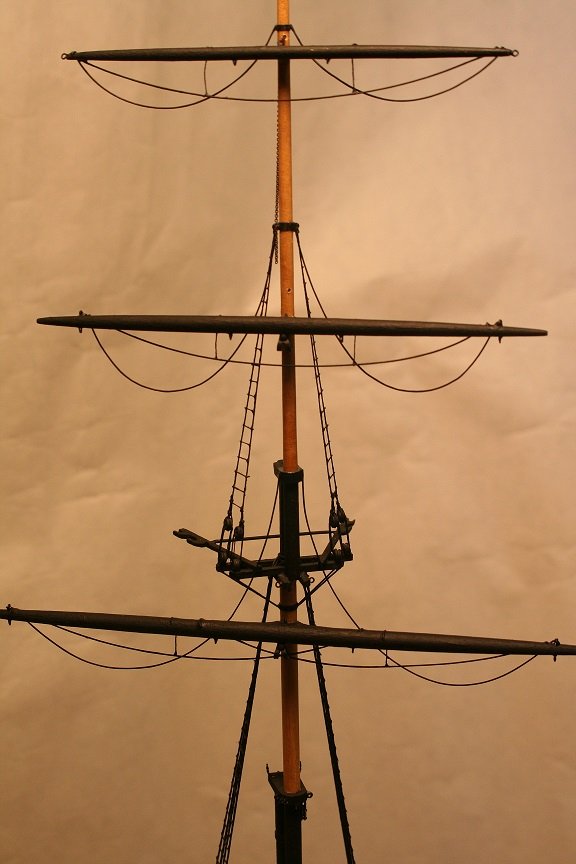
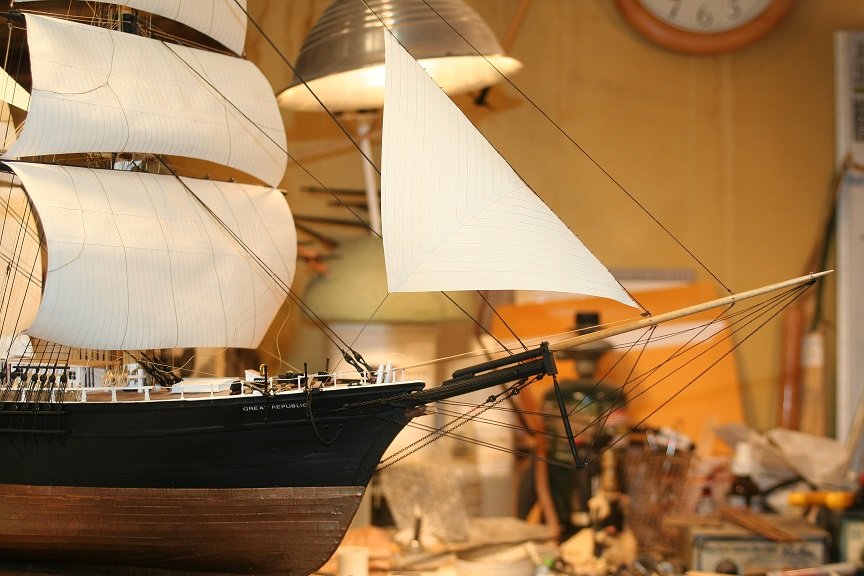
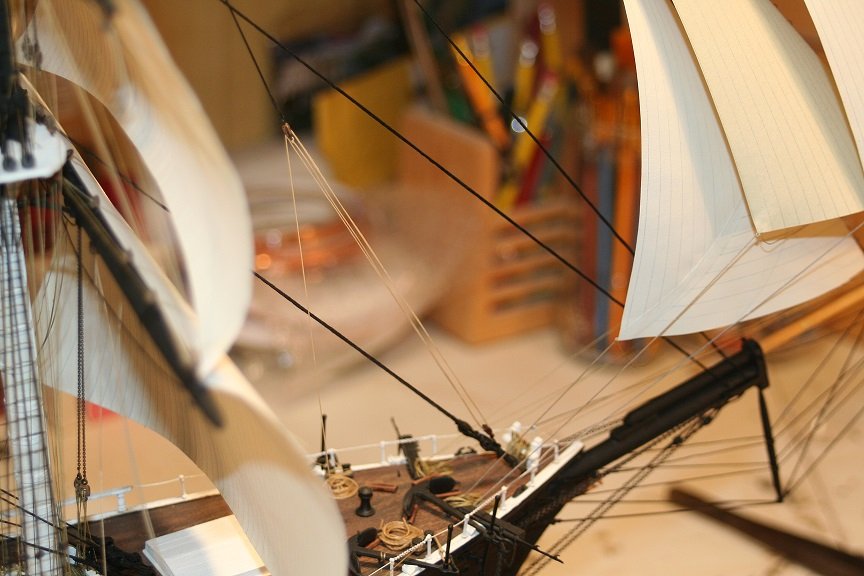
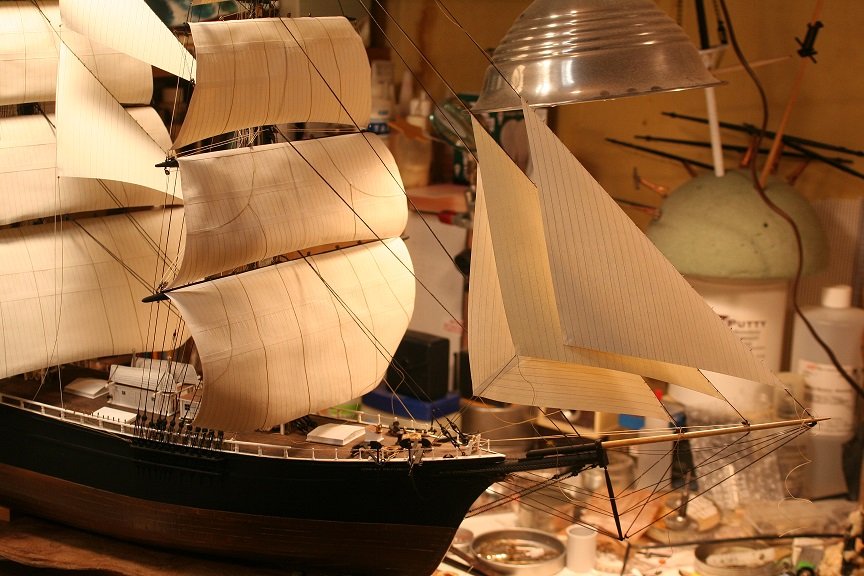
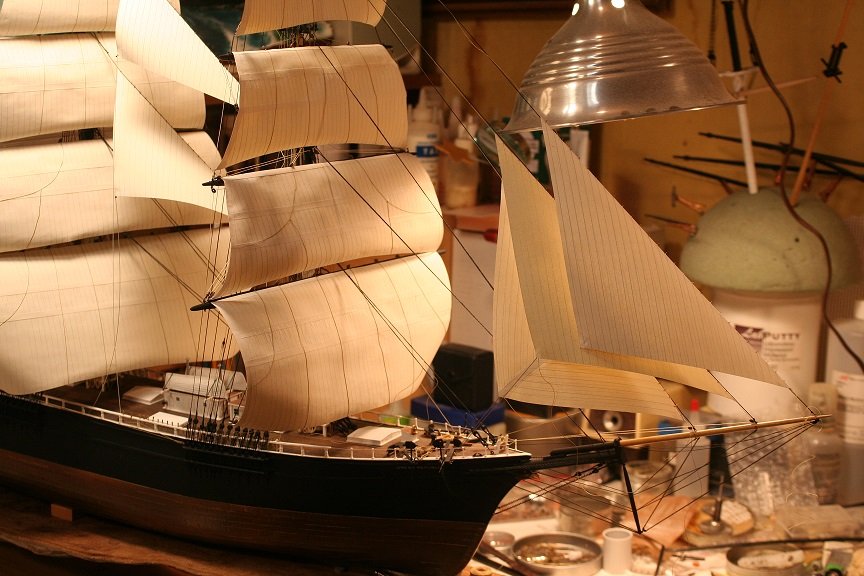
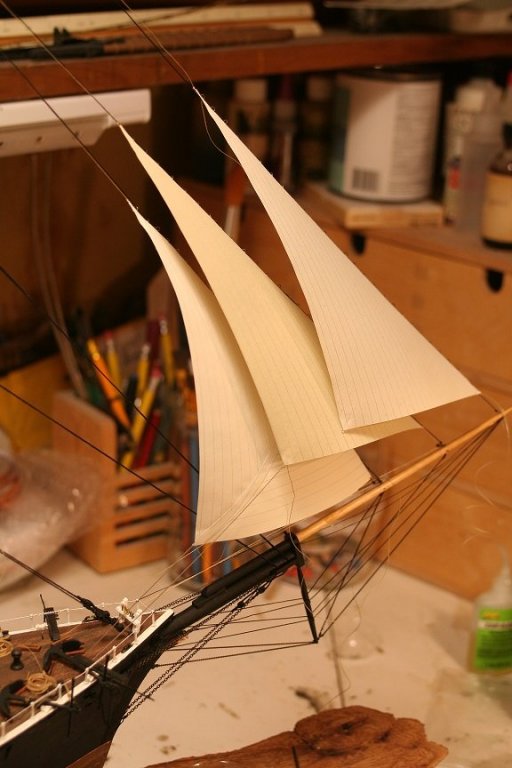
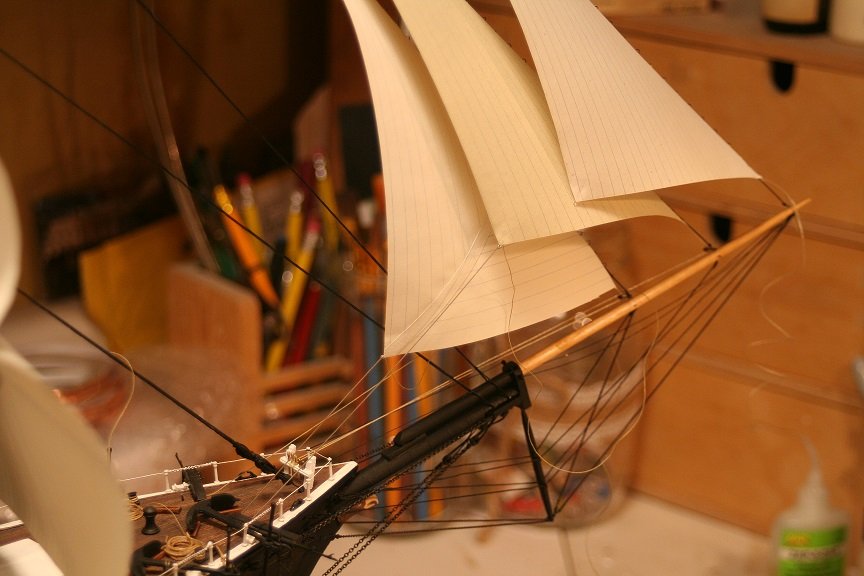
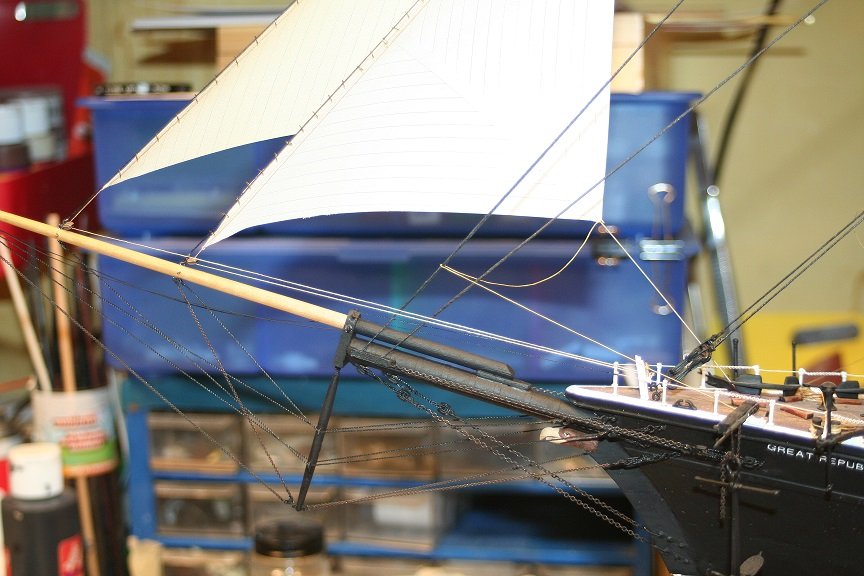
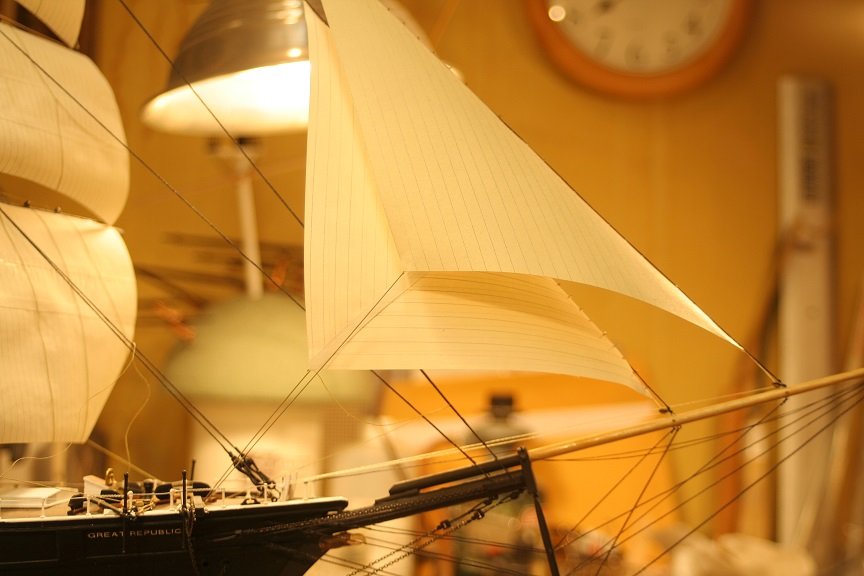
Spent some time working on the GR today. Trying to finish up the Mizzen. I worked on the royal and topgallant earlier and I finished up the basics of the topsail yard...now working on the topsail yard with its gin block lift rig. Here are a few images.
- 1,208 replies
-
- 8
-

-
- great republic
- clipper
- (and 1 more)
-
Scott..that sounds fantastic...love to watch that come together. Rob
- 1,208 replies
-
- 2
-
-
- great republic
- clipper
- (and 1 more)
-
What is this type of rig called.
rwiederrich replied to BANYAN's topic in Masting, rigging and sails
I'm confident in her non-descript rig. This conclusion is deduced from one major element not mentioned. She is an early steamer and from knowing just this, history shows that sail configurations were being experimented with during this transitional period. I have seen some extremely odd yard/sail configurations during this period. Depending on which painting you presented, you wish to model her from, it looks as if even from these there is an inconsistency in sail configuration. From single to double topsails. Now this may be evidence of her continual evolution of sail design as I mentioned earlier...of the period. I wouldn't stress over it too much....for even in my researching for all of my McKay clippers...there are inconsistencies based upon the vessels history, time frame and ownership. This accounts for so many differences in sail, masting, deck arrangements and sparing I have noted. With my own Great Republic searching, there is much error that is found were one artist depicts her with partial Forbes rig and bulwarks, while yet others depict her with skysails and a full railed weather deck. One could say if they chose too build it so....that their version of her with sky sails and bulwarks(With Only two cabins) or with only royals and a railed weather deck(My version) or as a three masted full rigged ship(her later/final German years) are all accurate representations of the Donald McKay masterpiece Great Republic. At some point in her history, they would all be right. I think the wonderful model you are building will fully represent the vessel you are replicating. Artistic license can be the missing sequence we use in the reconstruction of our vessels DNA. Rob -
Truck and flag look wonderful. I'll be doing the same for the GR...good tutorial. Rob
- 3,618 replies
-
- 3
-
-
- young america
- clipper
- (and 1 more)
-
What is this type of rig called.
rwiederrich replied to BANYAN's topic in Masting, rigging and sails
Three masted Two topsail schooner..with the leanings of a Baltimore clipper. Me thinks. -
Fantastic Scott. You're going to build in 1/128th or there abouts? Or are you going smaller? I fully appreciate your kind comments and I am so glad whatever processes or techniques I used can be an inspirational help to you. Over the near 50 years of building ship models and particularly clipper ship models I have either developed, adopted or applied processes, techniques that, I feel work the best and produce the fastest results. I've been at this for over 2 and a half years...and I can see light at the end of the tunnel now. I'm looking forward to your application of some of these processes on your next build. Rob
- 1,208 replies
-
- 4
-
-
- great republic
- clipper
- (and 1 more)
-
I don't know....it seams quite unclear. Notice how all the other sails are in a state of drying..as they are laid out across stays purposefully(the lowered top sails)......but these so called sails(On the gaffs) appear to be partially reefed/furled. A very unclear drawing. By the way Pat, I received the photographs and they are fabulous. They will be gladly and respectfully added to my collection. You are too kind..thank you. Rob
-
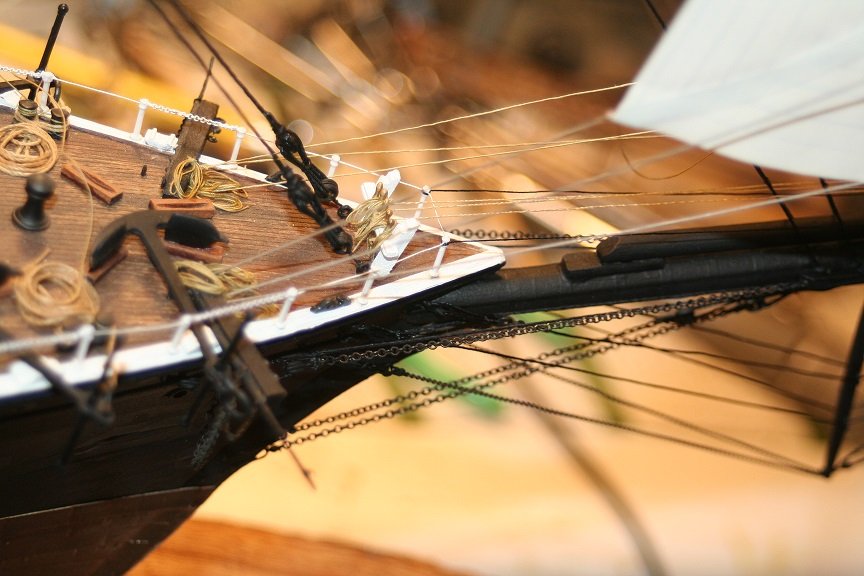
Thanks Keith. I too had that same question when I first saw this forecastle arrangement. The Original Great Republic utilized some very unique differences then most other clippers of the time...namely, there were no bulwarks. Railings and as seen here, iron stanchions and chain were neatly employed to accommodate the many necessary functions and actions of the flush deck forecastle. Much differences had to be made with the single flush weather deck. Glad you noticed one such difference. So many reasons why the Great Republic had to be on my list of models to add to my clipper collection.....there were no other clippers like her. Rob
- 1,208 replies
-
- 3
-
-
- great republic
- clipper
- (and 1 more)
-
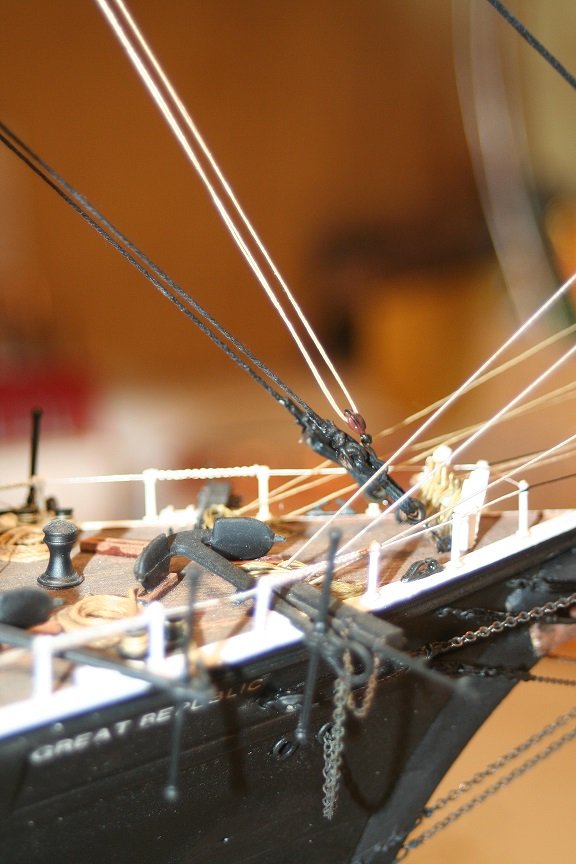
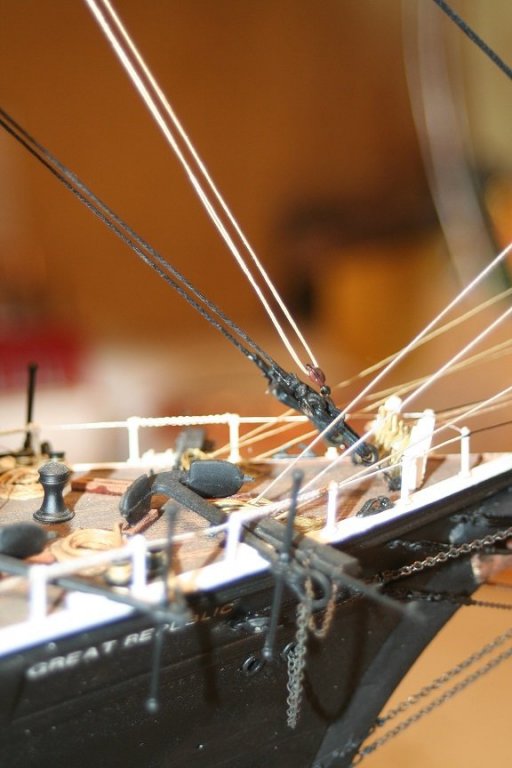
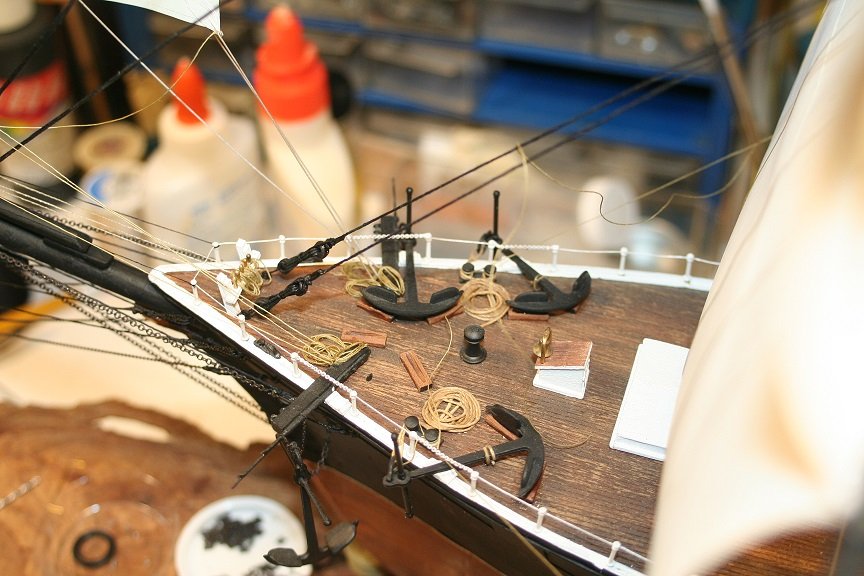
A bit more detail for the anchor purchase (Fish tackle).
- 1,208 replies
-
- 11
-
-
- great republic
- clipper
- (and 1 more)
-
Sails bent to this gaff? Not sure this is accurate. Looks like a monkey or pennant gaff...similar to those found on some clipper ships. Could be an early/hybrid double gaff top sail.....however, they were typically found on the aft spanker mast of Barques not the fore or main masts. Rob(I've been known to say foolish things)
-
Riight...thanks for the comment. I haven't seen one image of an historical clipper where the sails were perfect and pristine. furled sails that were not fully dry, molded and just a slight inconsistency in canvas was easily identified. I just wanted to replicate some of that. I'll probably have several other darker sails added to the mizzen and or spanker....to balance things out. Rob
- 1,208 replies
-
- 6
-
-
- great republic
- clipper
- (and 1 more)
-
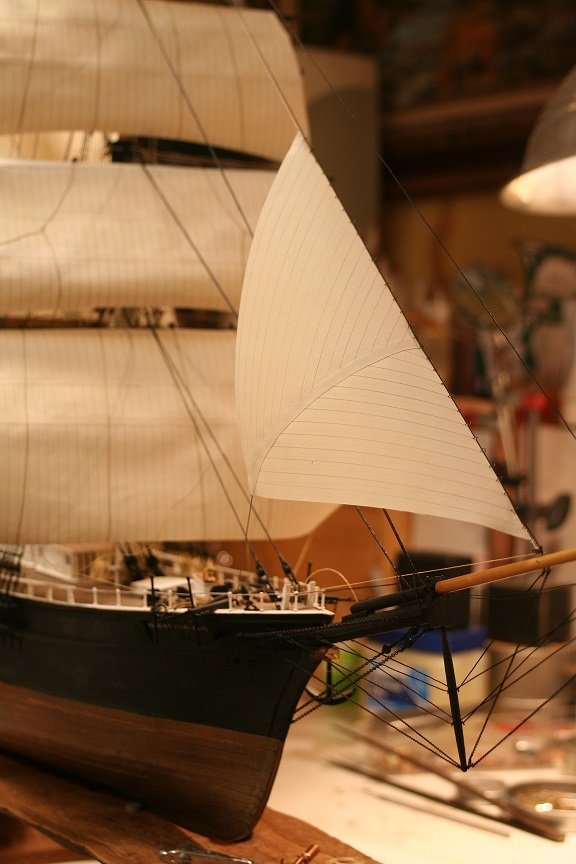
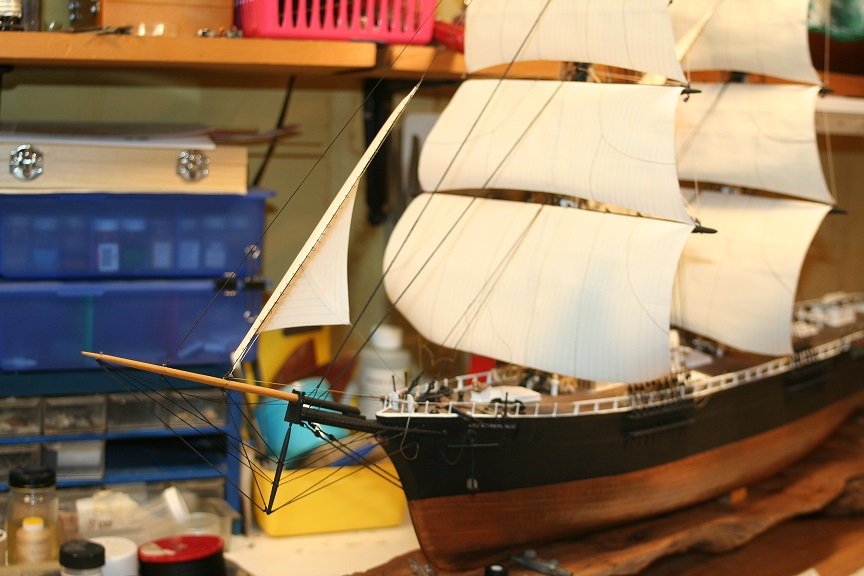
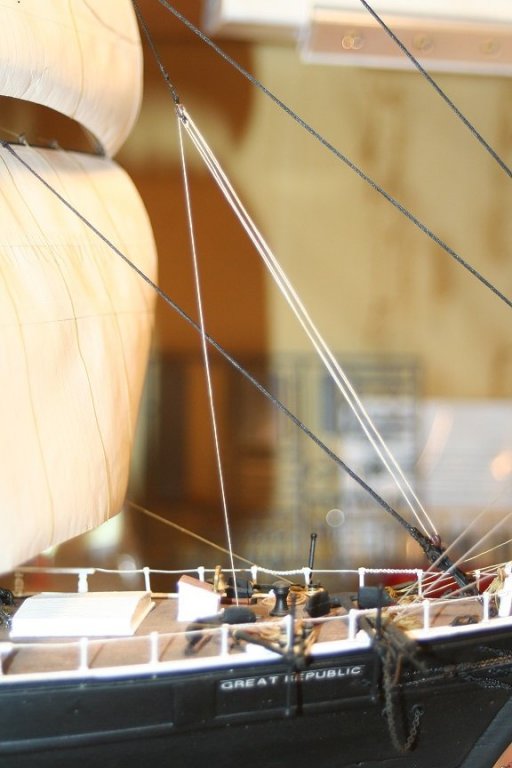
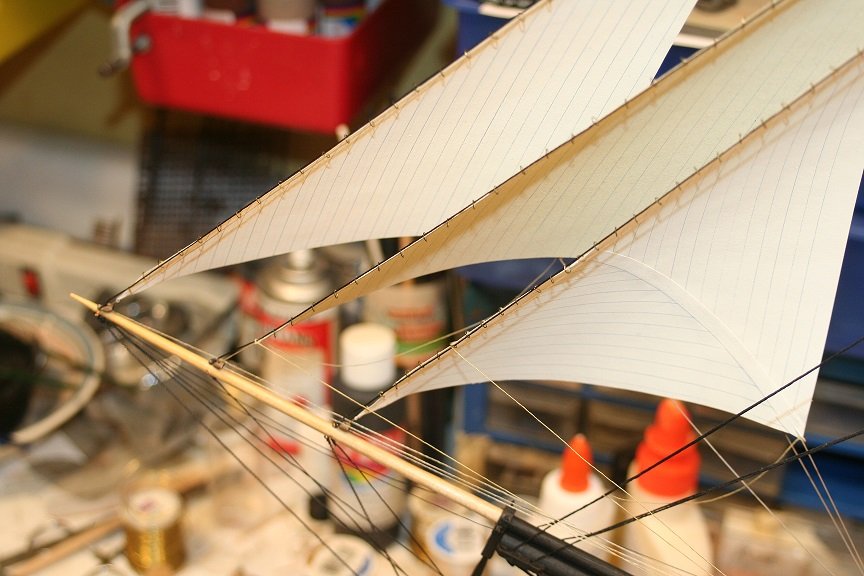
Here are some more images of the finished install of all the jib sails and their associated downhauls and rigging. Now it's time to add the inner and outer jib boom stays, their hearts and lanyards. Rob

- 1,208 replies
-
- 16
-
-
- great republic
- clipper
- (and 1 more)
-
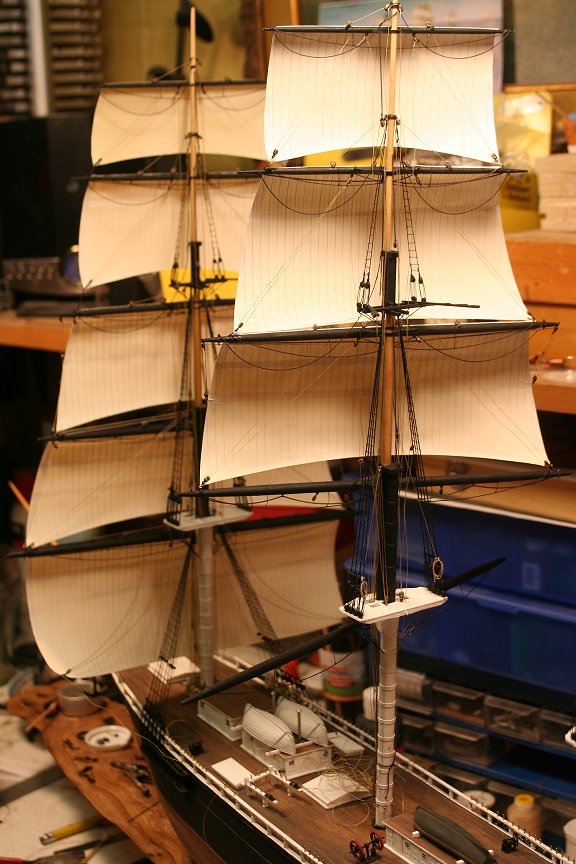
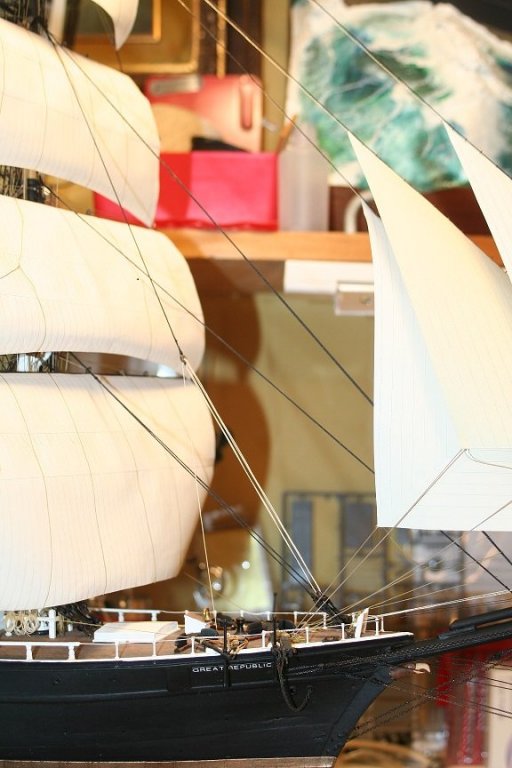
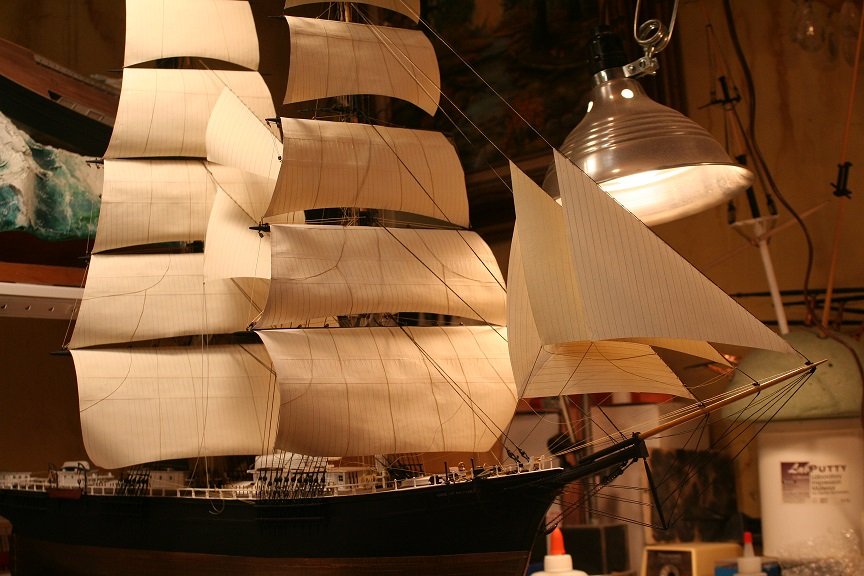
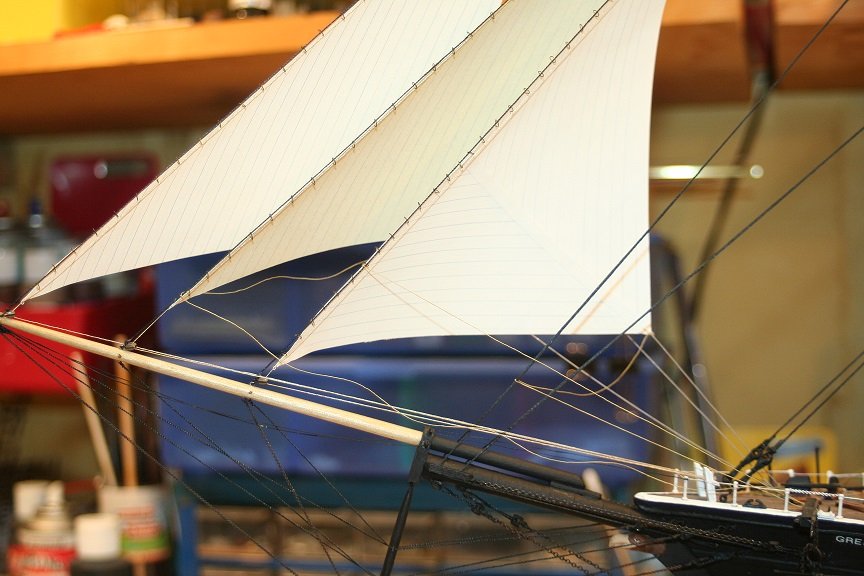
Just about finished with the addition of the flying jib. As you may notice I painted the inner jib slightly darker to give a more natural contrast and to add divercity. Not all sails were exactly the same shade...some were older and some newer.
- 1,208 replies
-
- 14
-
-
- great republic
- clipper
- (and 1 more)
-
And I also began the flying jib as well....I'll finish it up tomorrow.
- 1,208 replies
-
- 12
-
-
- great republic
- clipper
- (and 1 more)
-
Spent some time adding the outer jib sail and its rigging.

- 1,208 replies
-
- 8
-
-
- great republic
- clipper
- (and 1 more)
-
Creating Brass Blister Detail
rwiederrich replied to P_Budzik's topic in Metal Work, Soldering and Metal Fittings
Well explained. With further understanding of your *Purpose*, it fully becomes clear why the process was presented. In the model ship world, this principle is alive in my world....I almost couldn't have it any other way. Multi-media, and multi fabricational processes are fully employed in my shipyard. Rob(thanks for the presentation) -
Thanks Popeye. Just trying to make the progress I do make.....look amply significant. Gonna loath it when I have to create and install lots of rope coils. that will look like I'm not getting anywhere..... Rob
- 1,208 replies
-
- 3
-
-
- great republic
- clipper
- (and 1 more)
-
Thanks Pat. I try to replicate....not duplicate. To create the stretching of canvas under pressure and duplicate those distortions is far beyond what I am attempting here. A good proximity will do...so long as I maintain some structural and material accuracy. Paper is far easier to manipulate and is closer to scale then any fabric I could procure....not to mention it retains its shape, once painted(treated). I can only suggest you acquire a copy of Crothers book of masting and rigging American clipper ships...he has much information on the math and tables used in creating steps and construction information. Maybe it will help. It did for me. Rob
- 1,208 replies
-
- 4
-
-
- great republic
- clipper
- (and 1 more)
-
Wow...Pat. You have gone all out, as far as trying to locate and apply the math that was used to determine the mast steps. A noteworthy endeavor, however, my particular method is to understand the stepping process and *need* in actual prototypes, and then rely on my developed acute perception ( a very good eye) for measurements and translations there of....and then give it my best shot. There will always be inaccuracies in our models to some degree(None of us were there when our ships were actually built), and time can dilute the information we seek. Unless your vessel construction is well documented and not expunged by time...you have to make certain assumptions... based on the best practices of the time. Crothers book on masting of American clippers might be of some help. Rob
-
Creating Brass Blister Detail
rwiederrich replied to P_Budzik's topic in Metal Work, Soldering and Metal Fittings
Wood decks are a gimme......Hand rails,cleats and belay pins of a non rusting alloy ...to include bronze fittings are also included on the gimme list. Treat everything else or lose it....... Shipshape me maties. Rob -
Creating Brass Blister Detail
rwiederrich replied to P_Budzik's topic in Metal Work, Soldering and Metal Fittings
I tend to agree with Bob and Pat. That part could have been made from something far less work intensive. However, if exposed brass is the theme of your model...it is a necessity. Artistic license trumps reality. Personally I paint everything to replicate the actual item I'm modeling...so I use whatever meets the requirement of accuracy...and simplicity....not to mention structurally. There is no bare wood or metal on a sailing vessel...or any kind of vessel for that matter. Exposed surfaces were treated somehow. I do love the machining work however...……... Rob(Just a simple old man) -
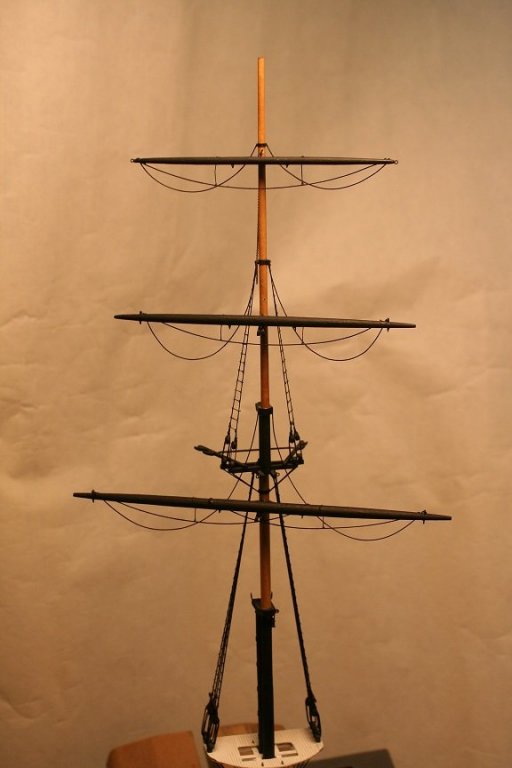
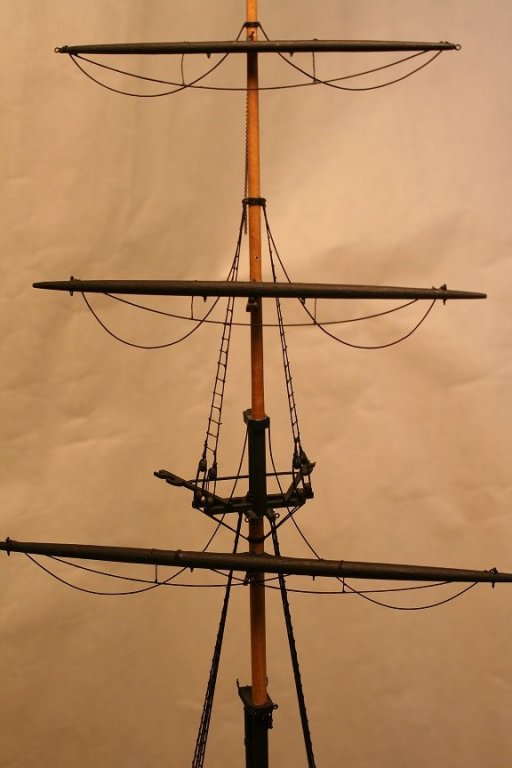
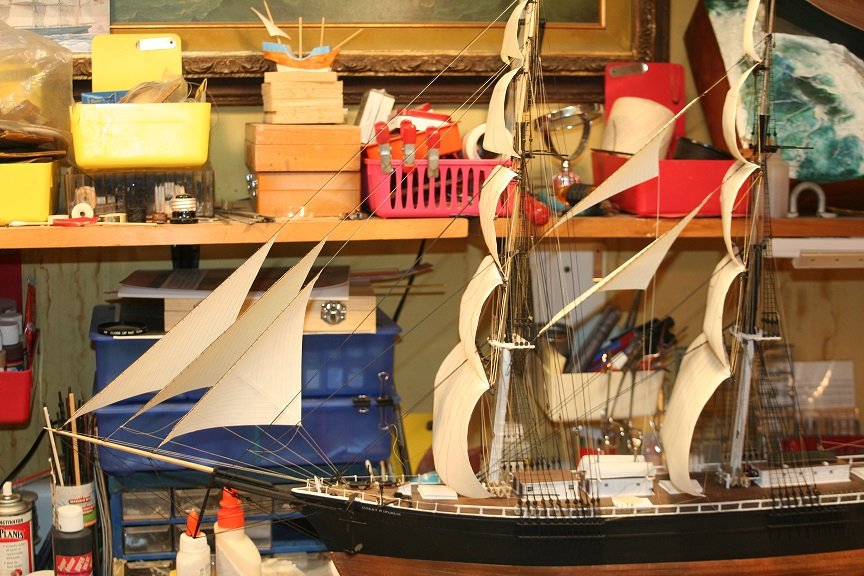
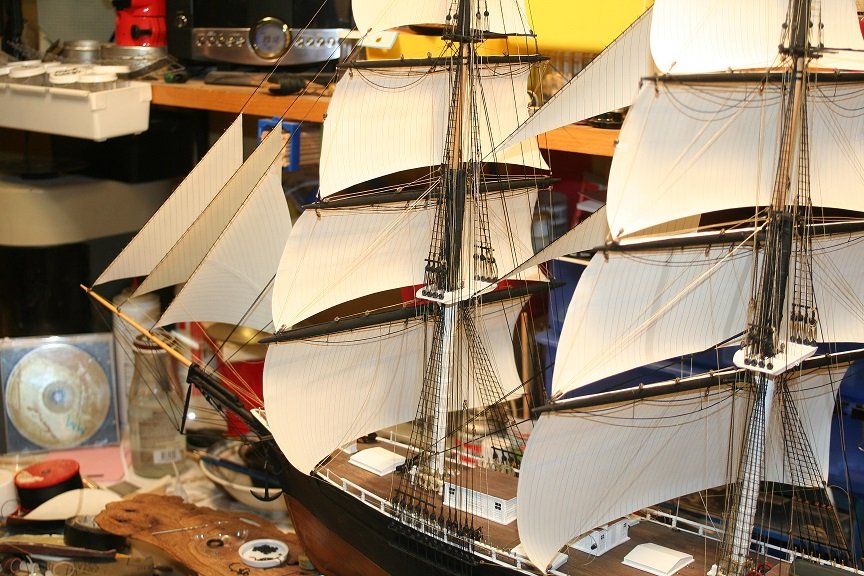
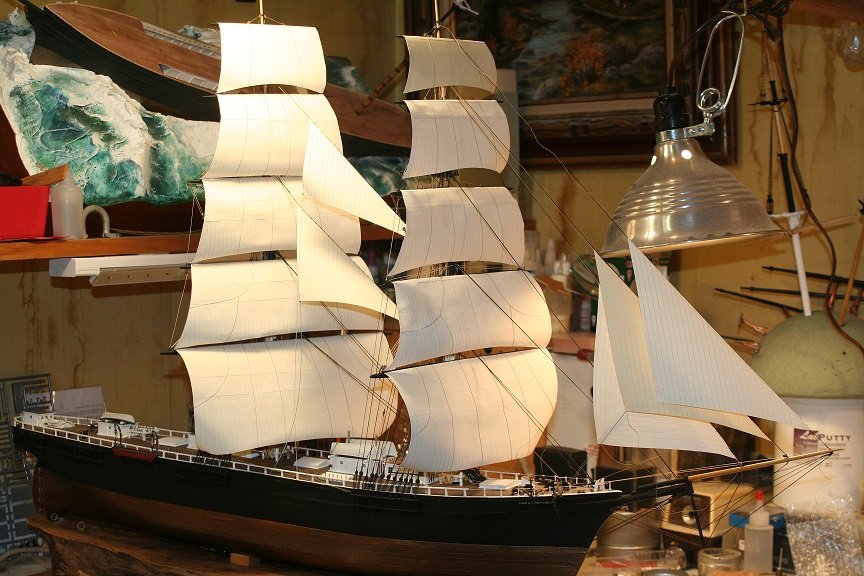
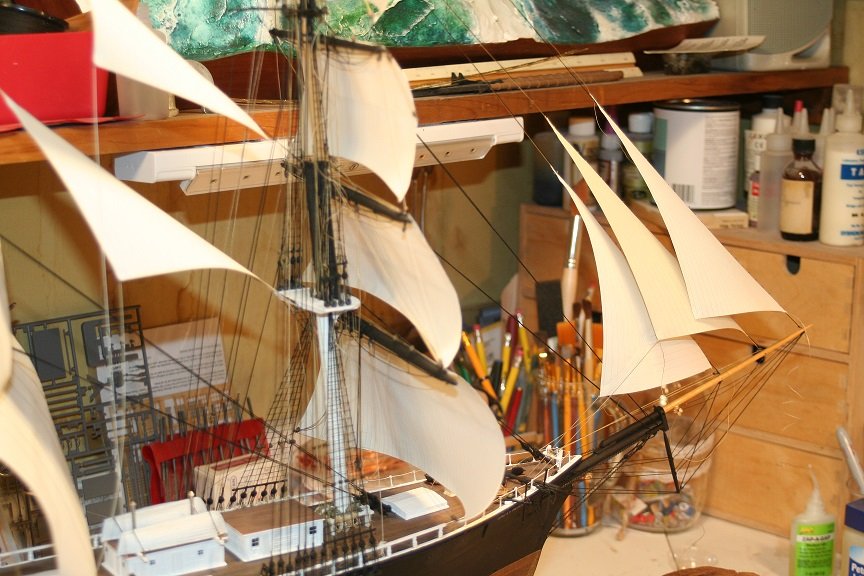
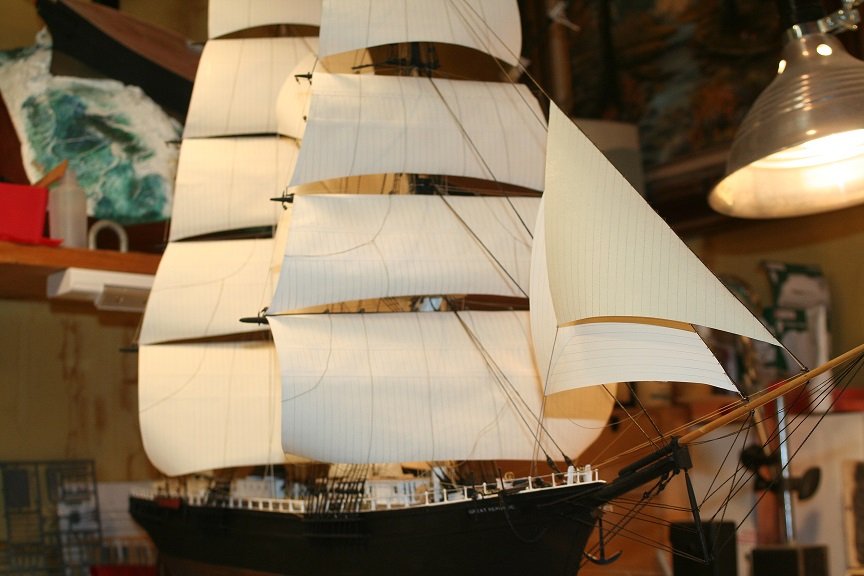
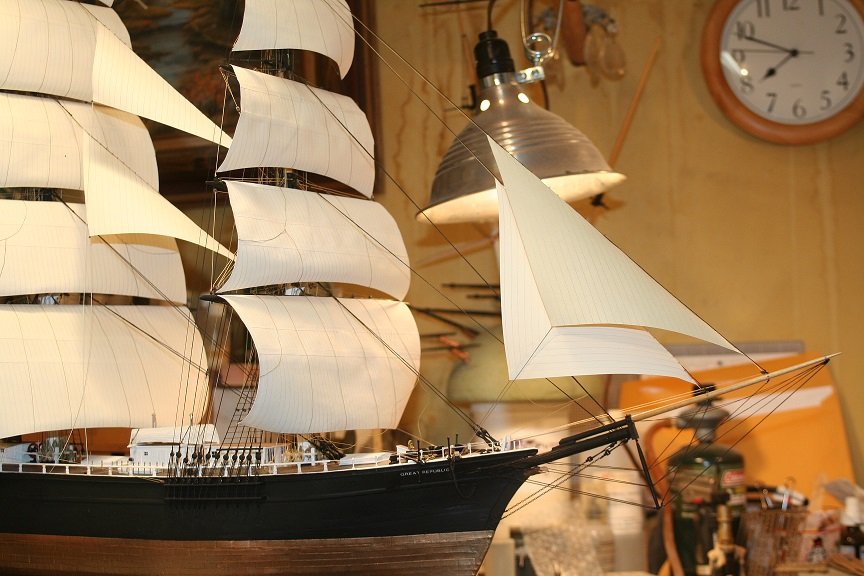
Well..I built my Great Republic differently this time, by rigging each mast with sails down to the upper topsail....leaving off the lower topsail and main course. Knowing that with the yards and sails off I could easily rigg the shrouds and ratlines...THEN add the them. This is the first model I utilized this technique. And it has been greatly successful. Here is an image or two to demonstrate how the shrouds are easily accessible to add. I would add the shrouds before the yards and sails on your build.