HOLIDAY DONATION DRIVE - SUPPORT MSW - DO YOUR PART TO KEEP THIS GREAT FORUM GOING! (Only 53 donations so far out of 49,000 members - C'mon guys!)
×


rwiederrich
-
Posts
5,518 -
Joined
-
Last visited
Content Type
Profiles
Forums
Gallery
Events
Everything posted by rwiederrich
-
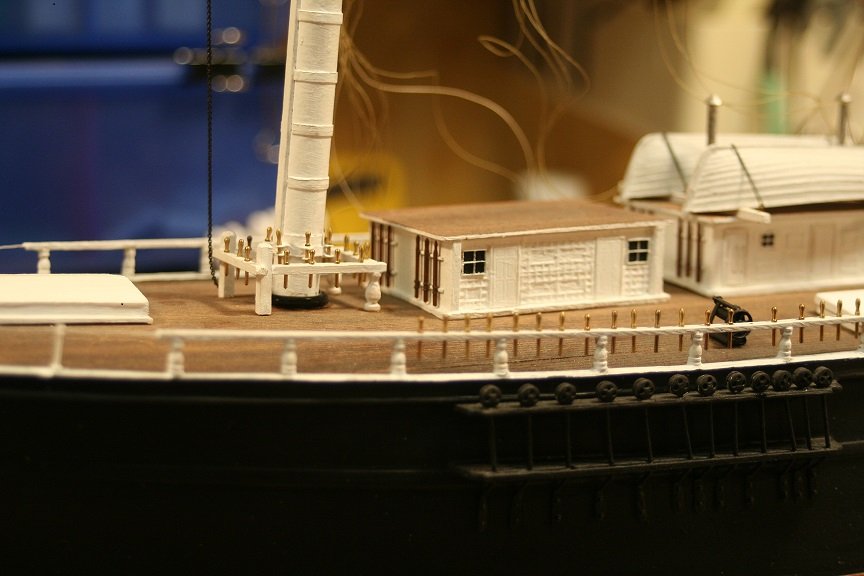
I removed the tape that held the rigging and now I am aligning and separating them to prep them for, either belaying or fixing them with blocks and their purchases. The lower topsail yard halyard needs its purchase rigged too. First I had to drill and mount a number of belay pins on the main weather deck rail.
- 1,208 replies
-
- 5
-

-
- great republic
- clipper
- (and 1 more)
-
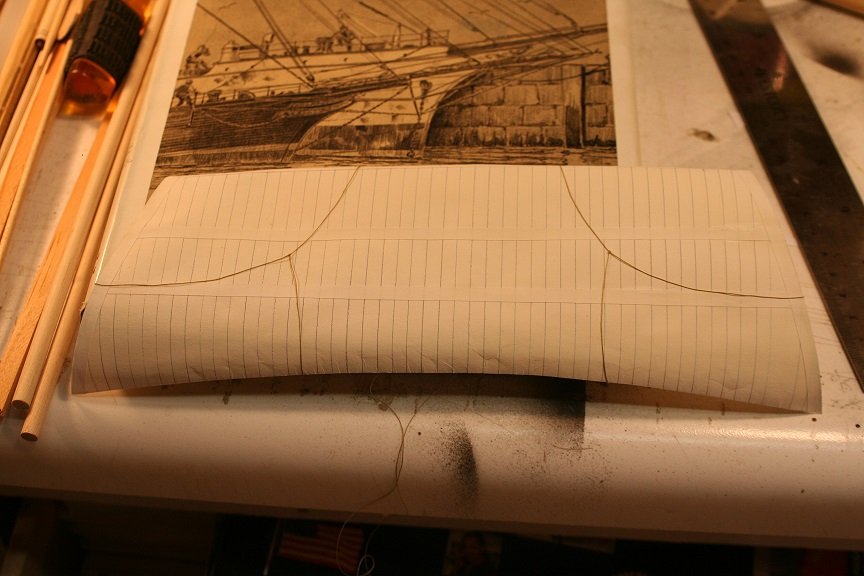
GMO....the only tutorial I have is the images I posted....AND any information your require...I can personally tell you...walk ya through it stuff. If you need any assistance just ask, and I'll be more then happy to walk you through it. First...you need a piece of paper(Copy). Draw on the scale panel lines for your scale. Remember to draw both sides... Making sure they are over the top of one another. Then make double sided copies of the *Master* blank. This will be your starting point. Rob
- 1,208 replies
-
- 2
-
-
- great republic
- clipper
- (and 1 more)
-
Yes..I do have a sharp eye. Model trains are my 4th passion too. Telescope making, and furniture making are in there too. I'd love to engage in a discussion in the non ship forum...... There is a live steam outdoor railroad in my town and it is amazing. I wondered what *Other* contraptions you might be making in that very nice modeling machine shop.... Rob
-
Fantastic work Ed...tidy and smartly done rigging. Rob
- 3,618 replies
-
- 1
-
-
- young america
- clipper
- (and 1 more)
-
Yeah...Dowmer...I think I might just rig the shrouds and get the foremast secure... before moving onto the next. Having the most room aft will be quite beneficial. All these sails really require loads of control rigging and I can tuck that all away nicely after the fairleads are installed on the shrouds. I'll work on that tonight. Rob
- 1,208 replies
-
- 2
-
-
- great republic
- clipper
- (and 1 more)
-
I see a little railroad action going on against the wall there...*O* scale possibly? Your work is impeccable. Rob
-
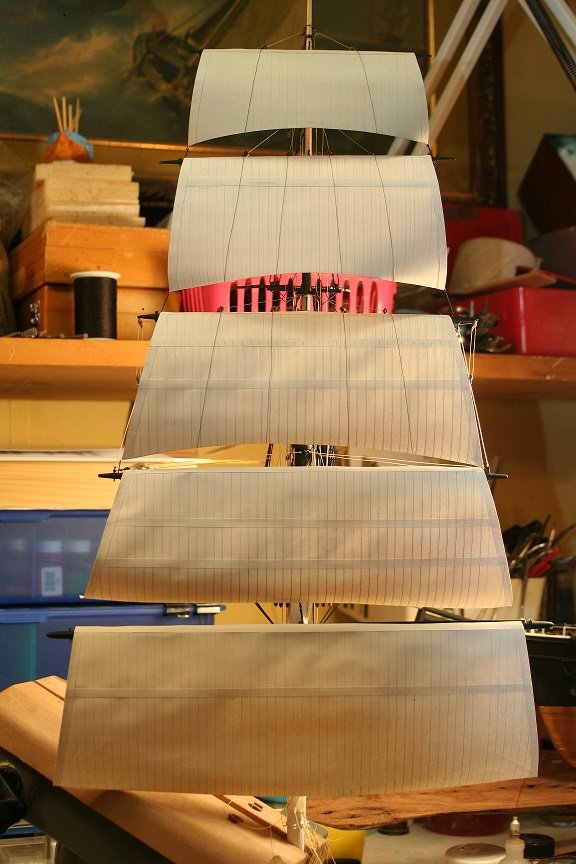
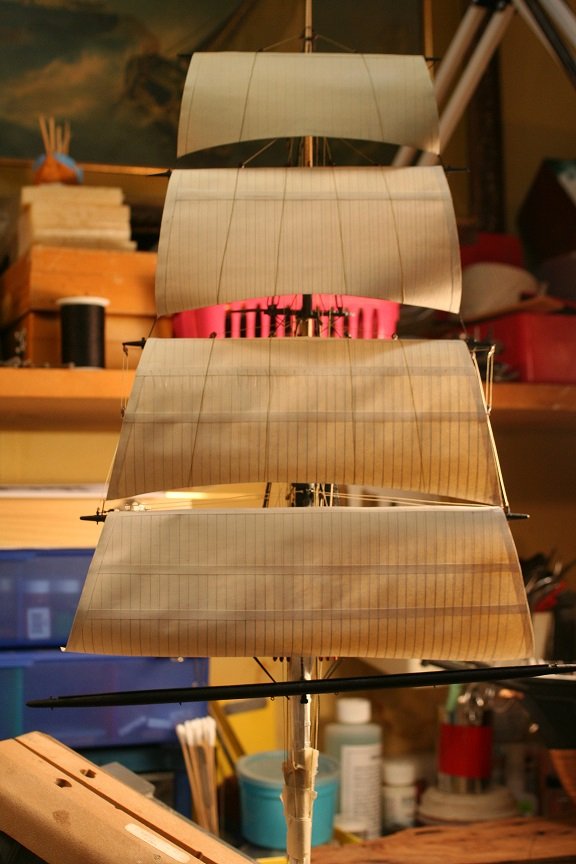
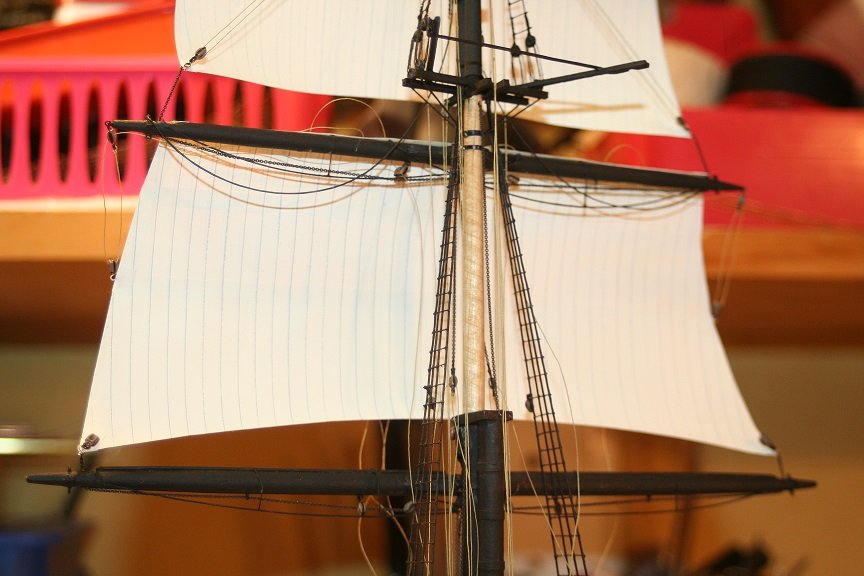
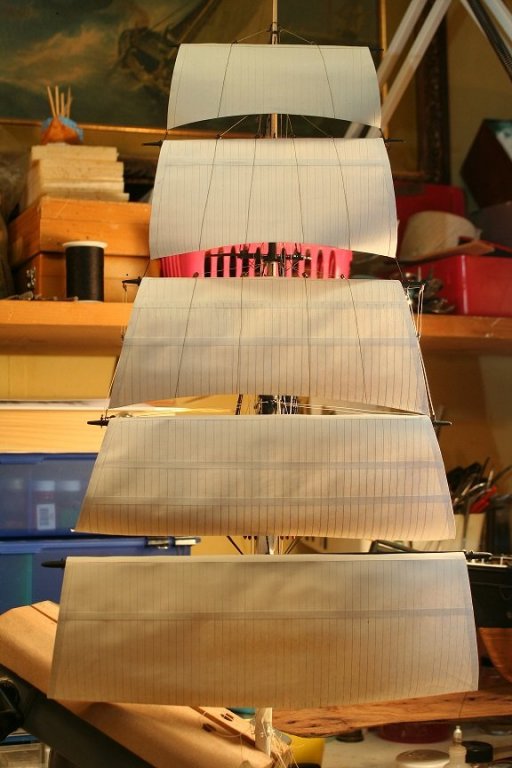
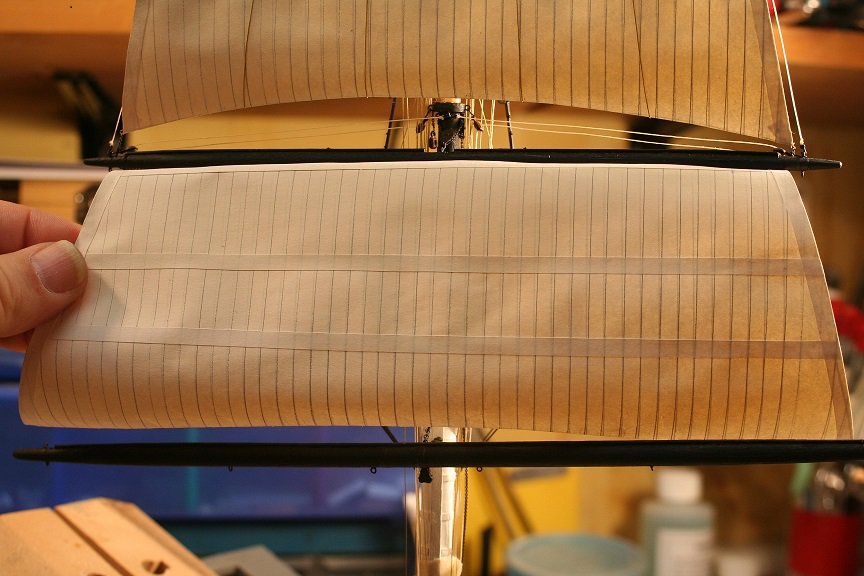
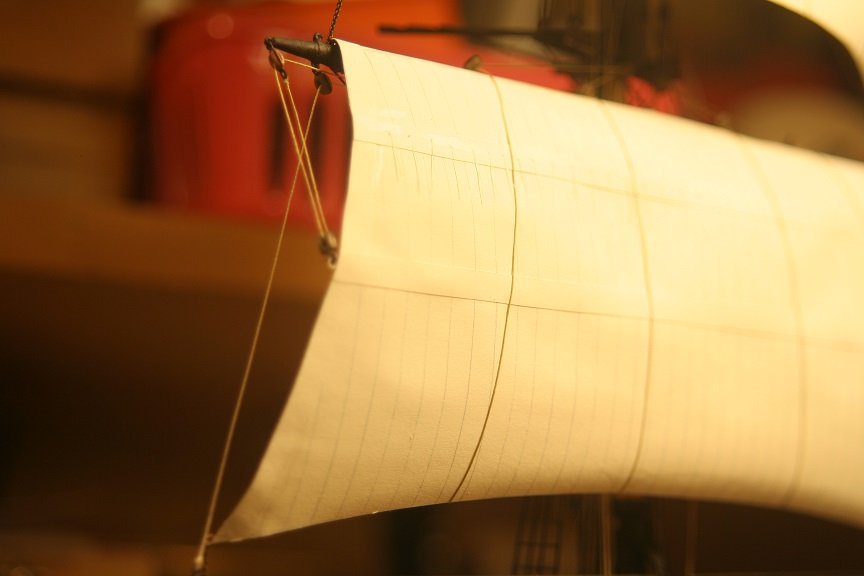
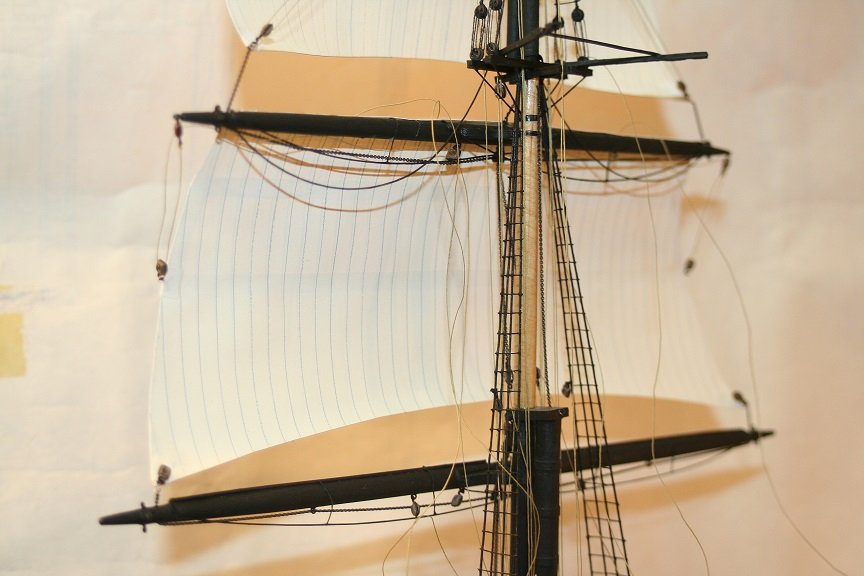
Thanks Michael....I've spent years developing the right (from my point of view) look using paper. They still have a natural translucency, but are not unduly wrinkled or opaque. Plus they are easily and quickly made, with very little fuss. I back lit them to demonstrate the natural look of them. Rob
- 1,208 replies
-
- 3
-
-
- great republic
- clipper
- (and 1 more)
-
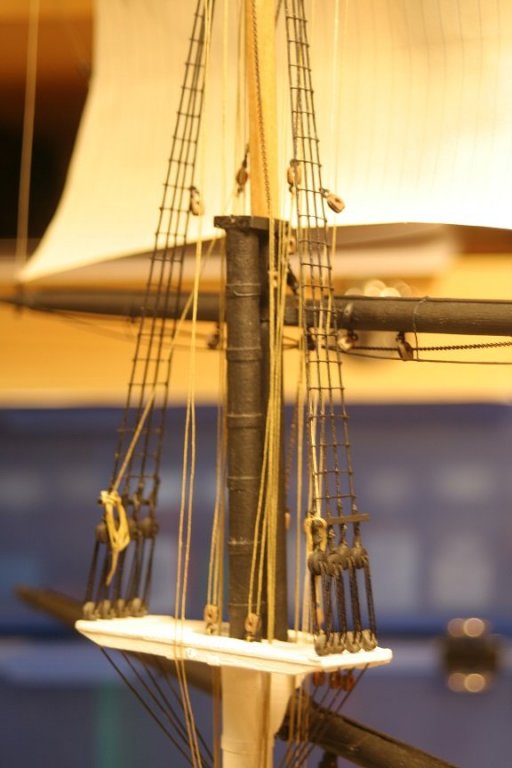
Then when everything was right....I removed the mast...placed the mast boot...applied the glue, placed the fife rail then glued things into place. I purposefully did not glue the fife rail down at this time in case alignment issues arose. Now, I'll wait till things are good and solid before my next step. Do I begin the mainmast...or should I finish rigging the shrouds on the foremast...while everybody is removable..so I have plenty of room? I might just do that...pull out all the other masts and focus on the shrouds and finding homes for all the line. I'll need fairleads on the shrouds anyway before any lines find belay pins. Rob
- 1,208 replies
-
- 7
-
-
- great republic
- clipper
- (and 1 more)
-
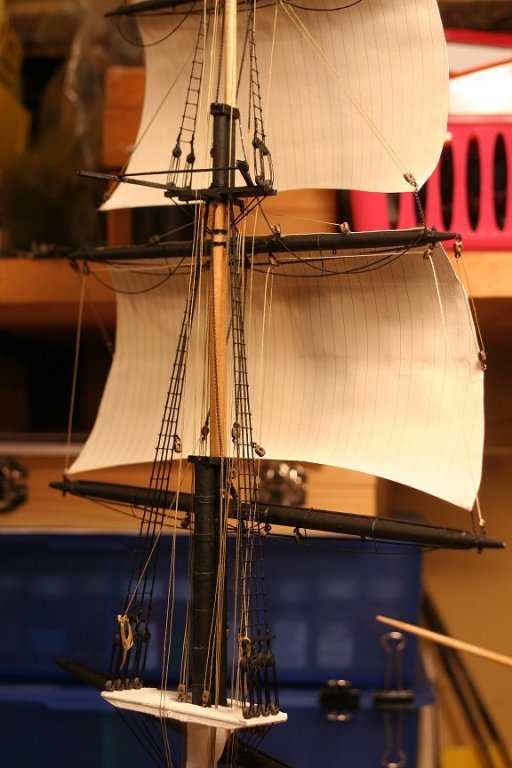
Enough of the Tom foolery. I finished up all the additions I am going to do to the foremast...so it was time to step the mast in place..first a test fit.

- 1,208 replies
-
- 7
-
-
- great republic
- clipper
- (and 1 more)
-
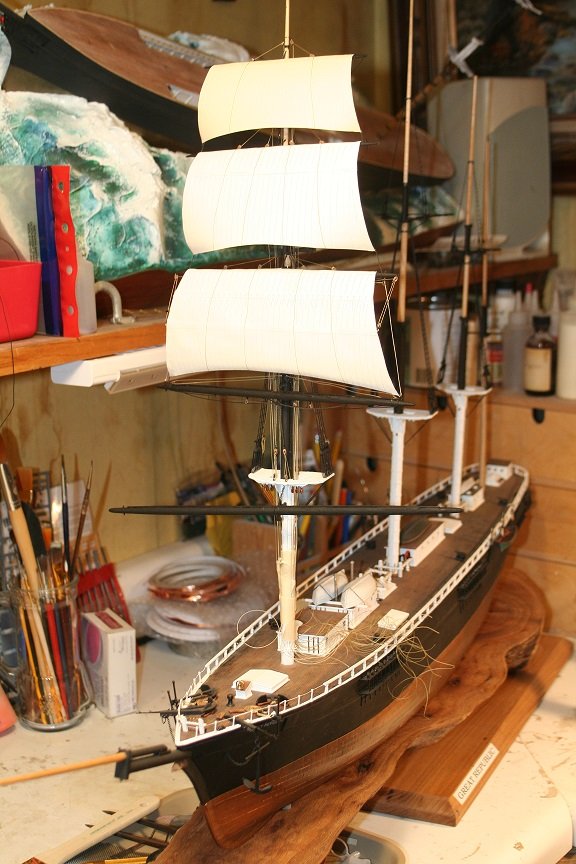
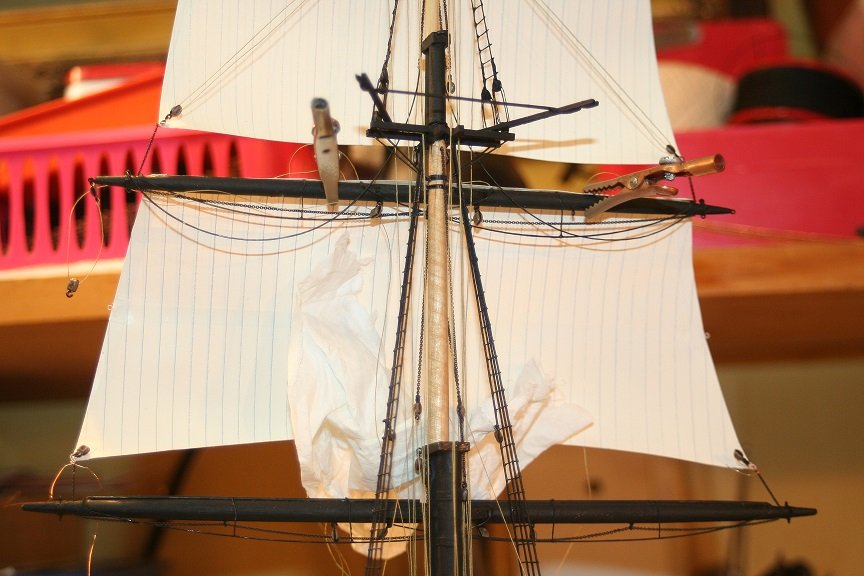
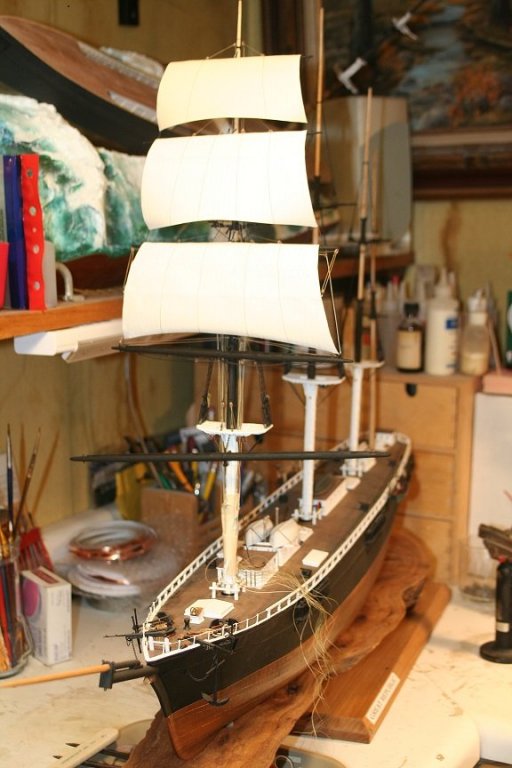
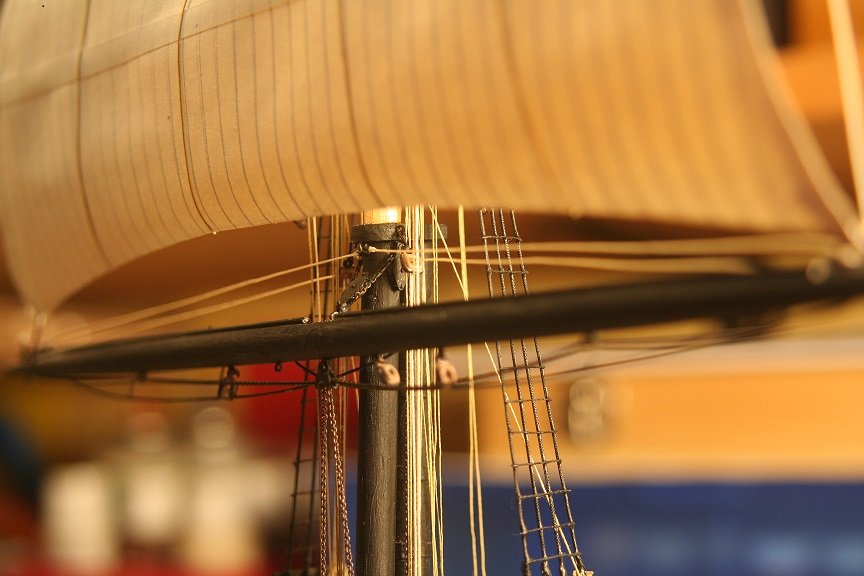
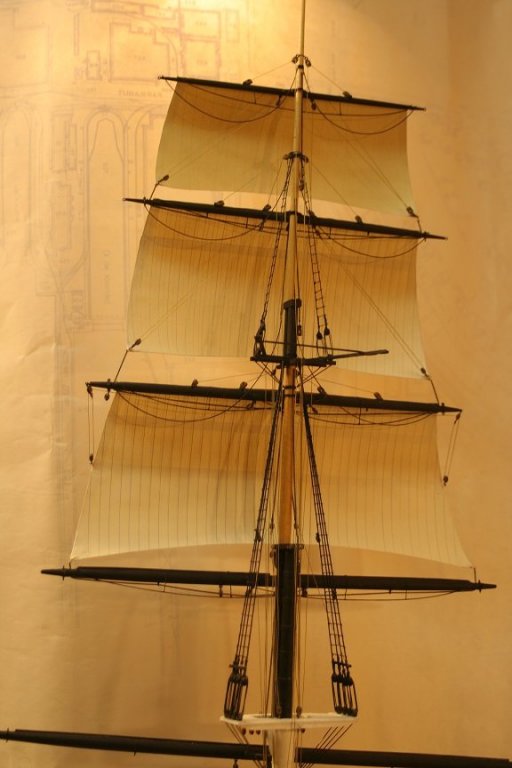
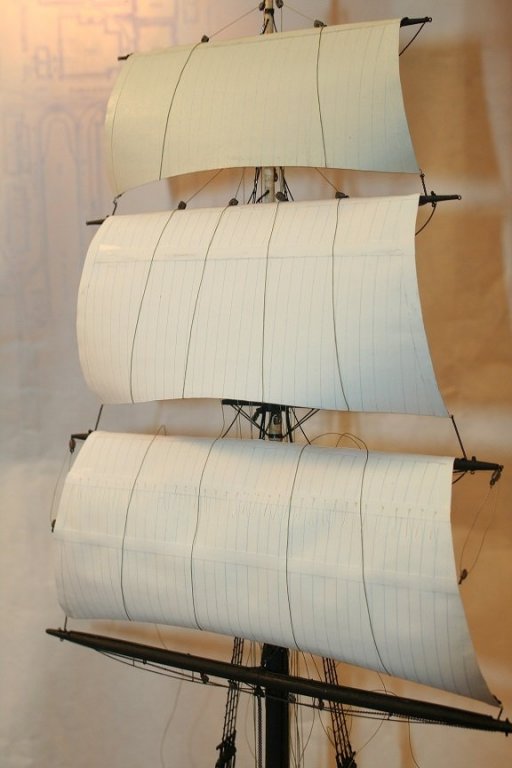
I went a bit looney and set up the main course....just for fun. This isn't the actual main course..but it is a facsimile.
- 1,208 replies
-
- 5
-
-
- great republic
- clipper
- (and 1 more)
-
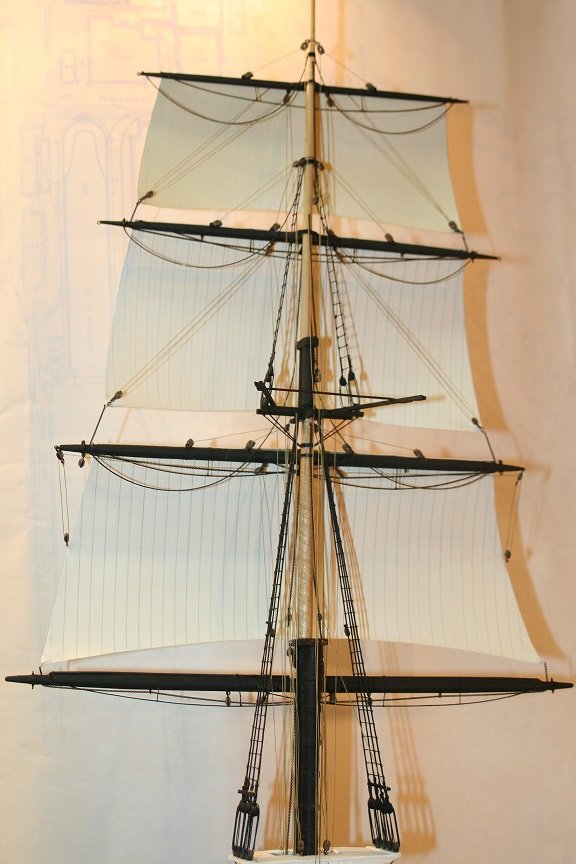
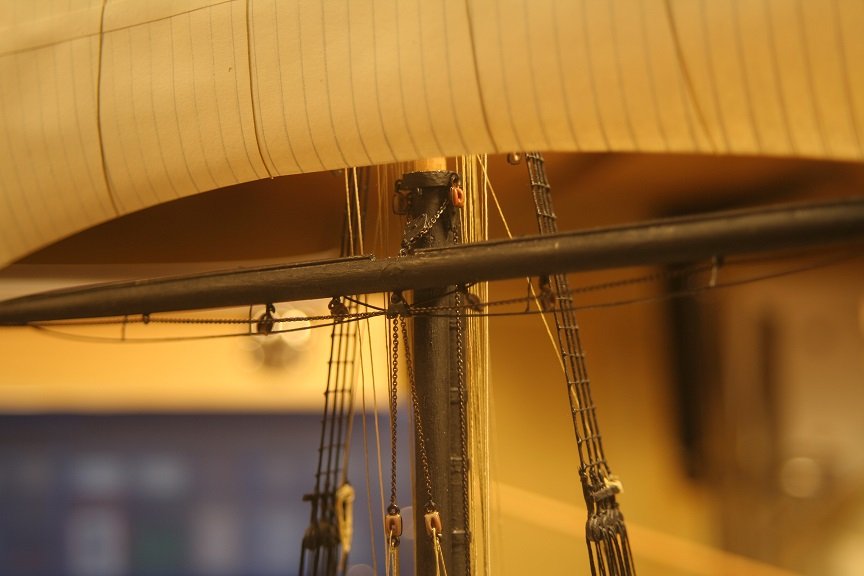
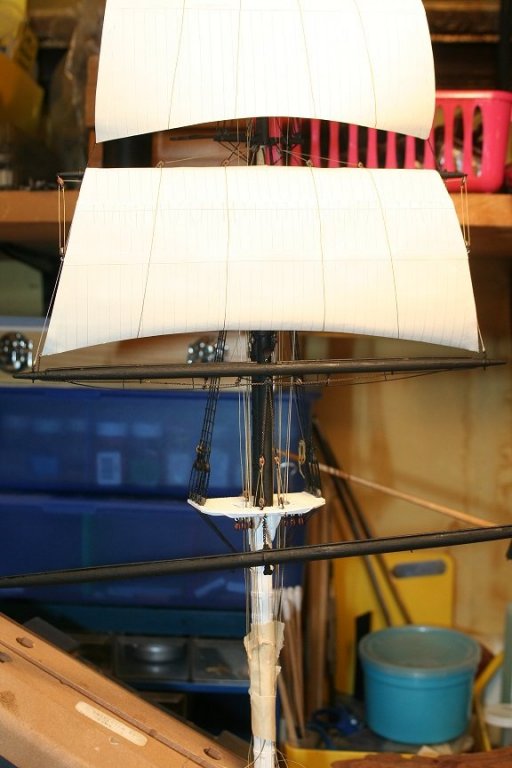
I temporarily set up the lower topsail to get some perspective.

- 1,208 replies
-
- 5
-
-
- great republic
- clipper
- (and 1 more)
-
I then built the lower topsail. I used a cake makingers flower forming ball tool to form the leading edge of my sails. I then added the buntlines

- 1,208 replies
-
- 5
-
-
- great republic
- clipper
- (and 1 more)
-
Spent a little time this evening finishing up the lower topsail lift.
- 1,208 replies
-
- 6
-
-
- great republic
- clipper
- (and 1 more)
-
Michael..your work is fantastic......Love the large scale. Makes use of the mill and lathe a bit easier. Rob
-
The downhauls are a slightly heavier line then the rest of the running rigging. As I progress down the mast, I'll slightly increase the diameter of the line as heavier members are supported. The sail rigging(Bunt, clews) will remain the same. I began making the lower topsail...it and the main course will be made together. I think I only have the lower topsail lift left..before I'm finished and I can step the mast. Rob
- 1,208 replies
-
- 3
-
-
- great republic
- clipper
- (and 1 more)
-
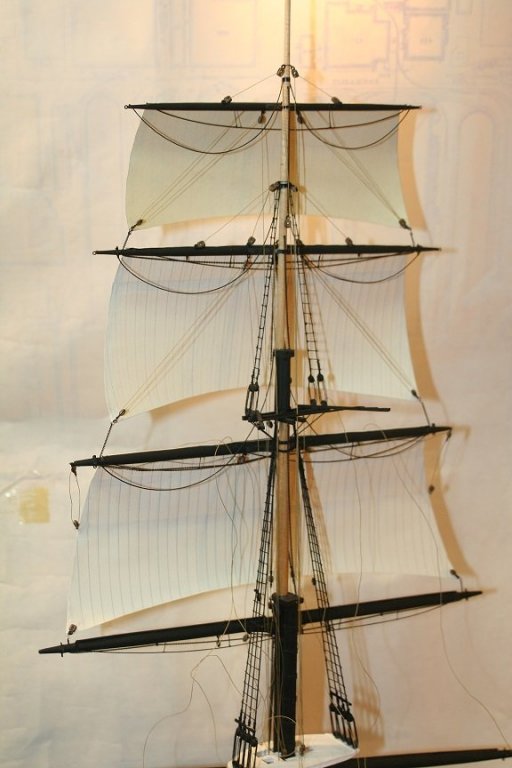
Thanks Popey. I decided to work each mast first..then step it. First time for me as well. but it seams to be working out for me. Here are some new images...I finished up the top sheet purchases and the upper topmast downhauls. Rob
- 1,208 replies
-
- 8
-
-
- great republic
- clipper
- (and 1 more)
-
Riiight...I see them now... In Some pics they are more evident. Rob
-
Hey...Ed.. I noticed you didn't include and downhauls on the upper topsail yard. Is this an oversight or did this feature not appear on the YA...which I believe was typical for all double topsail rigged ships Rob
-
Yeah Pat, there are generally 22~24 buntlines, 4~6 halyards, 2~4 downhauls, 4~8 reef tackle and 10~12 clew lines...and that is just for sail control. Rob(It's all an organized spider web).
- 3,618 replies
-
- 1
-
-
- young america
- clipper
- (and 1 more)
-
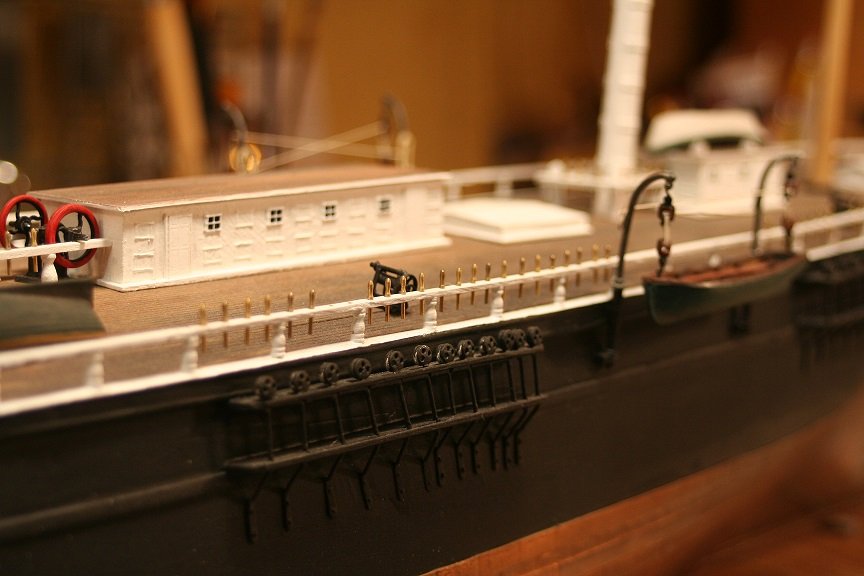
Thinking this through....I've decided to make both the lower topsail and the main course...but not attach them at this time. My plan is to remove the main yard so as to facilitate the addition of the main shrouds and ratlines. I would have to swing the yard out of the way and if the lower topsail's sheets are fixed...the yard will not move. So its best to just leave them both off for now and follow the assembly steps I have outlined. One problem(and it was brought up in Ed's log), is that of arm fatigue when rigging the top yards(and sails in my instance). If memory serves me, I recall it was an issue with my last clipper. With fatigue comes mistakes and even damage. By following my method I believe I will keep most of the complex rigging down low and near the deck where I can rest my arms/hands on nearby bench work or sturdy fixtures. I will have to identify the location of belaying pins and drill all the holes for them in the weatherdeck rail before I step any masts. Which brings me to that very subject. Since the GR had no bulwarks nearly all of her sail and yard control rigging had to be belayed at the rail after it was purchased by one of six crab winches. I think I might employ 3 of these winches to purchase the main braces. A process not typically modeled on the average clipper. Thank you for the fine compliment and encouragement.. and thank you everyone for your likes. Rob
- 1,208 replies
-
- 4
-
-
- great republic
- clipper
- (and 1 more)
-
I finished up the buntlines....later I'll address the upper topsails downhauls that afix to the yard band eye bolts. Some fine adjustments till I begin making the lower topsail. I think it is coming along nicely. Rob(thanks for all the likes)

- 1,208 replies
-
- 9
-
-
- great republic
- clipper
- (and 1 more)
-
There are lots of lines and I'm not half finished.....

- 1,208 replies
-
- 7
-
-
- great republic
- clipper
- (and 1 more)
-
Magnificent Ed...just wonderful work. I too have been tackling the small extremely numerous lines of the upper most yards on my GR build. Your work inspires. Rob
- 3,618 replies
-
- 1
-
-
- young america
- clipper
- (and 1 more)
-
A few more. I still have the buntlines to finish installing and their blocks and tighten up the reef tackle. Rob

- 1,208 replies
-
- 8
-
-
- great republic
- clipper
- (and 1 more)