HOLIDAY DONATION DRIVE - SUPPORT MSW - DO YOUR PART TO KEEP THIS GREAT FORUM GOING! (Only 36 donations so far out of 49,000 members - C'mon guys!)
×


rwiederrich
-
Posts
5,518 -
Joined
-
Last visited
Content Type
Profiles
Forums
Gallery
Events
Everything posted by rwiederrich
-
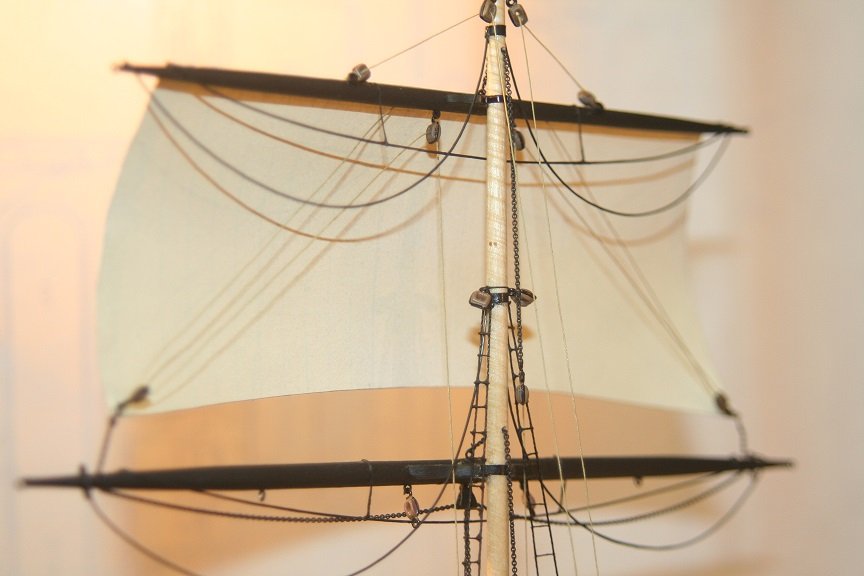
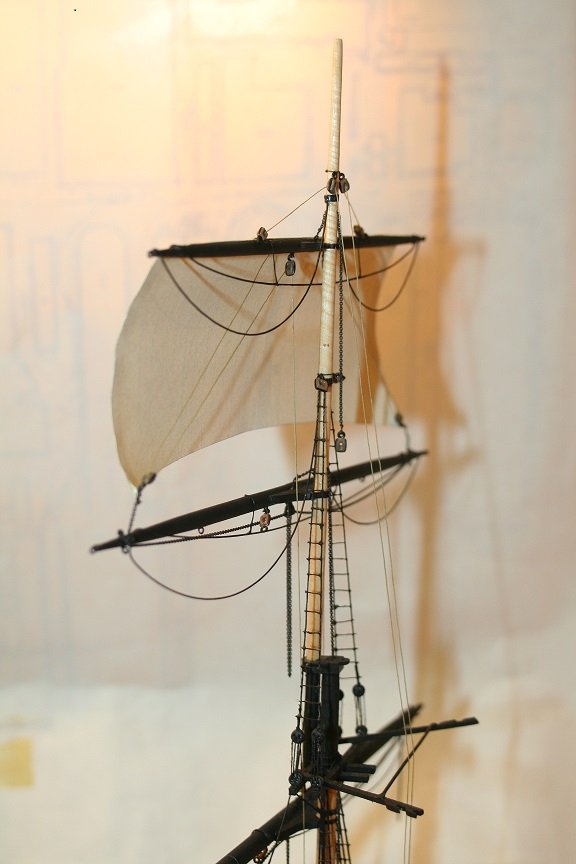
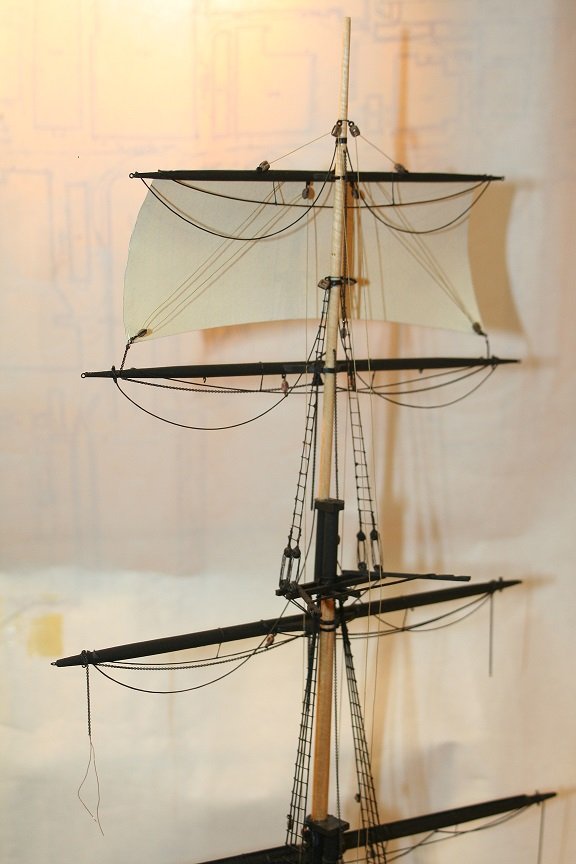
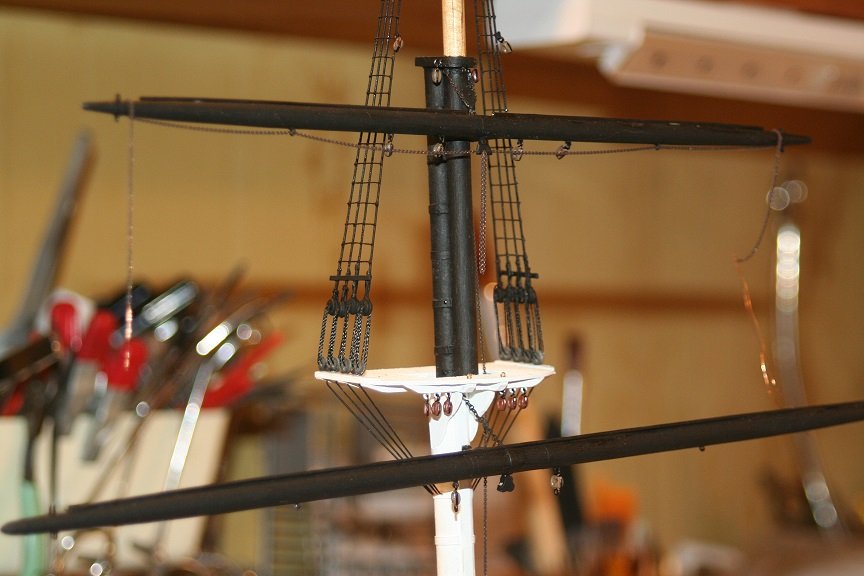
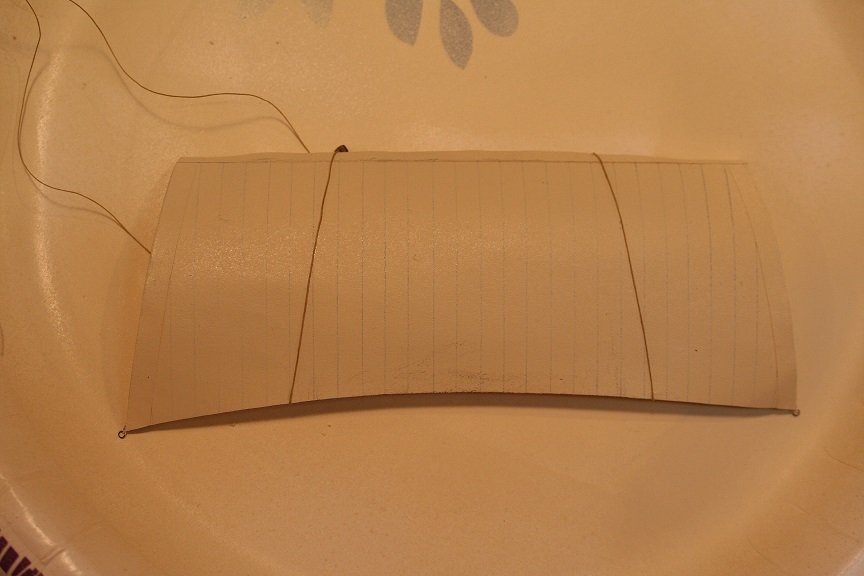
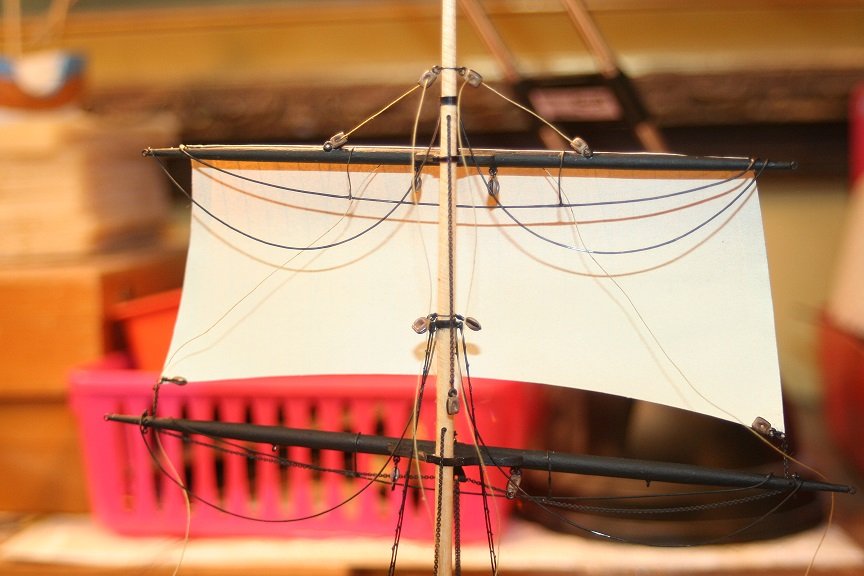
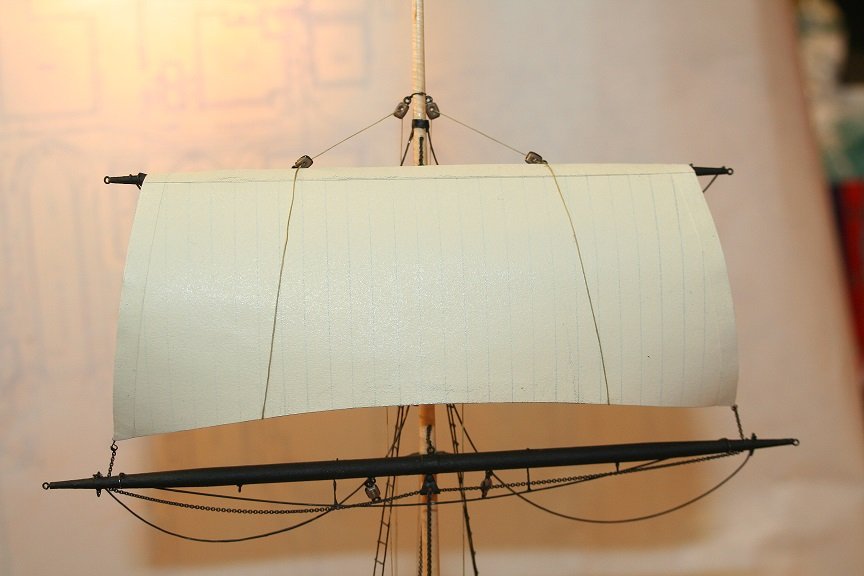
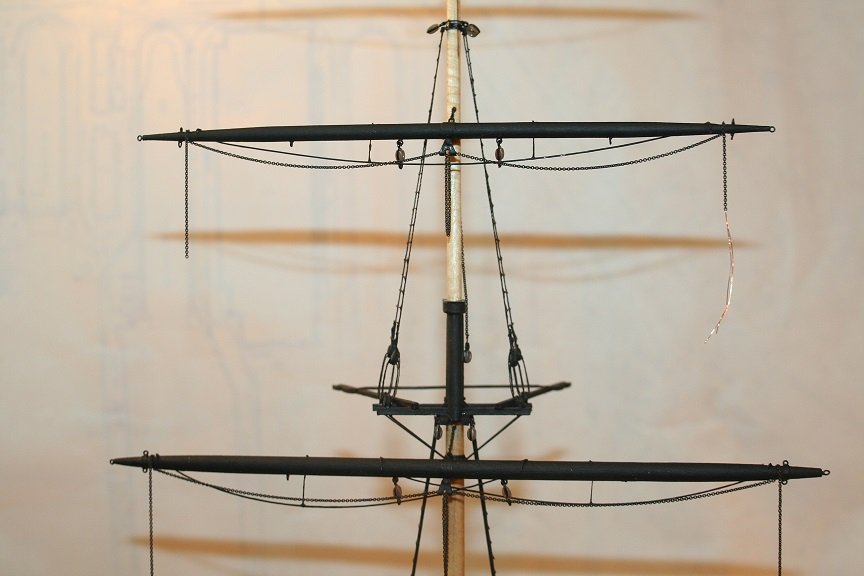
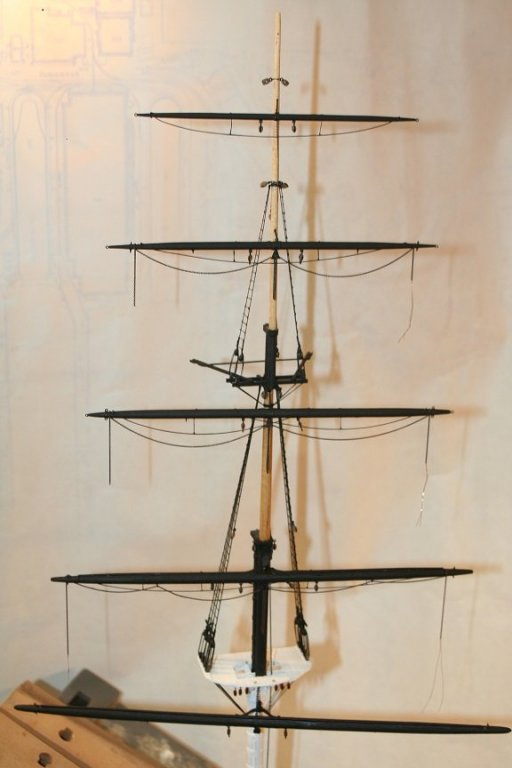
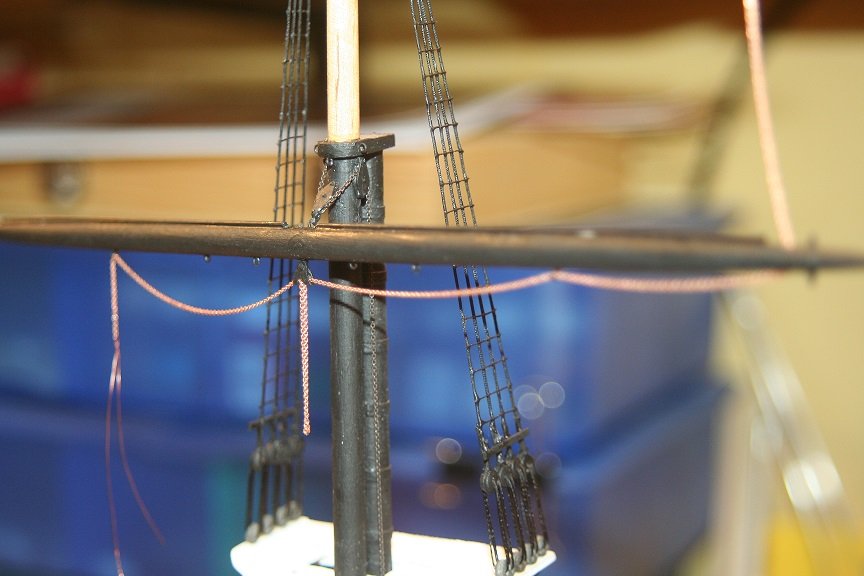
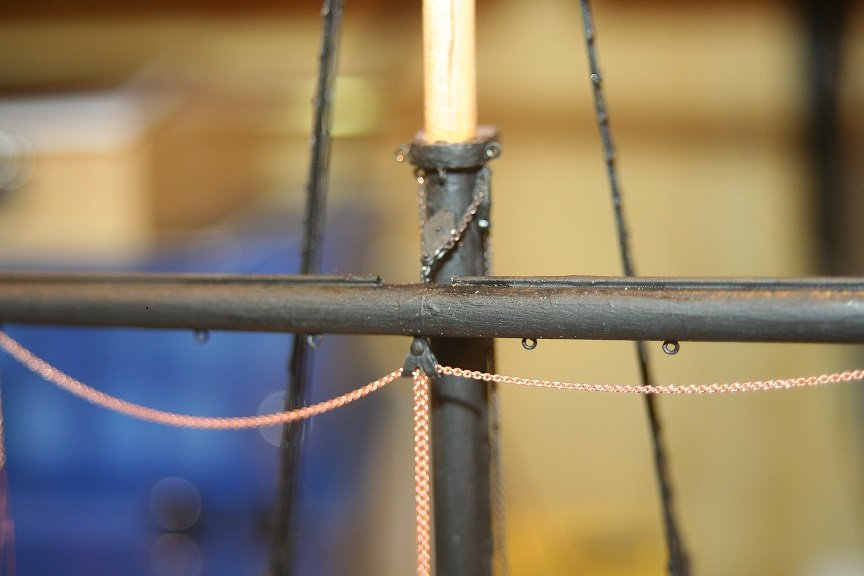
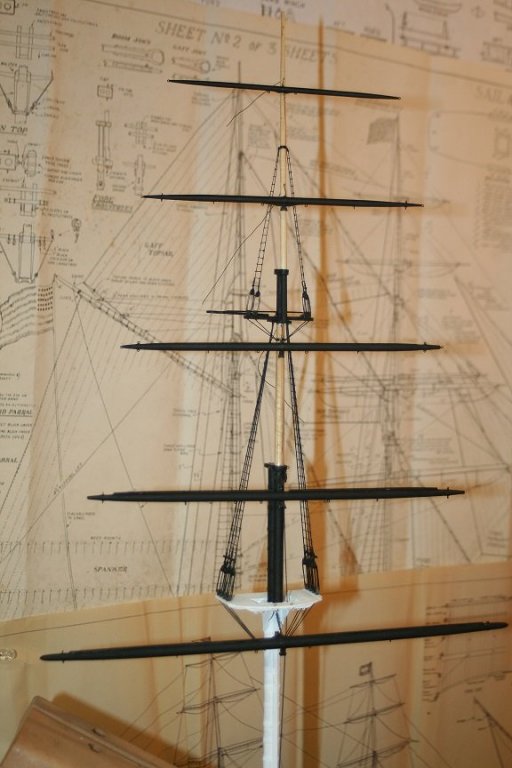
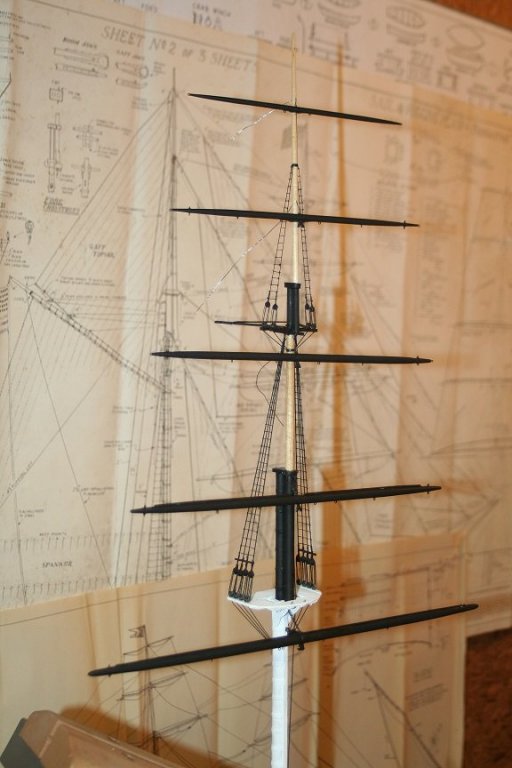
I tinkered on the GR today..not much because a dear friend of ours was admitted to the hospital today...she has early onset Alzheimer's and she had a Grand Mal seizure this morning and she is currently alert but unresponsive..... So I only set the foreroyal. I wanted to do more.....but we're off to the hospital now that she can see visitors. I made the paper sail, rigged it prior to install. Some of the buntlines are loose and so much more needs to be done...but I'm on my way...to setting sail. Here are some images.. Rob


- 1,208 replies
-
- 7
-

-
- great republic
- clipper
- (and 1 more)
-
I don't get all that precise or technical myself....just use a brown wood glue spread out thin....roll the rope coil up in the glue, starting in the middle and working out. when I have the desired size of coil...I lay the end over the rest and with my fine tweezer slide the entire glued coil up and off the plastic placemat I was working on and then place the coil were I want it...make some final adjustments and then simply let it dry. Yellow wood glue dries clear and with the tan rigging goes unnoticed. No runs, drips ,errors. Even if there is a bit more glue on the rope then needed it all dries clear. Now on to something else to model..... Here are some I did on a model of the Cutty Sark many years ago Rob

-
Fantastic....I'm not sure but did you ever describe your method for making the long twisted wire sheets, and halyards? I have an idea, but would like to know your method. They are quite even and clean. Rob
- 3,618 replies
-
- 3
-
-
- young america
- clipper
- (and 1 more)
-
Won't get to work on the GR tonight...Grandkids are coming over. but here are some pic of yesterdays work. Rob
- 1,208 replies
-
- 6
-
-
- great republic
- clipper
- (and 1 more)
-
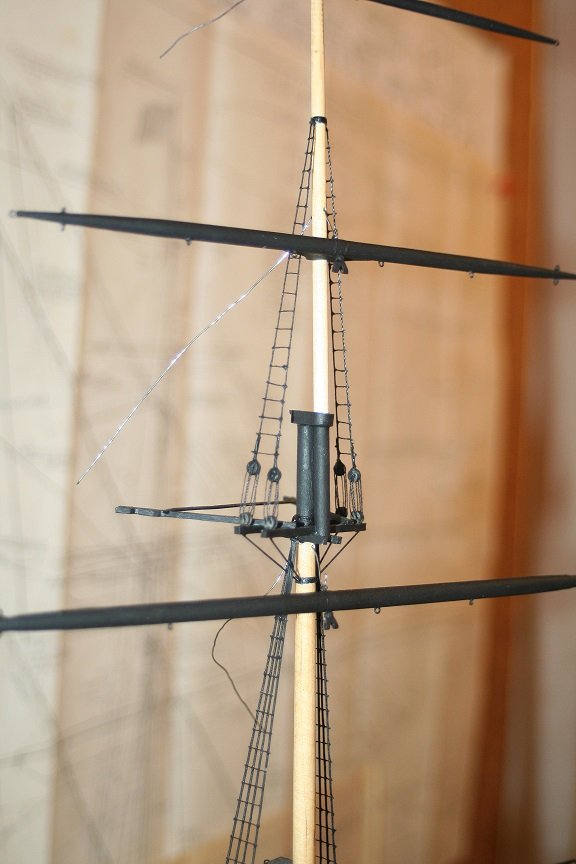
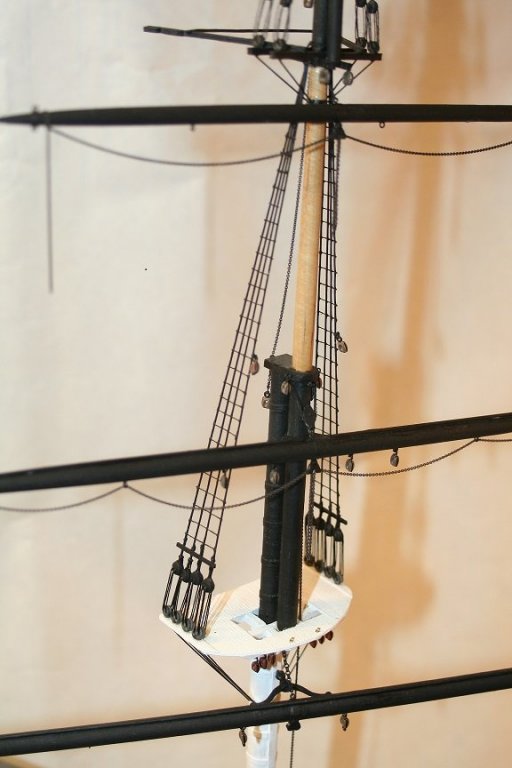
Thanks Pat...very much. I failed to get some images last night, but I finished up the stirrups for the foot ropes and am set to begin adding the relaxed lifts(All the sails are going to be set) and I'll be adding the sheet blocks and their purchases for the topsails, which will be fixed to the top. I try to do projects in separate stages(Like add the foot ropes, then paint any touch-ups...etc)...it makes the build go by faster I think. And for the first time (In 40 years)I am building each mast individually, with all its yards and sails affixed. I will only leave the main yards and their courses removable..so when I step the mast I can more easily rig the main shrouds and ratlines without any interference. As I said...this is the first time I ever tried rigging a mast this way....the advantage is I can fully rotate the mast/yards apart from the hull...making the assembly and addition of new components far easier....then if the mast was already stepped and I had to work around(In my small space) the hull. Pick in up and moving/rotating to the other side would be quite annoying. I don't have the leisure of having my model on a center island where I can work around it. Rob
- 1,208 replies
-
- 7
-
-
- great republic
- clipper
- (and 1 more)
-
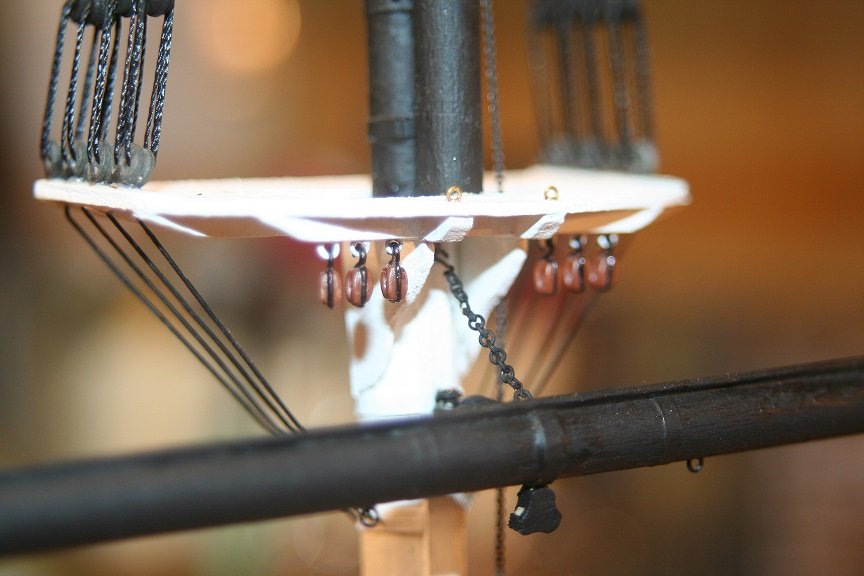
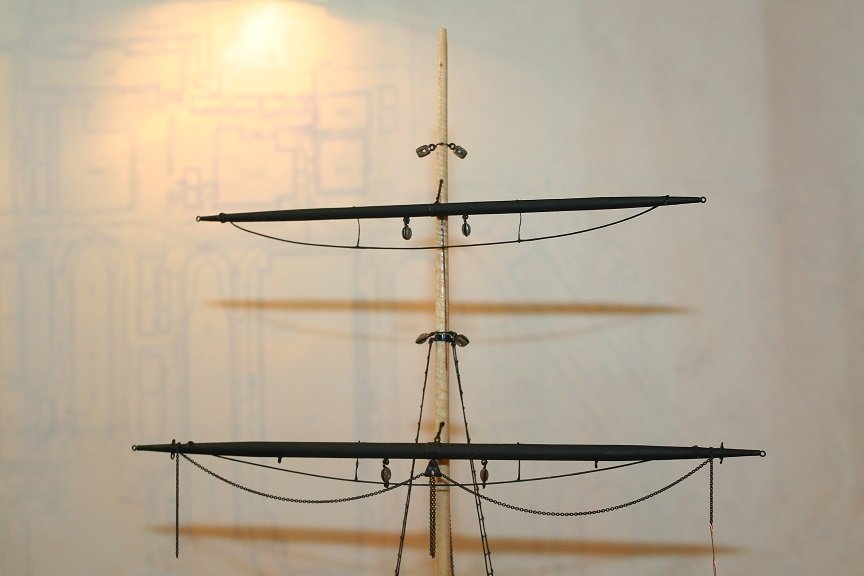
Next visit I will rig the upper and lower topsail's halyards block purchases that fix to the top. The topgallant and royal sheets will follow the downward path along with the buntlines to the rail. The interesting part will be when I add the first sail (Royal). I will need to affix the clew to the sheet at the sail corner garnet (from the topgallant yard)...the trick is permitting just enough oversize or width of the sail so that when it is fixed it will naturally bow...giving the sail the *Full* effect. Once this process is accomplished I will lift the sail up and affix it to the royal yard. After this I can rig the buntlines. Before all this funnary...I will add the foot rope stirrups. Rob
- 1,208 replies
-
- 6
-
-
- great republic
- clipper
- (and 1 more)
-
Absolutely Amazingly....beautiful Ed. I was wondering how you were going to run the sheets...but it appears you shackle them to rope then run that down to purchase and to a pin on the rail.....? or is that just the haul? Sweet. Rob
- 3,618 replies
-
- 1
-
-
- young america
- clipper
- (and 1 more)
-
Spent a bit of time today rigging up the foot ropes and adding more blocks and sheets. Rob


- 1,208 replies
-
- 9
-
-
- great republic
- clipper
- (and 1 more)
-
Spent some time adding blocks to the lifts and to the sheets. Tiny scale is working my eyesight....... Once I get the blocks in place....I'll fix the foot ropes....this is going to be very busy...with sails set too. Rob


- 1,208 replies
-
- 5
-
-
- great republic
- clipper
- (and 1 more)
-
This is indeed so true of these clipper vessels...rigging was being invented as were nearly every aspect of them....the theme of speed left no area or subject untouched. As you have aptly pointed out, in the short lives of many clippers, their look took on(In some cases extreme) adaptations or improvements. My own experience(And clippers are all I model) has taught me this very important lesson. Thank you for enduring my own criticisms and questions. It was never about your work or your attention to detail or mastery of wood/metal working in such small scales. We are all blessed you have taken your time to share your build with us. Rob
- 3,618 replies
-
- 2
-
-
- young america
- clipper
- (and 1 more)
-
Wait a minute...did you start it already....did I miss this? Am I clueless? Rob
- 1,208 replies
-
- 1
-
-
- great republic
- clipper
- (and 1 more)
-
I'm at work..so I'm not sure how long it is..but it is 1/128 and 3/32=1ft. You know about how large the Revell Thermopylae is well that is 1/96 and my Great Republic is slightly larger in size but comparatively the CS was just over 900 tons I think and the GR was 4555 tons so if I built her at the 1/96 scale she would be over four and a half Ft long. Billing Boats as well as Cast Your Anchor and Blue Jacket sell trusses. I've not found anyone who makes Sheet blocks...that is why I made mine. If you follow my method you can make some pretty small ones for your build. I'm not sure the Thermopylaer or the Cutty Sark used them....possibly. You can buy chain by the foot or longer. Get plenty. Good luck.....I'd love to see it when you start. Rob
- 1,208 replies
-
- 2
-
-
- great republic
- clipper
- (and 1 more)
-
Thanks Popeye. Ed's method of fabrication is just not possible at this scale. I even tried it. I'm agreeable to just a simulation. I try to scratch build most things...but as is my custom I love modifying someone else's engineered stuff to suite my needs. I got my chain from, Cast your anchor.com Rob
- 1,208 replies
-
- 5
-
-
- great republic
- clipper
- (and 1 more)
-
If Ed is half the expert of Clipper rigging and architecture as he is a master of modeling technique and skill, he will respectfully accept any criticism of his creations(which he has). The smartest expert is the one who treasures challenges to his expertise. And since I see no hands on experts who sailed on clipper ships...the best we can be is an interpreter of history with many holes in it. I believe Bob's *challenge* was not intended to belittle or lower Ed's expertise......but more to the point that some physical dynamics of function might have been overlooked. No one is perfect. Personally I appreciate Ed's wonderful work...even though I may not do things such as he did...but that is not the point of the Log. It's to enjoy and engage in his wonderful creation. Rob
- 3,618 replies
-
- 4
-
-
- young america
- clipper
- (and 1 more)
-
Apart from blatant errors or scale issues....my criticisms generally lay dormant......Cuz... I'm generally a lazy modeler and another's models *clean* construction techniques generally trump my critiques. Rob
- 3,618 replies
-
- 1
-
-
- young america
- clipper
- (and 1 more)
-
I agree ir3...it can be nearly impossible to fabricate a model of a vessel as it was originally created from this limited and somewhat diverse time frame. Changes were happening so fast as were the hull designs that a truly accurate representation is probably very difficult. Now, unless you are addressing some blatant errors or scale issues....I would defer to the most ardent experts who wrote on the subject...Underhill, Crothers, Campbell...etc. Somethings for representation purposes just have to be accepted. Rob
- 3,618 replies
-
- 5
-
-
- young america
- clipper
- (and 1 more)
-
Masterful job Ed, as usual. Talking about gaffs...will you be adding the pennant gaff between the mizzen spreaders? I'm wondering...what era have you decided to model YA...I don't recall...I'm sure you mentioned it earlier? If later...she didn't possess either fore or main gaffs from what I gather? Rob(2 thumbs waaay up)
-
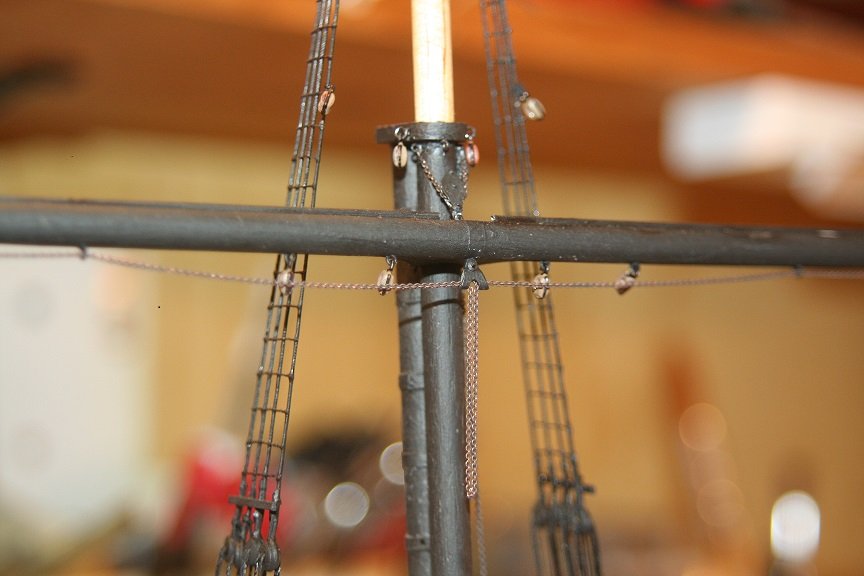
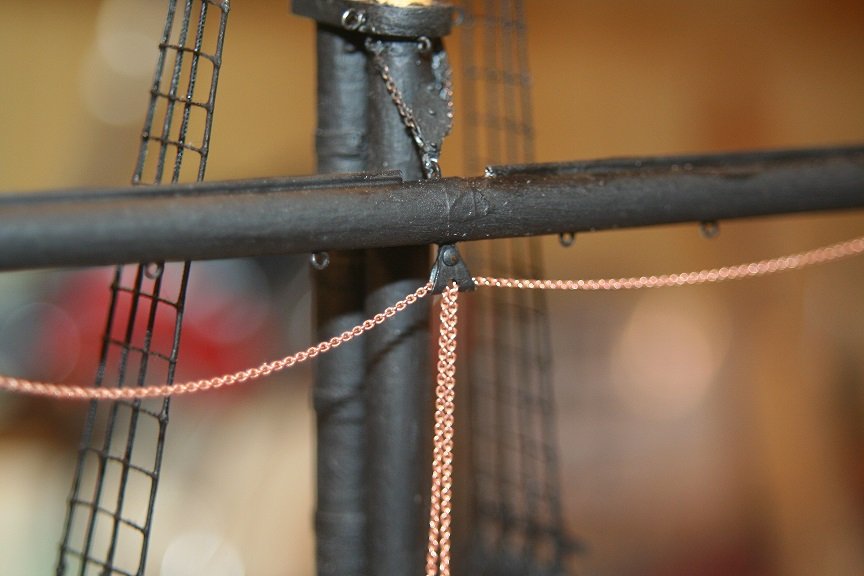
Just tinkering today and I tested the iron sheet blocks on the lower topsail yard with 42 LPI chain. Everything went smoothly. These things are tiny...so is the chain. The actual sheet blocks are pretty small on the real yard, about the size of half the yards diameter. Underhills drawings demonstrate this. That is why...even in my scale..they were going to be pretty small...like grains of wheat. And chain has to thread through them smoothly and then be drawn down to a block and tackle purchase to the top. Like threading a needle. Rob

- 1,208 replies
-
- 9
-
-
- great republic
- clipper
- (and 1 more)
-
Yeah....look at that dead rise........ Can't wait for some wood to start moving. Rob
-
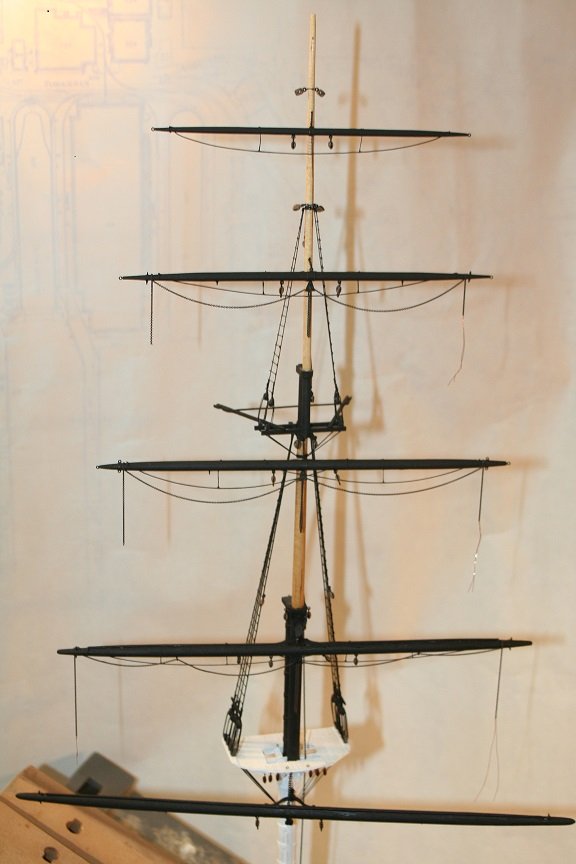
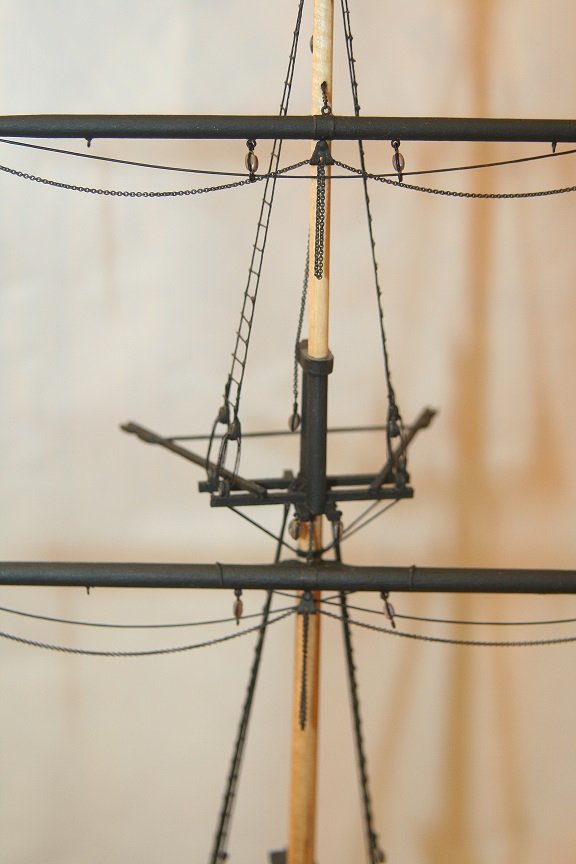
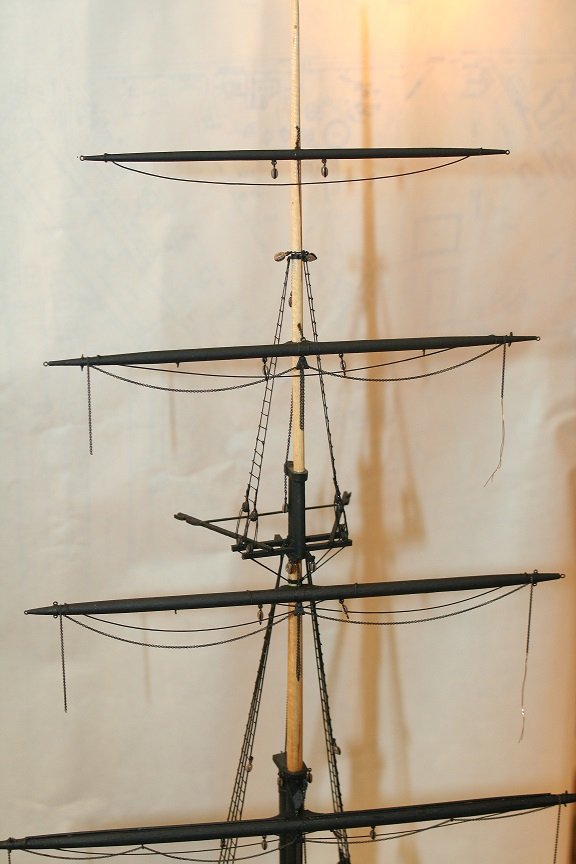
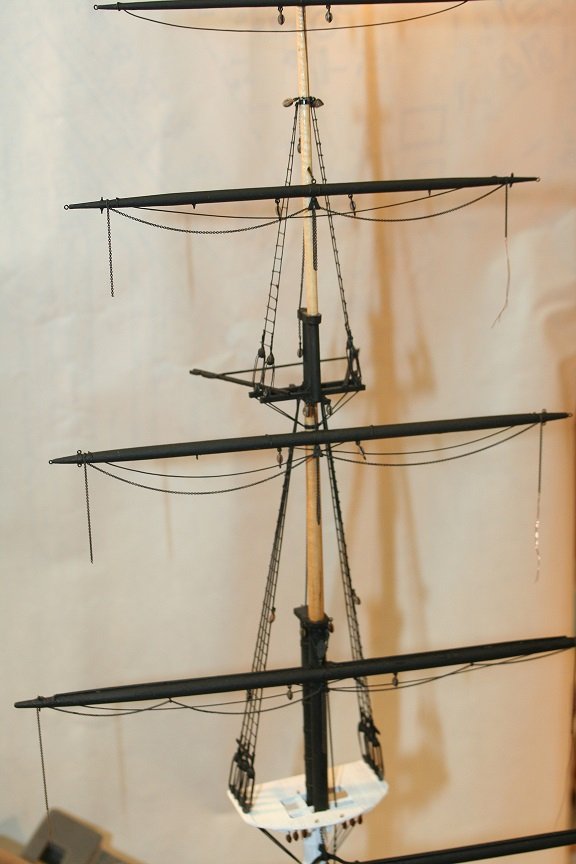
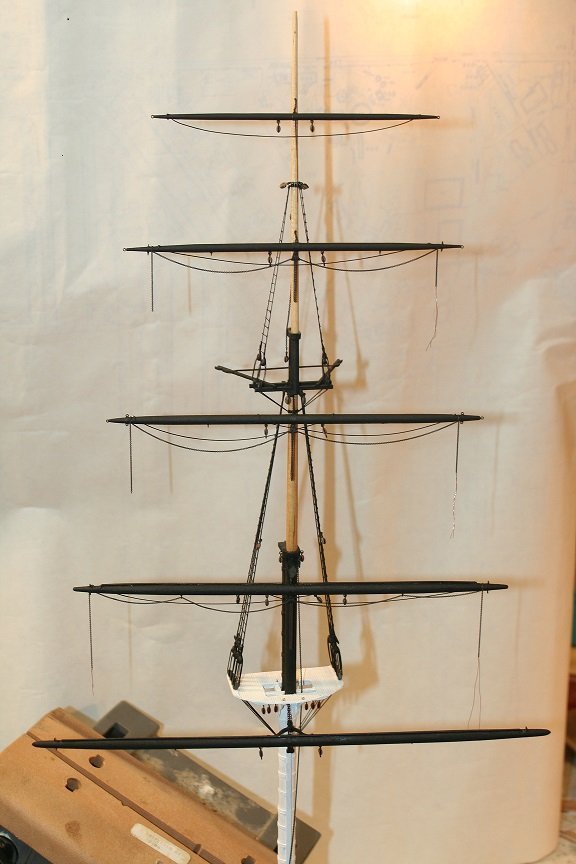
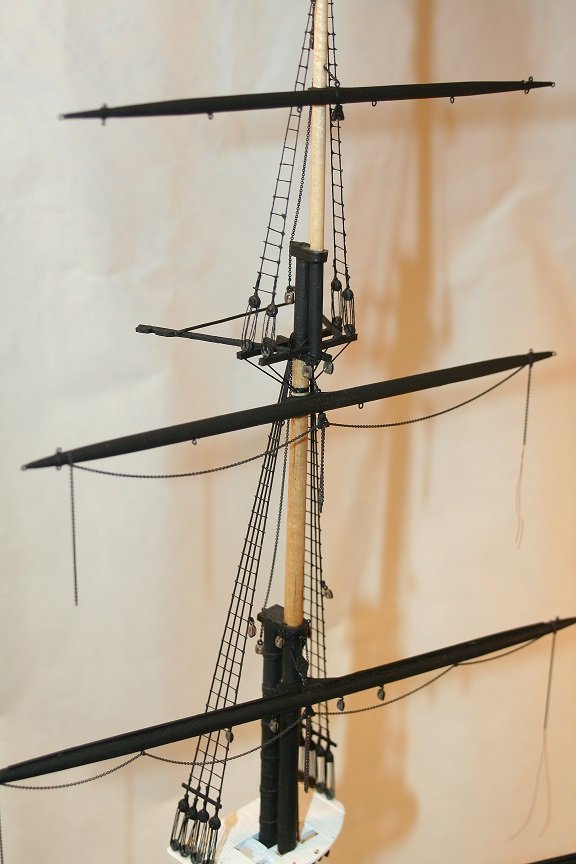
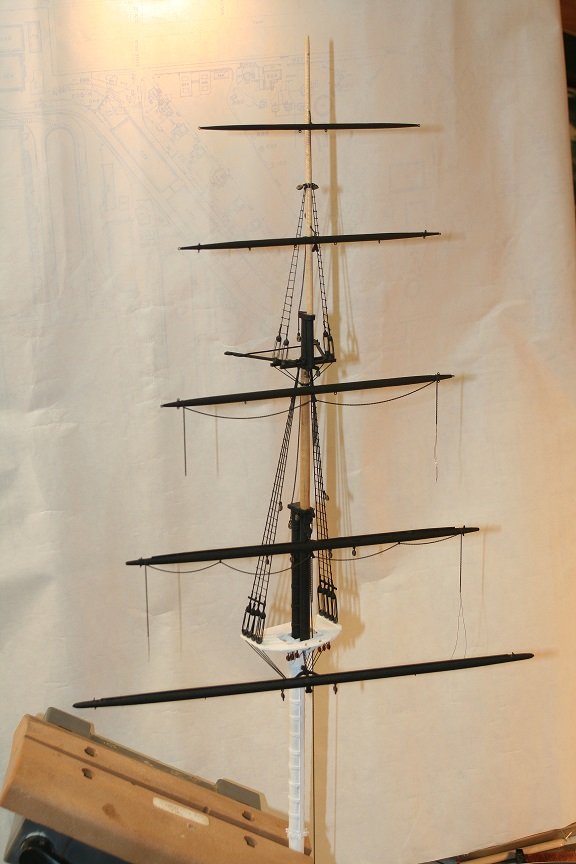
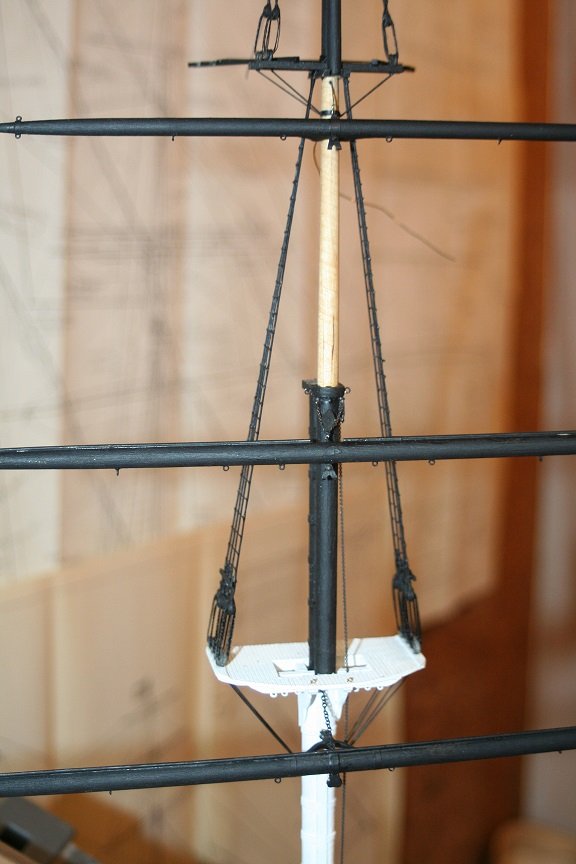
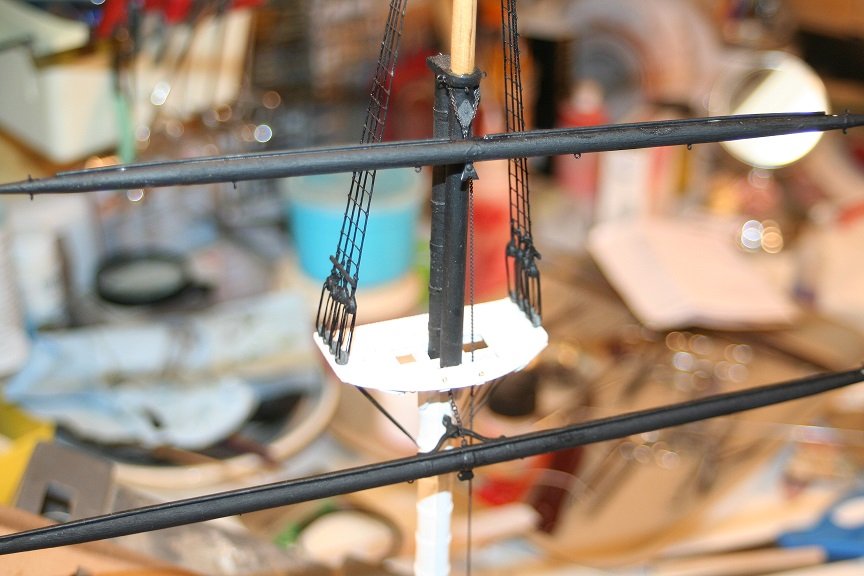
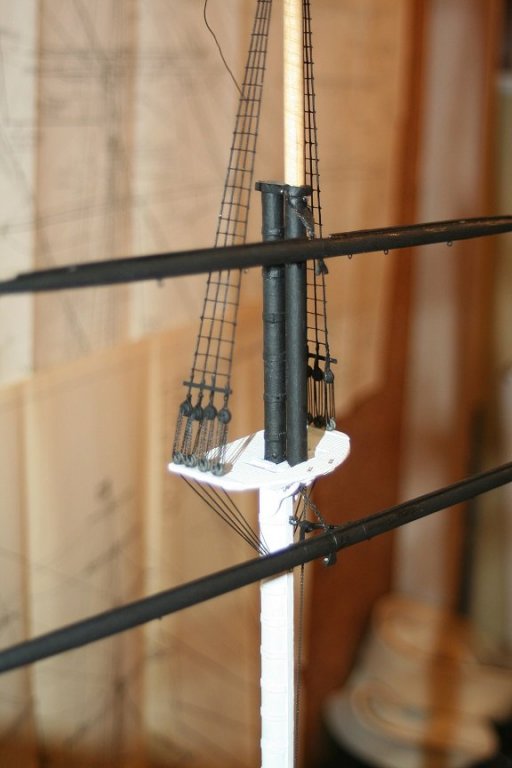
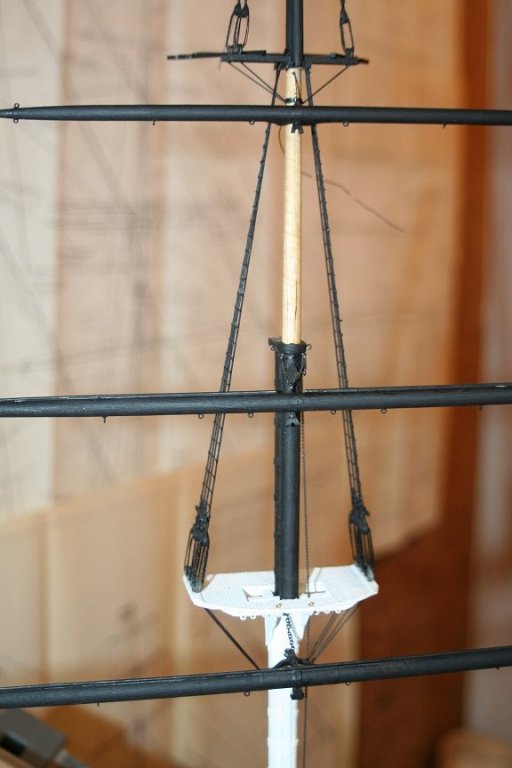
Spent some time today working on the foremasts yards. Making the parrel bands and lots of eye bolts. I'll begin to start installing the foot ropes and stirrups next. Once done I'll rig the yard blocks. I decided to add the sales after I finish up all the workings of the yards....just don't want to fight all that after the sales are set. Here is where I am today.

- 1,208 replies
-
- 9
-
-
- great republic
- clipper
- (and 1 more)