
HOLIDAY DONATION DRIVE - SUPPORT MSW - DO YOUR PART TO KEEP THIS GREAT FORUM GOING! (Only 72 donations so far out of 49,000 members - Can we at least get 100? C'mon guys!)
×


lb0190
-
Posts
686 -
Joined
-
Last visited
Content Type
Profiles
Forums
Gallery
Events
Everything posted by lb0190
-
 Here you go Randy http://www.amazon.com/Titebond-Translucent-Wood-Glue-oz/dp/B006XD1YTY
 -
Thanks for posting the pictures David. She looks excellent. I always enjoy seeing and learning from your progress.
-
Hello maltbyguy. I would think just using PVA would be your best bet. It does not dry as fast, but that has it benefits. I'm very pleased with how tacky and fast drying Titebond Translucent works for me. I could not find it close to home, but Amazon carries the product. If you need to glue something other than wood, you could consider using epoxy.
-
Hi Richard, Your suggestion would be an interesting project and I'm willing to contribute my time if the leadership is OK with the suggestion.
-
Painting Templates
lb0190 replied to dafi's topic in Painting, finishing and weathering products and techniques
Thanks Daniel, I'll try this on my current build. -
OMG, I have the same affliction. I've been told (by that little voice in my head) the only cure is BUY MORE TOOLS!
-
Niagara by Catch22 - Model Shipways
lb0190 replied to Catch22's topic in - Kit build logs for subjects built from 1801 - 1850
Absolutely! Speaking of cannons, has anyone gave thought to displaying cannon balls on their Niagara? -
Good morning Patrick, The sills were a bit of a problem, but after some sanding and a little filler material here and there they mounted OK. I just hope they are in the right position. Your point regarding the gunports is good advice. It's something I did not think of, but that patience issue we spoke of earlier is creeping in. I would just love to see the waterways and planksheers painted to see how they look installed. I'll try to hold off painting but that little voice in my head keeps saying "paint, go ahead and paint, don't worry about common sense..."
-
Niagara by Catch22 - Model Shipways
lb0190 replied to Catch22's topic in - Kit build logs for subjects built from 1801 - 1850
Welcome aboard Catch22. I believe we now have seven Niagara ships under construction. We can all learn from each other... -
Rich, it's good to see you back with your Niagara!
-
Sometimes I run across a part to be glued, that is very difficult to clamp in place. If possible, as an alternate to clamping and pins, I'll use CA glue on a few spots to keep the piece in place and also use titebond (PVA) on the remaining areas of the same piece. I do not let the glue mix, not knowing what the results would be.
-
This thread is off to a good start. Thanks everyone for contributing. I've already picked up some good tips I plan on using.
-
Hi Brian, Adding the top rail really helped define the flowline. Your ship looks very clean and sharp. I need to slow down on mine so you can pass me up allowing me to add yours to the list of ships I follow and learn from.
-
Hi Randy, Yes the CA can be unforgiving at times (to the fingers as well as the model... ) I tend to use both types depending on the need. I've wondered if anyone used a brush for spreading glue. It's an approach I'll try sometime. In regard to downtime, the titebond is very tacky and dries quickly. I like it over other brands I've tried.
-
Hi Del, I know what you mean regarding the glue that seeps out. When that happens (titebond), I give it a minute to slightly harden and it can be easily picked up with a dental probe. In regard to CA glue, excess glue can be sucked away by holding a napkin edge against the excess glue for a second or two.
-
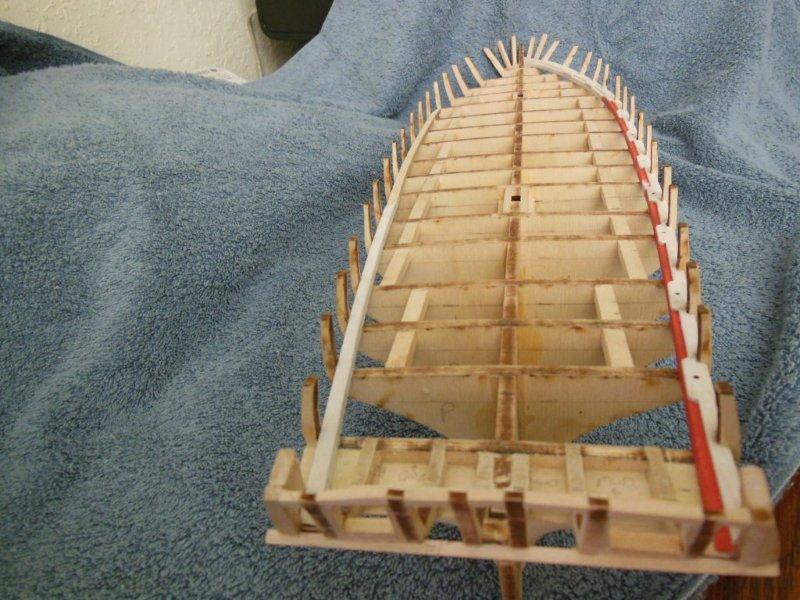
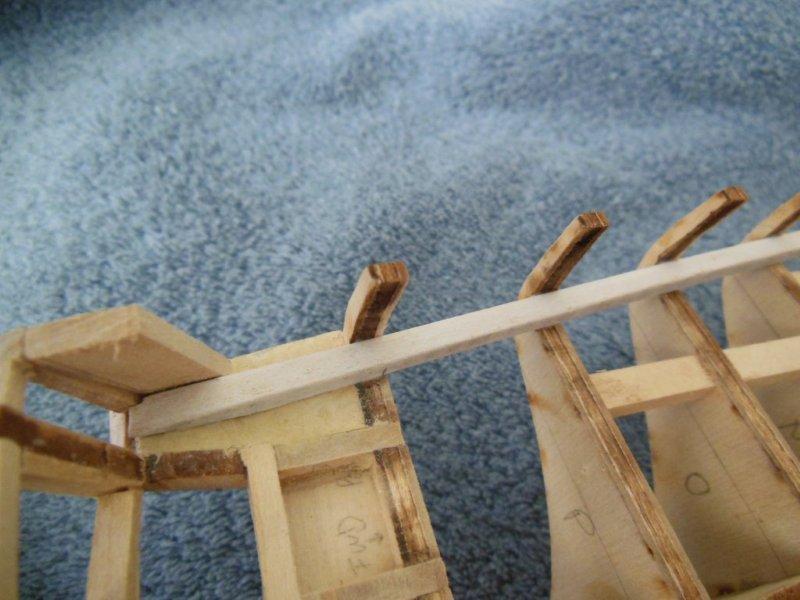
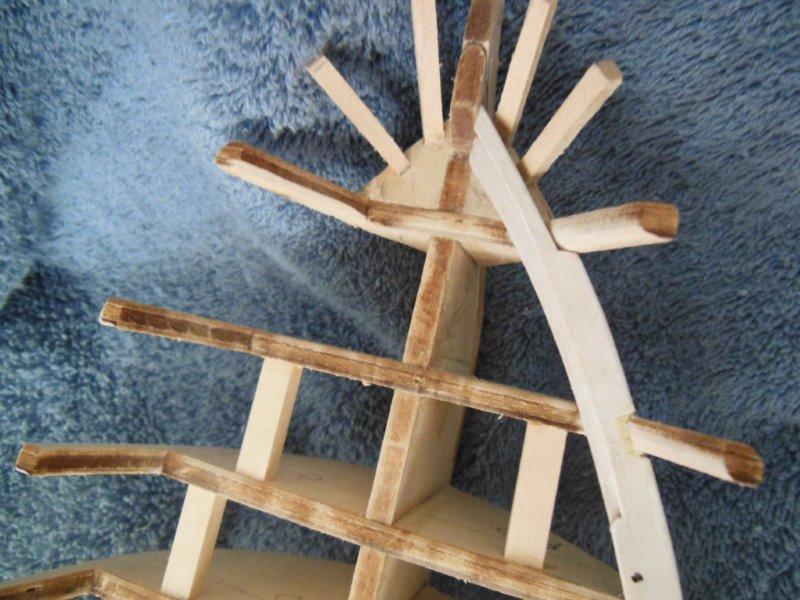
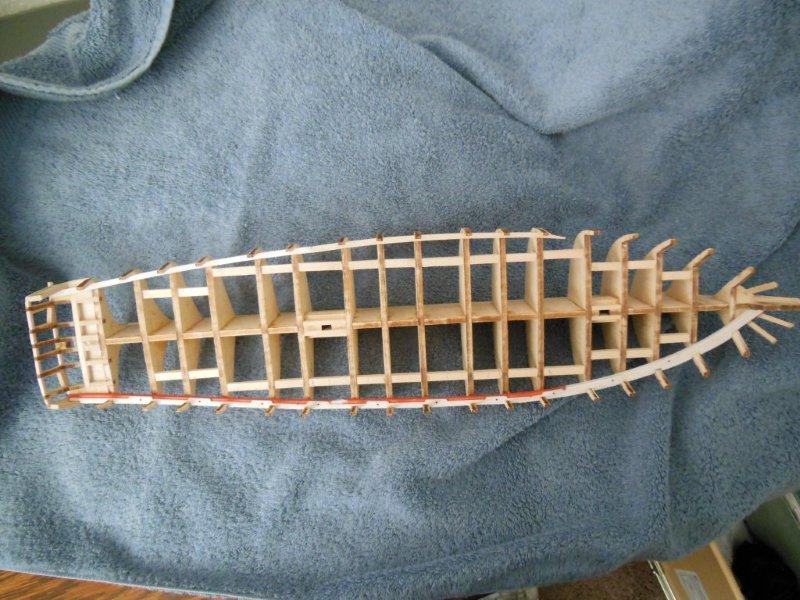
This looks like a good spot to document where I'm at. I'm almost done with adding the waterway and planksheer. You will notice I'm trying different methods on when to paint, prime etc.. You may also notice the bow filler block timberhorns need a little TLC. I must have went a little file crazy when cleaning them up. I need to add a thin plank to the inside surface to make it match the flow line of the other timberhorns. I also need to trim in the outside vertical stiffeners attached to the aft outer timberhorns, plus add the top horizontal stiffrners. Next steps are: Add the remaining waterway and planksheer pieces Minor rework where needed Sand Prime Sand Paint Move on to planking the stern It's almost starting to look like a ship!
-
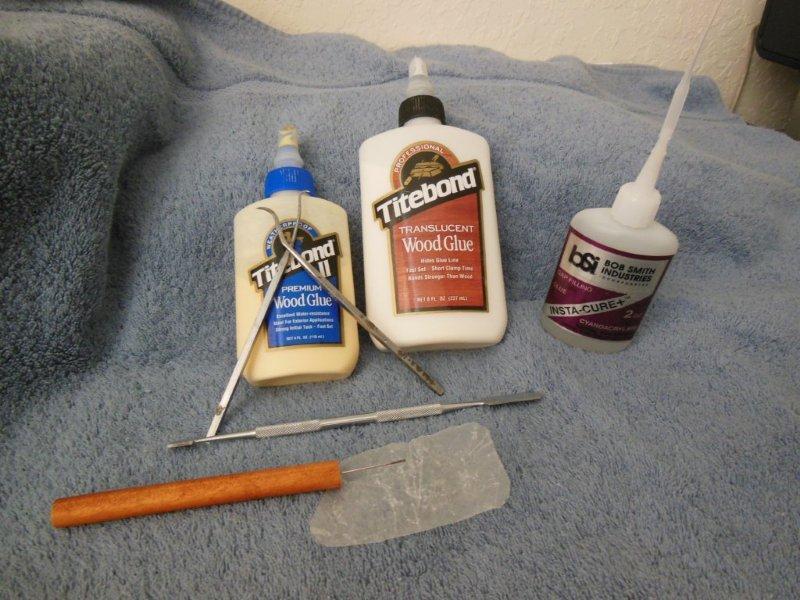
Below are the basic tools and glue I'm using on building the Niagara. Warning: I'm very new at this (working on second build) so please keep that in mind if you decide to use anything I post. I've found out the hard way, it's best to try a new technique of scrap material first. I like to use dental tools to help place titebond on targeted glue surfaces. Sometimes my glue surfaces end up being my fingers and other parts I did not target, but I'm getting better with practice. I usually place a dab of glue on a piece of tape I placed on the workbench and use the tools to gather up a small amount to apply where needed. I learned from someone on MWS (thank you but I do not recall who) that placing a small amount of CA on wax paper prevents the glue from drying right away and making it easier to gather a small amount to place in precise spots. I use a needle with the eye ground away (forming a fork) to pick up a small amount of CA glue at the fork. This allows tight control over where the glue is applied. If the CA builds up on the needle, a small flame will easily burn the hardened glue away.
-
I'm quickly learning there are many “tricks of the trade” on the use of glue in model ship building. I thought it would be useful to have one area in the forum that details some of the more common methods and tools associated with gluing parts together, as well as proper selection, application, surface preparation, cleanup and debonding. Lessons learned is also a good topic to share, I could could write a book... This subject is discussed in numerous areas of the forum, but if you would like to contribute in an effort to consolidate the knowledge, please join in. Newbies such as myself would appreciate learning from you. I was not sure where the best place was to post this subject (it's addressed under numerous subjects), so please move it if there is a better location.
-
Don't you just hate it when a PC crashes, especially when it's one you use frequently. My current desktop is @7 years old and starting to act up from time to time. Nothing serious, but enough to make me think maybe I should replace it soon. I'll probably procrastinate and wait until it dies. I would like to keep it running until the end of year holidays to see if I can pick up a new one for a hard to ignore price. A few years ago I installed a NAS with 4TB, set up for RAID1 so hopefully it would not be too painful for a recovery. I'm anxious to see the rest of your build log photos.
-
Hi David, I hope you are doing well. Thank you for the compliment and advice. I rely heavily on advice from you and the other builders. We're having a cold spell here in central Florida, I can hardly wait the the warm weather to return. I ended up only beveling the waterways on the bottom outside edge where they mate up against the timberhorns. I also broke the remaining edges so they have a very minor radius instead of a sharp cut. I kept looking at how I highlighted the scarf joint with a pencil and decided I did not care for the look so I'll dull it down a bit to where (hopefully) the joint is still visible but not so obvious. Right now I have four of the six waterways and two planksheers in place. I hope to post some photos this week, after all of the planksheers are installed.
-
Patrick, your ship looks absolutely awesome! I can hardly wait to see her with the rigging completed. Viewing your photos of the entire ship was almost shocking in regard to the height of the masts. The specifications state 27” in height, but seeing it is an eye opener, especially with the rigging you have in place. Your build is a motivator for notices such as myself.
-
Hi Popeye, I hope you are doing well. This kit does not have a false deck, but I did consider adding one at one time. As far as I'm aware, the waterway only had to be beveled at the outside lower corner and also the timberhorns to increase contact area with the waterway. I'll review the instructions and plans to see if I missed anything.
-
Hi Augie and Patrick, Thanks fpr looking in. I'll probably keep the highlighted scarf joints for the time being. I can wait to see what comments I get and see what it looks like as I add parts. It would be easy to blend them in later if needed. I'll glue in the waterways in on the port side without paint, as Patrick suggested, then decide which process appealed to me more. My dislikes on painting them first was; I just hated nicking up the paint when I installed them even though touch up is not an issue, plus I kept catching myself painting surfaces where I had to apply glue. Live and learn...
-
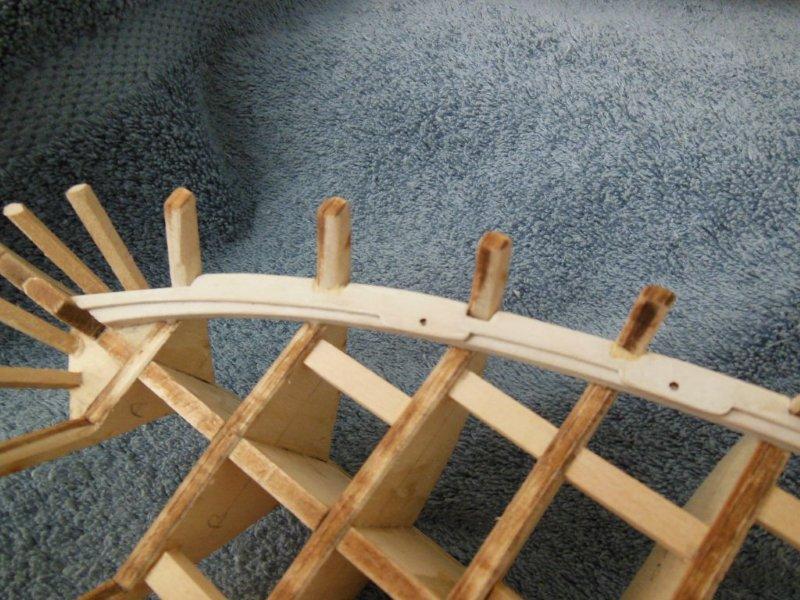
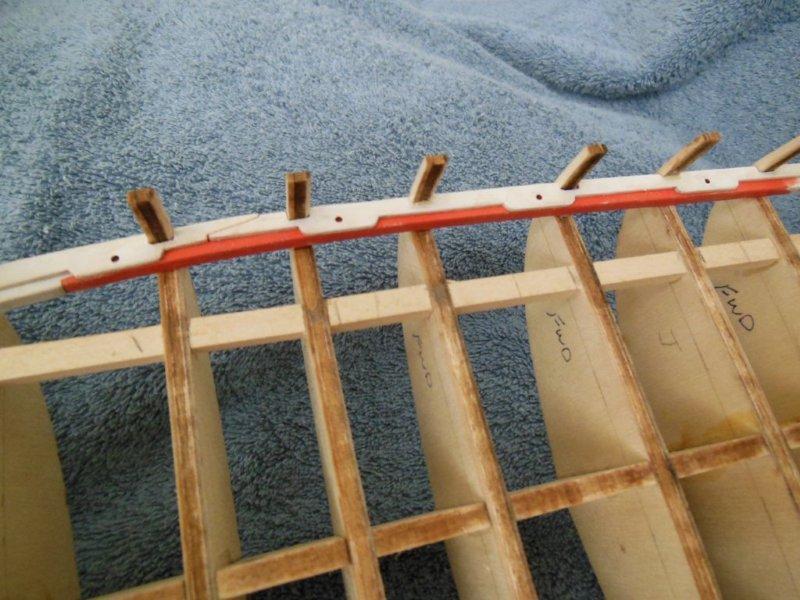
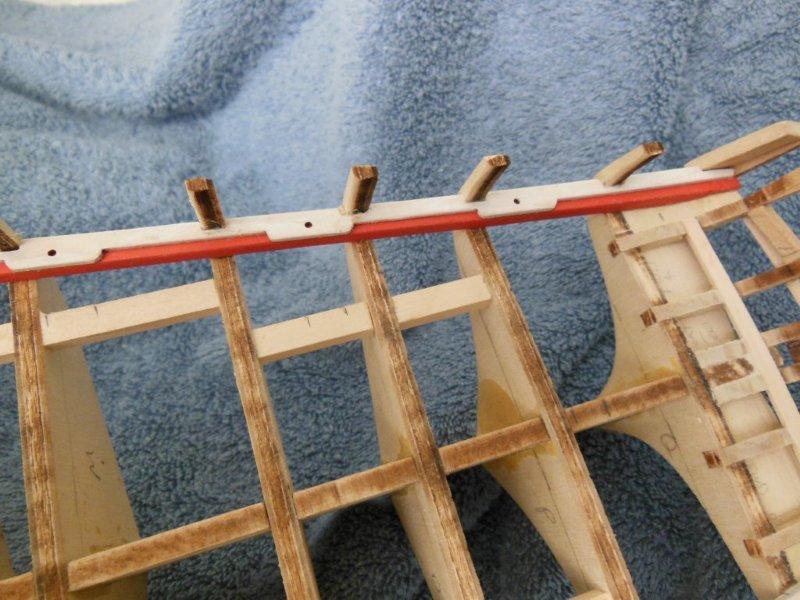
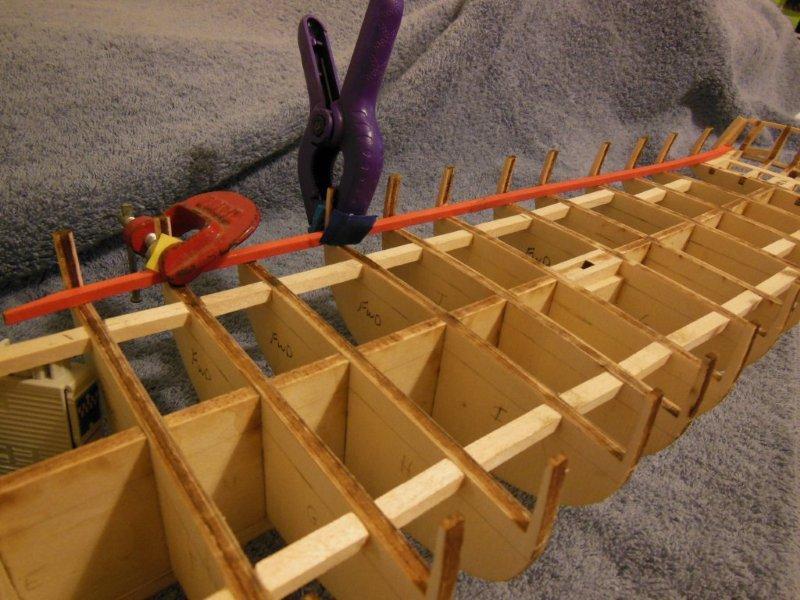
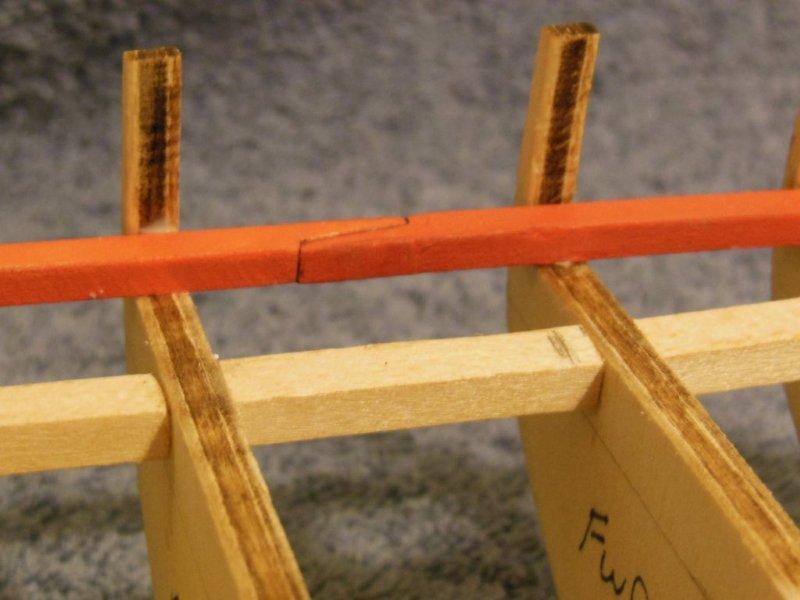
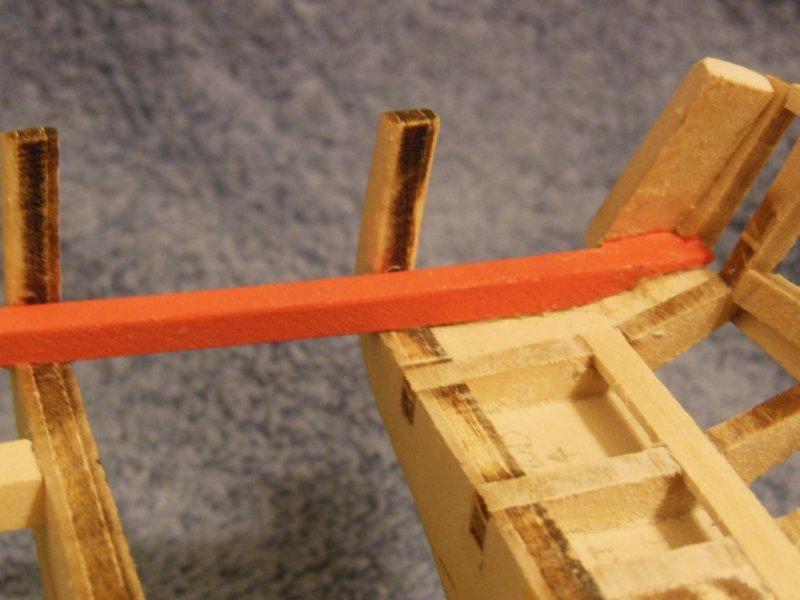
It feels like I'm making slow progress and posting small steps, but I'm moving fwd instead of backwards - at least 60% of the time. Tonight I also broke off another one of those #$&^$#%beep beep PIA timberhorns. At least they glue back on pretty easy. Well, enough sniveling and on with the update. A close family member gave me an airbrush she no longer used, so I gathered up the parts needed to make it operational and used it on my waterways. The results are much nicer than what I can do with a brush. I used Model Expo water based acrylic, thinned down with distilled water. This is the first time I've used an airbrush and was very pleased being able to apply thin even coats paint. I only have three photos tonight showing two of the three waterways in place on the starboard side. You can see where the timberhorn is missing behind the red clamp. Hopefully tomorrow I'll get the third piece on, then start on the port side waterways. I'll touch up the paint as soon as the plansheers are in place. I'm kind of on the fence regarding paint first then glue in place. I may diviate from that plan for the port side. Question I used a pencil to highlight the waterway scarf joint, not really knowing if it should be visible or blended to the point it's difficult to see. Your thoughts???
-
Hi Brian, Welcome to the Niagara club. I can see from your current posts, I will follow and learn from you as also. Your build looks like it's off to an excellent start! I had to edit my post just to say, "Watch out for the dreaded timberhorn game."
