HOLIDAY DONATION DRIVE - SUPPORT MSW - DO YOUR PART TO KEEP THIS GREAT FORUM GOING! (Only 72 donations so far out of 49,000 members - Can we at least get 100? C'mon guys!)
×


lb0190
-
Posts
686 -
Joined
-
Last visited
Content Type
Profiles
Forums
Gallery
Events
Everything posted by lb0190
-
 The offending green plank has been removed! I could not stand seeing that small gap, so I carefully cut the glueline and was able to remove the plank after shortening the piece to approx three inches in length by cutting the plank at a gunport. I was surprised I was able to clean off the glue so the same piece can be re-installed after touching it up with some fresh paint. My error with this piece was not beveling the inside lower edge enough before installation. As the piece curved around the bow, it could not sit tightly against the planksheer. I wish I would have taken photos to share, in effort of saving some other greenhorn like myself from making this mistake.
 -
Hi Patrick, I installed one green plank and still undecided if I'm OK with it. The plank must have slipped in position just a tiny bit when I clamped it in place. There is a very small gap between the plank and the planksheer around the first two gun ports. After looking it over, the majority of the area will go away when I trim in the gun ports, so I think I'll trim and install the next plank to see how it looks before deciding if I'll keep it. Hmmmm, every ship has "the best side," maybe I'm simply ahead of the game in that respect. I installed the plank as one continuous board which made it more difficult than necessary. The remaining planks (when possible) will be installed as two pieces, using a gun port as the transition area. Last weekend, I pulled my back, which currently does not like my sitting on the stool in the garage, so the past few days have been spent going to the Chiropracter and laying in the easy chair. Hopefully in a day or so I can start manufacturing sawdust again.
-
Rich, The paint job looks absolutely great! I hope you do not mind my stealing your idea for using white for the pin stripe. I hope the job interviews turn into offers for you. Are you getting any bites close to home or do you think there is a move in your future? If you do not mind tell us about your dog. We lost our Max (GSD) 3 years ago and have been without a dog for the first time in over 35 years. David, thanks for the paint tips and the waterline kit details.
-
Hi Brian, She's looking neat and trim! You'll be adding planks in no time...
-
That's a good idea I should try to follow from time to time....
-
I'm certainly not an expert but it would be easy to validate your idea using scrap wood. I suspect your biggest risk may be bleeding under the masking plank. I have a strong dislike for the teal color and may use something else, possibly white.
-
Good morning Ken. The first starboard ceiling plank (I hope I used the right terminology) goes in the paint shop this morning...
-
I'm anxious to see your painted hull. The one ship I've completed, painting it's simple waterline was a bit of a challenge for me. Having to add a stripe on the Niagara raises the difficulty level several bars. Even though I'm no where near painting my hull, I've been thinking ahead (very novel approach for me) about how to paint that small thin waterline stripe. How does this process sound to you? First paint the waterline color, making sure to overlap the upper and lower color areas. Find a masking tape the width of the water line and using tick marks, lay the tape as if it's the water line. Pactra makes some thin tape of various widths, but I have yet to try this brand. The waterline tape now becomes the base for adding wider masking tape to shield the upper and lower areas as they are painted and defines the waterline once removed. Based on my experience of one model ship with a much easier waterline, I suspect getting the tick marks and tape where I want, will be the biggest PIA. Does this process make practical sense?
-
It's been a few days since I made a post, so I thought I should at least give an update on what I'm working on and the current status. I decided now is the time to fix a few boo boos (boo boo = technical name for screw-ups ) that I've collected but delayed addressing, plus correcting a few I was not aware of until recently. The first is a poor fitting plank on the port side aft gun port. A little wood filler, some sanding and careful painting was all that was needed to fill in a couple of voids. The bigger issues are flow line mismatch at bulkhead K (starboard side only) requiring adding a plank to the outside edge of the bulkhead and doing the same for the interior of bulkhead timberhorn J. I tried fitting the first starboard ceiling plank but soon realized the there were more (minor) flowline issues where the gun/sweep framing was not mating up well with the flowline of the bulkheads. Sanding should resolve most of these issues and a more careful and detailed approach will be used when I frame up the port side. The transom ceiling height needed finished and lowered as well as replacing both transom corner stiffeners that were placed incorrectly. I found there is a lot of value in saving scrap and residual material from my previous ship (Geo W Washburn tugboat). I used some scrap basa wood to install the extra support for the deck fittings. I'll post a few pictures once I have some work that shows some forward progress.
-
David, Your work is as impressive as always. When you start to add masts and rigging the ship takes on a whole new look.
-
Thanks Popeye. The endplack is the only plank that runs port to starboard, the remaining will run as you suggested. I have read where others have used the archive pen with good results. Do your two suggested markers leave different indicated widths between the planls? I've read about scraping planks but sanding sounds like an easier method.
-
Now I have a resource! Since we're talking pencil’s, (no analogies intended) I have a mechanical pencil that ran out of lead and the replacement lead is marked as 0.5 HB which breaks way to easy. Which type would you suggest to reduce breakage?
-
Hi Joseph, Welcome to the Niagara Club!!
-
Ken, It's good to see you build log back on line! Your ship looks impressive and your deck planks are an excellent benchmark...
-
Thanks guys... Augie, I was not aware of the issue with #1 pencils throwing more dust. The funny thing is, I have two pencils I sat aside to try for planking, but neither have a number on them. As I mentioned before, one is from a golf course and the other is a carpenters pencil, which I like better since the lead is much thicker and less easy to break. I make sure I clean off any lead dust - thanks for the heads up.
-
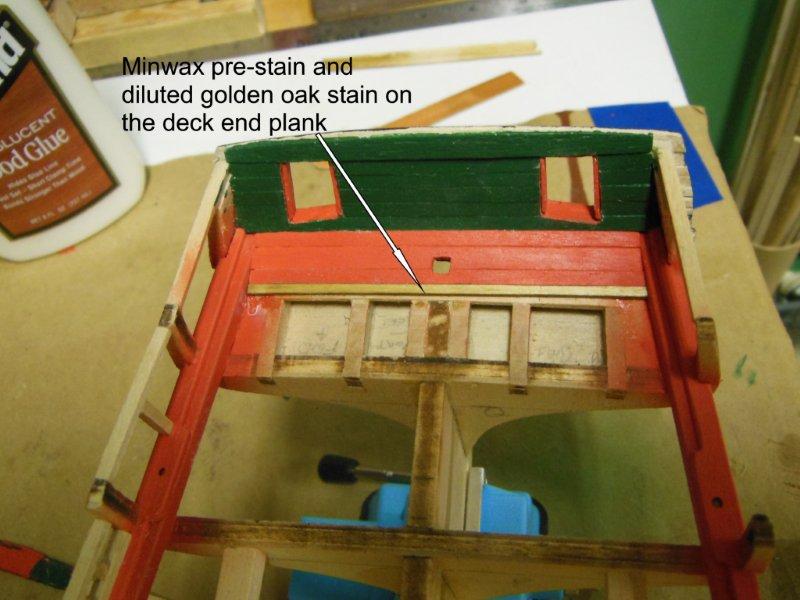
Good morning Popeye and David, I purchase a can of Minwax golden oak and made a few samples to look at. I decided to dilute the stain to lighten it up a bit and have since stained and installed the deck endplank. The pencil worked well for showing simulated caulking. Four hours of work and one plank installed. Good thing I'm retired or this ship would never get launched... Question What type of protective finish do you apply to stained deck planks and when in the build do you apply it? I have dullcoat, minwax wipe on poly and Model Expo satin finish on the shelf but not sure which to use.

-
David, As usual, your work looks very good and inspiring. Your plan on not gluing the mast sections together is intriguing. Is this a common approach for model ship building?
-
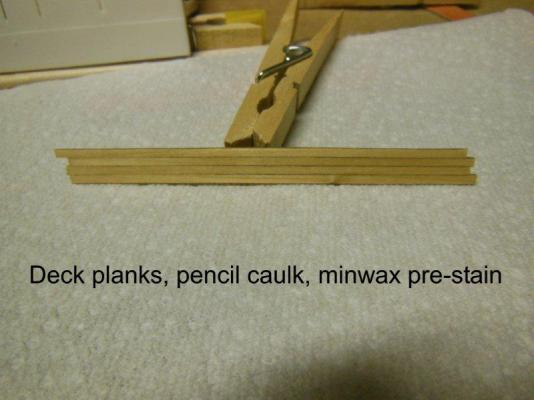
Thanks Ken. I did not think it would be a big deal but it's always reassuring to hear opinions from others, especially when they have so much more experience than me. I sidetracked today, while I think about/research how to plank around the gun/sweep ports. I want to install the deck endplank which will be stained to match the deck. Of course I have not purchased the stain or even decided on which stain to use so I looked at a lot of MSW posts and decided minwax golden oak will work for me. I may end up diluting it to get a lighter shade (Thanks Augie). I'll also use minwax prestain in effort to get a more uniform color. I'm currently making up a deck test sample. I used a pencil to color on one side of each plank so I can also see how that will work. I do not know what type lead I used, but I'll call it Stonecreek Golf Course #1 since that is where the pencil came from I'll post the results as soon as I have samples to review.
-
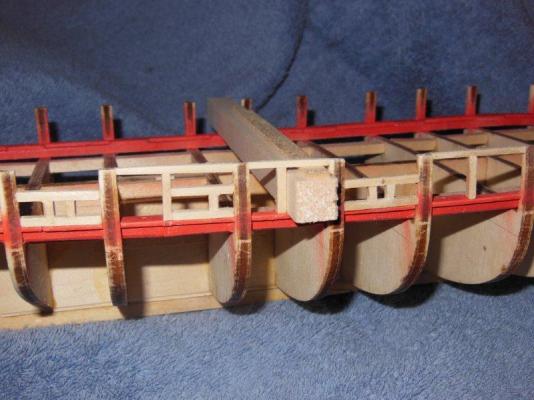
Thank you gentlemen. After I whittle down that massive mid ship beam , I still need to lower the aft most horizontal beam. I placed the beam on top of a structure instead of attaching it to the side wall, an easy fix that was not apparent to me until now. I may also have to work on the height of the timberhorns as mentioned by Rich in an earlier post. I have an idea I would appreciate your feedback on. I'm considering planking the starboard side (planksheer level and up) before framing in the port side. My reasoning is, maybe the planking will reveal issues I'm not currently aware of that can be avoided or corrected before framing in the gun/sweep ports on the port side. I cannot think of any issues it may cause by jumping ahead, but your thoughts would be appreciated.
-
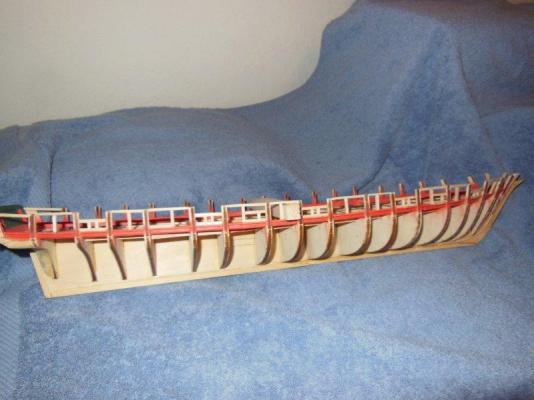
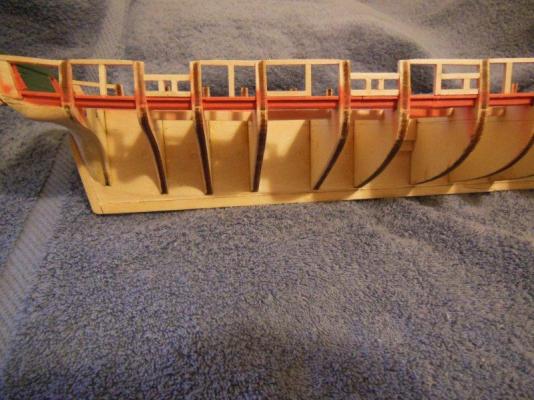
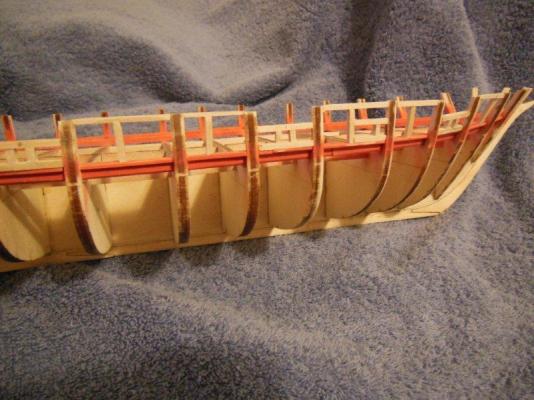
This past week, I worked on framing in the starboard gun and sweep ports. In photograph 1602 you can see how I used a jig to determine where to place the gunport framework. I used the same technique for the sweep ports. As usual there is more sanding to do but this seemed like a good time to take some photos. You may be able to see remnants of sawdust which I left in the photos just for our friend Sjors...

-
Brian, Congratulations on your first house. I believe buying your first home ranks somewhere in the top ten of events of your life.
-
Hi Brian, Thank you for the compliment and for the advice. The credit card idea sounds very useful and I'll add it to the tool box. I need to figure out how I'm going to sand the inside edges of the oar sweeps once the planls are in place. If a trimmed emery boad does not work well, I'll try your credit card idea.
-
Good morning Patrick, Great minds think alike... Your process is what I follow. If I miss a fuzzy or two it pretty easy to correct with an emery board before painting. The basswood sands and cuts easy which is nice for model ship building. I seen somewhere on MSW, someone using emery boards and tried them out. I found a two sided box at Walmarts with one side a finer grit than the other. They have been a great tool for sanding parts. Cut them to a needed size, they last forever and they flex or bend a bit if needed. Emery boards have become my main sanding tool.
-
Thanks Popeye. The framing looks a bit rough, but I need to keep in mind it will be covered by planking.