HOLIDAY DONATION DRIVE - SUPPORT MSW - DO YOUR PART TO KEEP THIS GREAT FORUM GOING! (Only 72 donations so far out of 49,000 members - Can we at least get 100? C'mon guys!)
×


lb0190
-
Posts
686 -
Joined
-
Last visited
Content Type
Profiles
Forums
Gallery
Events
Everything posted by lb0190
-
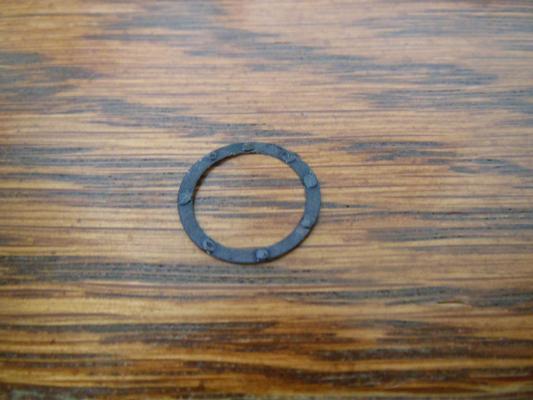
 Here is the picture with a dime for size reference.
-
Small update (no pun intended ) I painted the capstan parts which you can see below. I forgot to include showing a dime for size reference, but it's definitely tiny parts for my old eyes. At this point, I'm ready to complete the assembly once I figure out how to square the black cog on the shaft. It wobbles a bit so I want to square it up with a jig or something before I add glue. I still need to add fastener heads to the top metal band and of course add simulated metal bands (with fastener heads) after assembly is complete. The second picture shows my first attempt at making simulated fastener heads using CA glue. Some look OK while others were smeared. There is certainly a technique to doing this, in order to get repeat success. I may end up having to find a syringe as suggested by Dave - another trip to the hobby store... This ring was an earlier effort where it had the right OD but the ID looked too big, but it came in handy to experiment with. The simulated metal ring on the capstan top was made from very heavy paper (60-80 pound not sure which). The paper measured .006" thick which scales up to ~3/8" thick. This looked and cut better than the other three types of paper I tried. I used a 1/2" hole punch for the OD and a 3/8" hole punch for the ID. In case your wondering, yes you can sand paper edges if there are a few ragged edges. I initially used a black sharpie to color the ring, but it was shiney. I suspected dullcoat would take the shin away, but I was also worried about the glue soaking through the paper, so I simply painted the ring black before gluing it in place with diluted PVA. I considered using CA glue, but it dries so quickly I wanted more time to position the ring. I almost forgot to mention the portable AC unit works great! No more 15 minute sweat sessions

-
I agree!!
-
This evening, I cut out the capstan parts, cleaned off the laser burn, trial fit the pieces and started planning out the sequence for assembly and paint. I also made the metal ring that goes on the top of the capstan from heavy paper, colored black with a sharpie. I made the simulated metal ring using two hole punches. QUESTION: What type of adhesive do you use to glue paper to wood? I'm worried the wrong type of glue may soak thru the paper before it dries or release after some time.
-
I was on board with the idea of building the sub-assemblies and add on later (great idea), but did not think about dry fitting the eye-bolts to glue on later - another great idea - THANKS!
-
Very sharp and clean! I'm very impressed!
-
Darn, I thought I had one over on you... :D Thanks for posting them (again).
- 1,873 replies
-
- 1
-

-
- occre
- san ildefonso
- (and 1 more)
-
Robbyn, you missed an opportunity, let me see if I can help: Sjors, you have new tools? Where are the pictures? Pictures, pictures, pictures.... :D
- 1,873 replies
-
- 1
-
-
- occre
- san ildefonso
- (and 1 more)
-
Hi Brian, Thanks for looking in and for your suggestions. Originally I was going to install the caprail prior to the bowsprit, but after the review from you and other builders (friends), I agree it makes more sense to reverse that sequence and carefully review the proper sequence for all of the parts in that area. This is an excellent example of how MSW works, helping each other out, sharing experience and offering other perspectives that may not be obvious to the builder. THANKS EVERYONE !!
-
Happy Birthday Sjors!
-
Good news. I looked at the drawings (novel idea for me) and found out the following. The fwd most knight-head to keel center-line measures .184” on the drawing, when doubled equals a gap of .368'. The drawing states the bowsprit at the hull interface is .328” wide, which if centered leaves a 0.020” clearance on each side. Currently I have ~.266” gap, which is good news. I sure do prefer opening up the gap instead of figuring out how to reduce it. Thanks for the concern. It put a bug in my head I could not get rid of until I measured. The bowsprit looks like an interesting piece to make.
-
Thanks Ken, That has been on my to-do list for a while, I'm just afraid of what I may find I'm more concerned I left too big of a gap, but I just have not made time to measure yet. If it's wrong either way..., add a little wood, cut a little wood apply a lot of paint! Thanks for keeping an eye out for me, which remainds me of a joke...., naaaay, I had better pass on this one.
-
Hi Ken. Thanks for checking checking it out. After reading Sjors concern, I went back and looked at the plans and verified what you detailed above. I believe I'm OK (at least for the time being ) and heading in that direction. Sjors, Thanks for looking out for me.
-
Hi Sjors, It's by design, if I read the drawings correctly. When the caprail is installed, it should close up the gap other than where the bowsprit is mounted. I'll check this out closer in case I missed something. Thanks for the heads-up. Sjors, My initial spelling above was very bad, which I just corrected. I made my original reply on the iPad which was a mistake... The keyboard is too small and the text size was very small. I really like the iPad but for some uses it's not always the best choice.
-
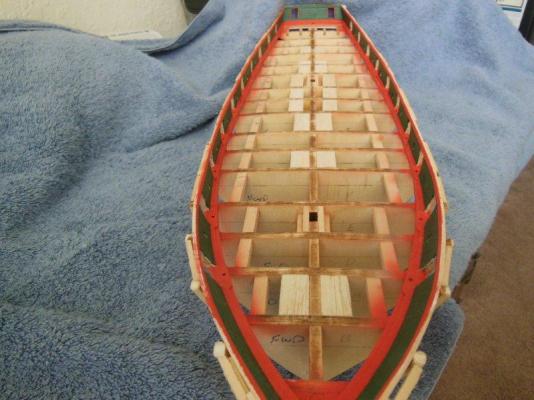
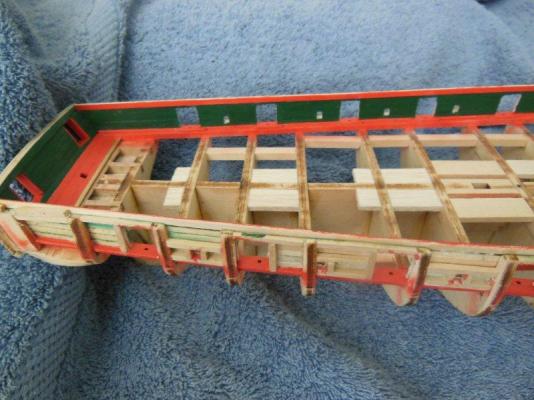
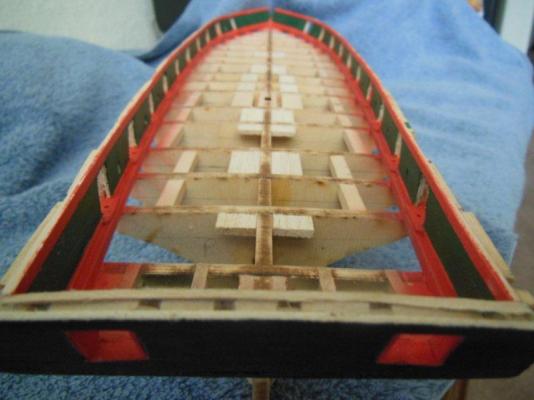
Last night I finished up installing the port side interior bulwark planks. The ports are cut in 95%. I'll finish squaring them up and removing the remaining material when I cut them in after installing the exterior bulwark (??) planks. The port side top planklooks to be ~1/2 mm higher the the starboard side at the bow. I need to look at this a little closer and determine if there needs to be any corrective action. I clamped on the top caprail and both sides seemed to mate up OK. It was late when I did this, so I'll have a closer look later today.


-
Andy, I worked a number of DOD contracts over the years and realize there are many Mil Standards out there, but it's been a while since I've seen the one your referencing for your ship building...
-
HMS Victory by Sven - FINISHED - 1:600 scale
lb0190 replied to Sven's topic in - Build logs for subjects built 1751 - 1800
Hi Matt, Amazing work! I cannot imagine building a ship that small with that level of detail. -
Here is a quick status update. Port side bulwark planks installed, ports cut out (95%) and painted. I'm currently waiting for the top plank glue to dry.
-
I'm with you in regard to the next kit I buy. Stained wood, very little paint... I'm working up the courage to buy Coral's Wappen Von Hamburg when I see it for a good price.
-
Rich, she's looking good. Your photo's entice me to start on the guns. I bet they would be a good mini project and nice change of pace.
-
That's his story and he's sticking to it! Sorry Popeyes, I could not resist.
-
Hi Dave, I just found your build log. What a great looking ship and a belated welcome to the Niagara club!