HOLIDAY DONATION DRIVE - SUPPORT MSW - DO YOUR PART TO KEEP THIS GREAT FORUM GOING! (Only 72 donations so far out of 49,000 members - Can we at least get 100? C'mon guys!)
×


lb0190
-
Posts
686 -
Joined
-
Last visited
Content Type
Profiles
Forums
Gallery
Events
Everything posted by lb0190
-
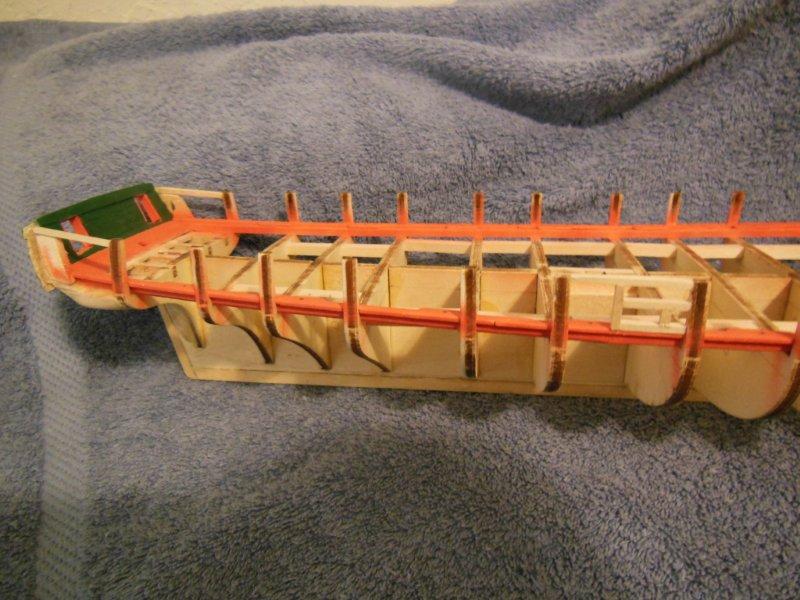
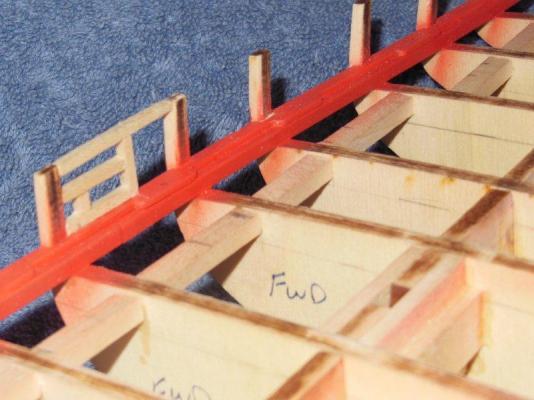
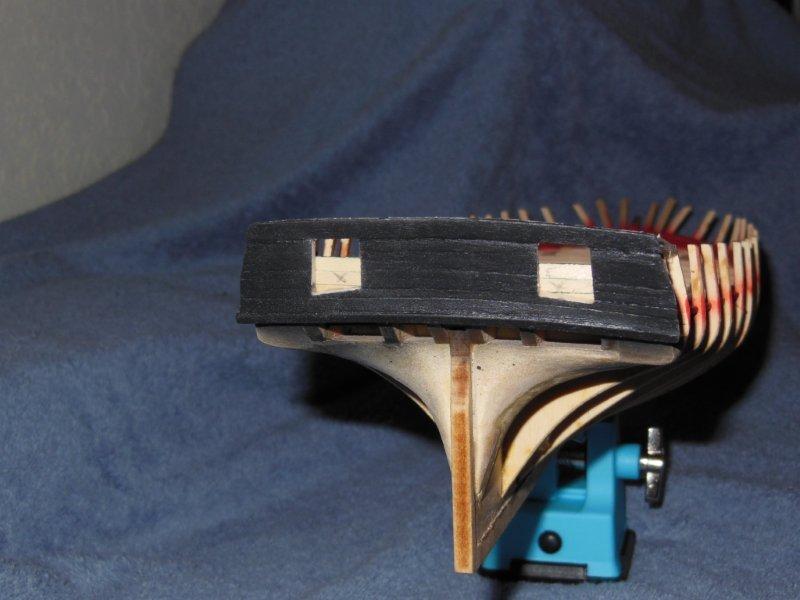
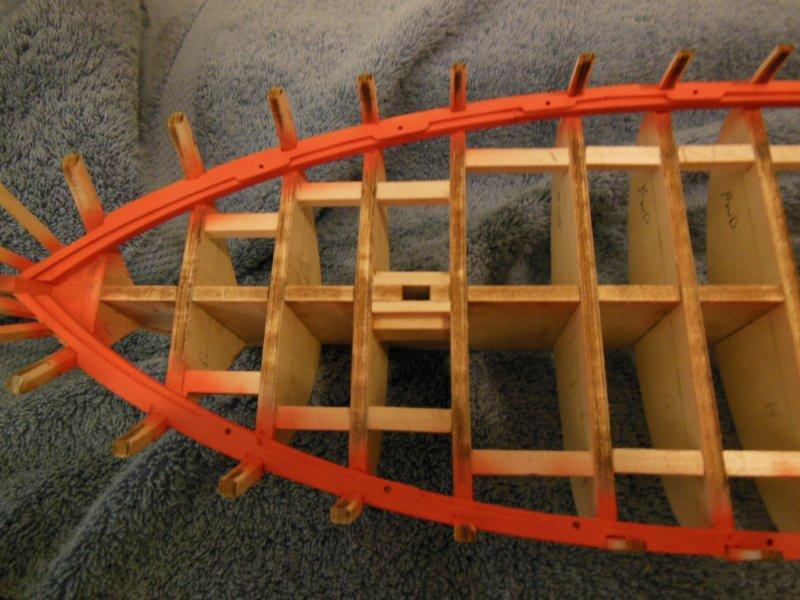
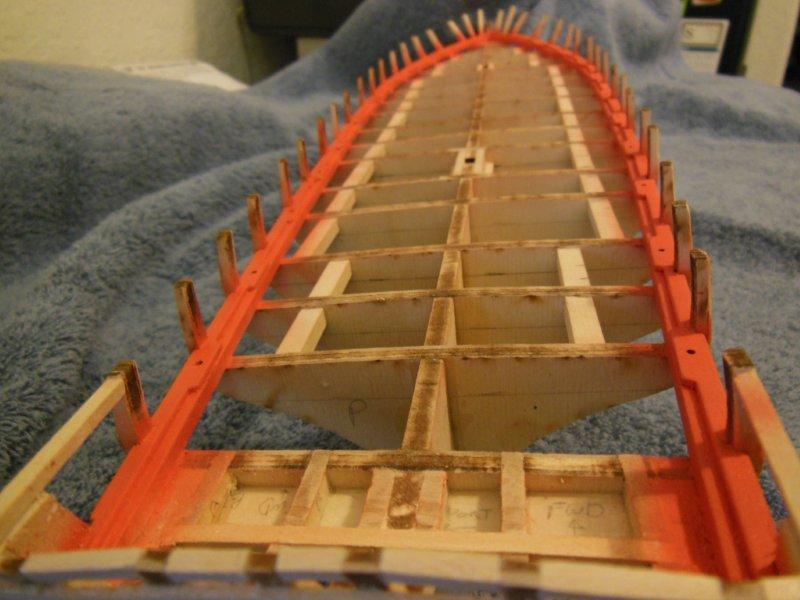
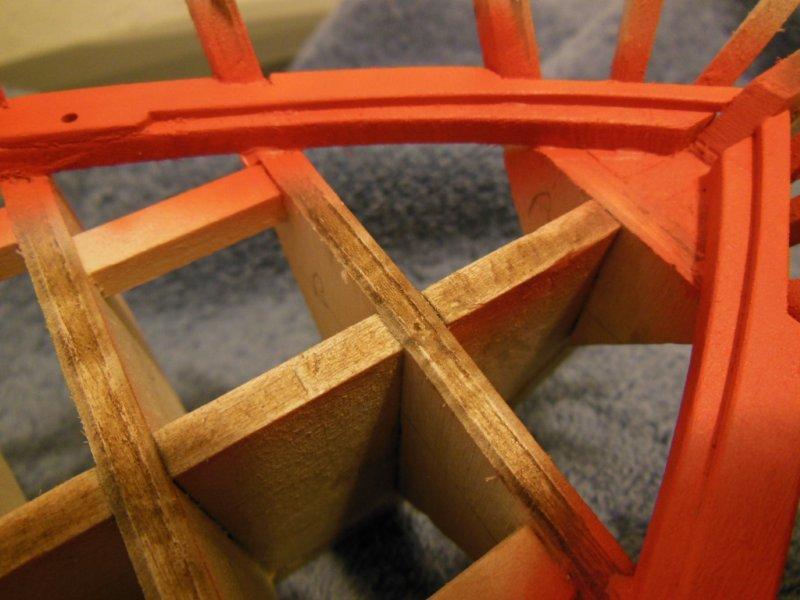
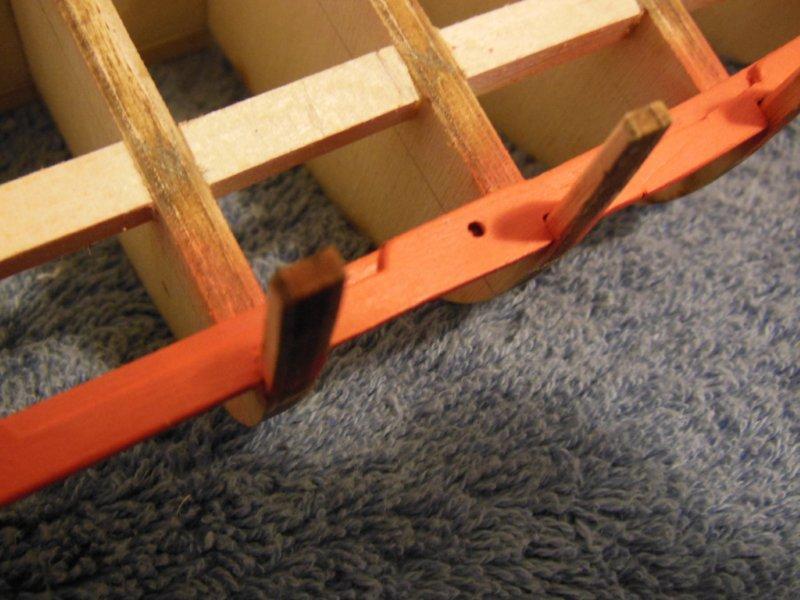
 Since my last post, I added the three red transom planks with the square rudder shaft access hole. I also added the vertical side planks to the aft gun ports, which did not turn out very well. I did not find any kit wood that worked well, so I ended up taking an oversized piece of wood and filing down the thickness which turned out a bit inconsistent and a poor fit. I've since purchased wood that will work better, I just need to decide if I will replace the installed pieces (probably will and be much more satisfied with the results). I also started working on framing in the starboard gun ports and oar sweeps. As you can see I deviated from the plans a bit by running the top board all the way across the two timber-horns. I still need to sand this area a bit to make sure the cap-rail fits proper, but I'll wait until all of the gunports/sweeps are framed in first. I need to start planning on where/how to install the deck supports for the coaming and other deck structures before I forget. Progress remains slow, but so long as I'm taking more steps fwd than backward, I'm OK with the progress rate. It's a good thing the war of 1812 is over, because if they waited for me to finish the Niagara, the outcome may have been different...

-
Rich, The pictures look great! Now you have a fighting ship.
-
Hi Rich, I'm still playing catch up on everyones build status and just read about your bad run of luck. I hope the situation turns around for you very soon, with an employment outcome better than before. Your cannonades look very nice with sharp detail.
-
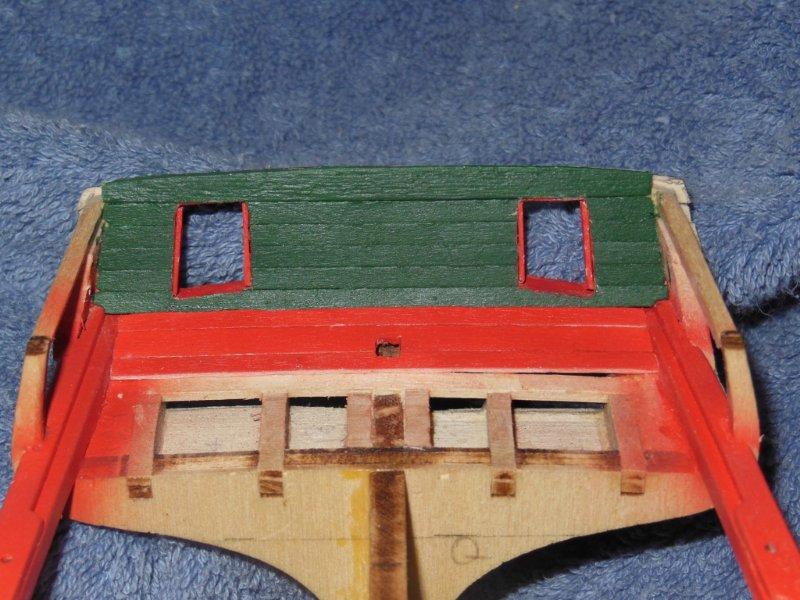
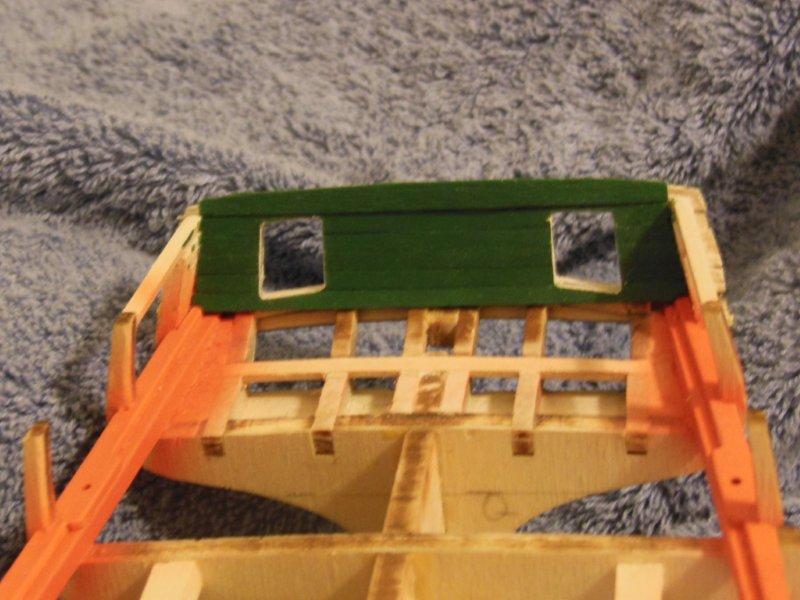
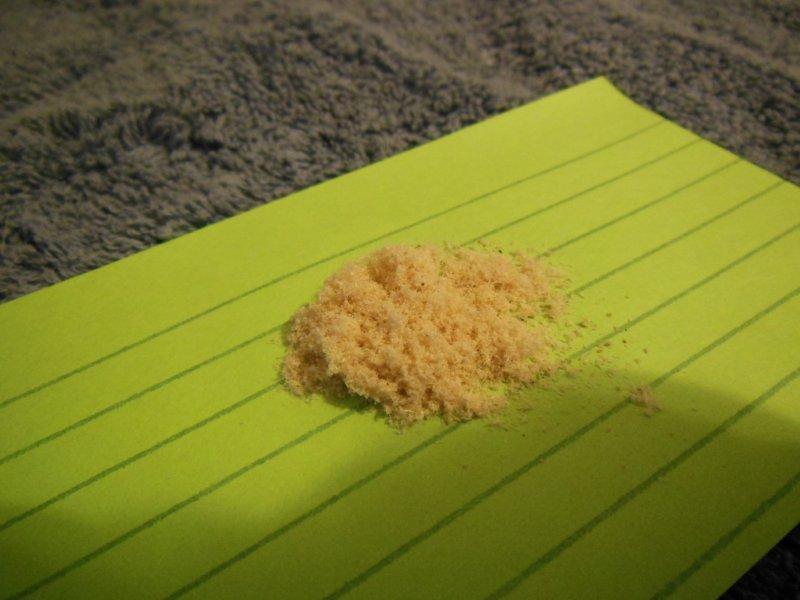
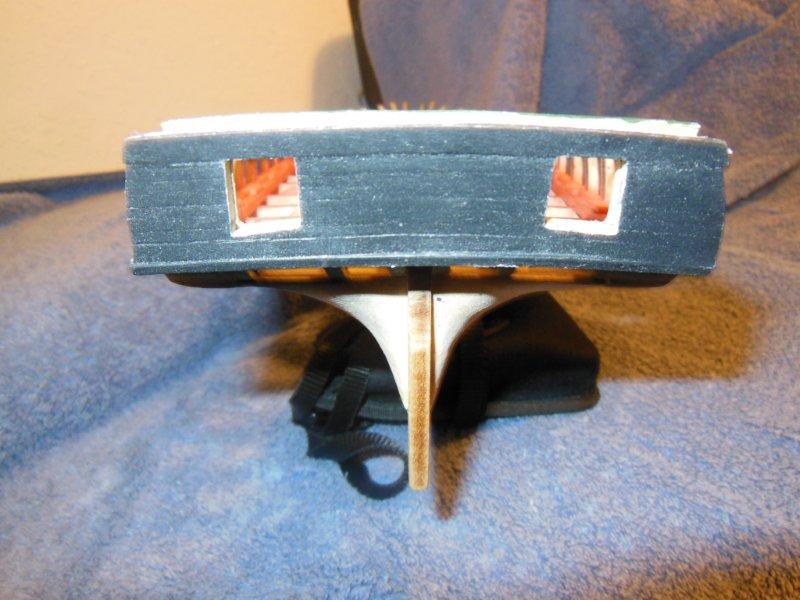
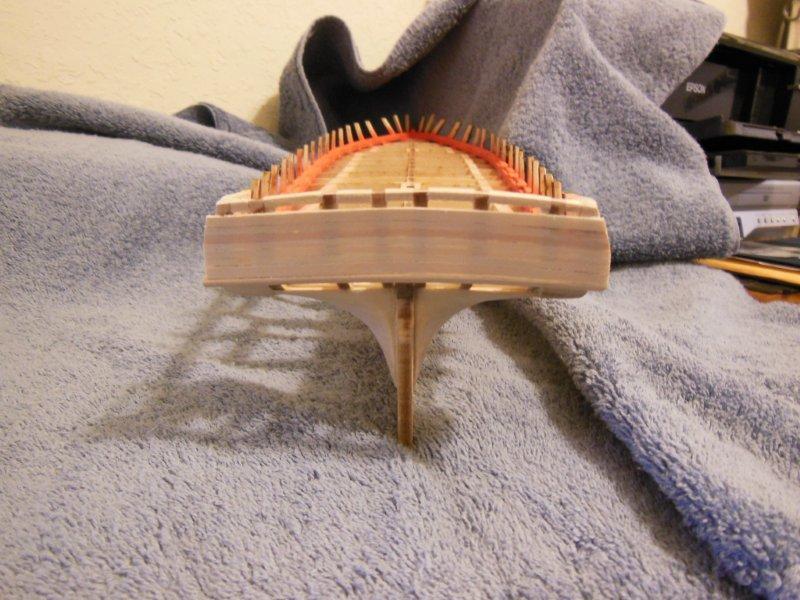
I managed to get a little work completed between yesterday and today. The top green stern plank needs trimmed in, plus the aft gun ports still lack the vertical framing and red paint. We'll see how steady my hand is when I paint the gun ports. The aft facing fwd stern view is a bit washed out from the flash and the camera angle does not show the windows shapes well, but I'll try to correct that on future shots. I also should have dusted it off before photographing, but I did not realize how much dust there was until I seen the photo results. I tried something different than I originally planned in regard to installing the planks. For each plank I cut and trimmed in the plank. After the dry fit looked good, I sanded, applied primer, sanded the primer, dry trial fit again, trim if needed, paint, trial fit, trim if needed, then glued on the plank and then moved on to the next plank. I'm on the fence in regard to using this sequence of steps for the entire ship. My thoughts were, maybe this method would keep the plank edges more visible if the planks were painted one at a time before gluing in place. I was afraid even if I use an airbrush to apply a paint after the planks were installed, the paint would fill and hide the plank edges. The risk is not getting the plank edges tight against each other. Oh yes, the last photo is for you know who. The word on the street is, if he asks for sawdust, someone had better provide some...


-
Augie, Your build is amazing. I wish we could post higher res photos to see the details better, but I know thats a cost and performance restraint.
-
Thank you guys. I hope I can lay a few more planks before we leave. We were lucky enough to have been aboard the New Jersey while it was still commissioned as well as the Missouri in Hawaii. They are awesome ships and it's a shame they are no longer in use. Here is a You Tube link showing the New Jersey as it travels through the Canal. I'll be looking fwd to seeing progress from all of the Niagara builders when we get back.
-
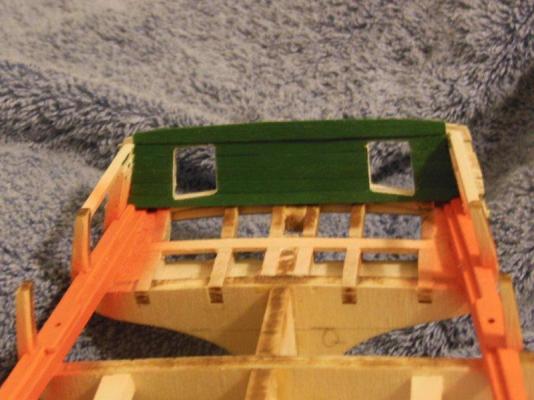
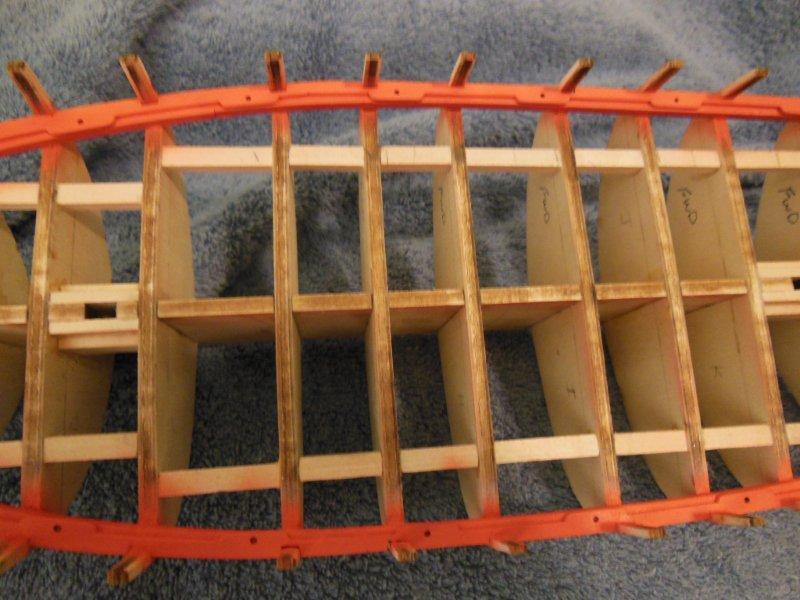
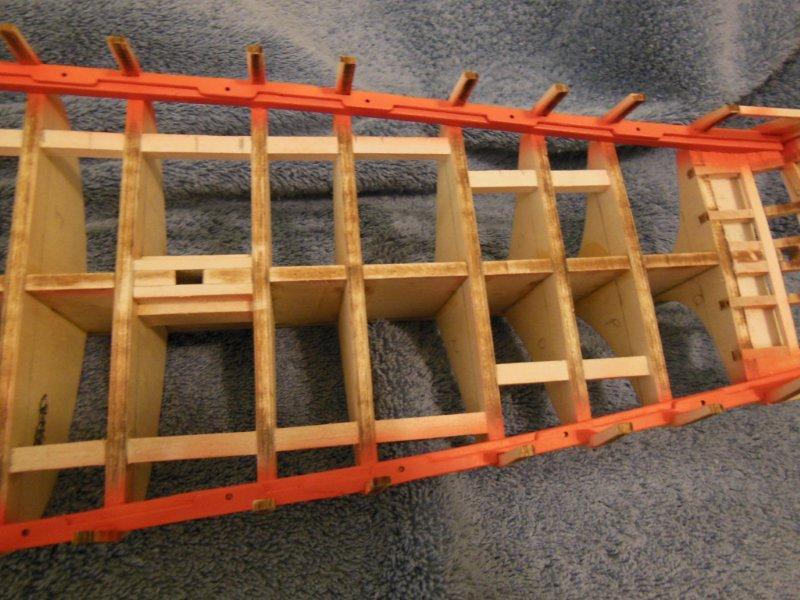
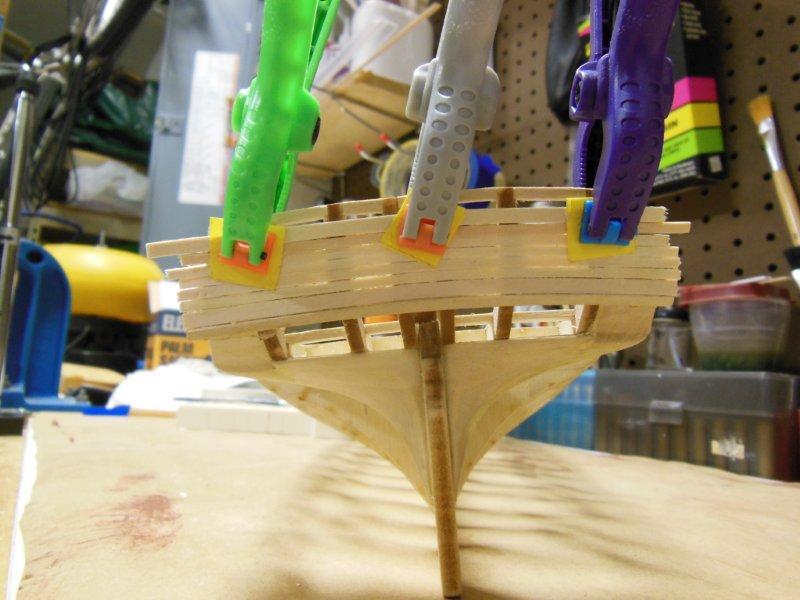
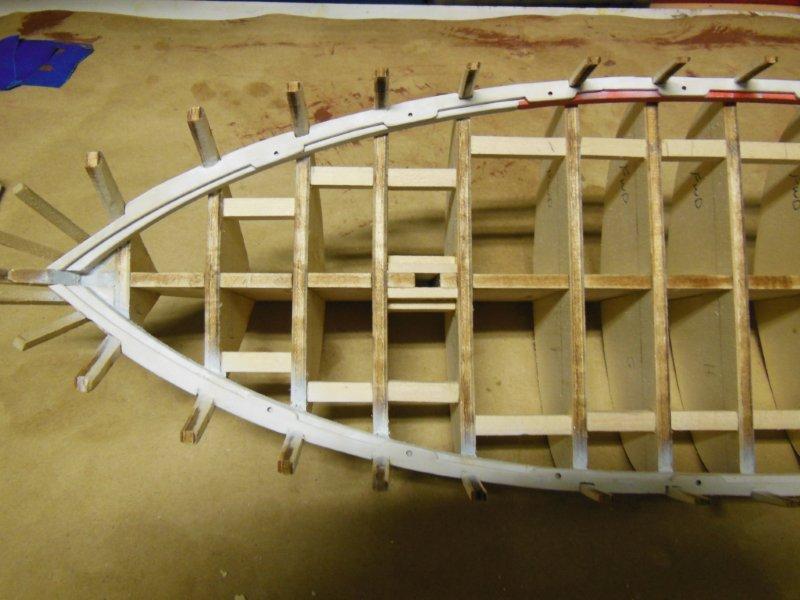
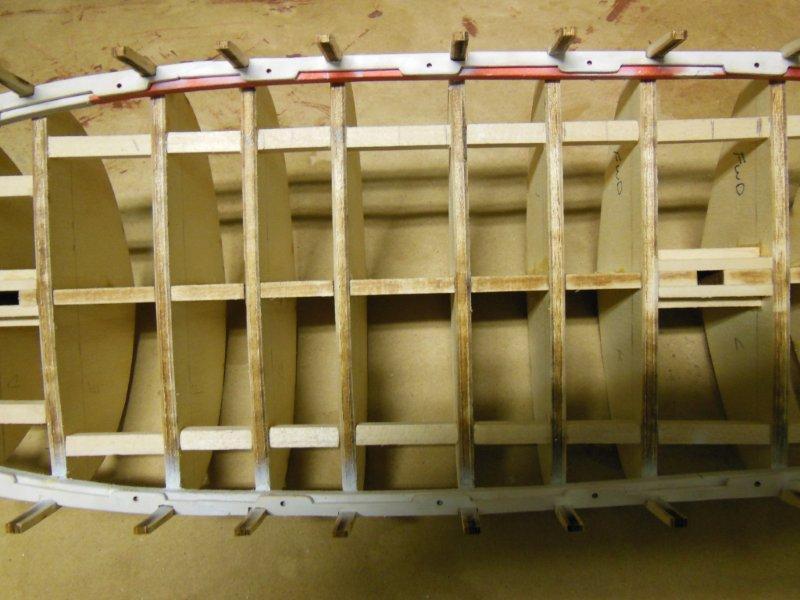
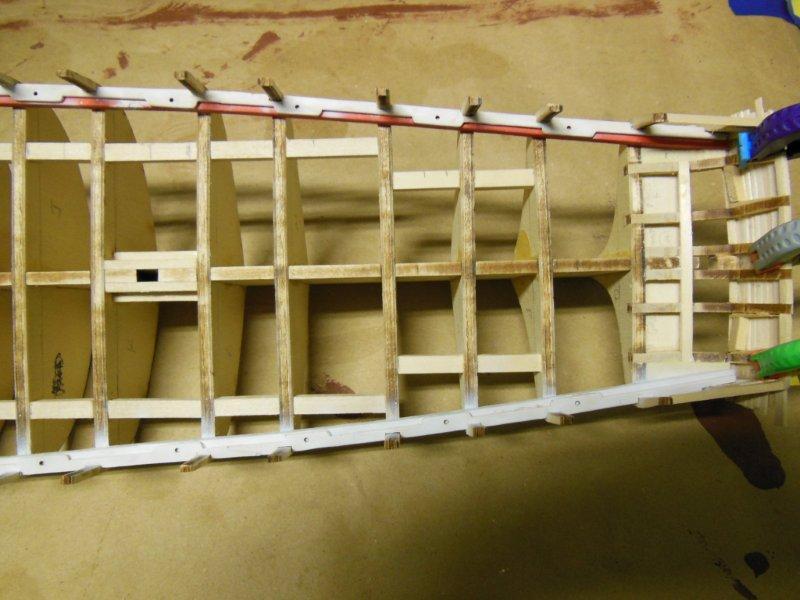
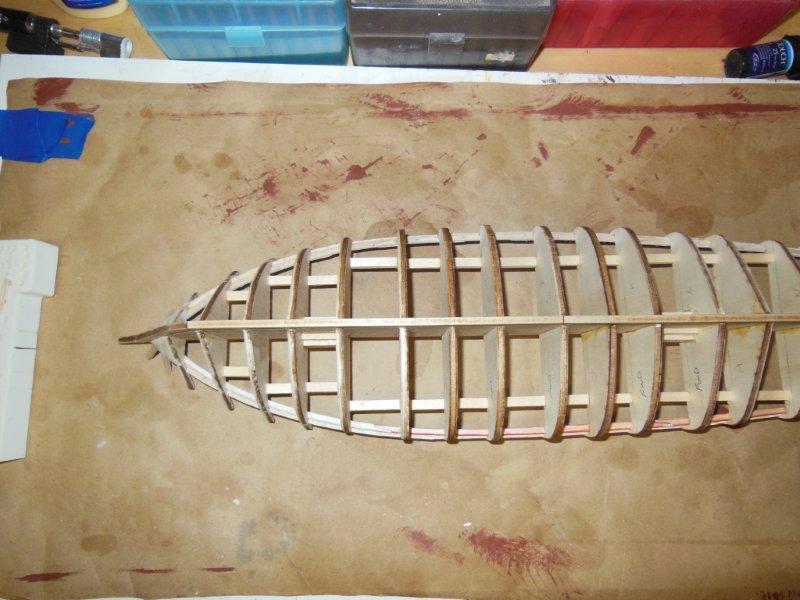
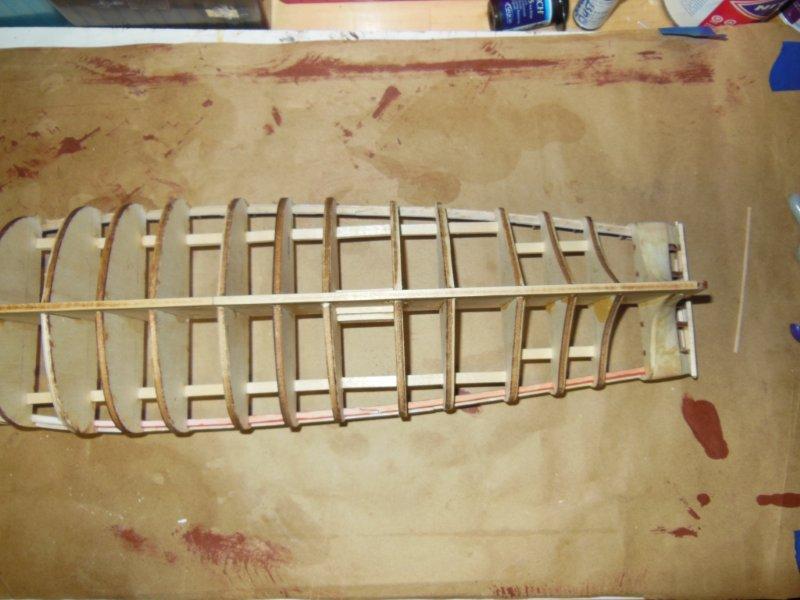
My progress has been pretty slow (not a complaint just an observation), but I'm getting to build areas I enjoy more than the initial framing. The photos below reflect what I mentioned in my previous post. I also brushed Titebond over the aft planks on the inner side as suggested by Brian. I was going to use Zpoxy but the Titebond was easier to deal with and more than adequate for a static model. After posting the pictures it looks like I should have dusted it off... Still have more obvious work to do in this area, but I was getting withdrawal from not posting anything. I'll lightly brush on a finish coat of paint when this area is complete and it makes sense to do so. Looks like we have an unplanned trip coming up next week, so the ship will sit for a while. We rec'ed an e-mail for a last minute cruise that was too good of a deal to pass up. We going to cruise the Panama Canal which is a bucket list item for us. So much history and engineering work that I find it worthwhile to visit at least one time. Like always, thanks for looking and let me know if you have any suggestions on work completed or down the road...

-
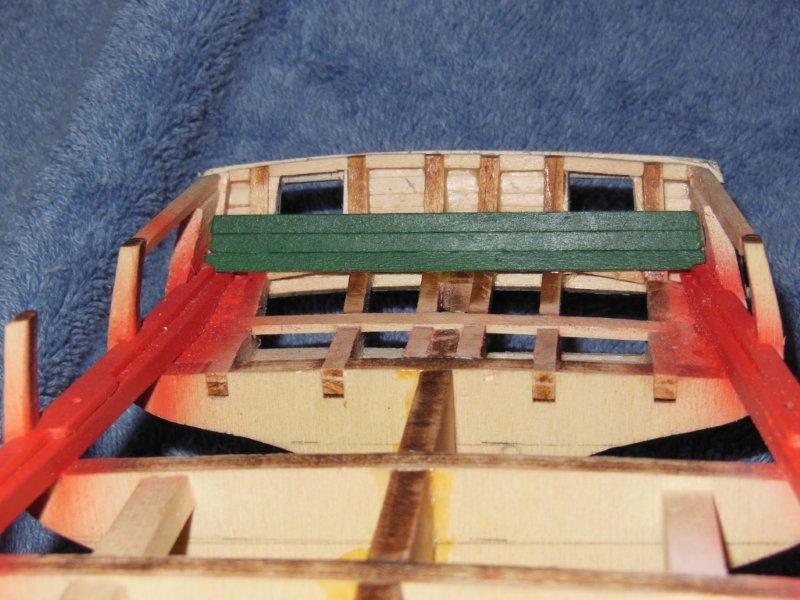
Welcome aboard Mainstay. You will find the members unselfish in sharing of skills, knowledge and encouragement. We're all interestd in see your build and progress. Update on my build: very little to report at the moment. I completed: planking the upper exterior transom planks cut out the aft gunports painted the transom planks black (still need a finsh coat) dry fit and painted three of the green interior planks that fit around the aft gunports. I'll glue them in place once the paint dries. Once the paint dries, I'll take some photos. I'll probably hold off posting until I fit a few more planks.
-
Thank you Patrick. I appreciate your taking time to do this.
-
Thank you! I would appreciate having the info.
-
Patrick, I forgot to comment on your cradle. I've waffled on how to mount my build numerous times, with my current plan being a cradle. Your design looks very nice and goes very well with the ship. Are your plans to secure the ship to the cradle or let it sit loose?
-
Hi Rich, Your carronade look very good and I like the process method shown in the pictures. I do not know if I would have the patience needed to sand down all of the blocks.
-
Patrick, Absolutely inspiring and your right, the gaff and boom really makes the built look more balanced. I'm adding the last photo to my desktop.
-
Virtually any material (solid, liquid, gas etc.), must have an MSDS (material safety data sheet) made available by the manufacturer (in the USA, I'm not sure how this may apply elsewhere). As an example if a paint manufacturer makes 50 different colors of the same type water base acrylic, they must have an MSDS for each color. This includes a separate MSDS for every brand and every type item. This is the best source to get information regarding the safety of use for an item. Below is a link for one type brand of CA glue, http://www.highlandwoodworking.com/msds/ca-adhesives-msds.pdf In my opinion it's always useful to read MSDS for a substance you plan on using. It's not uncommon for some people to become sensitized to some material, causing an allergic reaction even with a minor exposure. In many cases it's caused by heavy or long term exposure, but that is not always the cause. In case your bored silly and would like to read about it, here is an interesting link: http://blogs.howstuffworks.com/2010/07/09/how-sensitization-works-becoming-allergic-or-sensitized-to-common-chemicals-can-be-a-nightmare/ The main thing is to be safe and take precautions as needed. I apologize for being on the soapbox...
-
Hi Brian, Your waterways and planksheers look excellent. I liked how the top rail was useful for holding them in place while the glue dried. In respect to your glue question, like Patrick I use both types with a preference to PVA, which I believe provides a better bond and ease of cleanup/repair.
-
Hi Rich, I can hardly wait to see what stain you select. Are you using the basswood for your deck? A friend suggested I switch to ash, but I think I'll stay with the kit wood for this build. Your method of tapering the planks worked very well, I'll look into trying it once I get to that point in the build.
-
Hi Brian, Your build is looking very good. I can hardly wait to hear your thoughts on this method after they are installed. Ialso diviated from the instructions by installing each of the twelve pieces one at a time, which worked OK for me. One scarf joint did not turn out as well as I hoped but it will be pretty much hidden.
-
One last entry, then it's time to pack the car. I believe I saved the planks I installed earlier. I plastered the open seams with wood putty in some areas and used a sawdust and glue mix where the seam was widest. I also fixed an issue where the port side of the planks were ~1/2mm higher than the starbord side. I still need to do additional sanding and also need to add the top plank where I'll sand in the final arch, I'm just hoping there's wood planks left once I'm done sanding. I also left excess material on the left and right for the hull planks to butt up against. Tell me what you think, is it recovered?
-
I managed to spray a few coats of paint today. Here are the results. I see from the photo I have a small glue lump to sand off next to the fwd port gunport. I did not see it until I took a close-up photo. Note to myself - Do not take close up photos!
-
Hi Rich, Thank you and yes I agree, patience is a must and sometimes nowhere to be found... The stern planking will be good practice for me before moving on to the hull. Right now, I'm trying to save what I applied using the sawdust and glue method. I may end up ripping it off, but thought it provided an opportunity to try a repair and who knows, maybe it will do the job.
-
Thanks guys, for the input and guidance. I'll use pins for any follow on planking, plus make sure the stern is smooth for the name. The sad thing is I knew the planks had to be dry, but I simply did not wait long enough. It's an easy fix and valuable lesson learned.
-
Hi Popeye, Thanks for looking in as well as for the compliment. Yes it's basswood, but single planked (1/32 thick at the stern for most of the planks). It probably was not such a good idea for a second build. I have not heard of obechi and will look it up. I just applied my first coat of paint (airbrush). Once it dries, a couple more coats. It looks better already without the primer showing
-
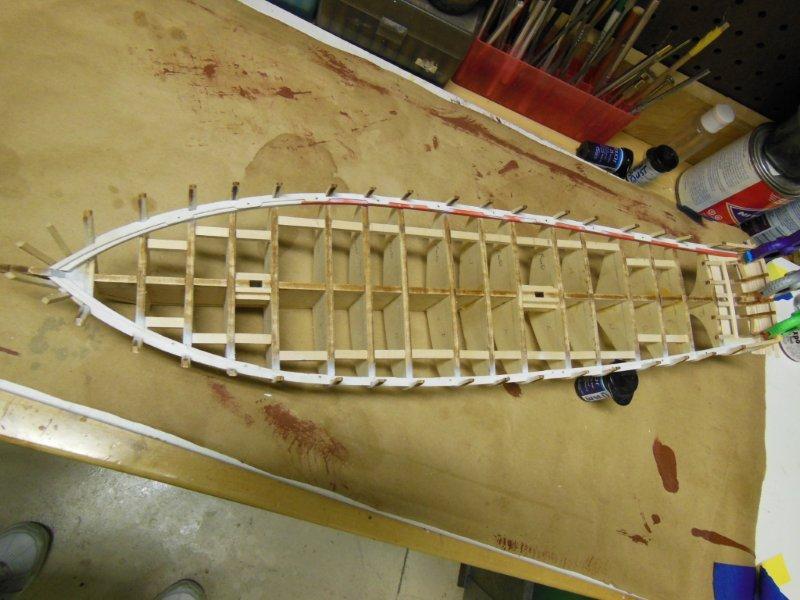
Progress continues to be slow, but it's better slow than moving backwards more than my typical 3 steps fwd and one step back. I'm getting ready for a road trip north and thought I should document where I'm at before leaving. I've completed gluing on the waterways and planksheers. I've aslo sprayed the bare wood with primer. Paint may be applied later today if the time presents itself. I was going to hold off painting until the gun ports are framed but I cannot stand seeing some primer and some red paint on the same parts (the little voice in my head won). I've also been working on the stern planking, but the results do not look very good at the moment. It appears I applied the planks before they completely dried from soaking them in water and shrunk, leaving gaps, as seen in the attached photo. I'm going to use some wood filler to see how it looks before ripping them out. I really want to see the plank seams after painting, which may not happen using the filler. If I get to do some painting today, I'll add a couple of photos to this post before leaving.
-
That's good to hear. I contacted titebond and they told me no one in Florida carries that product - amazon was the easy solution for me.
-
Your welcome. That is whats so nice about this forum, so much infomation and everyone is willing to share. I hope it works well for you.