HOLIDAY DONATION DRIVE - SUPPORT MSW - DO YOUR PART TO KEEP THIS GREAT FORUM GOING! (Only 72 donations so far out of 49,000 members - Can we at least get 100? C'mon guys!)
×


lb0190
-
Posts
686 -
Joined
-
Last visited
Content Type
Profiles
Forums
Gallery
Events
Everything posted by lb0190
-
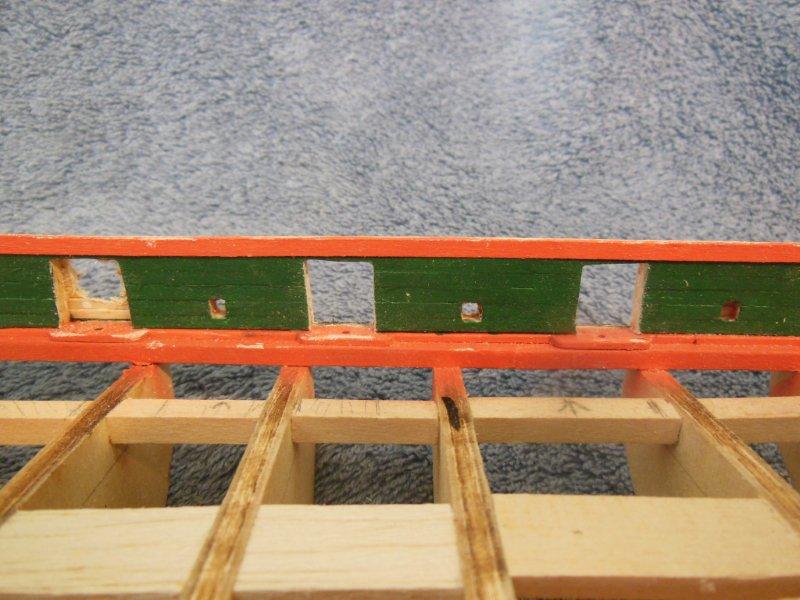
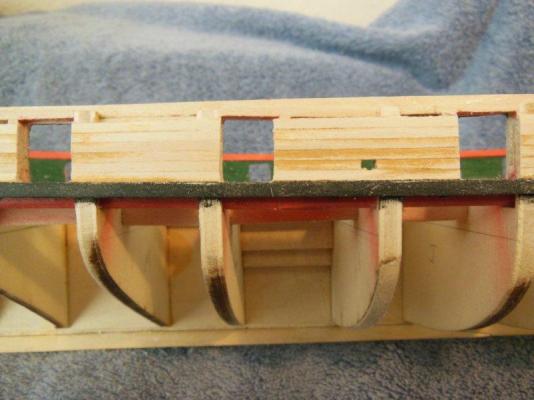
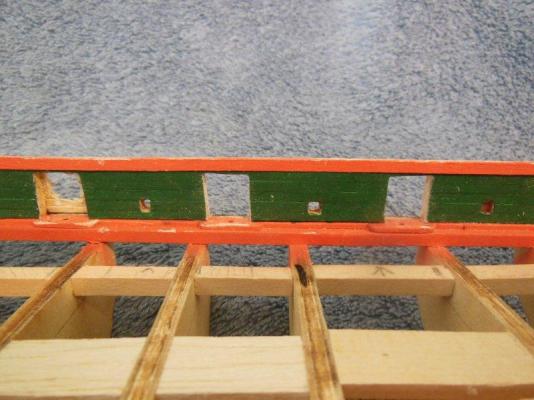
 As you can see from the first two picture below, painting the planks before installation was pretty much a waste of time for someone with my newbie skill levels. Planking in itself is challenging enough but I believe the single planked hulls raises the difficulty level a few bars. After sanding the bulwark planks the plank installation looks much better and I decided it looks good enough to keep (at least until I see how it looks with paint). I started cutting out the gun-ports just like I did with the inside planks. Plunge cut to open up the ports and sand with the jeweler files and emery boards. I have yet to sand/shape any sweep ports but that will be done after completion of the gun ports. I really nicked and scuffed up the interior paint along the way and fixed it several times, so again lesson learned – hold off on fixing paint nicks until after the planking is complete.


-
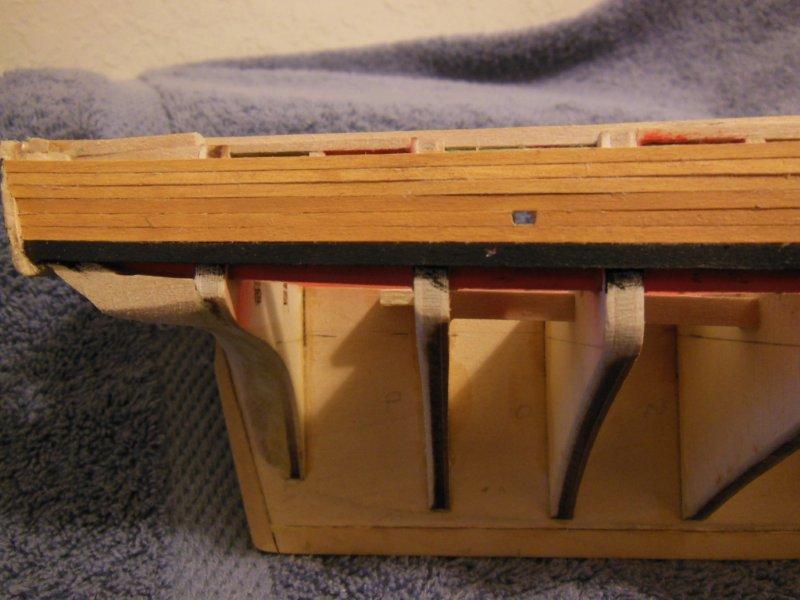
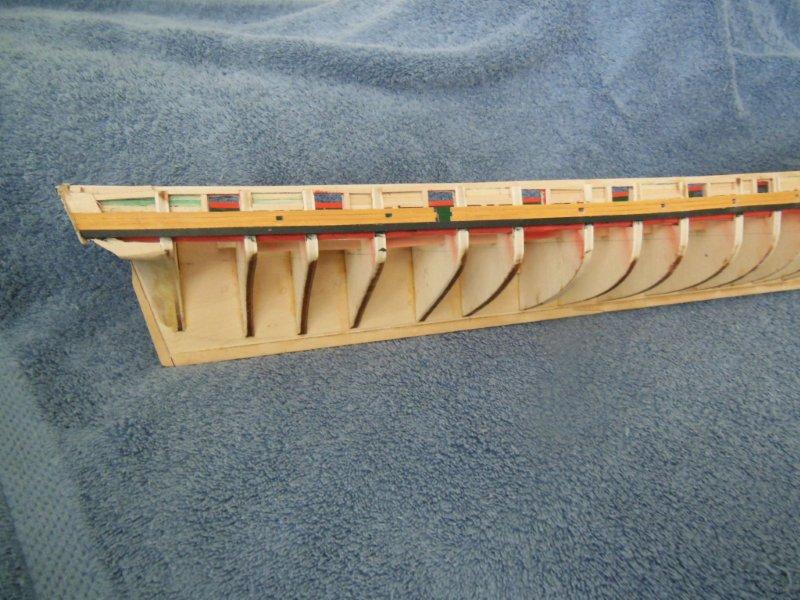
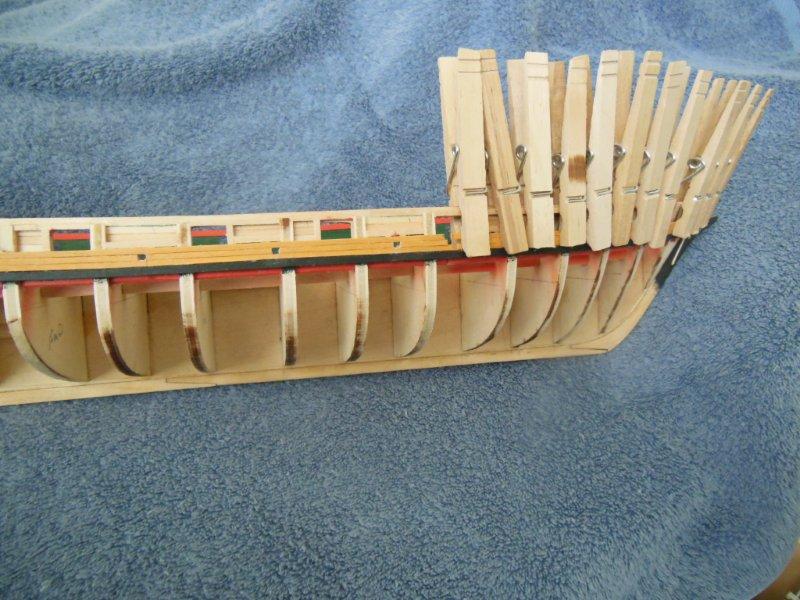
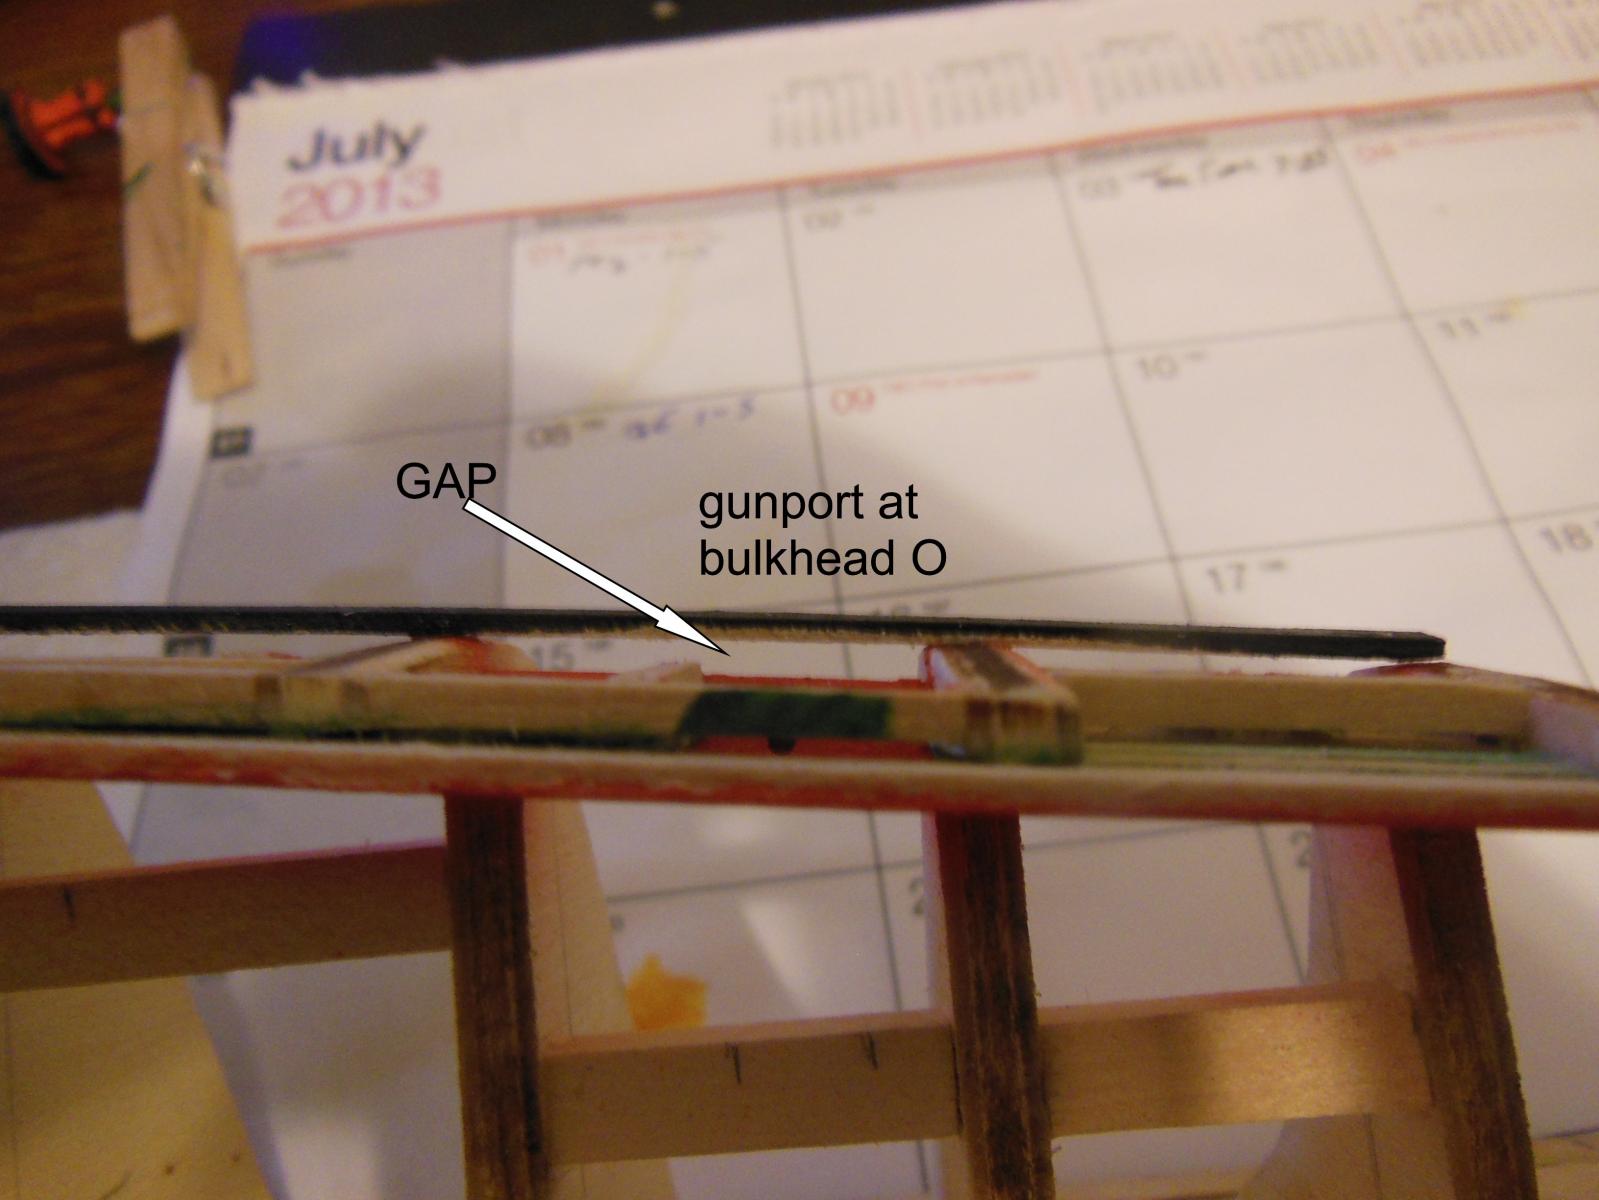
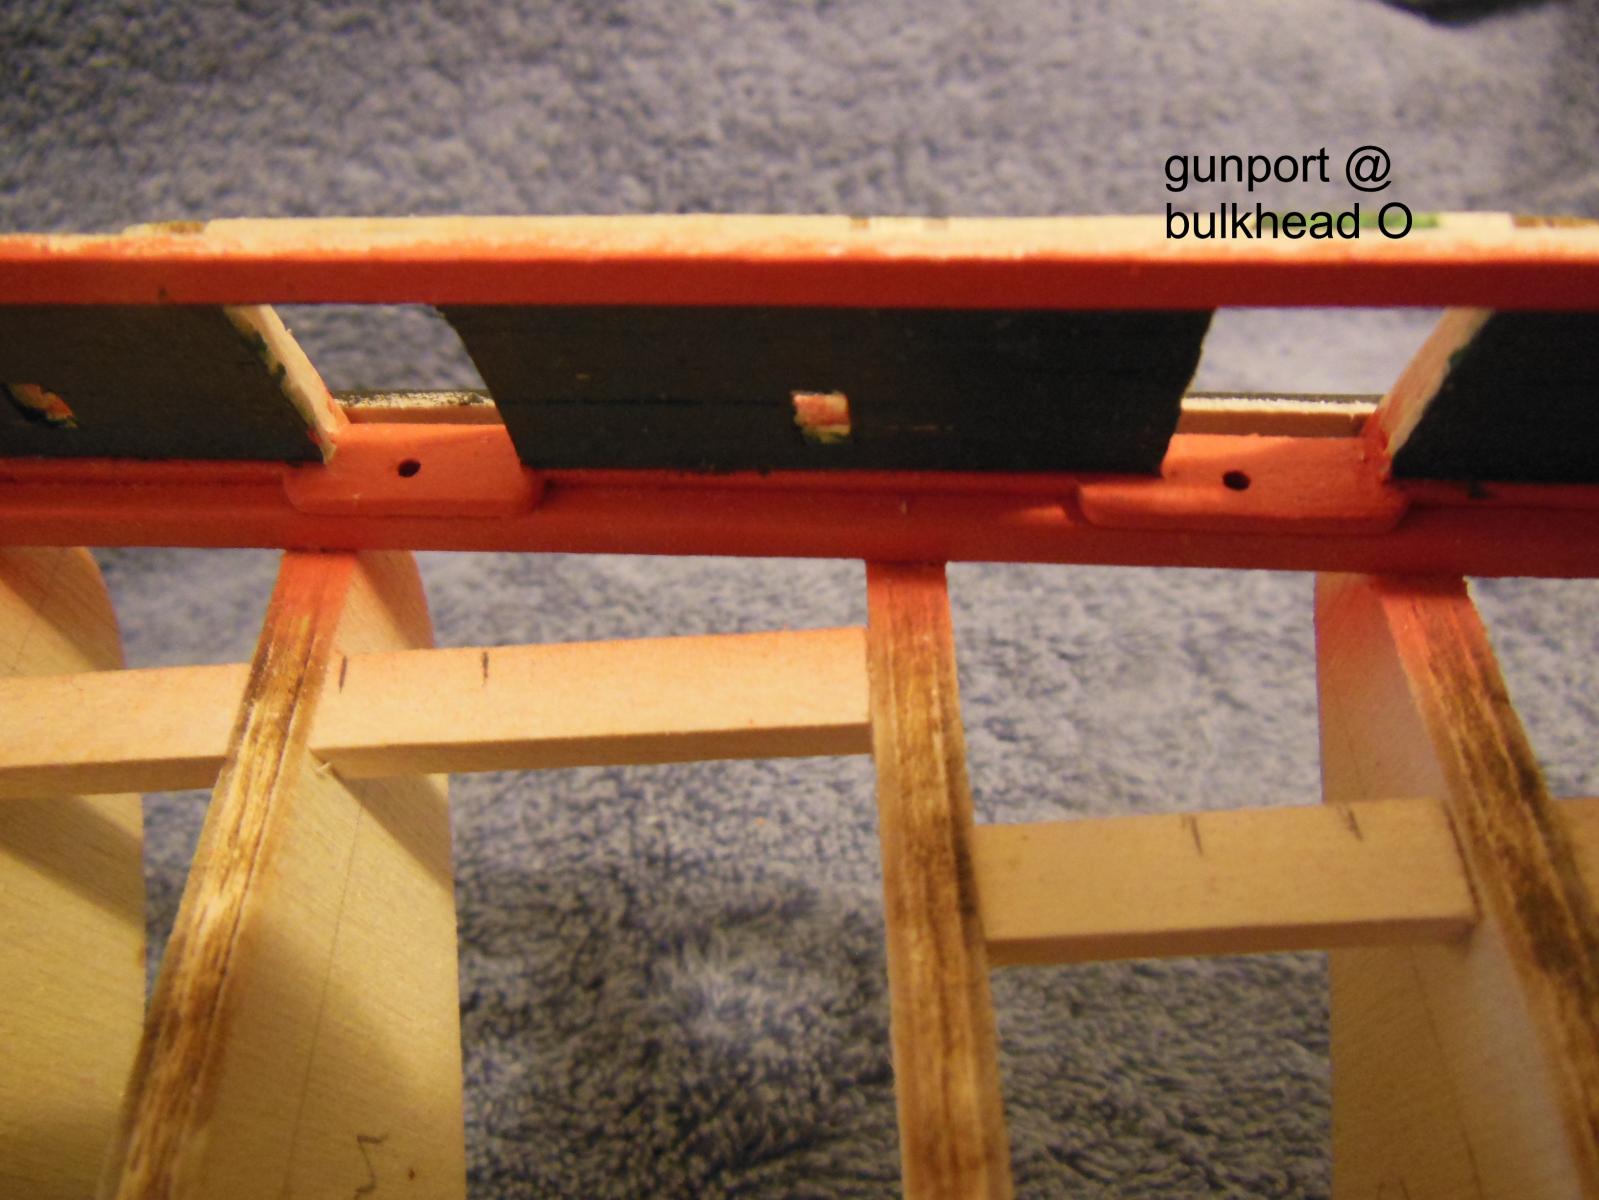
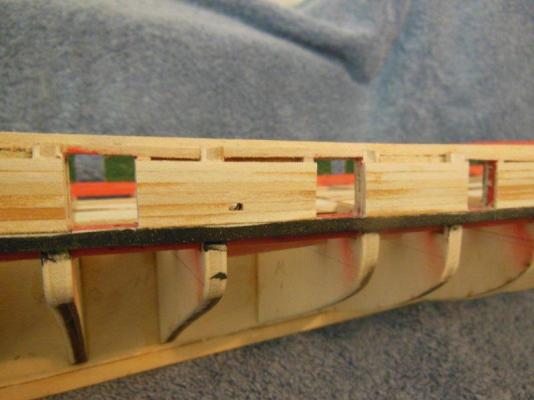
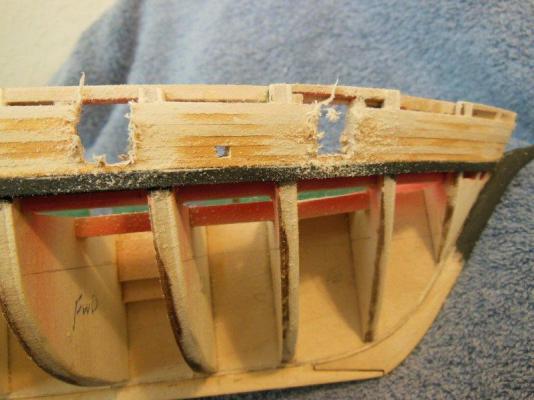
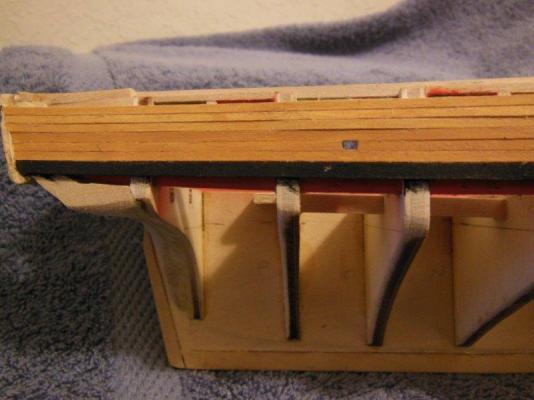
I spent the past few days removing planks that did not fit well, fairing the bulkheads better on both port and starboard sides and applying four planks along the full length of the starboard side. My issue with the gap between the planks and gun port plank-sheer was resolved with fairing and very thin shims for two gun ports. Of course the issue was successfully resolved primarily due to the help and advice from my fellow MSW builders. The fifth and sixth photo below is where I tried to show the gap issue is resloved. I sanded, primed and applied three very thin coats of paint to the planks before gluing them in place. Once the remaining planks three are installed, I'll sand again and paint, hopefully with an airbrush if I can mask off the area well enough. My goal is to hopefully improve on having visible plank seams, as compared to my inside (green) bulwark planks. Once I had two ochre colored (off yellow) planks installed, I filed open the sweep ports just enough to allow my file to fit later, after the upper planks are installed. This would negate the need to open up the sweep ports using a plunge cut with my rotary tool as I did with the interior planks - much too risky at this point... Hopefully I'll get the three remaining planks installed this weekend and start cutting in the gun ports and sweep ports. I hope everyone is having a good weekend!


-
Sjors, The guns (and ship) look impressive.
-
Hi Bob, Welcome to the Niagara club. Your build is looking very good.
-
Have there been changes to Model Expo Support?
lb0190 replied to rtropp's topic in Wood ship model kits
Tom, Welcome aboard! -
Over the past day or two, I've made good progress on installing exterior bulwark planks, so it's now time to rip them off I need to pay closer attention to minor details and hopefully avoid this exercise in the future. I did not notice the bundle of wood I cut the planks from apparently had a odd sized plank in the batch. The one plank was slightly wider than all of the others, which did not appear as obvious, until I stacked up a number of rows to where the cumulative affect became noticable. The use of isopropyl alcohol worked well to weaken the glue allowing removal of the planks. QUESTION: am I correct to assume areas where the alcohol soaked into but wood was not removed, will simply dry and the adhesion of the glue will still hold over time? After fuming about the situation for a which, I realized that in reality, once a ship is completed you have probably built at least two ships in respect to material and money.
-
It sounds like the guns by themselves are a major project. I shooting ( ) for guns out also.
-
Congratulations Augie. It looks amazing, something one would expect to see in a Museum.
- 1,668 replies
-
- 1
-

-
- syren
- model shipways
- (and 1 more)
-
Yes, I'm told it's all part of the fun. It hurts so good! OK Sjors - it's time to name that tune and artist... I'm still sanding on the starboard side. It's getting close to where the planks will almost touch the gun sills. I forgot to mention I was able to remove the three installed planks. Once a plank is installed and the initial glue has dried (Titebond in this case)I normally back it up with CA glue which I had yet to do - good thing I stopped short for this step.
-
Sjors, your ship looks very impressive! Thanks for the photo update.
-
Hi David, Sorry to say, but I'm glad I'm not the only one to have this issue... and after a little exploratory surgery (i.e. sanding) this morning proved the problem to be more minor than I initially thought (as stated by my fellow Niagara builders). My panic session is officially over. I also dry fitted a carronade together to see it there are any unknown issues regarding it fitting correctly in it's designated space. All I could see was a possible minor height issue as mentioned by most other Niagara builders. Fortunately for me I have their proven solutions to mitigate the issue. I also used the carronade to see if there are any issues with the gun in respect to my bulwark dilemma – non were noted. I did have a tiny mishap today. While filing away on the carronade mount pin ( a really tiny bugger) I dropped it just as I finished sanding it. I searched for an hour without success. I need eighteen and eighteen is what was sent . I'm hoping I walk out there tomorrow morning and see if laying right in front of me, but if not, I'll either make one from wood or ask Model Expo to send another. Thanks everyone for your support, help and encouragement! There must be a place where dropped pieces gather, never to seen again.
-
Hi Chris, I'm also not sure how to change the title, but I bet one of the moderator/admin people will see this conversation and offer to help.
-
Hi Ponto, I hope you decide to re-post your build log. I enjoyed seeing your build when it was on-line.
-
Hi Chris, Your WVH looks great! This ship is on my wish list once my skill levels are up to a ship this complex. I would enjoy seeing your build log if you decide to revisit the build.
-
Congratulation's Mr. And Mrs. Home Owmer! Do you have a space reserved for ship building?
-
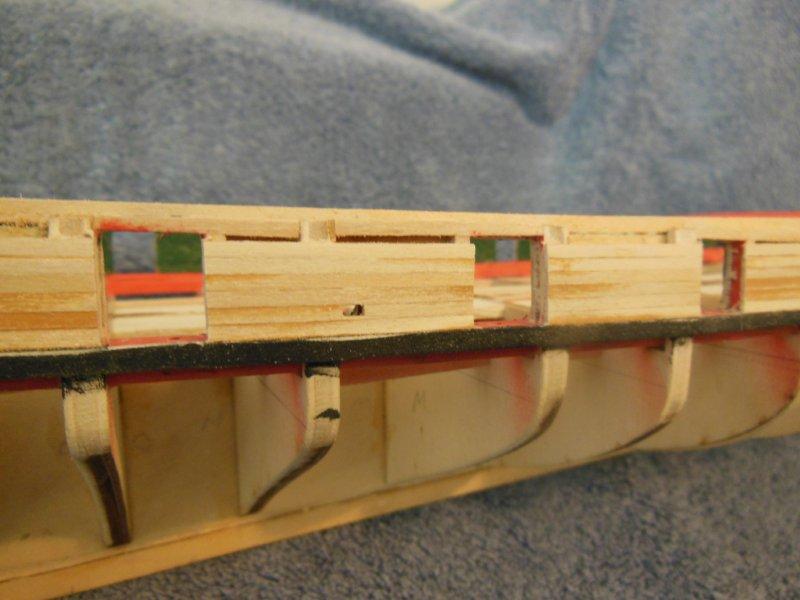
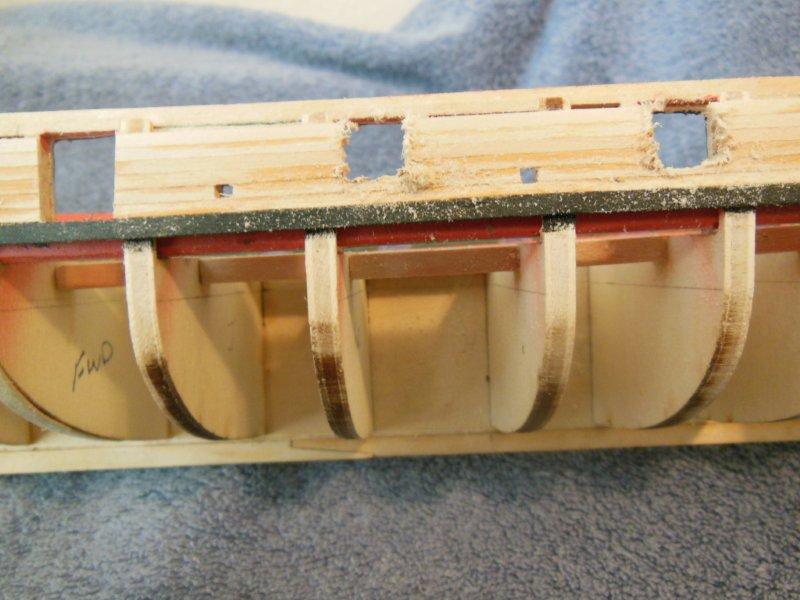
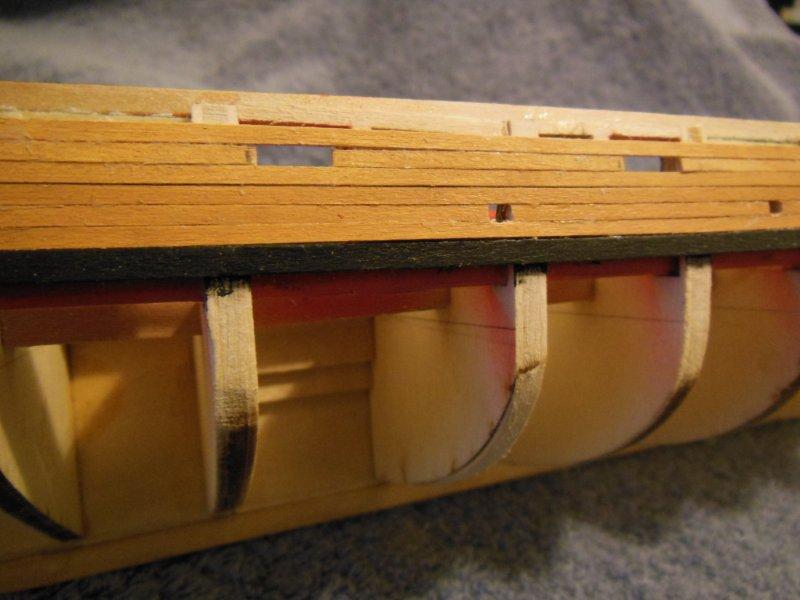
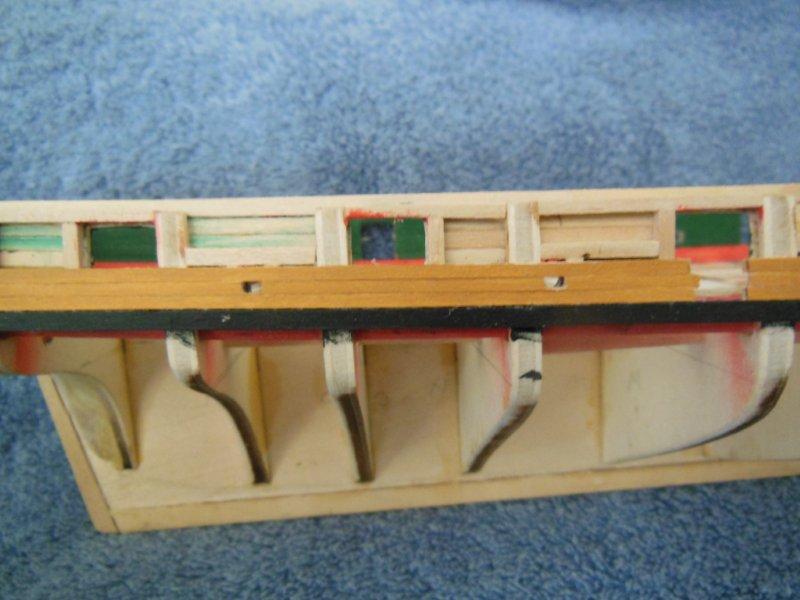
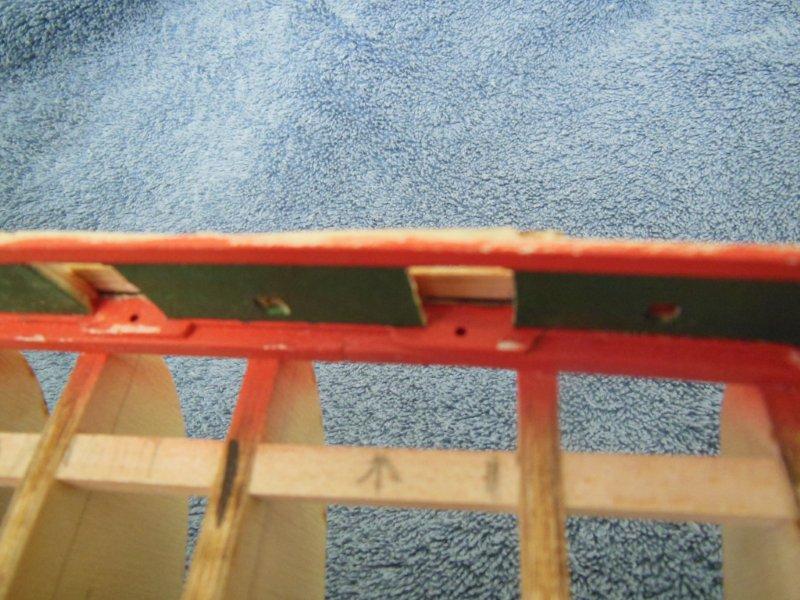
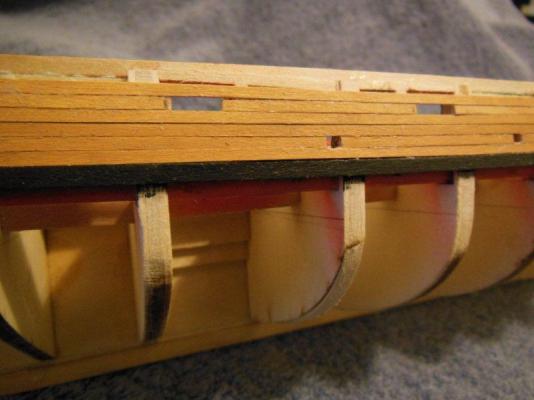
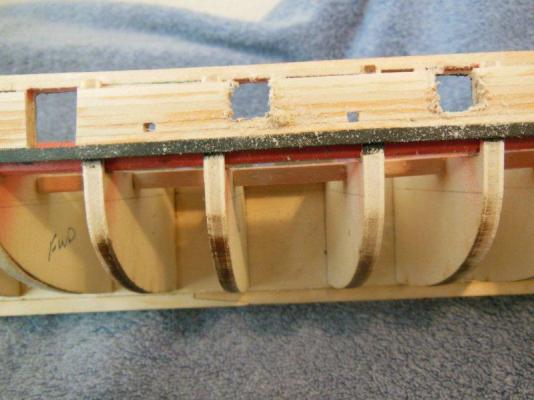
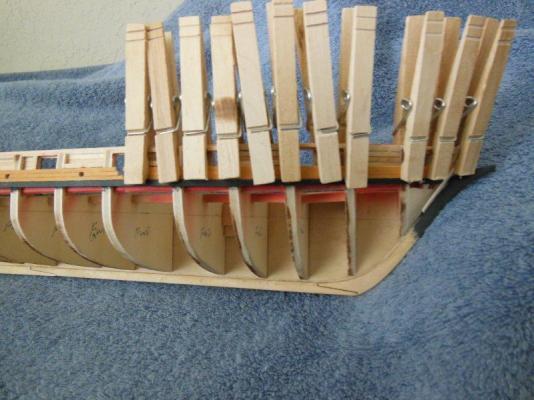
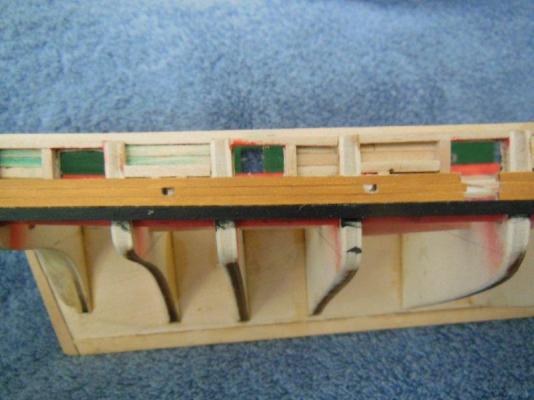
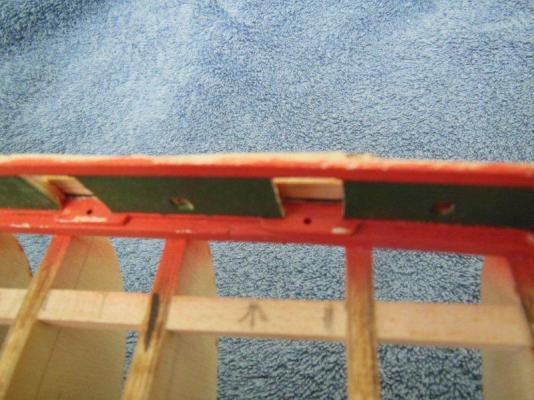
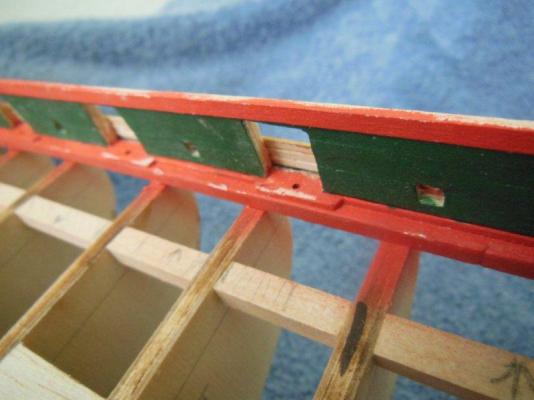
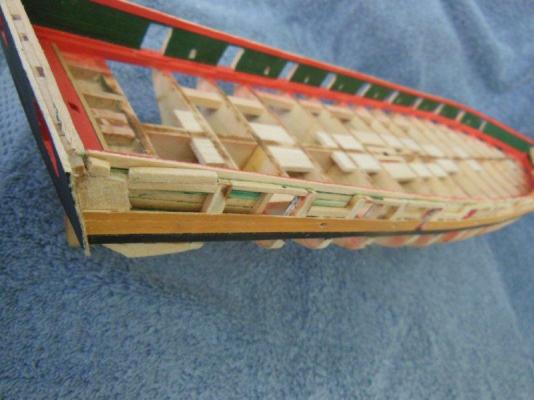
Help, all hands on deck!! As I mentioned earlier I glued a couple of planks on the starboard outer bulwarks and after removing the clamps I noticed what looks to be a major assembly error. Any input or ideas on how to recover, hopefully without a major overhaul would appreciated. The degree of error from bow to stern ranges from no issue to as big as the photos show below. There is a gap between the inside face of the installed outer bulwark planks and the outer edge of the plank-sheer, which really shows at the gunports and to a minor degree at some sweep-ports. At this time I'm not sure if it was caused by improper installation of the plank-sheer or a bad fairing effort on my part (maybe a combination of the two). I intentionally did not completely finish fairing every bulkhead thinking I could complete that task later as needed, which may have contributed to this issue??? If you look the location of the cannonade carriage hole, it looks like it's in the correct position to me (in relationship with the inner bulwark planks). Initially I thought add wood to fill the gap, but that places the gun muzzle further in – which I'm not sure how big of an issue that would be. Filling in the gap as needed is a somewhat easy fix, but I sure would appreciate your thoughts and ideas before I do anything to fix this problem. THANKS in advance!


-
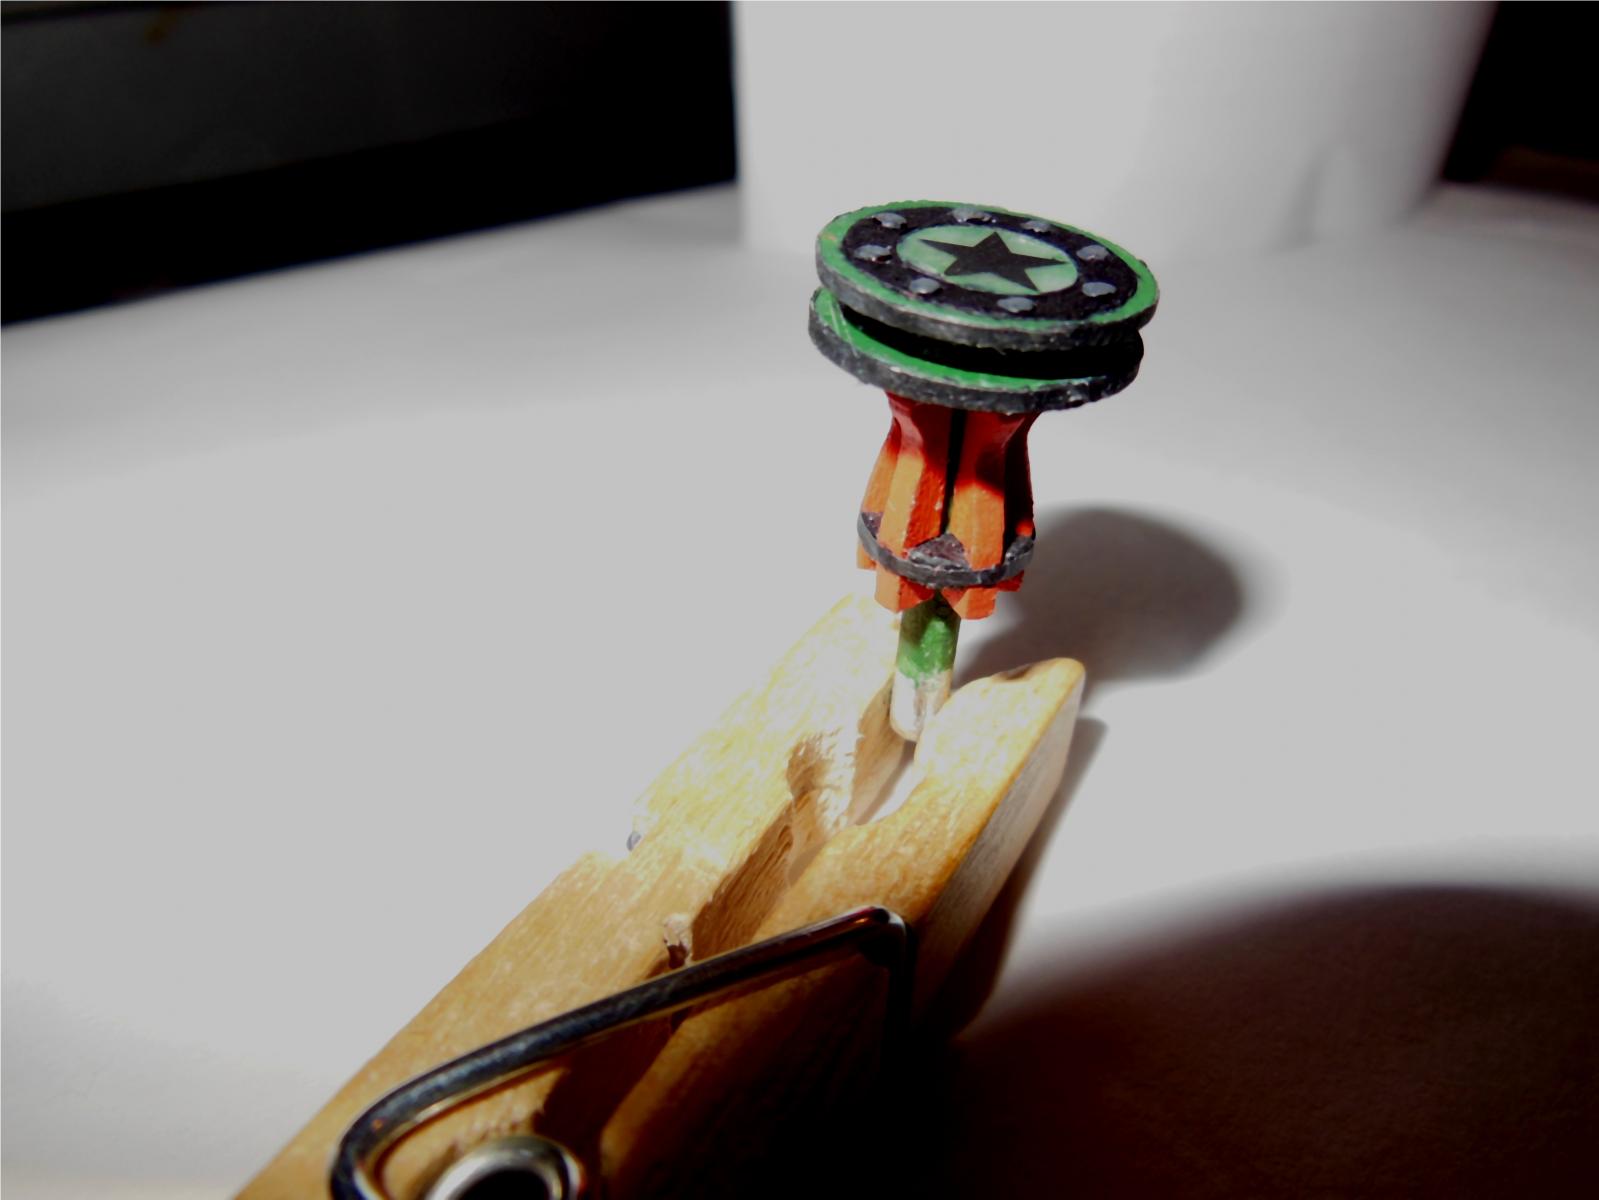
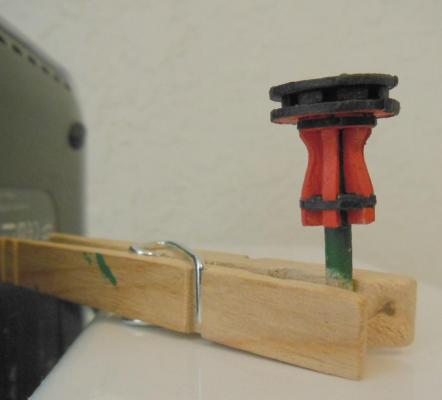
The capstan is complete. Sorry about the poor photos. The camera is new and I just cannot get the close-up to work as well as my previous camera - maybe I should read the manual. I tried adjusting the photos in edit mode, but they still look pretty bad. Back to the capstan; I painted thE simulated fasteners an off-black to try and make them stand out a bit from the four metal rings. The light and the angle affects how well they show up. The hull planks I installed yesterday revealed a big I need to deal with. It's a newbei error I should have seen, but more of a fustration than a big deal to fix. I'll take some photos tonight or tomorrow and share my mistake hoping it helps someone avoid repating my error. HAPPY 4TH EVERYONE!!!

-
Prior to retirement, the last place I was assigned was in a country setting away from population due to the noise we generated and the need for security. I went to/from work at daybreak and dusk, just the right time of day for the deer to run. Over the course of ten years I hit six deer. Actually I hit three plus the three that hit me and lets not forget the German Shepherd I hit who was chasing a deer. After the third one, I considered them to be nothing more than large rats with long legs and potatoes for brains. The tree line was close to the road and by the time you seen the long legged rat running at full speed, it was too late to do anything other "than brace for impact" (I think I heard that before in a Star Trek movie). The last one I hit, my wife was with me (who has yet to see this fun event) and as the impact took place, she said "oh my god it's hurt" while I was yelling "DIE YOU SOB DIE," needless to say, she was not pleased with my response. Last week I rec'ed an e-mail obituary where someone I retired with was hit by a deer (same general area) while driving his SUV. The deer was hit by an oncoming car causing it to go airborne right into his windshield killing him. His wife was with him at the time and was fortunate not to be injured. Now, back to ship building...
- 1,668 replies
-
- 1
-
-
- syren
- model shipways
- (and 1 more)
-
Thanks for sharing. I also use the wax paper for CA, but I took a sewing needle and ground off the eye so I have a miniture fork to pick up the glue. Sometimes I need a smaller amount than what the fork picks up. I'll try your idea of using the point of a needle to see if that helps. When I use PVA, I place a dab on paper, waxpaper, cardboard anything that's handy and use a dental probe to pick up a small amount to apply. I always have waste or it gets too dry to use before it's used up. Maybe the syringe idea will work better for me.
-
HAPPY BIRTHDAY KEN!
-
Very nice Sjors (I'm going to regret saying this).... and I see you have cannon balls. All kidding aside, I need to figure out how they were stored on board the Niagara, so my ship is not toothless.
-
Yes, it is an exciting sport. I just read an article about someone who set a new record catching a 1400 lb moose using only a 100 lb test line. He had to play him for over three hours before the big guy was wore out and finally reeled in.
- 1,668 replies
-
- 4
-
-
- syren
- model shipways
- (and 1 more)
-
Good morning David & Augie, Thanks for the advice on the syringes. I'm going to buy some and give it a try. Does the glue (PVA or CA) last as long as the original container? I applied the fastener heads to the top of the capstan last night using a pointed dental tool. It worked OK but I bet the syringe does a much better job. The star was not not painted (I wish I had that skill level). I purchased decal sheets and printed the star, but not without problems. The material was much ticker than what I prefered and for some reason, yellow wold not show up very well so I went with black. Under the right light, it appears there is some air or something (maybe fingerprint??) visable under the decal but not to the point it's worth doing over. I still need to cut and place the side bands, but wonder if it's too much. I'll play with it today and see how one looks, then finish up this mini project.
-
Such a close call! I'm glad the damage was minor.
-
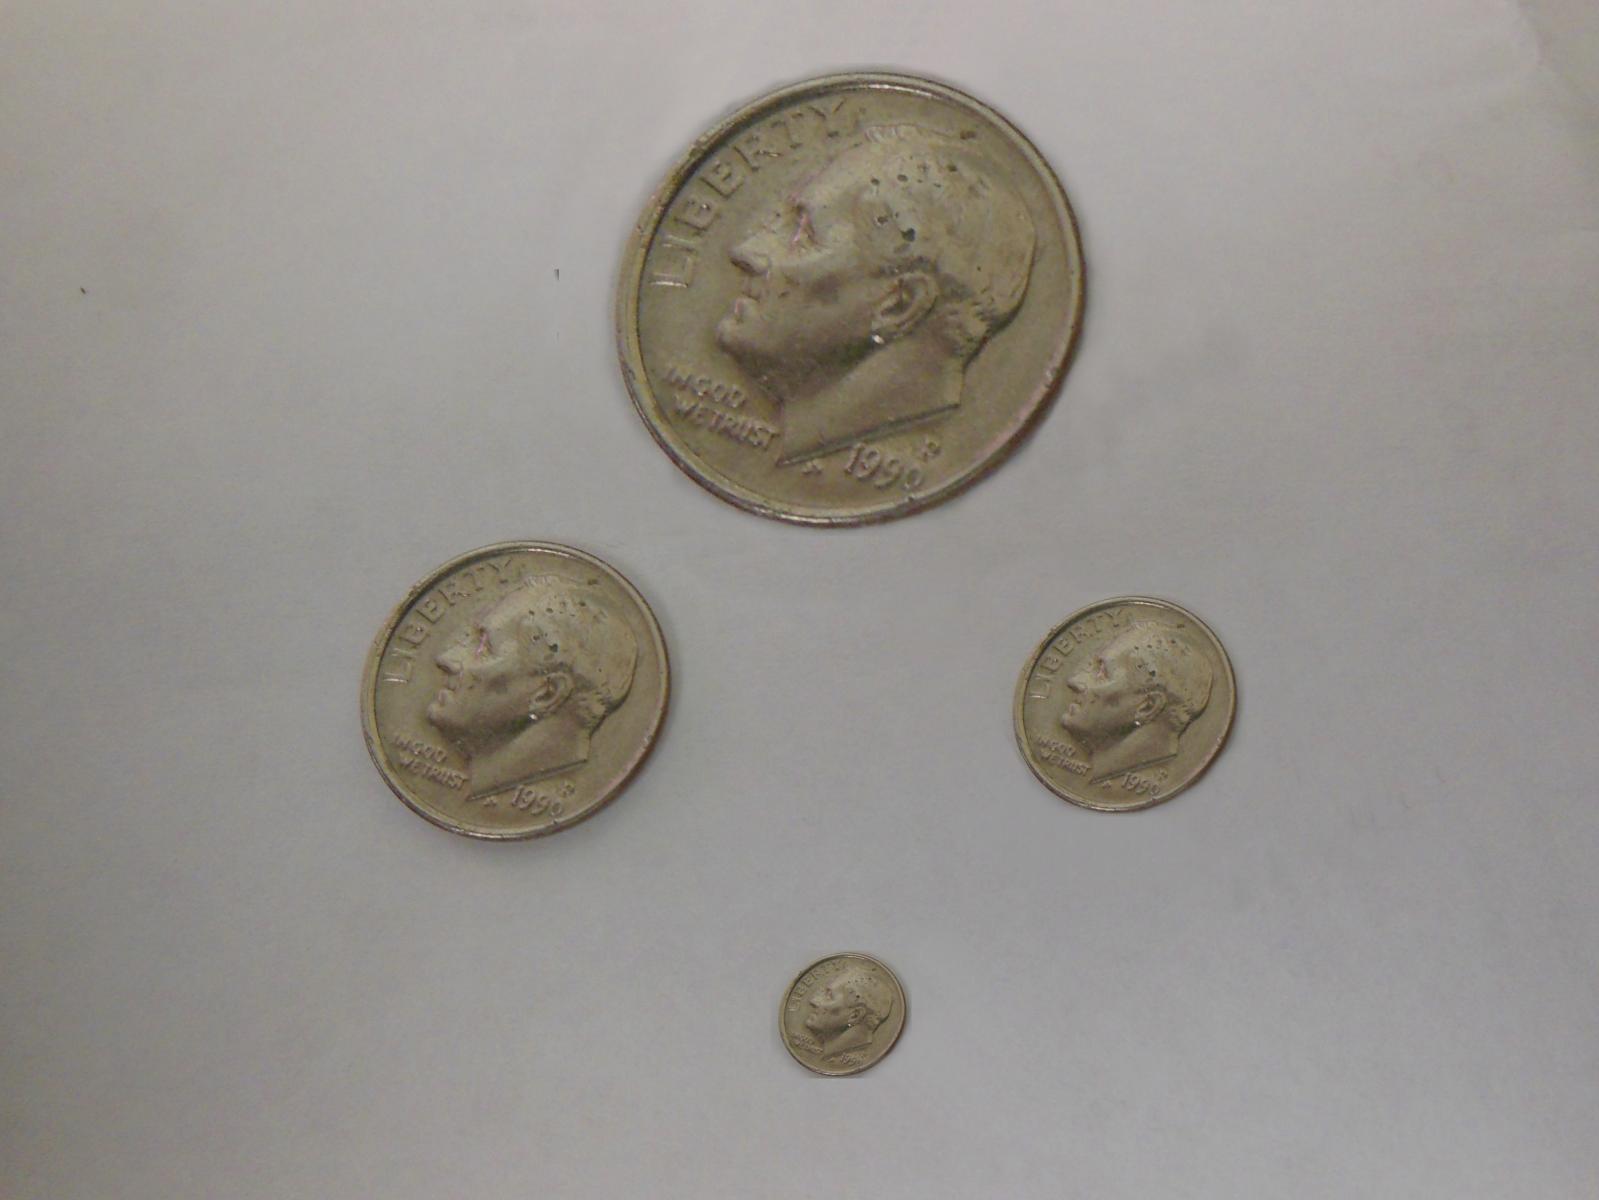
Thanks. Since the secret is out, here is my collection