

leclaire
-
Posts
115 -
Joined
-
Last visited
Content Type
Profiles
Forums
Gallery
Events
Posts posted by leclaire
-
-
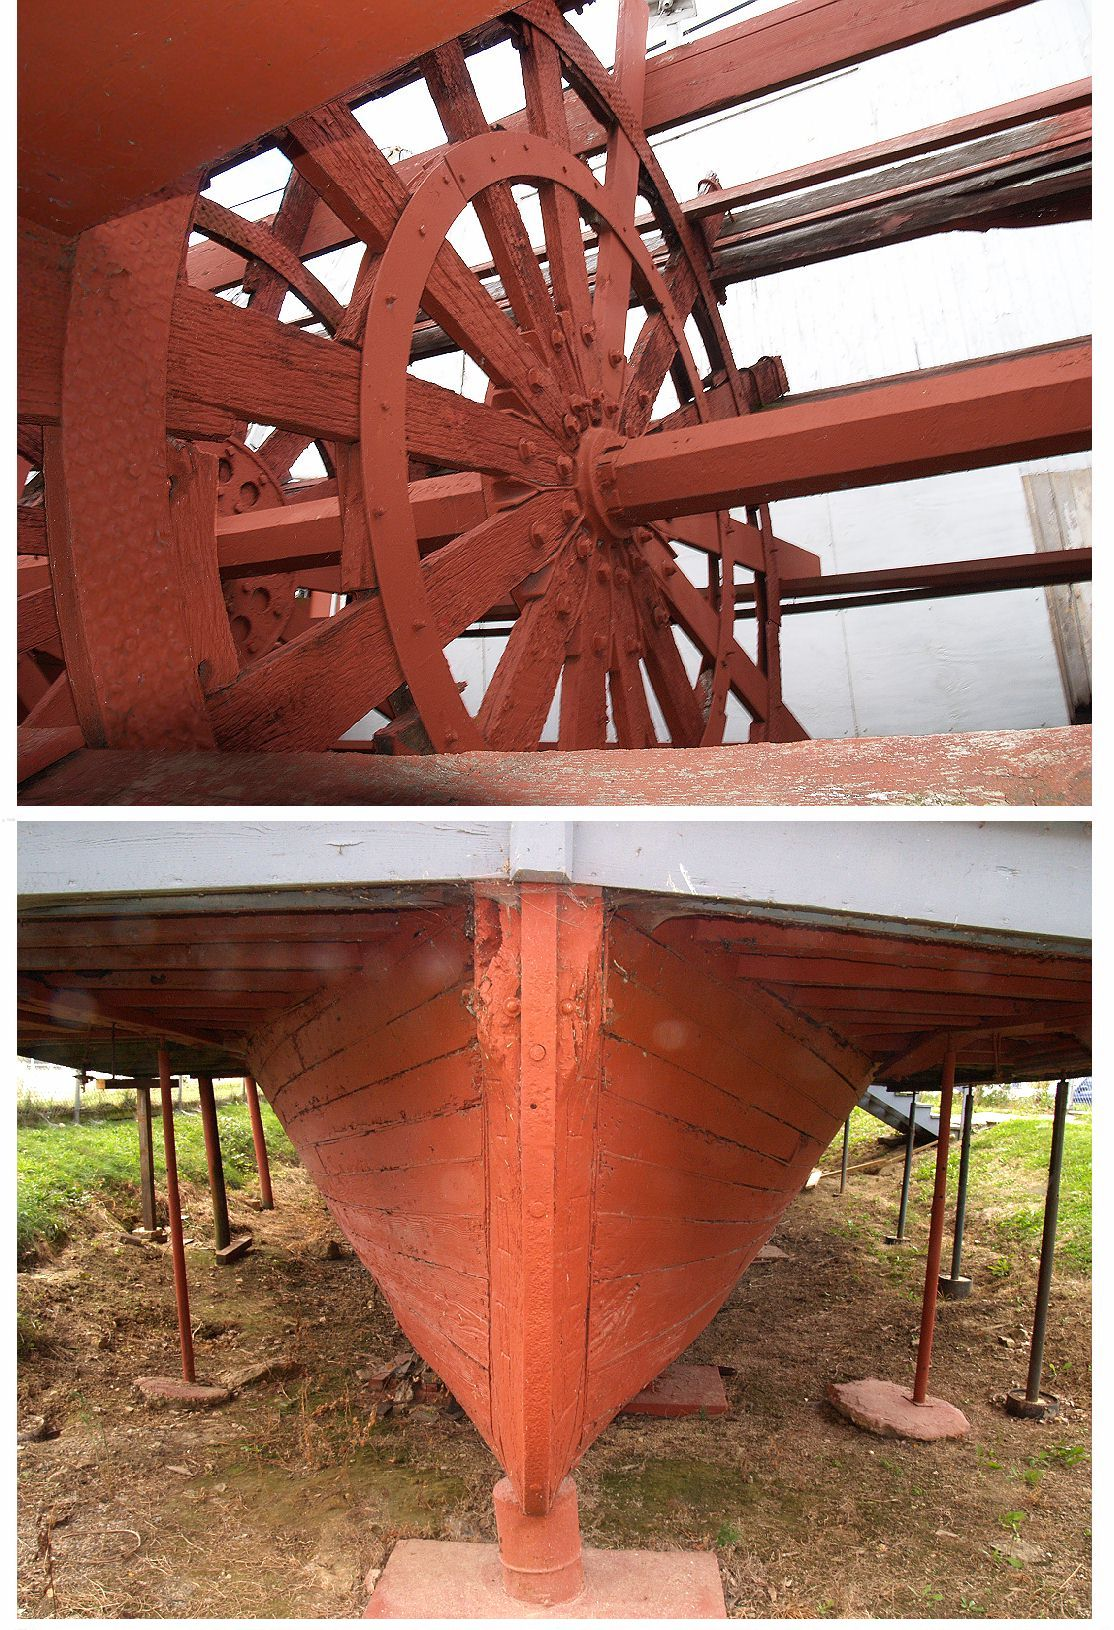
Eric - your planking is looking good. Soon comes the not so fun part from my perspective, i.e., sanding, filling, sanding, filing, and so on. All necessary obviously but still tedious. Re your question on planking the undersides of the guards - take a look at one of the pictures I posted earlier in this thread of the Lone Star sternwheeler. It shows that there was no planking. Only one example but still something to hang your hat on anyway.
Bob
- CaptainSteve, Canute and mtaylor
-
 3
3
-
-
Hi Eric,
As usual, very nice work. One question for you - you mentioned that sternwheeler guards were either non-existent or very narrow. I know that side wheel boats had to have larger guard areas to allow room for the wheel assemblies but it also gave them more deck space for cargo, etc. I wonder why they did not do the same for sternwheelers and give the extra cargo space (and make more money) for them as well. Just curious.
Bob
- Canute, Cathead, popeye the sailor and 1 other
-
4
-
John - rather late to the party in terms of finding your build log but looking forward to following along on this fascinating project. To date all of my models have been from kits but I keep thinking about trying my hand at a scratch build. I hope to find a subject that will have the personal attachment for me that the 'Meteor' has for you.
Bob
- mtaylor, popeye the sailor and Piet
-
3
-
Eric,
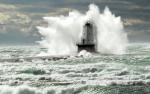
Here is a picture of the stern wheeler Lone Star on display in Leclaire, Iowa that shows the bow out of the water. Not sure if I attached this properly but if not you can find it at this site The Dave Thomson Collection - Steamboats.com
Bob

- Cathead, mtaylor, popeye the sailor and 1 other
-
4
-
Hi Eric,
Very glad to see you back at this project. I followed your research thread on the Arabia with fascination and will do so with the actual build log. Best of luck.
Bob
- Canute, mtaylor, popeye the sailor and 1 other
-
4
-
-
Nice synopsis Len.
The only issue I have encountered with my Chaperon is the joining of the decks. I initially thought that sanding off the laser burn portions of the pieces would make a nice smooth joint but not so. I wanted to stain the decks rather than paint them which is what I have done on the main deck thinking that the obvious joint marks could be covered up with firewood, cargo, etc. However, I did not consider that the same issue would be found on the upper decks where cargo would not look very good. I can't go back since all the walls, boiler, etc are glued down tightly. I guess that is the price you pay for not thinking ahead. Otherwise, this is a great kit.
Bob
-
Hi Len,
You may have had an issue with your cotton bales but I'll tell you one thing - your weathering sure is spot on. Your Chaperon looks well used, old and tired before it has even been launched. Very nice work. I'm afraid mine will turn out to be the "just slid down the ways" version.
Bob
-
-
-
John and Cap'n Bob - Indeed, I was referring to those "hanging spars" shown in your photos. So they are there to provide extra protection while alongside in addition to the rubbing rail. Interesting how some were seen to be stowed away all ship shape while many others were just left to dangle. I imagine it all depended on the discipline or lack thereof from the master.
Cathead - I knew they were not the grasshopper spars primarily from following the excellent description in your Bertrand build log.
Many thanks to all,
Bob
-
As I slowly move along on my Chaperon build, I often look at old photos of steamboats on several websites just for the fun of it and try to imagine life at that time on the rivers. One thing that I have noticed is many of these old boats have long spars attached to the edge of the boiler deck and most often are seen just hanging down to end a foot or two below the rubbing rail. In a few instances they are tilted so the bottom of the spar rests on the main deck rather than just hanging straight down. Try as I may I cannot figure out what these critters are used for. At first I thought they might be to kind of poke out and fend off docks where the boat would tie up but the way they seem to be attached they would not swing out but only left or right through the vertical plane.
Sorry for no picture to show what I mean but does anyone have an idea as to their function?
Bob
-
-
Chance,
I only spray painted the hull planking.
The walls with the CHAPERON lettering were painted with a brush using Tamiya acrylic Flat White. Two coats with a light sanding in between and the outlines were still visible enough to allow easy painting of the letters. When I say "easy" I mean in terms of seeing the outlines. Doing the actual letter painting was altogether another matter. The old fingers aren't as flexible and steady as they used to be.
Bob
- Ryland Craze, mtaylor, Canute and 1 other
-
4
-
-
Glenn,
I am currently building the MS Chaperon and also wrestled with color and how to get that washout look for the white painted portion, which is virtually all of the boat now that I think about it. I am using Tamiya Flat White Acrylic and have been very happy with the results. One coat, a very light sanding, and then a second coat is all it needs. Now that has worked on the wood that came with the kit but you may want to give it a try on some scrap from your build. Possibly a simple solution.
Bob
-
My thanks also for getting this thread going. I took some time off this winter from my Niagara project and started work on the MS Chaperon kit. Of course this got me looking at the builds going on for other steam boats and has really peaked my interest in the whole time period. It should be a natural since I live on the Mississippi river in Iowa and periodically see steam boat replica vessels cruising by. Looking forward to the discussions sure to follow.
Bob
-
-
-
-
Well, after not hearing from anyone with any suggestions to my questions I decided to forge ahead and see what happens.
Lo and behold, one coat of Krylon flat white spray paint on the sanded hull gave me a perfect weathered look. Kind of a washed out whitewash so to speak. Better to be lucky than good sometimes I guess. Anyway, I got the look I wanted and that is all that counts as many here MSW have pointed out before.
Bob
- skipper1947 and mtaylor
-
2
-
Question for you painting experts out there
I have finished the hull of my Chaperon river steamboat and am getting ready to paint it white in accordance with the common practice of the era in which it was built. I want to make sure that the planks and joints show rather than go for a smooth look like plastic. The MSW instructions suggest using Krylon spray paint as the area to cover is quite large and would be a real pain to do with a brush.
Should i consider some sort of primer or wood conditioner before applying the paint? i doubt the folks who built these steamers back in those days "conditioned" the wood in any manner but may have applied a primer base. Obviously i am looking to produce something as close as possible to the real thing, i.e., a little rough.
Also, it would be great to somehow "weather" the paint a bit too but have no clue as to how that could be done.
All suggestions welcome.
Bob
-
Mike,
Two thoughts. One, i would go with your second solution. Much easier and it should not show after the bowsprit is painted. My second thought is that when I do things like this I have a really hard time not taking the whole thing and slamming it against a wall. Hats off for your patience.
Bob
Arabia 1856 by Cathead - FINISHED - Scale 1:64 - sidewheel riverboat from the Missouri River, USA
in - Build logs for subjects built 1851 - 1900
Posted
Eric,
You mentioned working on the rudder - I assume this means only one on your build. My Chaperon has dual rudders. Just curious but does this have anything to do with basic design differences between a stern wheeler and a side wheeler?
Bob