
Jim Rogers
-
Posts
1,381 -
Joined
-
Last visited
Content Type
Profiles
Forums
Gallery
Events
Everything posted by Jim Rogers
-
ModelExpo American Privateer.
-
I am going to endeavor to make sails for one of my models. The plan was to use silkspan, paint it and run it through the printer. I am going to print them the same way Chuck does his flags as this works really well for flags. My only draw back is I haven’ t been able to locate a site with sail line drawings. Any one know of any, thanks.
-
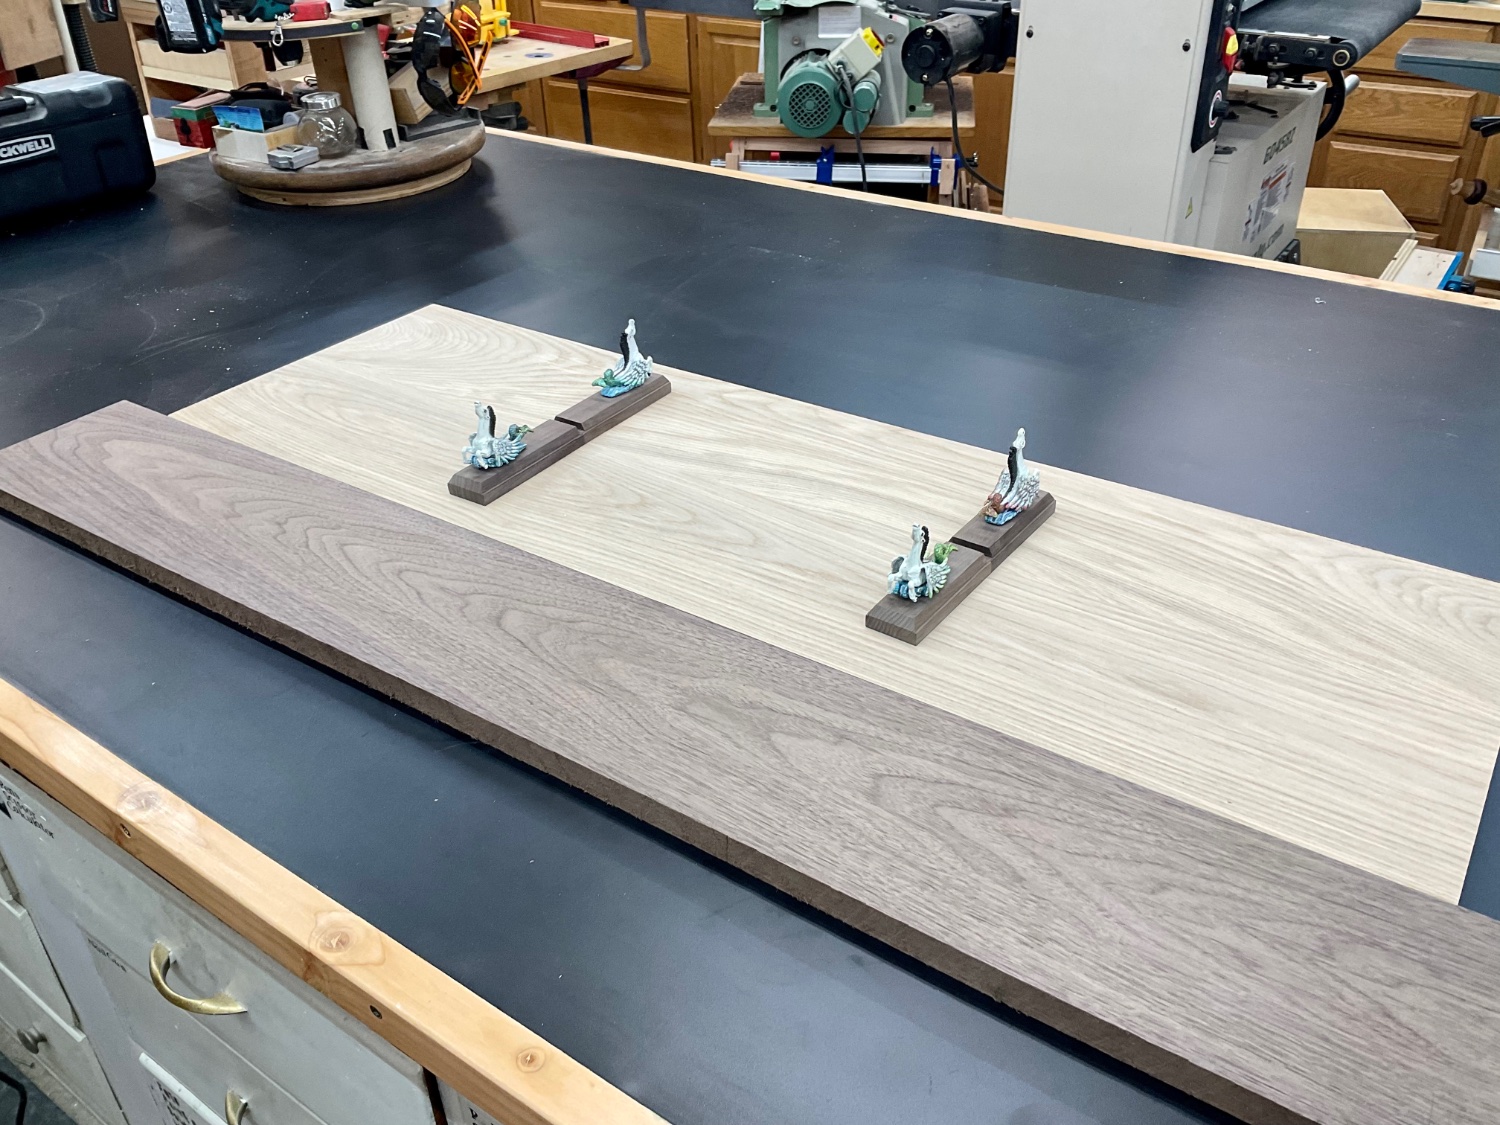
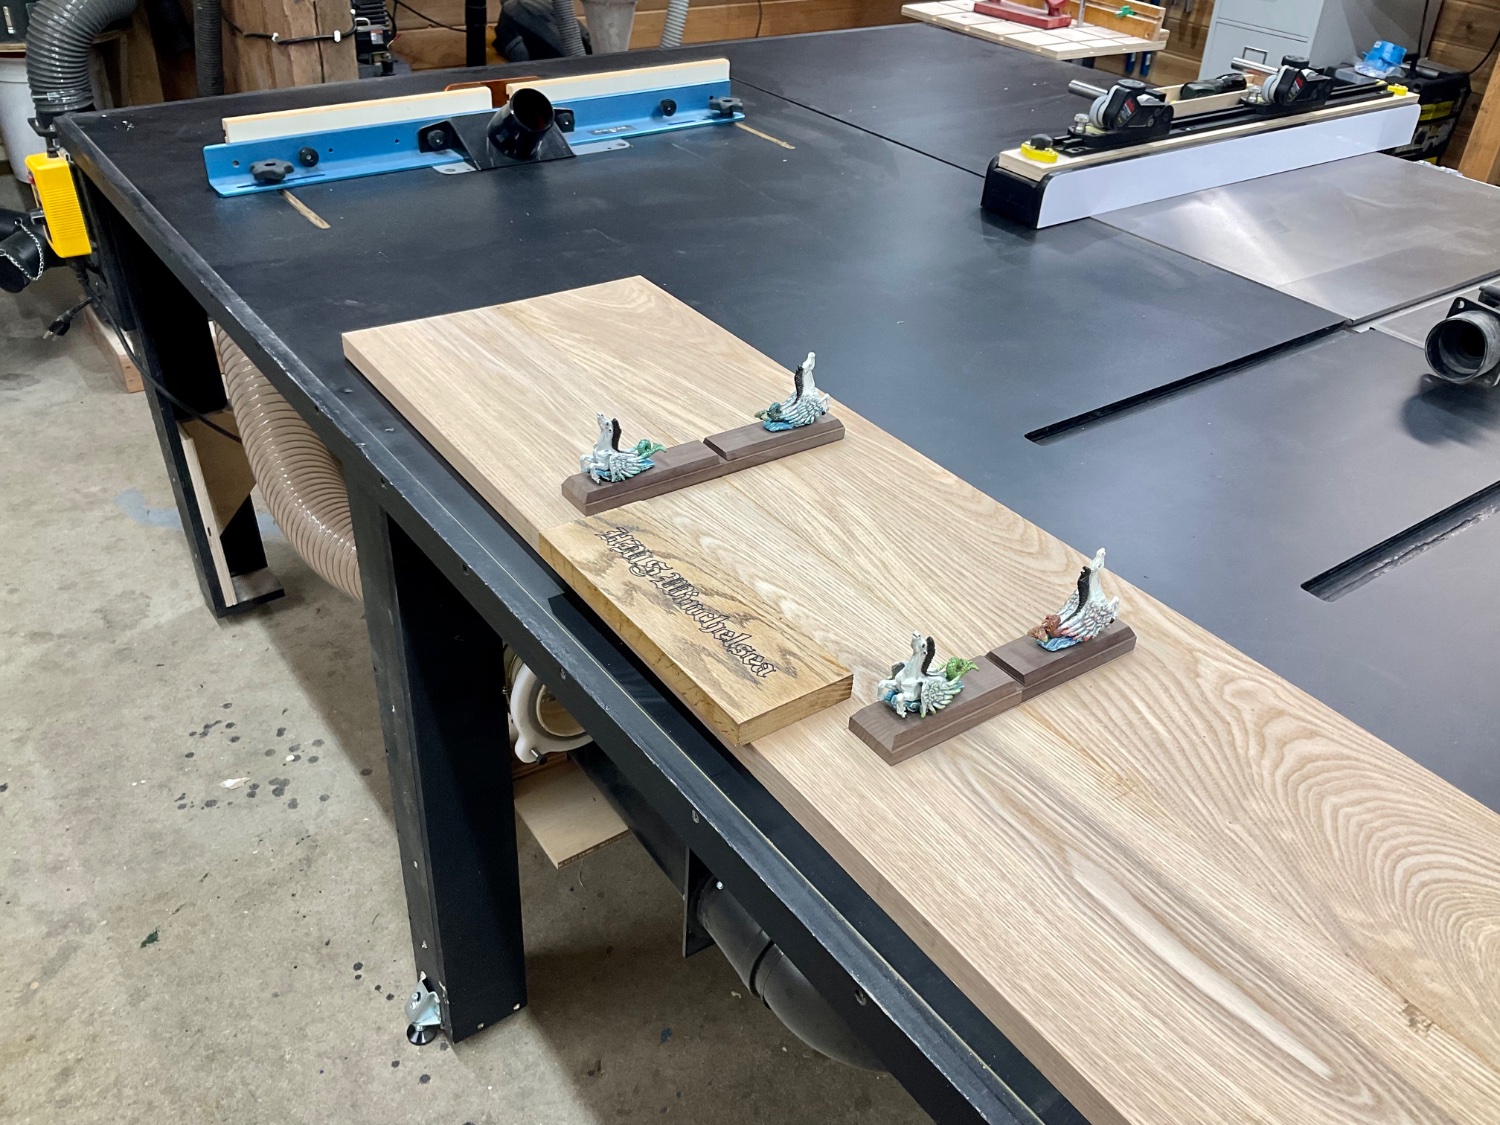
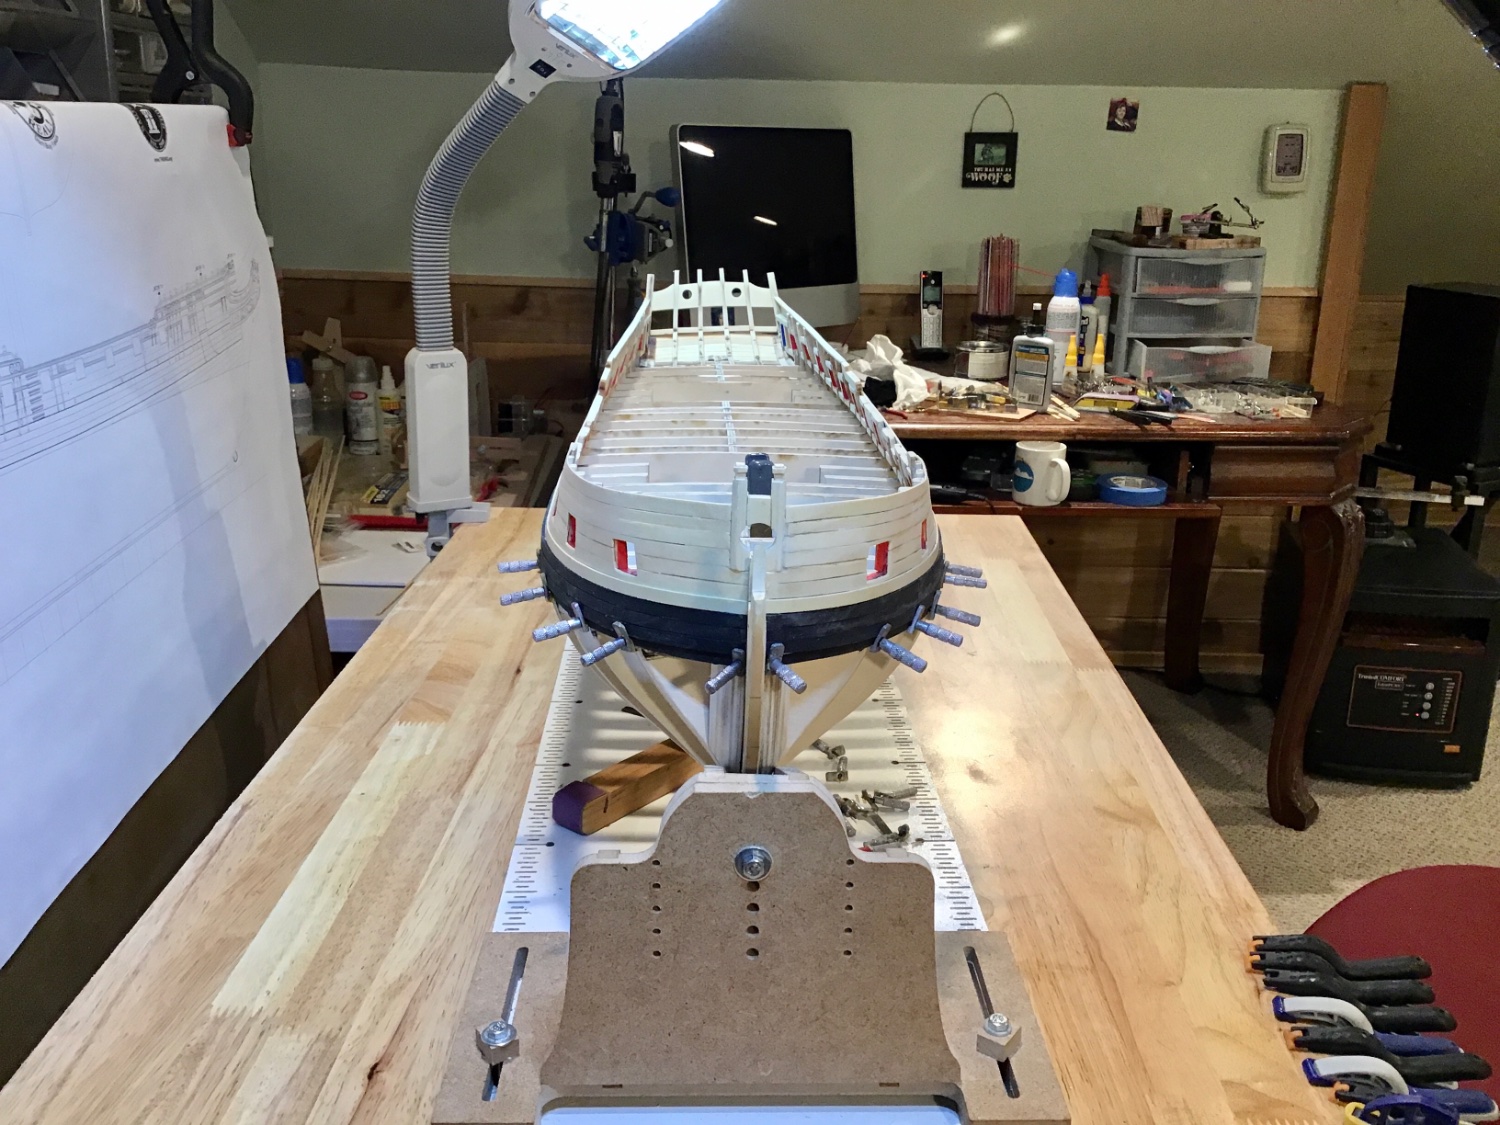
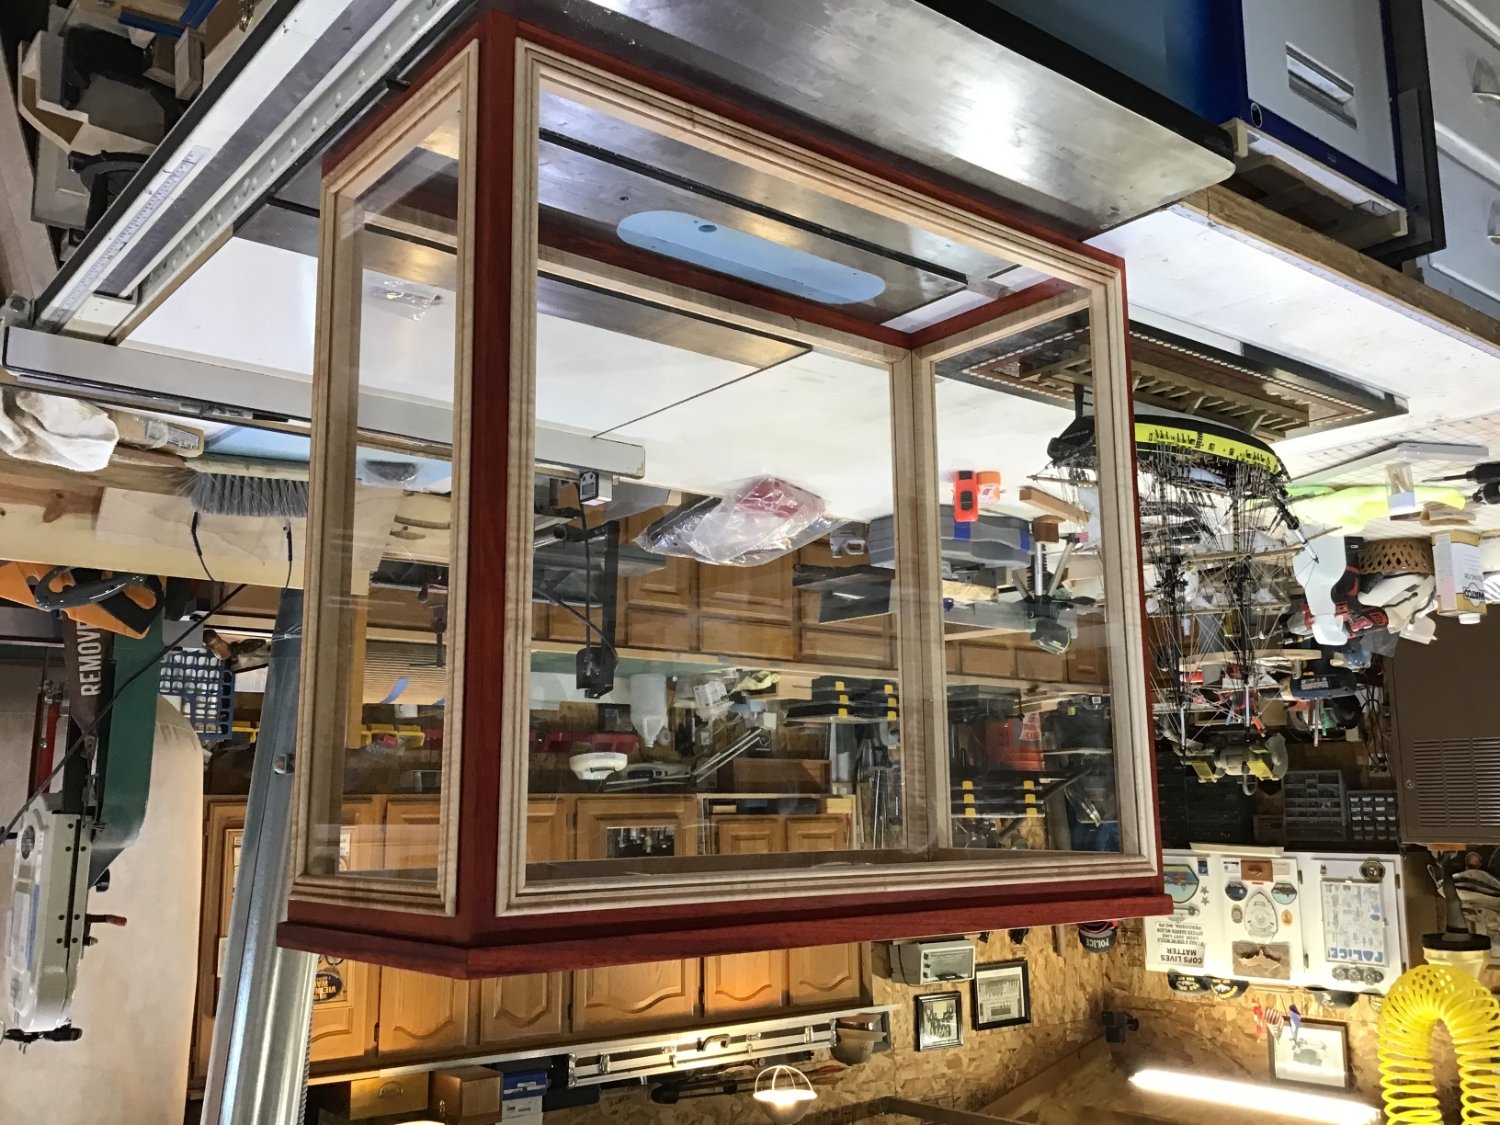
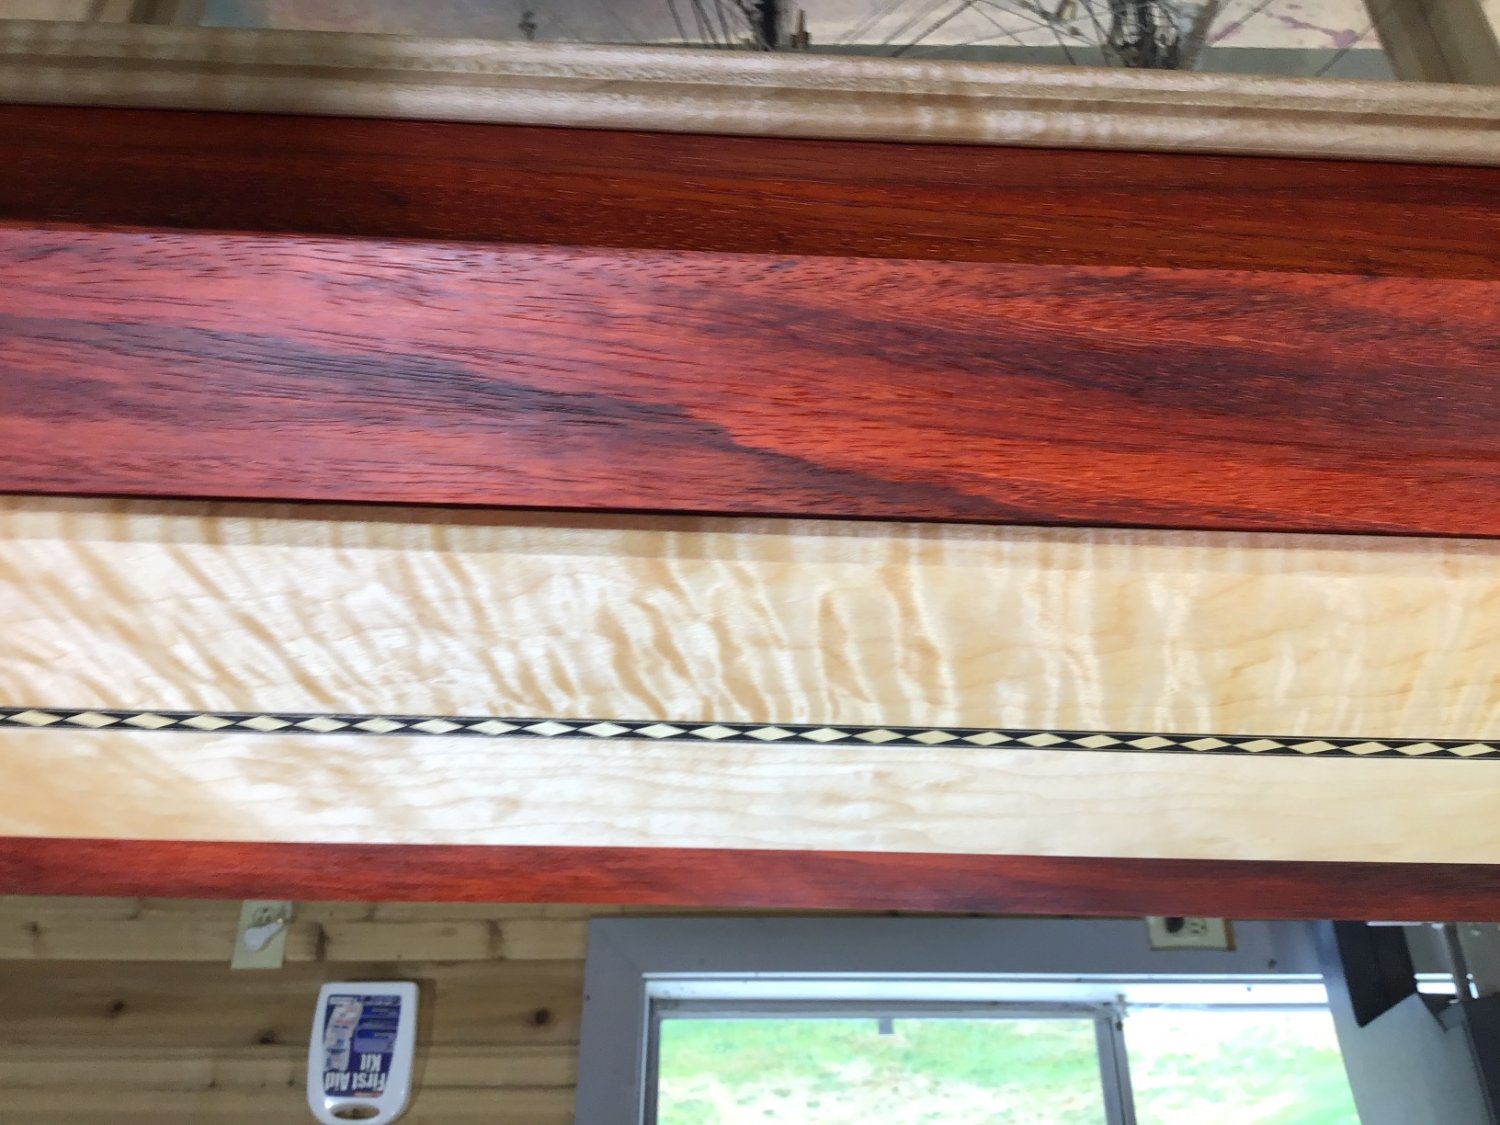
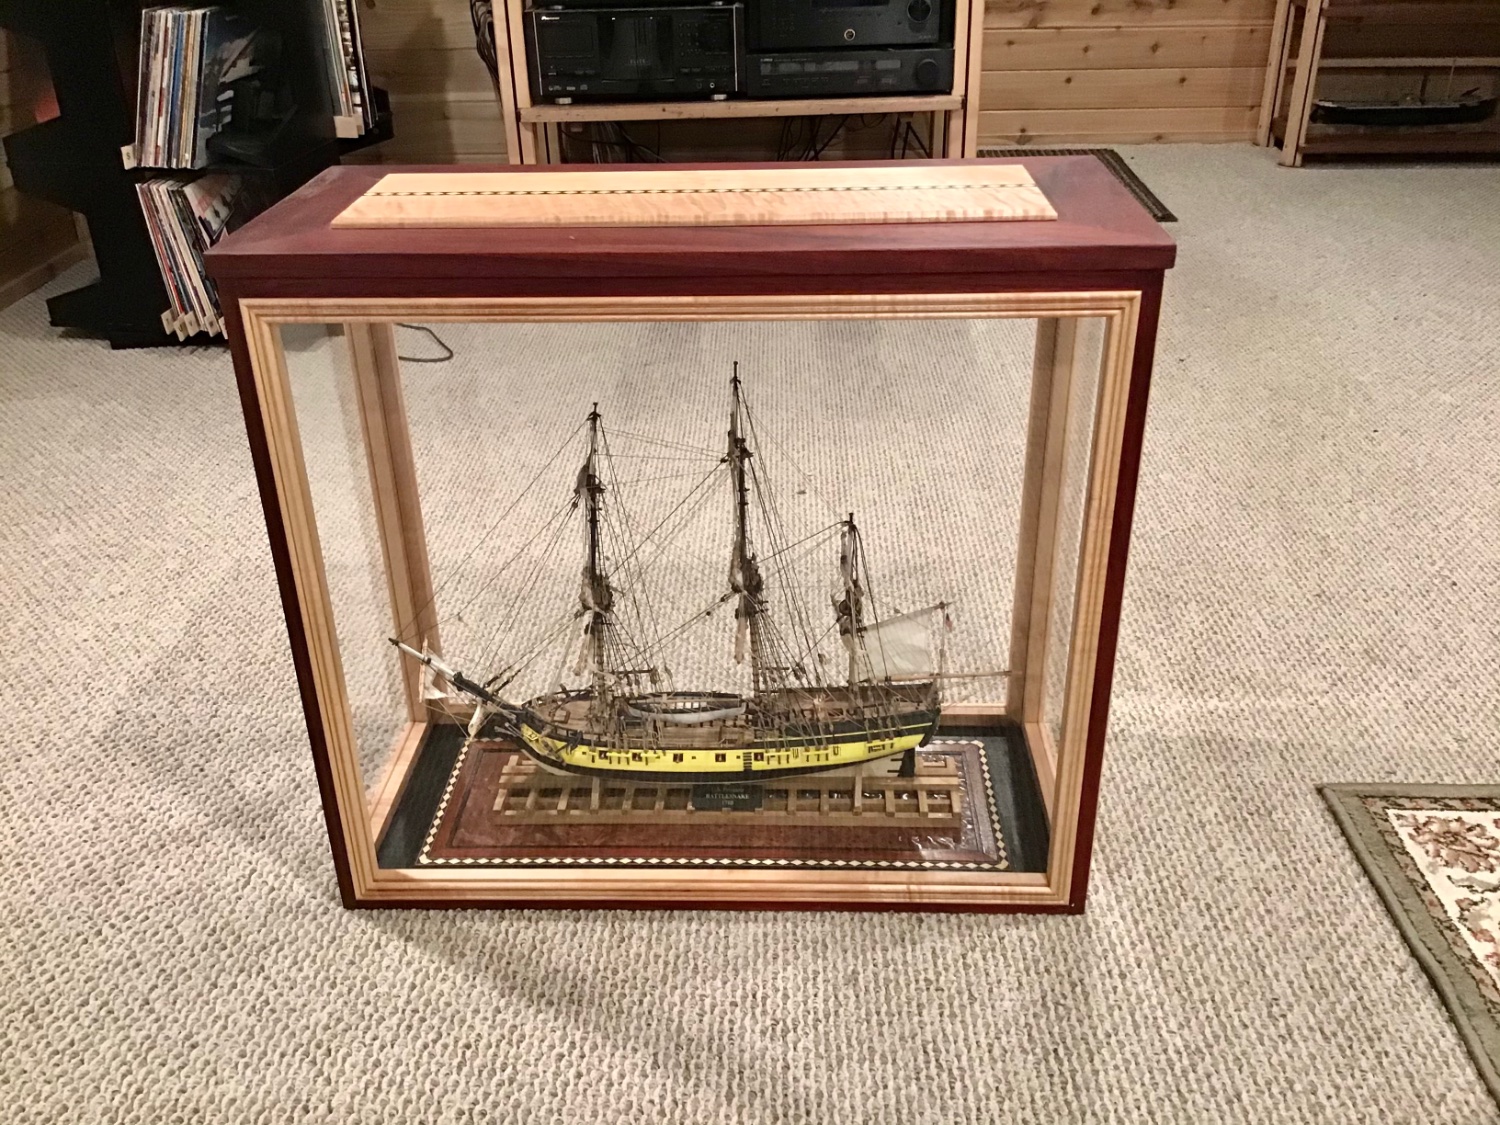
I have started the case. Milled up some white ash and walnut. The case will be 42 x 13 x 14. Using my Shaper Origin I am going to I set my Pegasus Stands about 3/8 inch into the Ash and then carve the name on both sides. I think this is going to be a real nice case. I actually felt lazy so I asked a guy that does this for a living to give me a quote. Came in over $500 plus almost $200 for shipping in a knockdown configuration. So much for lazy wood ran about $100. Here are some photos of current status. Will update as I move along.


- 105 replies
-
- 8
-

-

-
- winchelsea
- Syren Ship Model Company
- (and 1 more)
-
Is it summer yet?
-
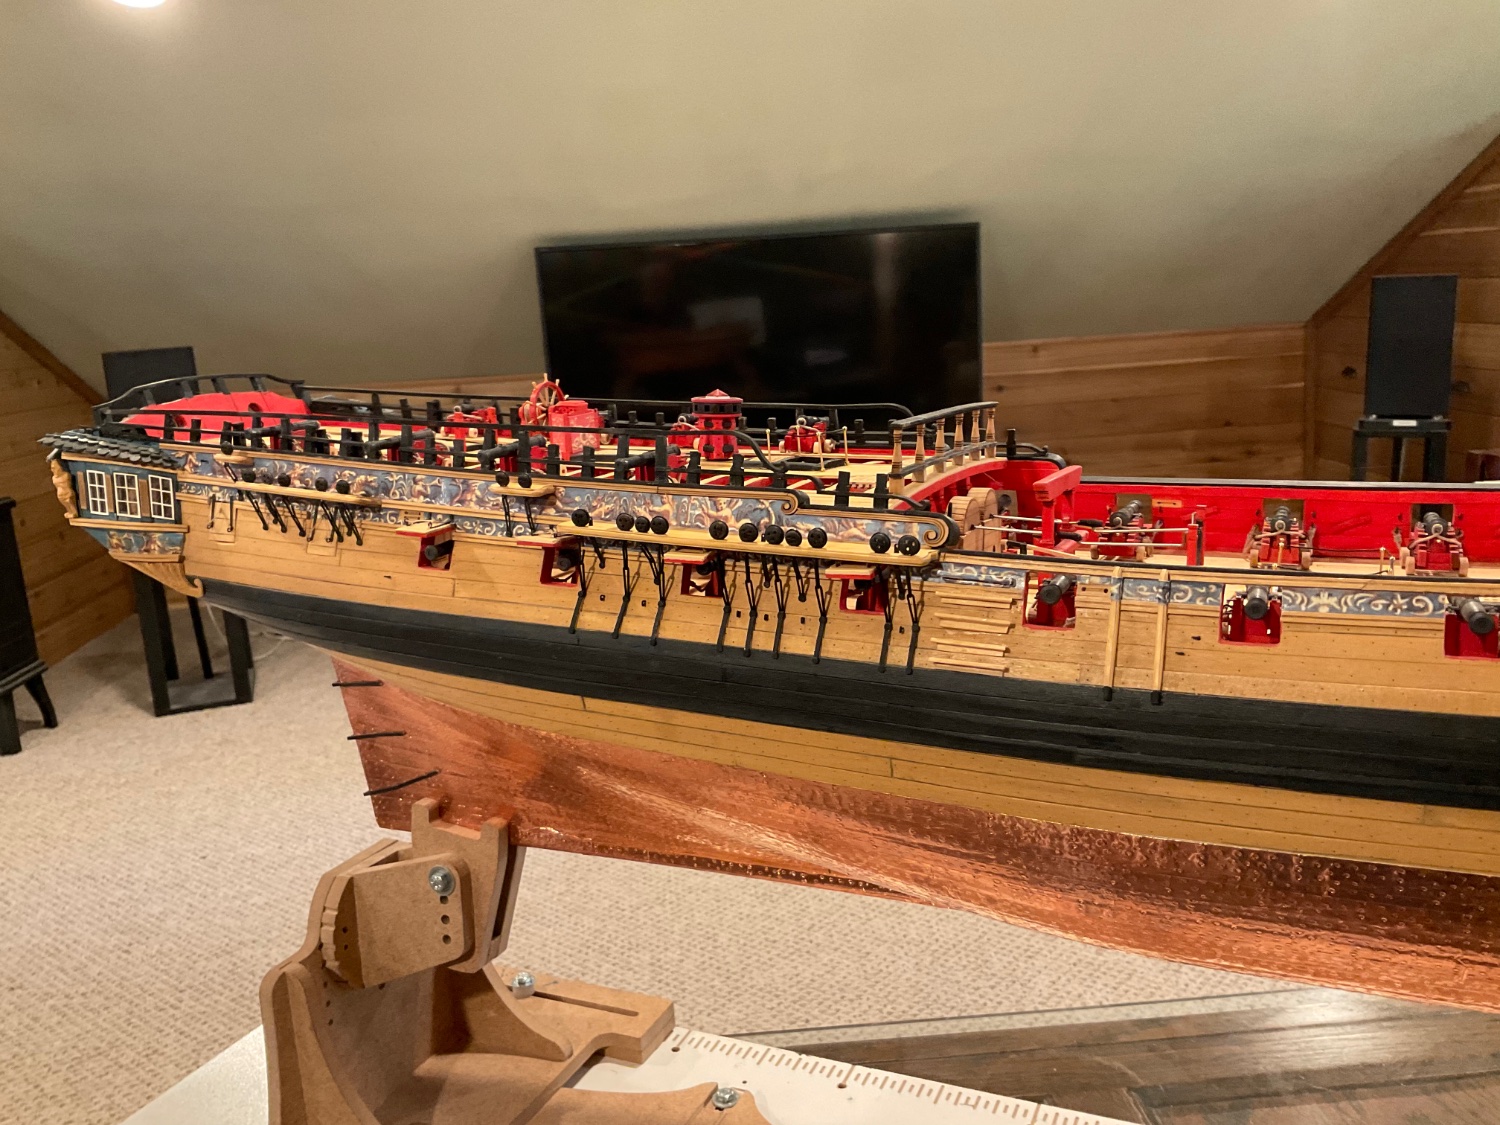
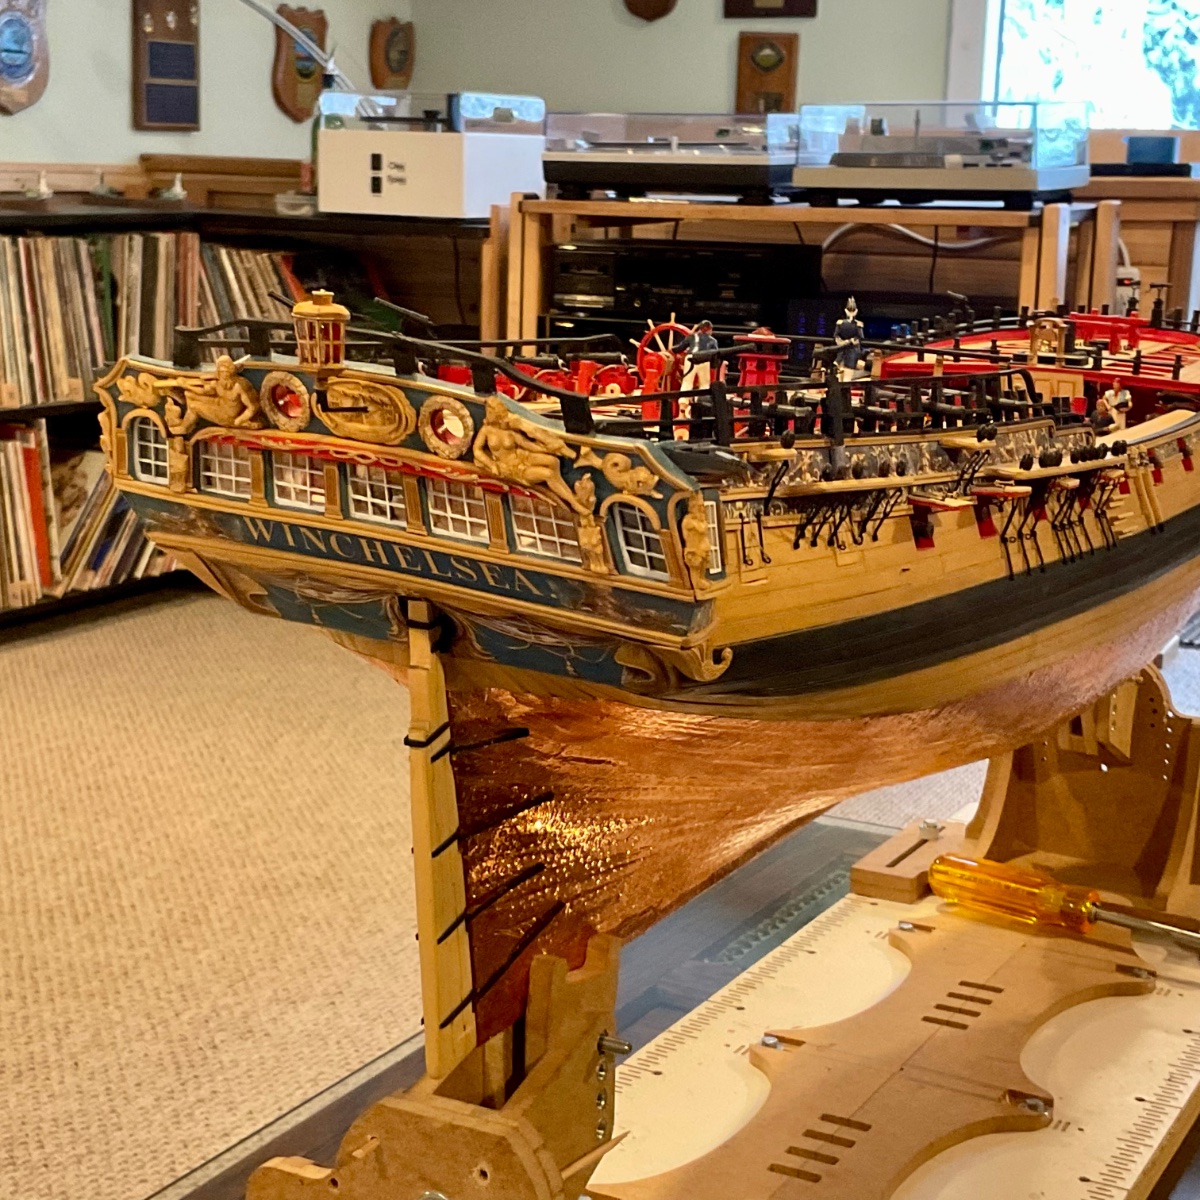
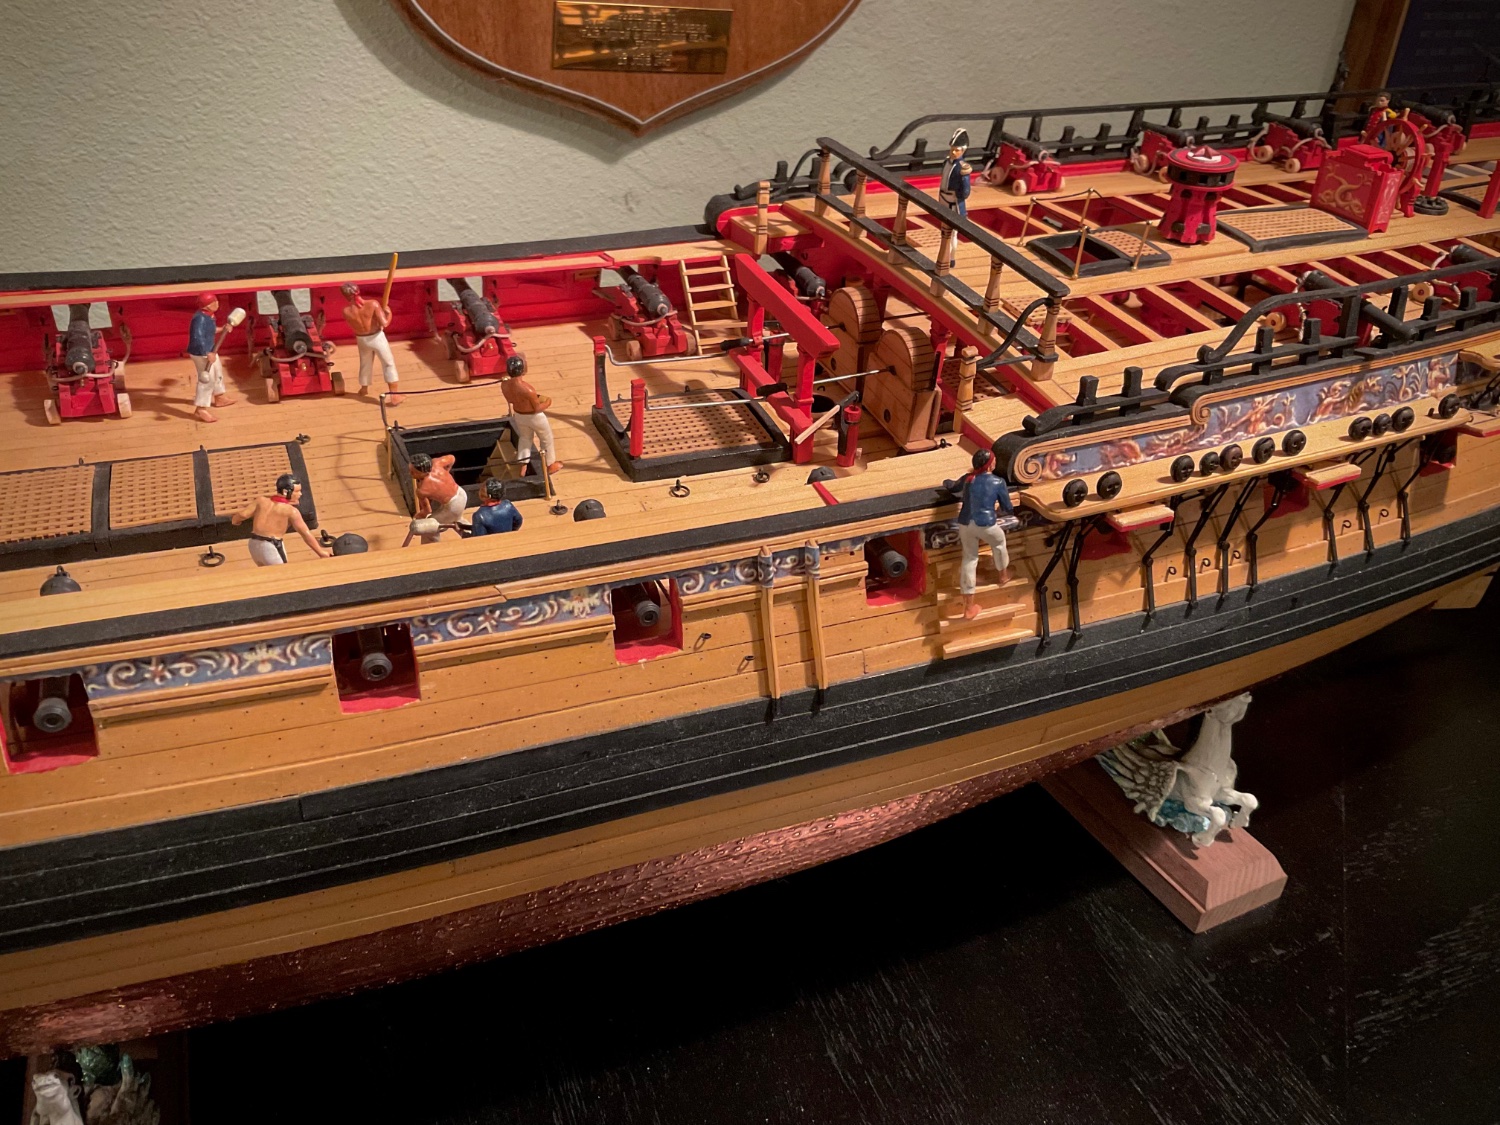
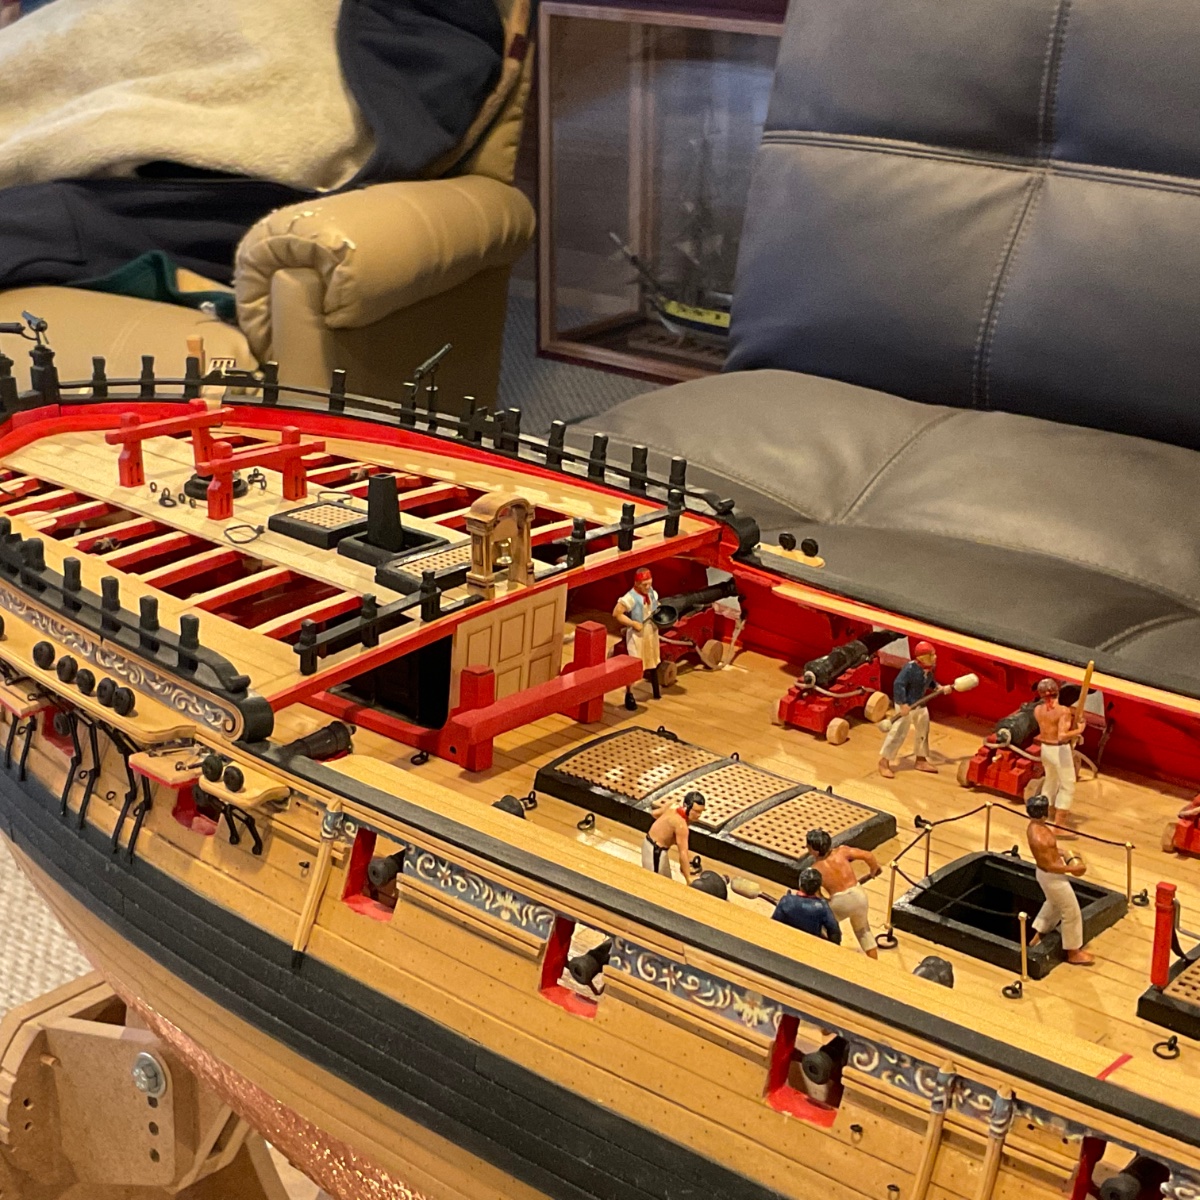
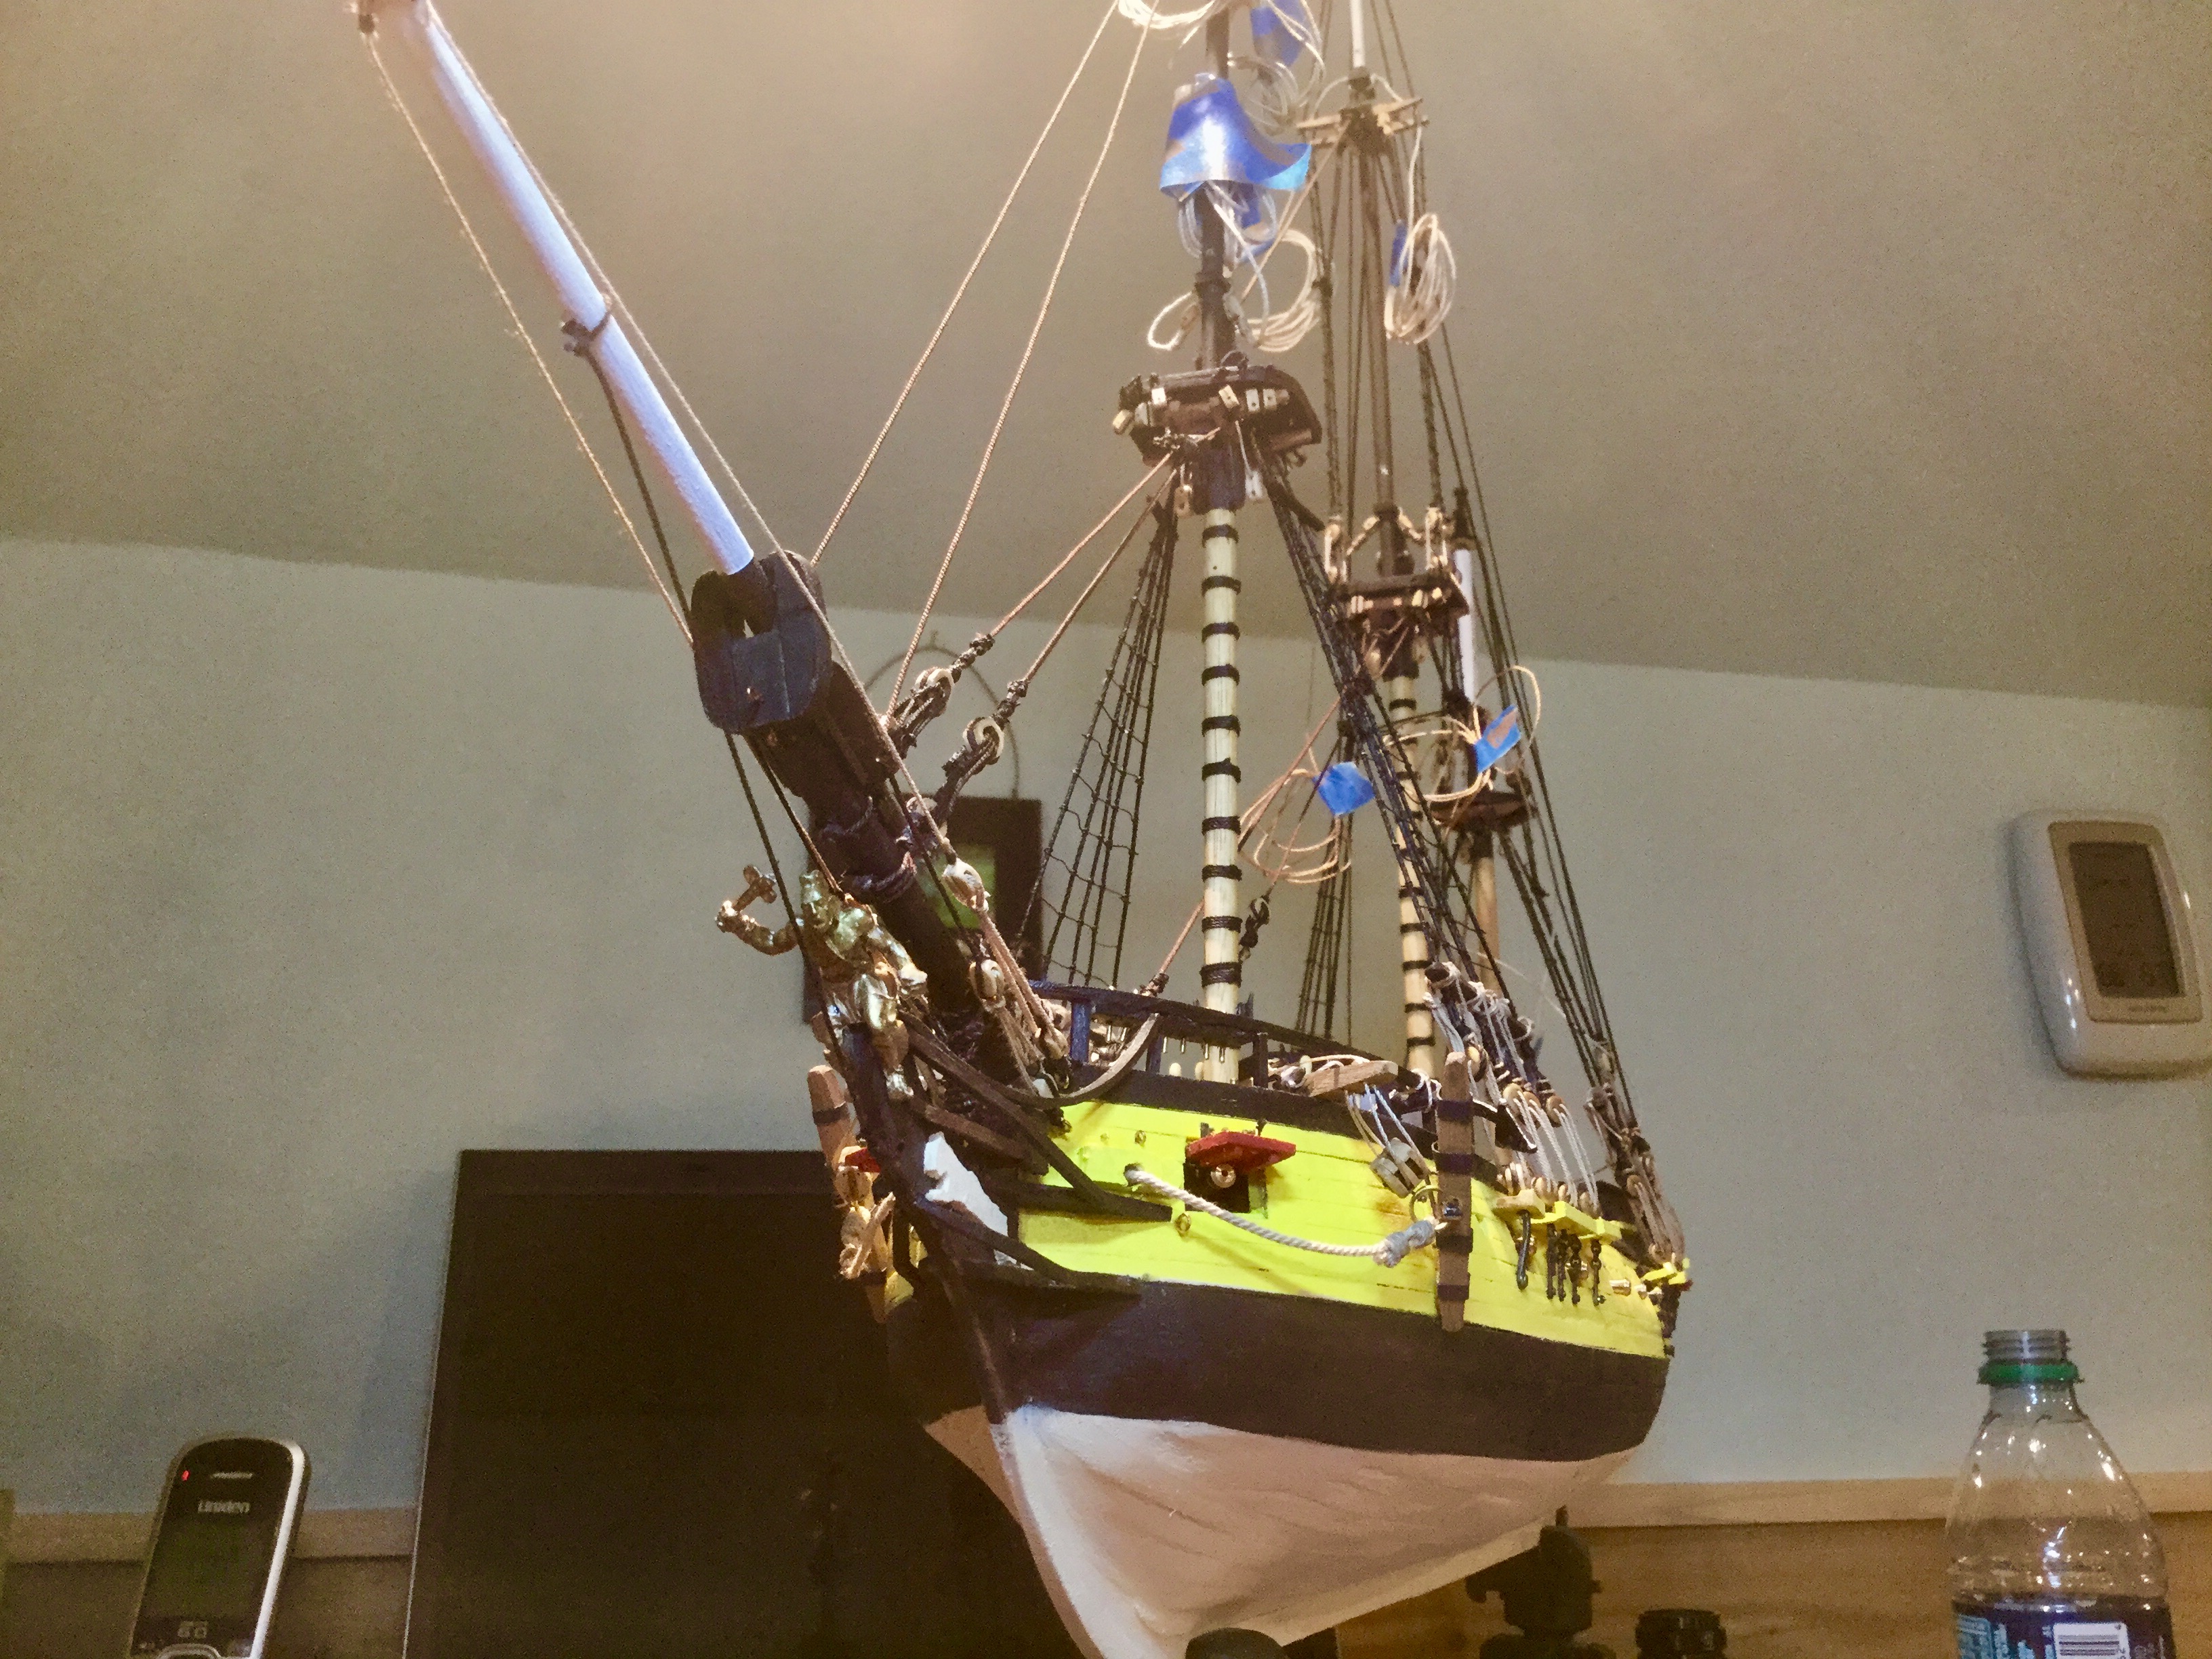
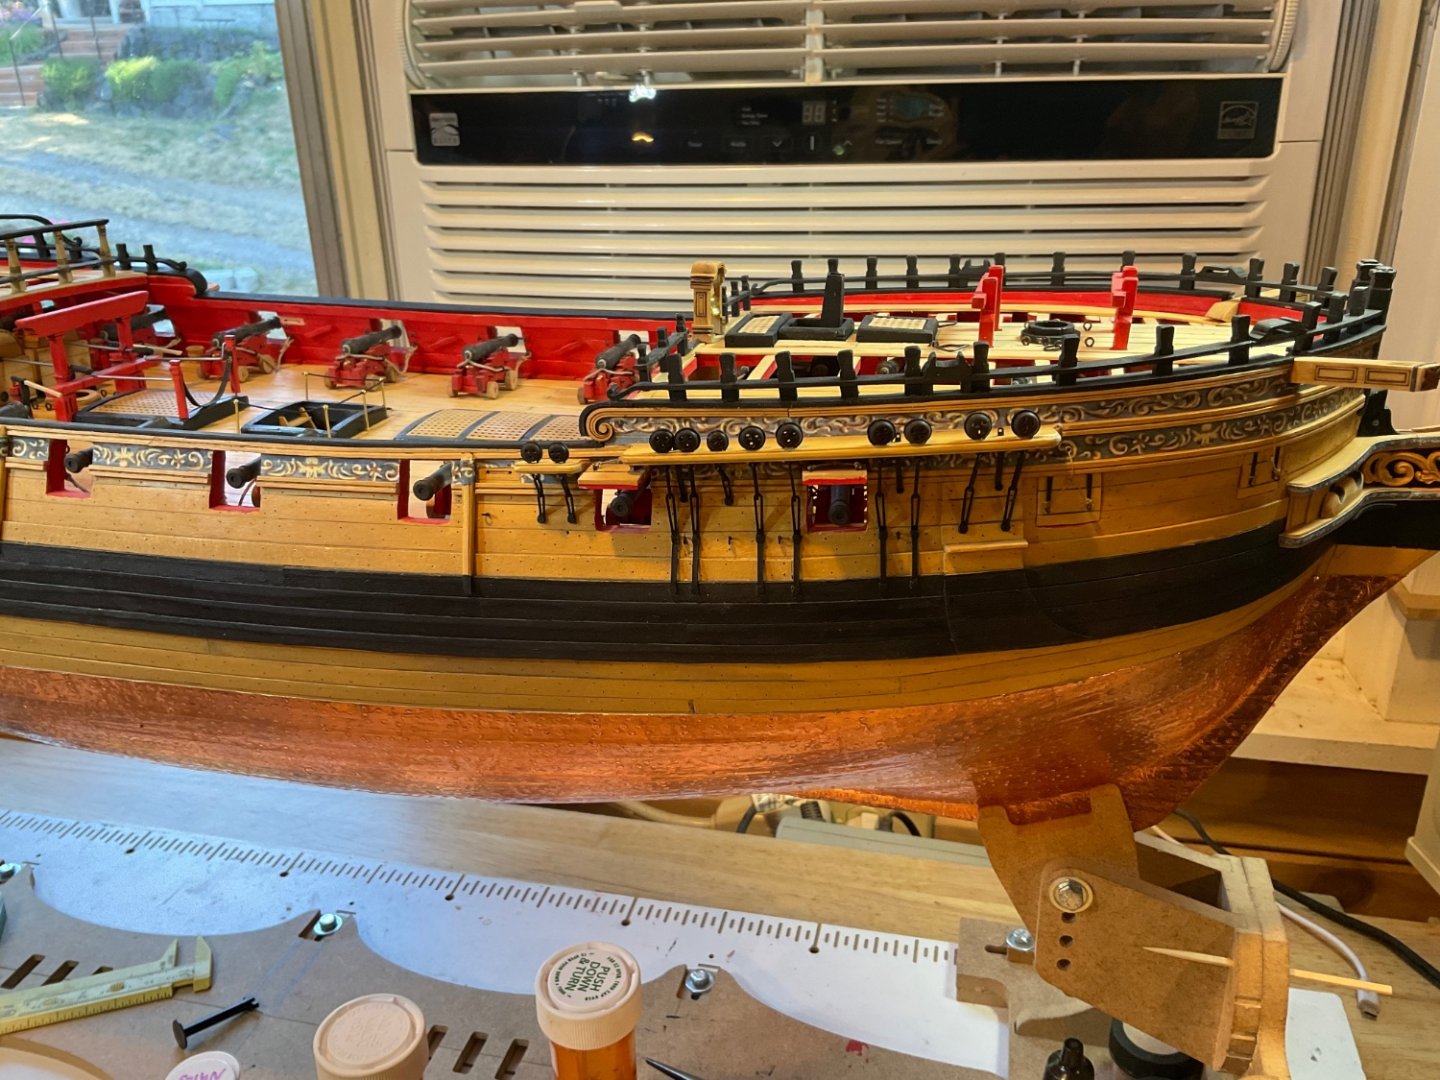
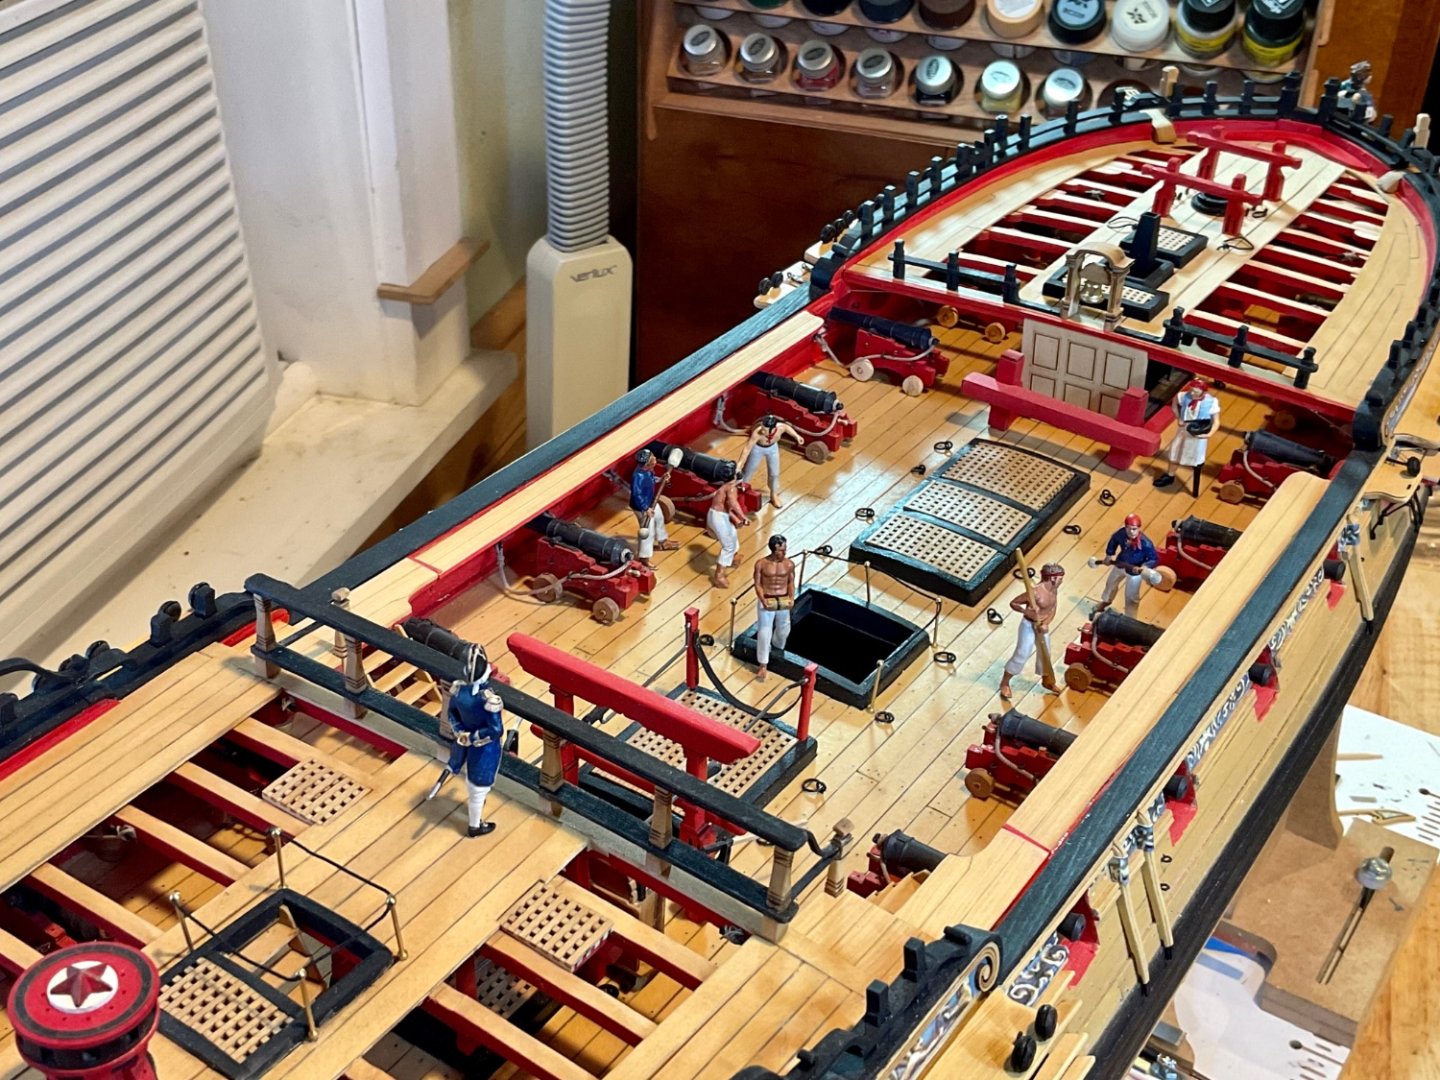
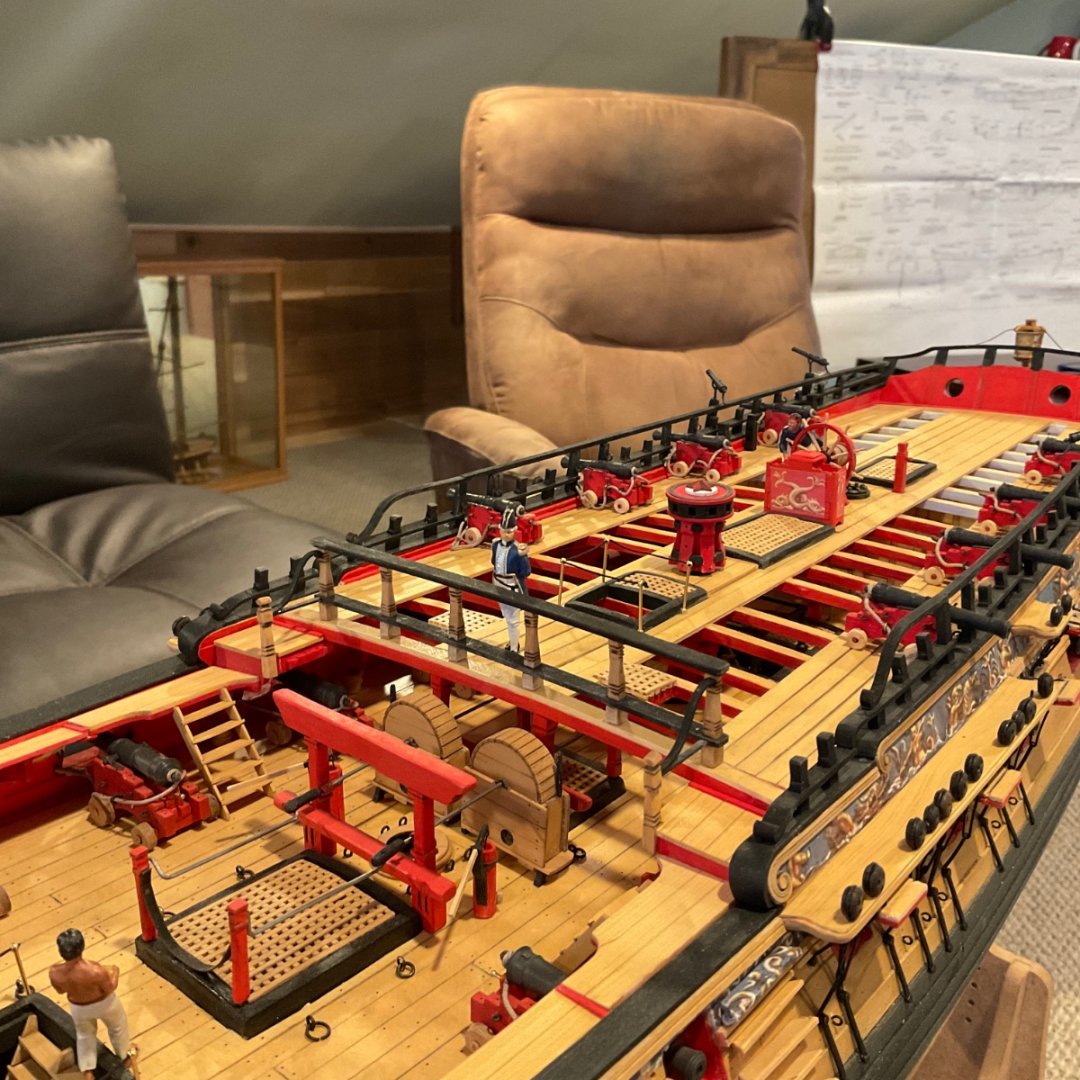
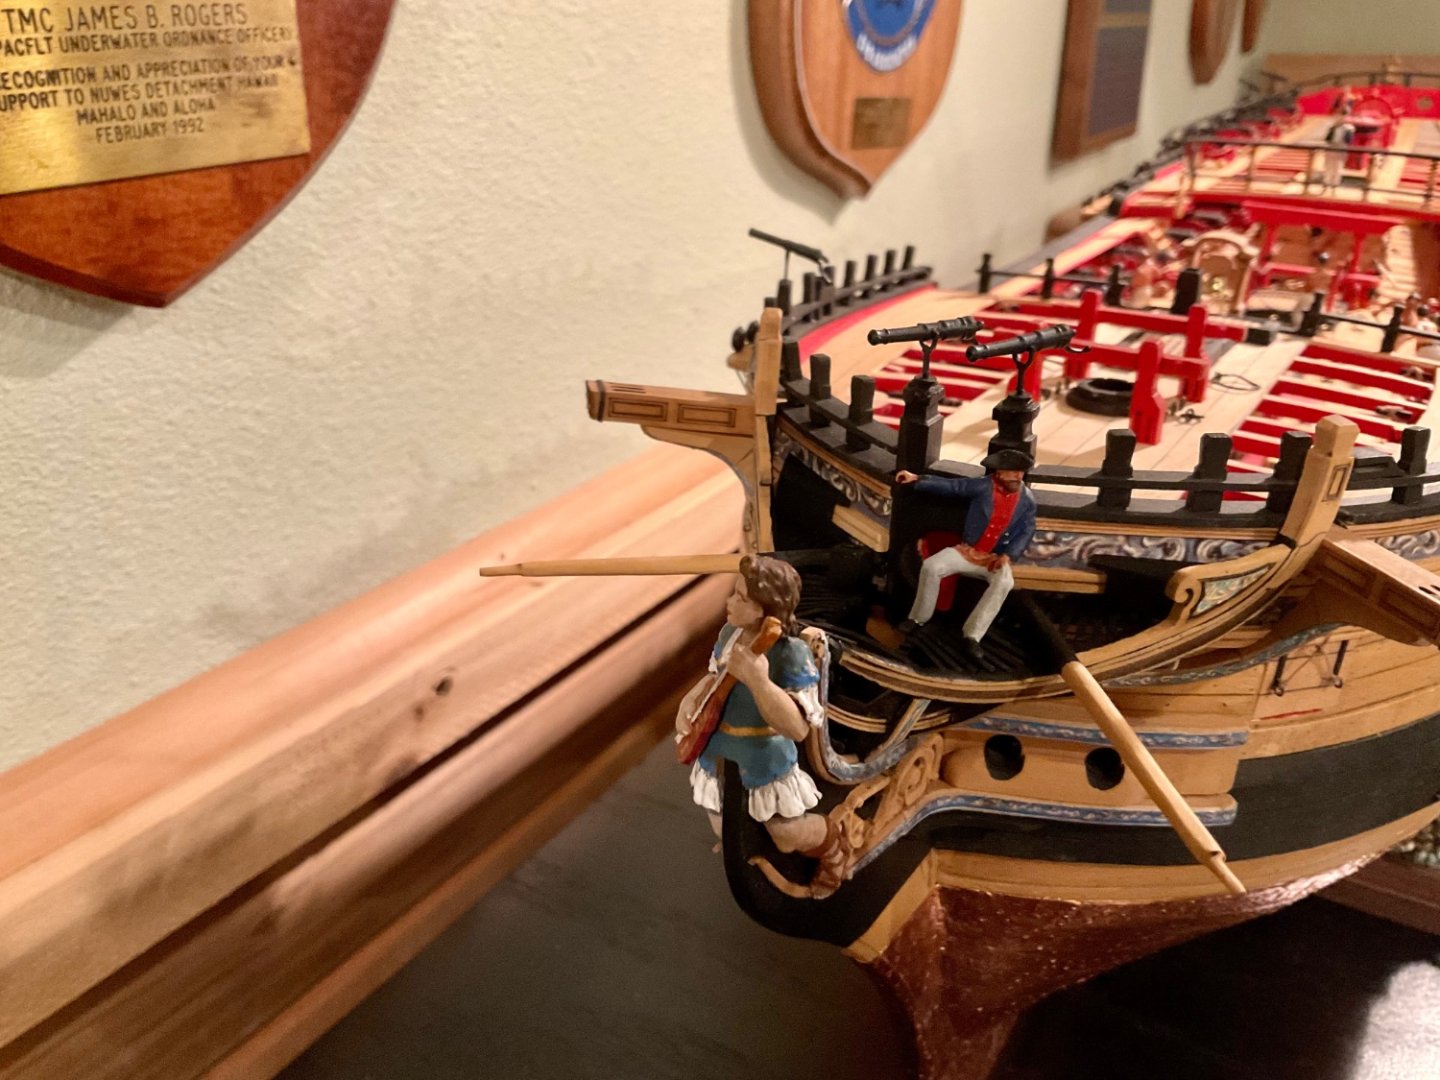
Well my Winnie is finished. As I have said before I took some liberties with Chuck’s awesome design. Mine is nowhere as crisp and beautiful as Stuntflyer Mike’s, I envy your talent, but I really like mine. I coppered the hull, added Trenails to hull and main deck, used ebony deadeyes, added gun crew and cook figures from Chris Watton and even found a figure I could sit on the head. I am currently in the stand planning stages and she currently rests on Pegasus. Thanks for a great time Chuck. Really, really, really looking forward to Speedwell.


- 105 replies
-
- 20
-
-
-
- winchelsea
- Syren Ship Model Company
- (and 1 more)
-
so when is this beauty coming to market?
-
A group holly stoning the deck.
-
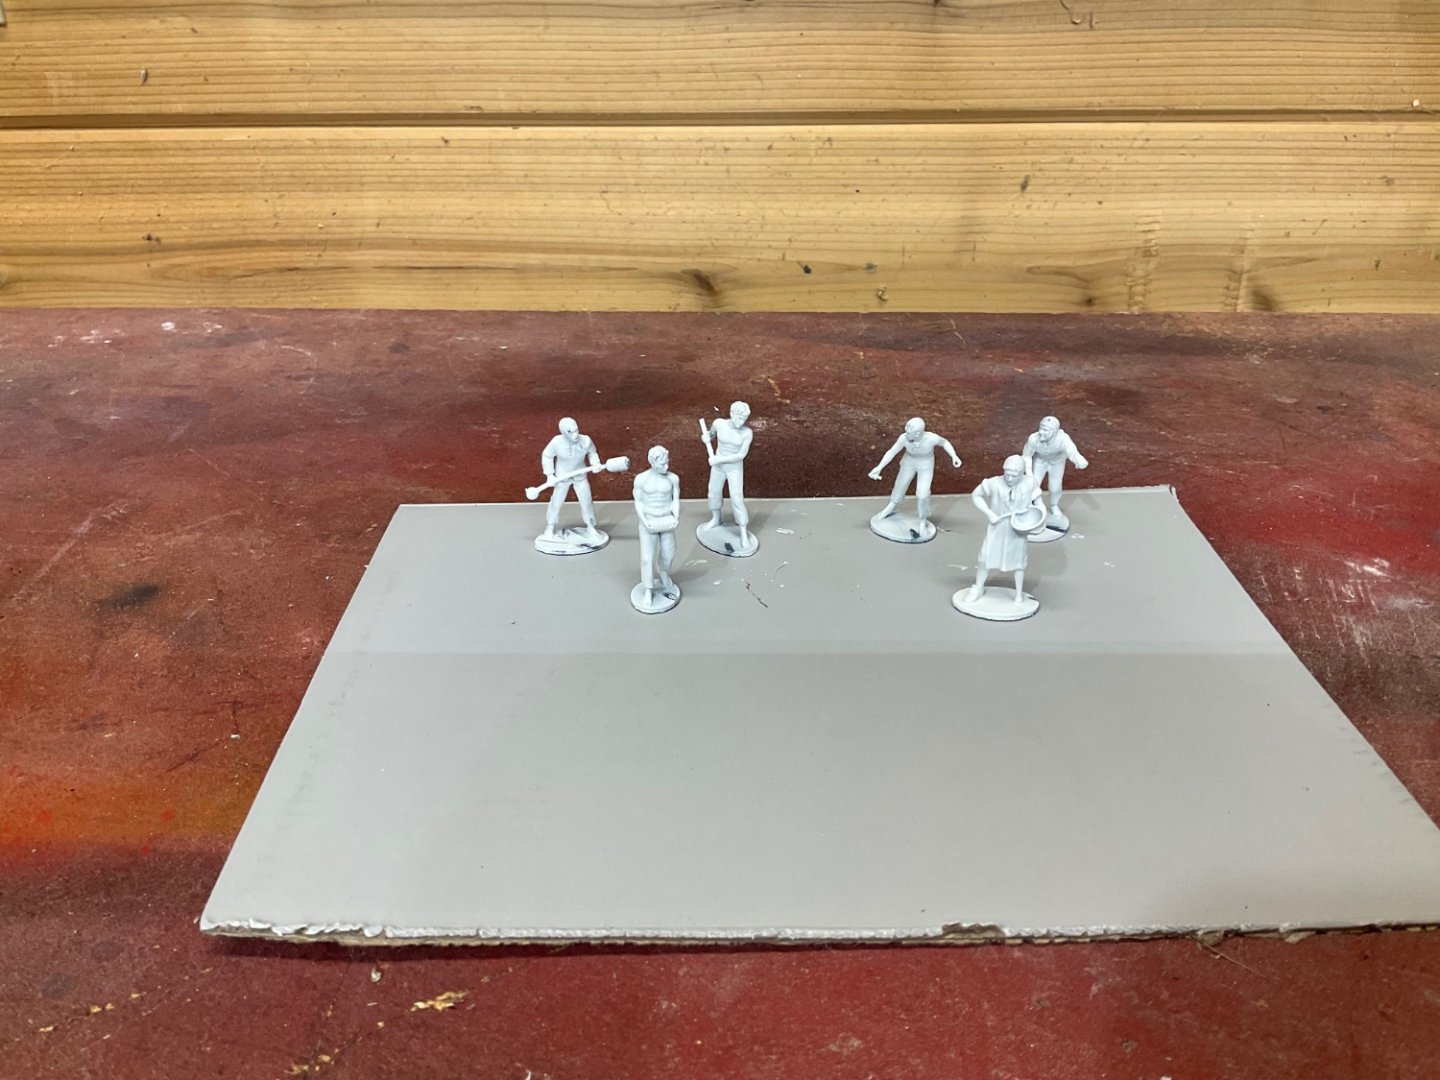
Chris I LOVE your gun crew figures. Would it be possible to come up with a set of sailors doing sailor actions. They really add to the model.

- 991 replies
-
- 12
-
-
-
If you are using them to hold planks whilst planking, don’ t. They split planks and leave unsightly holes and pri marks when removed. If you are using them for Trenails again don’t, use Chuck’s monofilament line method, looks great and is faster cleaner. For planking use these clamps from Micro Mark. Drill pilot hole in bulkhead and hold plank in place. Holes are covered up as you plank and they hold very tight.

-
New Hyundai HY7524 compressor not working
Jim Rogers replied to DaveBaxt's topic in Modeling tools and Workshop Equipment
Make sure the tank drain valve is closed. Usually located on the bottom. -
Soooo looking forward to this one. At my age it will be my final build. LOL.
-
Recommended pins for planking?
Jim Rogers replied to Capella's topic in Modeling tools and Workshop Equipment
I use these available from Micro Mart. They work great.
-
I think this would be great for a Group Project with parts and monographs published like you did the Winnie.
-
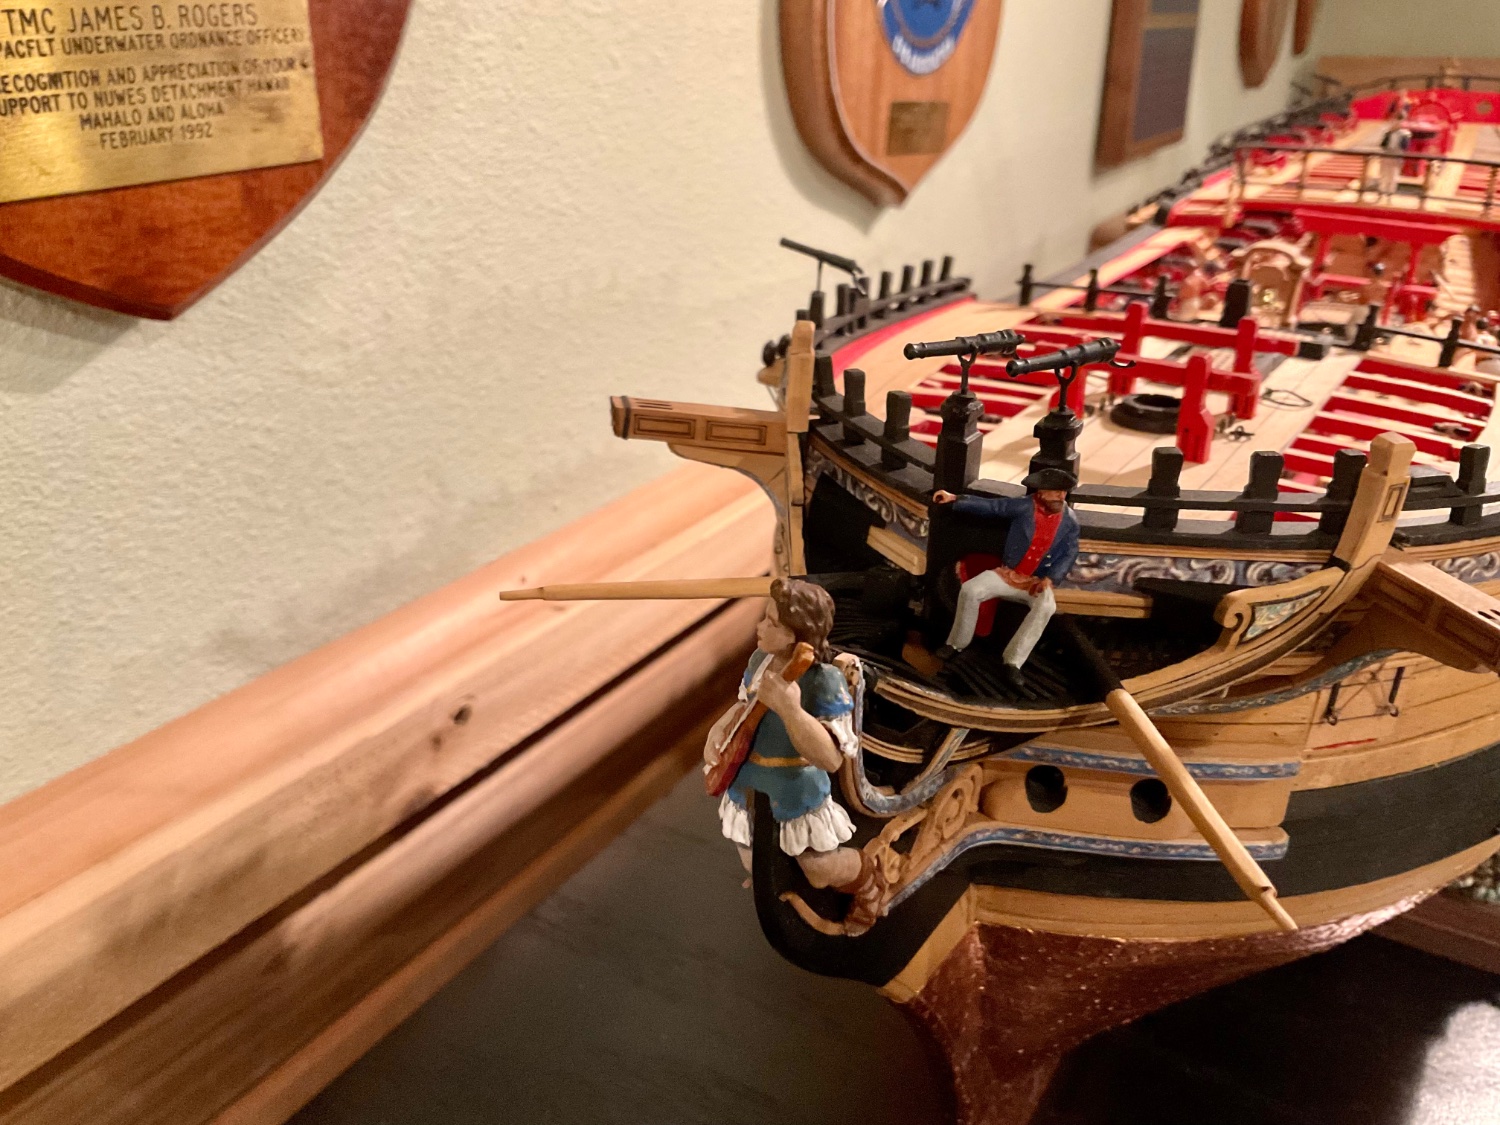
I’ll try to post some pictures soon. It just frustrates the heck out of me when they all post upside down. Waiting on my Chapter 12 parts to finish her up. I added some of Chris Walton’s figures and they really give her scale. Planning the case now, not sure what wood I’ll choose.
-
Chuck what do you use to take your ship photos?
-
Was actually just wanting the carving.
- 1,784 replies
-
- 3
-
-
- winchelsea
- Syren Ship Model Company
- (and 1 more)
-
Beautiful! Are you going to make the bases available for sale?
- 1,784 replies
-
- 5
-
-
- winchelsea
- Syren Ship Model Company
- (and 1 more)
-
Chuck how did you remove the base.
-
Love it. Will be a challenge. I do have a question that has nothing to do with this. There are ladders amidships, on the quarterdeck, on the gangways but nothing at the forecastle/focsile. How did they get up there?
- 1,784 replies
-
- 1
-
-
- winchelsea
- Syren Ship Model Company
- (and 1 more)
-
This case cost me over $600 in material. All of my cases are like this, I thought about selling them but the price would be to much, heck I wouldn’t buy them at the price I would charge. And as usual it is hit or miss if pictures will be right side up. This is the reason I quit posting. Just frustrating.


-
Just ordered the cook.
-
When will the cook be for sale? Just ordered the gun crew, got to feed them.
-
Chuck is the ship’s boat going to be mounted to beams across the mid ships gun deck? Are these beams shown on sheet 4 of the plans?