king derelict
-
Posts
3,295 -
Joined
-
Last visited
Content Type
Profiles
Forums
Gallery
Events
Everything posted by king derelict
-
Thank you Egilman for the kind comment and supporting information. Alan
-
Thanks Mark This is what I had in mind when I was working up the tarp. This one was used by the Germans but it was on a captured Ford truck so who knows who it originated from. The desert war saw a lot of "borrowing" by both sides. Of course the tarp is seventy years old but it was in the shade of a rock outcrop so probably not too heavily bleached out. Alan
.jpg.f082ab032dddd81a4256ad10f710957e.jpg)
-
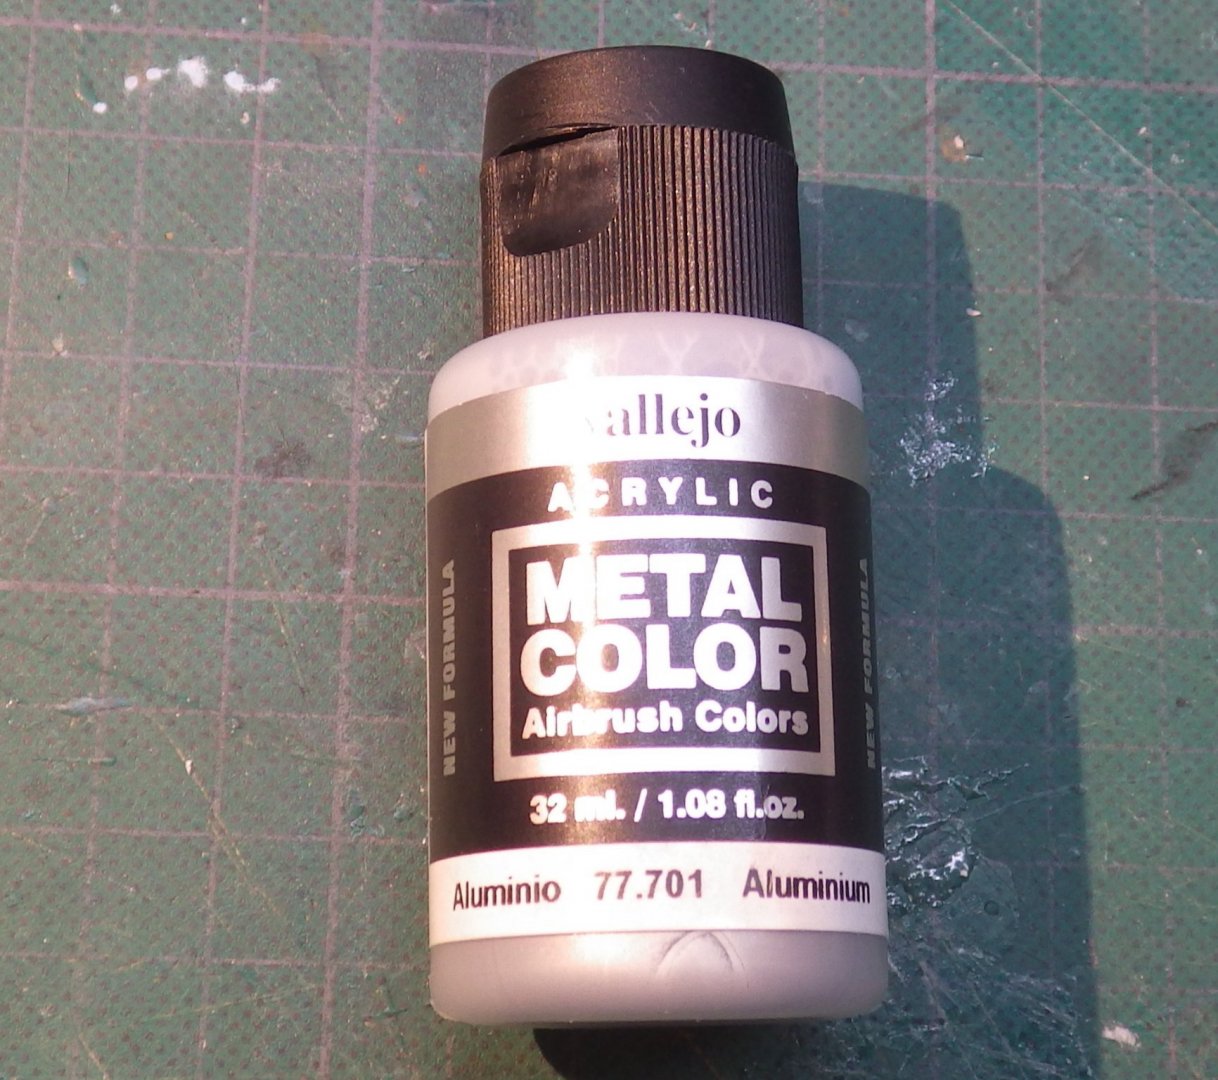
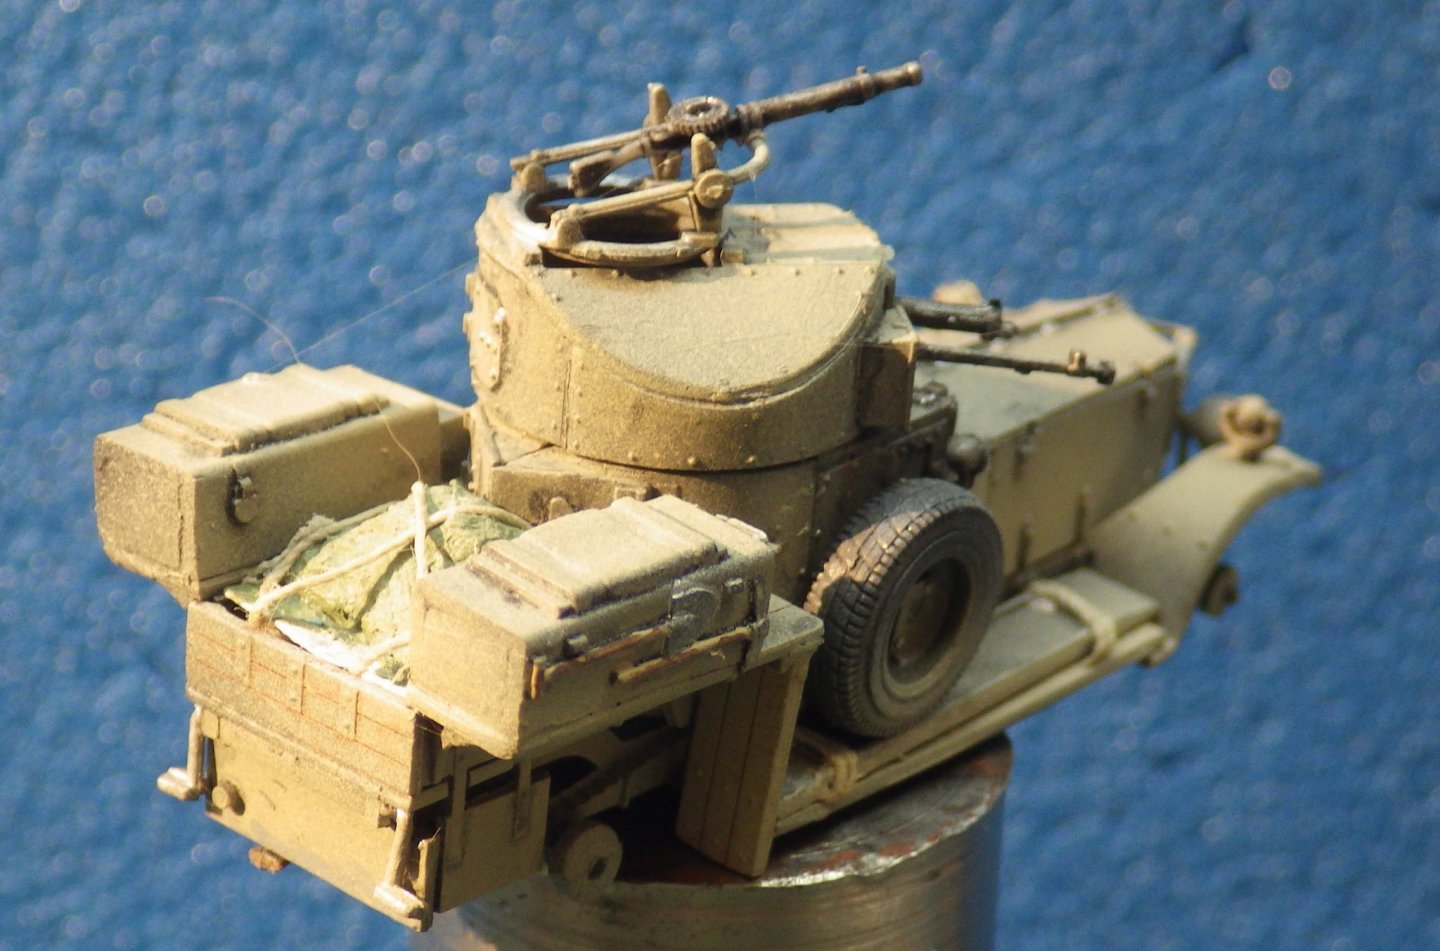
Suddenly it feels like this build in nearly over. For weathering and wear and tear I feel that rust is unlikely in a desert setting in the initial years. It takes a long time to develop the rust patina in that dry atmosphere. The more likely damage comes from scraping through the scrubby acacia bushes that are found in some areas around Khufra. Those spines will penetrate a sandal sole with ease. But amazingly the camels will crew them off the tree along with the leaves So I think bare metal and dust is the appropriate finish I used the Vallejo metal paint. It is "Aluminium" but I'm not sure its distinguishable from steel in the amounts I am using. Its the first time I have used this paint and I like it a lot; good coverage but it is thin enough to spread a bit farther than intended unless carefully watched I painted some onto the wheel nuts and rims as frequent use of tyre irons to fix punctures would take the paint off. And punctures would be frequent (see above acacia trees) I added bare metal edges to the mudguards, panel rivets and forgot to take photos. I used the Vallejo paint for the edges of the spades and gun metal paint for the middle part. I'm not sure it really made a difference. A dilute coat of Tamiya Buff was air brushed onto the lower part of the vehicle to add dust. I'm fairly happy with the result but a lot of tiny work with the metal paint has been lost; the headlights I was very proud of just look dirty now. LInkages were added to the radiator doors, guns were installed and the spare wheels fitted I can't make up my mind whether I like the tarped load in the load bed. It looks better now that its dusty but ........... Its only dry fitted so I can pull it out. The kit instructions would have you stow the sand ladders slung under the running boards. To me that seems a bad place to put them. If you bog down in the soft stuff and the rear wheels dig in the car ends up settling down - on the sand ladders - meaning they then have to be dug out from under the car; no easy task I decided to stow them on top of the running boards and added some rope ties to hold them in place. So a bit of tidying up, add some gloss back to the weapons, maybe some bare metal back in a few areas. Then time to put the wheels on. Thank you for looking in and all the nice comments and interest. Alan
.jpg.fd143ea423a2786b9910467b4cf3af27.jpg)
.jpg.61a59f05f14bef92de76eff544d0f9cb.jpg)

.jpg.d982eec6ca68e51a2fd97f783e9af5a1.jpg)
.jpg.efc7e94a5d8edb7f7ae48ace28409c2a.jpg)
- 92 replies
-
- 11
-

-

-
Thank you very much OC. It was a shame to dirty up the headlights to make them dusty. Alan
-
As soon as i put the headlights on I thought "There is a Rolls-Royce in there" Alan
-
Thank you for the nice comments Edward. This was a nice little kit and an interesting subject. Enough that I bought another with diorama intentions Alan
-
Thank you very much Edward. They were all a lot of fun. My thinking with these kits was to improve my painting skills which were horrible. The kits don't take too long to build so most of my time was spent painting and trying new ideas. They were also inexpensive if I made a real mess. I think my painting is slightly less horrible now and I really enjoy these little tanks so there is likely to be more. Alan
-
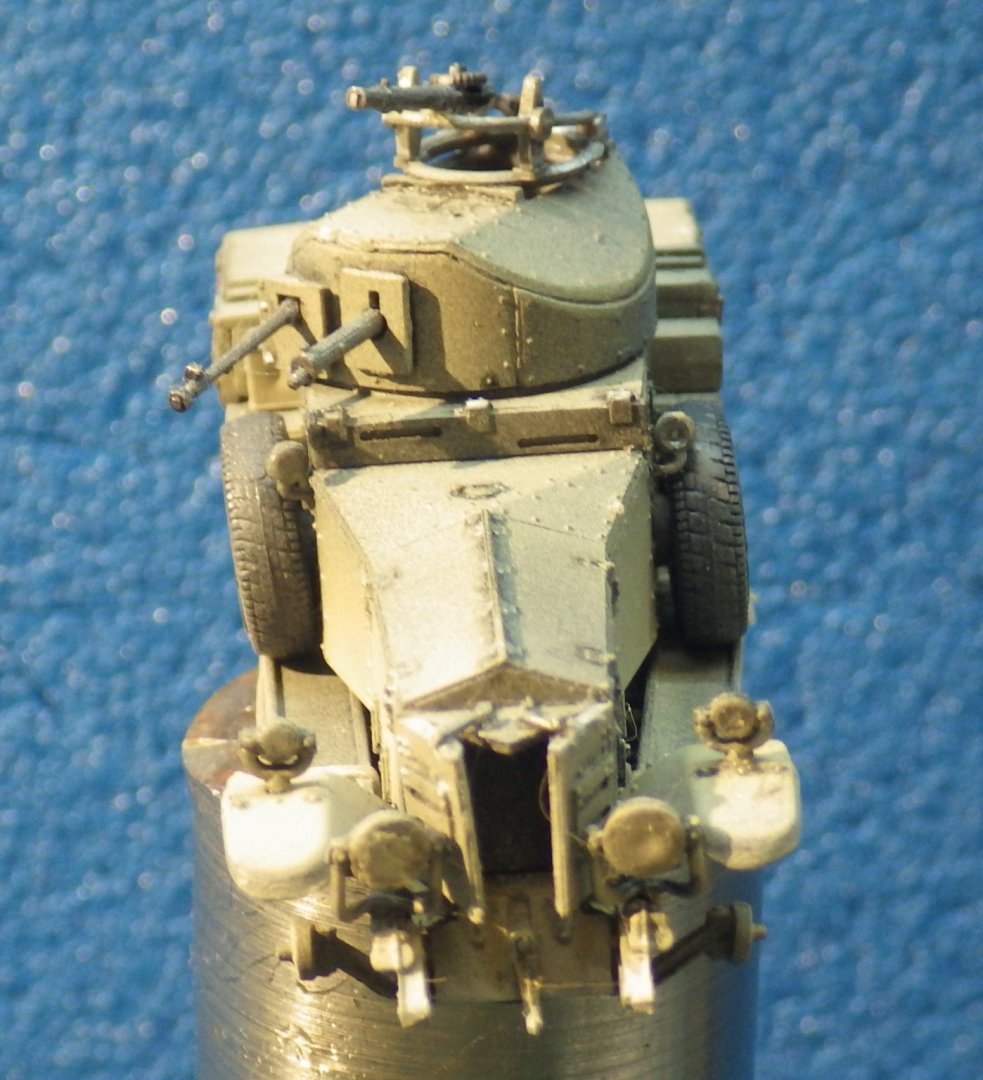
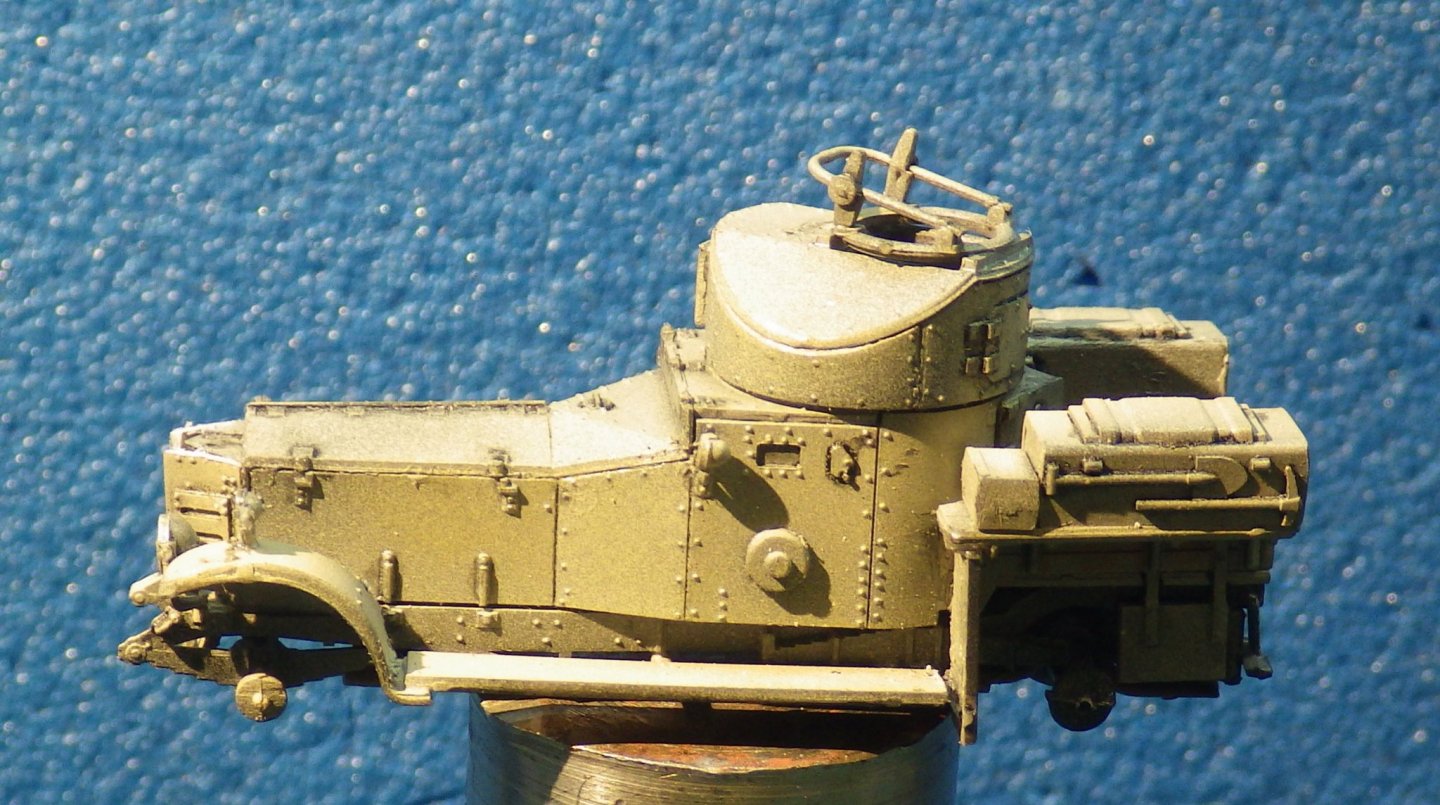
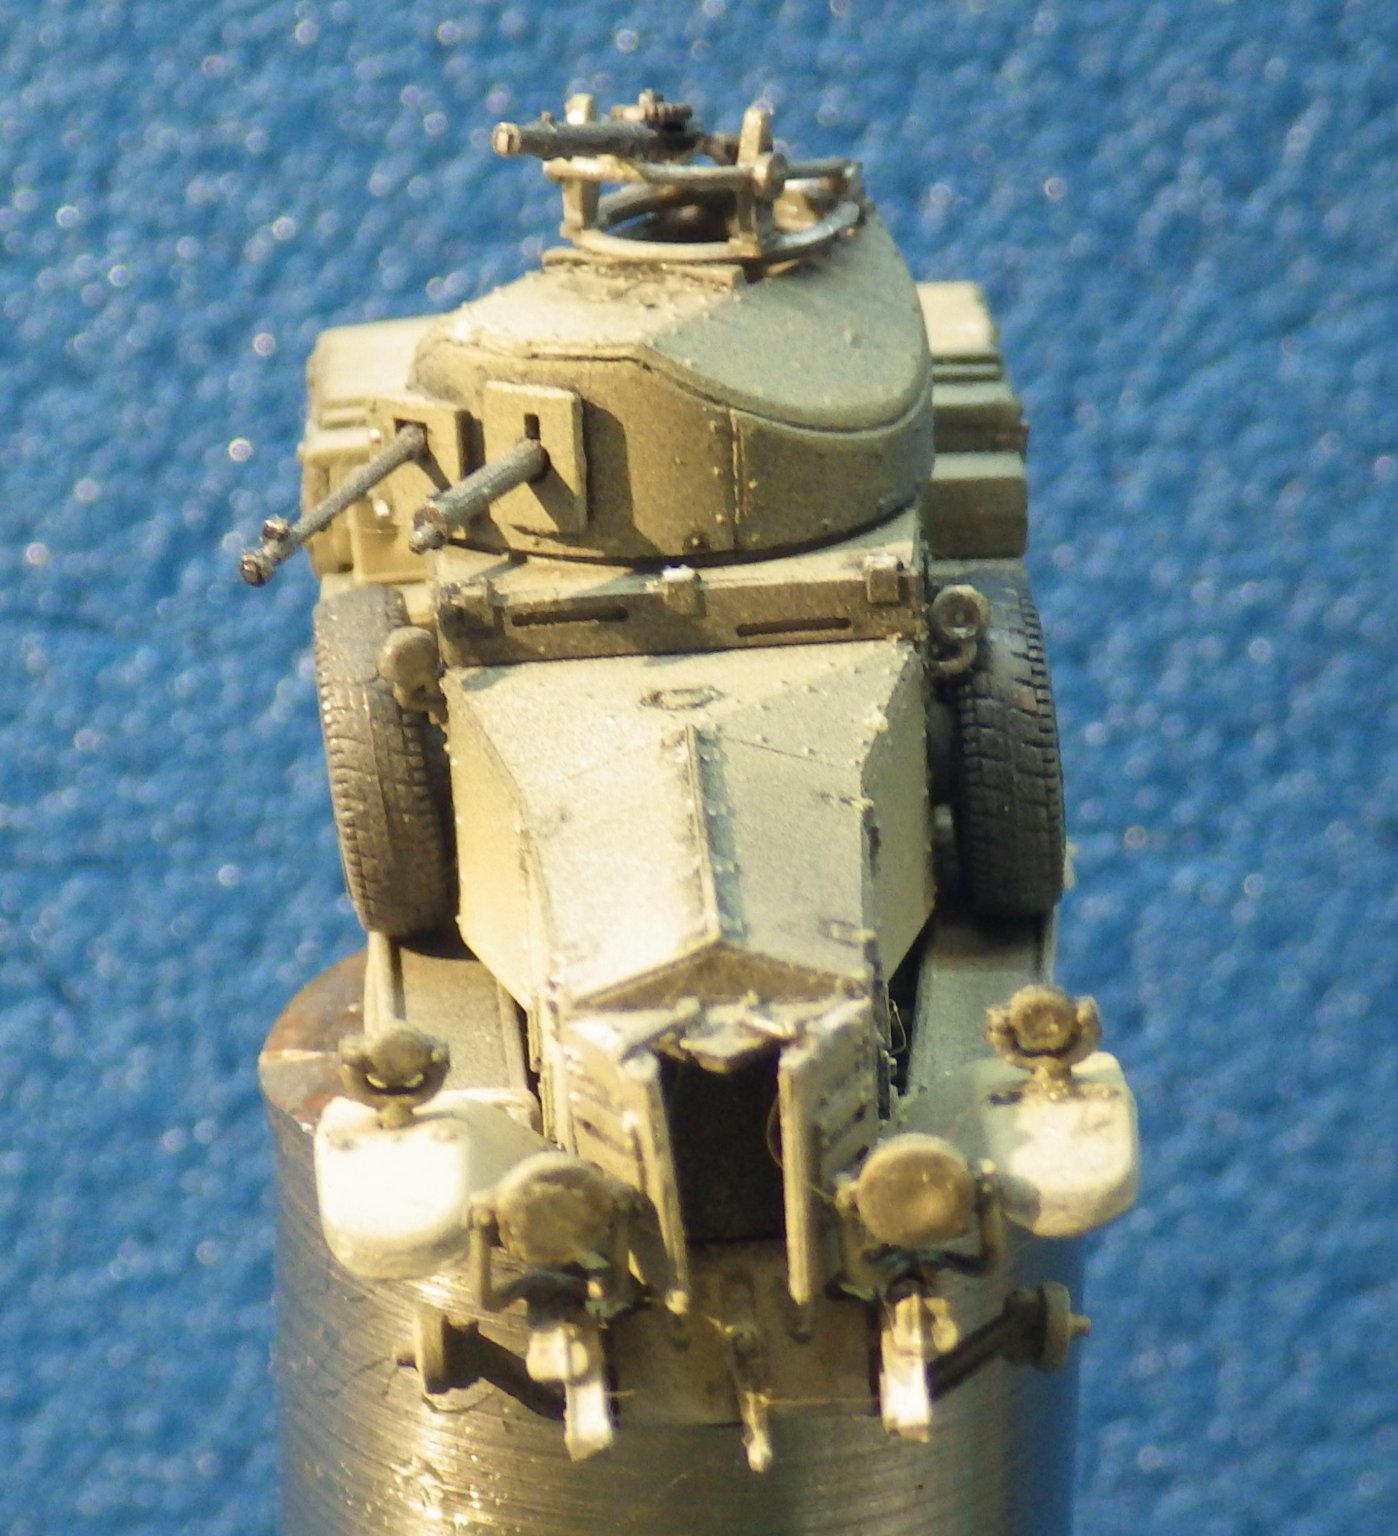
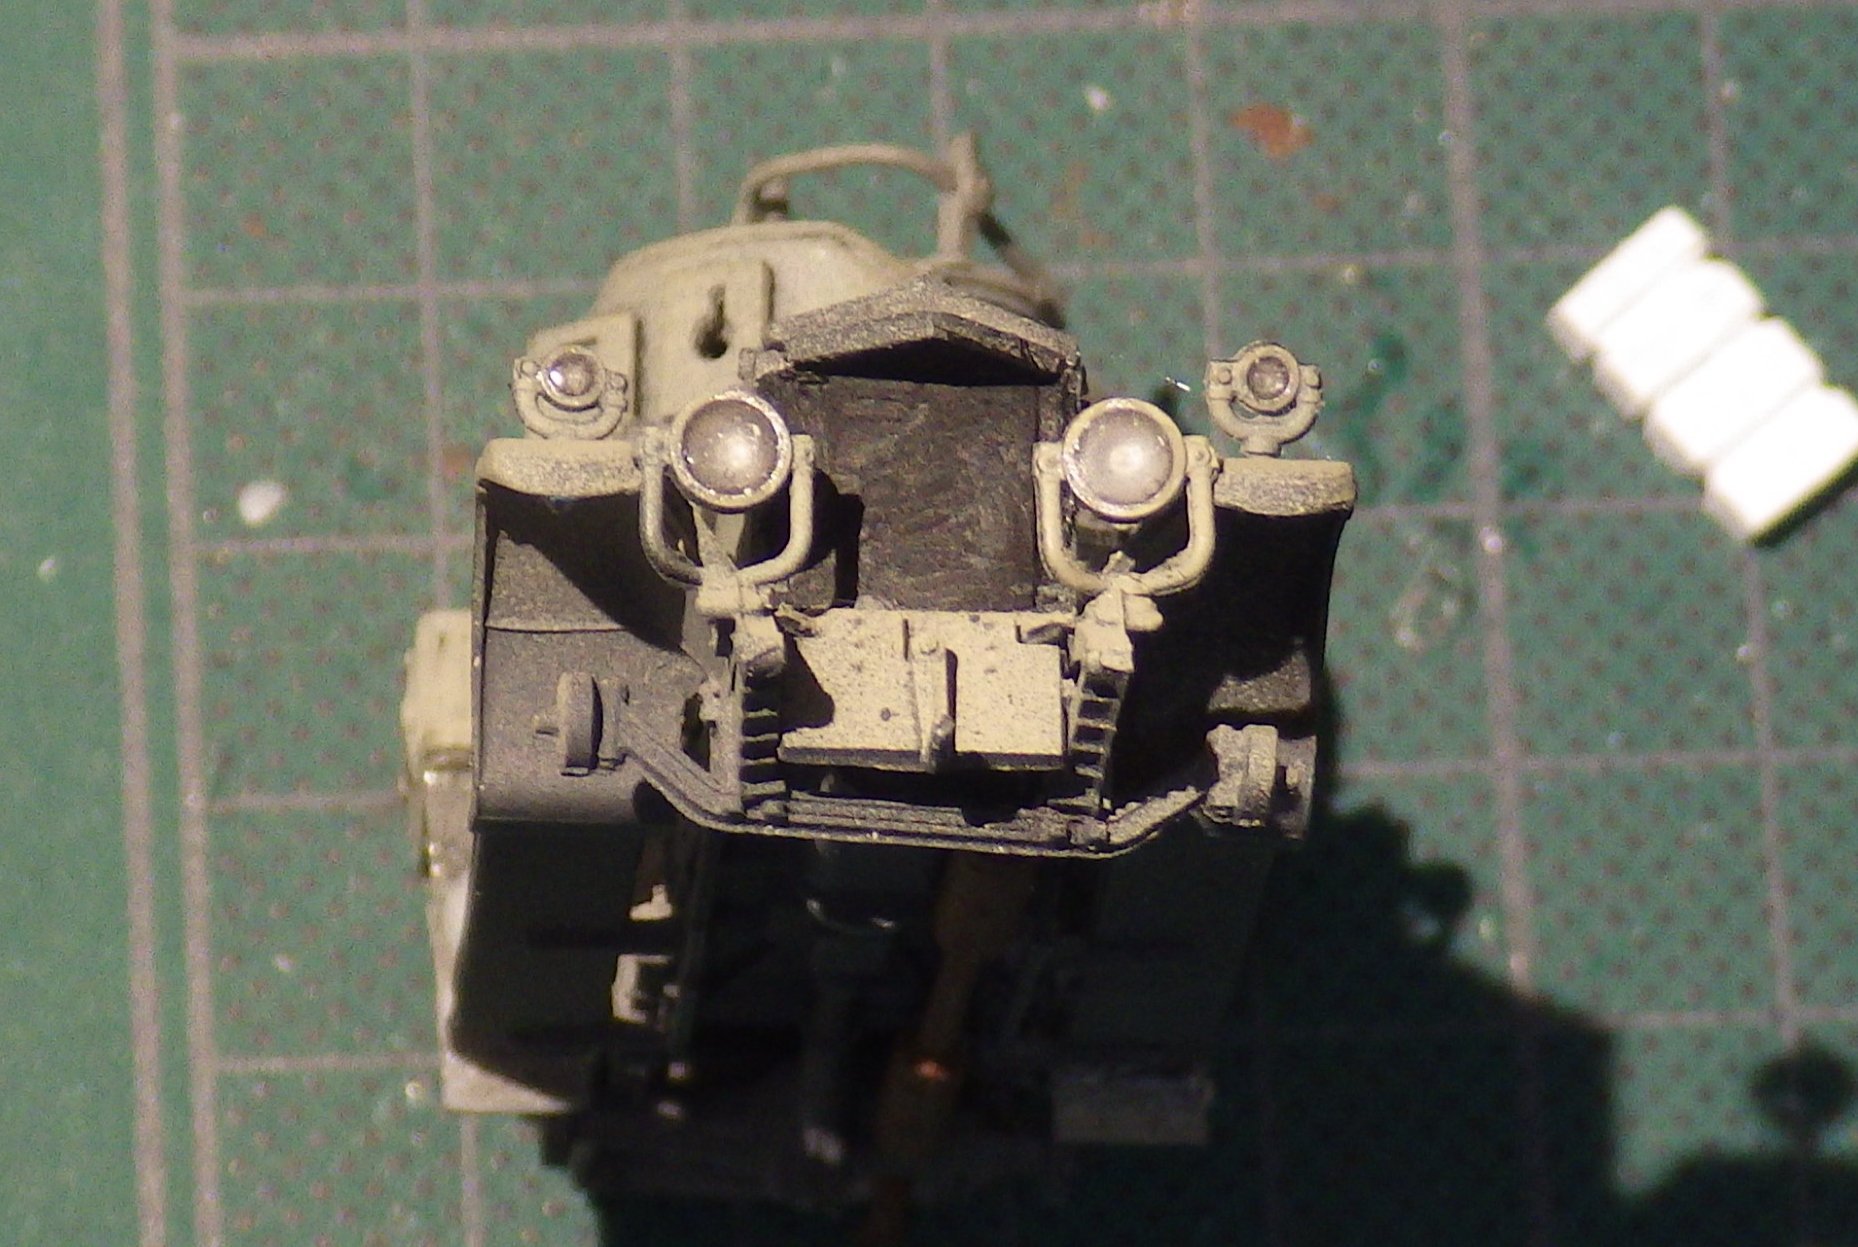
Today seems to have seen a bit of progress - the part of teh build where stuff is coming together instead of waiting for stuff to dry. The lights were added to the car. I am quite pleased with the result of painting the inside of the light with a bright metal paint and then filling them with the Kristal Klear fluid. The whole car was then sprayed with a gloss coat and when dry I added a thin black wash of oil paint to bring up the panel lines. Getting the dilution right is still a bit hit and miss but I think its getting better. I bought a cheap set of oils to try this and the black seems to be quite gritty and reluctant to dissolve smoothly so I will get a Rowney or Windsor tube now that I like the technique. I used a brown wash on the panel lines of the wooden parts and I like the result although its not very obvious The radiator doors were added. The kit has them closed but I would like them open so I thinned the edges and I will make a wire prop for the top edge. I painted the front of the hull matt black and hopefully the view past the doors will not allow much to be seen. The tyres and wheels were washed and the sand ladders were cleaned up. I put a layer of paint onto the tarp over the load and primed the flimsy row With a bit of shading on it the Scarff ring looks a lot better and I doubt if I could make a better one in wire I cut off the pin in the centre of the rear hubs (with the wheels sitting on teh edge of the rim it serves no purpose and drilled a hole into the hub. I plan to glue a metal pin into the wheel centre hole which will be long enough to fit into the hub and centre the wheel Thanks for looking in Alan


- 92 replies
-
- 10
-
-
Thank you Lou. I have all the Philip Marlowe books and they have been read many times. I always liked "down these mean streets a man must go who is not himself mean, who is neither tarnished nor afraid. He is the hero" Alan
-
Its starting to look really good OC. Fine work indeed. Sid really brings home how small but well detailed the paravanes and rafts are - and they are separate parts not moulded on Great Alan
-
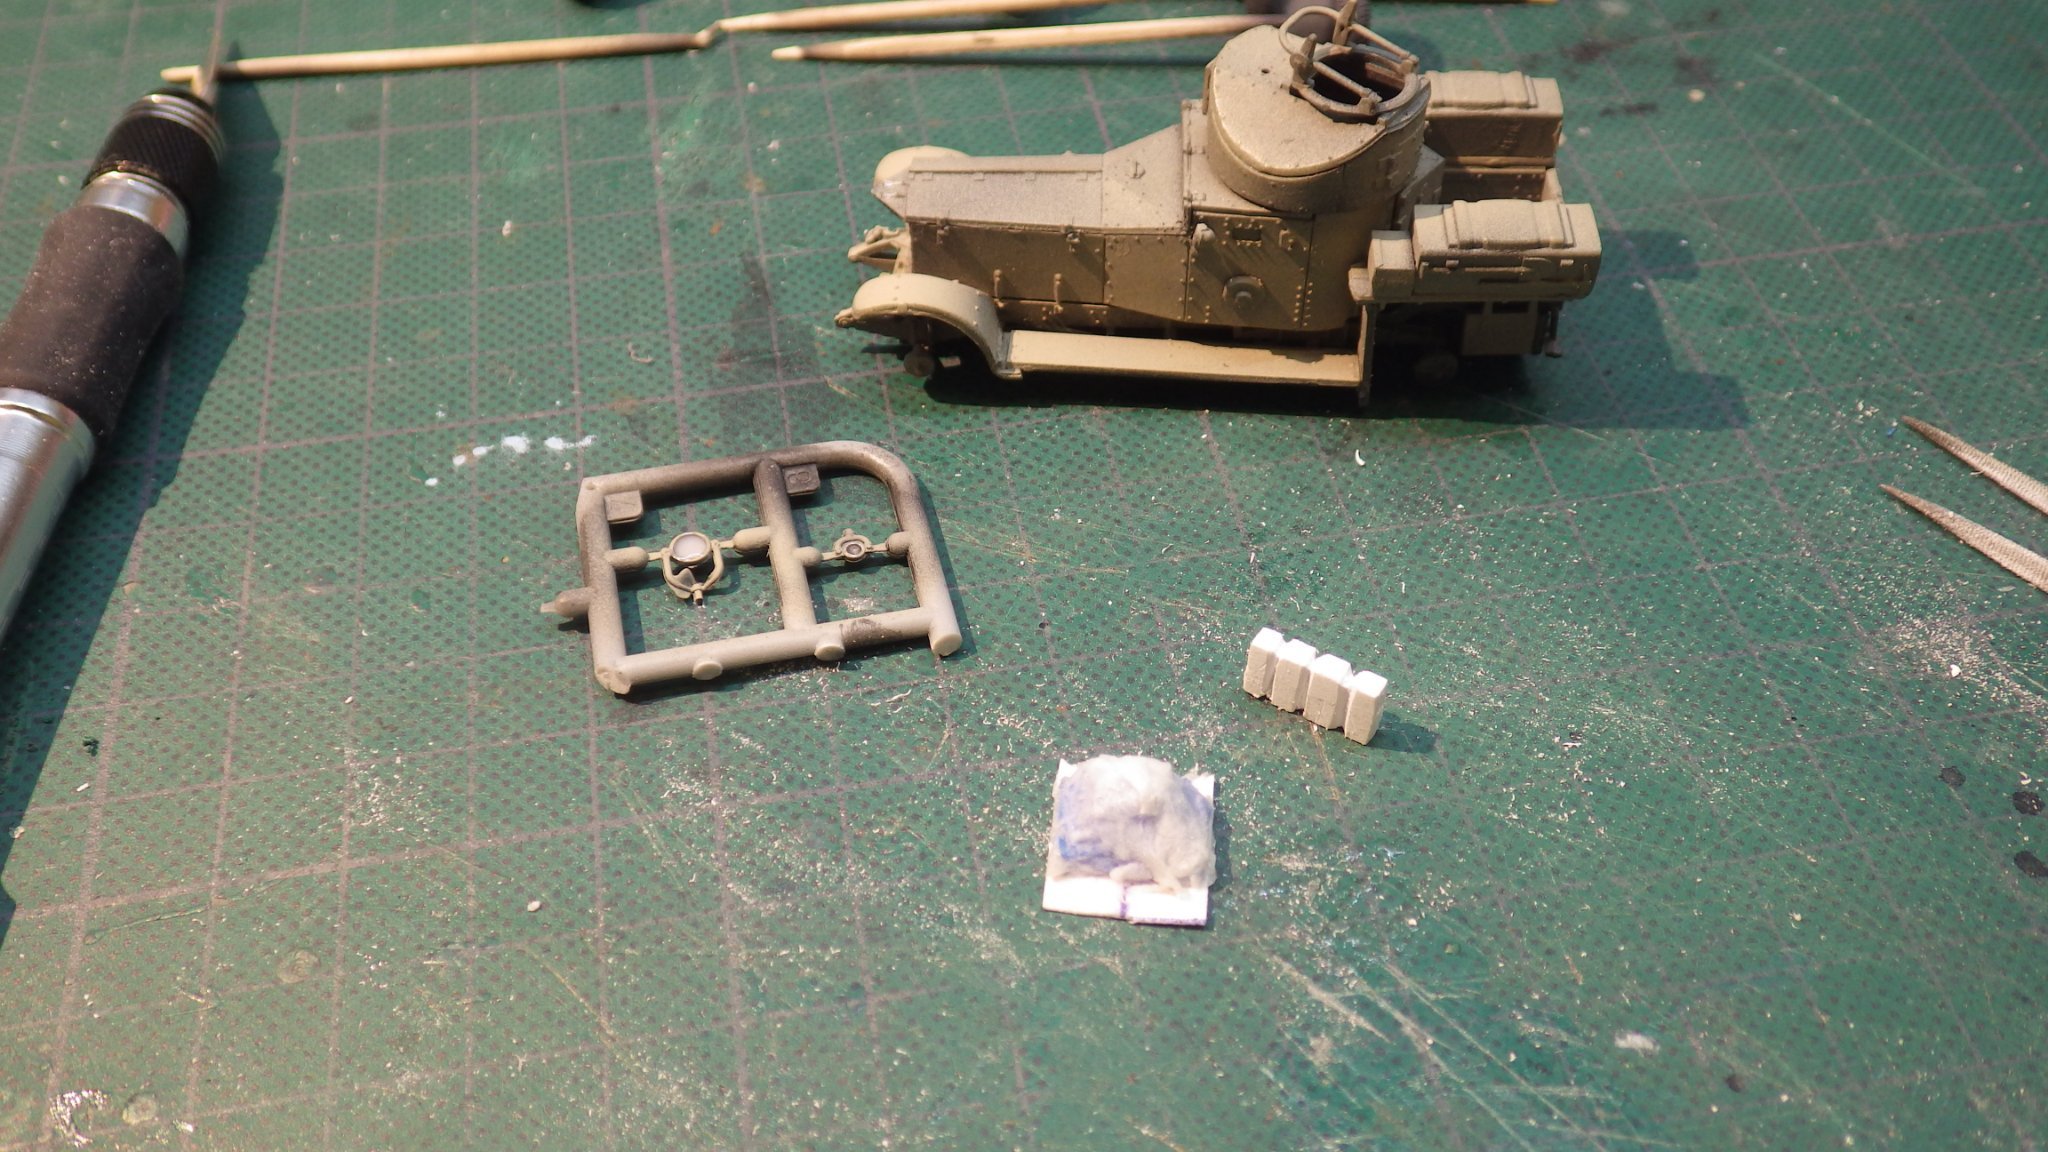
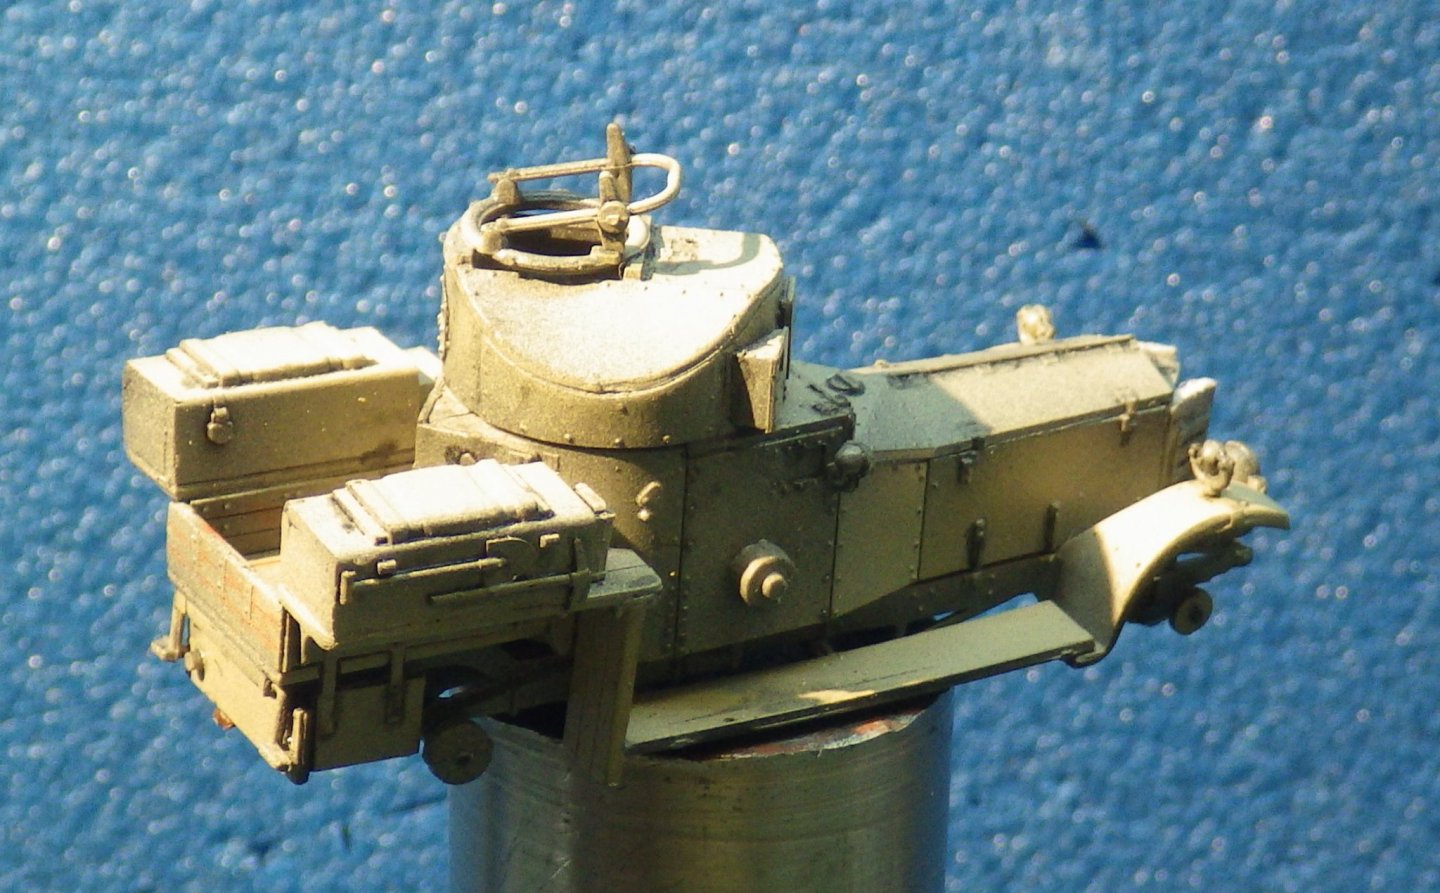
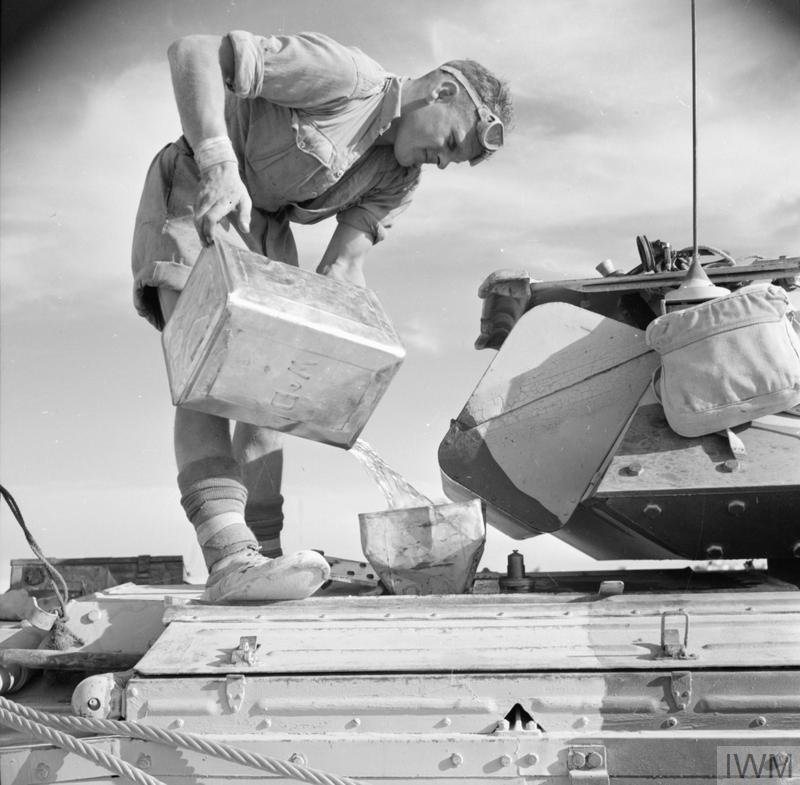
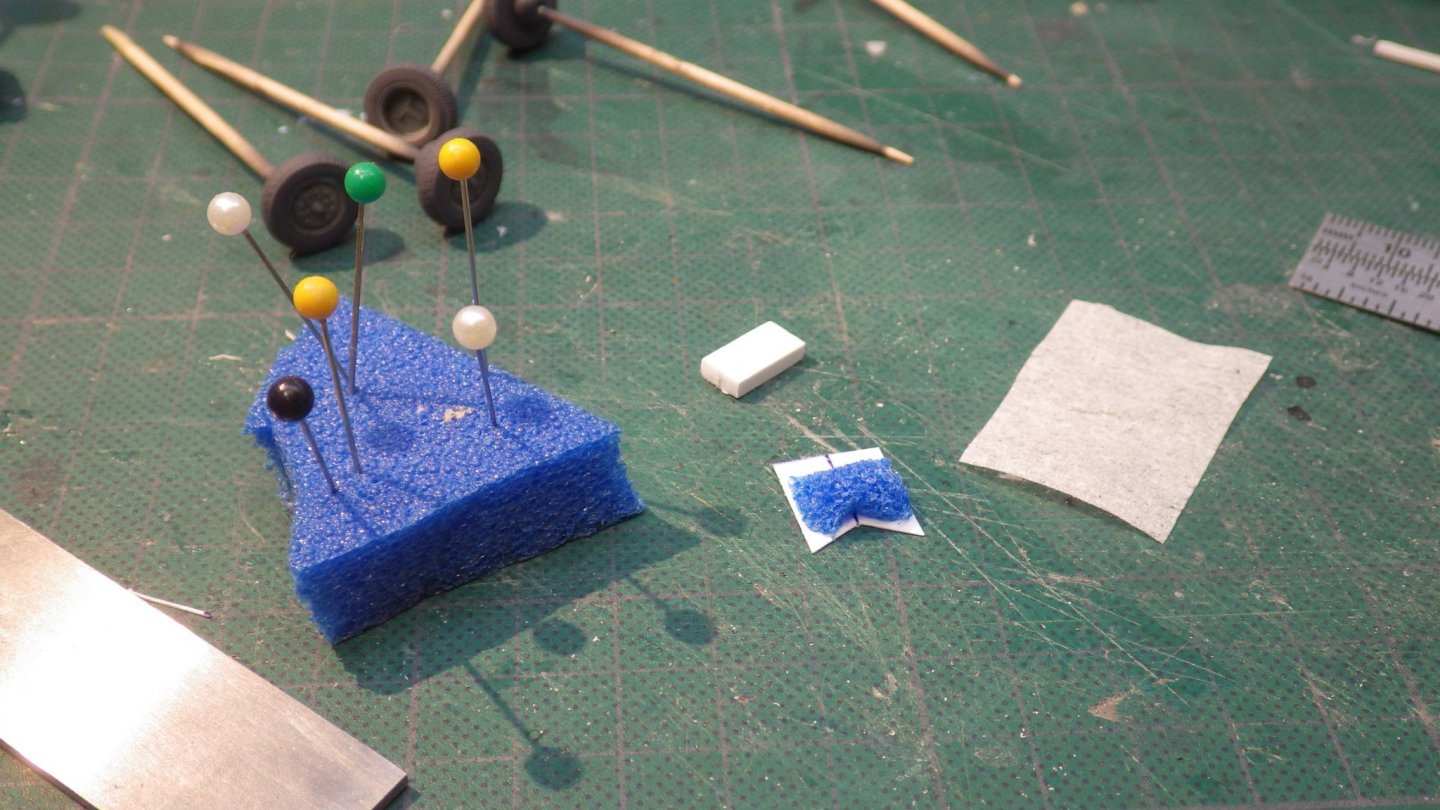
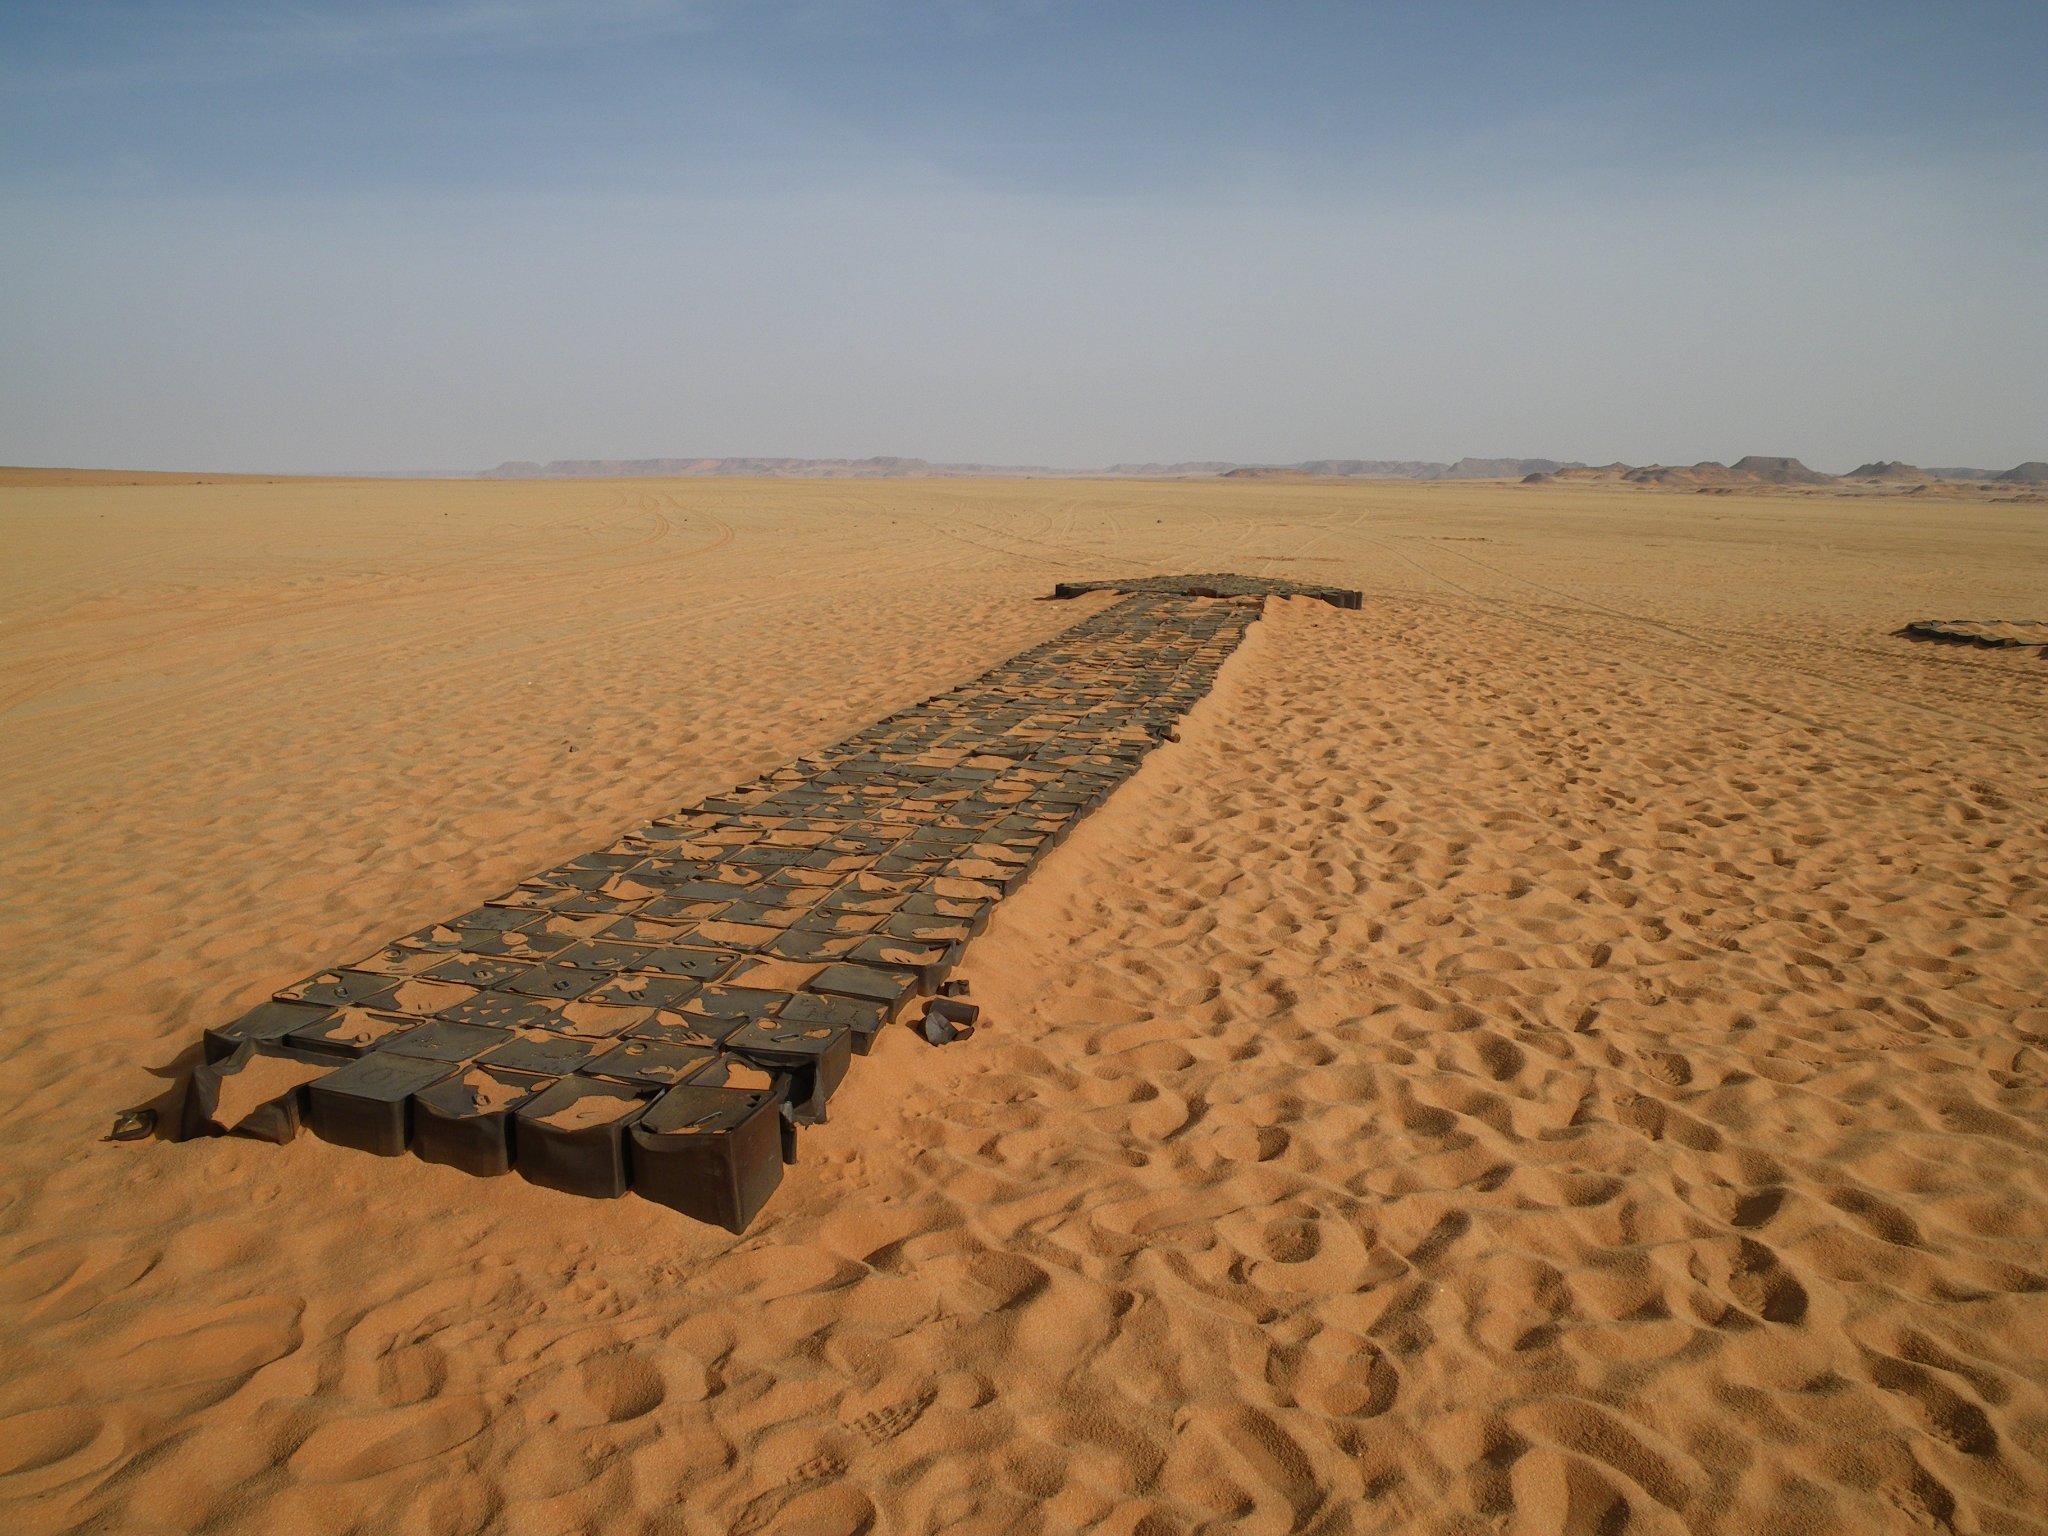
A little more progress today. I added another layer of the Krystal Klear to the headlights and while that was drying I thought about the load for the rear deck. I think a line of four petrol cans and a tarped pile of gear. The wartime British petrol can for aircraft and vehicles was the square "flimsy" These were considered disposable and were also capable of leaking a significant part of the contents. On rough desert crossings such as the Khufra convoys cans were damaged and would lose half their contents. They were packed for transit in wooden crates with cardboard dividers. The discarded containers were used as route markers for the convoys and there are stacked cans filled with sand acting as pillars. They were also used as markers for the desert air strips. The arrow points to the landing strip of "8 Bells" which is just south of the Gilf Kebir The airstrip is identified with more cans although its difficult to read from ground level With the British army running on tea several of the cans can be found that were used as desert stoves. A side of the can was cut out and the can was filled with sand and petrol poured in and lit. If a kettle wasn't available a second can was cut in half and used to hold teh water These cans were found well away from the convoy route so are probably from a Long Range Desert Group brew up. I have read that the flimsies were painted green in Europe and Sand in the desert but all the ones I have seen have no sign of ever being painted. They just have the typical patina of desert rust on bare metal as seen above This photo of a soldier in the desert refuelling a Crusader tank shows a bare metal can too. I will use a dull metal paint for them The flimsies were four gallon containers 15 inches high and 9 x 9. That scales out at about 5 x3 x 3 mm. I planned to make a strip of four cans from two pieces of plastic strip glued together to give me the appropriate dimensions. I made a cardboard base to carry teh load thinking it would be easier to build and paint it up off the model and drop it in when completed. The load is a foam offcut glued to teh base and a square of toilet paper acts as a tarp. The toilet paper was glued down with diluted white glue and the plastic strip was scored and filed to represent the individual cans, The strip of cans is not as neat as I hoped but may look better when tidied up and painted. The detail of the top of the cans is too small to attempt I think. I have ordered some 1/8 square plastic rod to make individual cans if this doesn't work out. The load will be painted when the glue mix dries and rope added. I checked the forward vertical piece of the rear wheel arch and I didn't like the way it leans back and it was also too close to the rear wheel so i clipped 2 mm off the running board and I think it looks better. Thanks for looking in Alan

.jpg.75fee1ef2650e31137fddf5a396bb4fc.jpg)
.jpg.299bf5610f3f7ca7724dfd144f456aa4.jpg)
.jpg.79eef12030b4669498256f5b97f7f330.jpg)
.thumb.jpg.a4fc8a251232d6b17e916fbecda3134a.jpg)

- 92 replies
-
- 12
-
-
Thank you very much Popeye. Its a fun build so far I thought I had the running boards sorted out by pushing them further forward to match the photos of the real thing. Unfortunately they are still too long and had to be clipped a little. I think the rear wheels are going to need to be mounted on the end of the hubs rather than the rim sitting around the hub which is the way the front wheels will mount. I think I have some plastic tube that I can use inside the rim to make a better glued joint. Alan
-
It adds an extra dimension and is thought provoking Alan
-
Thanks Ken Hopefully I will stay interesting Alan
-
Thank you Lou. I enjoy delving into the more obscure parts of history rather than reiterating a summary of a well-trodden route. Hopefully this won't turn out to be a turkey 😄 Thank you also for introducing me to Travis McGee Alan
-
Mike I think the diorama potential with armoured vehicles is great. I have a couple of WW1 scenes that I want to attempt. My problem is that dioramas take up more space than the model placed in a case but I really like the challenges of making them along with the diverse techniques that are possible. Alan
-
Thanks Mark, I agree with you. This is one of the forgotten corners of the desert war. Alan
-
Thank you very much Roger. I realise I have done a poor job of relating exactly where the focus of this back story is located. It is the meeting point of Egypt to the North, Sudan to the South and Libya to the West. Its deep desert several days drive from any oasis in any direction and with very few sources of water. A massif called the Gilf Kebir lies just withing Egypt and a mountain called Jebel Uweinat lies just inside Sudan. The Kufra convoys travelled to the west of the Gilf. This is a long way south of the main drama of the desert war which was mainly fought close to the Mediterranean coast so there are no wrecked tanks or battle wreckage down there. The route of the convoys is marked by discarded petrol cans and food containers along with a few trucks but they tried to reuse anything they could so a lot of damaged vehicles were hauled back to Wadi Halfa on the empty returning trucks. Those left were gradually completely stripped Alan
-
Thank you very much Mike, I have been having the same problem with aircraft models. So many interesting subjects out there but I have a growing pile of ships and now armour too. There is a growing problem with storing the unbuilt kits and a bigger problem with real estate for the finished ones. Alan
-
Egilman; I agree and this is a somewhat obscure bit of history and within it are ties to the pre war desert explorations and the search for Zerzura, the Long Range Desert Group, Operation Salaam (the mission to place German spies in Cairo) and evidence of ancient history found in the many cave shelters.. I find it all fascinating stuff Alan
-
Thank you Richard. I will continue to add notes and photos of what I know about the operations around Kufra and the associated convoys Alan
-
Thank you OC. Getting to the interesting part, details and weathering Alan
-
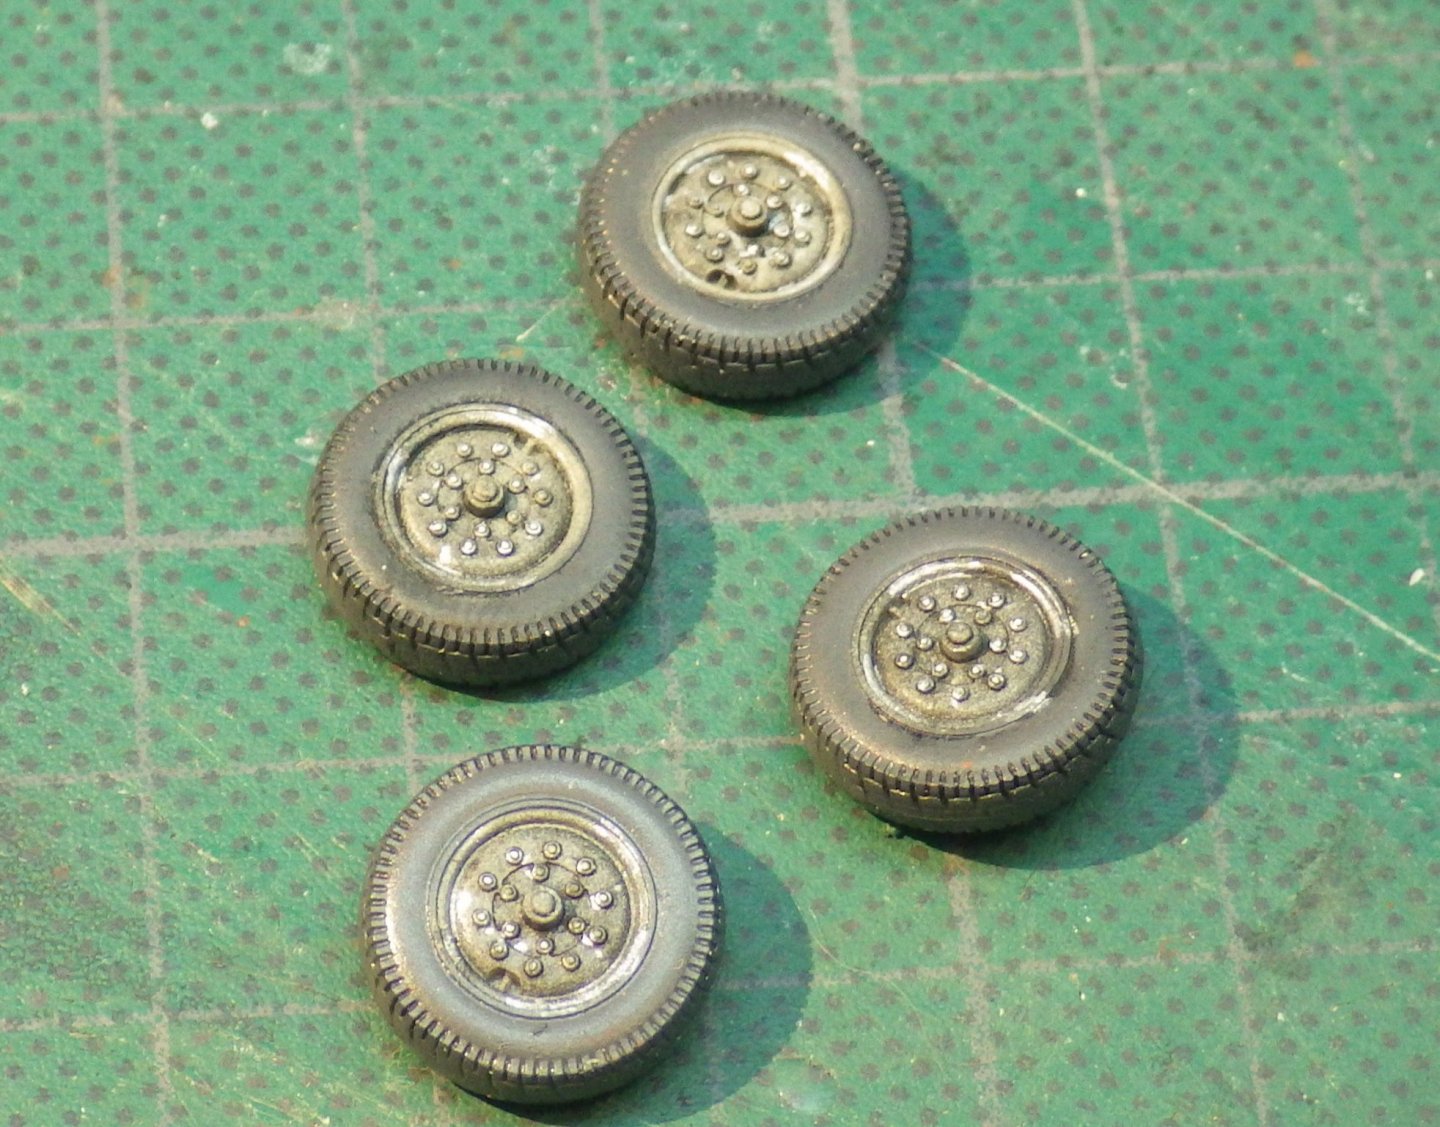
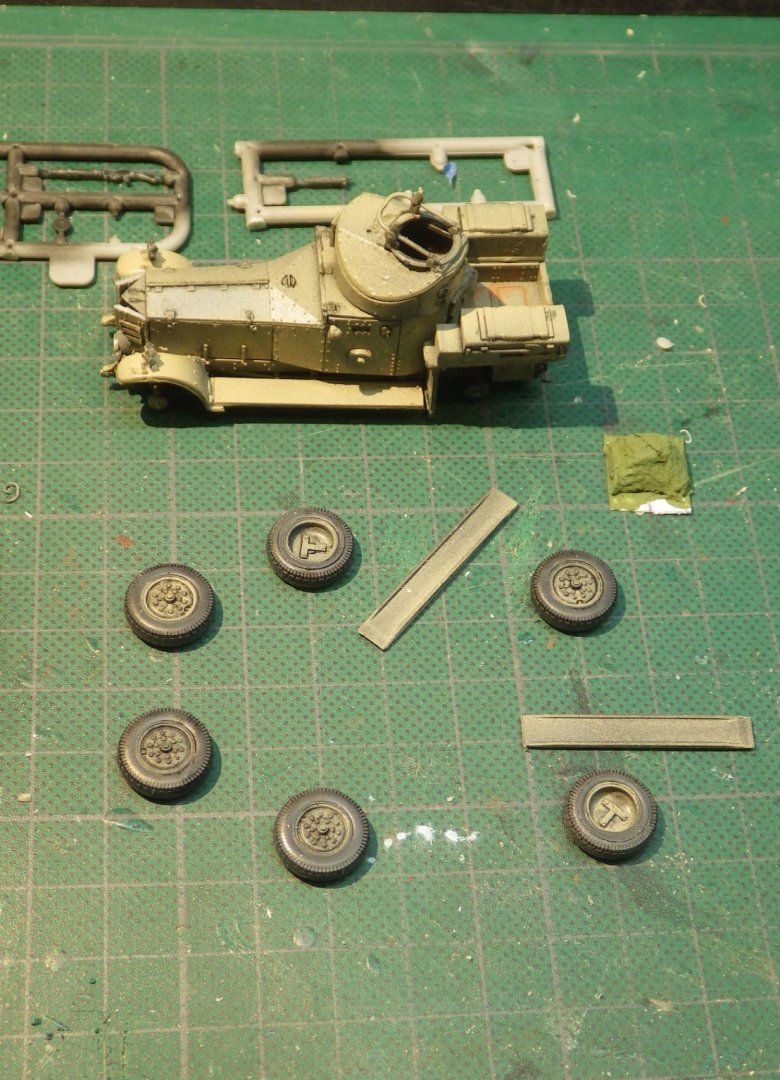
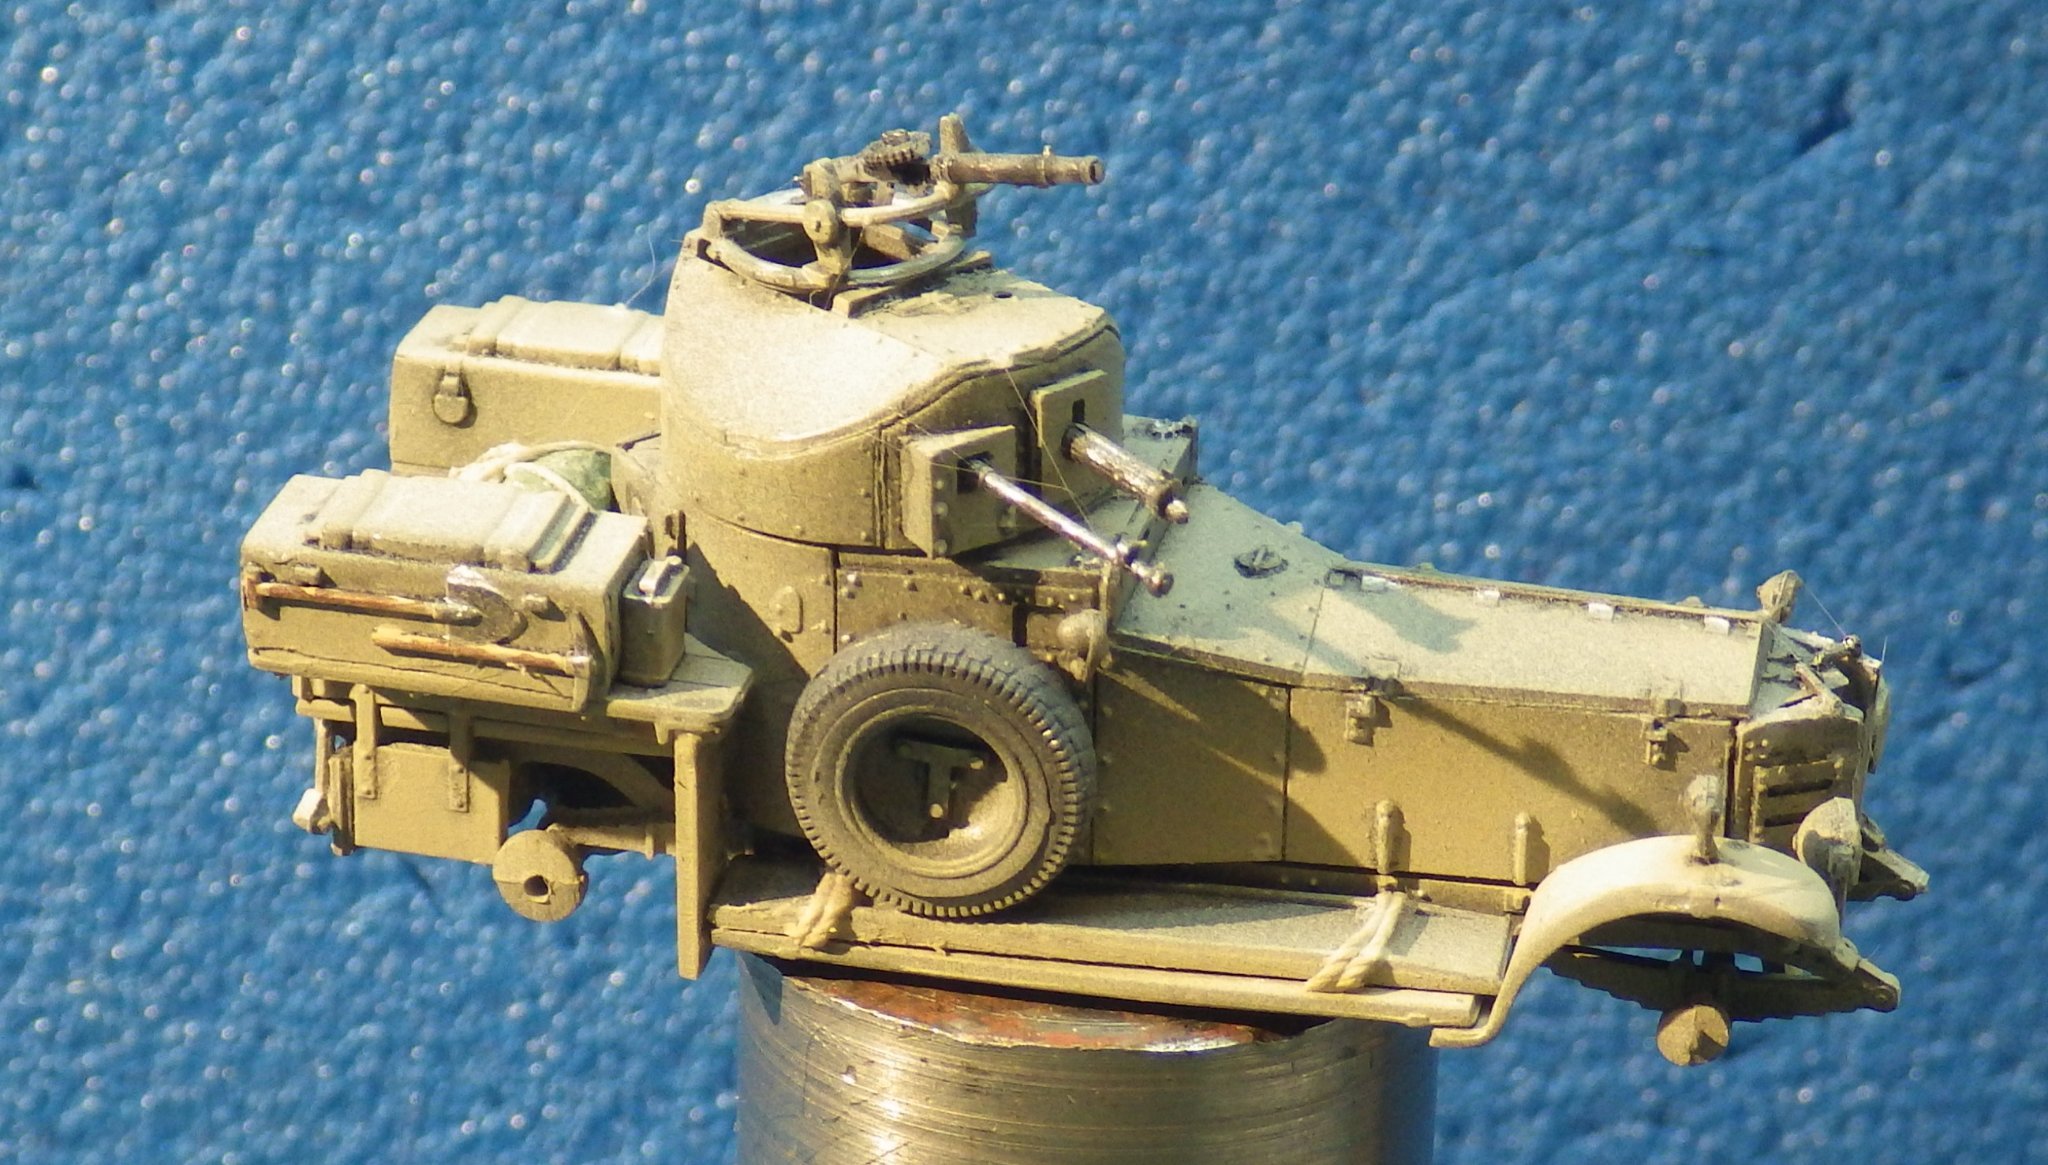
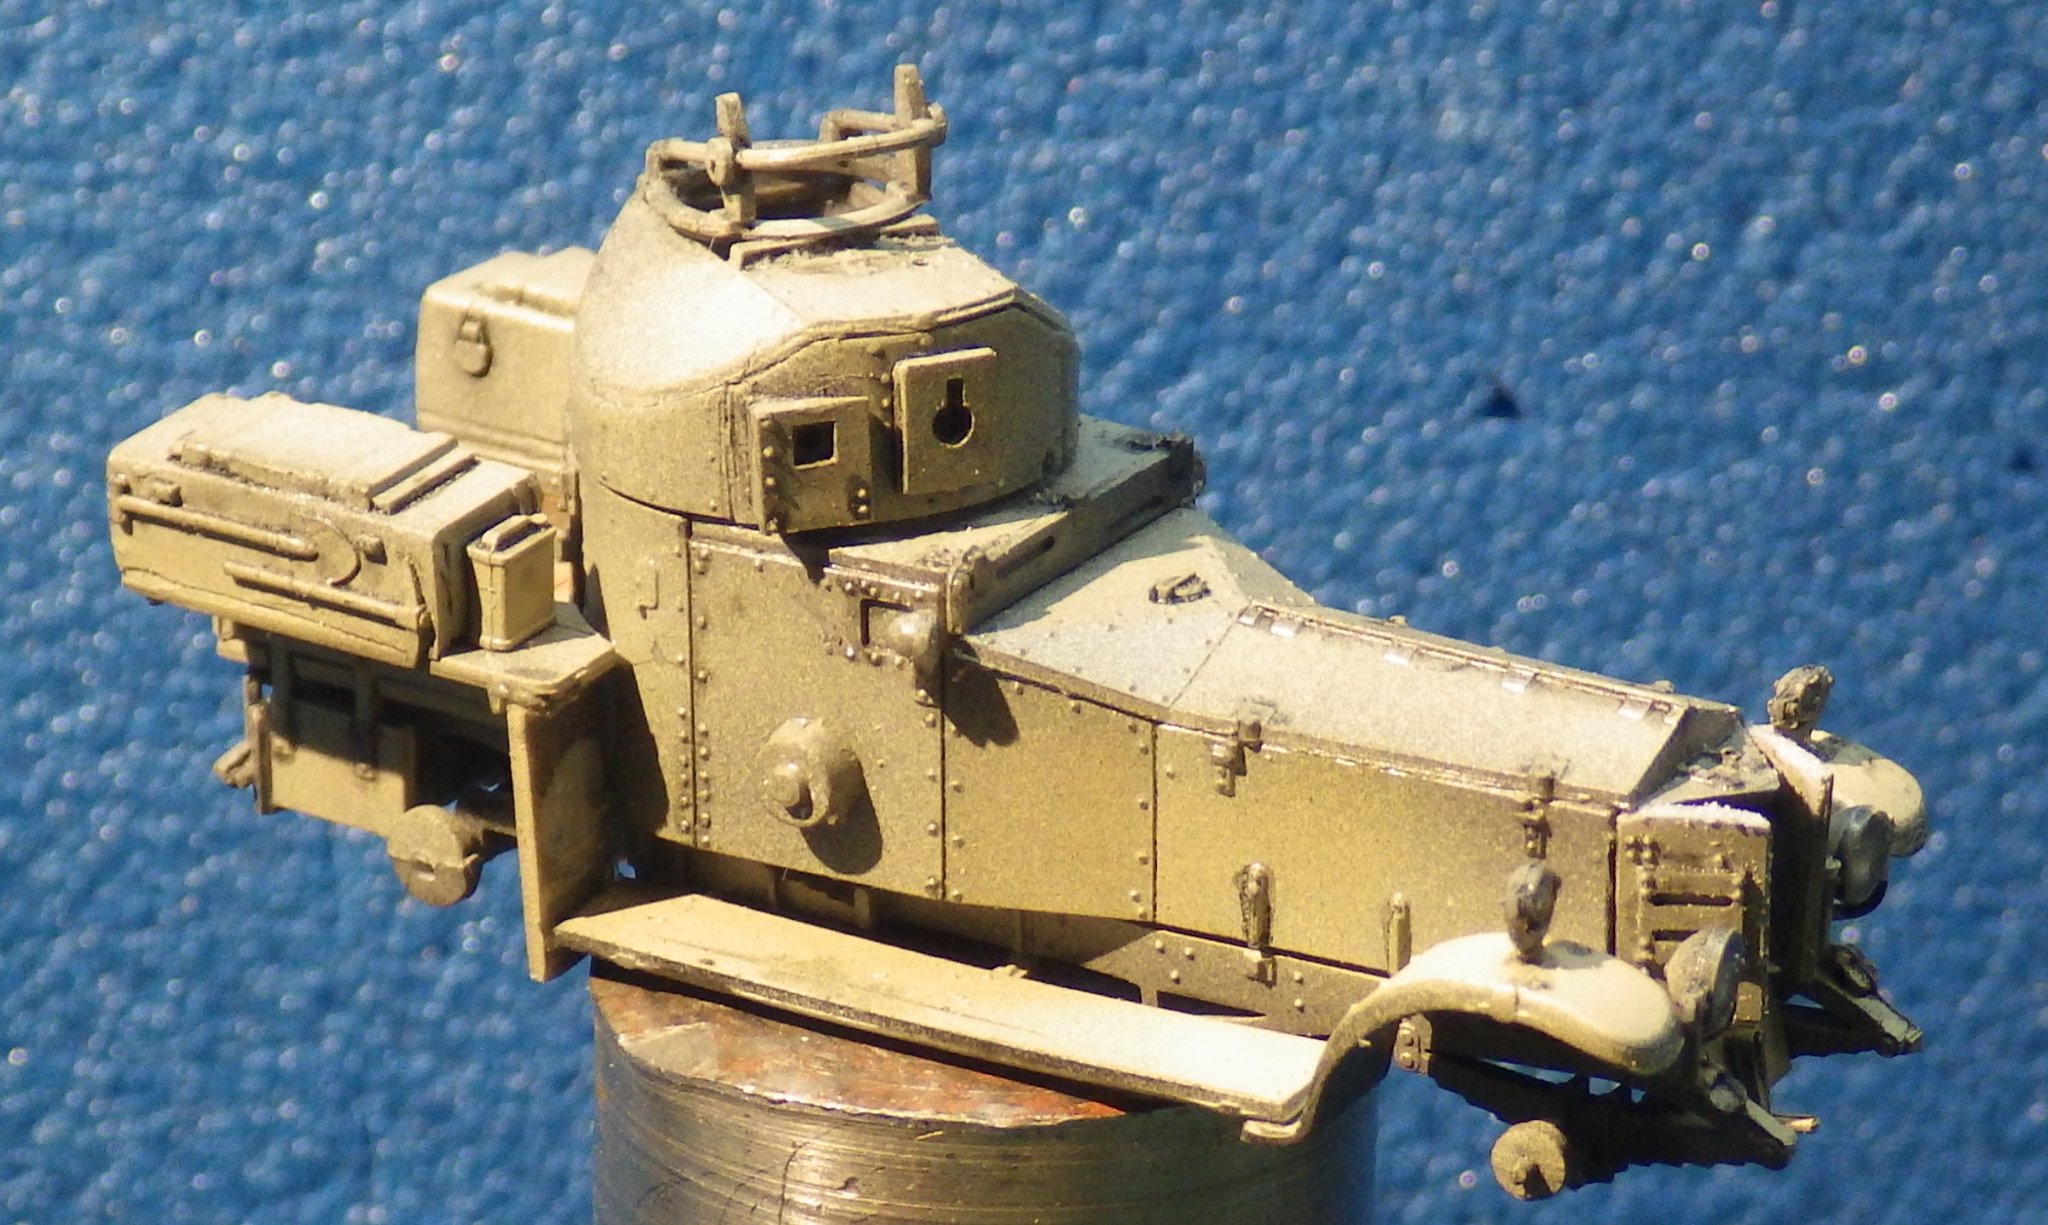
Slow progress while I have been thinking out the background to the model. I airbrushed the sand colour onto the assemblies and loose parts. I am beginning to realise that last year I had started out with limited / poor advice for using the airbrush and the maxim that you should use a fixed dilution for a given paint is not correct. I am starting to work with more dilute mixes and thin coats to allow shadowing from the primer to come through. Thank you to the masters here that have given me the insight. I really like how this is coming out as I attempt it. I am horrible at hand painting the tyres on a rim so this time I tried masking the rims with blue tack and air brushed the tyres with German Gray. Tyres would be dusty and sun damaged and not a glossy black. I will wash the treads to bring them up a little They came out better than I could manage by hand. The lights have been painted with Mig Bright metal and will be filled with window maker. The main assemblies have been fitted together ready for a gloss coat and washes and detail. The fit looks good. It looked okay at teh time but now the Scarff ring looks out of scale. I will see if a wire version will work Thank you for looking in Alan
.jpg.8fef1939ebc7acfda4742321ec817402.jpg)
.jpg.cc62281c9195b21696c0cbba3649c670.jpg)
.jpg.e07137e9cfd59958138b3580e103b64e.jpg)
.jpg.4a279813de4e8cc6ea650144e01b27e1.jpg)
- 92 replies
-
- 14
-
-
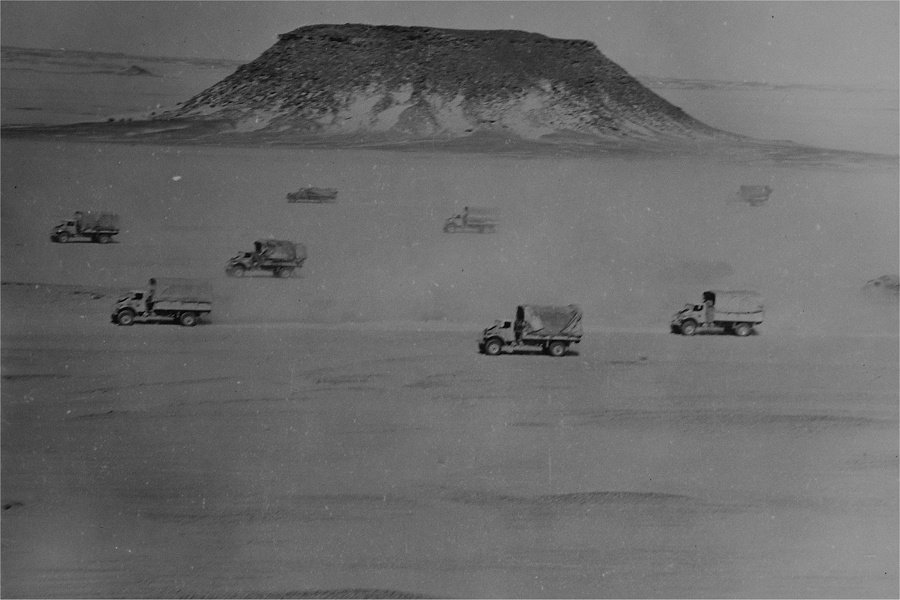
Slow progress; I had my nose in books working out background, as I try to work out a scenario for a SDF RR car. The SDF were busy before the war in all areas with the Italians in Libya in the North and Italian Somaliland in the south and east. I found some of the SDF logs for the occupation of Karkhur Murr (in the north close to the Libyan border) in 1934 and it looks like the vehicles were all Thorneycroft cars. The IWM photos of the Rolls-Royce SDF cars is dated 1941 in Omdurman so they had them then in possibly a sand and brown paint scheme In the south the Italian threat was removed as the British Gideon Force pushed the Italians out of Ethiopia in 1941. The camel corps of the SDF were part of Gideon Force but the country was not conducive to vehicle patrols. In March 1941 Kufra Oasis (in southern Libya) was captured by the Free French and became a base for the British Long Range Desert Group and was garrisoned by the SDF. The SDF also had responsibility for running the Kufra convoys to supply the oasis from Wadi Halfa 1200 kms away on the Nile. My reading shows that the convoys were lightly escorted, they were far from the fighting and petrol was an issue. Typically a convoy would use thirty trucks with twenty carrying supplies and ten carrying petrol for the convoy. As fuel was used trucks were left behind to be reclaimed on the way back The sand is quite firm in this area with a thin crust on top. Once broken the crust doesn't easily reform and so the convoy tracks are still there 80 years later. So my location for the Rolls-Royce cars is on garrison duty at Kufra in 1942. My colour scheme is plain sand which seemed to be the dominant scheme for SDF trucks and cars on convoy duty. They are all seen as light and single colour. Abandoned SDF trucks from teh convoys are all single colour Even the evidence of lunch is still there too I may be completely wrong but it fits what I want to do and none of my neighbours appear to be ex-SDF. I have decided not to try to bulge the tyres. My book notes that too low a tyre pressure resulted in punctures and too high a pressure got you stuck. As experience developed they generally used 30 psi in the sand. the tyres are nothing like modern sand tyres and the photos hardly show any deformation. I will probably just flat them a little. If the historical interludes are boring please let me know and I will desist. I find this area hugely interesting and can get a bit out of hand. Thanks for looking in Alan
.jpg.9bbcb177bc4bab1e0cd1b7f334caac3d.jpg)
.jpg.cc07b5eeafe1545dfec0027f181ea9b3.jpg)
.jpg.aa17e068f9cd56b5e15304d6eb765cf8.jpg)
.jpg.f69f5df54aaa847843a09fb2d38e5233.jpg)
- 92 replies
-
- 11
-


.jpg.b5edbc04ddf5b4a20983e1982dede3cf.jpg)