


king derelict
-
Posts
3,295 -
Joined
-
Last visited
Content Type
Profiles
Forums
Gallery
Events
Everything posted by king derelict
-
Thats a good point OC. I do like the look of the railings it somehow finishes the model off. On the other hand I don't usually add the rigging. In 1/700 its almost invisible and I fear the load on the delicate masts. I have a couple of the easy IBG destroyer kits to experiment on but at a foot or so the rigging just isn't visible. Alan
-
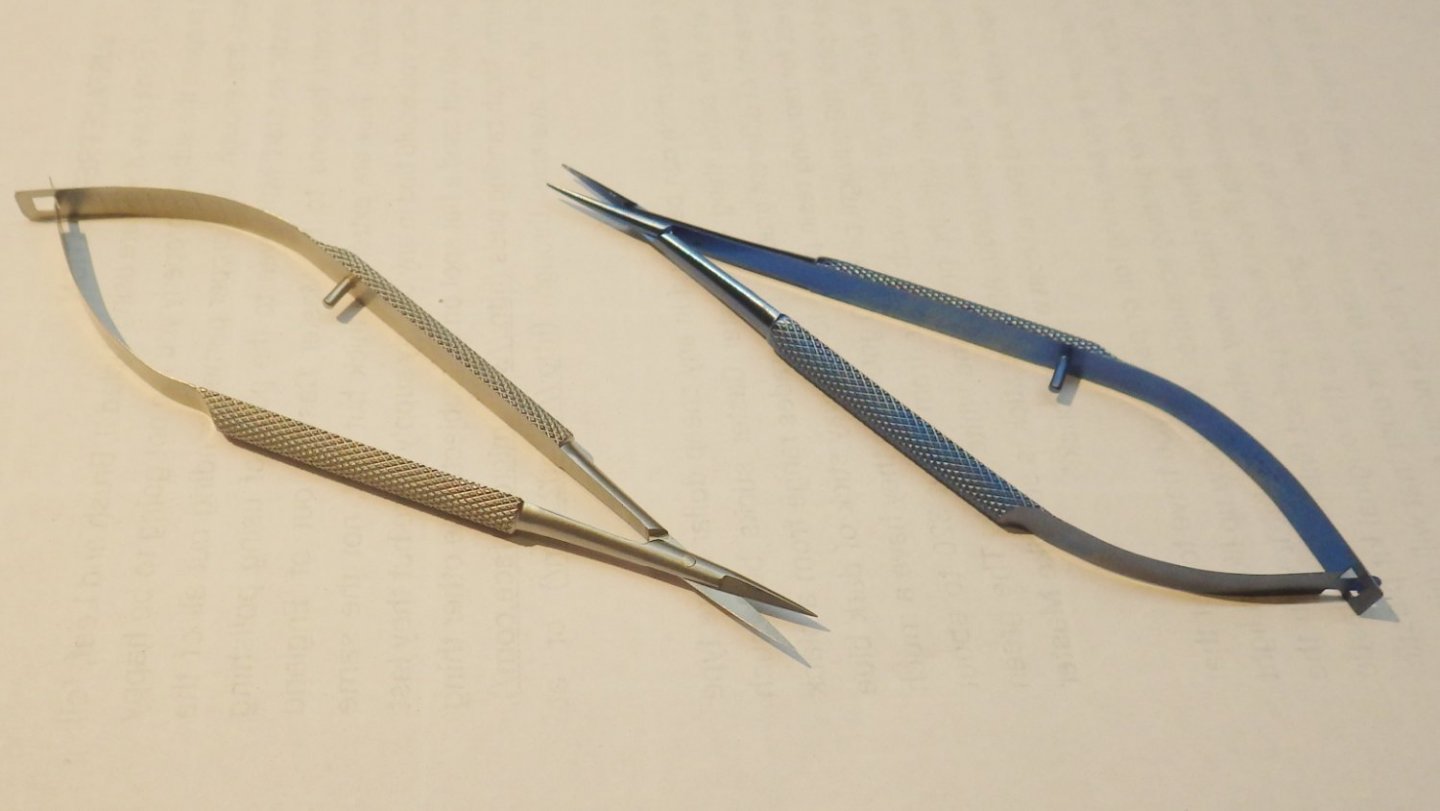
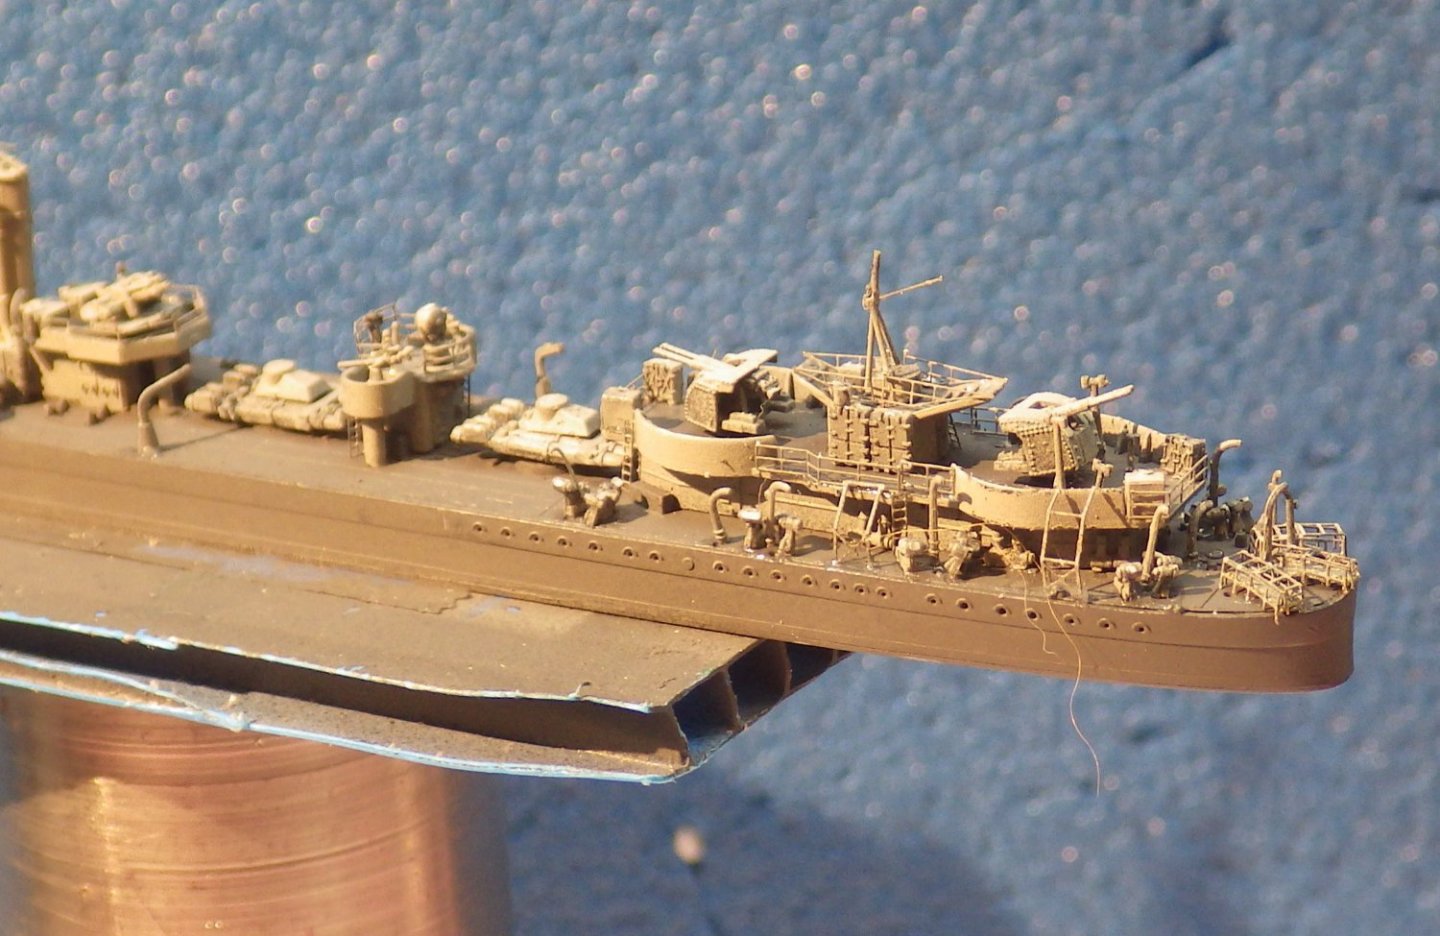
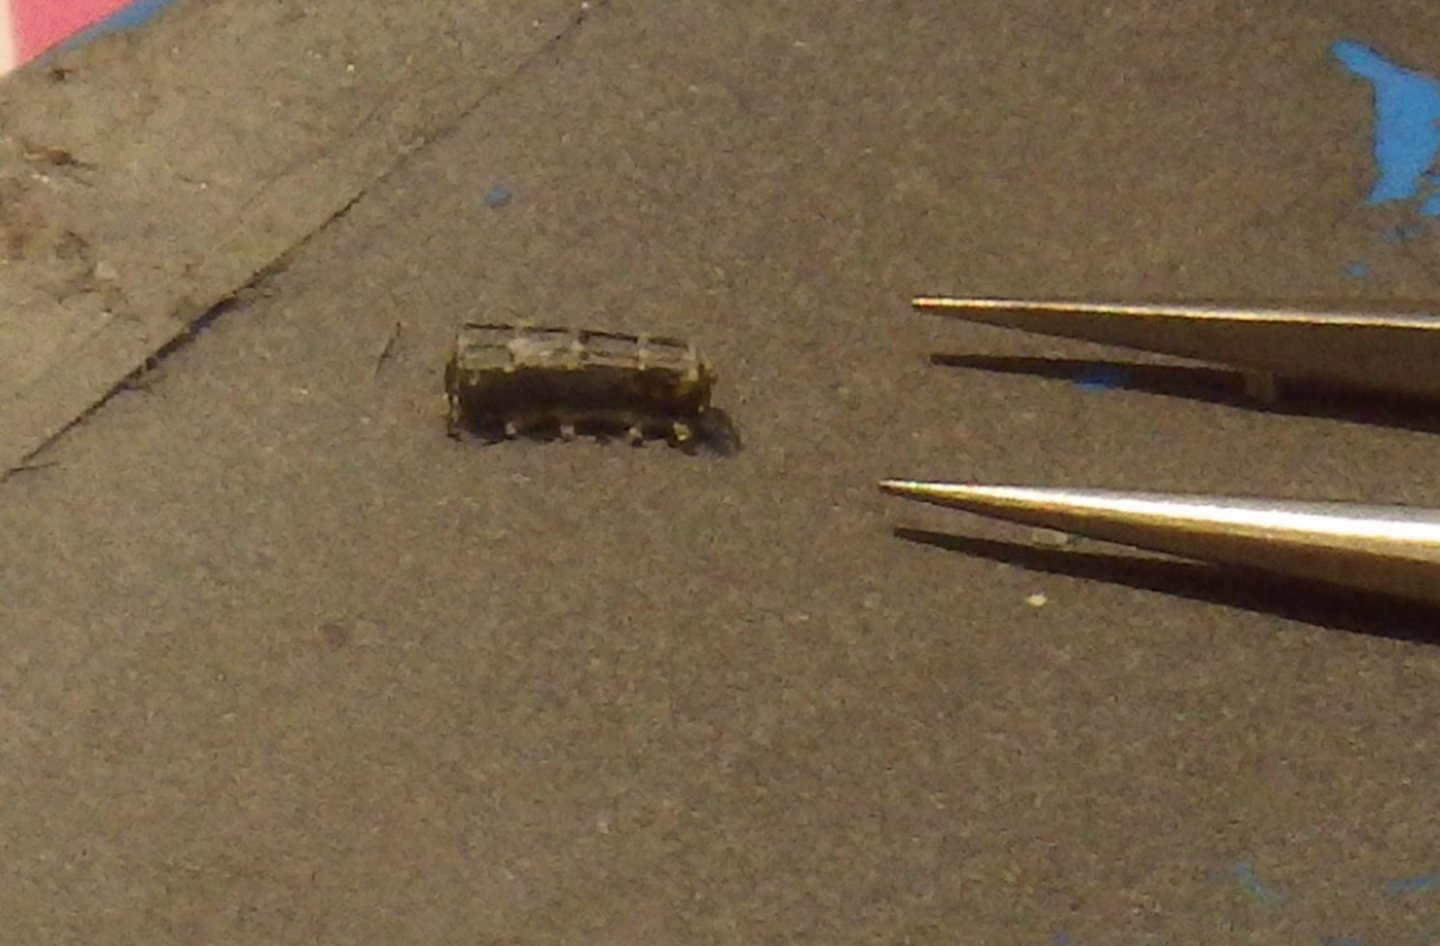
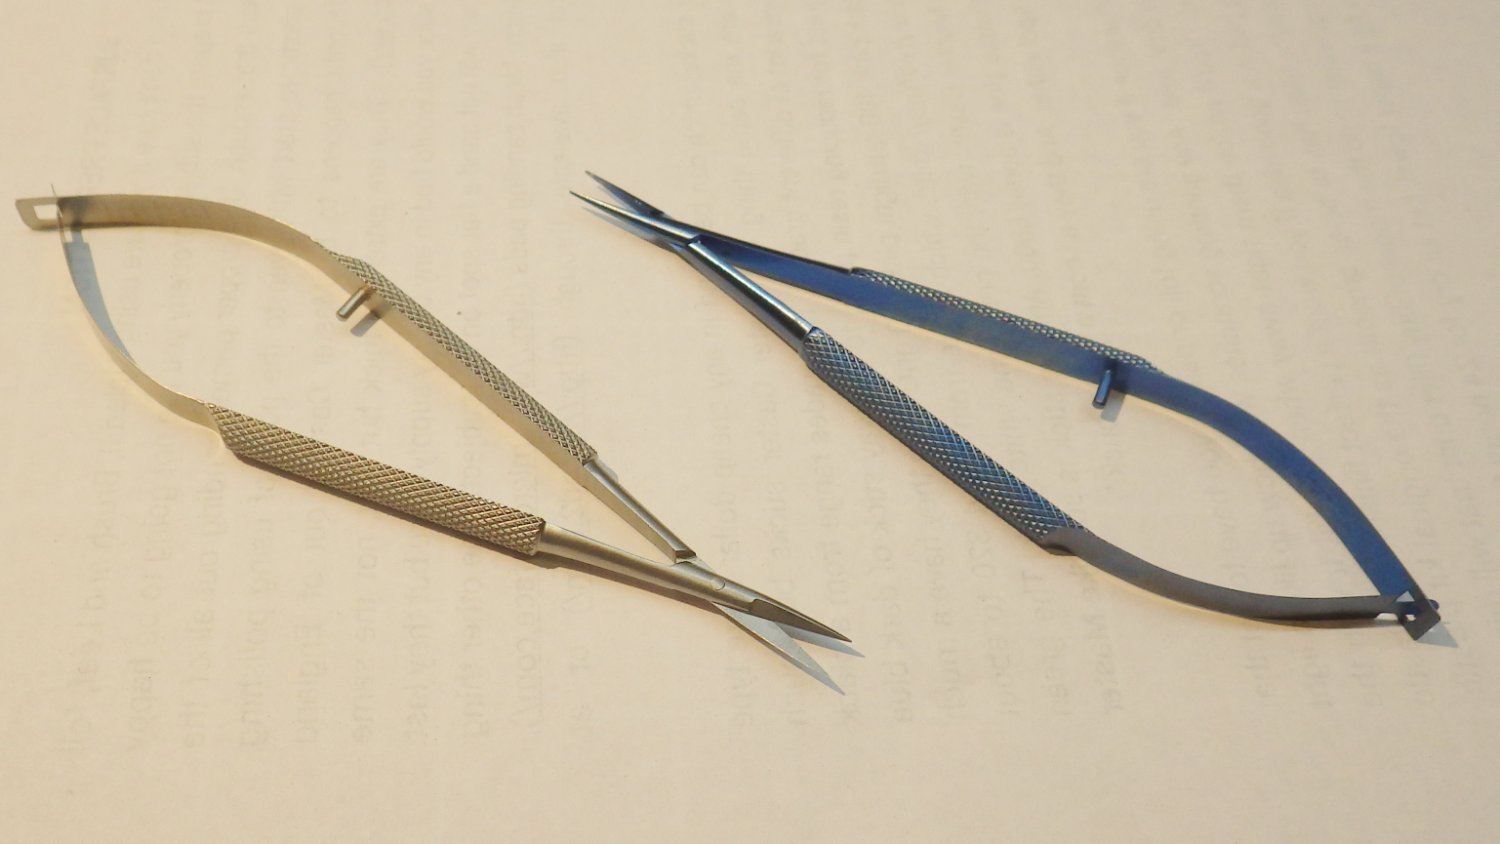
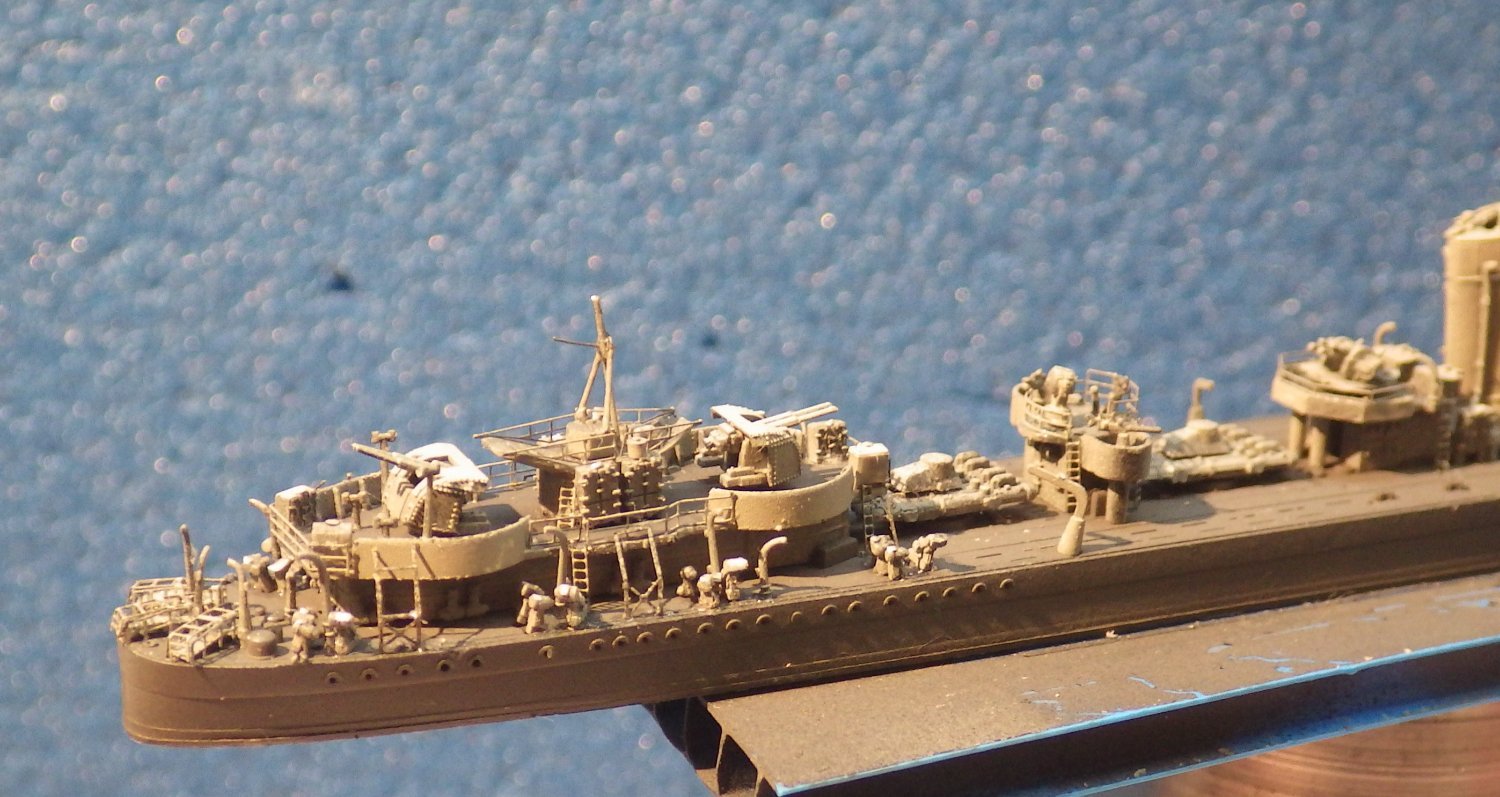
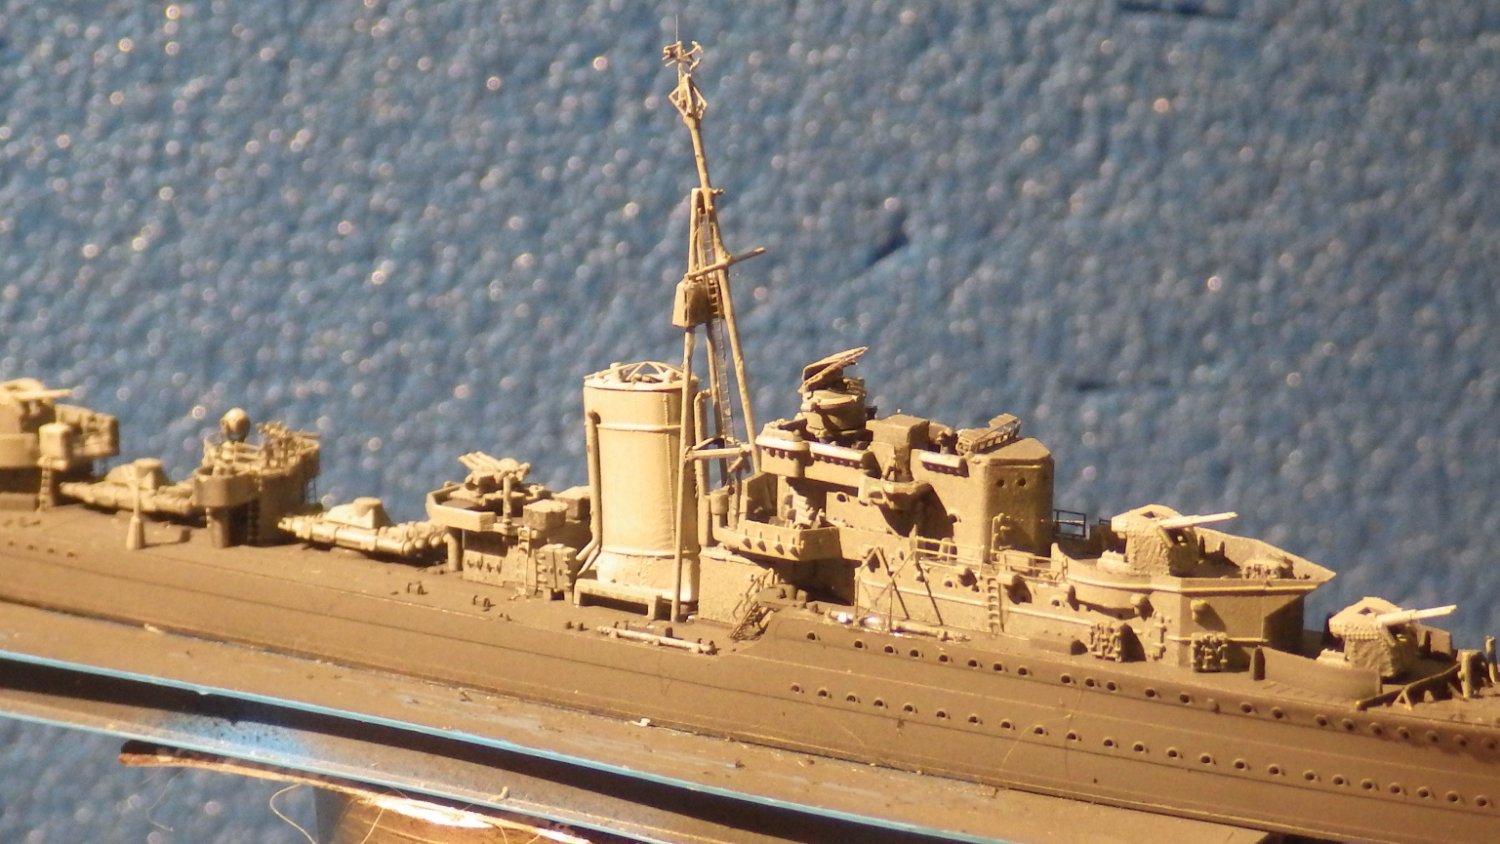
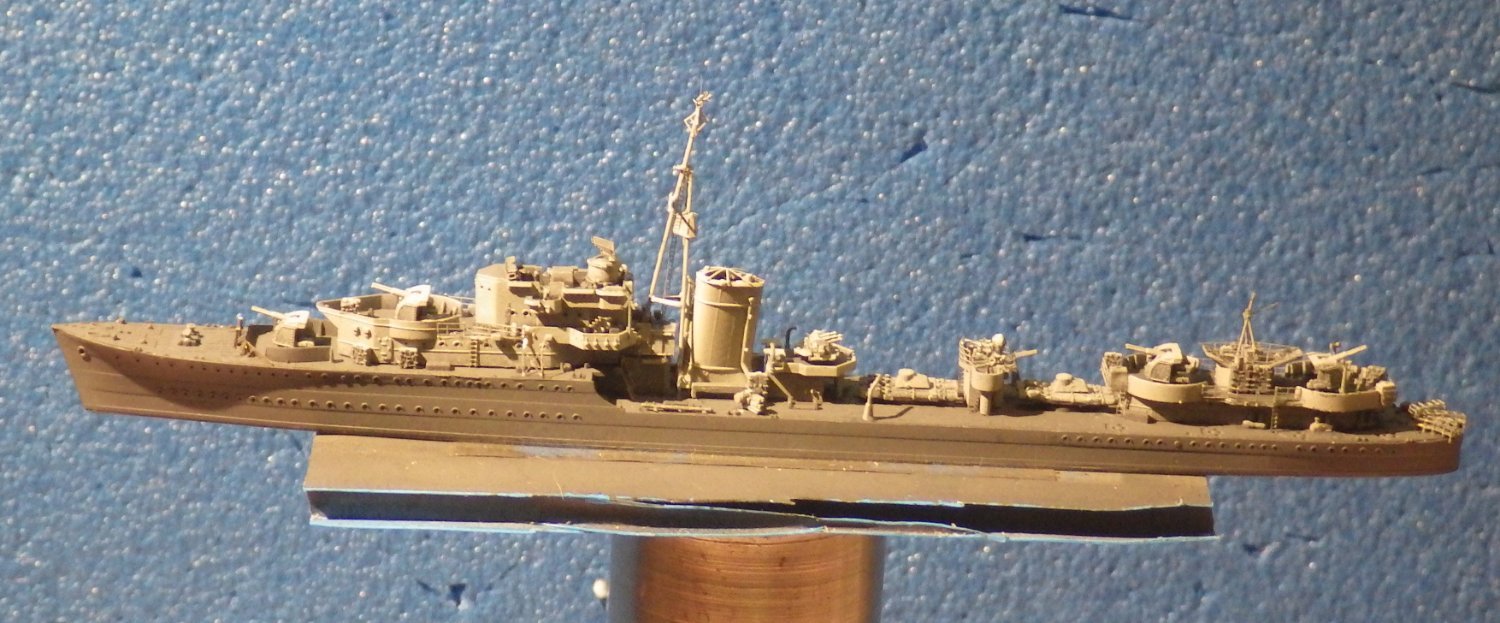
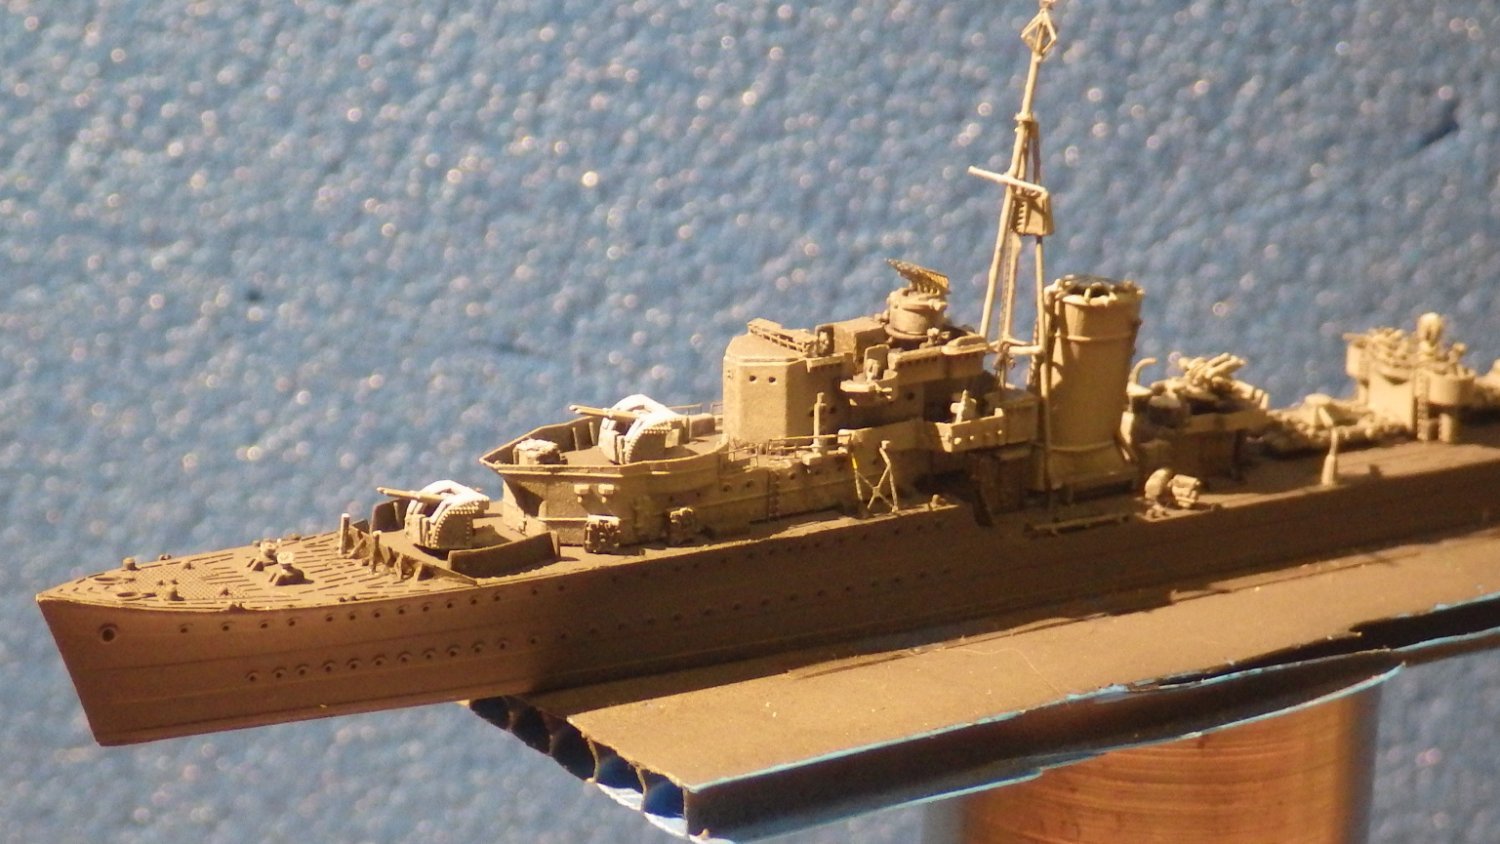
All the upper deck PE is installed and the lockers, depth chargers and throwers are placed on the main decks. A late Christmas present showed up today. The scissors are very nice and should allow precise cutting. They seem sharp and well made. The blue tool is a pair of fine tweezers. I'm still getting used to them. They seem good for control when placing small parts but at the moment I am experiencing a higher percentage of "ping" events with small parts departing the tweezers at speed. That is probably my lack of familiarity. So, touch up of the paint and washes are next. Thanks for looking Alan
.jpg.451f315d30cf1426f1738c12e825b7ac.jpg)
.jpg.f4c42f7c47b3afade33a53c72426bbdd.jpg)

-
Thank you kindly OC. I swear the PE is thinner than the norm for Flyhawk. The PE davits are actually too thin I think. The plastic ones might be a but chunky but the PE ones are like hairs stuck on the model. I had to use a couple because the plastic ones were damaged and i don't like them too much. Alan
-
Thats another good point Mark Thanks Alan
-
Thank you for the confirmation Egilman. The SDF only had a handful of the Rolls-Royce cars and they were used for patrol and garrison work so very possibly were not marked. As far as I know they were never used in WW2 combat Alan
-
Thanks for the kind comment and the input. So far I haven't found any photos showing how the SDF marked their cars. I have thought of using the ID numbers provided in the kit and then part obscuring them with sand and dust. Alan
-
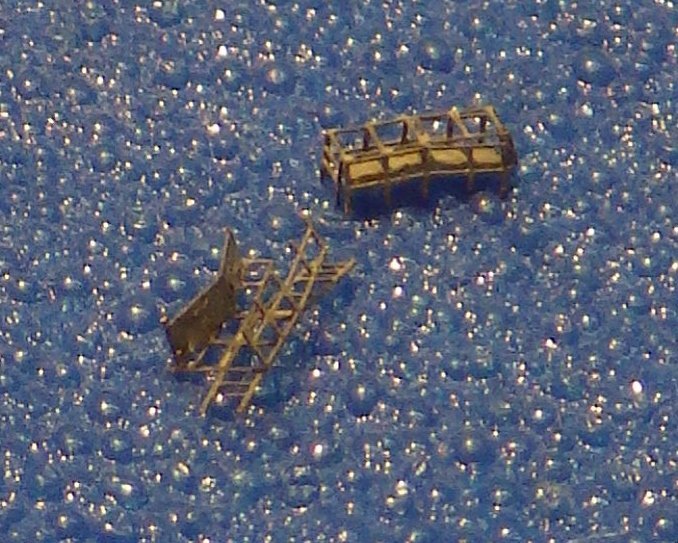
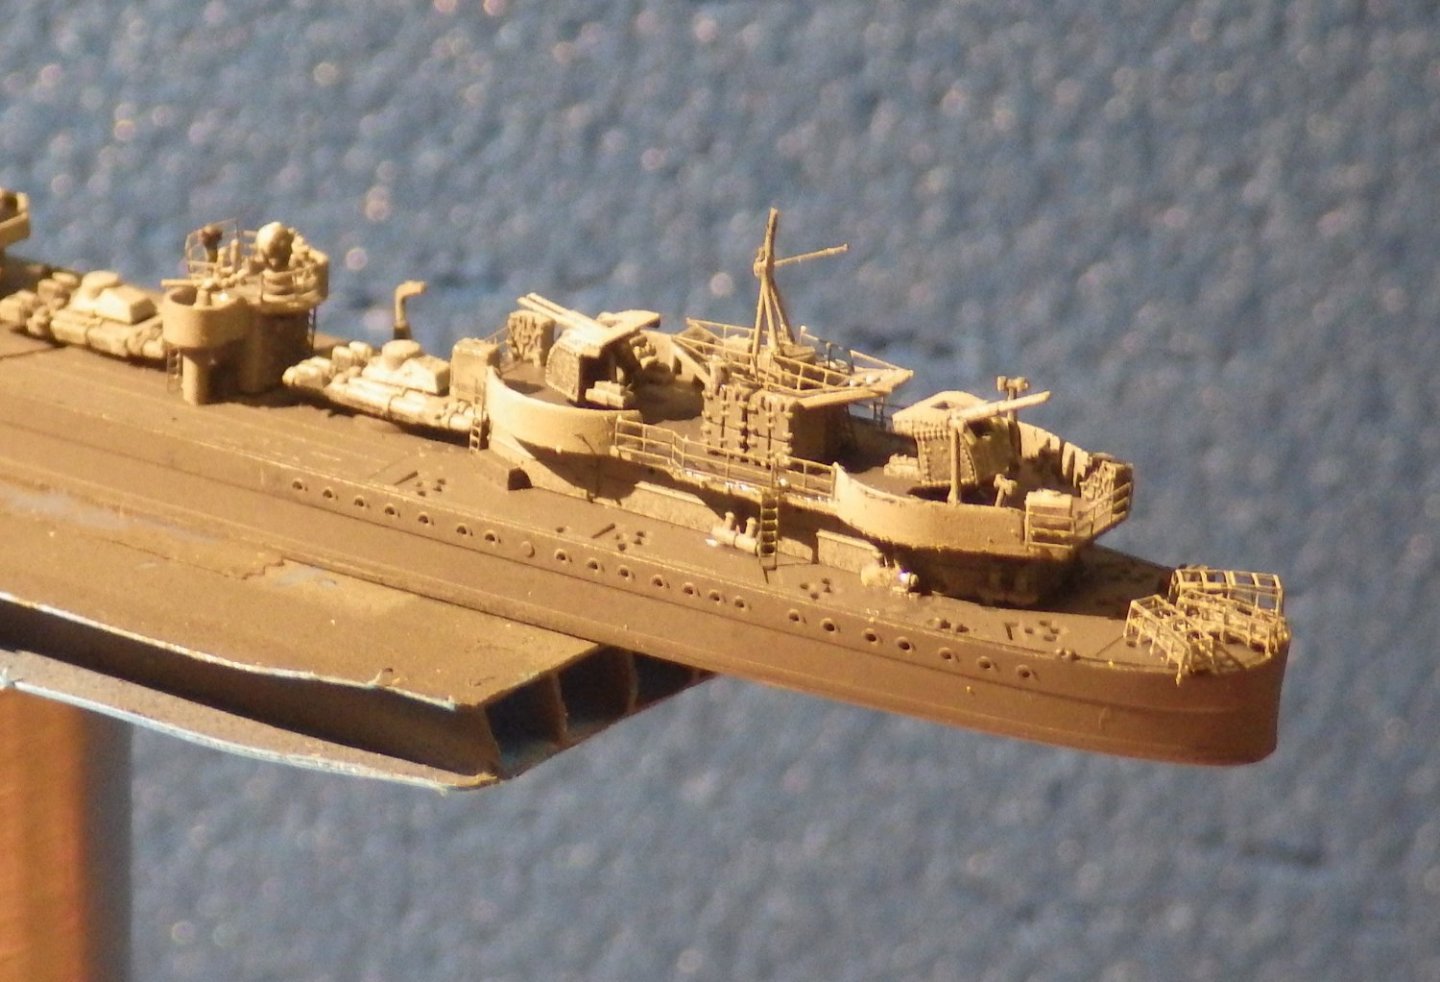
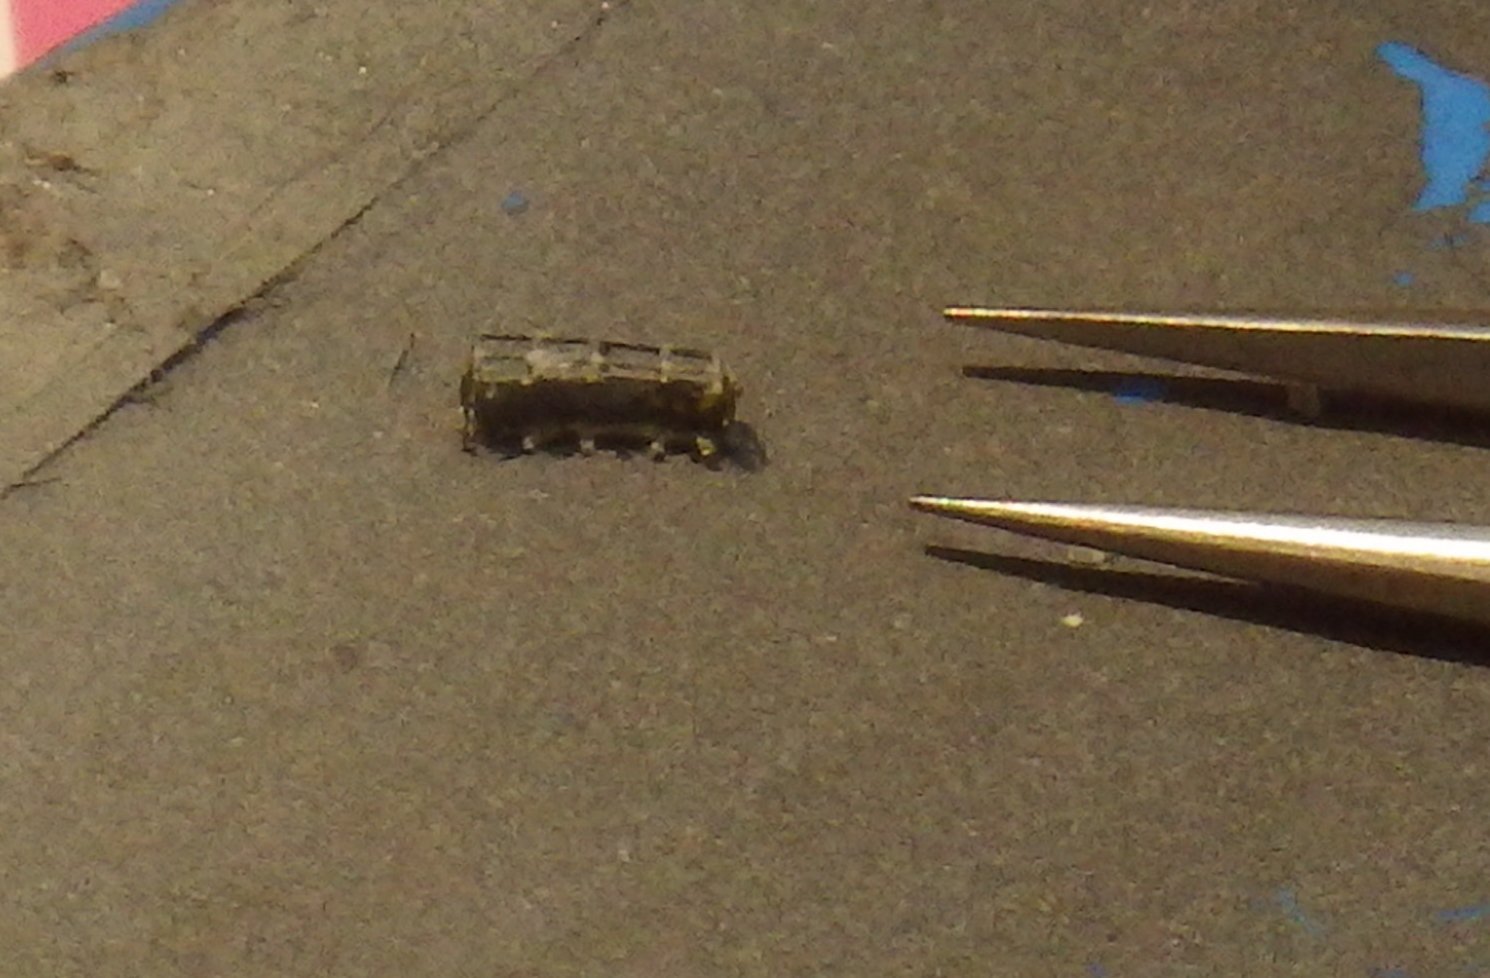
I did find that all three depth charge rails are needed so the first one will go in the middle where it is harder to see the detail. I made up the others by making the first fold and then gluing the solid floor onto the side frame and letting it dry before folding up the rest of the rail frames. The Gators Grip glue worked well. The slight elasticity that remains when the glue has set means that it floor didn't ping off while being worked around. The picture shows one set of rails completed and the last one in process The I fitted the repaired main mast and this time it dropped into place first time. I had taken the precaution of putting a little Gators Grip on the forward leg but no fiddling was necessary this time. Then it was back to adding the PE ladders and continuing with the railings. So far it is going nicely although the PE is very flimsy. I'll finish all the upper deck railings and then add the depth charger throwers and rafts and boats before the main deck railings. Thanks for looking Alan


-
I suffered a minor setback today. I was dry fitting the main mast and managed to drop it as i was trying to line up the three legs. I managed to repair it but it also needed to get a better paint job so attention switched to the PE railings. I focussed on the upper decks at the aft end of the ship because I'm likely to forget myself and put my stubby fingers in the wrong places when I make a second attempt at getting the mast in. So far so good. I then spent an inordinate amount of time on the first depth charge rails. Folding the body was quite straightforward but setting the solid floor in the frame was extremely vexing. I think this is adequate but after leaving it alone for a while I think I have a better way to do it and there is also a spare set of parts so I can choose the best of three. Tomorrow the Christmas decorations have to come down so progress might be a bit slower than usual Thank you for looking in Alan
.jpg.3f5d70e3824d59efde3e901953f911dd.jpg)
.jpg.7b72f7208287b32737bd516e5ec44ad6.jpg)
.thumb.jpg.1e33538964bd66834e0a36d957db68b6.jpg)
-
Thank you Mike The detail on the plastic is amazing. If they provided railings, ladders and the bigger gun barrels i could probably manage without the full deluxe kits. The plastic davits are better than the PE on this one I think Alan
-
Thank you kindly OC. I know what you mean; I suppose its the downside of the delicate Flyhawk mouldings. The thin mats and booms are really difficult to get cleanly off the sprues. I have started cutting those pieces out of the sprue away from the part and then cleaning it up by cutting close in once its separated from the main frame. It gives me better access and puts less stress on the part I think. Alan
-
Happy New Year All. I hope you had a great holiday season. I've been making slow progress in short sessions and haven't had a chance to catch up the log. Some photos also got omitted but nothing serious. The sub assemblies, parts on the sprues, PE frets and the hull all got a coat of the Vallejo black primer. The hull got a coat of Tamiya XF24 after masking the hull the decks got the deck grey. Its difficult to see the difference between the hull and the deck. The decks were then masked The superstructures were painted with 507C along with the majority of the parts still on sprues and the PE frets. Now its back to the Flyhawk magic. Those tiny pieces that make up the details. These are the capstans for the foredeck New year and a new cutting mat. I'm hoping small parts might show up better than on the dark green one. My clumsy handling of the epoxy glue has spoilt the old one. New magnifying glasses too. The old ones just failed at the side pieces - again. The superstructures and main guns have been added and the detail is starting to build up. Still a a lot of parts on the sprues and in the PE frets I'm pretty happy that I didn't bother with the brass gun barrels; the plastic ones are not really clumsy. That pink mat seems to have messed up the colour balance in the photos. I'll do better next time. Thanks for looking in Alan
.jpg.0cdacf904333242565e8b42d939bbb50.jpg)
.jpg.75b4f93389a5d826061157e88c11abc0.jpg)
.jpg.a1af6e94fd0d51de637b04e04c7291f2.jpg)
.jpg.ef35e054cb0ebfcae5ccac9b9df6d624.jpg)
.jpg.c993848ca761e16e3e39c9ea0e50e5d1.jpg)
.jpg.cb5cb575756afa0656167ea0192dacc7.jpg)
.jpg.d605637701c07fbd8965e438cedfc15f.jpg)
.jpg.80372ce9d1e01b8219236cac184dcea2.jpg)
.jpg.0644469f301039c56daa5846fed891b2.jpg)
-
Thank you Boydie. This PE seems thinner than the usual Flyhawk stuff. Thankfully there aren't any really complex structures to fold up. The tripod mast seems to have all the horrors Alan
-
A stunning model. Great work Alan
-
And now as I intended - darn autocorrect Hi OC, Flyhawk and White Ensign have frets of railings in various style. Flyhawk have "easy glue" generic railings as well as specific WW2 RN railings. I have used both successfully although cutting a strip out of a fret full of railings is likely to make your eyes cross. good luck
-
Hi OC, Flyhawk and White Ensign have frets of railings in various styles. Counsel have "easy glue" generic railings as well as specific WW2 RN railings. I have used both successfully although cutting a strip out of a great full of railings is likely to make your eyes cross. good luck Alan
-
Railings scare me OC, but I think I'm improving. Craig, @CDW is my mentor and his tips have helped a lot. The two biggest improvements for me were. - Working with short sections of railings, even for the straight sections. Getting the sections to join up on the model has been relatively easy once the previous section has dried. - Using Gators Grip glue which I think is a PVA type instead of CA glue. It gives time to adjust and it's easier to clean up. I let it sit for a minute to tack up before placing the section. The two items are kind of related. The shorter sections are easier for the glue to hold on place straight away. When I tried to install the railings in the lengths supplied I found it hard to place accurately along its length and then it would gracefully fold over at the deck edge because the glue couldn't hold it. So far I've been airbrush painting the railings and touching the up after installation. At 1/700 they are a challenge to me. If you get heavy handed with the paint or glue its easy to fill in the spaces between railings. Fragile things indeet. Alan
-
M29 Weasel family 1/72 (scratch) by Backer Finished
king derelict replied to Baker's topic in Non-ship/categorised builds
Patrick. They look very good Alan -
Thats a very thoughtful gift OC. It should make a beautiful model. It will be interesting to see how much of the bonus stuff is really necessary. I got a new salt shaker😄 Alan
-
Thank you Mike. Well the PE on Lance is certainly recalibrating my eyes back to 1/700 detail Alan
-
I'm looking forward to your Aurora build. That looks like a great kit. I might have to get it to complete the Force K set.
-
Thanks Boydie. Its fun so far but you are right about the PE. Some of the parts are breaking away in the frets just from moving them about. Alan


.jpg.8c66cffca5954343fe0d4ed7e134f43a.jpg)
