


king derelict
-
Posts
3,295 -
Joined
-
Last visited
Content Type
Profiles
Forums
Gallery
Events
Everything posted by king derelict
-
The brass barrels look much nicer. It's a good choice and you added the brass neatly. I always seem to set mine at an angle. Alan
-
Drawing the profile on paper or making a card profile is a great way of getting complicated railing runs to work nicely. Alan
-
Looking forward to this Egilman. I have a Vampire in the pile that needs a bare metal finish and I haven't a clue so I will be all attention here Alan
-
The cats are absolutely stunning. The weathering is so effective Alan
- 126 replies
-
- 7
-

-

-
- Thetis Bay
- Finished
- (and 4 more)
-
The weathering of the wooden decks looks very good. The wood really has character. Do you use washes or oils to get that effect? The model definitely looks like its in an upward trajectory now. Great stuff Alan
-
I worked through the decals on the flight deck. All the landing spots crows feet are complete along with the foul line and the elevator markings. I need to let this all dry thoroughly before adding the tram line which will run down the gaps in the crows feet. The tie down points have been great reference markers for setting the decals and I think they are reasonably accurate. I did find one issue which gave me some thought. For the F-35 test flying a yellow cross bar was added to the tram line about 230 feet from the bow as a reference point. This is not standard and so not included in the kit. I was wondering if I dare mask the line and paint it - and then would the masking rip up the tram line decal. I was looking though the decals provided for the air wing and USMC vehicles and found there are yellow strips provided for the LCACs which I won't be using so I might be in luck. The AV-8B markings look better than the Orange Hobby ones and the MARINES markings are provided as well I moved onto adding the decals to the island. It was definitely easier while the island is off the boat. There are a couple of discrepancies with the kit positioning of the smaller decals but mostly they are correct. The AFFF station markers line up with the photos. Back to the hull and the aircraft again. Once the broken SH-60 is glued down on the hanger deck I can put the roof on and start the delicate business of adding the PE catwalks. Thanks for looking in Alan
.thumb.jpg.259570705bad313973a35ff1519c1084.jpg)
.jpg.a827ce01de11f45cd1b04385fc7c5d39.jpg)
.jpg.03d118839eb2227808dec45b5a5bb069.jpg)
.jpg.aac19dc25dcd4ef09389071fa68241f1.jpg)
.jpg.0331271704e9669164bcafd980f20a80.jpg)
-
Thanks You Mike; This is a slow build; having so much reference material seems to mean I spend half of the time looking at photos and comparing the real ship with the kit. Alan
-
Thanks Chris; I should have thought of Spain. They have AV-8Bs and an assault carrier and I believe are still actively interested in the F-35B. Alan
-
I reached a milestone today - slowly as usual. The last PE railing, the ladders and the masting has been completed on the island. Well thats not quite true; I left off one piece of railing to give me a place to press on the island when it gets put on the deck in case it needs to be given some assistance. I put a coat on clear on the port and starboard sides. I think its going to be easier to add decals while it is off the hull. I am really glad I put the warning decals around teh Sea Sparrow and CWIS at the start of the island build up. They are pretty much buried now The SH-60s got a coat of dark Ghost Grey. I used Humbrol Maskol to mask the canopy areas. It seems to get awful reviews but we shall see how it works out I started adding the decals to the flight deck. As always sequence needs thinking through. I think the landing spots crows feet need to go on before the tram line but I'm thinking the foul line needs to go down at the start so I will add that next and go back for the rest of the landing spots. The decals silvered probably because of the tie down dimples so i have ladled solution on and it seems to have taken care of it. Thanks for stopping by. Alan
.jpg.a3a324b7868f288c5ff887e0f7b4d043.jpg)
.jpg.e273708f888c3bdac2bebb5c1c6390a1.jpg)
.jpg.39dfc3be2dae0e5701db30bebabacc8e.jpg)
.jpg.a0ba8d0f19e939e0233e2b28dd327f65.jpg)
.jpg.18f7328909ae1386e806bacf0eadda63.jpg)
.jpg.cf3acda005ba4dadf0bed4938ed9a325.jpg)
-
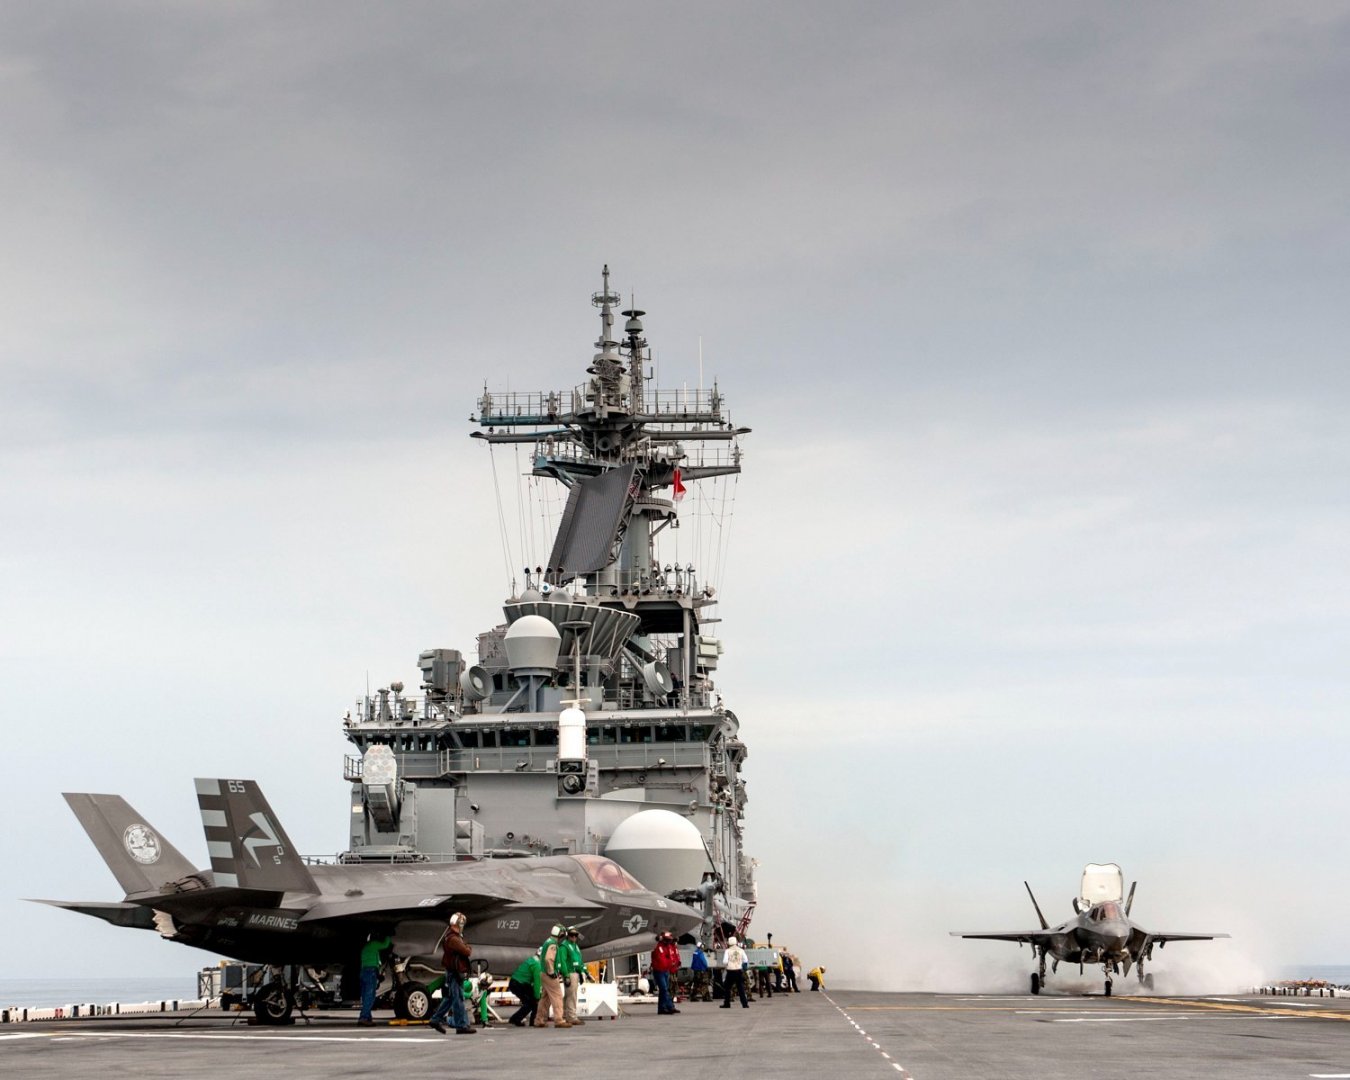
Mike, your numbers tally with mine. I think we got below the $100 million a copy for the F35 a couple of years ago. Back when the programme was launched the target price was $50 M compared to an AV-8B at $35 M. Already crashed five of them. Alan
-
We are harsh critics of our own work. We know where every piece of bent PE is and every fleck of missing paint. The informed viewer misses most of that and the average viewer isn't aware at all. I think as the final details go into place and obscure some of the problems it will be a great kit that you will feel good about. I don't know if I'll ever be good enough to complete a kit without any mistakes and the Wasp is proving to be at my limits but its still a a worthwhile venture. Last time I looked your Hood was looking great so I'm sure you will recover and complete an impressive model. The handling is an issue. I'm lucky with working on waterline models I can fix the hull to a base and use that to handle the model. It keeps my messy paws off the paint and it also stops them damaging the PE (well, most of the time) Good Luck Alan
-
Thanks Mike Its slow progress. The structure of masts and arrays is the most complicated set up I have attempted. And its all got PE and fiddly details to add so a lot of puzzling through the sequence. It seems to be a pretty authentic model in this respect. Alan
.thumb.jpg.413689e5ed23af5df471946b0b5b06d2.jpg)
-
Absolutely beautiful Yves. You took the base kit to a whole new level of detail and finesse. Having worked with the PLA plastic I can really applaud your finished model. It is difficult stuff to work with. I need to continue along the road with my more pedestrian effort. I use your build log constantly for inspiration. The virtual kit is a great concept and I would like to see more development in the field. Alan
- 321 replies
-
- 7
-
-
- Finished
- Flower-class
- (and 1 more)
-
Thanks OC, They really nice little models. I hope I'm not going to mess them up in painting. Alan
-
Thanks Ken That is something new for me. I can't see trainer / transport markings applying to the F-35s. I think the Aussie markings are a bit out of register too. The Roo is a bit off centre Alan
-
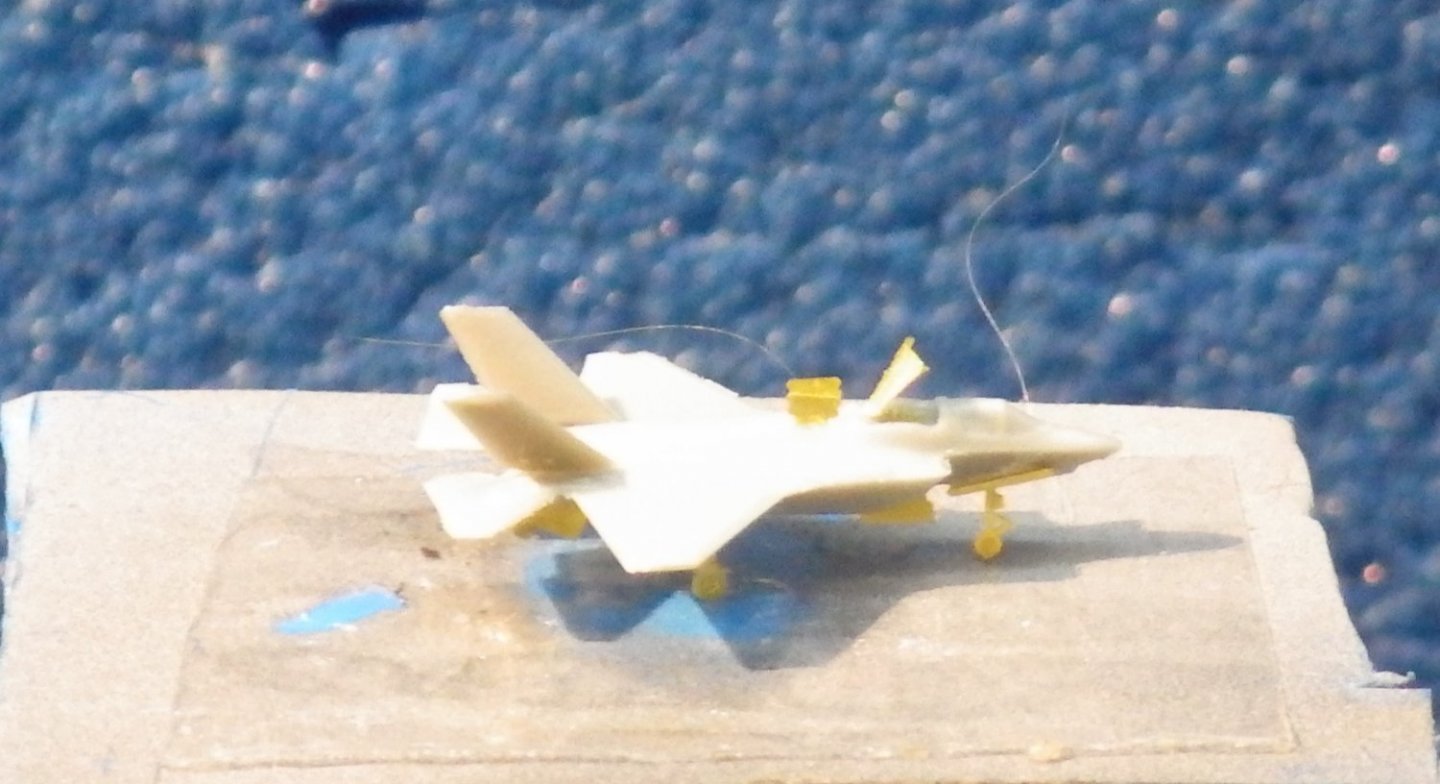
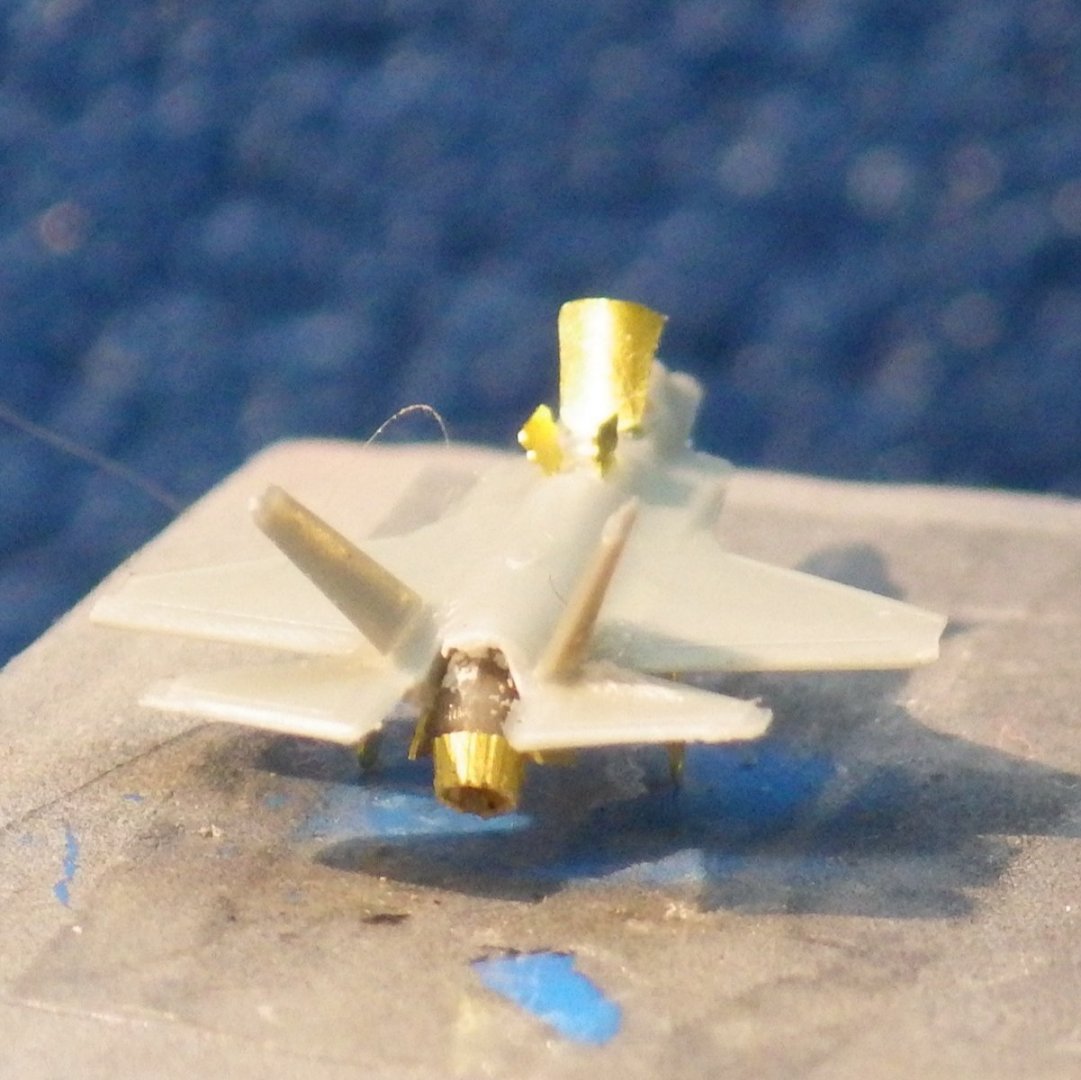
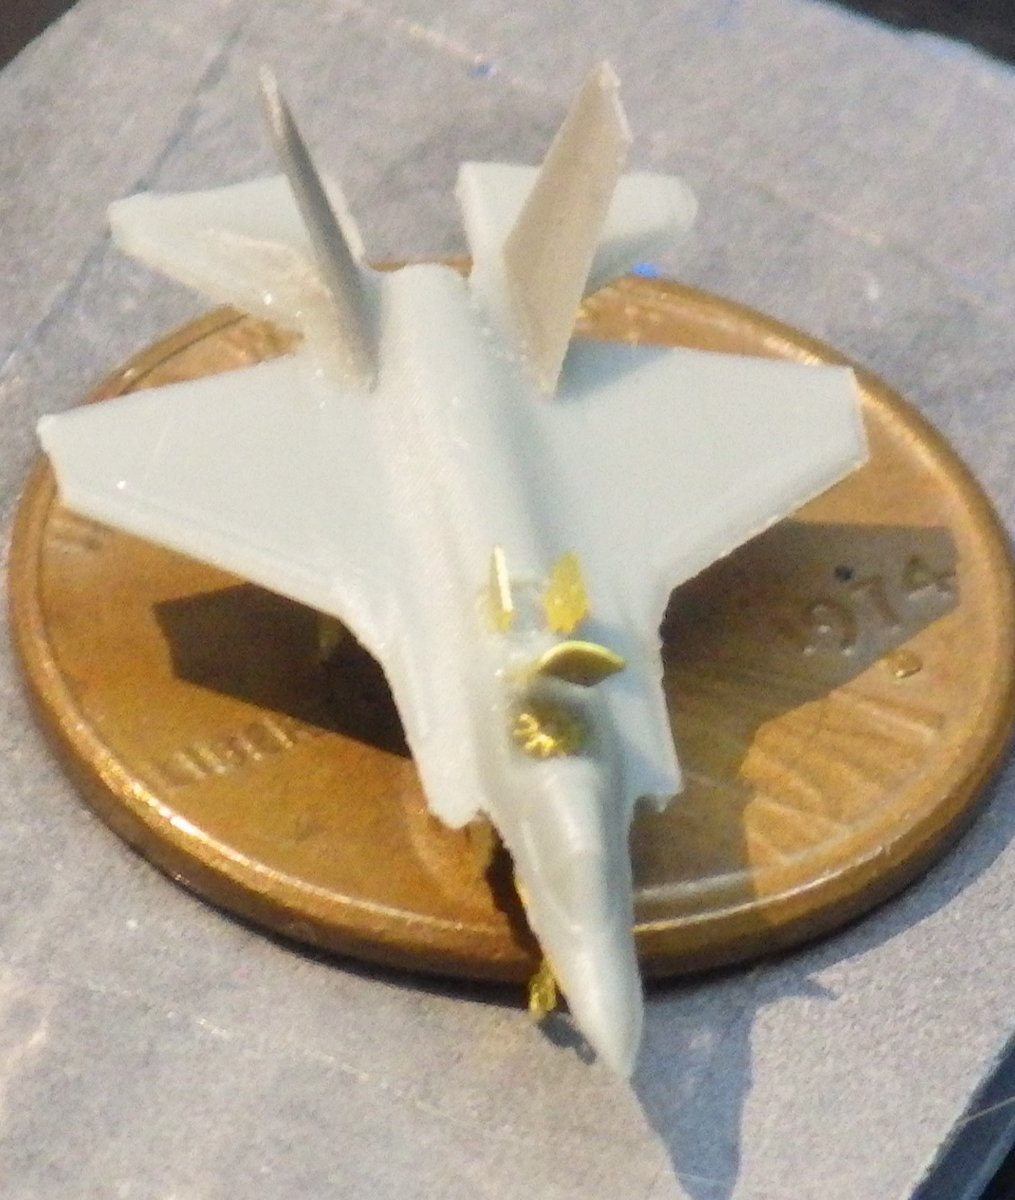
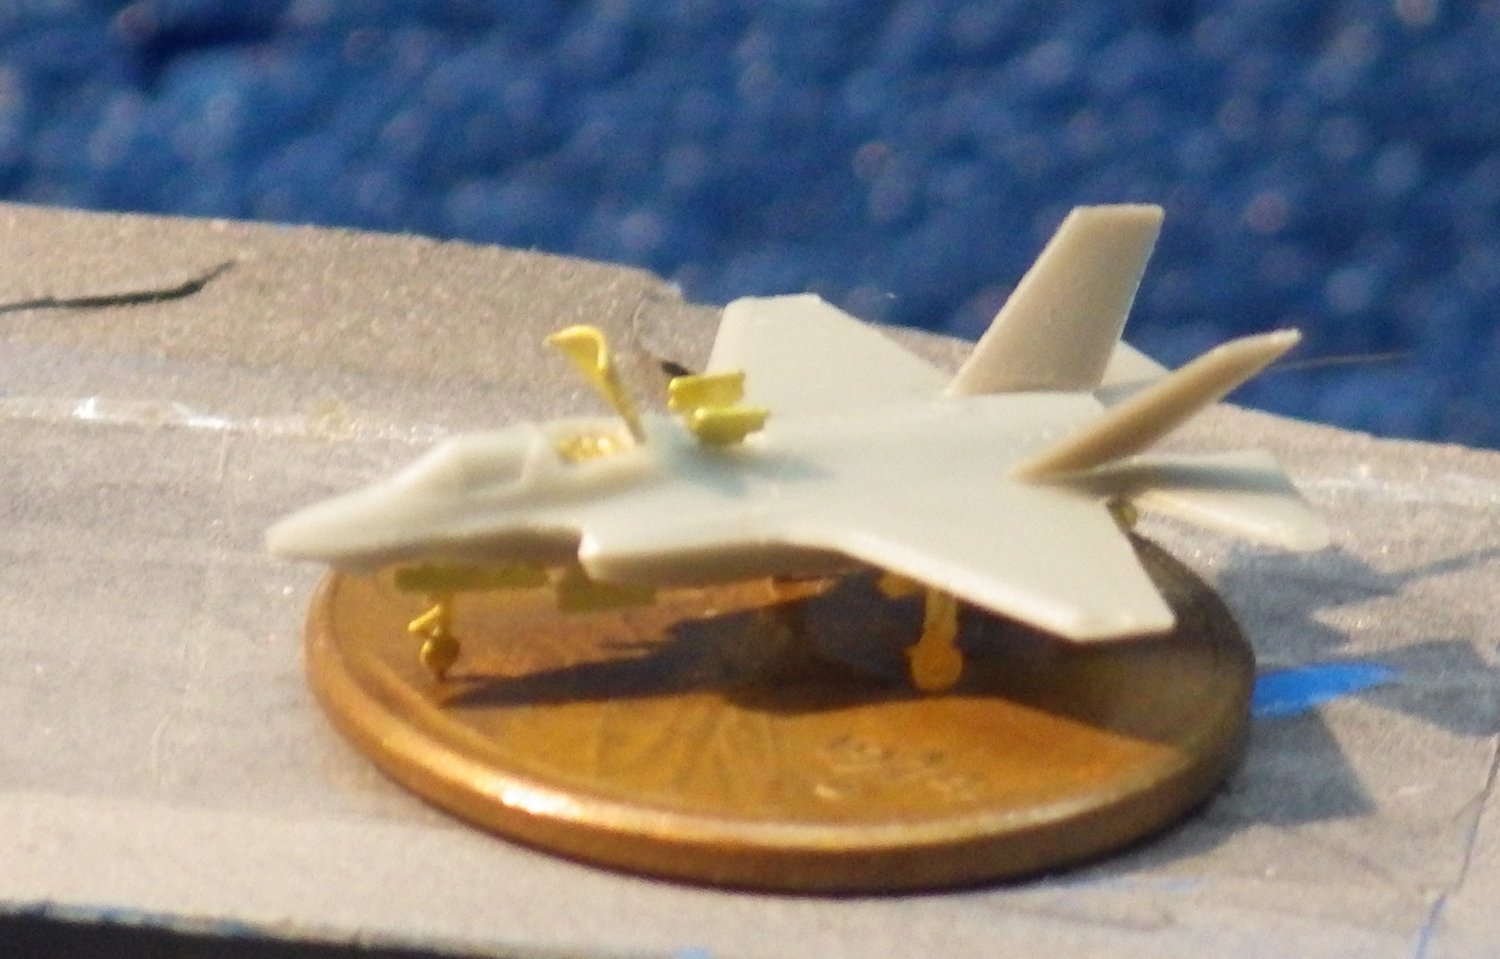
The island is still growing. I like the Eduard PE so far althoiugh I have mostly only used the railings so far. It bends nicely at the correct places and it is very "dead" with little spring. It is thick enough to stay straight and give you a second chance if you bend the wrong way. I thought I would have to build this piece up in several sections but it actually bent nicely in one piece. So more platforms, railings and radar arrays added Then I got distracted and opened the bag with the F-35Bs in it and built one in take off configuration. There are fifteen parts to make up the jet and bending the exhaust nozzle is a bit of a breath holder. There is even a tiny Liftfan in the intake. I'll probably make a second STOVL configuration and see if I can do better although I only need one. The second aircraft will have all the doors closed. Just need to survive the airbrush now. Thanks for looking in I hope everyone has a great weekend Alan
.jpg.433e755b0e05c3a36fd01b2fa11adf29.jpg)
.jpg.bc3b64cbc019d9863e17d3c09643471e.jpg)
.jpg.da34d1a175184edccd08a46542421c4f.jpg)


-
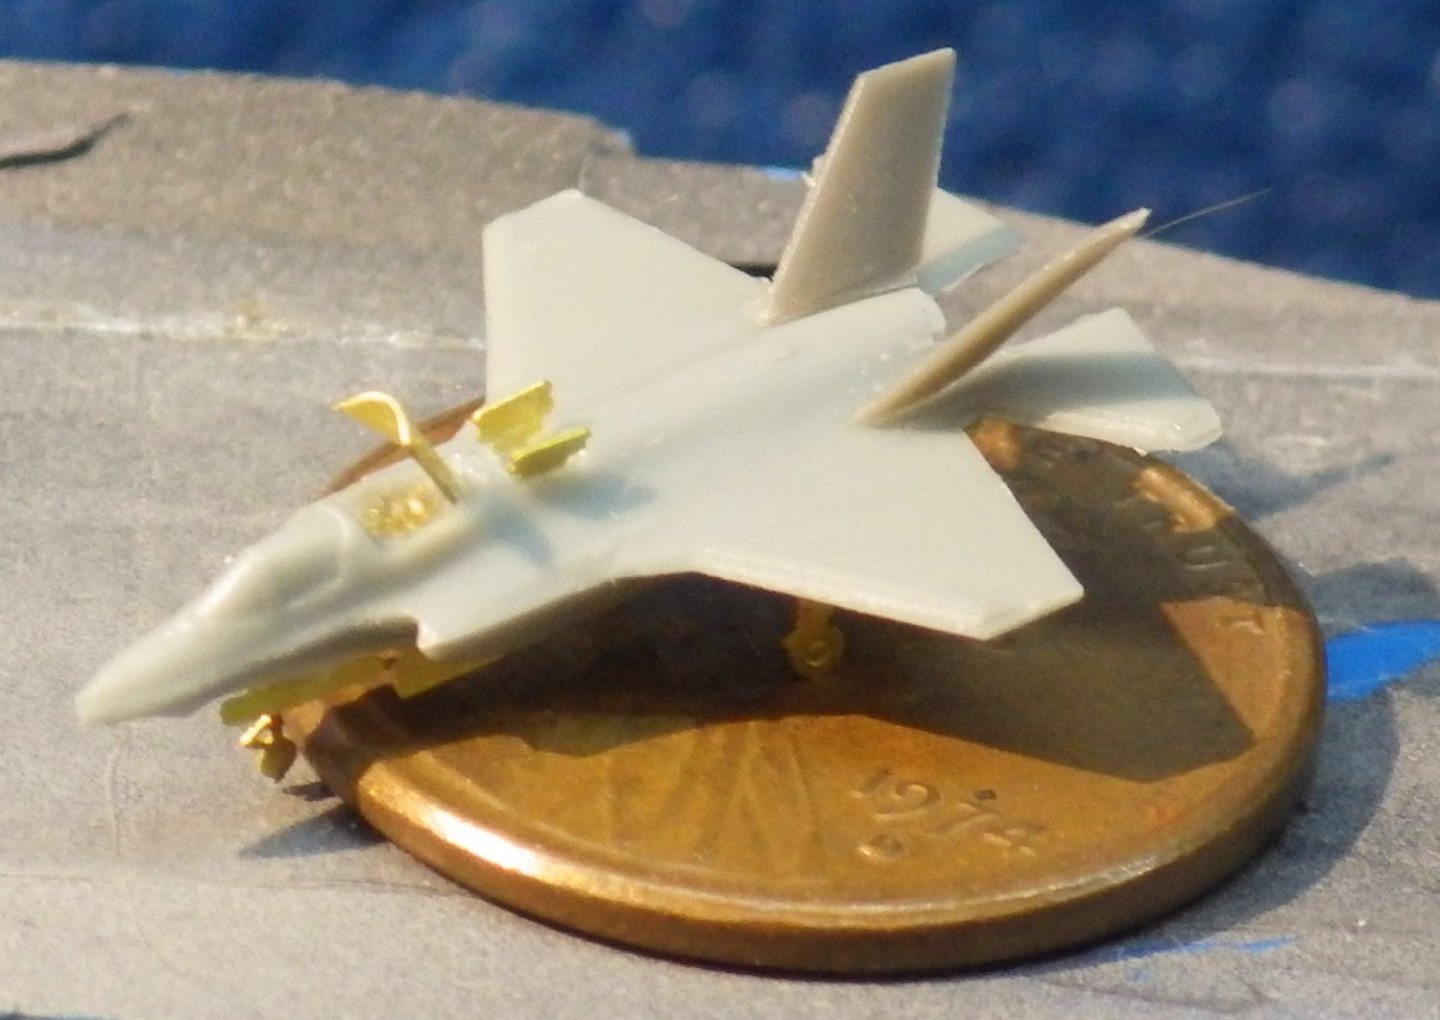
Hi Mike There are country insignia provided for several countries. I think the models can be used as A variants if the fuselage with doors closed is chosen. They are the same wingspan as the B model. The C variant has a longer wingspan. I checked the wingspan and it scales to a correct 35 ft span So the markings cover USAF (operating A) and USMC (operating B ) Japan (operating A) South Korea (operating A) UK (operating B ) Italy (operating B ) Australia (plan to buy A) I don't know what the bottom set of markings are. There are no squadron of service markings provided. I'm not an expert on this but I thought both USMC and USAF use the white star provided at far right. The USAF (?) marking to the left look wrong. Thanks Alan
.thumb.jpg.9388599e960bd2ef7d44e551155e6947.jpg)
-
The hull looks great OC. Always a scary moment when you pull the tape off though 😄 Alan
-
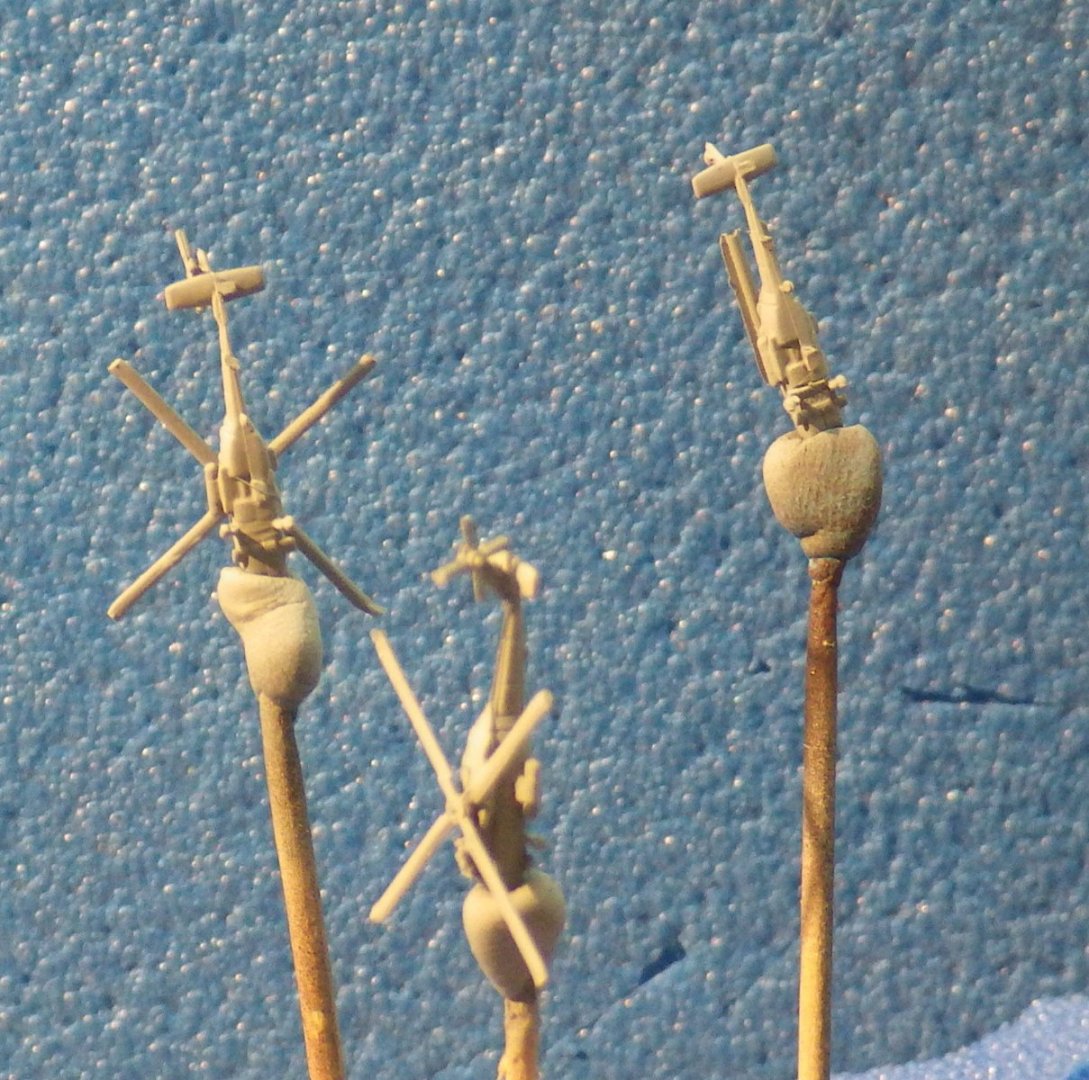
Work on detailing the island continues - slowly. The continuing decisions of sequence of build had resulted in a couple of reworks to remove parts to allow access to fit PE railings and also to remove PE to be able to add parts without damaging the PE. The island superstructure is (to me) a complex little jigsaw of parts and the illustrations in the instructions are not the clearest. The indication of placement of parts is vague to say the least. I spent quite a bit of time trying to understand the fitting of parts D12 and C25 in the picture below The offending parts are in the middle of the sprue below Luckily the photos are a huge help. This is the forward end of the island And the area of interest is the dome and mast to its right and suddenly the parts make sense. There is a strut as part of teh dome assembly that is not in the kit so a piece of thin wire will be added I think all the PE has now been fitted to the lower parts of the structure and I have started adding the masting and platforms above. Another round of PE railings and then up a little more. This afternoons excitement - a package from Australia. Yes - the jets have arrived The Orange Hobby F-35s look great. I think they are well worth the money. Six aircraft are provided; three are in CTOL configuration )doors closed) and three are in STOVL configuration with Liftfan and aux engine inlet doors open, the VAVBN and nozzle doors open. The parts for the three bearing exhaust duct can be placed at three different positions for STO, VL or taxi / forward flight. Its going to be a challenge to do justice to these lovely little things I'm sure painting the tail markings are possible (I'll send them to @Old Collingwood) Thank you all for looking in Alan
.jpg.0fc288e3f1b03f0d923eaac16cc17af7.jpg)
.jpg.f185f2db301d415de297f7ed023efcf6.jpg)
.jpg.7d3fa69c105c577972f6548c07e5751c.jpg)
.jpg.7998d4fcfb1484005179f2e79352f2e1.jpg)
.jpg.ba81b73bf0bb70be14de96301f27439a.jpg)
.jpg.793a5d532877ae4cc907f6c480943343.jpg)
.jpg.8b5c01fc4b045d9723ec82e2a0f80c81.jpg)
.jpg.b721a76fb716577137a35fb7c64b601c.jpg)
.jpg.d3a53f20f2017fefa570b124bc3d0322.jpg)
.jpg.e043a751dd841801620260f42faca376.jpg)
.jpg.c8cbc088b10a20f4920b14f5b06fb606.jpg)
.jpg.d531f08aef069d5f70d6325b80b049a5.jpg)
- 140 replies
-
- 11
-
.jpg.47742697b6585785c53cb49939cdf913.jpg)

.jpg.708c5e1516377357b48f65665bdeb3bf.jpg)


.jpg.d37298e3152cce88ffc86cf57badc952.jpg)
