king derelict
-
Posts
3,291 -
Joined
-
Last visited
Content Type
Profiles
Forums
Gallery
Events
Everything posted by king derelict
-
That’s why my two are strictly indoor cats, that and they are long haired so they would be dragging half the undergrowth back into the house. Not to mention the wildlife might be more than a match for them, starting with the family of bobcats living behind the lake. alan
-
Hi Mike, no this is the 1/48th scale 3D print from Benworx. I was impressed by the one made by @yvesvidal so I bought a 3D printer and set off on a voyage of discovery. I’m trying to work out how to insert the link to my build log and failing so far Alan
-
Beautiful work Chris. I always read your card builds with interest but I really enjoyed the semi tutorial. The extra little insights gave me more appreciation of card building. Maybe one day …….. alan
-
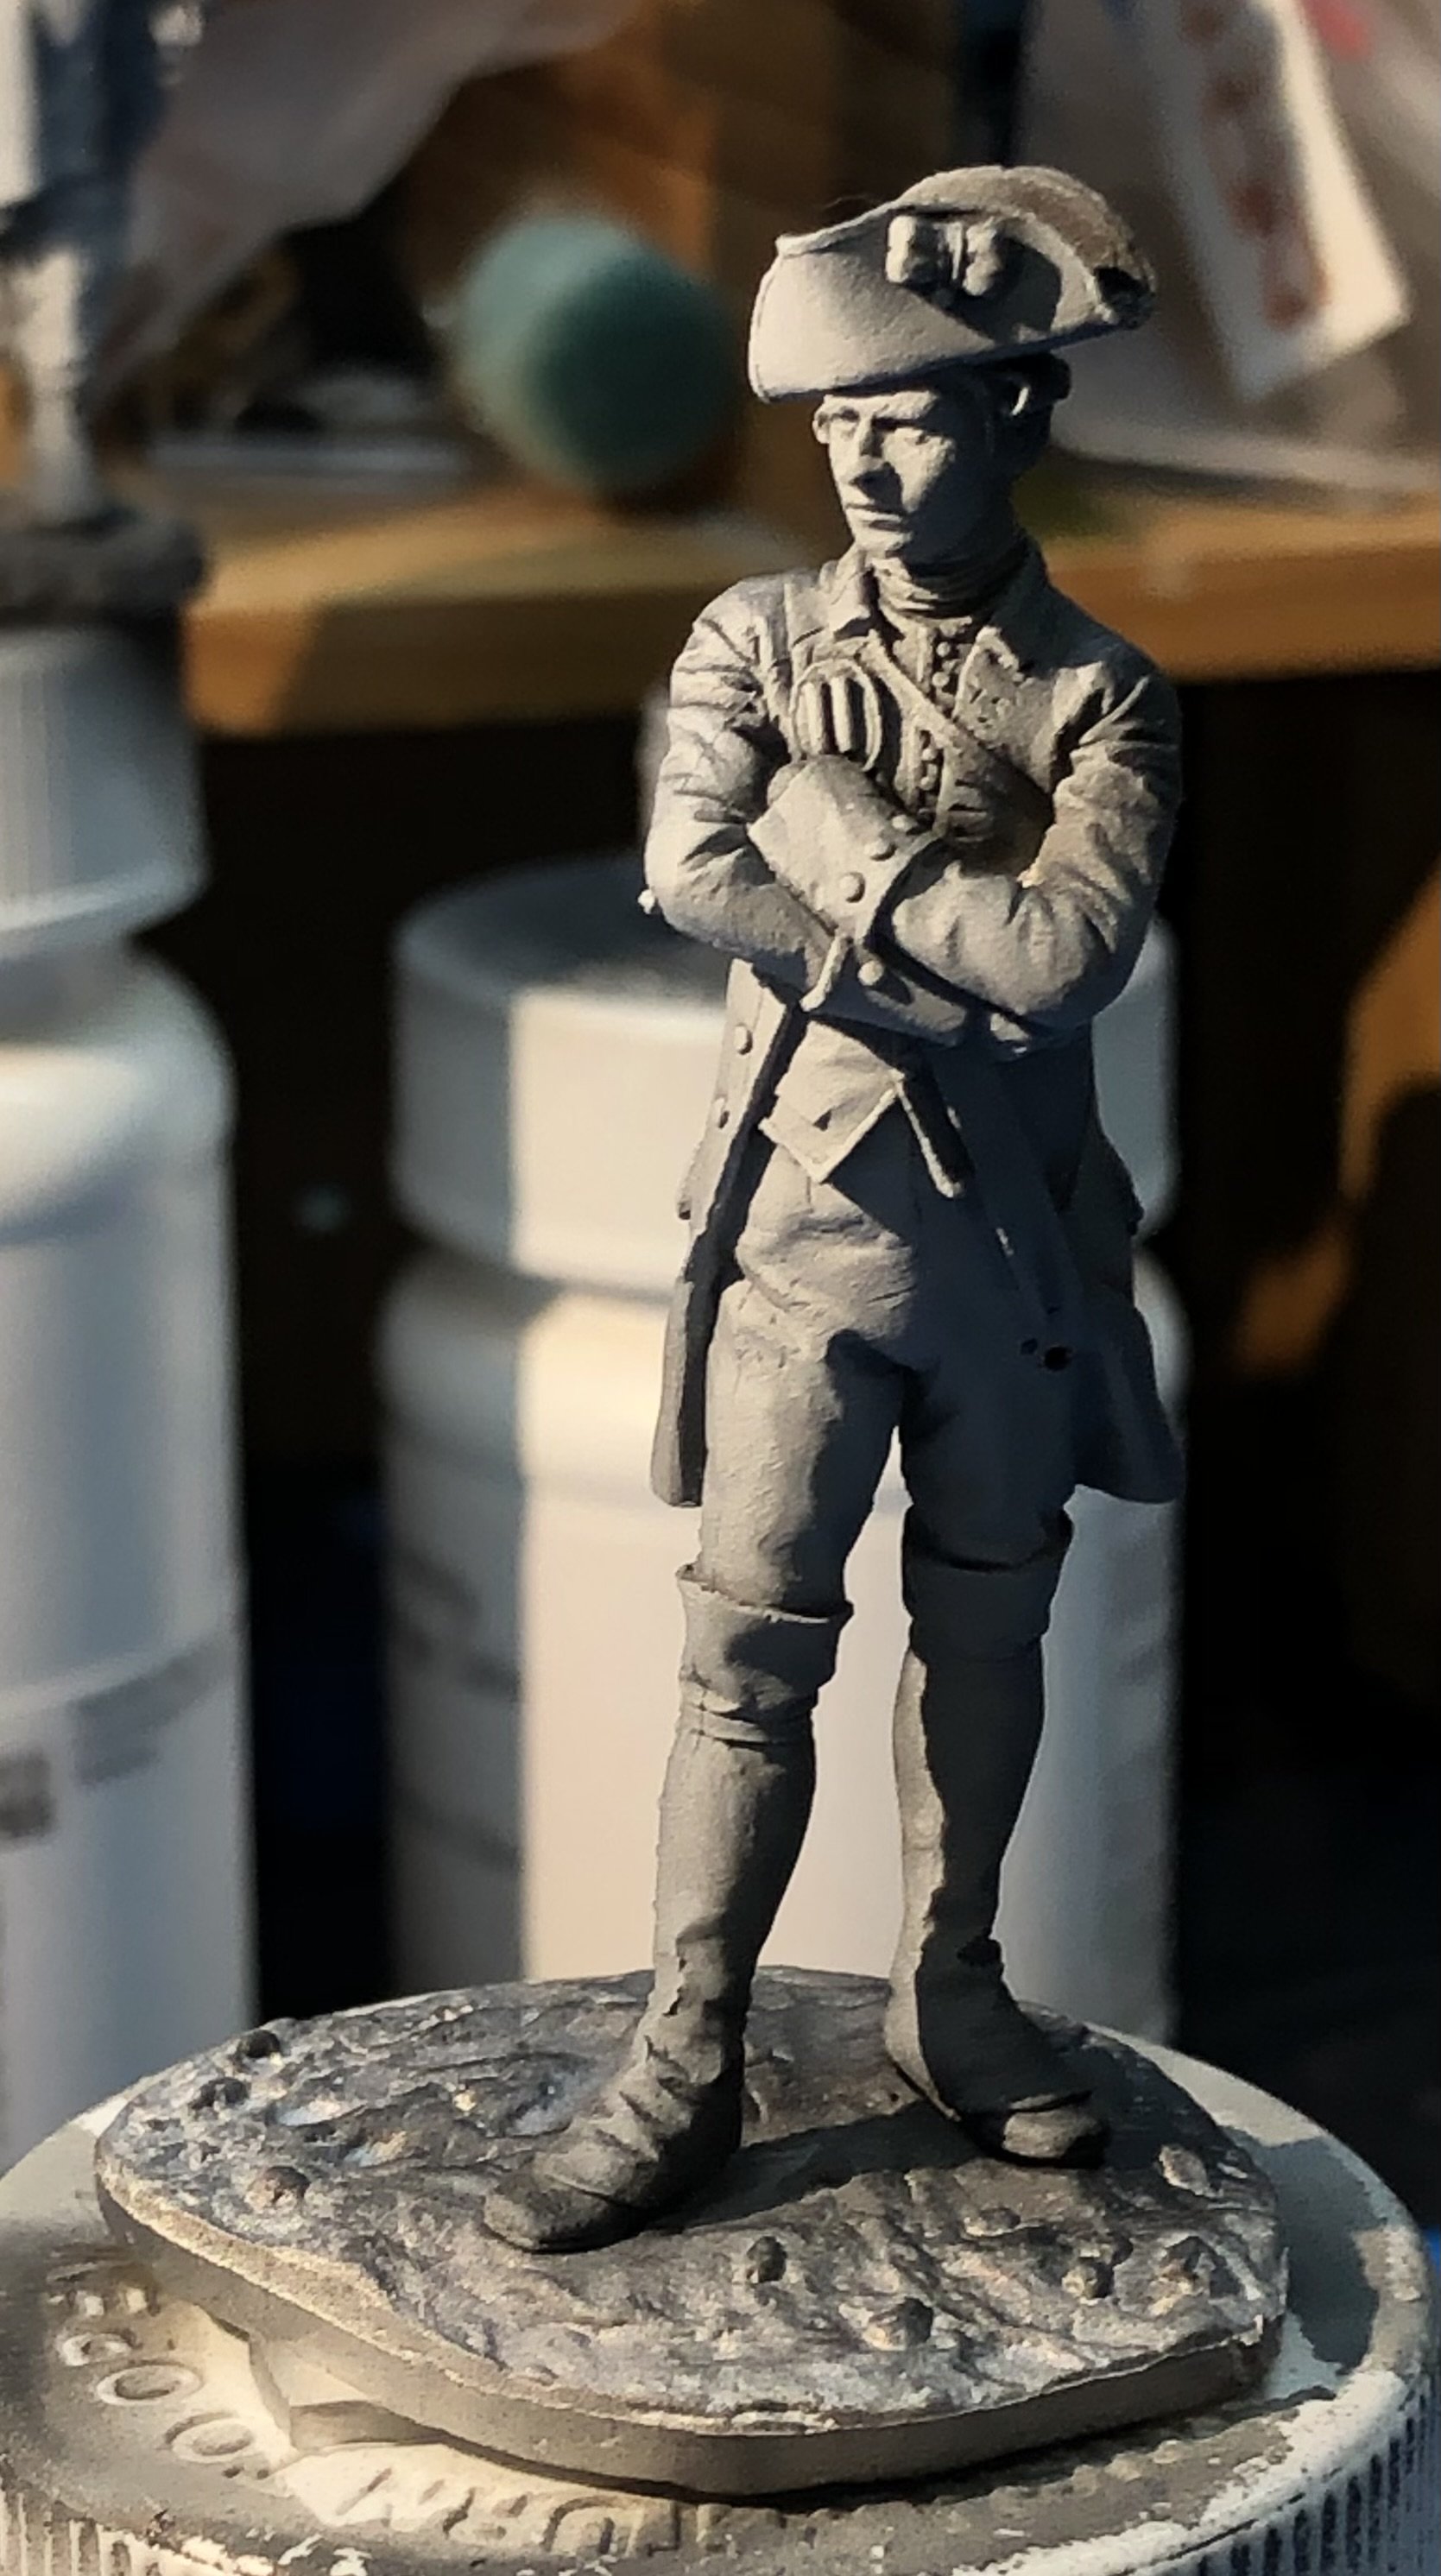
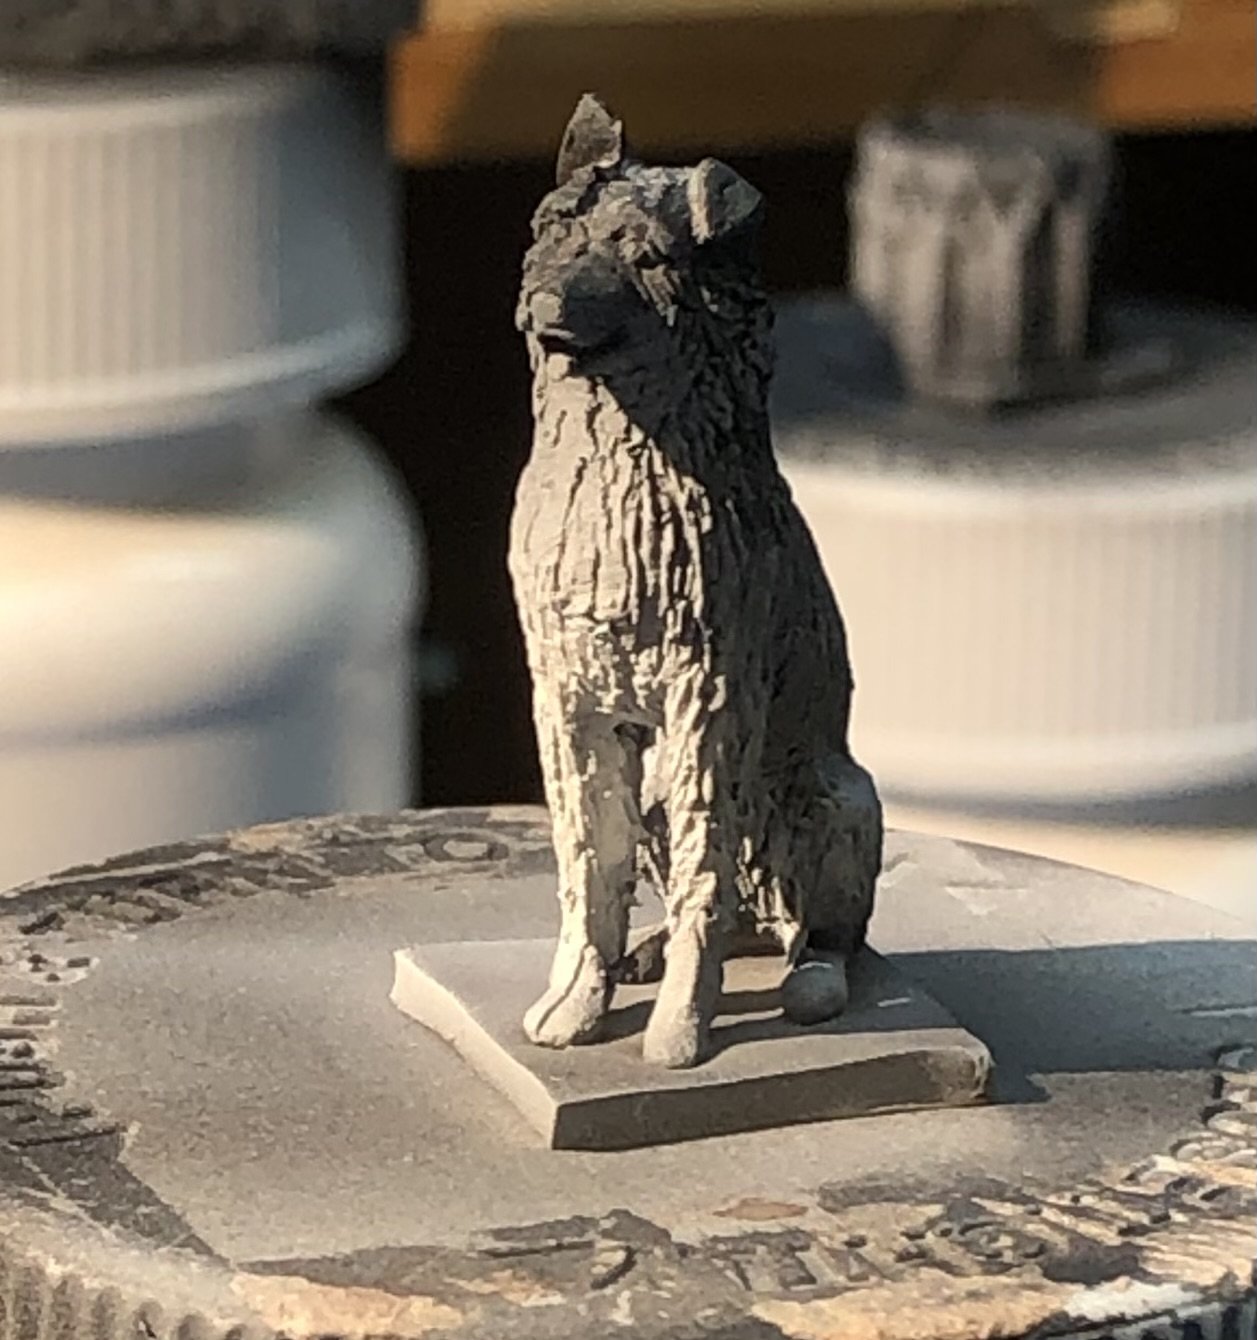
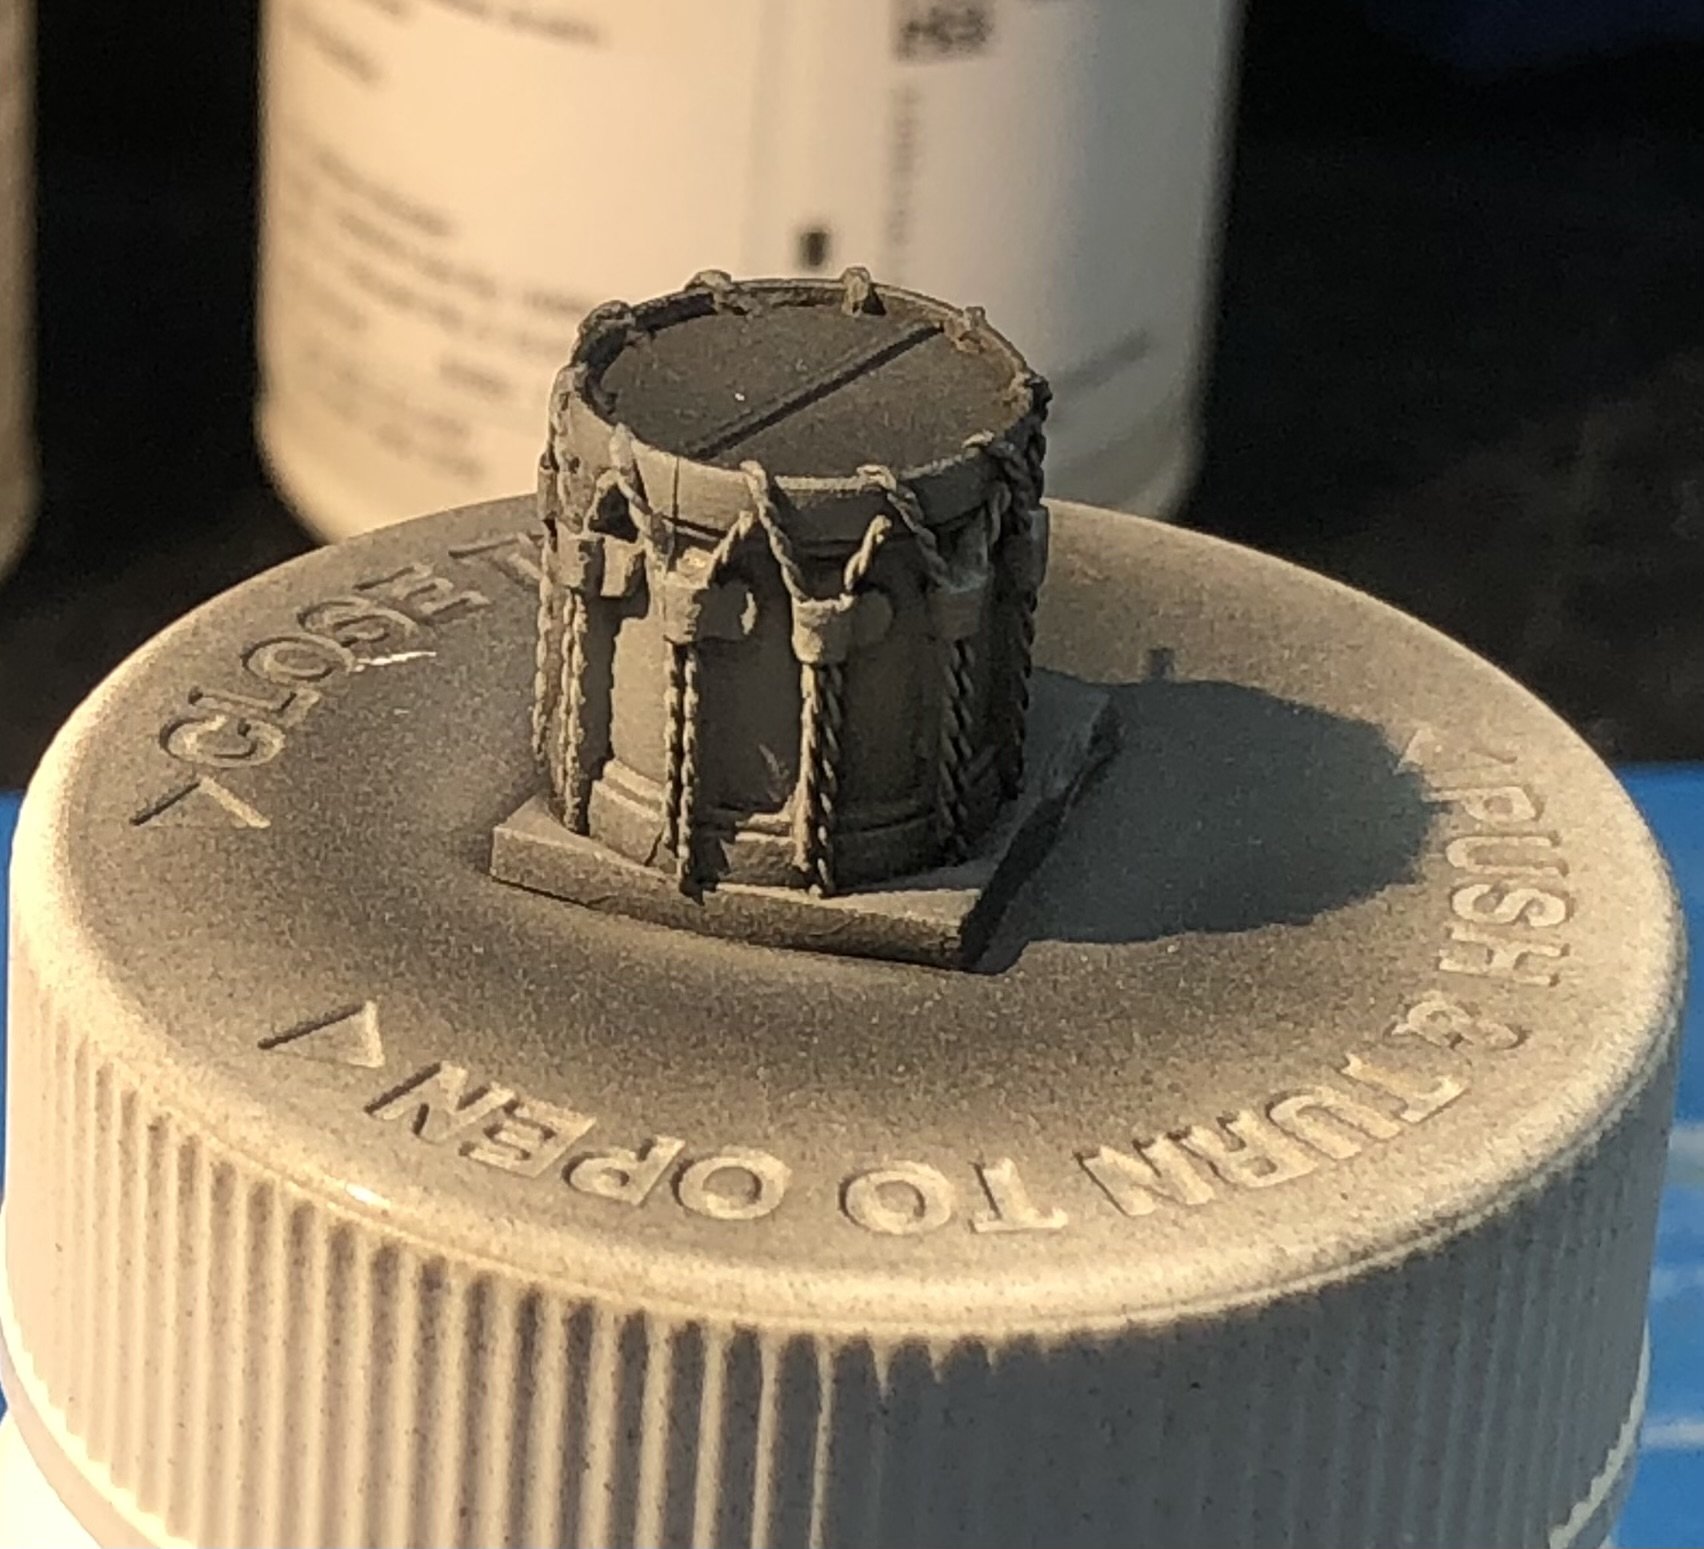
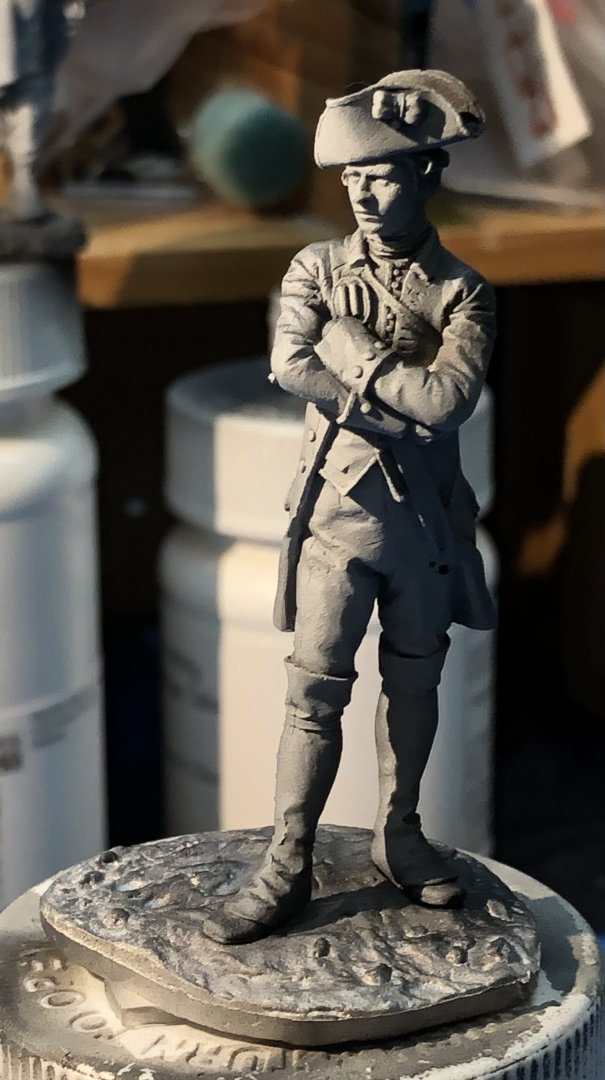
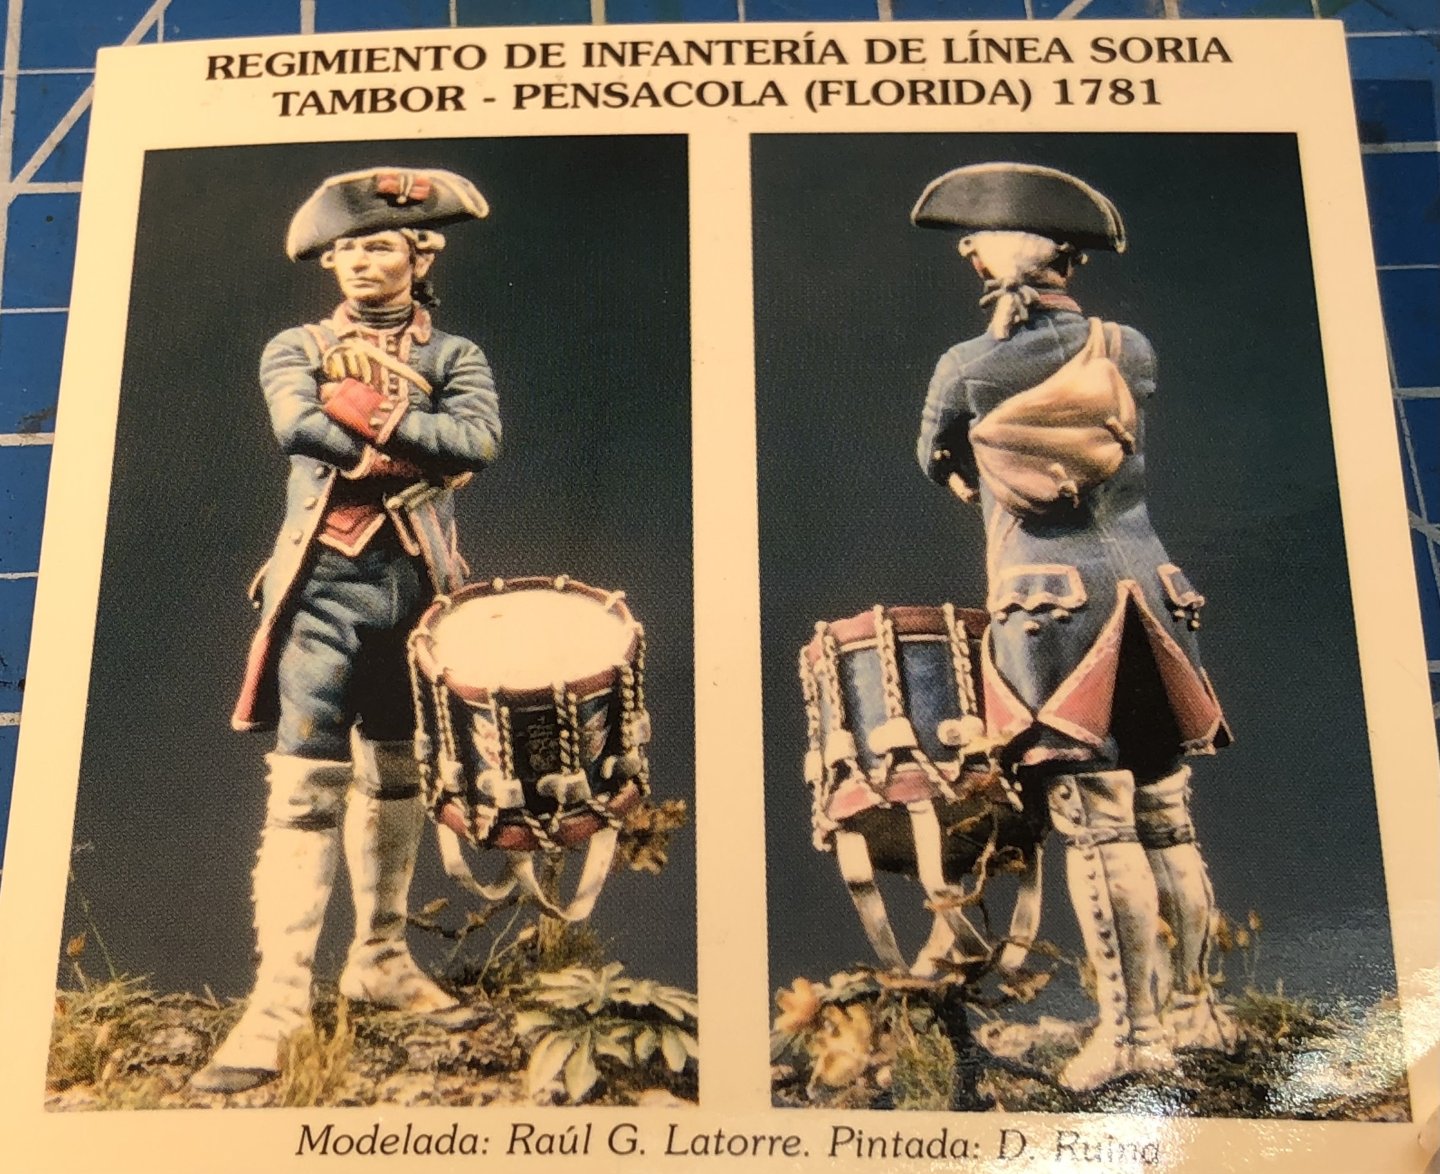
As a result of vacillating between kits I seem to have started a number of different things simultaneously. And so the next temptation, a white metal miniature by Art Girona Judging by the size this is a drummer boy. The sculpt is nicely done and this should be a pleasant little project. I’ve assembled the major elements and given them a coat of black primer and the white directional spray After looking at the box art I was surprised to find that a dog is included. That will be a new challenge but he looks well sculpted. I’m keeping the drum separate until the end of the painting. Thanks for looking in. alan


-
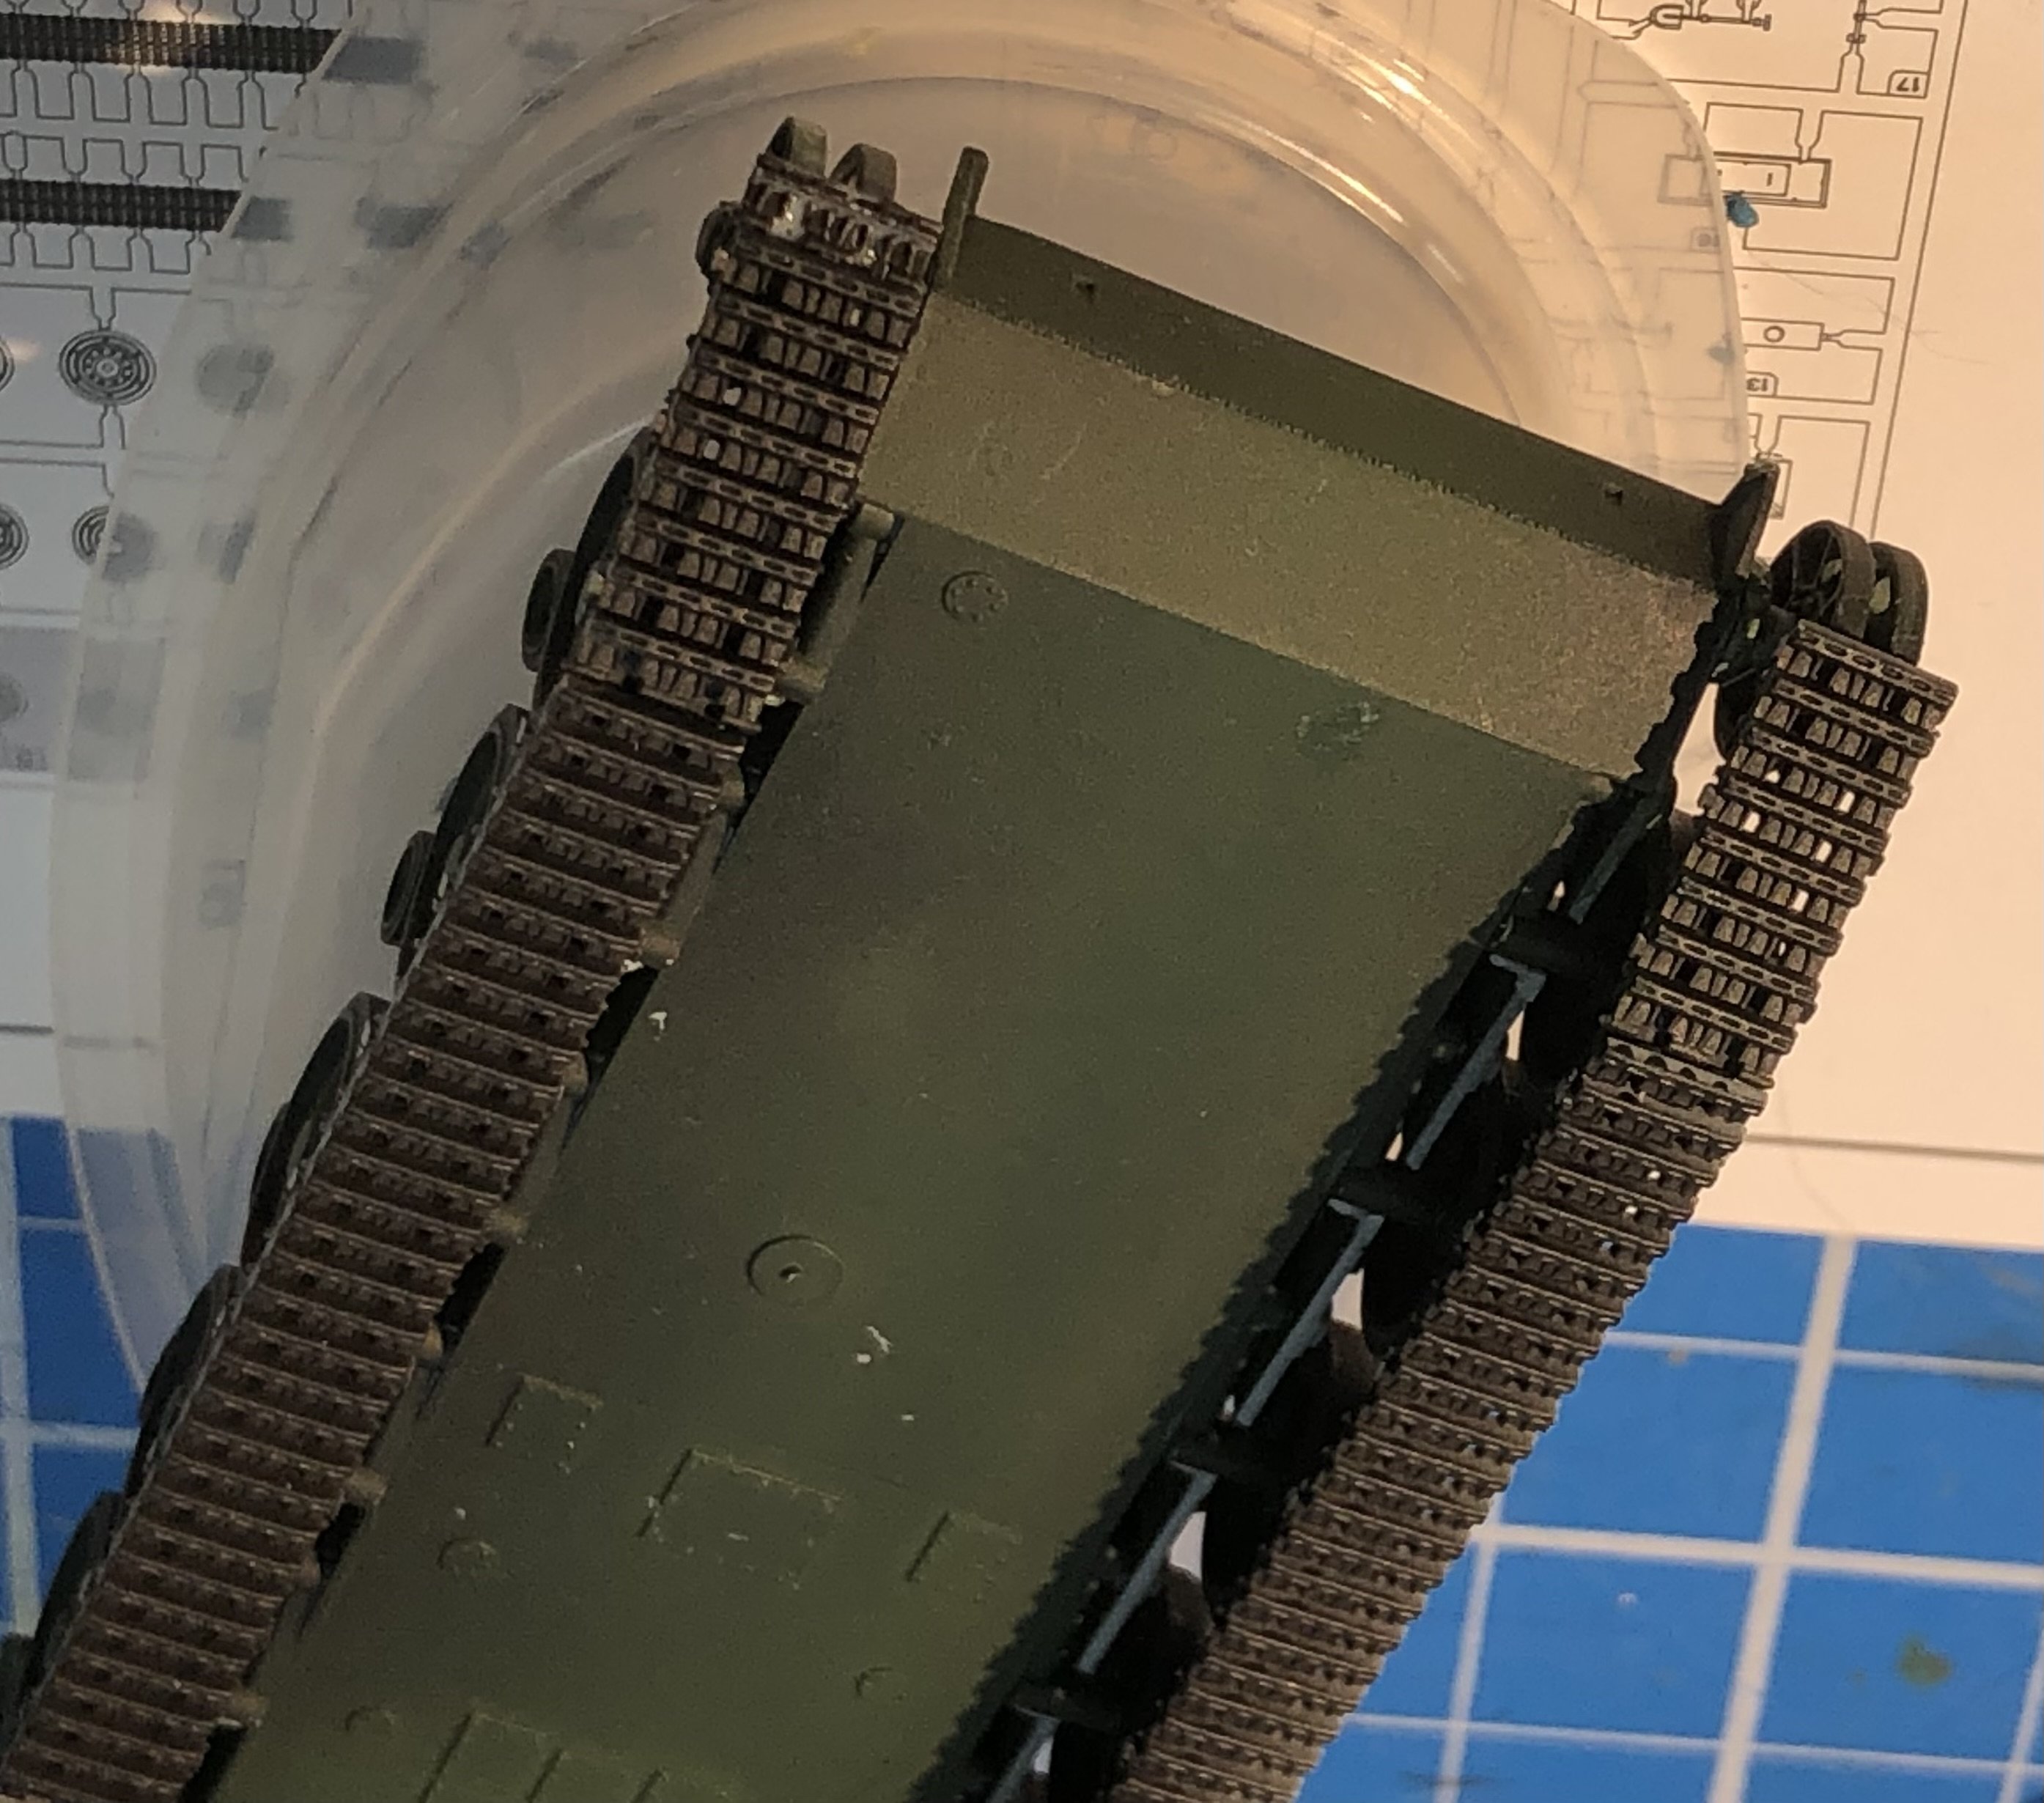
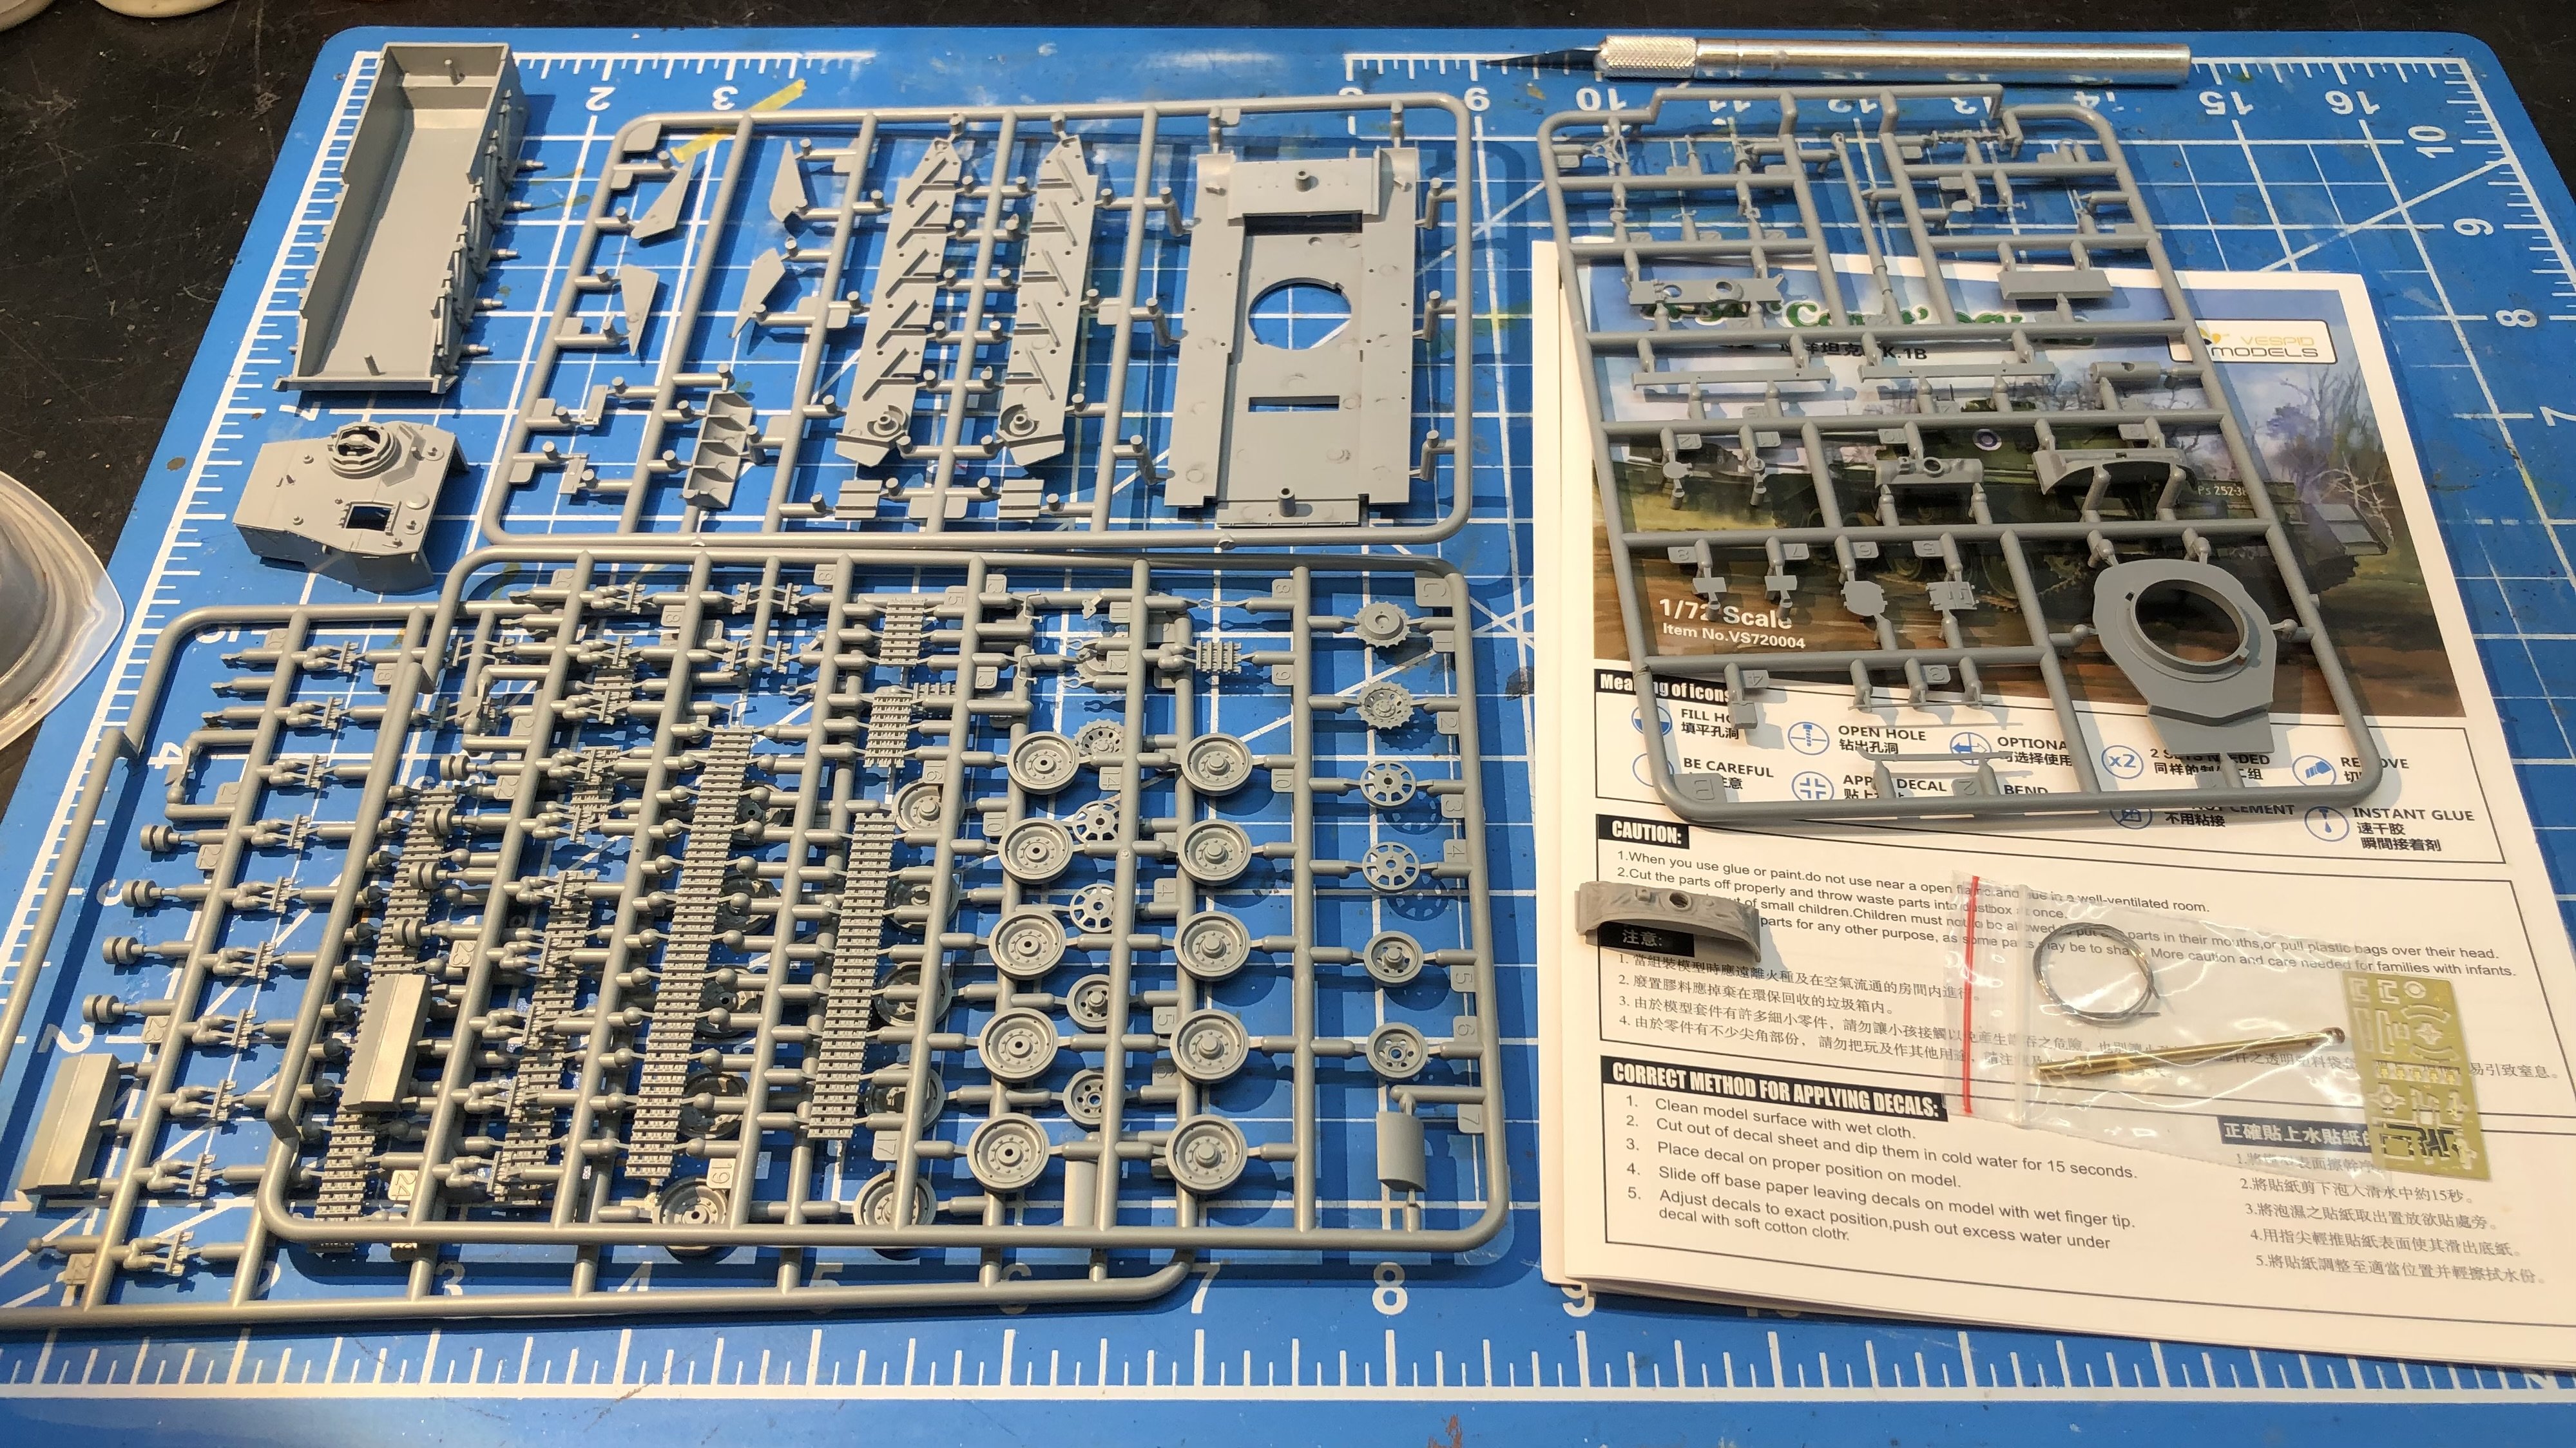
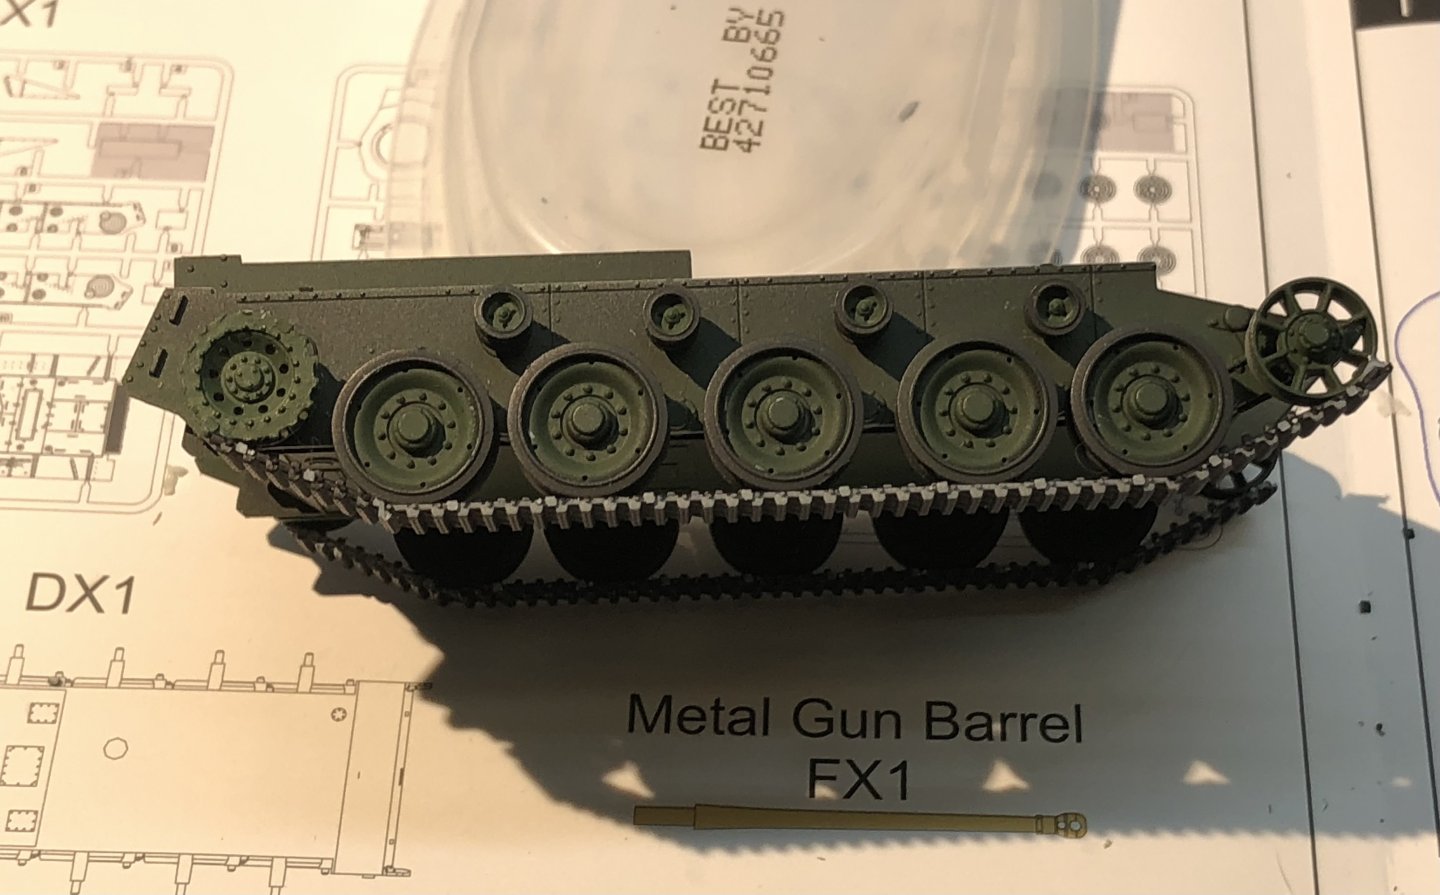
I assembled the running gear today. No issues, everything fits nicely. Then onto the tracks. The tracks are link and length again but the individual links have more positive locating features so I’m hopeful that this will be an easier build. The instructions call for 7 links at each end of the track pieces and there are exactly 28 links in the kit. No pressure. ive fitted the lower sections so far and then got brave and added the first link. It fits to the adjacent track section nicely so I’m hopeful. Thanks for looking in, the likes and the excellent input to help me out. alan


-
Thank you so much EG. That is a lot of information that you pulled together and it’s very much appreciated. The Comets had a pretty short war so I’m planning on a nearly new condition. Some wear on the cleats and some dust on the lower hull. Patrick’s photo also shows that using the resin mantlet was a good choice. It matches the real thing a lot better. Thanks again. alan
-
Thank you again Patrick, very useful. Looks like a terrific museum too Alan
-
I don’t understand why they eat weird things around the house. My girlfriend’s cats eat the plastic plants and then puke the debris. It can’t taste good. How do they survive in the wild I wonder.
-
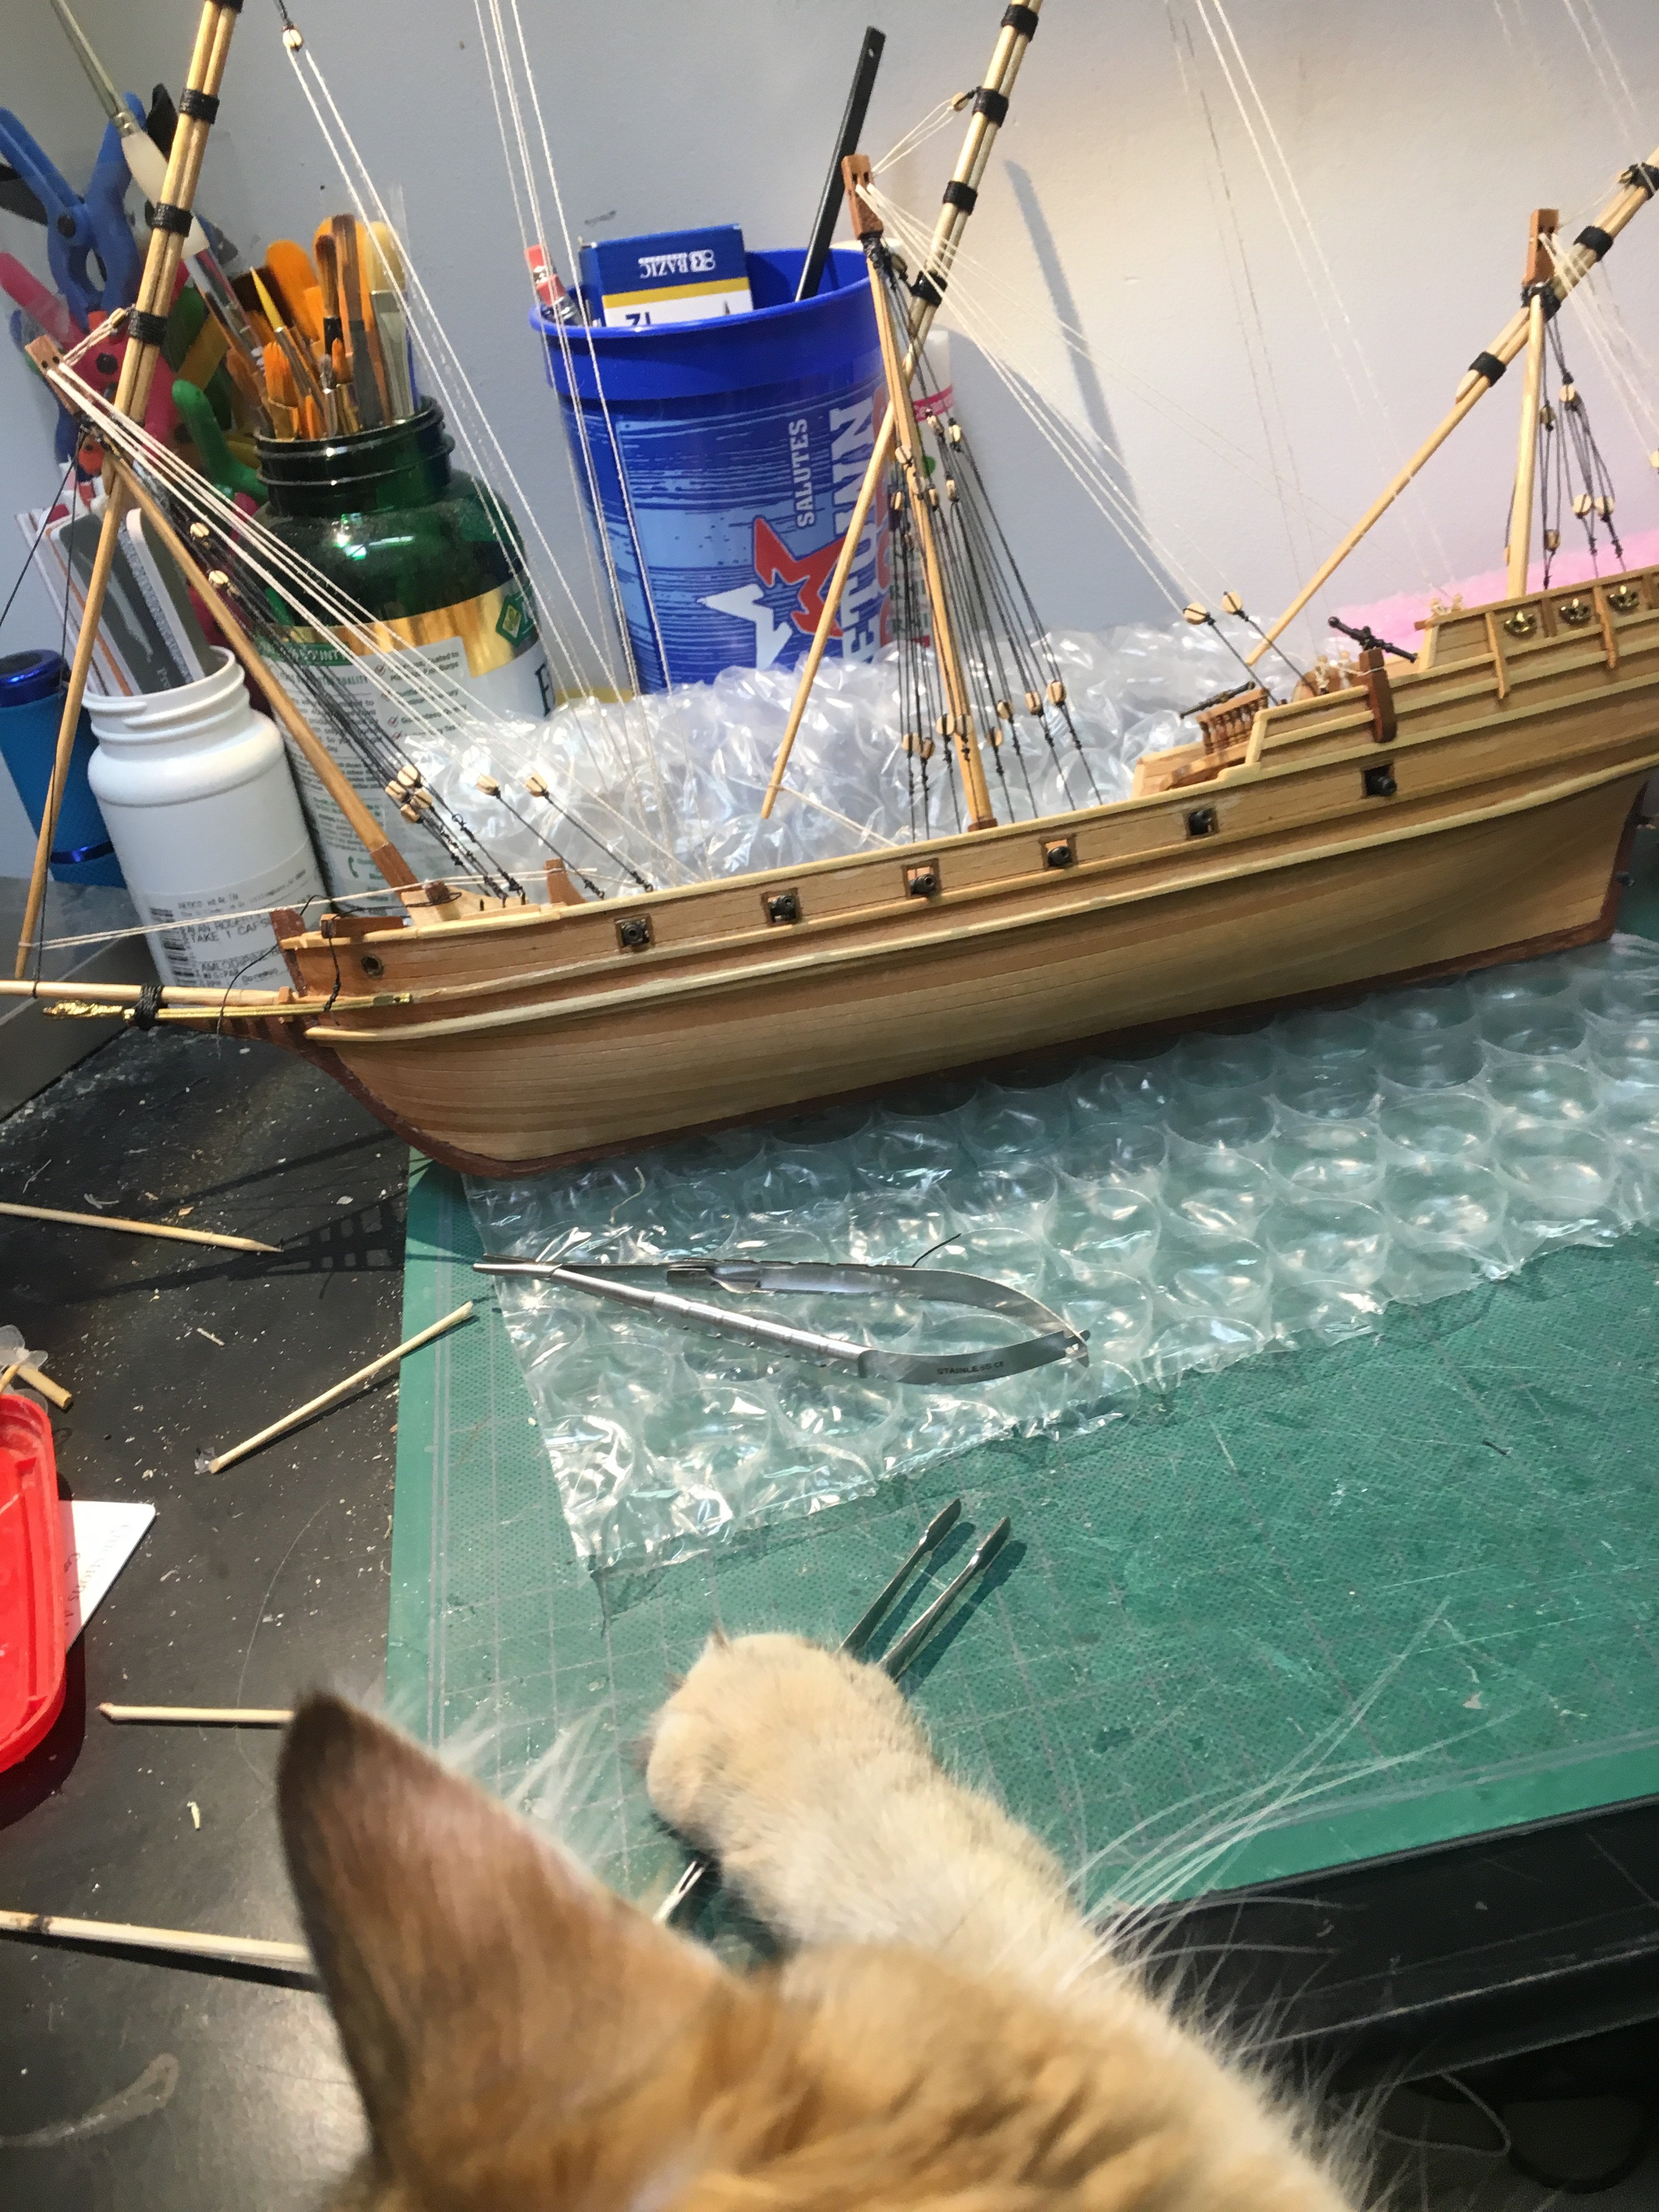
They have to be watched. Caught red handed with the tweezers actually she did a decent job of the rigging. And here we are contemplating mayhem. One good shove and it’s on the floor

-
Along with her sister they are responsible for all the criminal activity in the house. Thankfully they spend so much asleep there is a limit to what they can get up to.
-
Thank you very much for all the great information and photos Patrick. It’s very helpful. The Comet for sale has some excellent detail photos. And looks like a bargain to buy- maybe. The photos seem to suggest dark brown is still a good color but not so much silver / bright steel. I don’t think Ive ever knowingly seen manganese steel. It doesn’t feature in jet engines. Thanks again Alan
-
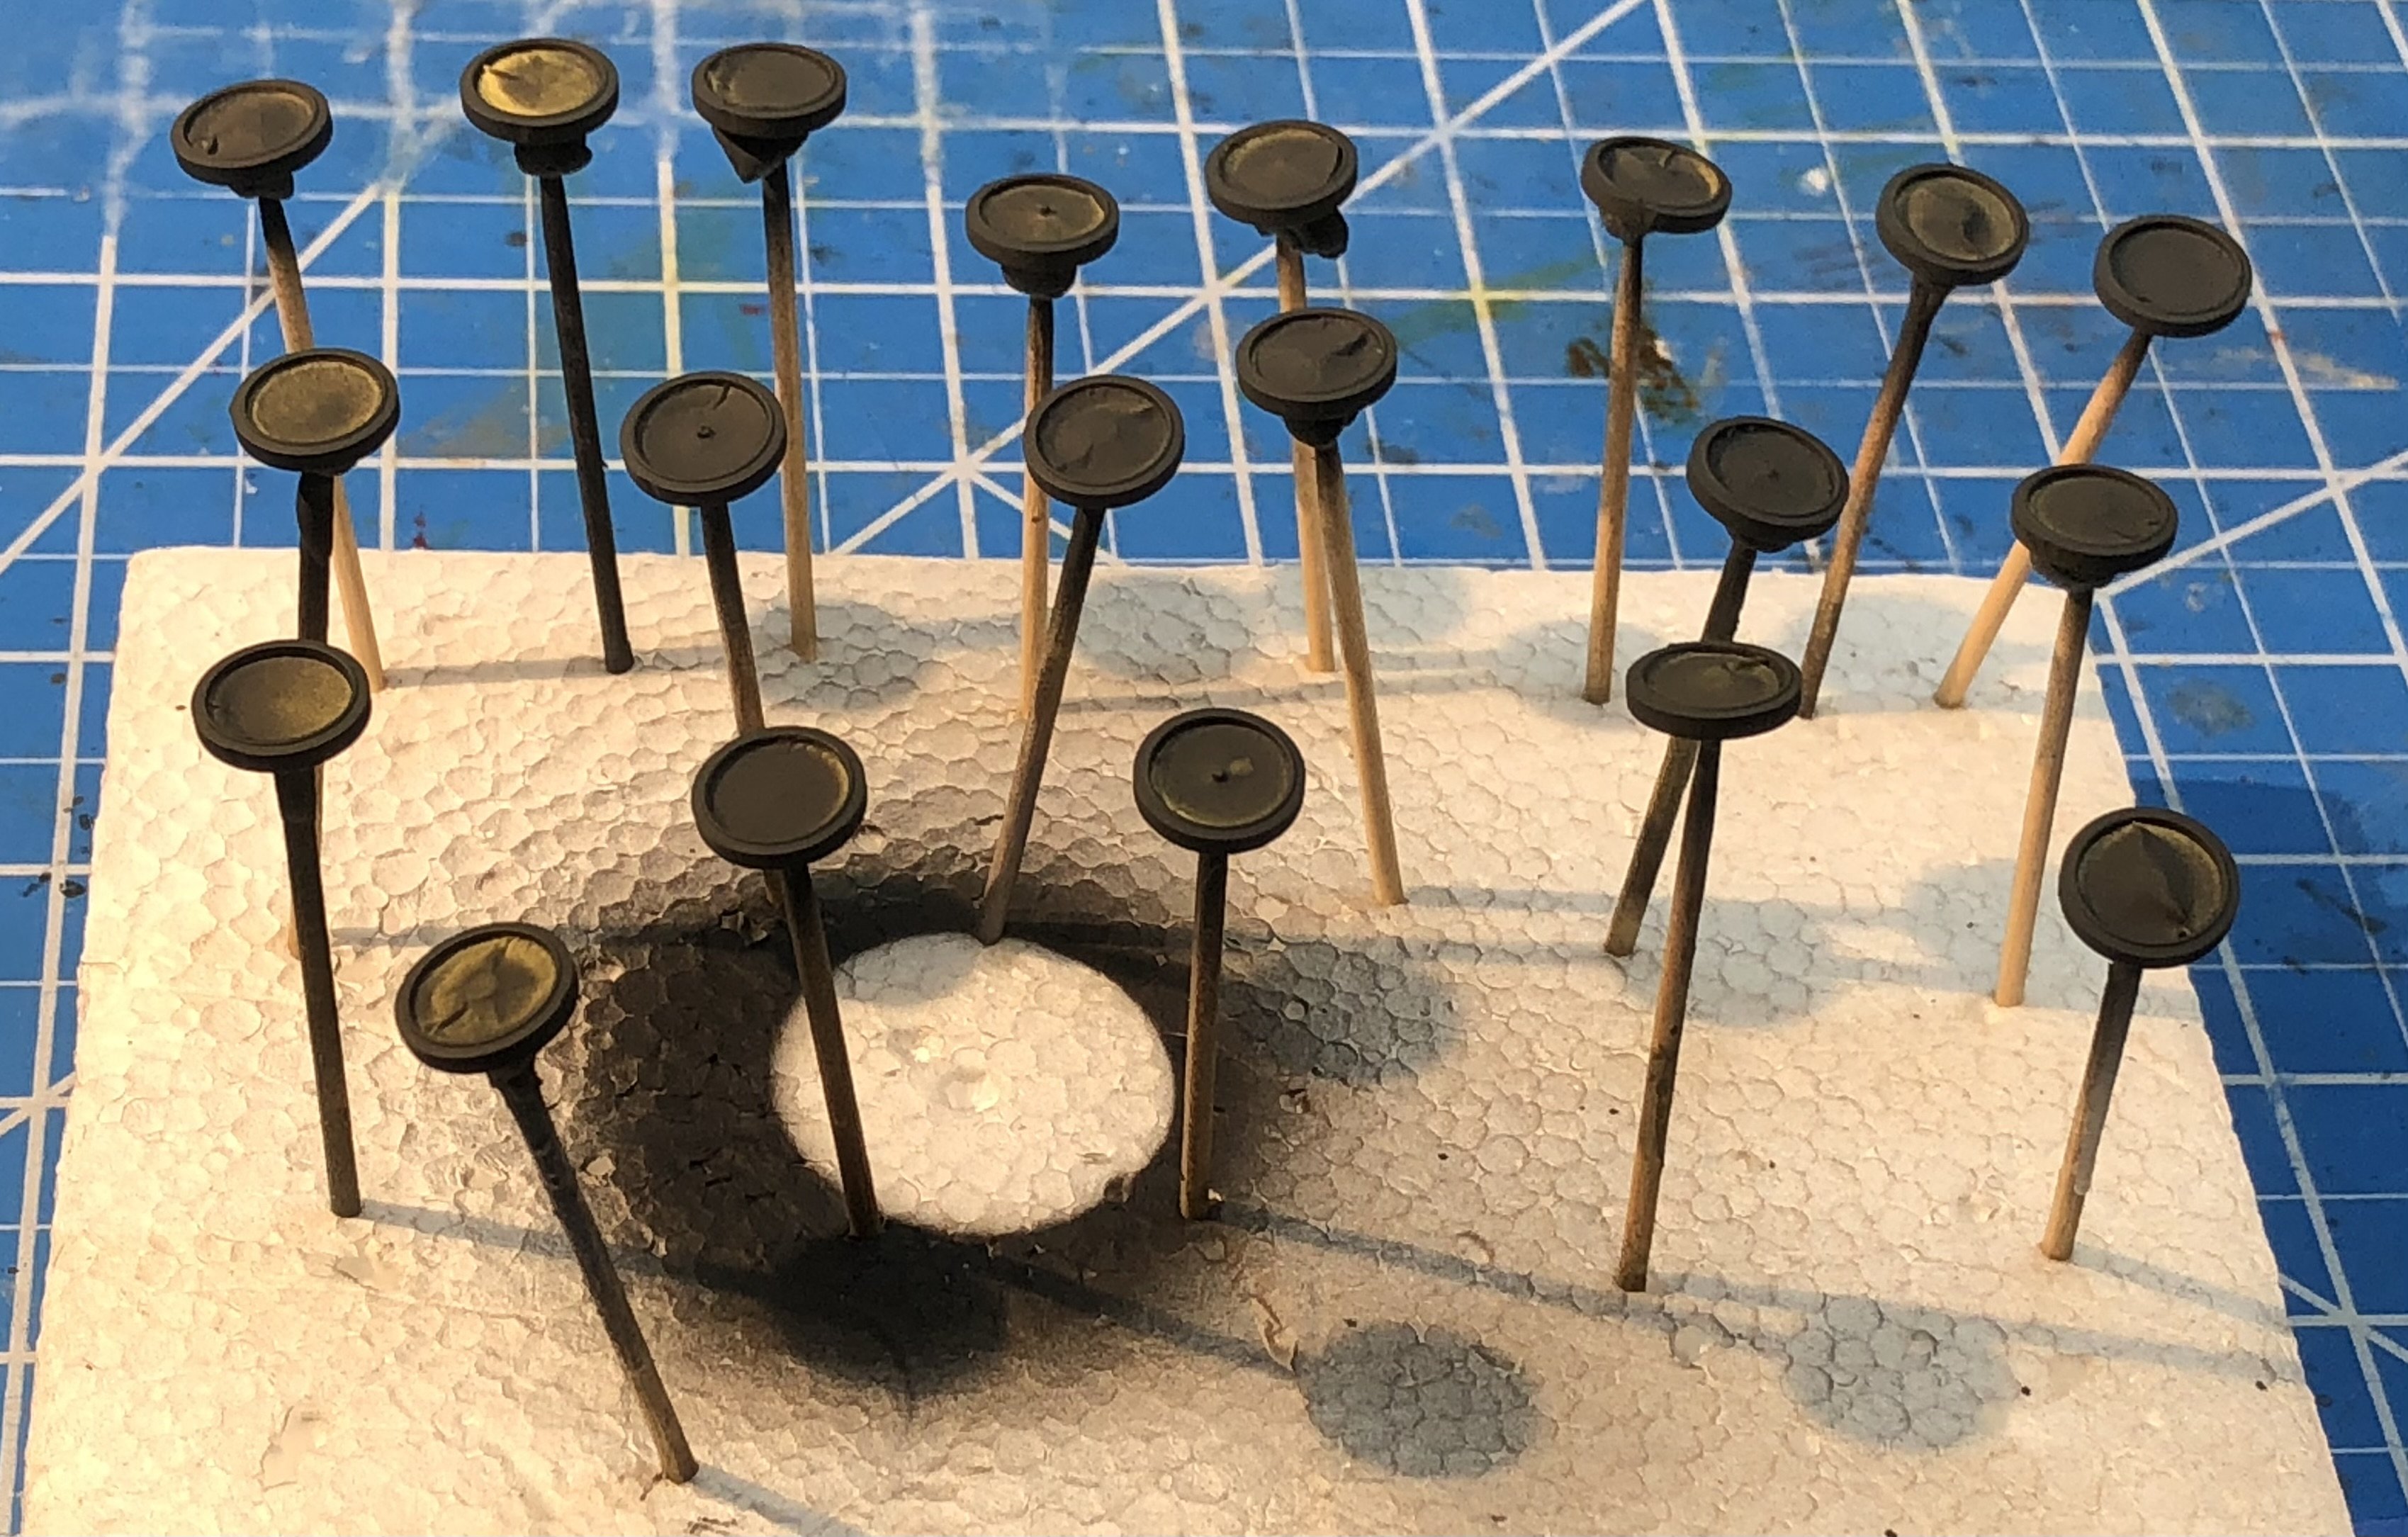
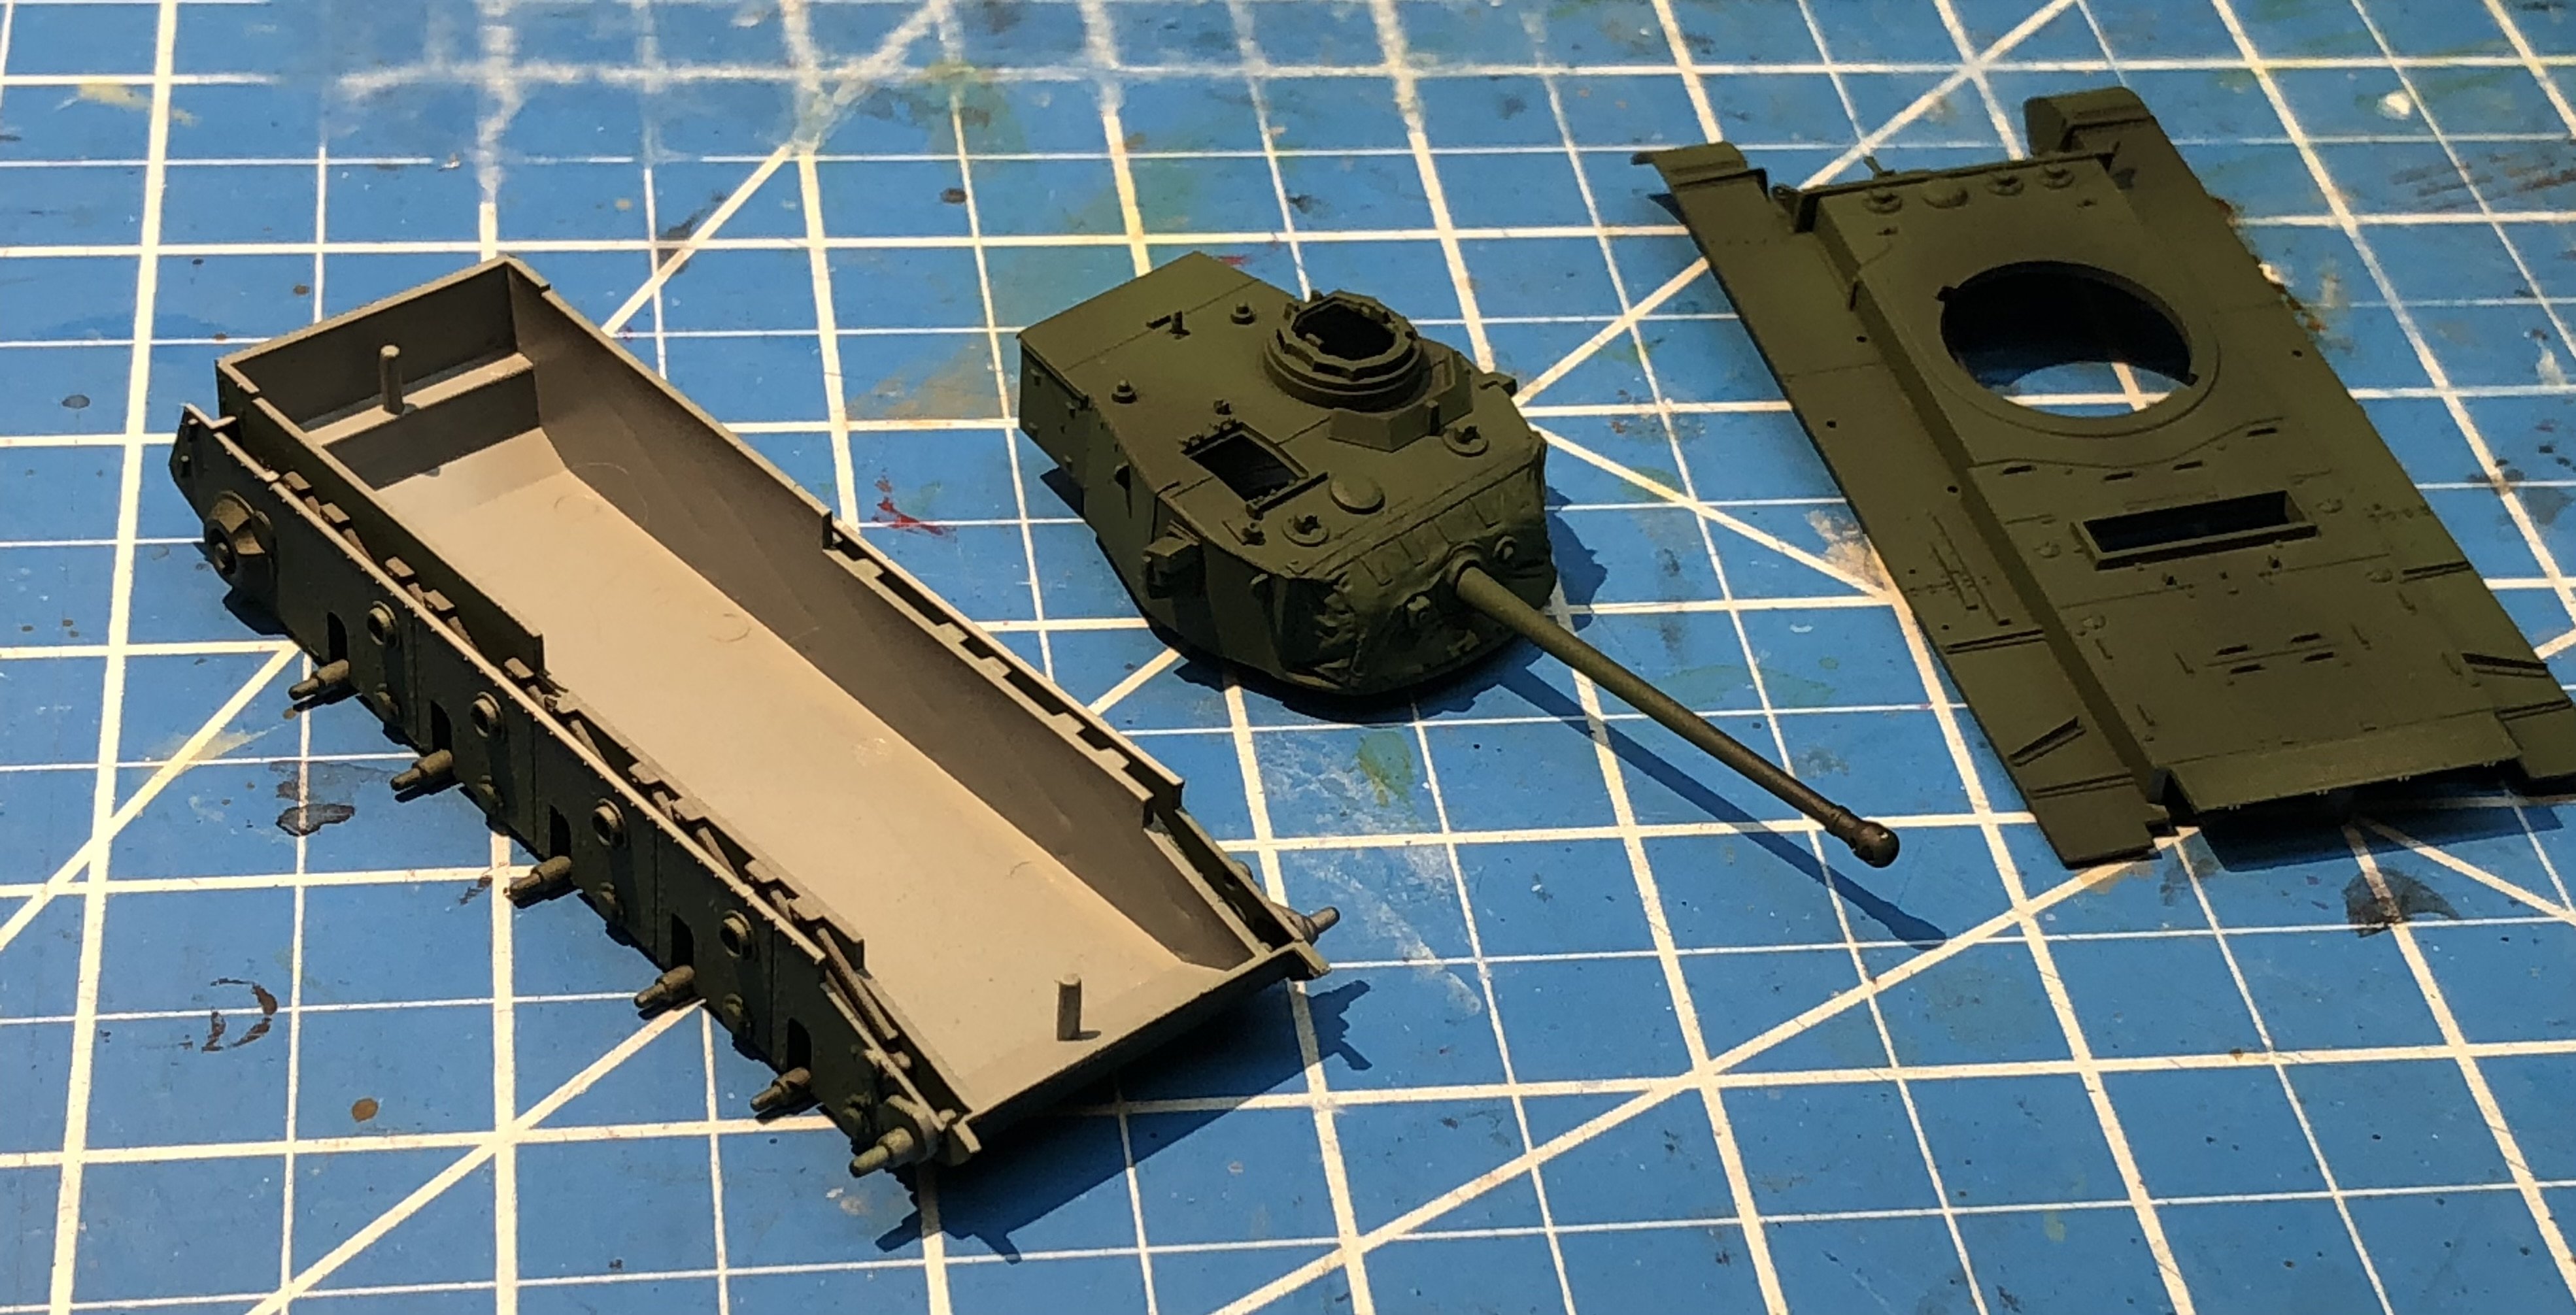
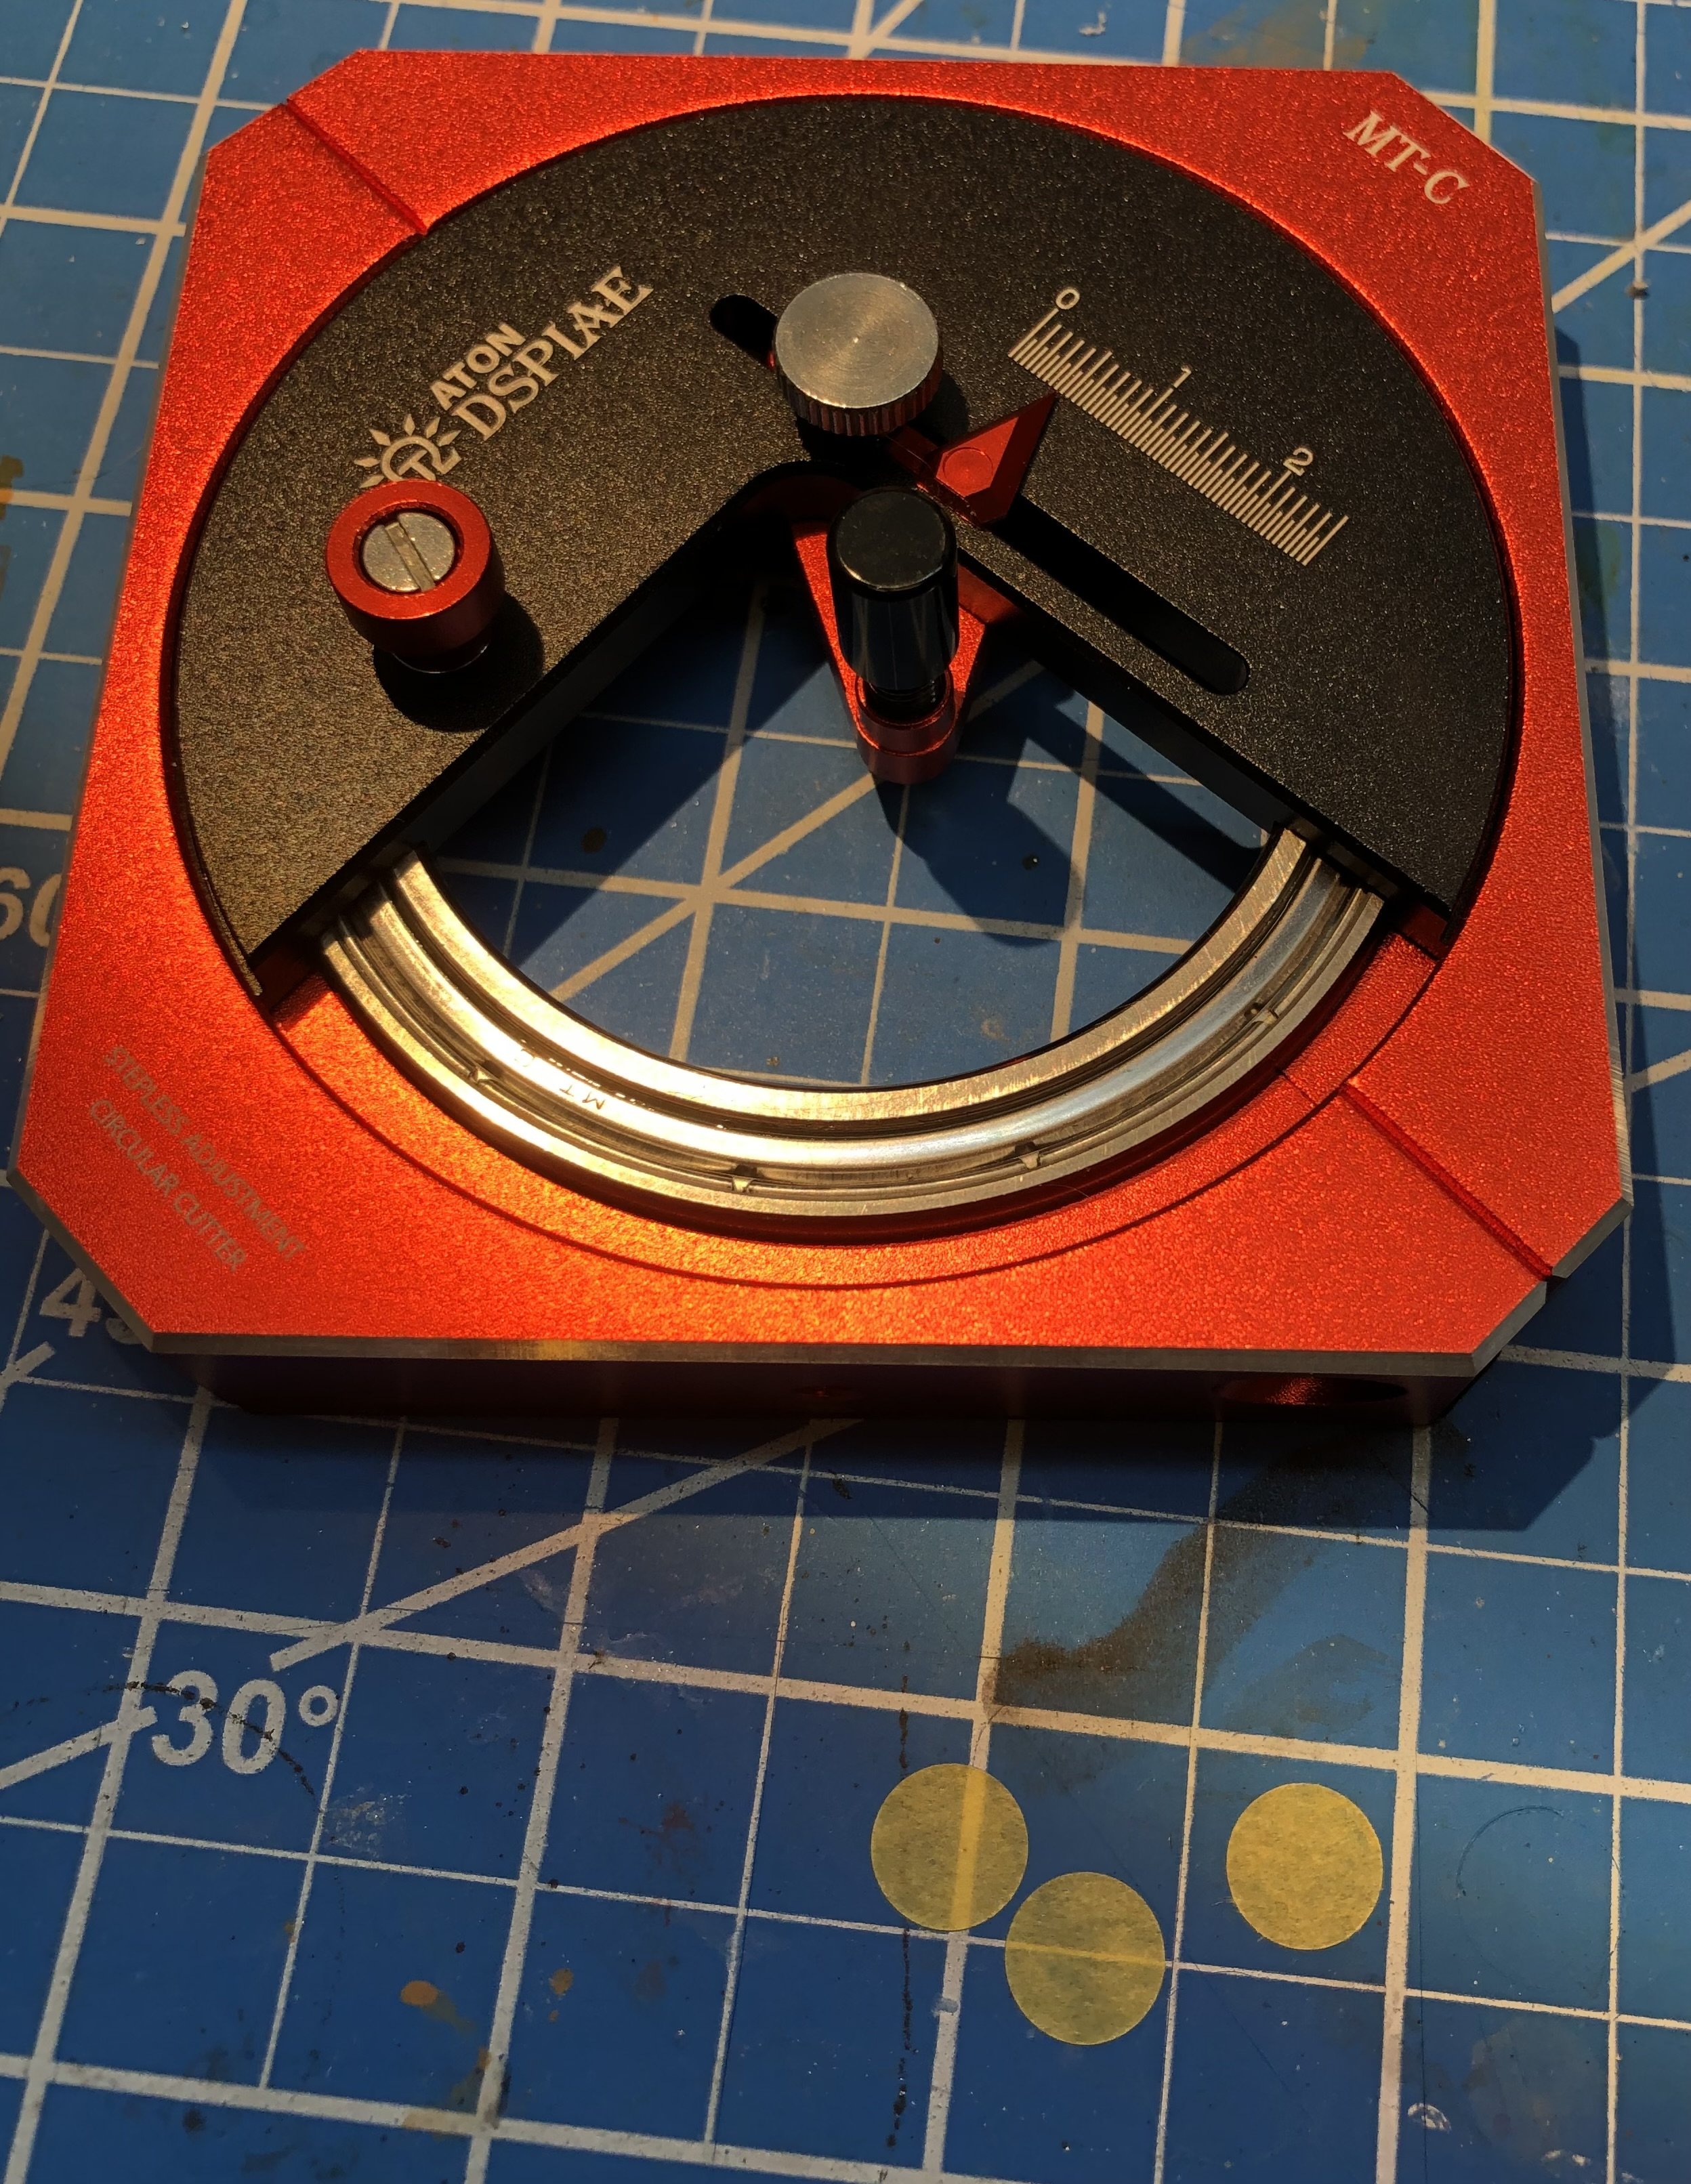
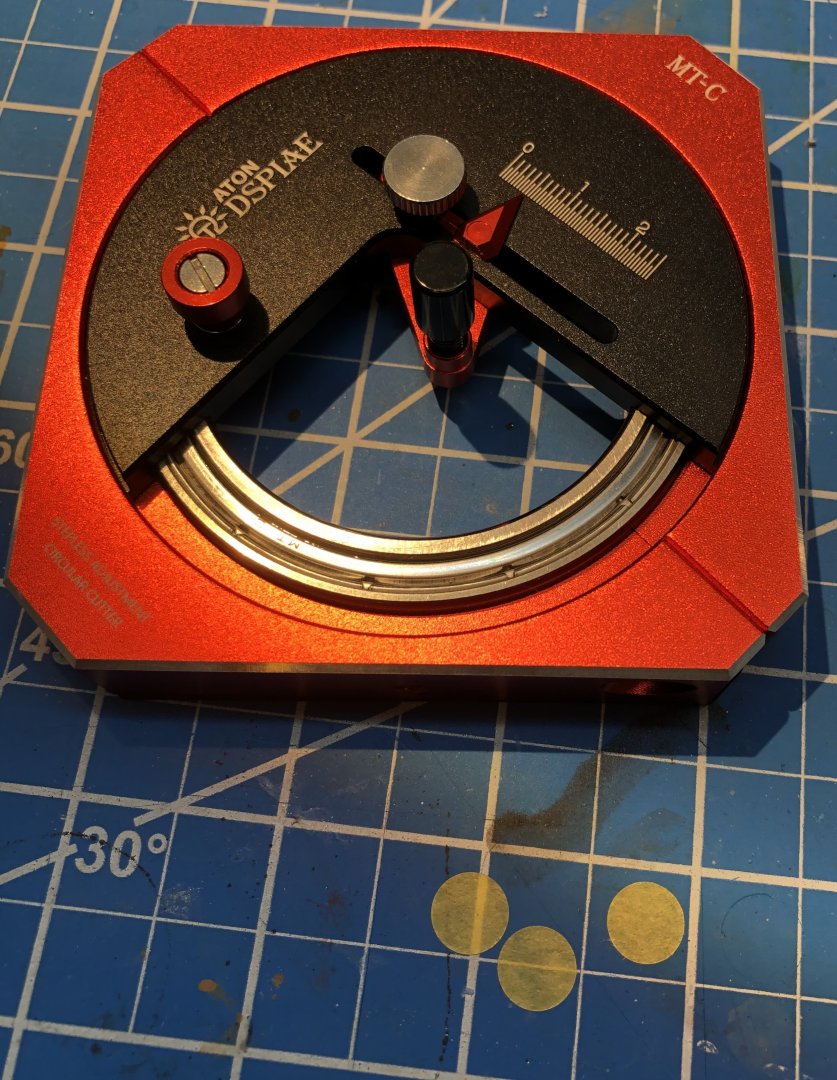
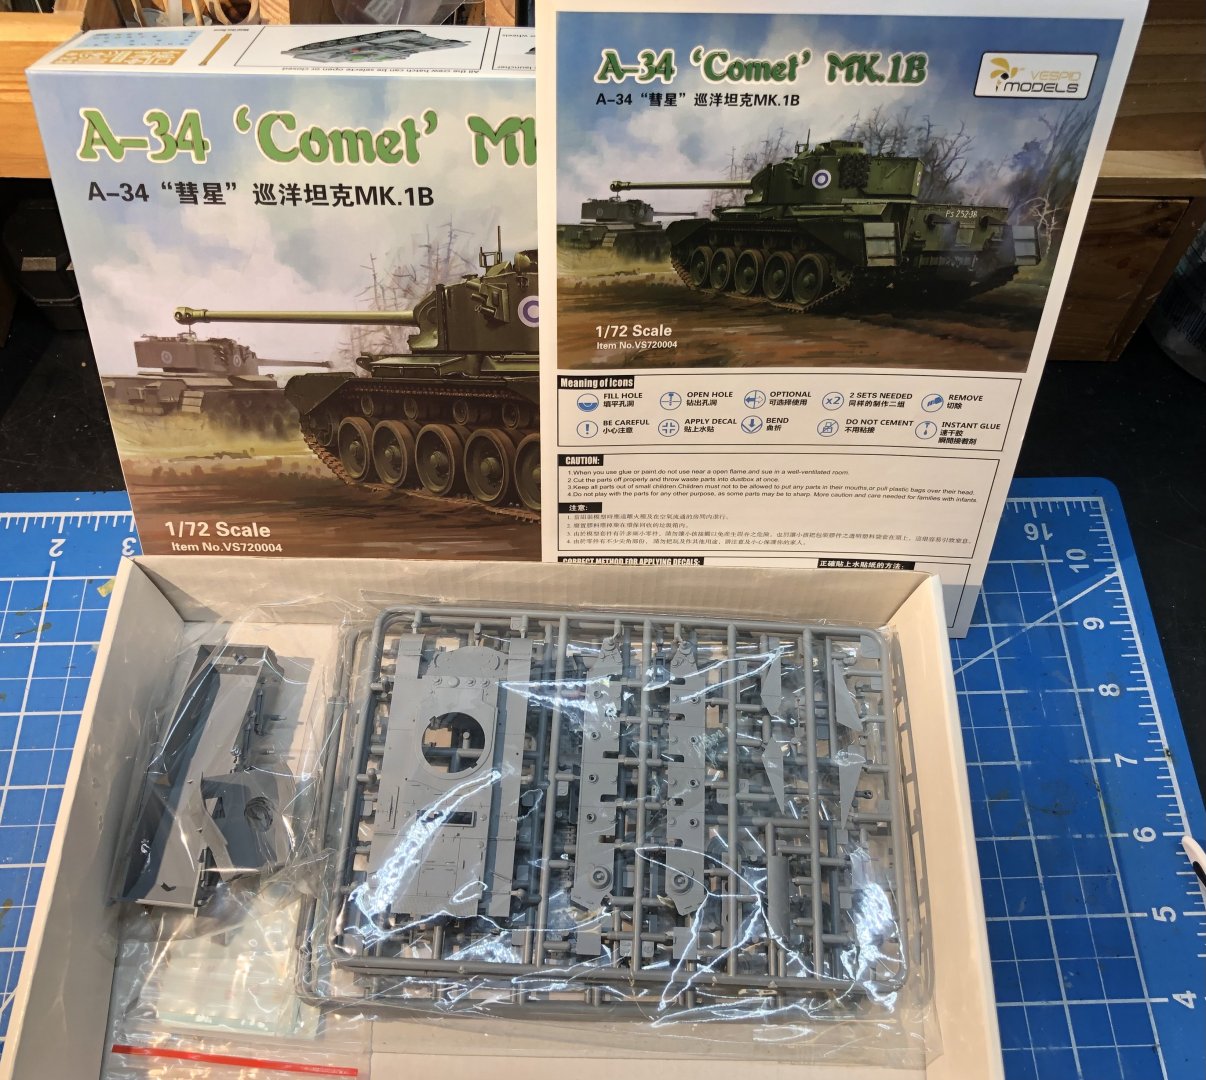
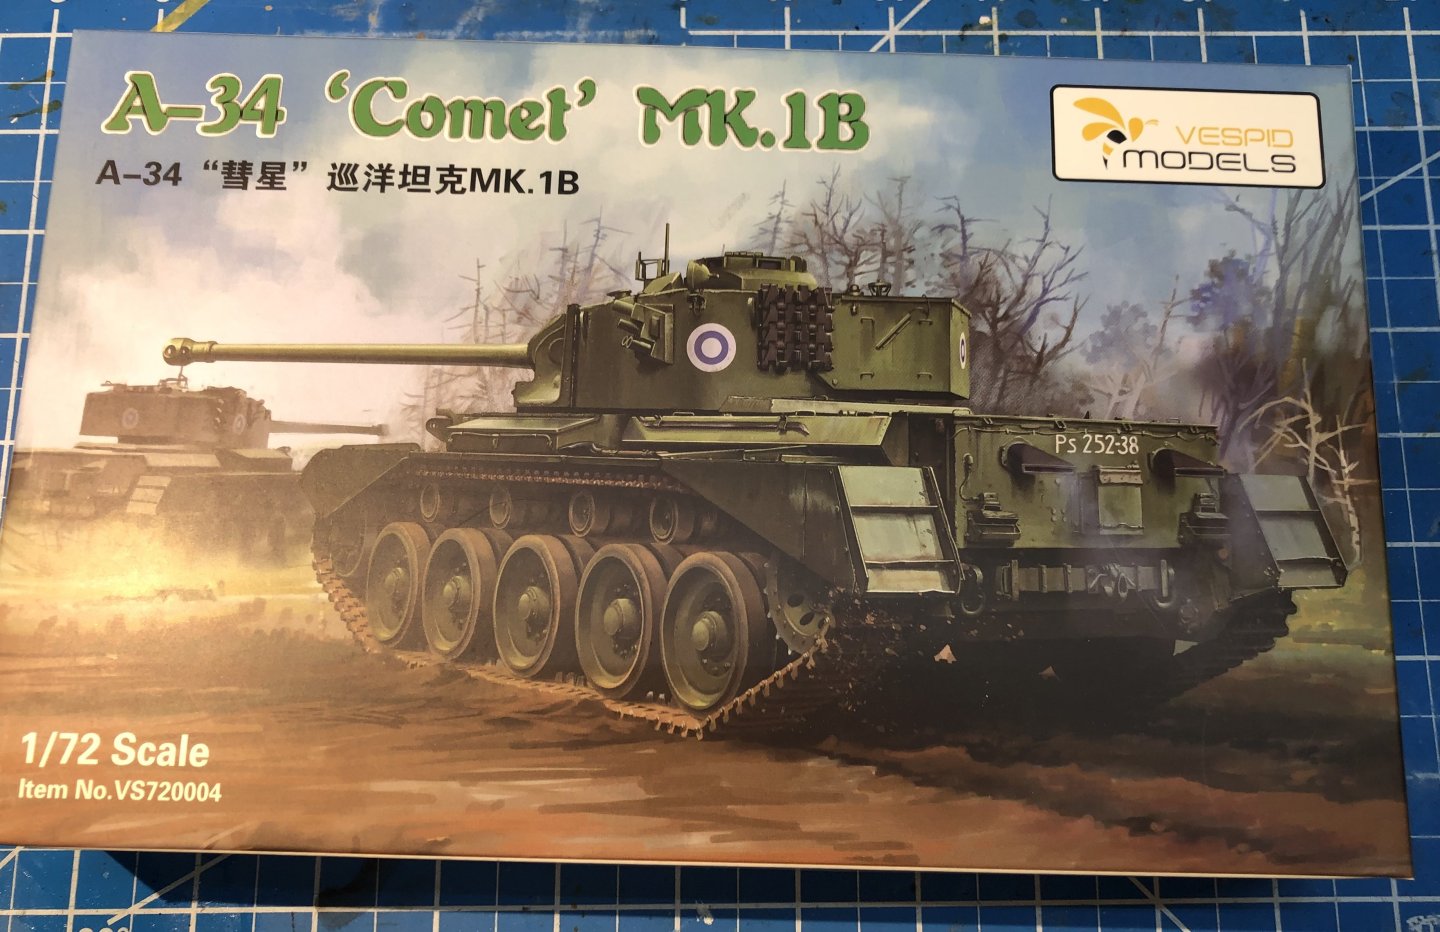
I decided on a couple of small projects before another 1/700 ship. Here we have the Vespid 1/72 kit of the A34 Comet British tank. i have no recollection of buying this kit and it’s my first time trying a Vespid kit, Chinese I think. I suspect it must have been weak will and a sale somewhere. As I understand it, the Comet was a late war production aiming to correct the faults of the Cromwell tank. Significantly upgunned, better armor and an improved drivetrain for the already reliable engine. it entered the field in March 1945 and then served with the British and other armies well into the fifties. Inside the box is a large amount of parts, nicely molded, a small fret of PE, a brass barrel for the main gun and a resin option for the mantlet which looks nice. The instructions look clear although the paint schemes are hard to interpret. We’re going with brush olive drab. I actually got the DSPIAE circle cutter working and knocked out twenty masks for the road wheels fairly quickly. The key seems to be to use the lightest possible touch with the traveling blade. The road wheel tyres have been sprayed with Tamiya NATO Black and are ready to assemble. i have question for the knowledgeable AFV people among us. Conventional wisdom seems to lean towards tank tracks being painted to show rust and a silver color where contact with the terrain has abraded the track. I recently read that tank tracks are made of manganese steel which is pale gold and does not corrode significantly. Any thoughts? Especially looking for help from @Egilman and @Baker. Thanks! Thank you for looking in. alan


- 29 replies
-
- 12
-

-
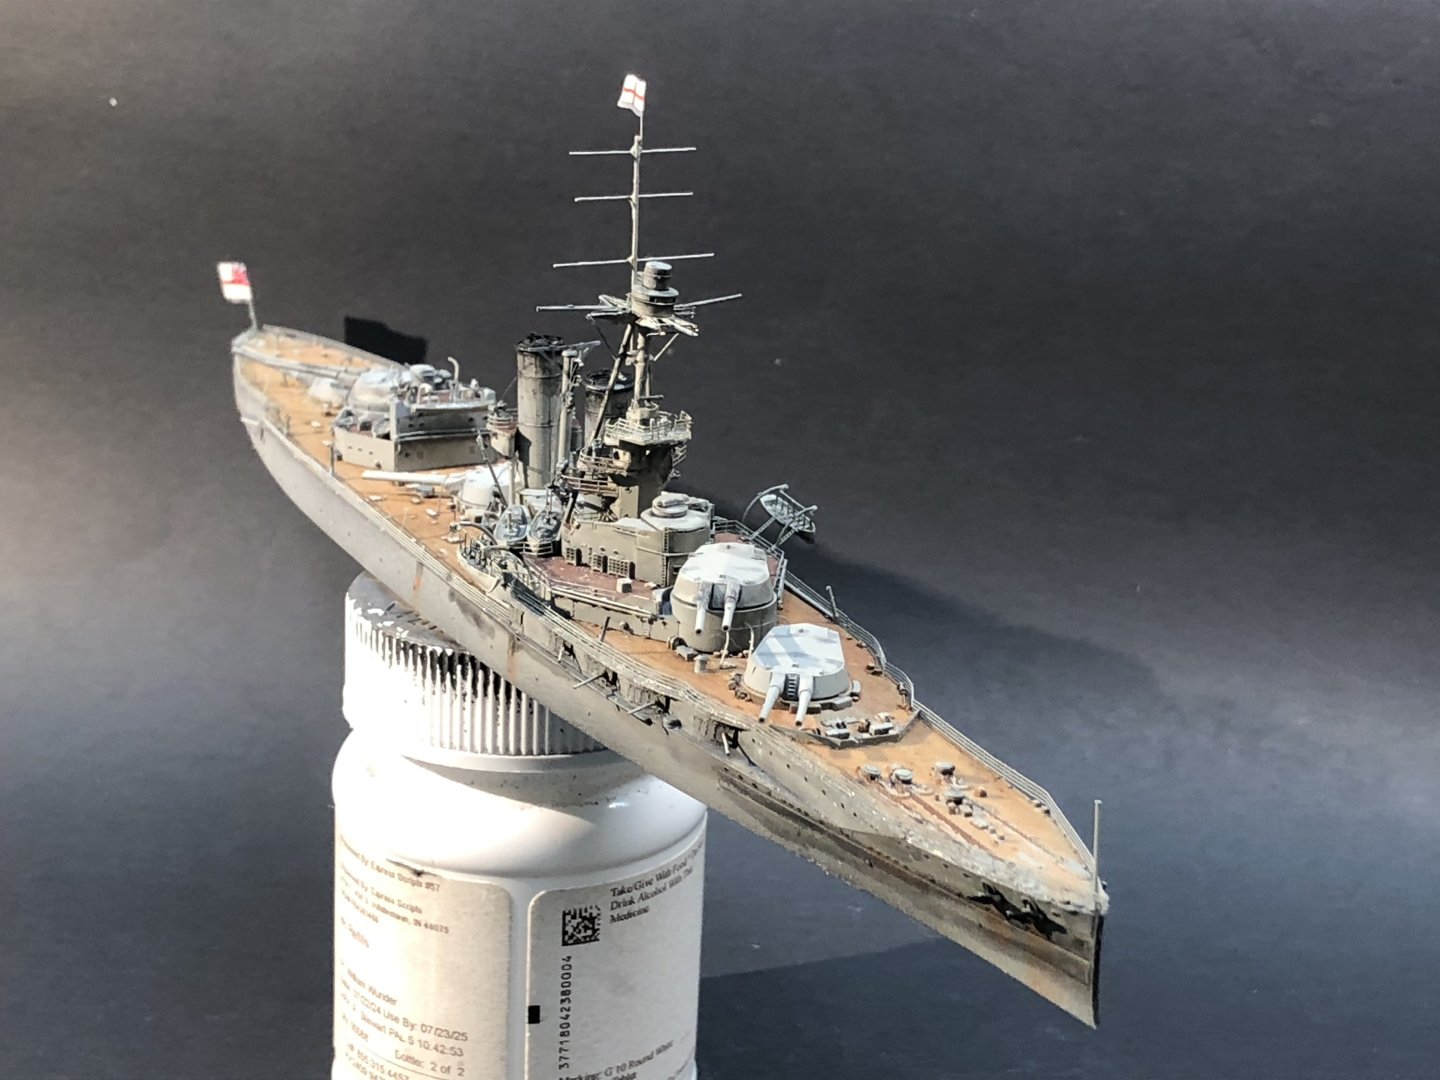
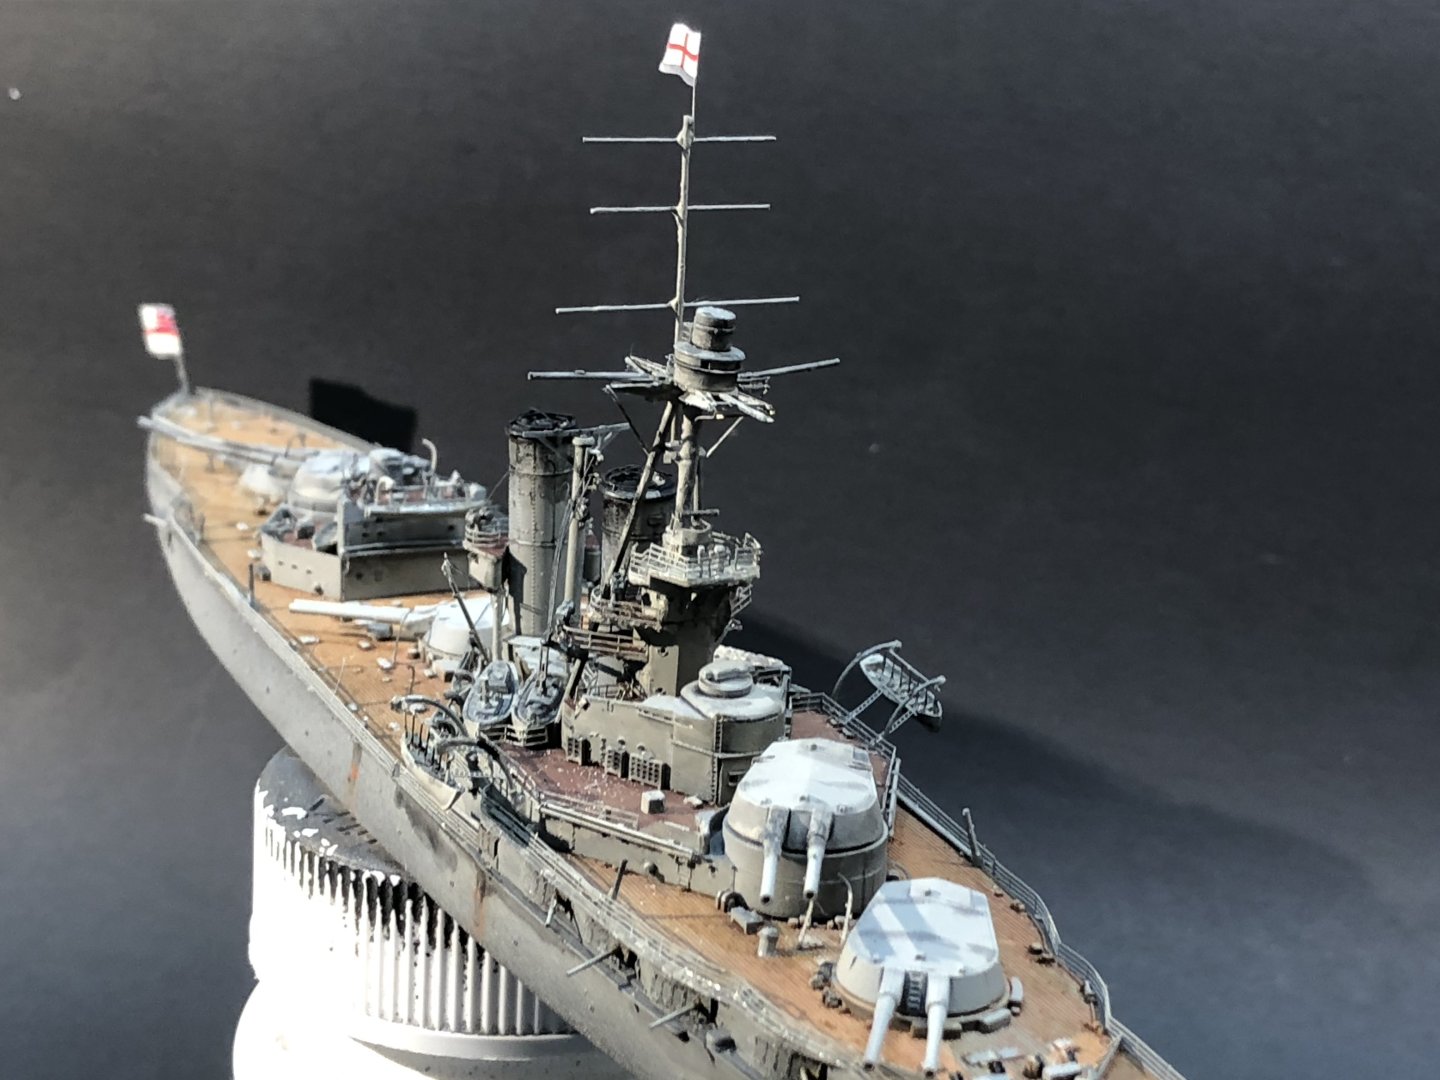
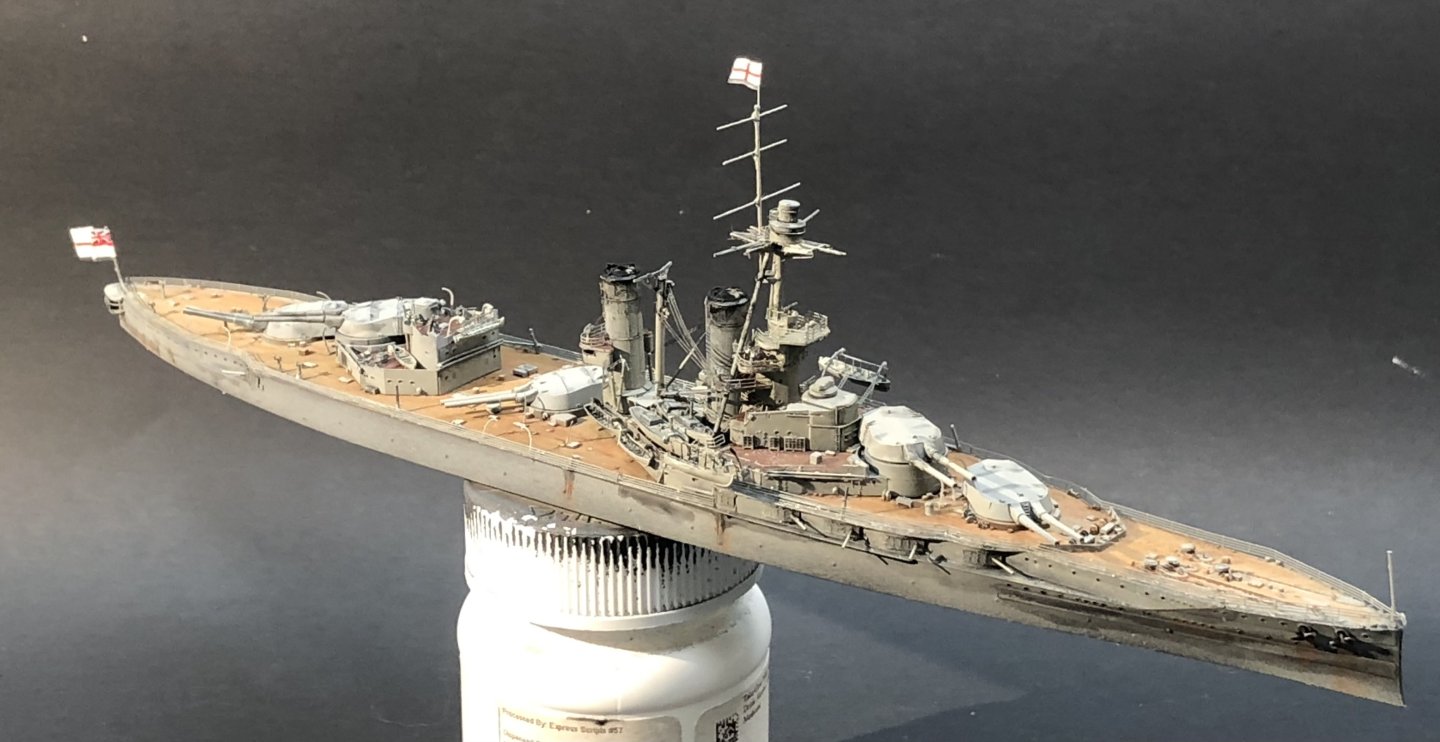
Thank you very much Mike. It generally went together well. I’m thinking about starting another WW1 ship. Regarding the mast mystery, I think this might be the culprit. I think the mast might have been knocked to the floor and got caught in her fur and transferred to the couch. alan

-
Thank you very much Per, at least I got some much needed practice soldering masts😄 alan
-
Thank you very much OC. Now what’s next? I spent time today opening boxes, ship (USS Lassen), AFV (A34 Comet), figures (Pegaso Slavic warrior) and not feeling very motivated. I’m sort of gravitating towards the figures. alan
-
Thank you very much Andrew. I hope you try on of the PE heavy ships. I think nicely folded PE looks great as railings, cranes, catapults and girders but less so for more 3D objects. I’m getting a bit more fussy about which bits I use. It’s very satisfying to fold up something delicate and for me at least, there are the other days ….. I suppose resin is taking over in a lot of areas, guns etc alan
-
Very sorry to hear that OC. Your painting artistry will be missed. All best wishes alan
-
Oh, and the missing mast. Very much as everyone predicted, it turned up just after I finished the model. I made a celebratory cup of tea and sat down on the sofa in the lounge (at the other end of the house from the workbench) and sat on something sharp. Lo and behold, the mast. alan
-
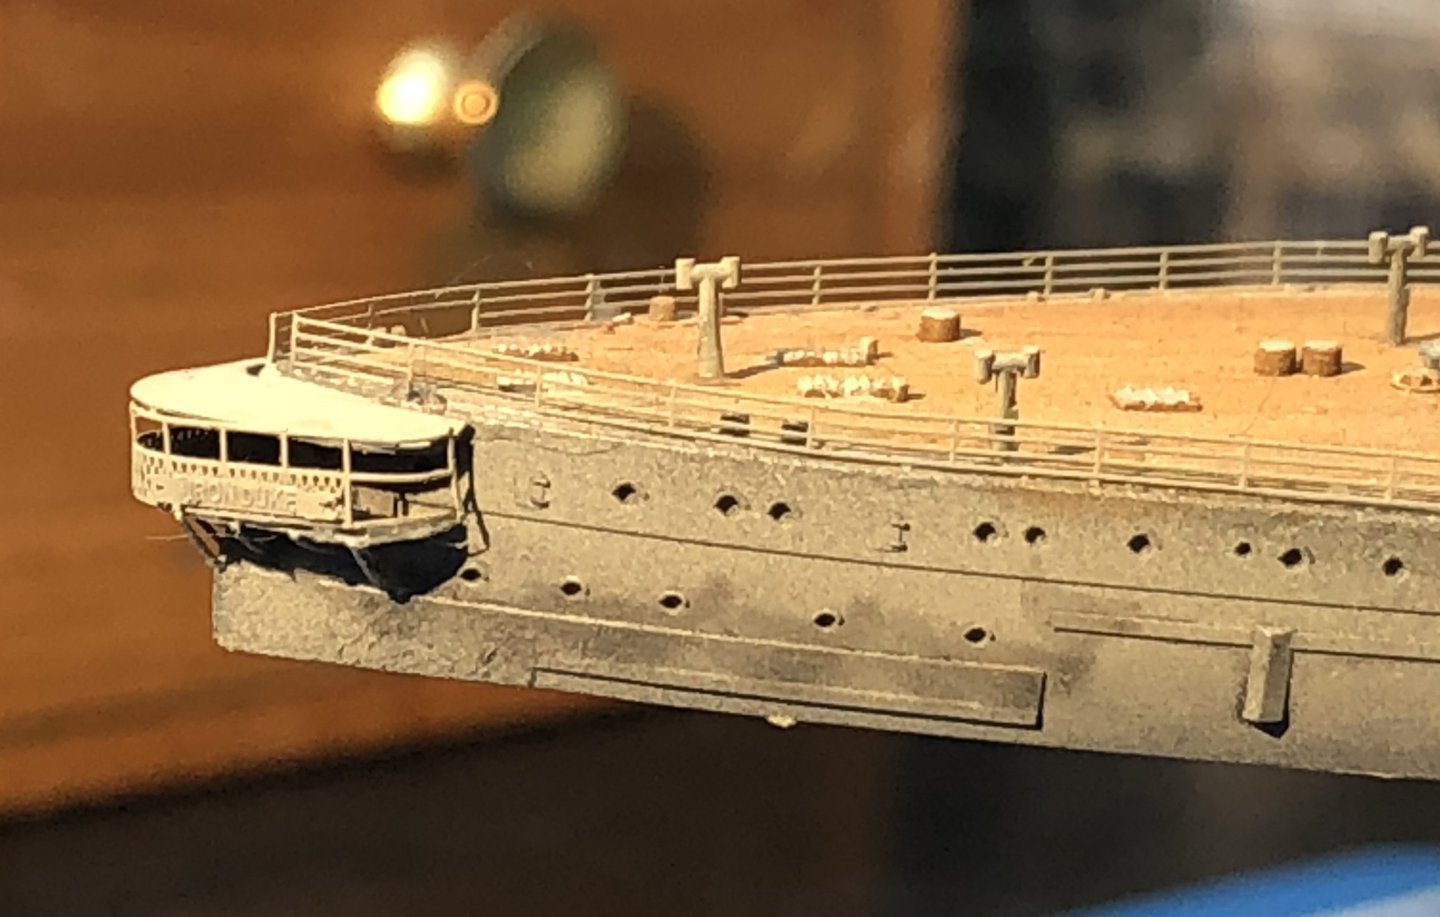
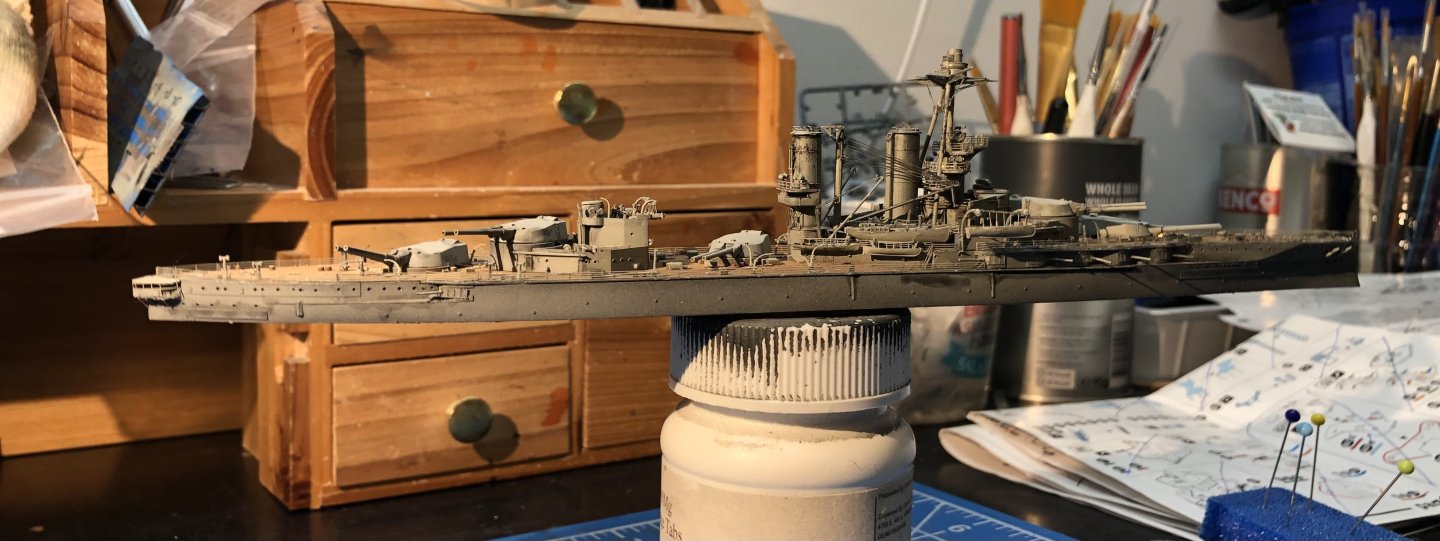
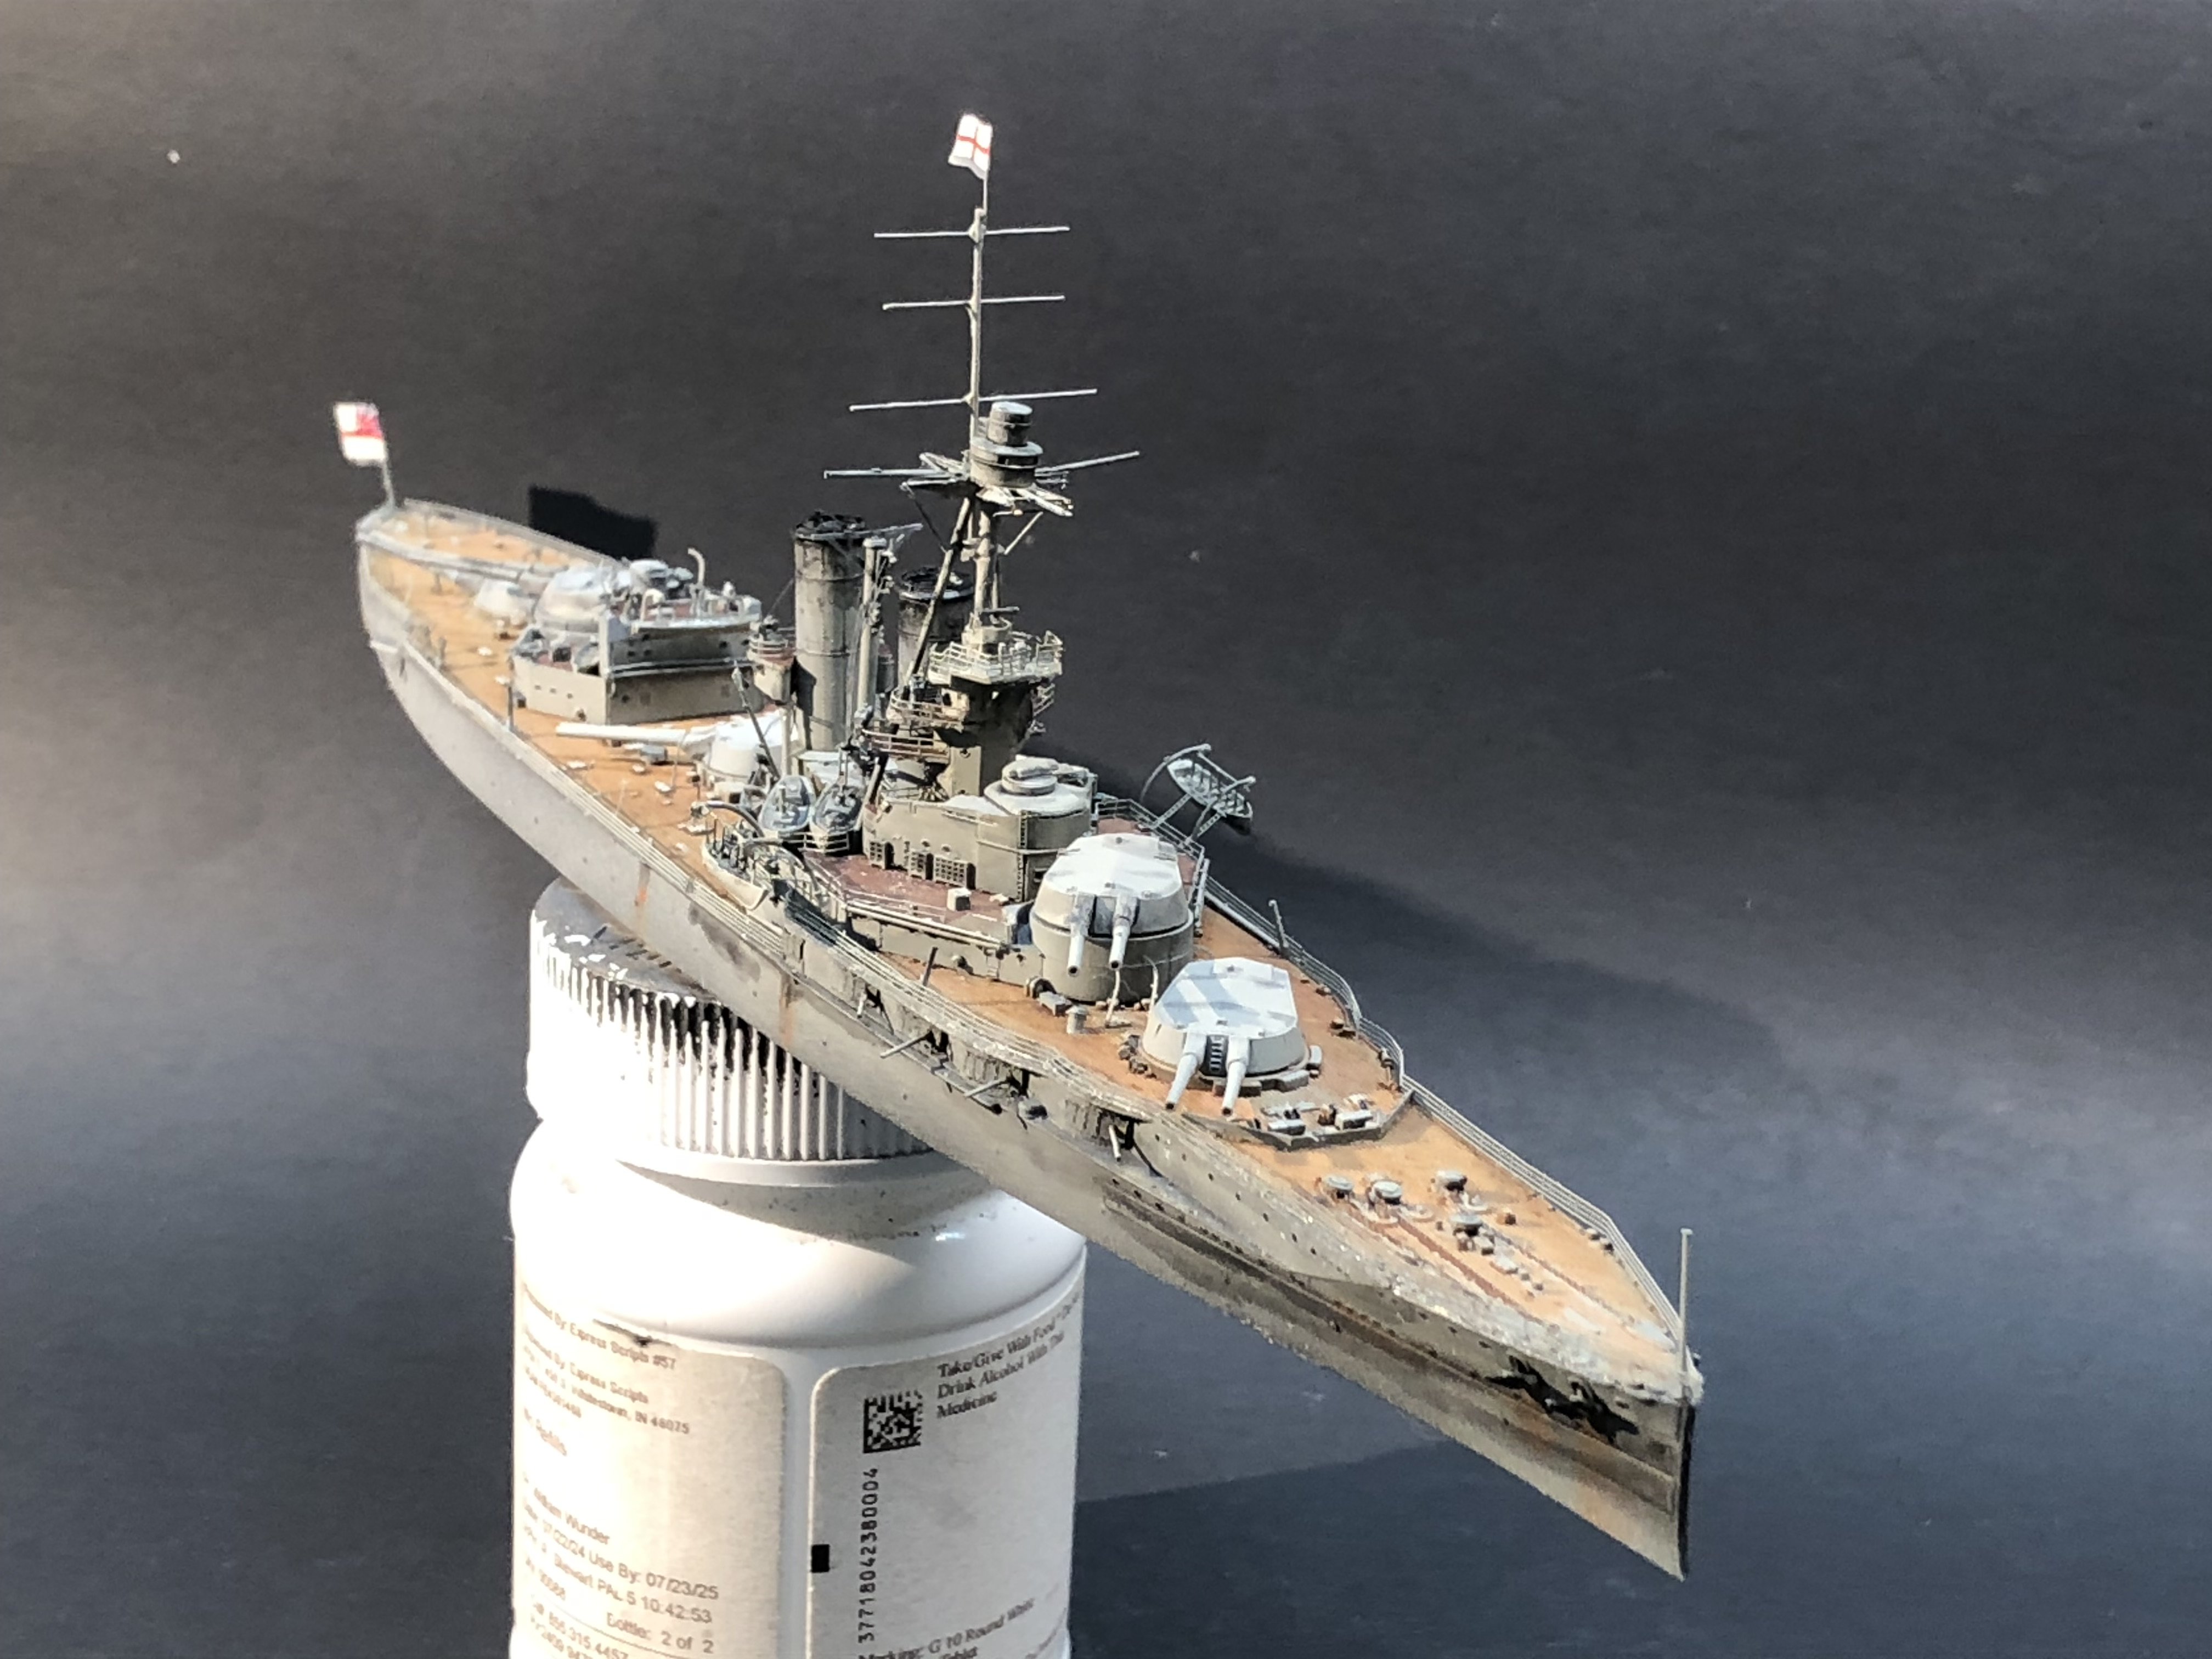
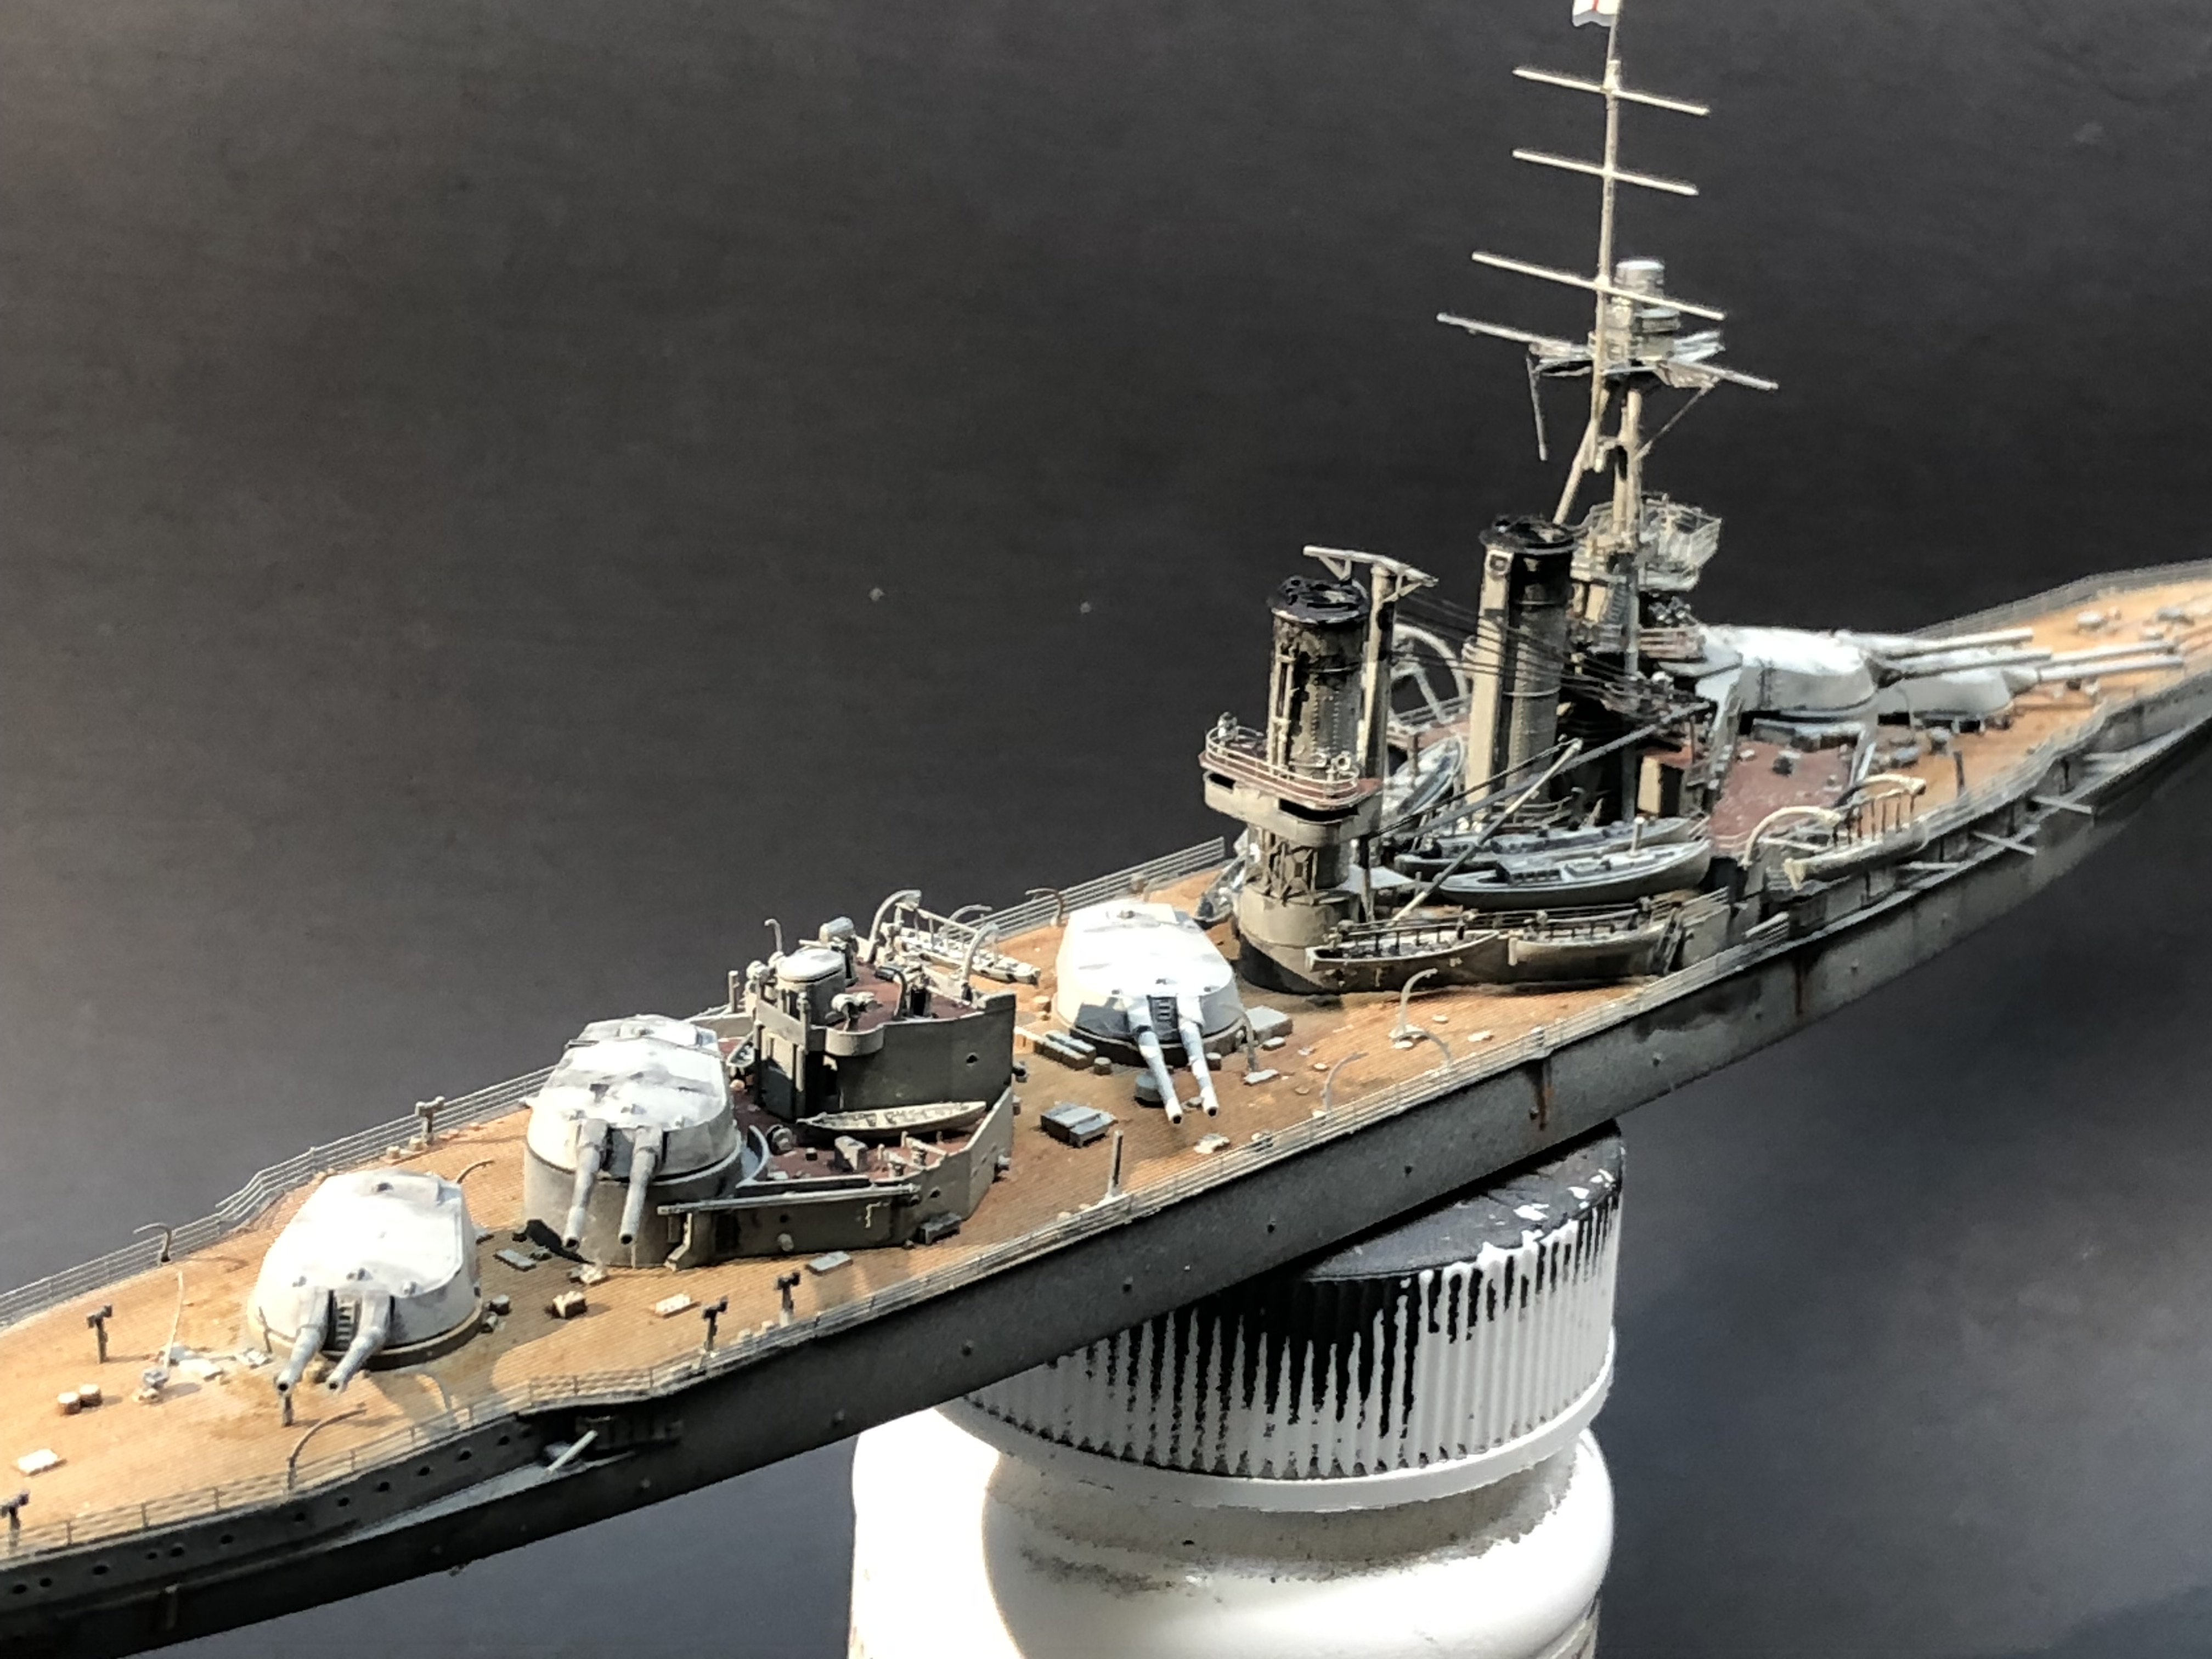
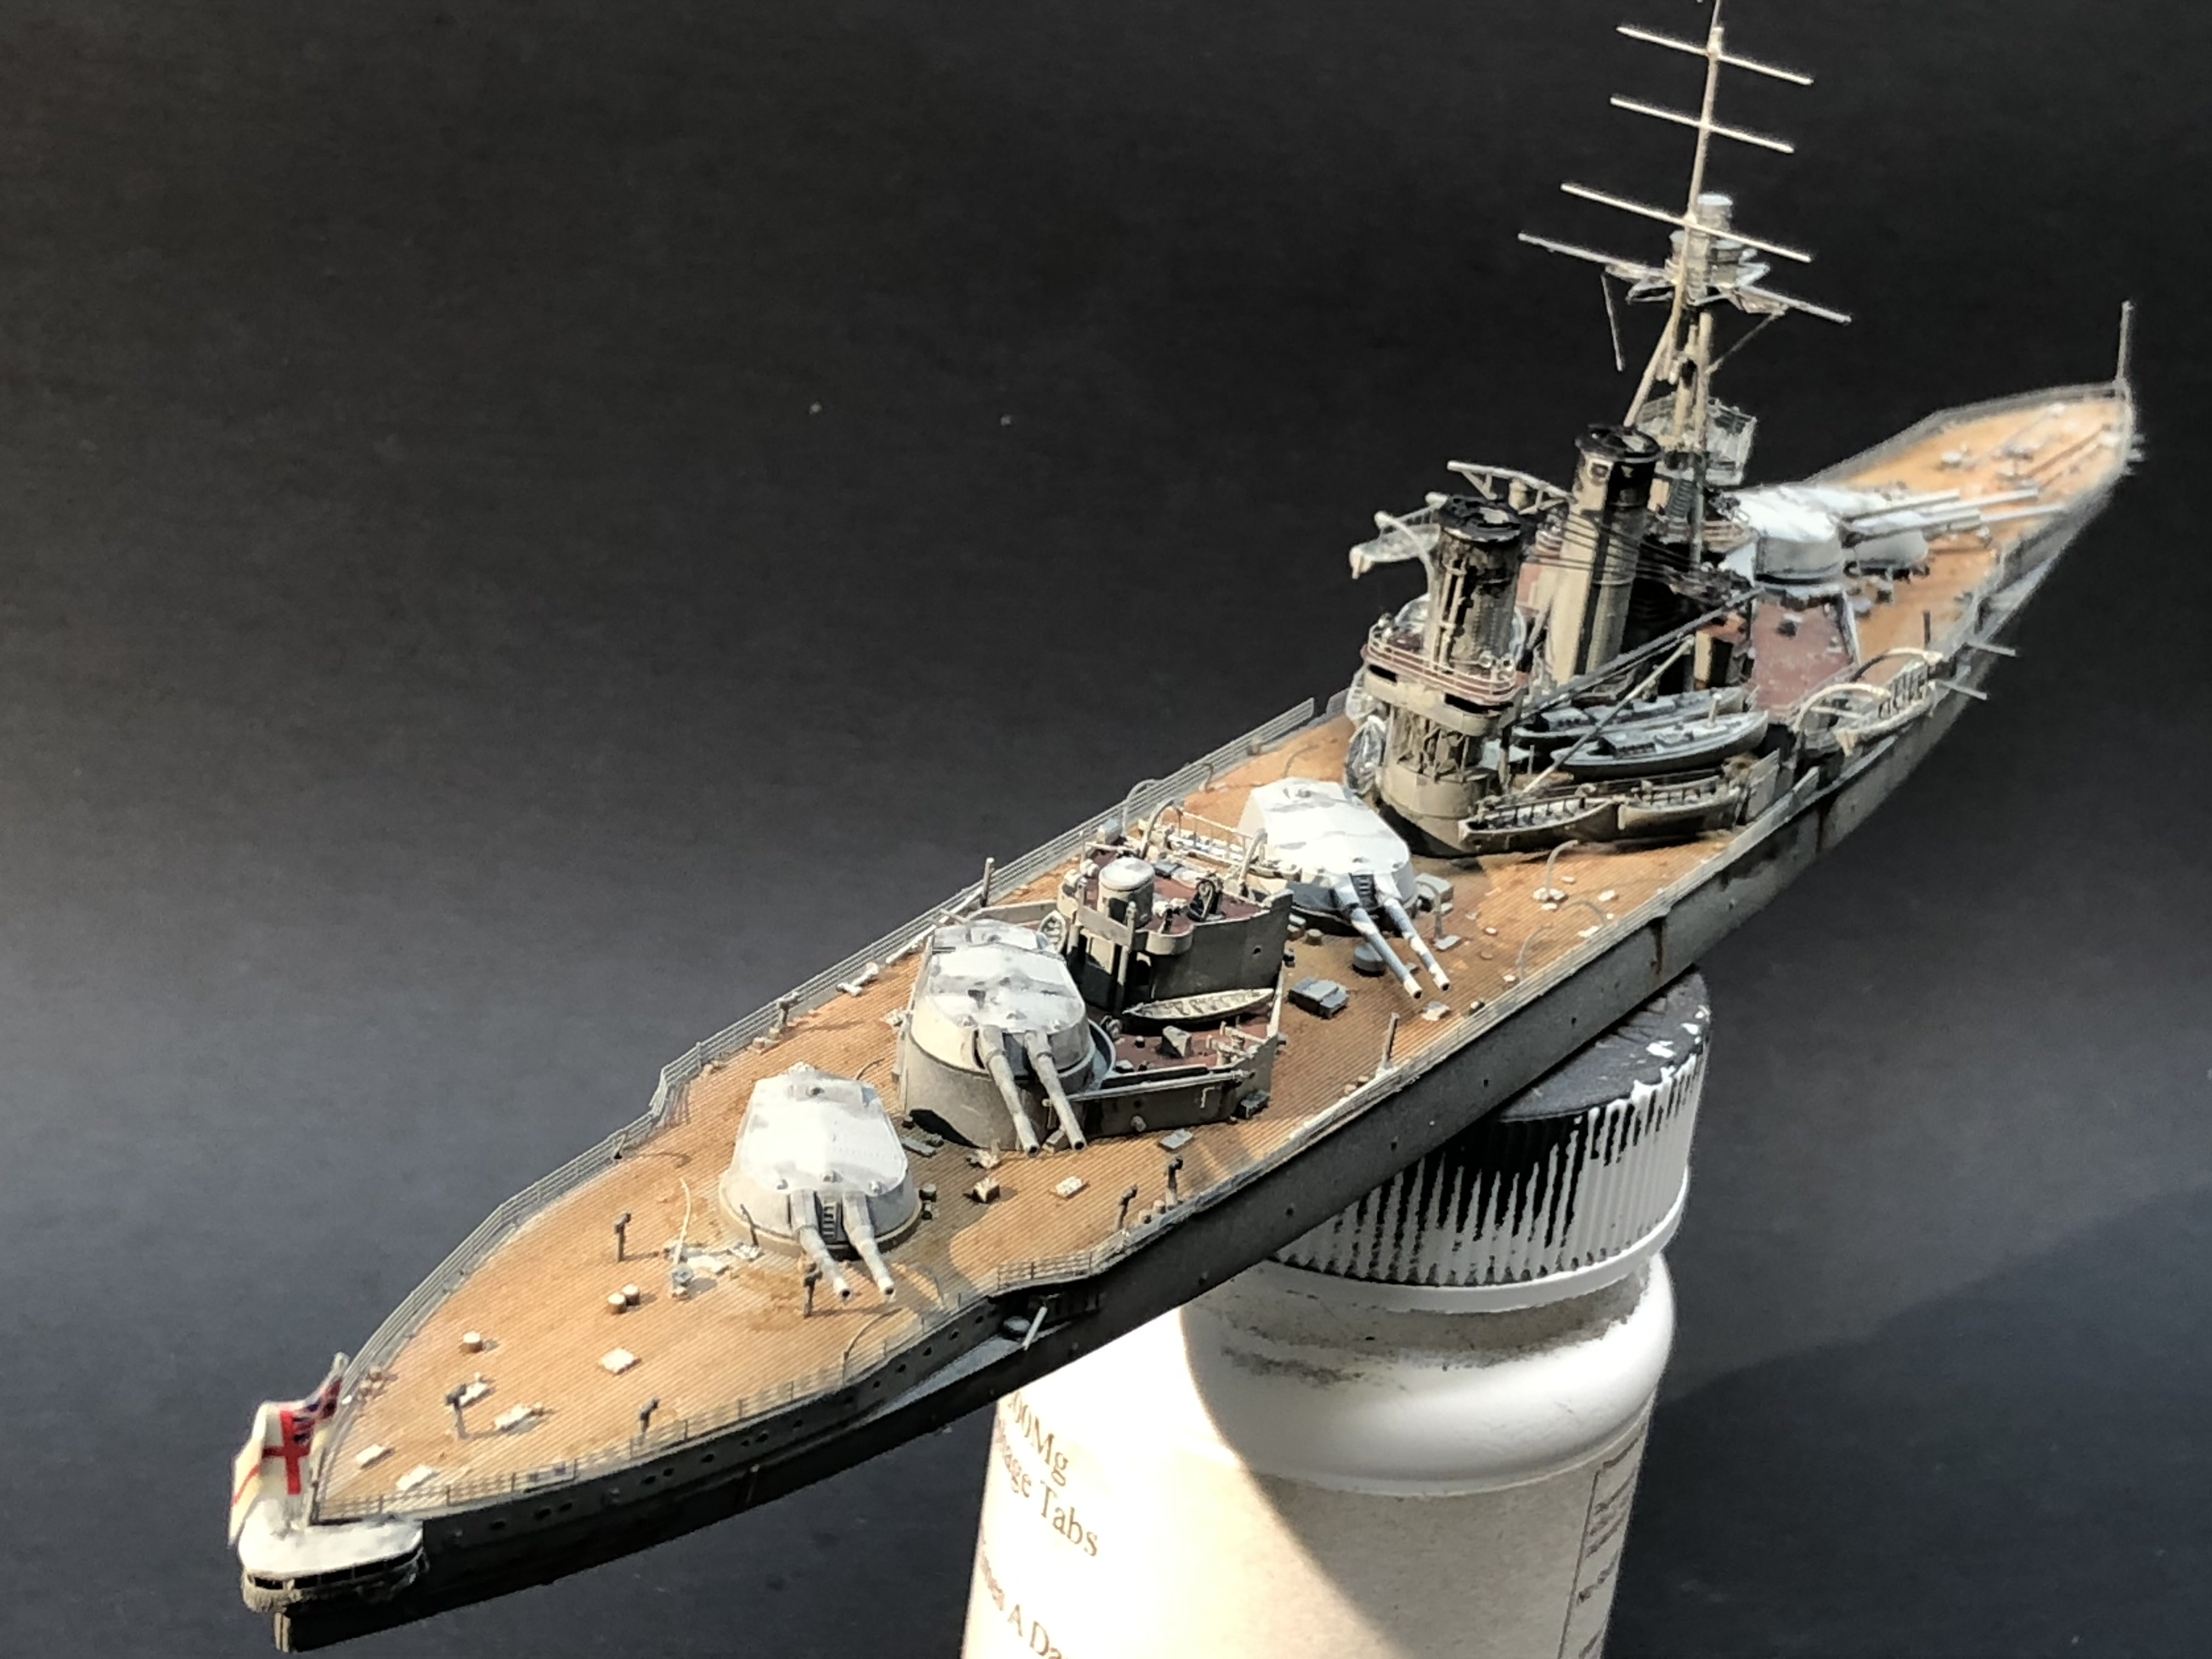
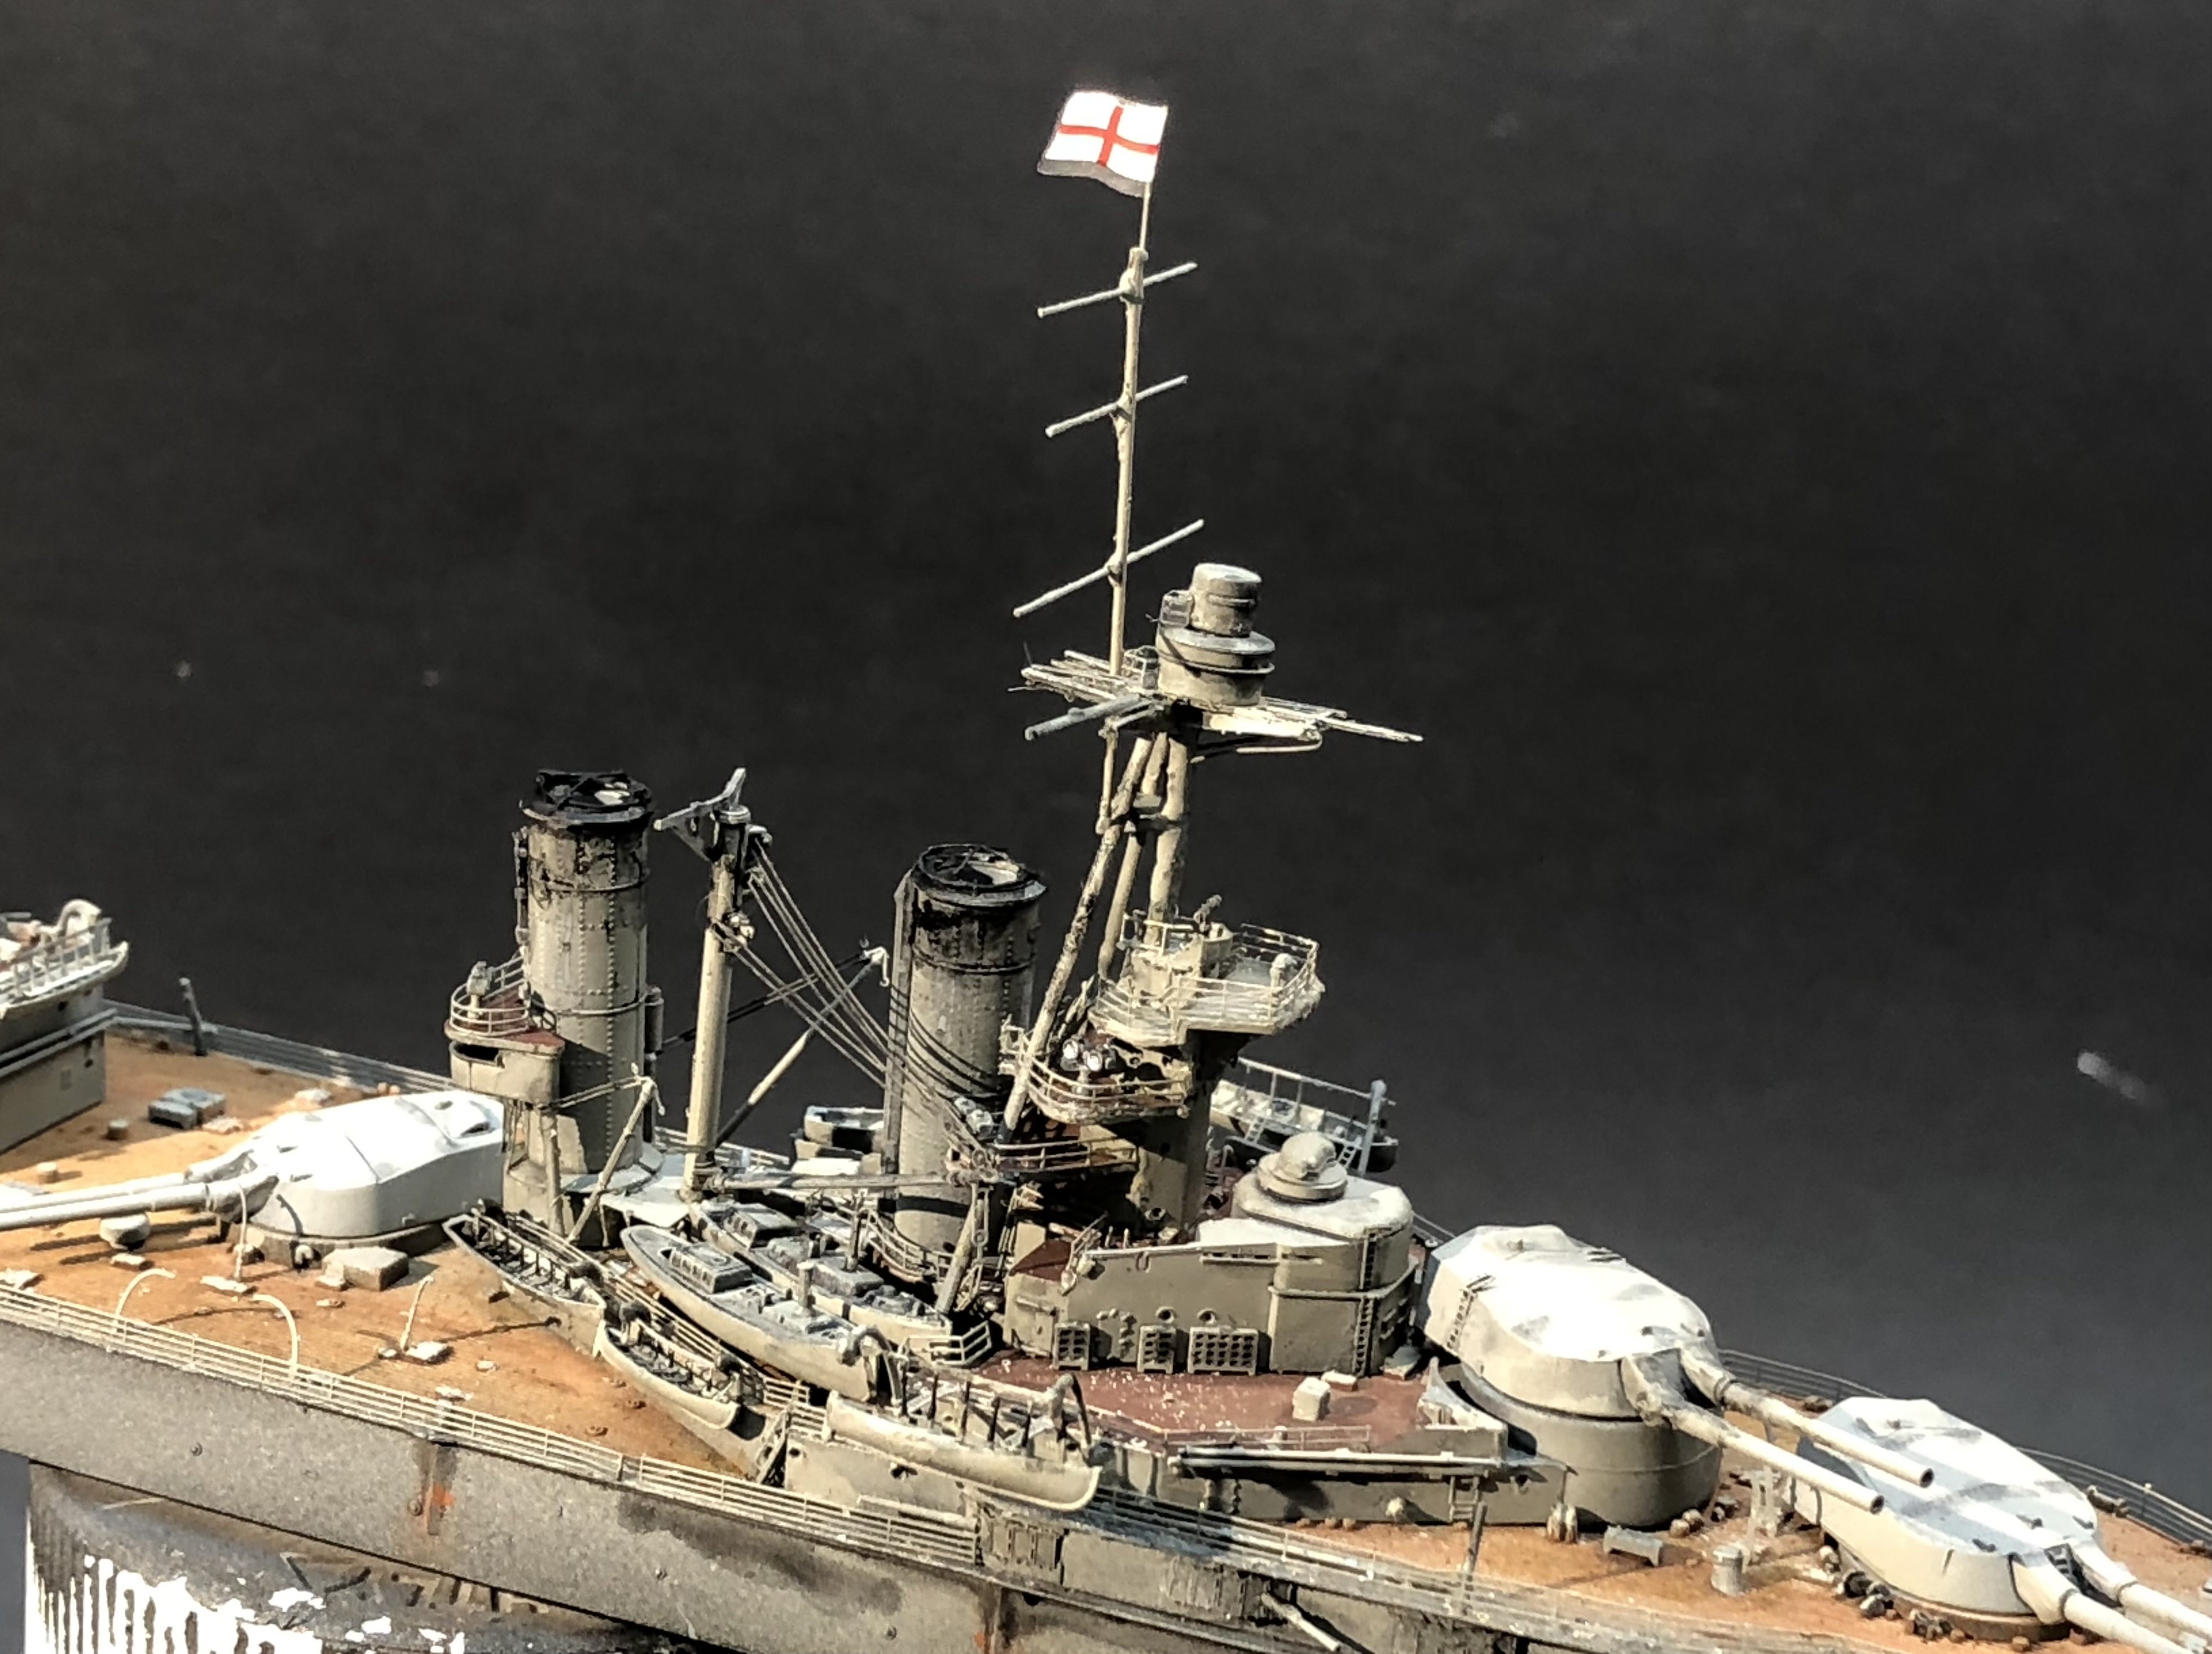
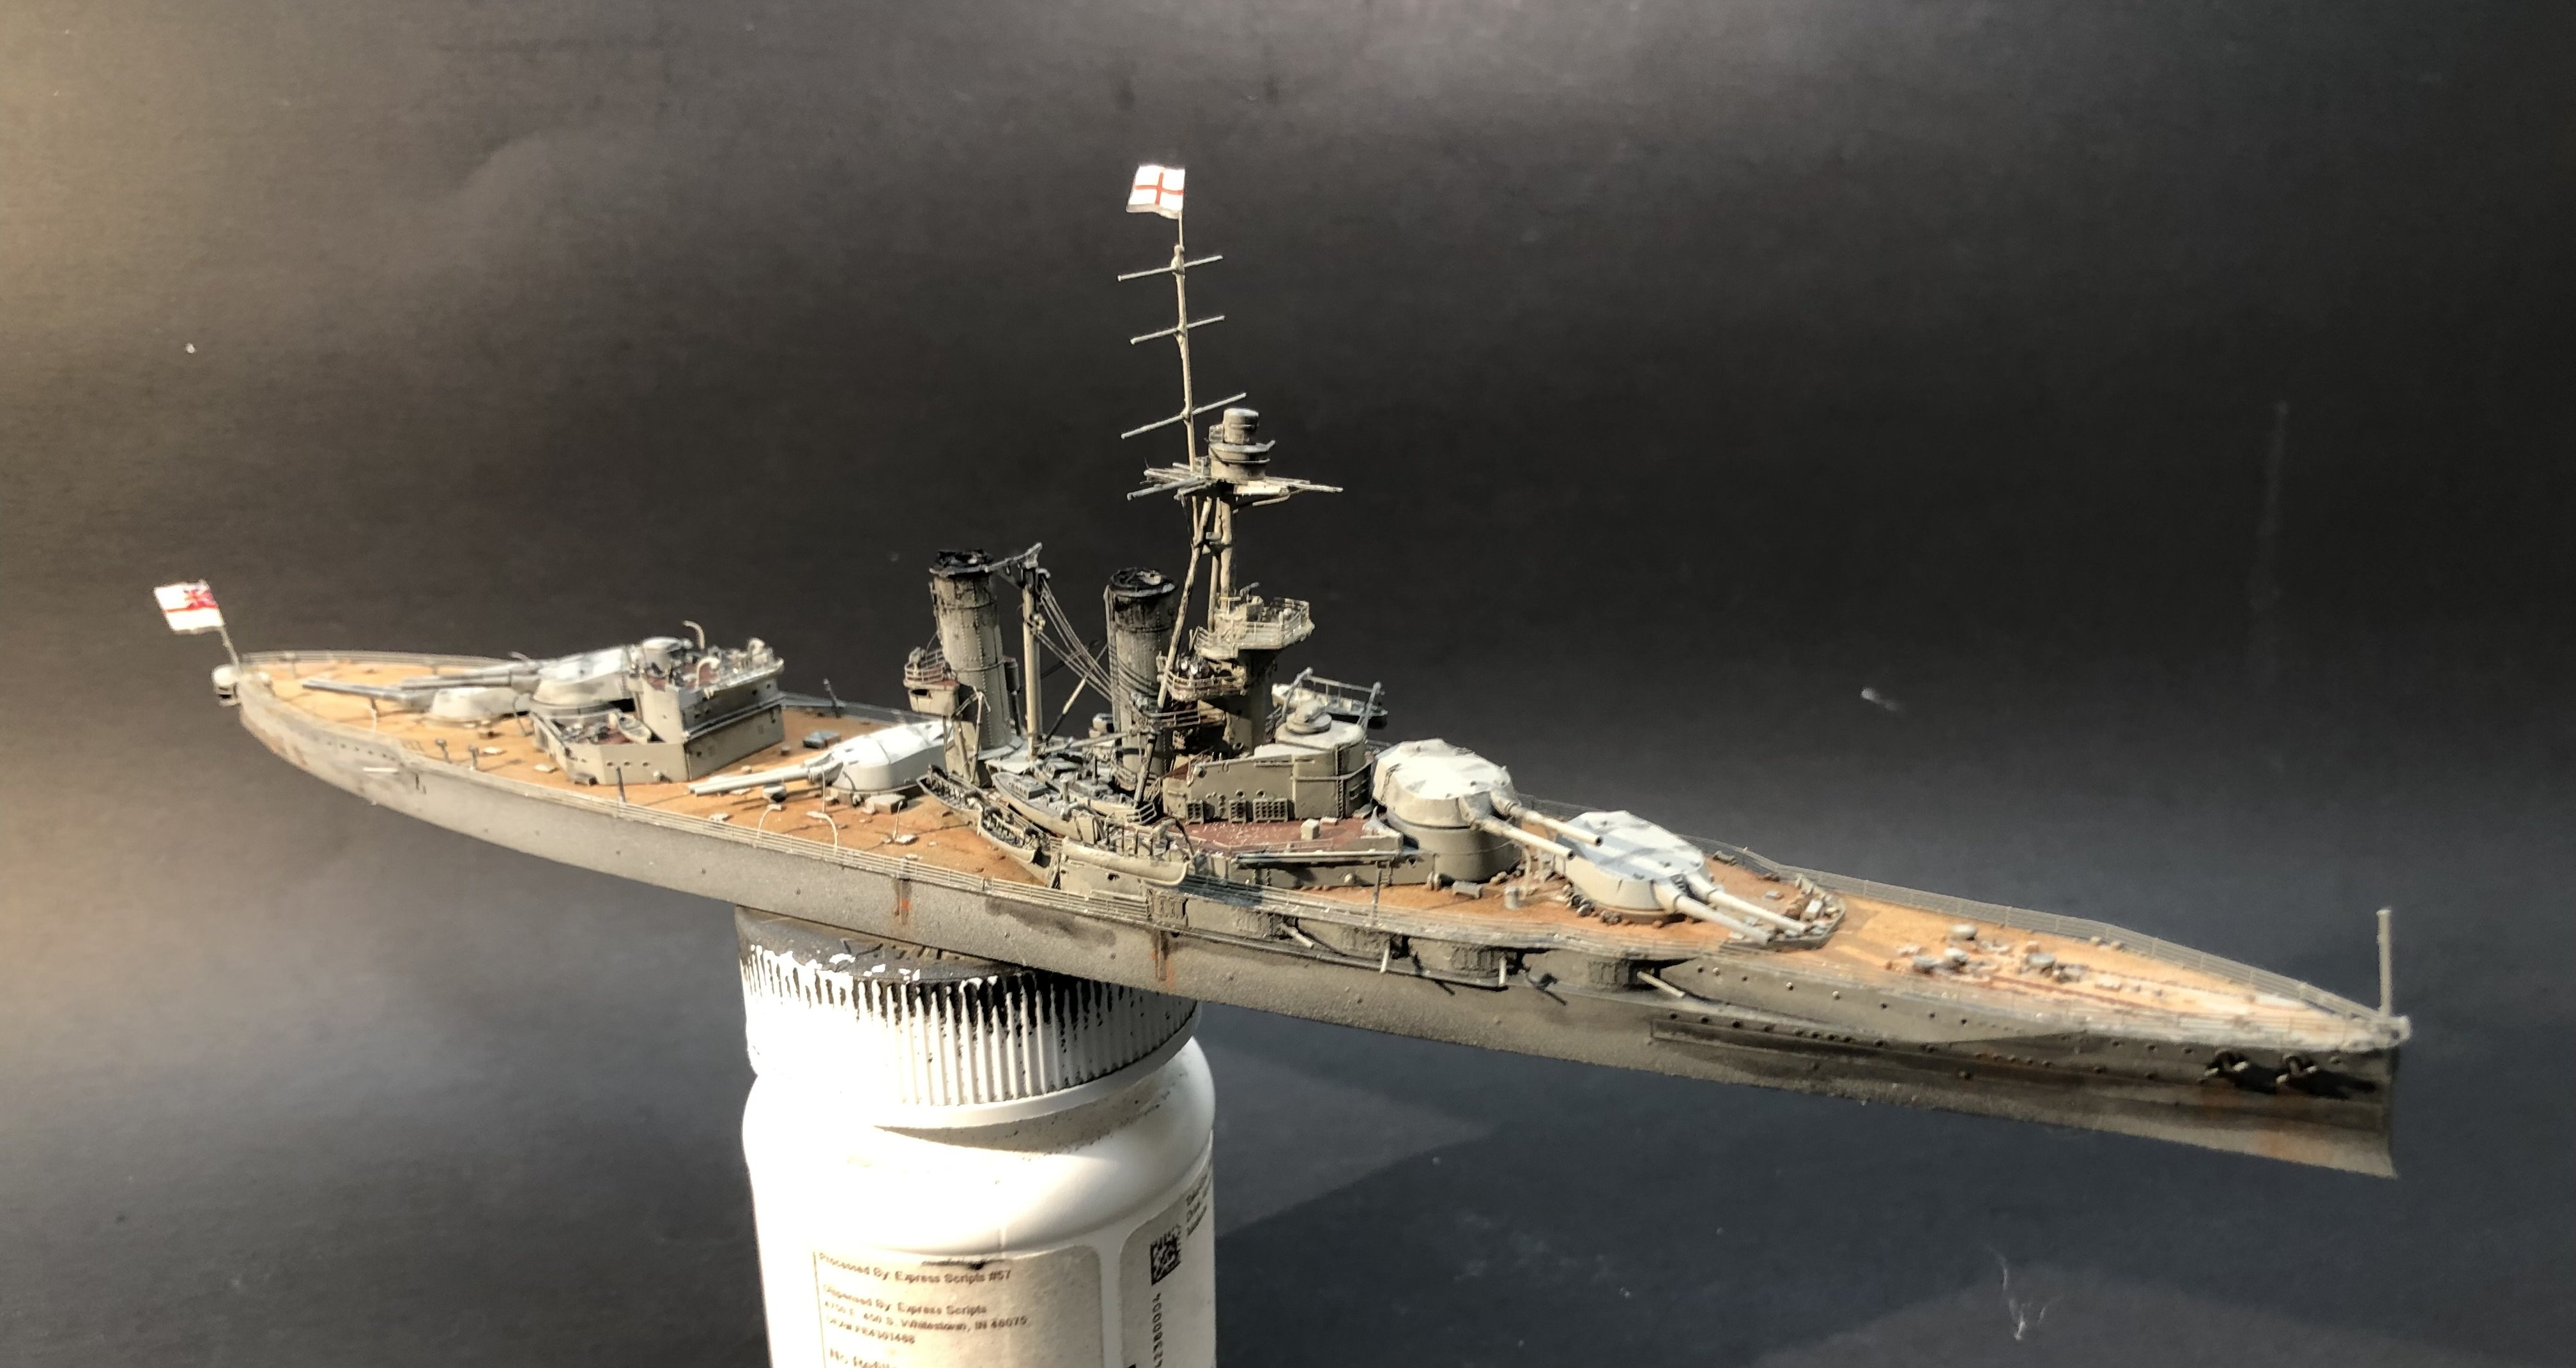
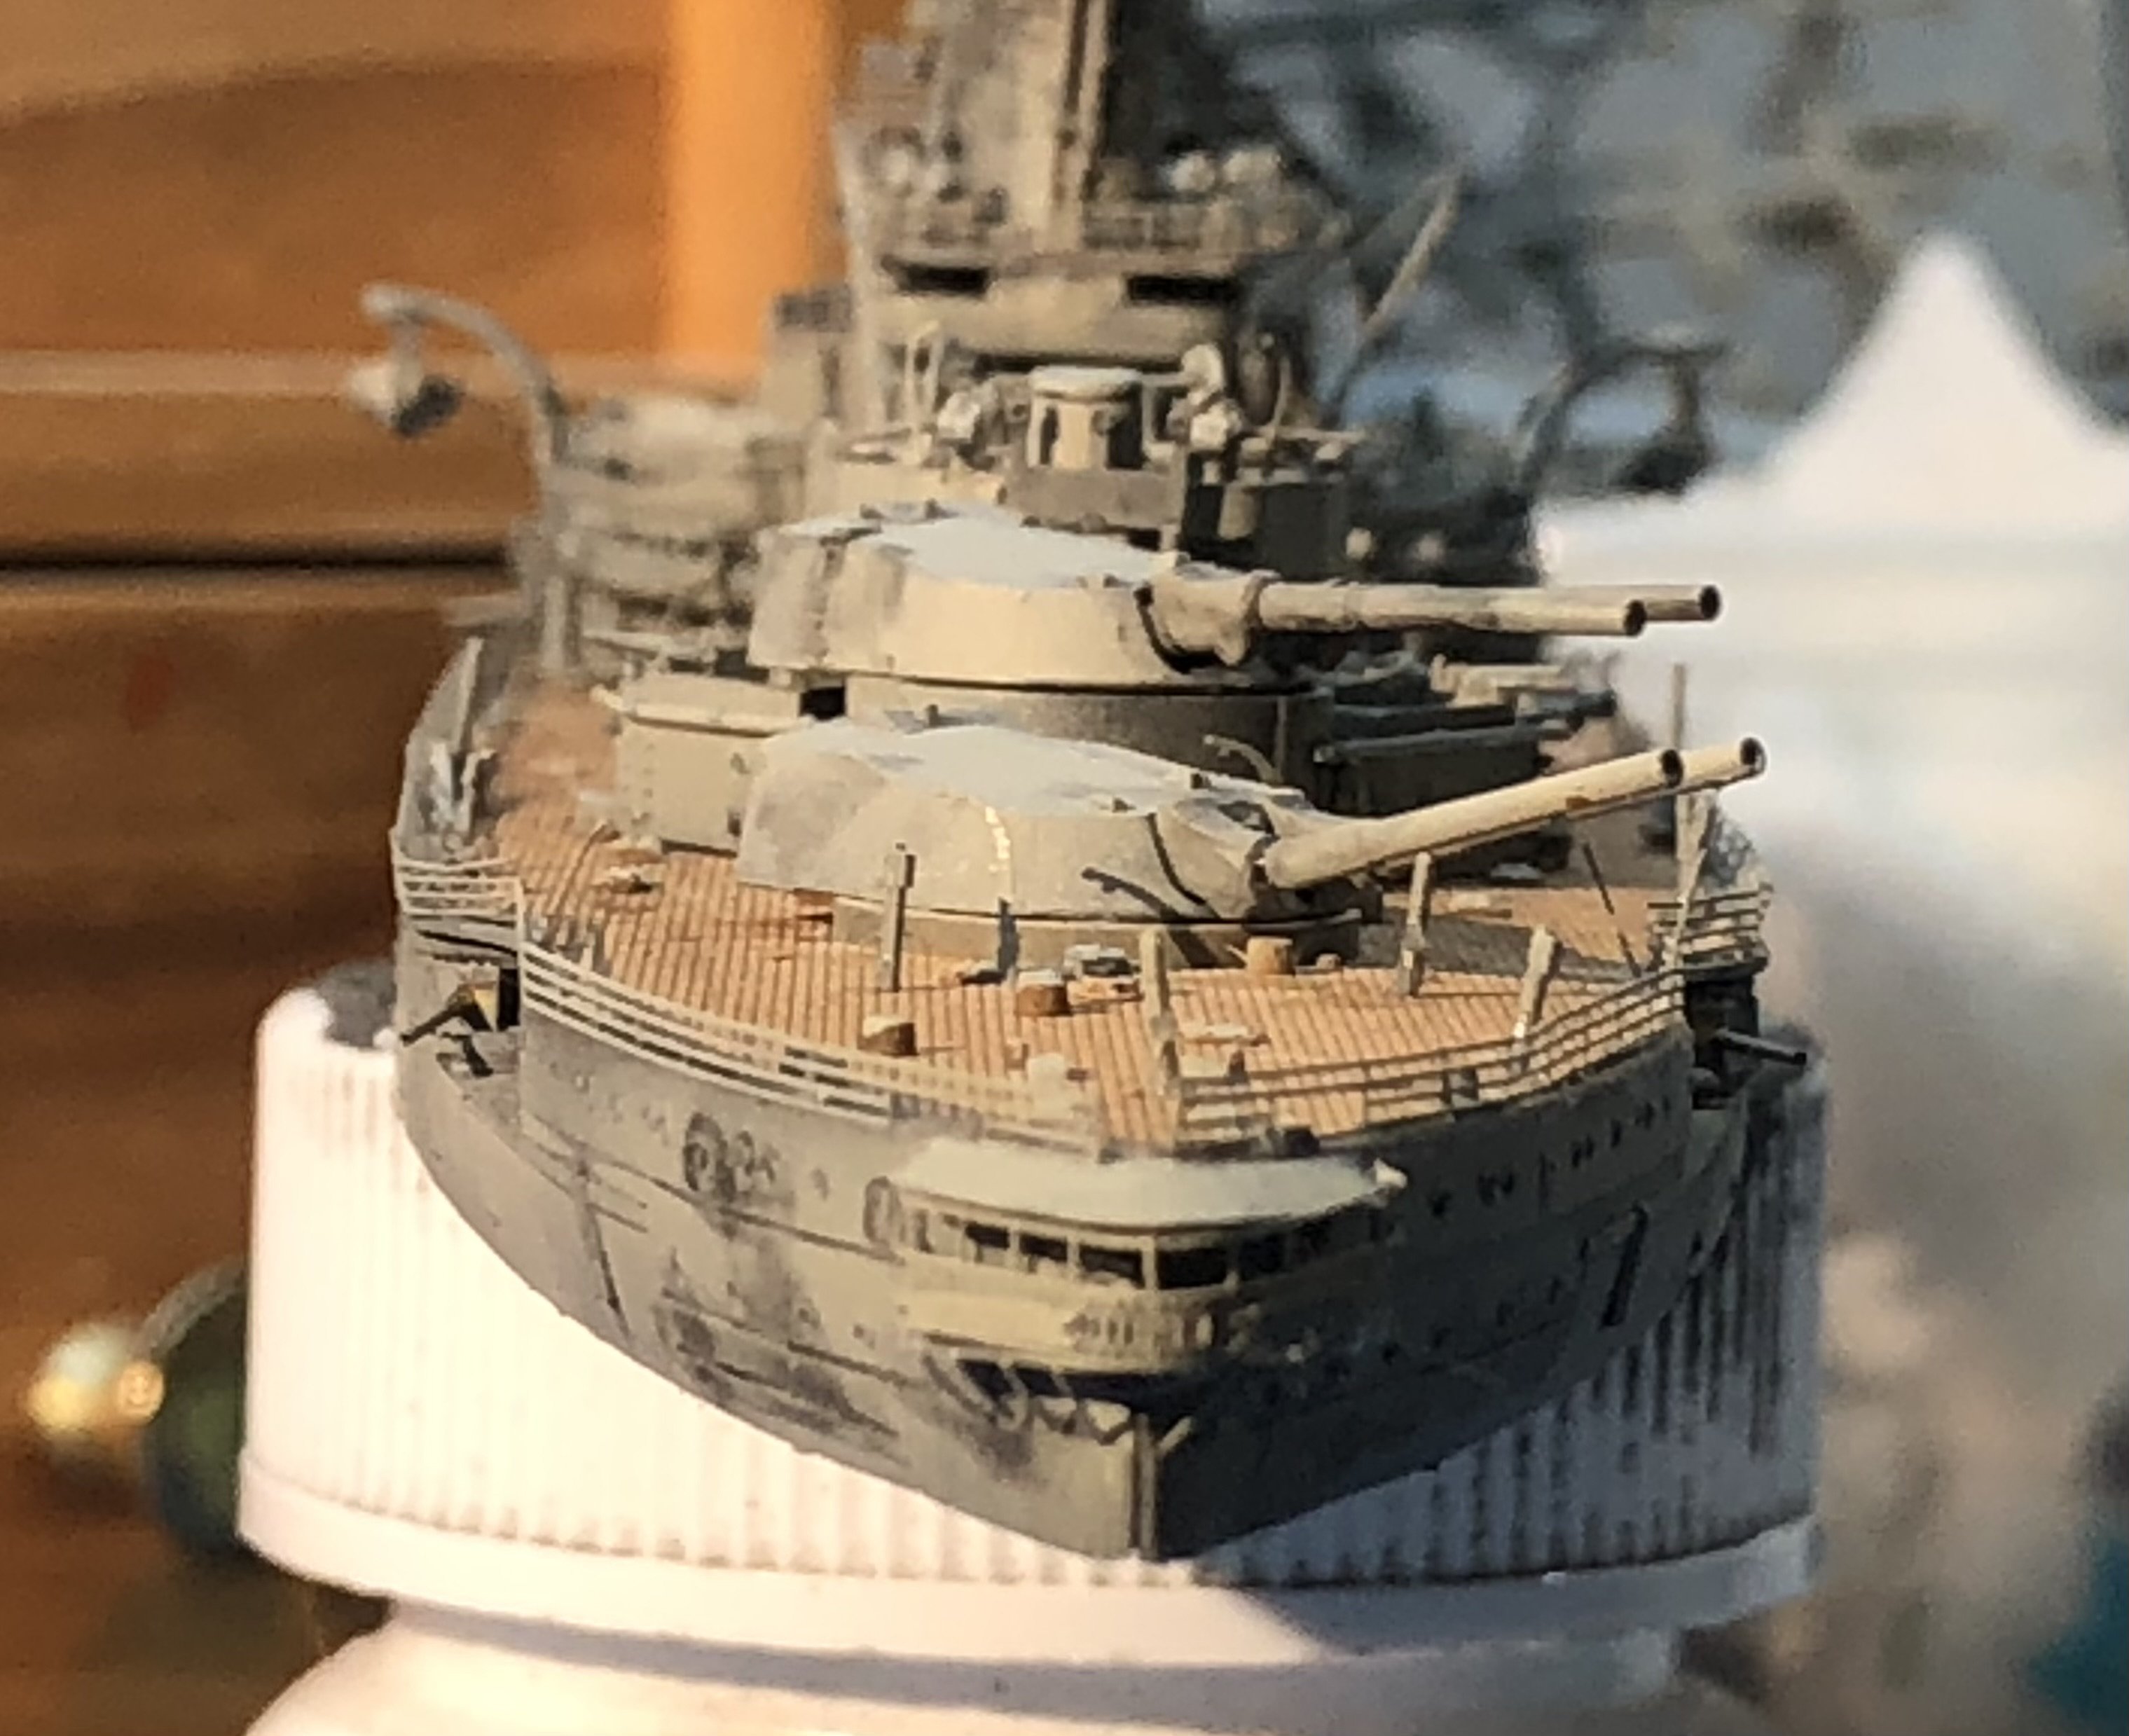
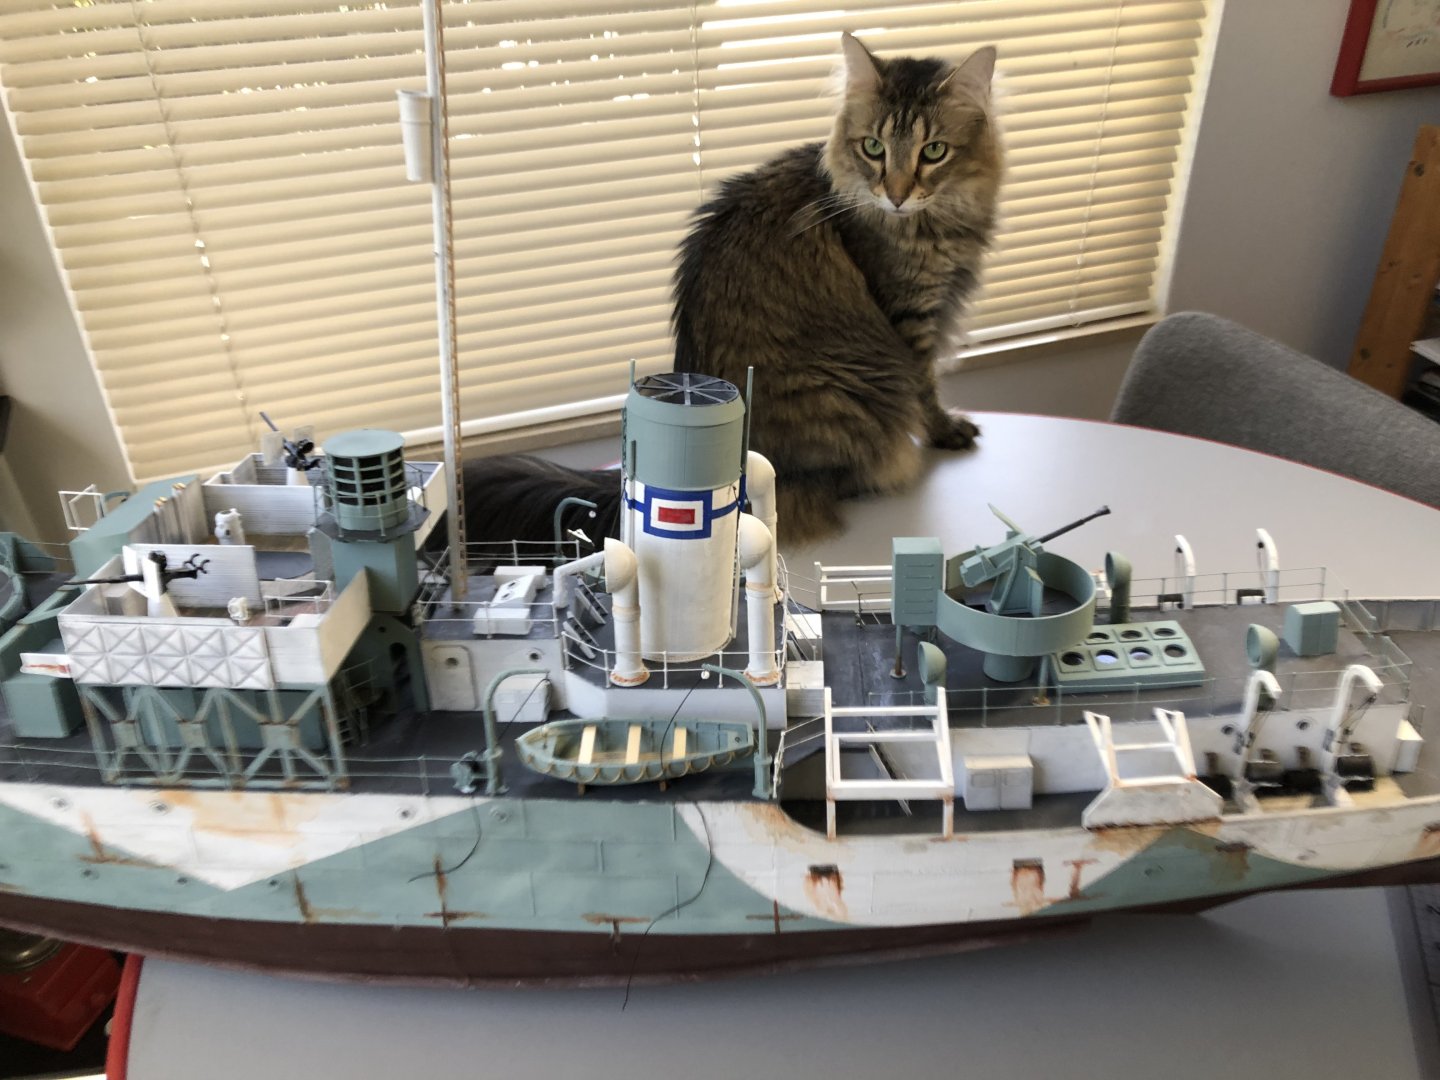
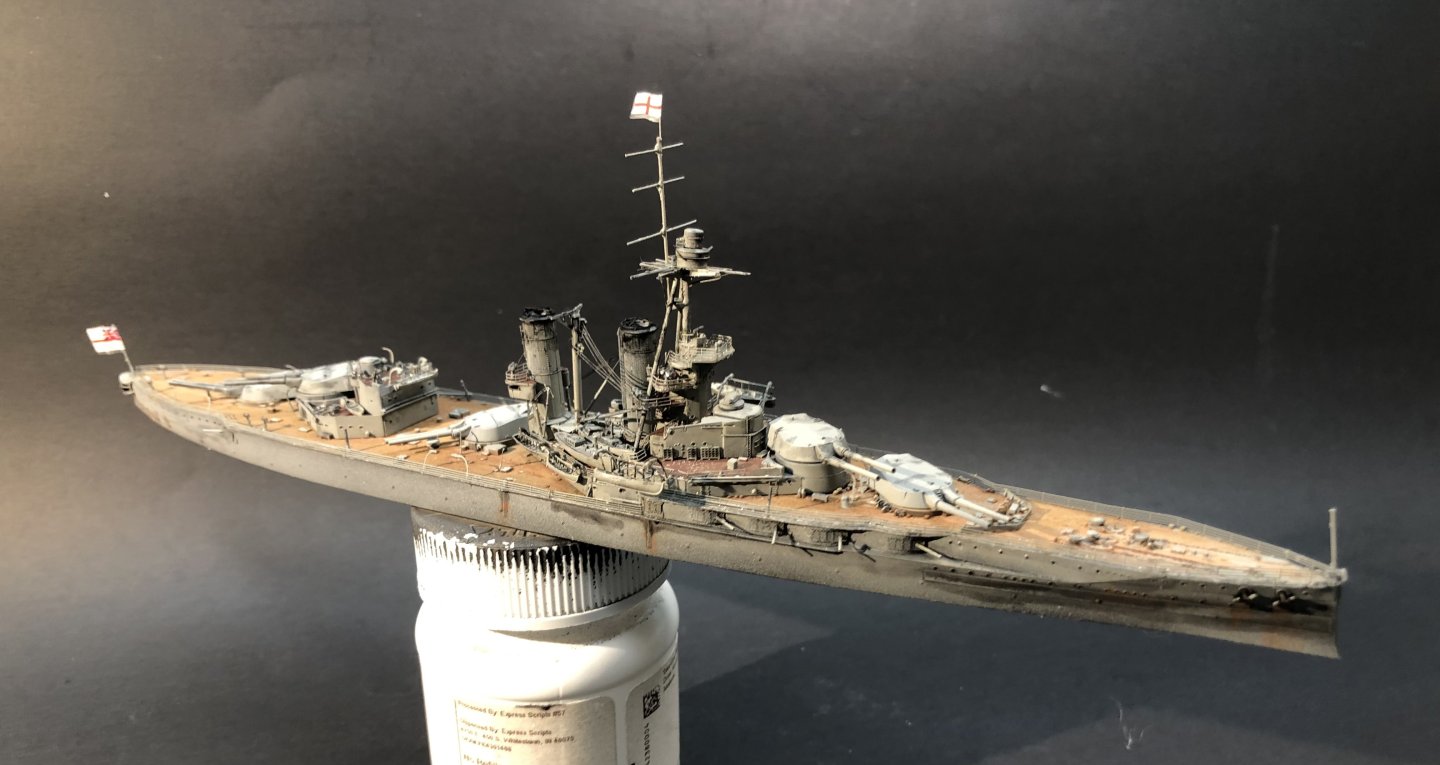
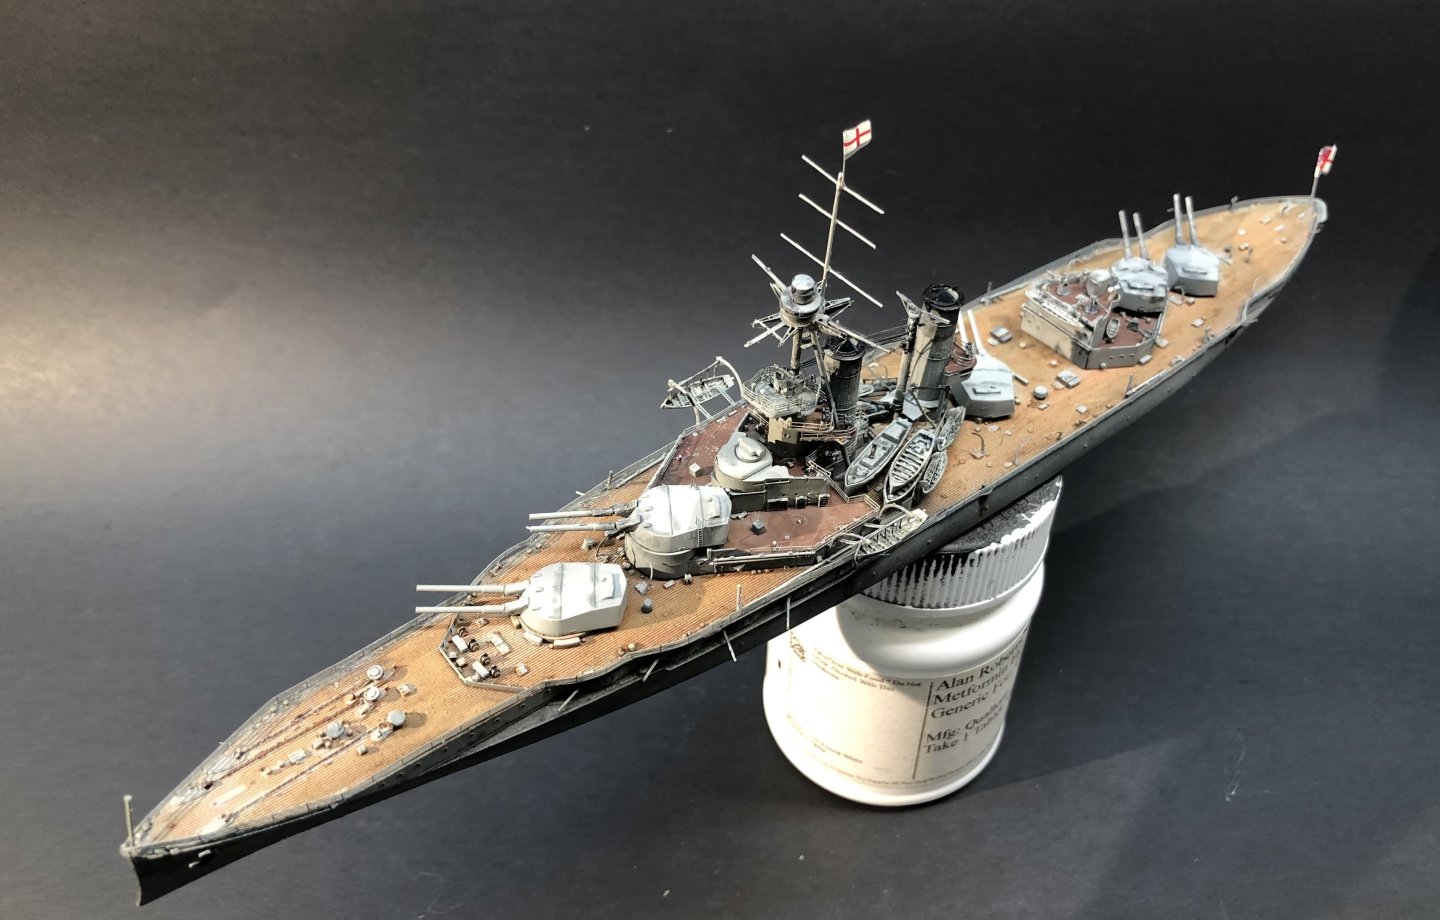
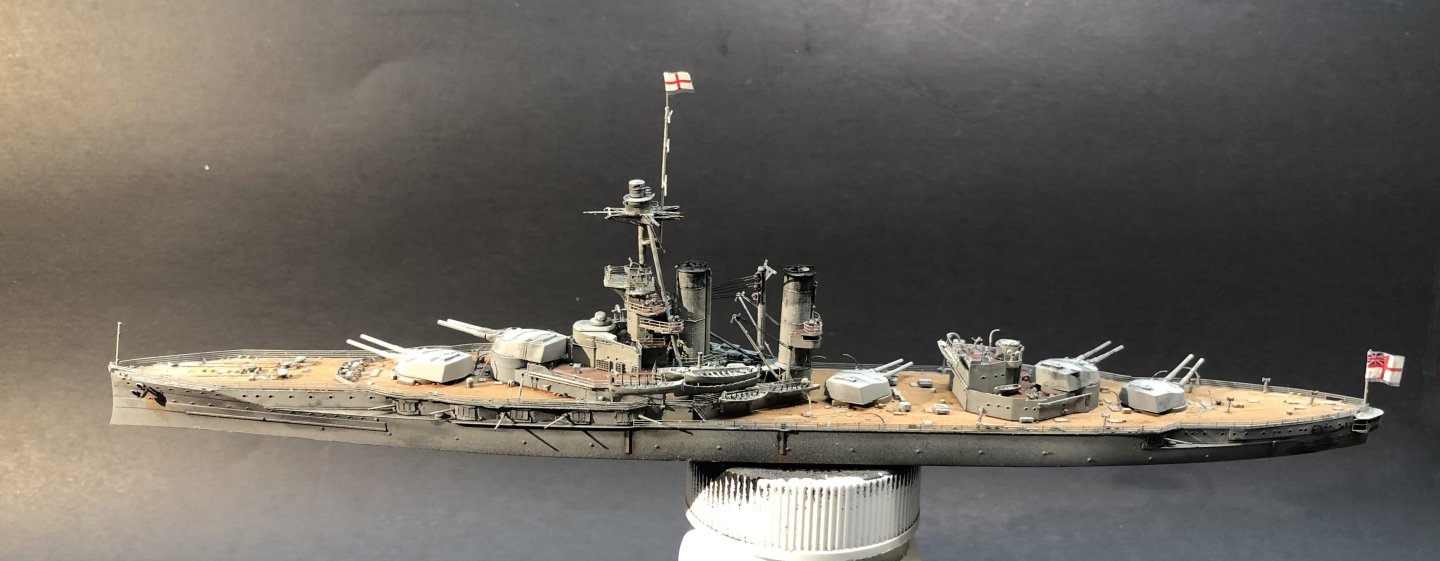
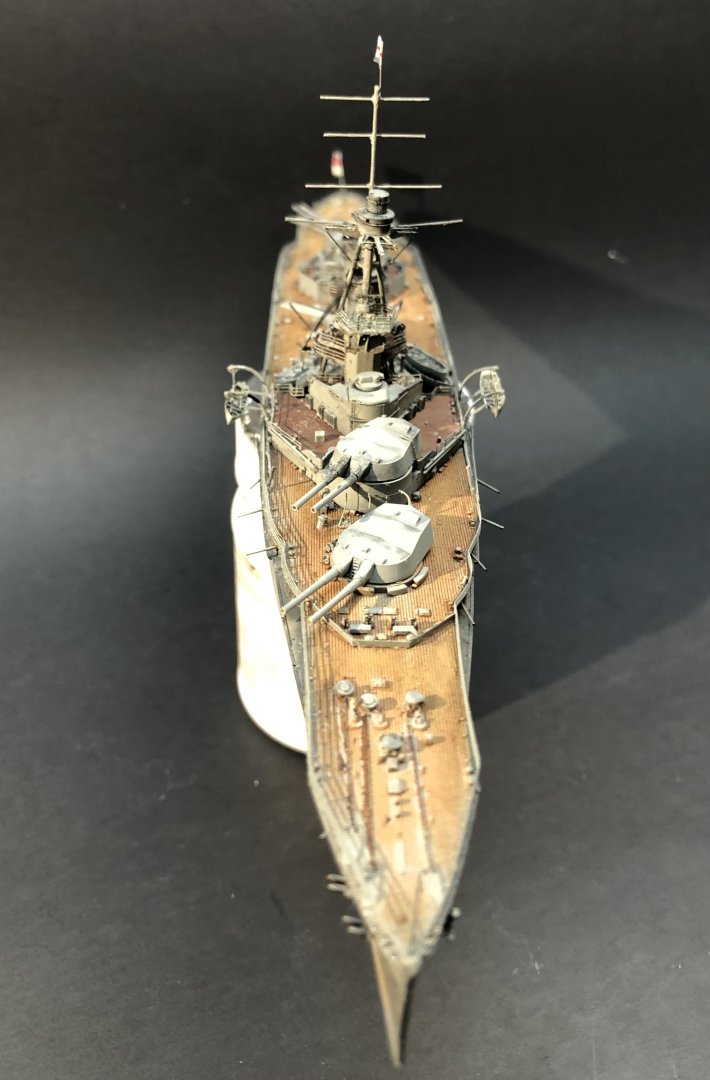
In amongst too much real life interference I painted the new mast and installed it. Much to my surprise it fitted nicely and is correctly oriented. The way it’s fitted between two different parts of the structure means that there is little wiggle room. That completed the adding of bits. I tidied up paint and some PE that needed finessing then moved onto weathering. I didn’t go wild with the rust. Just the usual areas around the anchor hawse and portholes. In 1/700 I think it’s too easy to overdo the rust and get a result that looks garish. If it bothers me later I can add a bit more. There should be a third flag on the bow Jack stay, a tiny Union flag, but I could not get it to look anything other than toy like so it was abandoned. And the final photos This was a harder kit than I expected, the tripod and bridge superstructure was finicky although it was quite robust once in place. Lots and lots of railings and some needing some tricky bending. Generally I enjoyed the build, I have Dreadnaught as well which is going to be very similar so hopefully some lessons have been learned. Thanks for looking in and the likes and supportive comments Alan


-
Many thanks OC. Tougher than expected but mostly still fun. alan
-
Thank you very much Andrew. This is a bit more complicated than I expected but we need challenges. Thankfully the mast was a scratch built part so could be repeated. I get annoyed when it’s something that doesn’t lend itself to being easily copied and is visible. I use the trays from the cats treats to hold bits in various stages of paint and assembly but I still mislay stuff. alan
-
I can’t believe that I can’t find the stupid thing. It’s not really tiny. Oh well
-
A rather mixed day for progress. I had made a brass mast to replace the kit plastic one. I painted it and set it aside to dry and now I can’t find it anywhere. I stripped the work bench, crawled around the floor with a flashlight, even vacuumed through the house and nothing! It’s not that tiny so I should be able to see it I would have thought. The cats are looking innocent, it’s gone! I made another one this morning and I made a better job of the soldering so maybe there are some positives. It’s had a coat of Mr Metal primer and it will get the grey paint tomorrow. I added the railings to the structure at the top of the tripod and bent up the admirals walk and fitted it. It actually fitted well and I placed the name boards on each side. The photo shows I got them the right side out and the right way up😁 once the mast is added I need to add a bit more of a black wash and a bit of rust. Thanks for looking in and the likes and comments. alan