king derelict
-
Posts
3,291 -
Joined
-
Last visited
Content Type
Profiles
Forums
Gallery
Events
Everything posted by king derelict
-
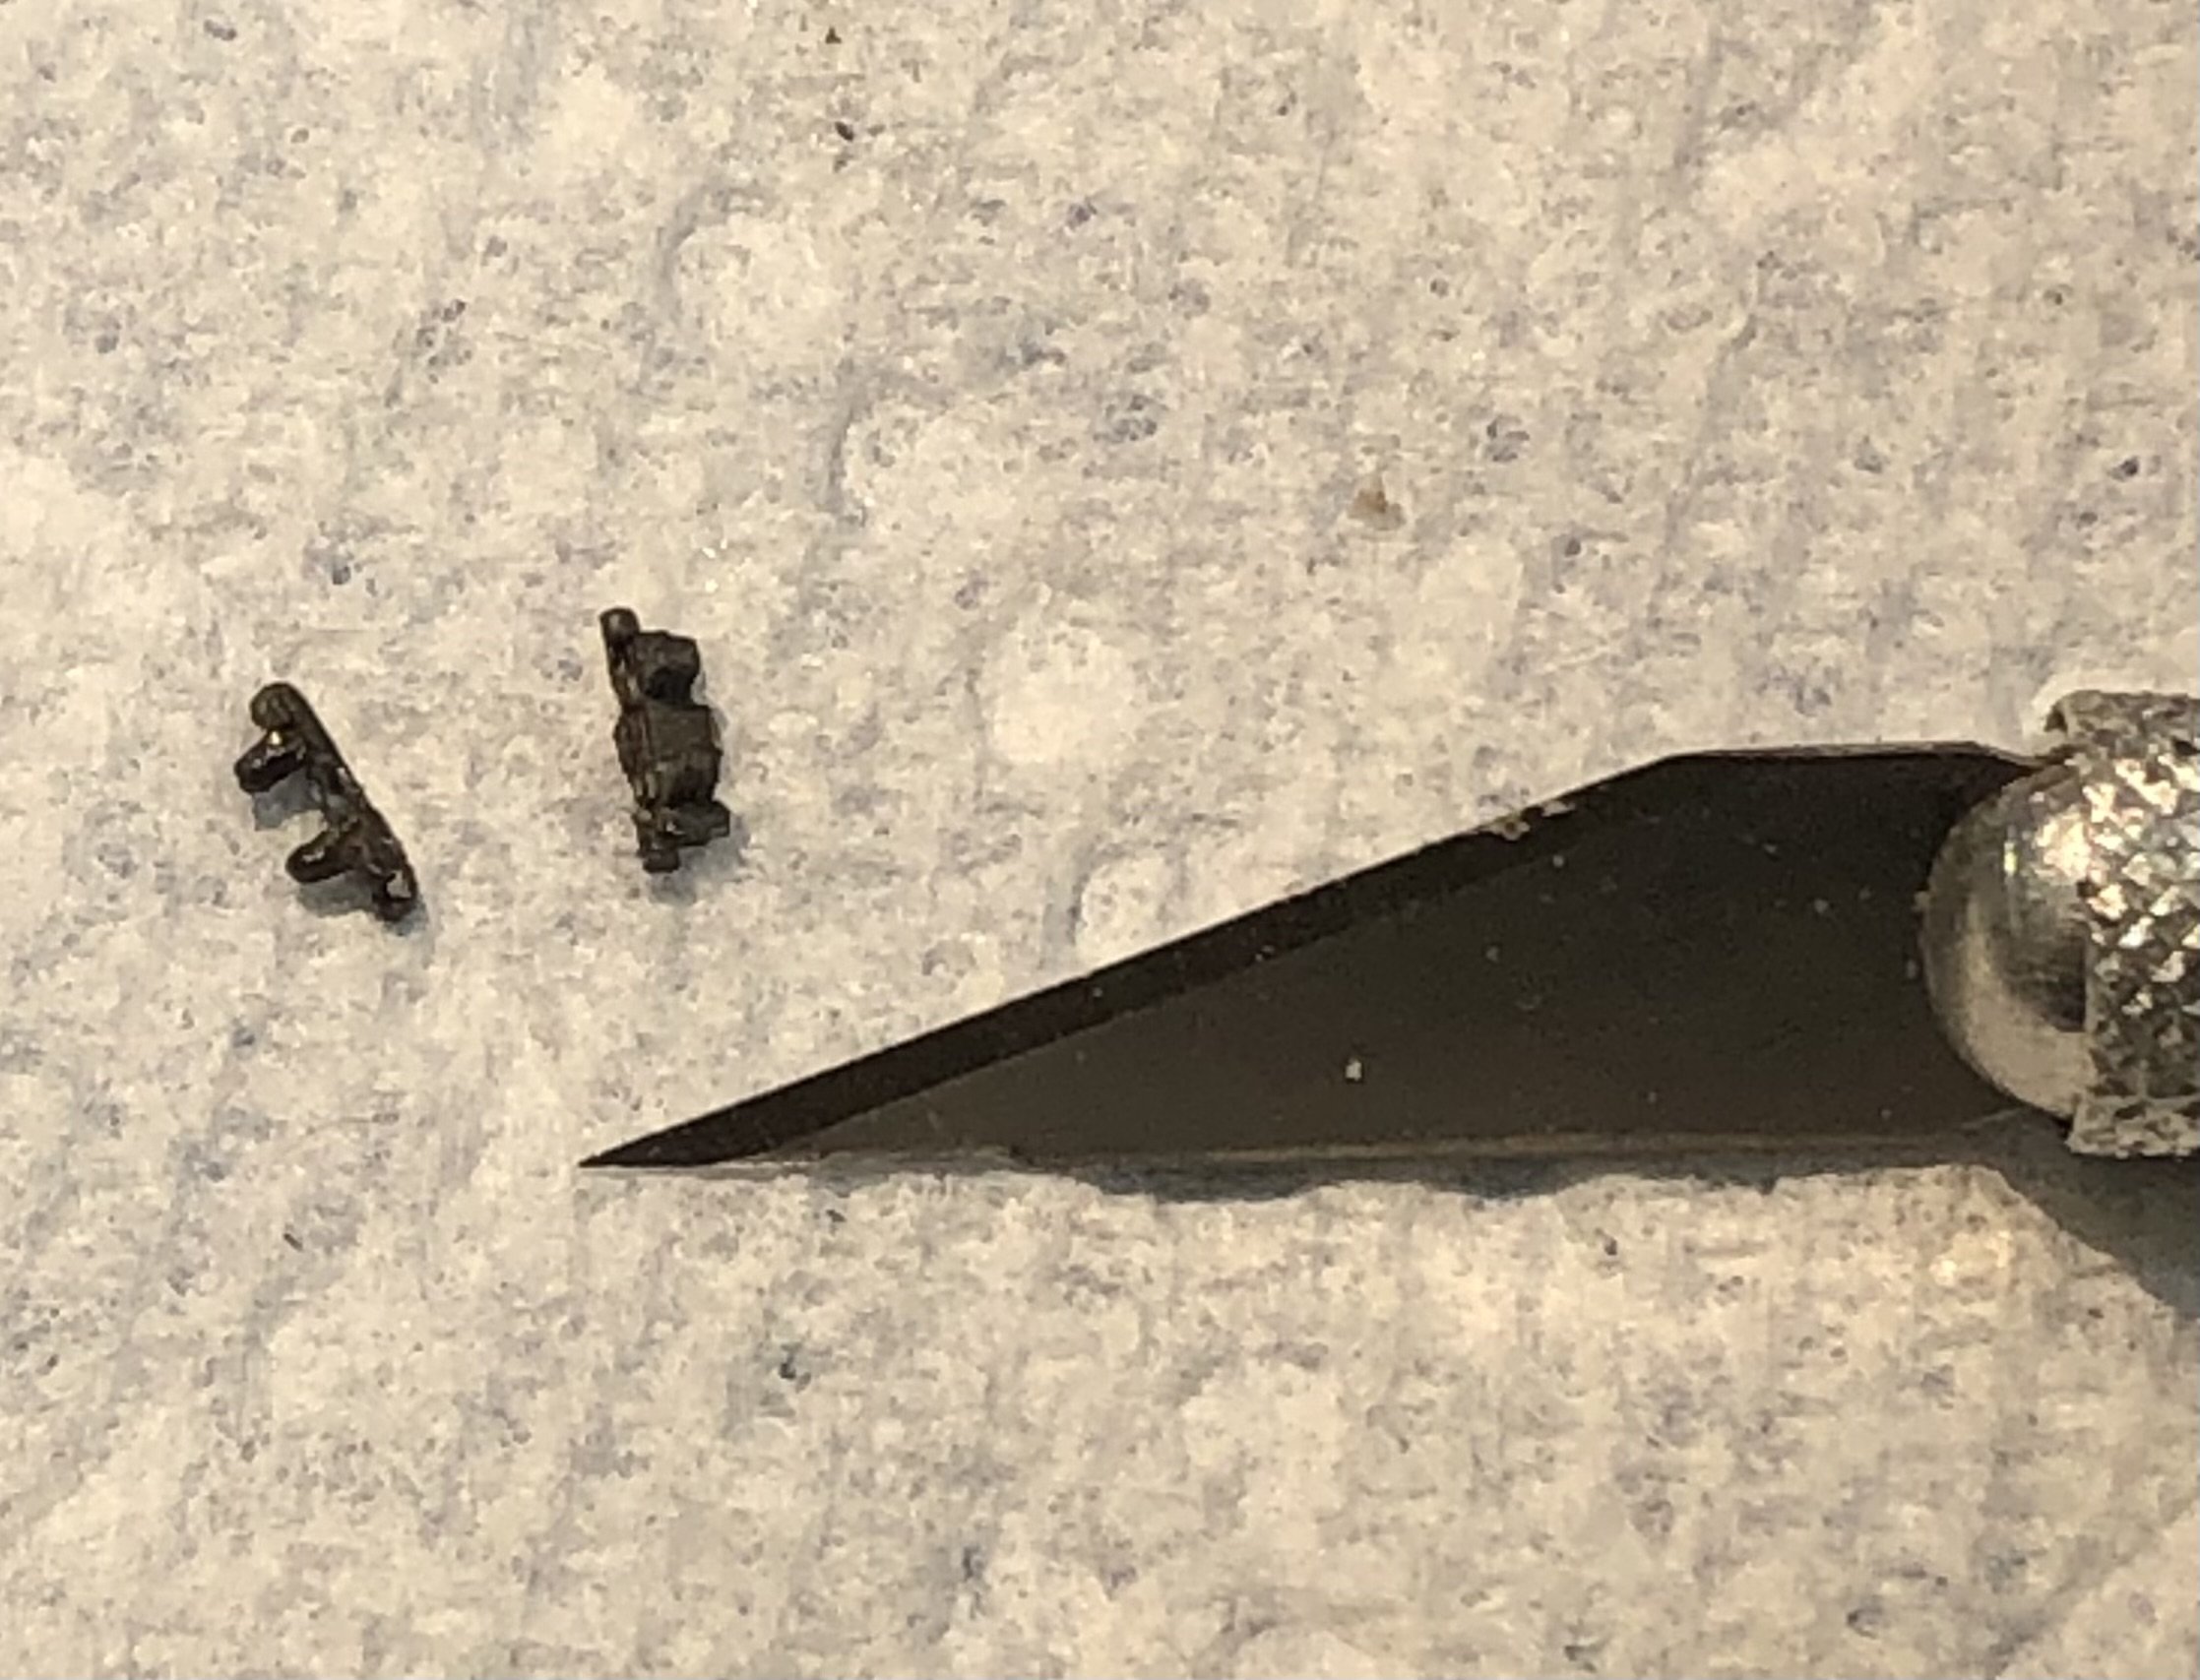
Many thanks OC. I’m not happy with the tracks but the hull turned out the way I was hoping for. Flyhawk do include some crazy small parts for an already small model. alan
-
Looking very nice Andrew alan
-
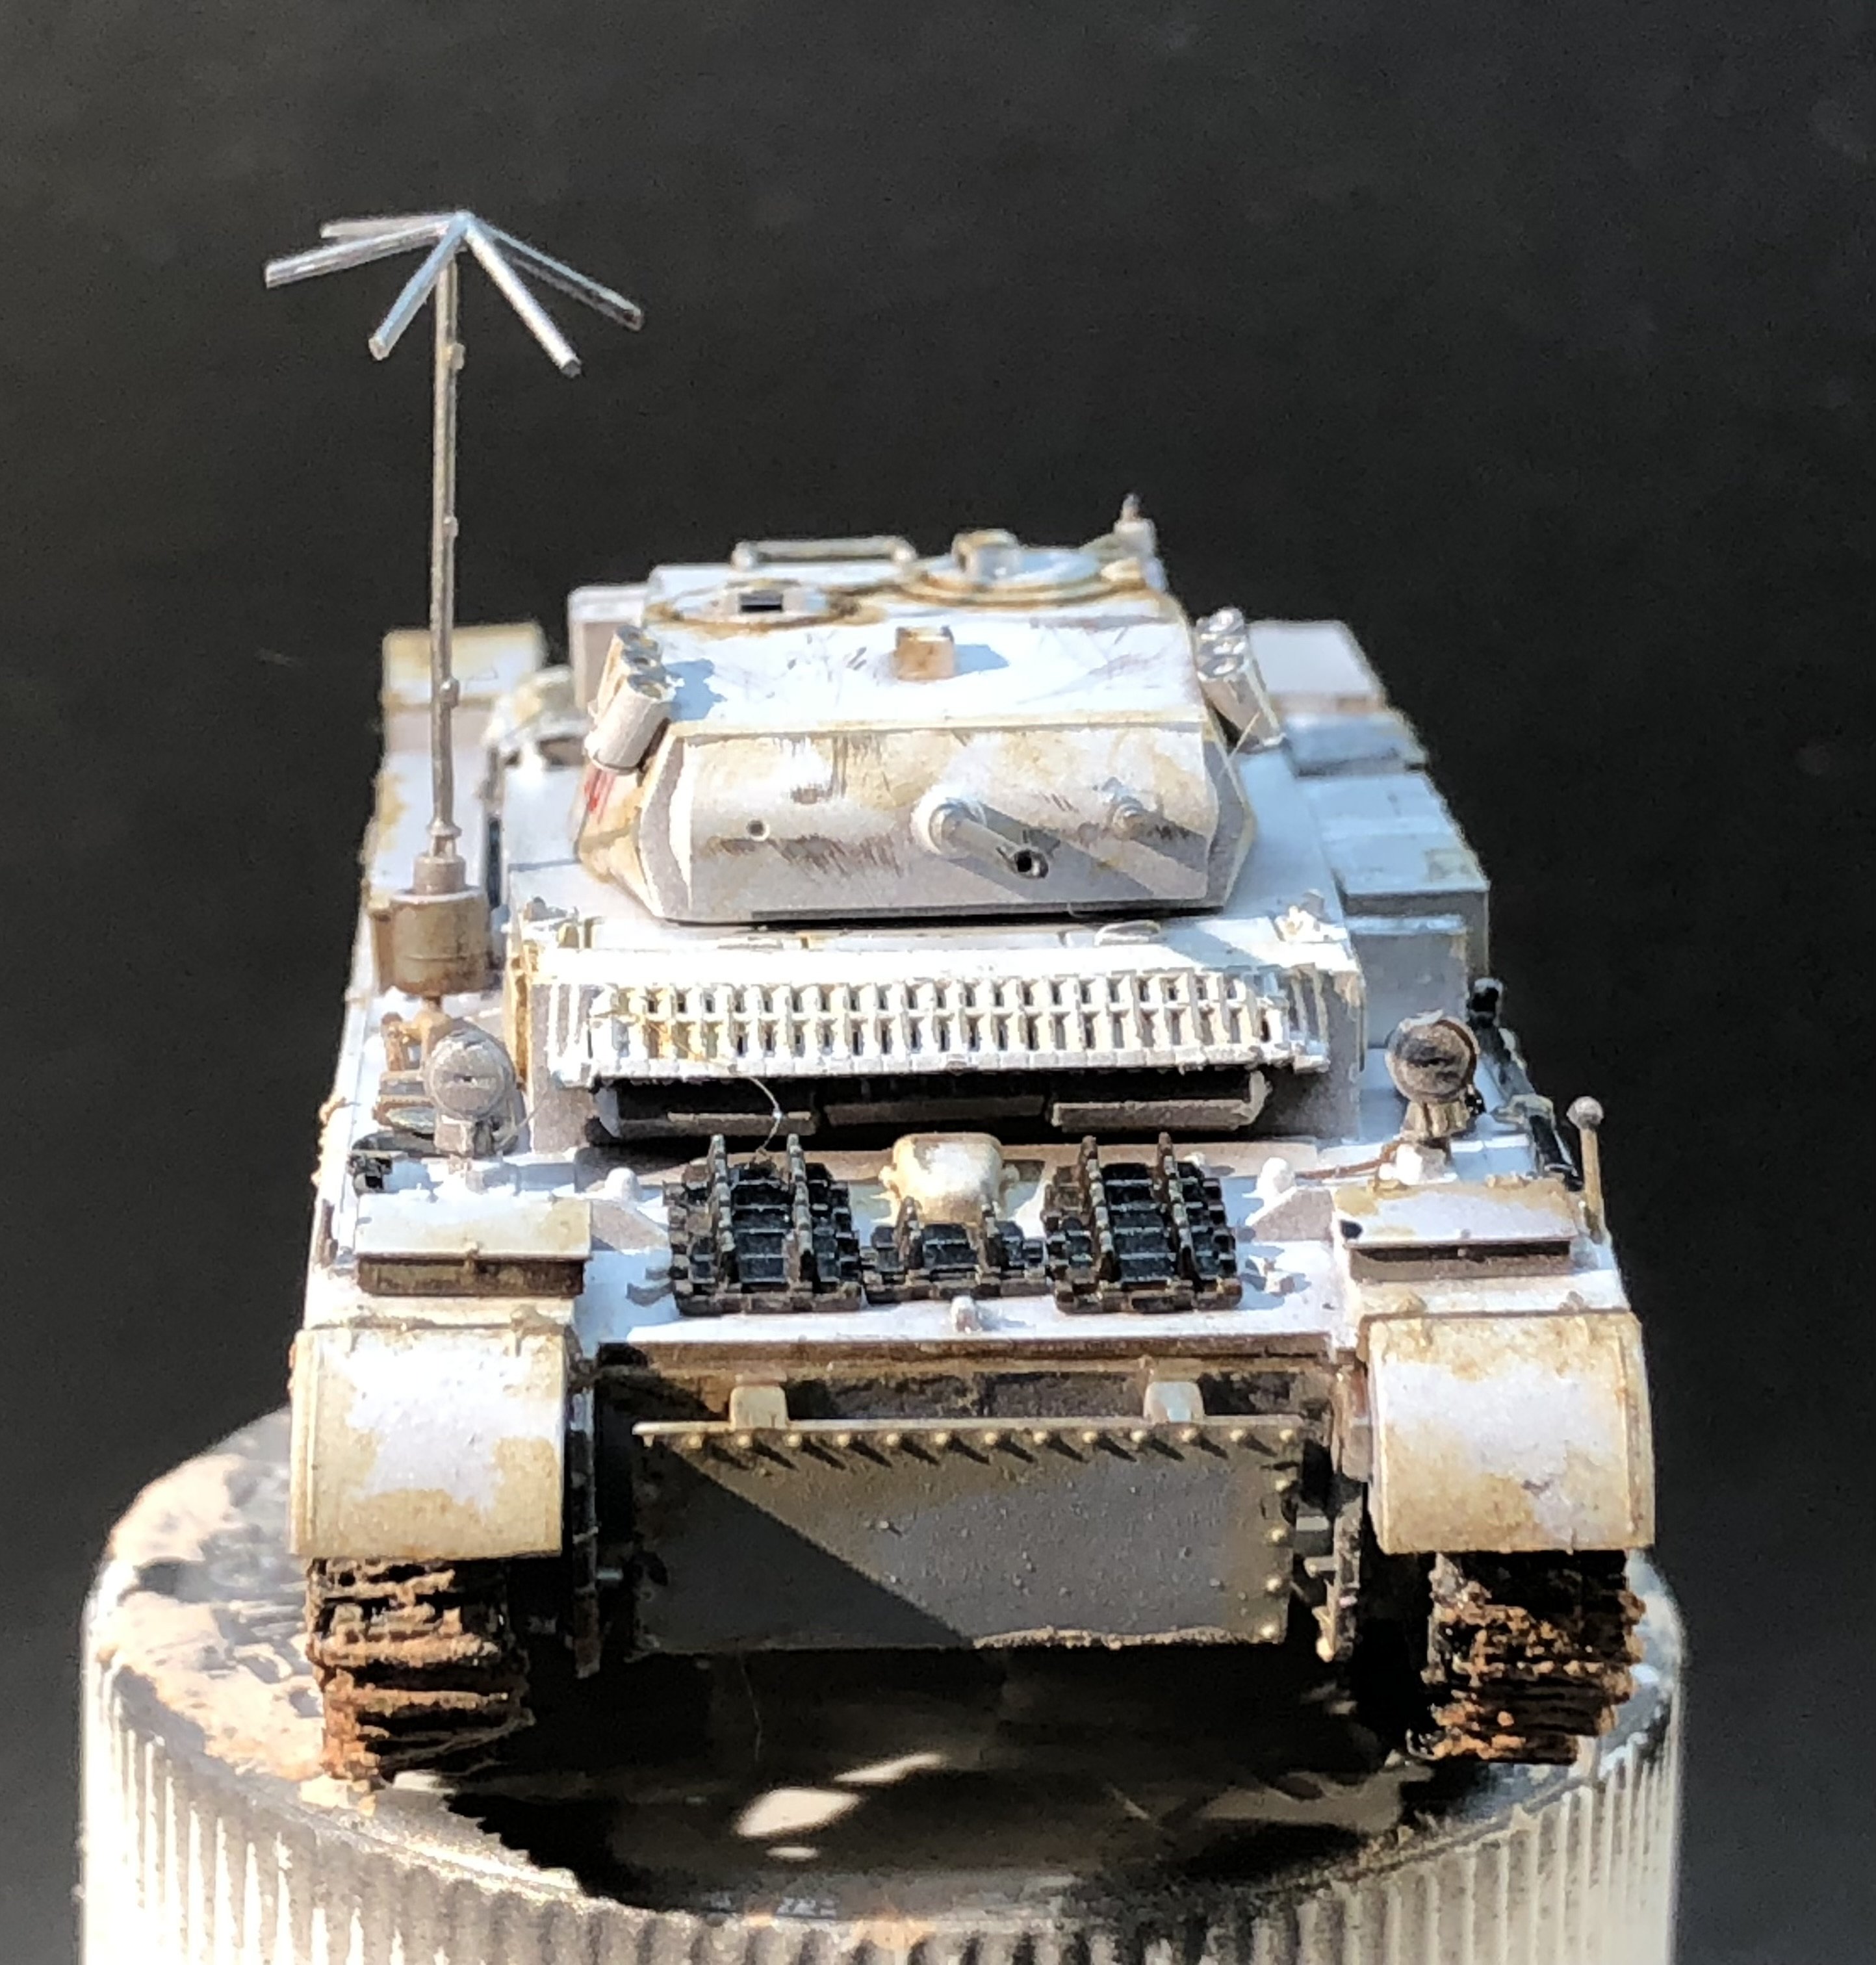
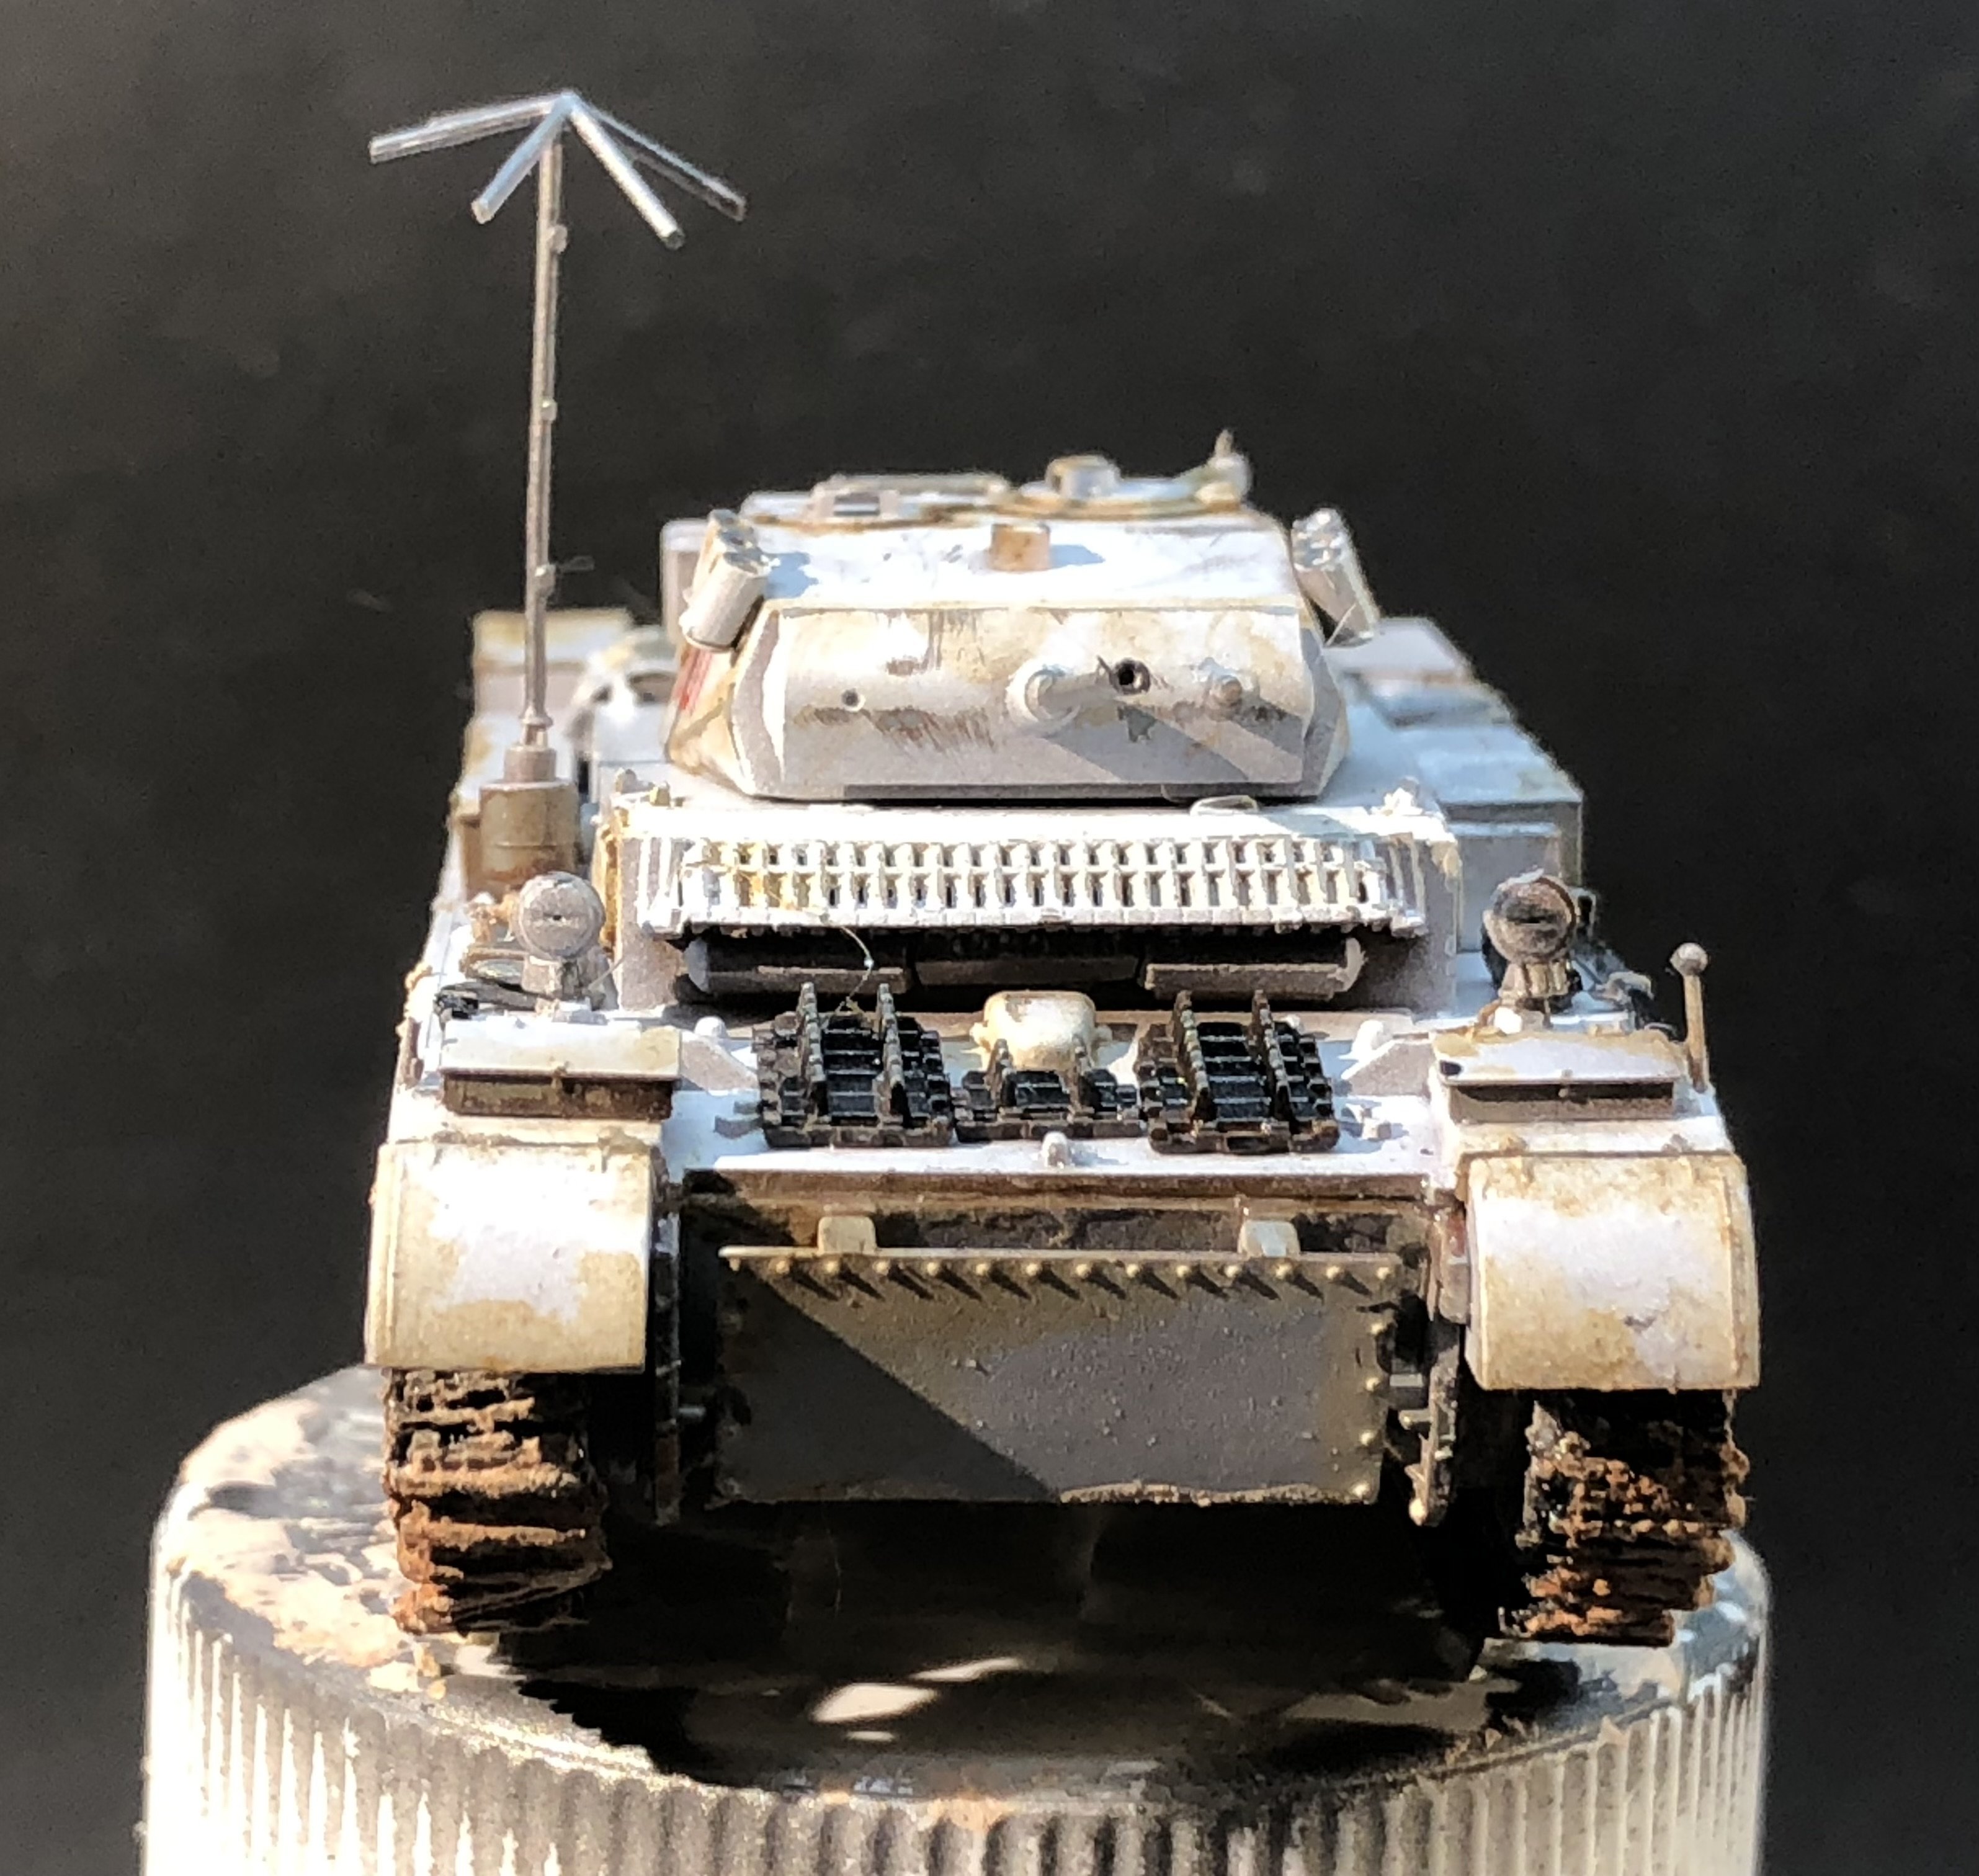
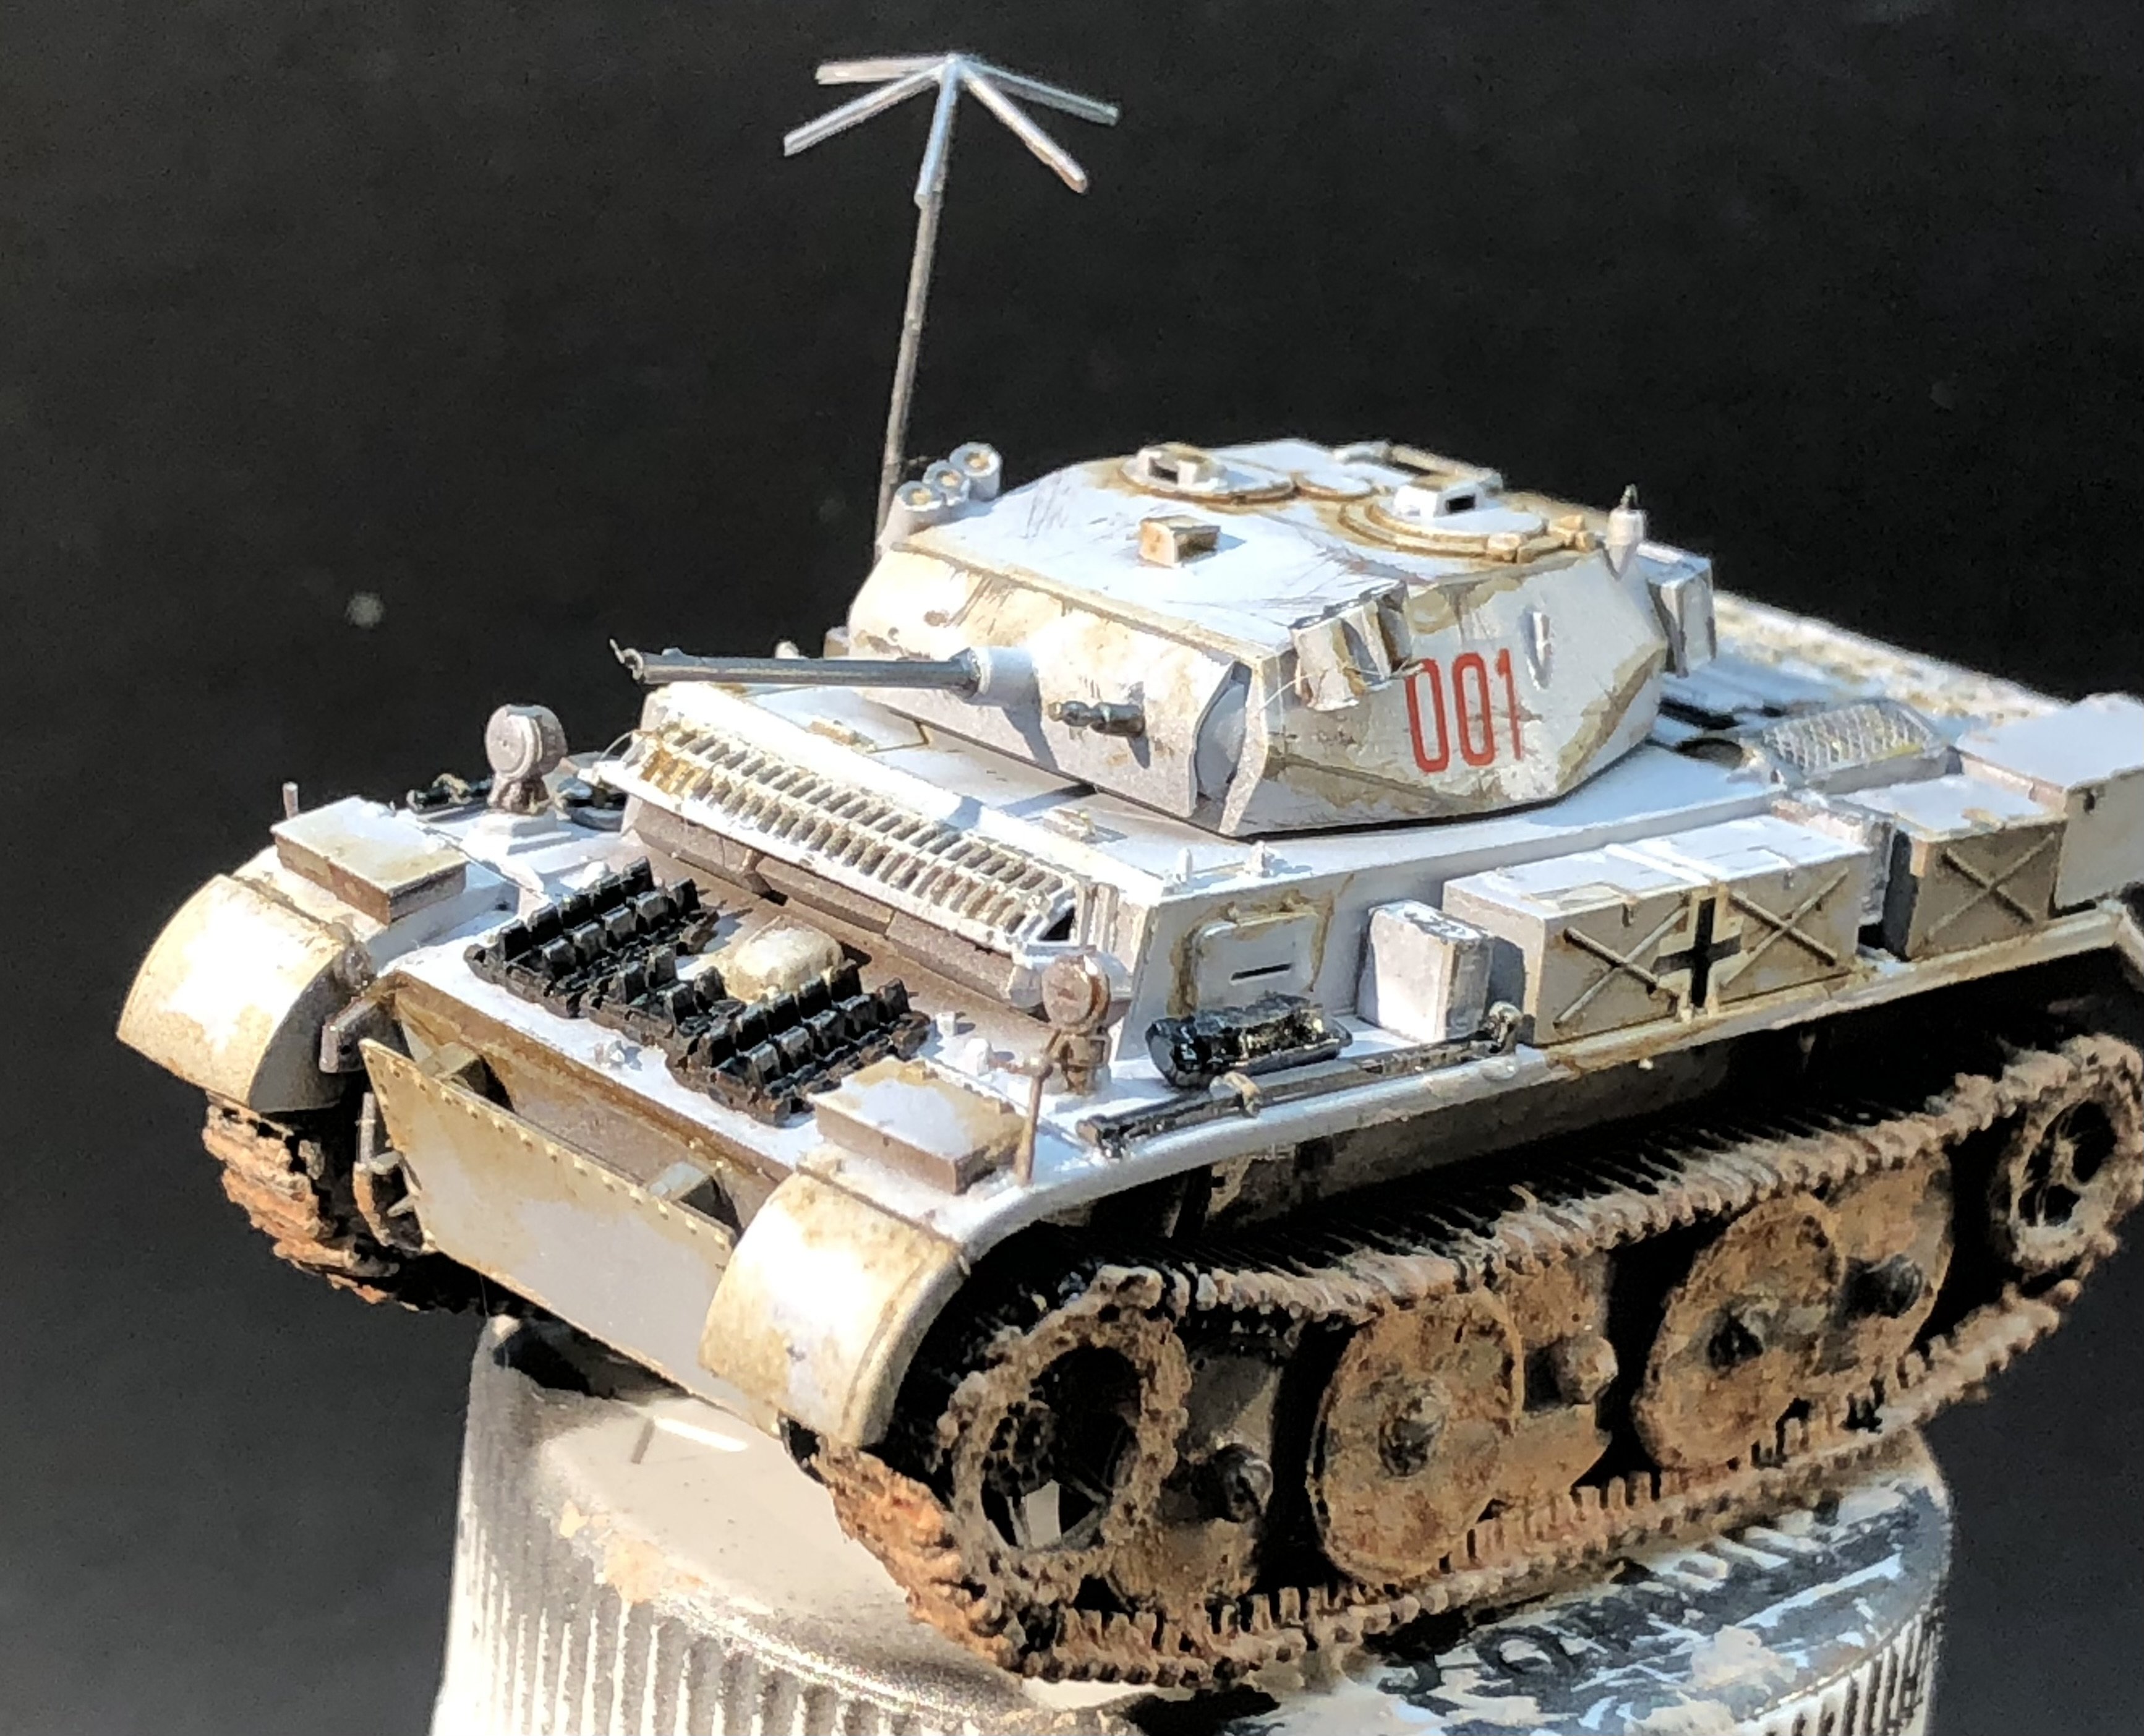
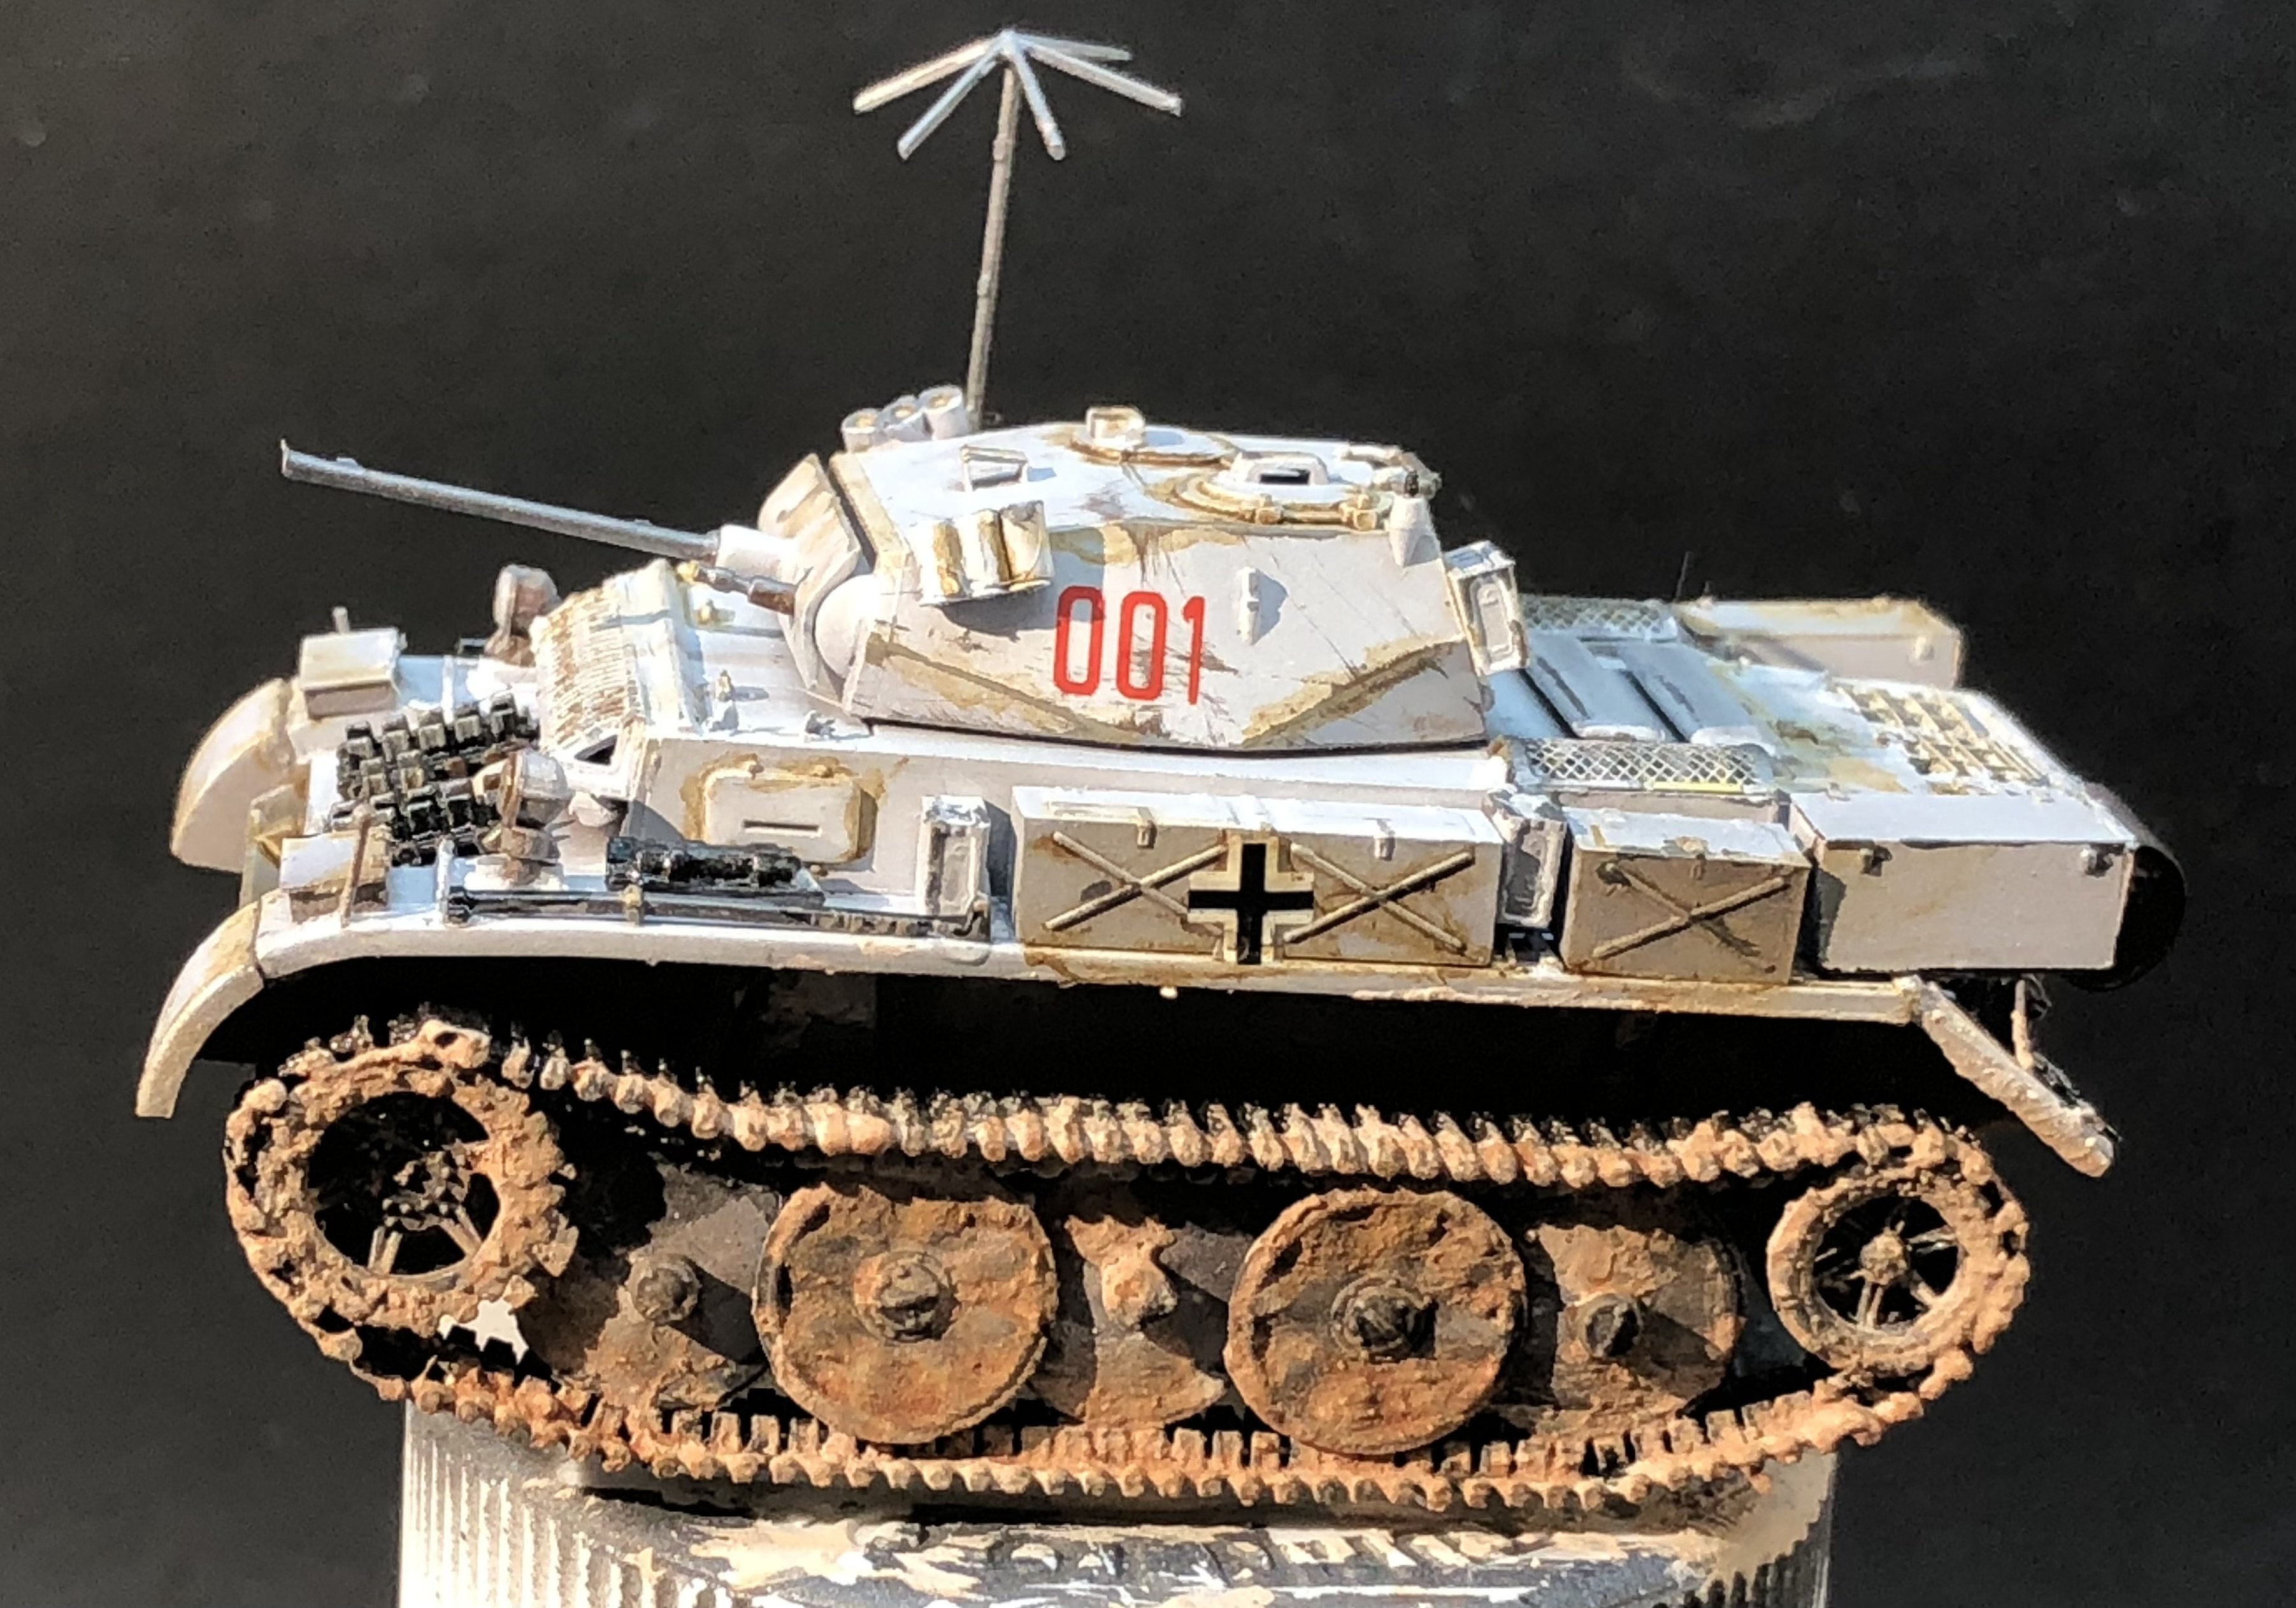
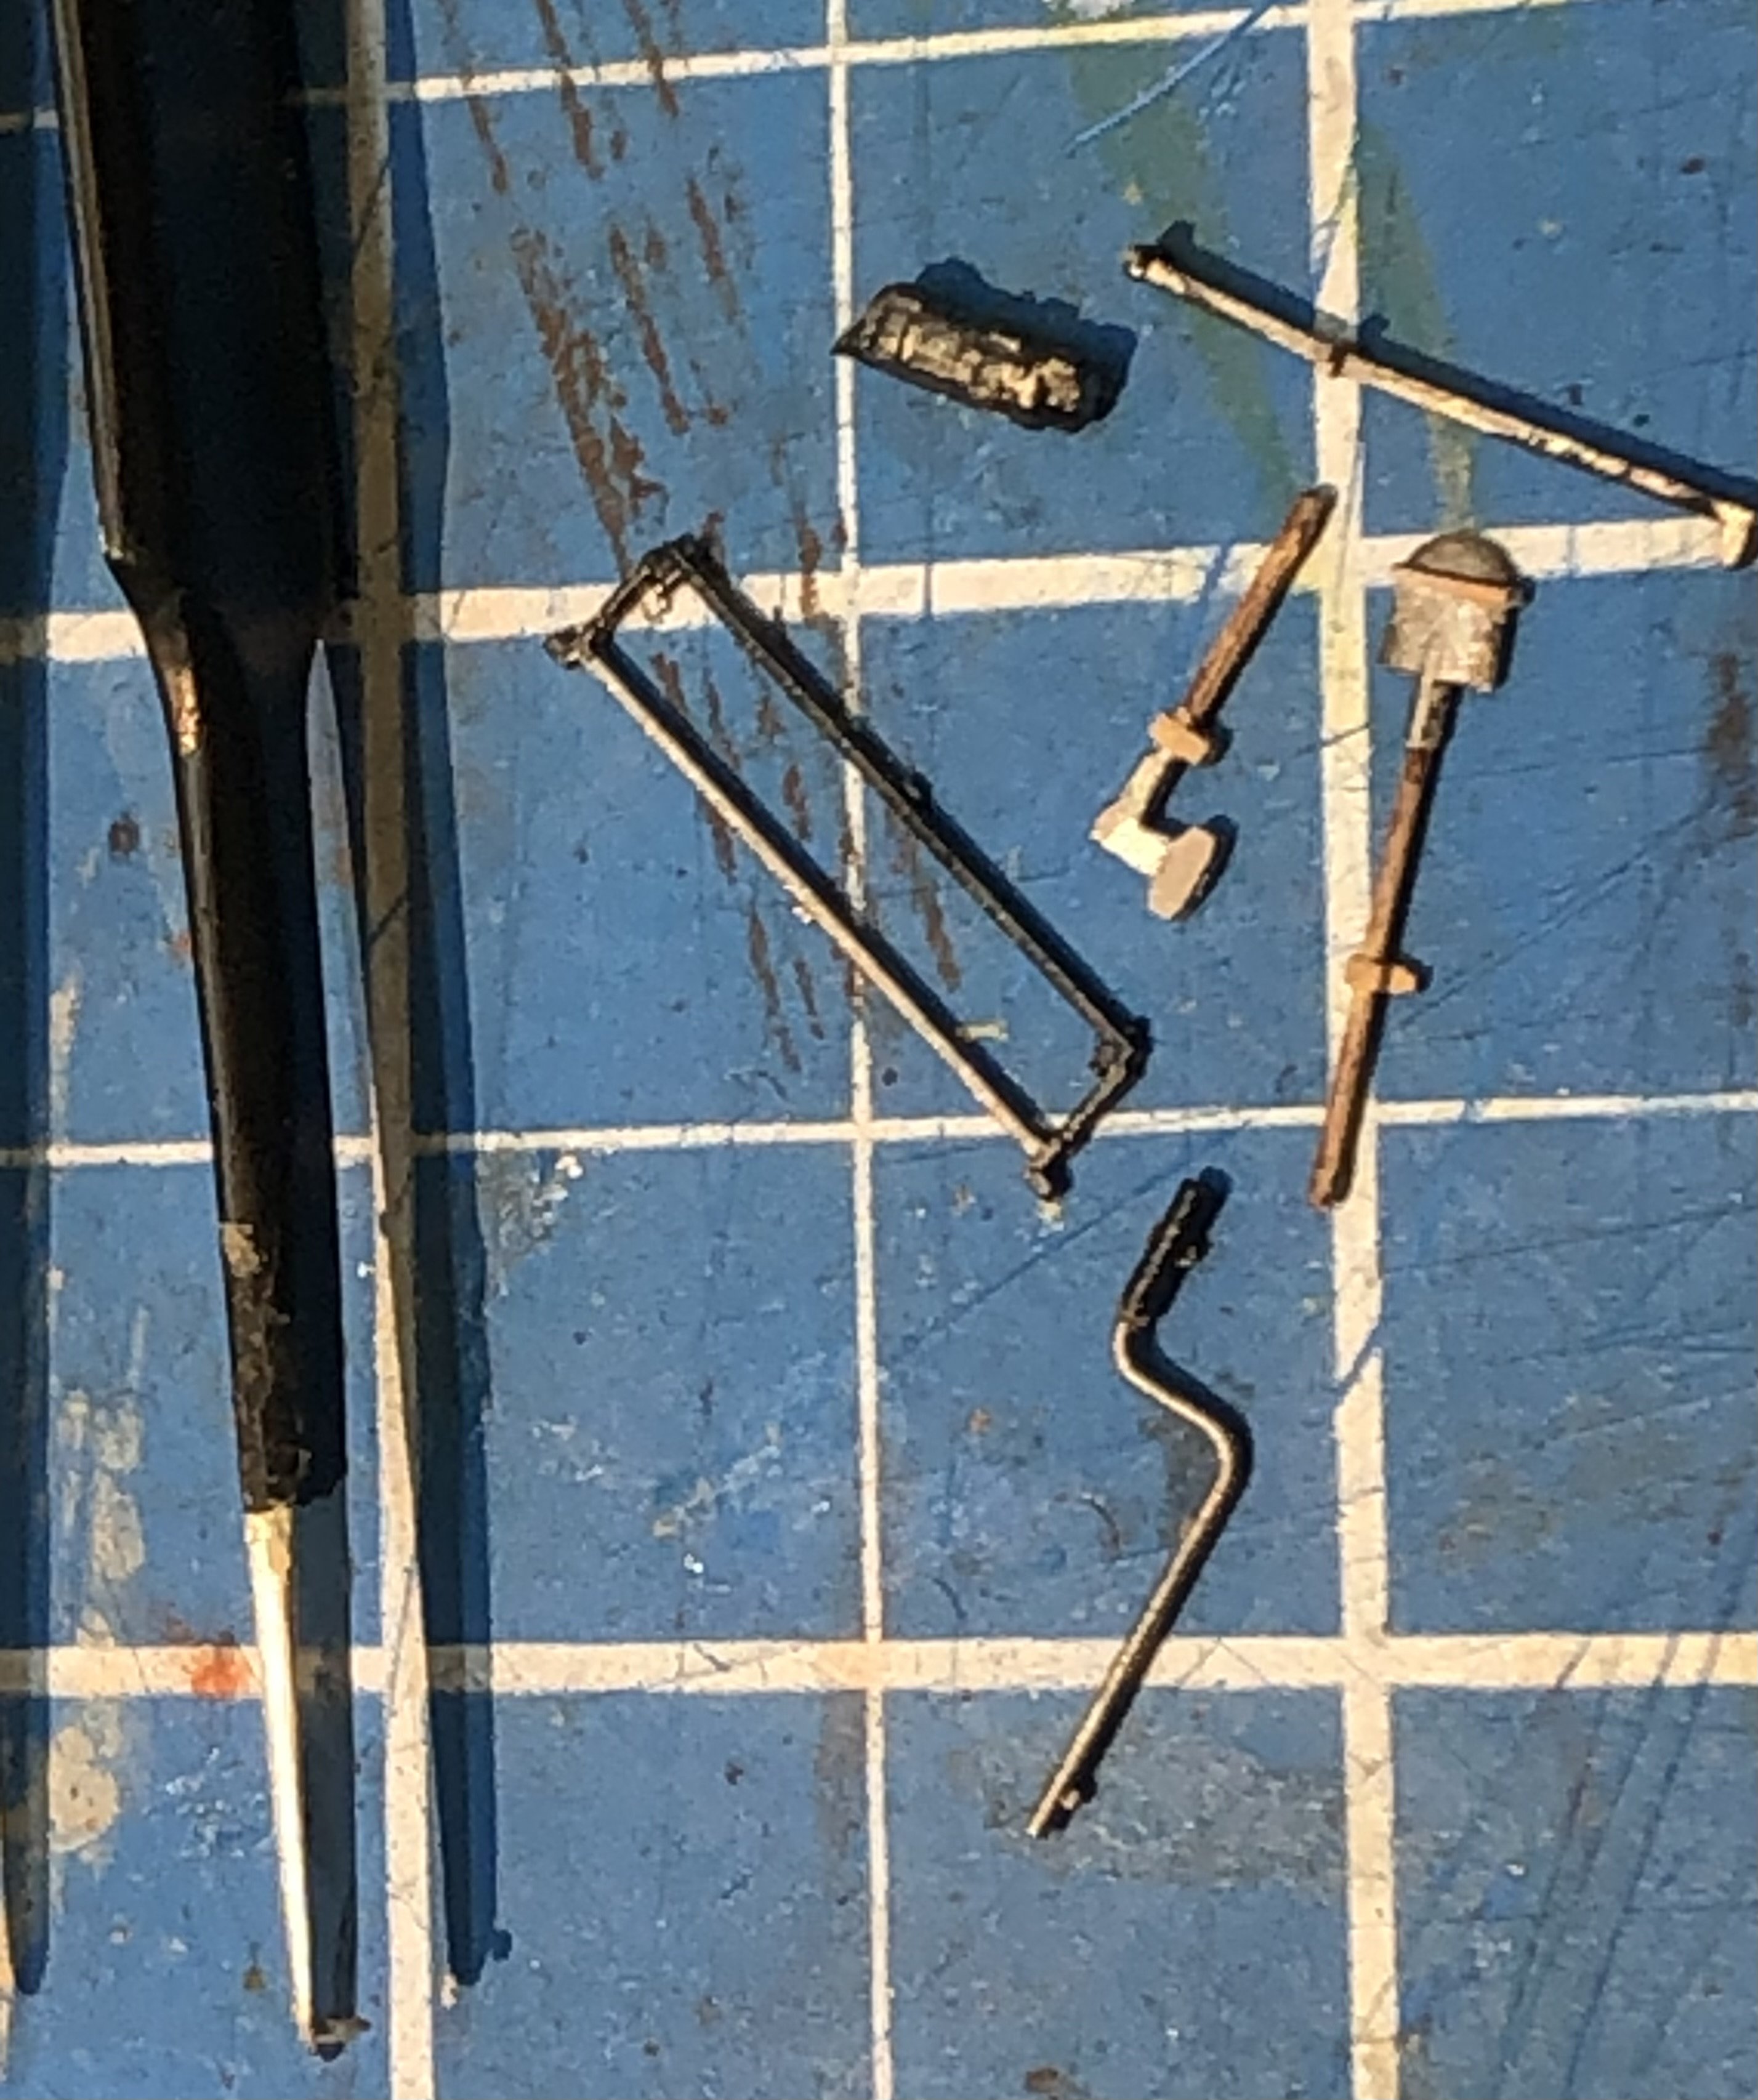
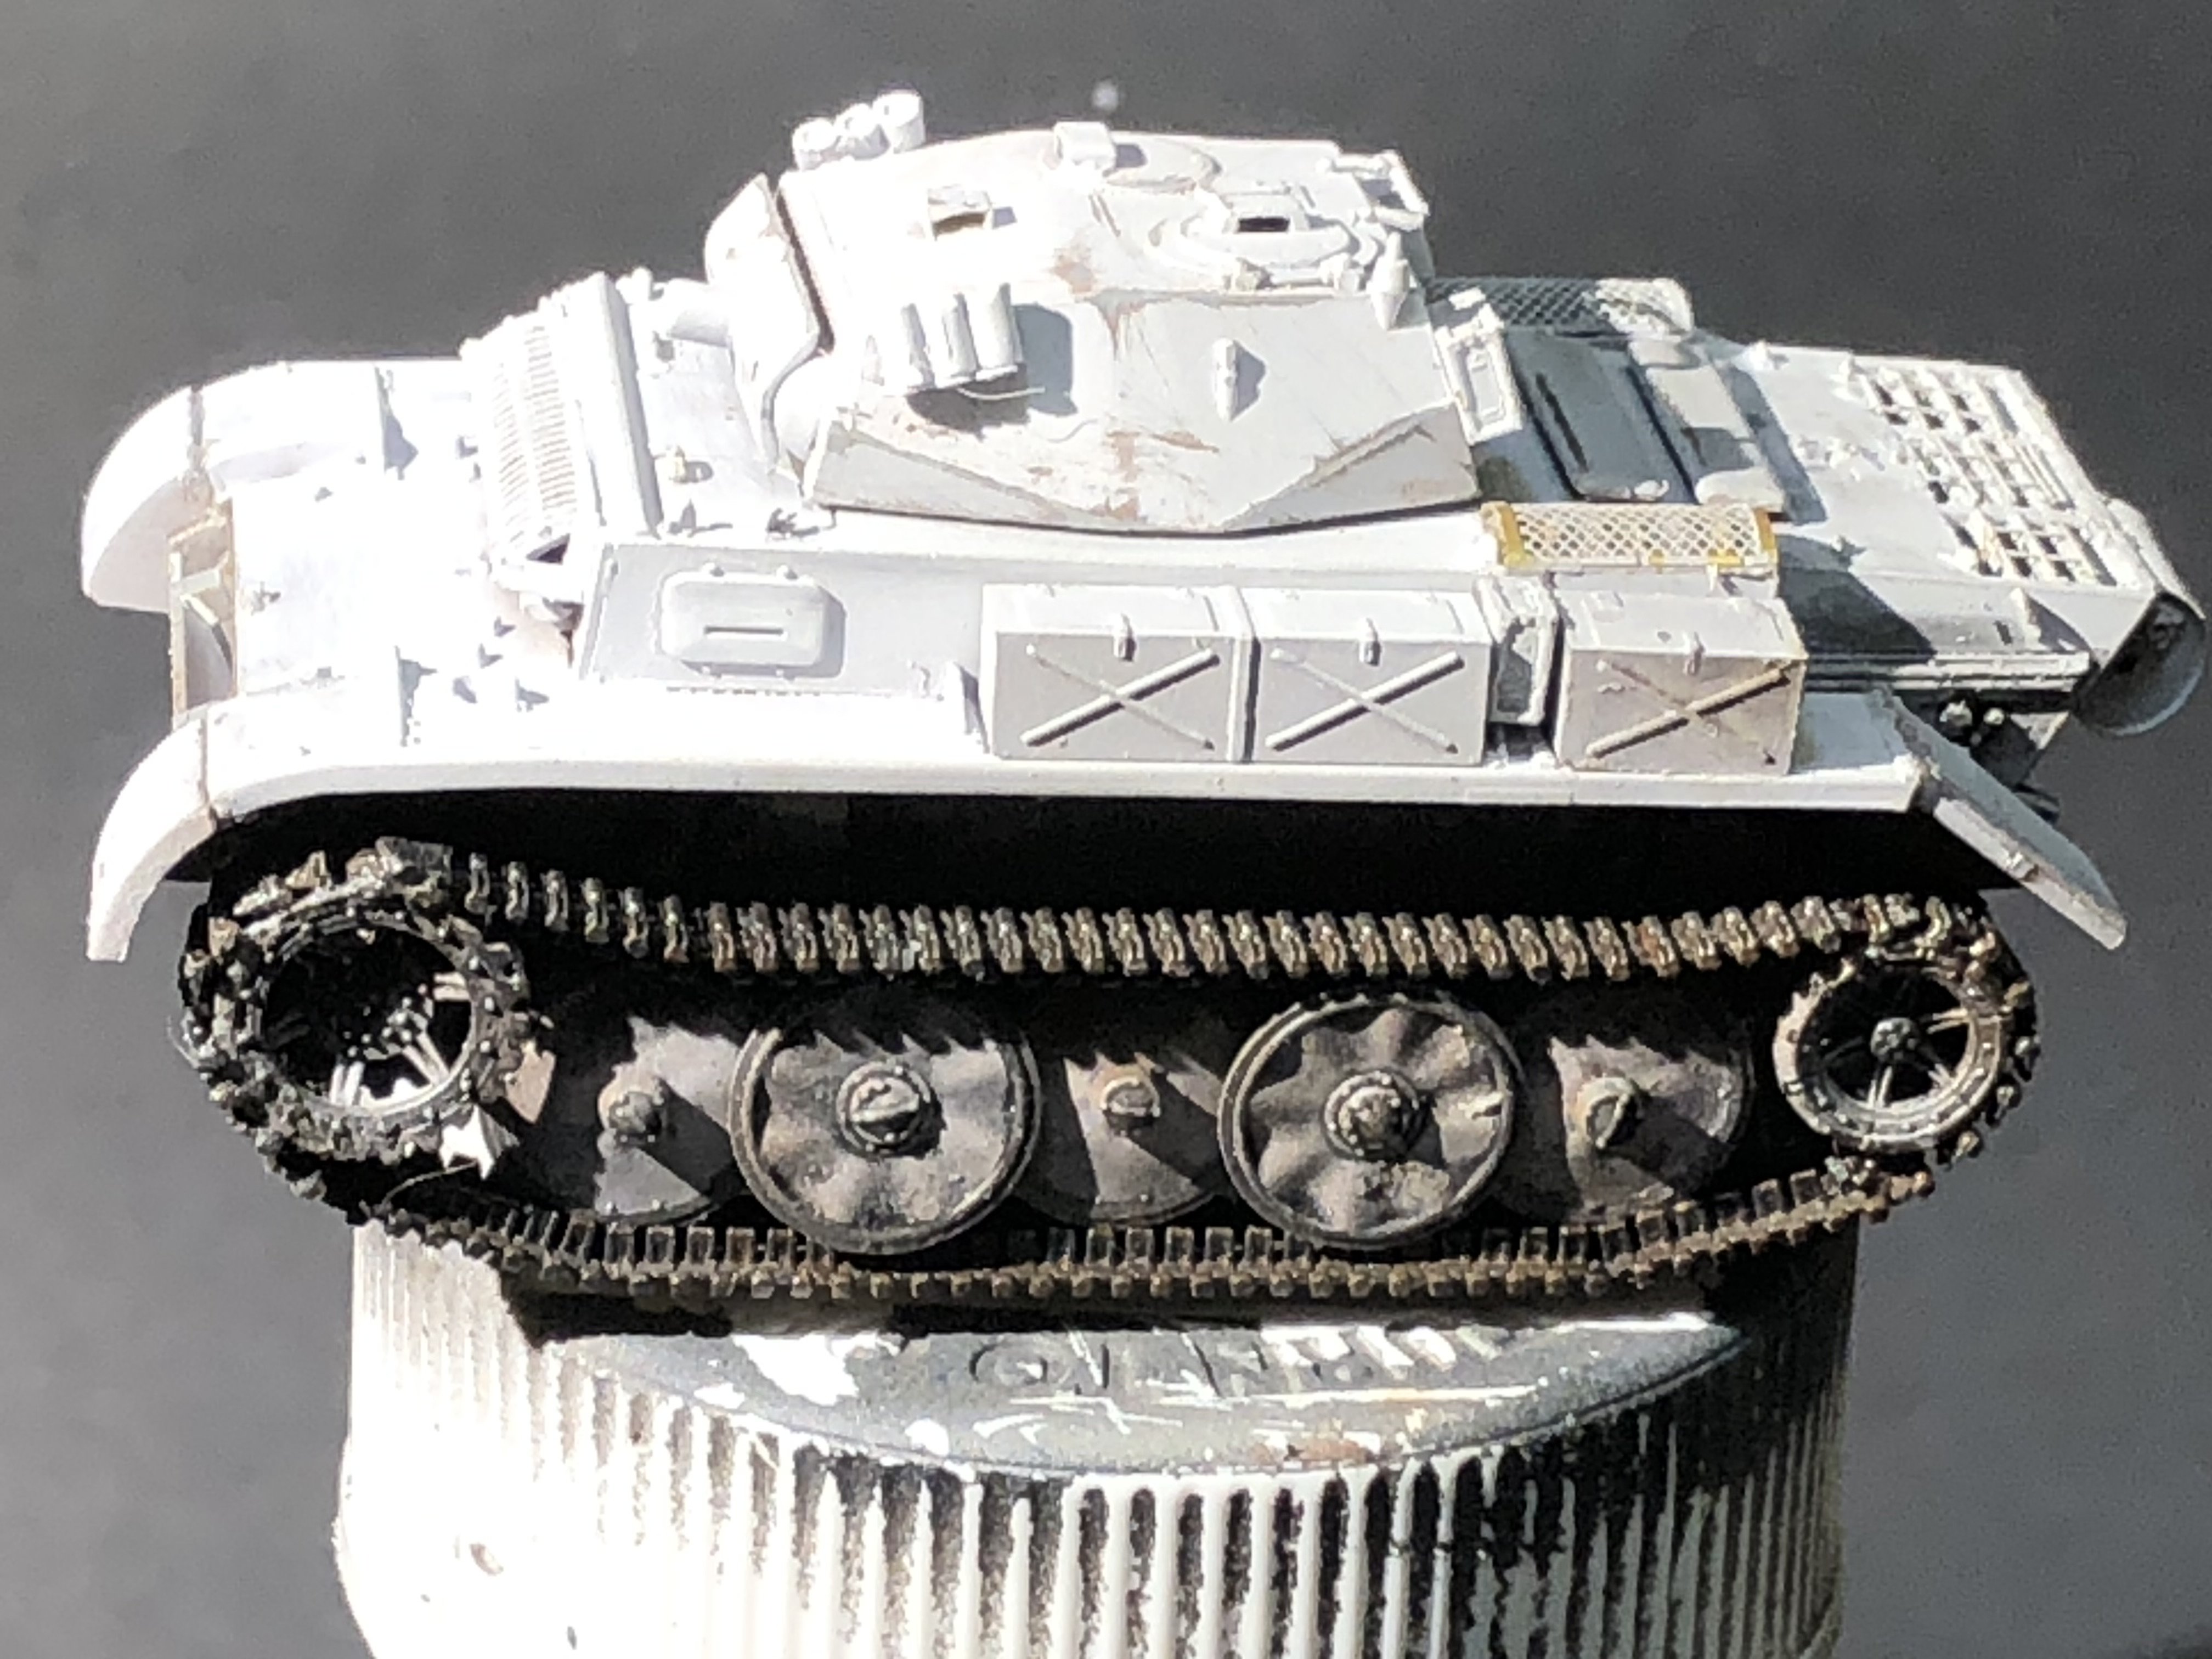
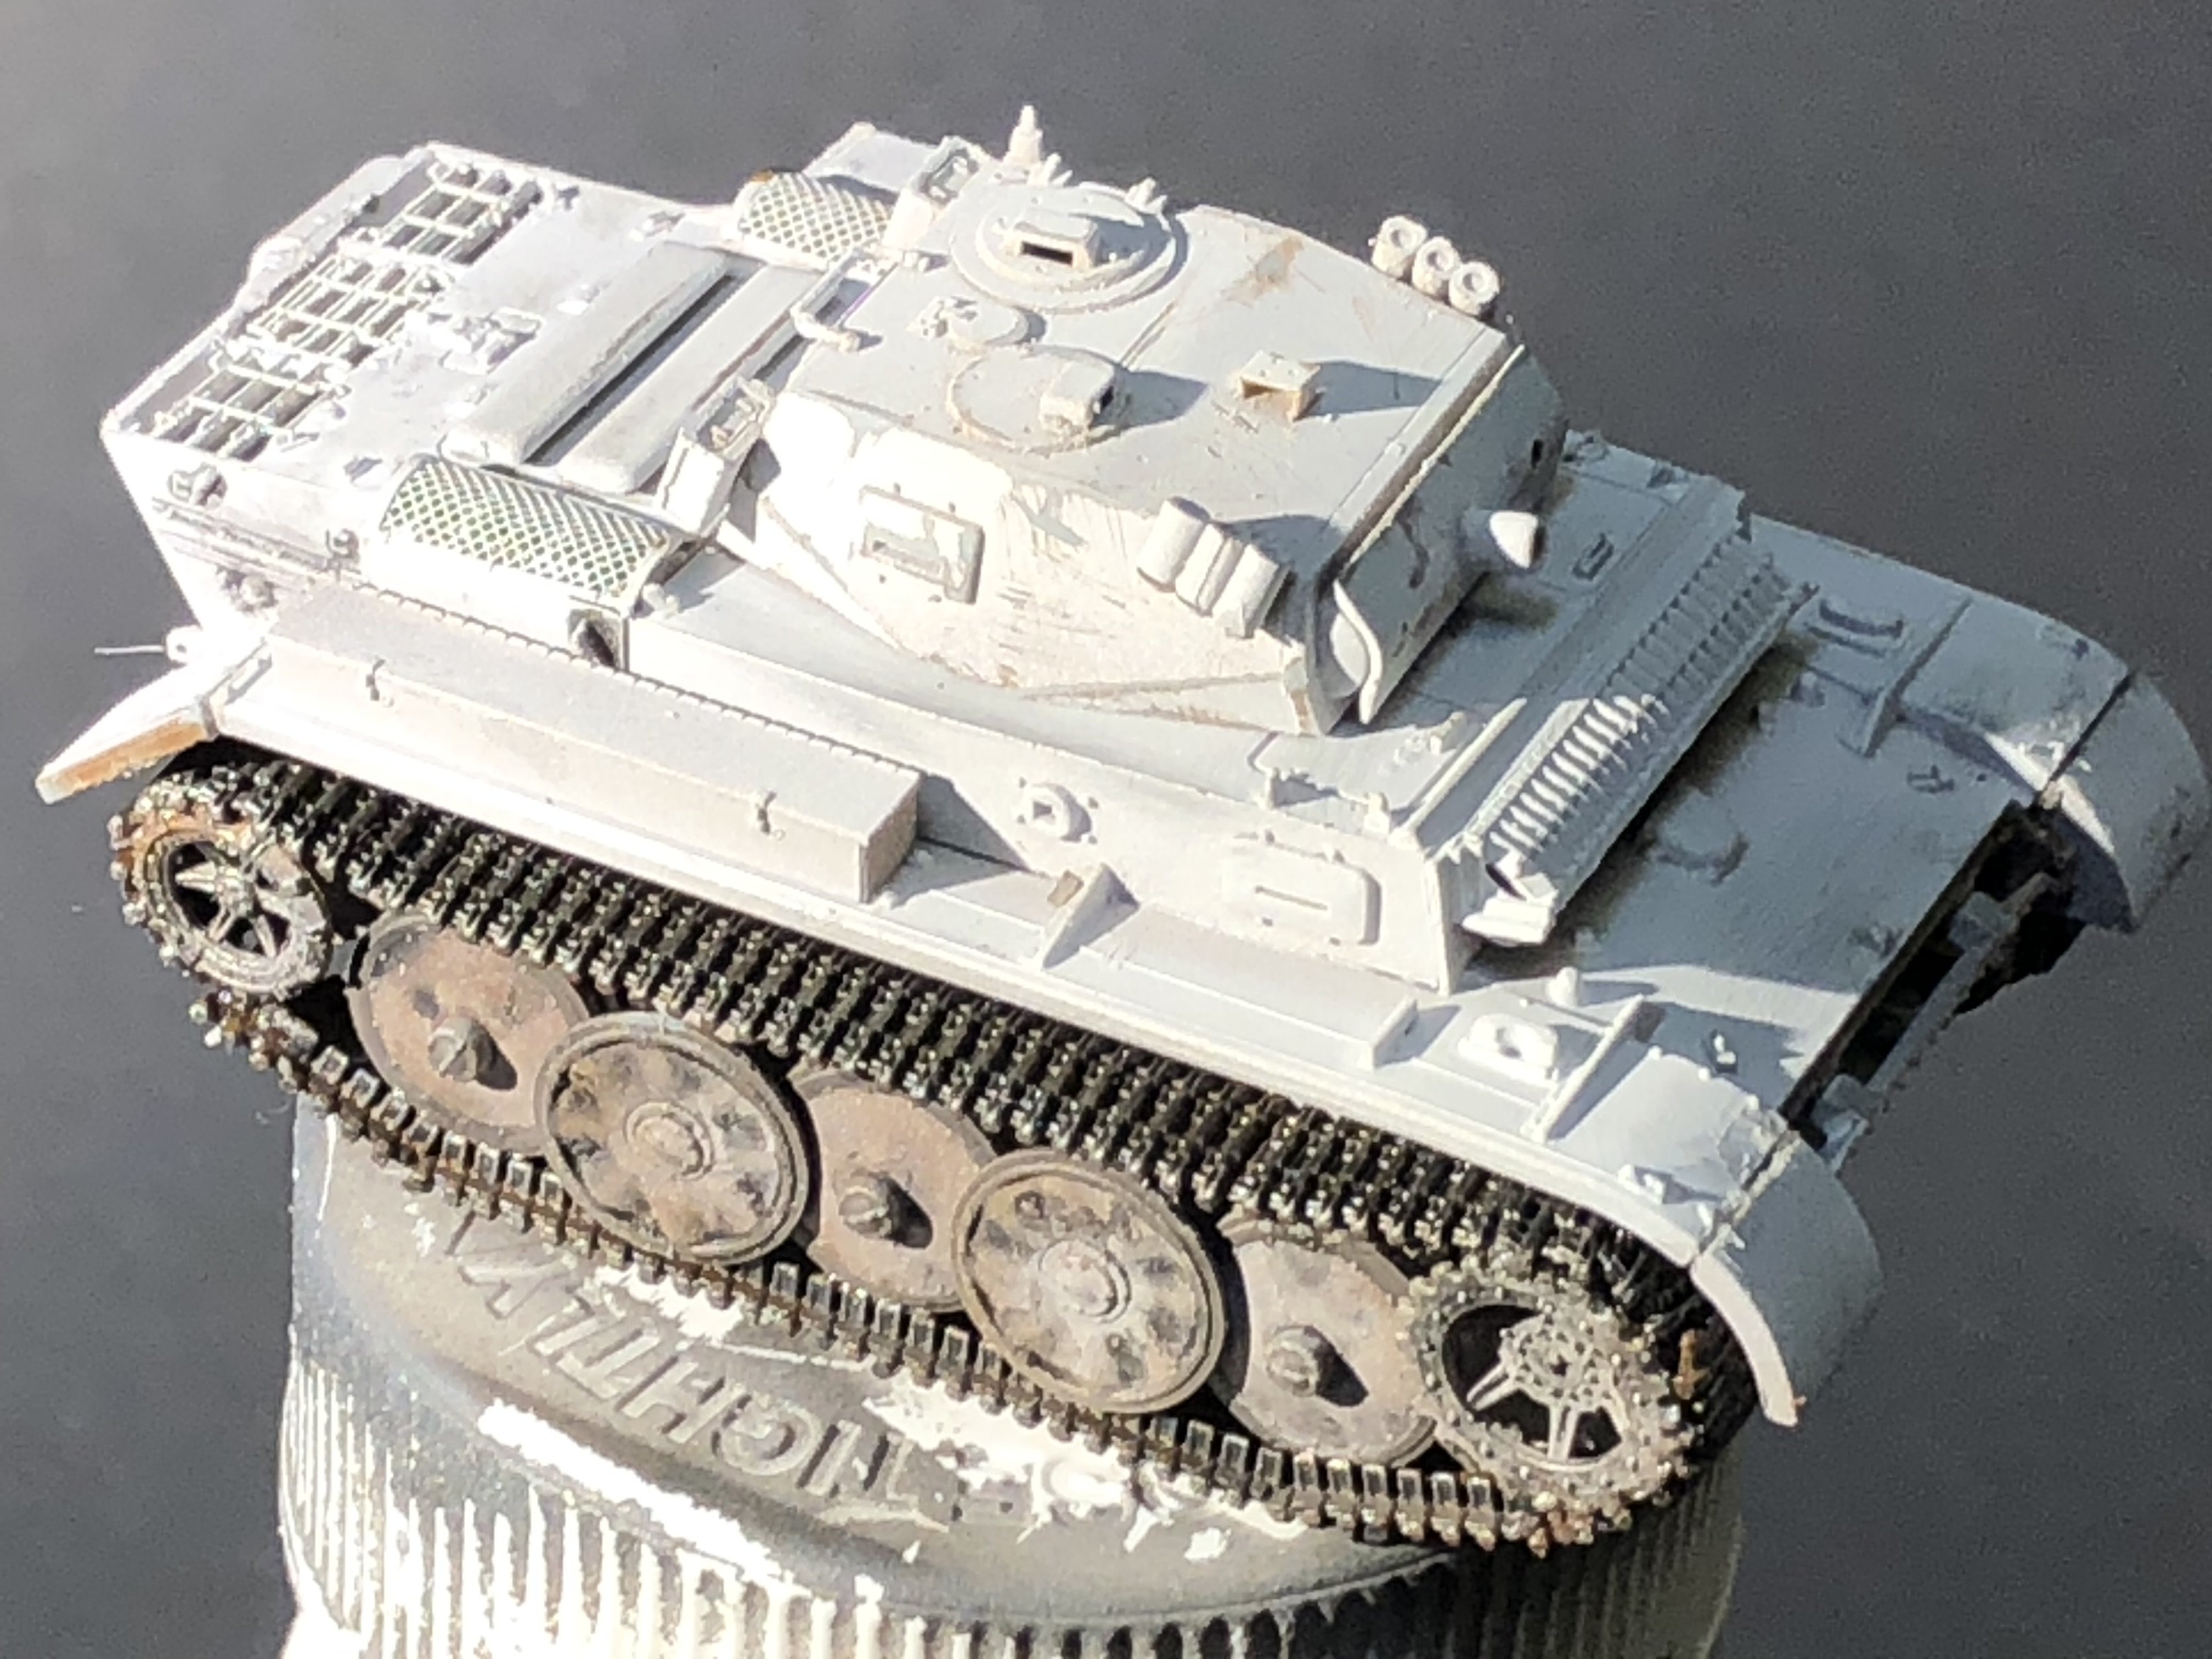
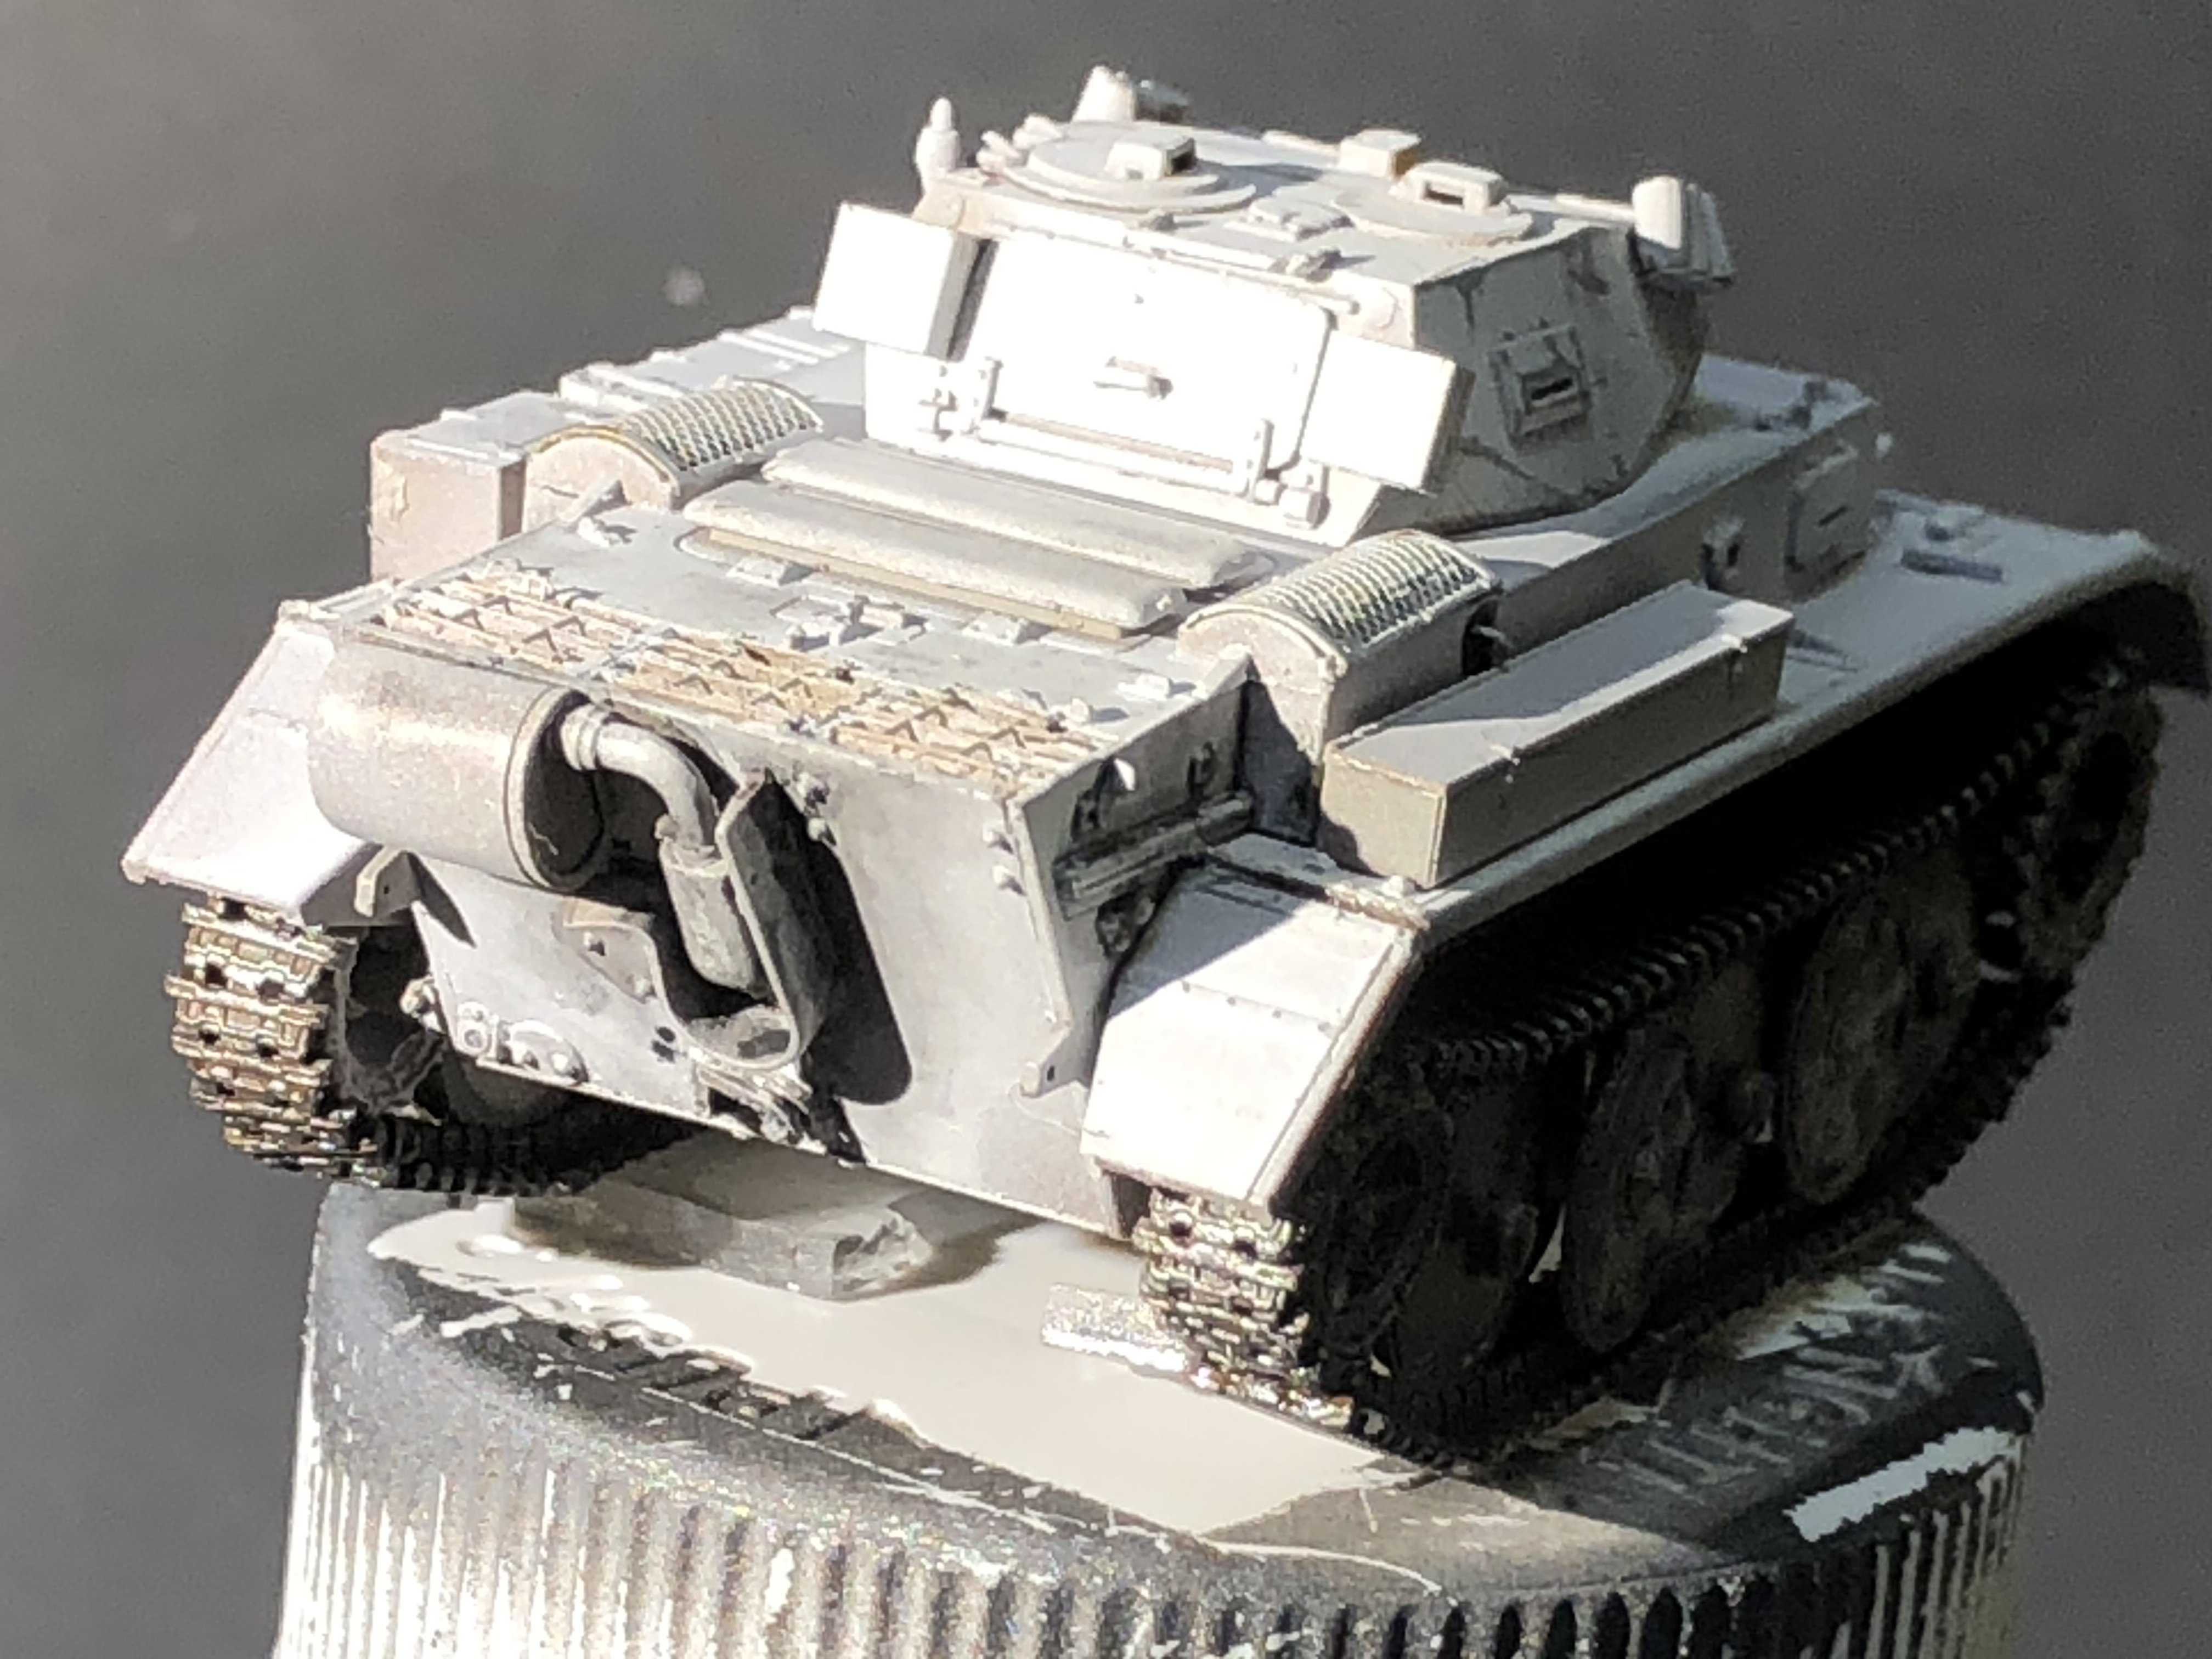
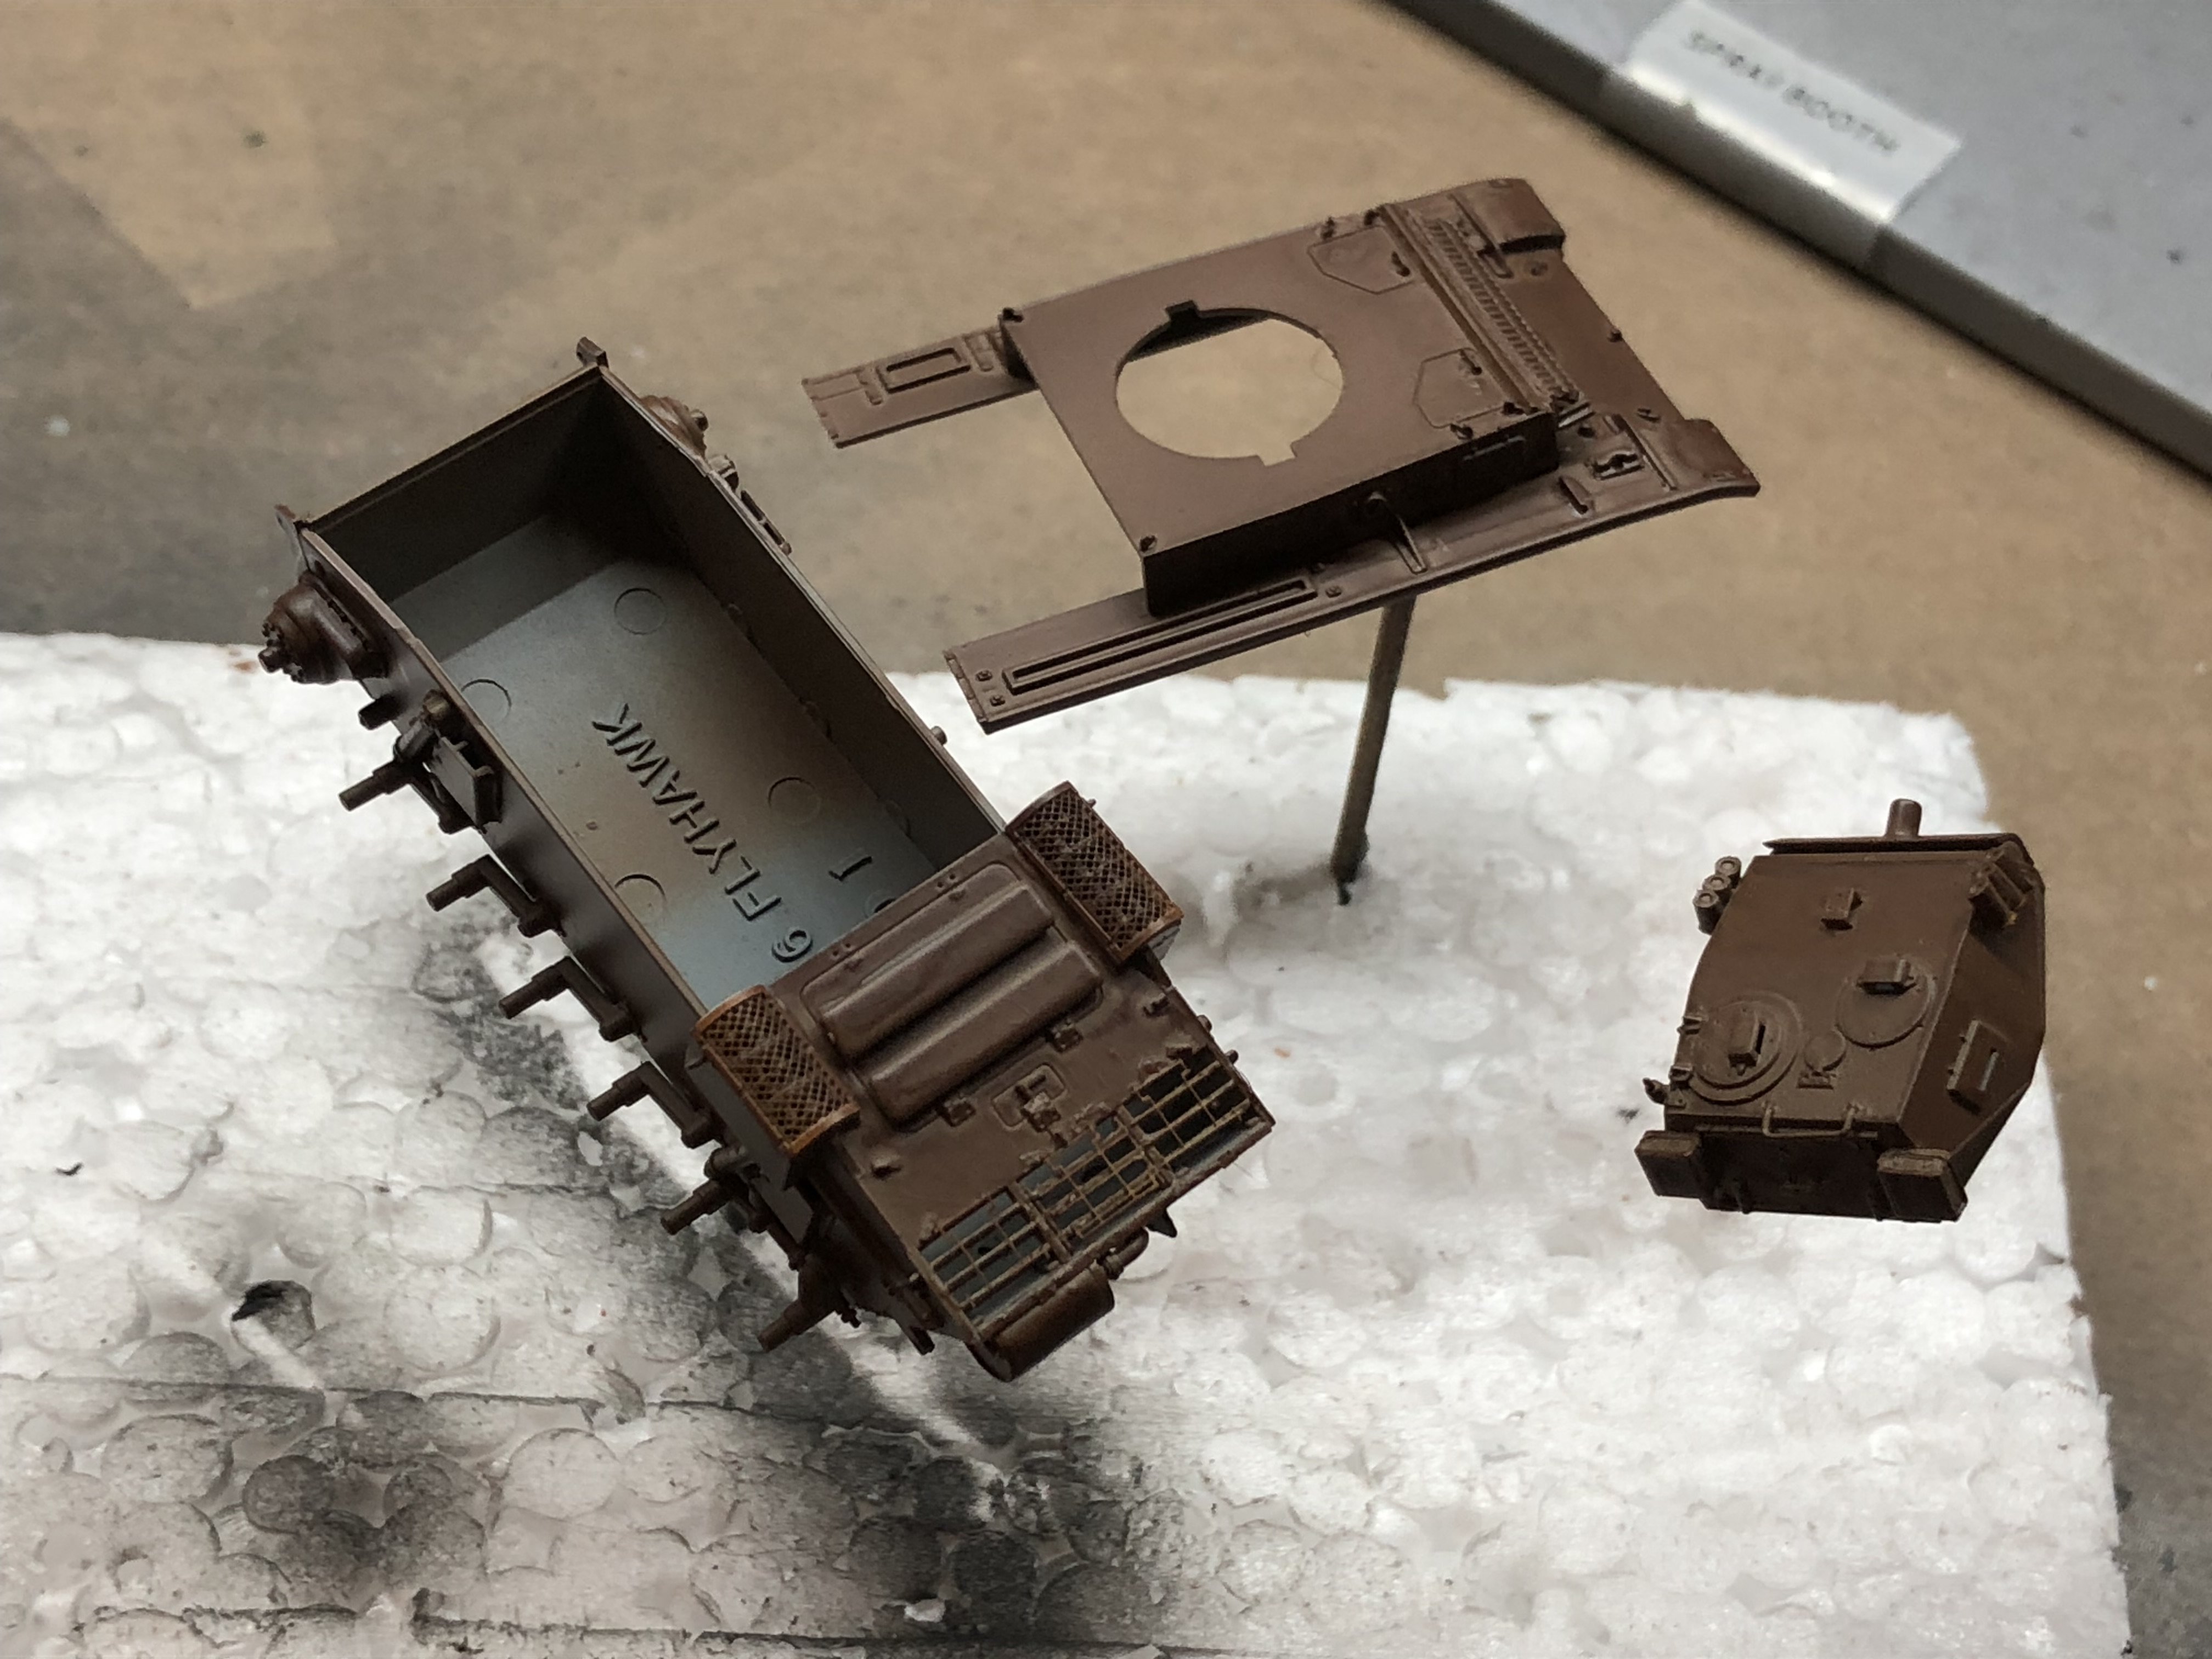
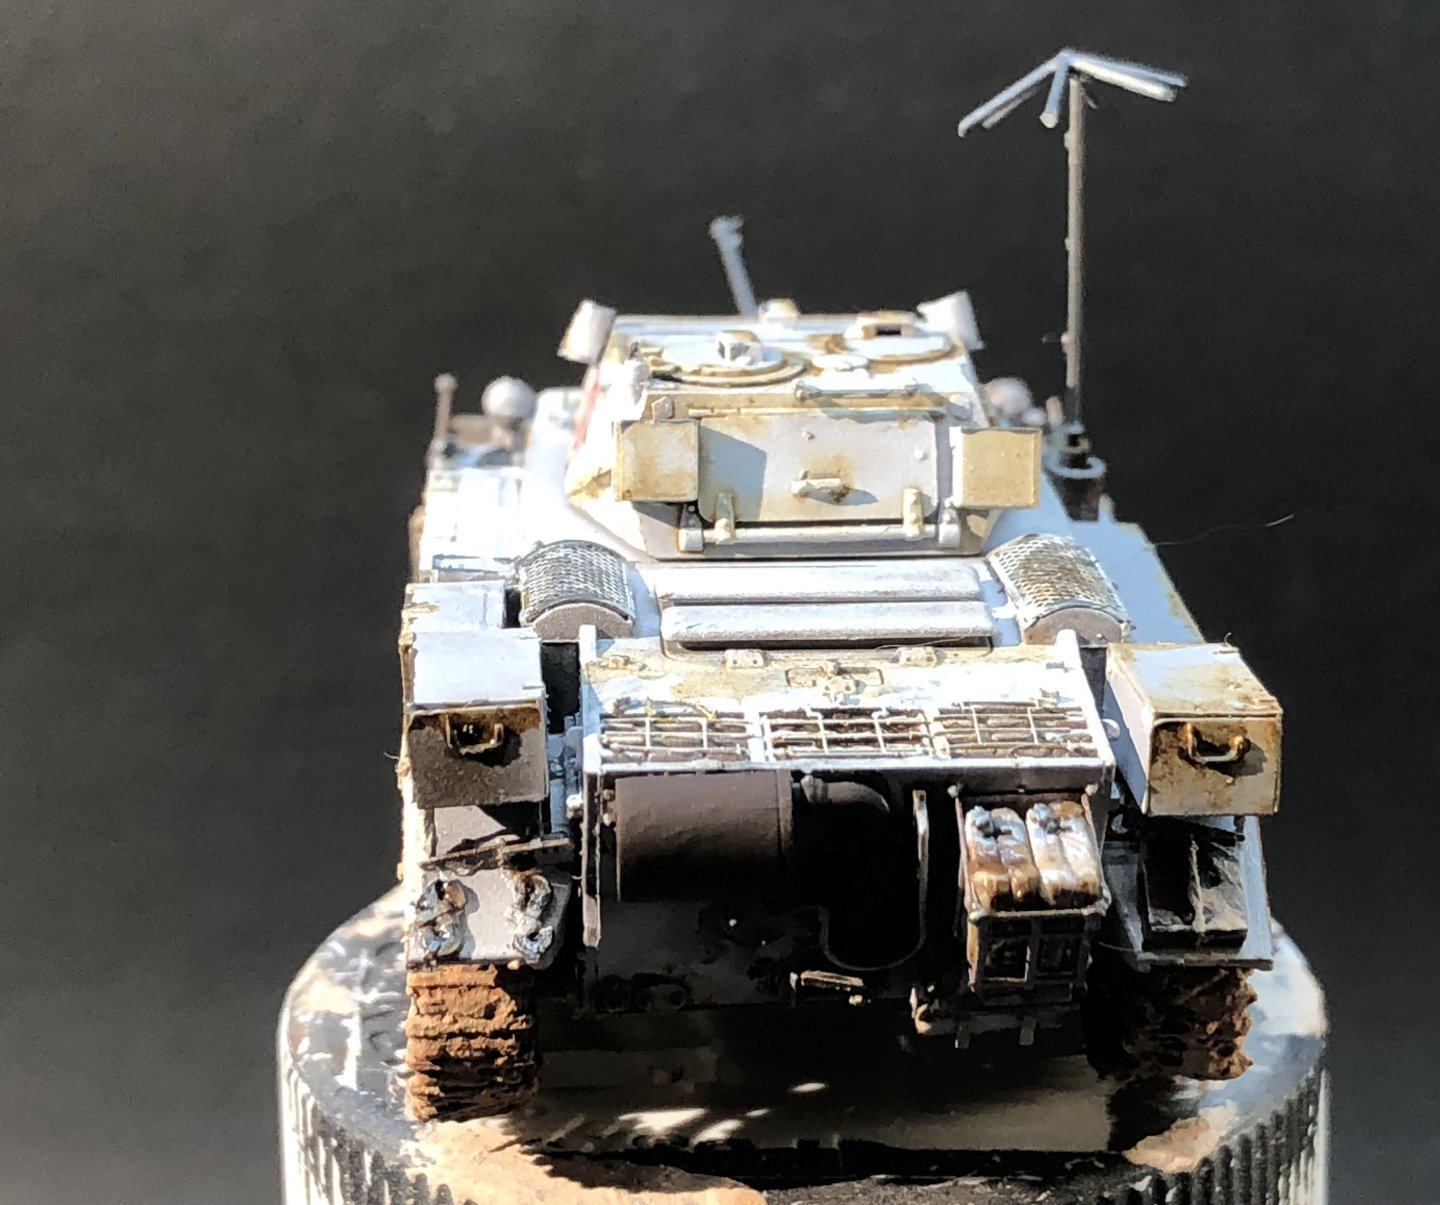
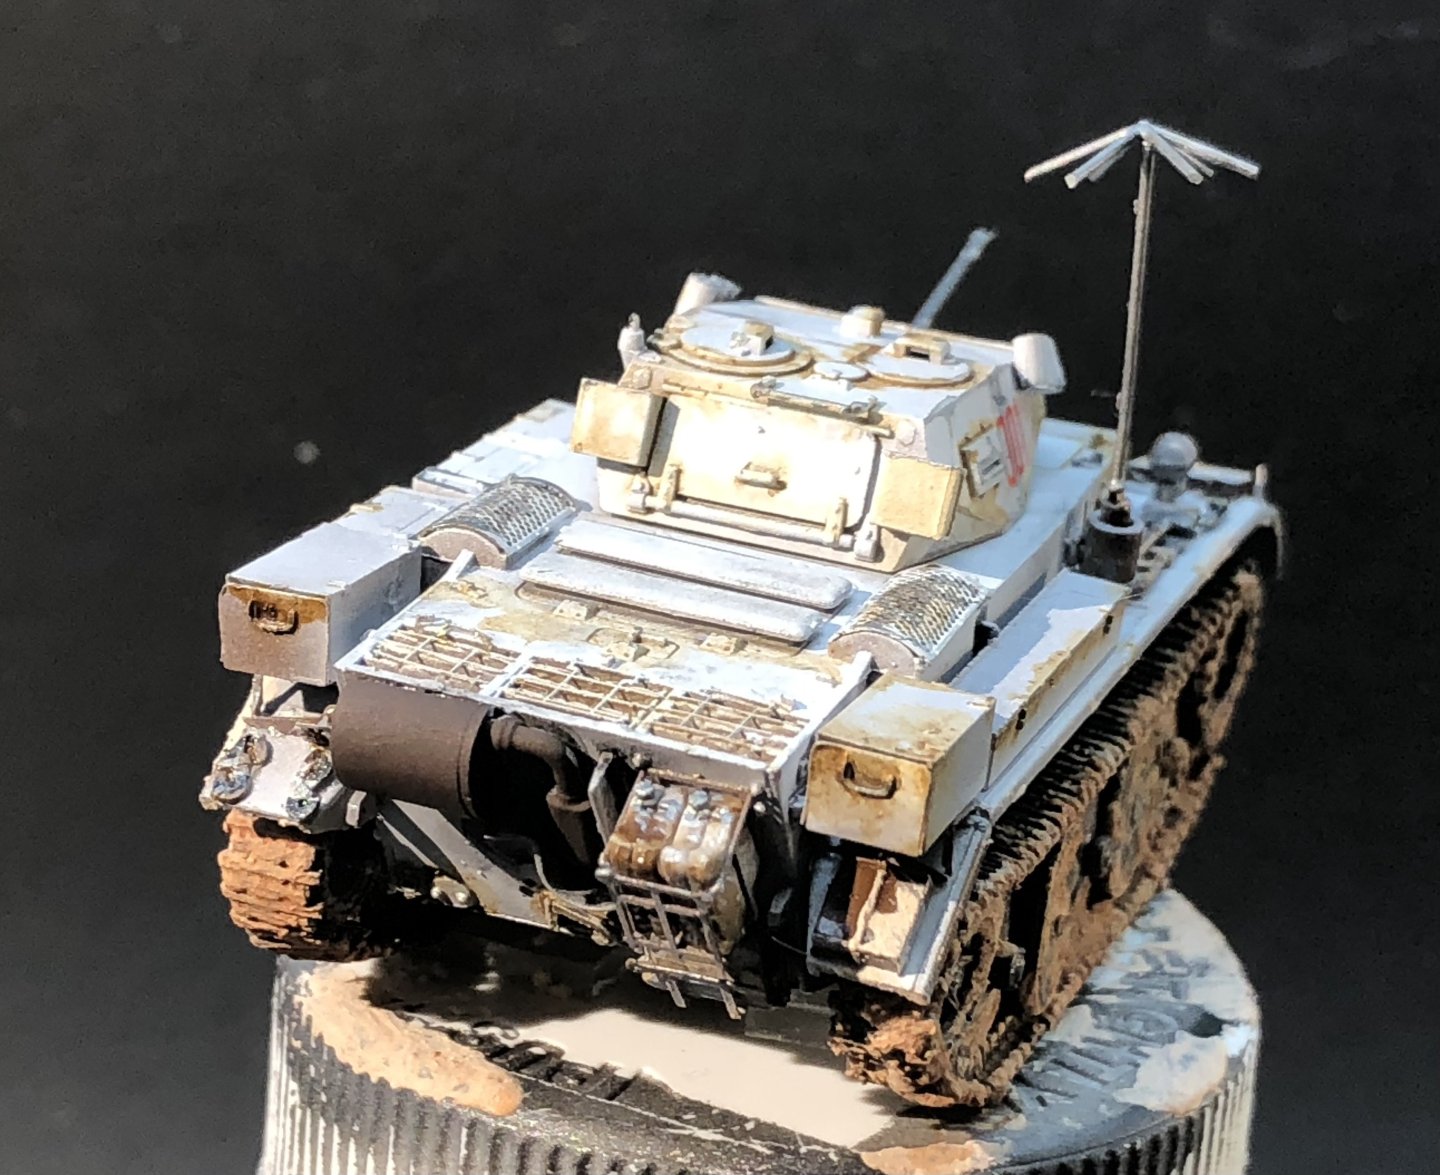
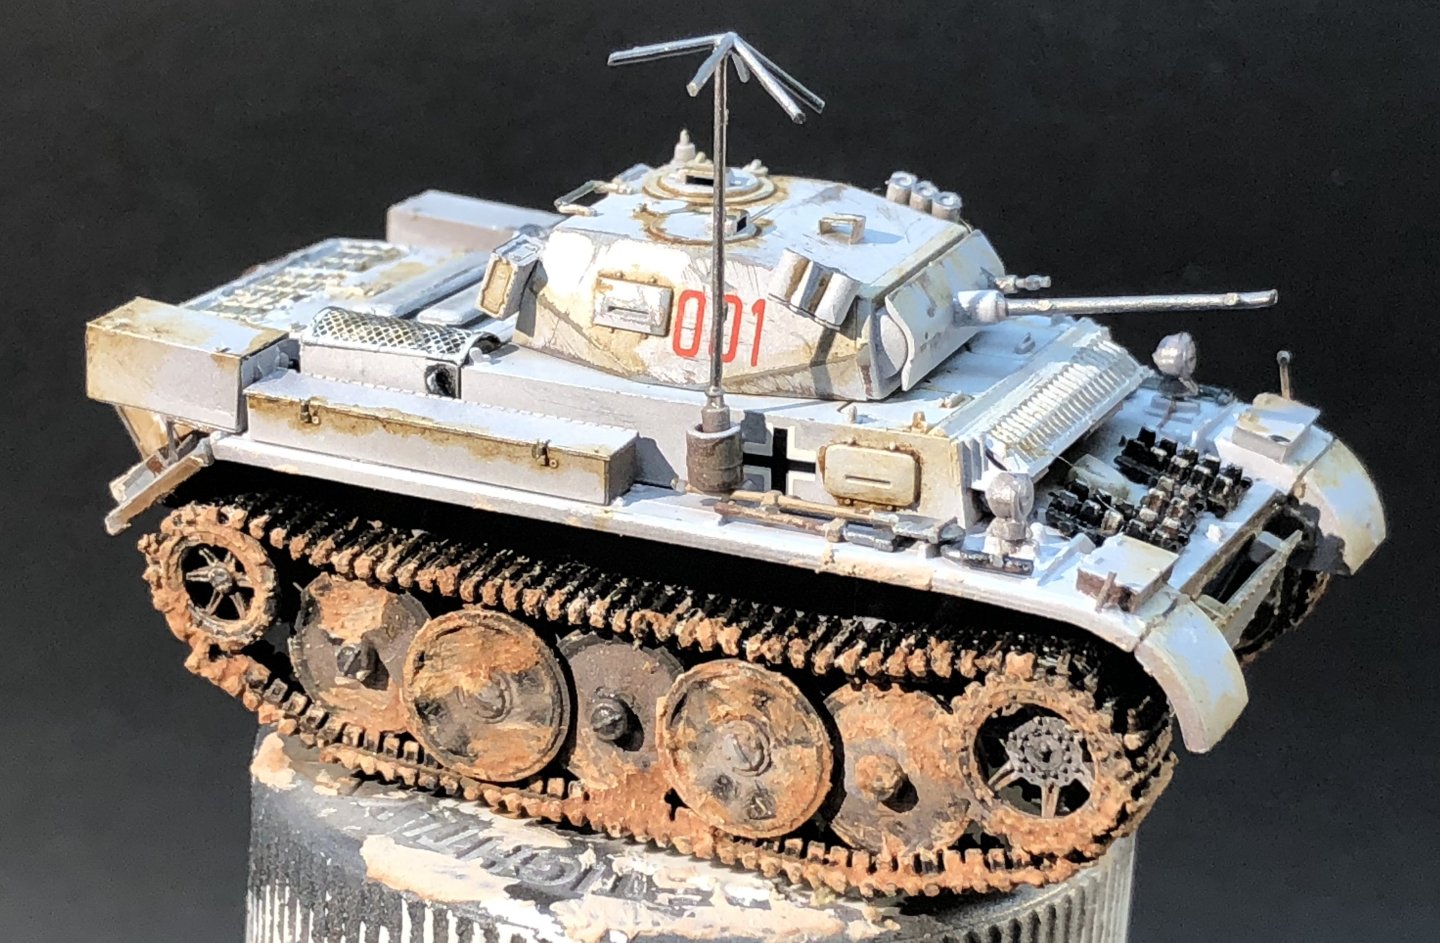
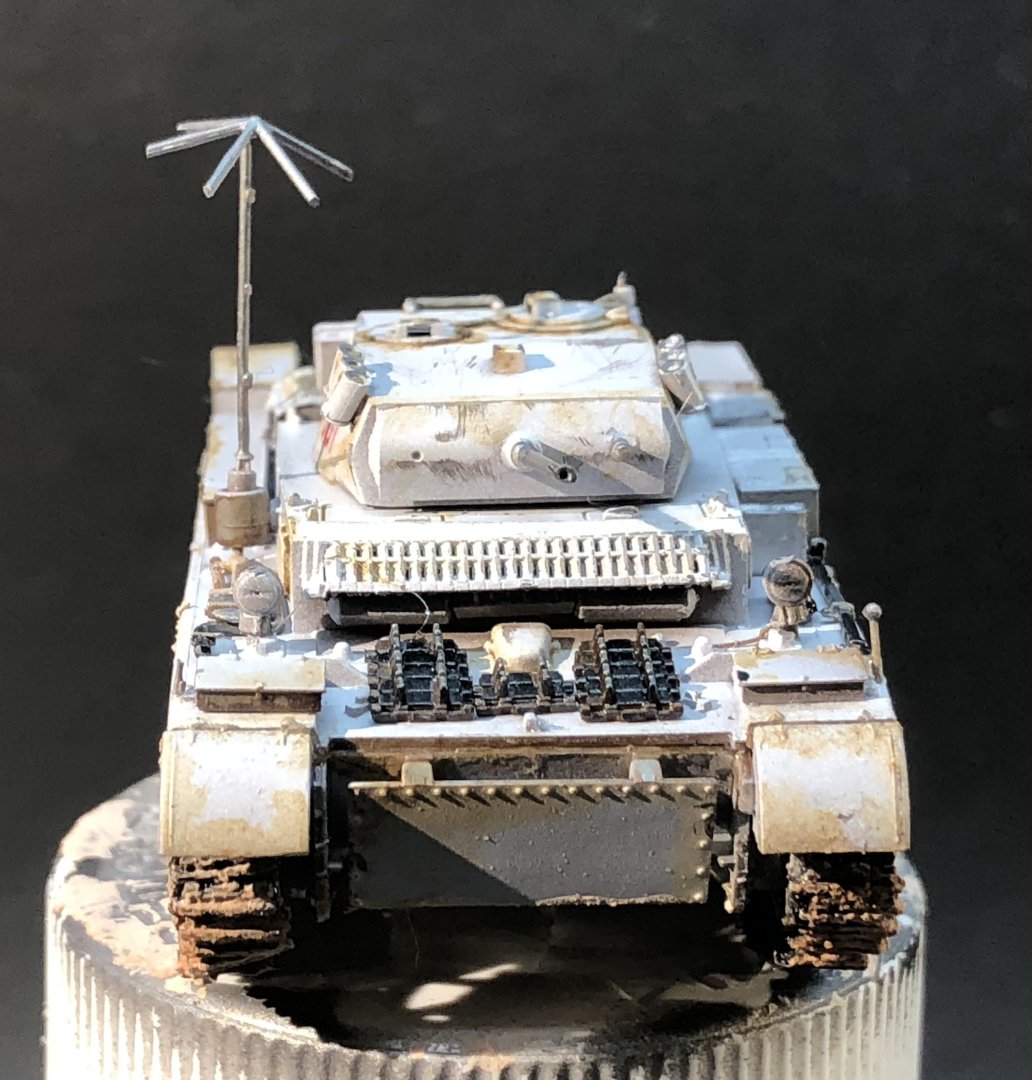
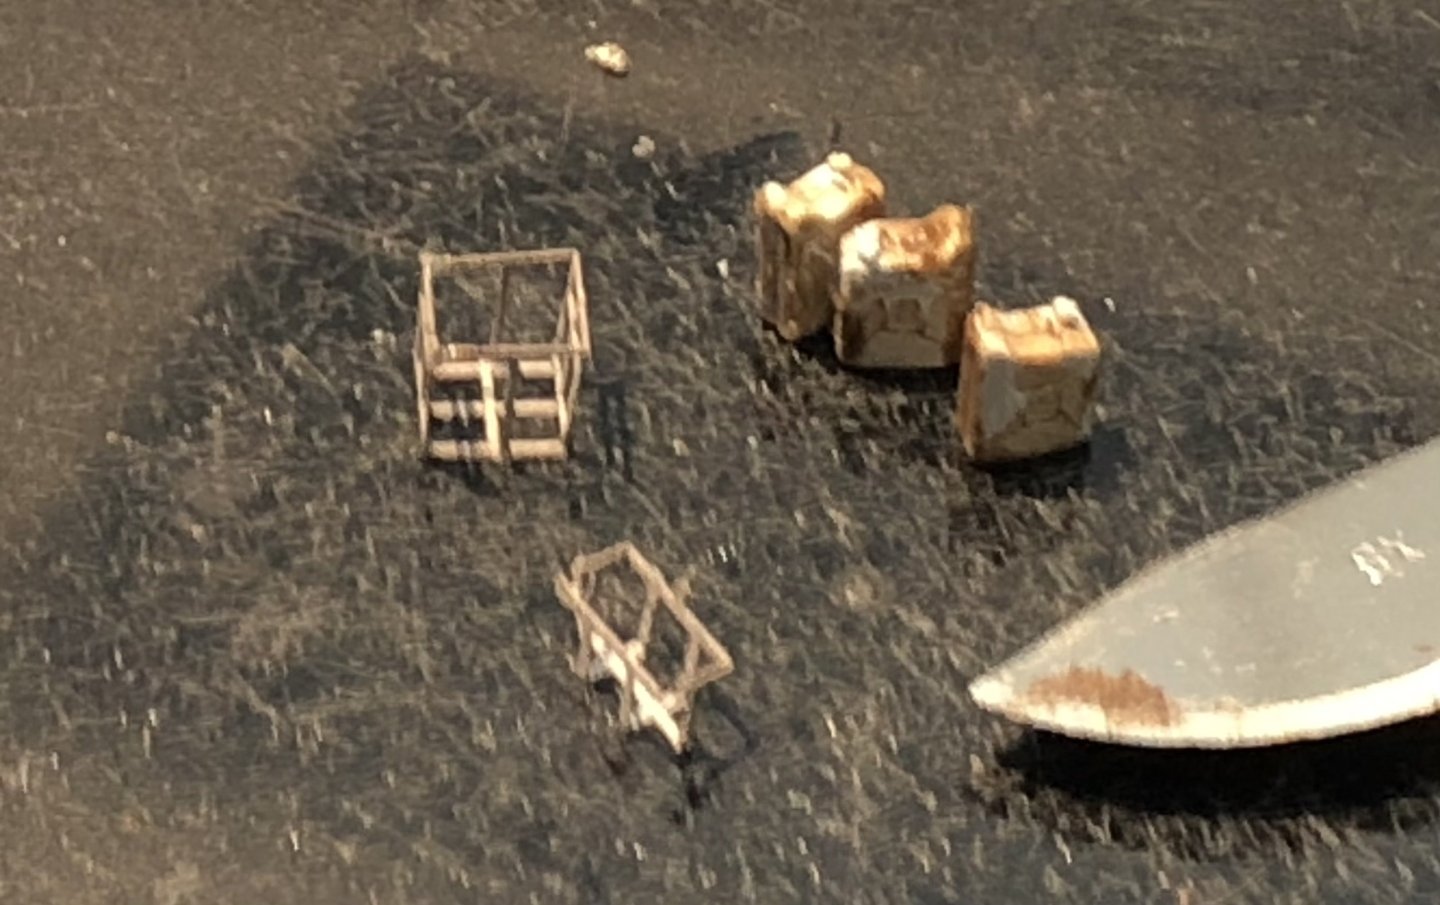
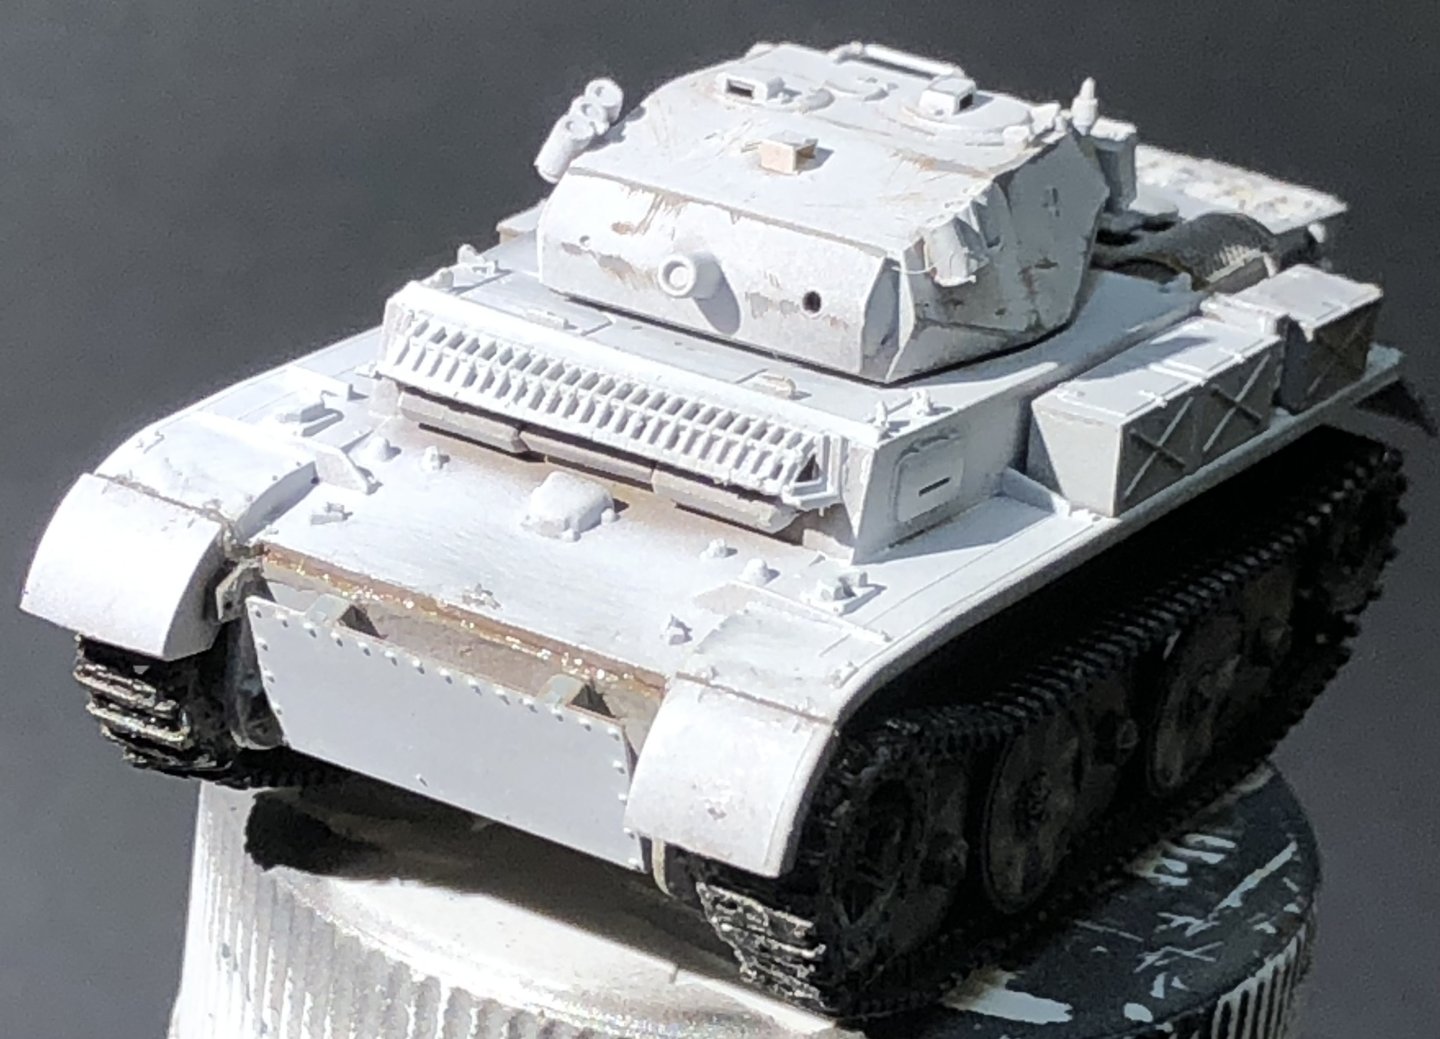
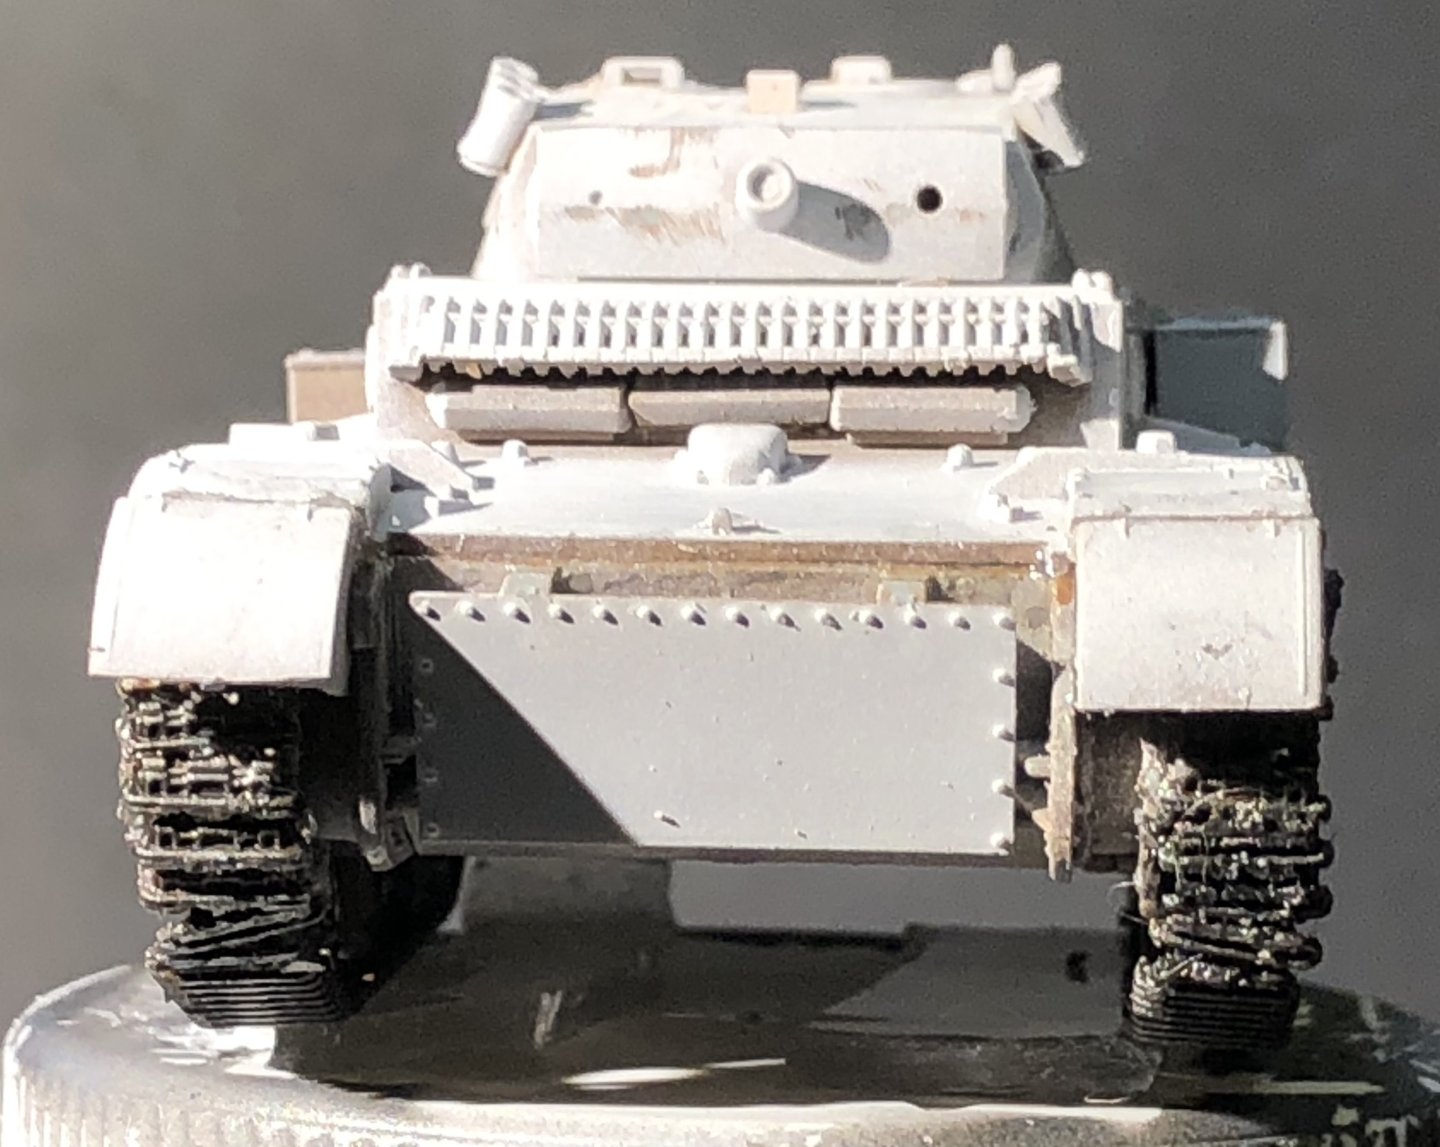
With the problems with the tracks behind me progress has been steady. The last serious photo etch was the baskets for the jerrycans. They were actually fairly easy to make using a folder and the cans fitted without causing any distortion. The tool kit was painted and added. The saw didn’t actually seem to be needed. I wanted to show the tank as the winter warms up, the white camouflage is deteriorating and the tank is plowing through mud. I used powdered ceramic bricks from my Aedes Ares Loarre Castle model, mixed with some white glue, water and brown acrylic paint. This was then applied with a stiff brush and cleaned up with cotton buds where I had got too enthusiastic. I may have been too liberal with the effect but I think it works and it does cover some of the issues with the track assembly. I think this is finished and it’s time to go back to HMS Iron Duke and some serious PE. Thanks for looking in, the likes and comments. alan


- 34 replies
-
- 16
-

-

-
Thank you very much Patrick That is a great suggestion and I will use it when I build the King Tiger which has the same tracks although the links are wider and better defined. Alan
-
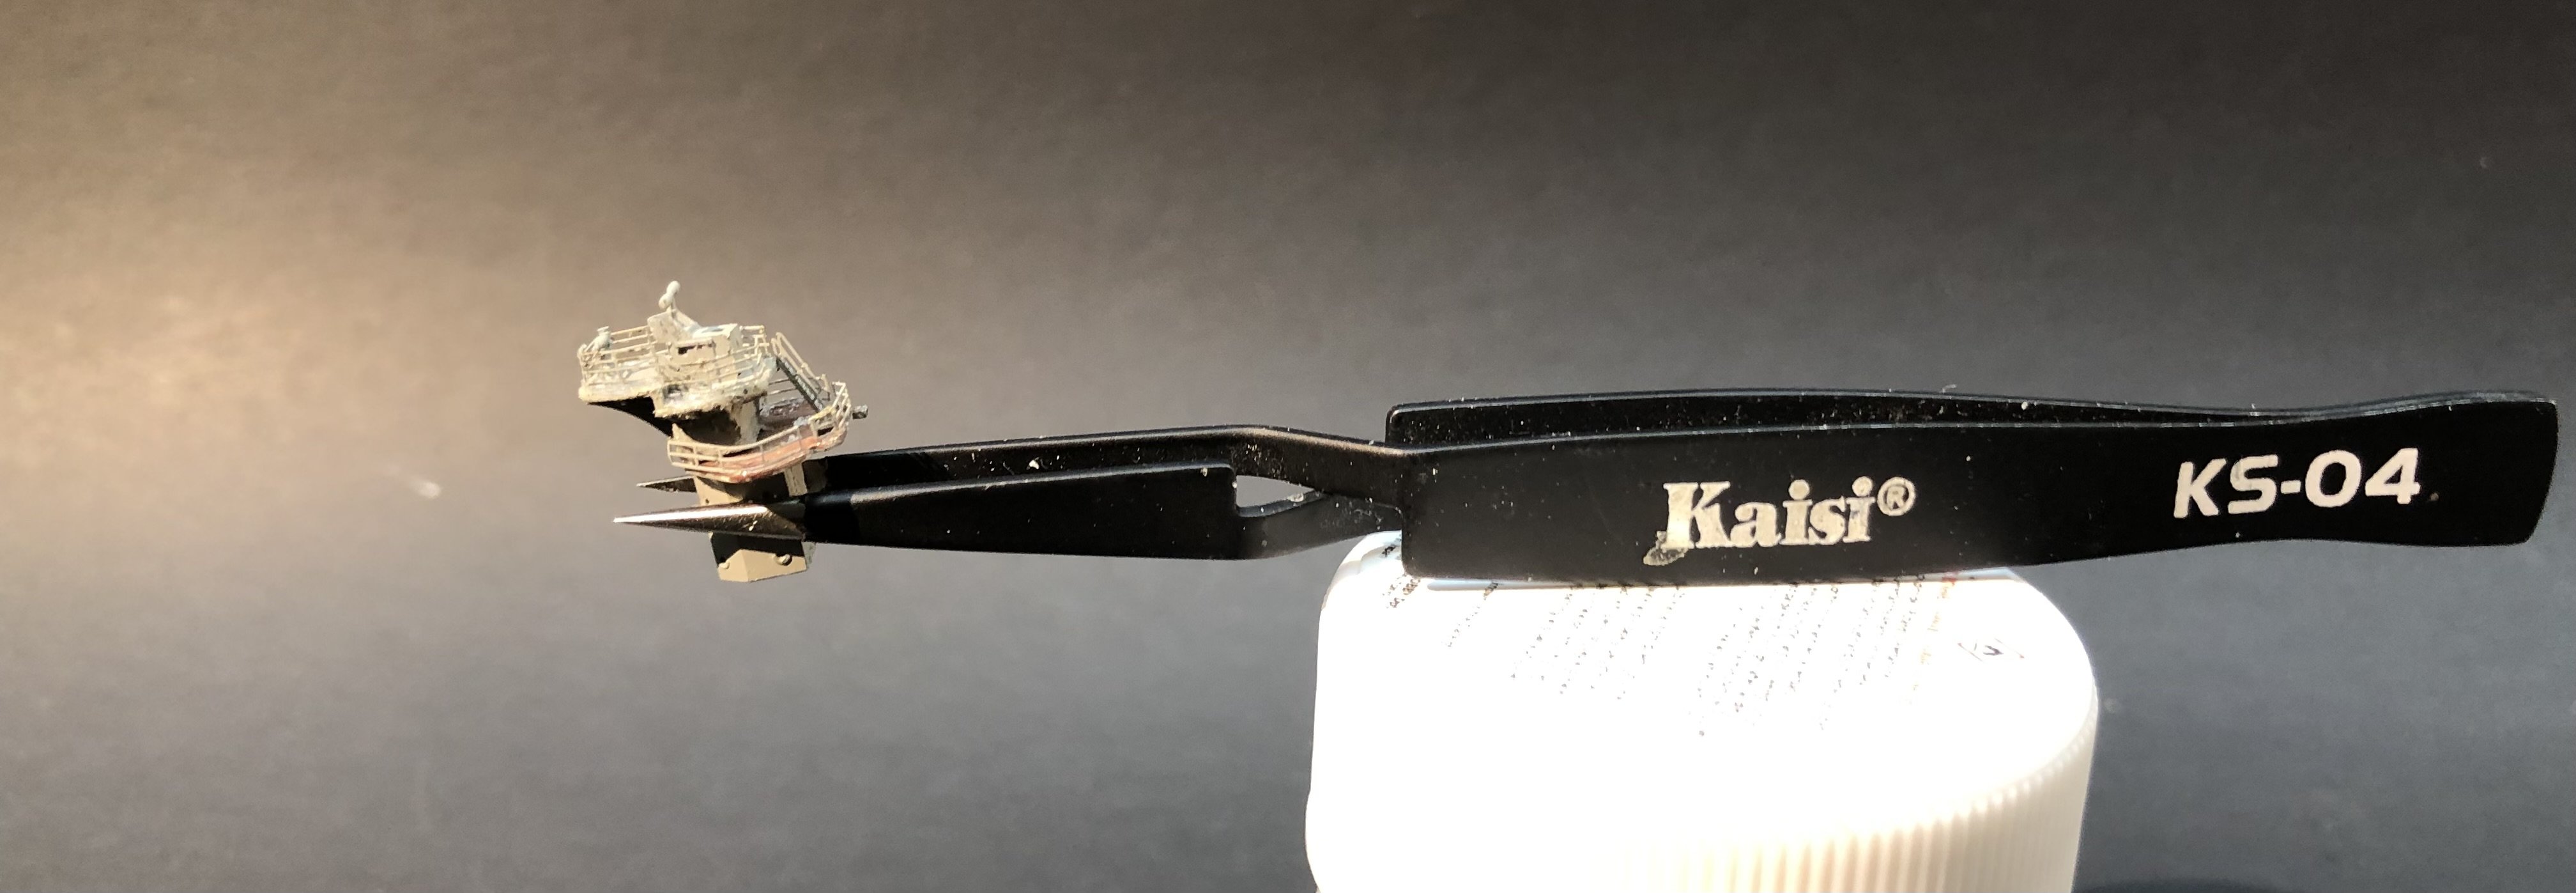
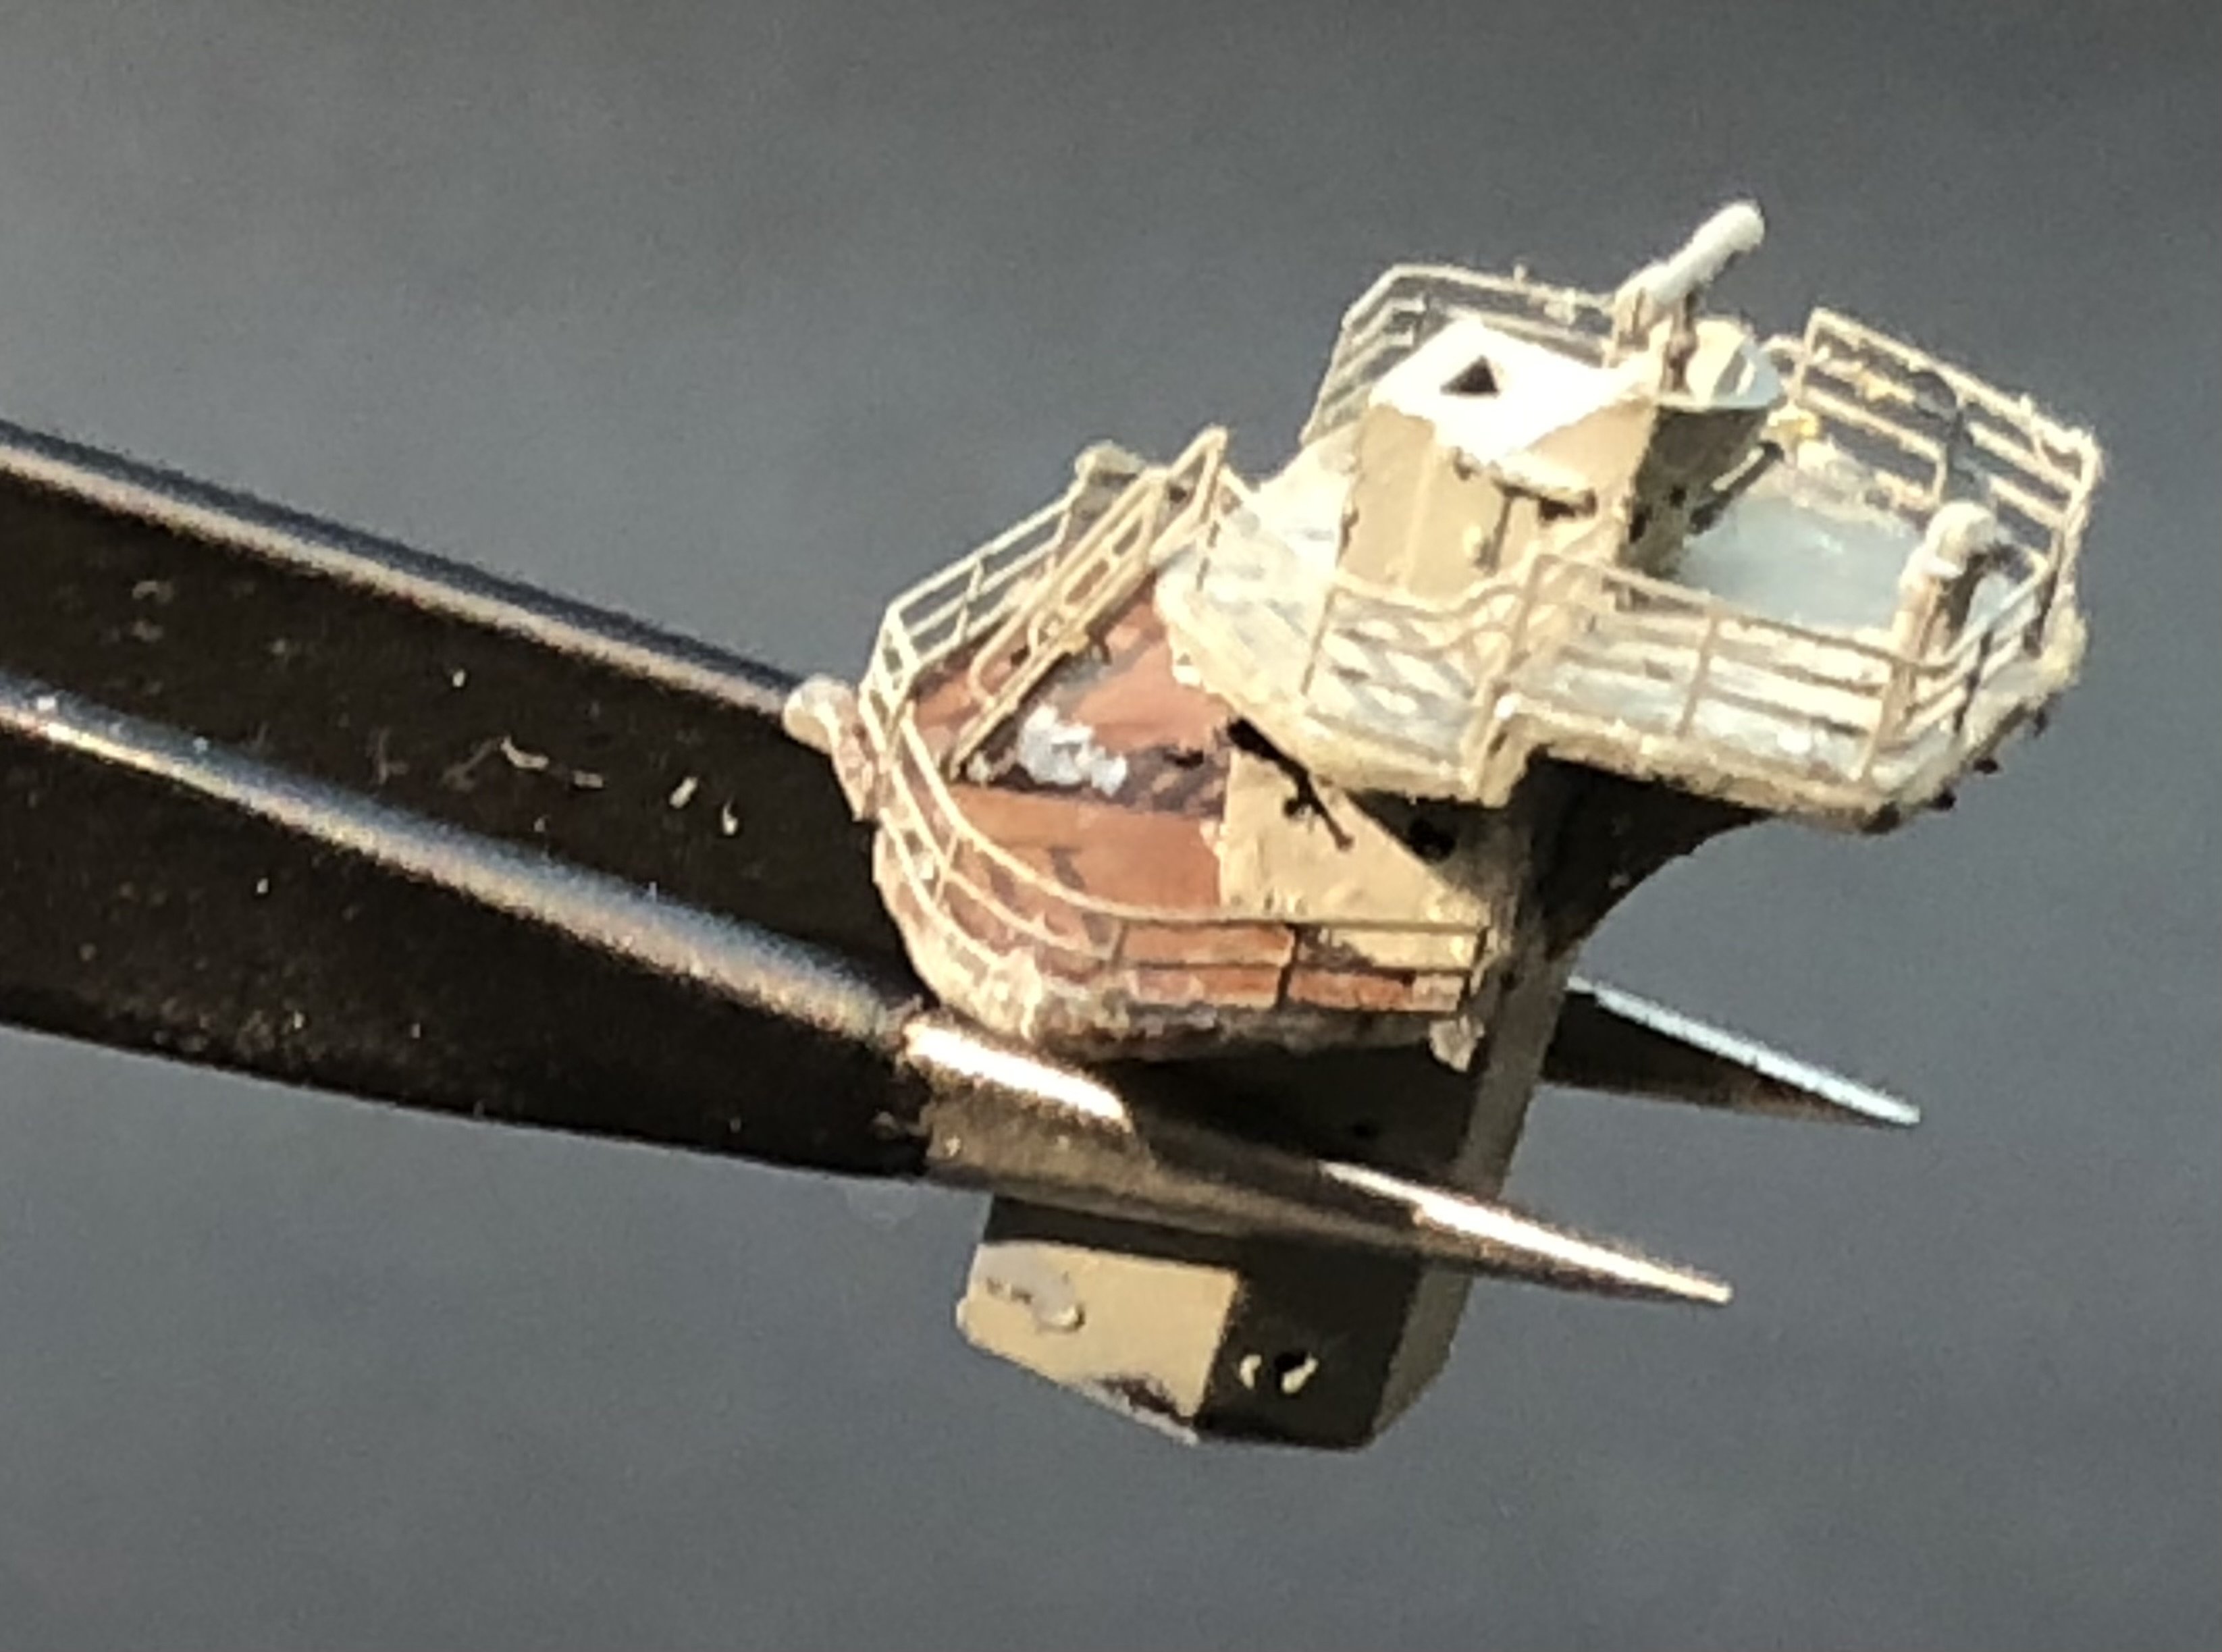
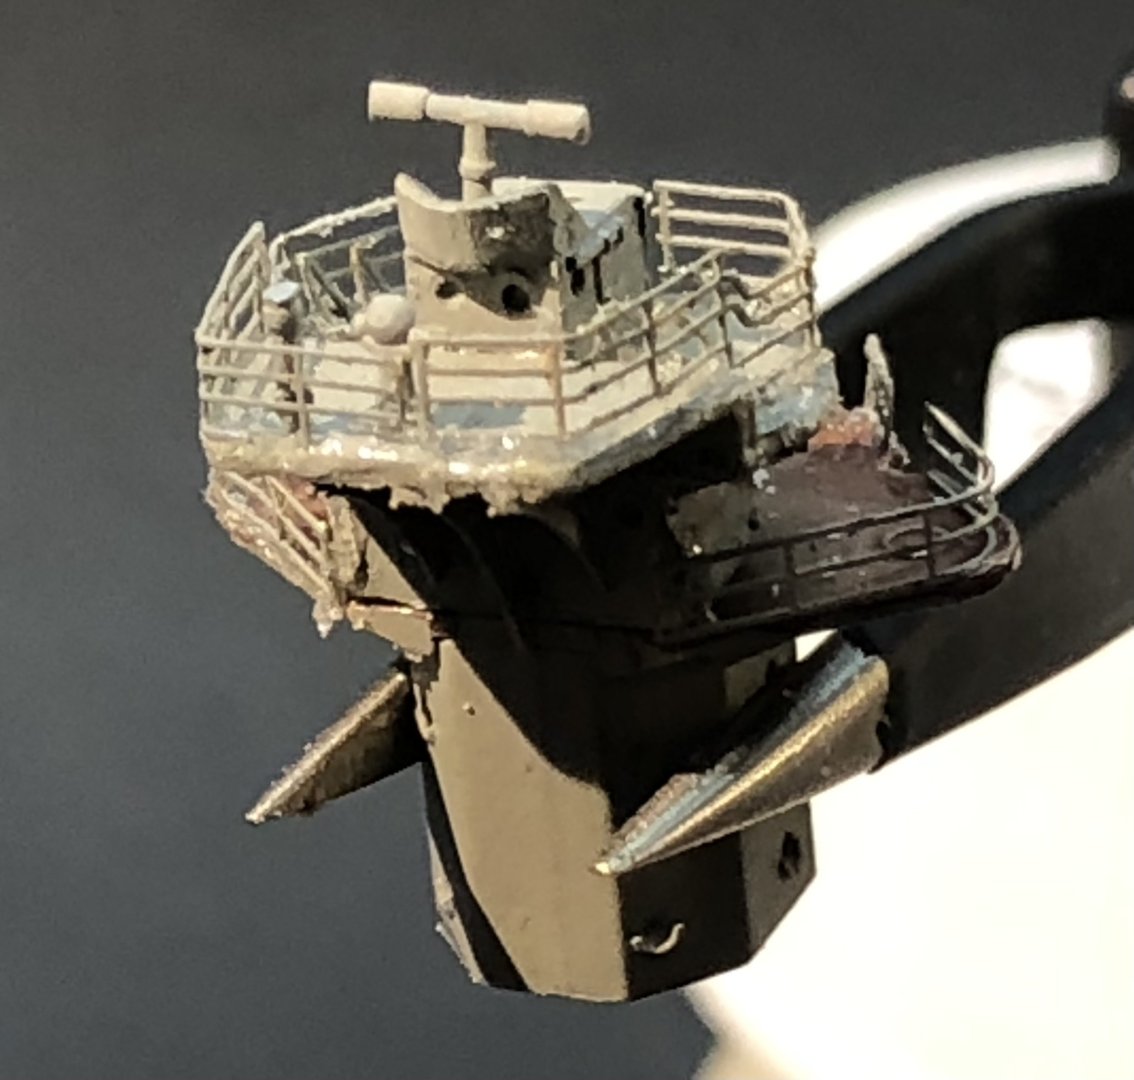
Picking this back up again at last. I started working down from the top of the bridge structure adding the photo etch railings and details while access is still easy. It doesn’t look much but this was an afternoon’s work which did include losing and finding tiny bits of railings The Mig Ultra glue is getting a bit clumpy as I reach the bottom of the bottle possibly from repeated dilution to keep the consistency thin. Time for a new bottle. Hopefully I’ll be making some progress again. Thanks for looking in and for the likes and comments. Alan


-
Congratulations on your recovery Dave. Great to see the Halberstadt finished. You did a great job, it looks beautiful. alan
-
A beautiful model Craig. The paint finish is spectacular and the details are superb. In several of the photos it looks completely real. congratulations alan
-
Yes, sorry Rob, that was my poor phrasing. I meant it’s the book I’m currently reading. I started rereading the series last month and I’m now on If The Dead Rise Not (set around Cuba). I enjoyed them first time round and find them better now, probably because I read slower and absorb the details
-
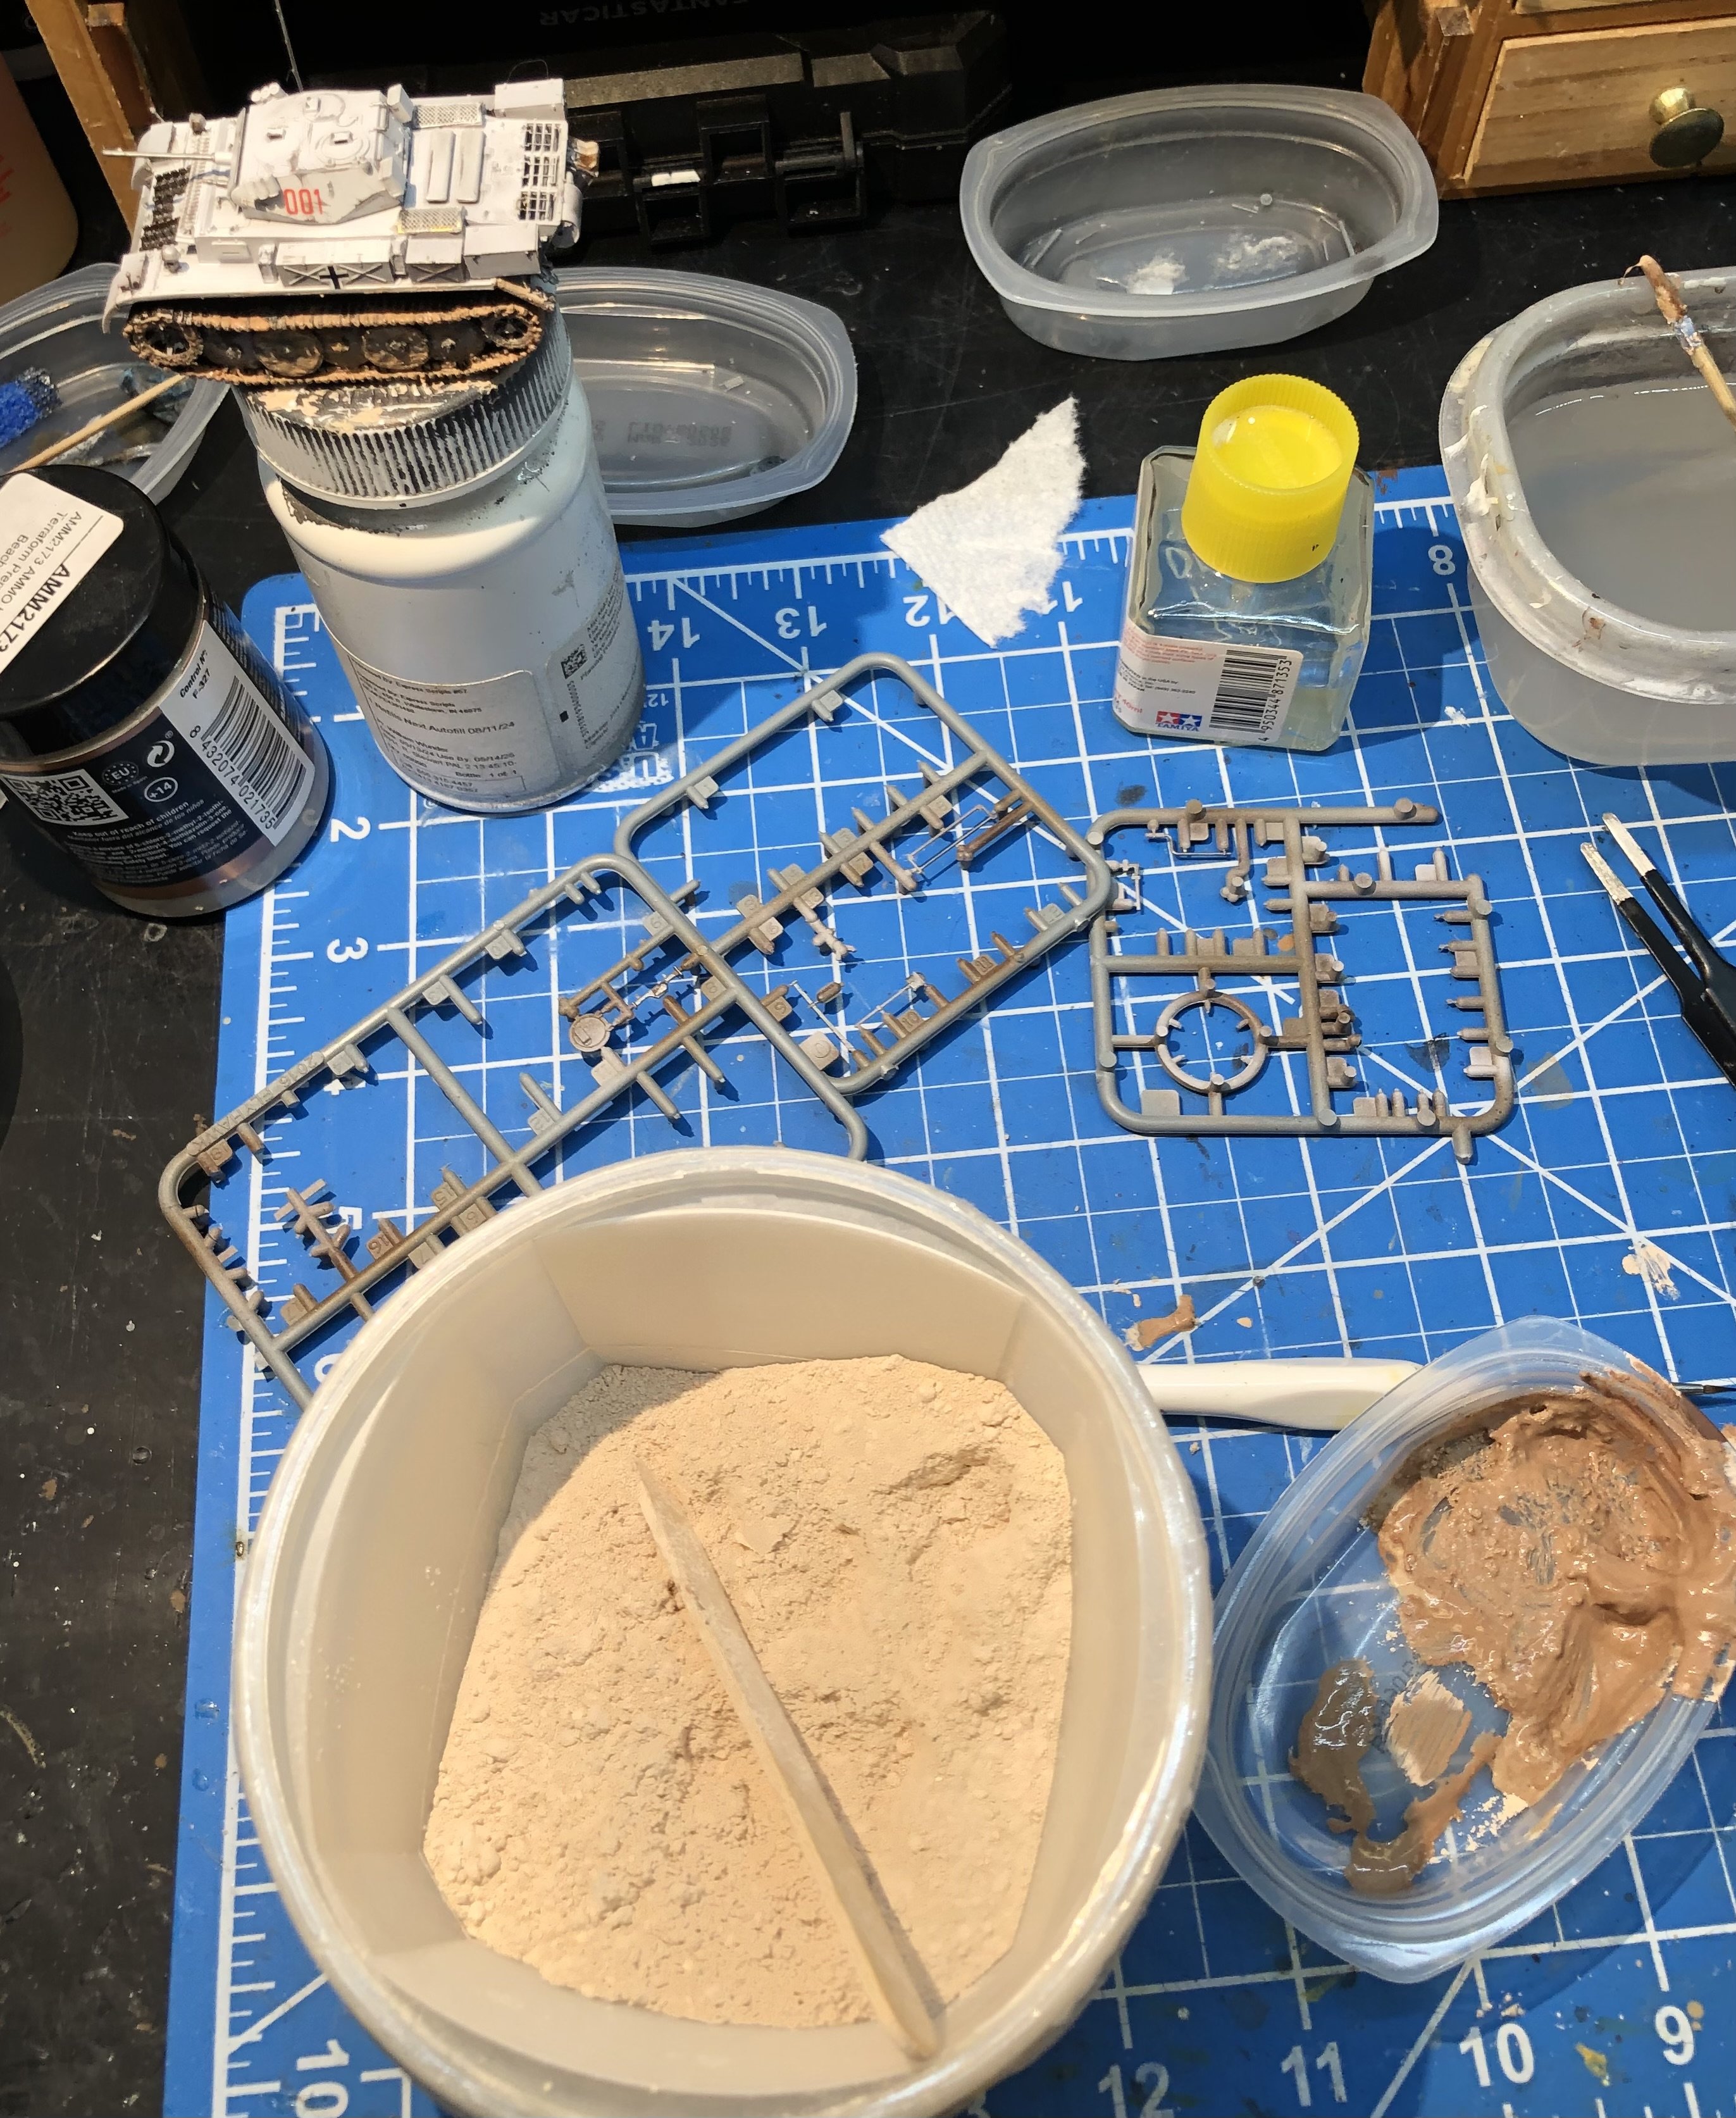
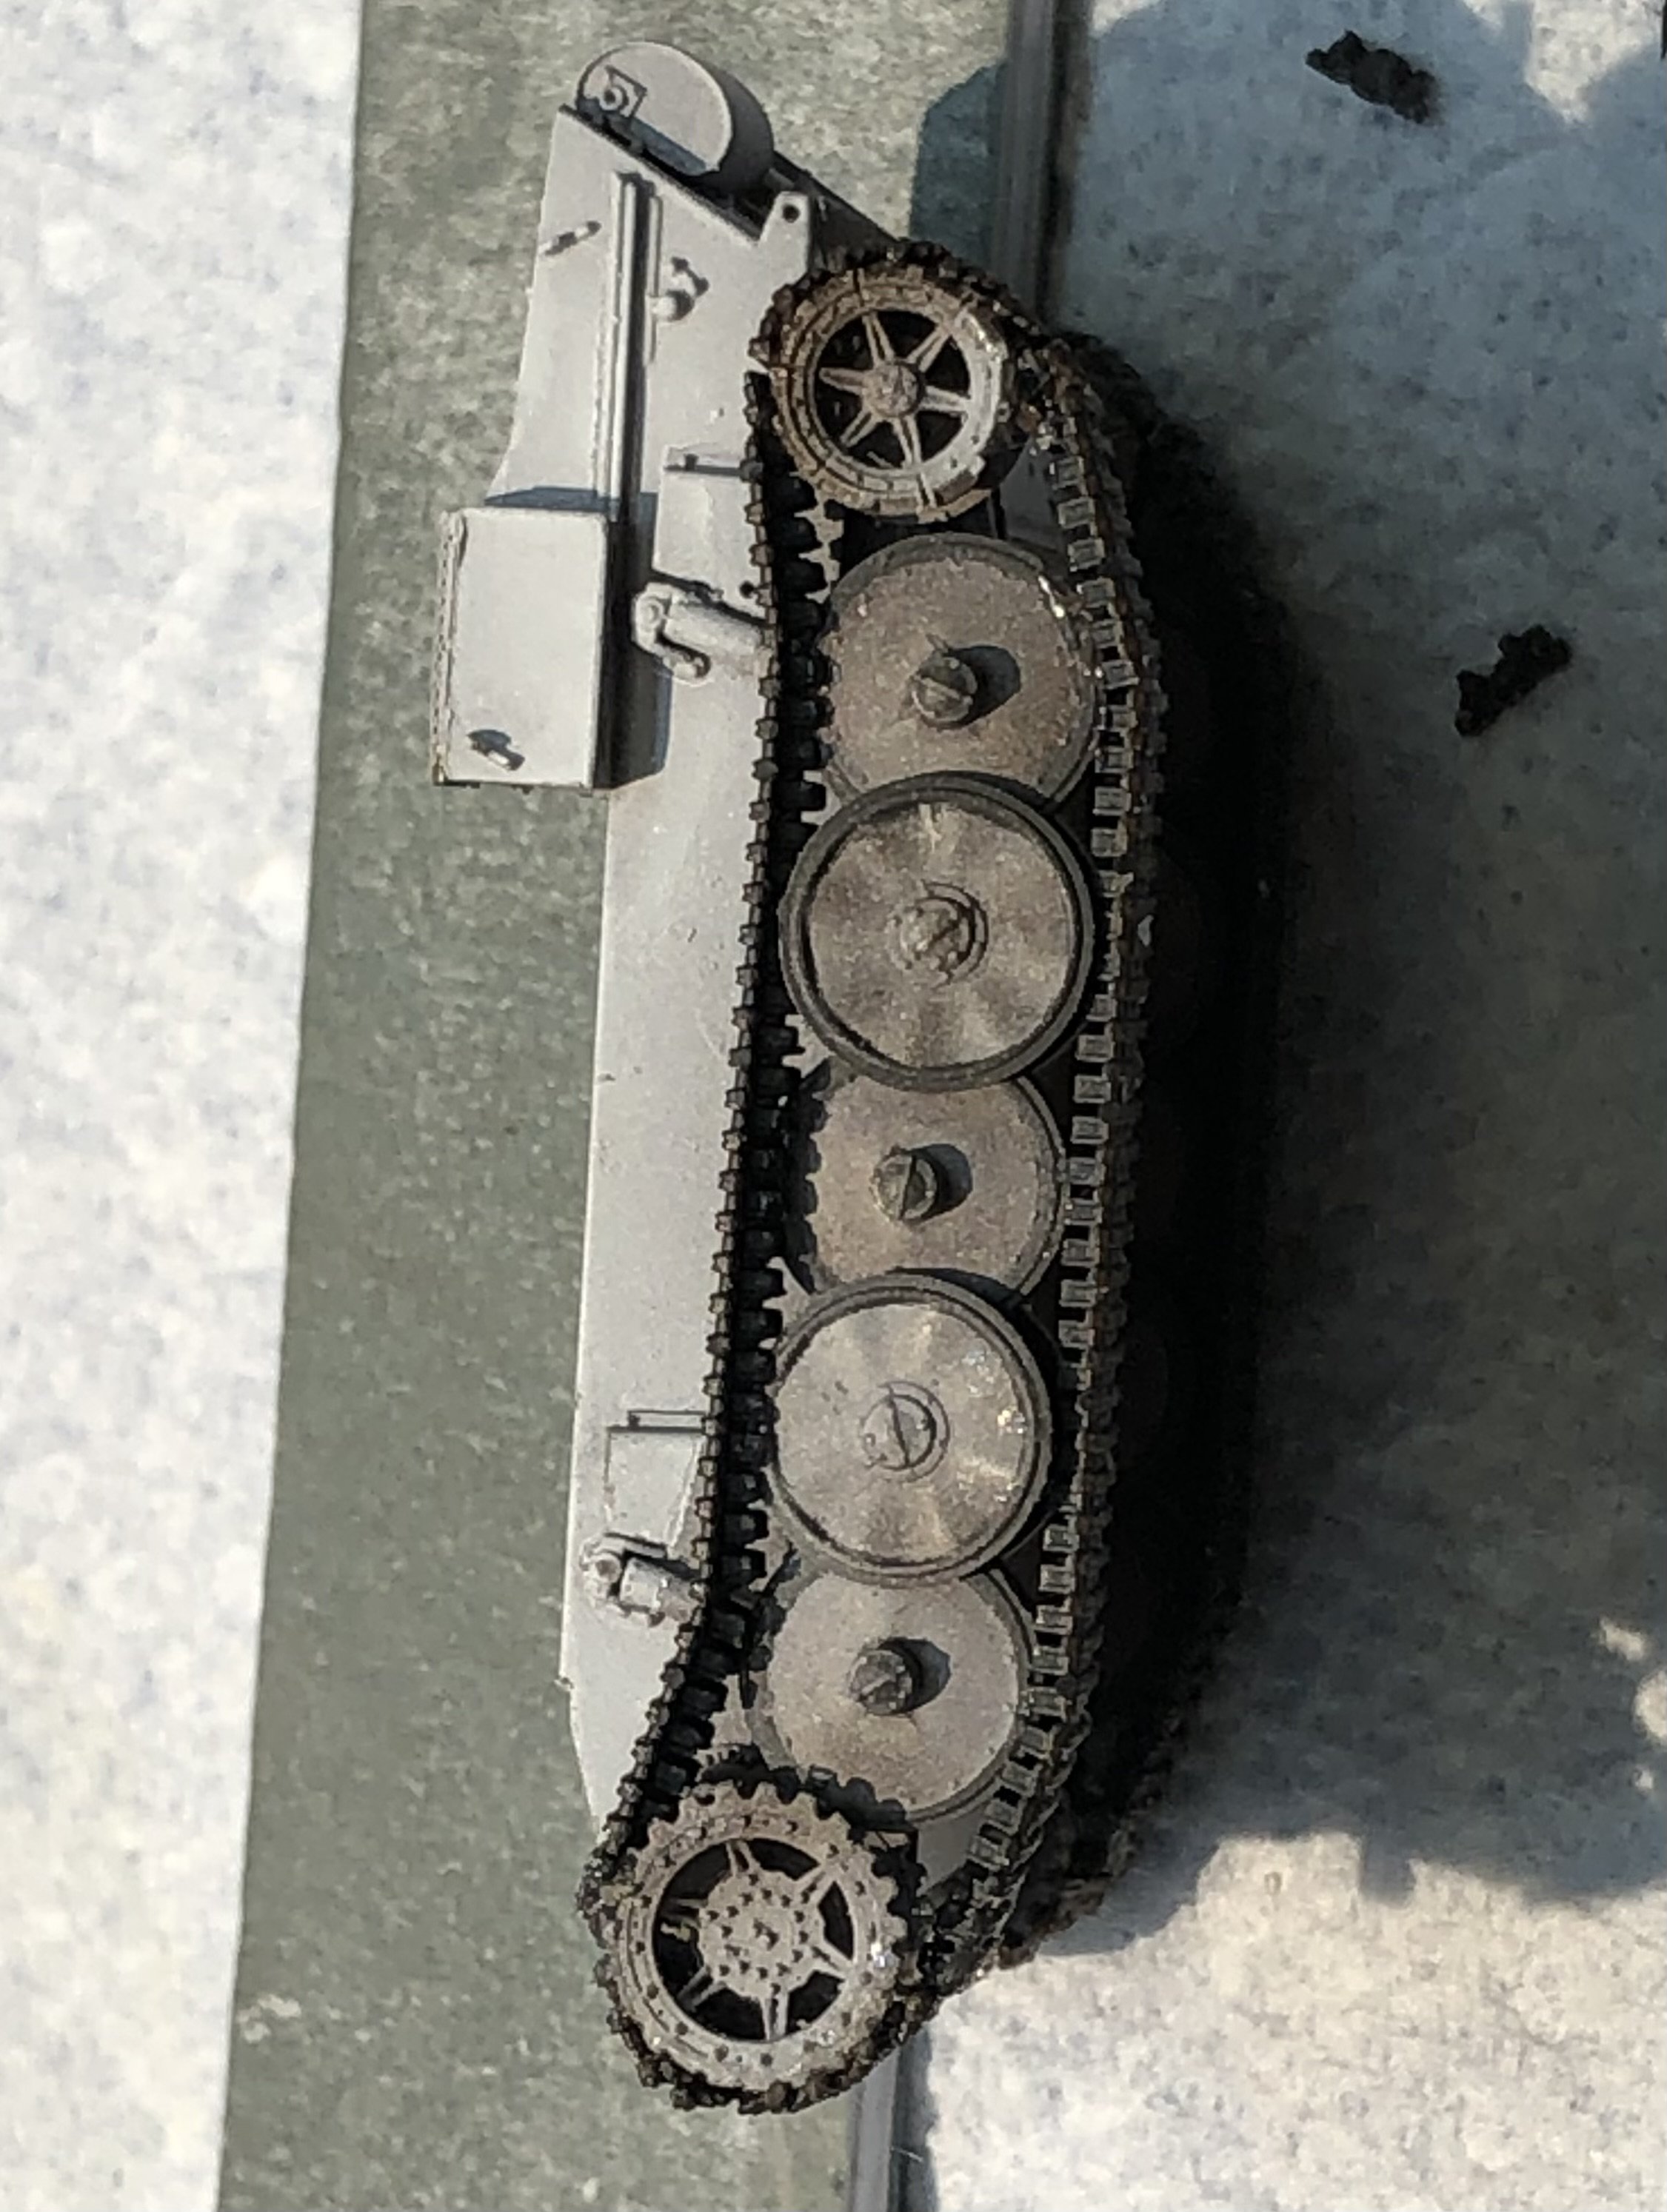
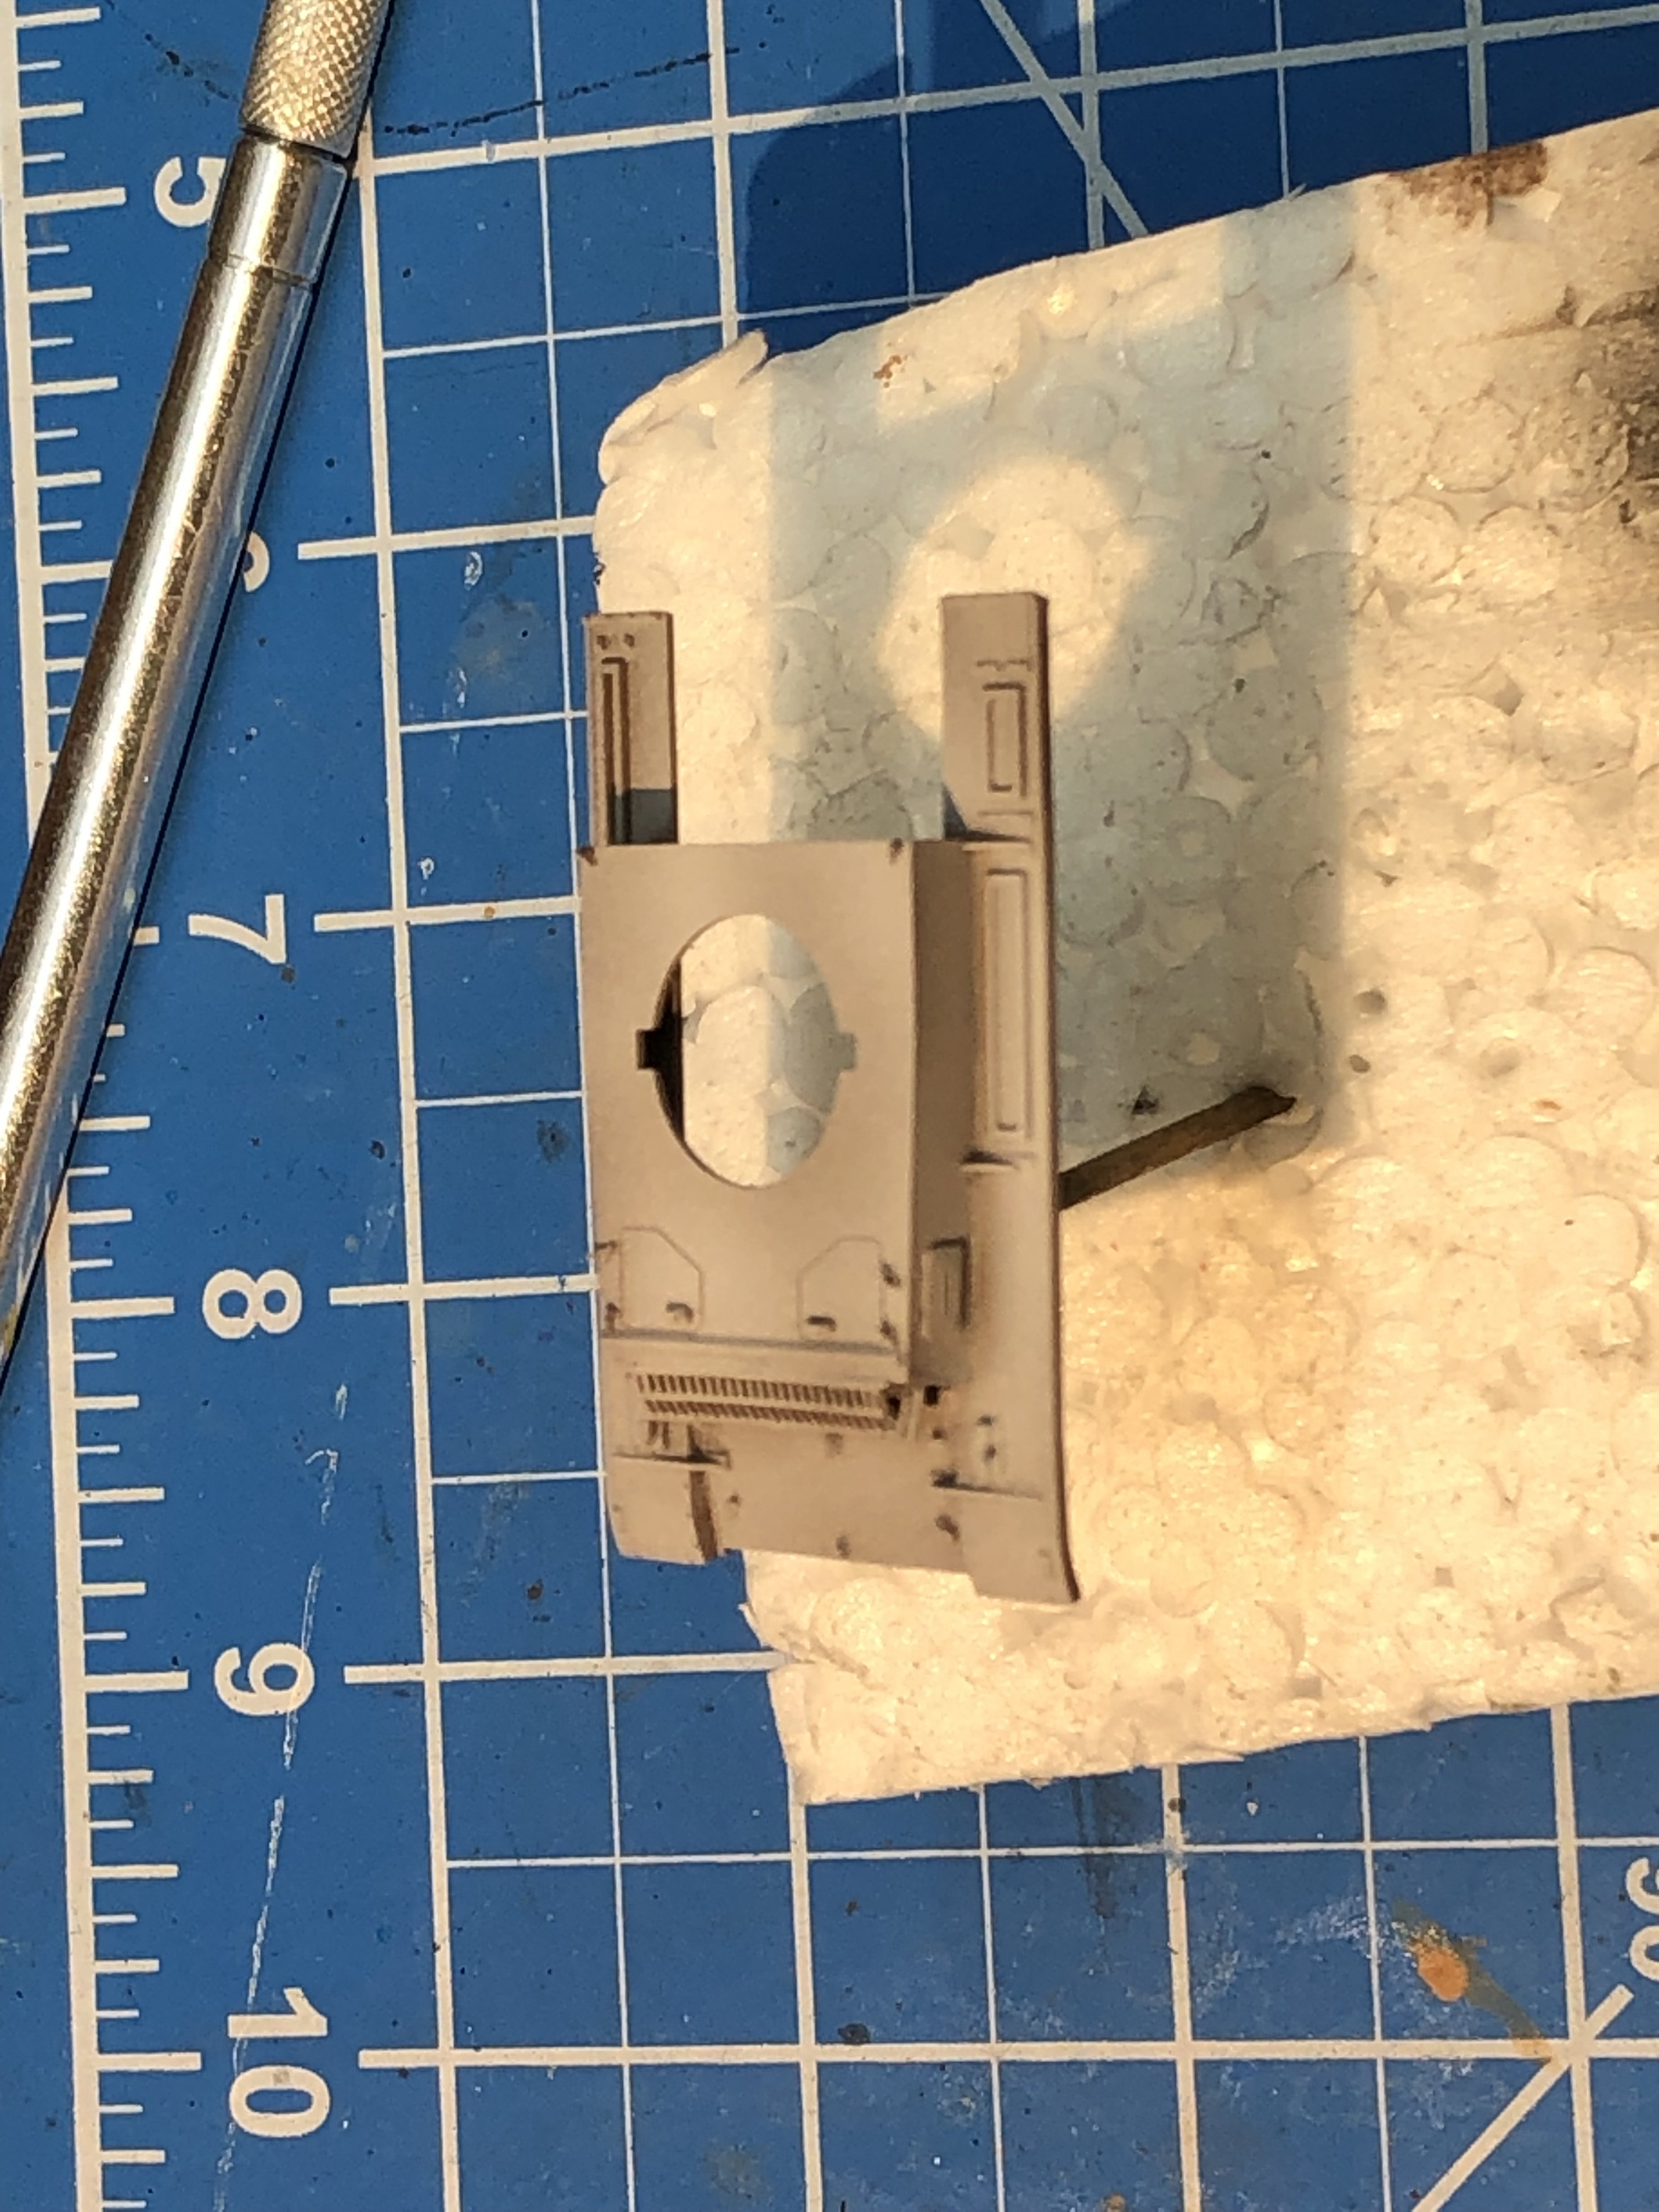
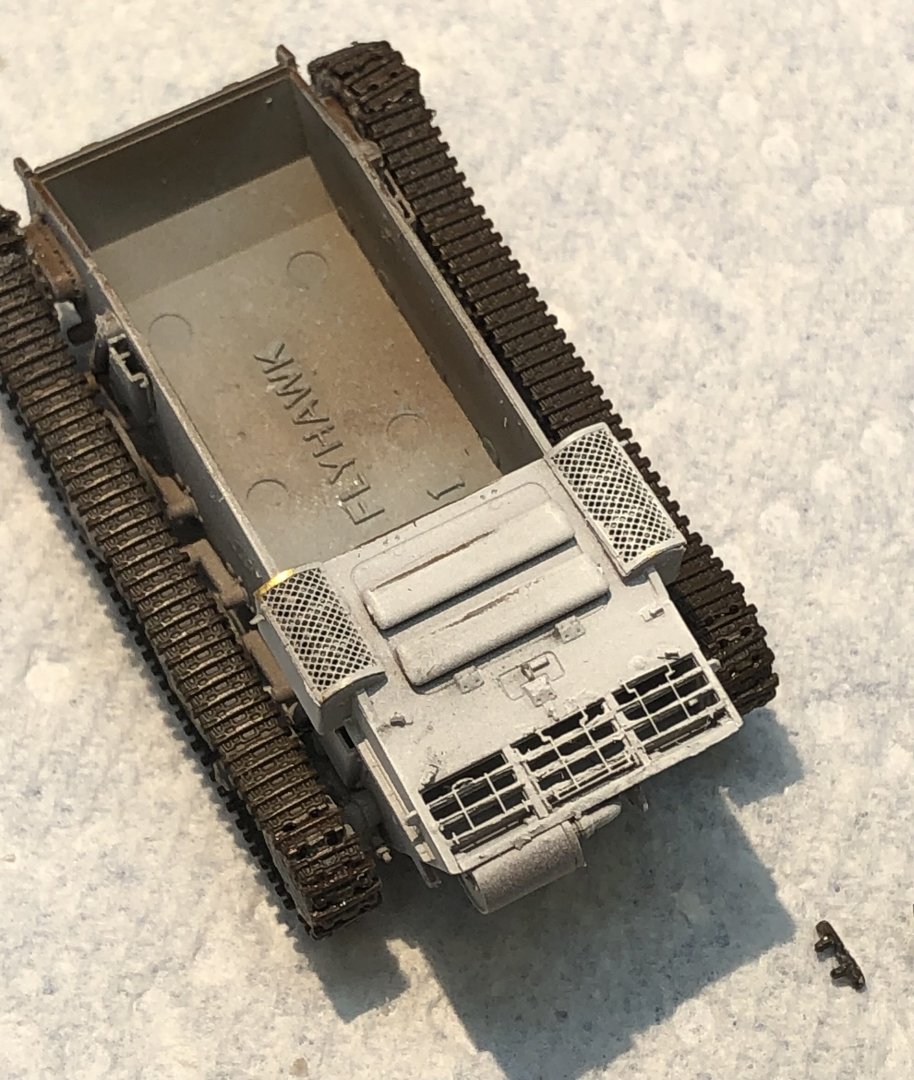
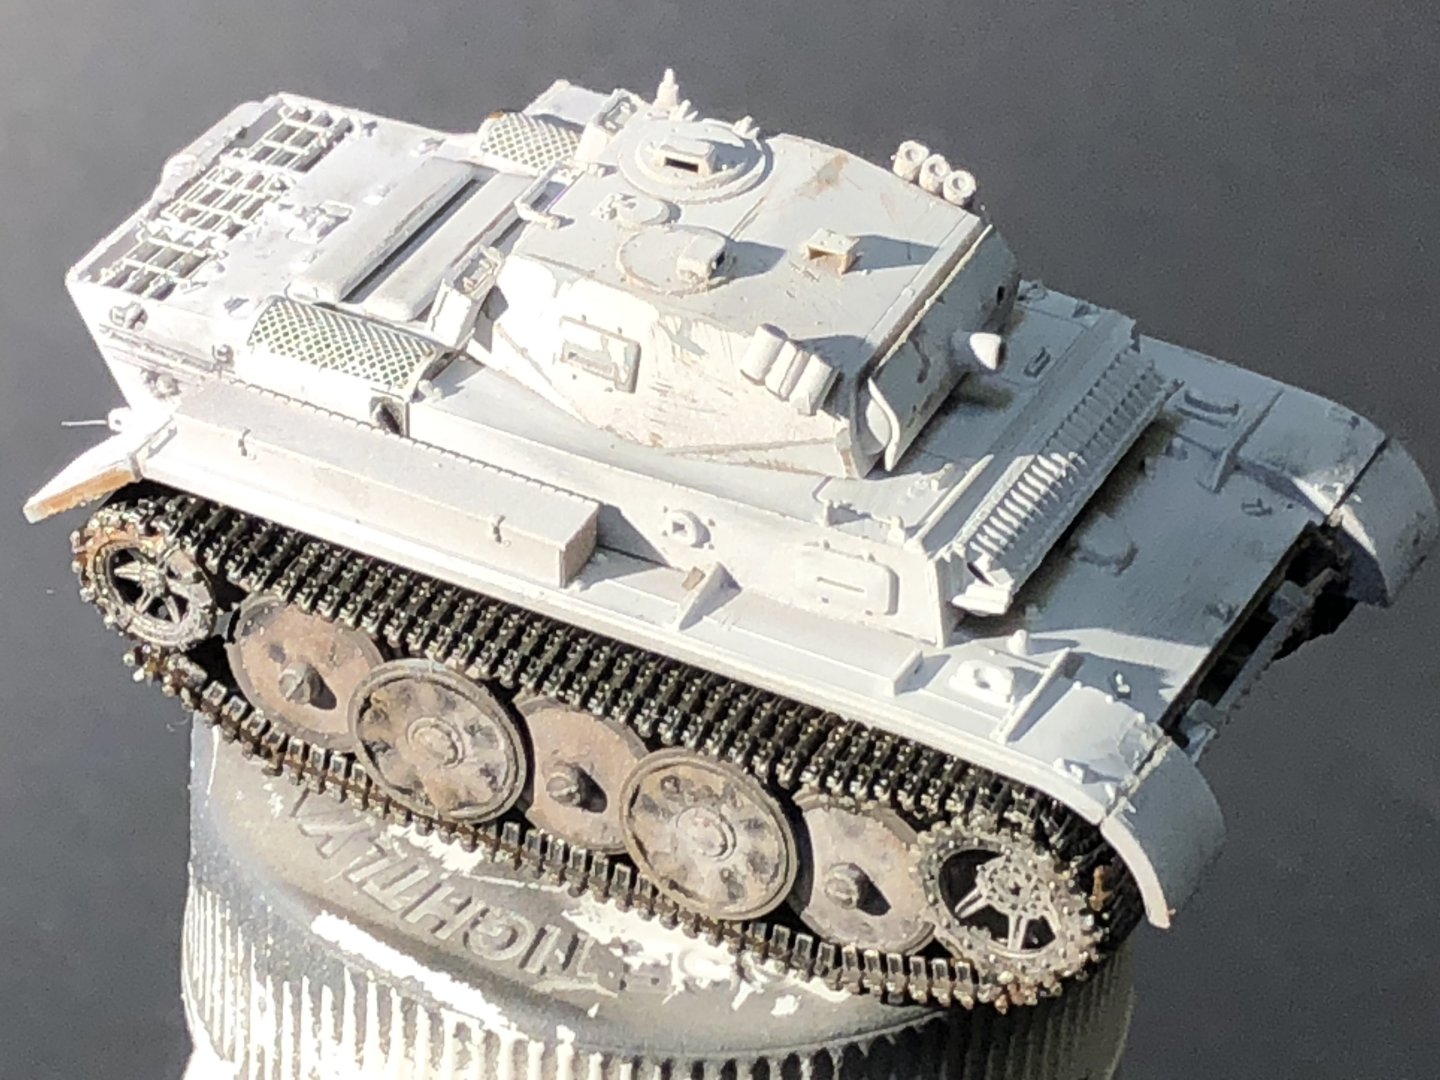
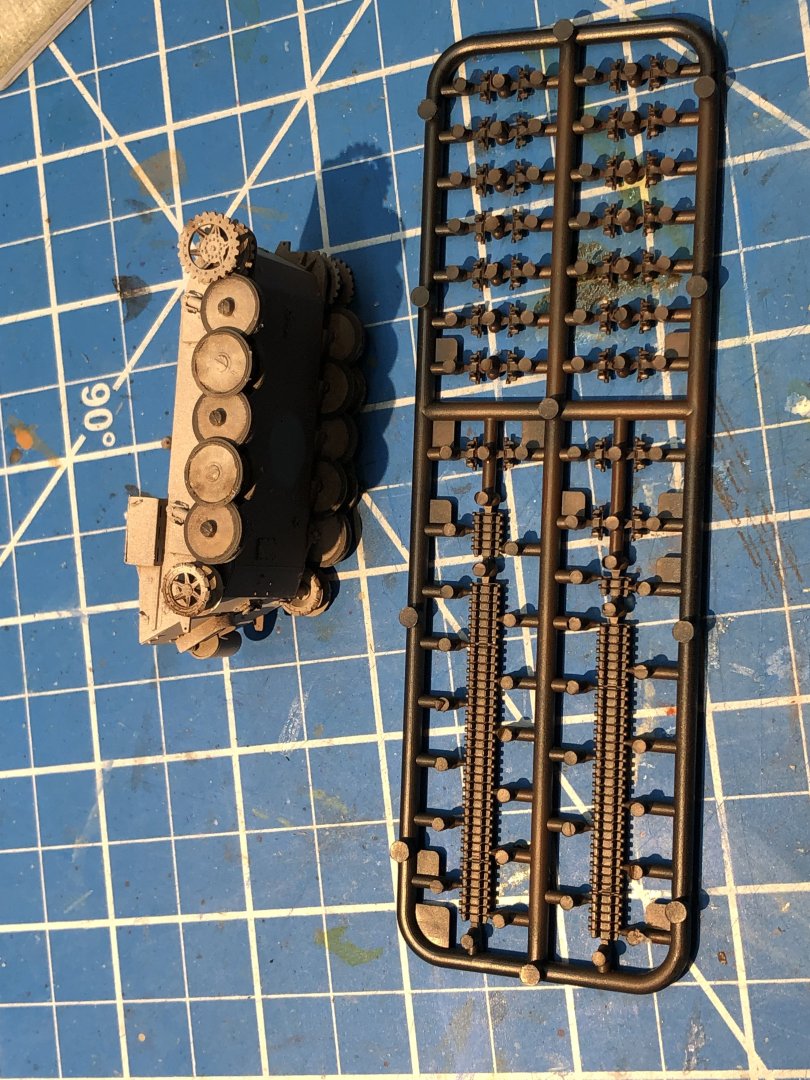
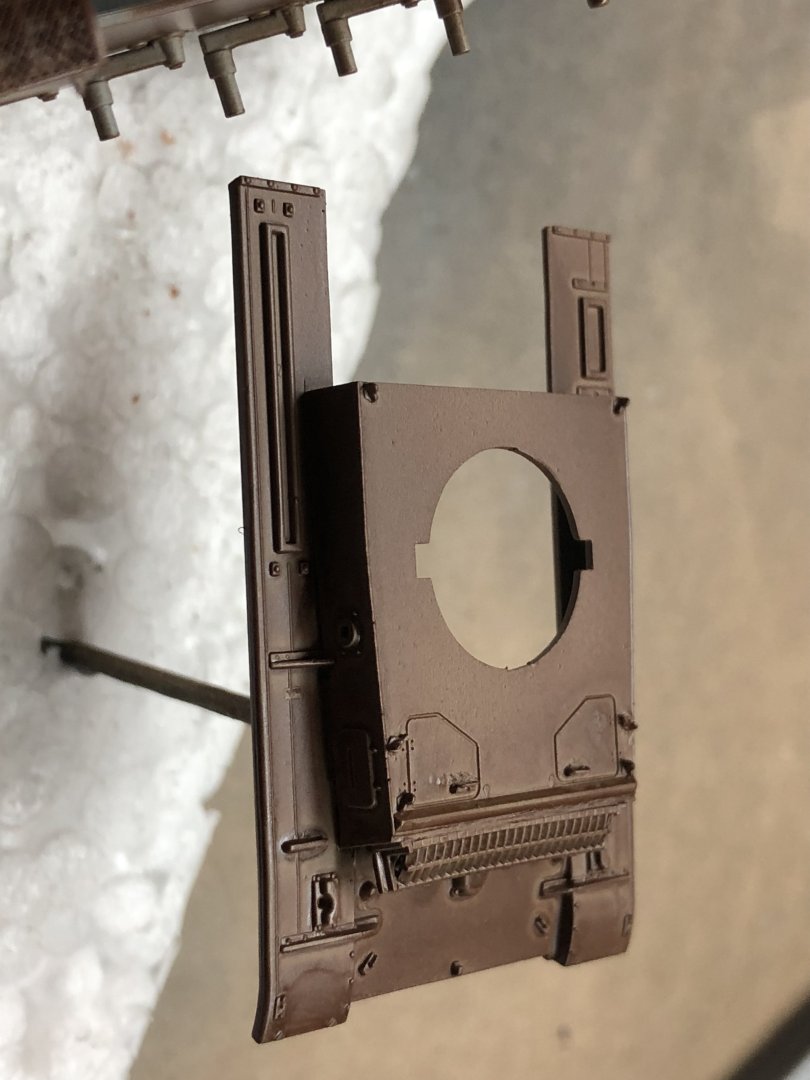
The building of the tracks was as frustrating as I expected and the build very nearly came to an as a result. I spent every day of the last week trying to get the individual links assembled. The links are small and don’t have any features that align the subsequent link and the width of the drive wheels and sprockets are almost too wide so setting the links on the rims is a challenge. Oh, and the teeth in the sprockets are too fine for the part of the track that engages. I tried making up sections of three or four pieces glued onto a small piece of tape and them forming them around the wheels. I think the concept might have been good but the links came off the tape at the slightest provocation so I went back to adding each link individually. Then I found that adjusting the next link invariably disturbed the previous link and it all had to be done over again. Eventually I resigned myself to adding two at each end and then going off for a cup of tea, a fig roll and a chapter of the current Bernie Gunther novel. The results could be better in places but I think this is a reasonable compromise with my sanity. The tracks have been dry brushed with dark steel and a black oil wash has been applied to the tracks and the lower hull. And suddenly thinks could leap forward. I added the upper hull and then the turret. The turret is a very stiff fit and I don’t want to try to add it once all the fiddle PE is on. additional frontal armor is added and several of the lockers. ive tried to bring out some of the brown oxide primer by lightly sanding wear spots and I also used a fiberglass pen / eraser. So far I think it works but I may need to work on it further. Well, it’s great to be away from those track pieces, suddenly the kit is fun again. Thanks for looking in, for the likes and theencouraging comments Alan


- 34 replies
-
- 14
-
-
Thank you very much Patrick. This time Ive gone with an initial brown oxide base and then dry brushed some dark steel over it followed by a black oil wash. Dirt to follow at some point. alan
-
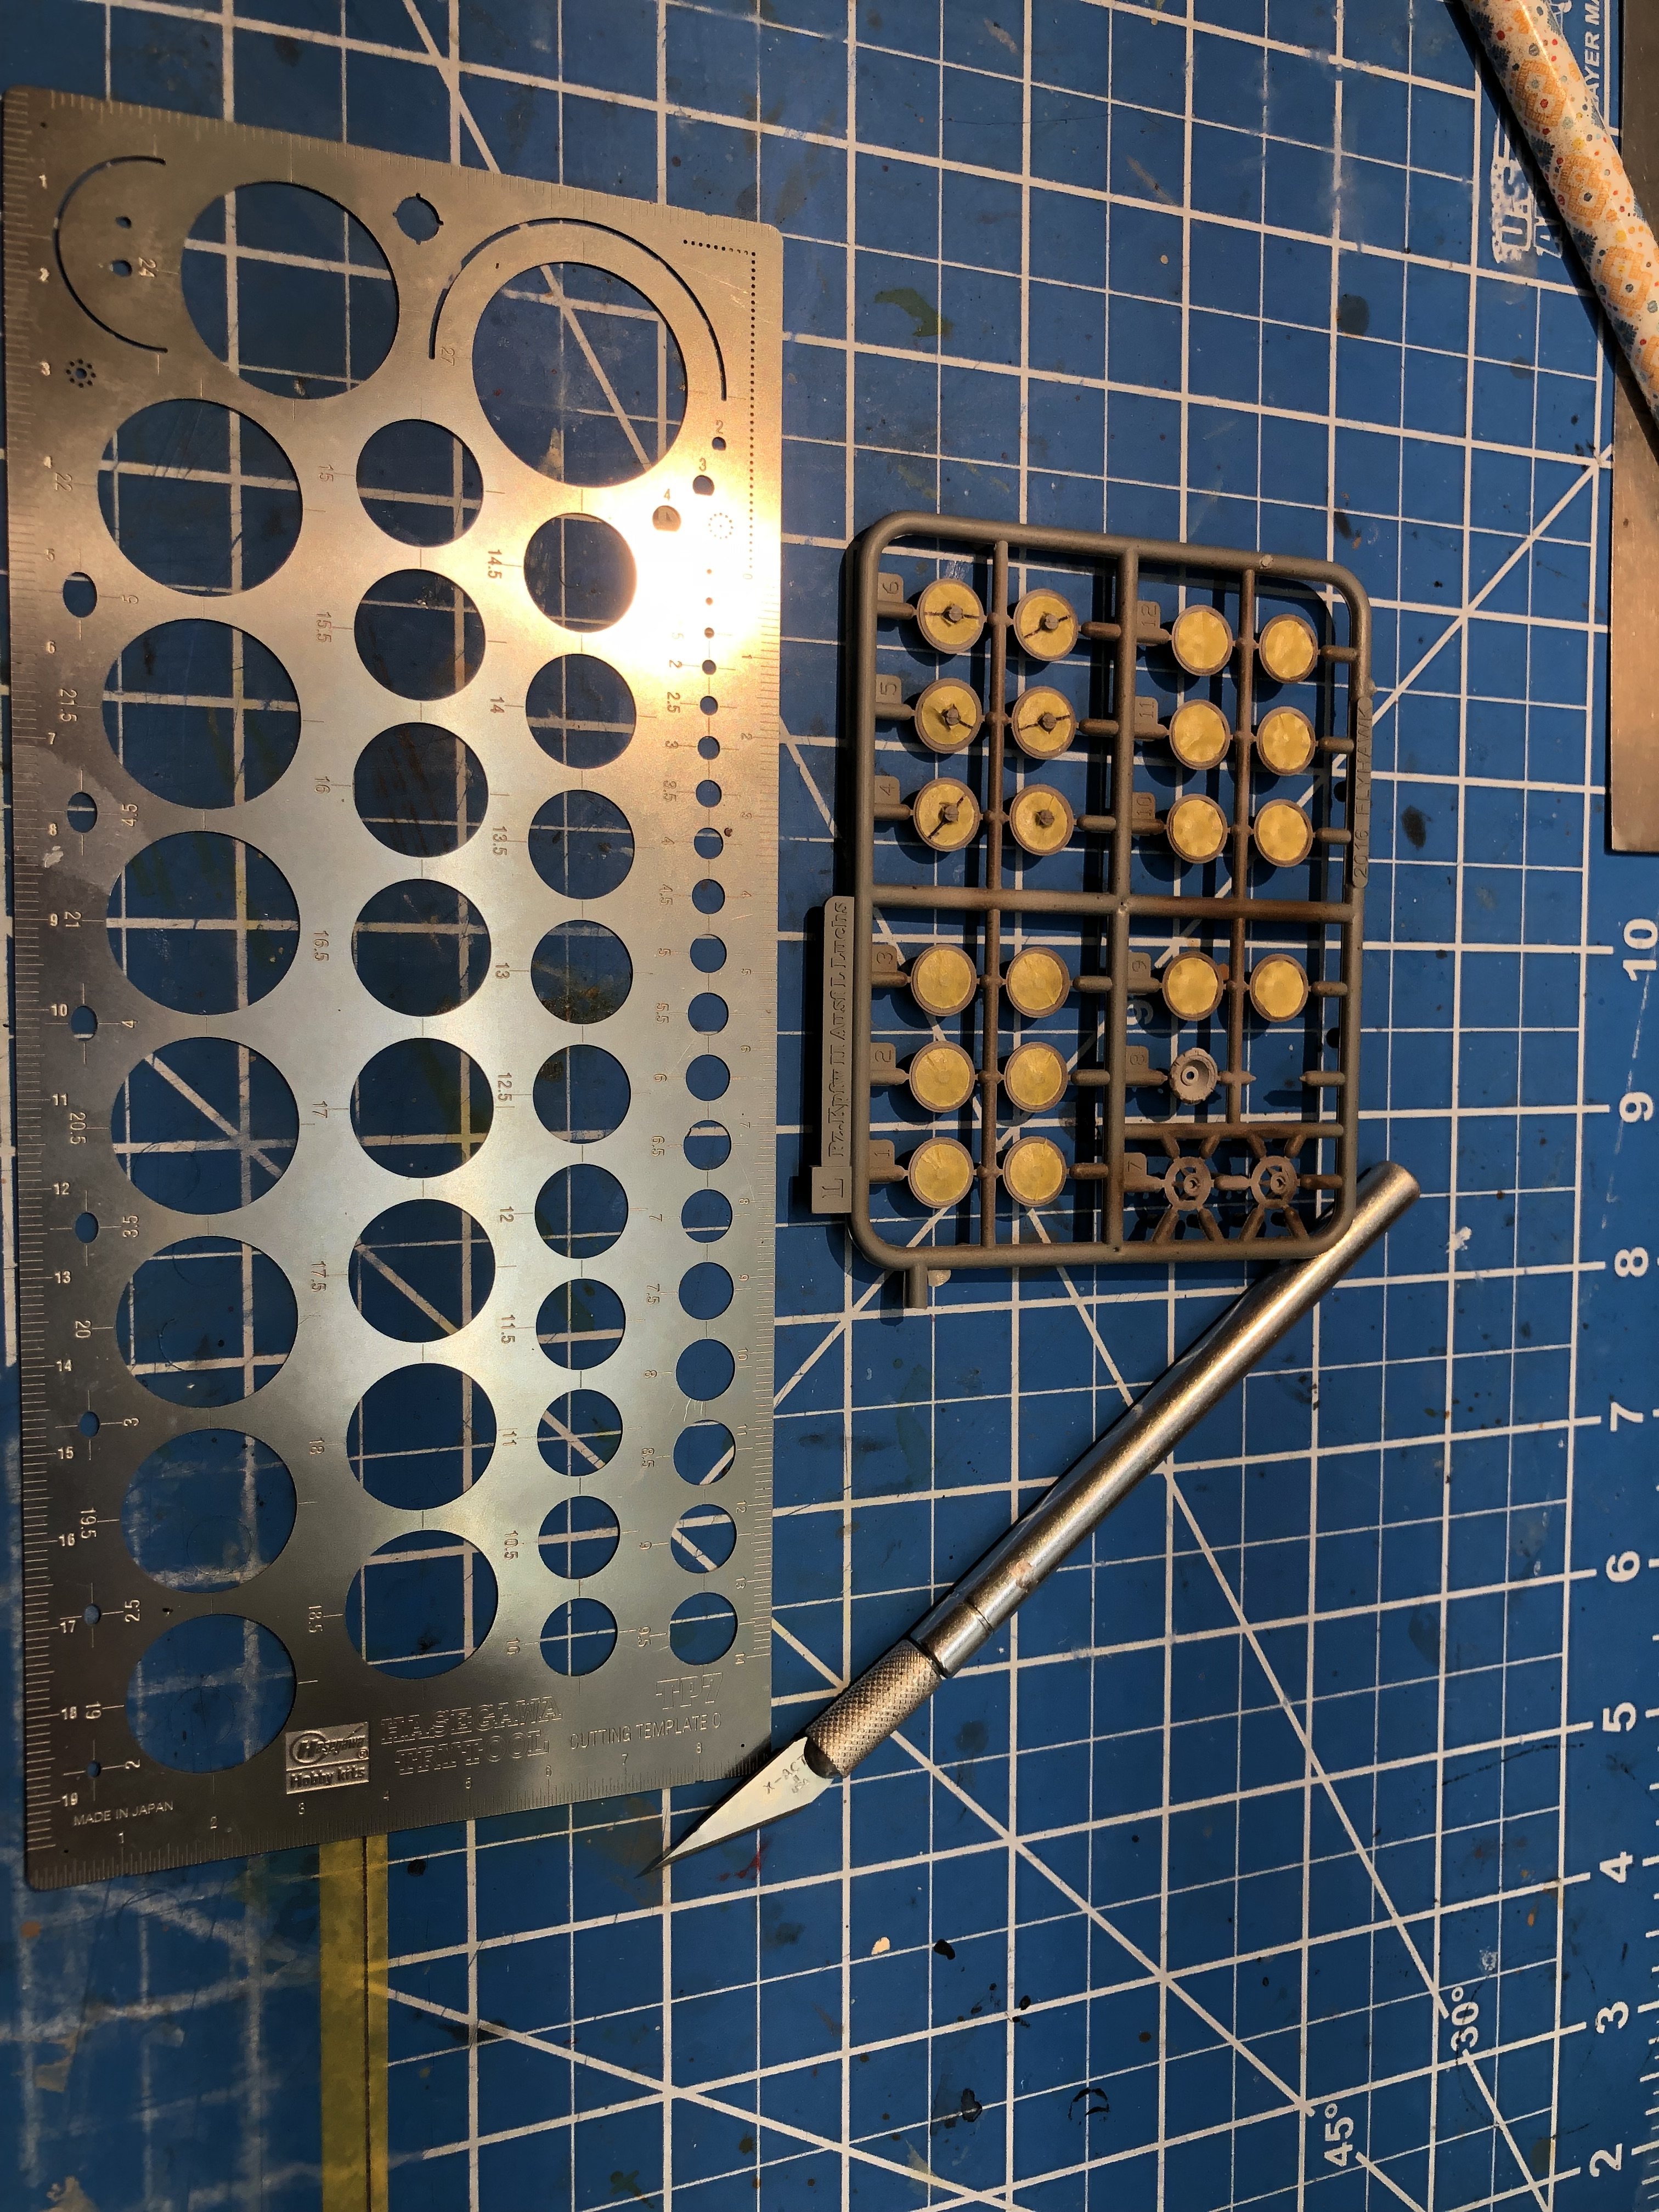
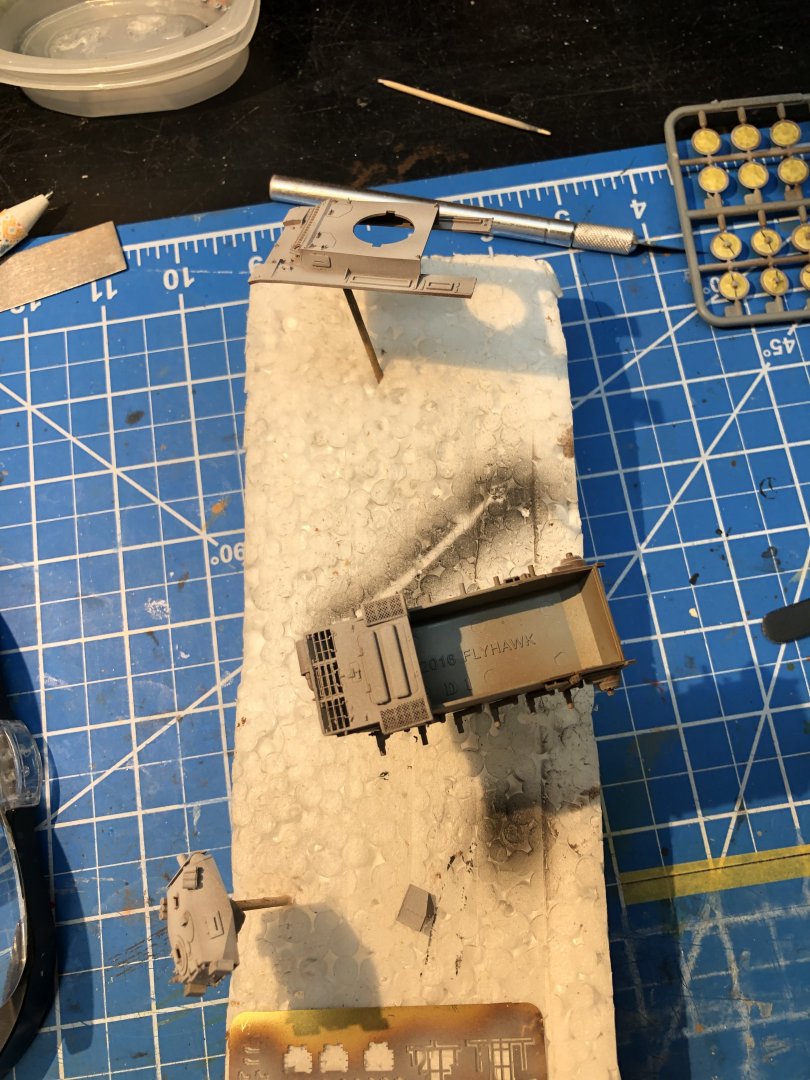
Thank you very much Rob. It’s a lot of kit in a tiny space. DSPIAE stuff generally seems to be nicely made with good materials but sometimes the execution is not so good. I probably need to be more patient with the circle cutter. I suspect that not orientating the blade was a part of my problem. i had thought about the chipping option for the winter camouflage but thought it might be a bit harsh. I thought the misted diluted white coats might do but I pit it on too evenly and just got a largely white surface. I’m trying to bring the brown back up by gentle sanding and a scrub with a fiberglass brush. I may try a burnt sienna oil was as the build progresses. Alan
-
Good luck with the water removal and dry out alan
-
Lovely neat work Jack. The shooting board and tools look like handy pieces of equipment. alan
-
It amazes me what you see driving around this area. I was stopped at the lights the other week and a very low sleek car pulled up in the outside lane and I couldn’t recognize the make or model. I kept looking across trying to see a badge and I guess the driver thought I was challenging him with my little GTI because on the green I just had time to see the Lamborghini badge as he disappeared into the distance. There is a lot of money rolling around these streets
-
Looking forward to the build alan
-
I think I saw one of these (definitely a Porsche) driving down the road a couple of days ago. I think yours looks a lot better alan
-
Beautiful finish Dan Congratulations alan
-
Simply spectacular Rob. Your patience and dedication to high standards has resulted in a beautiful creation. Congratulations. Alan
-
It looks great with the slats and flaps deployed. Great work Alan
-
I’ve been a bit dilatory with the updates and actually the build has been pretty slow thanks to intrusions by real life. After finishing the undercarriage everything got a coat of MiG One Shot iron oxide (brown) primer. The color schemes show what I assume is a winter scheme in white with some brown creeping through in places. I rather like it and thought I would give it a try. I added several misted coats of Tamiya Flat White and was fairly happy with the results. it’s a bit paler in real life but I’m starting to think another coat might be a good idea. I’m scared of getting a dead white result though. Next up was the tyres on the road wheels. I had great hopes of the Dspiae circle cutter but I abandoned it in favor of the old circle template to make the masks for the wheels The Dspiae cutter worked flawlessly on a piece of copier paper but tore up about 75% of my attempts with masking tape. I think it’s my fault for not getting the right tension on the cutting blade, it’s probably fiddle with thin material like masking tape. I should have tried painters tape- next time. The tyres were sprayed with Mig Rubber black which is a grey in reality but I think it works and then the running gear was assembled. And that brings us to the next significant challenge, the tracks! The sprue has all the parts needed for one side. I’m not sure whether to try to build the tracks off the model or assemble them in place. Thanks for looking in and the likes and comments. Alan


- 34 replies
-
- 14
-
-
Thanks Mike. As with their ship models the AFVs have some daunting small parts. Alan
-
Spectacular work with the rivets Alan
-
Beautiful work Mark. From the lovely glossy blue hull to the neat rigging and the magnificent sails it a lovely boat. The stand sets it off so well too. congratulations alan
-
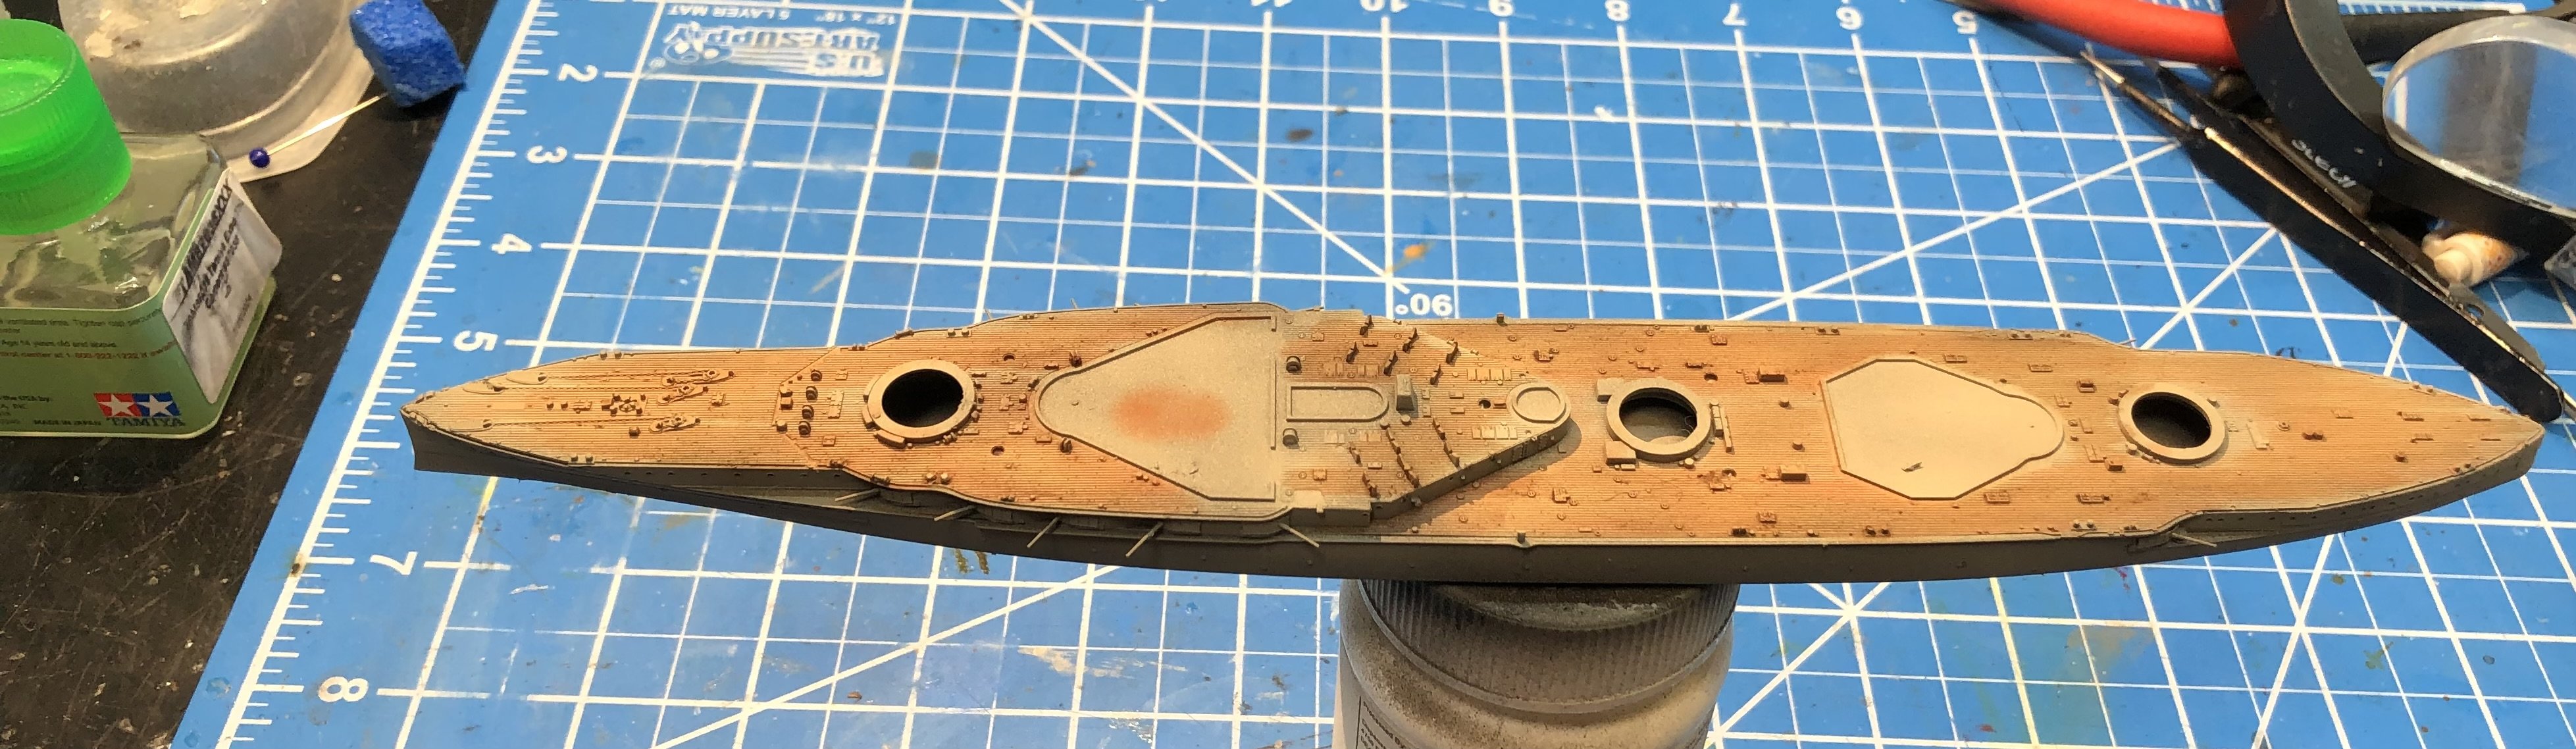
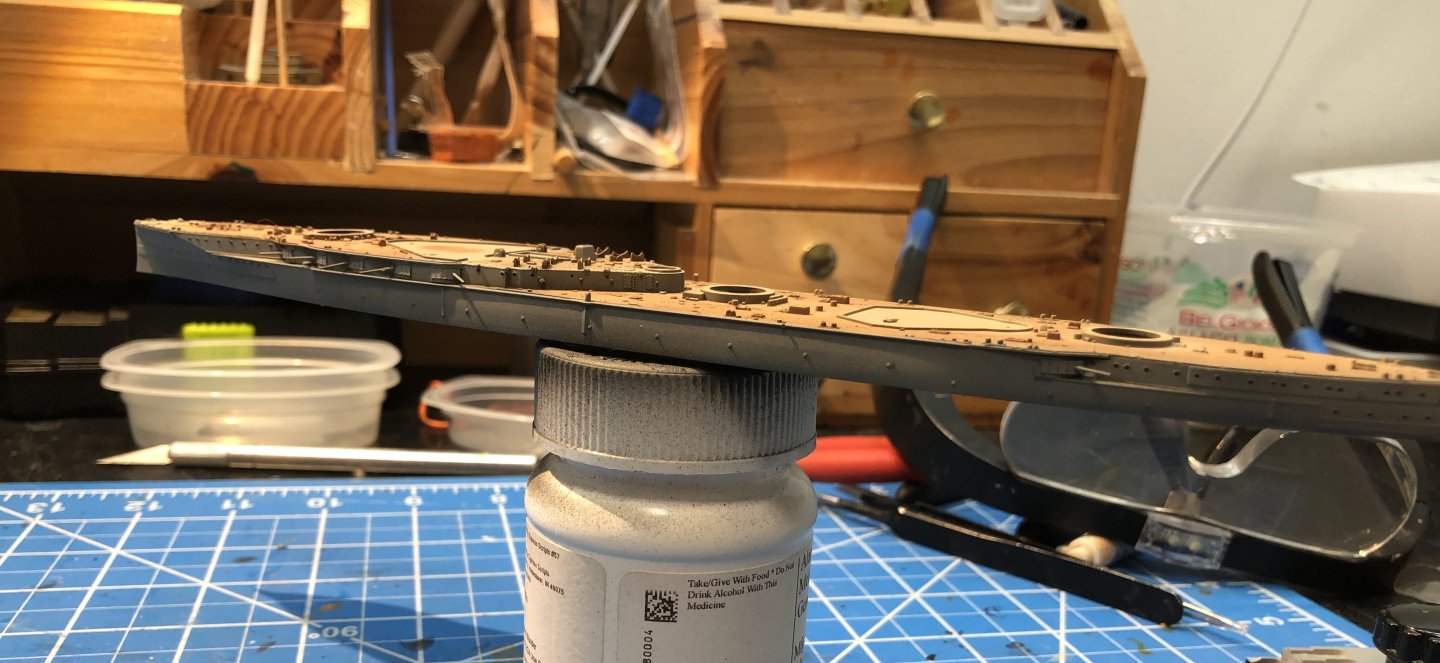
Progress hit a bit of a roadblock. I had to order the hull grey, the Flyhawk guide calls for a darker grey than anything I have. Then I had to do taxes, vet visit, eye clinic visit and a trip to the dentist. Anyway, the has arrived and the hull and superstructure were given several light coats to try to avoid a uniform color. The decks then got a coat to the Tamiya wood deck and then I used washes of burnt sienna and burnt umber oil paints. I like the result so far but I may add a thin black wash to pick out the details. Next up will be painting the linoleum decks and then back to the photo etch and a lot of railings. Thanks for looking in and the likes and comments. Alan


-
Hi Ken, As far as I can tell very few are alternative options for a different version so it’s all going into that tiny hull. tracks are link and length which I like better than the elastic band style but the links are tiny and it’s all going to be on show. Alan