king derelict
-
Posts
3,292 -
Joined
-
Last visited
Content Type
Profiles
Forums
Gallery
Events
Everything posted by king derelict
-
Great build Andrew. Brings back memories too. I did my air experience Chipmunk flights at RAF Newton. Must have been around 1968 or so. They had a Vulcan there that couldn’t leave ( all grass runways). I forget the story. Happy days. Trying to avoid the parachute with the wet straps after c some cadet had yakked on it during aerobatics Alan
-
Thank you Andrew. It’s been a slow build because of other commitments but the Mirage kits are very enjoyable and have decent detail. I’m looking forward to seeing the seascape done as well 😃 alan
-
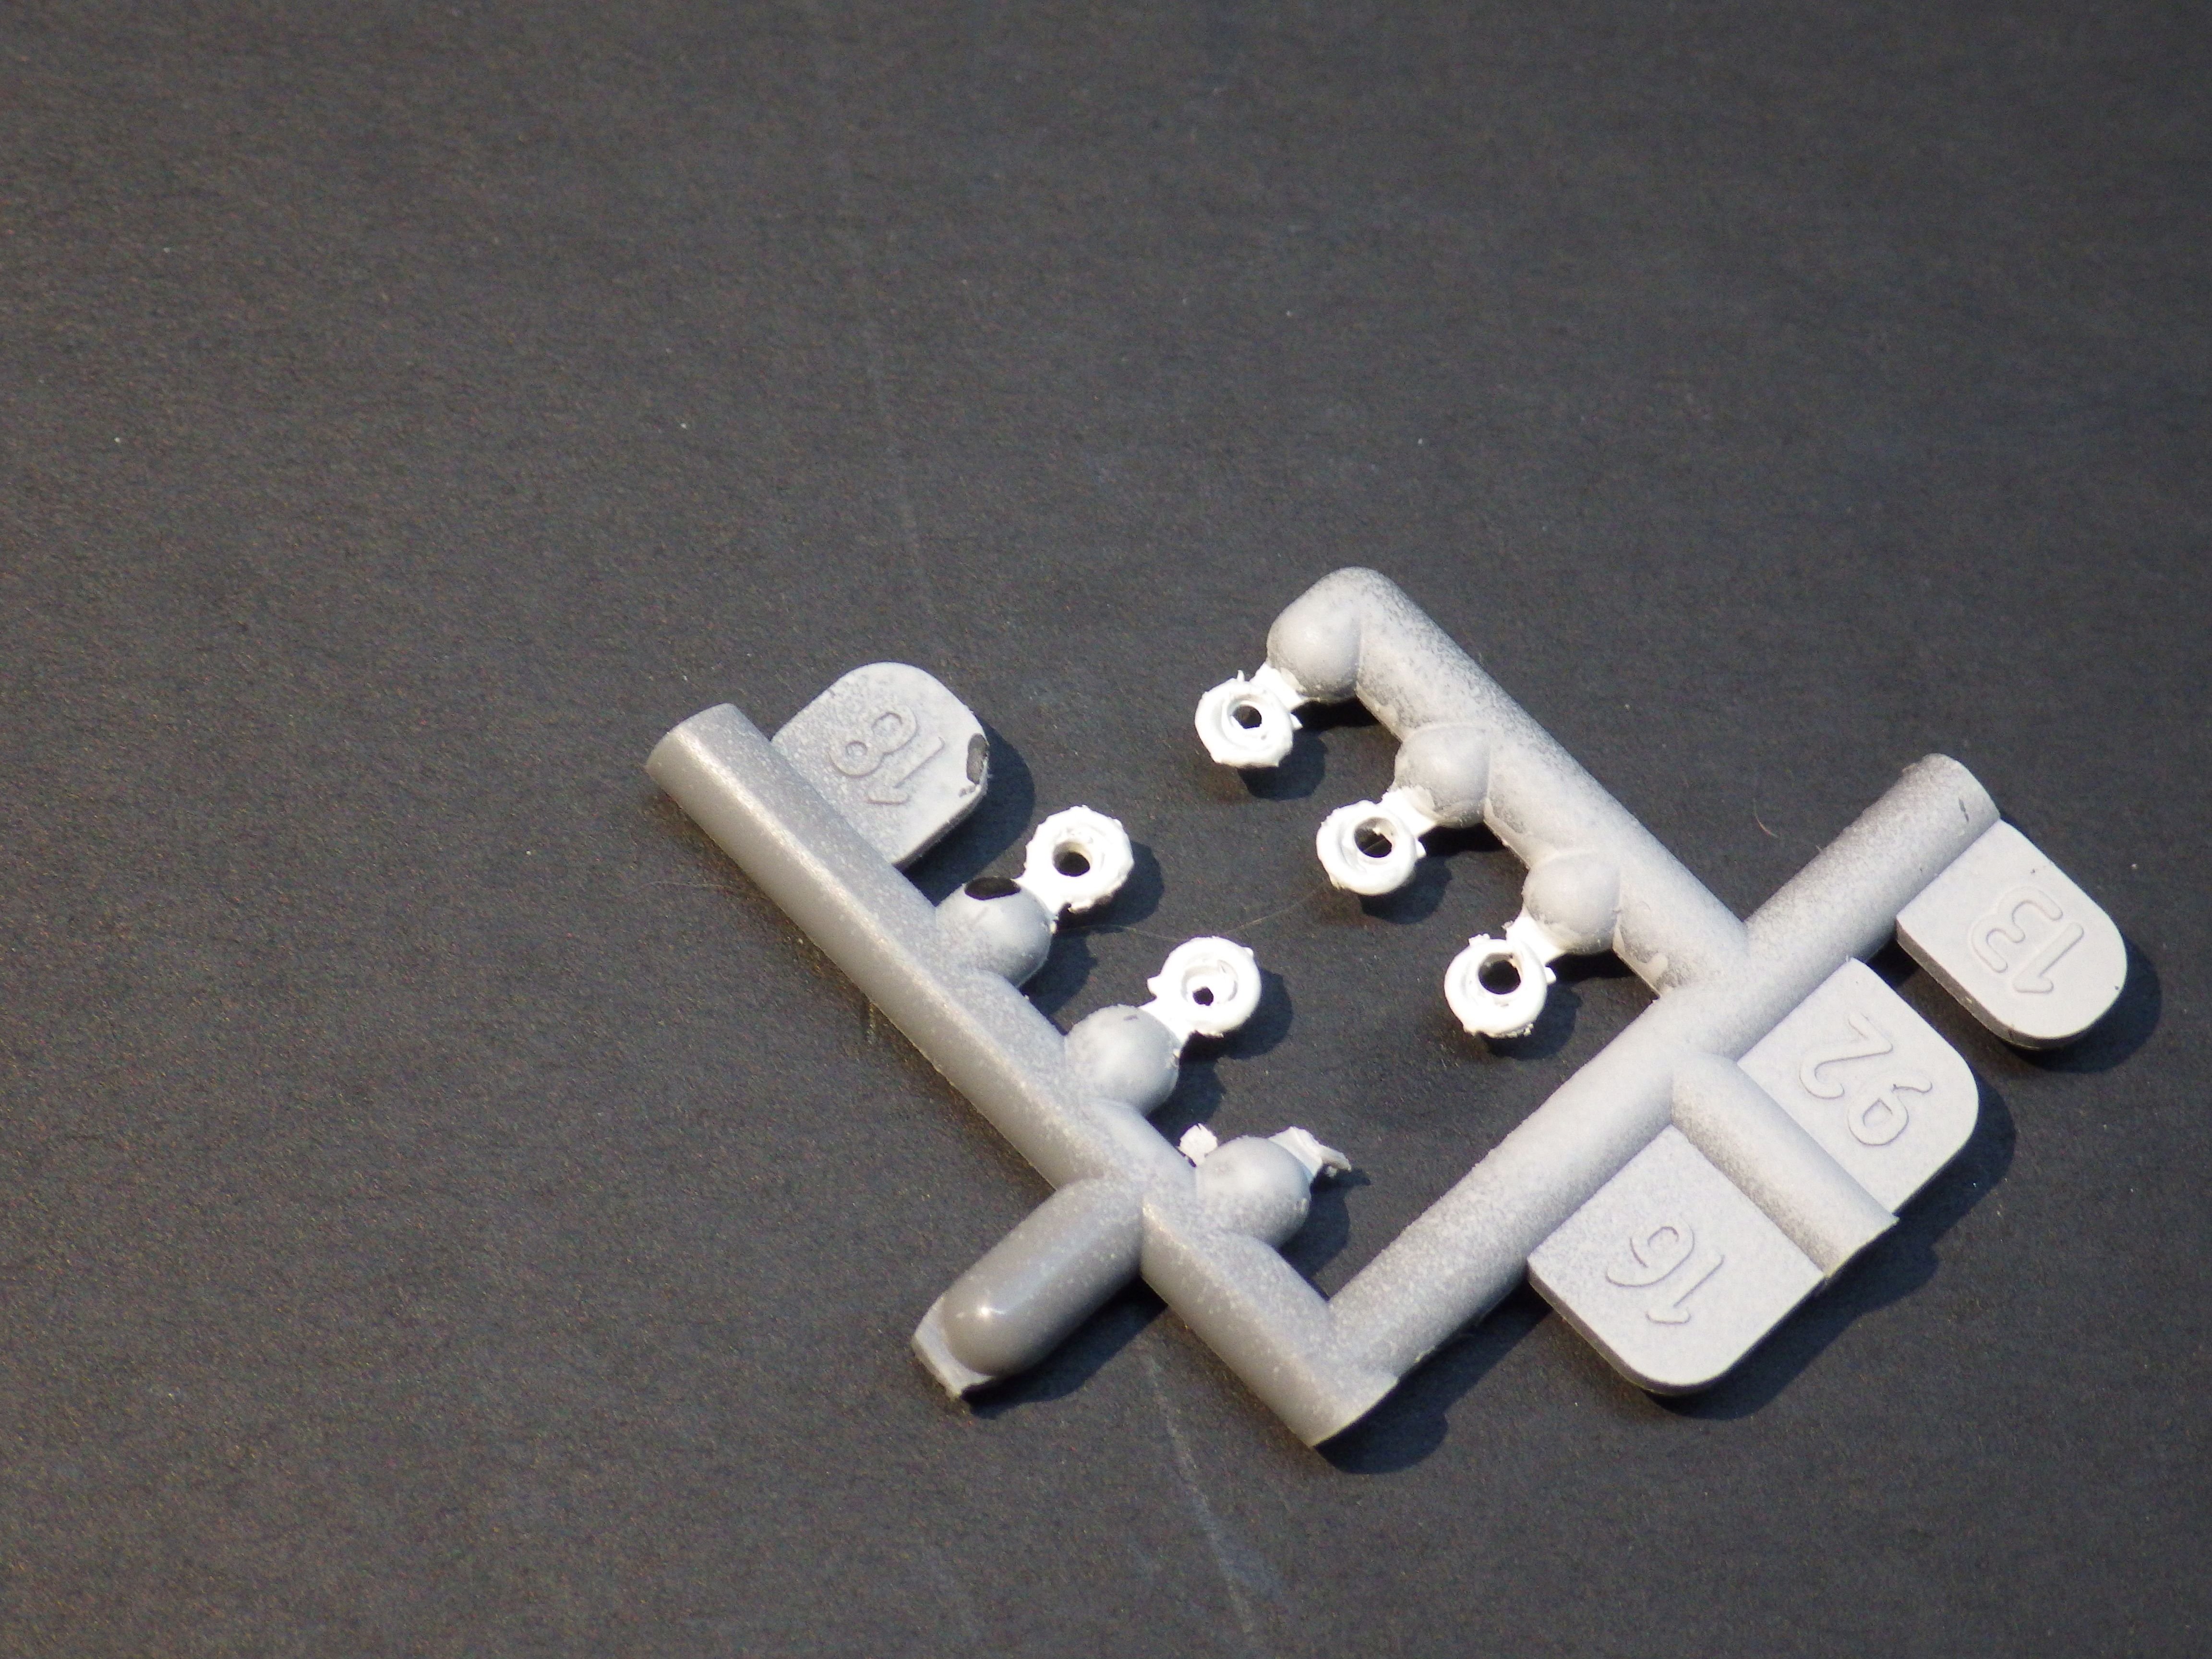
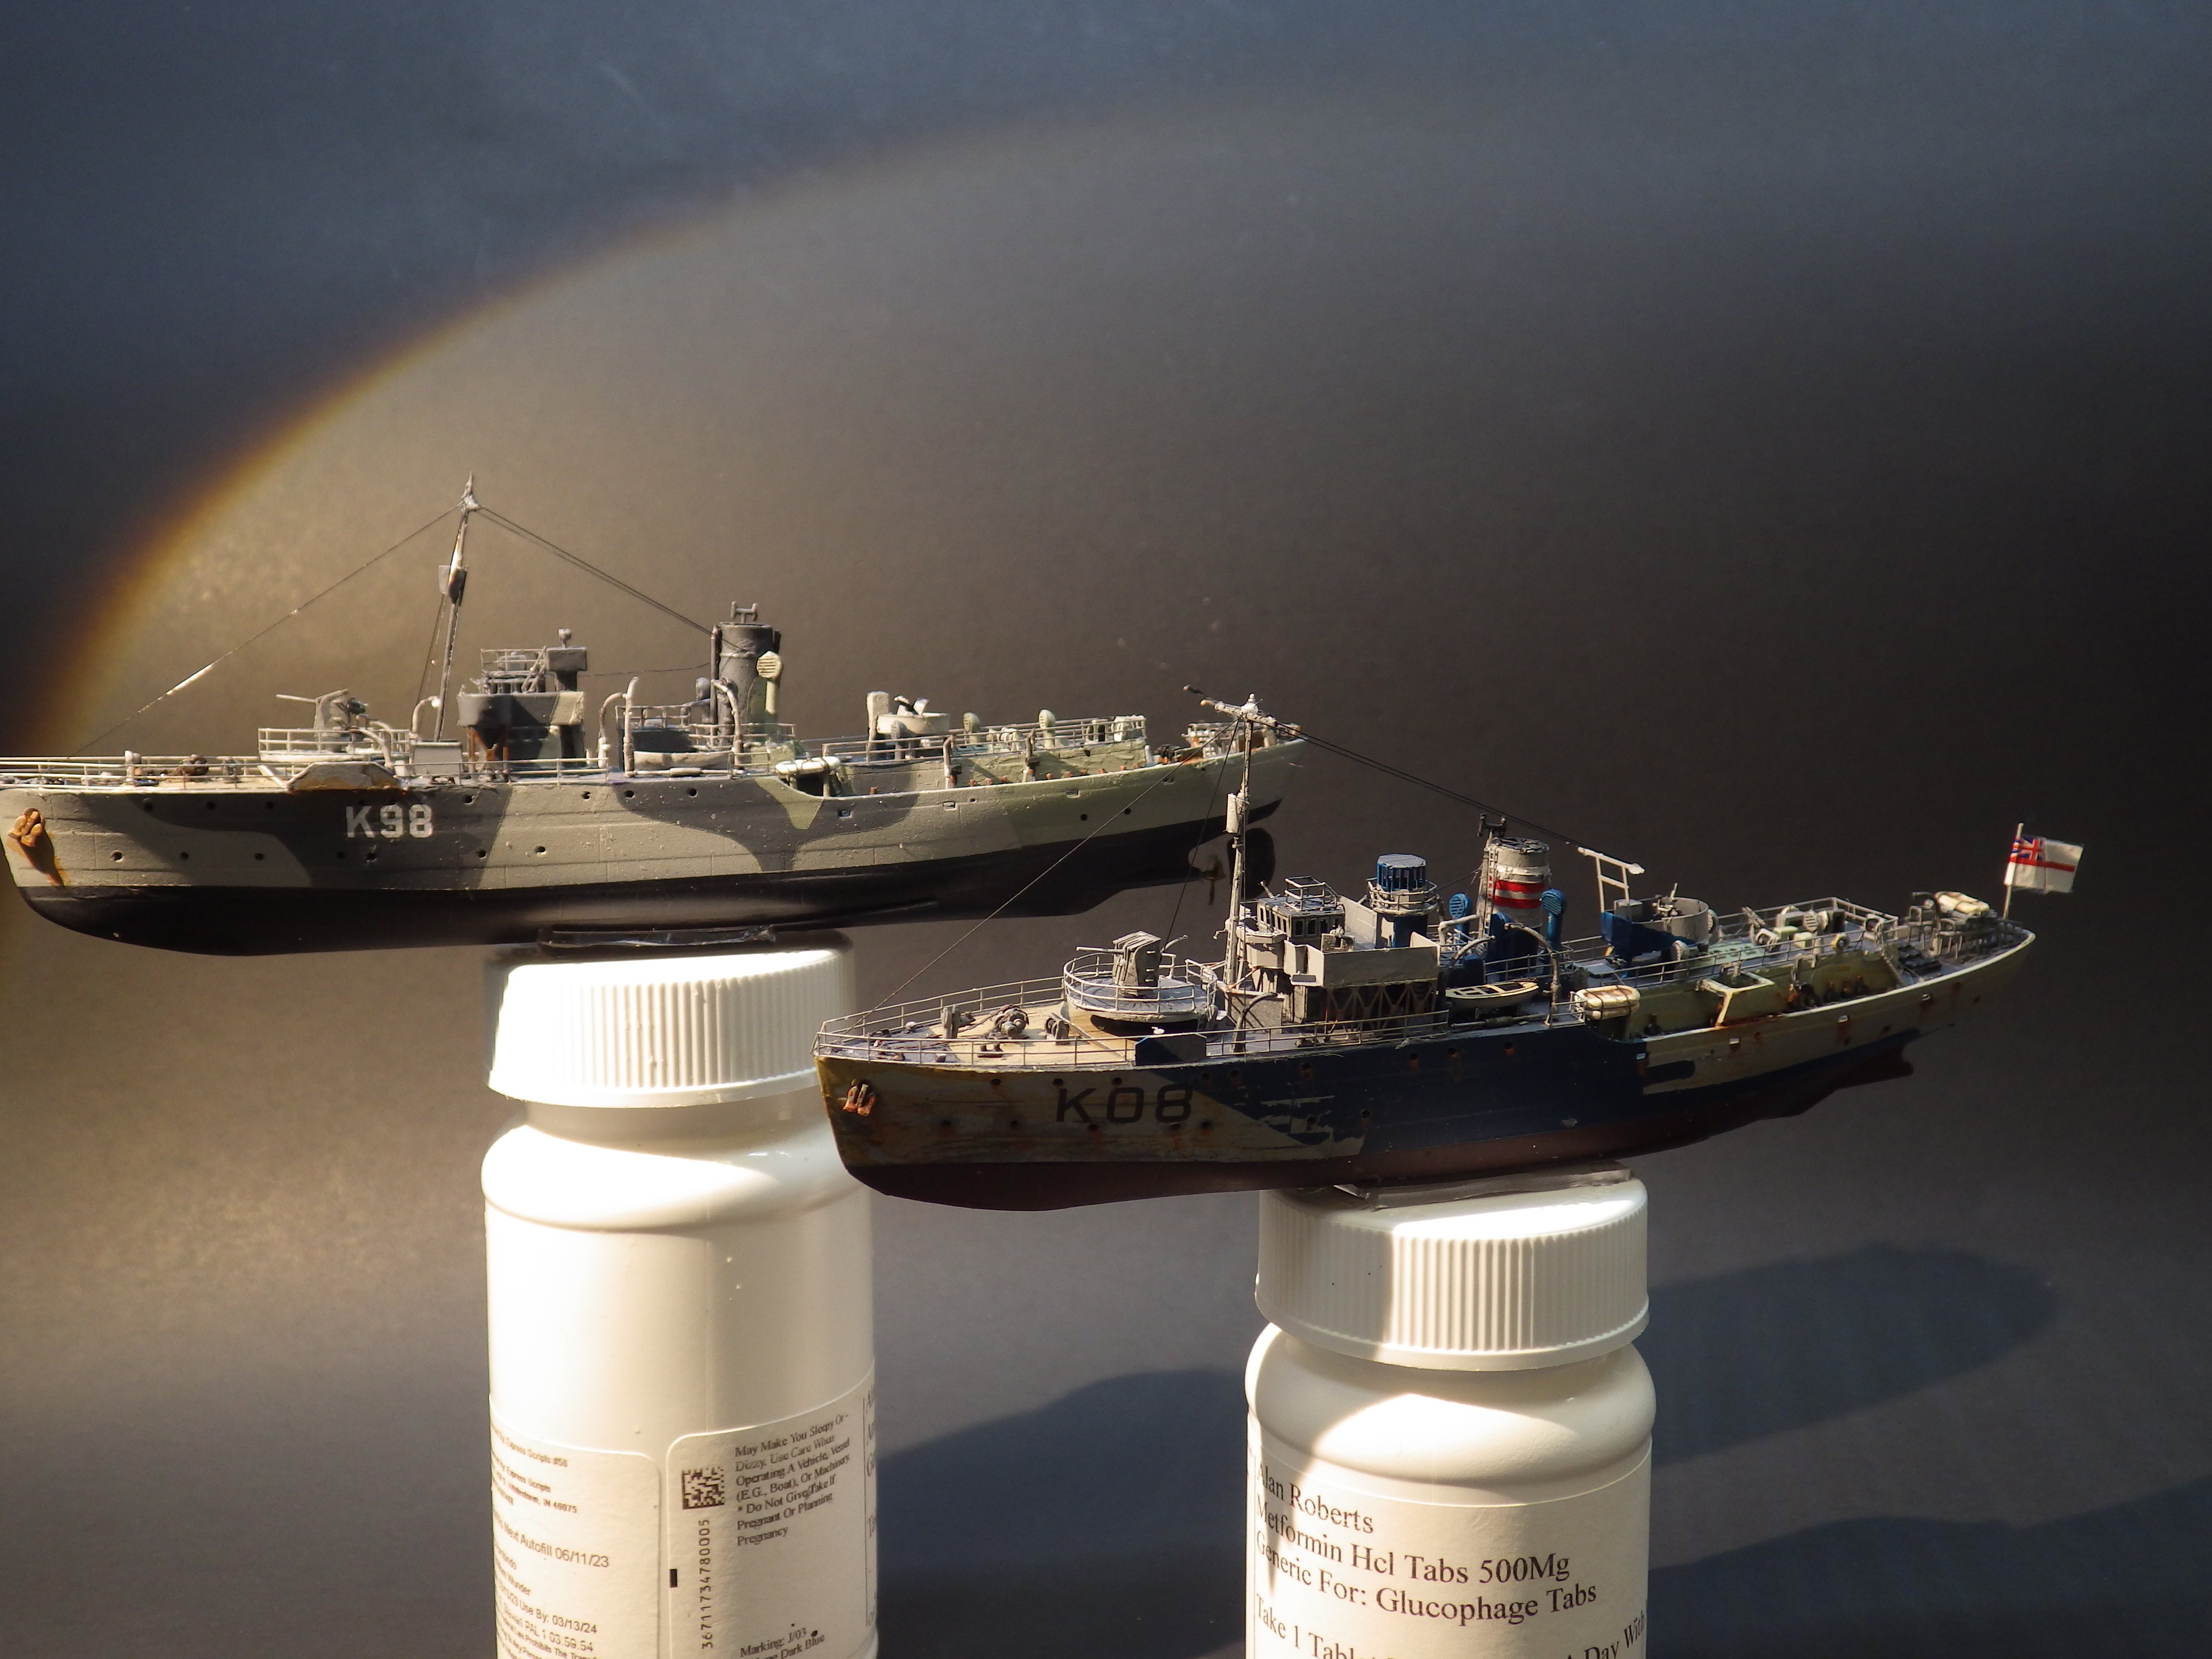
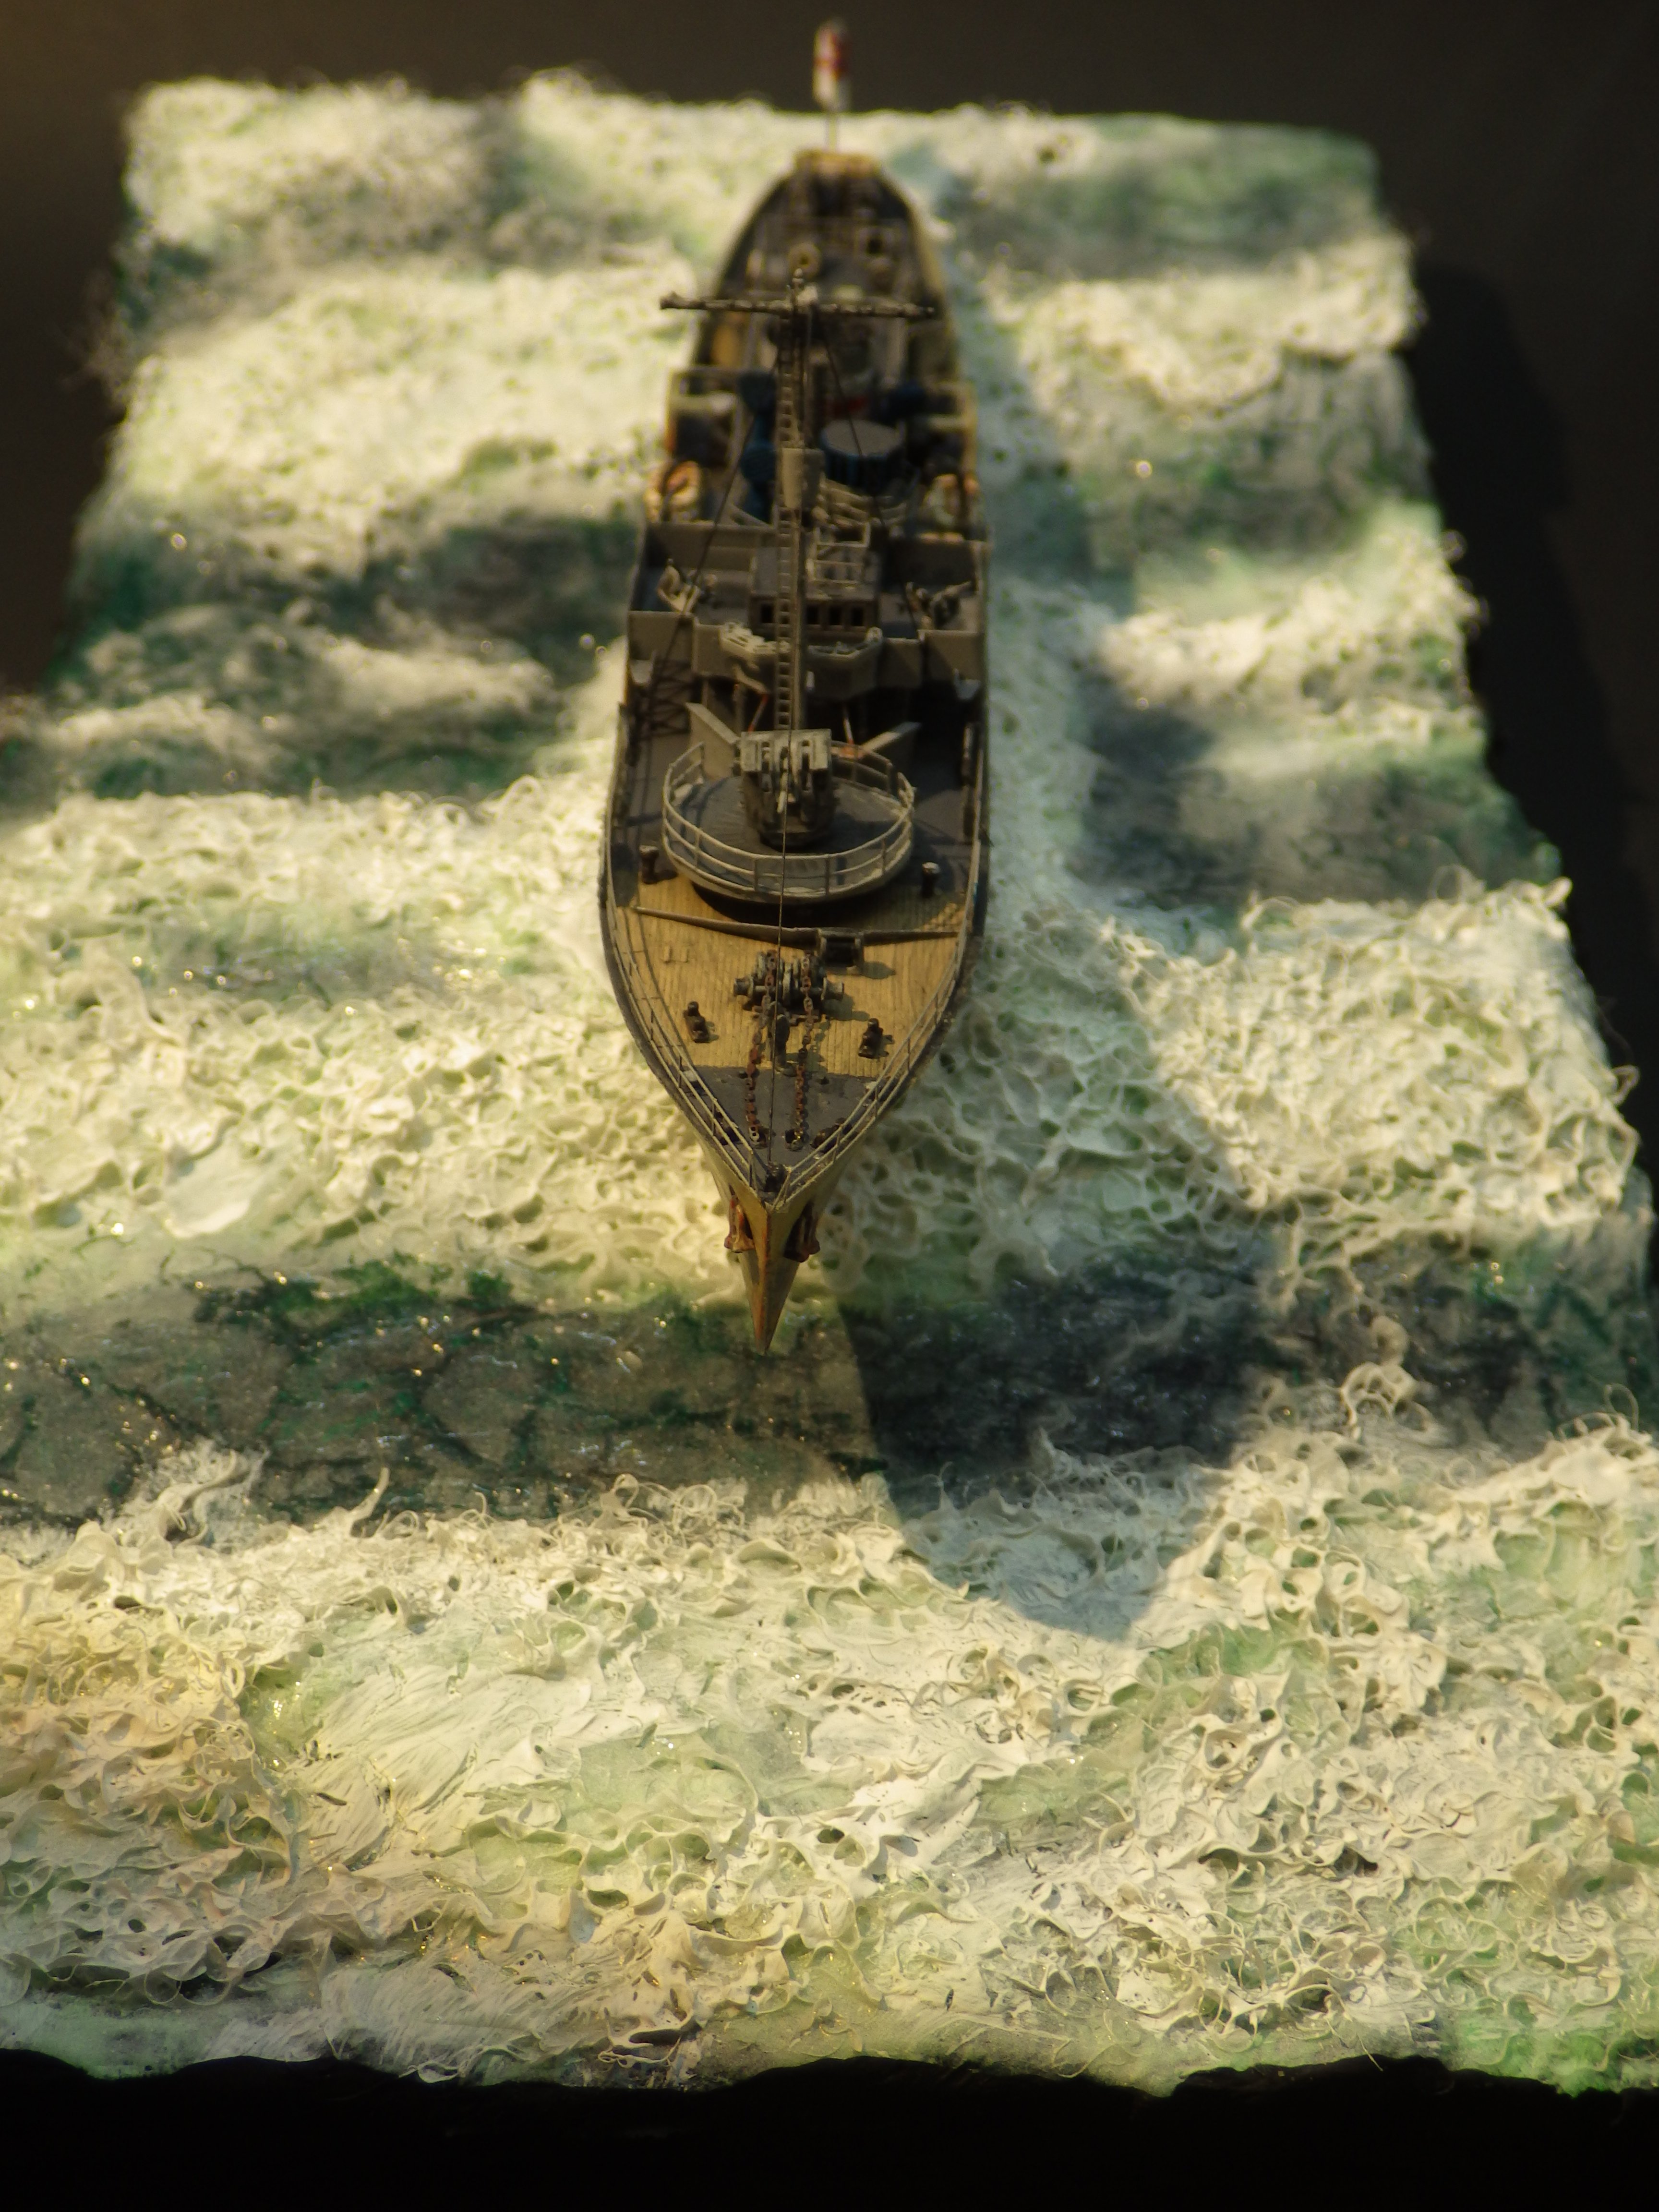
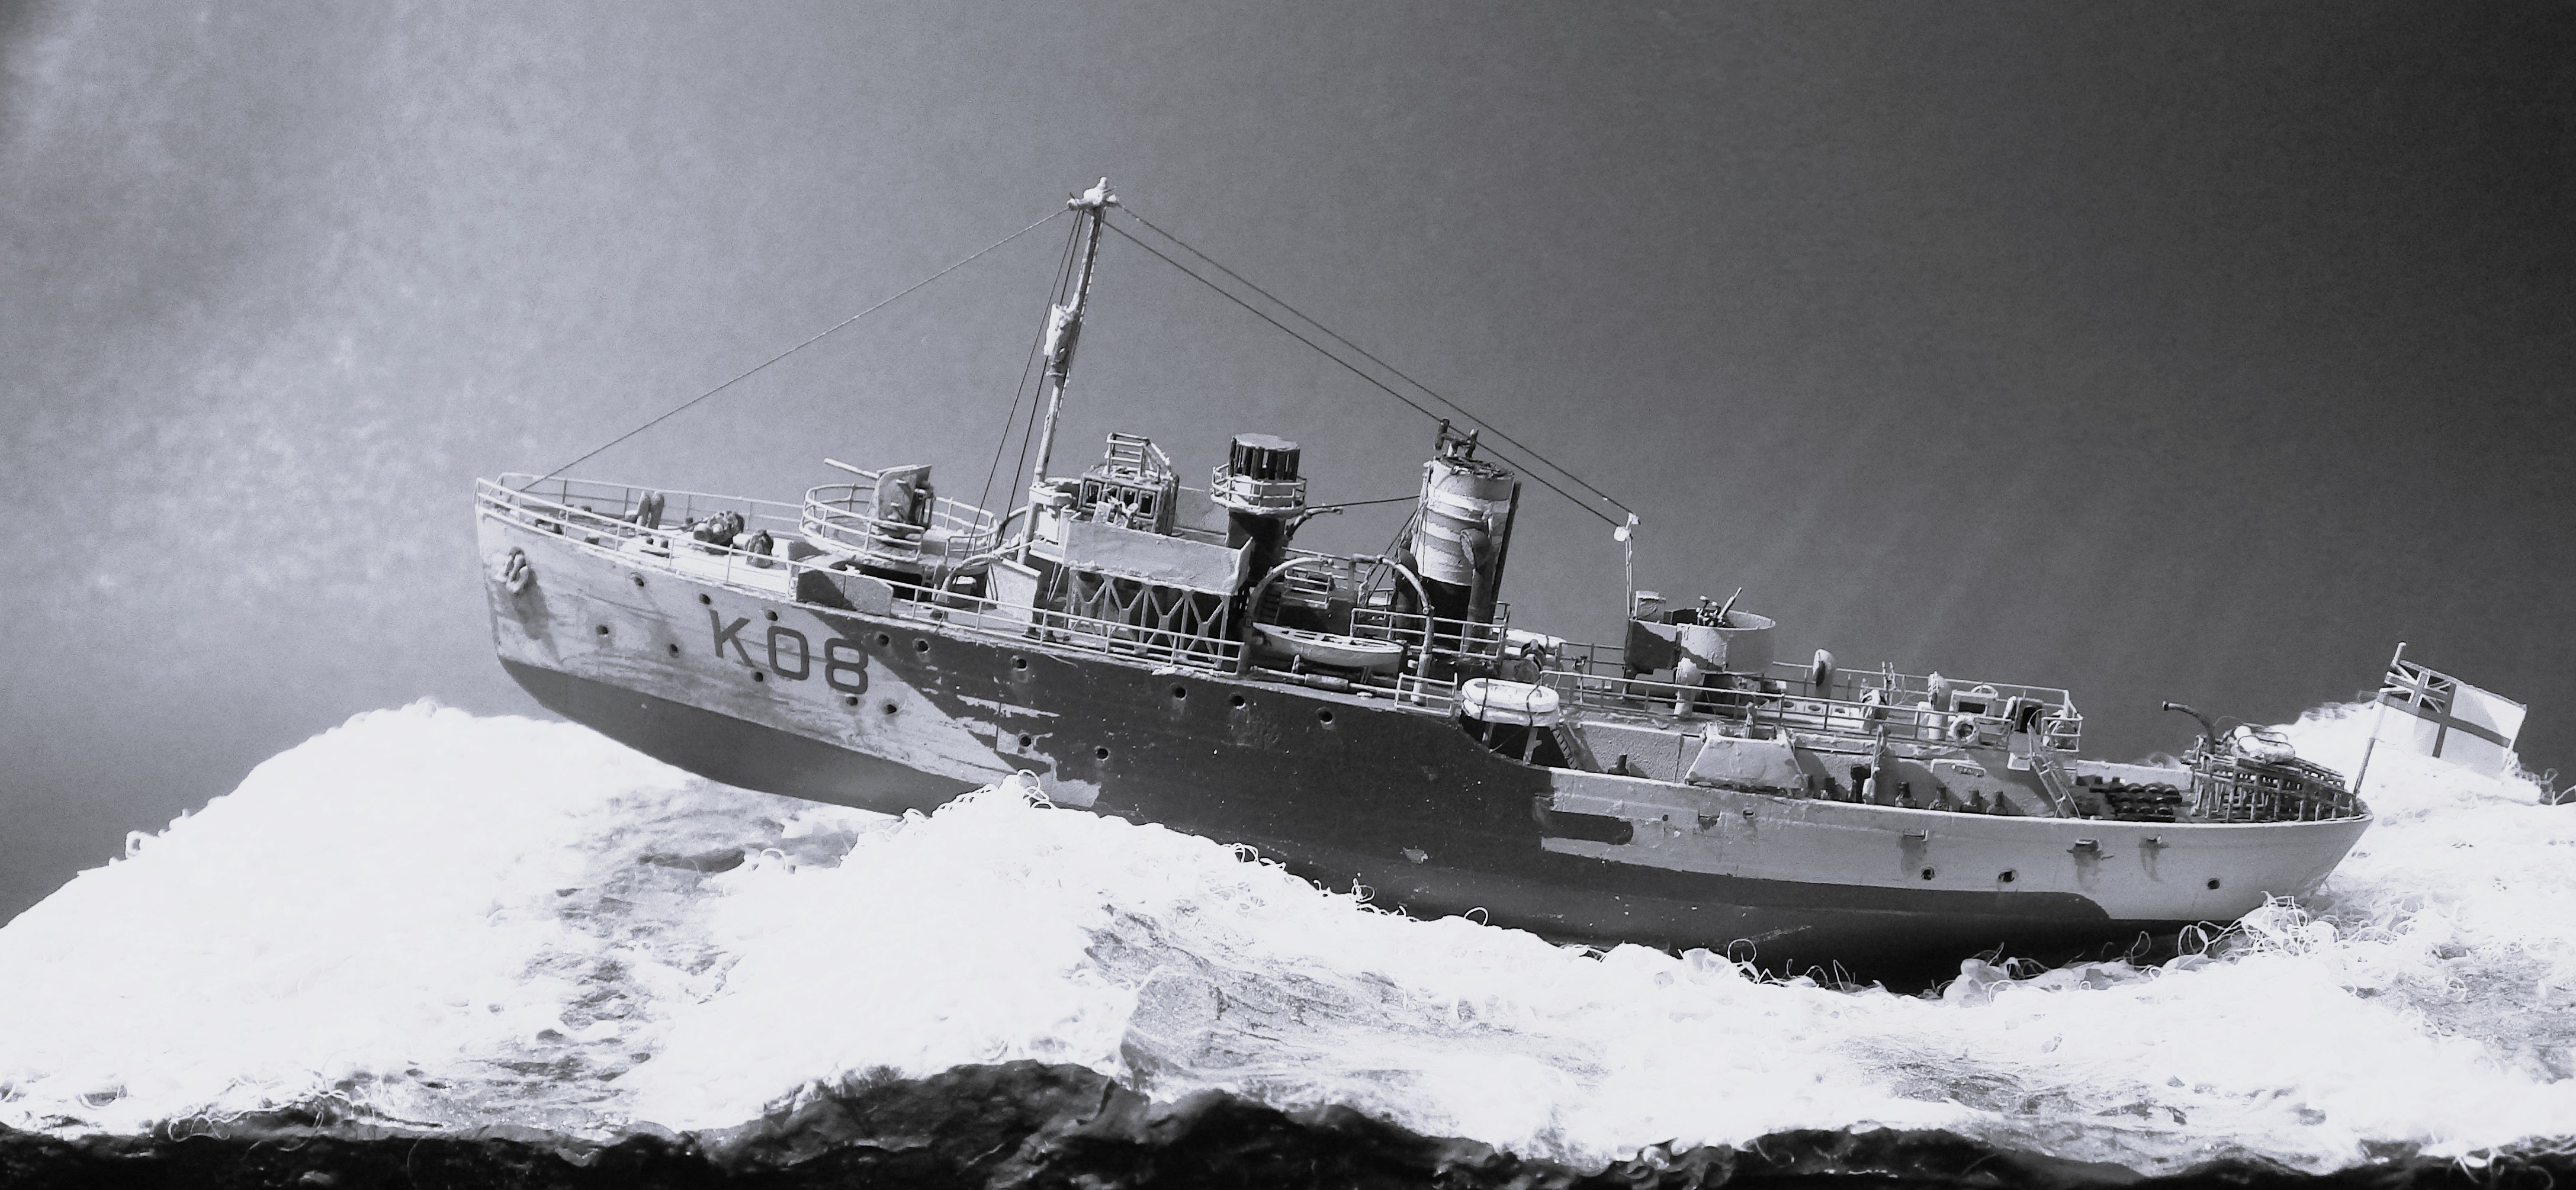
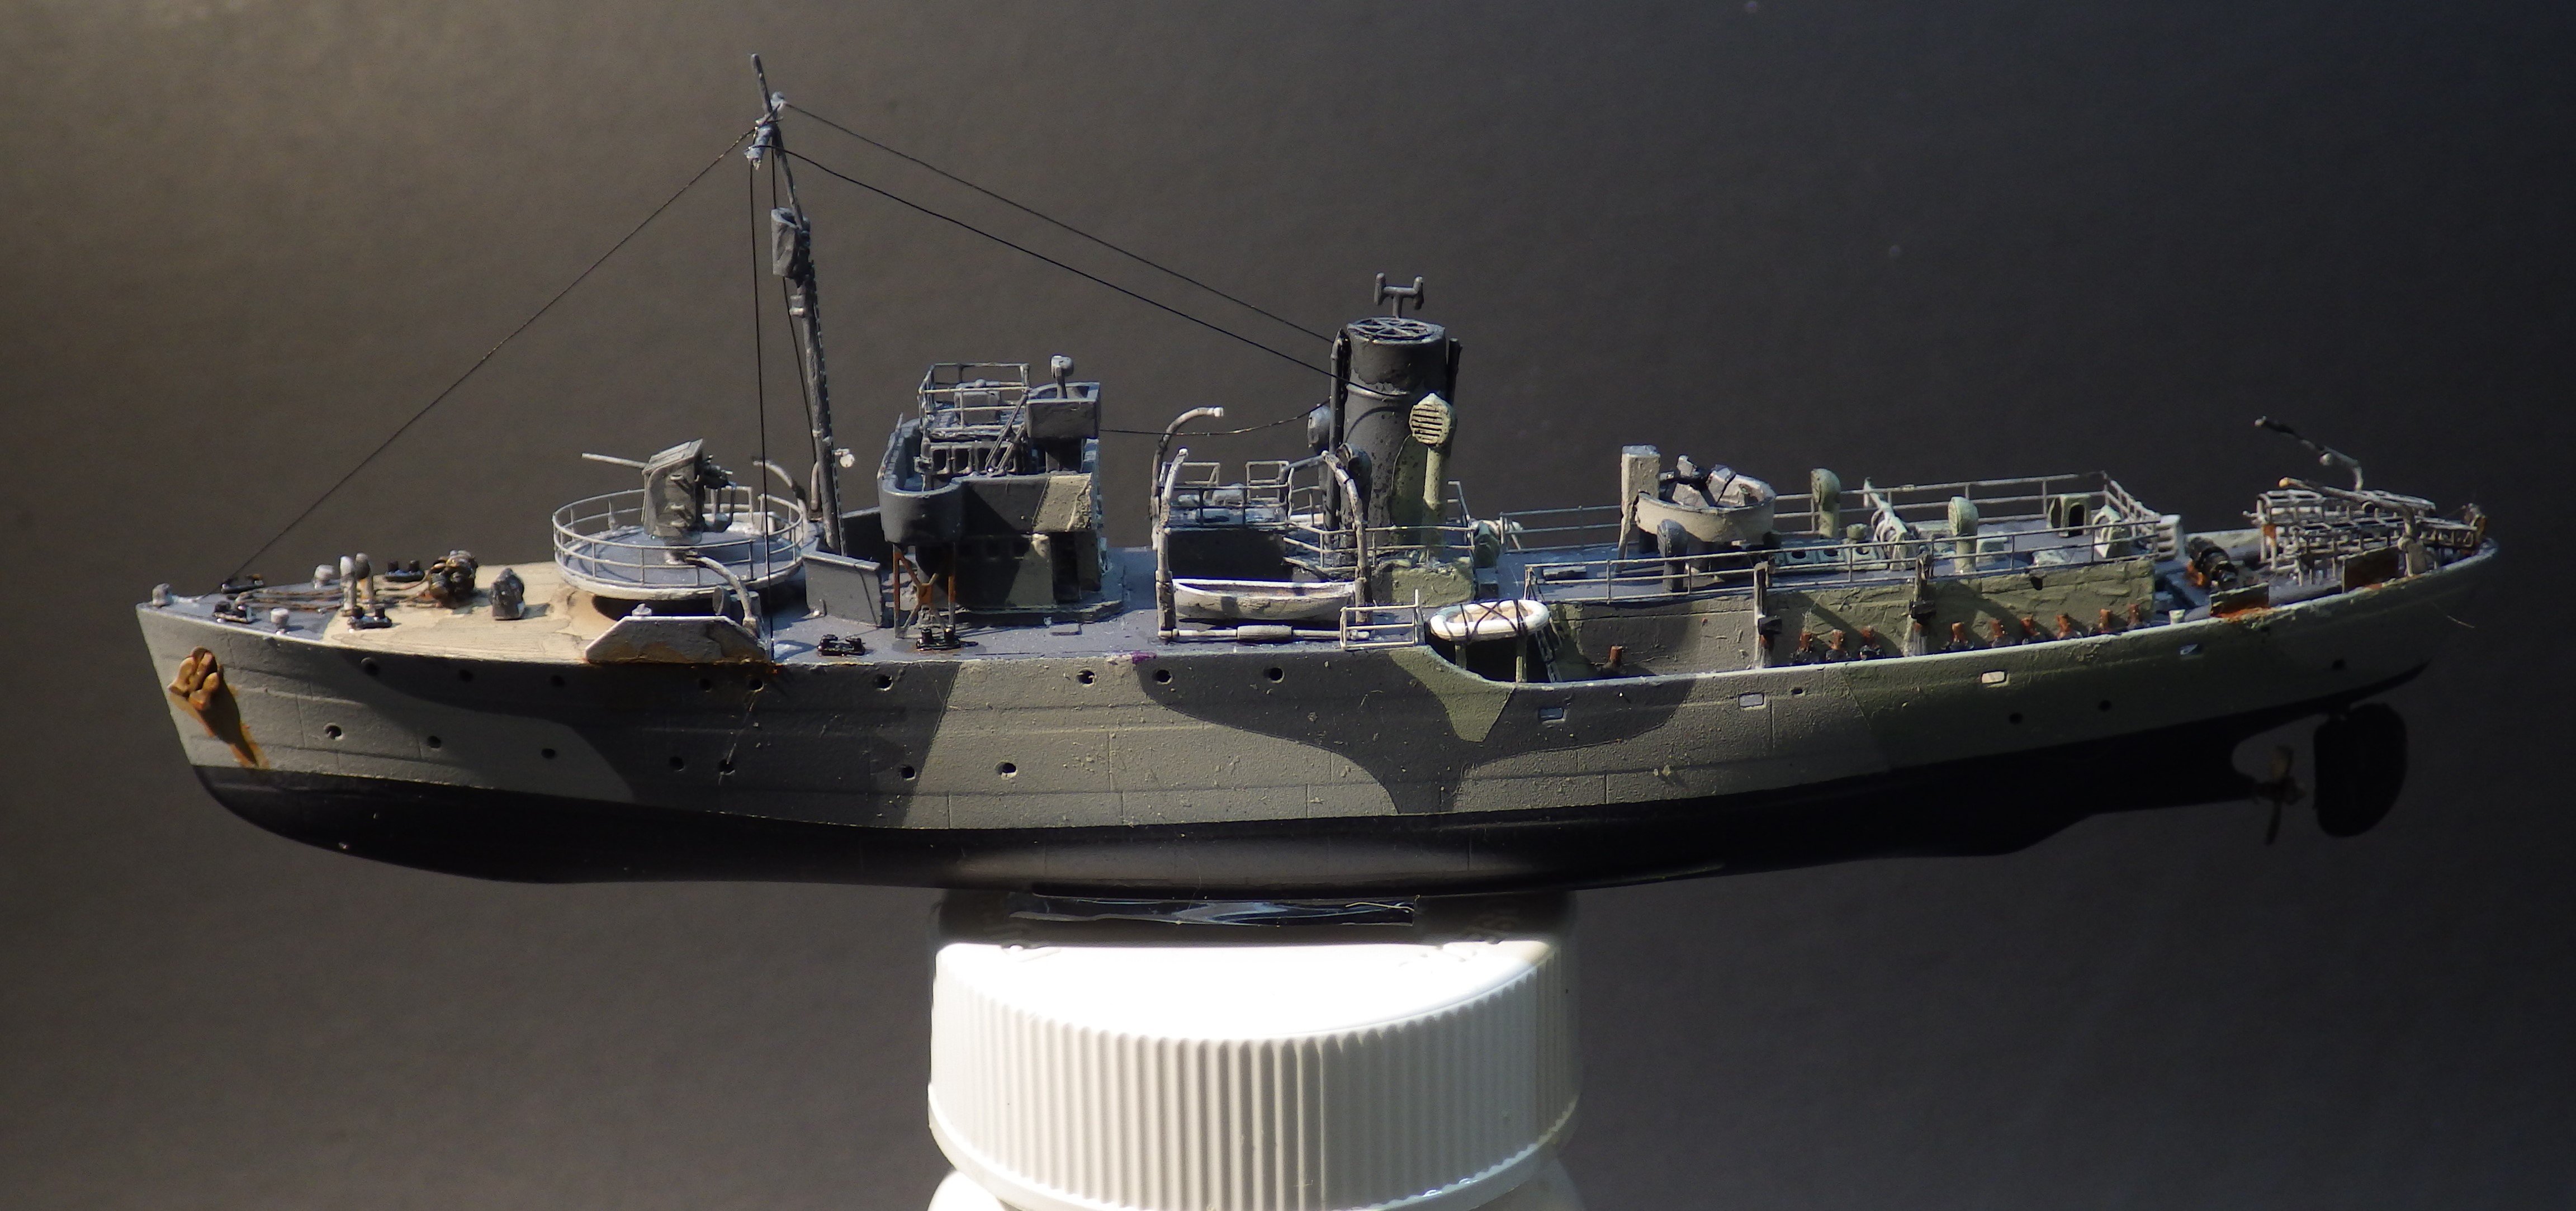
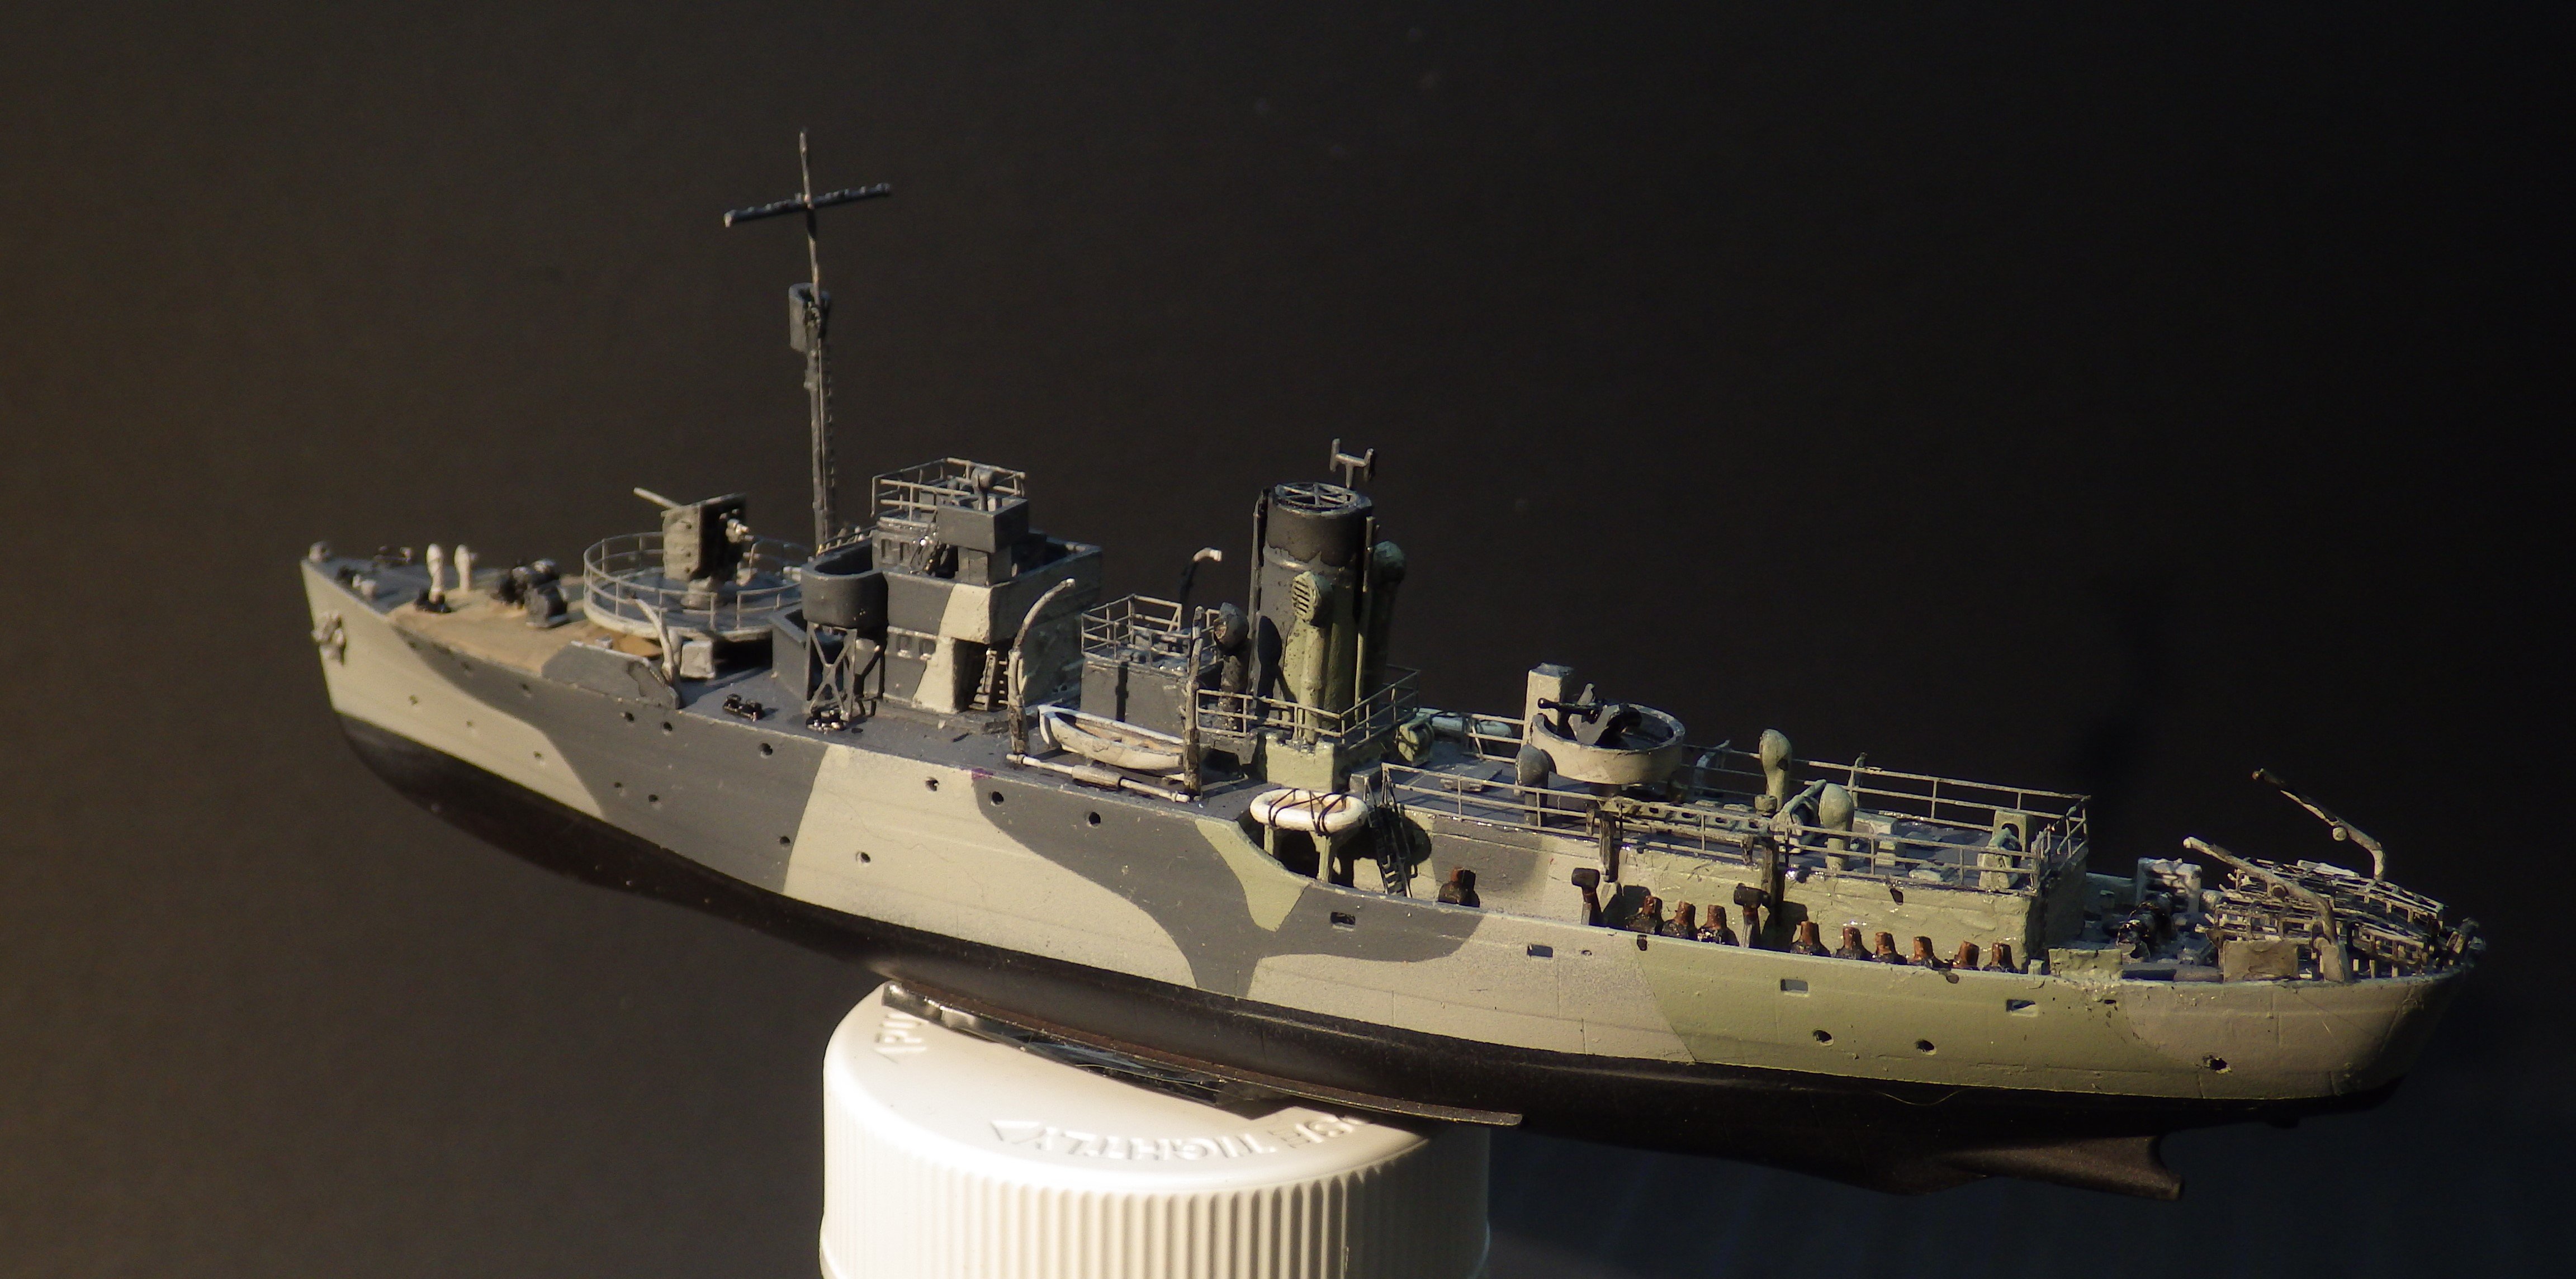
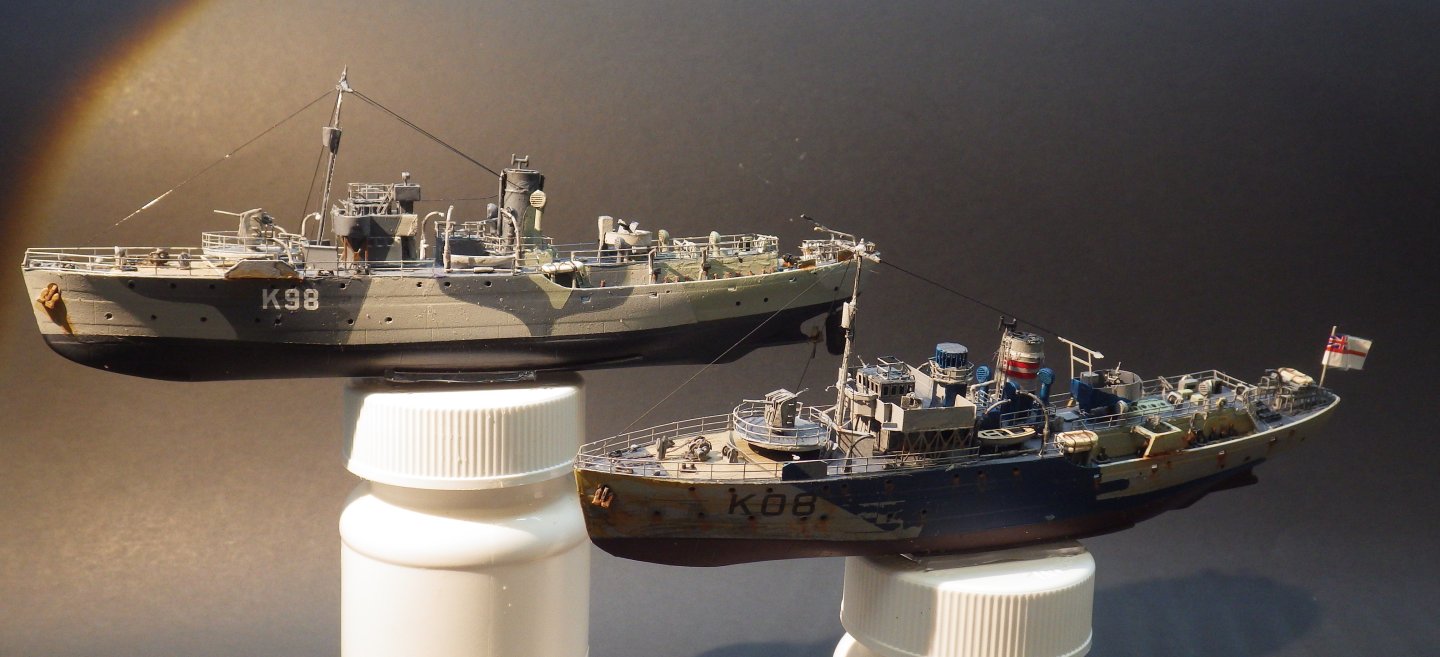
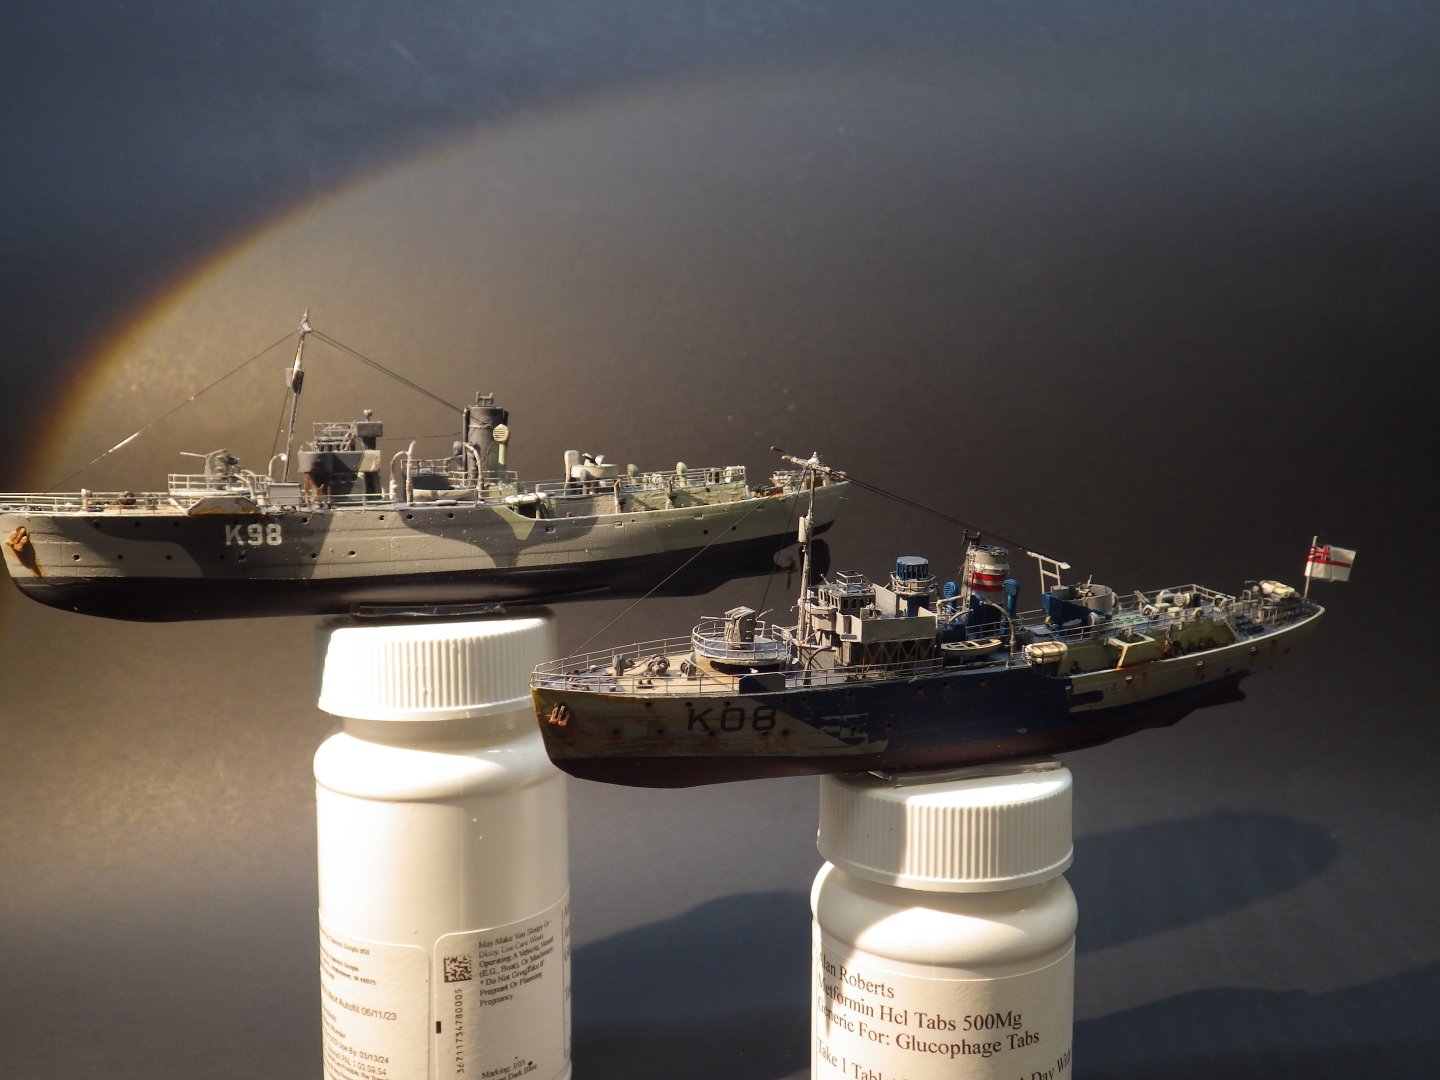
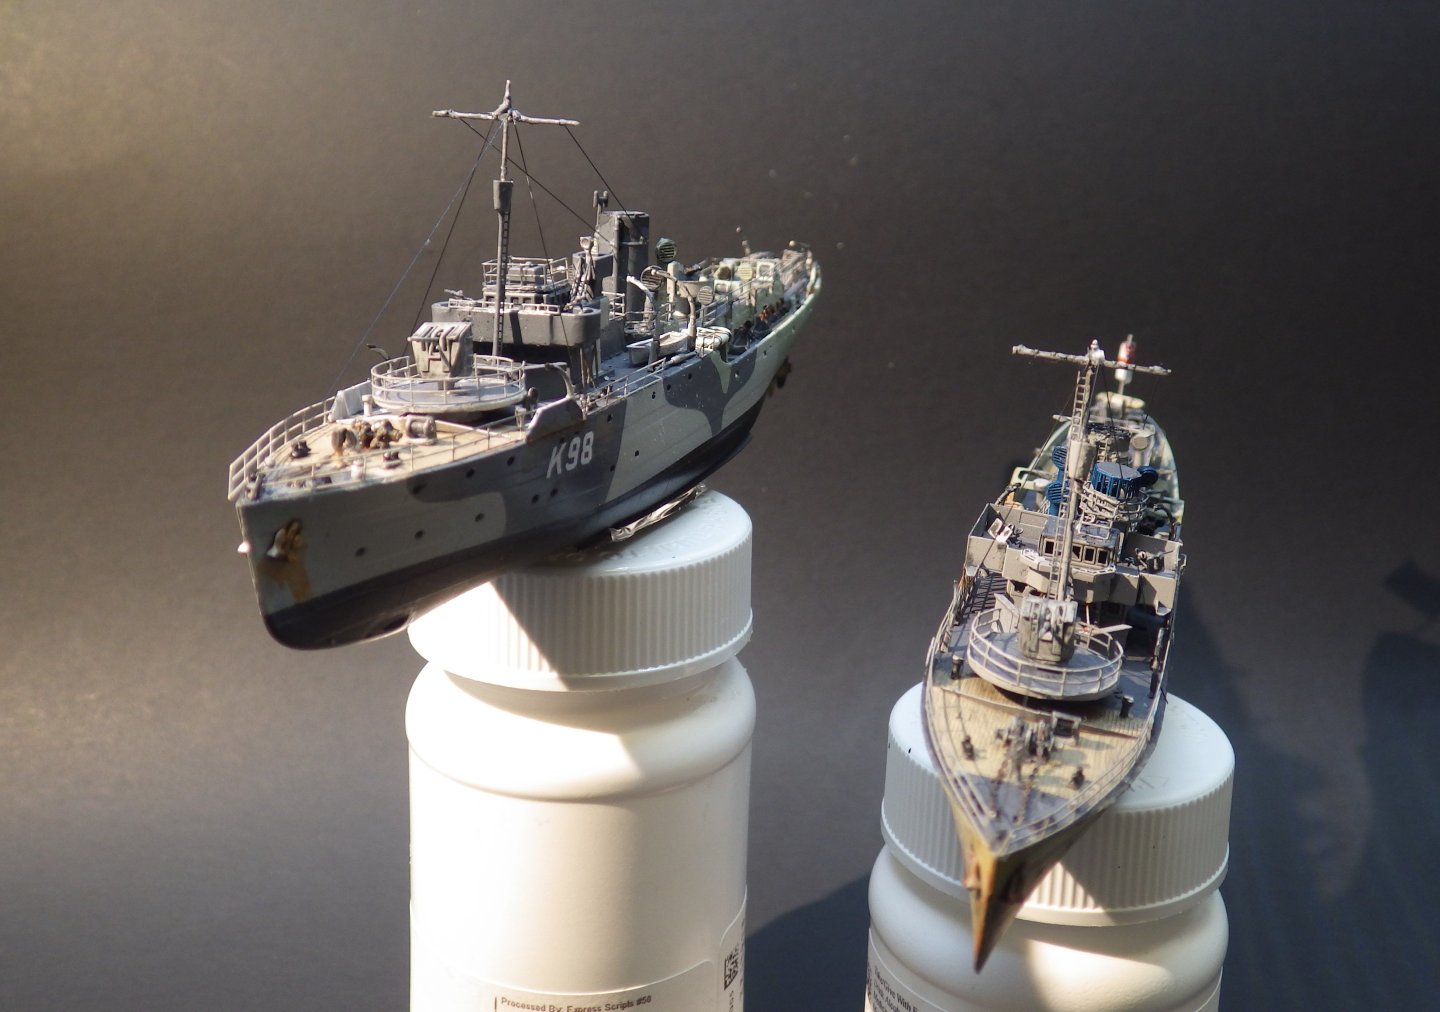
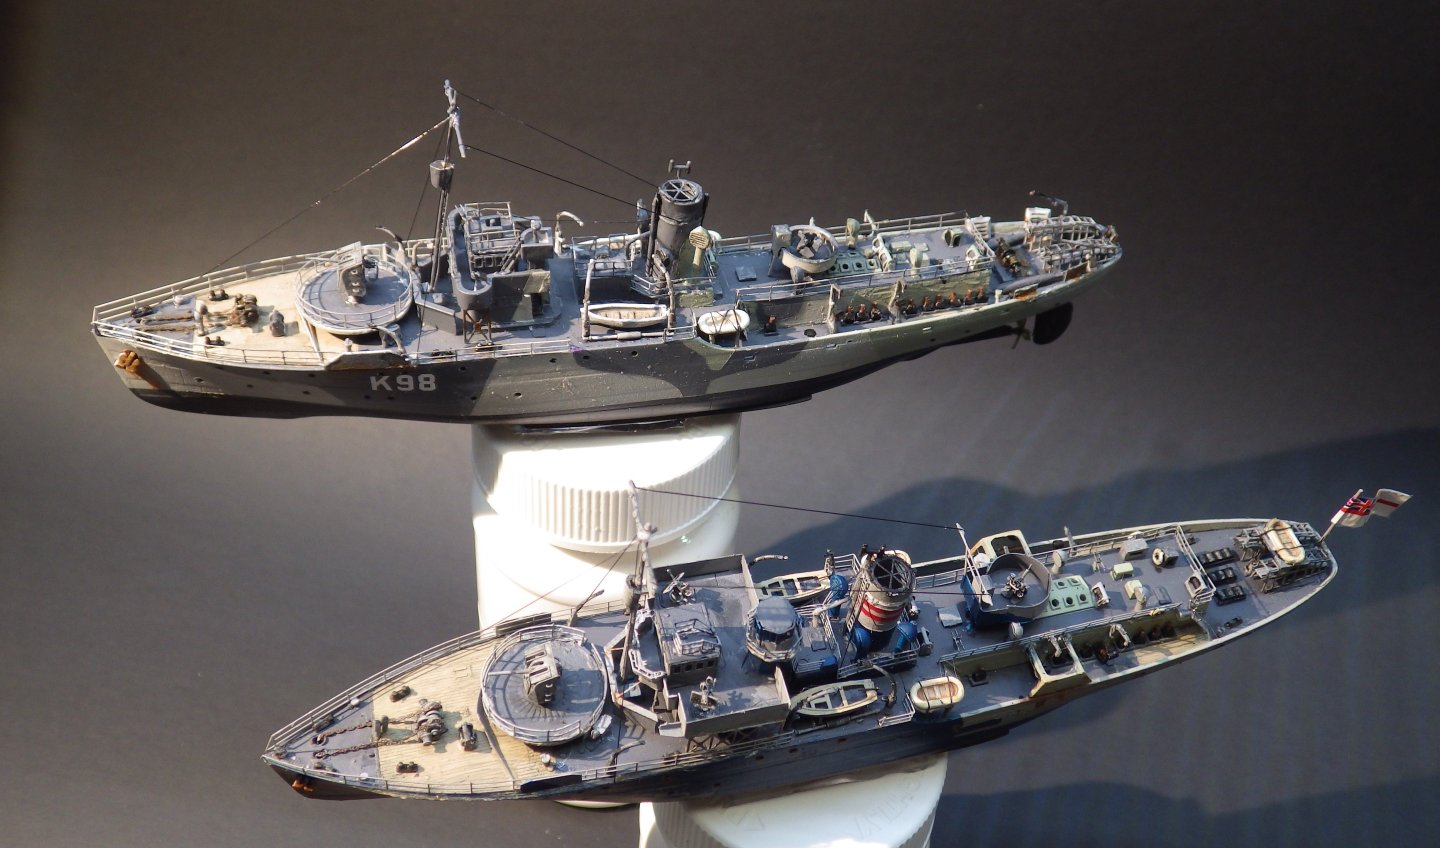
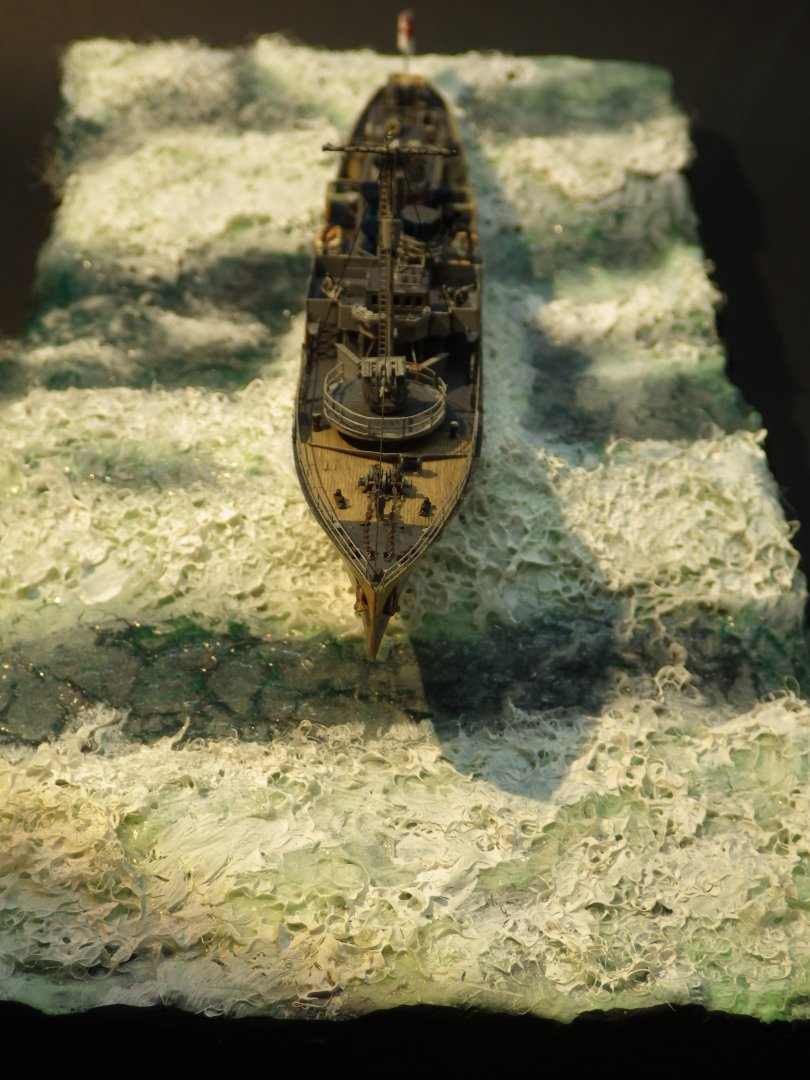
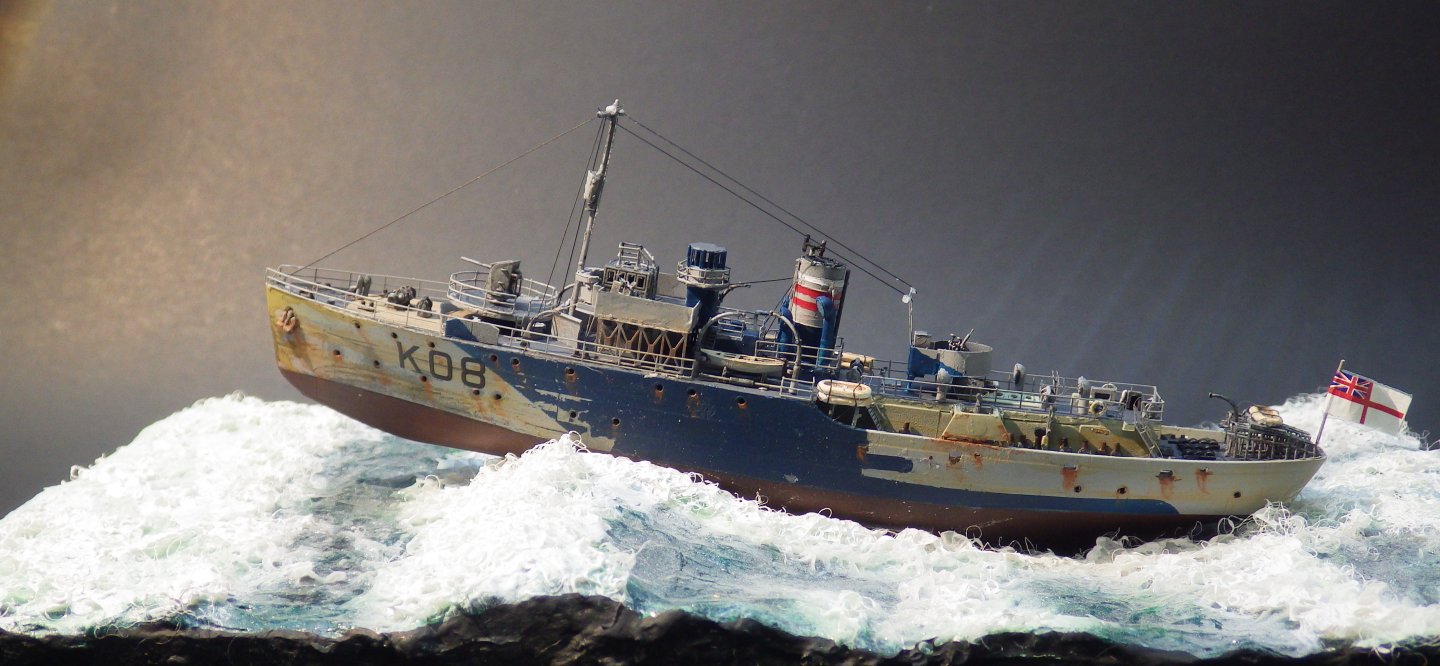
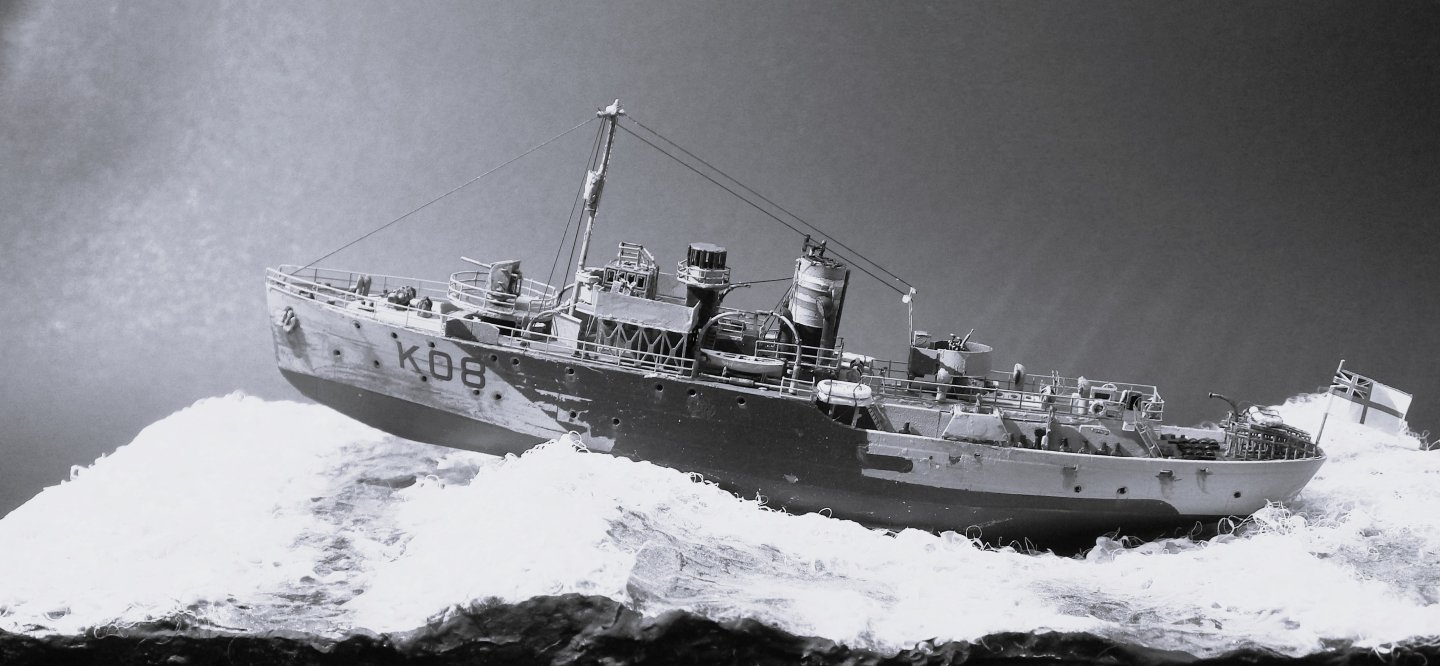
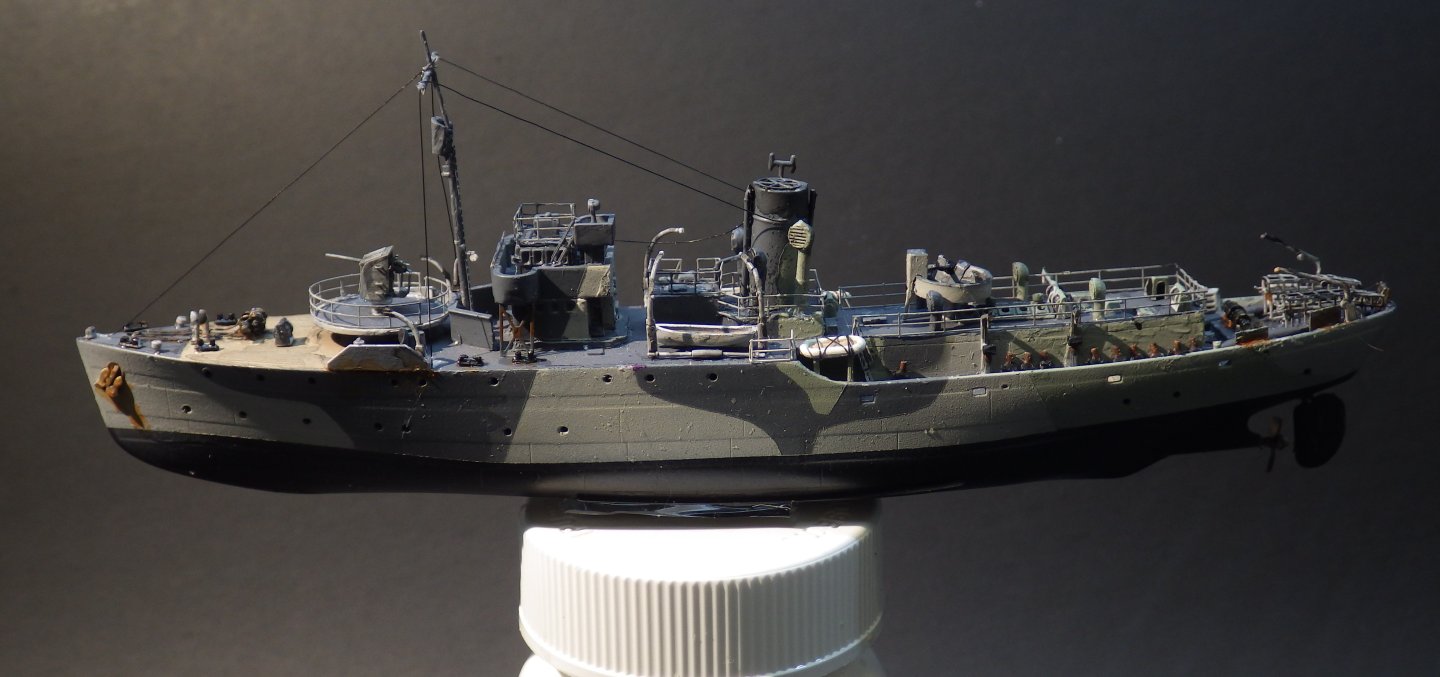
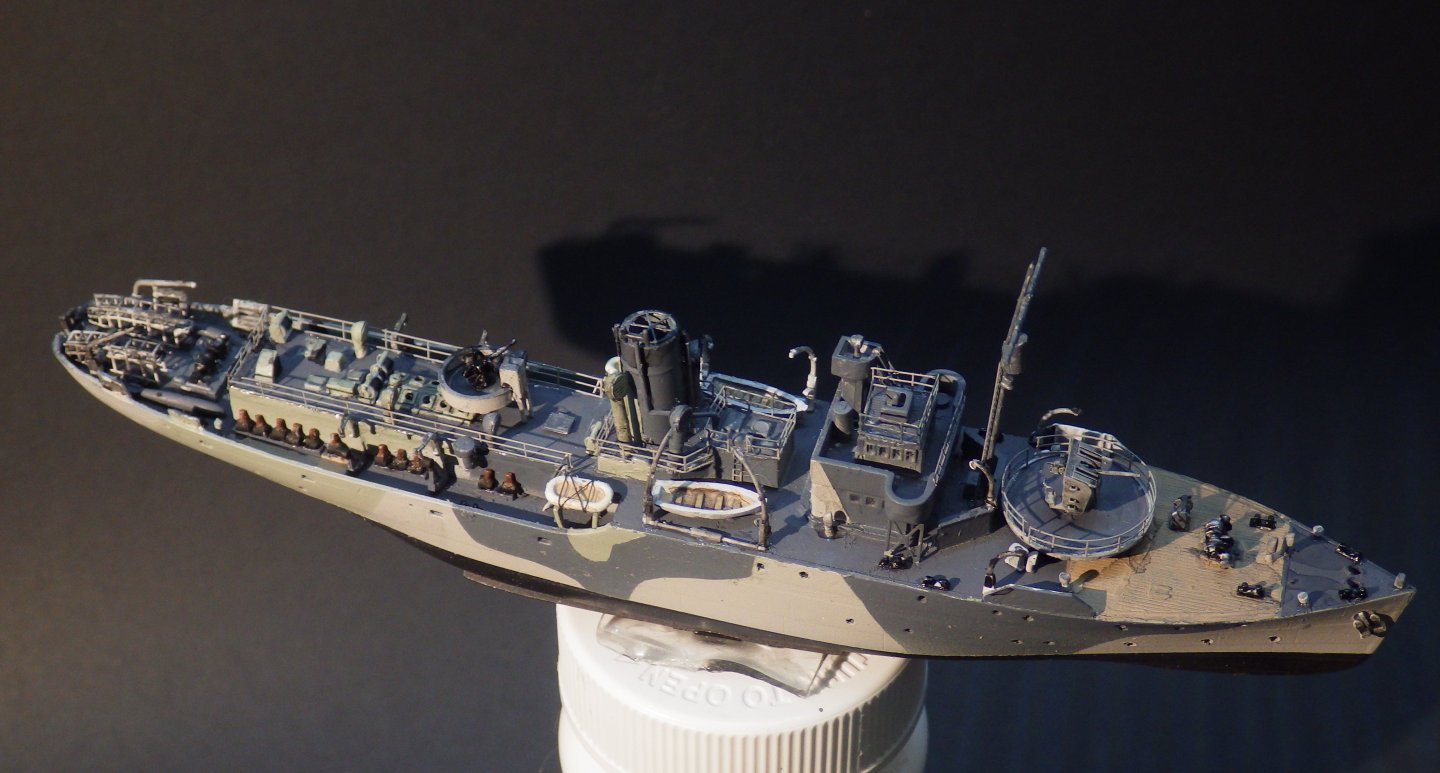
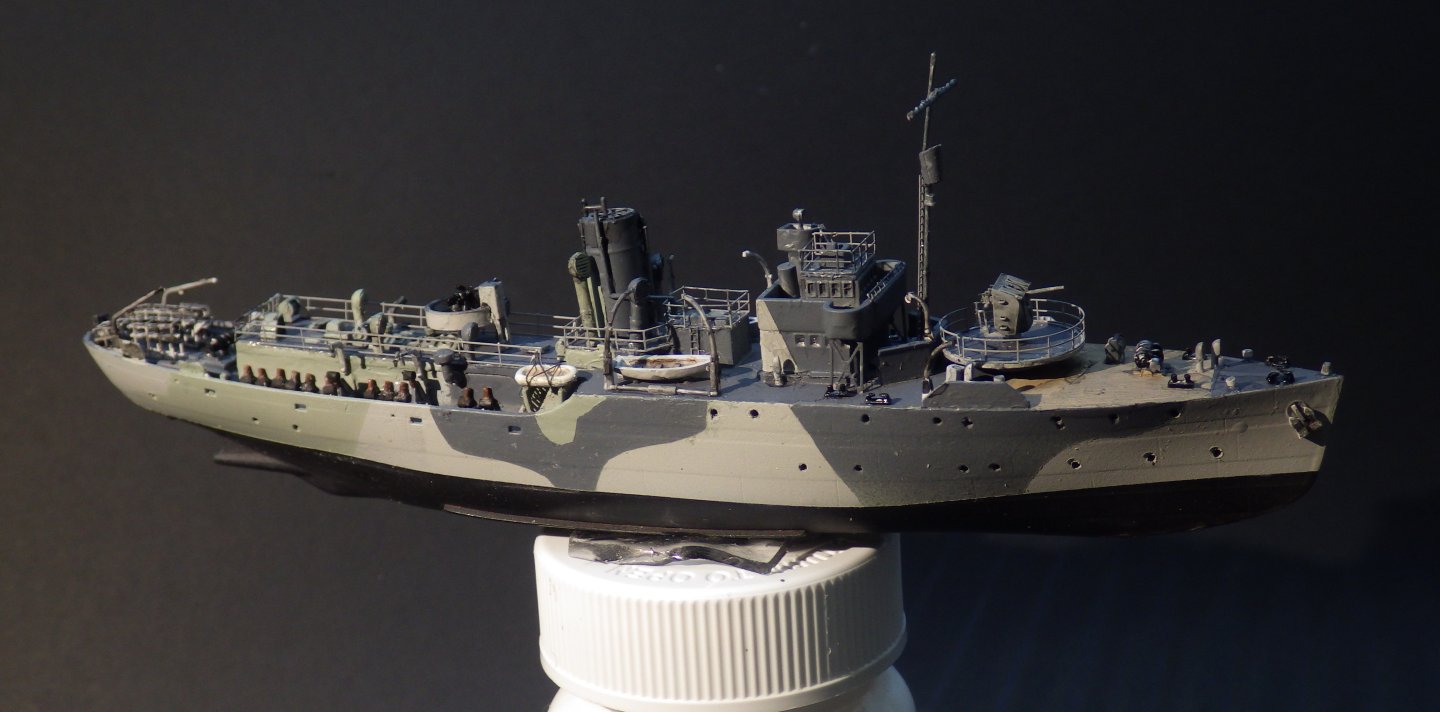
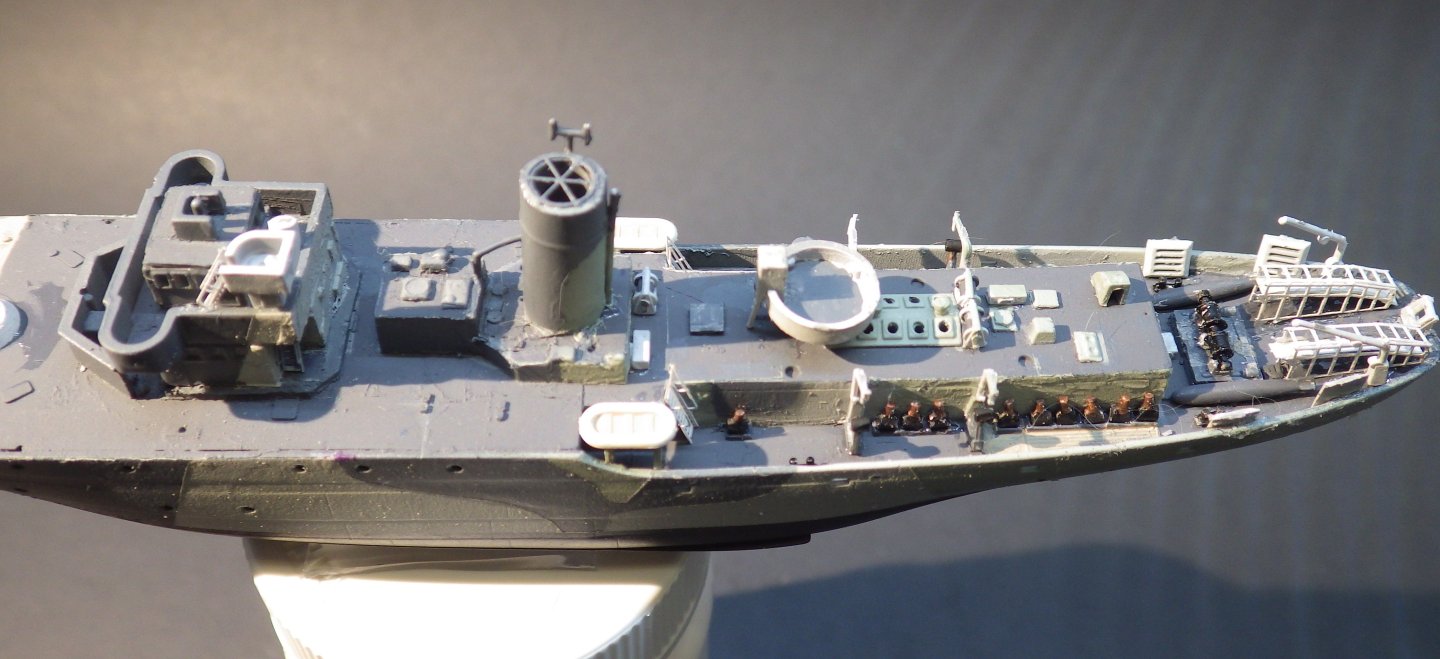
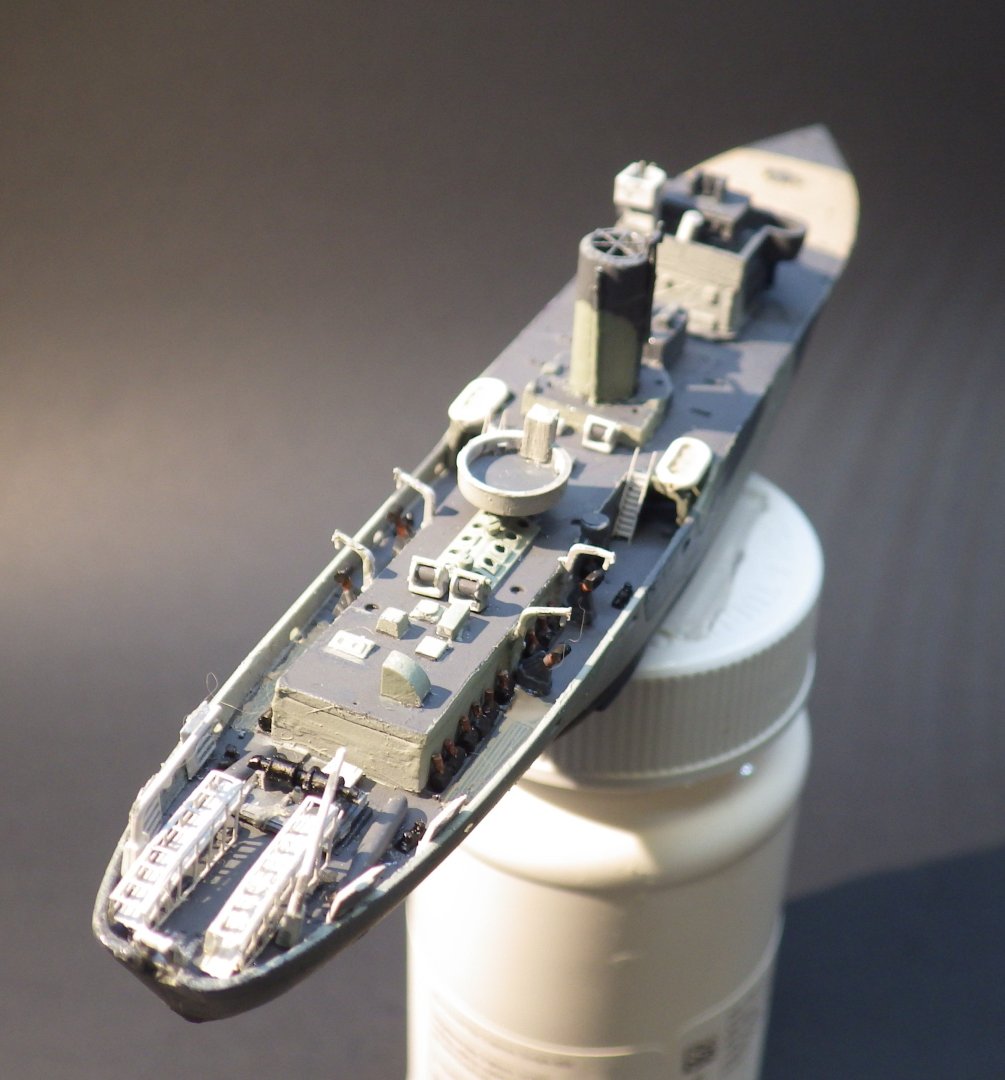
Well, I got brave and ripped out the mast and rigging. One great thing using Gators Grip glue; its relatively easy to dismantle stuff and there is less chance of small pieces pinging off into the unknown. I added the brass mast and while that was setting up I added the same basic rigging to Spiraea and found that the practice had made it a lot less intimidating. Apart from one diversion when I couldn't seem to get the rigging line to cooperate and finally realised I was trying to manipulate a cats whisker (I have no idea how that got up onto the work bench) and not a piece of rigging line it all went fairly well. The same rigging was added to the new mast on Zinnia, her forecastle railings were added and then the decals. The ships numbers need to be toned down a bit and the final matte coat. I am trying to sort out one final detail. The life preservers are full of flash and all attempts to clean them up with heated pins, sharp blades, files have failed dismally so they look horrible. I am trying to think of a suitable alternative I now have both ships almost complete Spiraea showing a lot more wear and tear in the foreground. I added Spiraea to the sea base and I think I am happy with it so far I need to add the last touch to the sea; the bursting wave on either side of the ship. Thank you all for looking in and all the likes and comments Alan
-
Great work Jav. The camouflage is very nice and subtle alan
-
Highly frustrating when the computer stuff goes sick on you. I hope you can get a plug in keyboard or a cleaning. I miss the progress on LHS Alan
-
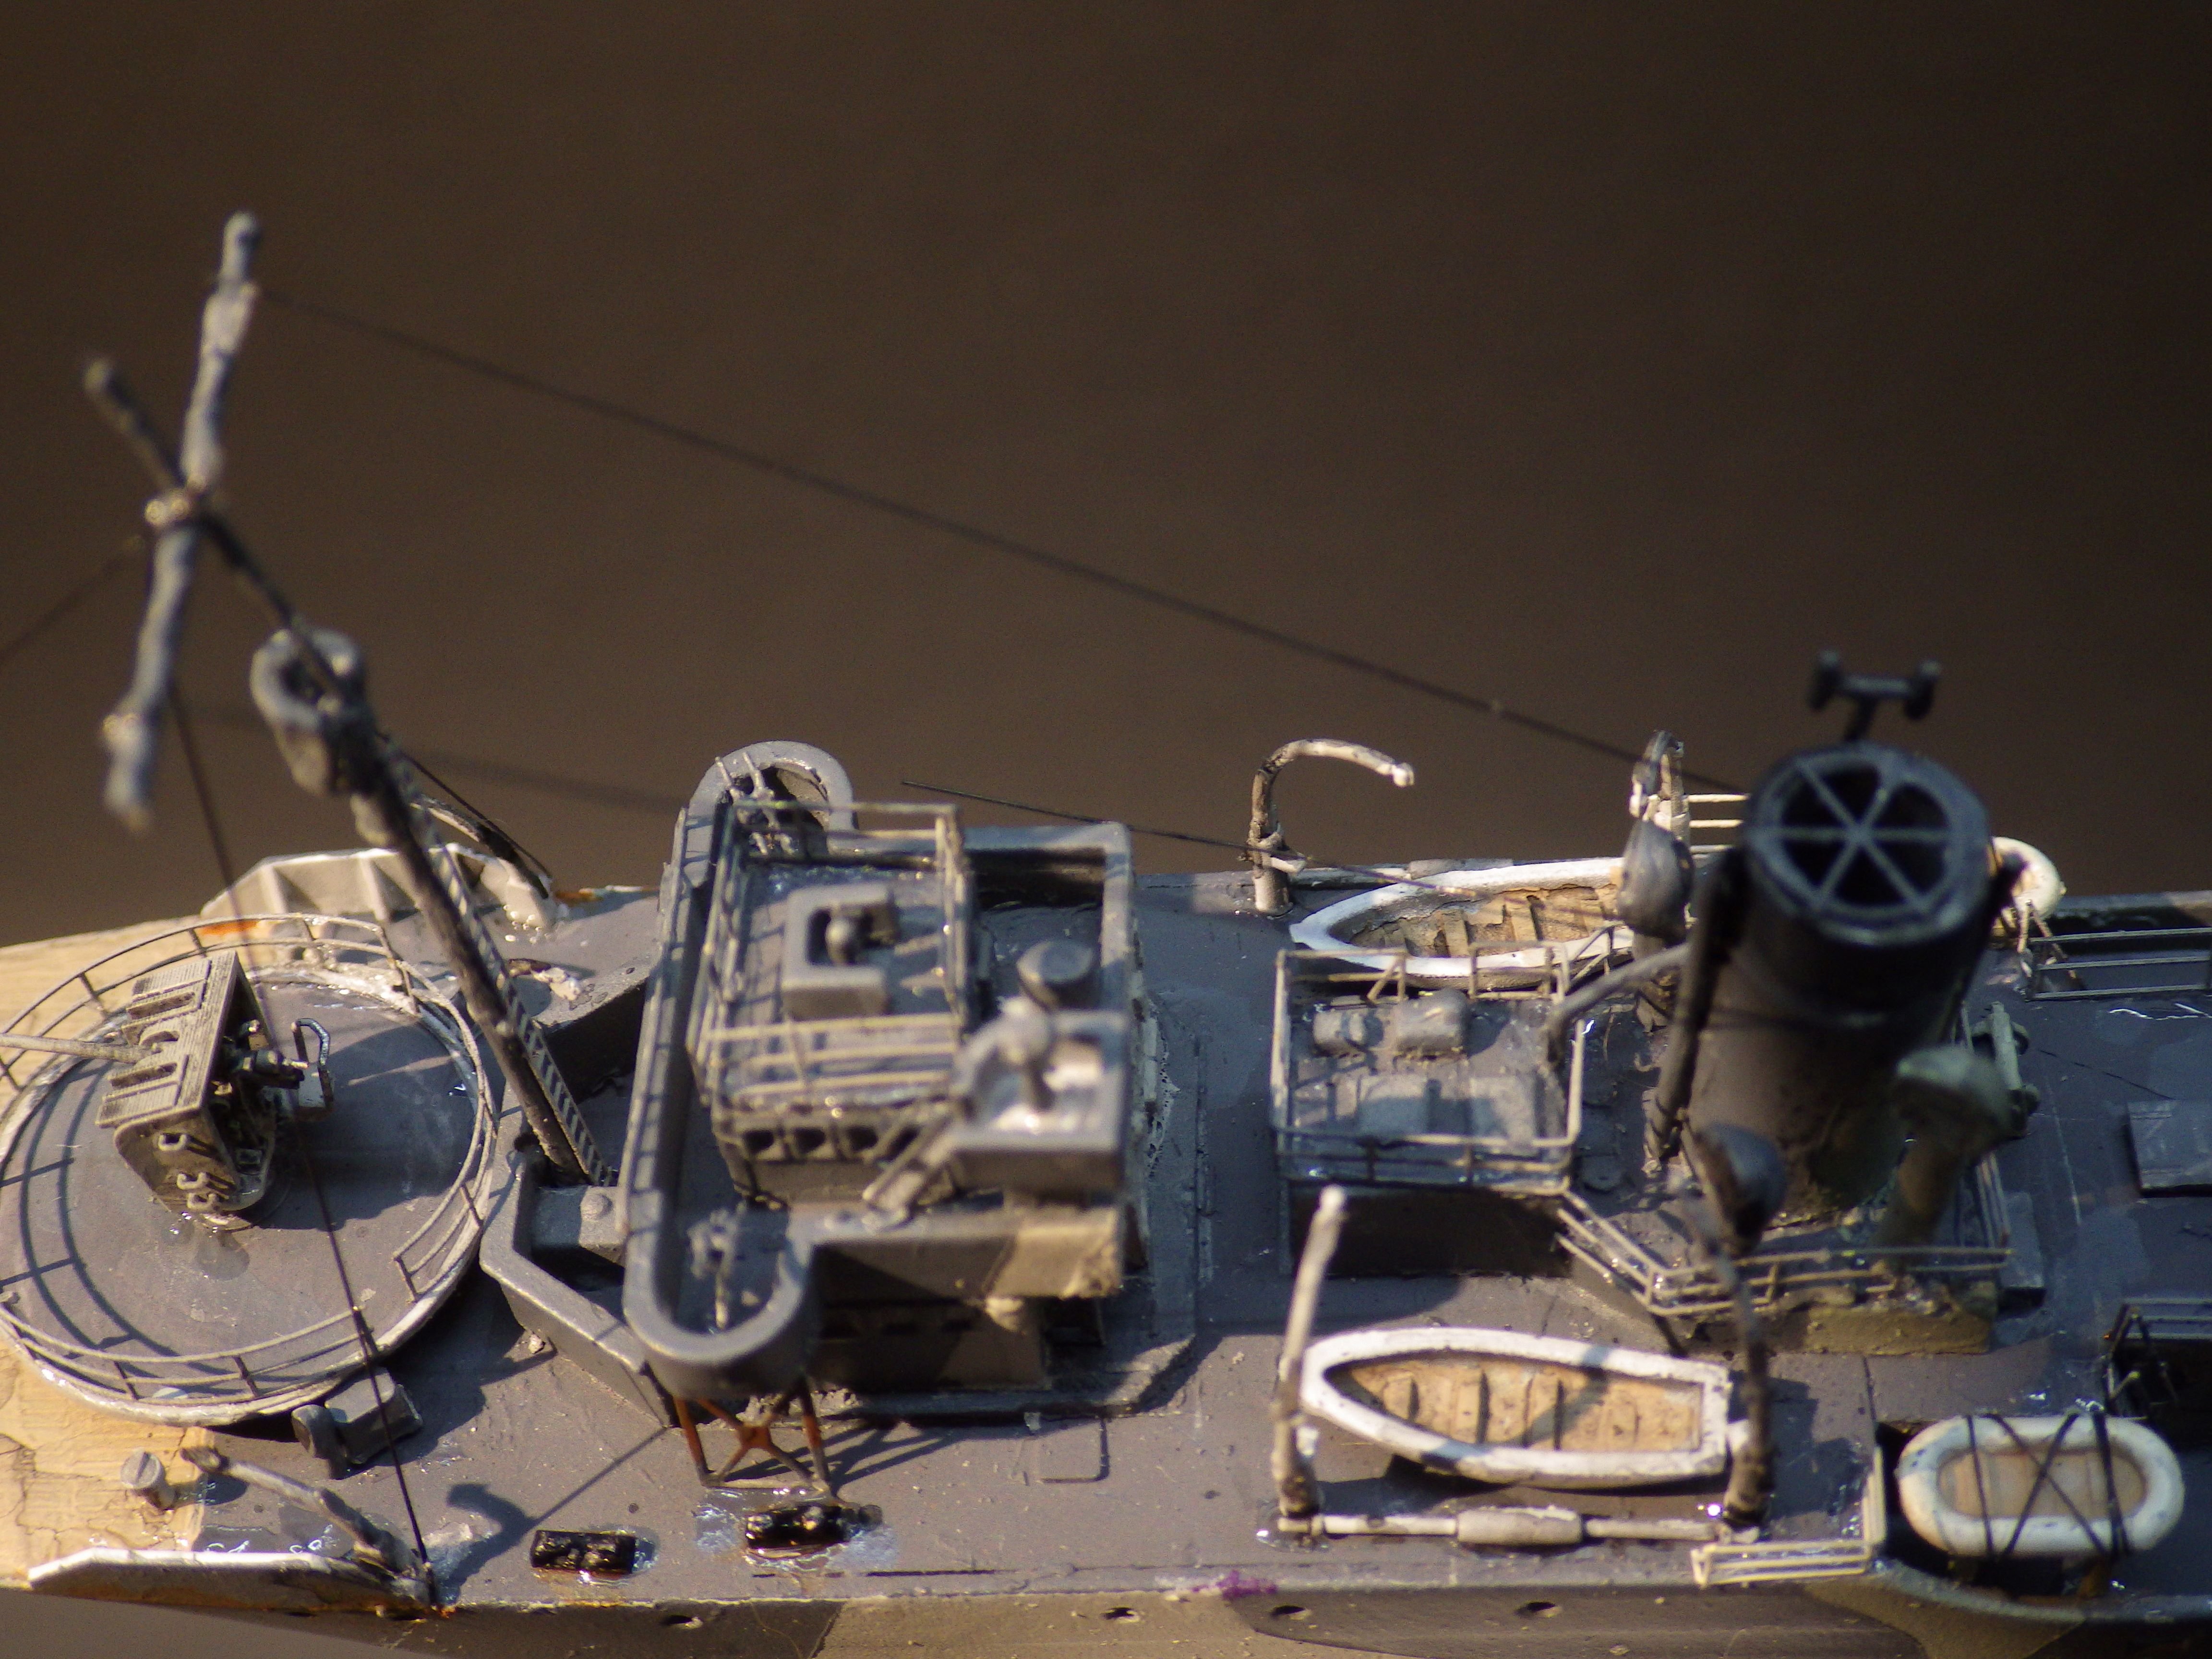
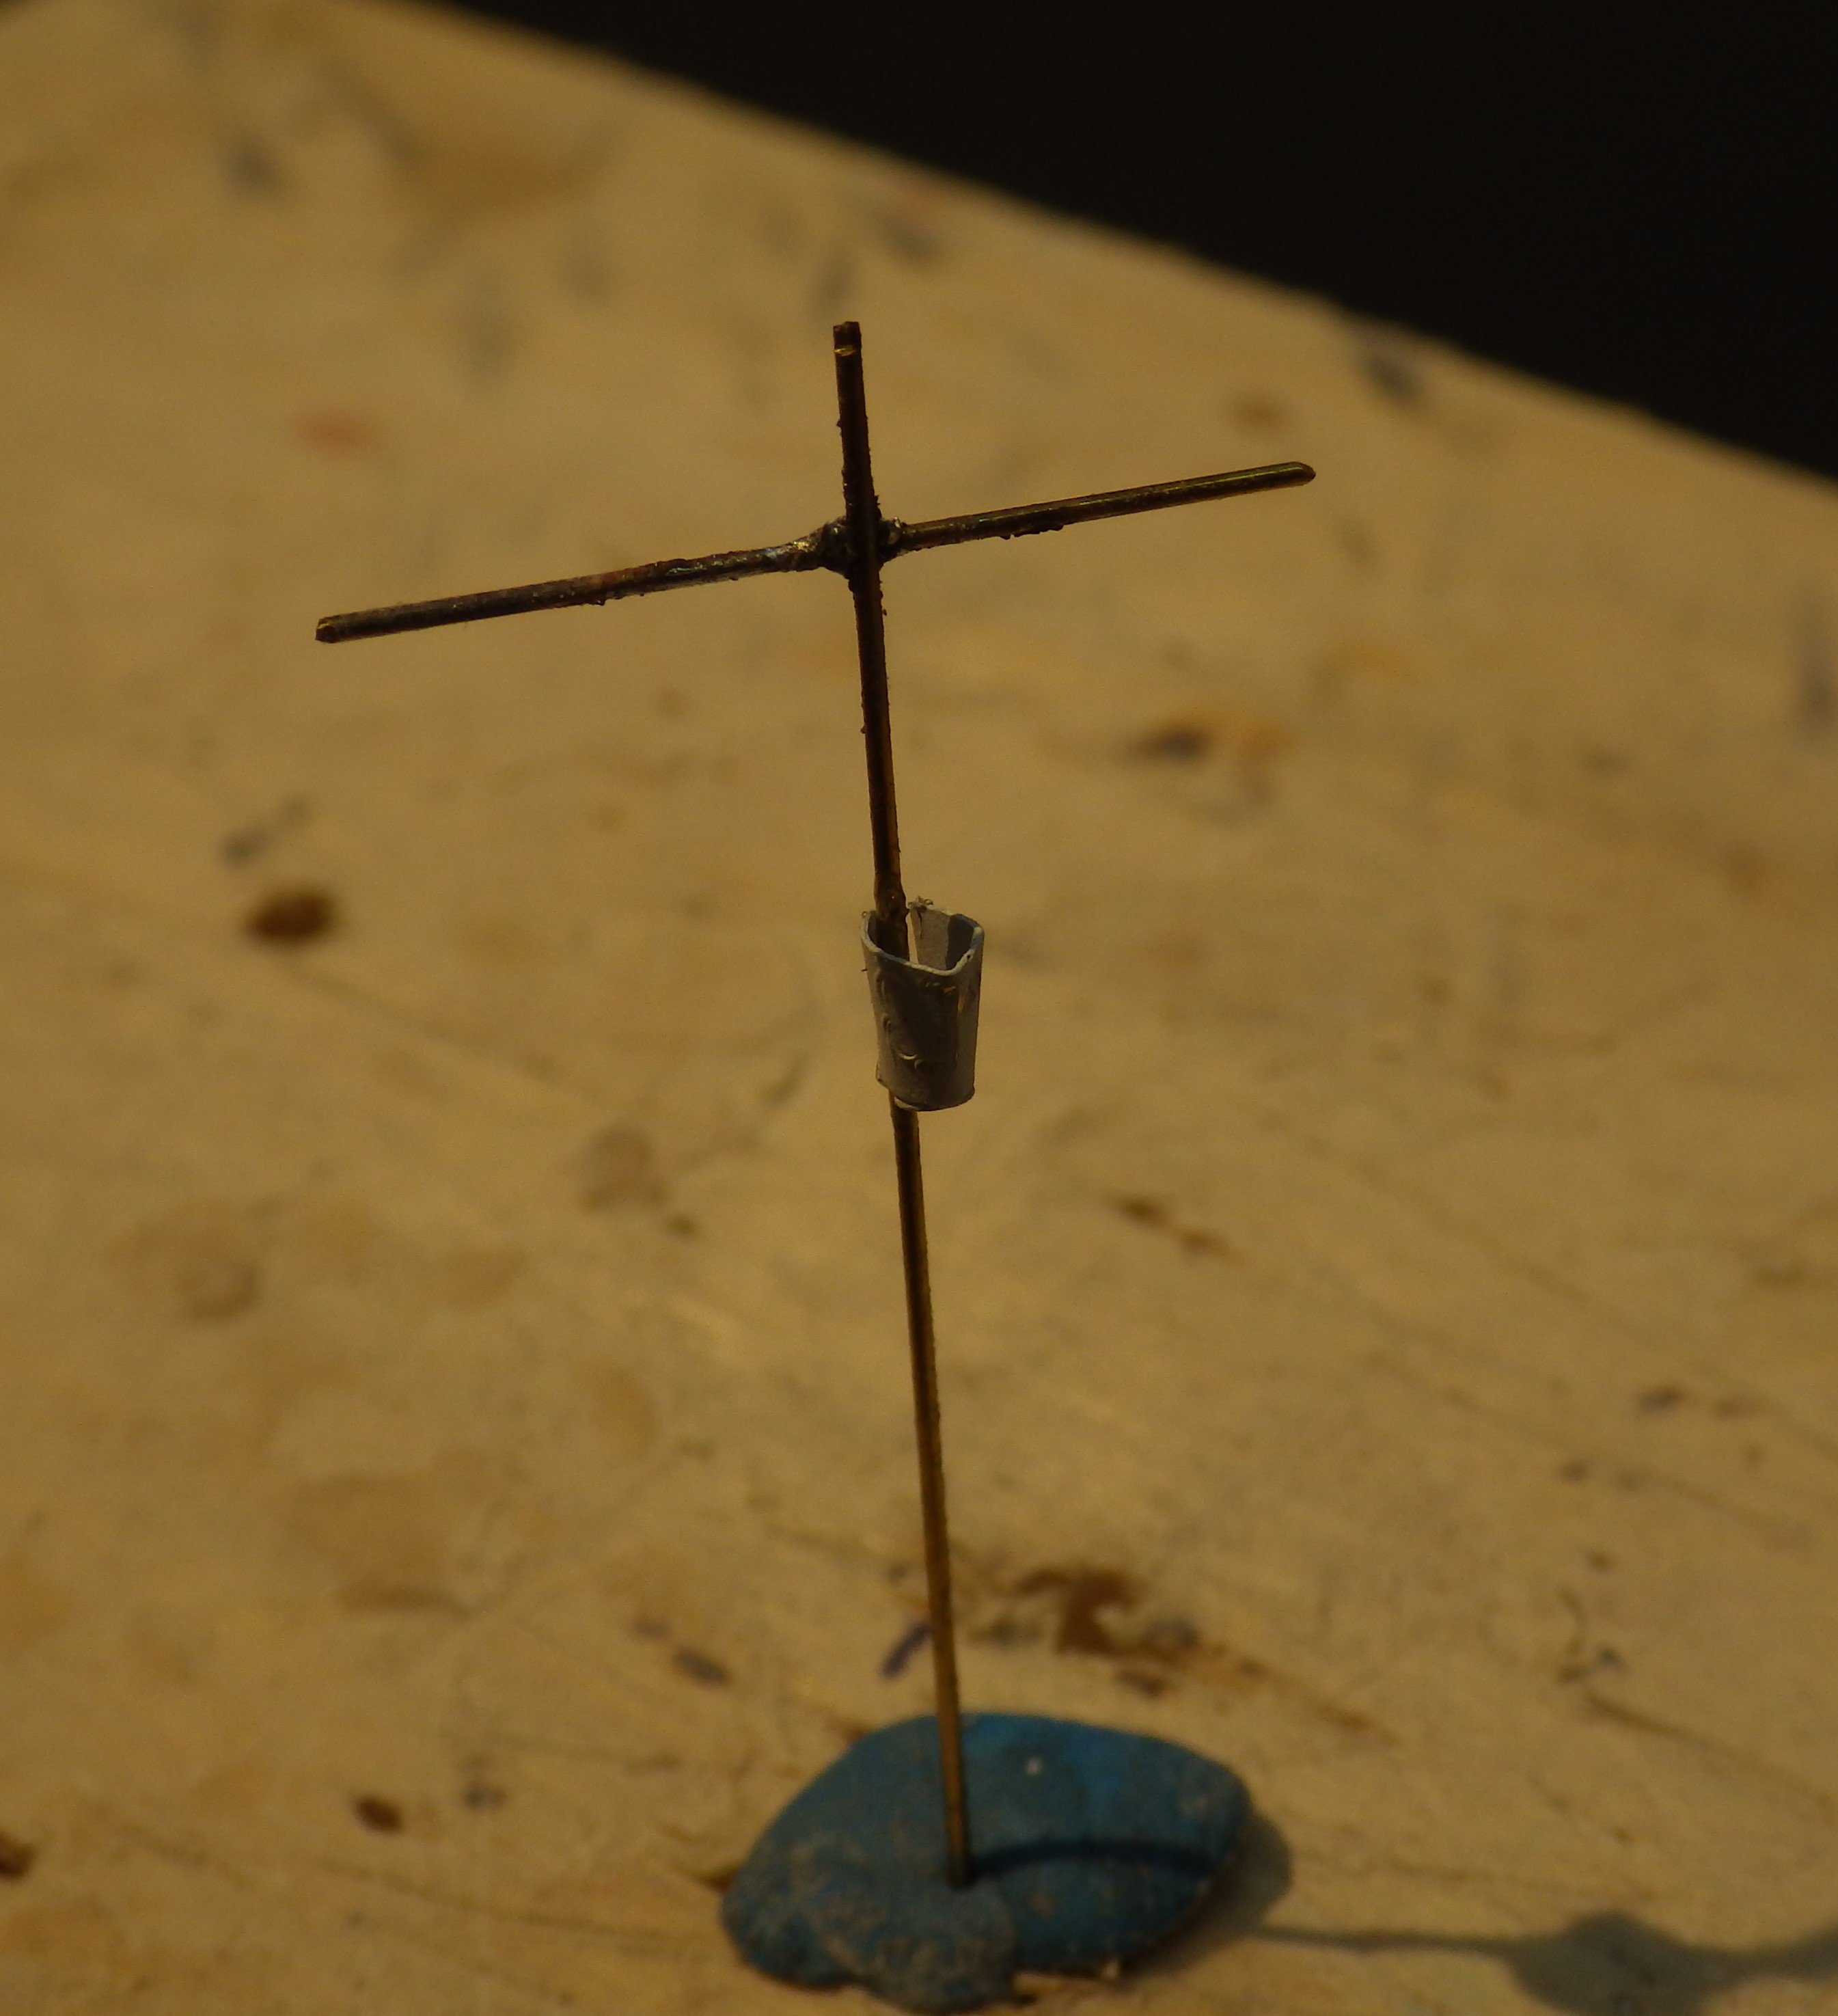
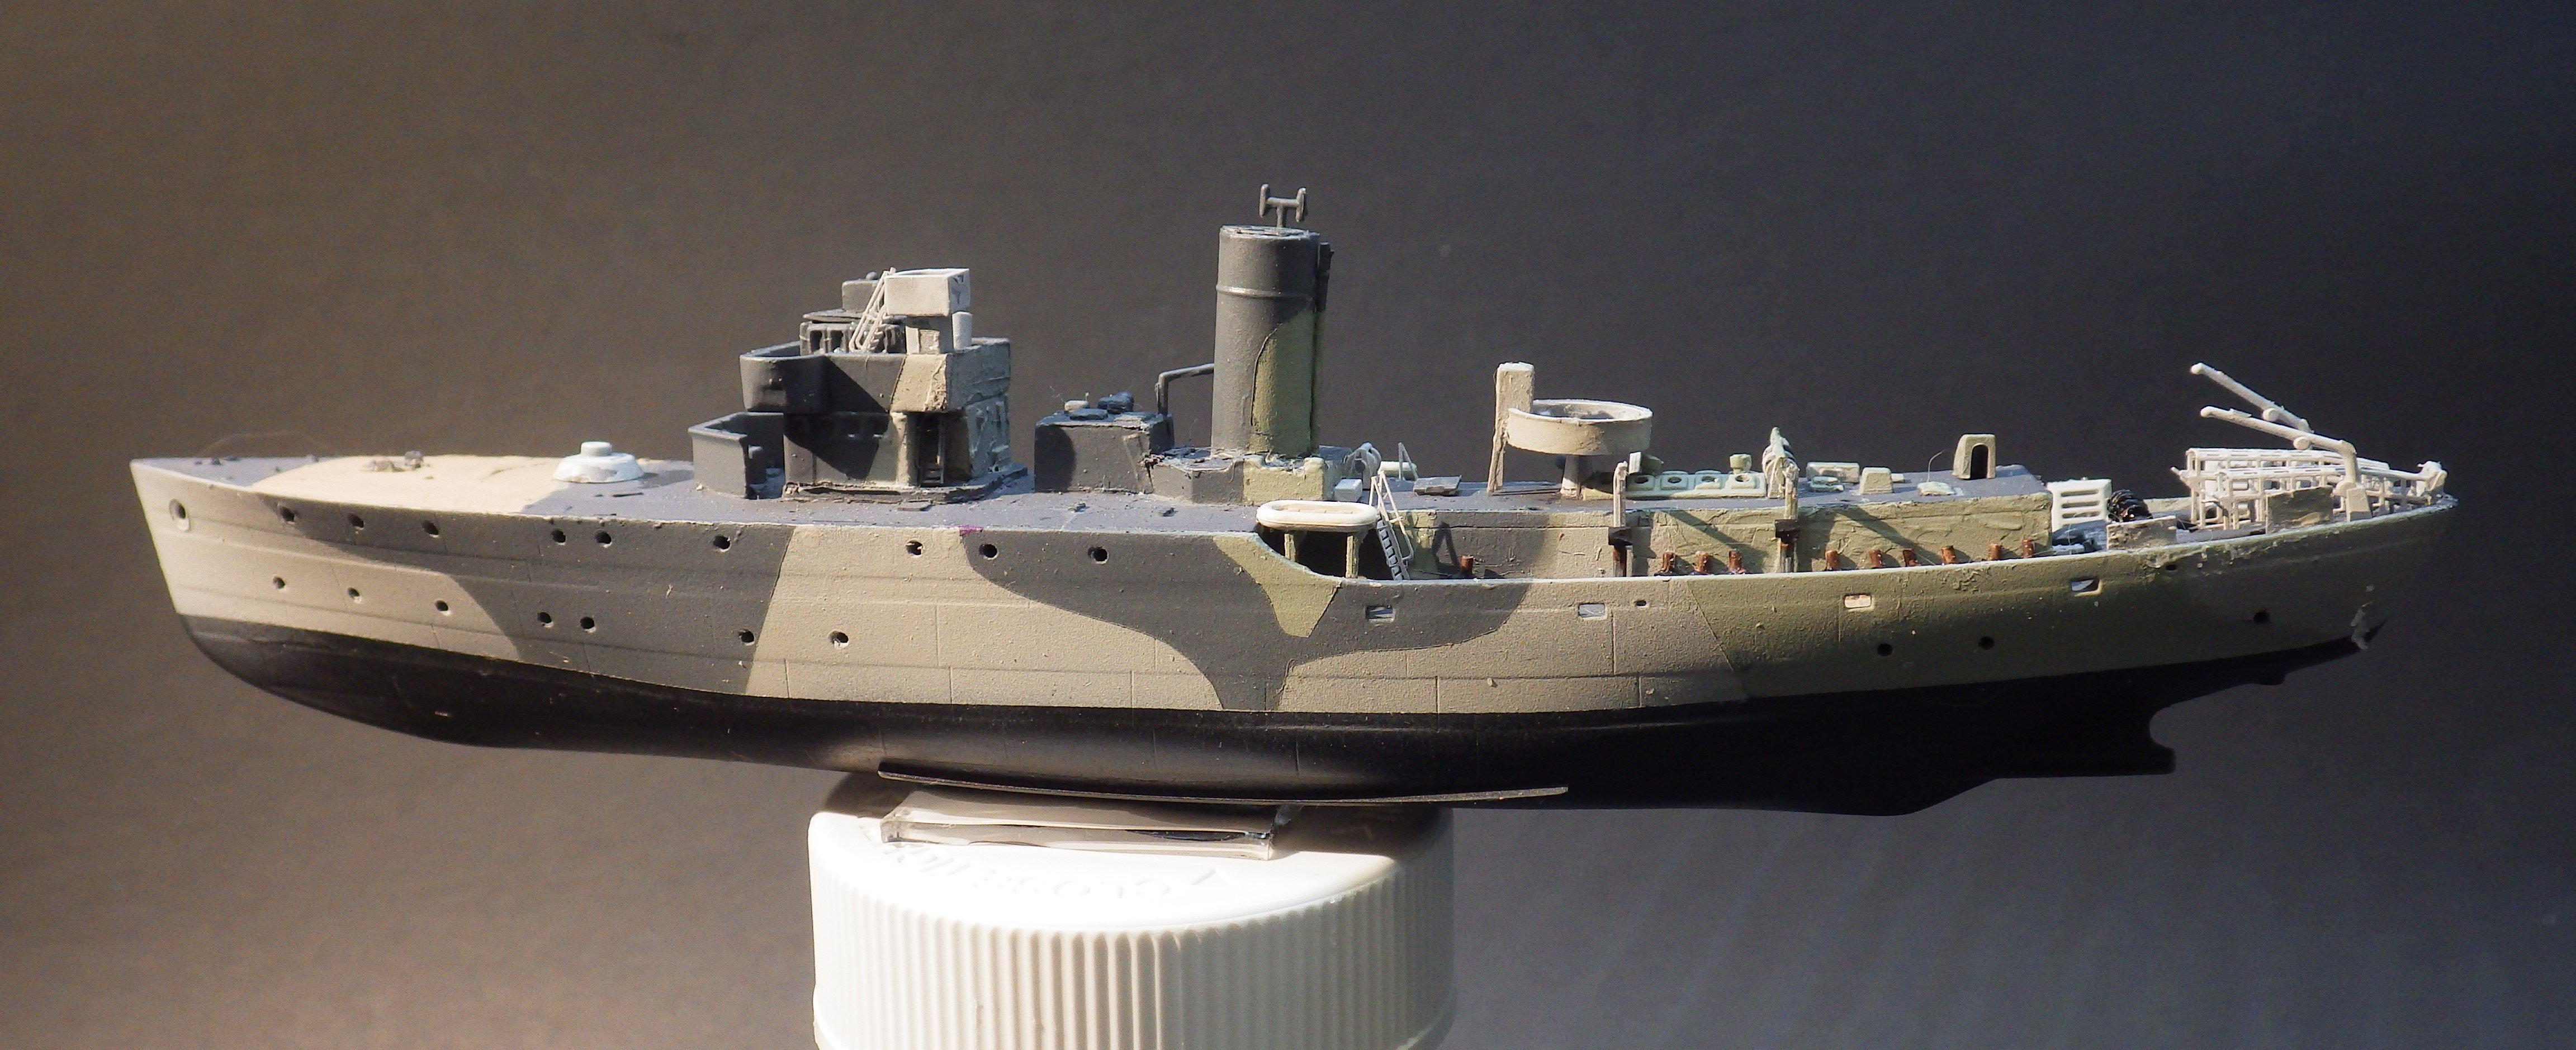
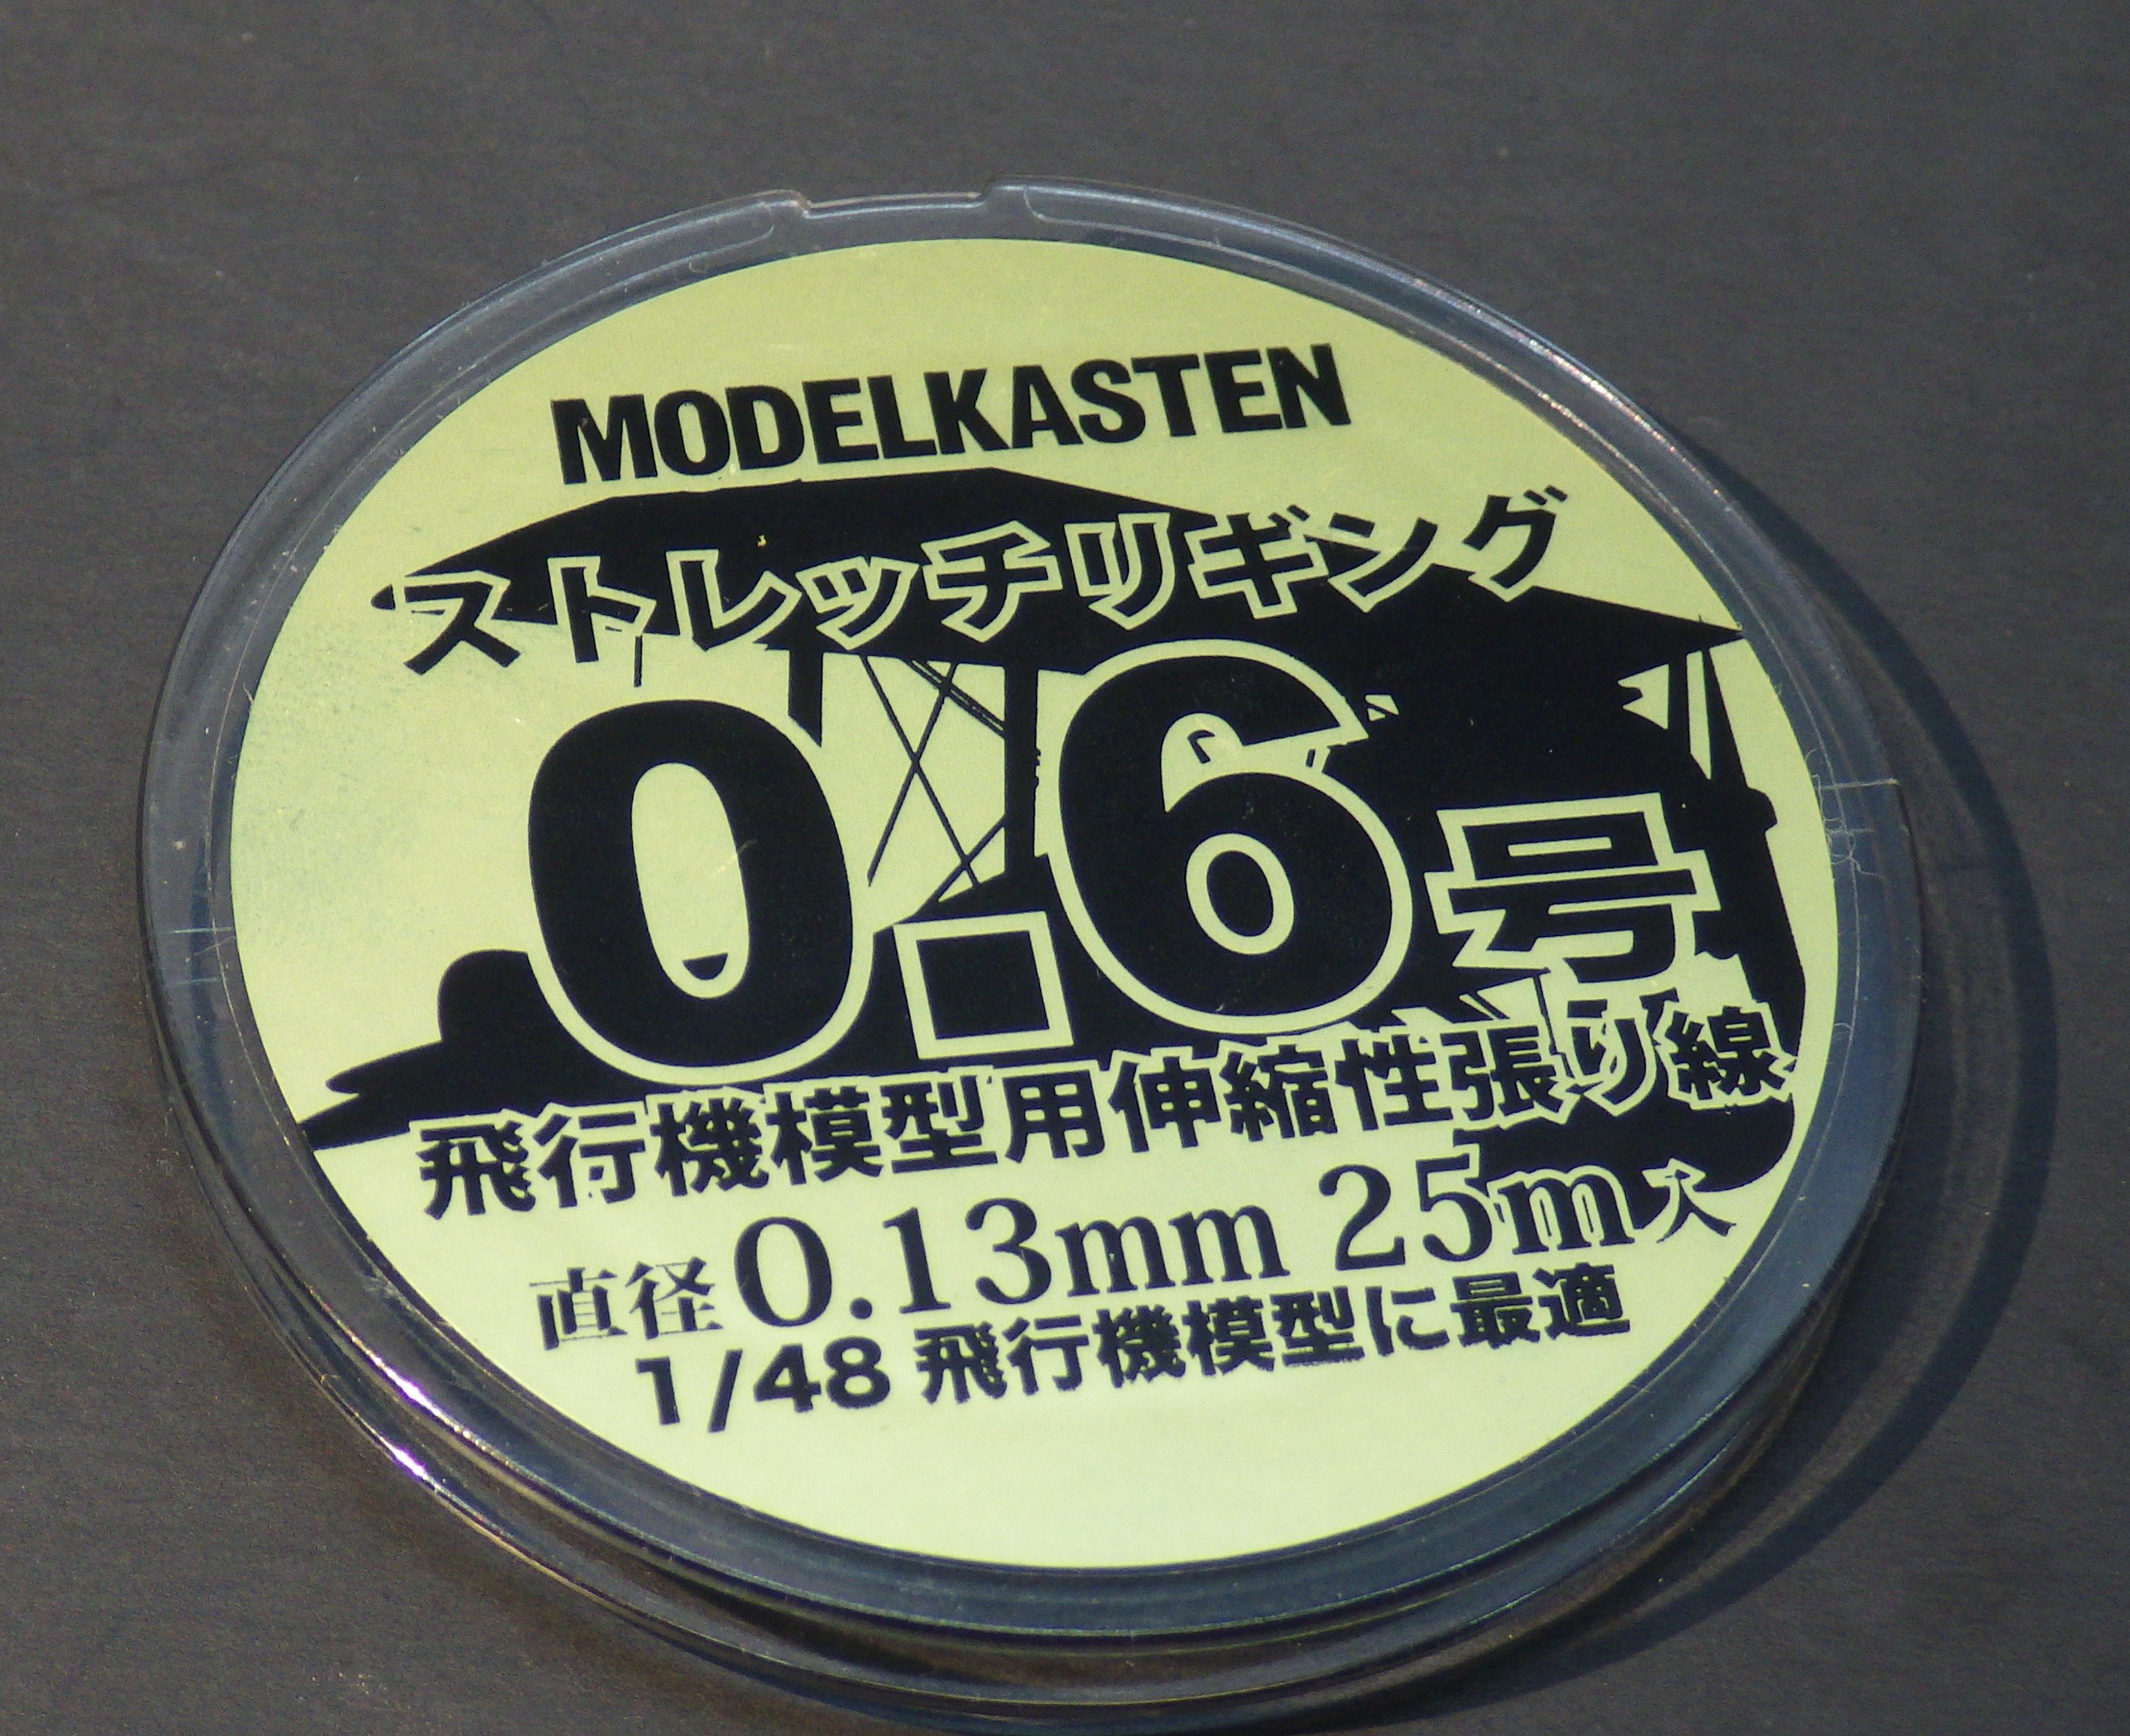
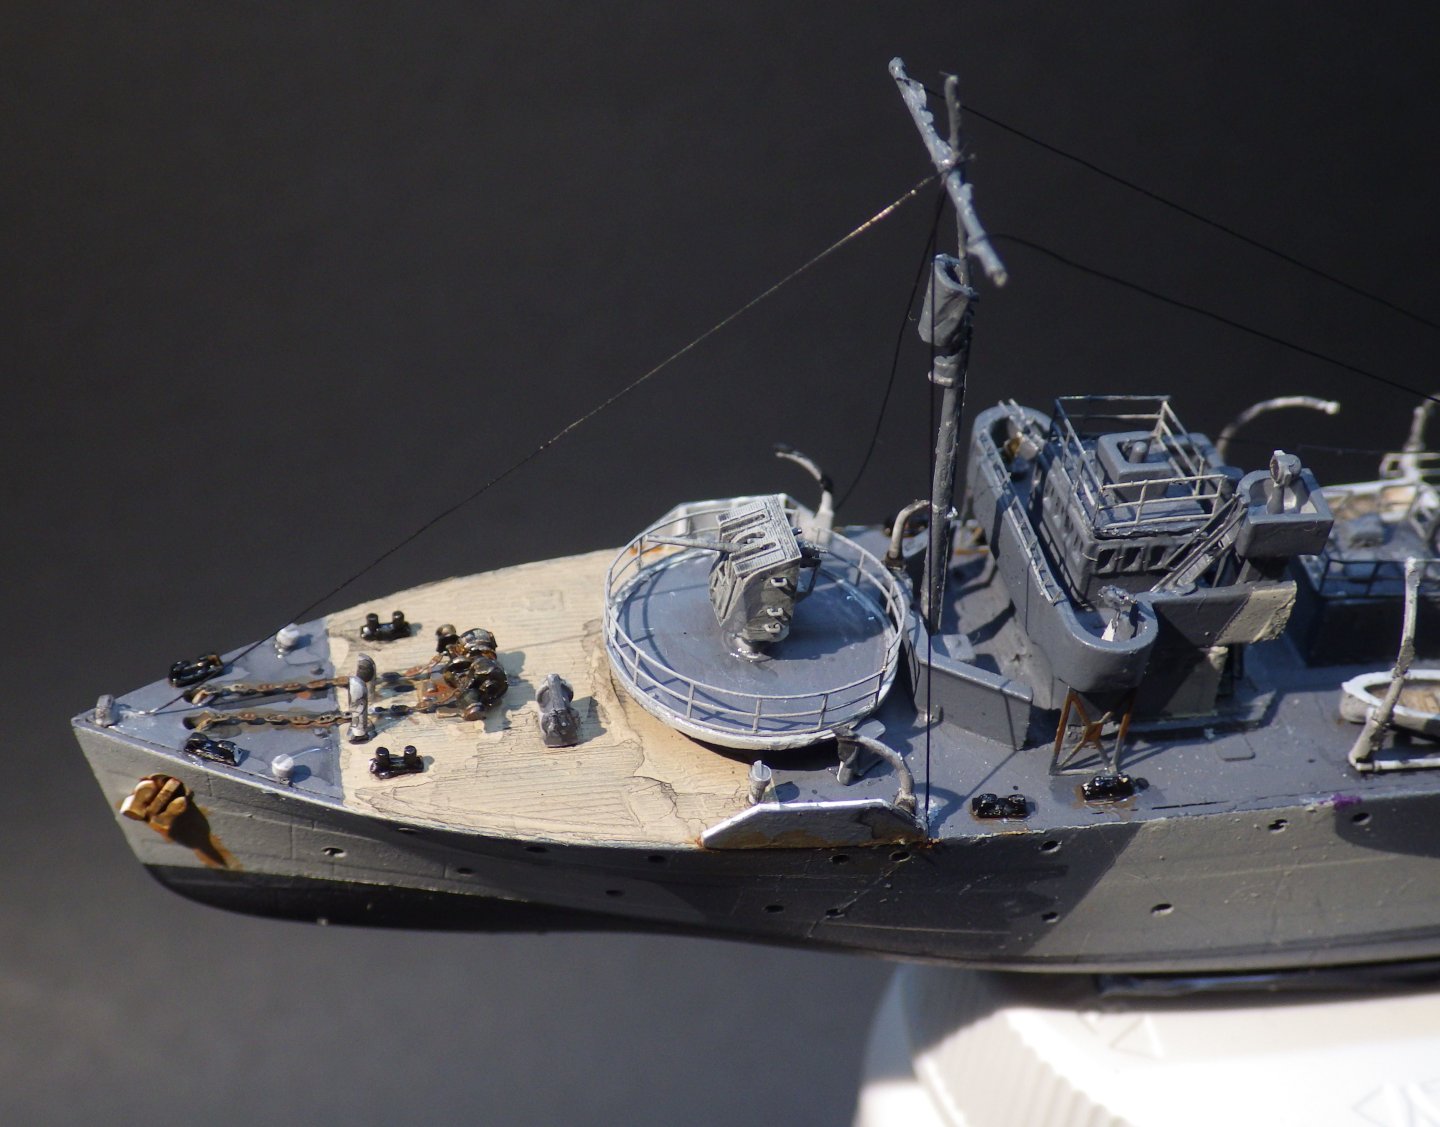
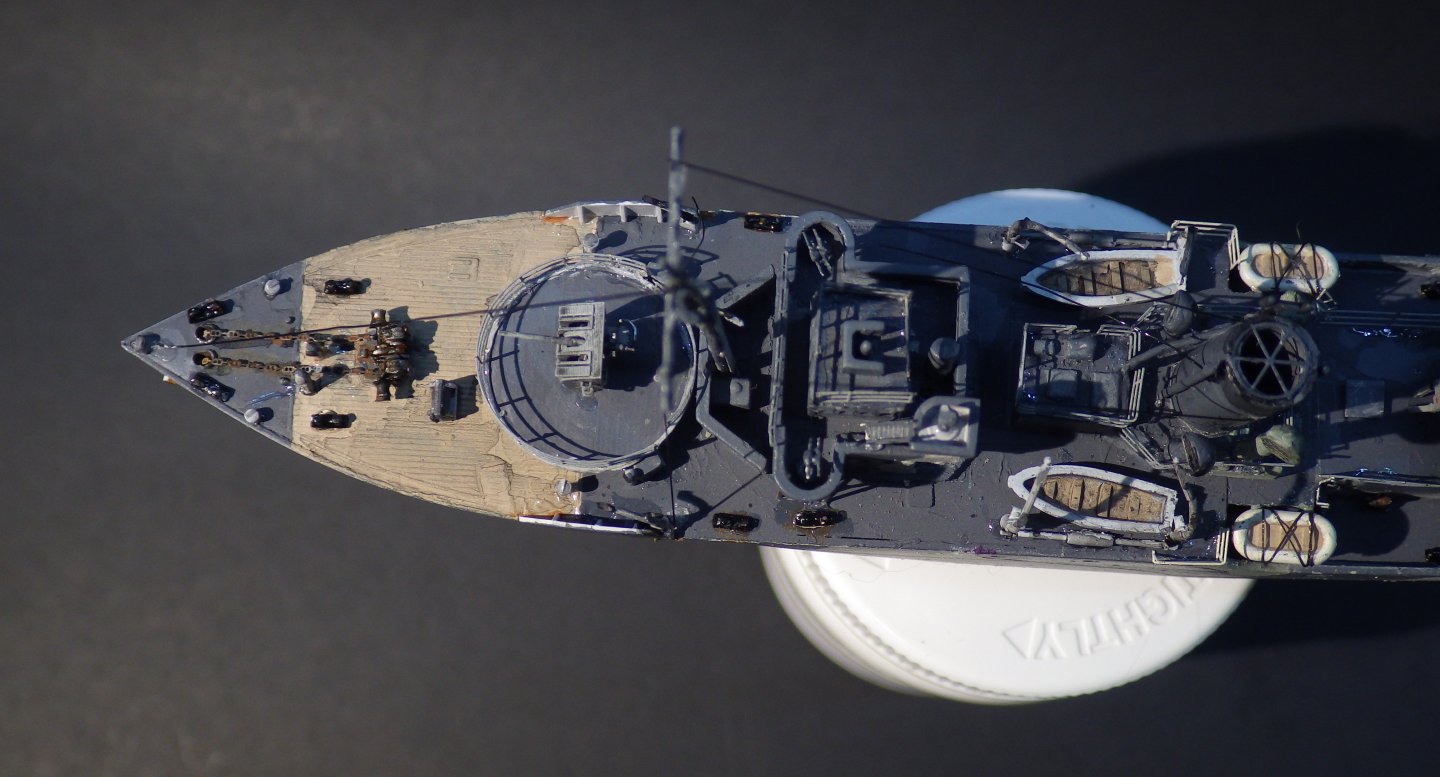
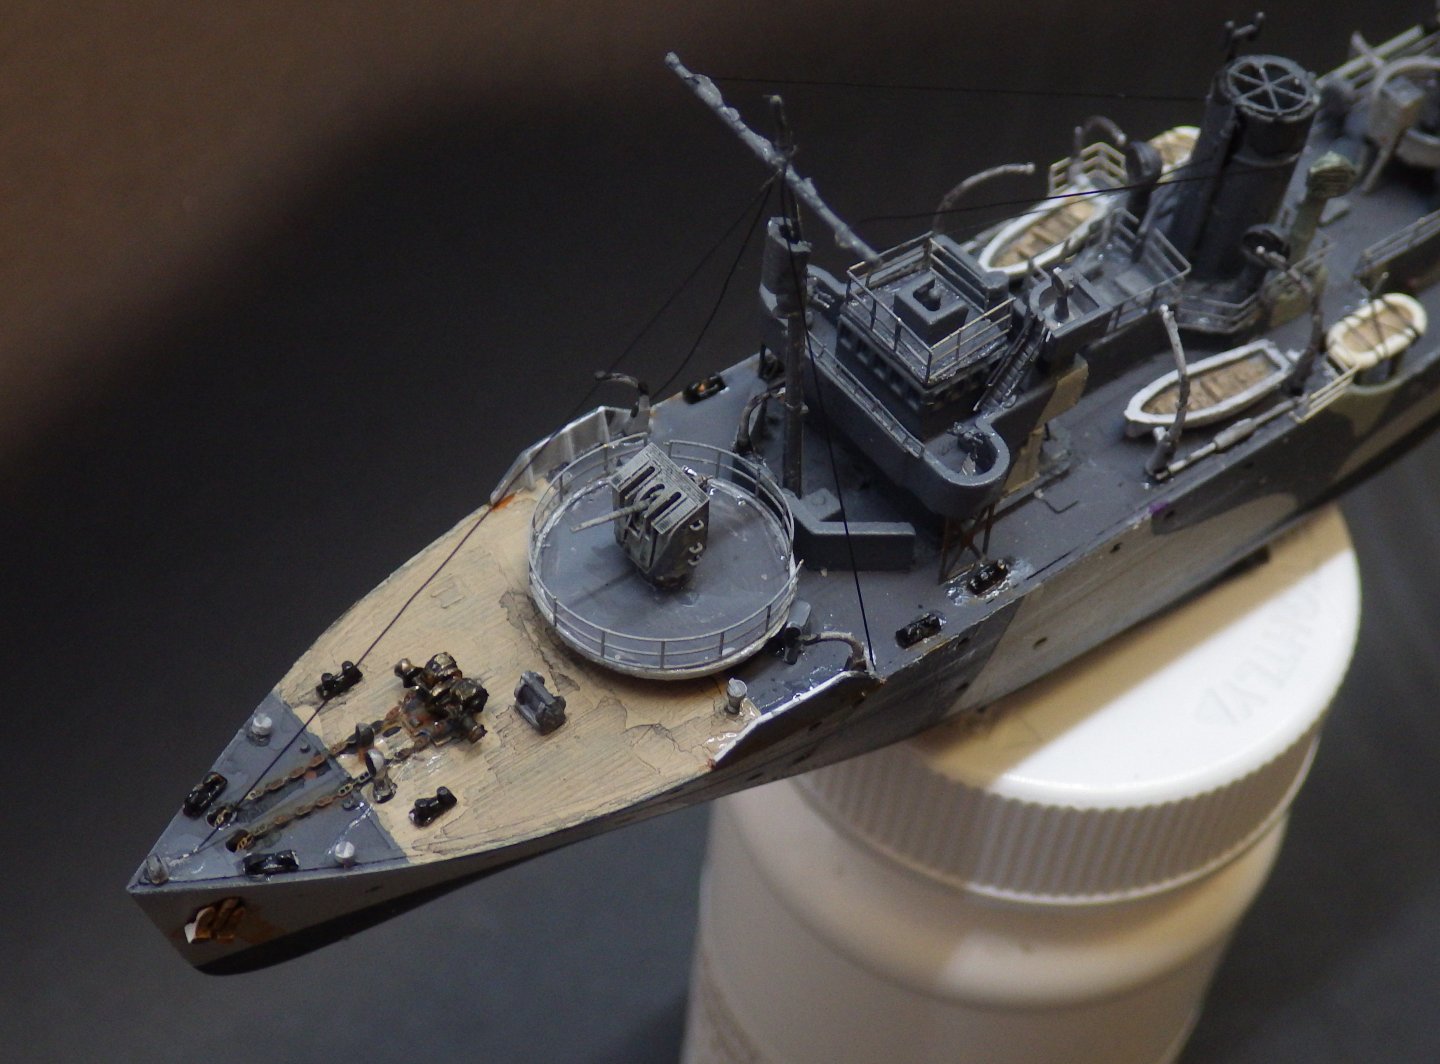
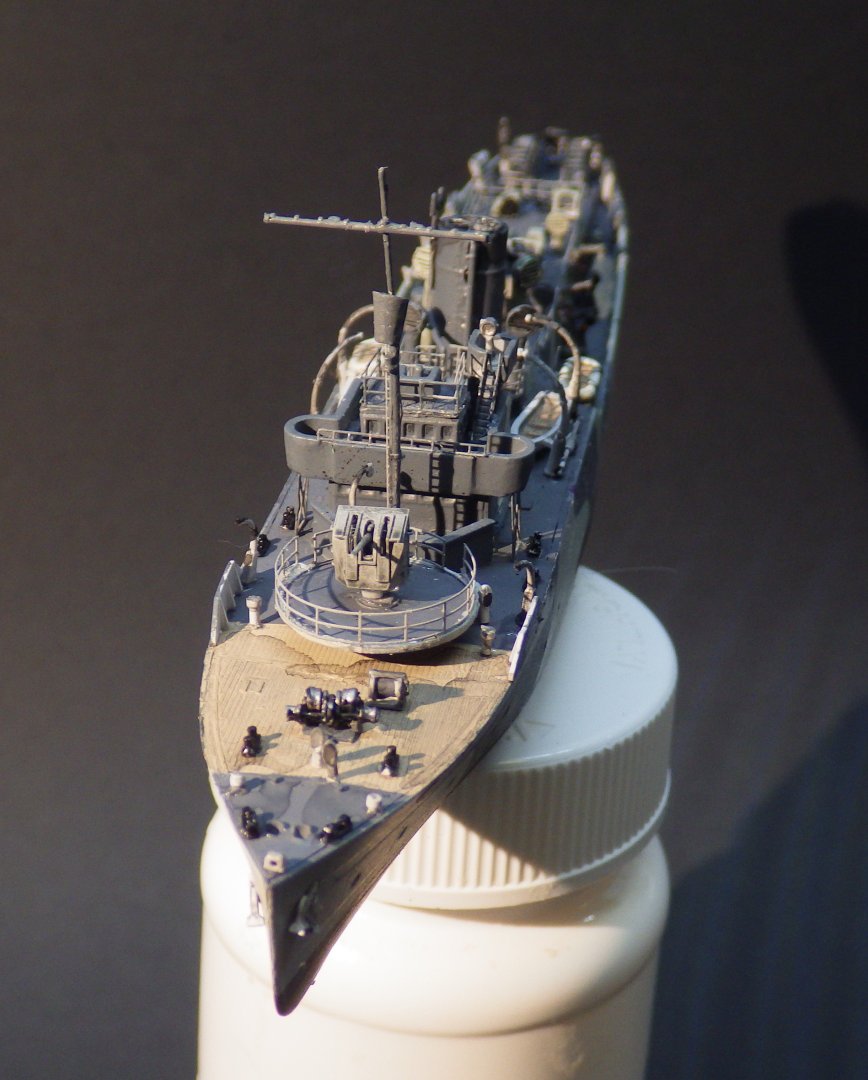
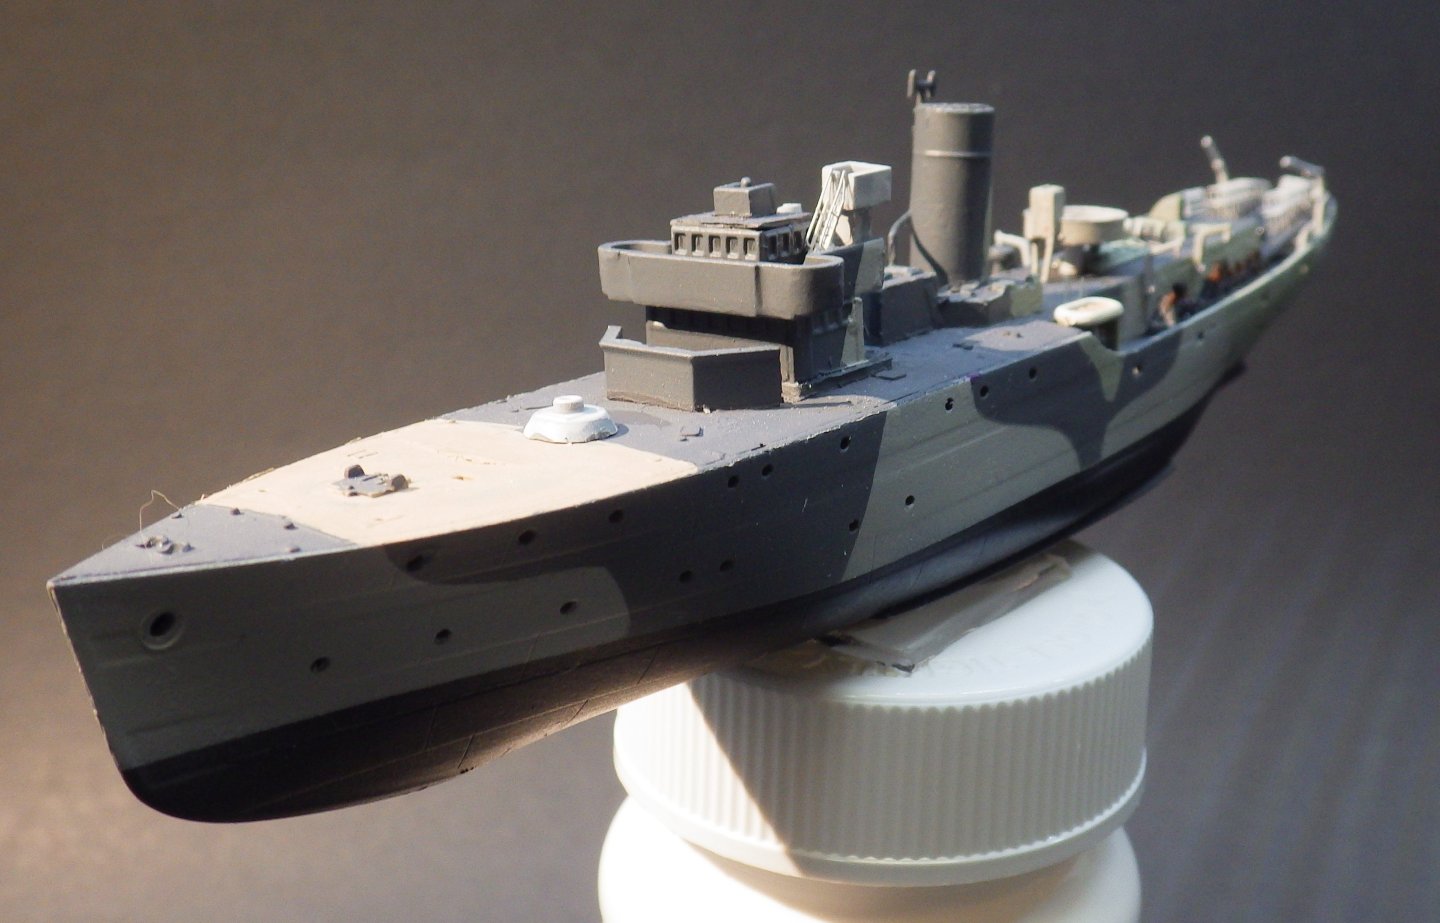
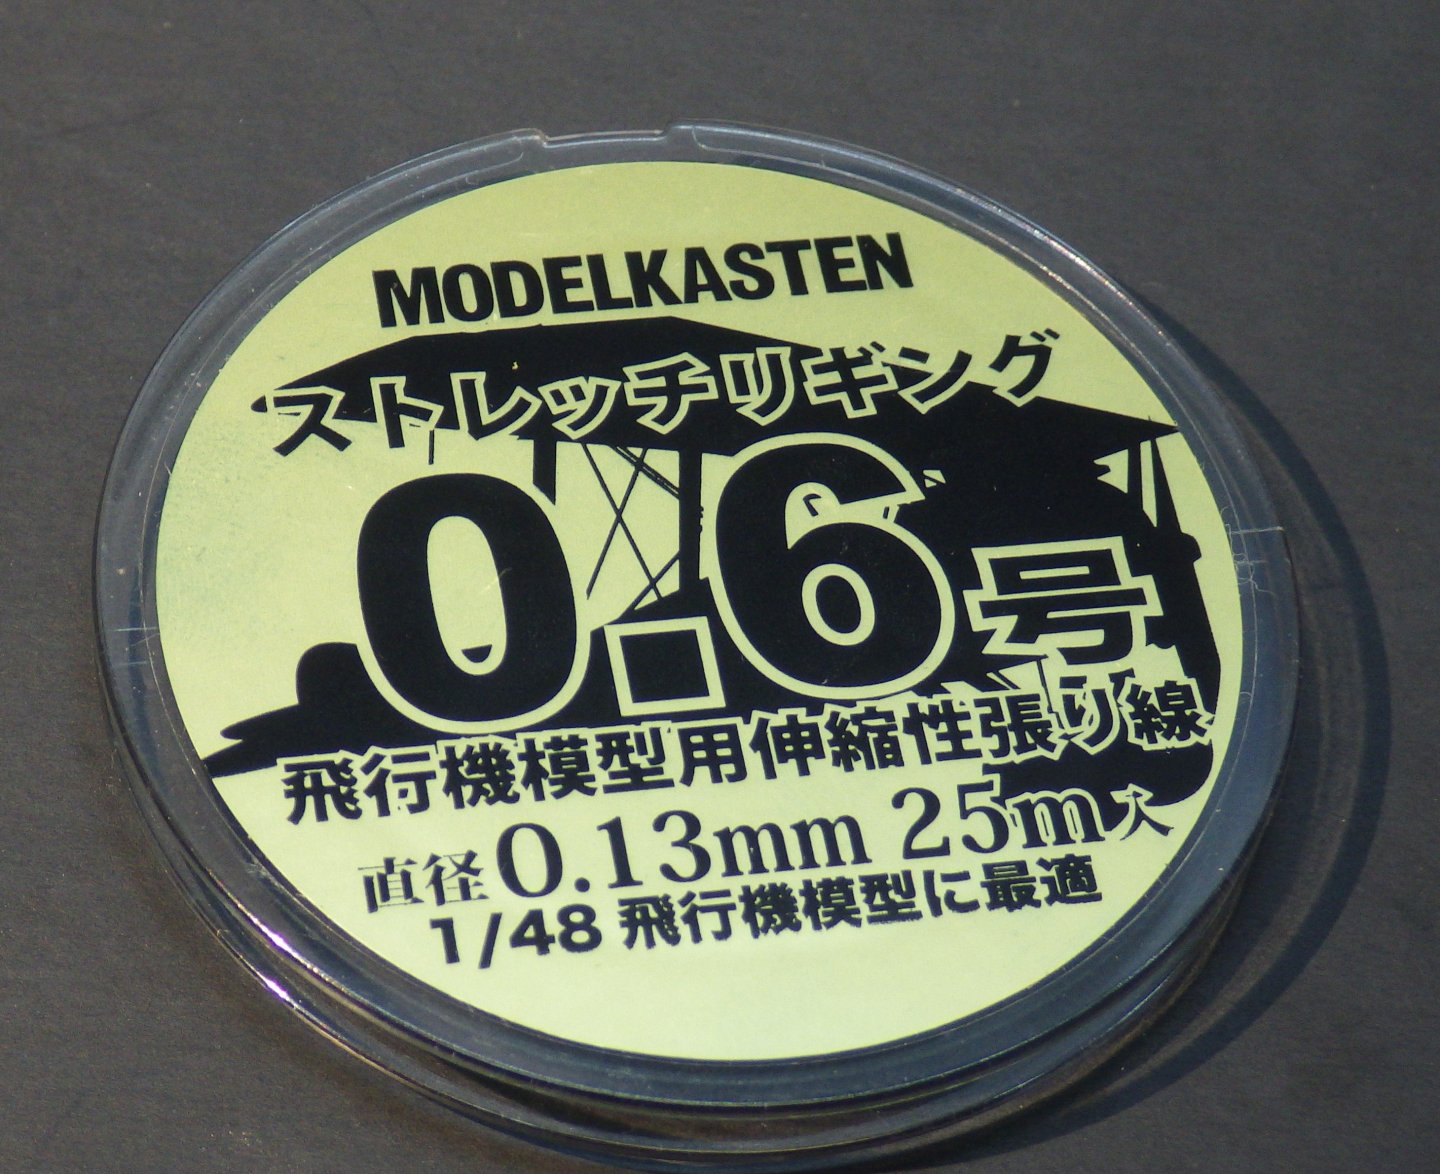
A somewhat tense day working on the last few difficult details. I painted the Lewis guns and added them to the bridge wings. I am not sure if I lost an ammunition drum in the process but they are too small to confirm even with magnifiers. The anchor chains have been added and the remaining rails apart from the forecastle. After a bit of prevarication I had a try at the rigging. I went with the basics, mast stays and a few other lines. No bridge halyards at this point. I used the Modelkasten line which doesn't seem to have the stretch of the Uschi line I tried in the past. Its not super tidy but I am pleased with it generally; it adds a bit more to the model.\ The only problem is the repaired upper section of the mast isn't strong enough and has raked forward with the pull of the rigging. I relaxed a bit and added some simple rust washes and I think that is sufficient. I then built a new mast from brass rod and added the PE crows nest. Hopefully tomorrow I will feel brave enough to remove the first rigging attempt and bin the current mast and try again Thank you all for looking in, for the likes and the supportive comments Alan


- 97 replies
-
- 10
-

-

-
Thanks Mike. I need to do a basic grey one next. These three colour camo jobs are a masking nightmare. It does look nice when its done though. Alan
-
Moving slowly forward. Partly because this was started so long ago I have rather lost the thread of what I was doing. I have lost my place a bit with the PE appropriate to Zinnia and I did miss the searchlight railings could have been installed from PE rather than the kit parts. Otherwise I think I am not too far off. I had a minor setback. The pill container is a nice comfortable base to work on the ship but it is a bit top heavy and inevitably I knocked it over. The only casualty was the mast which has been rebuilt using appropriate brass rod. My tip to prevent this (belatedly applied) is to fill the pill container about halfway with water. Photos of Zinnia are scarce but there is a line drawing of her towards the end of the Flower Corvette book which shows that Mirage got the details correct generally I have taken a bit of a pragmatic approach to the PE. A lot of the kit parts like the davits are very finely moulded and I think are better than toe 2D PE so I have taken the version I like best. Just because it has a PE equivalent doesn't mean I am going to use it. The railings of course. I think the PE railings step up the model all on their own. I used the kit 2 pdr aft gun; its really a nice representation. I used the resin 4 inch forward gun and the PE Lewis guns for the bridge wings. So far most of the details are added. Forecastle railings, anchor chains are the last parts. This means I am looking the rigging question in the face. The mast is a bit delicate. I should probably have remade the whole thing in brass. I may have to rethink it. Luckily Gators Grip glue is relaively easy tp remove and rework Some rust washes will be added but nothing too extreme. Zinnia never made any of the long Atlantic convoyes Thanks for looking in and for the likes and comments Alan

- 97 replies
-
- 12
-
-
-
Thank you Mike; that's a good point about the matte spray. That would be my last task in the build Alan
-
This looks like a great idea. It should be a fun build with a presentable result. alan
-
A fabulous subject and it looks like a magnificent kit. I’ll watch with fascination alan
-
I’ve had good results with this too Alan
-
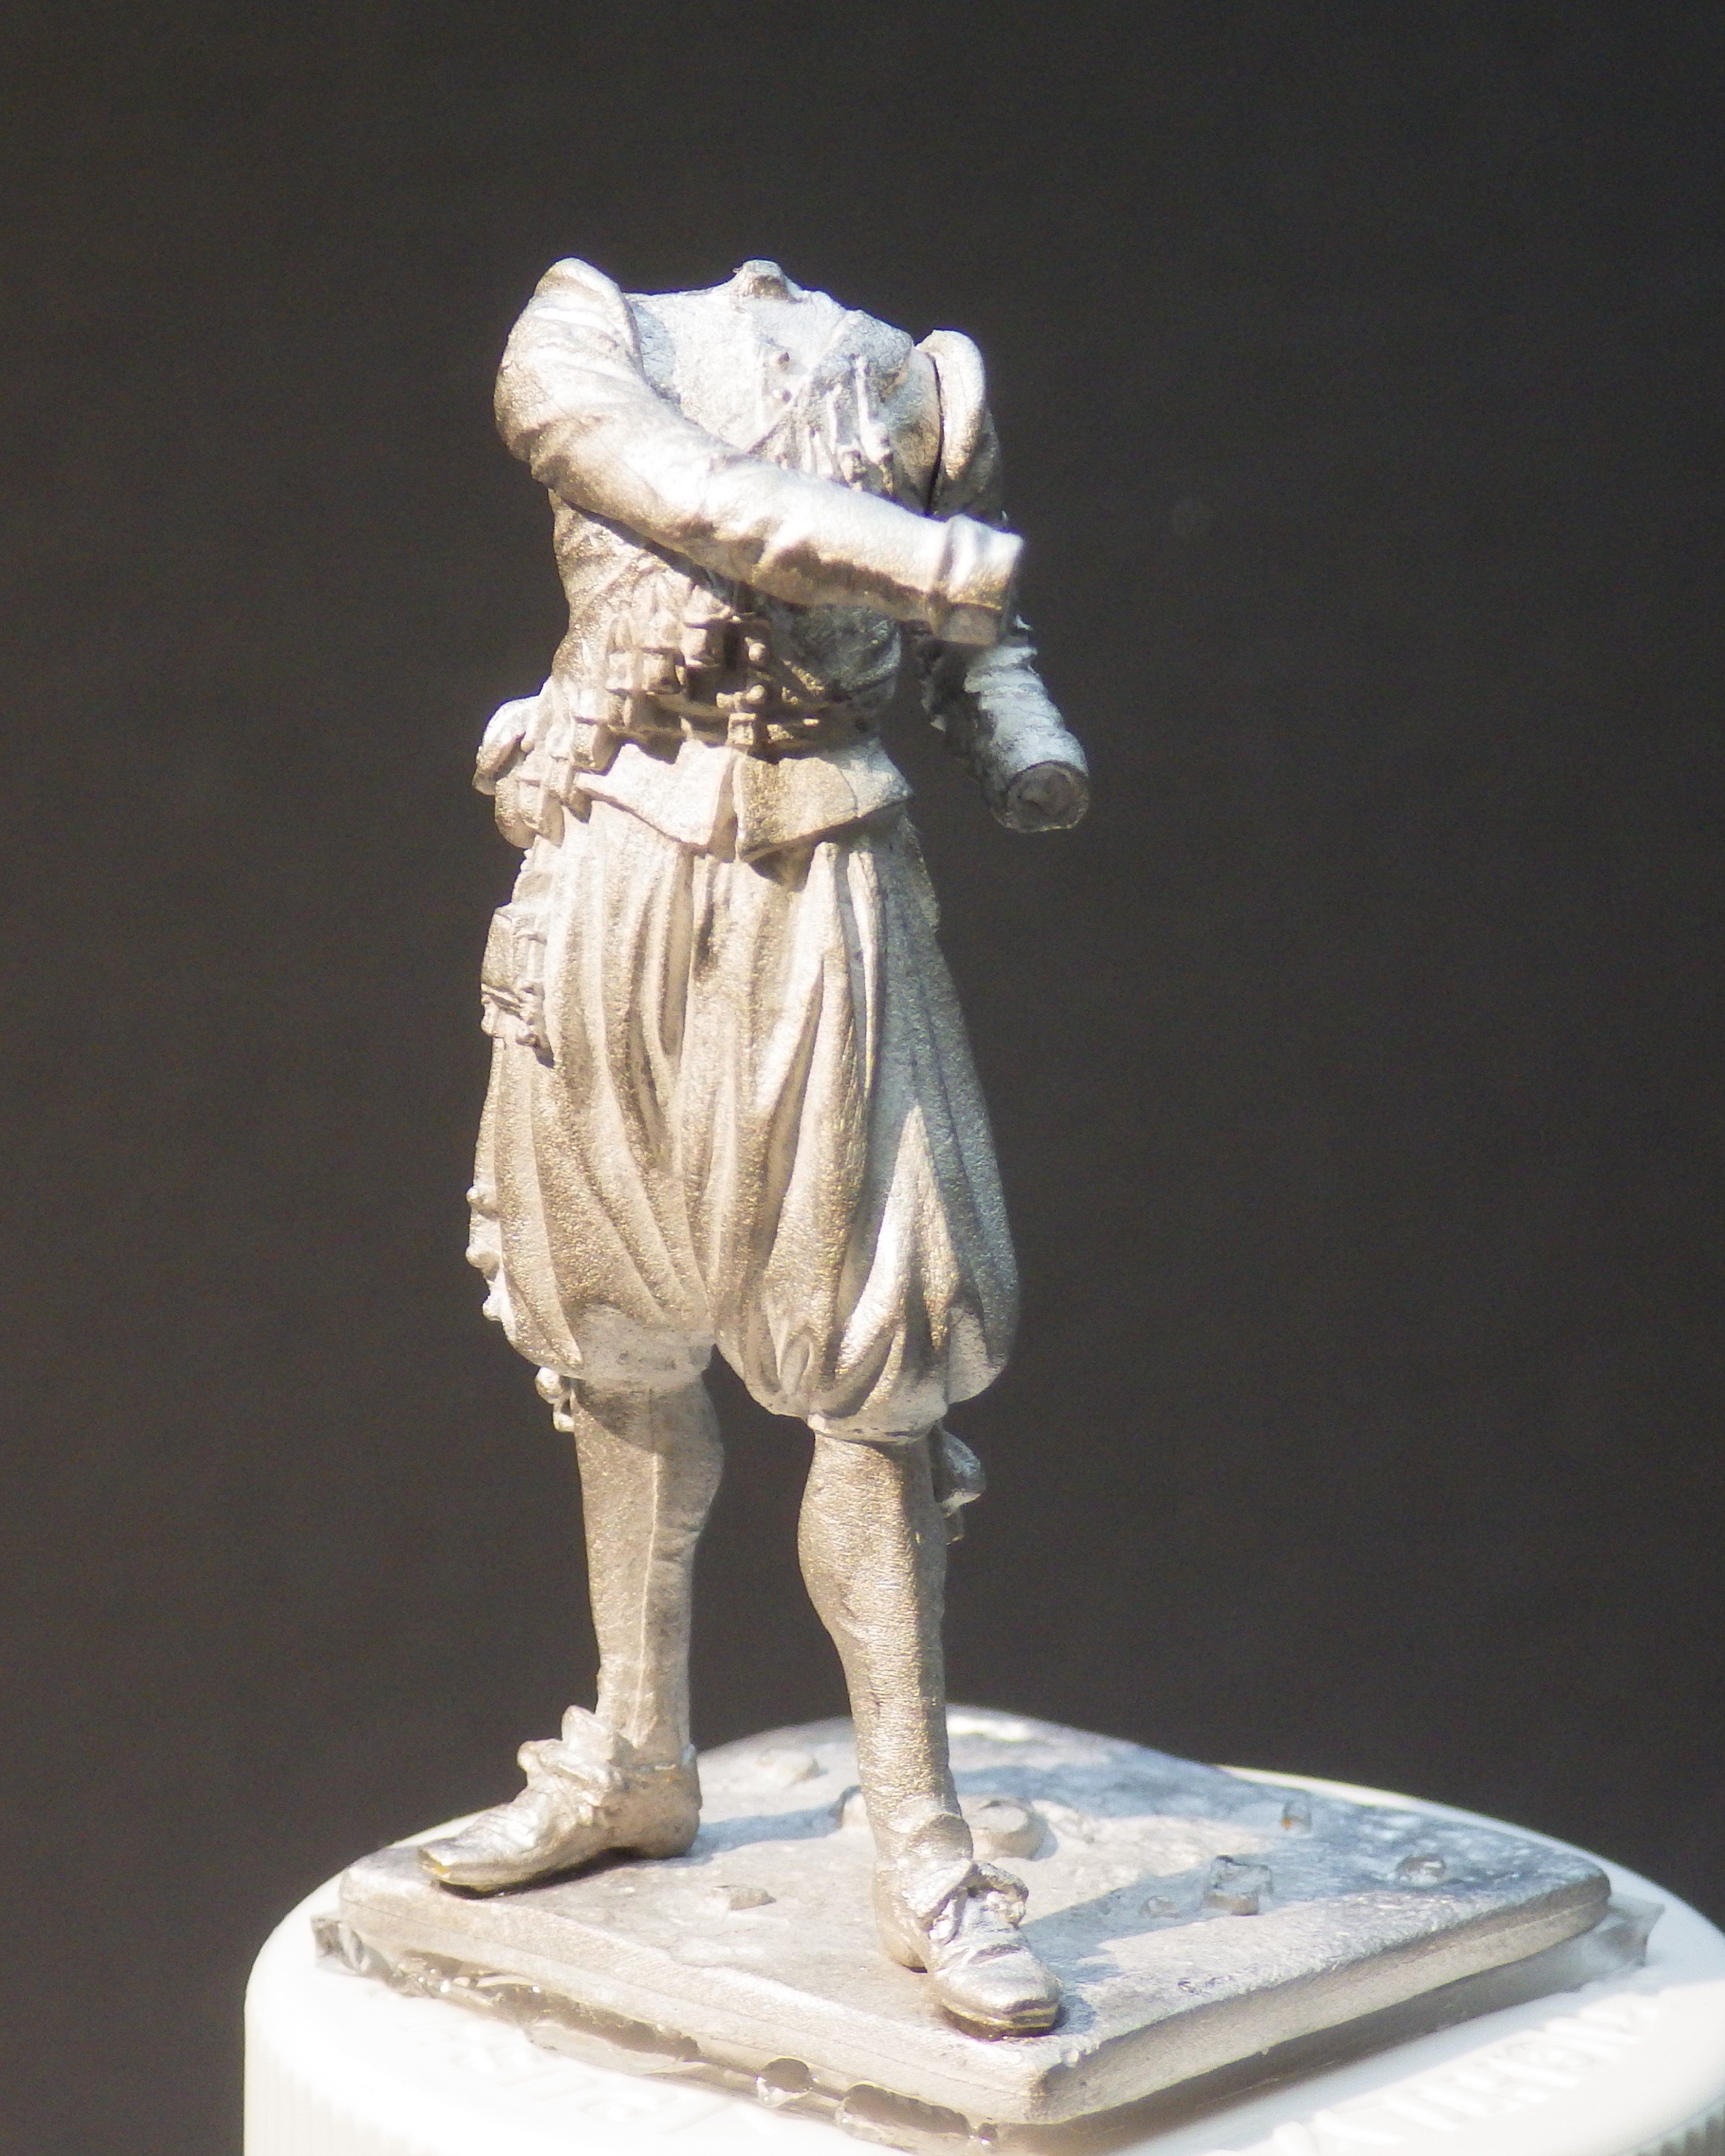
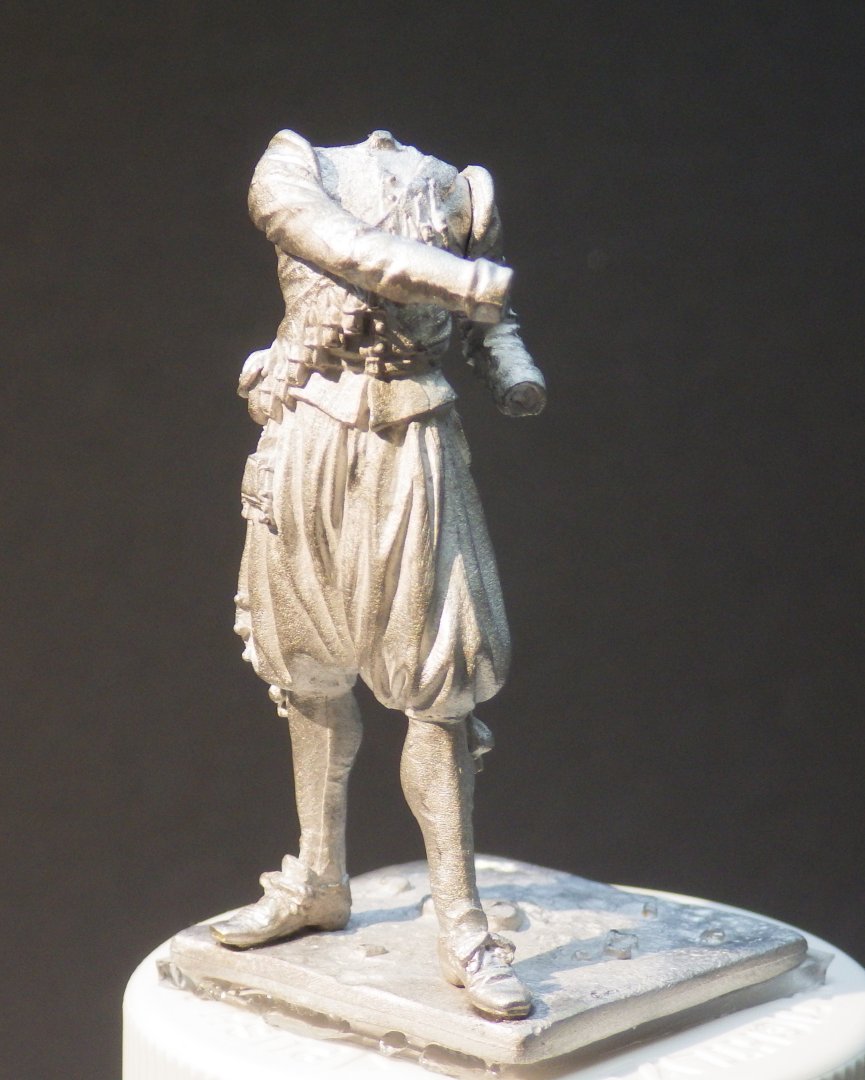
He certainly looks like he could carry his head under his arms! This is another Art Girona figure. From the Thirty Years War (1618 - 1648) he is a Spanish Arquebusier in the process of loading. It is another nicely sculpted piece. I’m toying with keeping the head separate during painting to see if it makes the work easier Alan
-
Work resumes on HMS Zinnia. I've started building up the detail with a mixture of kit parts and the White Ensign PE set although the PE is more appropriate to the later bridge configurations. I am going to use the kit parts for the aft gun tub and the forward bandstand. The PE really didn't improve the look although I will add the railings to the bandstand. Painting and some washes to weather a bit next. Zinnia did not last very long so I don't think heavy weathering is appropriate. Now I have to decide whether to rig the ship; something that I find difficult. I think some of it would be better done before the railing go on; the funnel stays for example. I just got the model kasten thread and I have the Uschi version too. I may have to try the funnel stays and see how it goes Thanks for looking in and the likes Alan

-
Nice work on the helo Mike Alan
-
The daffadar has been moved to a display shelf and now I'm working on finishing the Flowers and associated diorama. I did enjoy working on these figures so while the paint was drying on the ships I did open a package and fiddle a bit Thank you for all the likes and supportive comments Alan
-
Thank you very much Craig. I look forward to seeing your figure project coming together. Alan
-
Thank you Ken. I don't think he is going to win any tent pegging competitions with that lance tough. Alan
-
Thank you very much Jack. Your input was much ppreciated. Alan
-
Thank you very much OC. The camera is an unflinching critic too. I was pleased with my first foray into figure painting and I learnt a lot. I plan on picking up another one shortly Alan
-
Absolutely spectacular result. The model is beautiful. As always the log is an absorbing read and the photographs are a treat to see alan
-
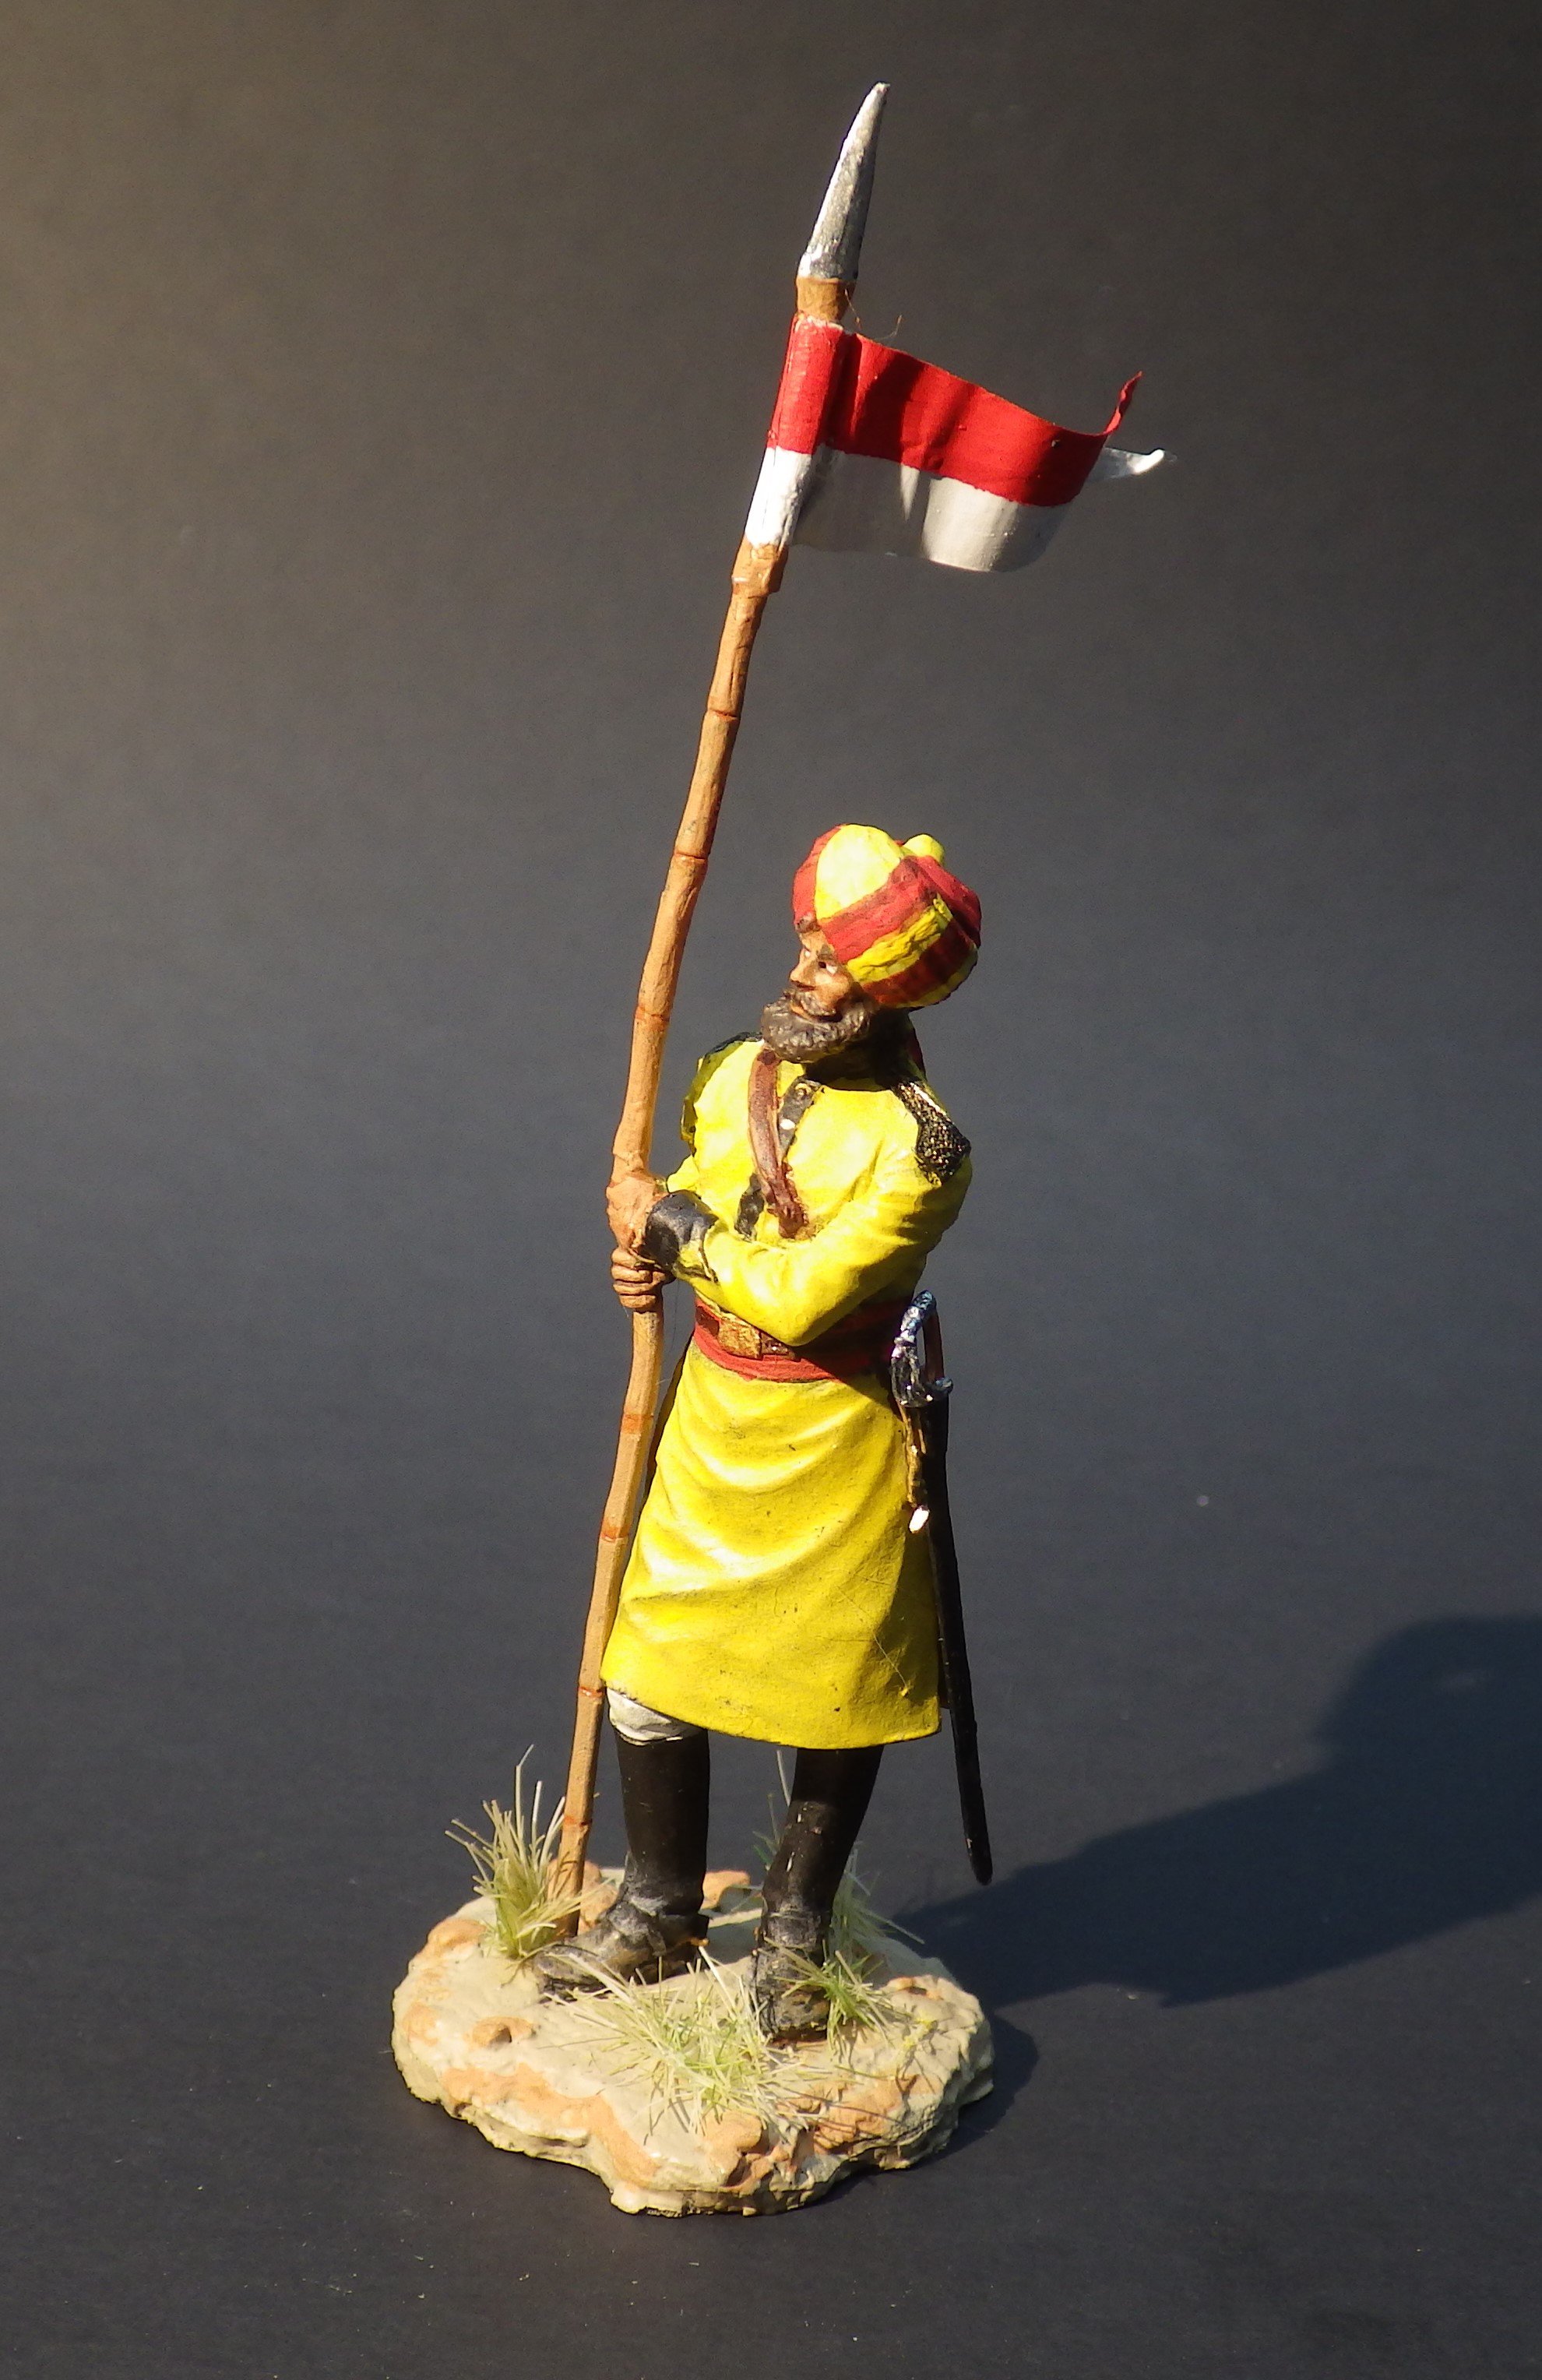
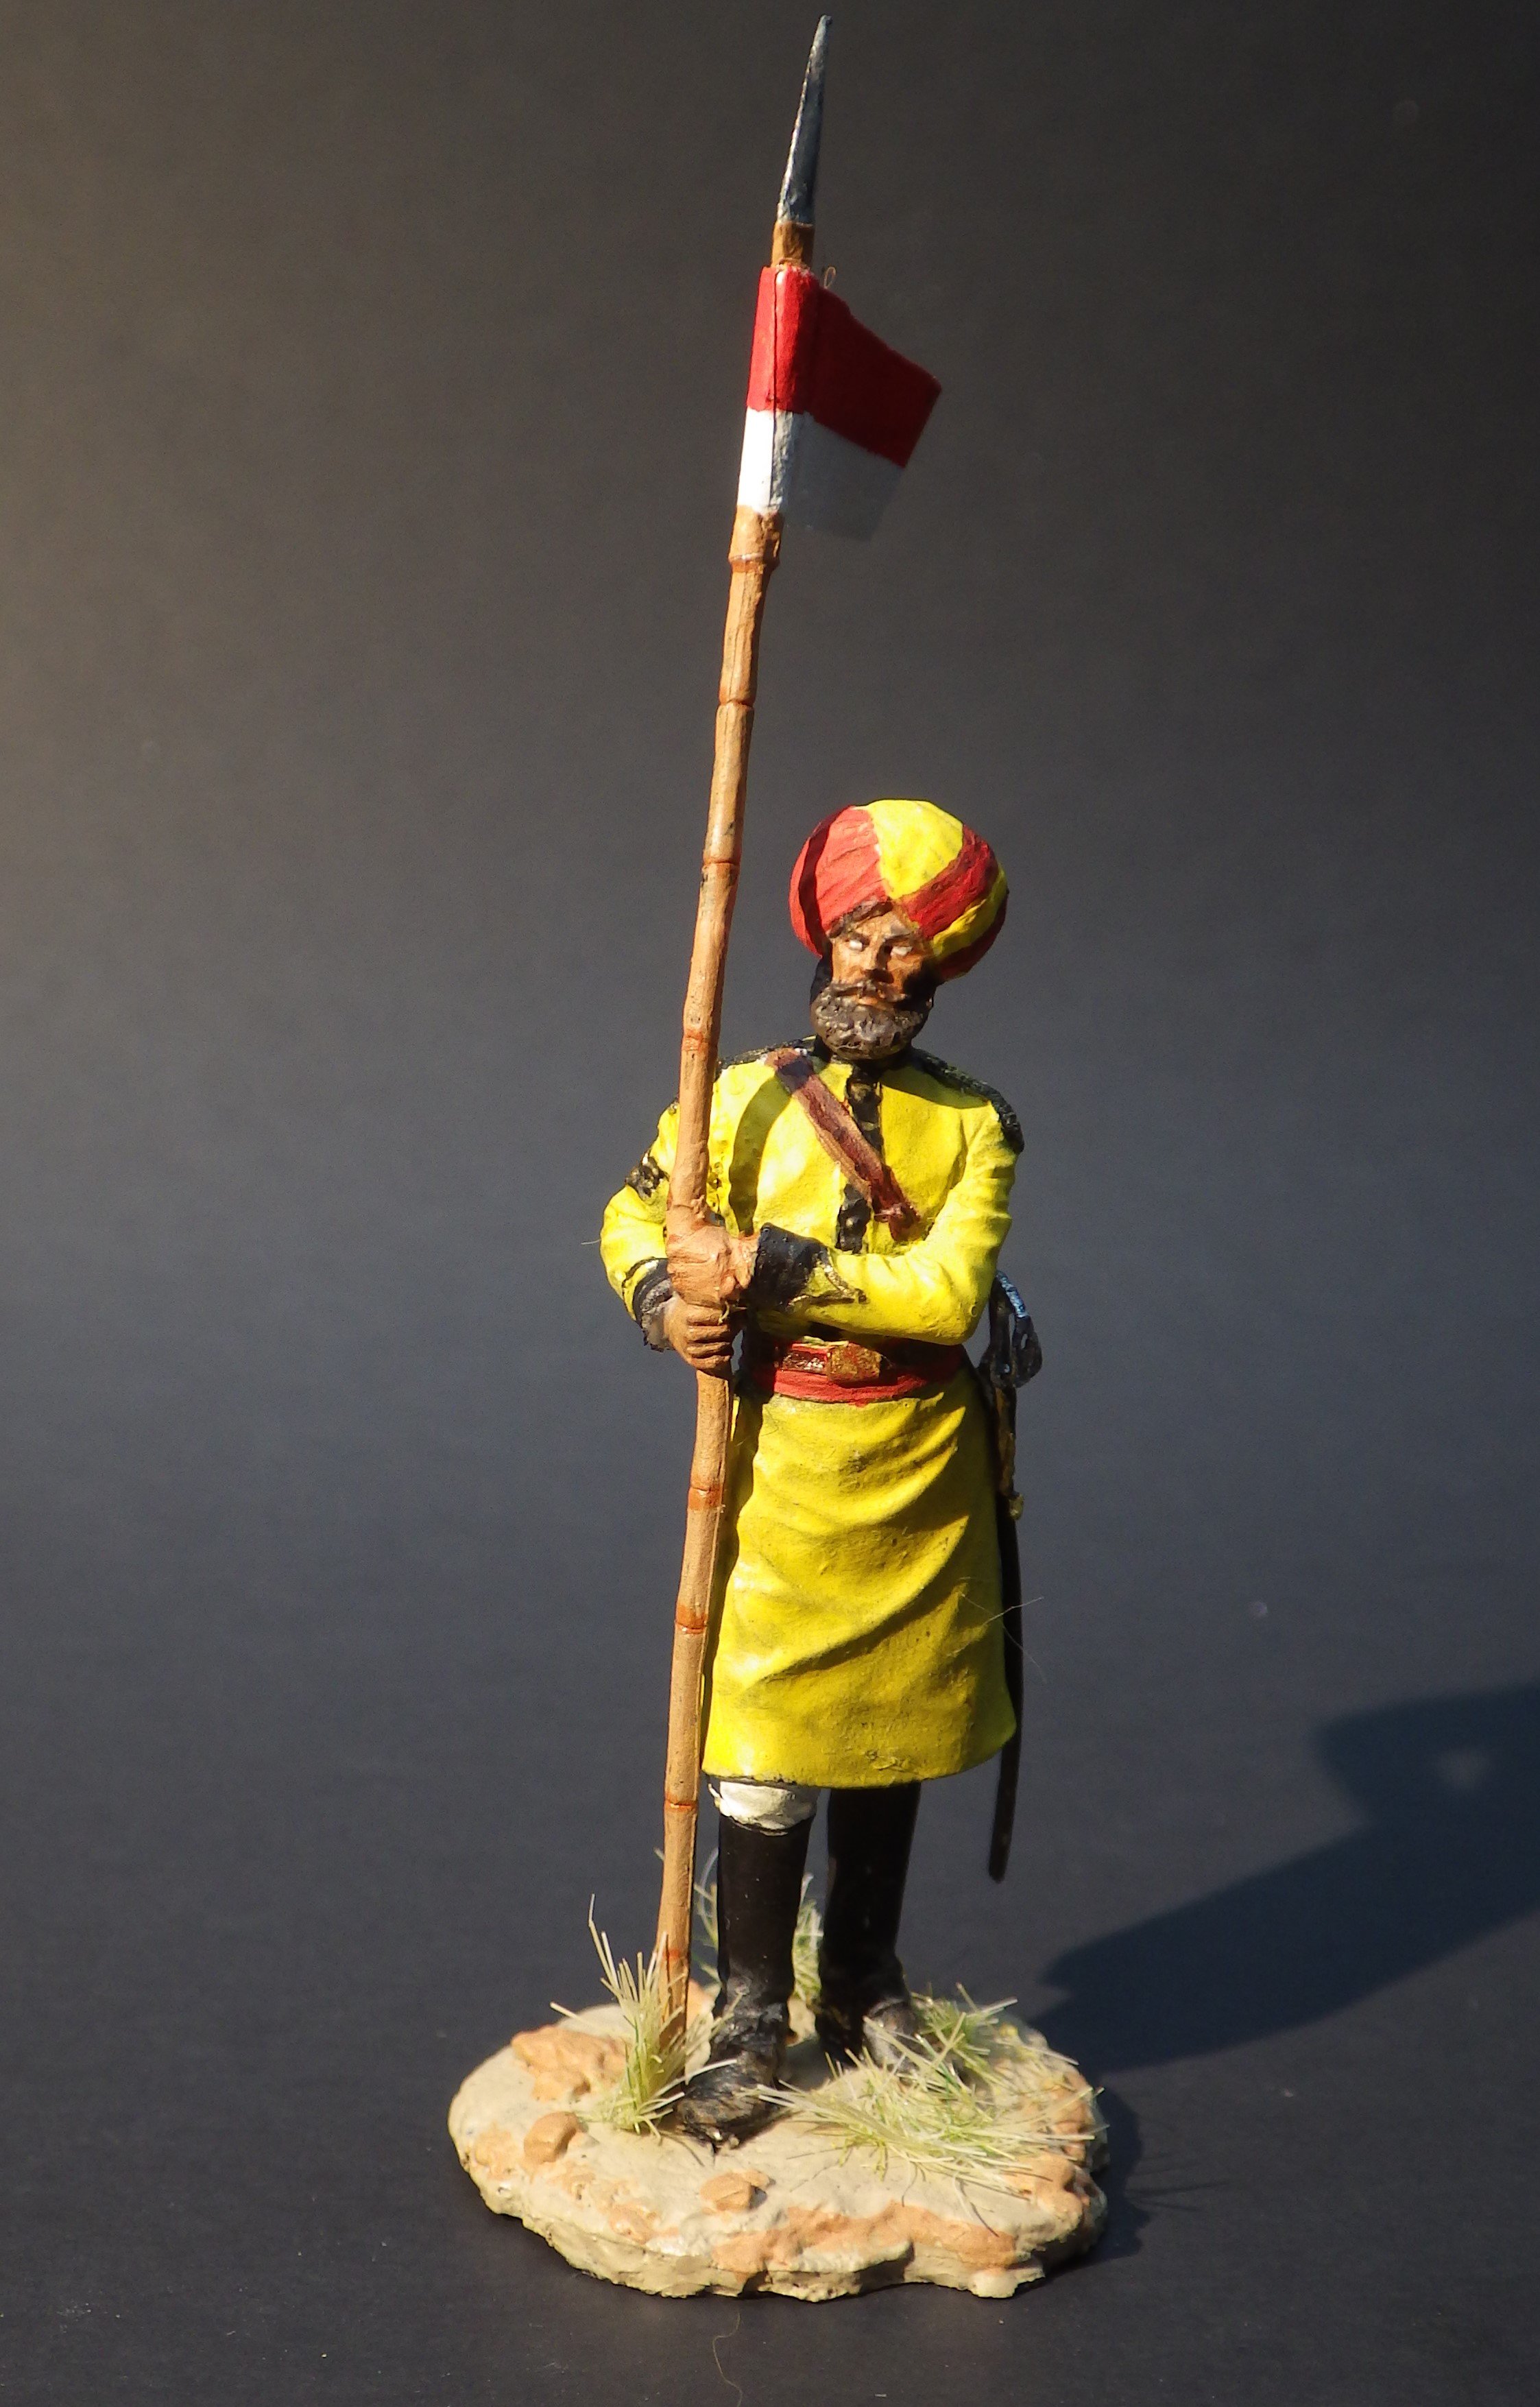
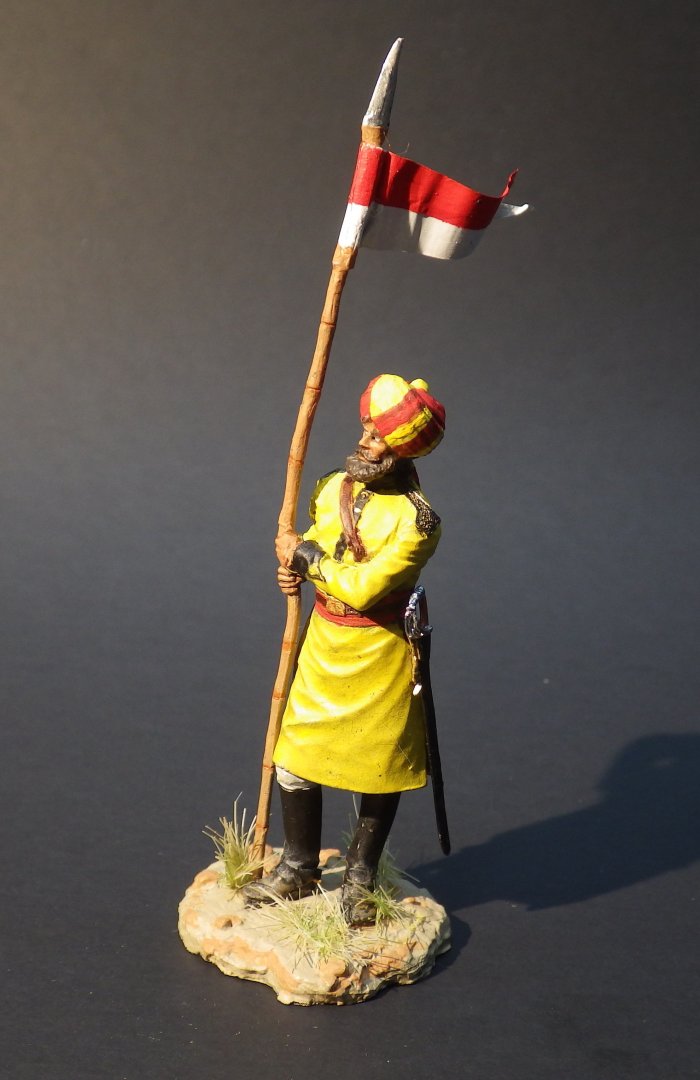
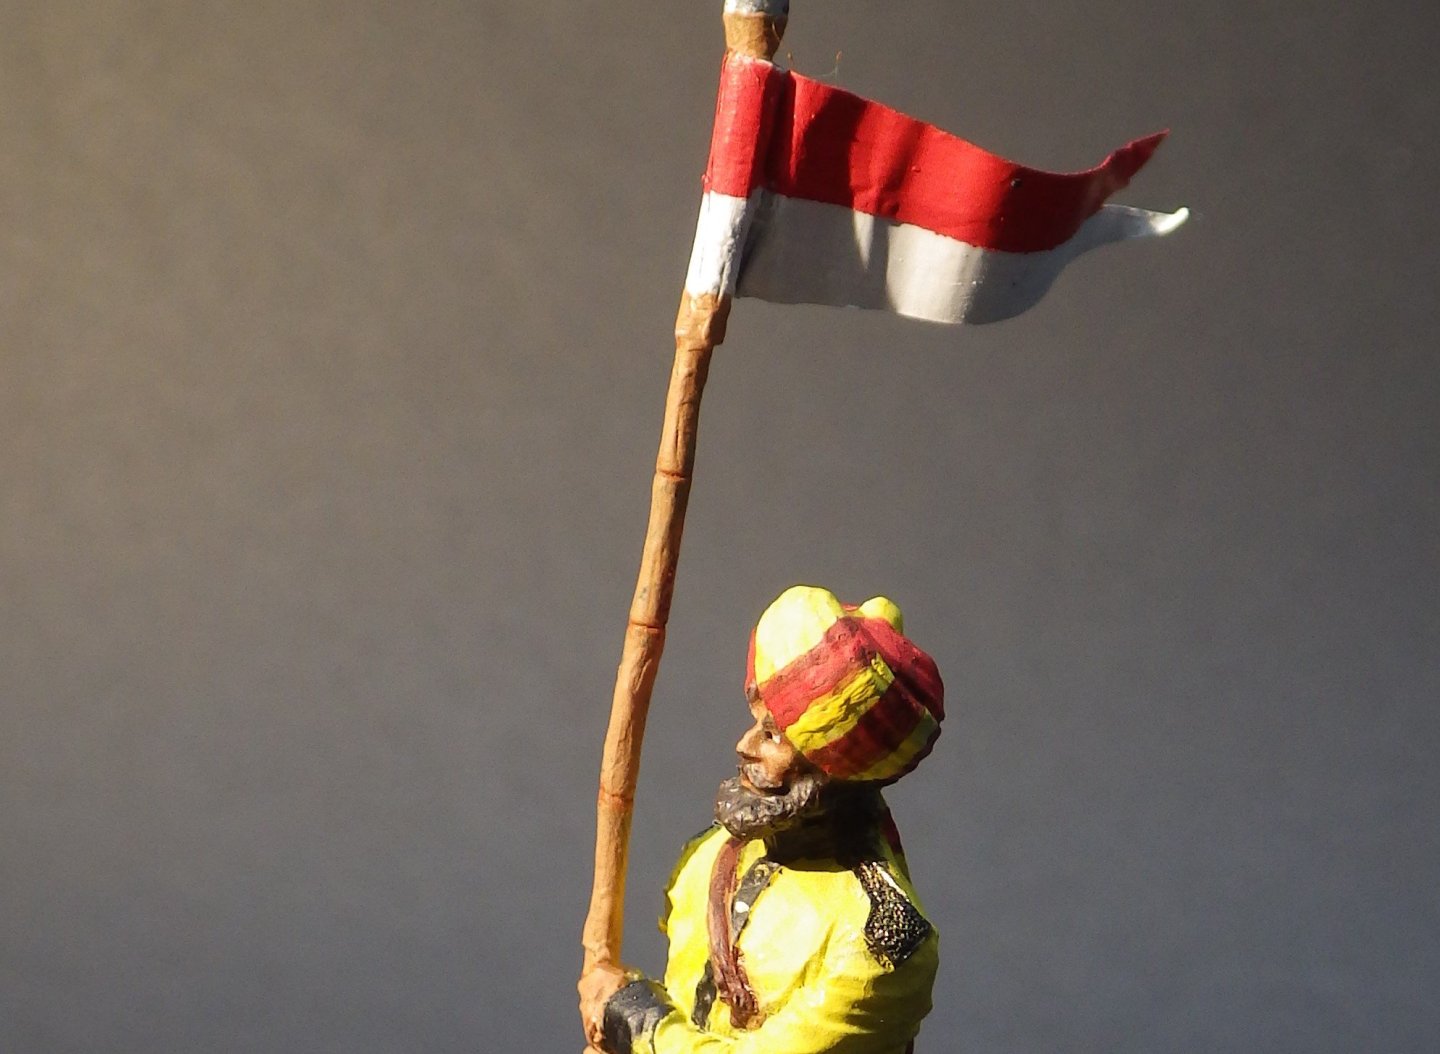
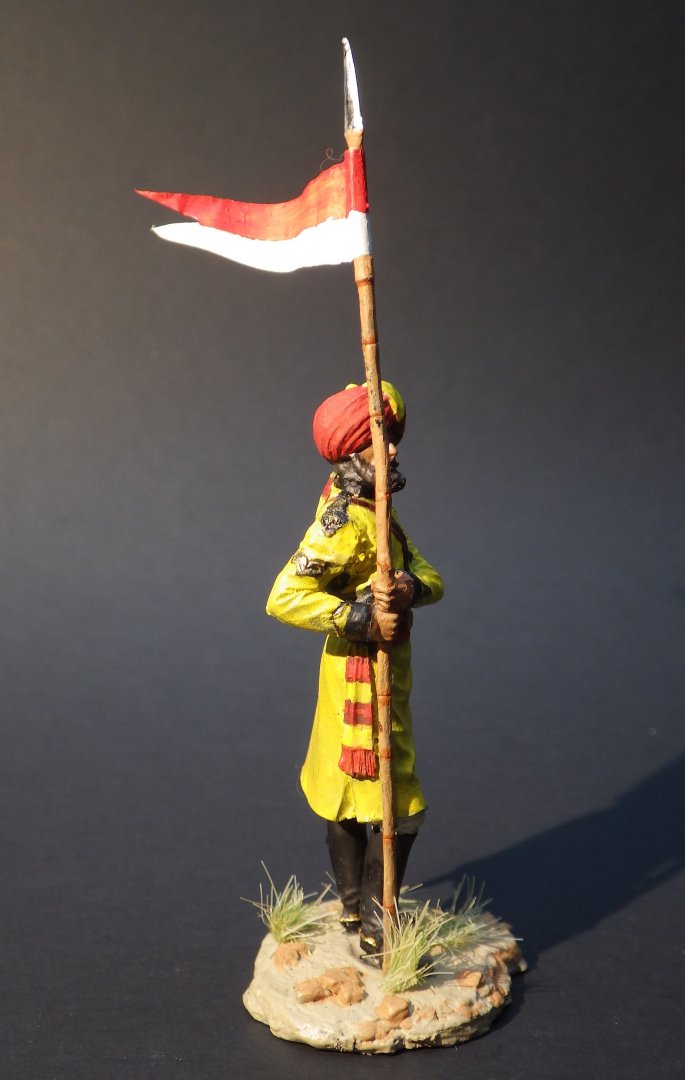
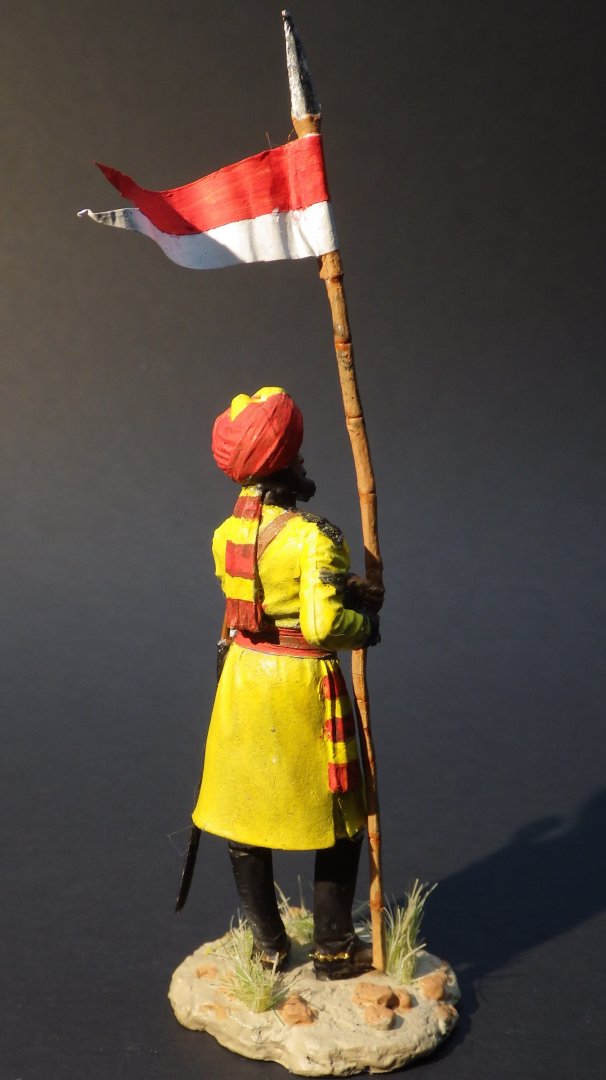
I decided some more fiddling was necessary. I wasn't happy with the red stripes on the turban and sashes; they just looked painted on. So I went back and added a darker shade of red at the interface with the yellow and I think it improves things. Still some room for improvement; maybe I should have added something to define the line properly - next time. Unfortunately I see a bit of yellow to tidy up now I also used a tiny bit of putty to build up the wrist which was a bit distorted after the multiple falls and rebuilds. Its a little better. I cut the white metal guidon off the lance and replaced it with a piece of foil which is much better. I added the top of the lance to the figure and, again, due to the shifts in the pose of the figure it doesn't line up too well. It will have to be displayed showing the side view which isn't too bad. Possibly drilling through the hand and using a single piece of brass with the bamboo nodes added would be a better option. There is a second chance. I like this figure and I learnt a lot painting it so I bought a second figure and would like to try again and hopefully do a better job. I will touch up the turban and I think I will call these figures done. I want to complete the Flowers before attempting anything else. I get sidetracked too easily Thanks to everyone for looking in and for the likes and all the helpful comments. Alan

- 114 replies
-
- 10
-
-
-
Thank you Ken; that's good to know. Its been frustrating enough having things pop off on this build. Alan