


king derelict
-
Posts
2,962 -
Joined
-
Last visited
Content Type
Profiles
Forums
Gallery
Events
Posts posted by king derelict
-
-
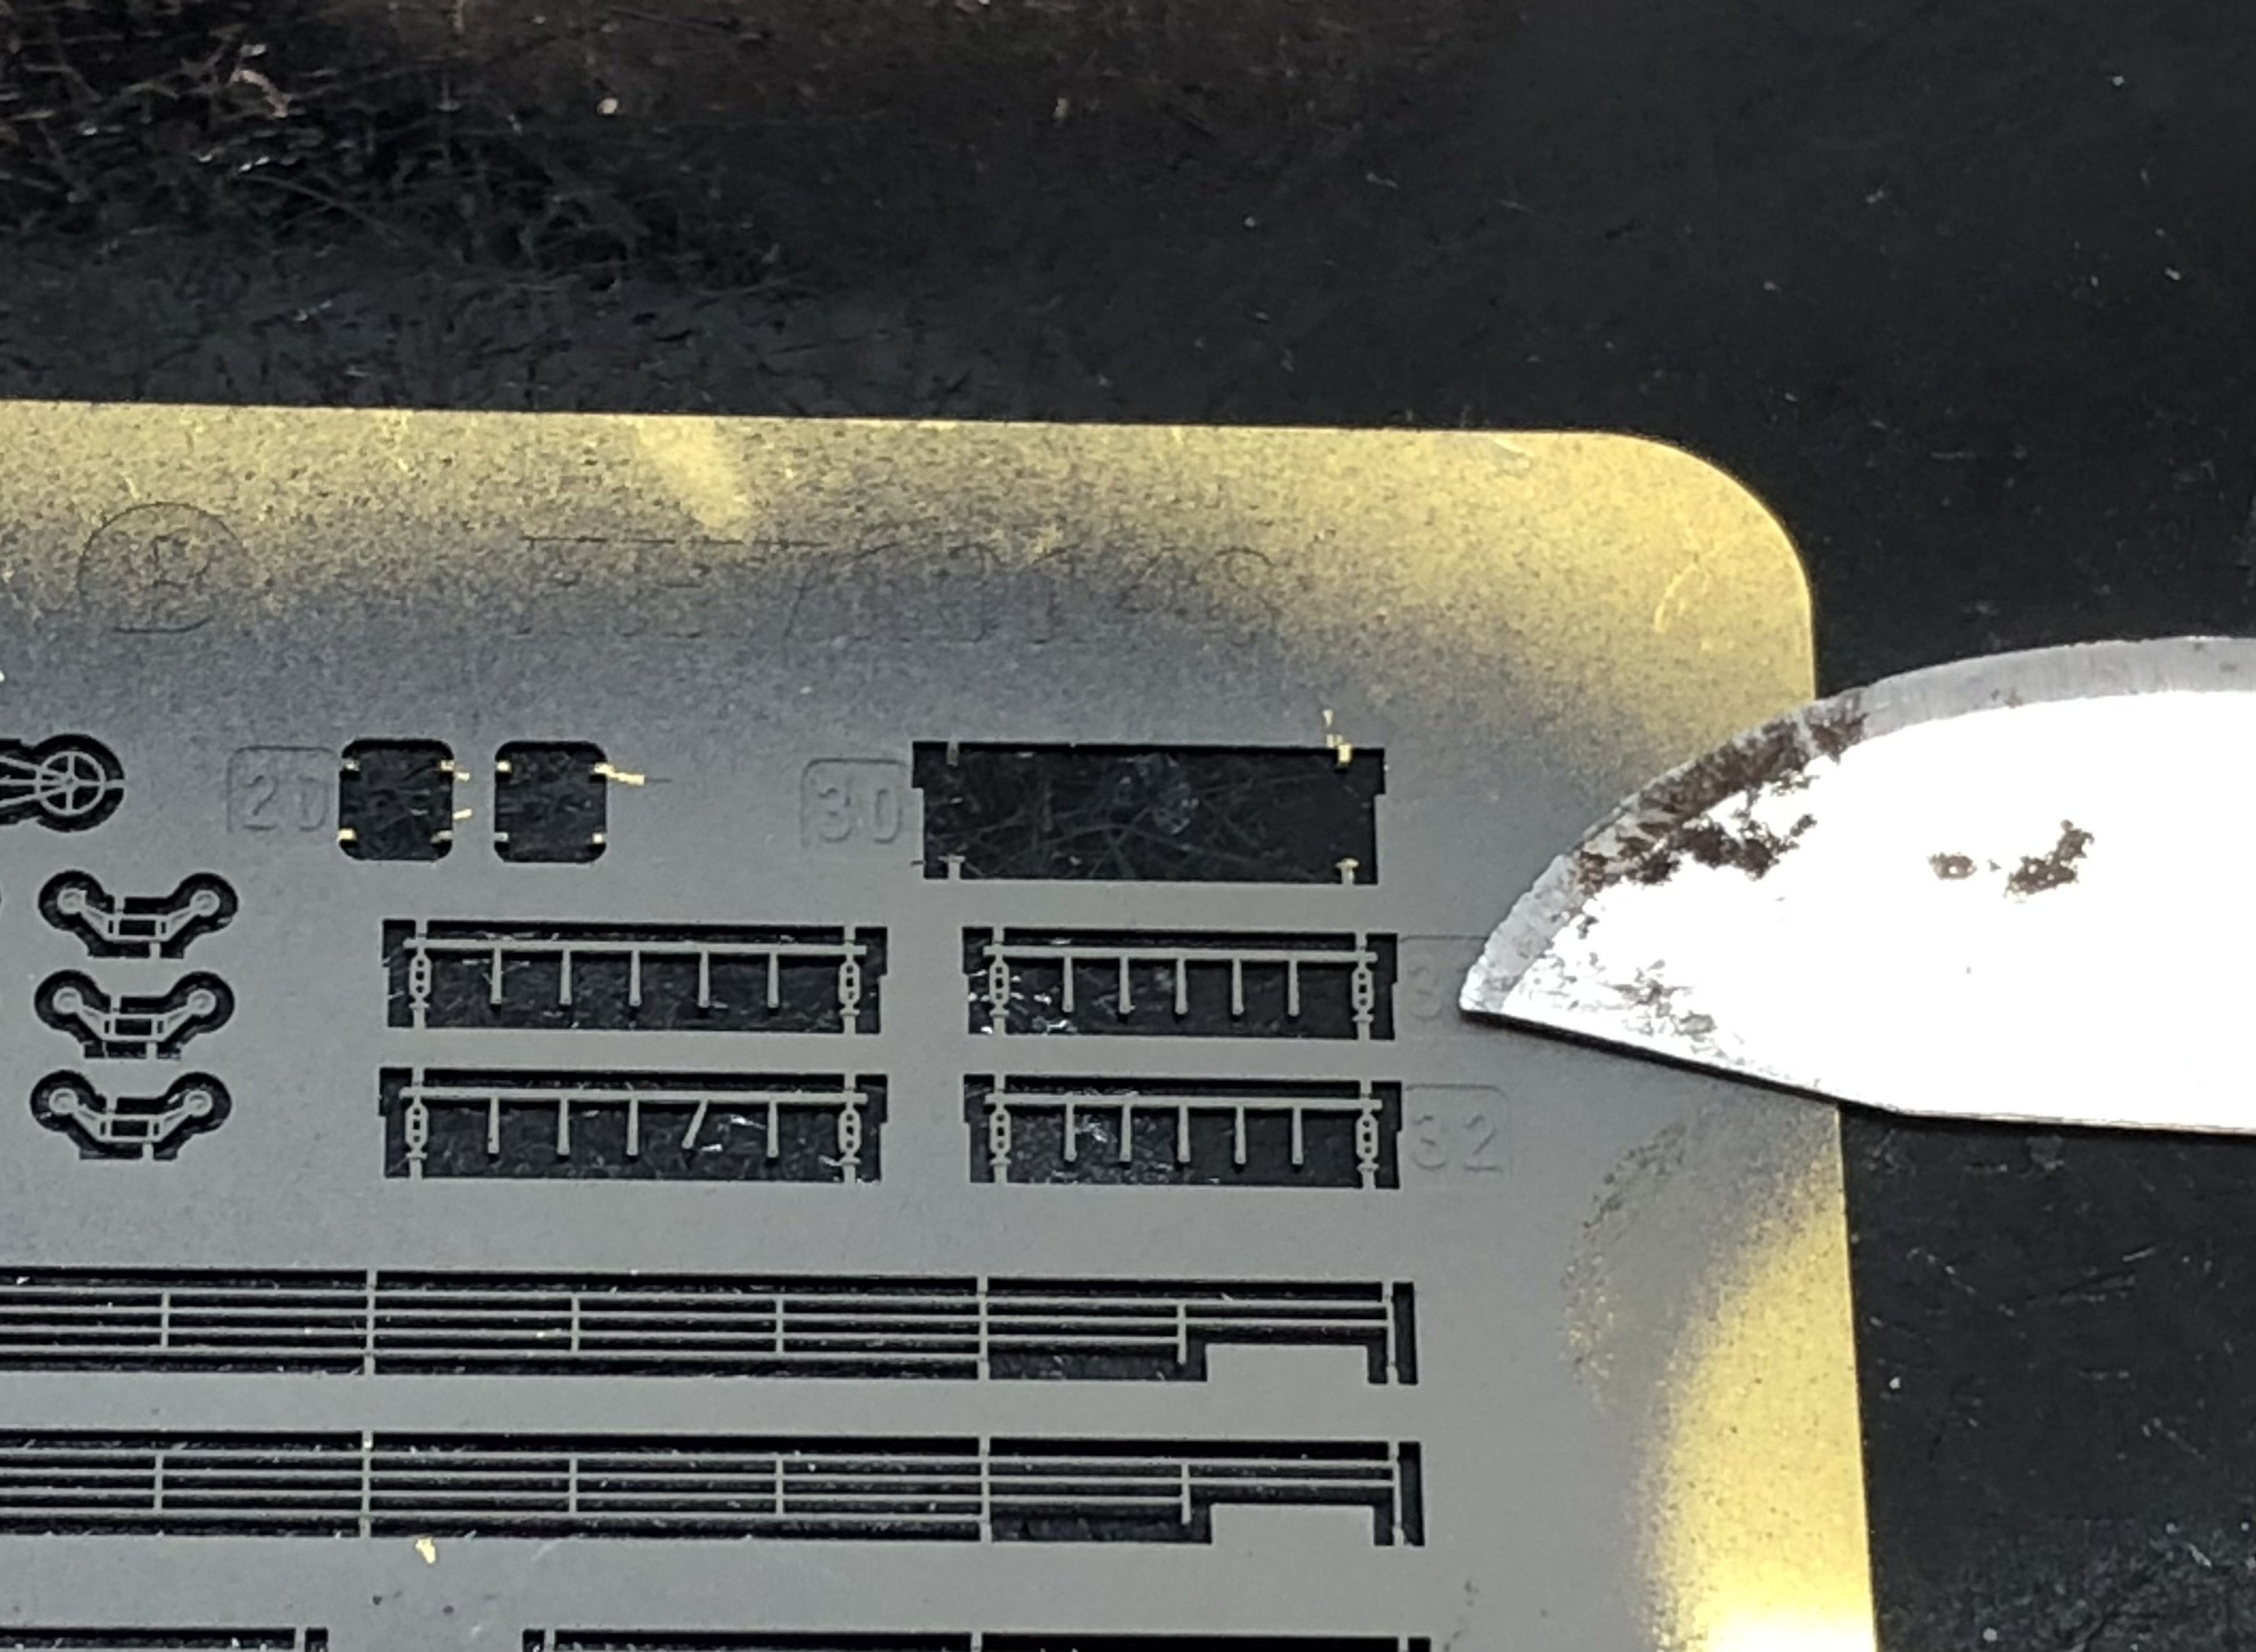
Lots of small bits and fiddly PE Davies and winches added today. The sprue are starting to look a bit bare.
The breakwater has been added but needs the braces turning into position. It will be interesting to see how many survive the process. Luckily there are spares.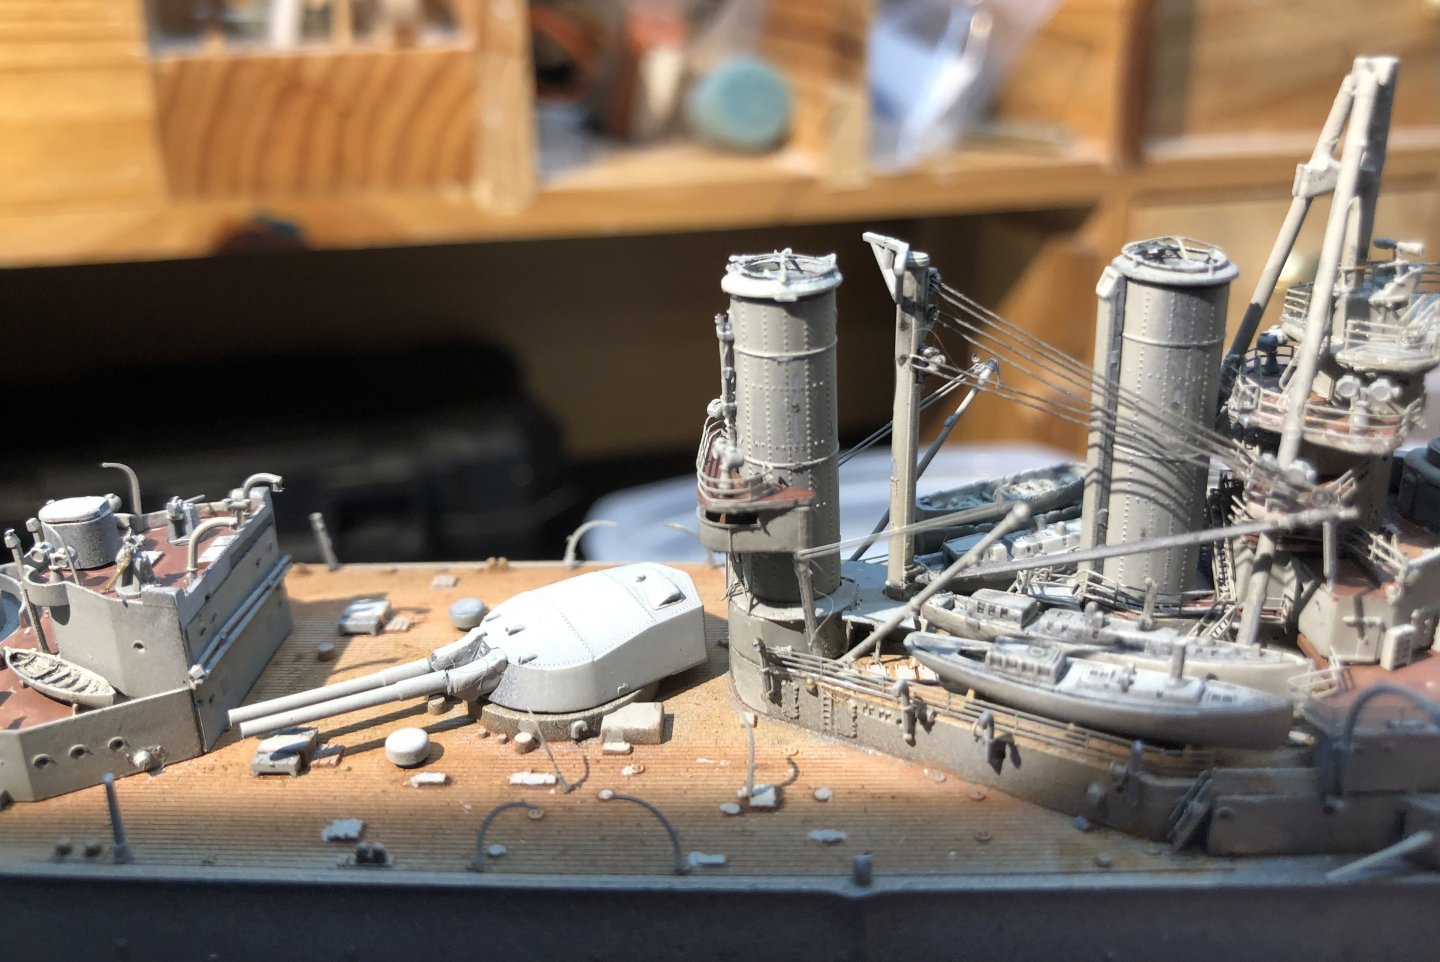
We now approach a ticklish element of the build, adding the boats to the davits. The kit davits have thick vertical sections on the davits which the boat is glued to. It looks a bit clumsy and the PE solution is to use a bar between the davits which has a number of suspension points for the boat. The tricky bit is deciding whether to add the PE to the boat first or to the davits.

Ive added the PE to the boat first or.

I’m thinking I may have to switch to CA glue to attach the assembly to the davits but I’m anticipating a fight. I may be digging out some more davits from the spares box but we’ll see how it goes.
Thanks for looking in and for the likes and helpful comments.Alan
-
Thank you very much. I think it’s very easy to over weather on 1/700 models and it’s easy to get the deck looking a little excessively scruffy. I’m moving away from the precut wood decks in favor of painting them. The painted deck looks good to me and avoids the issues of the deck lifting later or if the wood deck is not perfectly lined up it can cause problems adding the superstructure because it won’t sit down flat.
All that happens at a stage when things are getting delicate and recover is difficult. I’m still learning to get the railings to as good as I would like. I use MiG Ultra or Gators Grip PVA glues which gives time to fiddle with the positioning and is easy to excessive with water. I left it sit for a few minutes before installing it. That way there is a better initial grip. For long lengths I will get one end down and then work along. Sometimes it’s easier to cut into shorter pieces if the length is unwieldy.
Alan
- Canute, Old Collingwood and AJohnson
-
 3
3
-
-
-
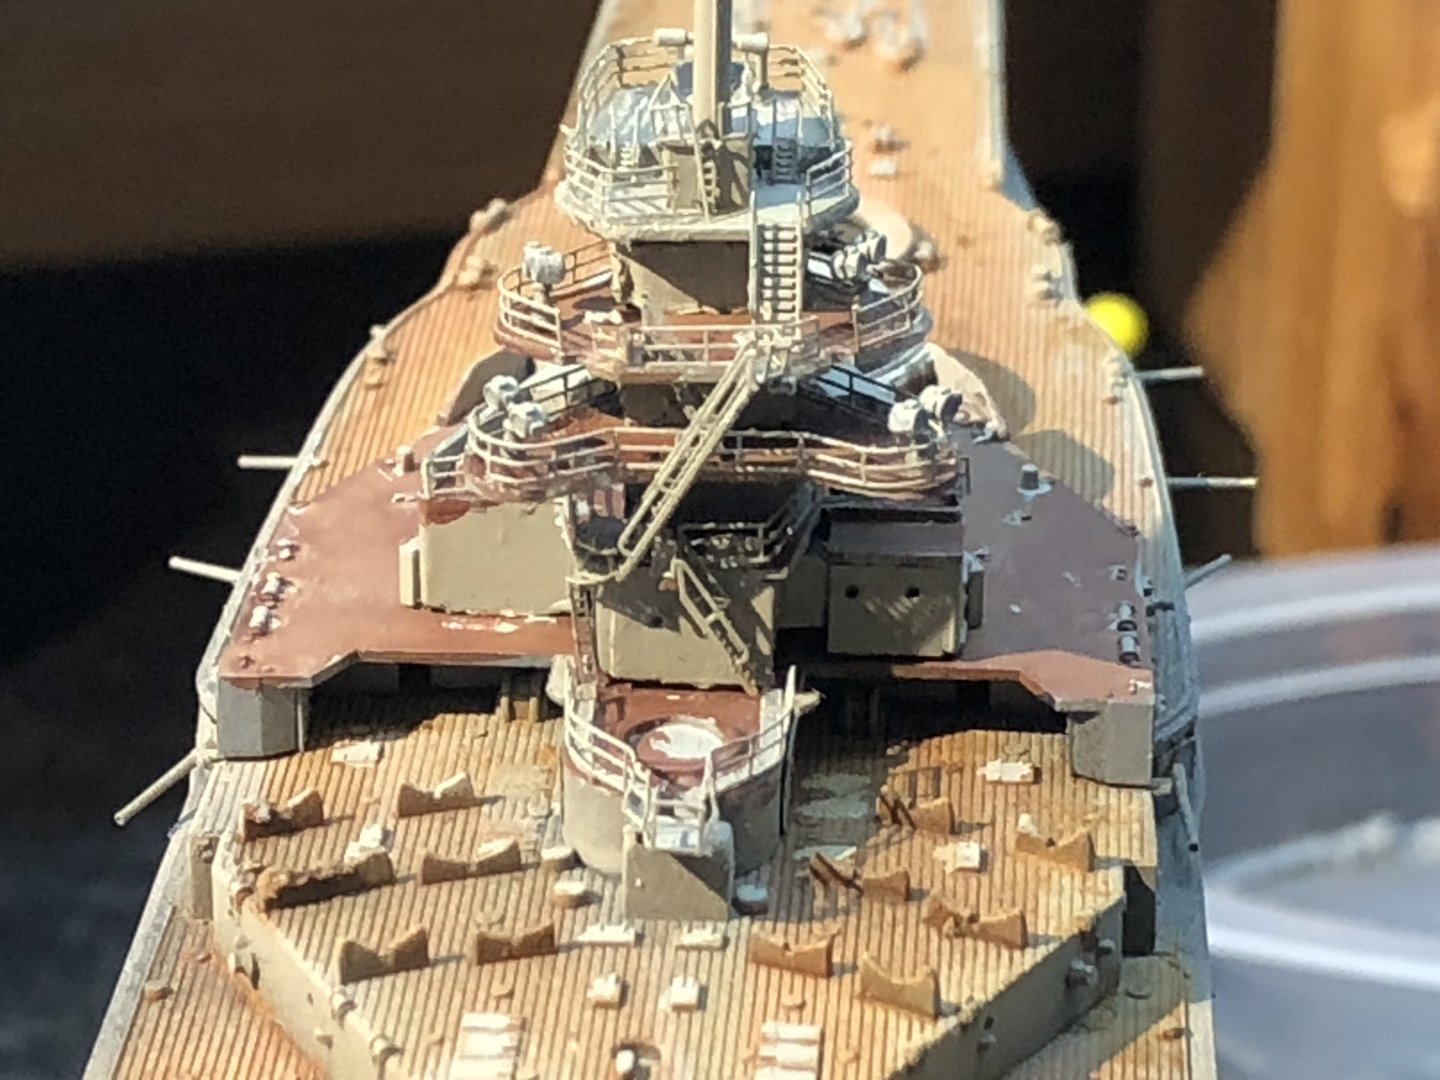
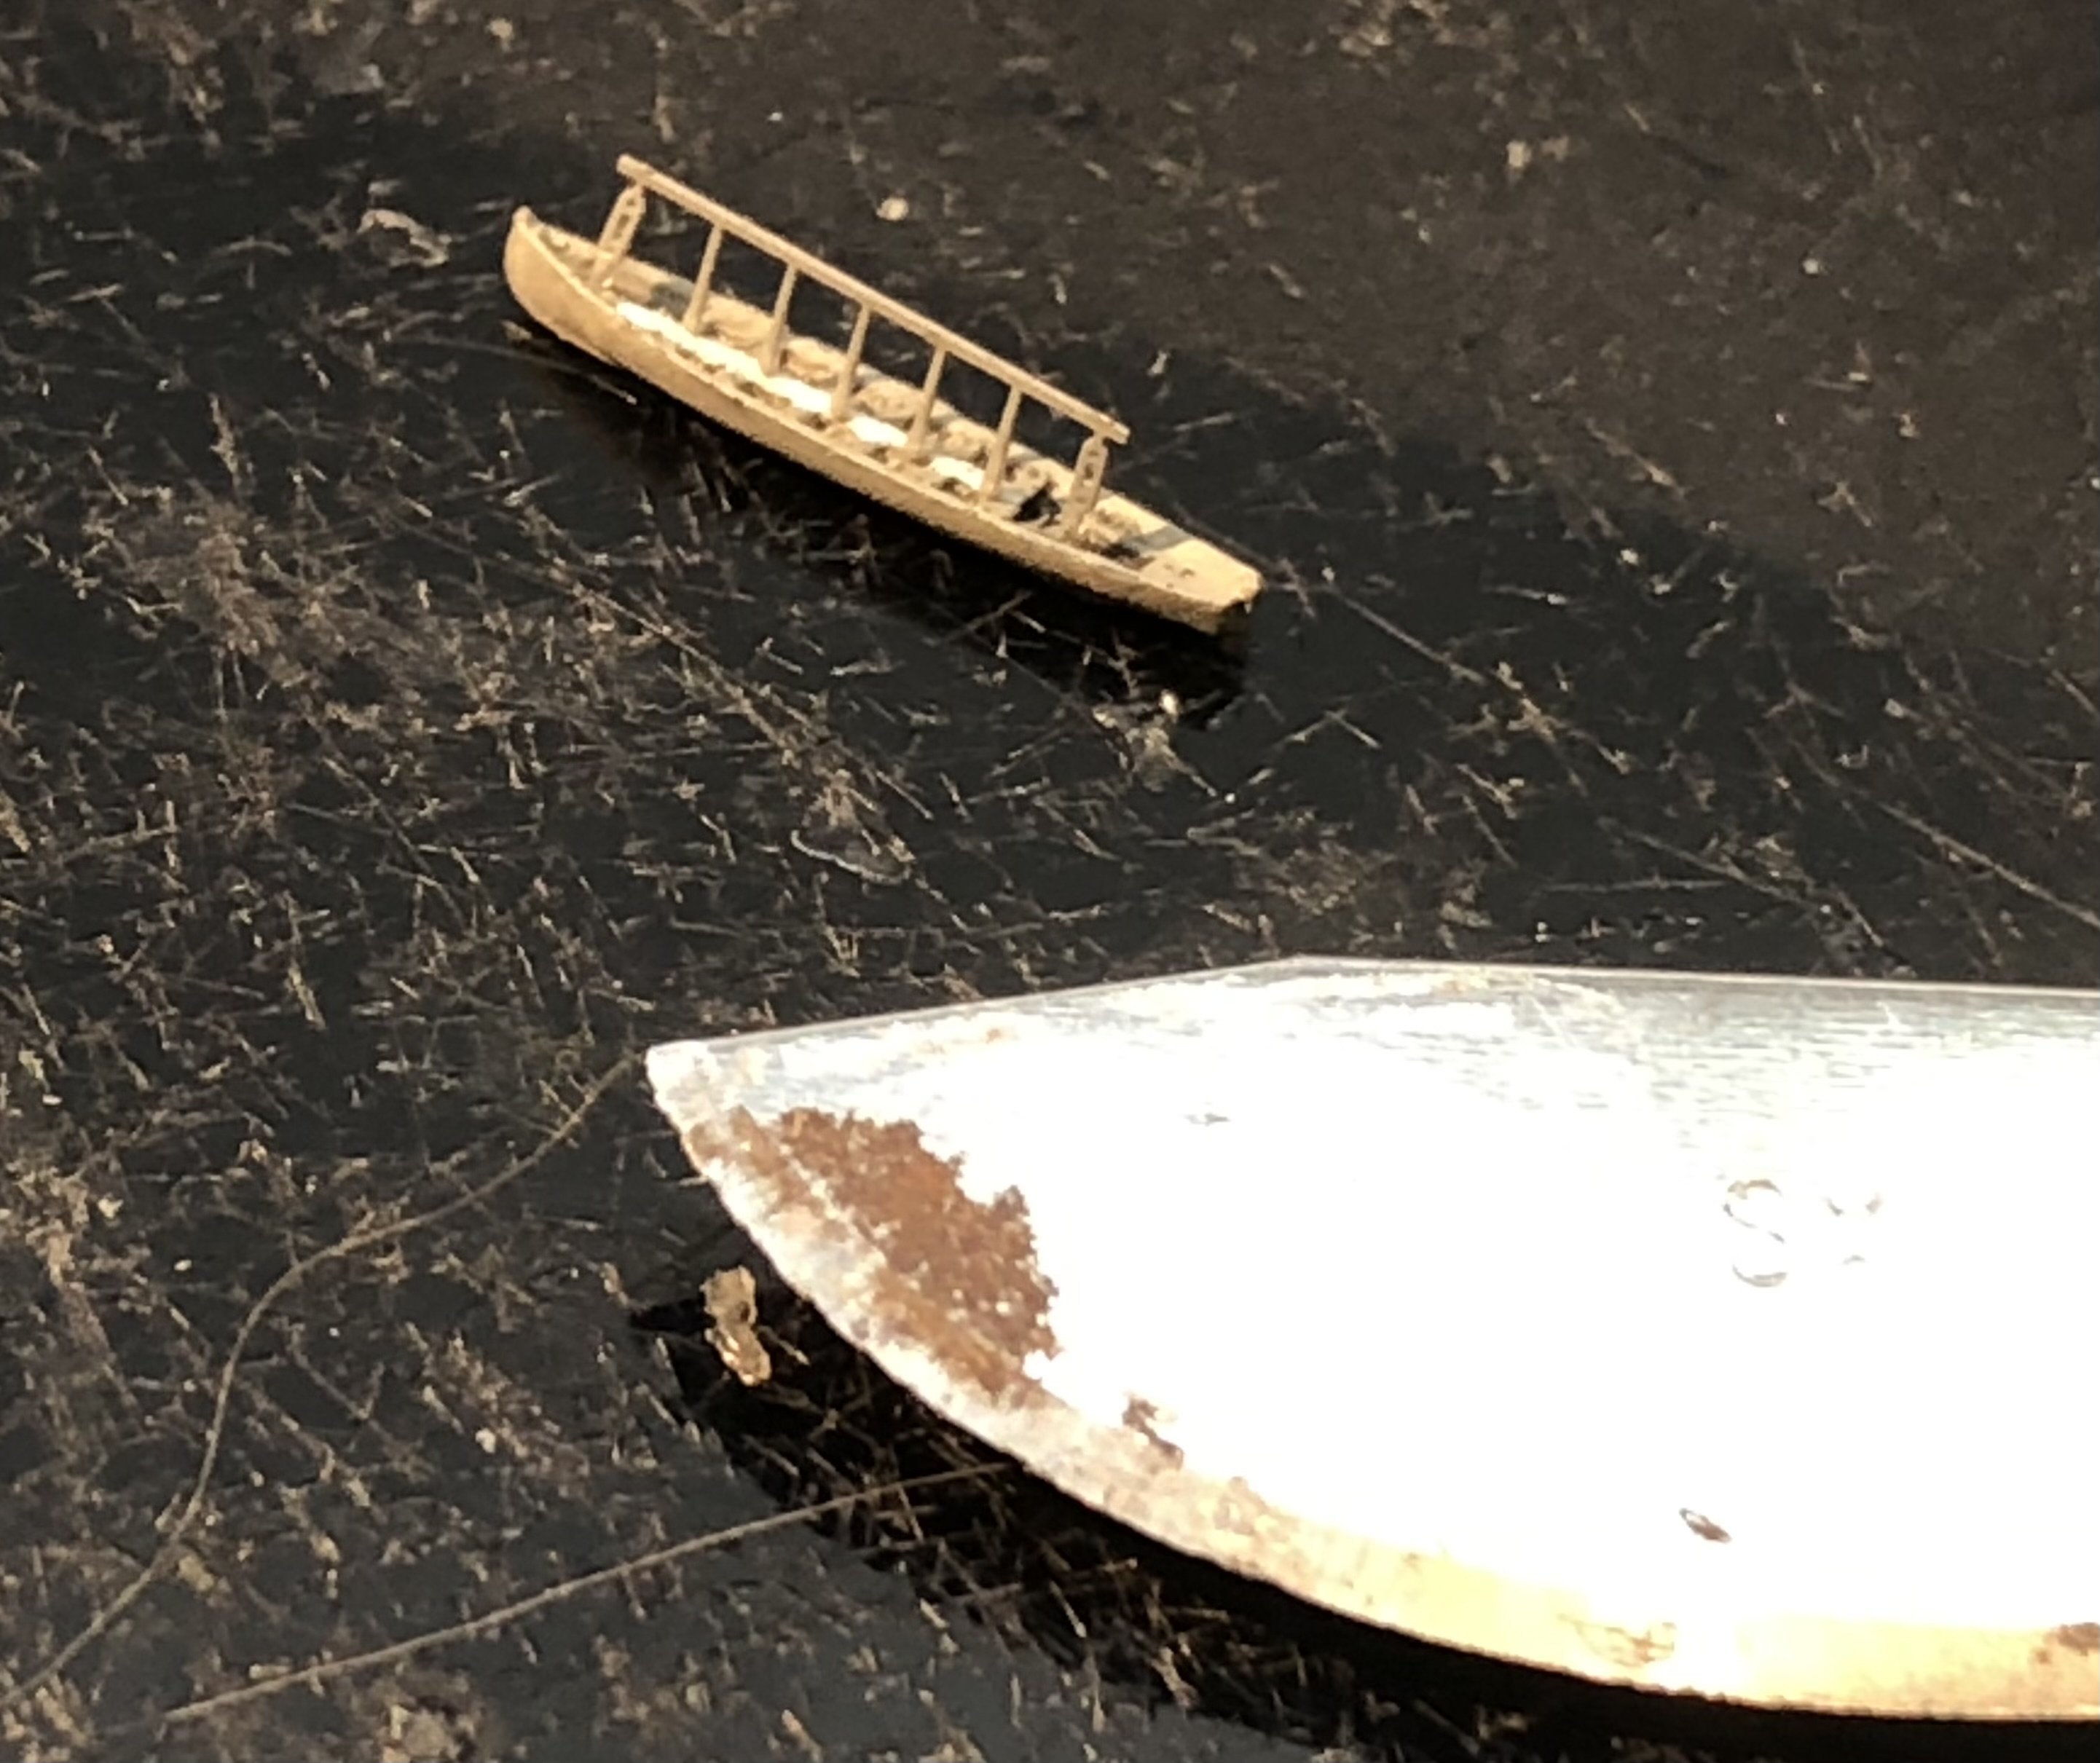
Moving forward again I’m in easier country. I’ve been painting and weathering the ships boats. I’ve lost a bit of the bottom boards wood color with the washes but there wasn’t a lot of contrast between the Tamiya light grey XF20 and the deck tan. The oil wash did improve the detail on the steam launches though.
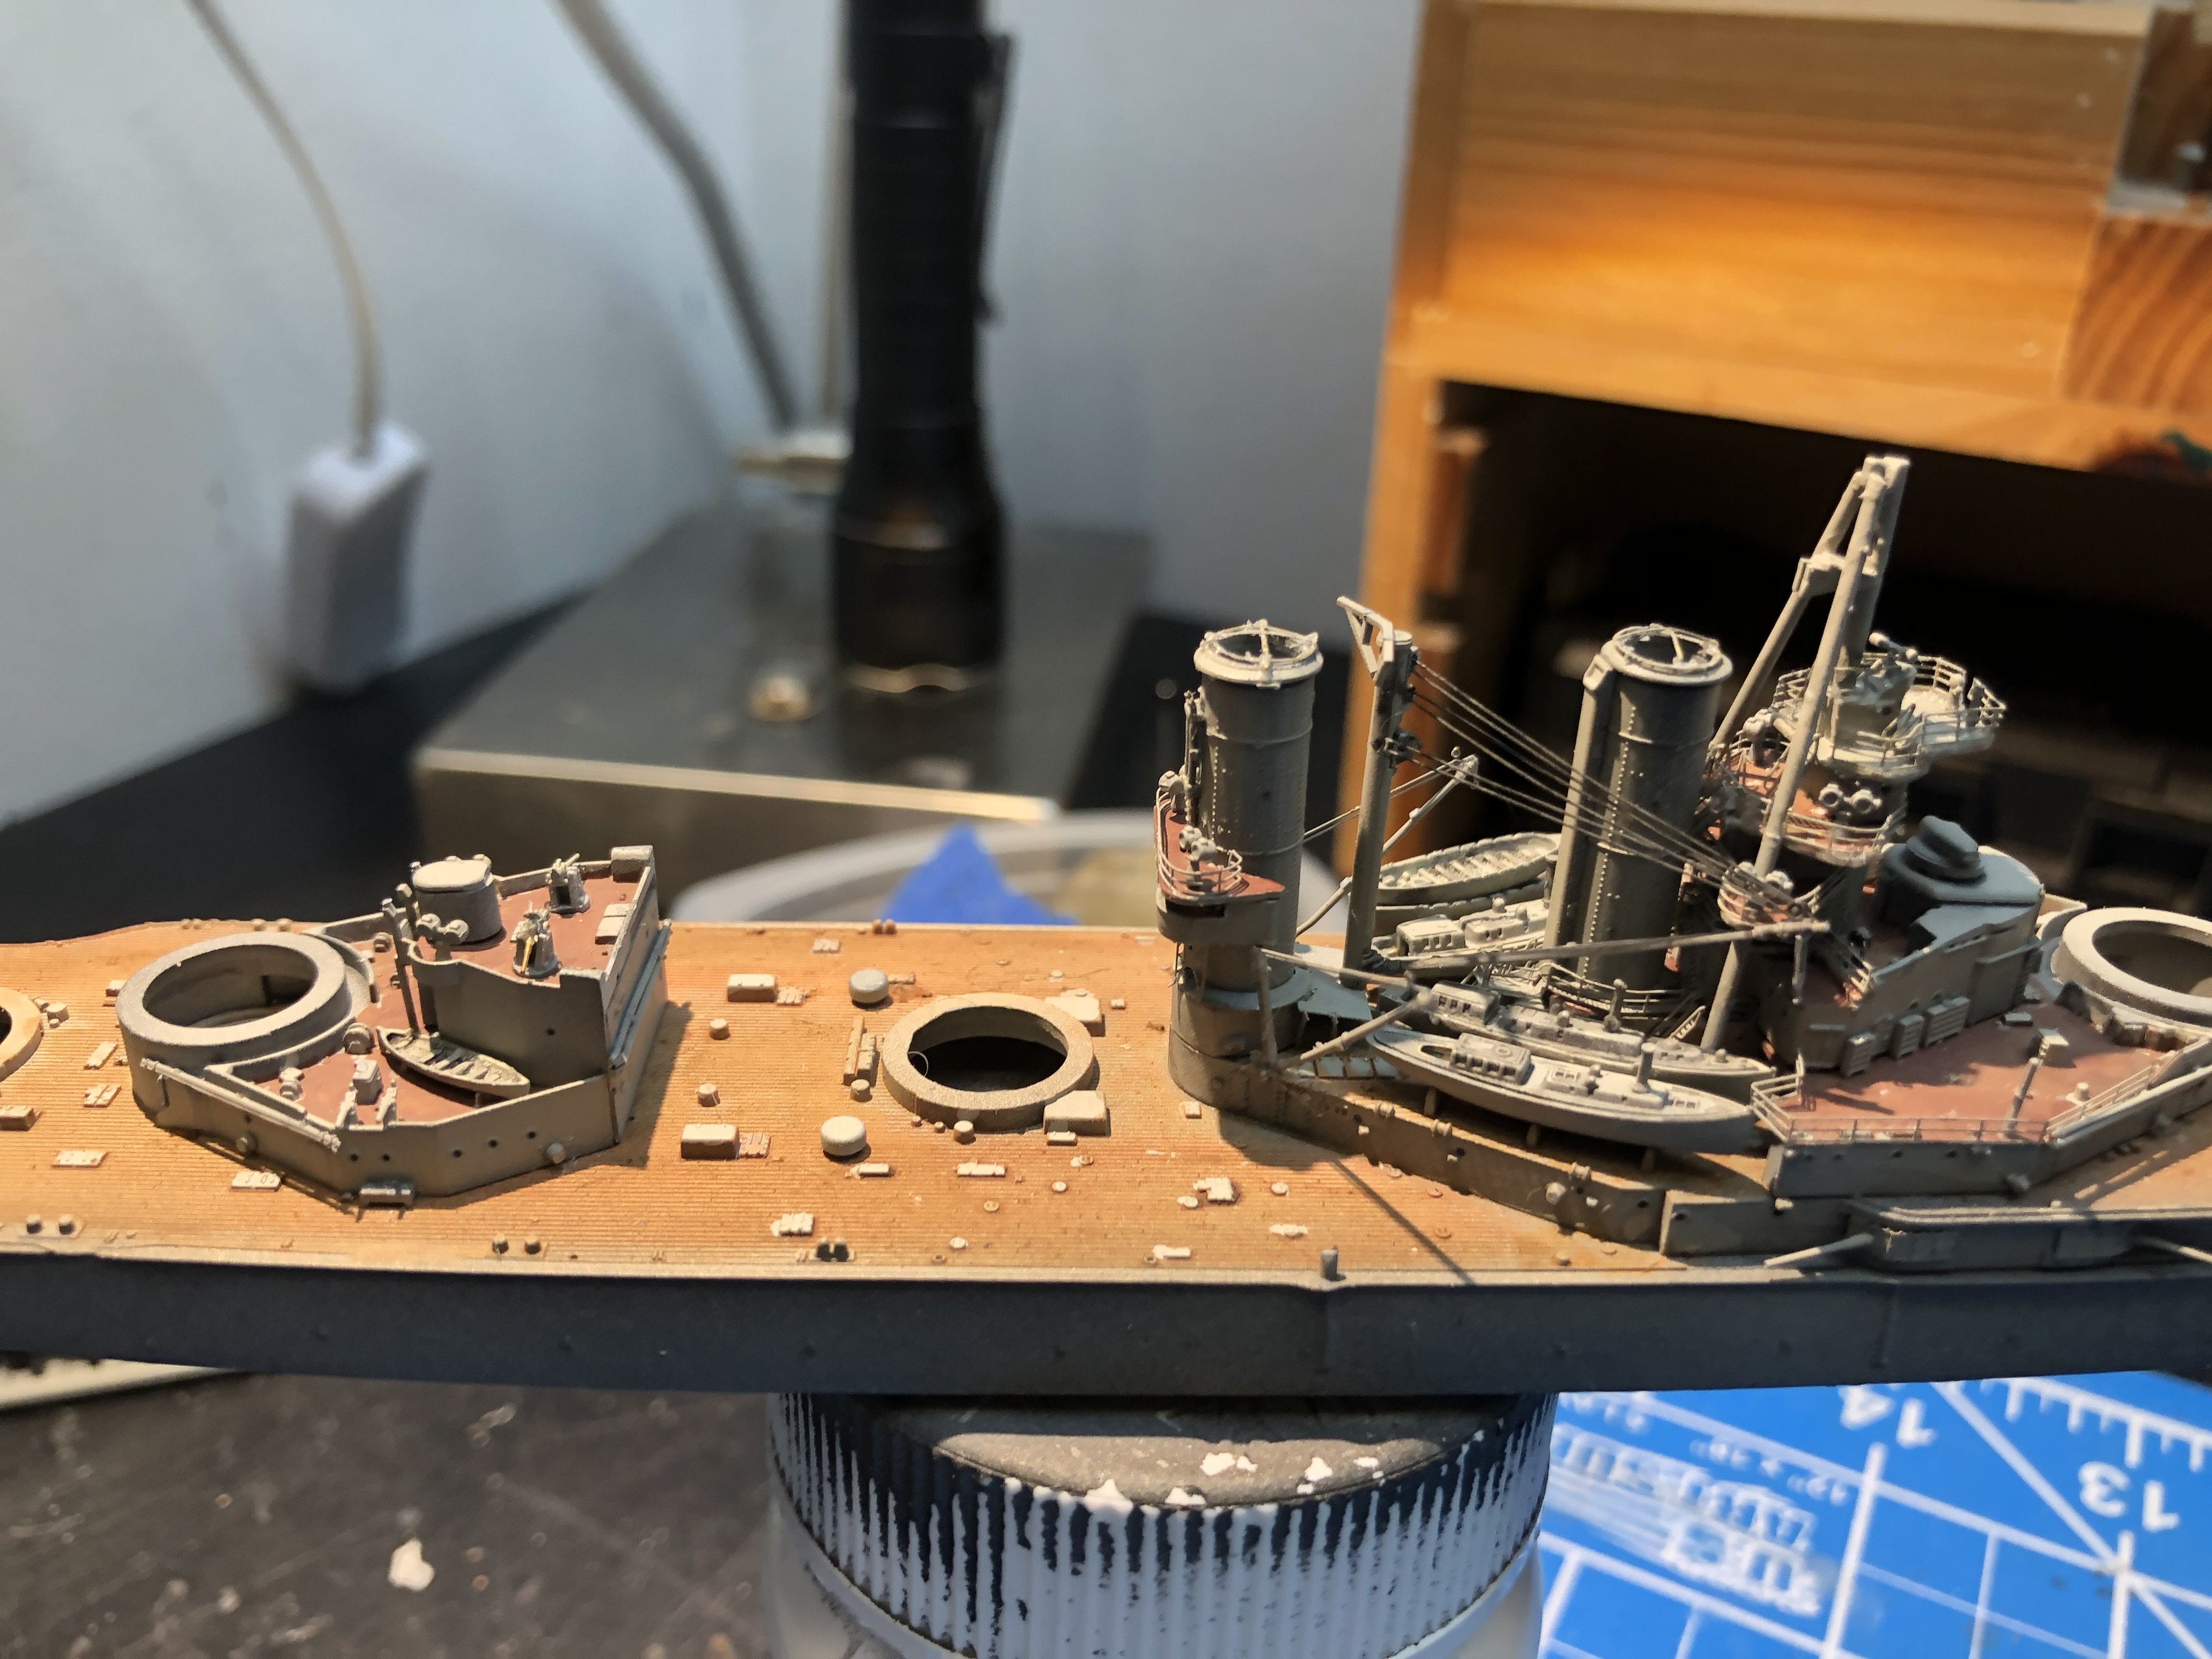
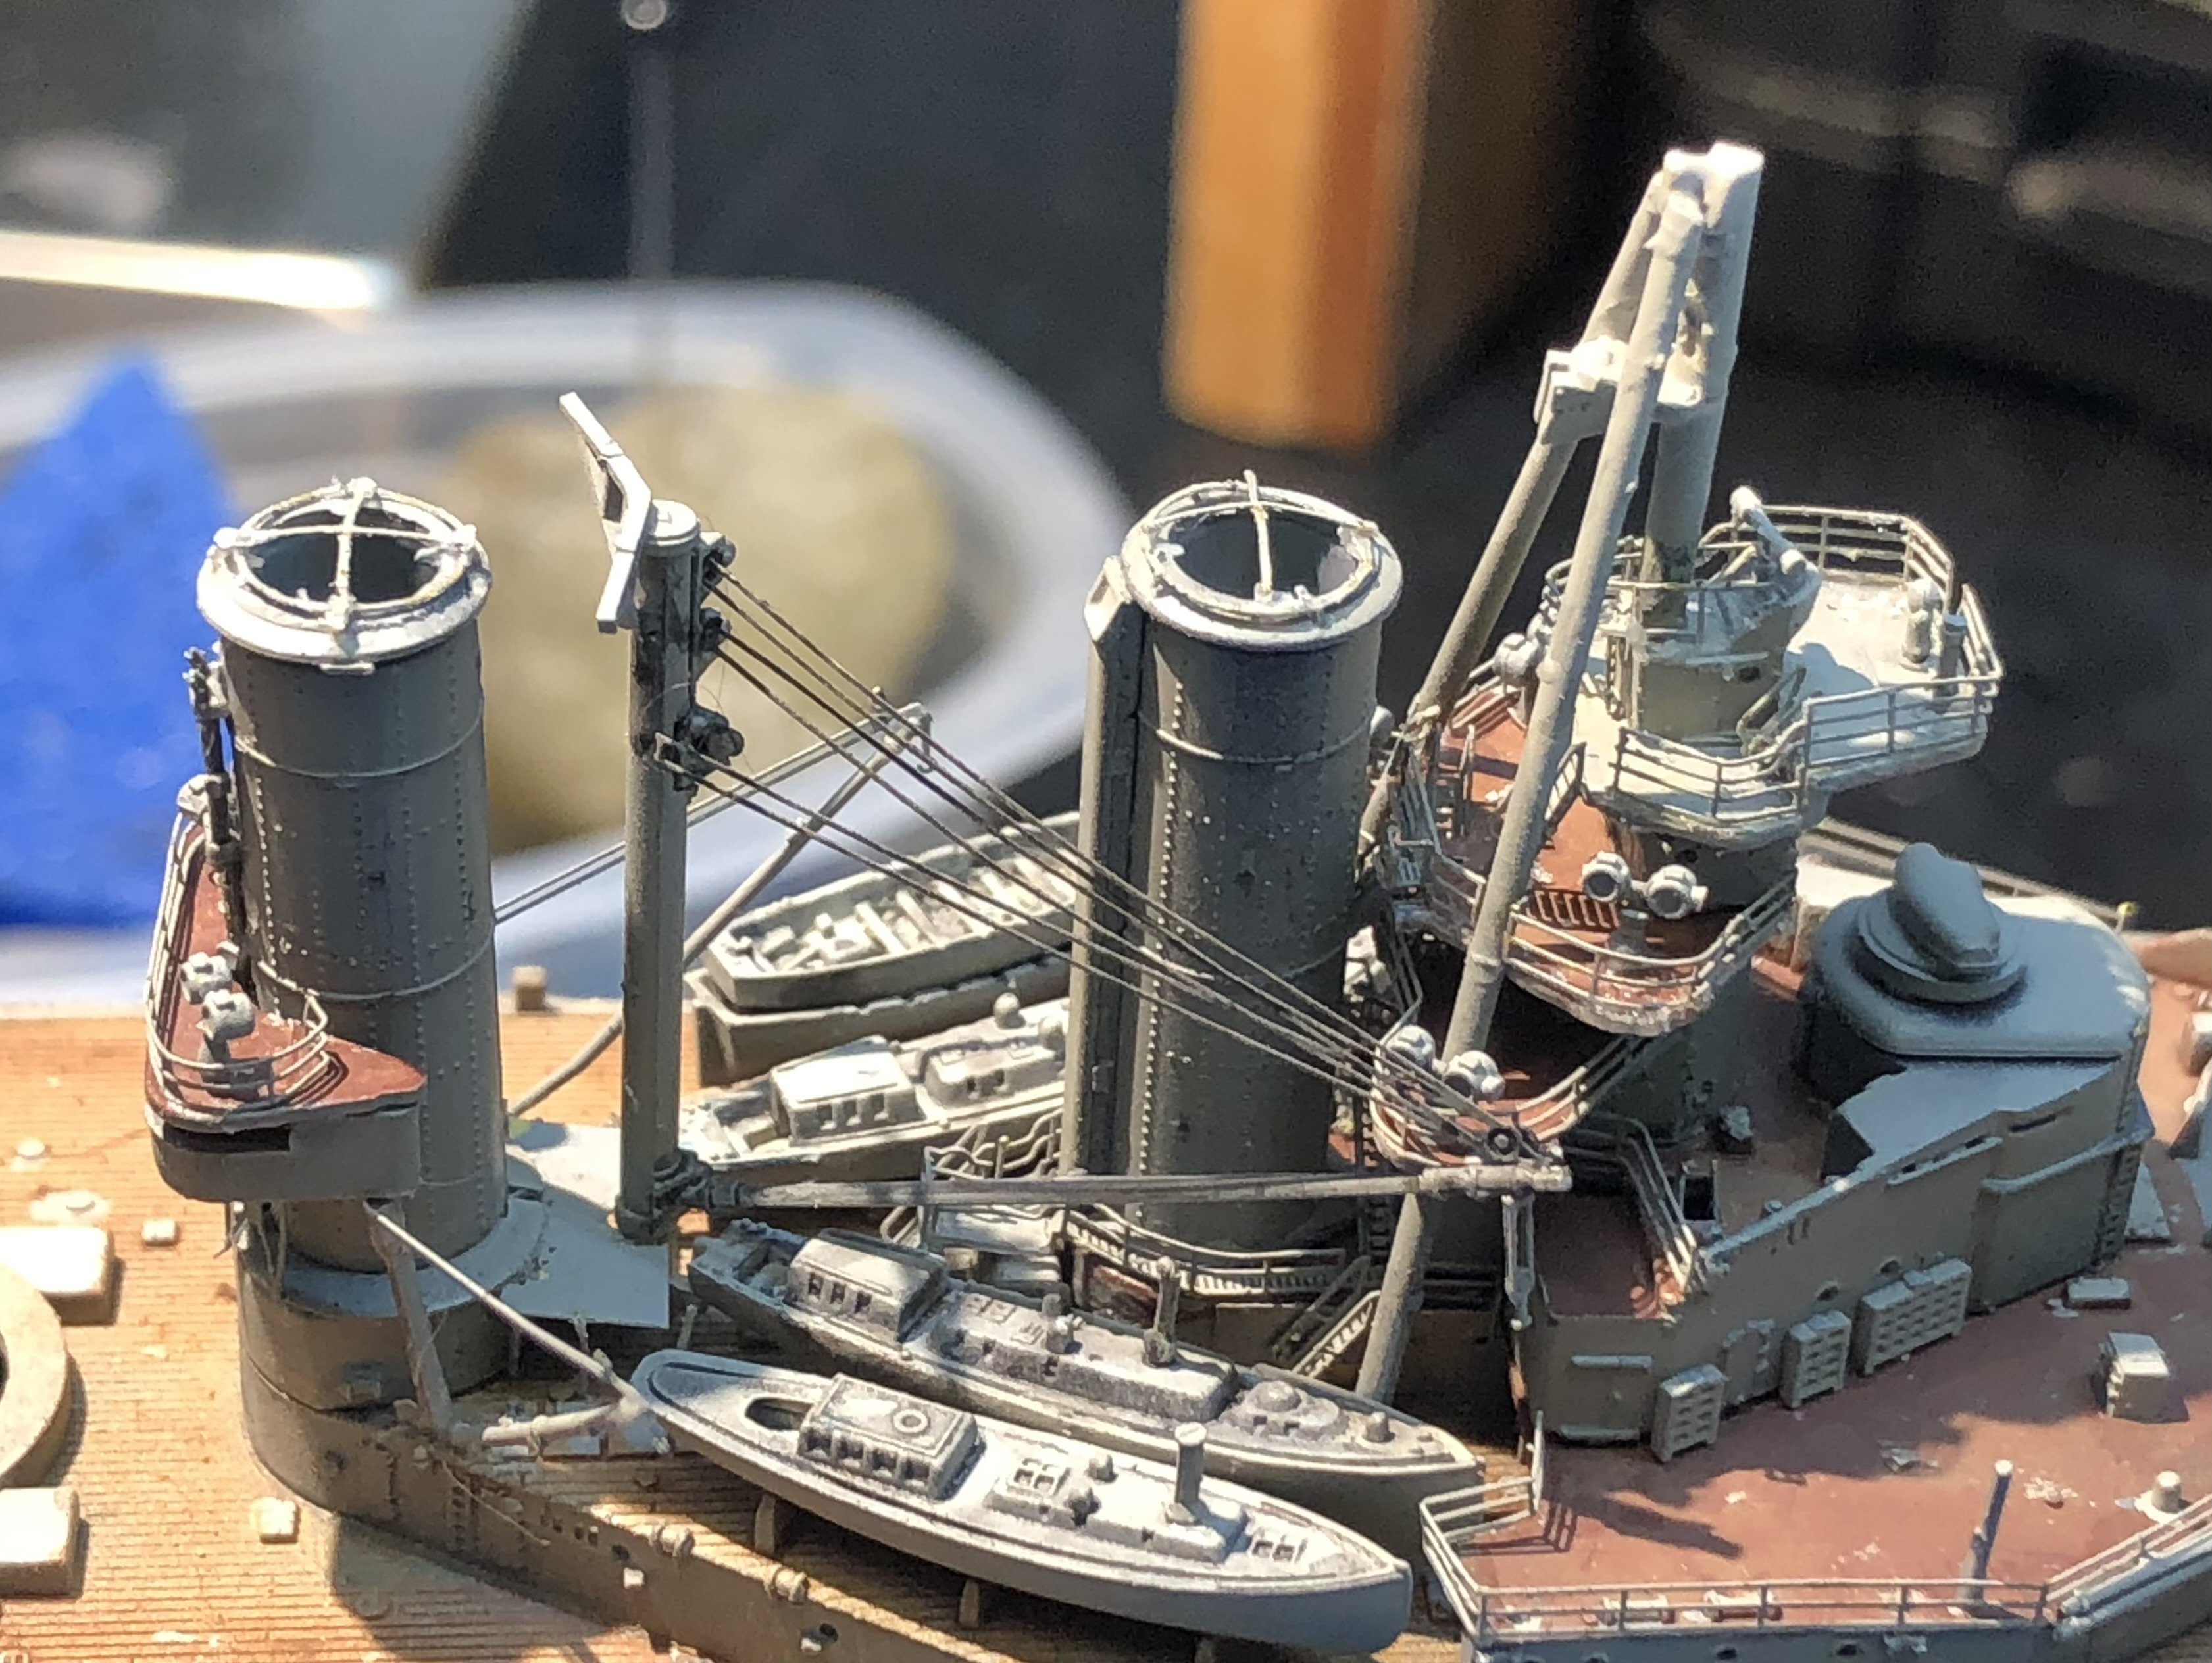
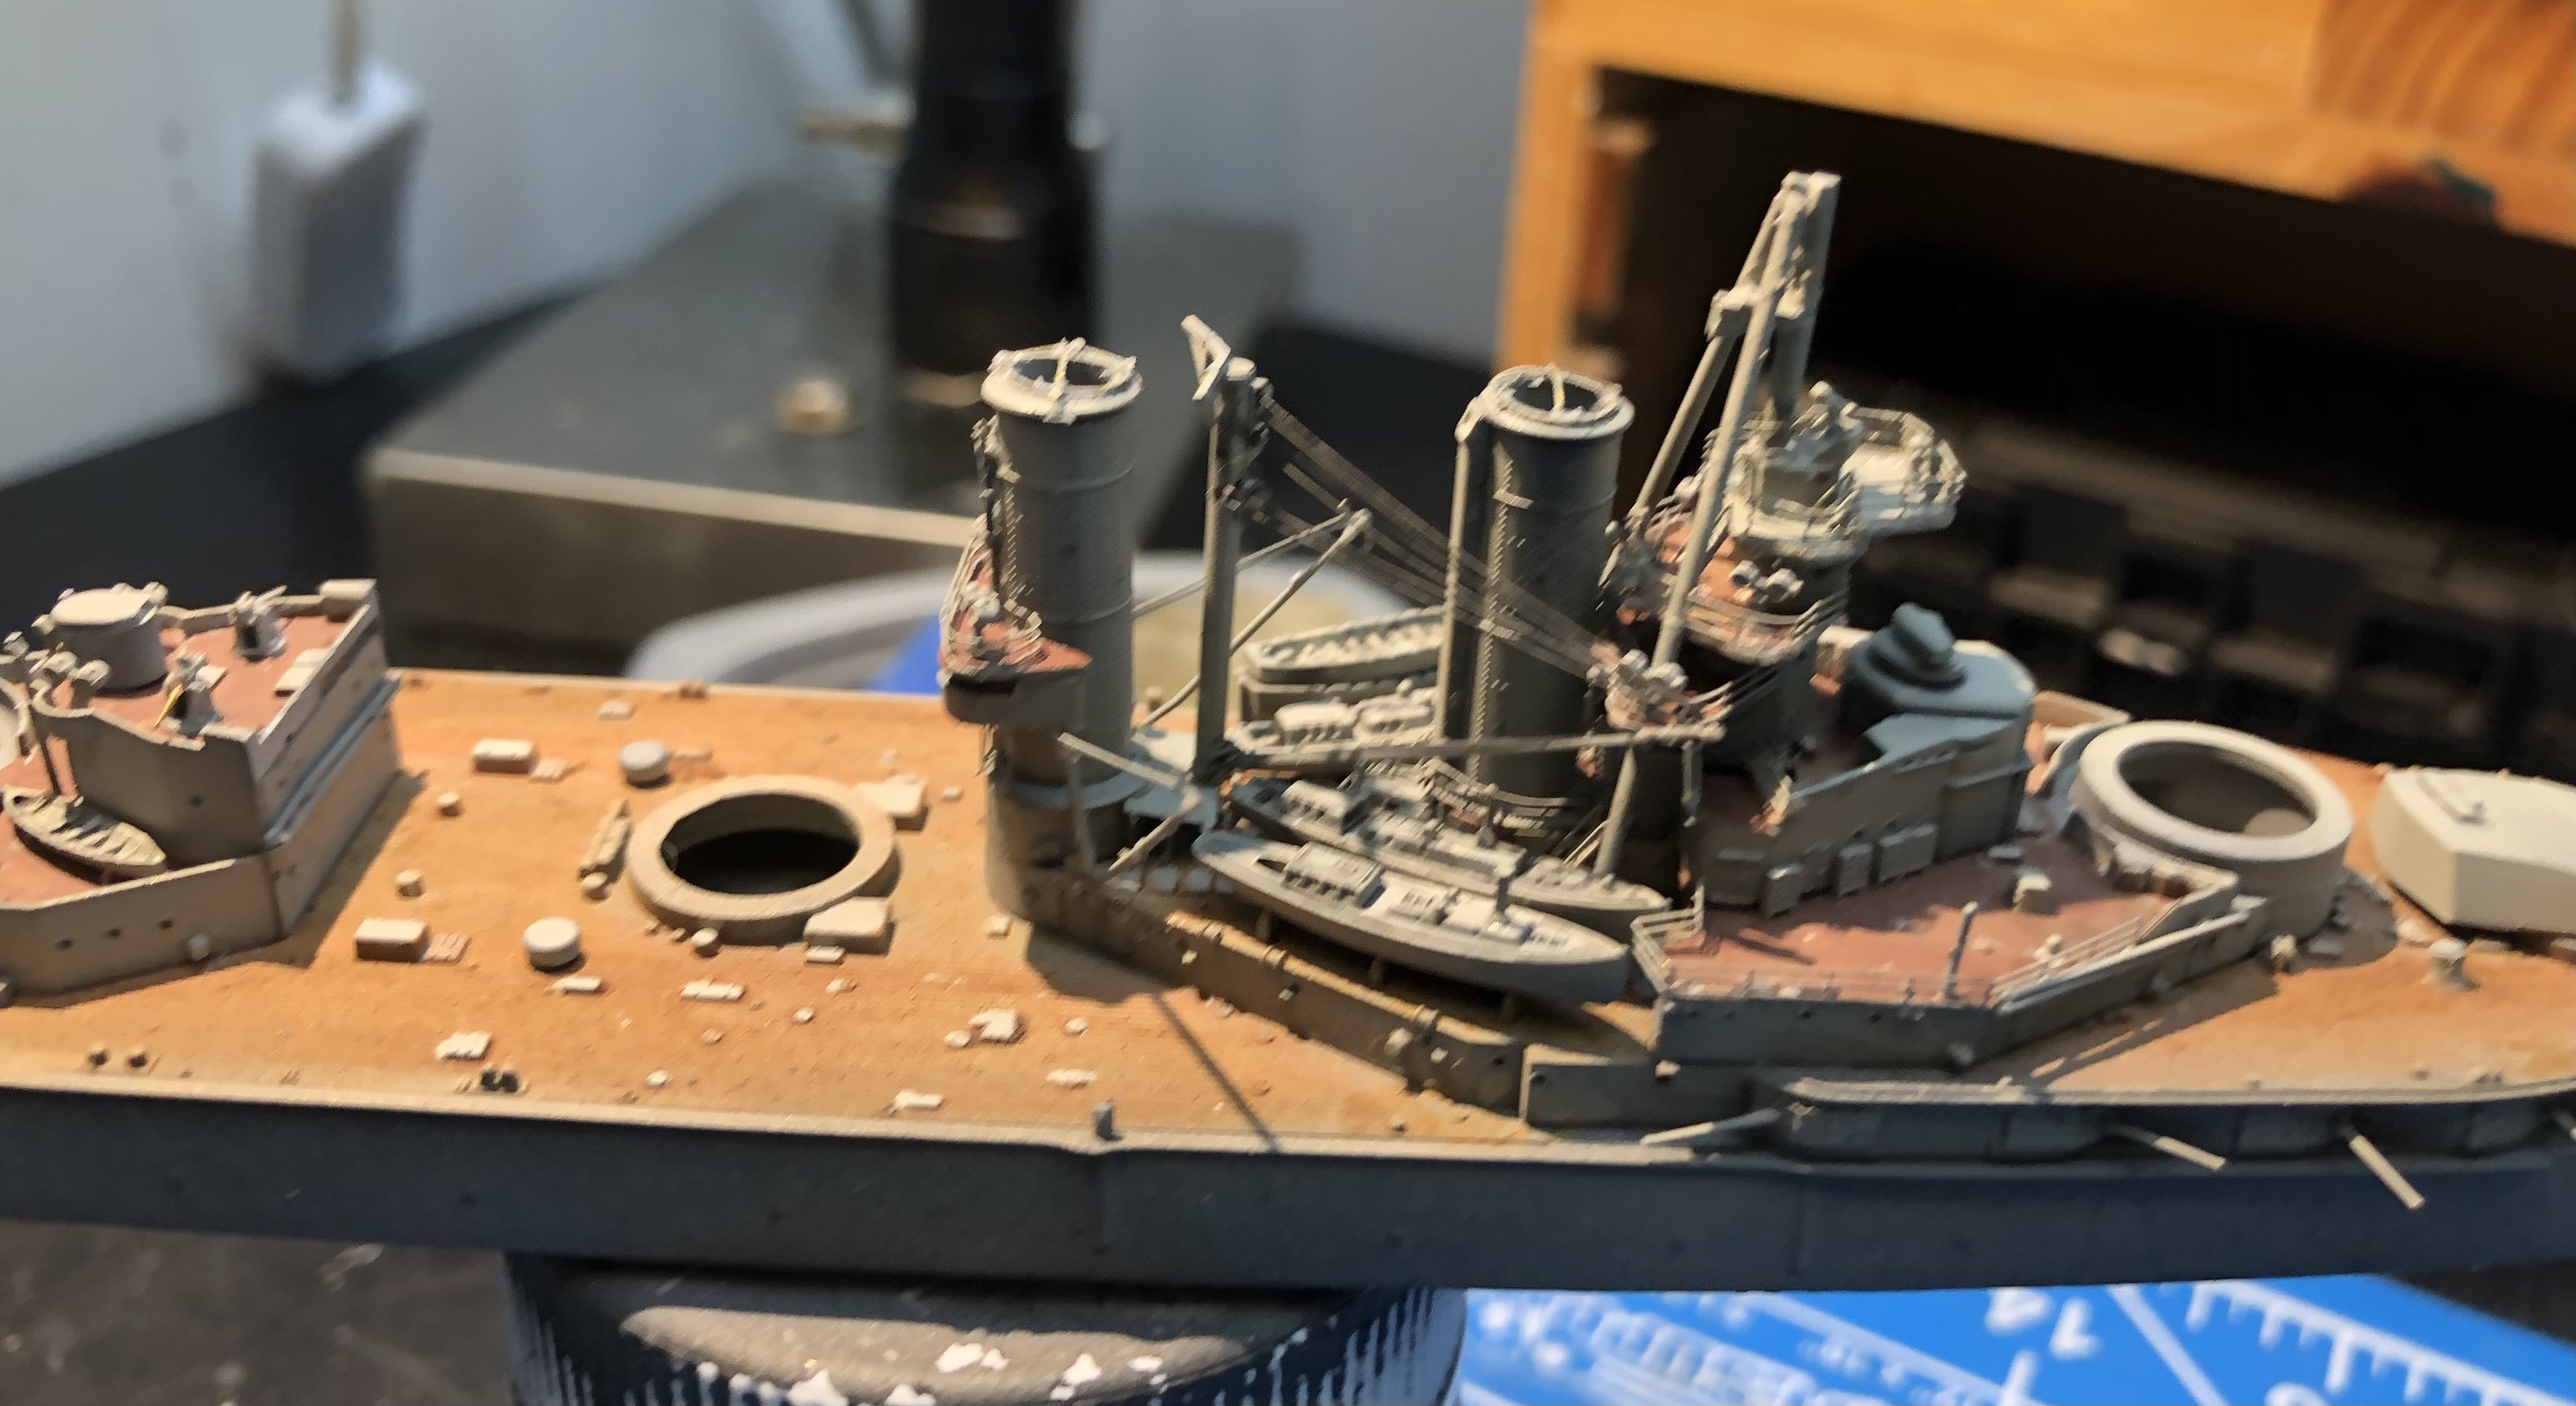
The major achievement was assembling and installing the boat deck derricks without getting the PE cables damaged.
I’ve started on the deck detailing with the capstans and ventilators. I also assembled and added the two QF 3 inch guns. I didn’t plan on using the brass barrels but one of the plastic barrels was badly damaged so I had to try.

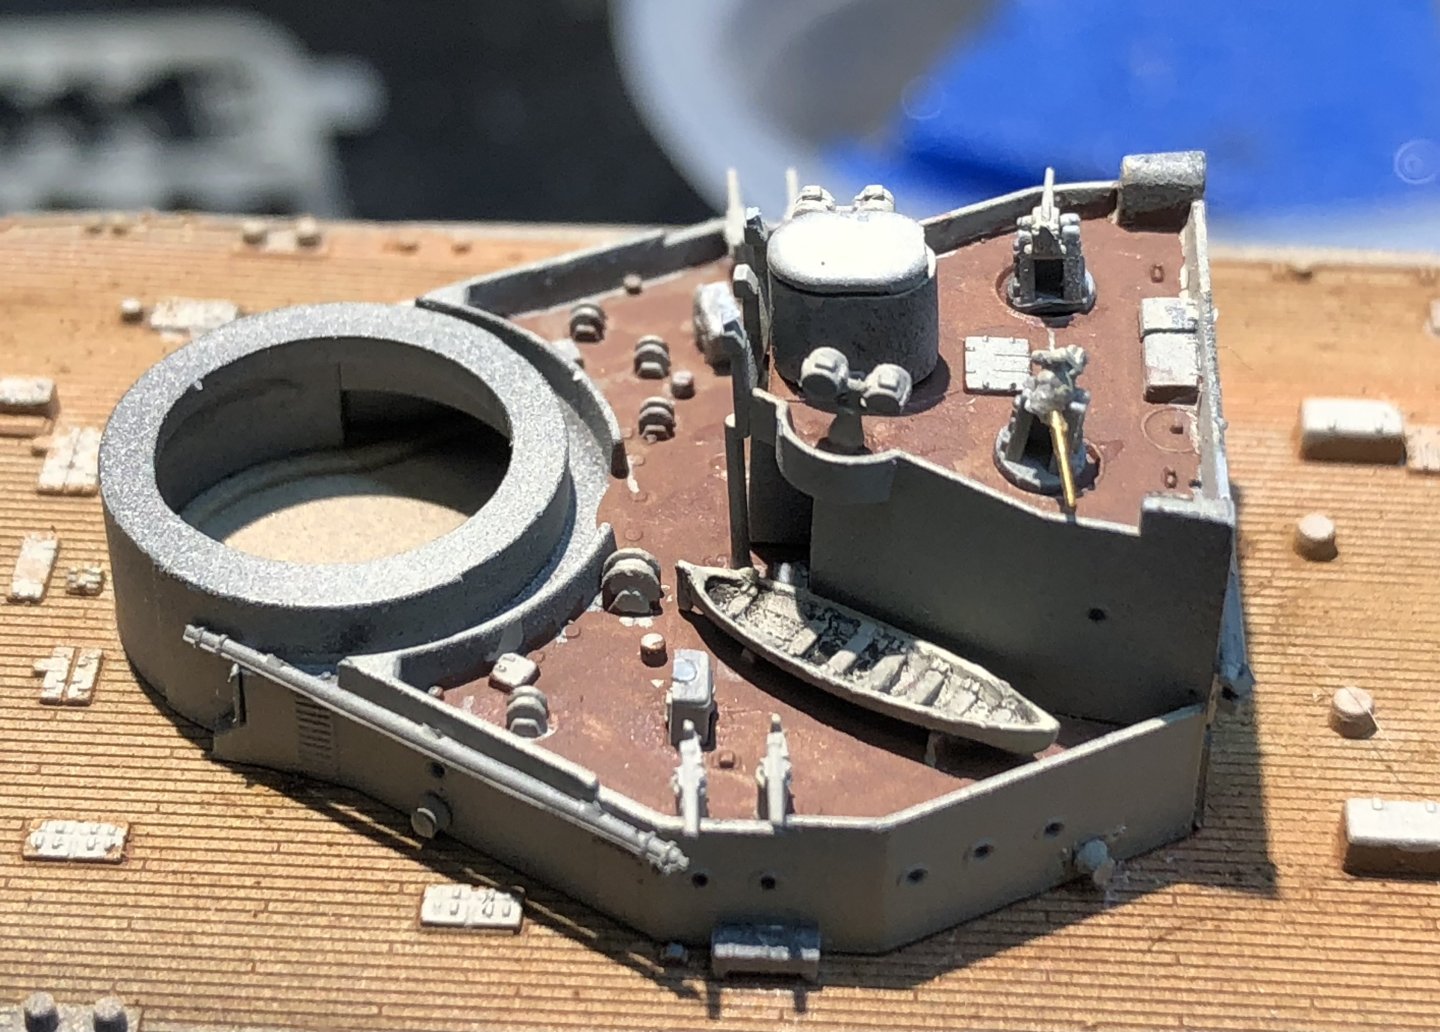
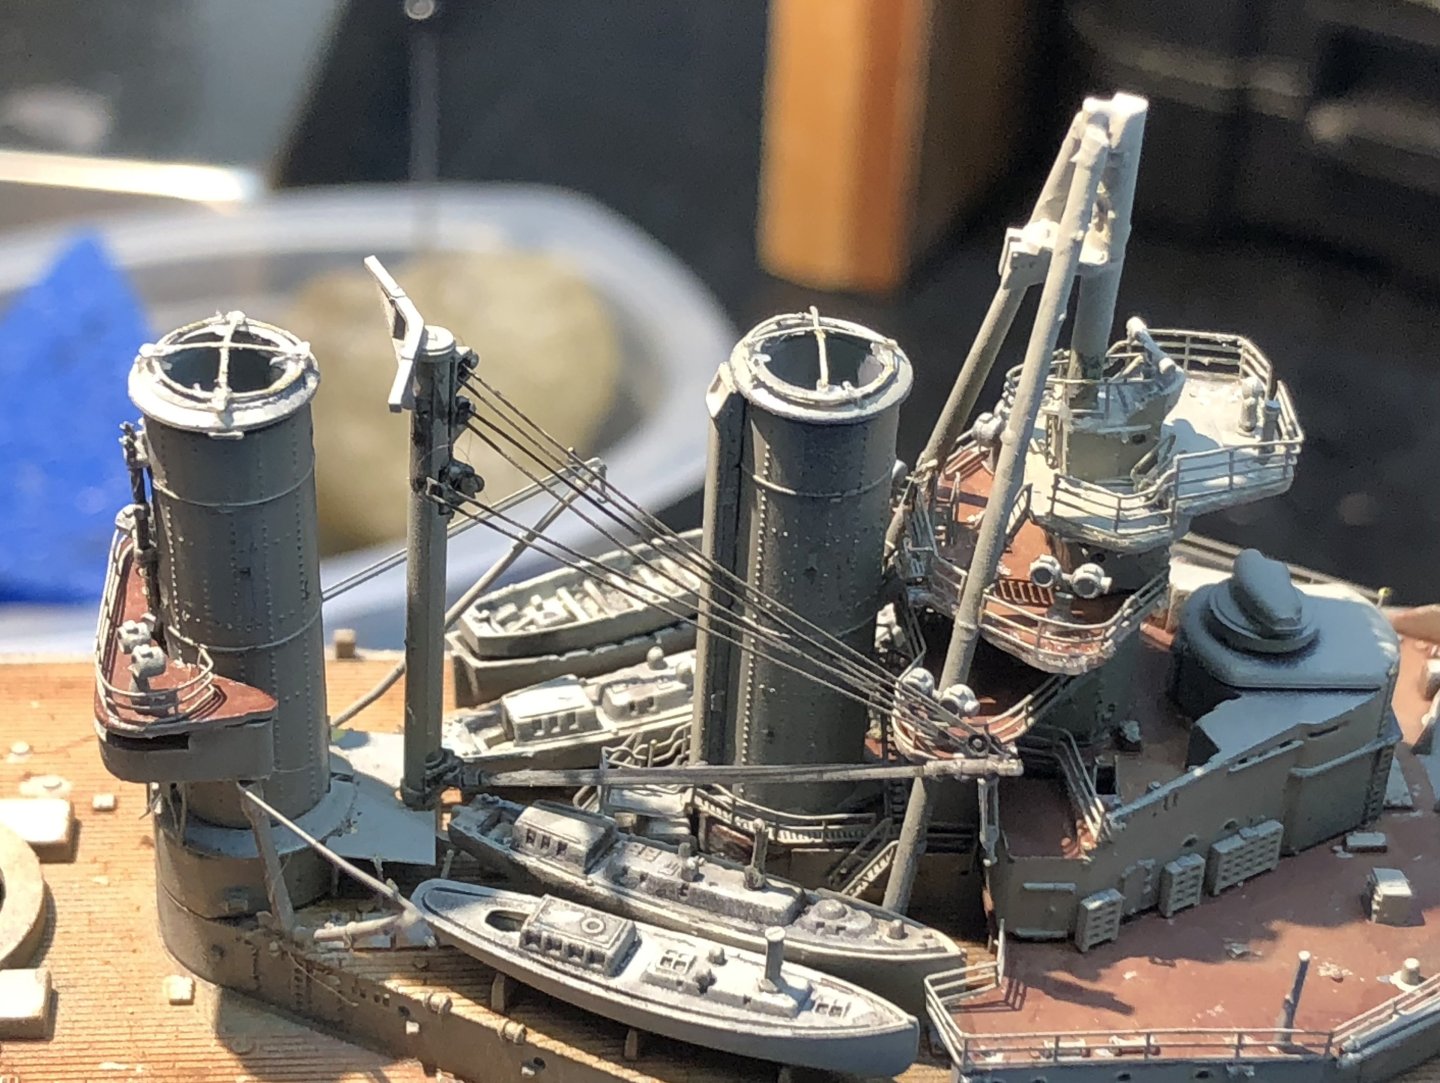
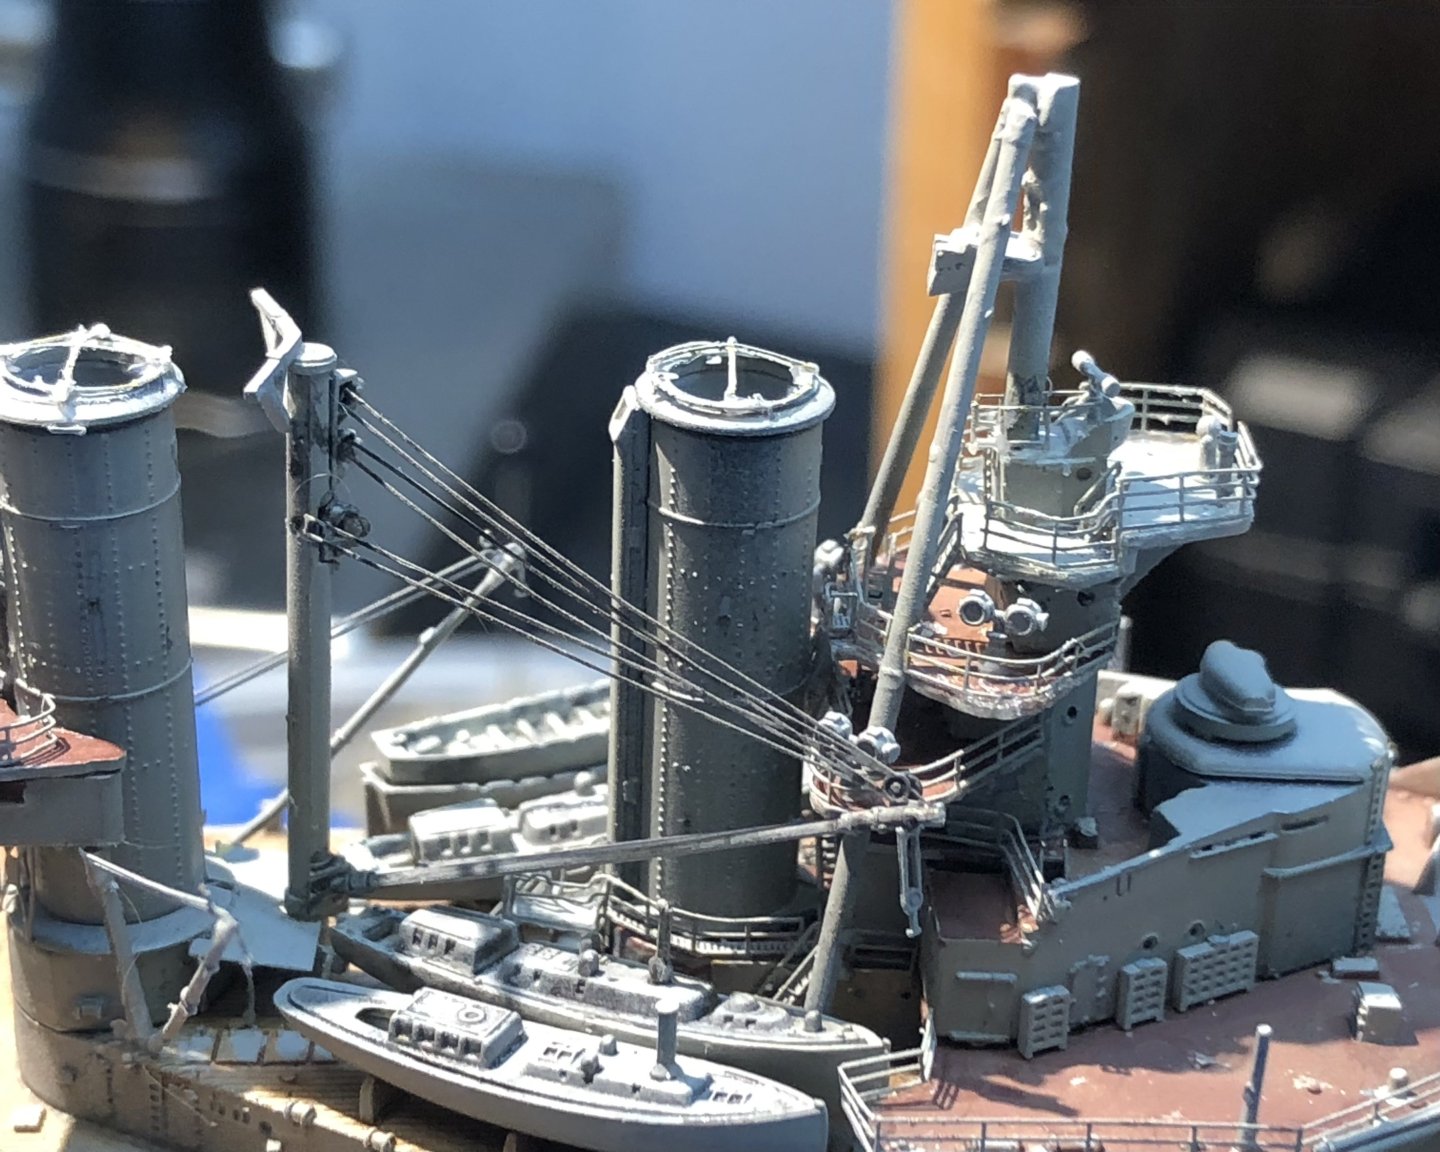

Amazingly there suddenly seems to be only minor parts to be added, mostly David’s and the remaining boats. Lots of PE railings still of course.
im trying to ignore the large elephant sat in the corner. There is a large multi yard mast to go on the top of the tripod and I am not looking forward to placing that.
Thanks for looking in, for the likes and kind comments.
alan
-
21 hours ago, Old Collingwood said:
Thats an excellent recovery there Alan - these kits at this scale are such a challenge and a Bad language tester.
OC.
Thank you very much OC, it’s great seeing the model come together but it is very challenging at times and the PE / base kit instructions take a lot of puzzling out. Getting there though.
alan
- Old Collingwood, Jack12477 and Canute
-
3
-
On 4/14/2025 at 12:51 AM, Nirvana said:
It is hard to replicate metal and wood surfaces on plastic, but this looks really nice.
Thank you very much Per, hopefully the final weathering will bring it all together.
alan
- Old Collingwood and Canute
-
2
-
On 4/13/2025 at 7:23 AM, mikegr said:
sometimes we need to apply high skills to get the desired effect and this may fail so we need to improvise
You are right Mike, this kit would be easier if I had a better skill set but, thankfully I have found work around when I have hit trouble.
alan
- Old Collingwood, Canute, mikegr and 1 other
-
4
-
Simply beautiful.
alan
- Old Collingwood, DocRob and Canute
-
2
-
 1
1
-
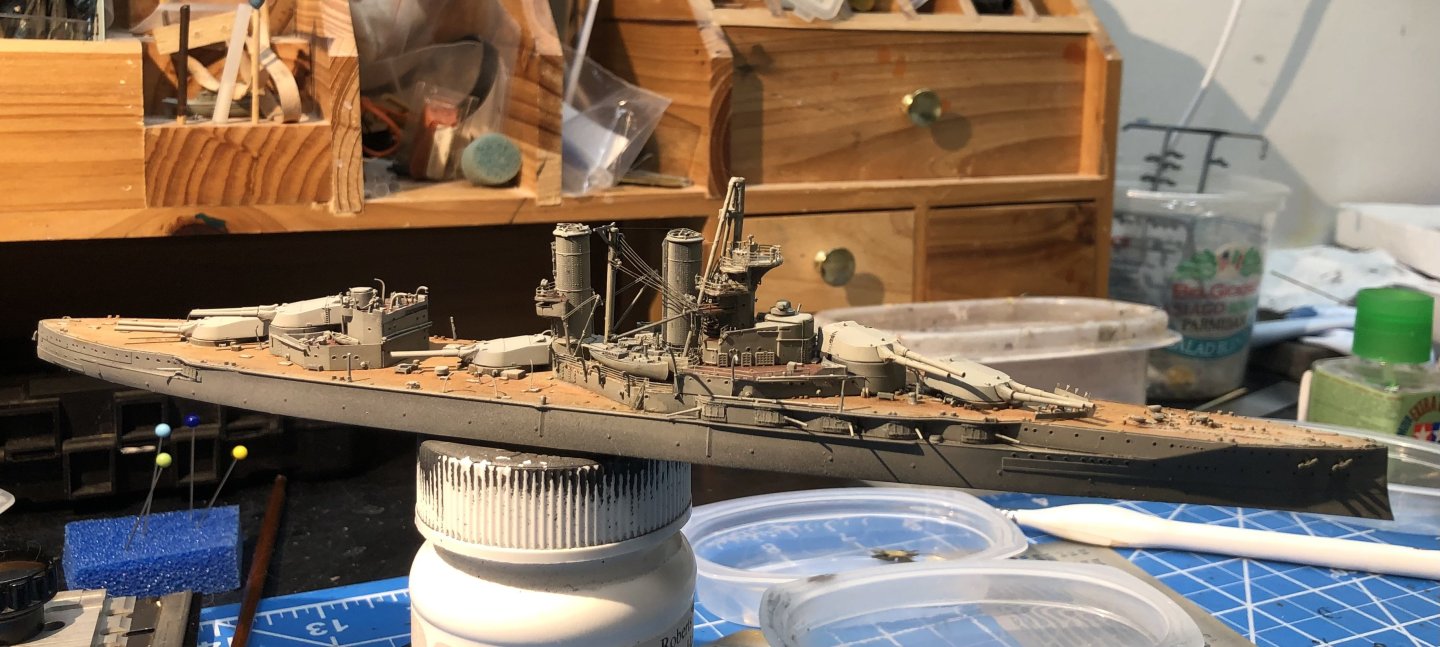
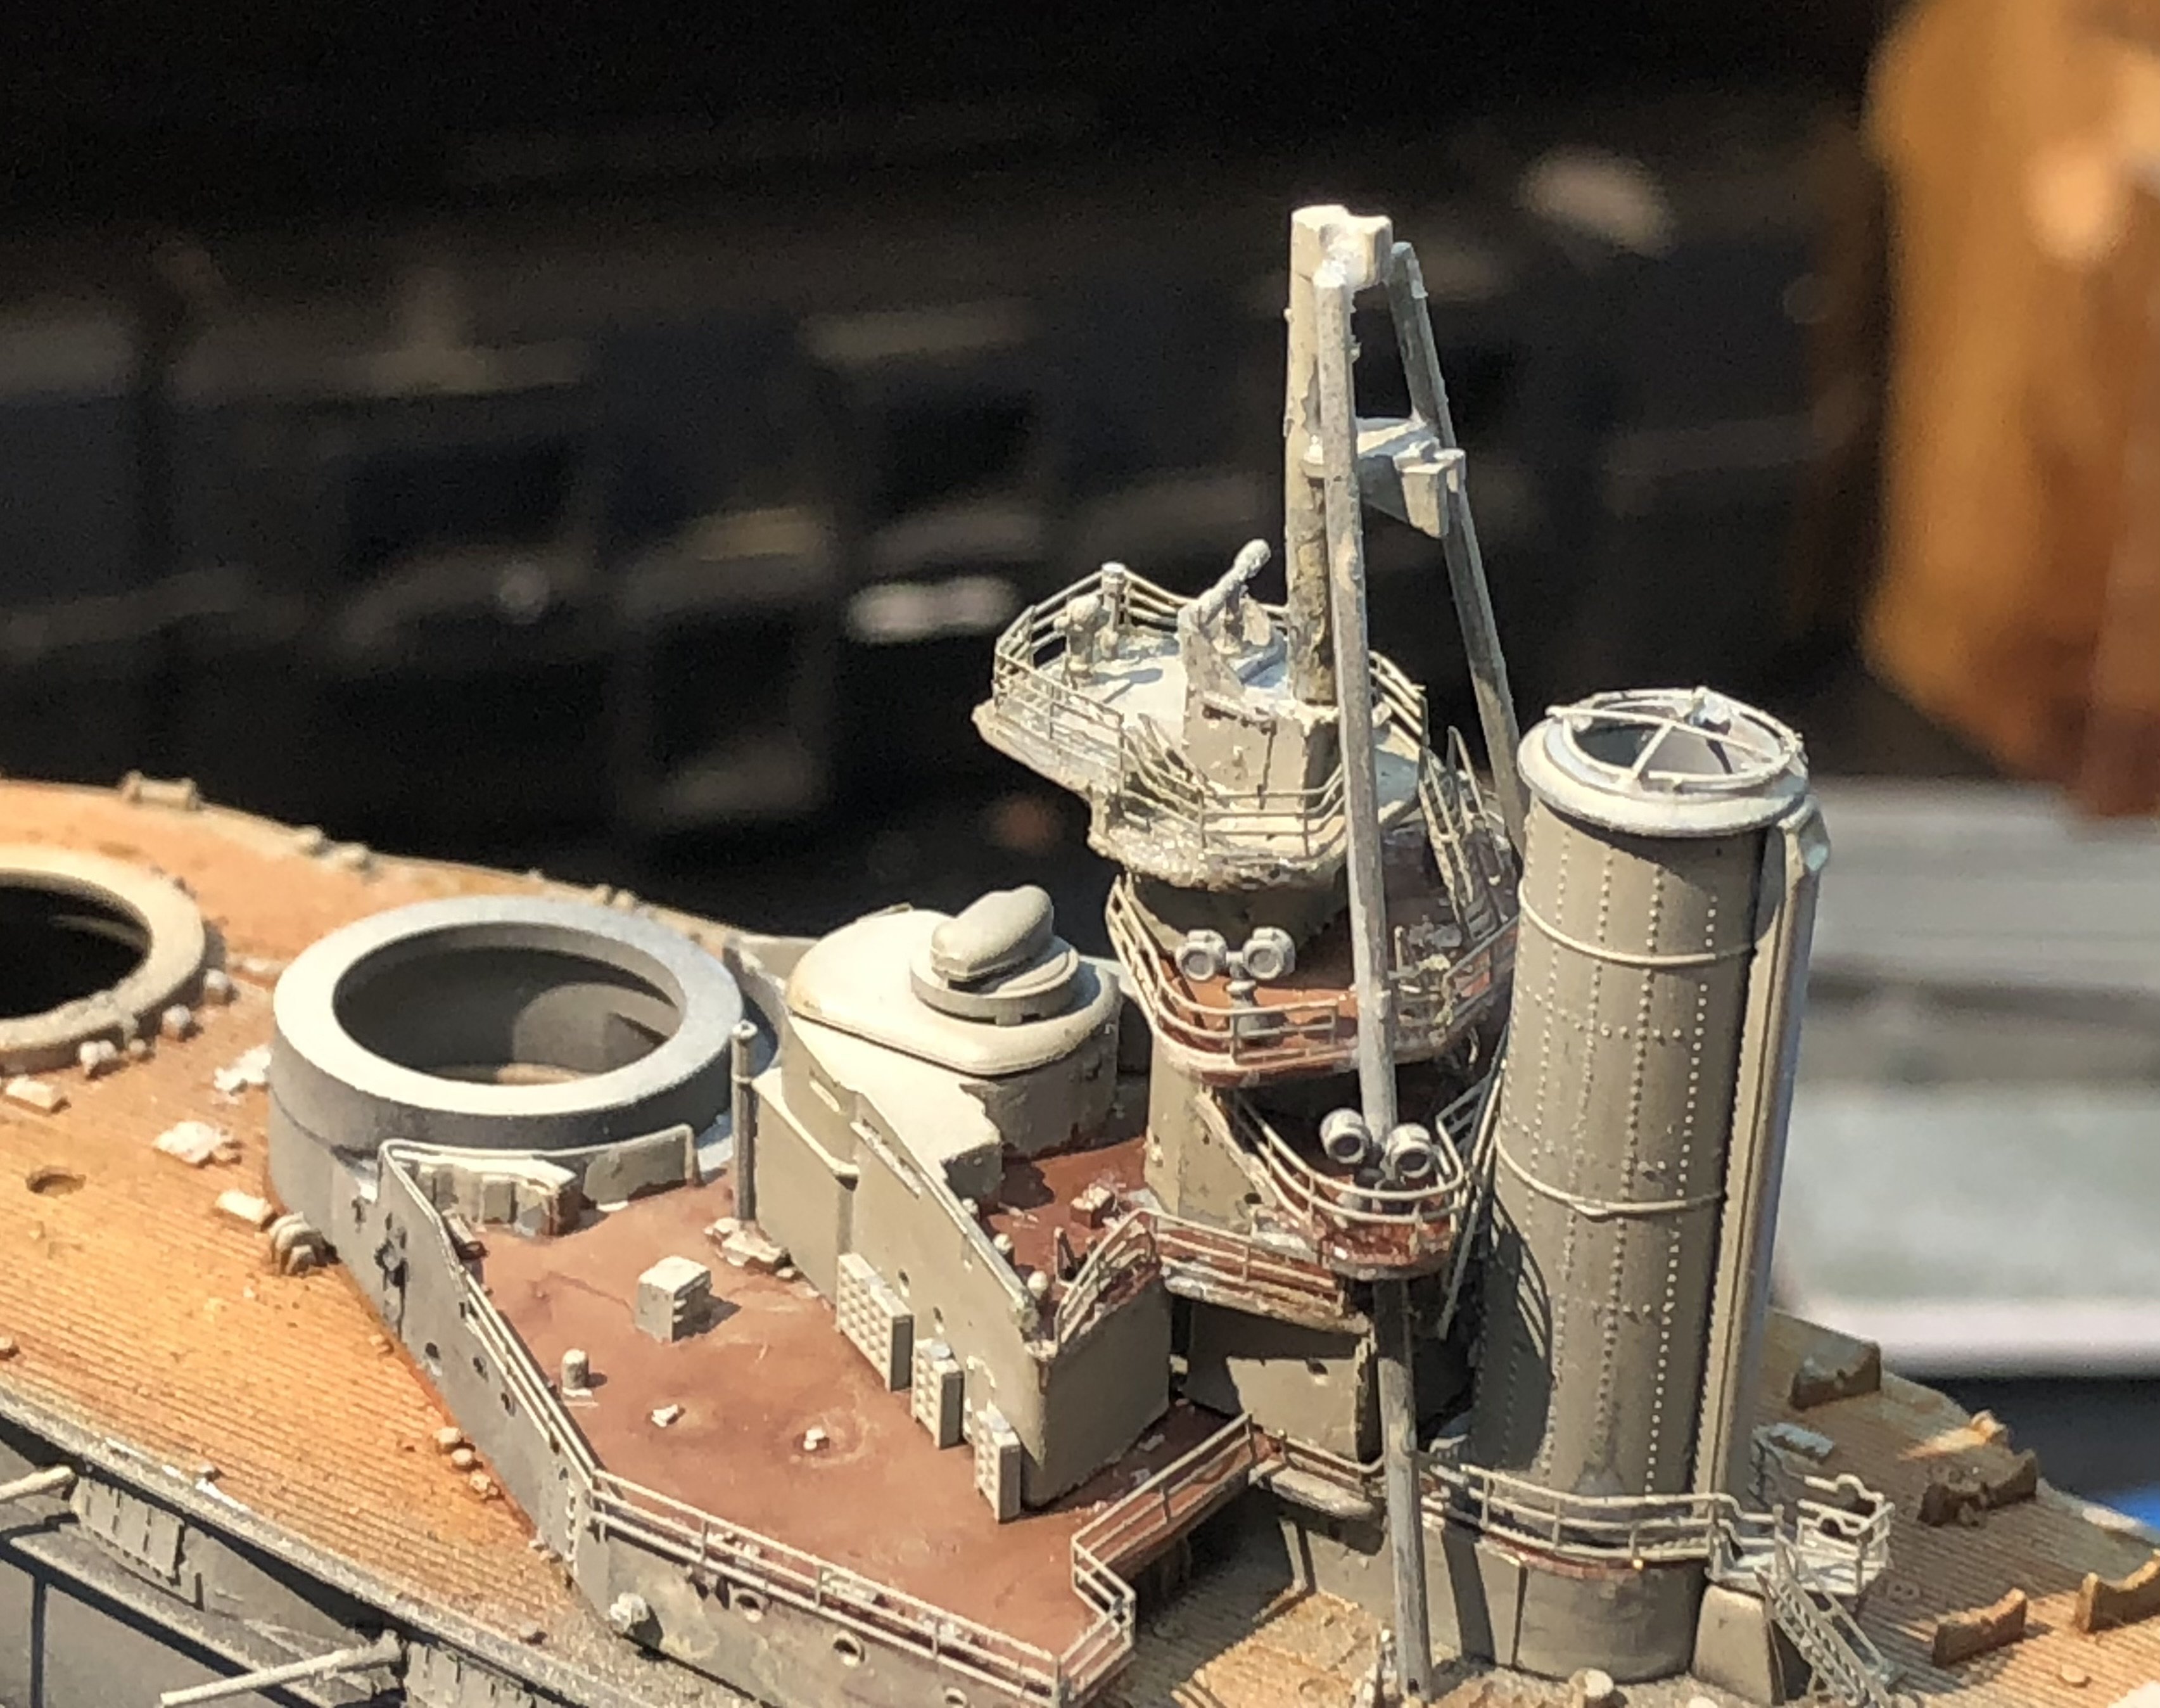
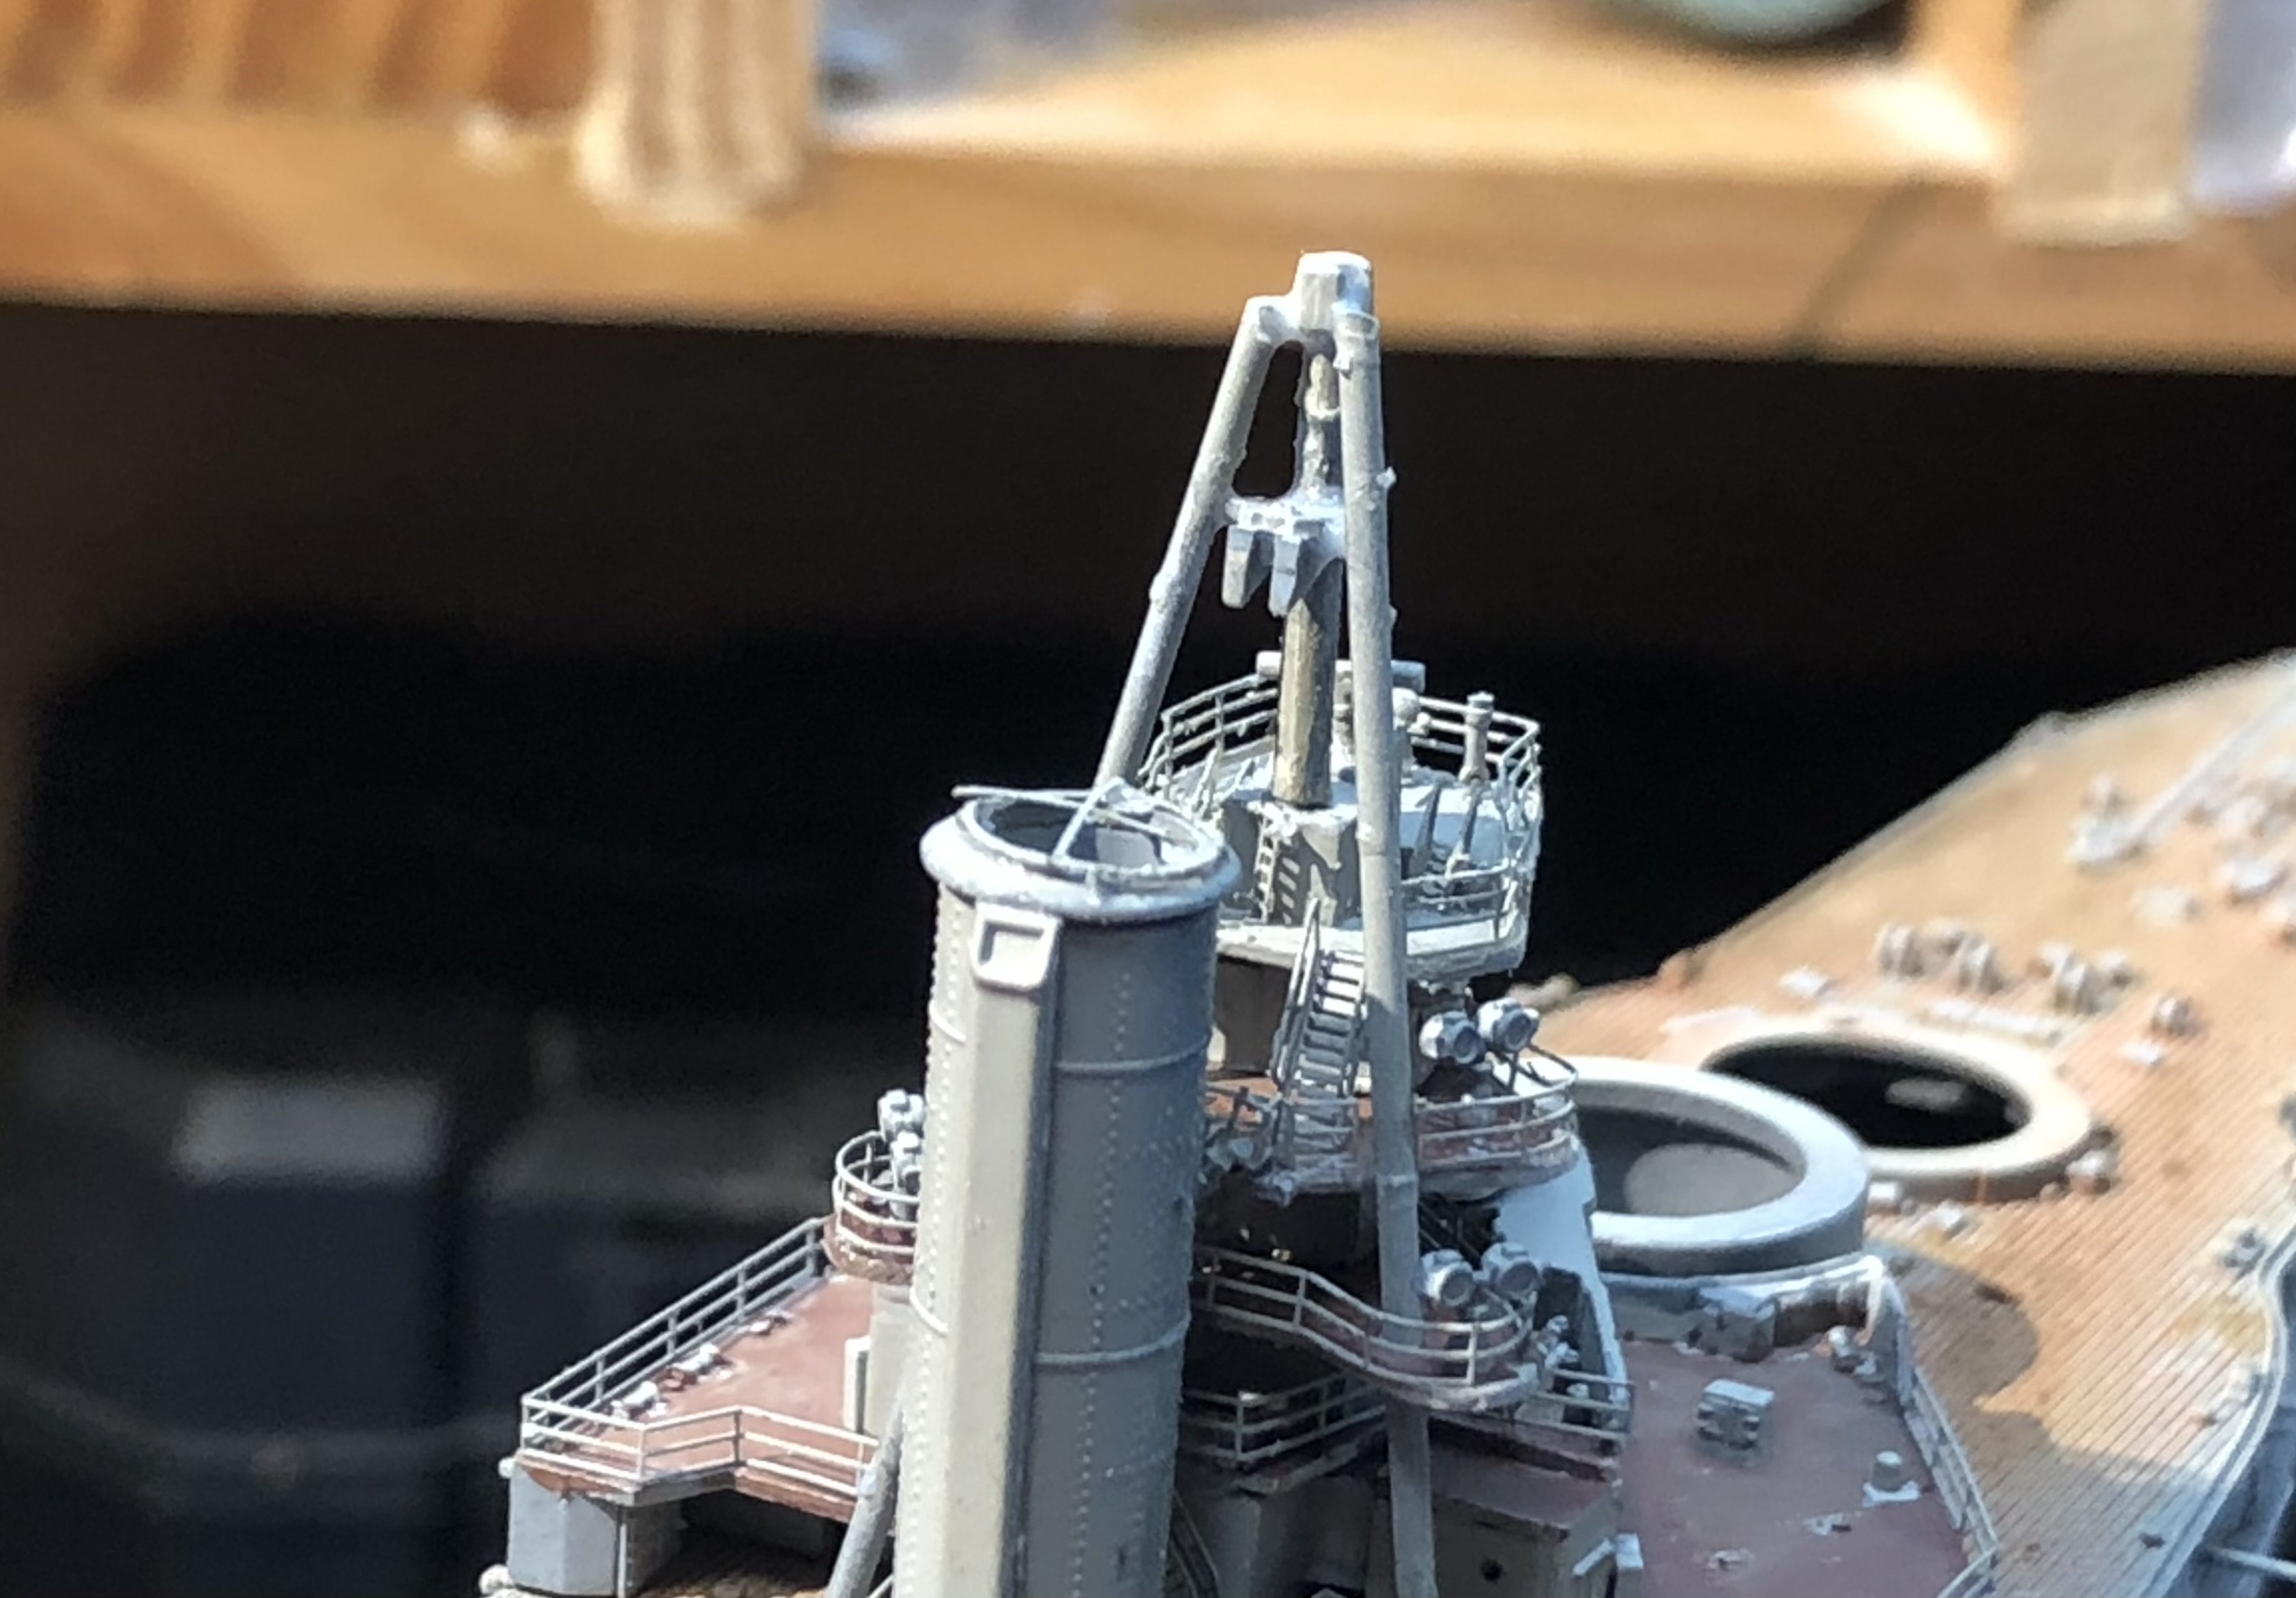
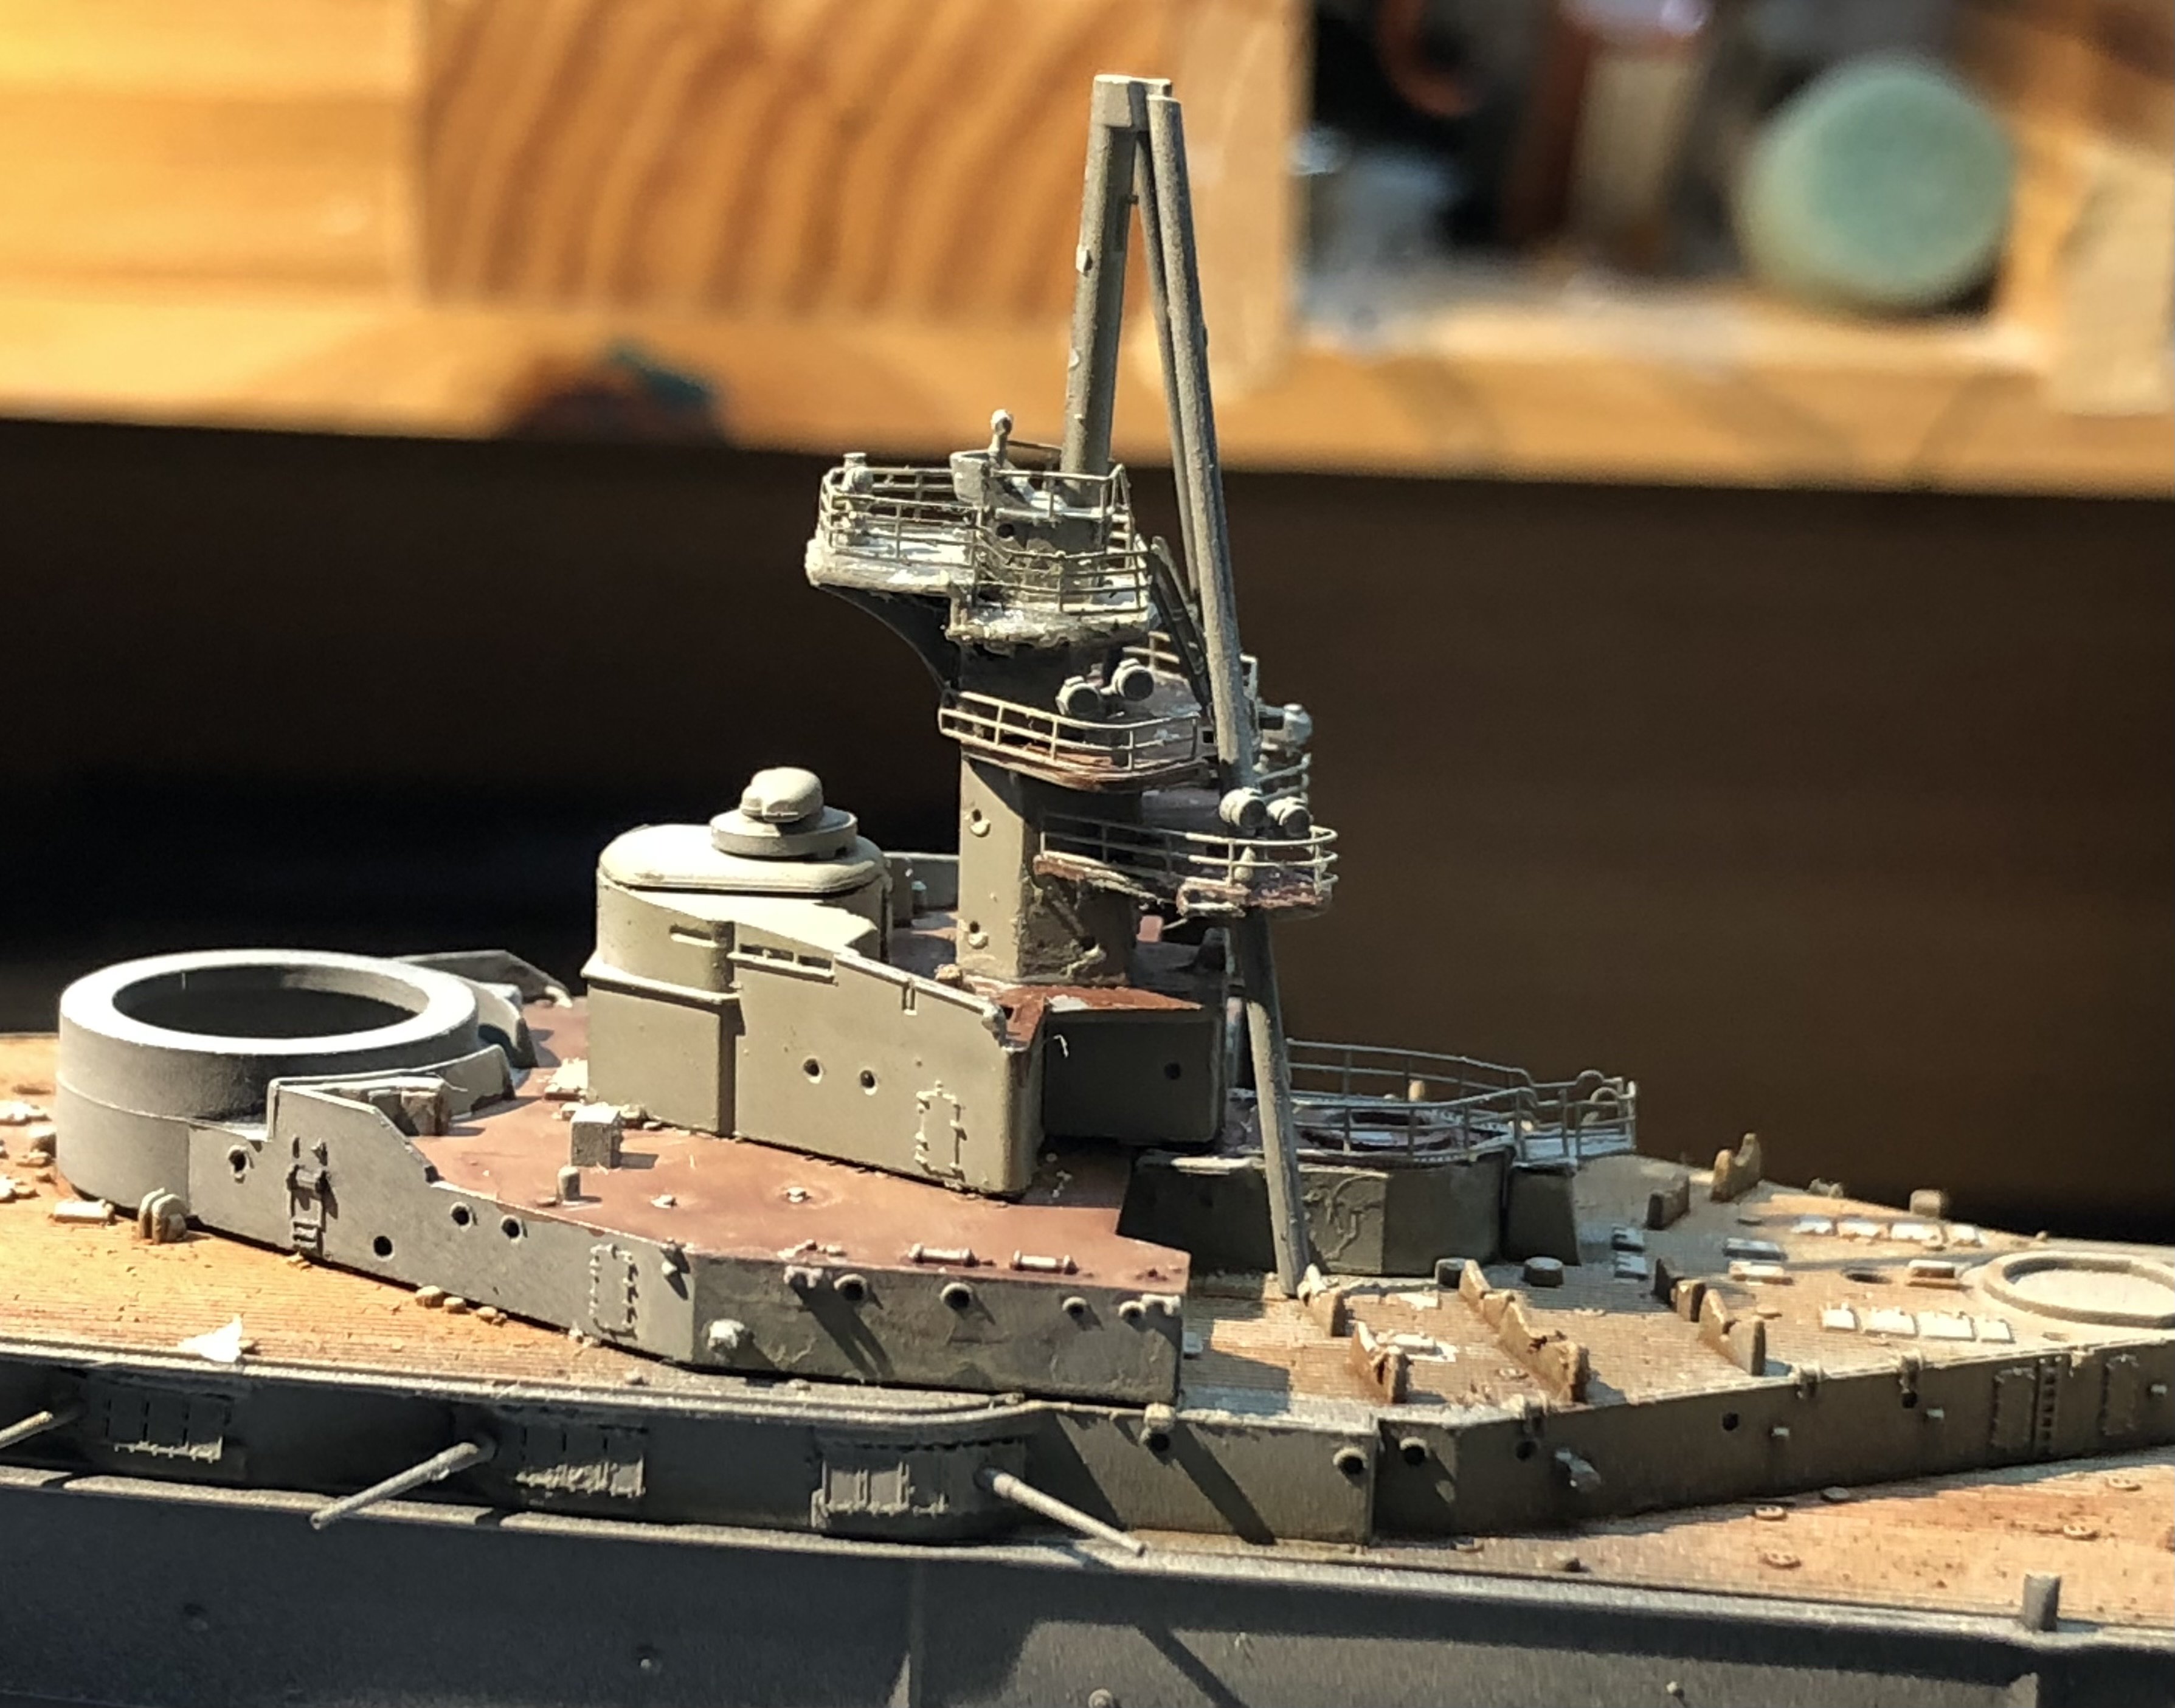
I lost all of the day yesterday dealing with one tiny part and got very close to binning the whole thing. There is a support structure for the mast that sits towards the top of the tripod. There is a five part photo etch assembly or a plastic piece. I built up the PE item but utterly failed to get it into position. There was just not enough room between the tripod legs. During the struggles I damaged the PE railings on the tops deck and broke apart the tripod legs. I decided that the only way forward was to lower the position of the support to get more space between the legs. This meant making some cuts in the forward leg to receive the support. I did this and tried to assemble the support in its new place. As a final insult, during the last attempt of the evening the PE support pinged off the tweezers and disappeared. I spent an hour searching with no success and decided that the plastic part would be easier to modify anyway and it’s really not too bad looking but I was seriously considering giving up the whole build thinking it was just beyond my skill level. This morning I thought I would try one last time and curiously the first thing I saw when I sat down was a glint of brass and the PE support was sat on the cutting mat in plain view. I have no idea what dimension it spent the night in. However I had pretty much committed to the plastic bit so I filed it down to accept the pylon and placed it in the lower place and everything fell together. So, the build continues. The ships boats have been given the first coat of light gray and a few small pieces have been added to the forward structure, the damaged railings have also been repaired.


Thanks for looking in and for the likes and comments
alan
-
-
-
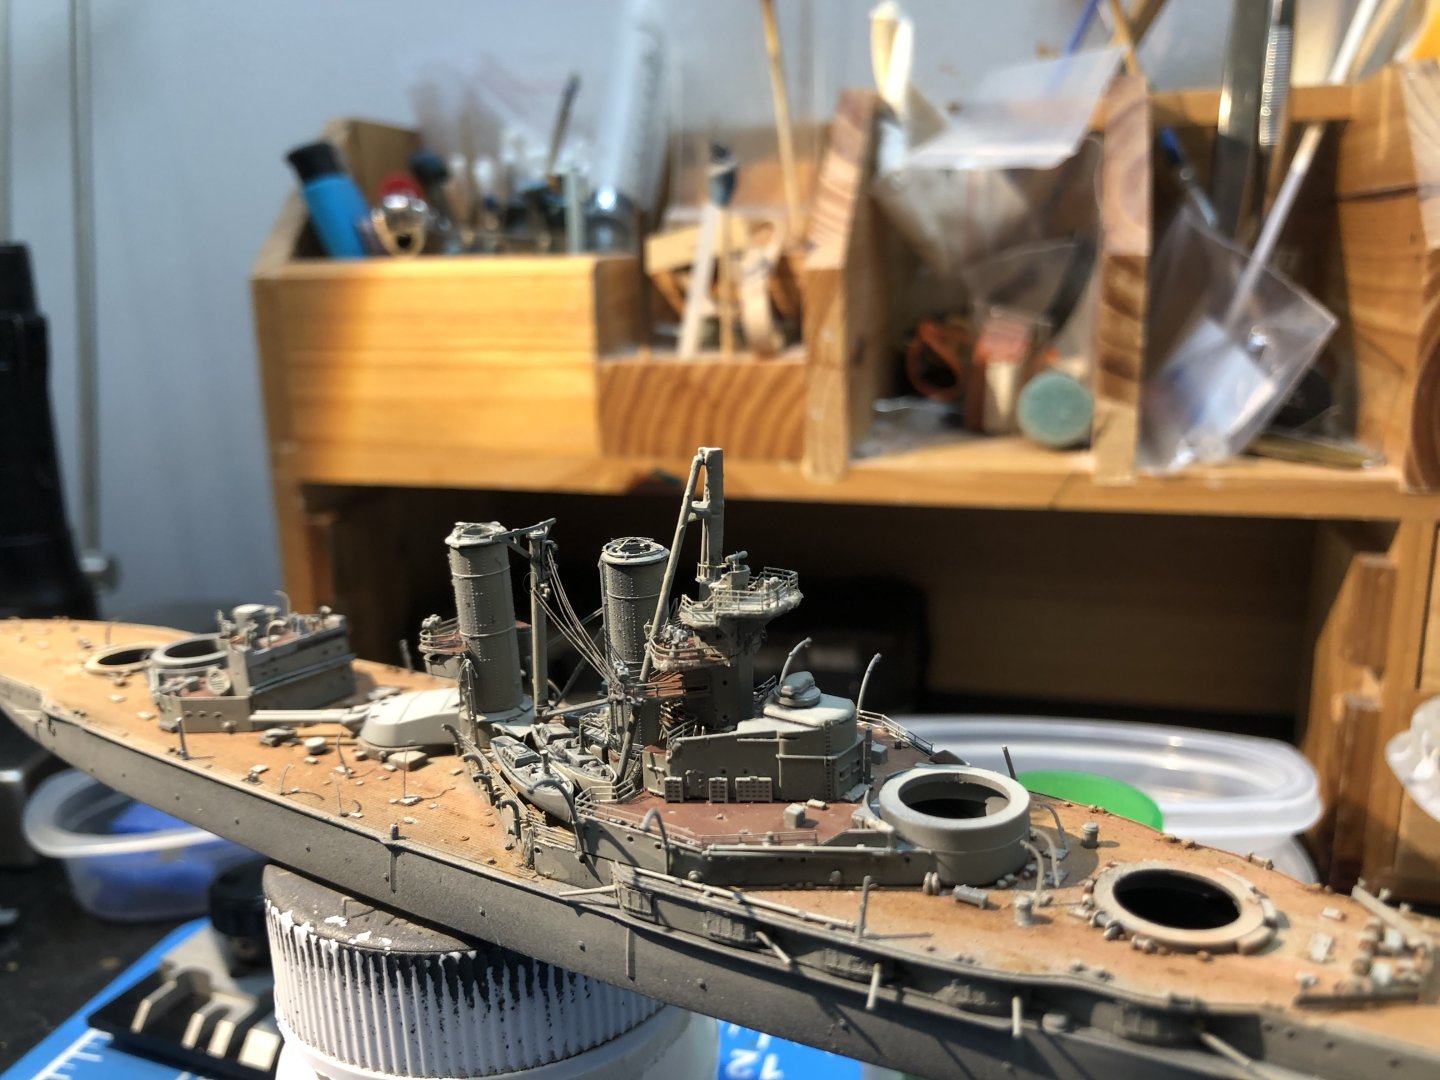
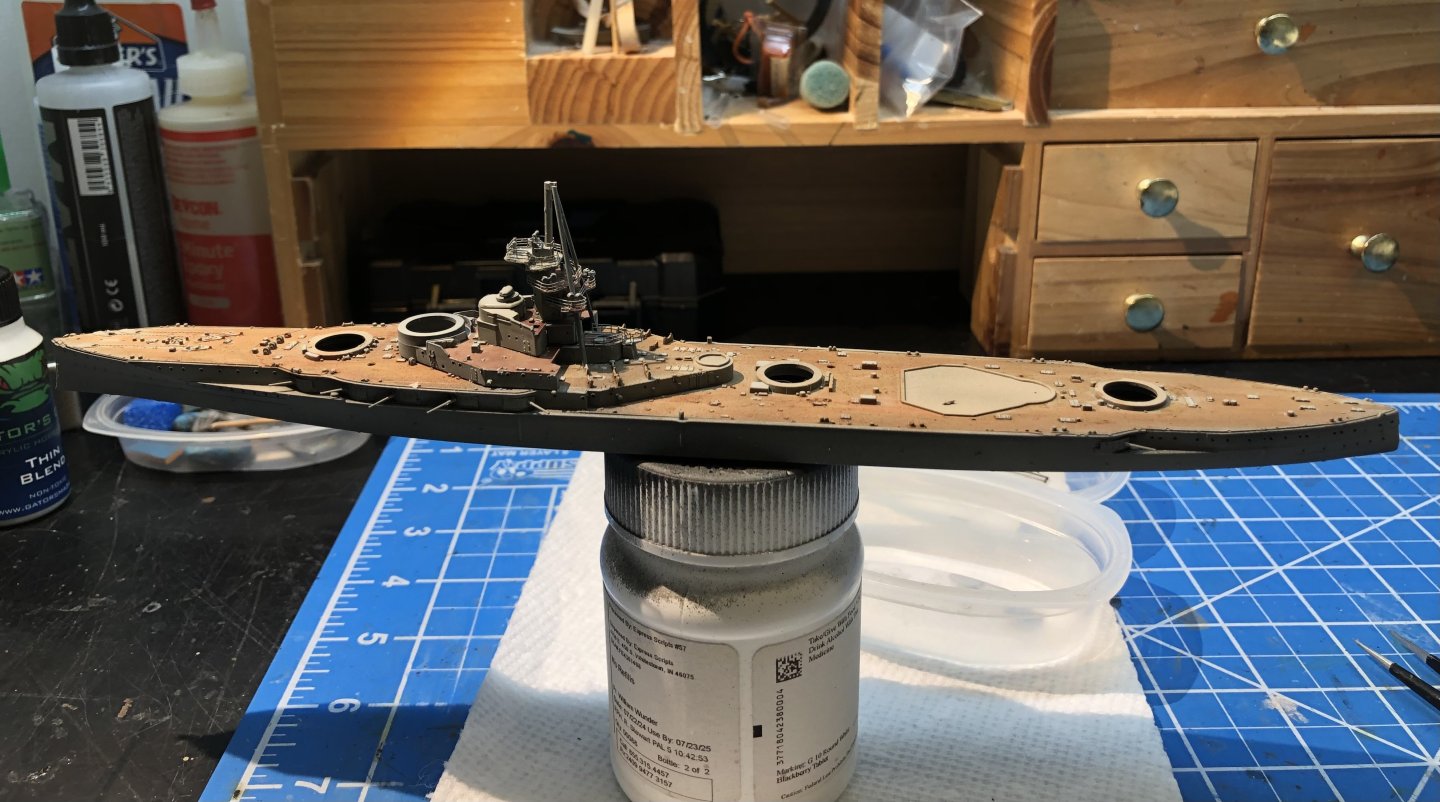
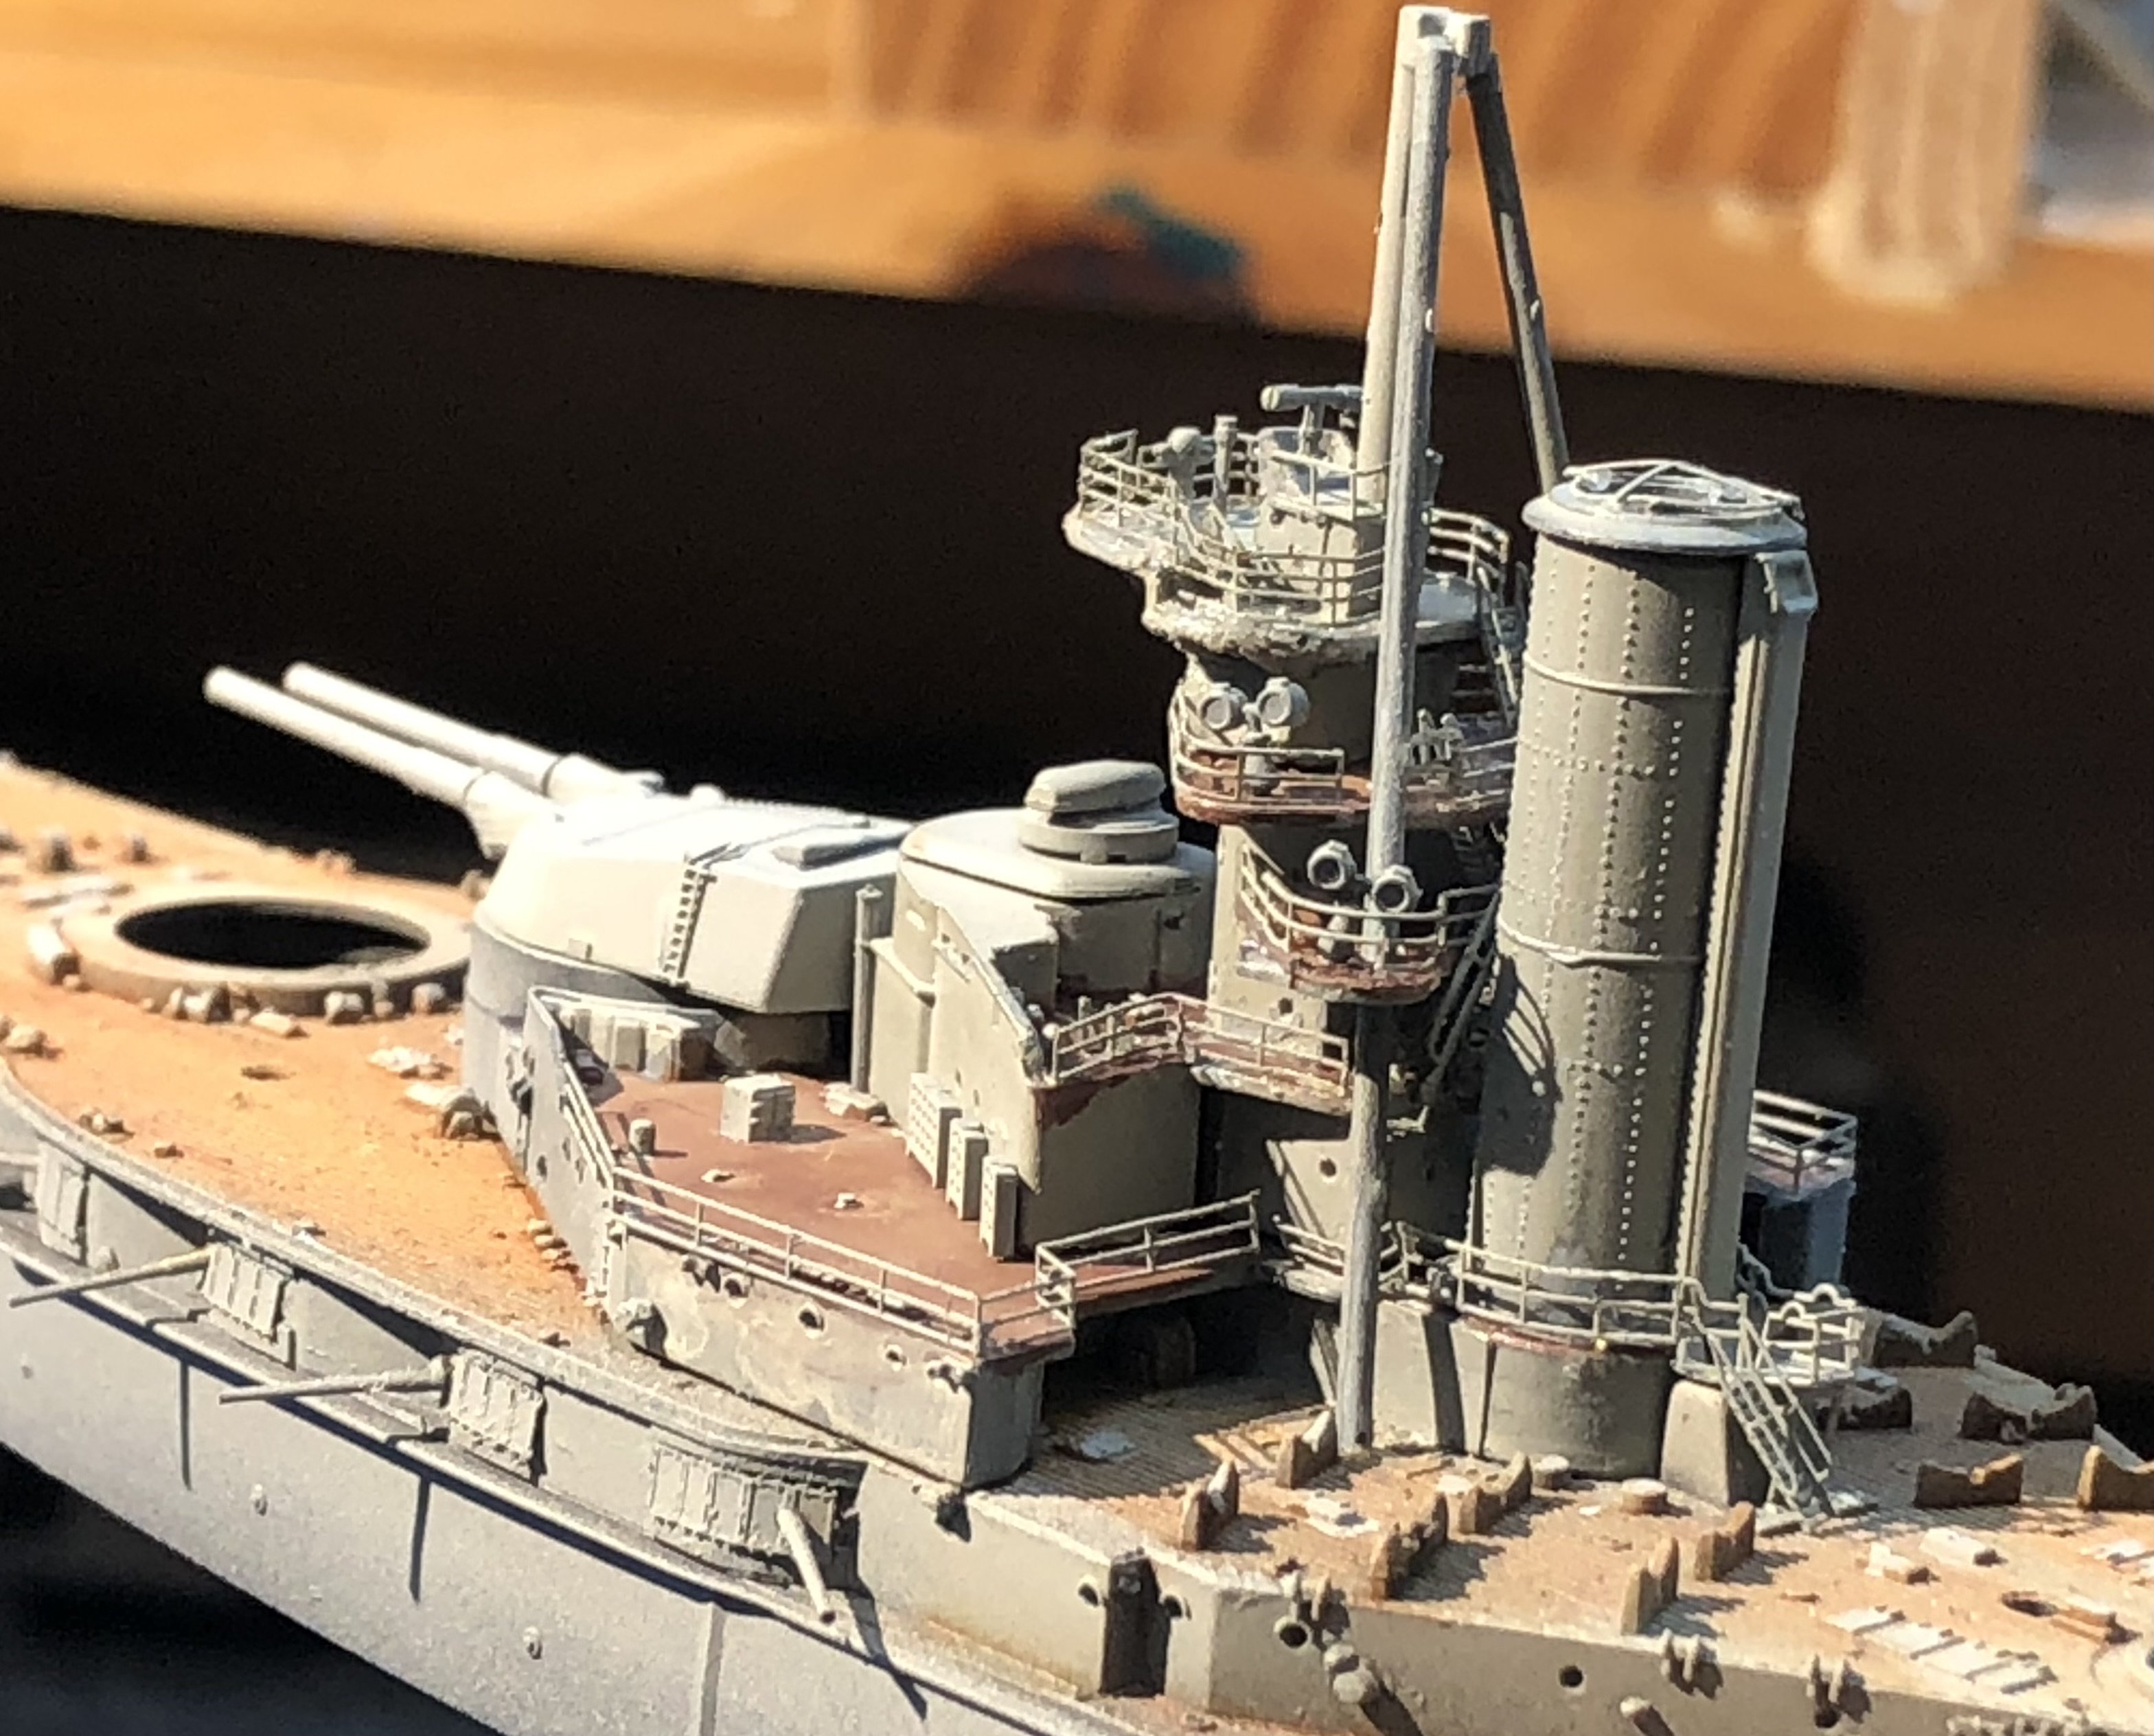
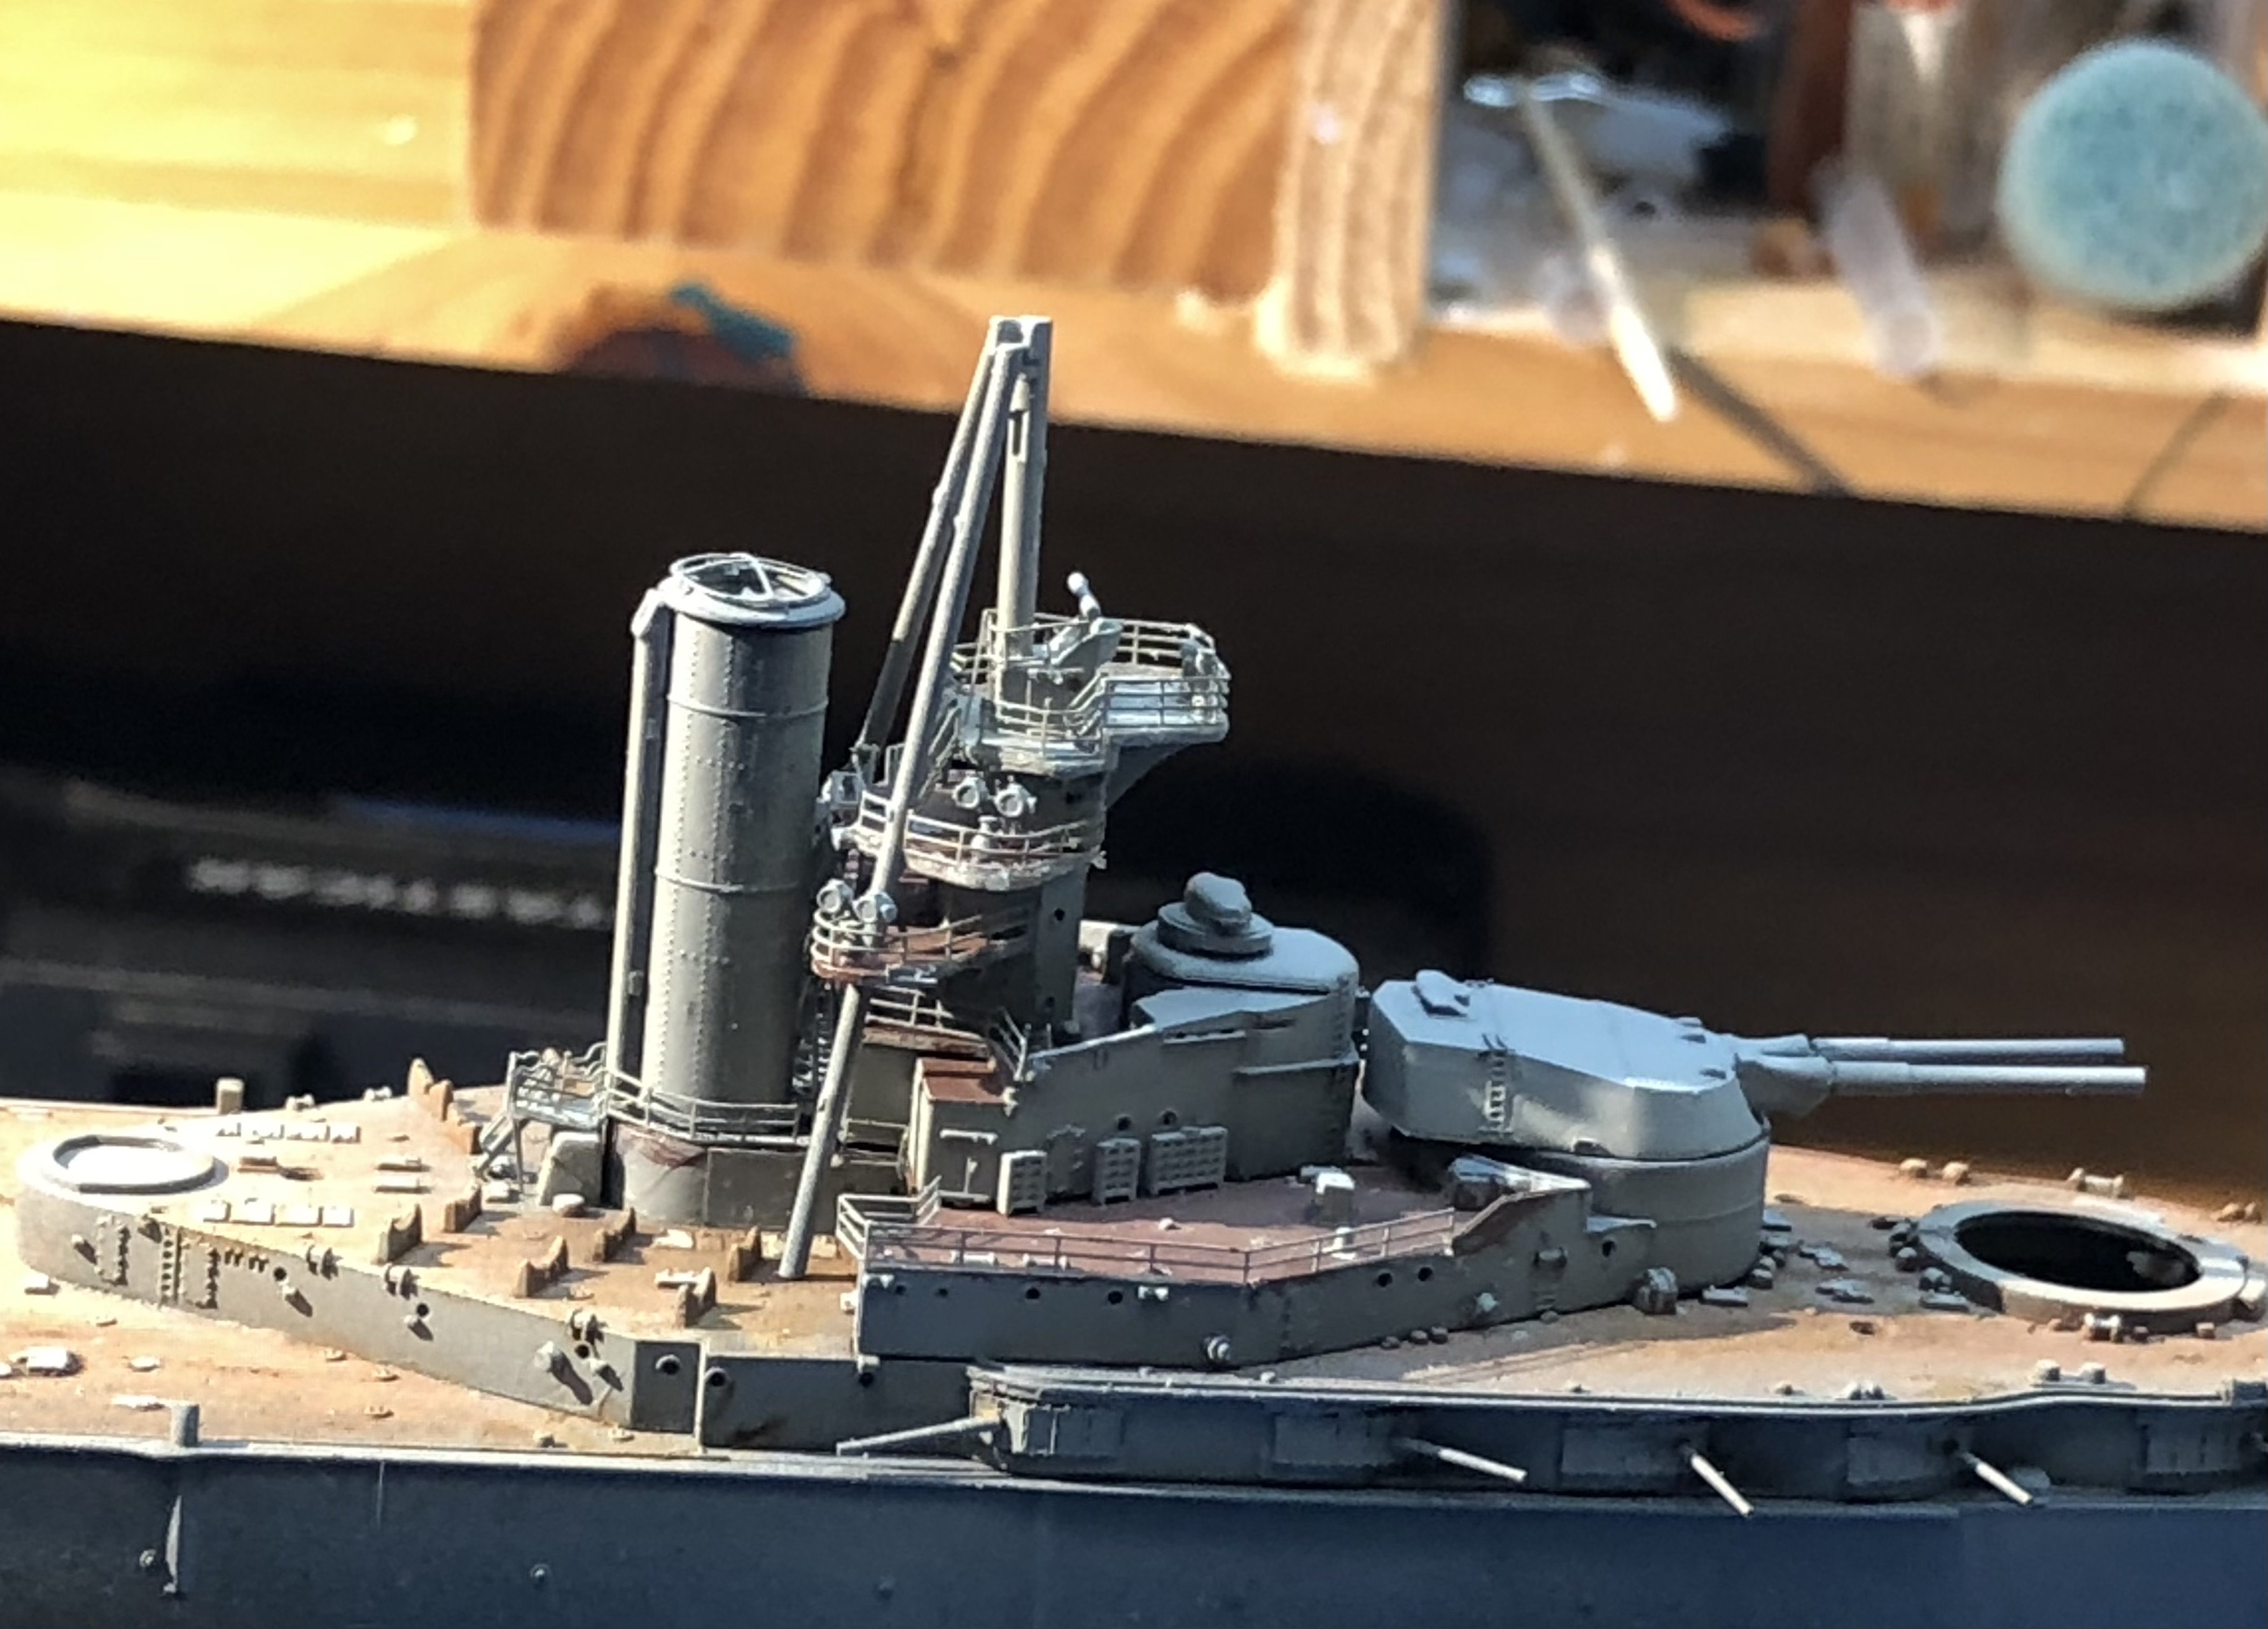
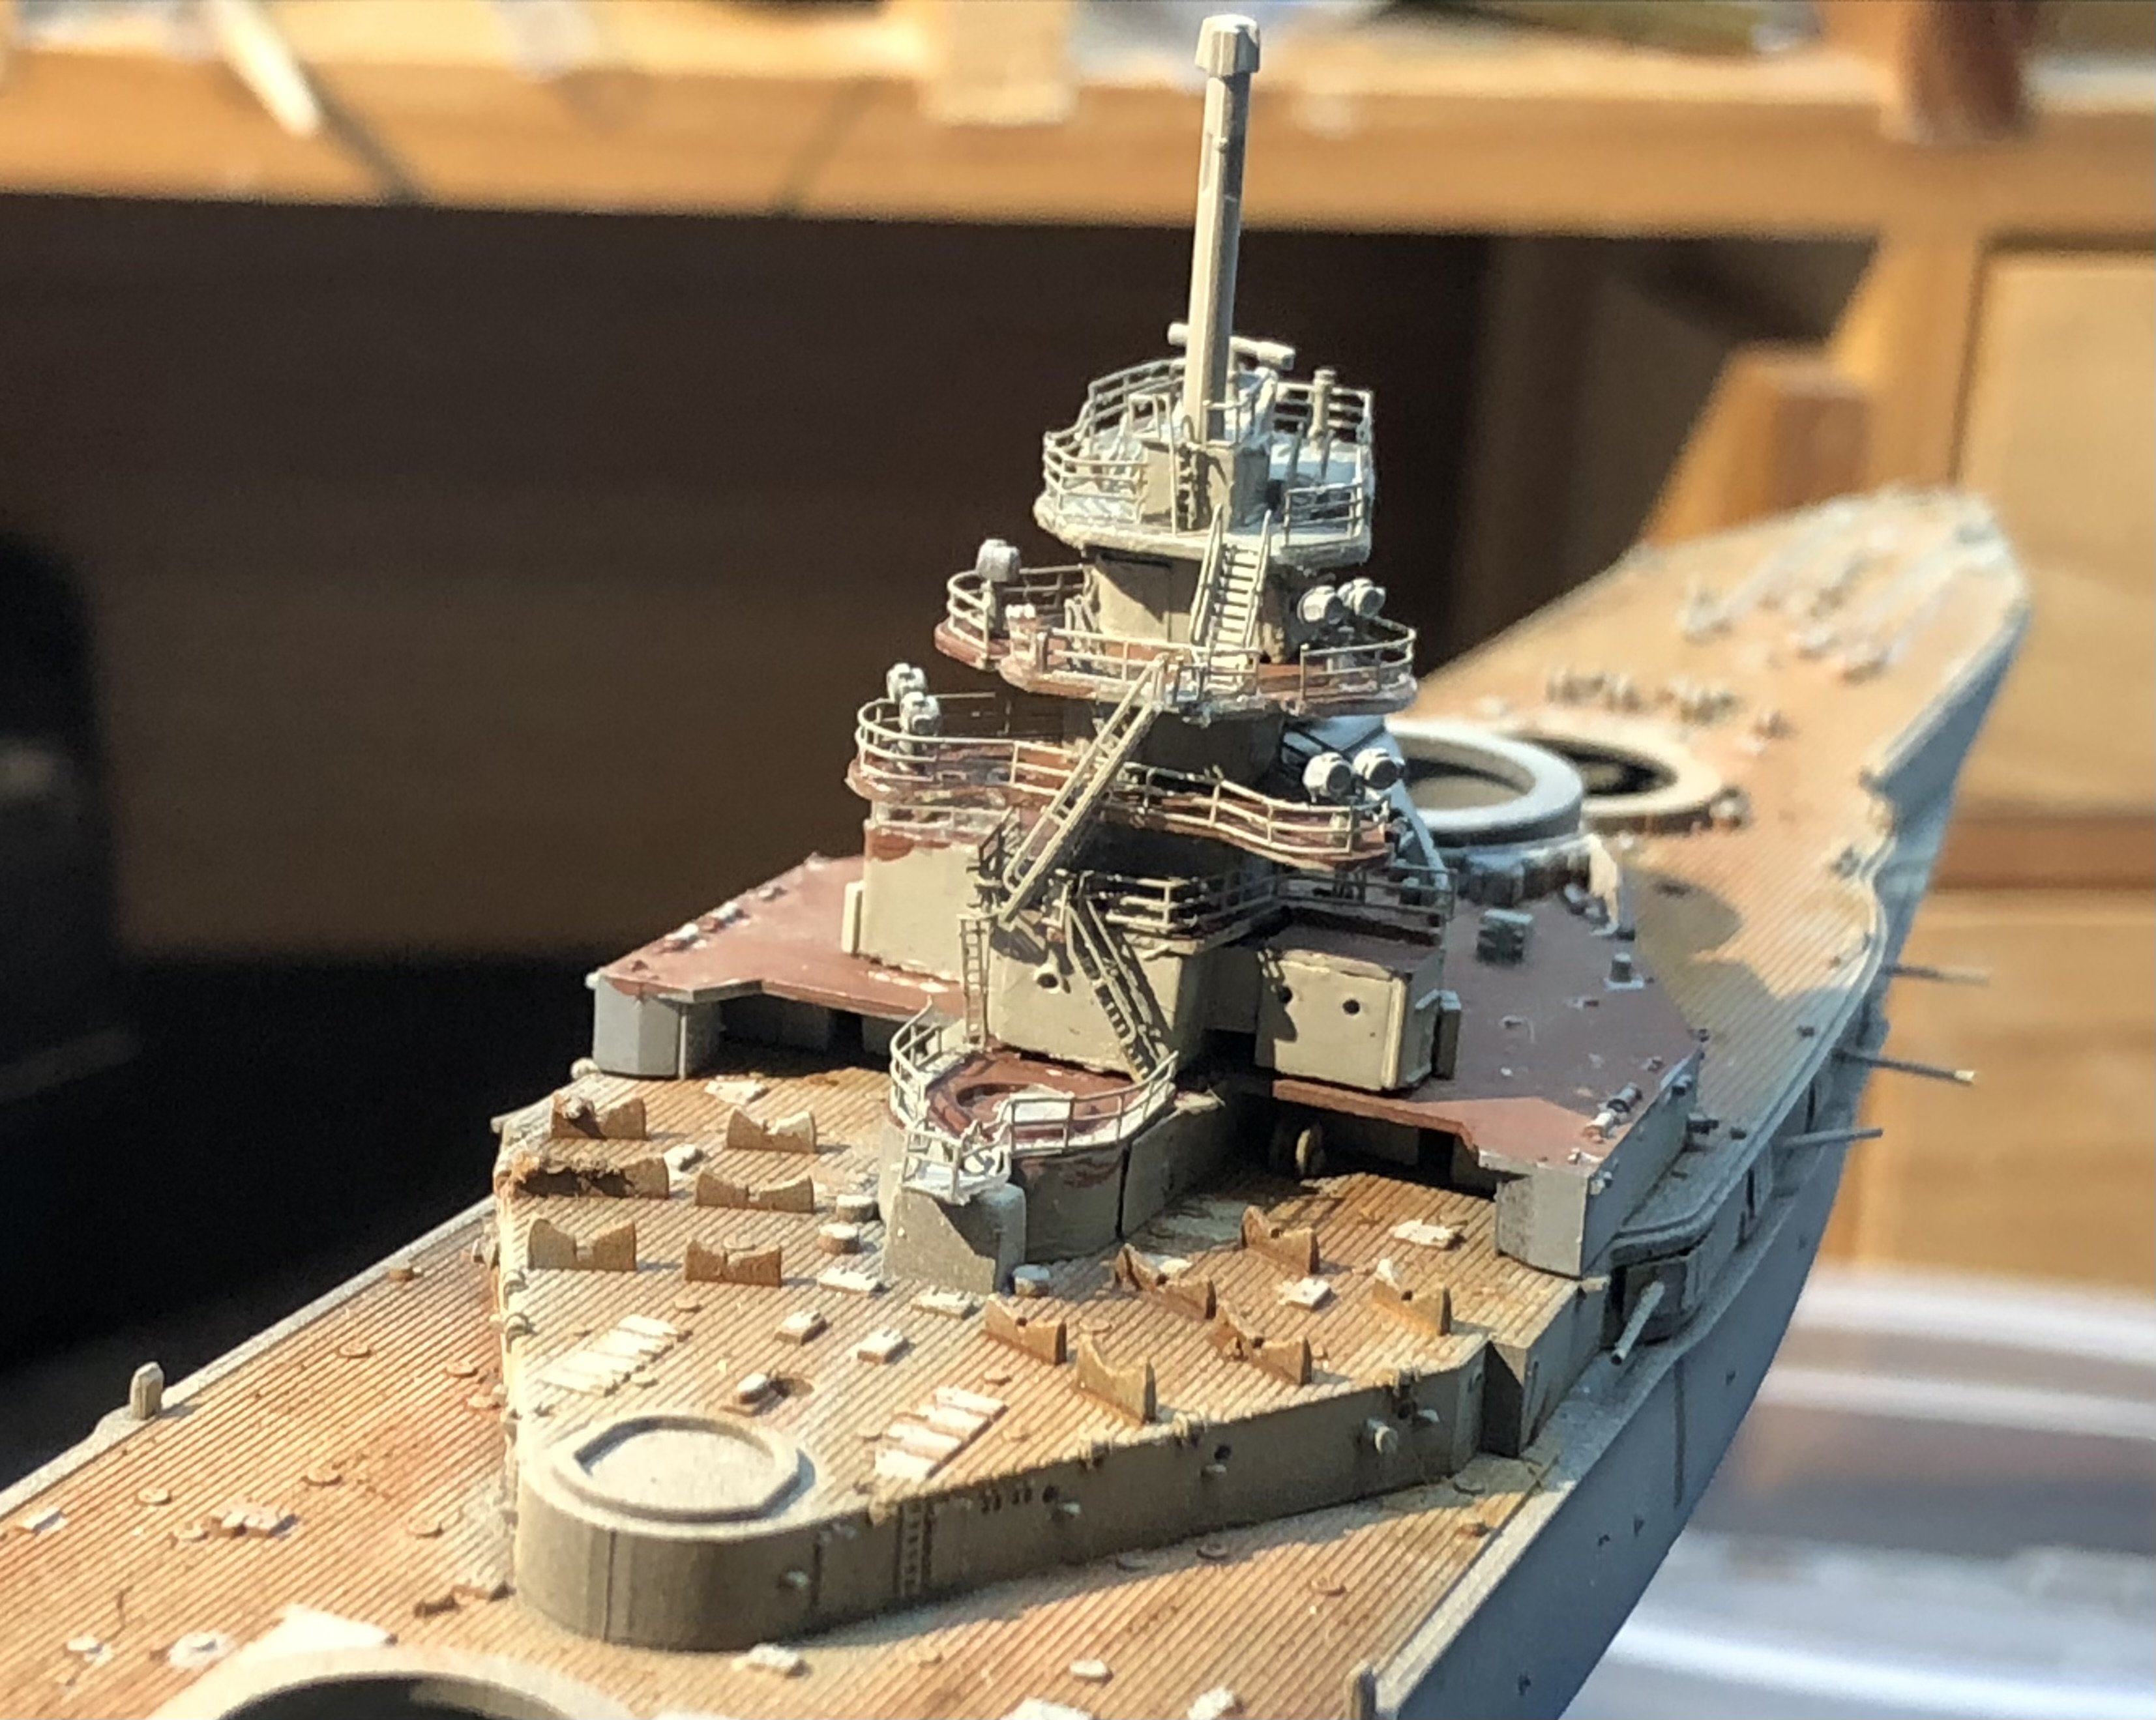
Well, we have a funnel now and the B turret is dry fitted for morale purposes. The pylons are fixed in place and went remarkably easily. The funnel was a major exercise. Flyhawk were very restrained in not wrapping it in fiddly PE, the problem was the fit. That long diagonal ladder at the back of the forward superstructure interferes with the funnel and I could not see a way to make any space so, after several attempts I had to settle for the ladder getting deformed. I think this may all be my fault, I think I have the upper bridge structure a little too far aft and that results in the foul. However I was correct, the ladder is almost completely hidden by the funnel. A ladder and a few bits of minor PE finished up the day.


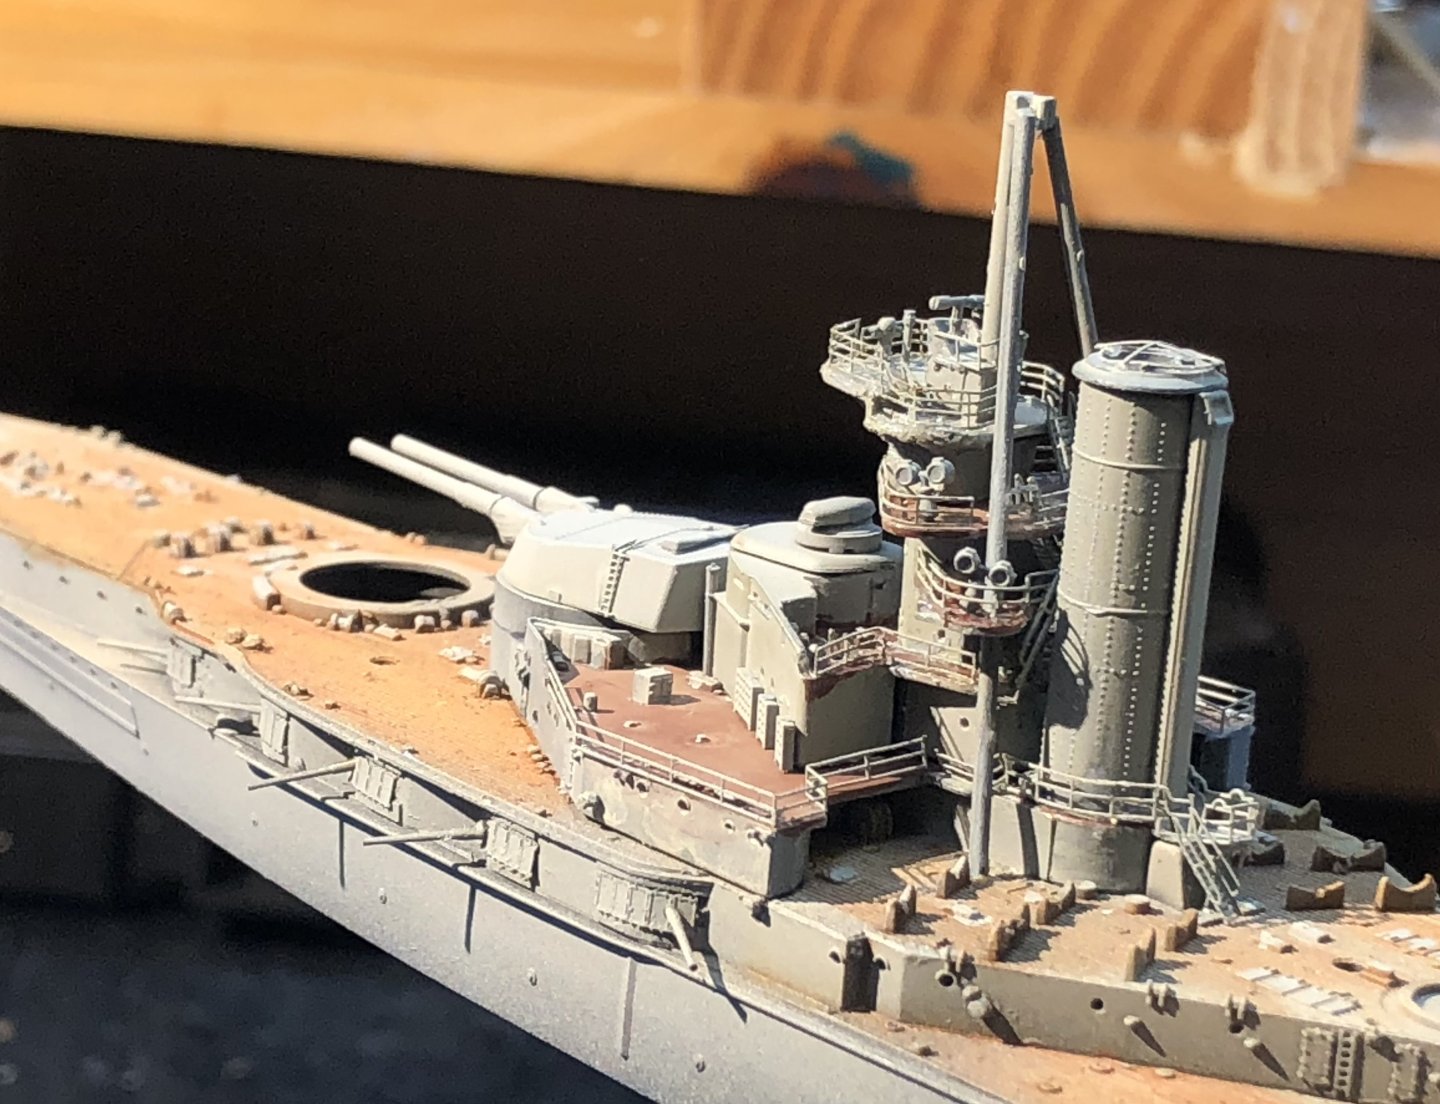

I think it’s time to start working on the ships boats and the aft funnel I have three ladders left so I hope the aft superstructure is not too populated with them.
Thanks for looking in, the likes and kind comments.
alan
-
20 hours ago, Old Collingwood said:
Amazing work Alan - looking so good mate.
OC
Thank you very much OC. This is one of the more complex builds that I’ve attempted and I am on my limits.
alan
- Canute and Old Collingwood
-
2
-
This will be a great build. I’m looking forward to seeing it come together. I saw one at the Berlin Luftwaffe museum last year. It really does have a presence.
alan- AJohnson, mtaylor, Old Collingwood and 4 others
-
7
-
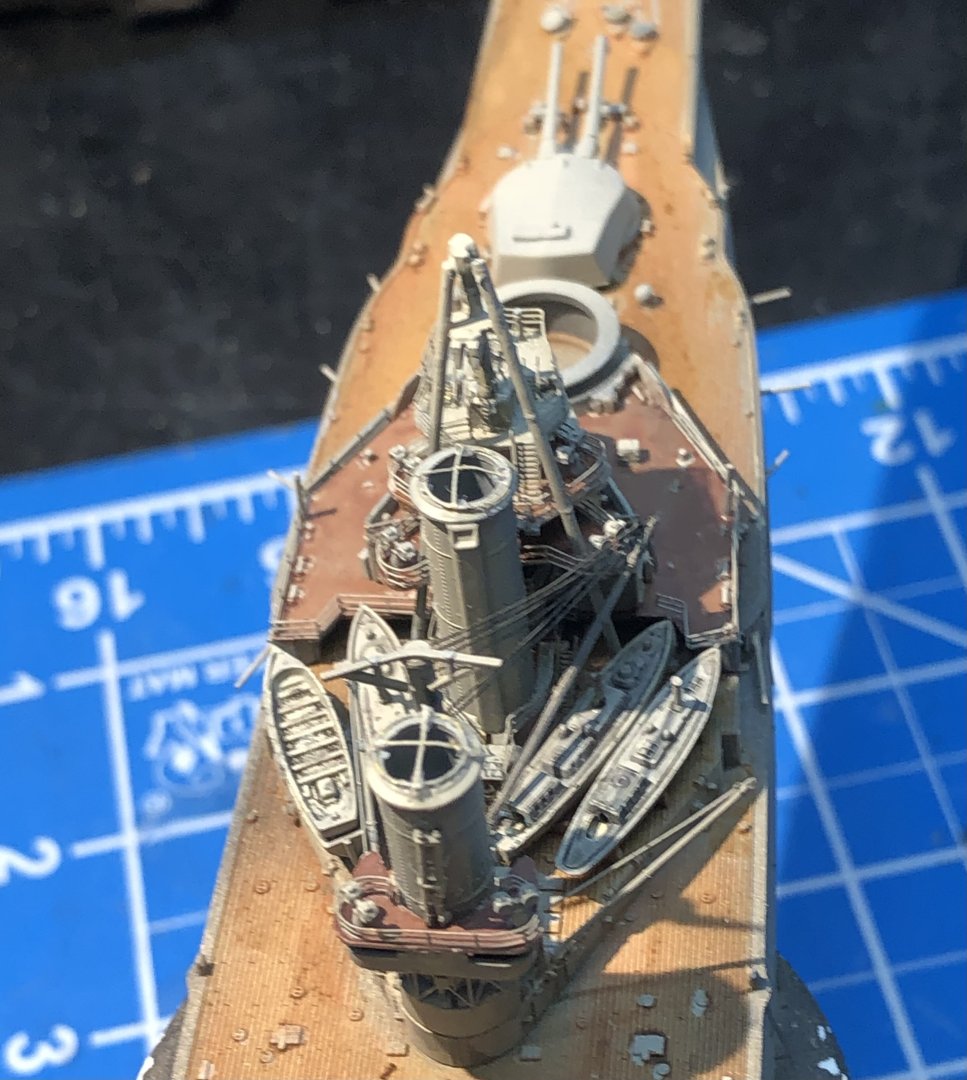
Another day in tiny world with apparently not much to show for it. Ladders and railings mostly. The Flyhawk PE instructions don’t show where the ladders go and luckily I reread the general kit instructions and realized that I needed to add several to the bridge decks. Unfortunately it was a bit late in places and adding the ladders was ticklish to say the least
one ladder drops from the second highest deck through a hole in the deck. On the deck below three ladders drop through the deck. The center one used up an hour or more because it had to be fed upwards from the deck below with very poor sight lines. Gently insert, drop, retrieve and repeat with the occasional variation of the ladder dropping and needing the flashlight and hands and knees treatment. I eventually got it in and now realize that the long ladder masks it completely. I suspect a lot of the will be obscured when the funnel is in place but think of the benefit to my soul.

I think I’m ready to fit the pylons and then move aft.
Thanks for looking in and for the likes and kind comments.alan
-
18 hours ago, AJohnson said:
Agreed, amazing - not sure with my shaking hands I could get the rails and ladders on the correct part at that scale! 😂
Thank you Andrew. I need something solid to rest on when adding the railings and ladders. The pill containers are great for providing a solid handhold and keeping paws off the model but they also give me a brace when adding the delicate stuff.
alan- Old Collingwood, AJohnson, Jack12477 and 1 other
-
4
-
20 hours ago, Nirvana said:
Alan, at that scale you are doing amazing! I am having a hard time at 1:350 scale.
Thank you very much Per. Some of the parts are minuscule and definitely tax me. This kit is very much on the edge of my limitations. But it’s fun!
alan
- AJohnson, Jack12477, Old Collingwood and 1 other
-
4
-
-
Super work Phil. The railings really make the model and are a tribute to your patience and neatness of work
alan
- Canute, Old Collingwood, Keith Black and 2 others
-
4
-
1
-
Well, the plan to work downwards with the superstructure came to an end as the railings and details filled out the work so far and left it with very few places to hold the assembly. So I built up the lower sections of the forward structure and added the bridge platforms already detailed. A nice morale boost too. Now there are more railings and ladders to add to the lower section. The bridge pylons are just a dry fit to see if everything lines up. It’s not perfect but it will work I think. Once those are fitted there is some highly fragile and complicated stuff to go on top.
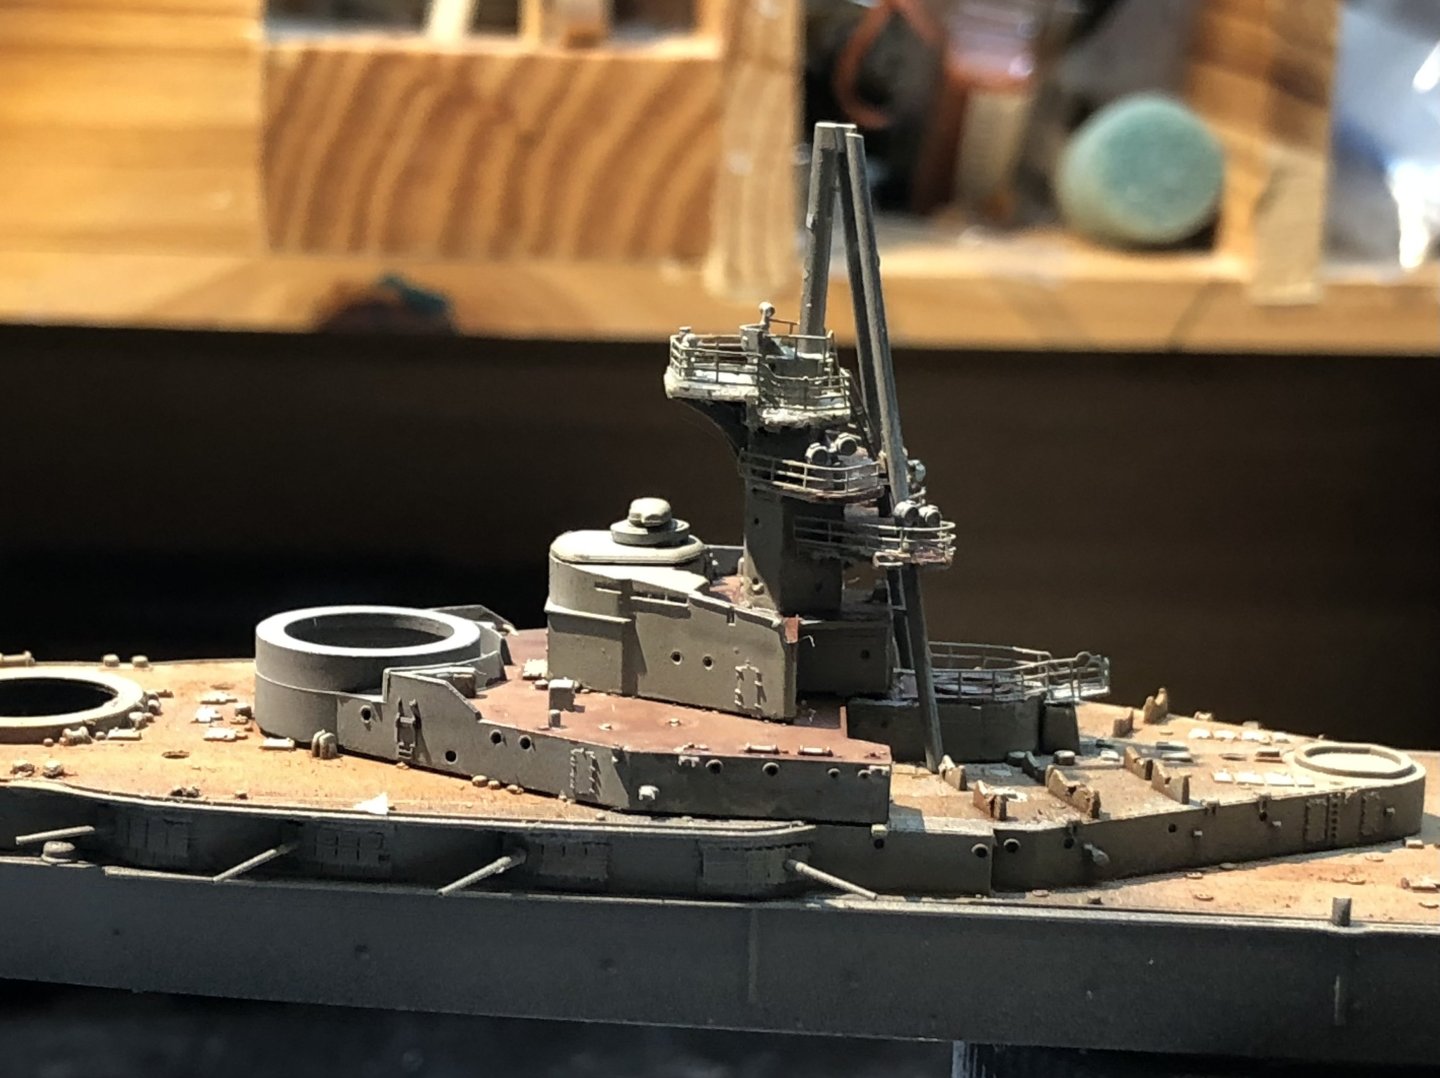

Thanks for looking in, for the likes and comments.
alan
-
-
-
19 hours ago, Old Collingwood said:
Excellent work Alan, one needs to remember the small size of this - making it even the more great.
OC.
Many thanks OC. I’m not happy with the tracks but the hull turned out the way I was hoping for. Flyhawk do include some crazy small parts for an already small model.
alan
- AJohnson, mtaylor and Old Collingwood
-
3


HMS Iron Duke by king derelict - Flyhawk- 1/700 - PLASTIC
in - Kit build logs for subjects built from 1901 - Present Day
Posted
Thank you very much OC. Starting to see the end in sight I think.
alan