


king derelict
-
Posts
3,296 -
Joined
-
Last visited
Content Type
Profiles
Forums
Gallery
Events
Everything posted by king derelict
-
Thank you Egilman. Please don't ever leave the forum. You are a complete and comprehensive reference source Alan
- 460 replies
-
- 4
-

-
- Finished
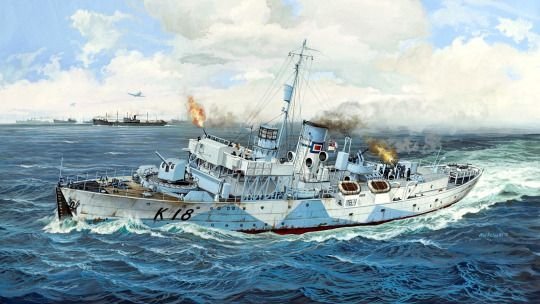
- Flower-class
- (and 1 more)
-
Thank you Mark. I think she is quite tolerant of my mistakes. Thanks for the chain vote too. The small one is really too small Alan
- 460 replies
-
- 4
-
-
- Finished
- Flower-class
- (and 1 more)
-
Another great face Alan
-
F-86F-30 Sabre by Egilman - Kinetic - 1/32nd scale
king derelict replied to Egilman's topic in Non-ship/categorised builds
Everything Dan said. I look forward to a steady stream of high quality reference information from you for many years ahead. And I wat to learn how to do the metal finish for my Vampires Alan -
The build continues at a slow pace. It seems each detail requires hours of research before placement. Some of the results are still frankly guesswork or borrowed from the layout of other ships Thankfully the dockyard inspector passed the work to date "One good nudge should test his sense of humour" The raft racks have been painted and installed. Lockers have been placed around the ship. See the comment above about guesswork! I decided that trying to print and use the mast would probably result in tears so I made one up with hardwood dowel and is dry fitted. The last four stanchions have been used to add railings to the aft end of the foredeck and now need painting. I found some decent drawings showing the man ropes on the dinghies and added them It seems very variable whether a given ship had man ropes on their dinghies but I liked the way it added detail to the boat - which should have been clinker built anyway😁 The rafts were given a cream coat to simulate the canvas covers in the weather and I started painting the man ropes. It is hard to get a neat finish because of the rough texture of the printed part. I probably should have scraped them off and added ropes made from thread. I found two candidate anchor chains (jewelry supplies but they look reasonable). I need a little feedback on which is the more appropriate. The smaller link scales out at about 6 inches full size which I think is too small. The larger size is about 11 inches full size which seems a better fit. Any input would be very welcome I'm working on adding details to the davits and painting the stowed depth charges and the throwers. I'm almost at the point of weathering and shadowing the ship. That scares me a little but I'm also looking forward to it. Thanks for looking in Alan
.jpg.f8d53a61bfd90eb037a9db78d4e5ef53.jpg)
.jpg.01490320636e8430bc0320a9d4b4adca.jpg)
.jpg.12a54c1f6286ef1b8268dbf12fe2910f.jpg)
.thumb.jpg.859d684b96de714927ad3339ab07644c.jpg)
.thumb.jpg.65b0b97f3372deccdeec3d0b1605fb05.jpg)
.jpg.9b07faa40d5a6165be63ca40d0655432.jpg)
.jpg.6ac016925d303e94dca2302ca3a91ae0.jpg)
.jpg.1272023bdf7fd82d5d761d4023a538f1.jpg)
.jpg.a202e0cc2e372d84abd22d74dd42f5ce.jpg)
.thumb.jpg.5f9f0aa28869d165b6829f177ae1f7bf.jpg)
- 460 replies
-
- 10
-
-
- Finished
- Flower-class
- (and 1 more)
-
F-86F-30 Sabre by Egilman - Kinetic - 1/32nd scale
king derelict replied to Egilman's topic in Non-ship/categorised builds
Nice clean cutting work there. It looks very good Alan -
F-86F-30 Sabre by Egilman - Kinetic - 1/32nd scale
king derelict replied to Egilman's topic in Non-ship/categorised builds
I think you are right. It works if you can smooth it into a thin gap and wipe off any surplus. It tends to tear when sanding I find and I hate the way it peels if you try to use it to smooth out a step on the surface and then profile it when dry. Alan -
Wonderful work OC. That bugler is especially excellent. The detailed painting is so tidy. Alan
-
A step backwards to start the day. I realised that my interpretation of the forward raft rack did not really capture the look of the rack in the picture in the previous update. It was too far forward so I disassembled the Mark 1 version (after sticking it in the freezer for a while - thanks for the tip) and rebuilt it to look rather more like the real thing They have been primered and dry fitted and look quite a bit better. I have a bit more room for the boats too which is a help. And with the rafts temporarily in place. Thanks for looking in and the likes Alan
.jpg.07e160d90c6f9363645347cacd748f04.jpg)
.jpg.d8869b790007d9f9997cc7161c727682.jpg)
.thumb.jpg.6d67fd09e03680d939cd50fcf5b579c8.jpg)
- 460 replies
-
- 10
-
-
- Finished
- Flower-class
- (and 1 more)
-
Moving into the details. Campanula life raft stowage is different from the generic kit layout; its more like the Snowberry as built by @yvesvidal. Actually the configuration on Campanula seems to have changed during her years of service. I have photos showing a set of double banked rafts on each side and other images show two single rafts stowed on each side. I am trying to stay with this version of the ship where possible So I spent time today with strips of styrene making up racks for the life rafts. Working with styrene and solvent glue was quite relaxing after dealing with PLA, epoxy and CA glue. The forward rack might be a bit bulky but it looks quite hefty in the pictures so I will go with it. The racks are just placed along with the boat, They go off to the paint queue now along with davits and other sundry parts. Thanks for looking in Alan
.jpg.cd73eb853a8f17351ad0874f81c53fe0.jpg)
.jpg.7cc60177d74aaa9ef679576c92e94341.jpg)
.jpg.d7d4d0da605dcceb32eea93fd809bf9f.jpg)
- 460 replies
-
- 11
-
-
- Finished
- Flower-class
- (and 1 more)
-
Thank you for the kind words OC. Its starting to feel like progress at last. Alan
- 460 replies
-
- 3
-
-
- Finished
- Flower-class
- (and 1 more)
-
Great work. Its hard to remember how small these figures are, Alan
-
After a long absence I am back. June seemed to be the time for visitors from the Uk coming over to take advantage of the beach and warm surf temperatures so there was rather too much of this and this Some progress was made on the Campanula but I didn't find time to update the log. As part of accommodating visitors the printer had to be moved from its previous home in the guest bathroom where it was safe from the cats and could run long prints undisturbed. I took advantage of the move to change the nozzle - been using the original all through this build. Naturally after setting it all up again I had trouble getting a decent print and it looked like the filament was slipping. I checked the extruder gear and it looked a bit chewed again so I replaced that. I think I have room now to use the filament heater instead of the spool holder. From the test prints I don't see any improvement from changing the nozzle so I'll hang onto the old one. I now get good prints but I occasionally get a kick back and click from the extruder which is supposed to be the result of attempting to over extrude but checks show I am extruding close to what is commanded. Other possibilities I read on the web include damaged stepper motors or drivers etc. I don't have much to print now for the corvette so I'll dabble in the voodoo on the side. So - the boat. I added the remaining two major elements to the hull. There was a lot of room around the decks. I think the original intent was to have the decks mounted on caulking so they could easily be removed if work was need on the RC components. I used superglue to fix the decks in place and then putty to fill the voids. I found Bondo Plastic Metal to work well although the useable working time is very short. About half a tube was needed but it bonded well and was easy to fair into the decks. Significant paint touch up then followed. My plan is to finish the corvette in a heavily weathered appearance; Atlantic convoy style so I have not attempted to get a uniform finish on the decks and hull rather the opposite with slight changes of shades and some simple chipping on the hull (with mixed results) The main weathering effort will be done at the end when I can make sure it all blends together. The railings have been installed along the fore and side decks. I used 0.5 mm brass rod for the railings on the engine room roof and around the bandstand but with no significant bending needed i used 0.5 mm plastic coated stranded beading wire which was easy to work with and didn't tie me to fixed lengths of rod. I have a nasty feeling I am going to be four stanchions short to finish the rear of the foredeck behind the boats. I'm now into unknown county with the details. Photos of Campanula have been great for locating the Lewis guns and the life rafts but do not show the position of lockers around the ship. It seems that there were very few on the engine room roof but there must have been some on the side decks and aft deck. There must have been somewhere handy to stash the Lewis gun magazines for example) I have started detailing the ships boats. I used thin strips of wood to cover the printed floor and slightly thicker strips of make the benches using the printed part as a template. These were then weathered a little. Oars are yet to be painted. I would like to add man ropes along the sides of the boats but so far I haven't found any good photos showing the size of the loops as a reference. Depth charges are printing. I need to source anchor chains and 1/48 scale Lewis guns Thanks for looking in Alan

.thumb.jpg.ed1d74876a9ef3d432d2239d232bca18.jpg)
.thumb.jpg.7f9a67a76c4d5c7f50cf5e8aeb8f8472.jpg)
.thumb.jpg.32f08f371f417af7f91e69e06d530dd3.jpg)
.jpg.5412bd5a173c09c89df78dbbef589172.jpg)
.jpg.42787614f98325d8efa96988a9b36cbb.jpg)
.jpg.b8c5d6938f2570eb12d0cfb0adee3ac7.jpg)
.thumb.jpg.3d33abca988b8f8604c331ae1f58c825.jpg)
.jpg.59413aaa6645aac305365a0c7bfced15.jpg)
.jpg.3f1d531a7babe0b9bfc5795747122079.jpg)
- 460 replies
-
- 11
-
-

-
- Finished
- Flower-class
- (and 1 more)
-
Thank you very much Jav. This was fun to build Flyhawk make very nice 1/72 AFV kits. The secondary weapons are especially nicely detailed on this one. I have their Tiger left to build Alan
-
Its looking very nice OC. I think horses are very difficult to get right. The colours and the sheen of the coats. You have it down nicely. Alan
-
Terrific work Dan. I'm learning a lot from your techniques. The panel lines are really neat Alan
-
Thank you Ziggy I'm quite pleased with the candy wrapper solution. It's a lot better than paint. Alan
-
Beautiful work Dan, the landing gear struts are spectacular Alan
-
It's coming together really nicely. The French soldiers look superb Alan
-
Beautiful shading and weathering. A fantastic model. Congratulations Alan
-
Thank you Kevin for the really helpful input. I think I need to try bed adhesives and cut down my dependence on brims. I hate cleaning them off the print. 3DLAC is about $40 so I might try Magigoo. I'm changing my set up around to get the space to put the dryer in line with the printer. Your serving machine looks really clean and smooth. Something to aim at. Thanks again Alan
- 460 replies
-
- 4
-
-
- Finished
- Flower-class
- (and 1 more)

.jpg.bd269d74a9d9491064037aed30d8a5d5.jpg)
.jpg.ff292ea2982c3737d5e8f20ef5265efe.jpg)
.jpg.7c15578ec2a4ae2d4367bc4a5c77ecd4.jpg)

.jpg.d997f0ab2ccc22dda34140441dd2cea0.jpg)
.jpg.387e29d5a14478866cacef593af9ad87.jpg)
.jpg.65e8904bfb0d0ac3239a11e73e544af1.jpg)
.jpg.db65b265f81fe022ef60e17def36ab72.jpg)