HOLIDAY DONATION DRIVE - SUPPORT MSW - DO YOUR PART TO KEEP THIS GREAT FORUM GOING! (Only 20 donations so far - C'mon guys!)
×


Fernando E
-
Posts
242 -
Joined
-
Last visited
Content Type
Profiles
Forums
Gallery
Events
Everything posted by Fernando E
-
Dan, a great quality build. Have picked up some ideas for my Norfolk build and am looking forward to your Bismarck build log. Have already booked my front row seat! Cheers...........Fernando
- 295 replies
-
- 4
-

-
- amatsukaze
- halinski
- (and 2 more)
-
Welcome back Nigel and glad to hear your had a great time in the UK and your birthday celebrations! I'm looking forward to your continuing build log as well as how well your airbrush compressor works for your already good Bounty build to date. I'm now .on holidays and won't be back till the end of September. Had a great day in Stockholm visiting the Vasa museum. When I get enough build experience will no doubt give that ship a go. I see from other build logs that it can take anything up to 2 years!!!! Looking forward to heading back to Sydney to continue my build of the Norfolk. Cheers.......Fernando
- 121 replies
-
- 2
-
-
- bounty
- constructo
- (and 1 more)
-
Many thanks Danny, will hunt some down. Fernando
-
Nice work Danny.......and I thought a wooden kit build was difficult!! I just pulled up a chair to keep an eye on how the professionals do it! Fernando
- 295 replies
-
- 2
-
-
- amatsukaze
- halinski
- (and 2 more)
-
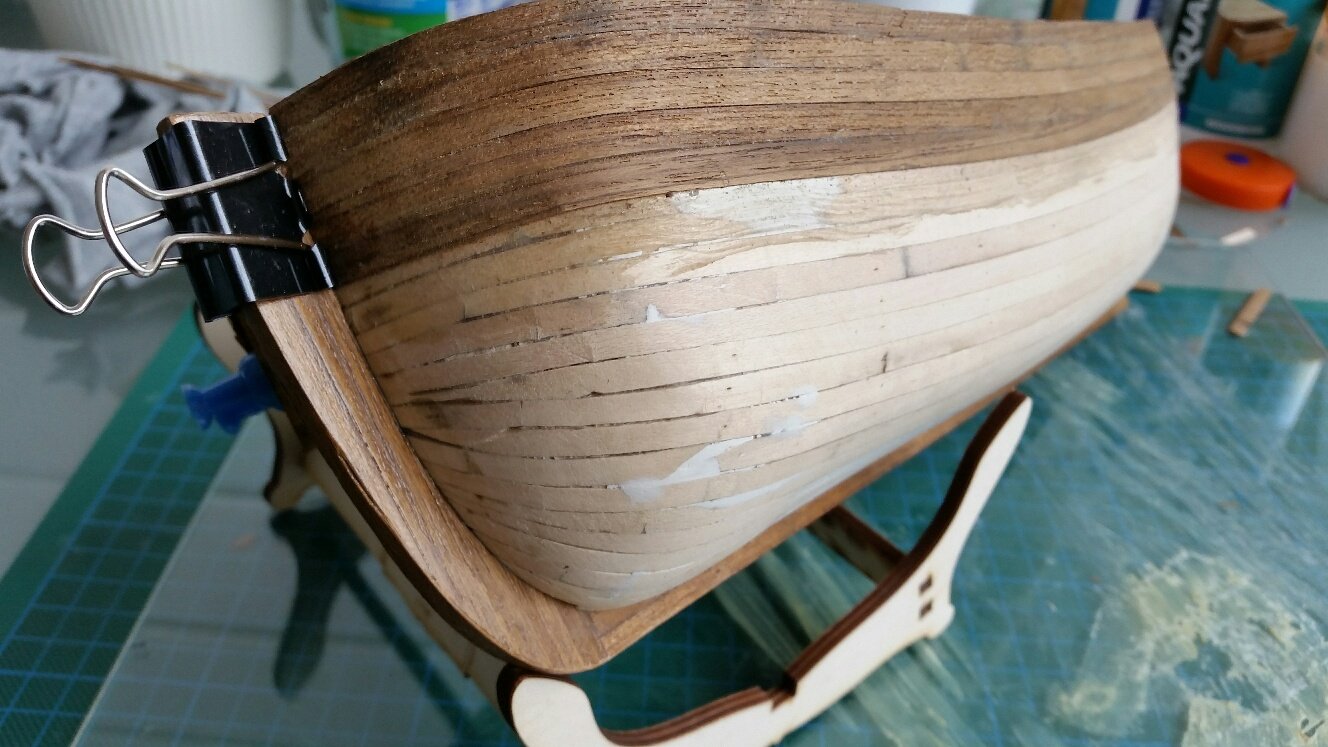
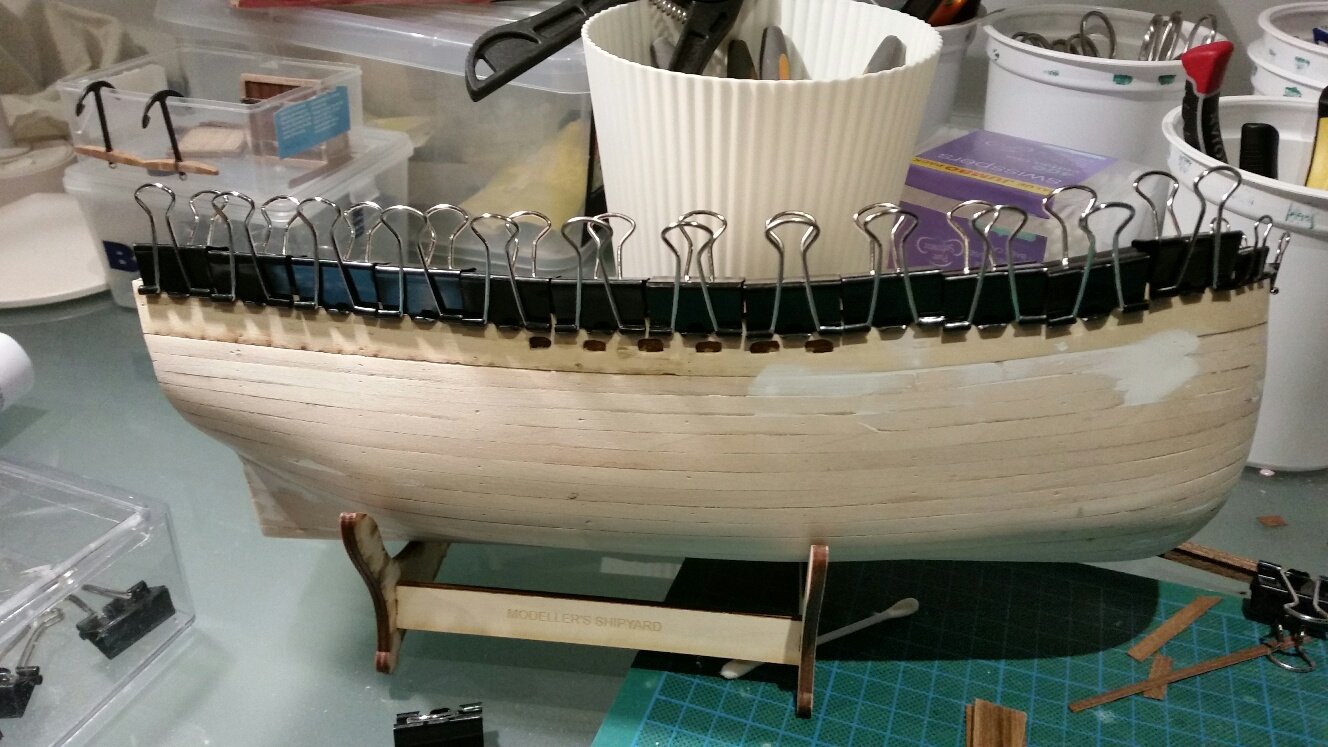
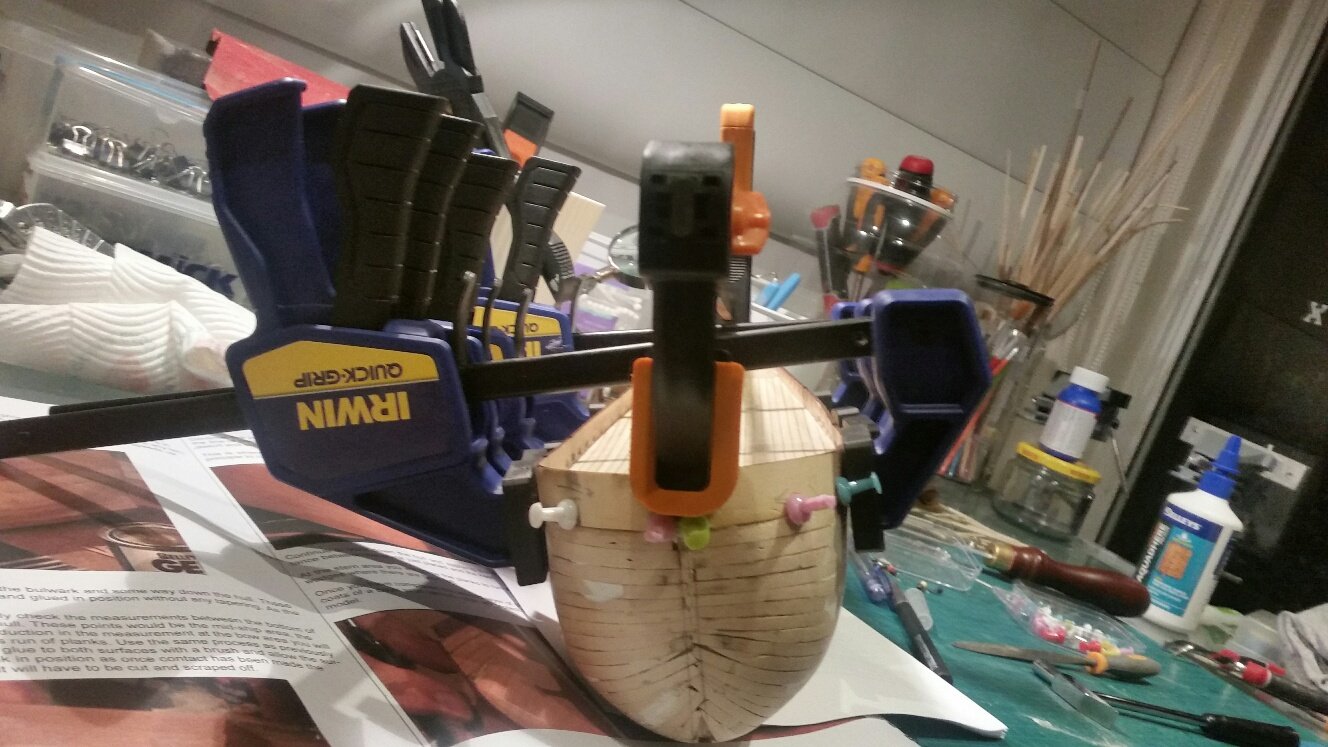
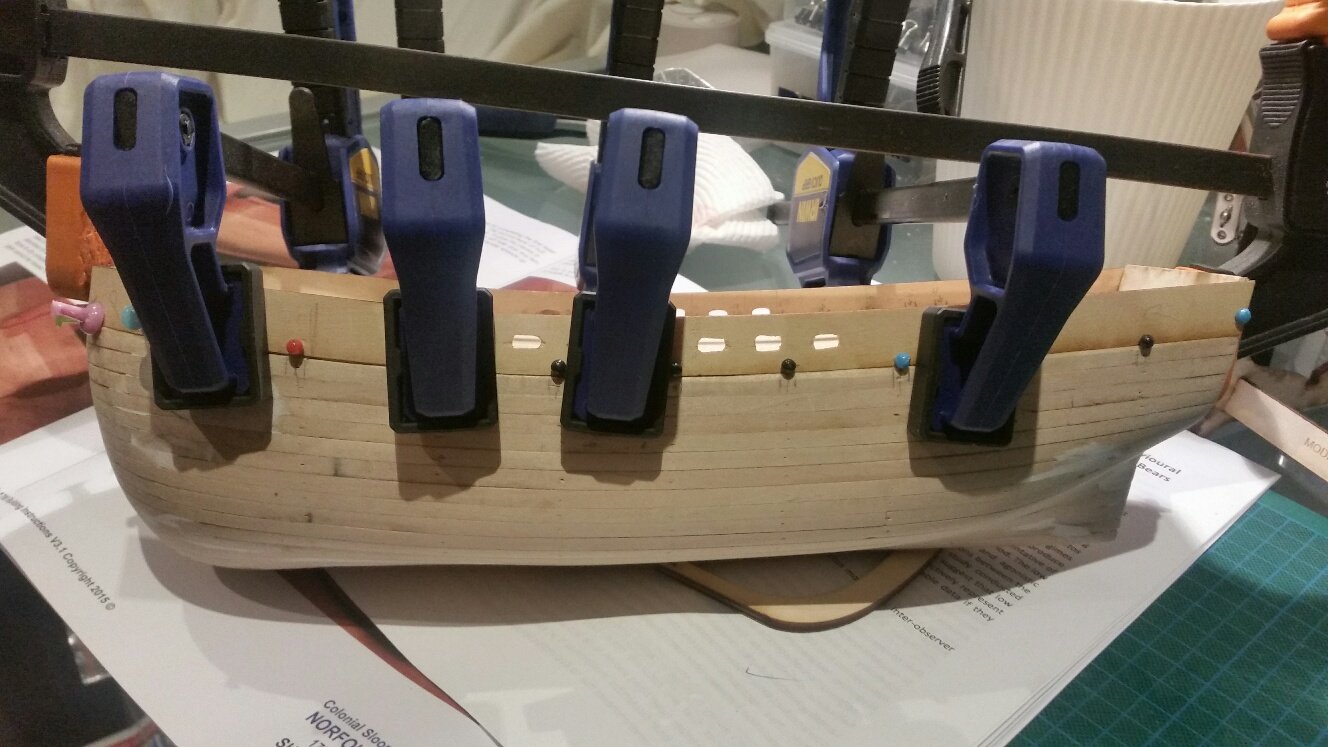
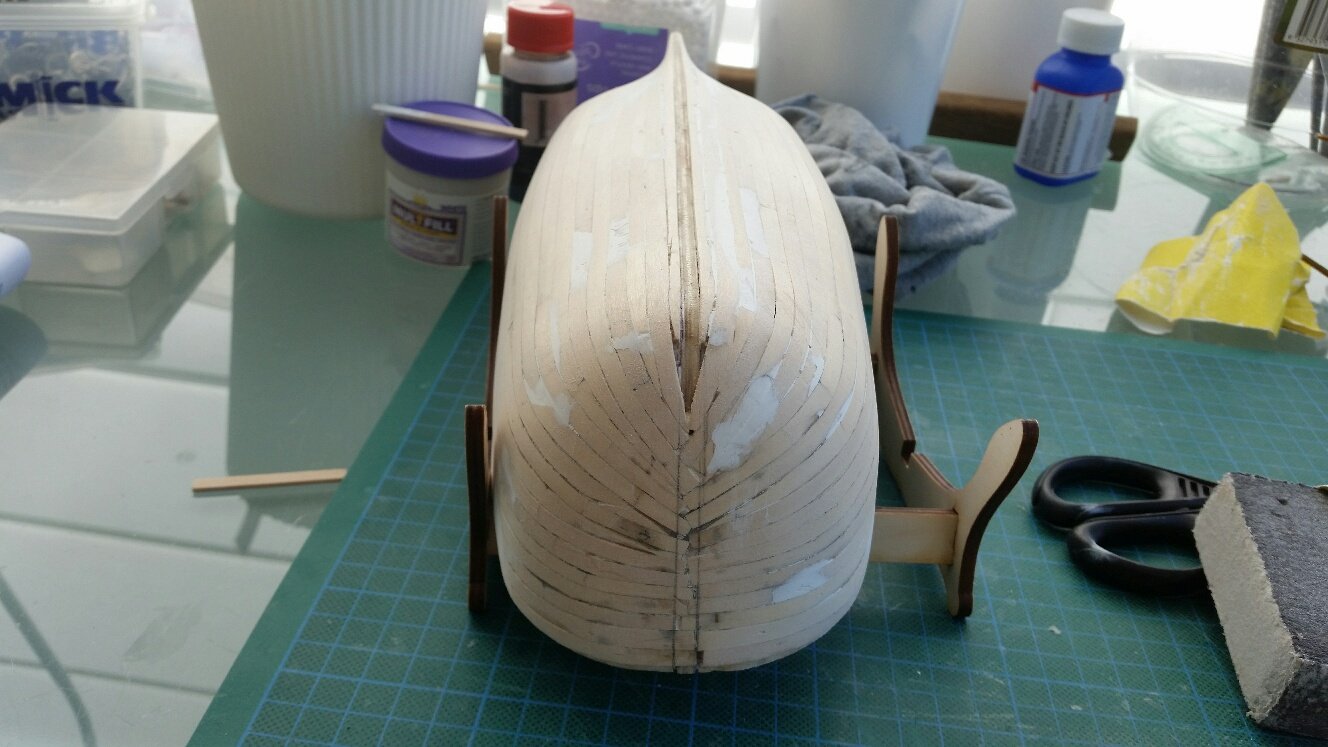
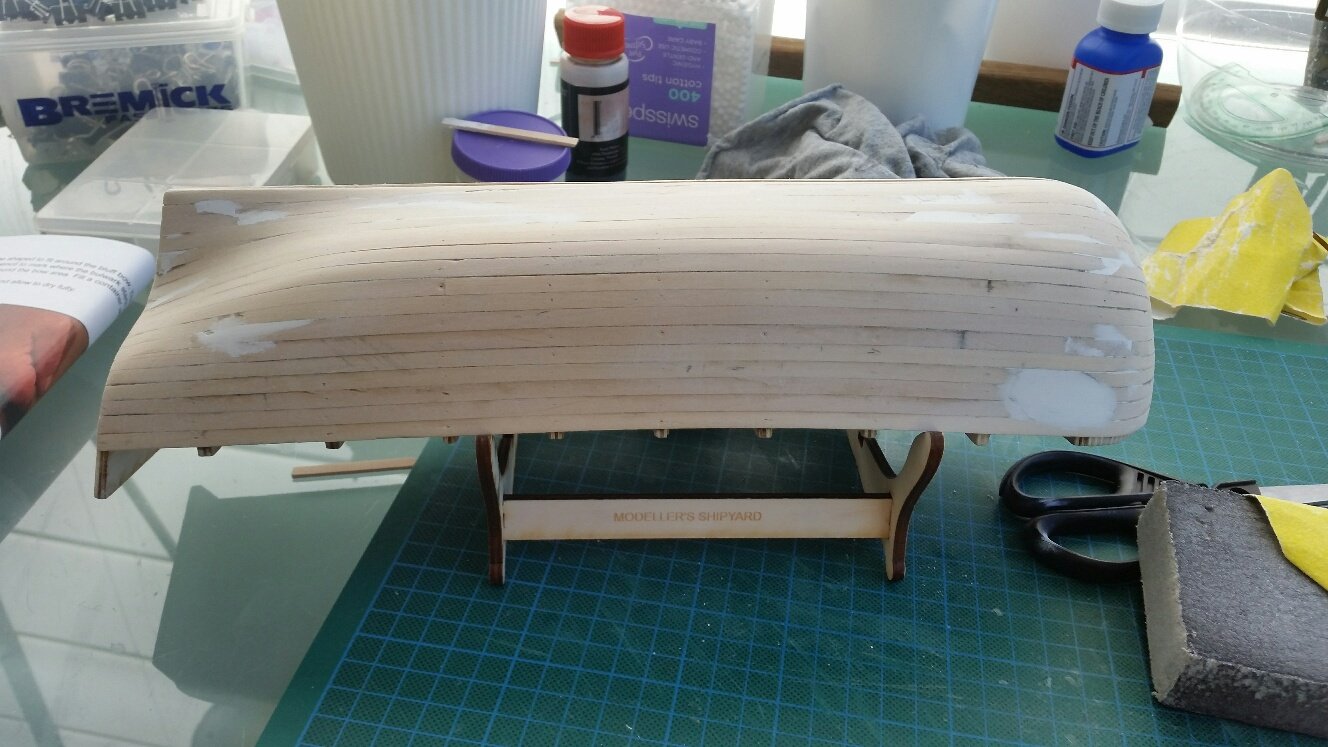
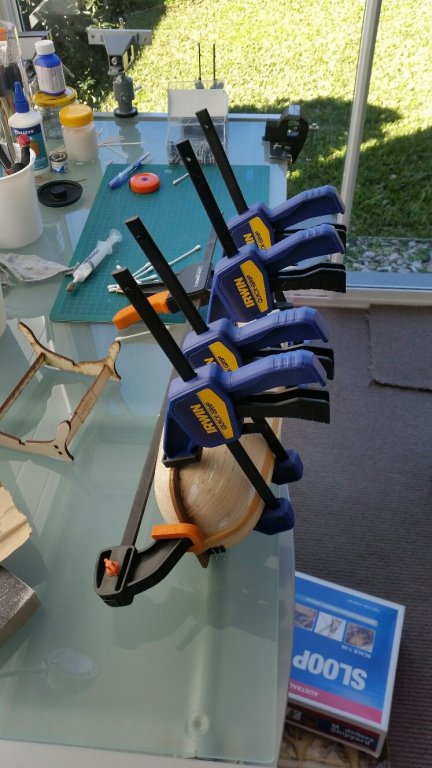
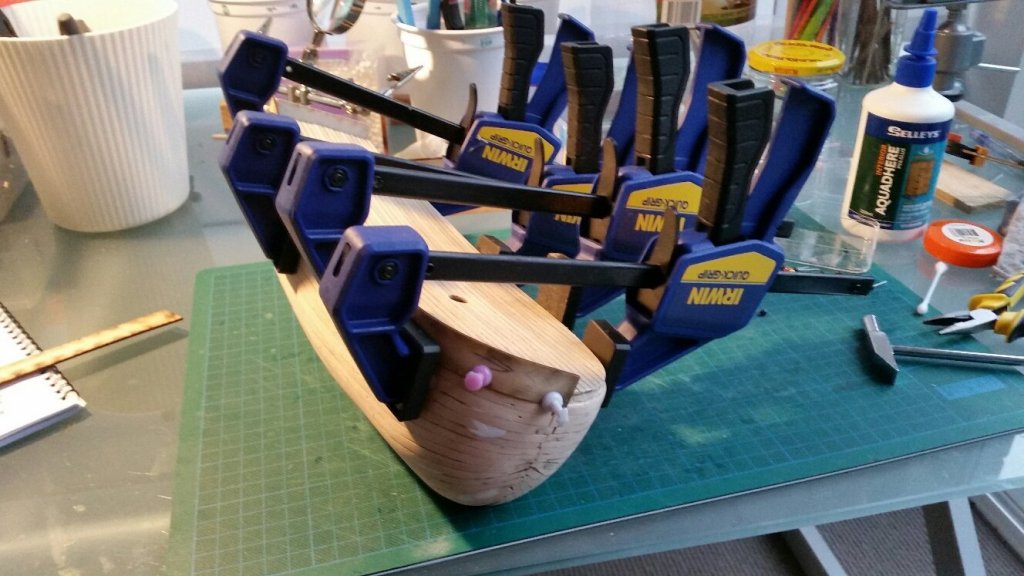
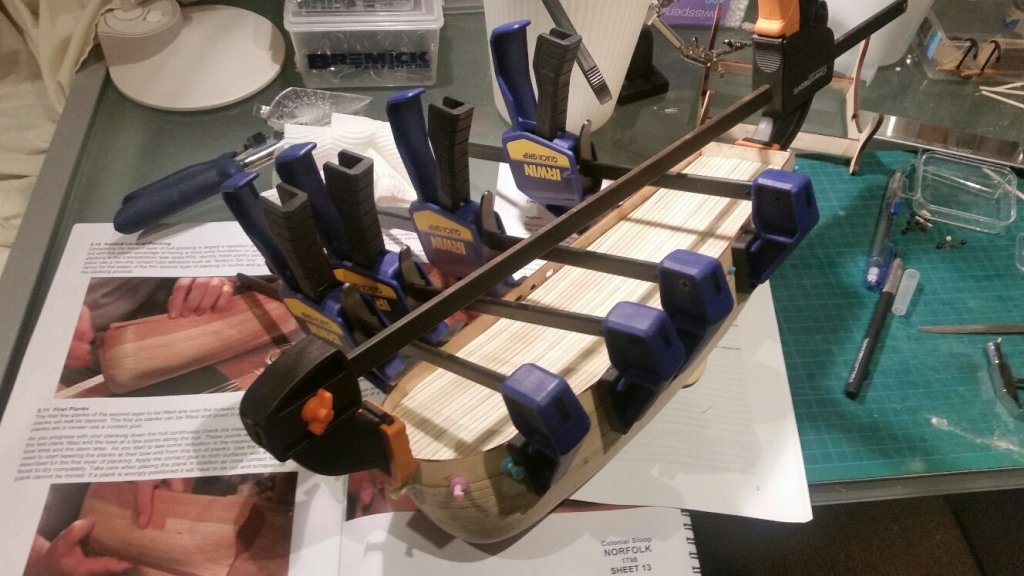
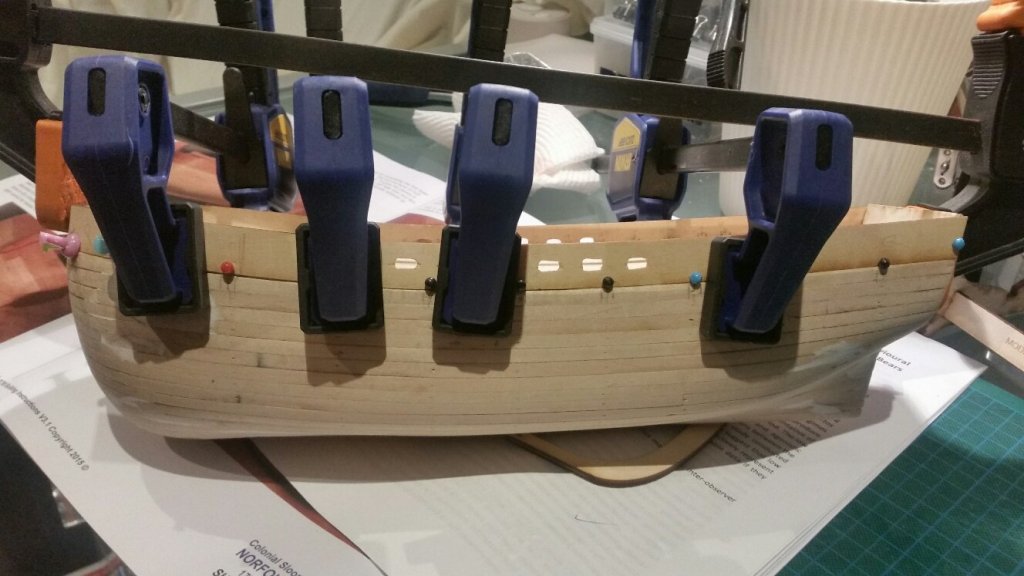
Hi Martin and Danny, many thanks for your comments and for looking in. I have been rather slow in updating my build log due to other commitments so will try to put in a few more before I head off at the end of this month for a holiday. Dan, I had a look at your build log and was amazed at the quality of the build....I can only hope that my finished product looks as good as yours. I was very interested in your "add ons" and am thinking of copying some of your ideas. I was able to see a scratch build model of the Norfolk when in Tassie last month at the Hobart maritime museum but unfortunately did not have time to head to the Bass and Flinders Museum where the replica currently resides....maybe next time As to my second layer of planking I have had some difficulty in keeping the planking on. I started using Selleys Quick Grip water based glue and found that for some reason it was taking well over 40mins to touch dry. When I placed the first planks on (both port and starboard) they were fine until I looked at my handiwork the next day and found that some of the planking lifting off!!! I used normal wood glue to try to fix the issue up but eventually had to pull out a couple of planks and sand back the residue. I then wen't back to the normal quick drip glue and it appears to be working OK although, again it's taking quite a bit of time to touch dry (maybe because of the cold weather...any hints or clues as to why ?). Anyway here are a couple of photos showing where I'm at with the second layer of planking and lets hope they stay on!! Updates to follow in the next couple of days.


-
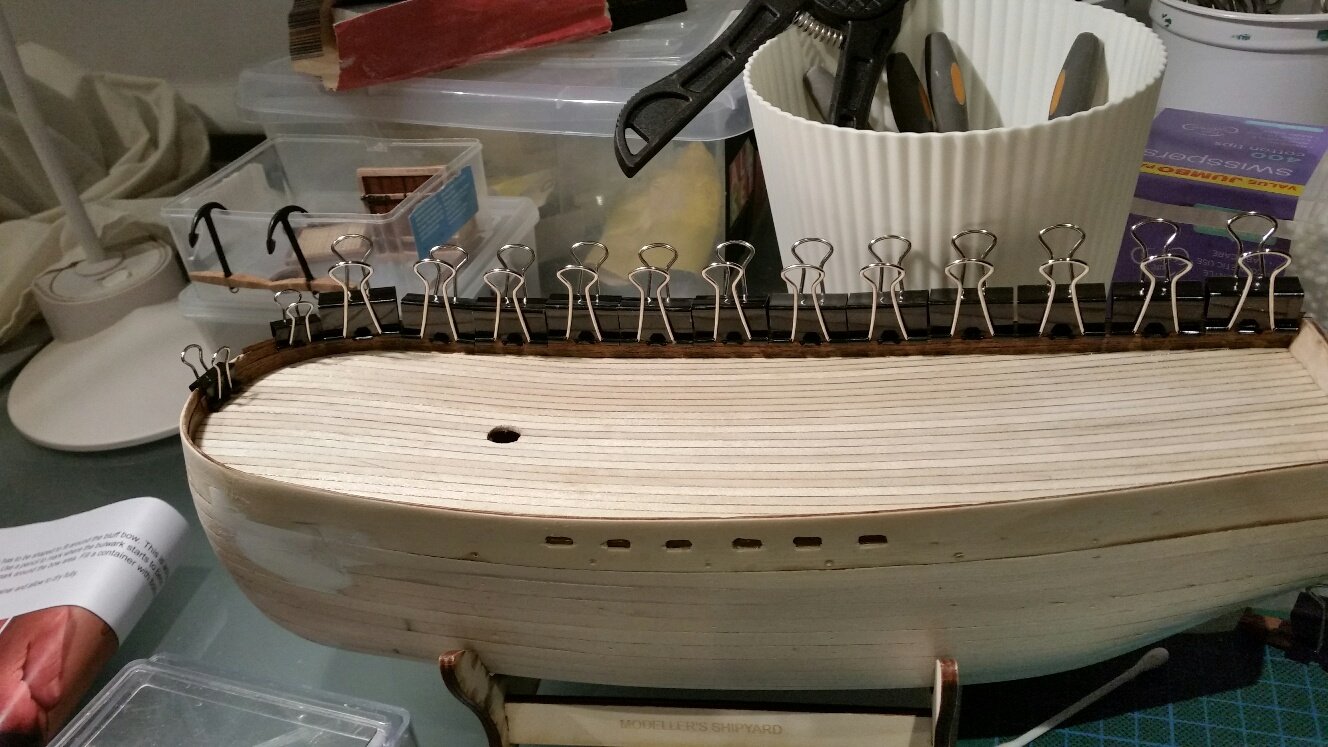
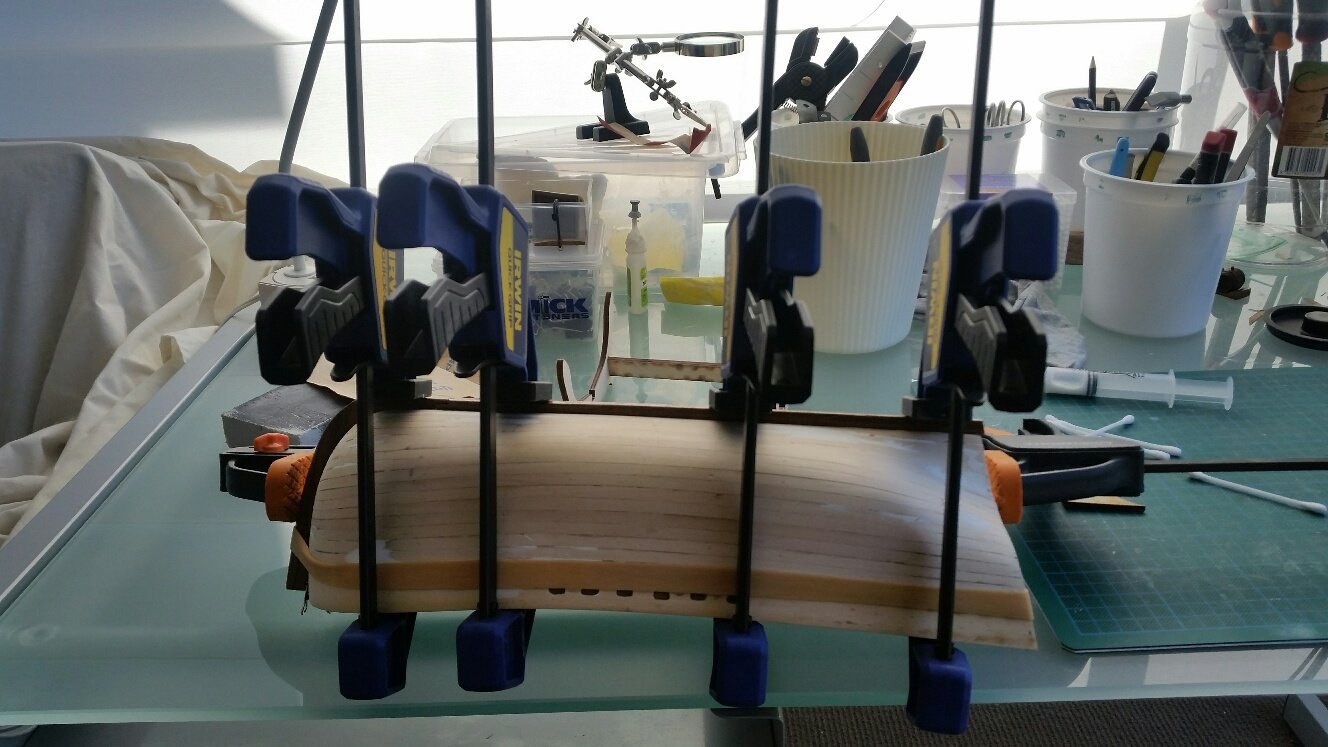
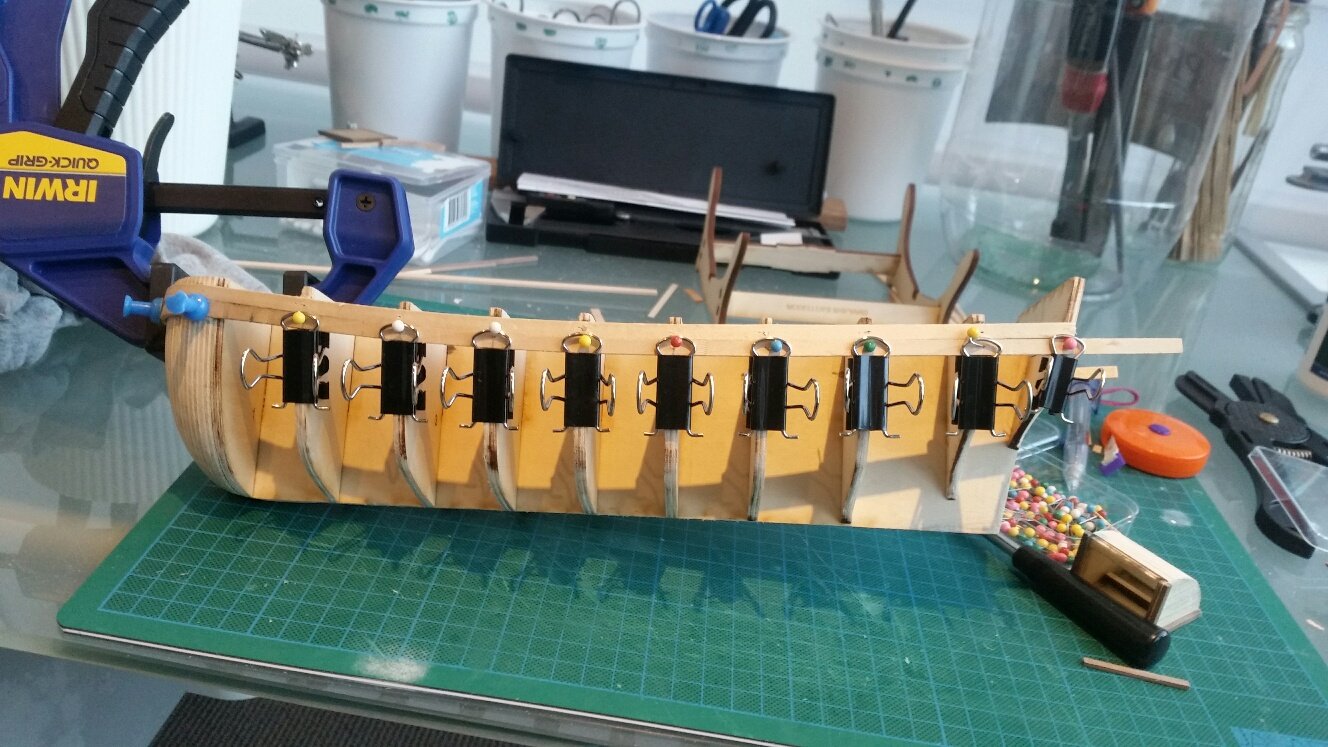
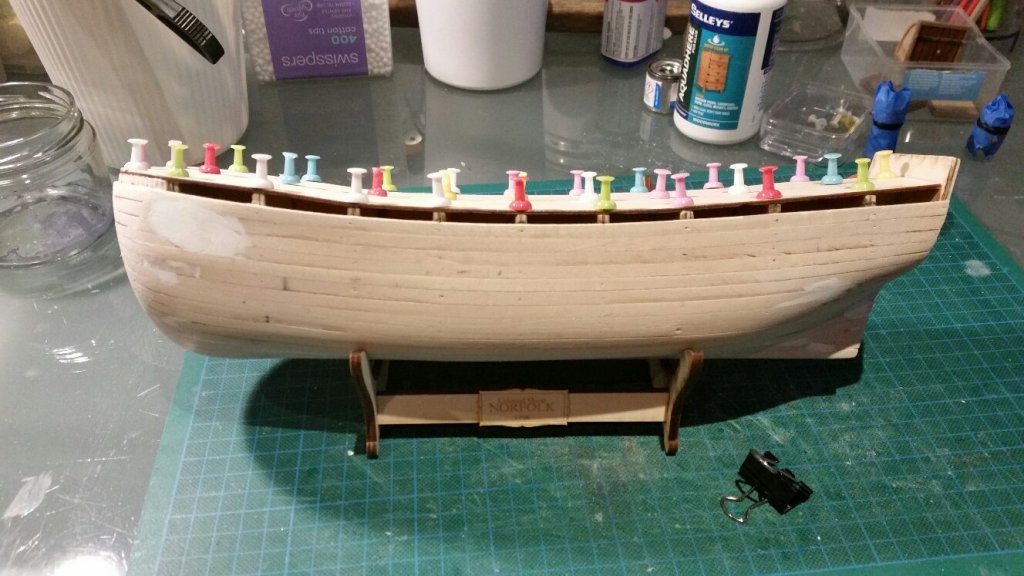
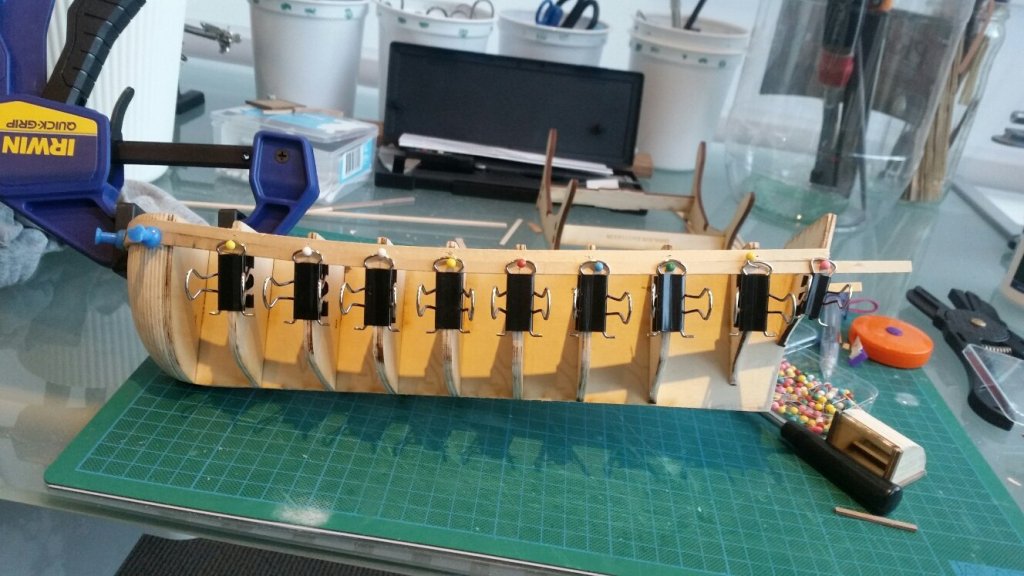
Another update on the build. The inside planking on the bulwarks have now been placed with no real difficulty, other than I used all my bulldog clips just to hold it in place whilst the glue was drying. After that it was a matter of putting on the false keel and stem post. Once dry its on to the second layer of planking. I'm not sure how that will go as it's my first attempt at a bluff bow ( I think that's what it's called). As they say if you don't try it won't get done!


-
Hello Martin and welcome to MSW. I'm also a newbie to this site but built my first boat last year...the Cadaque. A lot of trial and error but got it finished and now sits proudly in my study with all its mistakes. I have picked up a few ideas from this website which made my second build (Cutter Mermaid) much easier including seeing this you tube clip from Leon Griffiths ( . If you haven't seen it have a look at it particularly the planking tips....made my life less stressful and answered many of my queries which I had when building the Cadaque. Stick with your build and I'm sure you will find it very rewarding when finished. I'll be watching your build with interest. Cheers.........Fernando
-
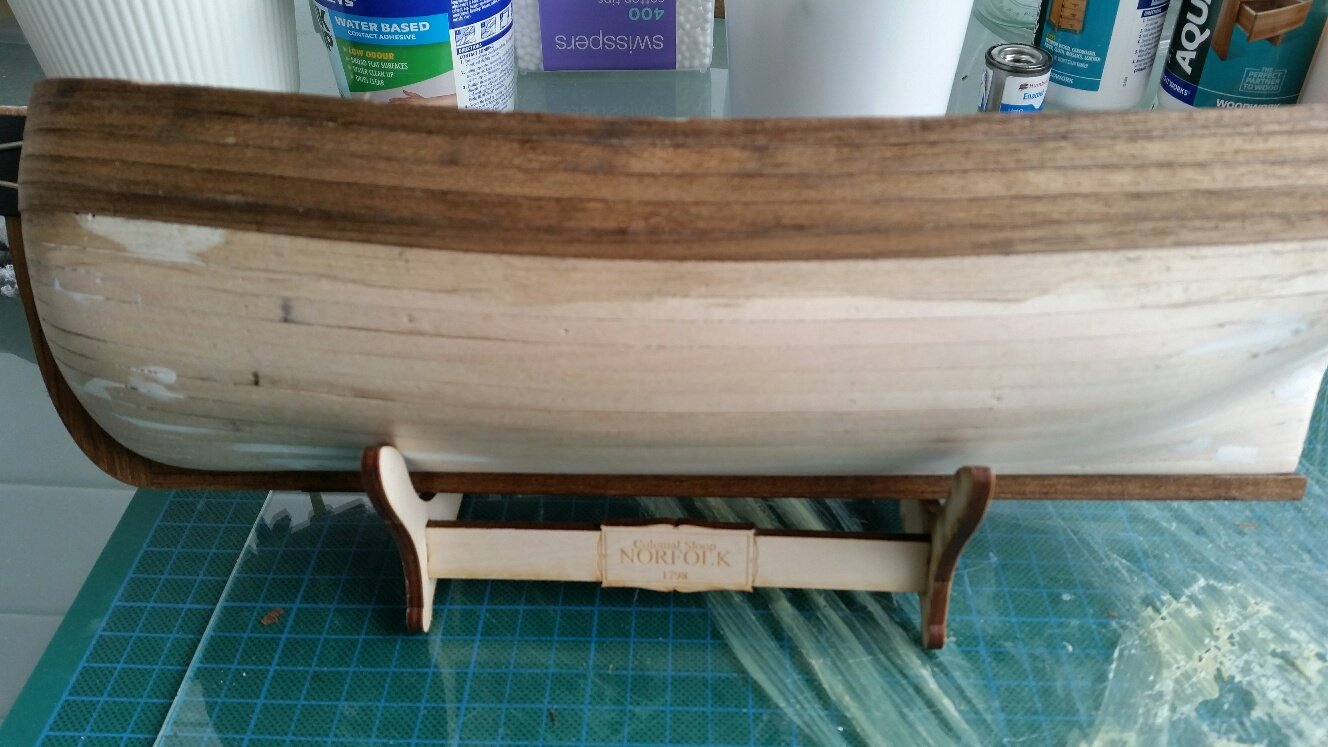
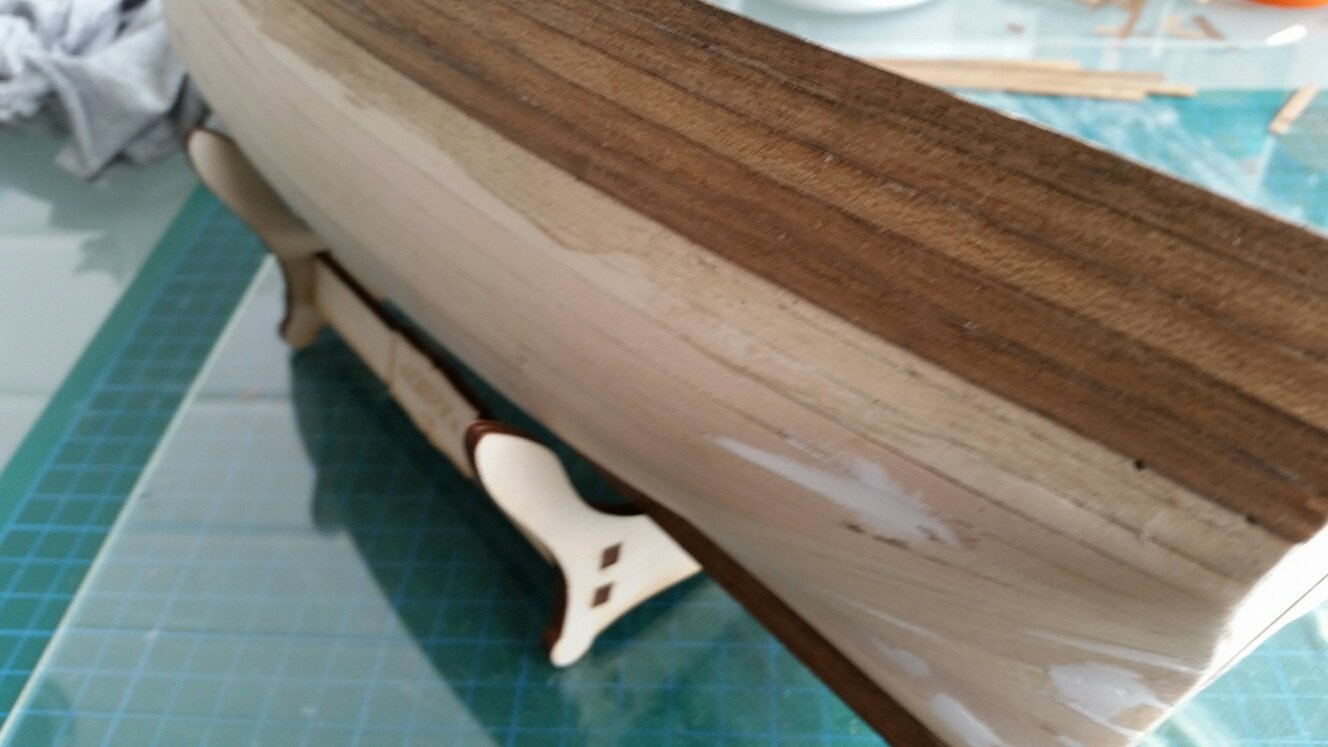
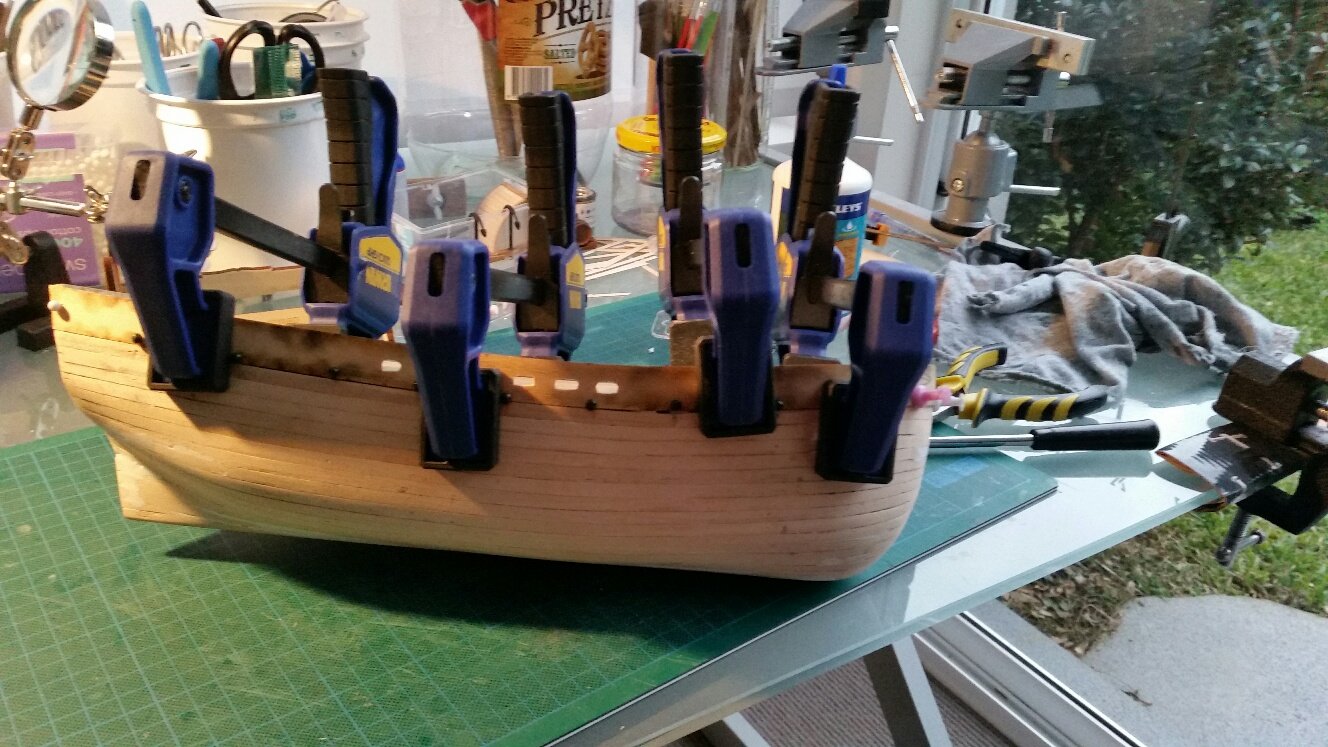
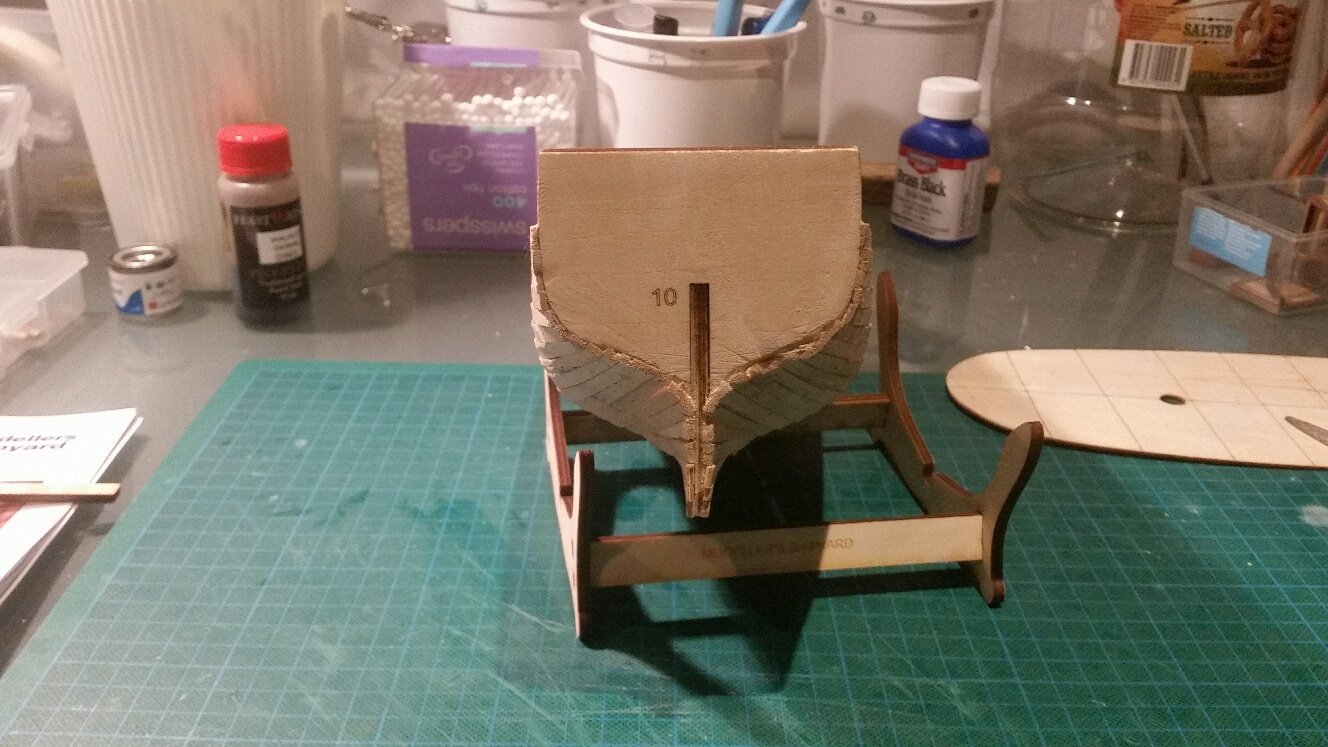
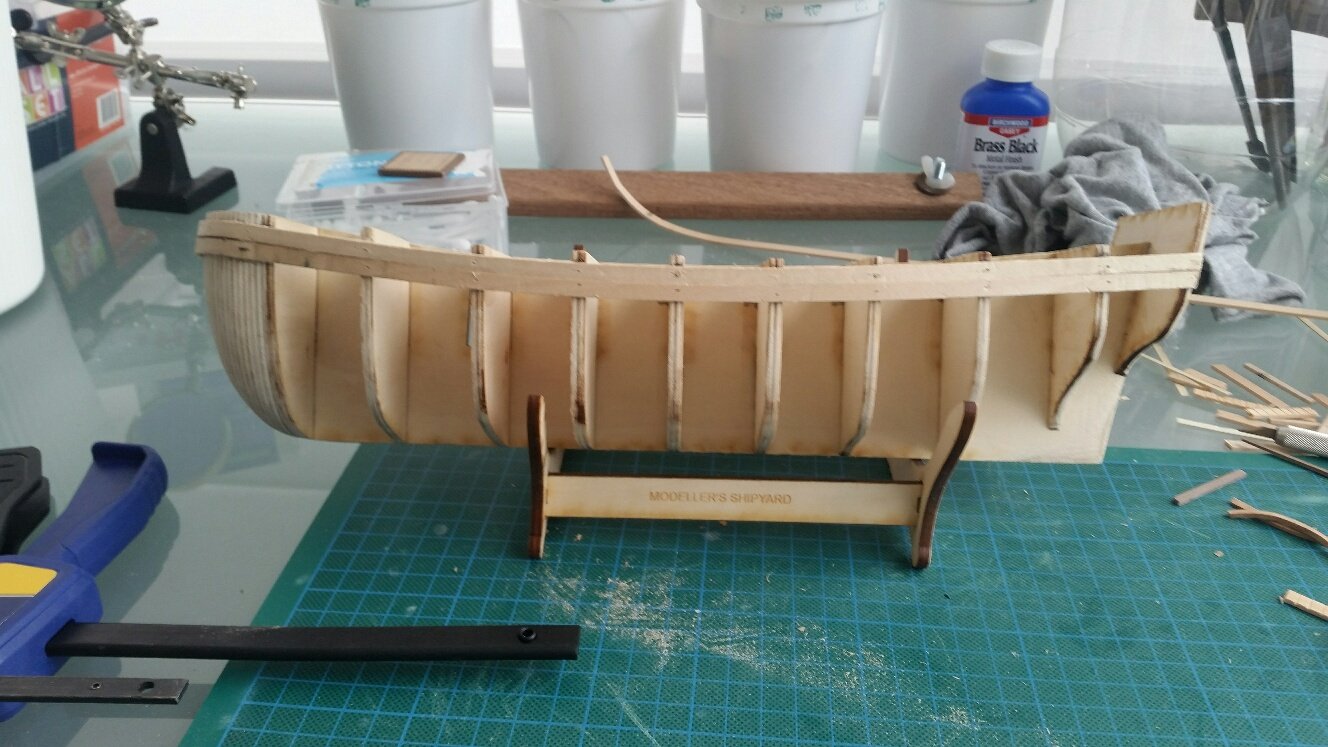
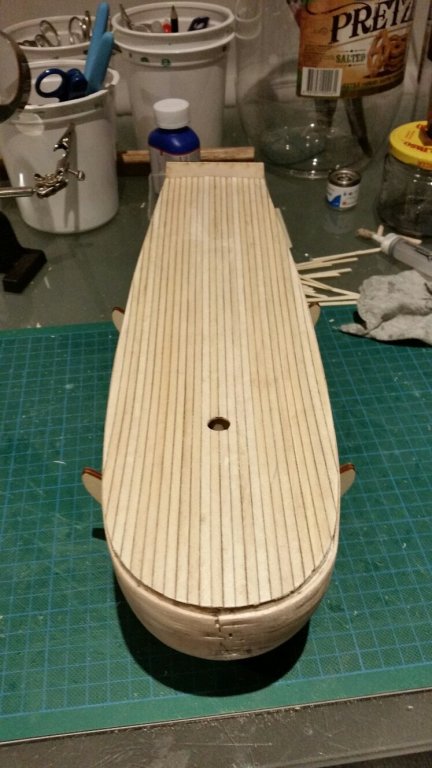
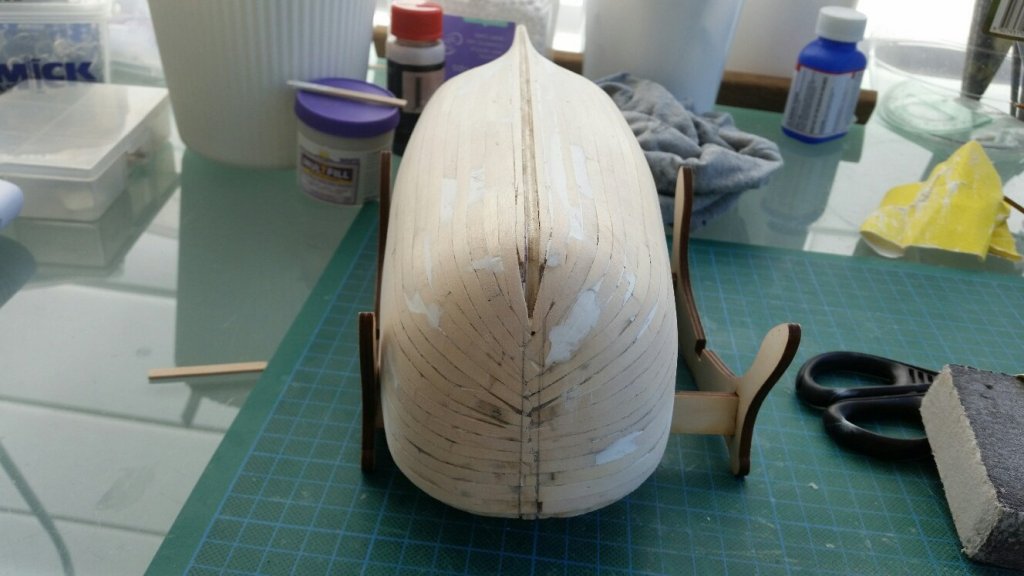
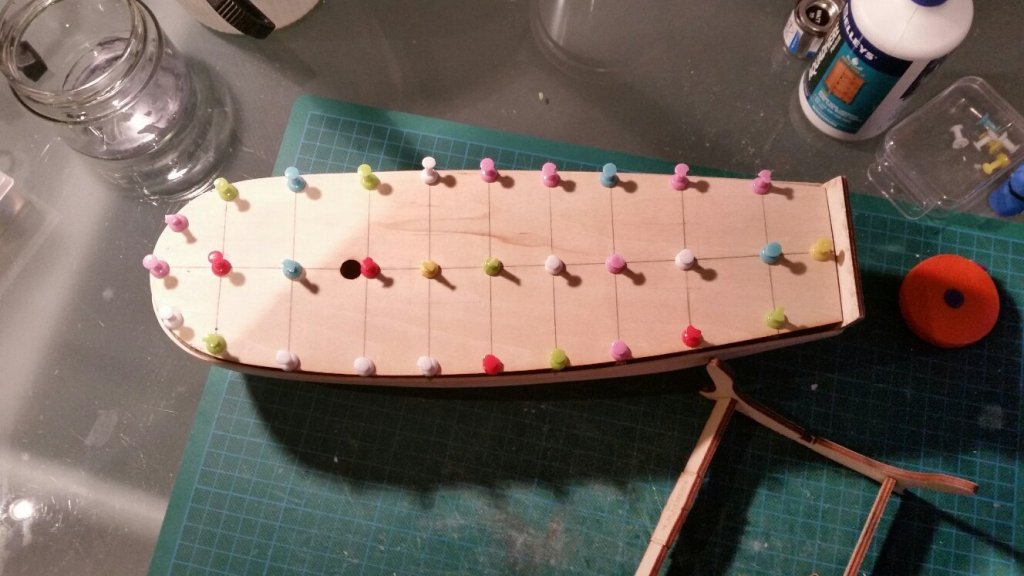
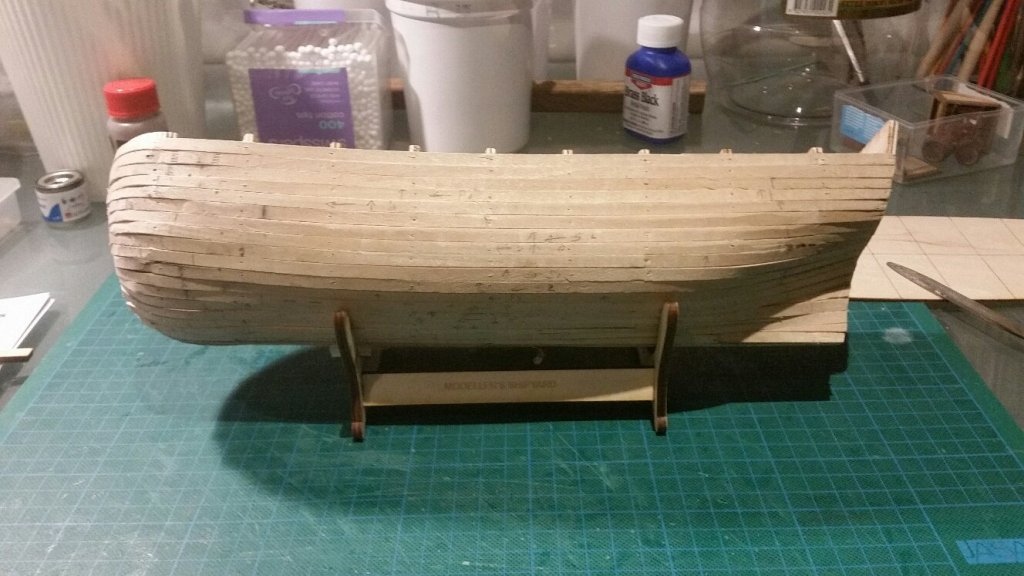
The deck planking is on with no real concerns and it was only a matter of checking the bulwarks to ensure that they still fitted OK. Before fitting the bulwarks I cut out the wash holes as I thought I would at least hide any mistakes under the second layer of planking. As you can see I think the wash holes may be a bit big so am hoping they can be "reduced" with the second layer of planking. The bulwarks are now on and I will wait till the weekend to sand down the whole hull again to ensure a smooth overall surface before the next stage. I will first be putting on the false keel and stem post as soon as I cover these with teak strips provided in the kit....my job for tomorrow!


-
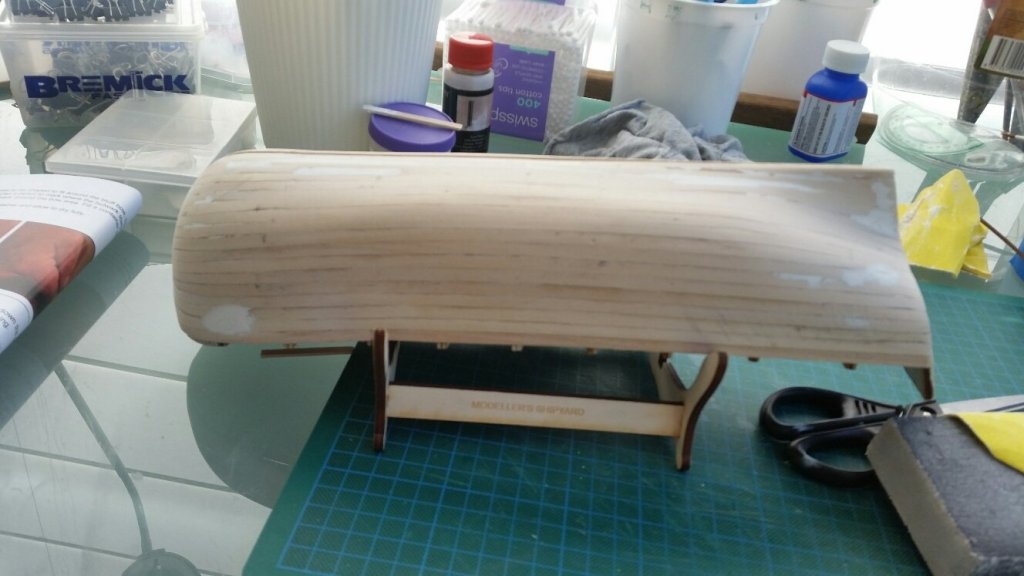
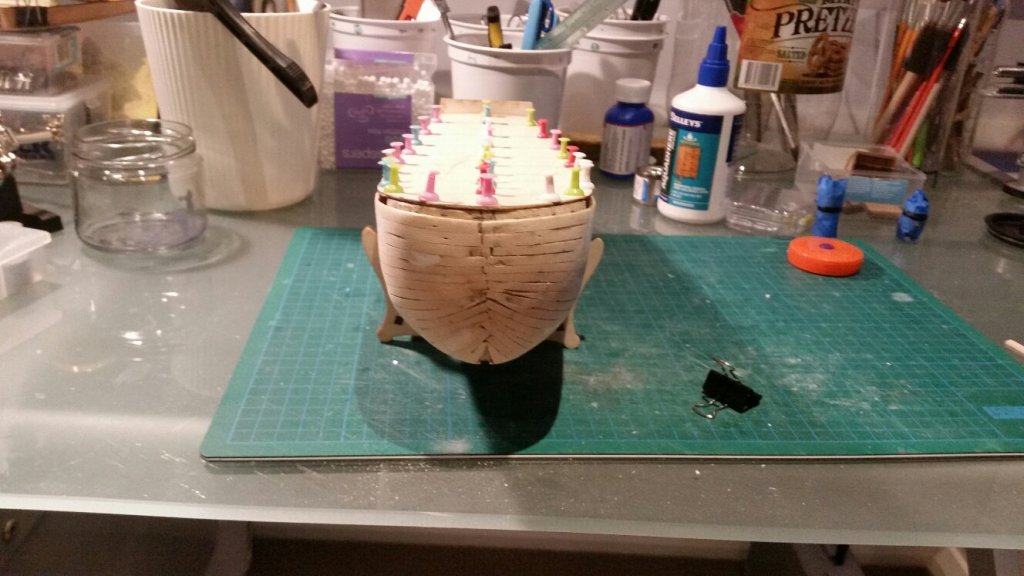
After a bit of sanding and some wood filler I was able to get a pretty good finish in preparation for the second layer of planking. Firstly though was getting the false deck in place which was a pretty good fit...so far so good. As with the Mermaid I will be putting on the deck planking first before the bulwarks as I find it much easier to cut the planking to fit the shape of the deck. I will be dry fitting the bulwarks to ensure that they fit properly before putting on the planking just in case I need to do more fine tuning on the hull itself.


-
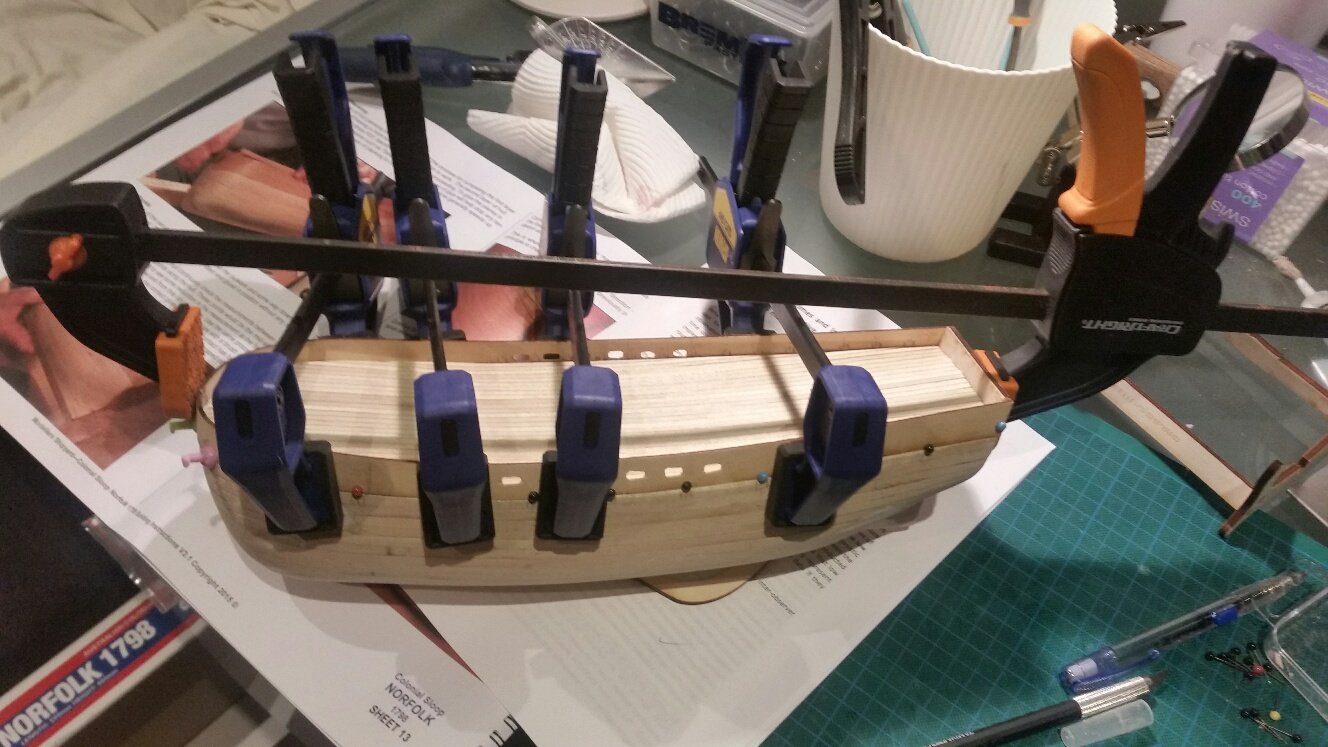
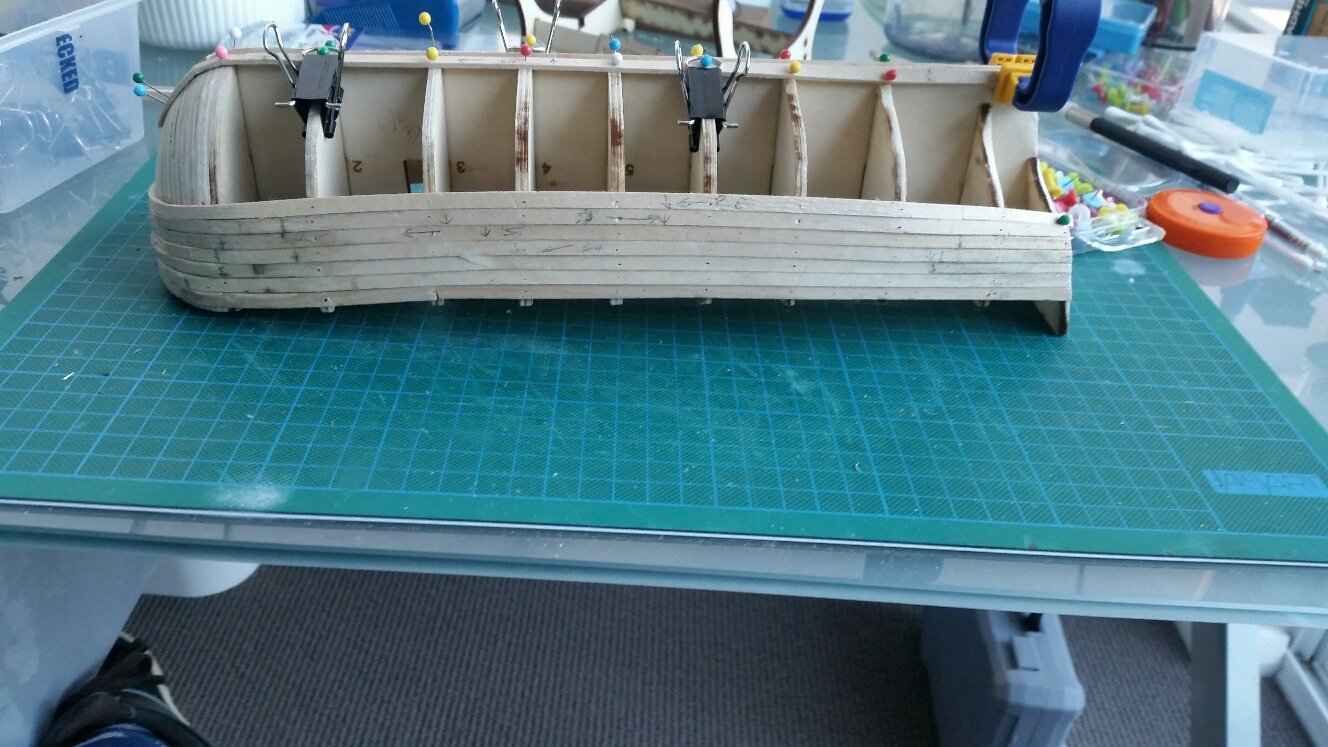
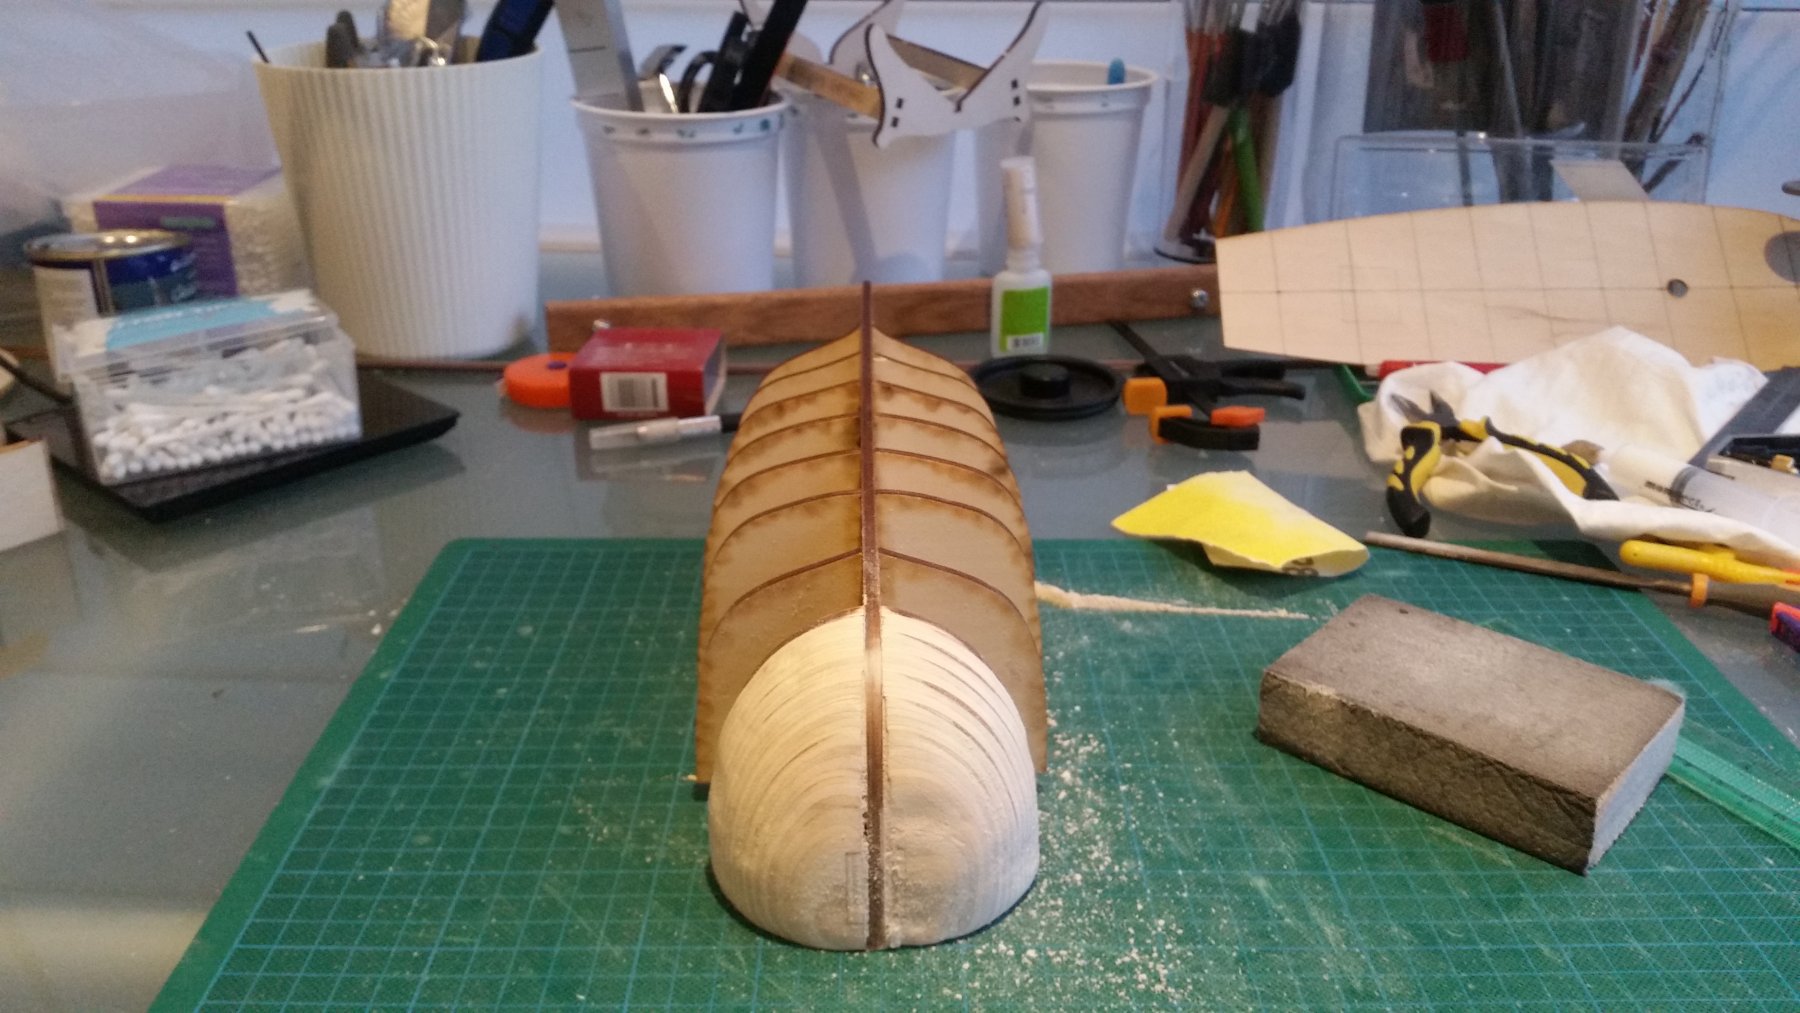
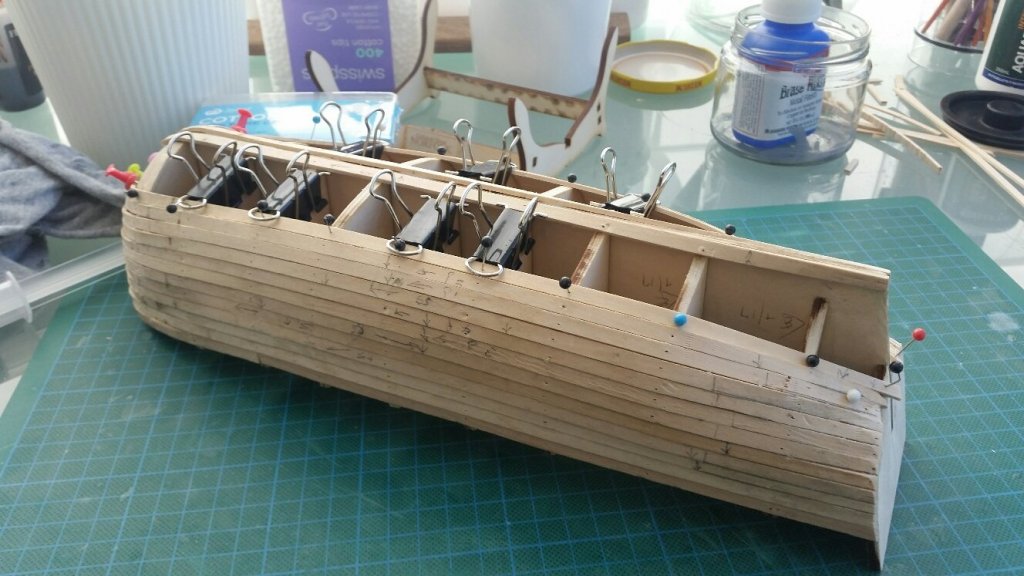
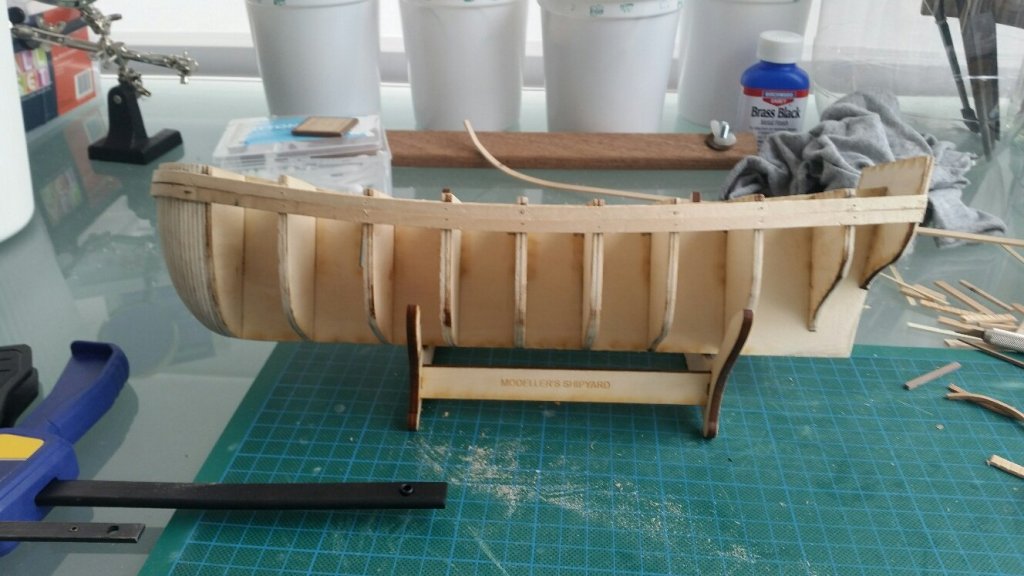
Apologies for the delay in uploading progress on the Norfolk, but due to financial year end over here my so called "semi-retirement" had become full time for the past couple of weeks. I still had time up my sleeve for completion of the first layer of planking which as it turned out was much harder than anticipated....notwithstanding I was able to get a fairly good finish and I will be posting the next lot of photos showing the finished and sanded hull. Following my earlier questions re blackening the brass parts of the model kit I was able to source "Brass Black" from a gun store here in Sydney. If anyone is interested the bottle costs $22.00 and should last me a lifetime!


-
Hi Steve, many thanks for your posts and as I've said before, I've picked up a number of very useful ideas and suggestions when looking at your superb work....will make my Norfolk build much easier and hopefully look as professional as yours. I look forward to seeing your "finished" Bounty and all the best on your r c build. Cheers.............Fernando
- 291 replies
-
- 4
-
-
- bounty
- billing boats
- (and 1 more)
-
Slow and steady as they say! I have been slowly putting on the first layer of planking. As mentioned earlier I've settled on the "boiling the kettle" approach which has been a godsend....I think I should have enough of the first layer of planking after destroying a few when using the crimpers. I should have the first layer of planking finished in the next week, time permitting. I have now finished the companionway and am pretty happy with the end result. All I need to do now is a very light sanding and a final coat of satin finish and I can move on to other fittings.


-
Hi Steve Beautiful work on the rigging.....the different sizes of rope on the rigging just further adds to the quality of your work. Cheers........Andy
- 291 replies
-
- 4
-
-
- bounty
- billing boats
- (and 1 more)
-
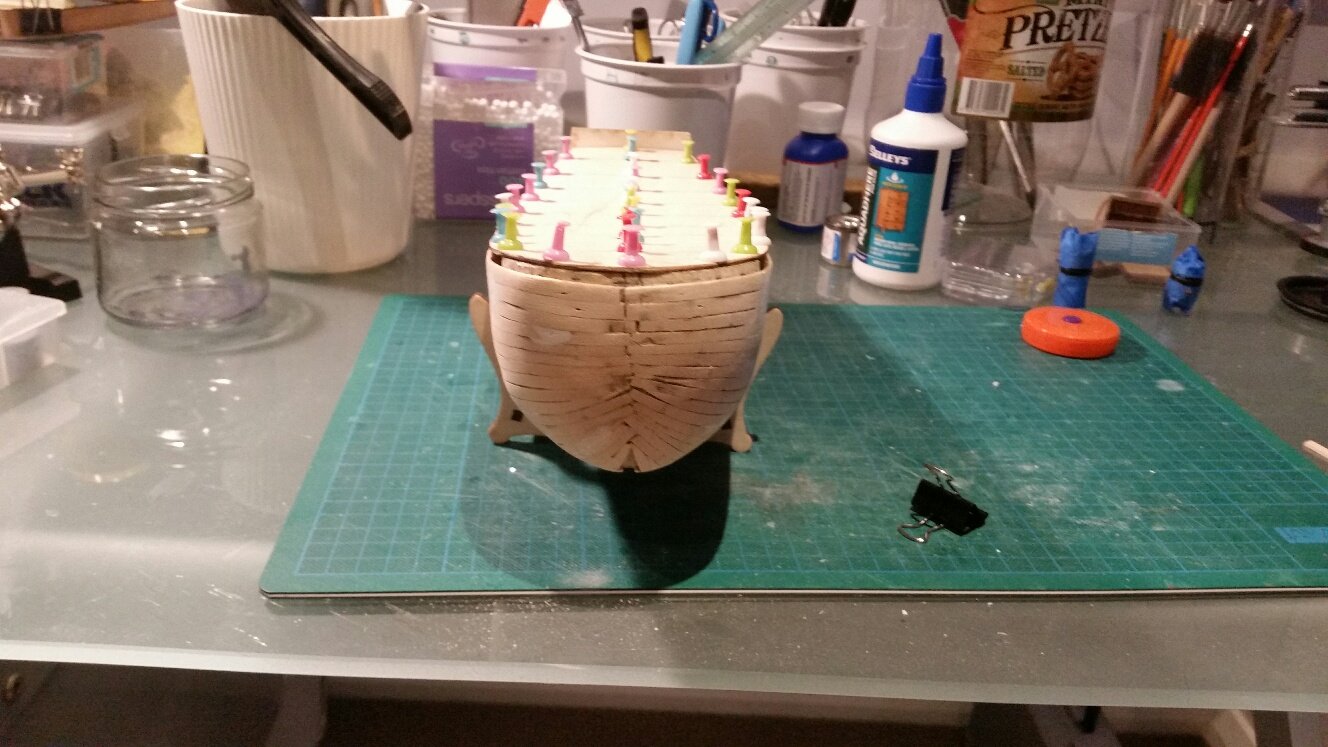
Have been moving along slowly but have now started on the first layer of planking. The bow filler was a bit more work than I thought it would take but eventually was happy with the way it turned out. The next part of preparation was bending the planks for the first layer which is much harder than I thought it would be. I broke a couple of planks but after much reading up on the subject, including on the NRG website have managed to settle on the boiling kettle approach....slow but very successful! I have also been doing a little more of the companionway.I'm not totally happy with what the kit has suggested I use as it makes the whole structure look much too big for the size of the schooner. I have also been playing around with the front of the companionway and have already removed a couple of bits I had glued on as I was not happy with the look....will keep on trying but this time will dry fit before going ahead and gluing. A few more photos to show was has been done to date...slow but steady!

-
Hi Syd Welcome from another relative newbie from North Sydney! Cheers............Fernando
-
Ah....that's why it looks so good. Looks like I need to order some more black cord!
- 291 replies
-
- 2
-
-
- bounty
- billing boats
- (and 1 more)
-
Looking good! Out of interest, what size black cord are you using for the fixed rigging. Is it 1mm or .75mm?
- 291 replies
-
- 2
-
-
- bounty
- billing boats
- (and 1 more)
-
Enjoy the holiday in the UK....and no doubt celebrating your 60th Birthday. Cheers...Fernando (who also turned 60 this year!)
- 121 replies
-
- 1
-
-
- bounty
- constructo
- (and 1 more)
-
Hi Nigel Am following your build and am impressed with how she is coming along. I have already decided to do the Bounty as my next build....... I already hinted to the Captain what I want for Christmas! The paint work is beautiful and those cannons have come up a treat. Keep up with the postings. Cheers..........Fernando
- 121 replies
-
- 2
-
-
- bounty
- constructo
- (and 1 more)
-
New member from North Sydney Australia
Fernando E replied to Fernando E's topic in New member Introductions
Many thanks for the welcome Scott. -
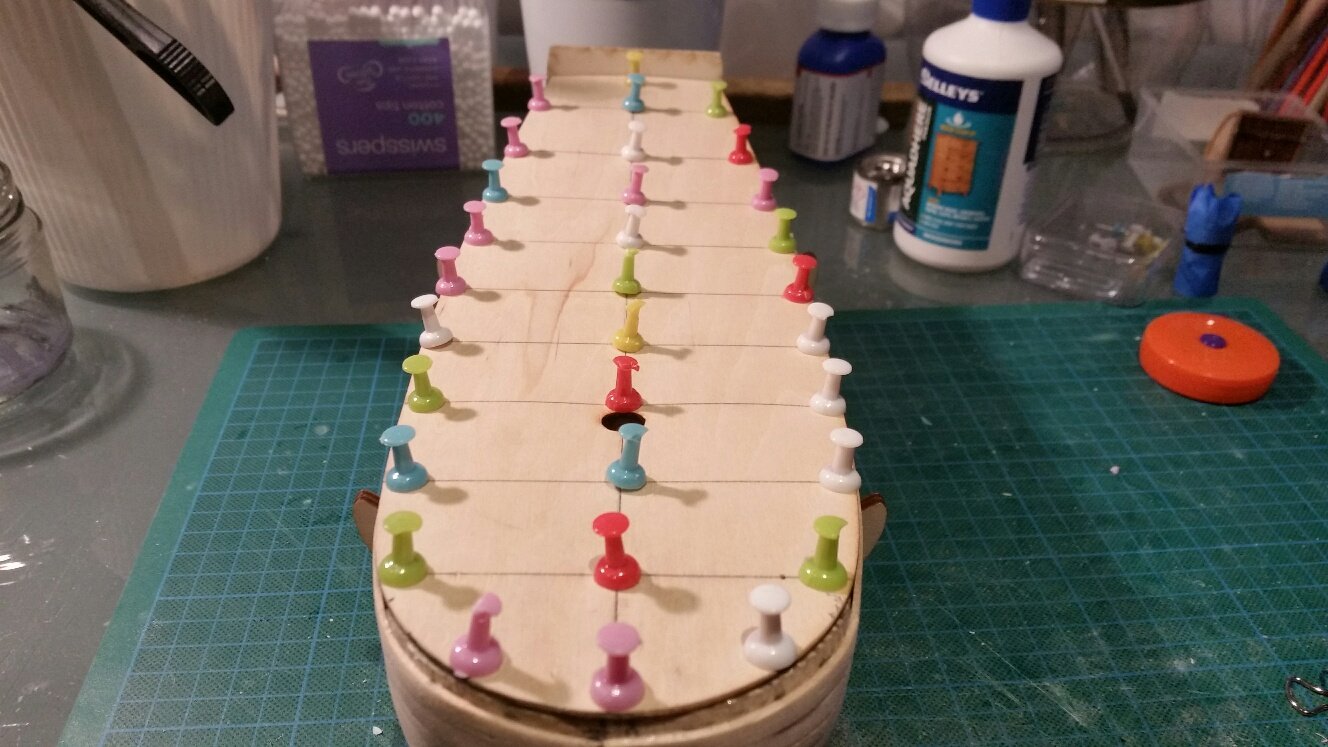
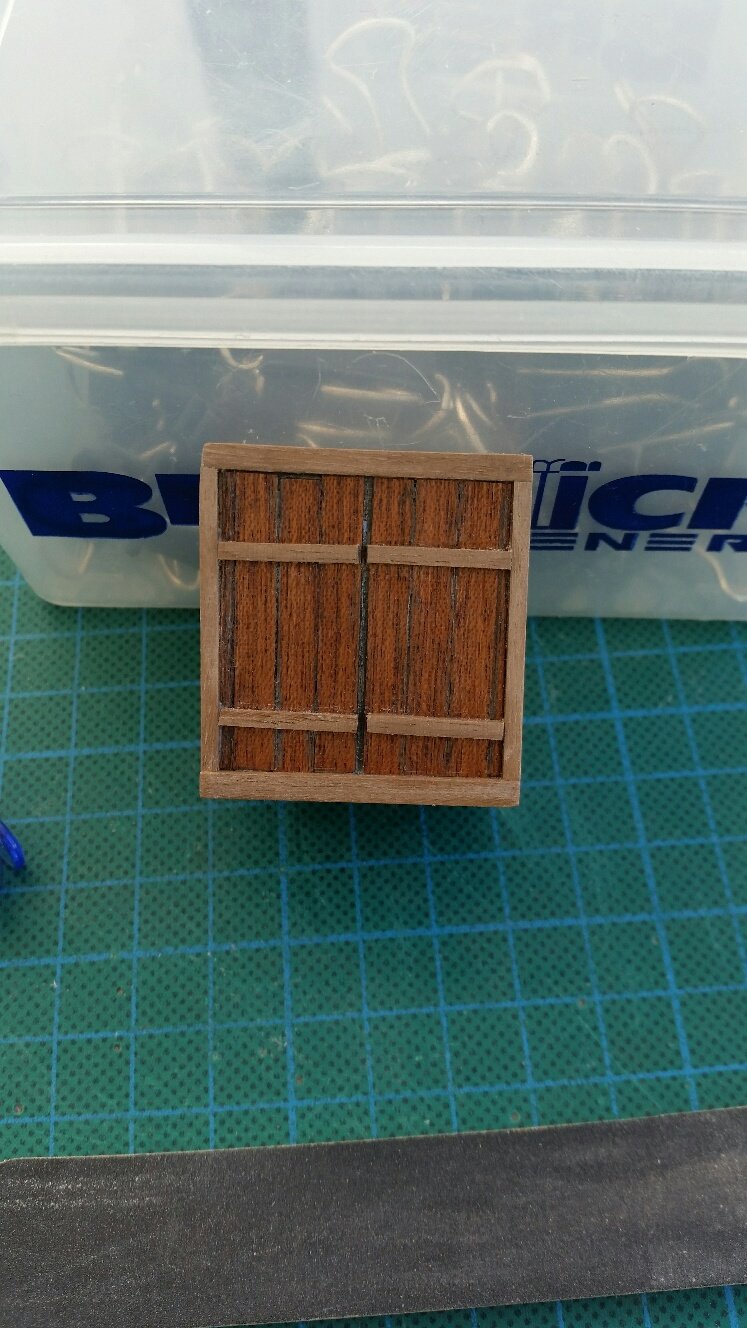
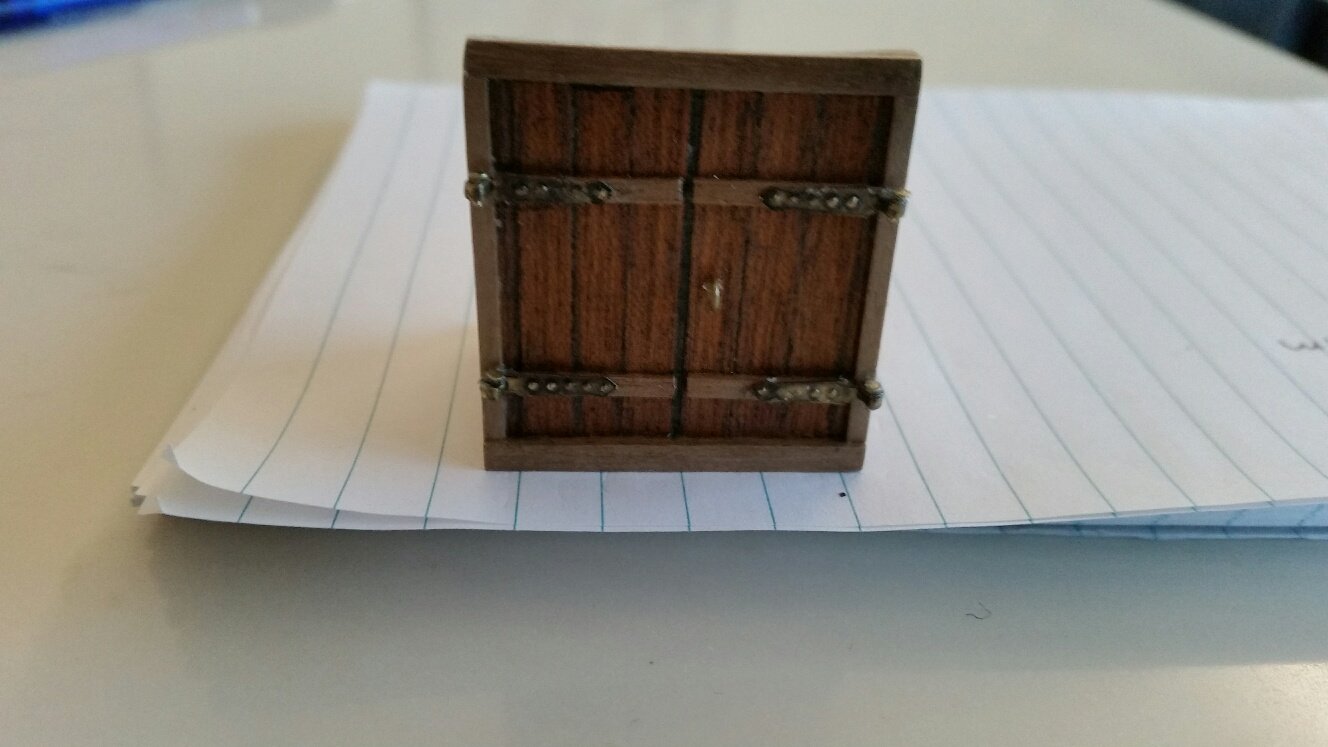
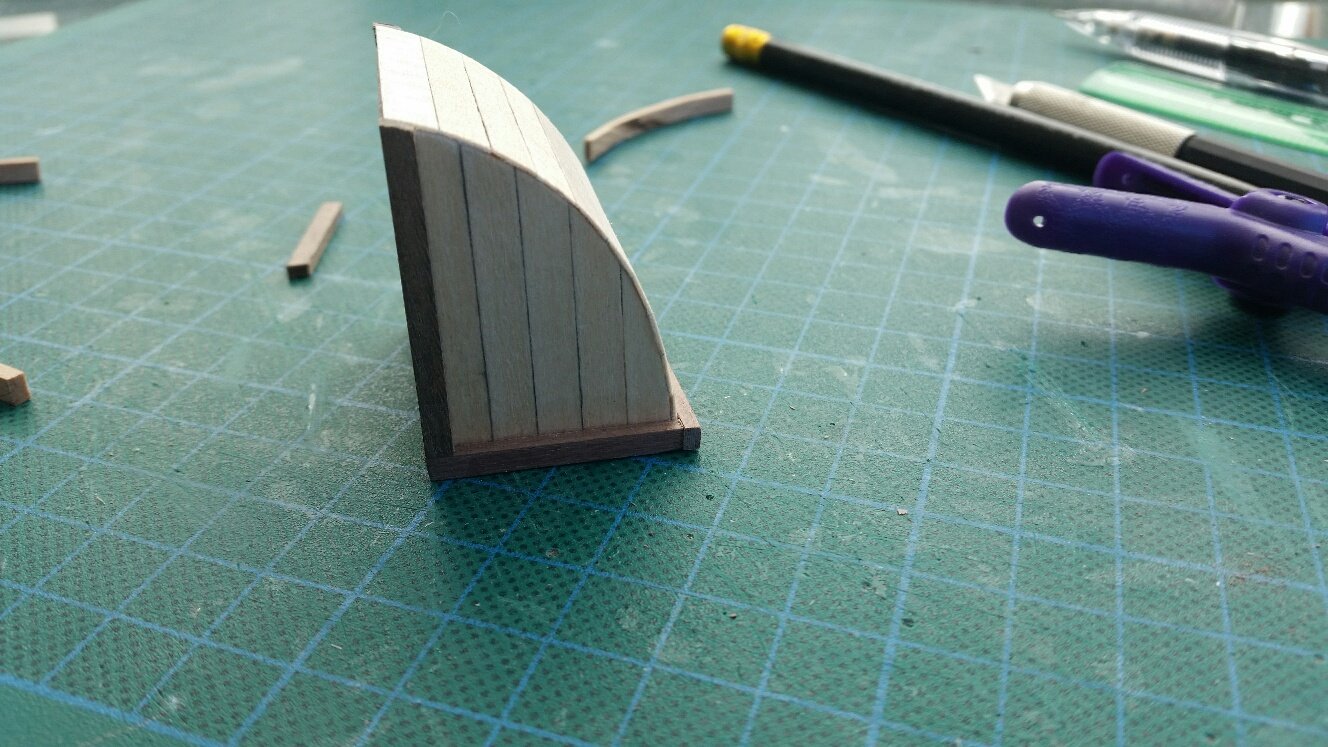
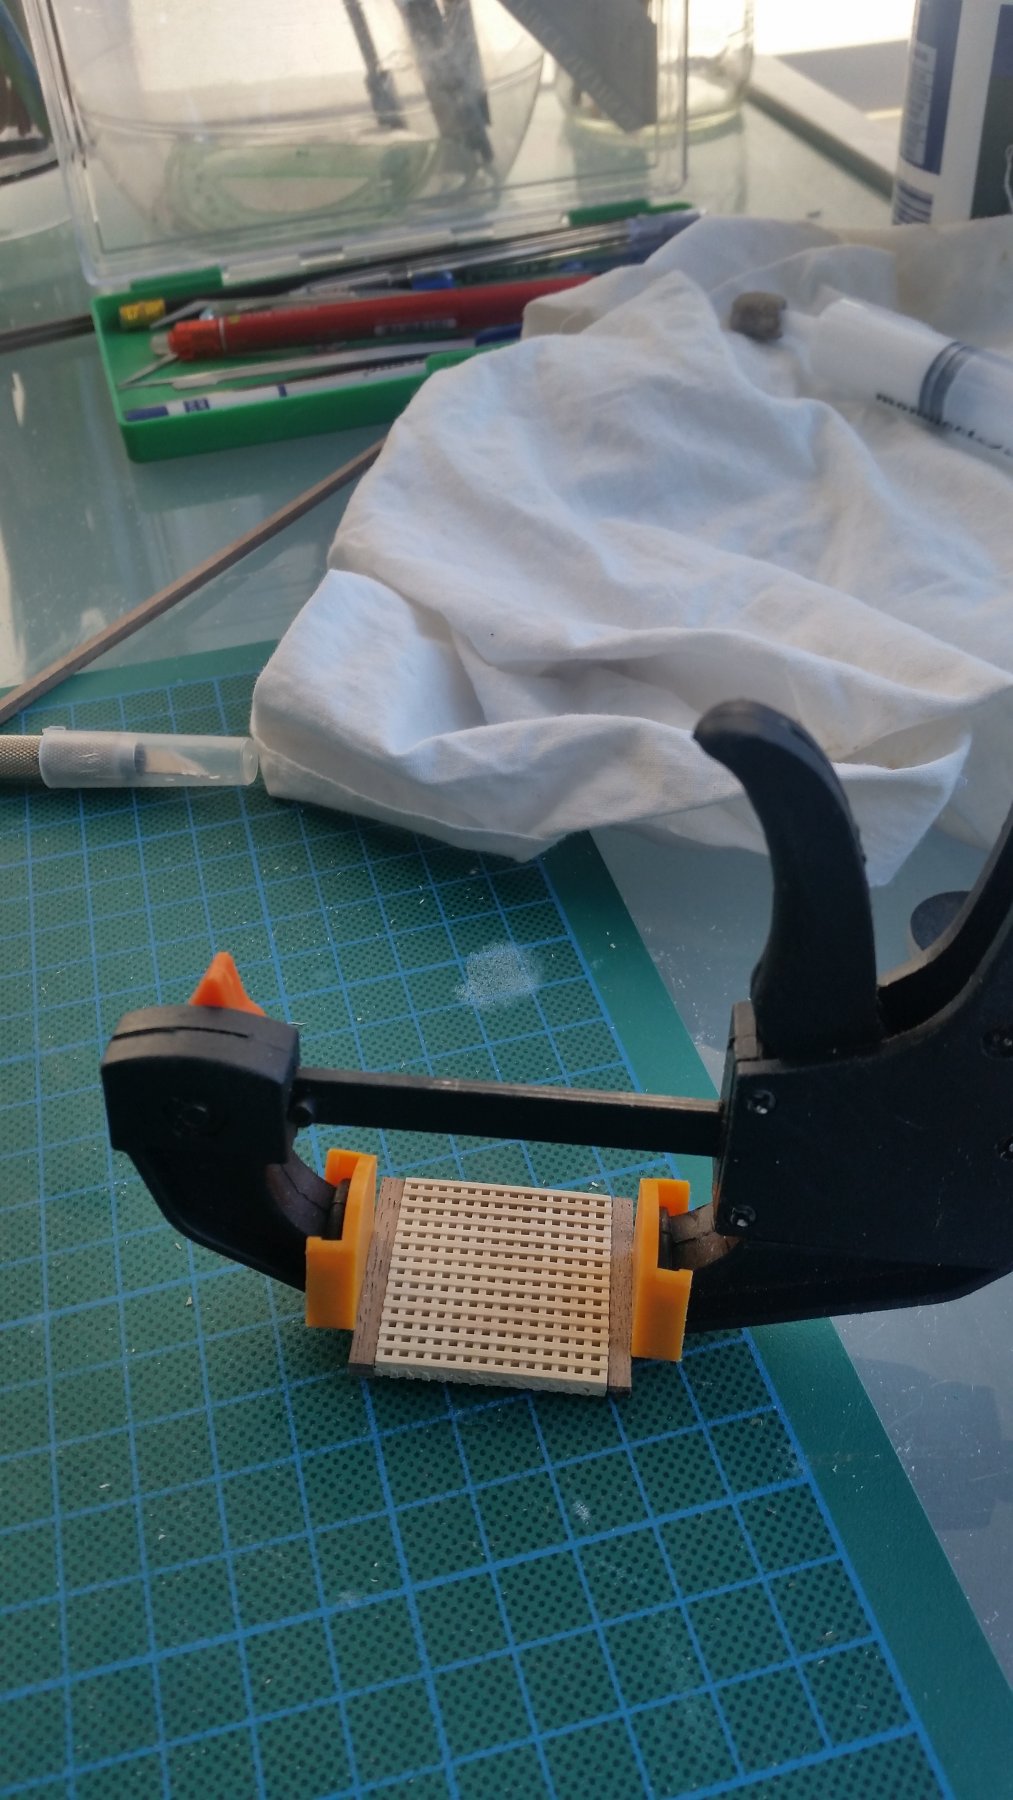
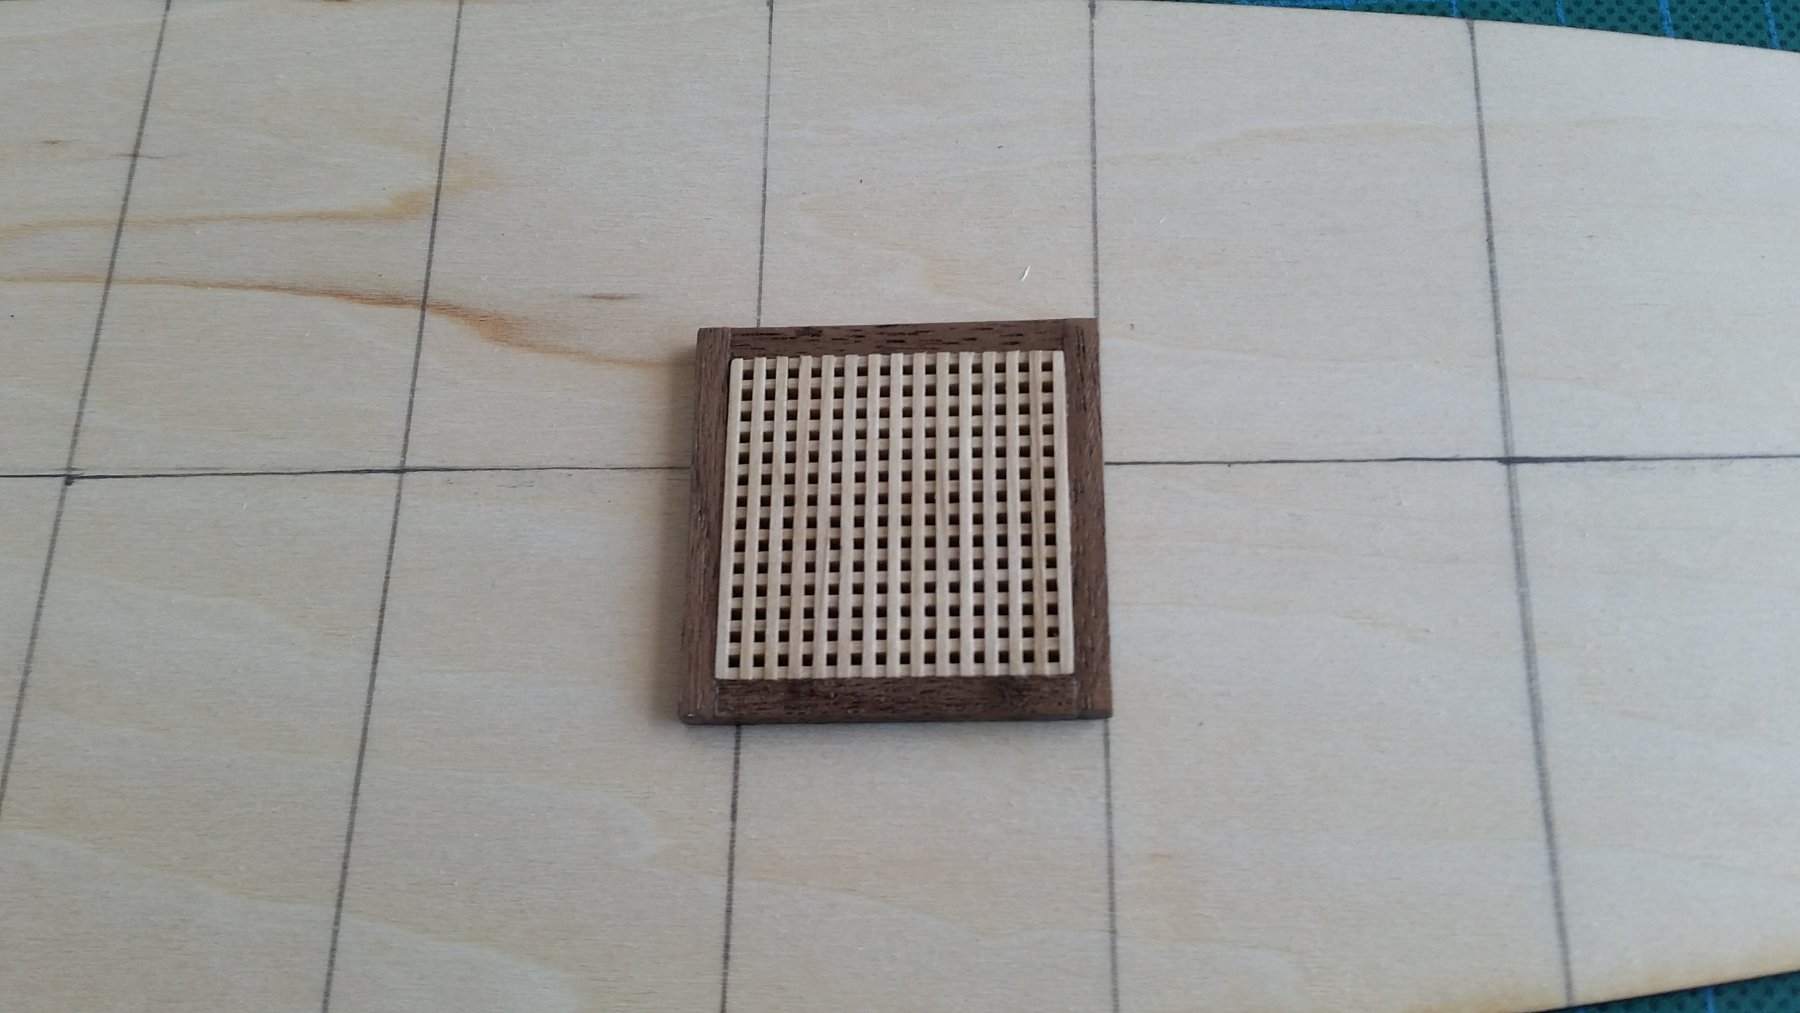
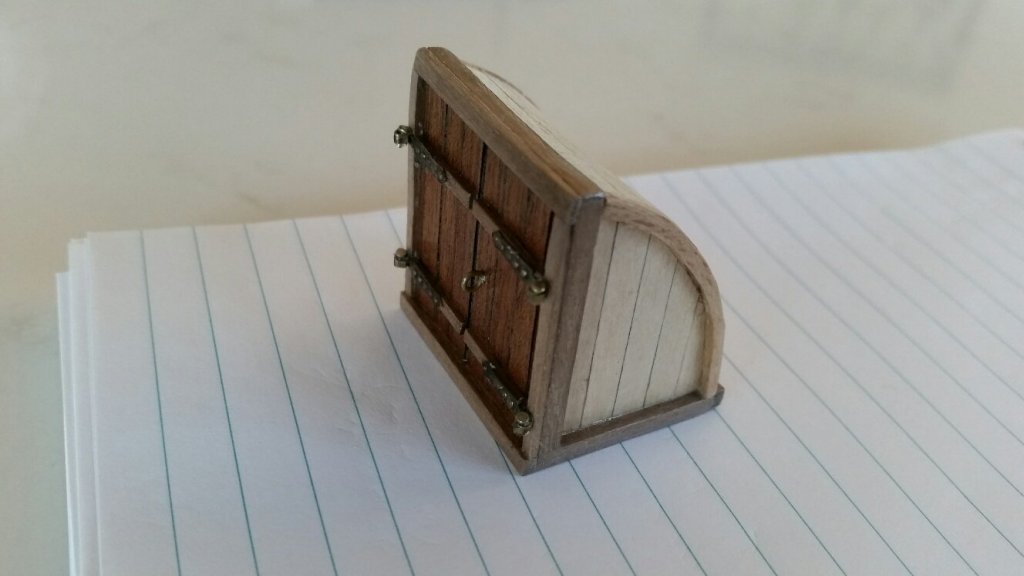
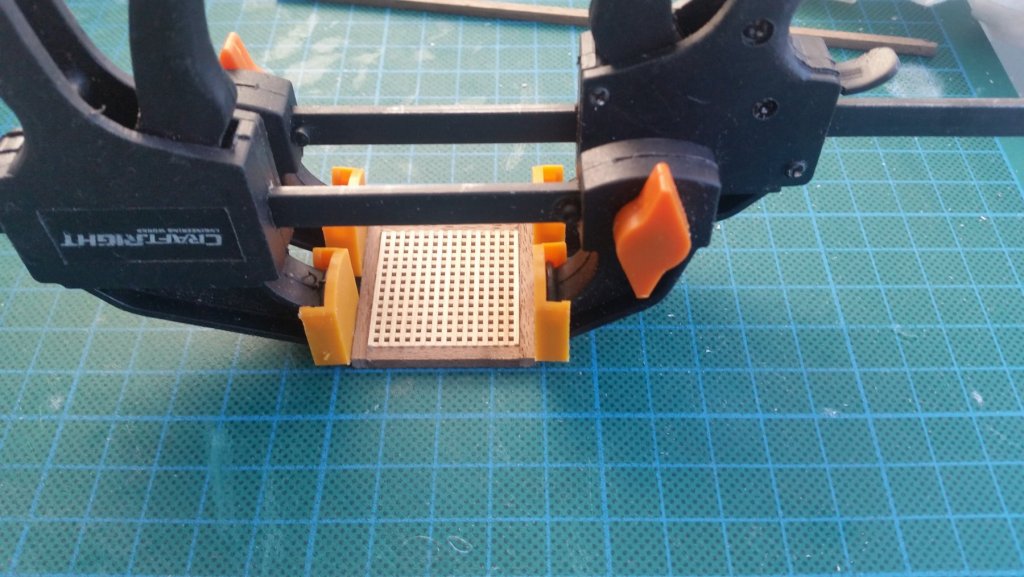
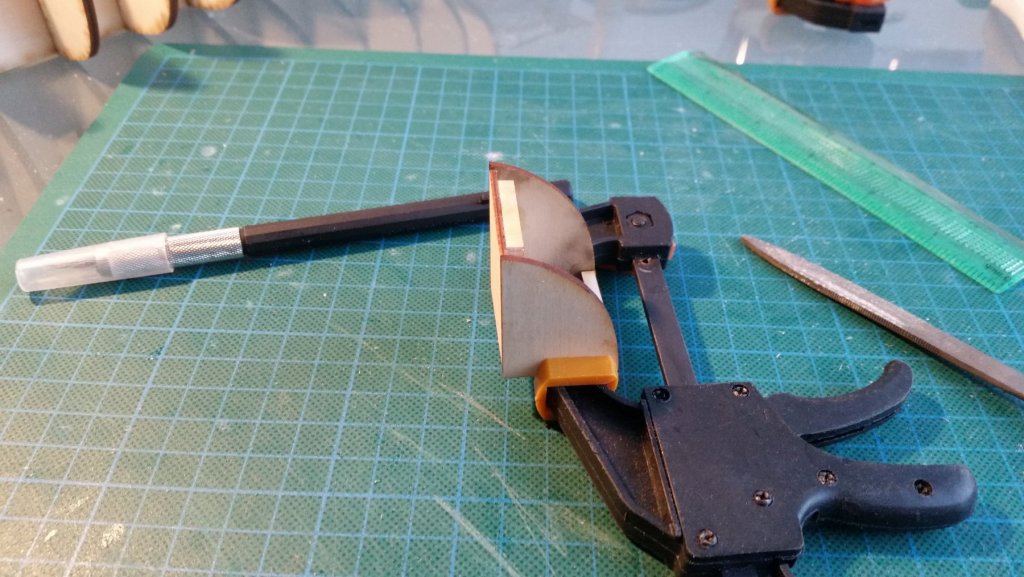
Whilst waiting for the glue to dry on the on the keel and bulkhead frames I thought I should start on some of the deck furniture. The quality of some of the furniture is pretty good but I thought some of it I would try my hand on doing it from solid wood rather than the kit plywood (eg. the tiller and barrel base). I've never done this before but, hey, I can only botch it up and try again! I did complete the cargo hatch as the grating supplied was very good. Below are some pictures of the reasonably simple process of putting it all together. I've already put one coat of matt satin finish and will give it a slight sanding before another coat is put on. I've also started on the companionway. When building this I realised that the walls would need some bracing whilst building it and hence I have put some bracing on the inside of the companionway....perhaps over engineered however it is very solid and ready for the outer planking. The kit provides silver ash strips for this but am thinking that I may use walnut planking which I have left over from my Mermaid build......just thought it would contrast nicely to the silver ash decking.


-
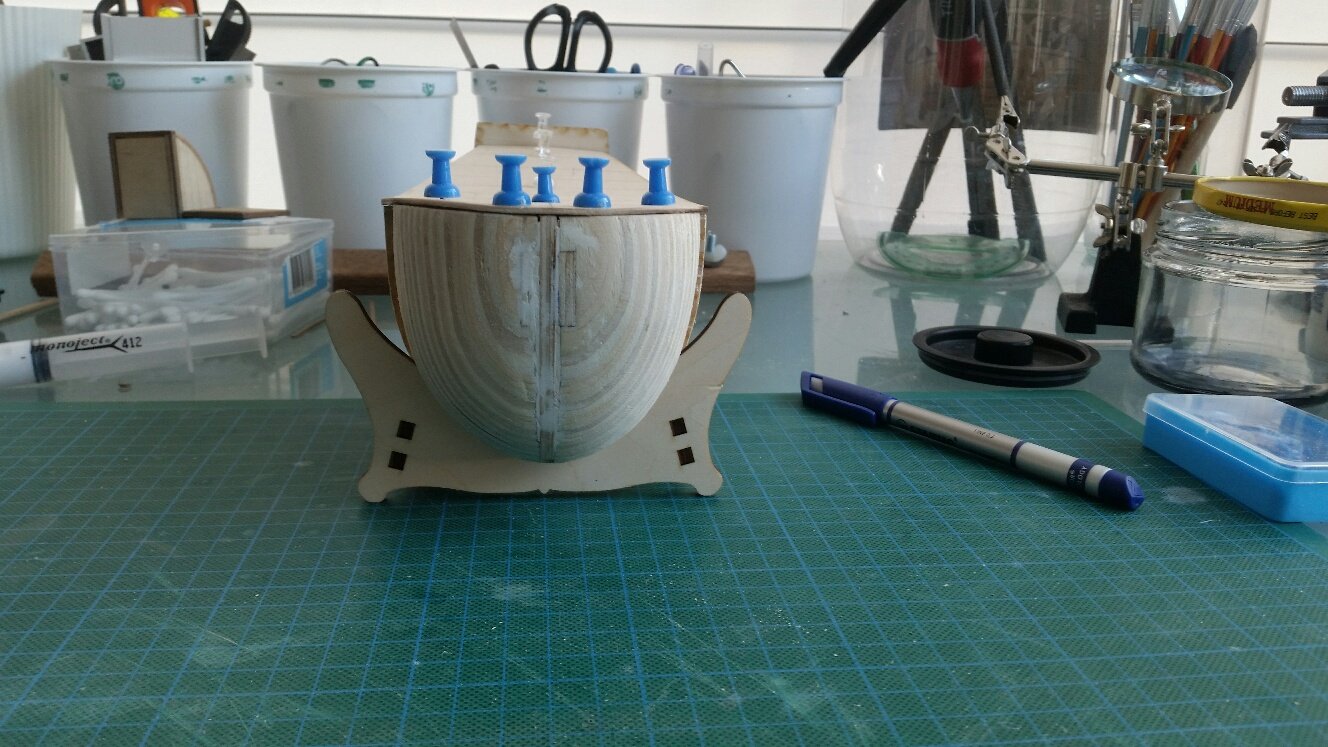
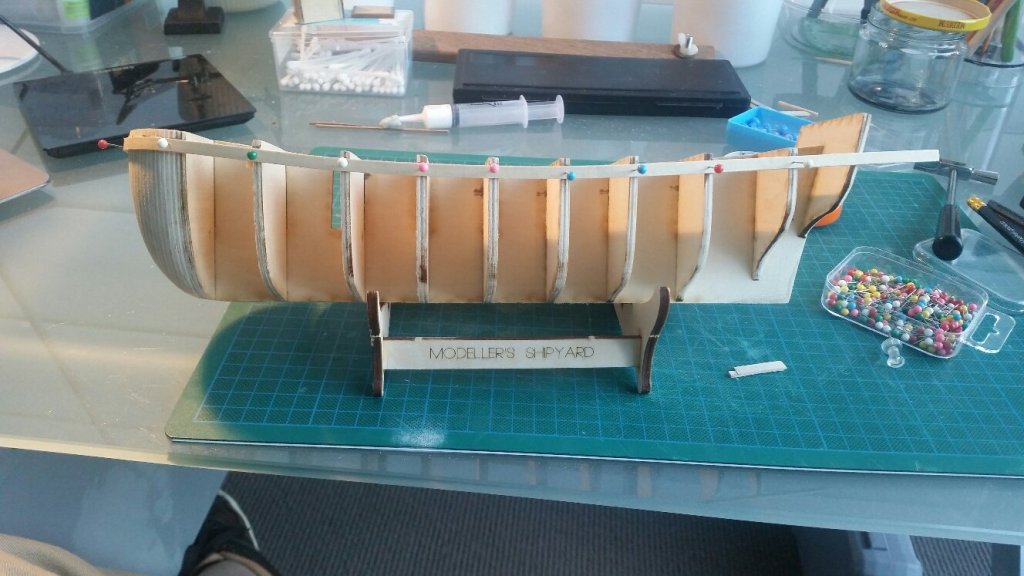
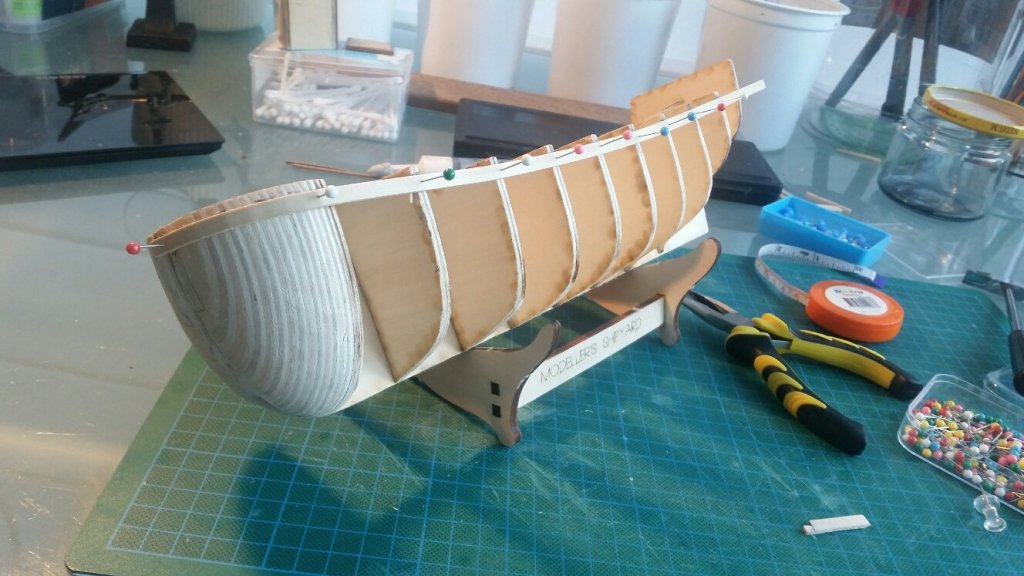
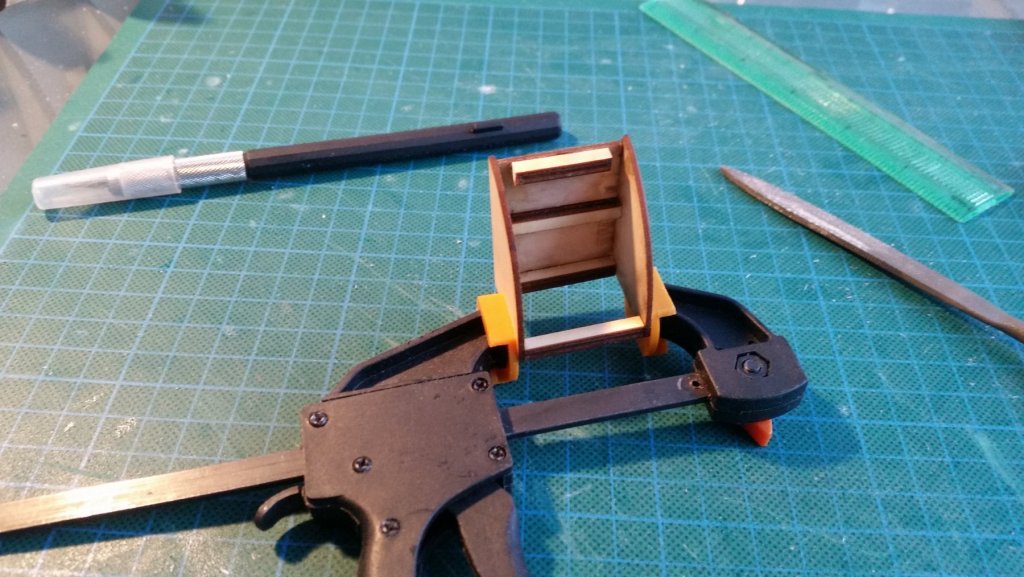
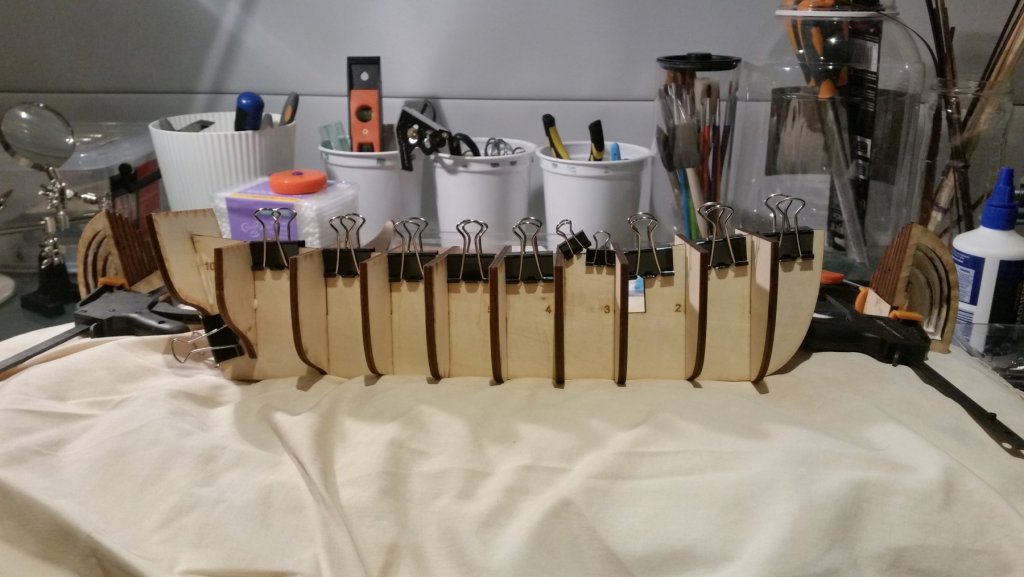
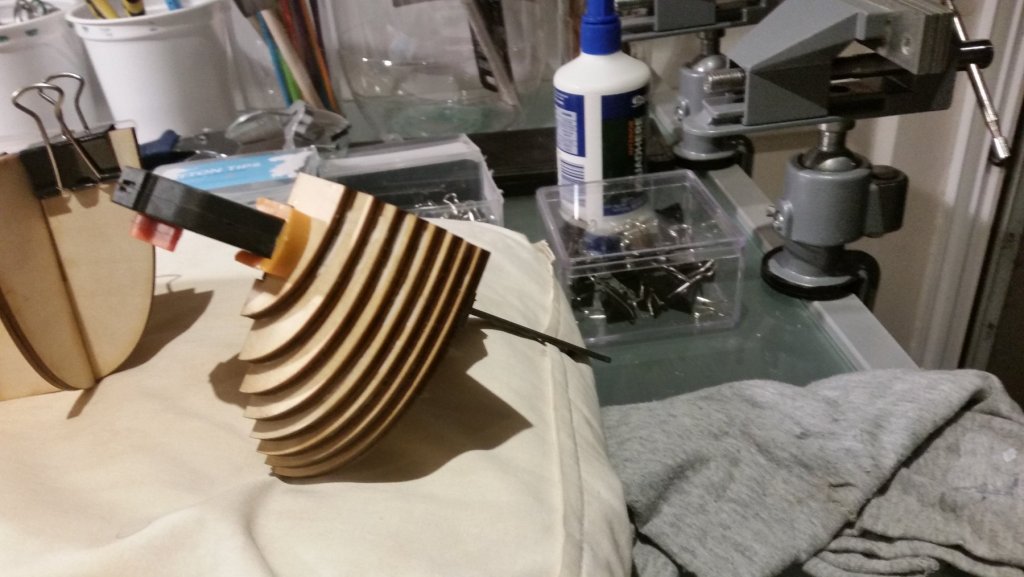
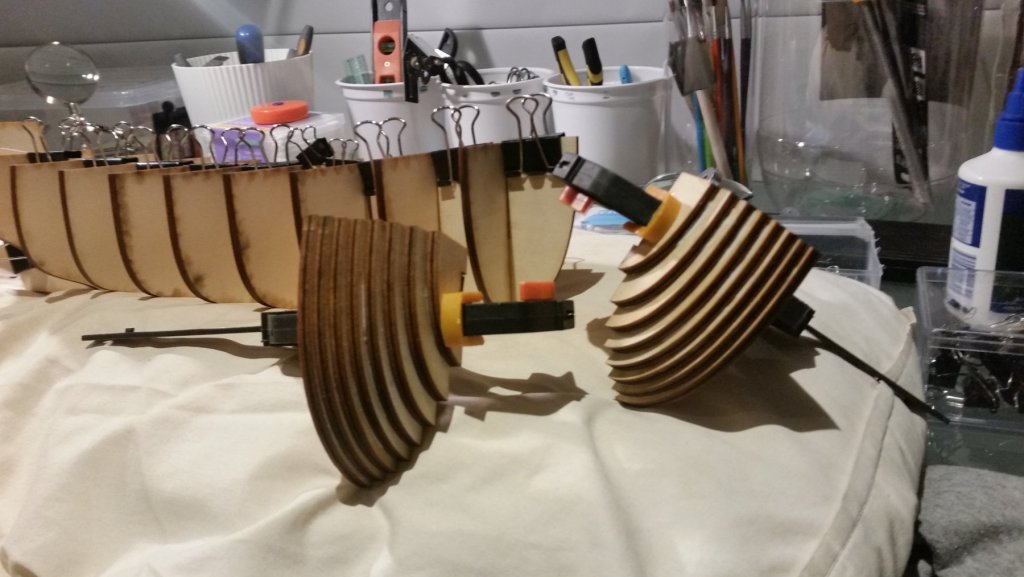
So, after a couple of very chilly days in Hobart I've started in earnest on the Norfolk. Below are a few photos of the start of the build. I must say that the laser cuts are very precise and needed very little in terms of sanding to fit in the bulkheads to the keel. I only had to do some very minor sanding for one or two to slot in nicely. The bow fillers were a little more work and , although not completely sanded I am happy with the way they are turning out.

-
New member from North Sydney Australia
Fernando E replied to Fernando E's topic in New member Introductions
Hi David, I have just started a build log but was then called away to Hobart for a few days. Am heading back to Sydney later today so am keen to continue my build. I had a chance to go to the Maritime Museum in Hobart....worth the visit as there are dozens of model boats, most donated by locals who either scratch built or from a kit. The Norfolk was one of those scratch built boats. Gave me some ideas when I proceed with my build. Cheers........Fernando -
Hi Steve, have been looking at a number of sites and as you have experienced, it seems I can't get any solutions over the post or it will be shipped from overseas which is very expensive. I think the easiest thing to do would be to use a black primer (very inexpensive at about $4:00 a bottle) and will give it a go.