HOLIDAY DONATION DRIVE - SUPPORT MSW - DO YOUR PART TO KEEP THIS GREAT FORUM GOING! (Only 20 donations so far - C'mon guys!)
×


Fernando E
-
Posts
242 -
Joined
-
Last visited
Content Type
Profiles
Forums
Gallery
Events
Everything posted by Fernando E
-
Thoroughly enjoyed watching this build. Great work and the detail , painting and the finish is superb. Cheers.........Fernando
- 122 replies
-
- 1
-

-
- greek bireme
- scale-1/35
- (and 2 more)
-
Stunning work Danny. Always a great joy to see where you are at as well as admire the craftsmanship. Cheers.........Fernando
- 524 replies
-
- 11
-
-
Congratulations Antony on a great job... Cheers............Fernando
- 32 replies
-
- 2
-
-
- santa lucia
- panart
- (and 1 more)
-
That's a nice piece of work Antony....the sea base really sets it off! I can only hope my Santa Lucia ends up looking just as good. I will see if I can get away without painting it as the wooden finish just looks fantastic. Cheers............Fernando
- 32 replies
-
- 2
-
-
- santa lucia
- panart
- (and 1 more)
-
Hi Antony and many thanks for letting me know about those additional links and I look forward to some more photos. I have been looking at the instructions all day (on and off....very frustrating) and unfortunately I have to agree with your comment that they are not particularly helpful. Even the diagrams are somewhat confusing. I'll just plod along and see how the build pans out I have started on fairing the frames and the plywood is pretty dodgy...either a function of age or the manufacturer supplied stuff....not a great start! I will have a build log in the not too distant future once I'm brave enough to start on the project. Cheers..........Fernando
- 32 replies
-
- 1
-
-
- santa lucia
- panart
- (and 1 more)
-
Hi Antony, my brother gave me a partly completed Santa Lucia which he started some 25 to 30 years ago and asked me to see if it can be salvaged. I've already had to pull off all 6 layers of the first layer of planking as the frames had not been fared and, as you can imagine, nothing was even on the build!! In his defence this has been his first and only build to date and I suspect he gave up after realising that wooden boat builds do take a little bit of effort....hence why I now have it! As this is my first build of this type of boat I was wondering if you had any further updates on your build. Reading the plans has been a bit of a nightmare even though they have an English translation of the Italian instructions.....(I suspect that the translator was still in his first year of the English language course)! Any more photos, particularly of the hull would be appreciated. Many thanks...........Fernando
-
Many thanks Danny, very much appreciated. Not sure what my next build will be. I do like the colonial ships.....perhaps the Sirius, the Supply, Perseverance or maybe the Bounty or Endeavour.....so many to choose from Will see what sits under the Christmas tree in December! I definitely have the "bug" to keep up the modelling so will be keen to start another one in the not too distant future. Watching the Ashes test whilst working on a model sounds like the way to go over the Christmas/New Year summer break Cheers........Fernando
-
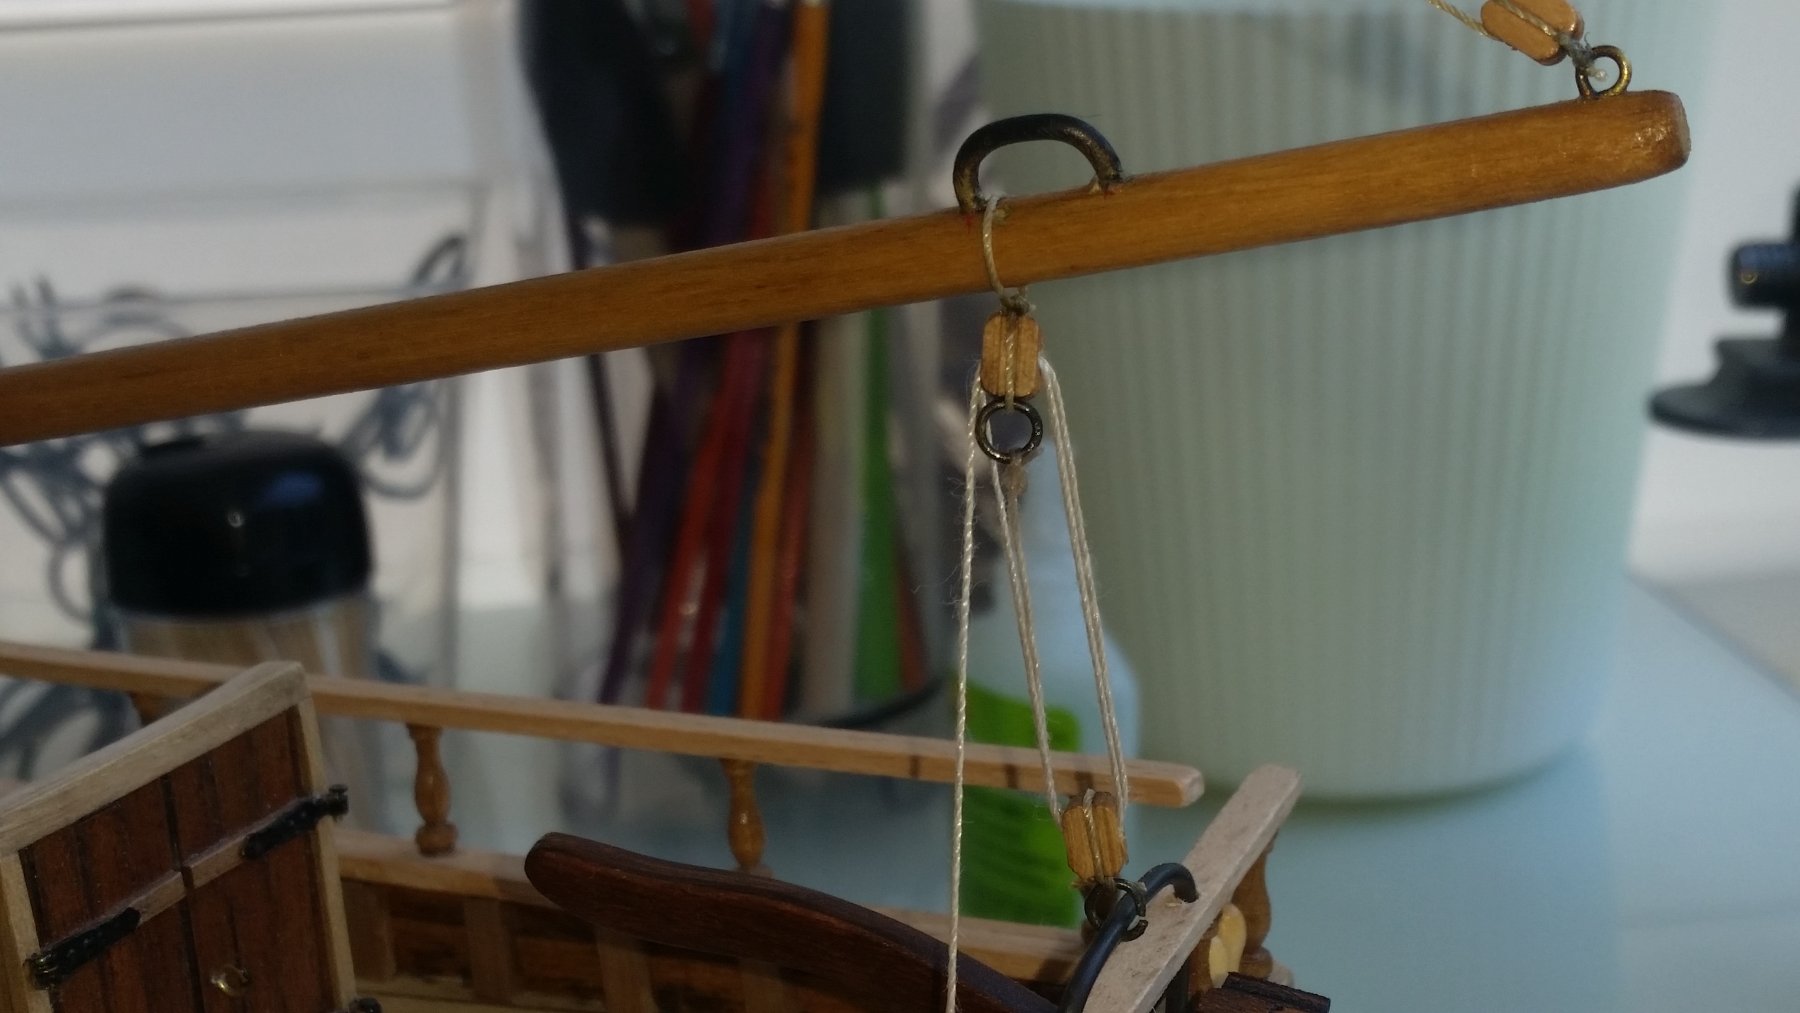
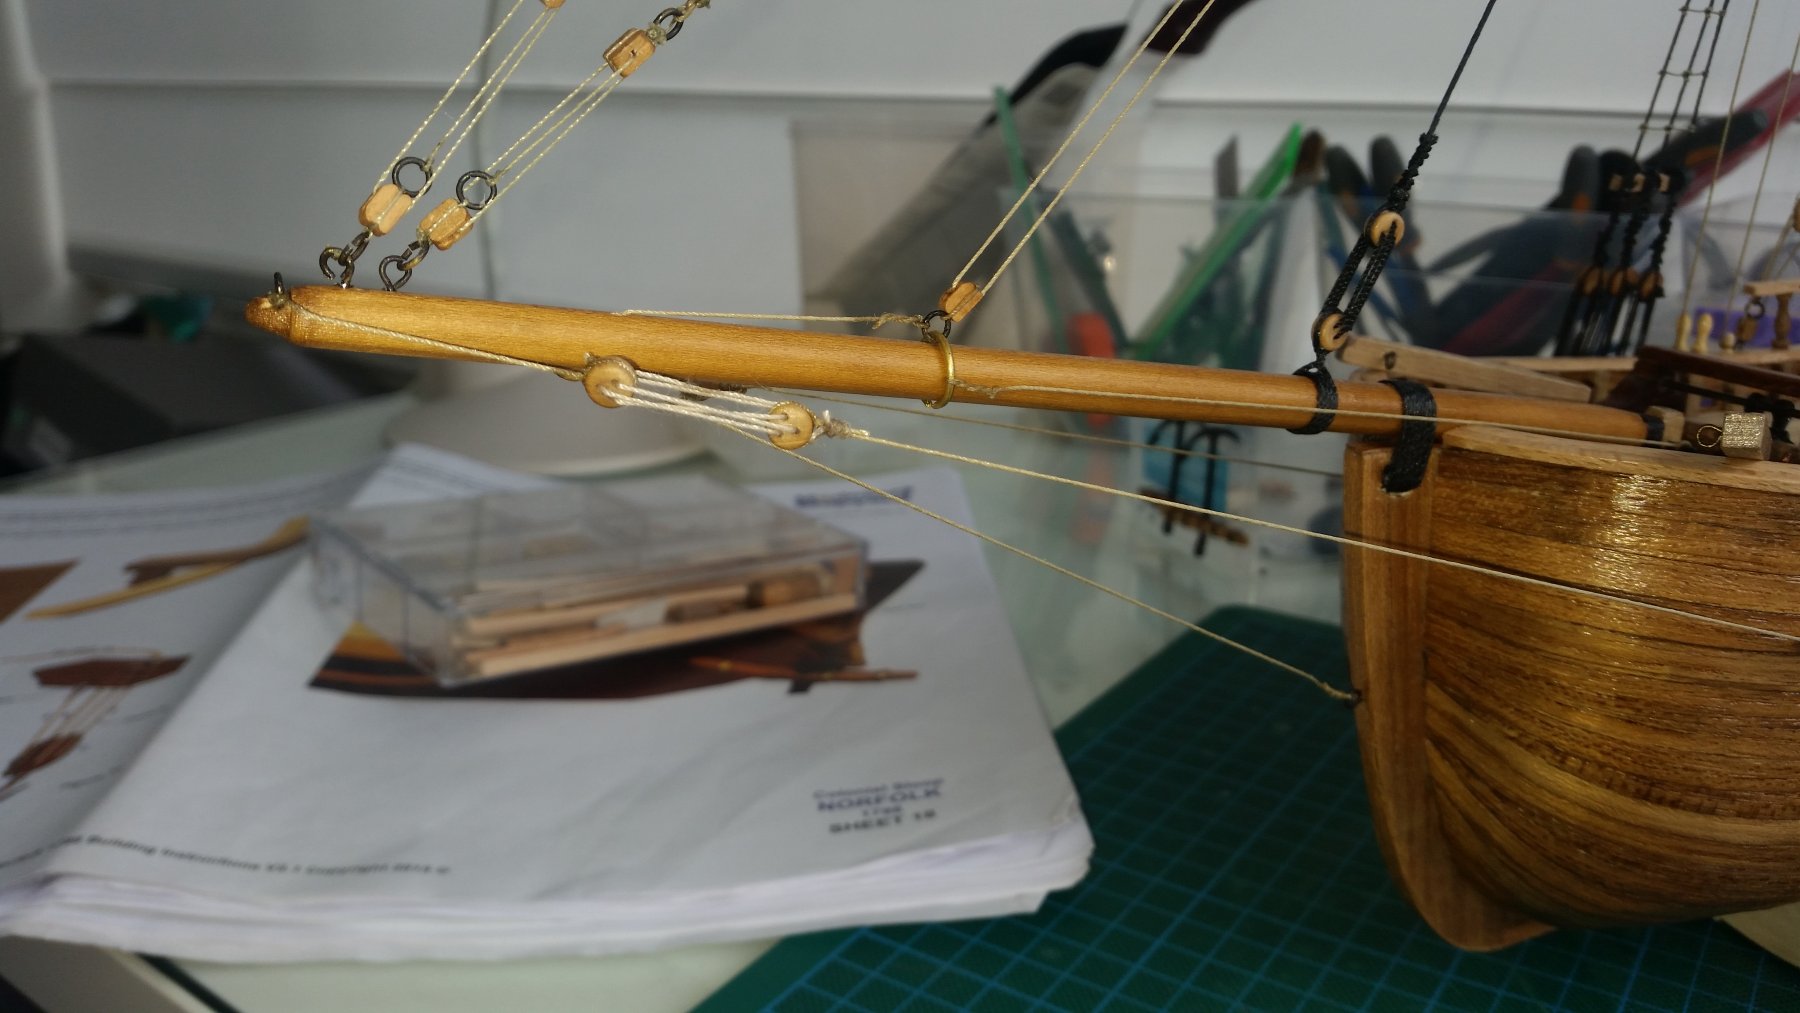
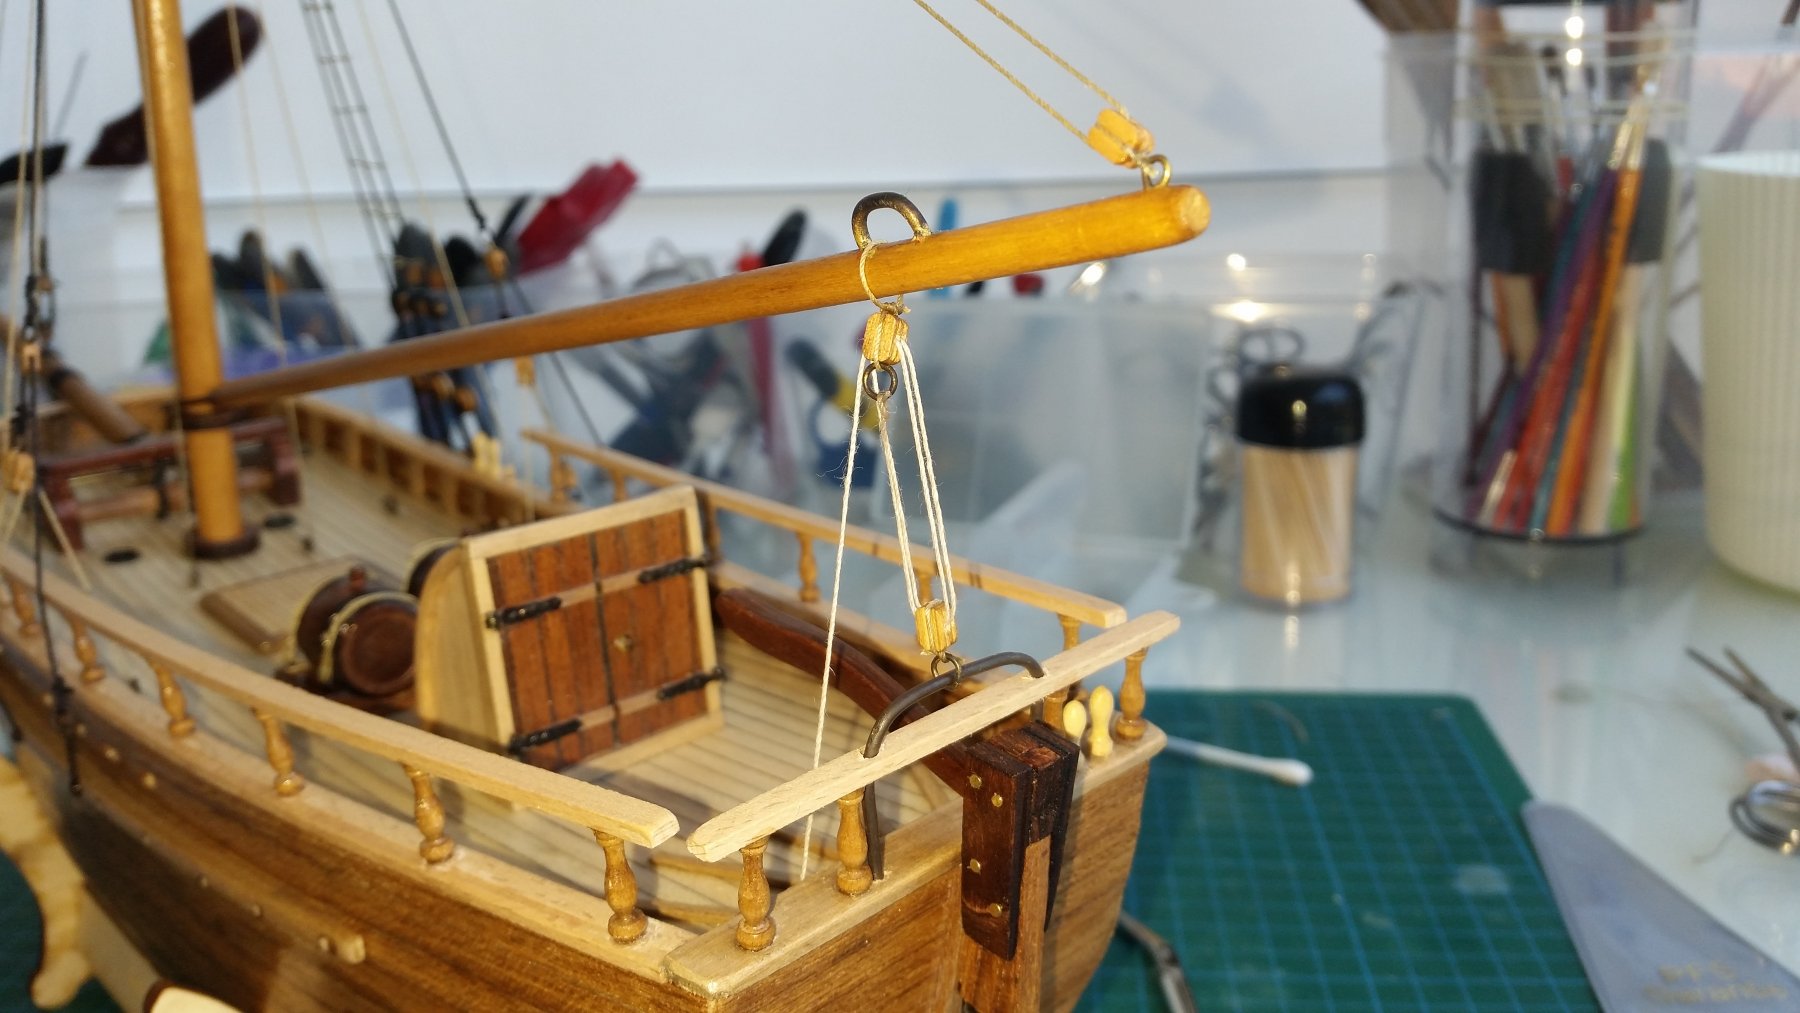
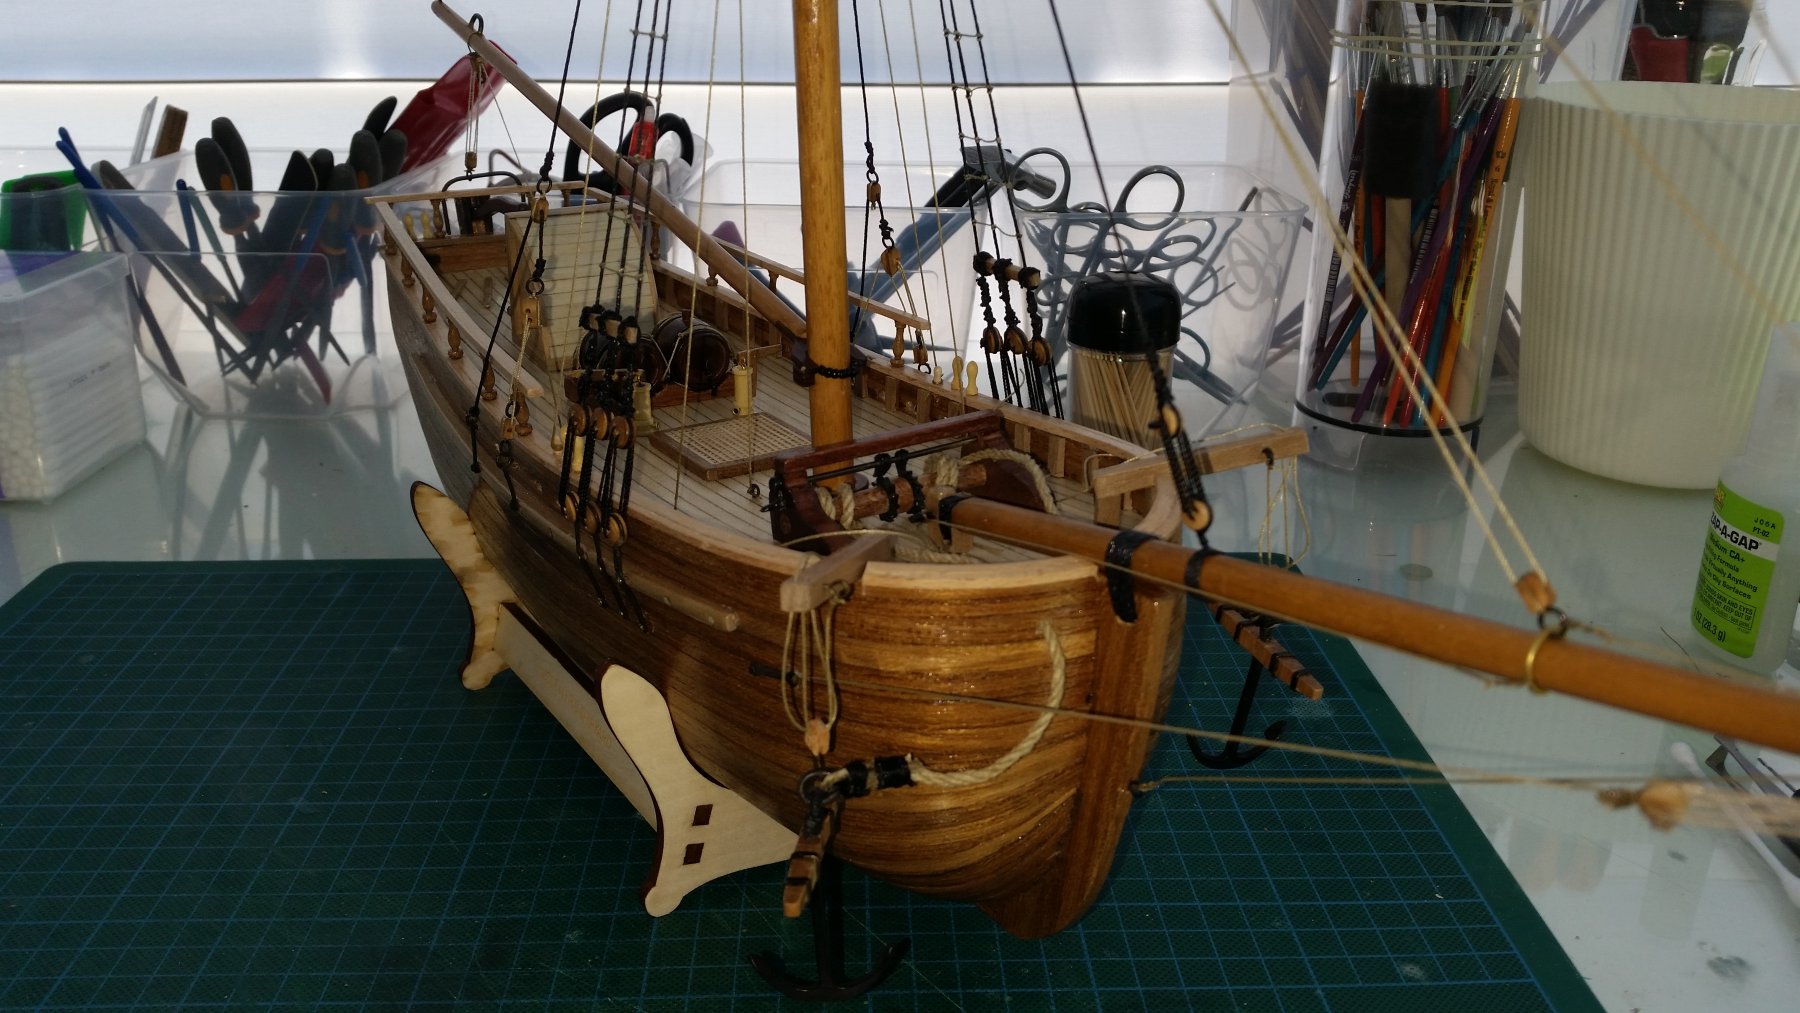
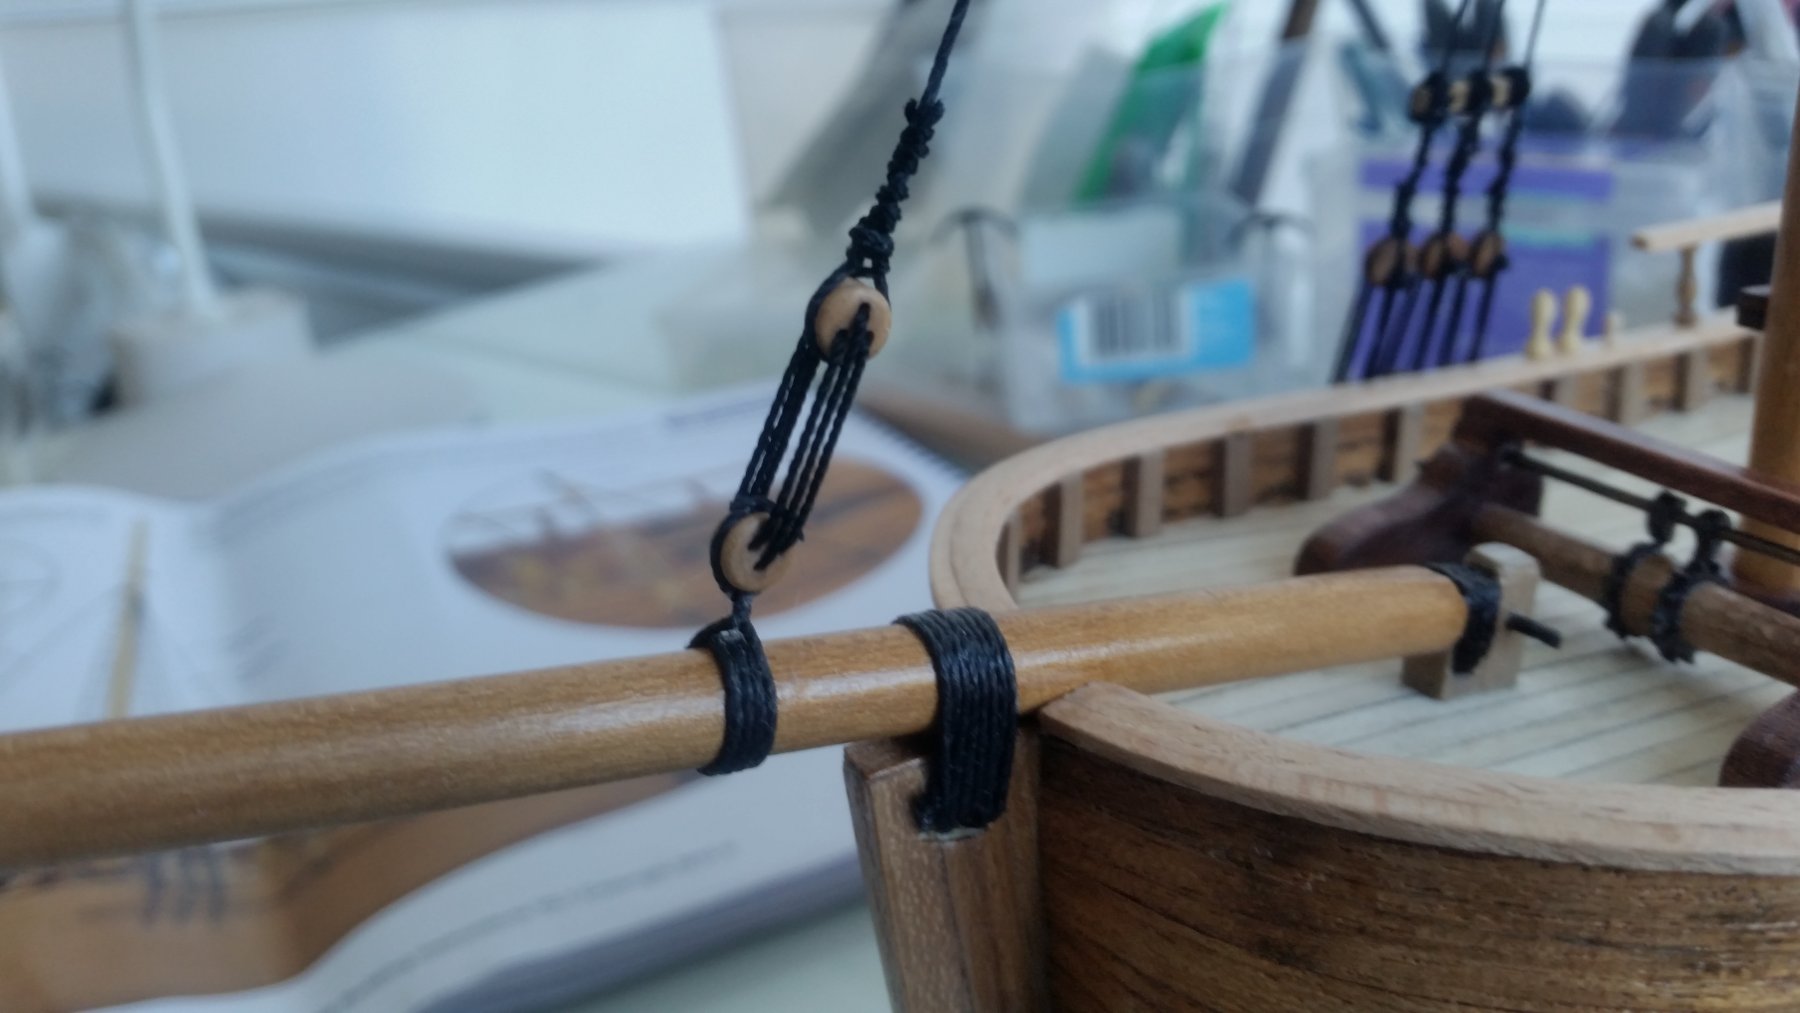
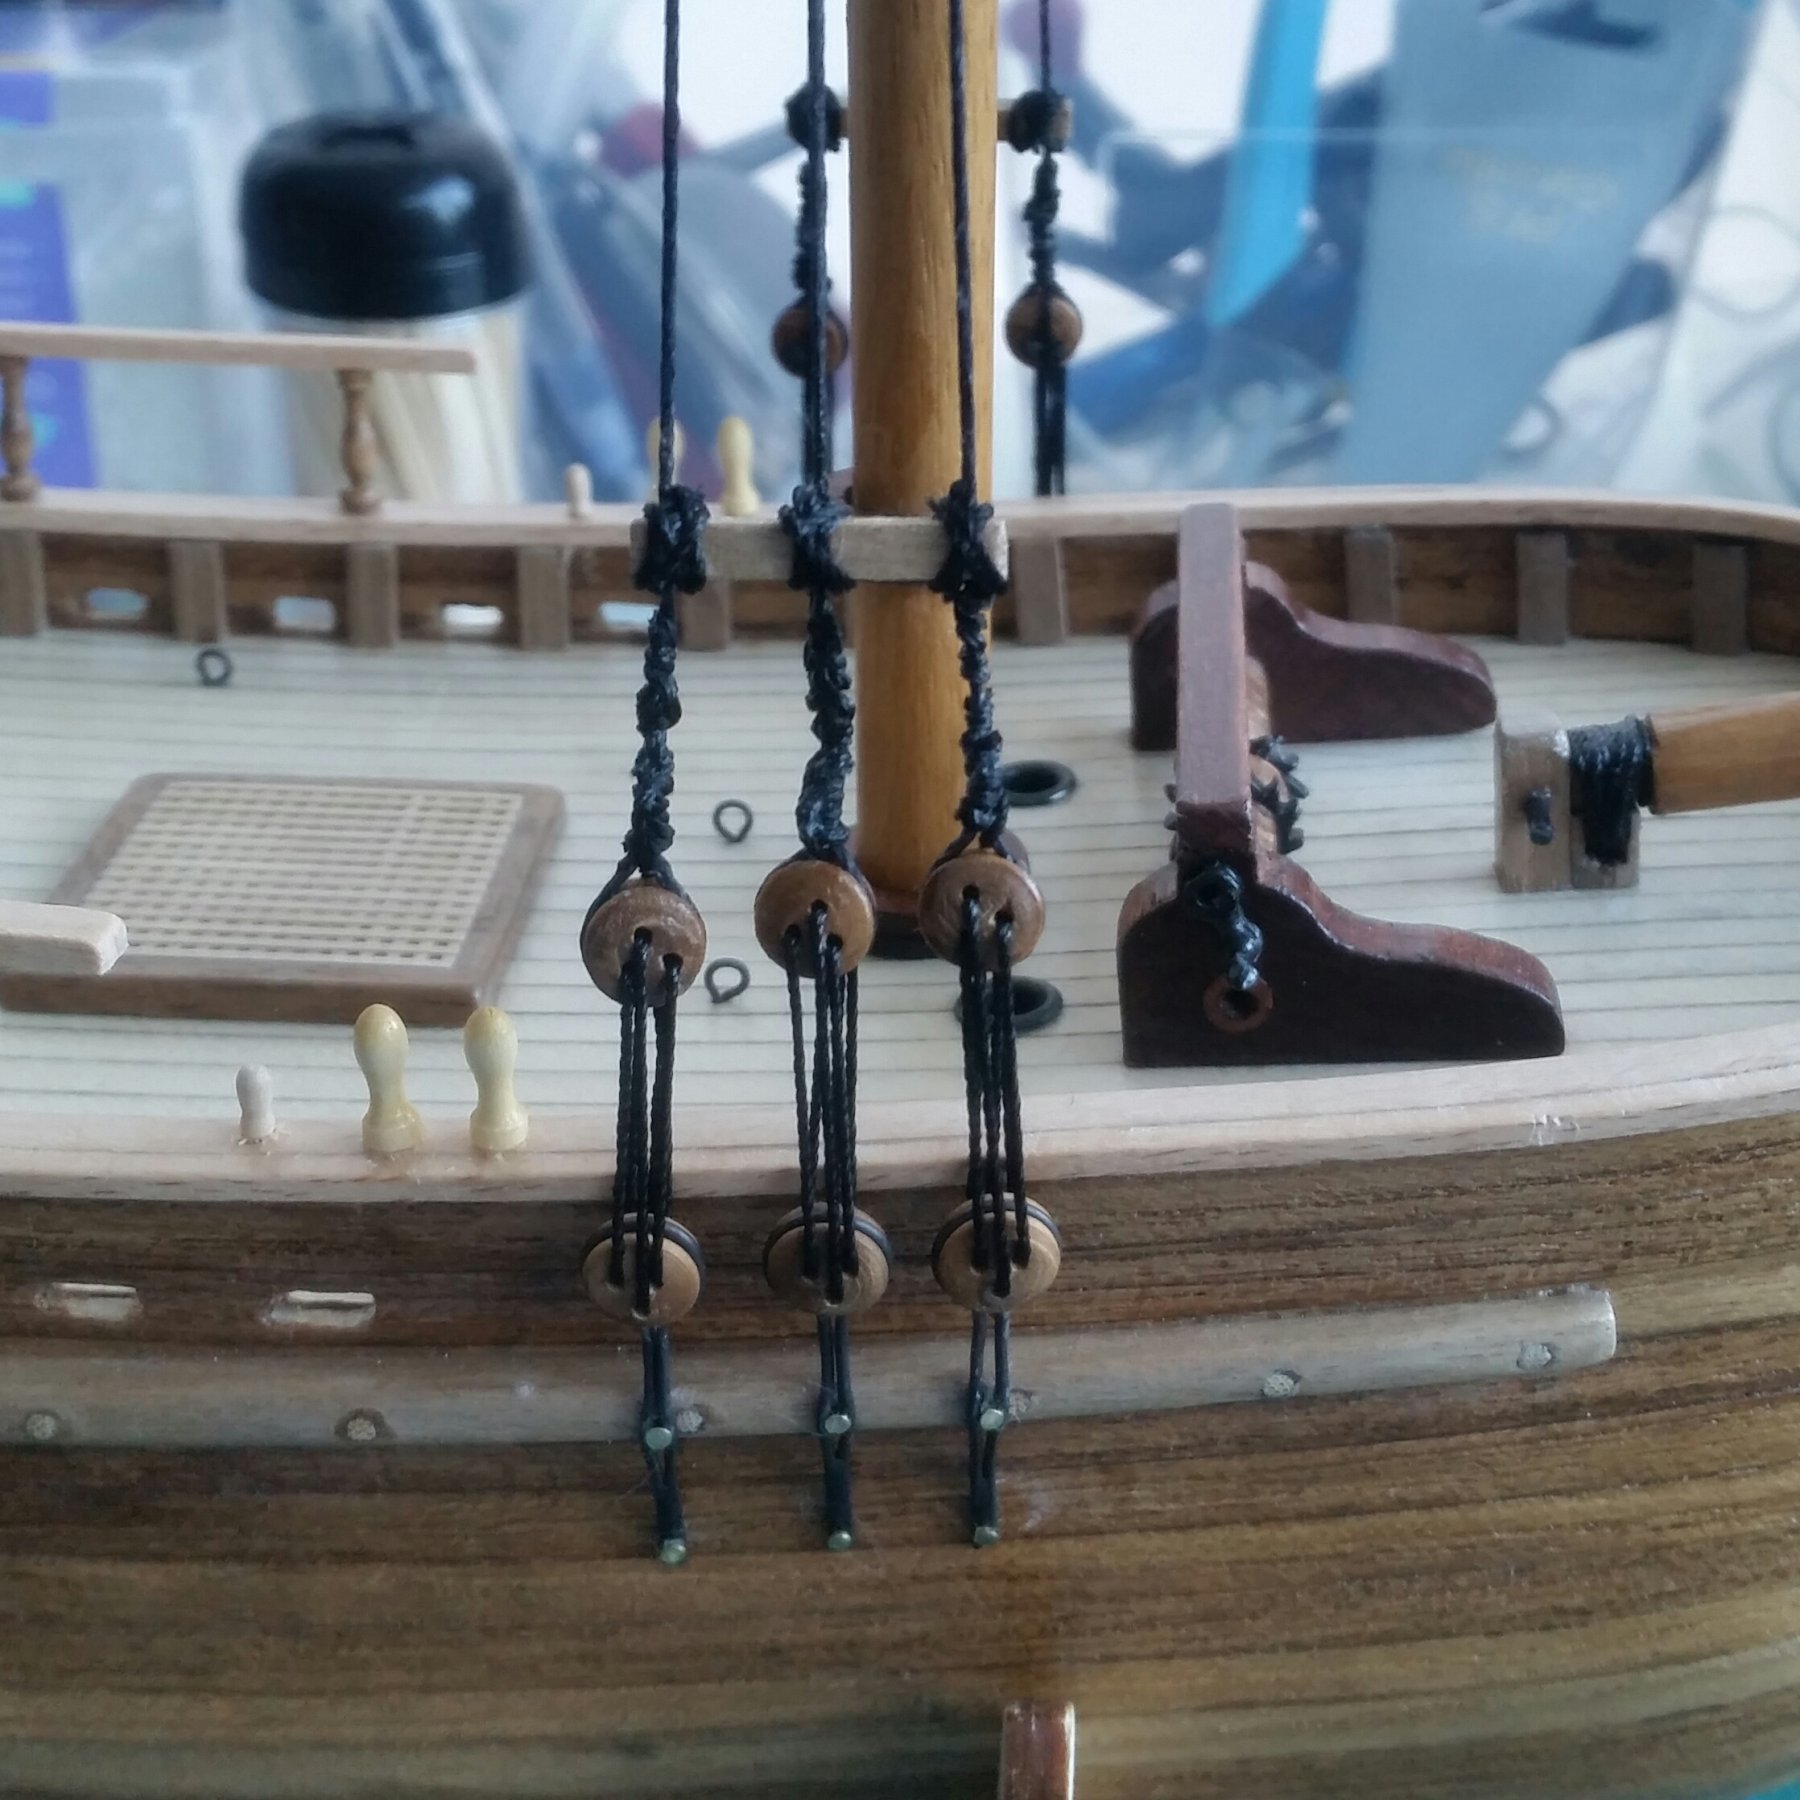
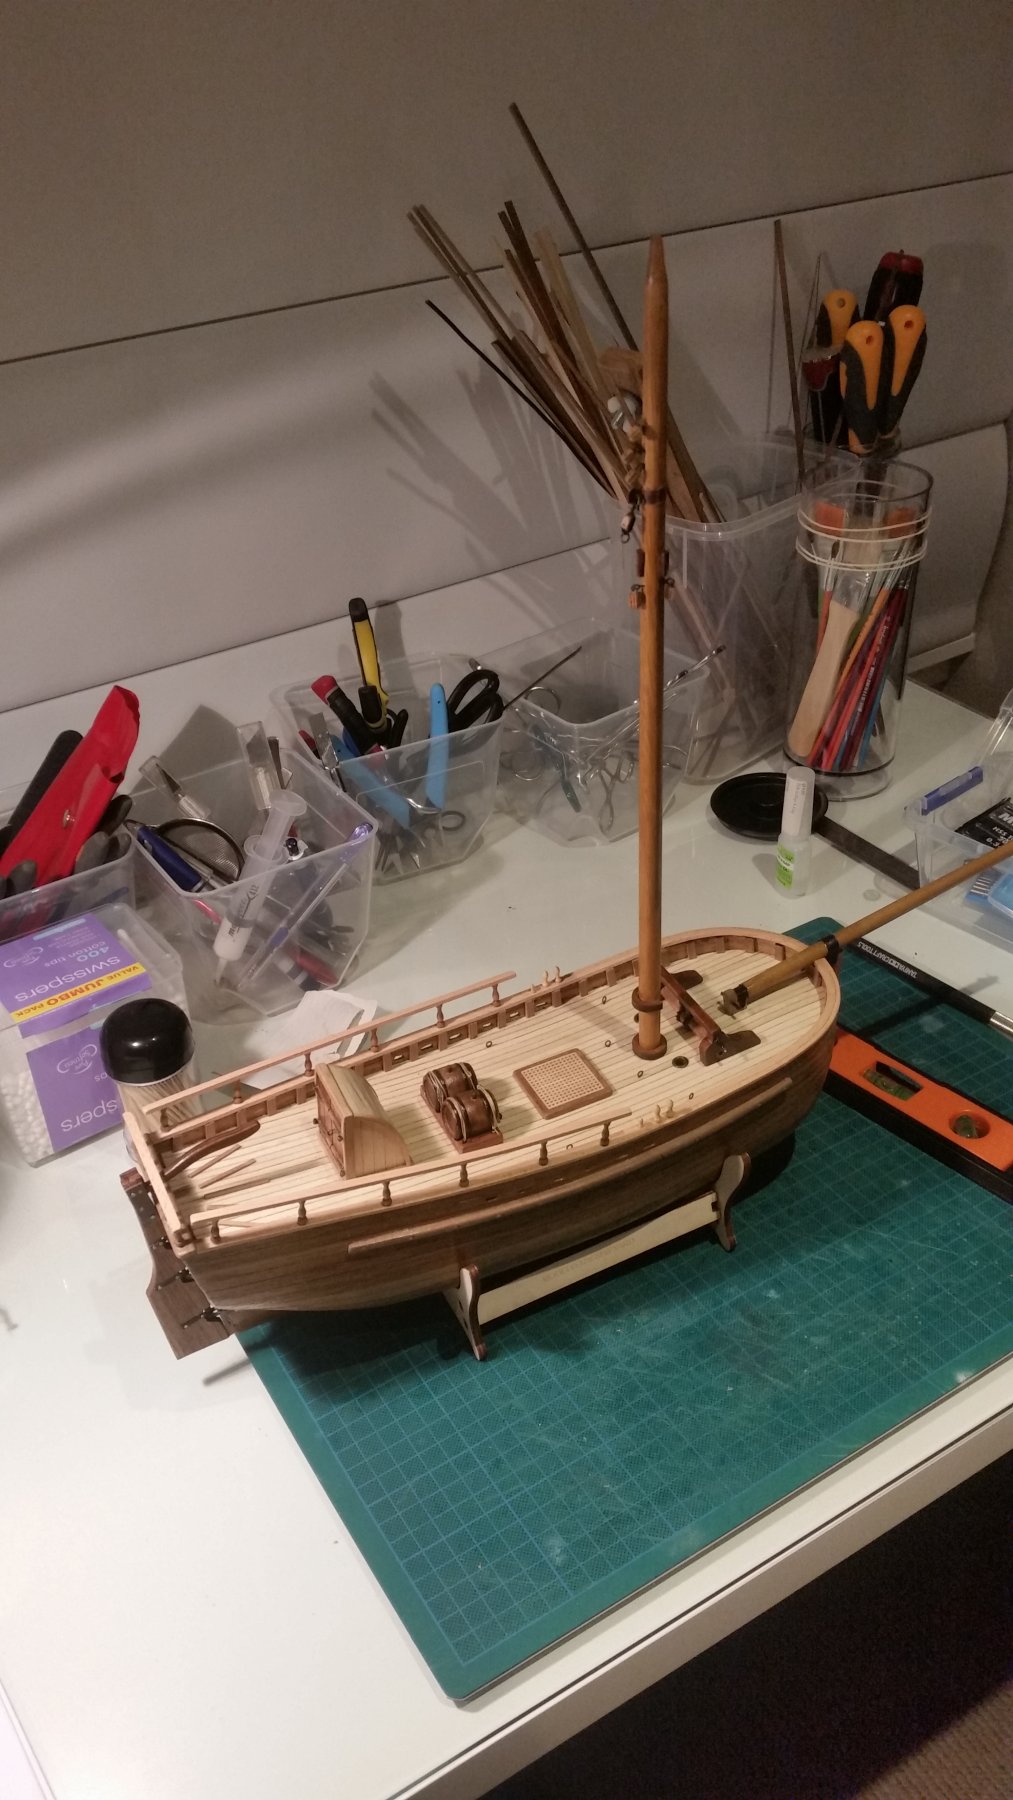
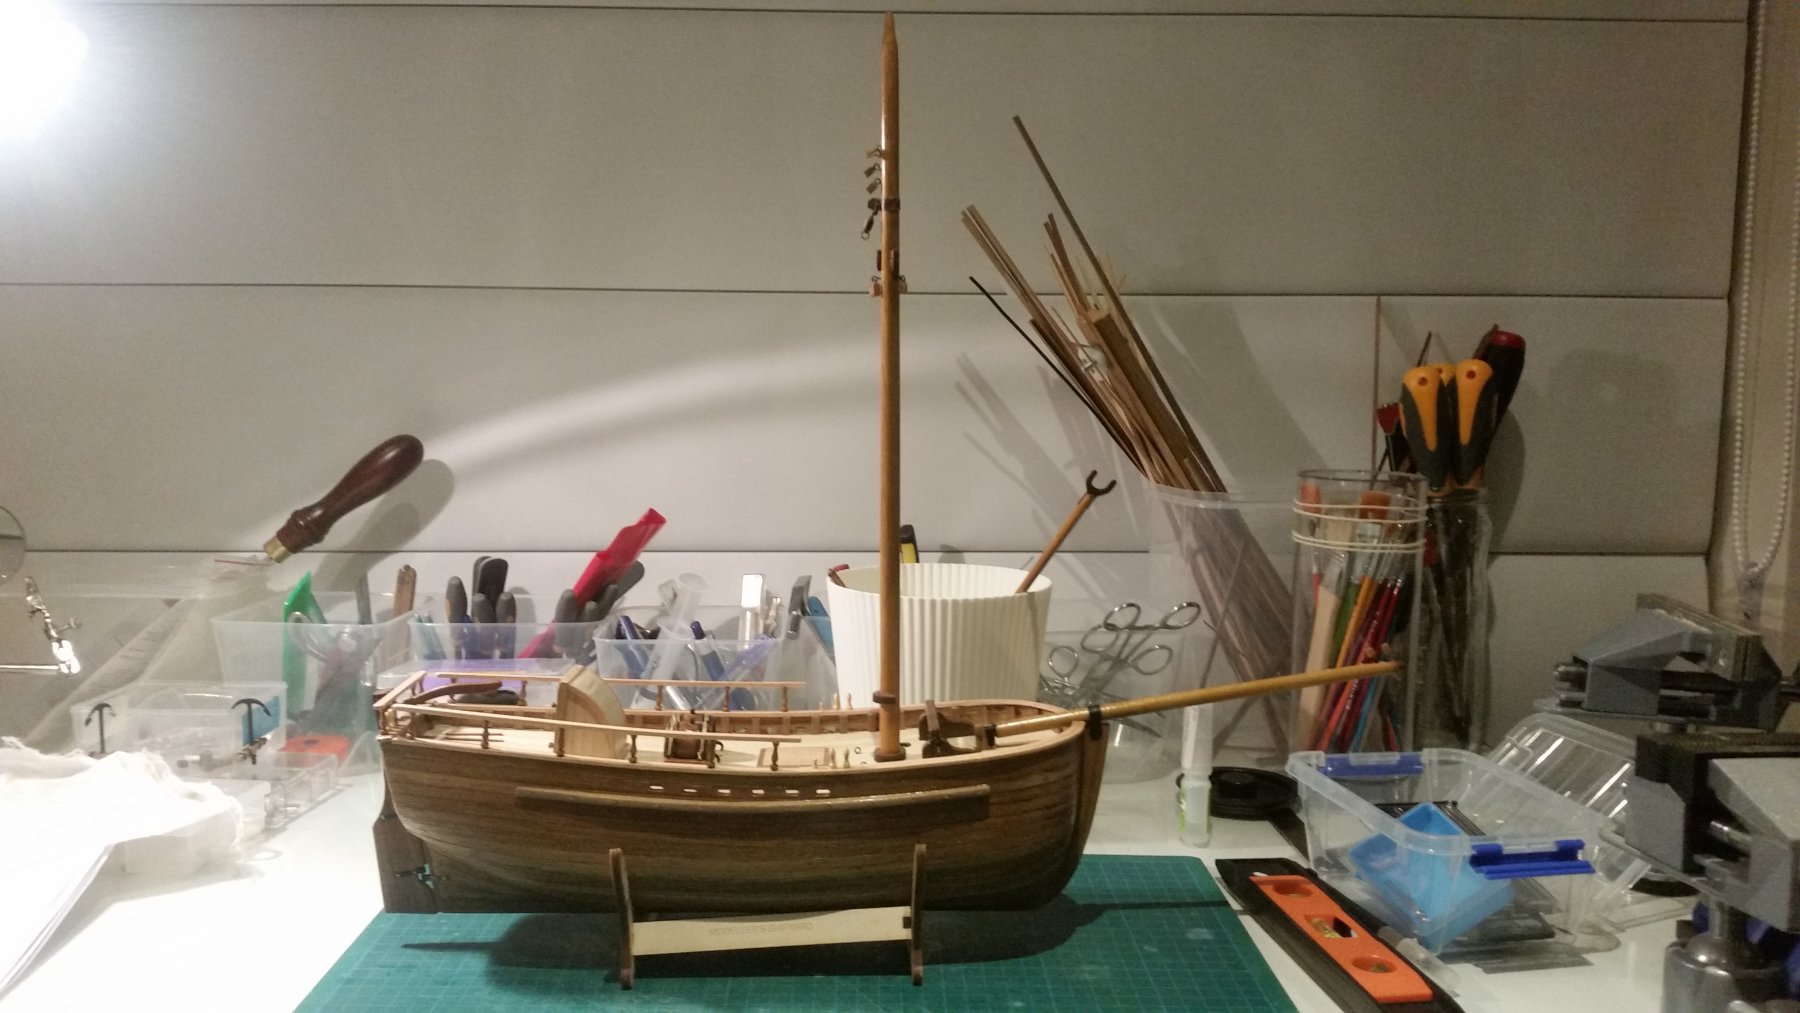
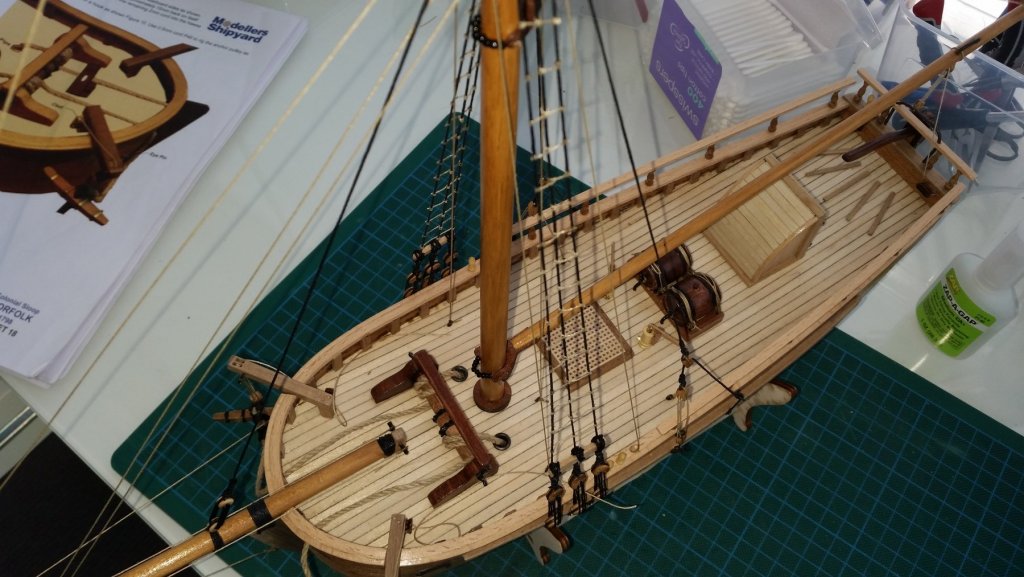
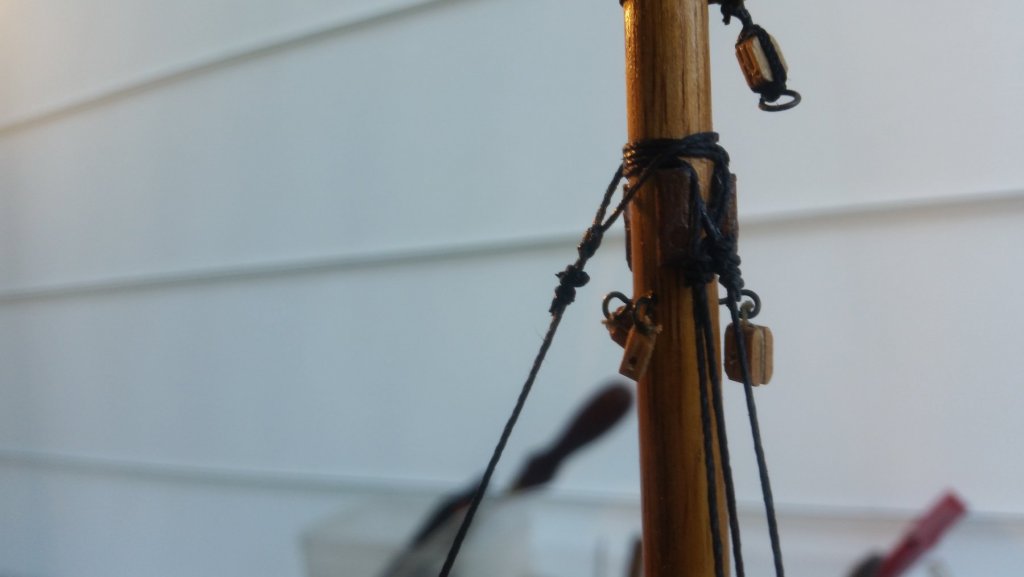
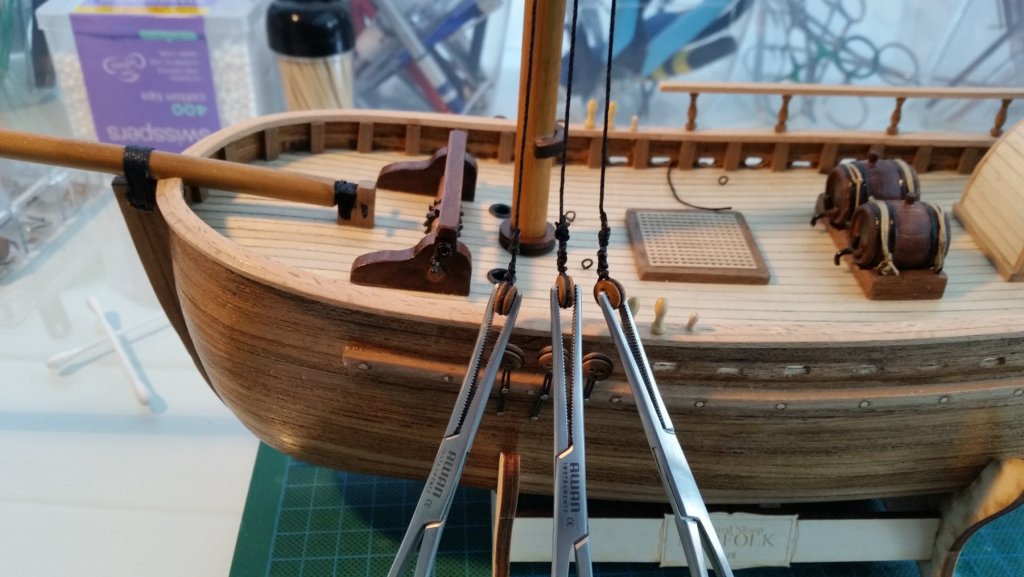
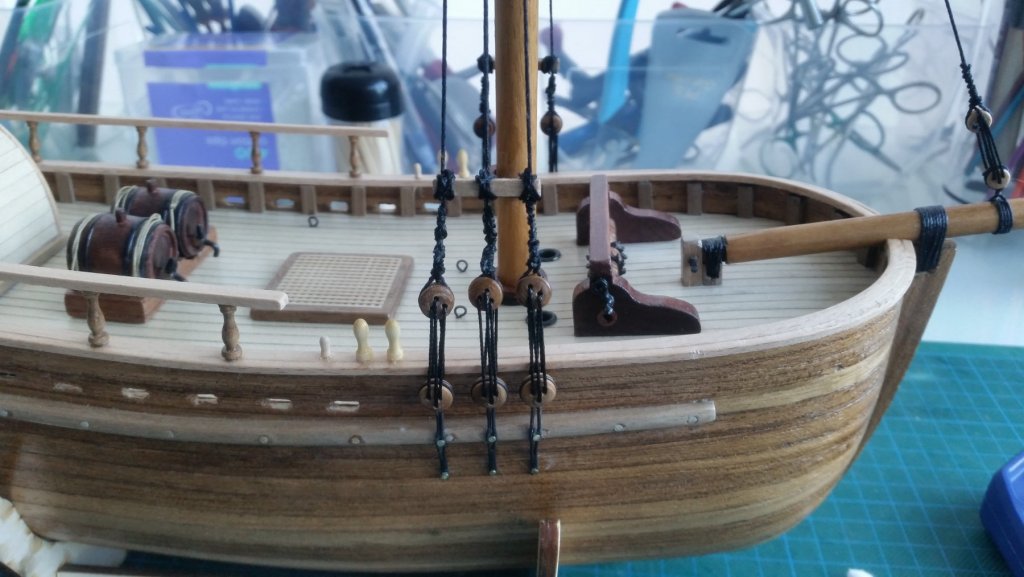
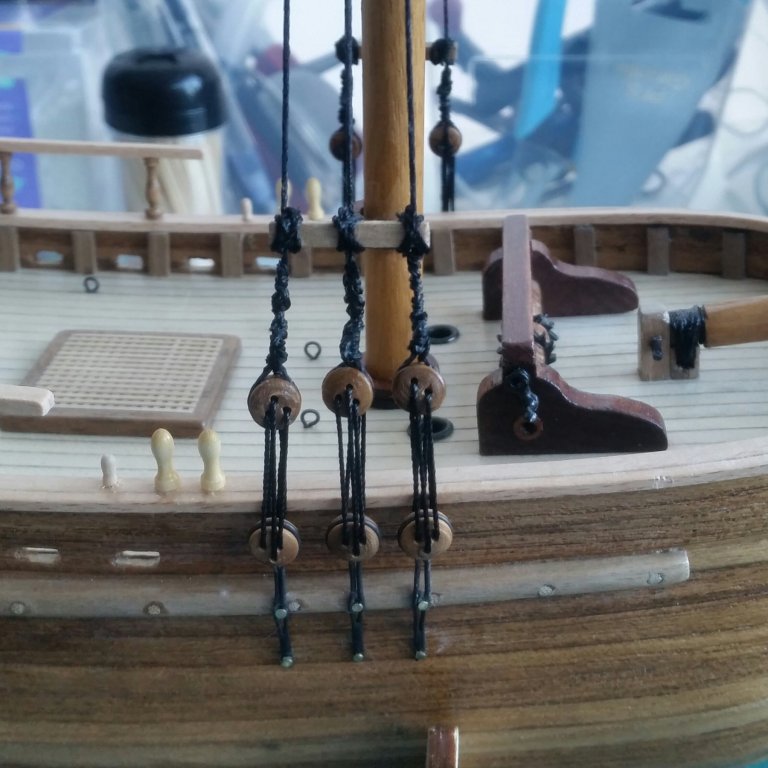
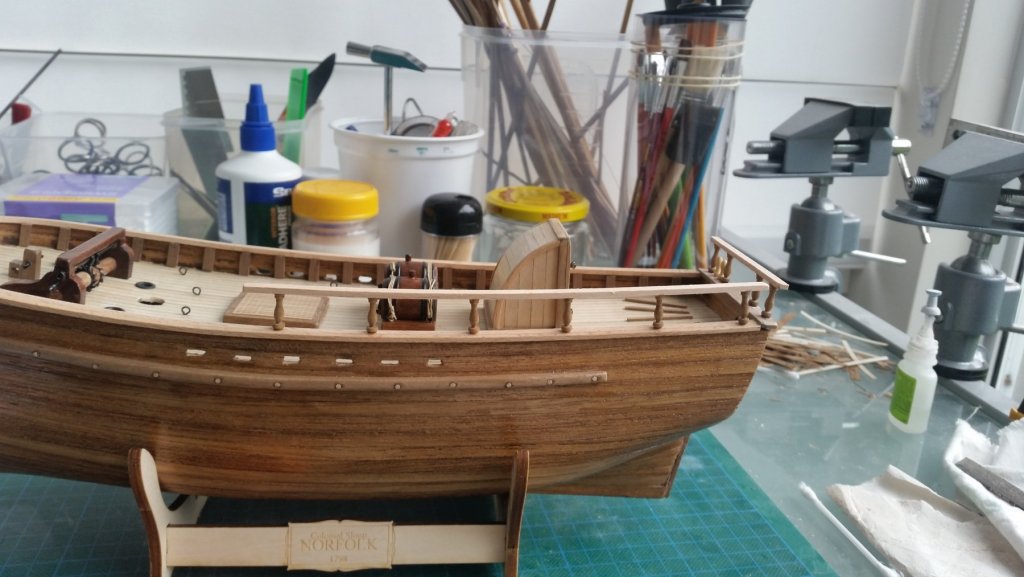
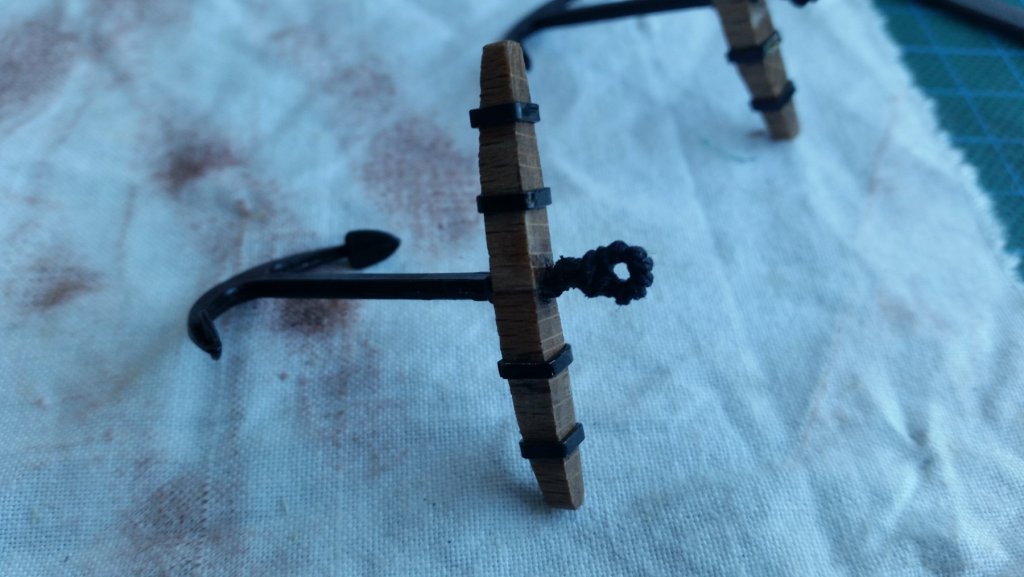
I've finally put in the hard yards over the weekend and finished off the build The backstays and the, fore preventer stay and fore mast stay were fairly straight forward.The jib halliard was a breeze as was the the jib halliard out haul. The throat halliard as well as the peak halliard were also straight forward (though the blocks were, to say the least of poor quality and I had to do some sanding and re drilling of a number of holes!).Probably the most fiddly bits to do were placing the parrel beads on the yokes but after a couple of goes was able to finally get them all on...I went cross eyed a couple of times!!!!. I followed Dan Vad's build on the boom traverse and placed it through the transom banister rail. Putting it on to the transom front just didn't make sense to me as it would have been far to difficult to move around with the rudder above it. I was able to use some old copper wire and blackened it to make it look a bit more "used". Next came the cat heads which I had already made up earlier. I did cut a rebate on the cap rails for them to sit a lot better on the model. Adding the anchors was also fairly straight forward. I will probably add some more deck details (rope coils for the belaying pins and on the deck) some time in the future but for now will leave it as is. A few points now that I finished the build- Overall a very enjoyable experience! The kit build instructions were excellent and generally easy to follow particularly for a newbie like me The materials supplied were generally of good quality. The only issue I had were the quality of the blocks and I will pass this on to the supplier (in a constructive way of course). Many thanks to those who checked in from time to time (particularly Dan for his comments and his build log). Final photos attached and I hope to be back soon with another build log. In the meantime I will be following a few more build logs along the way.


-
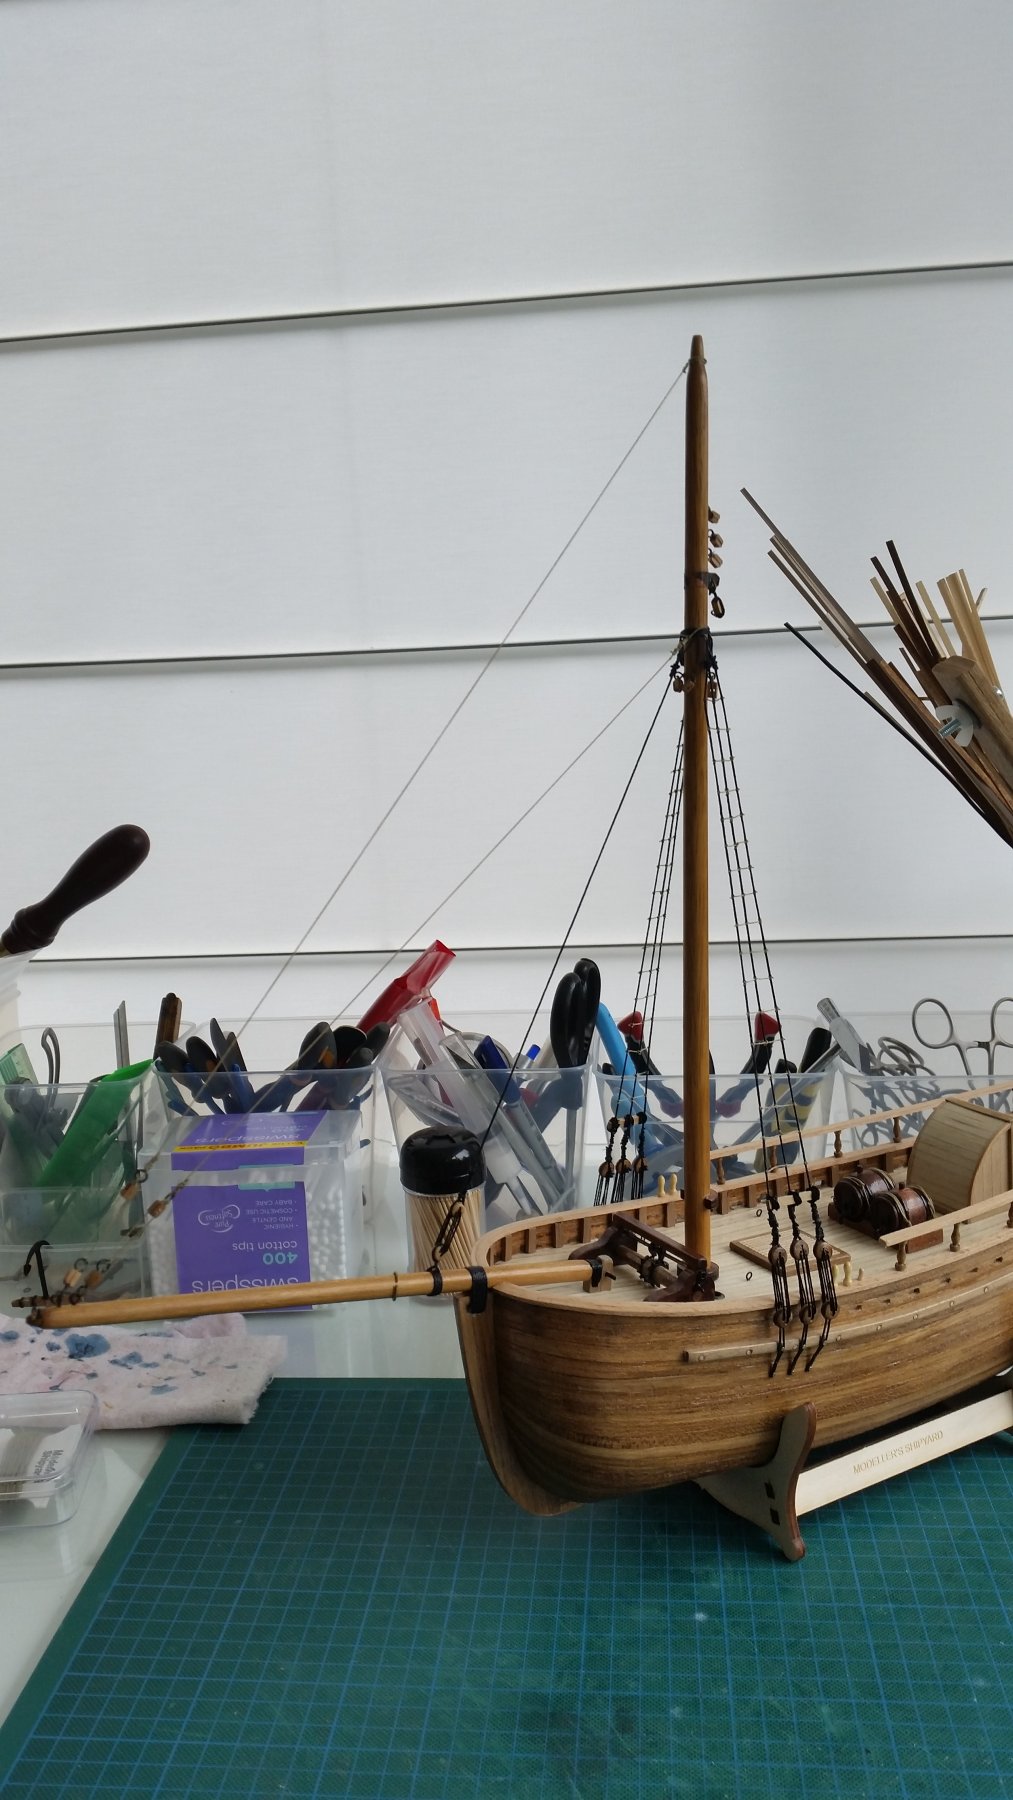
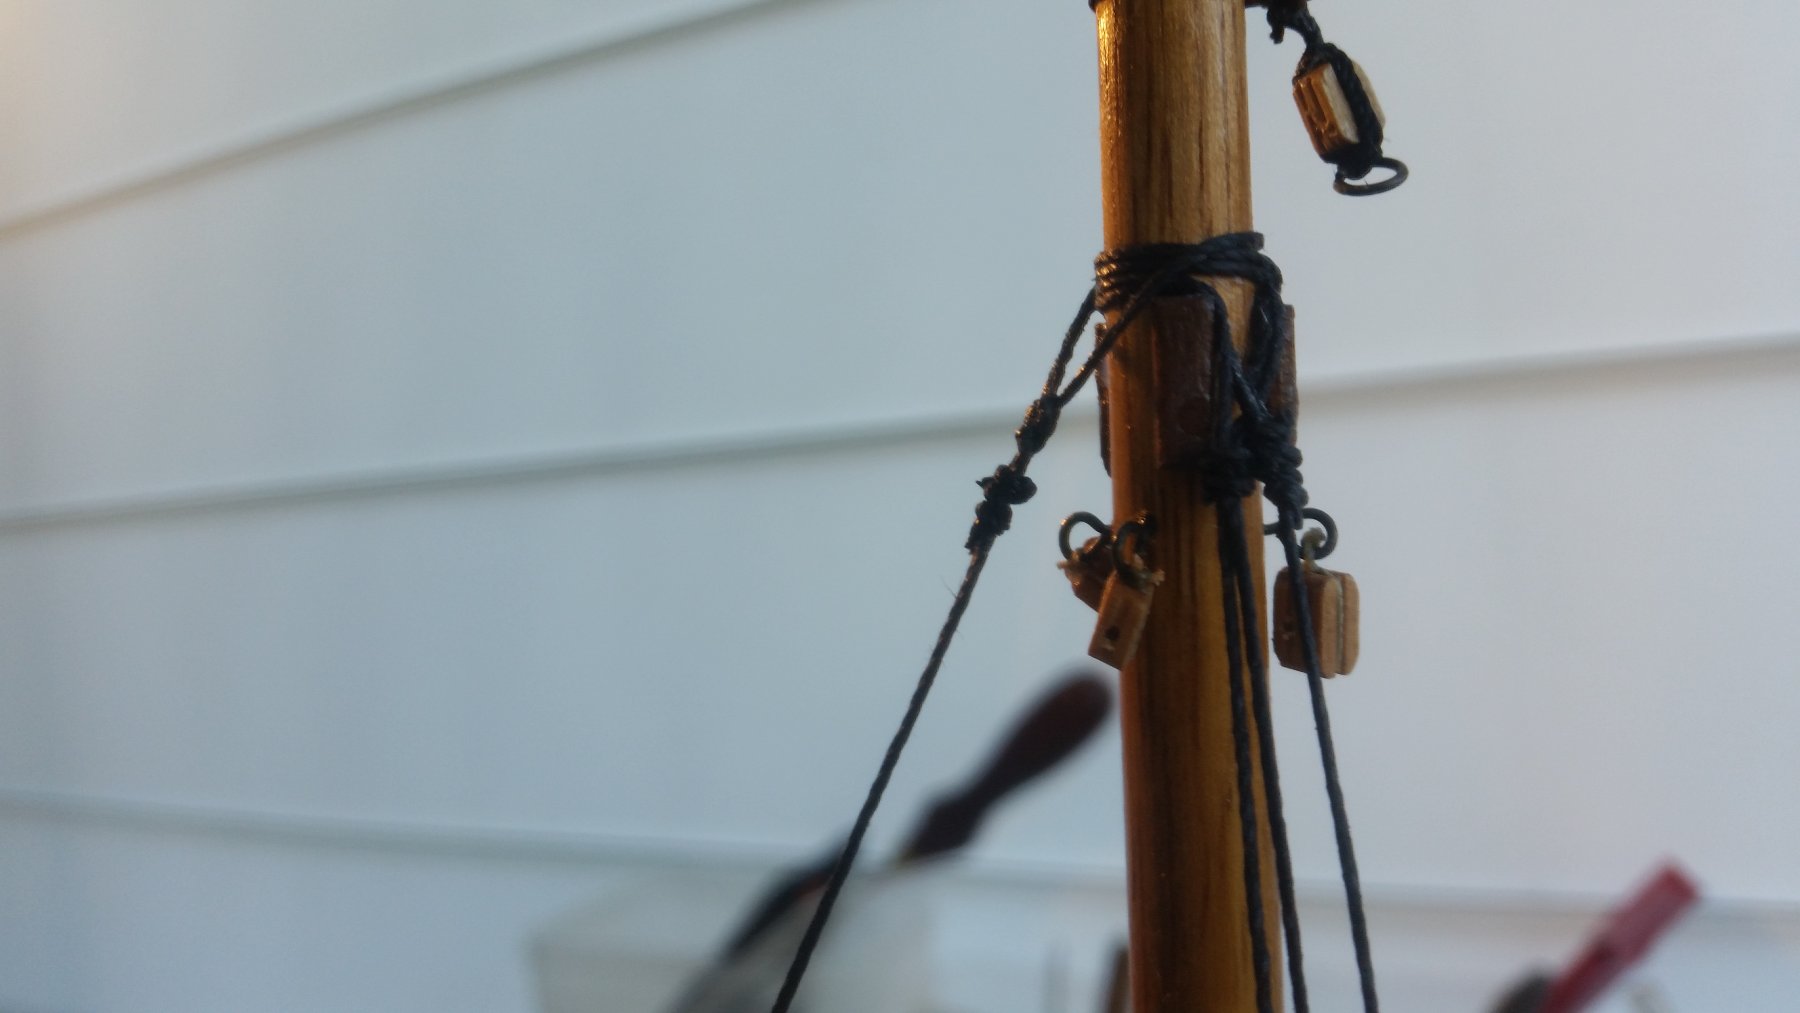
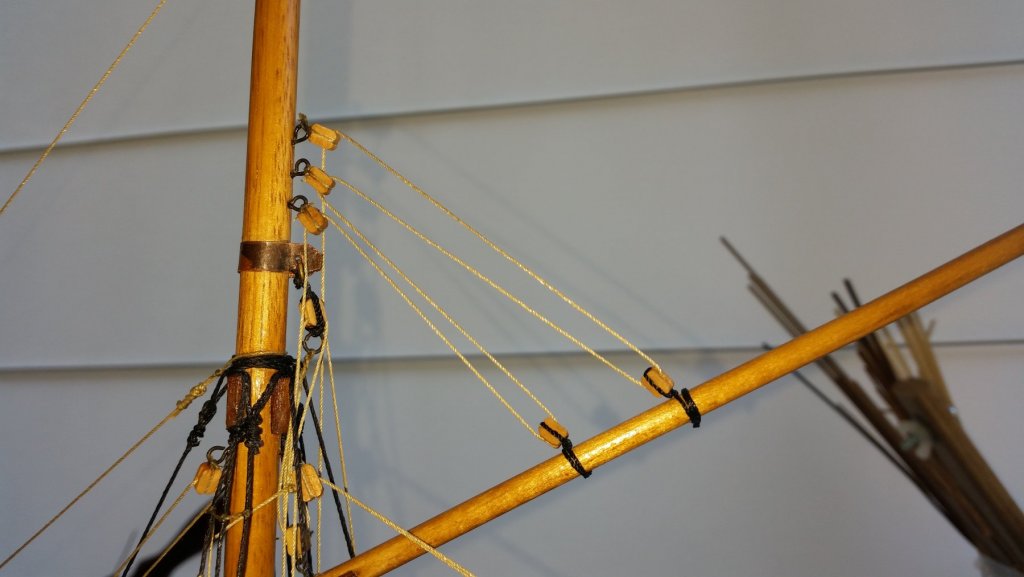
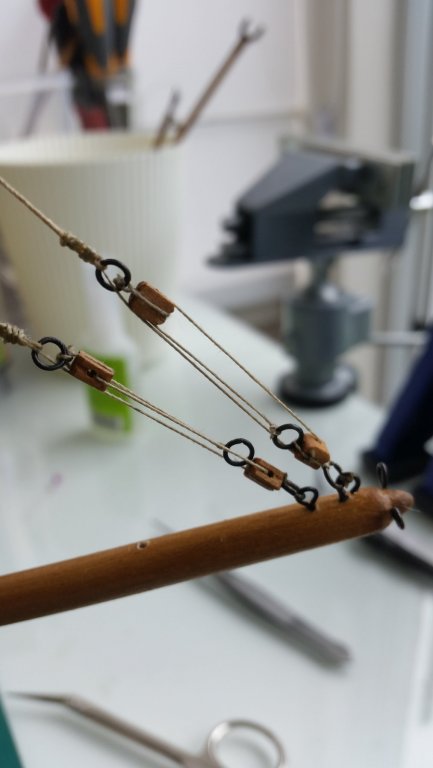
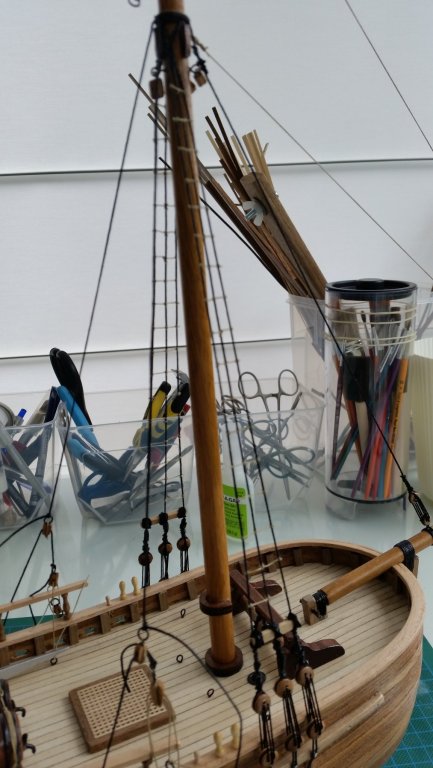
Many thanks Danny,Russ and Rony for looking in. I had a couple of hours last night and today to do the ratlines,the fore preventer stay and fore topmast stay. The ratlines, as I expected, took some time to do as I started with a .75mm black thread (my choice) at 5mm spacing as mentioned in the instruction. As mentioned in my previous post a 5mm space between the ratlines didn't look right and when I put a couple of rows on it was clear that they were far too close and did not look right. I then went to 10mm spacing but realised that the .75mm black cord was far too thick and again just didn't look right so off they came and I started using the brown cord (.25mm) supplied by the kit and they actually did the job. Once started I got into a rhythm and a couple of hours later they were done! I spent a lot of time measuring the spaces between each row and ensuring the levels were identical before adding a touch of glue to hold the thread in place. Next I worked on the fore preventer stay then the fore top mast stay which were relatively straight forward. I did have to do some small sanding and enlarging the holes in the blocks as the kit supplied ones were either too small or only half way drilled!!! Next came the backstays which, I have started on but after looking at thin thread for a few hours and going cross eyed I have put down the tools and will finish them off tomorrow if I get a chance. More to come

-
Here's what I just finished....have just added the Forestay which was fairly straightforward. I have used two types of black thread, one was 1mm whilst the other, .75mm, I used for reeving(?) the blocks. I prefer to use black thread as it stands out much better. I will need to use brown thread for the running rigging as it appears that it's the norm to use that colour. I will be starting the ratlines next. The instructions say that they should be spaced approximately 5mm apart which seems a bit too close for my liking. I was looking at 10mm spacing but any suggestions would be appreciated. As this is also standing rigging I was hoping to use .75mm black thread. The instructions also say to use .25mm fawn cord which again doesn't seem to look right (too thin and to my limited experience not right for standing rigging) and again any guidance would be appreciated.

-
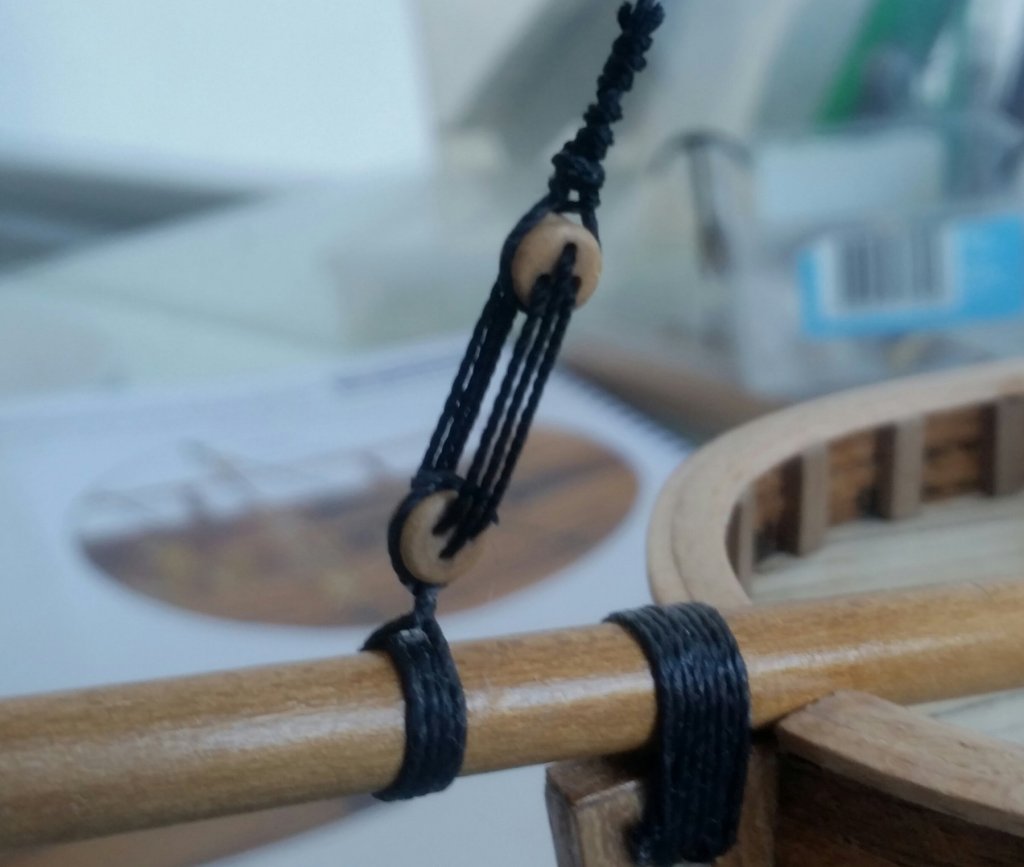
Many thanks Danny for looking in and your encouraging words....very appreciated. As to the rigging I am using the thread supplied by the kit as, from my limited knowledge, it isn't that bad. I also decided that I would finish off this model and depending on what I build next and what is provided by the next kit maker I will have a look at getting some of the Syren thread as it looks a treat! I won't be putting sails on the model but just following what the kit has given me....sails and hoops (particularly as it hasn't been supplied ) is a bit too advanced for me at this stage. As I get more experience I will get more adventurous and more true to what the models actually looked like. I suppose at this stage I am just trying to get experience on building wooden boats....very enjoyable so far even though I have been rather slow with the build updates. Here are a couple of photos of what I have been doing over the past week. I didn't realise how difficult /fiddly fixing the shrouds on to the boat could be. I had two goes at it as the first time the shrouds just did not align properly. I did use a jig (see photo below) which did assist me the second time around - Next time I will read through some of the build logs in much more detail I've also fitted a lanyard strip which the manual said just to stick it on to the thread. I decided to lash them on to the shrouds as it does look a lot more realistic. More to follow shortly


-
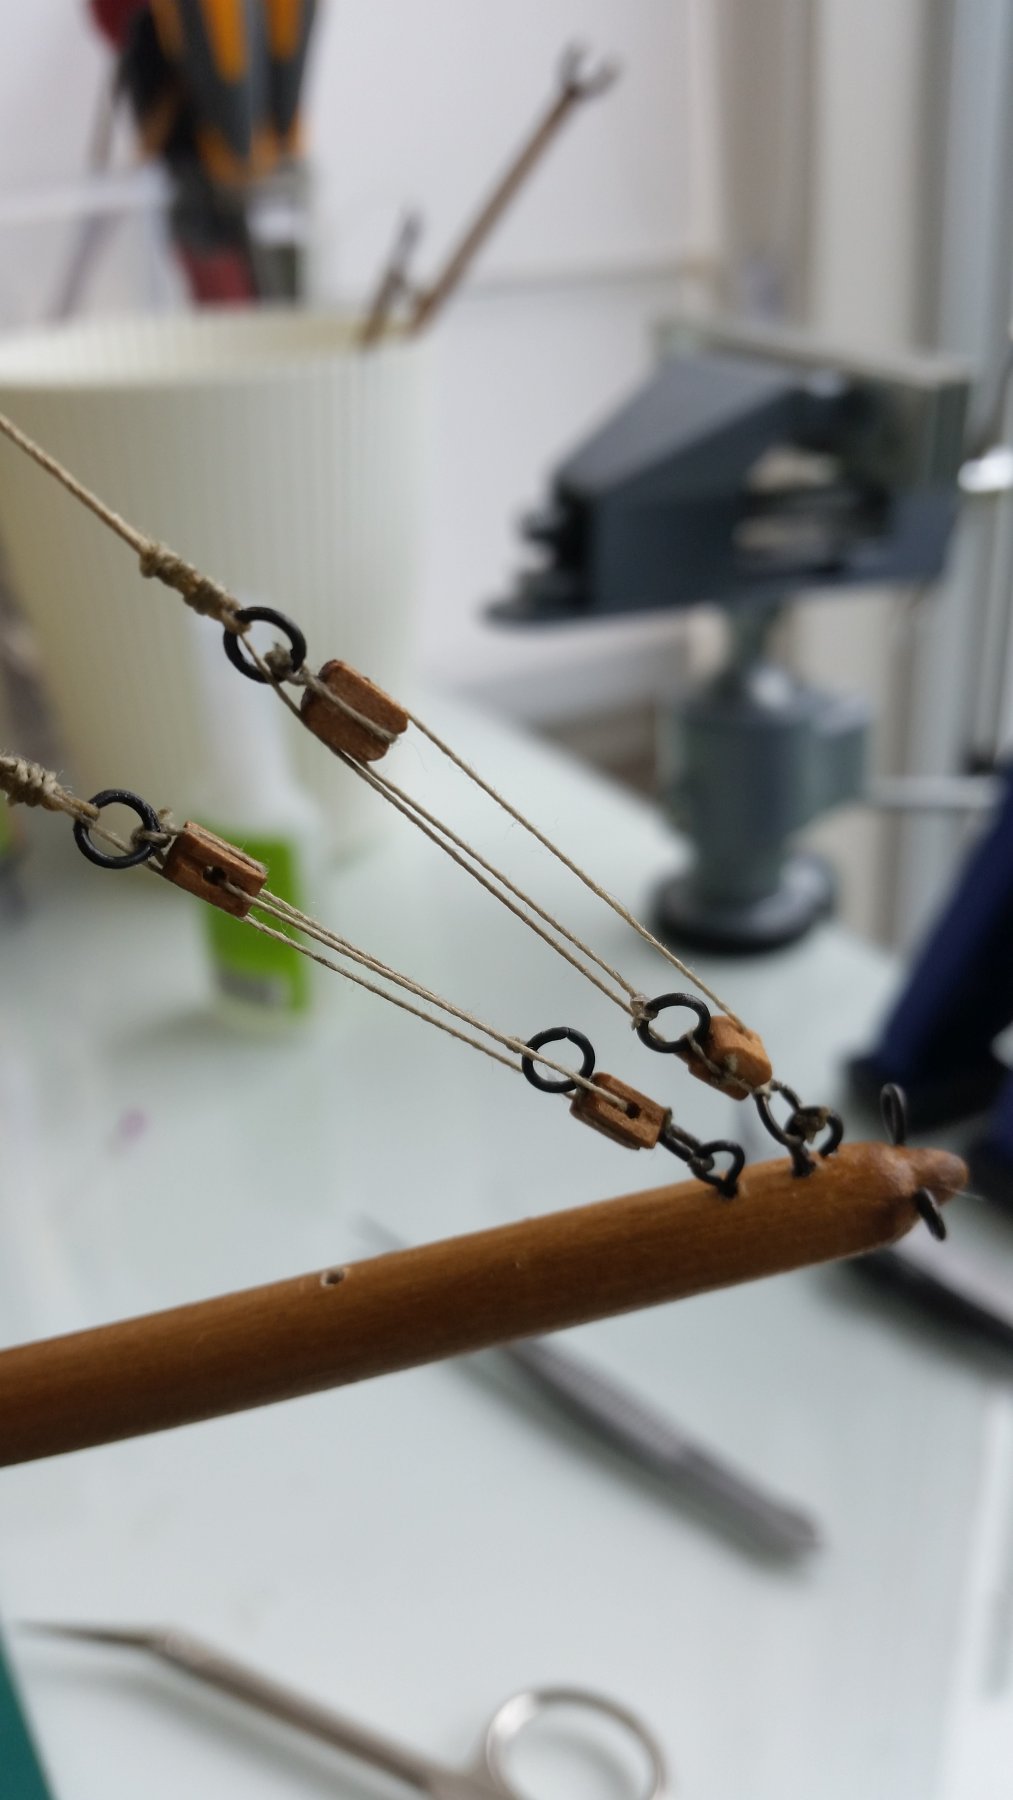
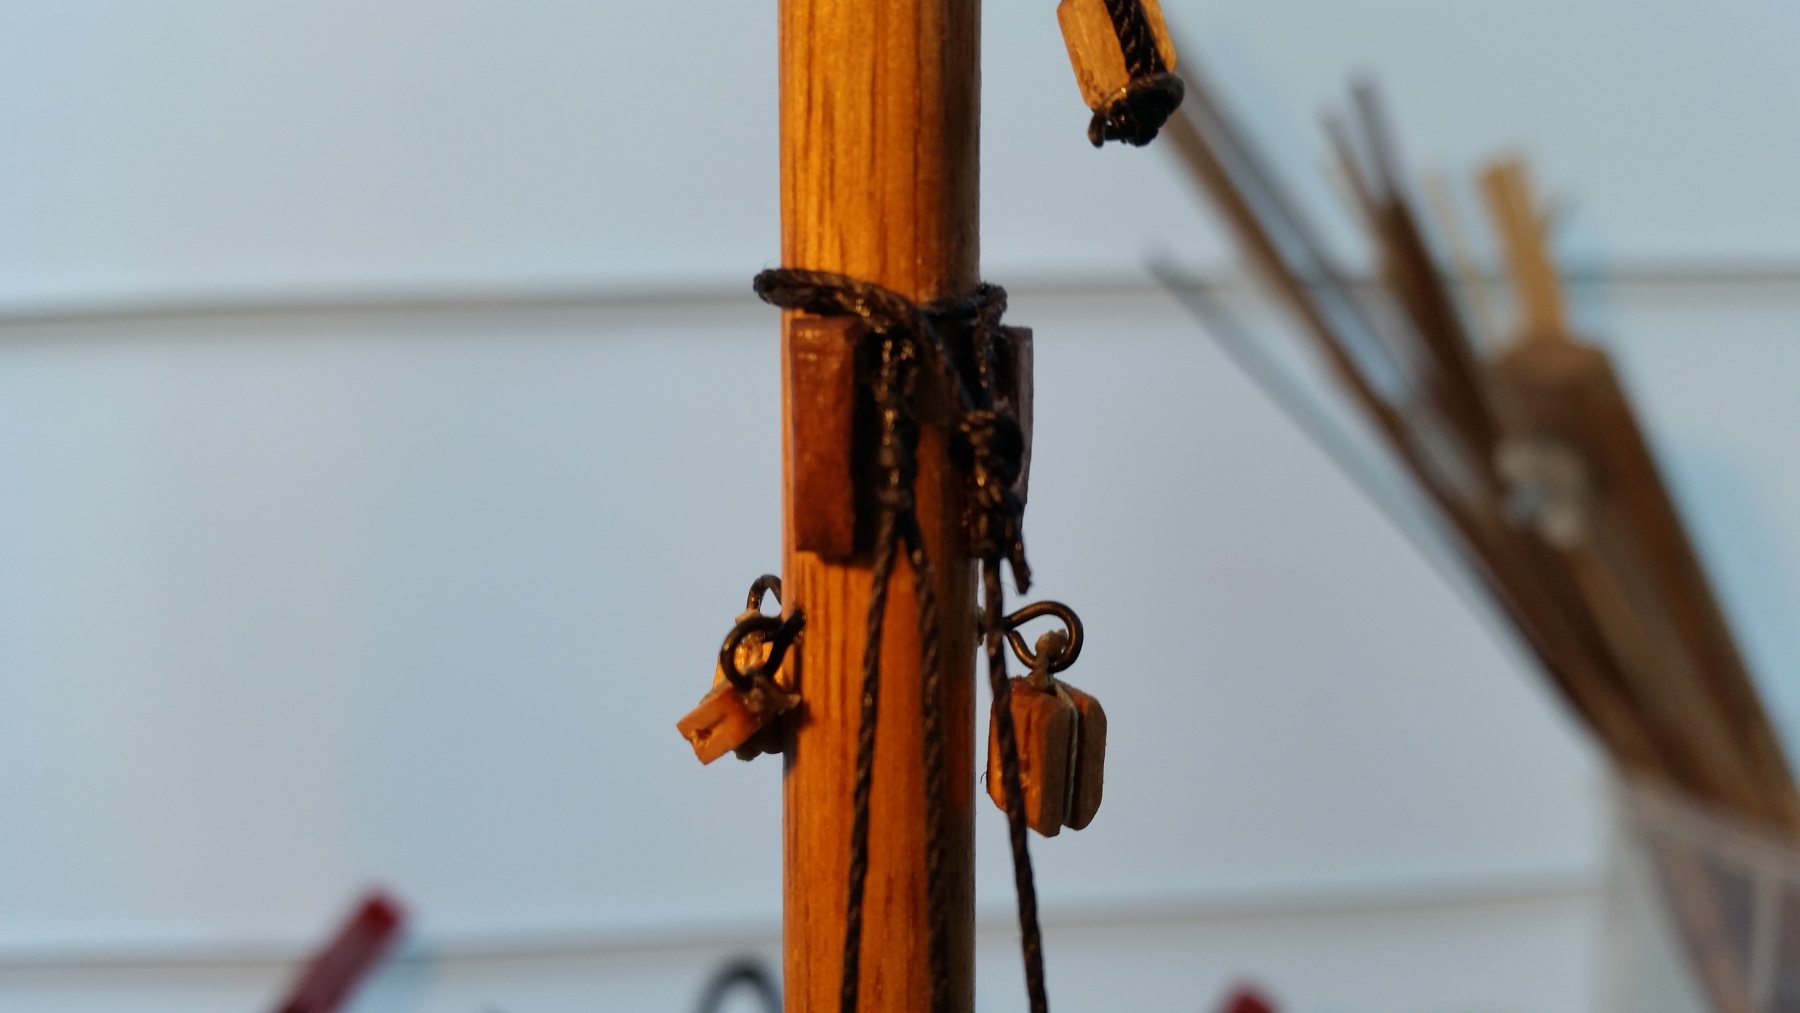
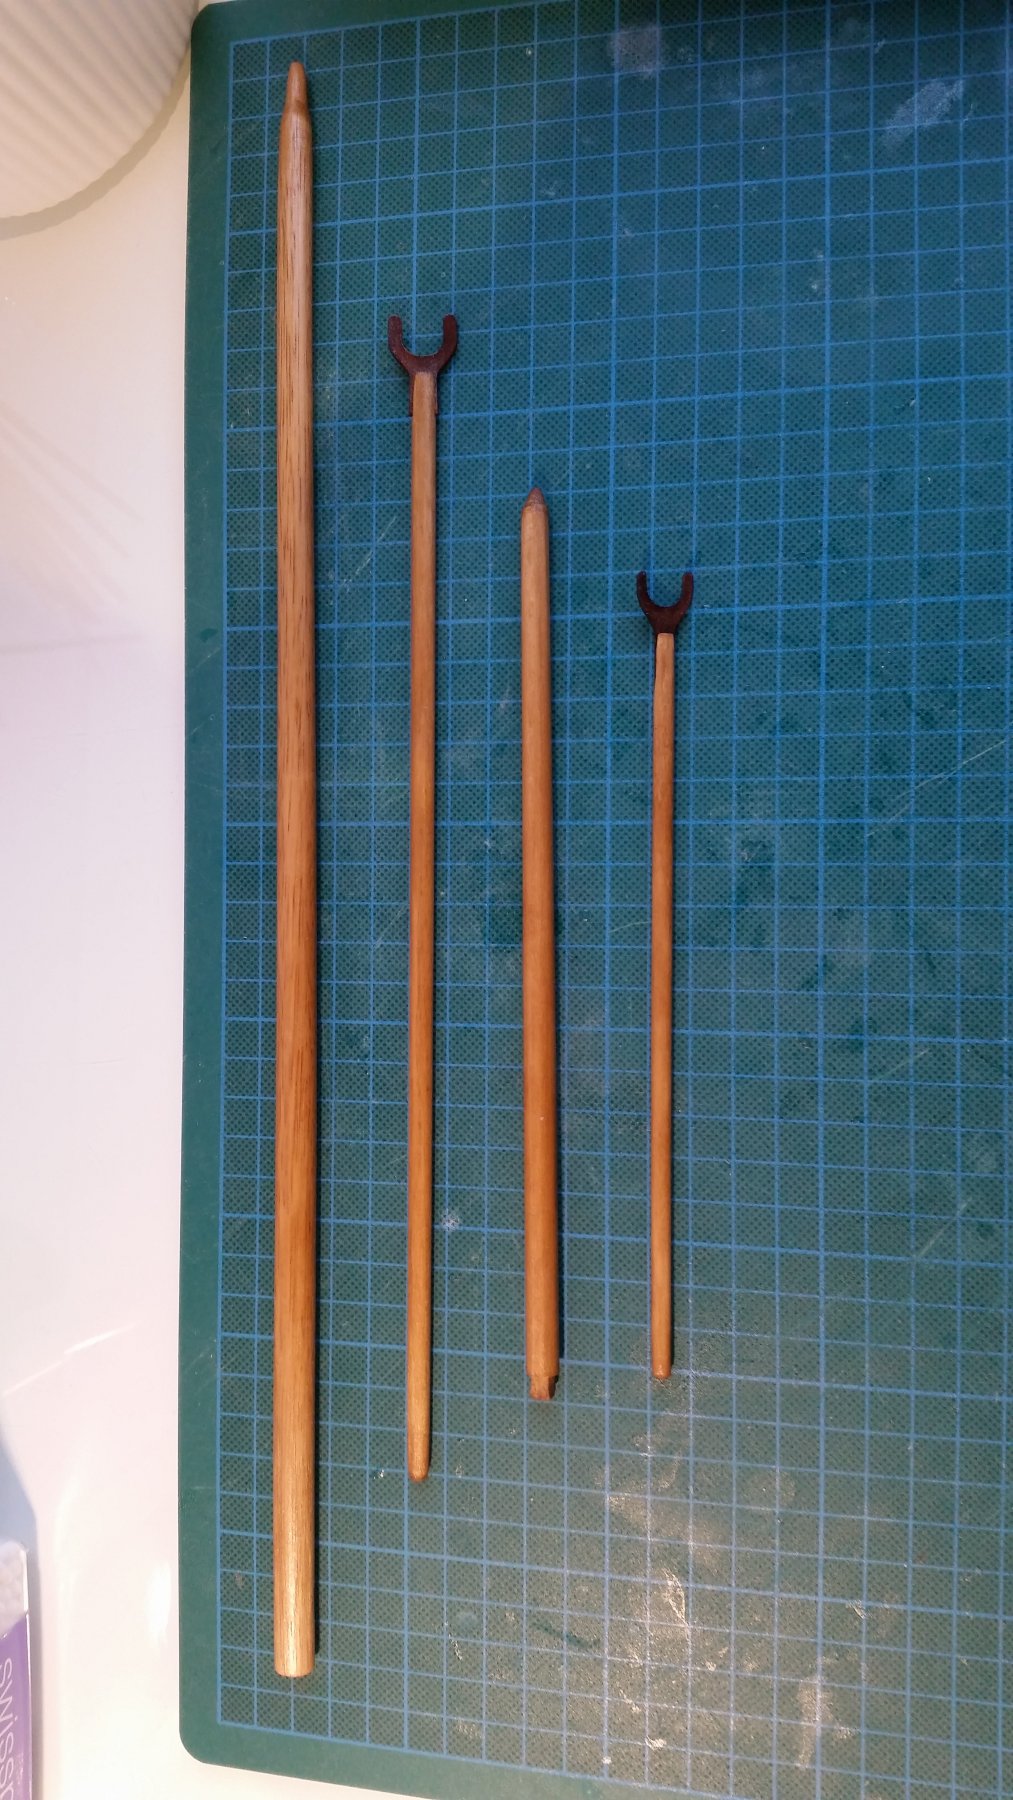
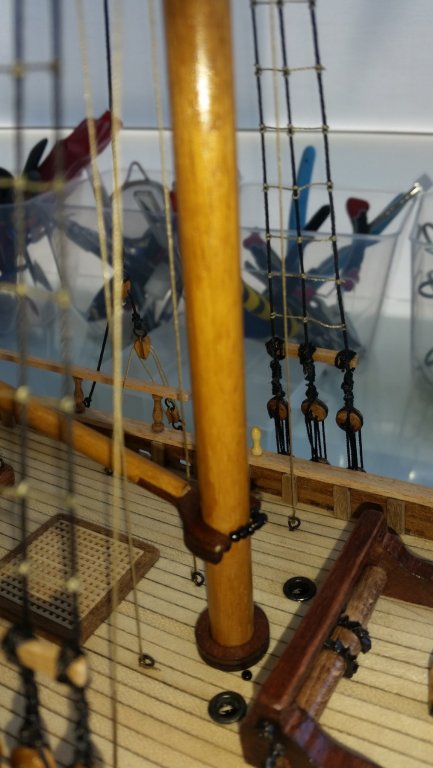
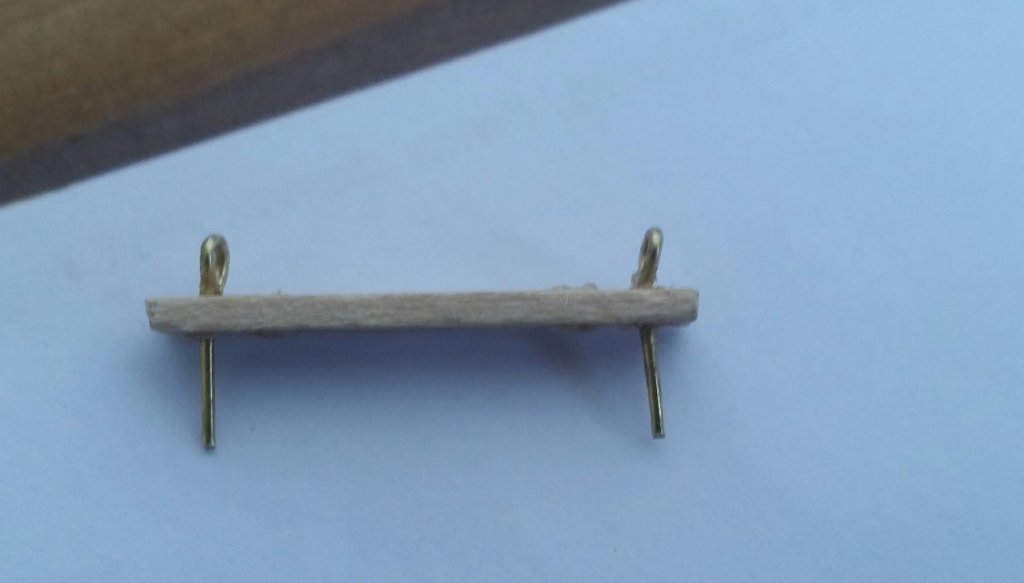
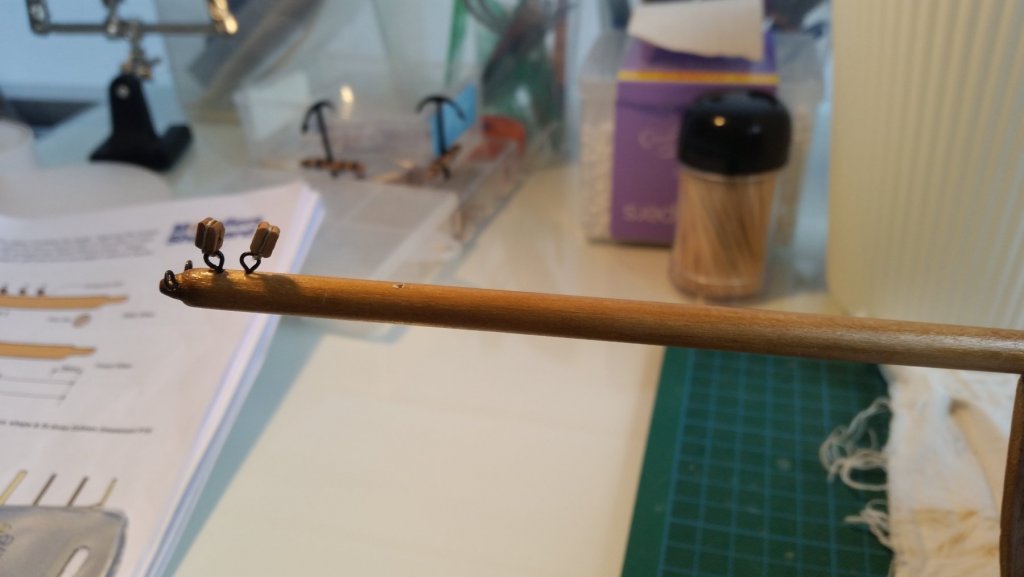
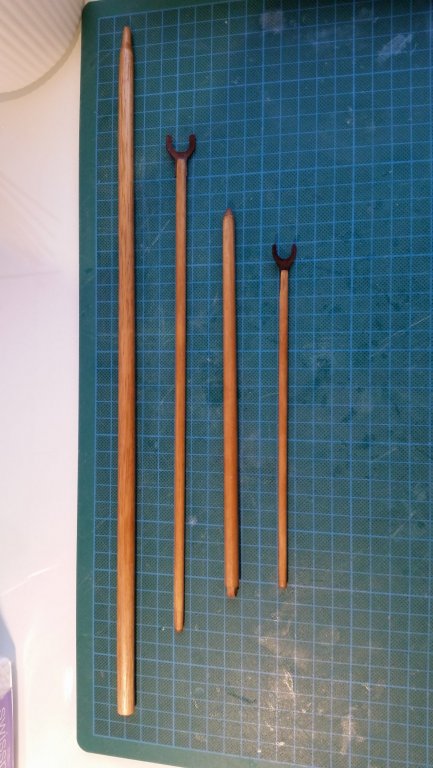
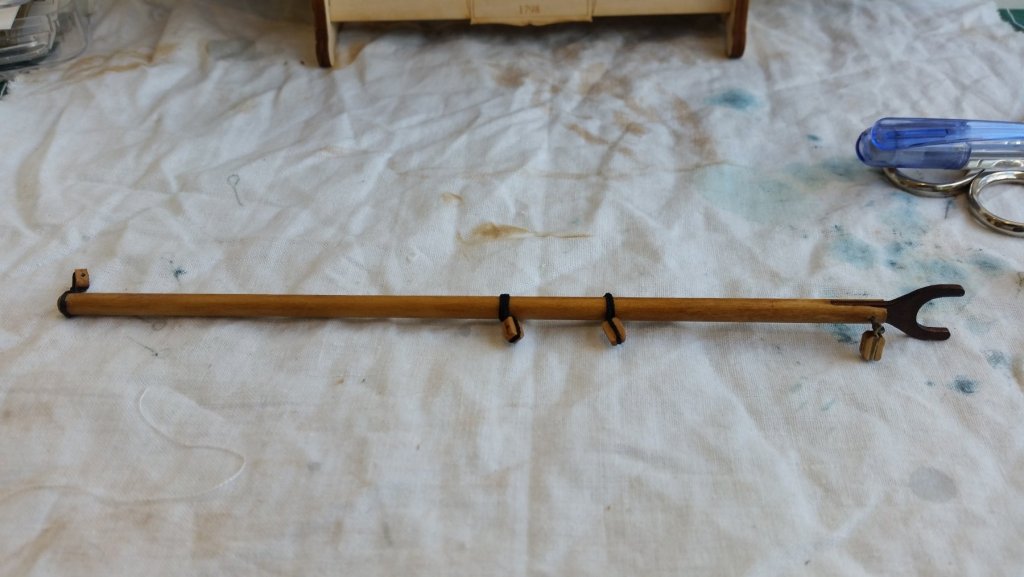
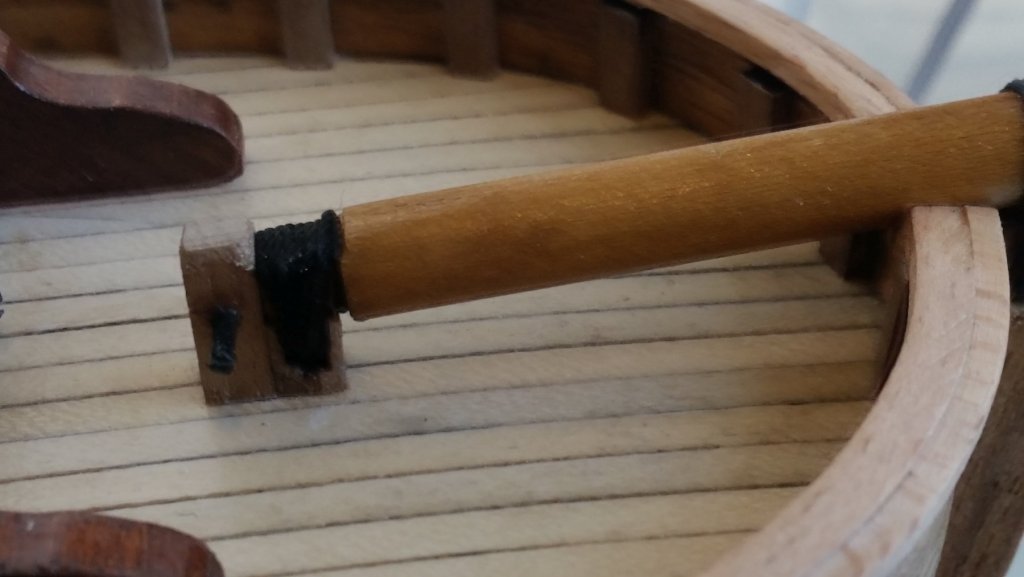
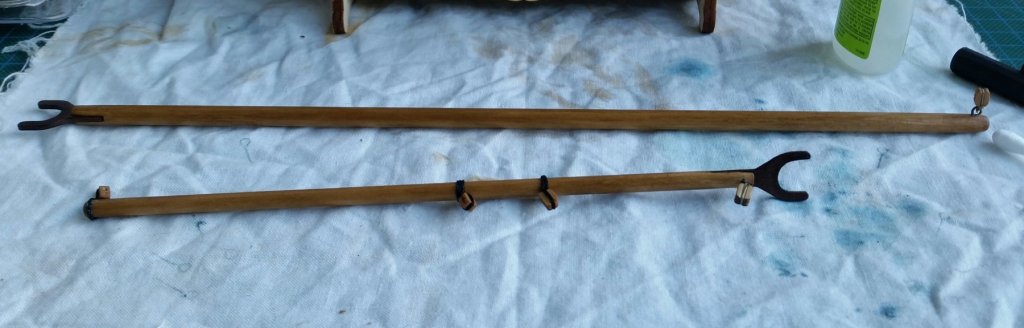
Spent today working on the mast, boom, bowsprit and gaff. The kit provided various lengths and thicknesses of dowel which I had shaped using a mini plane and sandpaper over the past couple of days to get the right size and shape. The dowel was of good quality...very straight and easy to deal with. I then put on two coats of old baltic pine stain as the dowel wood was far too white for it to just have a coating of varnish. Adding the gaff and boom yokes were a bit tricky as I needed to work on the yokes which were rather thin and made of ply. I was a bit worried they would snap but in the end after a bit of fiddling with the shape and some cutting and sanding they fitted on reasonably well. I then stained the yokes with a double coating of walnut and I think they don't look too bad. I don't know if the colours are historically accurate but I am pretty happy with the overall look of the masts. I then set about adding the various blocks to the masts and this is where I have my first real complaint/annoyance with the kit supplied blocks. The quality of some of the blocks were below par as far as finish was concerned. The only positive is that the kit came with additional blocks which makes me think that this is a normal problem from the supplier. ANyway despite me having to drill some holes on a couple of blocks I had sufficient to see me through. The bowsprit is now on as well as the mainmast so its starting to look like the home stretch I should add that to date ,as a newbie to this game, I have been generally very happy with the contents of the kit including the ease of reading the instructions provided (plenty of very helpful photos as well as explanations which was vital for this novice!). The rigging comes next so am looking forward to starting on this stage with some trepidation.....watch this space!!!


-
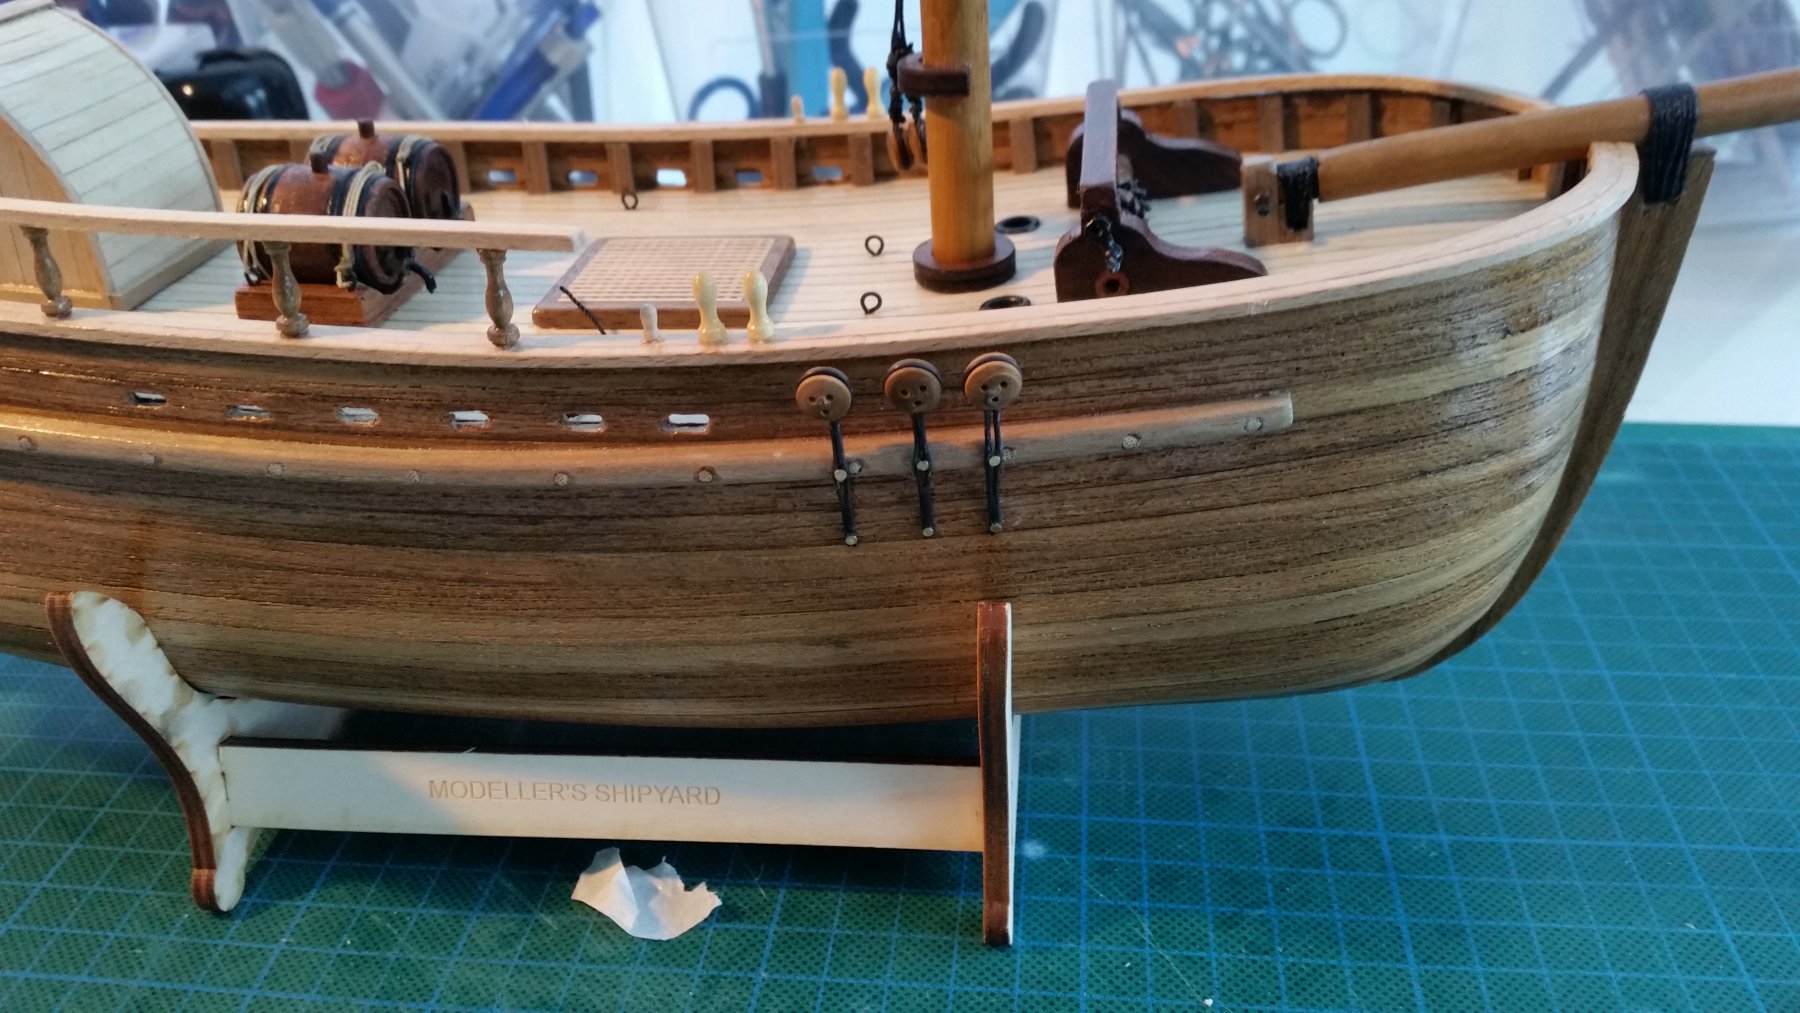
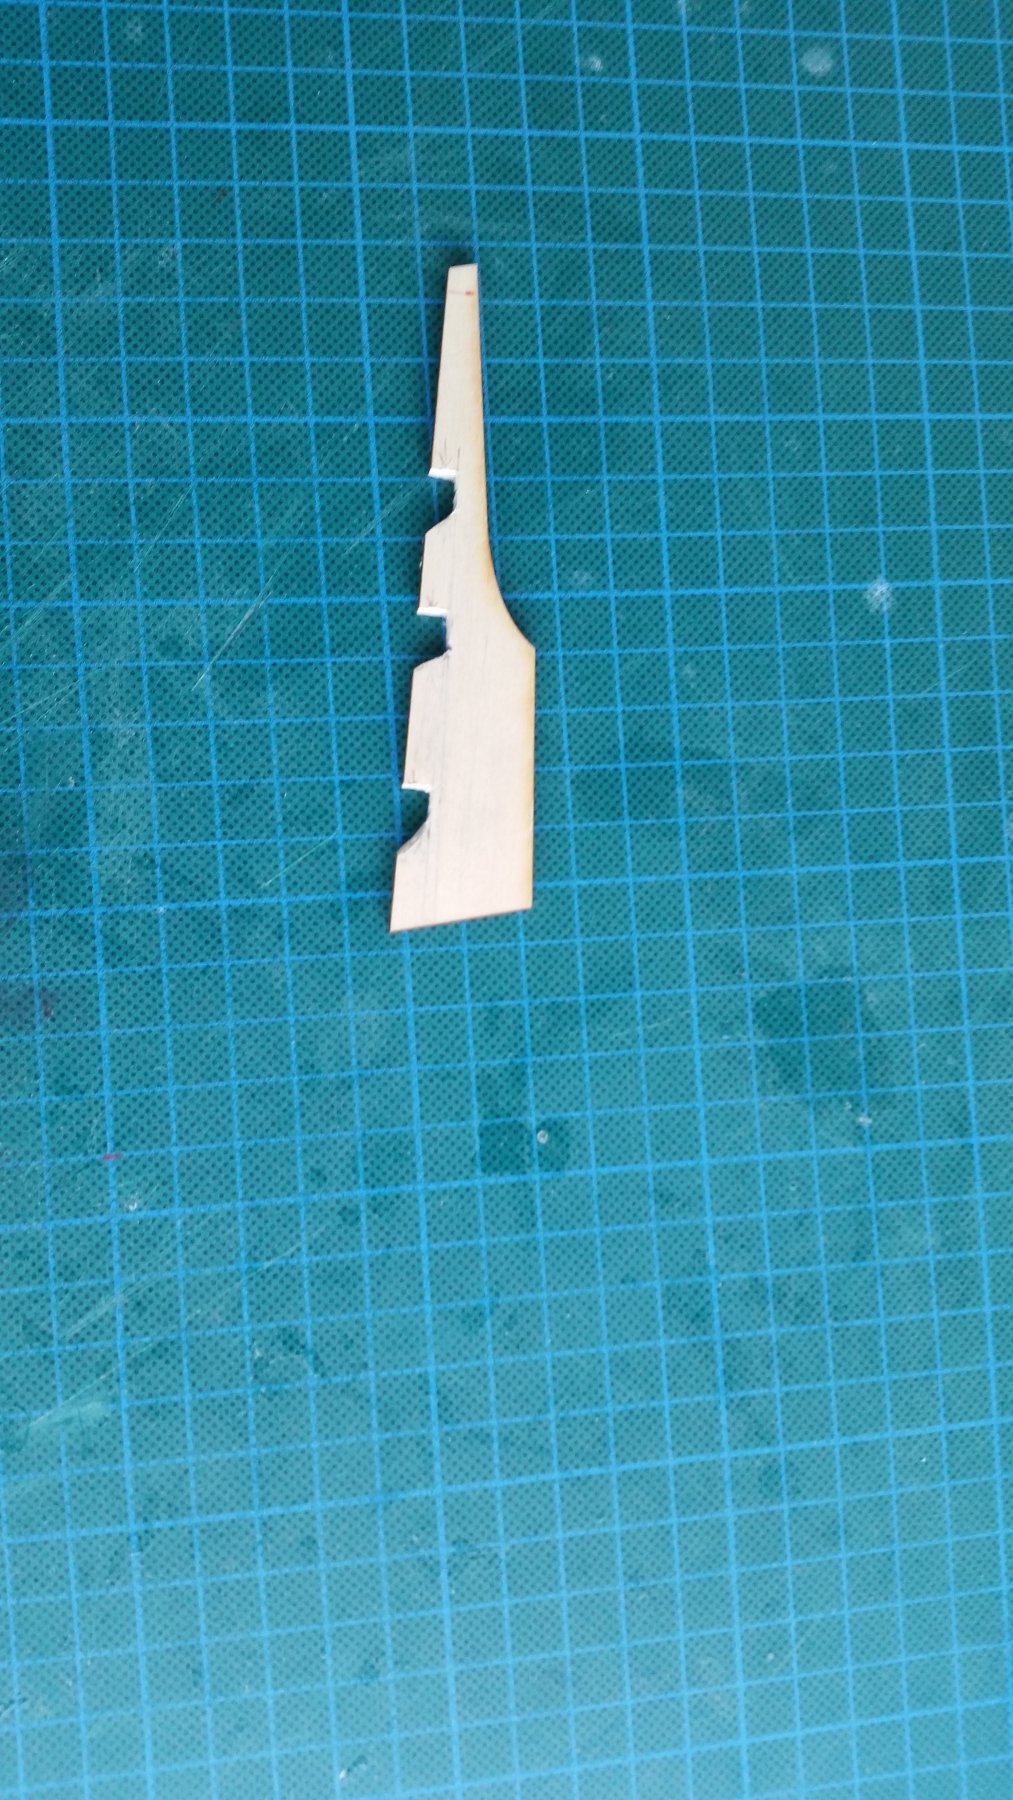
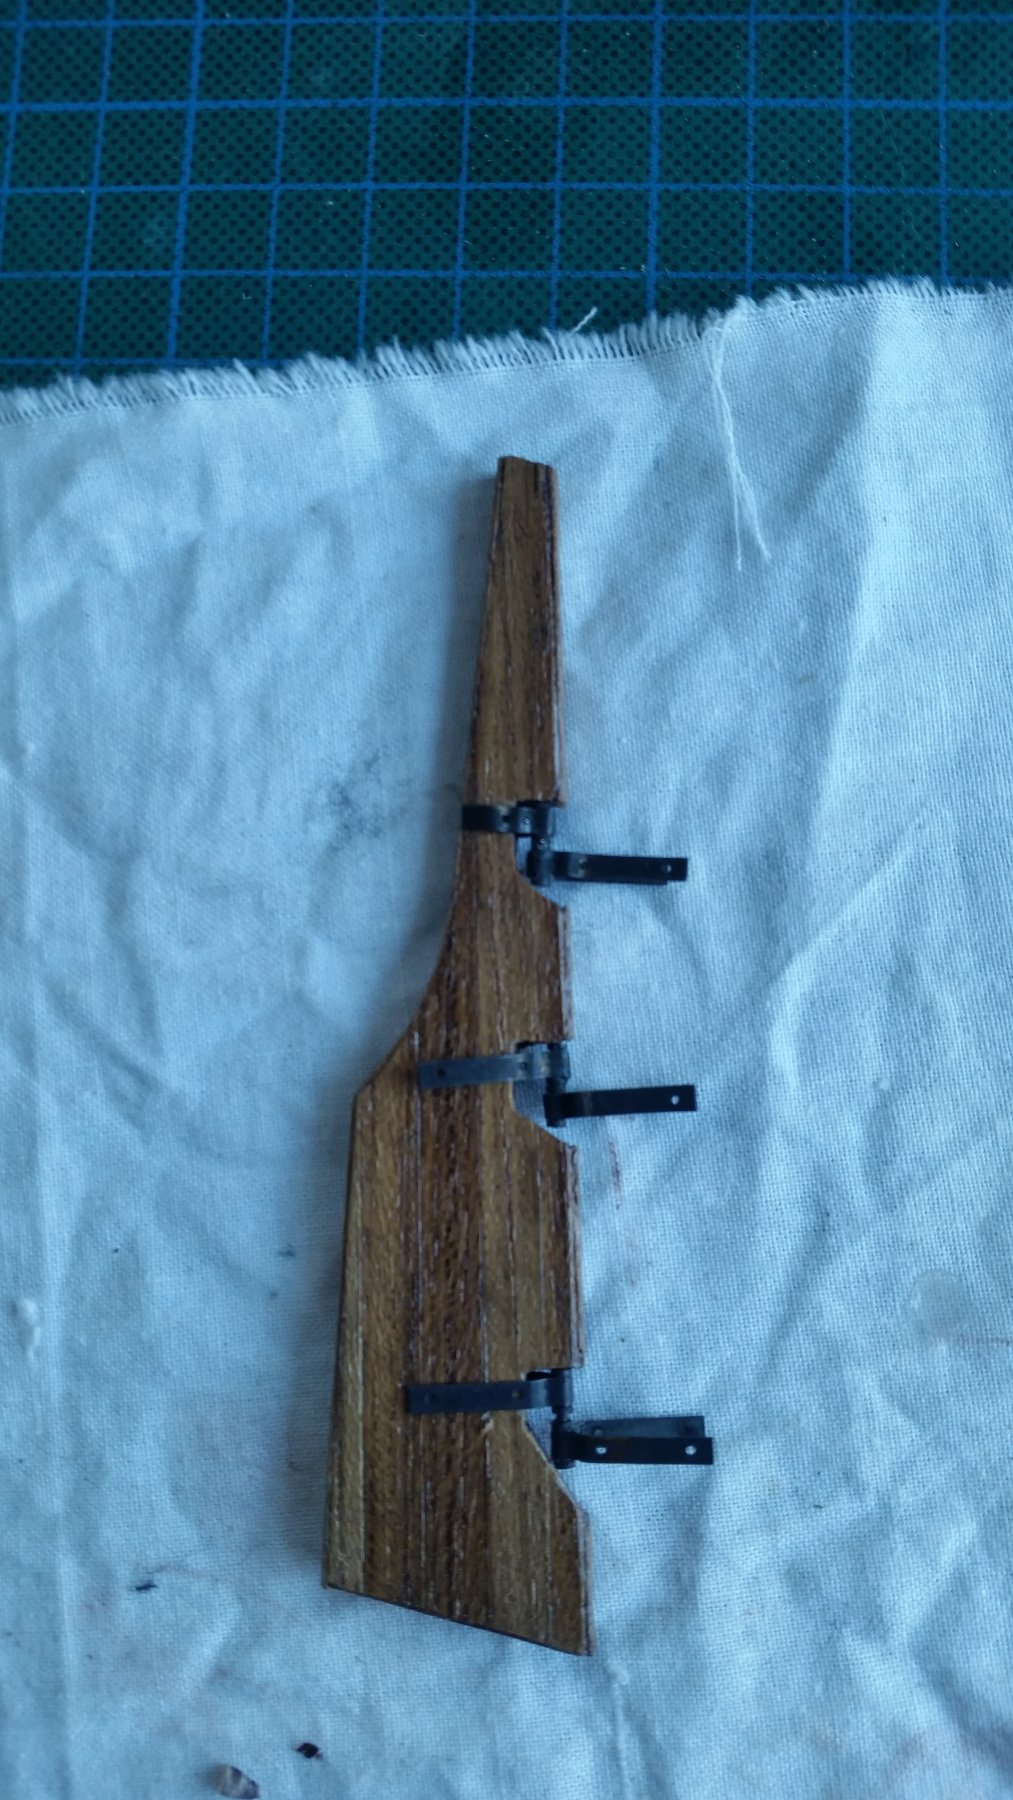
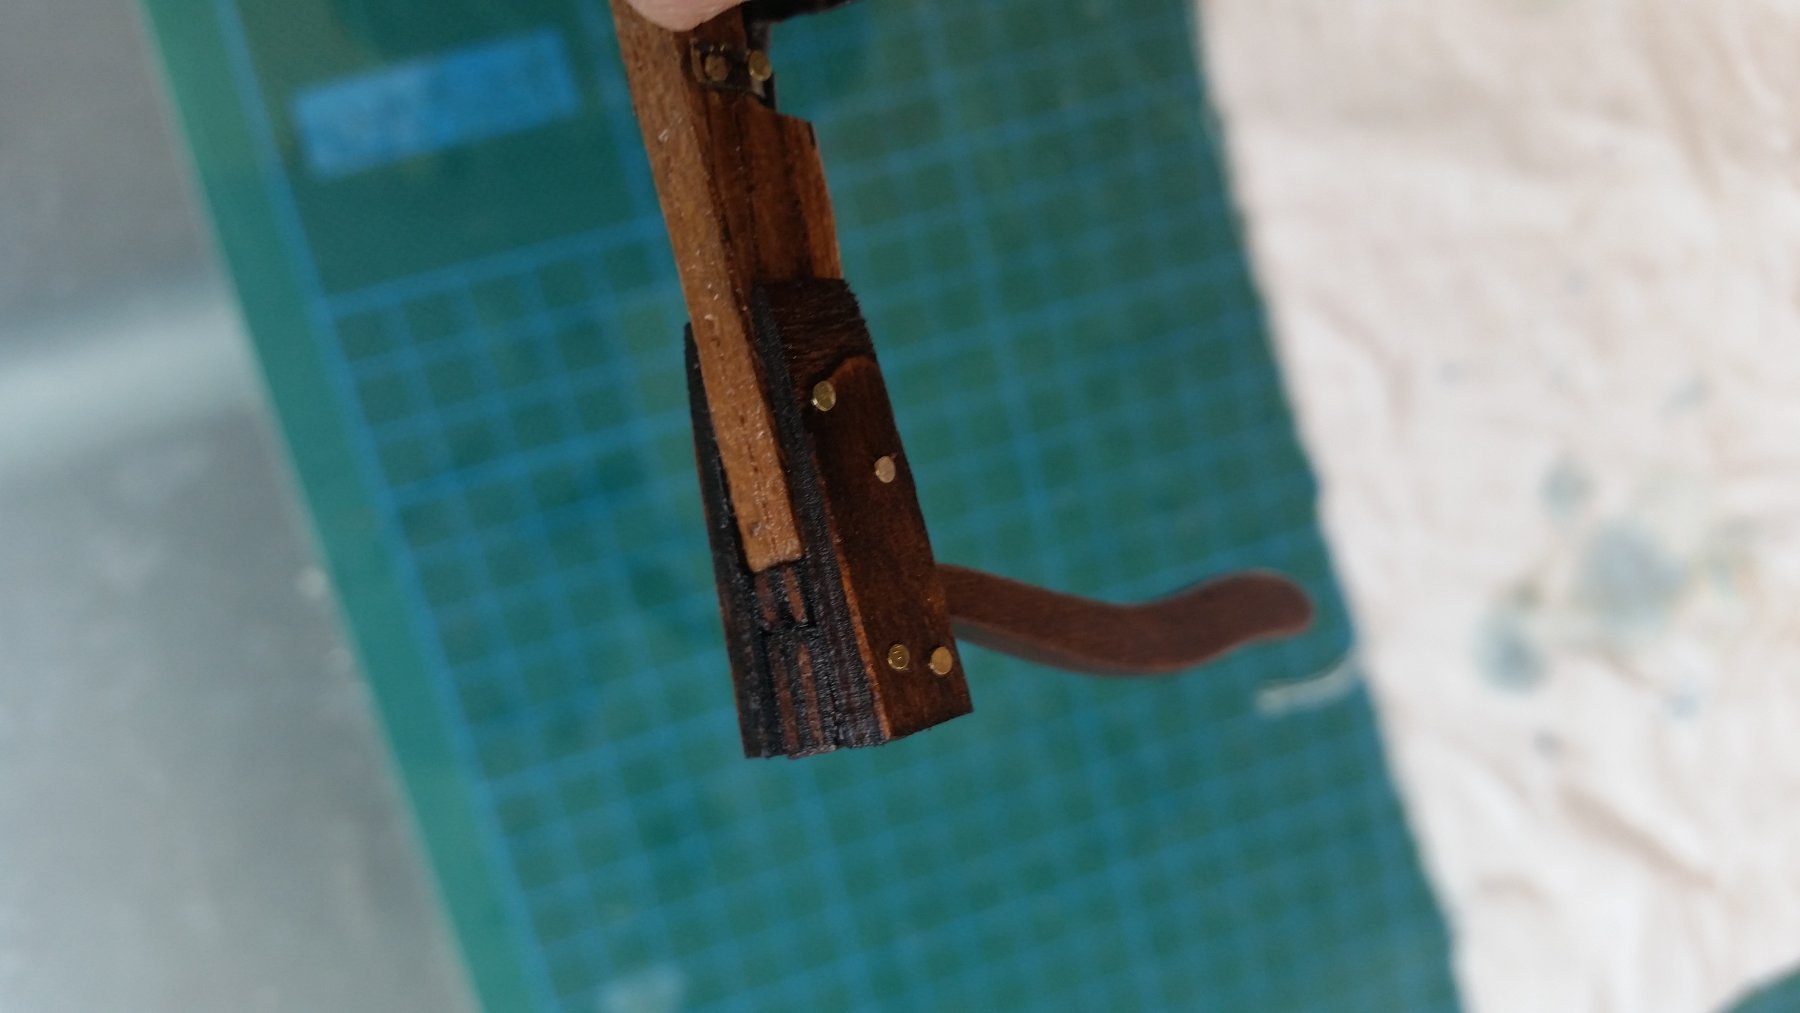
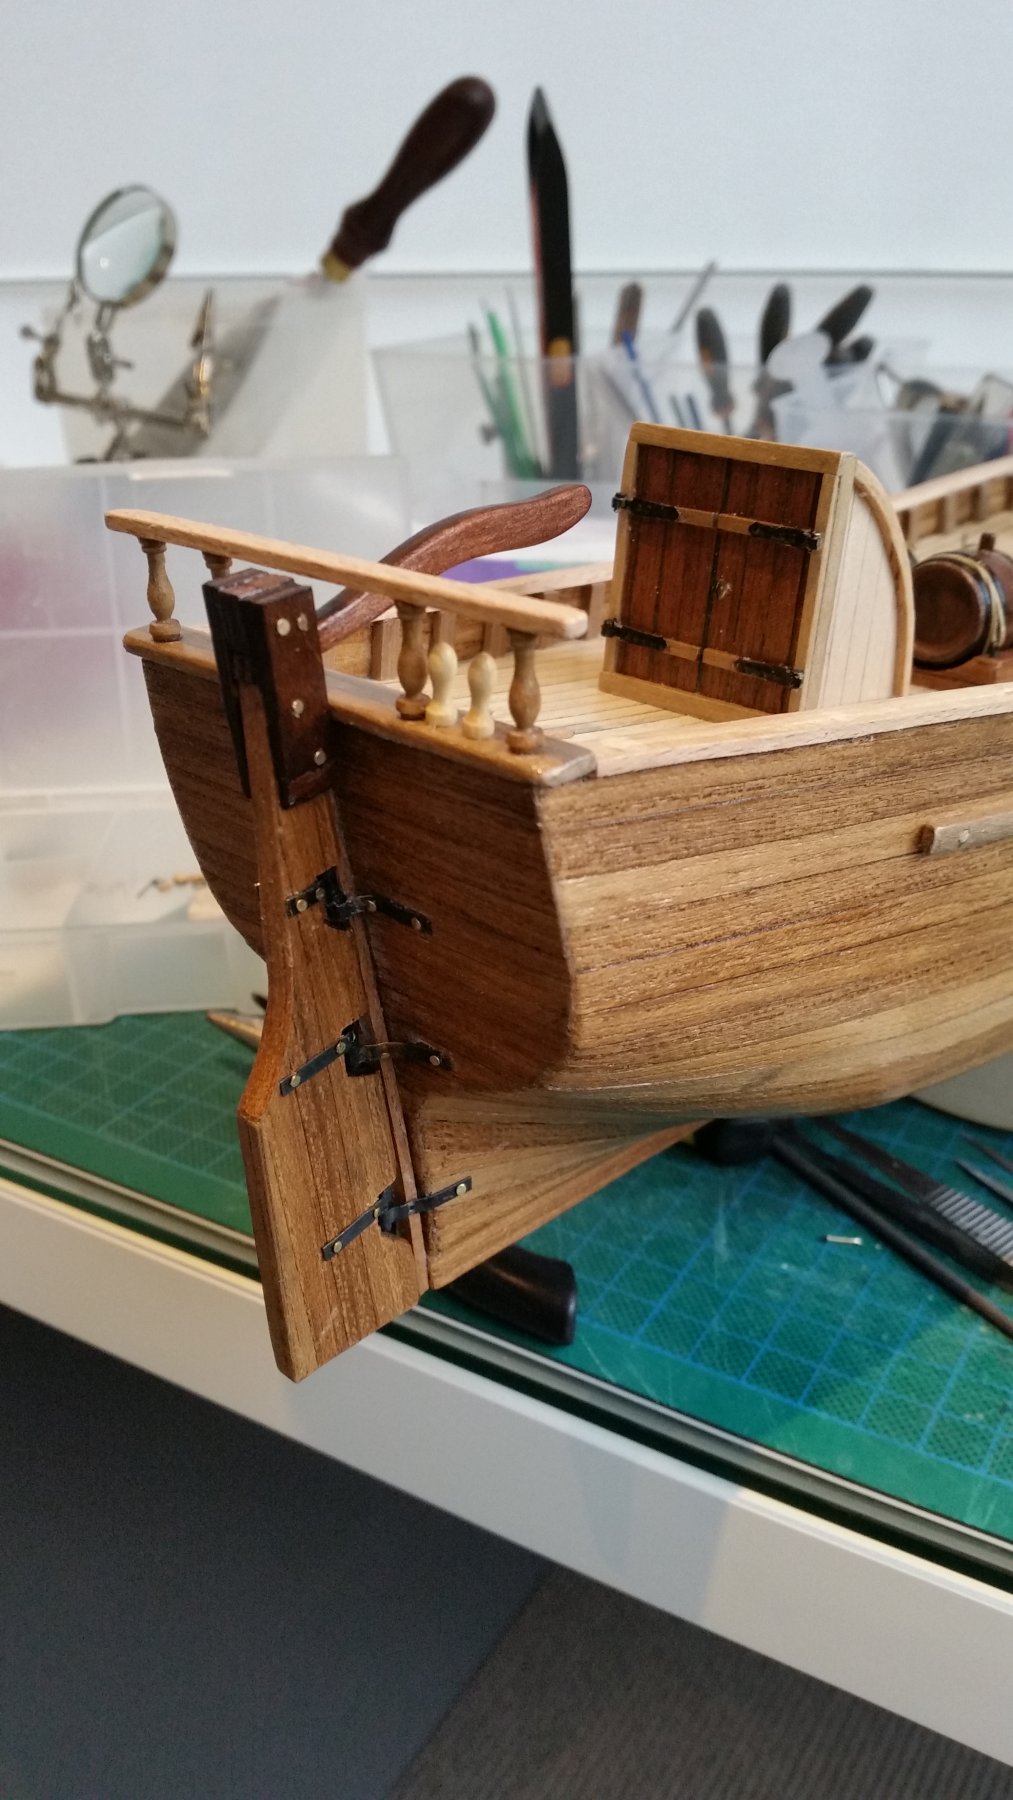
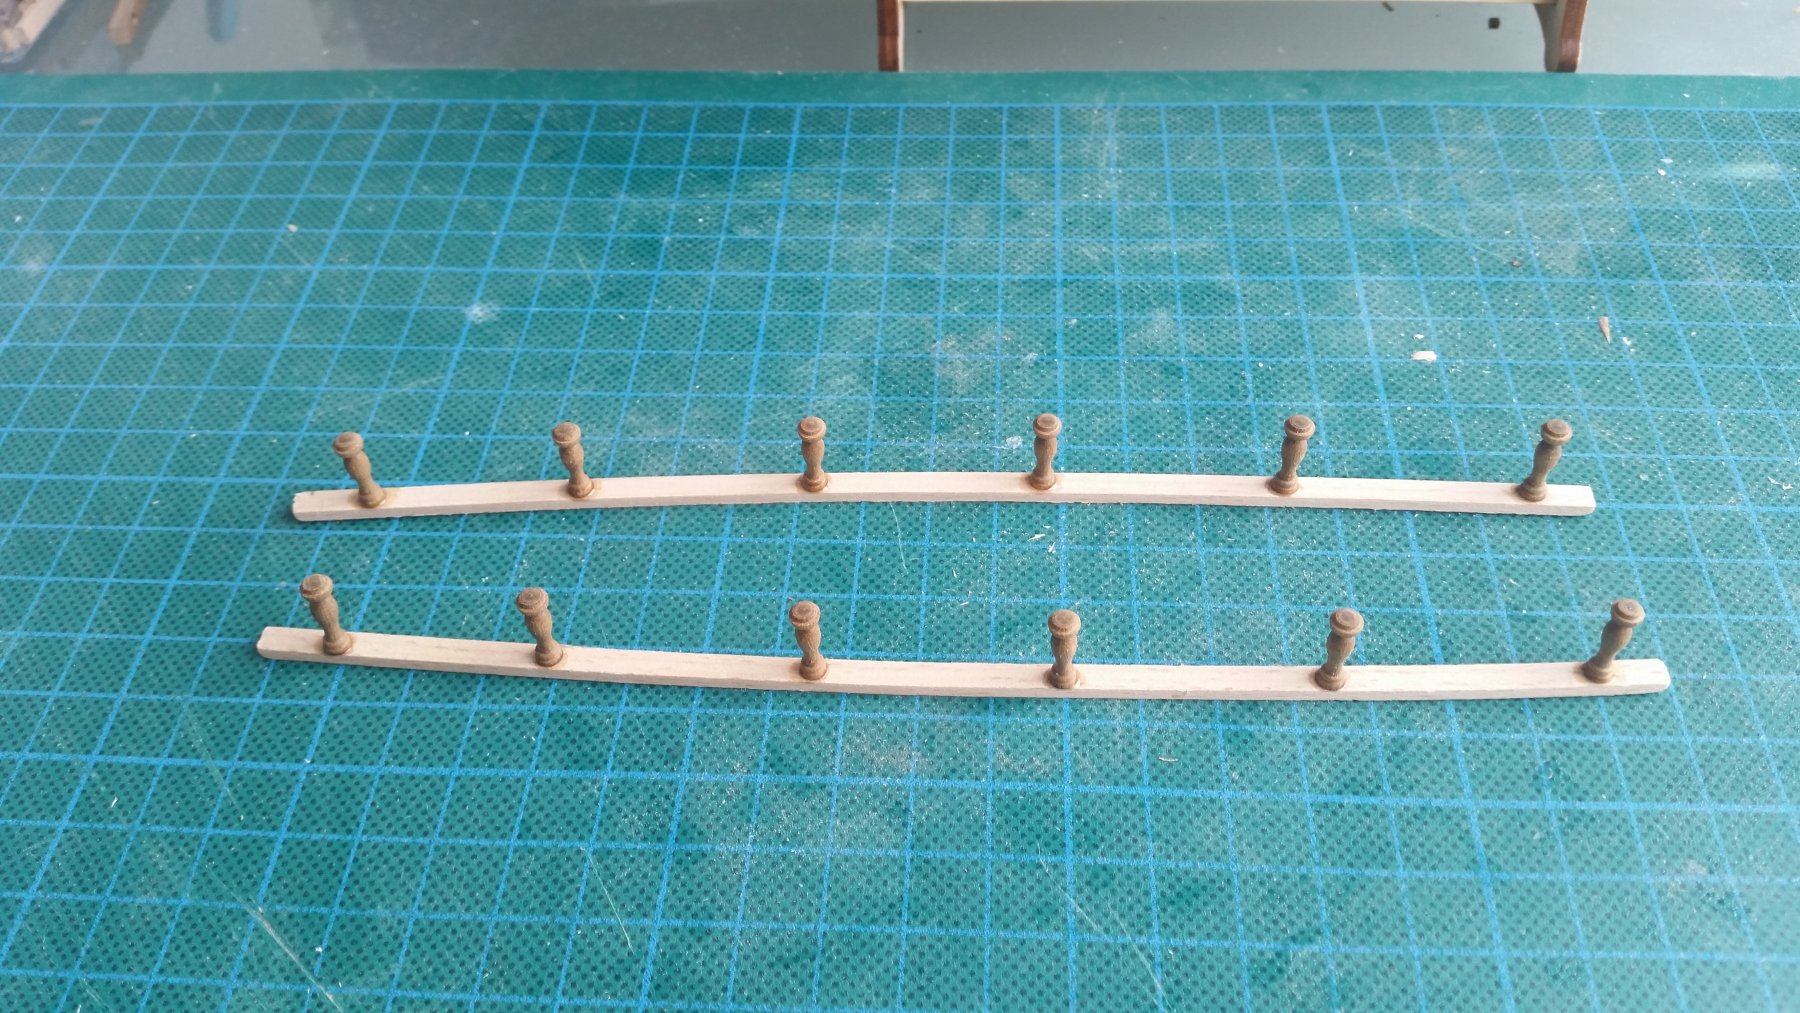
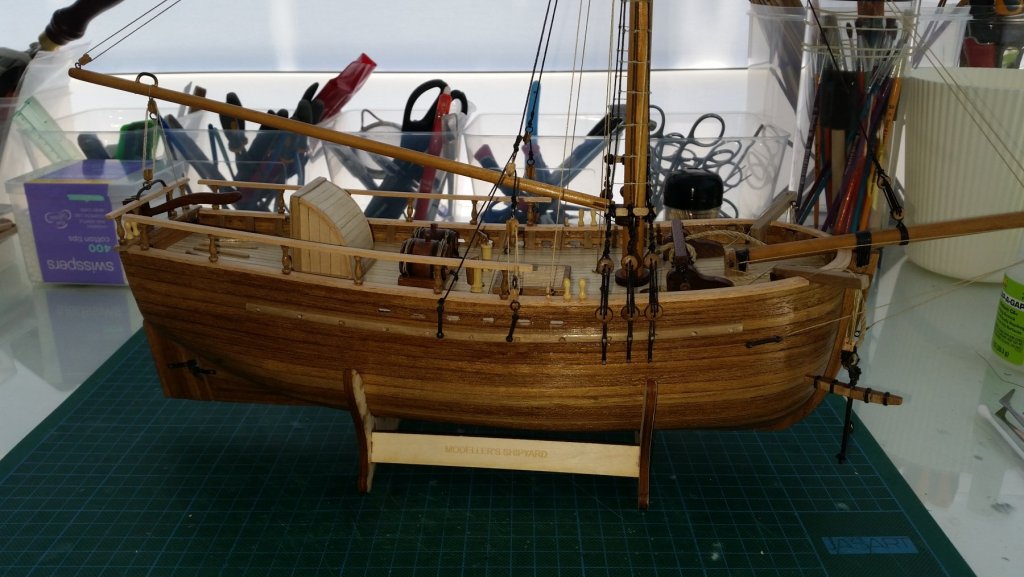
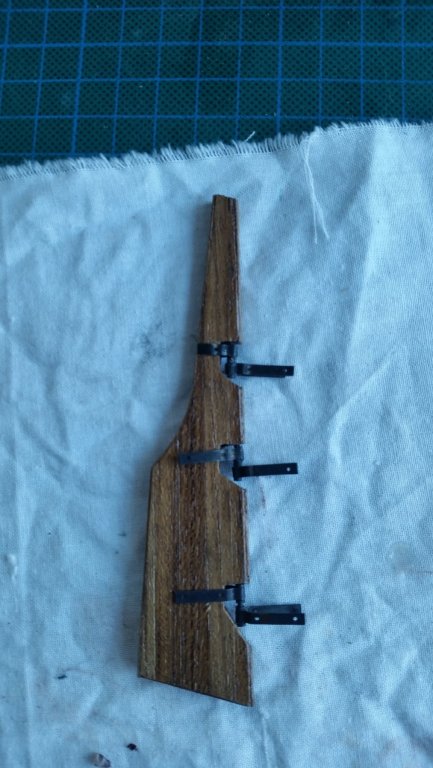
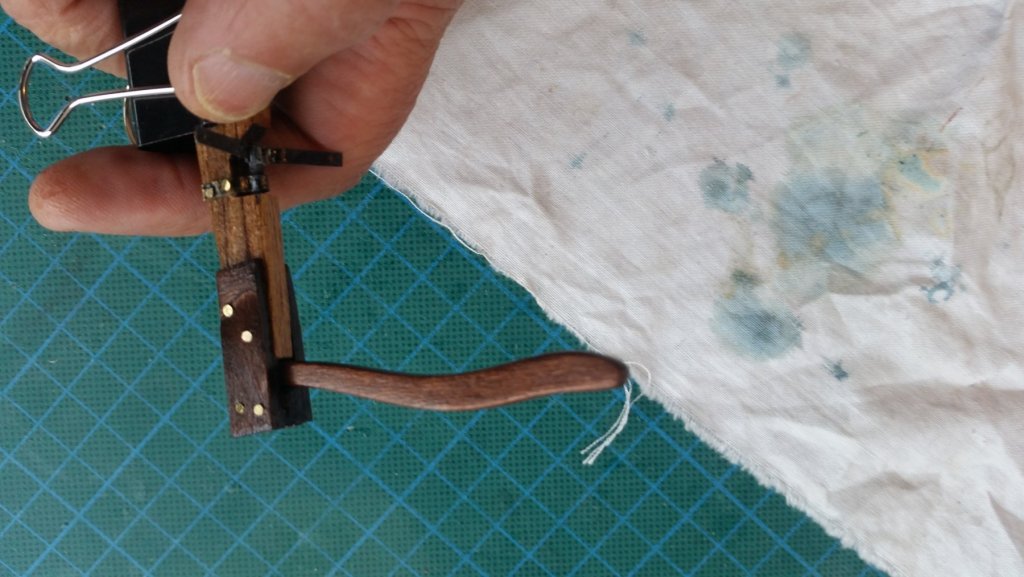
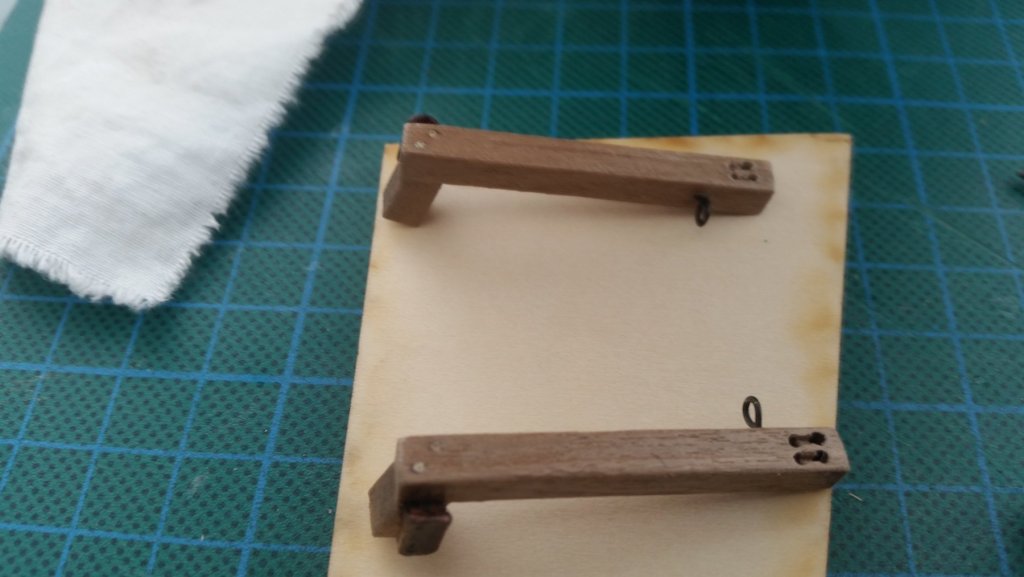
With the wet weather over the weekend I was able to do some more work on the build. I've finally decided on some small kit bashing on the rudder and tiller after getting an idea fro Danny Vad's Norfolk Sloop build on this site. (I have said it before, I have found Danny's build log to be a great source for my build though I know it will take me Many Many years to reach the quality of workmanship he shows in all his build logs!) The only addition to the kit supplied rudder and tiller is the addition of two "cheeks" on either side of the tiller. I've also added some nails to give it some semblance of reality. I used some leftover ply and gave it a good dose of walnut stain followed up with clear satin varnish. Not sure of the scaling but I think it looks OK. I have also added the transom and gunwale railings (all kit supplied) which, other than getting my fingers glued together with CA glue, was not too difficult. Next will be the main mast, bowsprit, gaff and boom....more pictures to follow.


-
Hi Nigel, good to see you back in the shipyard. Those cannons look first rate...good work as usual Cheers...........Fernando
- 121 replies
-
- 1
-
-
- bounty
- constructo
- (and 1 more)
-
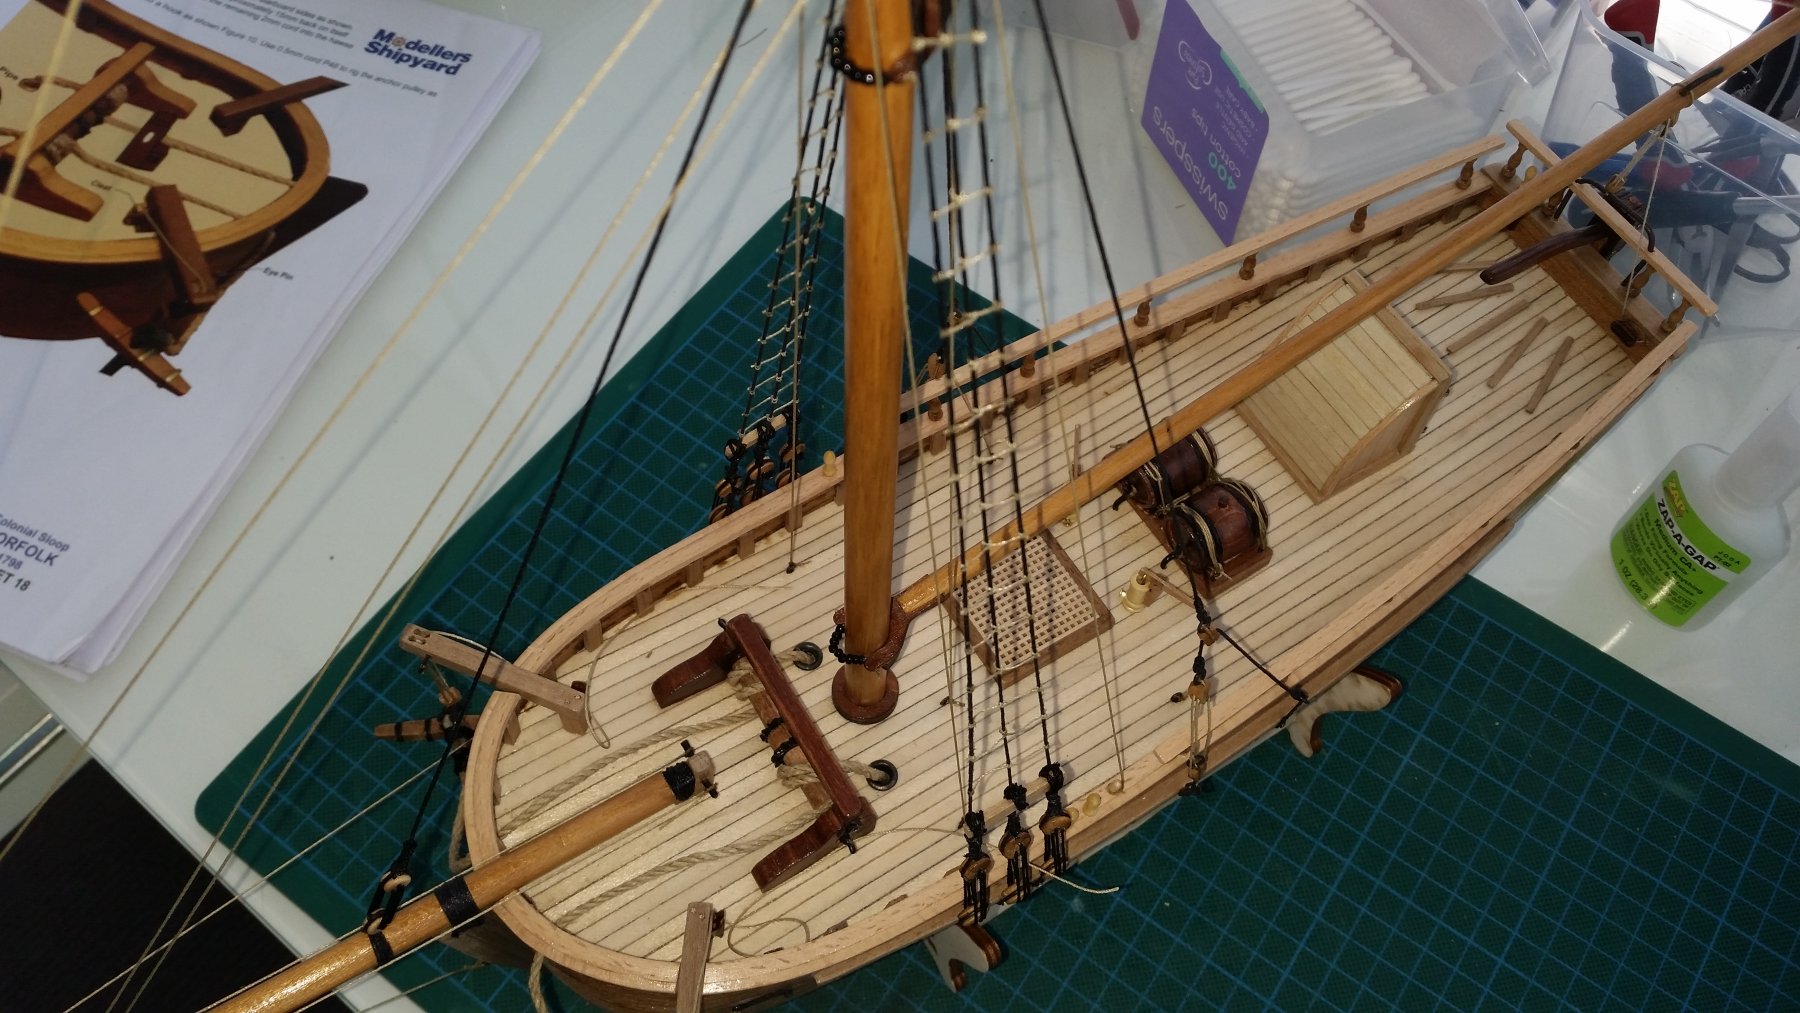
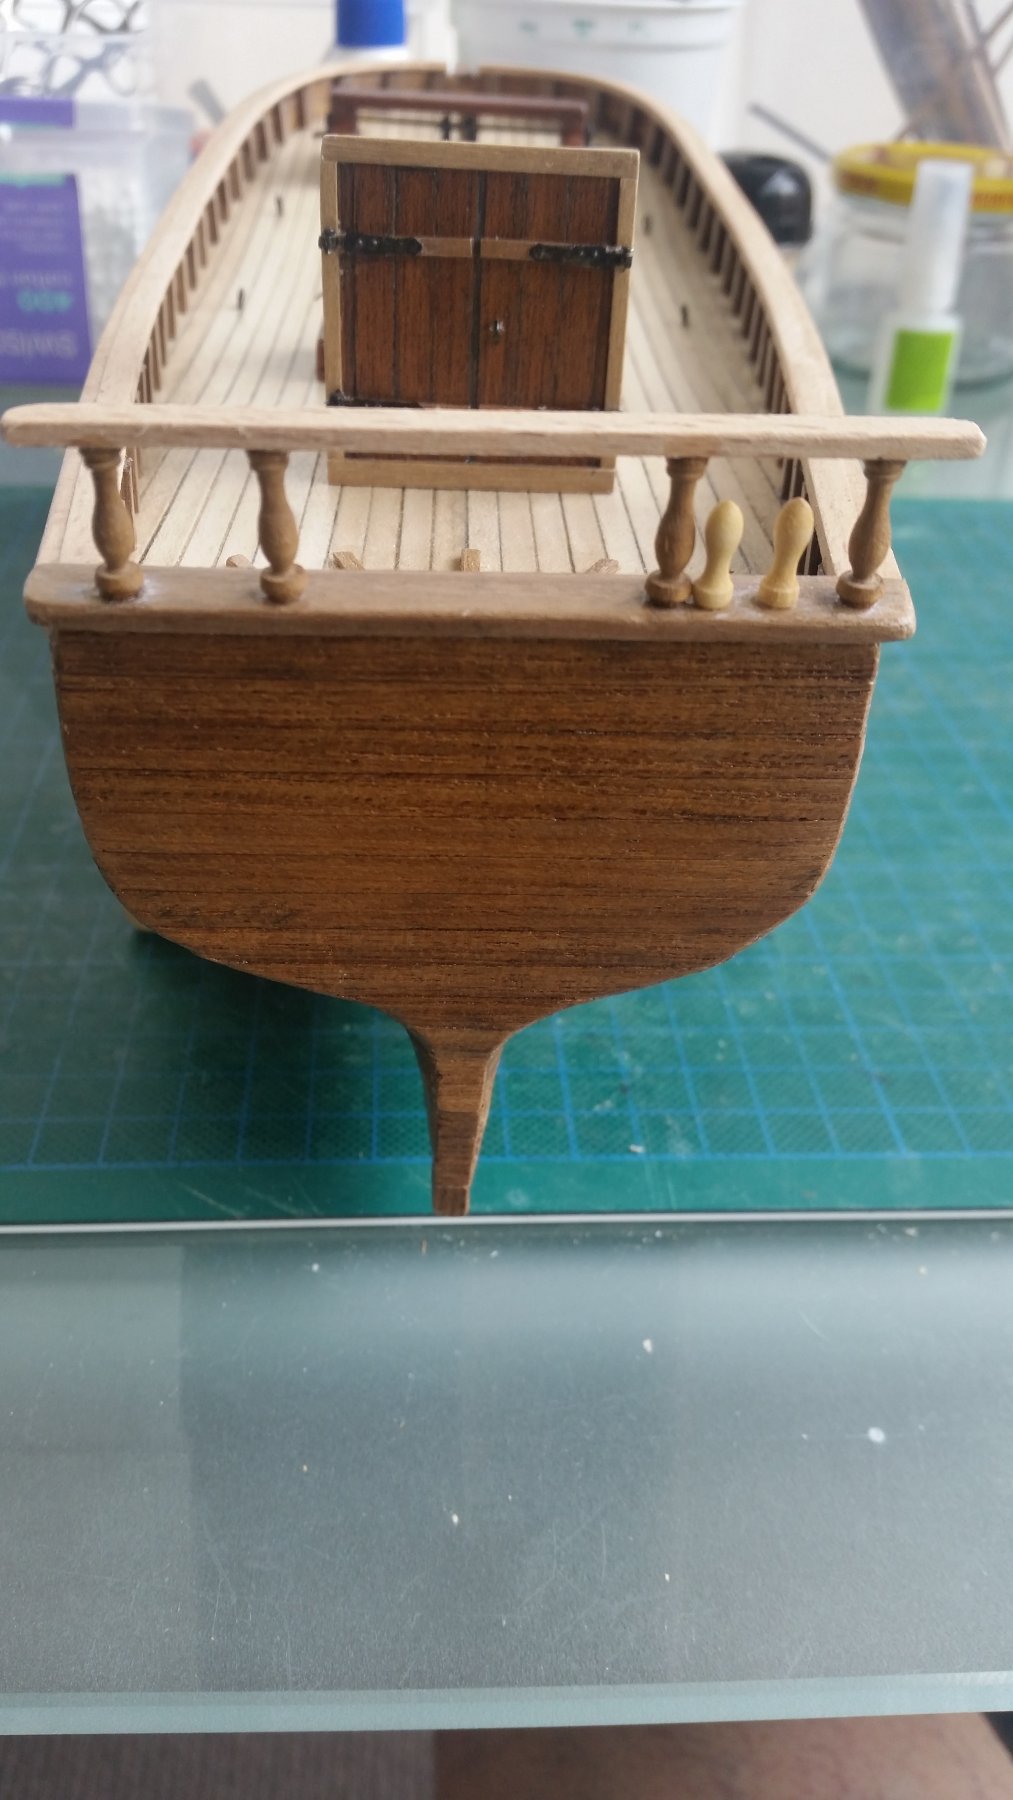
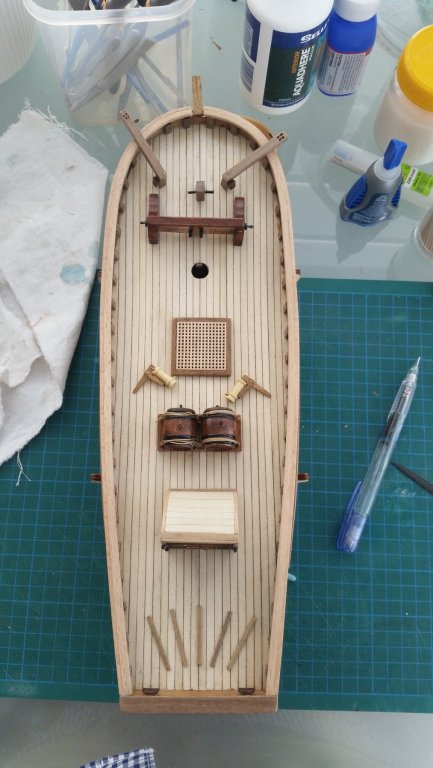
The deck furniture dry fitted on to the deck! The kit suggested I cut 2mm x 30mm lengths of teak veneer leftover from the second layer of planking for the foot grips. I was not happy with the look so cut some walnut (1mm x.25mmx30mm) and placed them on instead...a much better finish I thought. (if this is "kit bashing" I think I'll do more of it!!). I'm still working on the tiller and rudder so will add more pics when finished.
-
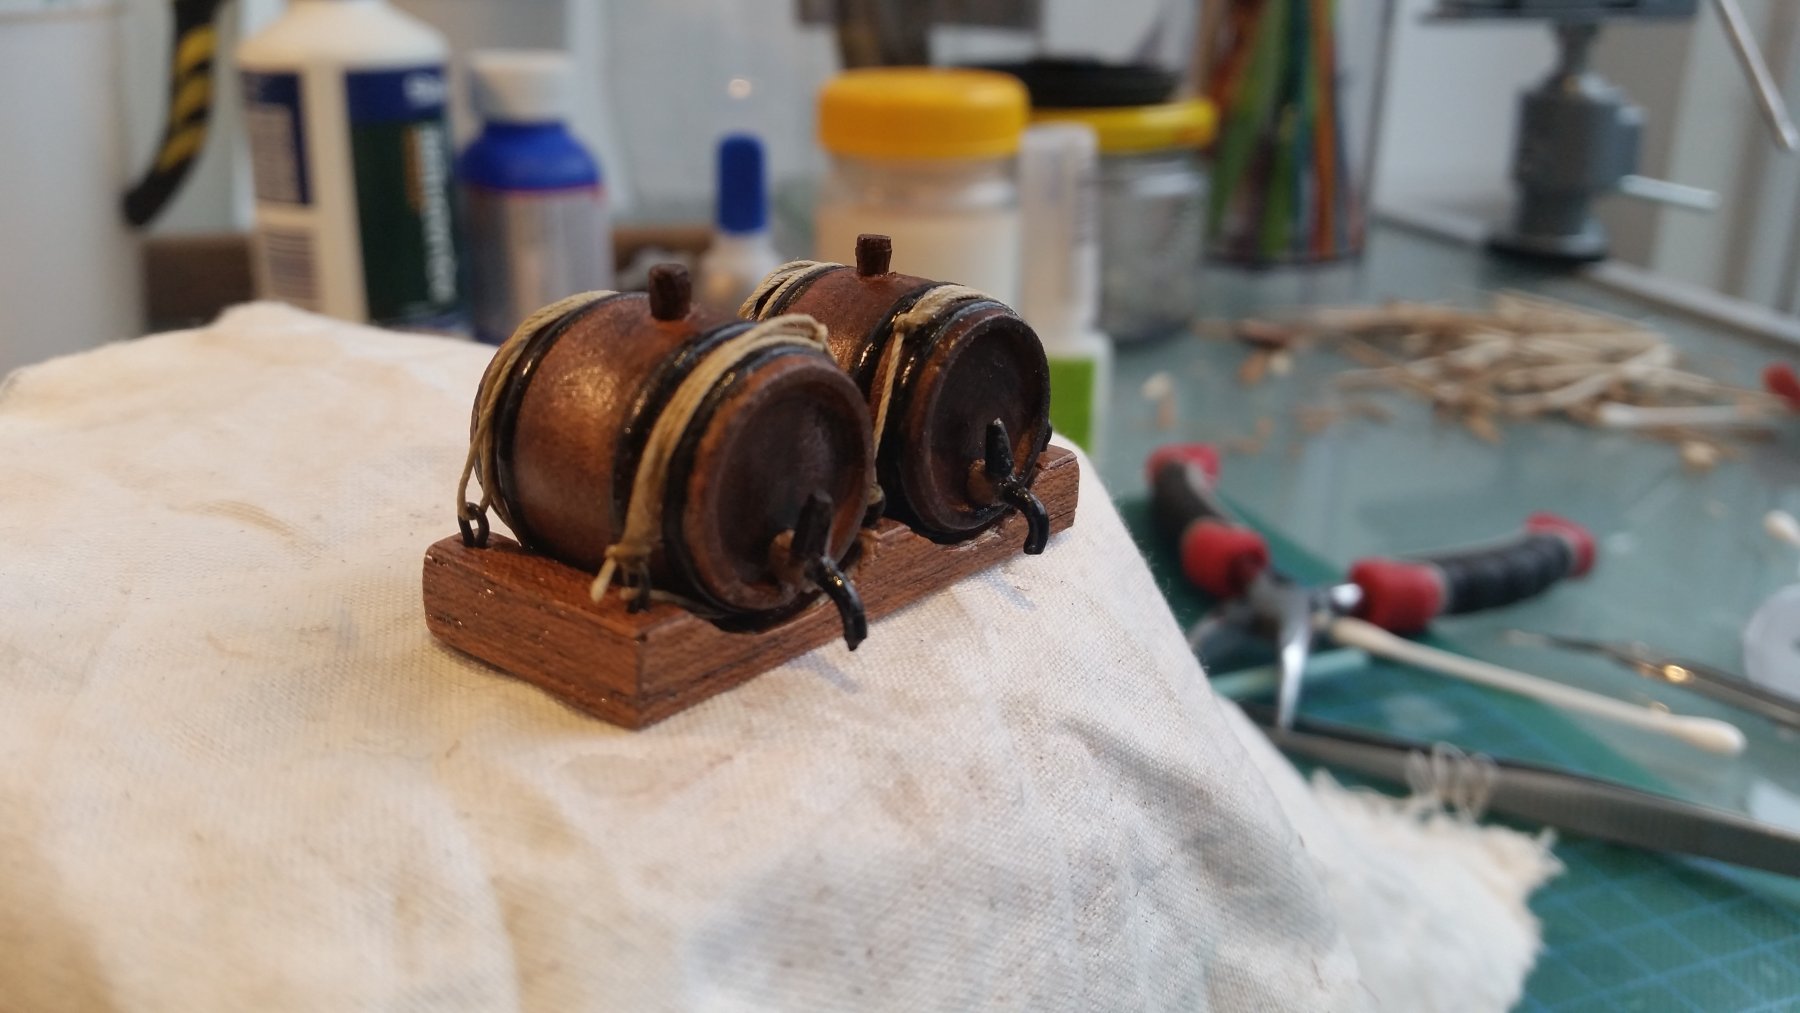
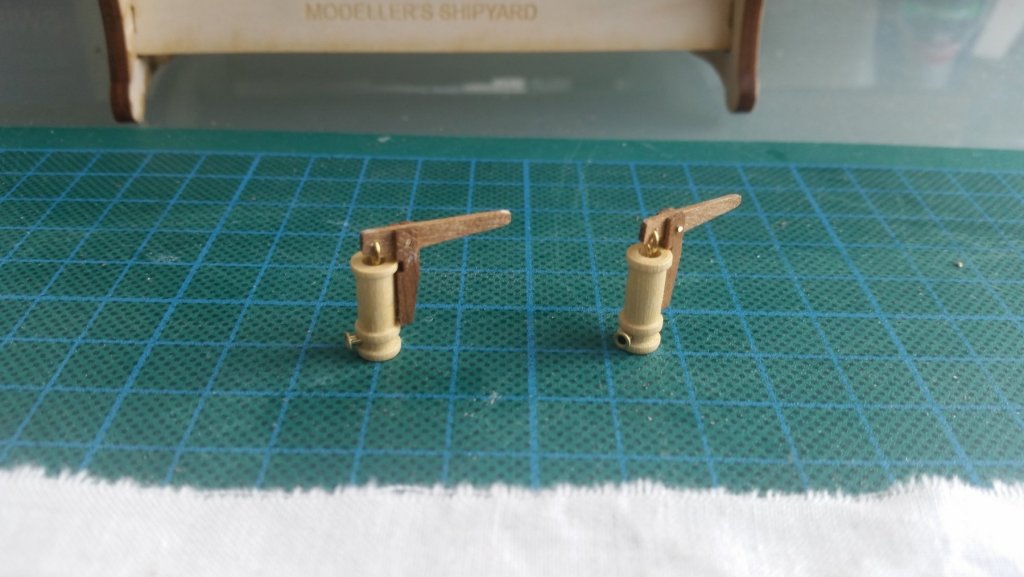
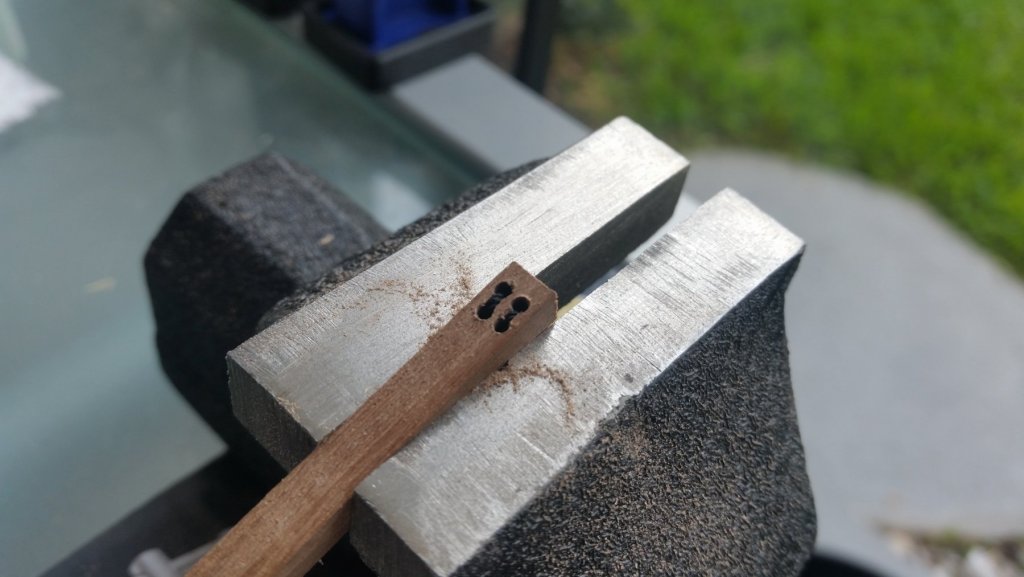
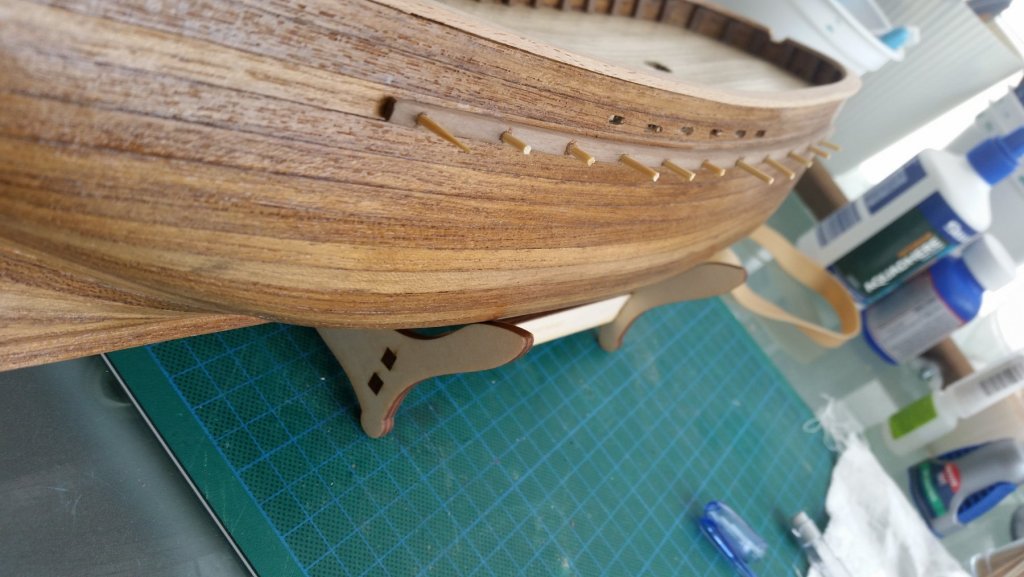
Here are a couple of photos of the deck furniture including dry fitting them on to the decking. I clearly need more practice on some of the detail work but overall I am happy with the work. I, again deferred to Danny's great build log and added some little detail on the cat heads (tree nailing) as well as making small channels in between the holes (sheaves?). The pumps needed no work on them other than to glue the parts together and then putting on a light satin finish. Other than putting a dark walnut stain on the anchor winch I did not need to do anything else with it.

-
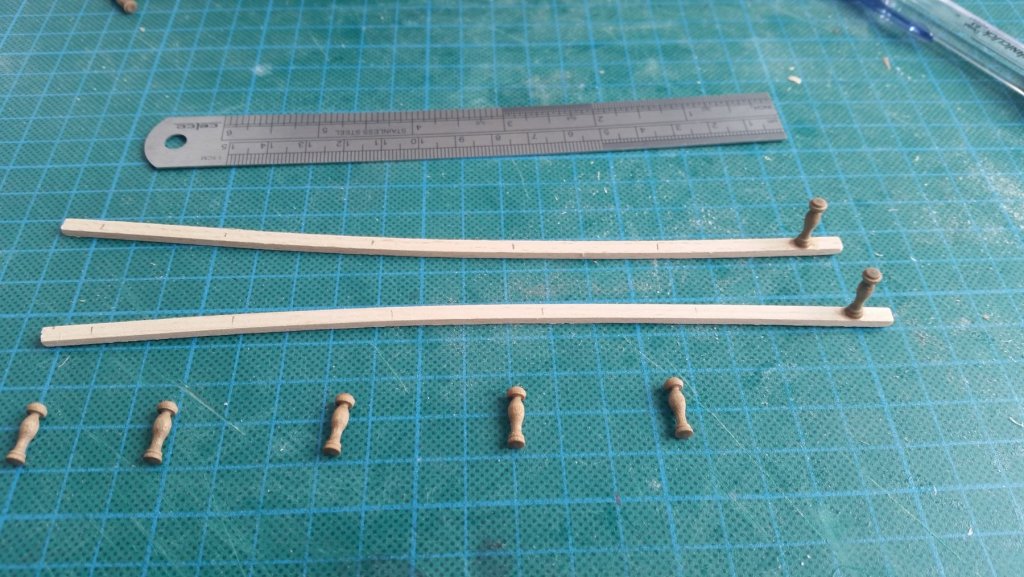
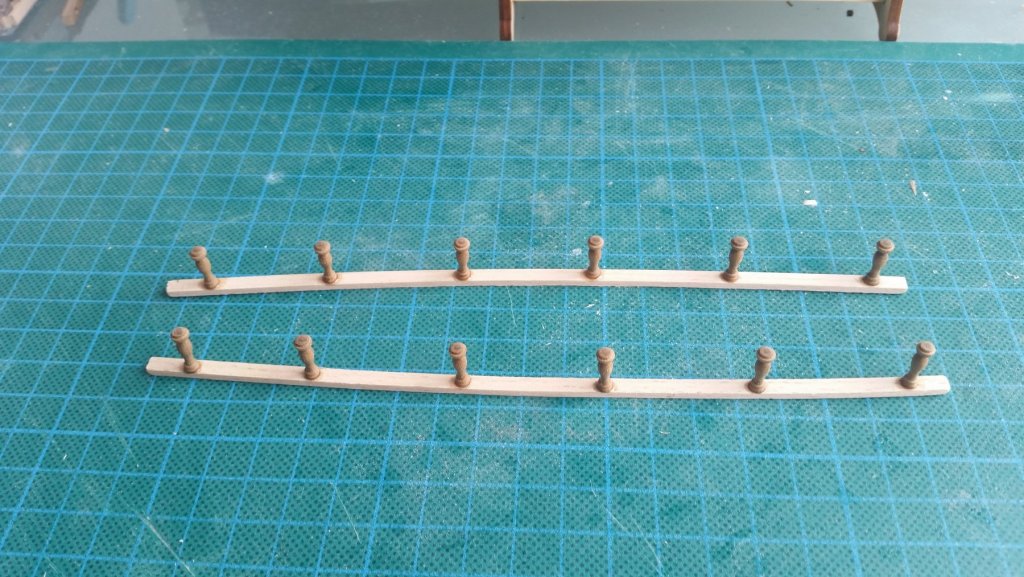
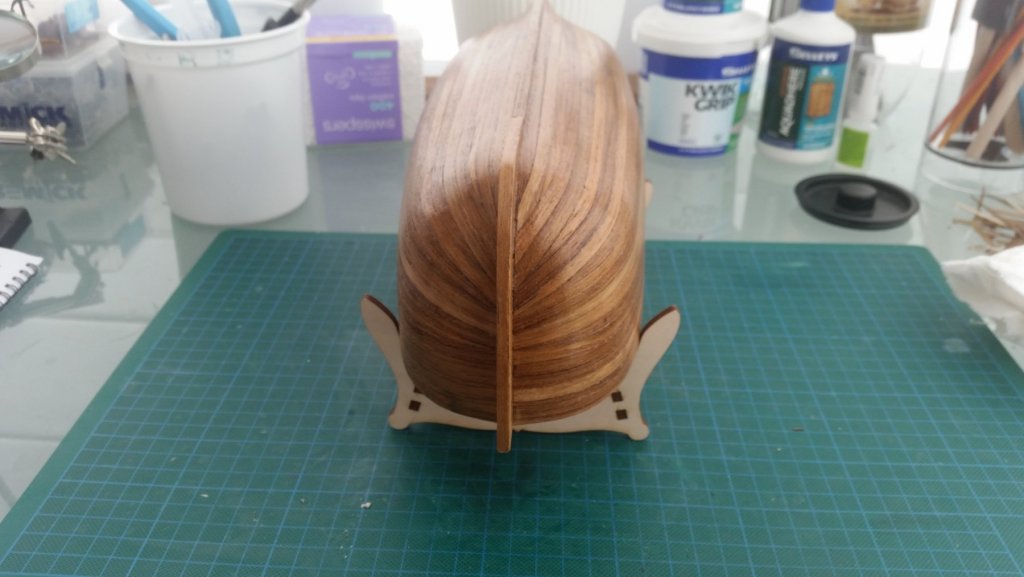
Have been busy on my so called semi retirement but have been able to some more work on the build but not enough time to upload photos of where I am at with the Norfolk. Firstly, I have been doing a lot of work on the deck furniture as well as adding the cap rails, transom cap and gunwales. The gunwales were easier than I thought as I made up a simple jig to match the curvature of the hull and after soaking the walnut for 10 mins and leaving them overnight in the jig to dry. They fitted on perfectly. After putting them on I thought they looked a bit too bare and having a look at what Danny had done on his Norfolk build log decided to add some tree nails. Again, not that tricky but time consuming to make sure that they were all level. Am pretty happy the way they turned out (many thanks Danny!)


-
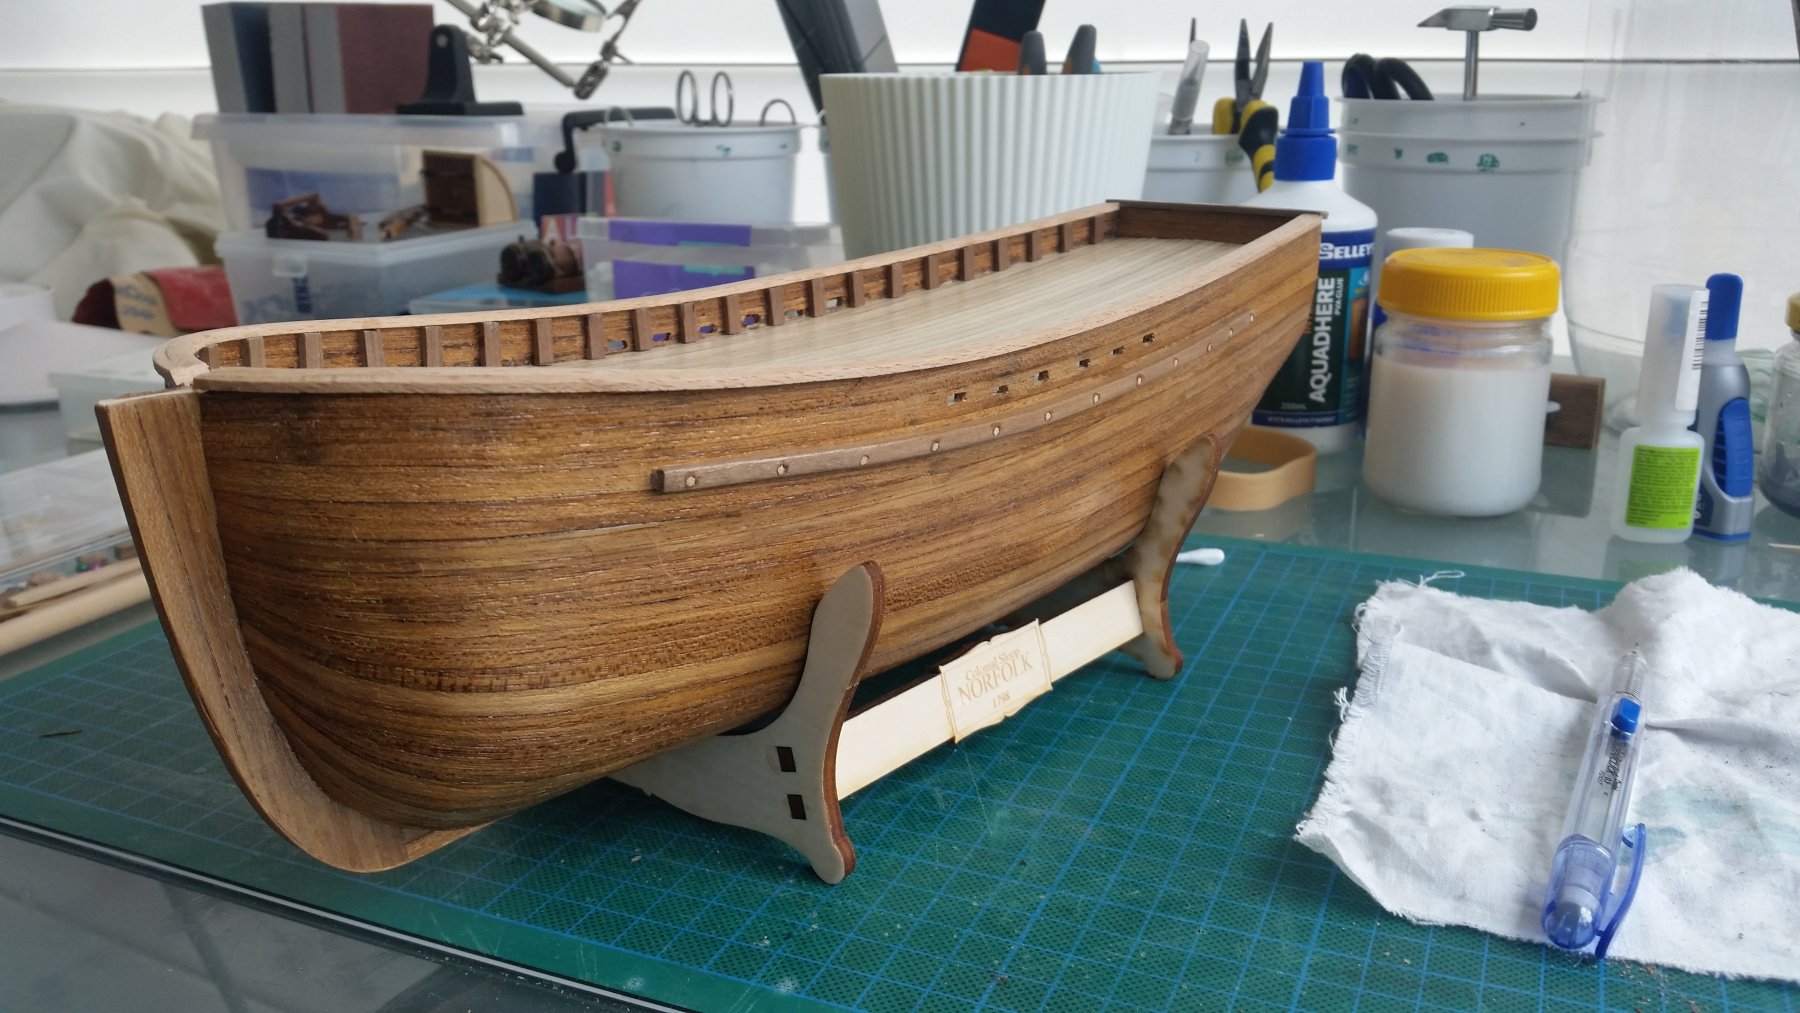
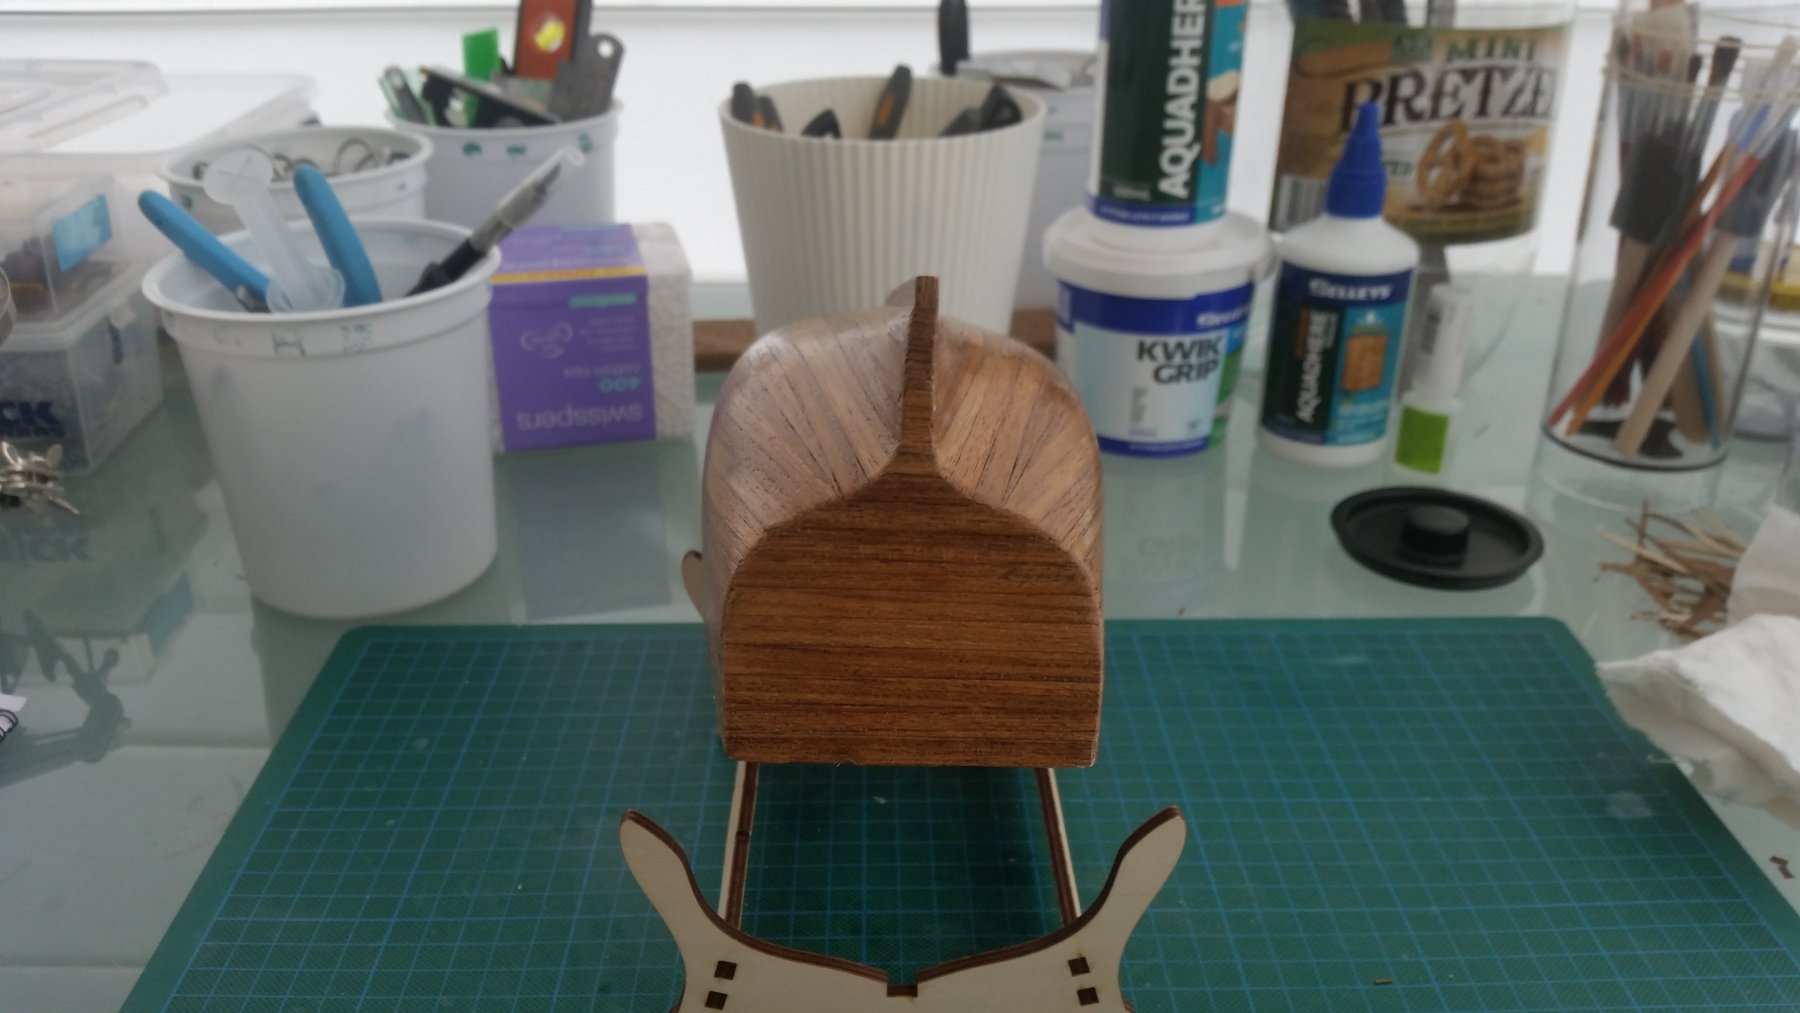
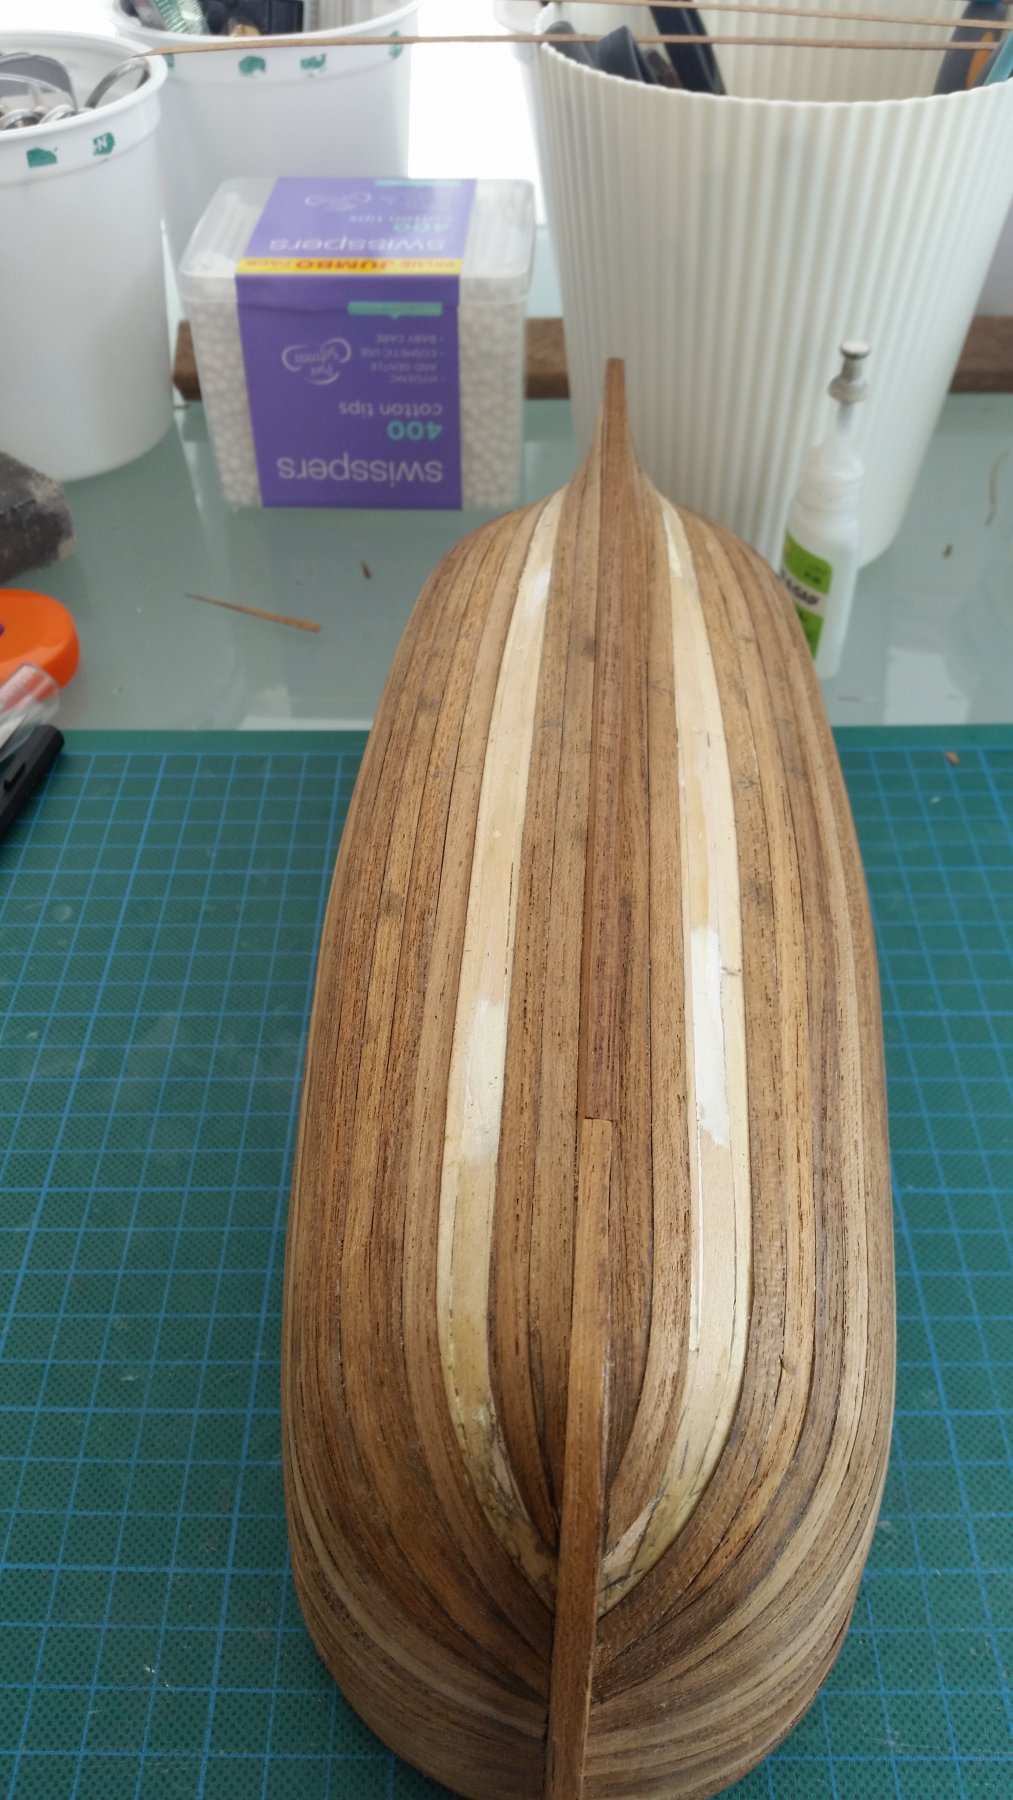
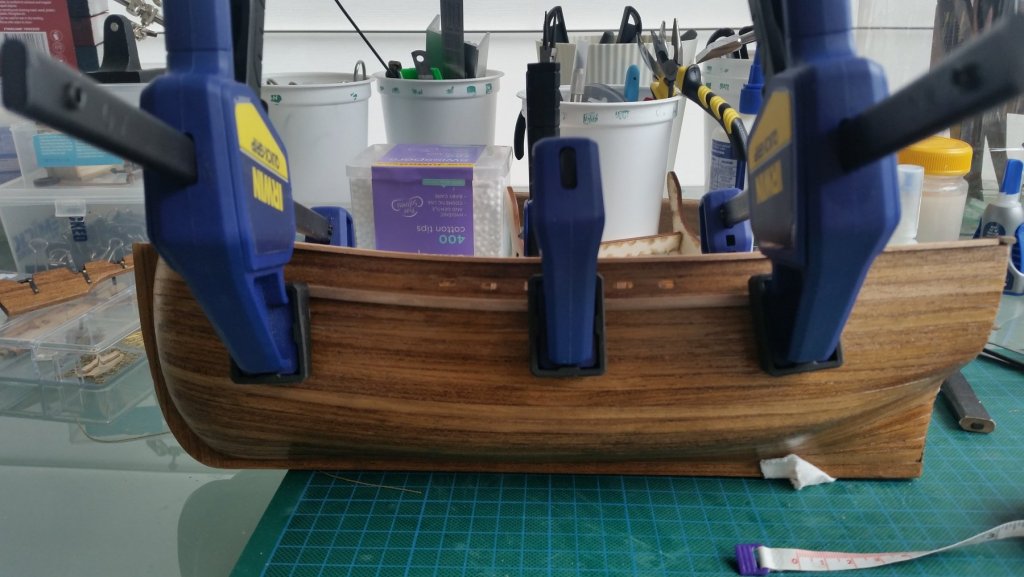
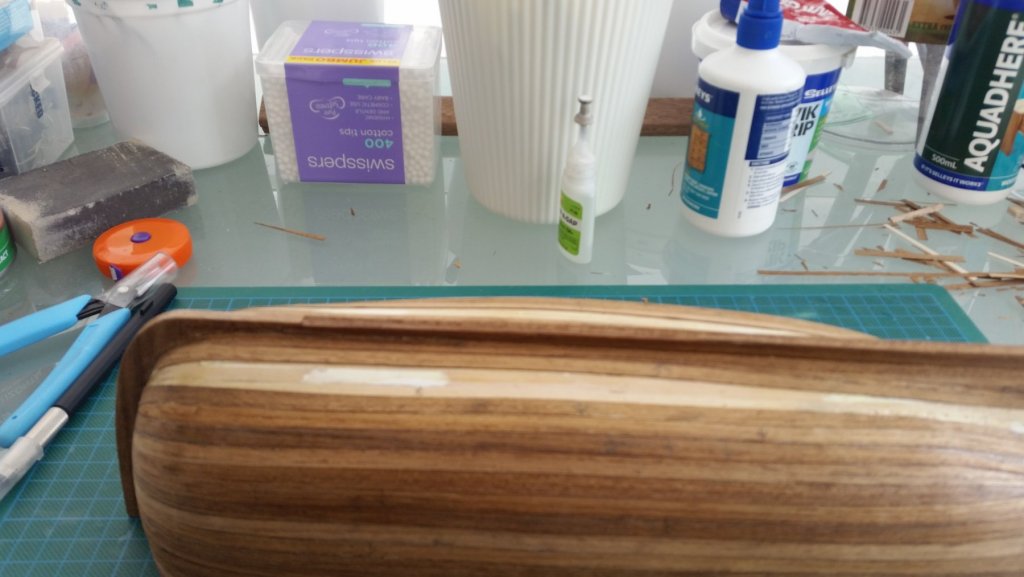
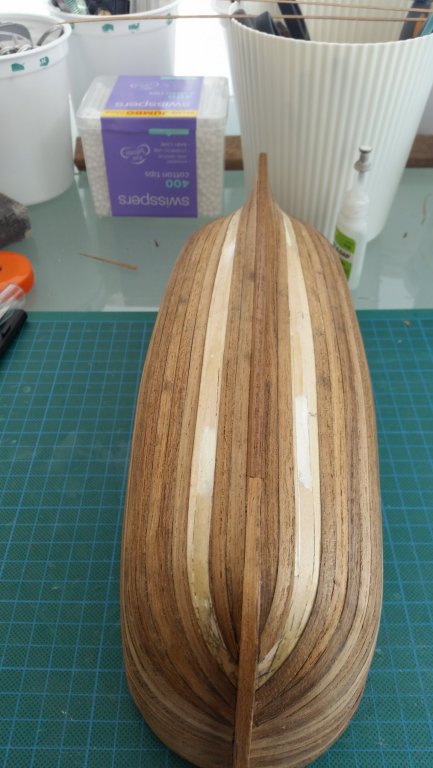
Many thanks for looking in. Many thanks for the kind comments Heinrich. As this is only my second build I am still learning many of the intricacies of building model boats. I did think of adding wood nails but in the end decided to concentrate on the instructions from Modellers Central....maybe a bit lazy but still unsure of how these builds go. Will probably be more adventurous by adding more detail on my next build! I've finally finished the second layer of planking and although not perfect am generally happy with the result. After a light sanding and a couple of coats of satin finish the hull is looking OK. Next comes the cosmetic frames that go on the inside of the bulwarks. I will also need to cut out the wash holes which will be done after the false frames have been inserted. Have also been finishing off some of the deck furniture which should be finished before I put on the cap rails. More to follow!


-
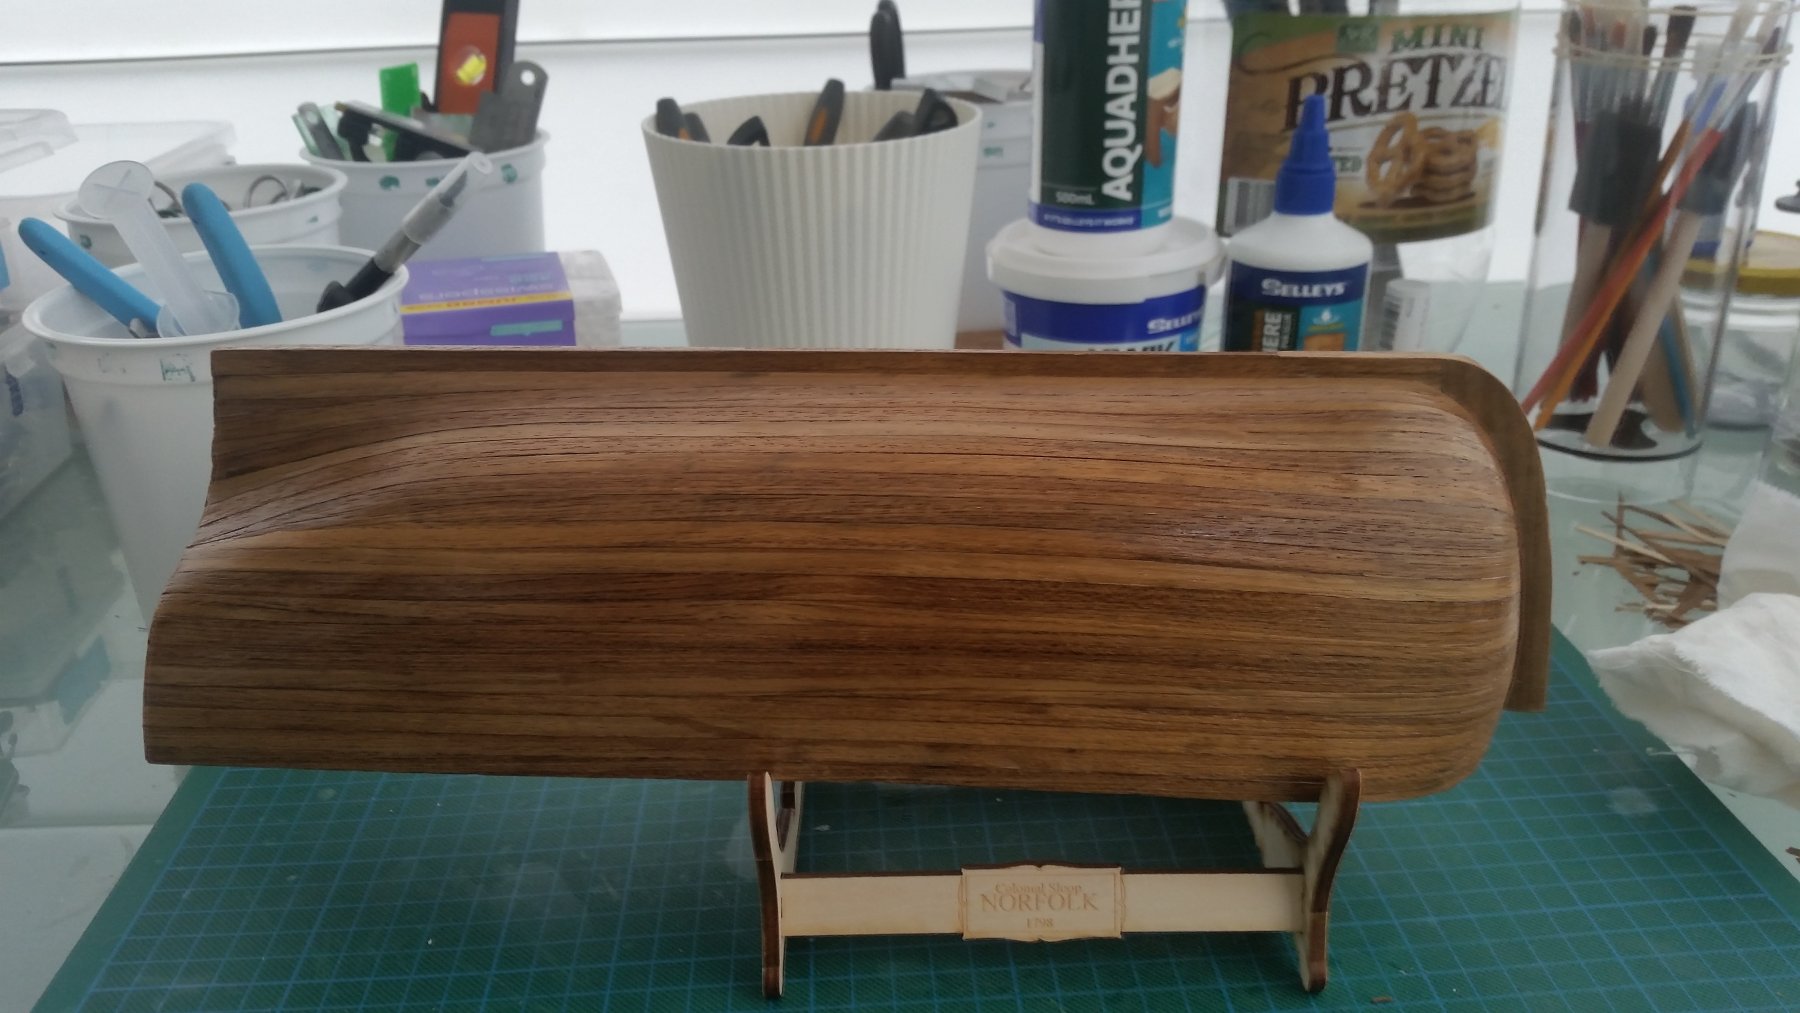
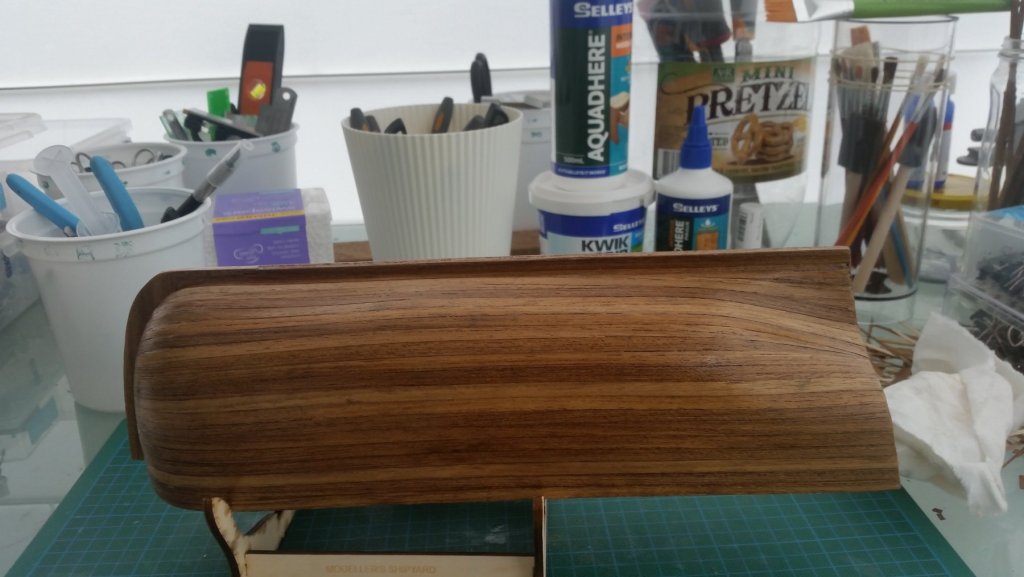
Apologies for not posting for some time. I spent most of September on holiday (managed to visit the Vasa museum in Stockholm on my travels...worth the 4 hours I spent there!) and arrived back home only to get a shocking flu which kept me in bed for nearly a week! Anyway have been able to do some more work on the Norfolk and have just about completed the second layer of planking. Apologies for the clarity of the photos (my phone has also been playing up...must have caught the same flu bug that I had!!!). I will be finishing the planking later today then a sanding job together with the first coat of a matt satin finish. The bluff bow was a lot harder than I originally thought it would be but the experience has been both frustrating and enjoyable...if that makes sense. More to come........Fernando
-
I,m also in Dann....love your work so keen to follow this one. Looks huge so should take you an extra week! Birthday wishes to you as well. Cheers........Fernando