HOLIDAY DONATION DRIVE - SUPPORT MSW - DO YOUR PART TO KEEP THIS GREAT FORUM GOING! (Only 20 donations so far - C'mon guys!)
×


Fernando E
-
Posts
242 -
Joined
-
Last visited
Content Type
Profiles
Forums
Gallery
Events
Everything posted by Fernando E
-
Hi Vinnie...and good to see you are back in the shipyard. I am keen to buy the Syren blocks as well as the rope (ready made stuff) as it looks fantastic and has been recommended by a few builders on this site. I'm due to finish my brothers Santa Lucia in the next couple of weeks and will start on the Modellers Central Perseverance soon after. Nice work on the cannons and the rope coils....how did you get them so neat and tidy? Cheers..........Fernando
-
Welcome back from down under. Look forward to your build log. Cheers...... Fernando
-
Enjoy the summer
-
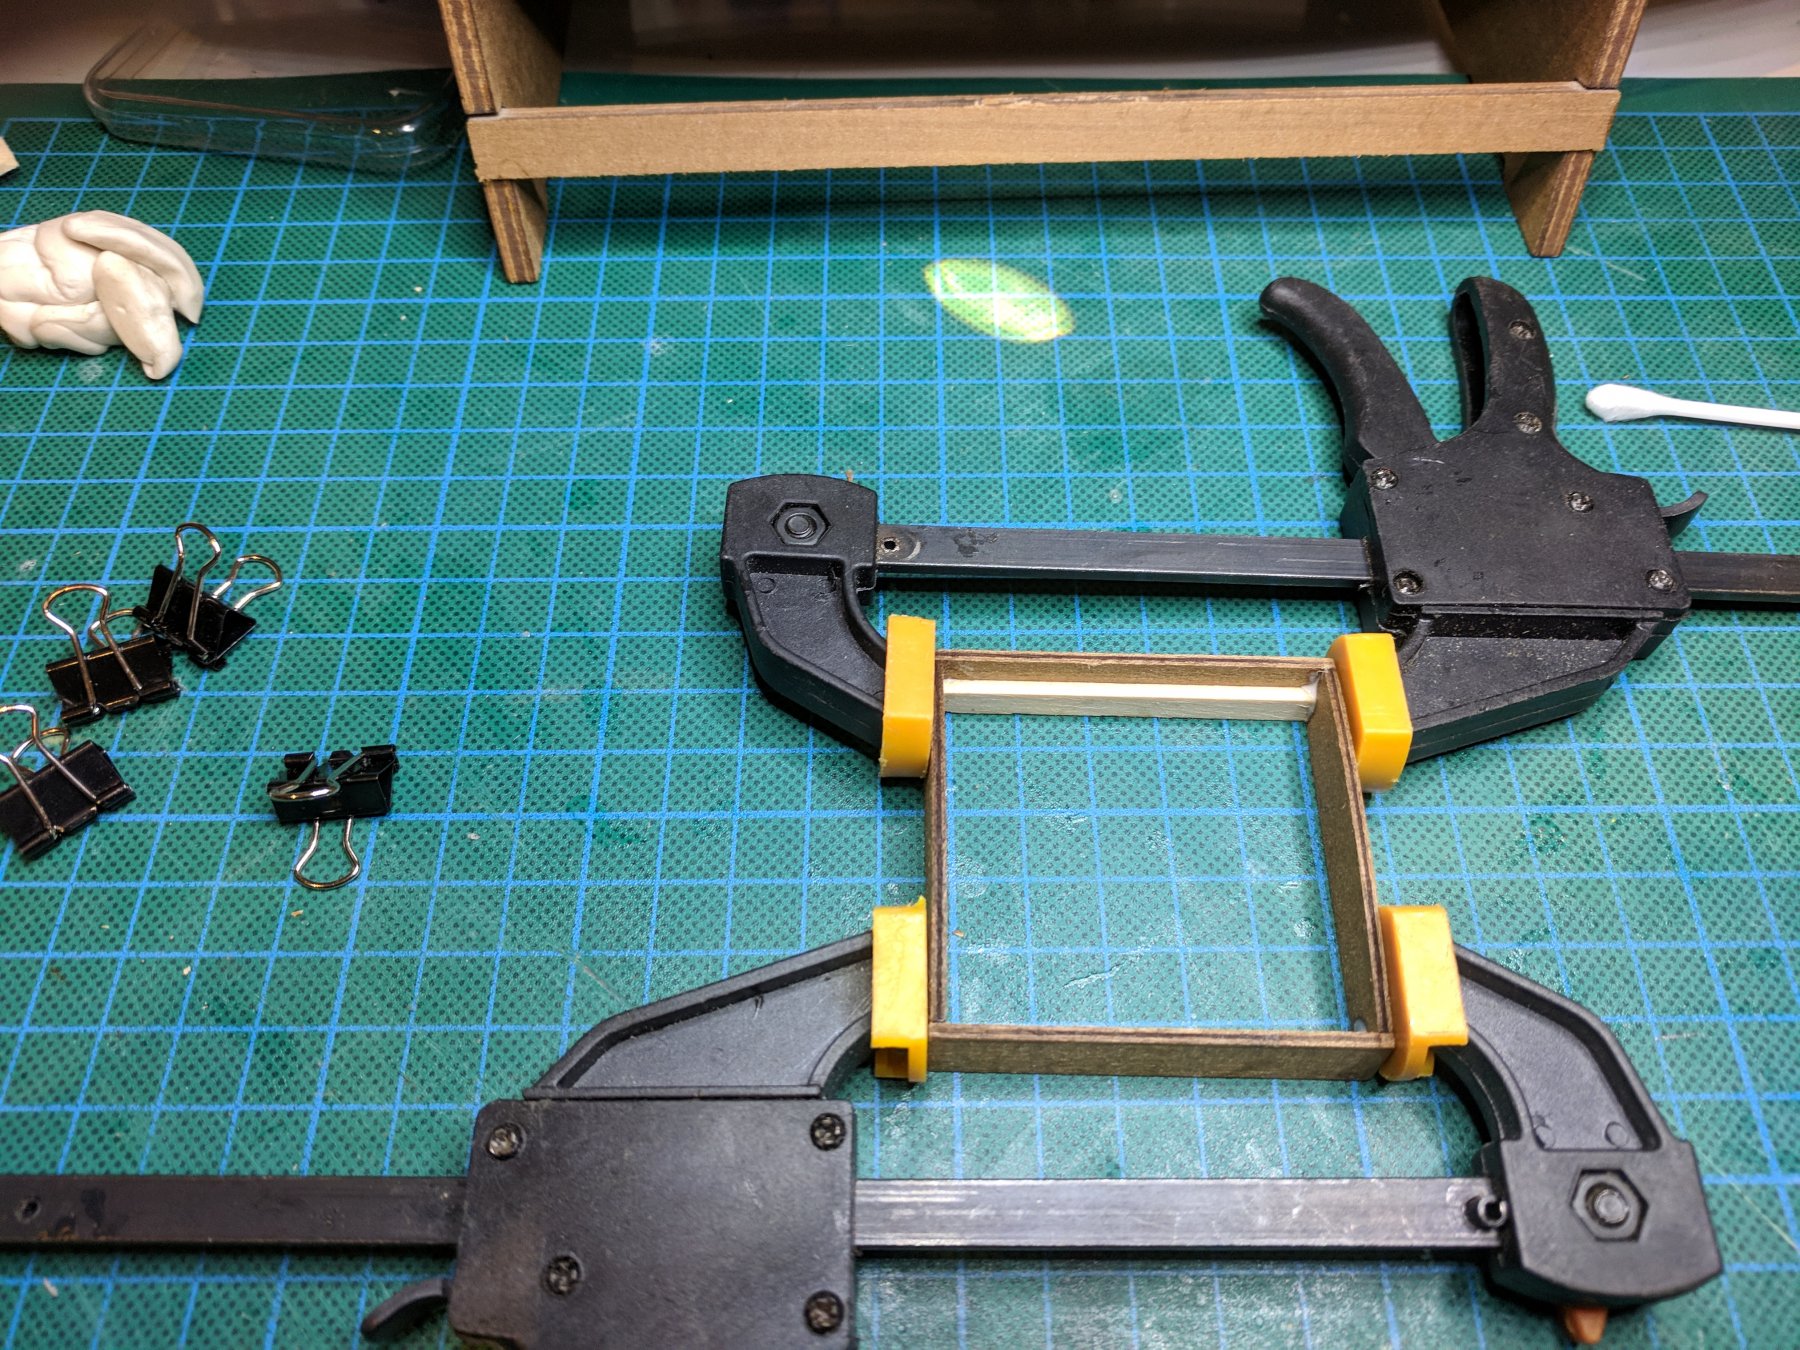
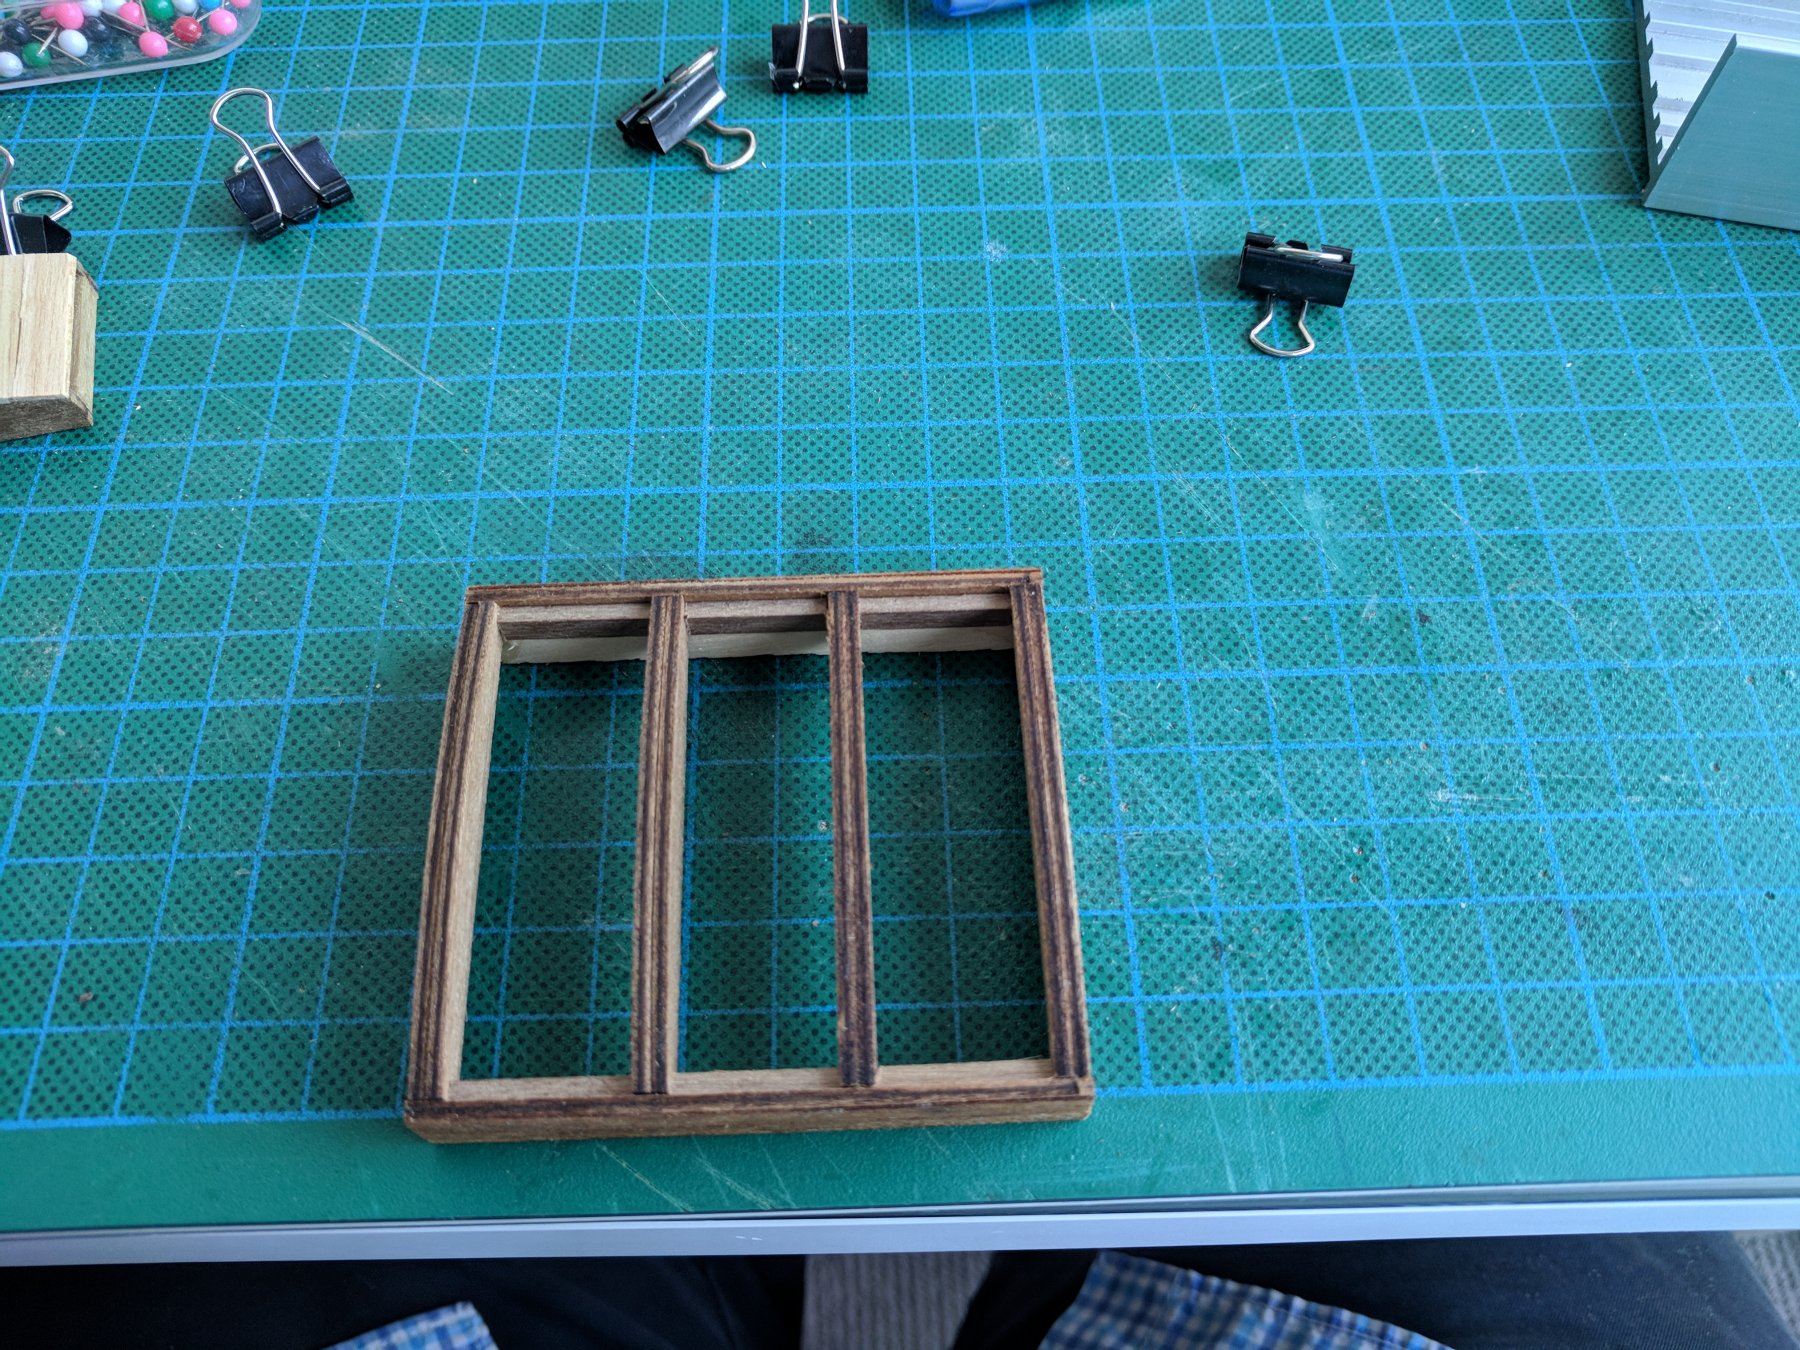
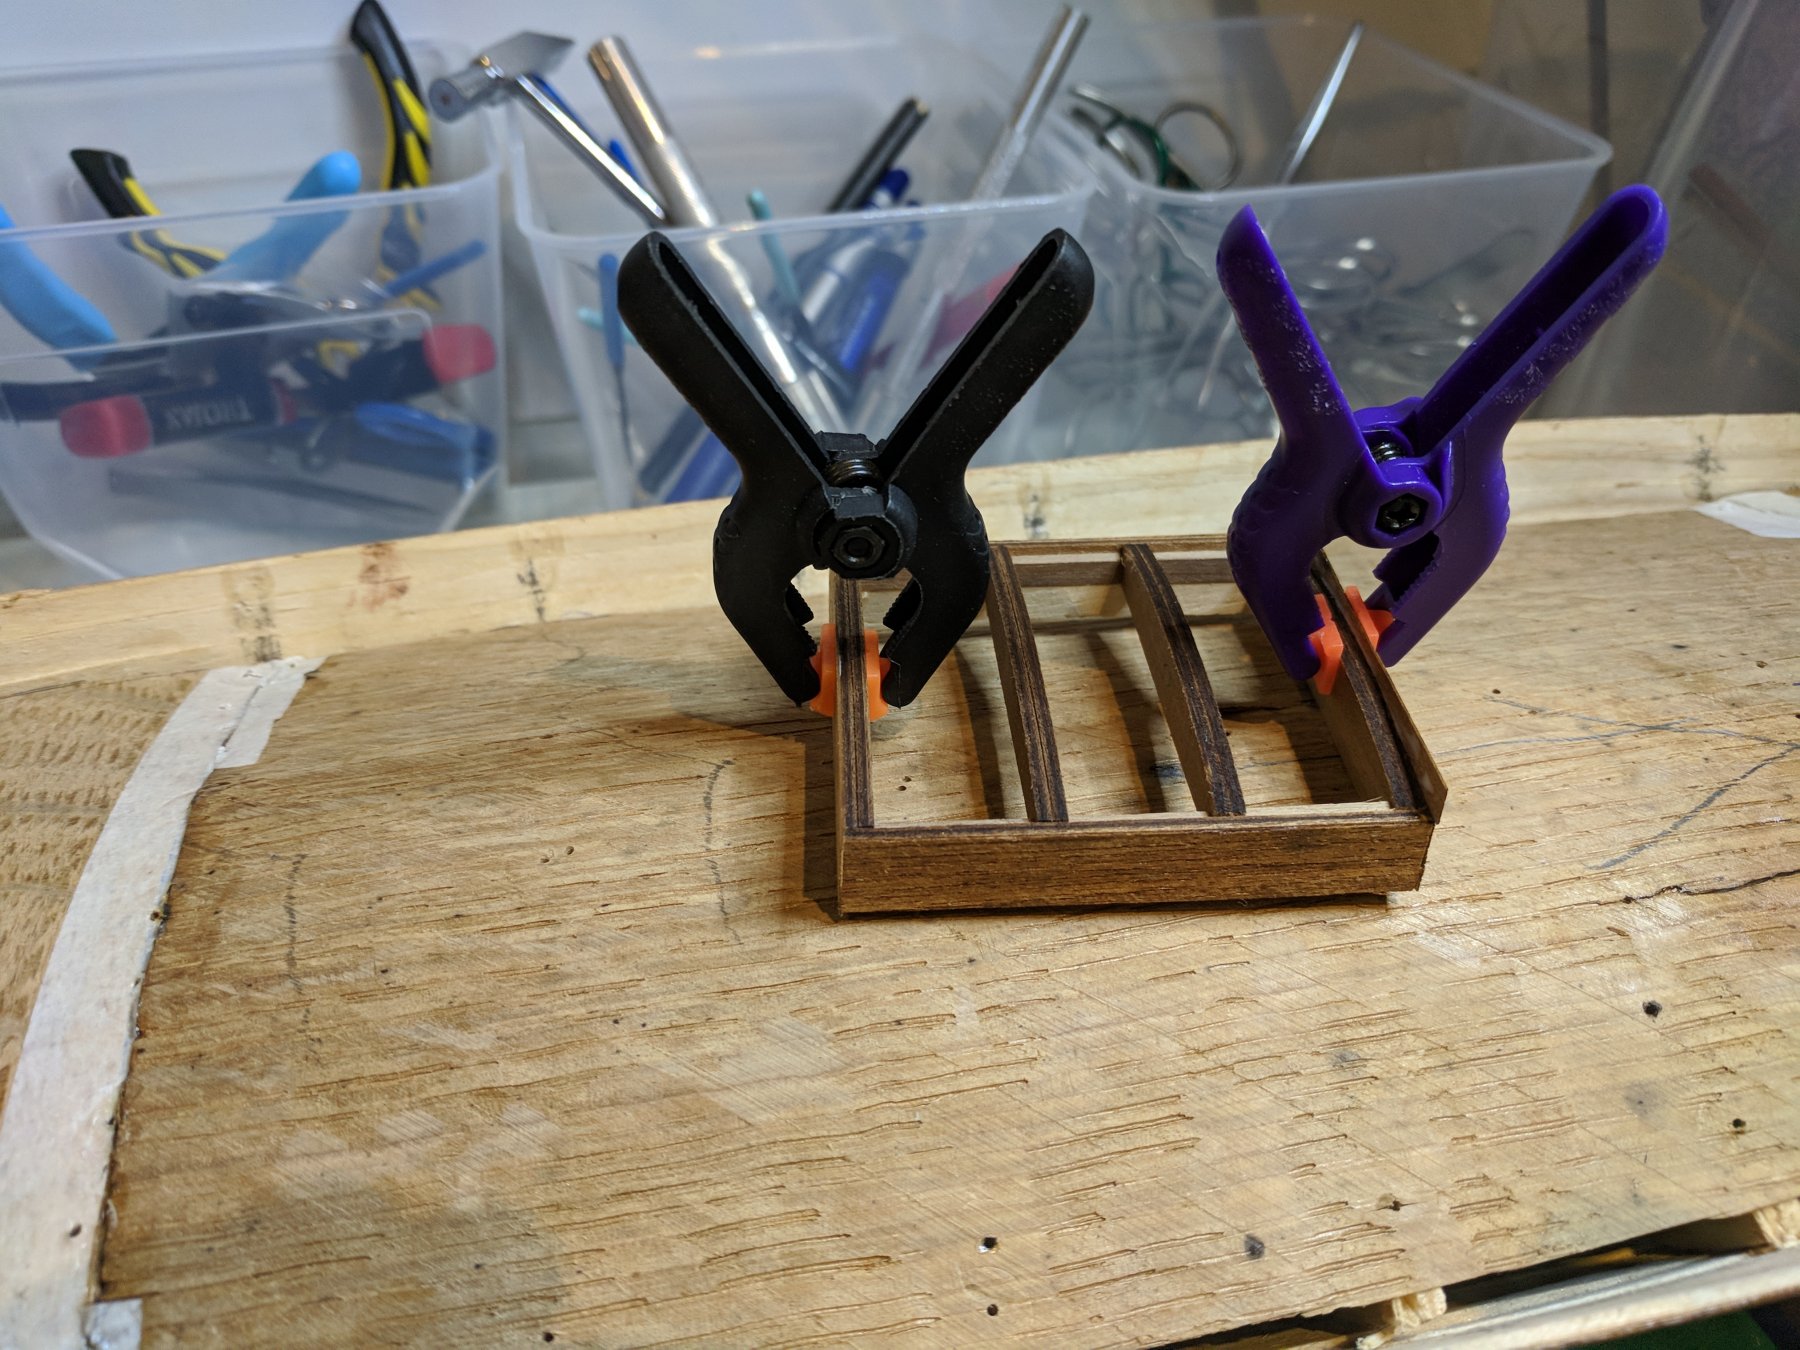
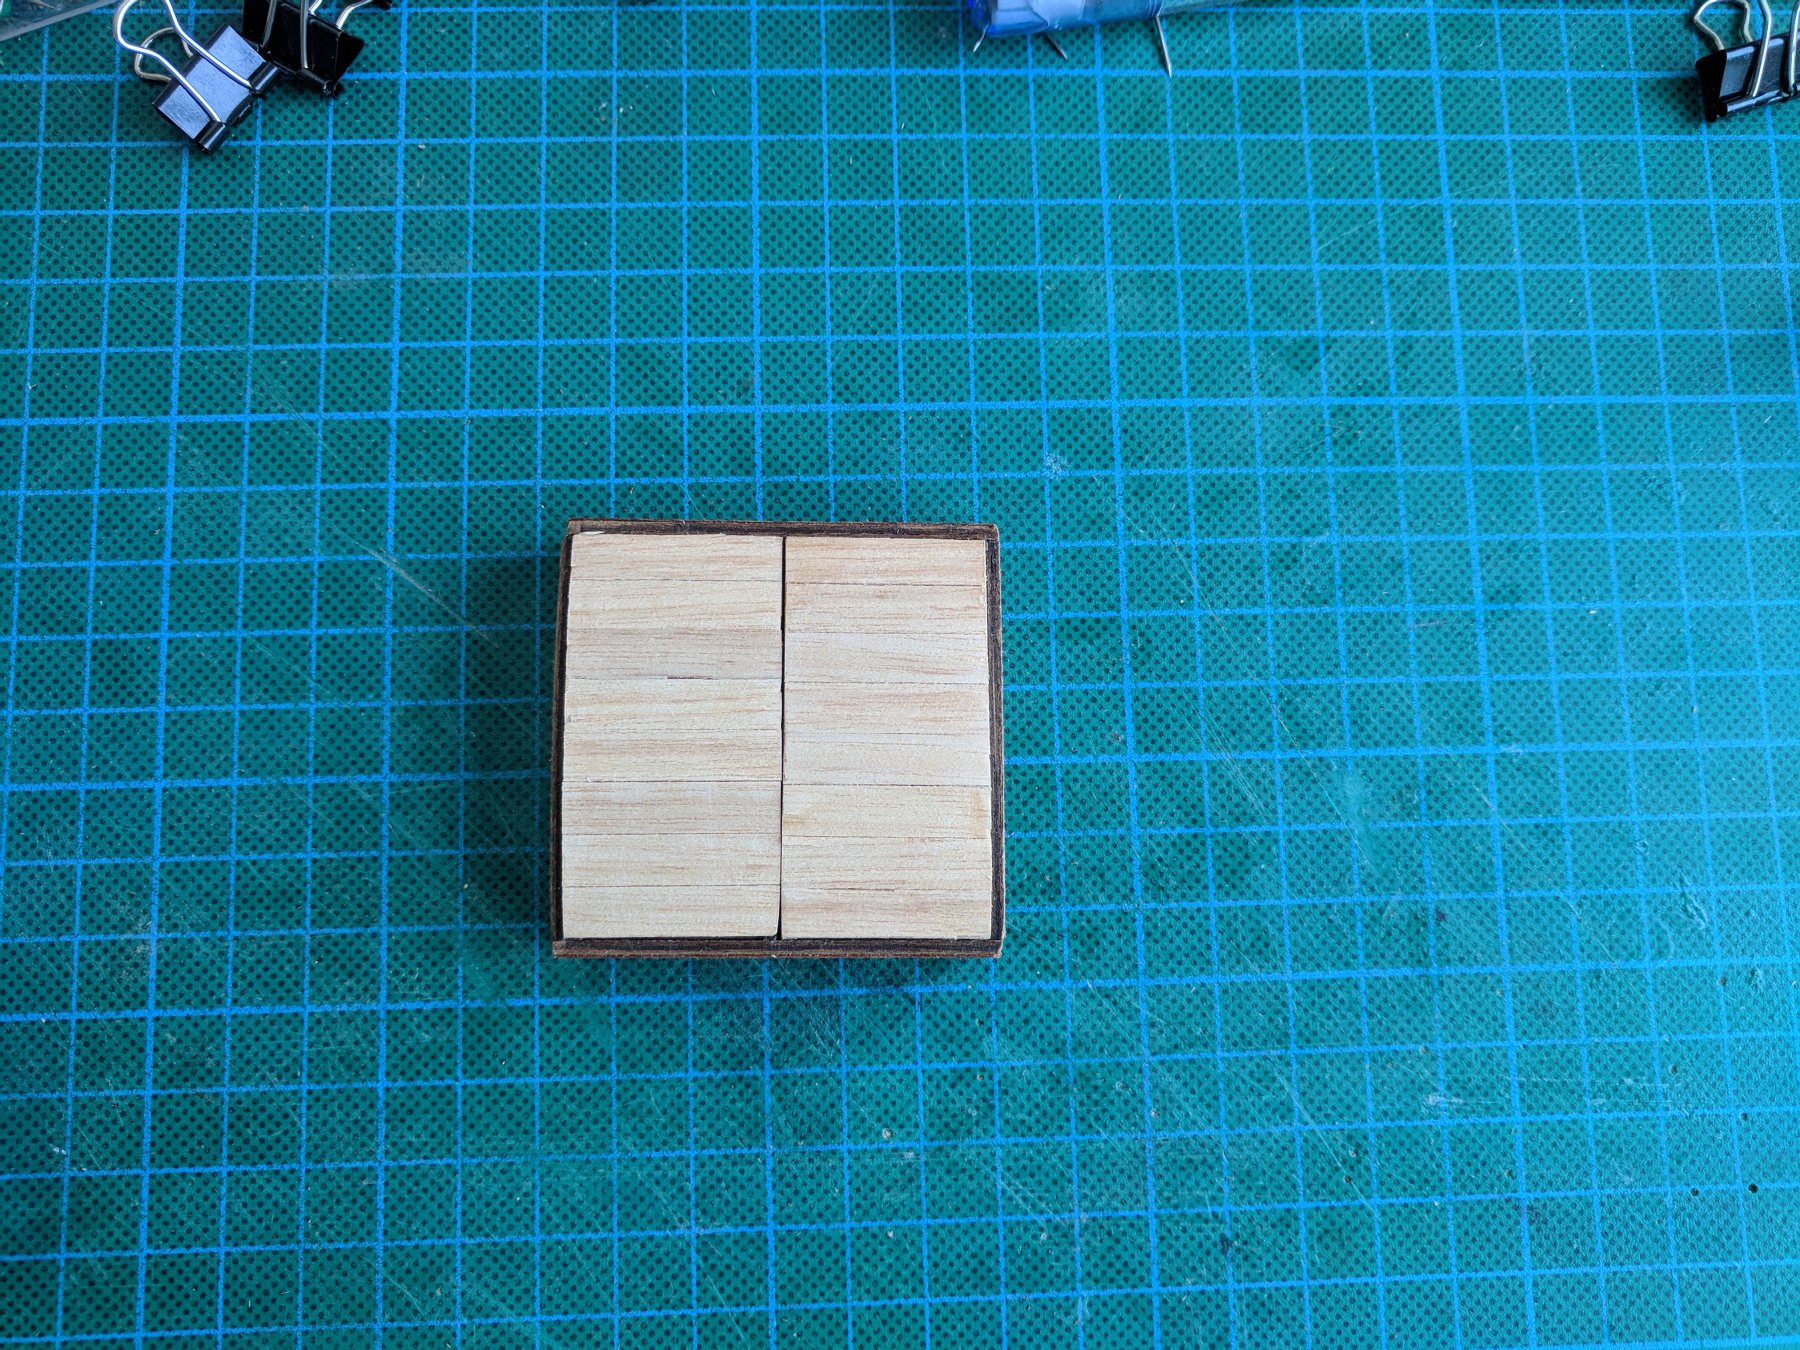
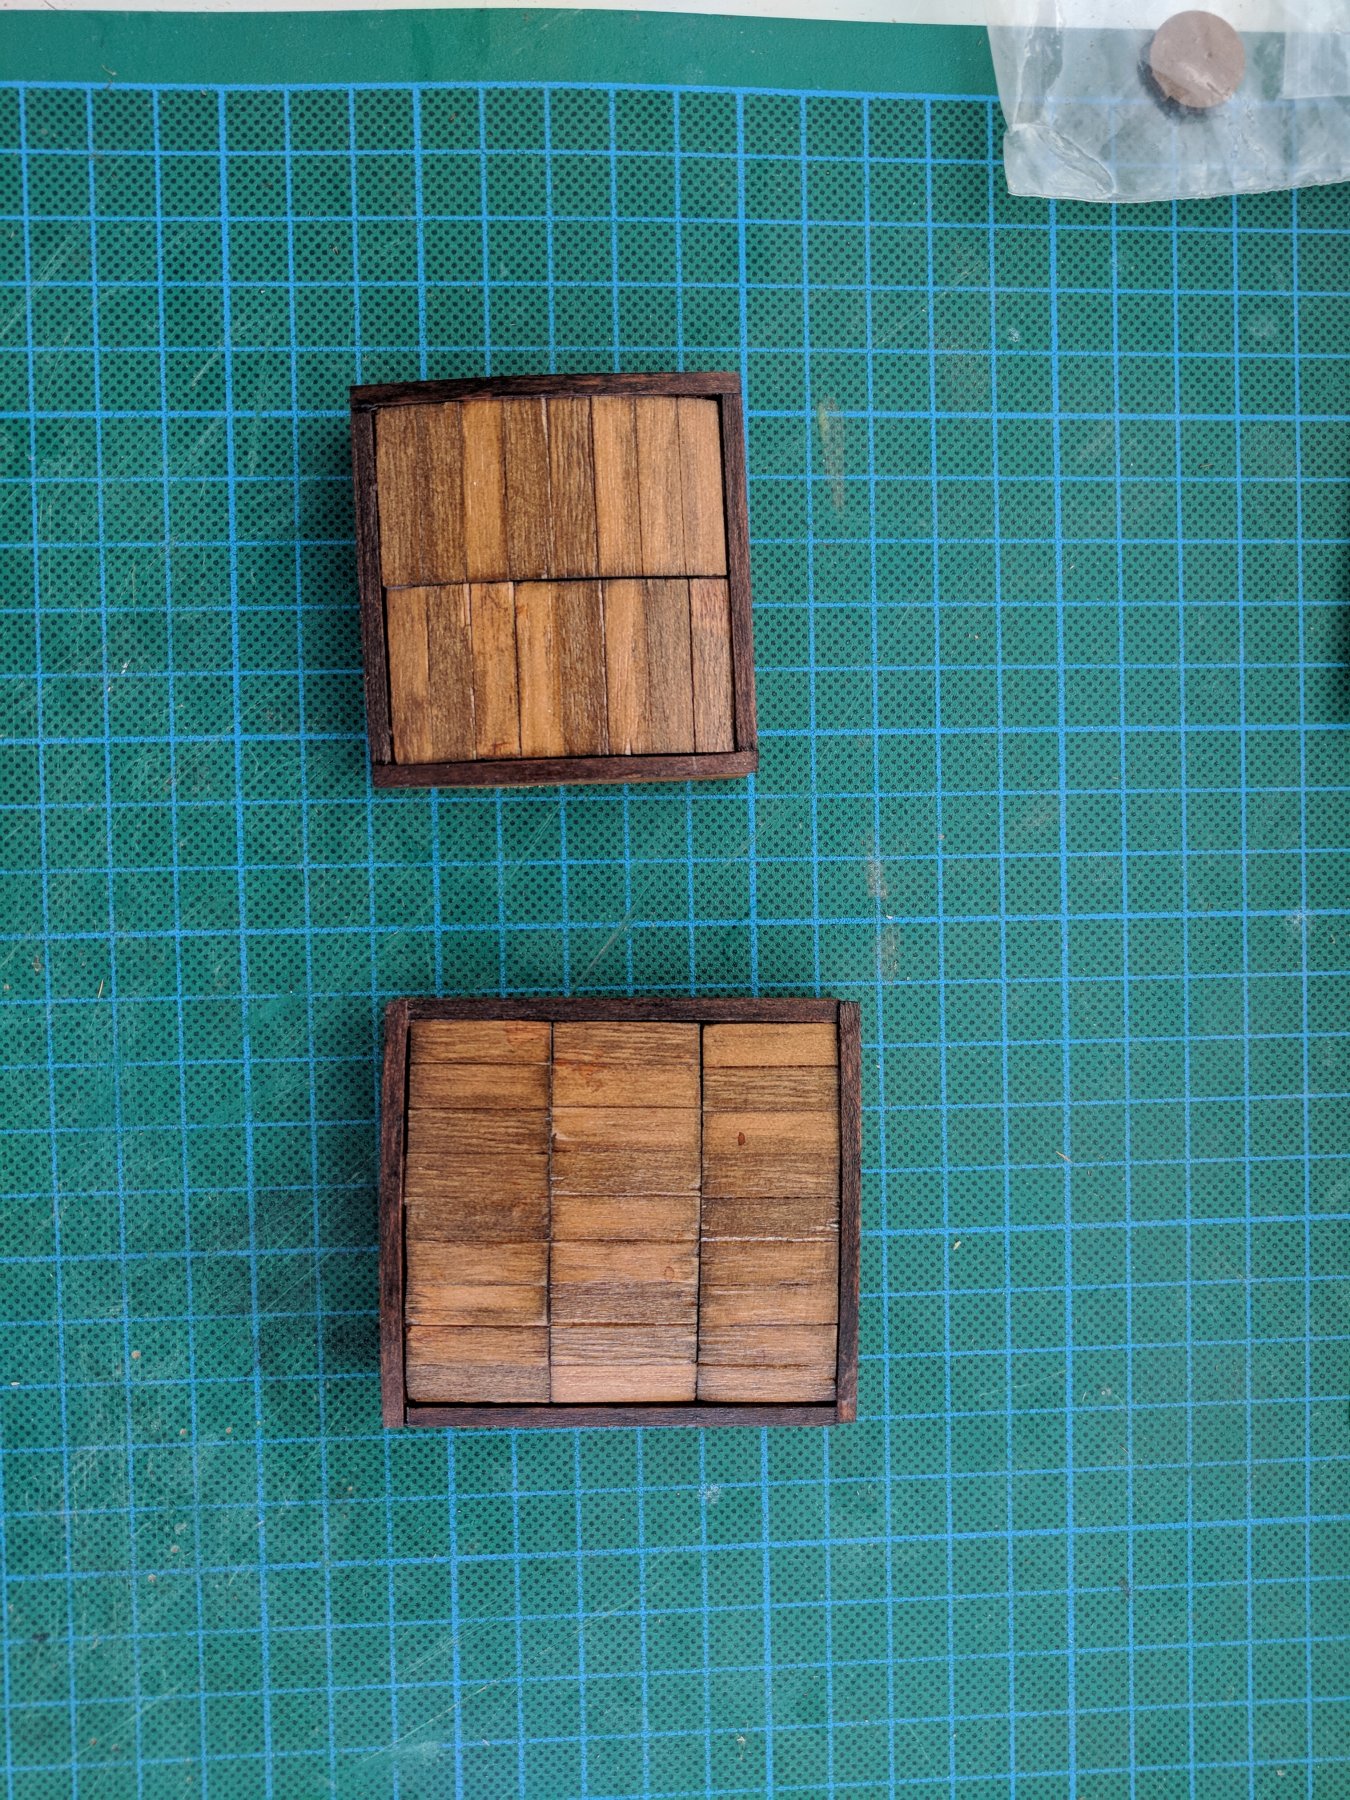
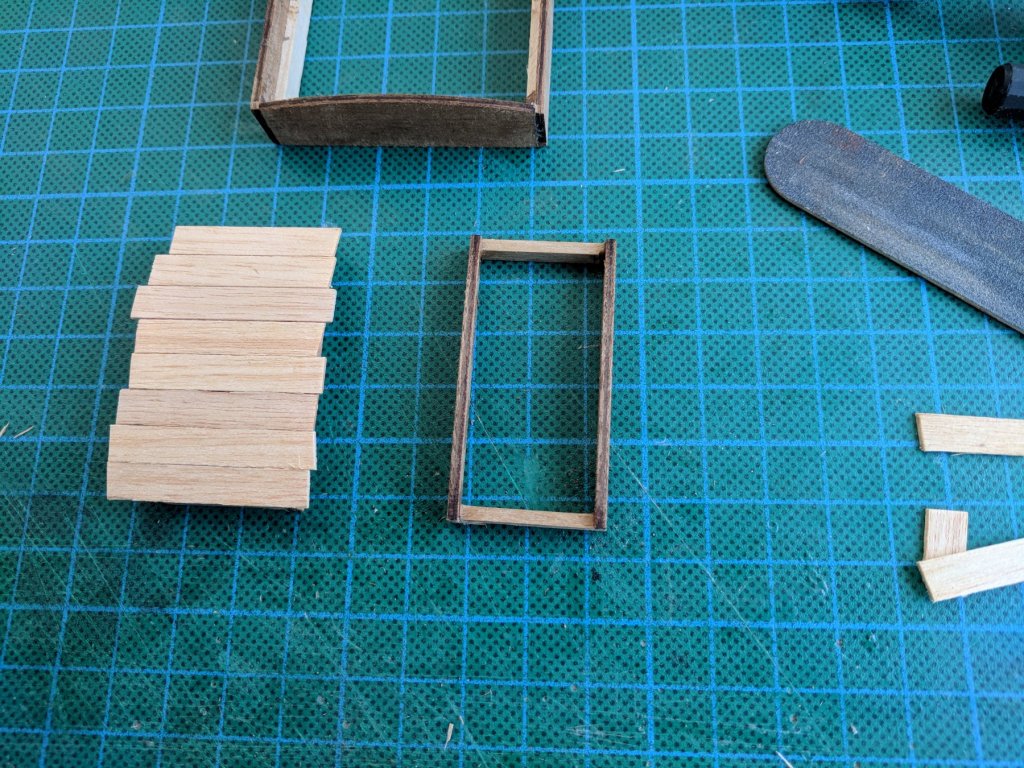
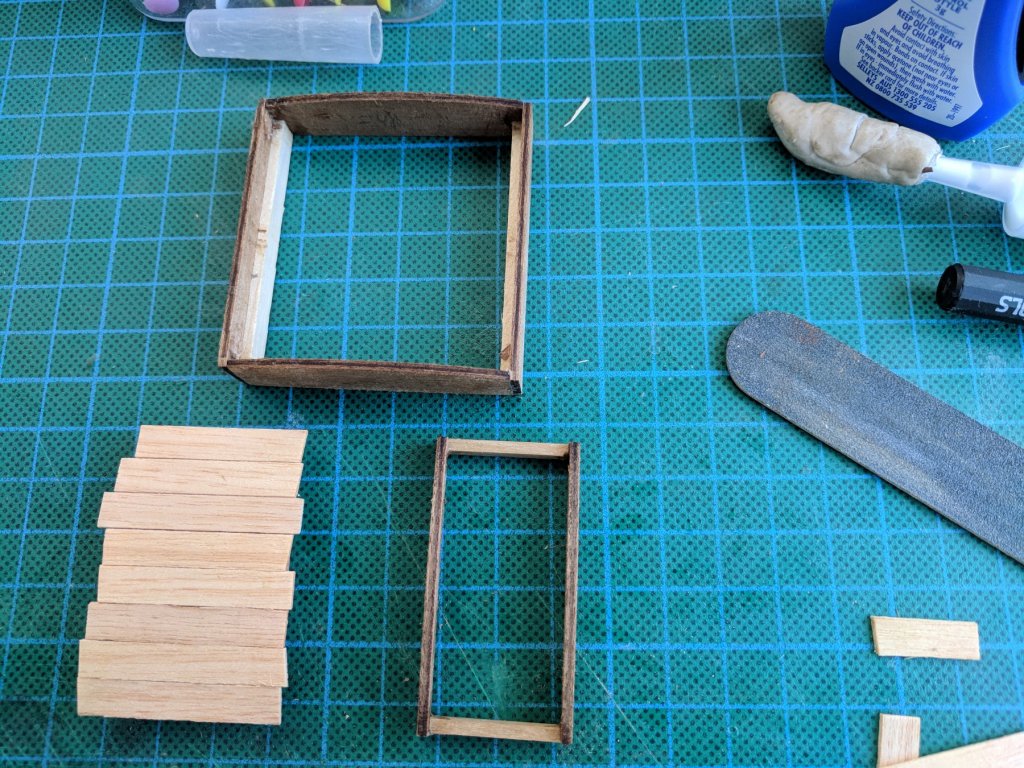
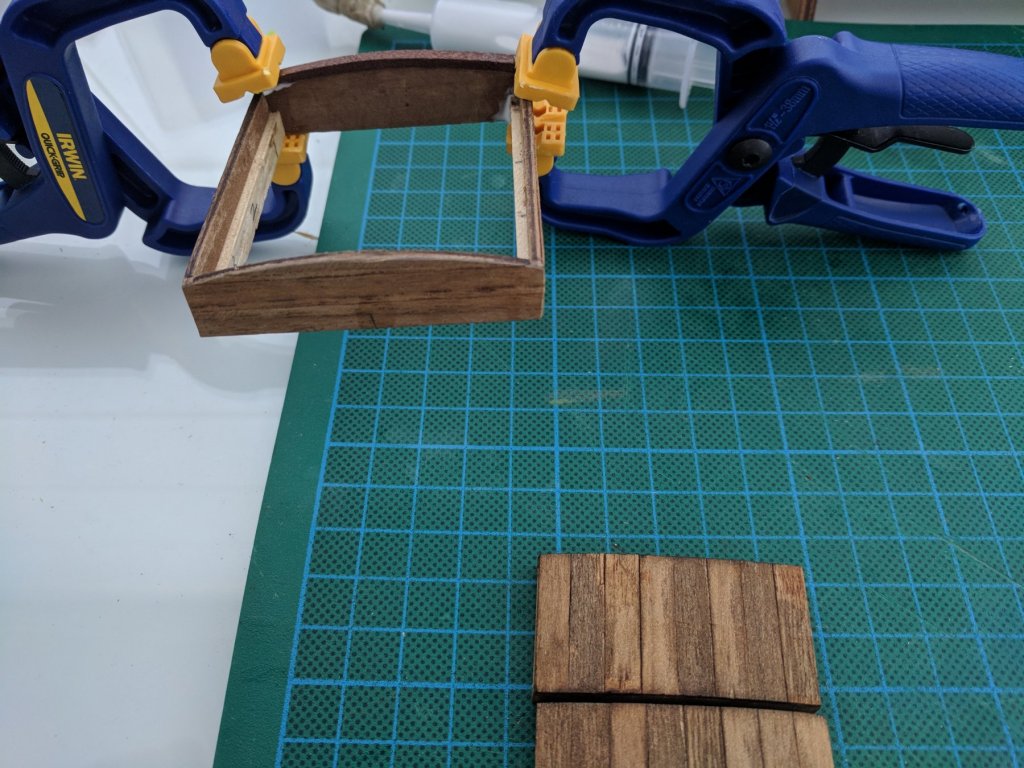
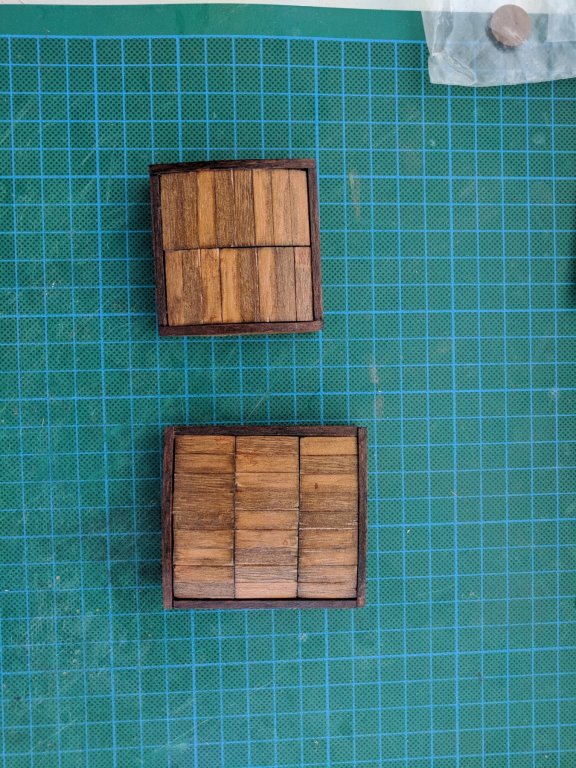
I have also started on some of the deck furniture whilst giving myself a break from the hull. The kit has supplied some very good quality laser cut pieces and they were easy to assemble with some very minor sanding. As mentioned earlier I will not be painting this model but will keep as much as possible with a wood finish. I had some leftover teak strips from my Norfolk build and have used it for some of the deck furnishing. Next is the deck itself! Cheers............Fernando


-
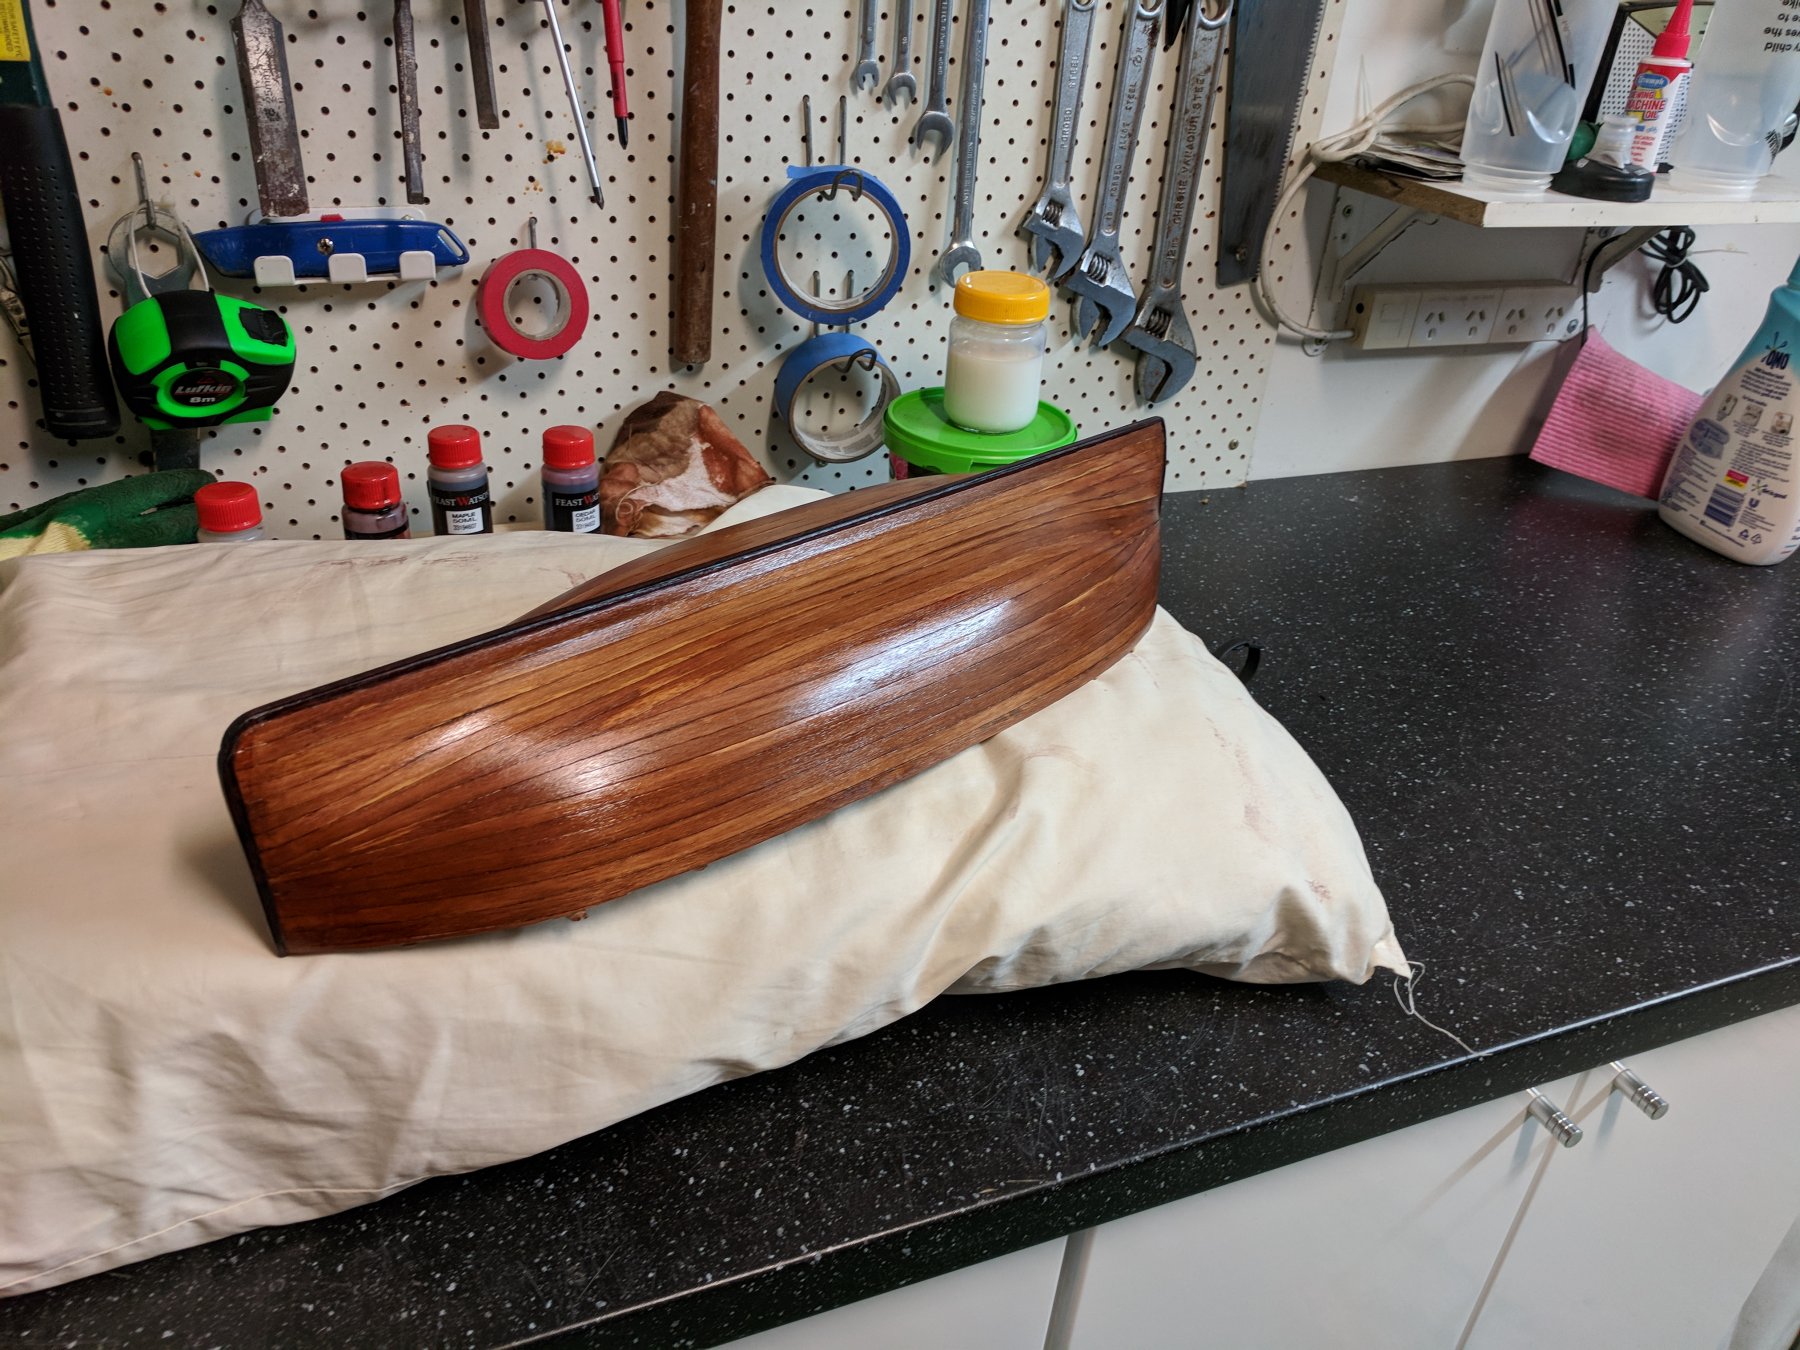
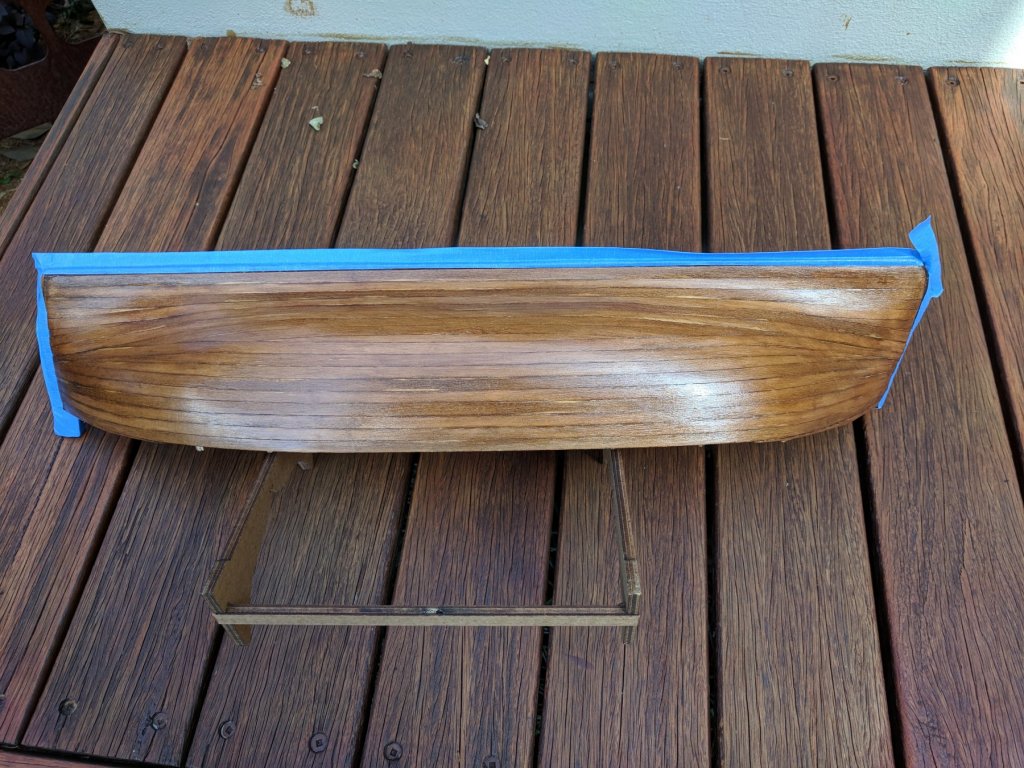
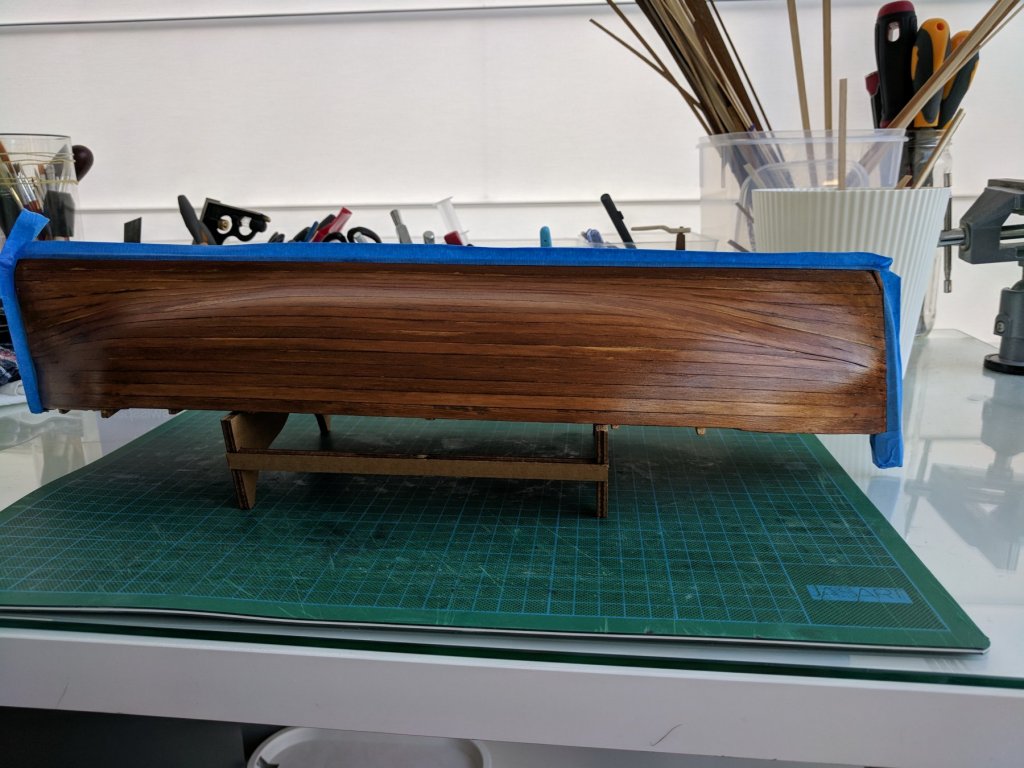
After seeking guidance from my brother (who is going to get this boat when finally finished he wanted the "old baltic pine" stain put on the hull. Although it currently looks like a gloss finish I have put a coat of clear satin finish which now looks ok. More pictures to follow


-
Welcome to the site.... I've only been a member for just over a year but have found it to be a great resource for all things nautical modelling. Cheers from Sydney Australia...... Fernando
-
Apologies if the photographs are out of sequence....I don't know what happened there!
-
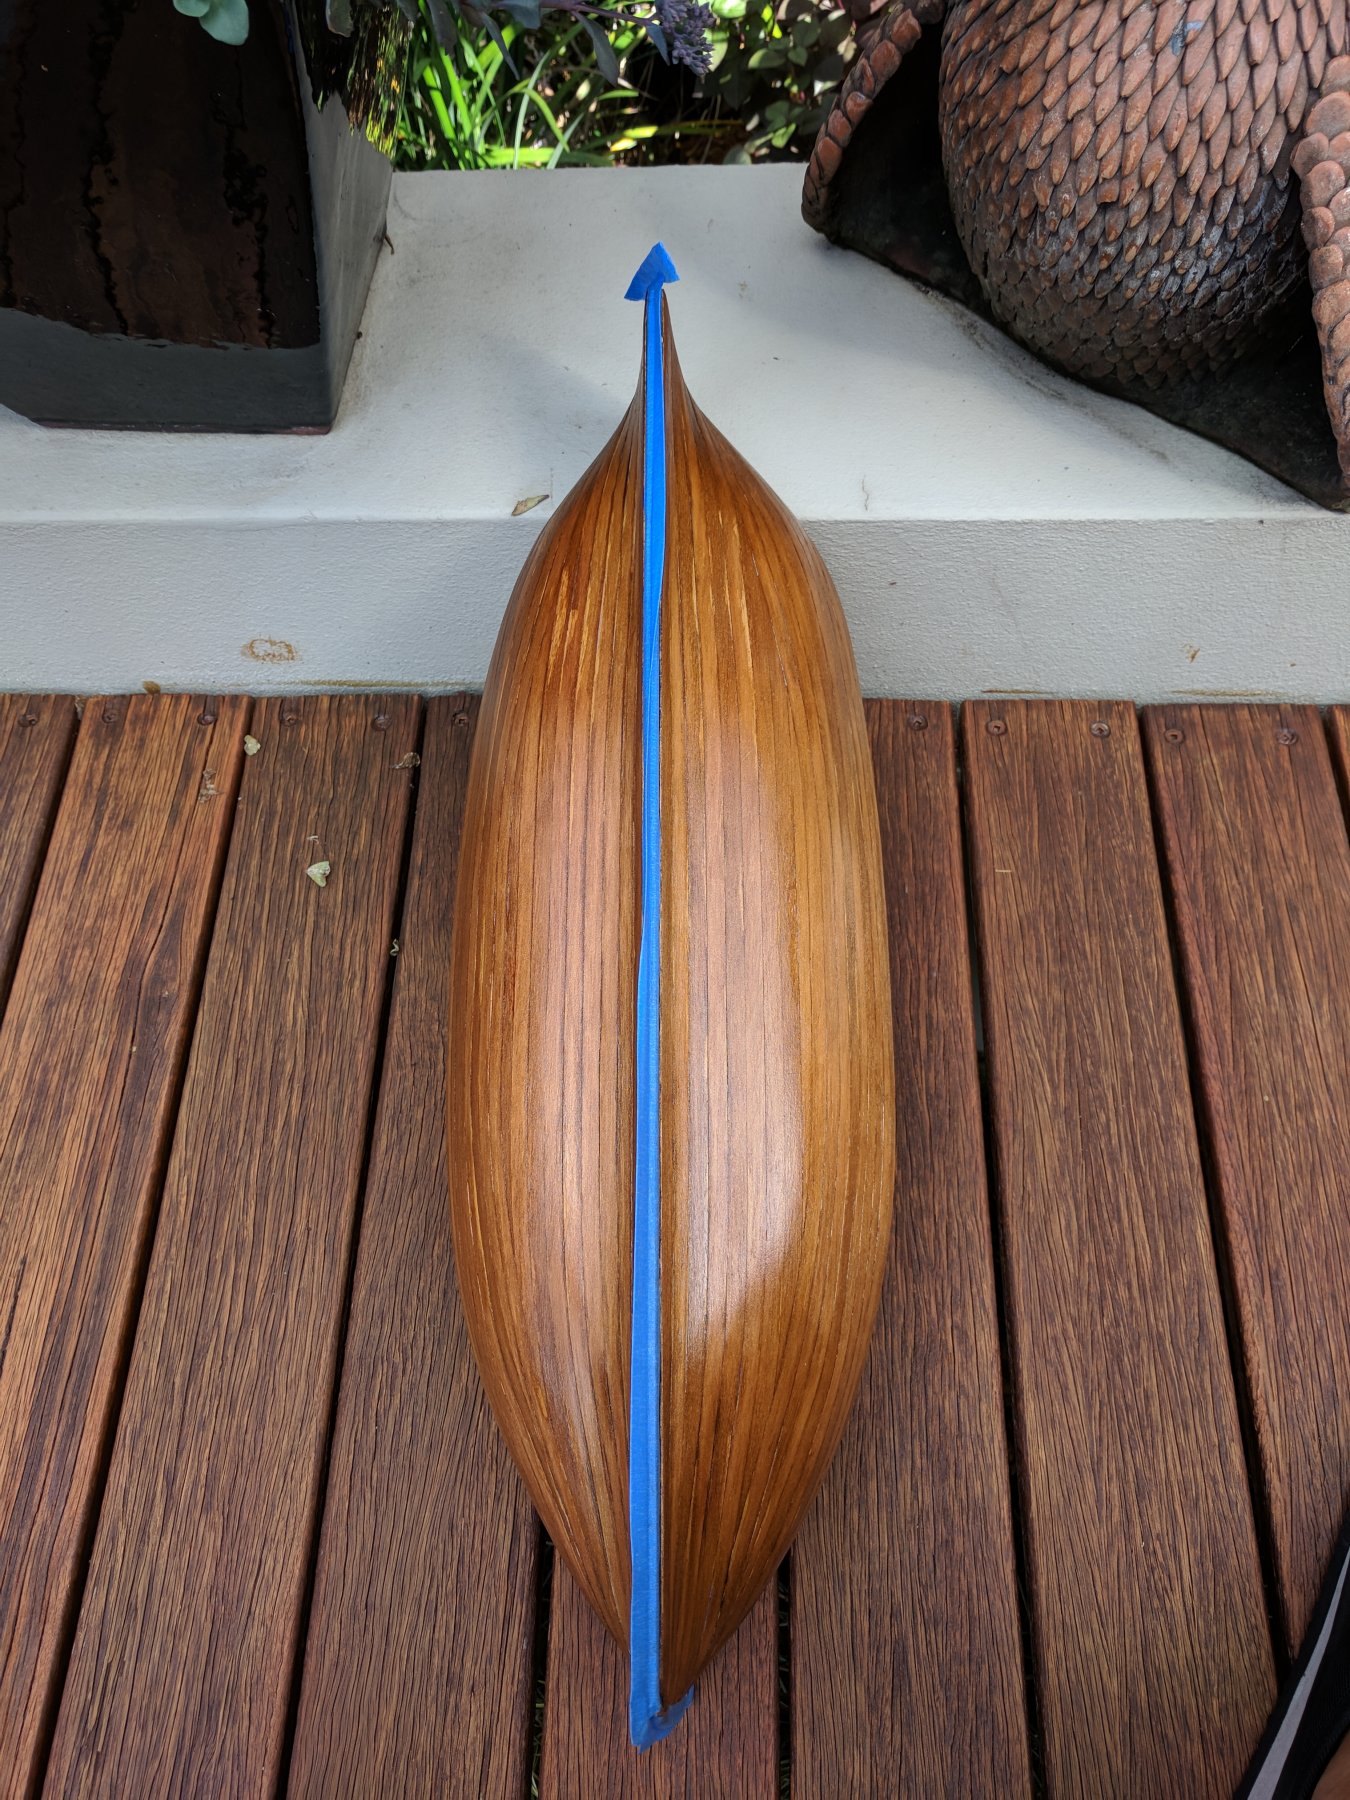
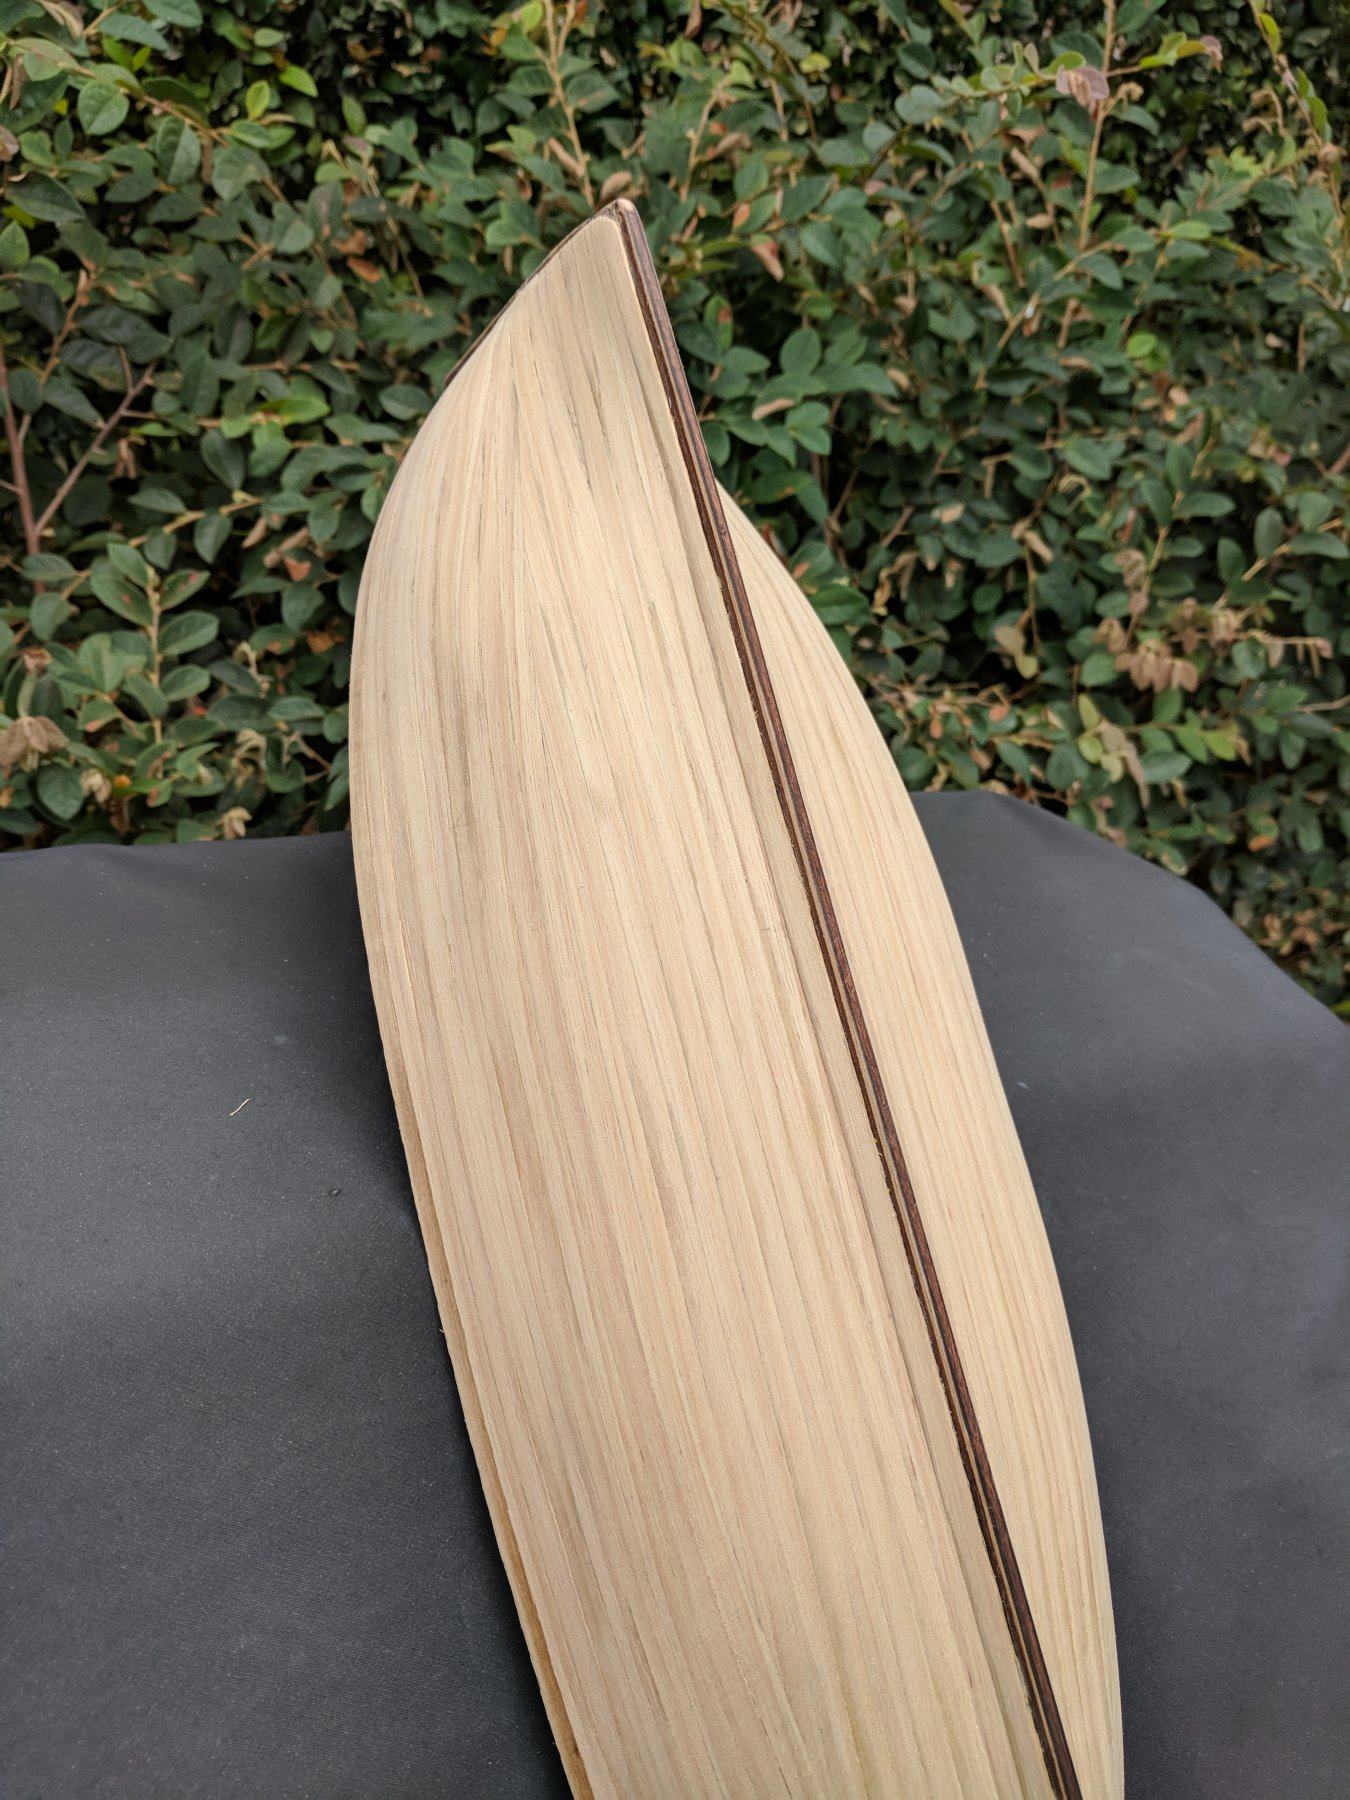
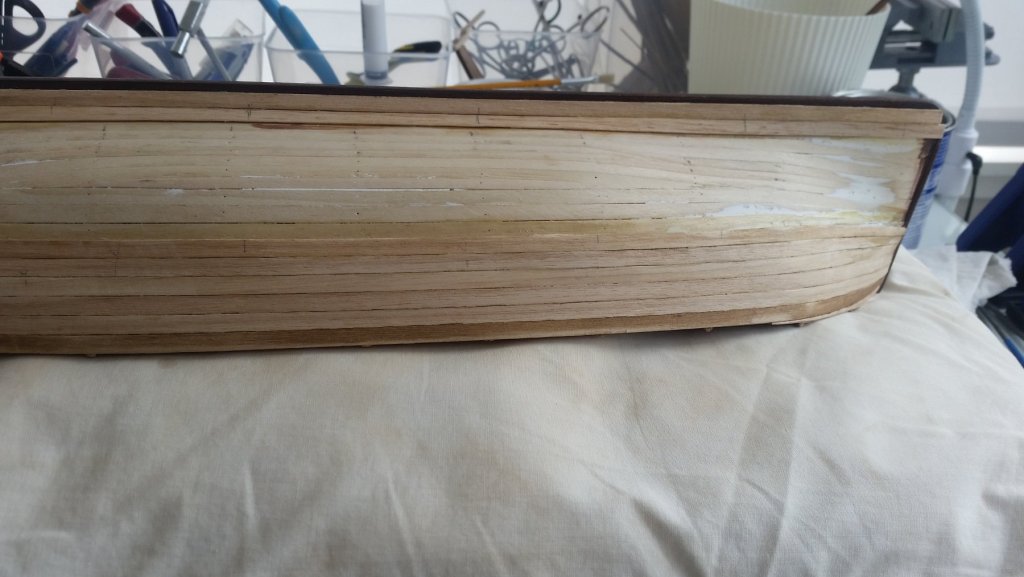
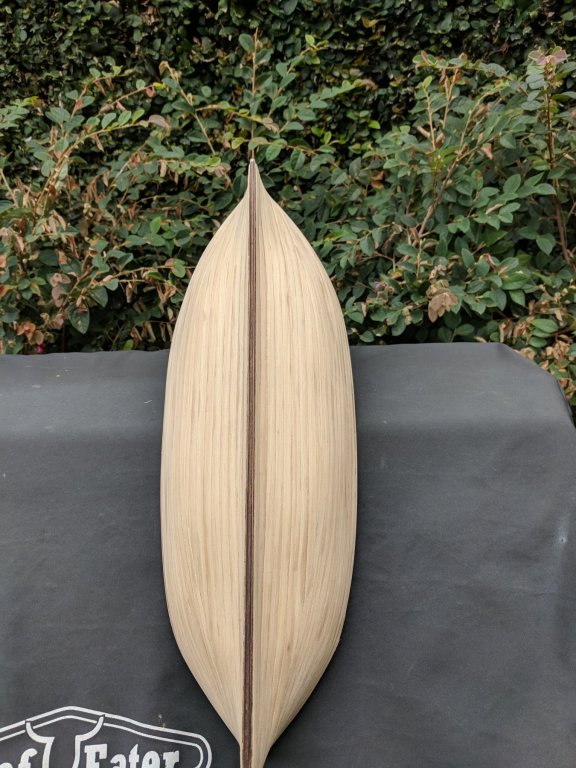
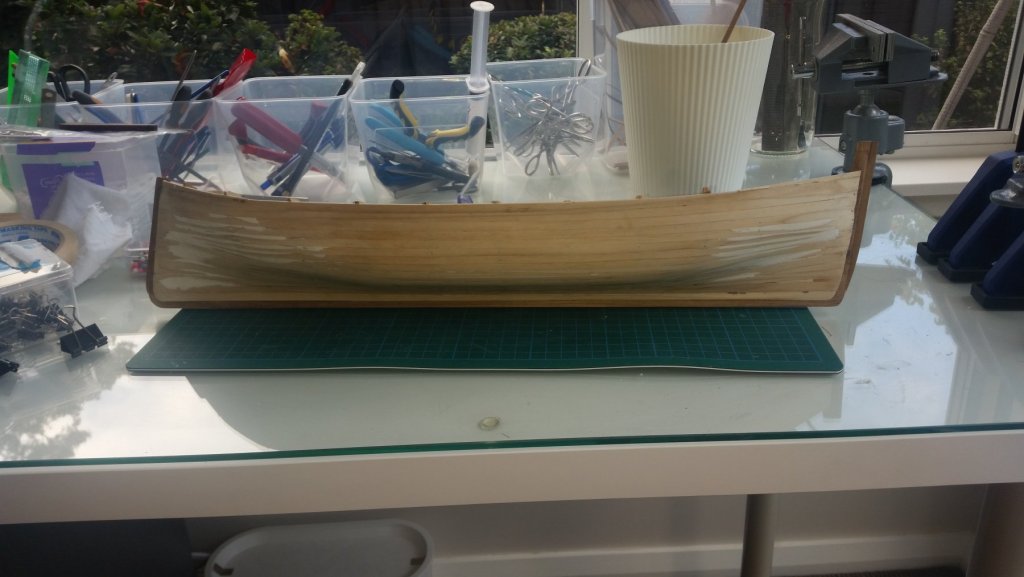
I'm back from my two week break and started on the second layer of planking. This layer was easier to put on and luckily hid all the faults of the first layer. I am pretty happy with the finished look particularly after sanding it all back. The colouring of the second layer in the photograph is due to some old planking which I had and was able to use on this model. I realised that after starting the planking some of the wood had gone missing (after 30 years in storage etc. it should not have surprised me!). I was able to sand the stain off and will be trialling some wood stain to see which colour looks the best. More to follow.


-
Thanks for looking in gents and your very kind comments...much appreciated and welcome aboard Tom. It will be a slow build as I'm still only semi retired but will hopefully be putting in regular updates after I get back in a couple of weeks. Being a granddad is a great feeling Antony and a lot of fun! I'm not using any paint on this model as my brother gave me strict instructions to have it all in wood finishes....which means a second layer of planking and wood stain where needed. I need to also make it look like it has been a working ship for some time and hence will need to have it looking a bit old and possibly tattered I will be starting on the second layer of planking using the wood supplied but will need to stain it ...am thinking old baltic pine but will need to do some testing before I decide what looks the best. Cheers.........Fernando
-
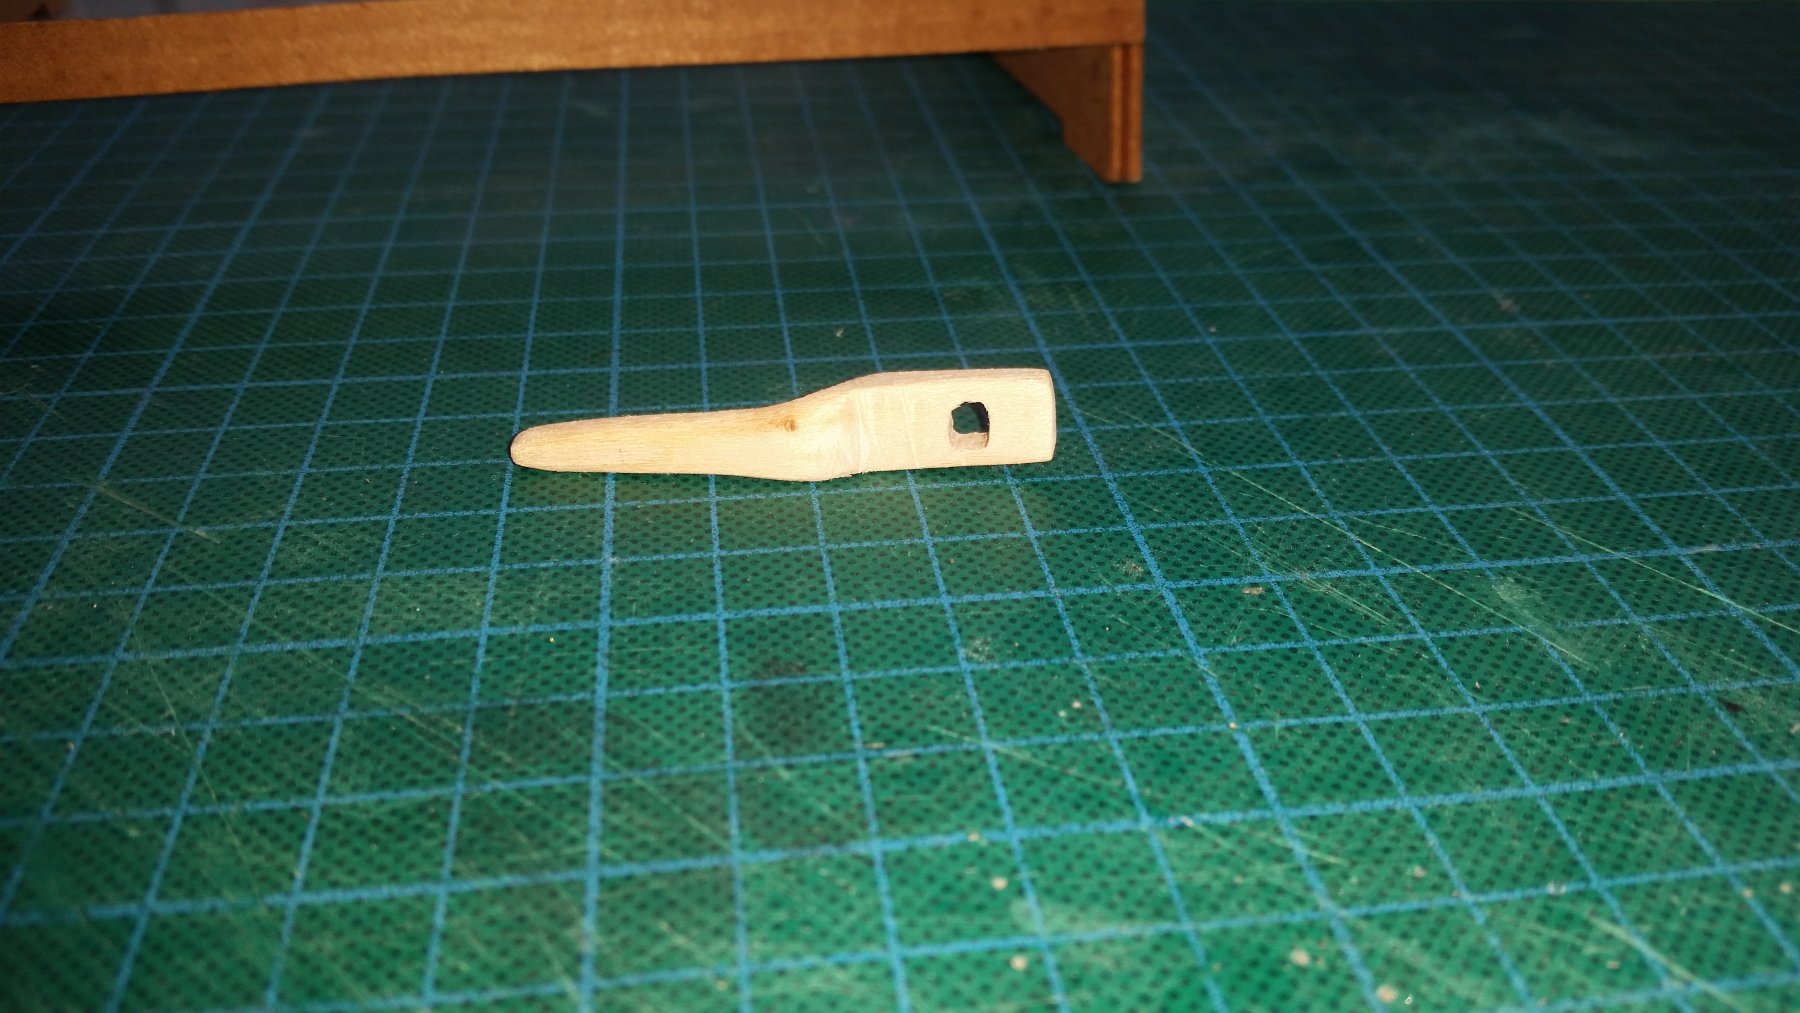
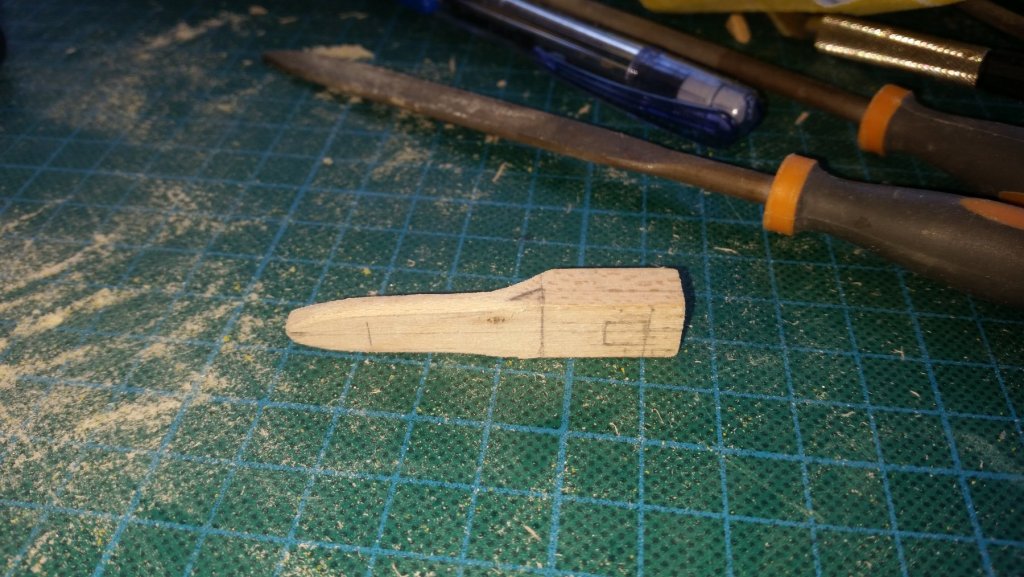
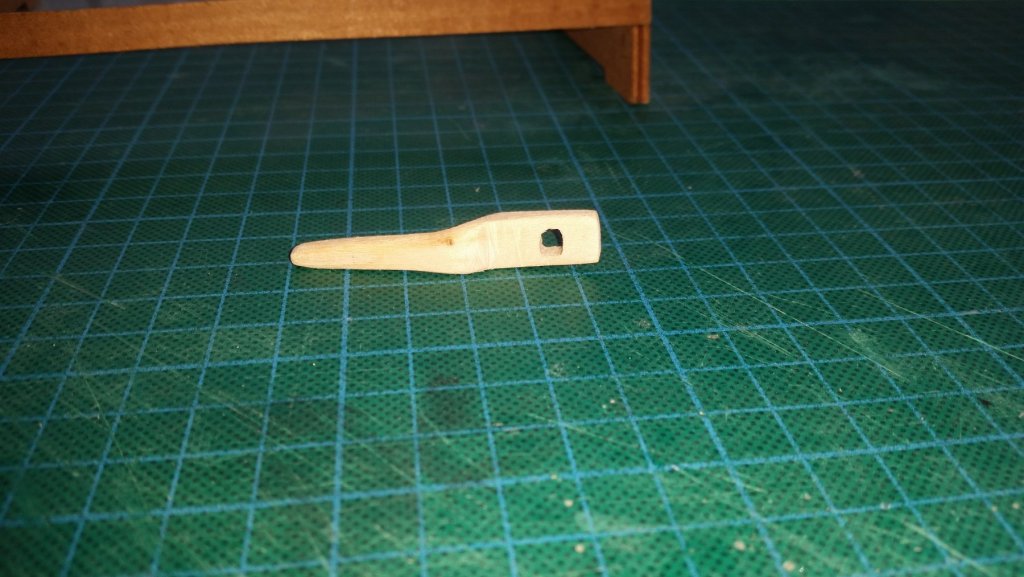
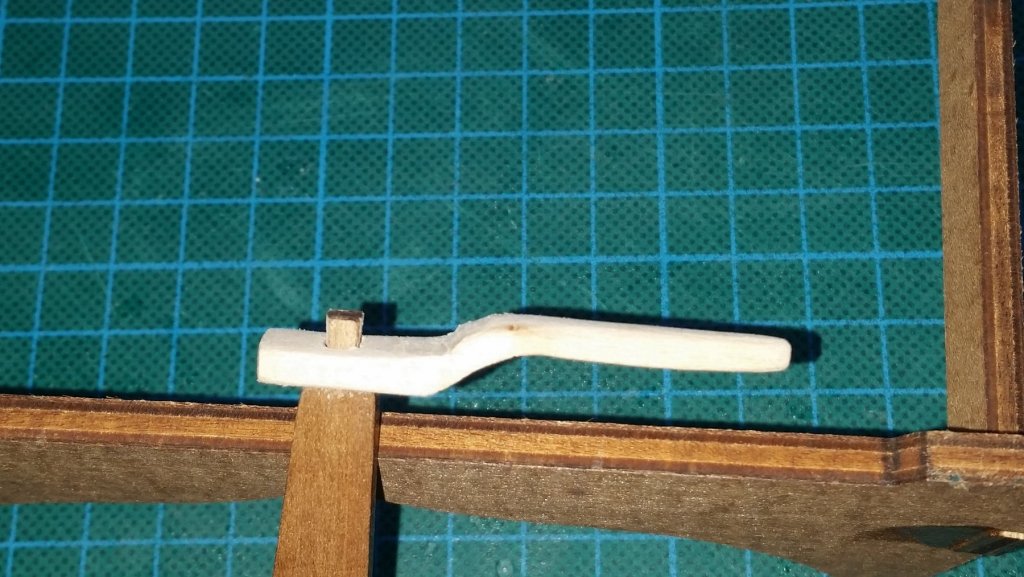
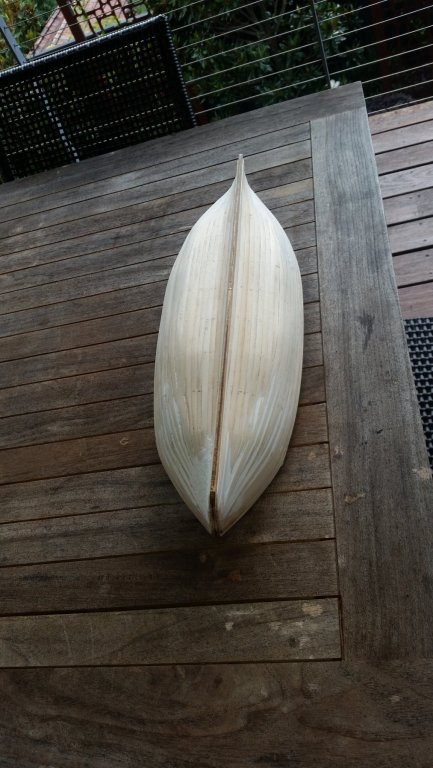
Whilst attempting the second layer of planking I decided to work on the tiller...something I'd never done before. After a couple of hours of cutting, sanding and more cutting I ended up with something that looks like a tiller. I'll need to do some more minor tweaking on it but am happy with the result so far. That's it for the time being as I'm away for a couple of weeks and have to therefore down tools. Cheers............Fernando Antony, I realised when looking at your build log from last year that you became a first time granddad (congratulations!) whilst doing this build. I started on this build and became a first time granddad (a grandson, Lucas)...is there a trend here ie: to become a granddad and start building the S Lucia !
-
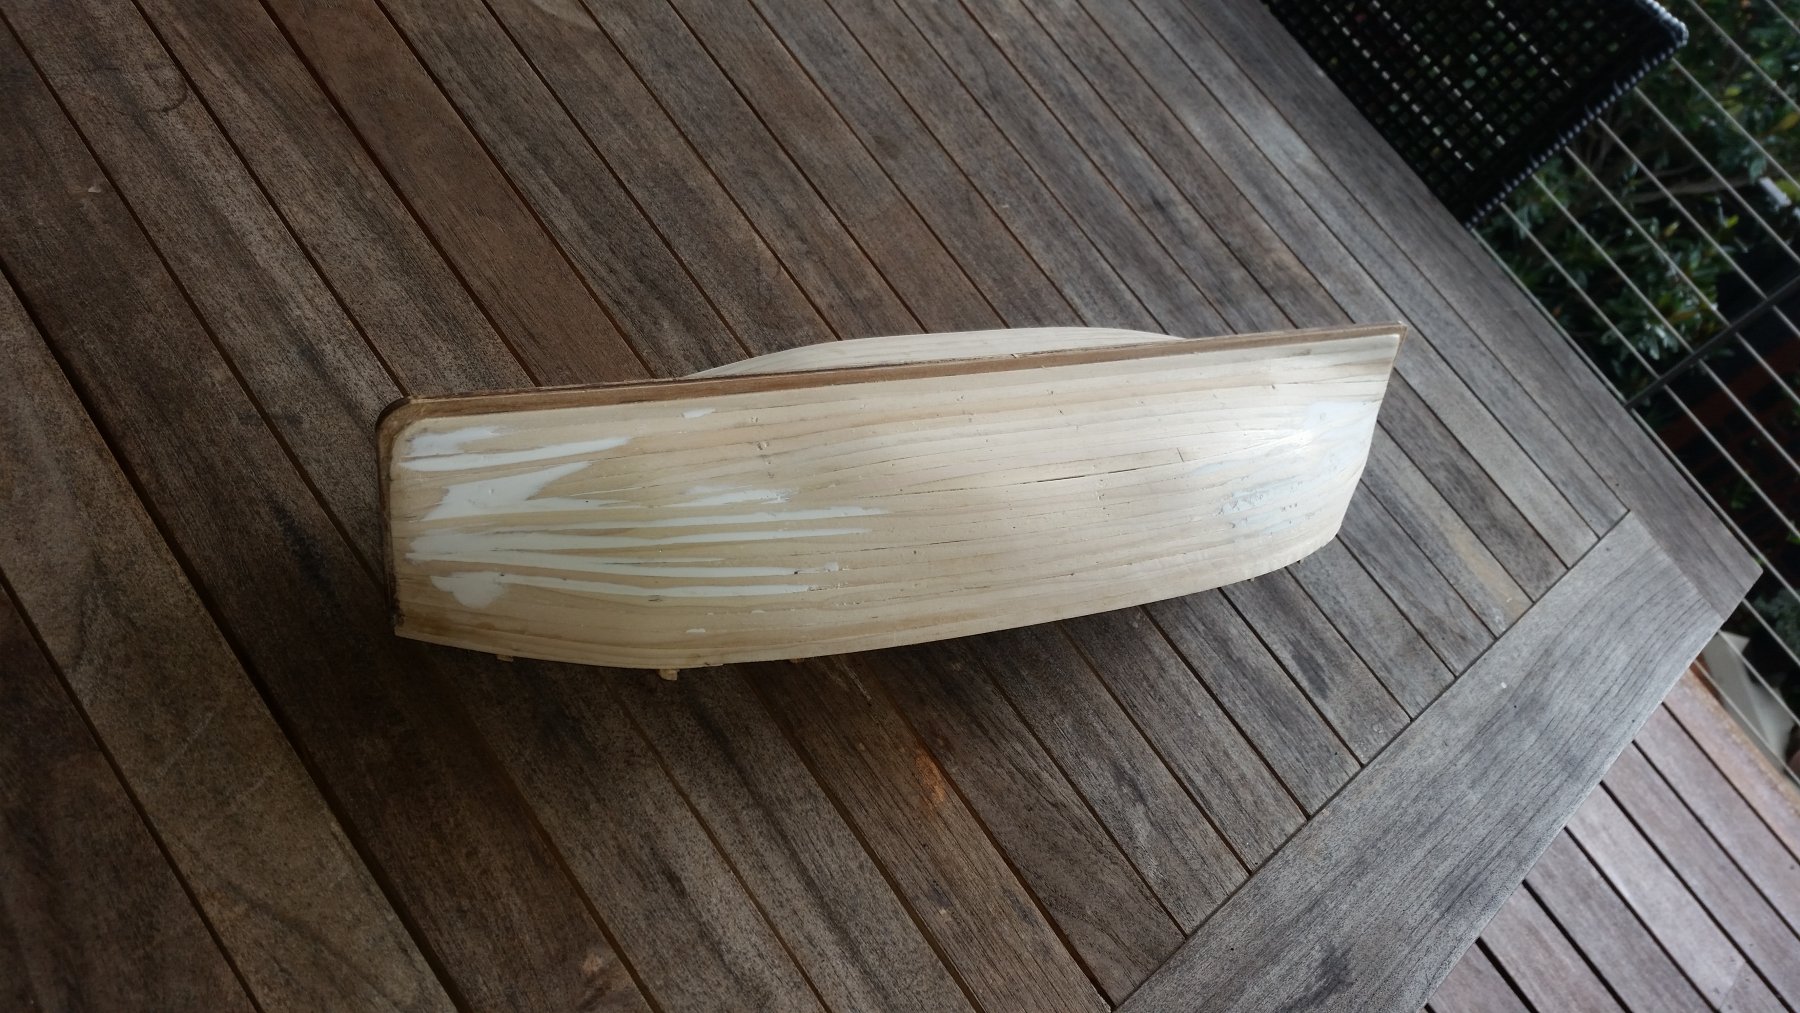
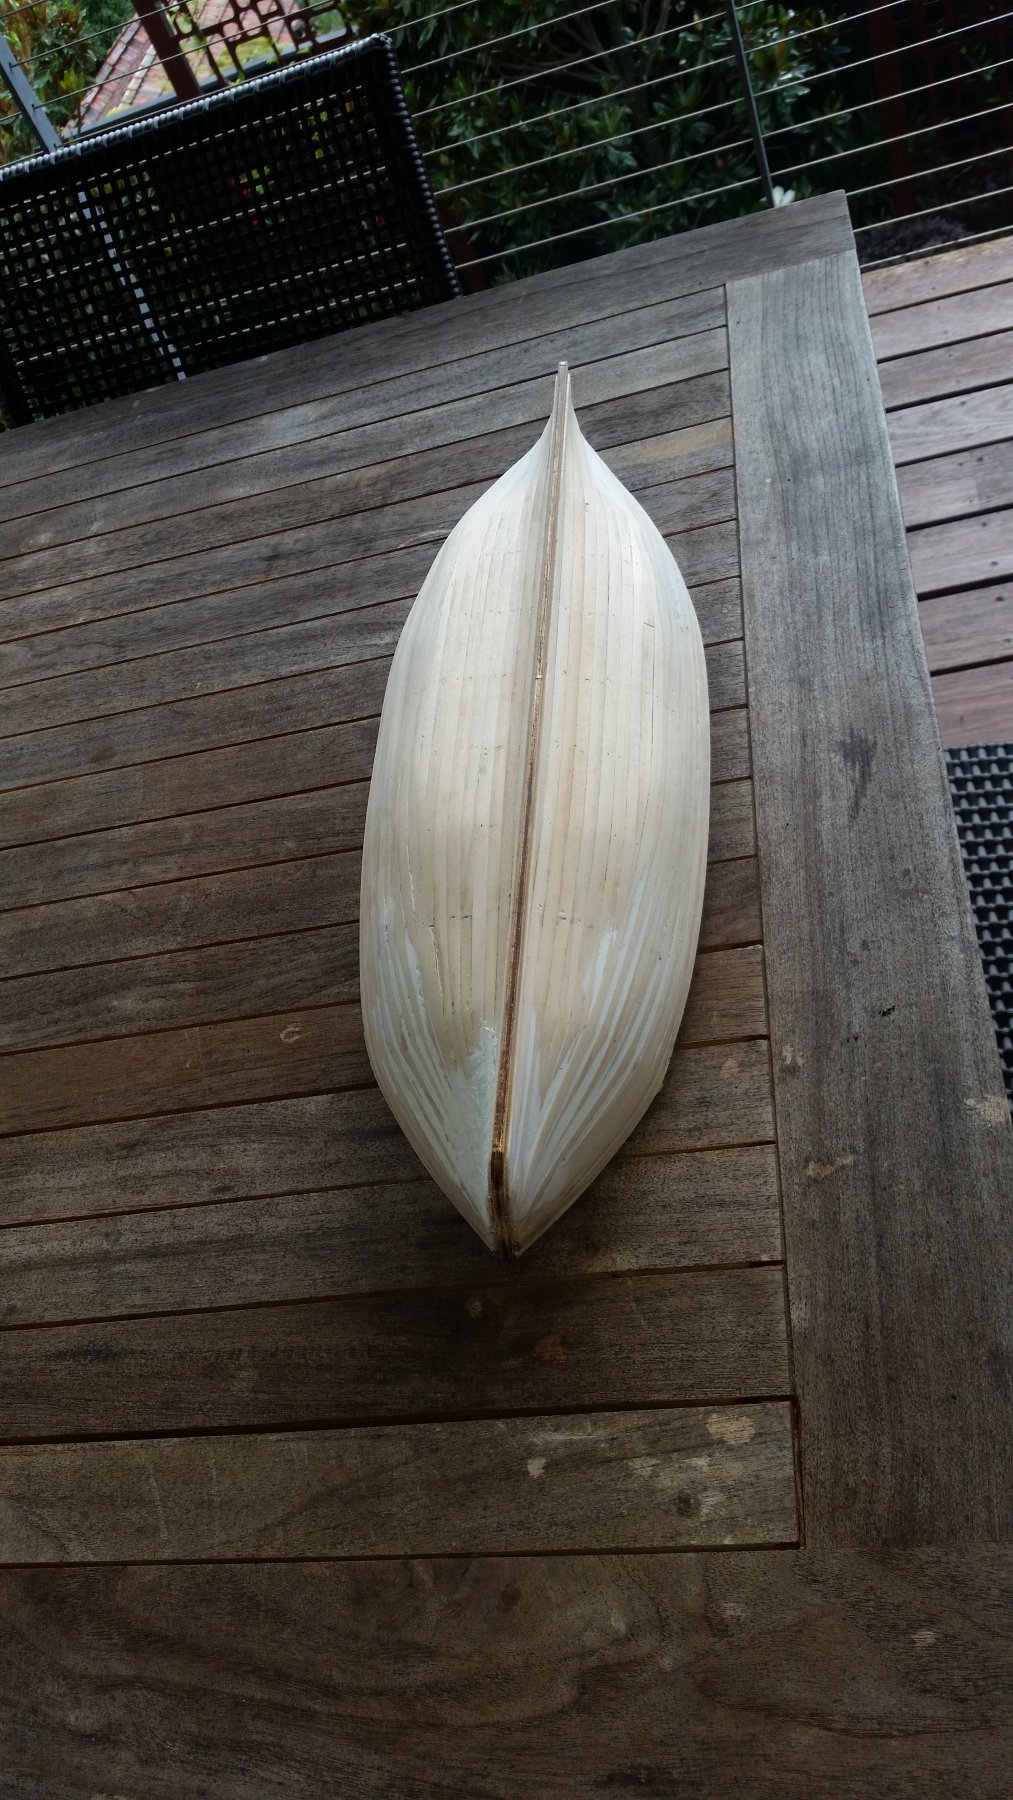
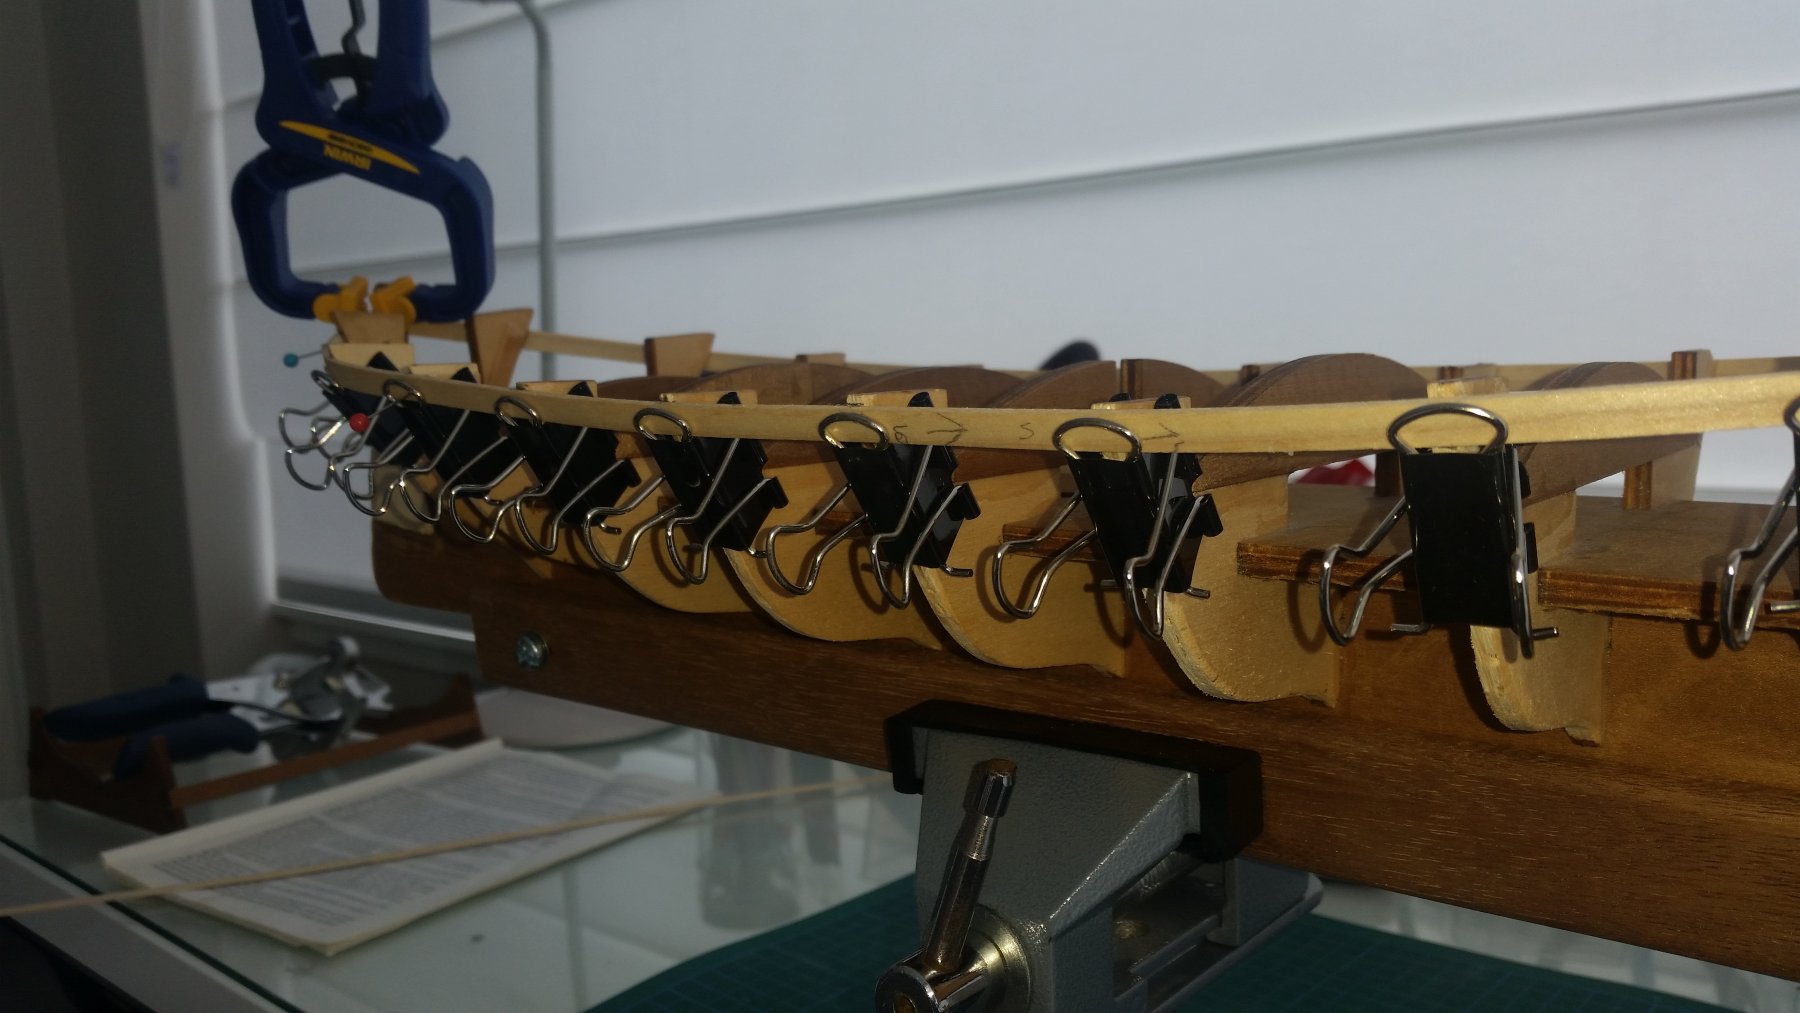
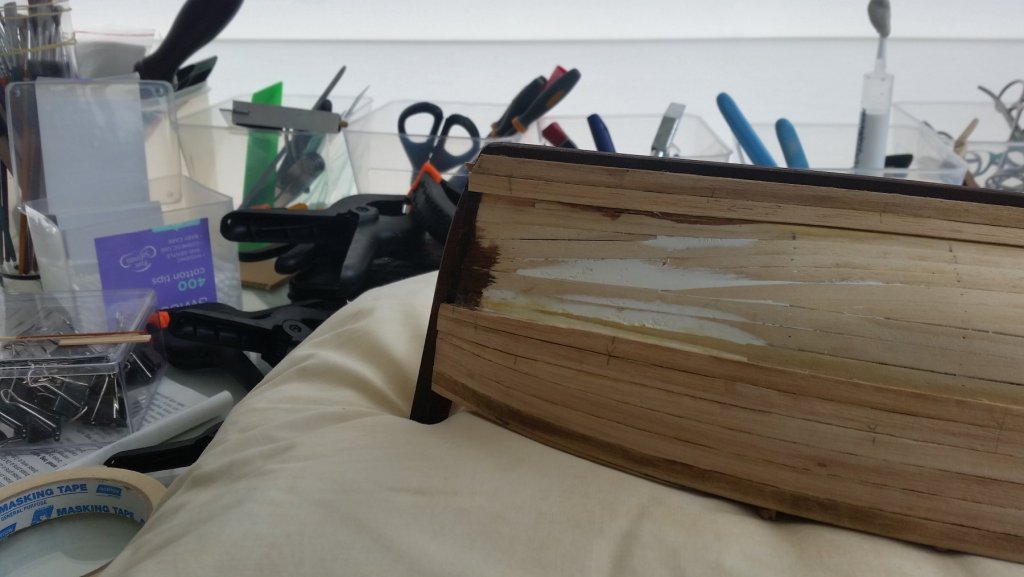
Another update after a very frustrating few days! I thought the first layer of planking would be difficult but didn't realise how difficult it would be. Antony, you were right to warn me that the planking was difficult due to the shape of the hull....it was just a hard slog.....and I thought I would have it finished by last weekend! Anyway after some time I did finally finish it (with some extra wood filler) and here are some photos of the finished product. The first photo looks like there is dent in the hull but it's not...just a bit of shadowing. A couple of more pics to follow. Cheers.....Fernando

-
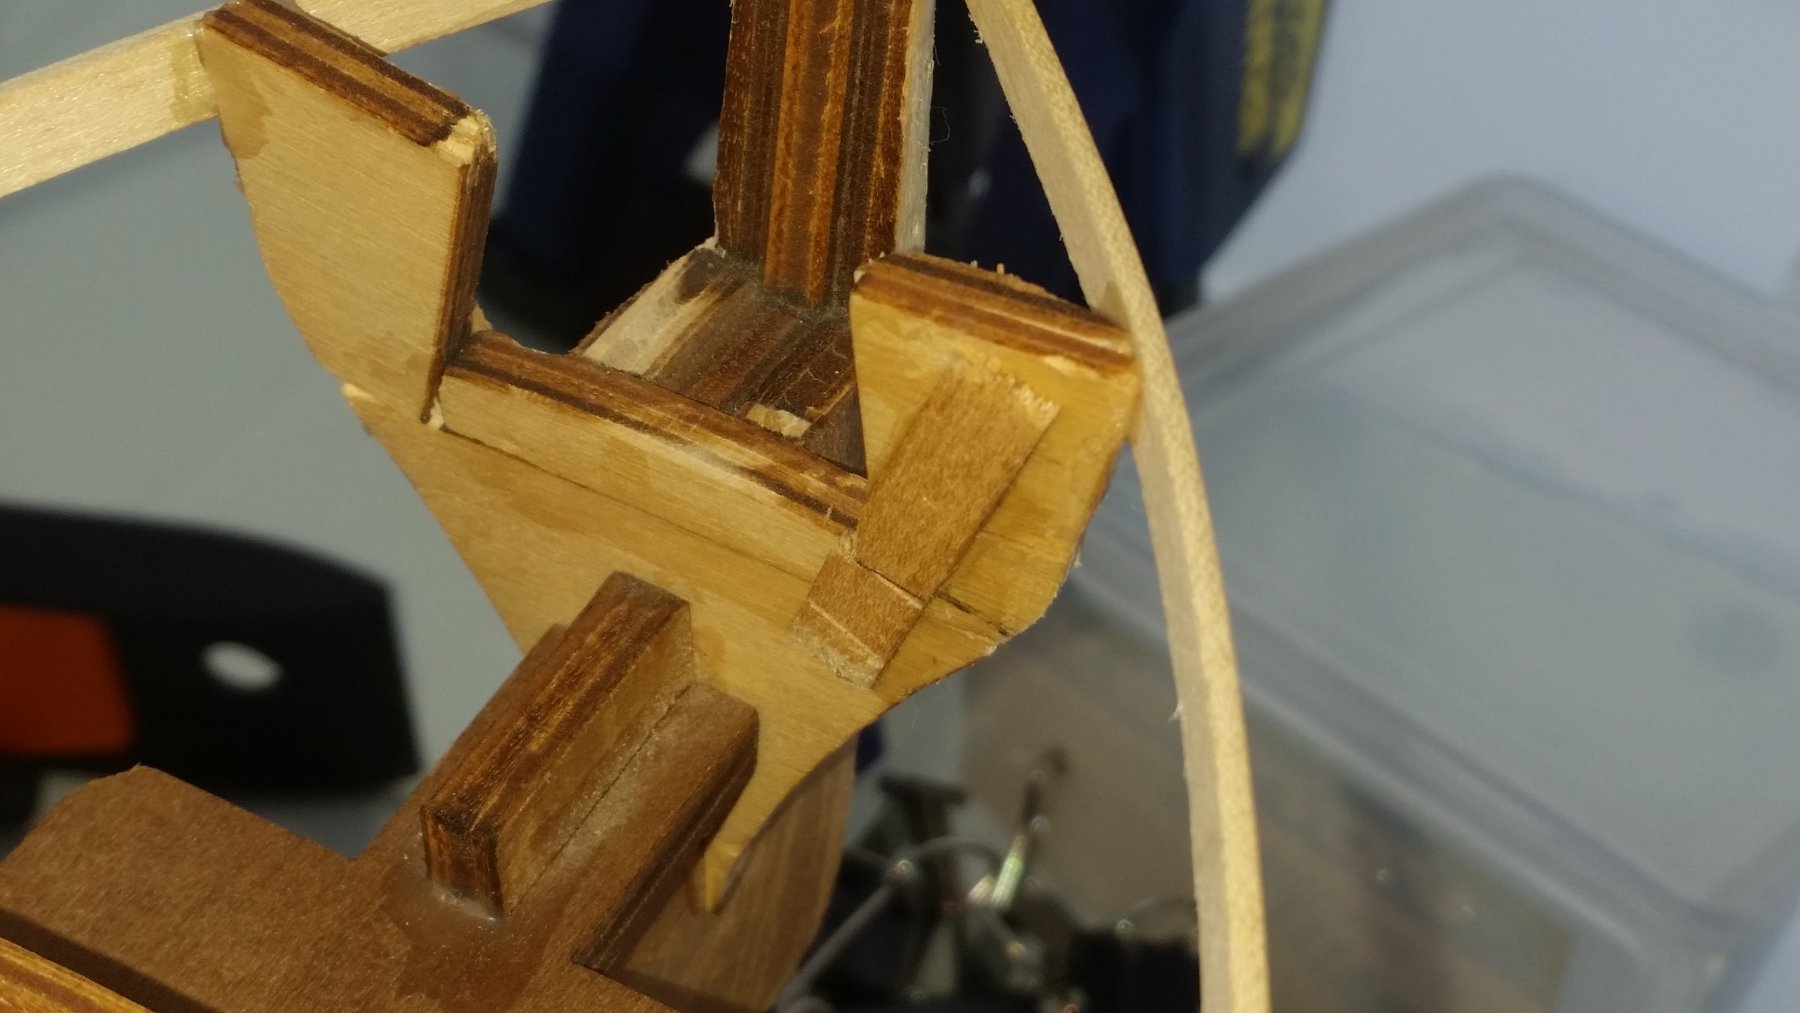
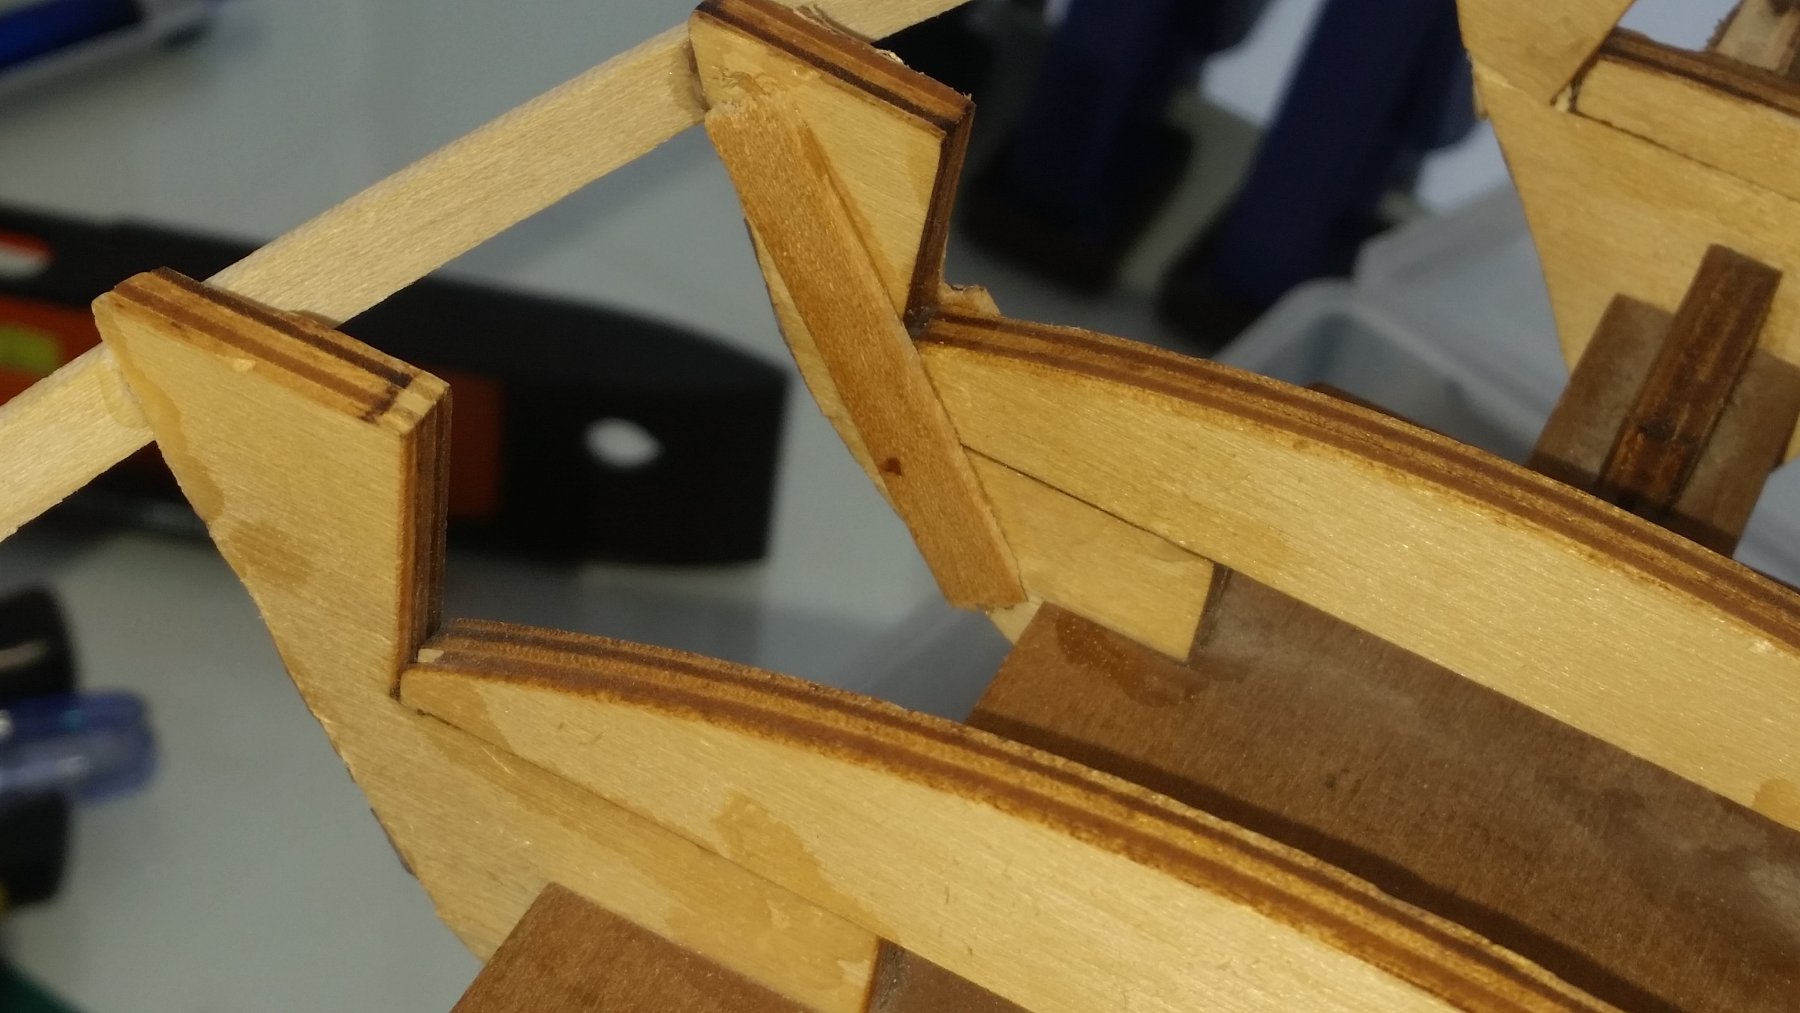
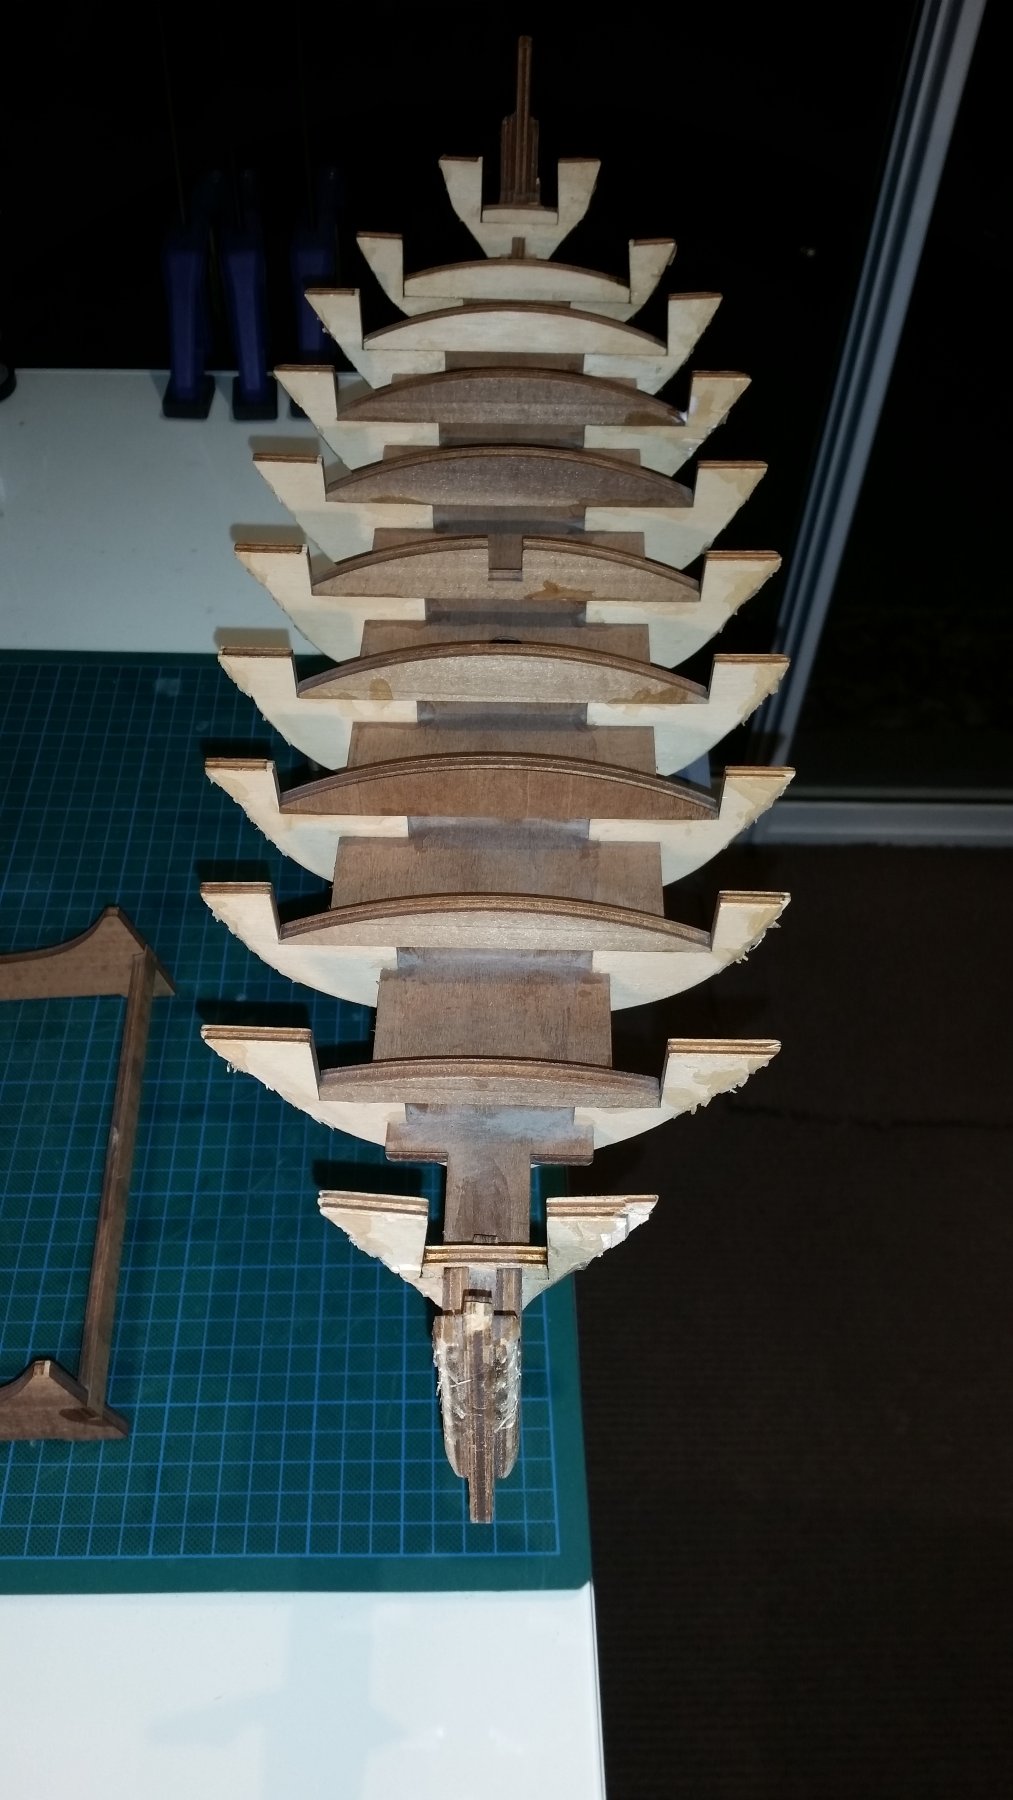
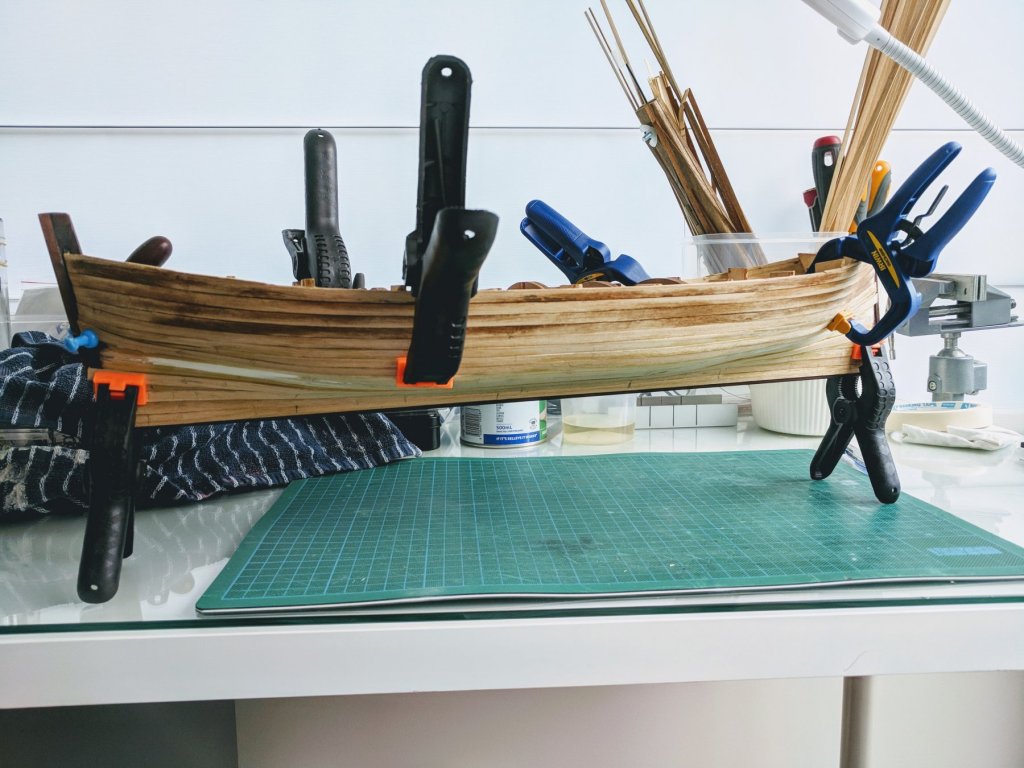
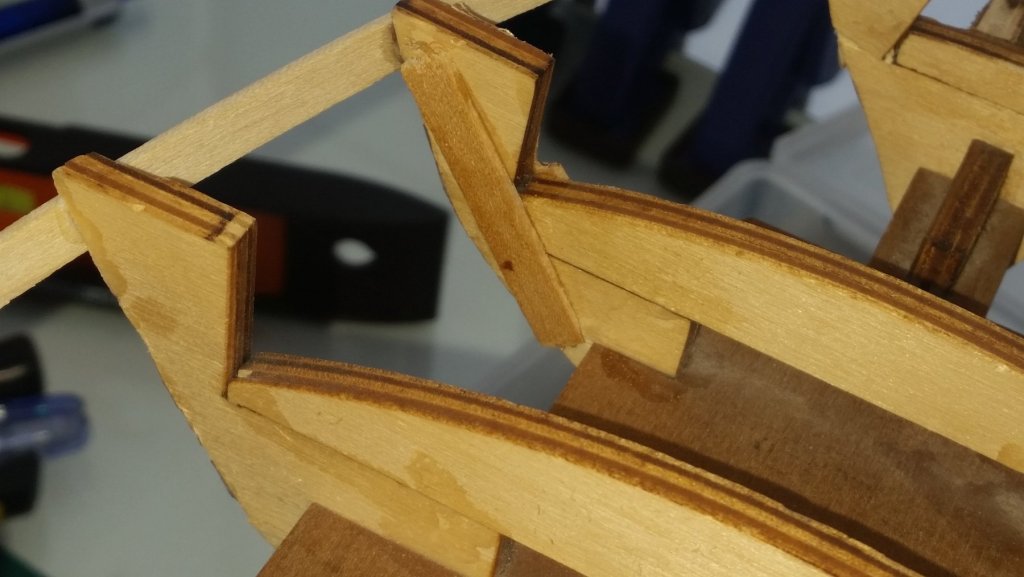
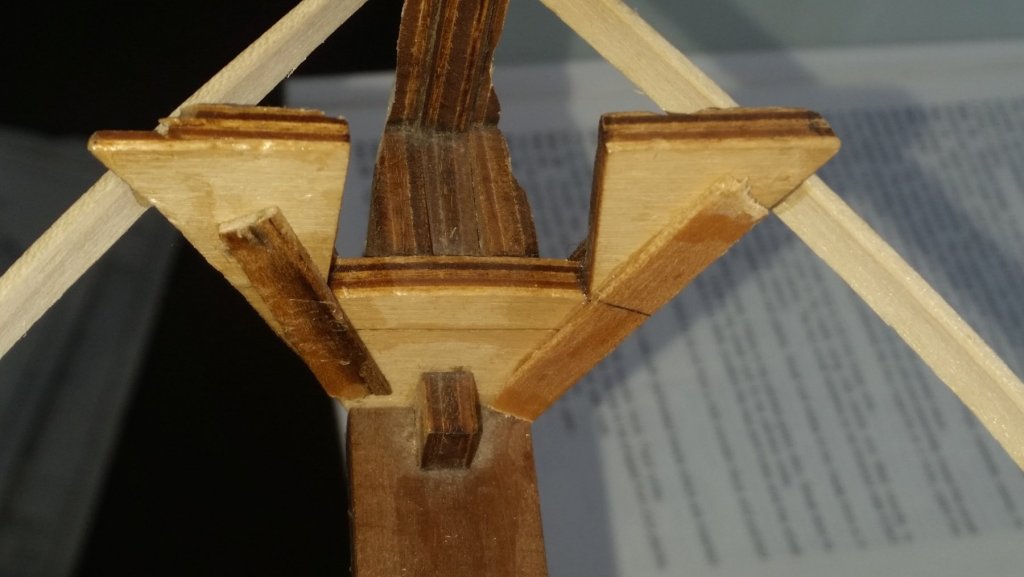
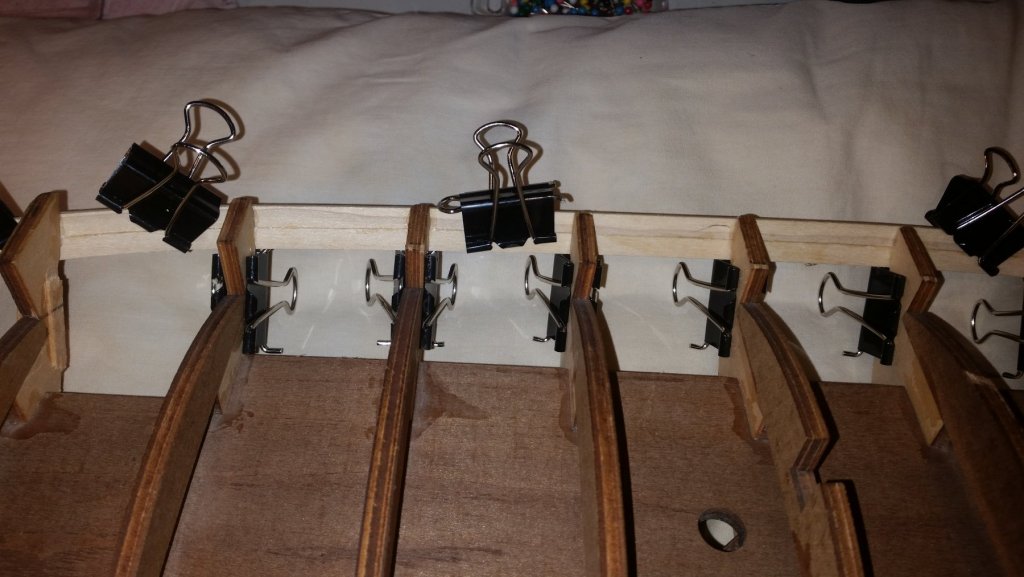
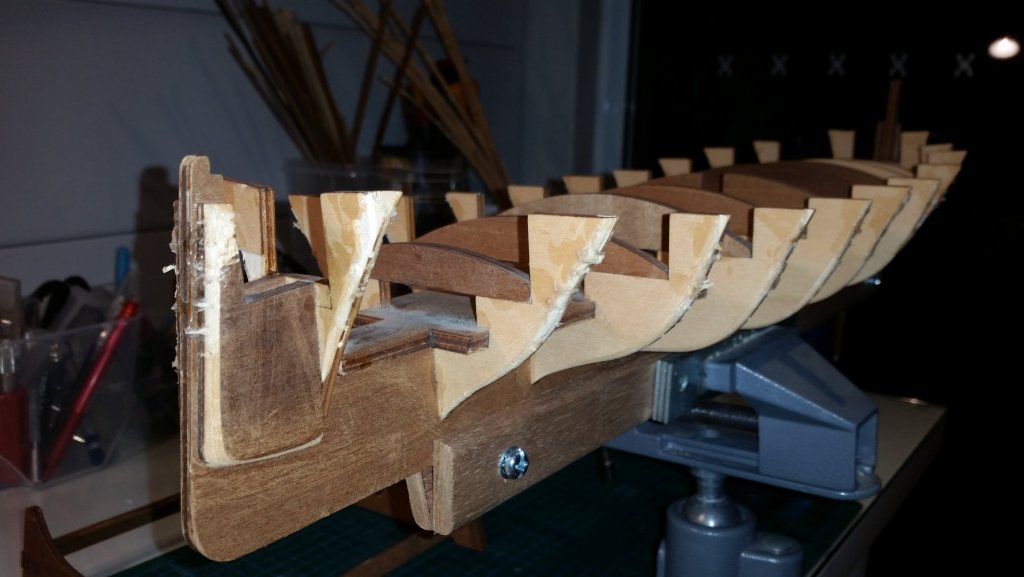
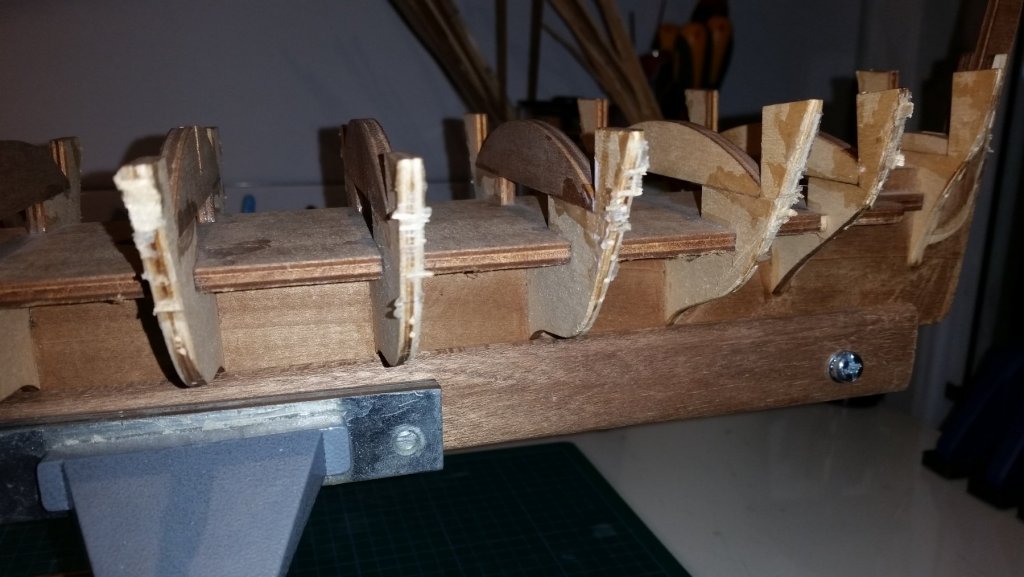
Many thanks for the likes and looking in guys. Welcome aboard Antony. I've just spent a few hours sanding and and sorting out the bulkhead frames! As soon as I started fairing the wood started to split or just snapped off....either the wood is just too old or the quality is not brilliant (I think it's probably a bit of both ) After a bit of thinking about how I could proceed without throwing the lot away I was able to add additional wood struts to strengthen the frames as well as slapped on a pile of glue. I guess that once the second layer of planking is on no one will be seeing any of the handy work beneath it all. . After allowing it to dry overnight I started the fairing process and was glad that the wood didn't fall apart on me. I have also started the first layer of planking and hopefully will be finished by the end of this weekend Will send some more pics when I have finished the first layer of planking. Cheers..........Fernando


-
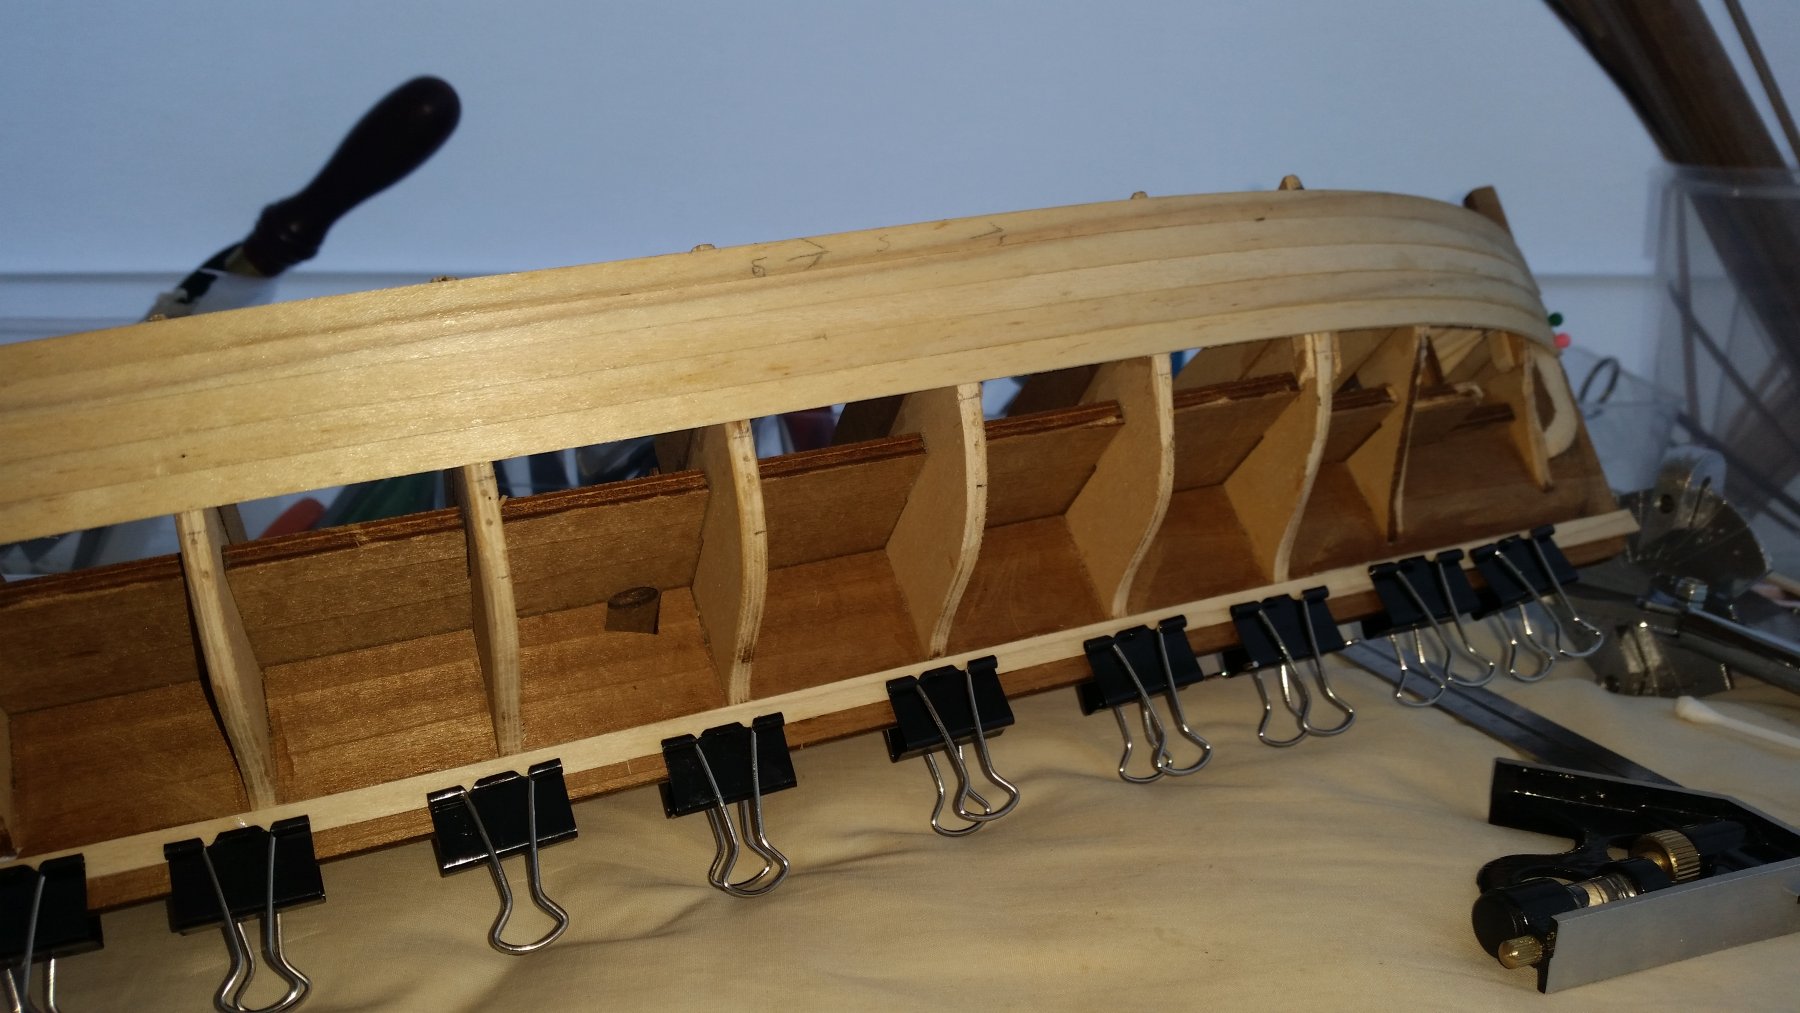
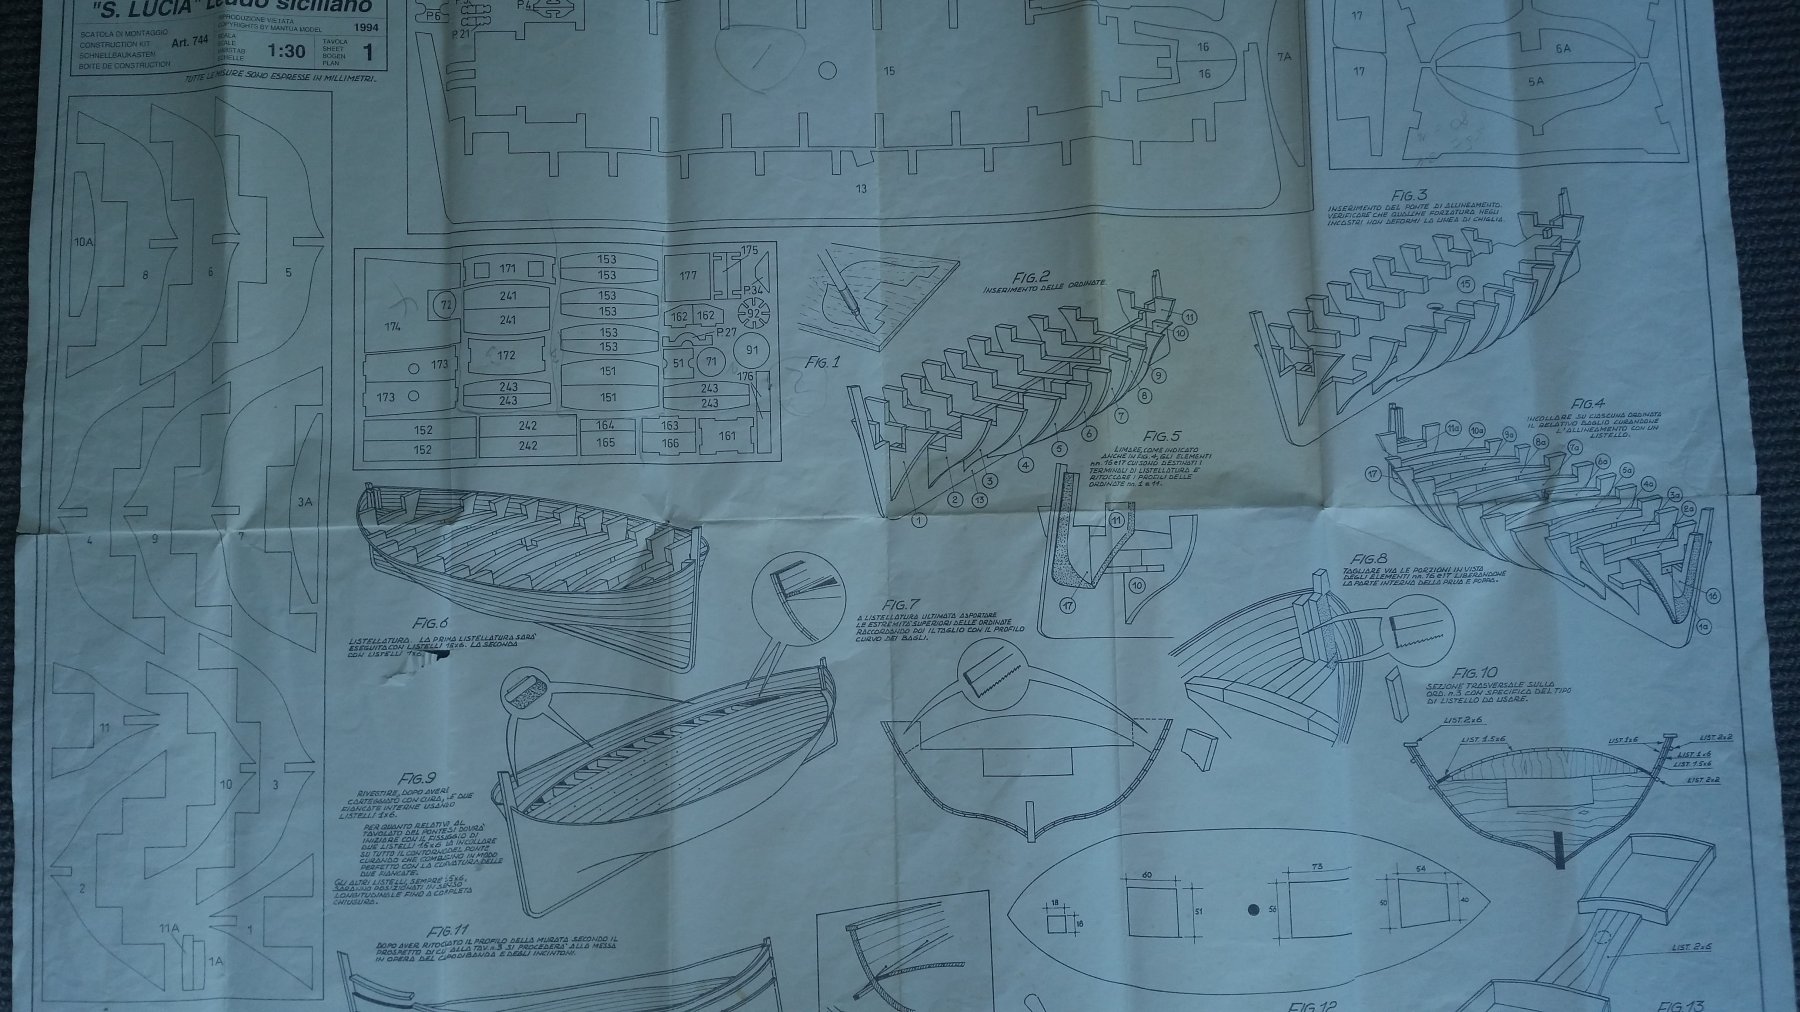
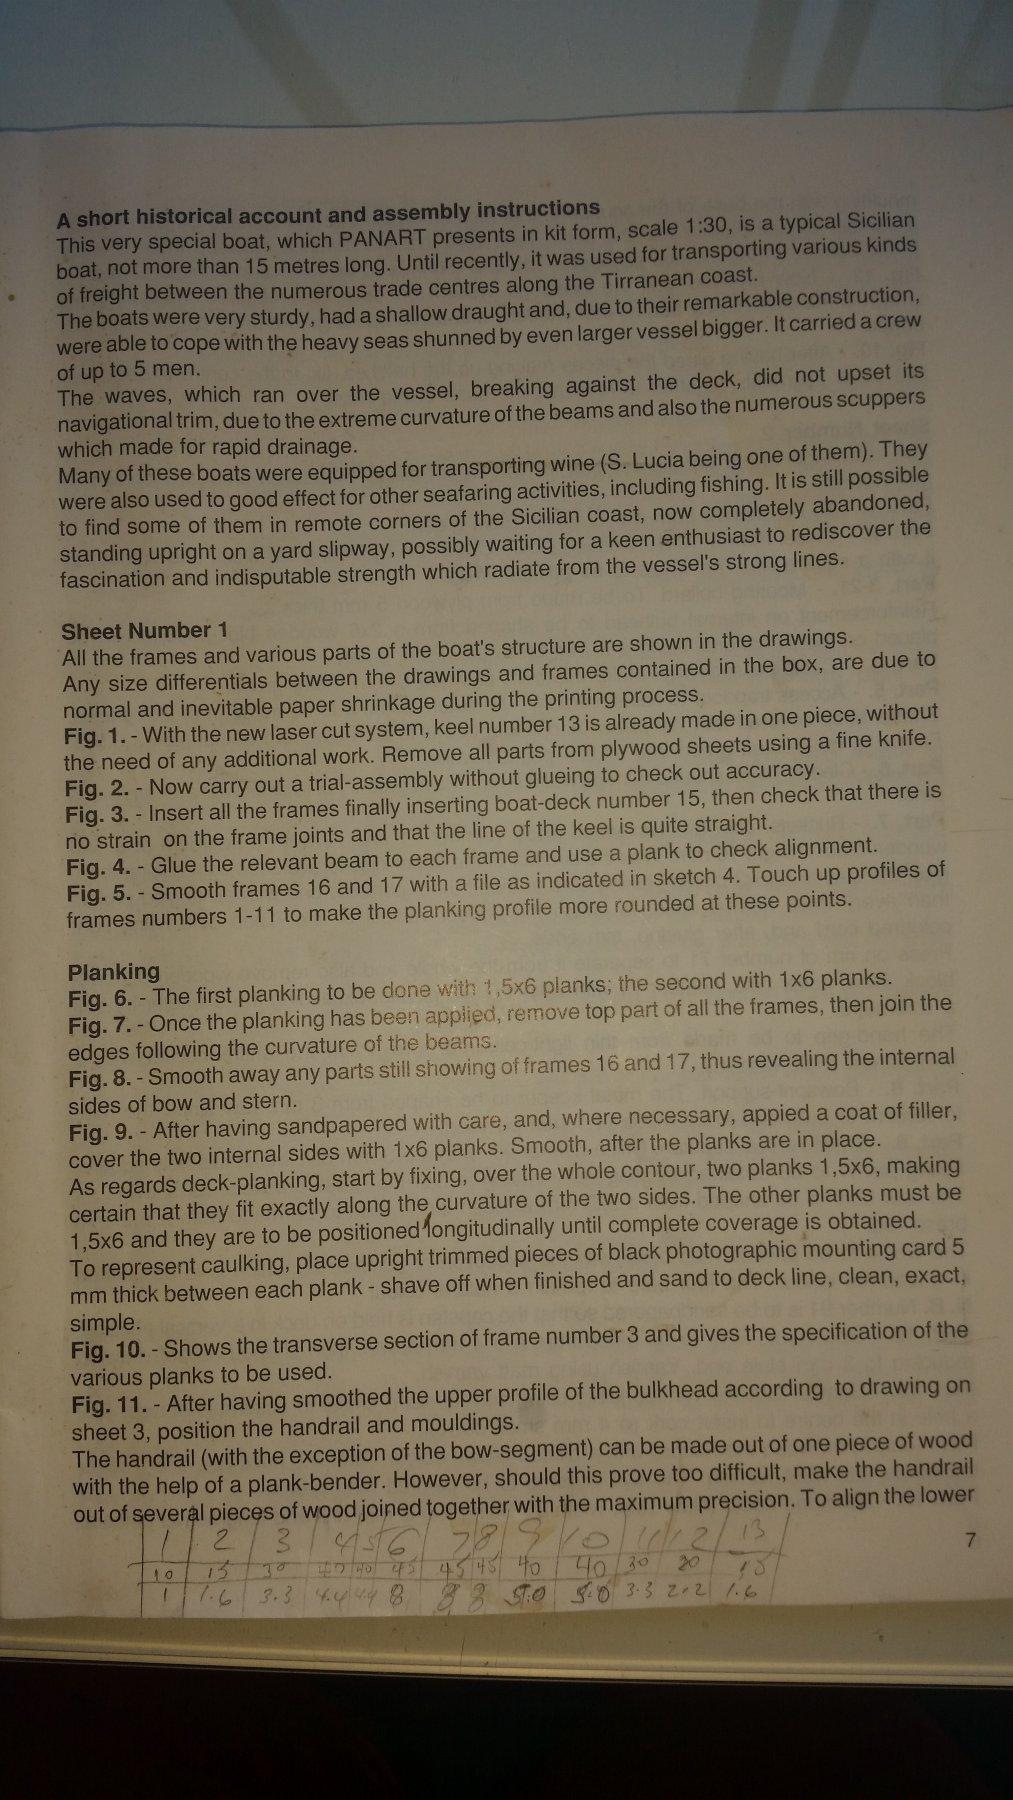
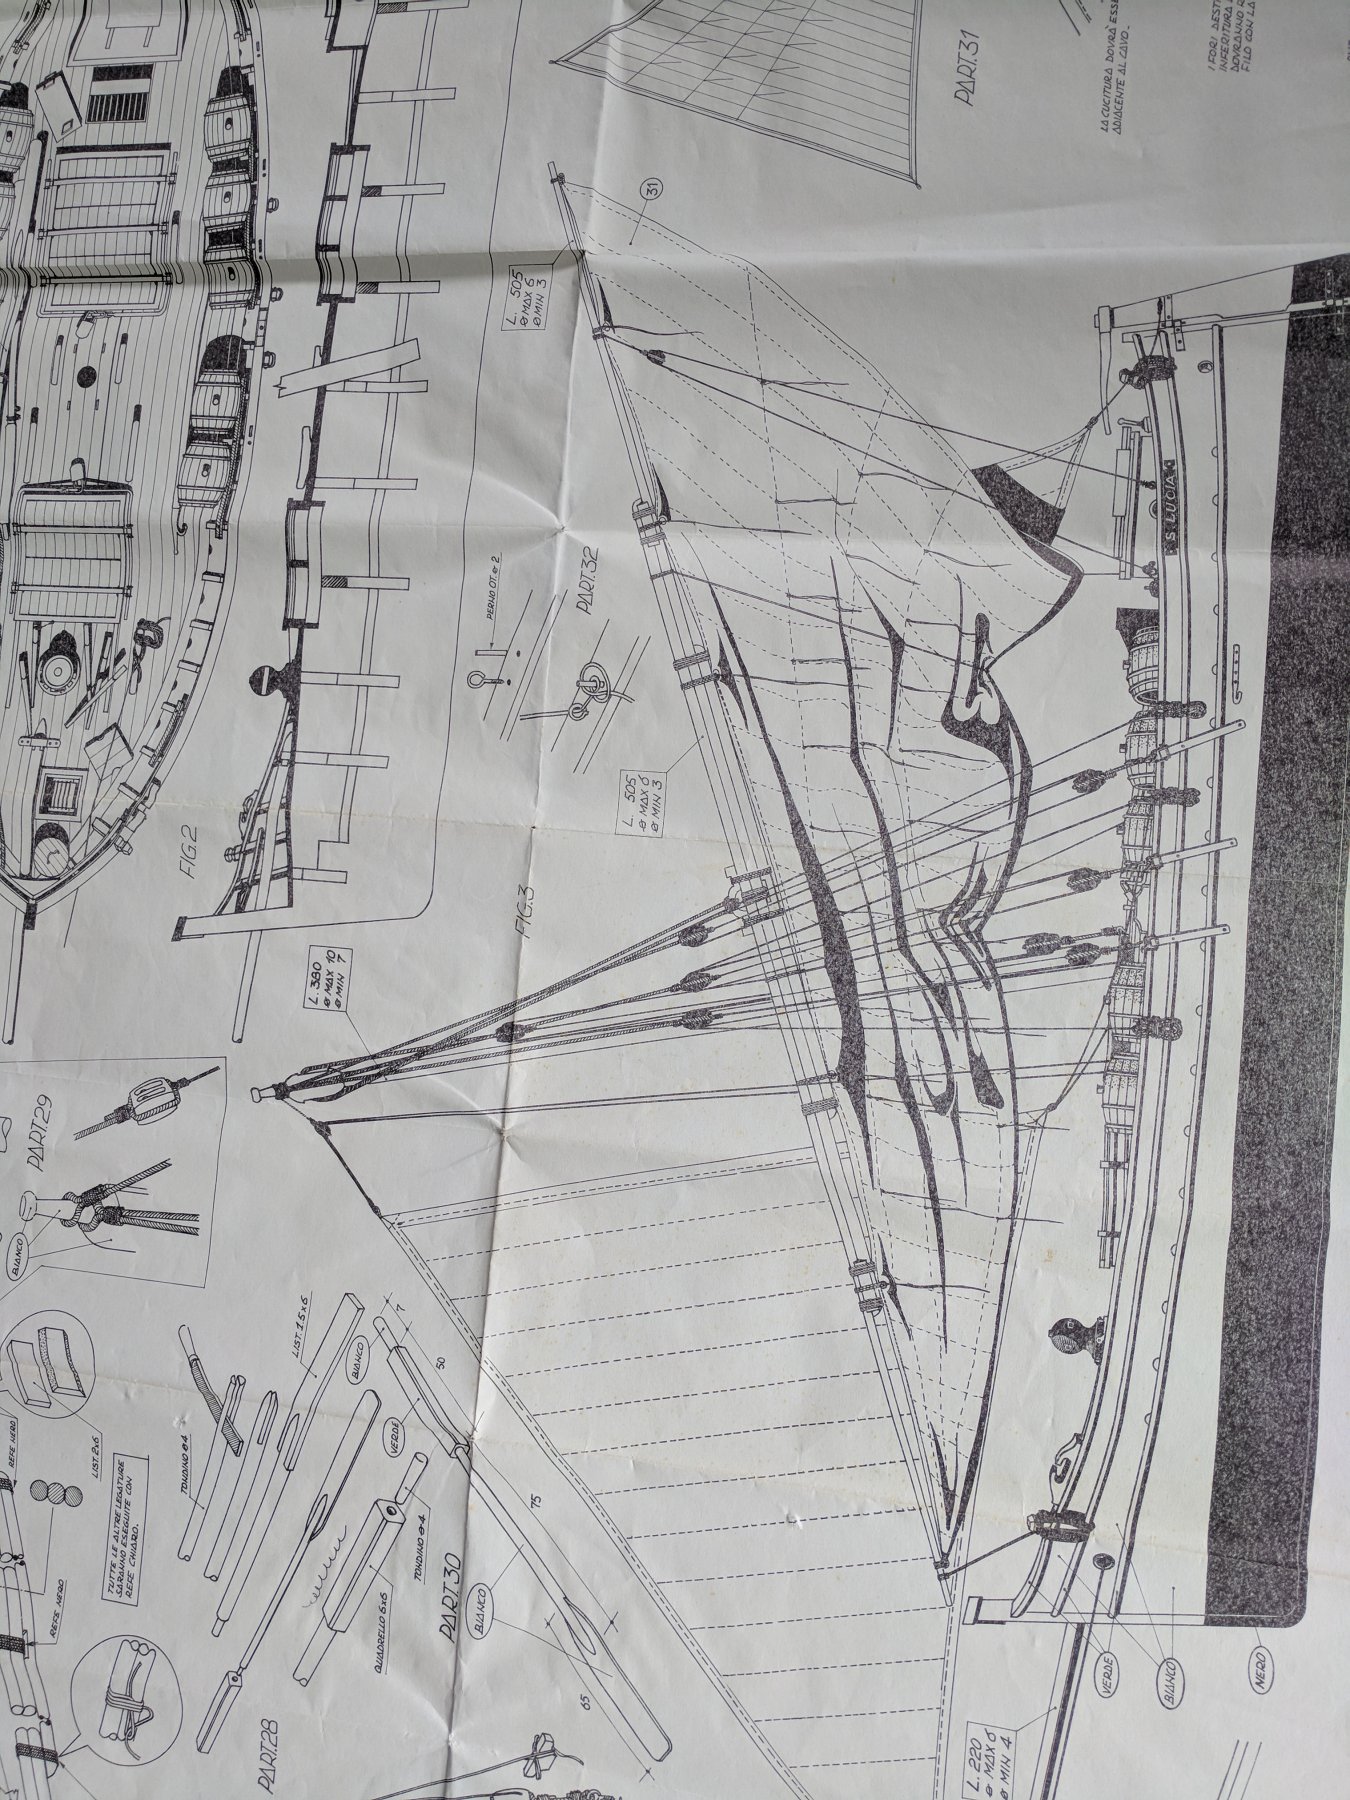
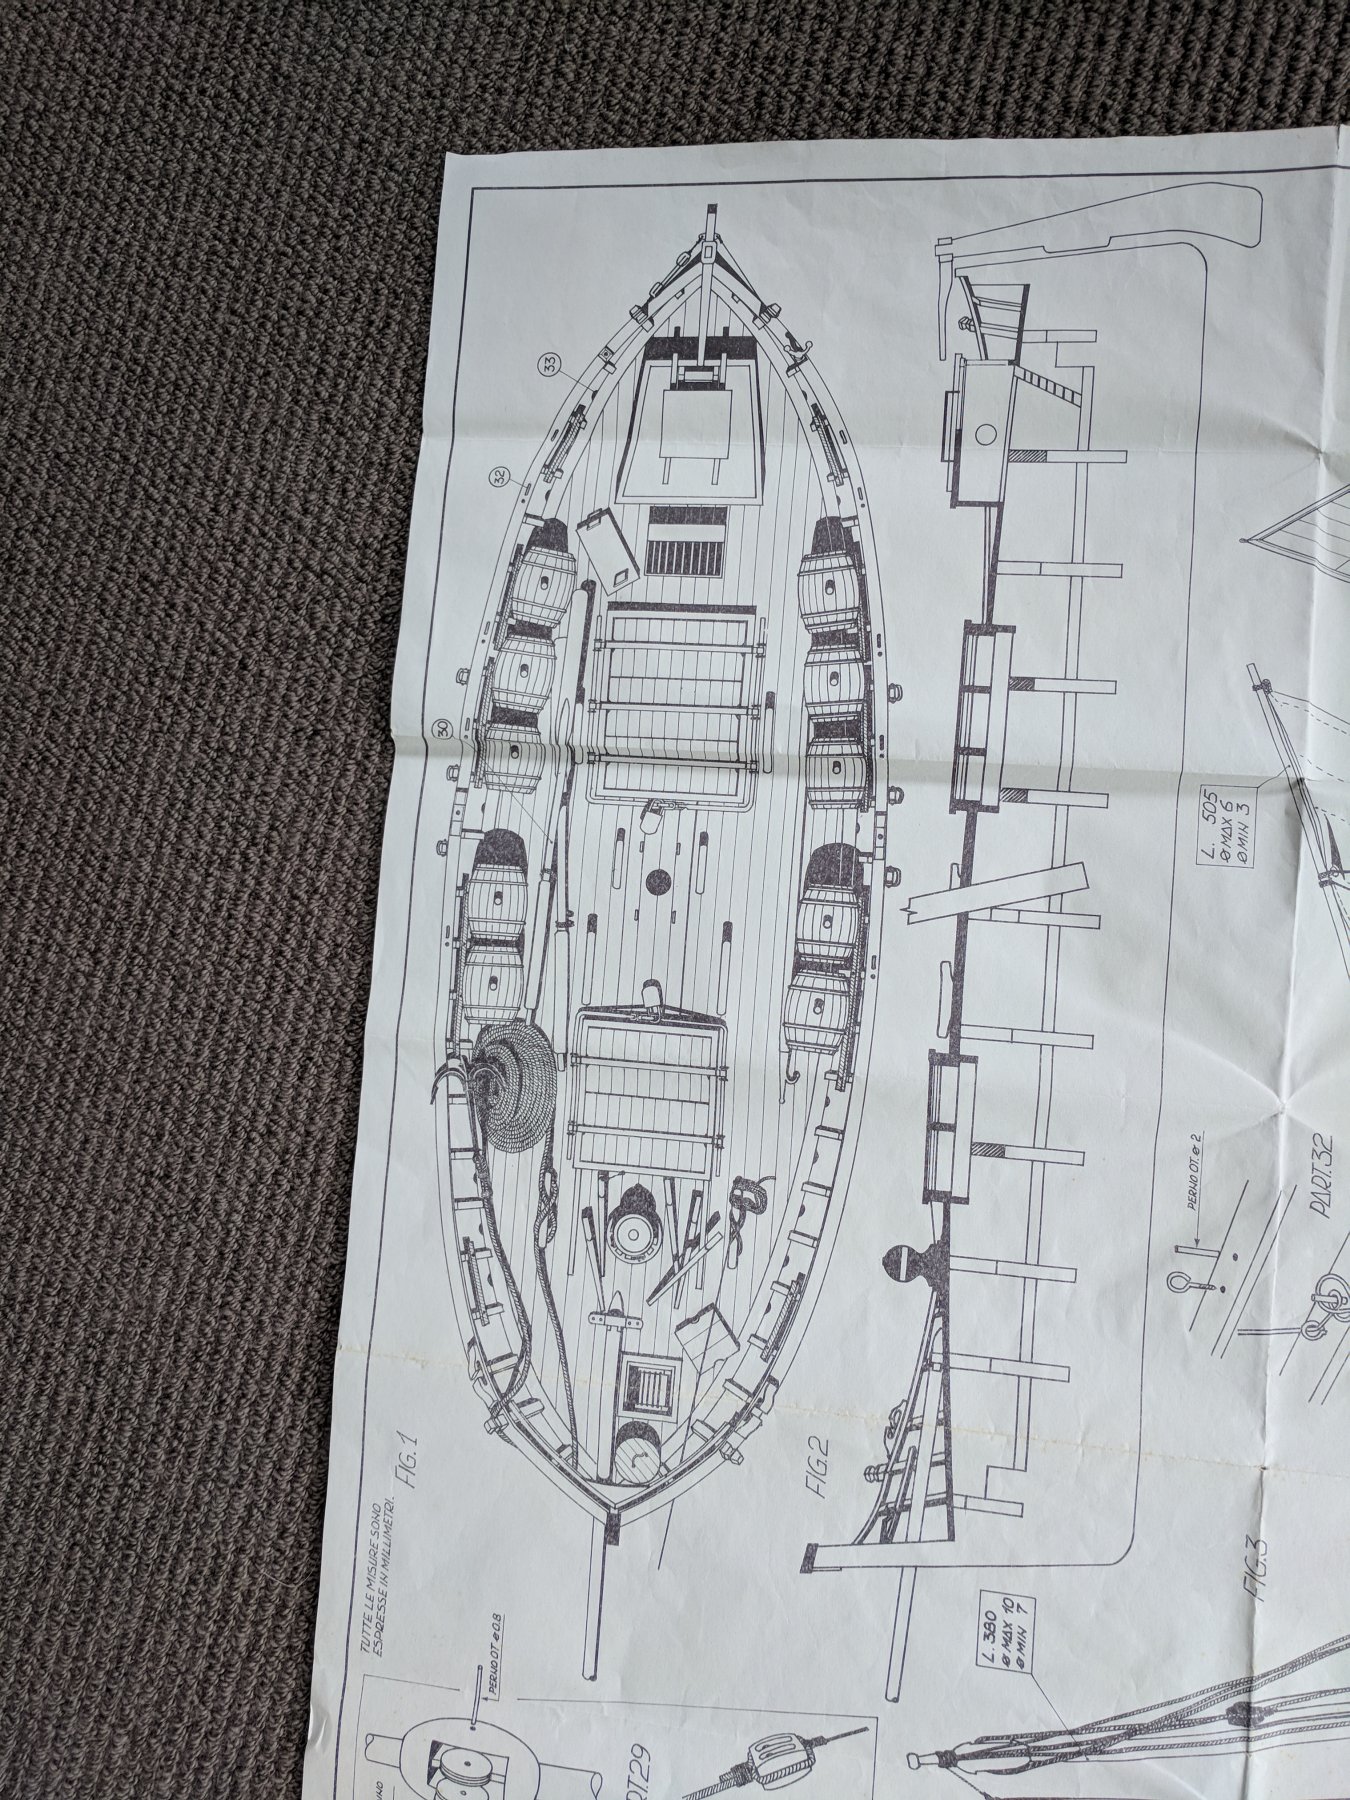
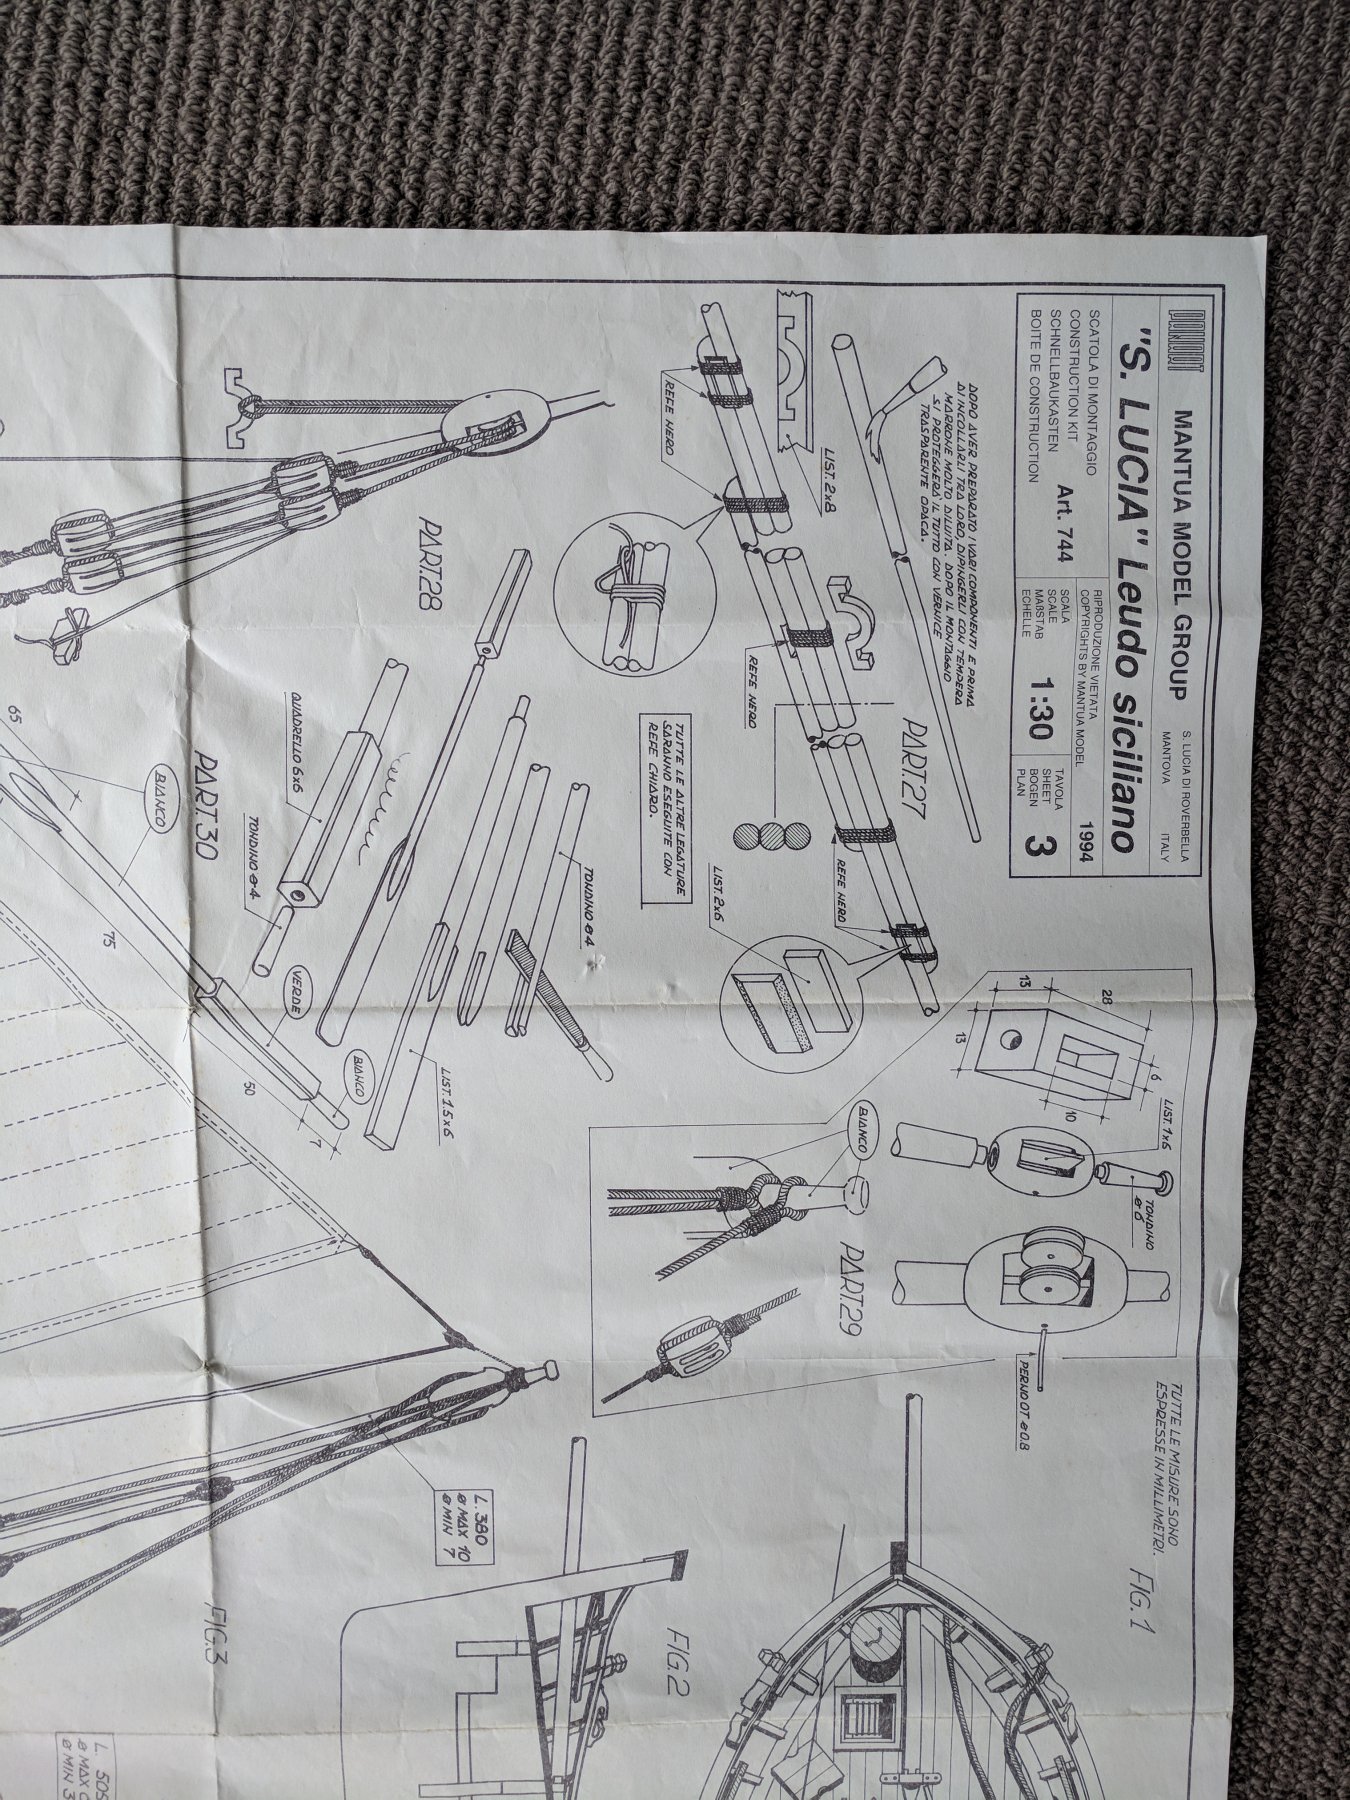
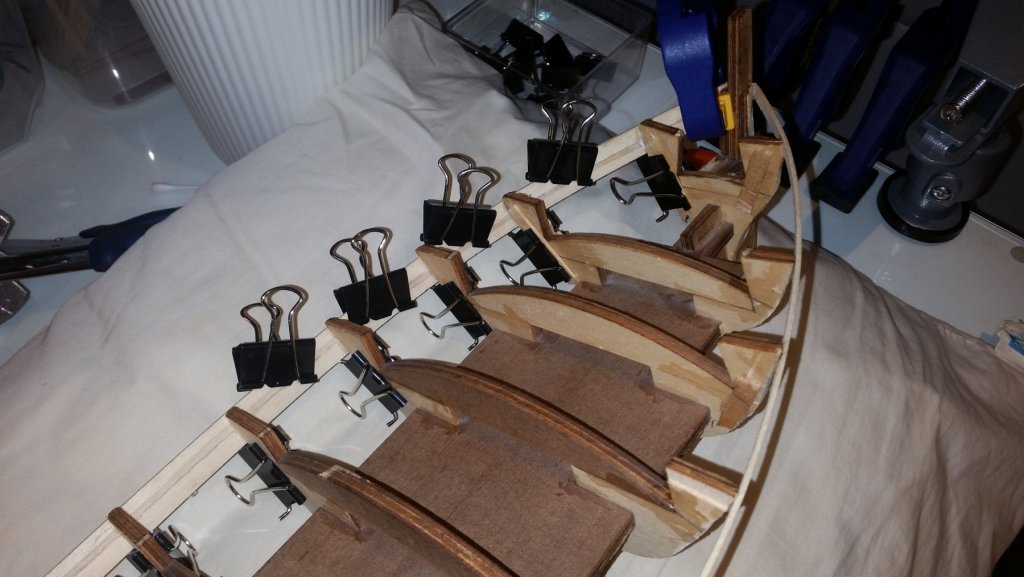
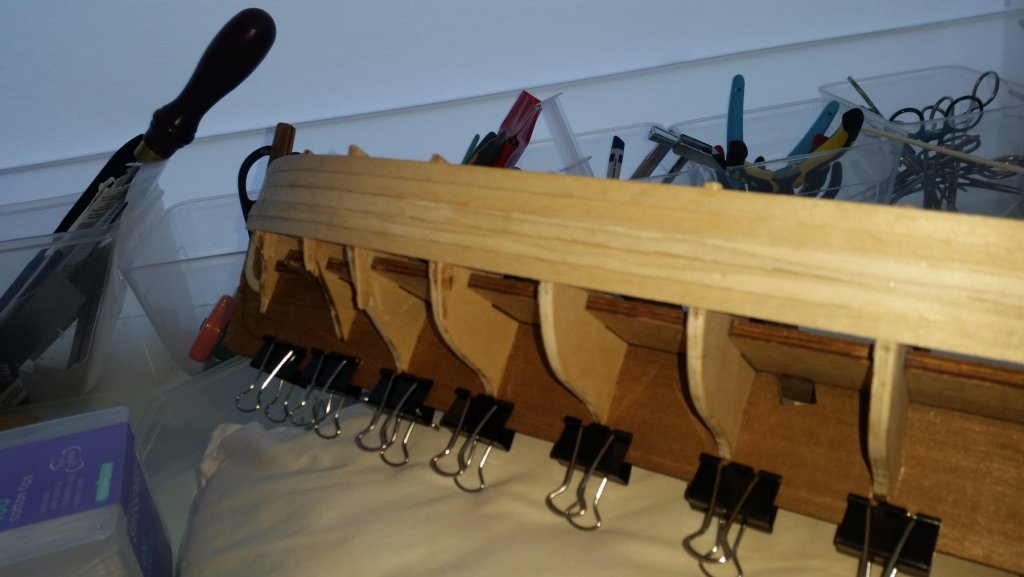
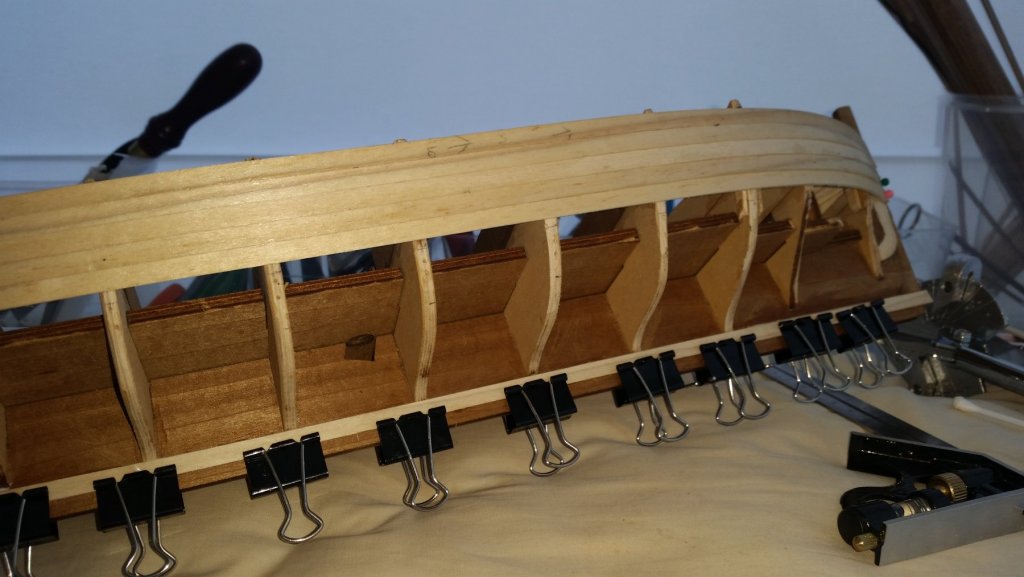
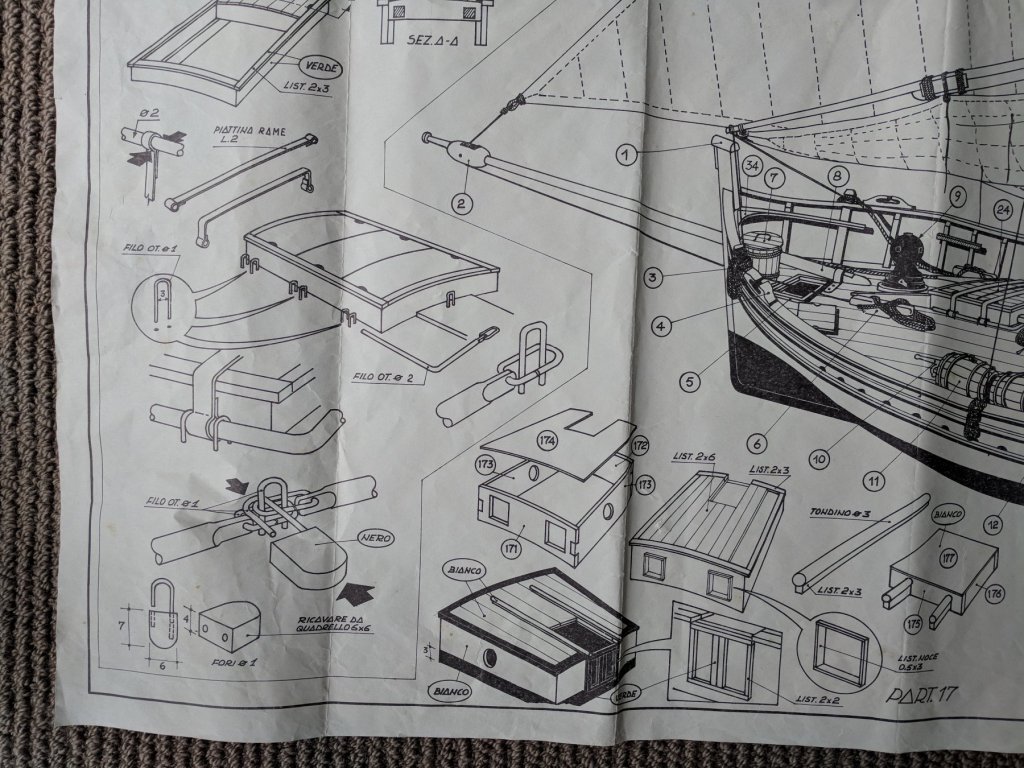
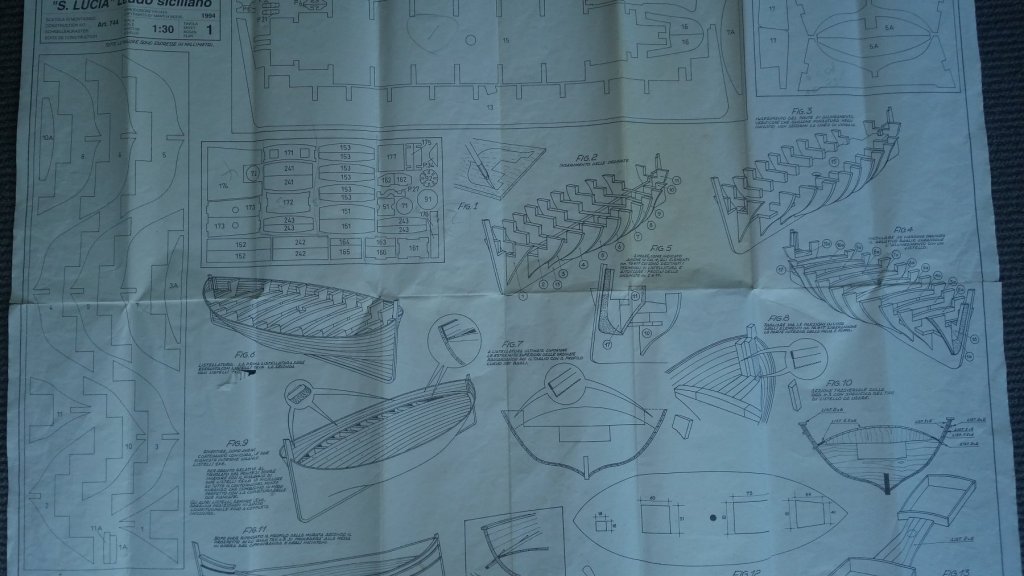
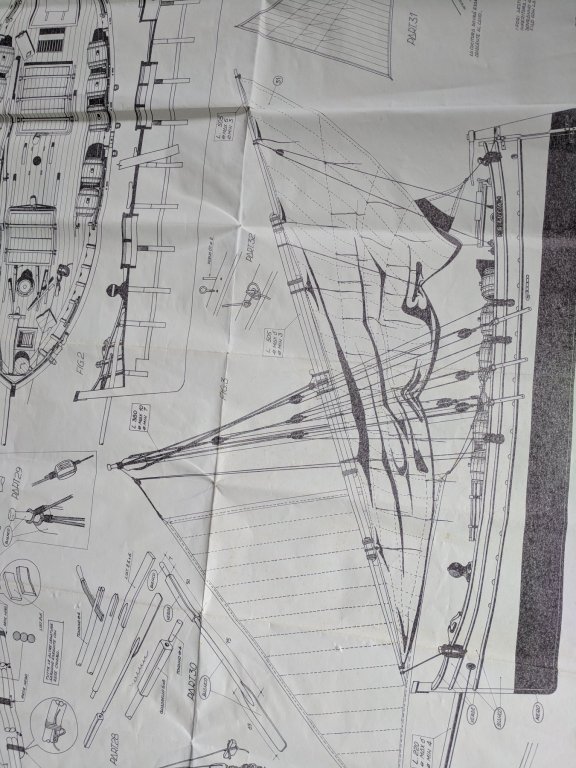
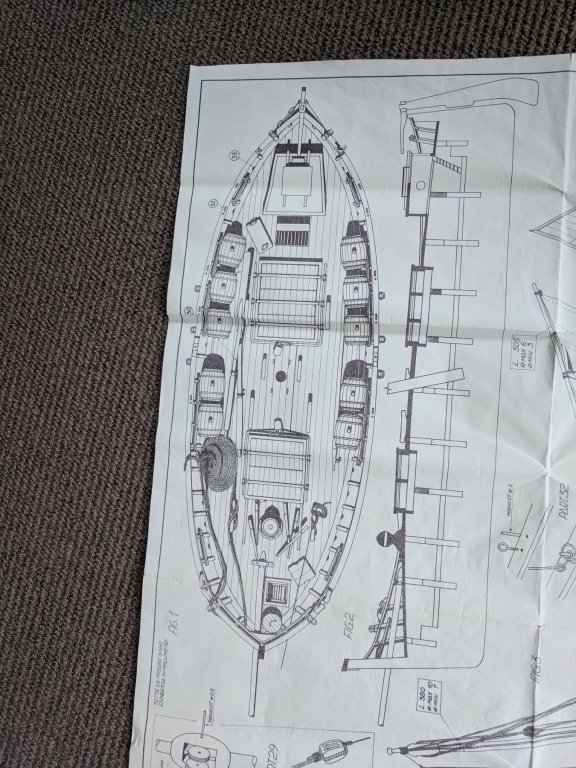
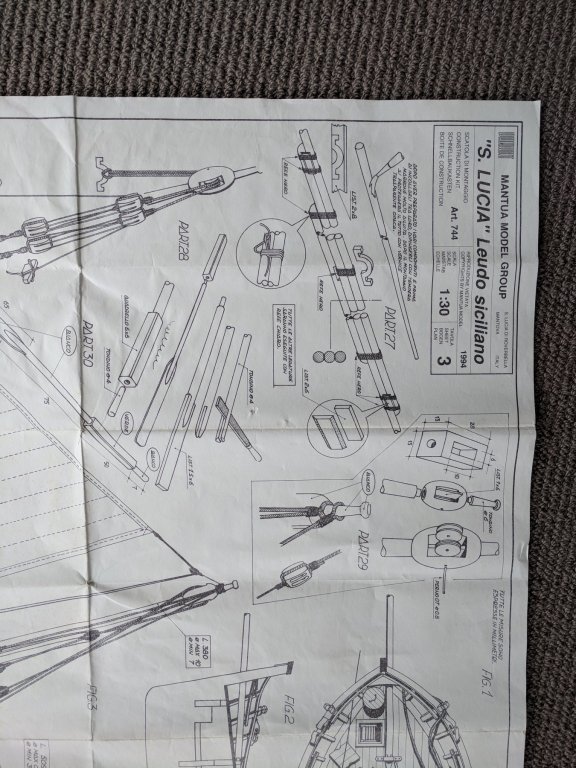
Here are some more pics of the plans which I eventually was able to decipher...some of the scaling was 1:1 whilst other drawings were not...very confusing I had to take the first layer of planking as these were not aligned and were spaced apart for some unknown reason Fortunately I had counted sufficient planks for the first layer of planking (assuming I don't make too many errors myself!). Here is what I ended up with and as you can see it needs a lot of work on it before I can put the first layer of planking. I will need to do a bit of sanding and fairing before the first layer of planking so this will be a long build for a relative newbie like me. Thanks to AntonyK build of this model last year I can refer back to what he has done for any issues or problems I will no doubt encounter. Like his build , my brother would like the model not to be painted but to make it look like it has been in service for a few years! Hopefully I can meet his requirements!!!

-
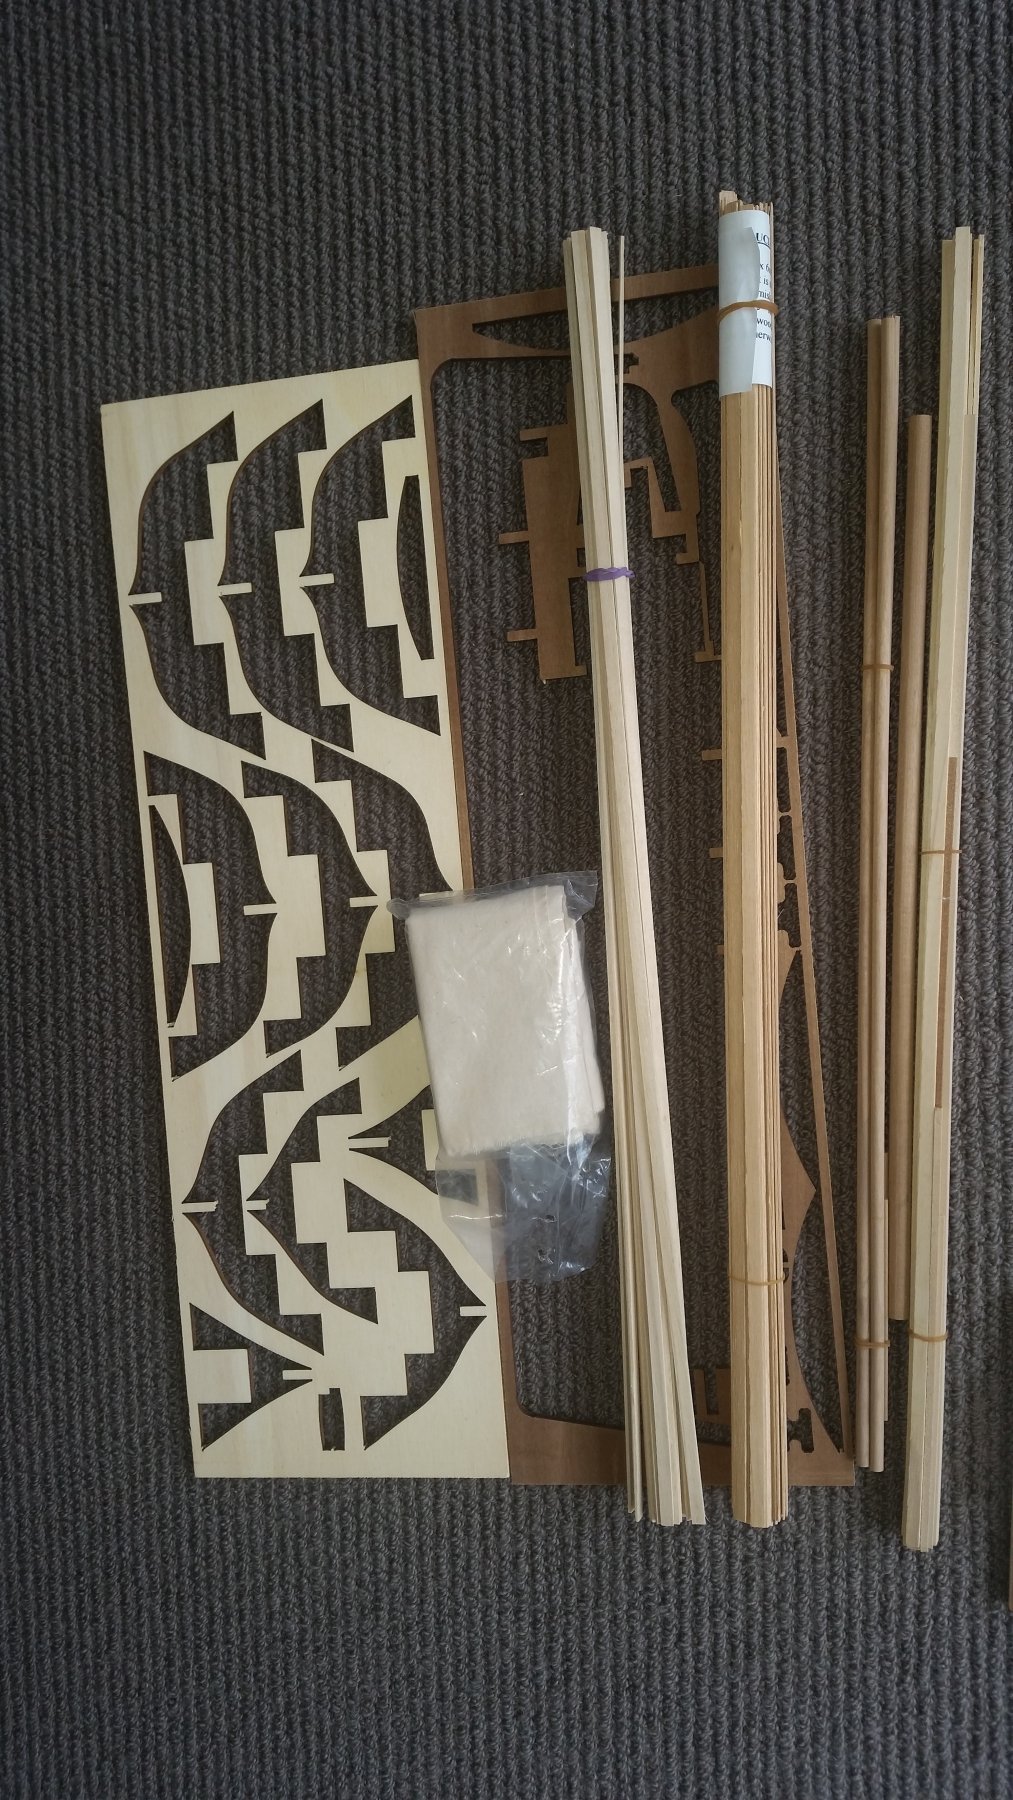
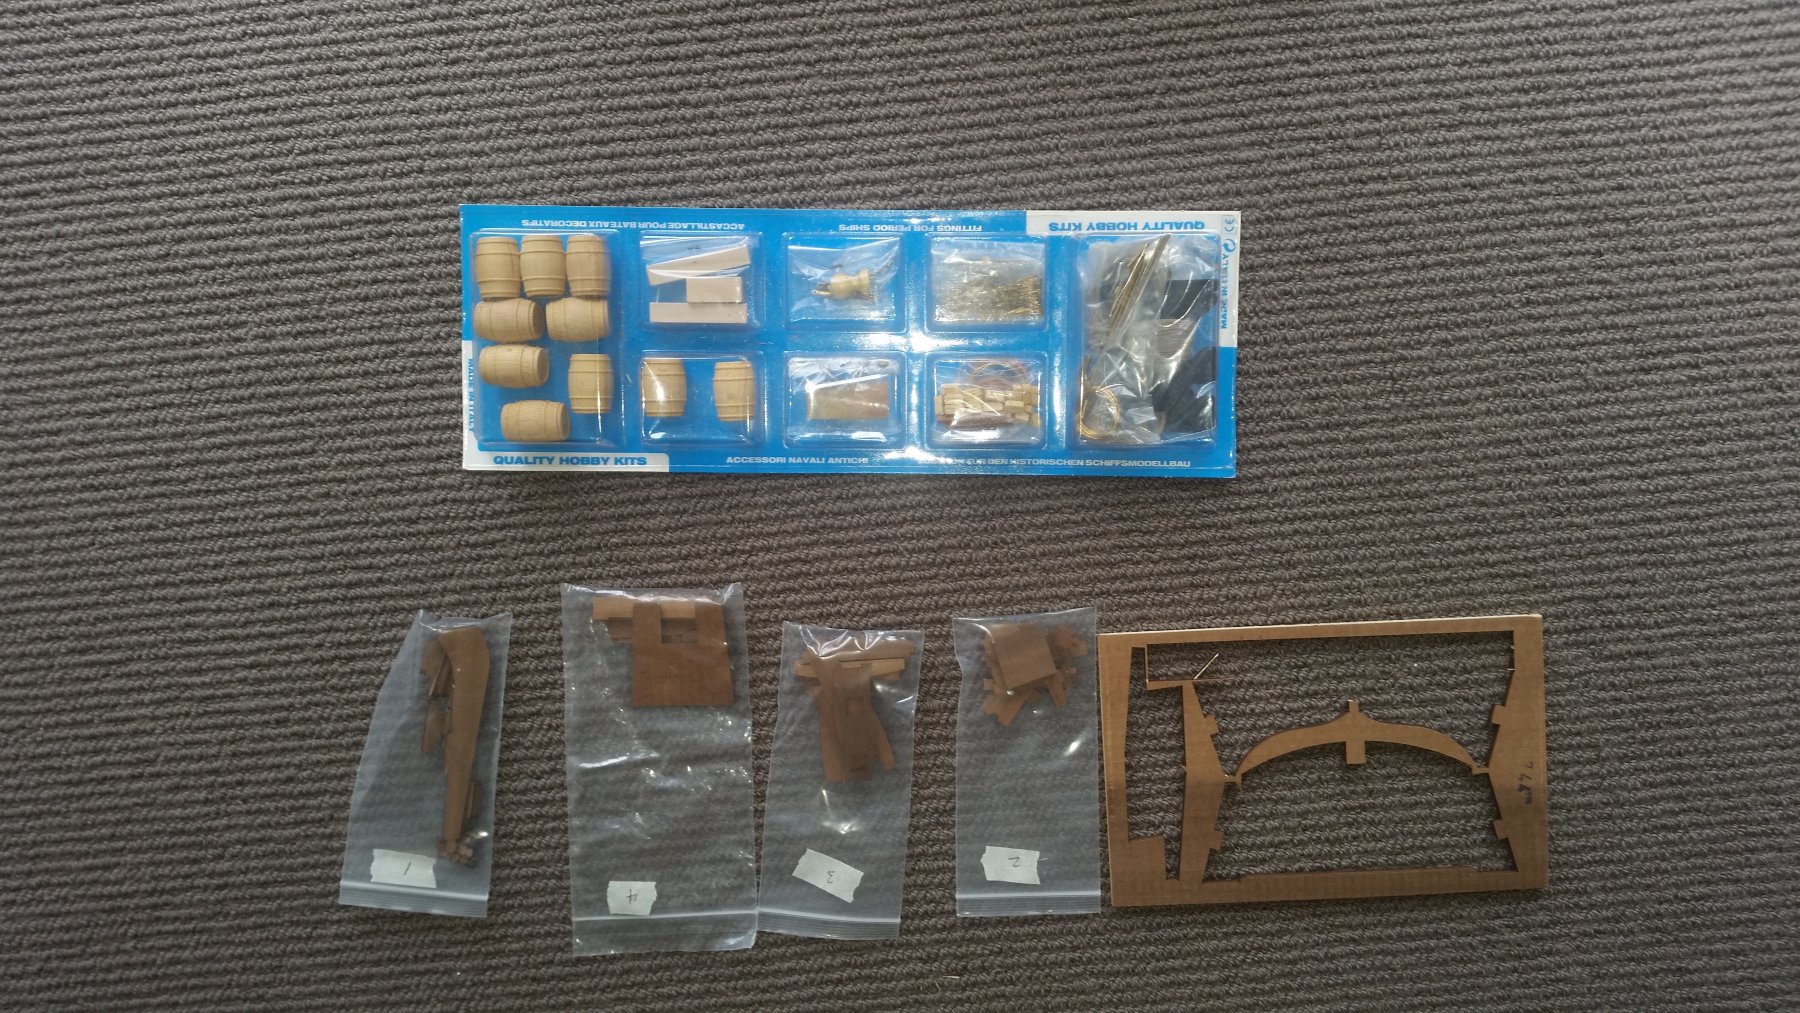
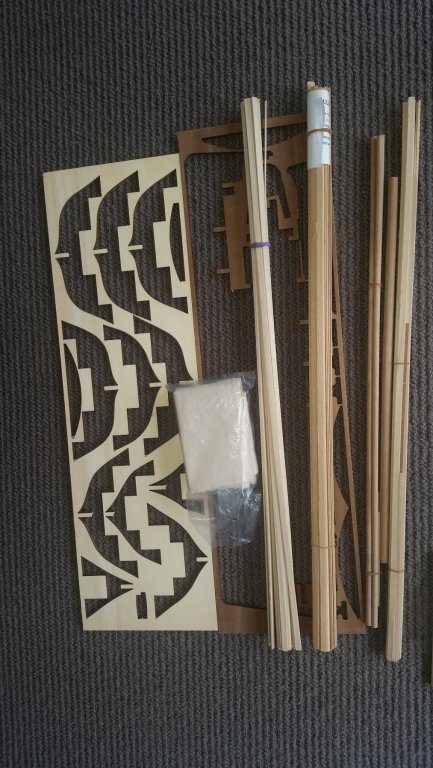
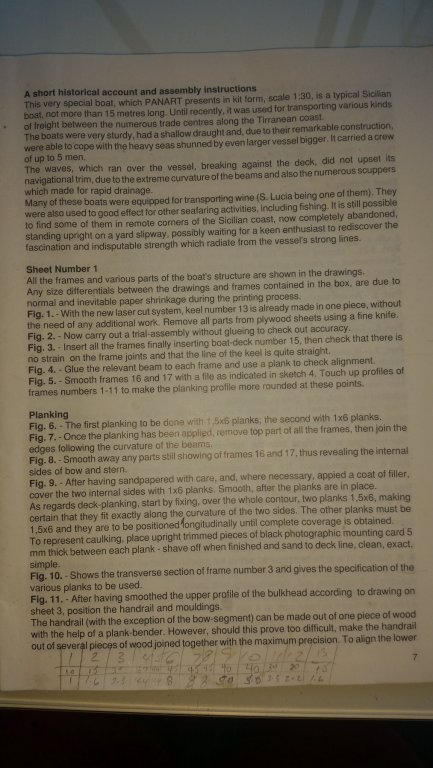
After a very long delay I'm finally starting my build log for the S Lucia. I say finally as I had originally started this project back in January but due to other commitments (my youngest daughter's wedding and my eldest daughter giving us our first grandchild ) I have not had a chance to progress on the build nor the time to download the photos I took earlier in the year. By way of background my brother bought this kit nearly thirty years ago, started it, then realised that he did not have the patience to work on it! He thought that one day he would get back to it but eventually realised that this was not going to happen. Long story short he gave me his part completed model just after Christmas last year and asked if I could finish it for him. The obligatory photos of the the box together with parts and some very basic and at times hard to decipher plans and a booklet are shown below. One of the annoying things was that my brother had originally pulled out all the laser cut pieces which meant I spent a few hours making sure that none had been lost over the years....luckily they all appear to still be there More to follow

-
Hi Vinnie, funny you should ask but was about to start a build log for a fishing vessel which has had a very long gestation period....watch this space! Cheers..........Fernando
-
Looking good Vinnie...keep up the good work! Cheers.............Fernando
-
Nice work Vinnie....coming along very nicely. Your shipmate seems to be slacking off though!!! Cheers..............Fernando
-
2 hours for such beautiful work..... I'd take 2 days just to stress out how to make it look as good as yours Danny😎 Great detail and great instructions as usual. Cheers Fernando
-
Dan, I go away for a few days and come back to see you're already well into your build....you sure are keen! I've pulled up a seat (not quite front row but near enough). Look forward to another lesson on card build. Cheers............Fernando
-
Nice work Vinnie and welcome to your new shipmate! As to the wood finish, I'm with you on not painting too much as wood finishes look great on these ships. If you like it, go with it! Cheers...........Fernando
-
Hi Vinnie, I've bought a few things from modellers central (the Norfolk model kit and the HM Cutter Mermaid) as well as getting a Christmas gift of the Brig Perseverance. I've found these kits to be good and when I have commented on some of the quality of the fittings (blocks in particular) they have immediately replaced them free of charge...mailed out to me the same day! I look forward to further updates on your build. Cheers..........Fernando
-
Nice work on the planking Vinnie....am impressed with the treenails as well. I was told for my first build not to do the Bounty as getting the planking right was not an easy job for a first timer. If this is your first build you've done a great job. Am keen to see how you progress on this build as further down the track I'm hoping to build this then the Endeavour!!! You mentioned earlier that you had to buy some more wood. Out of interest where did you buy it from? Cheers...........Fernando
-
Hi, for what it's worth I have used perspex and as there is no risk in cracking or breaking of glass. If you are having a wooden frame to hold it all in place I would be happy with 3mm. Cheers............Fernando
-
Hi Danny....what an epic build. Have been watching this one from the outset and am continually amazed at what you have achieved using card. Congratulations and I've got front row seats when you start on the Hood! Cheers............Fernando