HOLIDAY DONATION DRIVE - SUPPORT MSW - DO YOUR PART TO KEEP THIS GREAT FORUM GOING! (Only 20 donations so far - C'mon guys!)
×


Fernando E
-
Posts
242 -
Joined
-
Last visited
Content Type
Profiles
Forums
Gallery
Events
Everything posted by Fernando E
-
Hello Attila I had a Revell kit of the Cutty Sark I started back in the early 80's but never finished as life got in the way (marriage, three daughters two dogs and goldfish!!!). After moving house three times I unfortunately mislaid/lost the kit and never saw it finished. I'll be watching with interest how your build progresses. Cheers............Fernando
- 82 replies
-
- 3
-

-
- revell
- cutty sark
- (and 3 more)
-
Hi Chris Many thanks for your very kind comments. Cheers....................Fernando
-
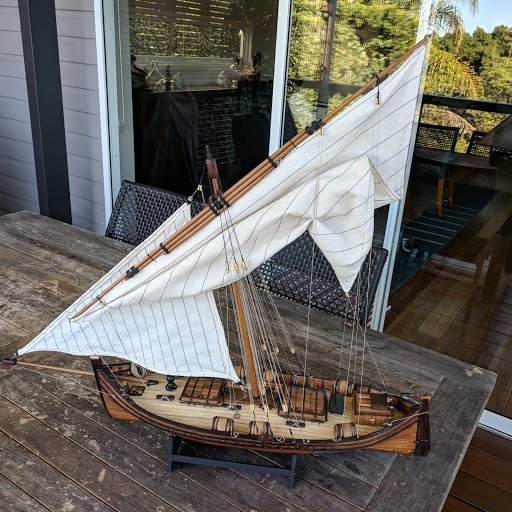
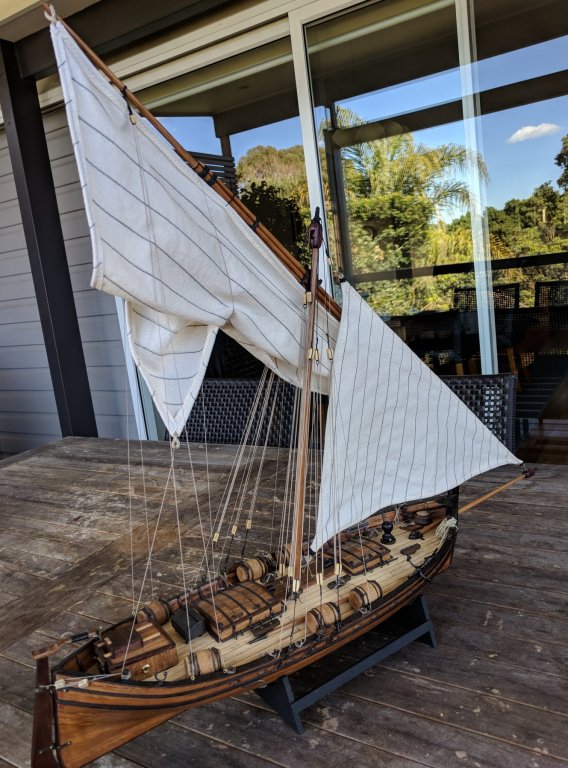
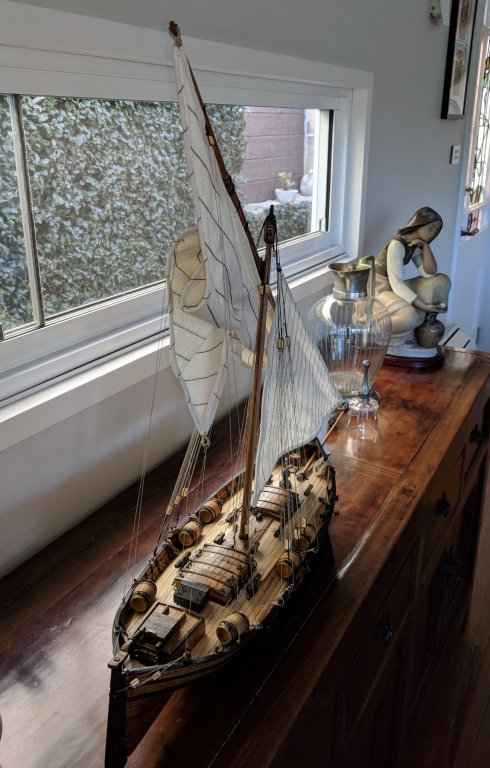
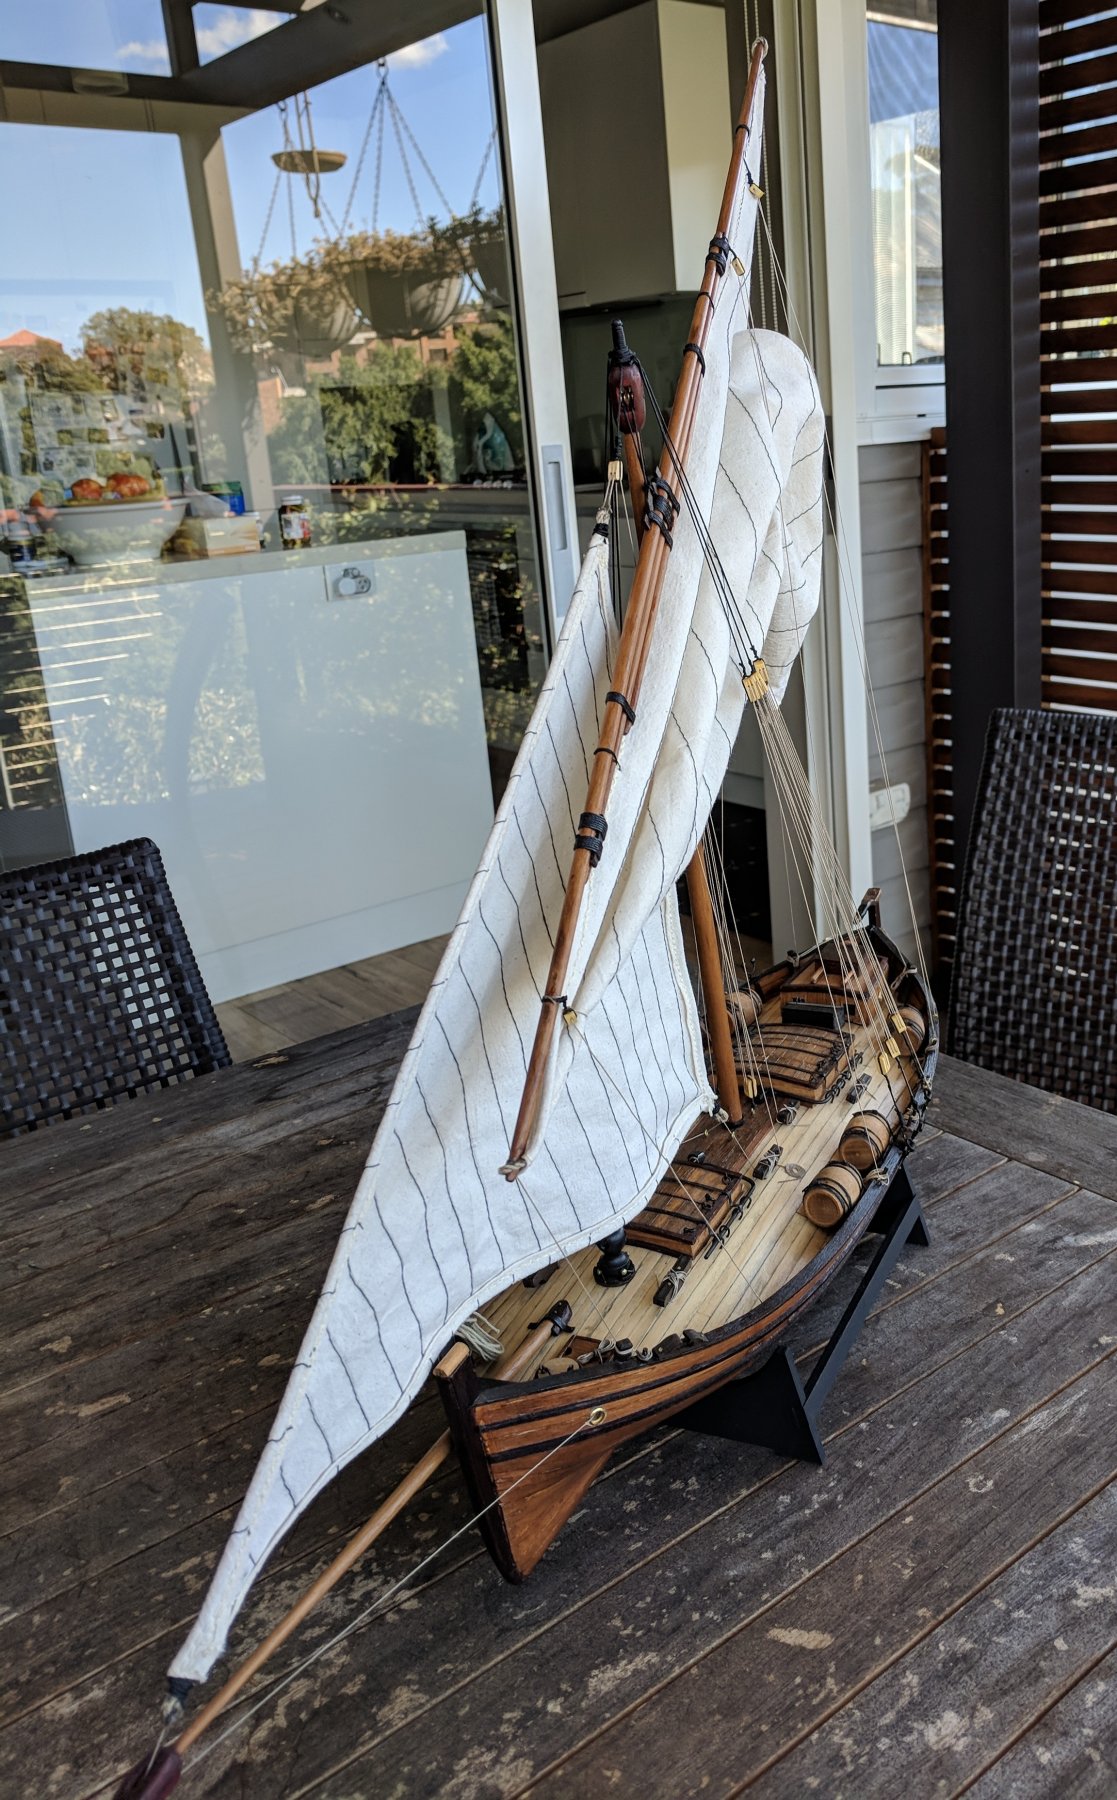
I can now officially close off this build log as I've handed over the Santa Lucia to my brother! The sails were added and he is delighted with the finished product ( I haven't shown him all of my mistakes and hopefully he won't look too closely at the model). Many thanks for looking in as well as your kind comments. I will be starting another build log in the not too distant future. I have a couple of kits sitting on the shelf and it's a matter of deciding what next. Cheers....................Fernando

- 32 replies
-
- 10
-
-
Gondola by AntonyUK
Fernando E replied to AntonyUK's topic in - Build logs for subjects built 1901 - Present Day
Two builds......you're a glutton for punishment Antony! Cheers..........Fernando -
Welcome back from downunder! I'm extremely jealous of your "man cave"...... can't wait to see your workmanship. Cheers...... Fernando 😎
-
I will be starting another kit build in the next month or so and have been doing a little bit of homework on rope available other than what has been supplied in the kit (kit rope doesn't inspire me that much !) . This may sound totally stupid on my part (so please excuse the question from a relative newbie if it is!) but some suppliers offer a "left" twist or a "right" twist coil. Is one better than another or are there specific reasons for the difference. I also noticed that some are called "served" cotton ropes. Again what is the purpose of these or can I use any type of rope which will do the same thing. Any help would be appreciated Cheers..............Fernando
-
Hi Vinnie Glad to see your back in the shipyard. The rigging is looking good and those blocks are much better than the kit blocks! Look forward to more updates. Cheers............Fernando
-
Hi Dave Love your work....the rigging is just beautiful and your explanations have been extremely helpful for a future member of the "Endeavour Club"! Cheers.............Fernando
-
Welcome Geoff to MSW from up north on the big island. I also recommend Modellers Central. Have a look at their site (they are situated in the Blue Mountains west of Sydney). They have some good pointers and easy to read plans and videos for each of their models, plus they have helped me out whenever I have needed any assistance on my builds. Enjoy whatever you decide to build.... it's a great hobby. Cheers...... Fernando 🍻
-
Hi Rod, enjoy the break.....sounds like a great trip. Cheers...... Fernando 😎
-
Hi Mark and welcome to the merry crew of the MSW. Cheers............Fernando
-
Hello Richmond and welcome to this fantastic site from another Sydney member. I started building wooden models only 18 months ago and have found the guys at Modellers Central in the Blue Mountains very helpful and great for service. They have starter packs for entry level blokes like me and are always happy to chat if you get stuck on any issues during your build. Have a look at their website on https://www.modelerscentral.com/model-ship-kits/ Cheers..............Fernando
-
Hi Rod, arriving a little bit late on your build but now have found it will follow along if ok with you. I plan to do the Endeavour in the not too distant future and was looking at the Caldercraft kit to buy and put under the workbench. The kit looks very good (as does your workmanship!) so am keen to see how your build progresses. Cheers..........Fernando
-
Many thanks for your kind comments Antony......very much appreciated. I'm taking a couple of weeks off and heading your way to visit my sister in Polperro. On the way from London will be spending a few days in Portsmouth to see the Victory as well as the Mary Rose. Will be back in the shipyard on my latest project in August. Cheers........ Fernando
-
Hi Ron and a warm welcome to the very helpful crew of MSW. Look forward to seeing your work on the site. Cheers.....Fernando
-
Many thanks Tom....sails are still on the sewing machine! I will be away till the end of July so no new pictures until early August (hopefully)! Cheers........Fernando
-
Many thanks for your kind comments John. Cheers.........Fernando
-
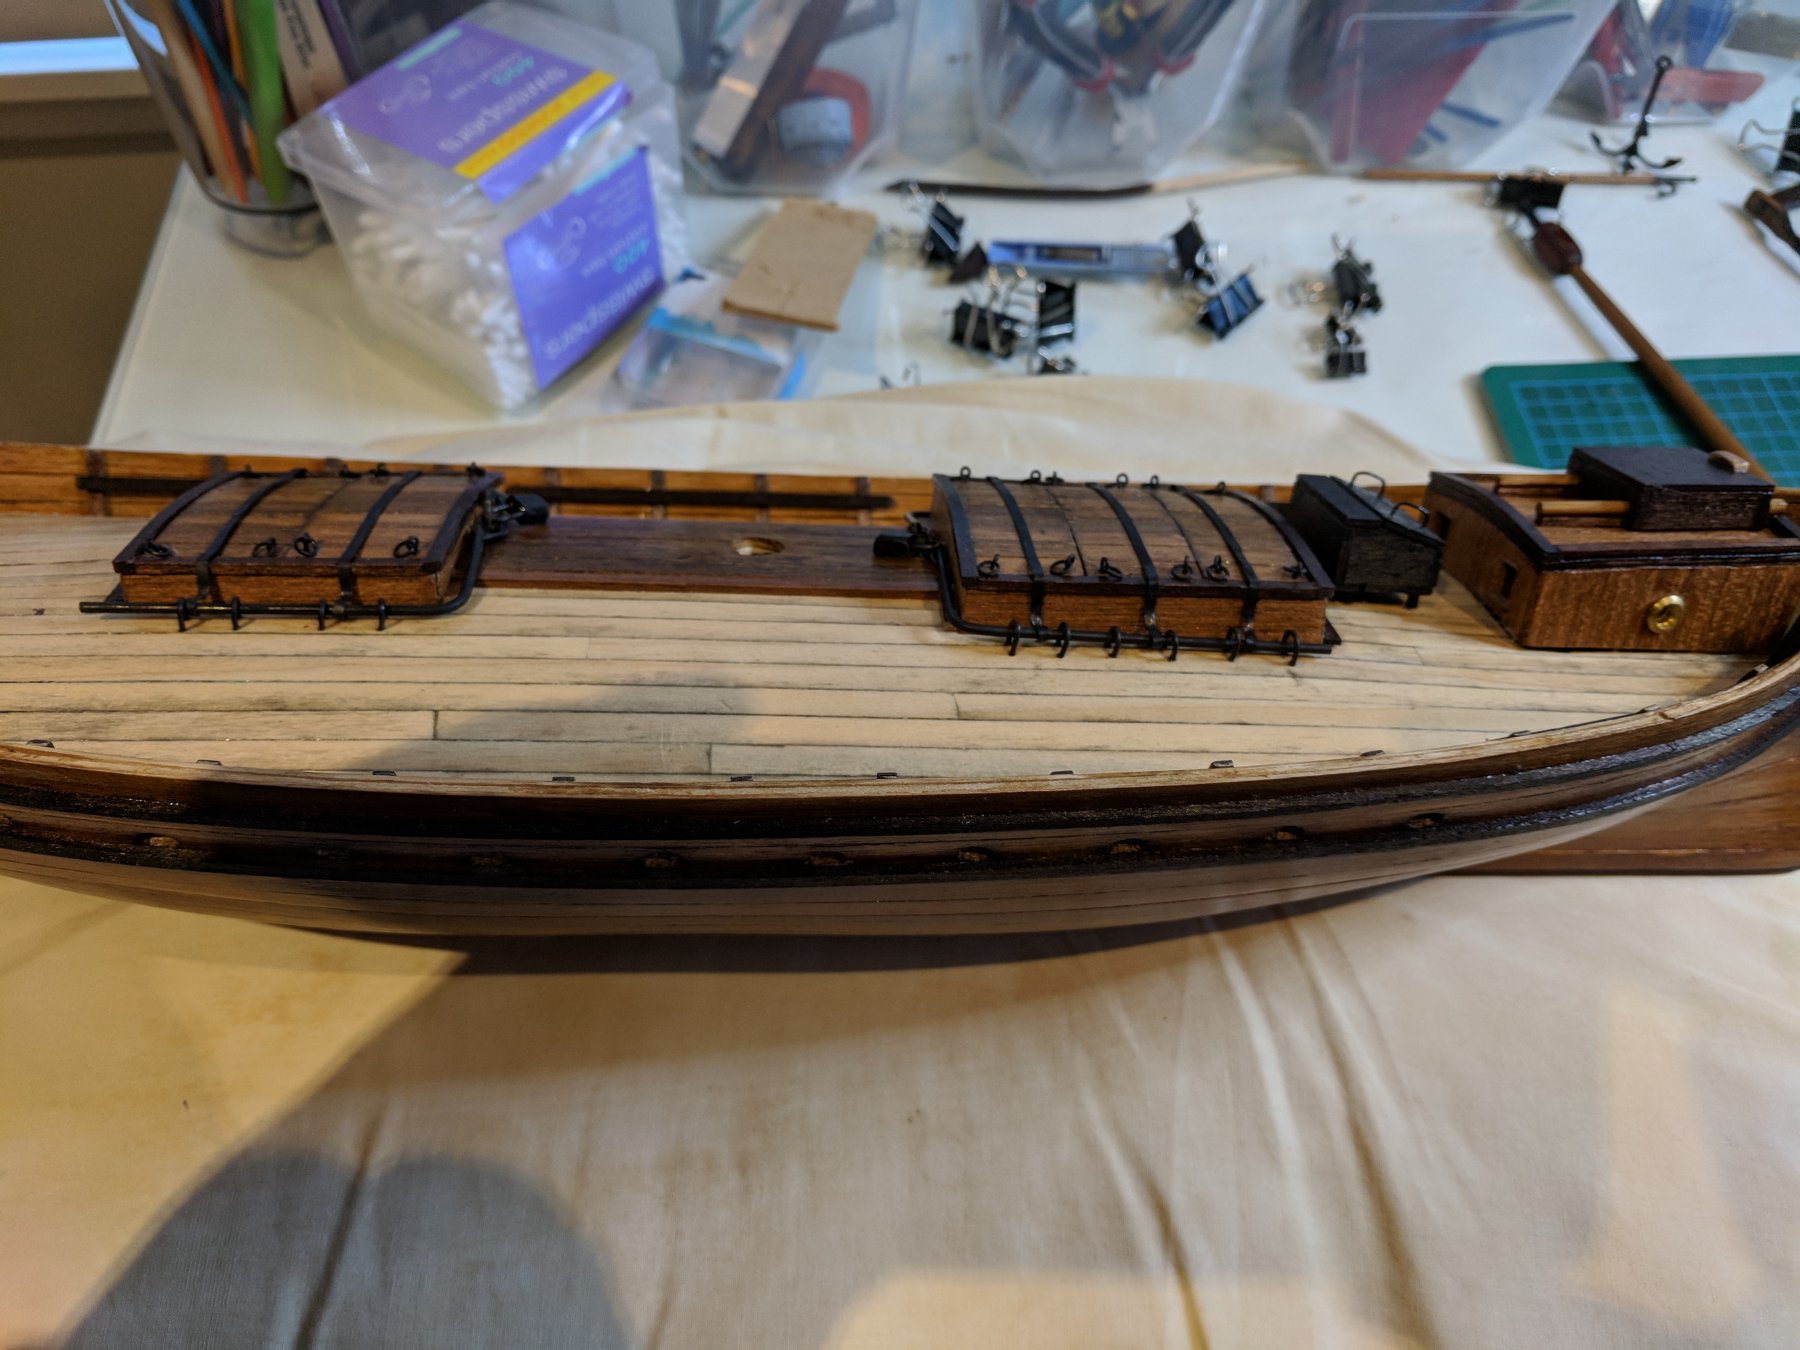
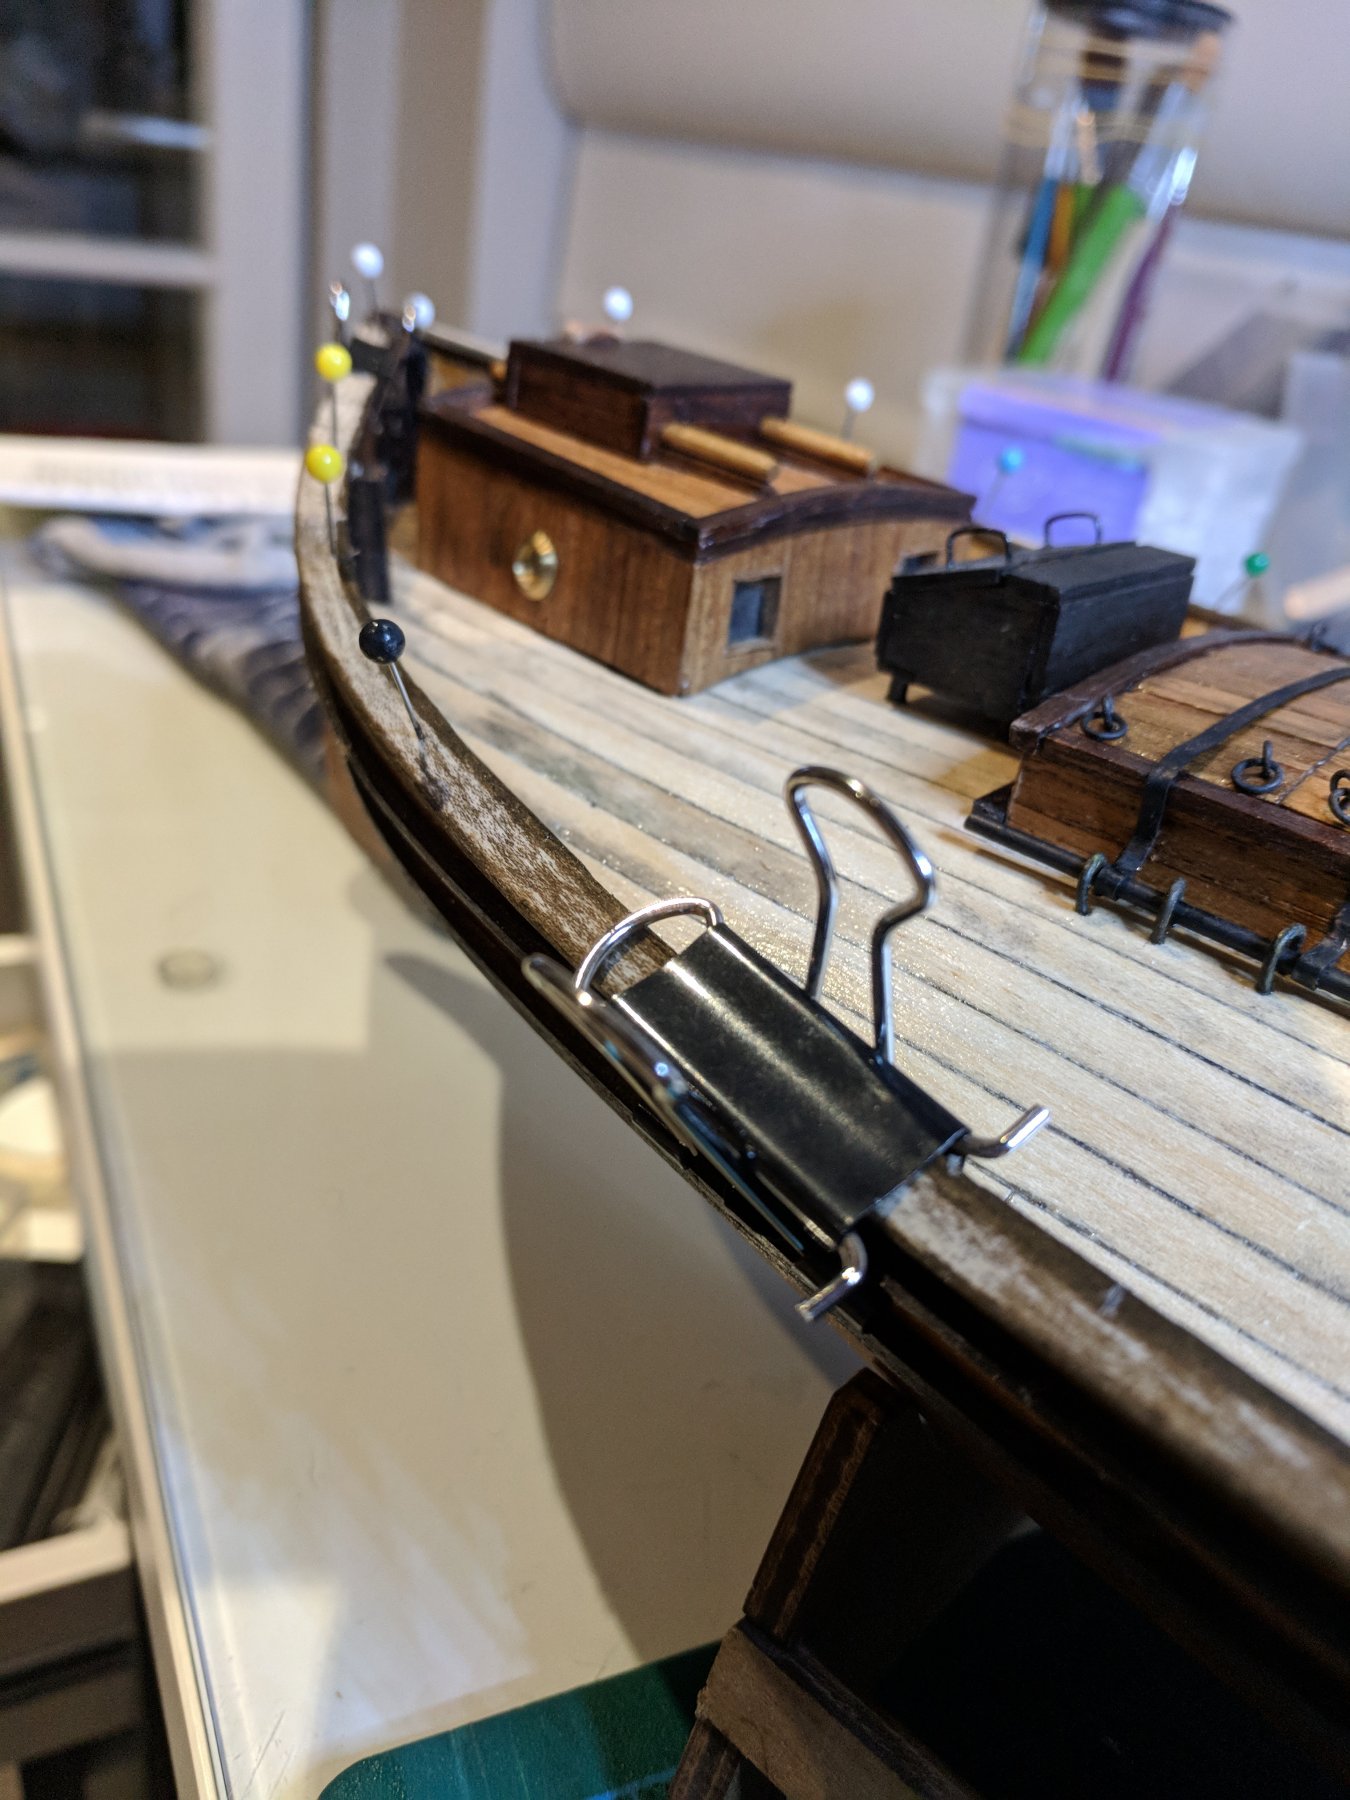
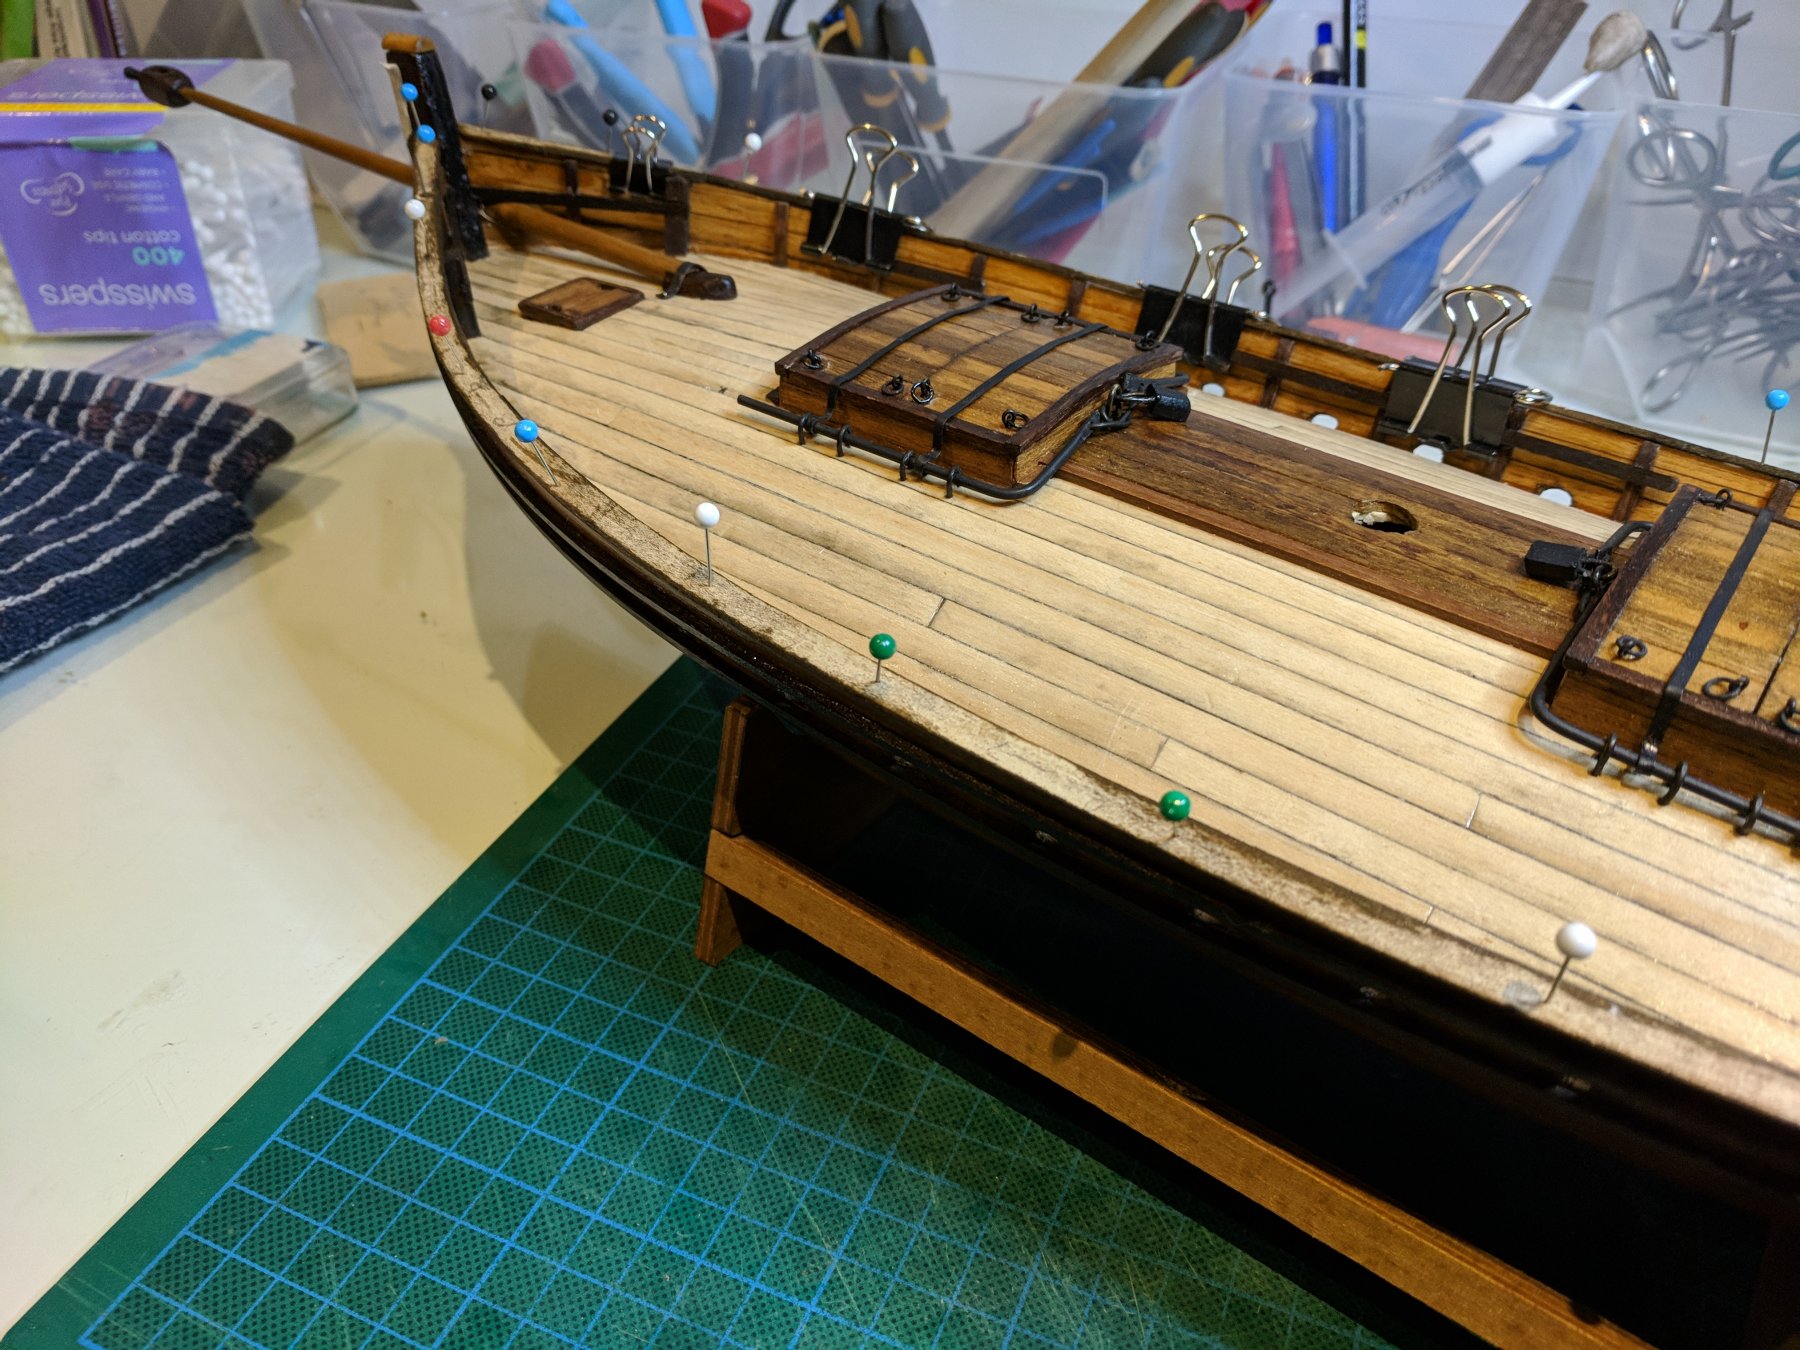
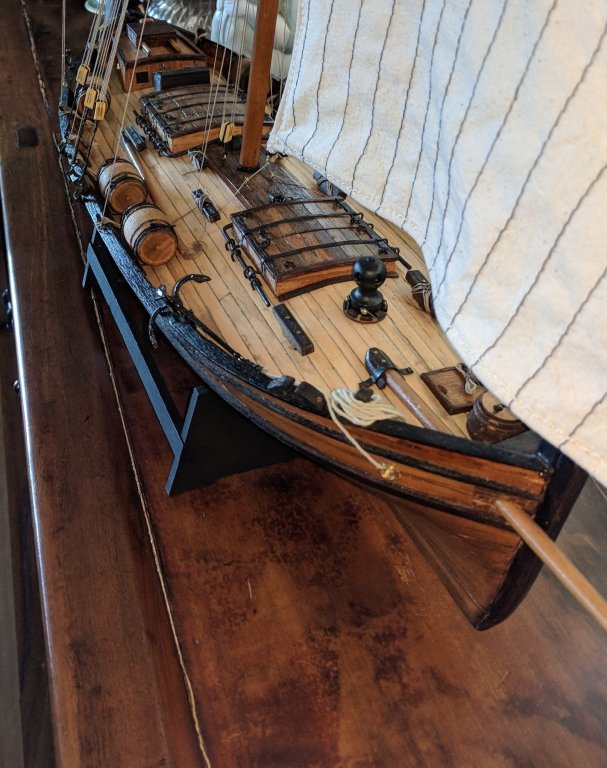
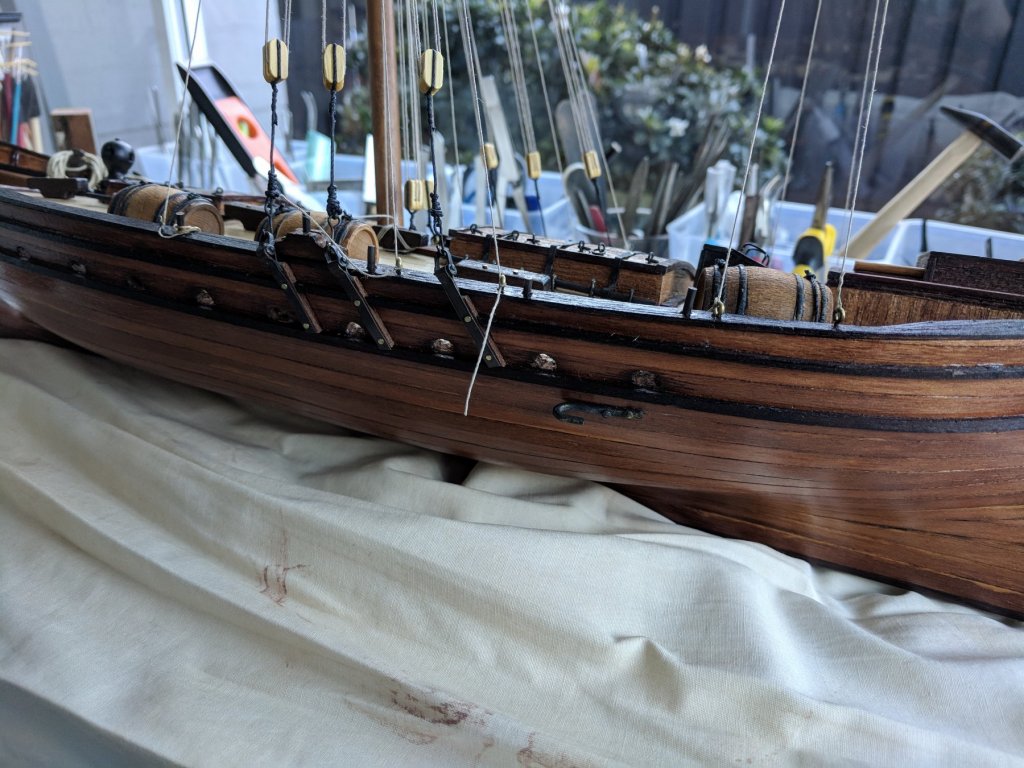
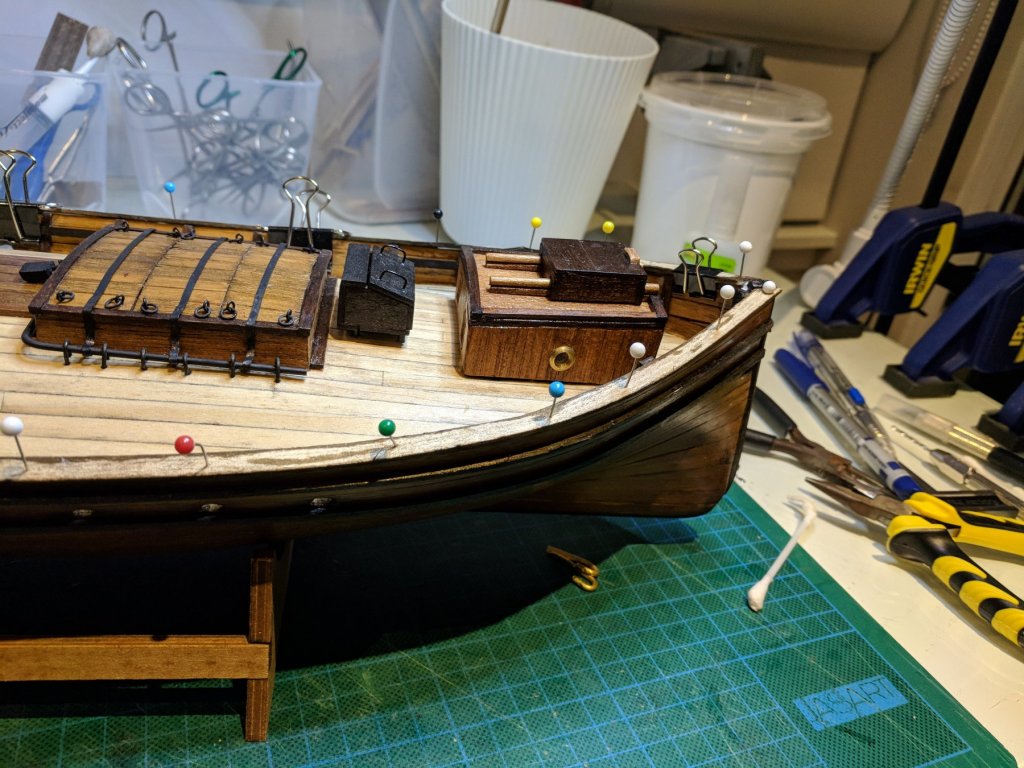
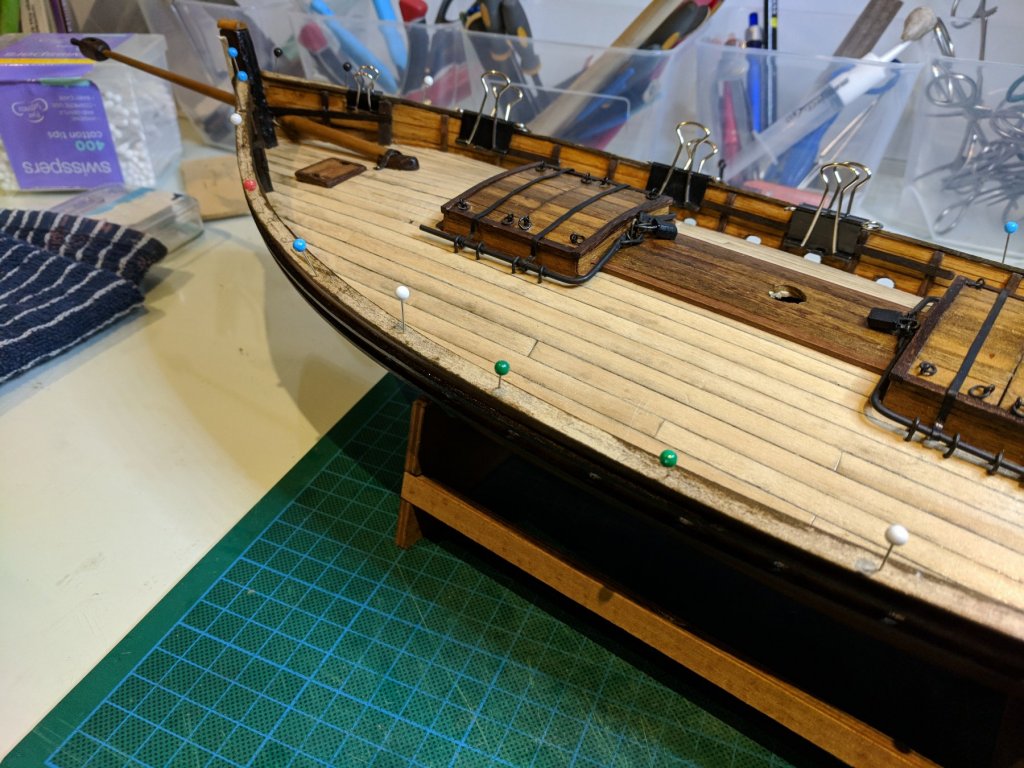
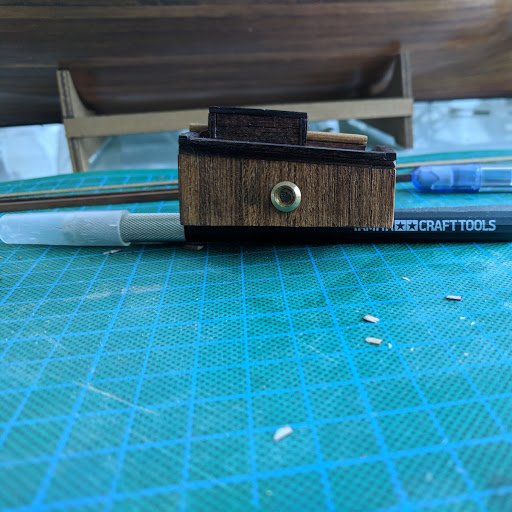
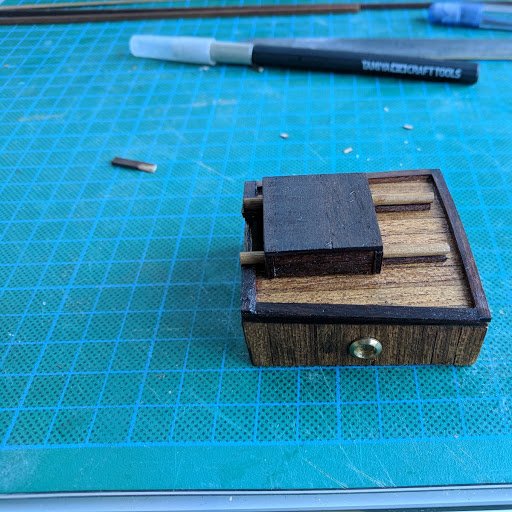
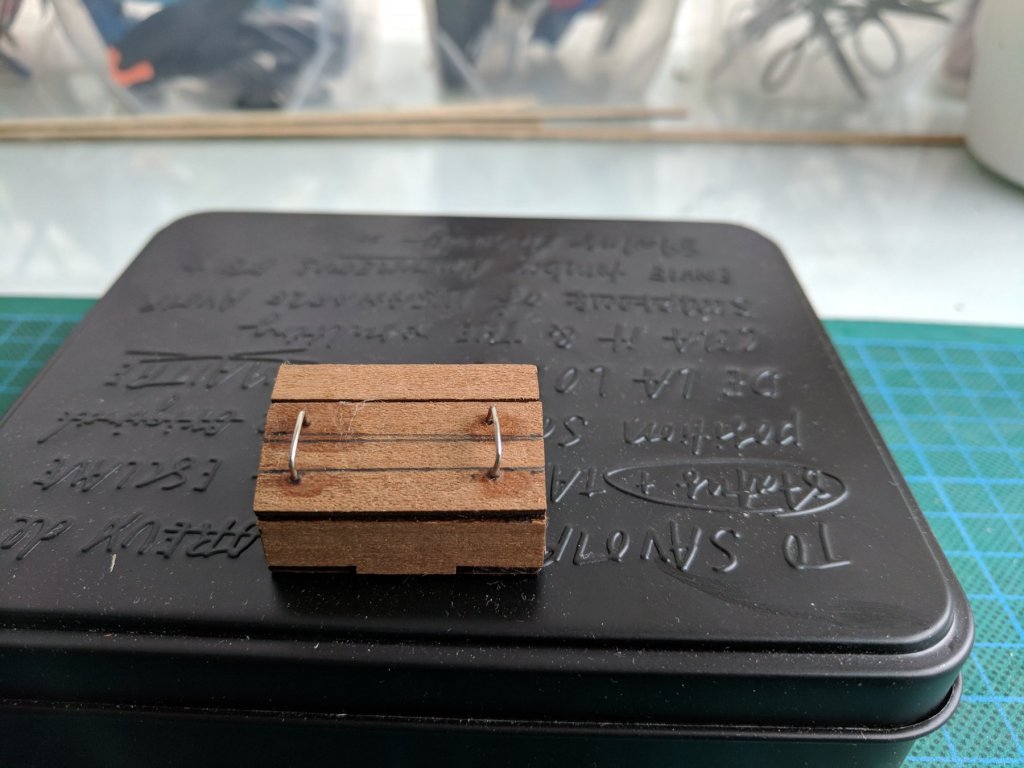
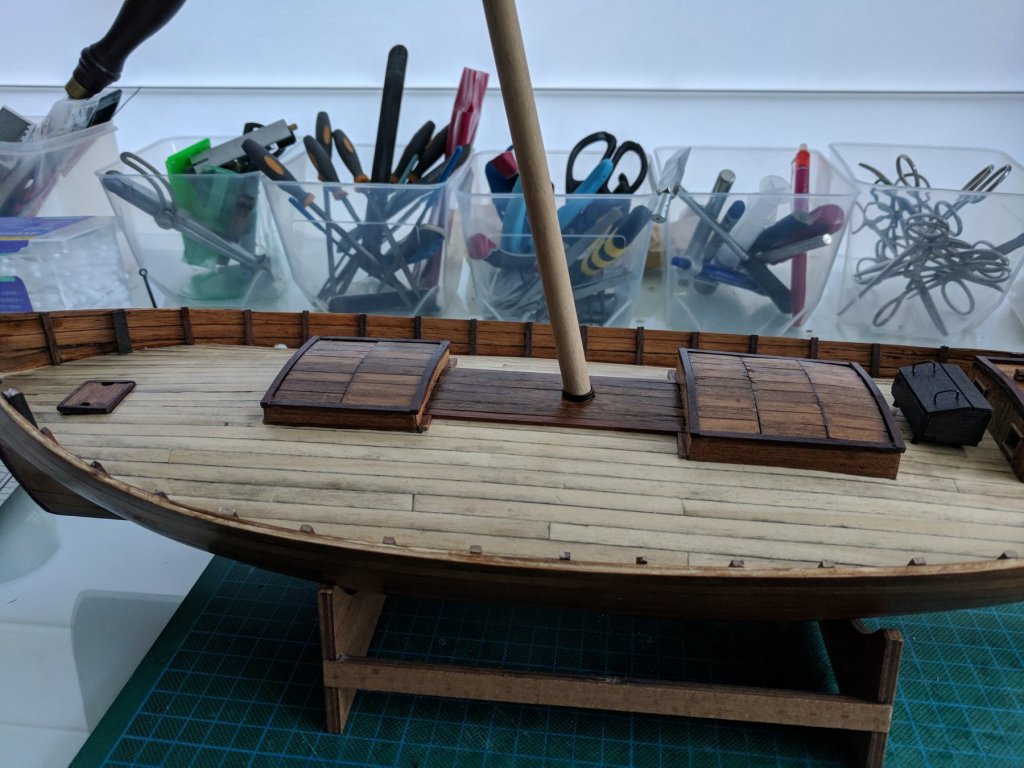
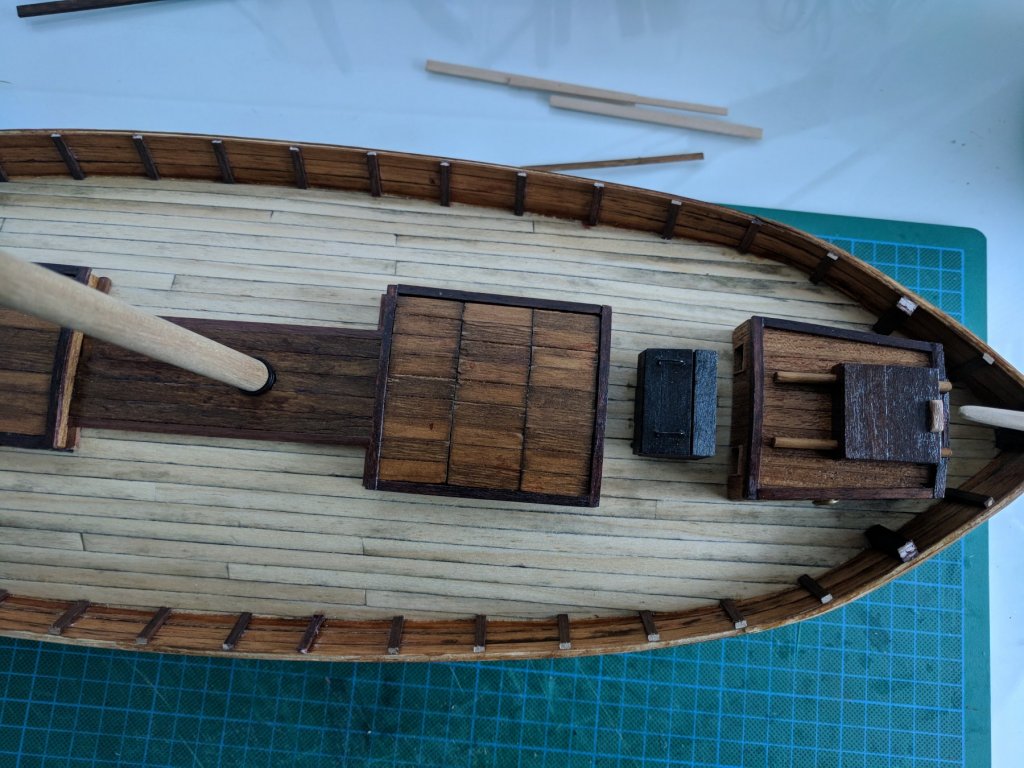
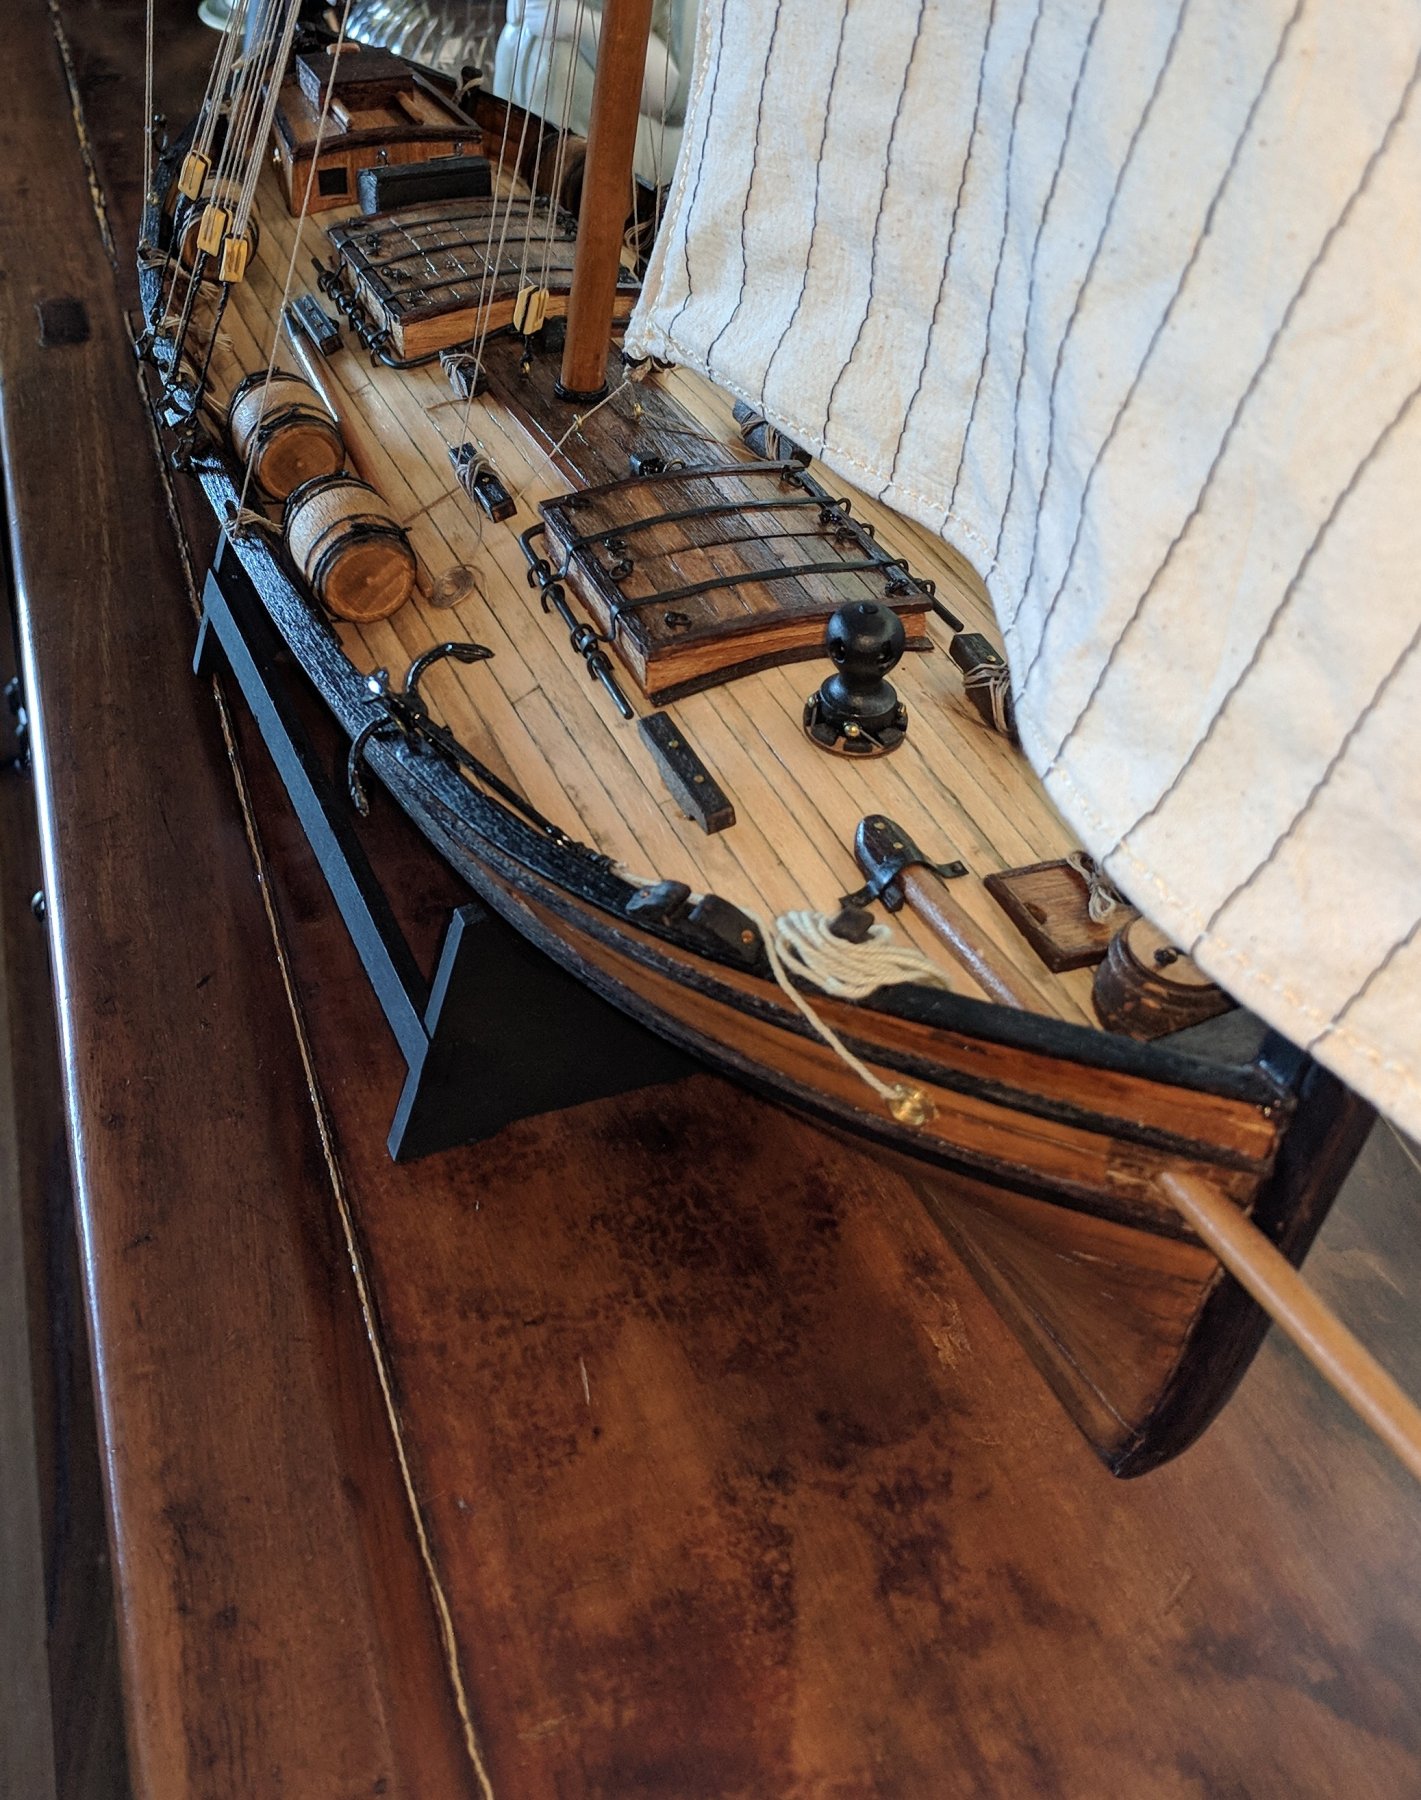
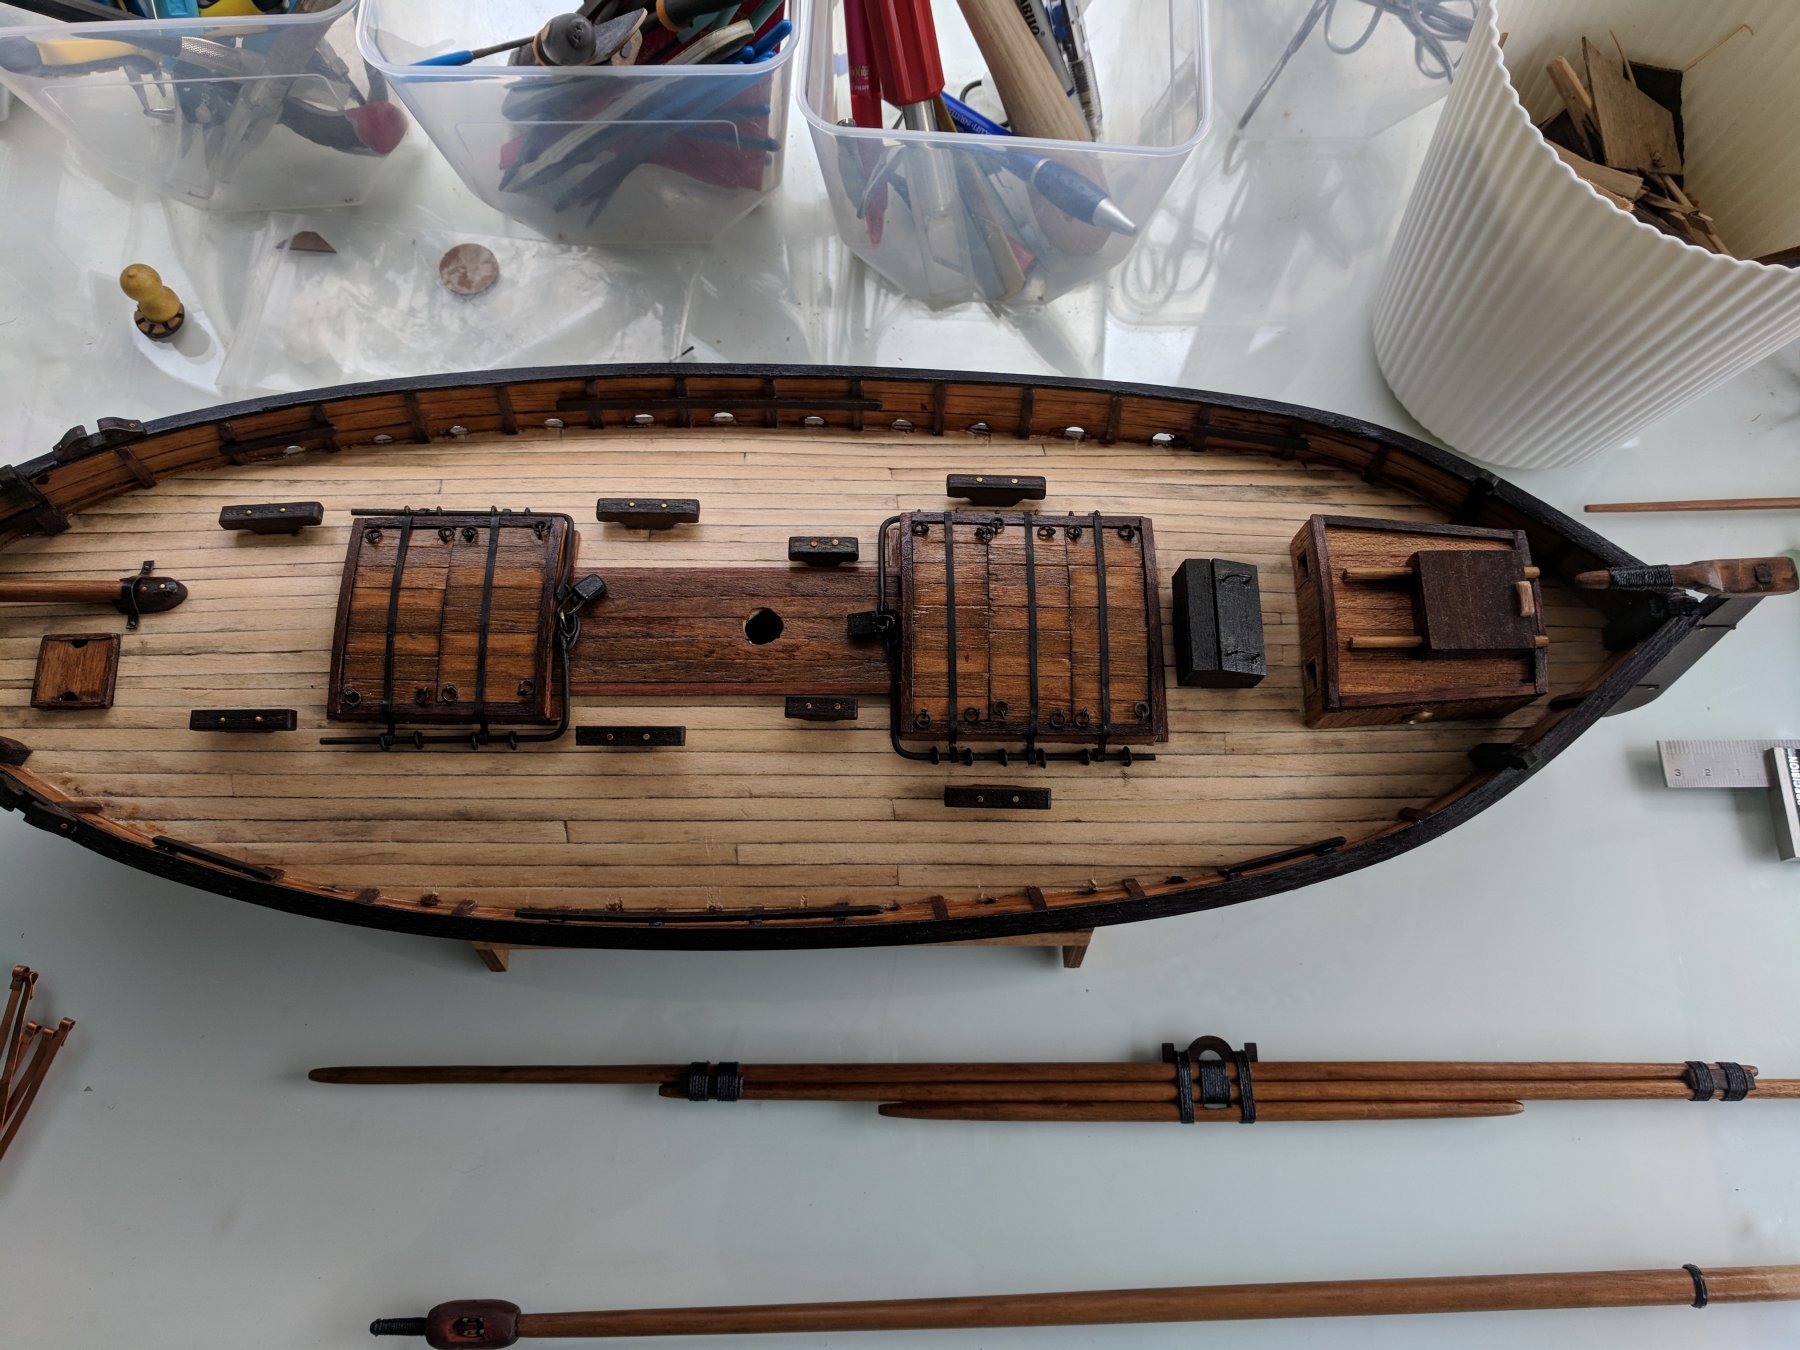
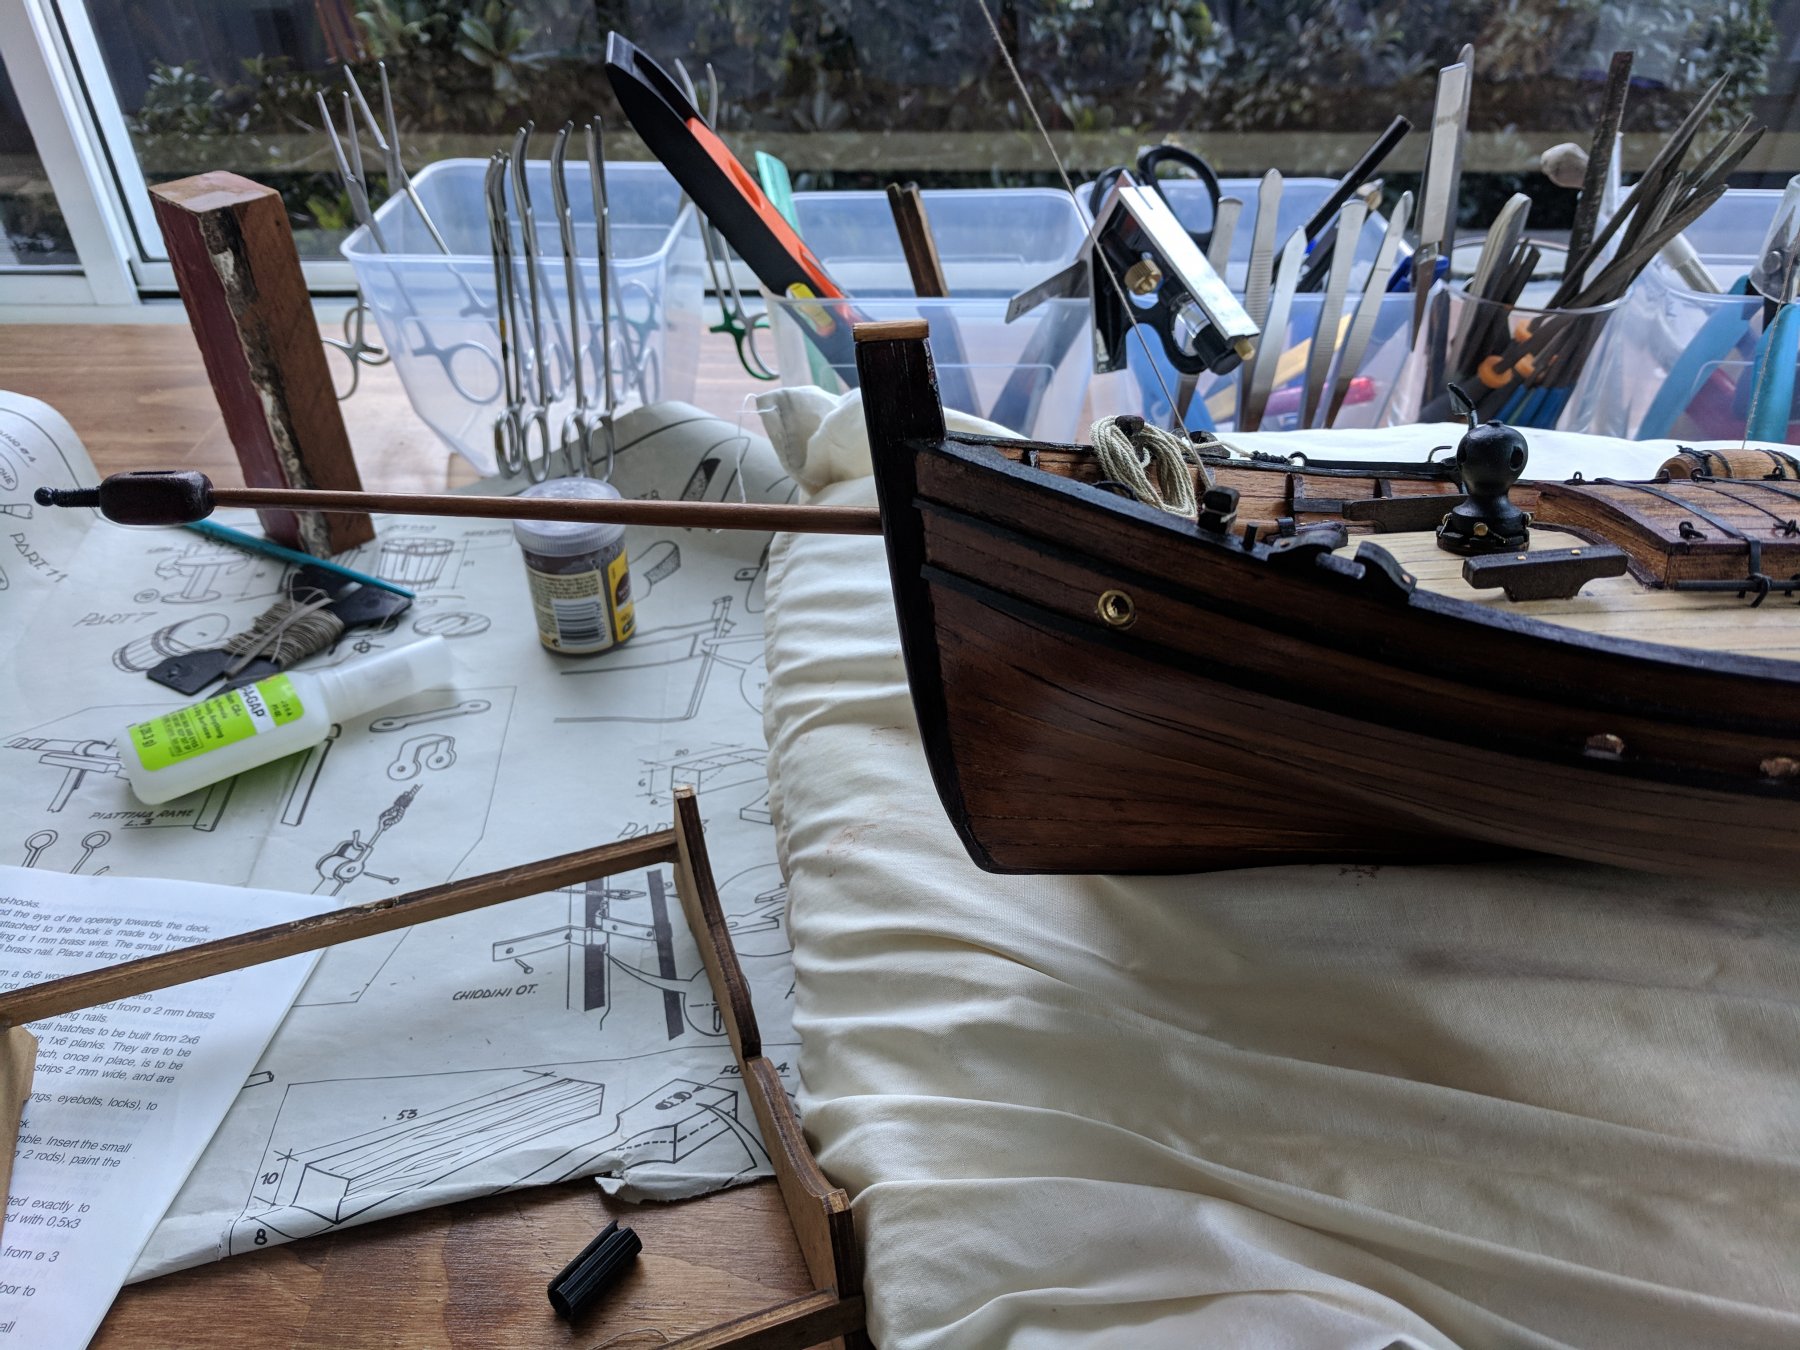
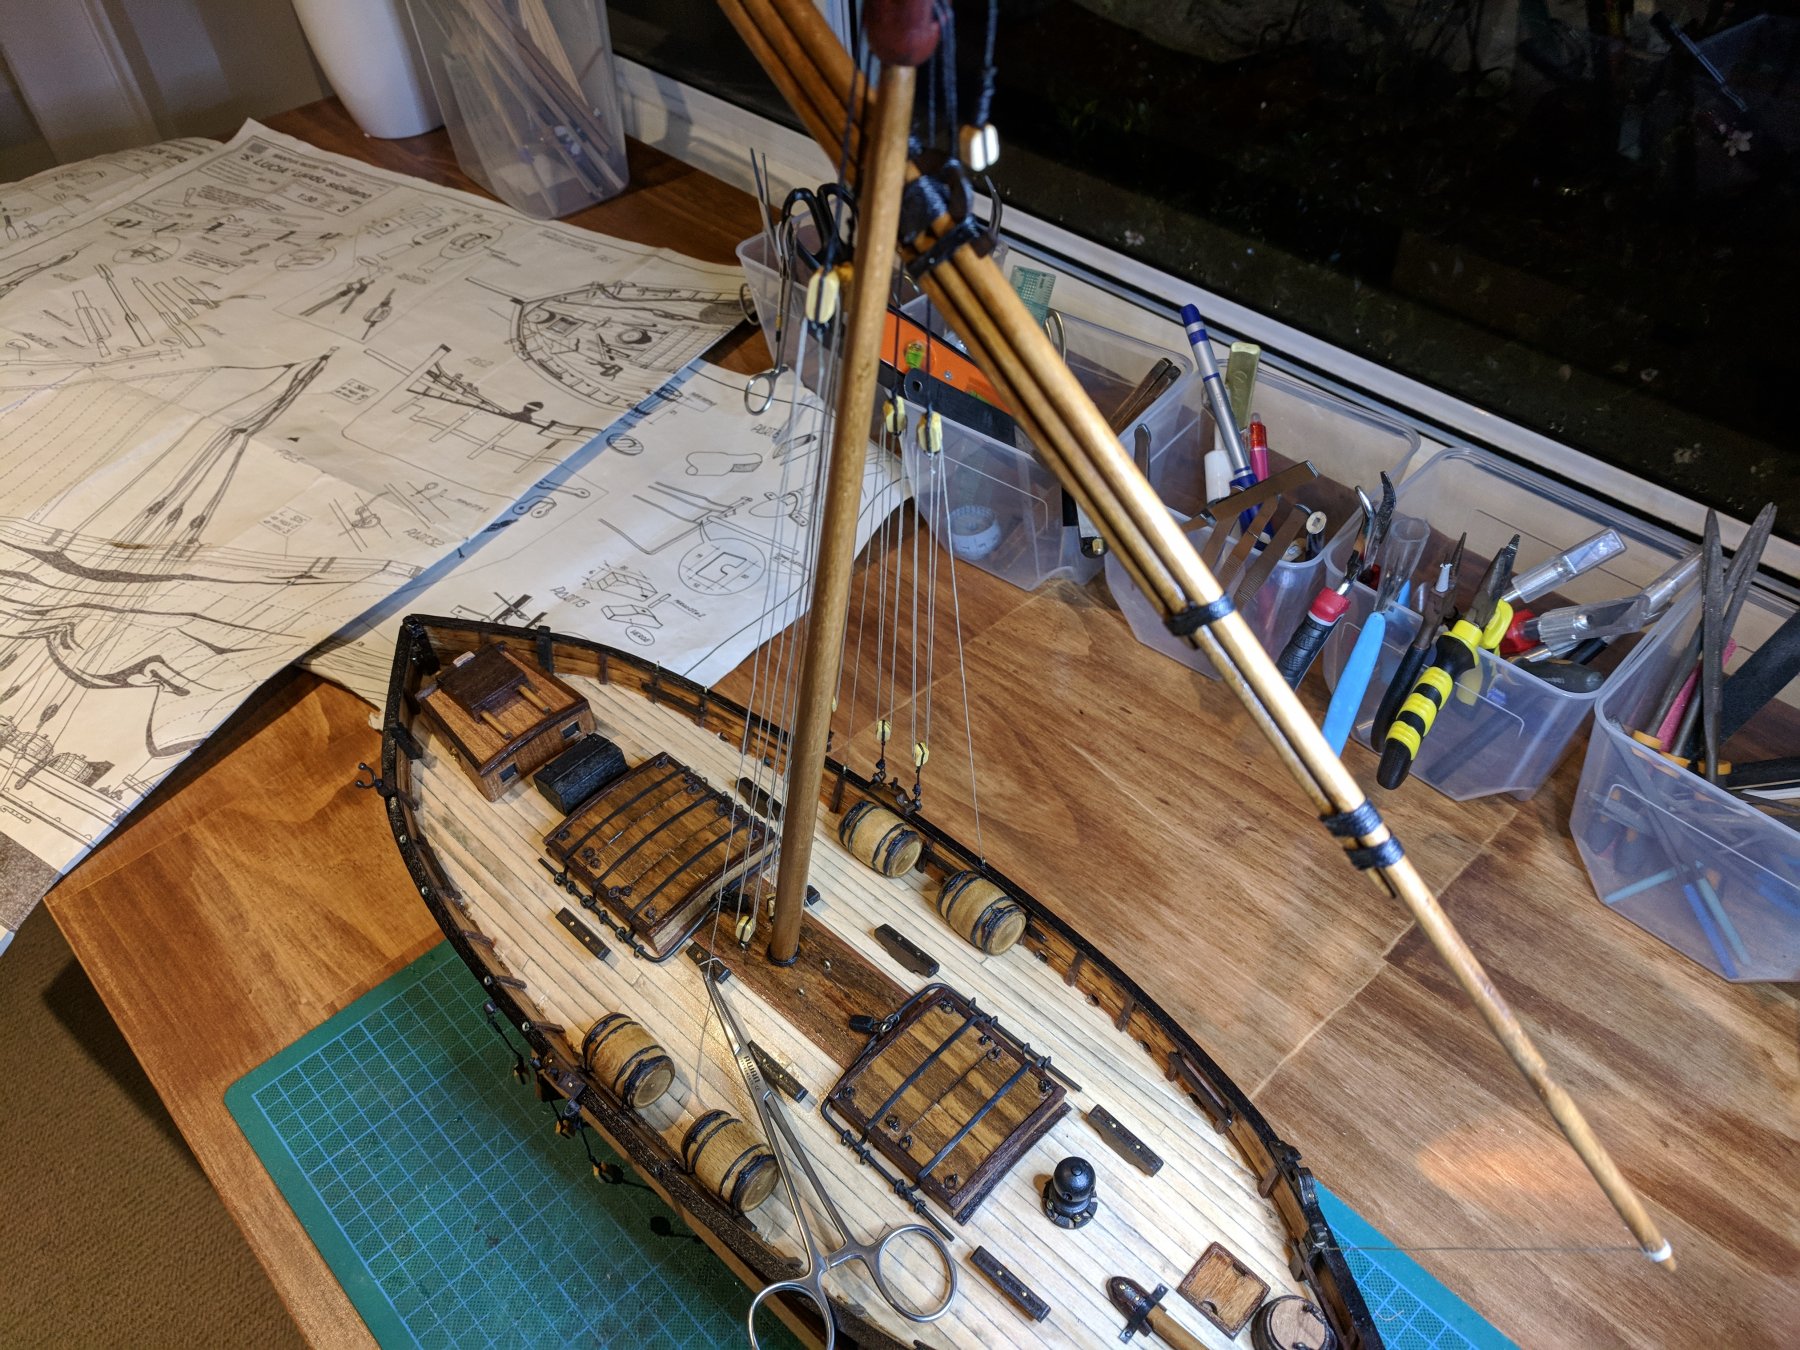
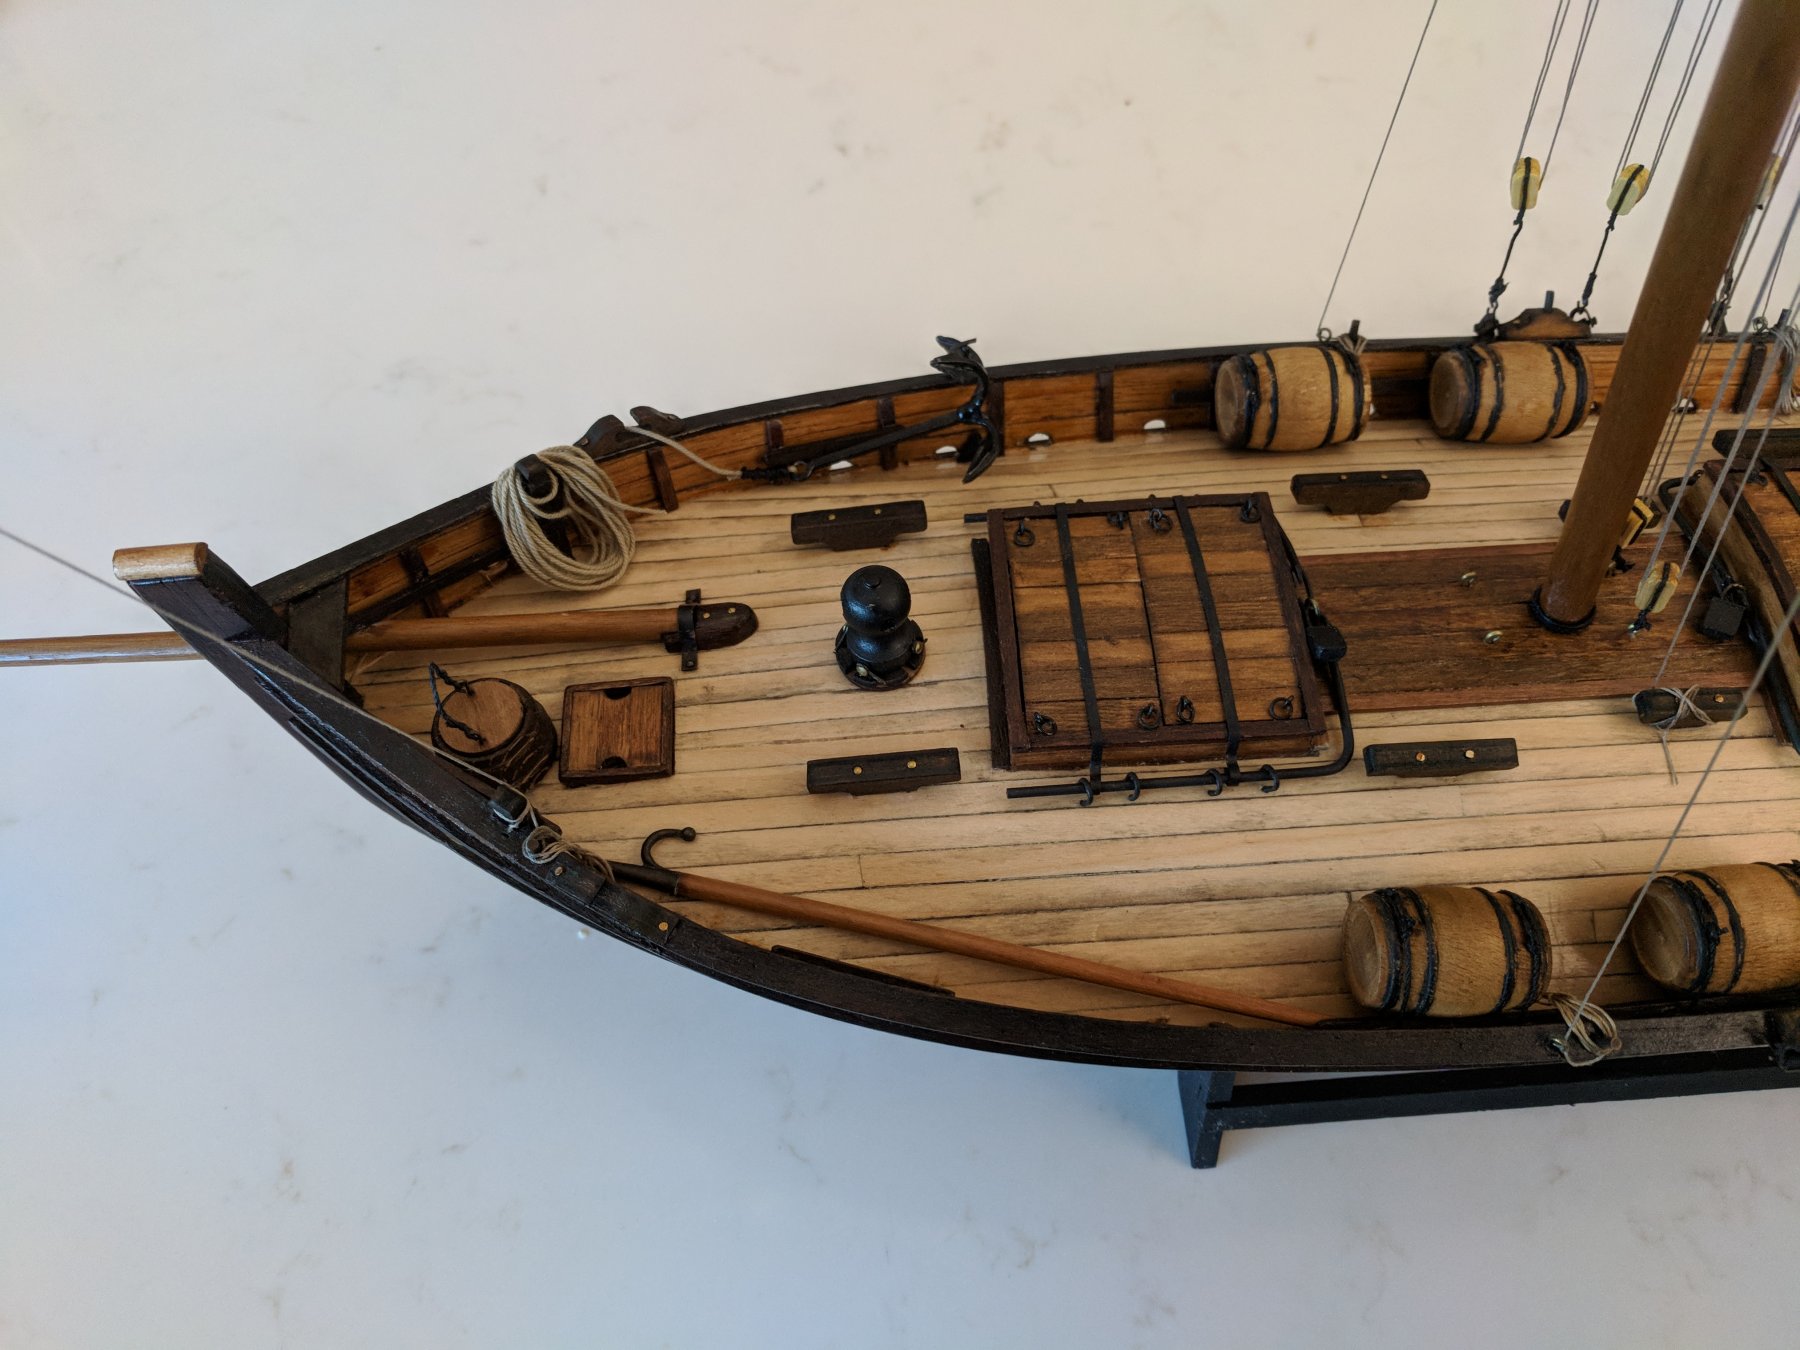
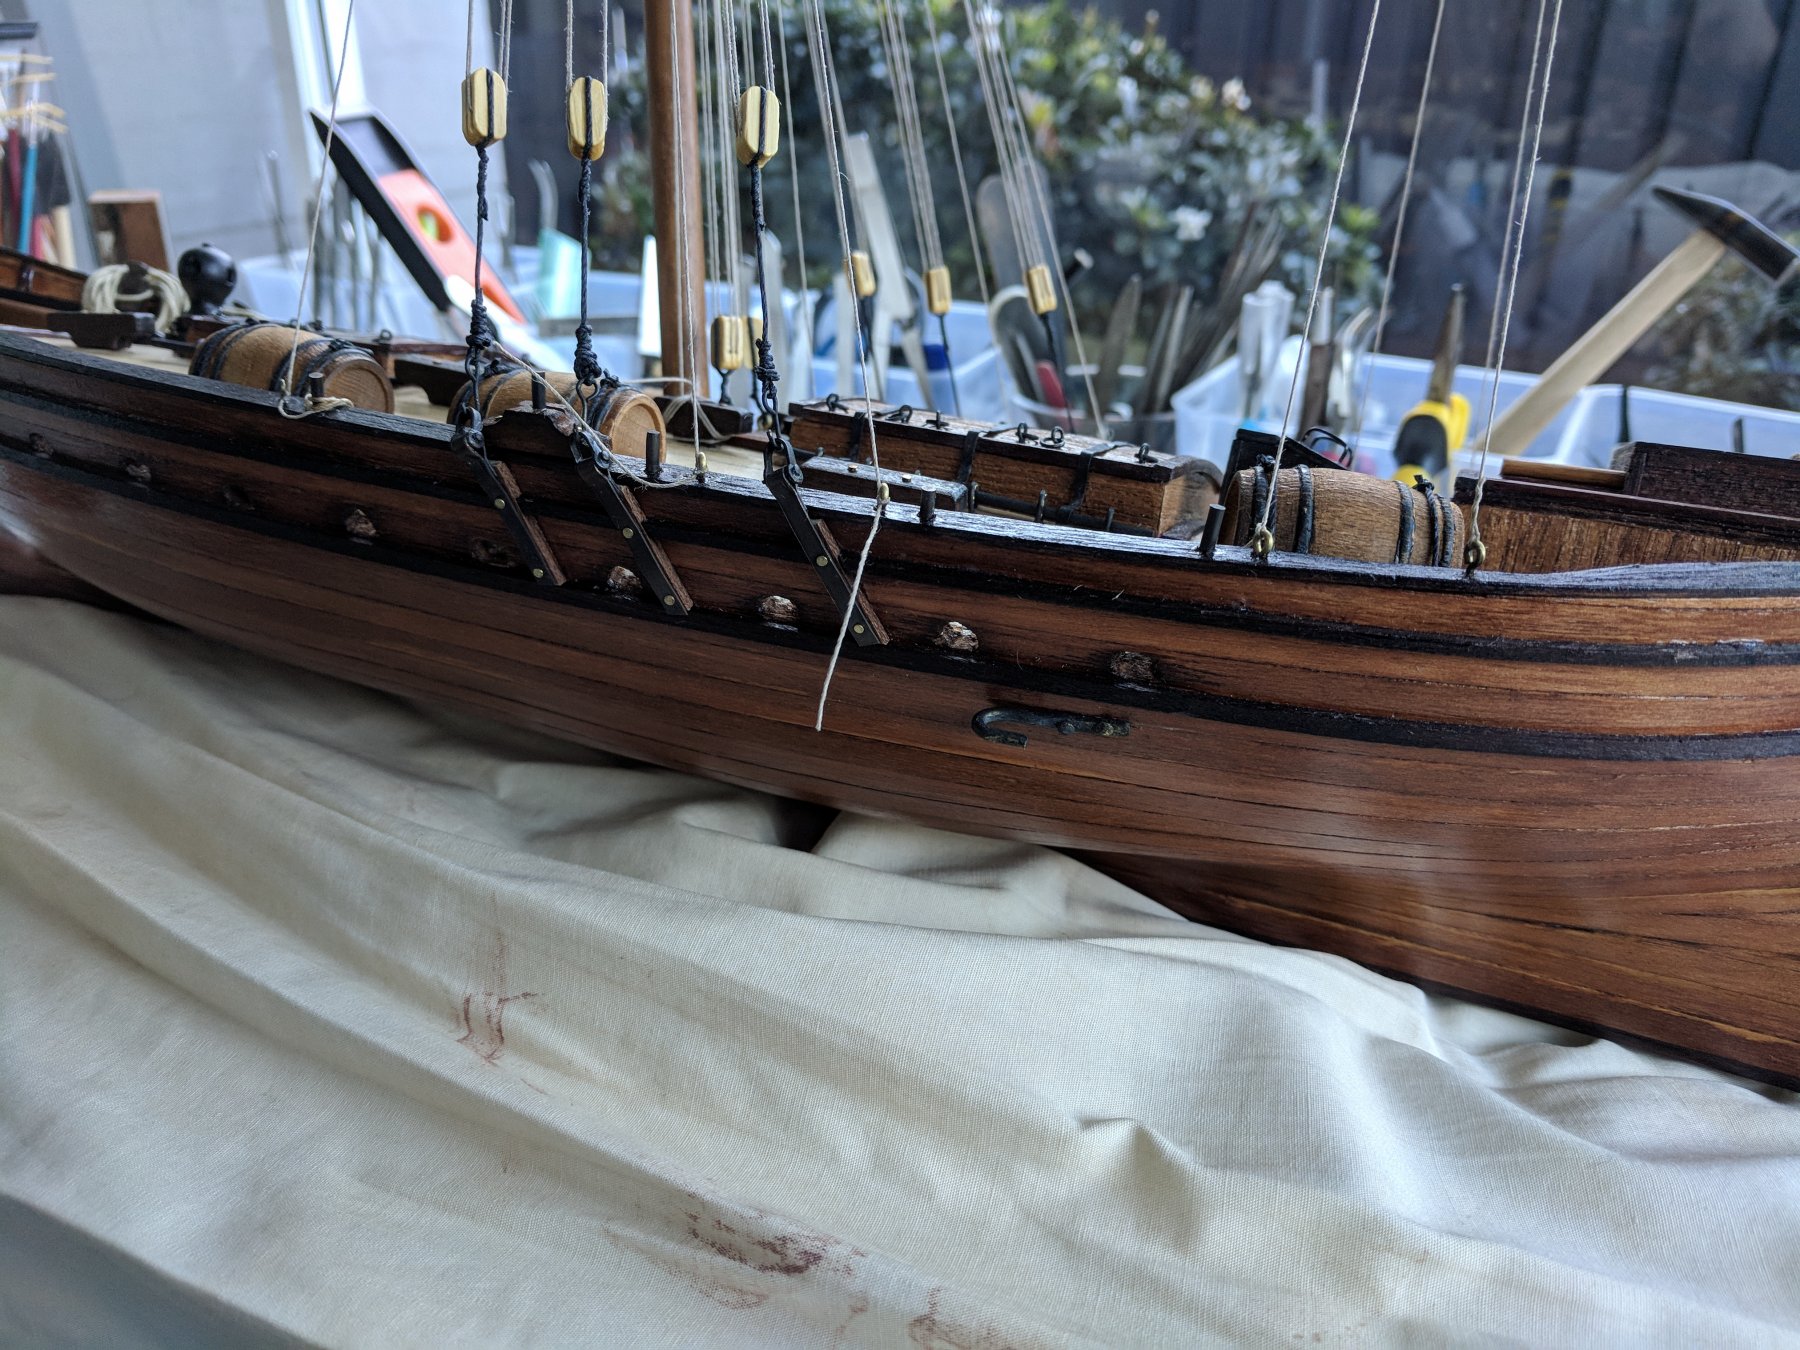
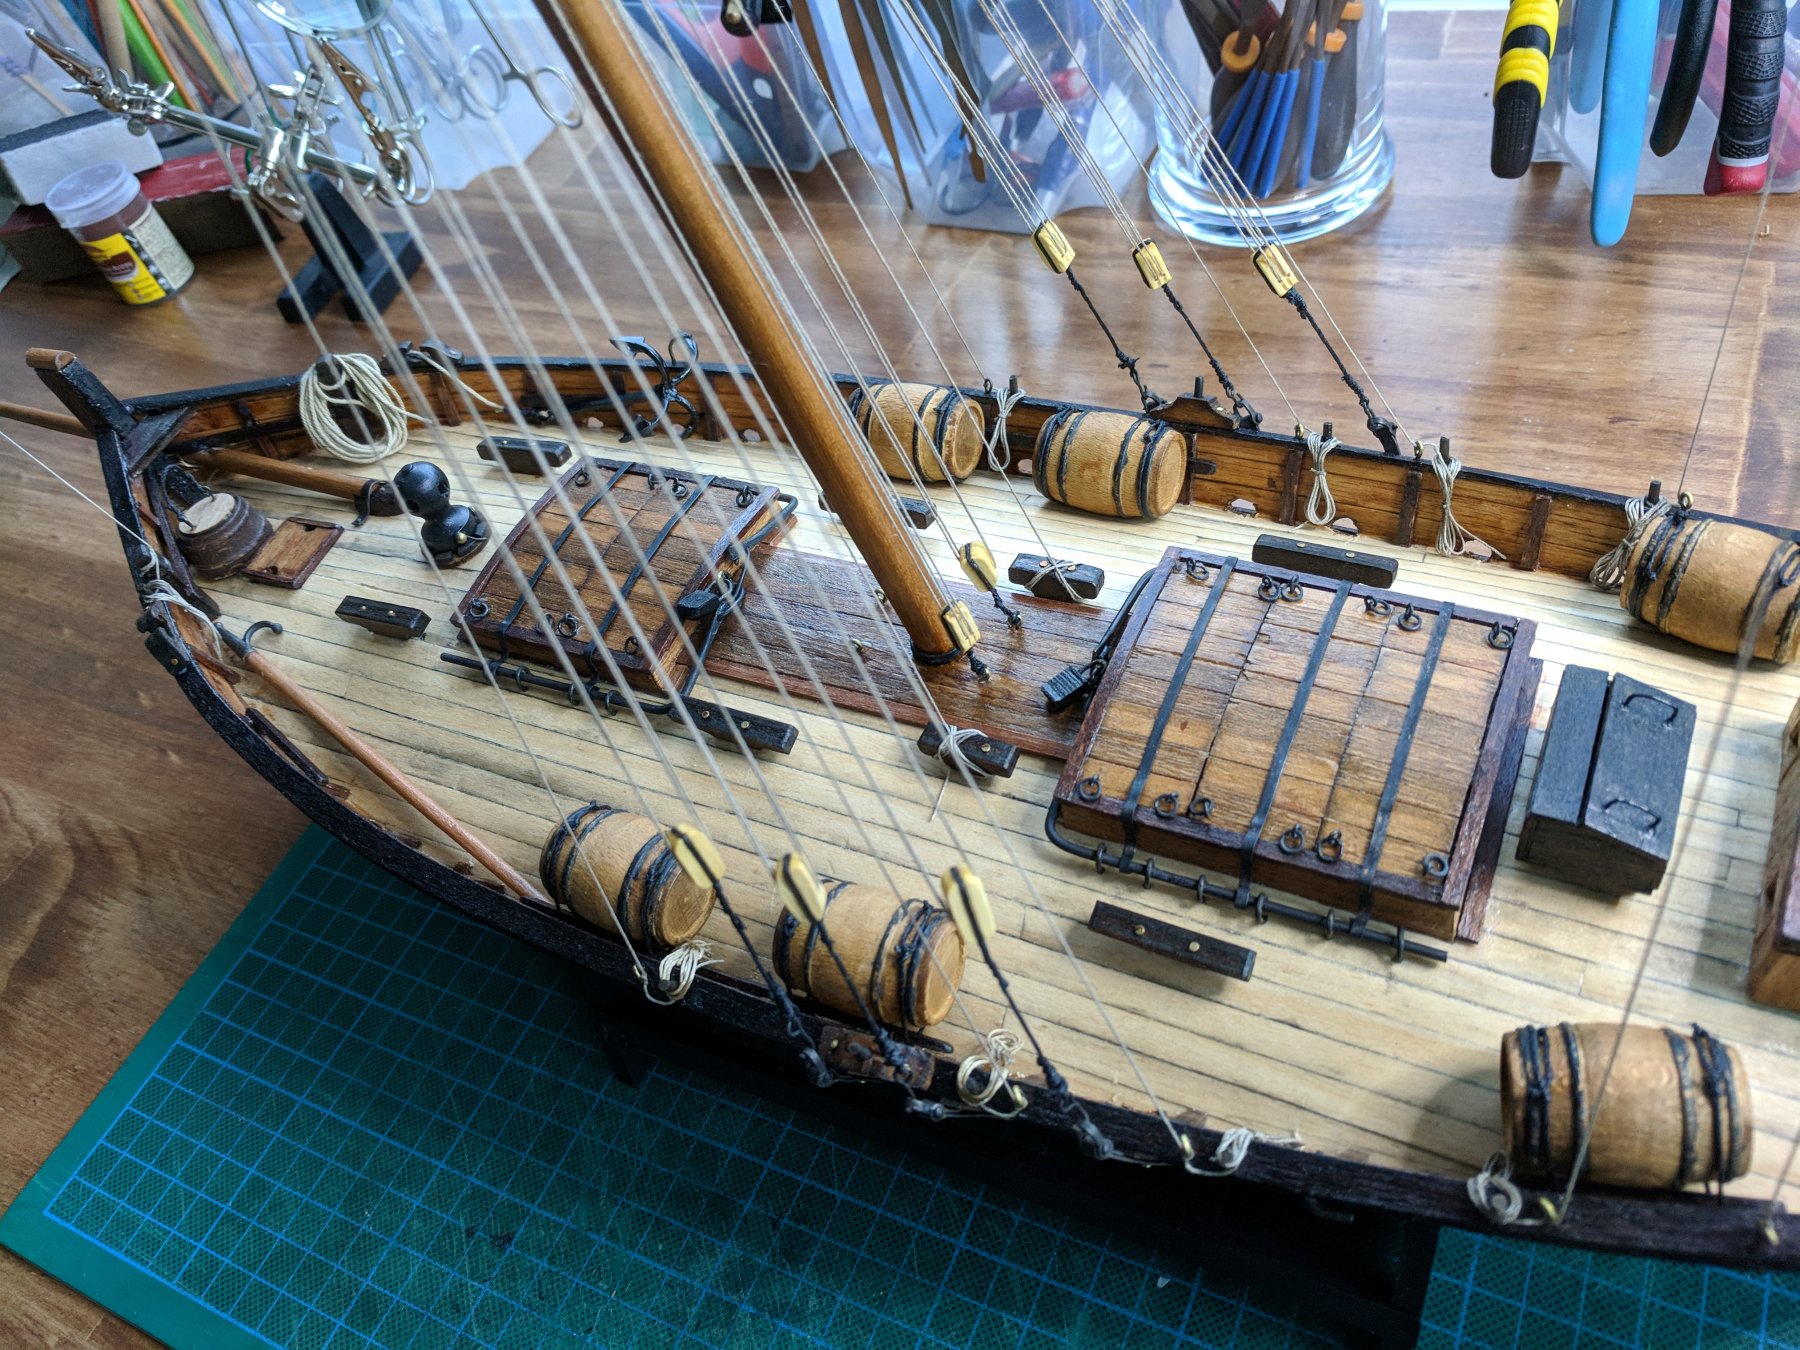
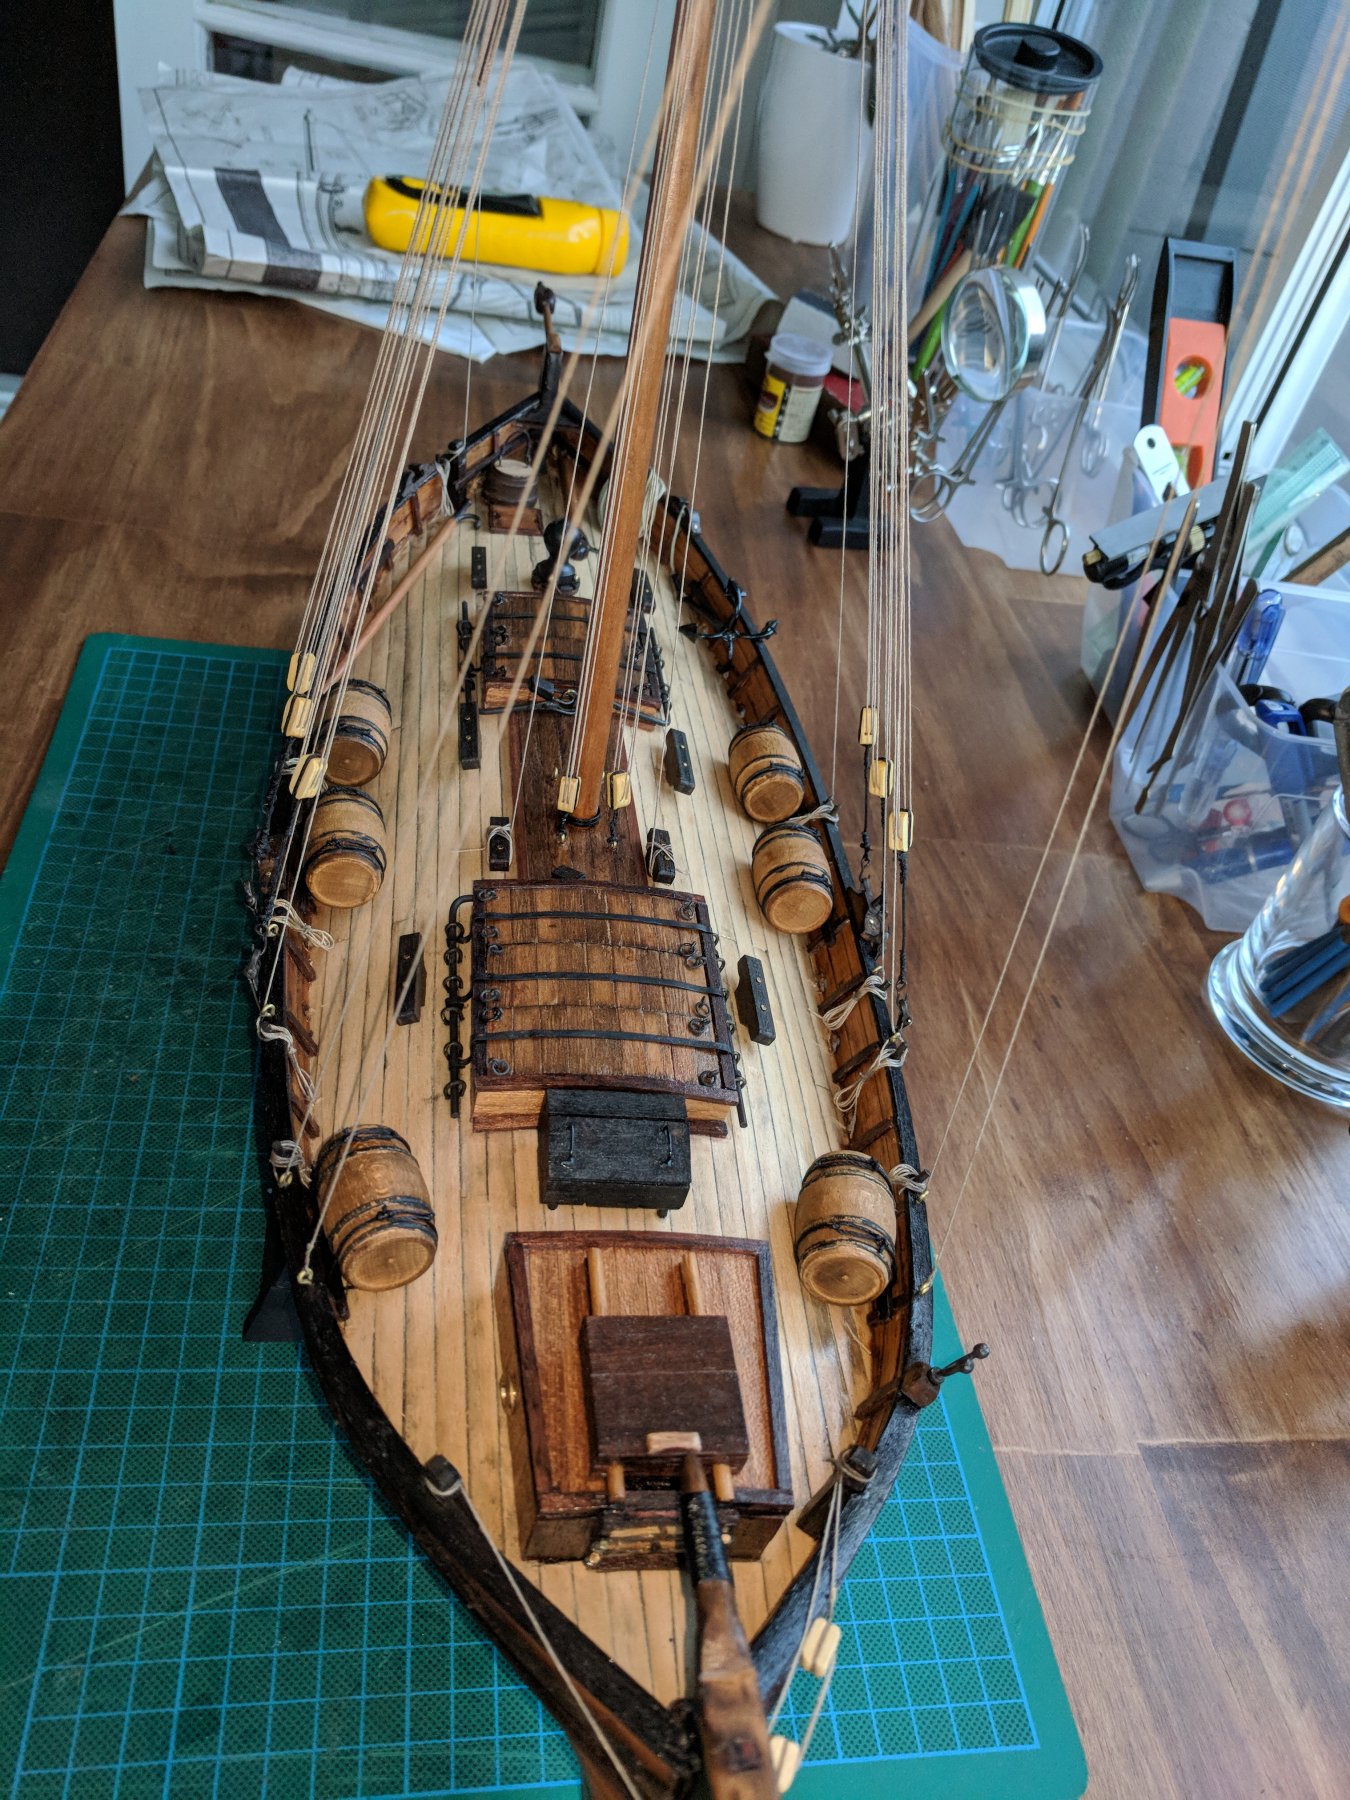
Many thanks John for looking in and your very kind comments. I'm now into the home straight.... More work on some of the deck furniture as well as the main mast and lateen yard, which has turned out ok (including placing pulleys inside the blocks at end of each). The tiller has now been completed and fitted, again no problem there. Next came the small capstan which is the only other painted piece on the model. I was in two minds on this as I was trying to have as much of the model in wood as much as possible (natural or stained). In the end I decided to paint it black in keeping with what the instructions had said. At this point it was time to look at the barrels and where to place them on the deck. The number of barrels provided was 10, which when I placed them on the deck really made the whole thing look overcrowded and messy. In the end I chose to only use 6 which was sufficient to show off some of the detail. I stained the barrels as well as painted the staves black then tied them on to the bulwark stays. Next came the anchor , which was kit supplied and easy to asemble. After I was happy with the decking furniture I glued all the pieces into place and waited a day before starting on the rigging. The instructions in the kit says to "place the rigging as per the diagram" which would be fine except that it was not at all clear. After an hour or so of looking at the plans as well as looking at AntonyUK's build log (thank you Antony!) I was able to work out what went where. Next comes the sails. This is where my sowing skills are, shall I say, non existent. Thankfully a very good friend of mine and neighbour agreed to make the sails for me. They are still on the sewing machine so are not part of the photos. The model is, subject to the sails being made and put on is now finished...... I'll post photos with the sails on as soon as they are completed A couple of points to make on the build and the kit. Firstly the kit itself was probably close to 30 years old so the following may not be the case for the newer models The plans and instructions provided were not at all easy to read or understand. I really relied on AntonyUK and his photos when I was stuck on what the plans were telling me what to do....very frustrating. Some of the wood supplied was of poor quality but that just may be a function of the age of the kit. I was able to use some wood from previous builds. Saying that, the dowels for the mast etc were dead straight and thankfully no need for me to visit the local hardware store. The rope supplied was poor and I did not use the kit supplied but some that I had from a previous model. Deck furniture was of good quality with only minor sanding or filing to be done on the parts. Overall I probably will stay clear of Panart kits unless someone convinces me otherwise. Cheers............Fernando PS. Not sure why the photos were showing in reverse order....my use of computers is as bad as my sewing!!!


-
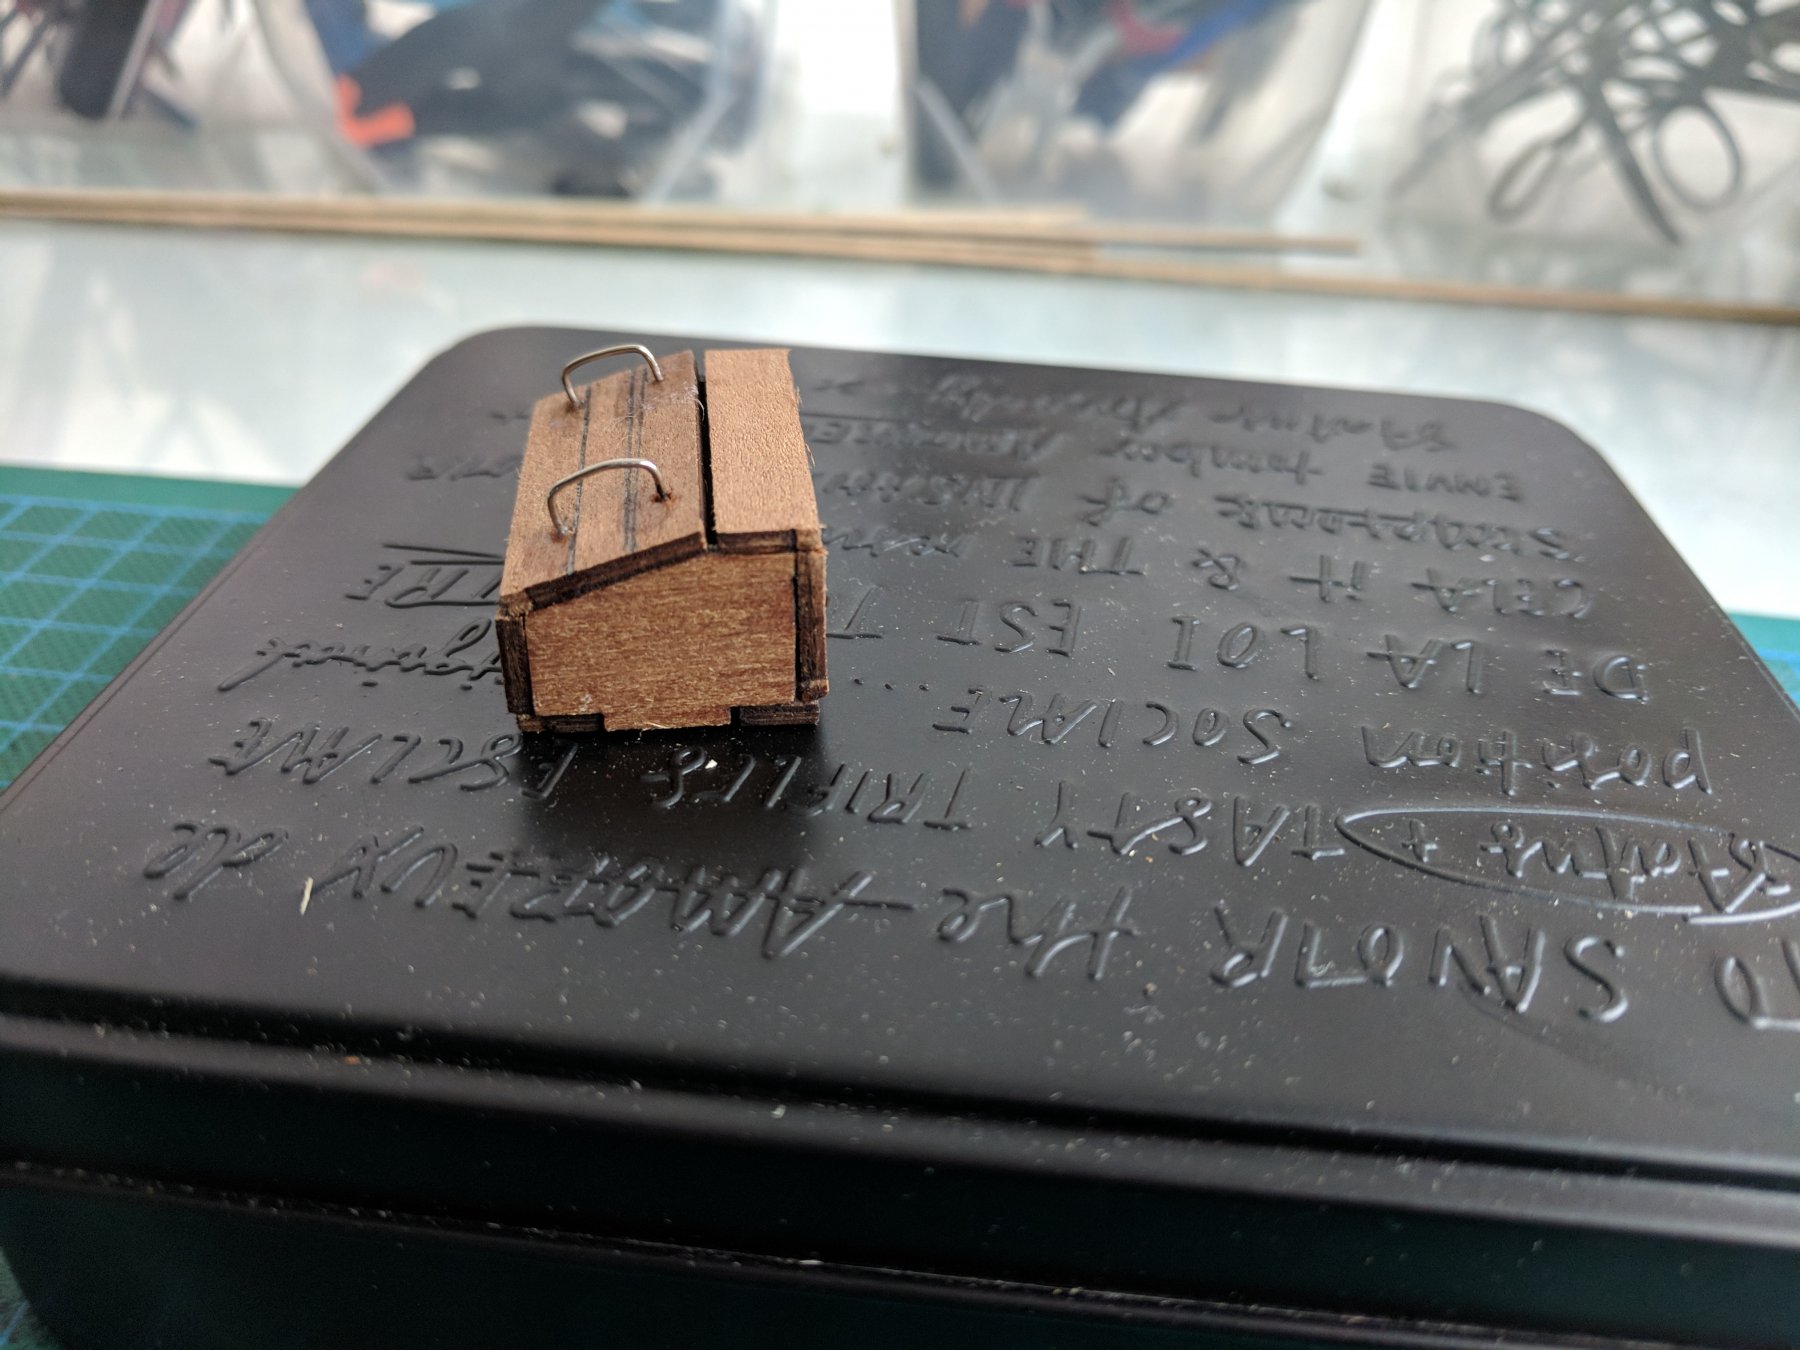
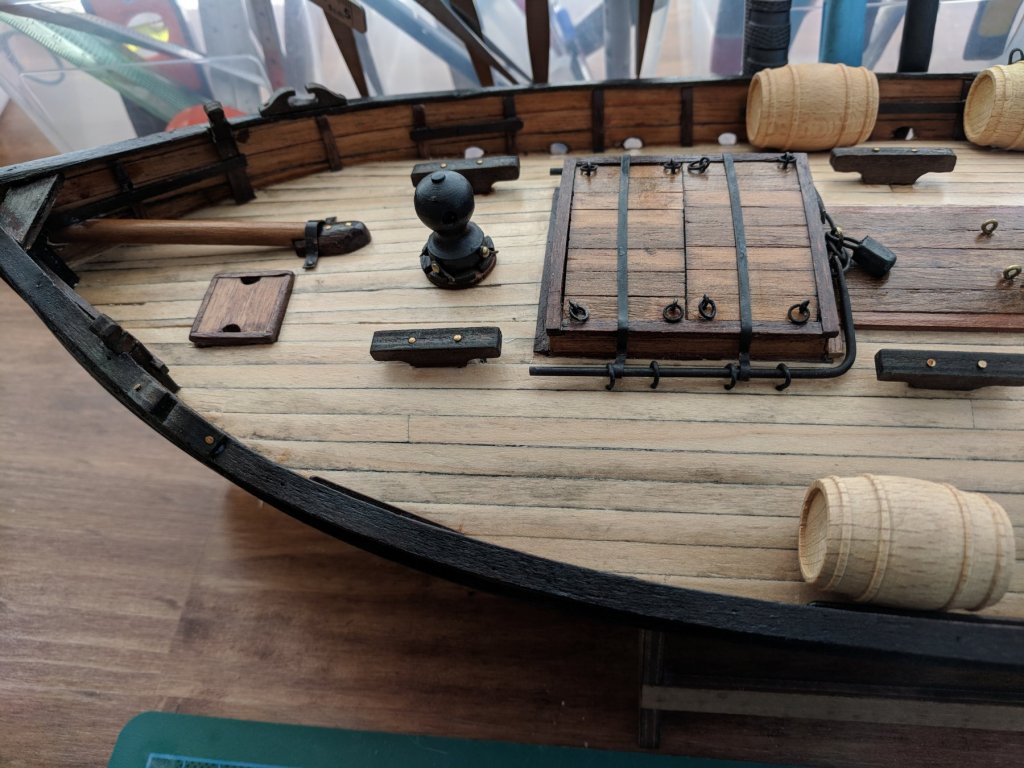
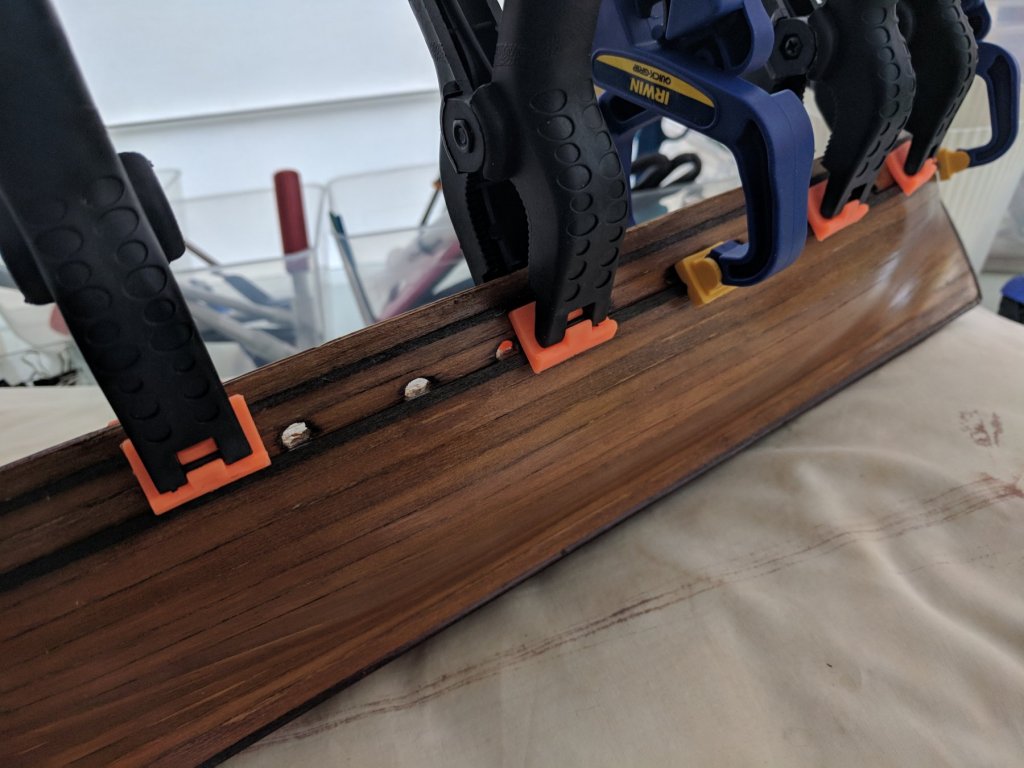
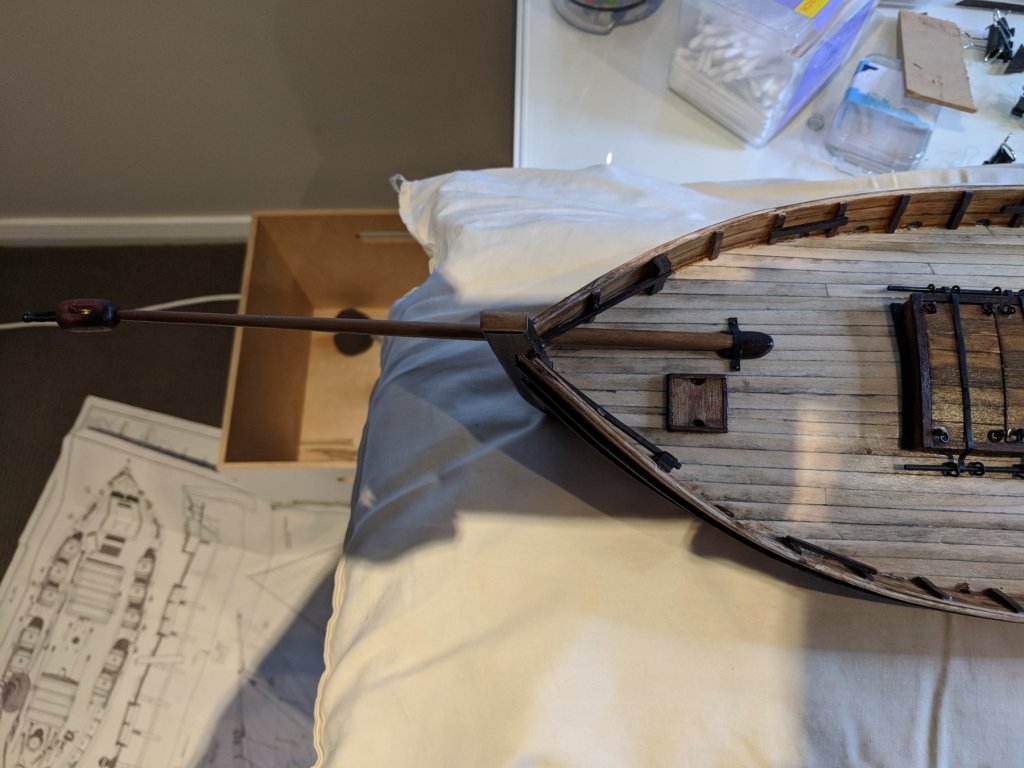
More pics.... I have cut out the wash holes and have also put the gunwales on both sides. AT this stage I decided not to put the cap rails on as there is still a bit of fiddly bits to complete on the deck and I did not want these damaged. Loading hatches were glued into place and the locking bars were made up of brass strips cut to shape. Again, all a bit fiddly but at least they look the part! The bowsprit has now been completed and has been placed on the deck and held in with the bowsprit support. I've also completed the lateen yard and the main mast and is ready to be fitted which will be done towards the end of the build. The cap rails have now also been added. The wood provided was somewhat inferior but was able to use some leftover wood from previous builds. I shaped the curves by first soaking the wood then bending them and placing them in a jig which I made with a block of wood and some nails. The wood will be stained walnut which will be a nice contrast to the rest of the wood shades on the boat. Will follow up with more pictures in the coming days as the build is fast approaching the finish line and I can give a finished product to my brother which I hope he will like! Cheers............Fernando
.thumb.jpg.7c86ac7c5038801c5a4a0bf3813540c6.jpg)
.thumb.jpg.89022b049375b73adbcc5e748cbc1ad6.jpg)


-
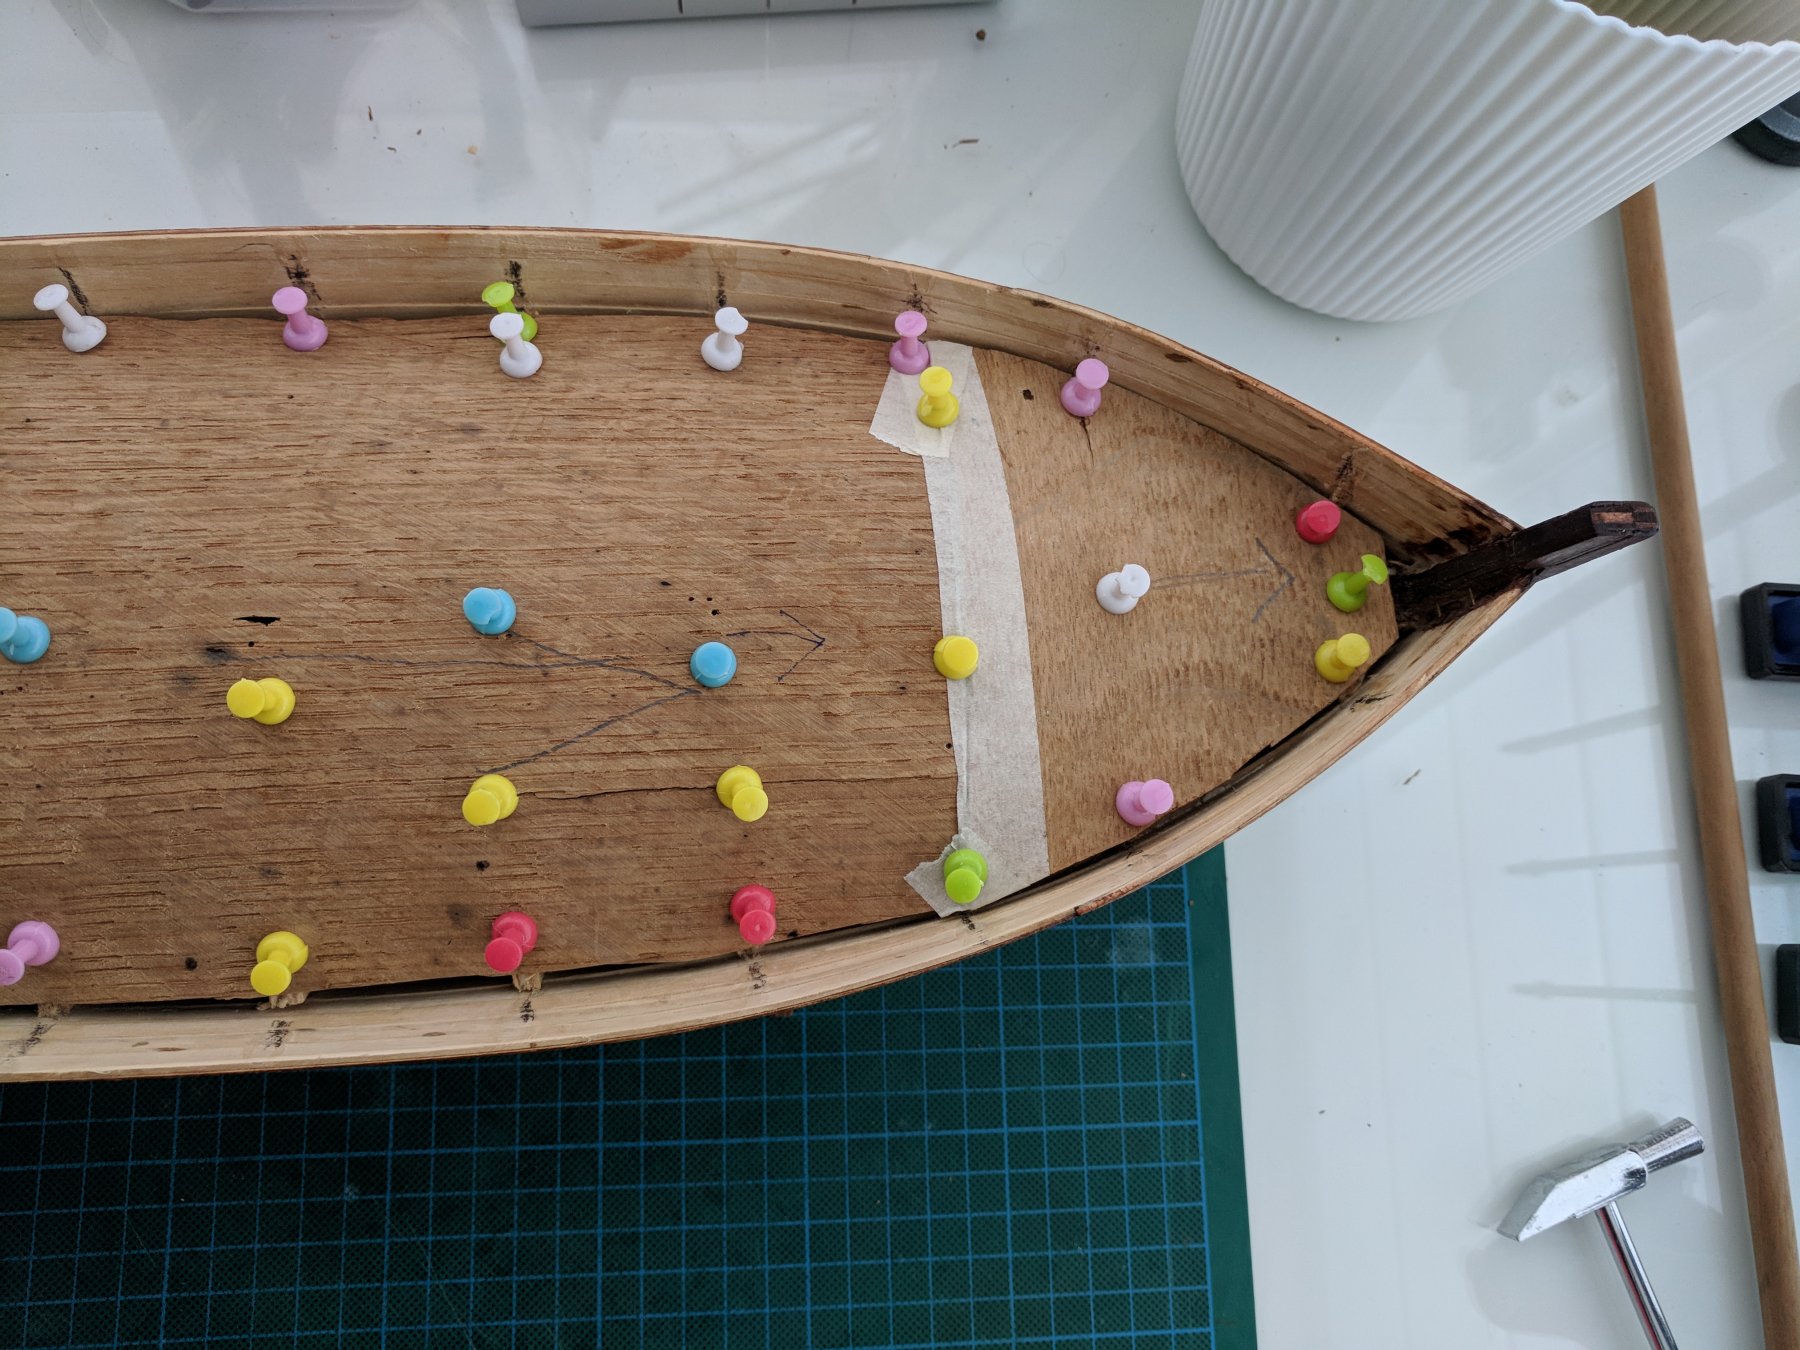
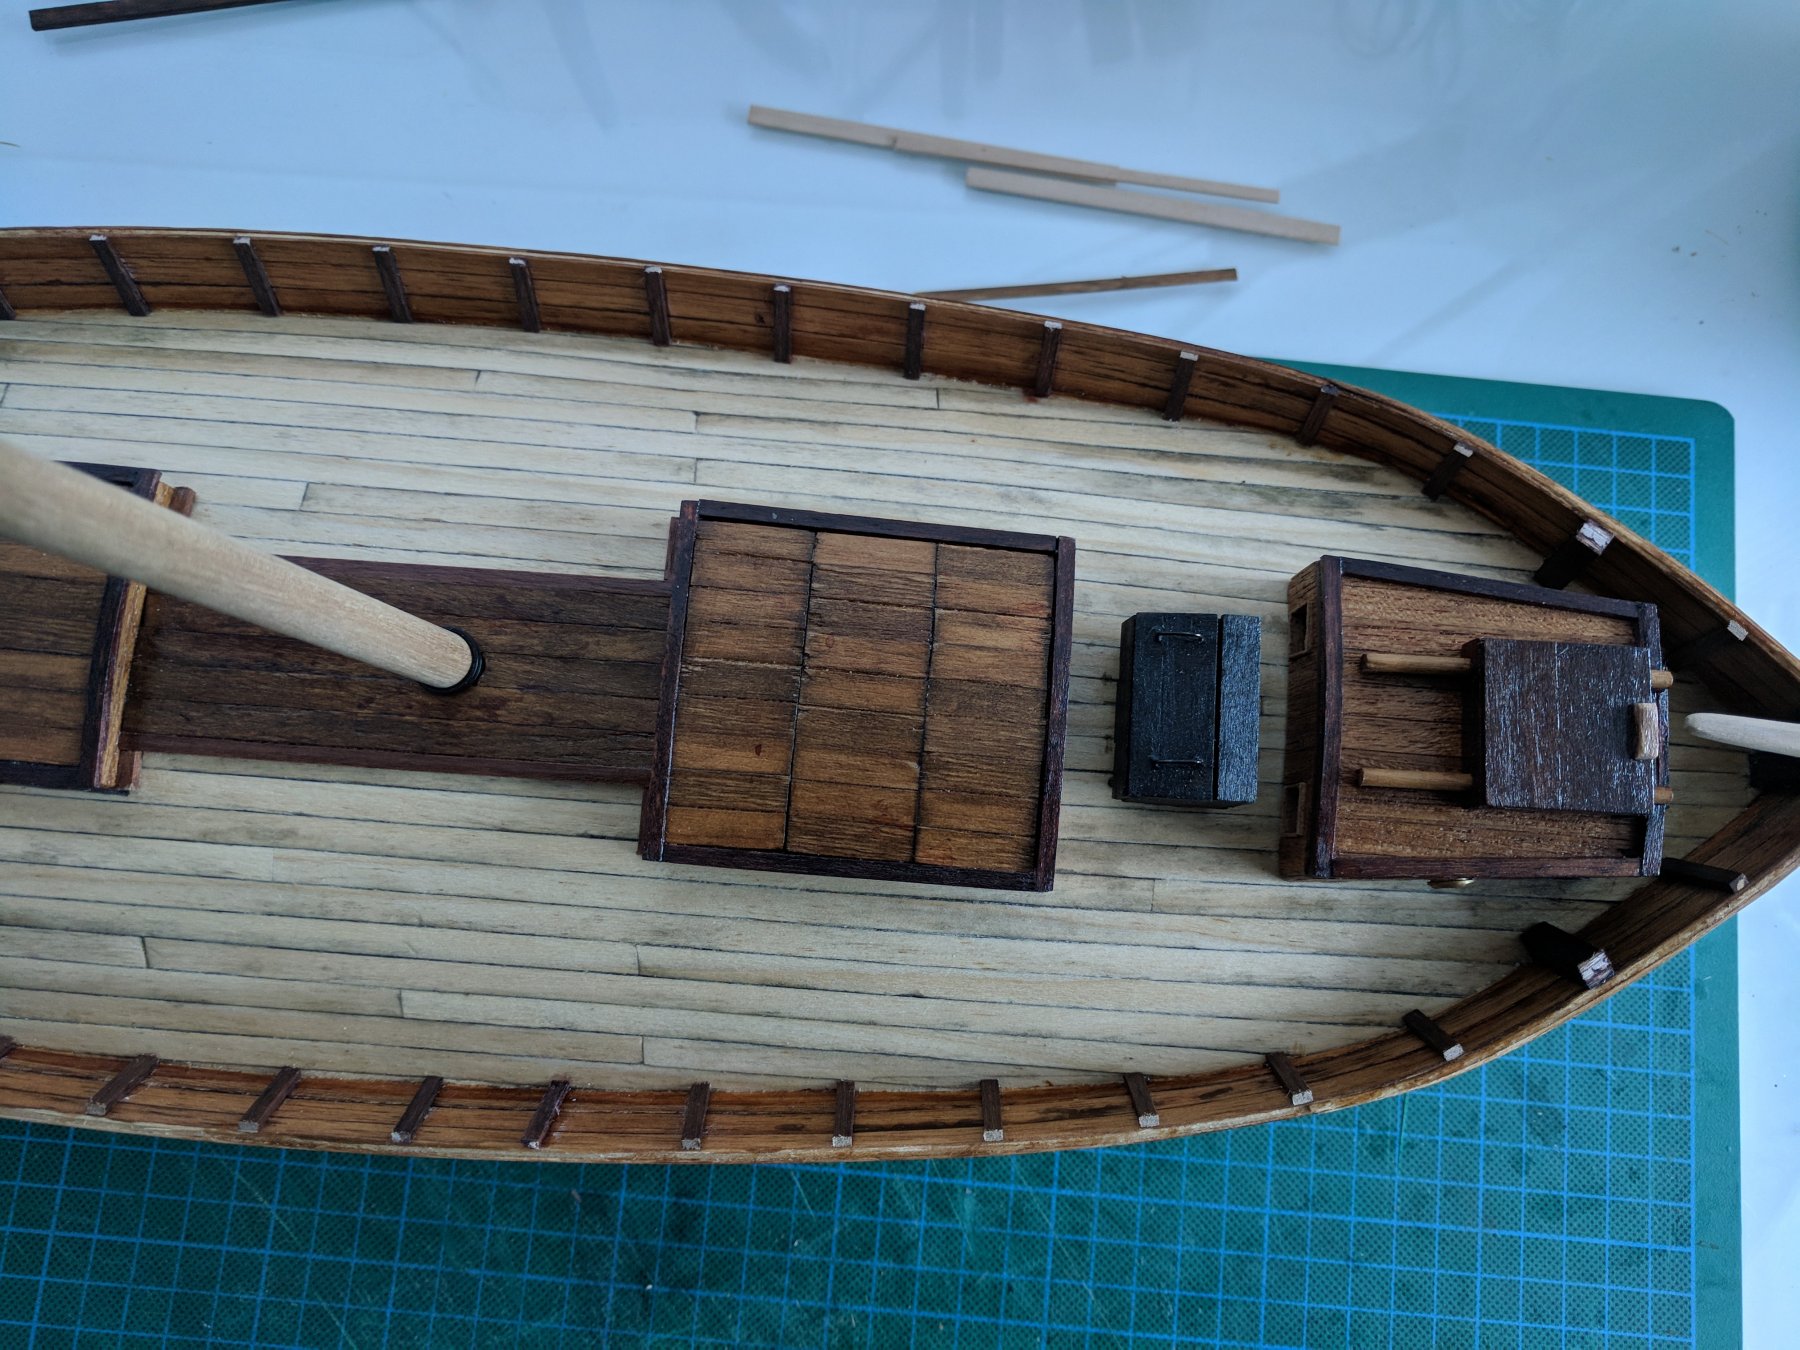
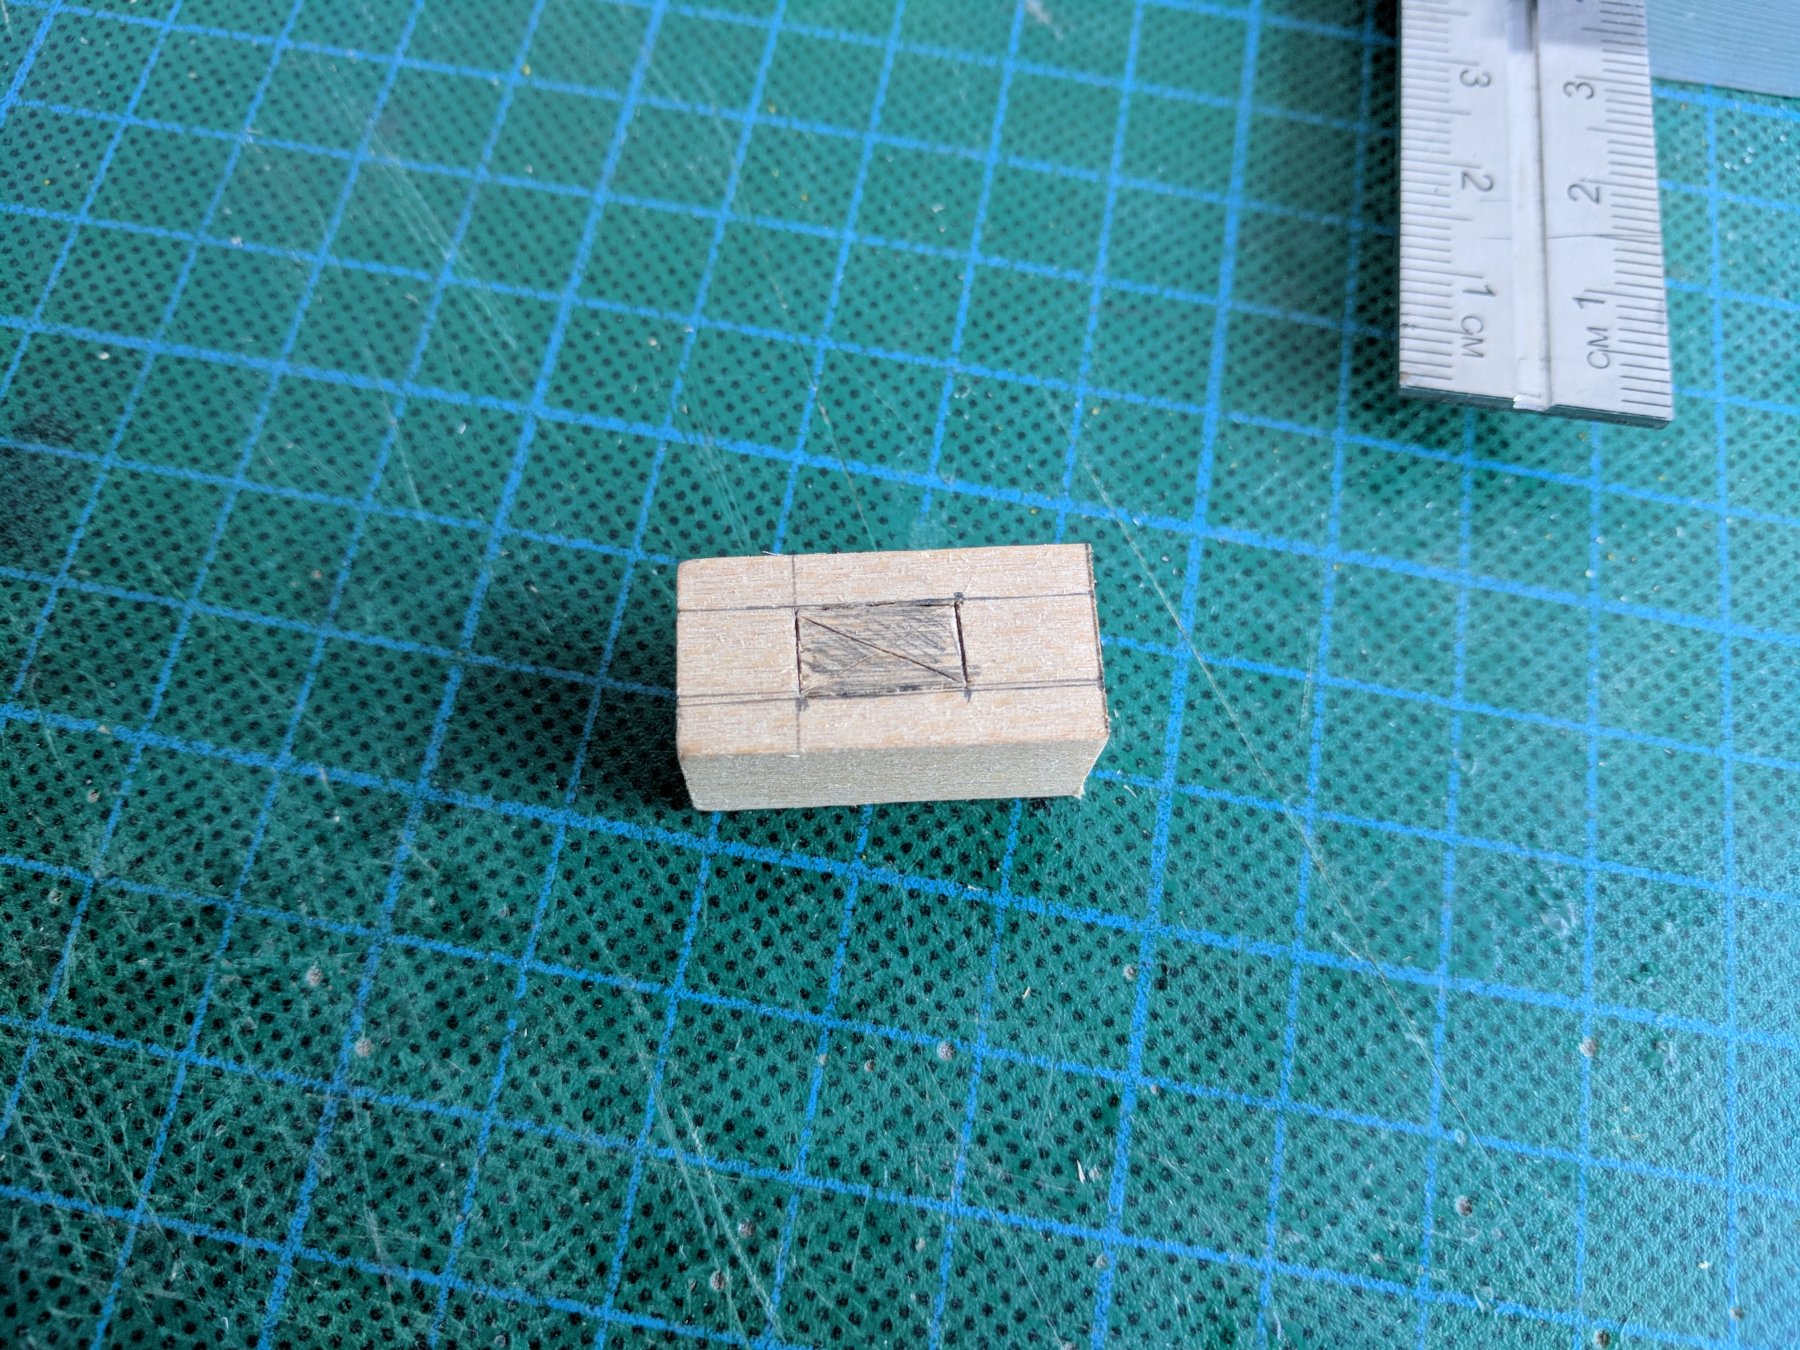
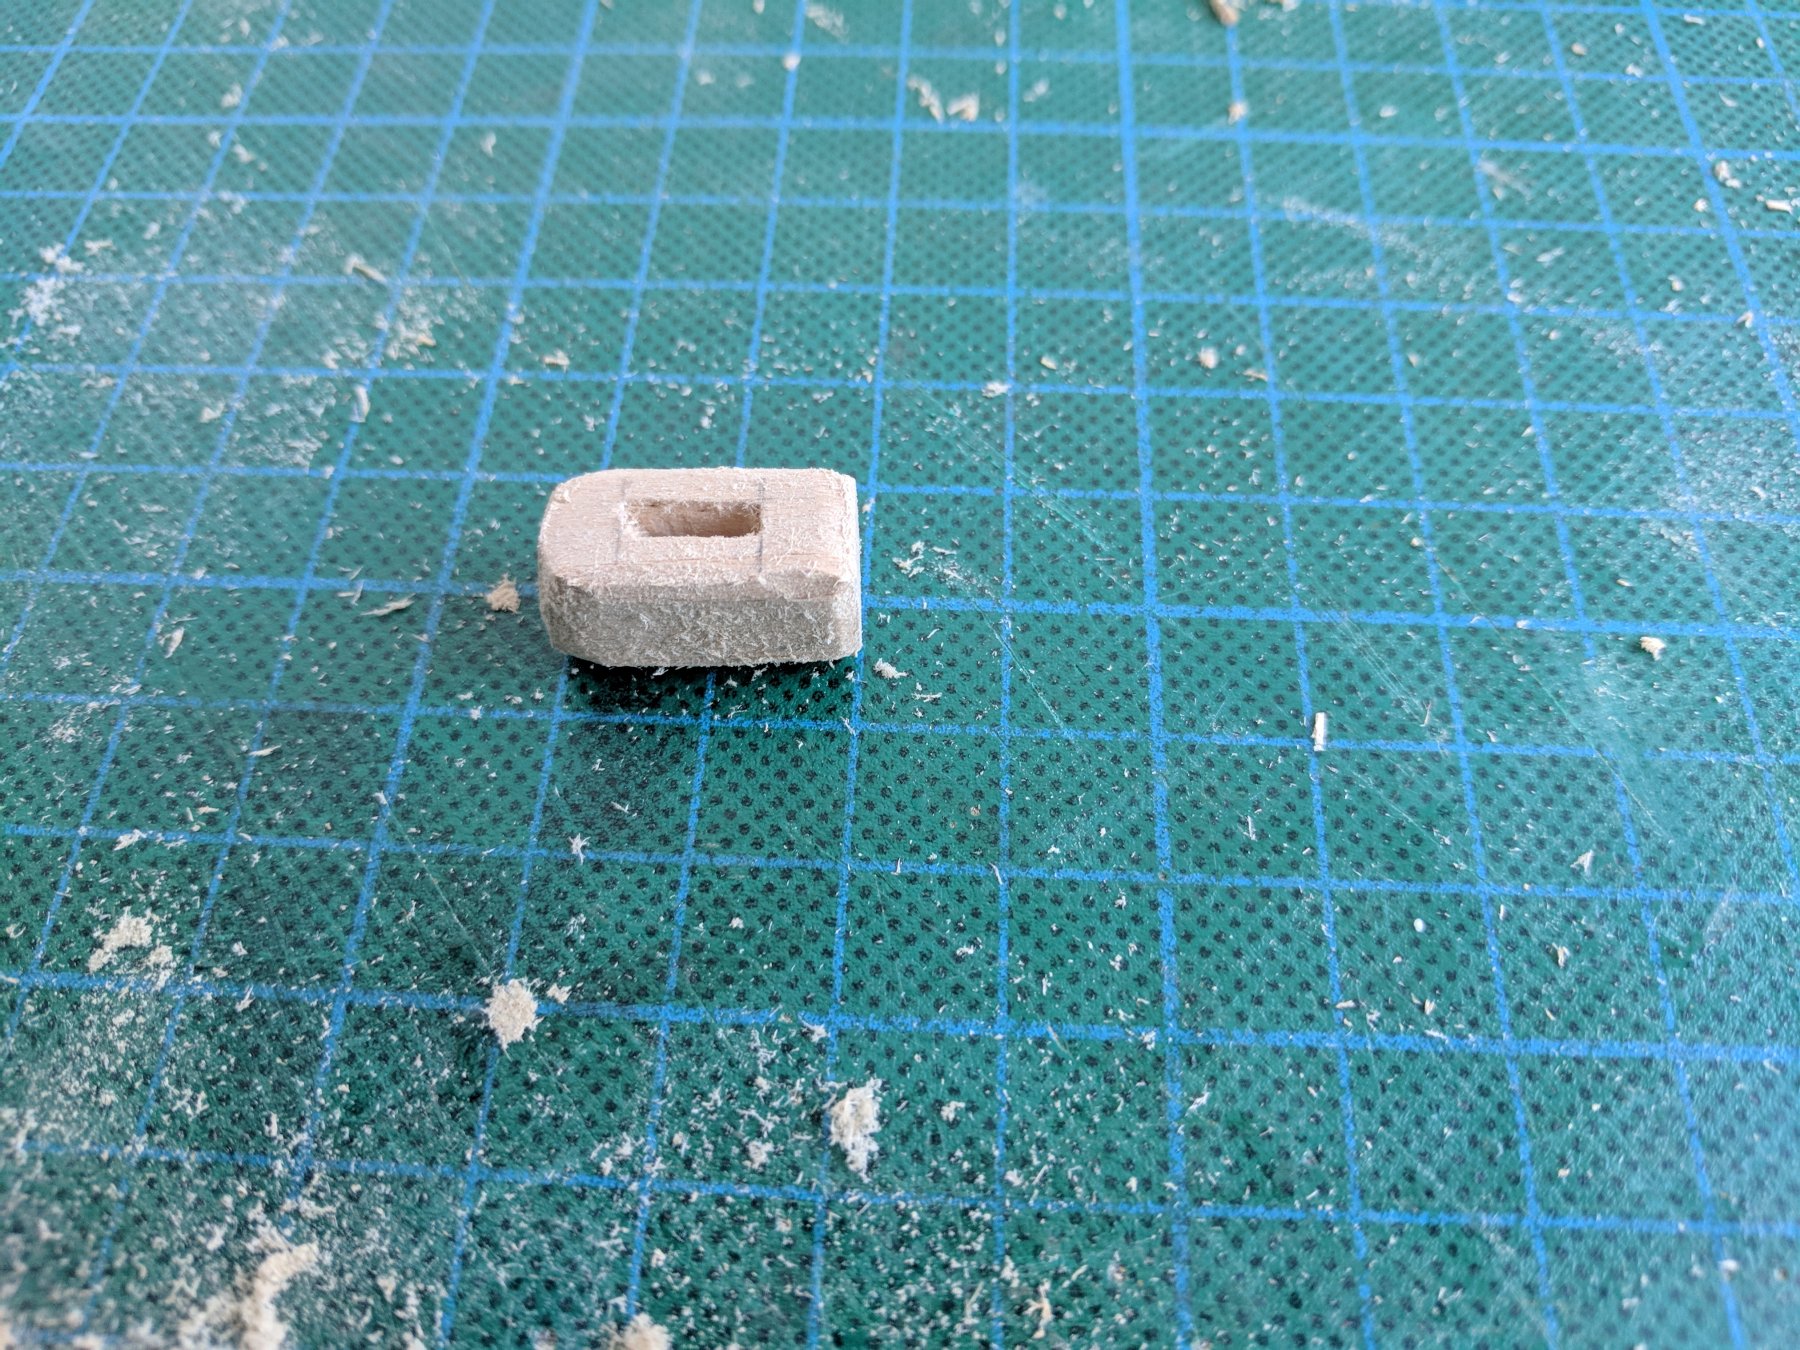
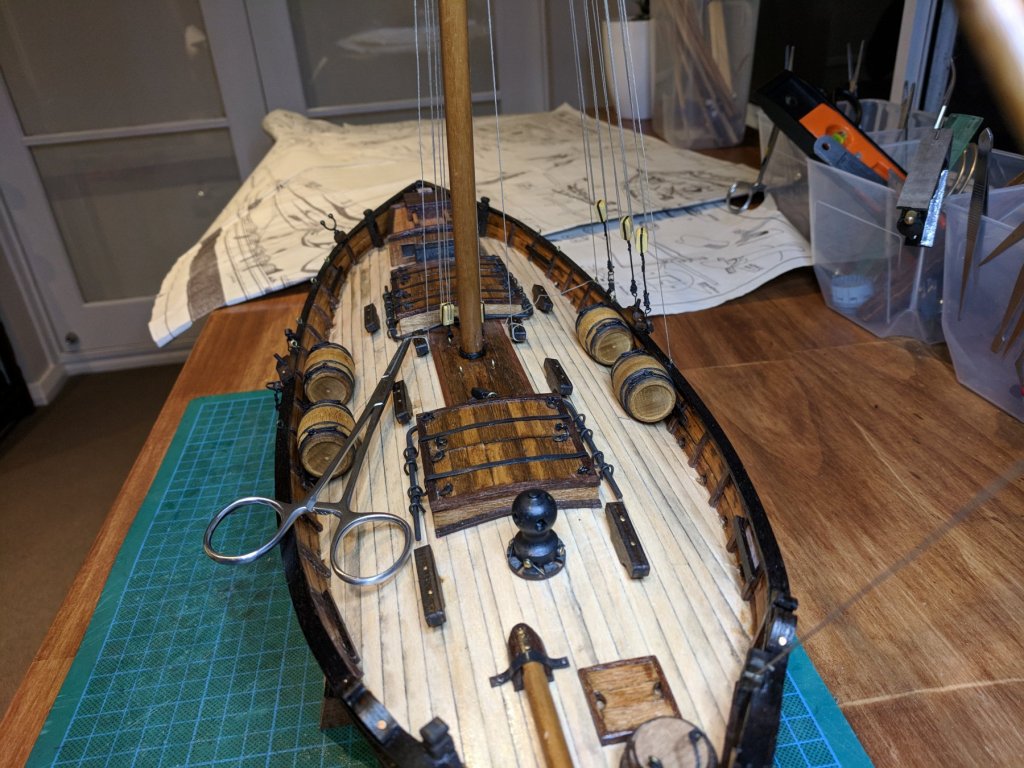
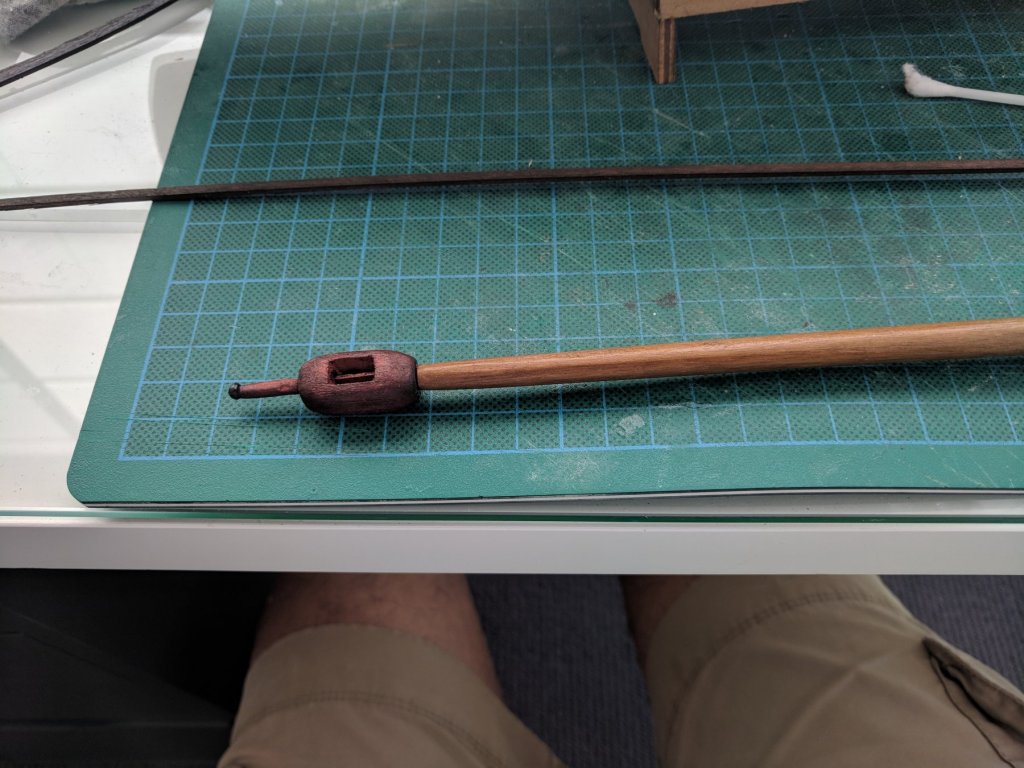
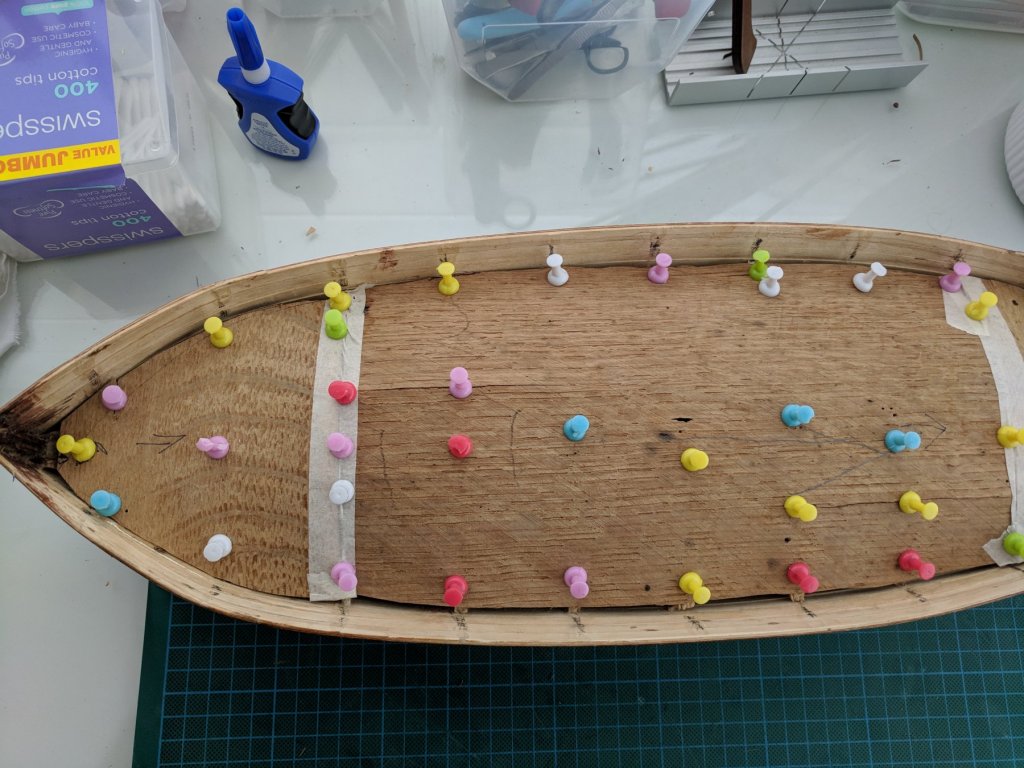
A long overdue update on the build. I have been putting in some hours over the past couple of weeks and so far am happy with the progress. Firstly, I started to put the decking on but after a couple of planks had been placed on it became very obvious that I needed some strengthening of the base and a false decking had to be put in. I found some very thin ply that was lying around under the house and cut it into a near enough shape of the decking. I didn't need it perfect as I just wanted the planks to lay evenly across the bulkhead frames. Before placing the false deck I had to cut off the top part of all the frames which , although fiddly was not too difficult. (apologies for the photos being out of order ....still sorting out what went wrong!) Whilst waiting for the glue to dry I started on more of the decking furniture including the wheelhouse and cooking box (this item will be one of the only painted wooden pieces on the boat). After the glue dried on the false deck I completed the deck and although not happy with the layout...most will be covered by the amount of deck furniture on the model....in fact so much that I will probably not use all of what has been provided by the kit. The below photograph shows the planking completed with some of the deck furniture dry fitted. I'm not sure what the bit at the end of the bowsprit and the top of the main mast is called but I have made them out of a solid block of wood which did take a little time but am happy with the way they turned out. The plans say that they should be painted white but I will be staining the wood with a colour yet to be decided. More pics to follow.


-
Only 8 days to build..... that's how long it would take me to build one! Stunning work as usual. Cheers.....Fernando👍👍
-
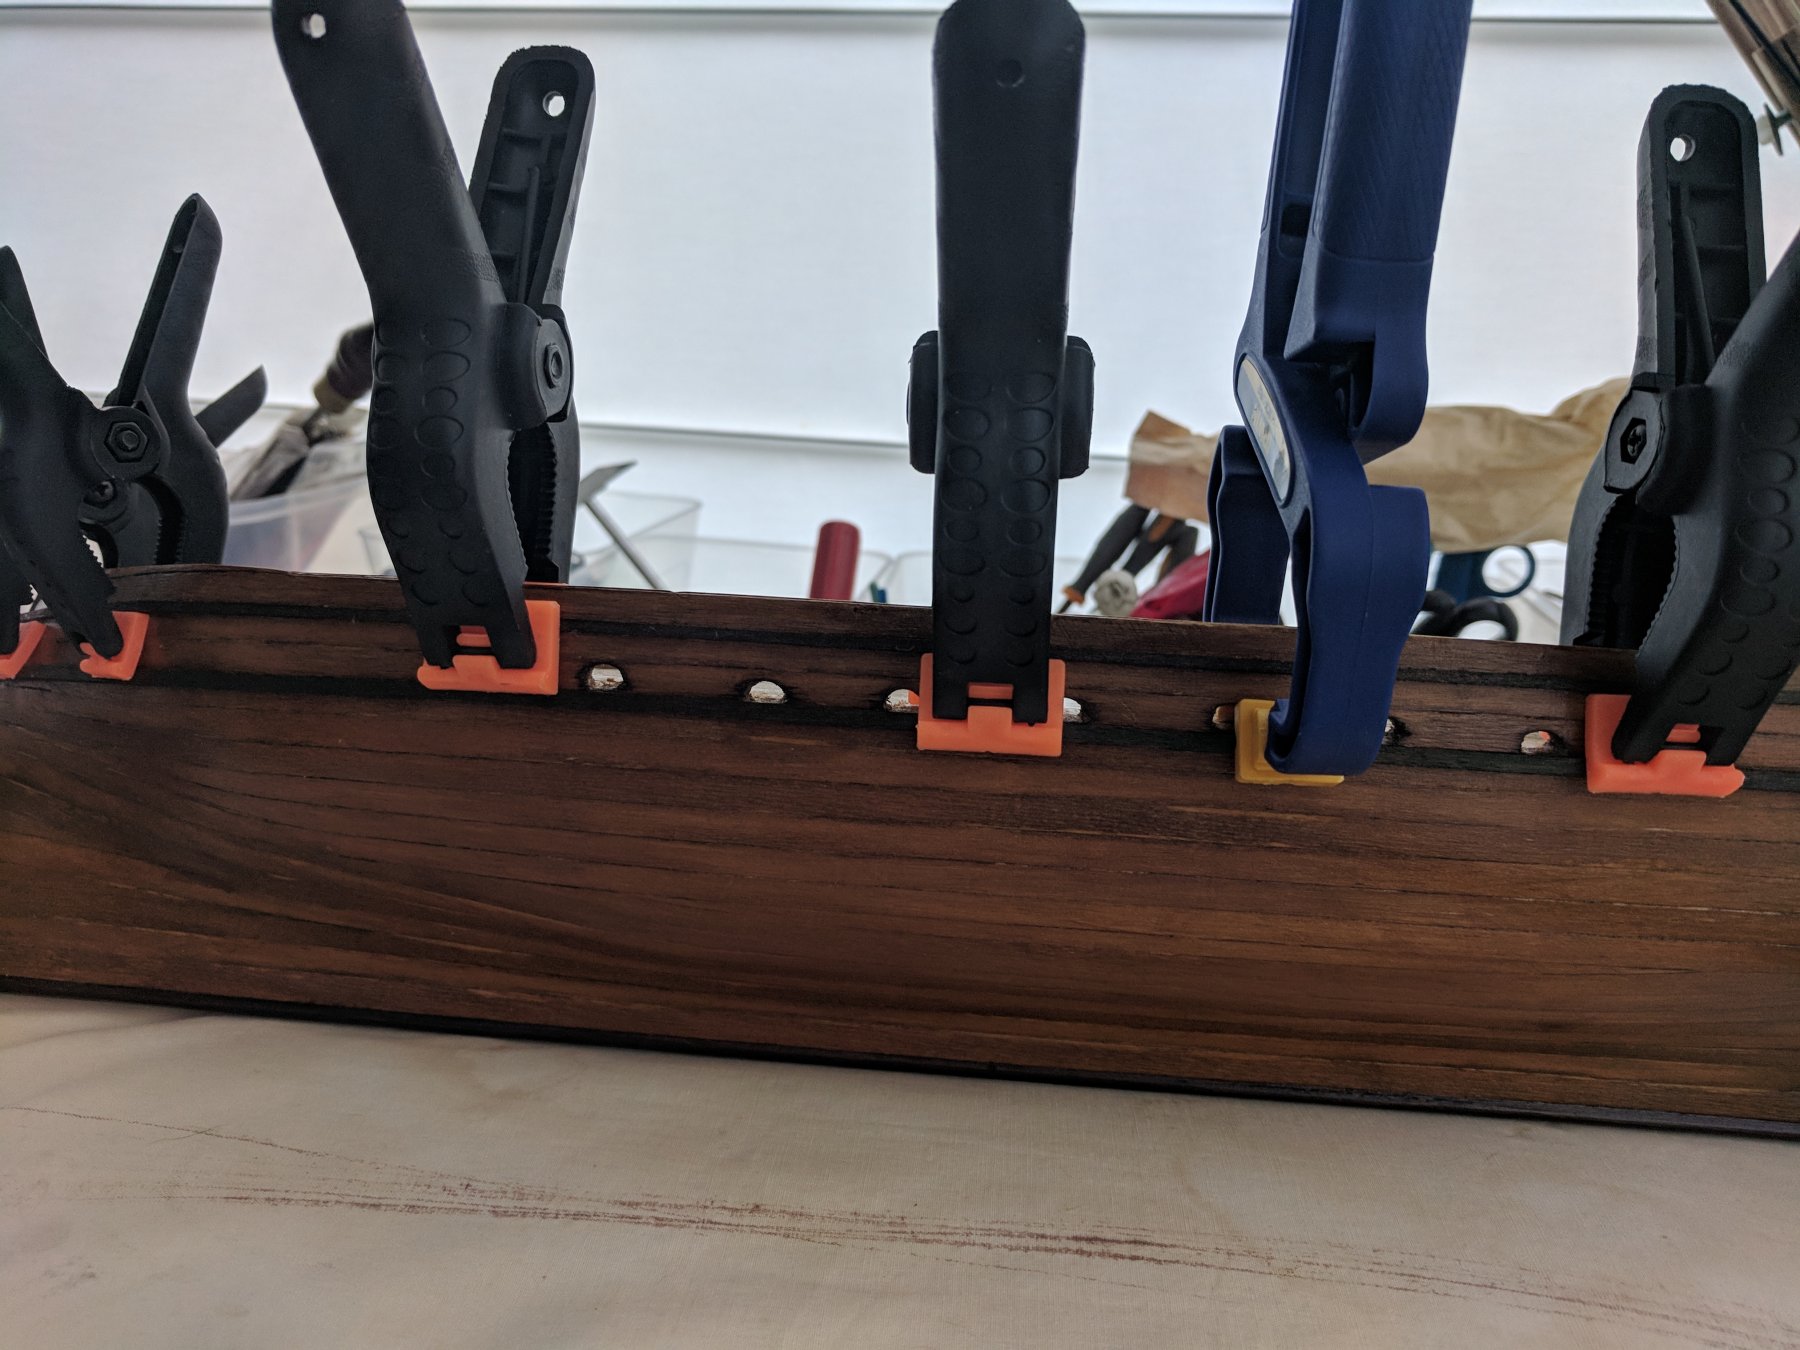
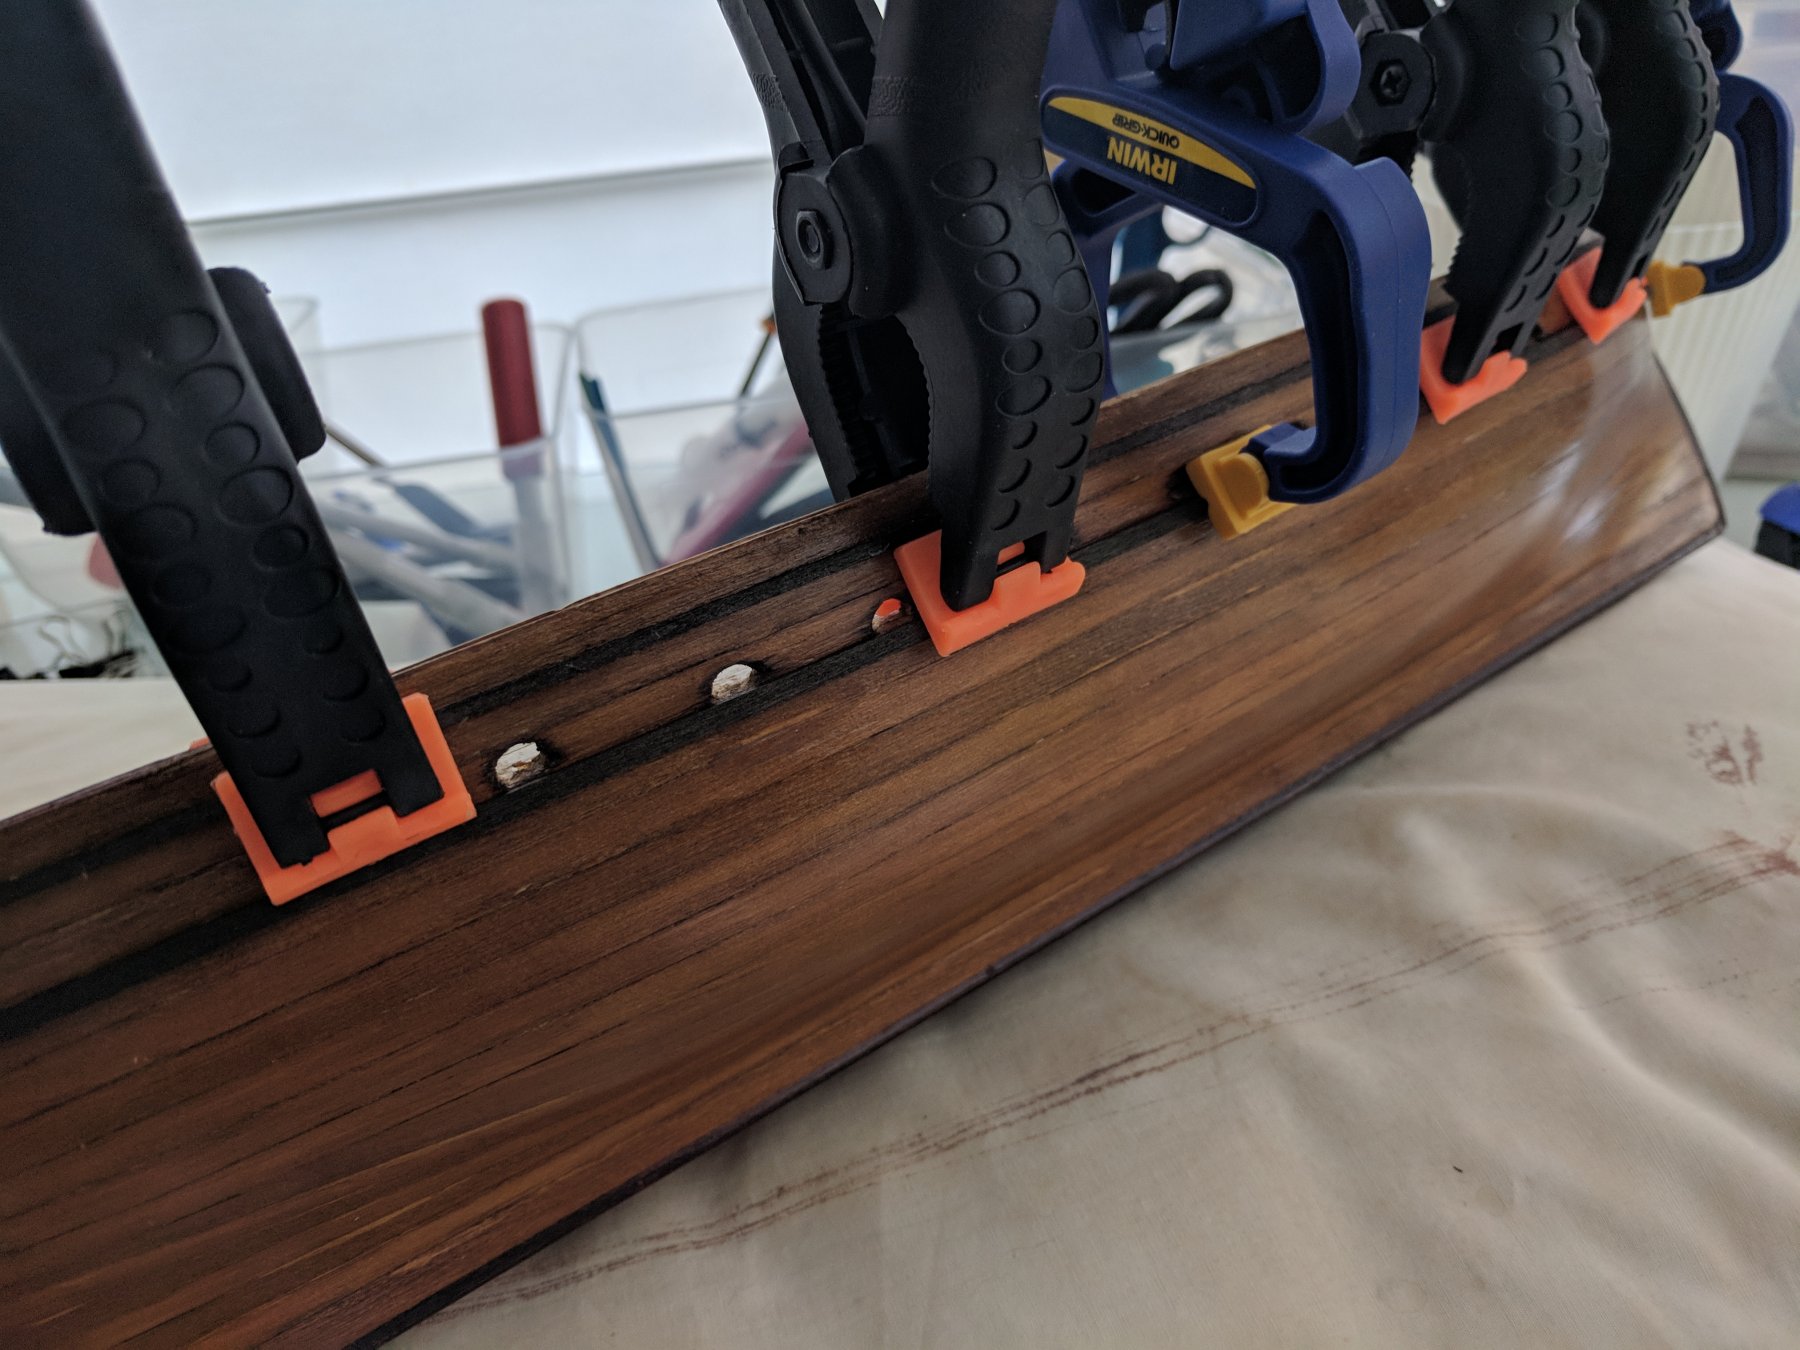
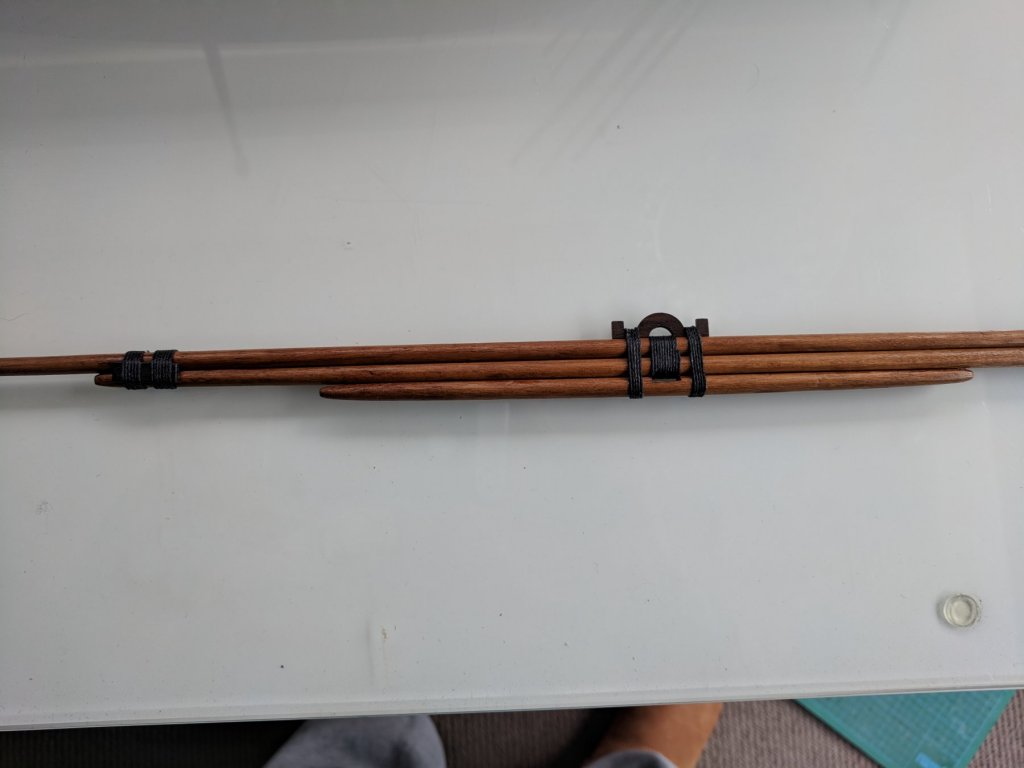
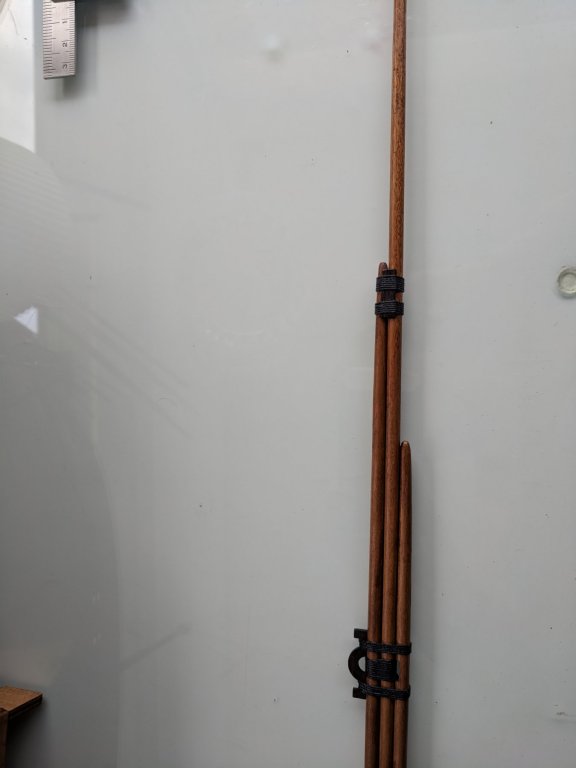
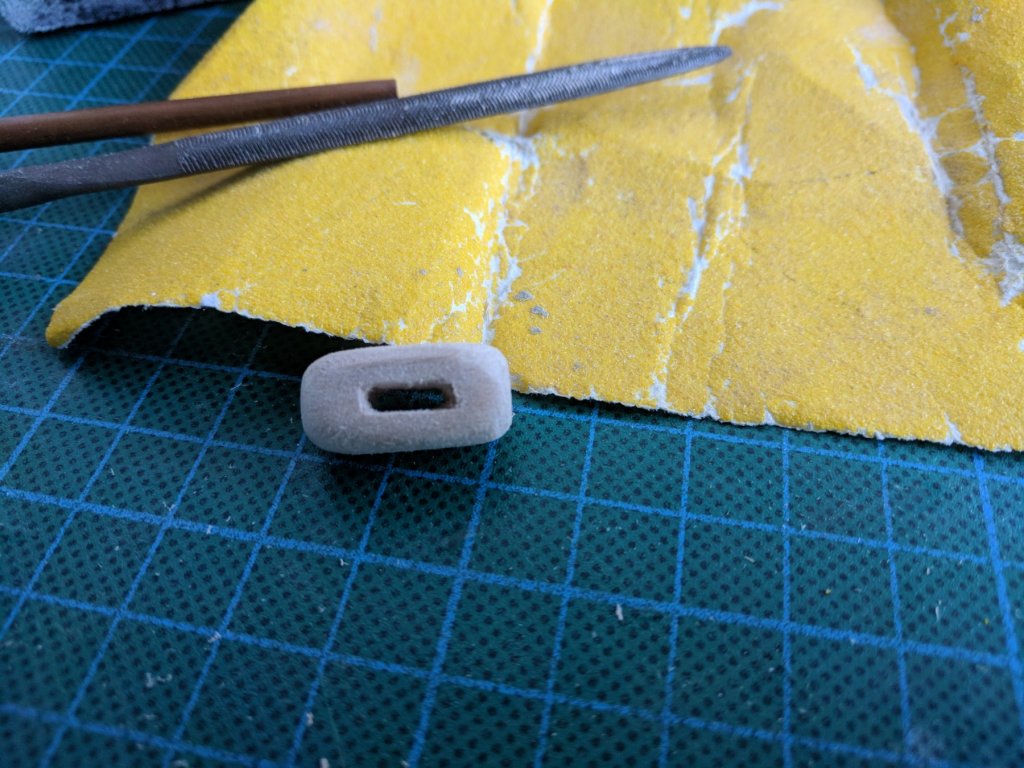
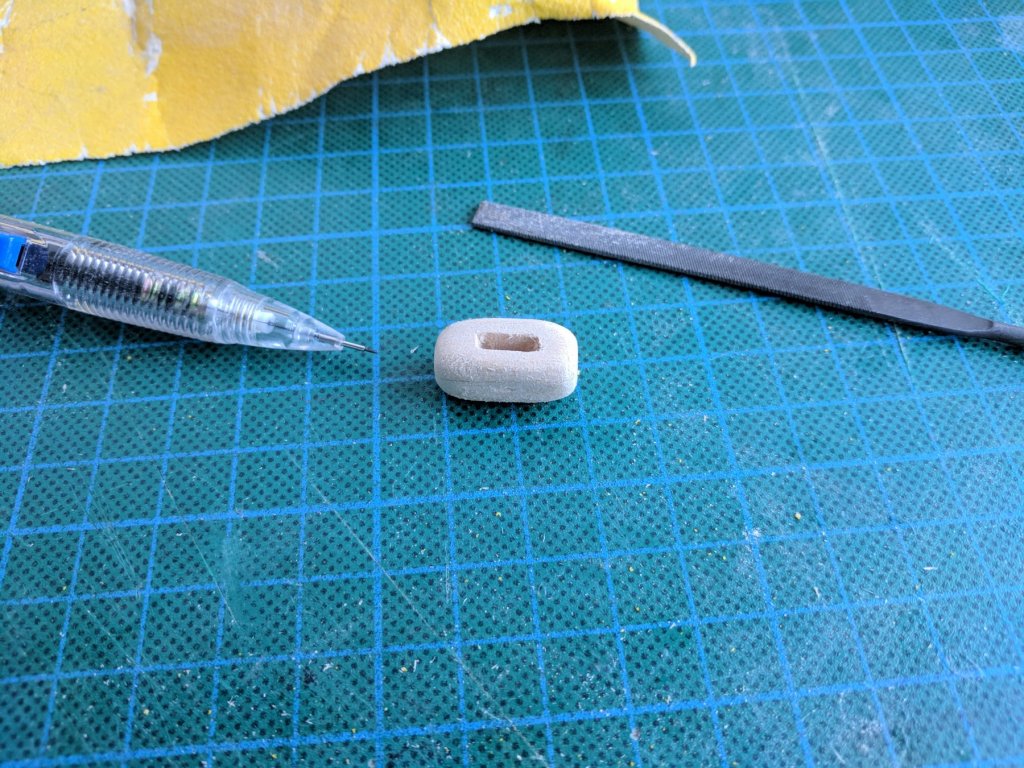
Nice and simple idea and looks good to boot. Thanks for the hint. Will use it to finish off the S. Lucia 😎


.jpg.2fcfb1f86edcfa34543d28dc58eacf62.jpg)
.jpg.fcf0570dbf4c8a816455d2689764ce22.jpg)