HOLIDAY DONATION DRIVE - SUPPORT MSW - DO YOUR PART TO KEEP THIS GREAT FORUM GOING! (Only 24 donations so far out of 49,000 members - C'mon guys!)
×
Tom E
-
Posts
469 -
Joined
-
Last visited
Content Type
Profiles
Forums
Gallery
Events
Everything posted by Tom E
-

B-25J Mitchell by Tom E - Revell - 1:48 Scale - PLASTIC
Tom E replied to Tom E's topic in Non-ship/categorised builds
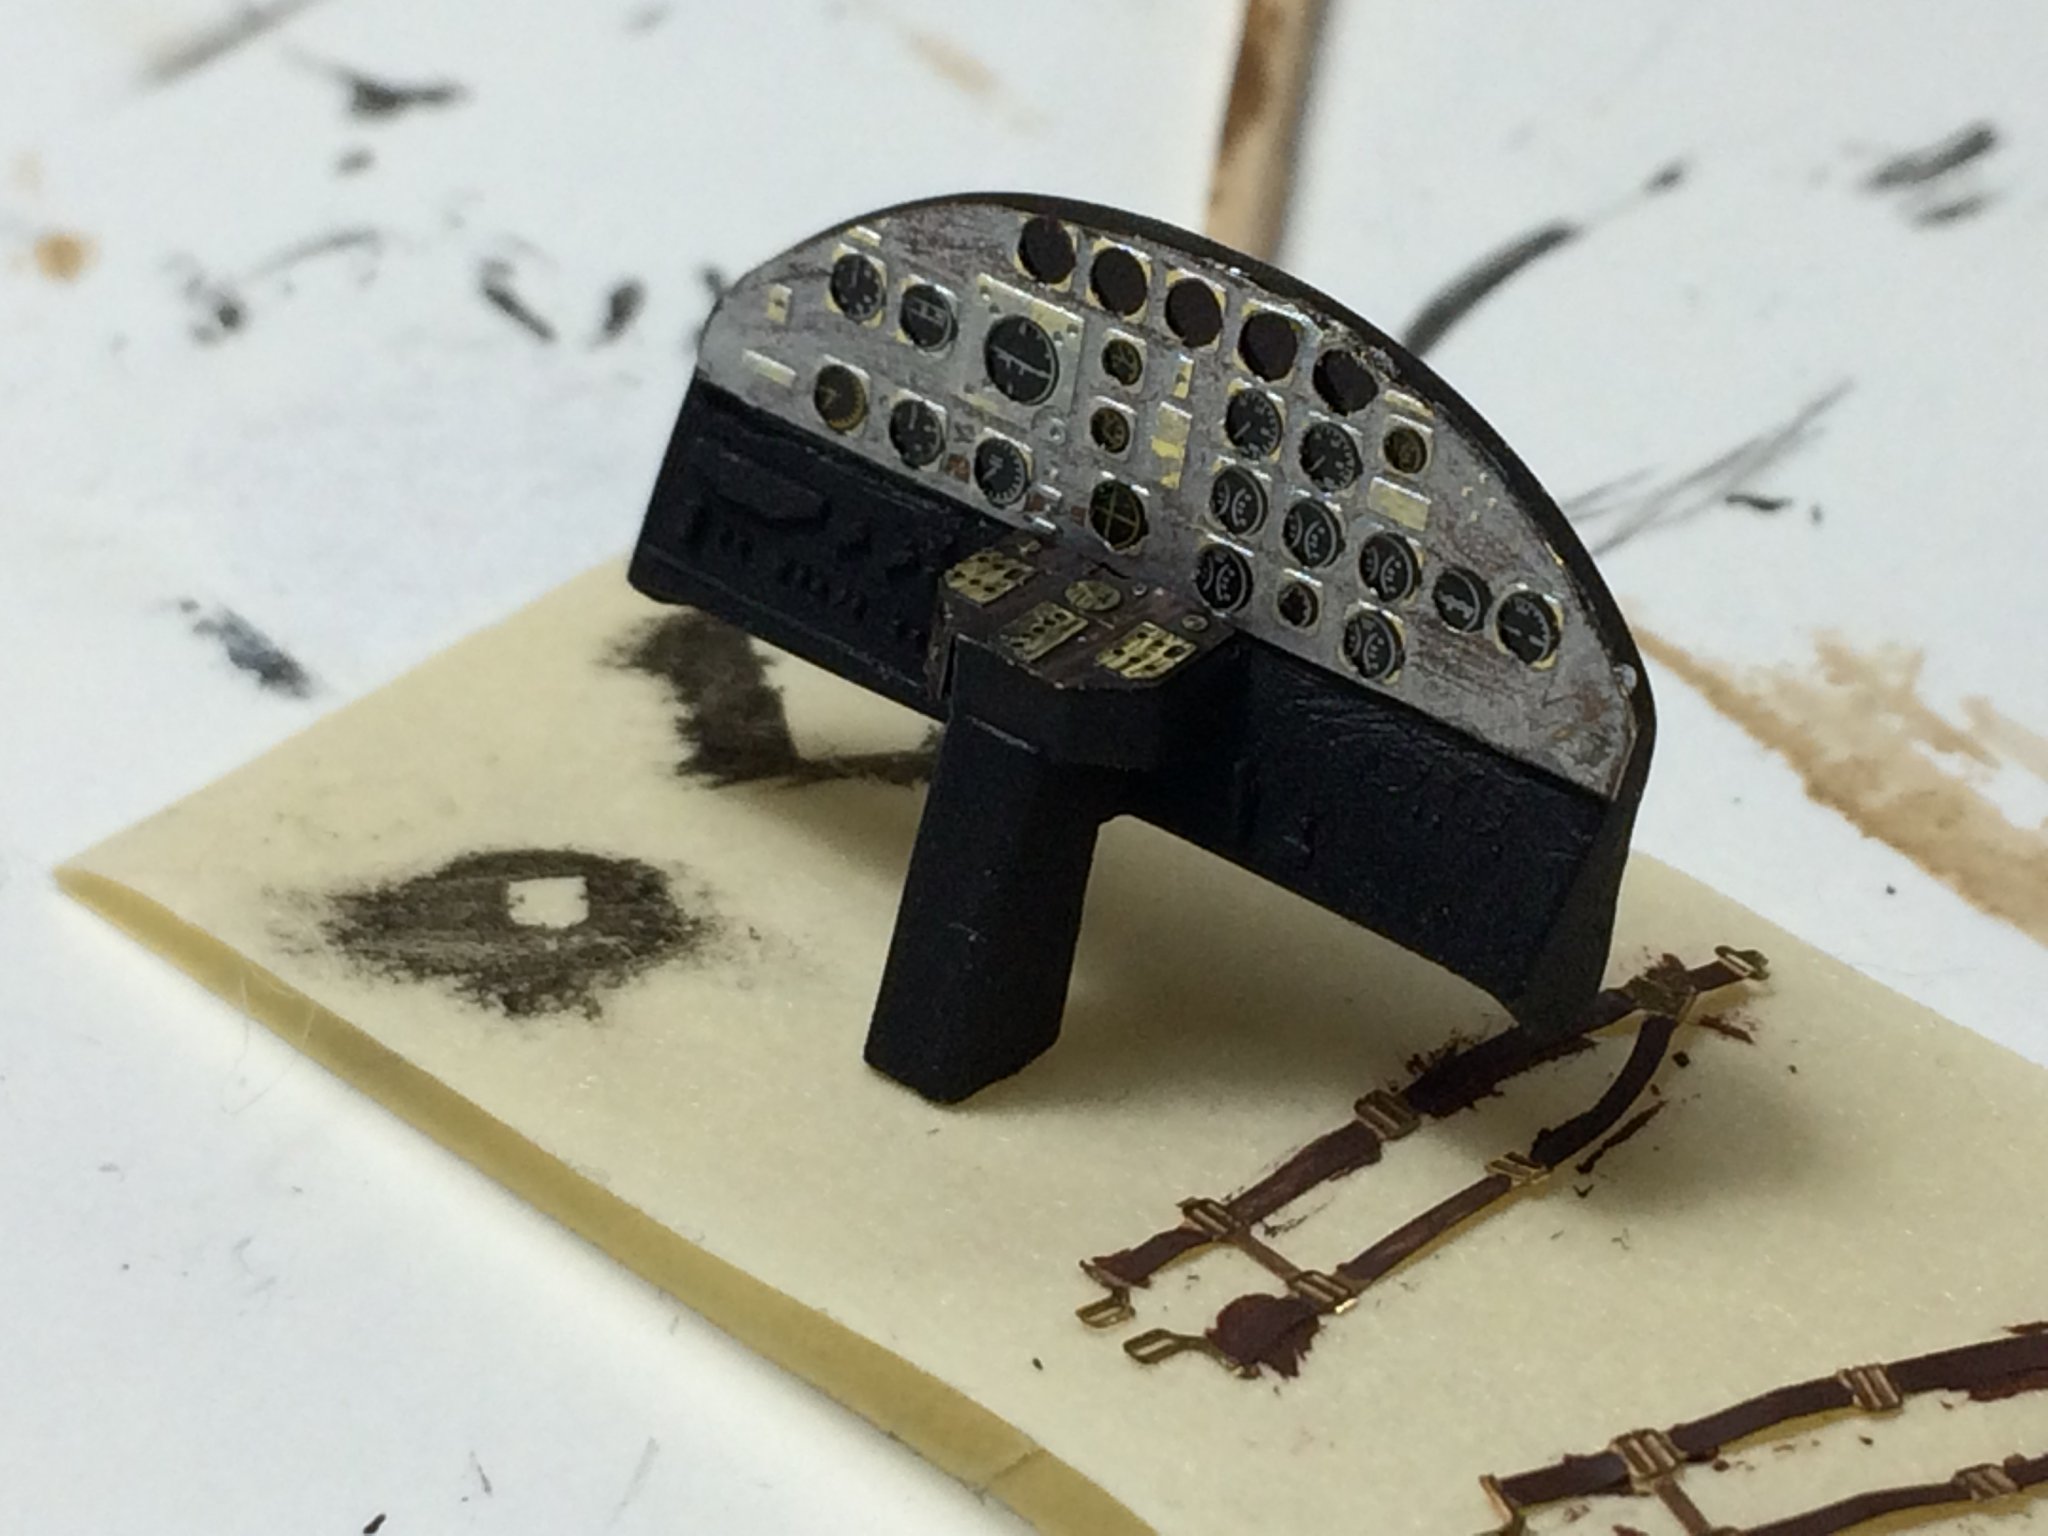
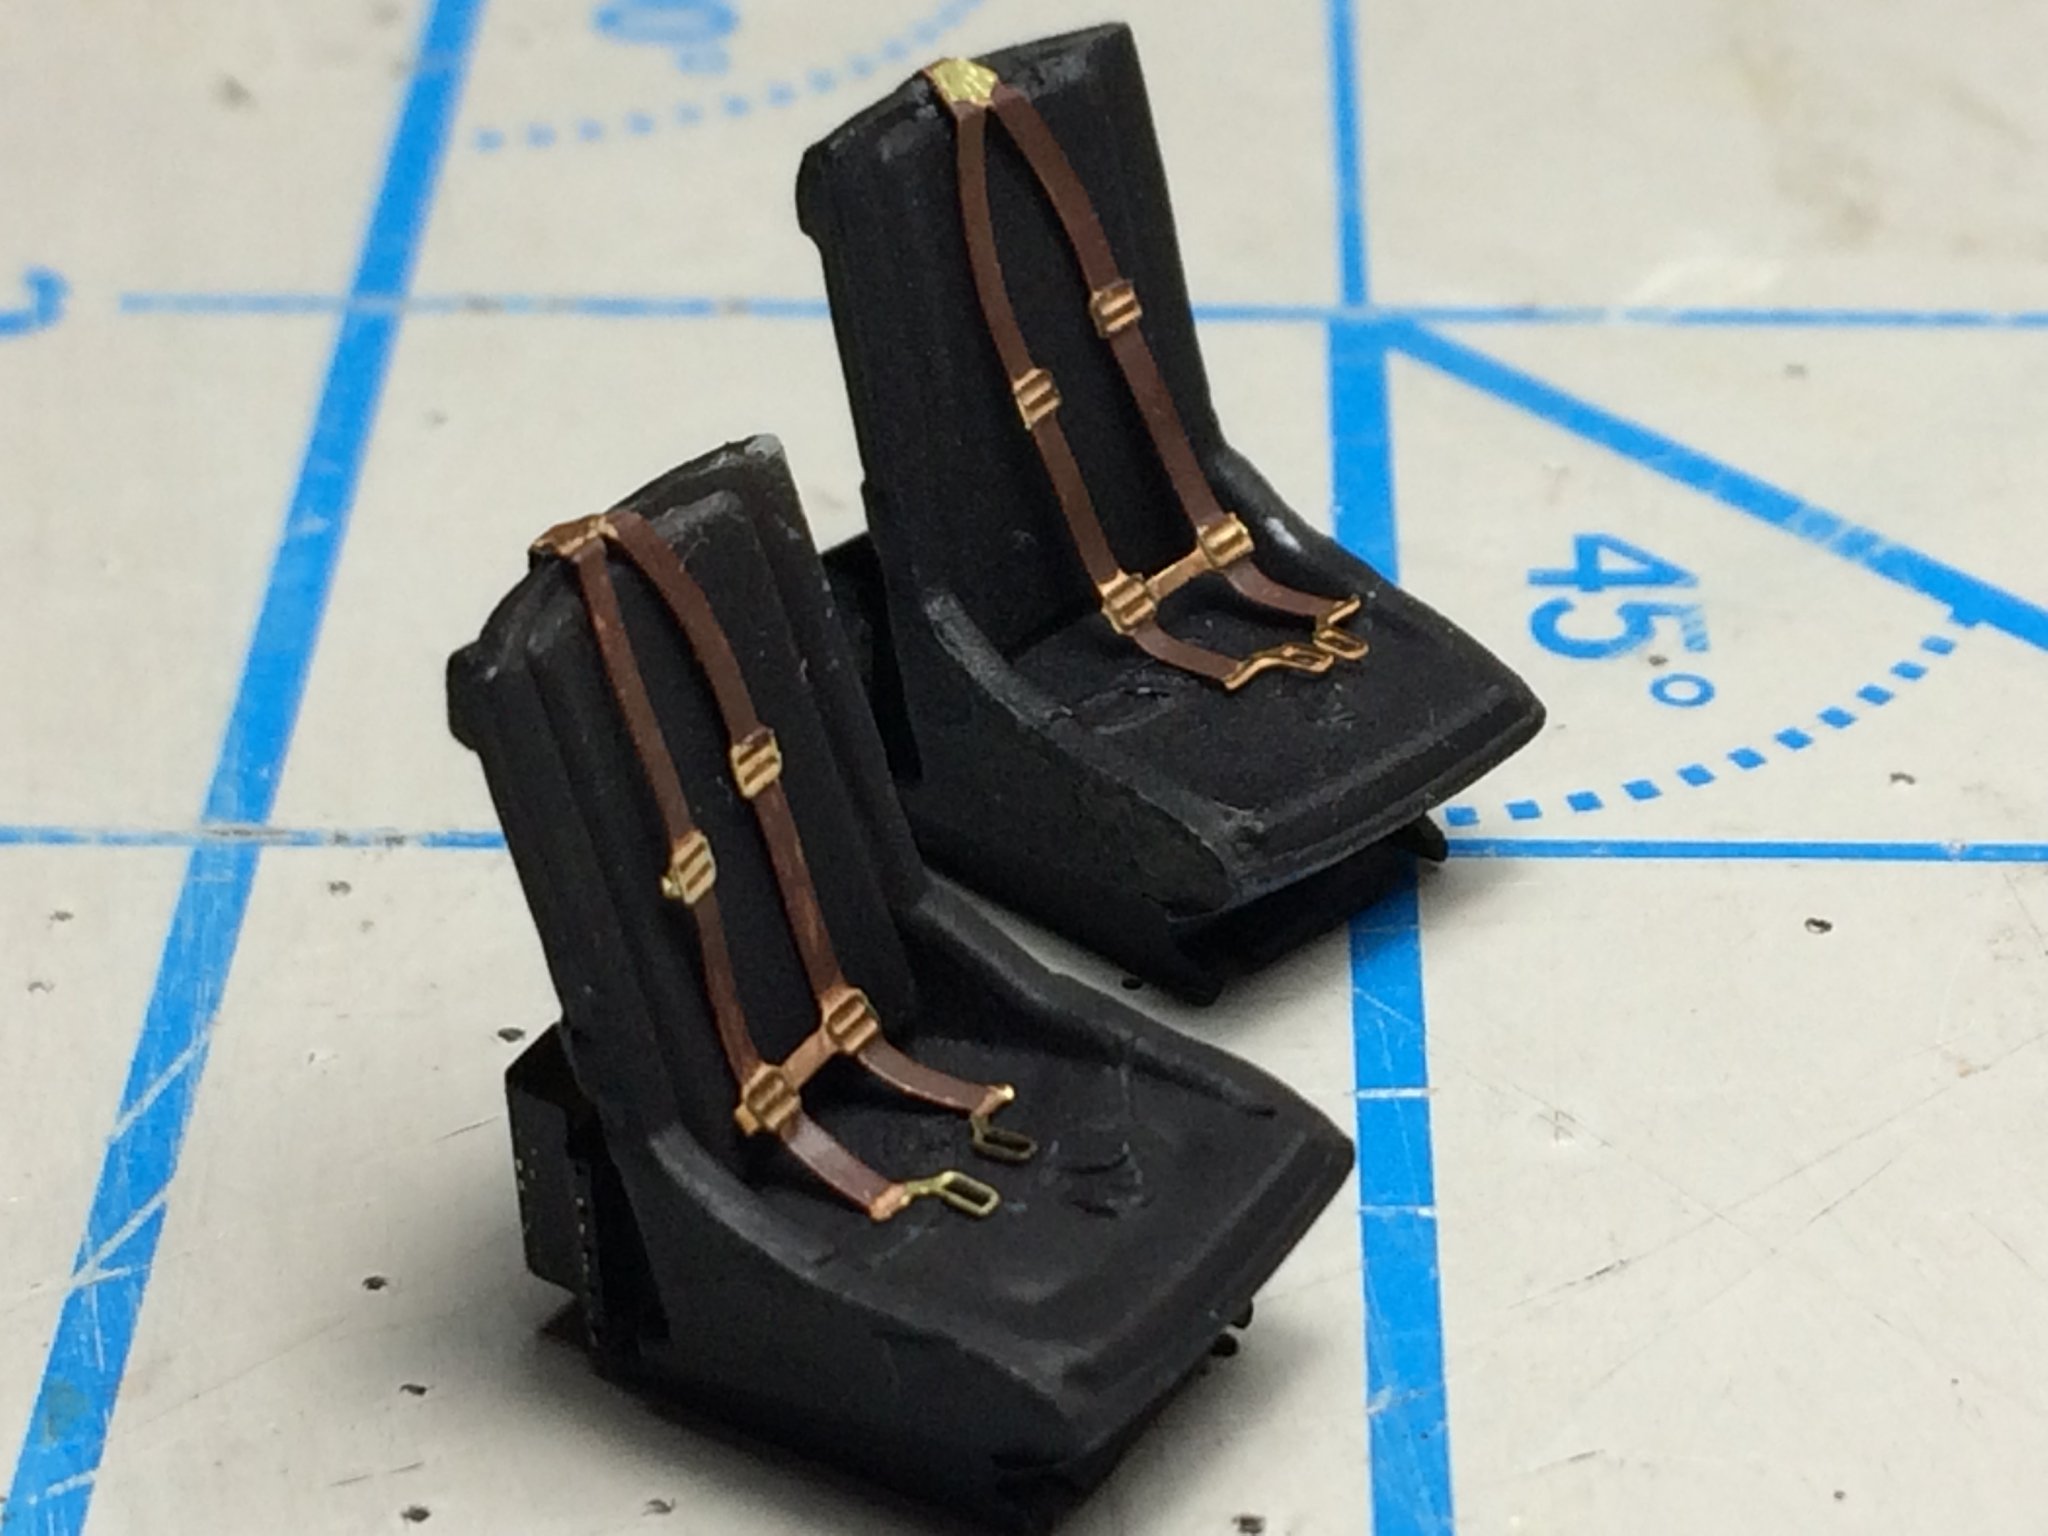
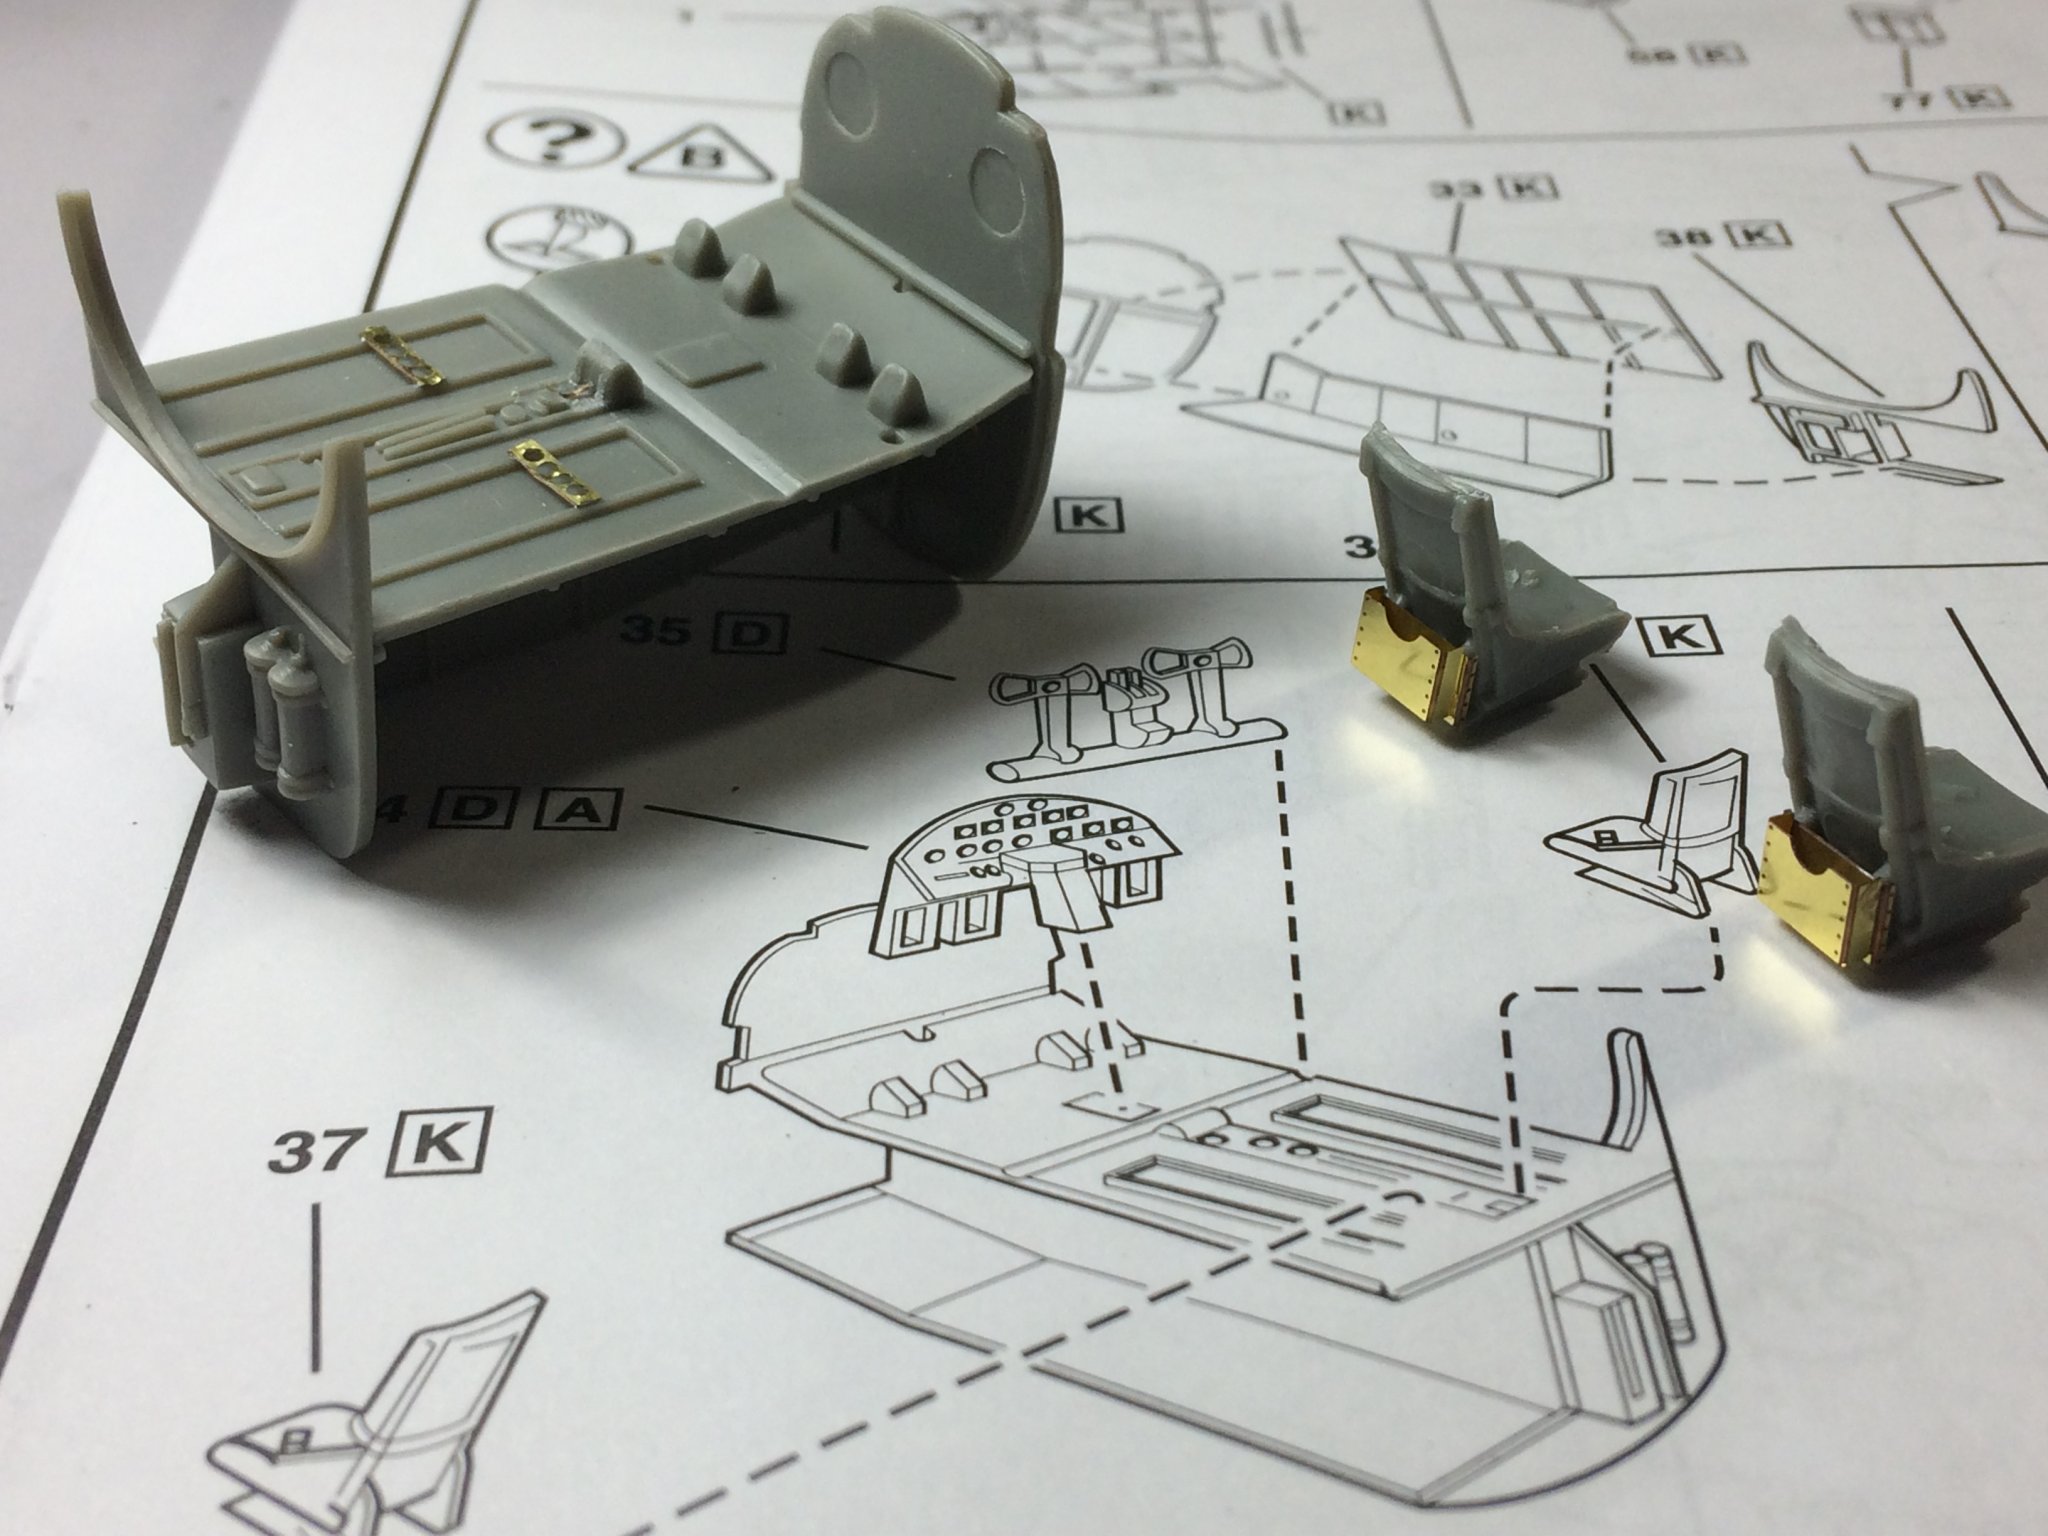
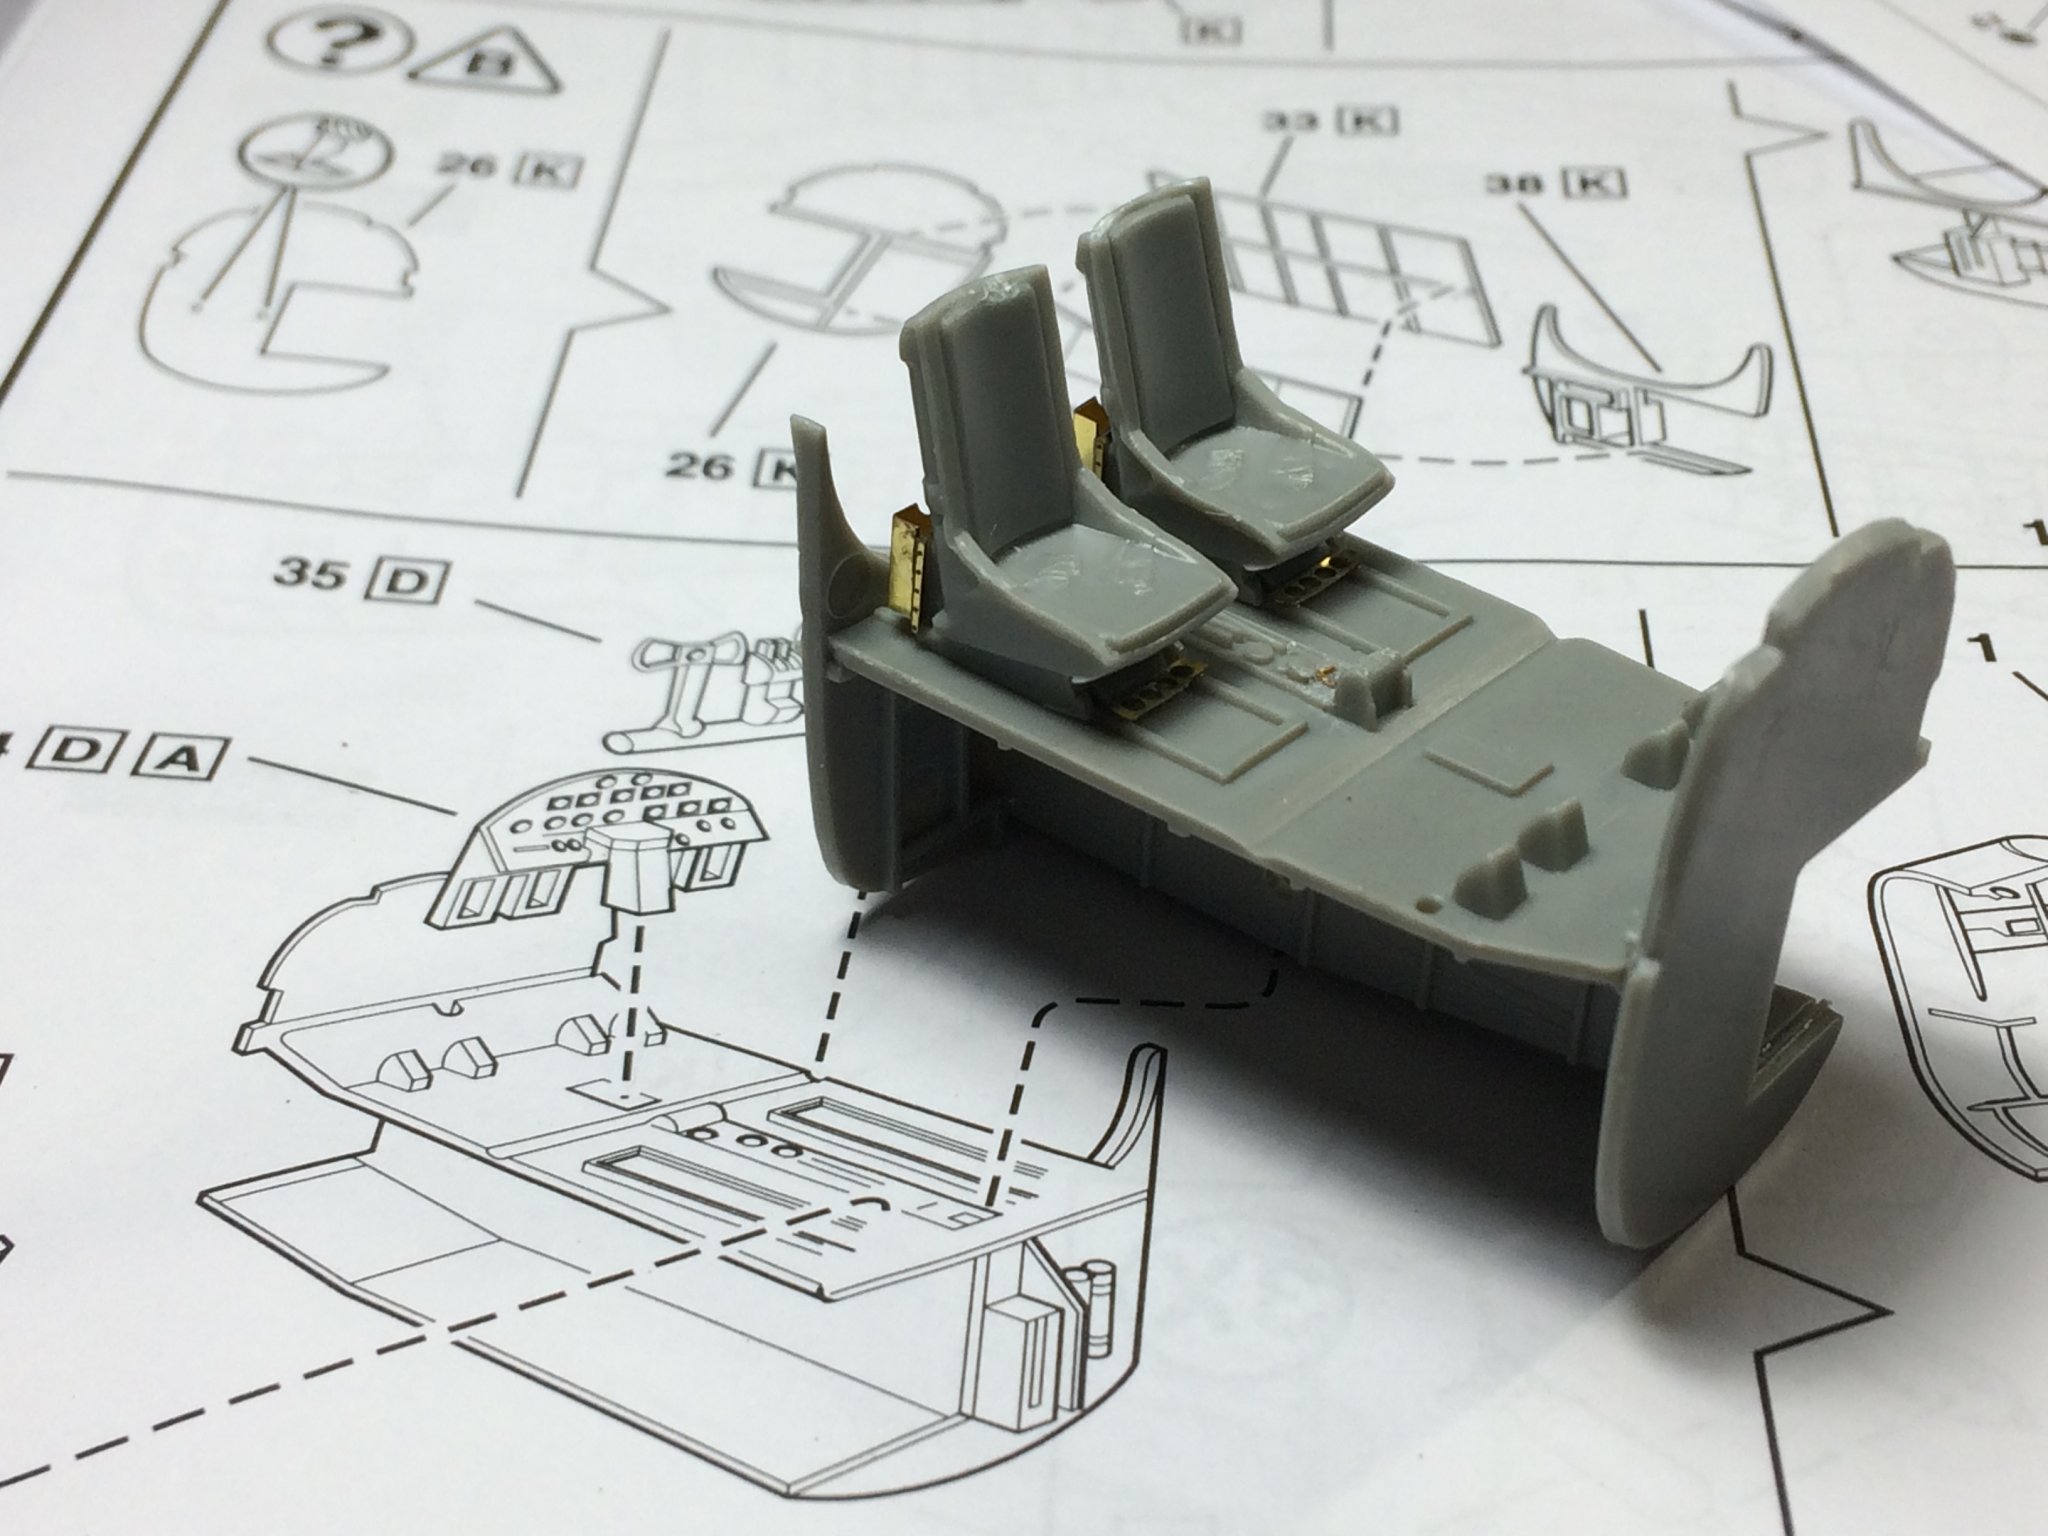
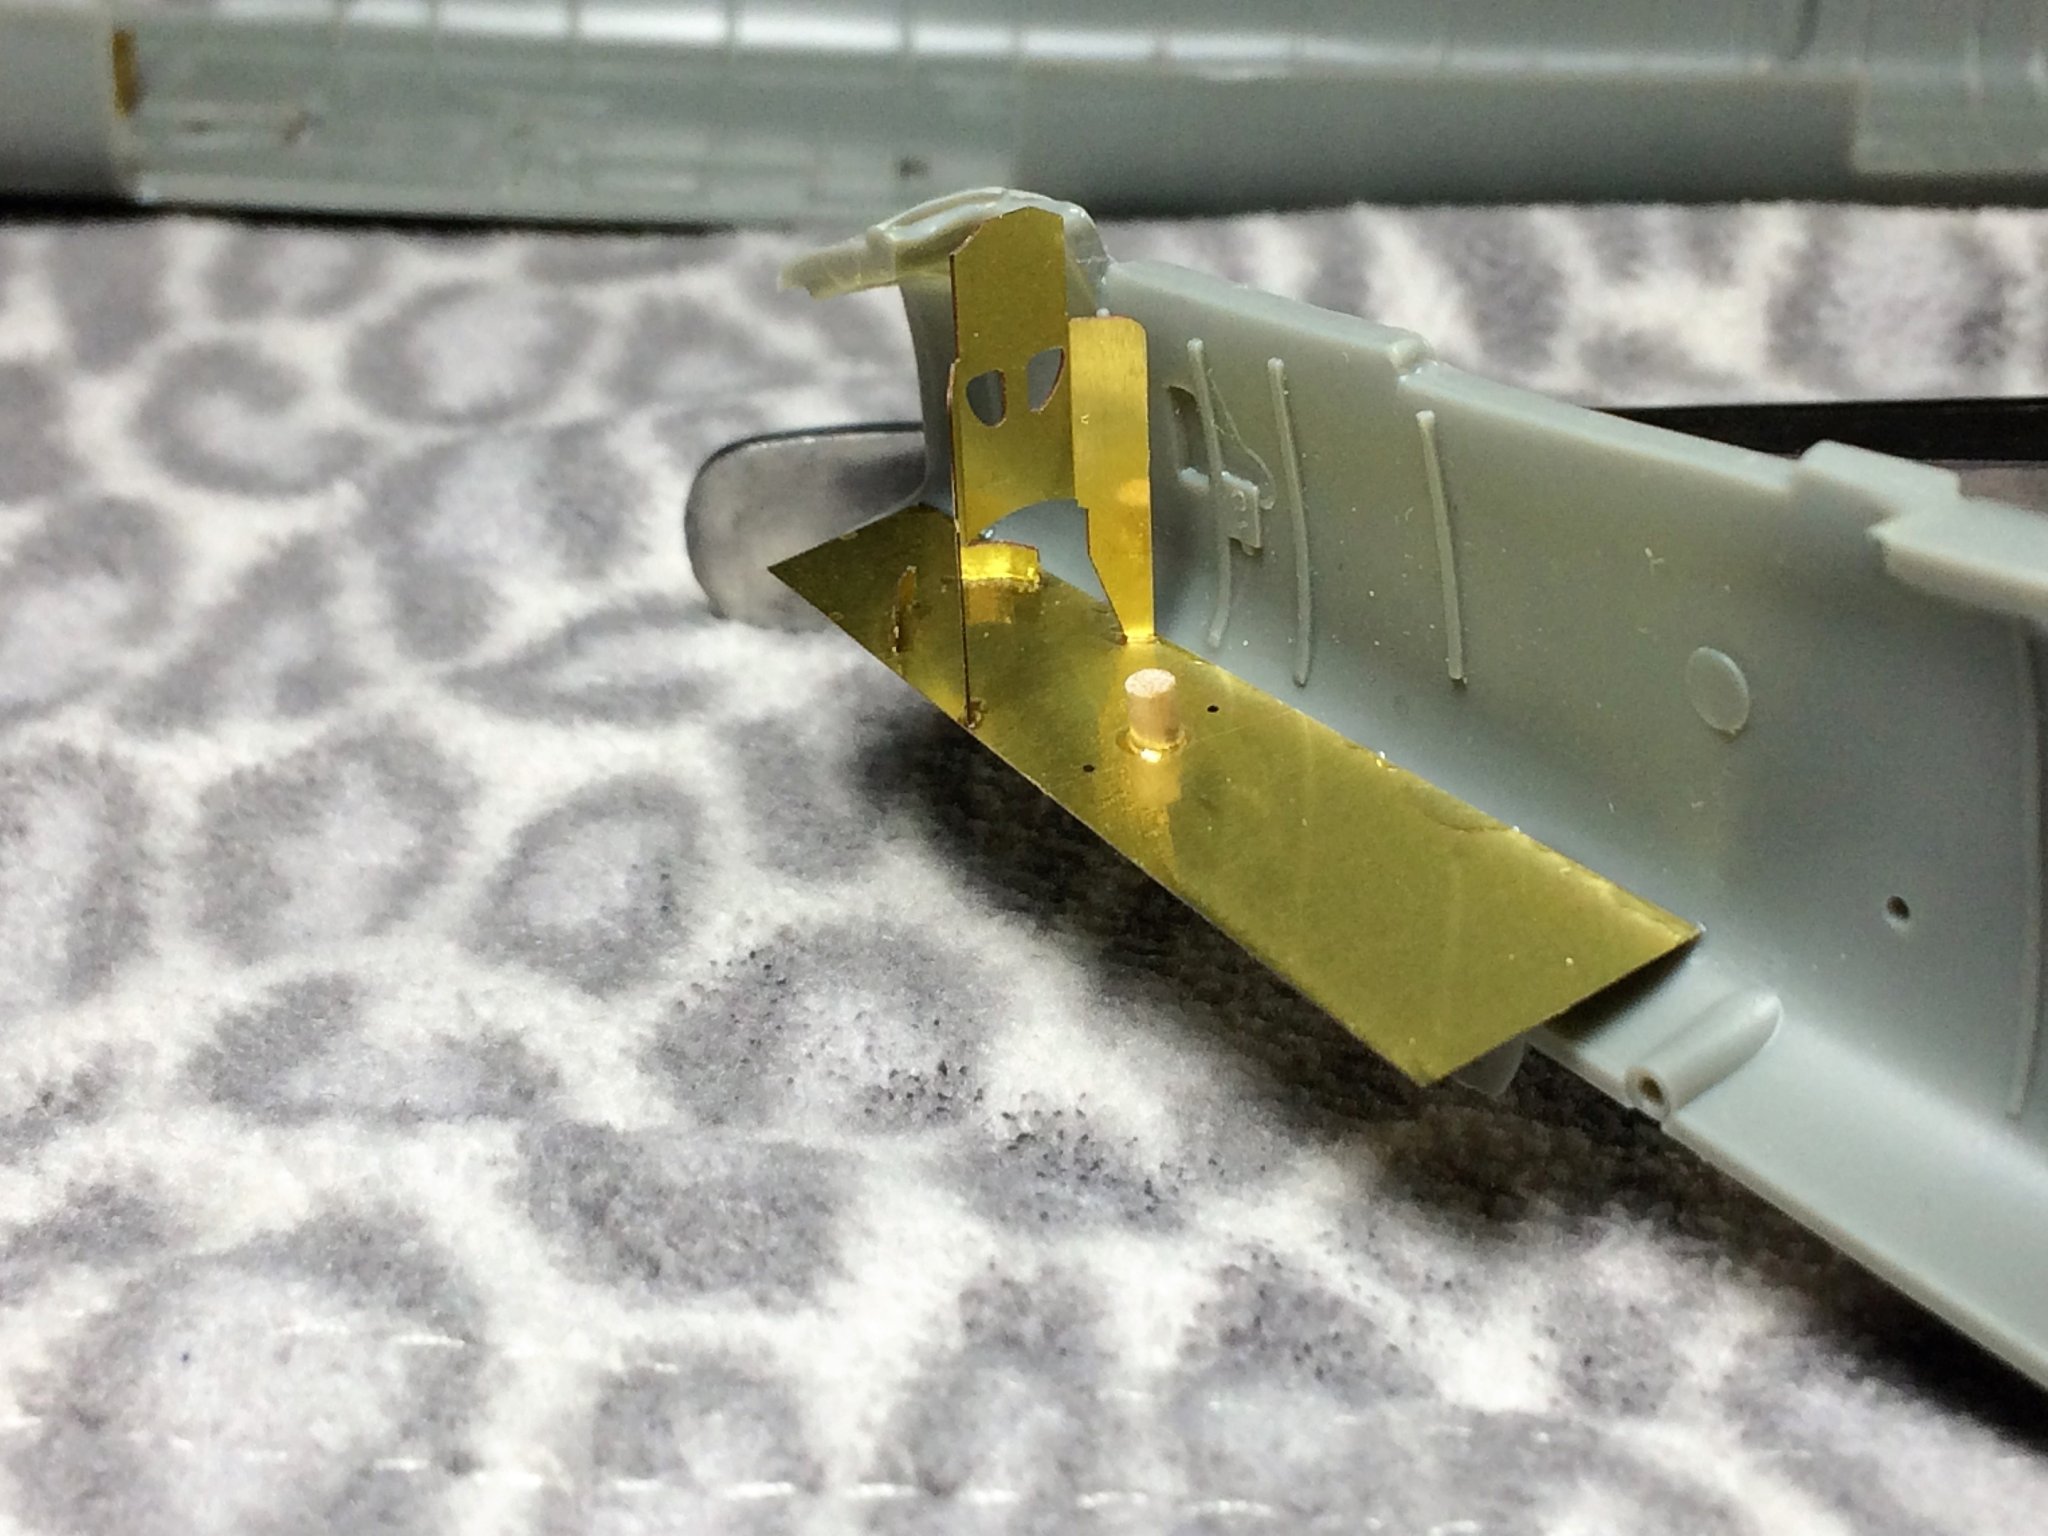
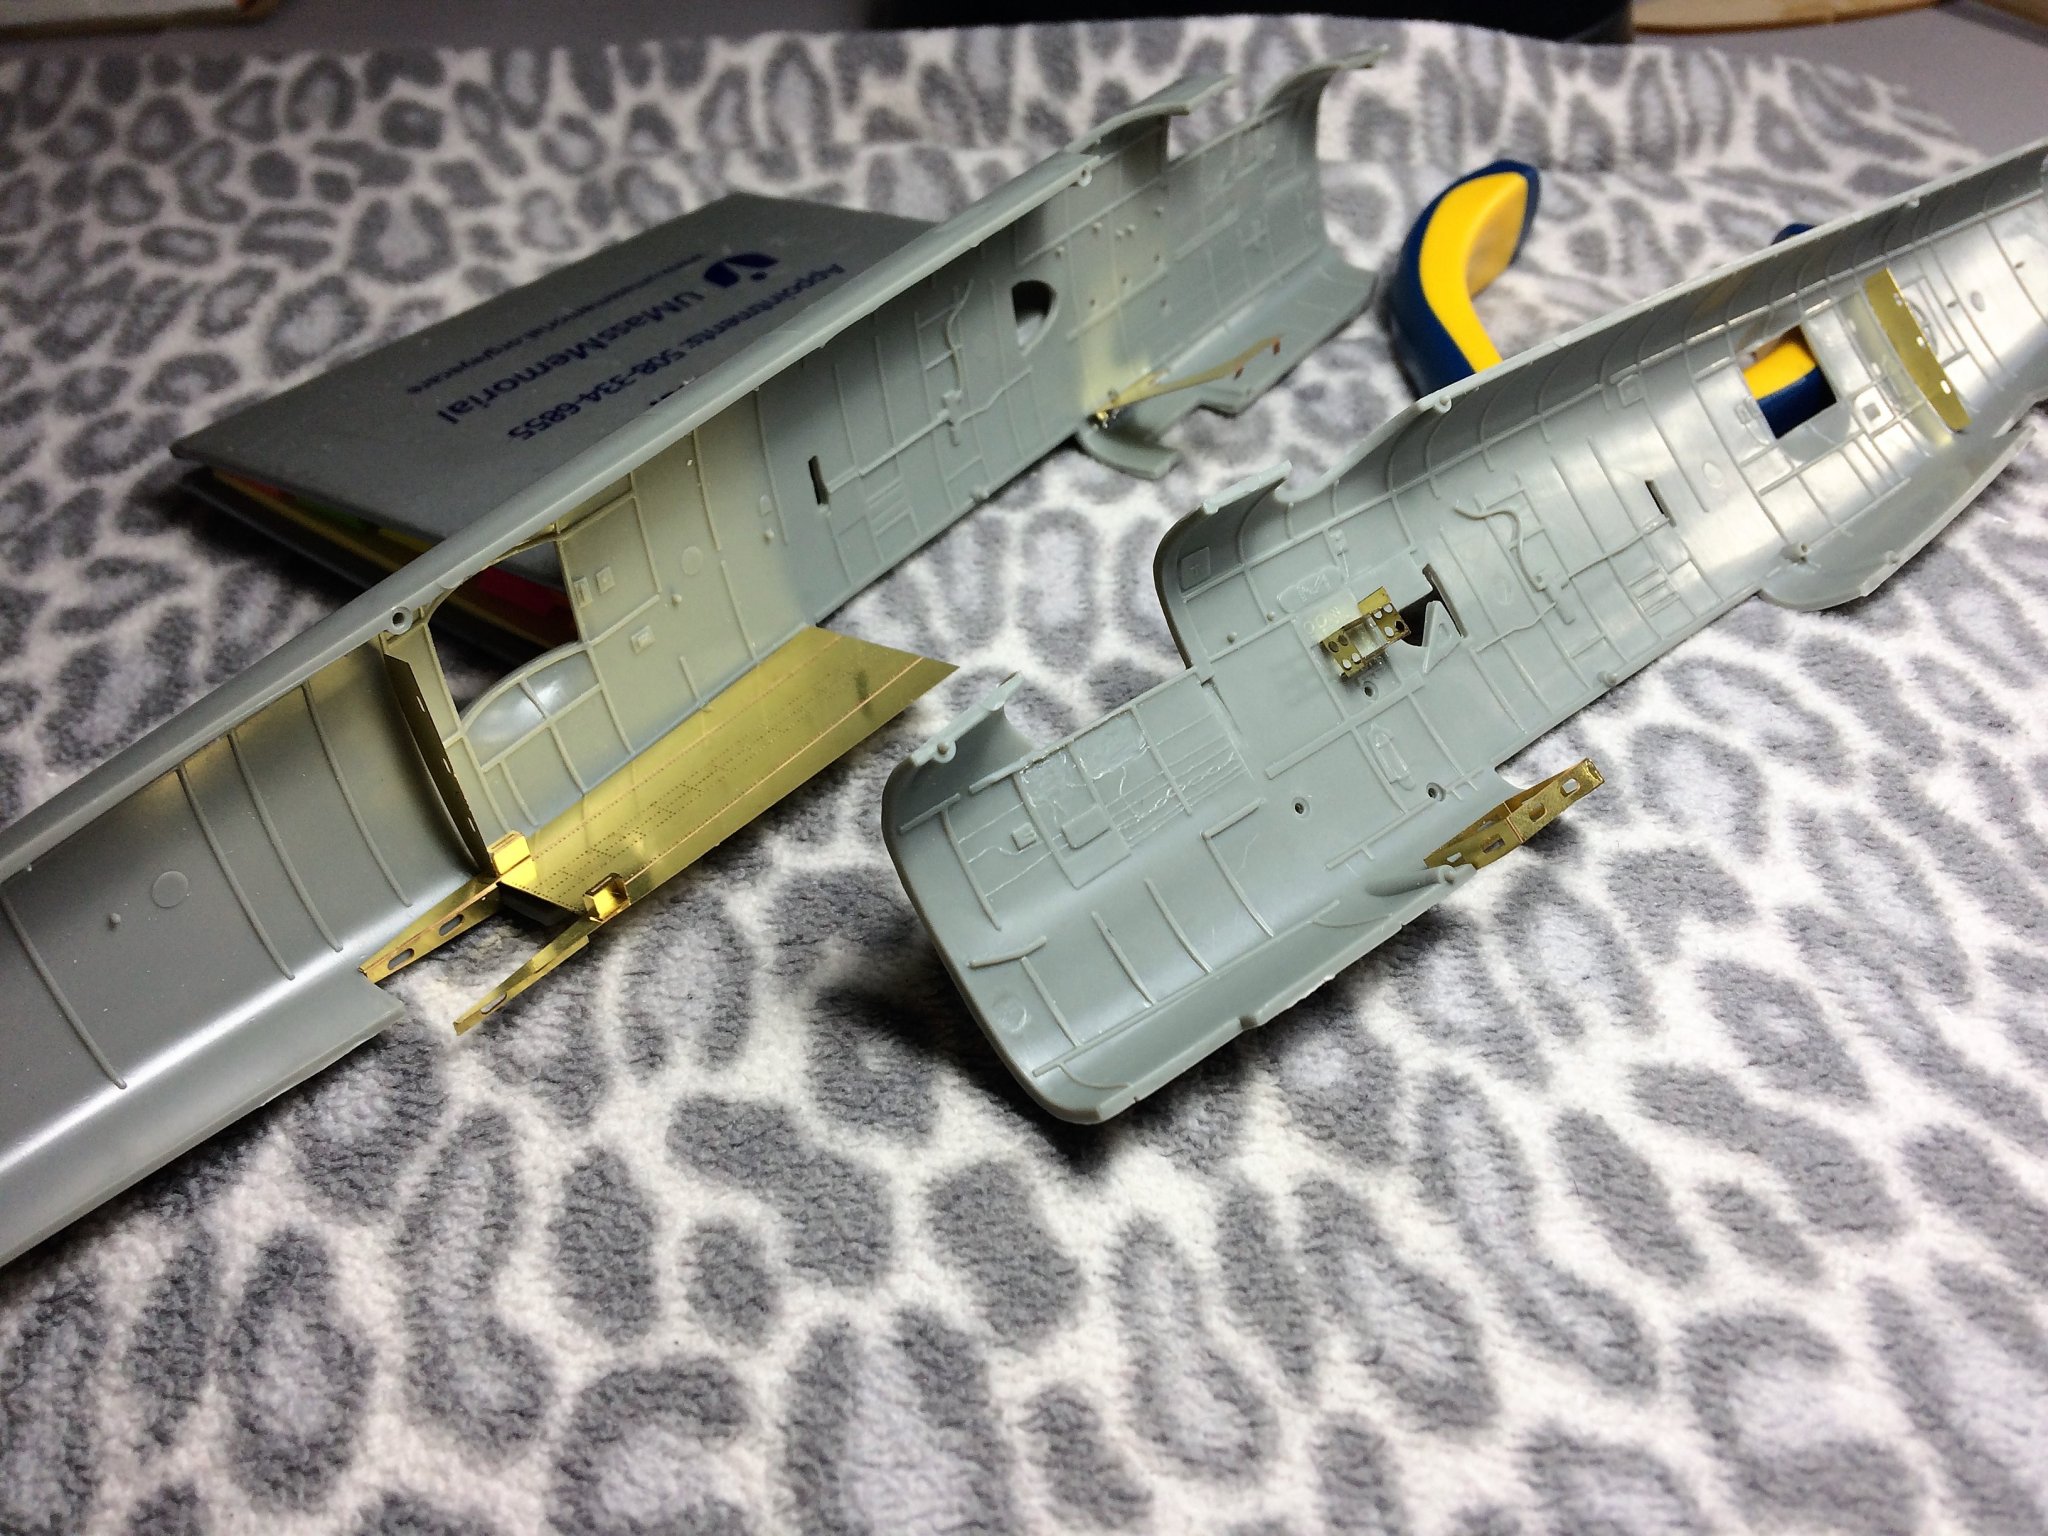
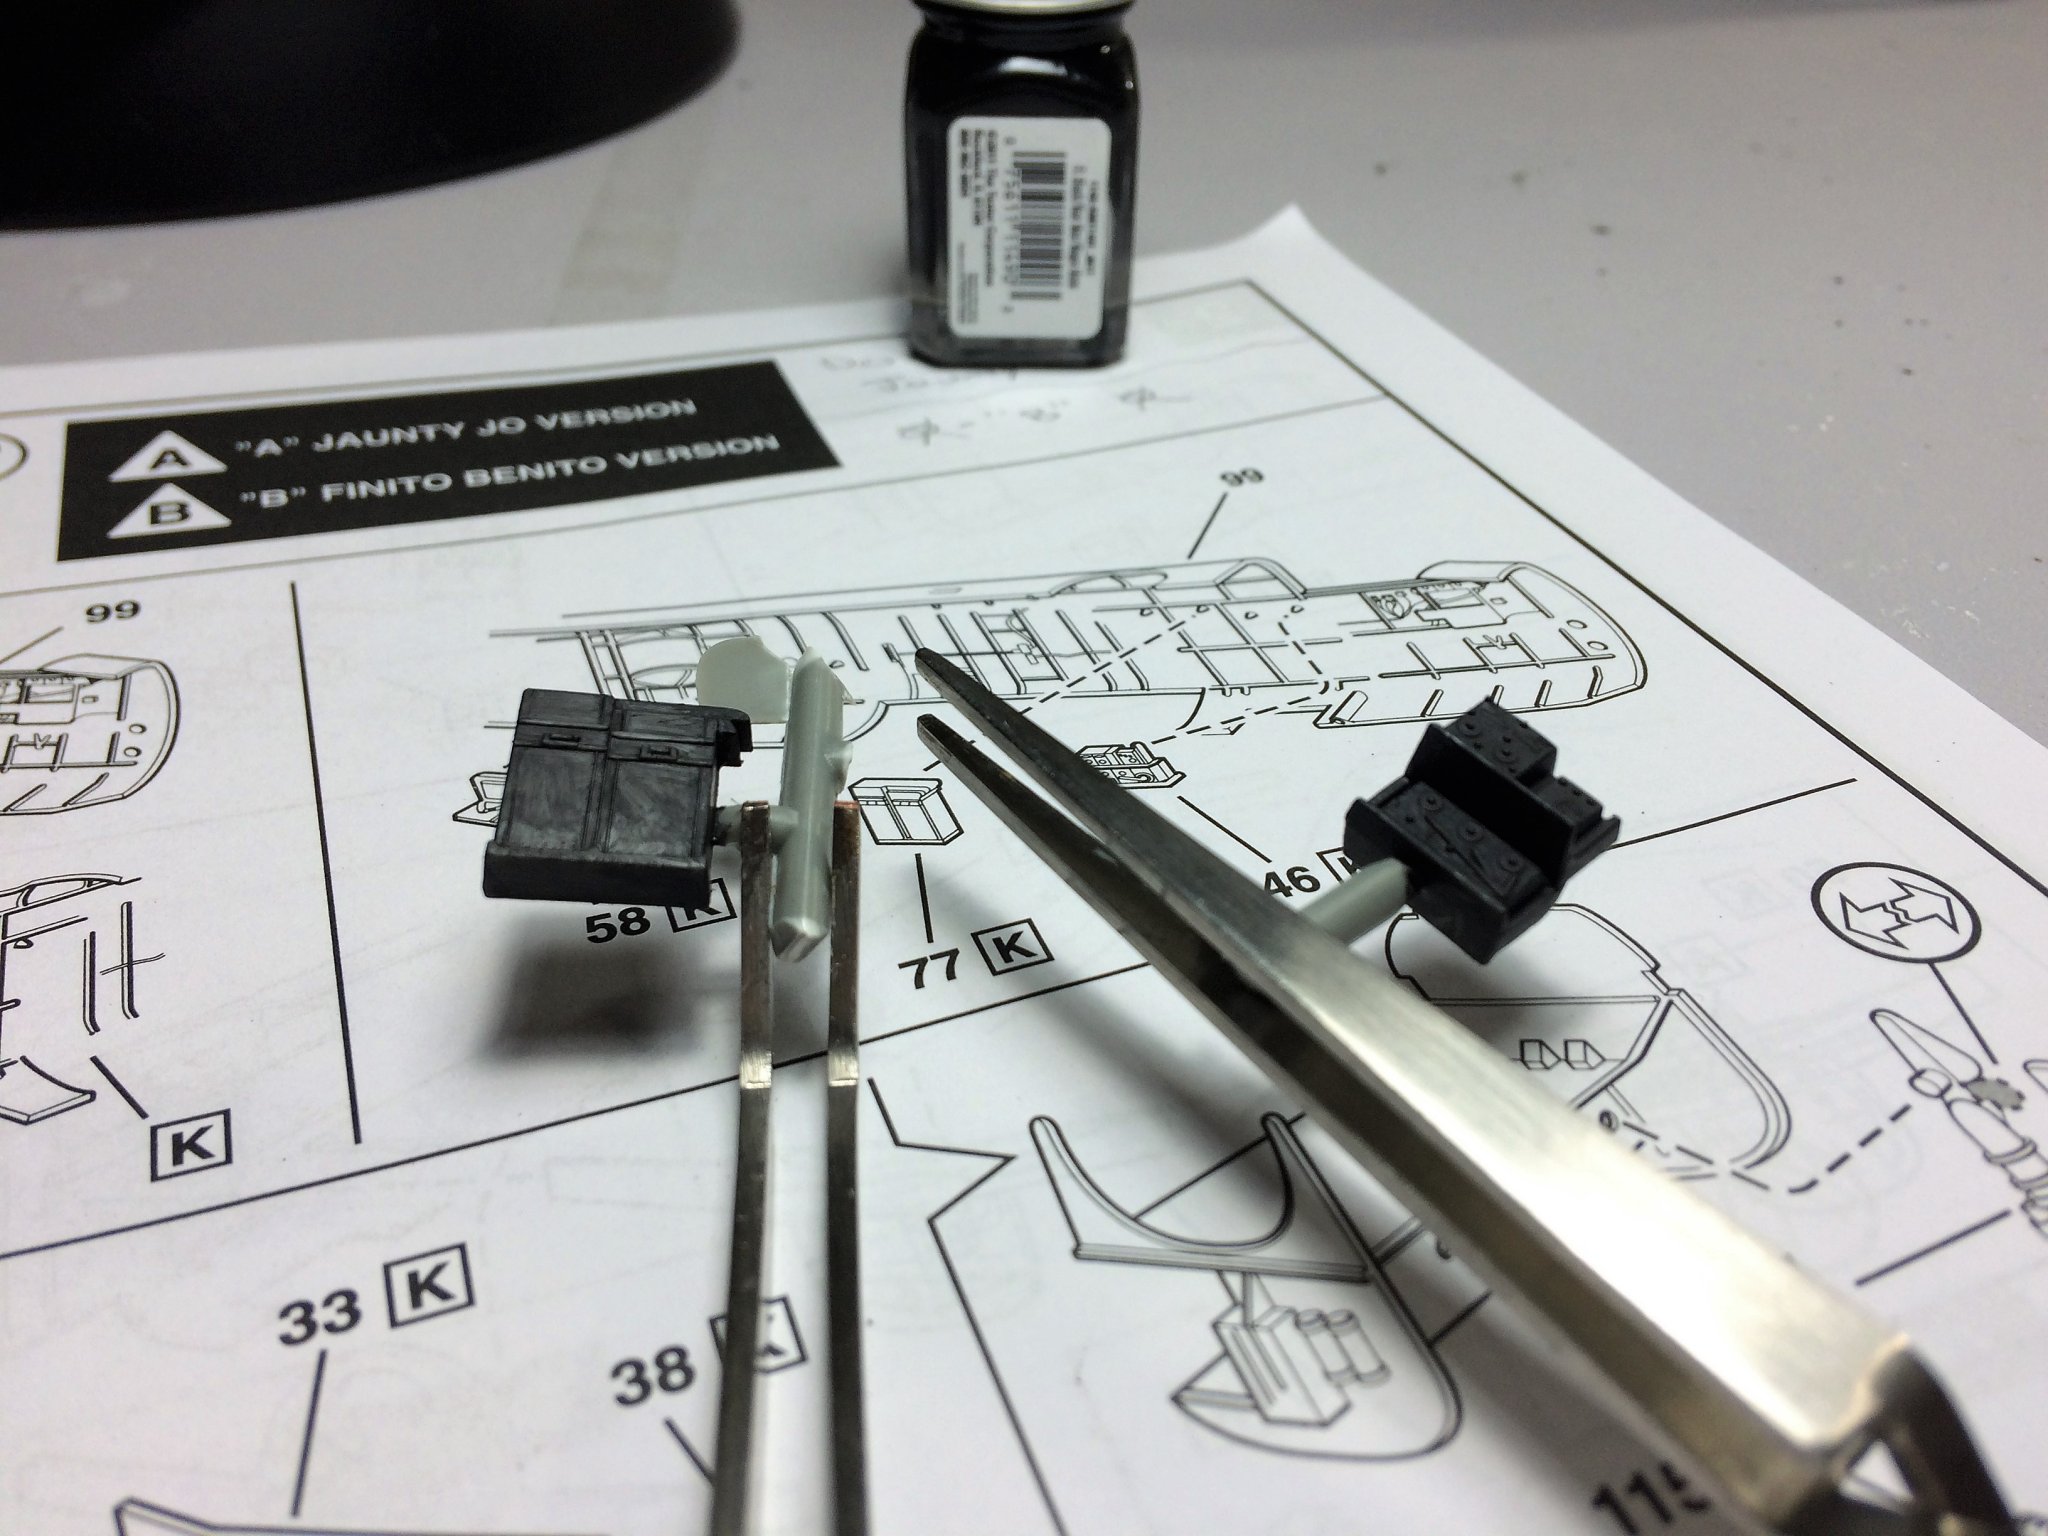
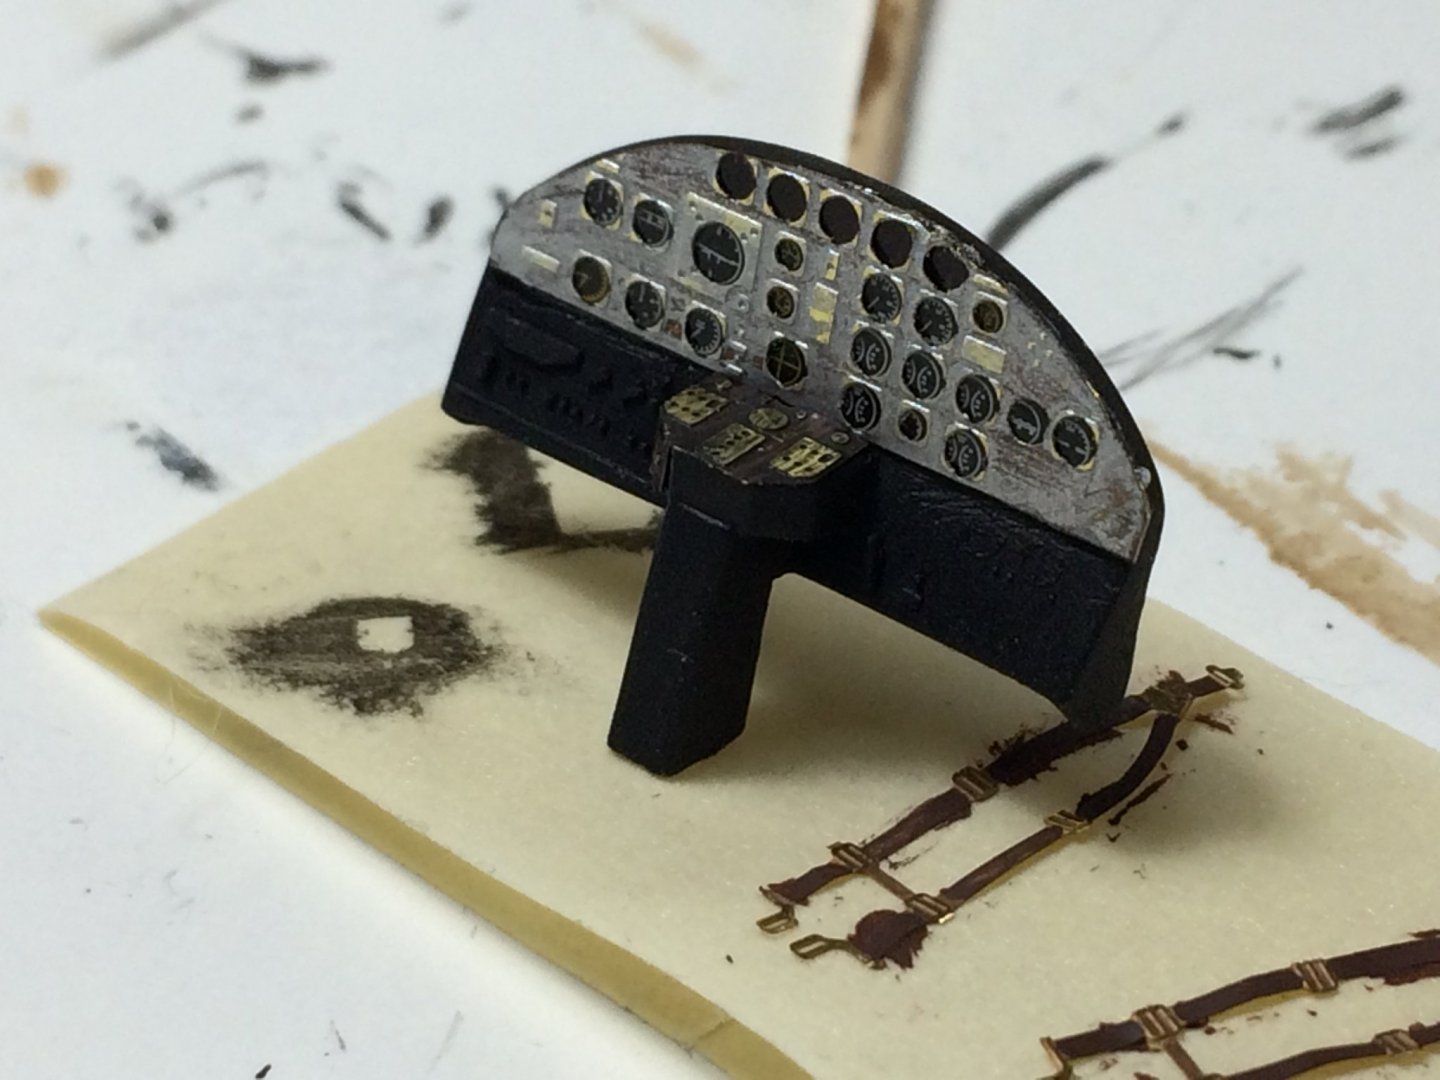
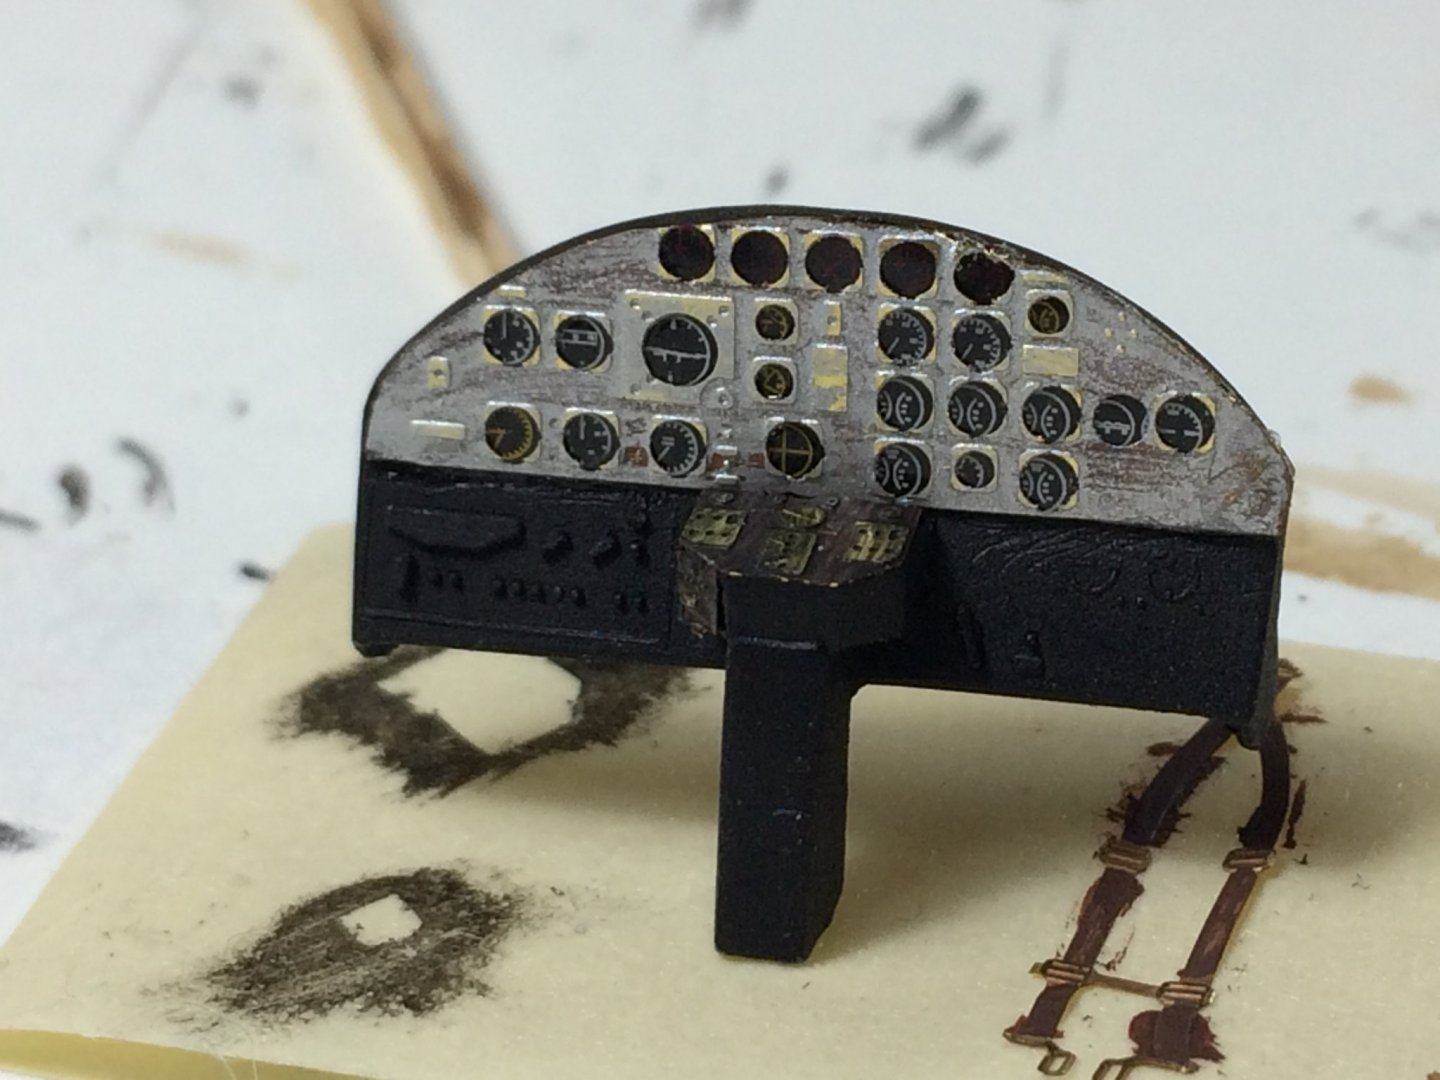
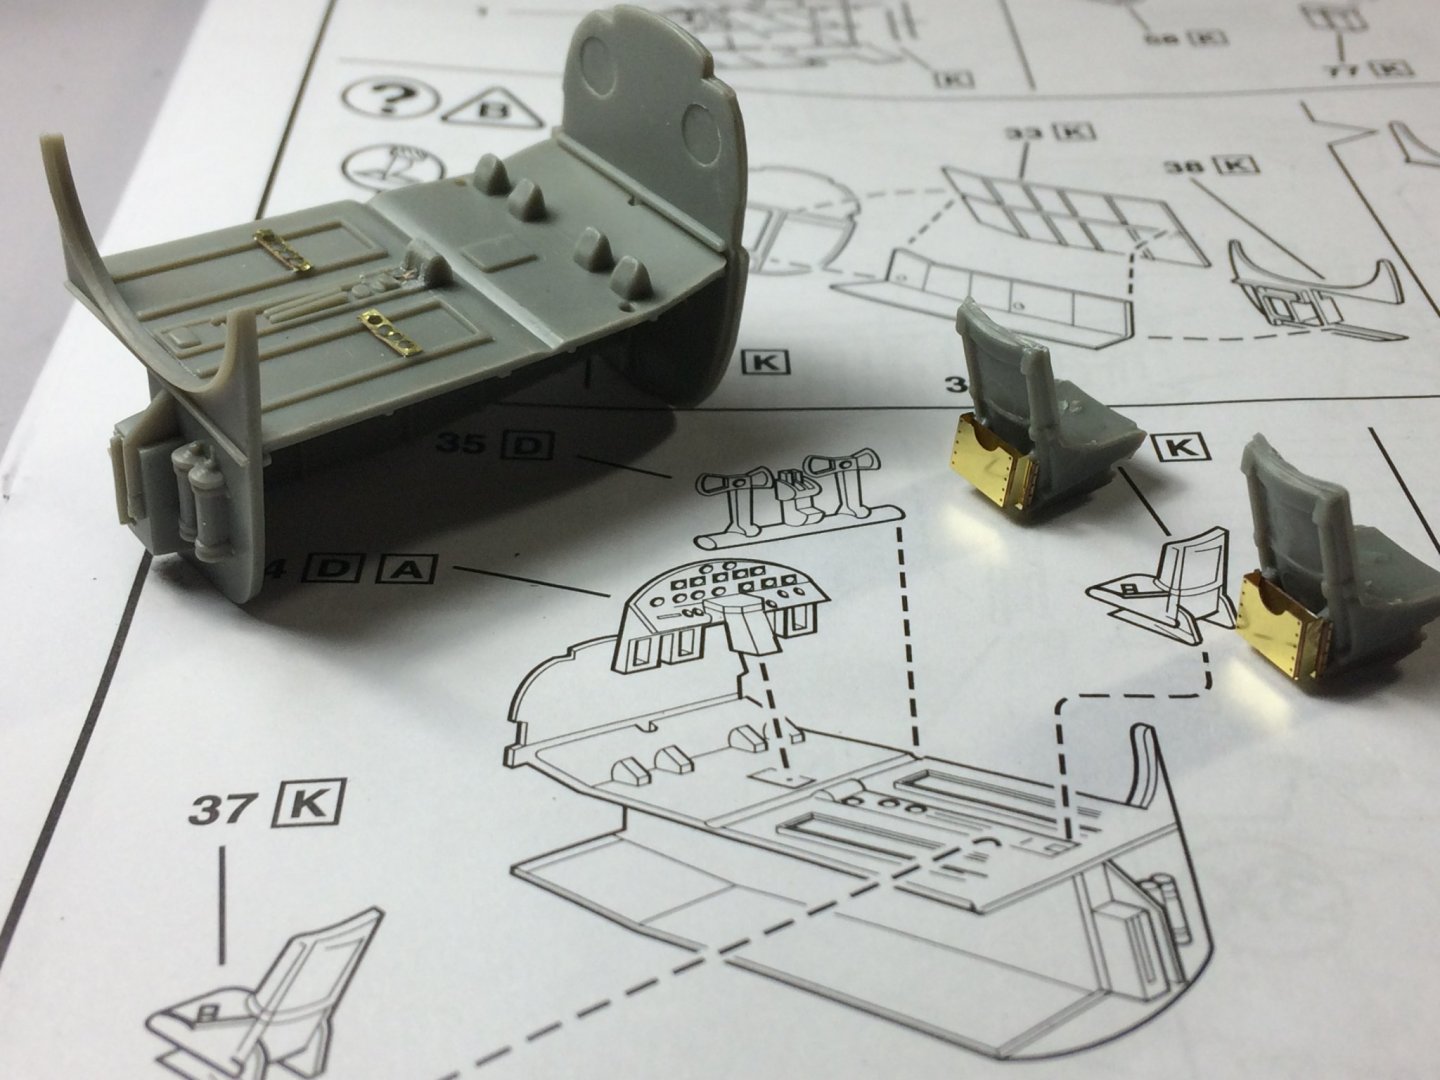
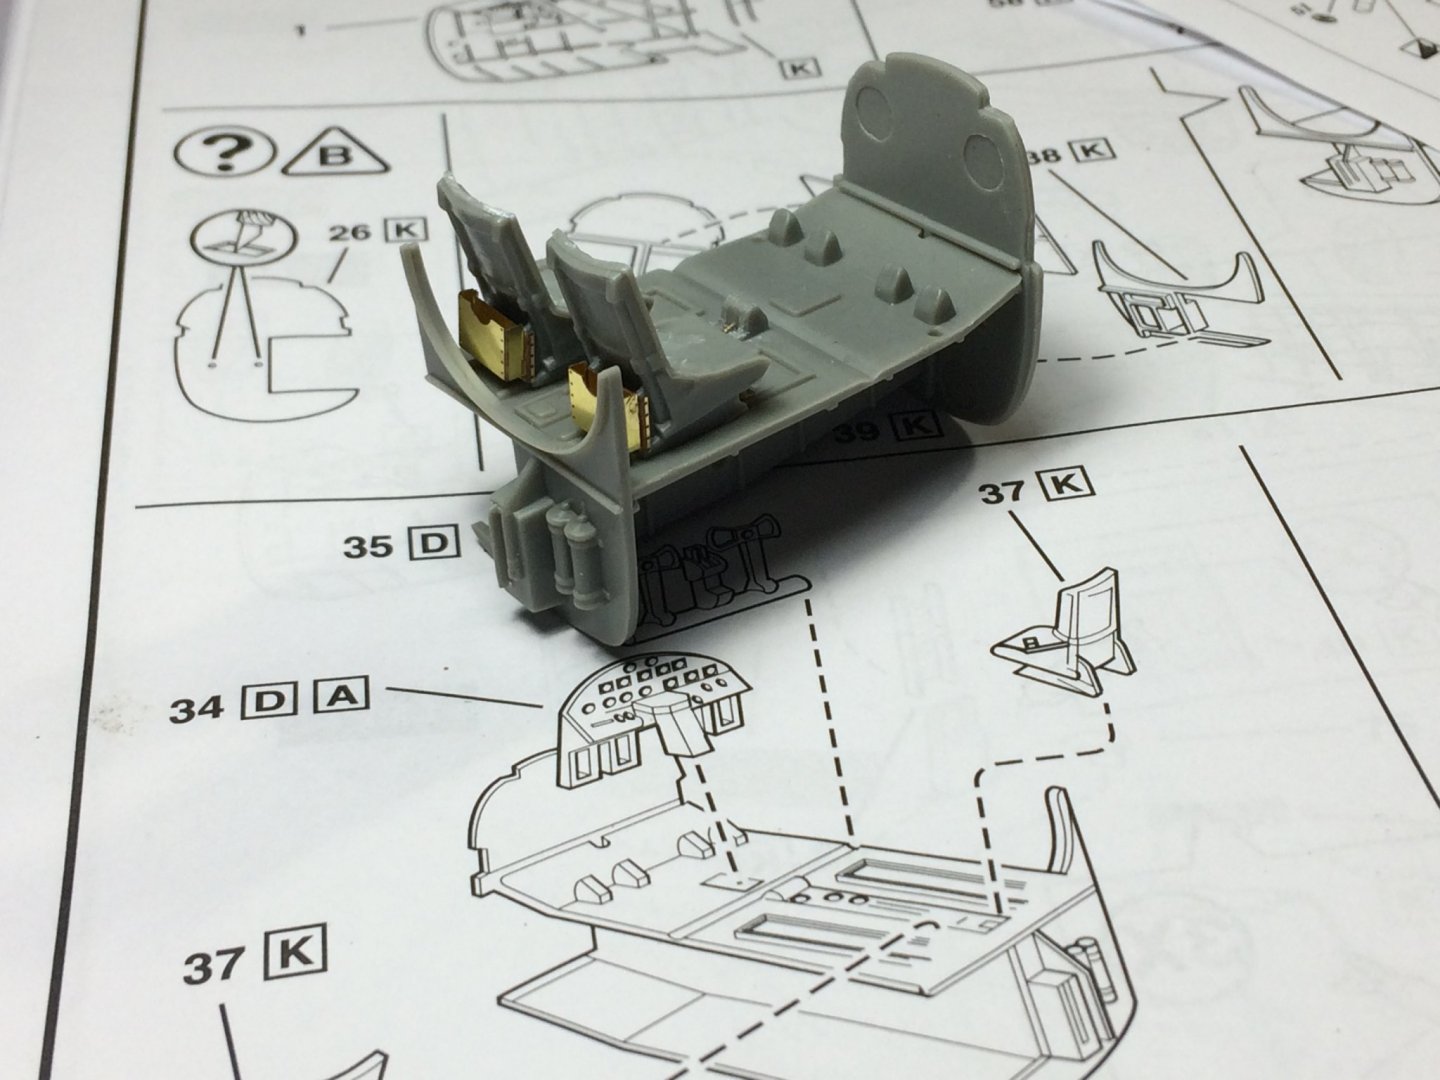
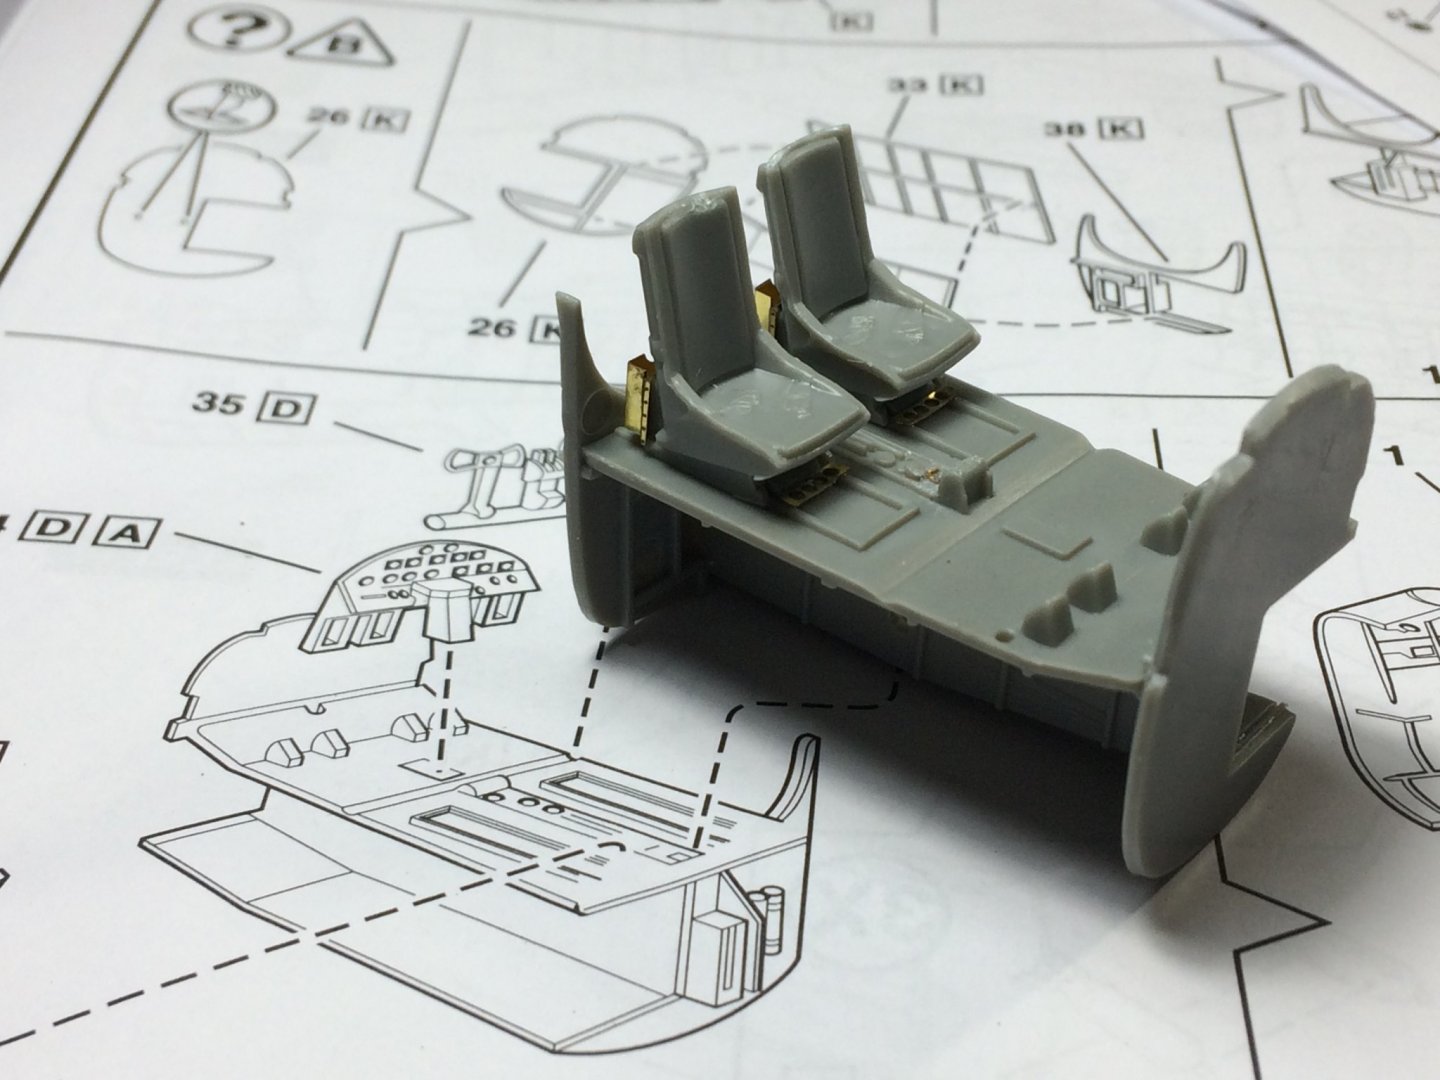
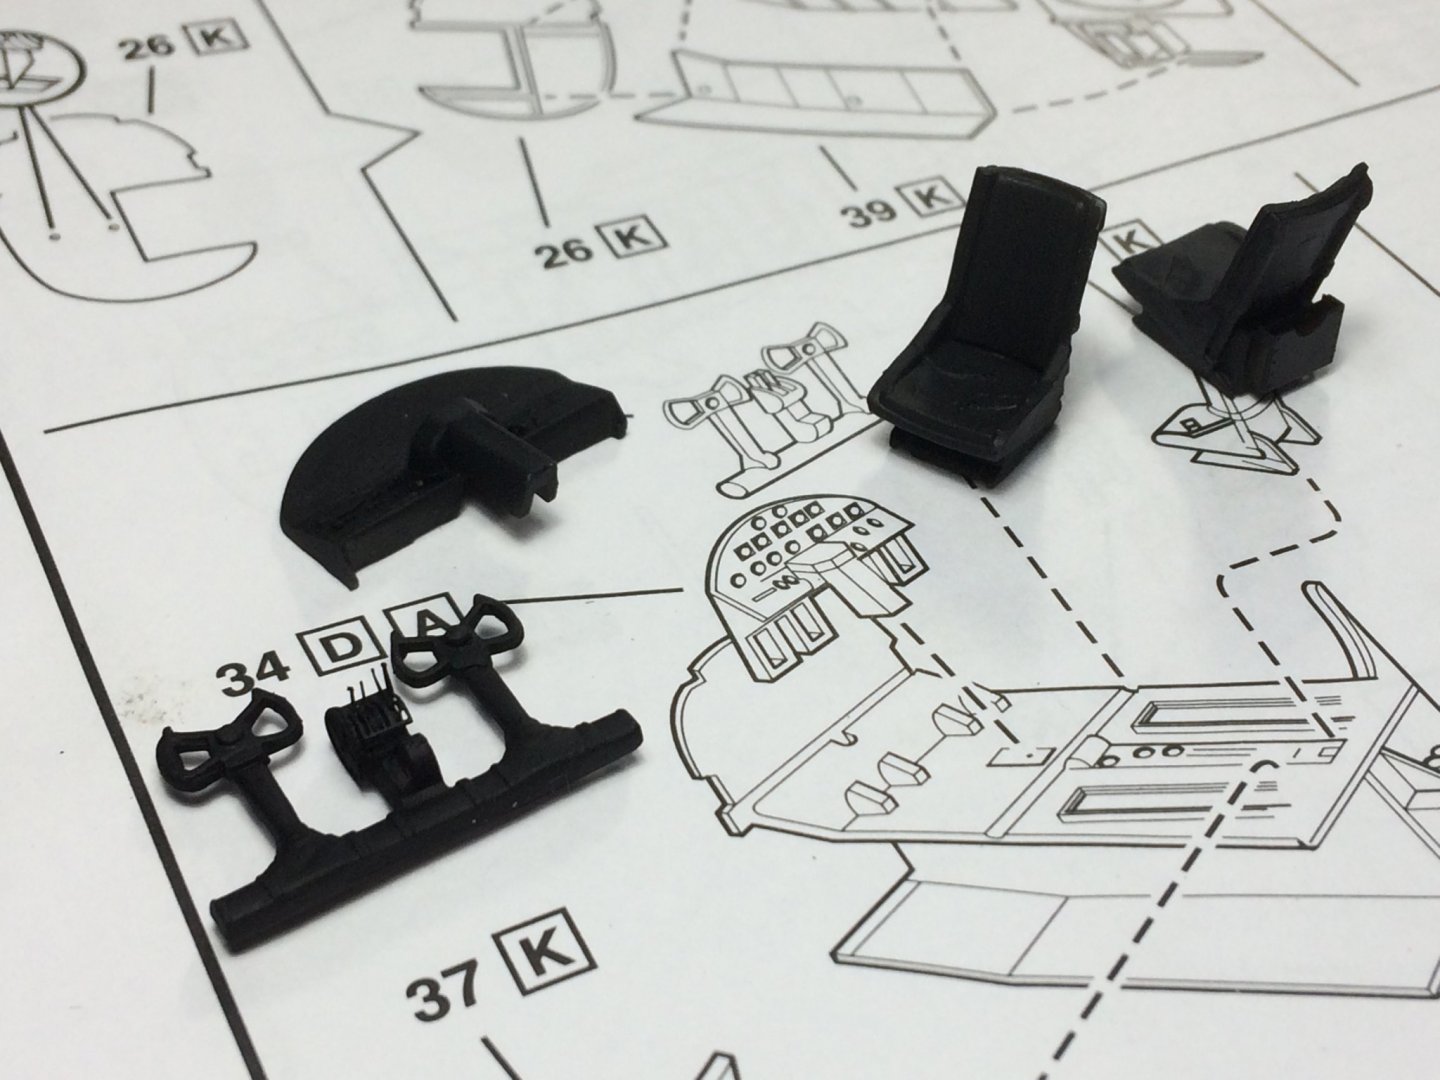
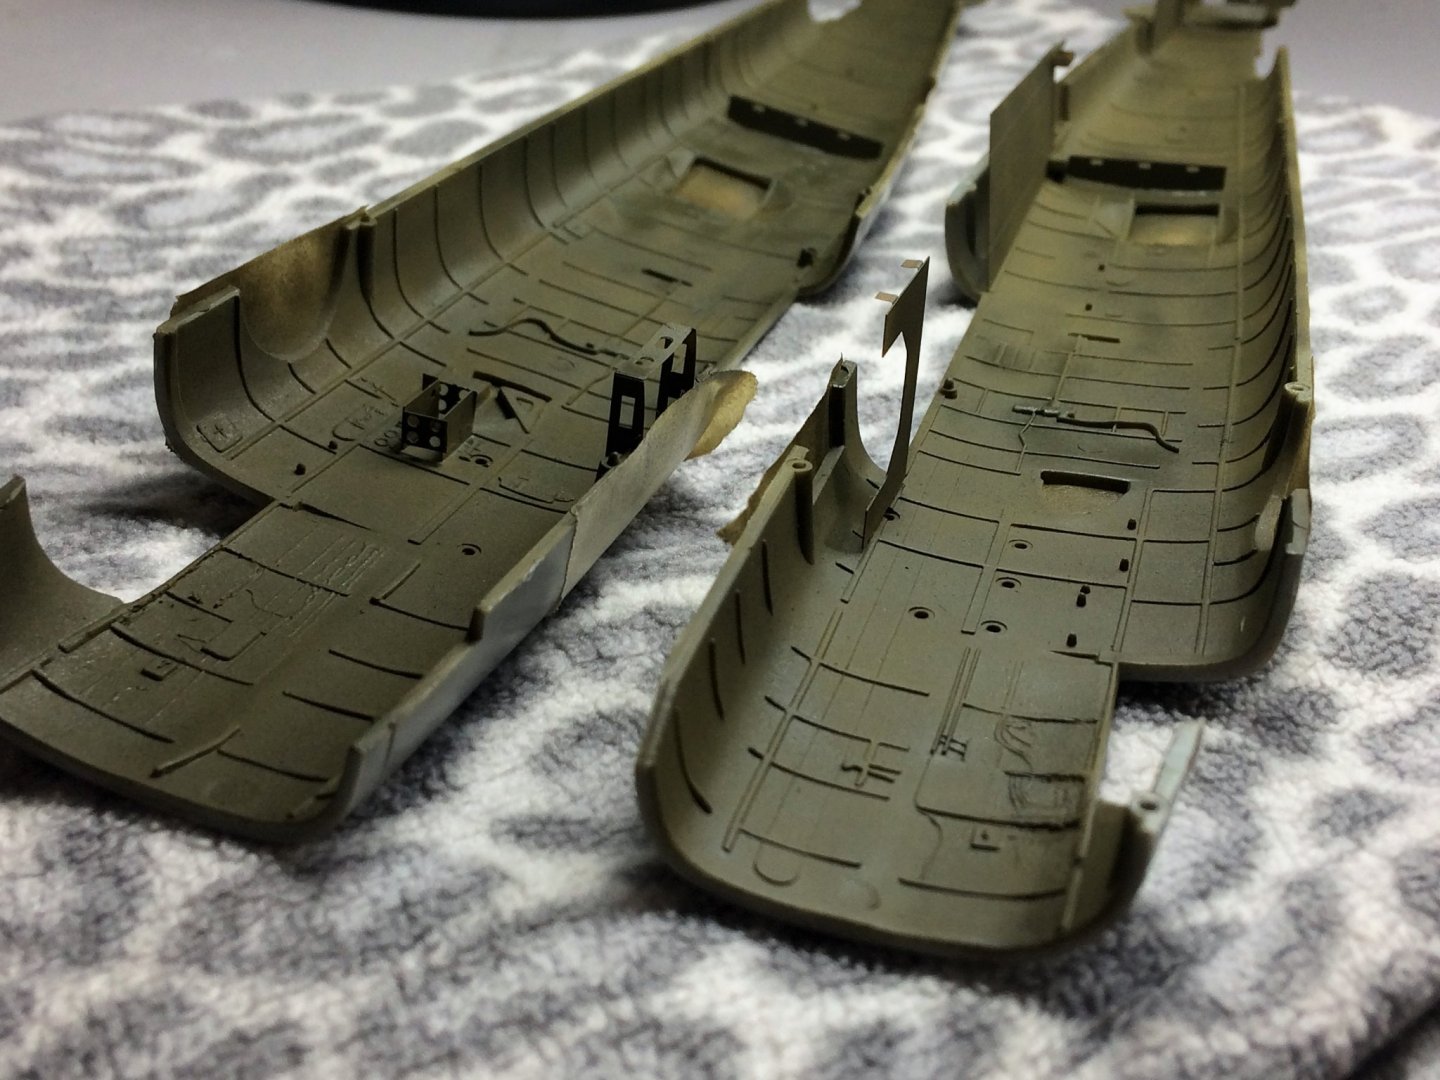
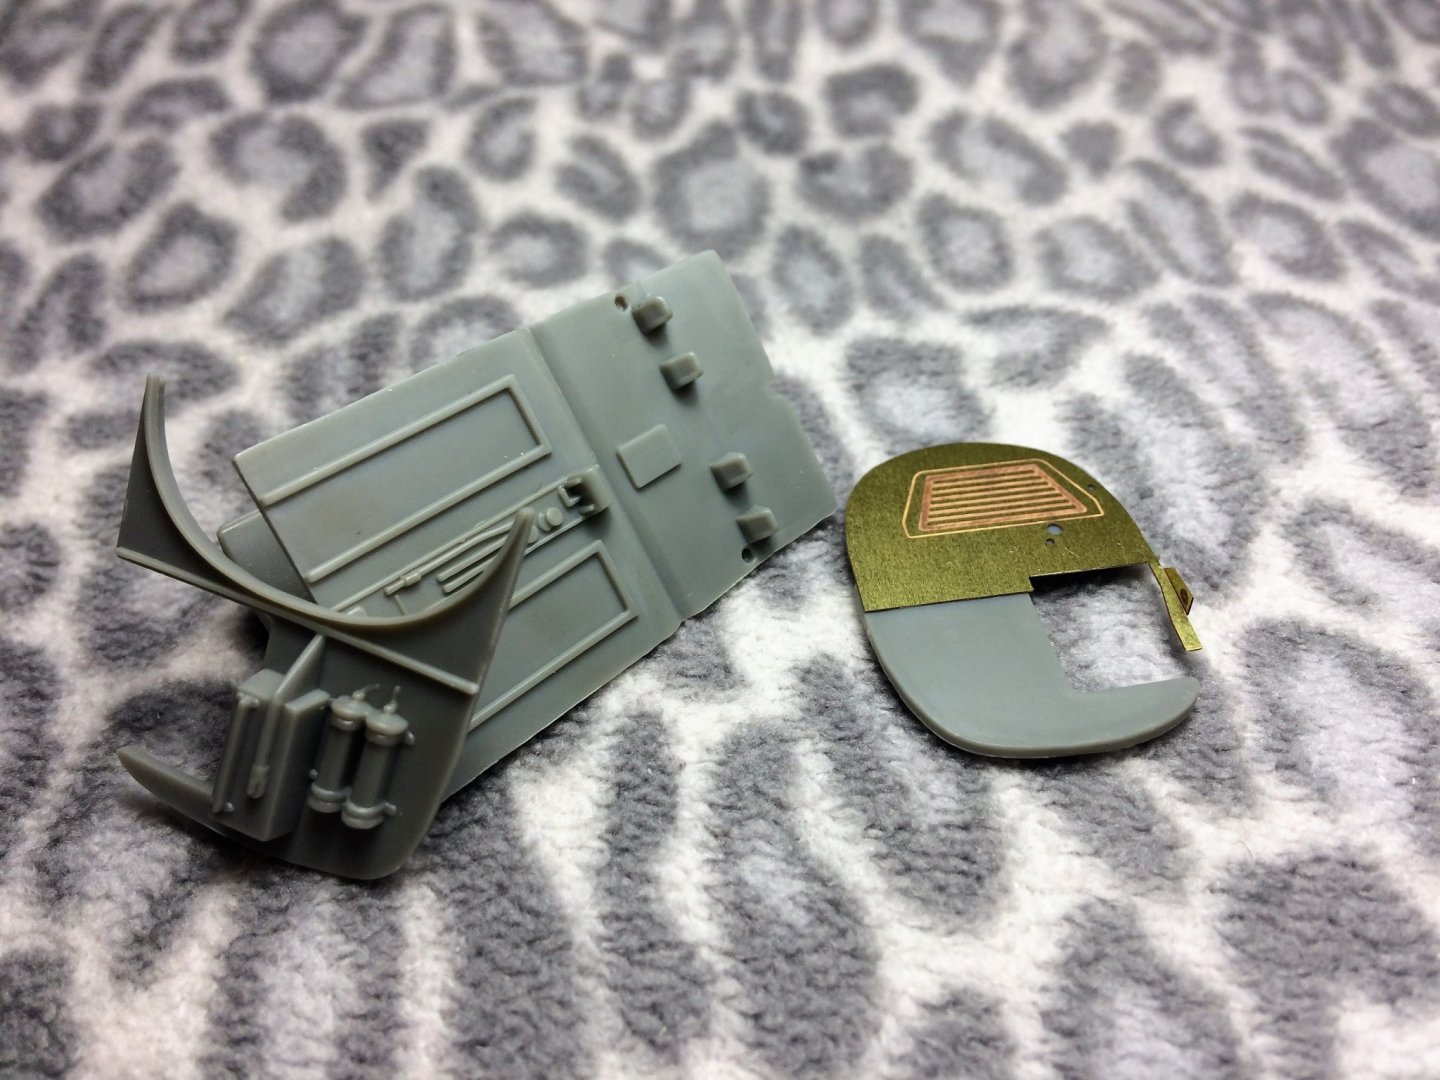
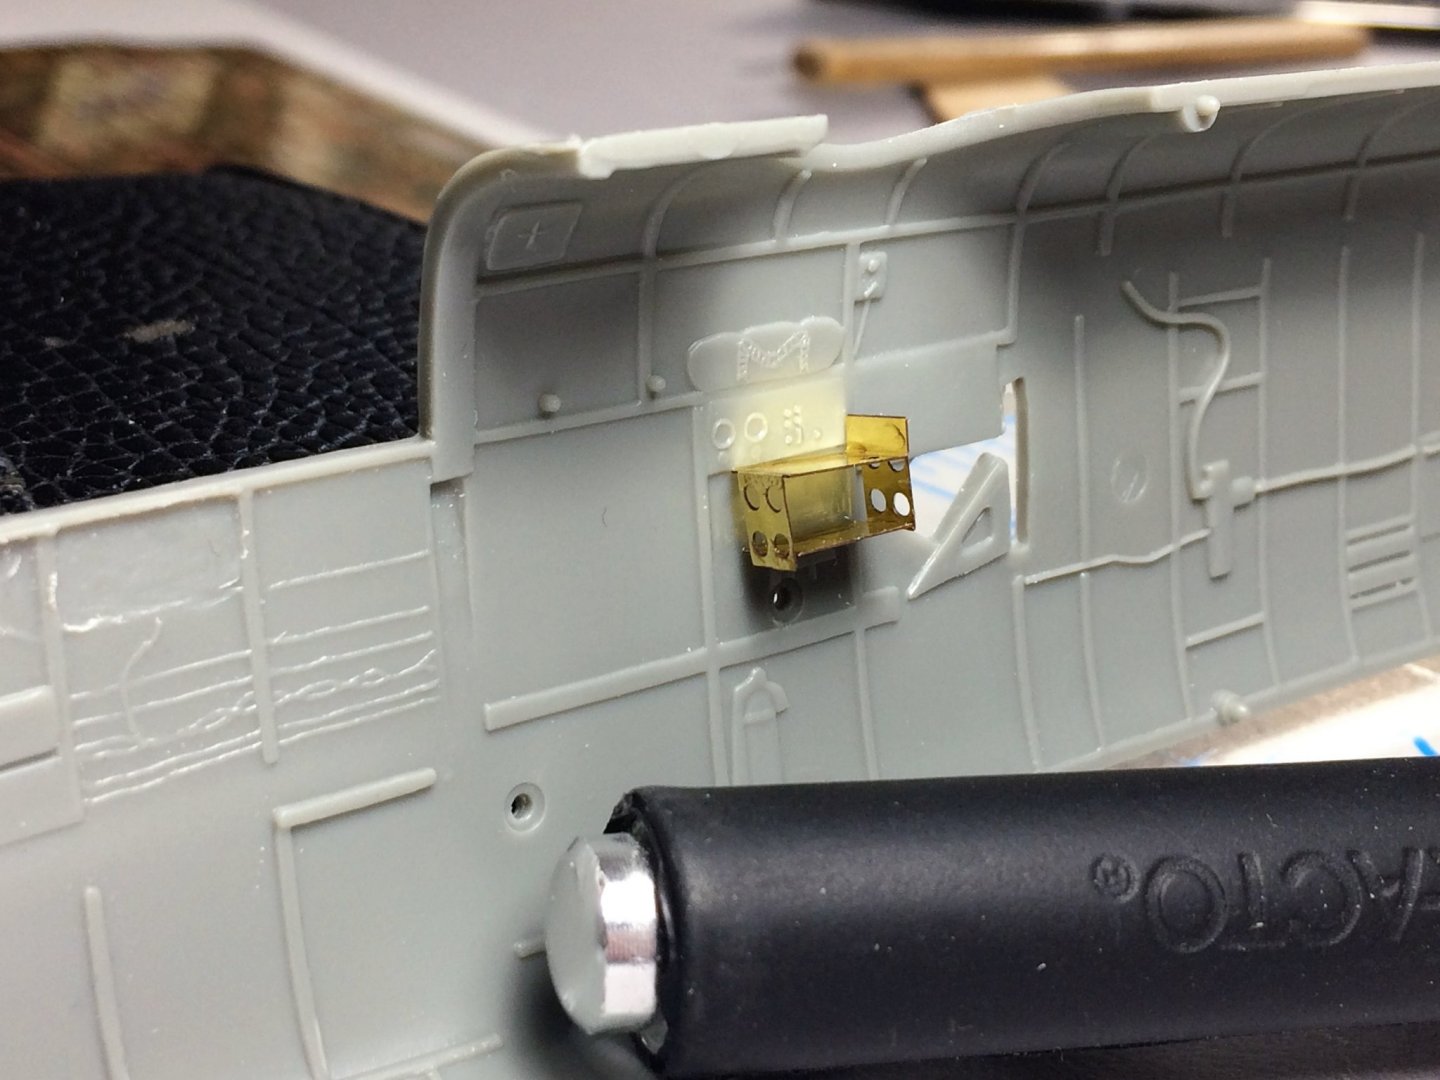
Morning, Thanks for the kind words Gents! Progress continues...... Staying in the cockpit area, the flight controls and control panel are next. There is some PE for the flight controls. I got about half of it on. Some of the pieces were incredibly small and wont be missed. The control panel was a "sandwich" type construction. The silver piece is painted PE. Under that is a "film" glued underneath for the displays. This is all glued to the front of the panel. Looks like my aim was off a little bit! The dials don't line up perfectly with the holes in the silver piece....oh well. Also, in the bottom right of the pic, the seatbelts have been painted. I really like the look of the seatbelts. There are two smaller PE pieces that are lap belts. I stuck with just the over-the-shoulder belts as the bottom half rest where the lap belts would go. I've also started paining some PE pieces for the cockpit area. I'm hoping to have these installed by the end of today. Be good! Tom E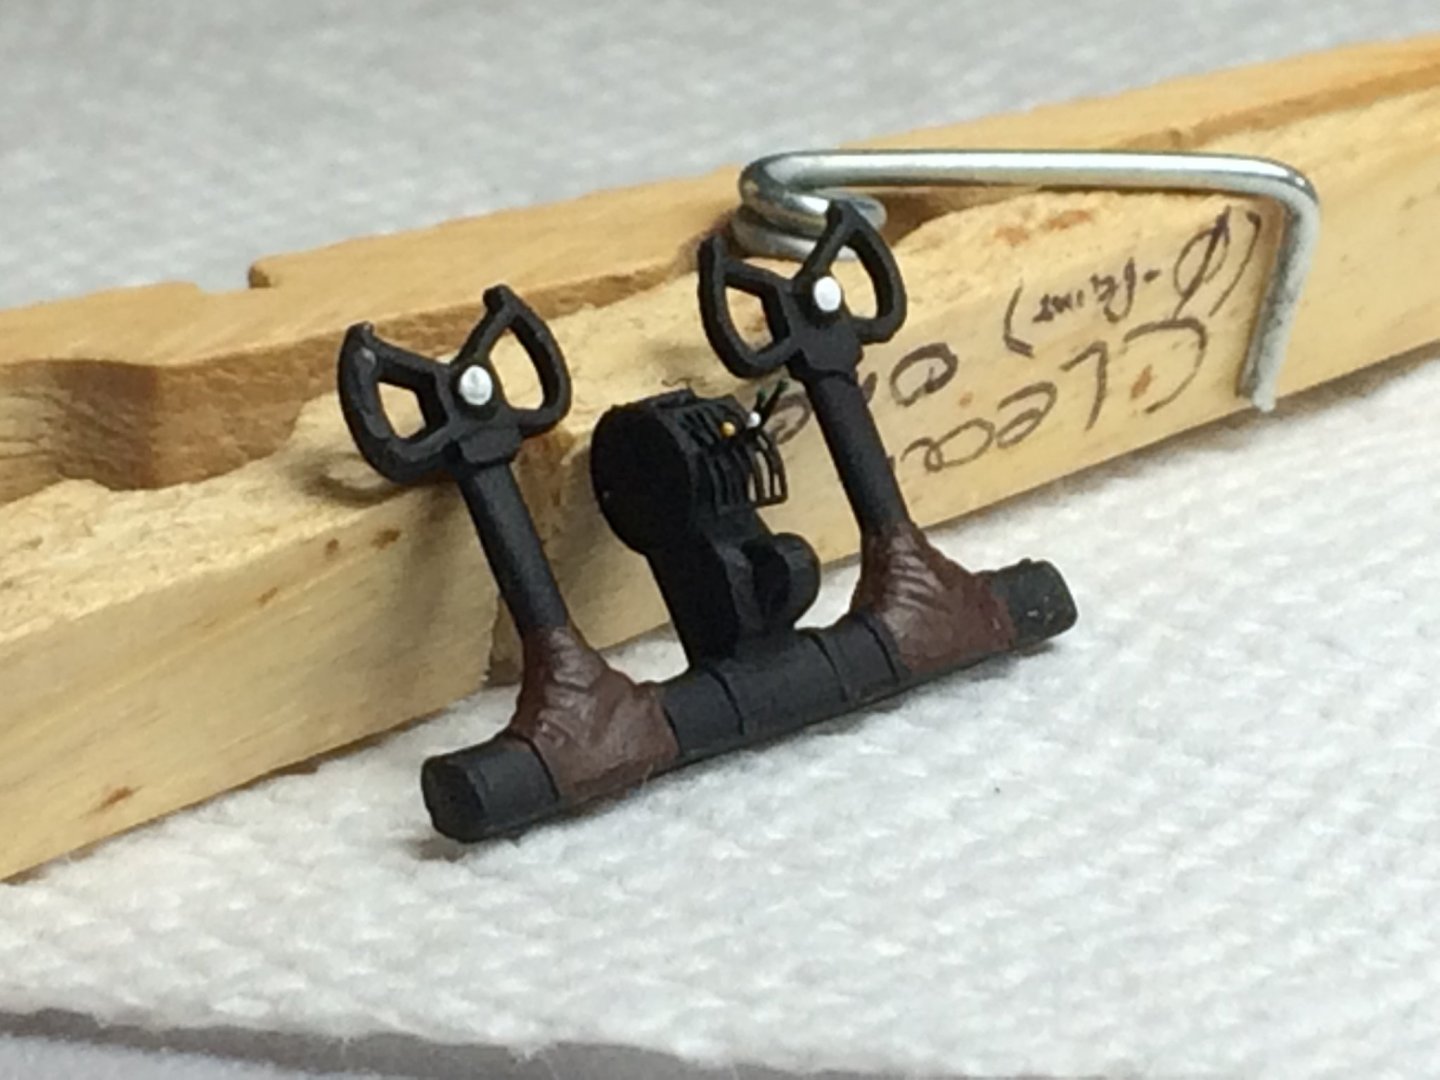

- 120 replies
-
- 14
-

-
Christos, Stunning work, she's beautiful! The sails really accentuate the entire model. Tom E
-
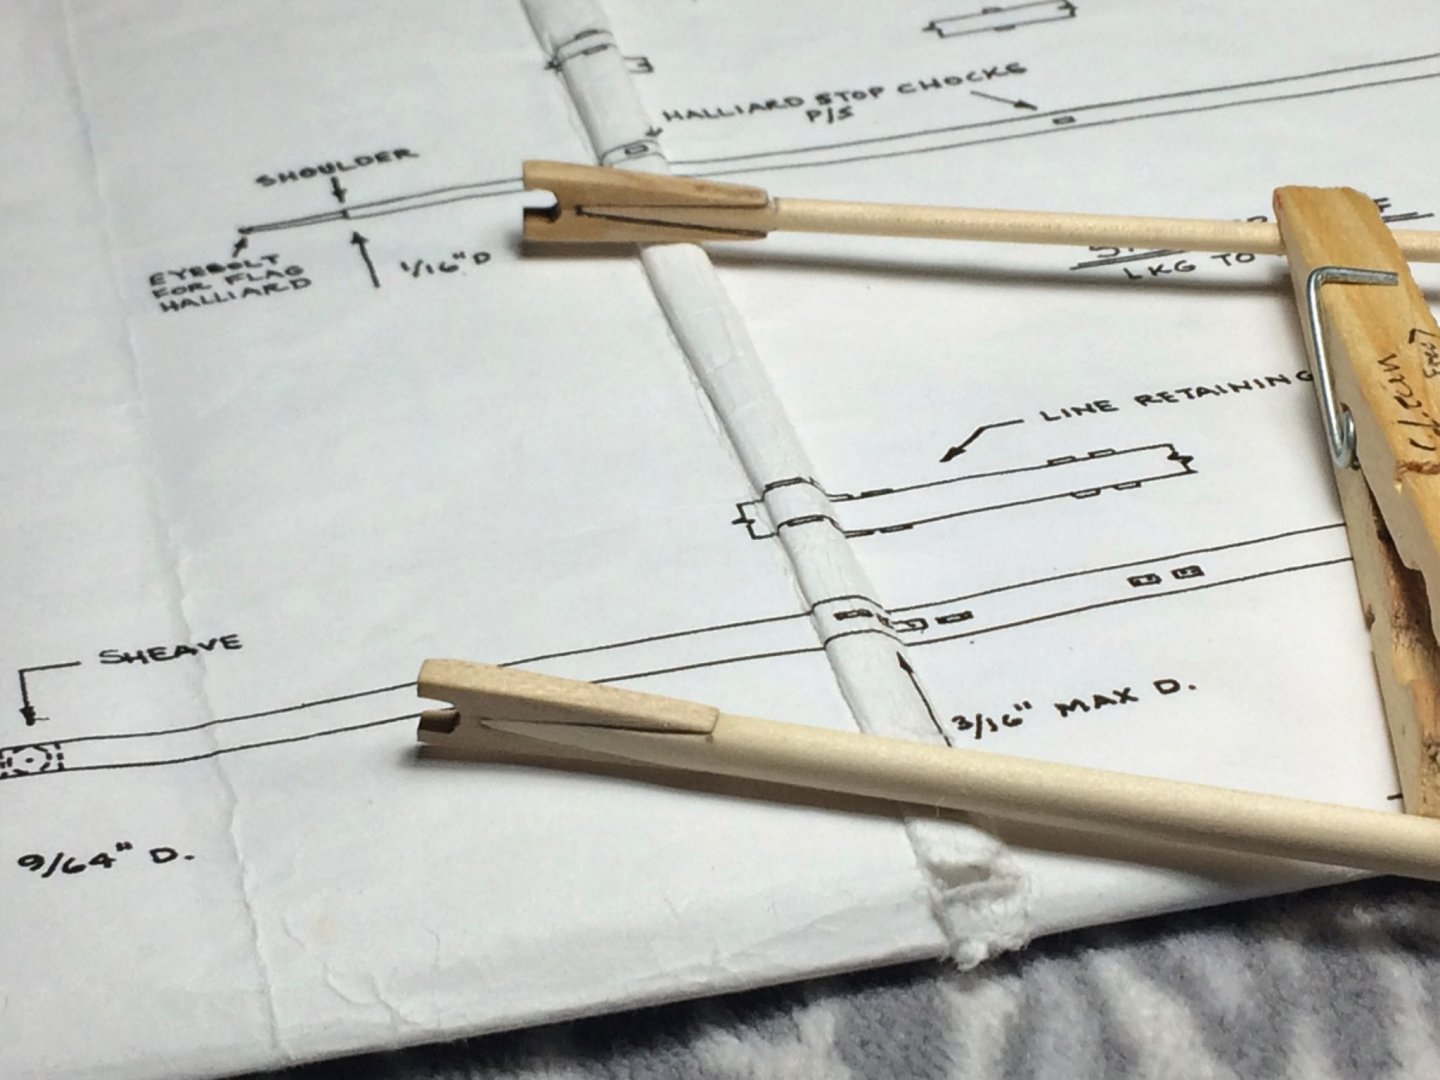
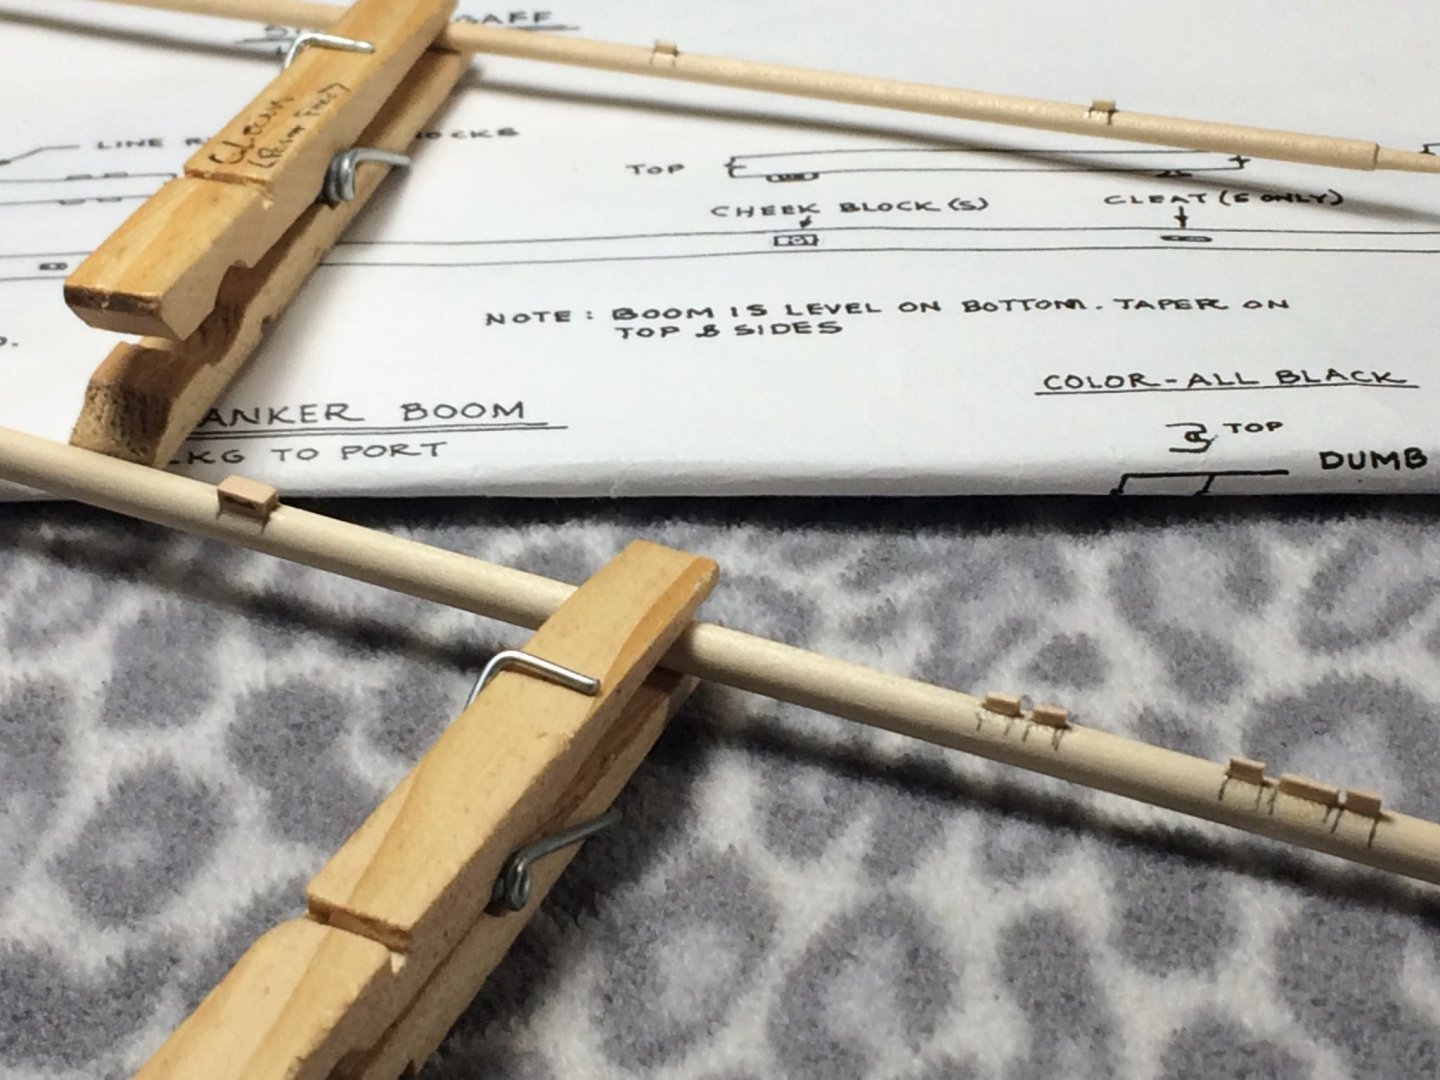
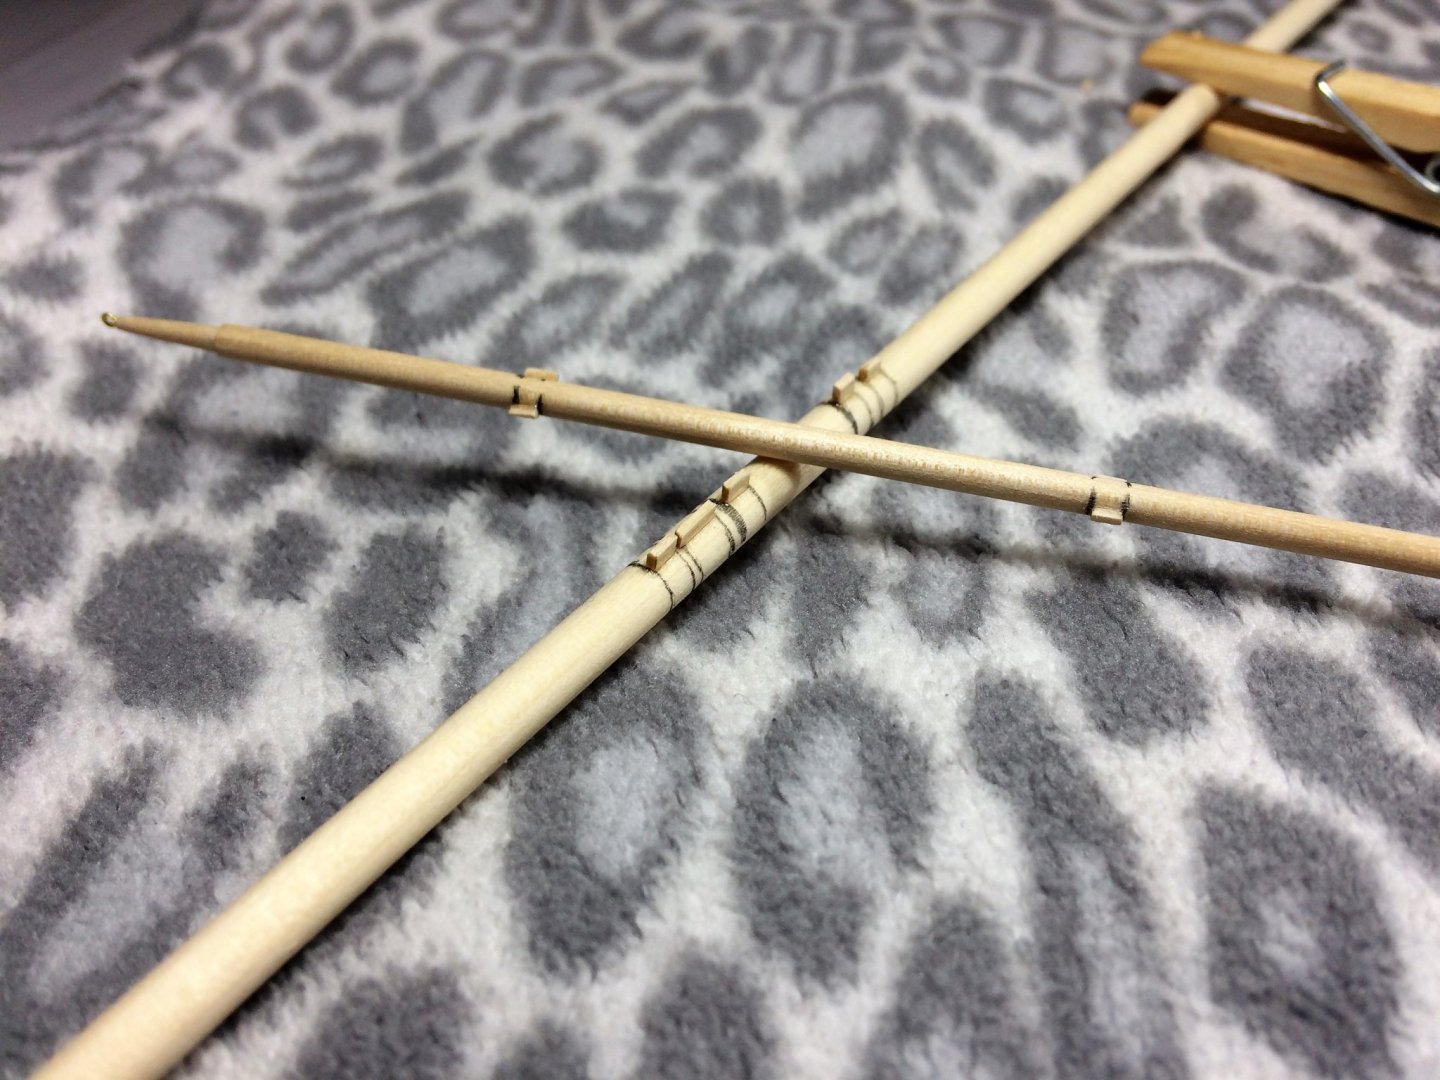
Morning, Sheesh, I cant believe it has been so long since I updated the Niagara. Guess I've been hanging out in the "non-ship" section to much! With the next several weeks off, I have, and should, get a fair amount done. Well, at least that's the plan! Mike, I like the idea about the watered down Elmers. When I'm at a point where they become close to being installed, I'll take a closer look at stiffening them up. Some of them where a bit wonky and a little shrinkage may help some. The Spanker Gaff and Boom are next up. Over the past few months I have been focusing on the Yards. I think by the time I got to the Spanker section, shaping the wood seemed to get easier. Shaping for the Jaws was slow and methodical to keep these straight. I think they came out ok. Next the small fiddly bits were installed. The Cheek block may look a bit large right now. All these parts get a good sanding to bring down to scale before paining. The retaining chocks are tall on purpose. Makes for easier shaping. It's easier to remove wood than add it on. I think the toughest part was keeping all the small bits aligned with the rest of the yard. The pin rails and support rods are done. The curve to the support rod was done purely by mistake. I think I was trying to push one in with my thumb when It snugged right into the curve of the bulwarks. I liked it, I don't think its correct, but I went with it for the rest of them. I think the support rods add a pleasing curve to the look of the bulwarks. Time will tell if they stay put or pop out. I did try to anchor them in with a dab of CA. Stay safe! Tom L.


-
B-25J Mitchell by Tom E - Revell - 1:48 Scale - PLASTIC
Tom E replied to Tom E's topic in Non-ship/categorised builds
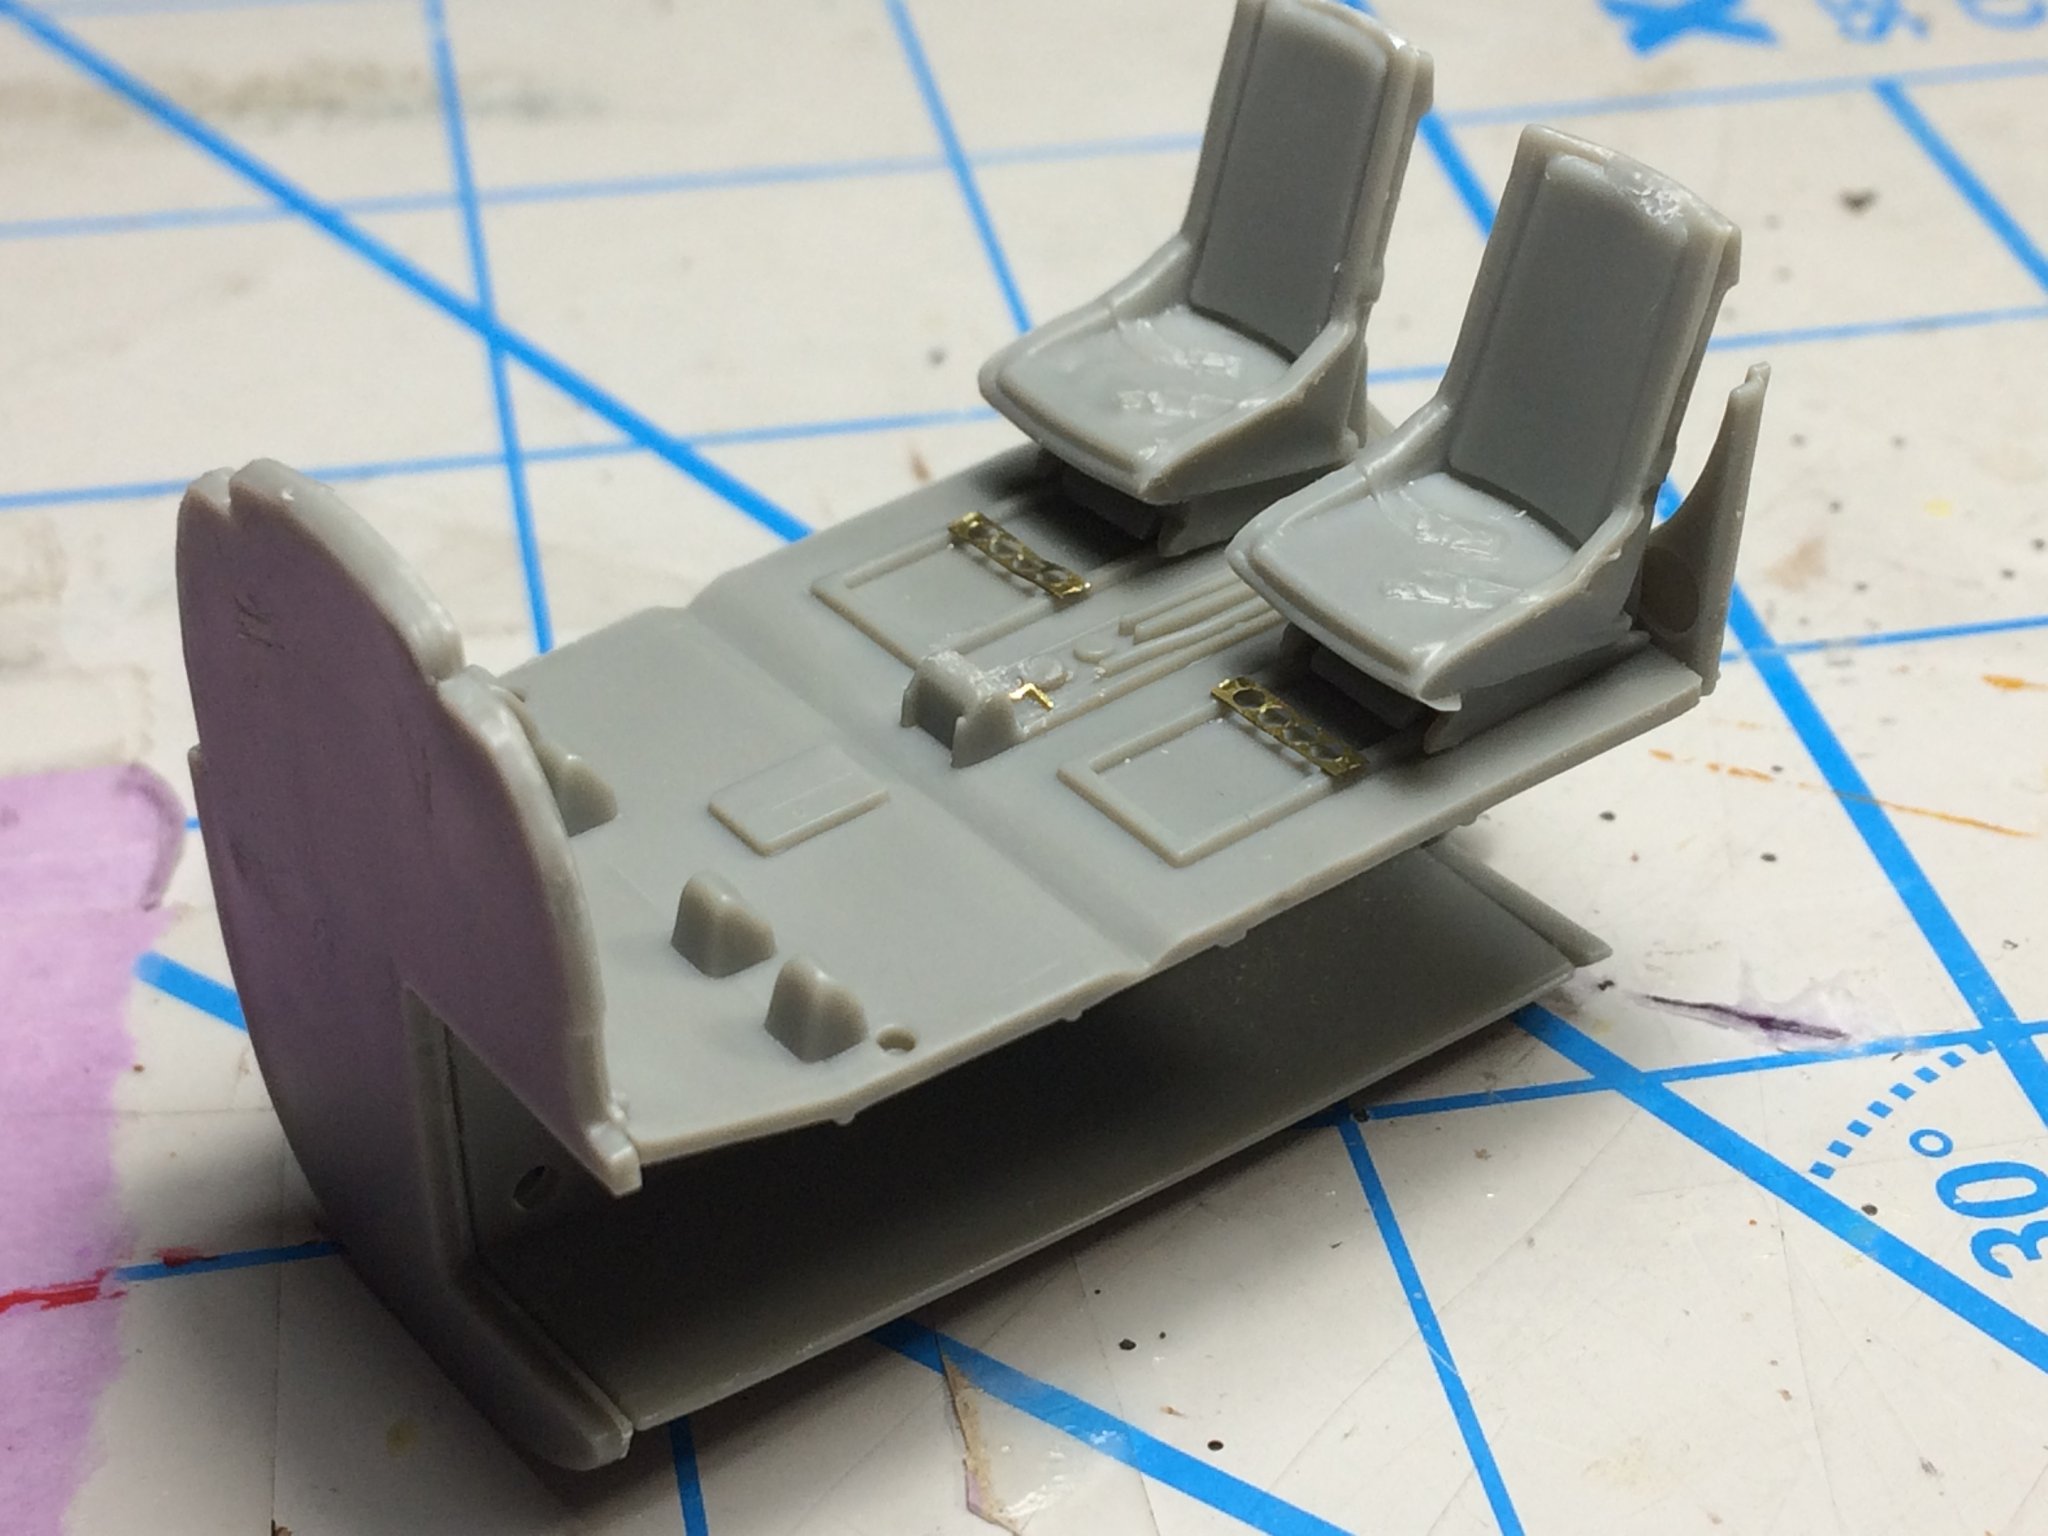
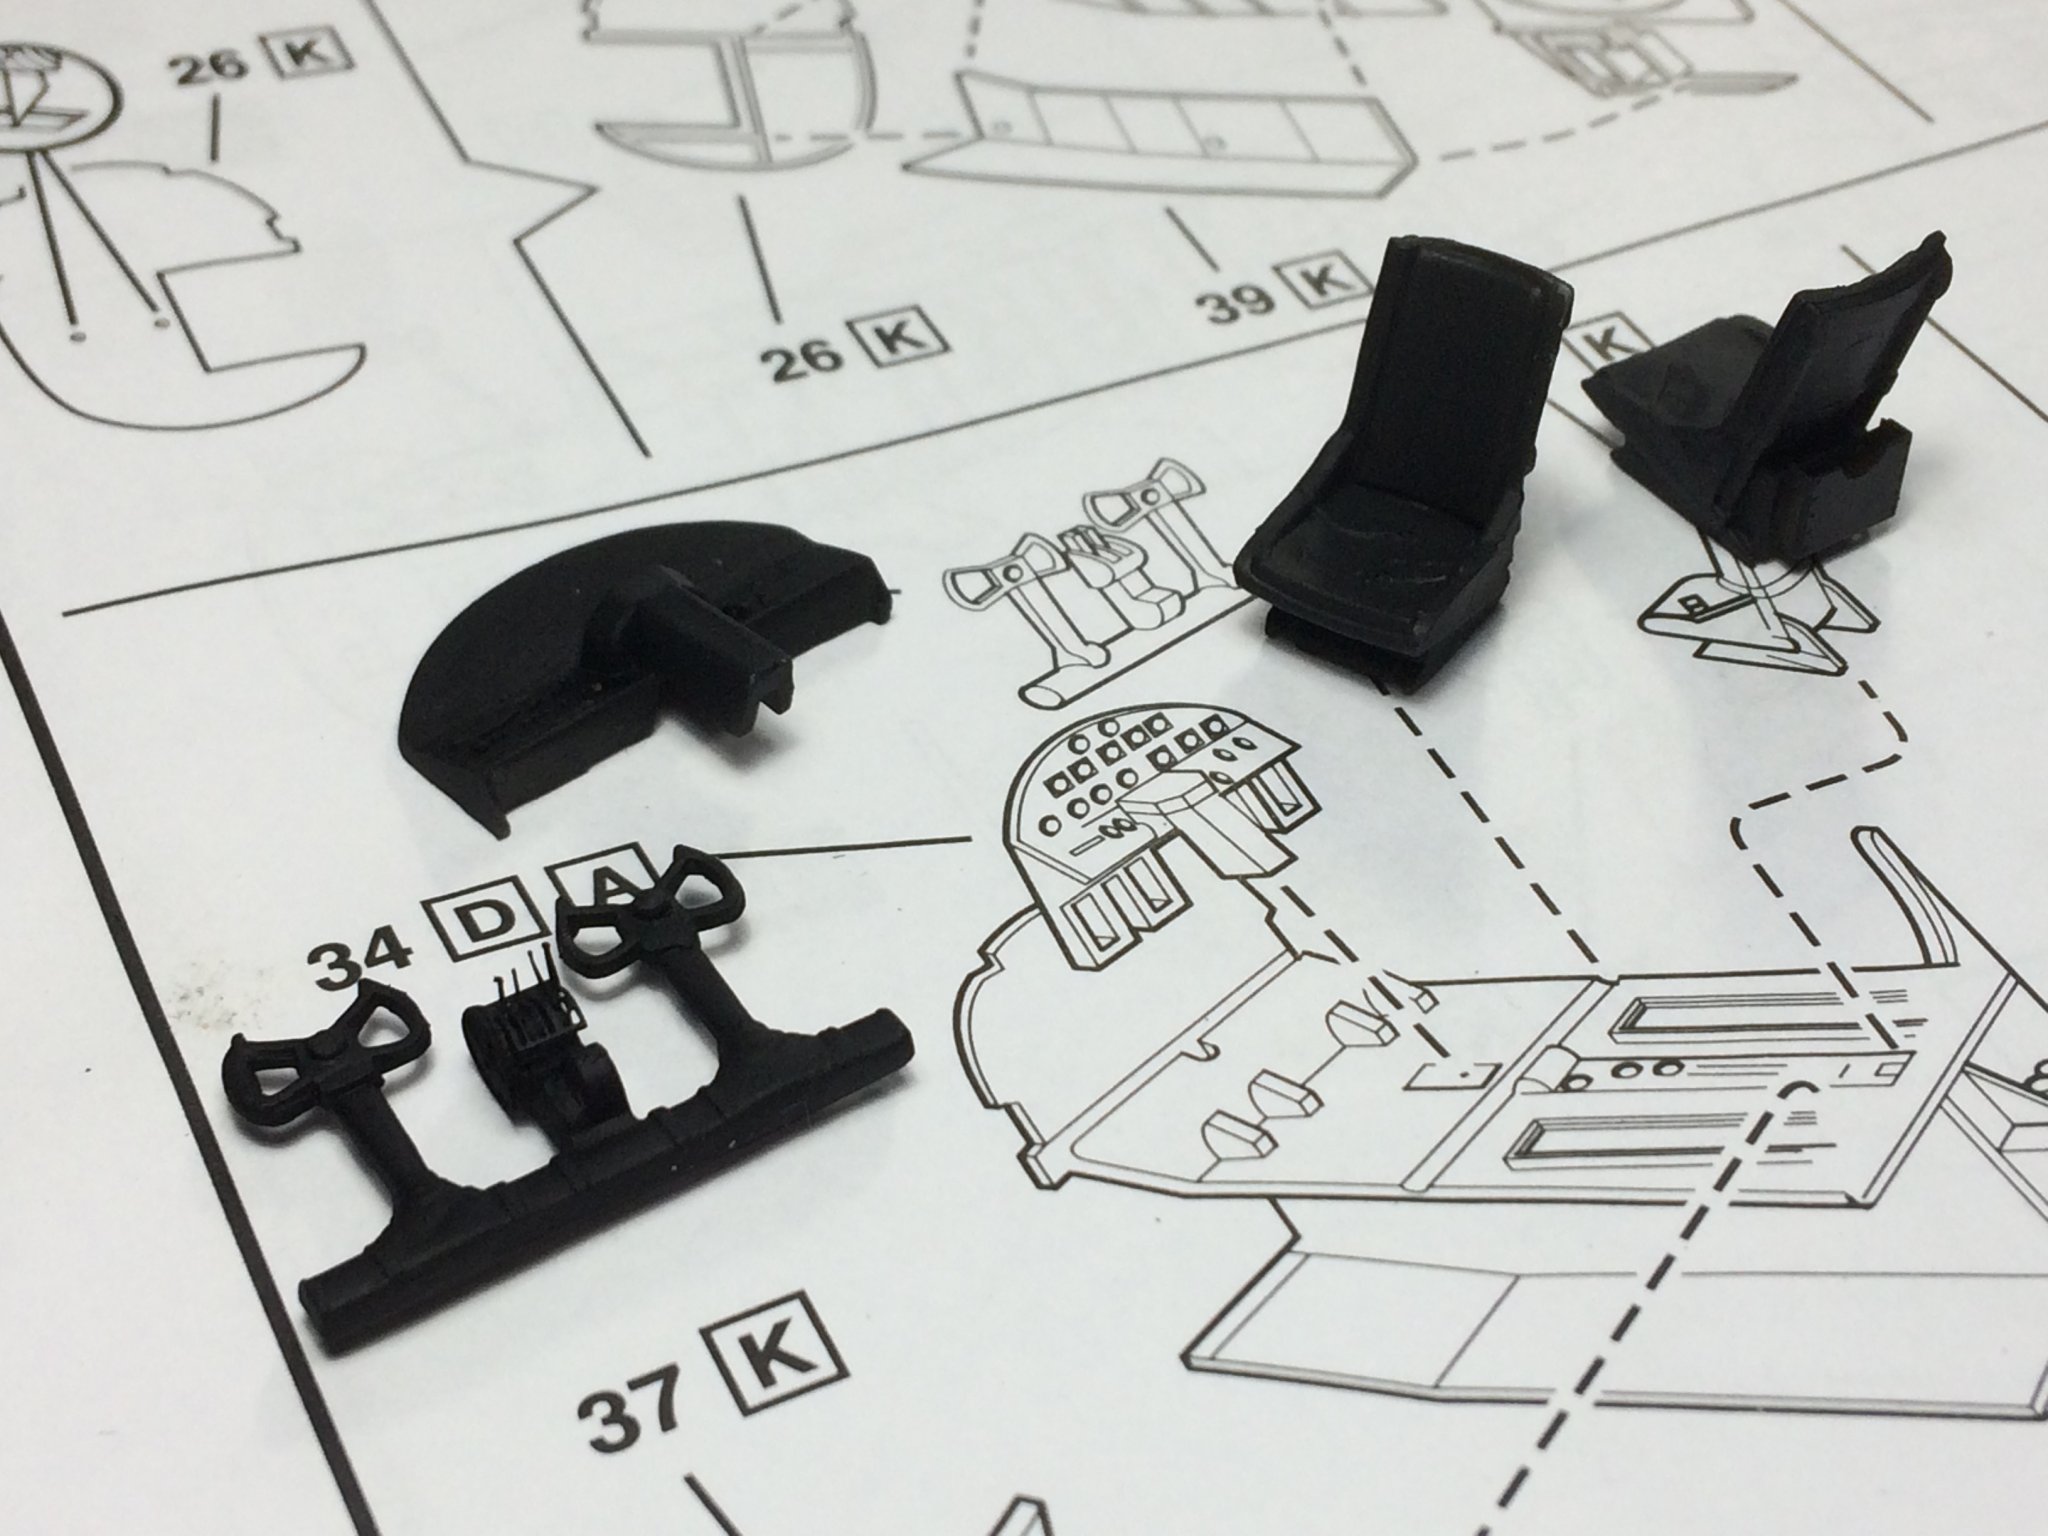
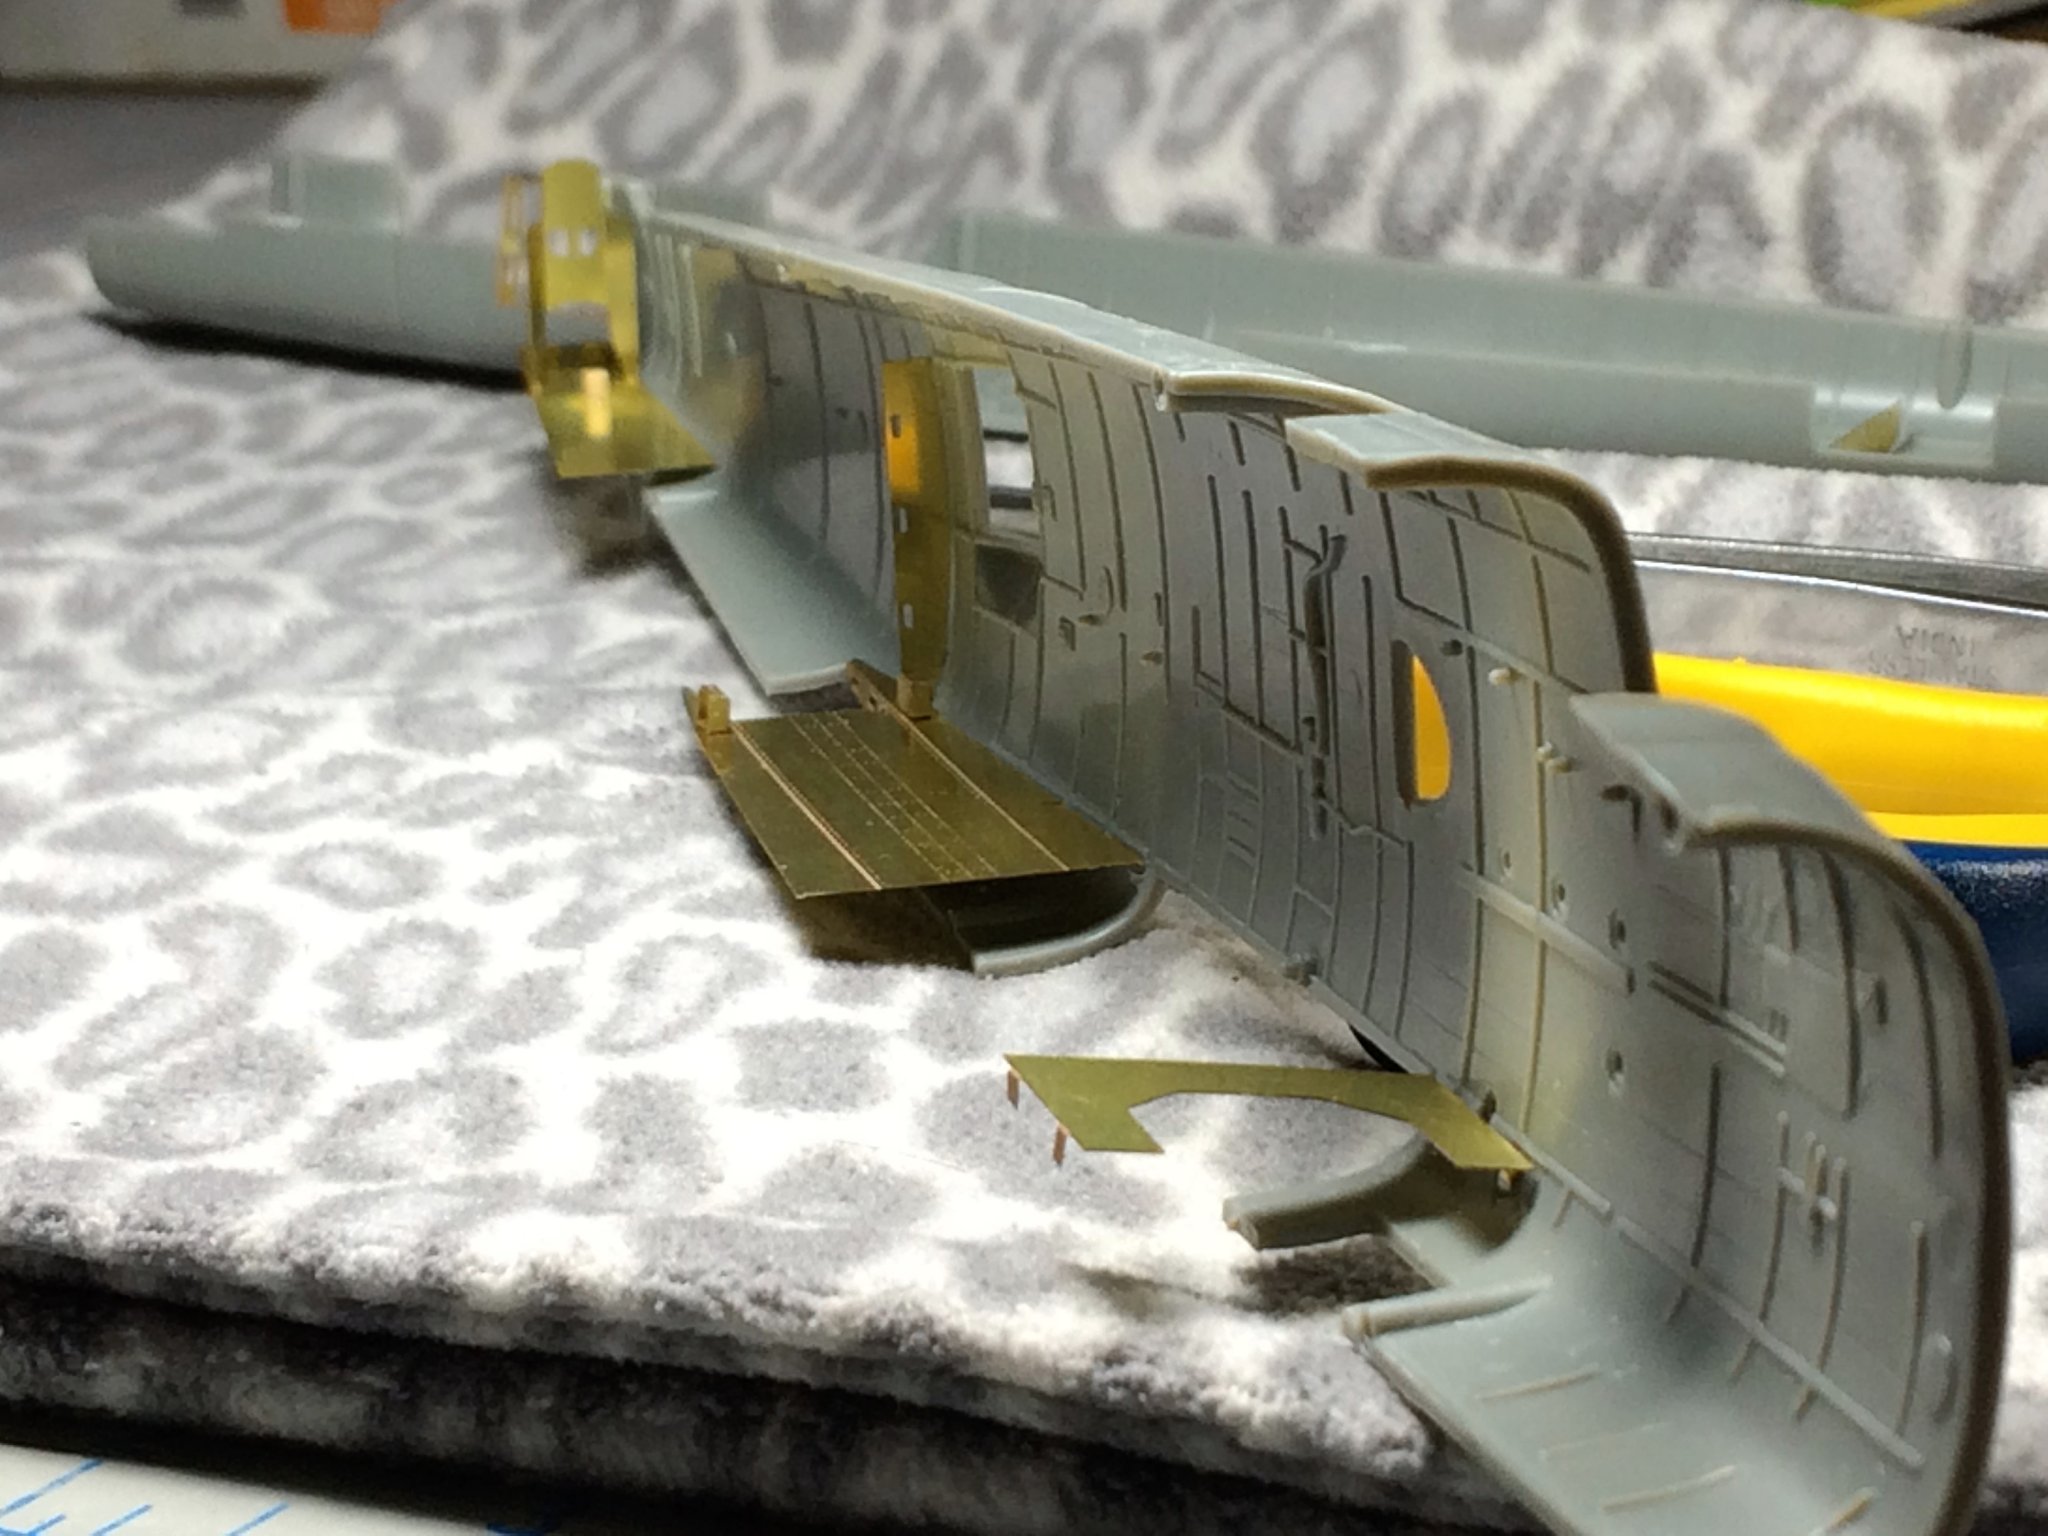
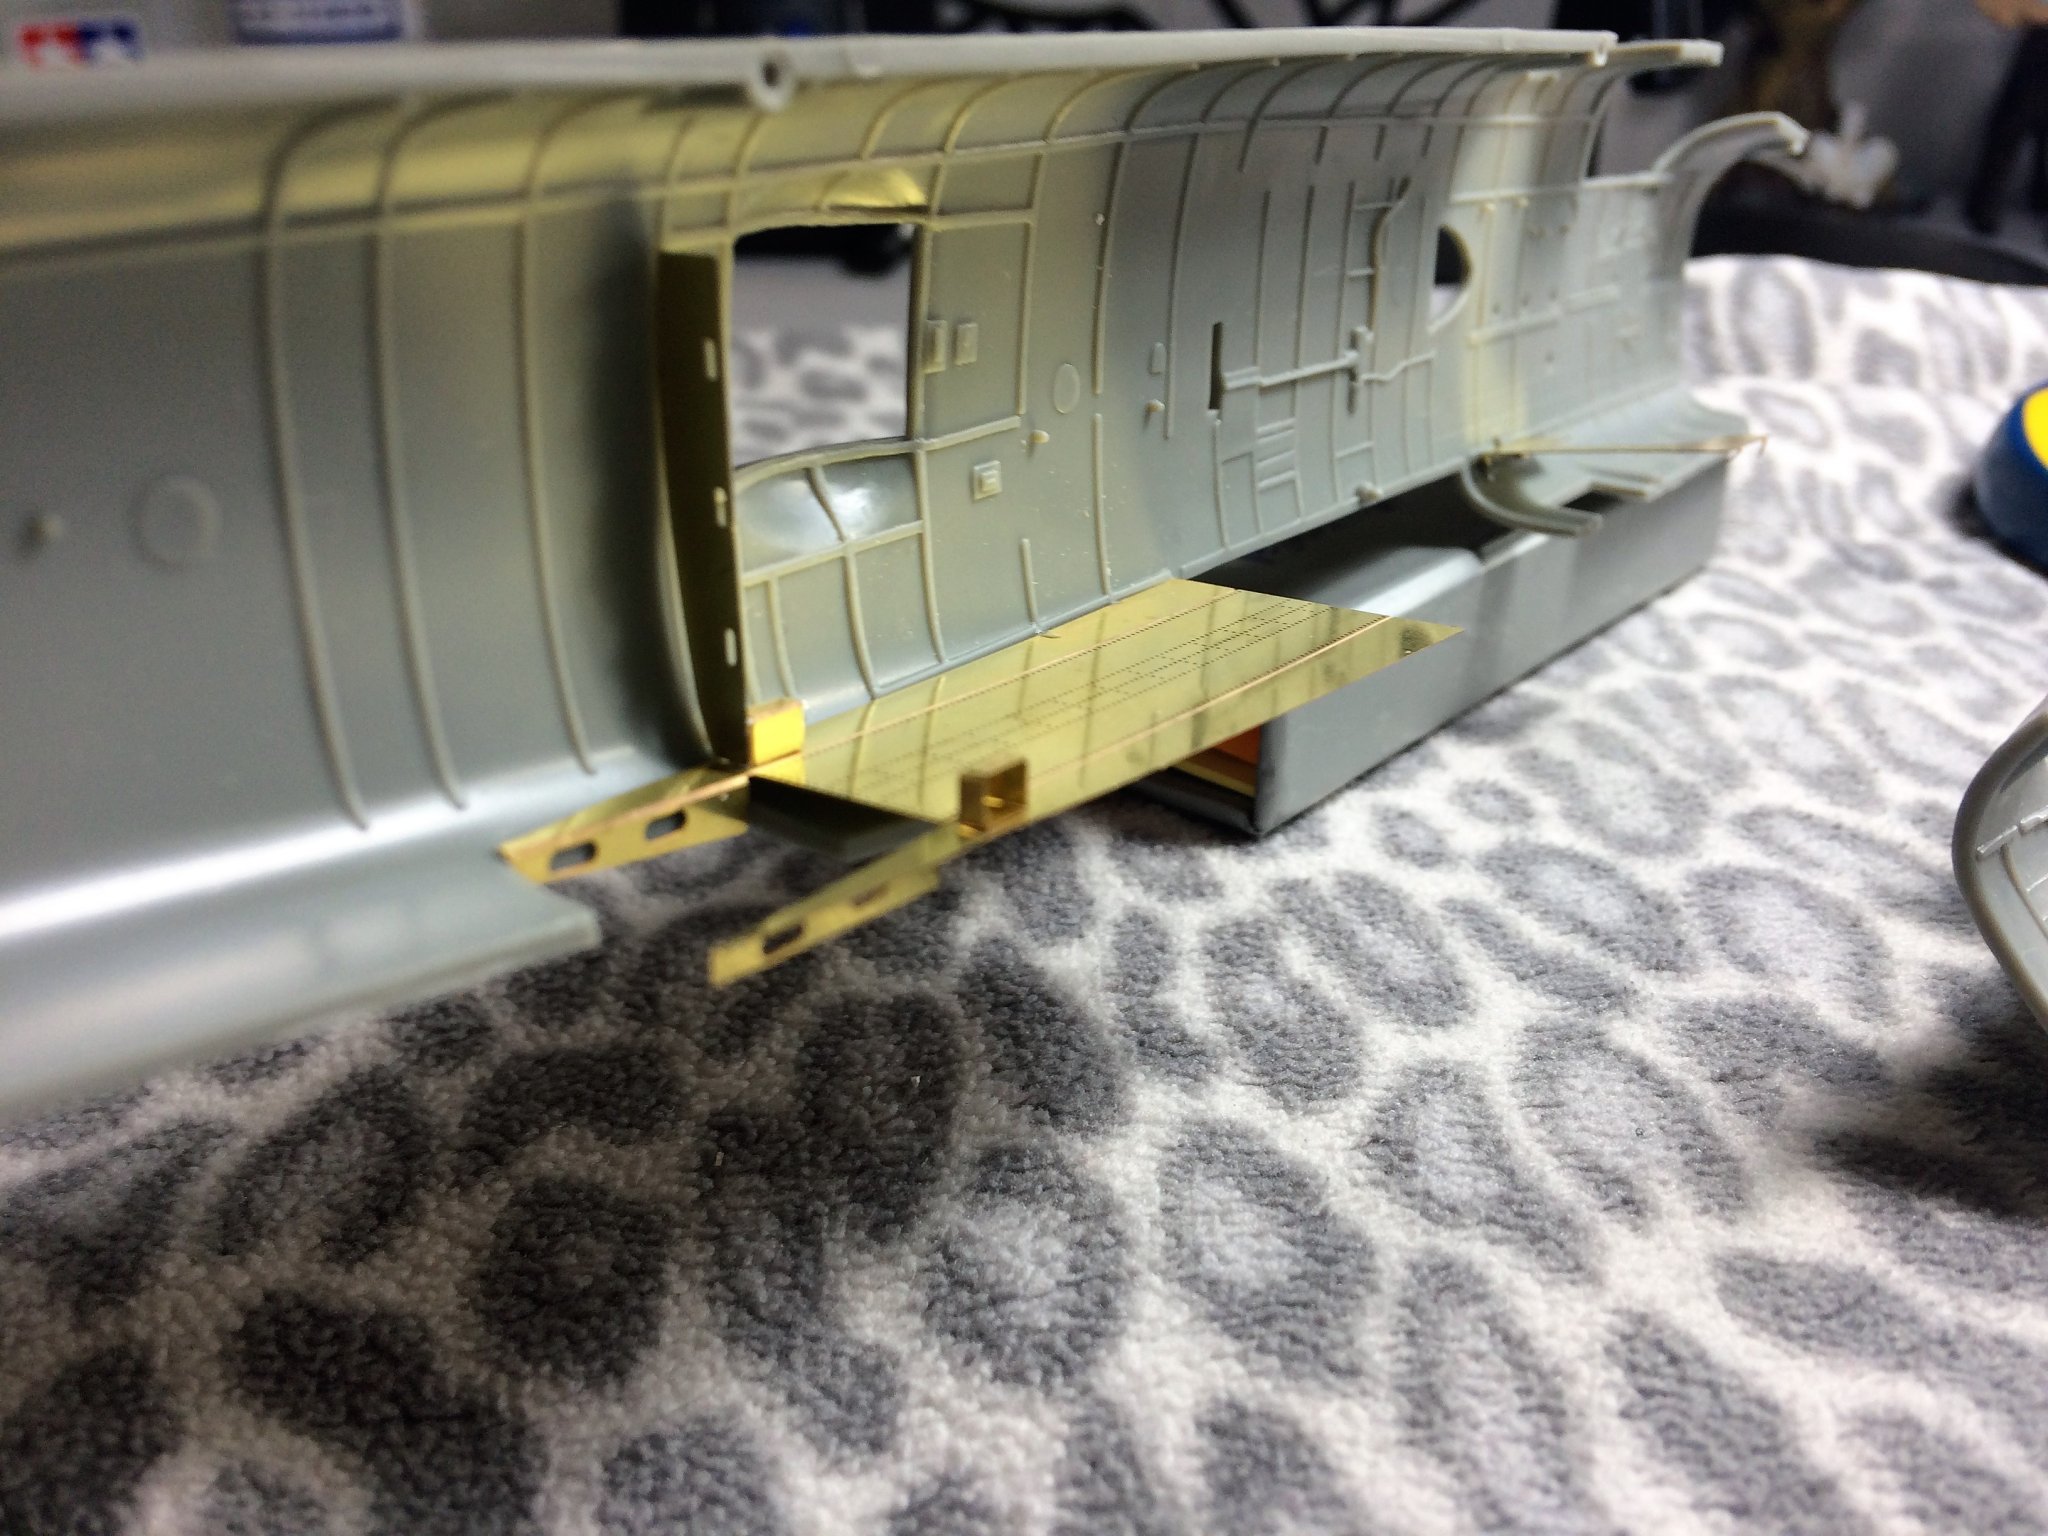
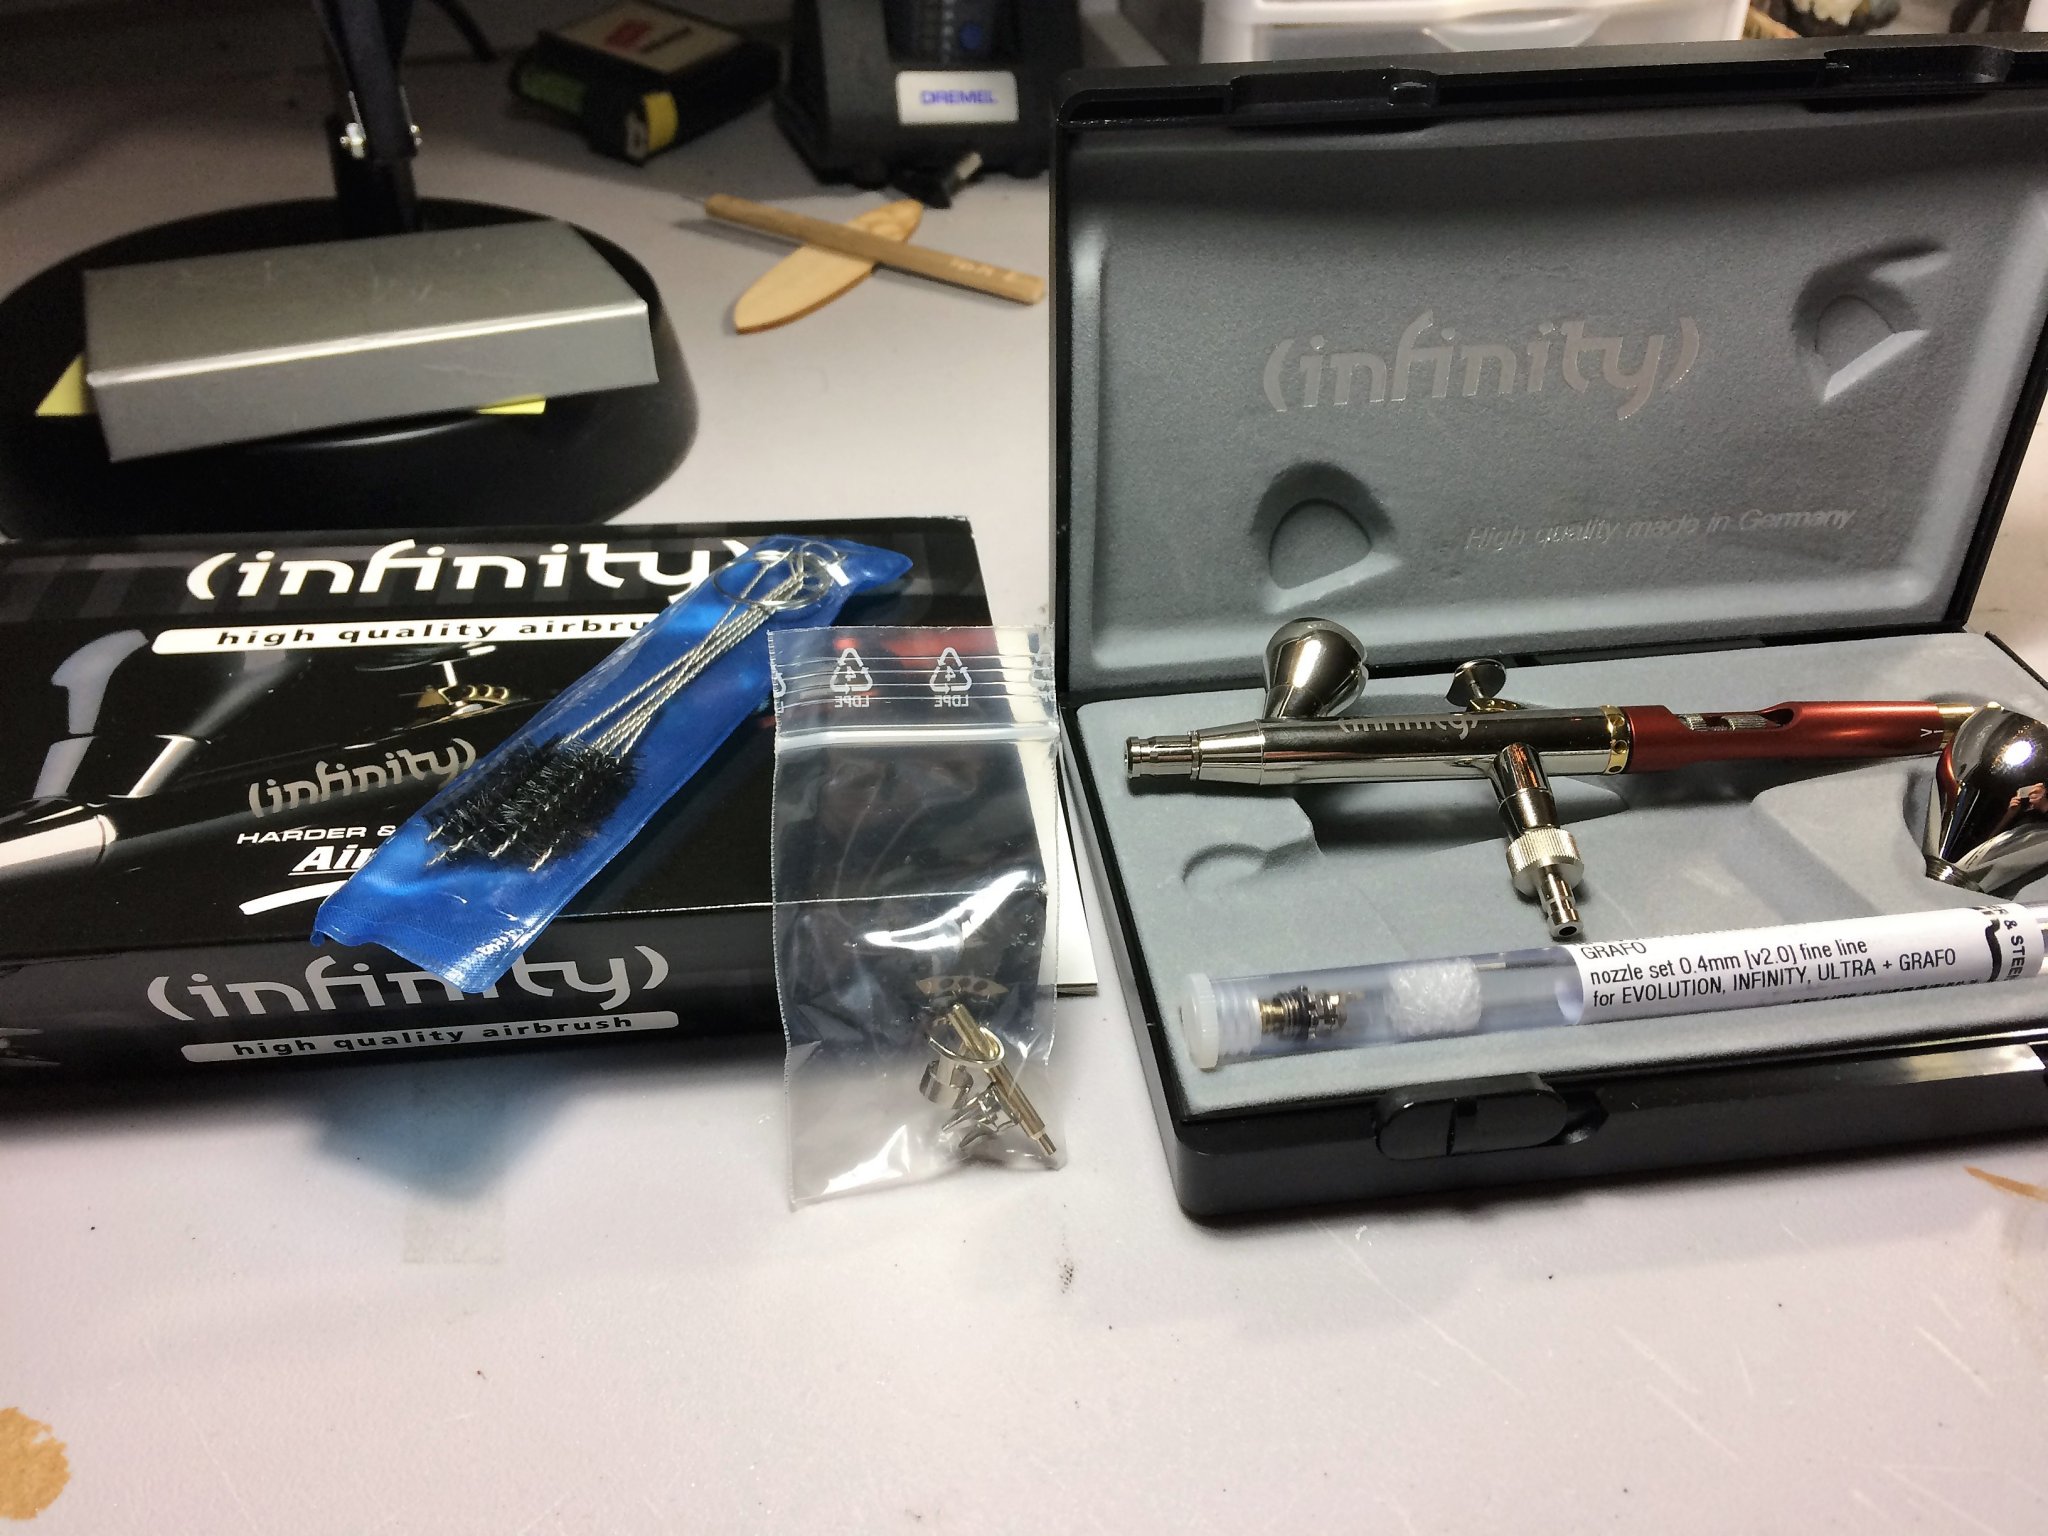
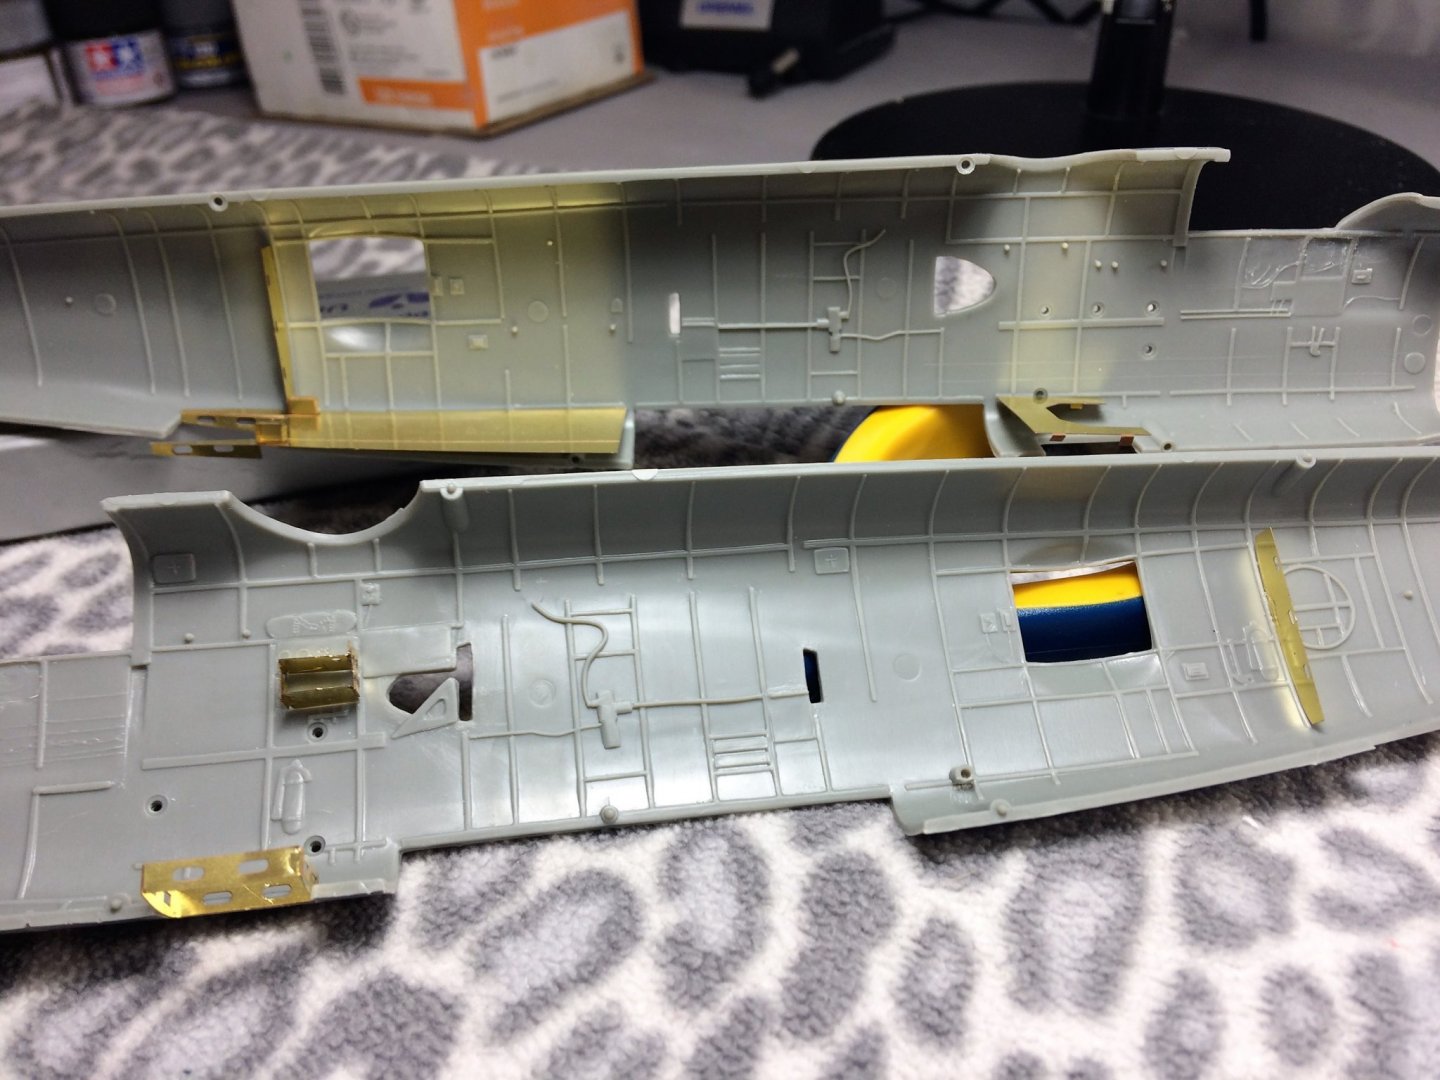
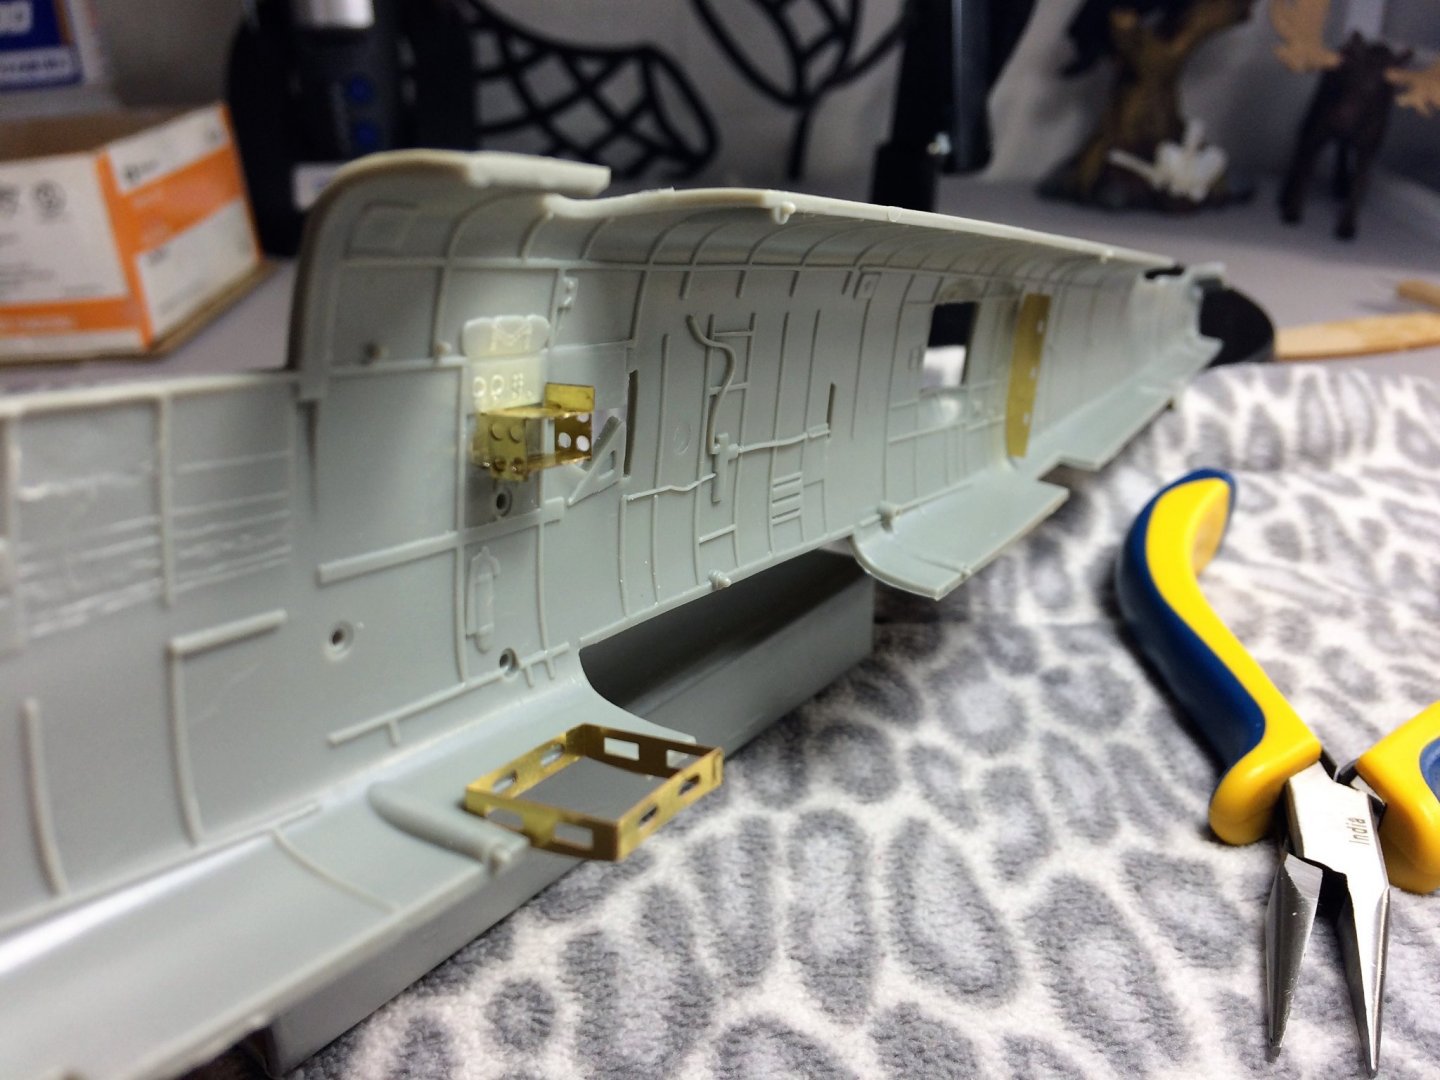
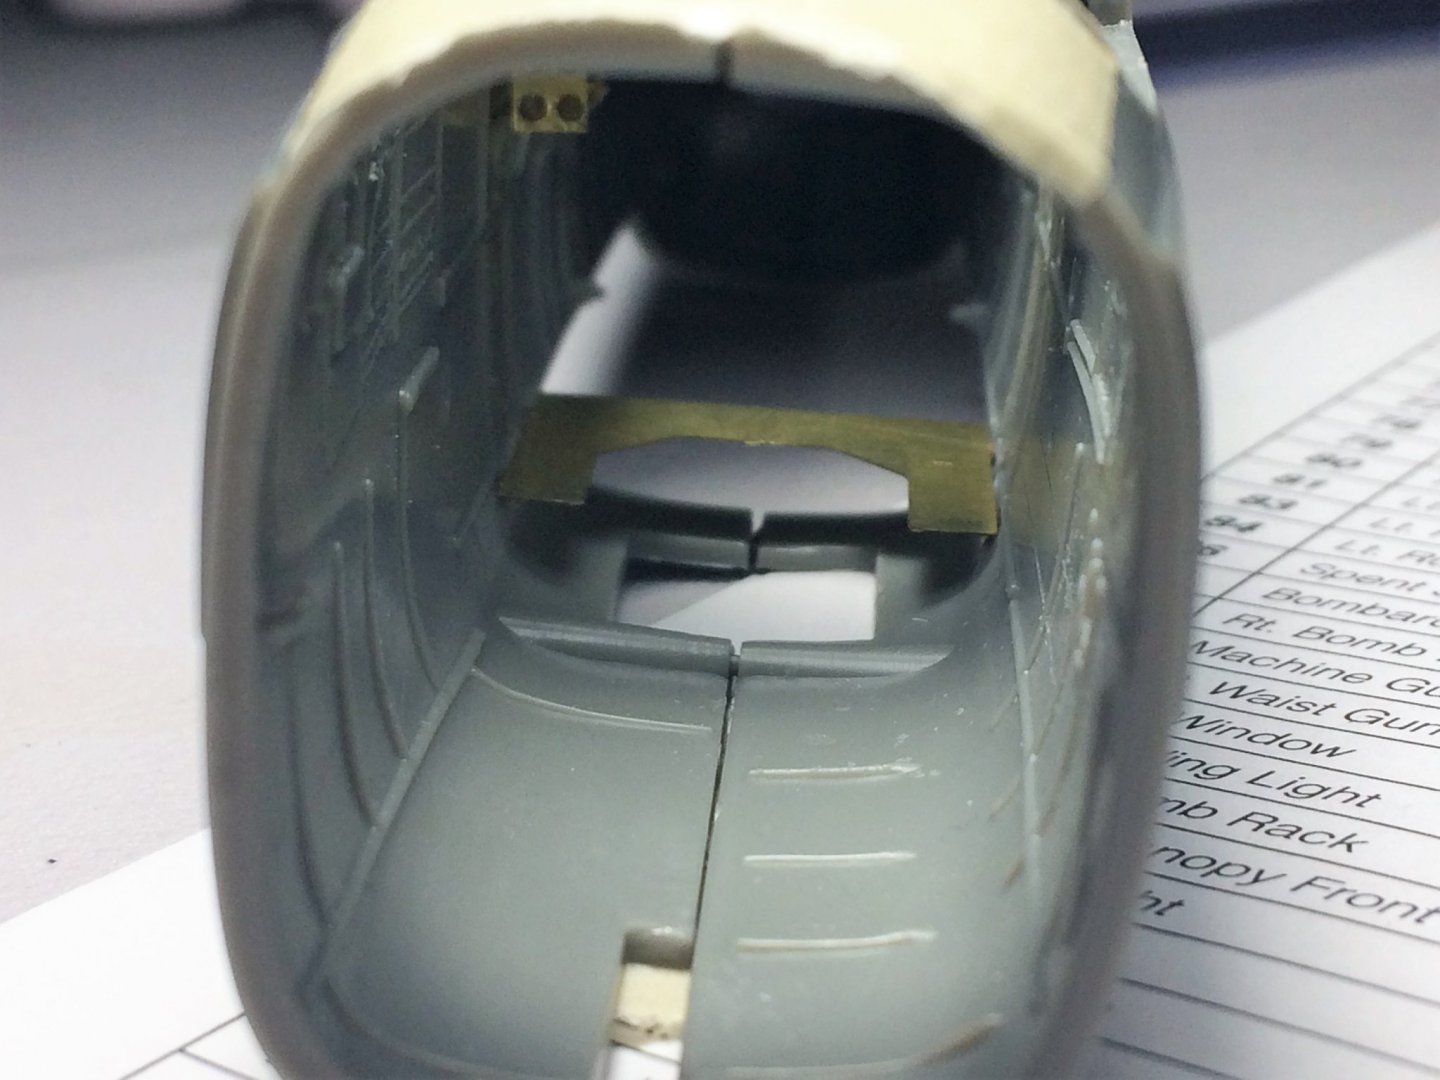
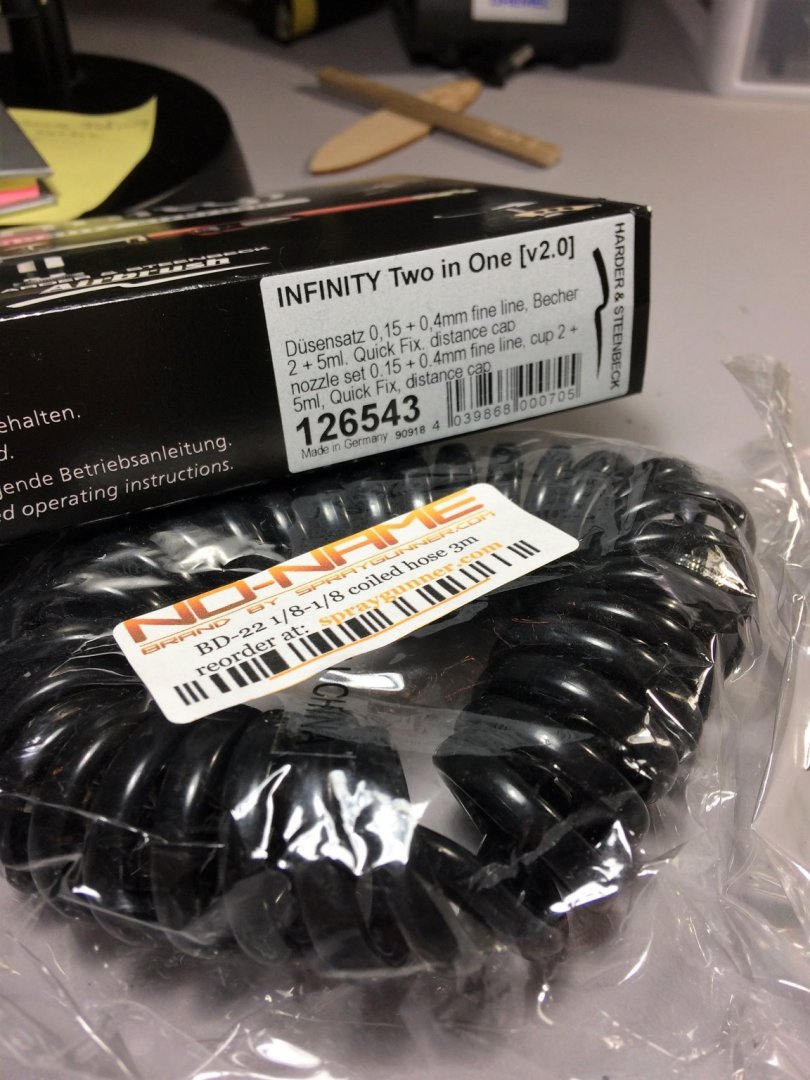
Mornin, Beautiful crisp early spring day in New Hampshire. Sun is rising, birds are chirping and the coffee is hot. I see a lot of building getting done today. Before I head to the table, another update. With the interior of the fuselage coming along nicely, I needed to make some head way on the cockpit area. There are some small PE parts for the core of this area, easily placed. I did check where the brass strips should lay in front of the seats so not to block/foul up any future parts in this area. Kept reminding myself there's still a control stick and console to install. The seats had some PE parts. They look like map boxes. They'll be a bit buried in this area once all is installed, but I like them and went forward with it. Had to make sure I had the clearance for the map boxes. Glad I checked and checked again where these will finally sit! This area is essentially ready for paint. The seats will have some PE seatbelts but those will be after I spray these a Mr Color flat black. Off to paint we went. I'm getting more confident with the airbrush. With that being said, I did change over to the Harder & Steenbeck Infinity airbrush sooner than I would have liked. A very basic no name airbrush came with the compressor I bought. It kind of "fell apart" while cleaning it. There are some small PE pieces for the control panel and flight controls. All in good time. The deck area was painted olive drab. Same as the rest of the interior. Stay safe, Tom E


- 120 replies
-
- 13
-
-
B-25J Mitchell by Tom E - Revell - 1:48 Scale - PLASTIC
Tom E replied to Tom E's topic in Non-ship/categorised builds
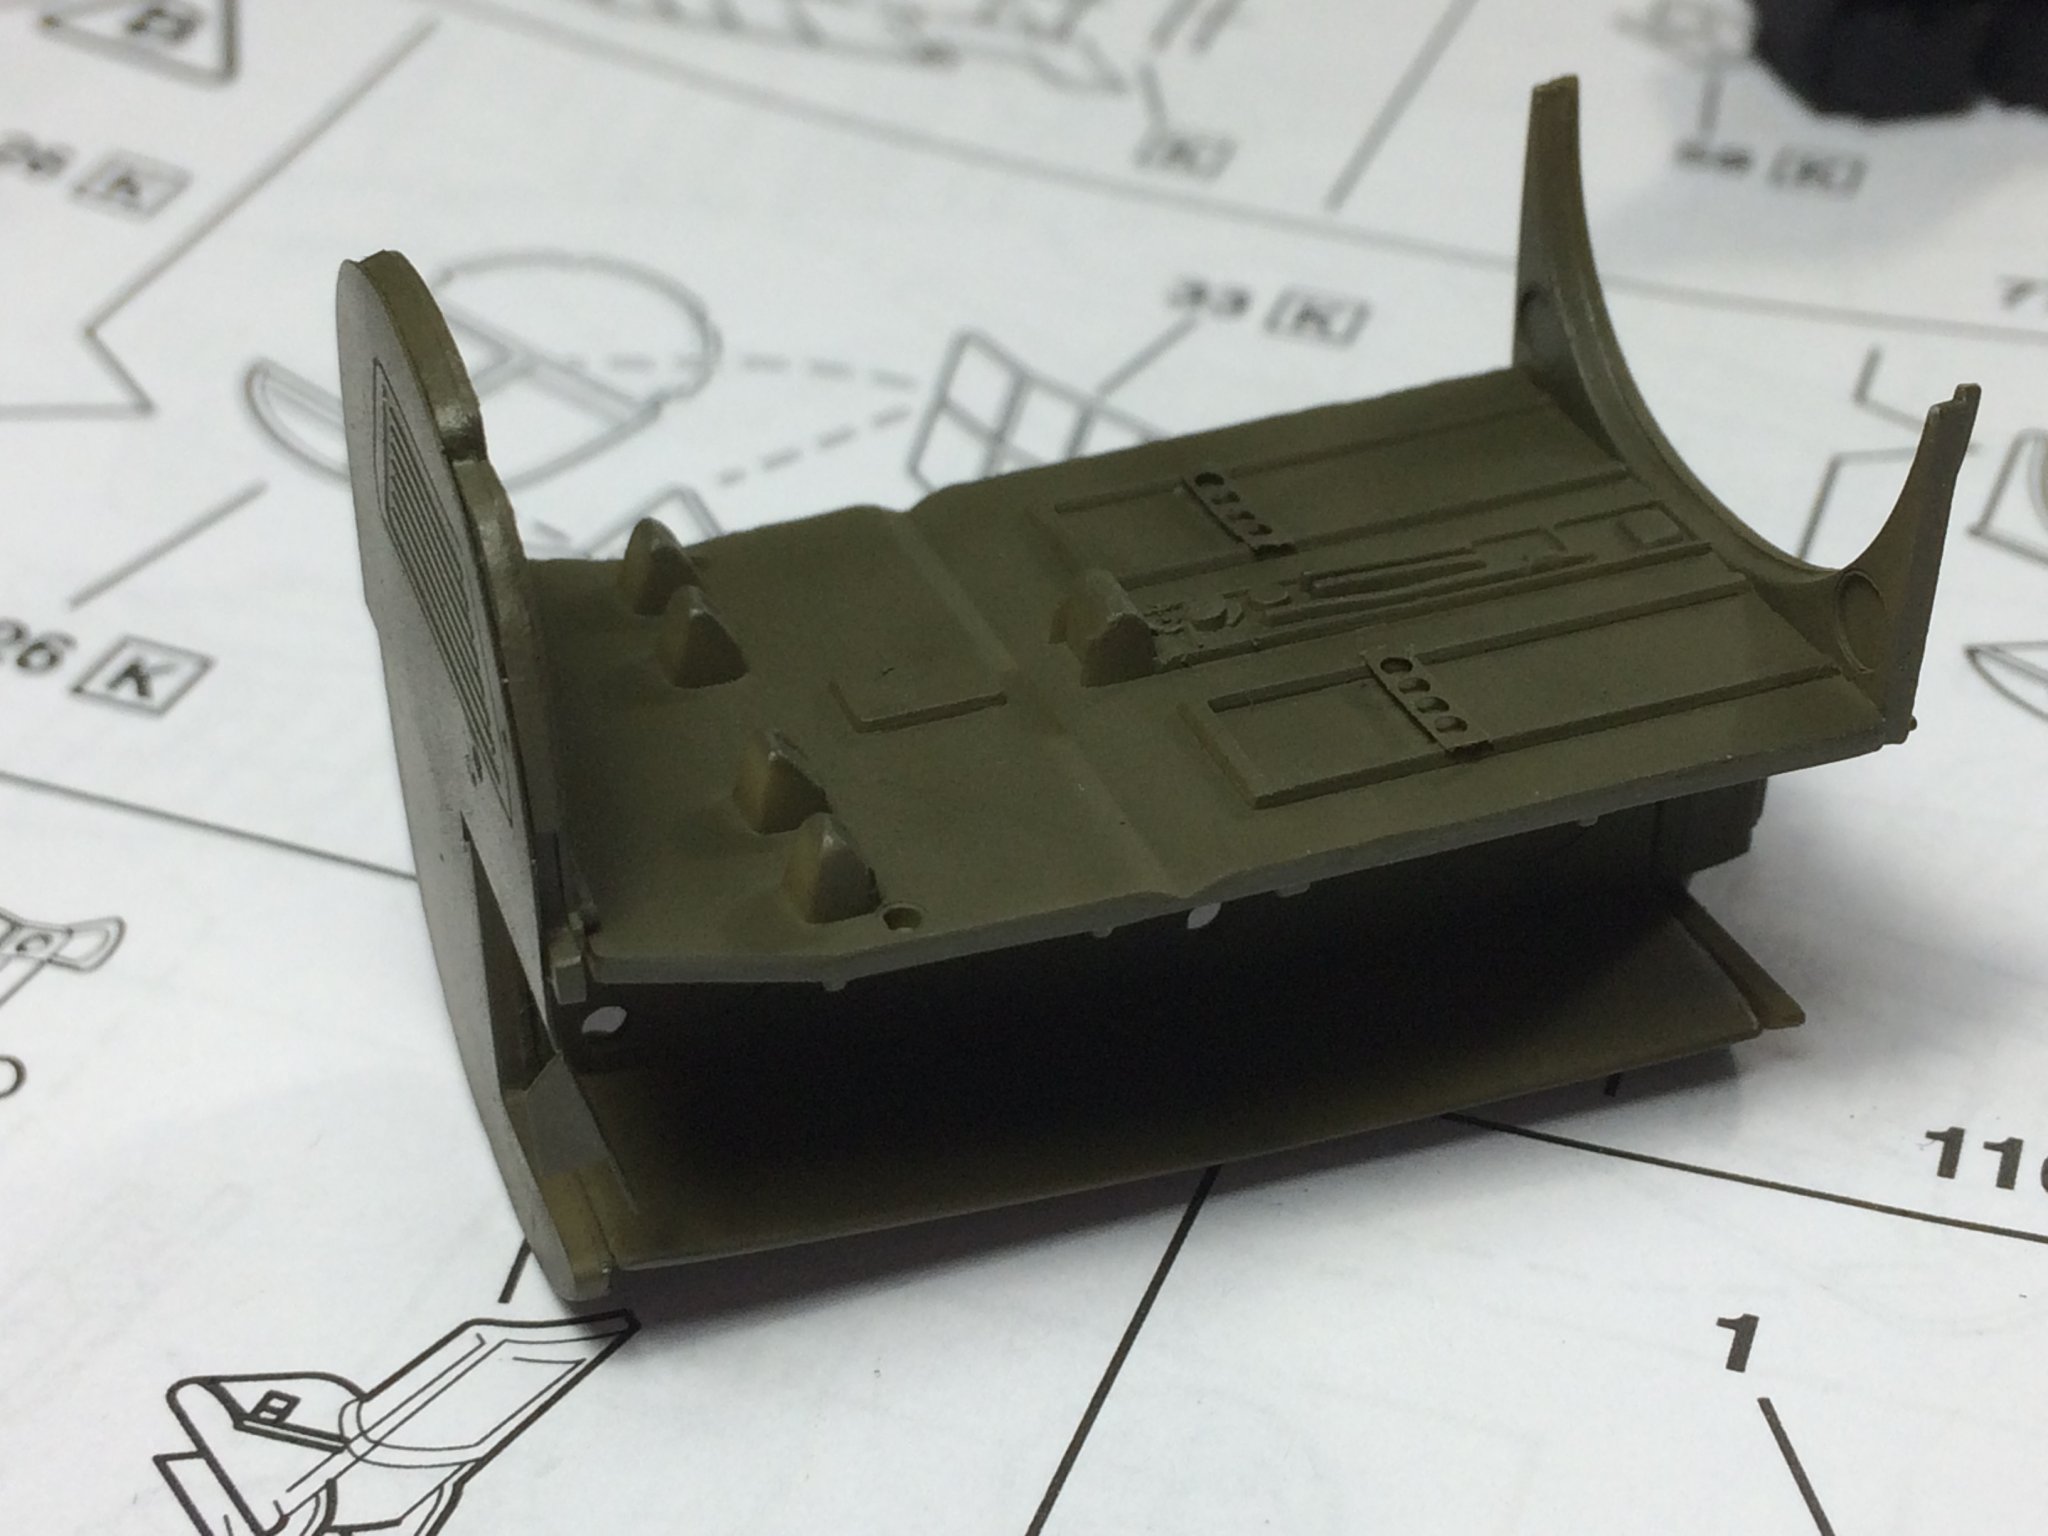
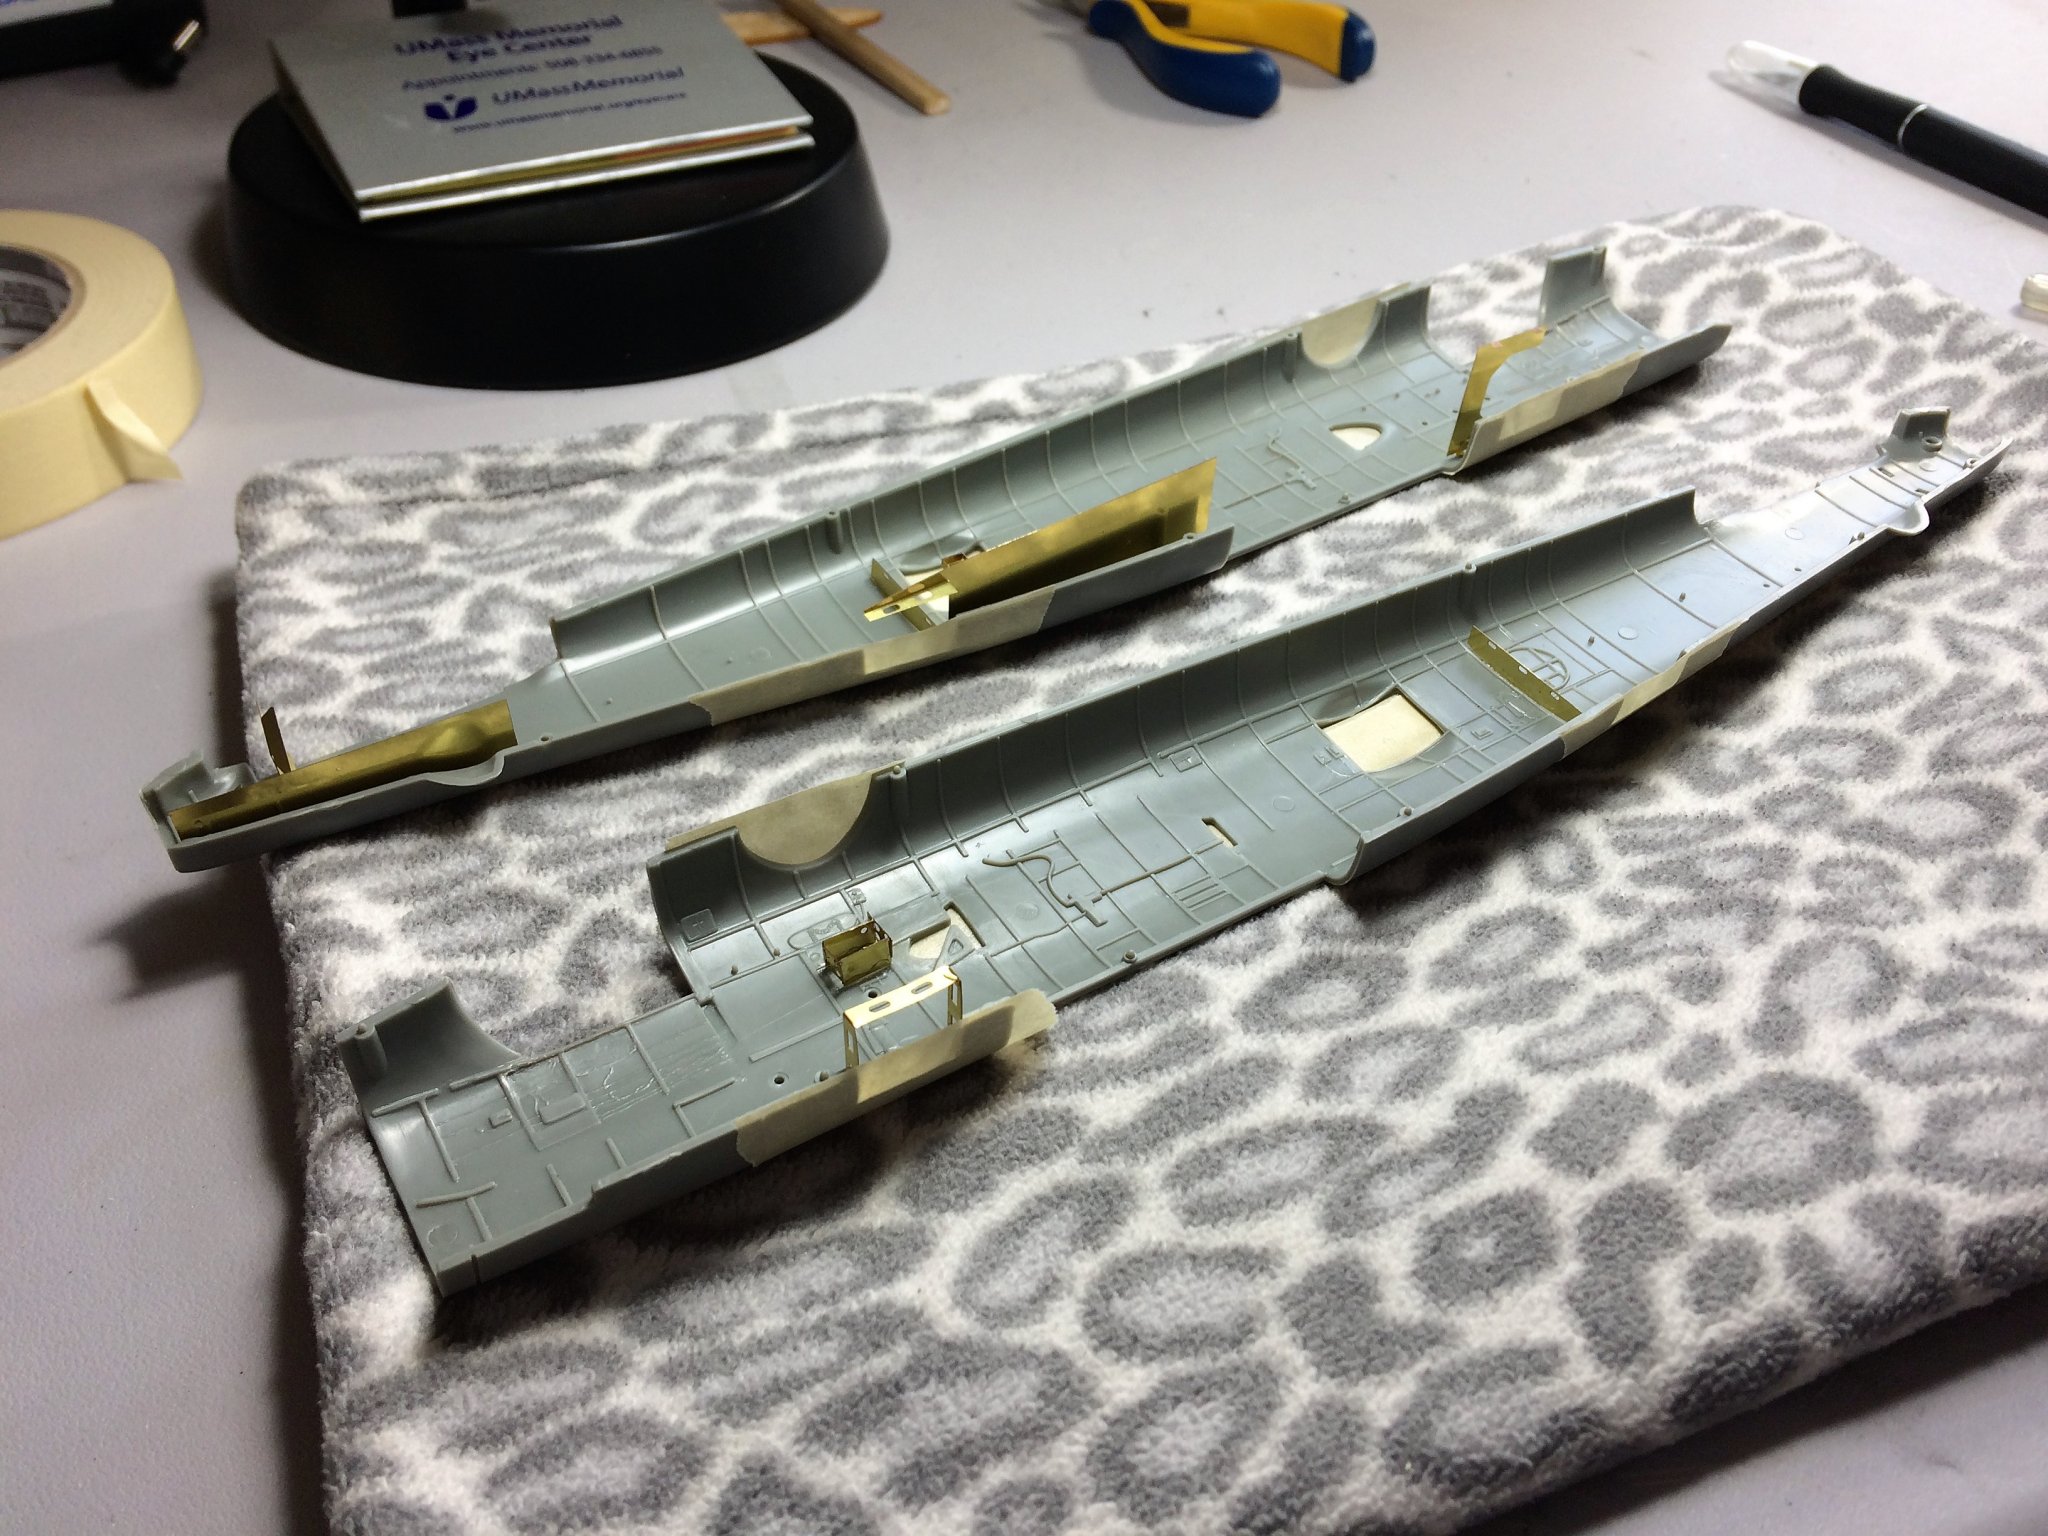
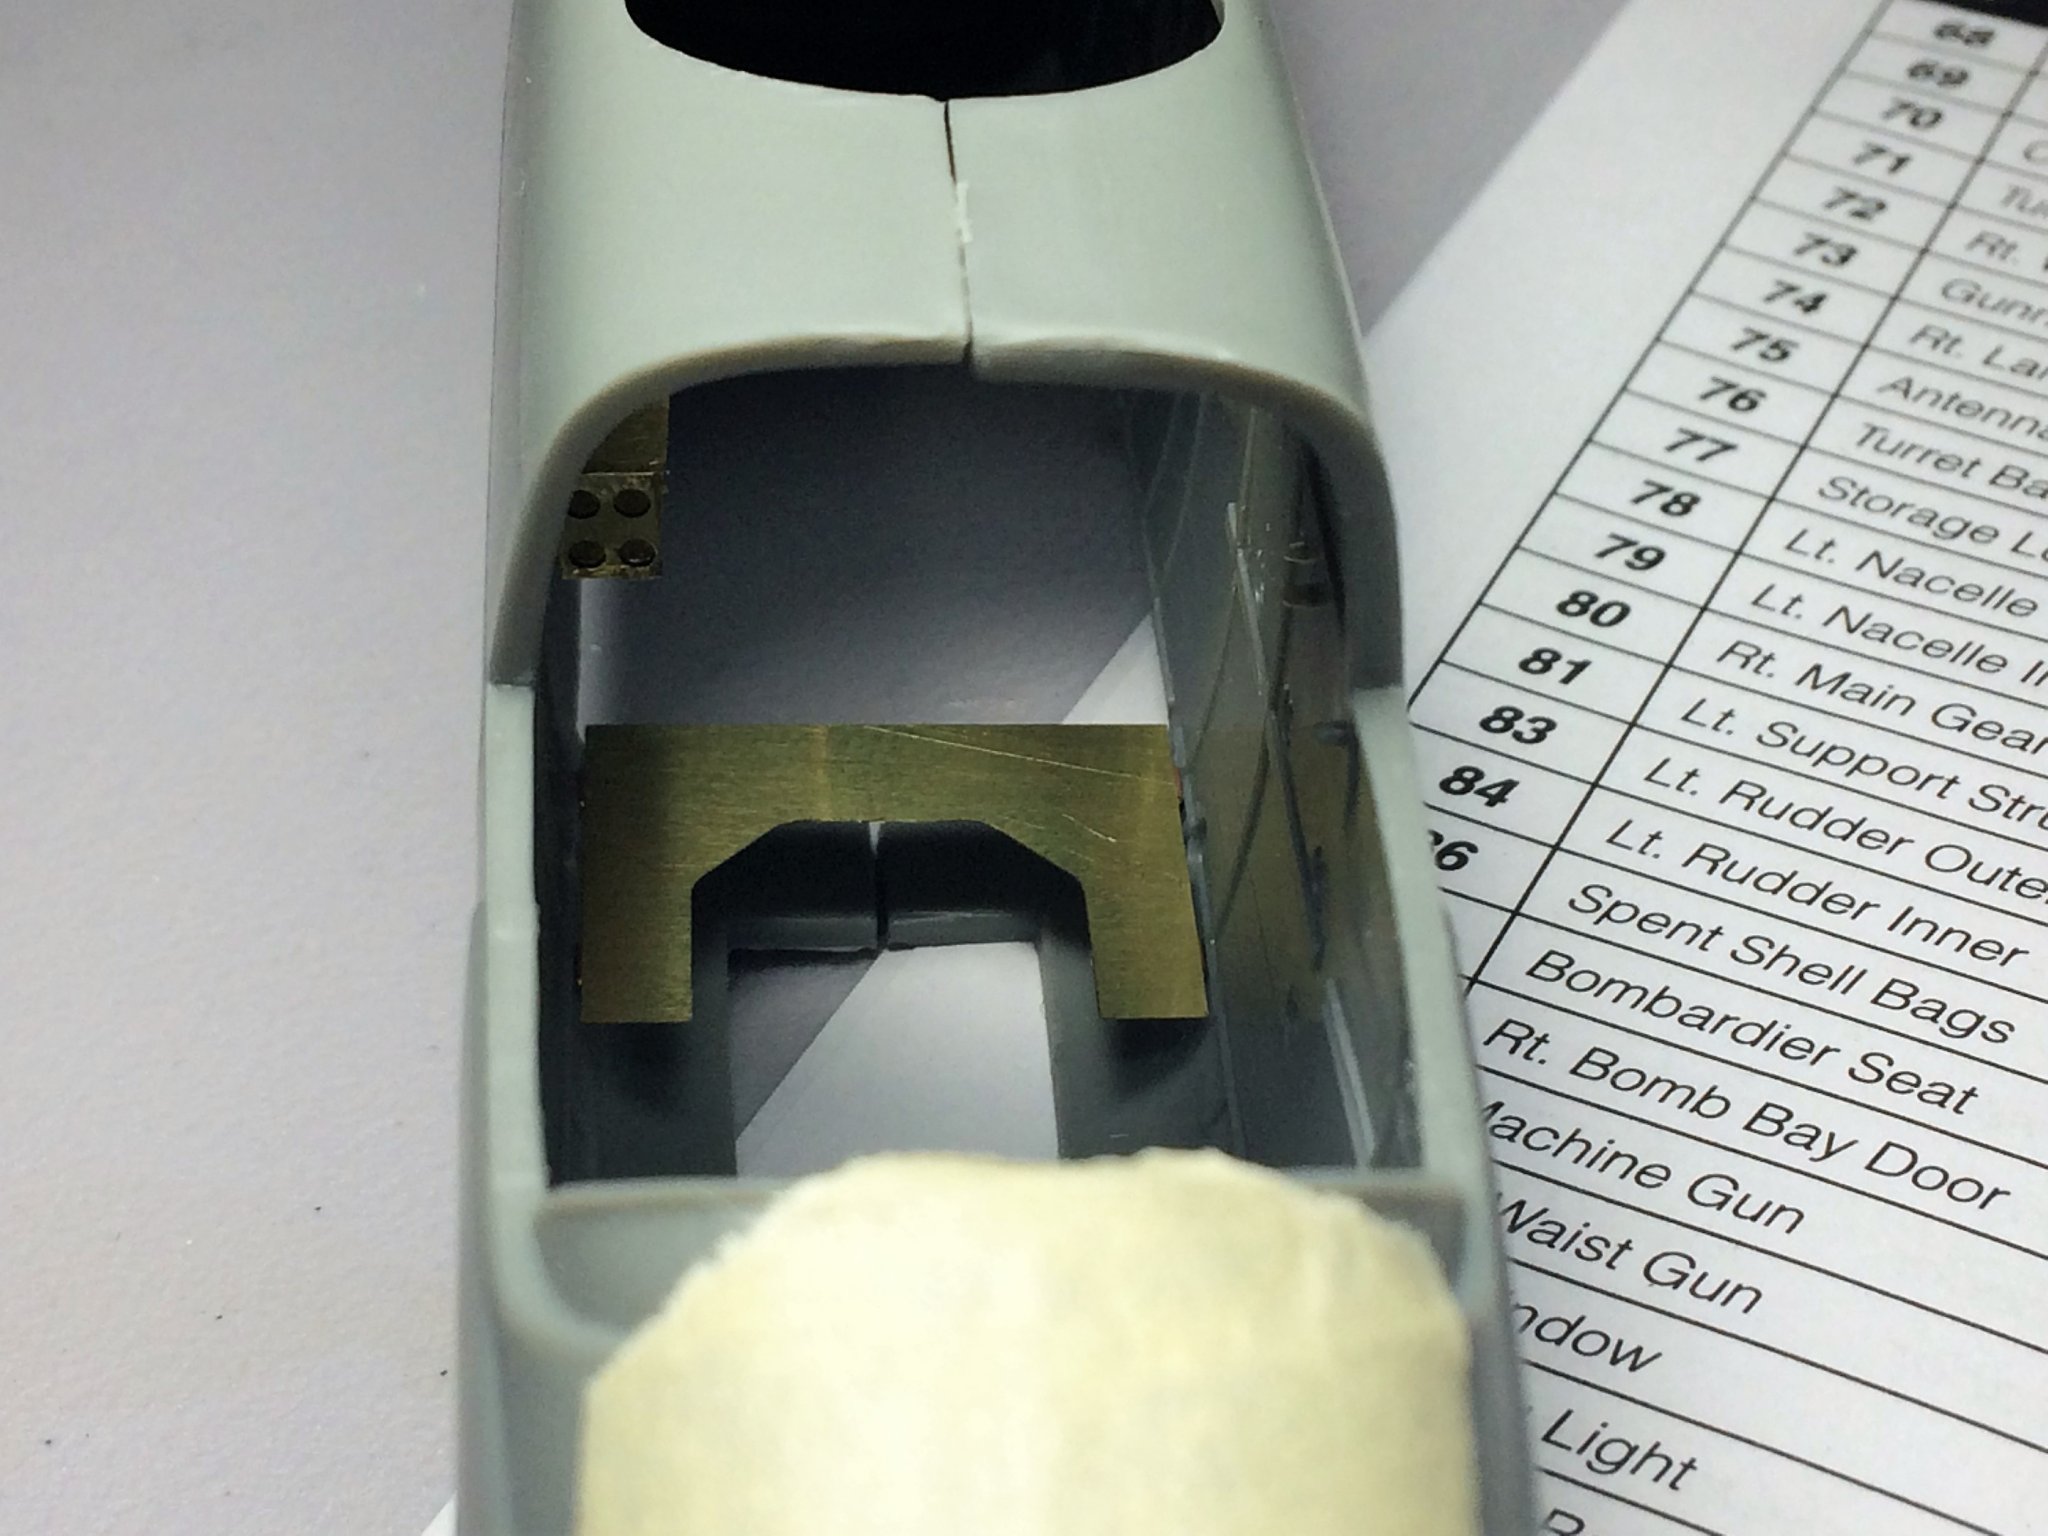
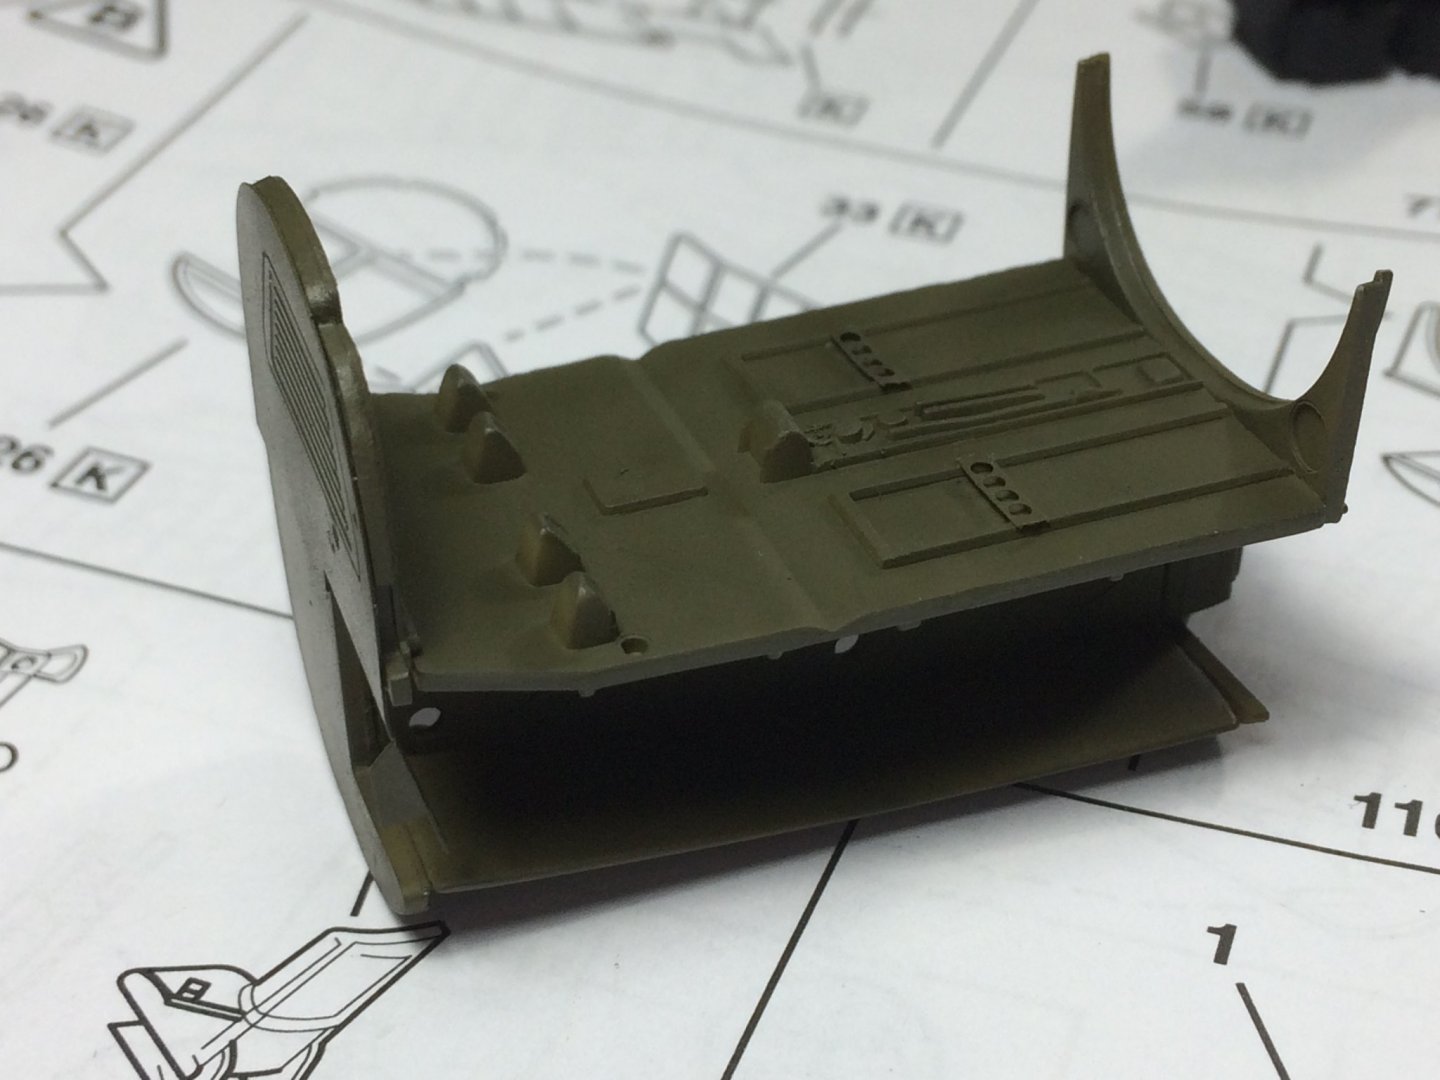
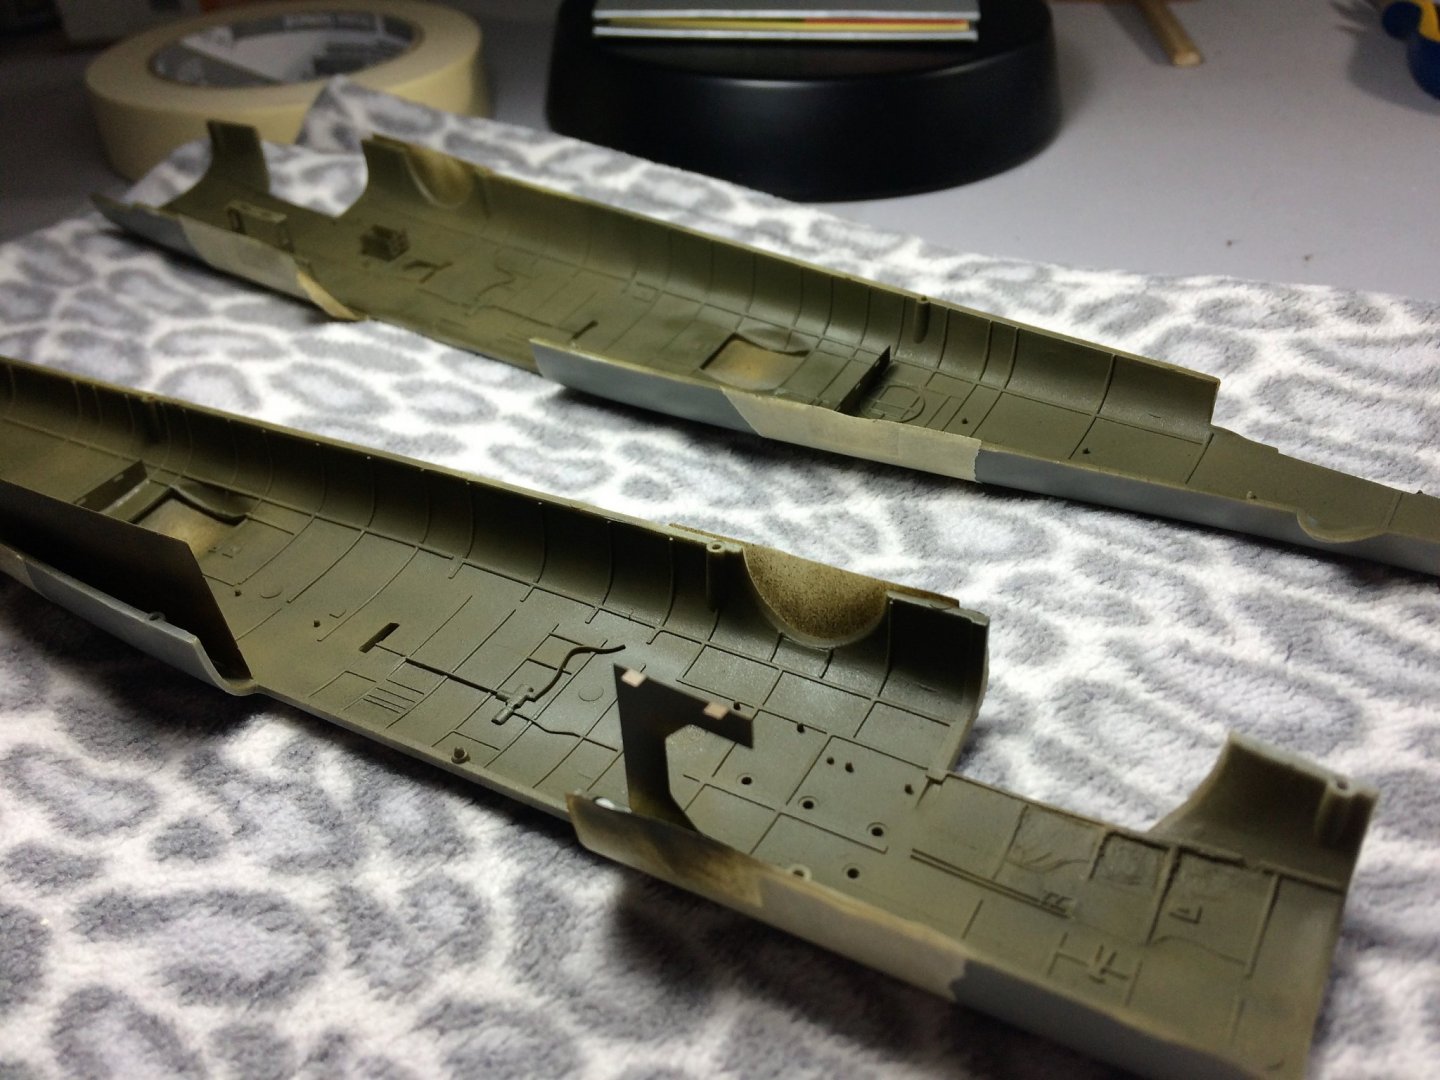
Evening, This build needs an update!!!! Continuing with the internal PE, the rear gunner position was next. There's still a gunners seat and seatbelts that will be eventually installed. I hope to use the aftermarket gun barrels I have in this area. But that's looking ahead. With the rear section finished, that finishes the big pieces of internal PE and the interior of the fuselage is ready for paint. I taped up a few areas where I wanted to contain the spray of paint. Being completely new to airbrush painting and masking, It was mostly guess work. I was so nervous by the time I went ahead and got the airbrush up and primed. I had three of everything on "stand-by"!!!! Reminded me of my old days working in Operating rooms. In the end, it wasn't too bad. Most of the worry was in my head. As you can see below, It is a bit splotchy, but I think I can chock that up to my paint/thinner ratio. I'm still learning that aspect! I didn't worry too much about another coat as most of this will be covered when the fuselage halves are glued together. I can see why airbrushing is so popular. All the little details really jump out. I was always a hand painter, still am on my Niagara build, but for plastic it looks fantastic! Using Mr. Color Olive Drab for the interior. For the exterior I plan on using an Earth Green from Mr. Color as well. The interior still has some pieces install. There are foot lockers, seats, and ammo boxes yet to be installed. These will be done later, there being painted black. Stay safe! Tom E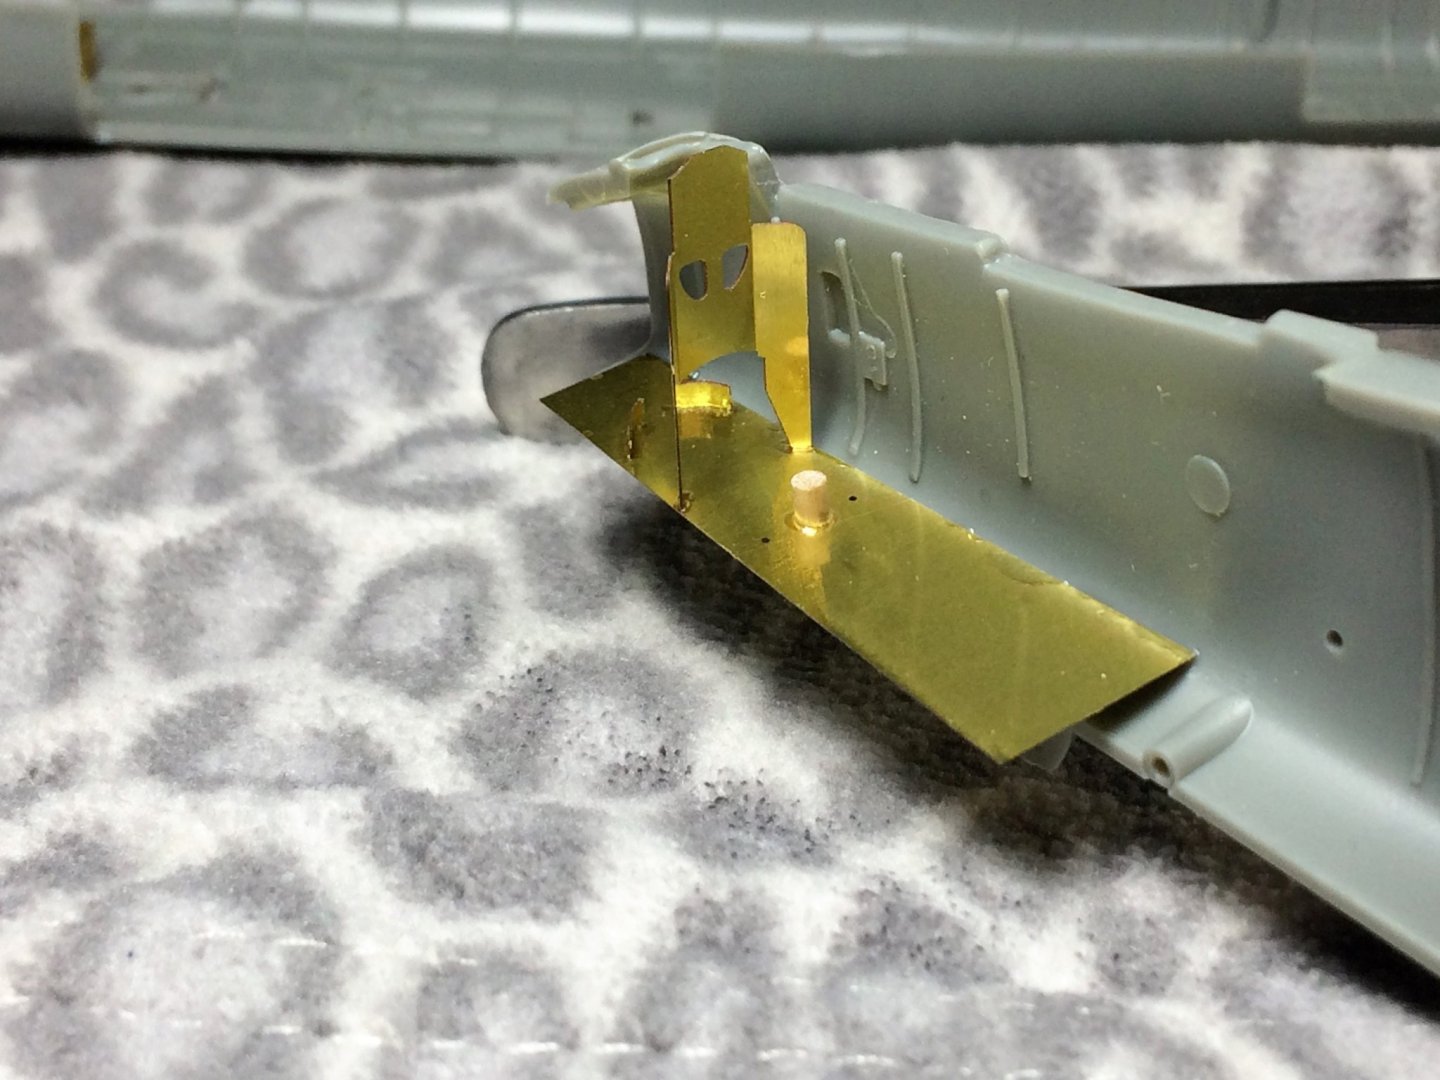


- 120 replies
-
- 14
-
-
B-25J Mitchell by Tom E - Revell - 1:48 Scale - PLASTIC
Tom E replied to Tom E's topic in Non-ship/categorised builds
Hi Lou, Sent you a PM. Sorry for the lack of updates, there are plenty! With what's going on in the world, my mind has been elsewhere. I work in healthcare, and it has been absolutely insane!!!!!!!! I was furloughed by my workplace and now have 4-6+ weeks off. So I got the house in order, stocked the pantry and the like, and now settled into my "bunker" for next few weeks. And I still have the next 4-6 weeks off...…..that's a lot of building! Should have an update for both my Niagara and B-25 build shortly.....dinner is almost ready!!!! Tom E -
B-25J Mitchell by Tom E - Revell - 1:48 Scale - PLASTIC
Tom E replied to Tom E's topic in Non-ship/categorised builds
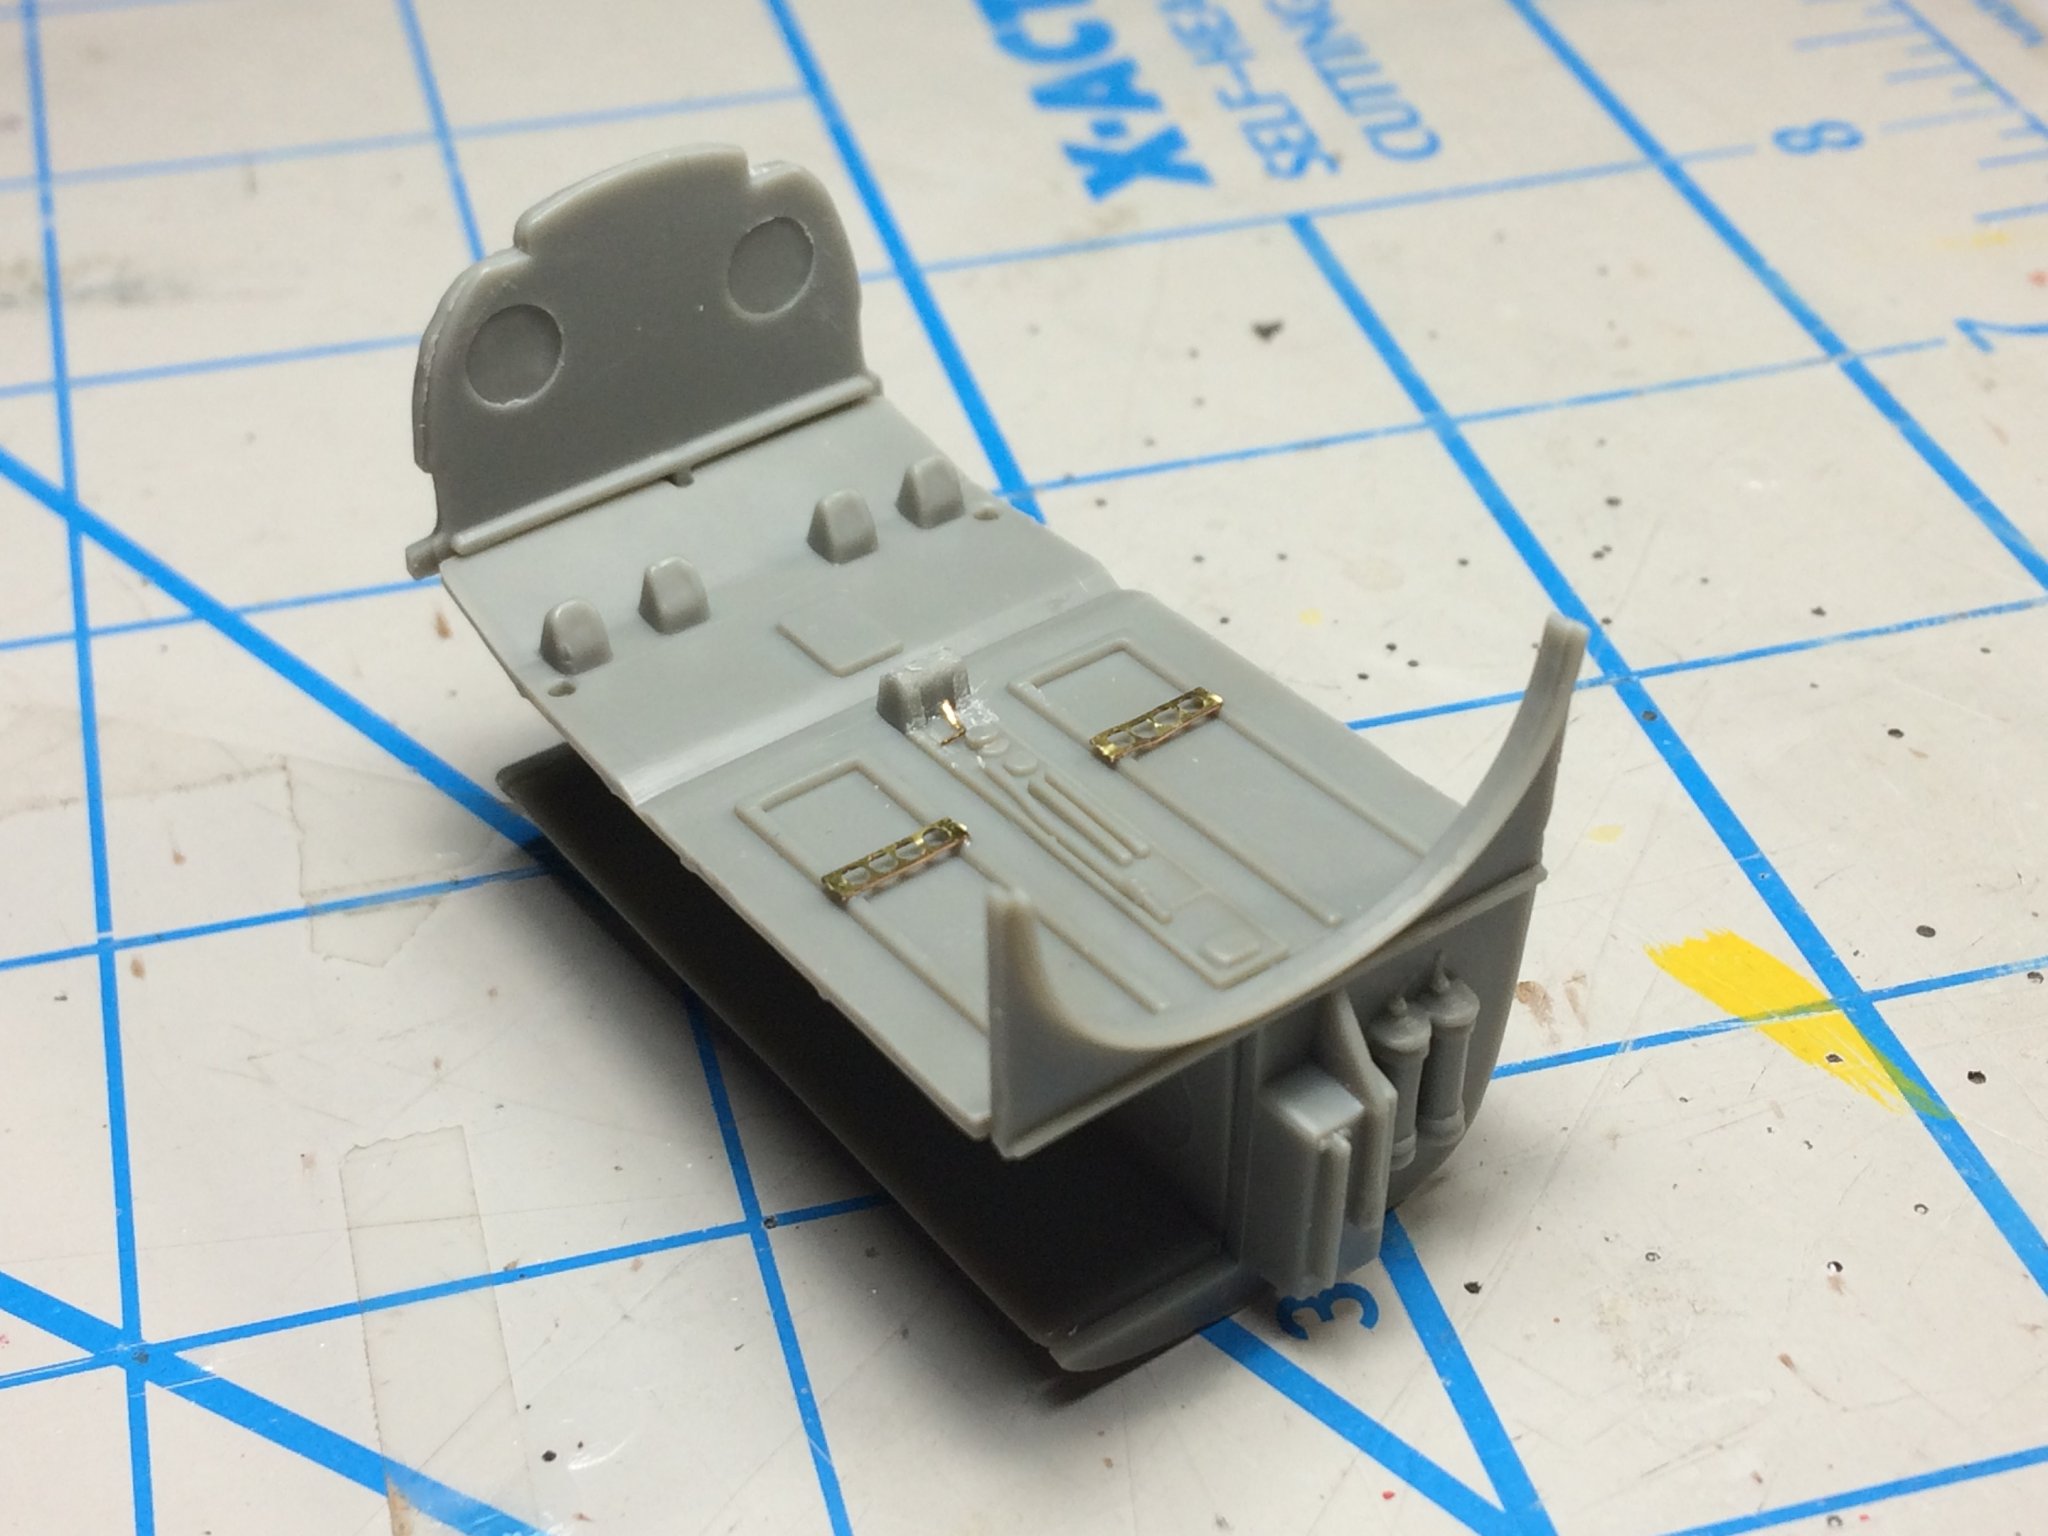
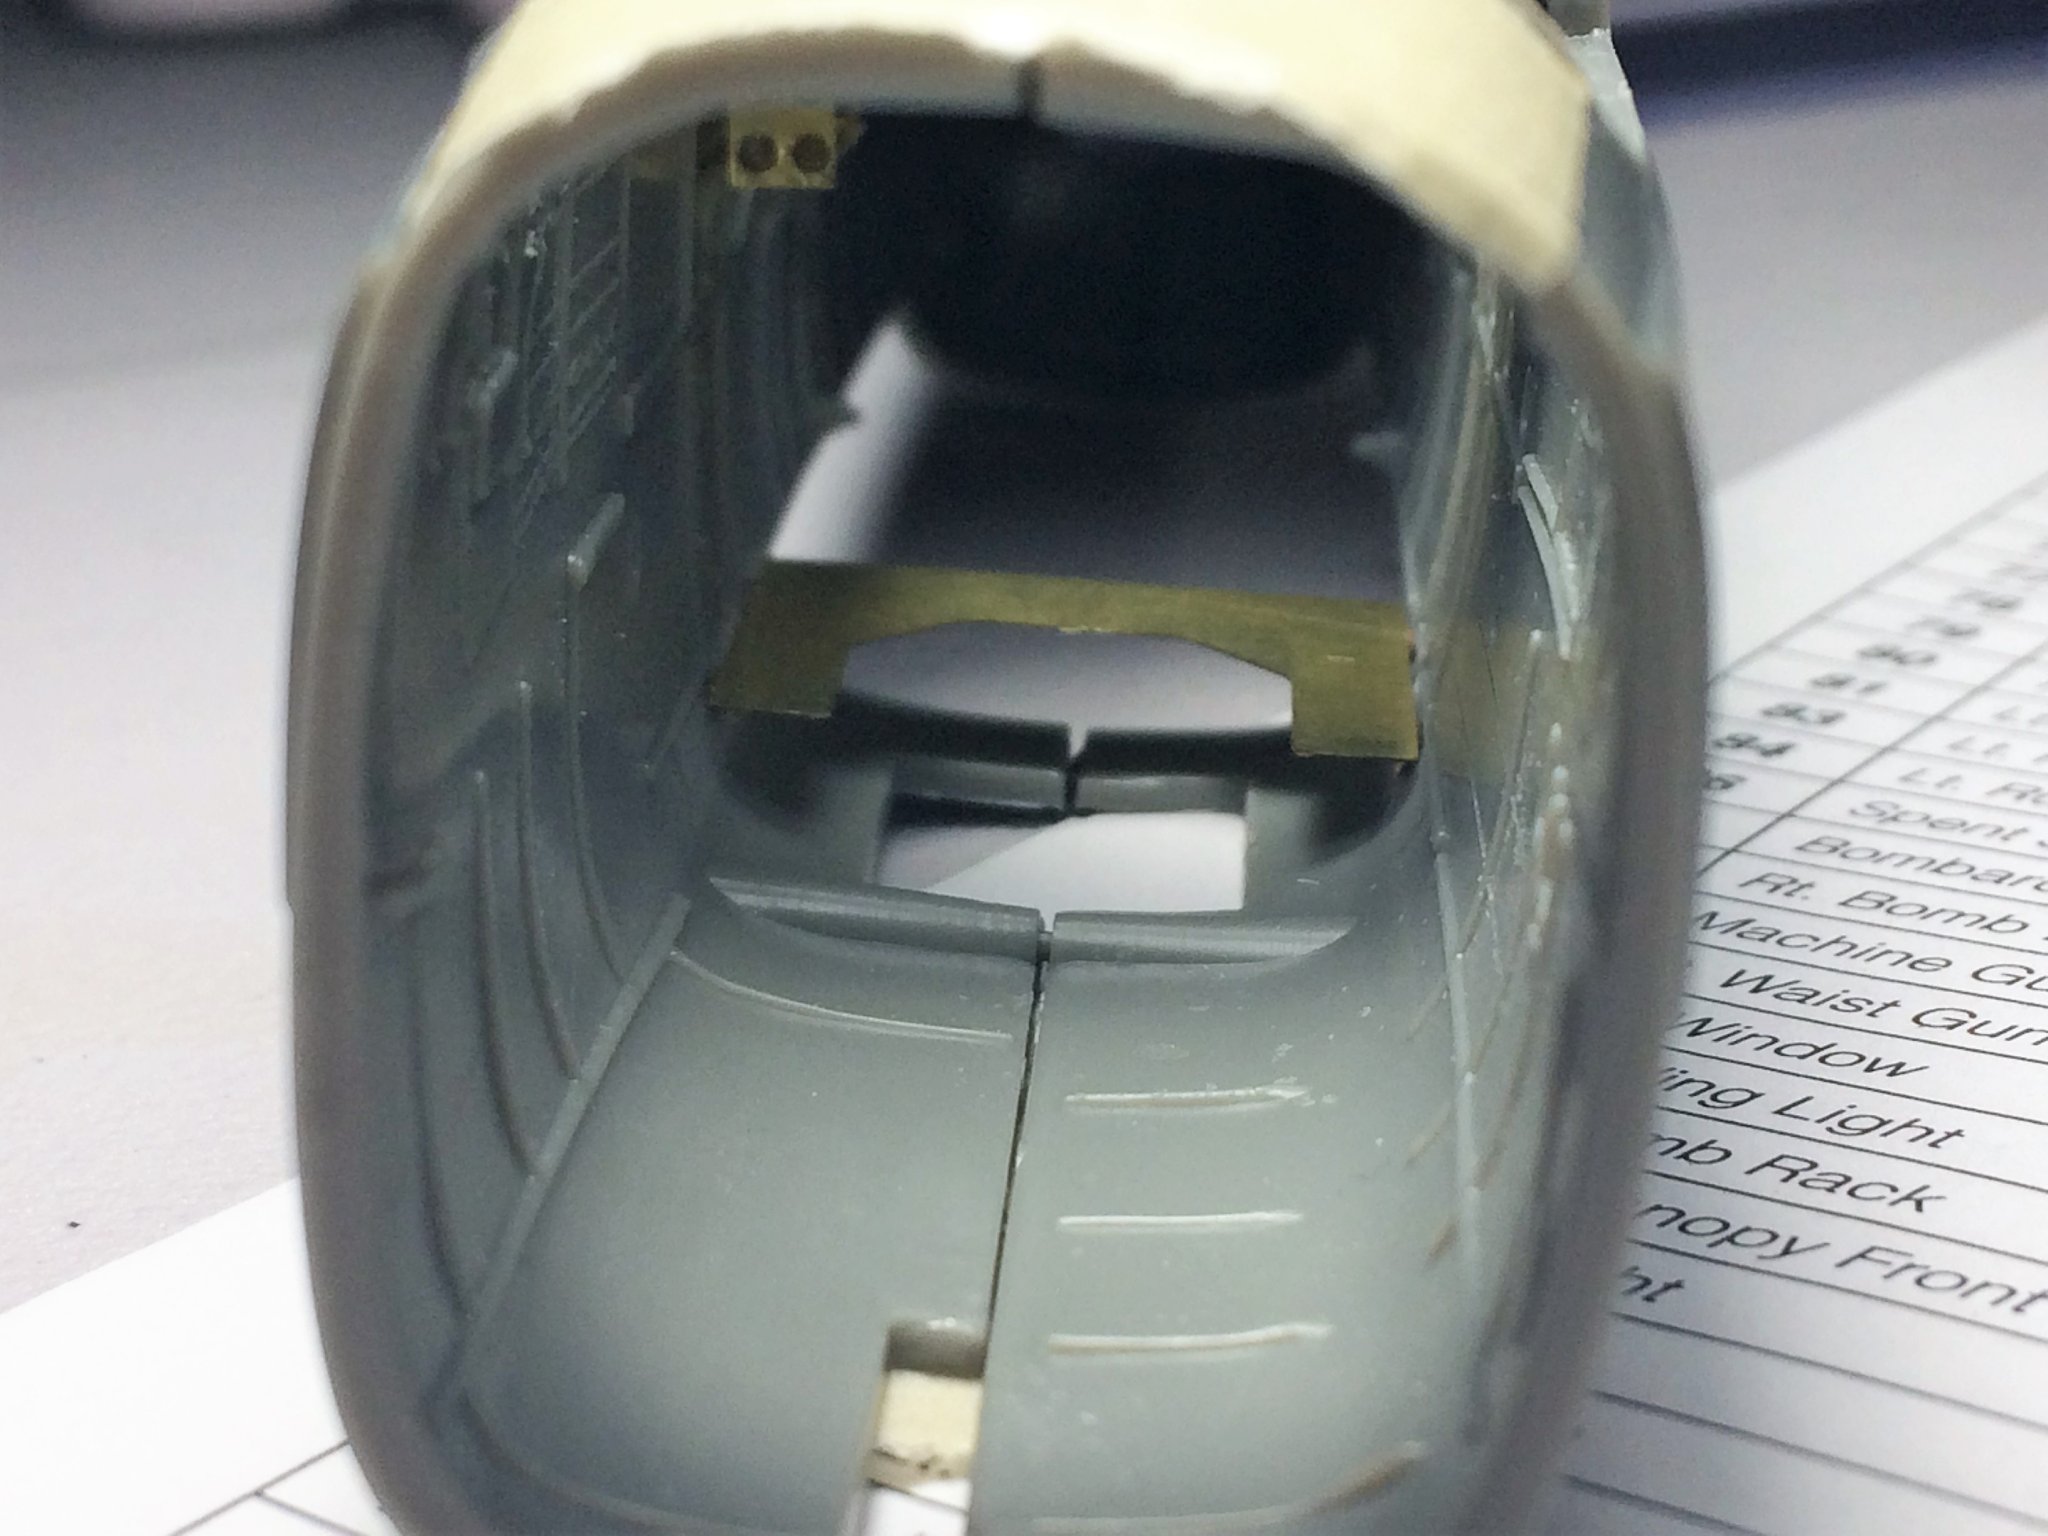
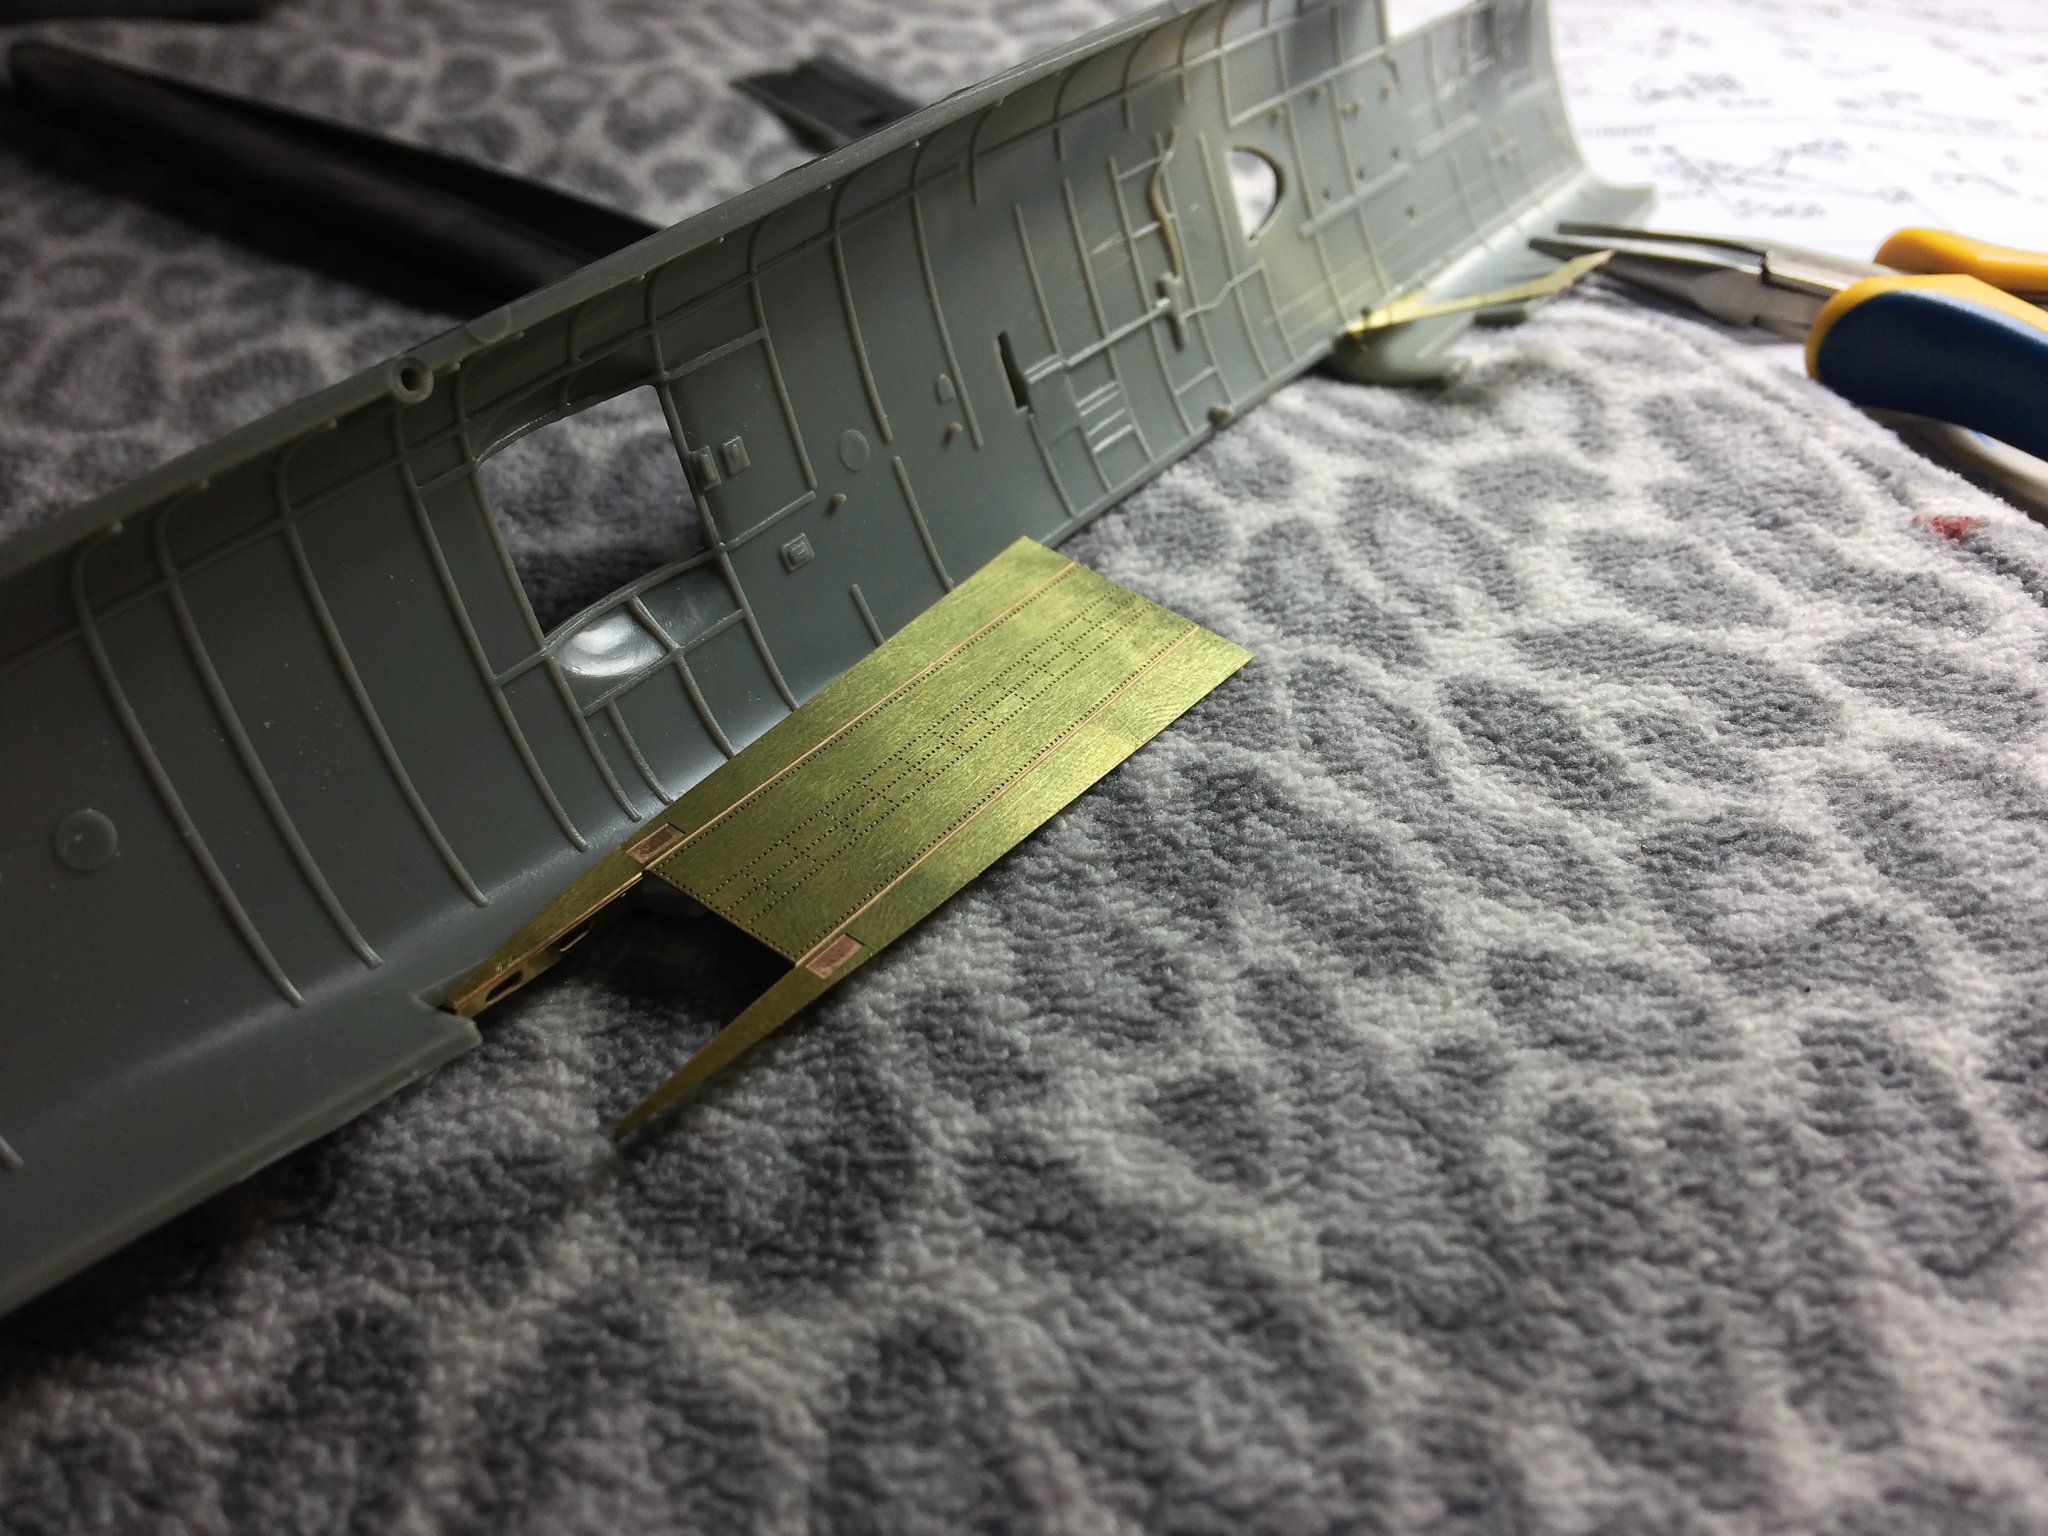
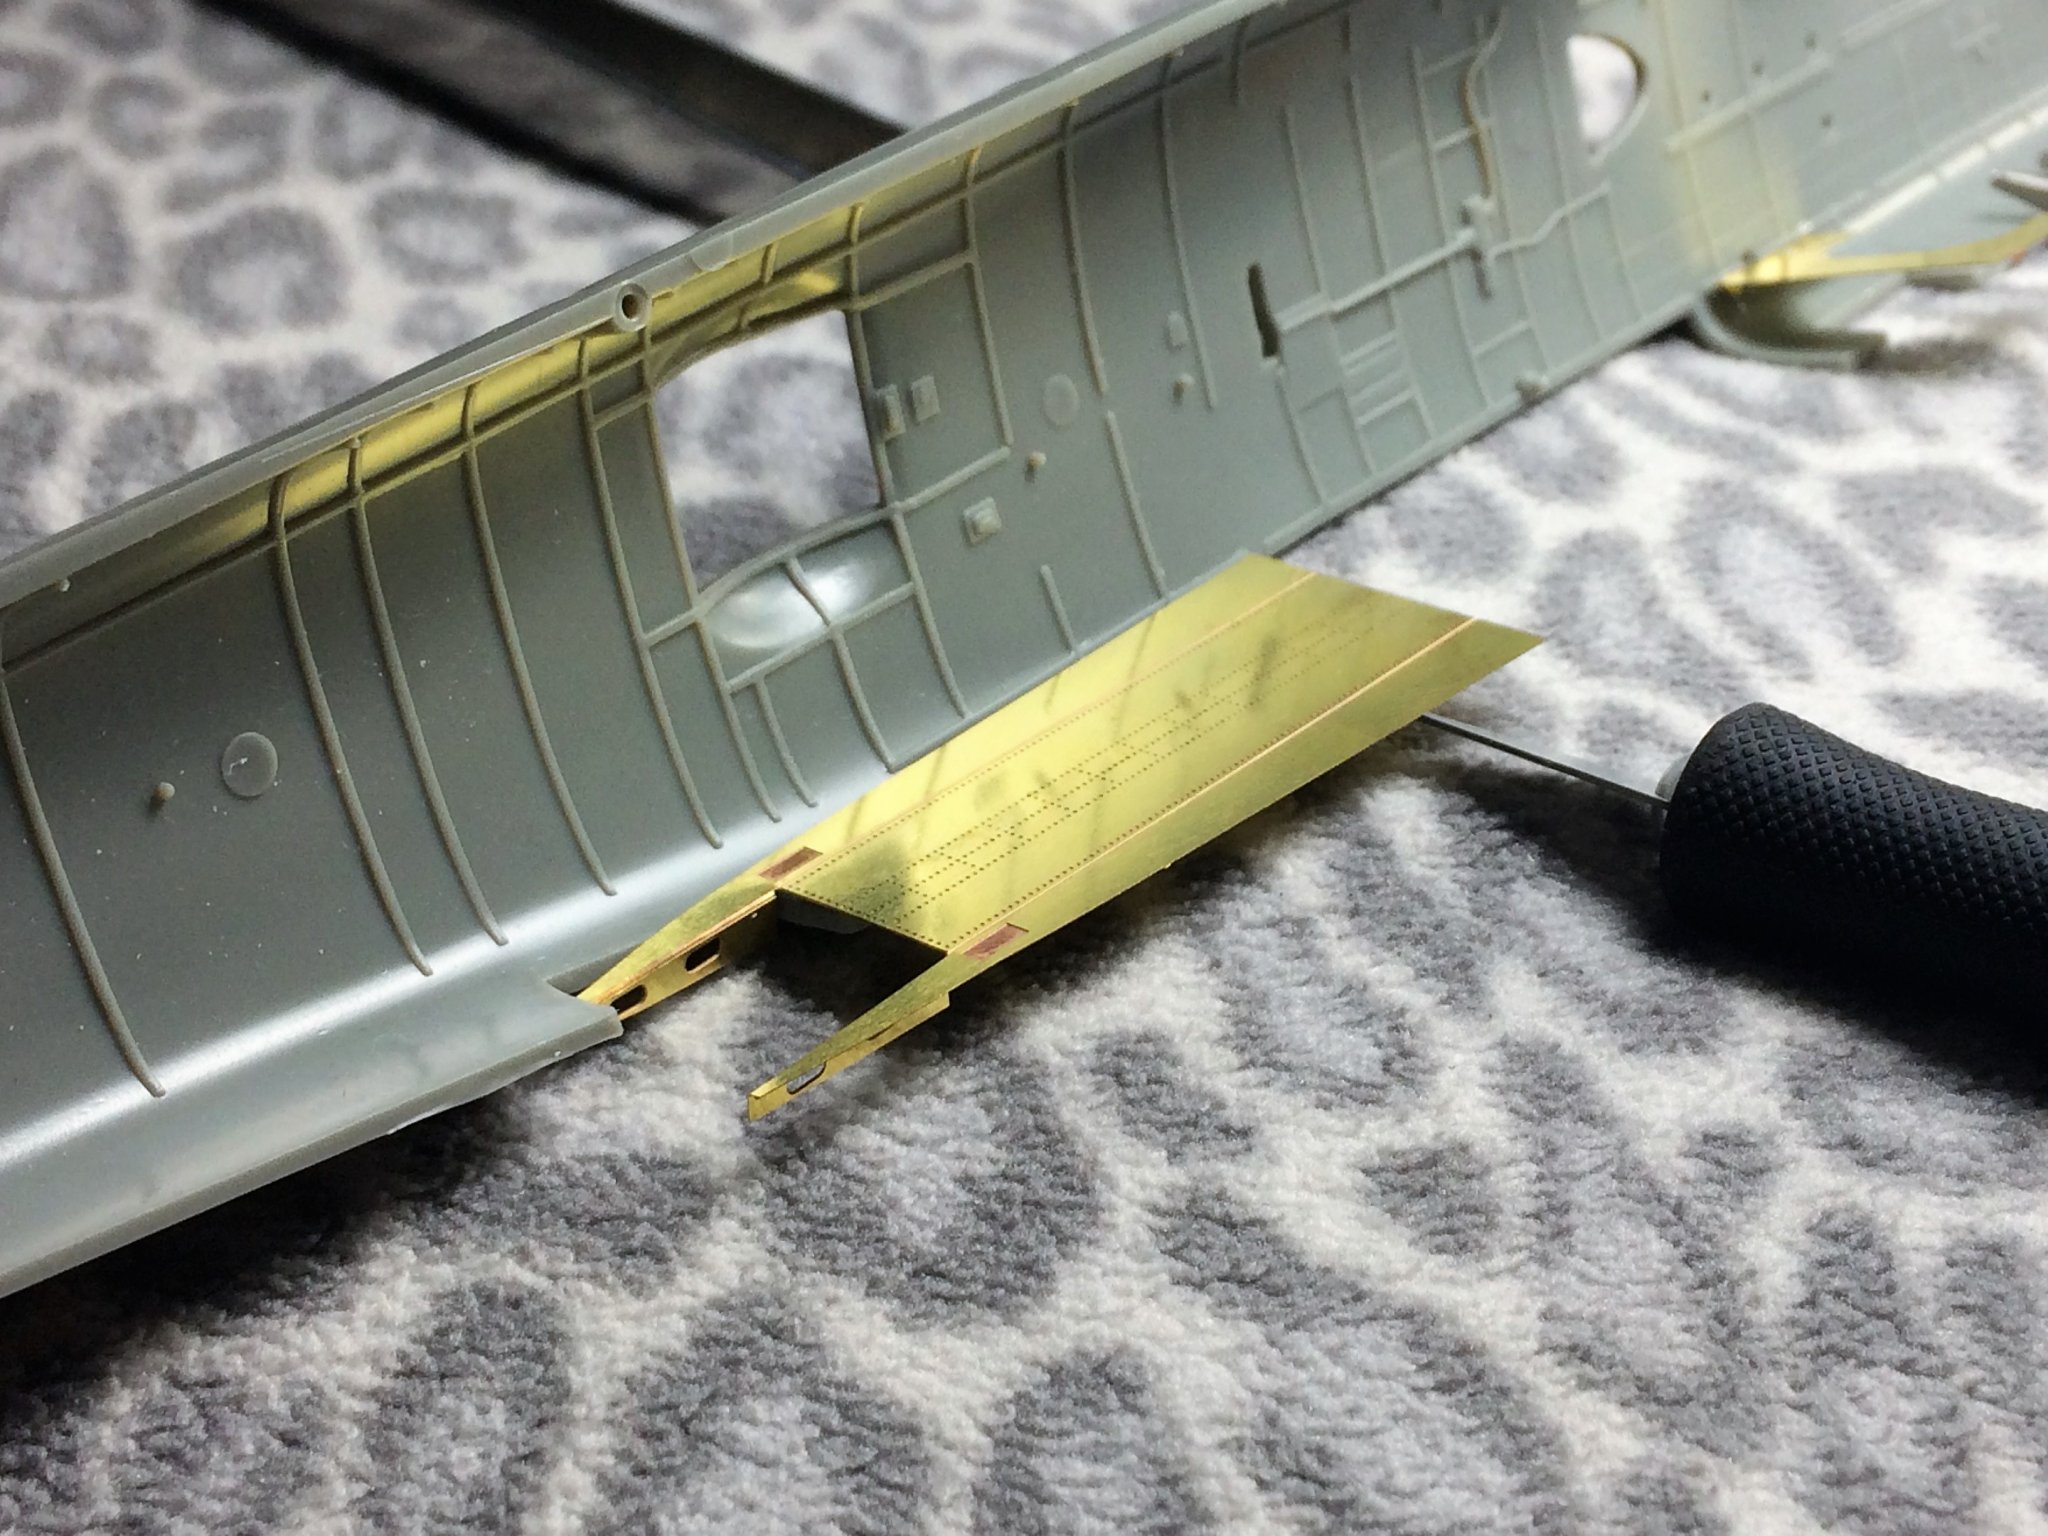
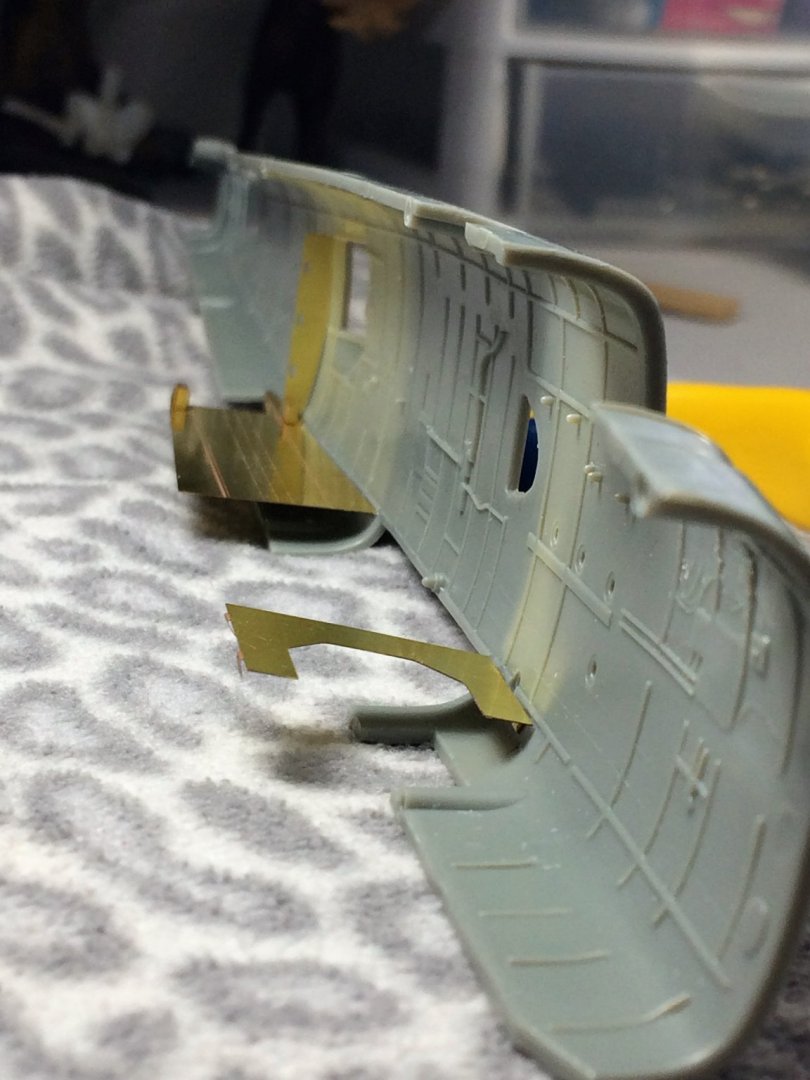
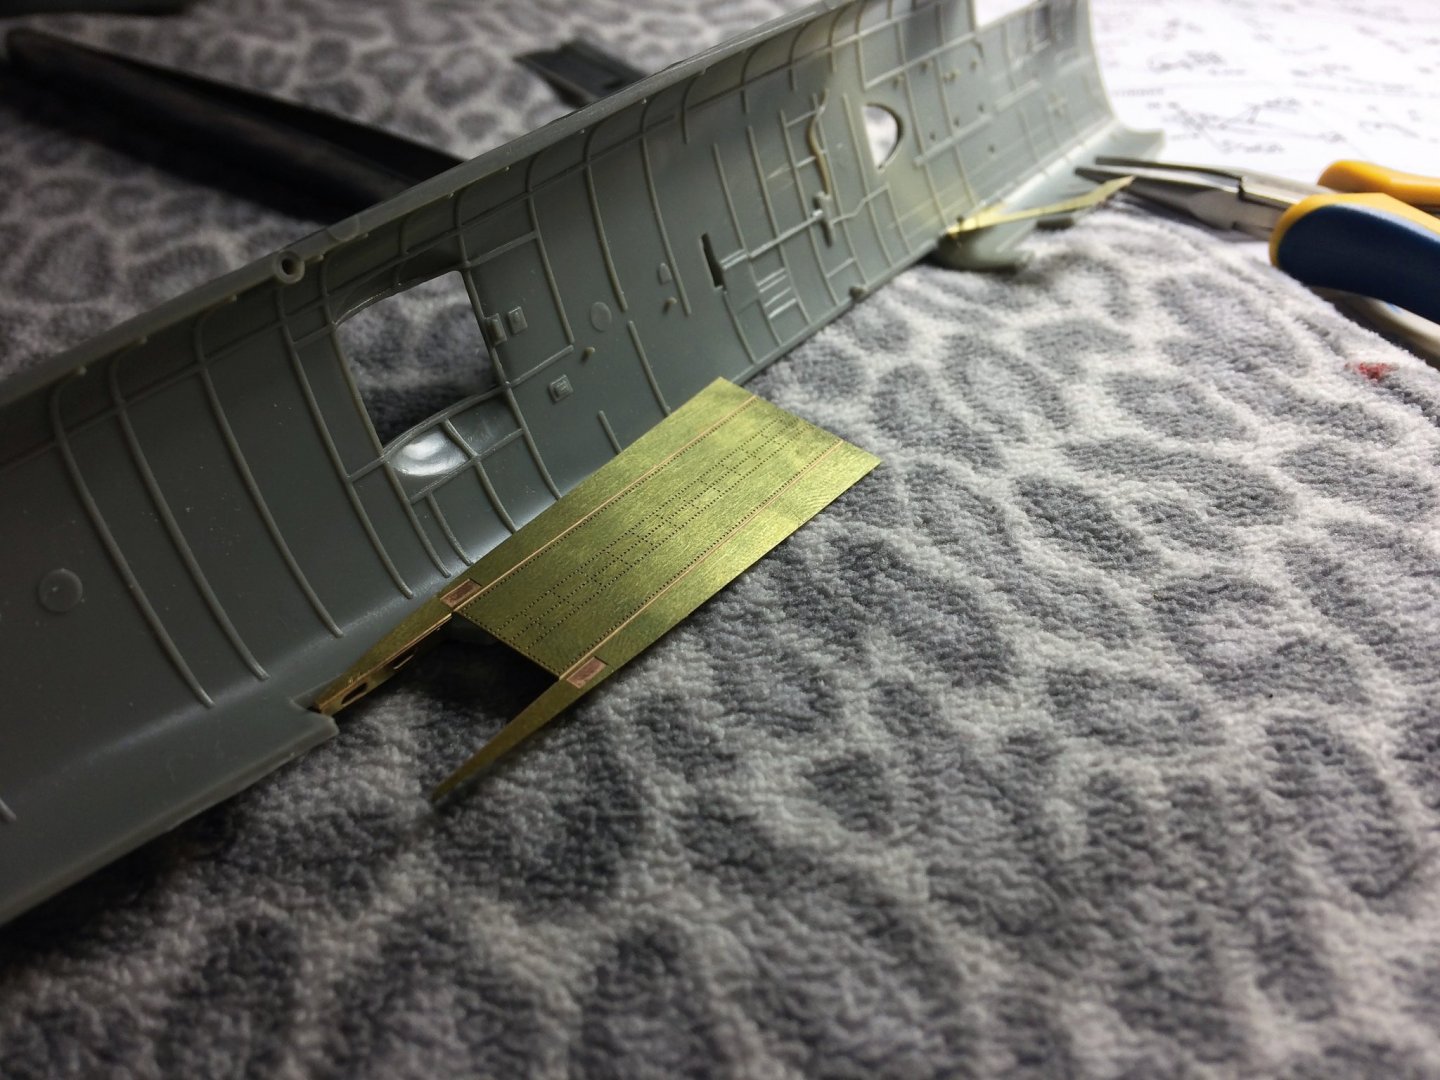
Evening, "The consistency of Whole Milk"....I can see that, great tip Javlin. Thanks! Still working on the interior. The rear deck and compartment dividers are all in. These were all placed and glued with both halves of the fuselage taped together. There are some gaps in the compartment dividers. I tried these things every which way and below was the best I could get. According to the PE instructions the smaller end has to be on the bottom. So I was a limited a bit by that. Future builds, I may try using Styrene to fill that in. I don't have any right now, and don't see me buying any in the near future. There was a lid on the PE box in the below pic. It snapped off. If I truly need it I'll attach it later. If I didn't break it now, I most assuredly would later in the build. Everything seems to be lining up well. The front piece of PE will eventually lay flat to the other side of the fuselage, its a little wonky in the below pic. Started brining together the cockpit area. There are some PE I want to attach before painting. Tom E

- 120 replies
-
- 15
-
-
B-25J Mitchell by Tom E - Revell - 1:48 Scale - PLASTIC
Tom E replied to Tom E's topic in Non-ship/categorised builds
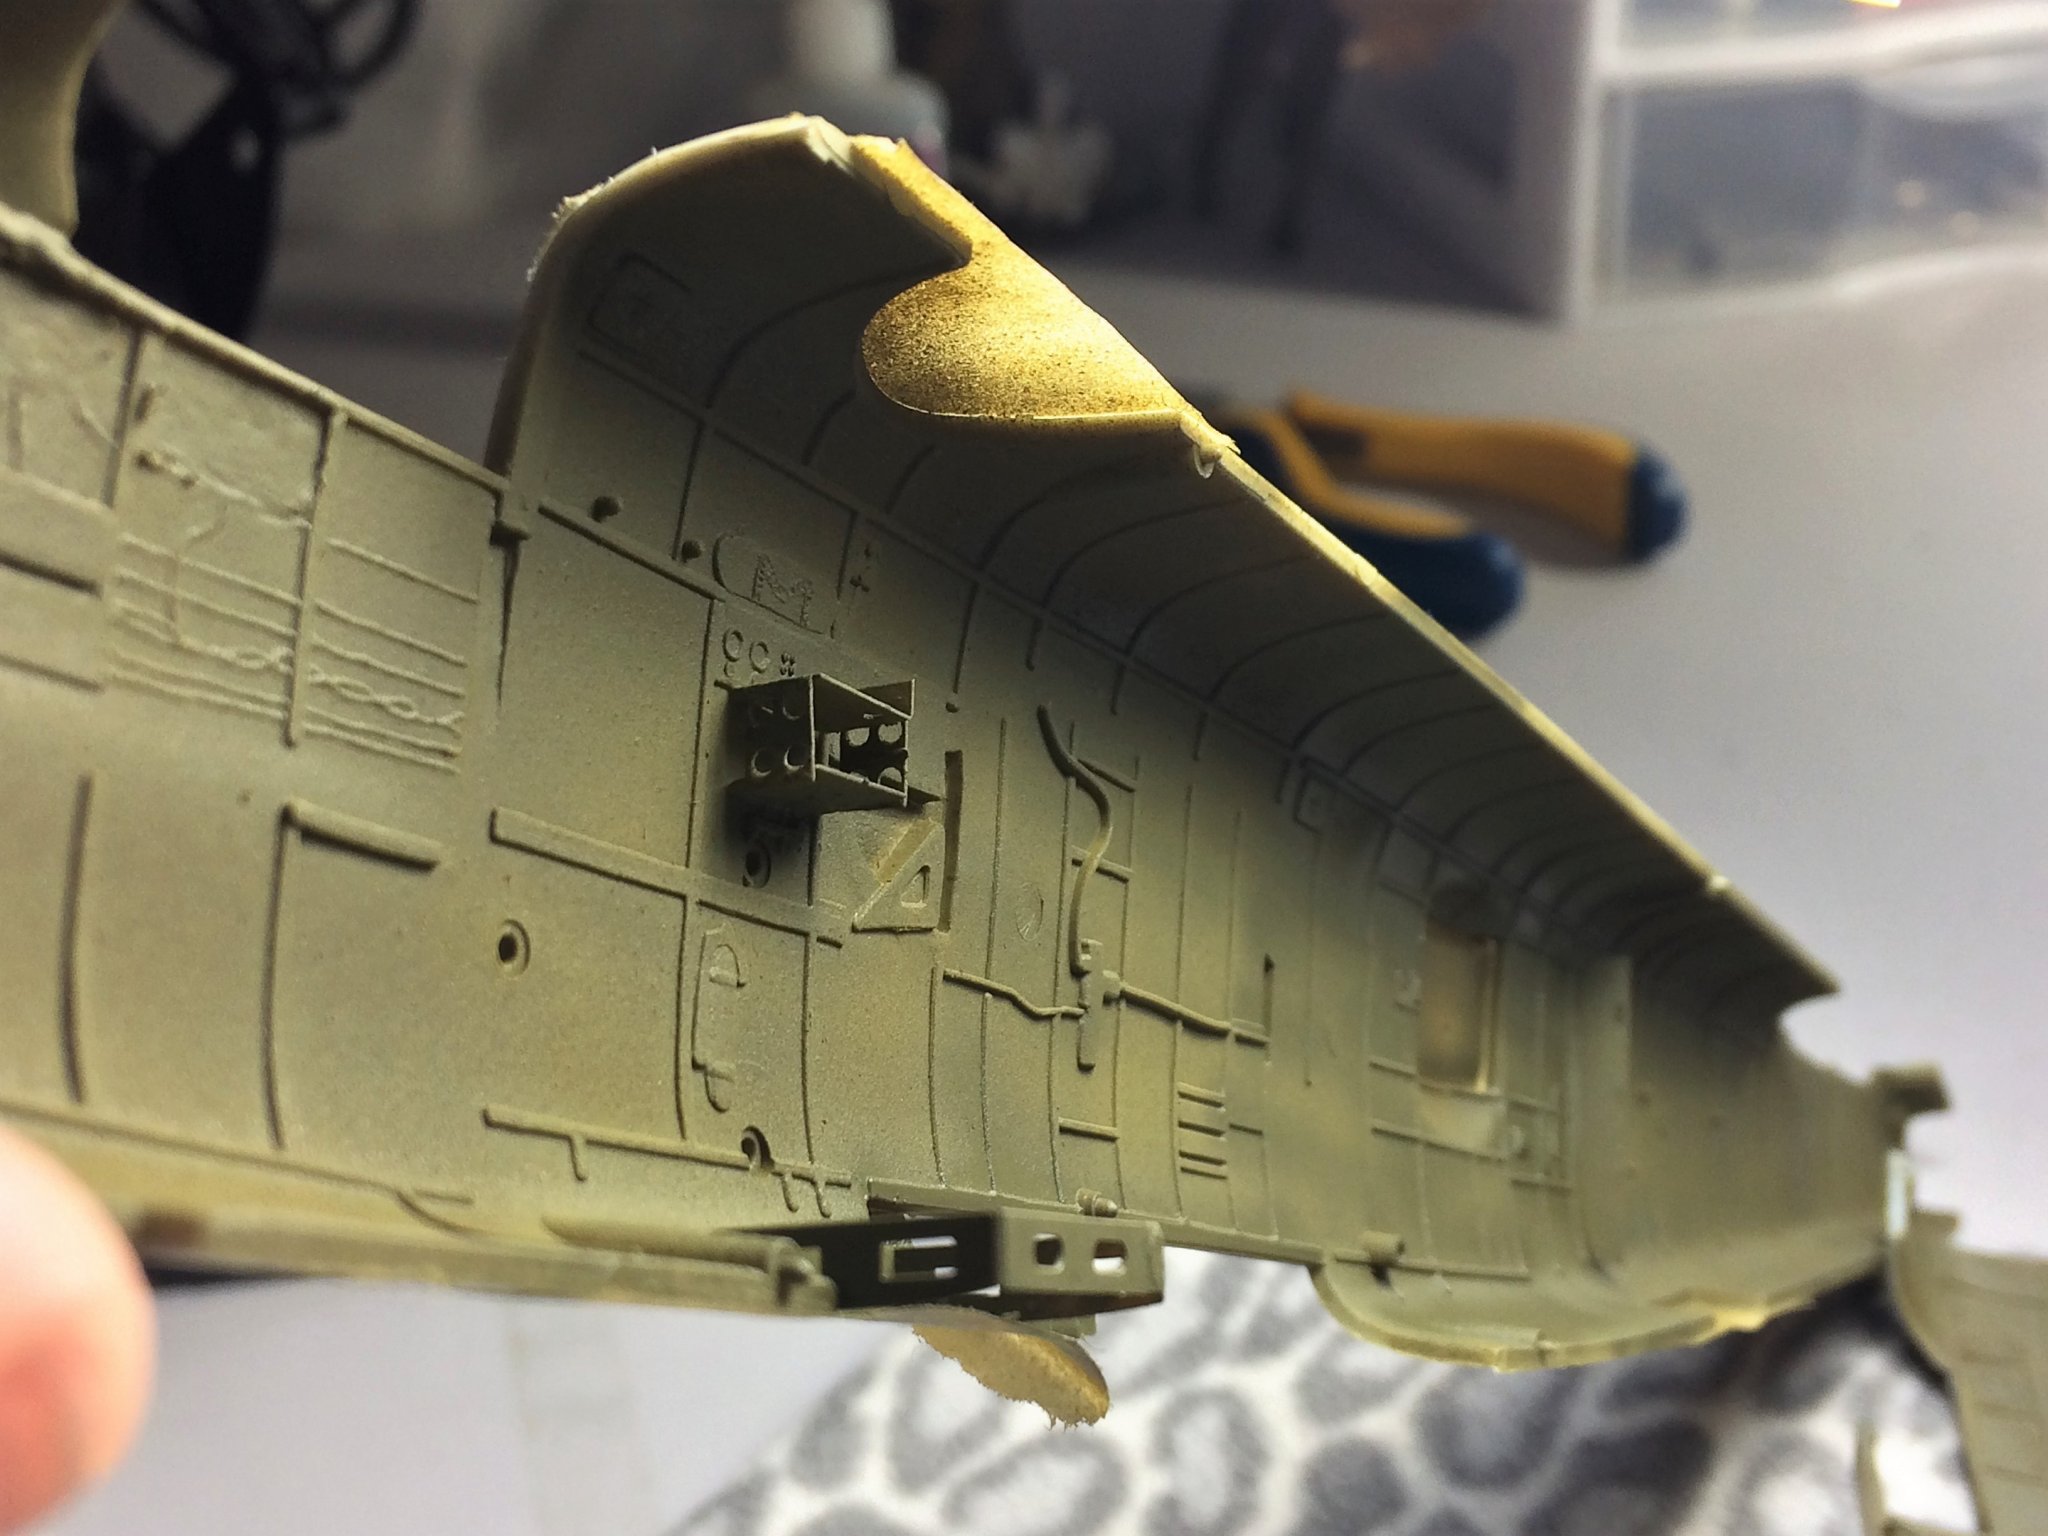
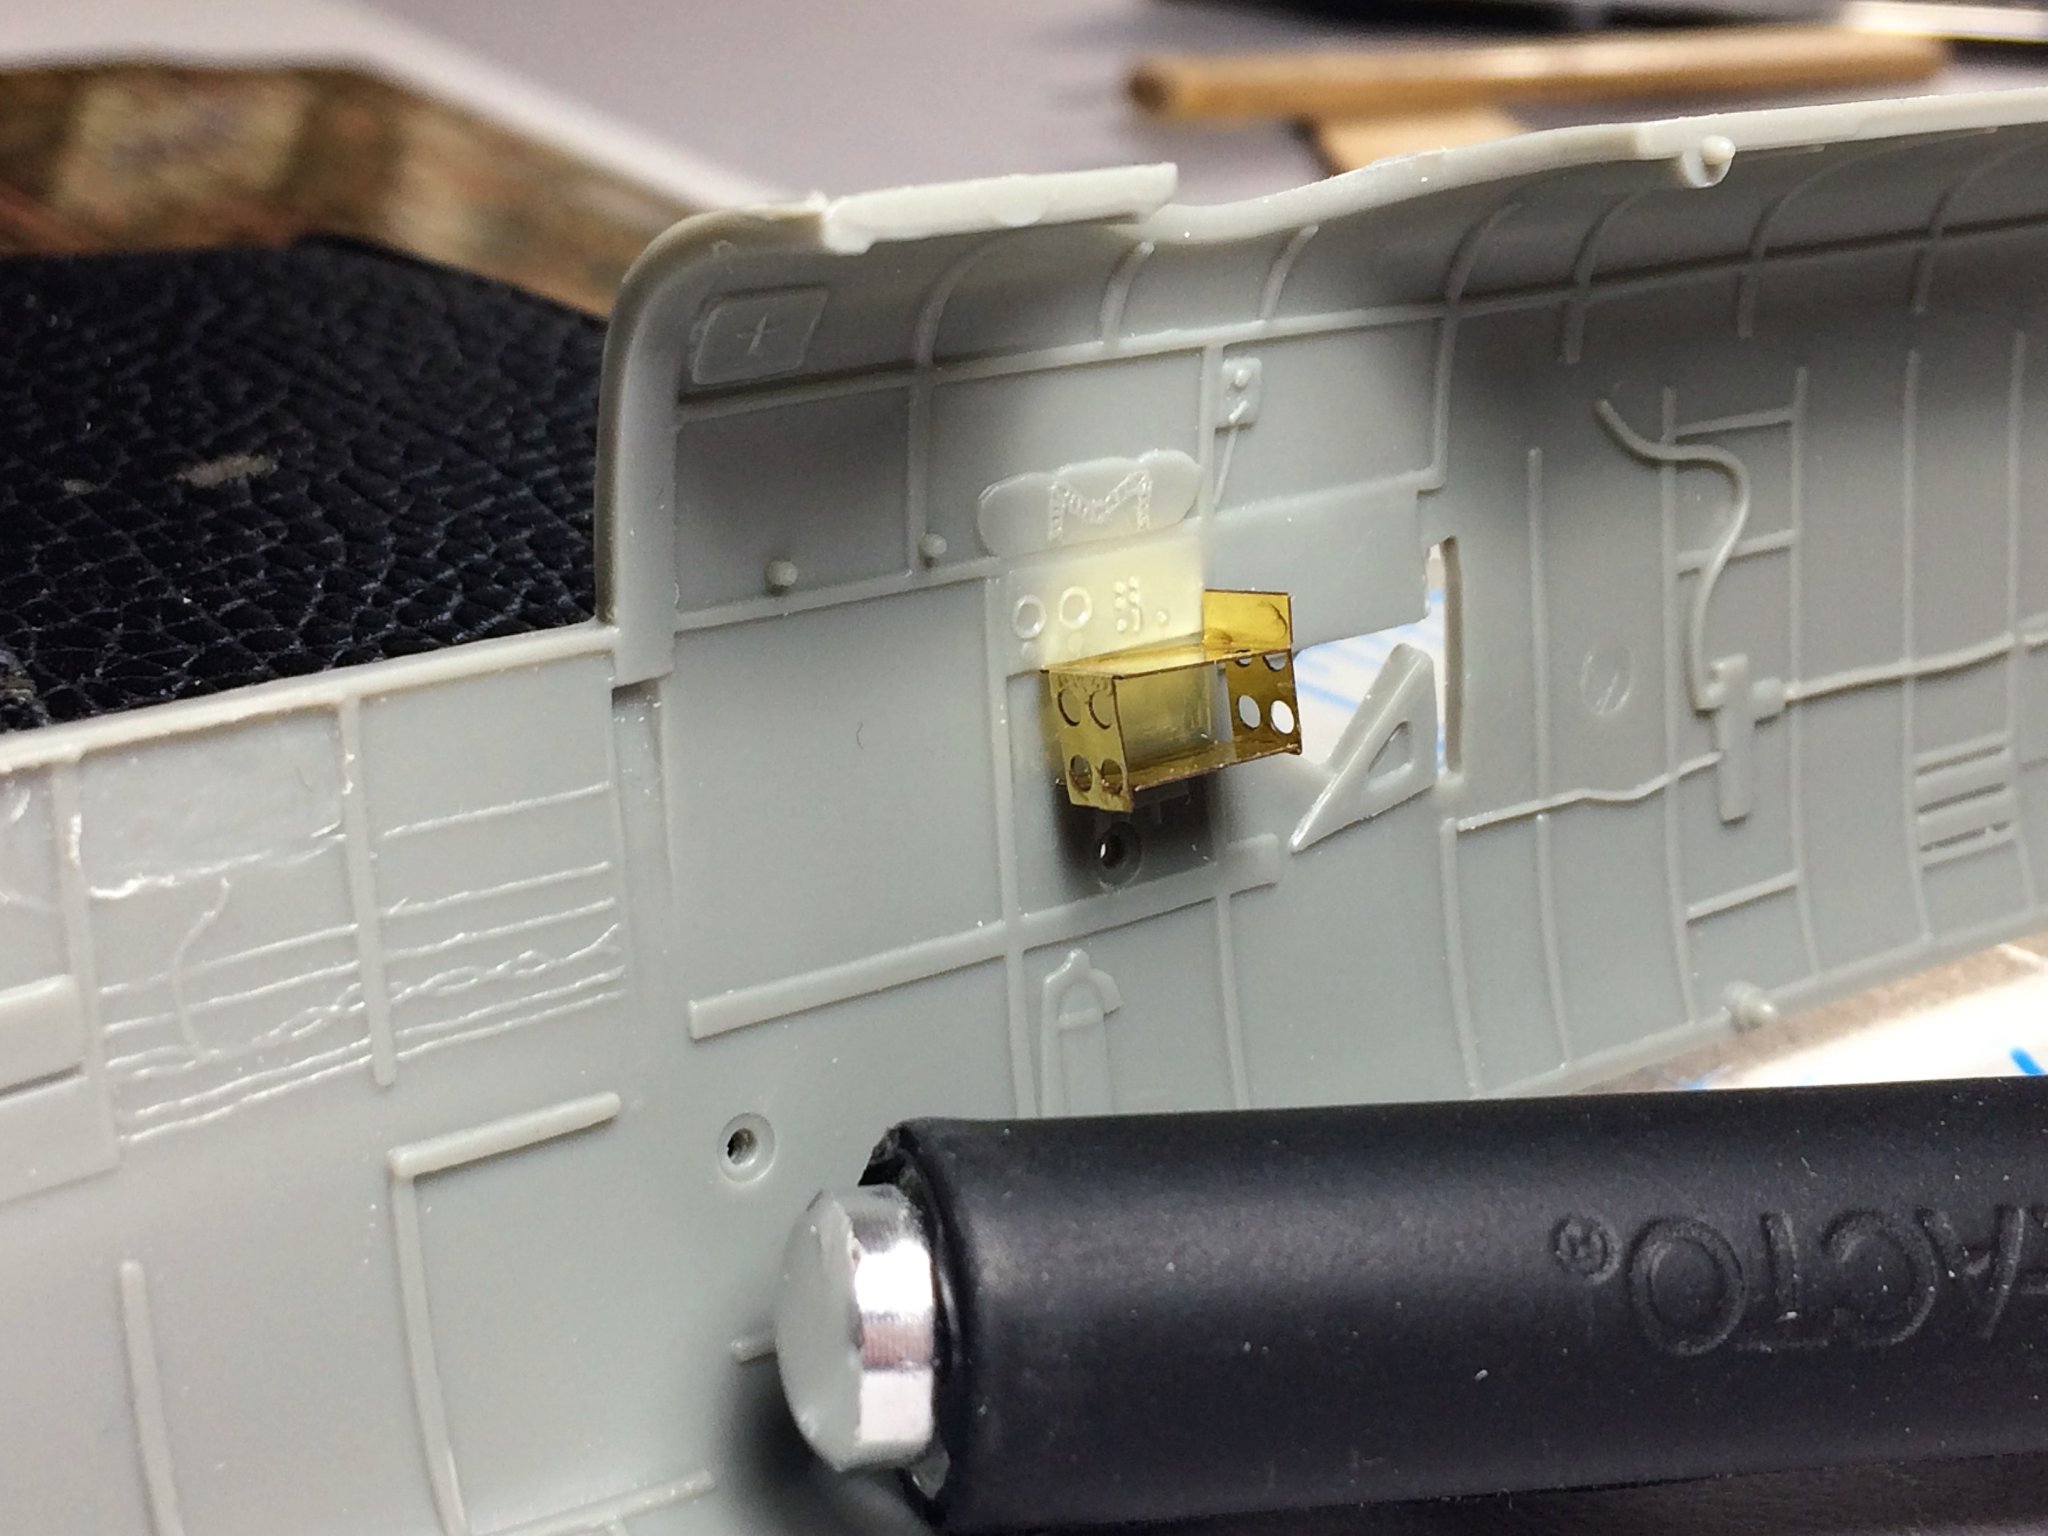
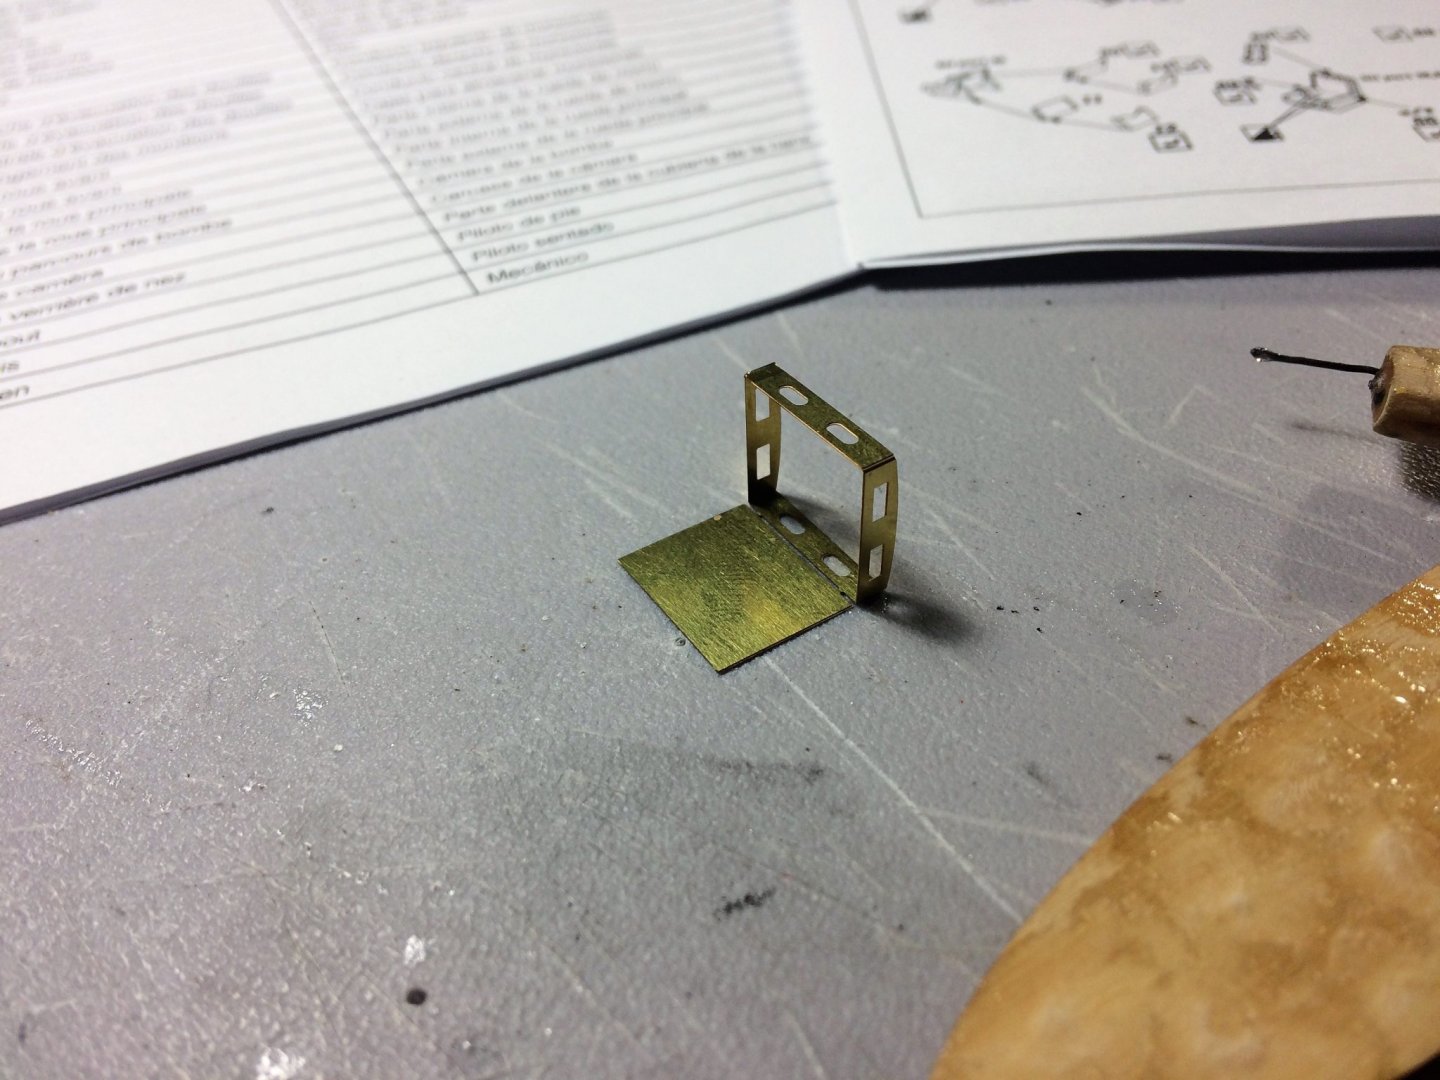
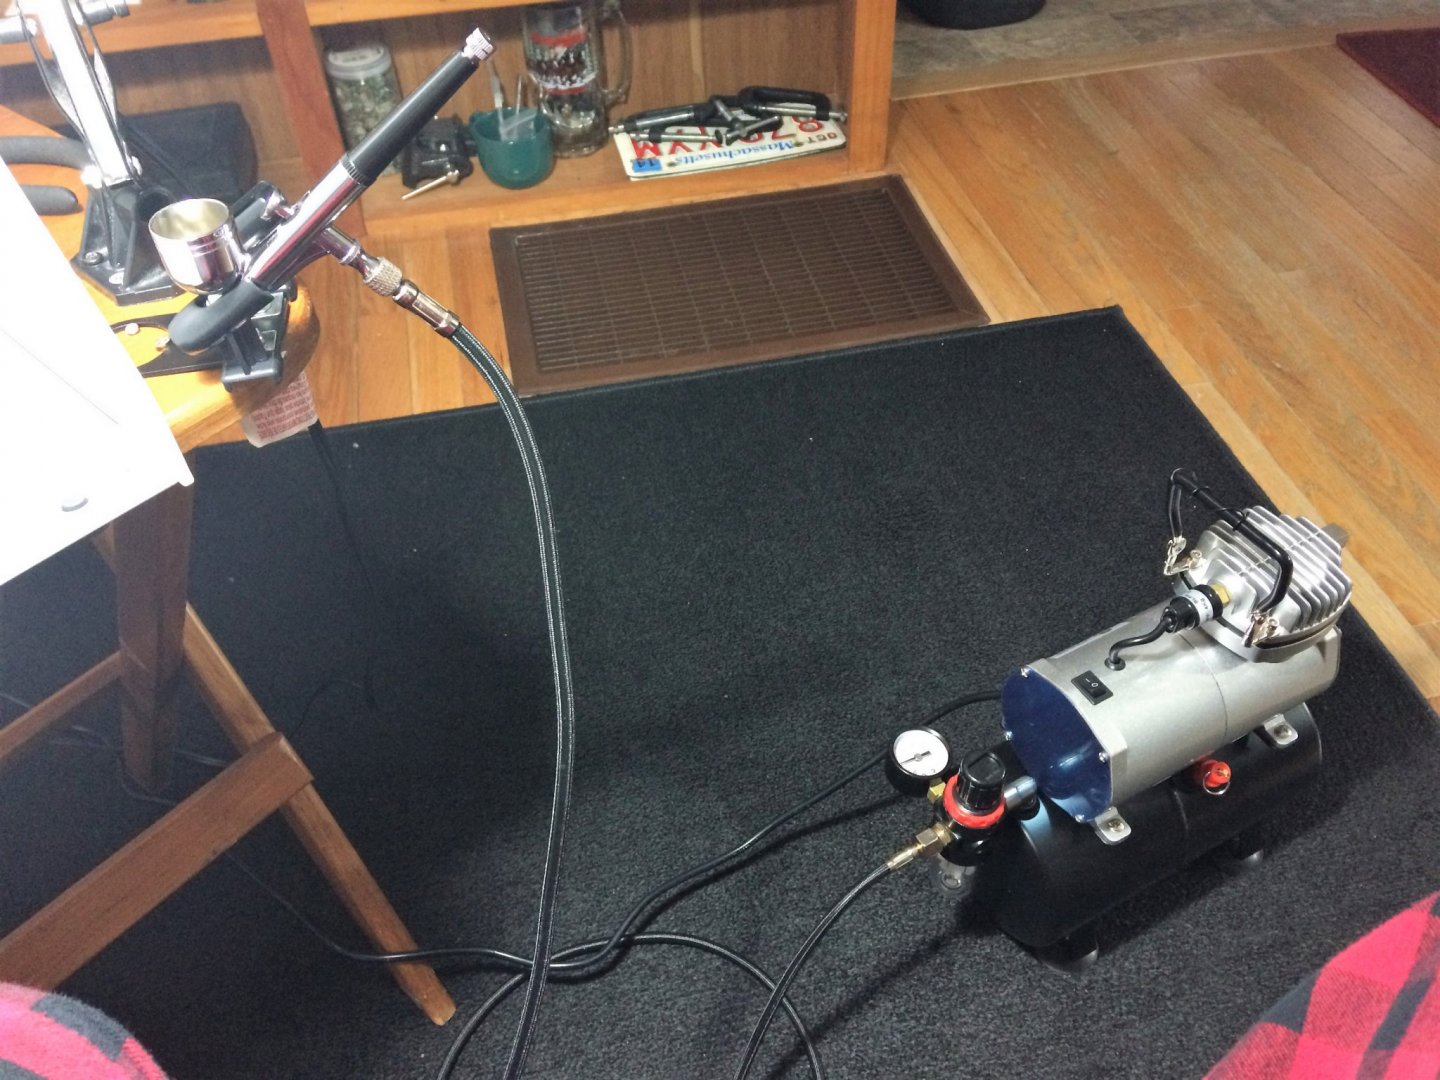
Evening, CDW, Thanks for the advice. I have my compressor set at 20lbs. Being new to airbrushing I was going to adapt a 1:1 paint/thinner ratio and learn from there. I figure thin enough to not clog the airbrush, but thick enough to cover. This past weekend was a perfect one. Three days long and only left the house once. Did the basic chores and did a fair amount of building on this project and my Niagara. Didn't think the coffee and creamer was gonna hold out! Continued placing parts that will be eventually be painted the same as the interior. I figure once the interior PE is placed I'll try airbrushing the interior. A large area where I can see how the paint lays down. All parts that straddle the interior where placed, and glued, with the two fuselage halves taped together. But only glued on one side. Should insure a fair alignment...…..mostly. Time to make another box from the PE! The dreaded box! Bend once!.....and glue. Came out a bit better! Started playing with the rear deck. Not glued on yet. I must say, being new to PE and which manufacturer is better, but the Eduard PE seems to fit really well. I can see some Panel Line accent on this once it's painted. Stay warm Tom E


- 120 replies
-
- 15
-
-
B-25J Mitchell by Tom E - Revell - 1:48 Scale - PLASTIC
Tom E replied to Tom E's topic in Non-ship/categorised builds
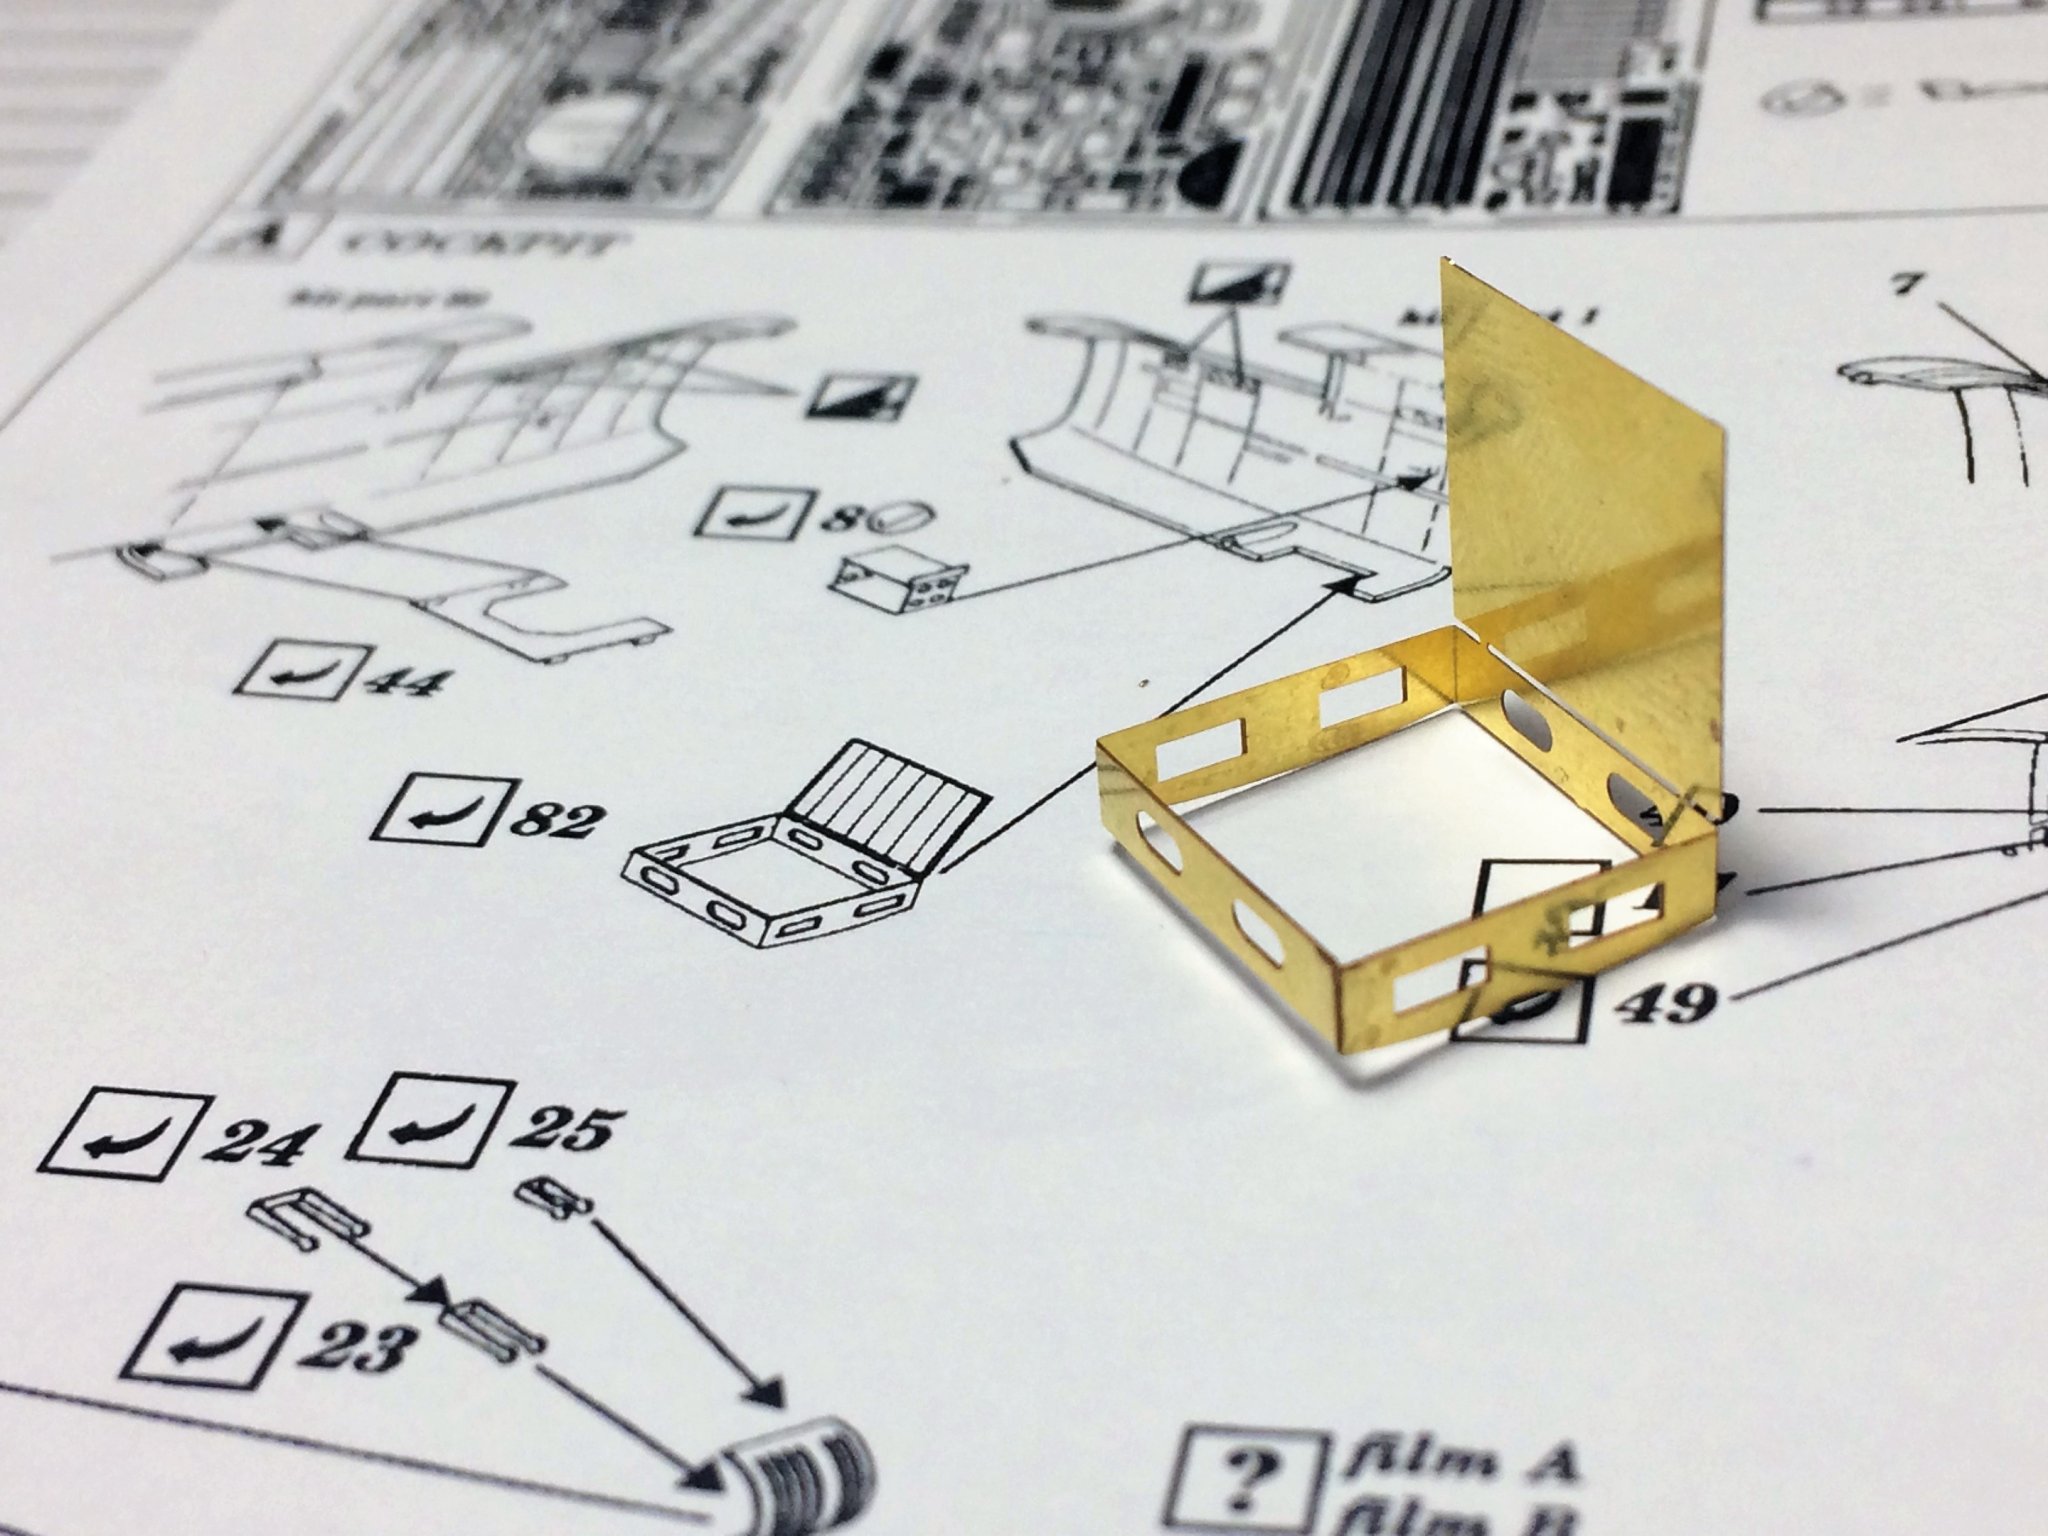
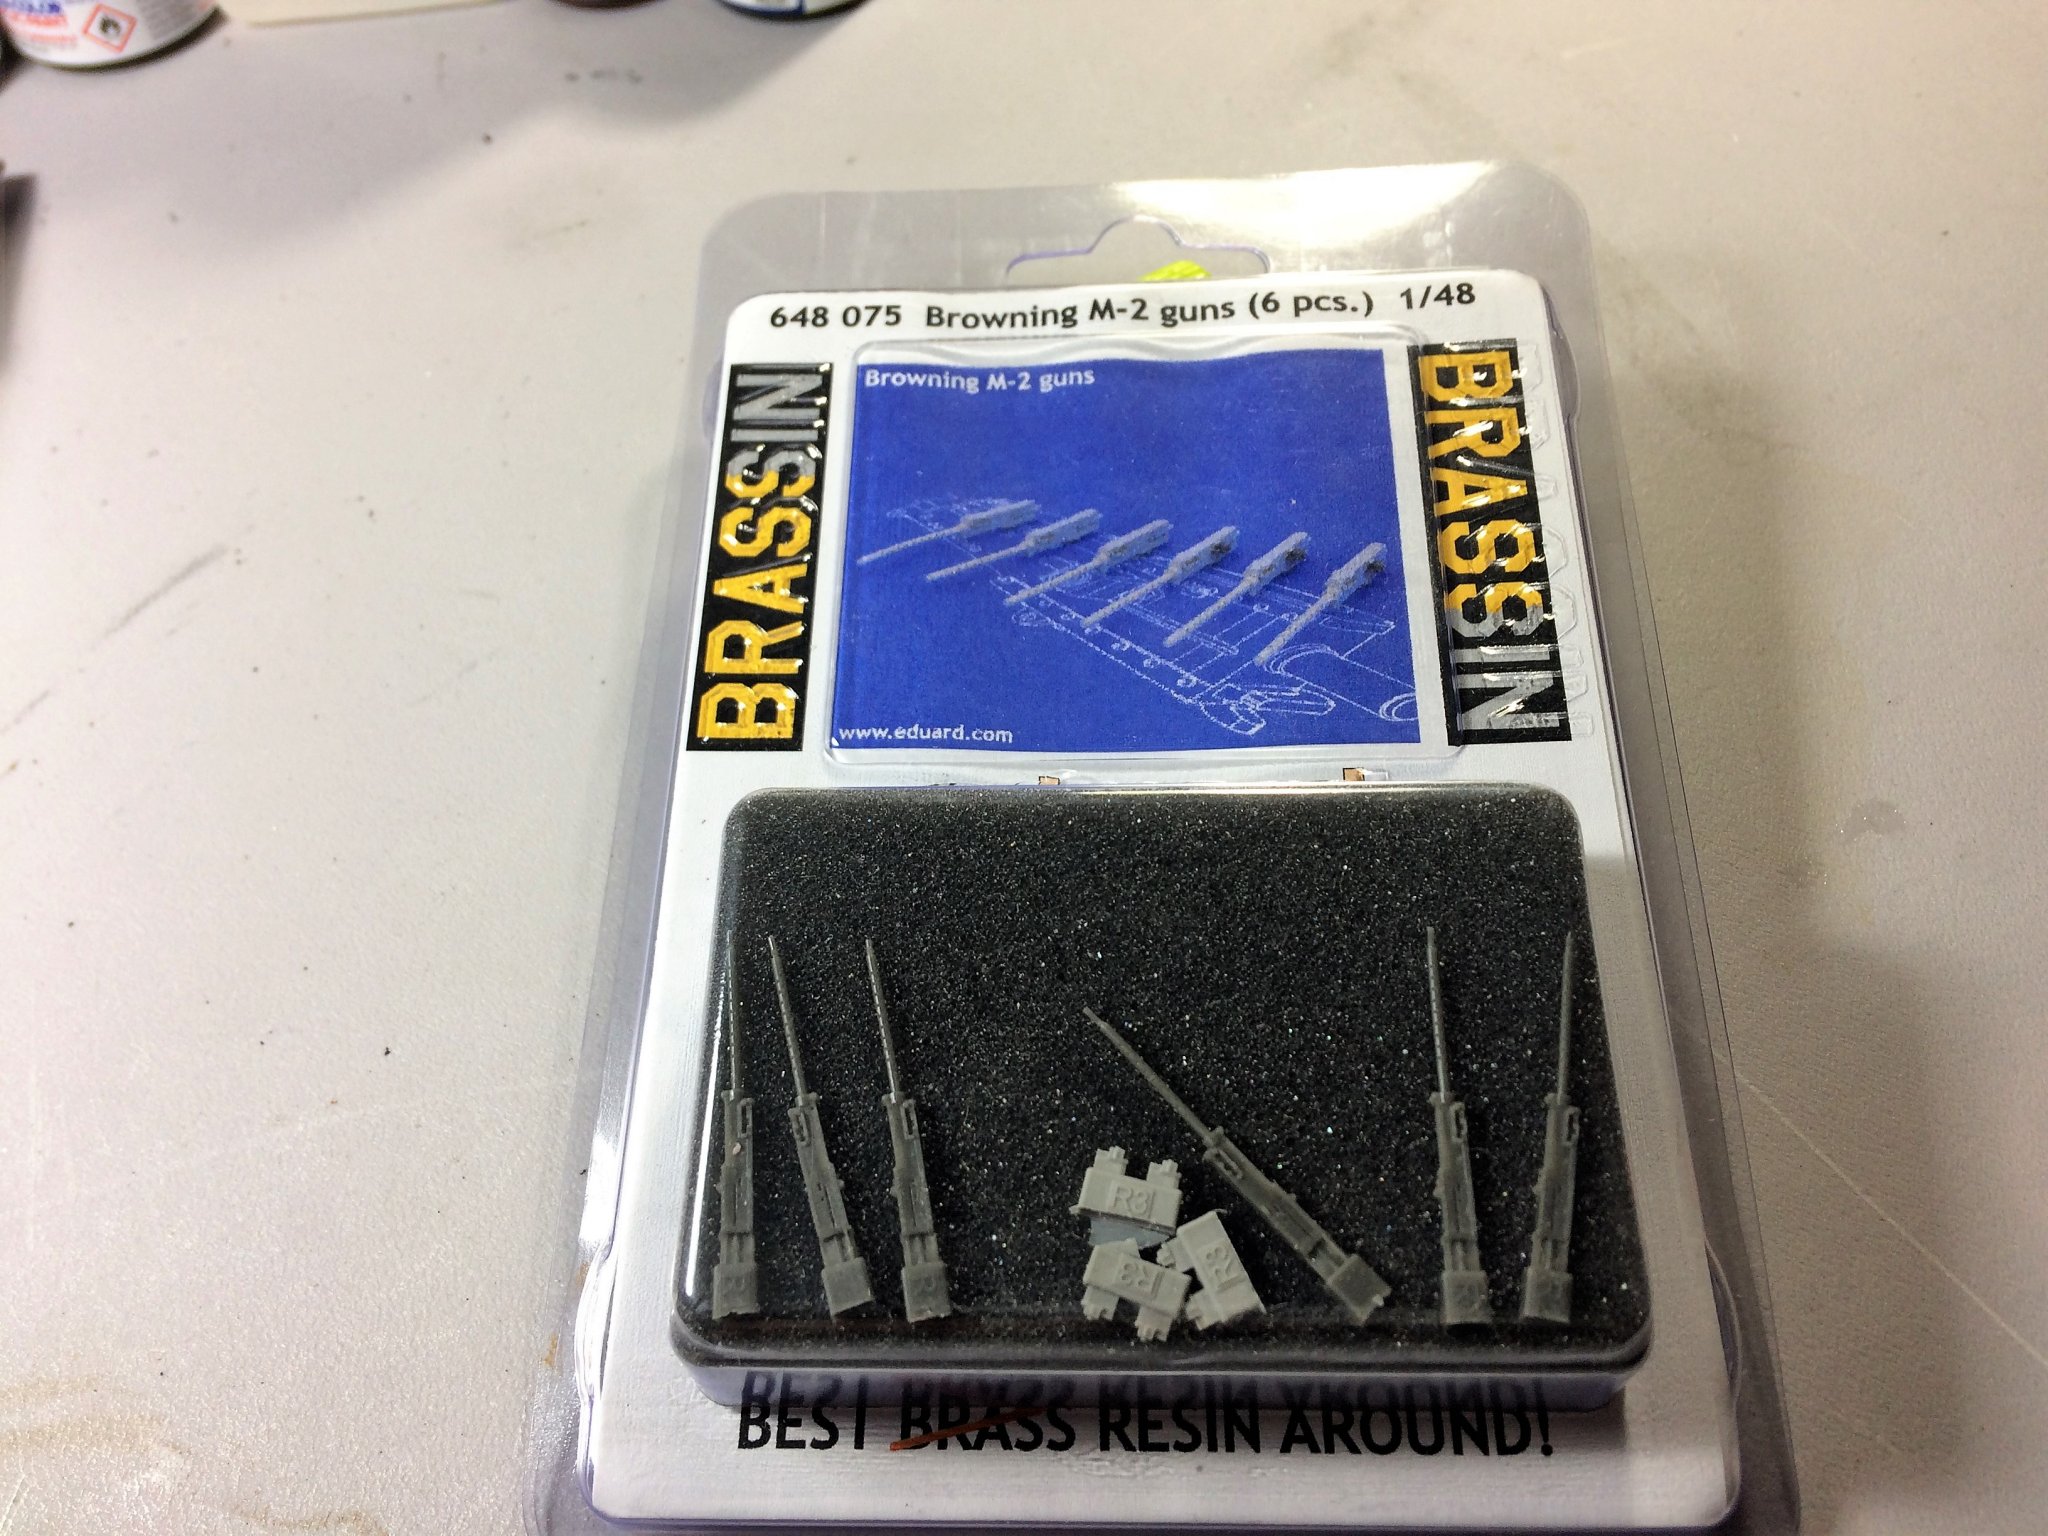
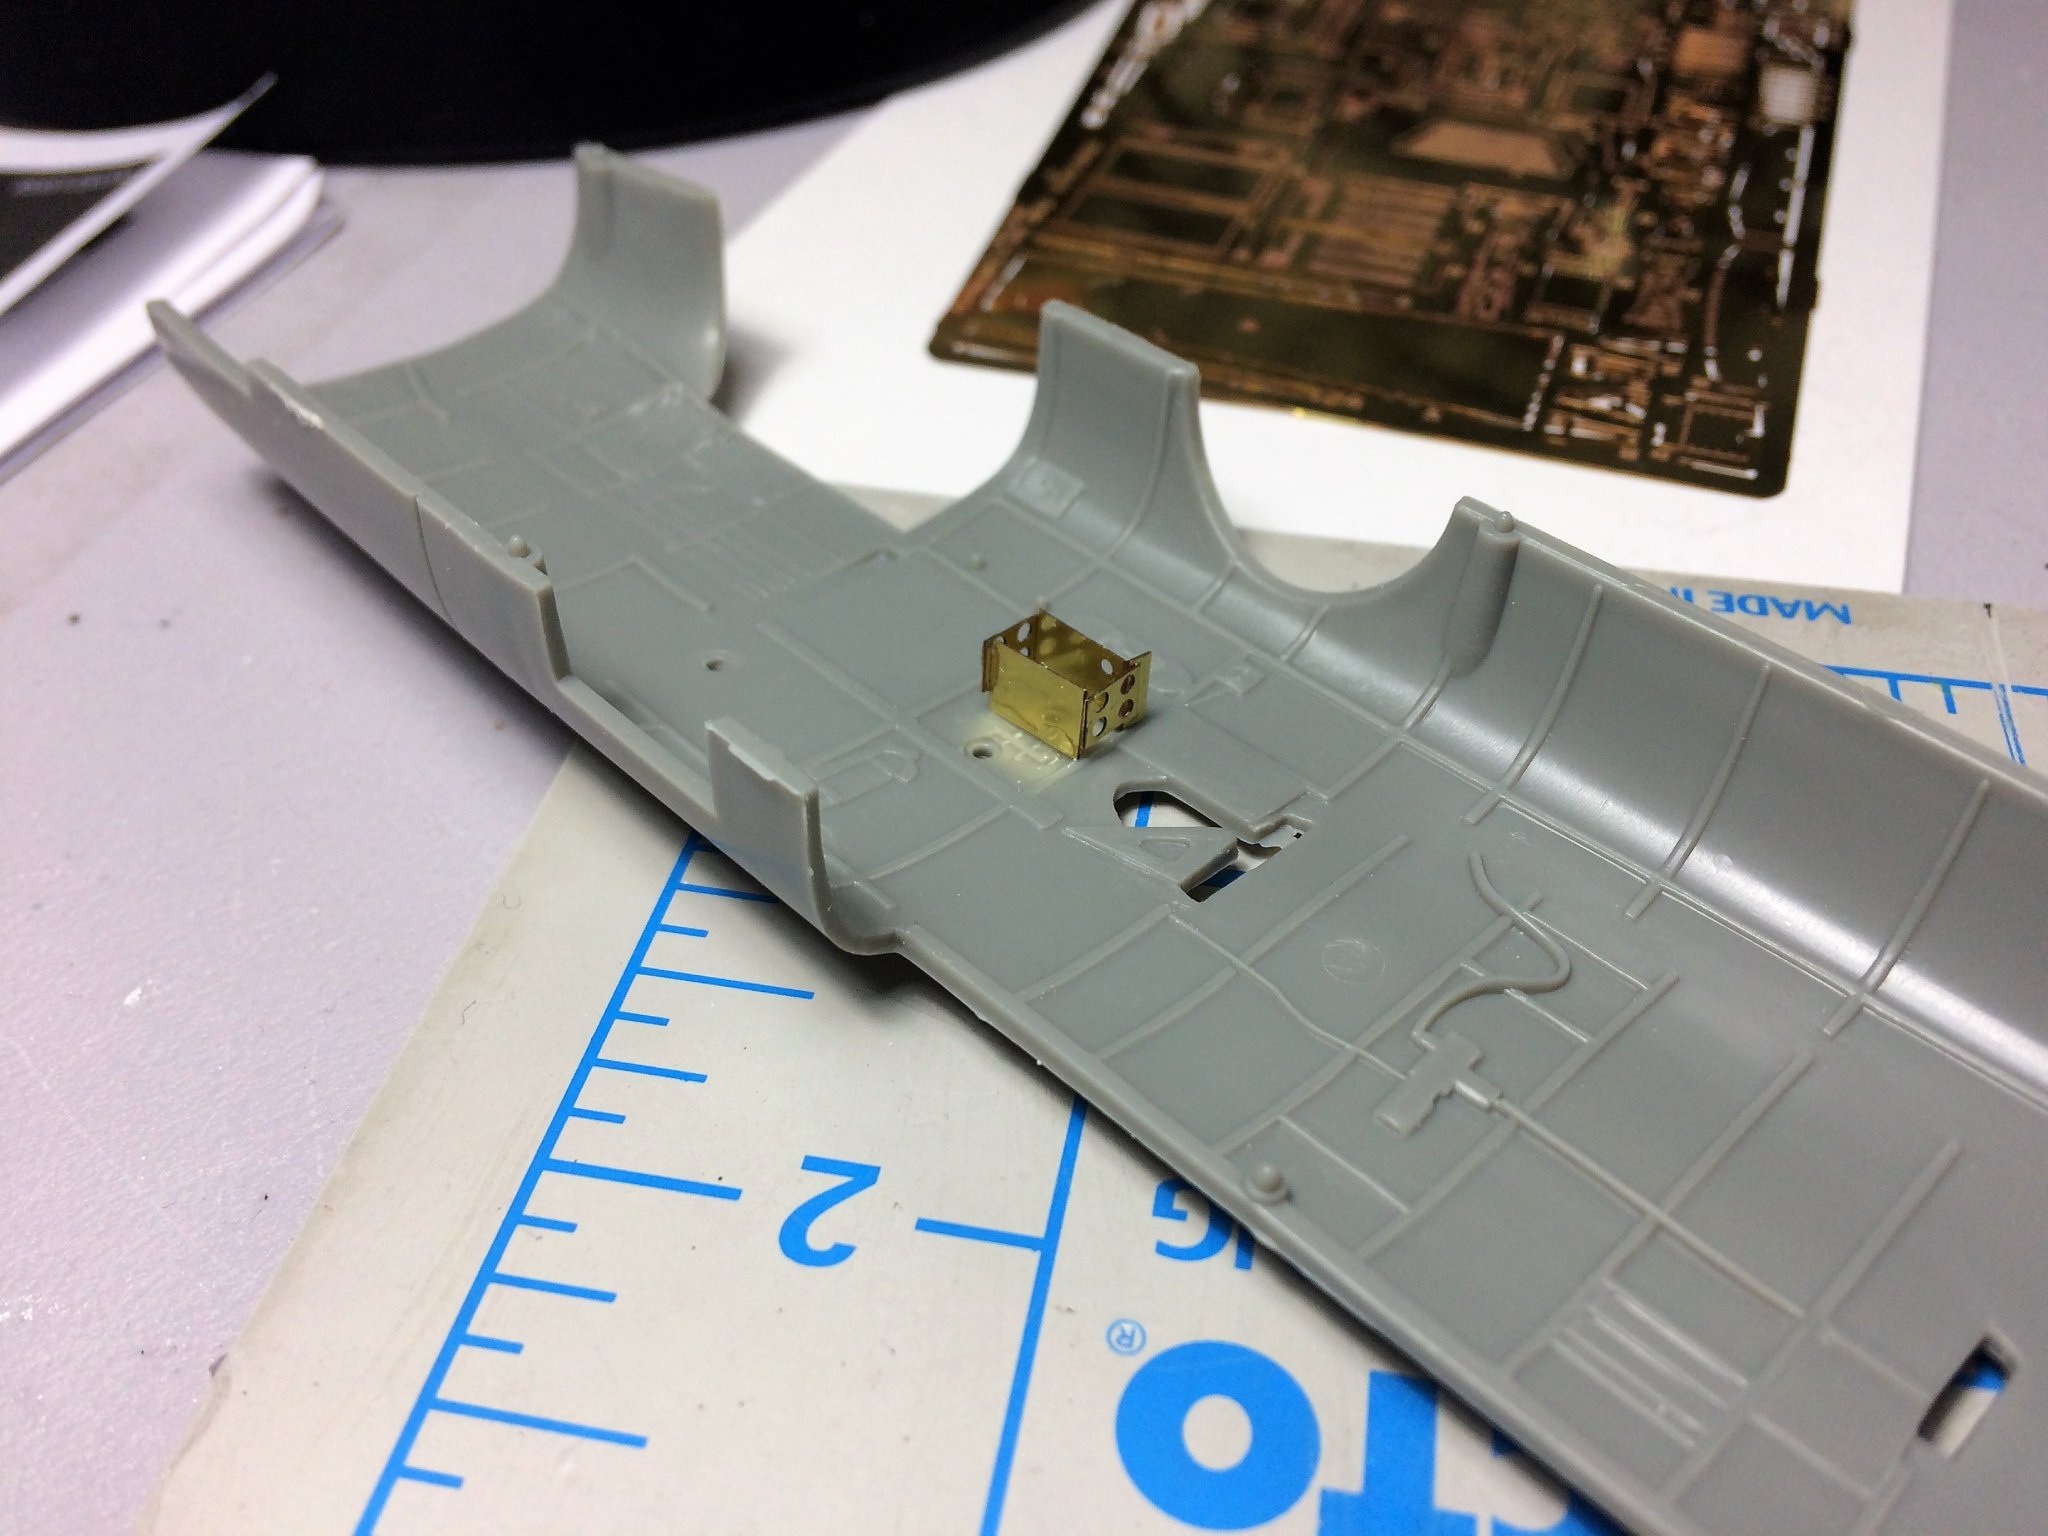
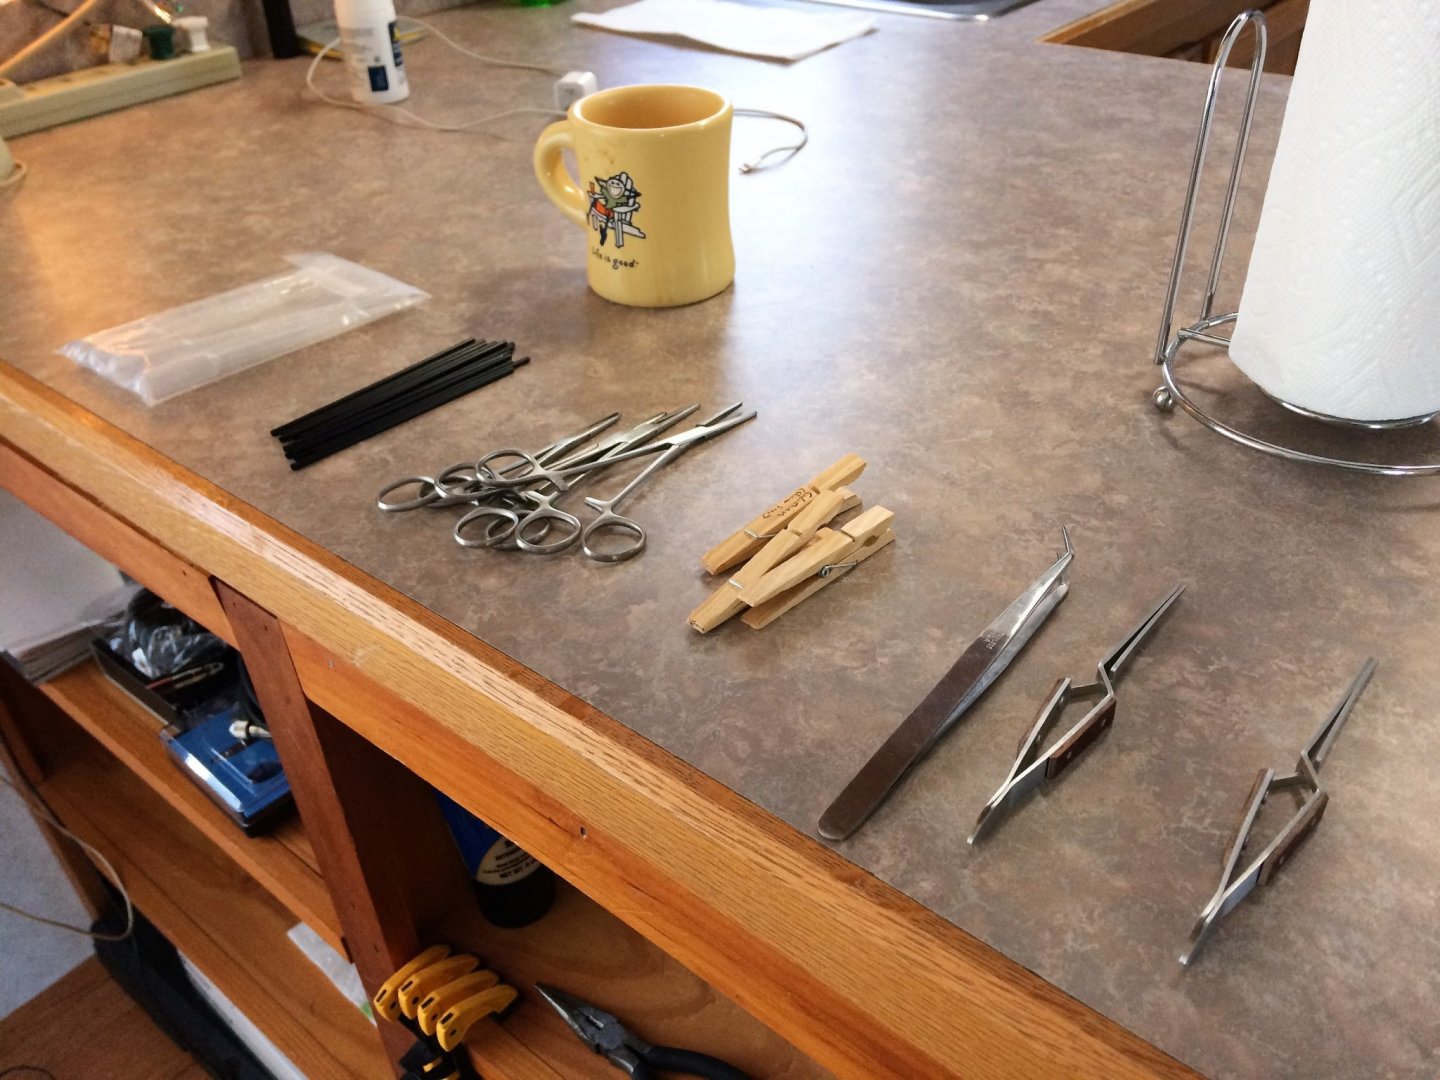
Afternoon, Admittedly, I have been dogging this build for a bit of spare time. I dipped my hand "into the cookie jar" called internet shopping and bought a few more "Needful Things"! Supplies...…I tell myself.....colors I will eventually need.....appropriate thinner....supplies...….yeah....supplies! I bought some more paint, that I will eventually need, but heavy on the Tamiya this time with a few more Mr Color paints. I bought the below guns just because. They looked cool! Don't know if there historically correct, looking into that one, but lets see If I can "work em in" some where. If not, save em for another build. When I bought the compressor, the spray booth was on sale as well. We'll see about this, seems pretty straight forward. It fits my place. I have the compressor at my feet so I can watch the pressure gauge. What's a good pressure to work at? Instead of diving right in and shooting paint, I went with water instead. I put up the below paper towels in preparation of a cone of water to come spraying out. When I finally did it, I got it. It atomizes the liquid, I get it now. I had to spray it on my hand to feel anything coming out. Didn't need the hanging paper towels! Well, I went a head and started screwing around with the PE. I decided I wanted to start installing interior items that will want painted when I do finally paint the interior an olive drab from Mr Color. I made a box. My very first piece of PE. I chose this piece because its a simple box, cant be too hard.....right? Lesson number one......don't bend too many times. Snapped at 3 different places. Bend once and only once!!!!! I hacked it in, I'm hoping paint will cover a heck of a lot of sin. Tom E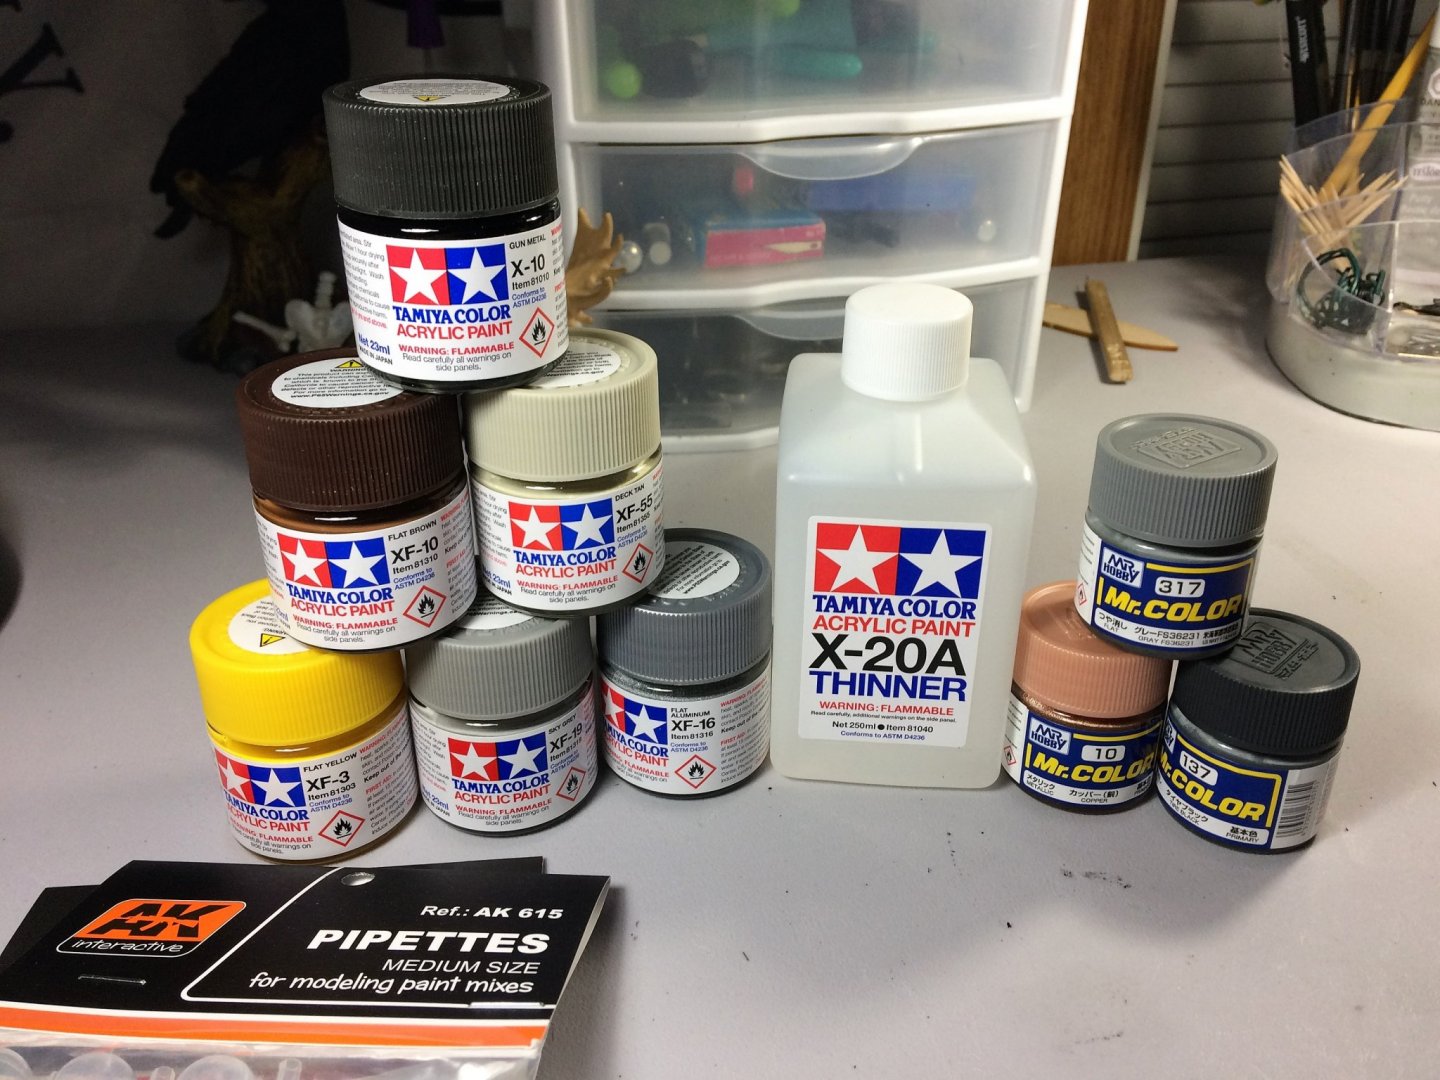


- 120 replies
-
- 13
-
-
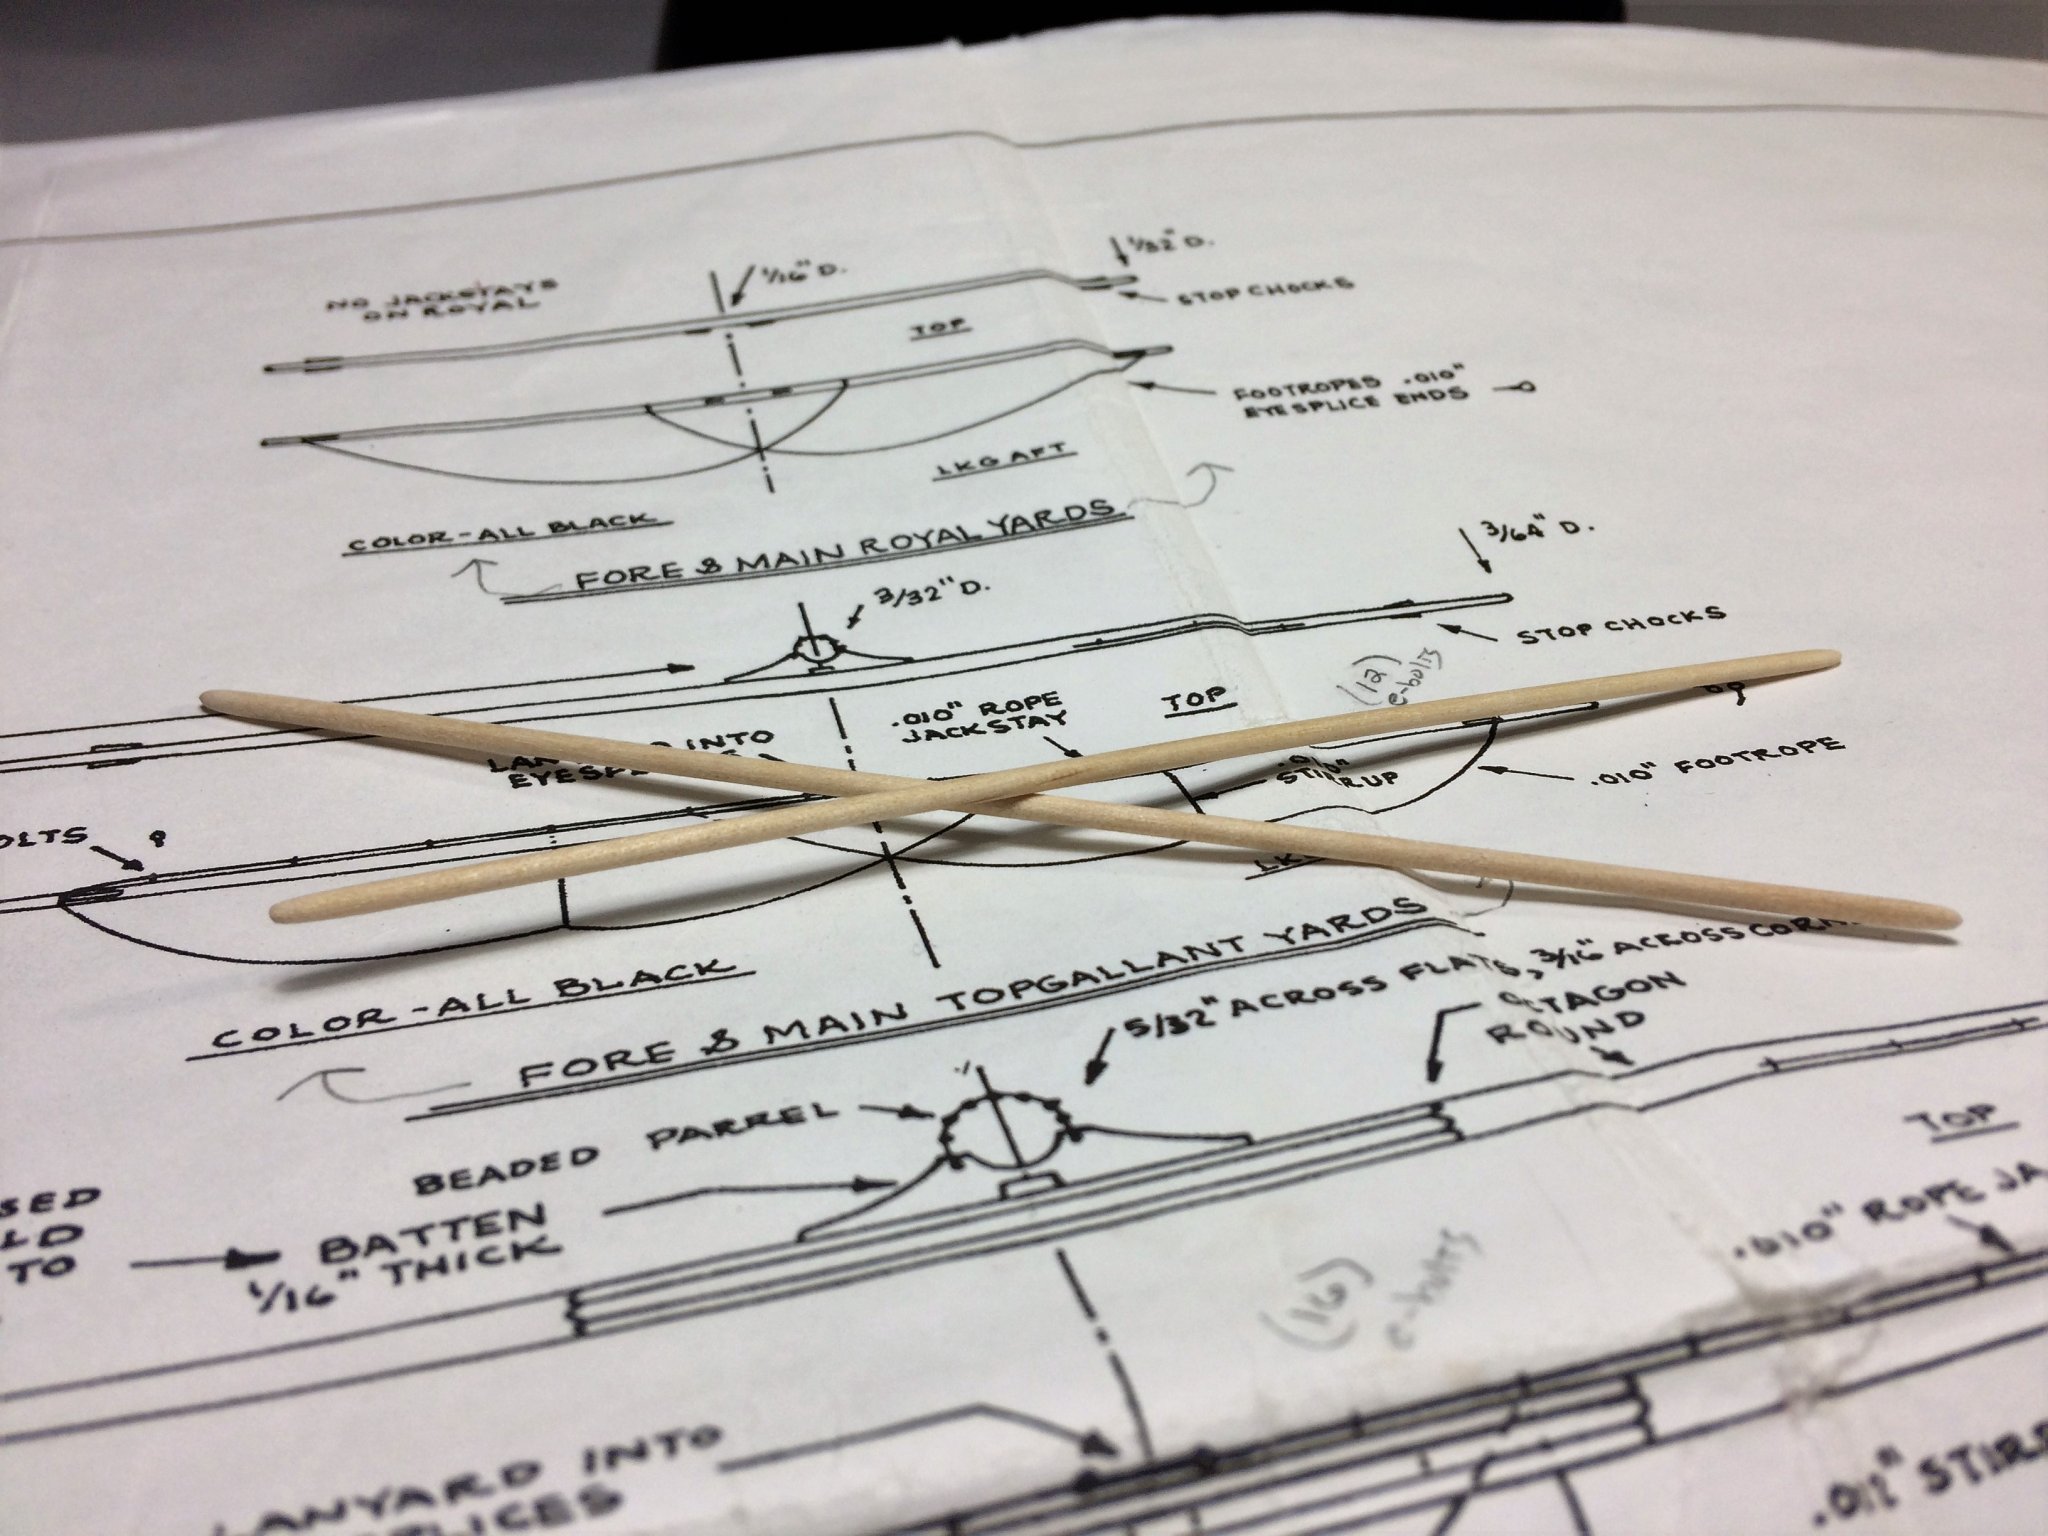
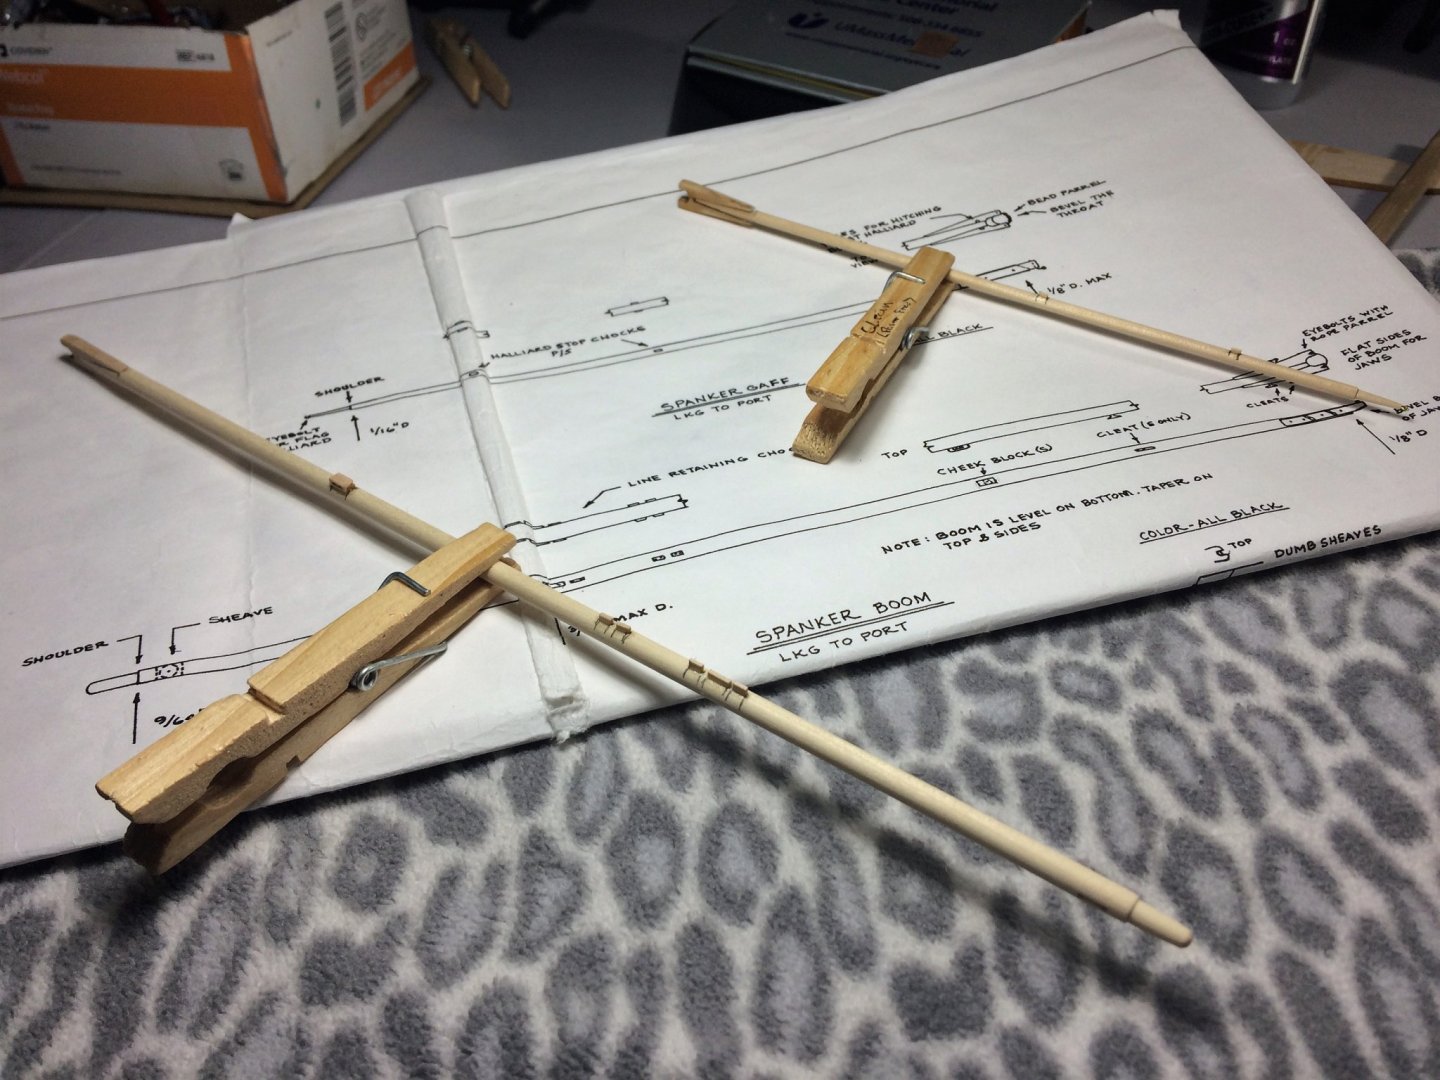
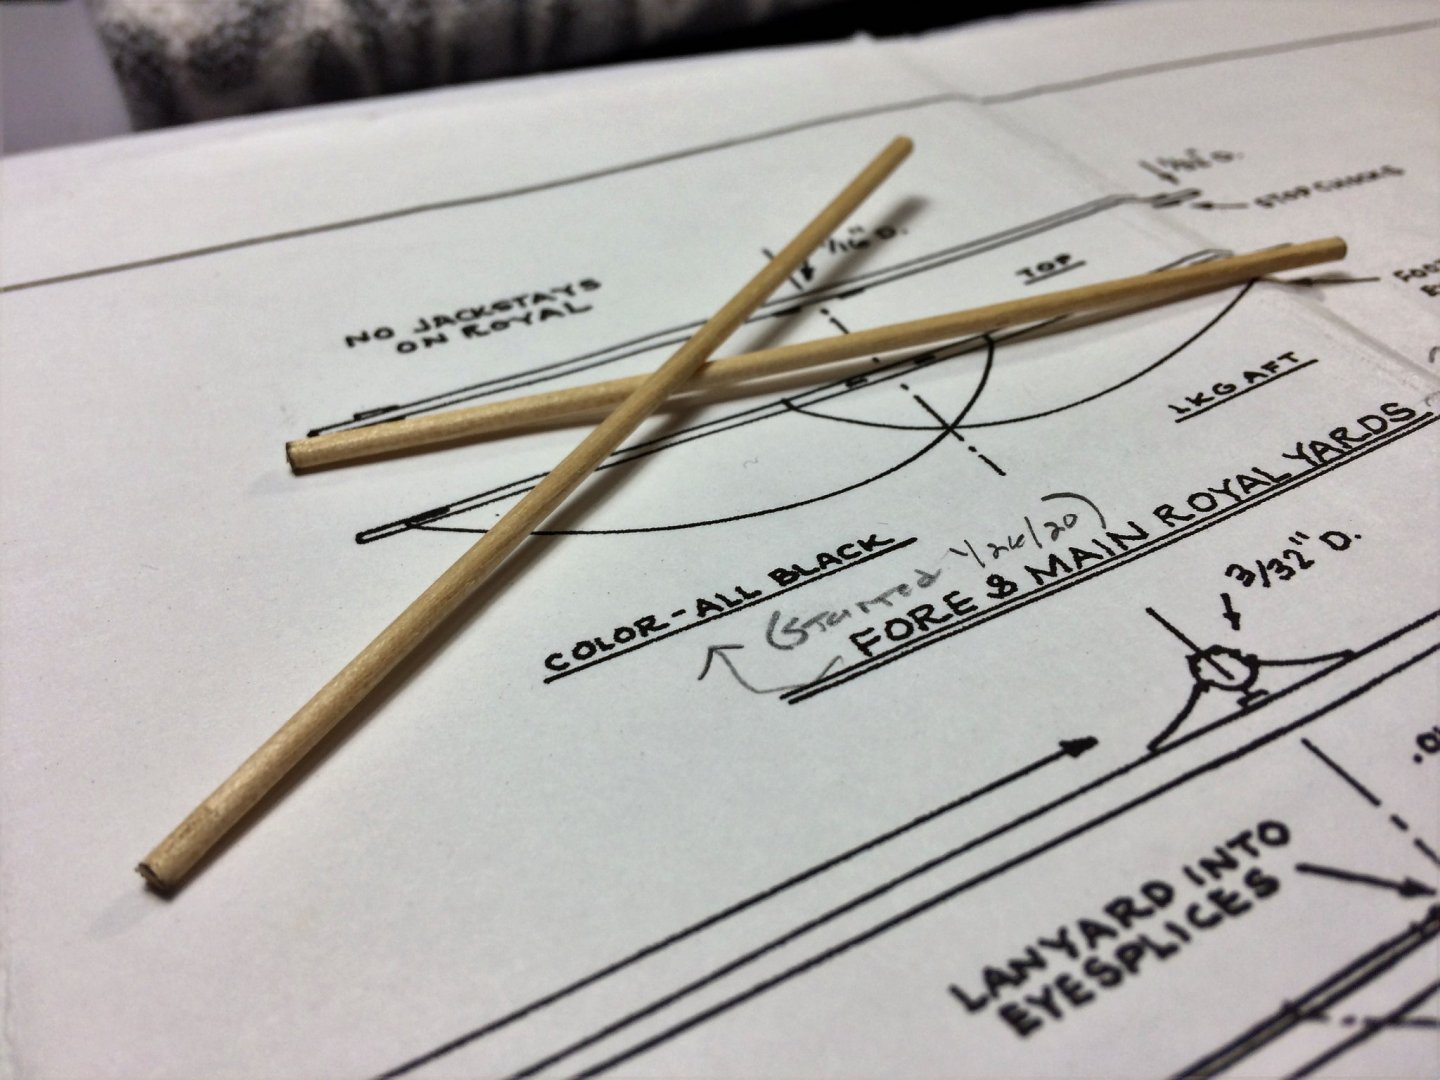
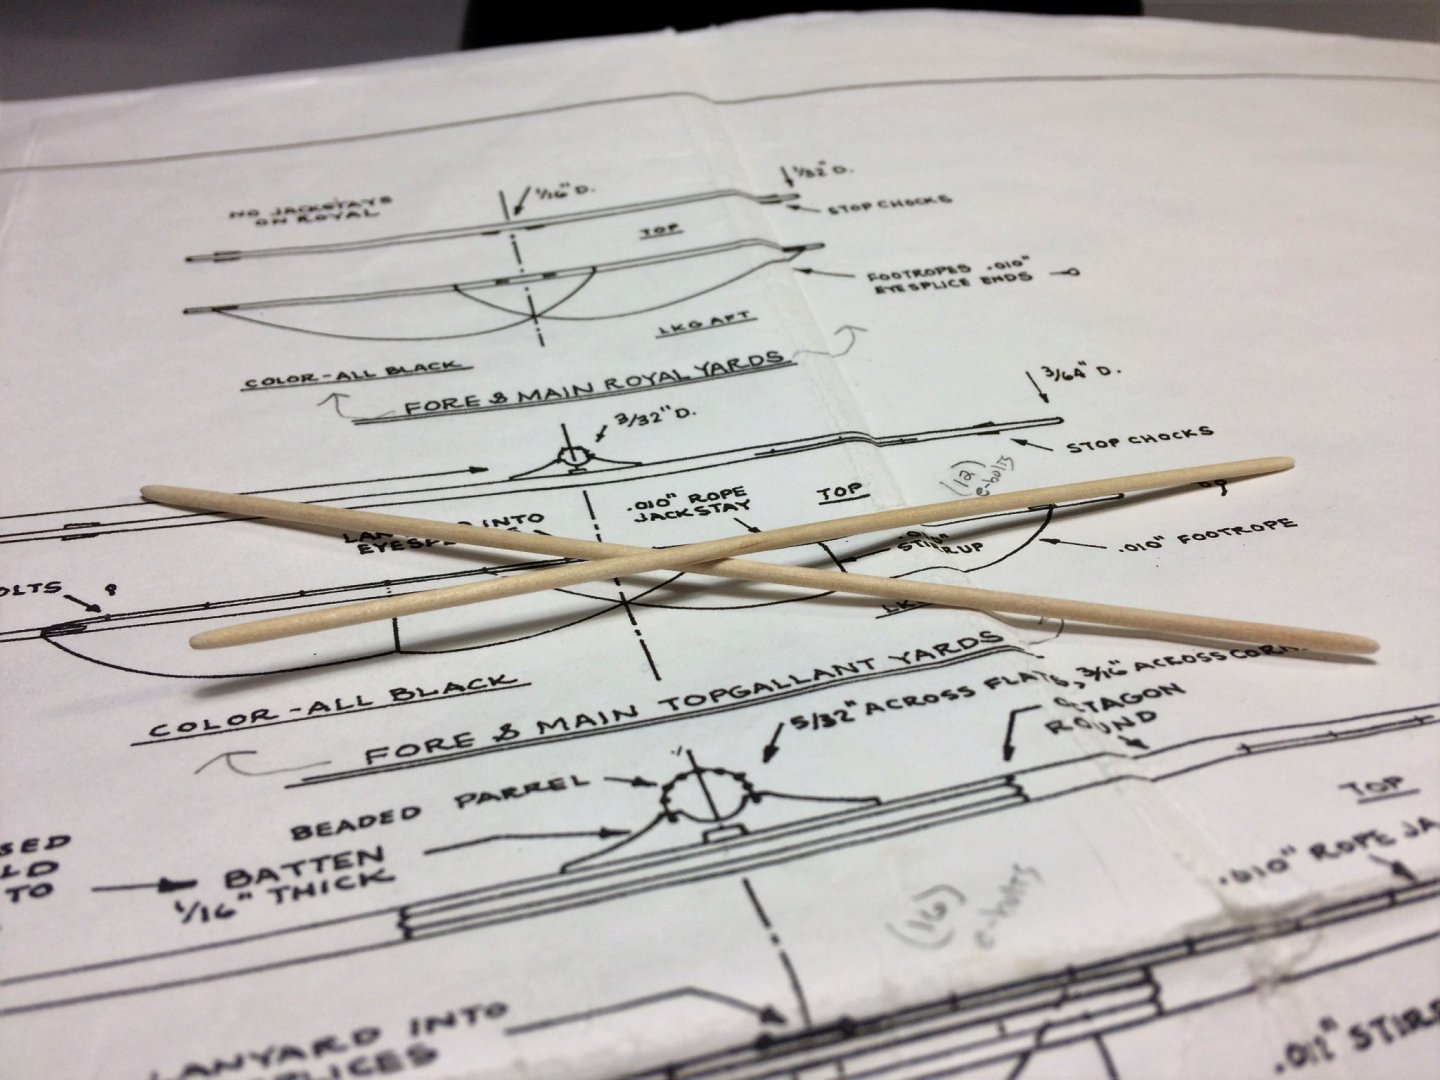
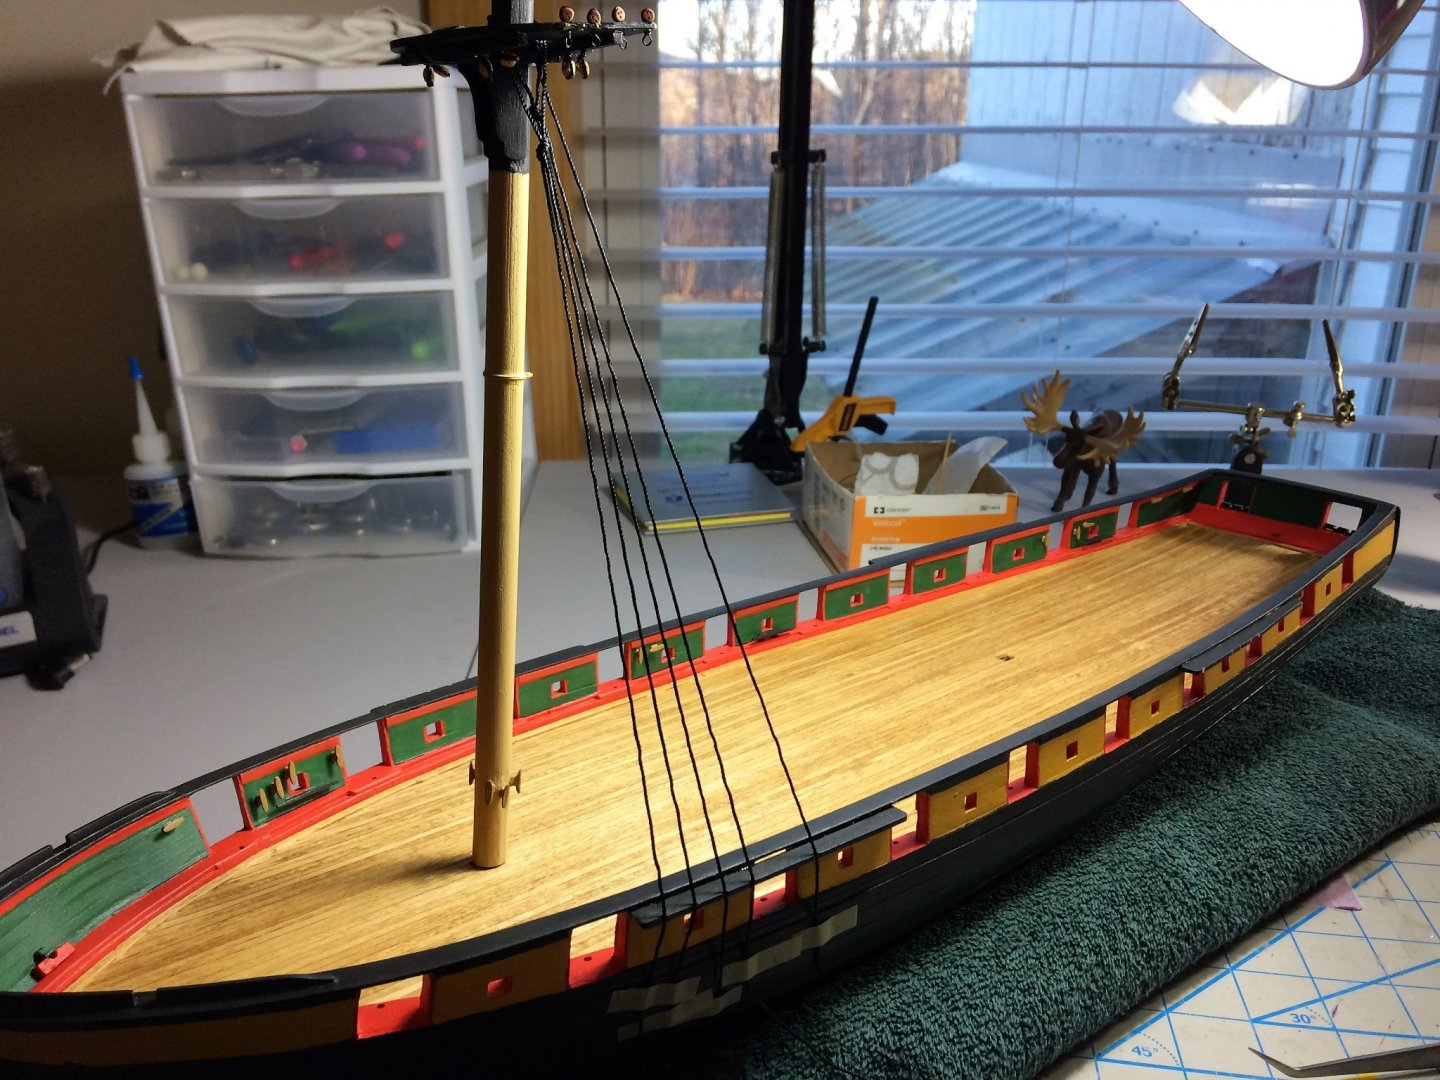
Evening, I think Niagara needs an update. Admittedly, hanging out in the "Non-ship" section with my B-25J build Niagara will be always be my "main" build. I'm seeing this ship thru to the very end! Plus, I may be building a bomber in another section, but I can almost guarantee I'll always have a wooden ship build going. I already know Bluejackets Bowdoin will be after Niagara. The Royal Yards have been started. These weren't too bad to build. Being smaller it didn't take too much time, mostly sanding to shape and attaching the hardware. The foot ropes were simple, so no real fuss with these. Either that or I'm getting better at this...………..NAH!!!!! I would constantly use the tweezers to see how my ropes "balanced out" in relation to the centerline of the yard. I followed this rule for all Yards and the footropes. Not too shabby. Still some touch up work to do with some black paint. I see some glue shine. They fit perfectly into the grooves of some clothes pins and made rigging a bit easier. I now have a full compliment of Yards! Little bit of a milestone in my book. The Spanker Boom and Gaff are on order next. After the those are ready, It'll be time to start putting it all together. I'm thinking carronade sleds first, just the sleds. I've seen it done on other builds and seems the logical way. Masts will be rigged off model as much as possible. Be good! Tom E


-
B-25J Mitchell by Tom E - Revell - 1:48 Scale - PLASTIC
Tom E replied to Tom E's topic in Non-ship/categorised builds
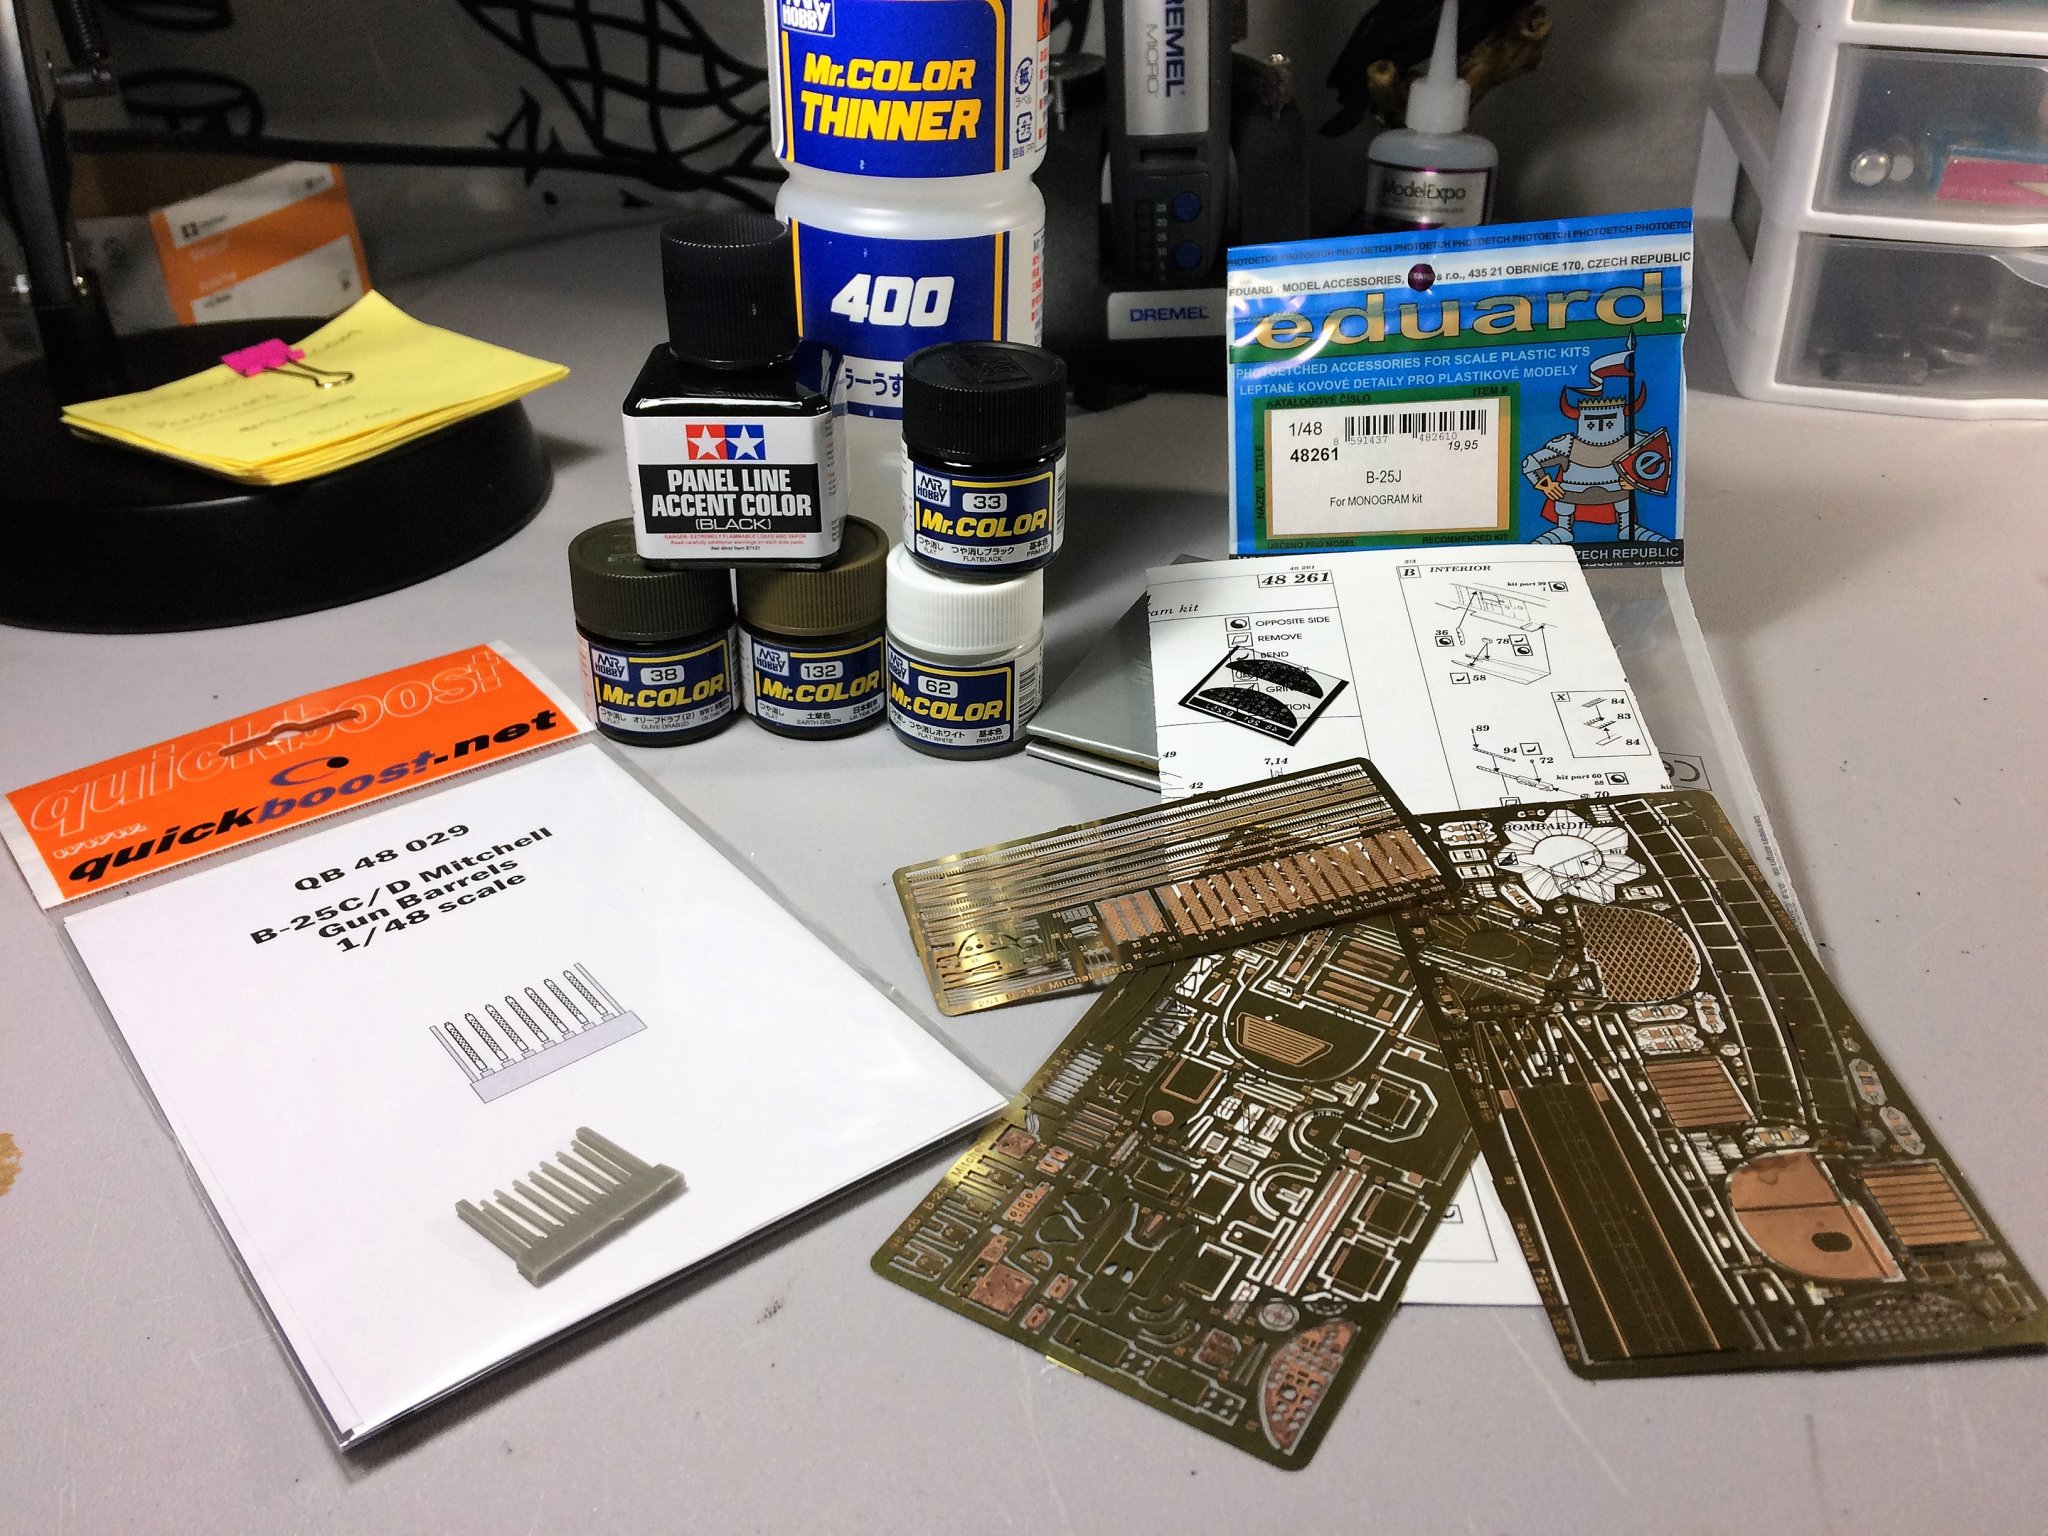
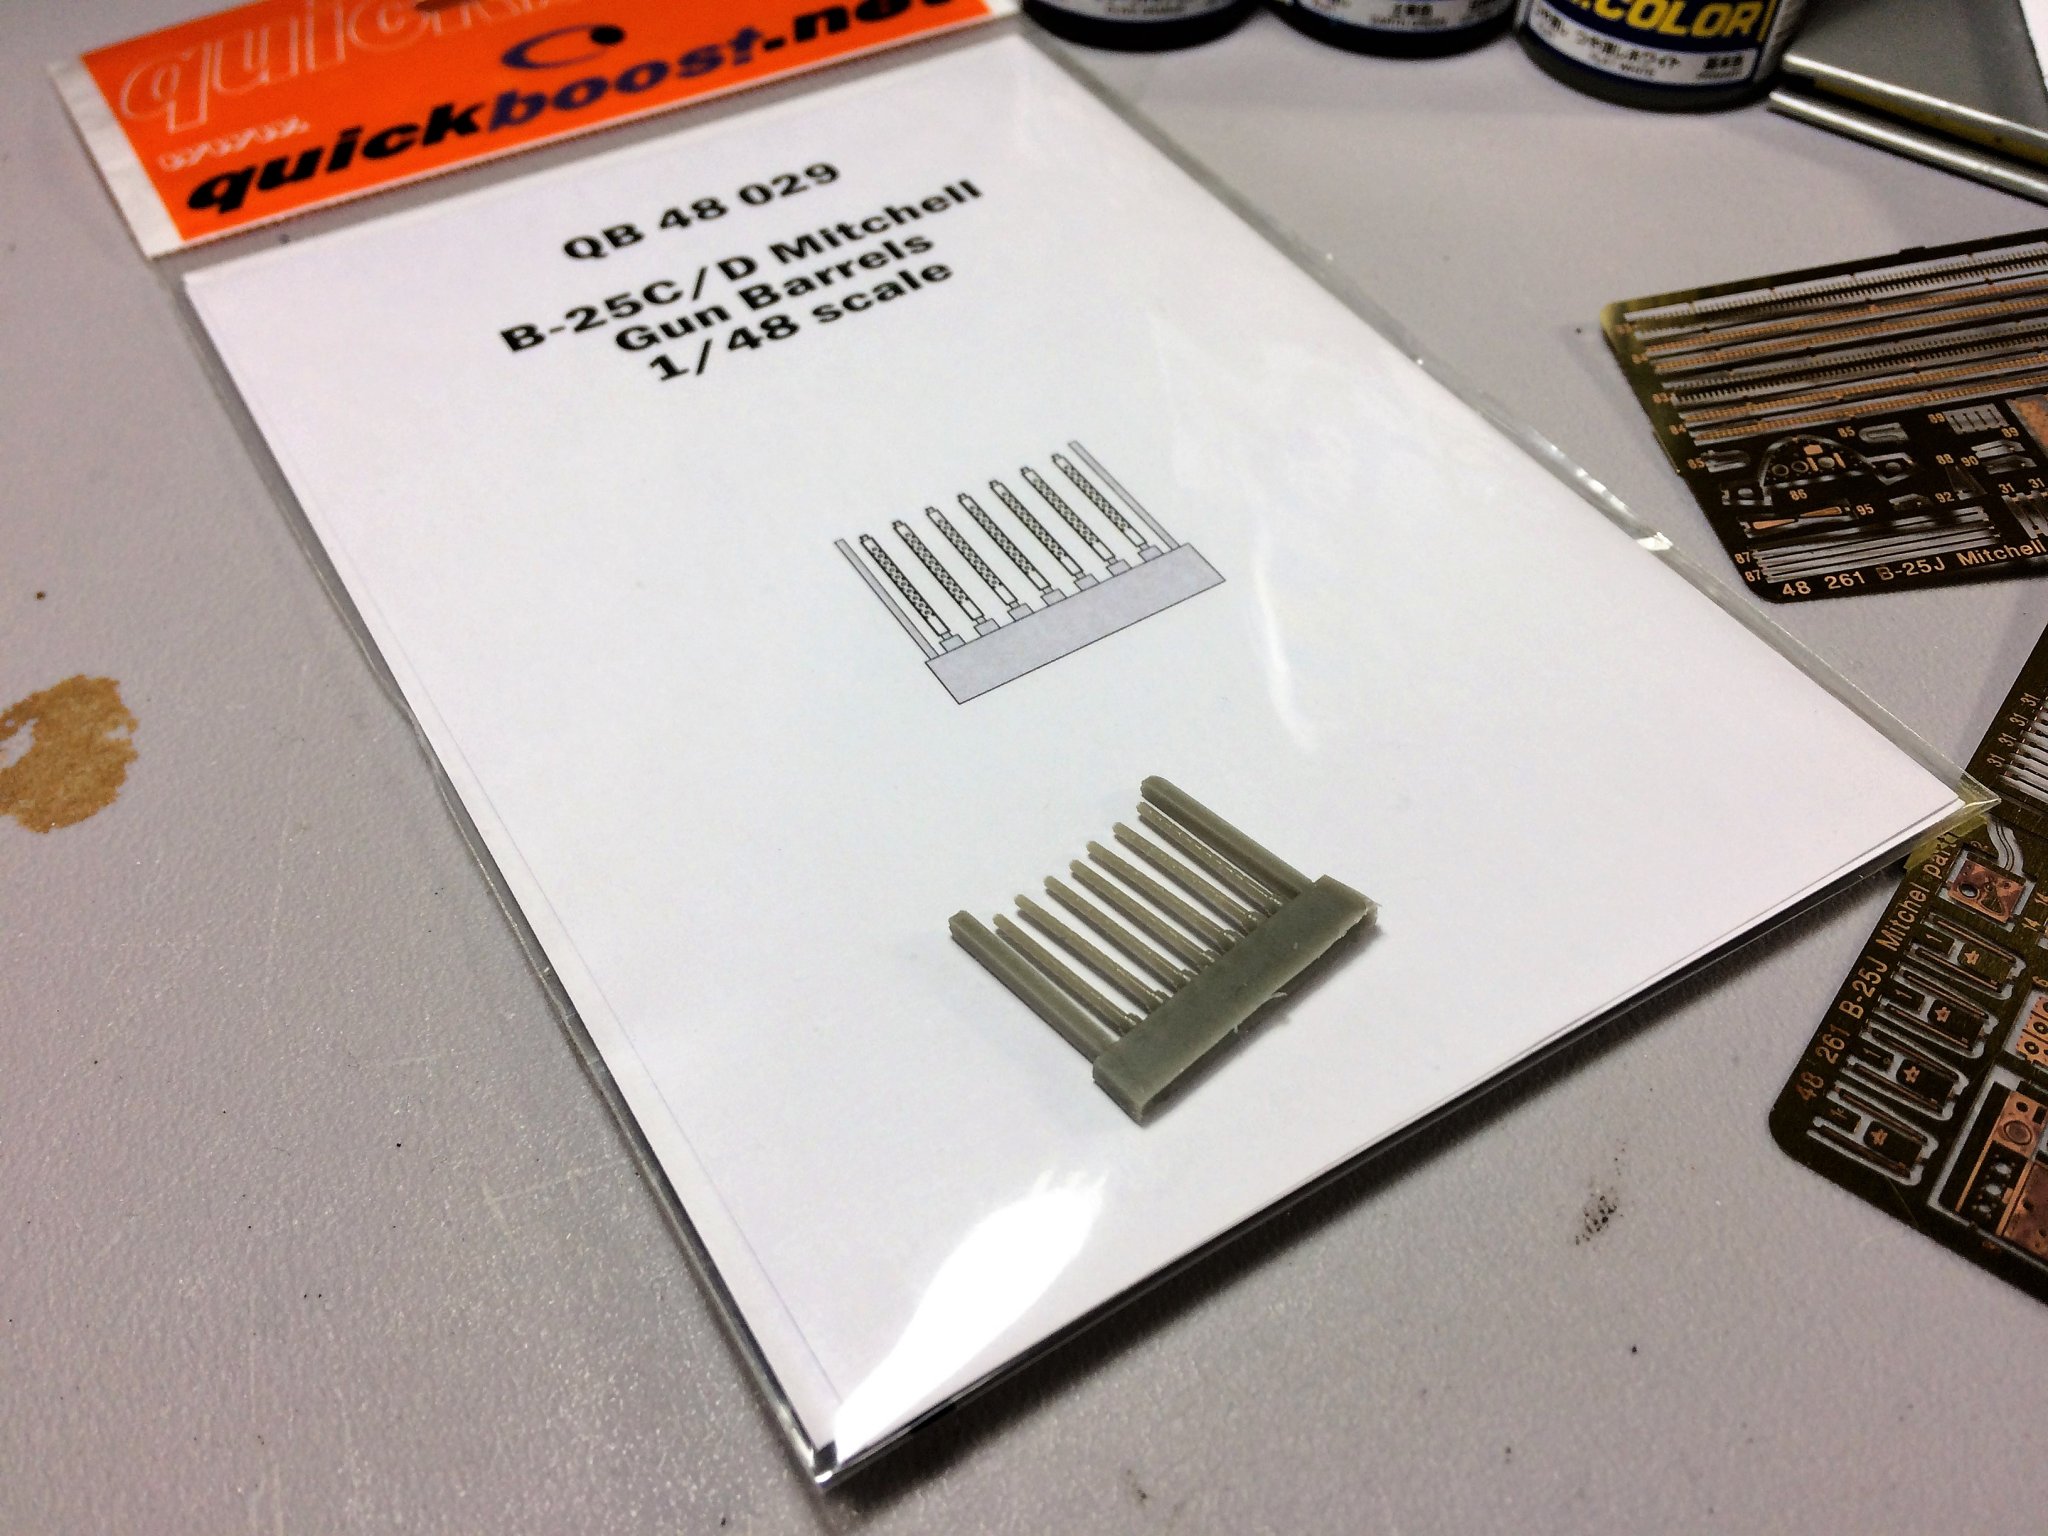
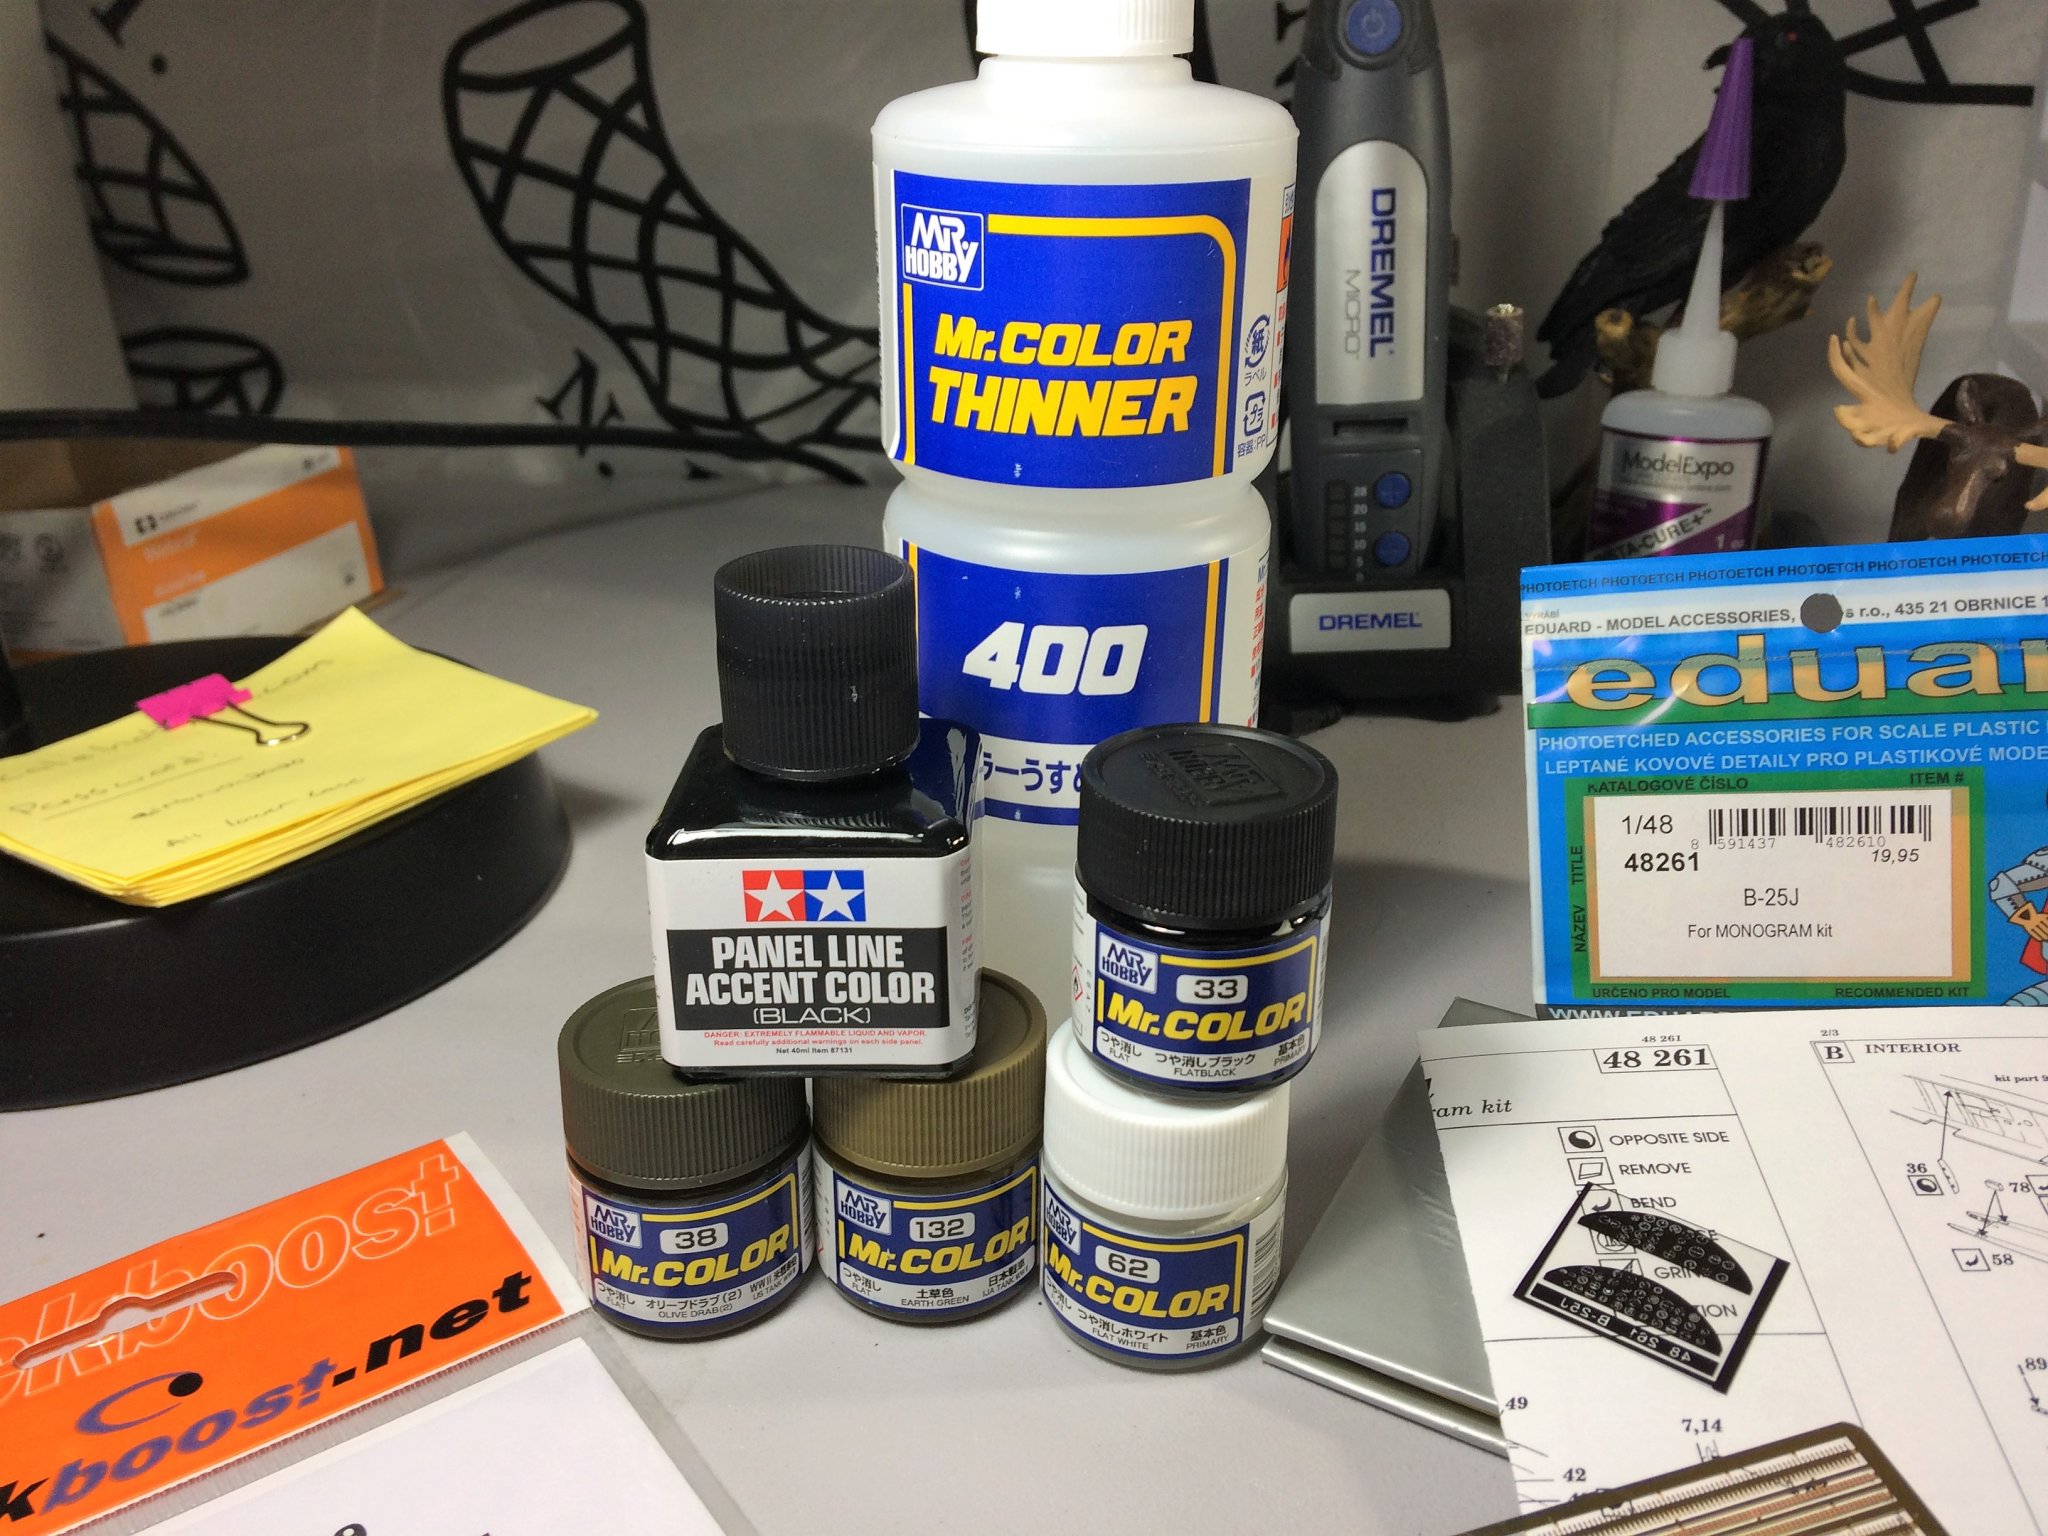
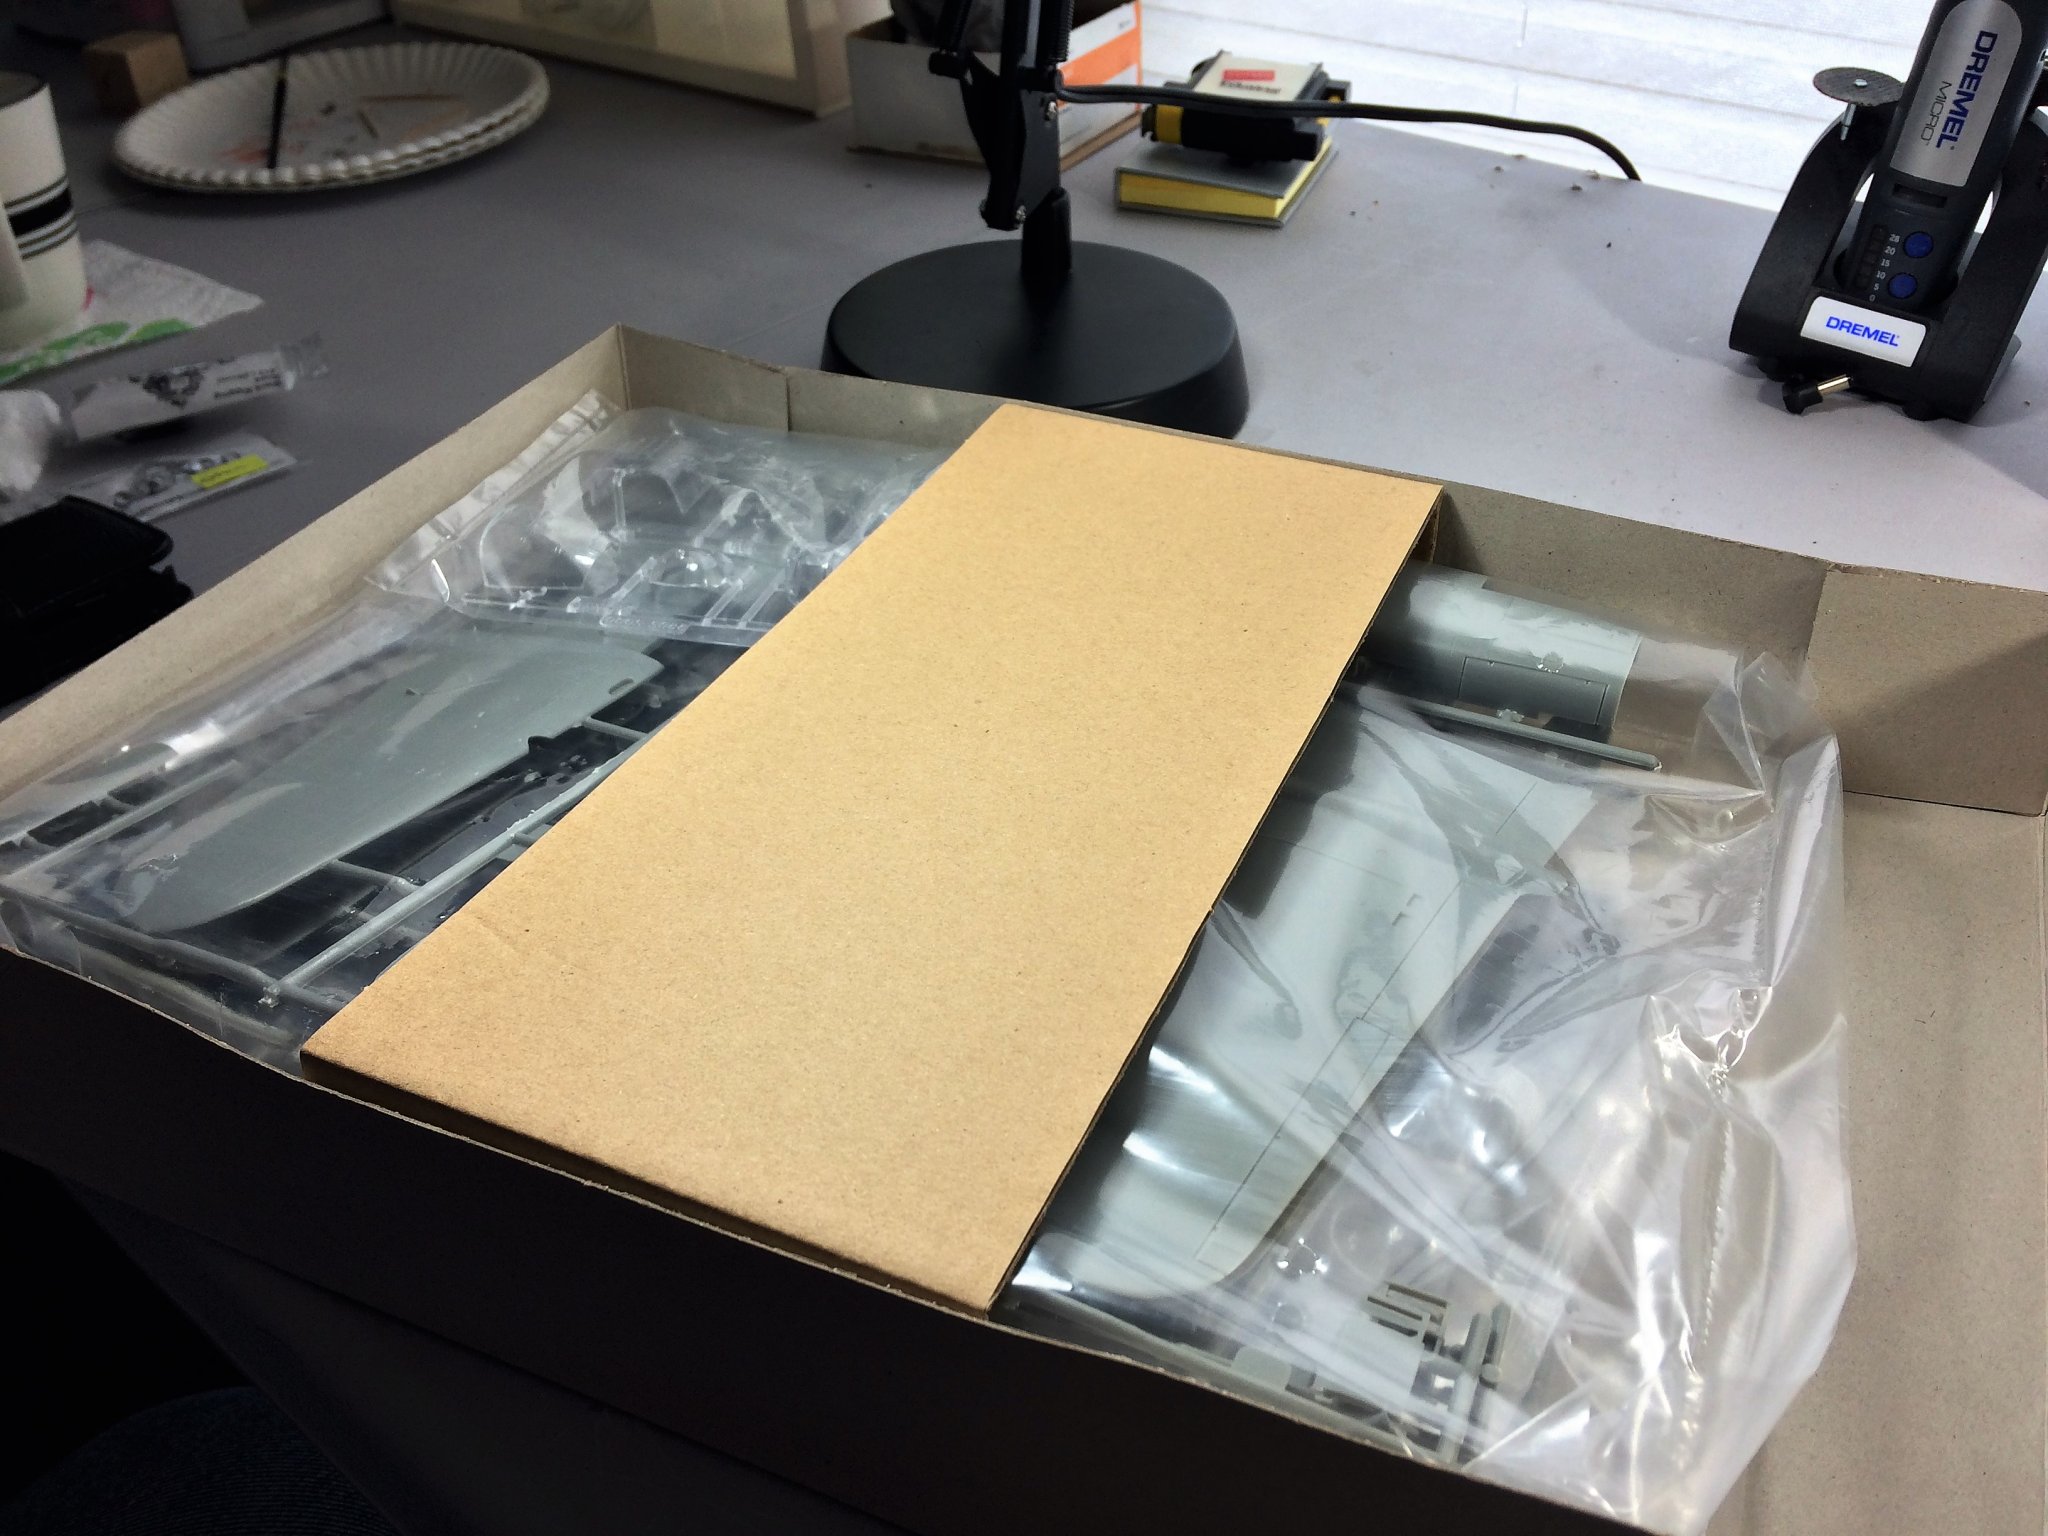
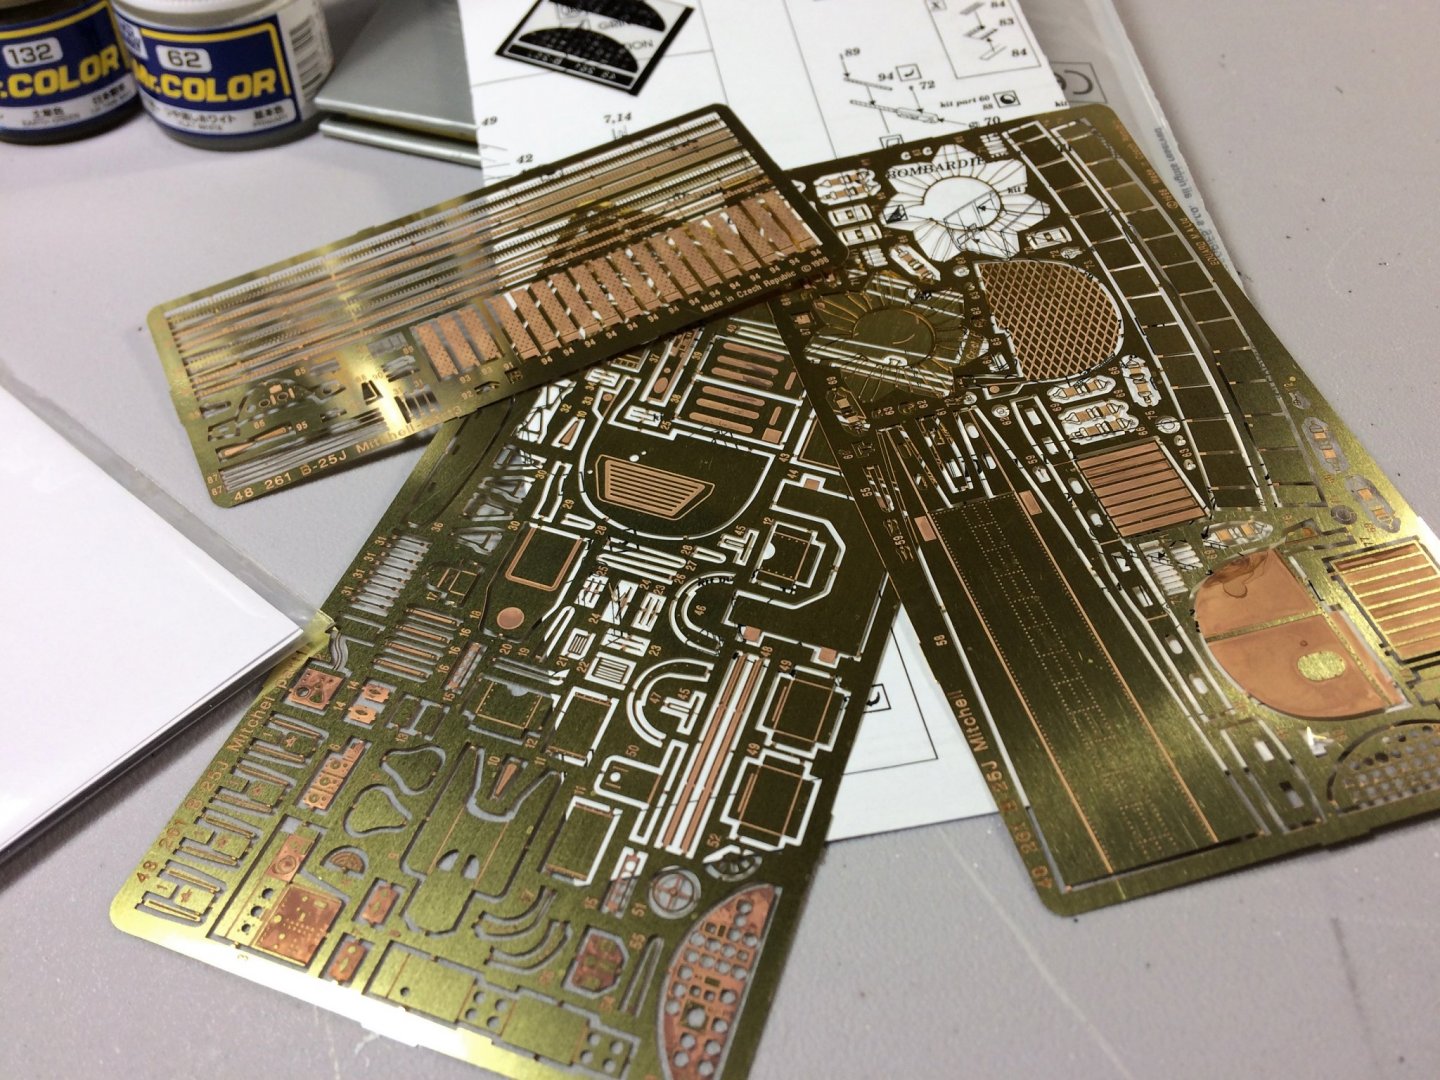
Evening, Thanks for the warm welcome folks, appreciate it! Ron, I have seen that video many times. It really has helped me. A must watch in my book! Ken, That website is awesome! Already signed up for the news letter. I'll be exploring that one fully. Denis, Lou, OC, welcome! Glad to have you all on board . In my yearning to do something with this model while waiting for new supplies, I did some painting. I used a bottle of Testors flat black and hand painted the storage locker and radio. These might be some of my first pieces to try some airbrushing. Besides today being Friday, It was an easy day to go to work because I knew I had a package coming from UPS. I have heard of a website mentioned called scalehobbyist.com. Wonderful website with great products! Bonus, they are in Nashua NH, me being in Lebanon NH, means basic shipping is essentially next day for me. My first ever set of PE, with new paints and other fun stuff! The photo etch itself is funky. Strong yet weak and very light. There's some small fiddly bits in these things! I bought the below gun barrels just for a little fun. It'll be cool to incorporate these in. I decided to start with a few colors from Mr Color. Never used this paint before but have seen wonderful results with it in other builds. So any paints I'll buy will most likely be Mr Color and Tamiya. I started basic with flat white, black, olive drab, and an earth green. More colors will be brought in with a future order. I bought some Panel Line Accent color as well, never used this before. But it looks like it adds a great dimension to any model. I'll experiment with this on some scrap pieces first. There was some progress done on the fuselage. First things first....both halves got a warm soapy bath and will dry overnight. Stay warm Tom E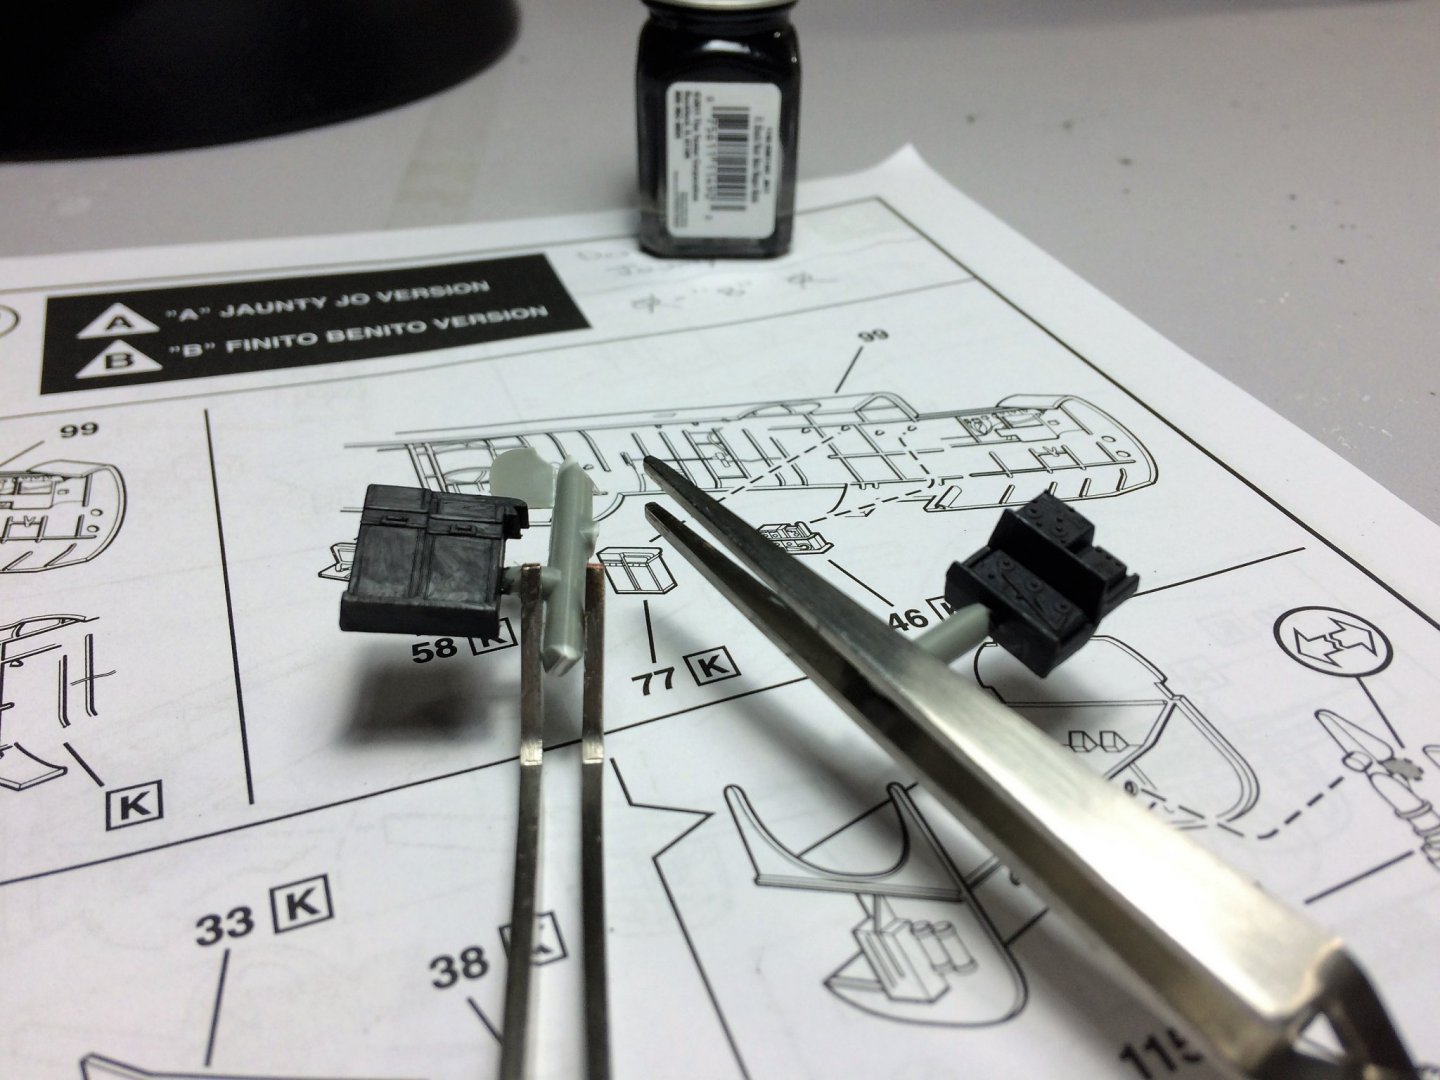


- 120 replies
-
- 13
-
-
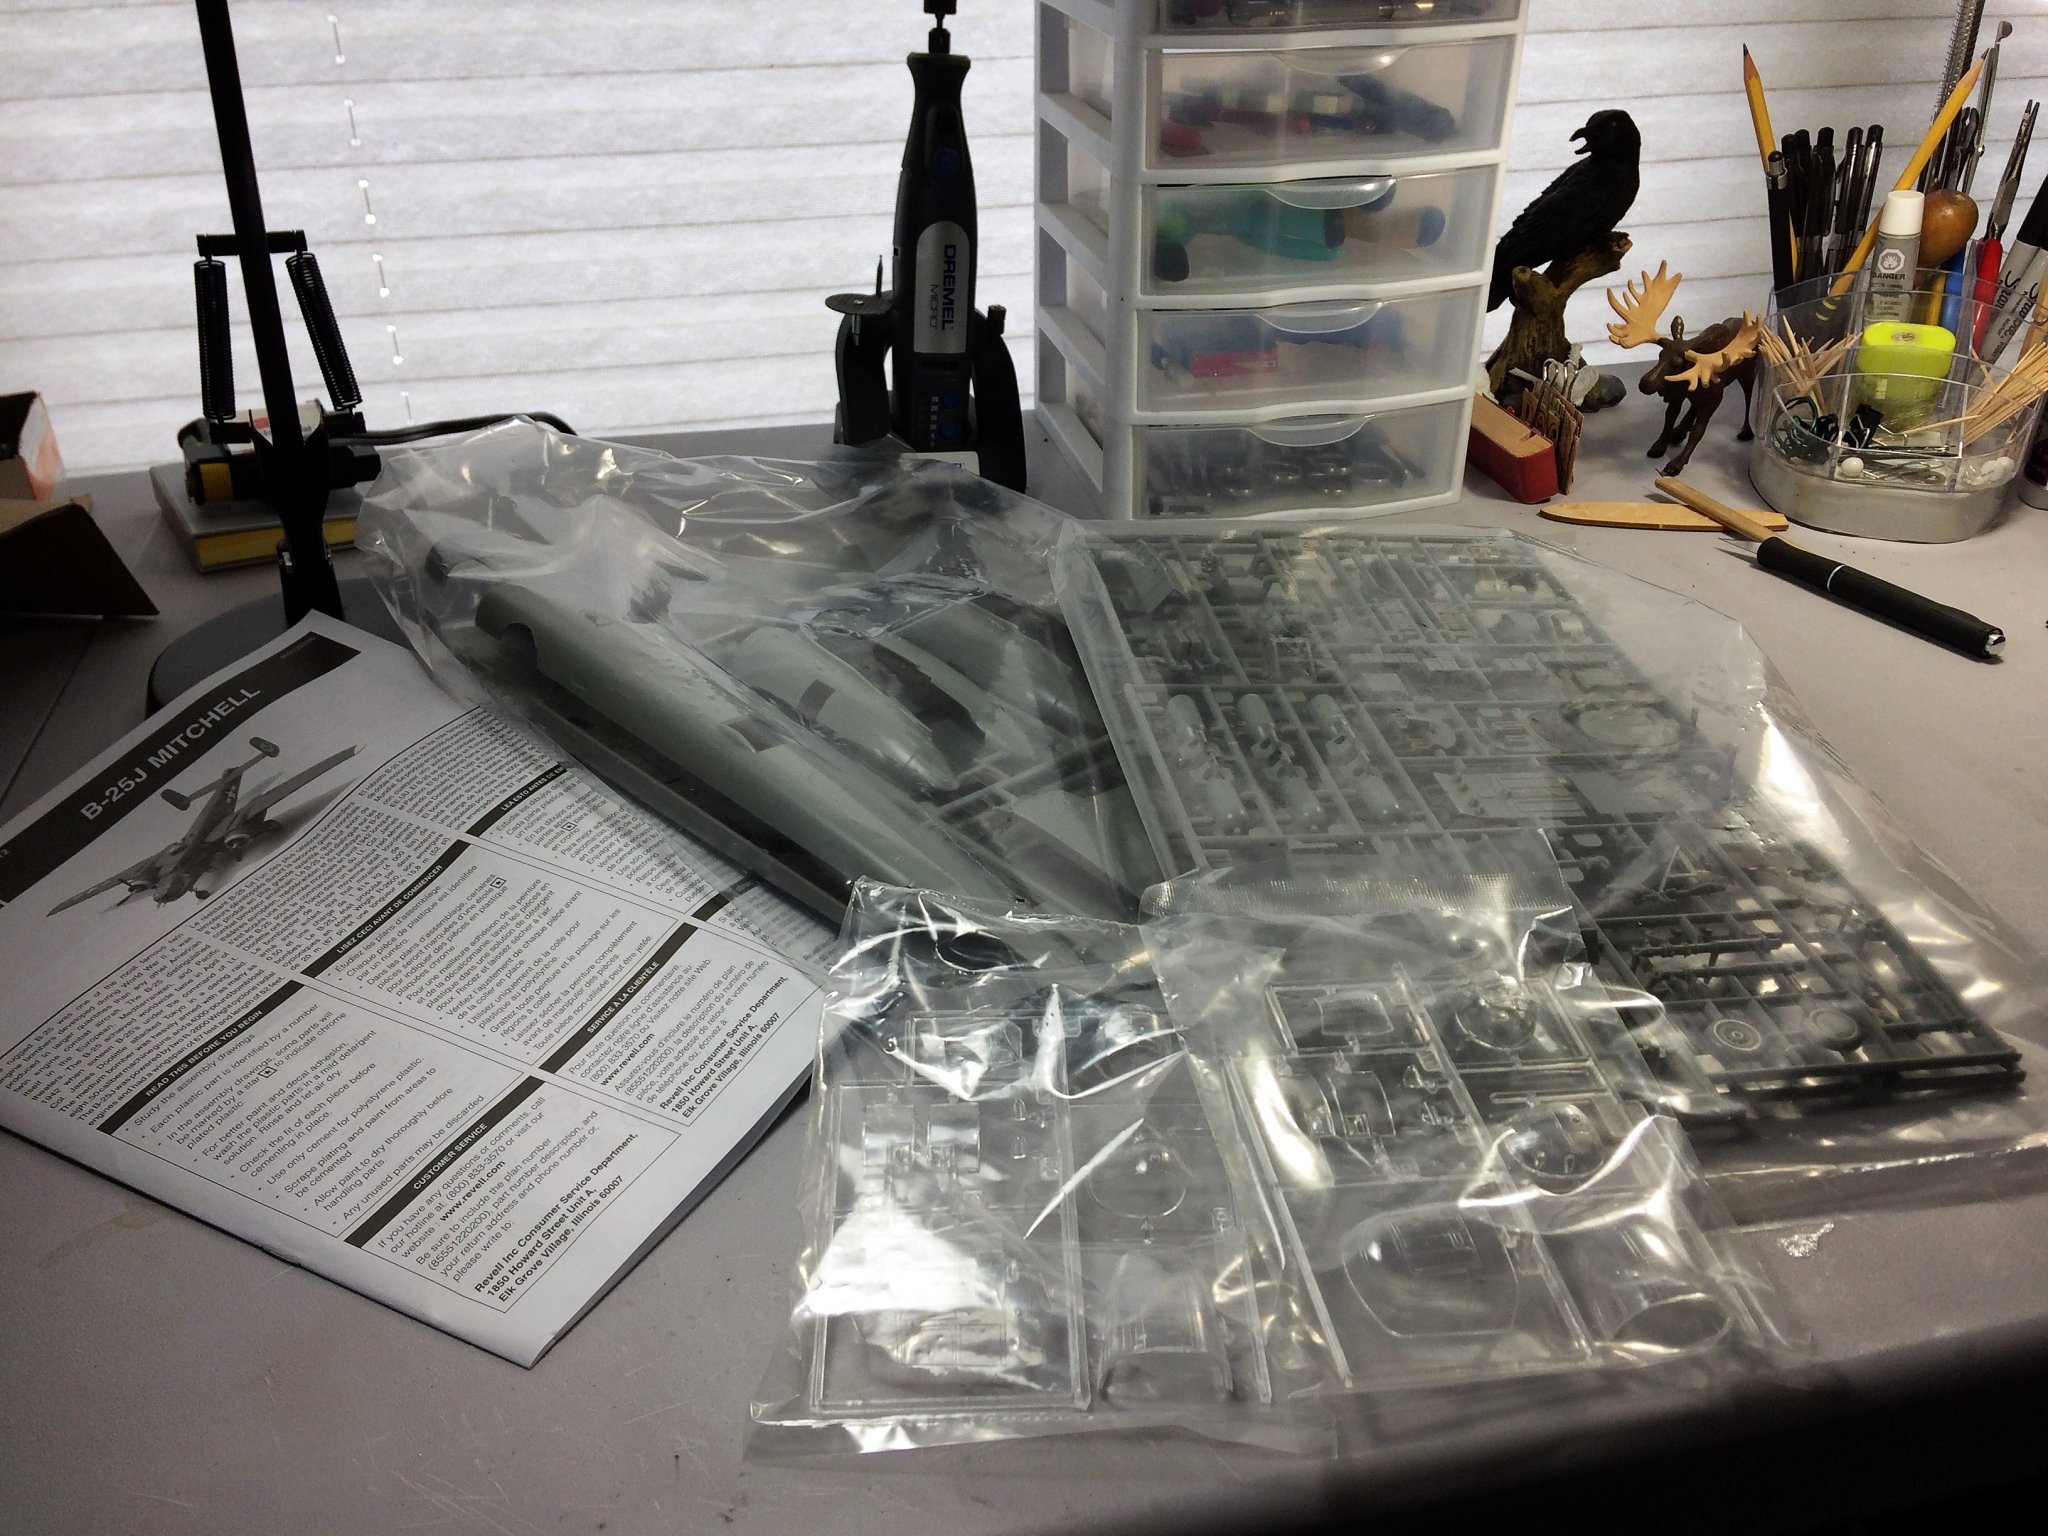
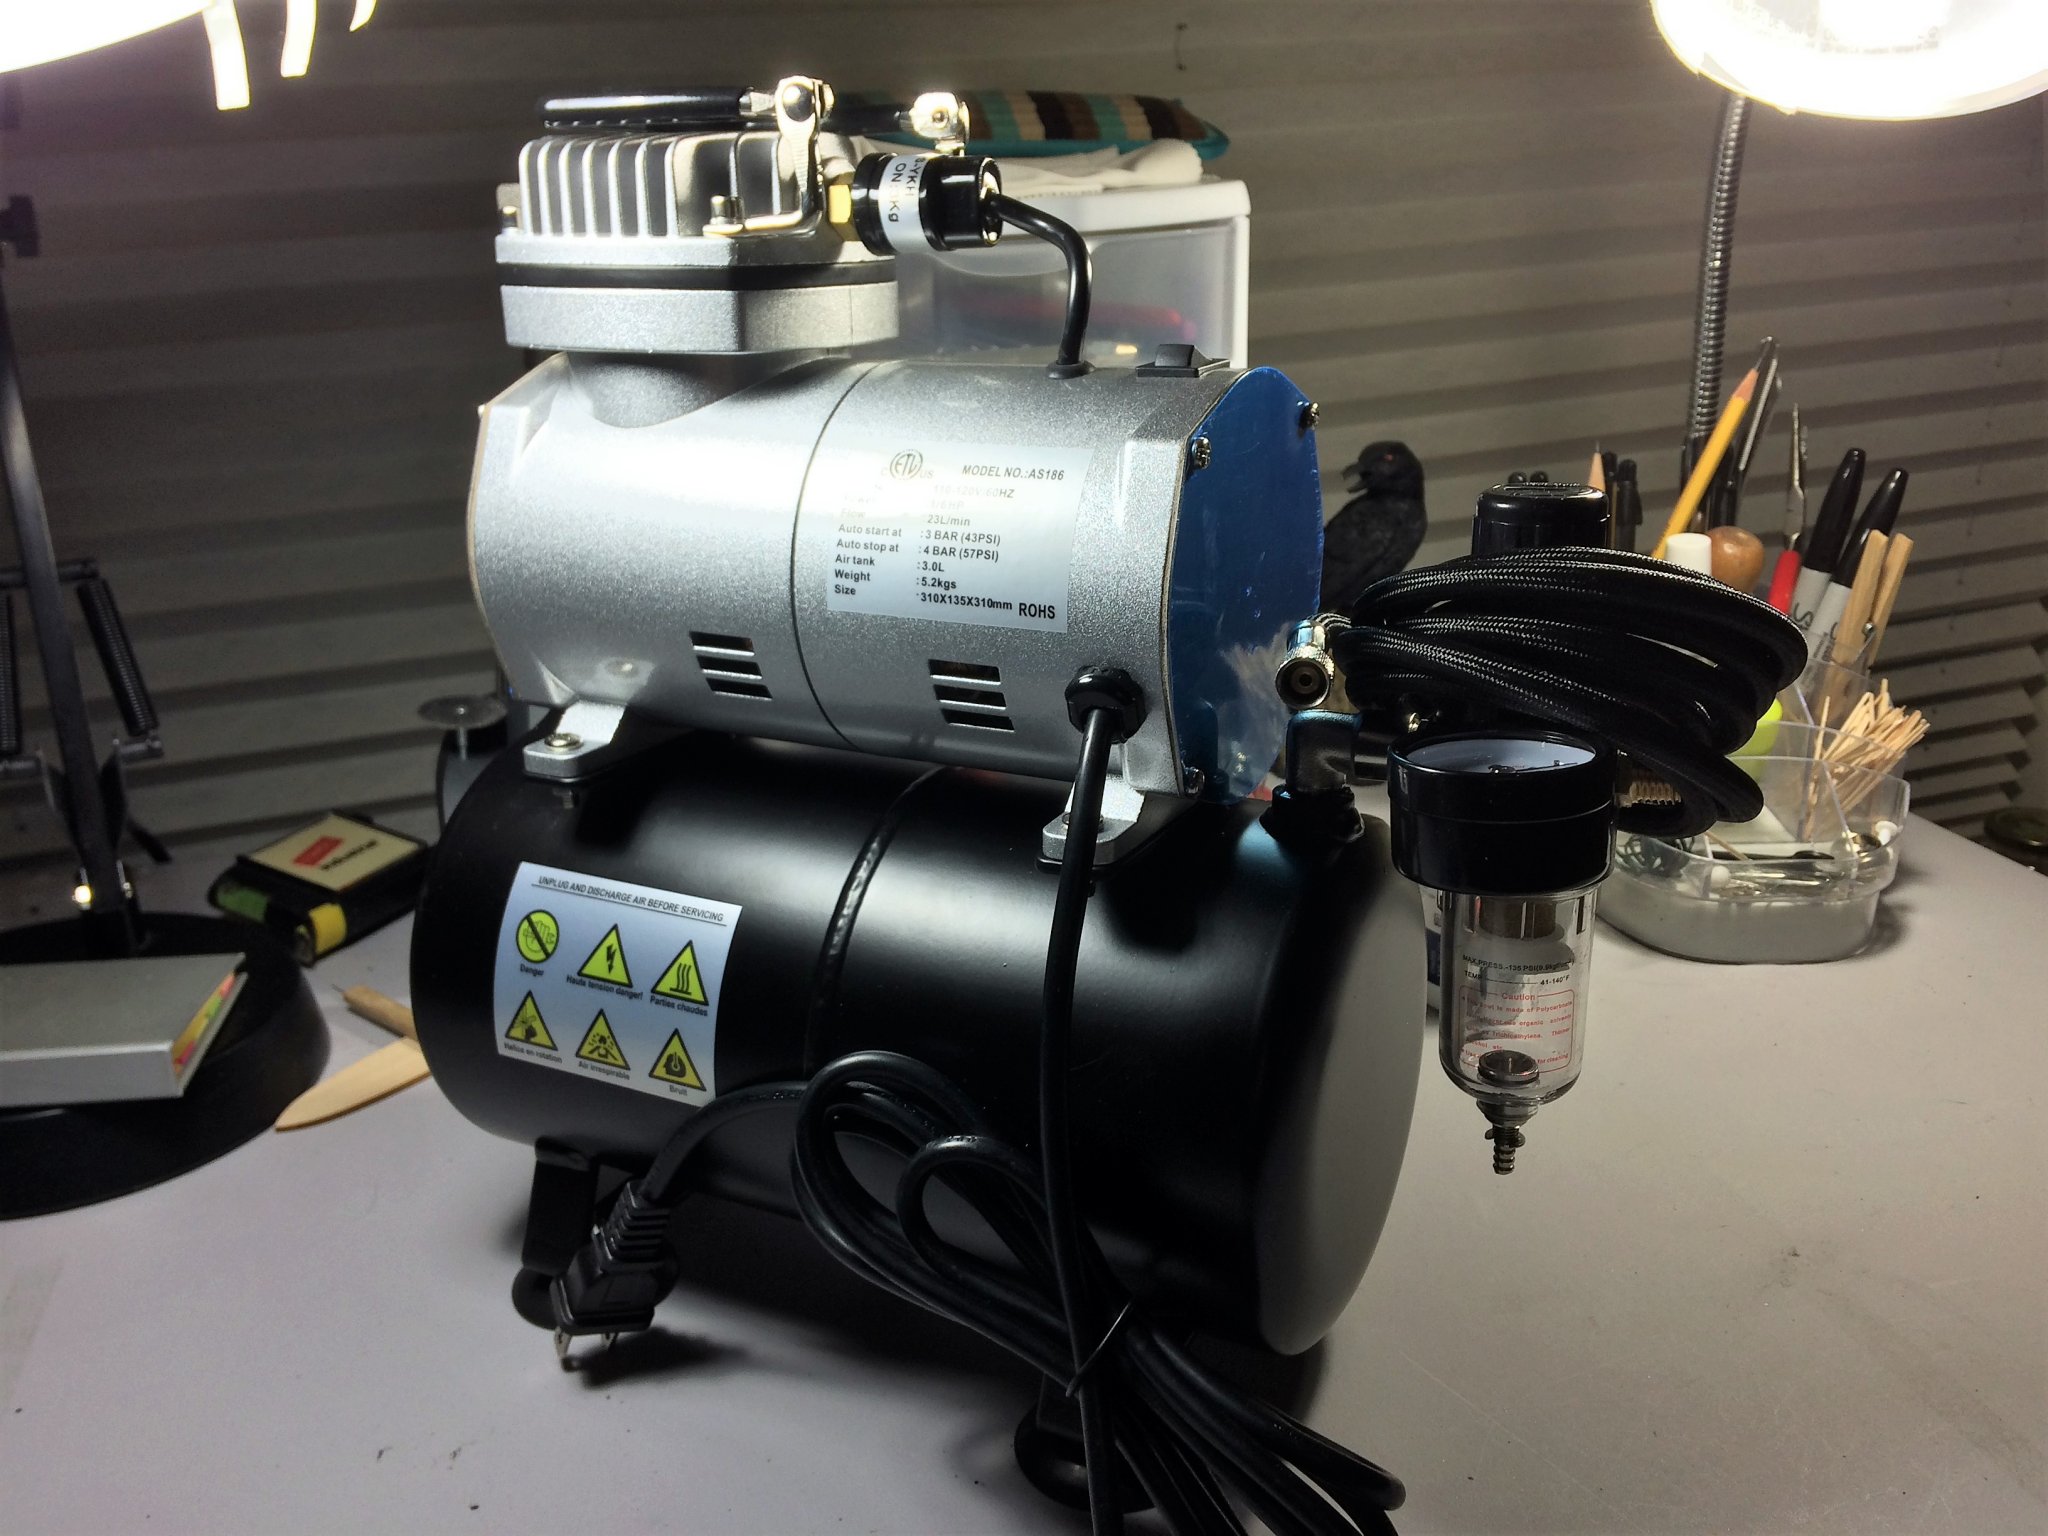
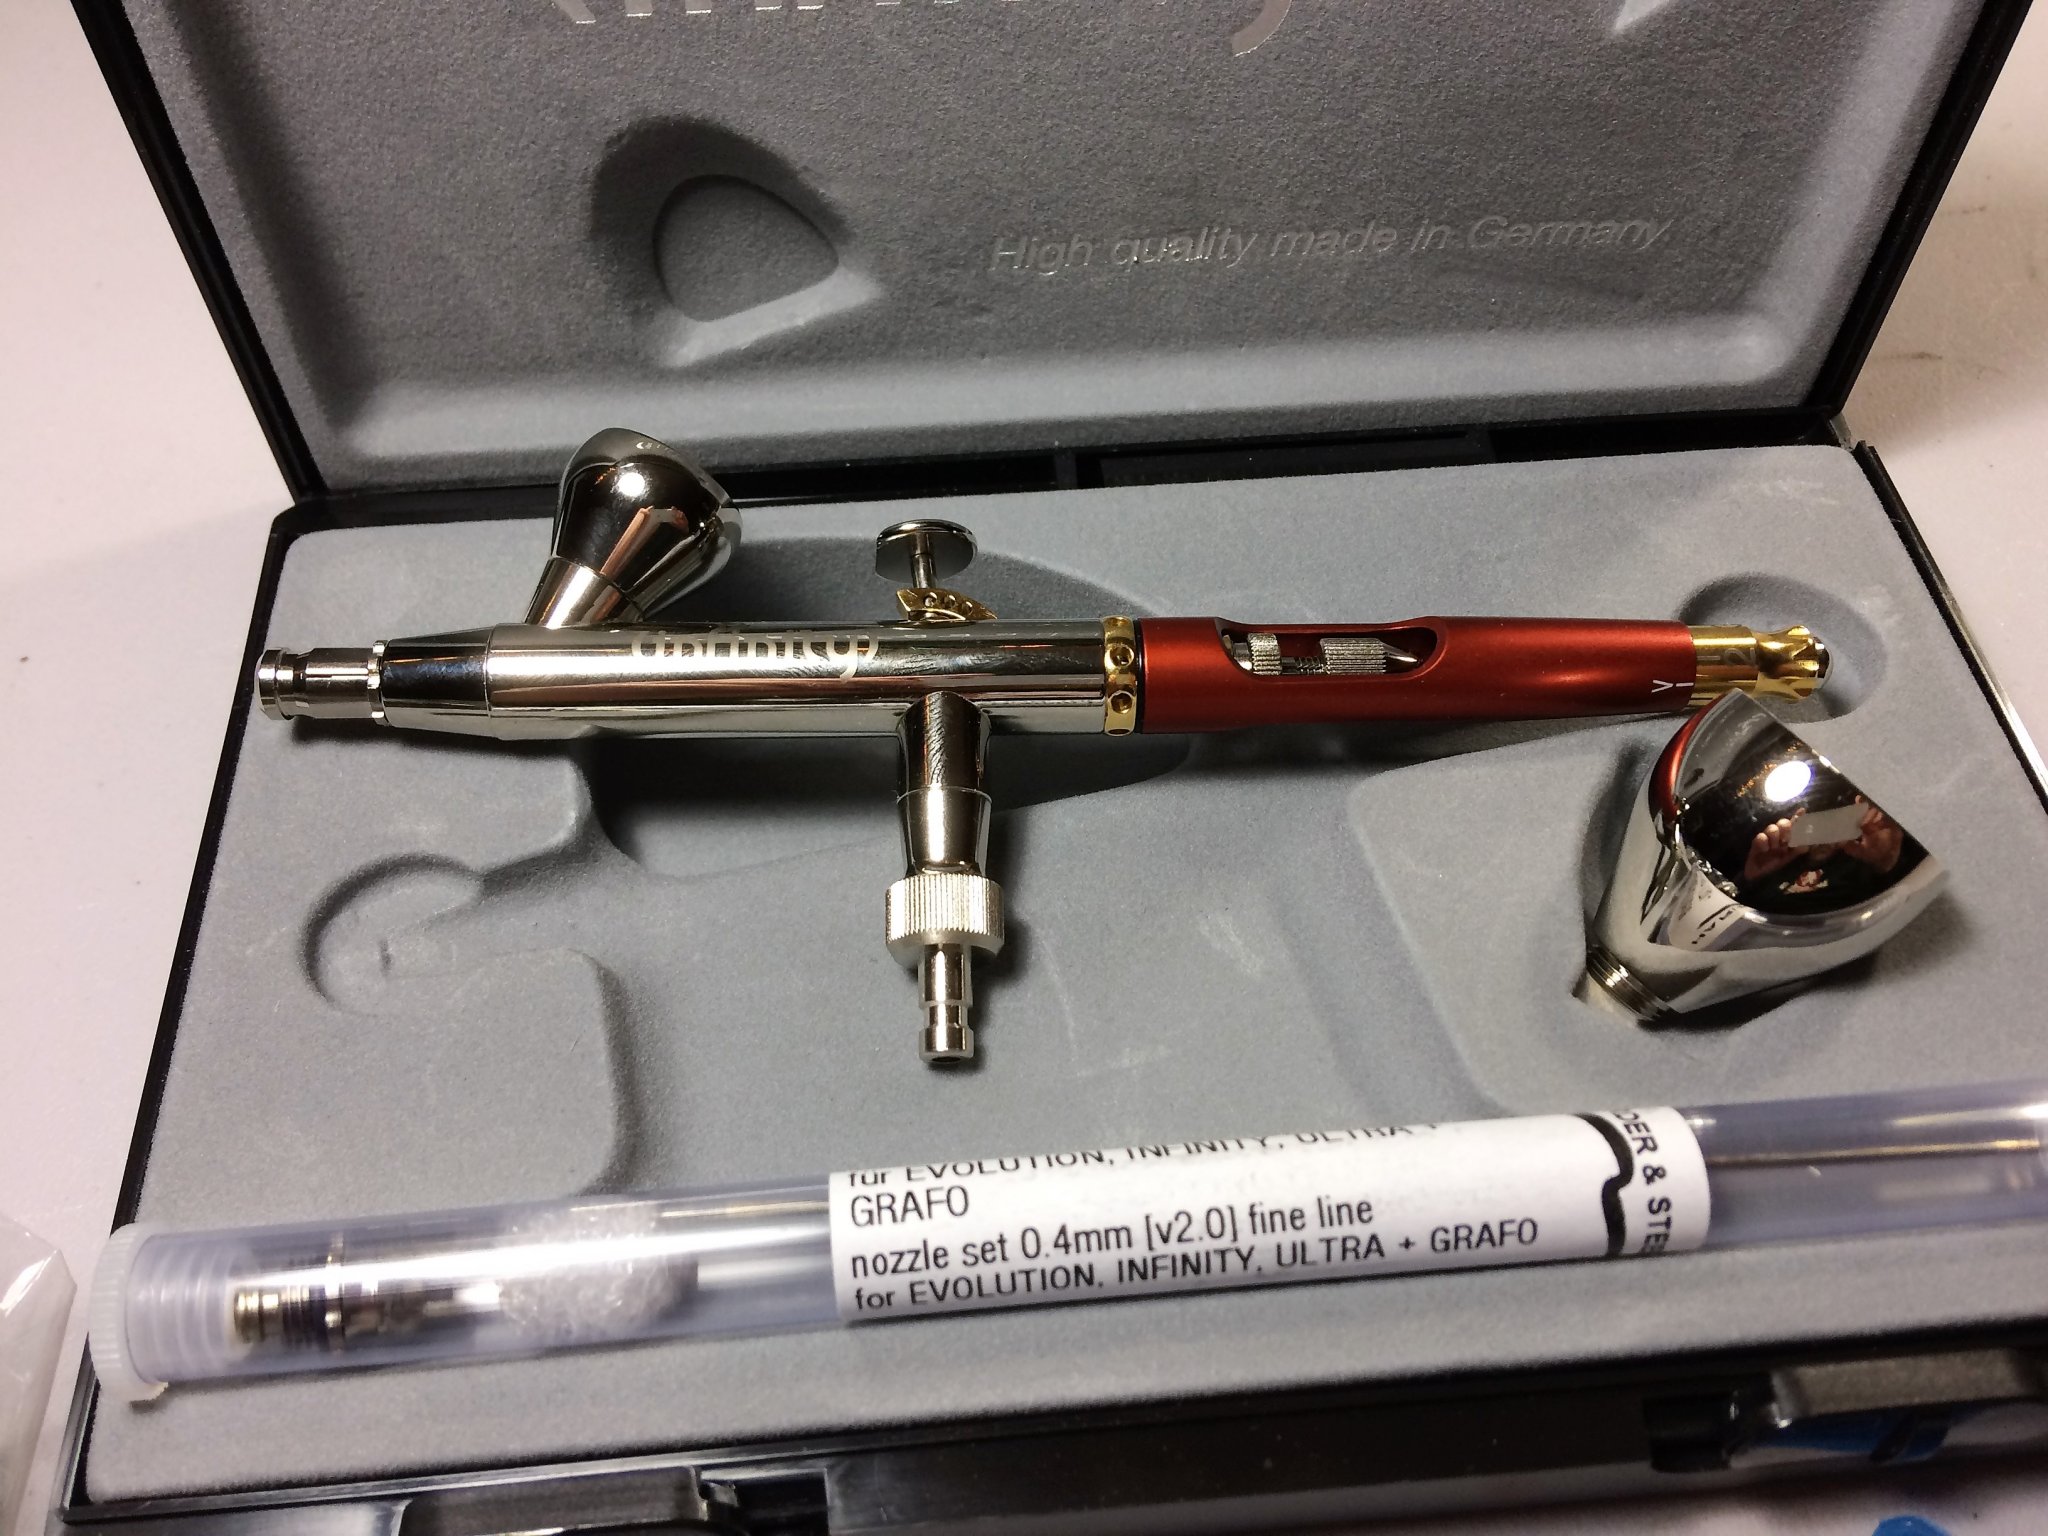
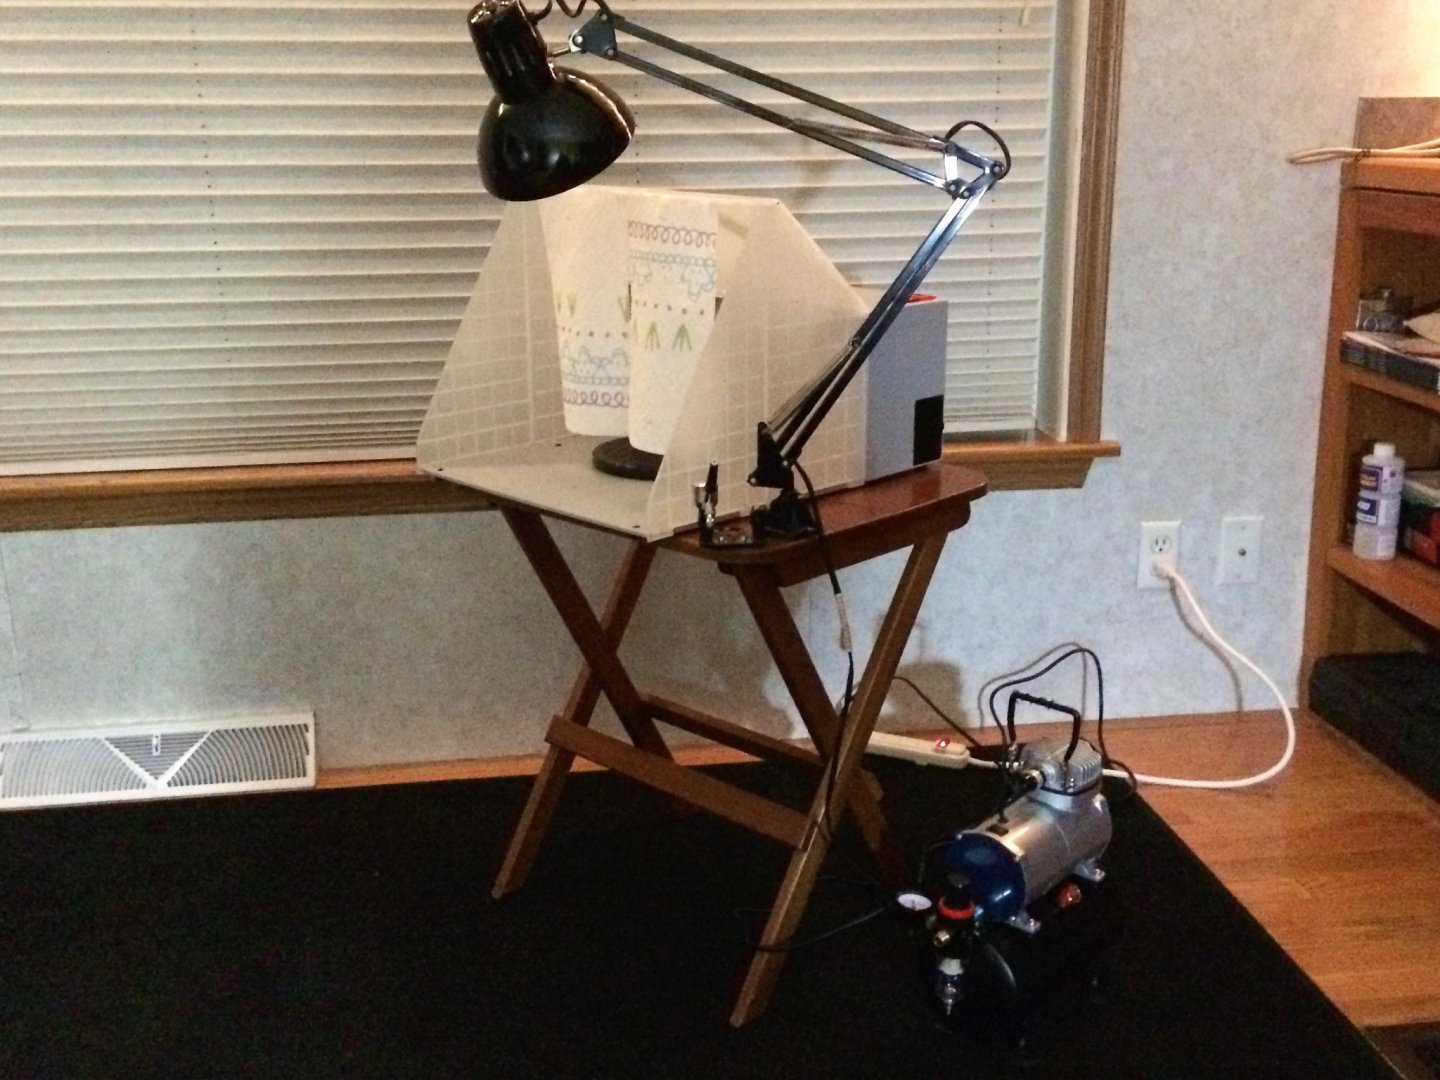
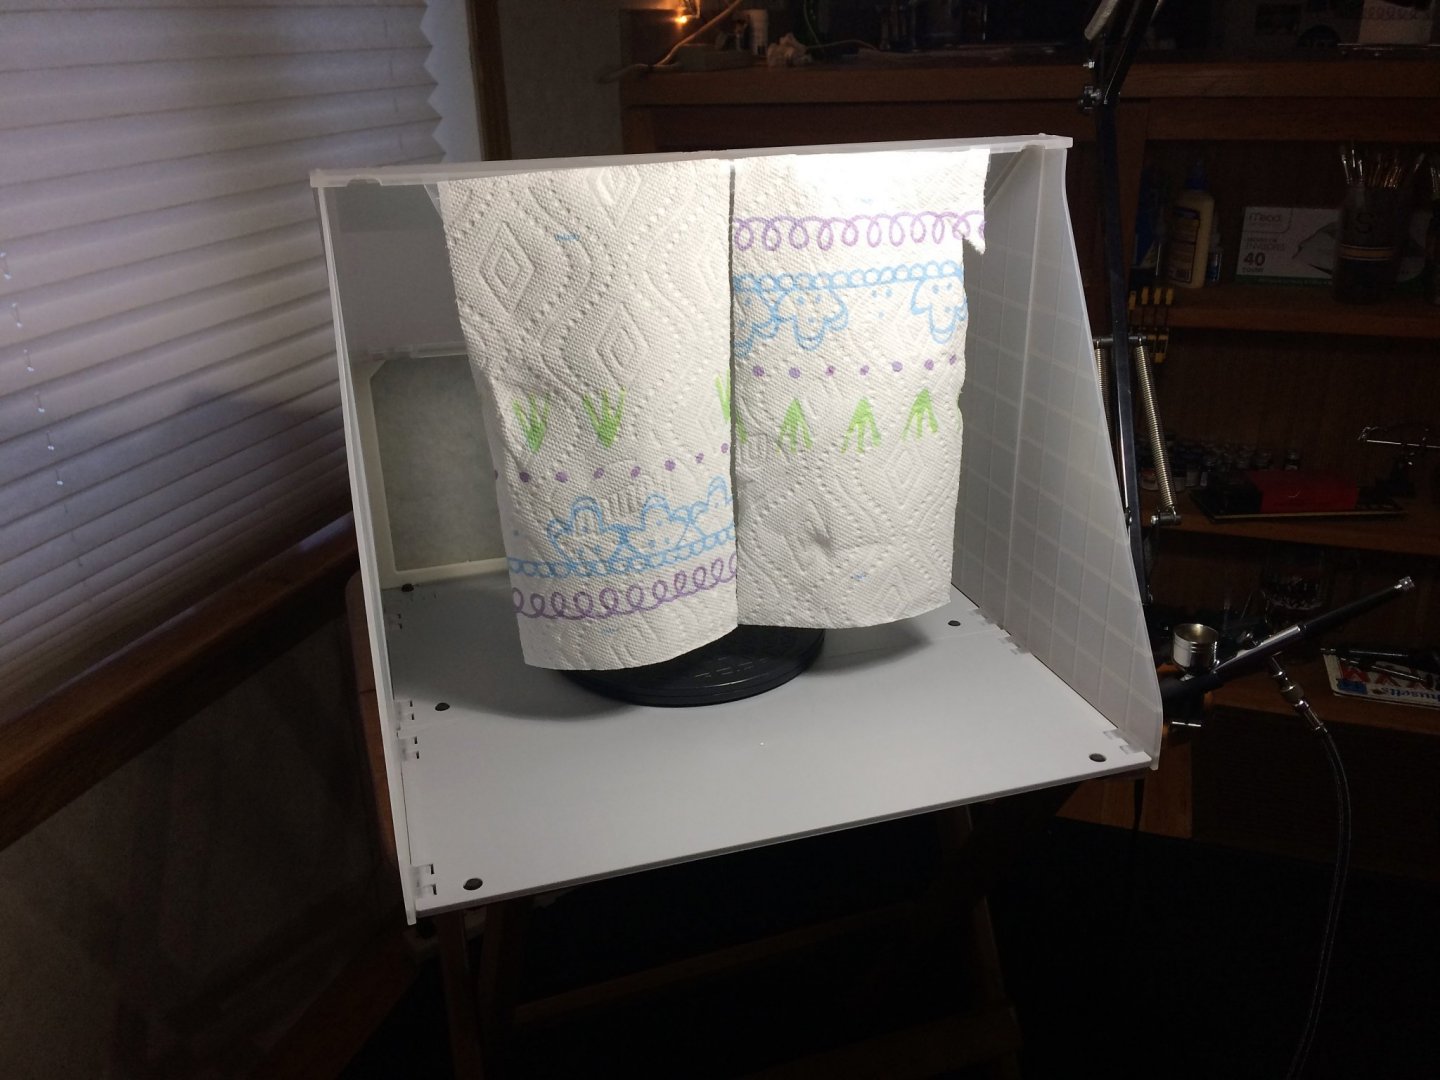
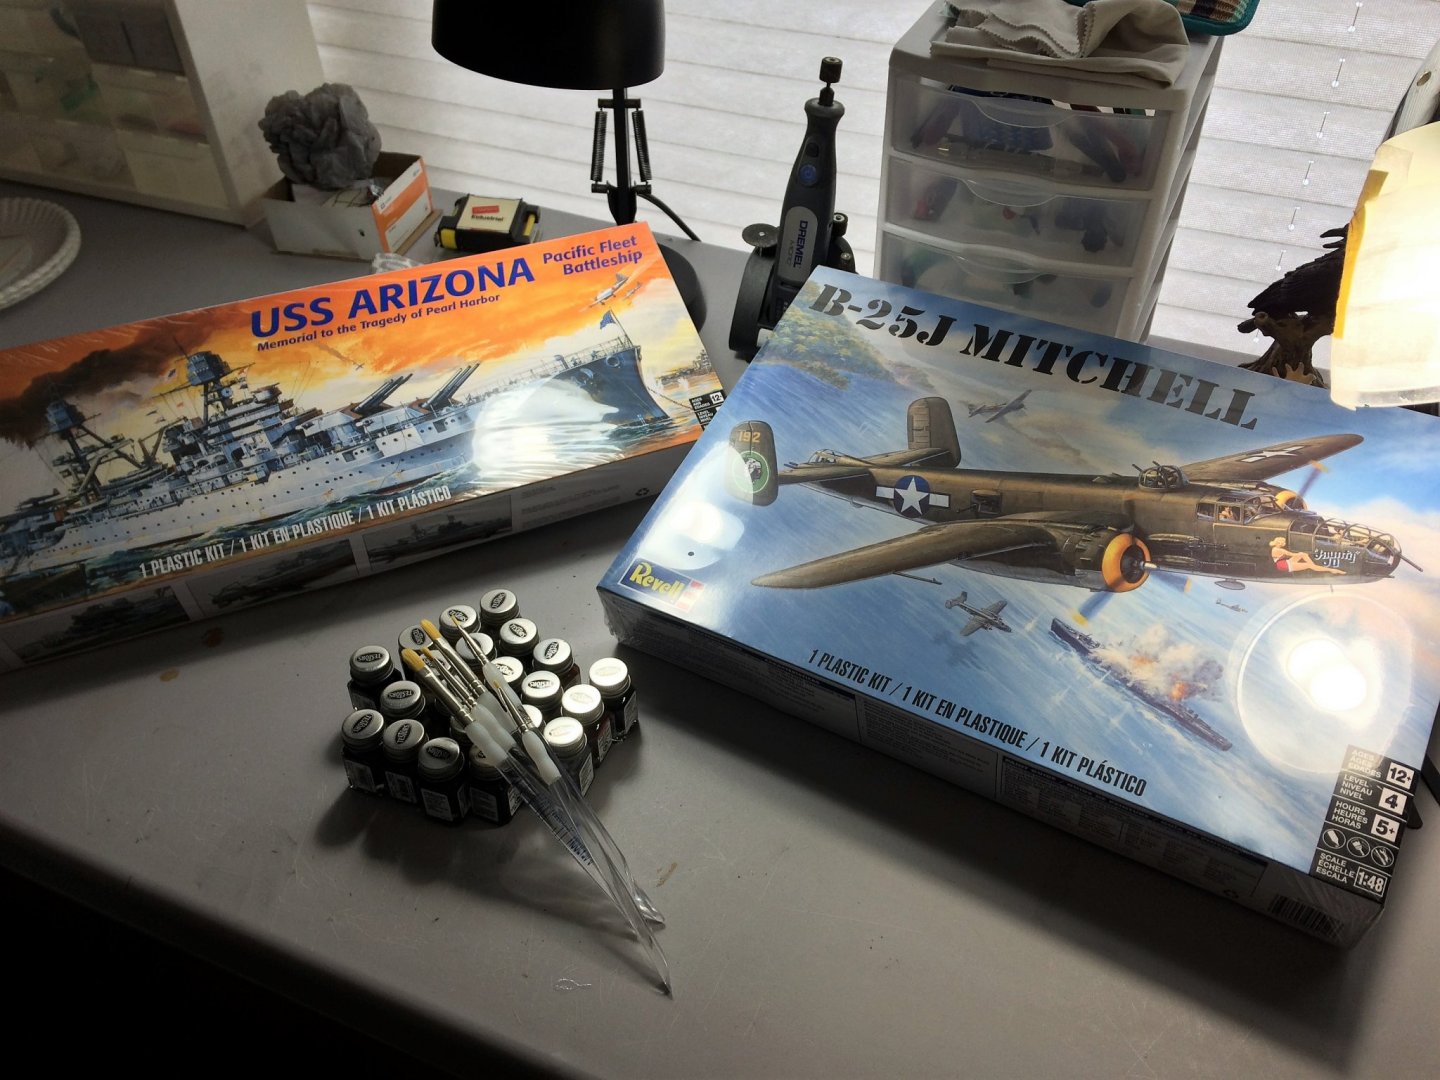
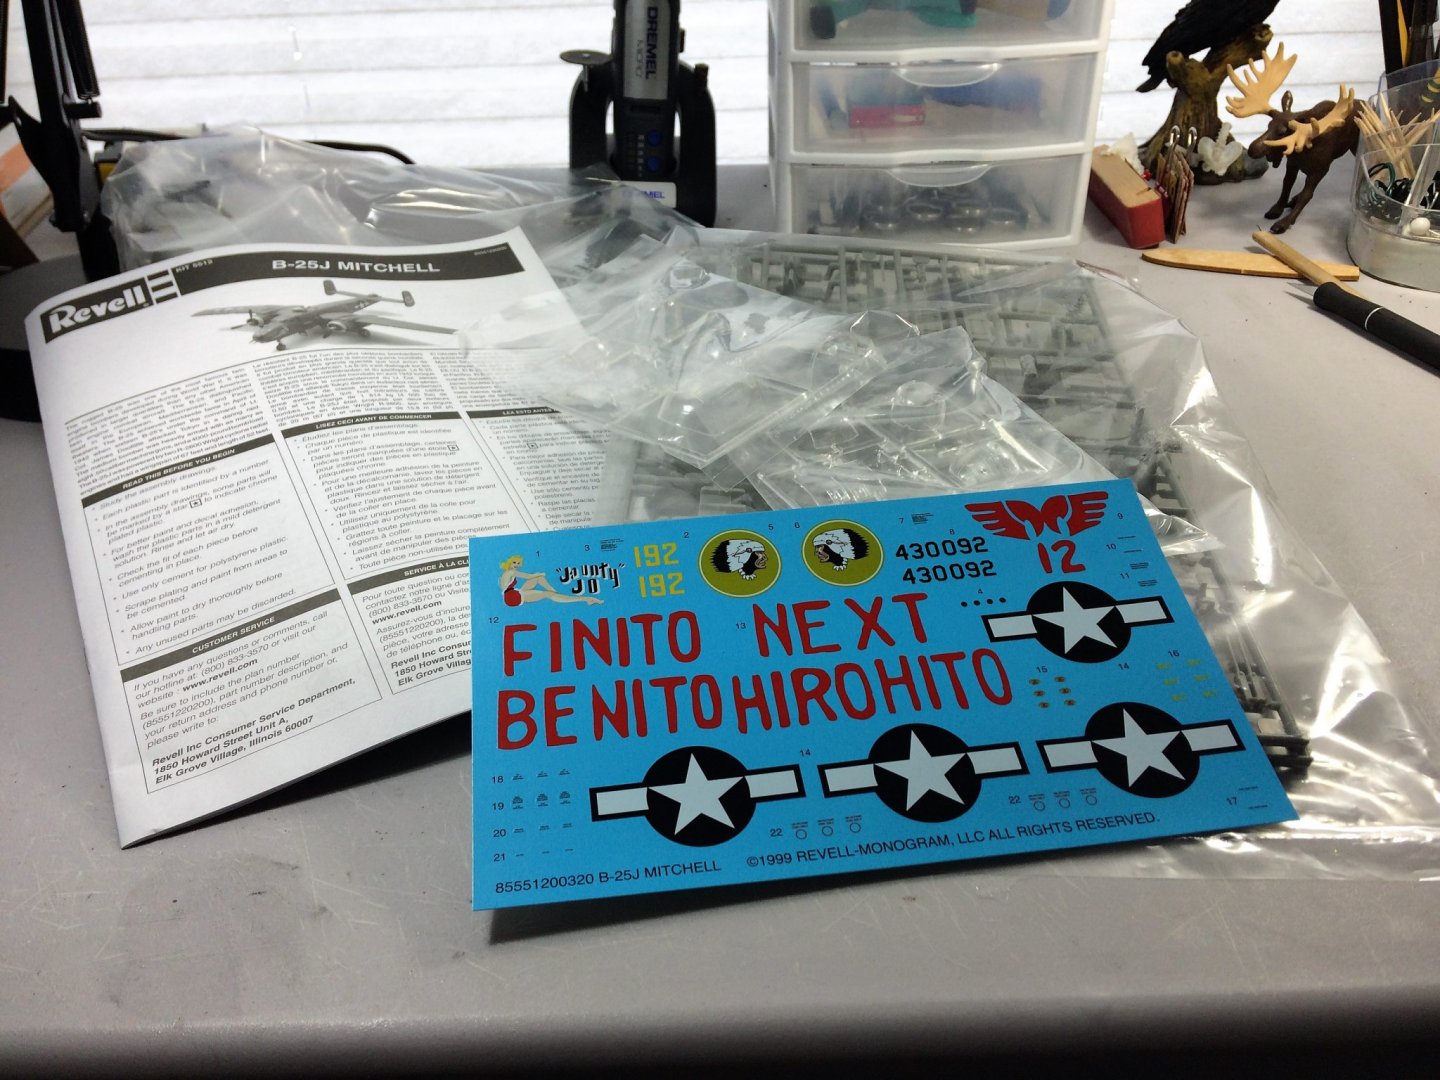
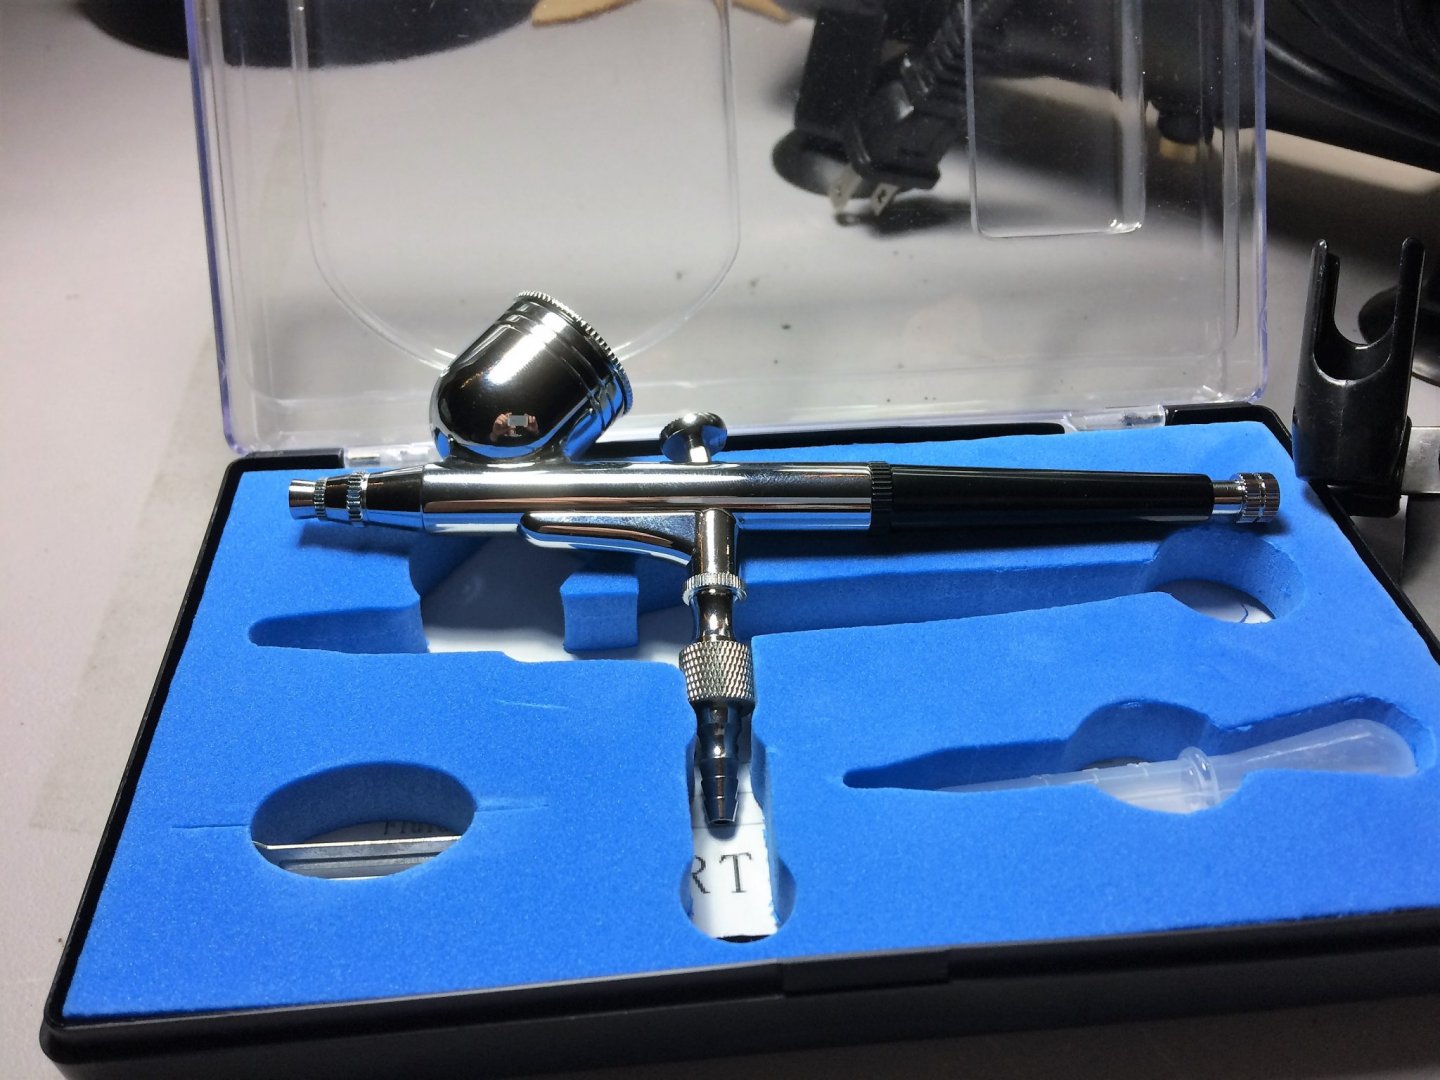
Evening, Thought it might be a good time to give this project some wings!...….pun intended..... This project will go beyond just the Mitchell bomber. I plan on using this to learn how to airbrush and use photo etch. Never have used PE or an airbrush before, this may be interesting. A "practice" model, yet I don't want to wreck it either. We shall see what happens in the end. Originally, the kit was bought in an unplanned trip to Michaels and had a few dollars burning a hole in my wallet. These were bought to just put in the stash, and see what happens. Curiosity got the best of me and I had to pop open the Mitchell kit. Neatly packed kit in grey and clear sprues. Instruction are pretty straight forward. The decals look a lot better than the ones used when I was a kid. They give 2 versions of decals to use. The "Jaunty-Jo" or "Finito Benito". I like the leggy gal "Jaunty-Jo". Next came the air compressor. When I moved into my new home, I laid out some monies for an airbrush set-up (compressor/brush/ventilation). I have been researching these things for over a year now. I looked at the most expensive to the cheapest of compressors that are available. Many to choose from, many quality products, and many to avoid. In the end, I bought from a company that I was familiar with instead of Amazon. 90 day return policy helps. This compressor works really well and is quieter than some fish tank filters I've had. Holding tank and adjustable pressure settings. Those were the two things I centered around the most. I didn't want one that runs continuously. Very happy with this purchase so far. The compressor came with a basic hose and airbrush. All work well. I test shot some water thru the airbrush this past weekend. I learned a lot just from doing that before shooting any paint, which I have not done yet. I plan on learning on the airbrush below. I'm going to excel with the Harder & Steenbeck Infinity Two in One. I just learned of this brand of airbrush no more than a month ago. For some reason I never saw these come up in an "airbrush" search while shopping. I was searching thru the "Painting" section here on MSW and finally saw this brand mentioned. And from the results I've seen from the people that recommended them, it's a worthwhile investment. I hold off using this one until I'm more confident in my abilities. It was a little bit of an investment. Not cheap. The hose comes with it. There were some other trinkets that came with the airbrush. I'll learn about these as we progress. Lets have some fun Tom E


- 120 replies
-
- 11
-
-
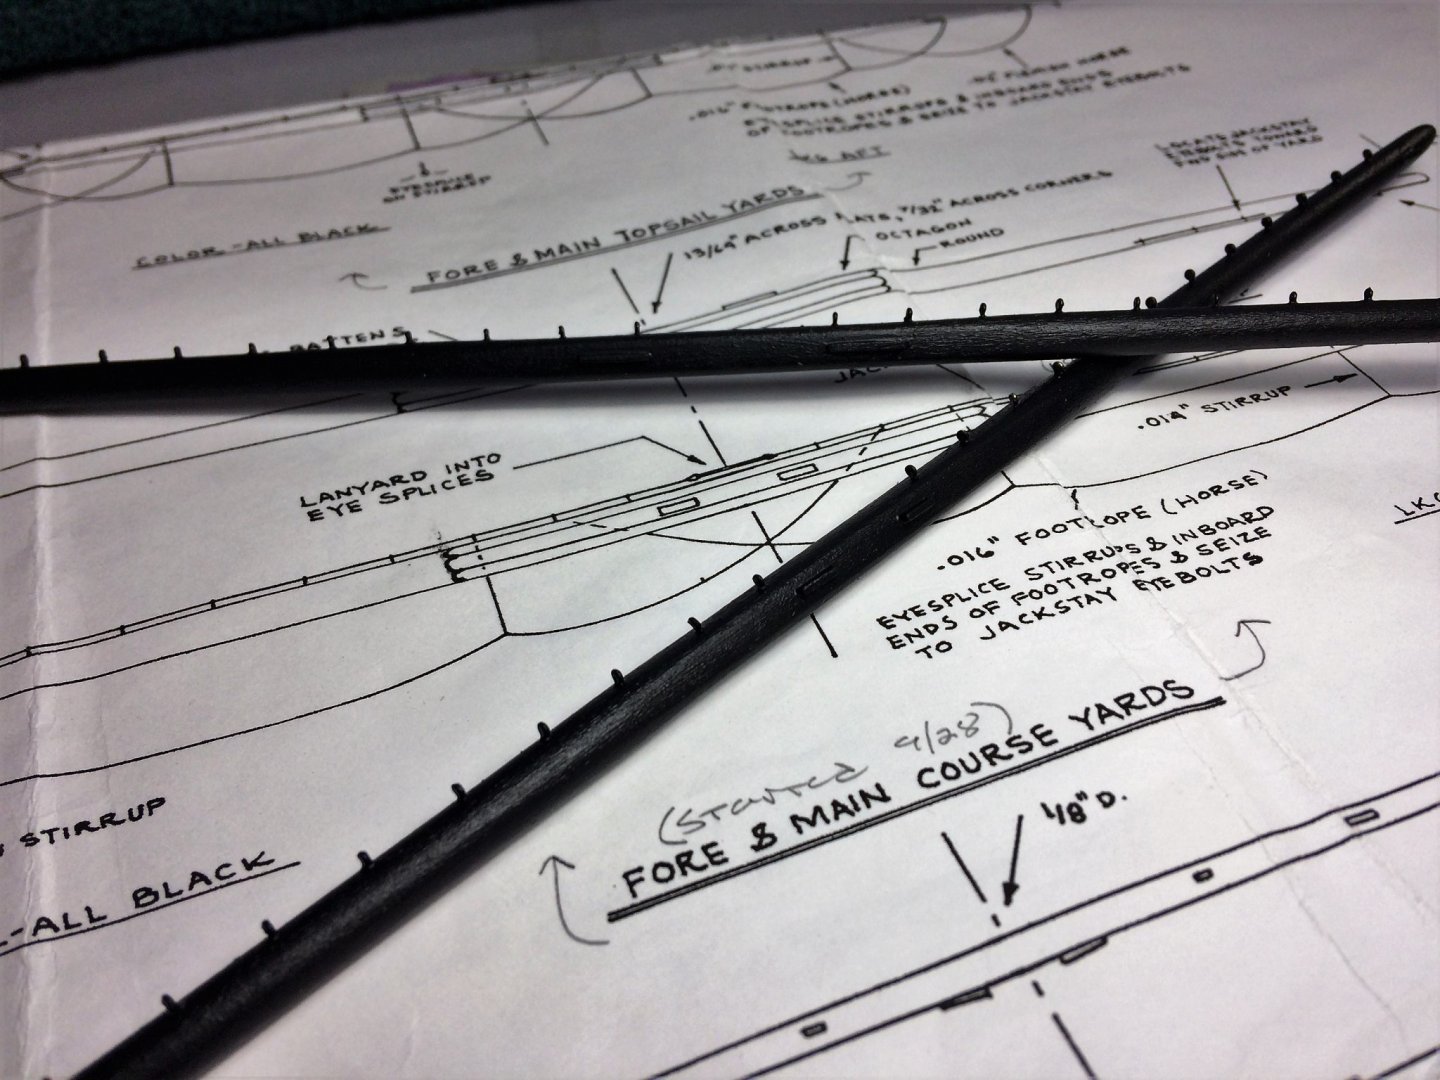
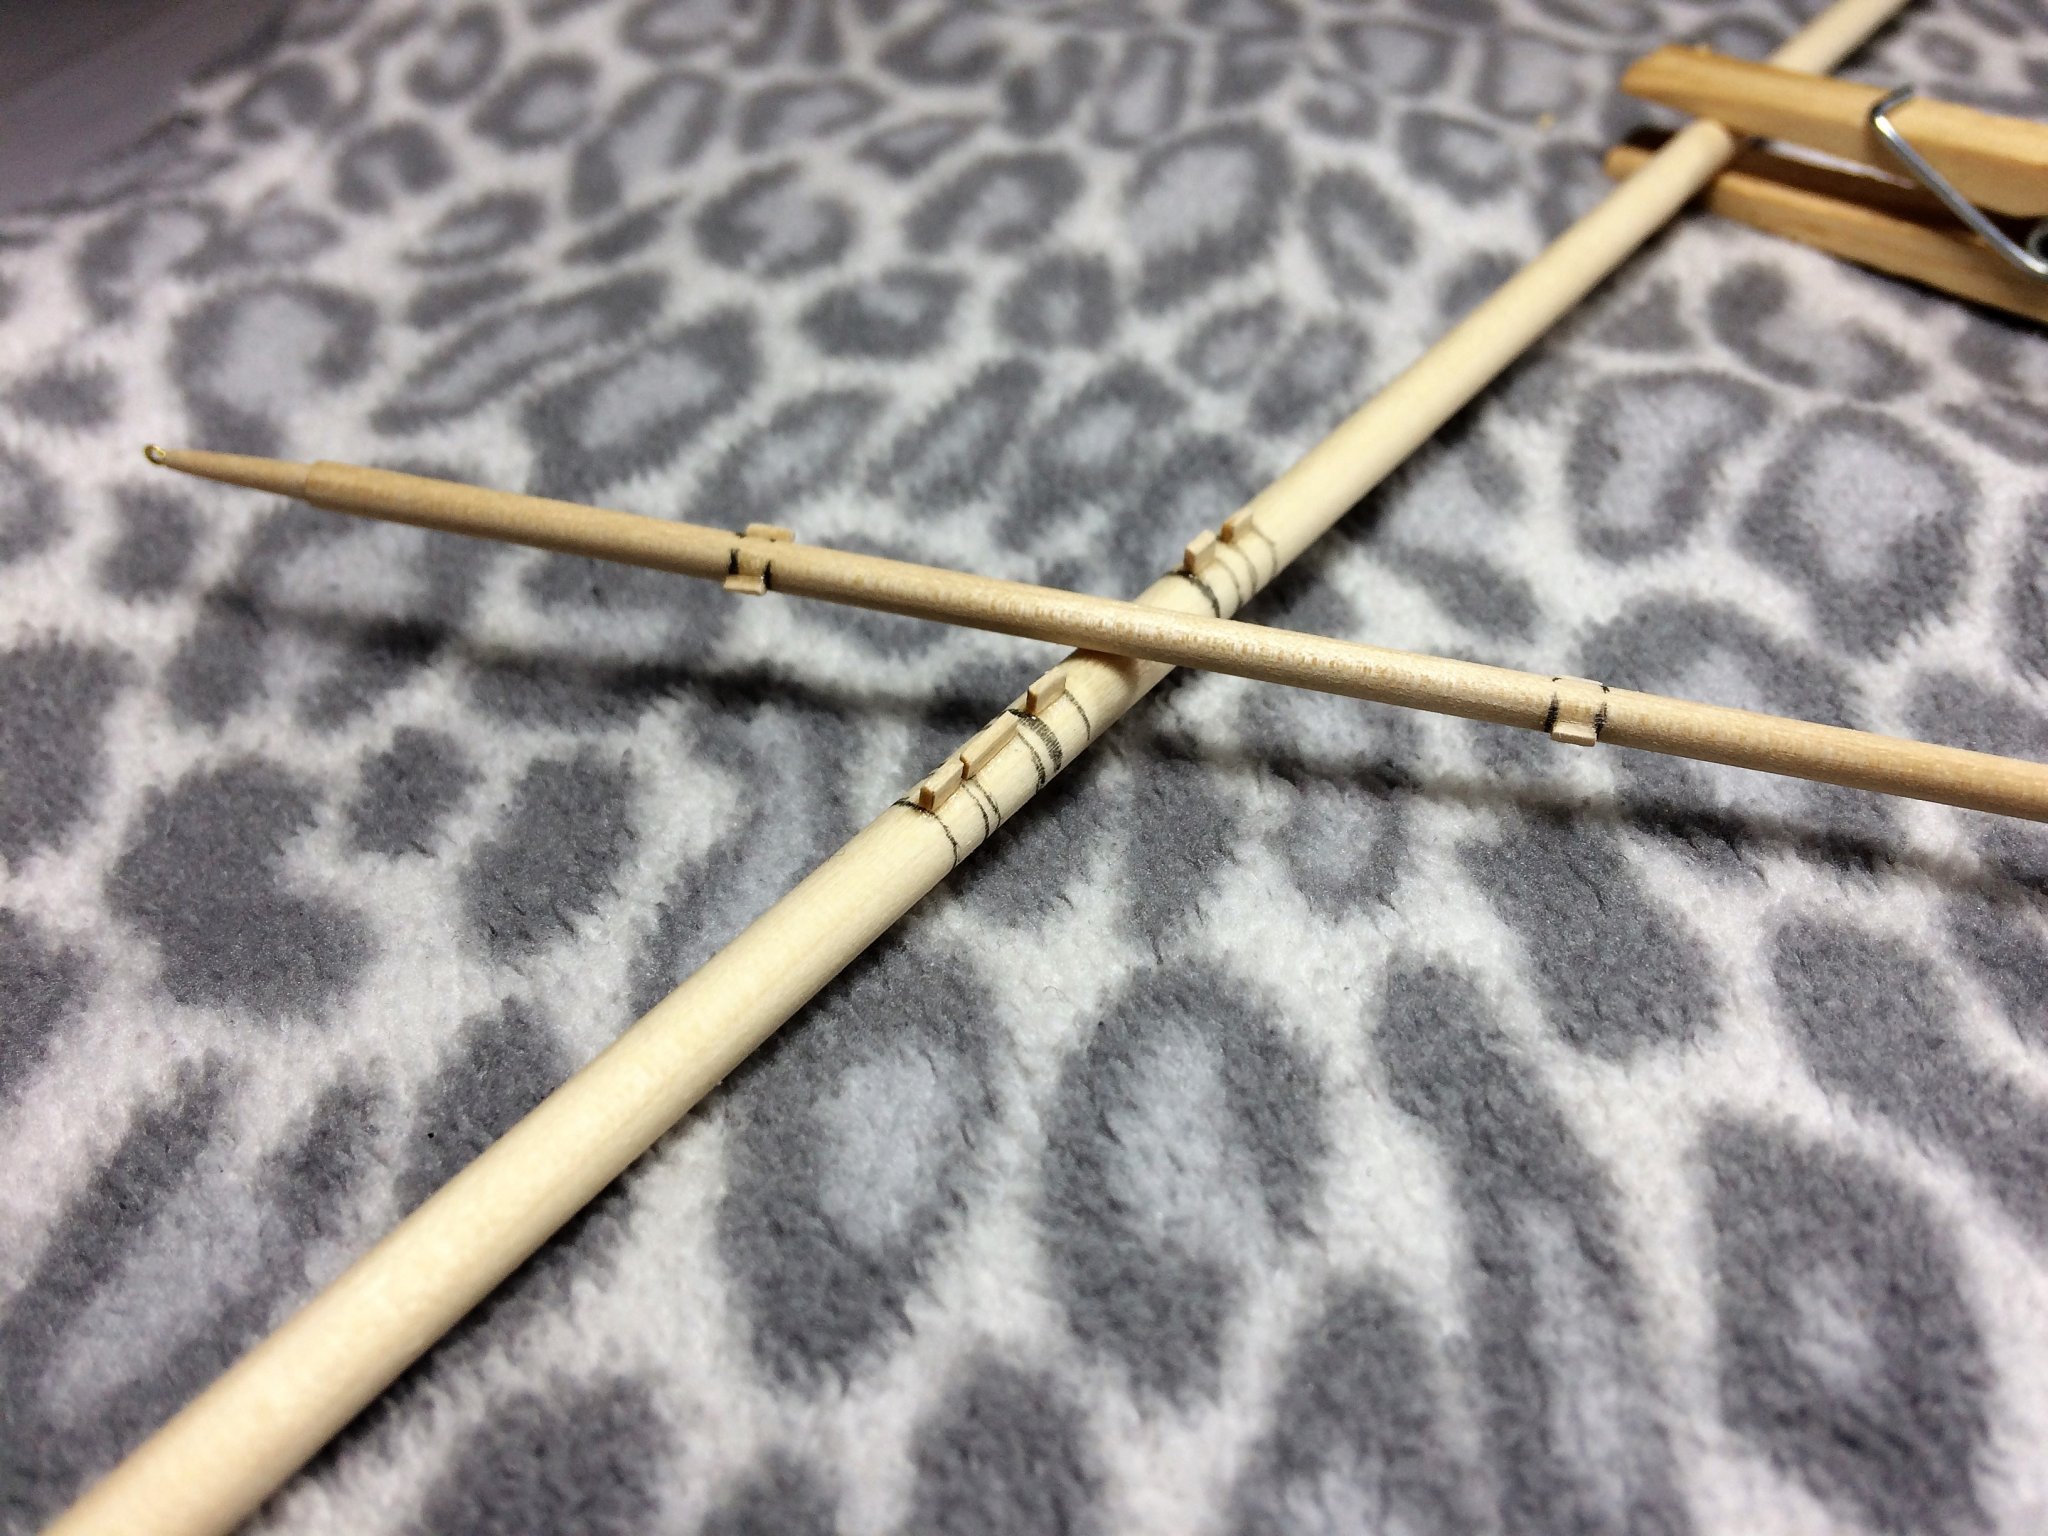
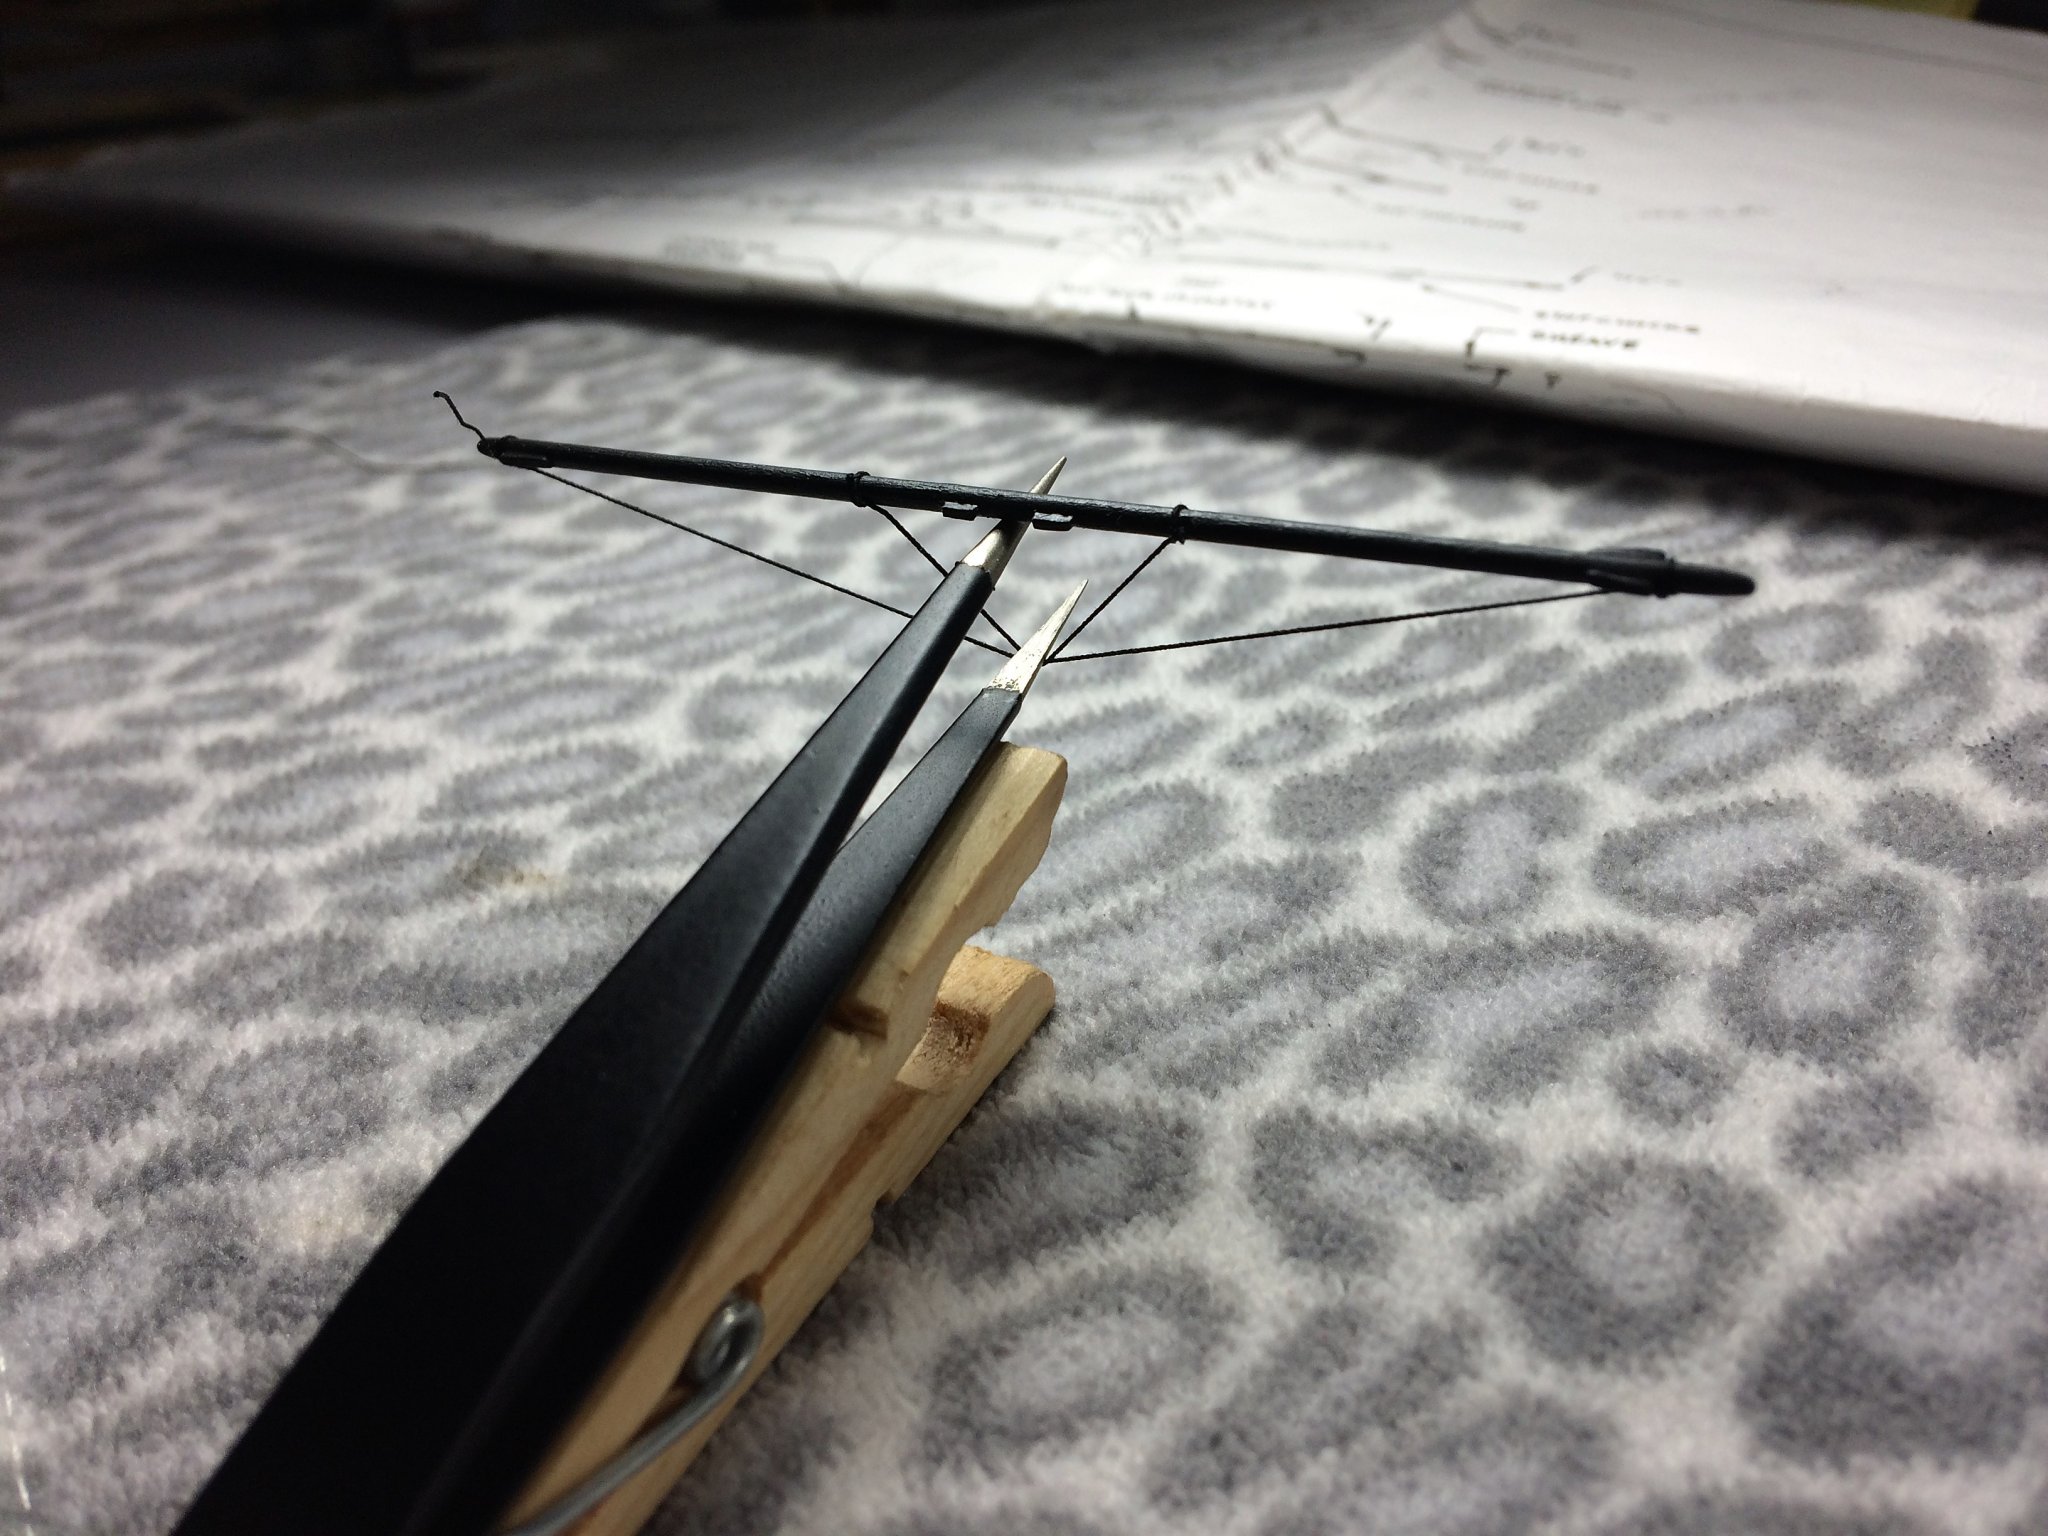
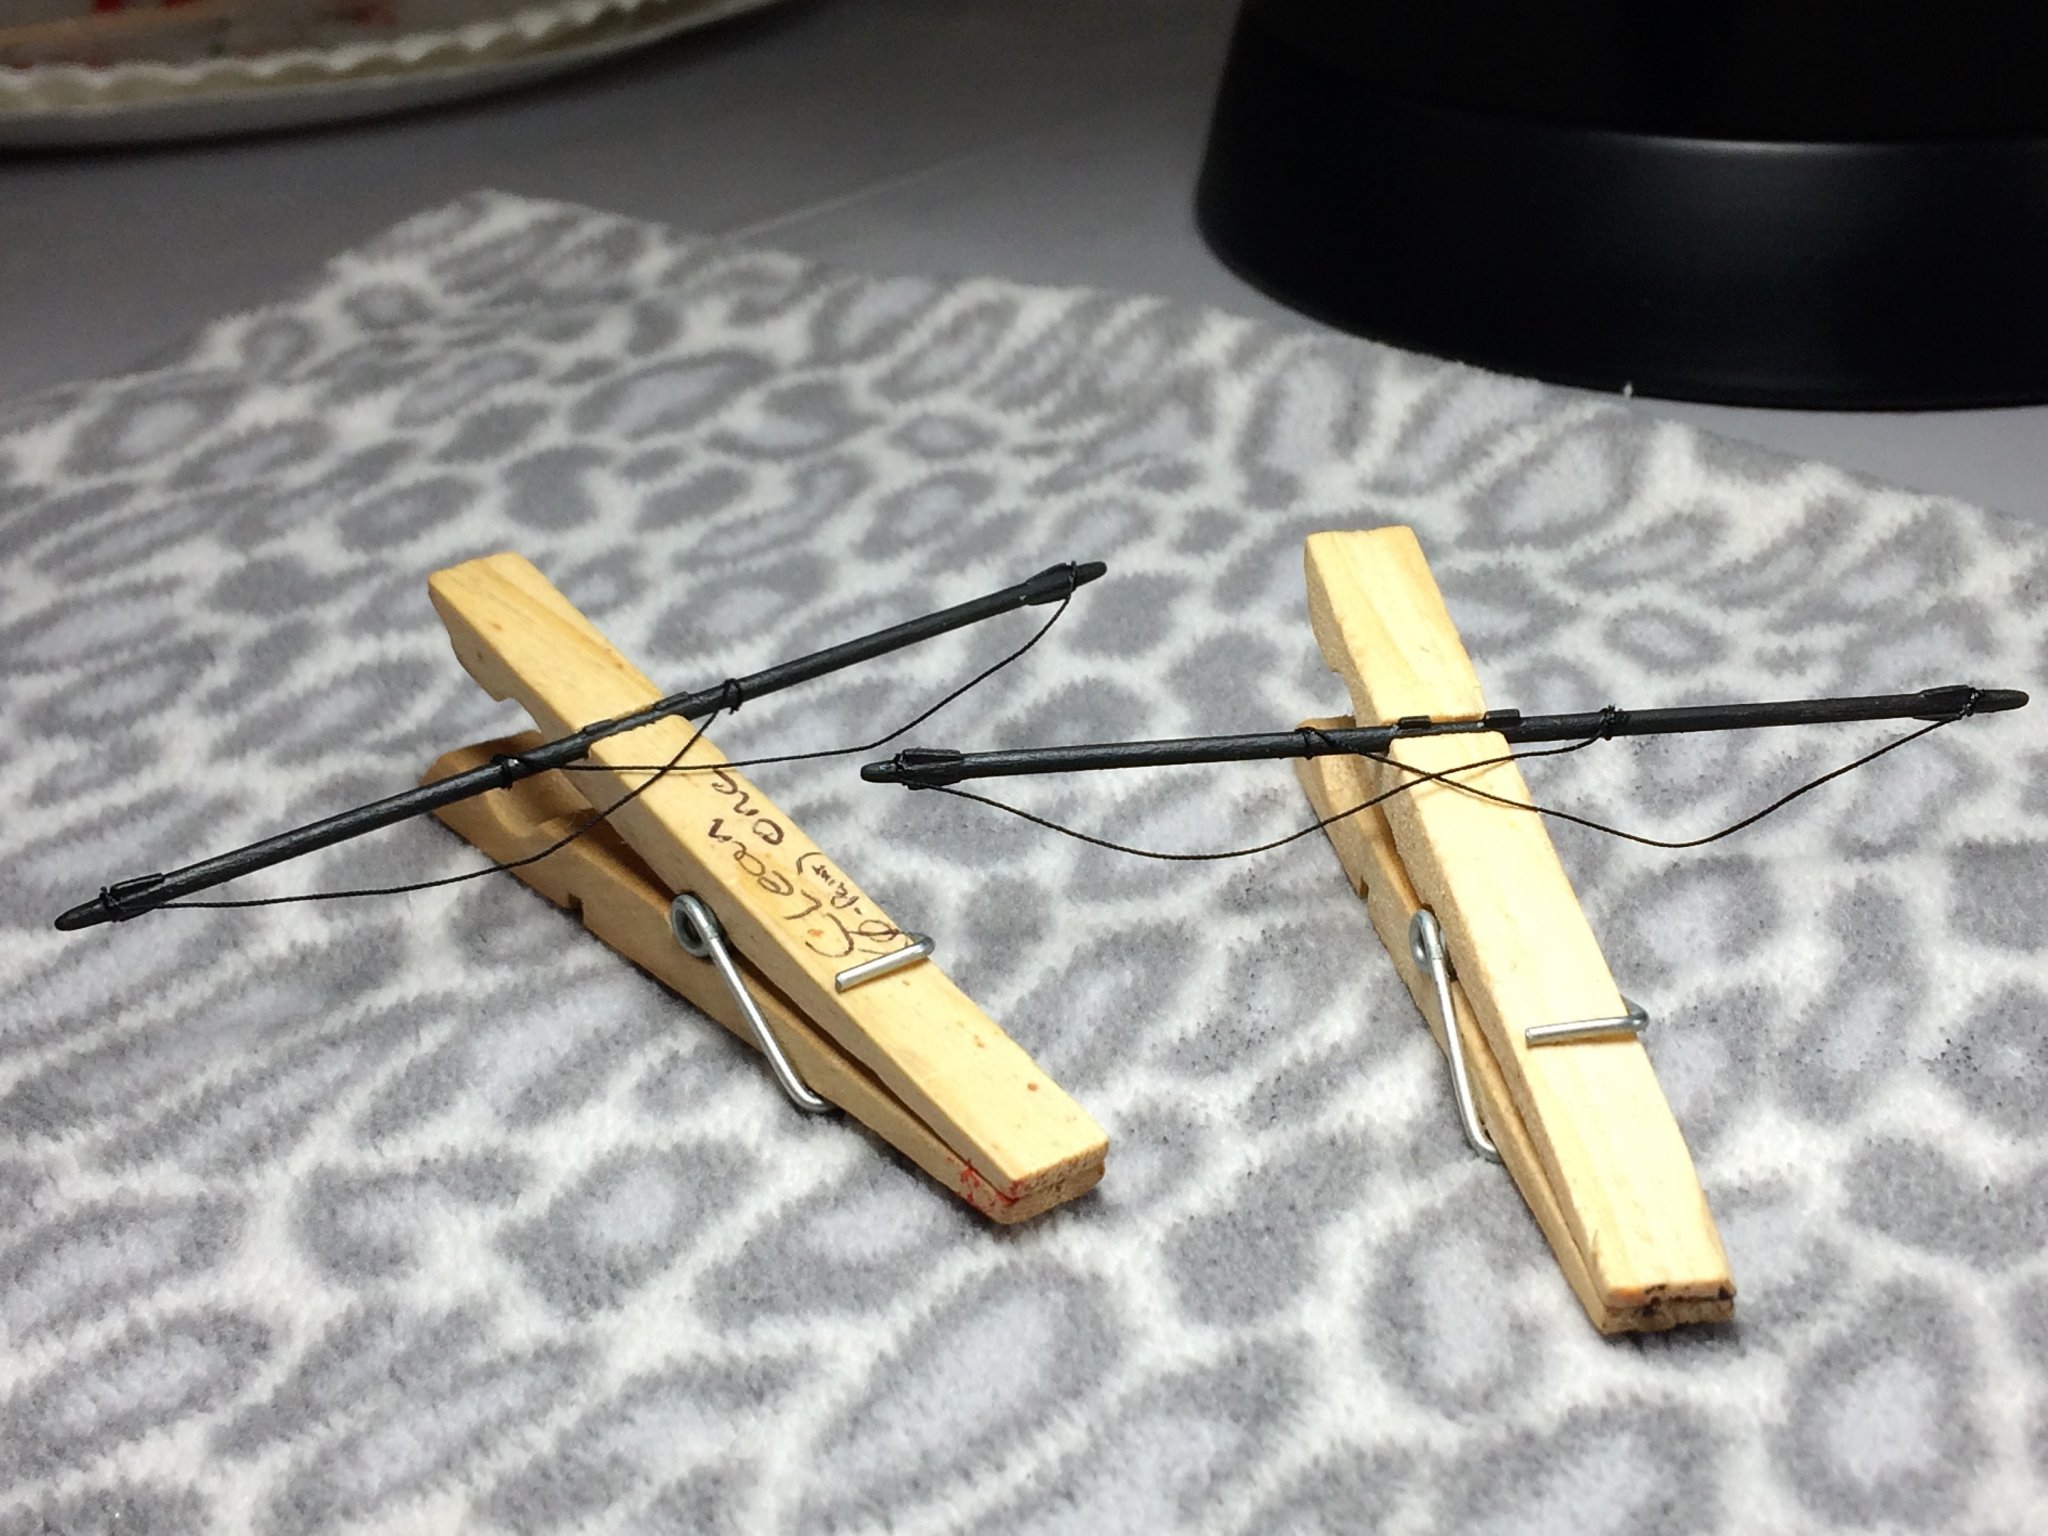
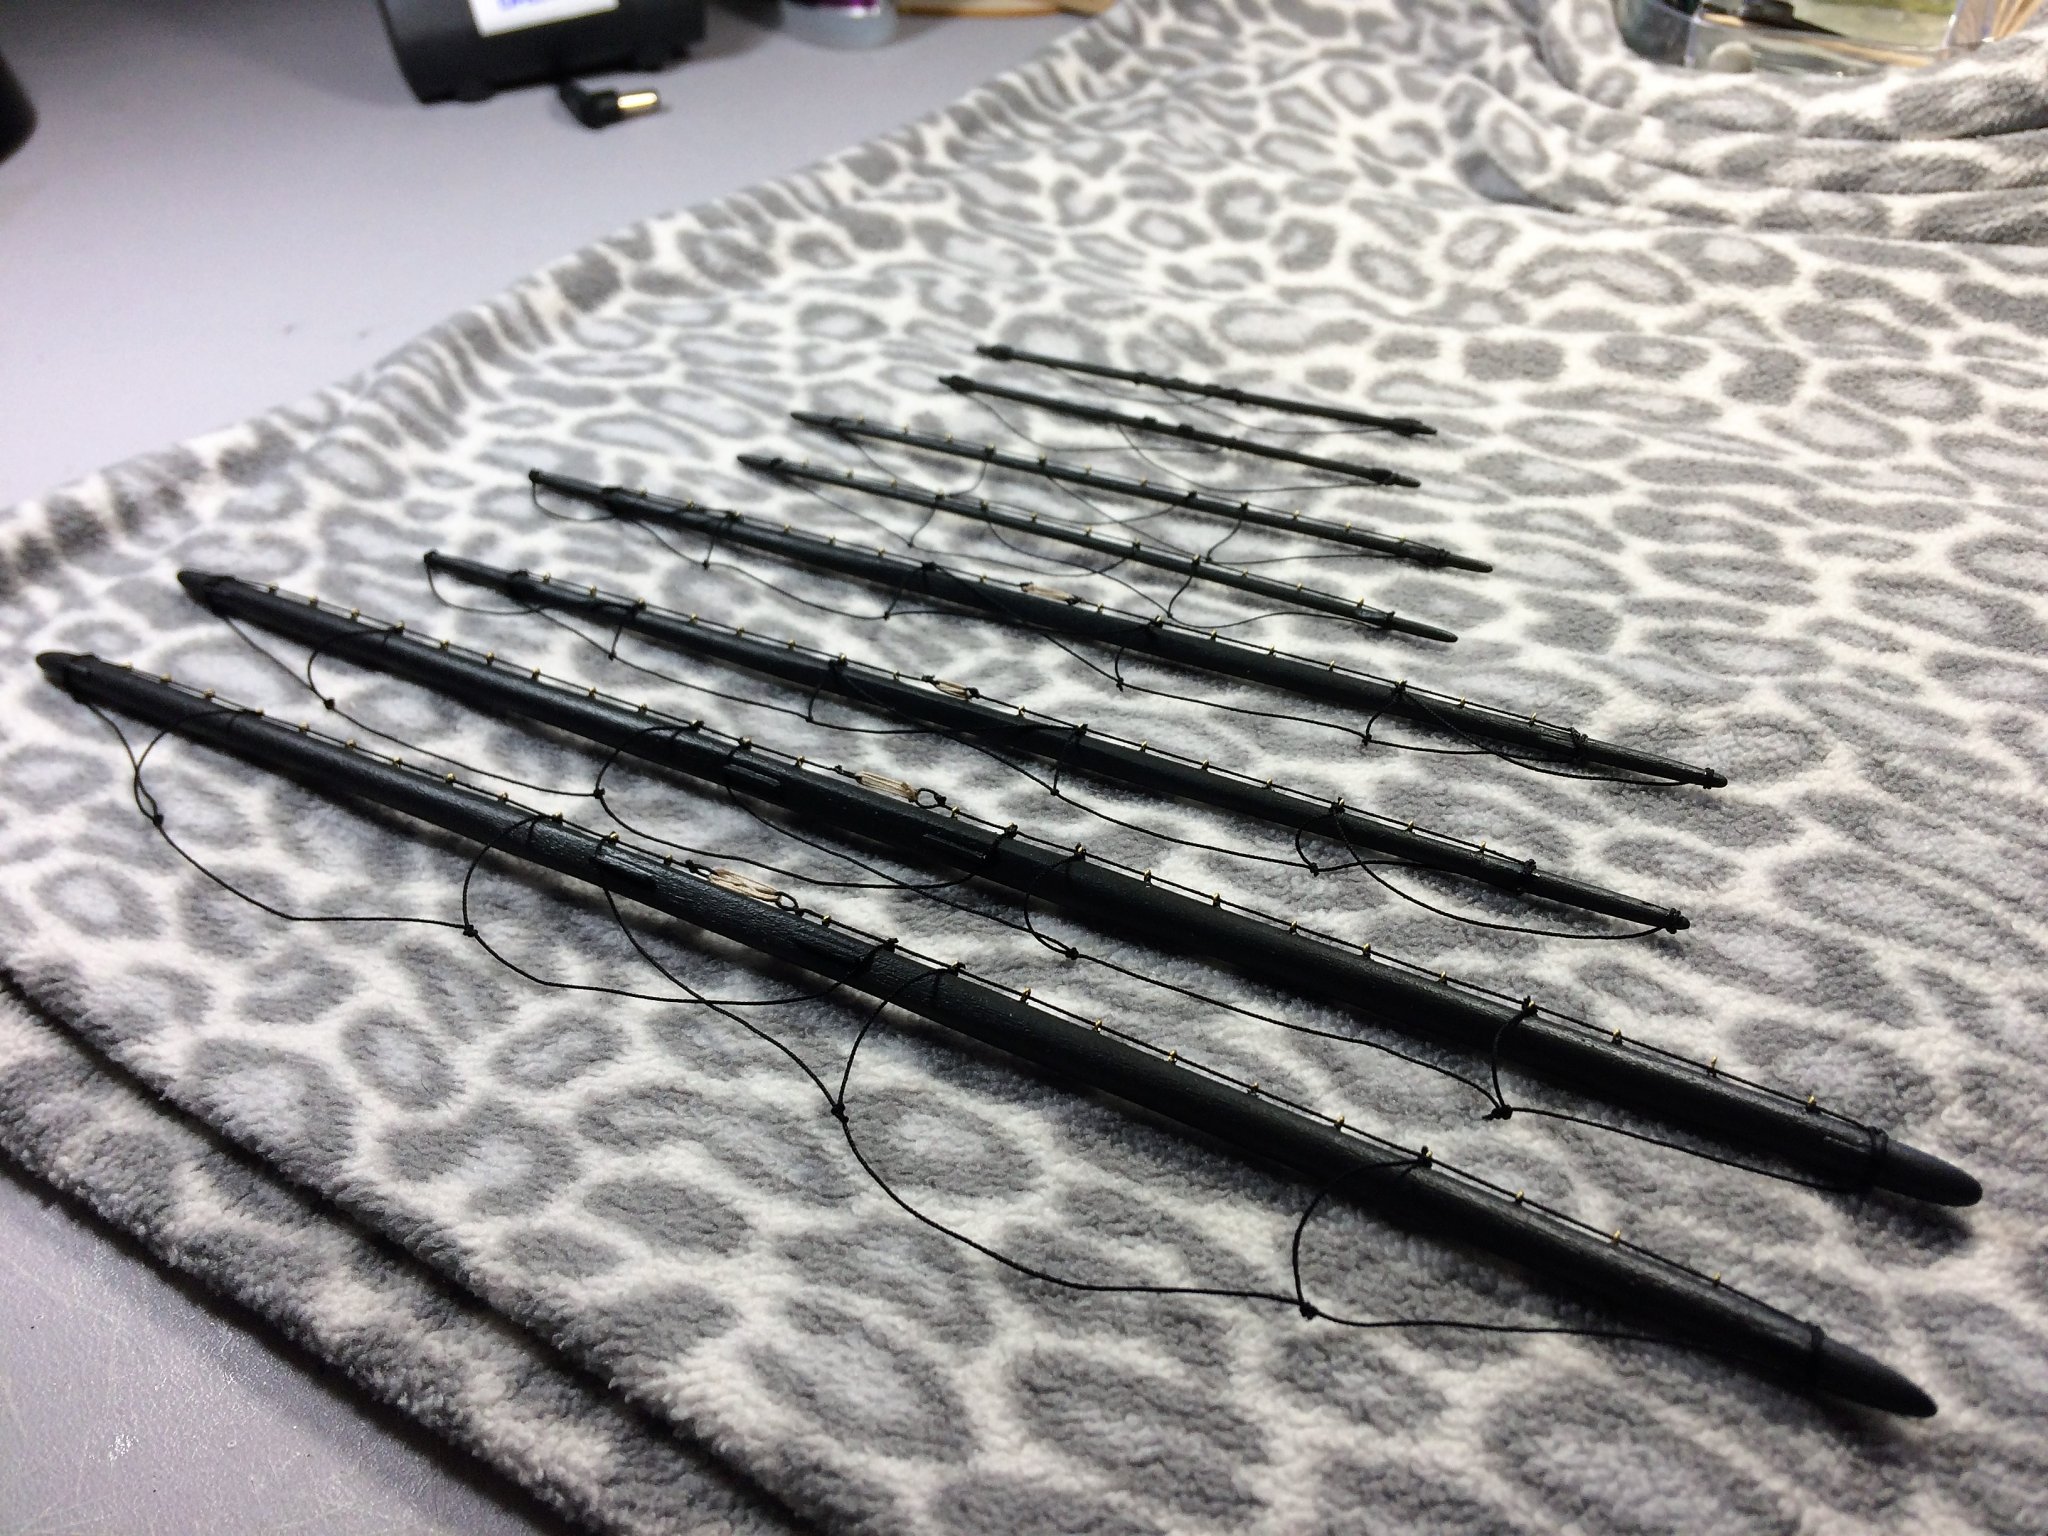
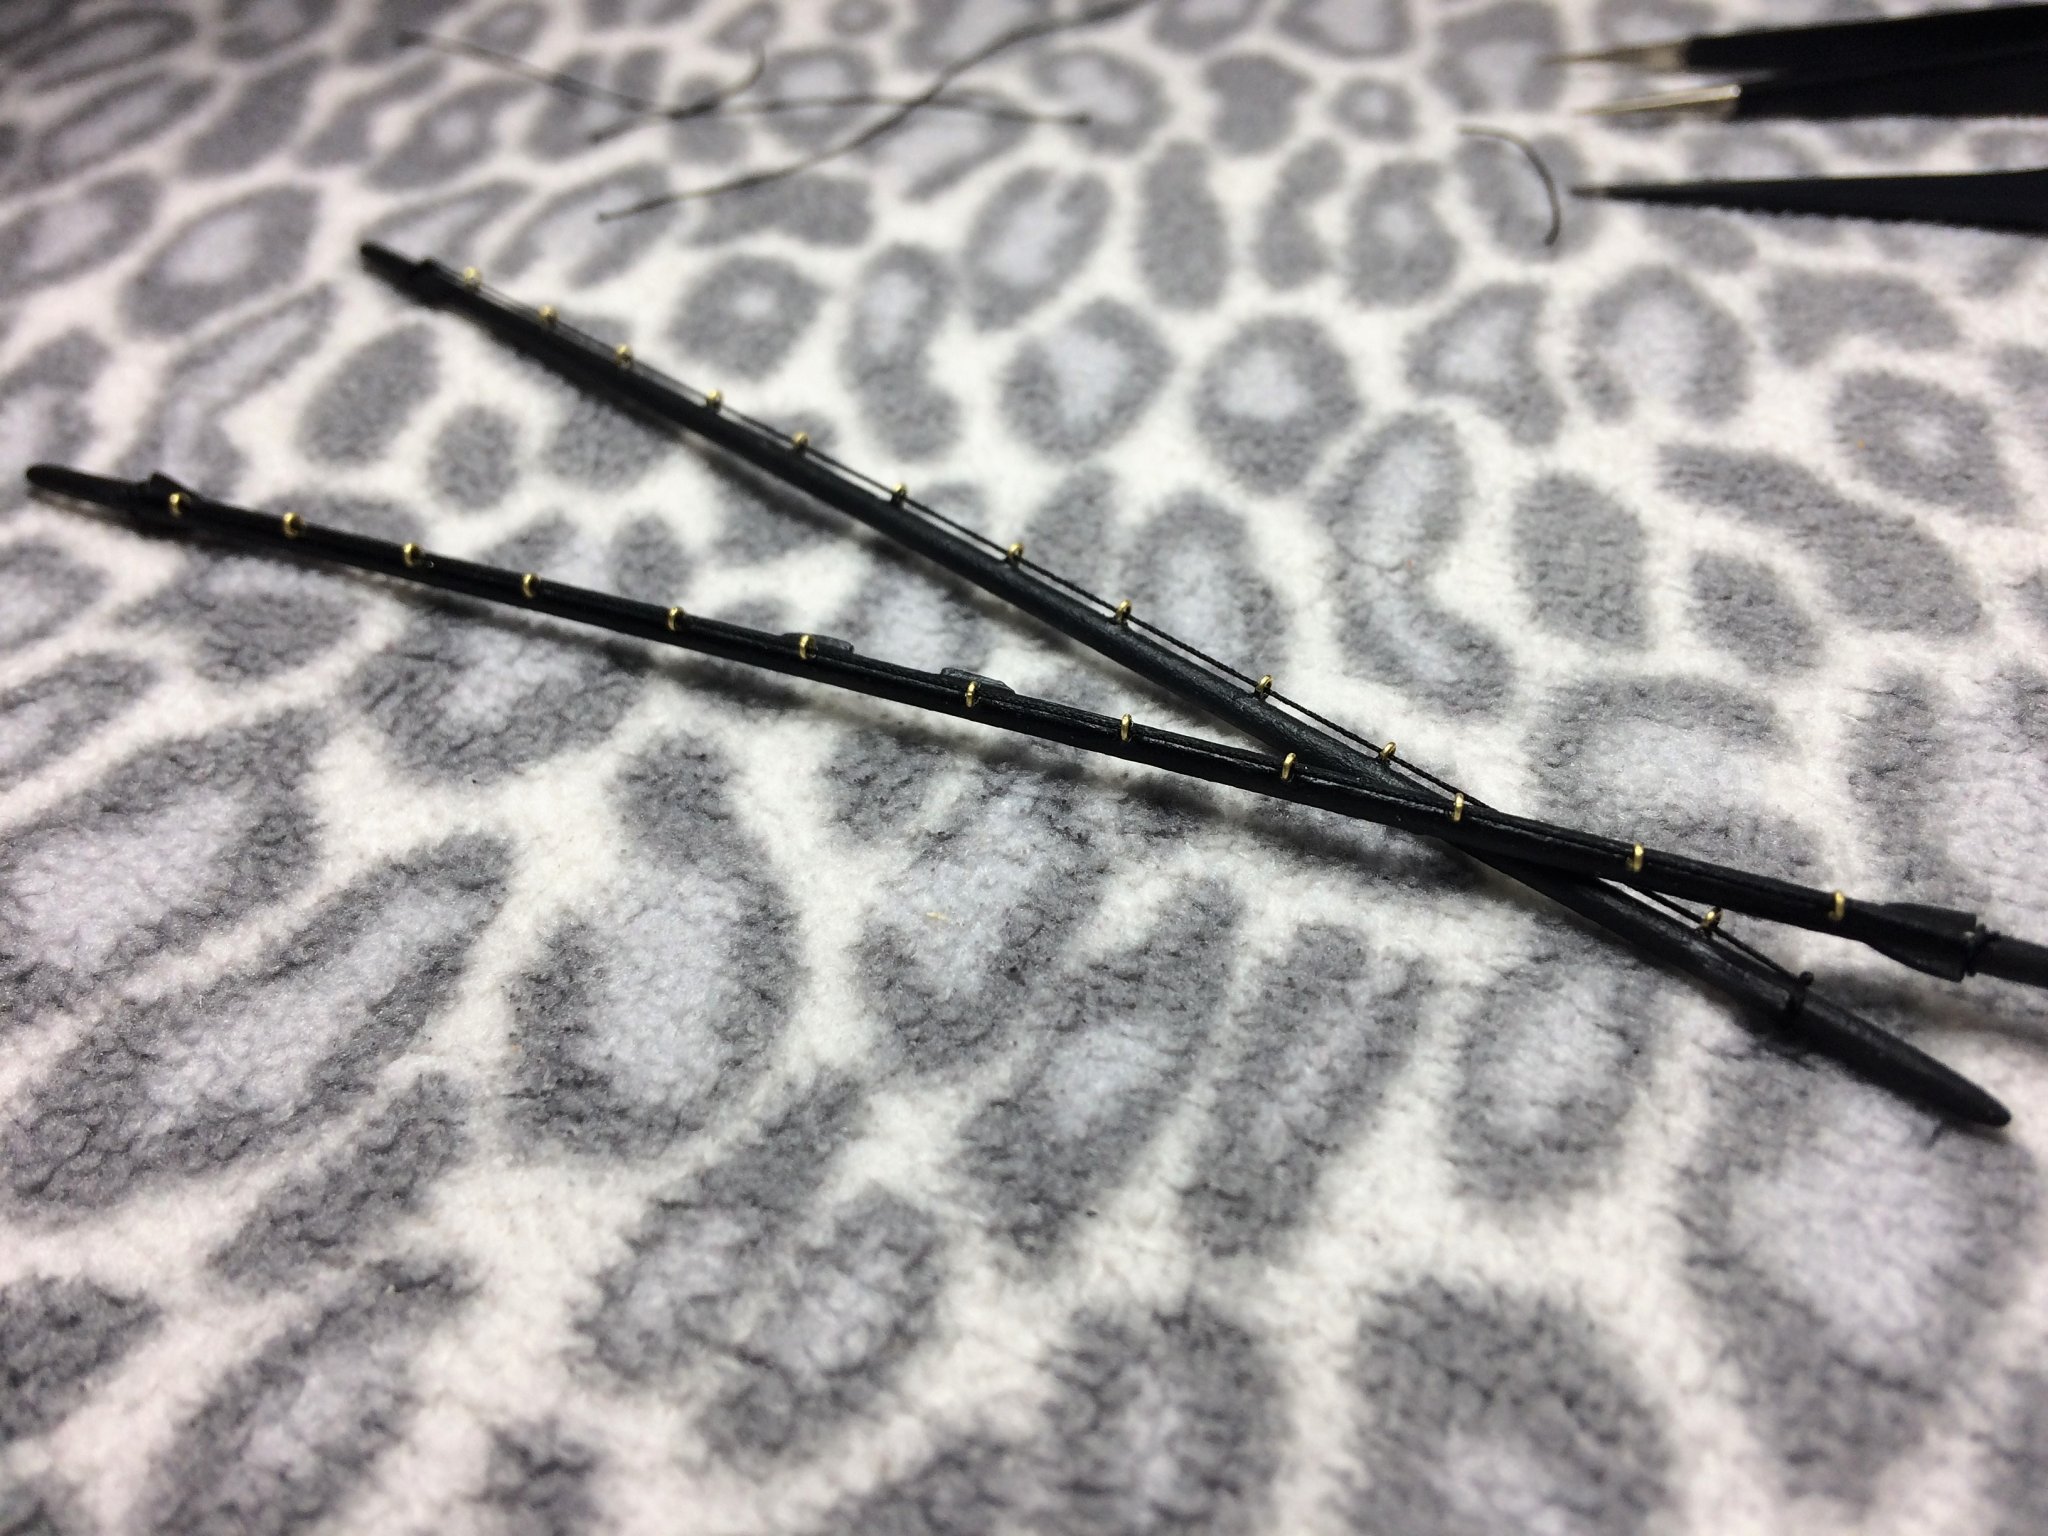
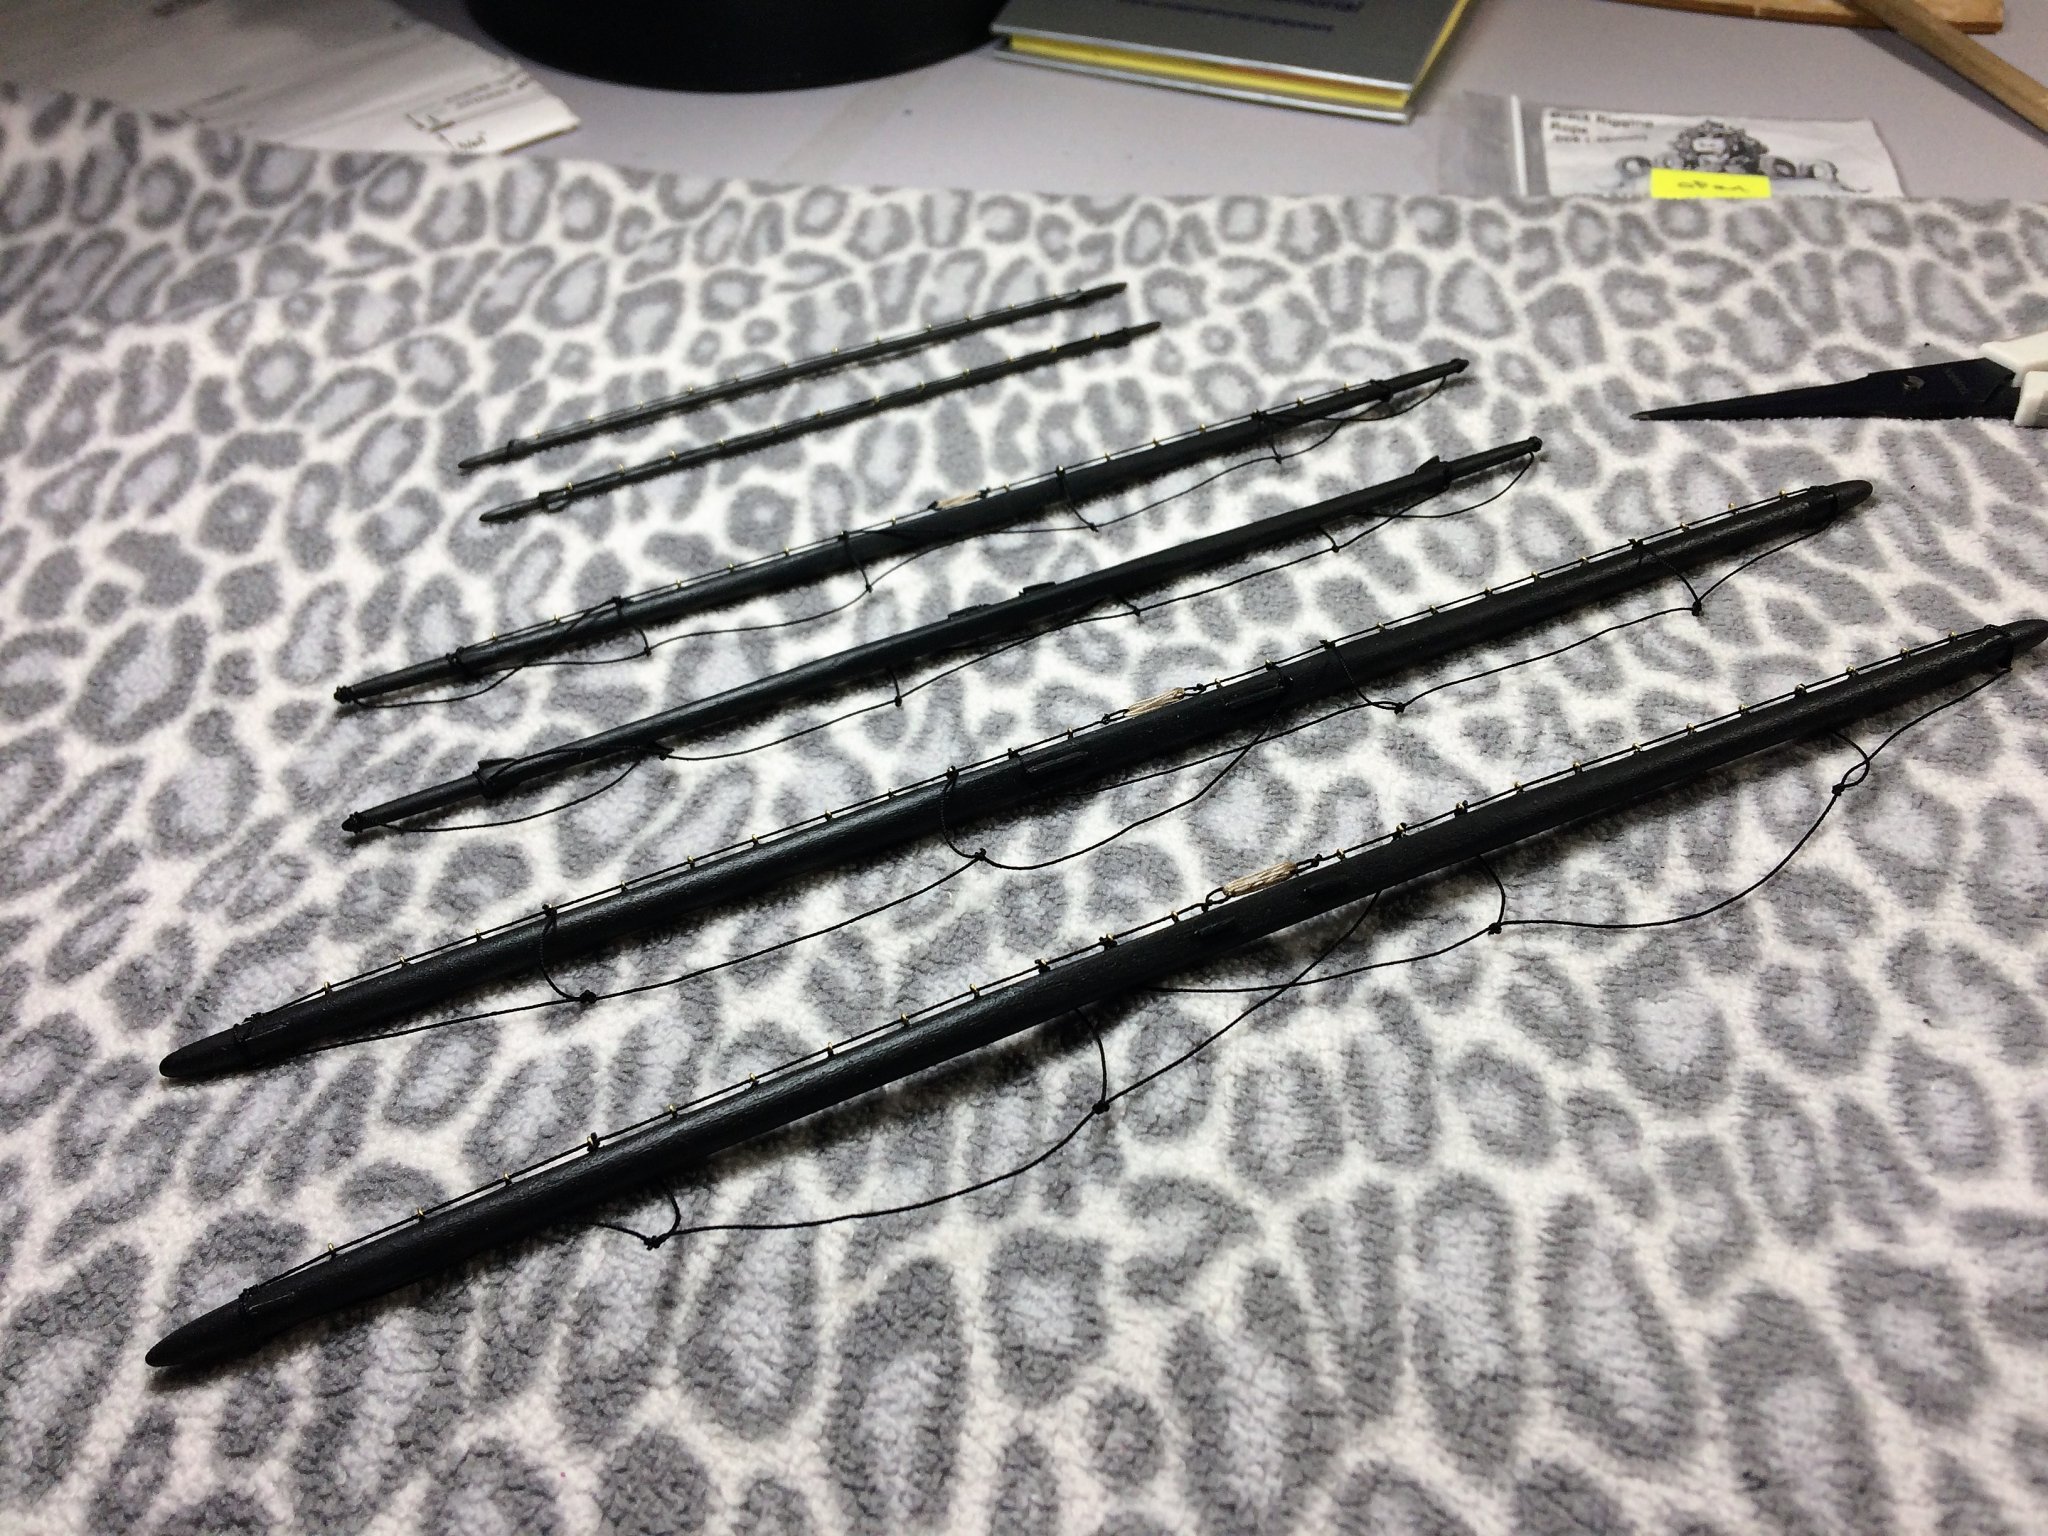
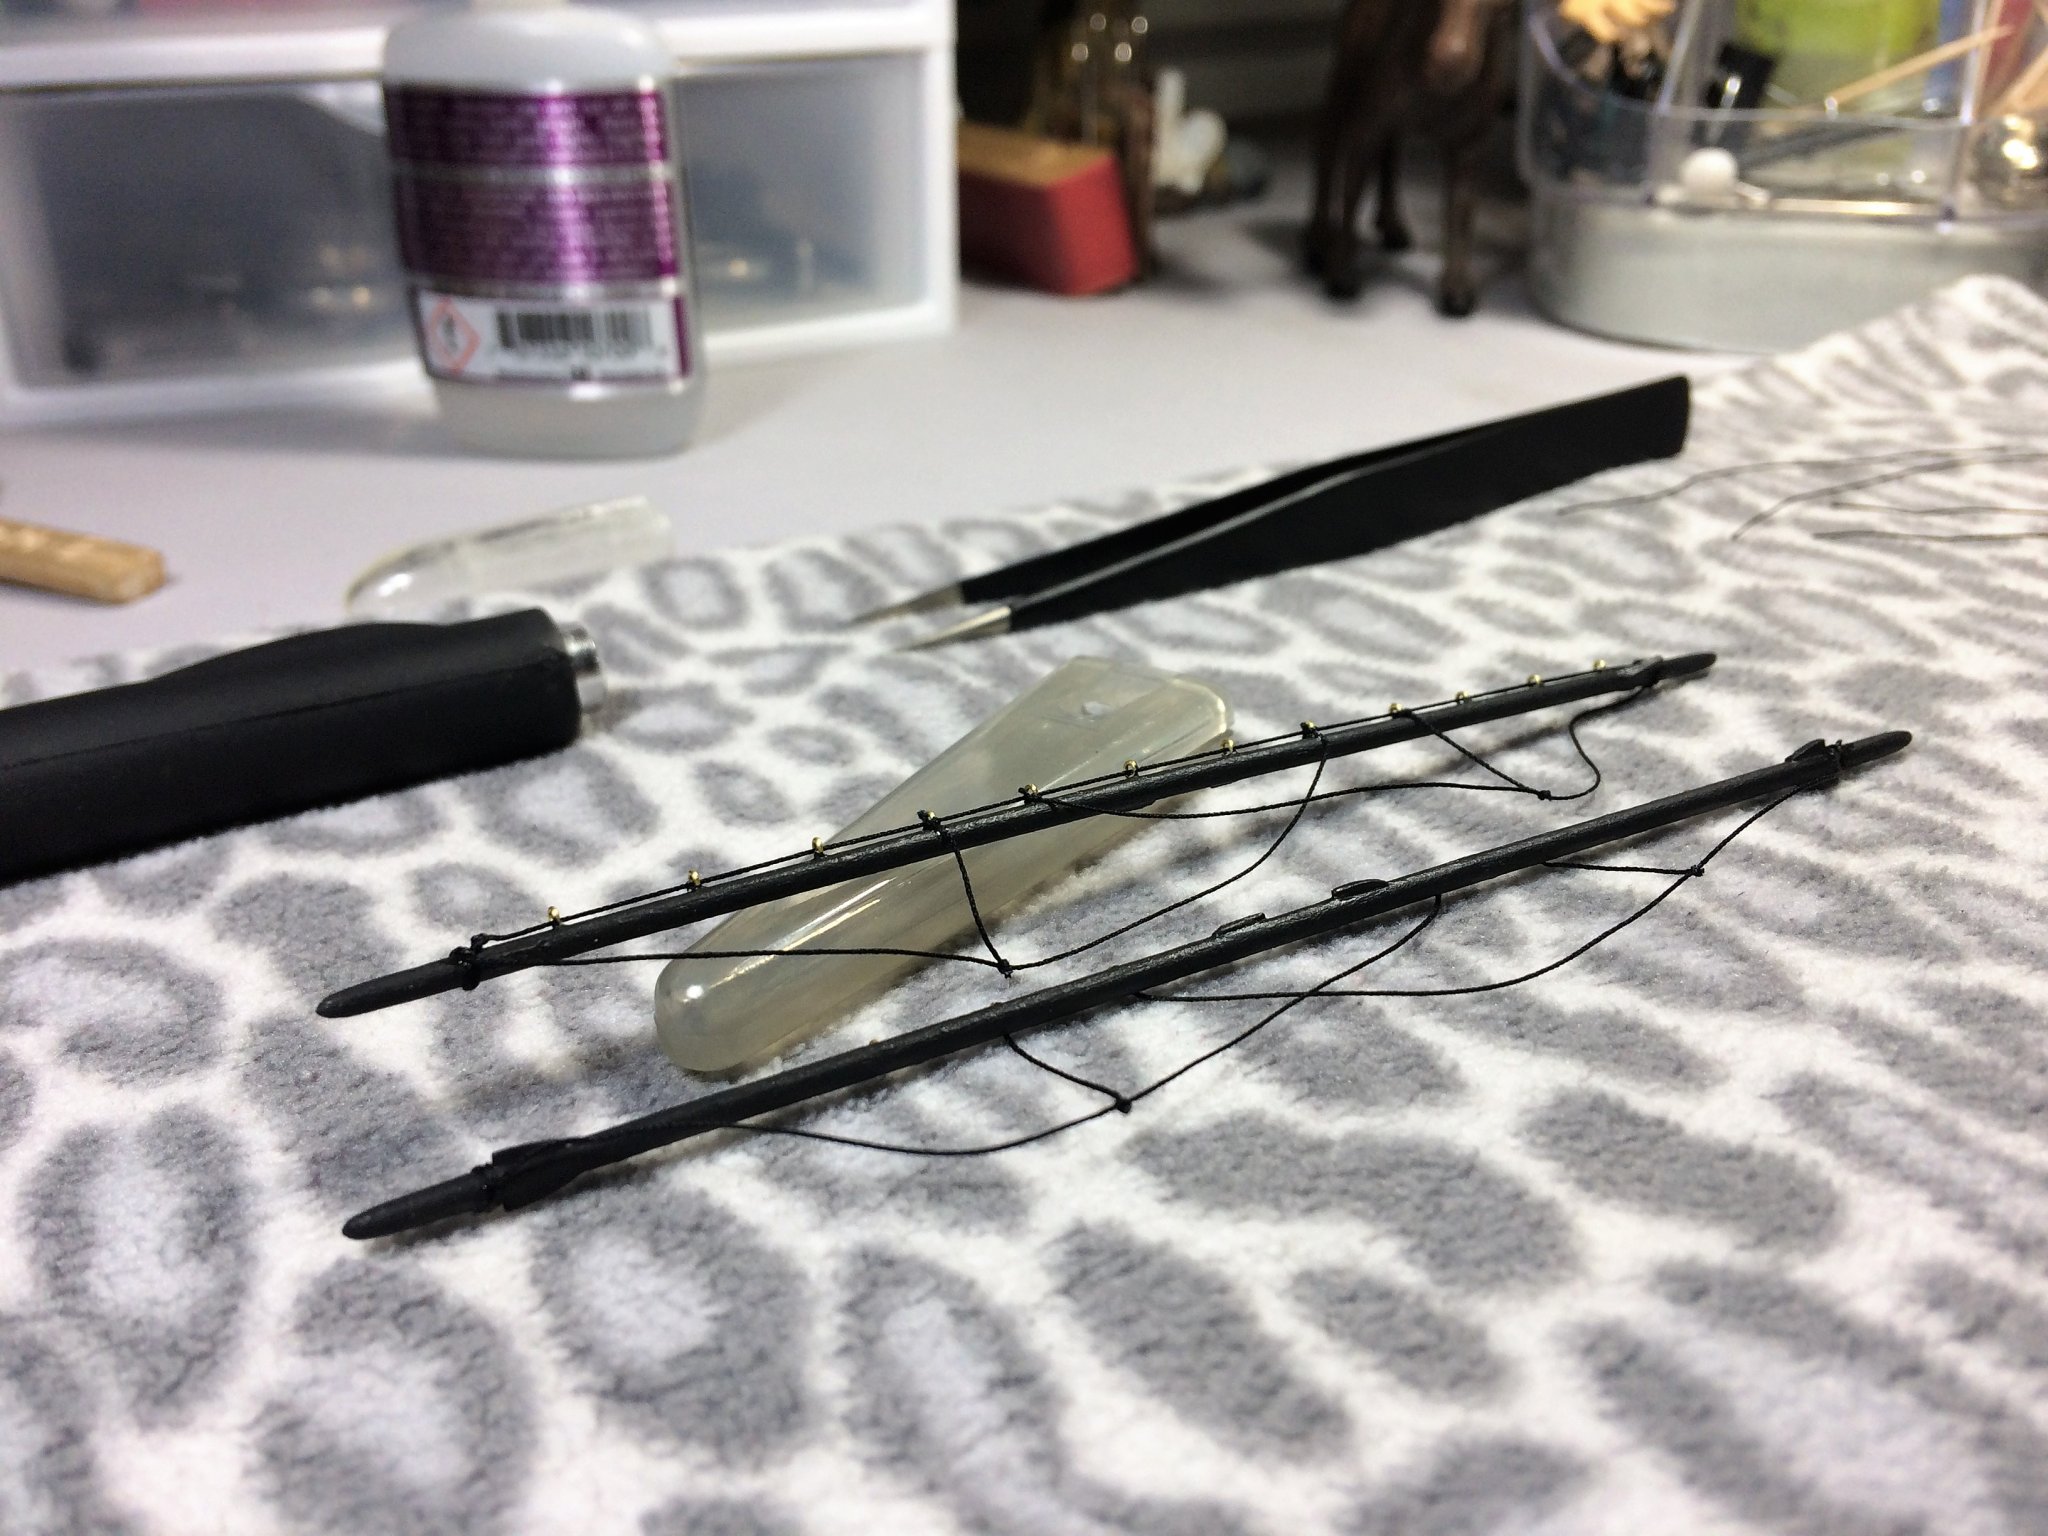
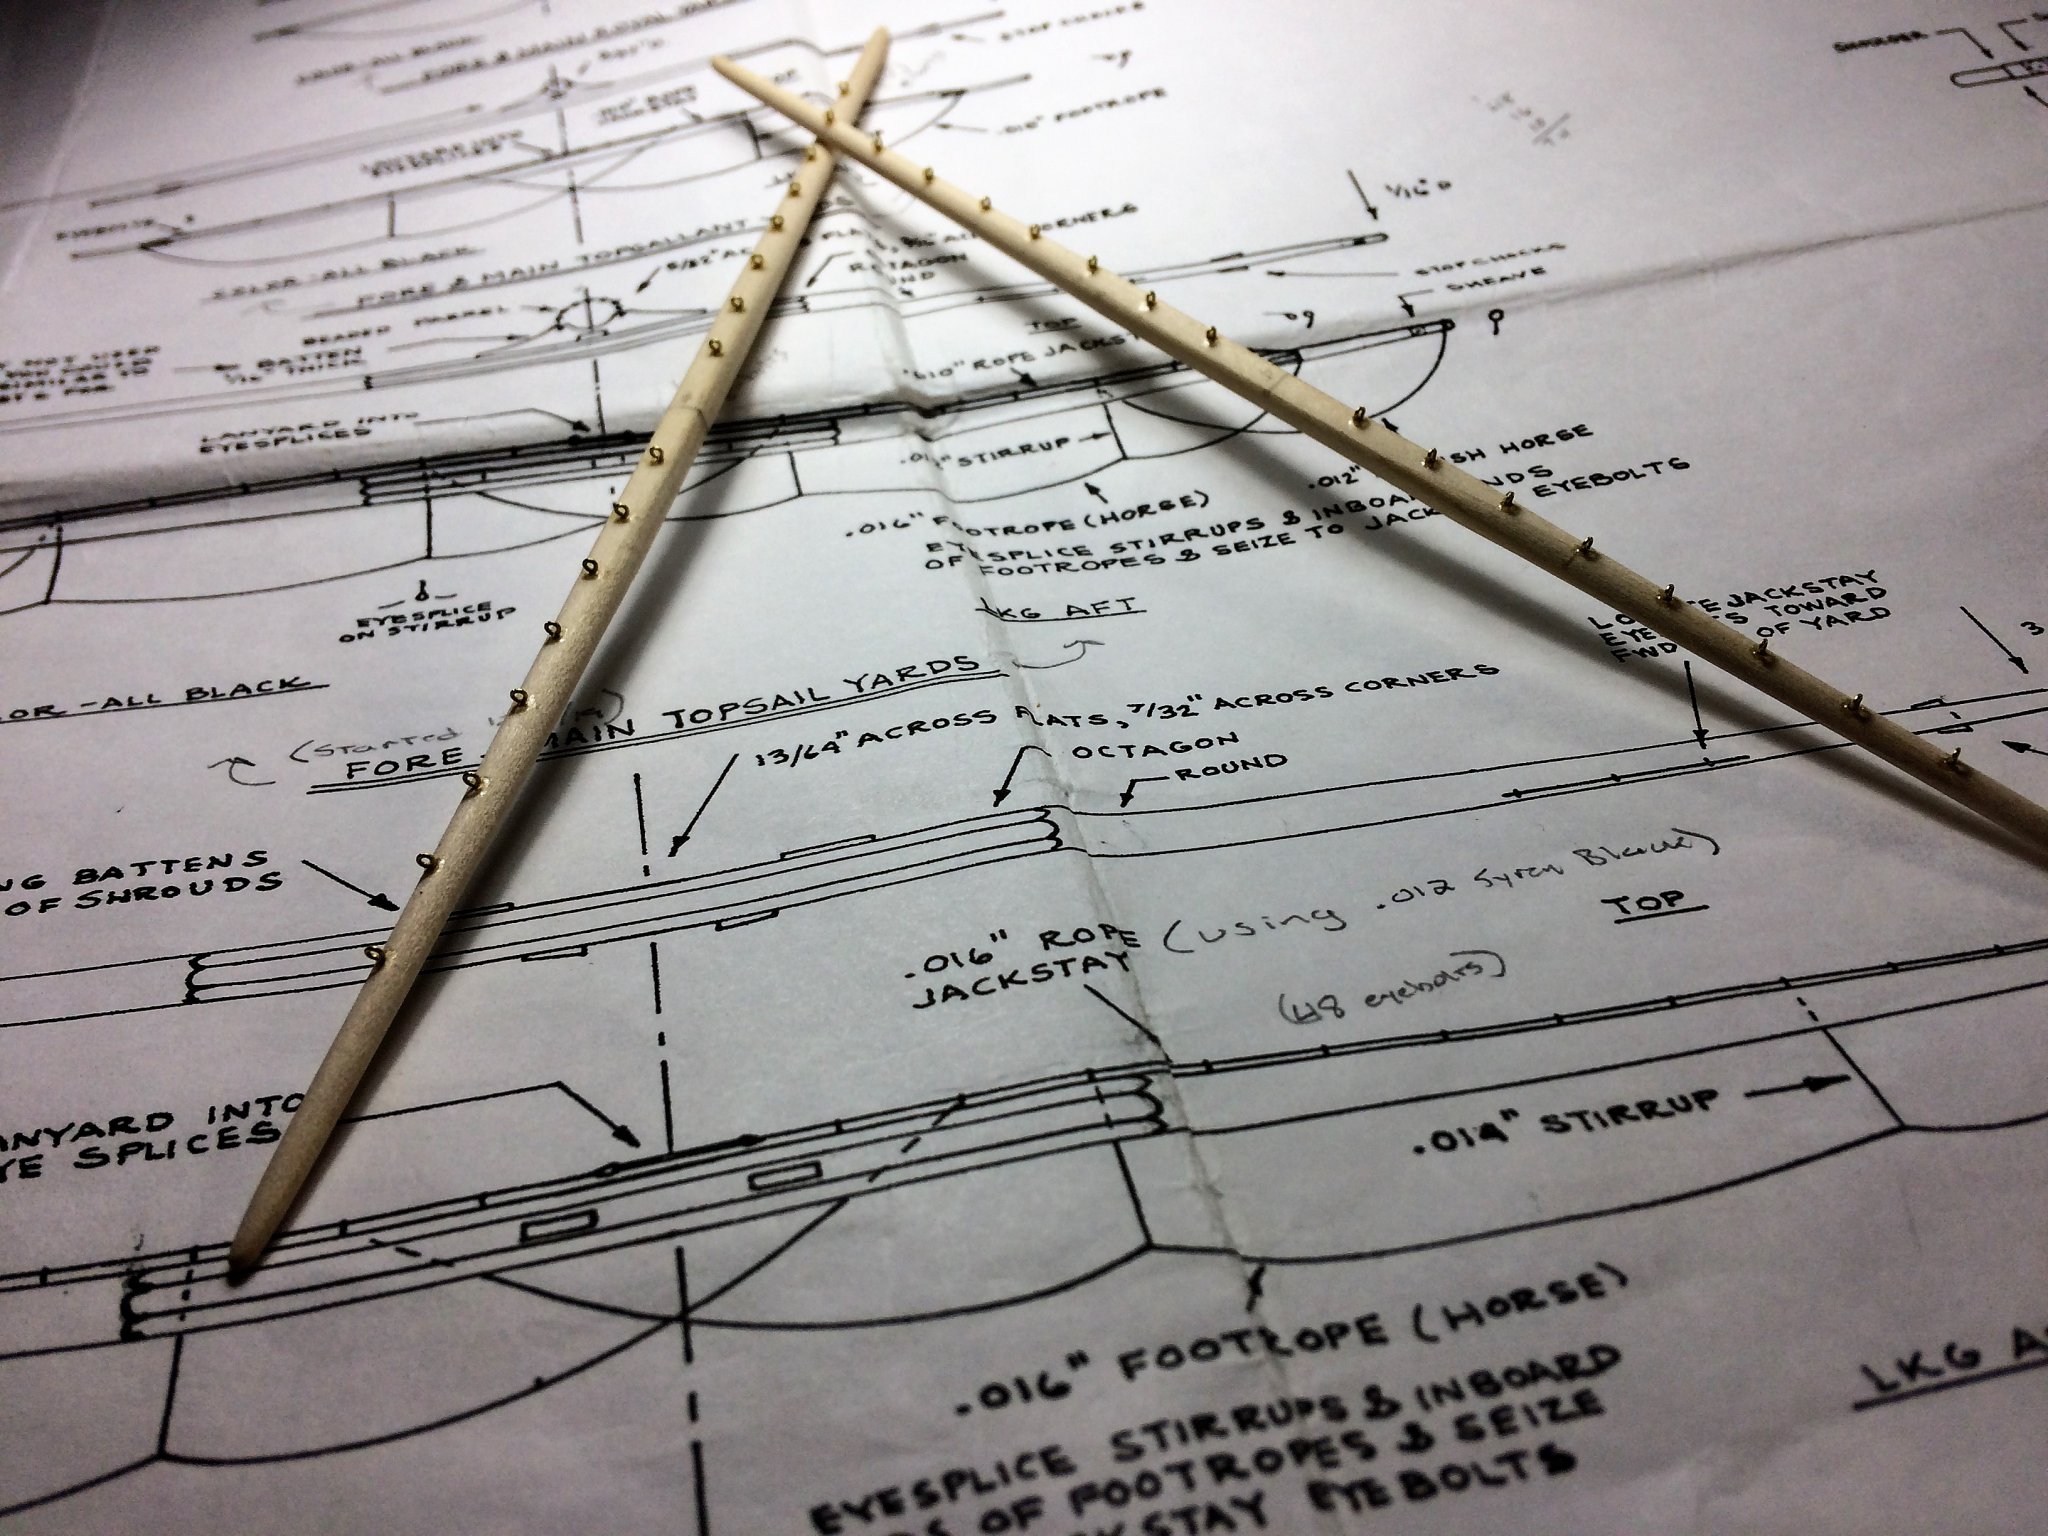
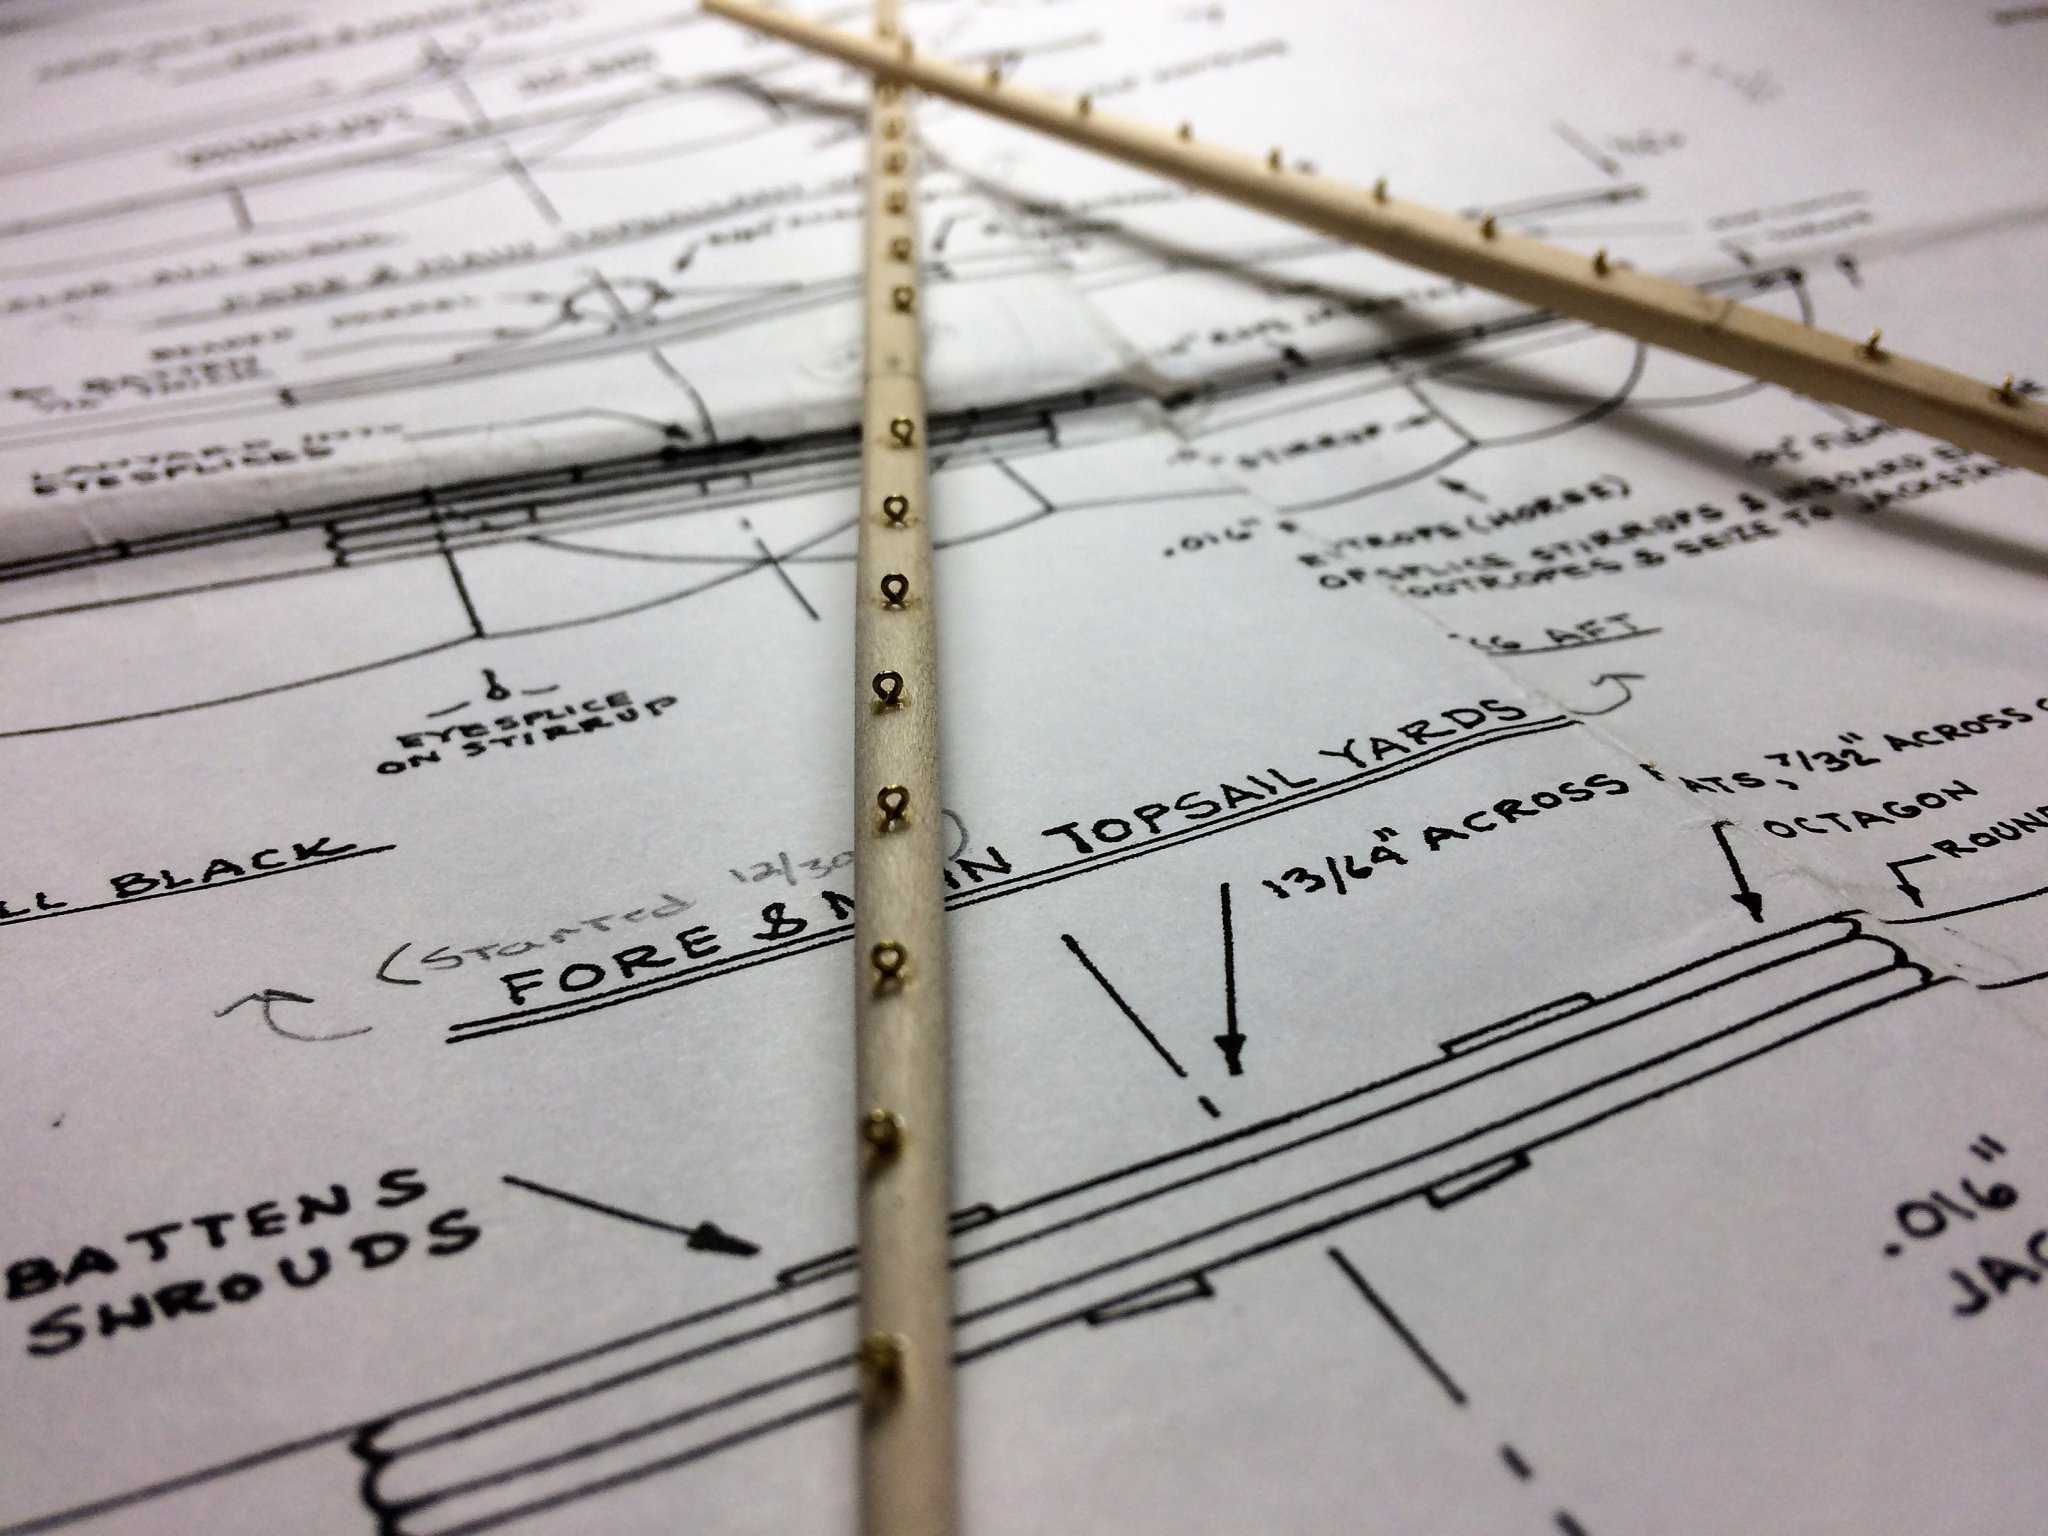
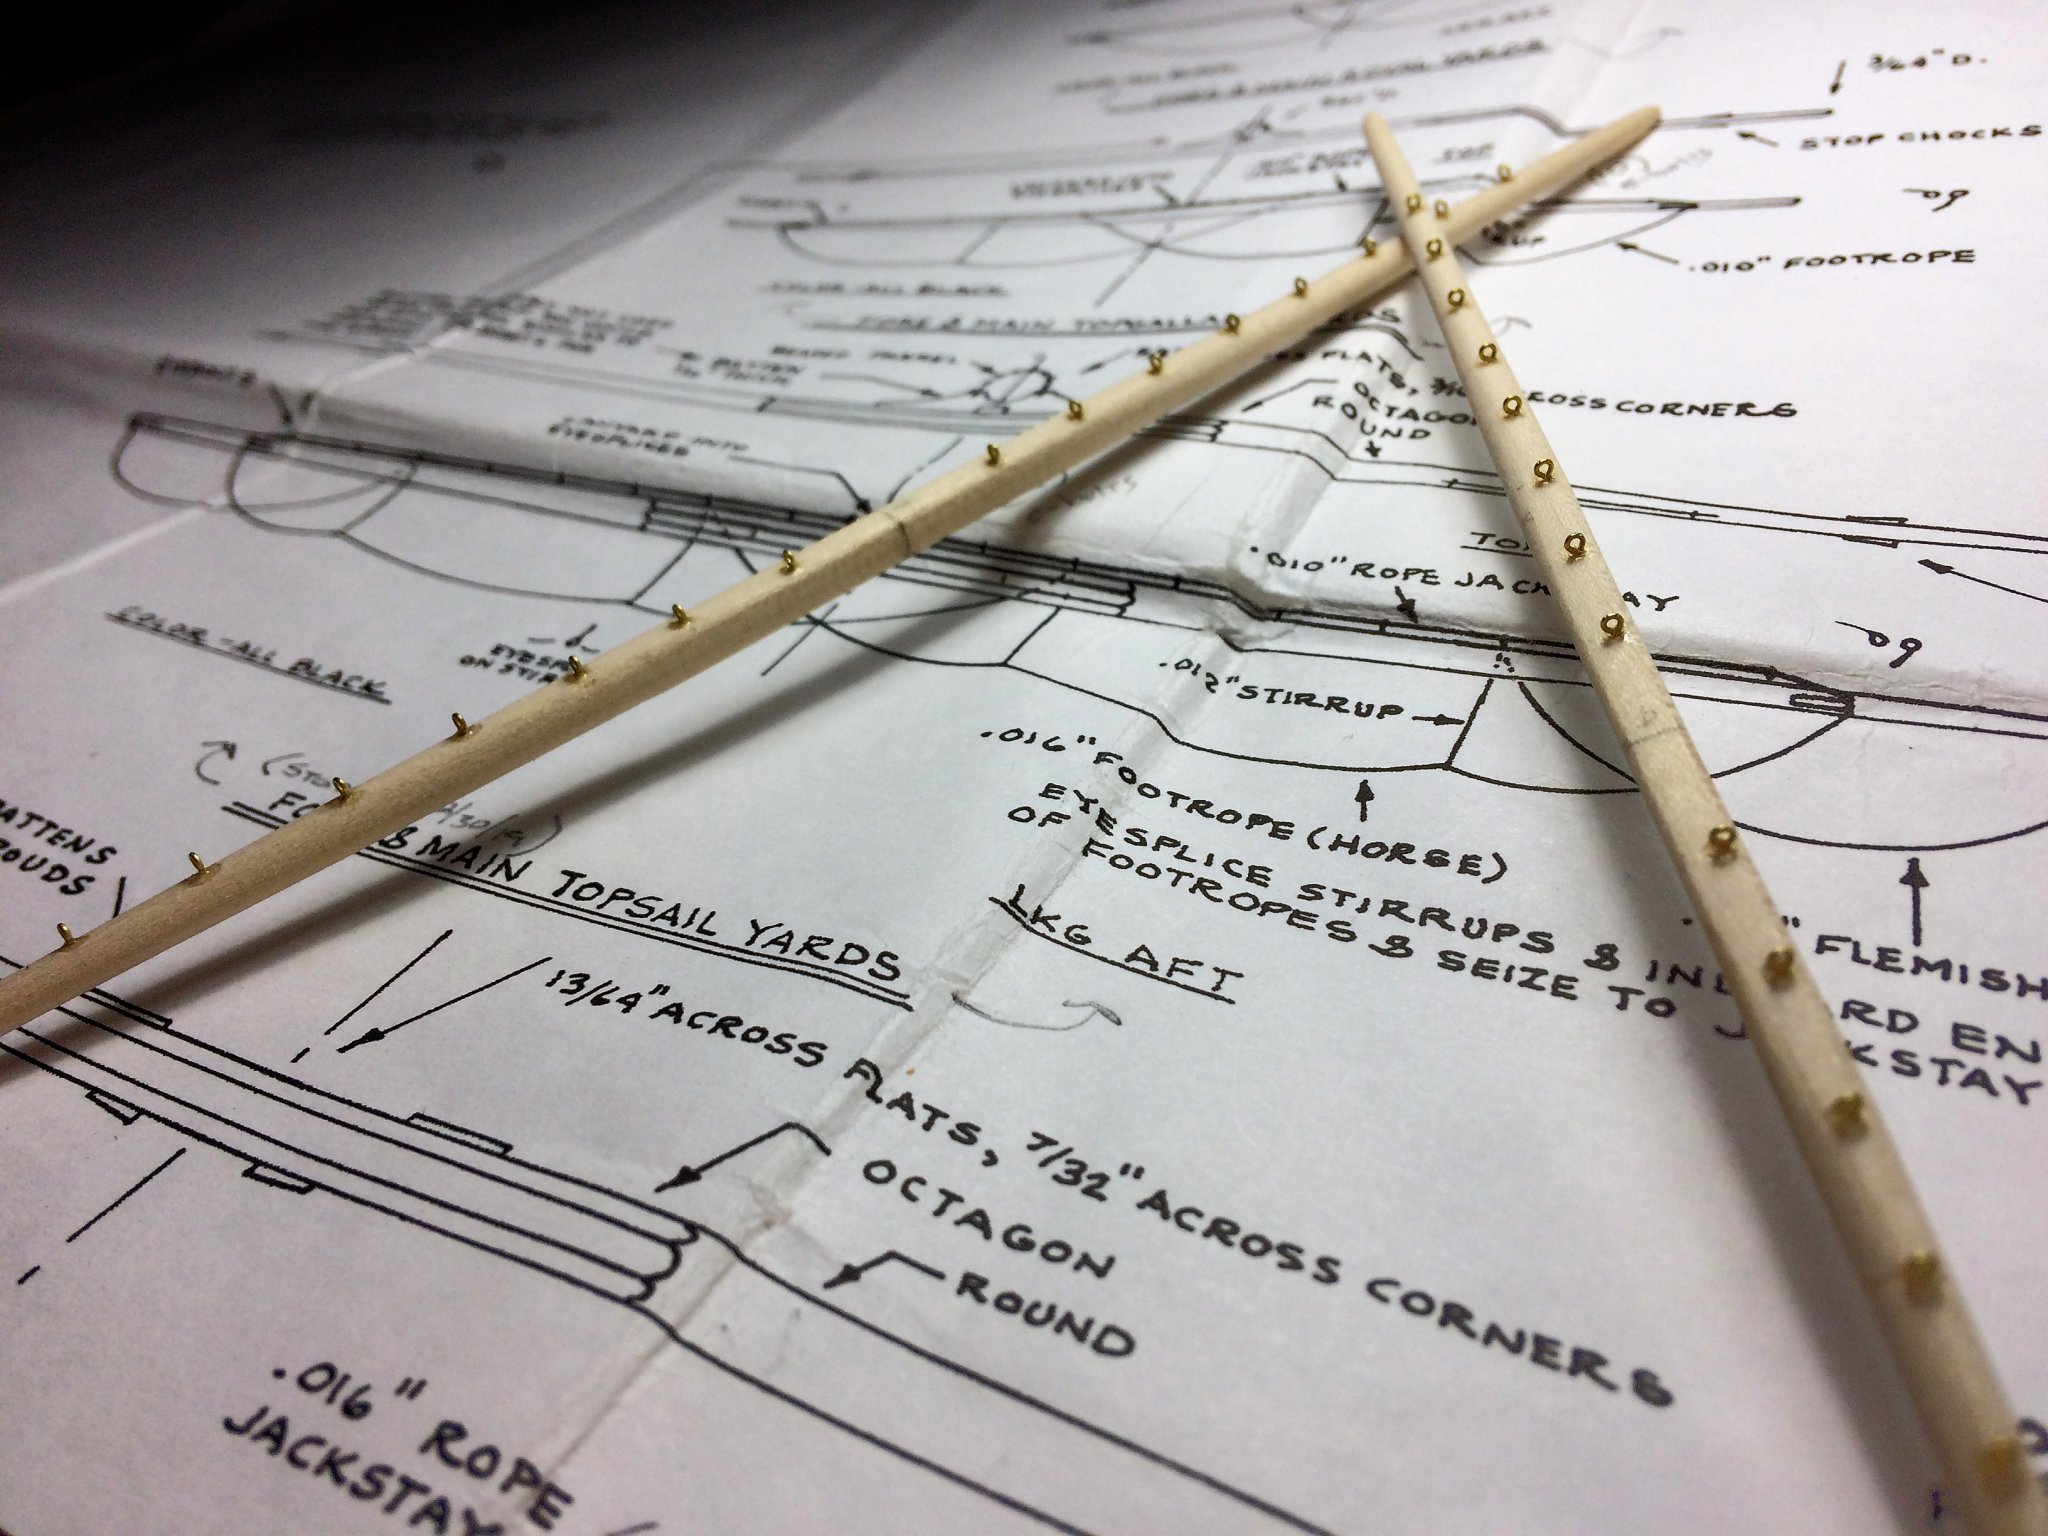
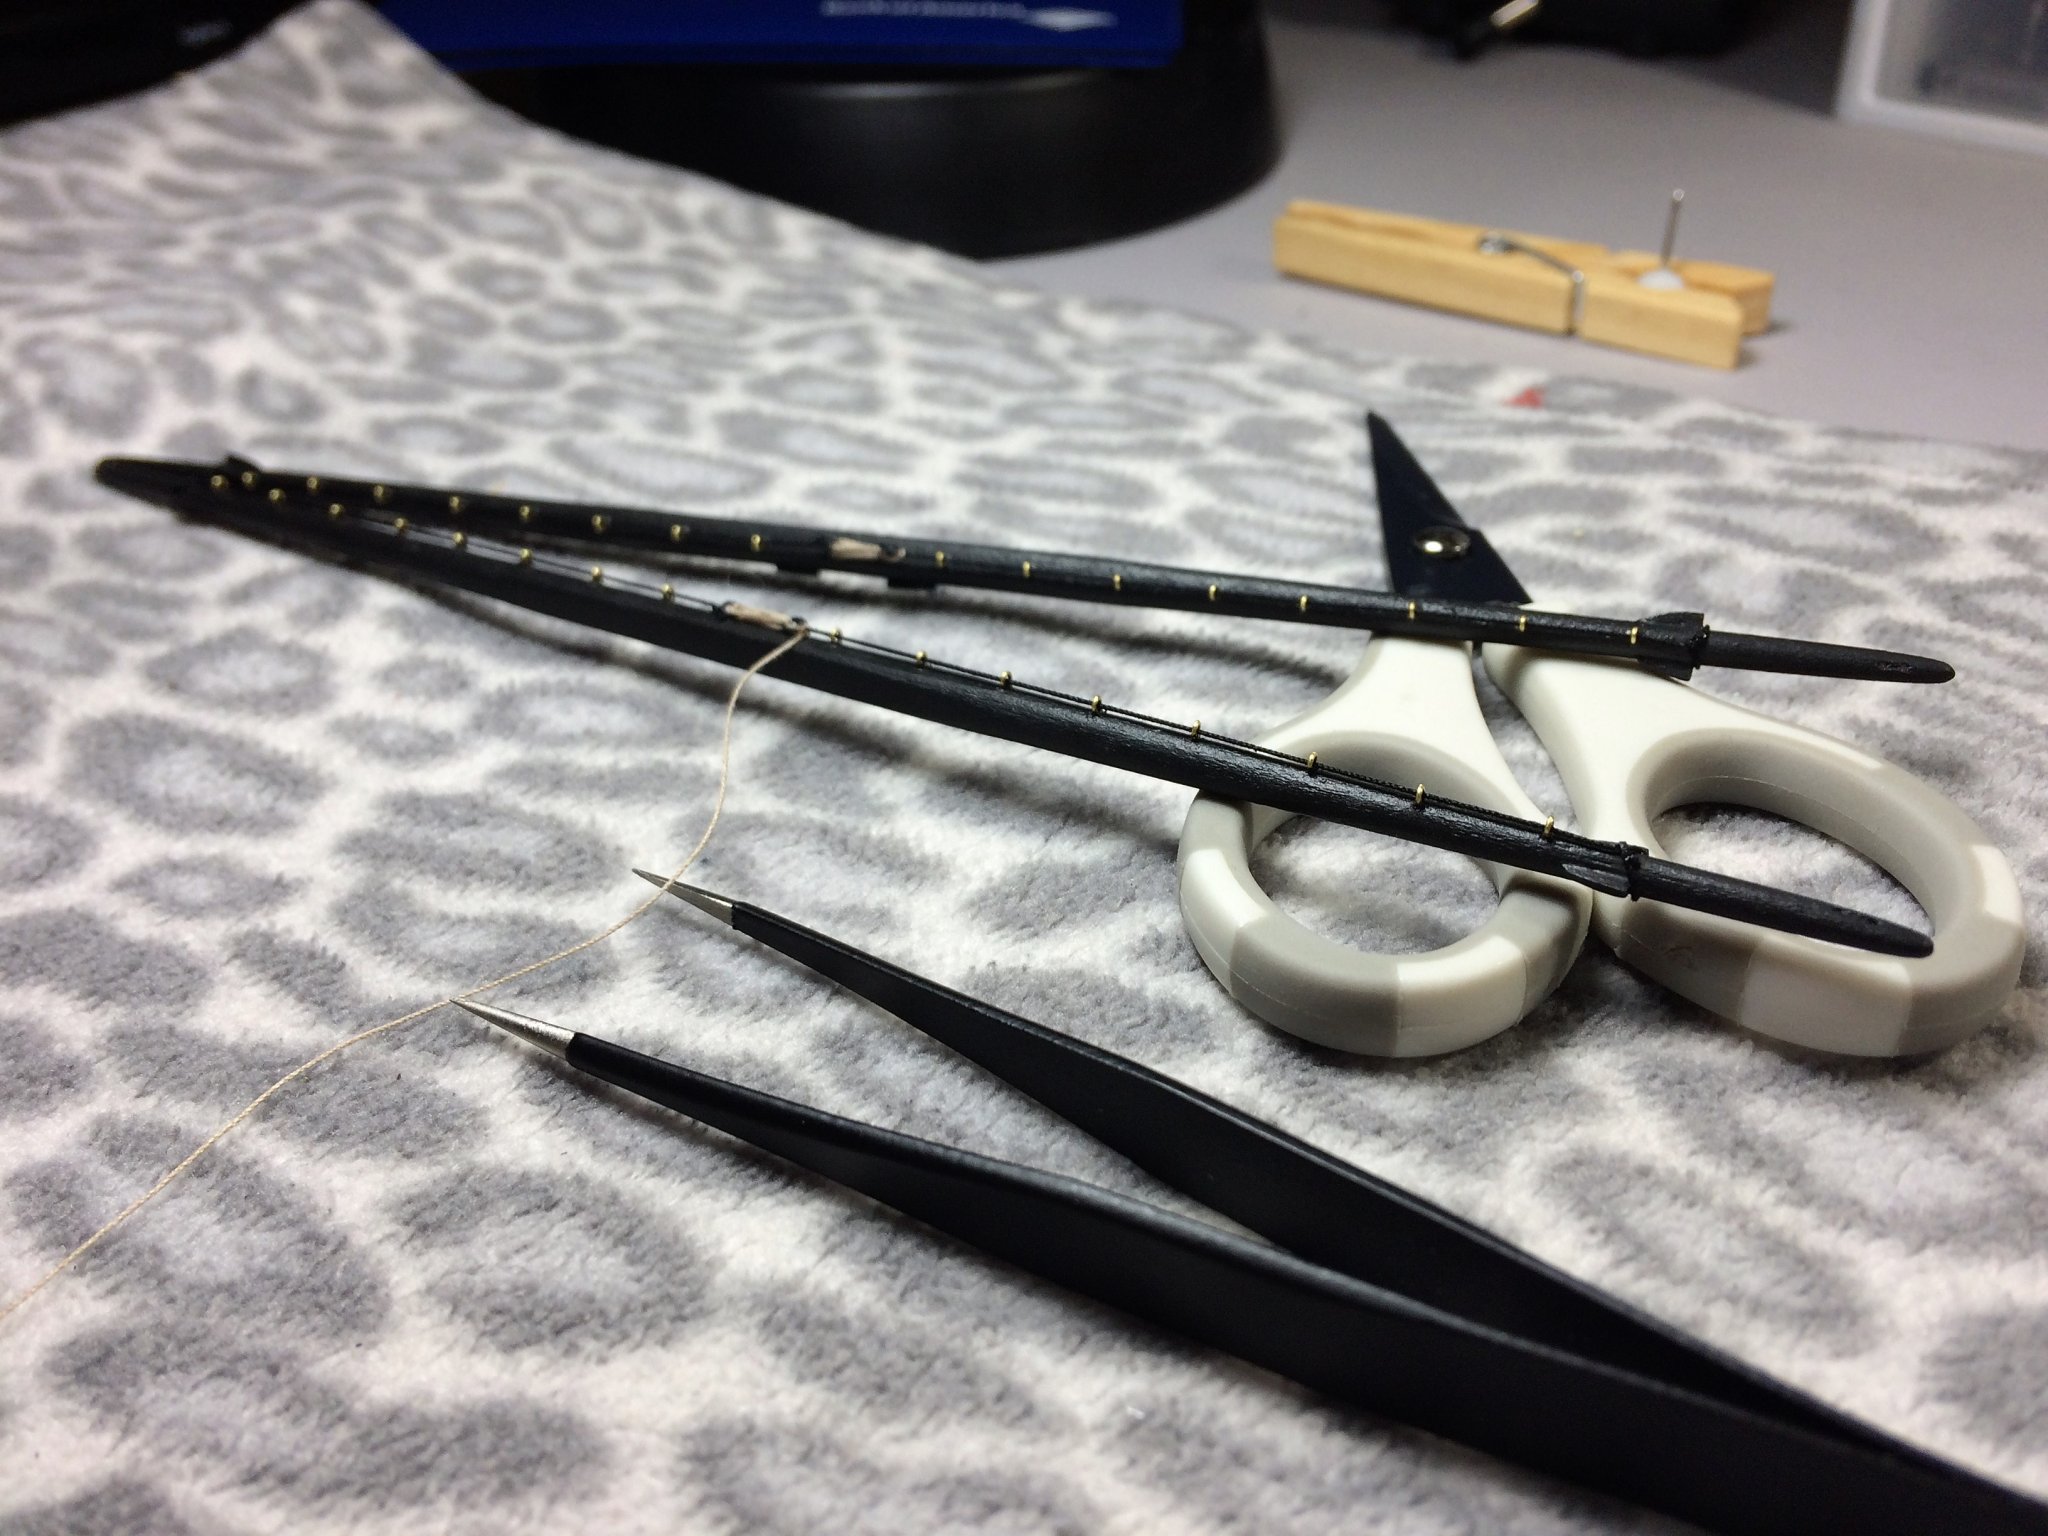
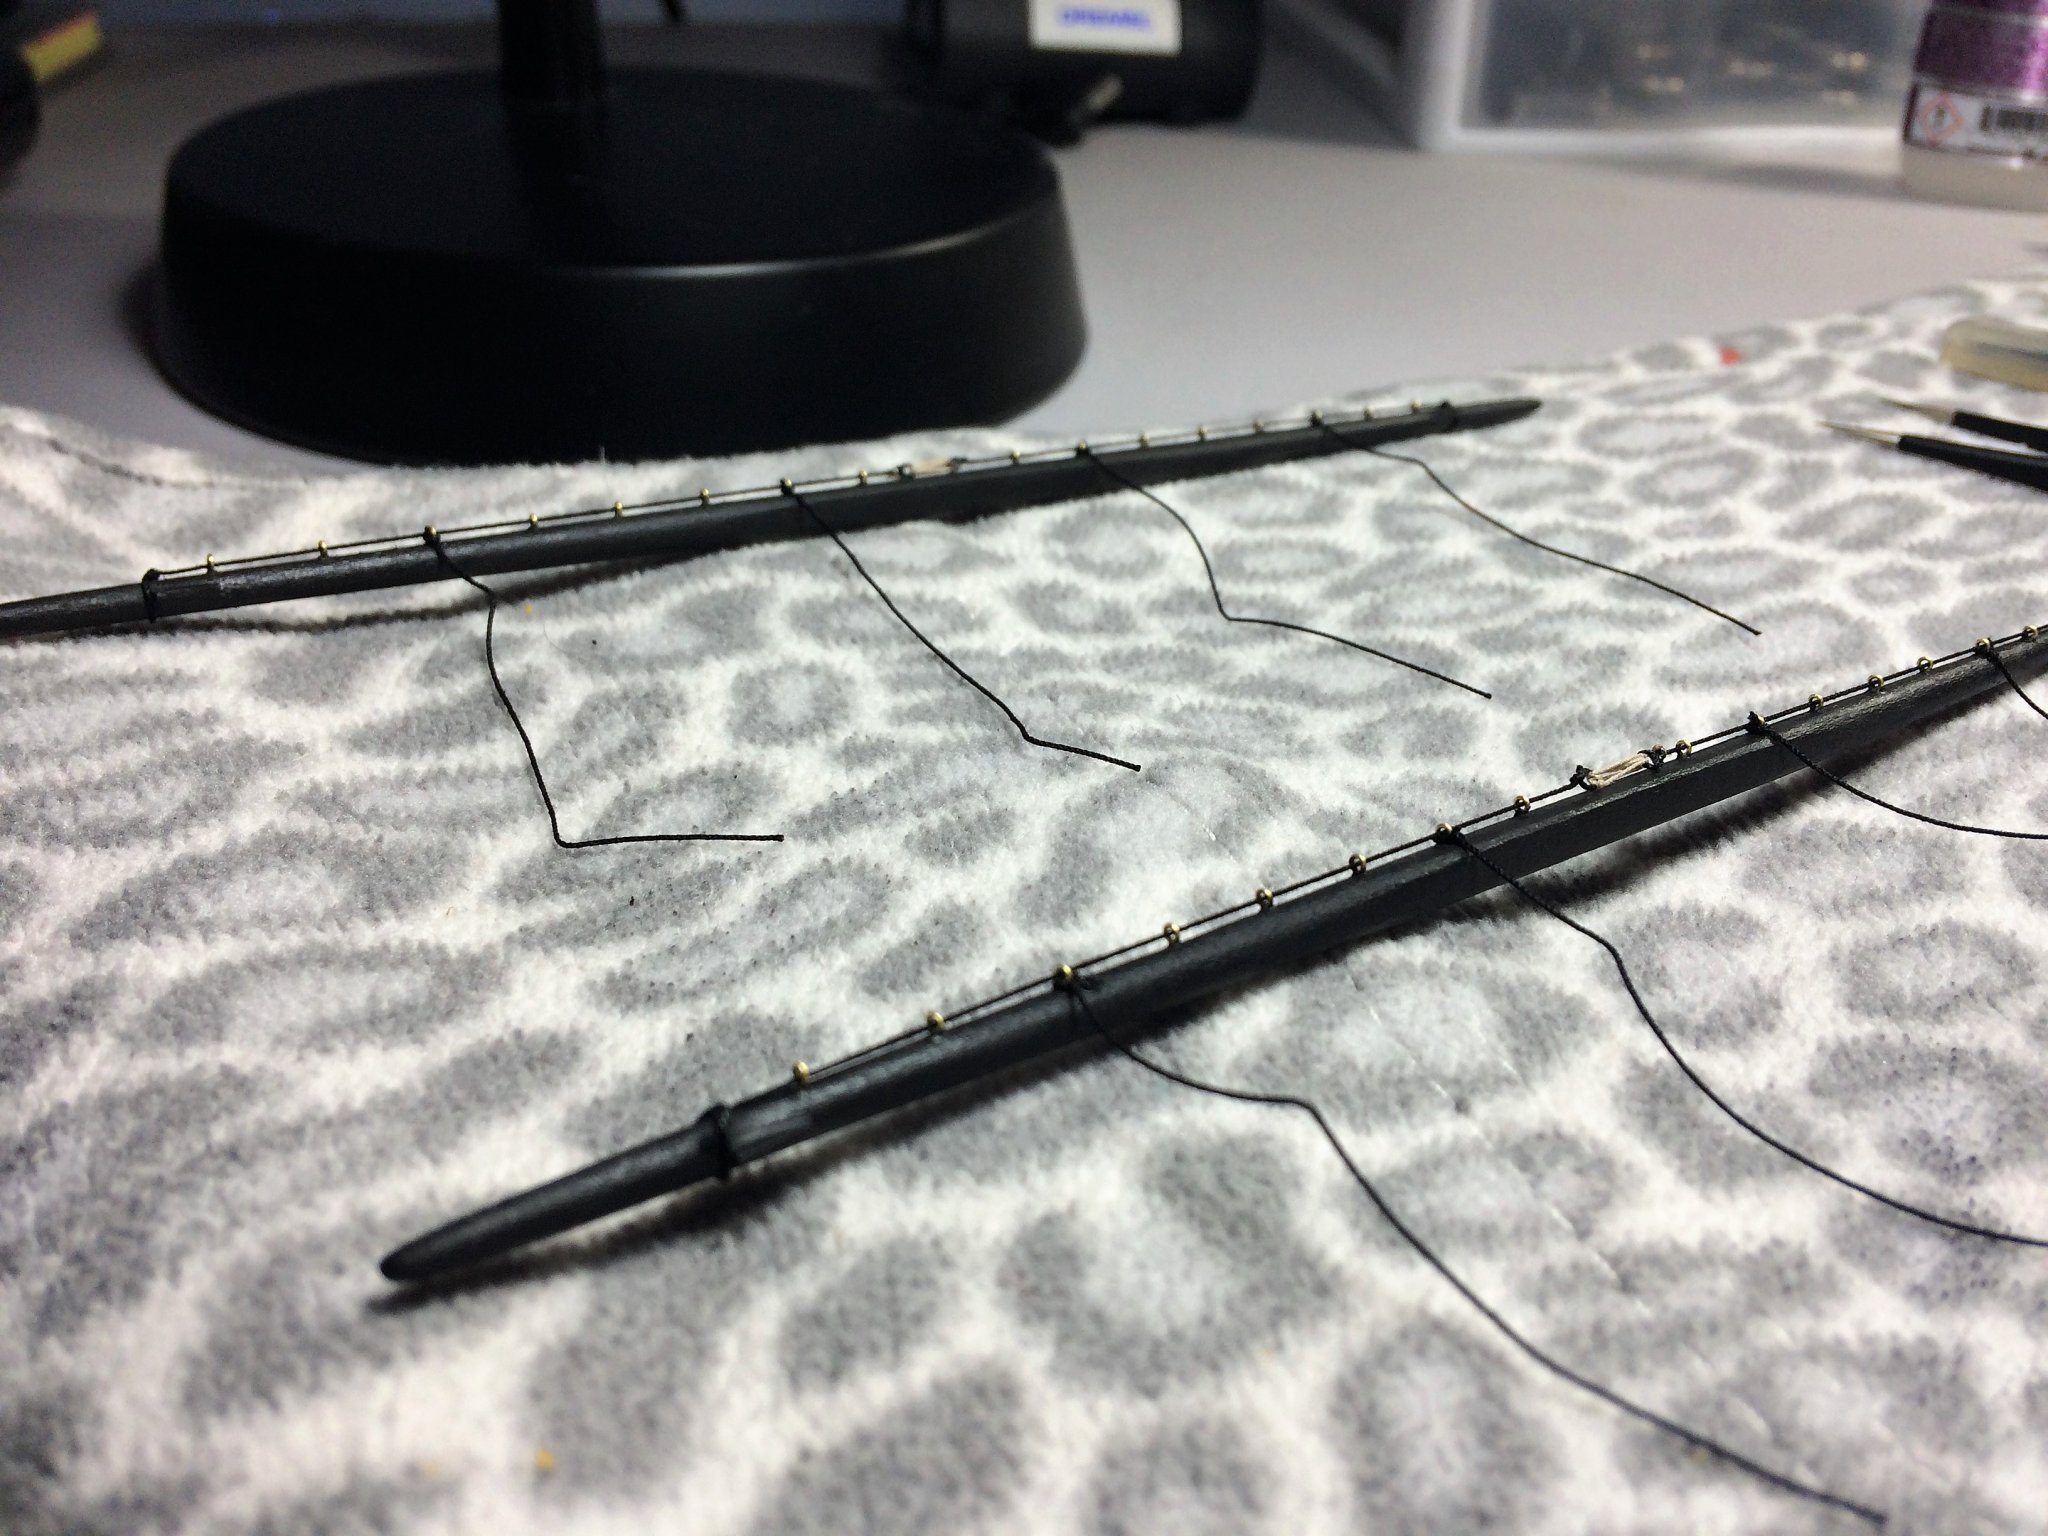
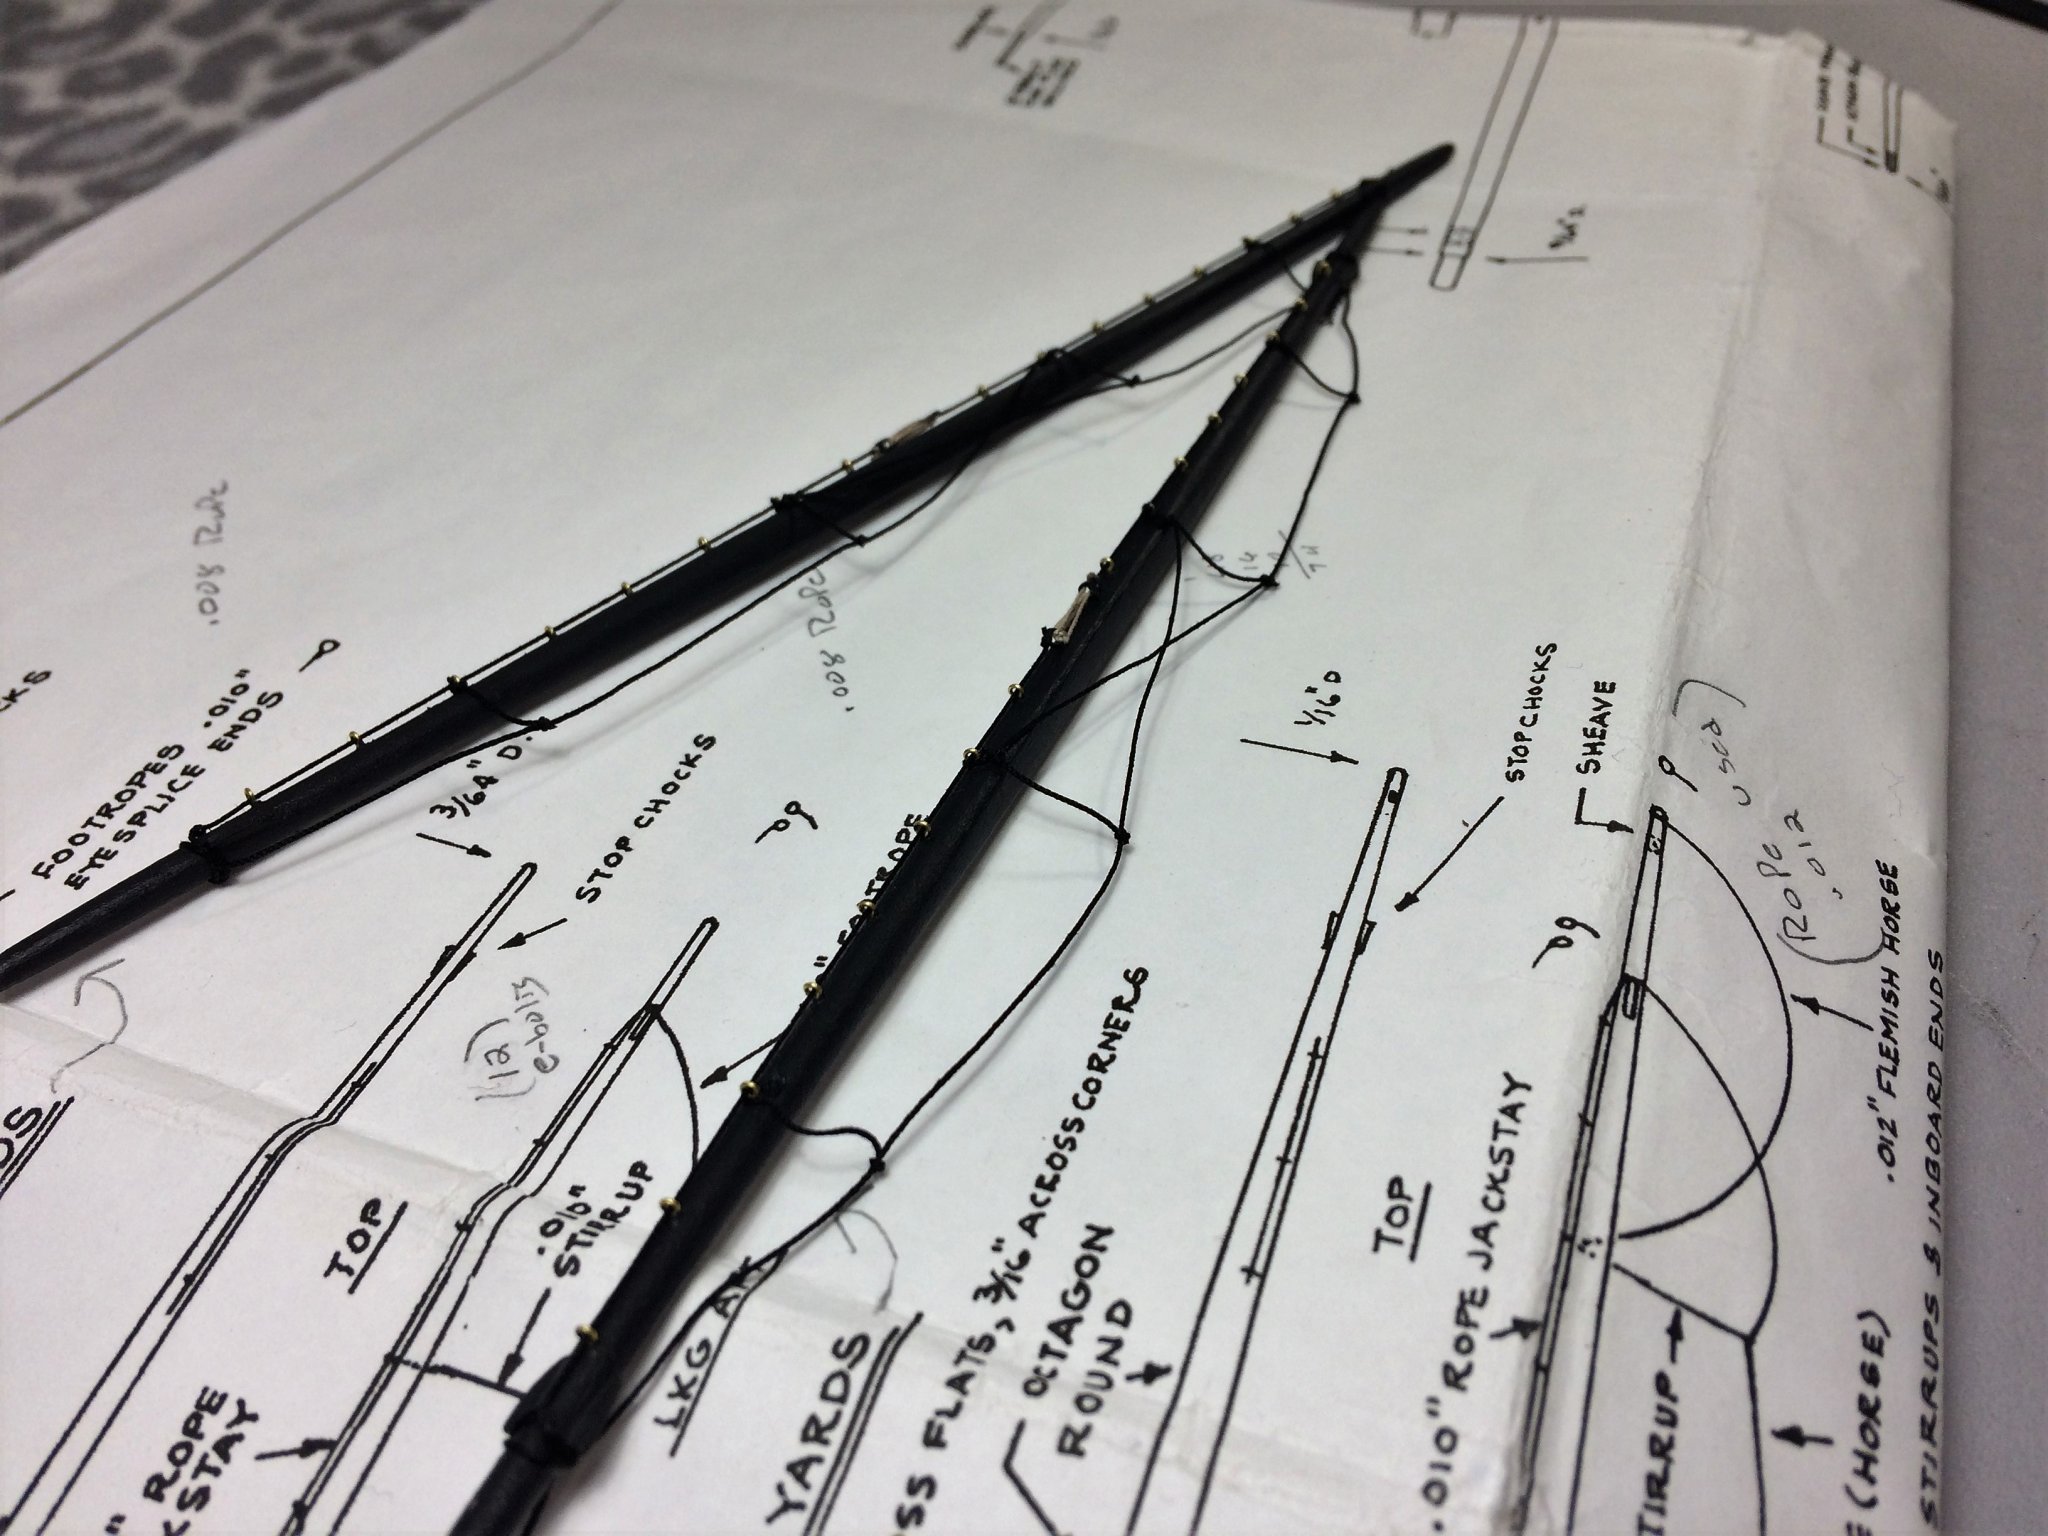
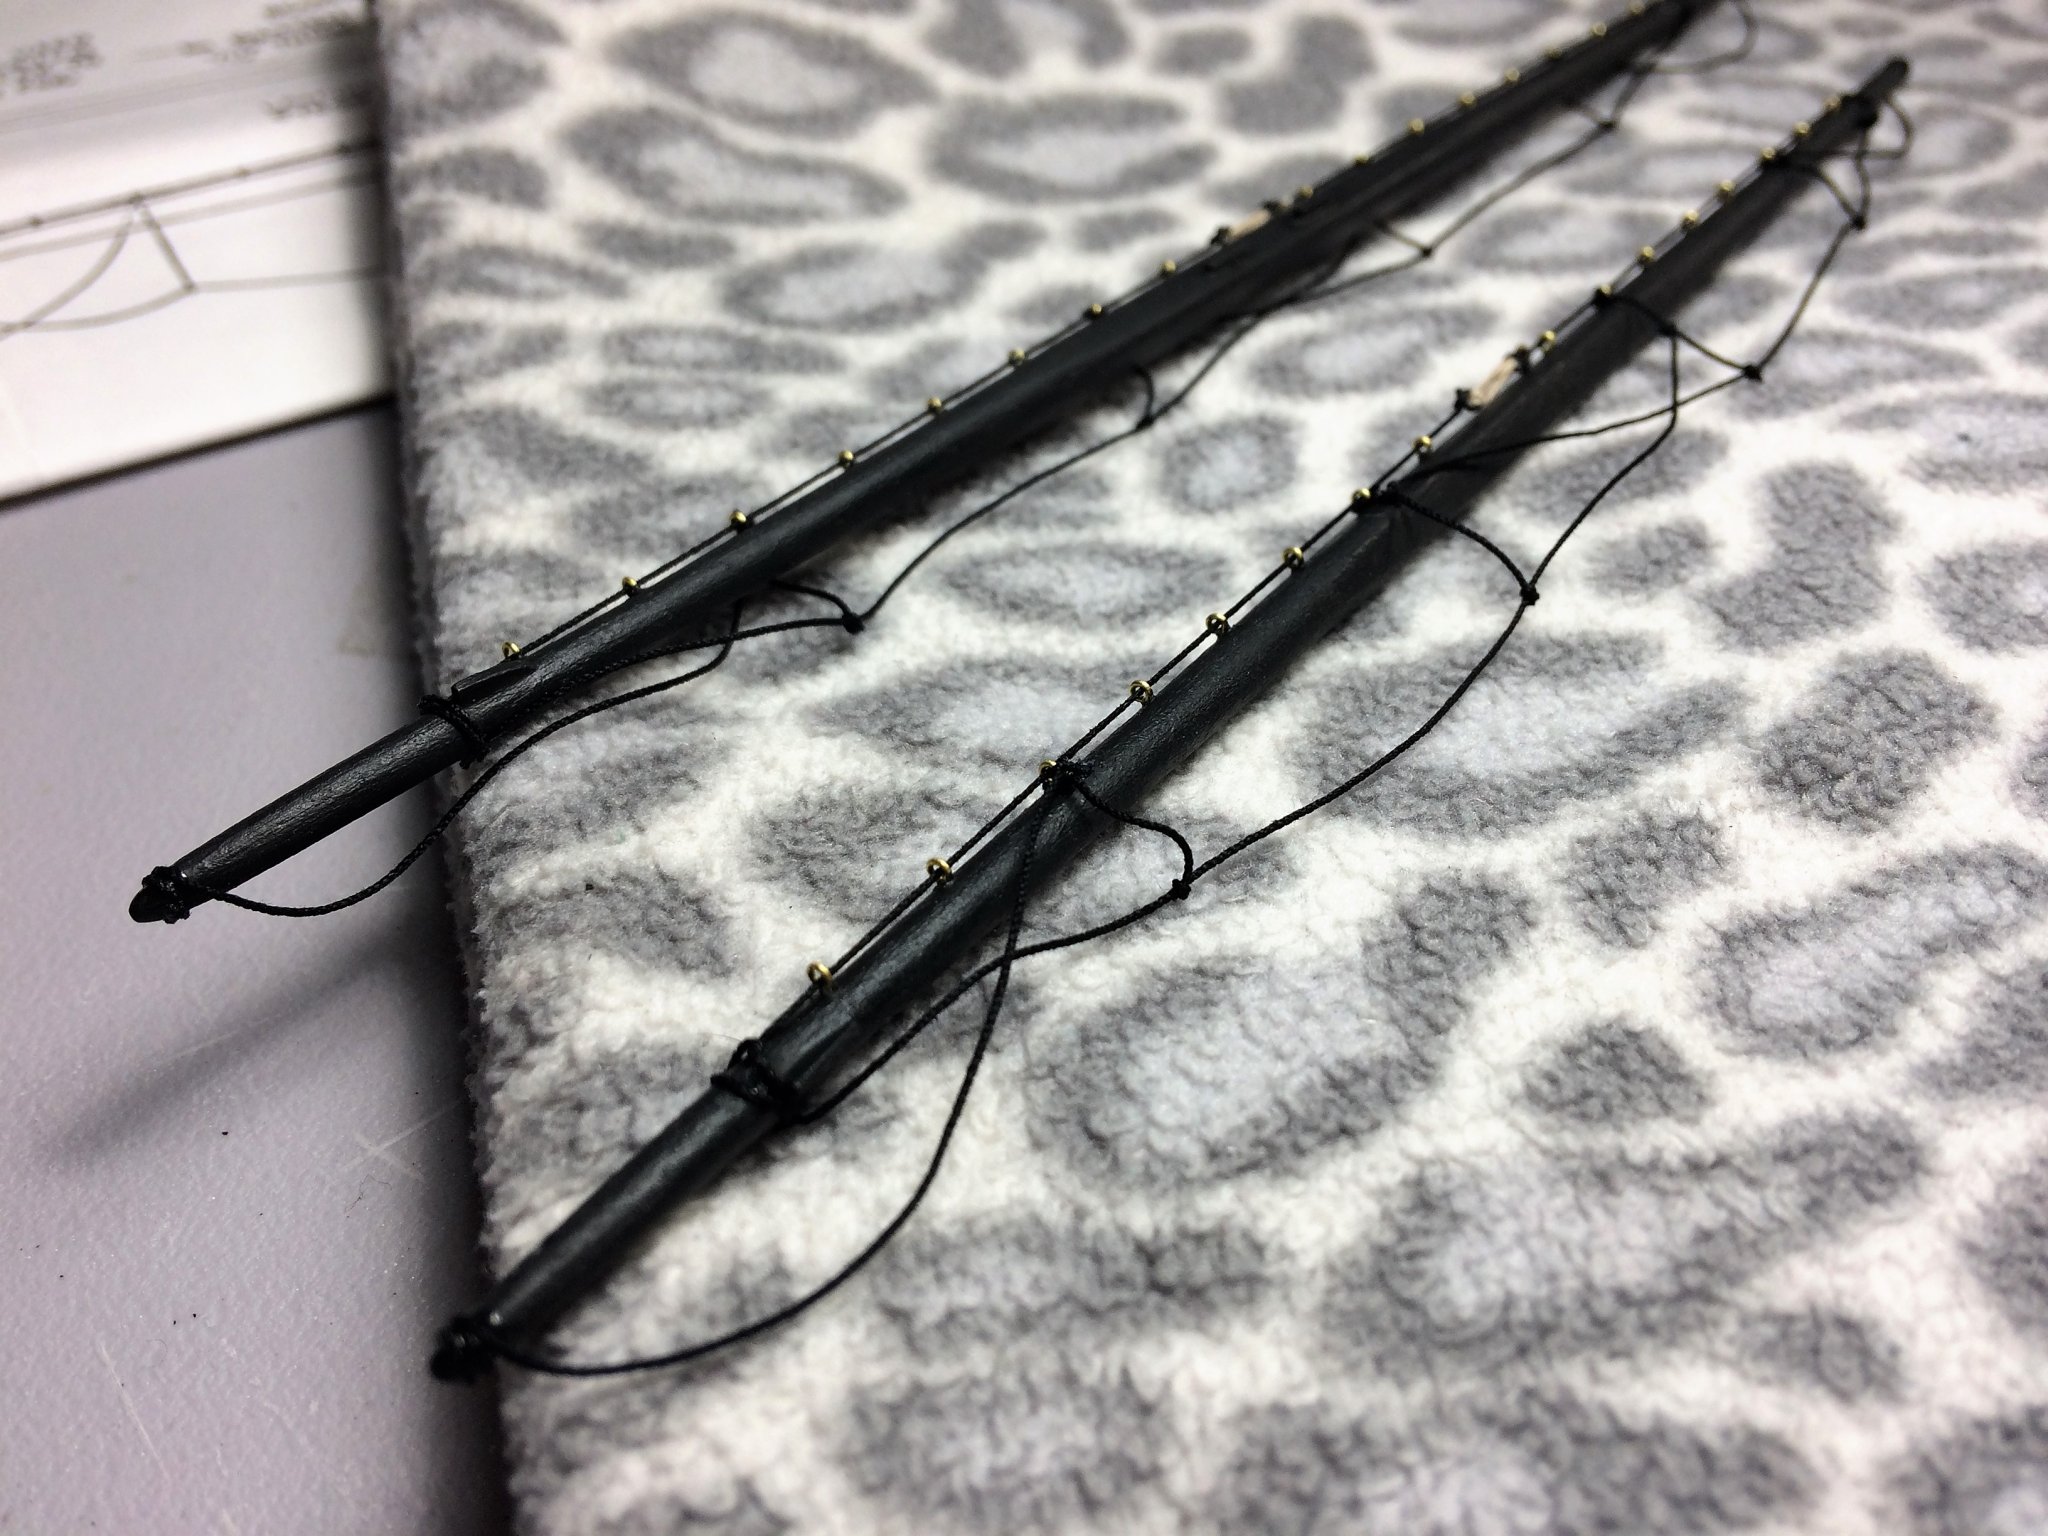
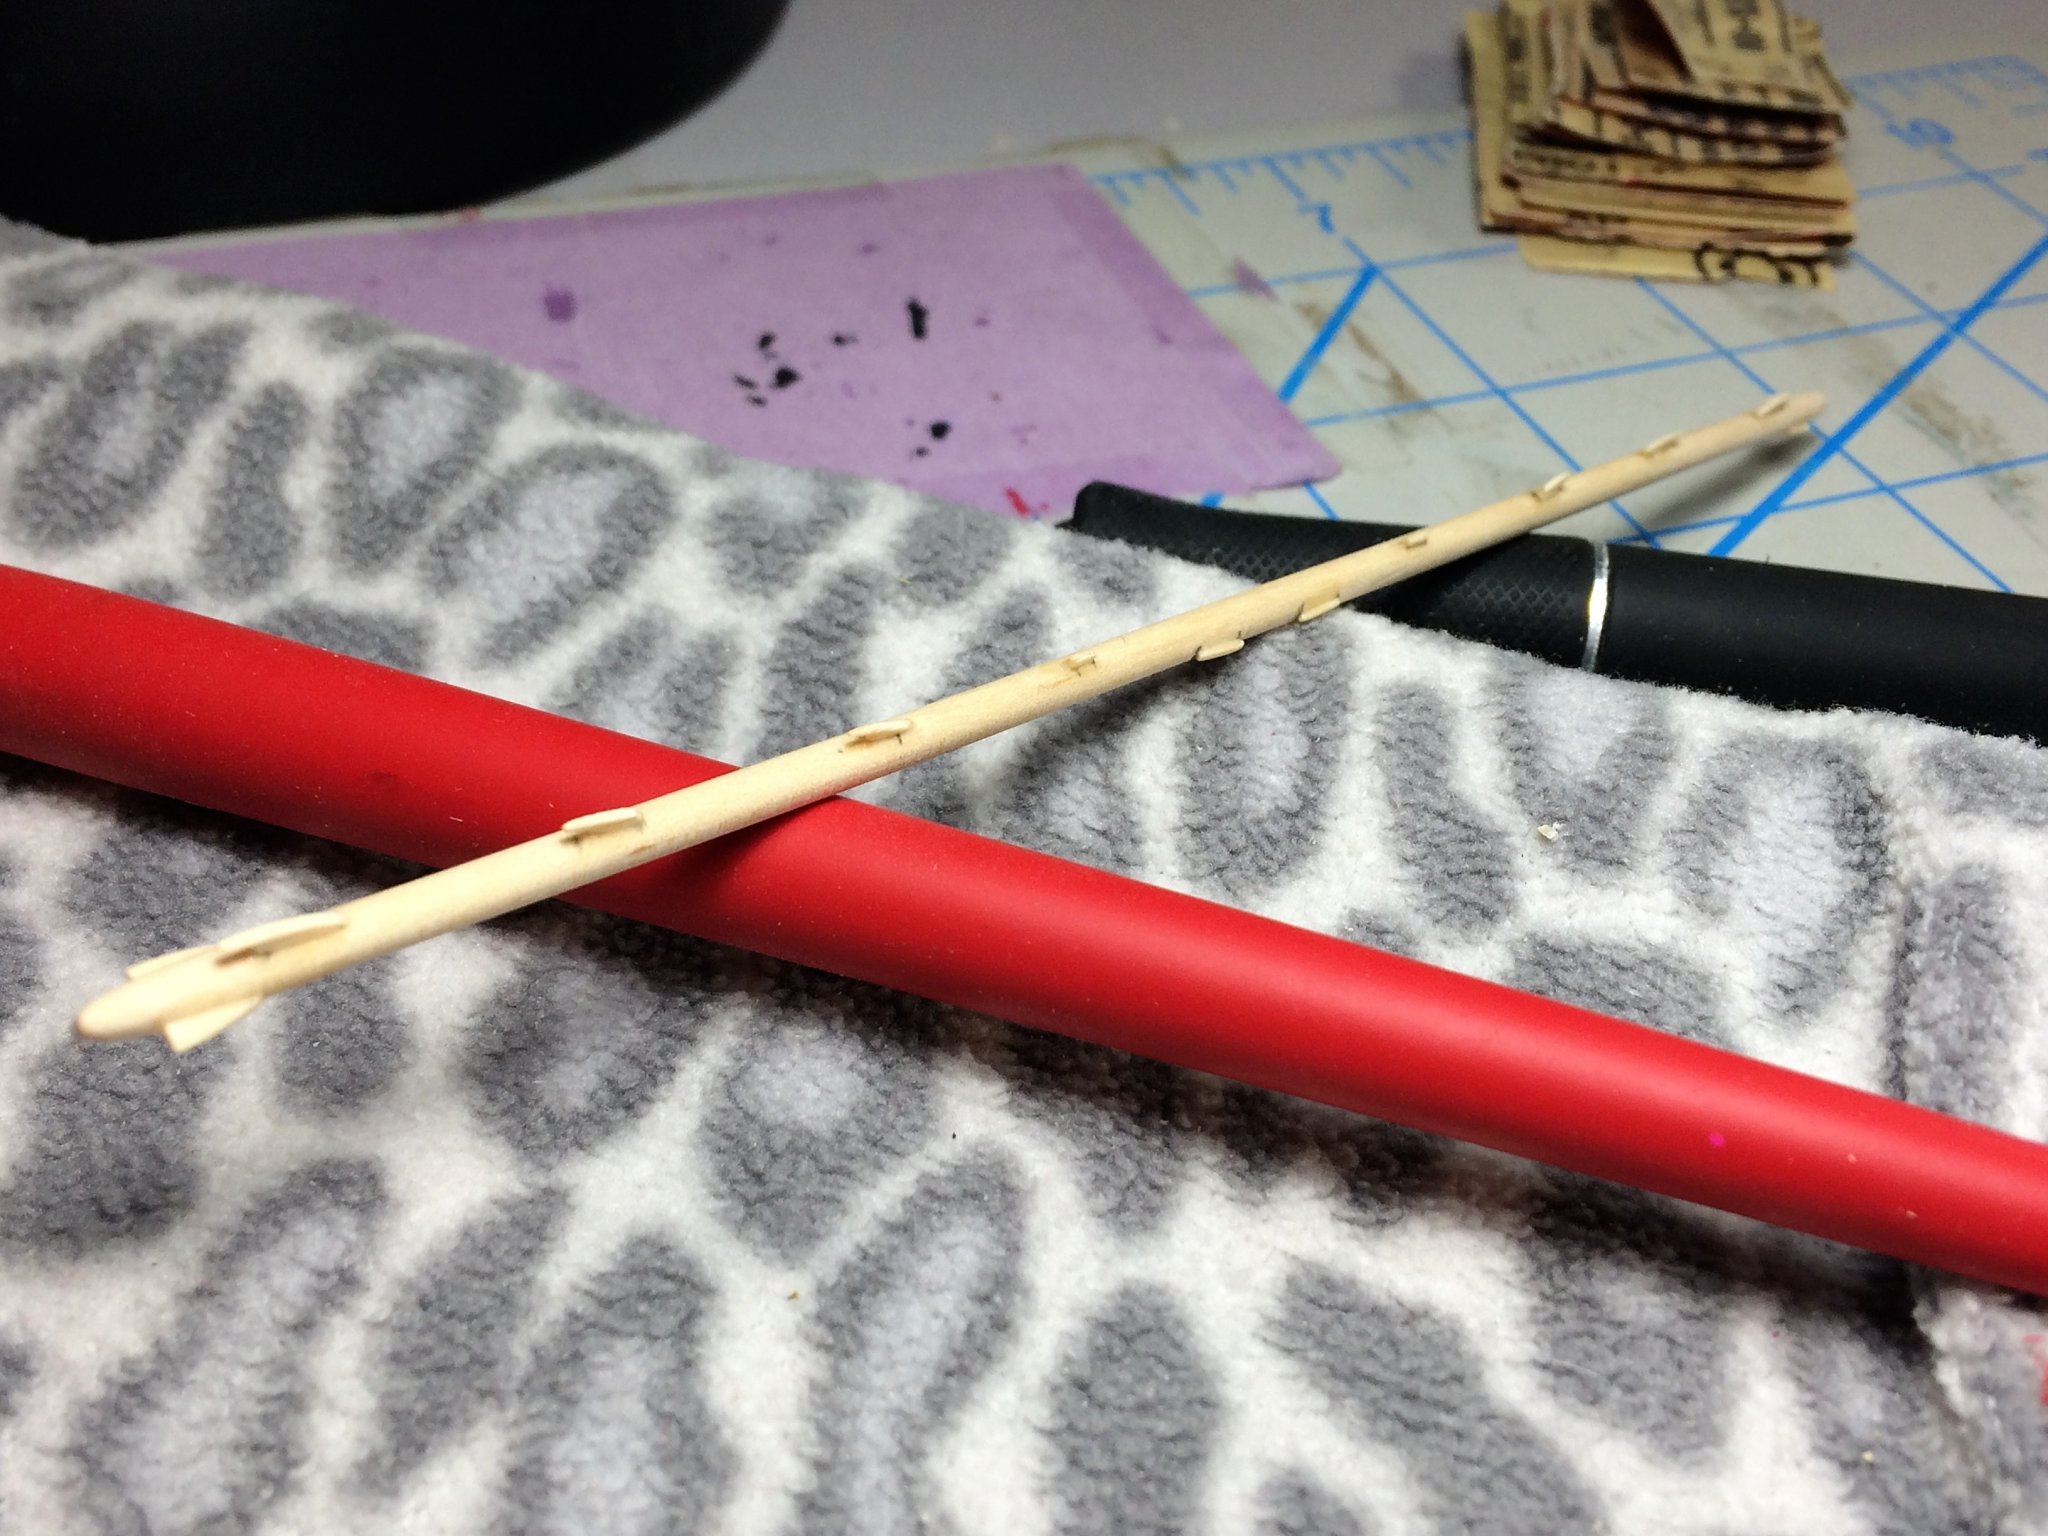
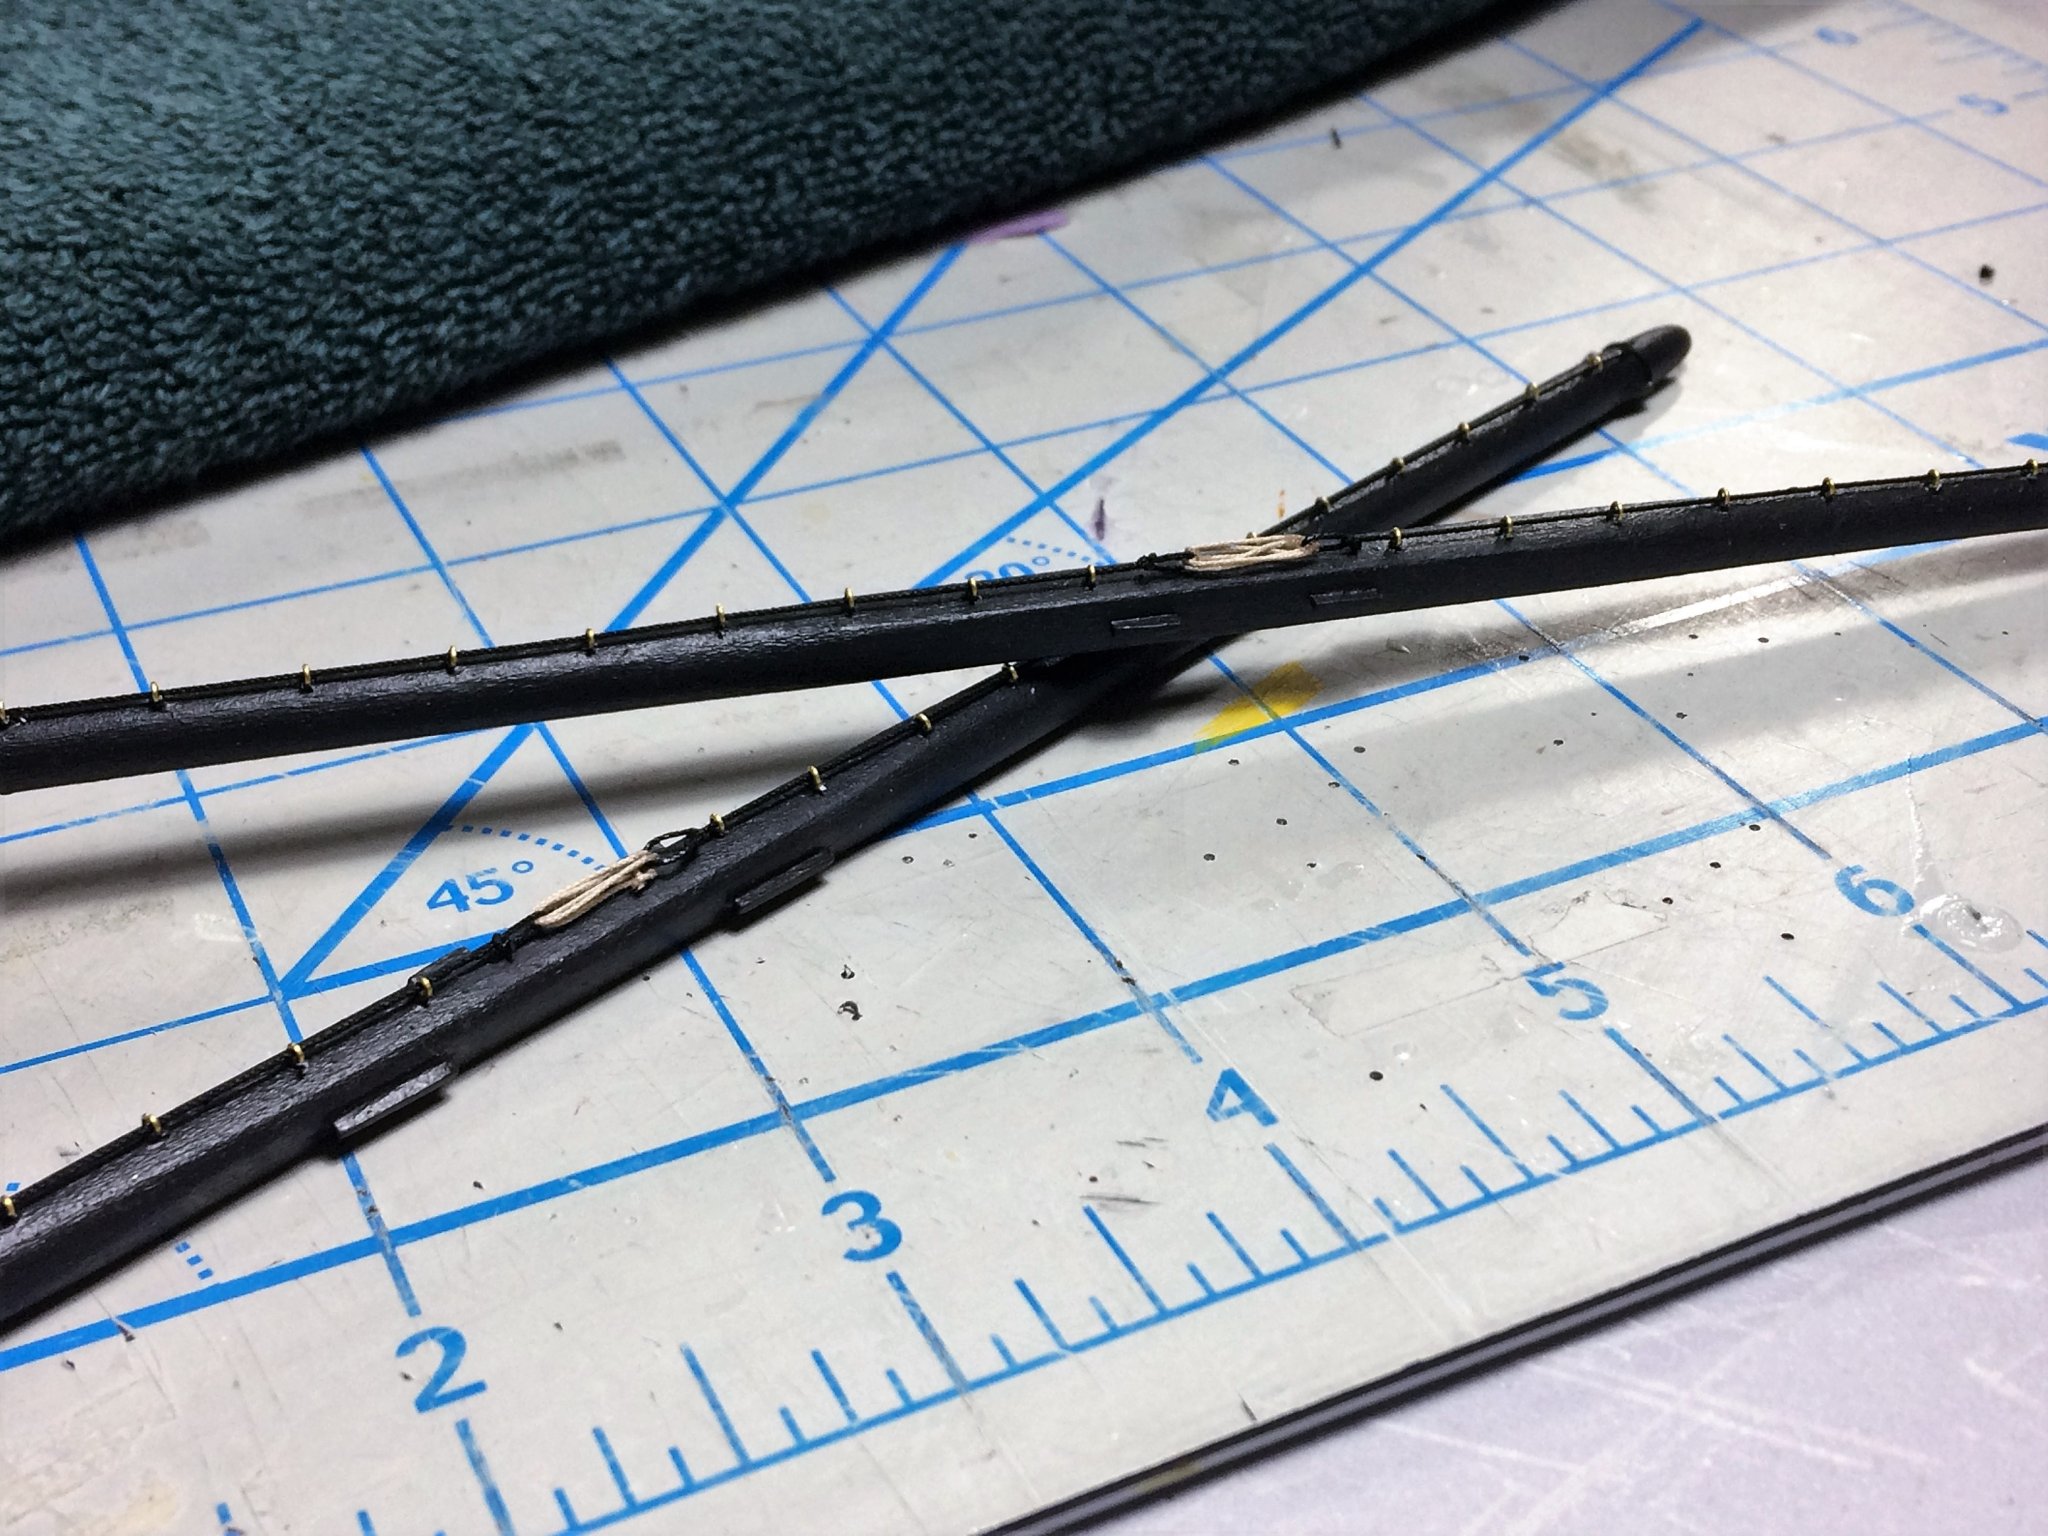
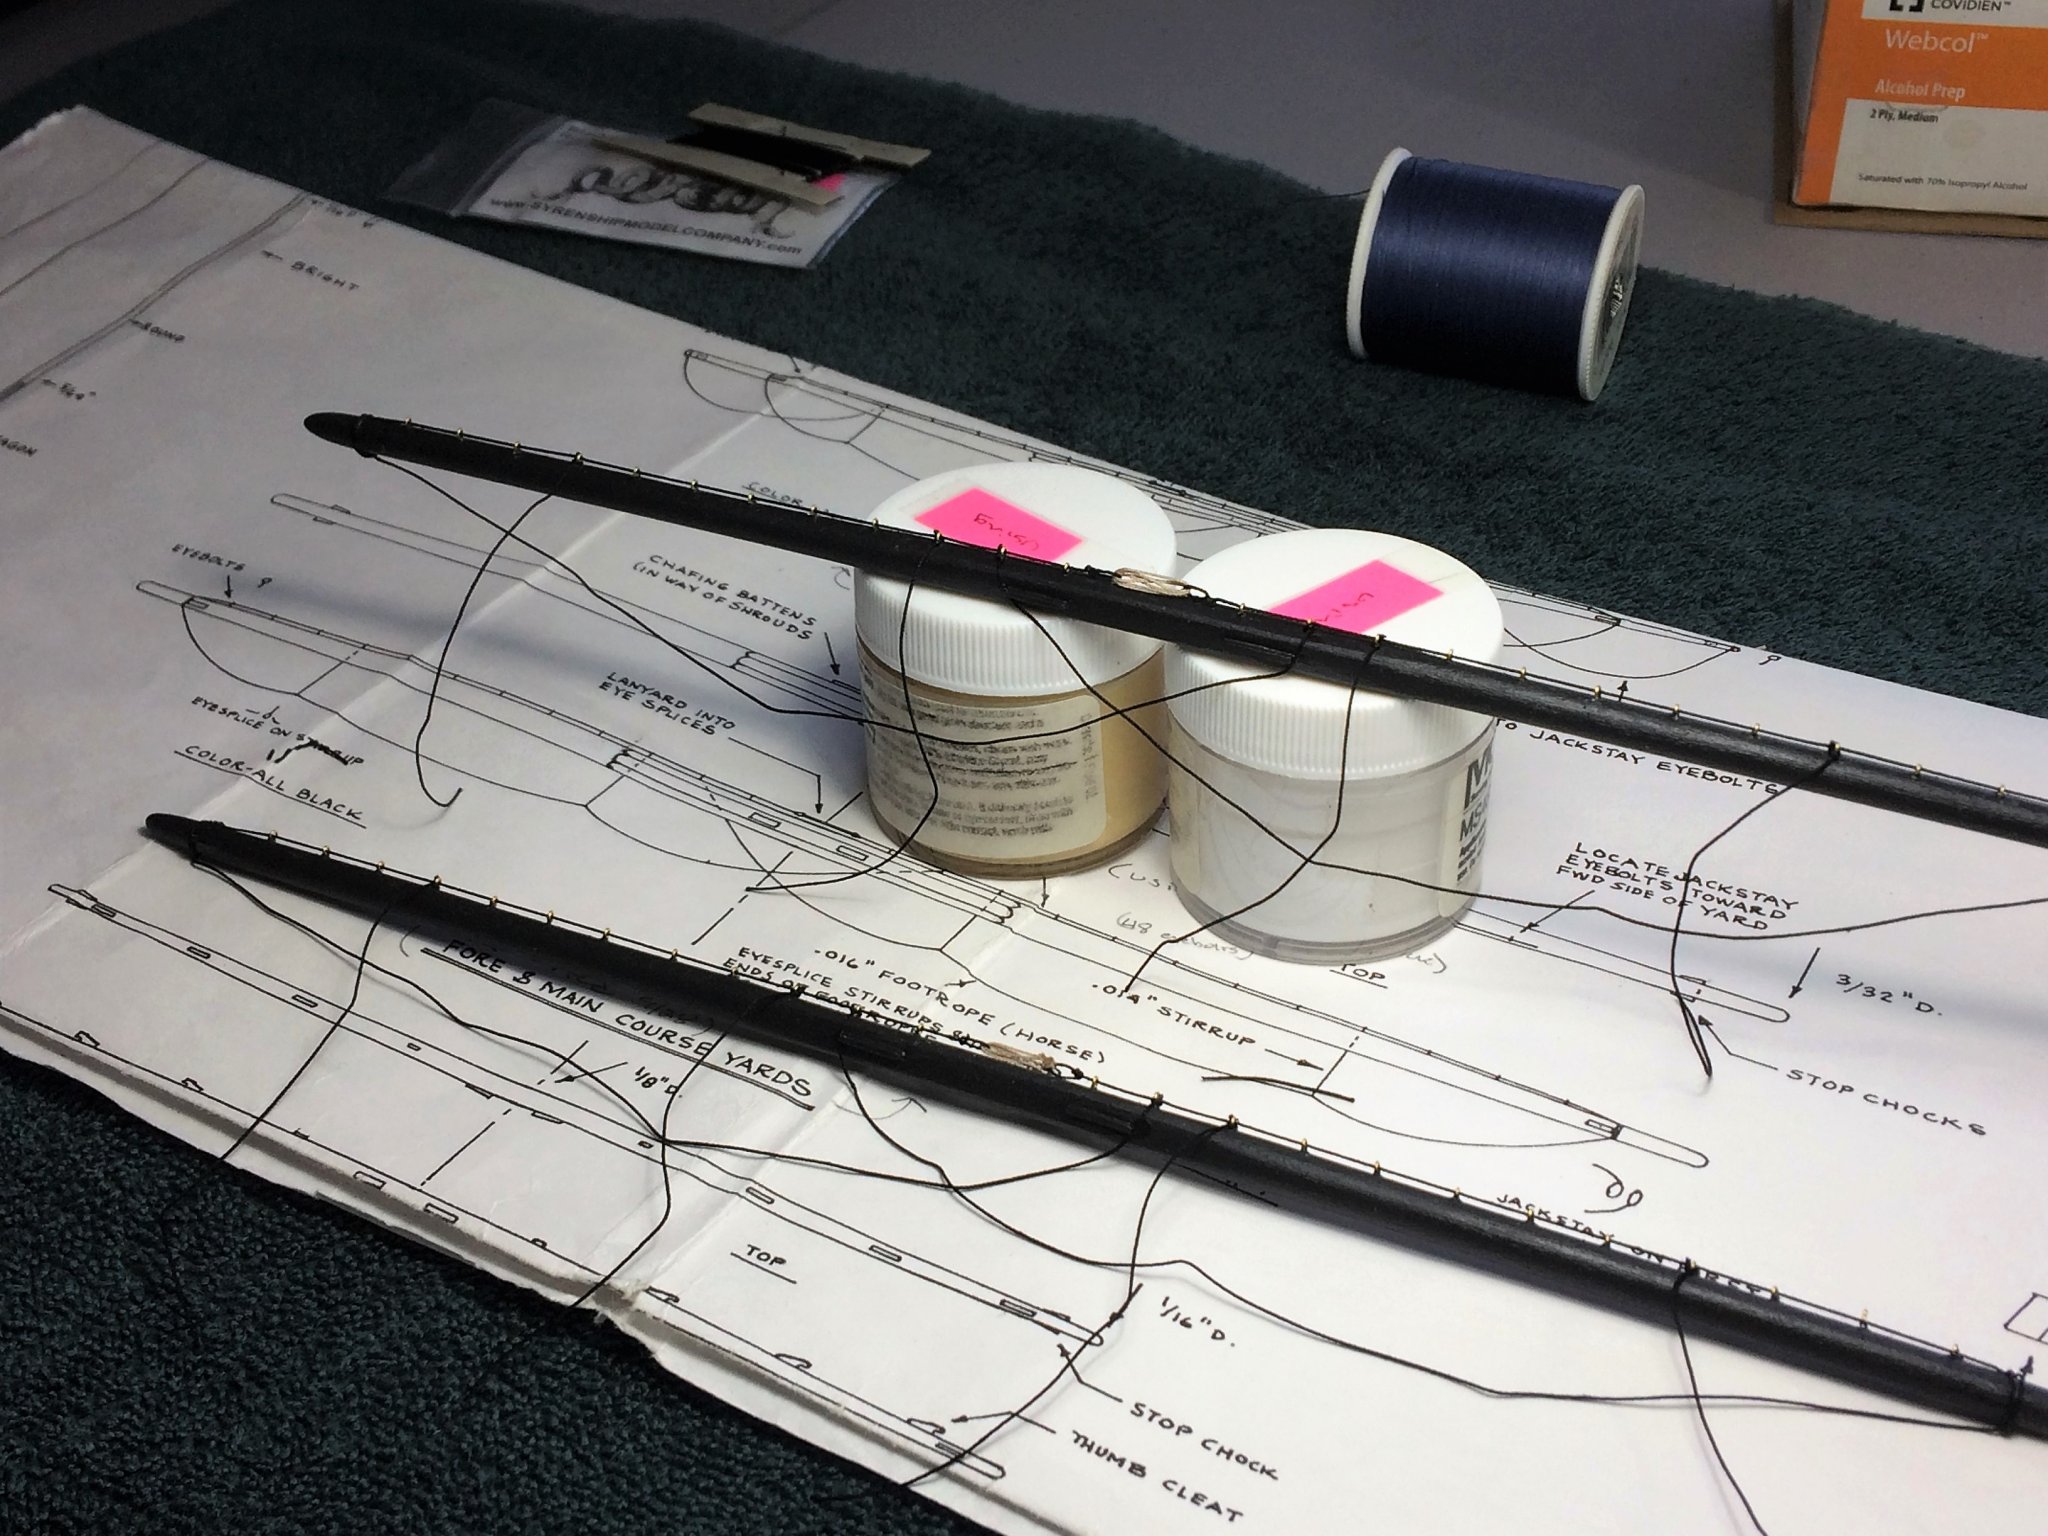
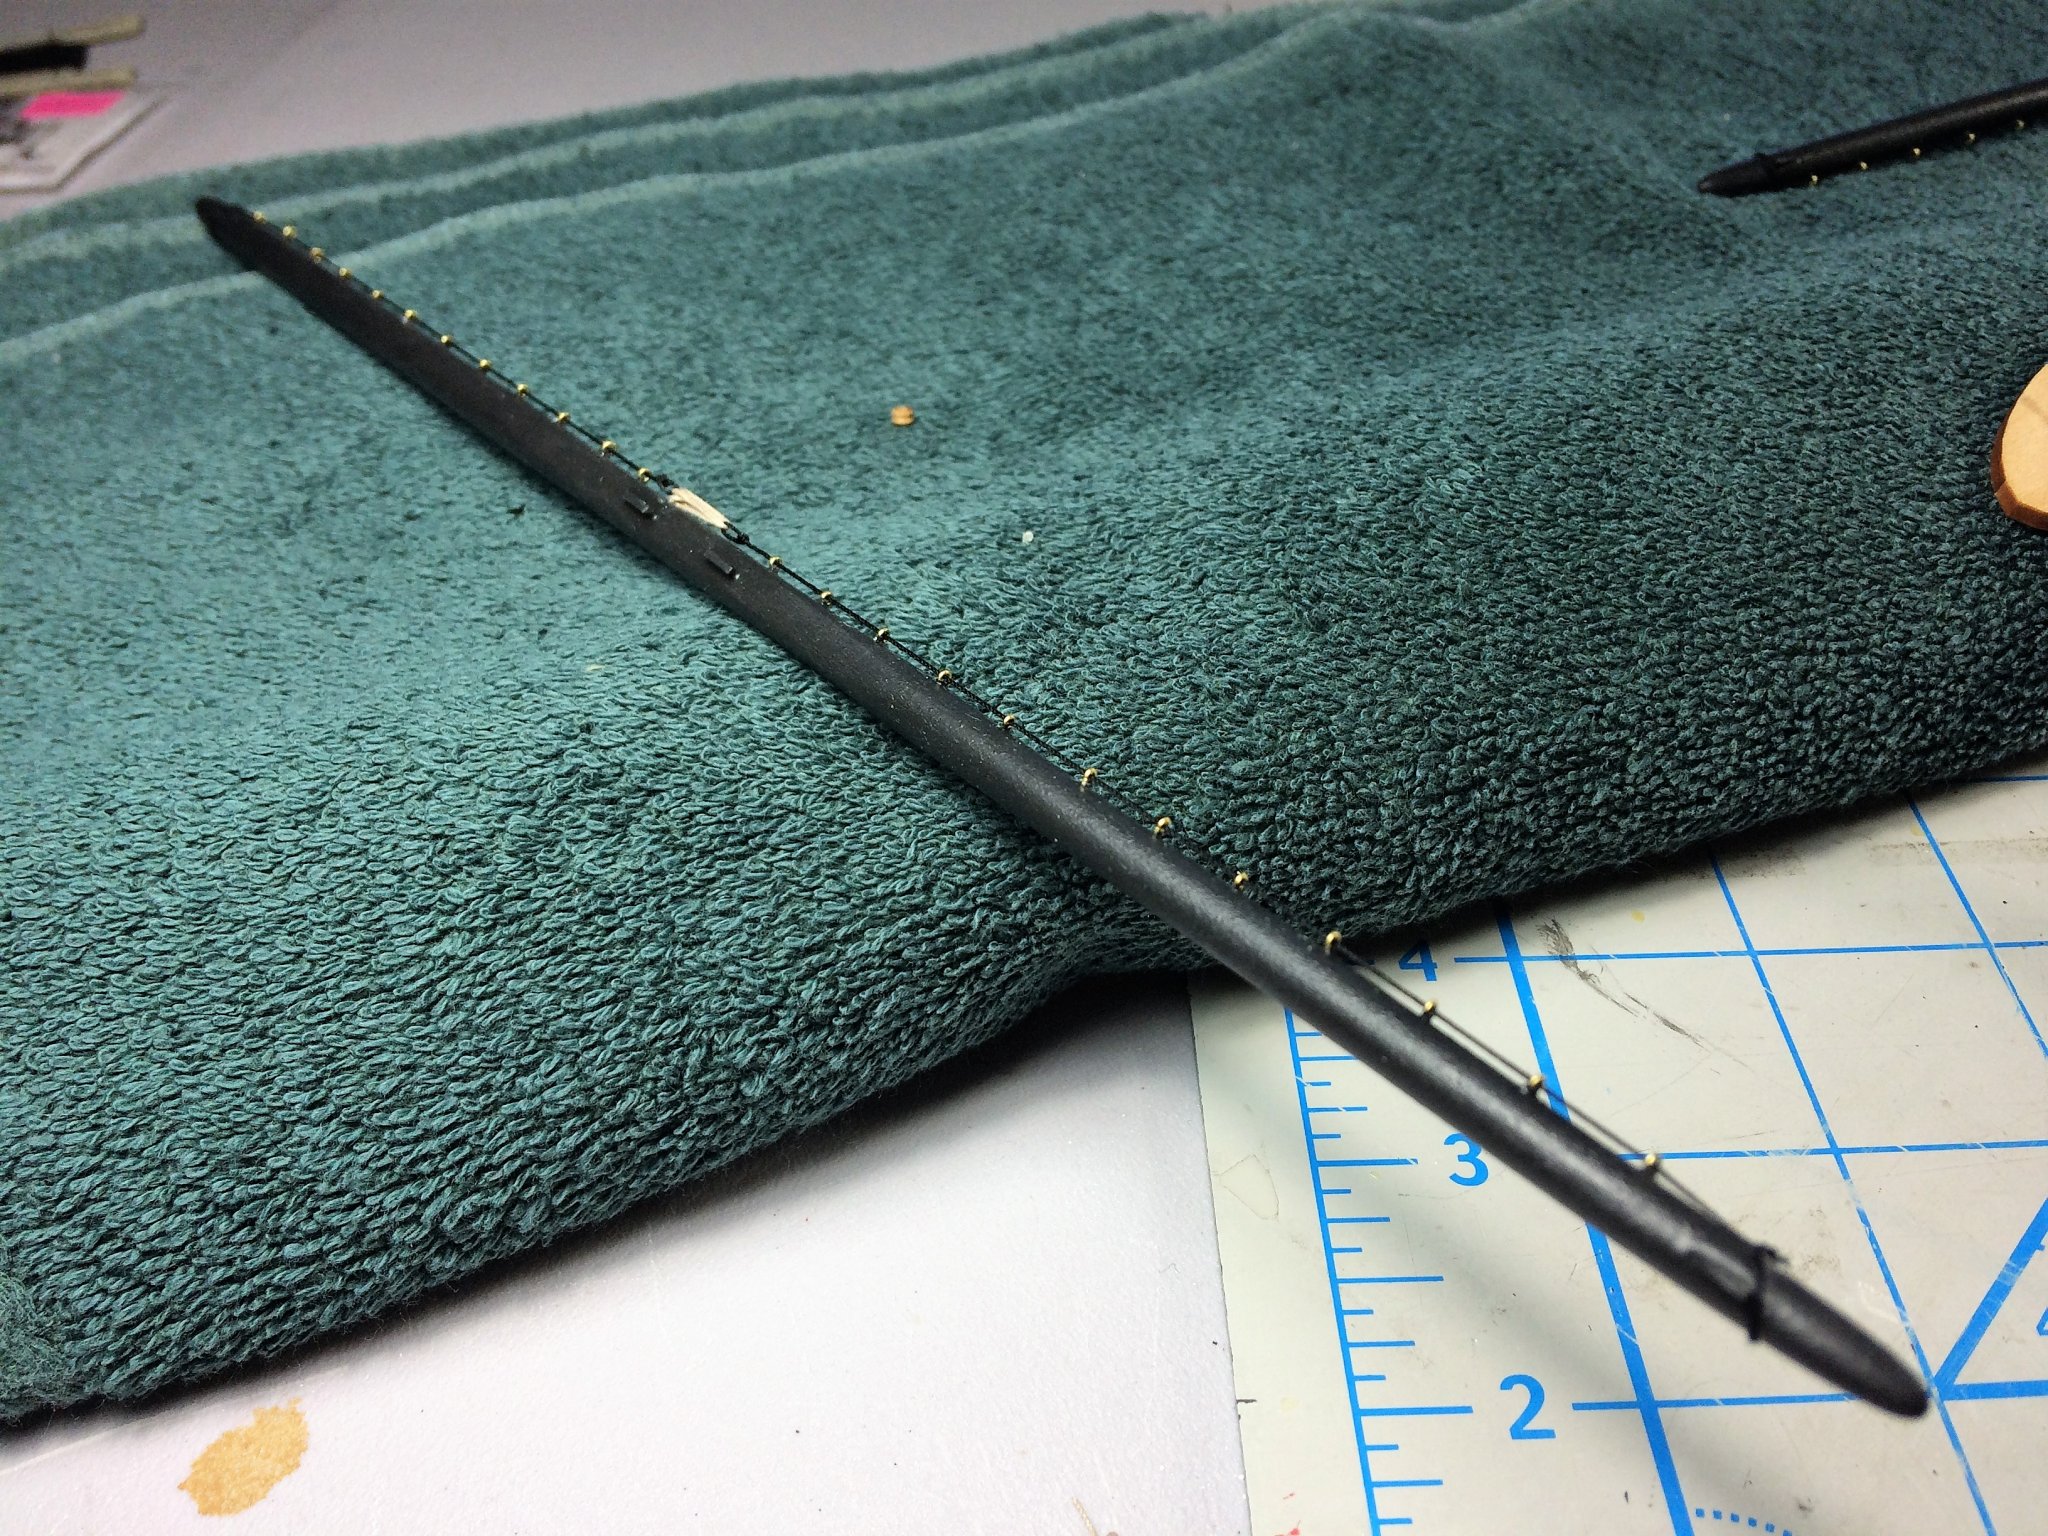
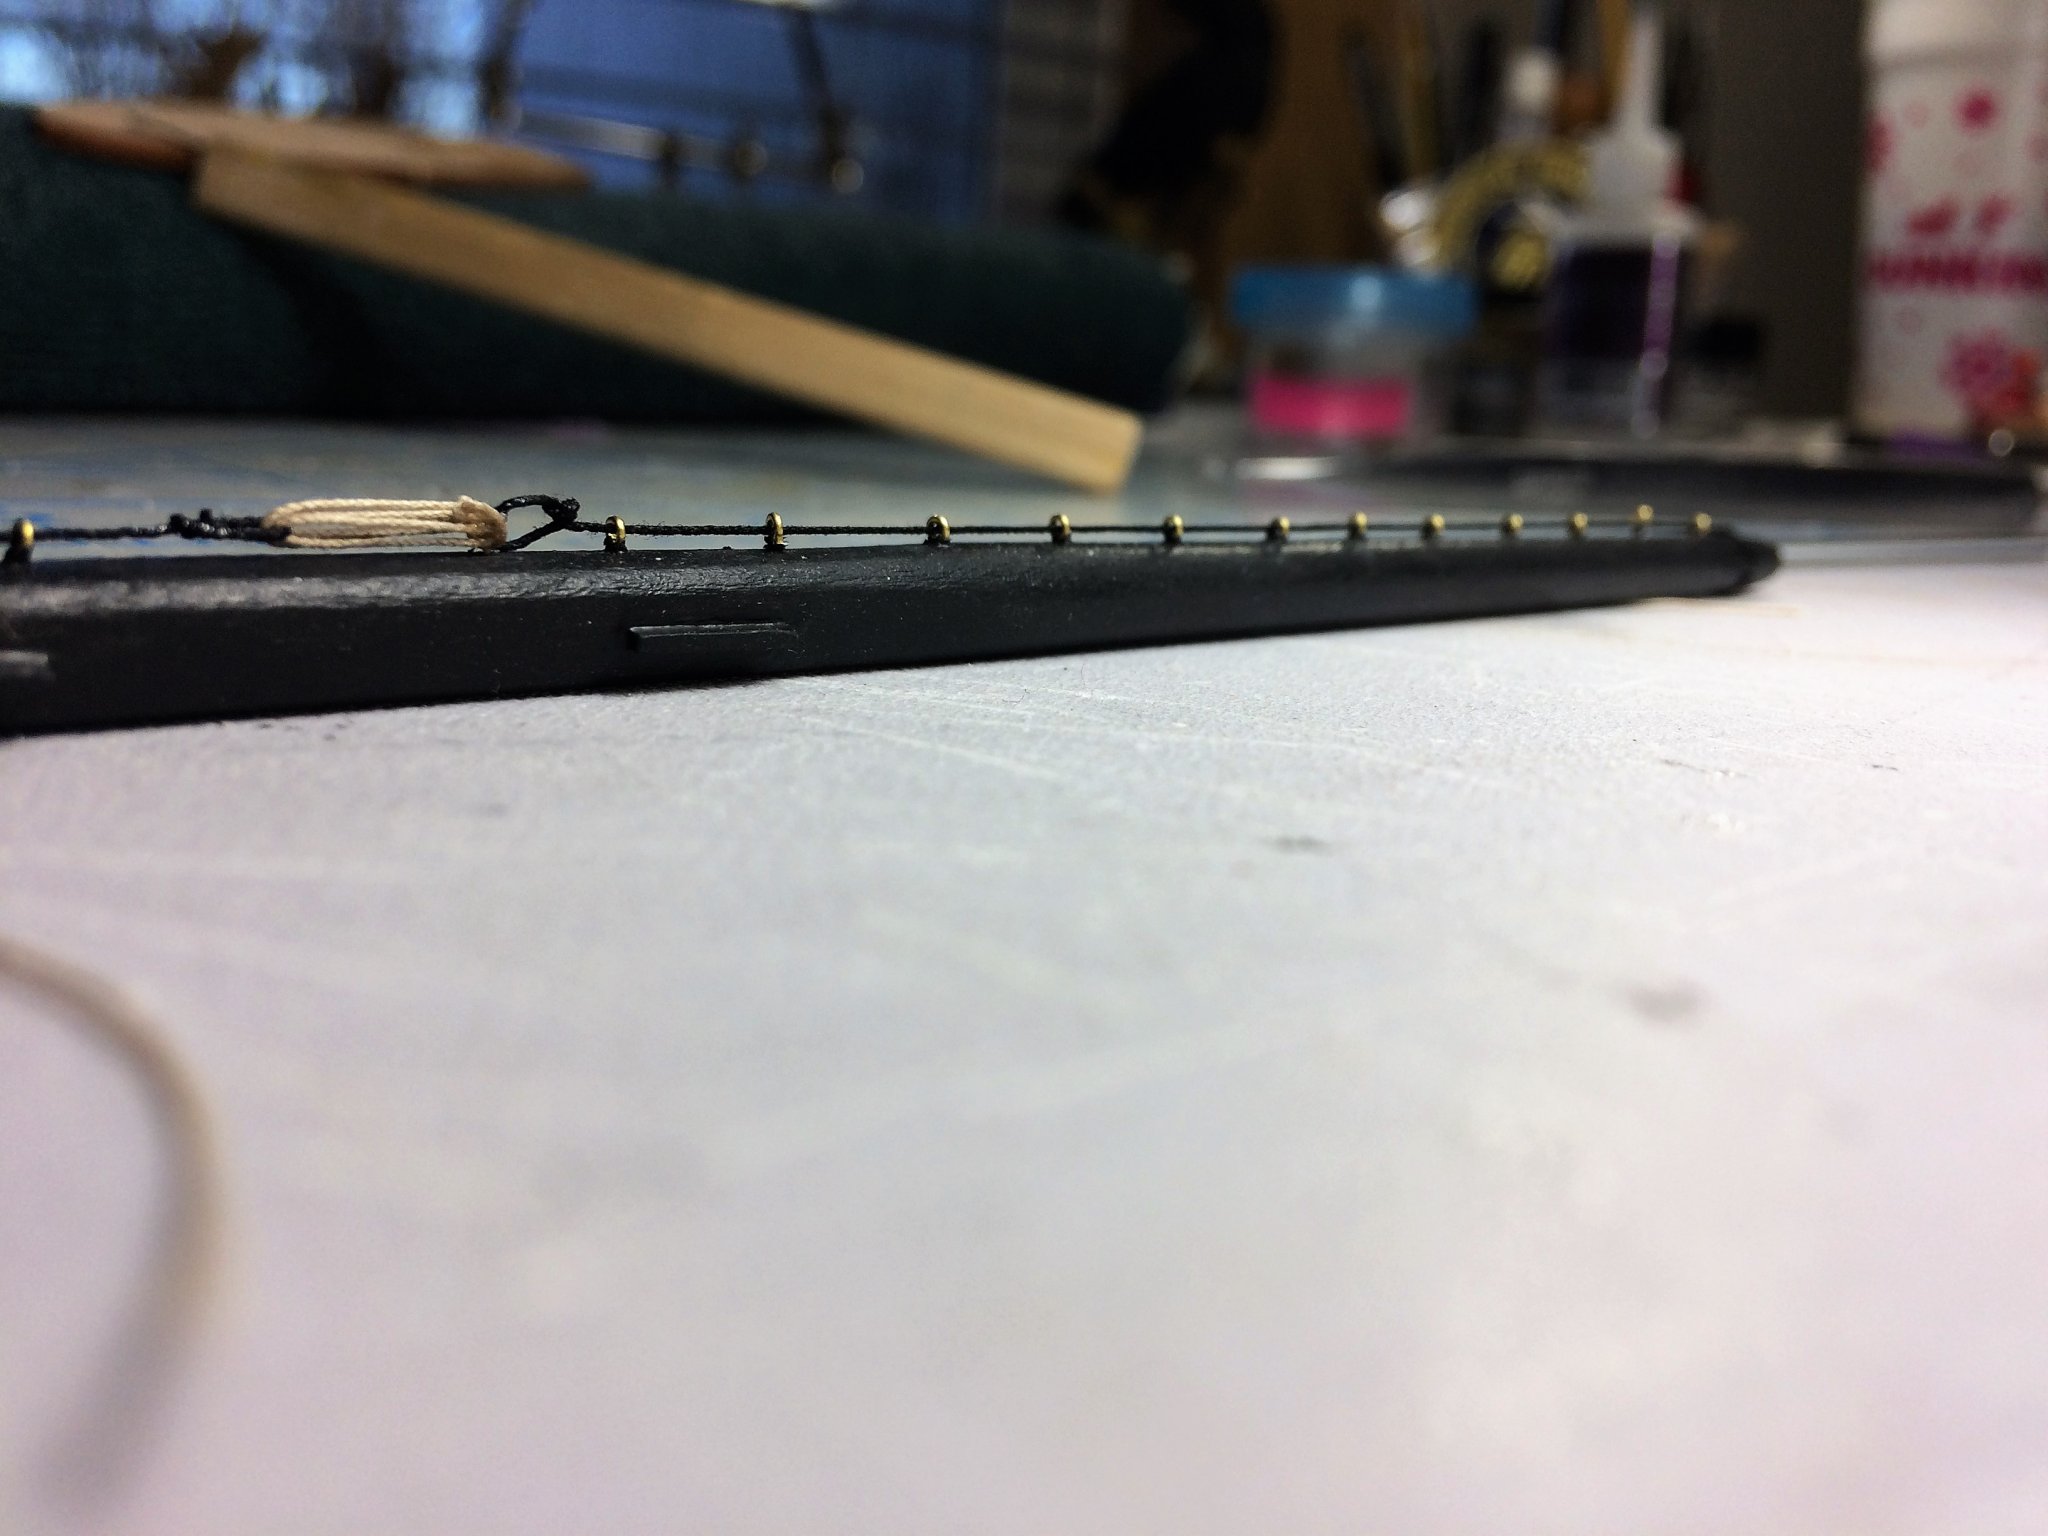
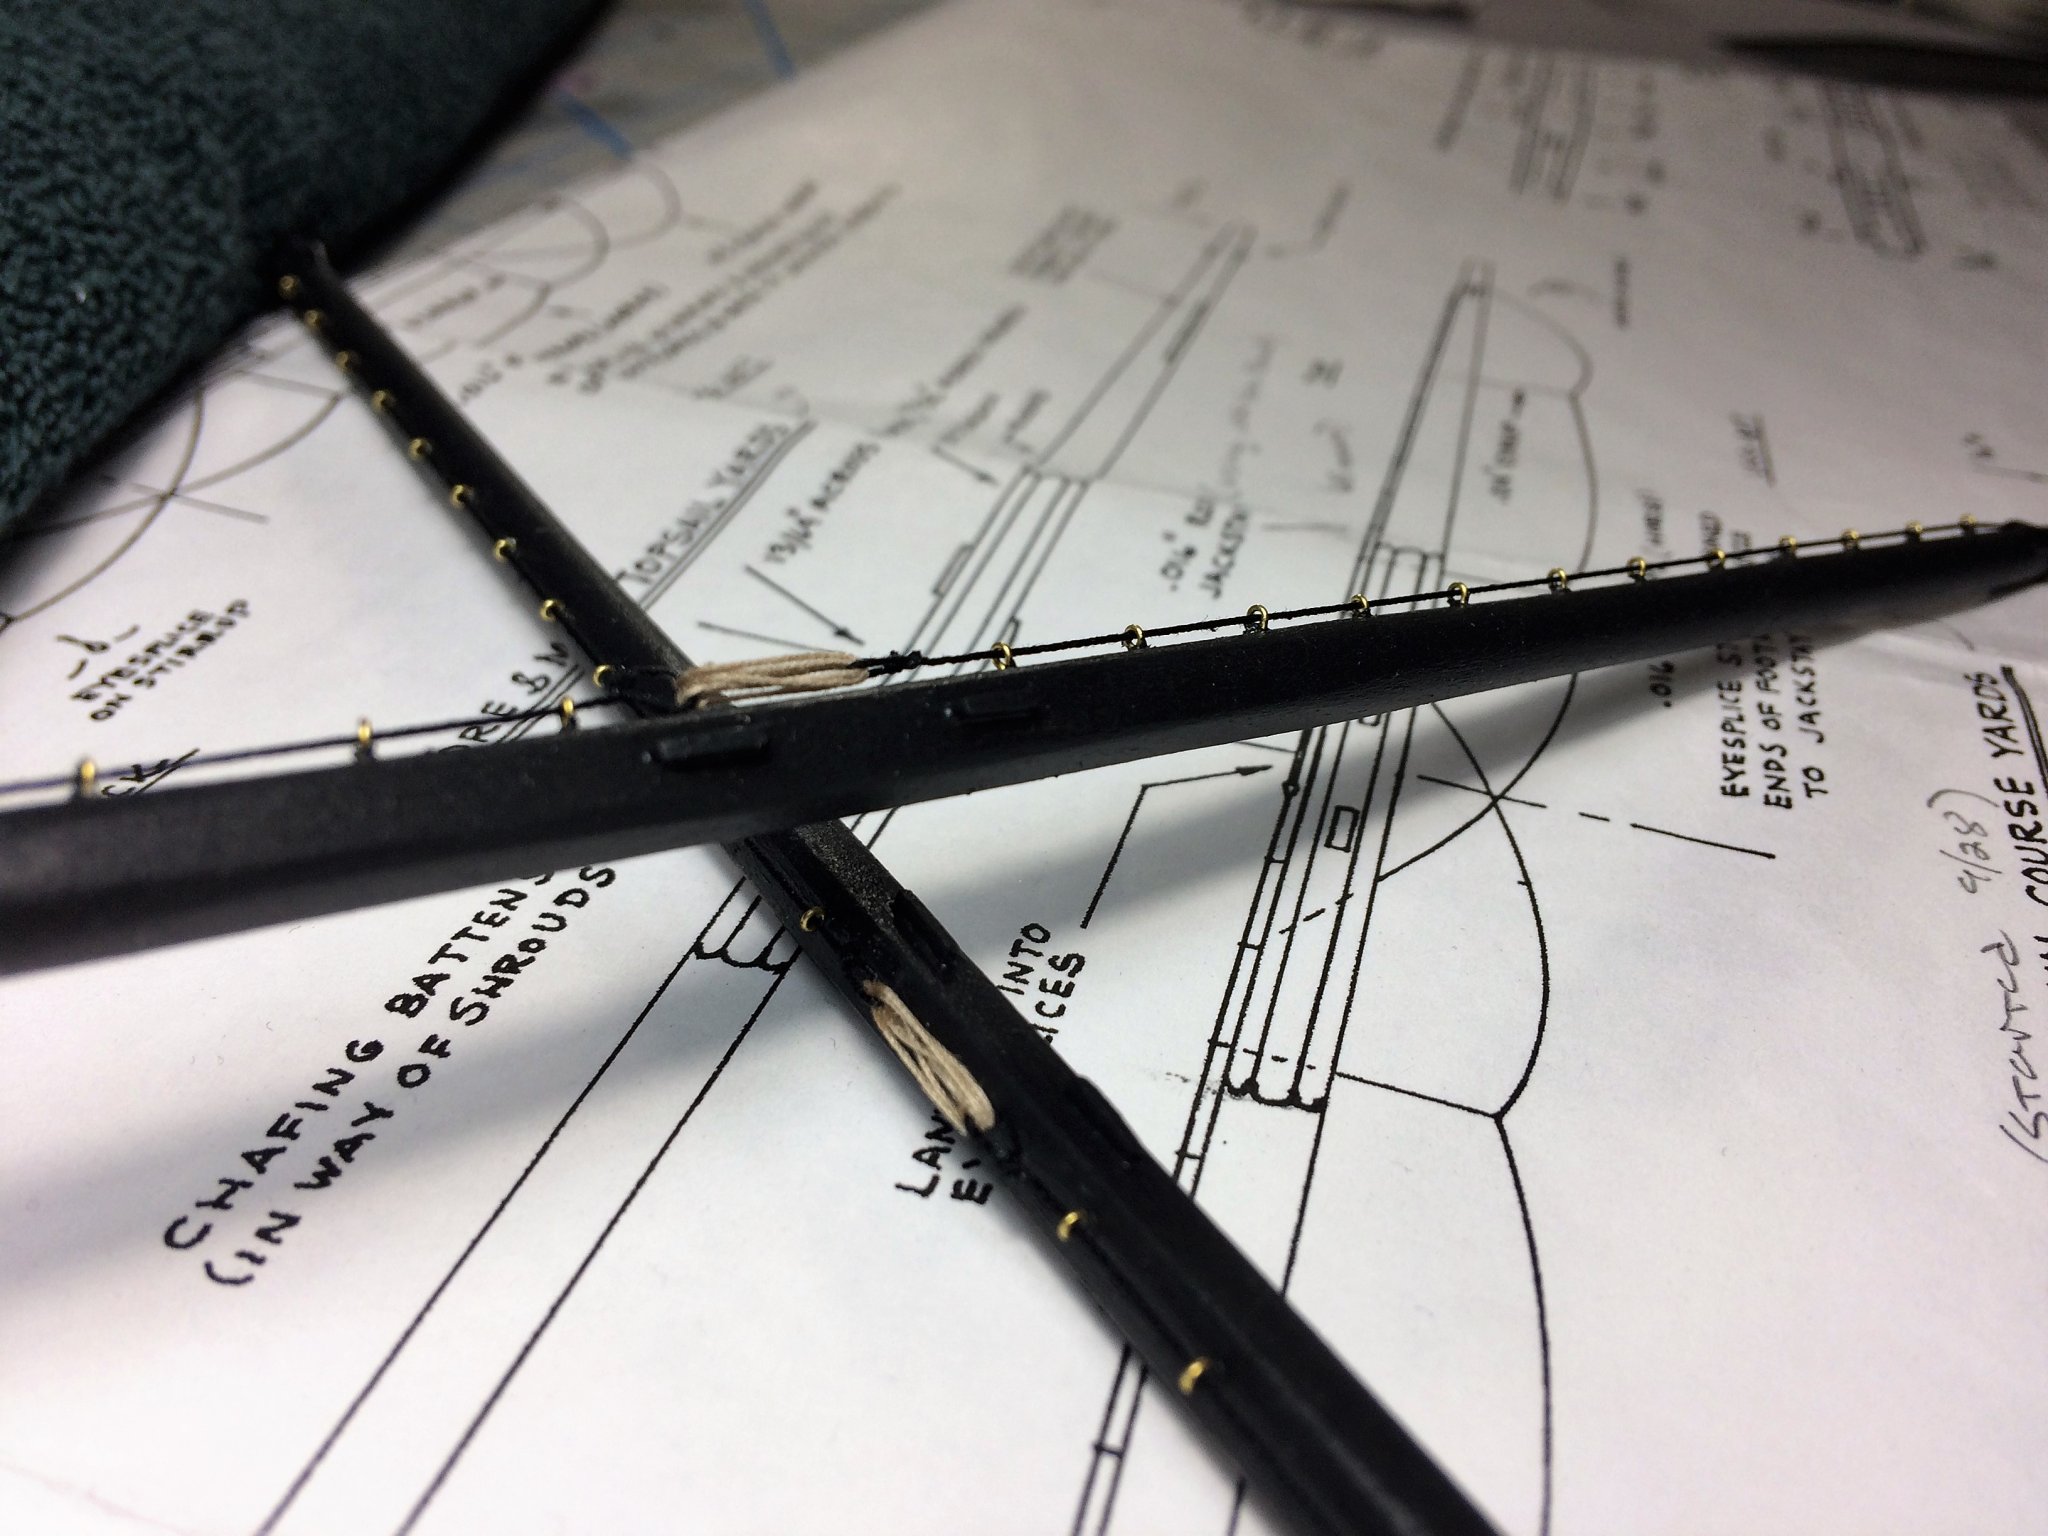
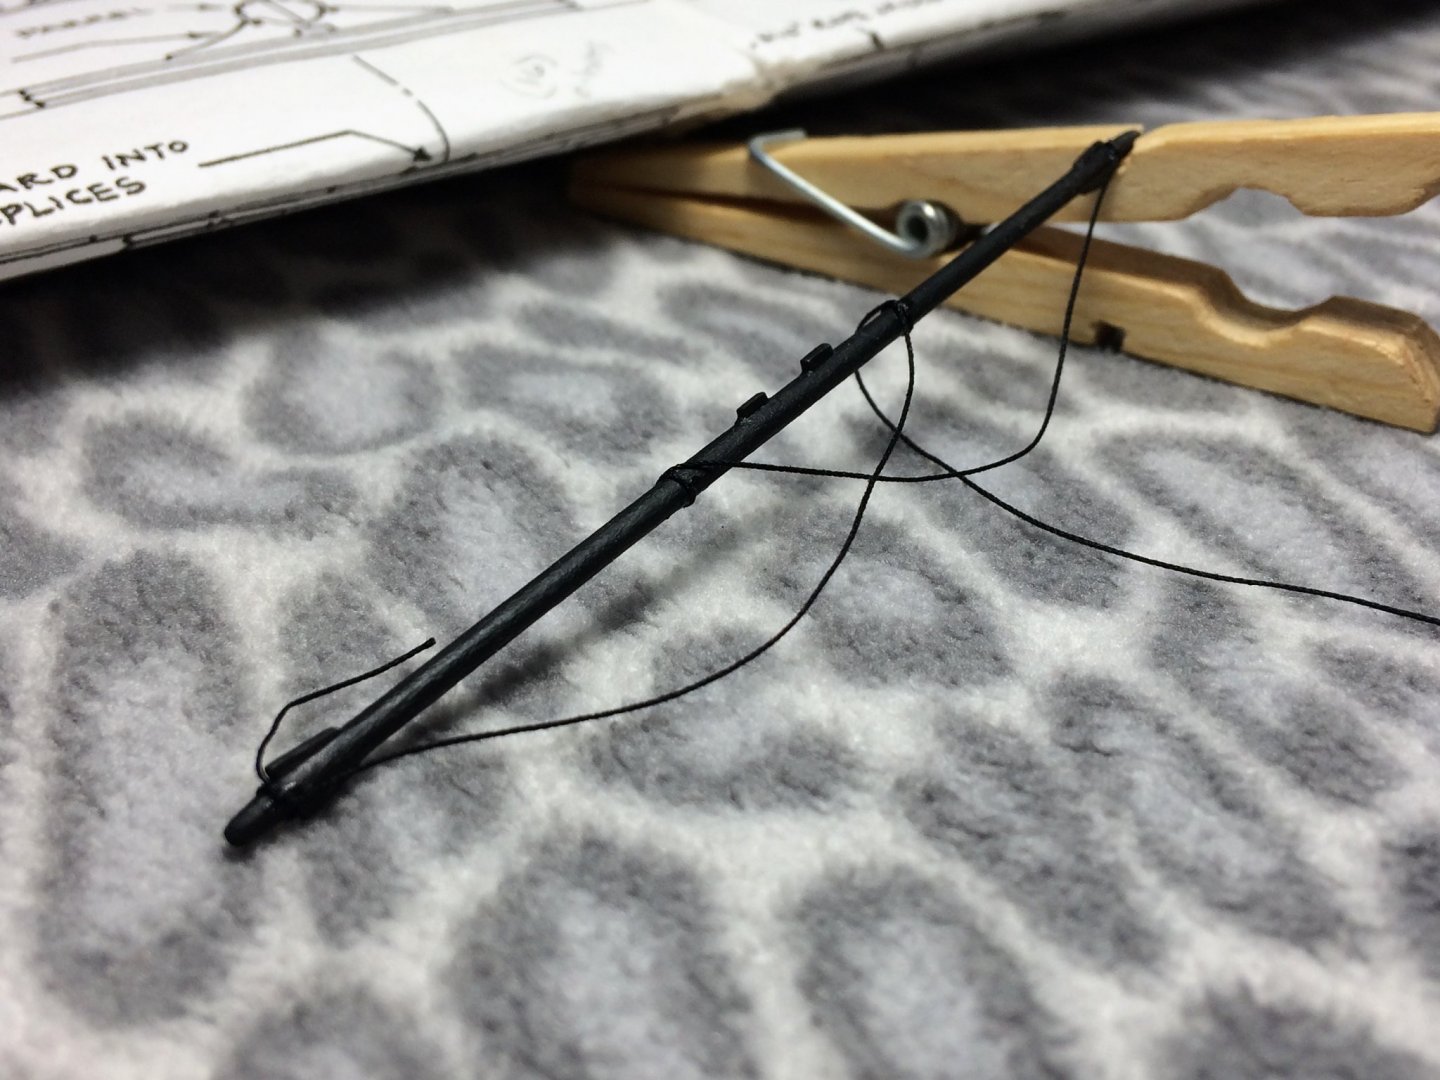
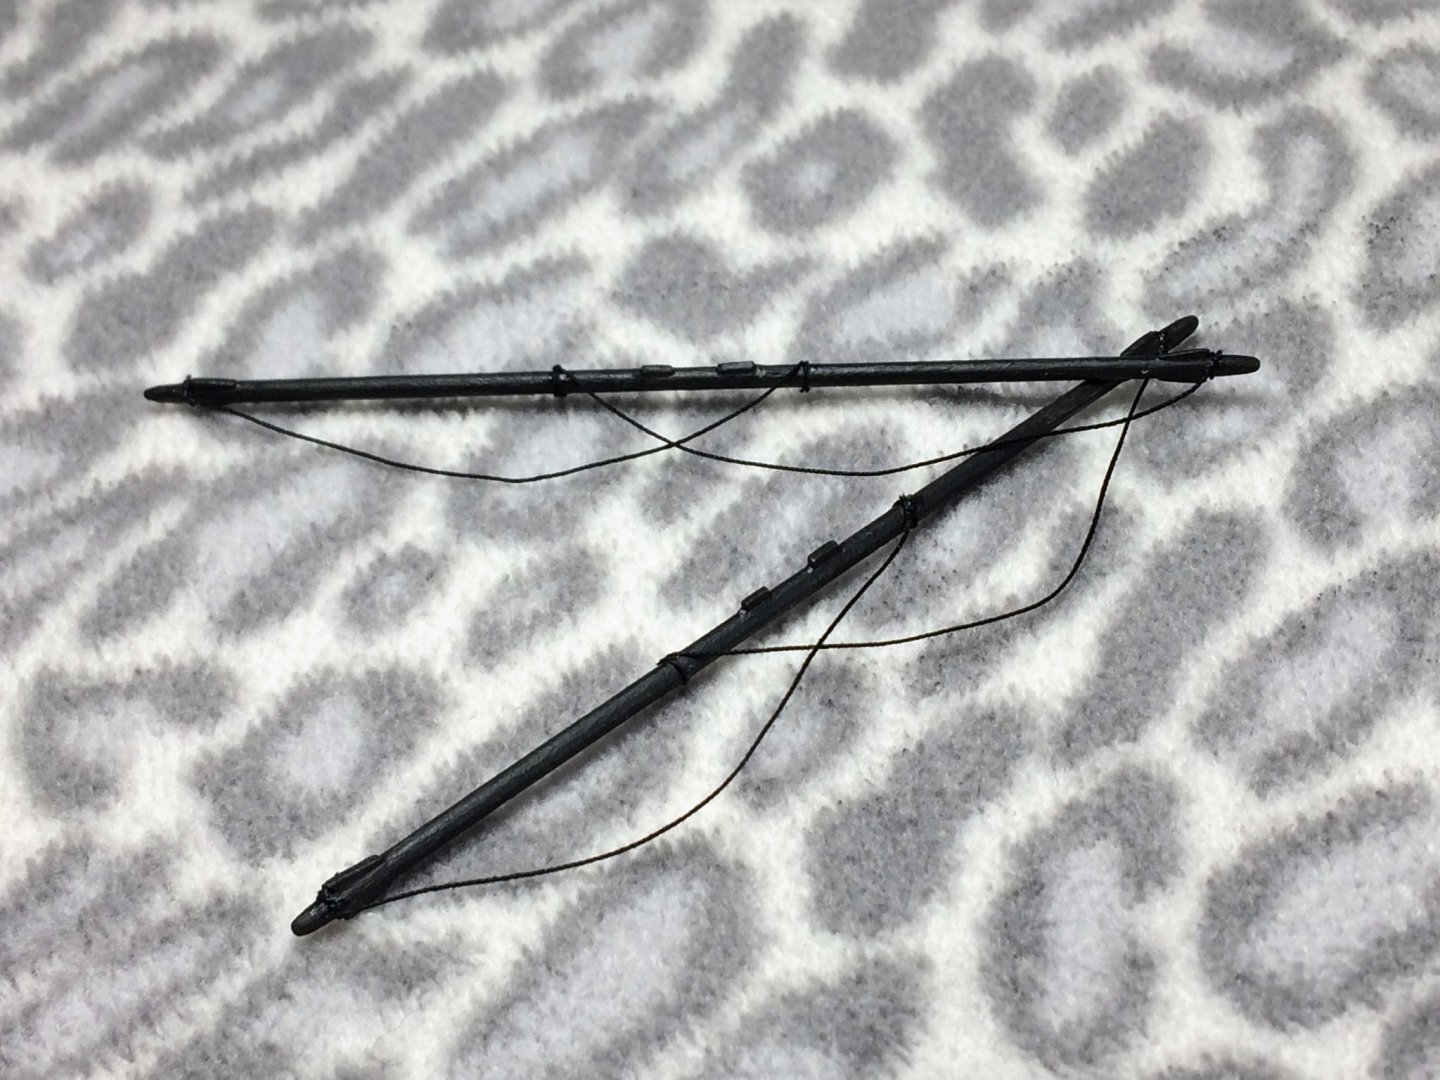
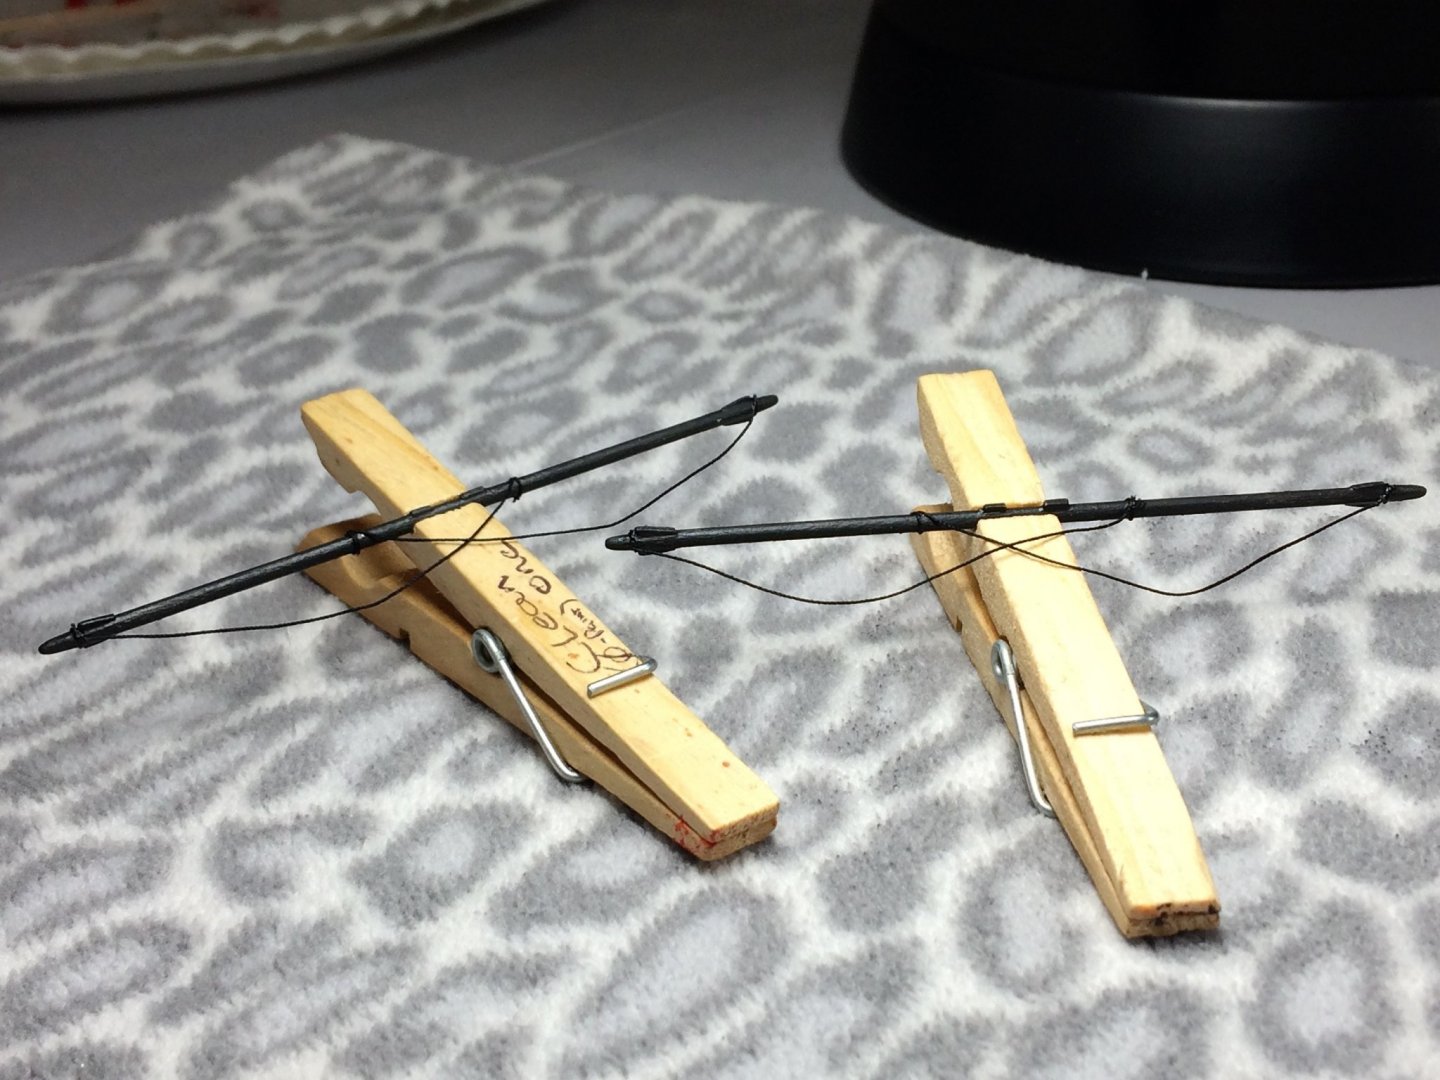
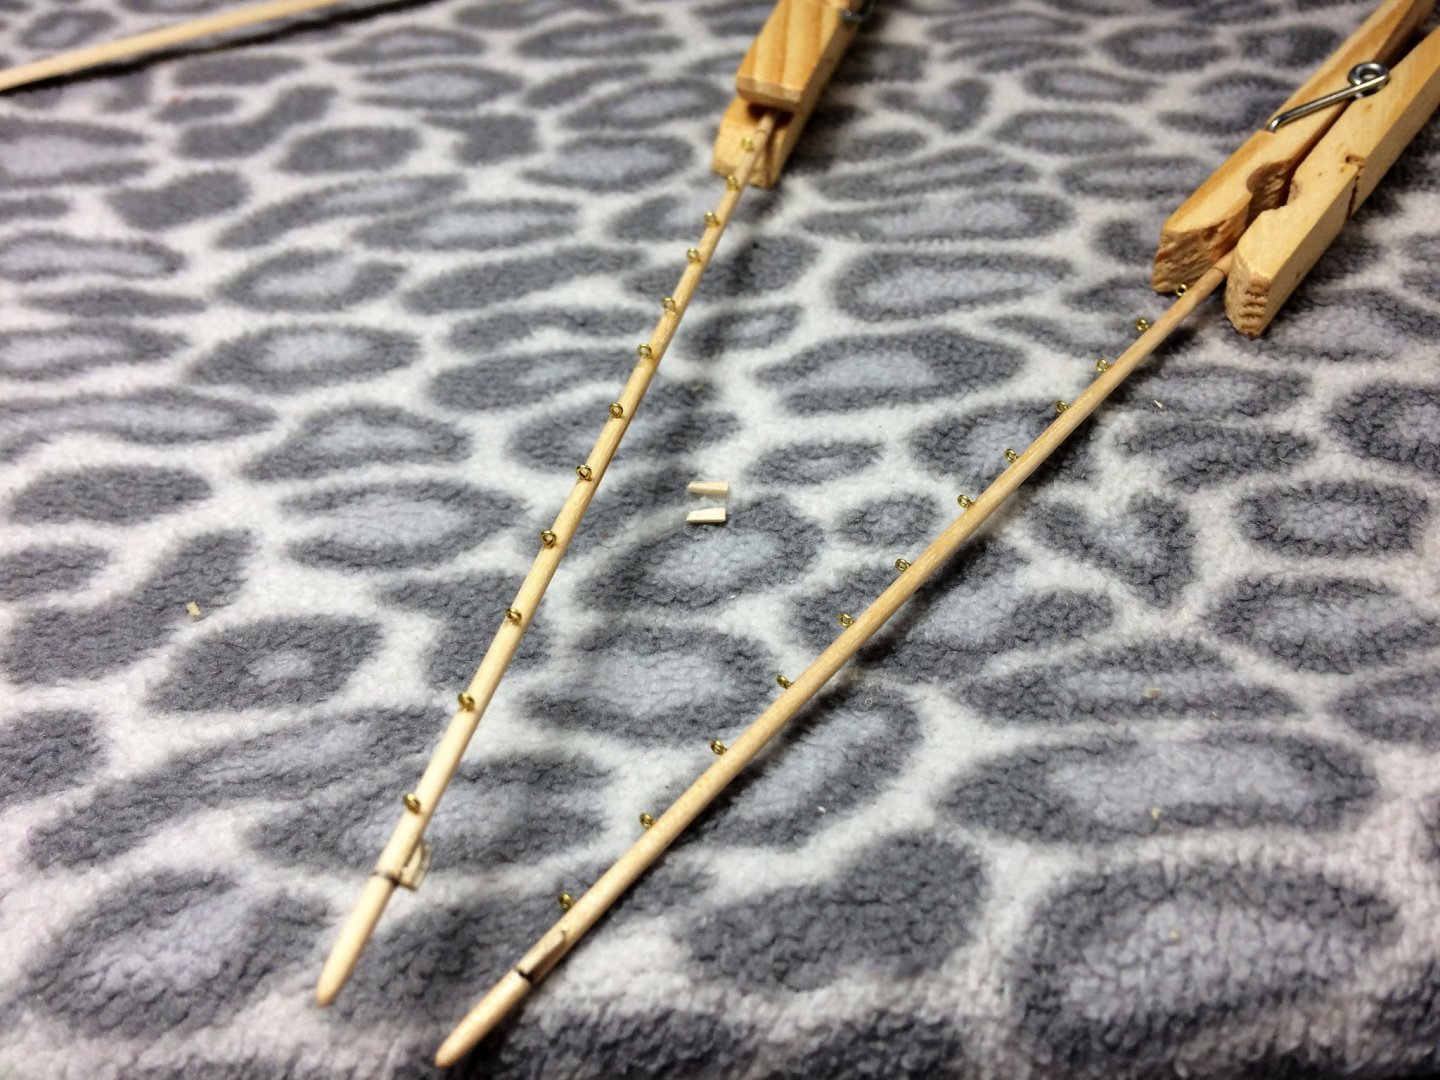
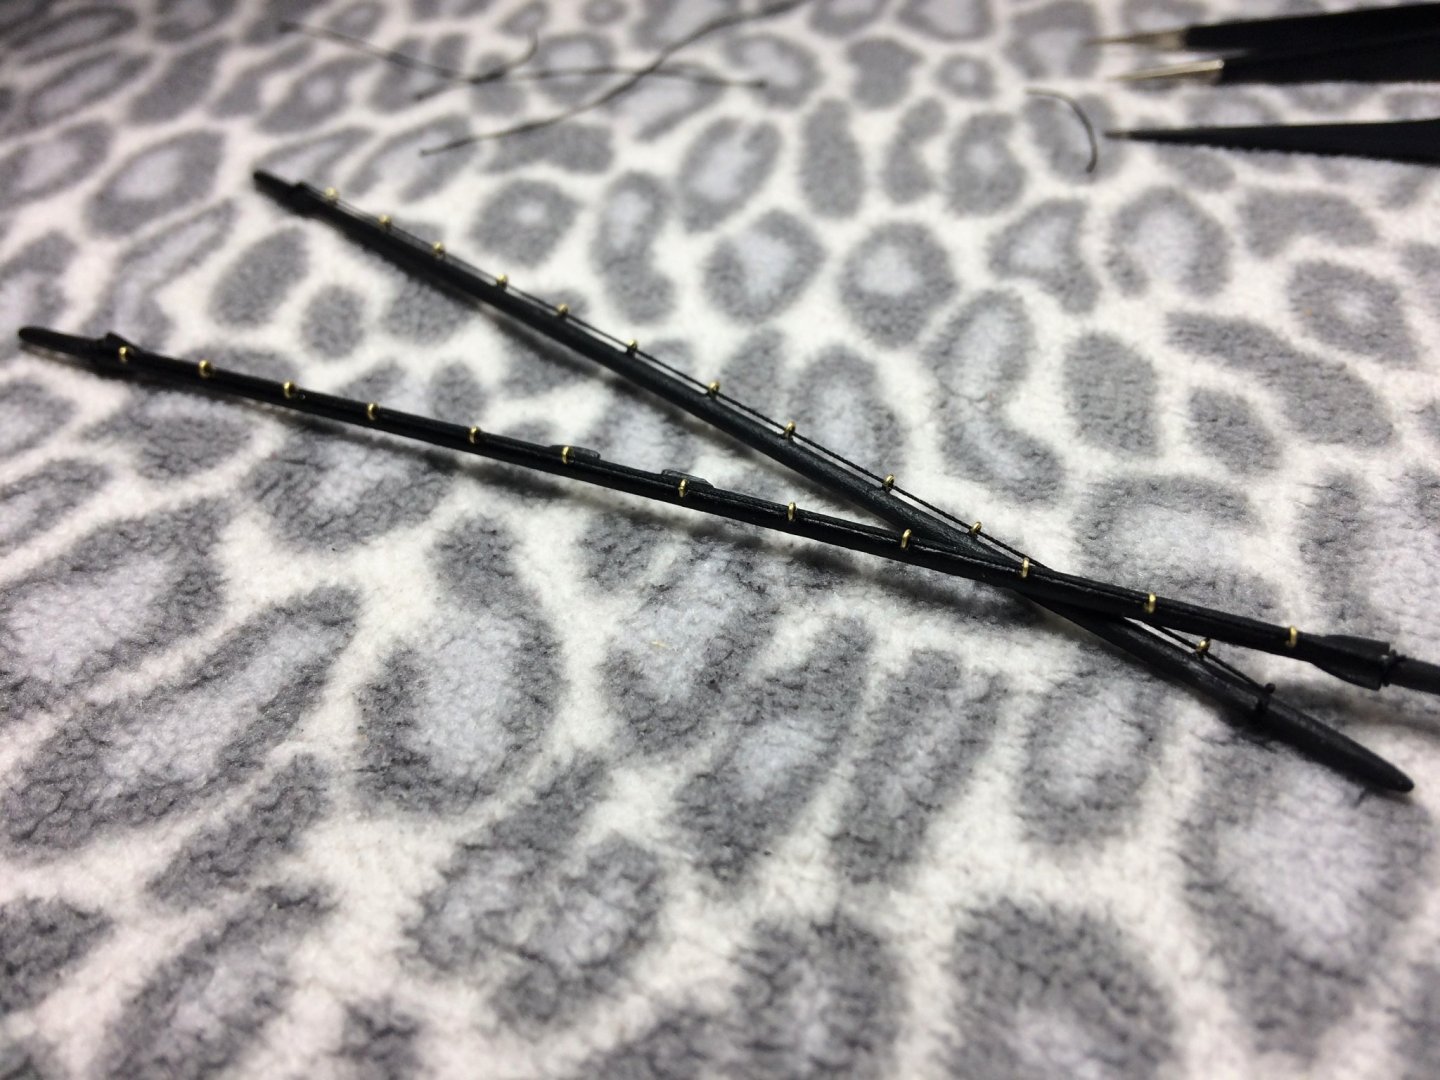
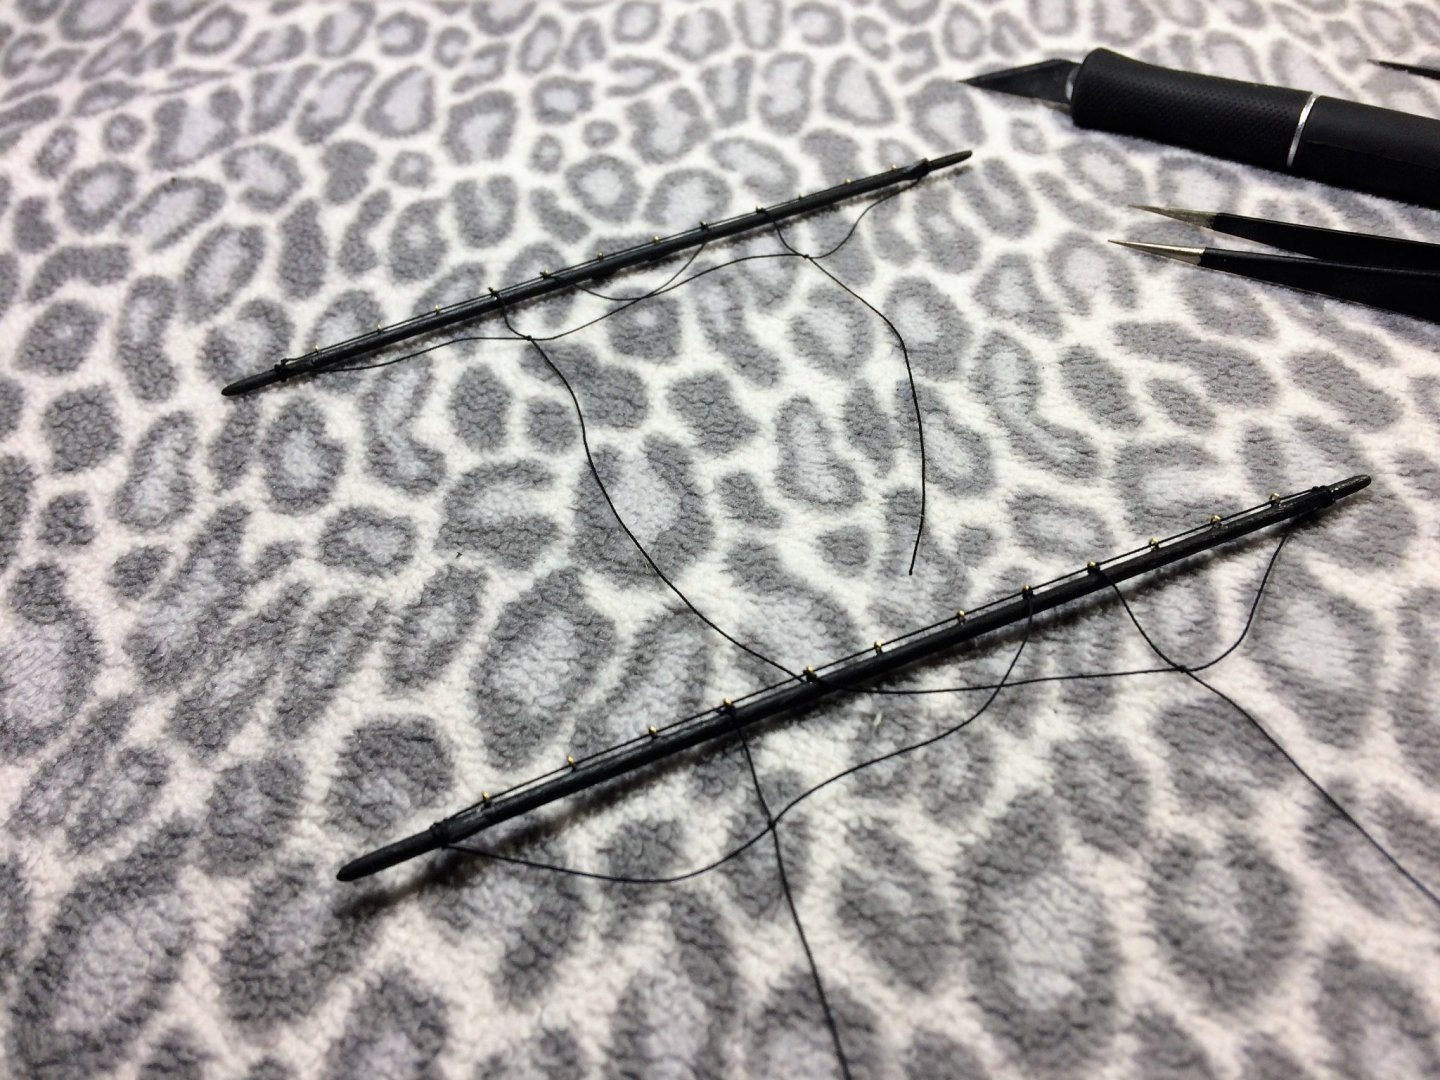
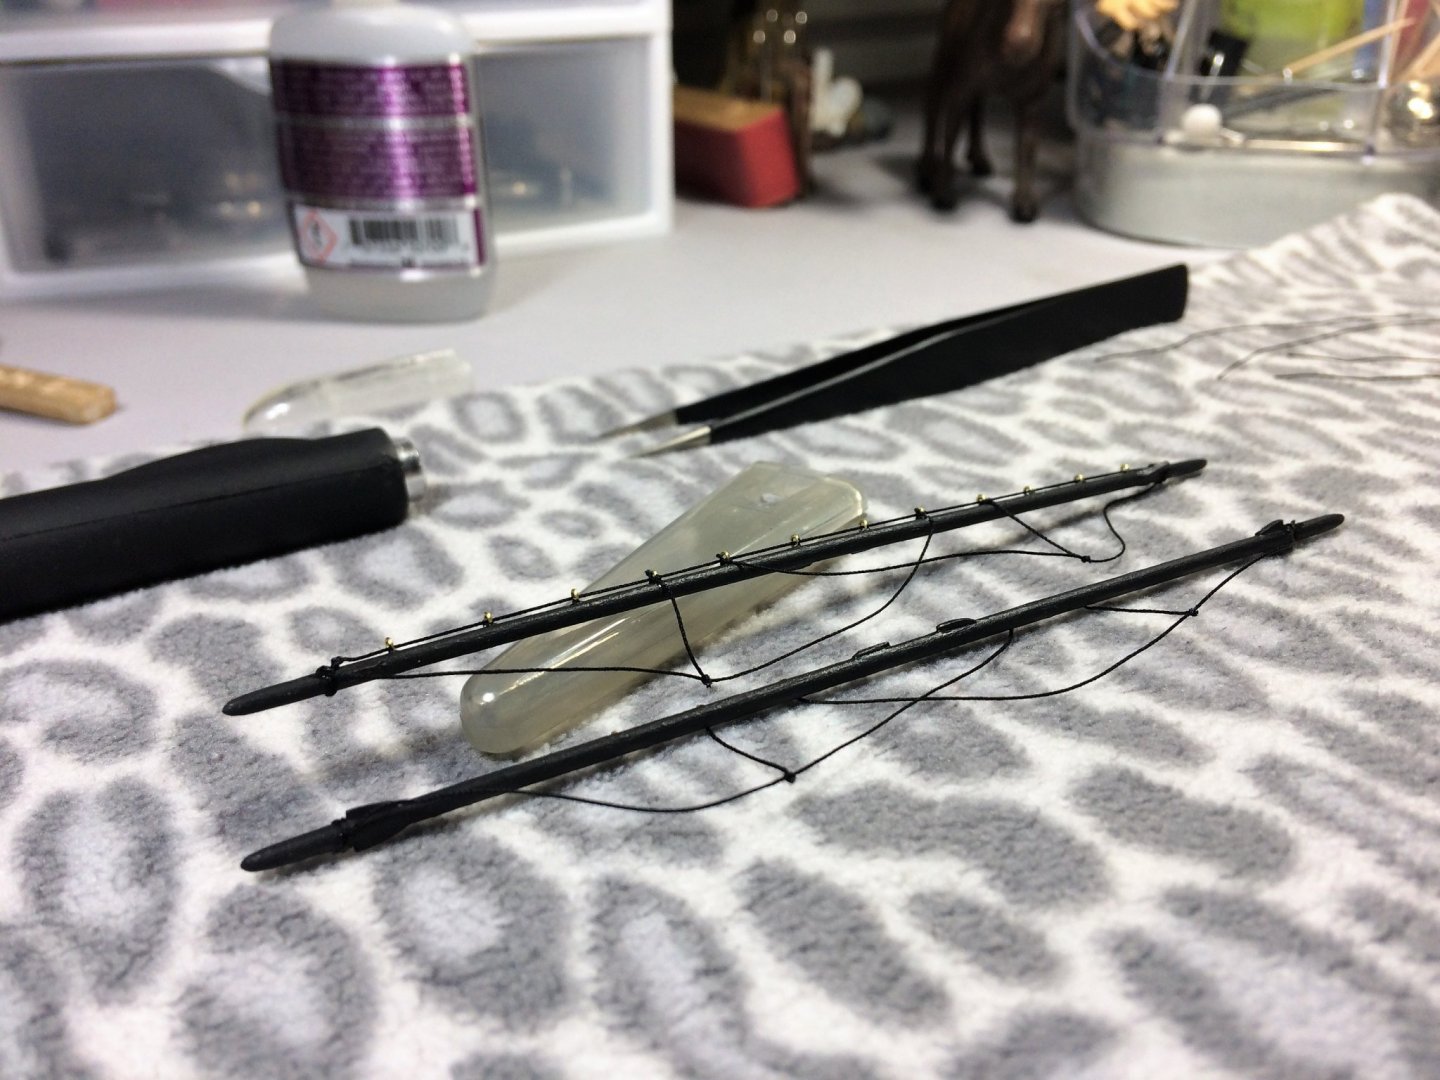
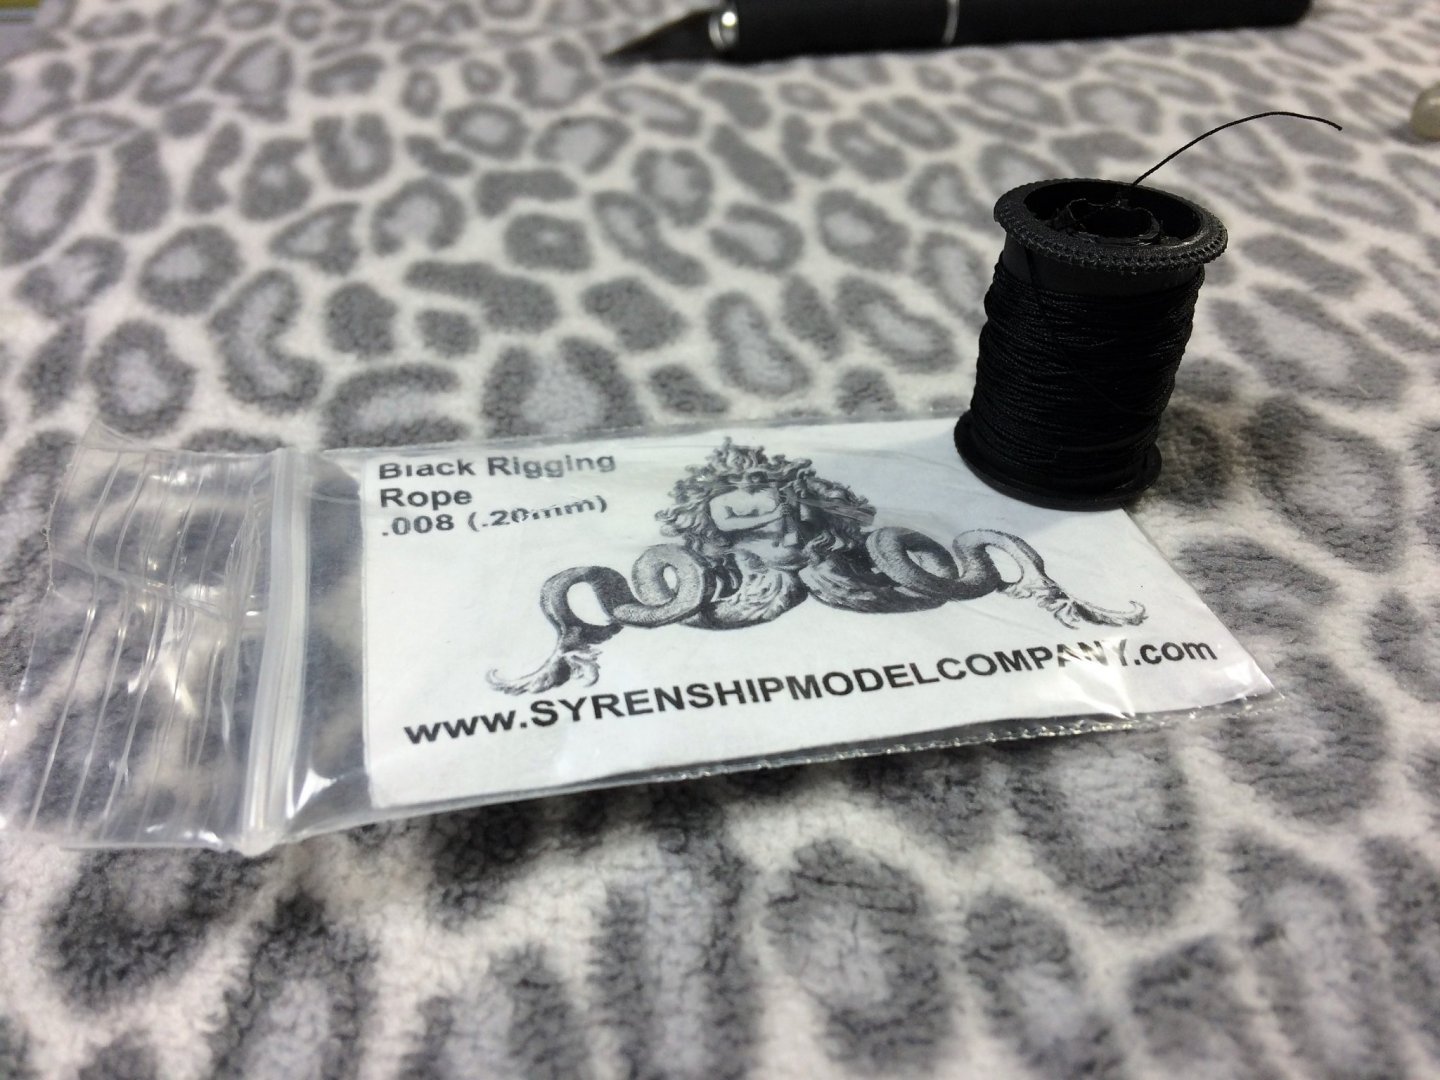
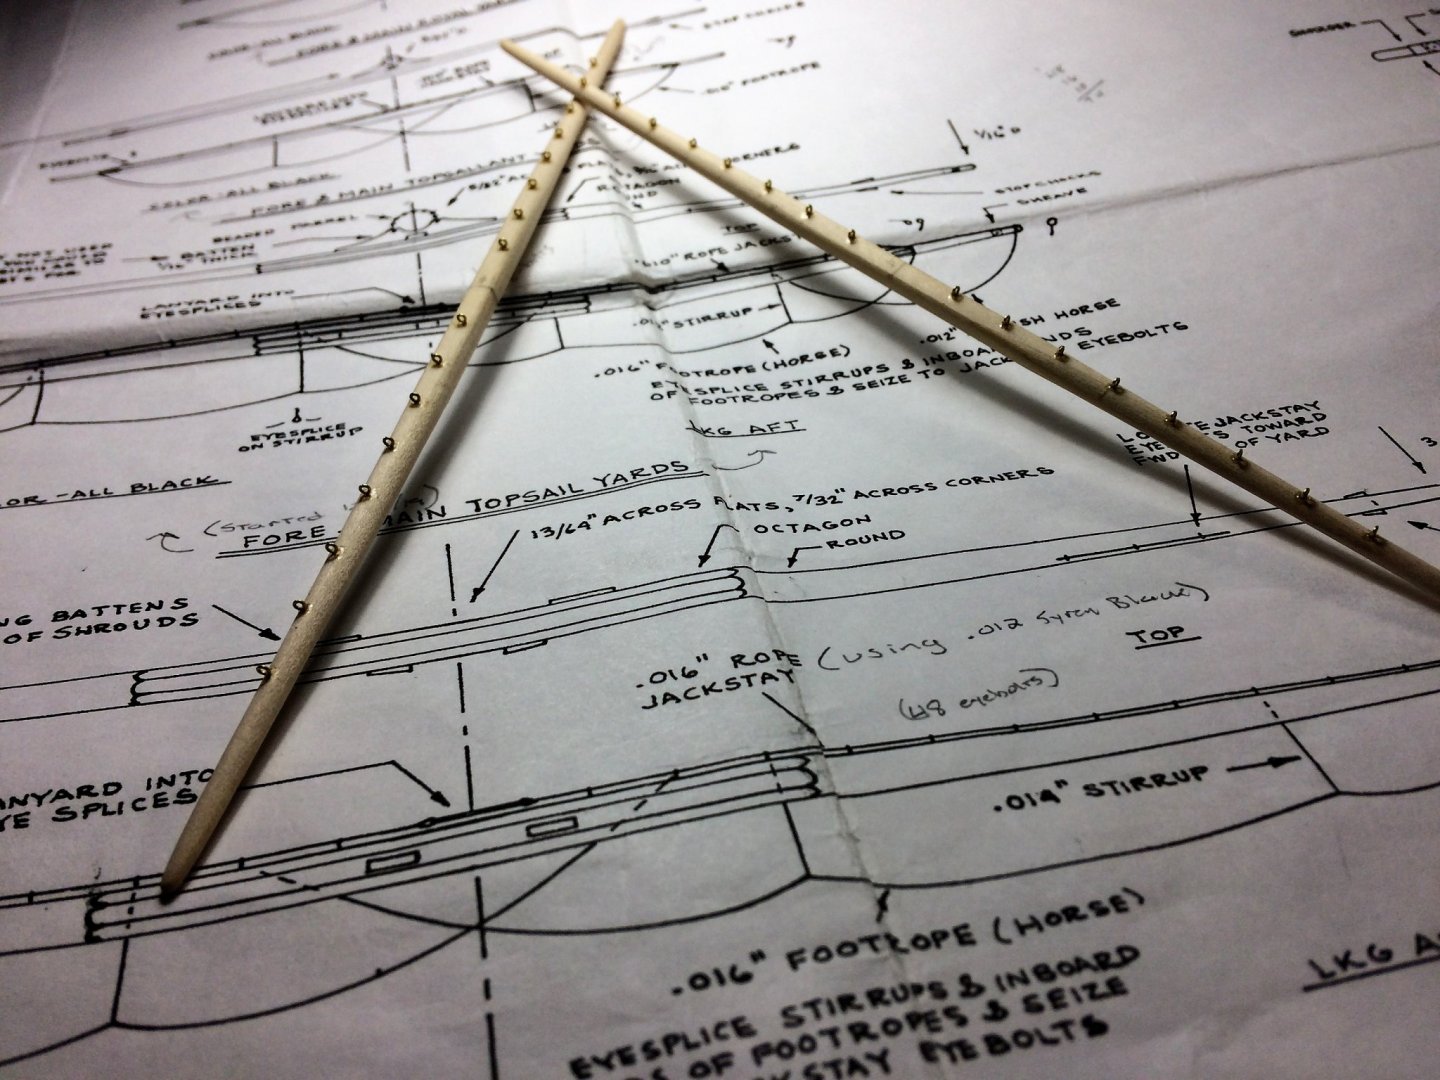
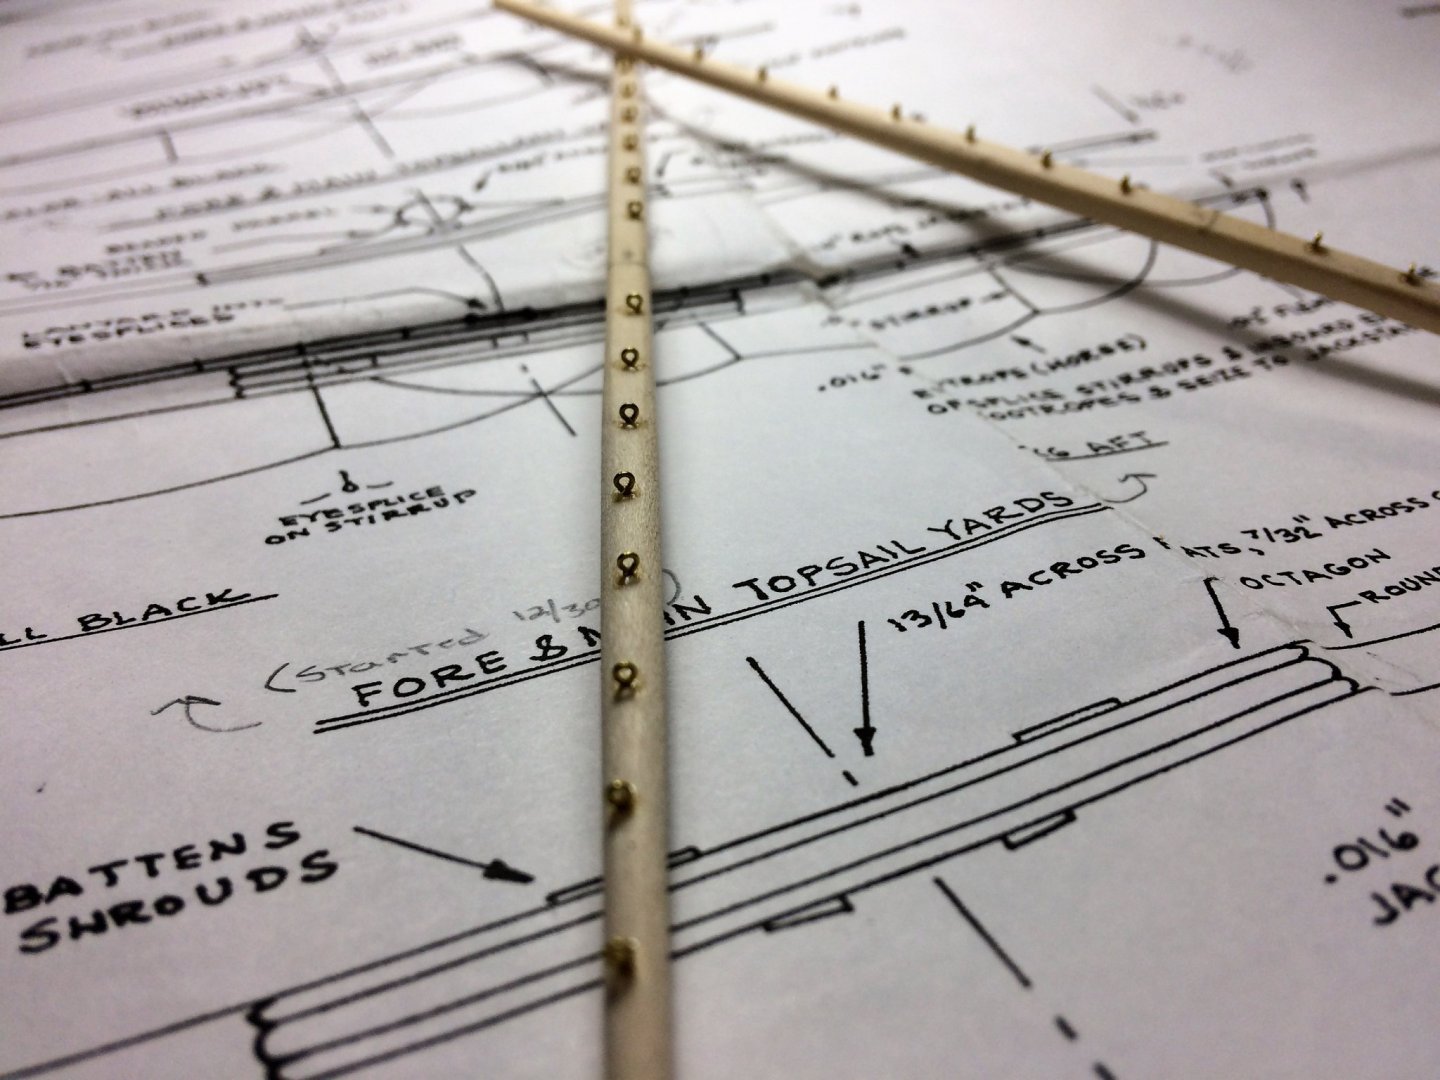
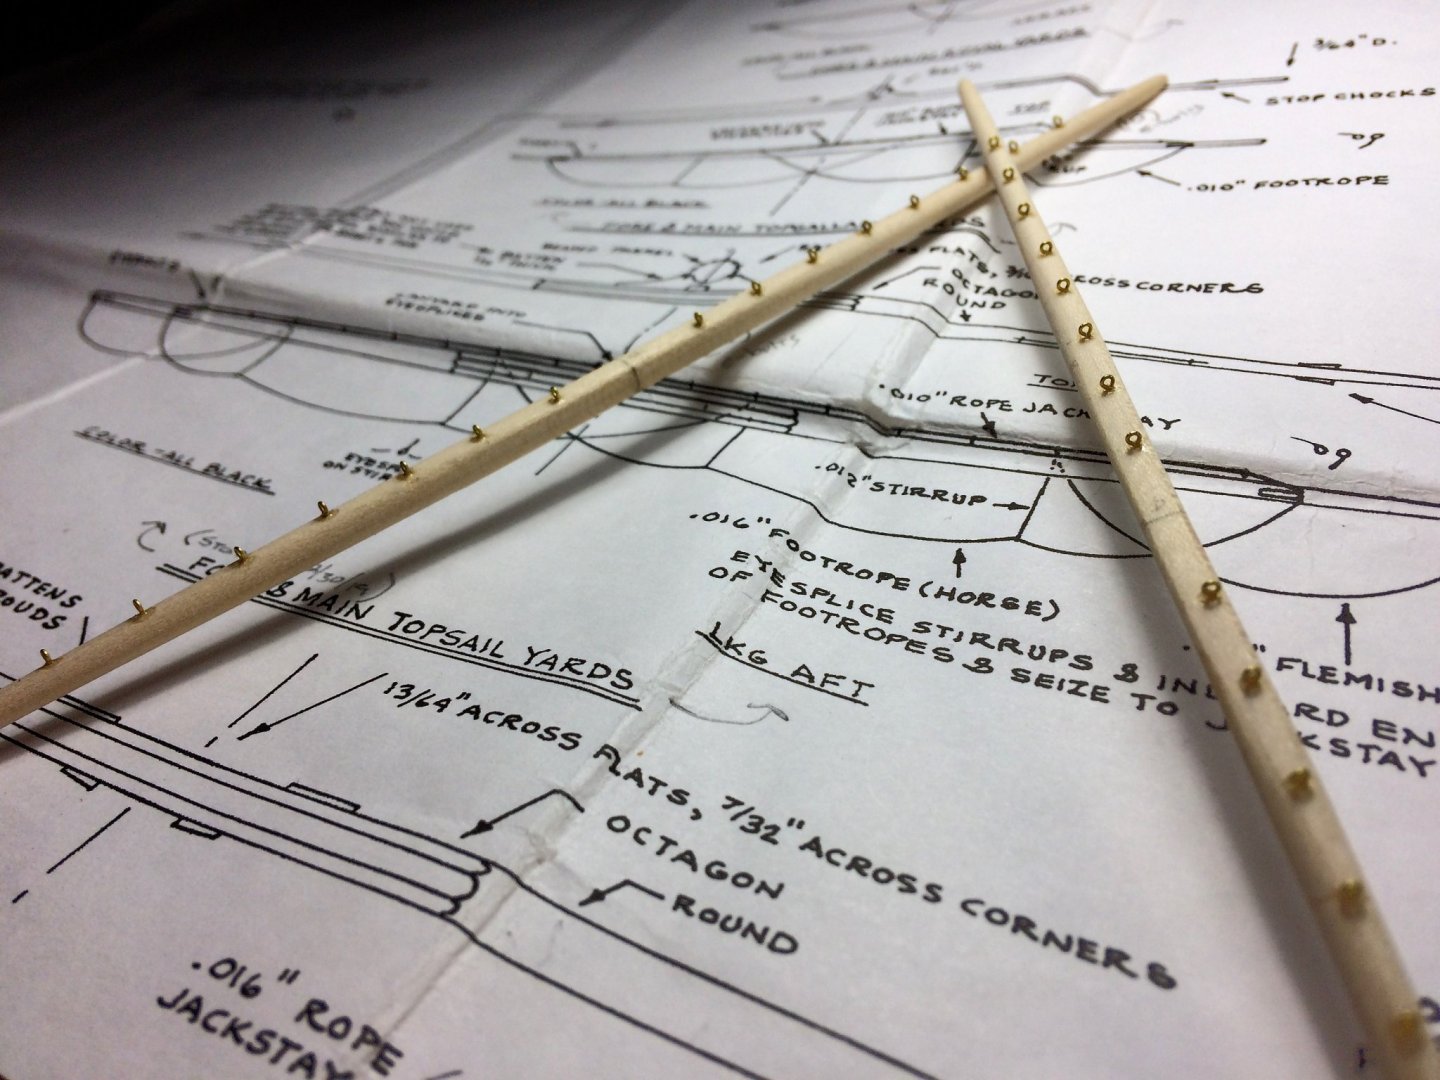
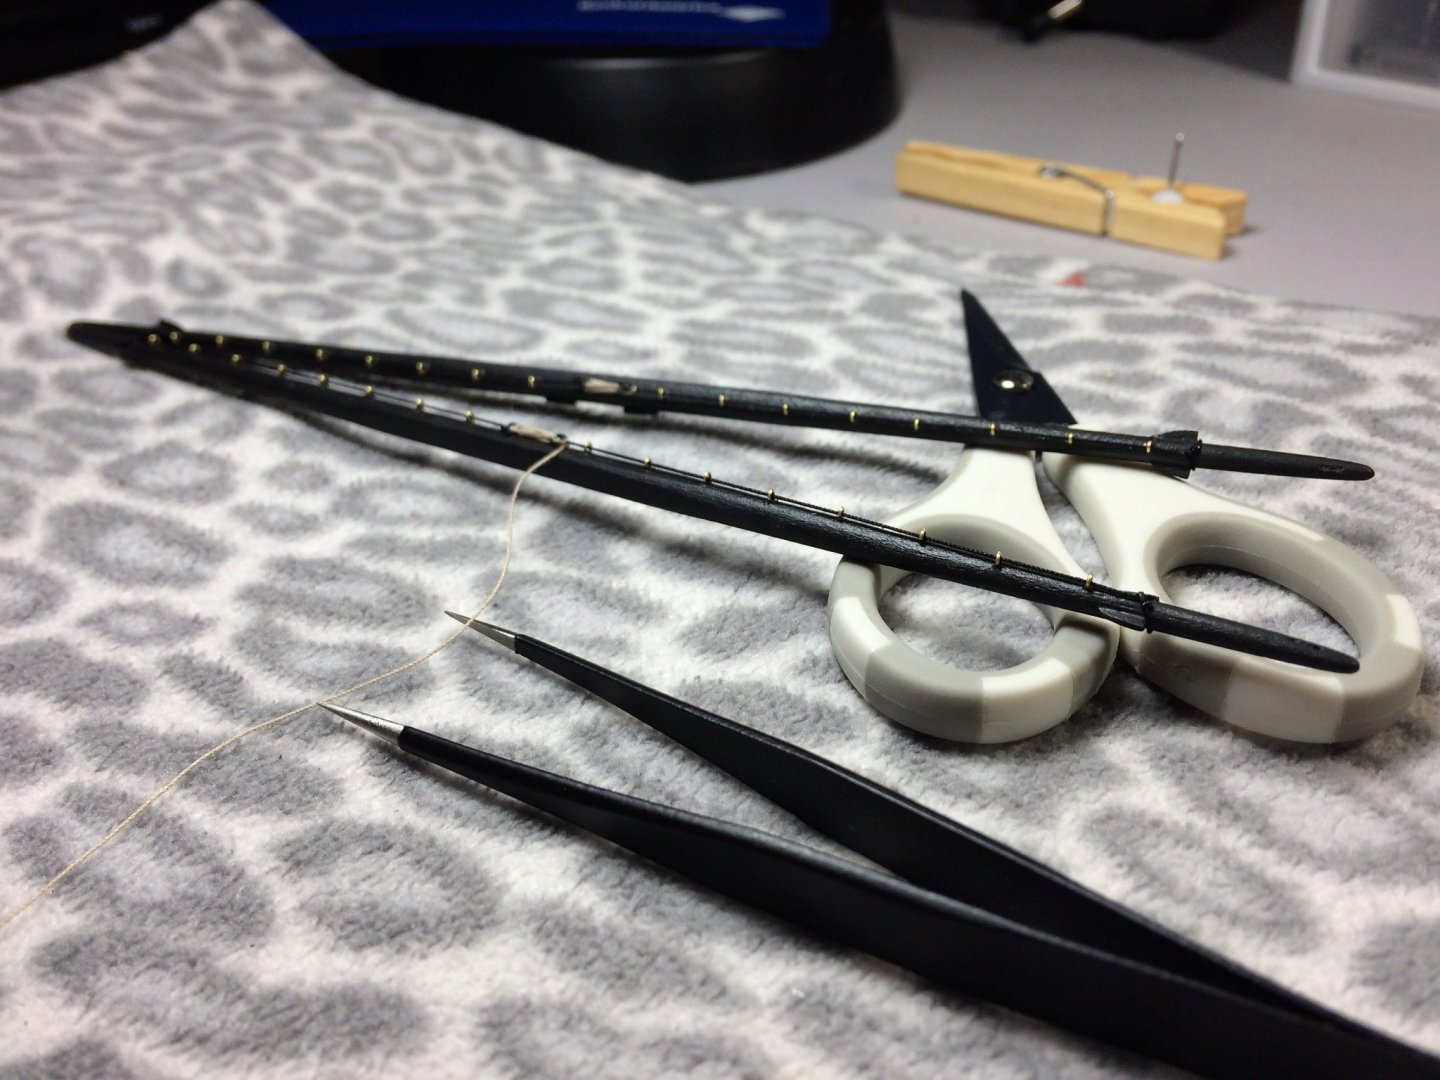
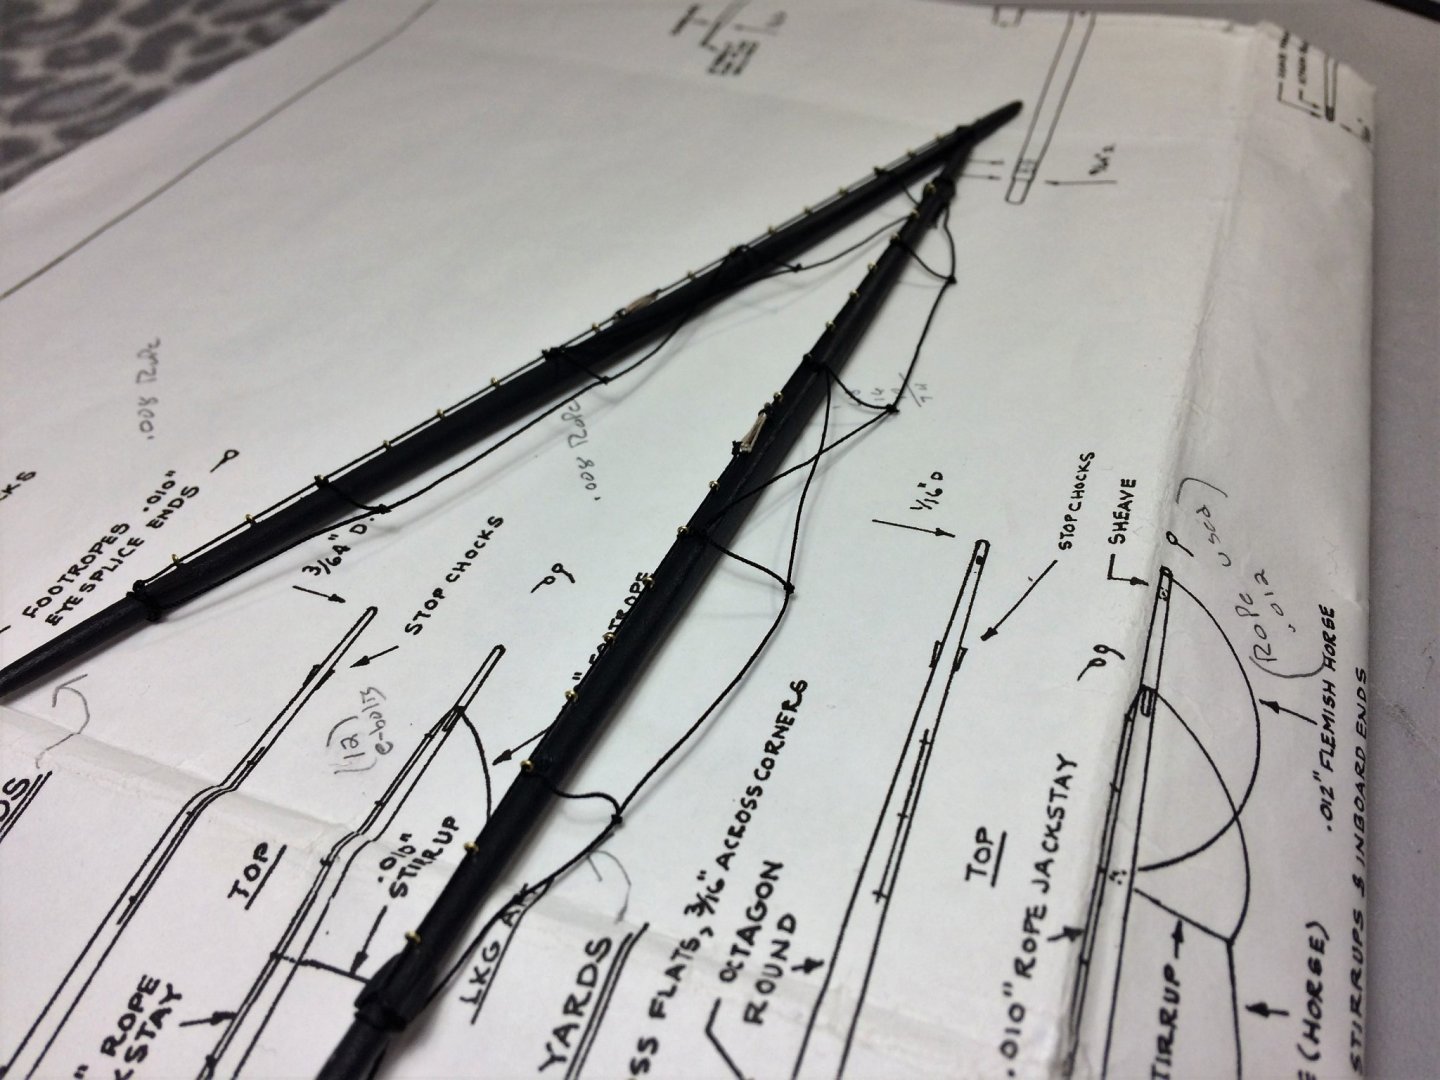
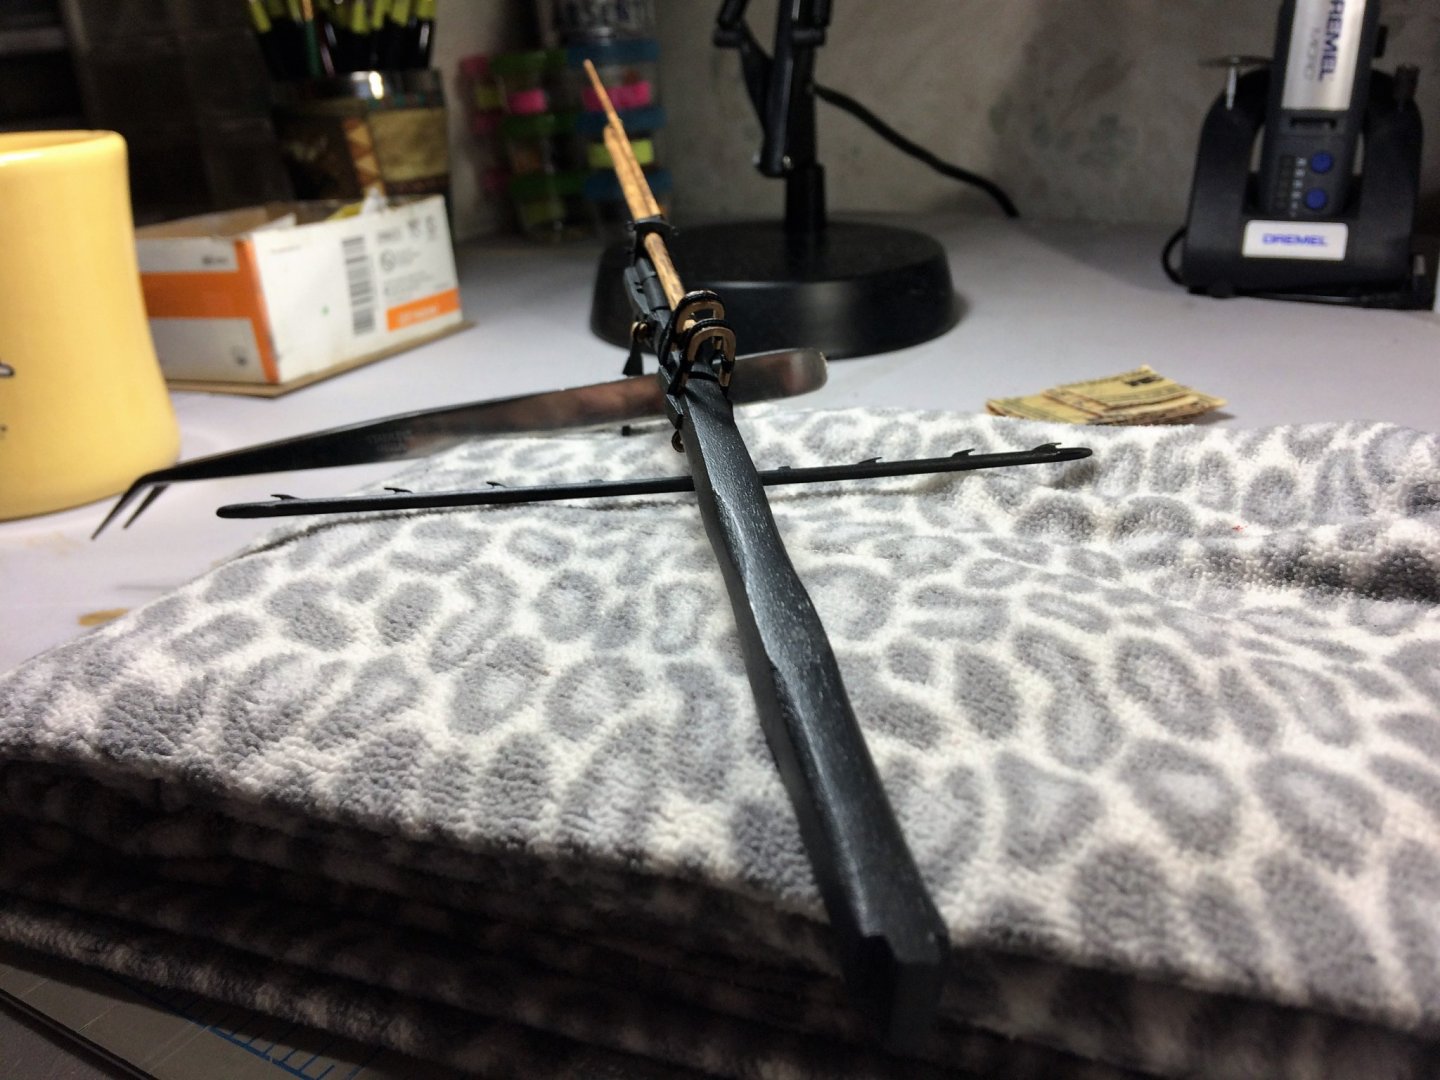
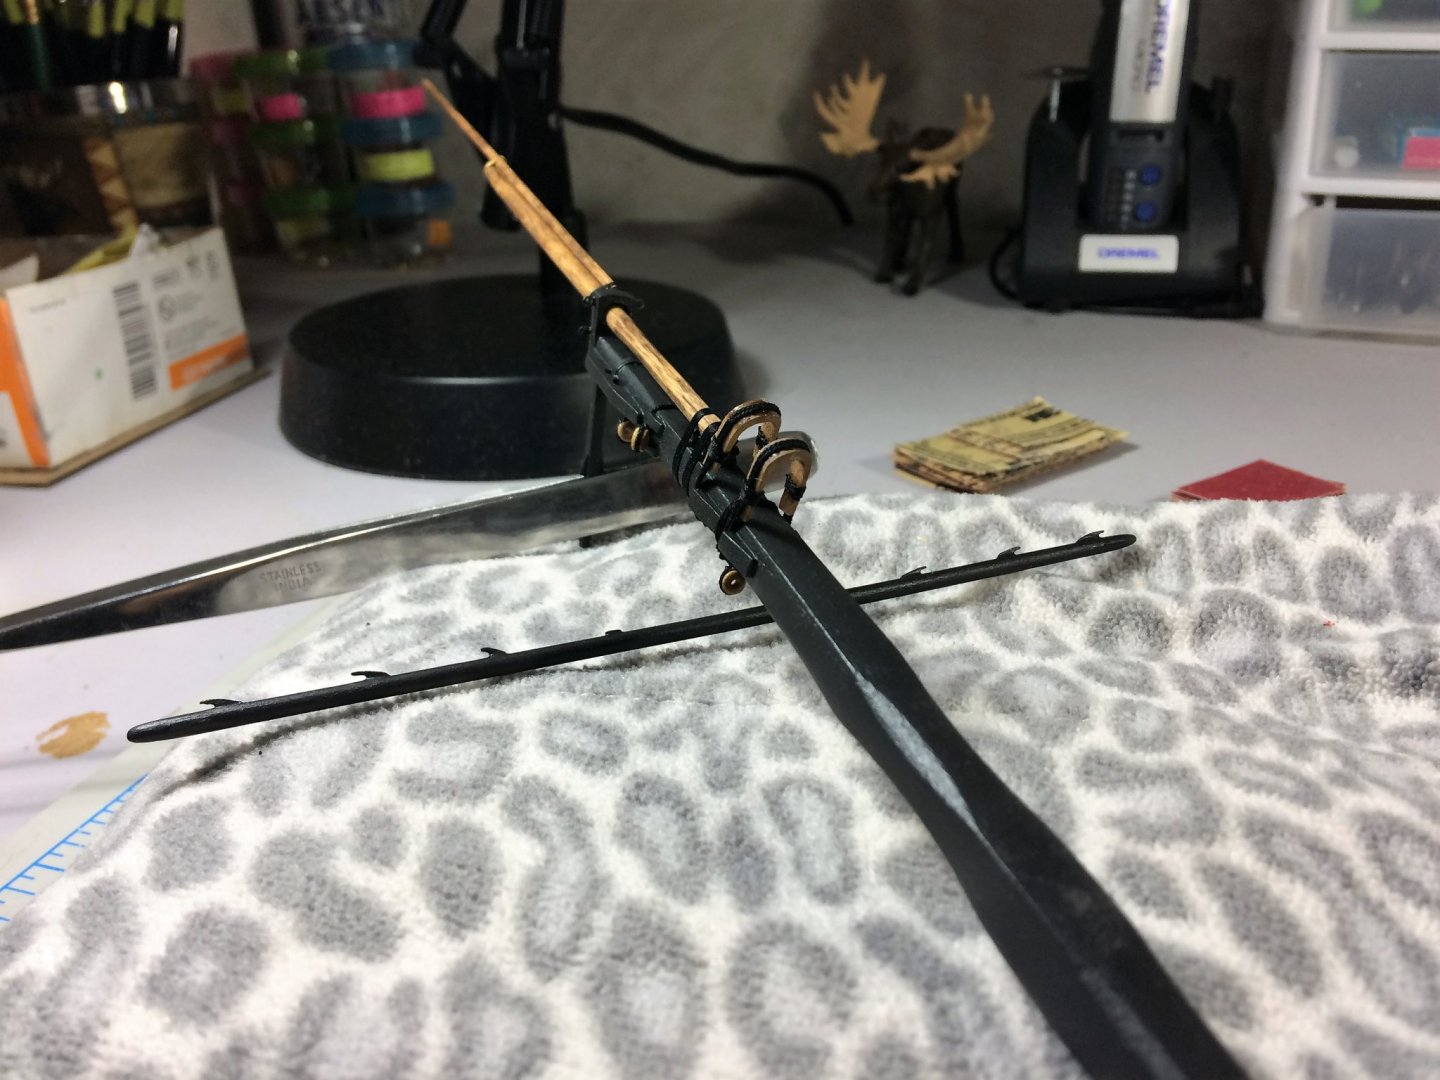
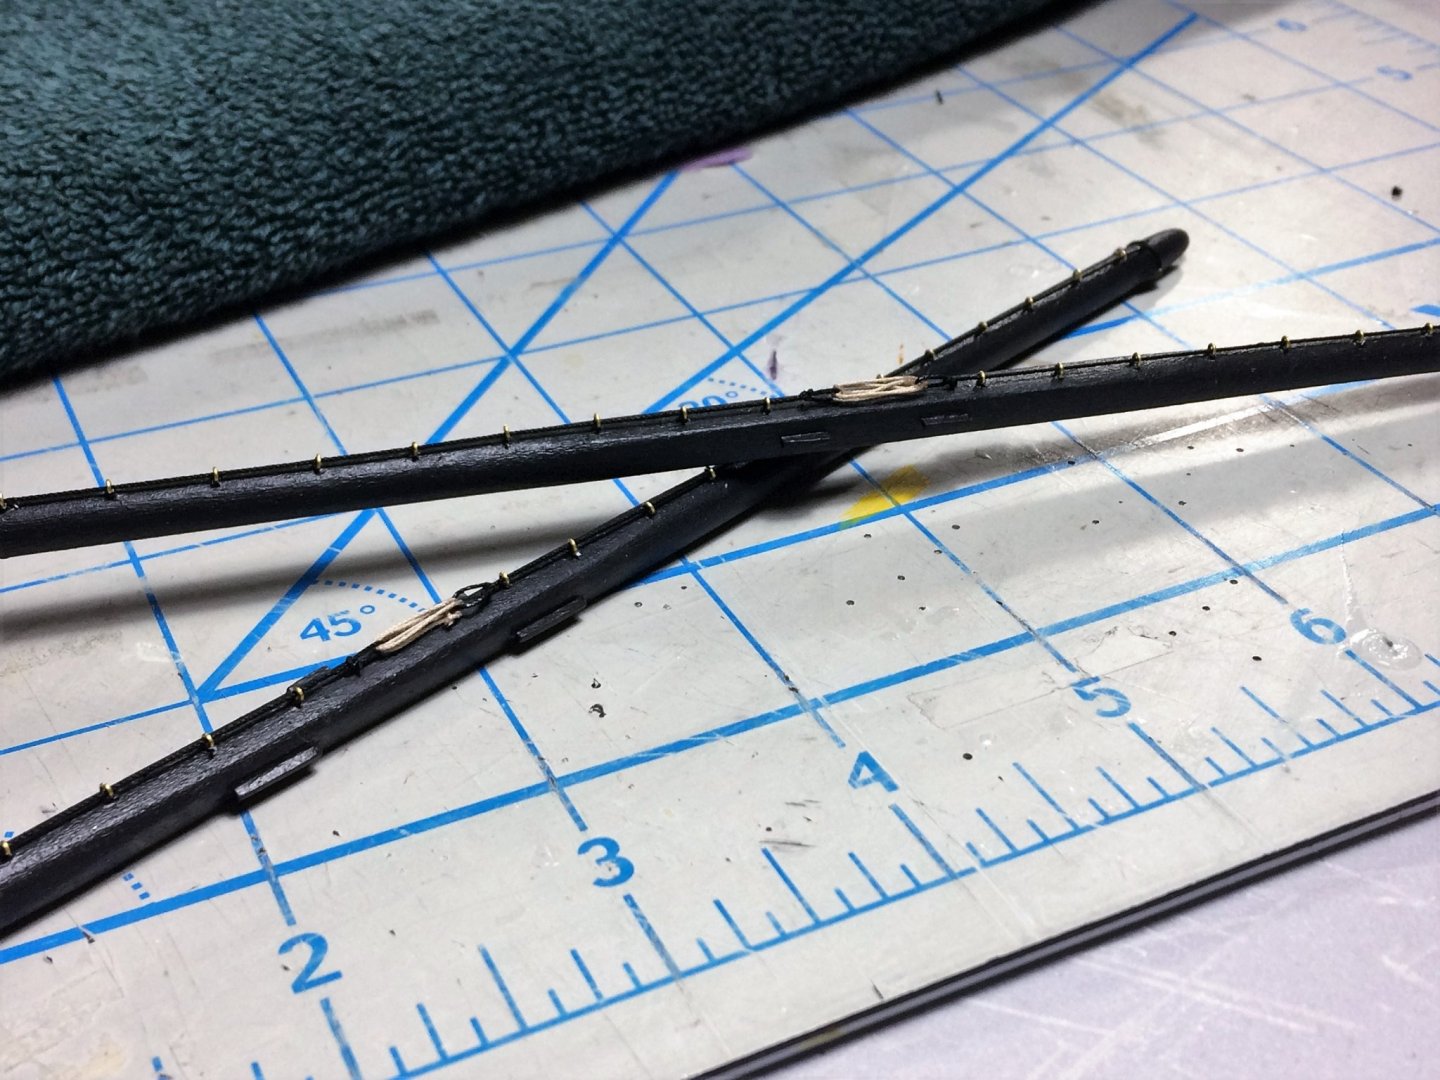
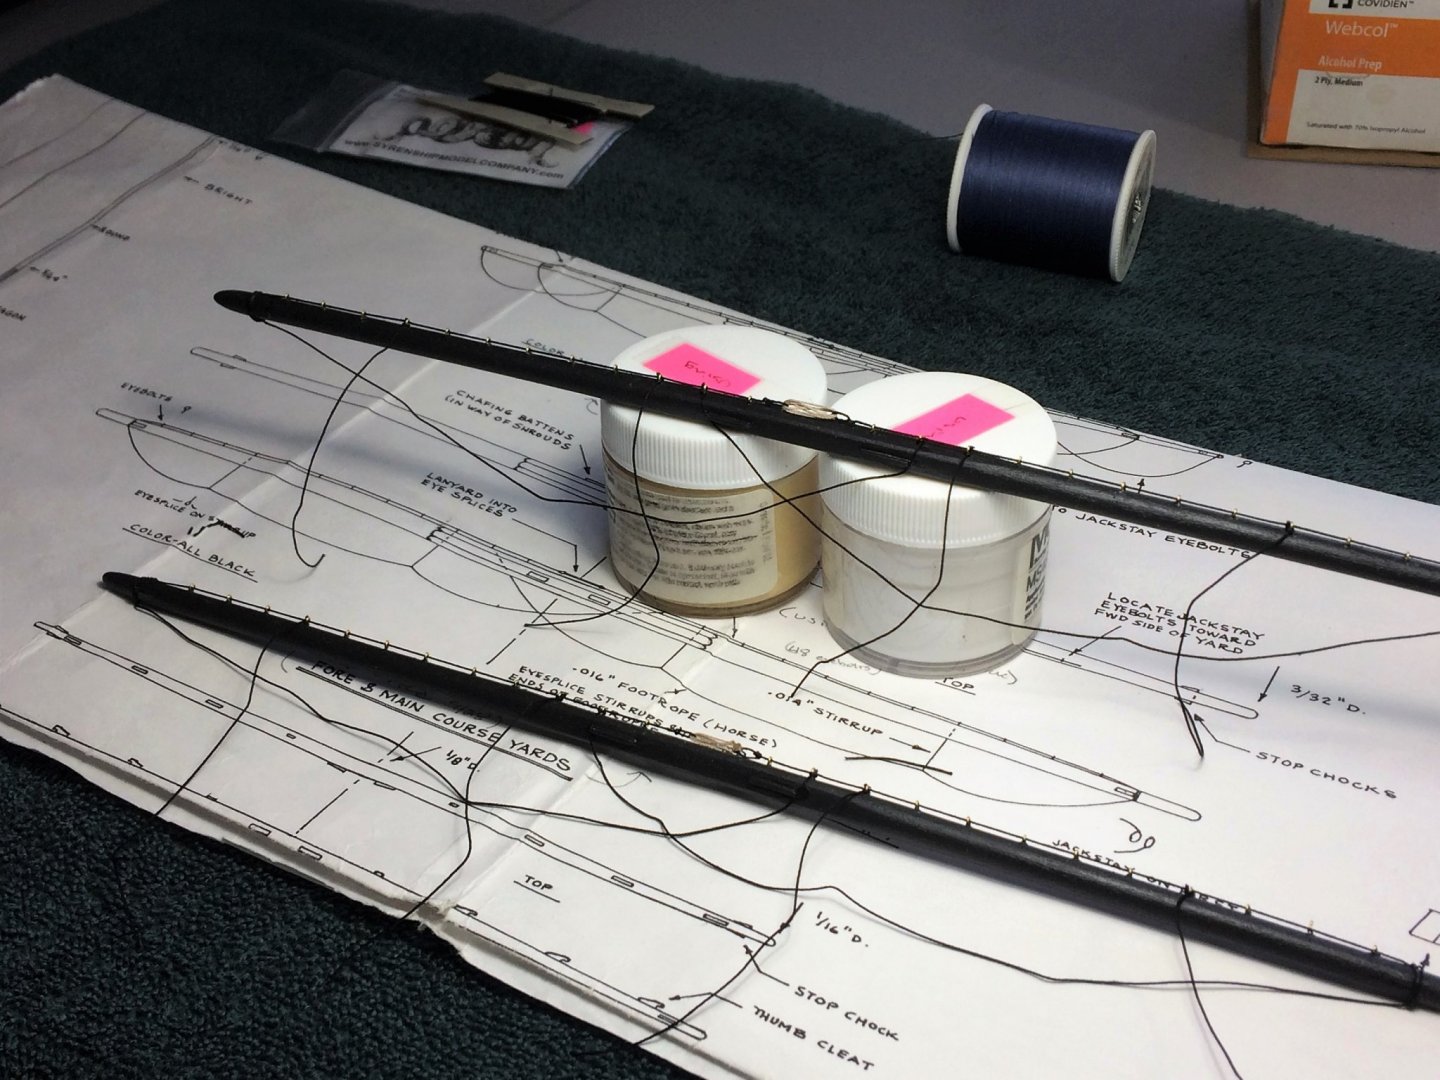
Evening, Work on the Yards continue. Would really like to see these done. With all masts and yards soon done, I may start installing cannon. Still chewing on that tho, still some items for the main deck area I want to finish first. Topgallant Yards were started. The Topgallant yards were relatively easy to make. A bit tricky installing the Jackstay eyebolts, didn't want to drill too much and go all the way thru. Painted and strung with .008 Syren black rope. I tried making the lanyard in the middle of the Jackstay rope but it looked lumpy and out of scale. I opted to just have one continuous rope for the Jackstay. Looks a heck of a lot better than what was there! Before I strung the footropes I just had to see what I had so far in regards to Yards. I like what I see! Footropes and stirrups were installed. I'm getting better at tying the stirrups to the footropes. Less curve in the stirrups. Before Syren stopped making the black rope I bought a good sized order for the Niagara. Should have plenty. Once I open the rope, it gets wrapped around a small thread bobbin. The bobbin fits right back into the bag the rope came in. Works for me! Stay warm! Tom E

-
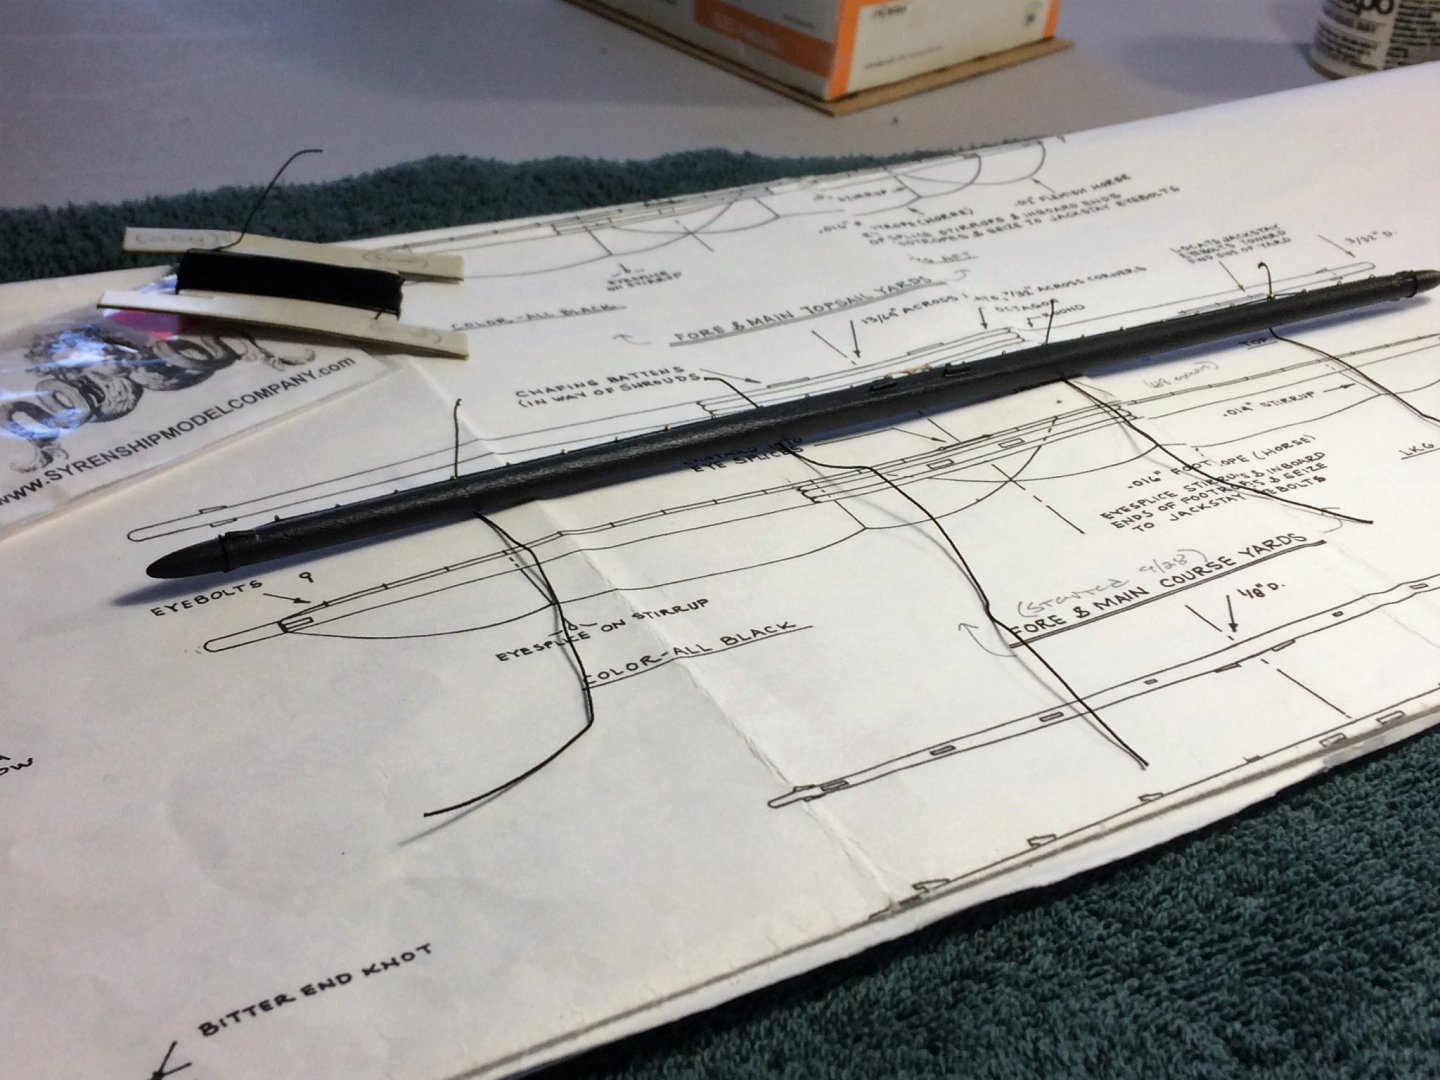
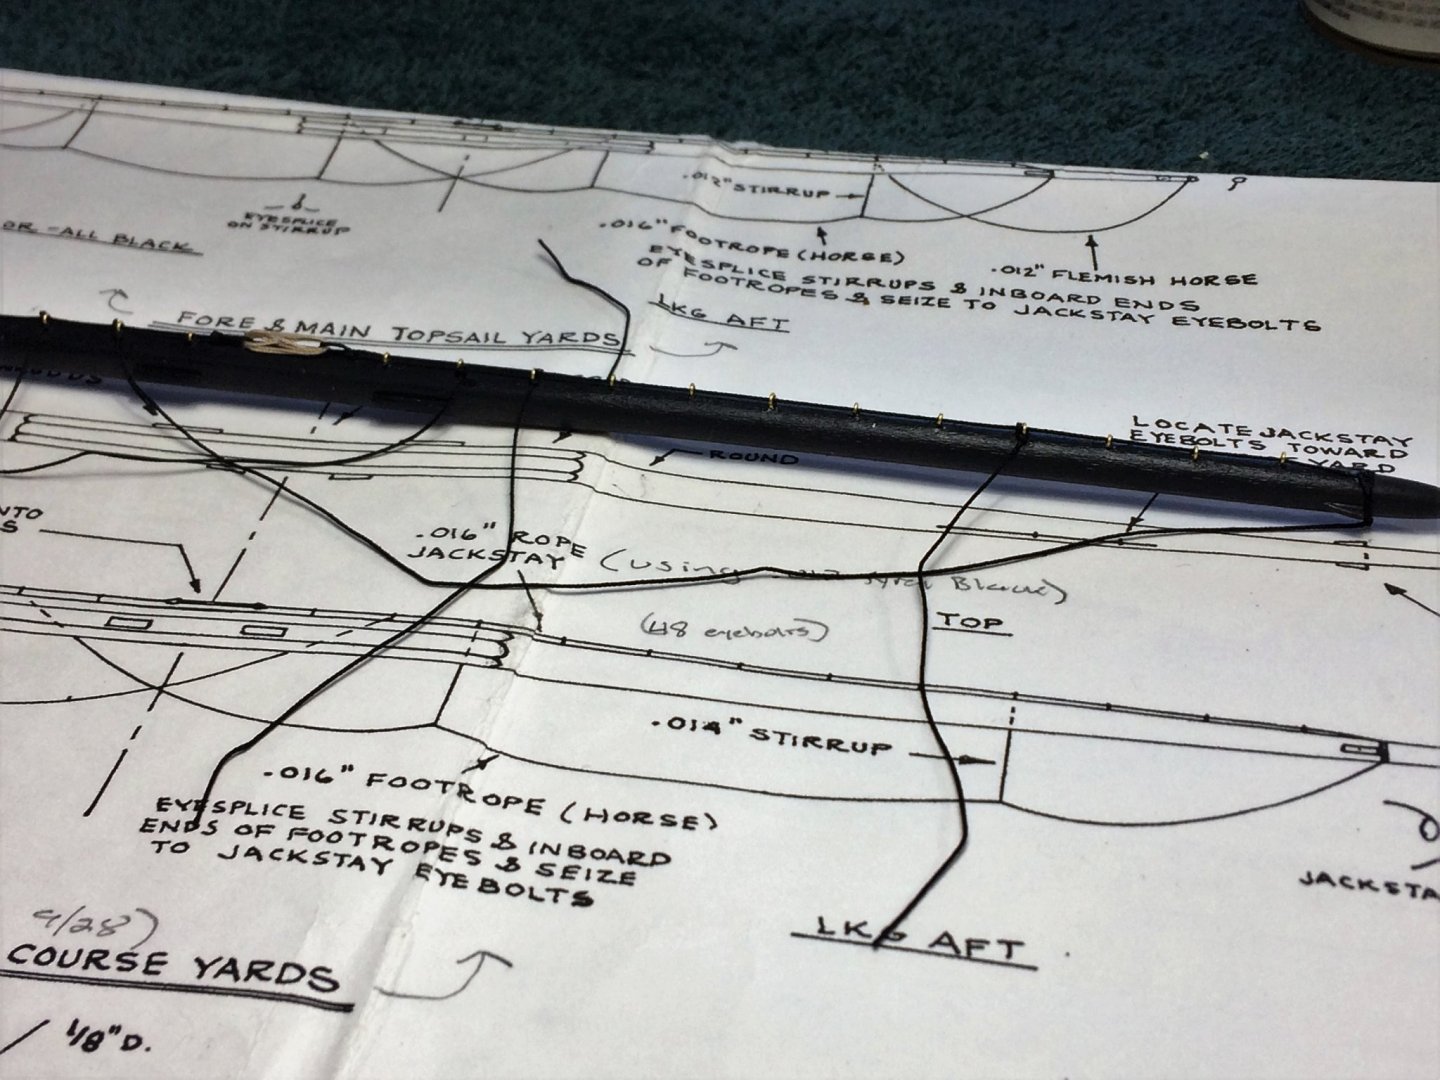
Evening, Quiet night at home, waiting for the big 2 day storm coming. Sounds like a mix of everything. 5-8 inches of snow, Ice, sleet, rain, all in about 48 hours. Of course the majority of those hours will be at work. Thankfully, I live in an area of the country that knows how to drive in the snow, well, most do, definitely not all! Gary, I actually did try the wire approach. I just couldn't get the "look" right. They looked out of sorts, kinked, and bugged the living daylight out of me. So I made another try with the rope and, I think, have some better results. Besides the Yards being built, I started the rear boat davits. Sanded the char off then decided to open up the holes. I don't know what I was thinking or drinking, but I used a way too large of a drill bit. As I drilled other holes they were cutting into the other holes. I could see It happening, and my brain is yelling at me to stop, but the fingers kept on going for just a second too long. Ended up filling them with thick CA to fill the holes. Will let that sit and try again with an appropriate bit! Moving on with the Yards. Topsail yards have been shaped and eyebolts installed. There a little wonky, but I remember somewhere in the plans, It mentions the line of eyebolts should hug the front side. I started there, but would slowly wander into the middle so I wouldn't split the yard. These seem a bit easier to build after doing the Course yards. Eventually painted and strung with Syren rope. Foot rope stirrups installed. Foot ropes strung and stirrups tied in. These look better than the Course yards, I think. I still have some "bow" in the stirrups, but no where near as much in the Course yards. Flemish Horses tied in. Not too bad for a rook. Thanks for watching! Tom E


-
Awesome! Count me in! I'll make the popcorn. Any one bring the beverages? Tom E
-
Nice to see you back at it J. Heading over to Popeyes build right now to follow as well. This should be fun to watch! Tom E
- 211 replies
-
- 2
-
-
- agilis
- steingraeber
- (and 1 more)
-
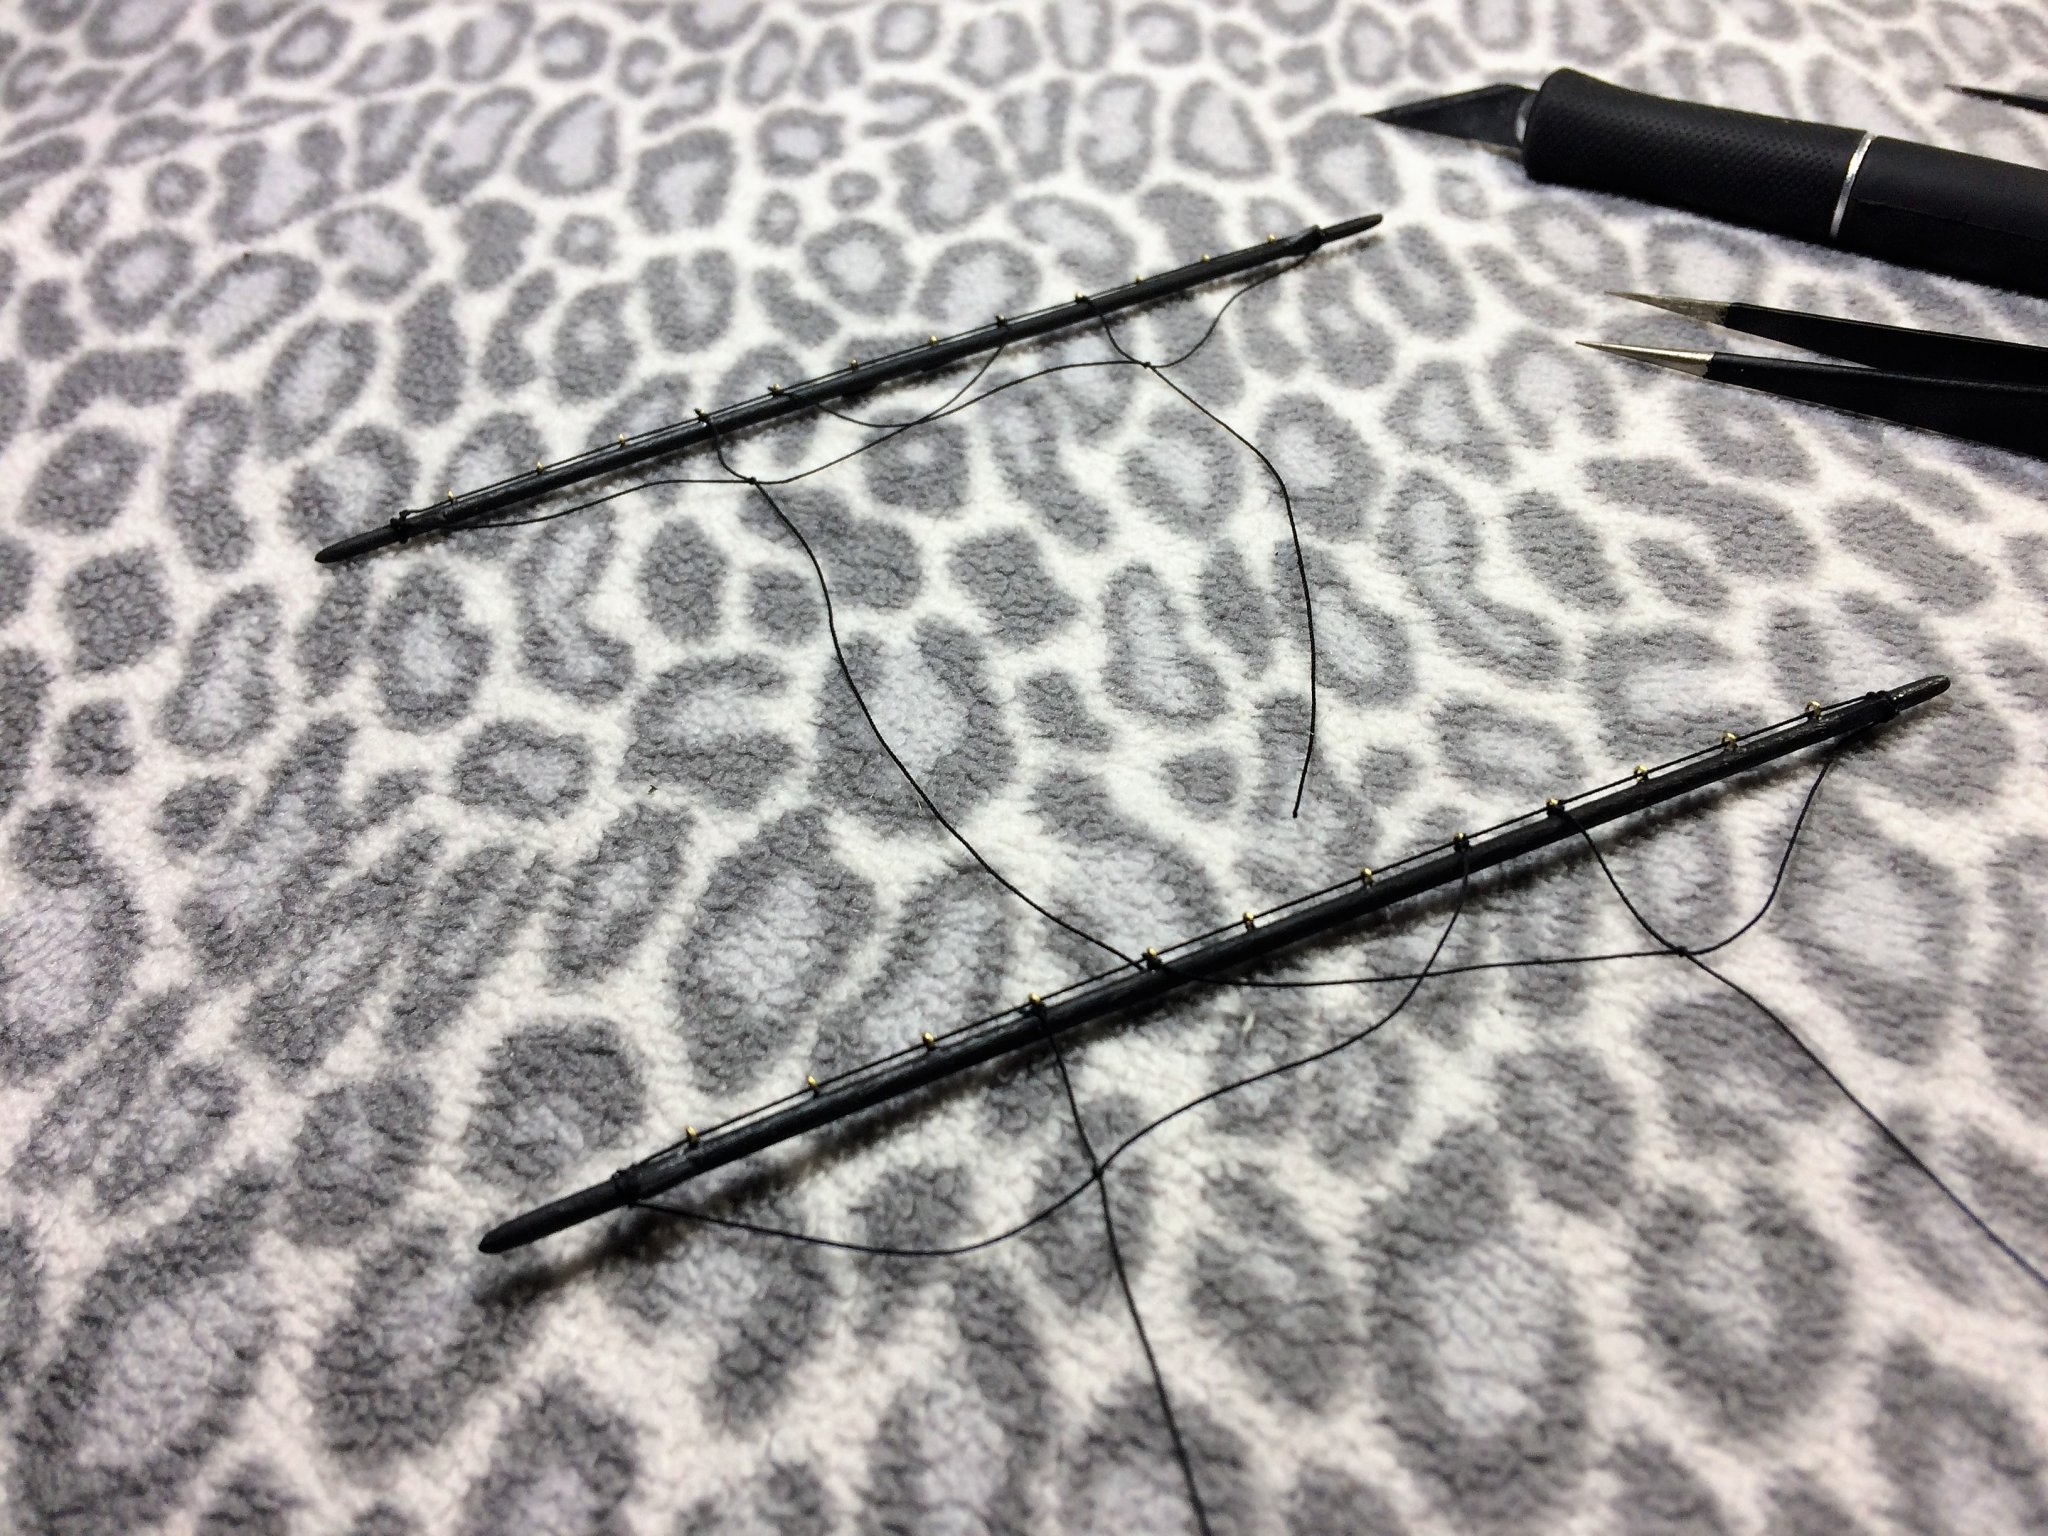
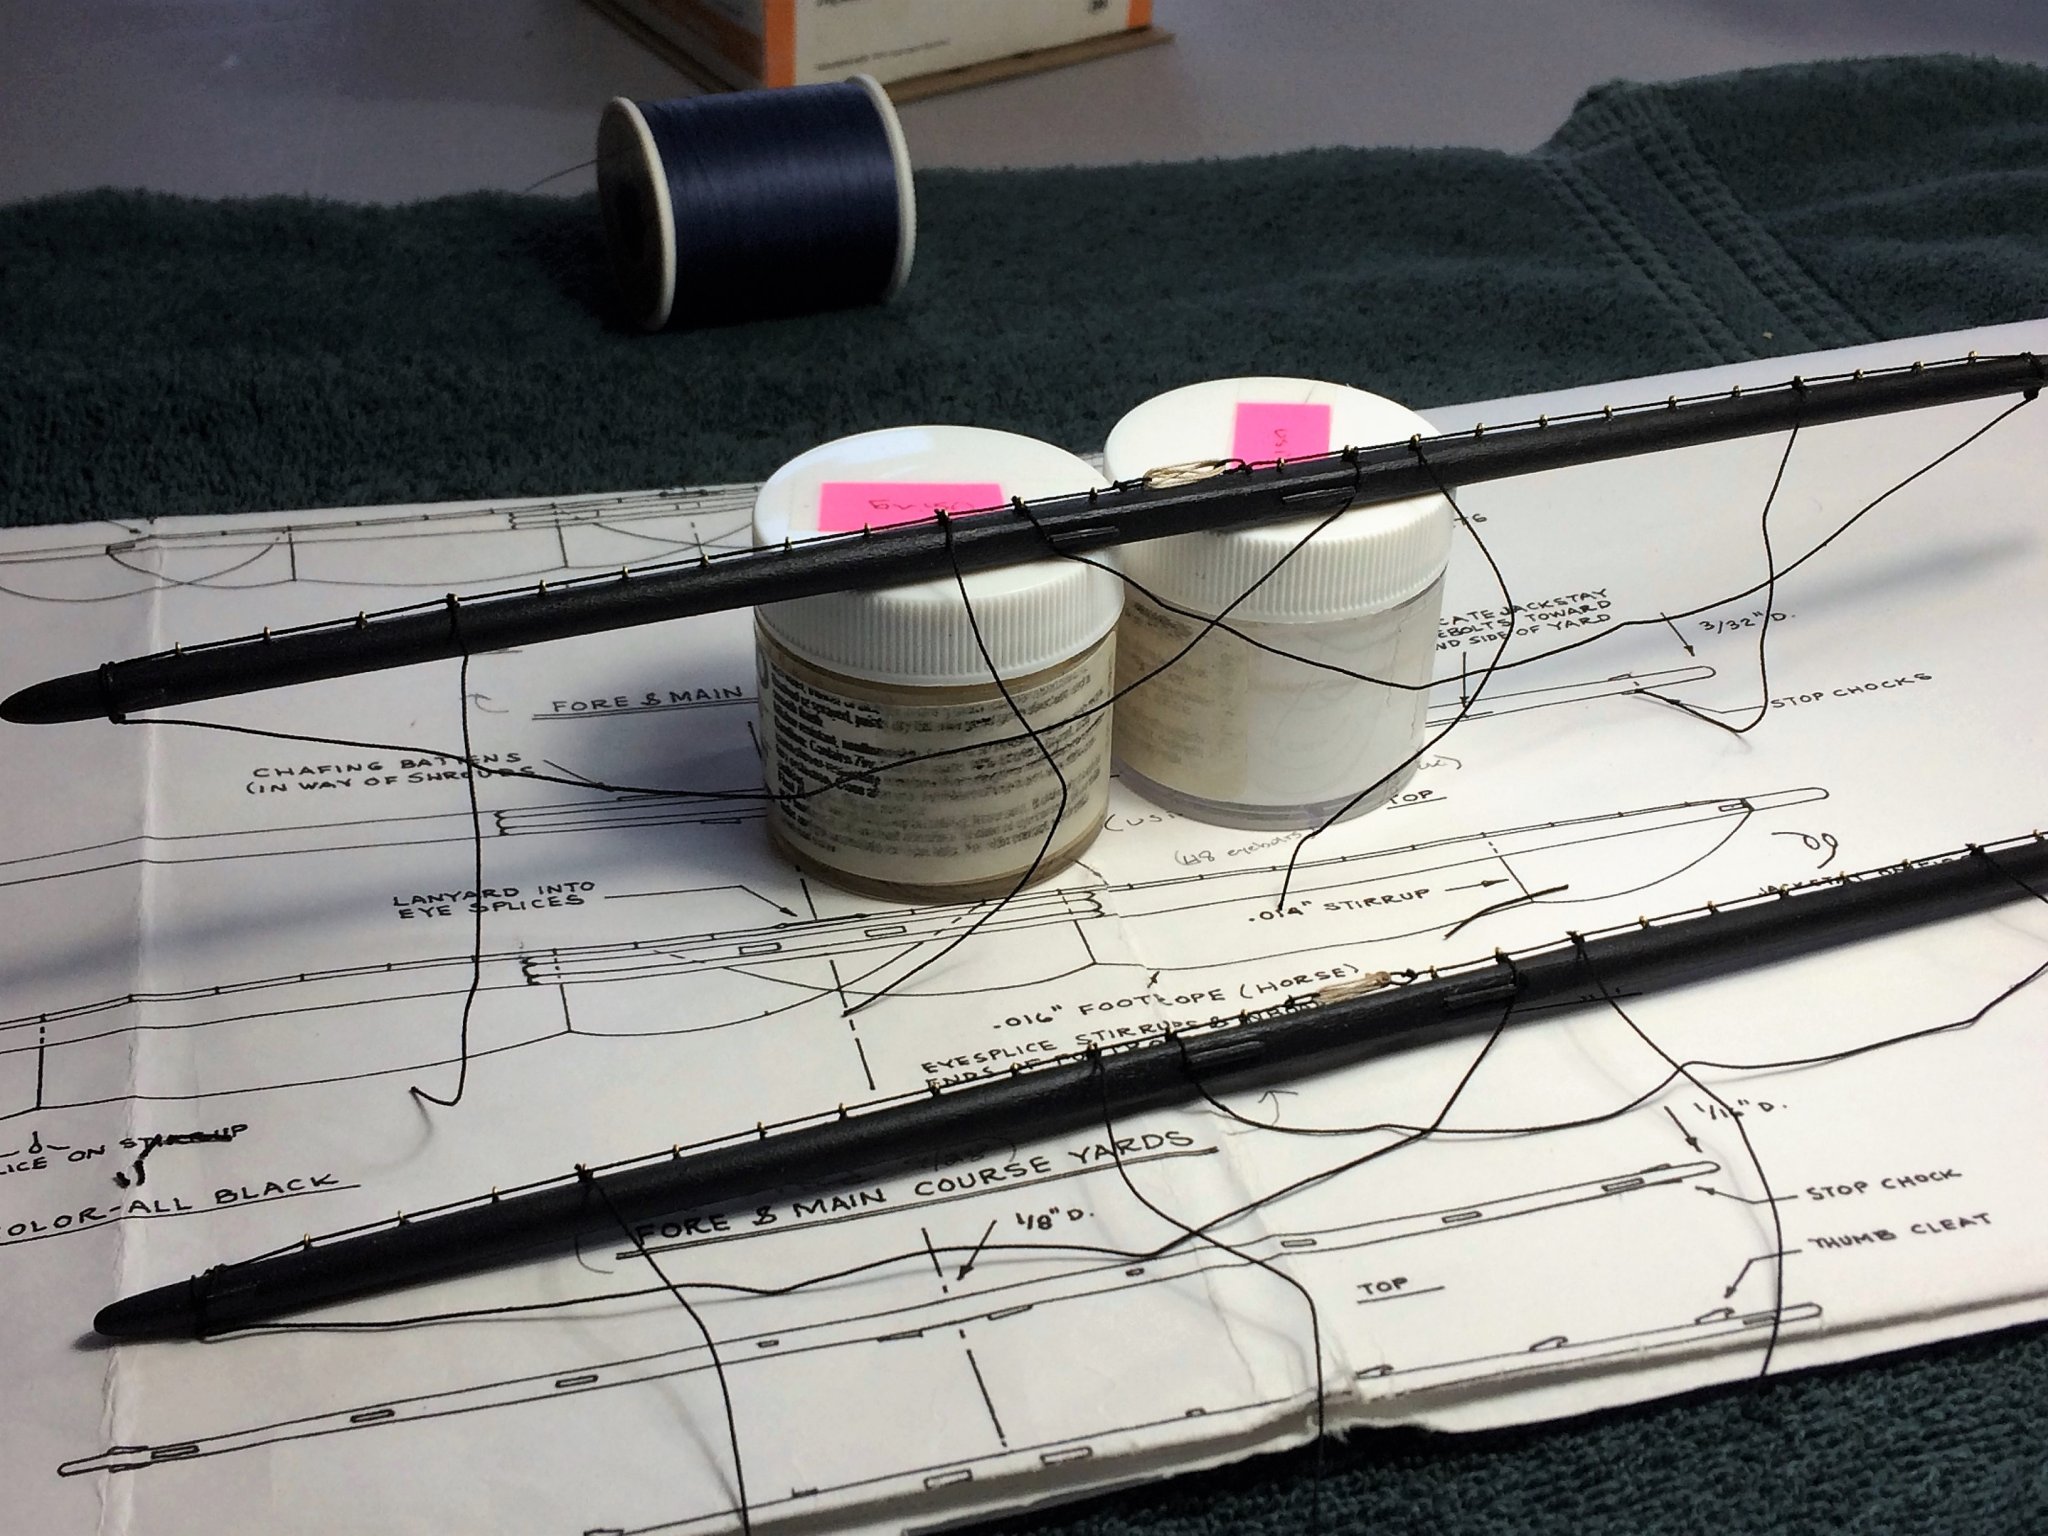
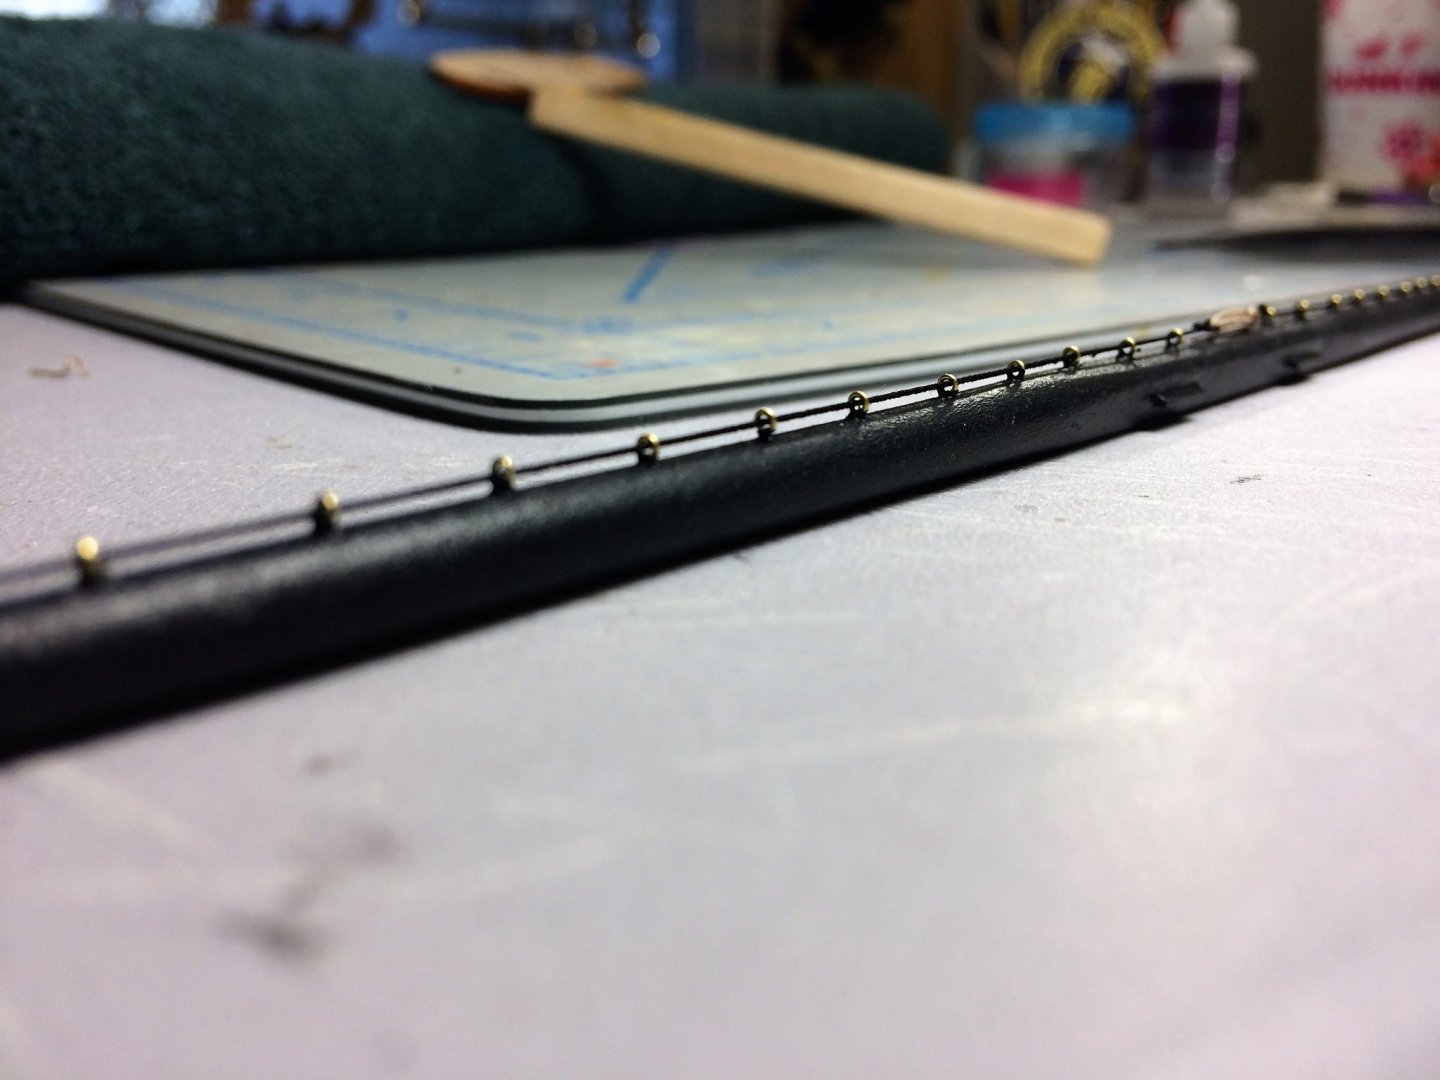
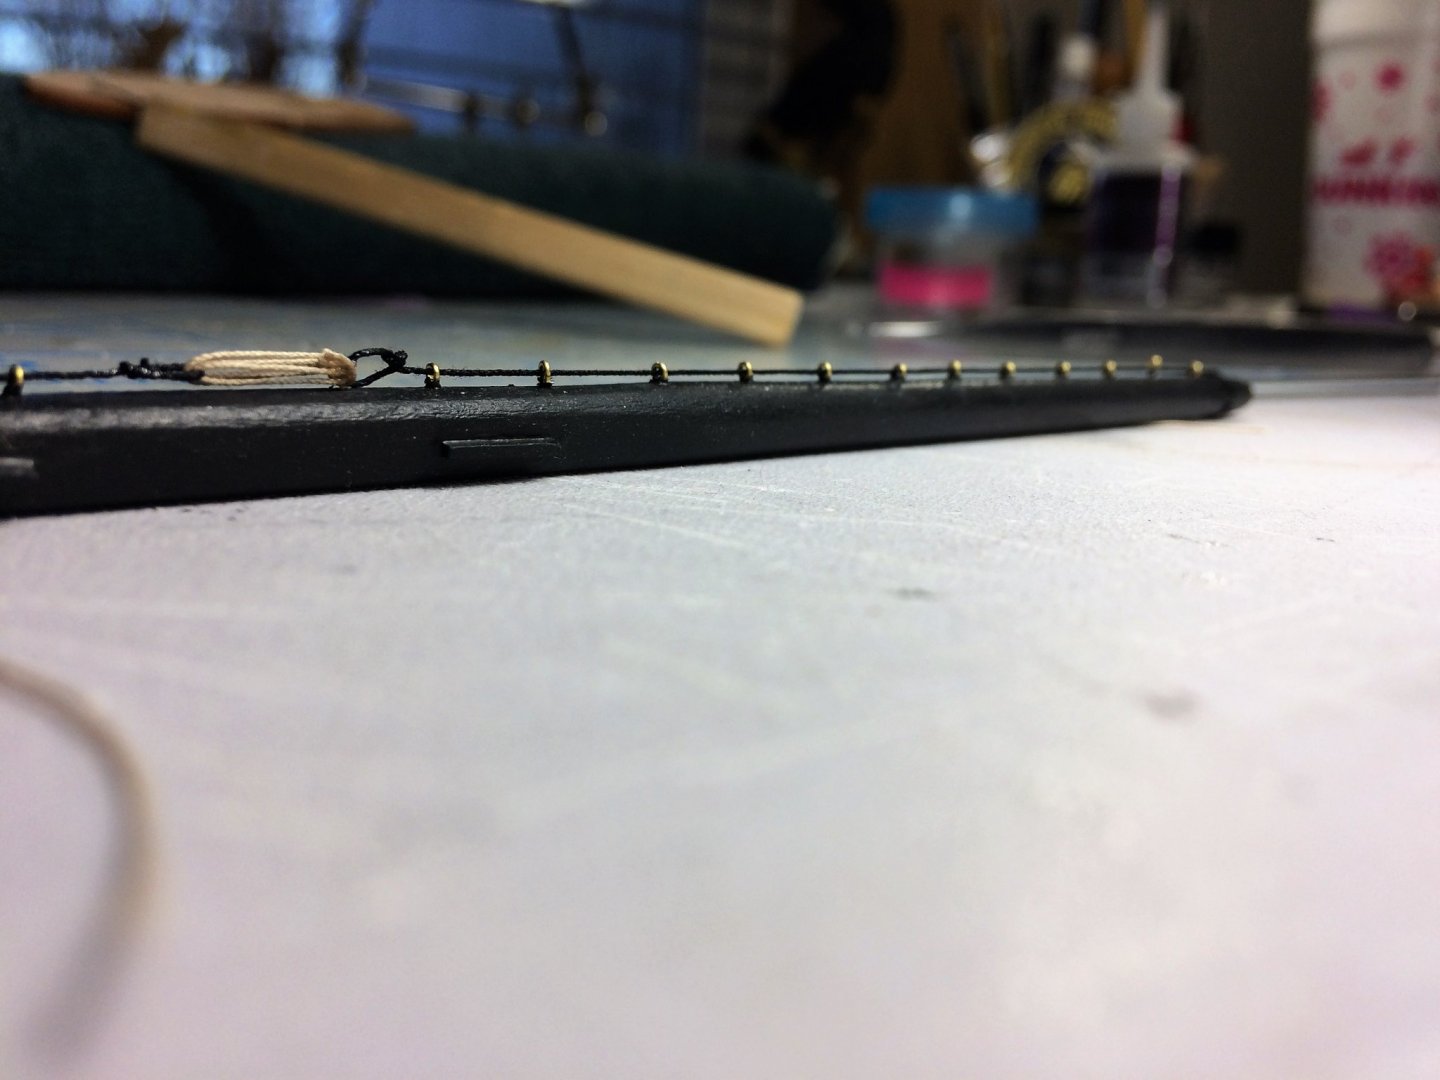
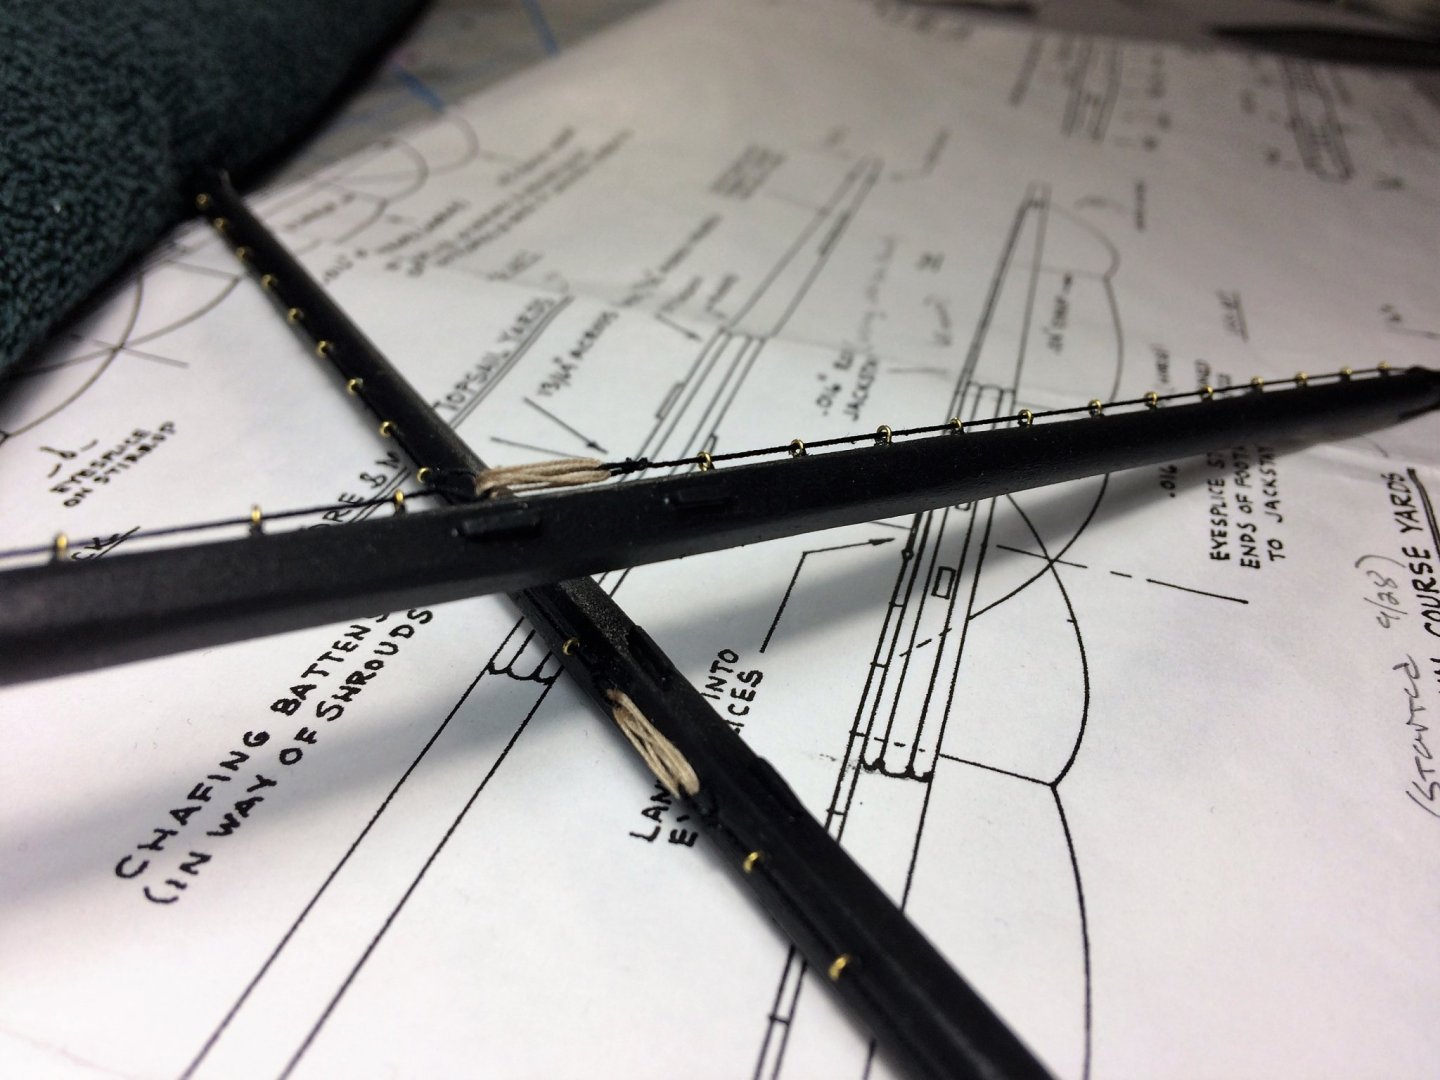
Evening, Already bored with the work week and the mind drifts to the Shipyard, and since I'm not actually building, thought I'd share an update. When we last saw the Fore and Main Course Yards the Stirrups were not attached to the footropes yet. I was finding it difficult to get the length to look right. Tried building Jigs and other knick-knacks with no success. What I finally did was so simple. In the below picture see how the Yards are laying on the blanket? The "drag" from the rope laying on the cloth kind of grabbed hold and made it easier to work with. Not a perfect fix, but it worked for me. In the end...…….. Still working on a good length for those stirrups! I continued to work on the Spritsail Yard as well. From working on the Main Yards, I found it easier to form the bits needed. As towards placement, I followed the plans. Once I mark the centerline on the yard, everything kind of falls into it's place. These may look a bit bulky but a good sanding would be last. That's where most of the shaping is done. Looking much better. Eventually primed and several coats of Hull Spar black. There's something about pics online. The Yard is not as chunky as it looks in pics. Pictures must add 30 pounds to everything! In the end, I'm happy with the results. This will eventually will get woven onto the Bowsprit. They may be a bit later. Don't wanna snap it off with one wrong arm swing reaching for something! Thanks for watching! Tom E


-
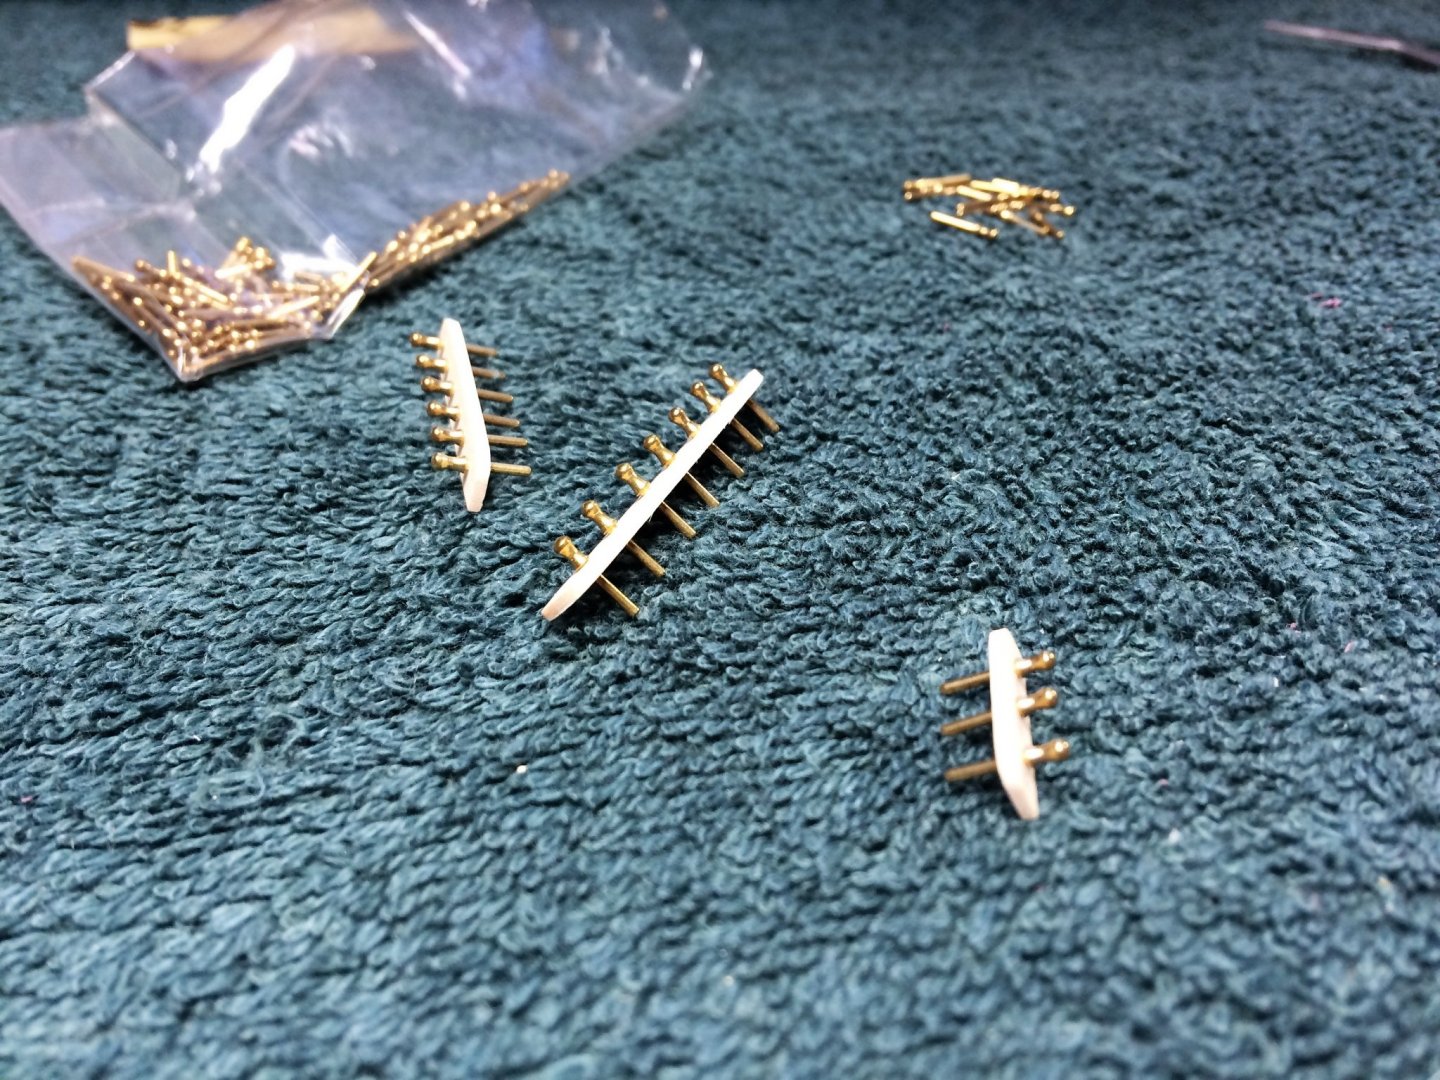
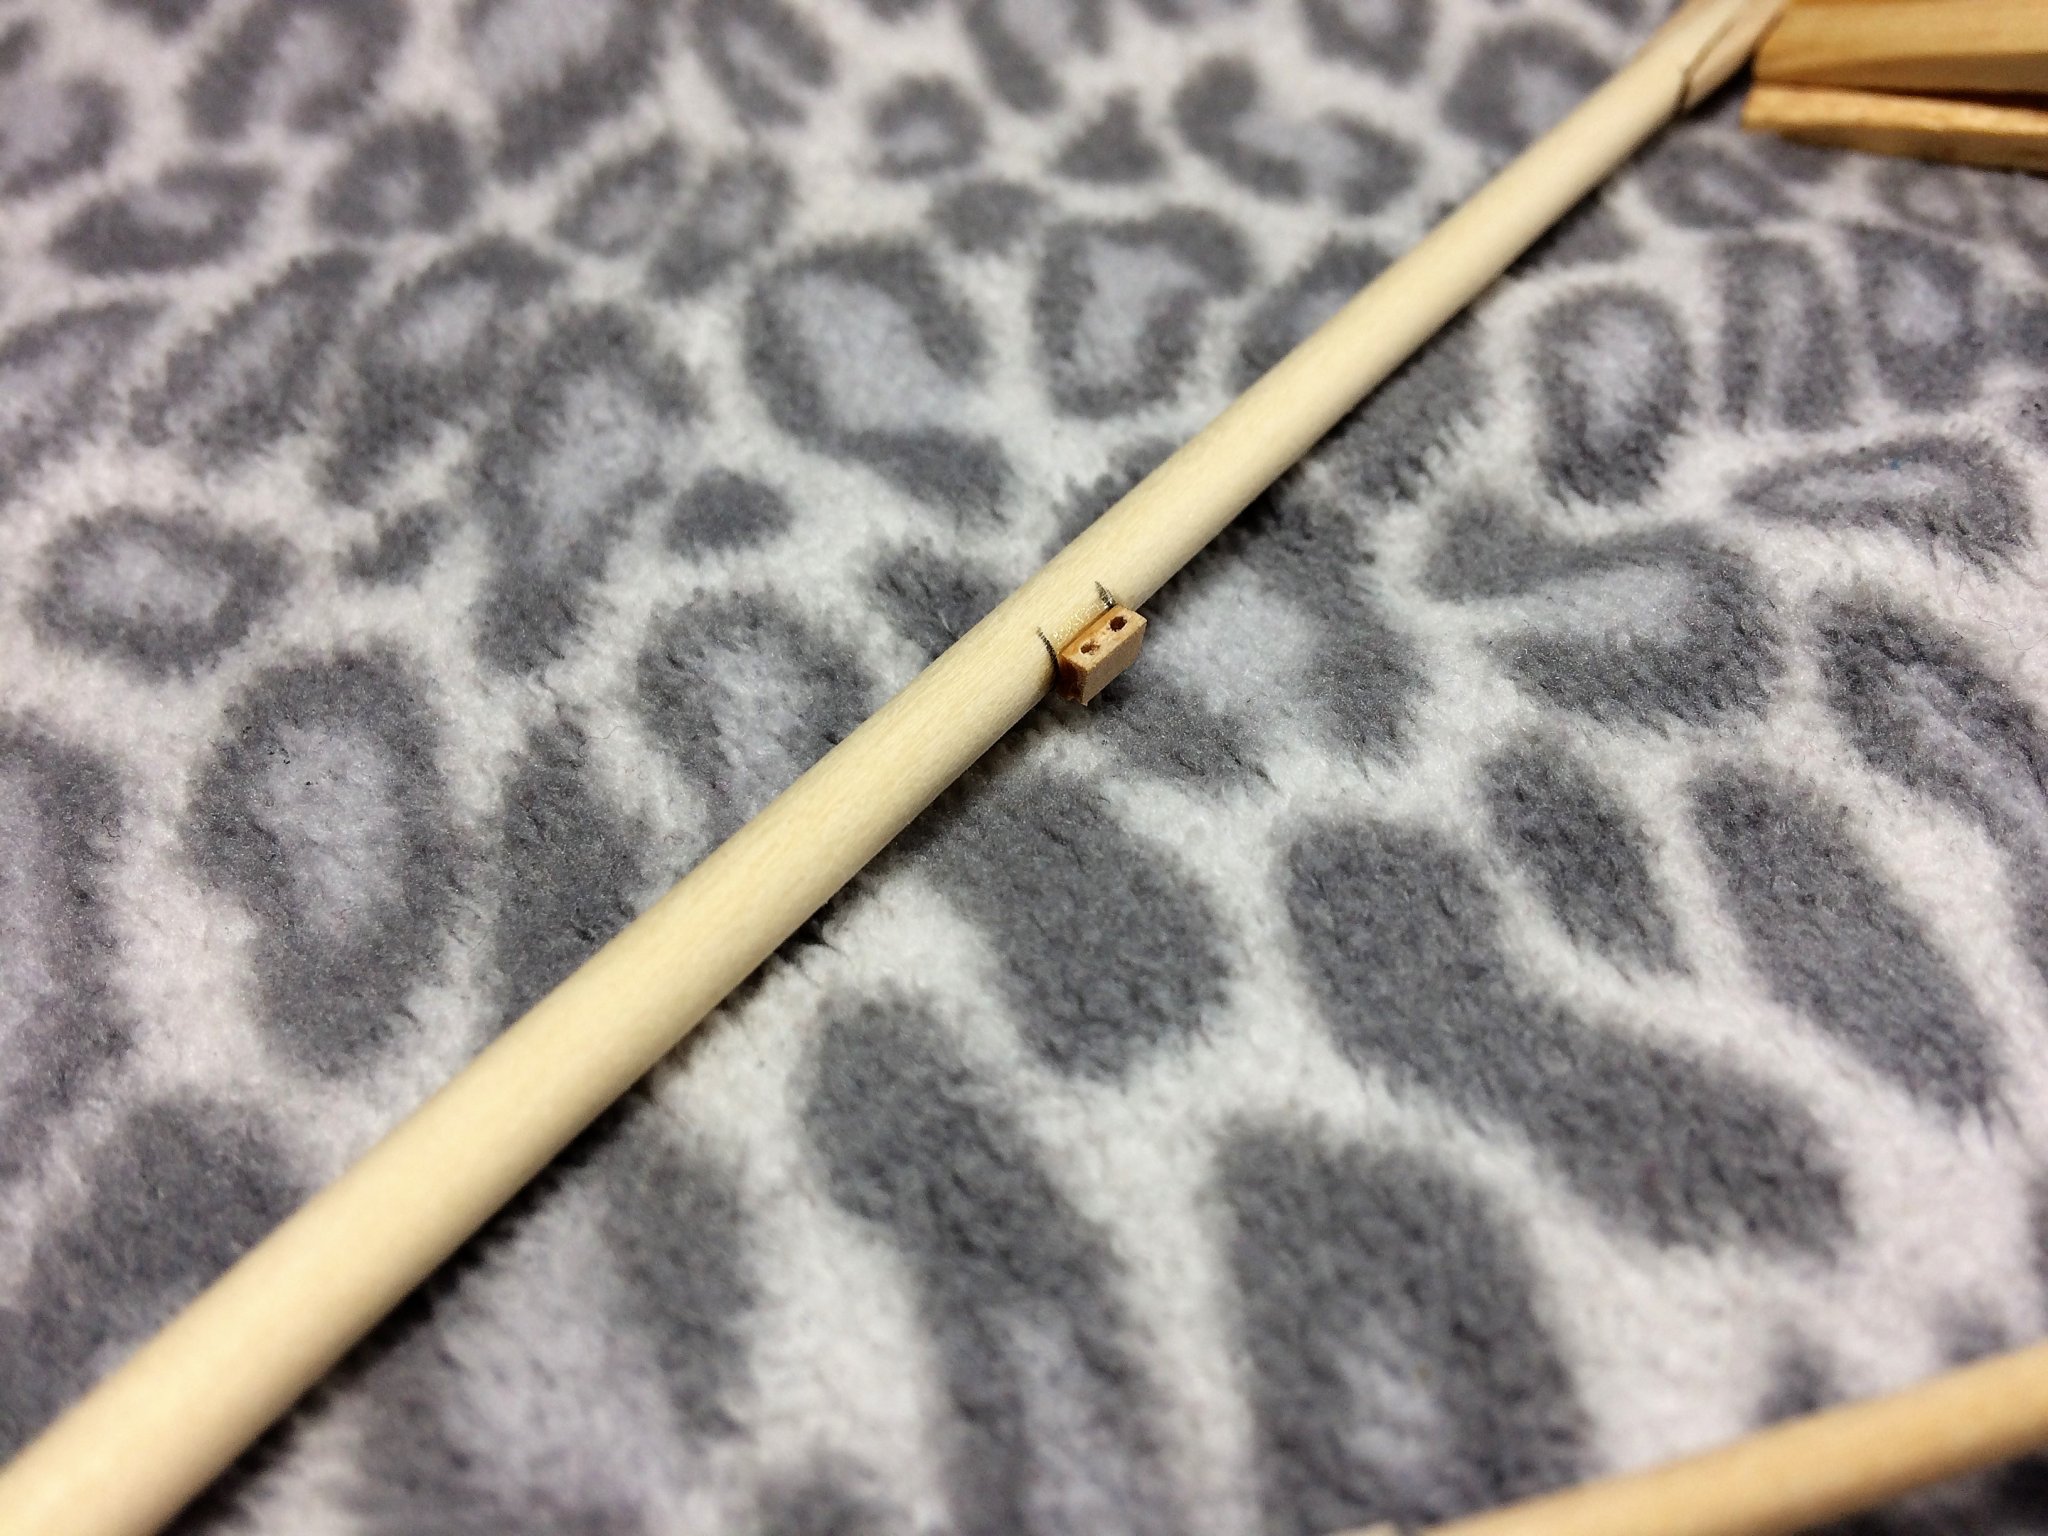
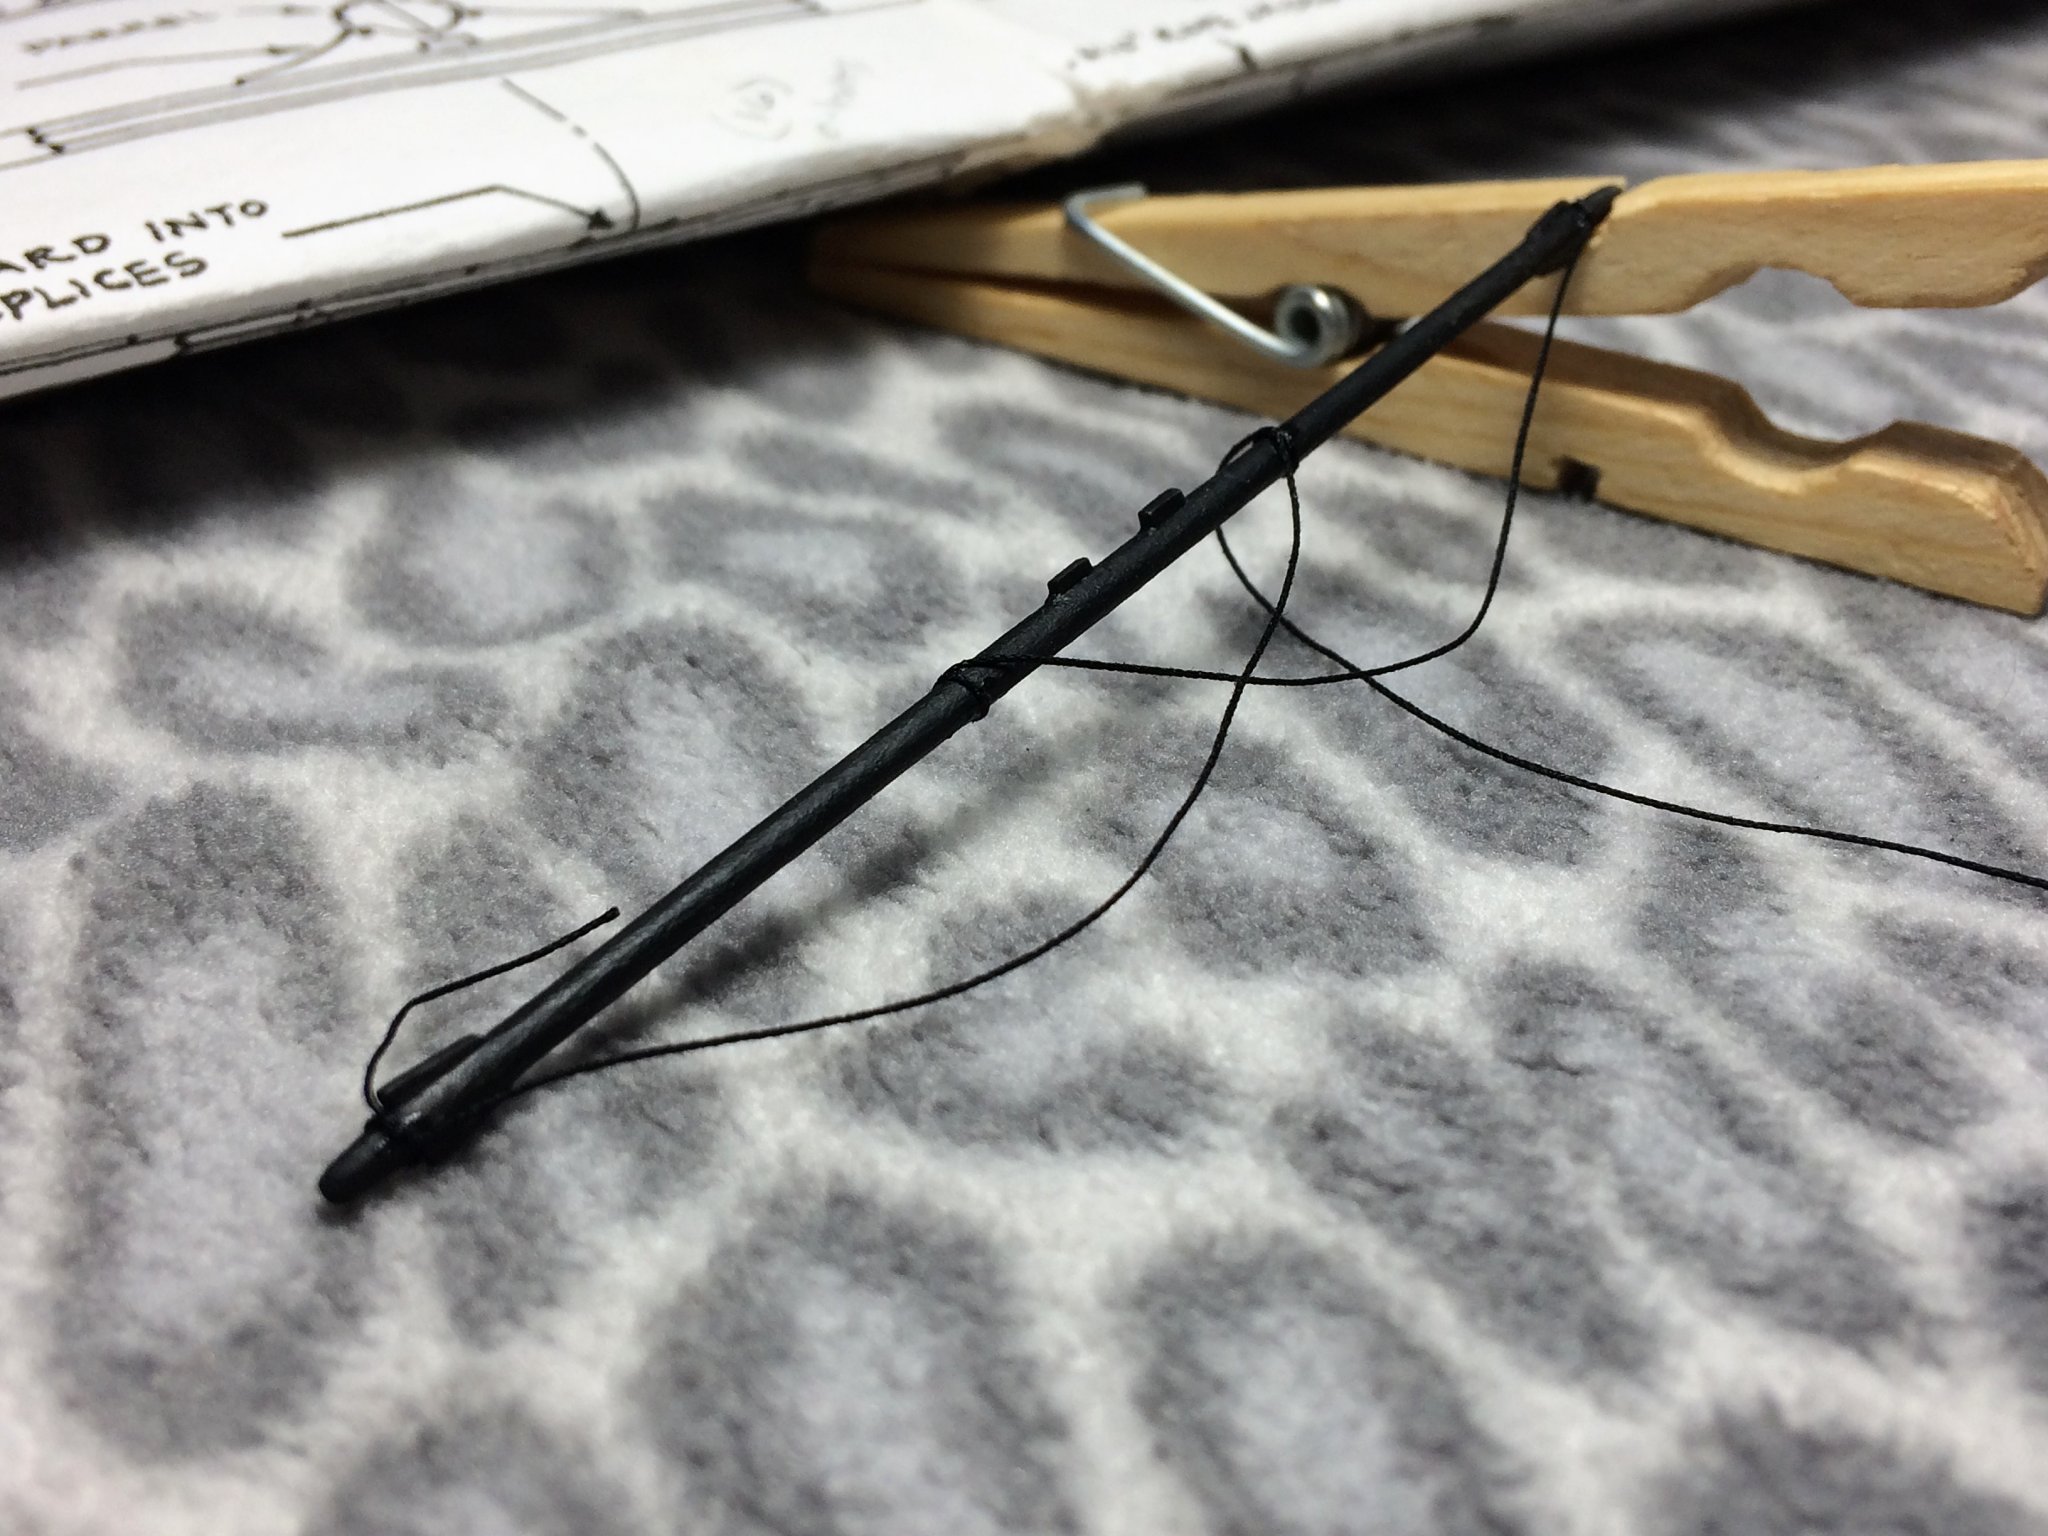
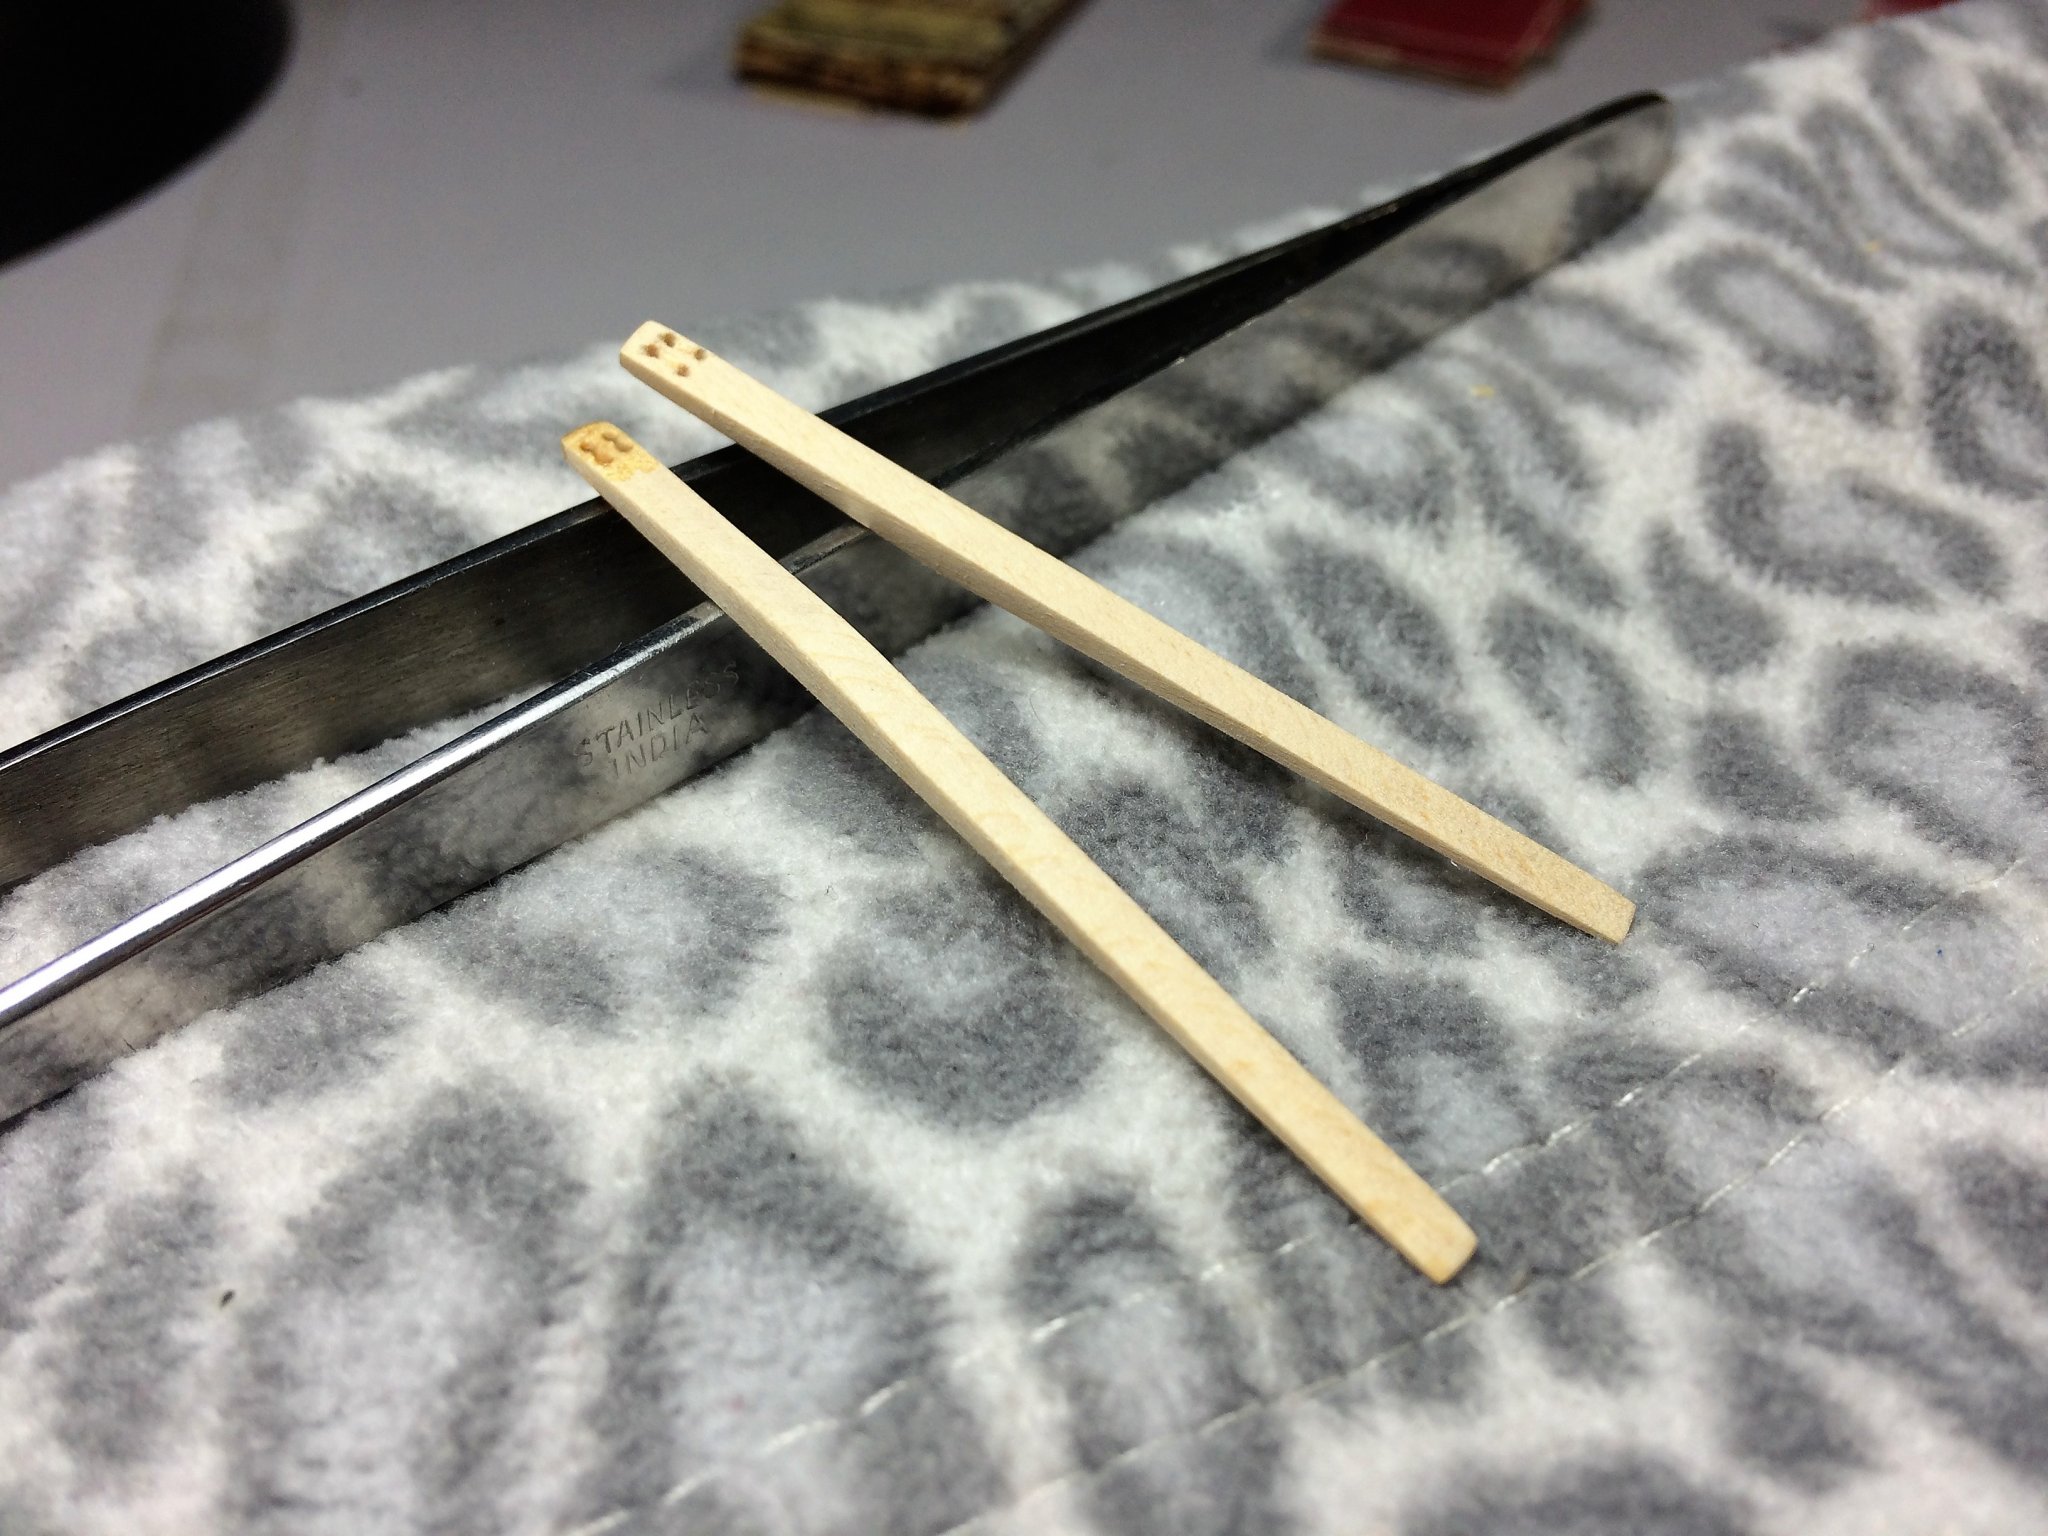
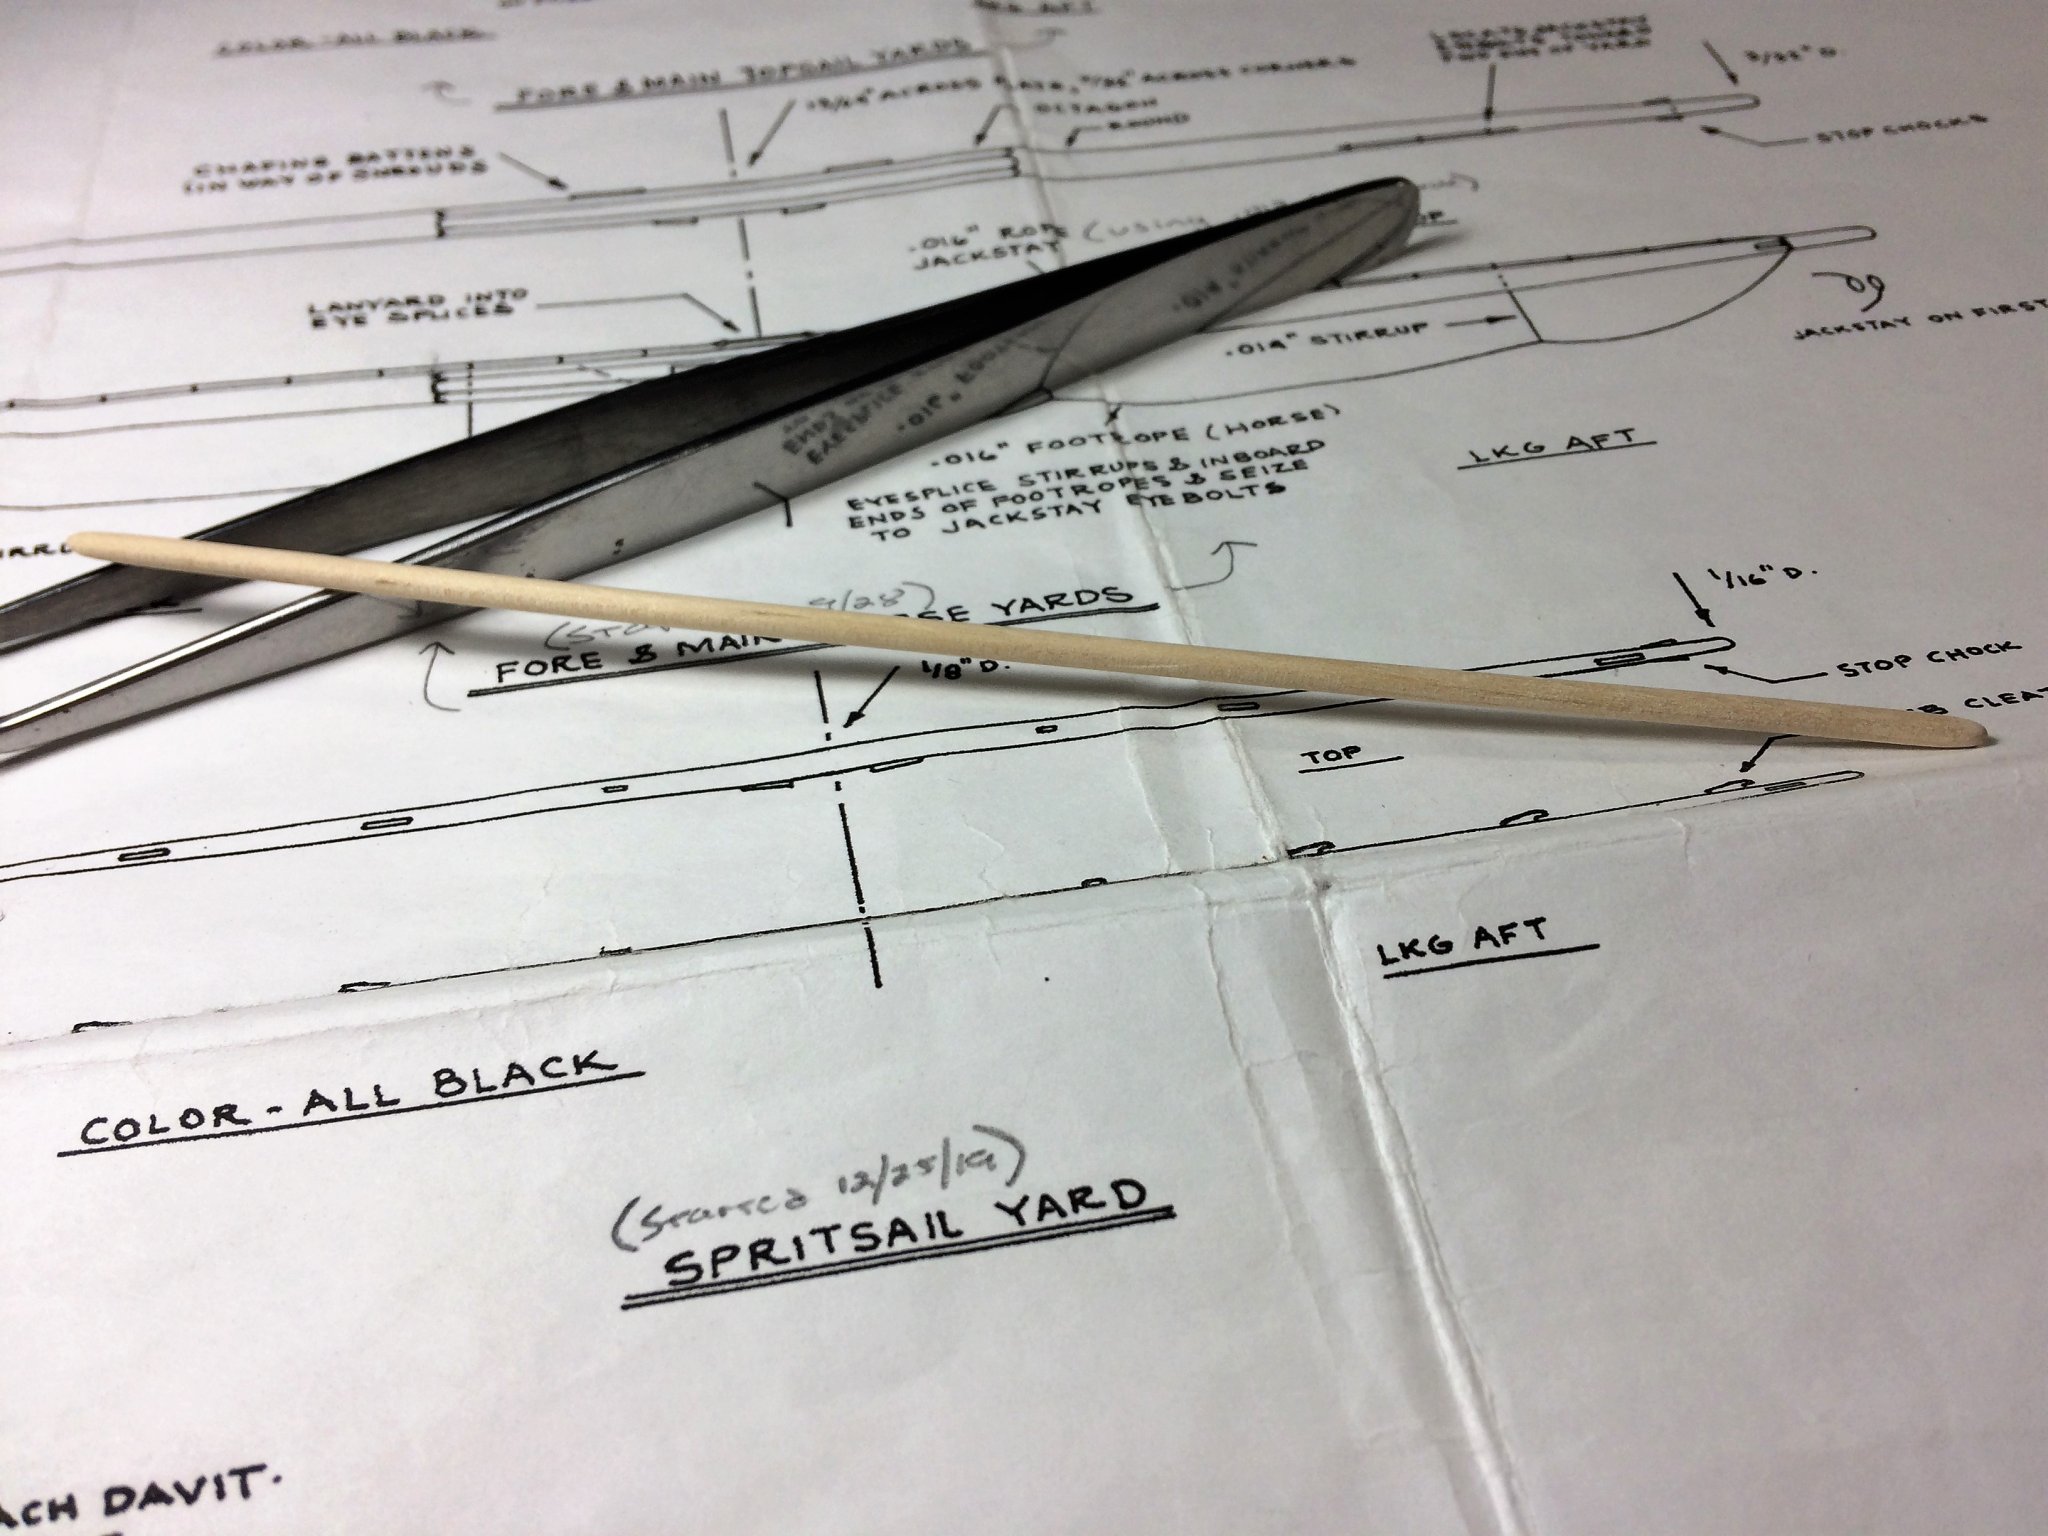
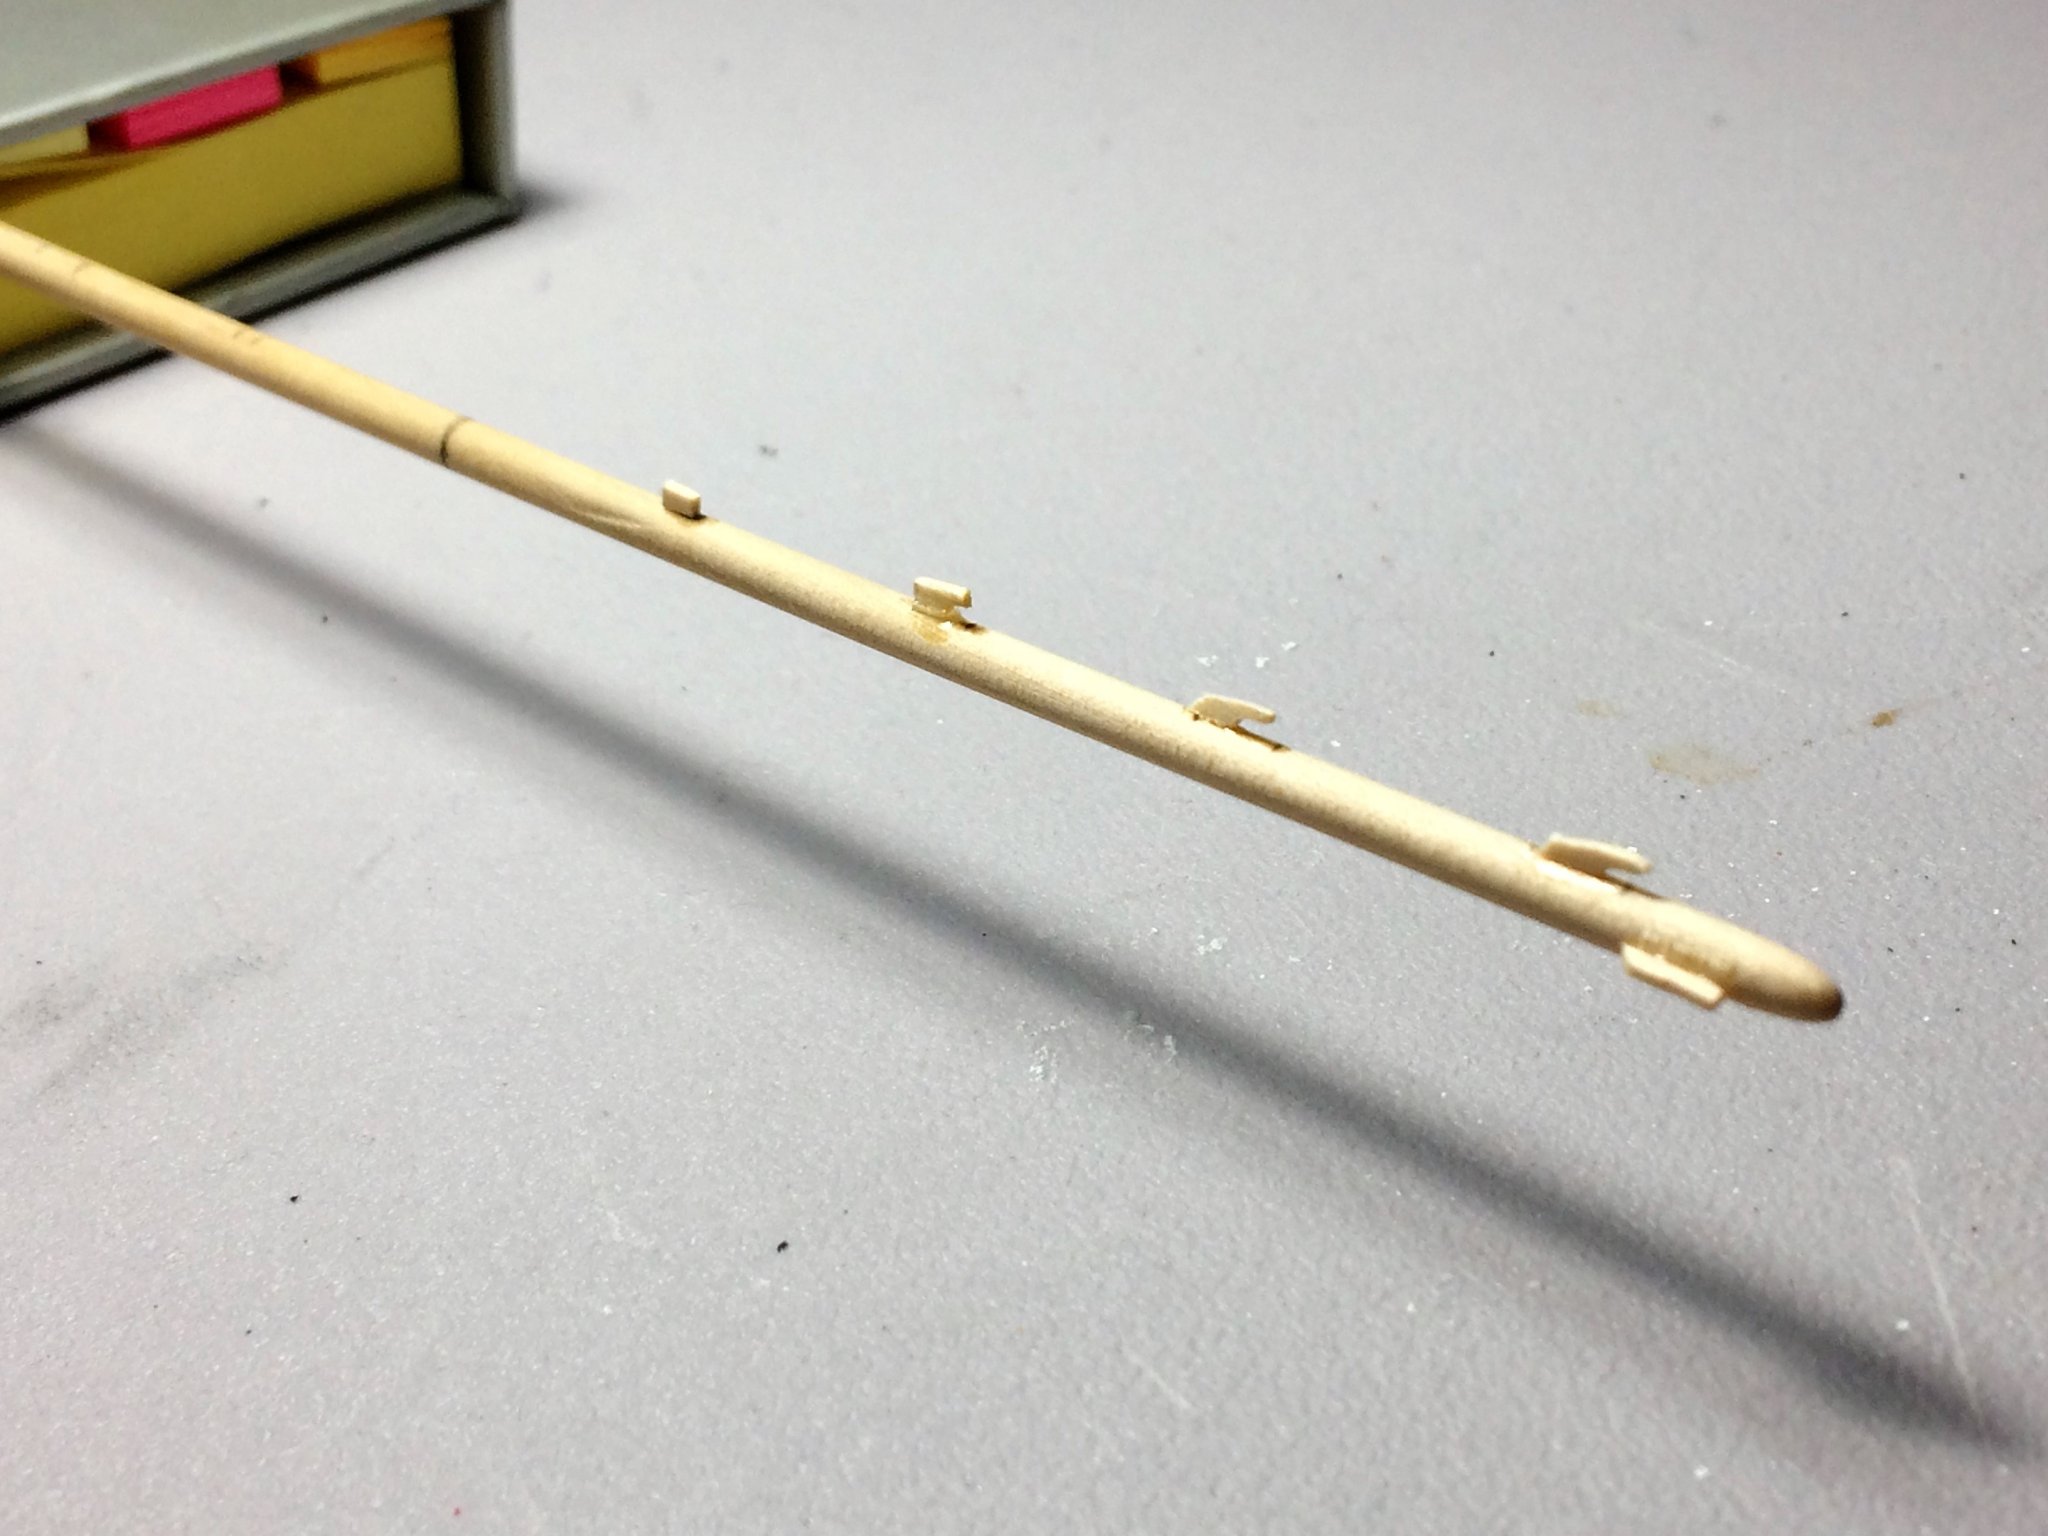
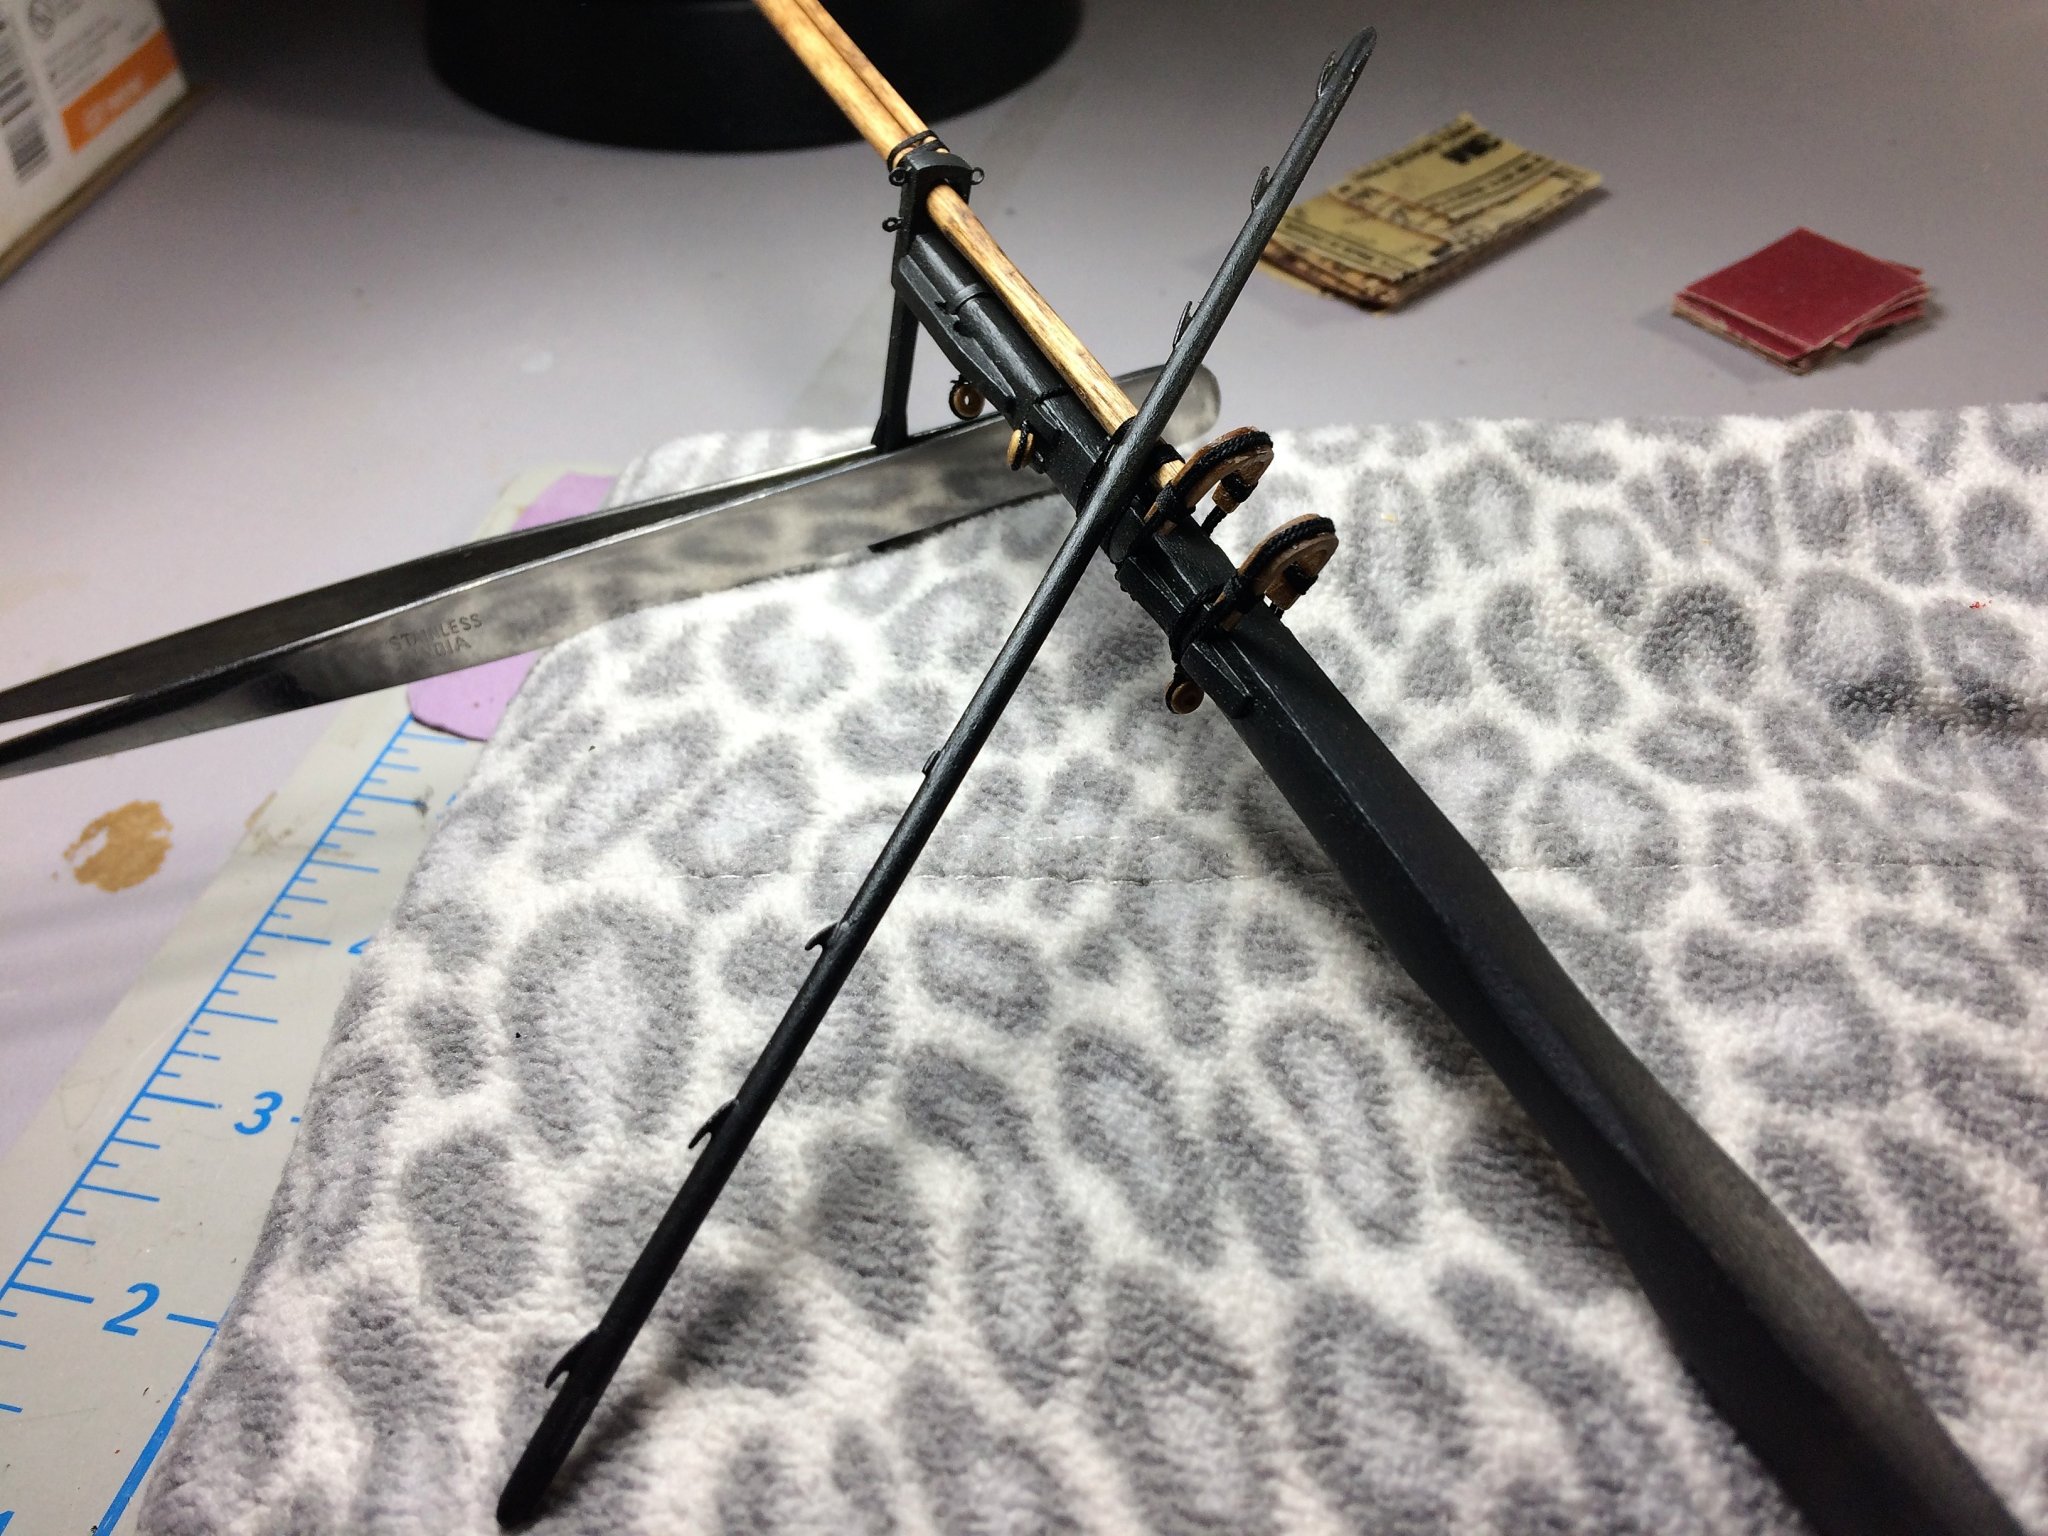
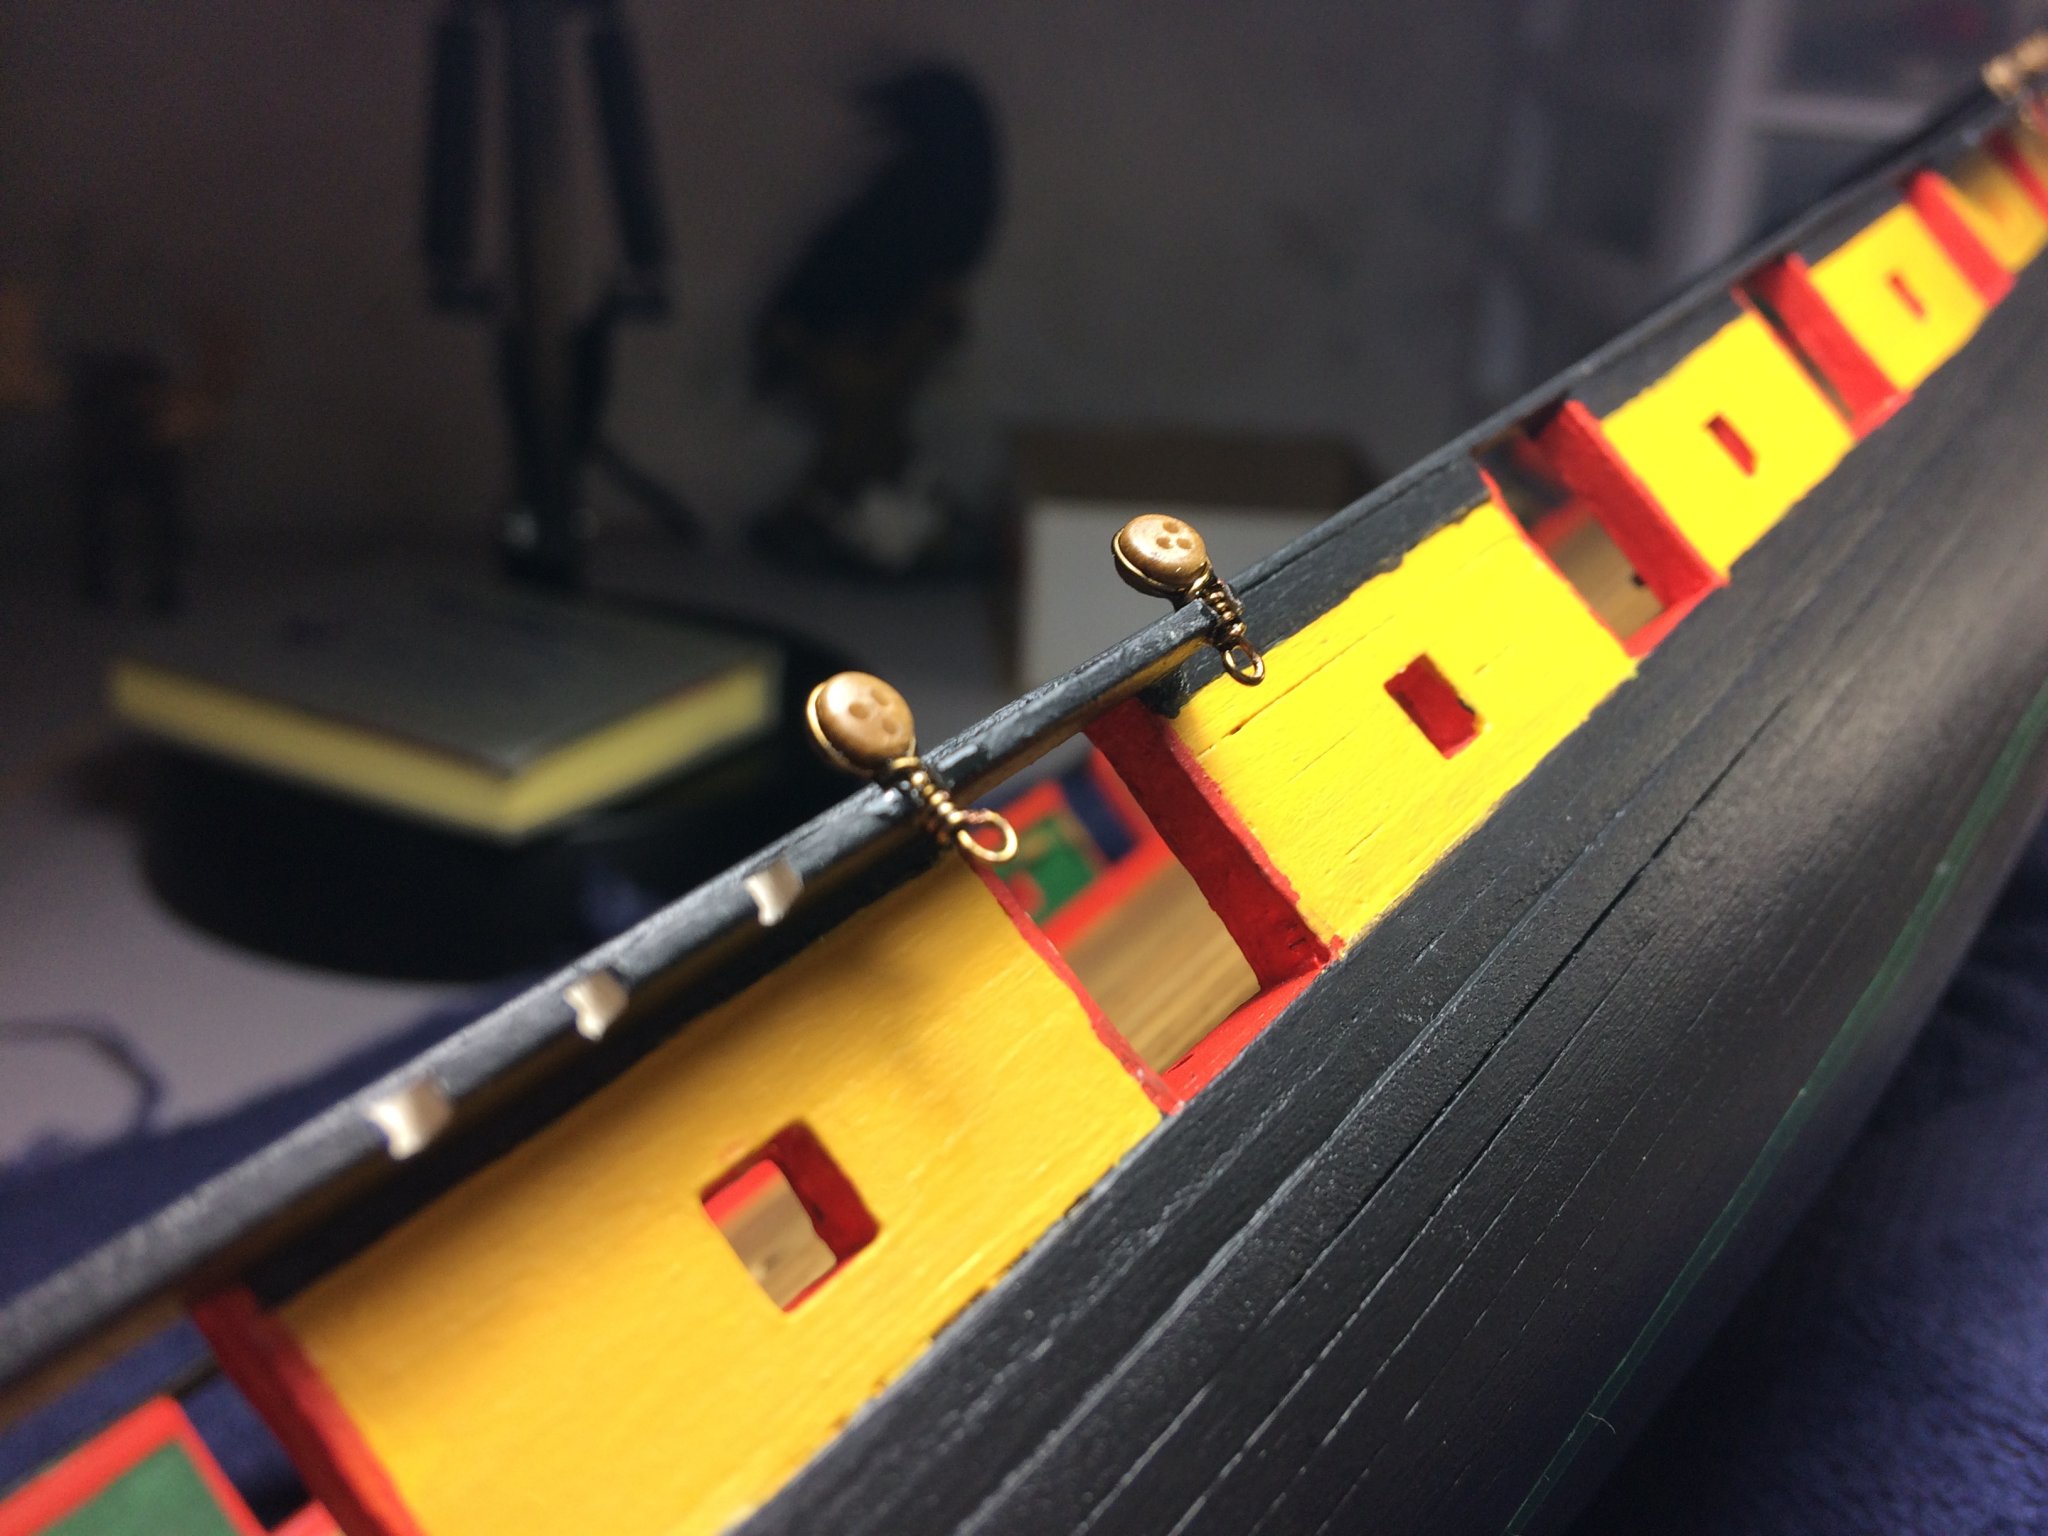
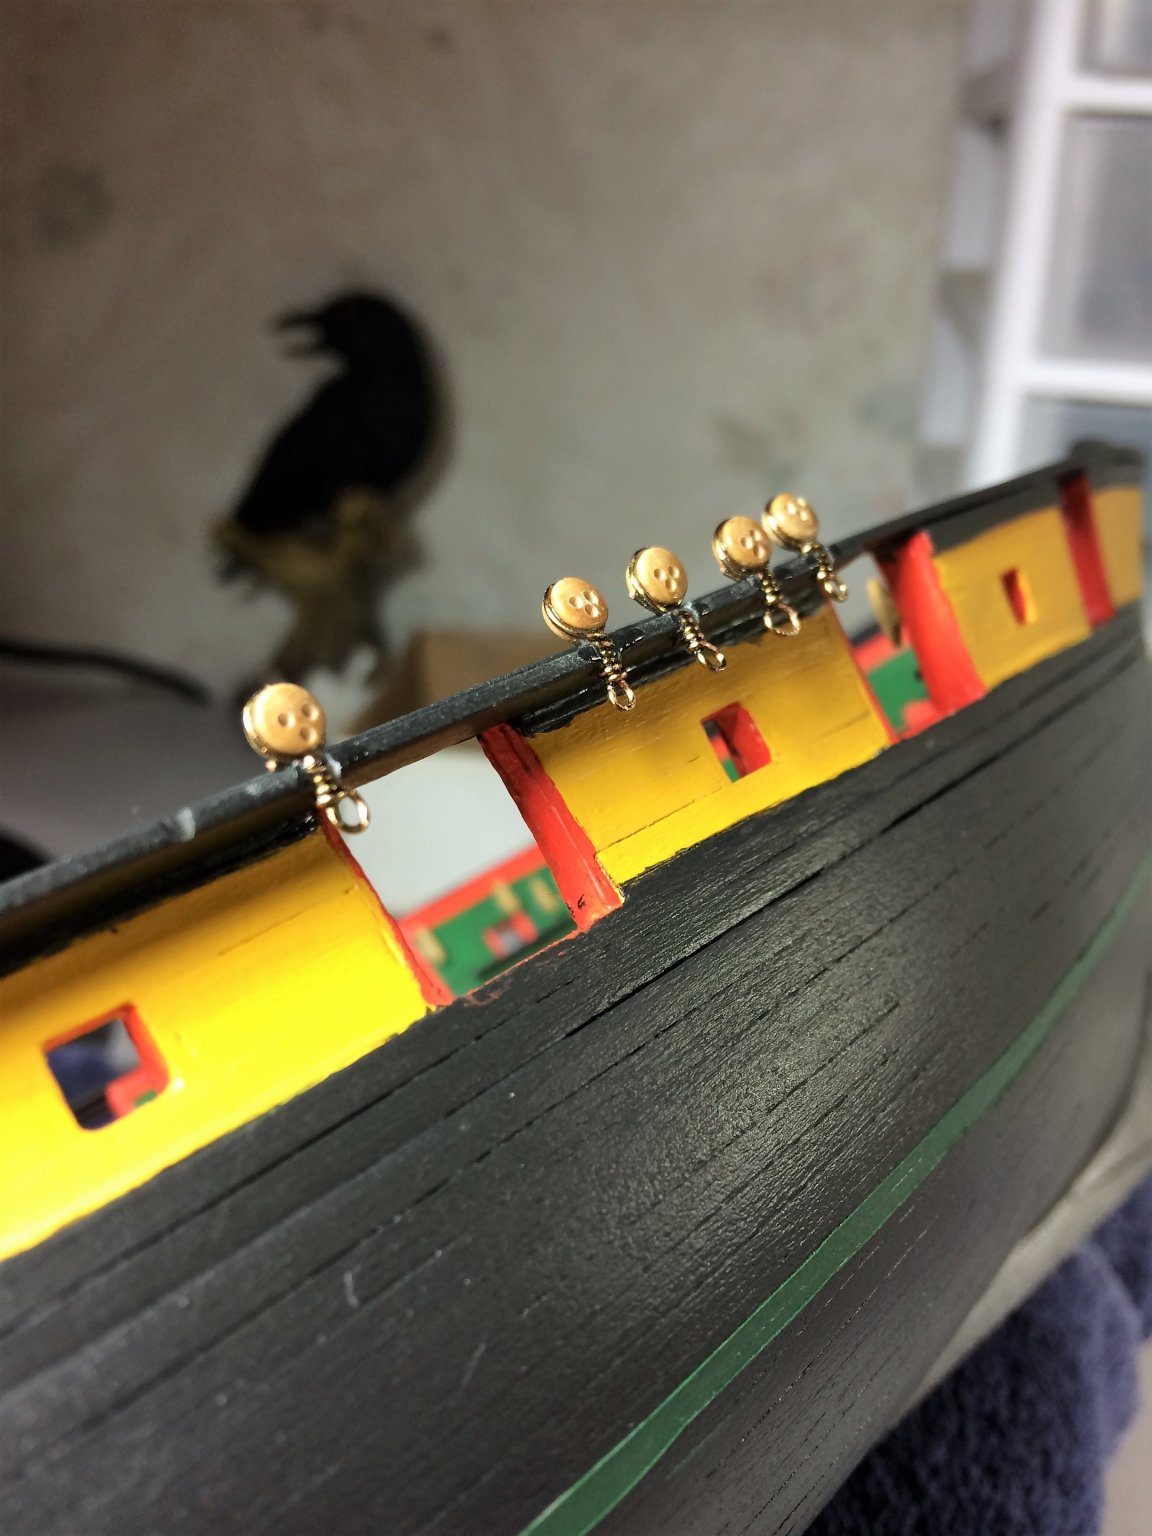
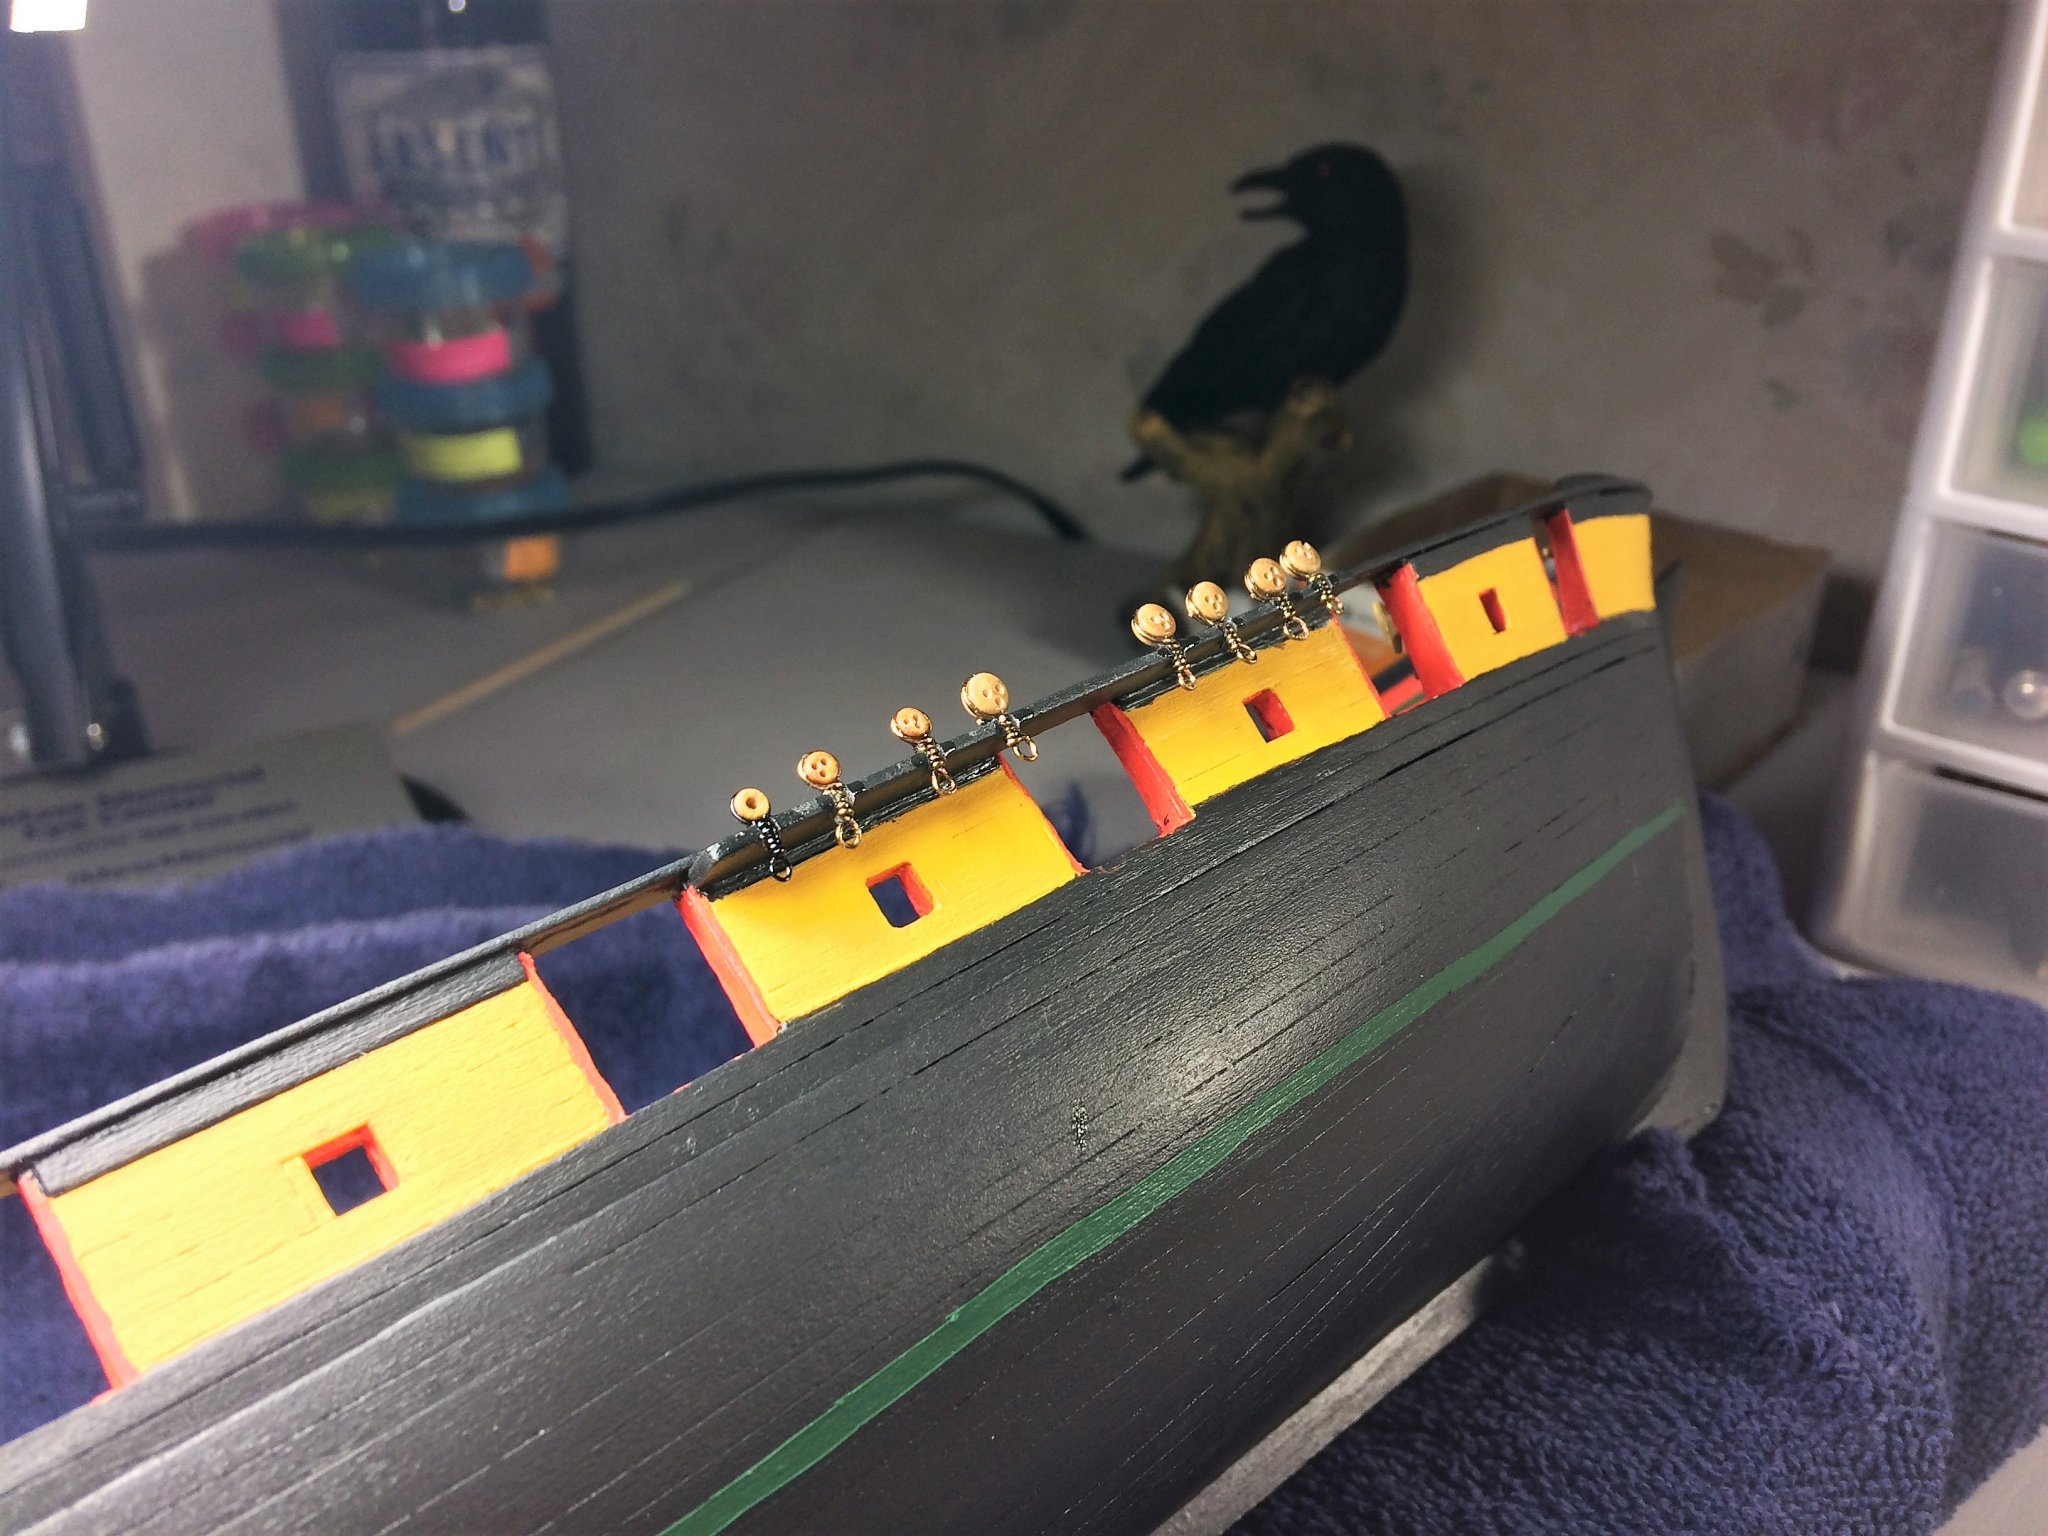
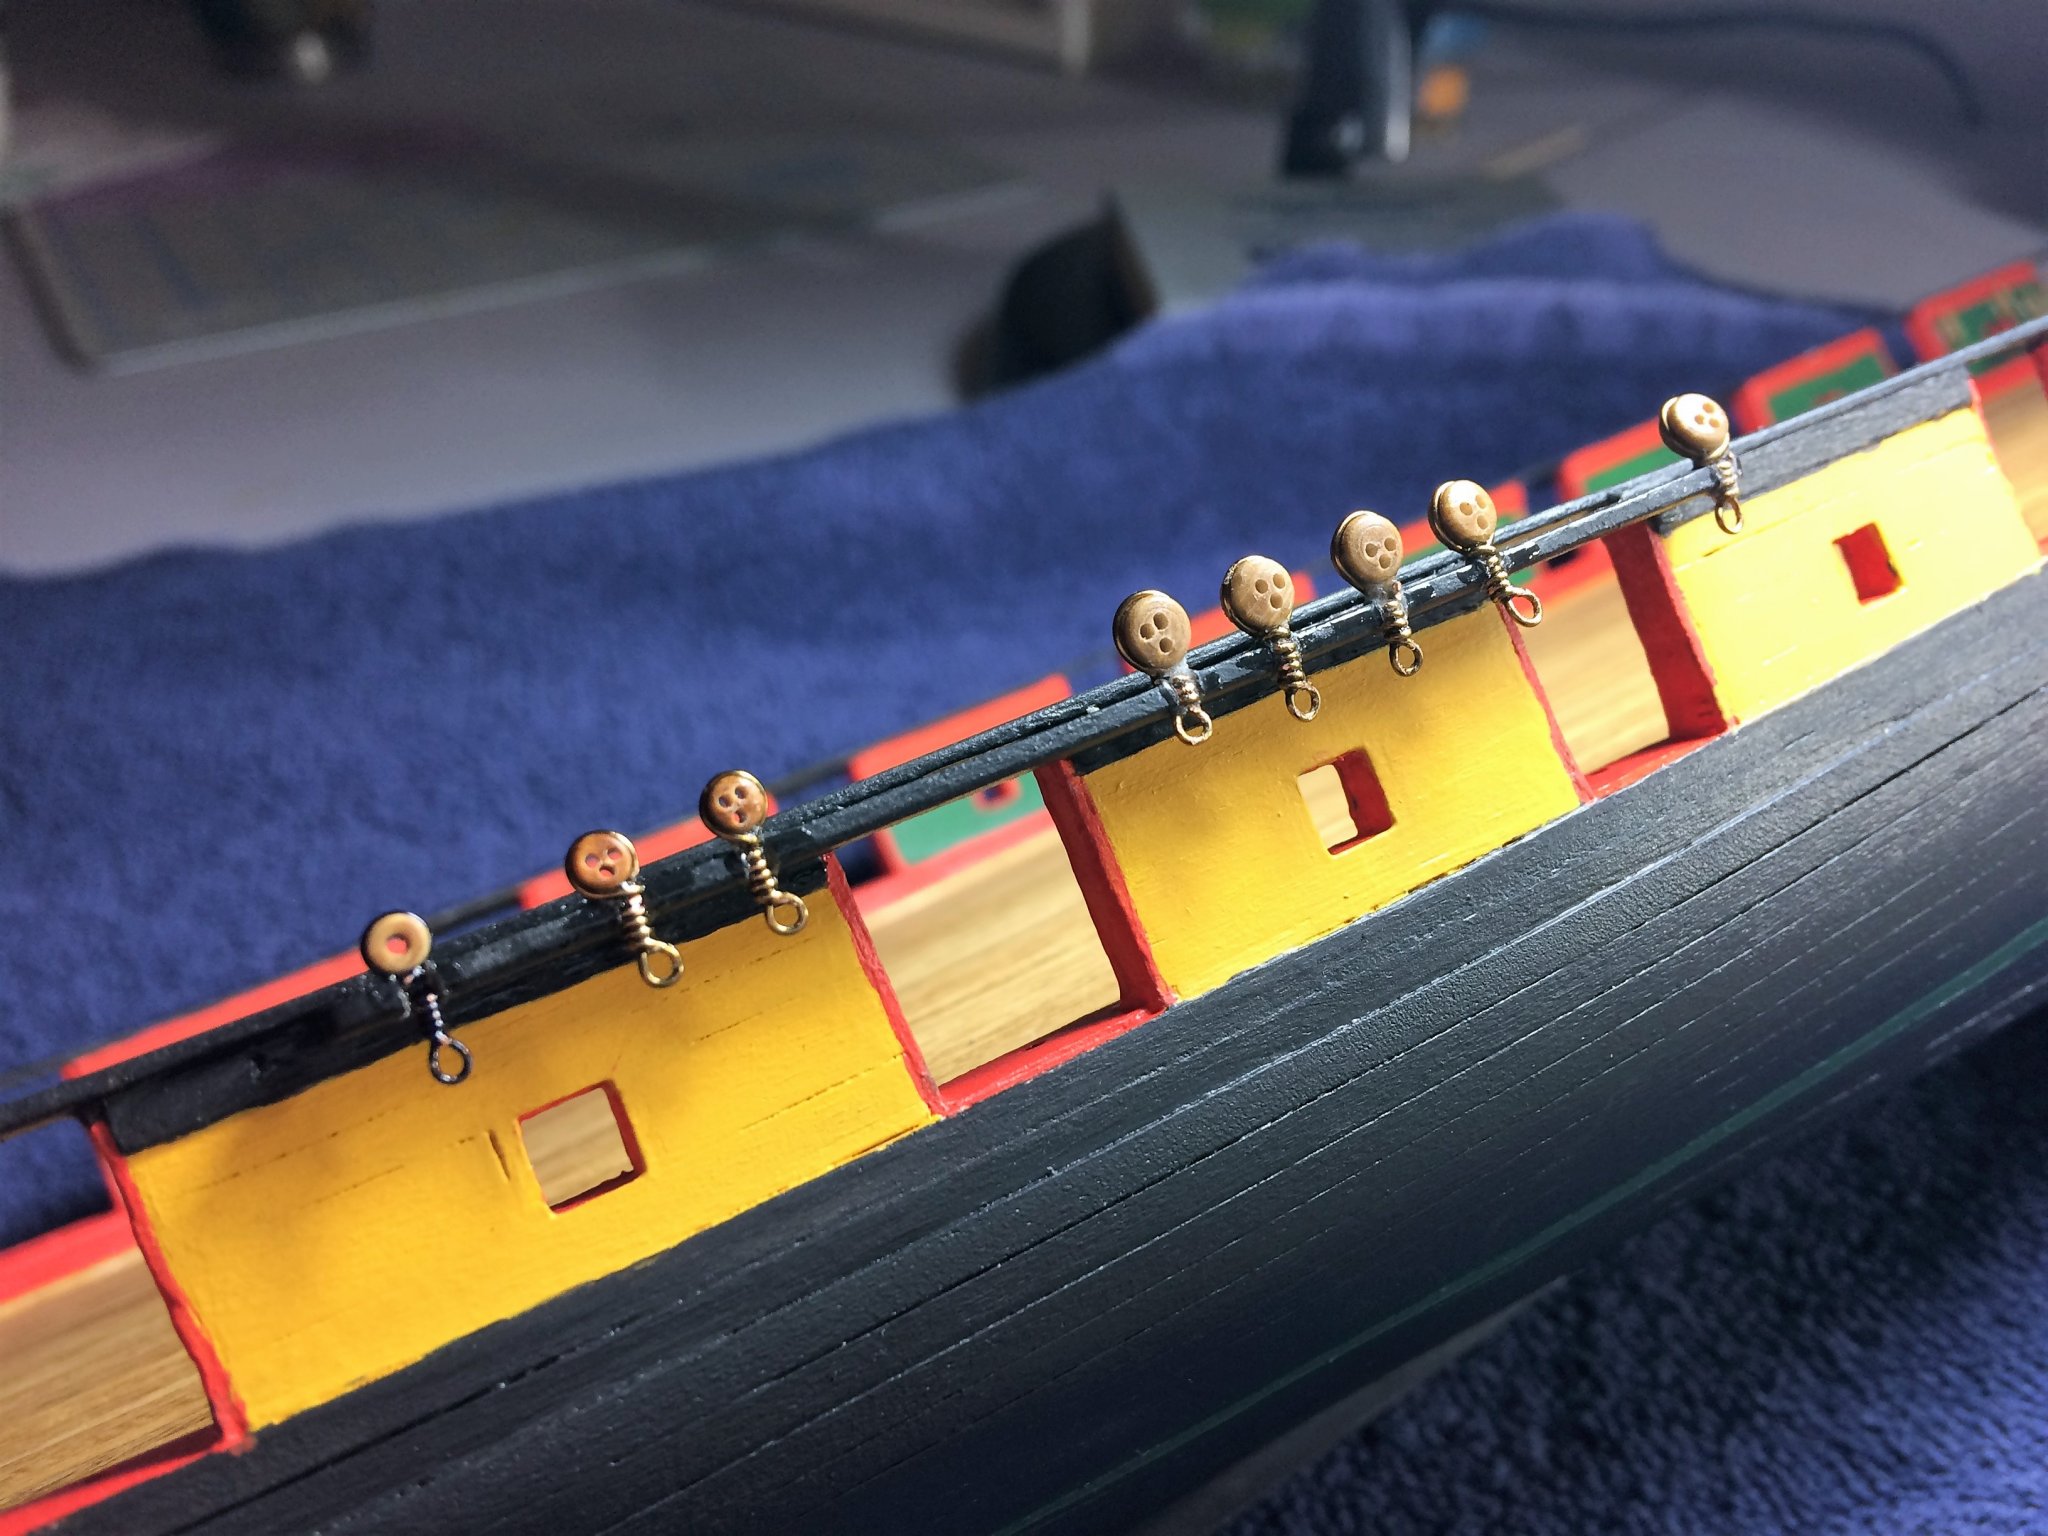
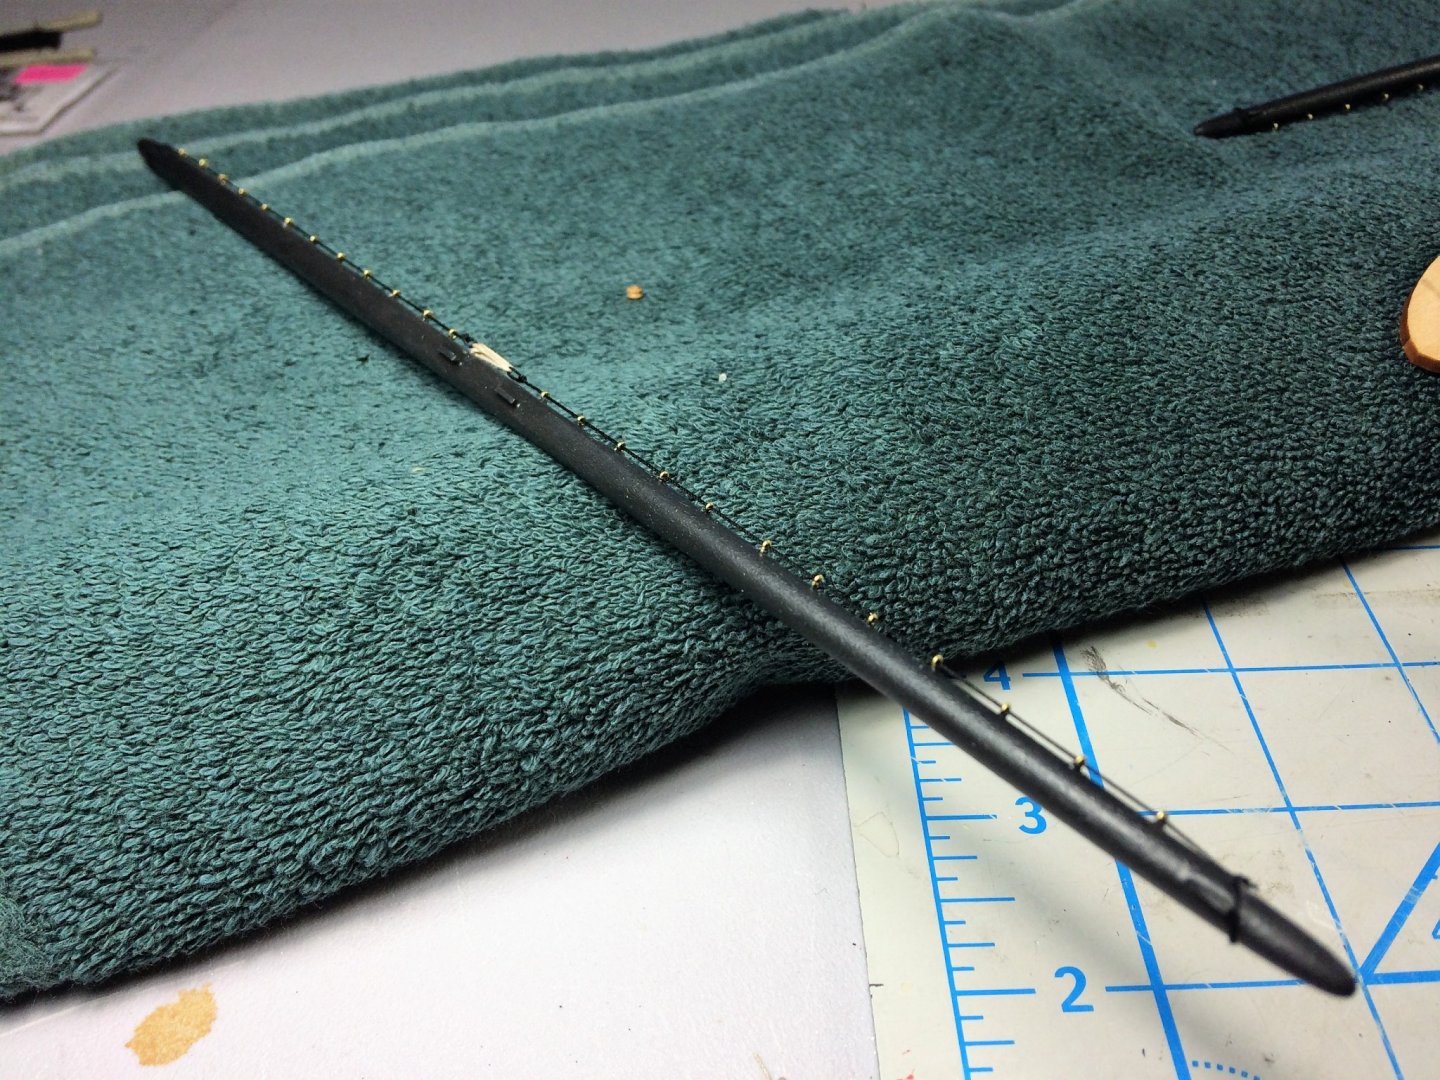
Morning, Well, we received another 4-6 inches of snow over night, and, its almost time to go out and shovel......again...... Oh well, Thought I would share an update while I finish my coffee before I head out. I started installing the deadeyes in the Channels. Bear with me, these may look a little snaggle toothed.....I'm learning!!!! I learned many lessons on the first set and were done over numerous times. The biggest lesson I learned was to sand a deep enough divot for each Deadeye. These are covered with a keeper strip and should look a lot better when finished. I used a light gauge wire for the Strops. Strong enough, but easily bent/adjusted. I'm trying to keep these even with each other and the natural curve inwards with the ship and ultimate shroud placement. Patience is a virtue, install one, and hold...………………….. In the beginning, I was struggling to build these. I was wrapping the deadeye first then trying to make the eye last. That didn't work out well. Once I started making the eye first then wrapping the deadeye did I get a better looking result. And these still don't look that good!!!!! But, believe me, these do improve as I did more. The glue gobs and the like will all get a good sanding and re-paint. These kit supplied deadeyes are rough to work with. Some just flake apart with any pressure applied. A while back Model Shipways had a "materials" sale and I bought a bulk pack. I ended up using those. They seemed "fresher". They seemed easier to work with. Minor problem, just sayin...….. All the holes were cleaned out with a #67 bit. Lesson learned...….pay attention to which deadeyes you pick to use. I don't know how these things are made in the factory, but some of the holes looked like the drills to make the holes missed. That's understandable, I cant think its easy, and there were enough good ones to use. The strops for the Topgallant and Topmast deadeyes is a lighter gauge wire than the strops for the Lower shrouds. I used 3/32 deadeyes and bullseyes, as compared to the 1/8 deadeyes for the Lower shrouds. Trying to keep things in scale. Some sizes are given on the plans but don't match perfectly to what I have on hand, I tend to round down. Things start looking "too big" and it blows the scale/look in my head. This is one of my struggles as a modeler and constantly working on it. I've also started the Spritsail yard. With this last piece the Bowsprit will be done, besides some blocks and the like, which I should have done soon. Stay warm and God bless all you people not waking up to snow...…...again! Thanks for watching! Tom E


-
Richard, Your metal work is incredible, looks really nice. You seem to be the jig master! From the soldering setup to the mini sawhorses on your bench. Those mini sawhorses are a great idea, are they just made from Styrene? I could see those on my bench! Tom E
-
Thank you Richard, Appreciate the kind words. Must admit, I've been watching your Bluenose build. Impressive build, the metal work is beautiful. Tom E
-
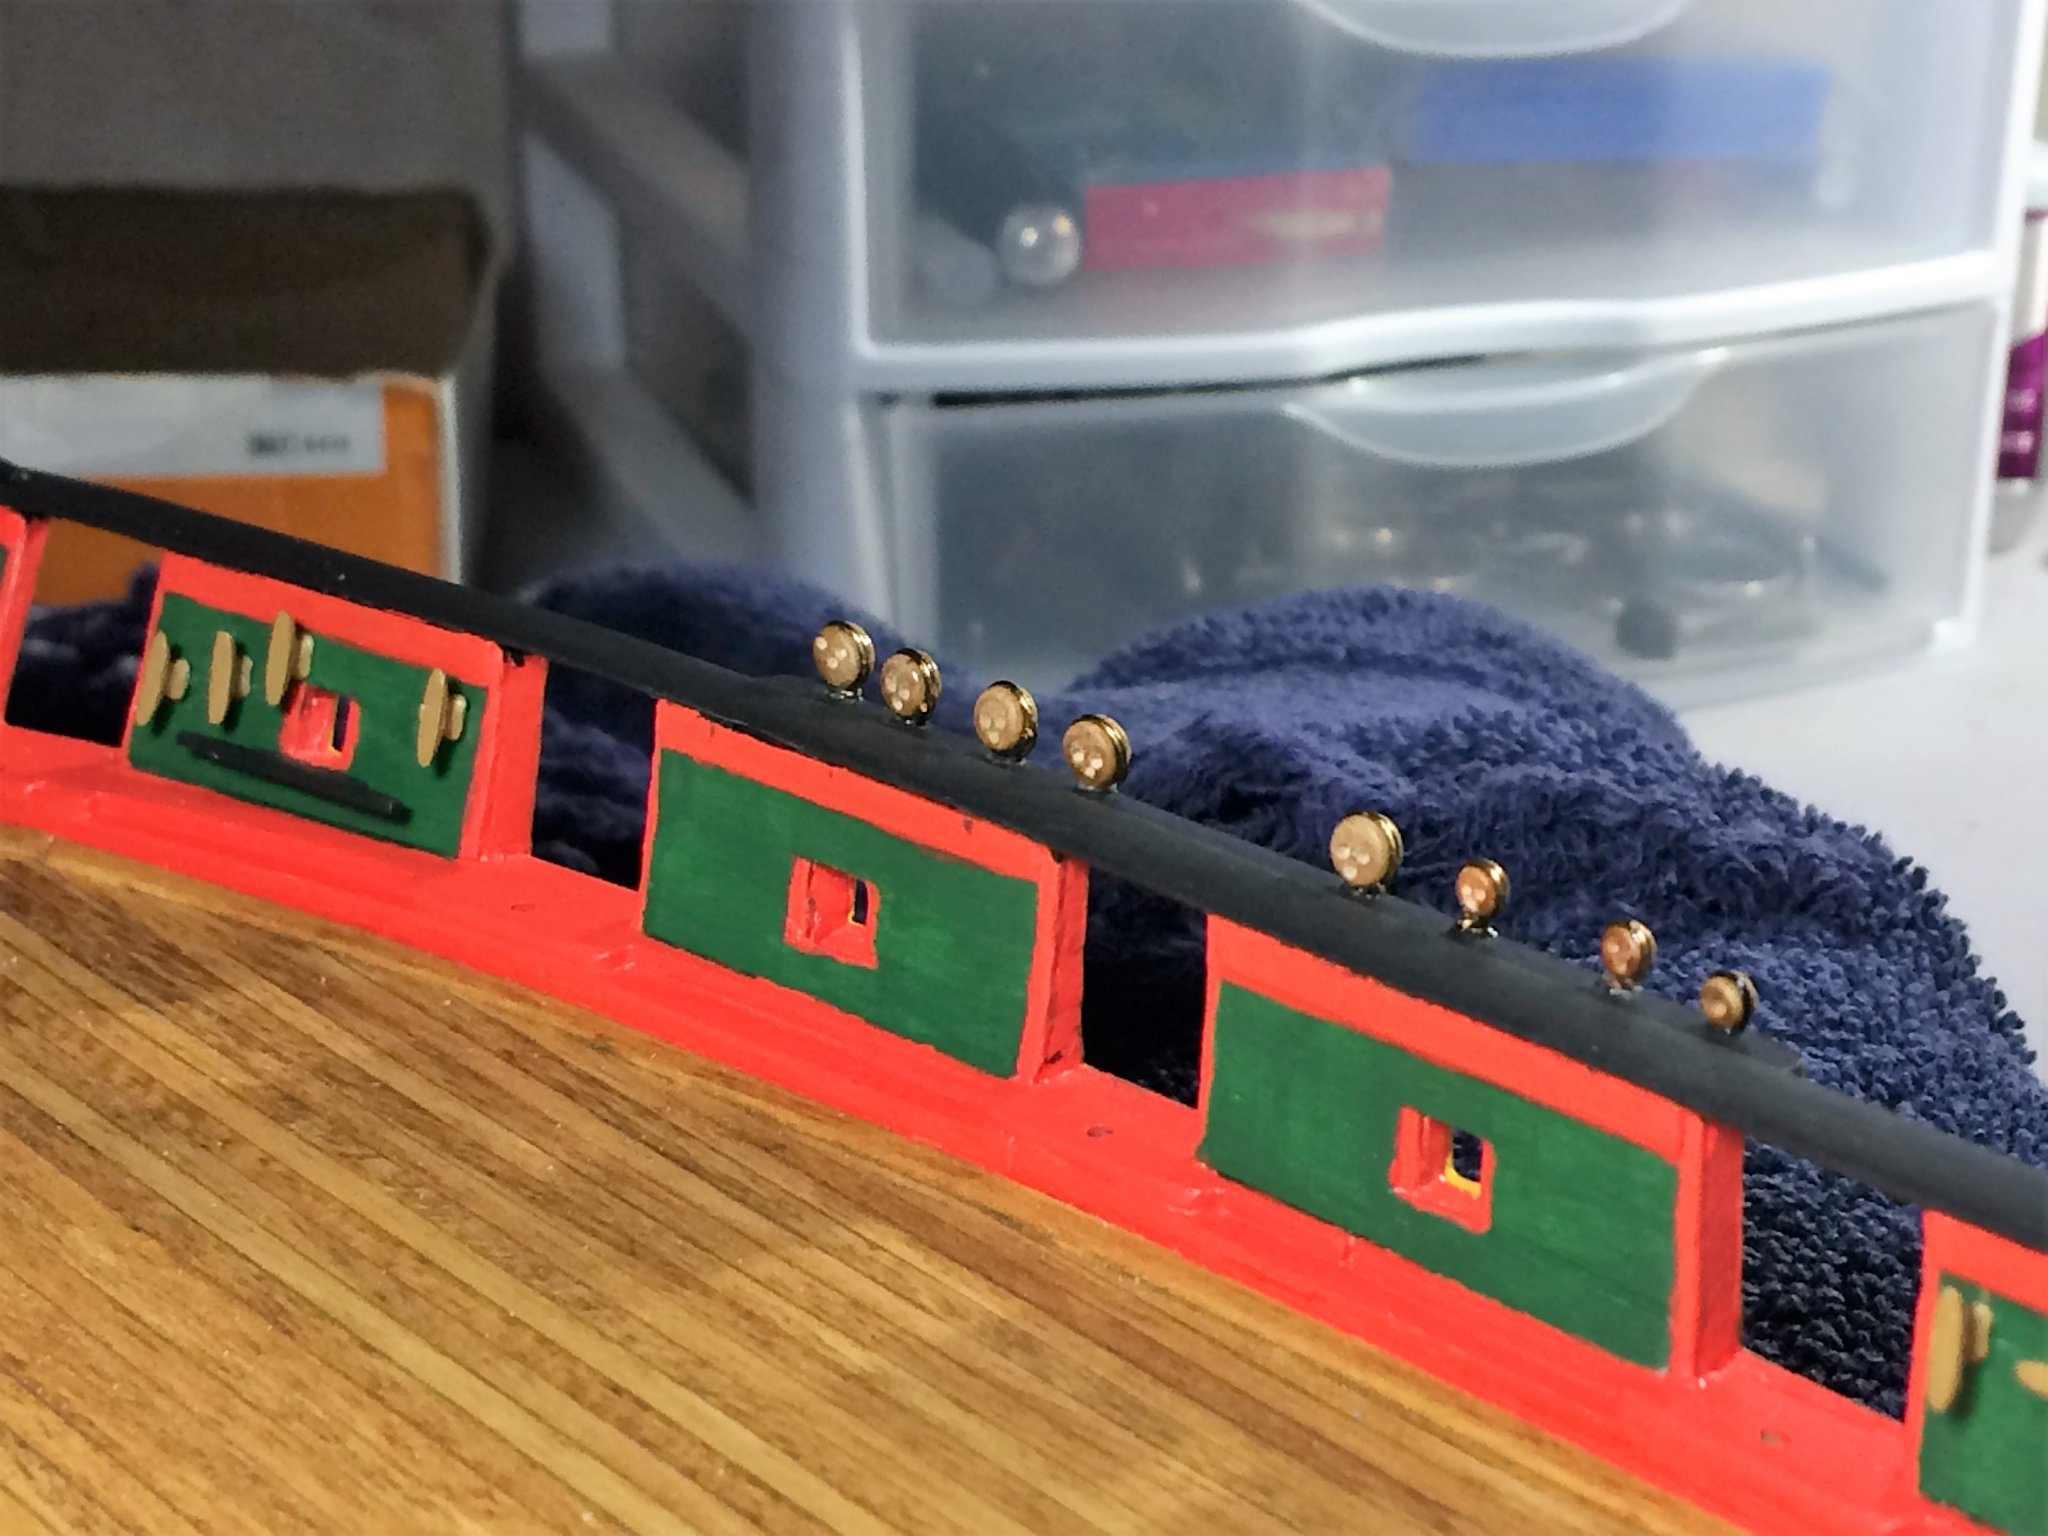
Evening, Mike, Christos, as always, glad to have you looking in. Happy New Years to you and yours as well! With the move to the new place finally settling down, Niagara has come back to life! I dove back into the build with some rope work. With the Main Yards built, they needed the Footropes and Stirrups. These are fiddly little things! You sneeze once.....and you have to start all over....true story! I started by hanging the Stirrups. As long as they were long enough, they posed no problem to work around. The Footropes were strung next. All the ropes are Syren .012 black (if I'm remembering correctly) I'm having a tough time to get the length of the Stirrups just right, so no finished shots of the Main Yards yet. Hopefully soon. Deck work on the ship itself has begun again. It seems every time I look at the plans, there's always something else to make and install, bloody amazing! Started by getting some Deadeyes installed. Easy enough, open up a large enough slot and they slid right in.....mostly! The Deadeyes are wrapped with a 23G wire that creates the loop on the end. I'll get more in depth with the Deadeyes soon. Thanks for watchin! Tom E
-
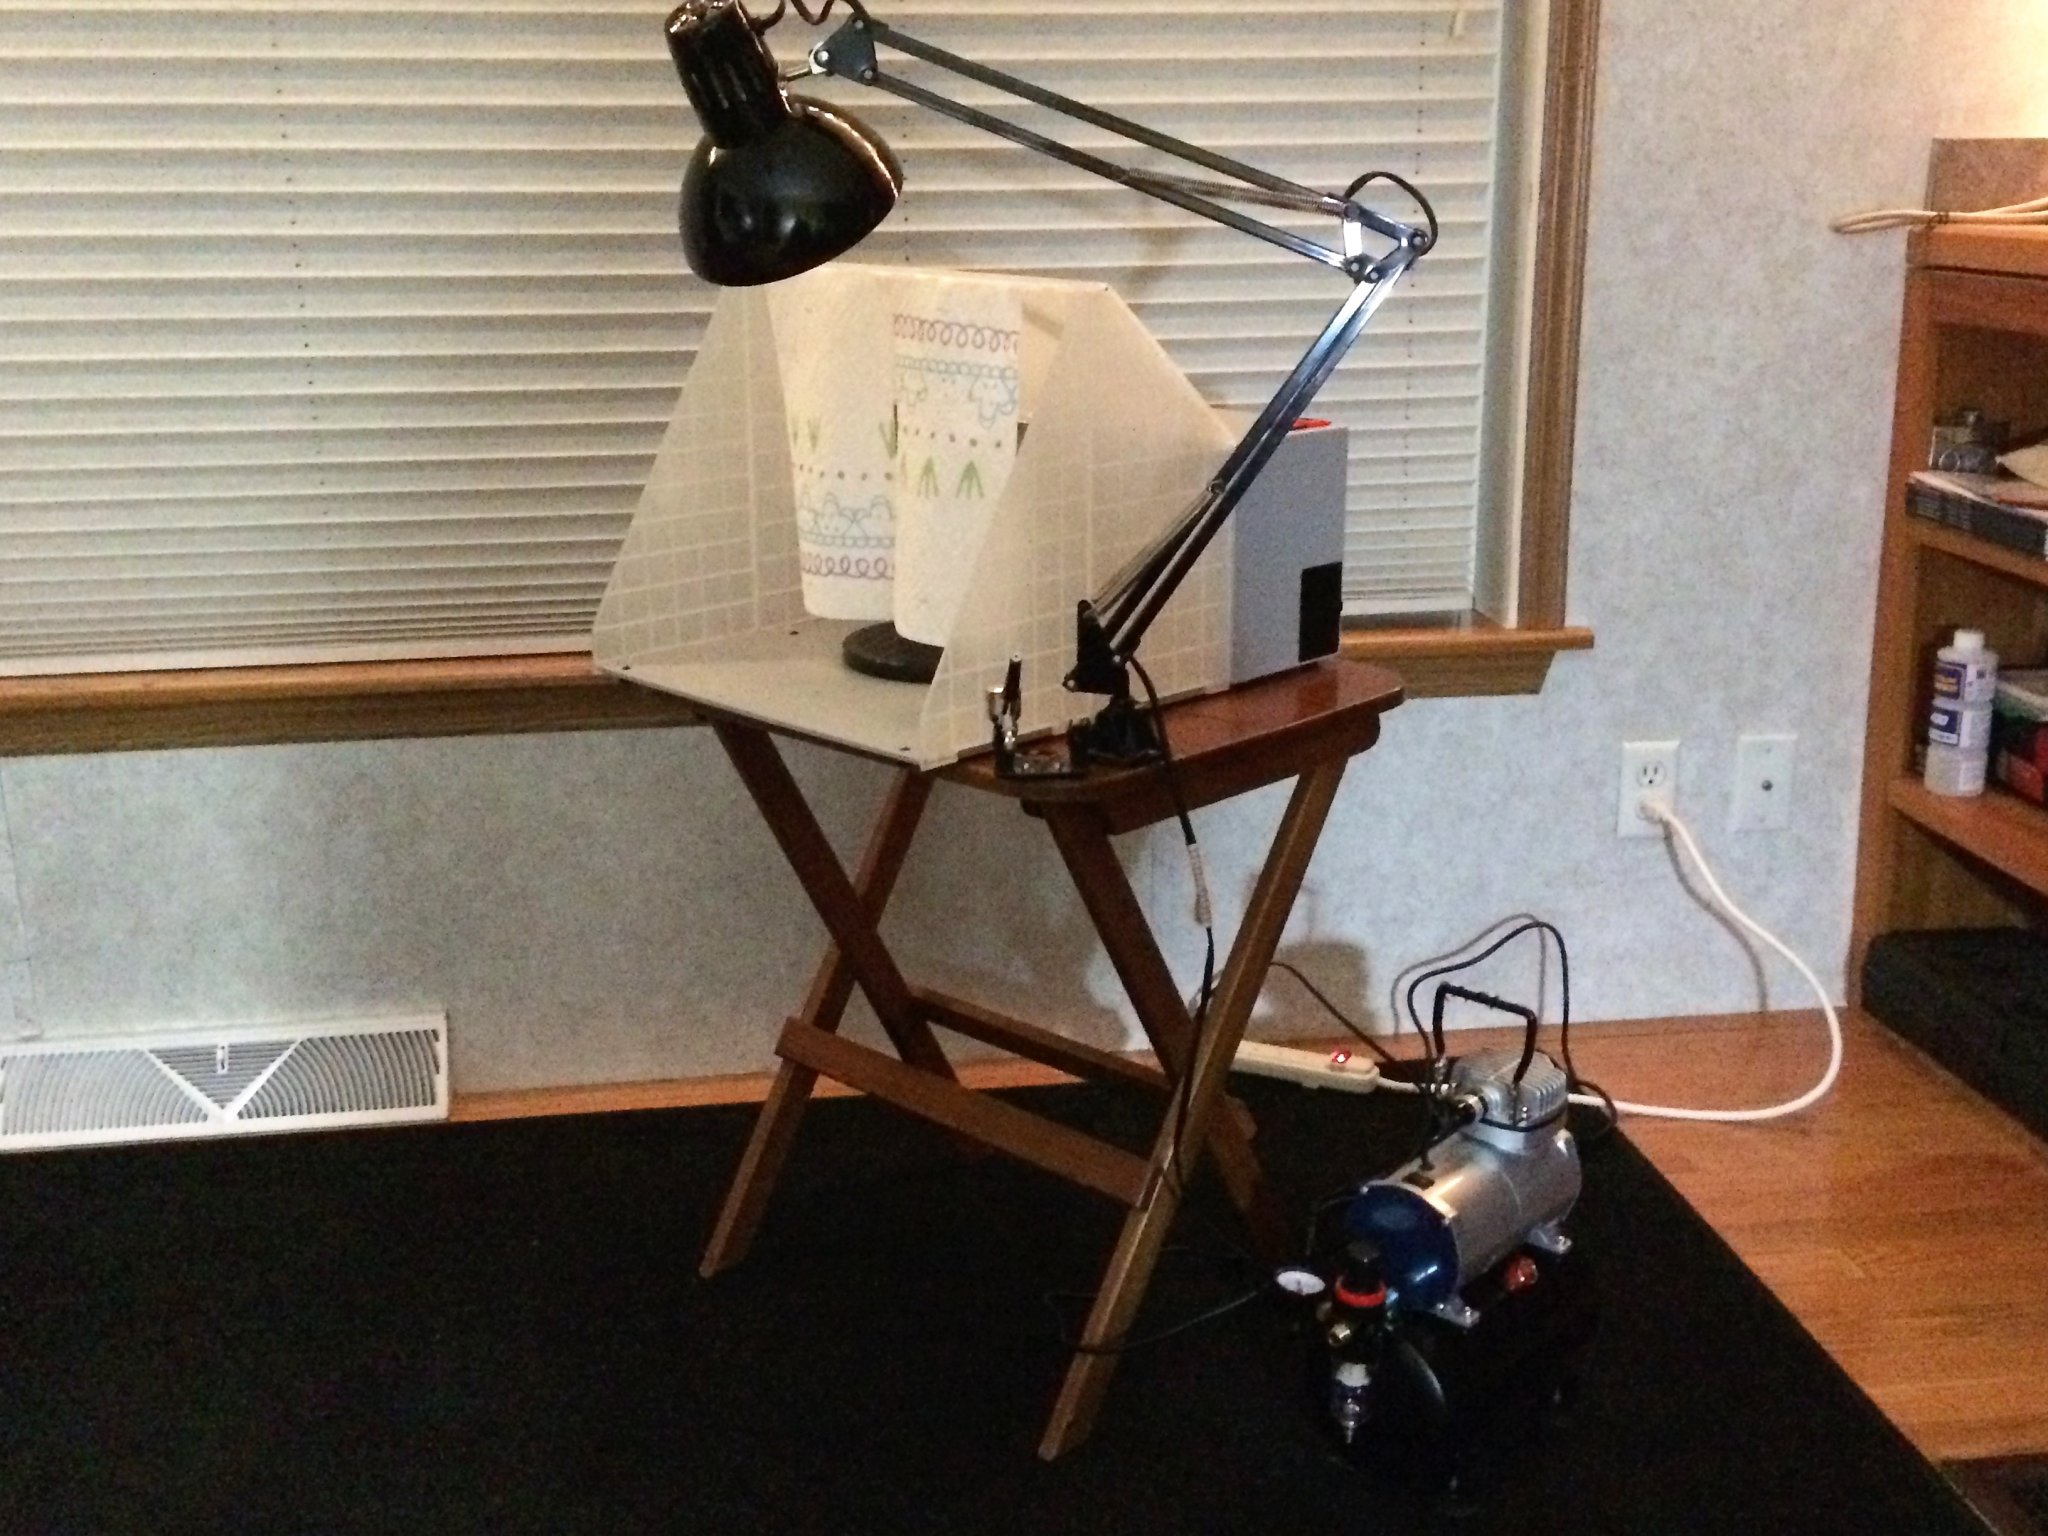
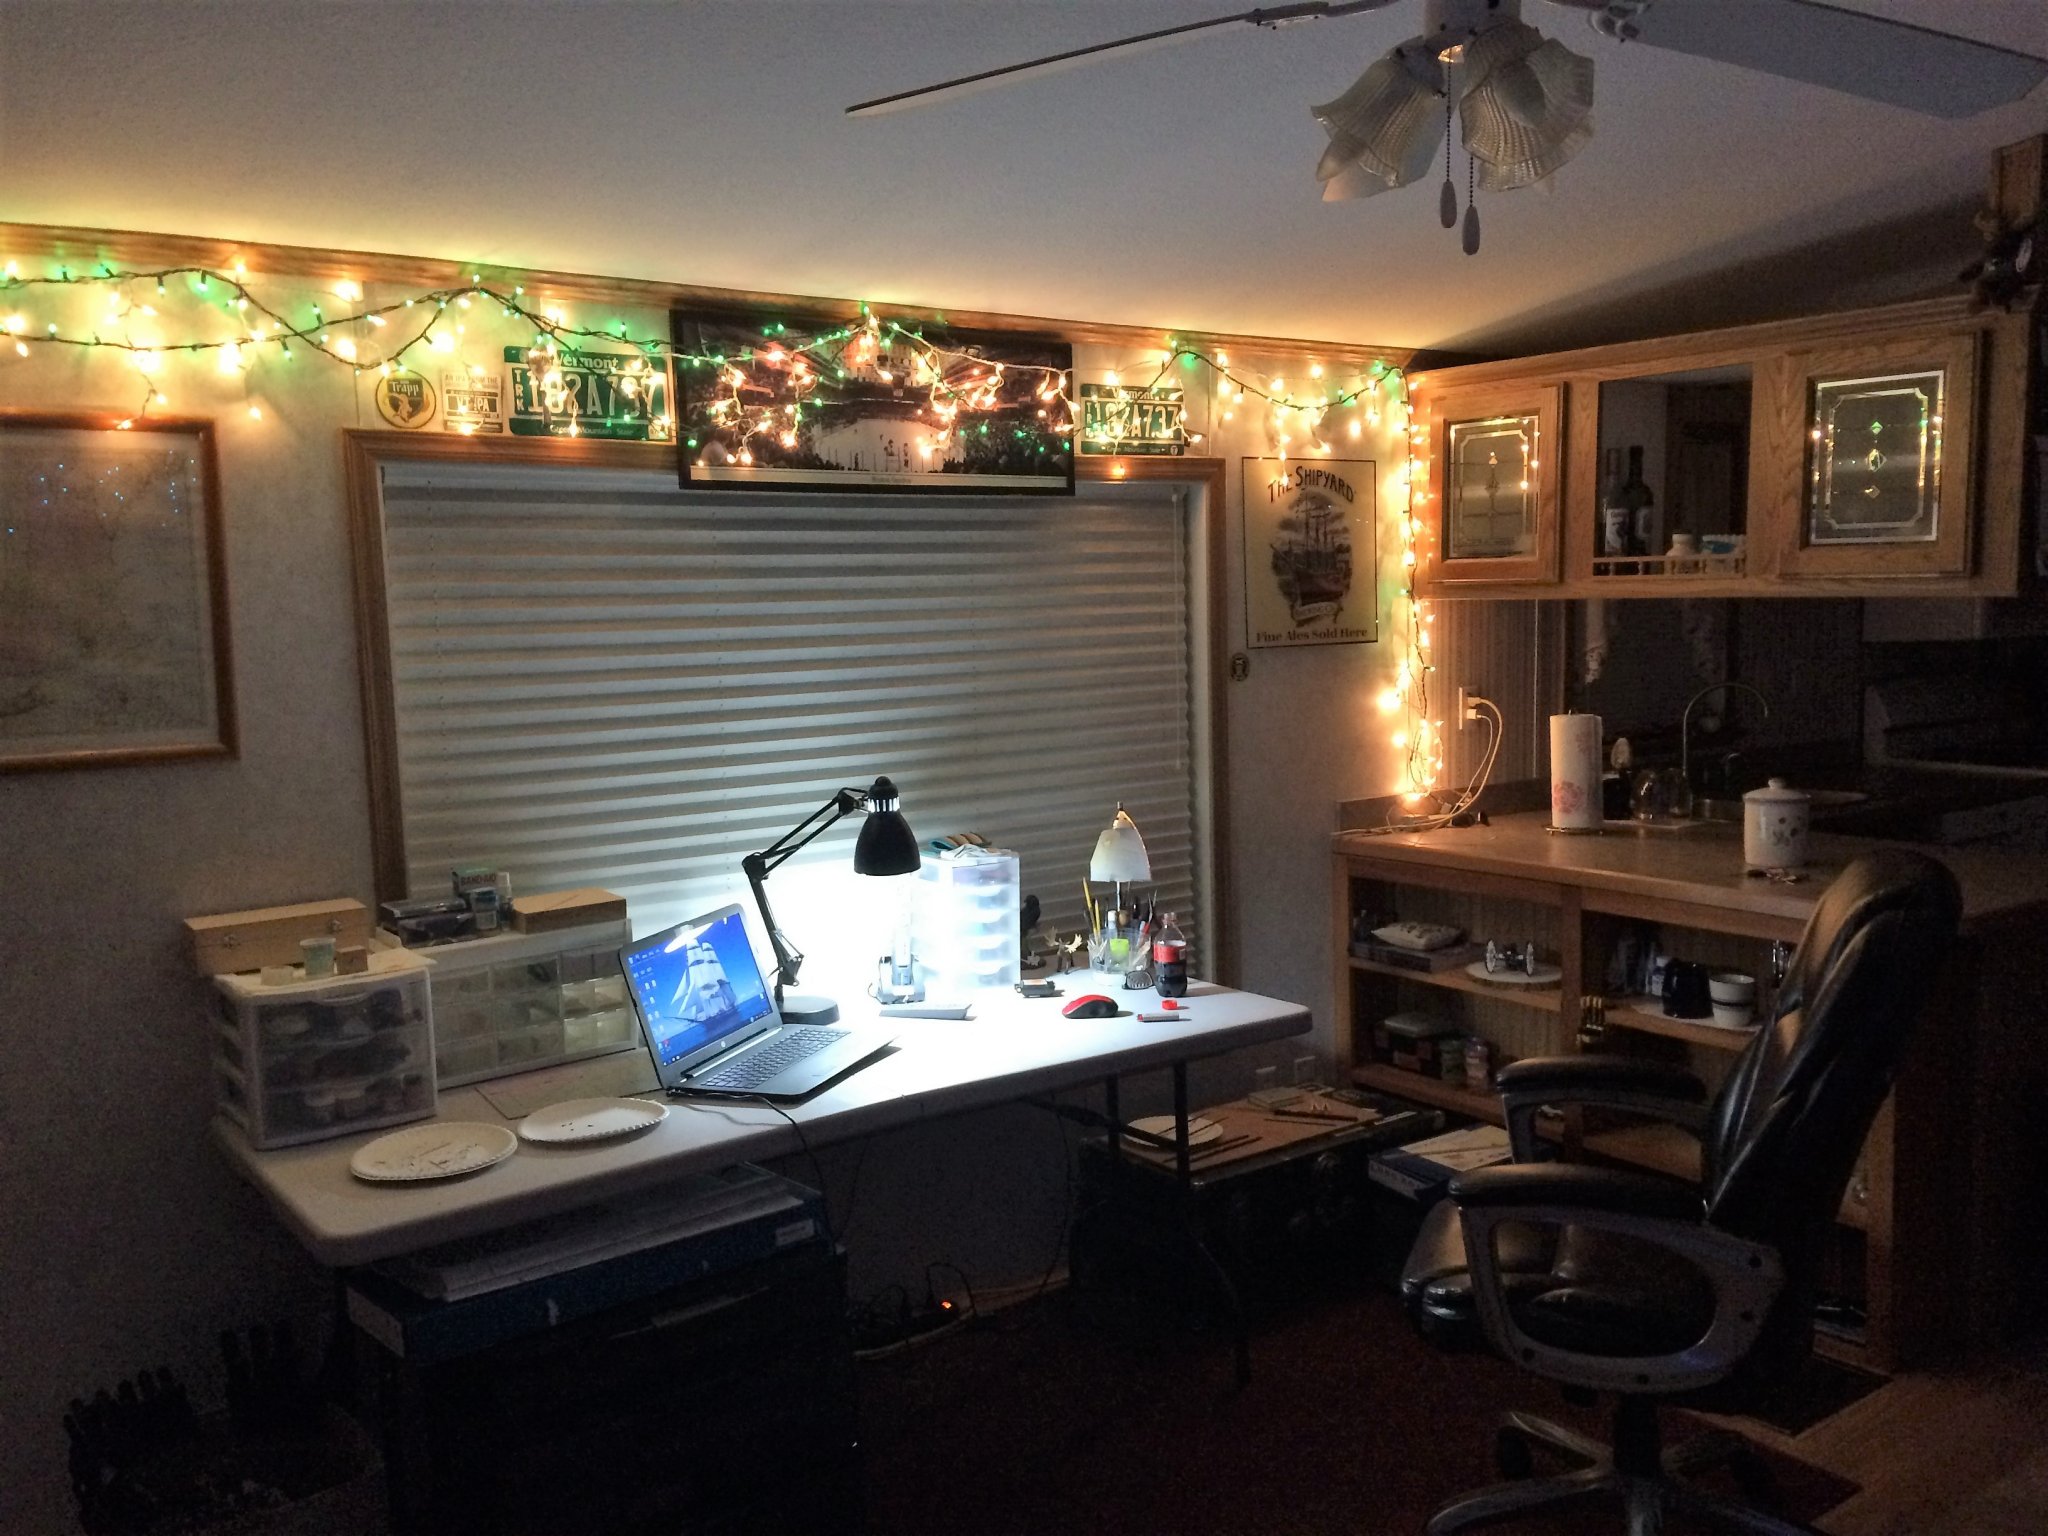
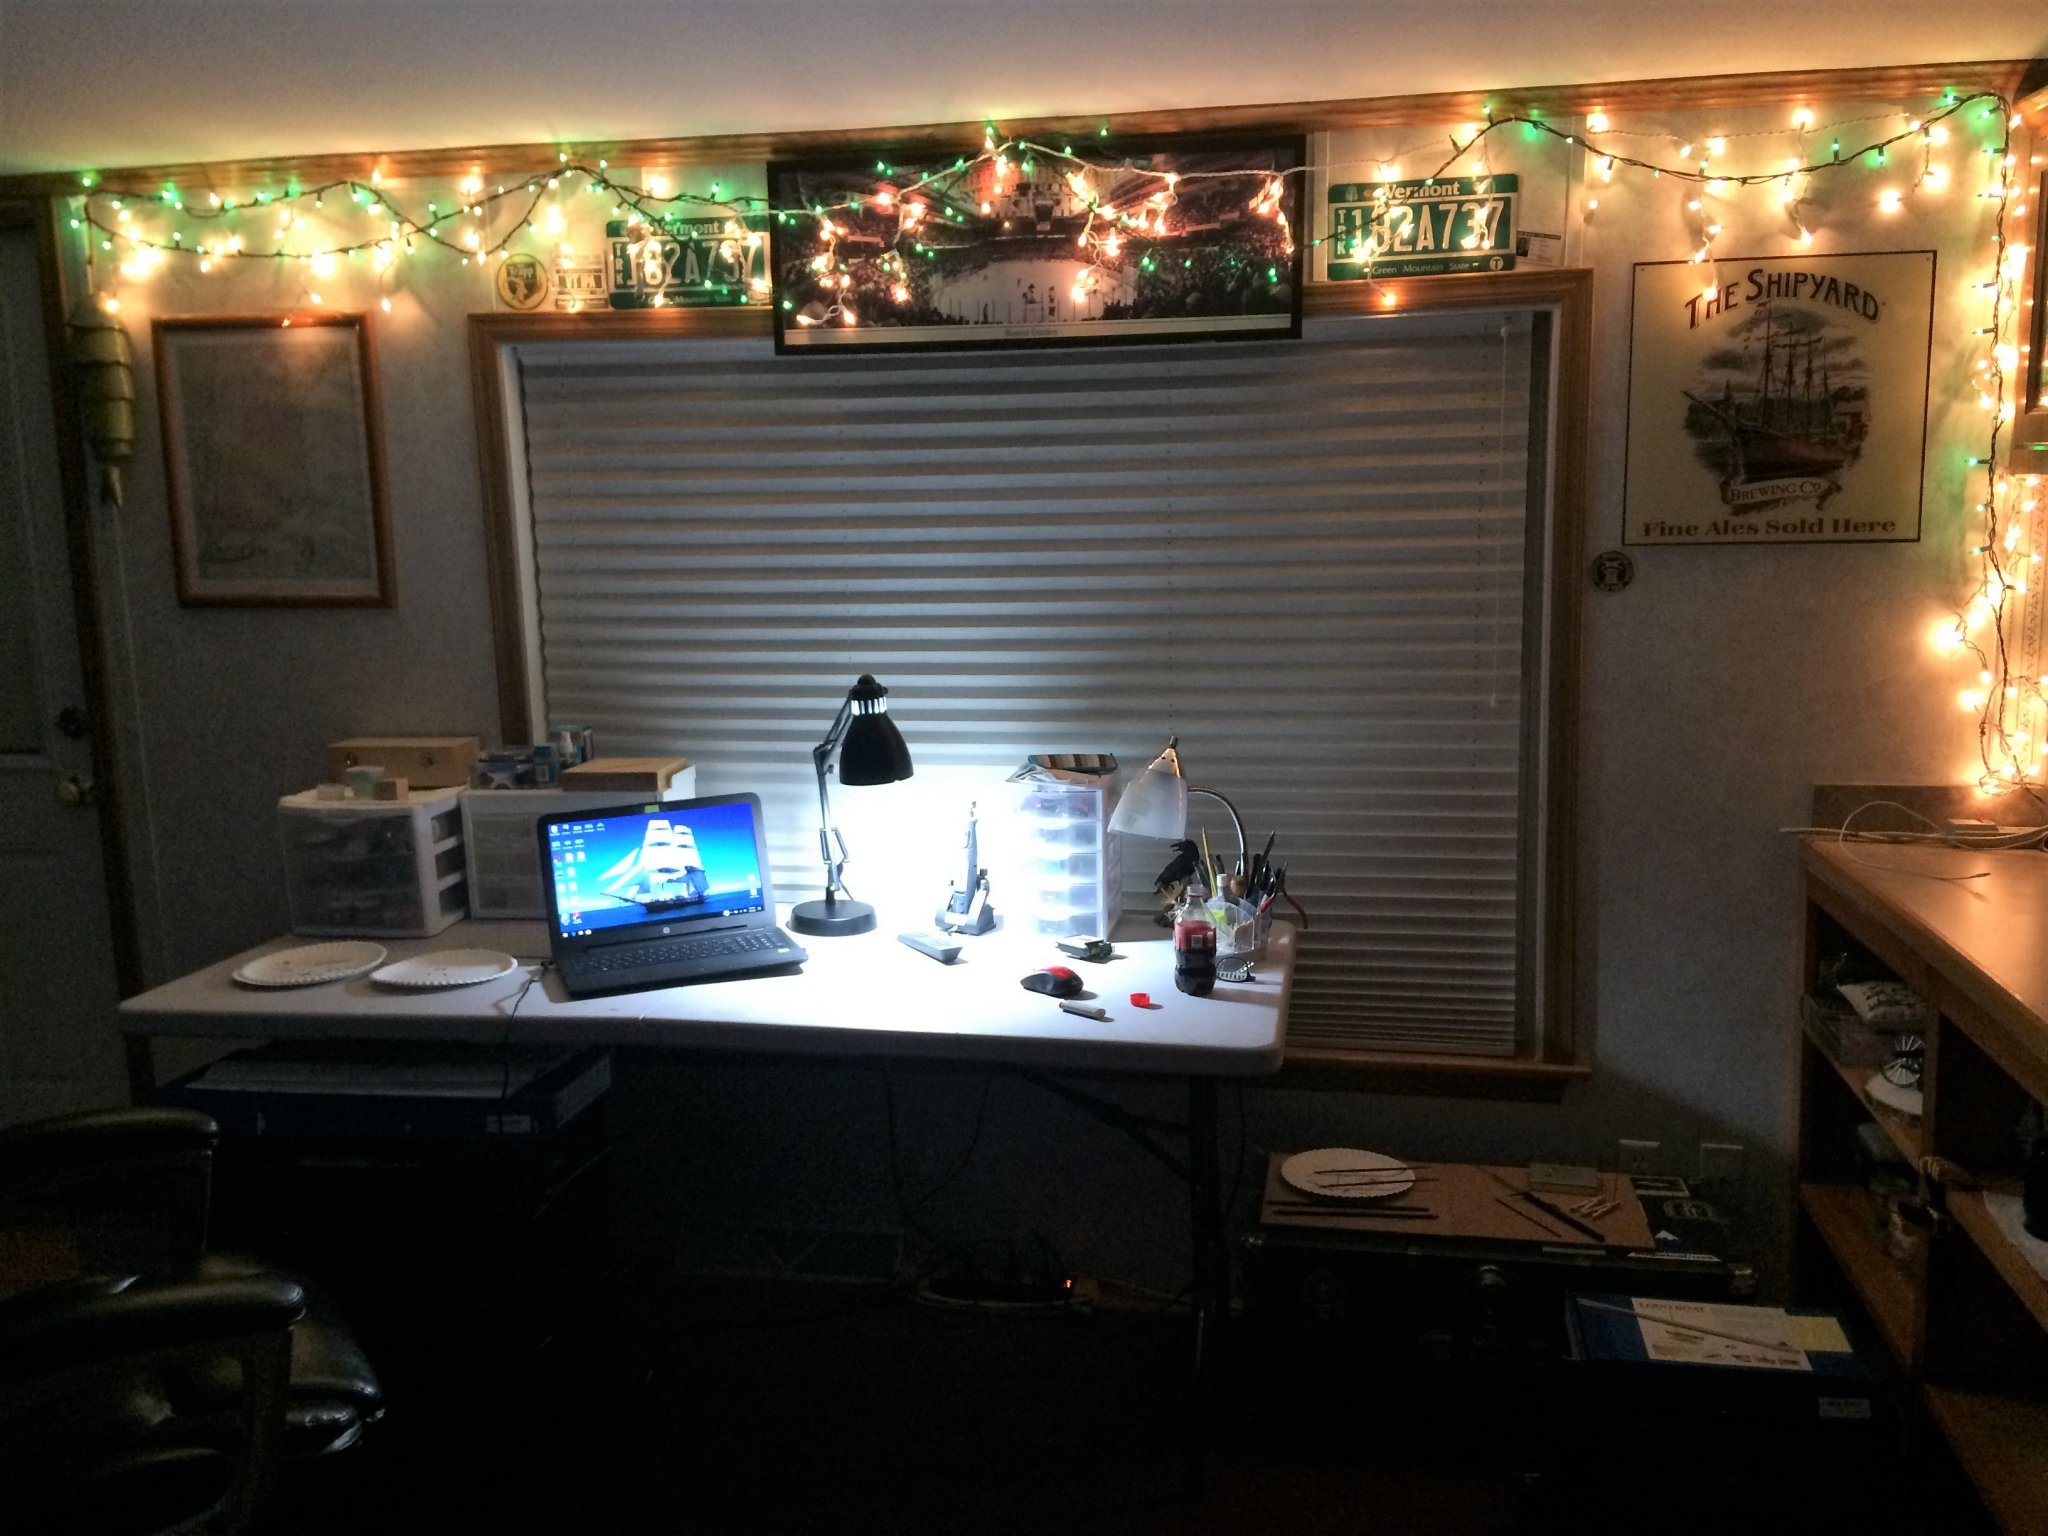
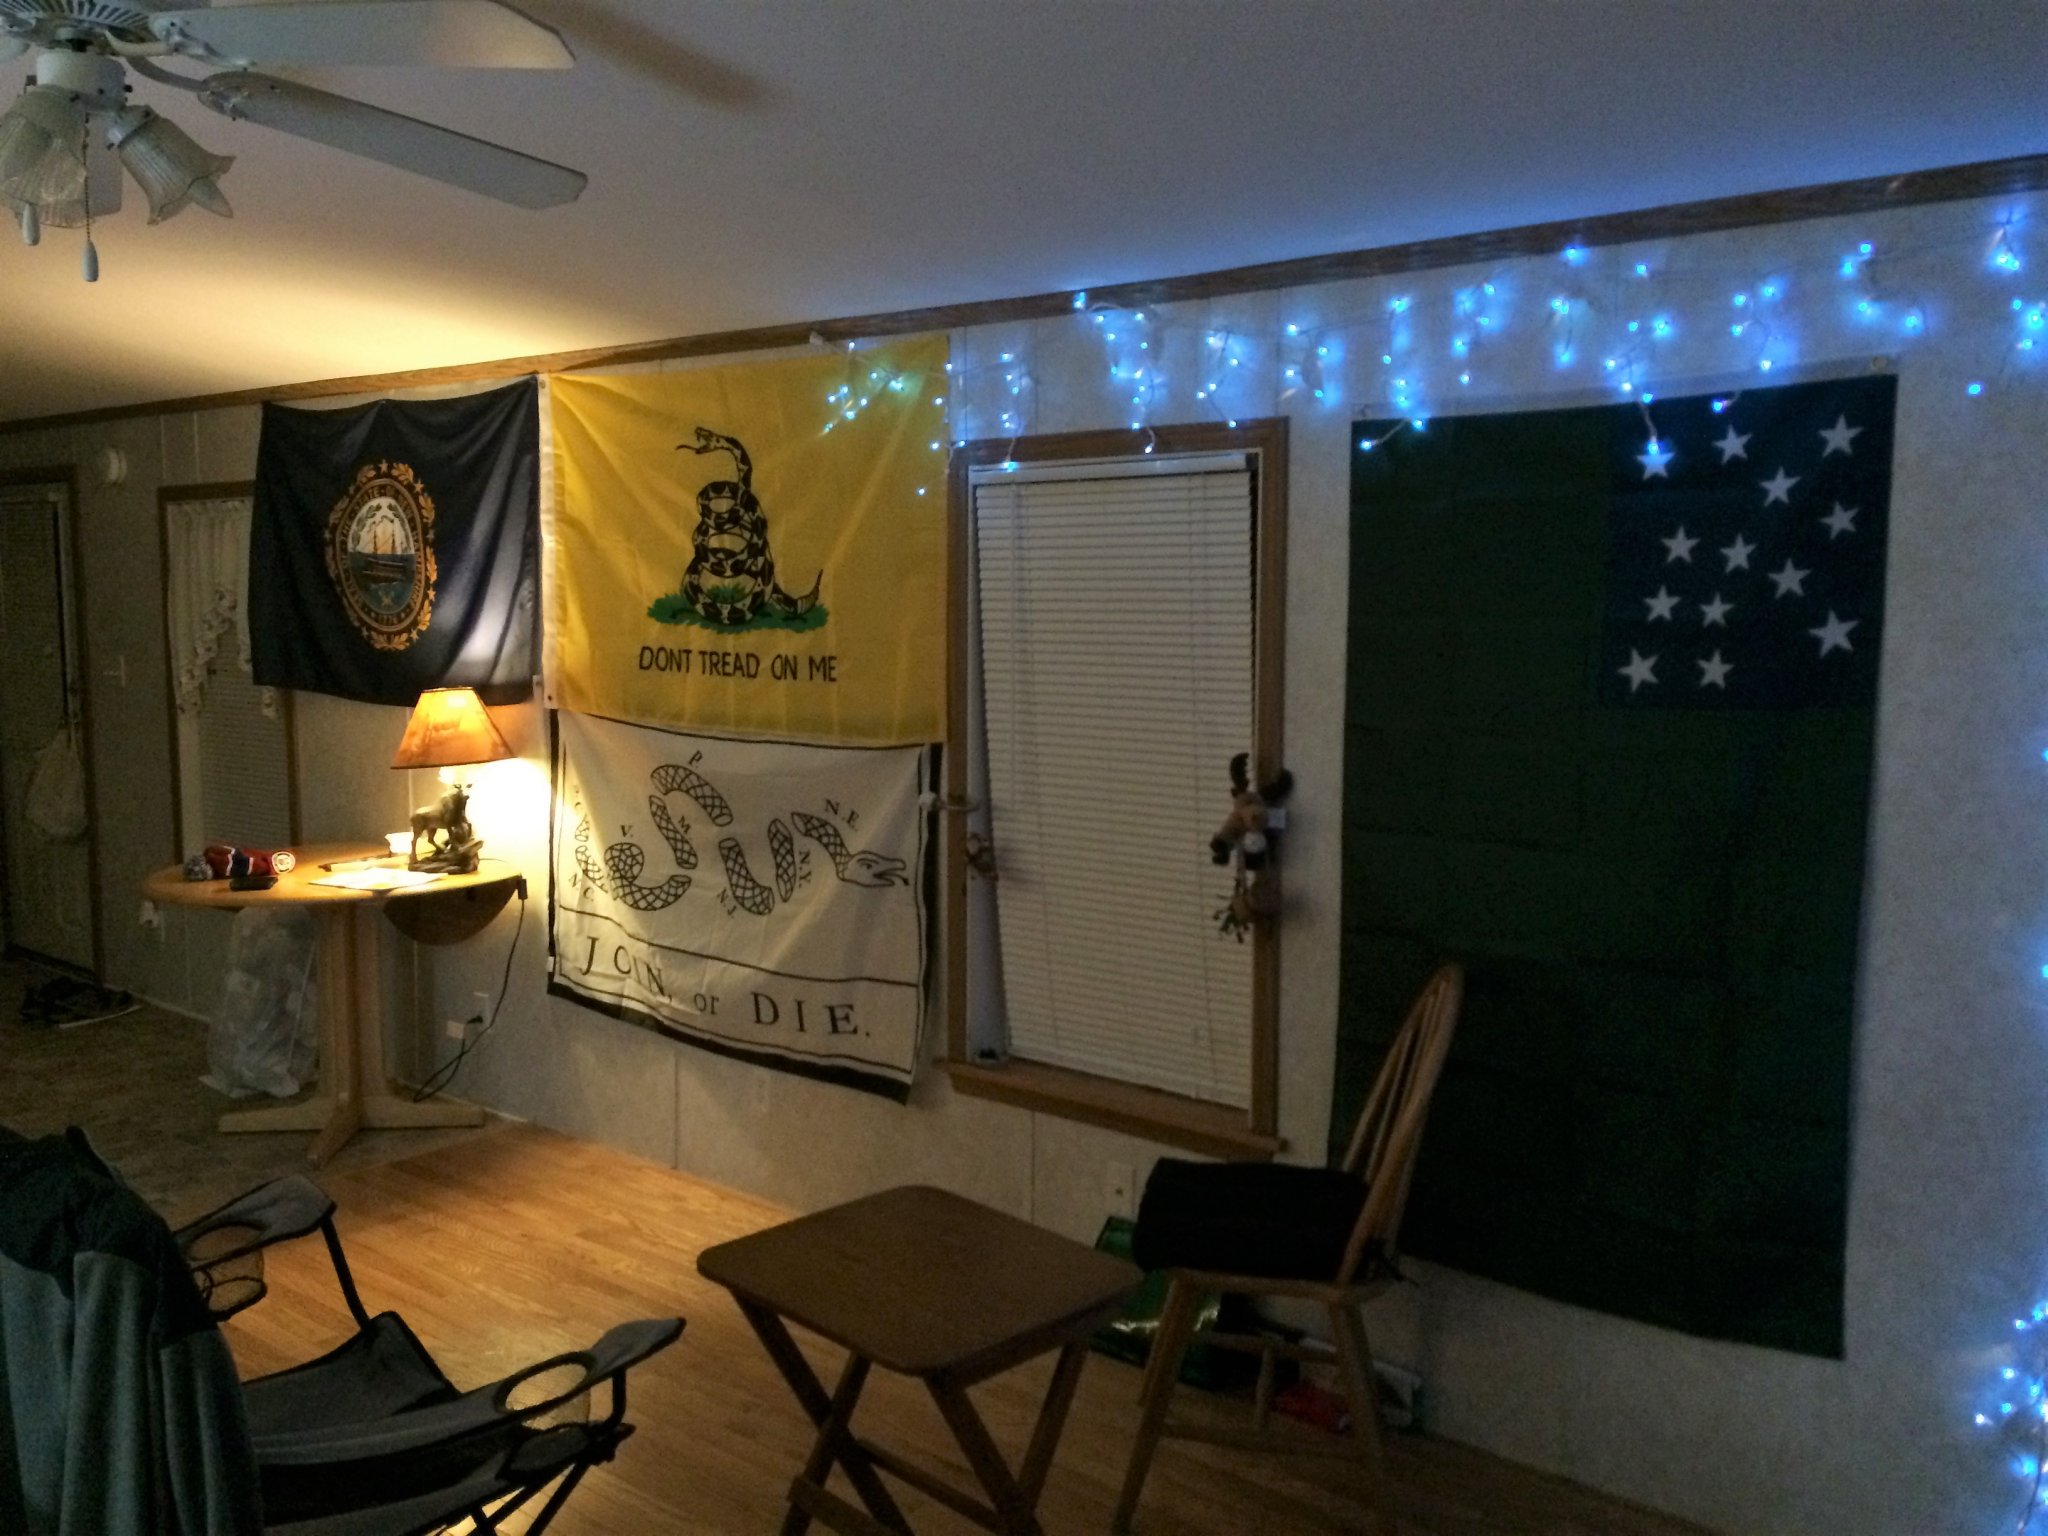
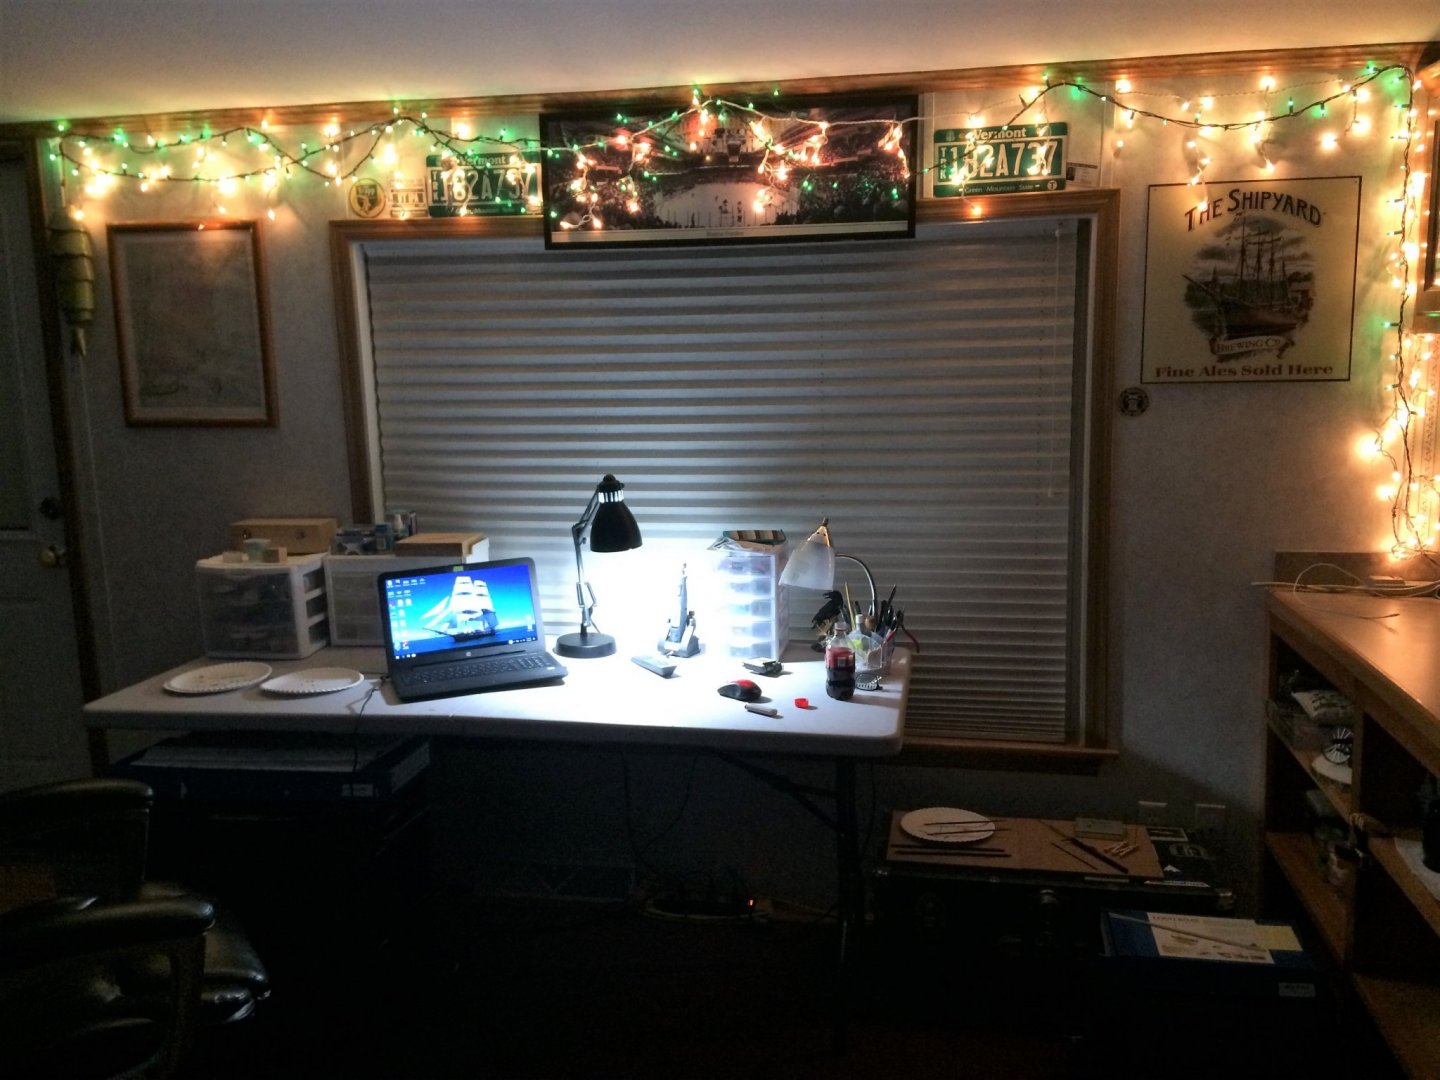
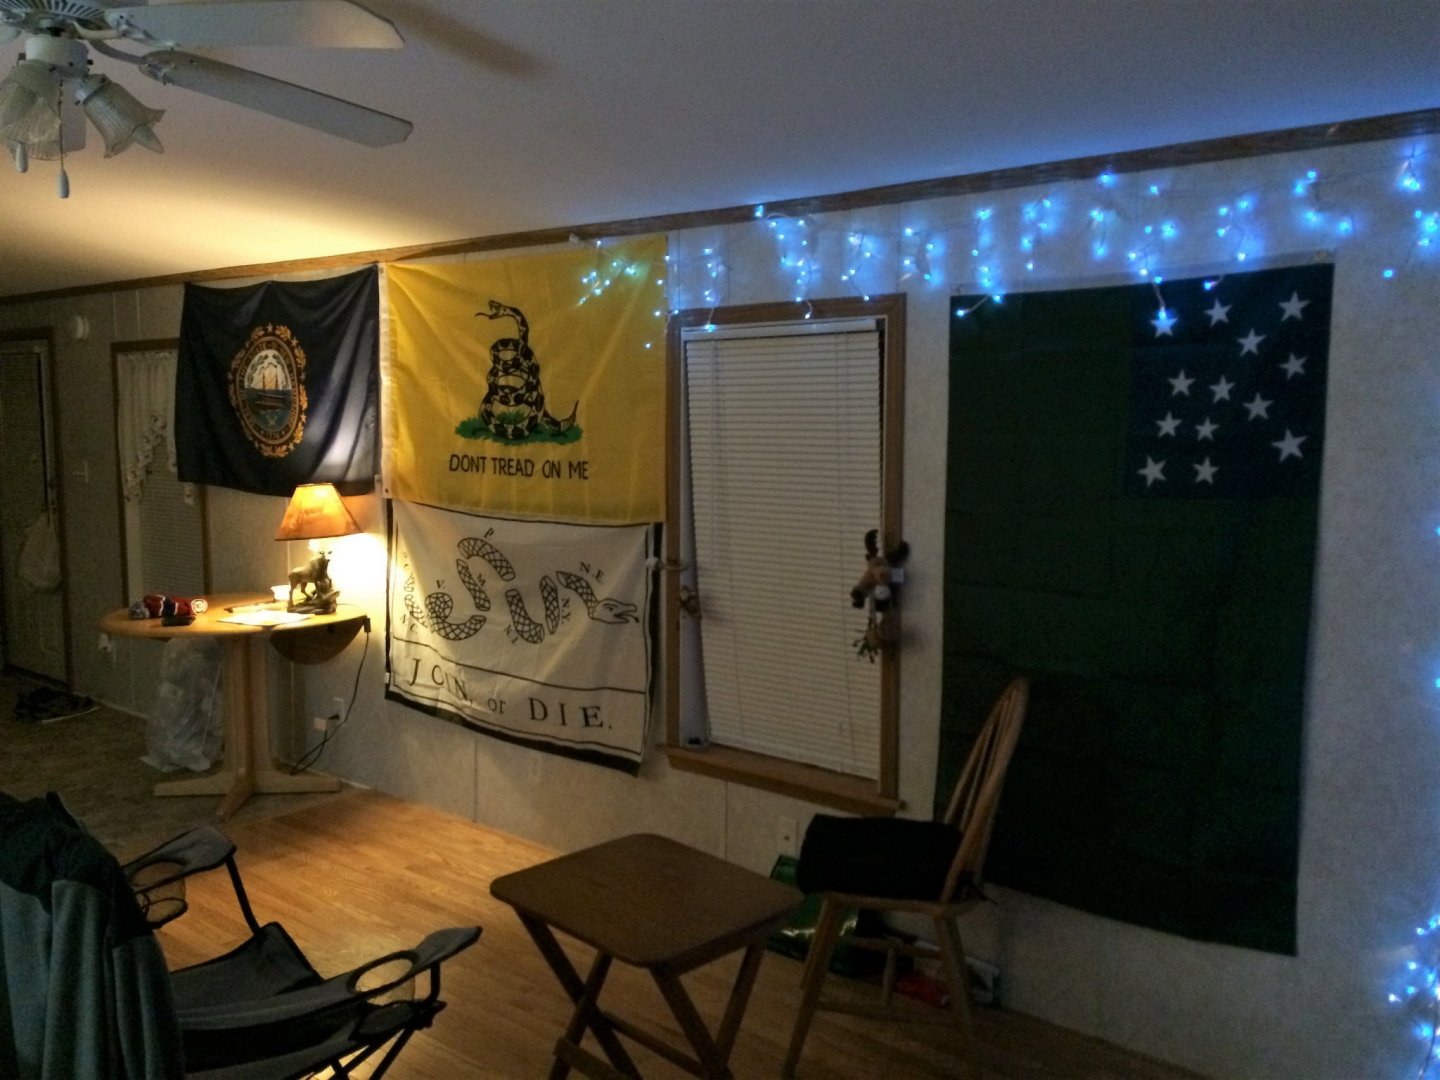
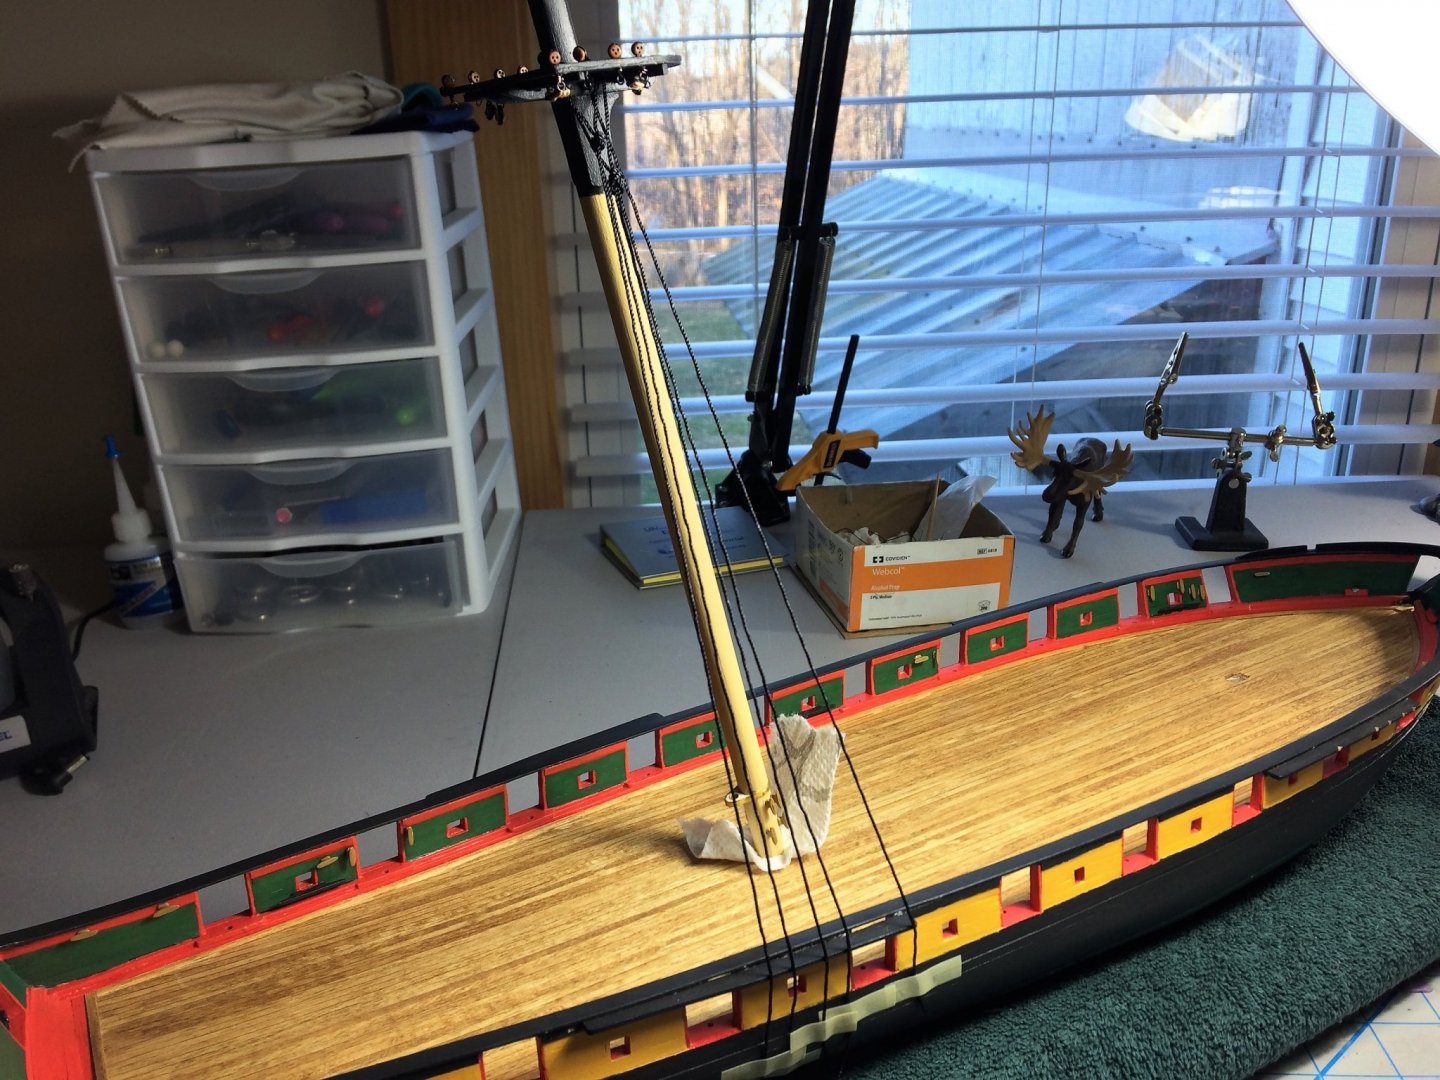
Let the building begin!!!!!! I have successfully moved into my new home! There was little blood shed! 🏁 With the move behind me, the Shipyard begins to take shape. I think I have it in a spot that works. Behind the screen is a large bay window. Oddly, It has two small side windows that open. One of those windows has been ear marked as a vent for an airbrush vent system. Most likely right where the trunk is on the floor. I cant wait to dig my teeth back into Niagara. I've got the modeling itch something fierce! I still have camp chairs as furniture for now. A new sofa and recliner are in my near future. These flags will eventually be replaced with more permanent fixtures. I see a ships wheel clock in my future!!!!!! 😮 My cable TV was set up just in time to see the Bruins lose, then the Patriots lost......what the heck!?!? Oh well...…. It's great to be back on MSW and should have updates soon. Tom E

-
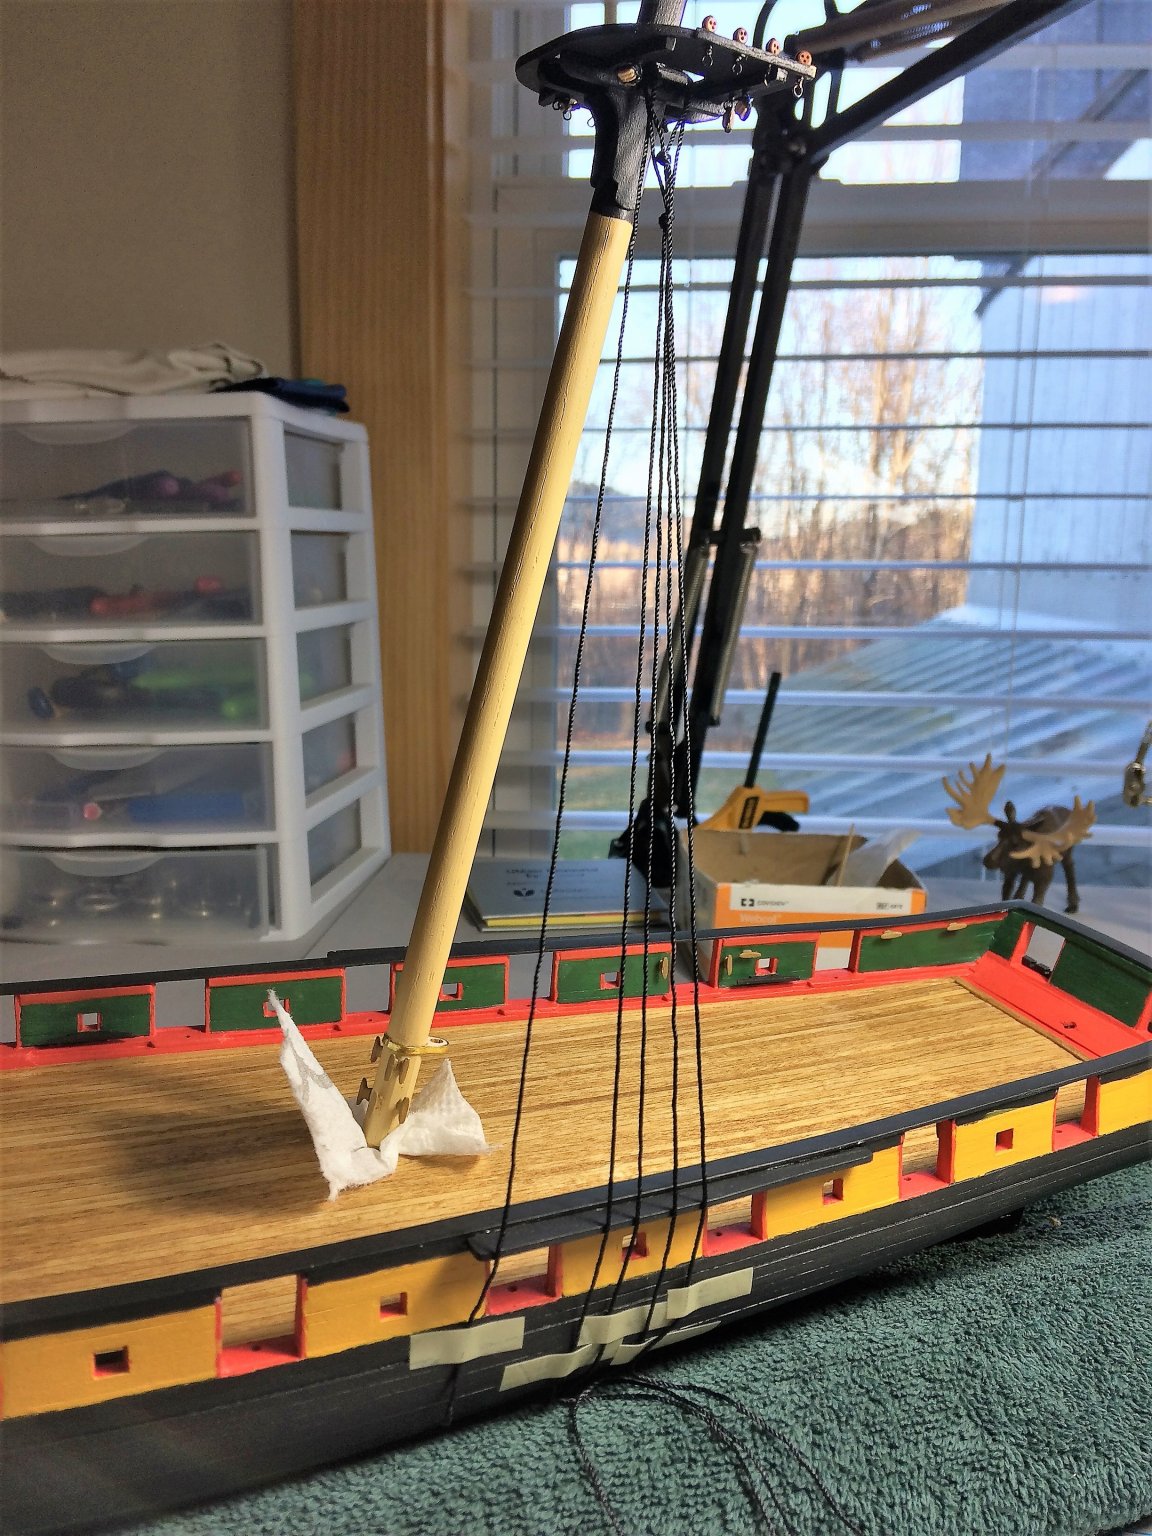
Evening, Thought I would share un update, may be a while until my next. As of today, the Shipyard has been shut down, packed up and ready to bug out. I close on a new house this coming Thursday. Of course, the Shipyard will be moved first...…..of course....…..carefully, slowly, in the car, with a lot of towels/blankets!!!! The rest of the apartment goes in the truck on Friday. I've been thinning out the inventory of old useless junk we all seem to accumulate thru life. I'll be essentially starting out with a new canvas. New couch, bedrooms, it already has a new kitchen with all new appliances. This is my first house, quite the process. I do however plan on having, what looks to be, a nice build area. But until I'm truly in there, I wont know. Dimensions, right work table, lighting, etc. Any who...... The Niagara does continue, this and maybe one more update, and I'll be completely up to date. The Fore and Main Yard Jackstay eyebolts have been rigged, with a simple collar where they meet in the end, nothin fancy. Using .12 Syren rope. They line up fairly well. I scraped away the paint that ended up in the bolts. I think they look fine as is. On other builds I will consider blackening these. Chunky looking Landyard in the middle......what can I say, it was my first....still learnin! Both the Main and Fore mast Yards where done at the same time. I'll do the same when I start the Topmast Yards. Slow and steady at a comfortable pace. With all the Channels finally in place, I finished marking where my Chain plates/deadeyes will be. Below, Starboard rear. These are just the faux shroud ropes I've used before, kit supplied rope actually. Syren rope will be used for the final product. Port rear I used paper towel in the Main mast slot to firm/tighten things up and gain the correct rake, and be able to maintain it while I fiddled with things. Port front The Fore mast didn't need the paper towel in the mast slot. It sits really well on its own. Thanks for watching! Tom E

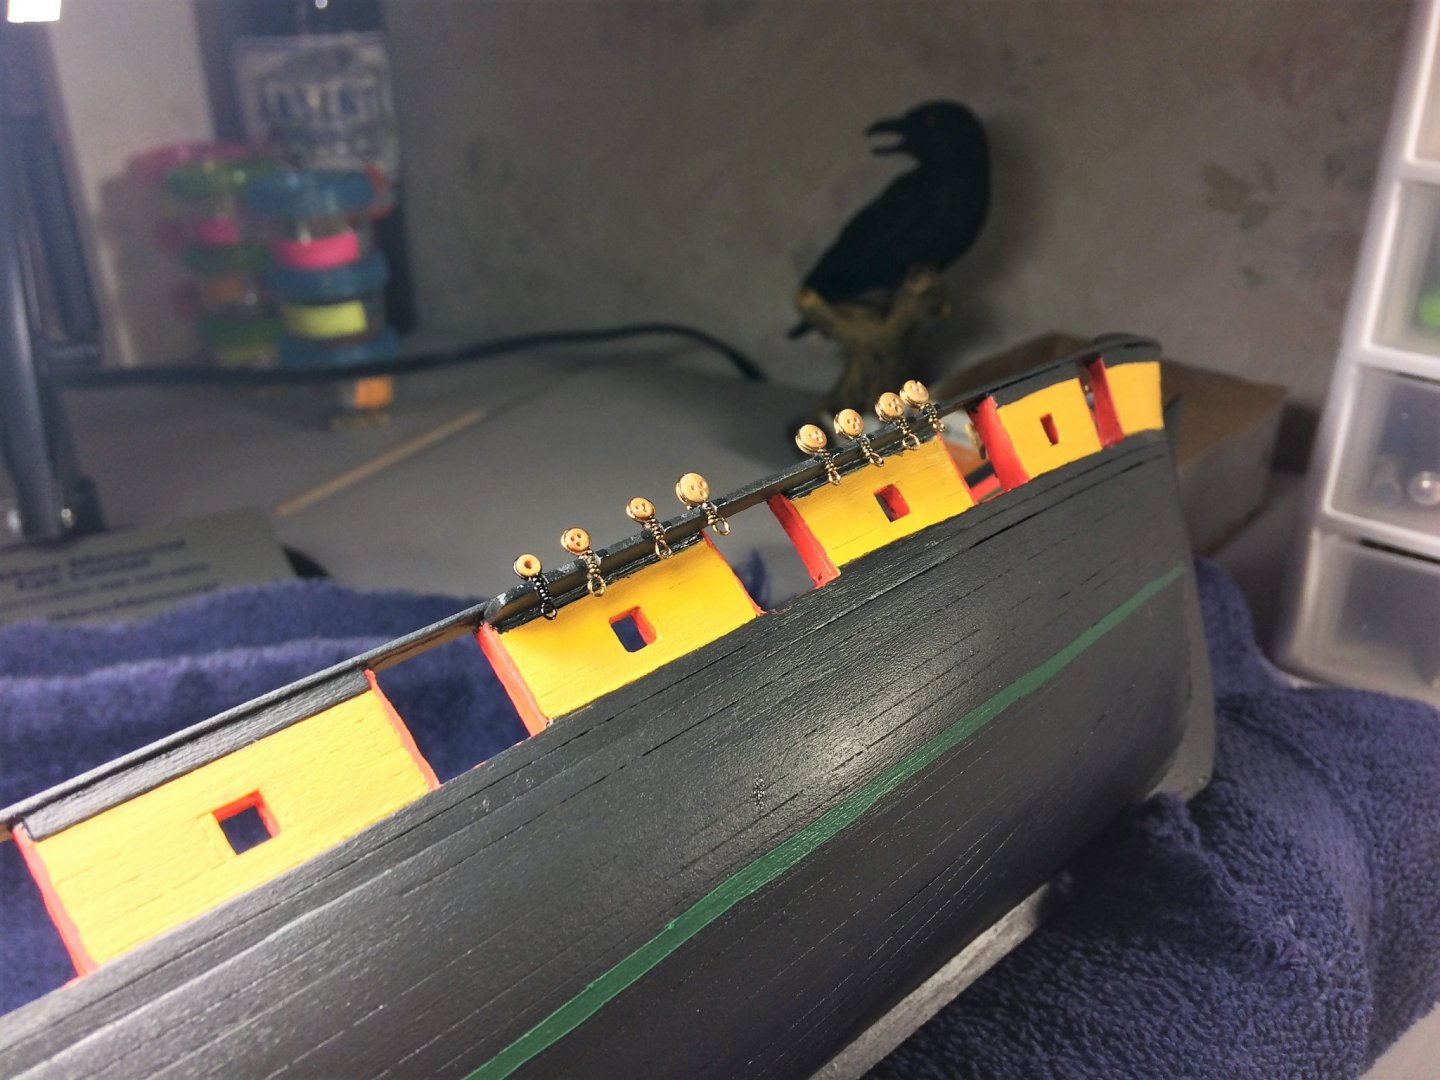
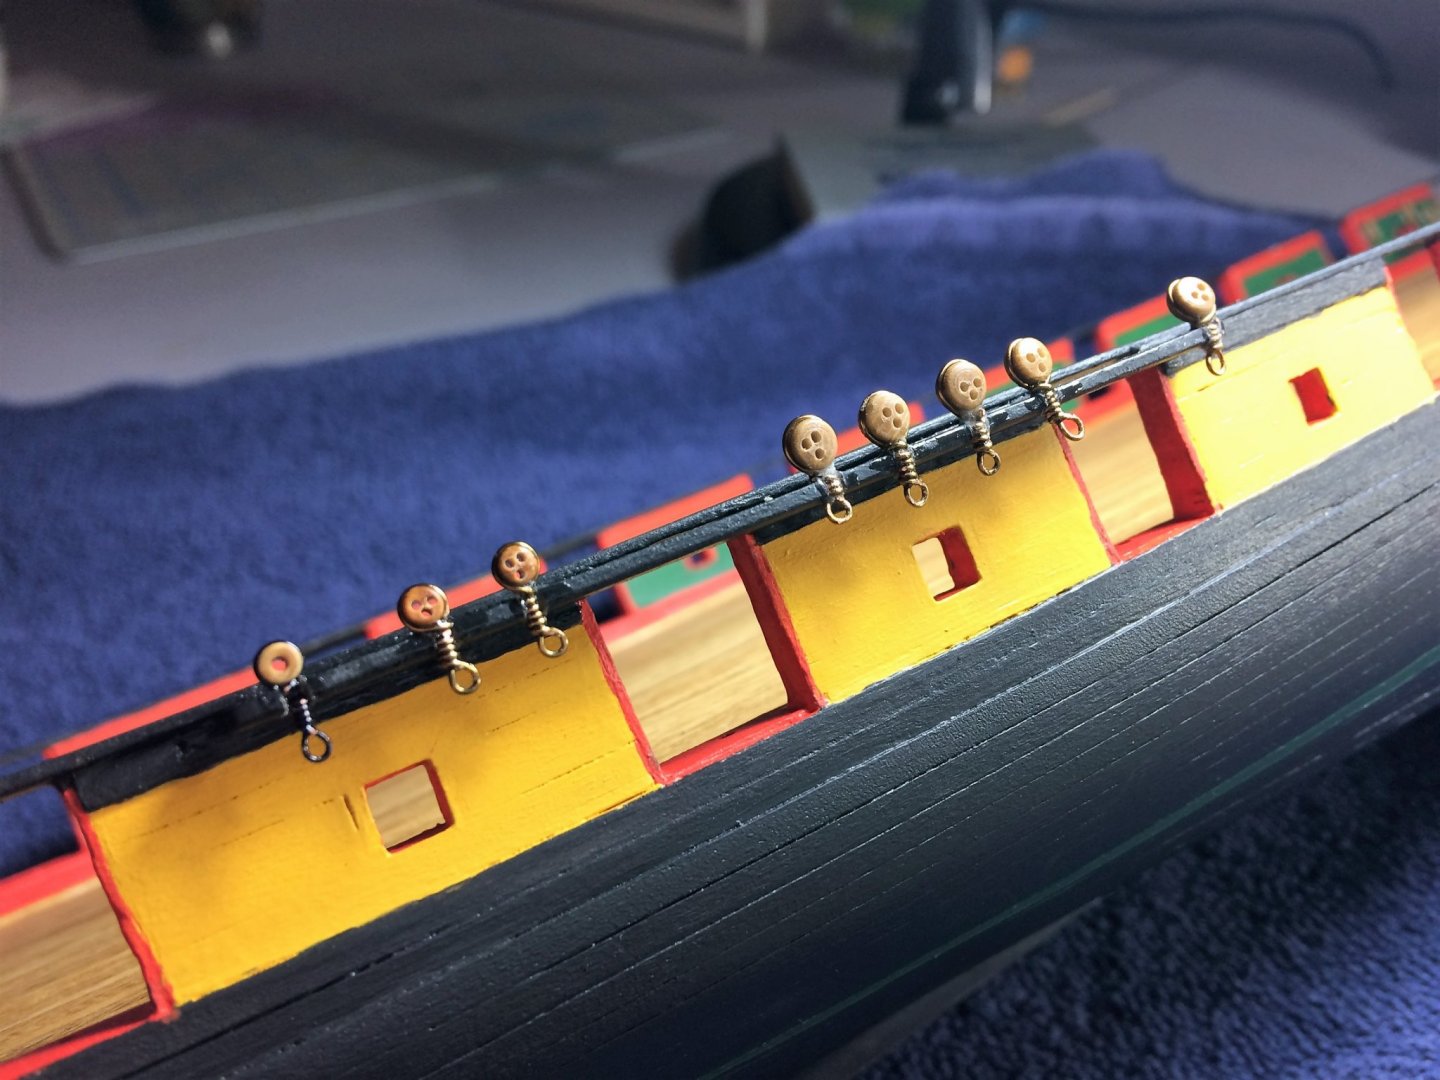
-
Christos, Really coming along nicely. Glad to see you back at your build! Tom E
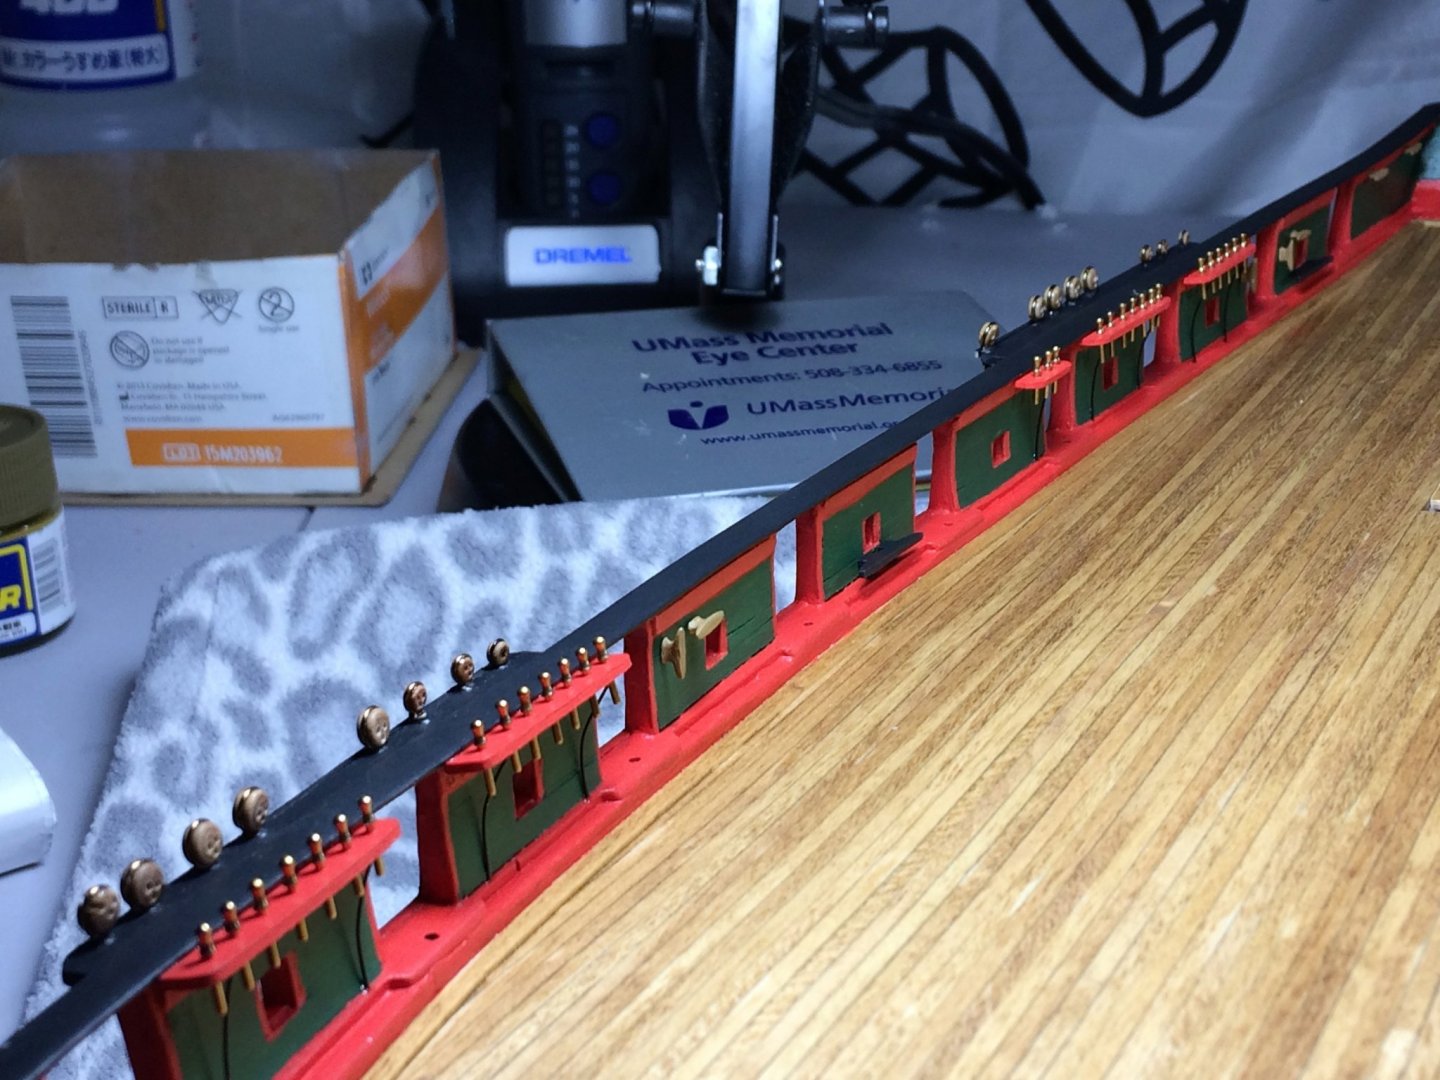
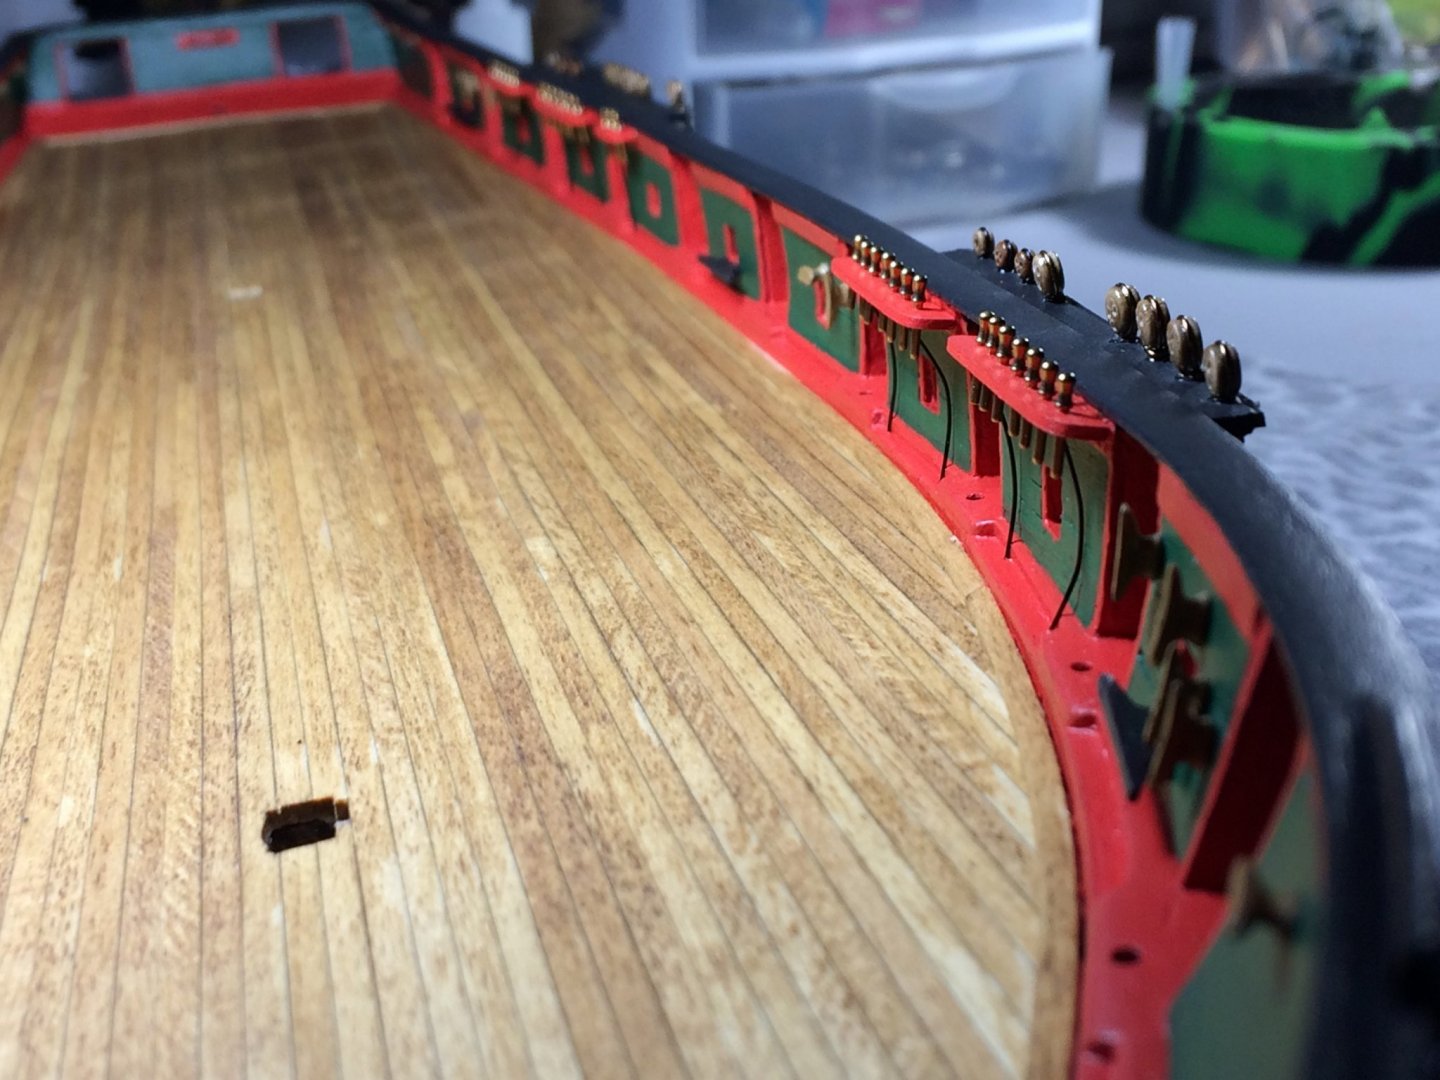
-
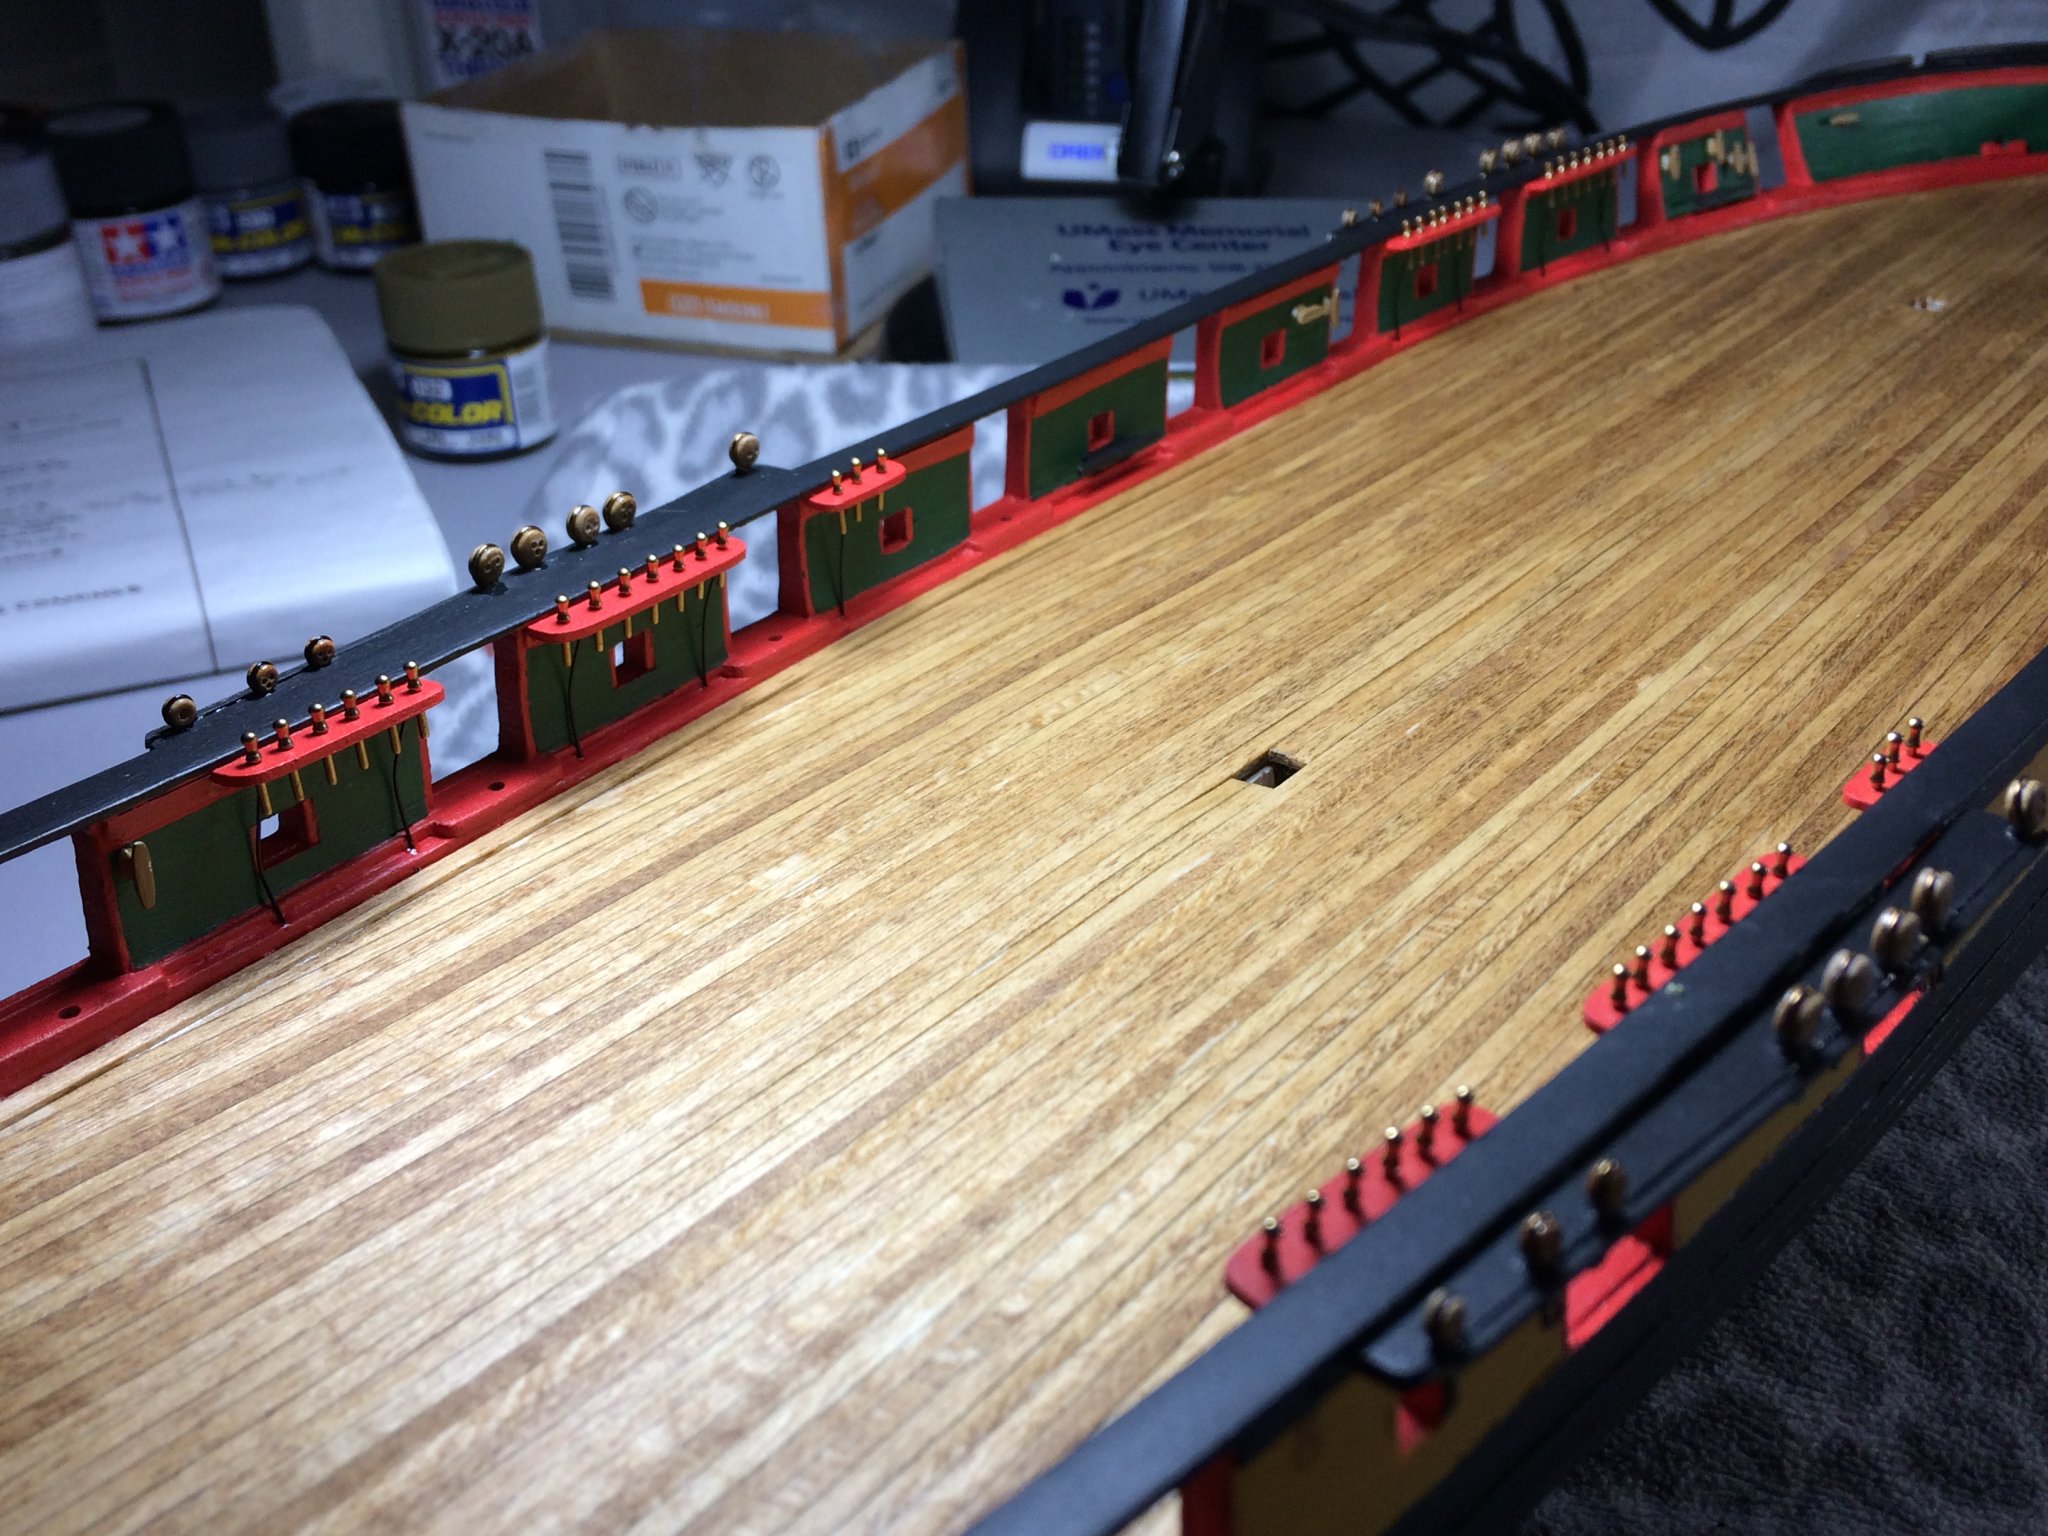
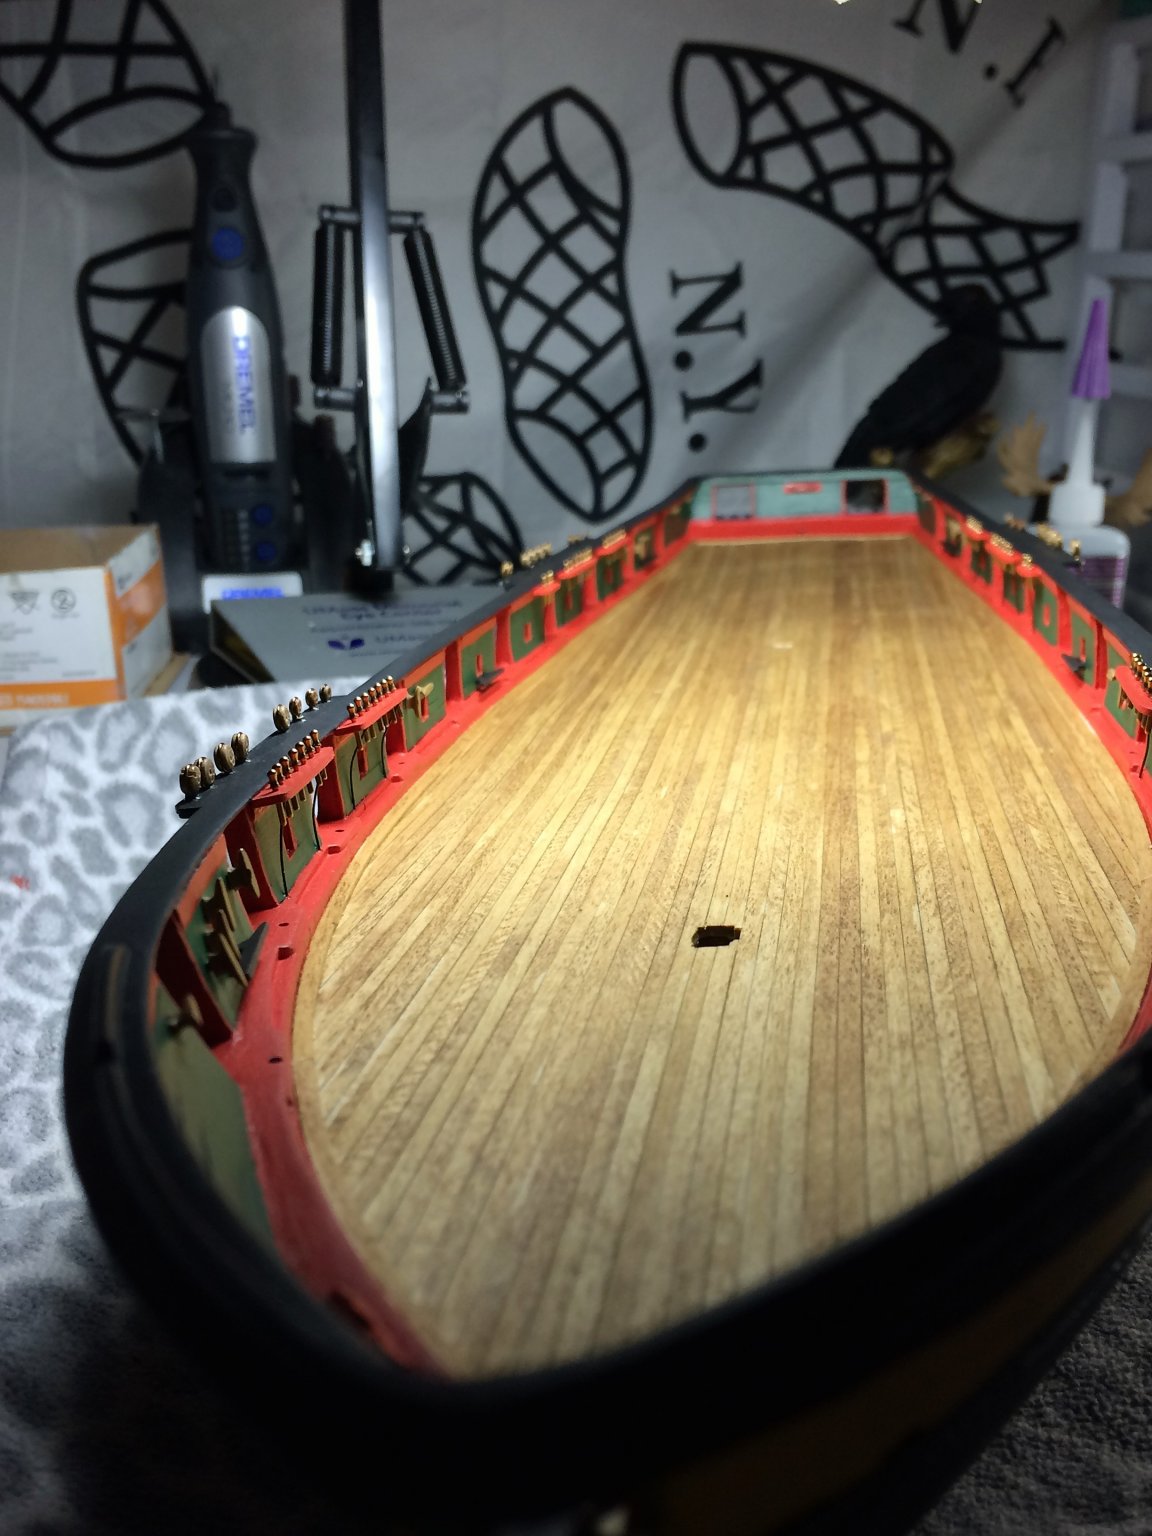
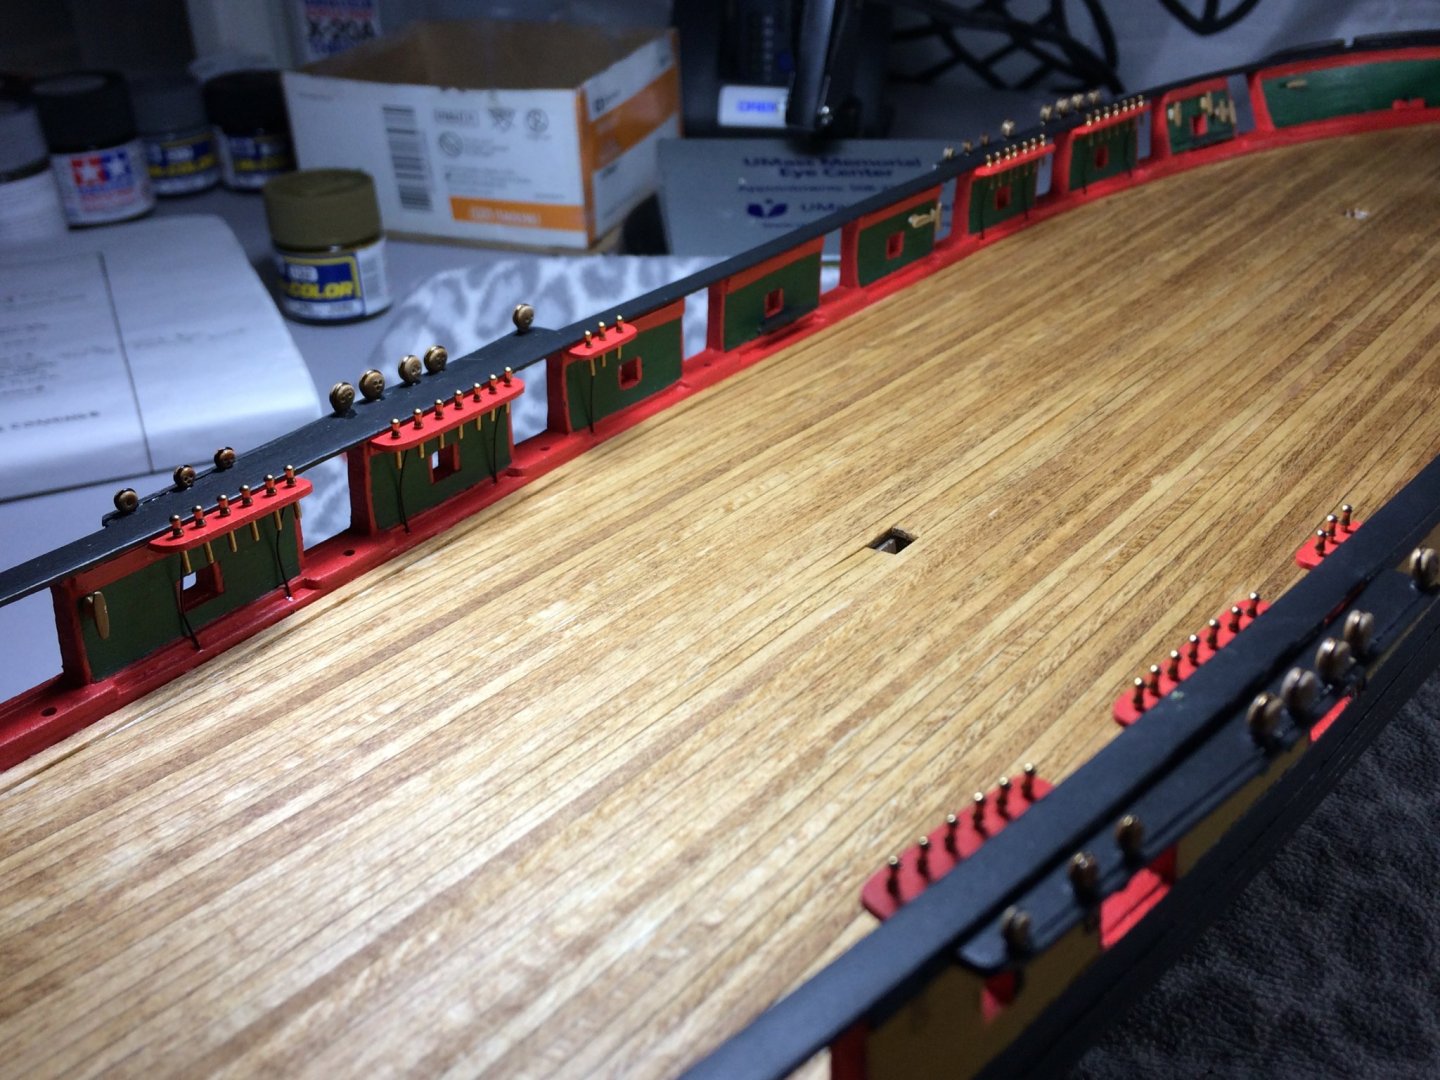
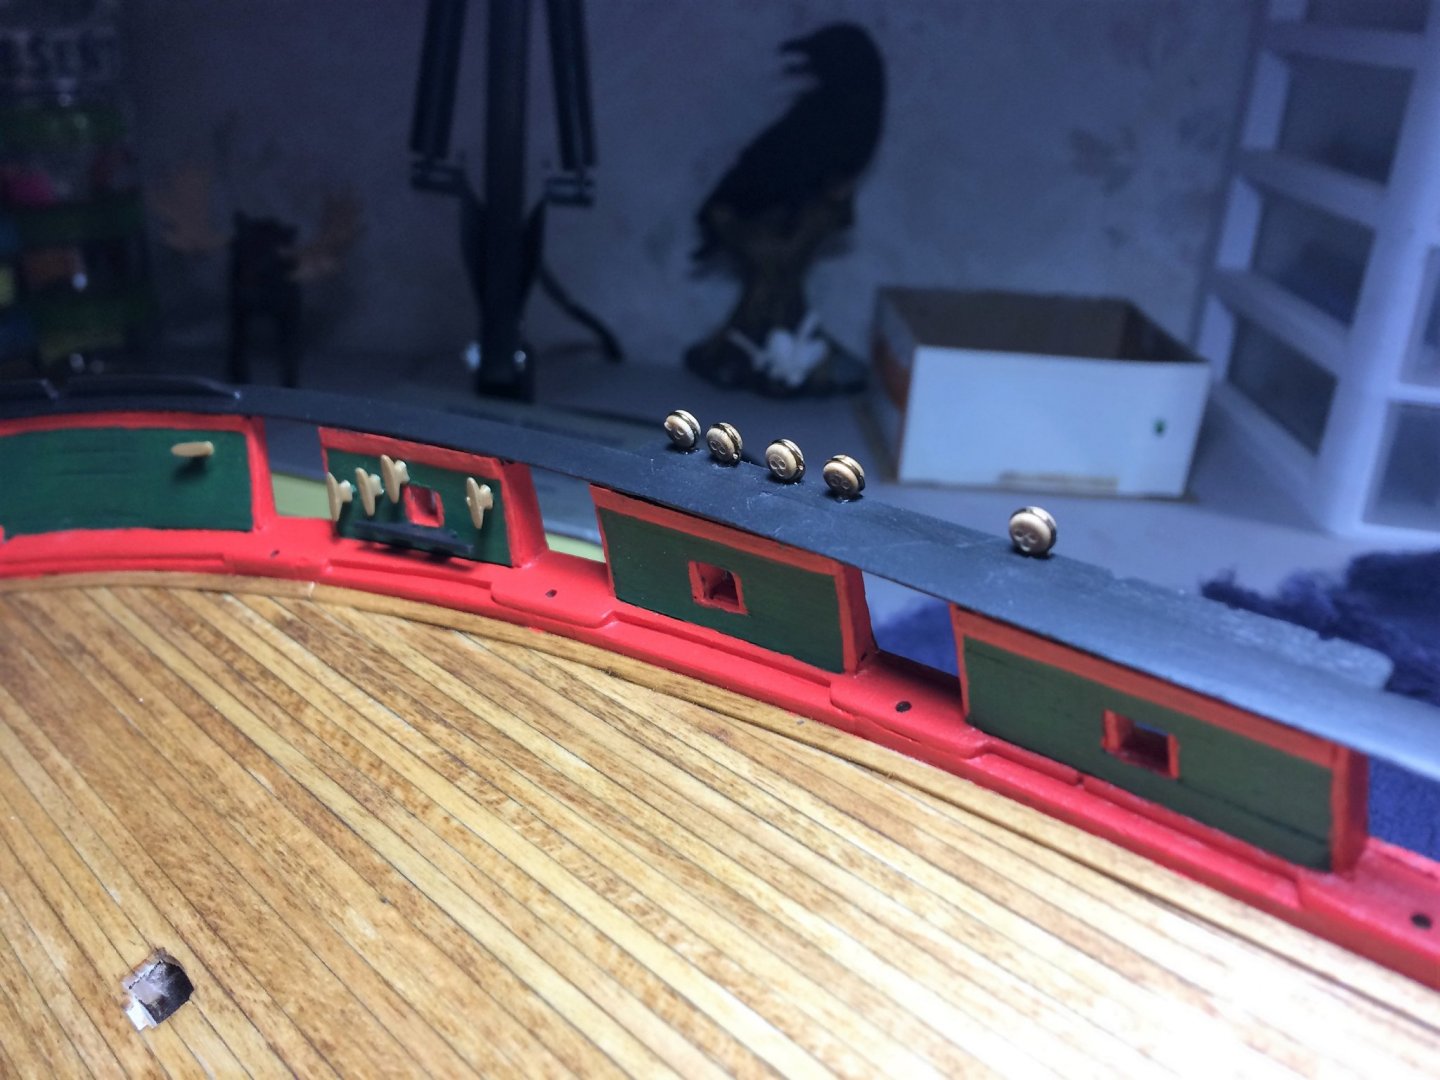
Evening, I cant believe its been over a month since I last posted! Sheesh....life does get one distracted from the build. But it's been a good distraction, I'm buying a house!!!!! It's a small place on Mascoma Lake in Lebanon NH. Since it's just me these days, this will be my "retirement" home. Should be paid off by the time I retire, if not earlier. The closing is scheduled for December 19th. That means I'll have to shut down the Shipyard. But, with the space I have at the new place, I should have a pretty sweet model shop. I have funds set aside already to set it up with a quality workbench and airbrush set up. Cant wait!!!! Any who.... Back to Niagara The Main and Foremast Course yards are painted. The eyebolts need the paint cleaned out of them. The eyebolts will be rigged with rope, then the foot ropes. I also added the two inner double blocks for the Course Yard Truss on the underside on the Main and Fore tops. The outer two blocks are the Buntline blocks. Below is the final income. The blocks for the Truss have not been glued in yet. I have a suspicion it will be easier the rig the blocks before gluing and I'm not at that point yet. The Pin rails continue. Below are the rear Starboard rails. The front pinrails are currently being painted red, as will these. Port side rails will be next. Tom E