Osmosis
-
Posts
626 -
Joined
-
Last visited
Content Type
Profiles
Forums
Gallery
Events
Everything posted by Osmosis
-
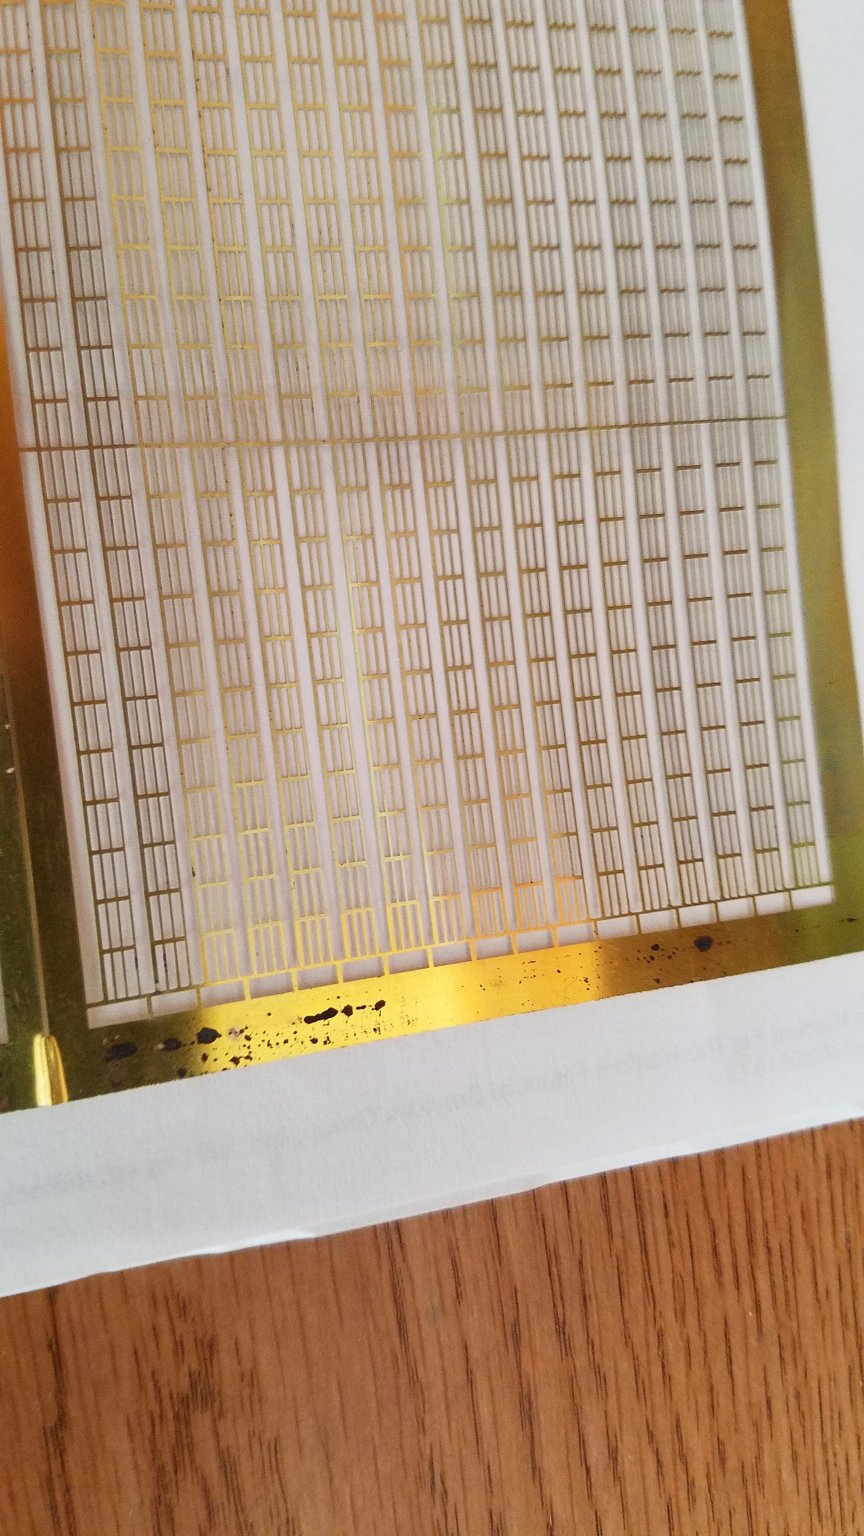
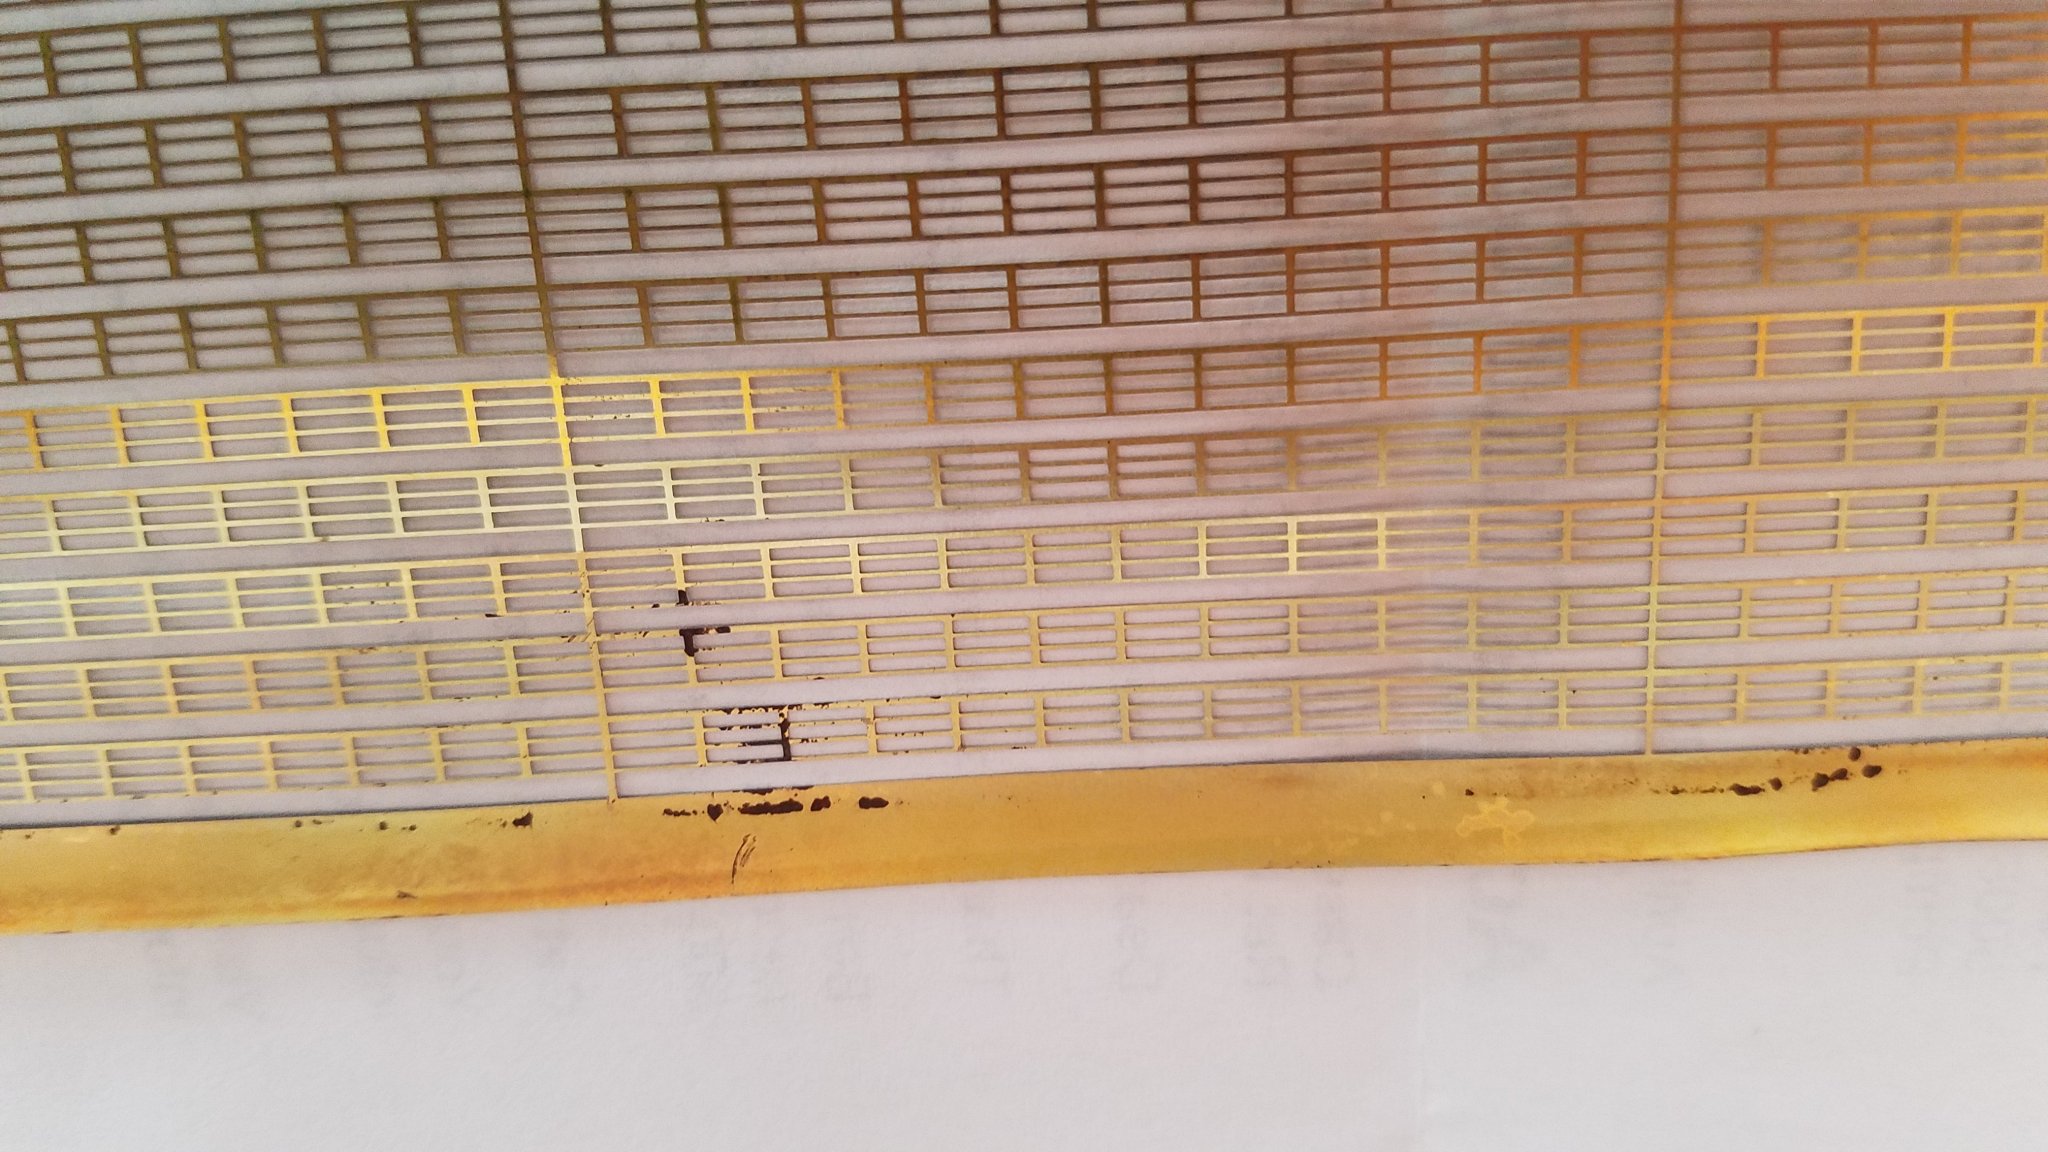
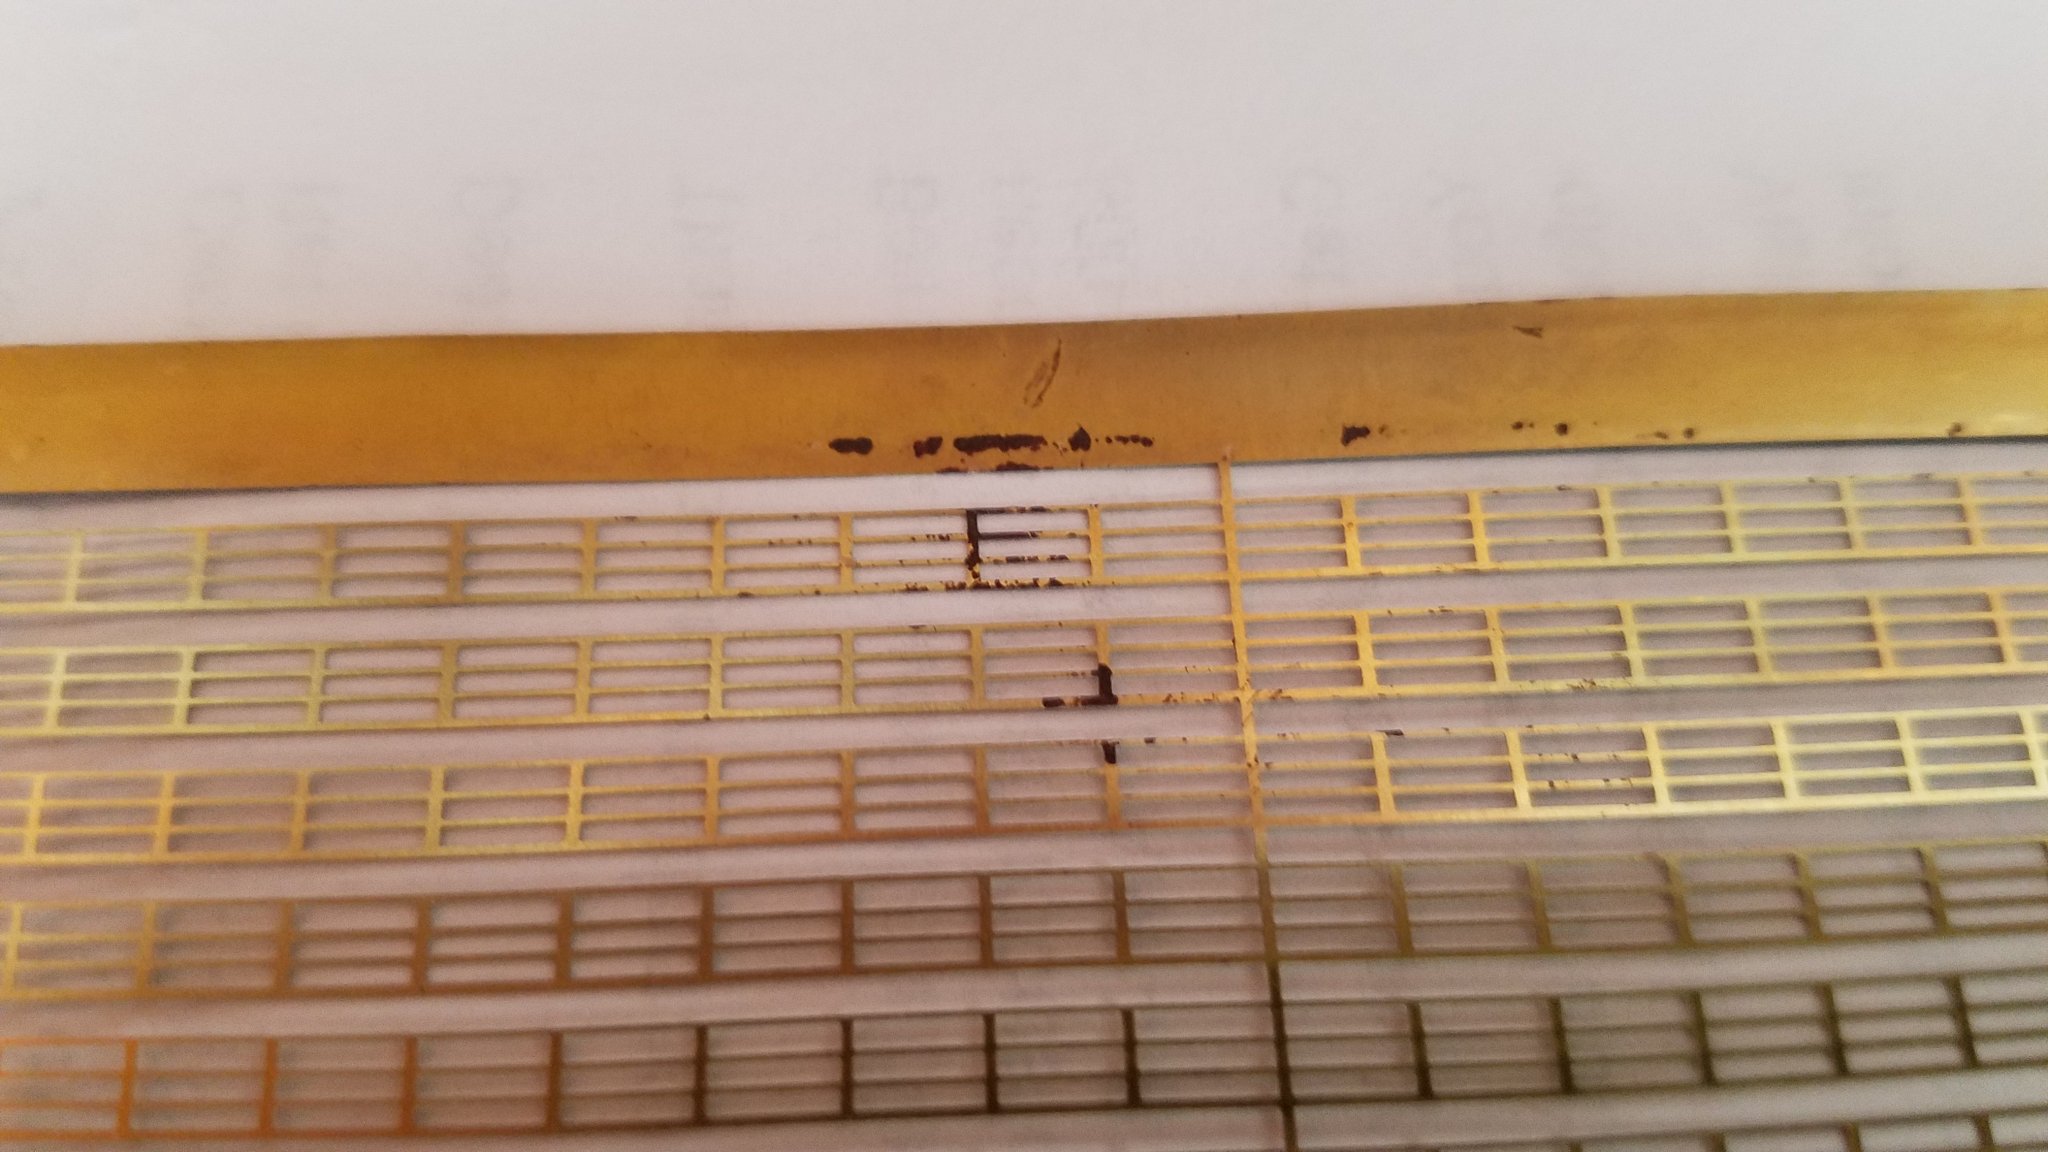
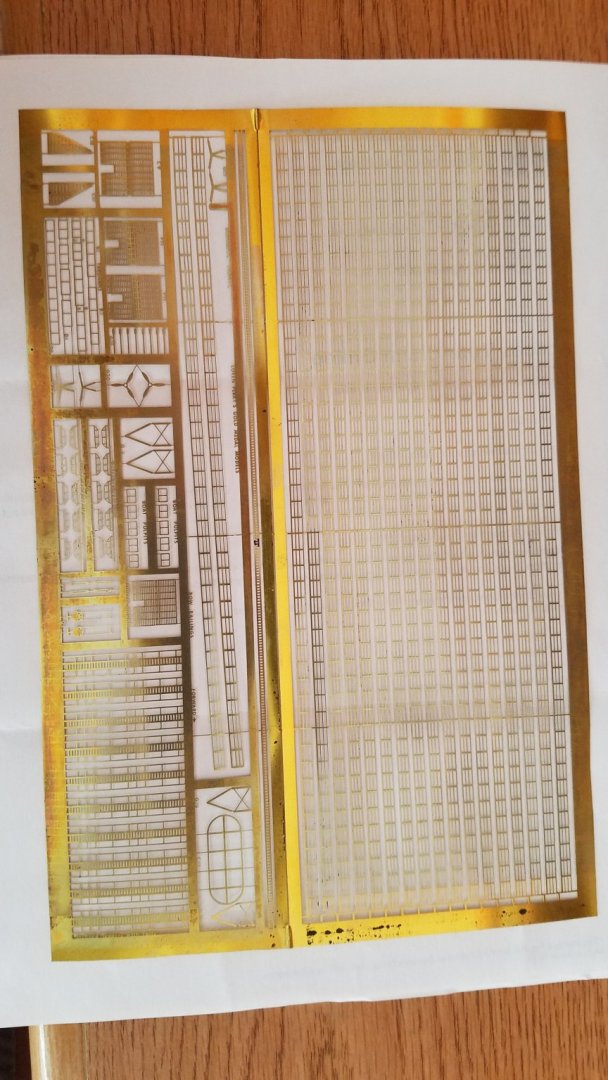
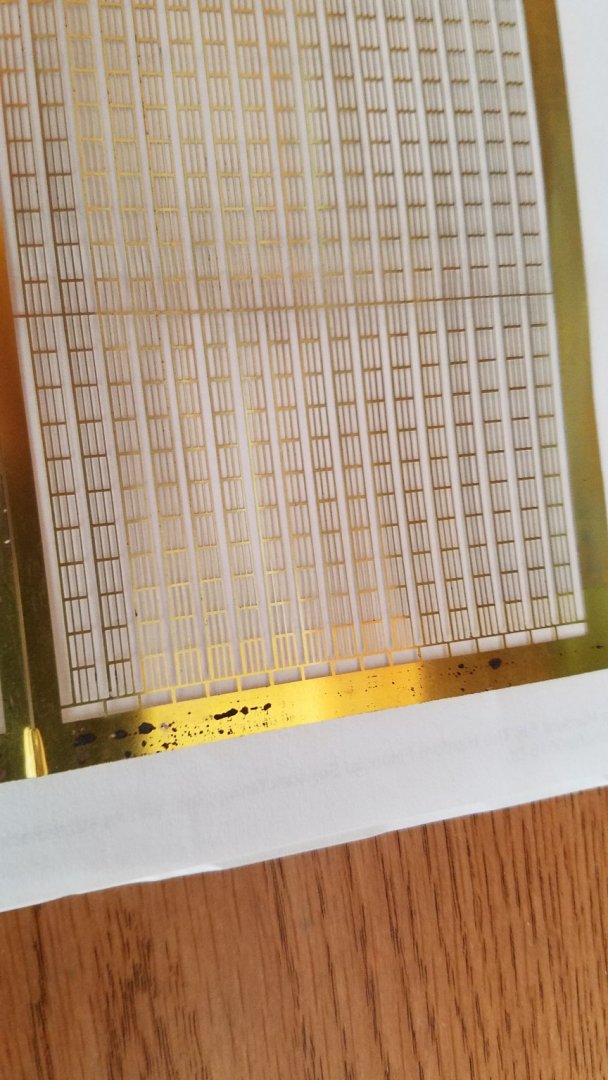
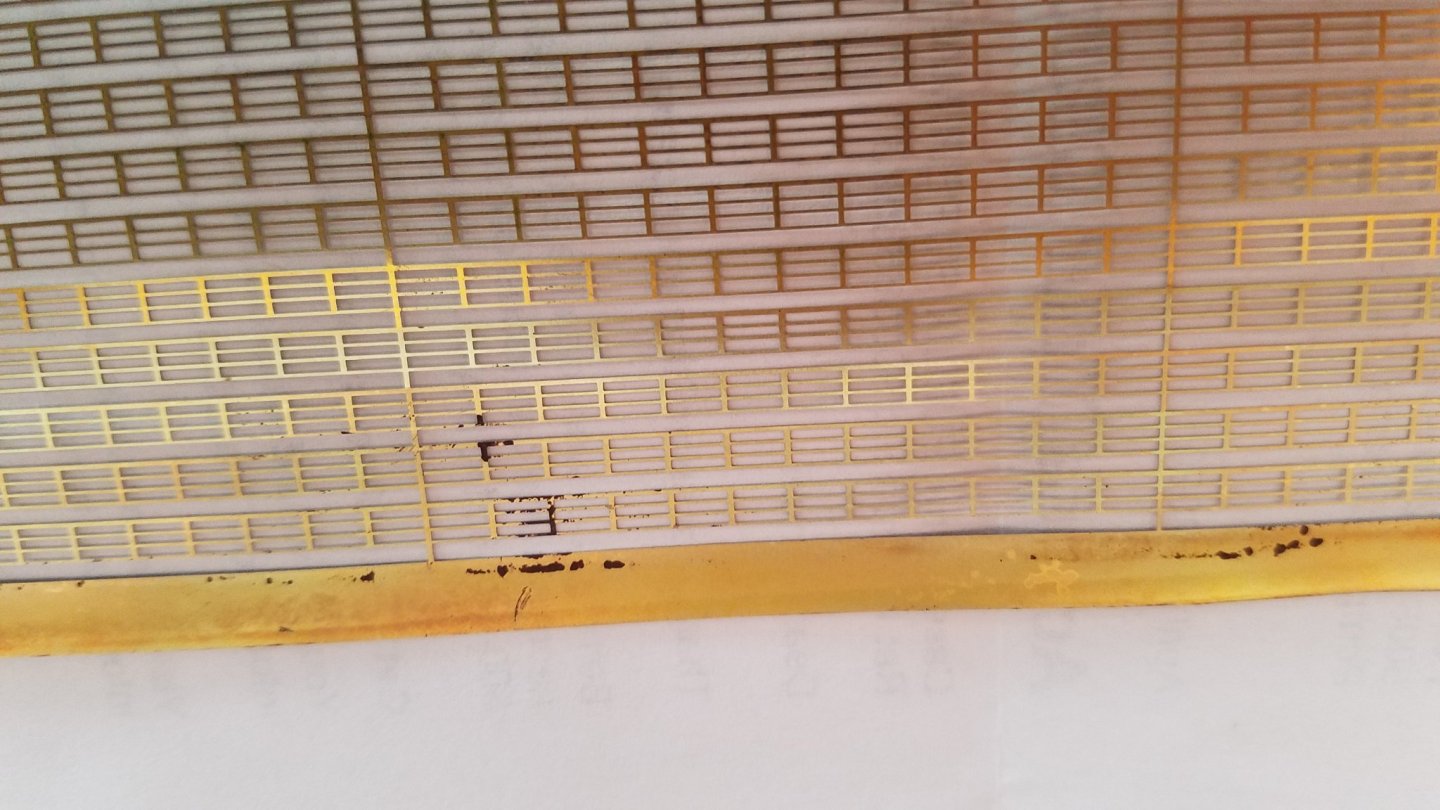
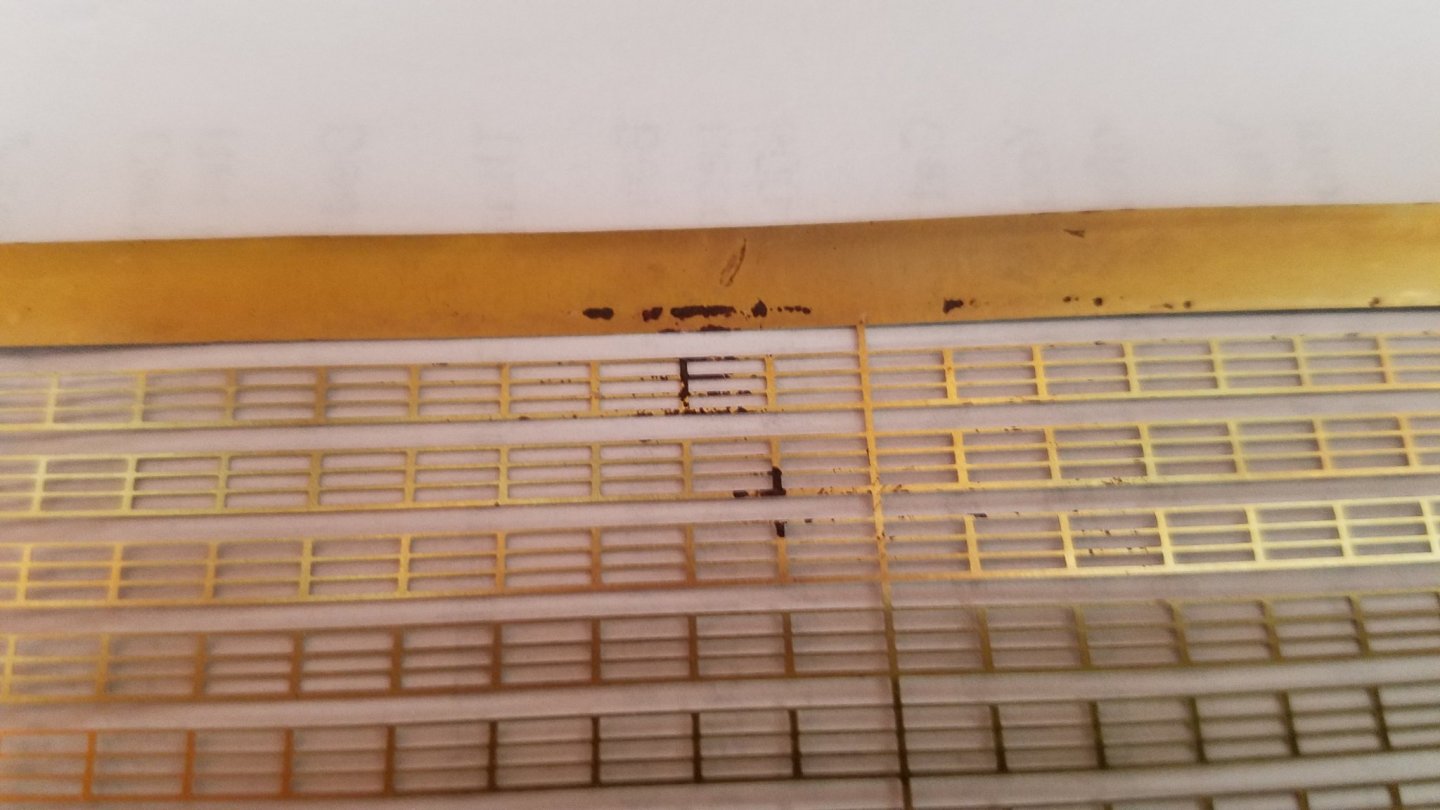
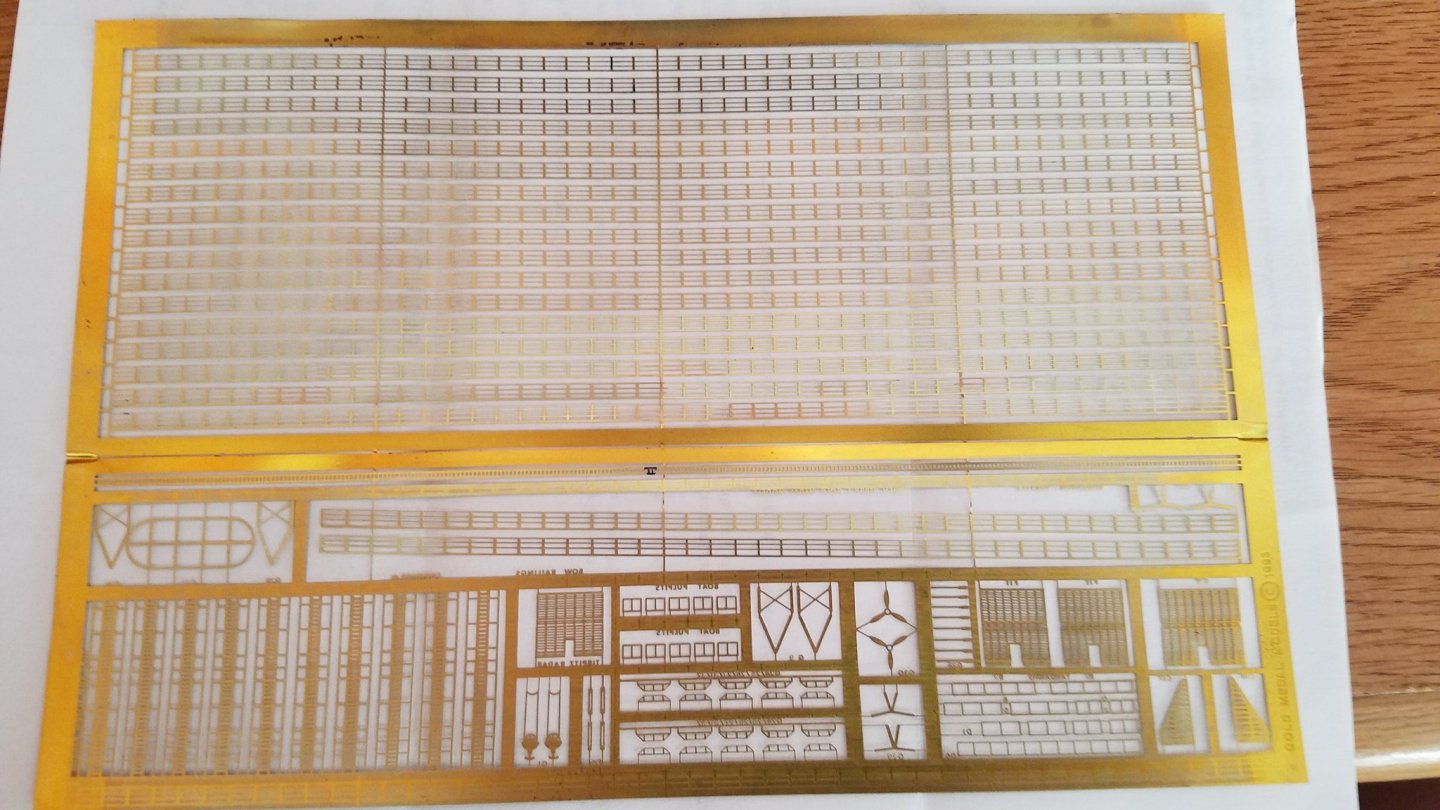
Well I decided on the gold medal models kit and found one for $65.00 on ebay from a hobby shop in Texas. It arrived today and is not exactly what I would call "New and Unused". The entire sheet, yes one sheet is covered in rust and totally unusable in my humble opinion. The seller does have a very good rating so hopefully he will do the right thing. Some of it is hard to see in the pics but in the right light it is quite extensive. Let the ebay fun begin.
-

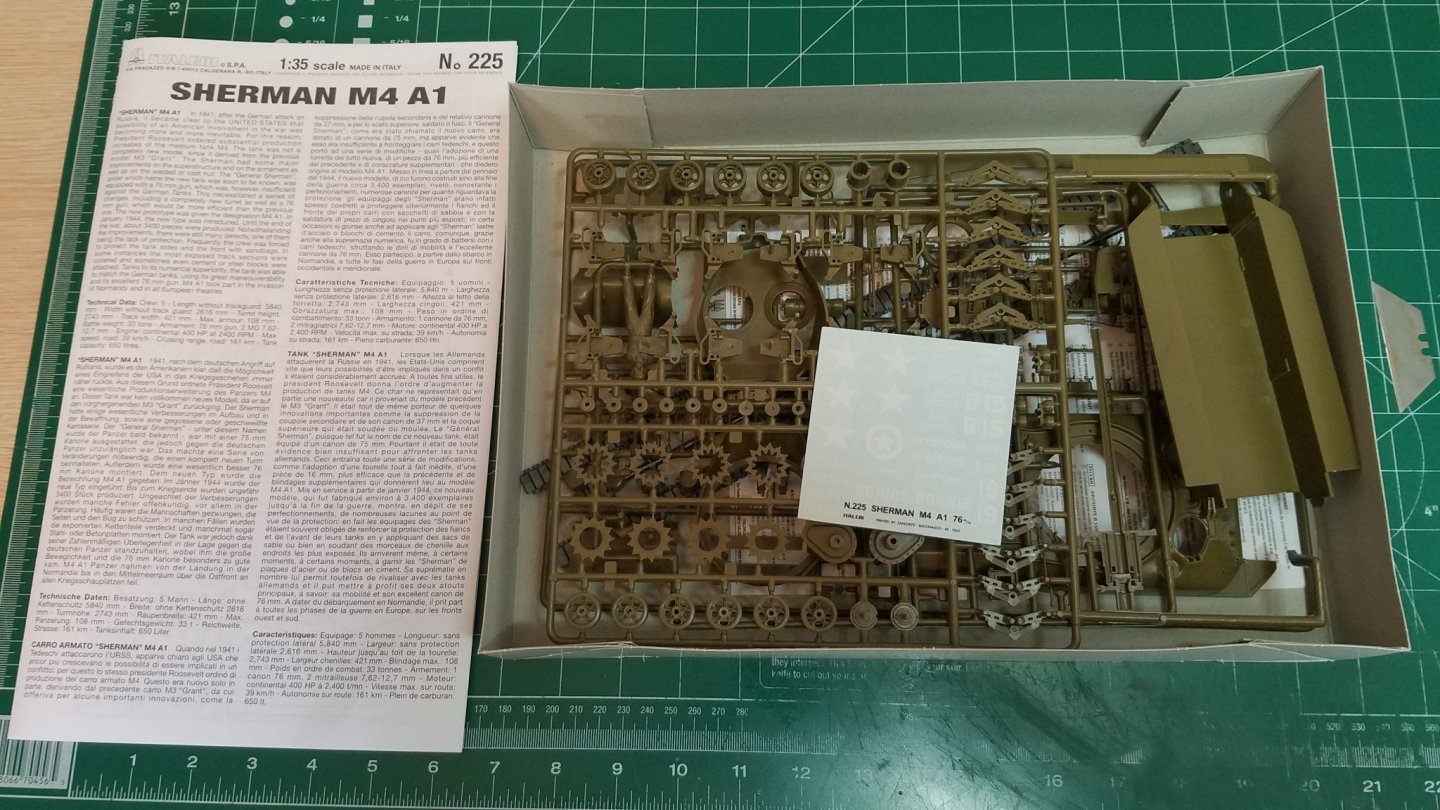
M4-A1 Sherman Tank by Osmosis - Italeri - 1:35
Osmosis replied to Osmosis's topic in Non-ship/categorised builds
Yup Popeye they are movable. I have decided that since my painting supplies won't be here for a while yet that I am going to concentrate on getting this one glued together. I am finding that challenging enough. I am used to PVA glue and the long set times. Once I have figured out how to get them all stuck togethe,r I will figure out the painting on the next one. -
If the real one looked anywhere near this bad just imagine what those poor sailors were going through.
-
M4-A1 Sherman Tank by Osmosis - Italeri - 1:35
Osmosis replied to Osmosis's topic in Non-ship/categorised builds
That is really what I intended for this model one big experiment from beginning to end. -
M4-A1 Sherman Tank by Osmosis - Italeri - 1:35
Osmosis replied to Osmosis's topic in Non-ship/categorised builds
Yes after about 5 minutes on the interwebs I answered my own question. They don't call it Olive Drab for nuttin. Very monotone. Is there a way to de glaze the plastic or do I just shoot the whole thing with dull coat when I am done? -
M4-A1 Sherman Tank by Osmosis - Italeri - 1:35
Osmosis replied to Osmosis's topic in Non-ship/categorised builds
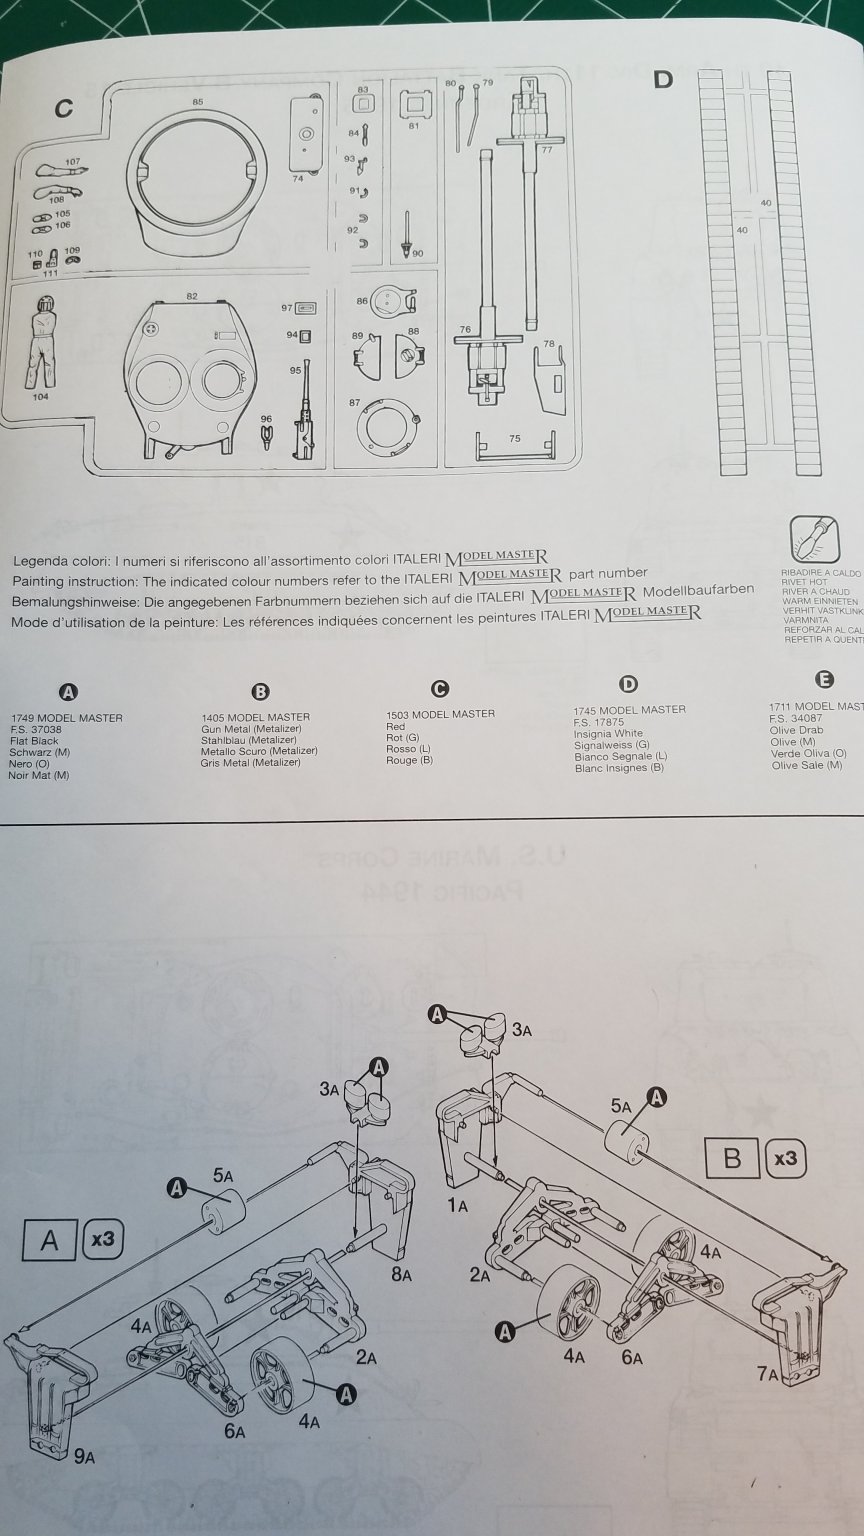
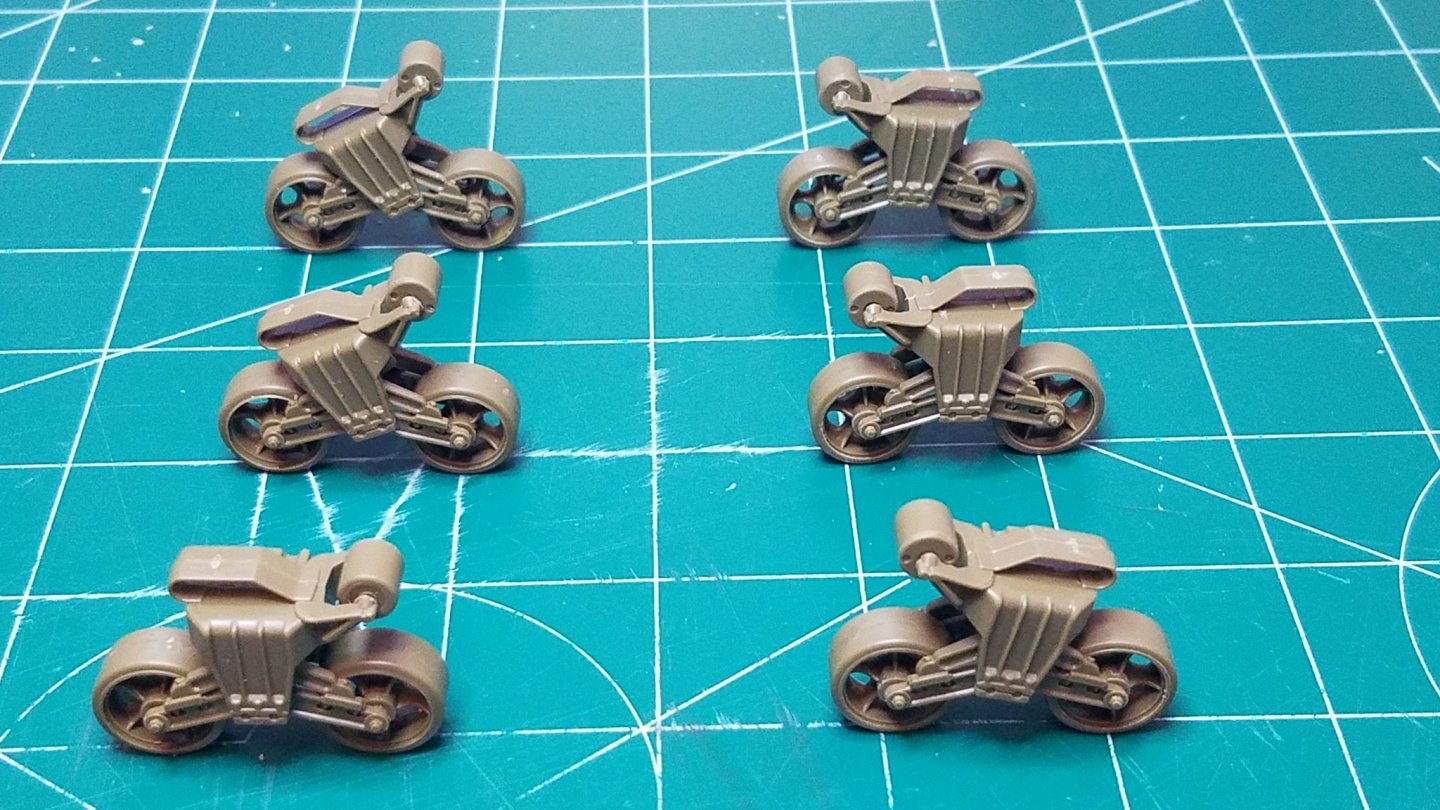
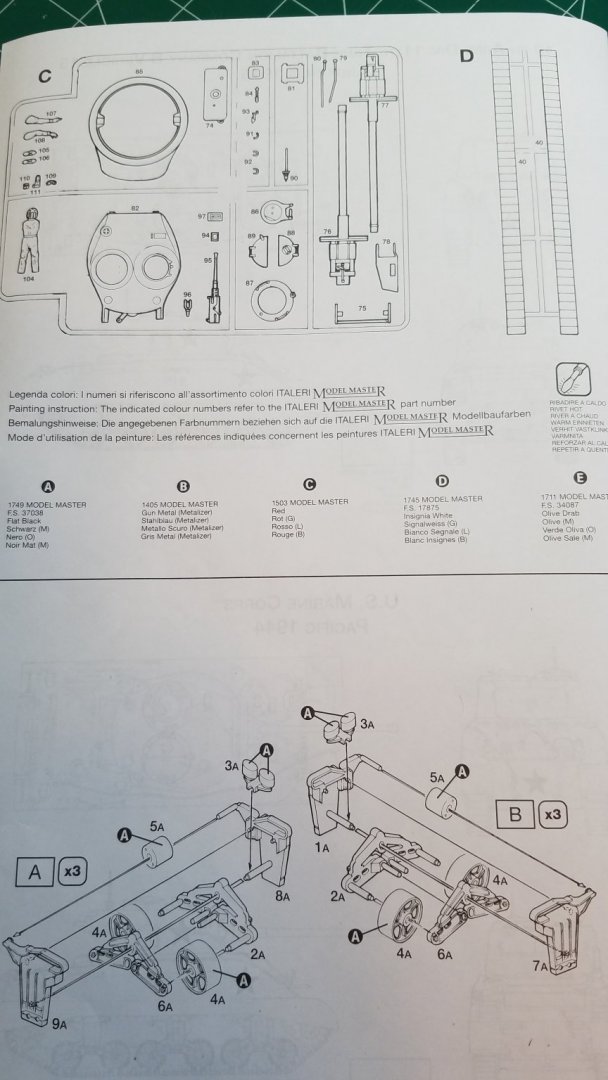
Almost a whole day and I am not even close to being done with step one of the instructions. But I do have all of the hard part out of the way ..... I Think? All of the suspension parts or whatever they are called have been nipped from the sprue, deburred, deflashed, and dry fitted. Here are the first three and all of the tools I have used so far. Nippers knives, emery board. 800 and 1200 grit sand paper. While the flashing was minimal the mold misalignment marks were pretty bad in some spots. Reminds me of something out of TRON. All 6 dry fitted. I got them aligned as bet I could but there are still going to be some fairly major in my opinion misalignment where the two halves come together. This leads me to my first question/problem. As you can see below the only parts of theses assemblies that are called out for painting are the wheels, guide rollers and a small part that you can barely see once they are assembled that I assume to be part of the hydraulic system. So if the rest of the assembly does not get painted how do I hide and filling or sanding that I would need to do to correct the misalignment. Or am I worrying to much at this point. There are very few parts that are labeled for painting in the entire kit. Do they leave it to the builders discretion? Or were these really basically just one color. I spent quite a few years in the US Navy so I know how the military can be when it comes to paint but I am more concerned with winding up with a decent looking model. I have been doing a bit of research on painting and prepping for painting but I would like to hear from some of you. Is washing with warm soapy water and air drying the best method or do you have a different way? Thanks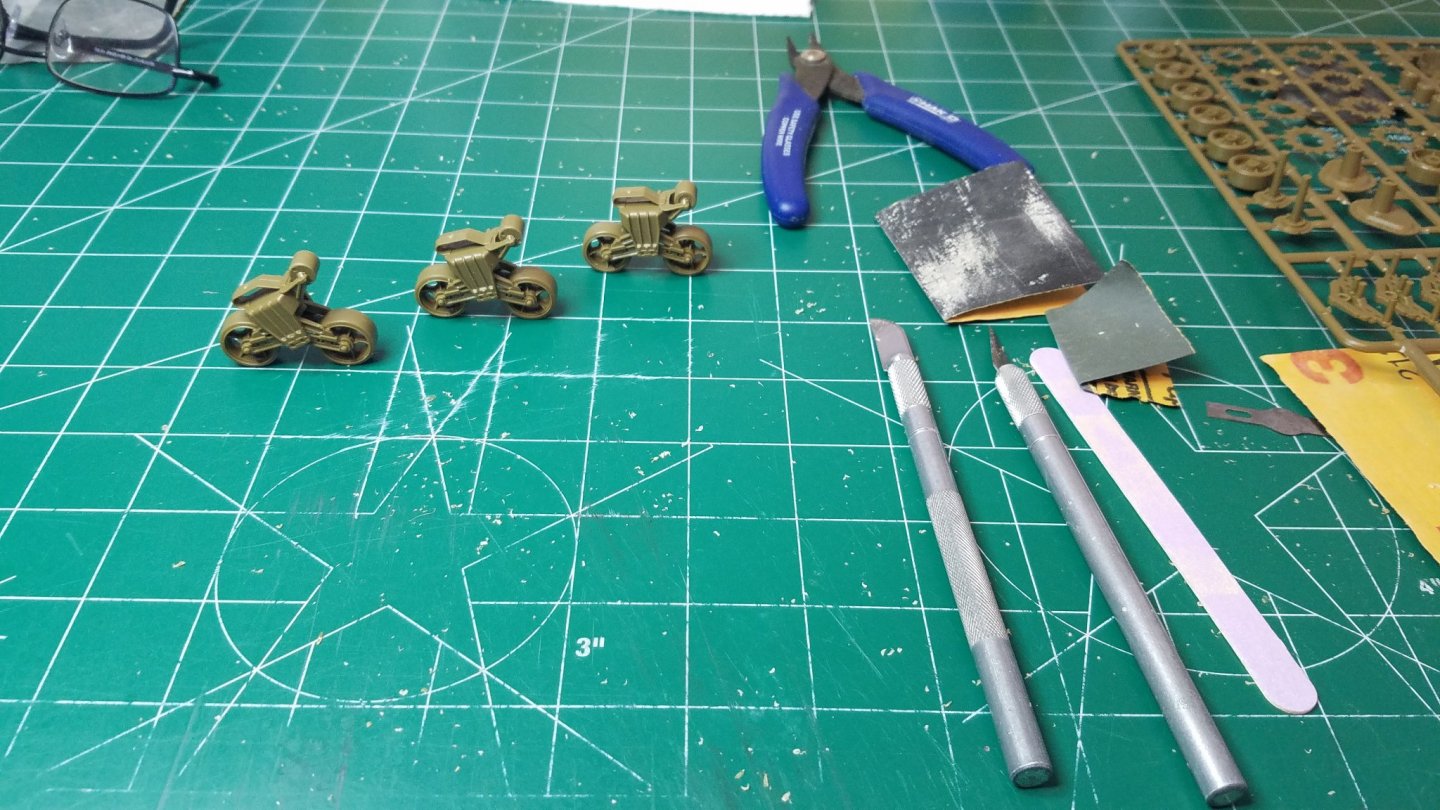
-
M4-A1 Sherman Tank by Osmosis - Italeri - 1:35
Osmosis replied to Osmosis's topic in Non-ship/categorised builds
(*^%^%$% I just got home from lowes an hour ago. Thanks -
M4-A1 Sherman Tank by Osmosis - Italeri - 1:35
Osmosis replied to Osmosis's topic in Non-ship/categorised builds
What is the putty all you plastic guys use for holding small parts. Is that just sculpey? Thanks -
M4-A1 Sherman Tank by Osmosis - Italeri - 1:35
Osmosis replied to Osmosis's topic in Non-ship/categorised builds
I am still going to have to roll around in some sawdust every now and then just to get rid of the smell of plastic. Lol -
M4-A1 Sherman Tank by Osmosis - Italeri - 1:35
Osmosis replied to Osmosis's topic in Non-ship/categorised builds
Thanks for the likes and the tips. Based on recommendations from another thread I started in the plastic ship section I already have Testors cement and quick drying liquid glue. I had to order the Tamiya quick dry green bottle from amazon that should be here Monday. I got both just to see if I like one over the other. I already have acrylic spot glazing putty. I need to order some Tamiya paint and a few other airbrush related supplies but other than that I feel like I am all set. Got started tonight deburing some of the parts for the suspension assemblies. That should keep me busy till the painting supplies get here. Thanks -
M4-A1 Sherman Tank by Osmosis - Italeri - 1:35
Osmosis posted a topic in Non-ship/categorised builds
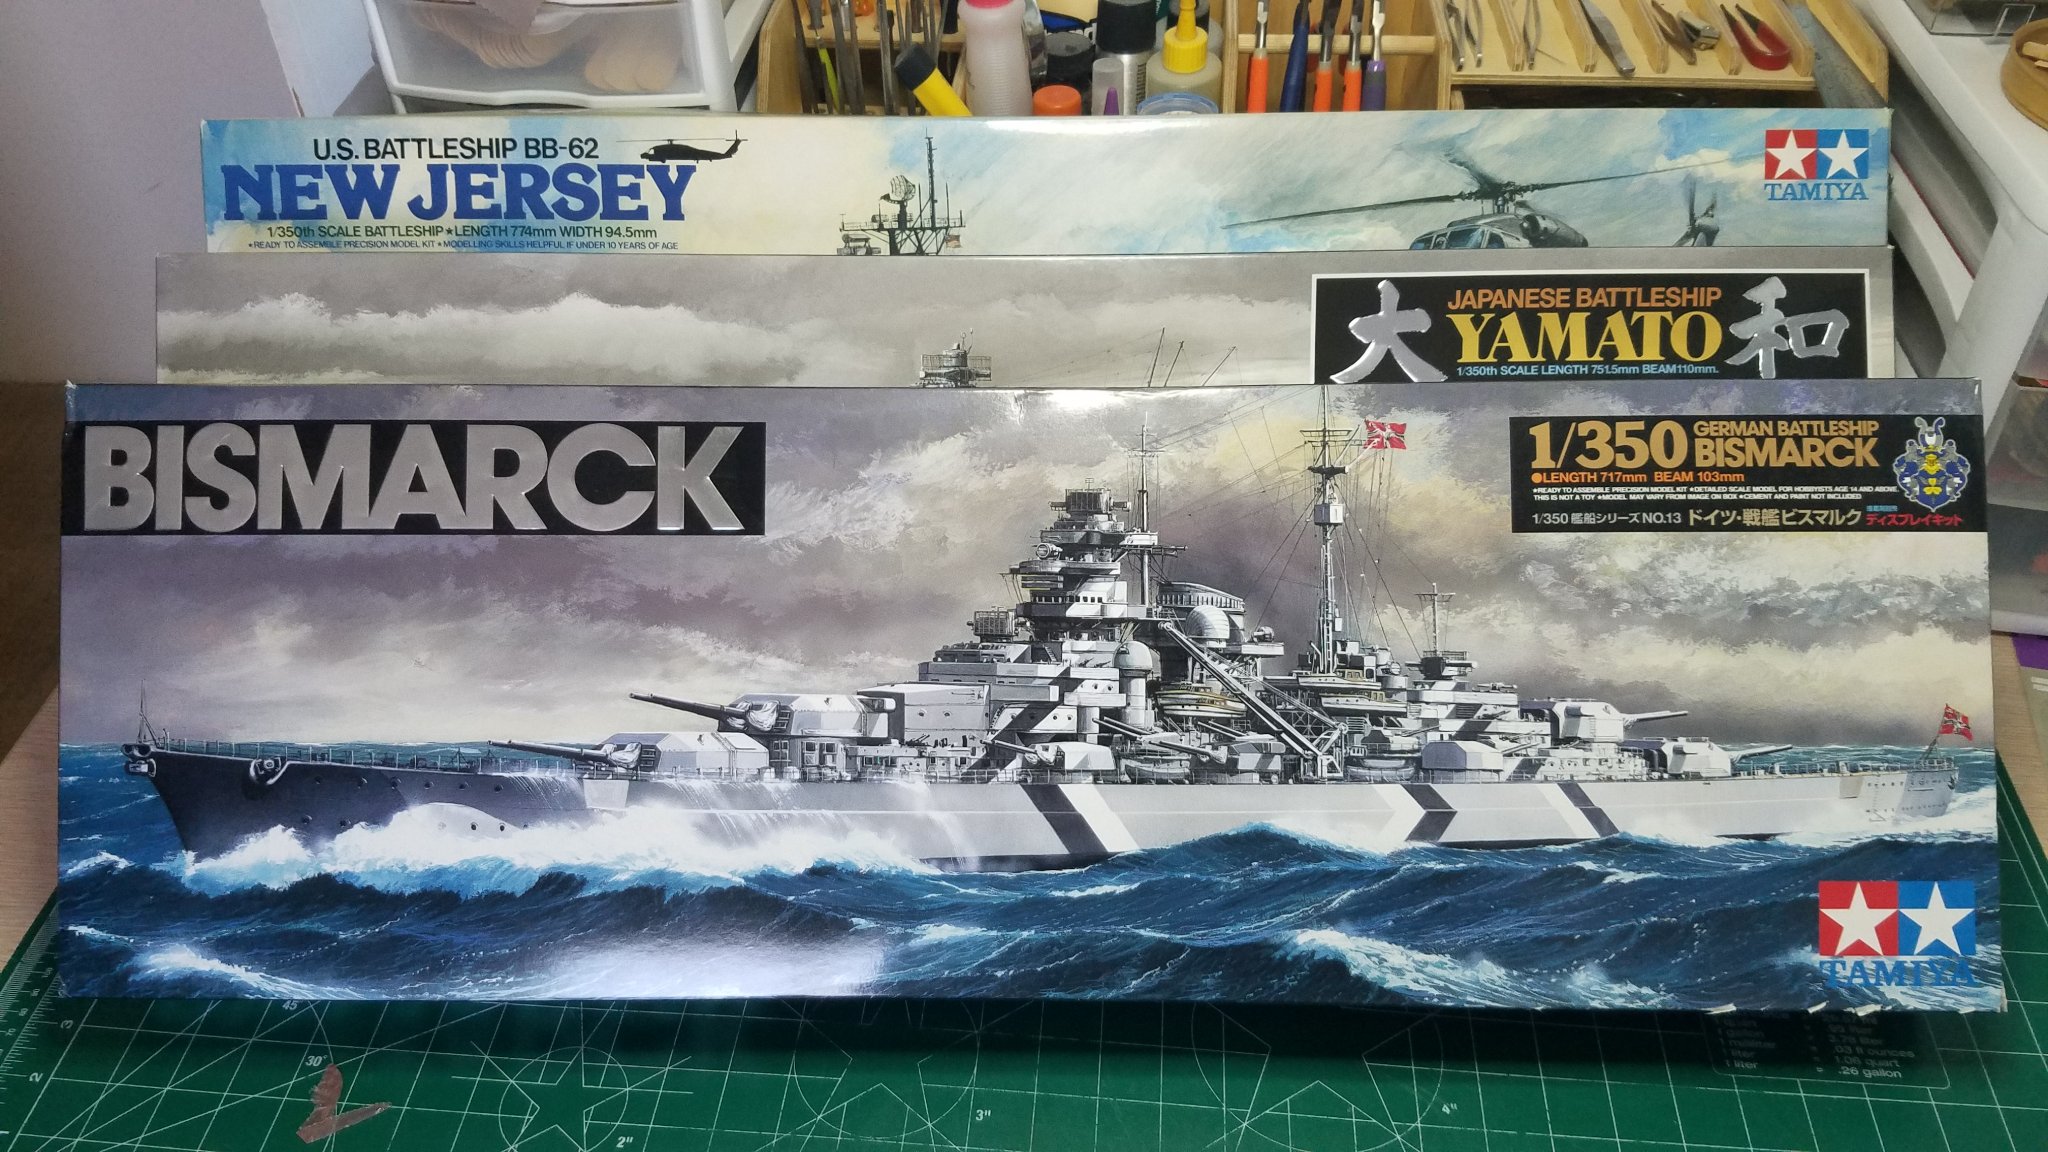
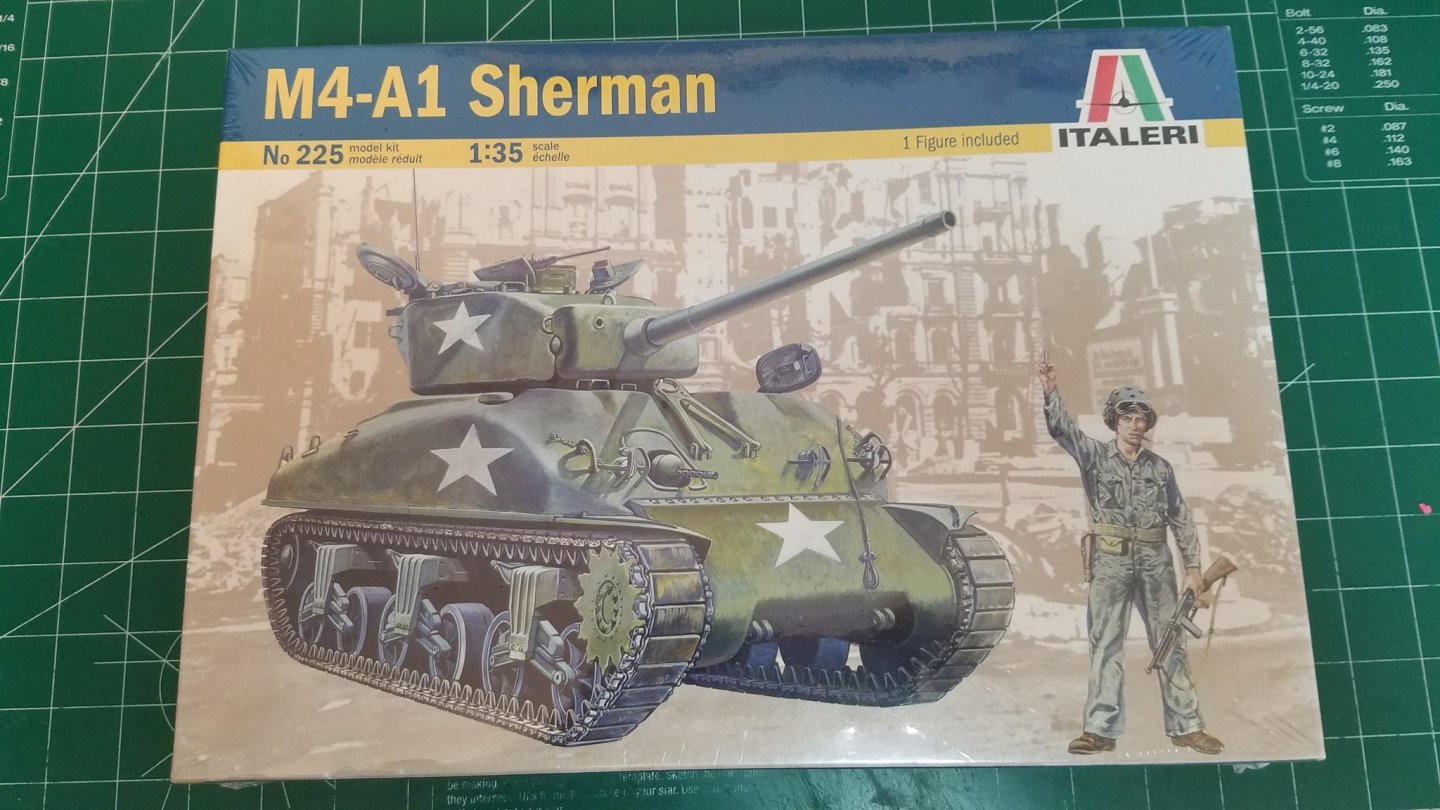
I am going to start this log with a disclaimer. This is my first attempt at a plastic kit in about 50yrs. Seriously since i was about 12 or 13. The reason for this particular model is simple it was the cheapest and easiest to lay my hands on at short notice. I recently had an opportunity to acquire these three kits at a very reasonable price (some would say that I stole them) . Before I tackle them I would like to relearn how plastic kits are done. I was never very good at them to begin with so it may take more than one shot. I will be taking my time and doing the best job I can with this but I do not have very high hopes at this point. I will be using this build to practice gluing and fitting techniques and also finding out if the skills and tools I use on my wooden kits will work on plastic as well. I am also going to be leaning how to use my newly acquired airbrush at the same time. So we will see how that goes as well. I am currently waiting on a new hose for it so I will be doing a lot of trimming and sanding and dry fitting until that arrives. So on with the build log. I was able to purchase this locally on offer up. It is still sealed in the factory shrink wrap. It appears complete as you would expect from a factory seal kit, right? The instructions are in multiple languages but the illustration seem clear and easy to follow. I am going to get to work now and will report back once I have made some progress. Regards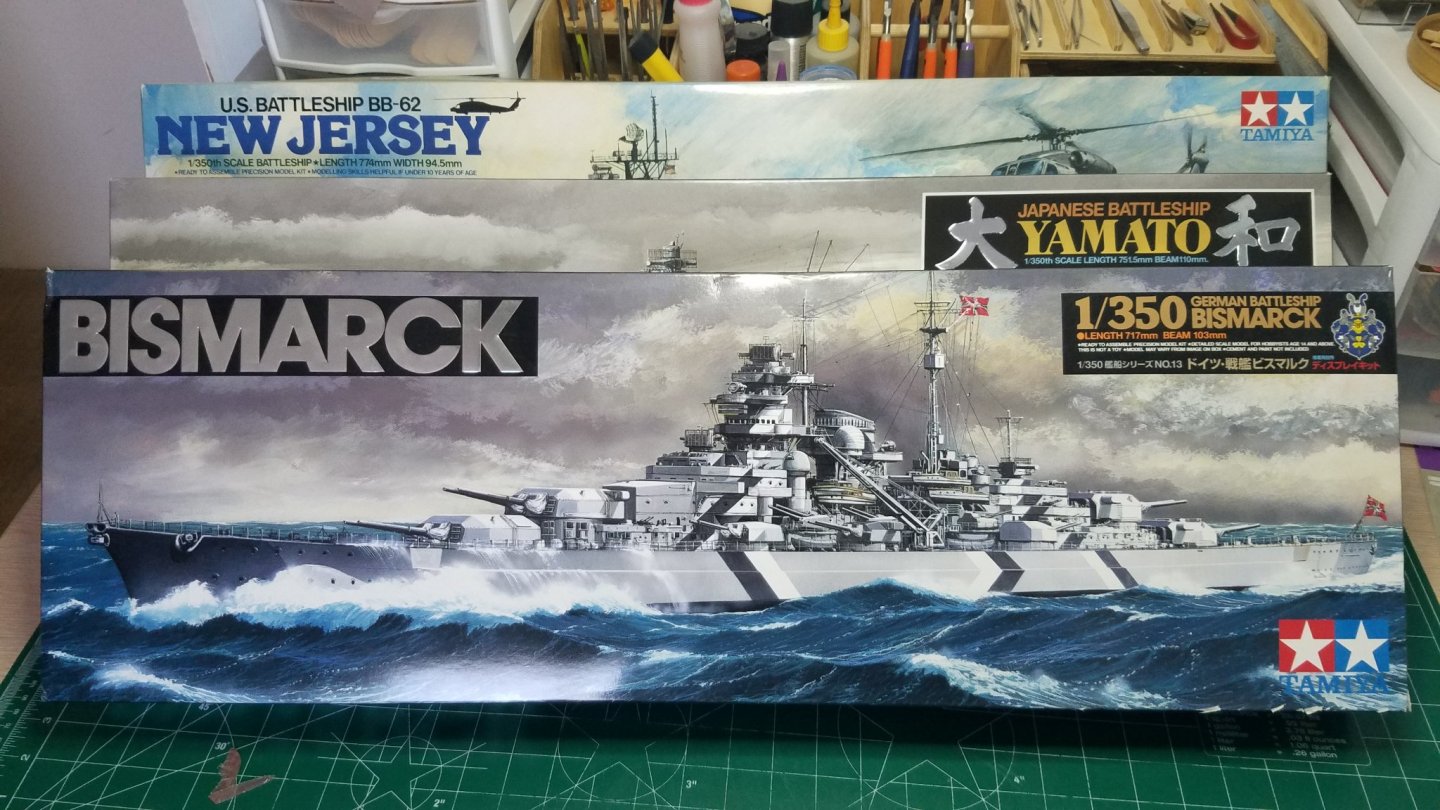
- 24 replies
-
- 11
-

-
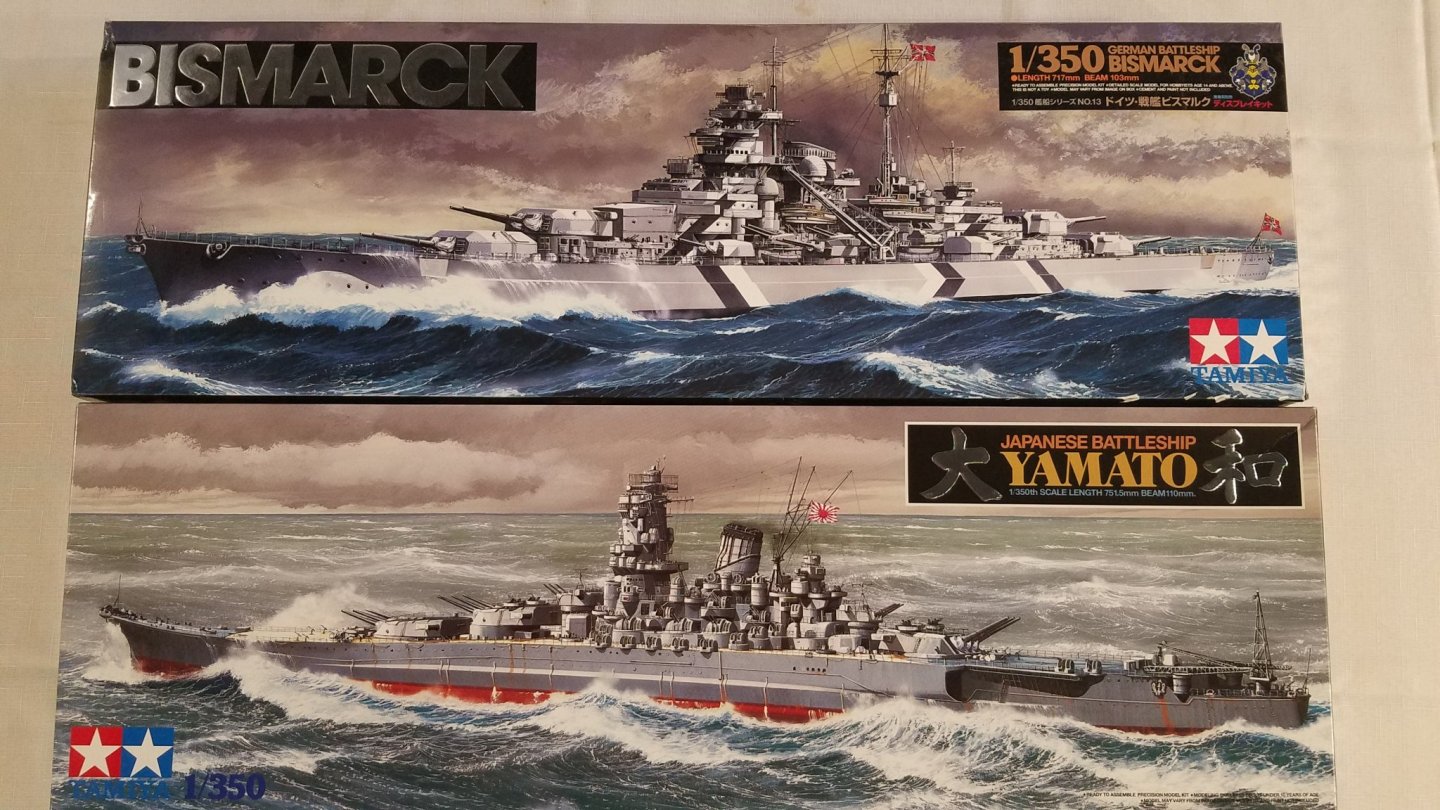
Thanks for the heads up. The kit#s for both the Bismarck and Yamato, 78013-6500 and 78014-6500 respectively as well as the date stamped on the box would indicate that they were released in 2005. The New Jersey #78005-5000 puts it a 1984 release. I have been careful to include the kit # in all of my searches for add-ons. I have decided to do the Bismarck first. I would like to get a detail up kit that provides some experience without being overwhelming for the novice builder that I am. Tamiya makes a detail up kit for the Bismarck but which to me actually looks very much like a Pontos kit and the price point is about the same. Way more than I want to tackle my first time out. The GMM kit seems awfully lean for the price and I am not sure what to think about the Toms and WEM Kits as there is not much information about them. That left me with the Eduard kit. I have not placed an order yet so I would certainly appreciate any and all input from you guys that have dealt with this stuff already because I am in the dark on all of this. The bottom line is I still hope to have a decent model when I am done and would not want to kill it before I get started by making a bad purchase.
-
Blackening Britannia Metal
Osmosis replied to stevenmh's topic in Metal Work, Soldering and Metal Fittings
Steven, Just the marikate after cleaning with ammonia. Be careful and read the label before you you use it. If you look at my naval cannon build I go into more detail. sjanicki, Blackening is a usually a chemical process to change the color of the metal by changing its surface properties. In some cases more durable than painting in some cases not so much. There are lots of people around here with more knowledge on the subject than I can provide. Hopefully they will chime in on this. I only know enough to make me dangerous, as they say. Best Regards -
I am going to order some basic photo etch detail up kits. Most likely the Eduard as they seem to be the most detail for the least money. While I am waiting for them to arrive I will be reading every build log I can find on all three.
-
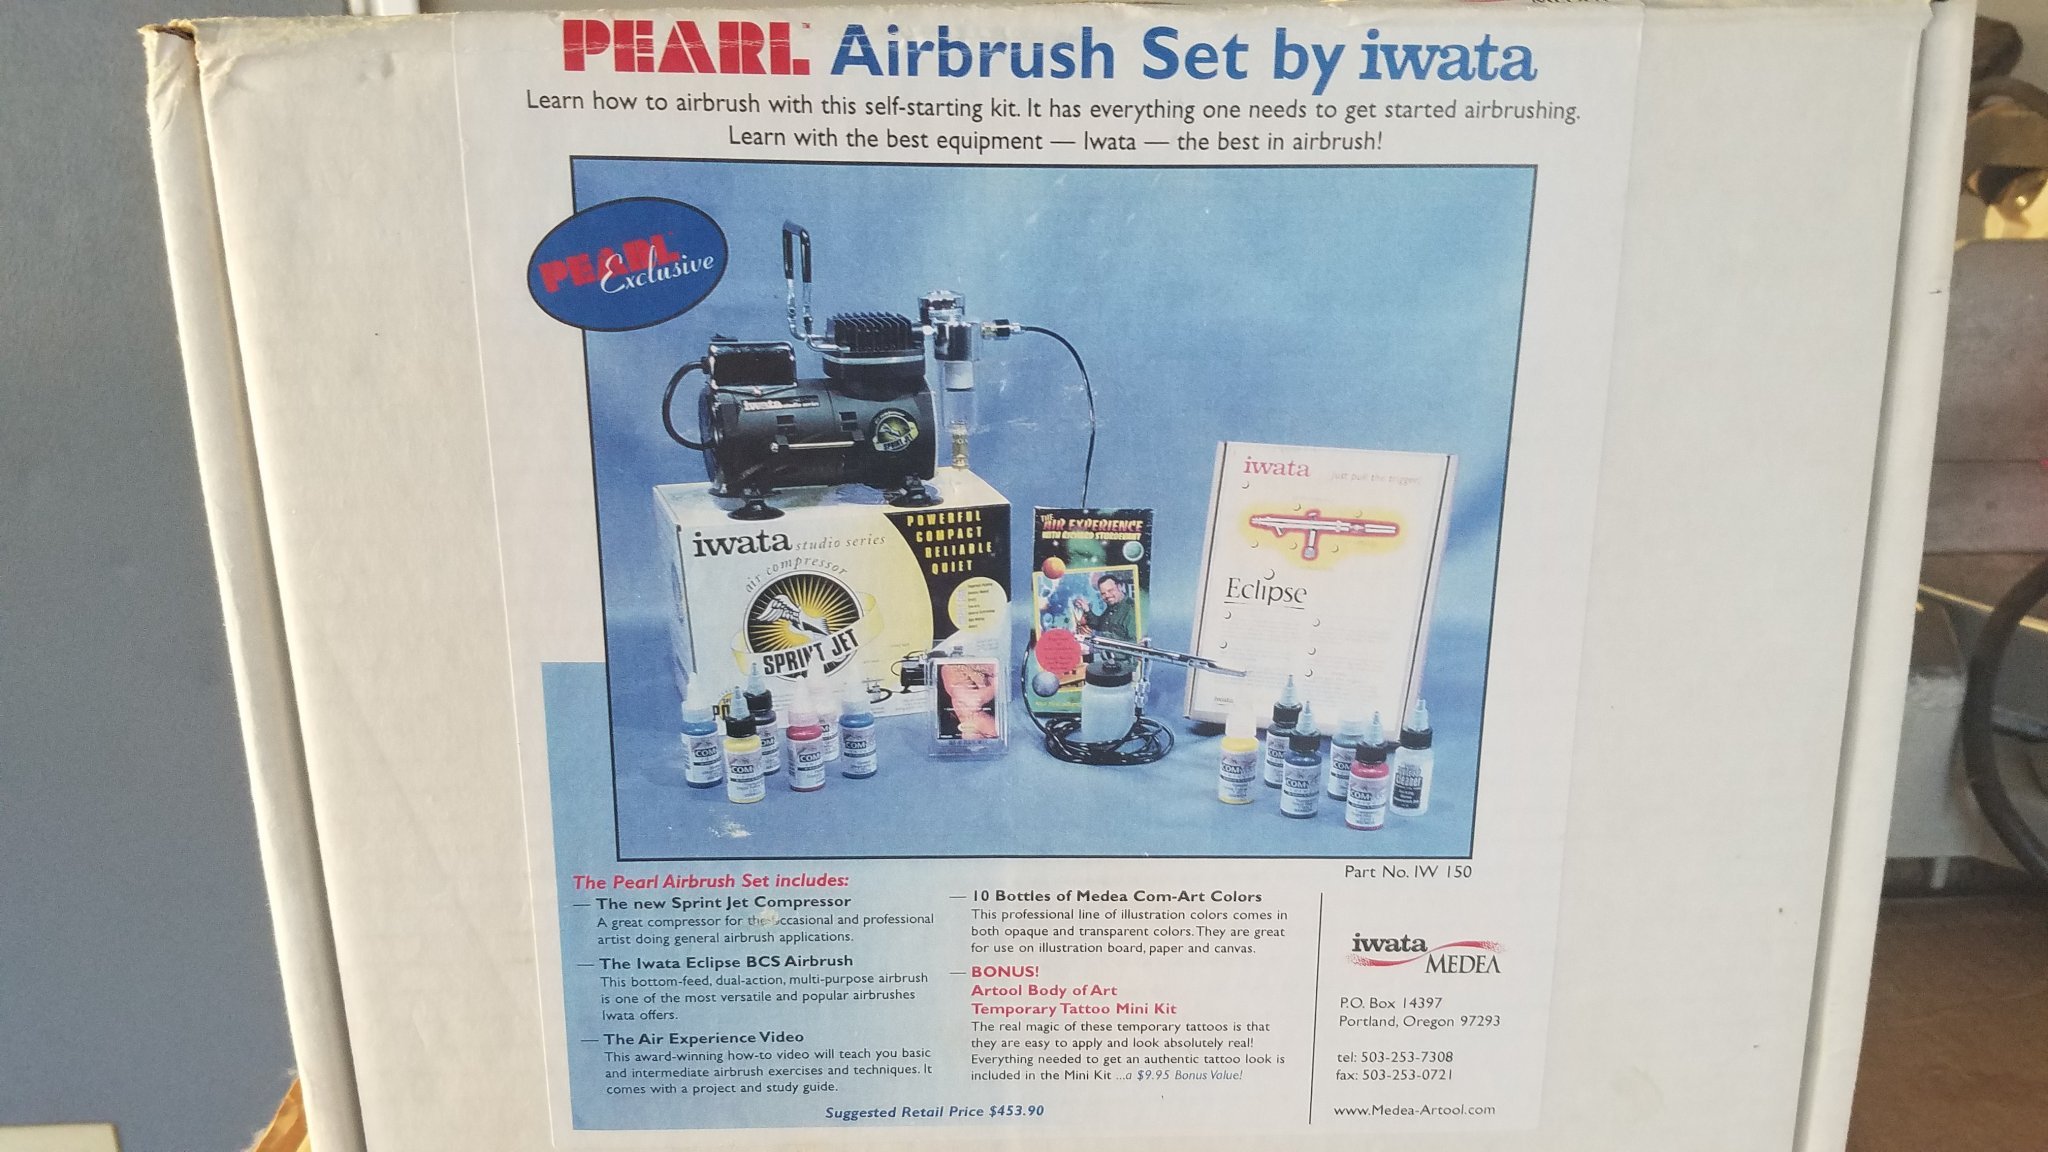
I recently got an amazing deal on an older but never used Iwata airbrush and compressor package. (see what have you received today thread) As you can see it came with a very nice Iwata Eclipse siphon feed airbrush. My question is would it be worth while to get a gravity feed also? Are there advantages to one over the other or is it more personal preference. It seems like the siphon would be more for larger jobs where a lot of paint is required where the gravity would work better for finer details? I am just guessing as I have not the first clue about any of this stuff.

-
Blackening Britannia Metal
Osmosis replied to stevenmh's topic in Metal Work, Soldering and Metal Fittings
I have used their gun bluing with great success. Here is a thread I did some experimenting with varying levels of success. -
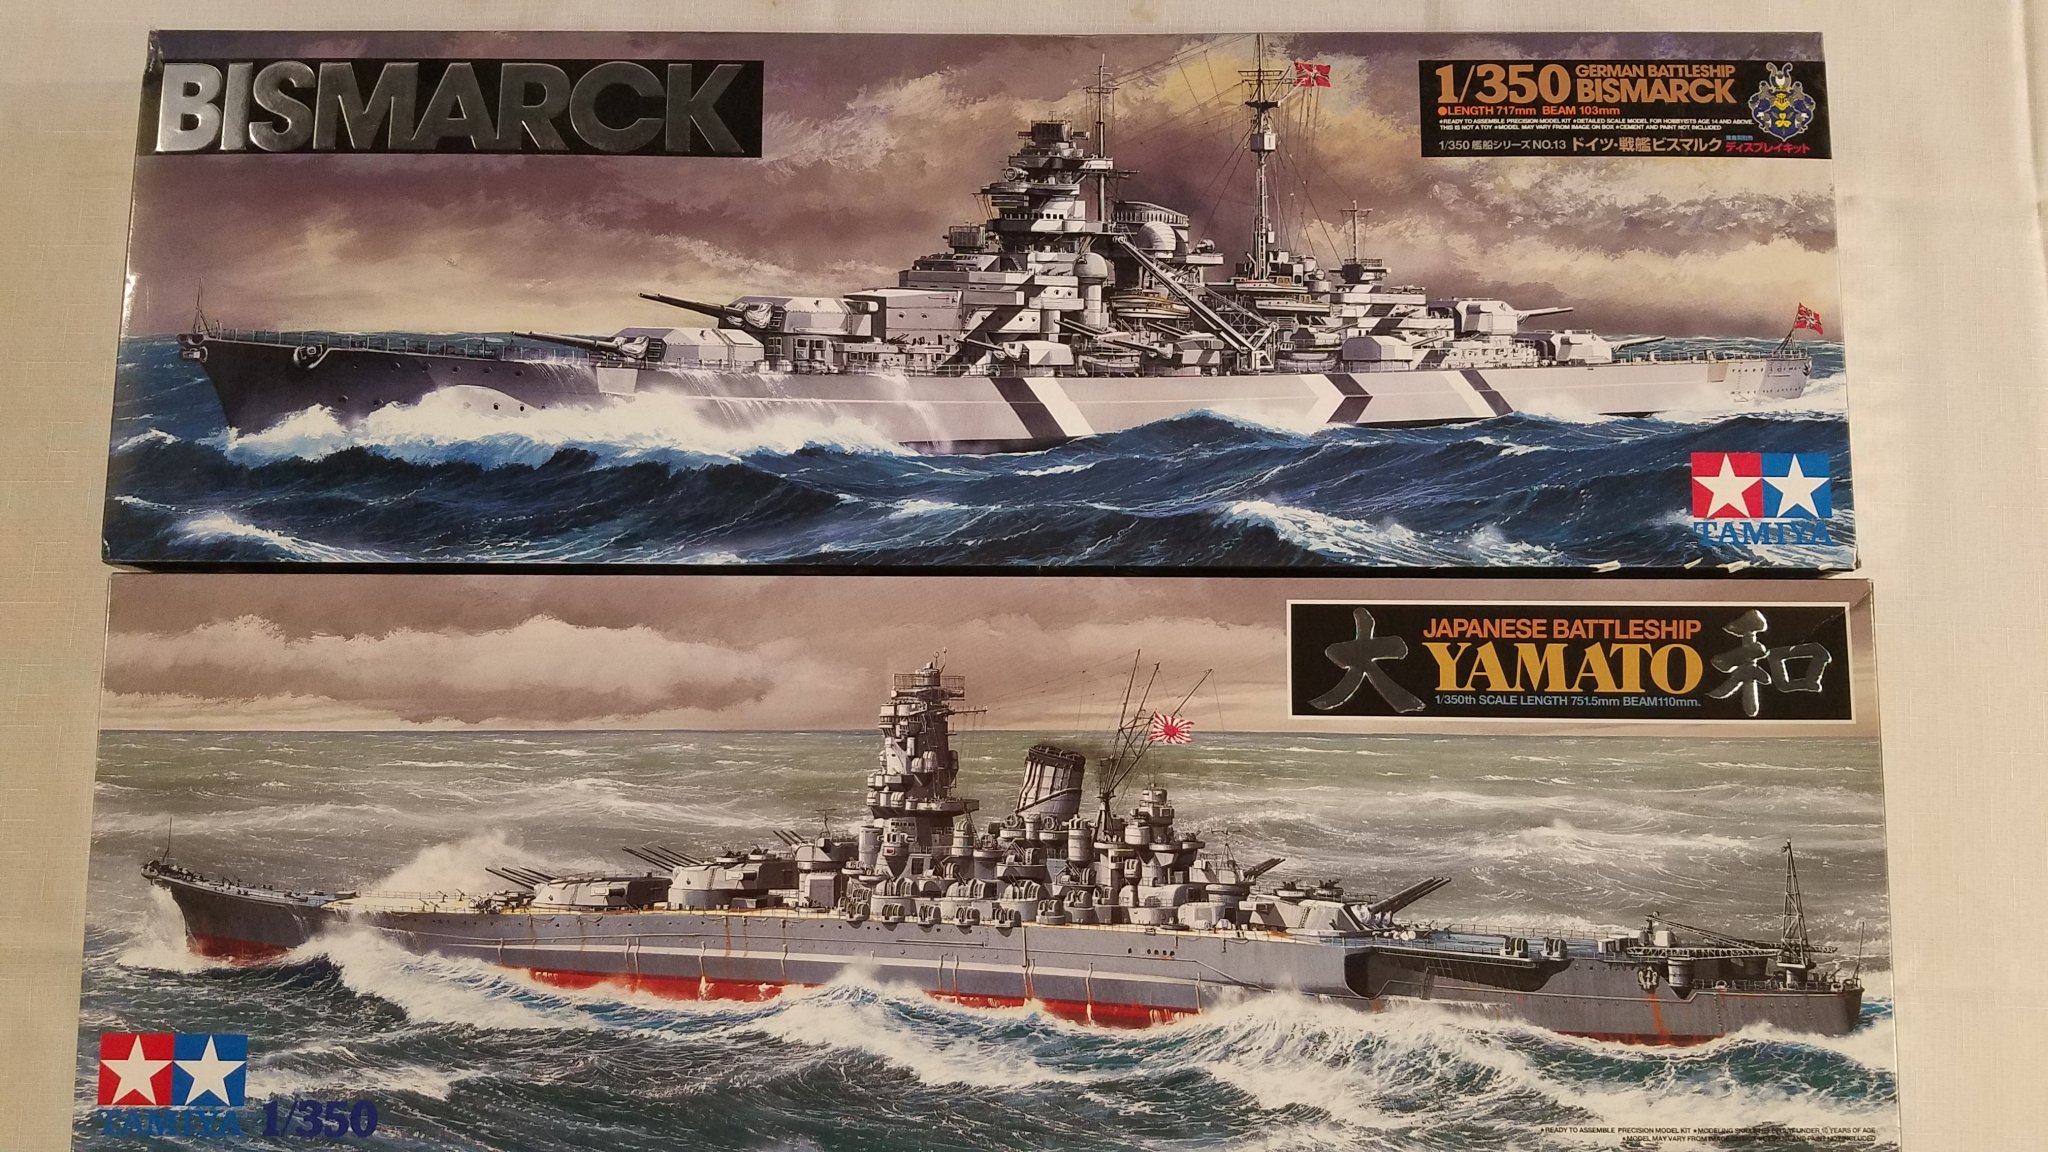
I have been having quite a bit of luck on Offer Up lately. I found these last night for $70.00 for the pair. The guy that was selling them literally lives around the corner from me so I picked them up on my way in to work this morning. I thought it would make a nice set with the New Jersey. Both are complete and unstarted.
-
Like I said before I have been keeping an eye out for the Pontos detail up kit for the New Jersey. Right now they are pretty scarce or really expensive. However the Missouri kits are readily available at a decent price. I have two questions in mind. How much difference could there be in the details? Secondly, there is an upgrade kit for the WWII Missouri, would it be possible to make this model into a WWII New Jersey using that upgrade package? Thanks
-
I am still amazed by the tiny details. Is there a tutorial somewhere on how to apply the photo etch detail parts. I am trying to work up the nerve to start the Tamiya 1/350 BB-62 but have no clue how this level of detail is achieved. For instance how and where do you apply glue to such tiny pieces like the ladders and handrails?
-
Thanks CDW, Wow that is one impressive build. It should provide a nice step by step guide although there are details that are way over my skills at this point. 1/10 of that would be a lofty goal for me but I will give it my best shot you can be sure of that. I have been burning up the inter webs looking at all of the available detail up kits and found that as far as bang for the buck goes the pontos is by far the best for the money. For one sheet of photo etch from GMM they want $70.00 and there are 6 sheets in the pontos set plus all the brass and resin parts. I am counting on availability returning once the world gets semi back to "normal". What ever that winds up being. In the meantime keep the suggestions coming. Regards
-
Yves, What stunning work. You have created so much more that just a scale model. You have really brought this subject to life for us. Not only with your skills at building and adding detail but with your narrative as well. Thanks for sharing this.
-
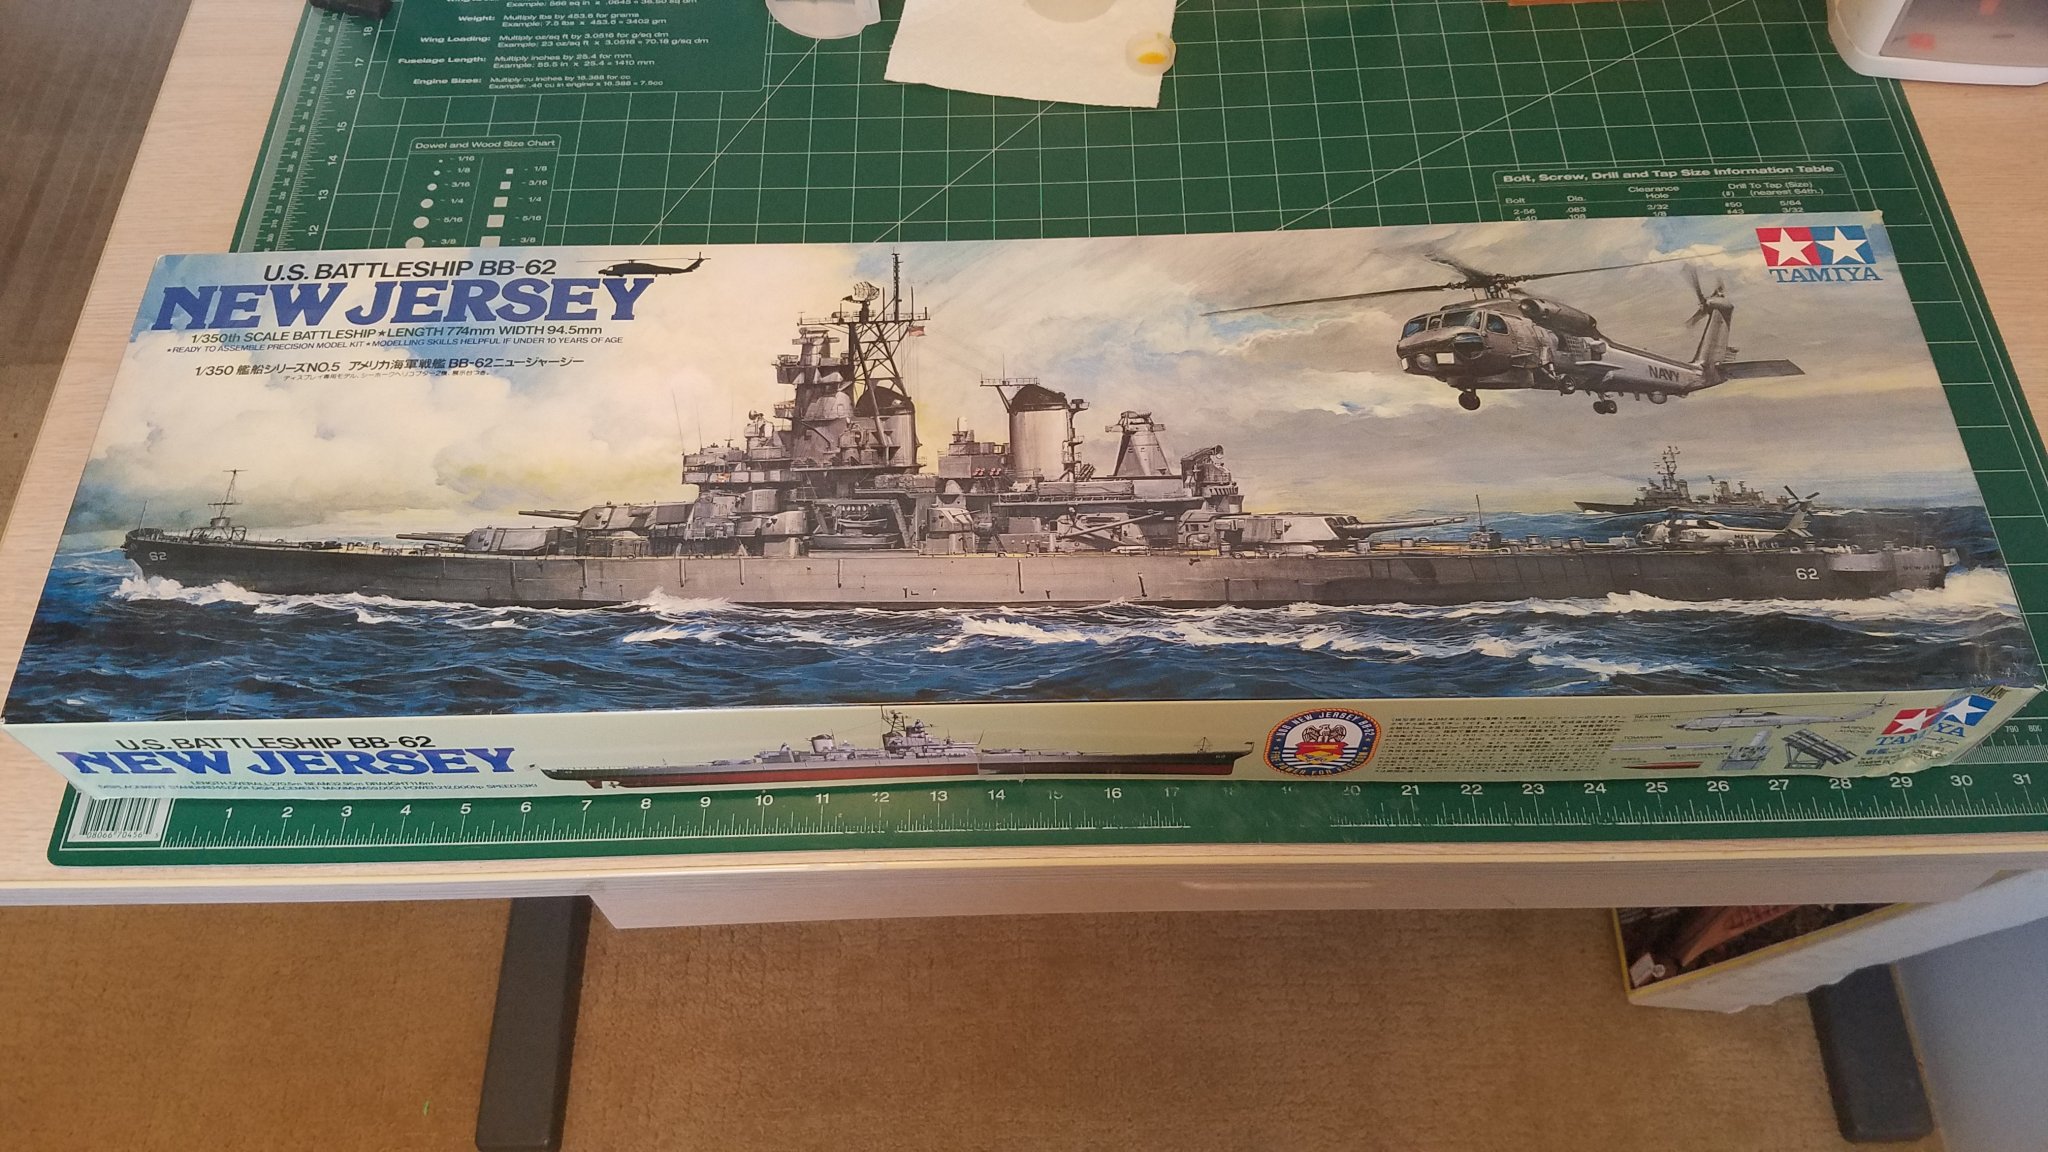
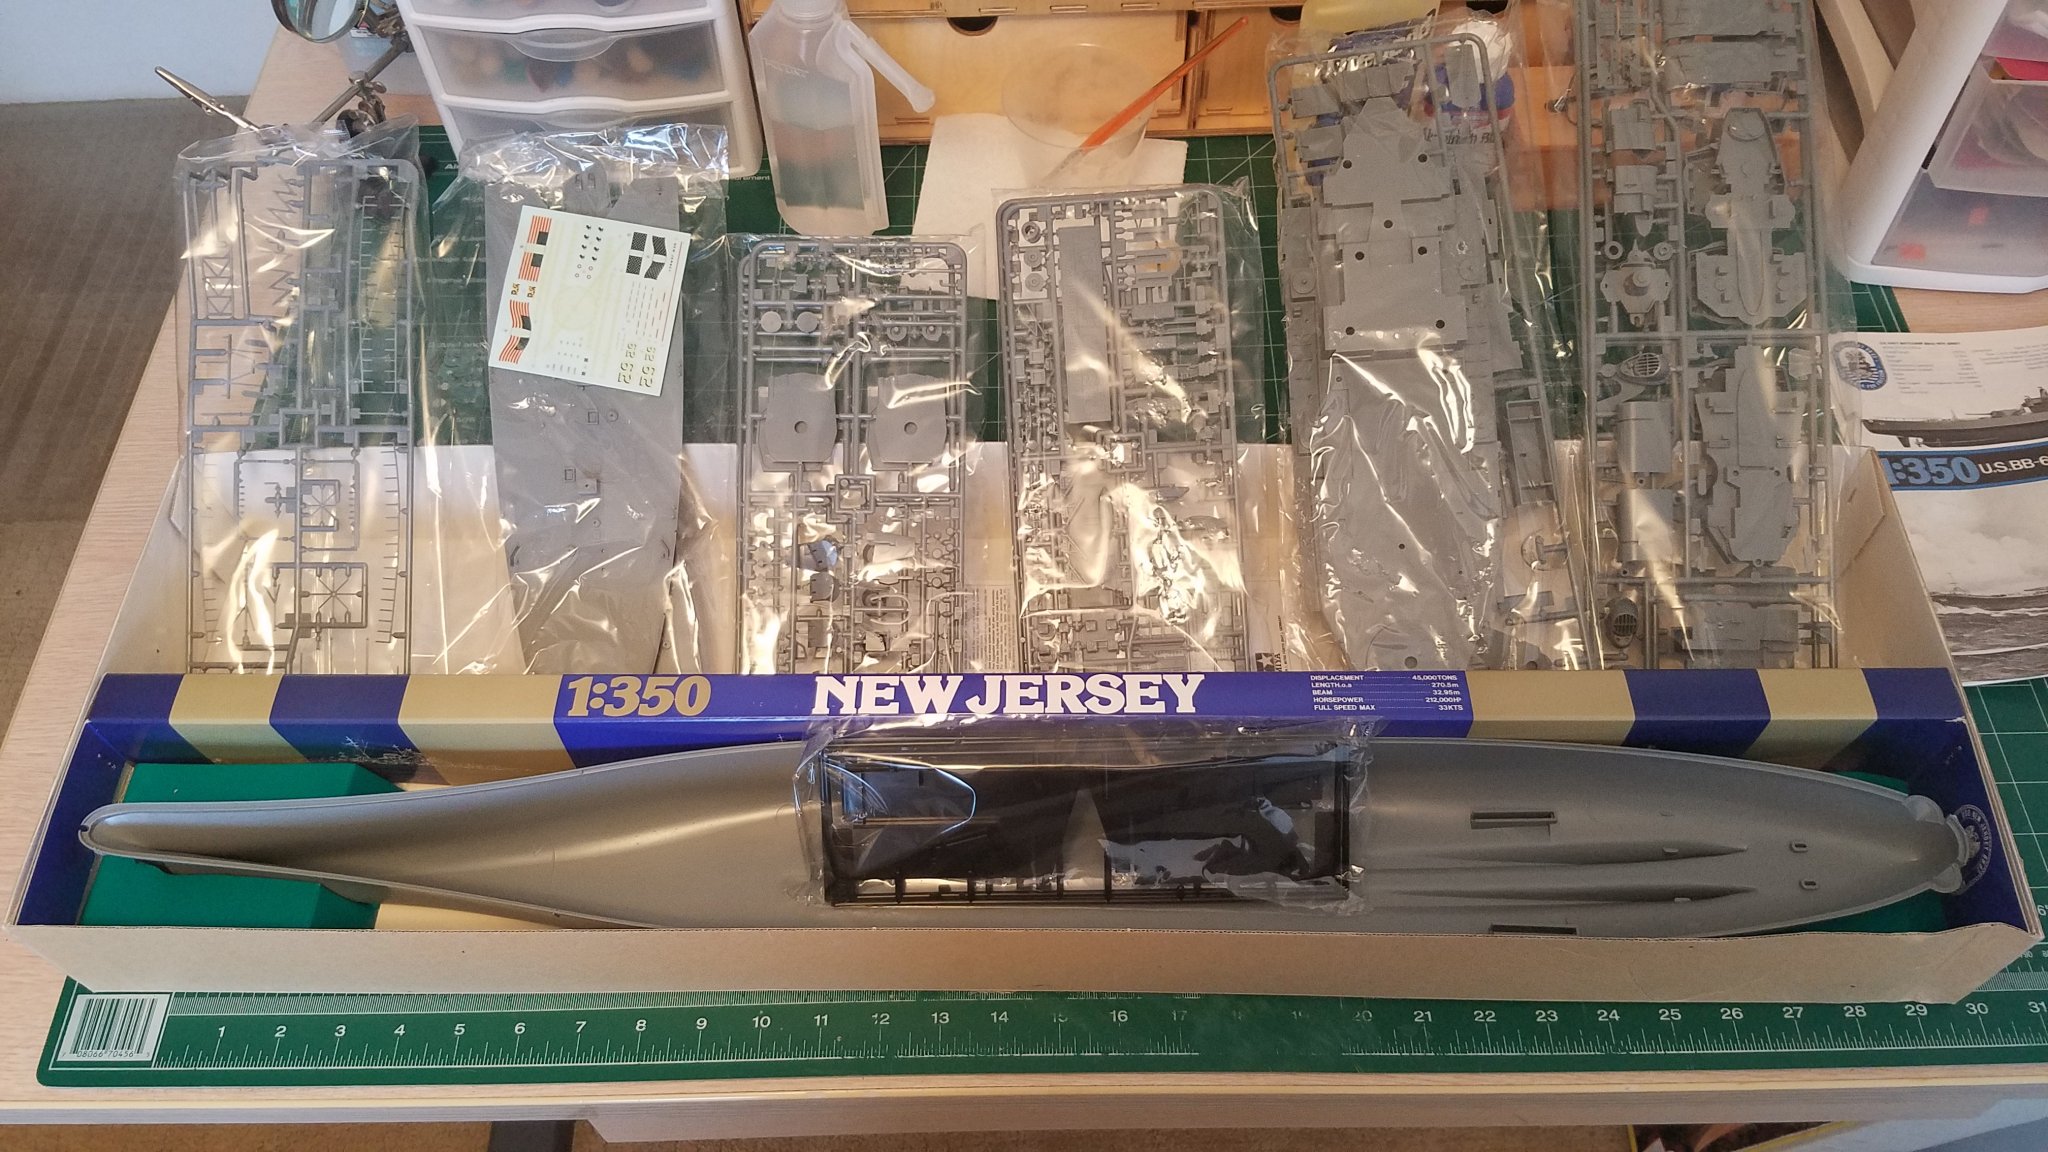
Thanks for all the input. I have a lot to get up to speed on. I will get started by reading all of the build logs I can find. I have been following a couple in anticipation of finding a kit. I stopped on my way home from work and picked it up. Other than a little corner damage on the box the kit appears to be complete and unstarted. Judging from the box art work this looks to be one of the original early 1980's kits. Not sure if that means anything or not. Seven unopened bags of parts one hull and 2 sets of instructions. Looks good to me. I will not be starting this for a little while. I don't think I will need to get any tools but having no idea what I might need as far as fillers paint and other plastic specific stuff I am open to any and all suggestions. Also since I got such a great deal on the kit I will most likely grab an upgrade package of some sort. It seems the Pontos kit is not readily available anywhere except amazon and it is $241.00. A bit pricey for my budget is there a source I have not found? Or is there a slightly less inclusive kit that would still give me some degree of upgrade. I would like to get what ever I need on order so I am ready to go when I am ready to go. Thanks


- 44 replies
-
- 10
-
-
Thanks guys, you are absolutely right that is why I hang out here. Joe do you think 1 bottle would get this done?
-
Canute that is what I was thinking but was wondering if all of the detail up parts would be beyond my skill level seeing as how this will be my first plastic model in about 50 or so years. I am not even sure what kind of glue to use!
-
The outside of the wheels I am not so worried about as they will be partially covered by a black "metal" rim. The inside however I had planed to leave natural or possibly stain a slightly darker color.