Supplies of the Ship Modeler's Handbook are running out. Get your copy NOW before they are gone! Click on photo to order.
×

Osmosis
-
Posts
626 -
Joined
-
Last visited
Content Type
Profiles
Forums
Gallery
Events
Everything posted by Osmosis
-
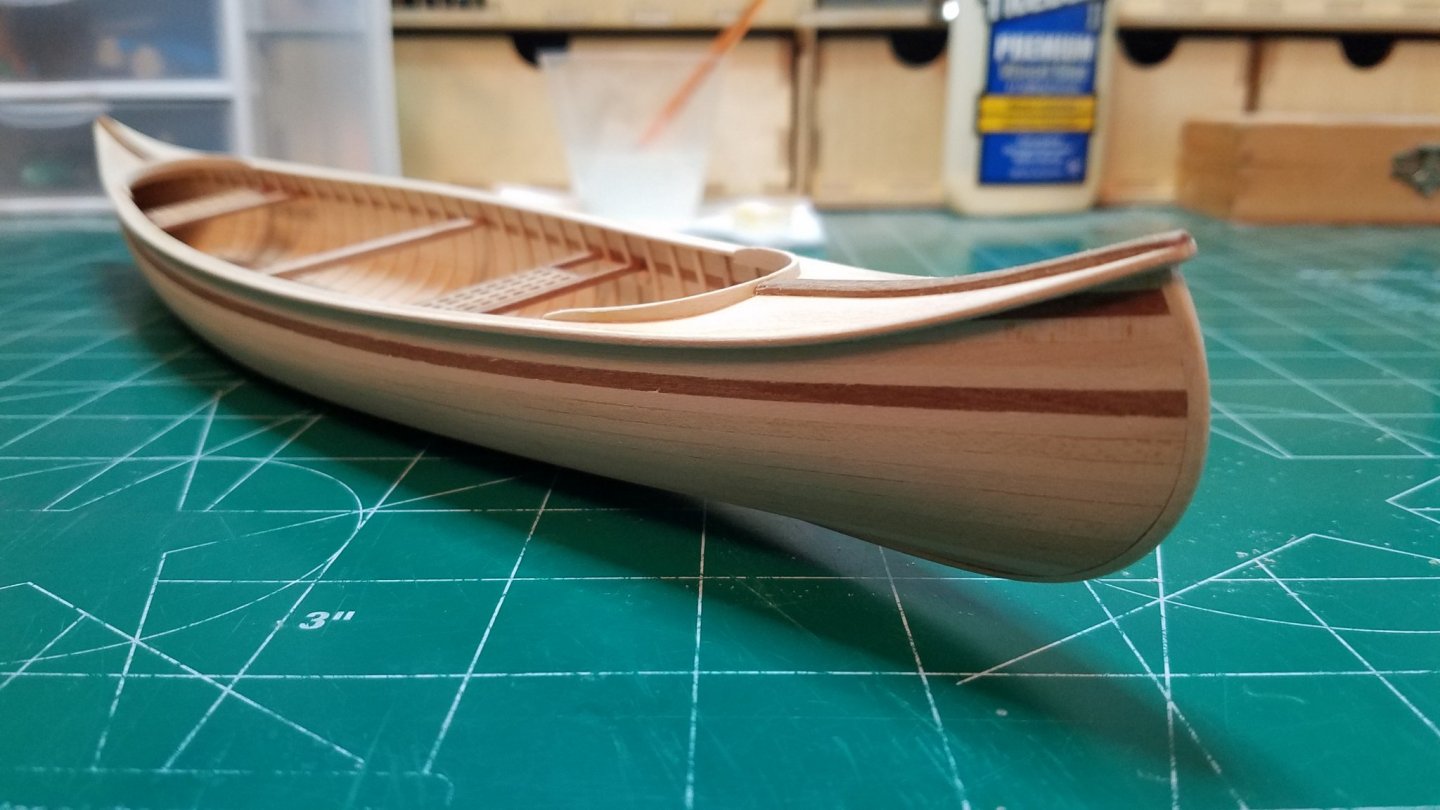
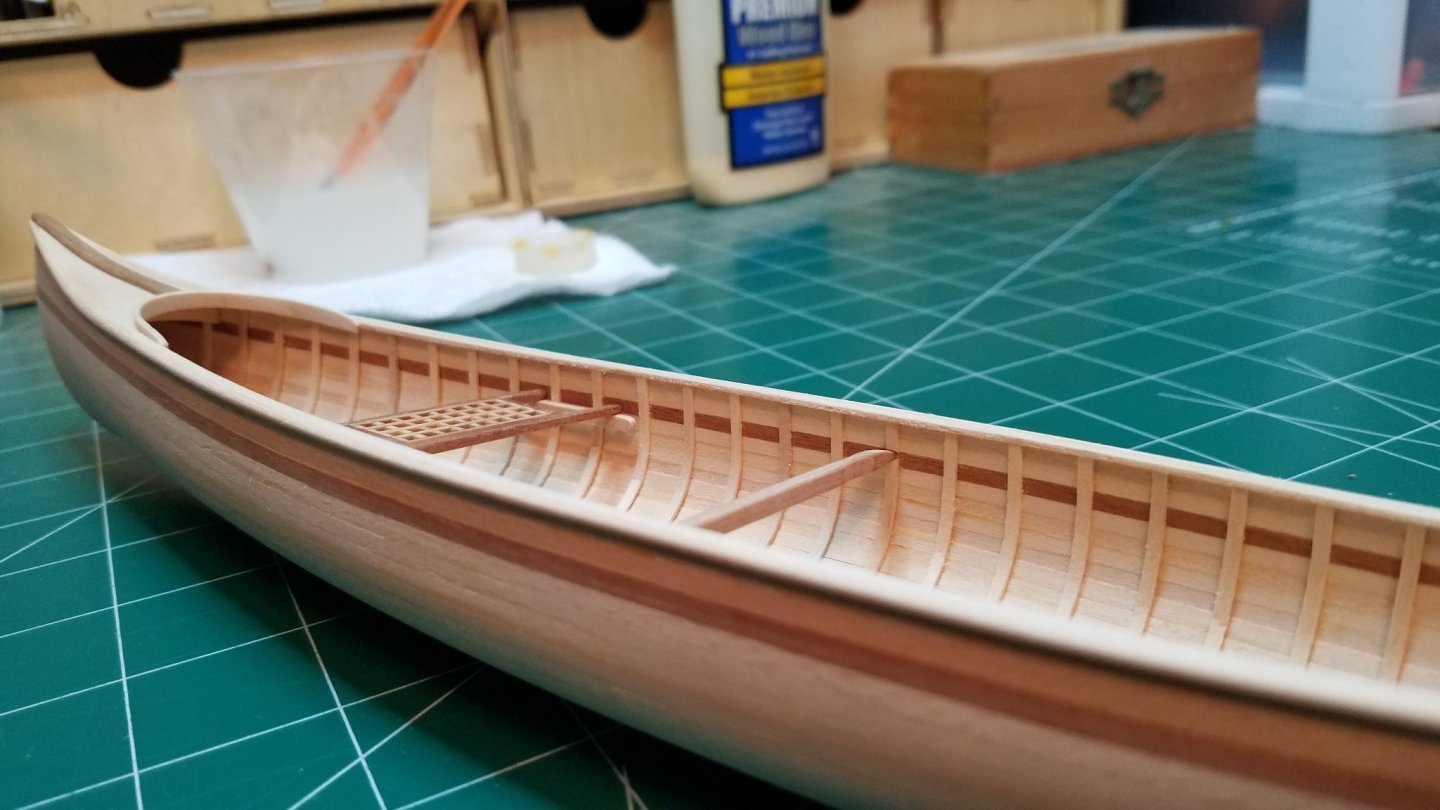
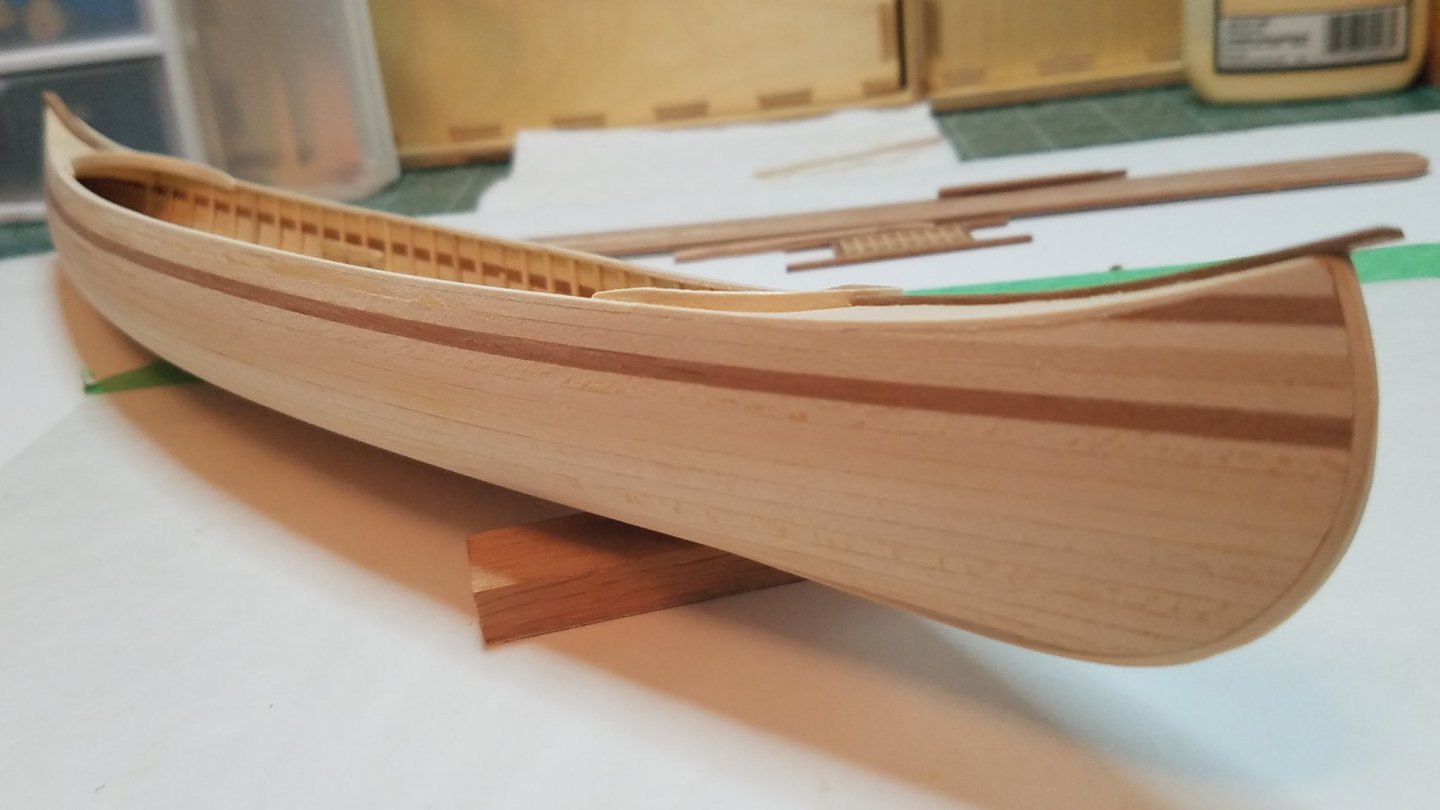
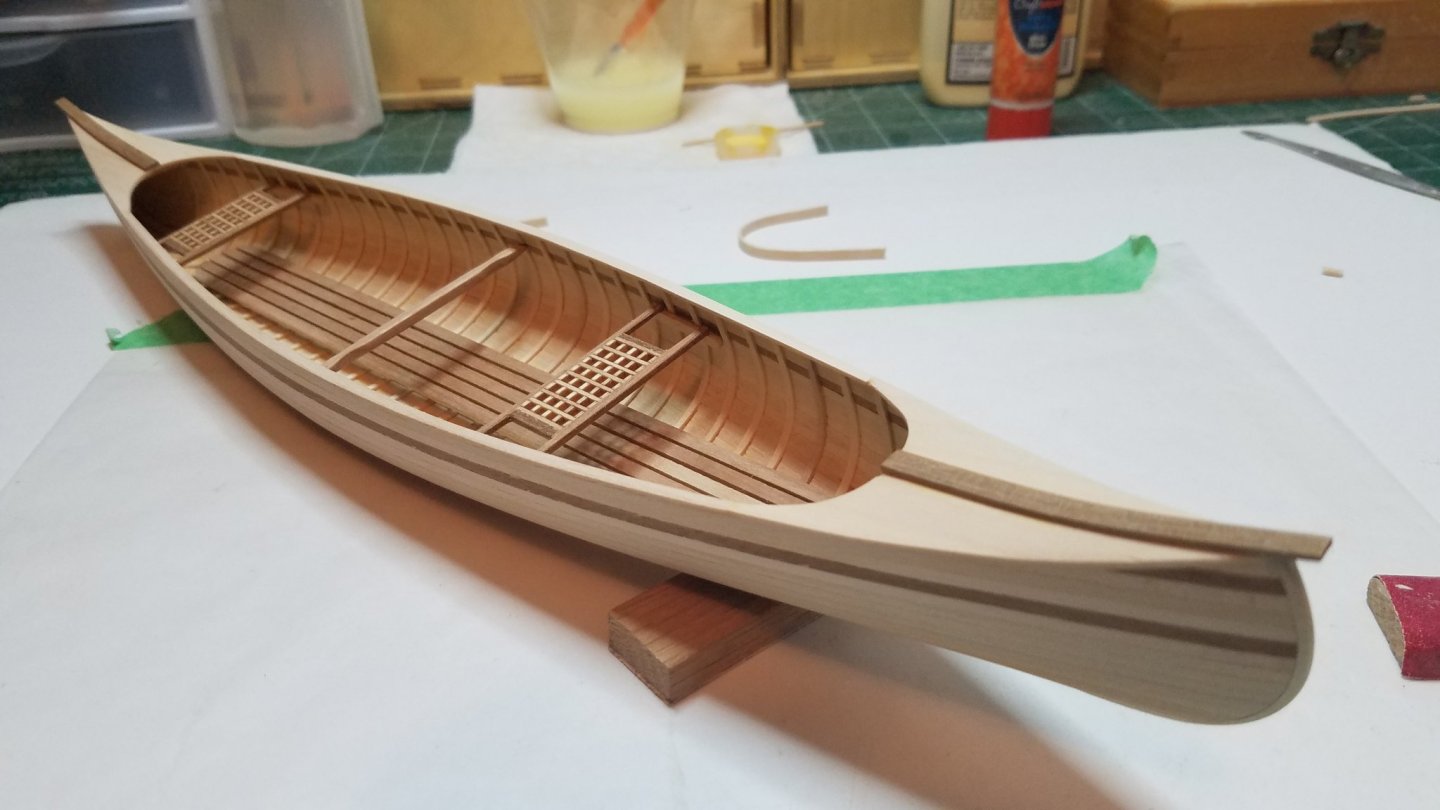
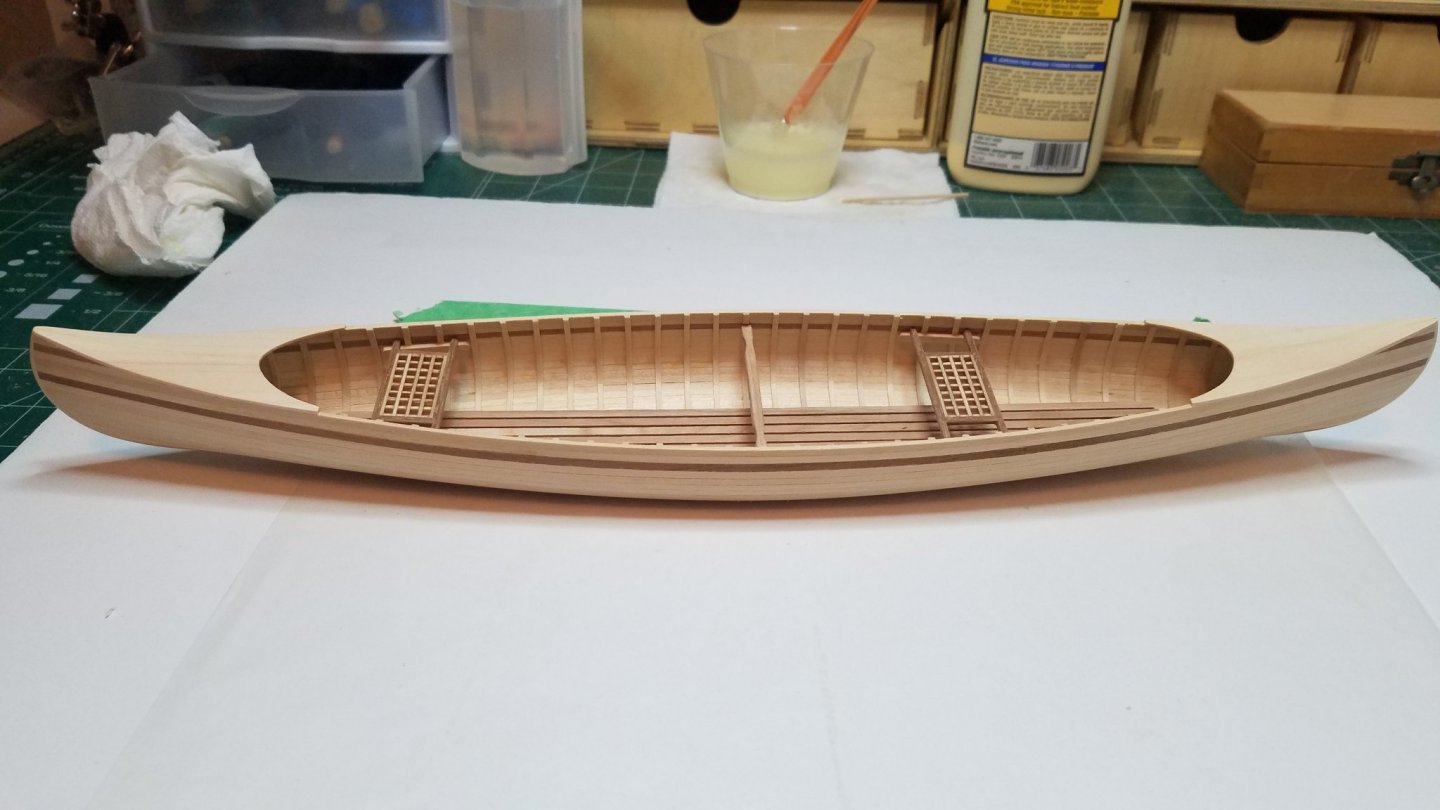
 I managed to get 3 coats of satin poly on the paddles and the interior surfaces so far. Should be able to handle it enough tonight to get a at least 1 coat on the outside. I also got my workbench all cleaned off and ready for my next project which I have not decided on yet. I have plenty to chose from on the shelf. Best regards
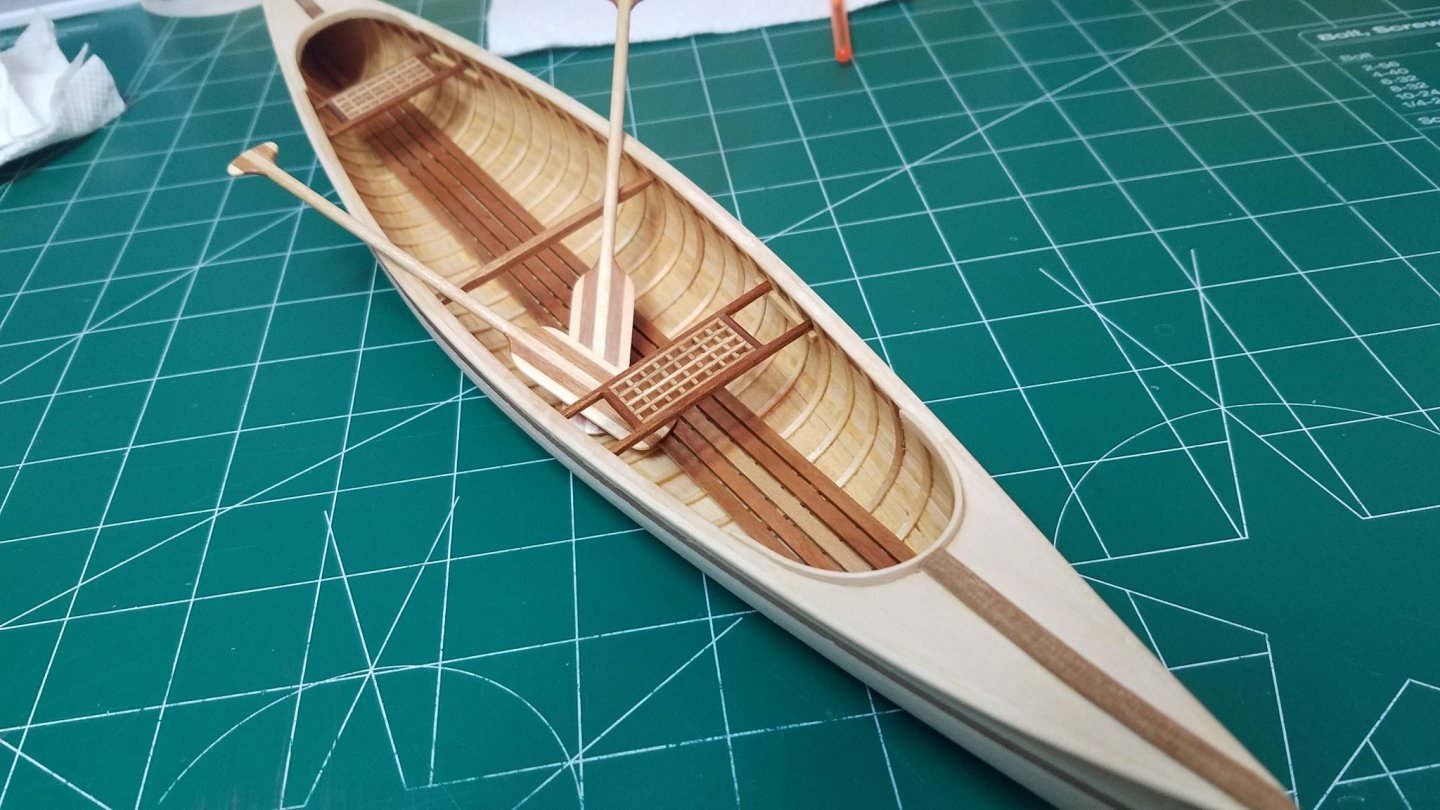
- 84 replies
-
- 8
-

-
- peterboro canoe
- Finished
- (and 1 more)
-
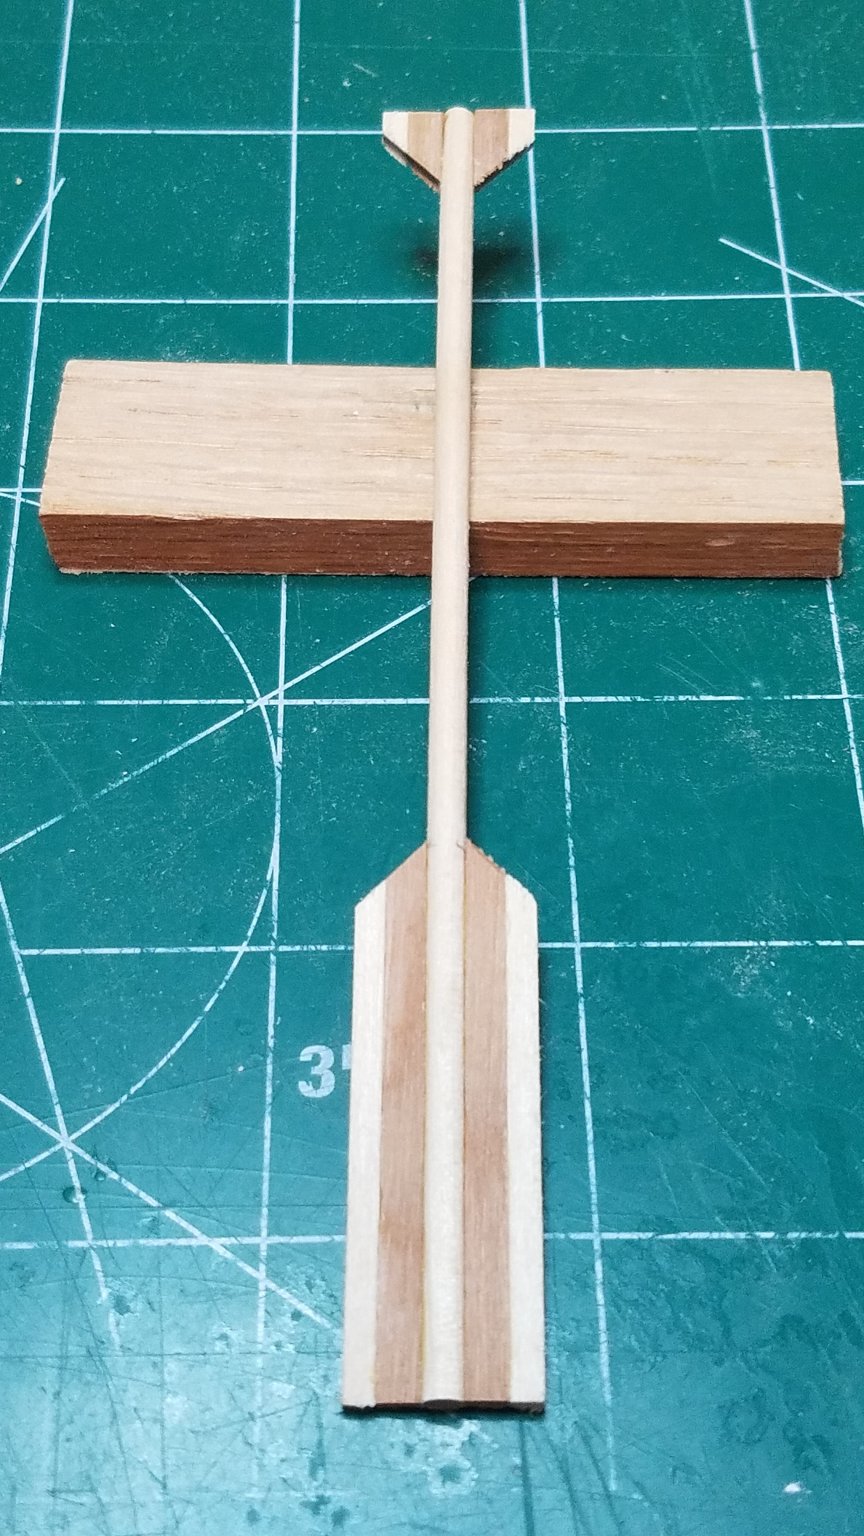
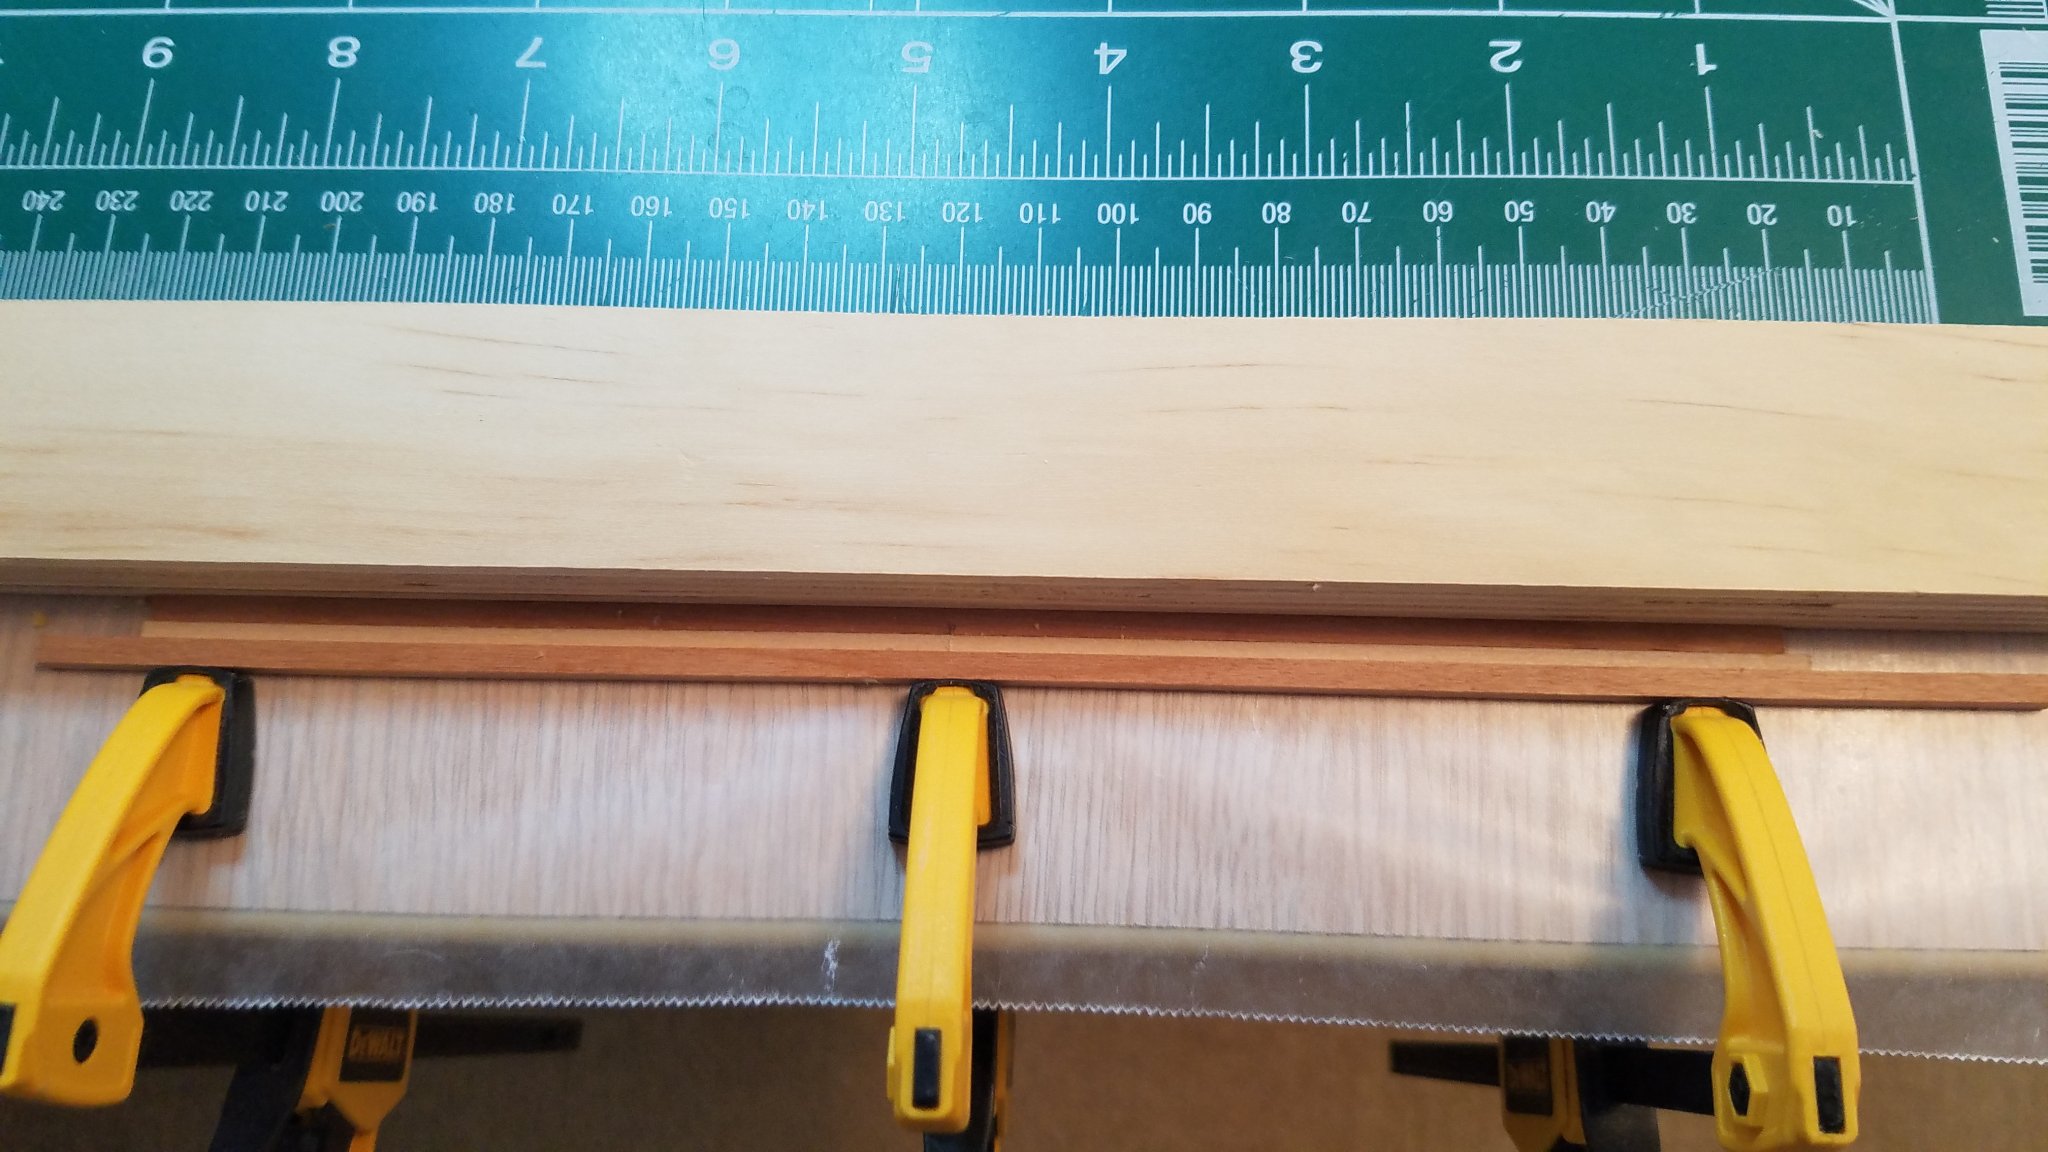
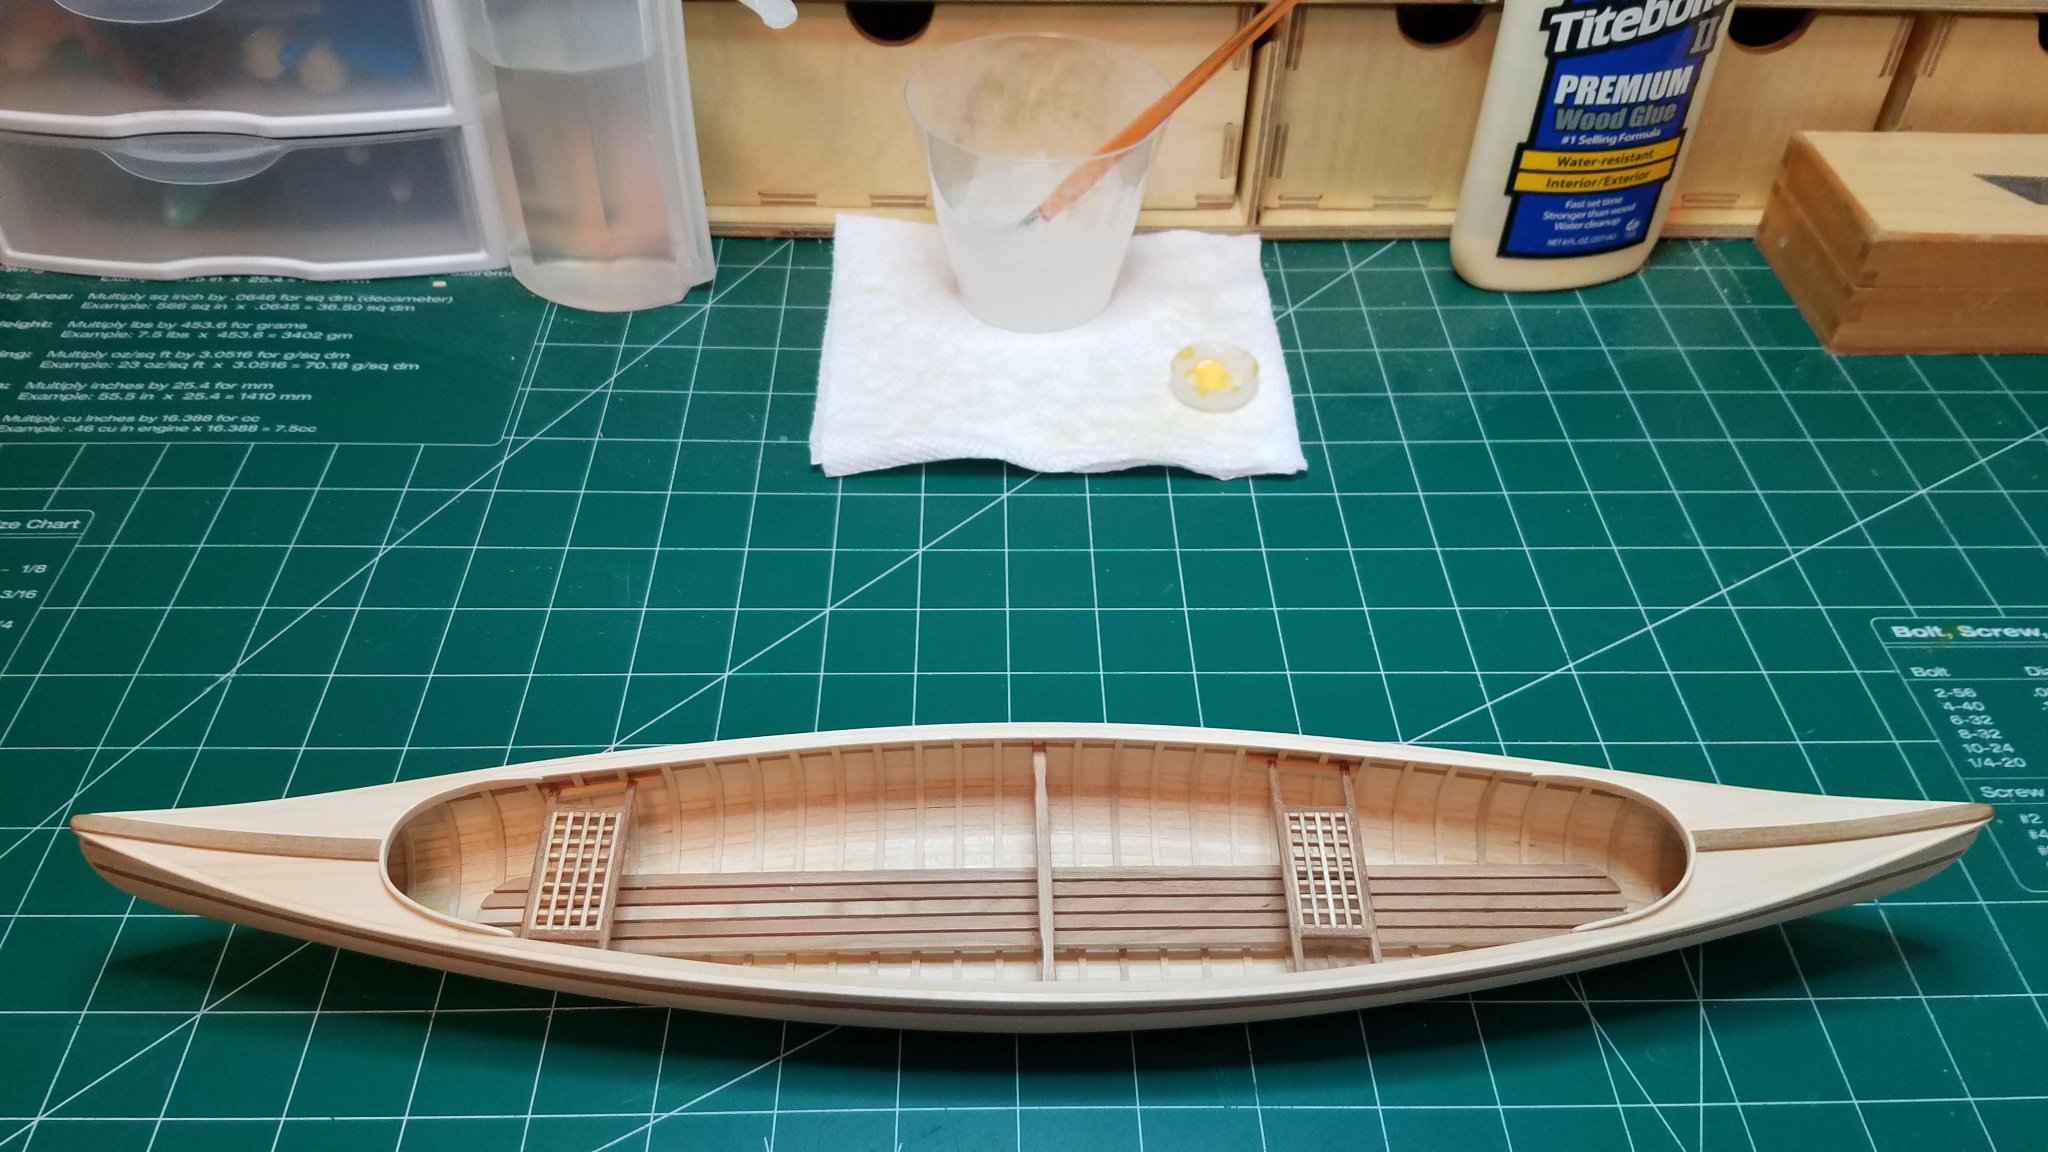
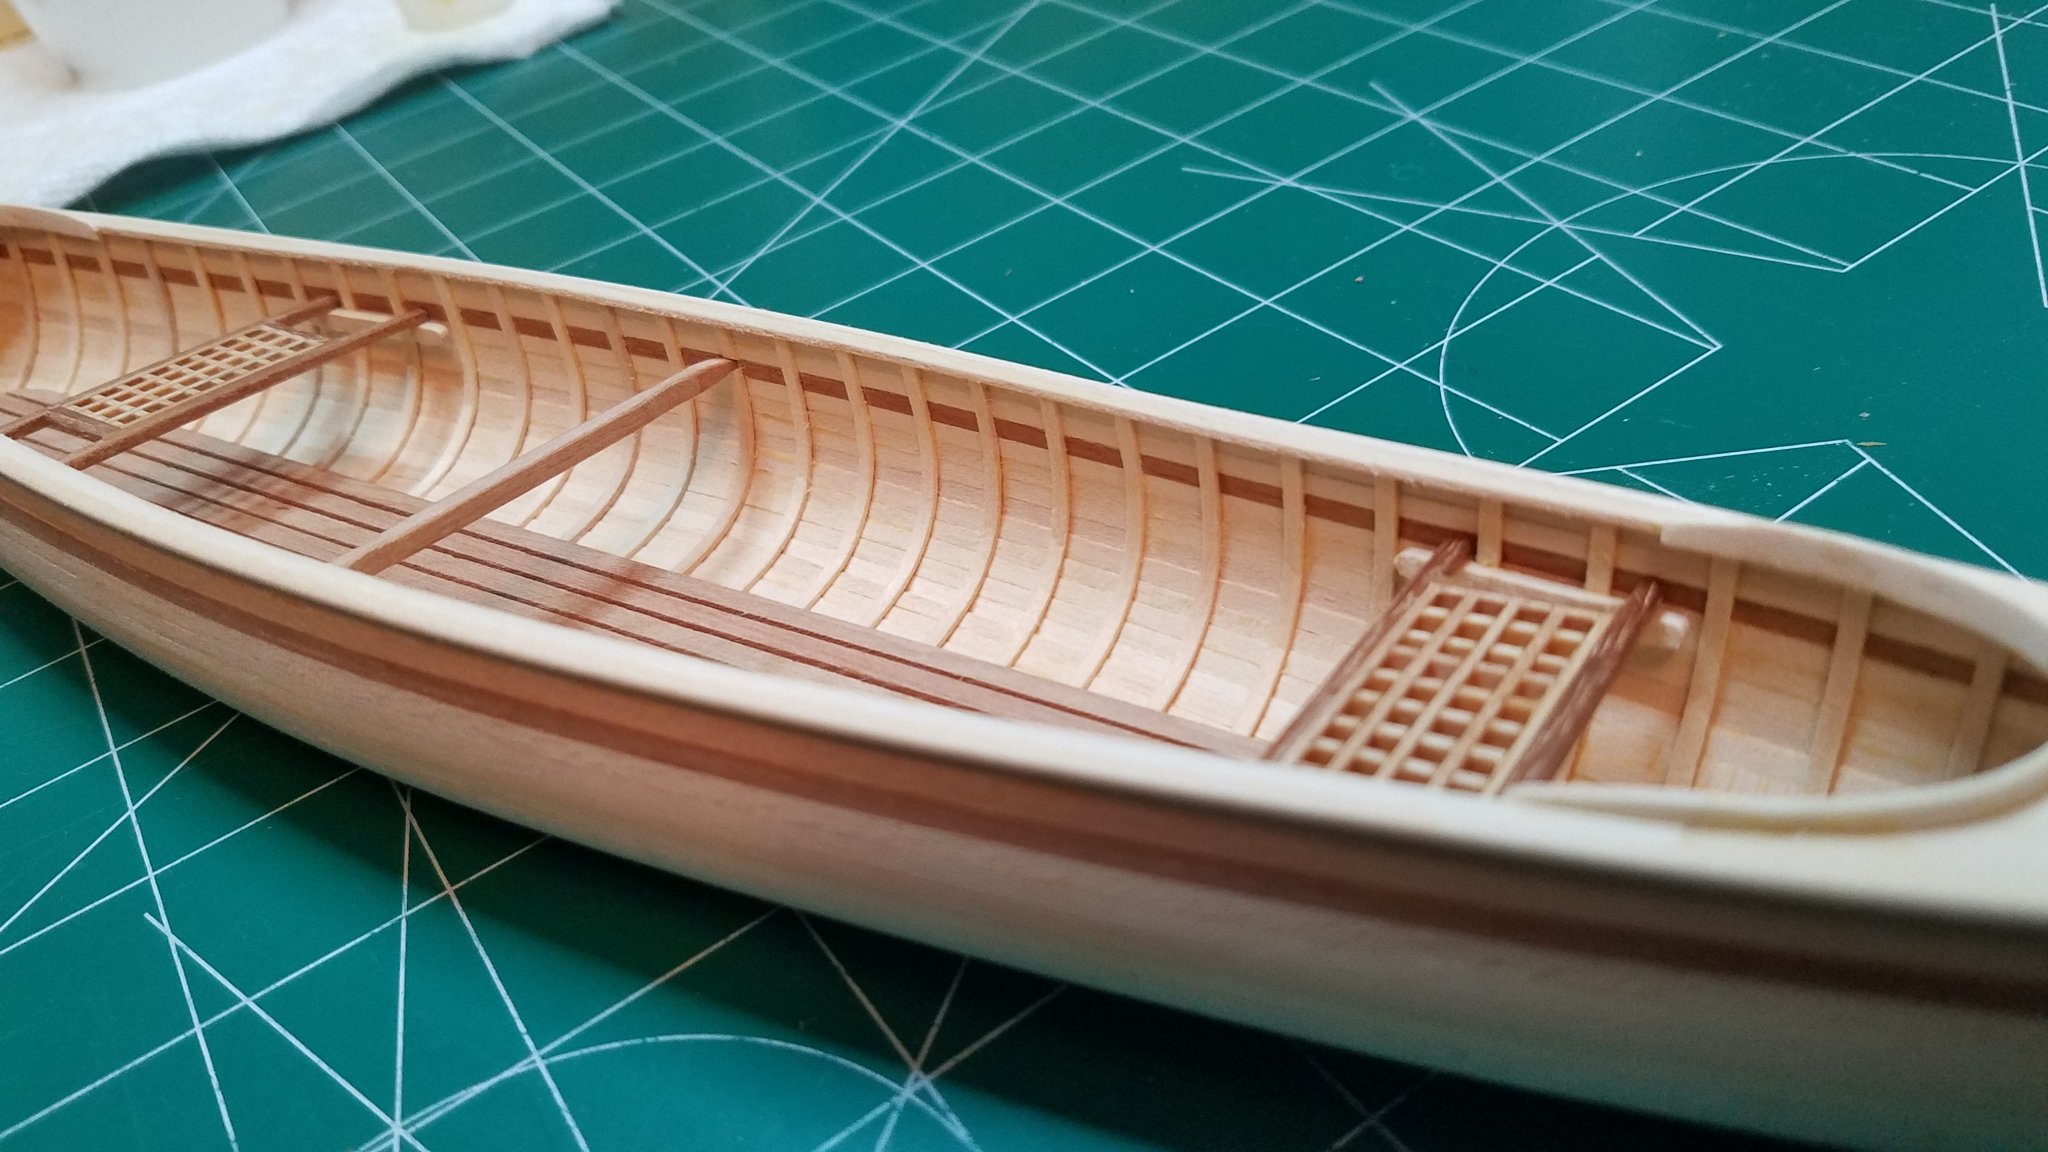
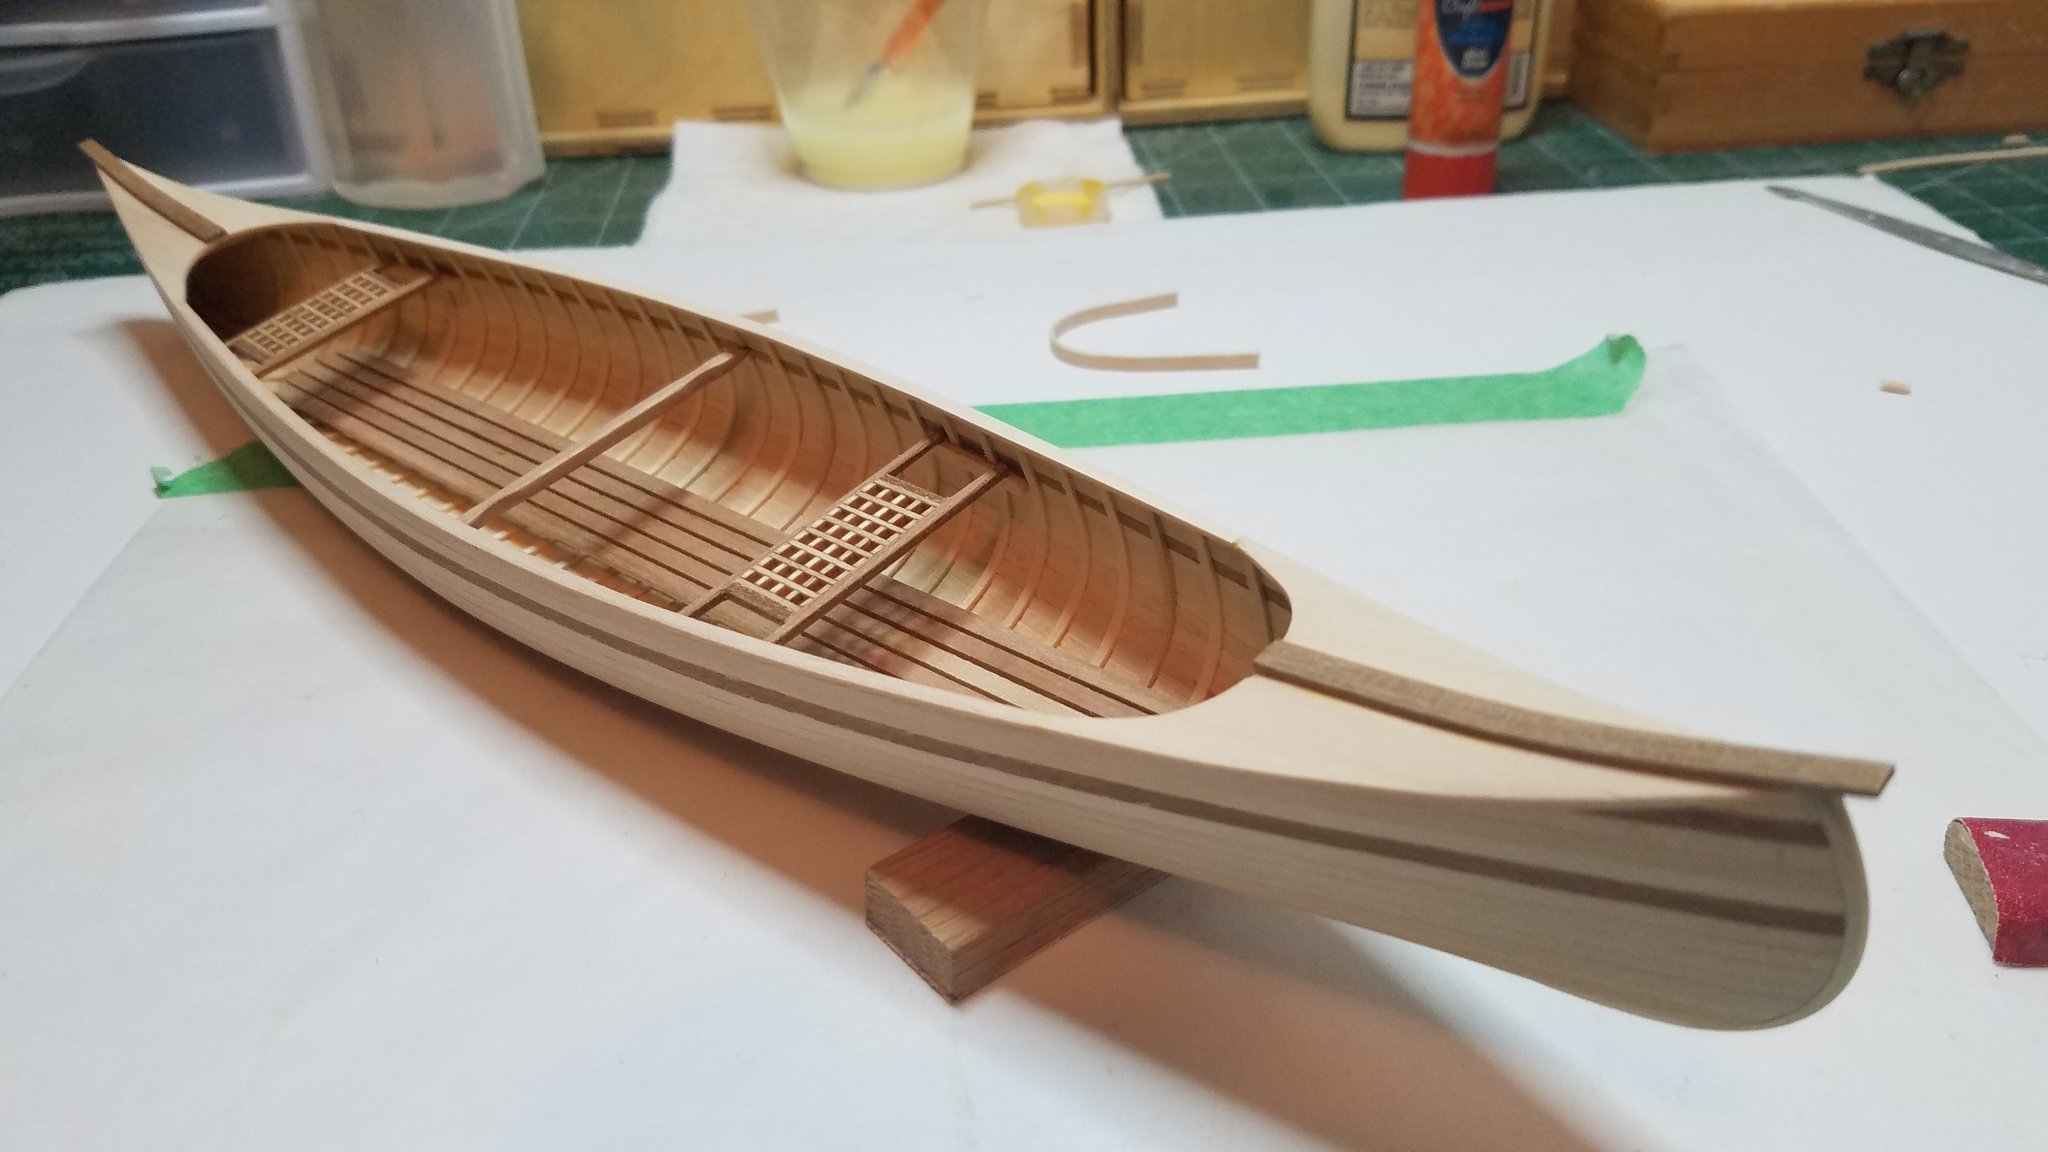
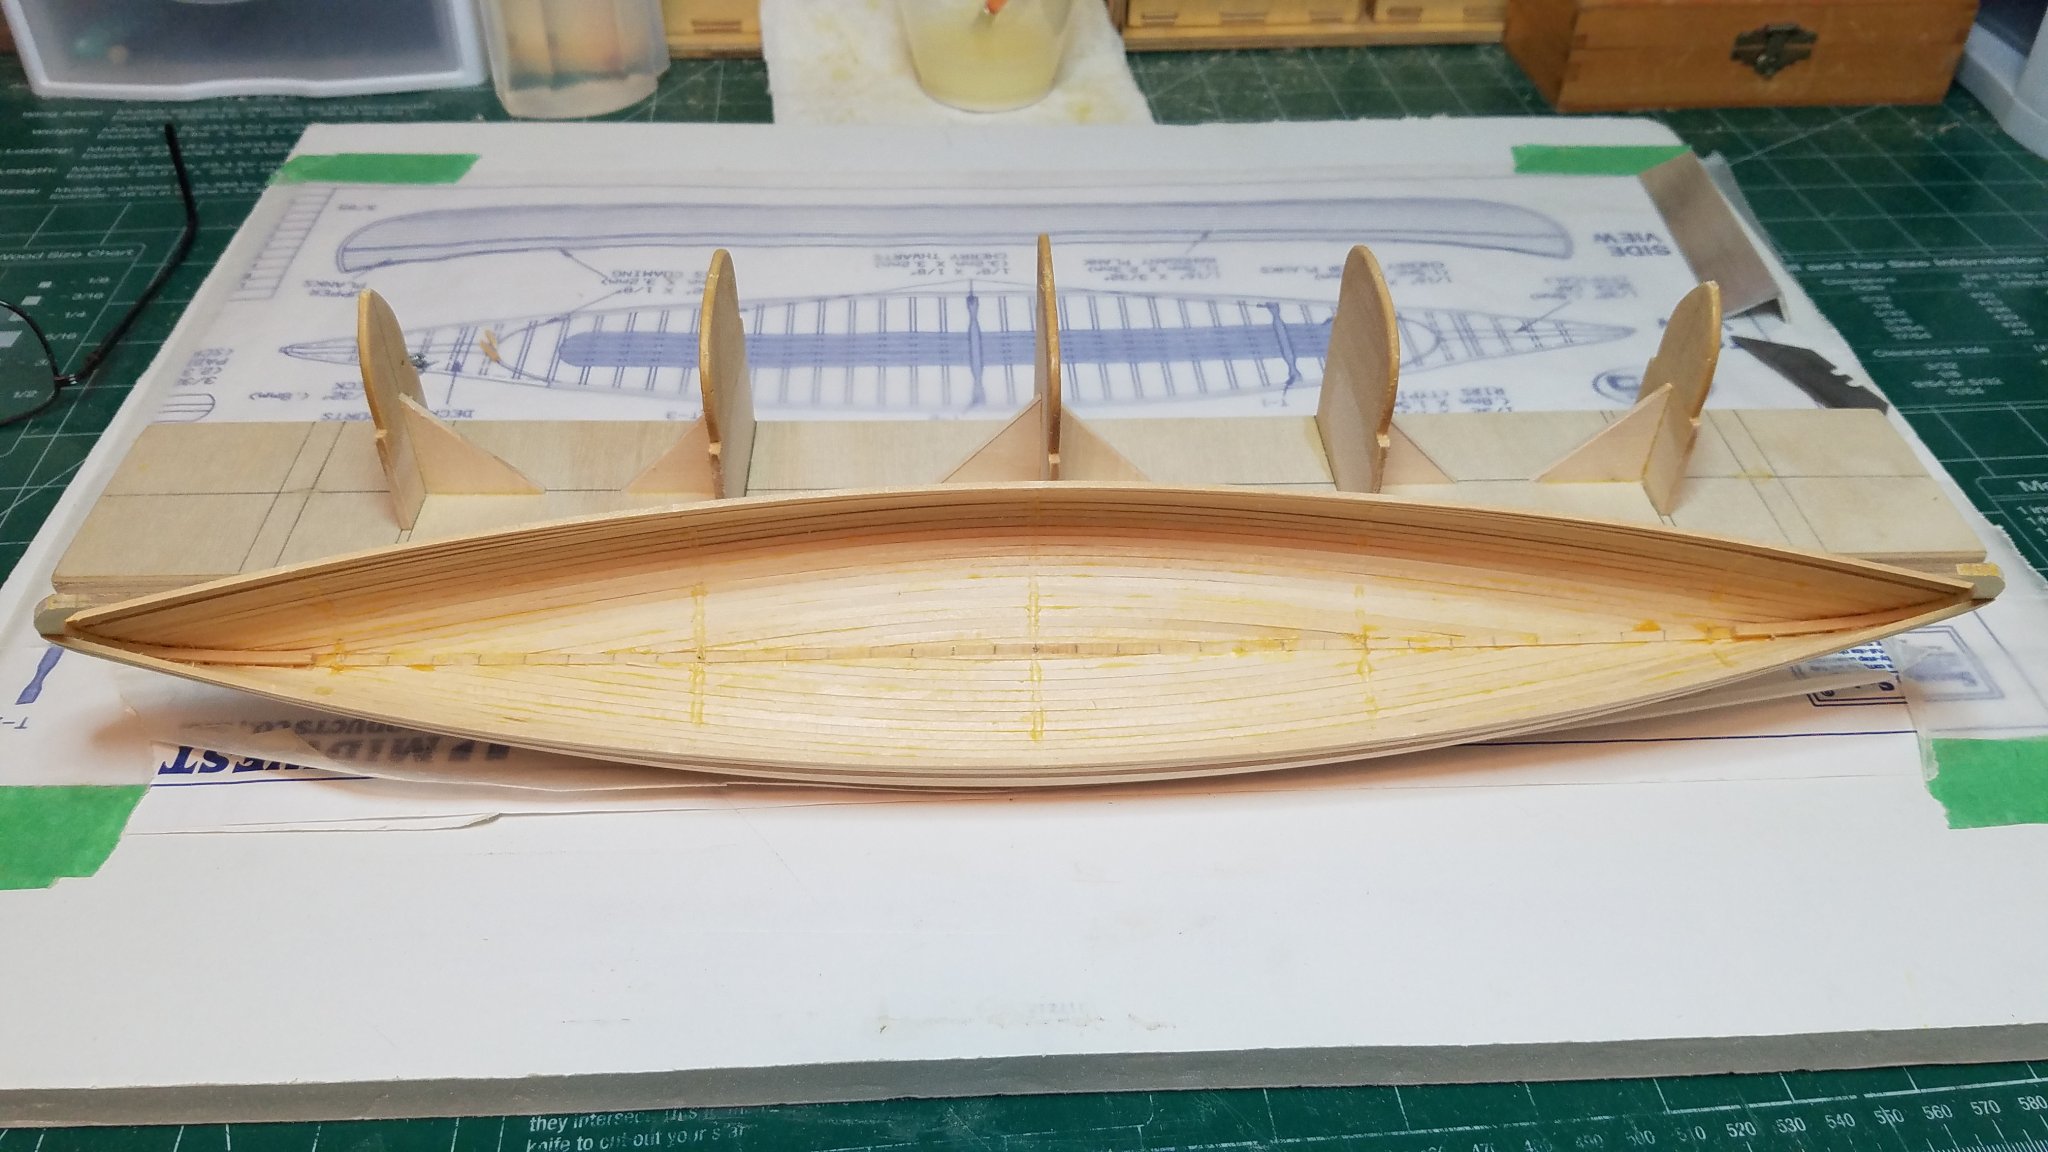
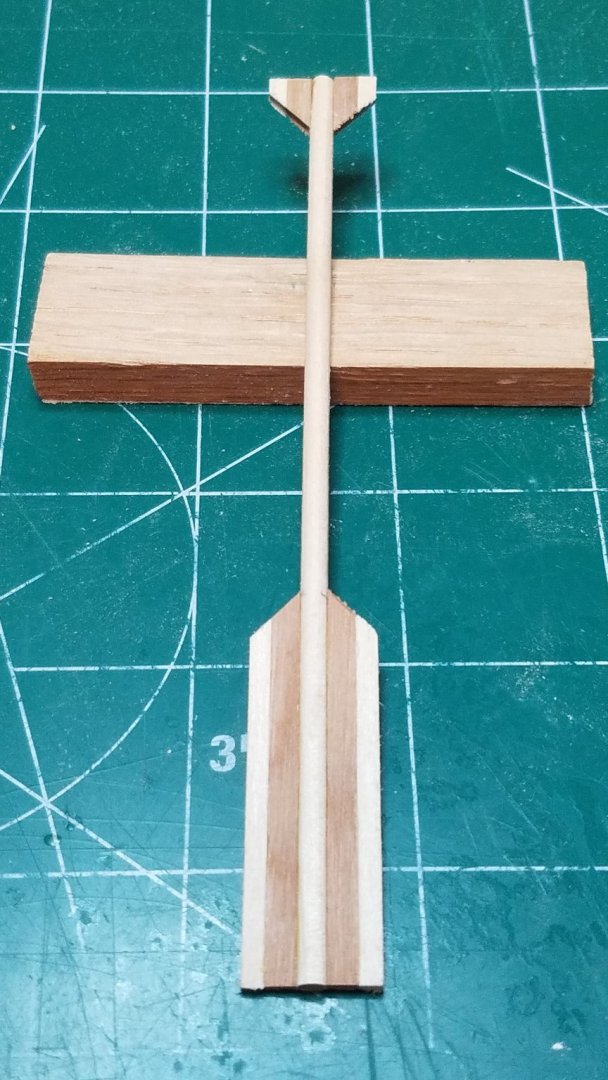
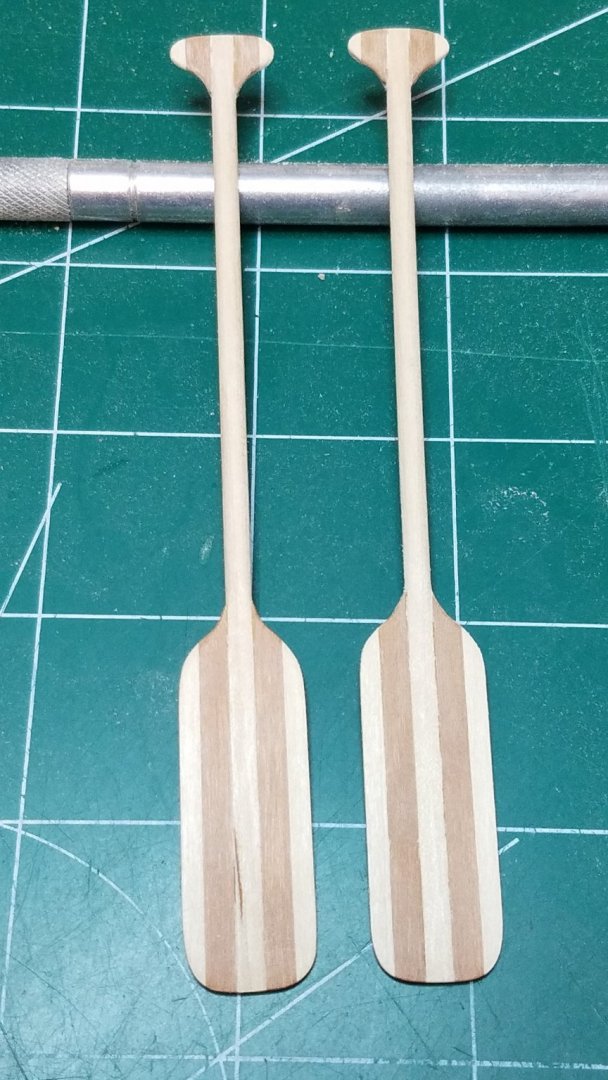
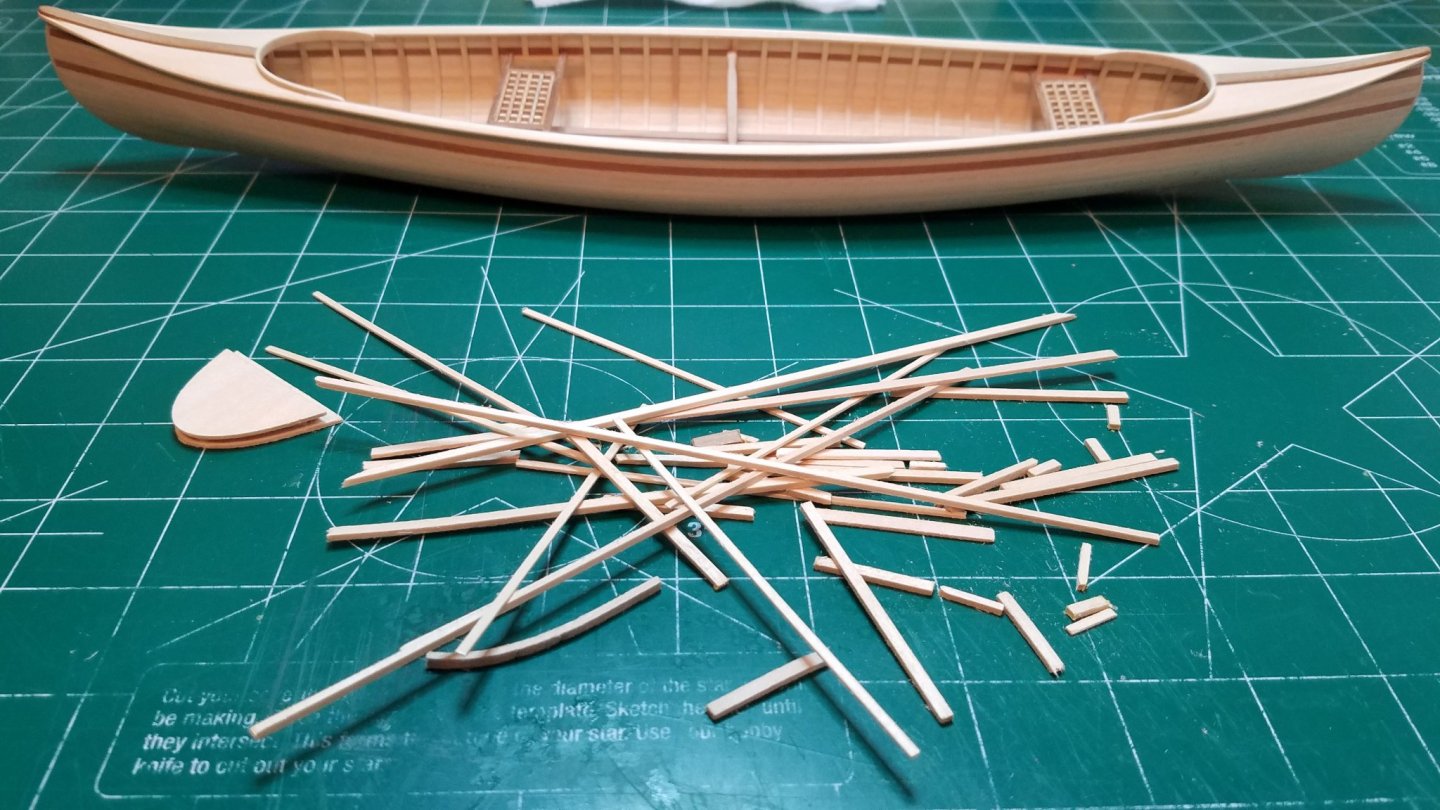
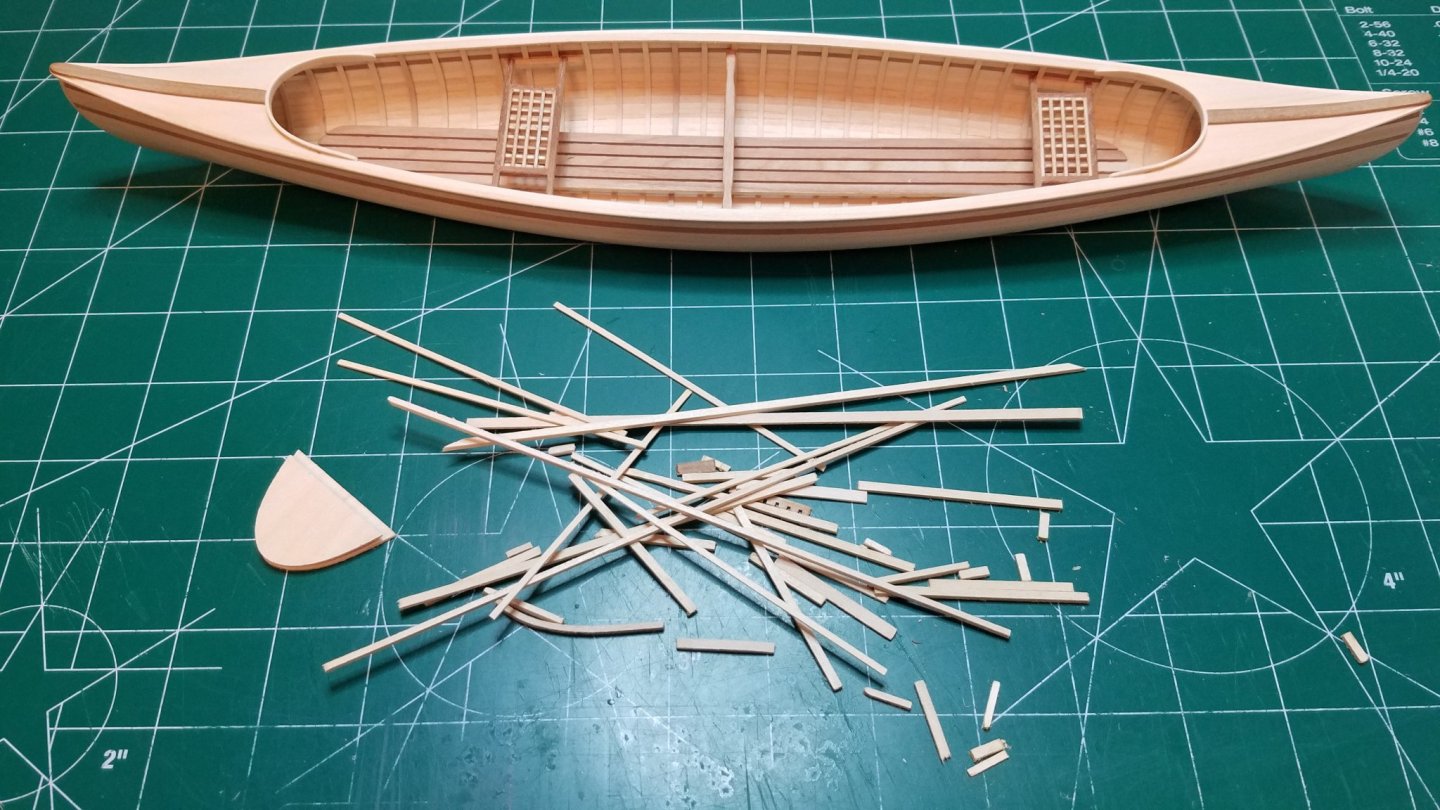
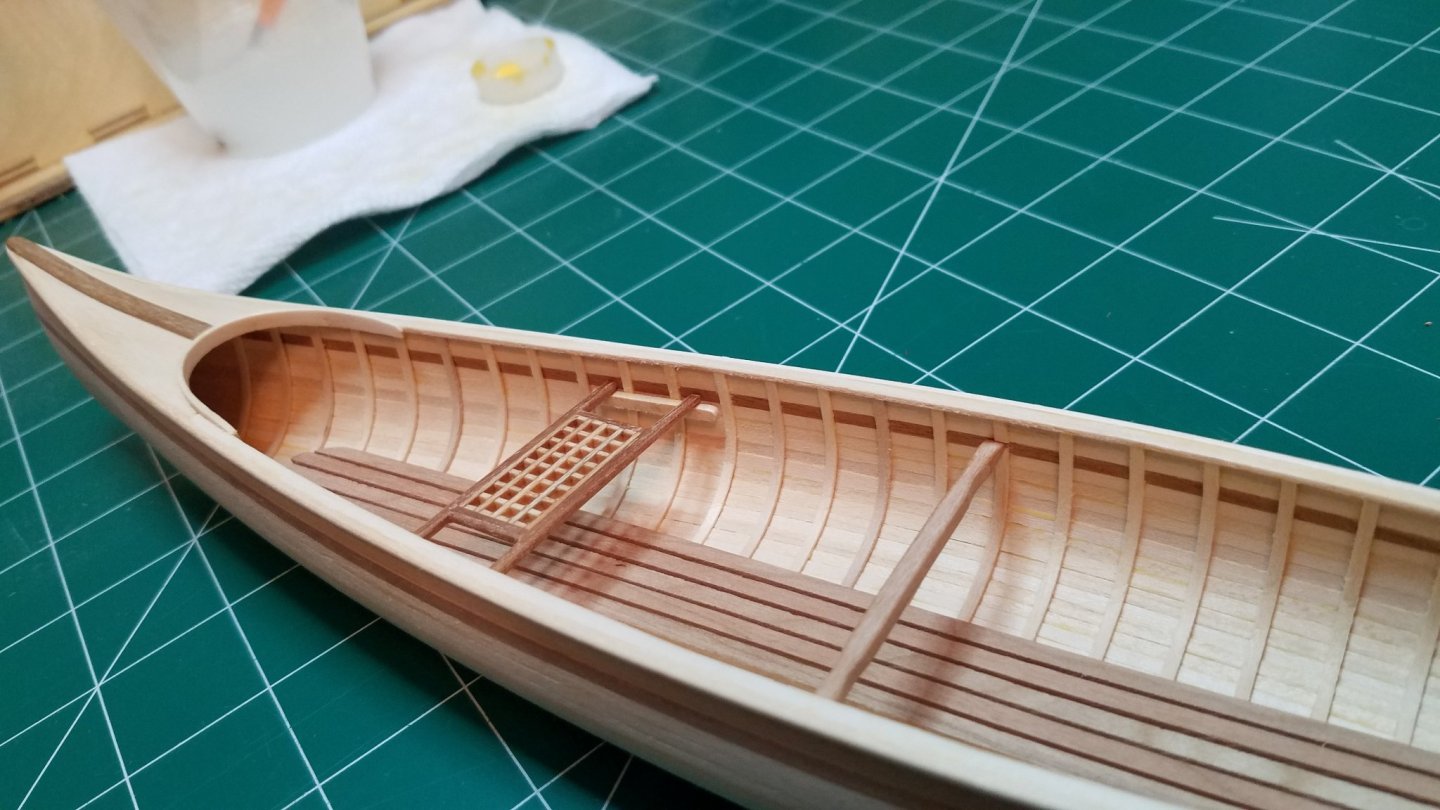
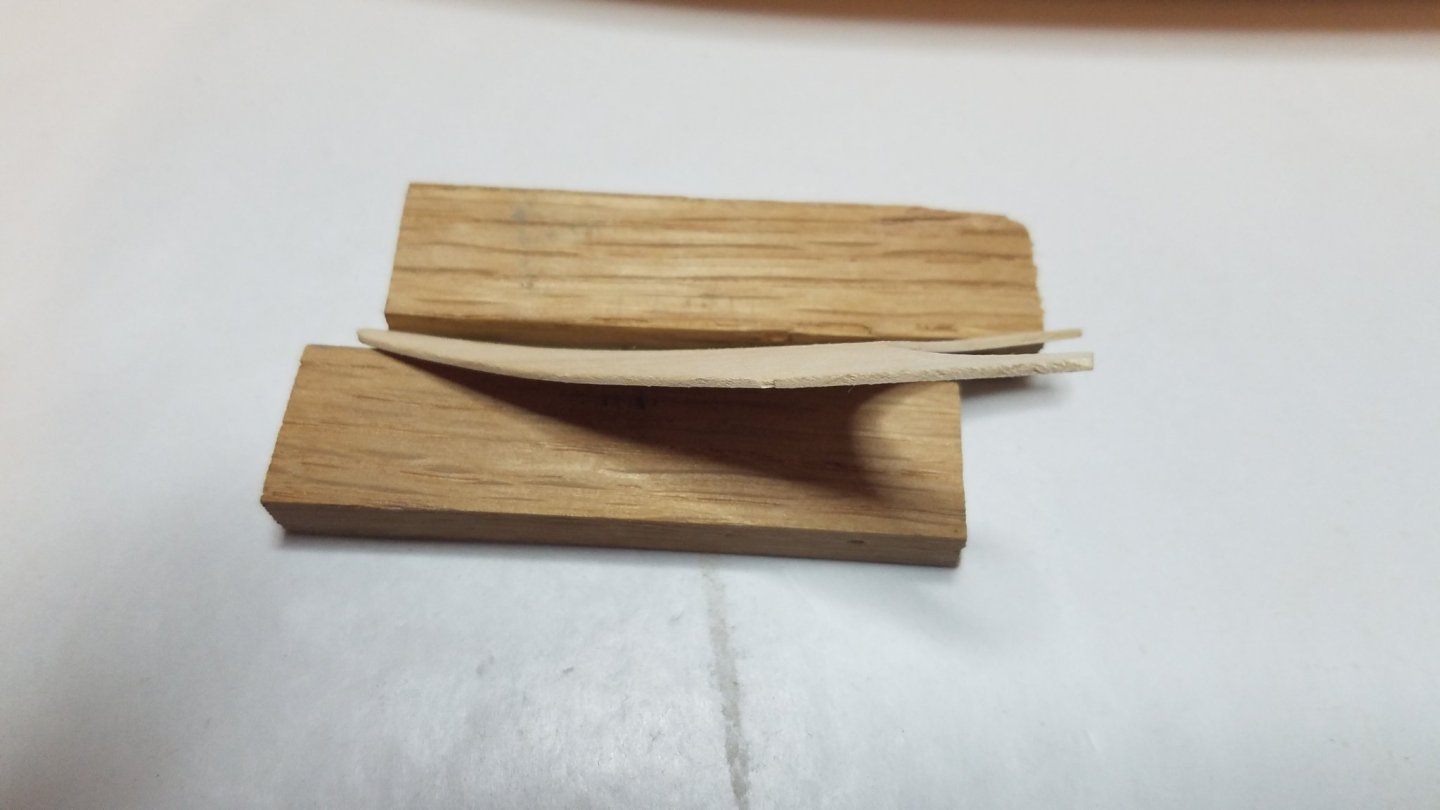
I got started this morning by gathering the parts to make my paddles, mostly from my scrap pile. Also pictured are two paddles that were in the box when I got the kit. Not sure if they were part of the kit or not but they don't really match. First I edge glued the cherry and basswood strips together. Once that was dry I cut the parts using my razor saw and miter box. Then I glued them to the dowel like so to form a rough paddle. Then after quite a bit of sanding and then even more sanding I was left with a pair of paddles. And as long as I was in sanding mode I did the "final" final sanding on the hull. Then it was time to start assembling the canoe it self. I wanted to be sure to at least get one coat of finish on the underside of the deck planks. So I did that before assembling them. I applied a coat to all the surfaces that would be inaccessible after they were glued in. Not sure why the underside of the deck looks so bad but I can assure you it is nice and smooth. Must be the lights. Now I am waiting for glue to dry again then the first full coat of poly tonight and more of the same tomorrow. Thanks for the comments and the likes. Best Regards


- 84 replies
-
- 9
-
-
- peterboro canoe
- Finished
- (and 1 more)
-
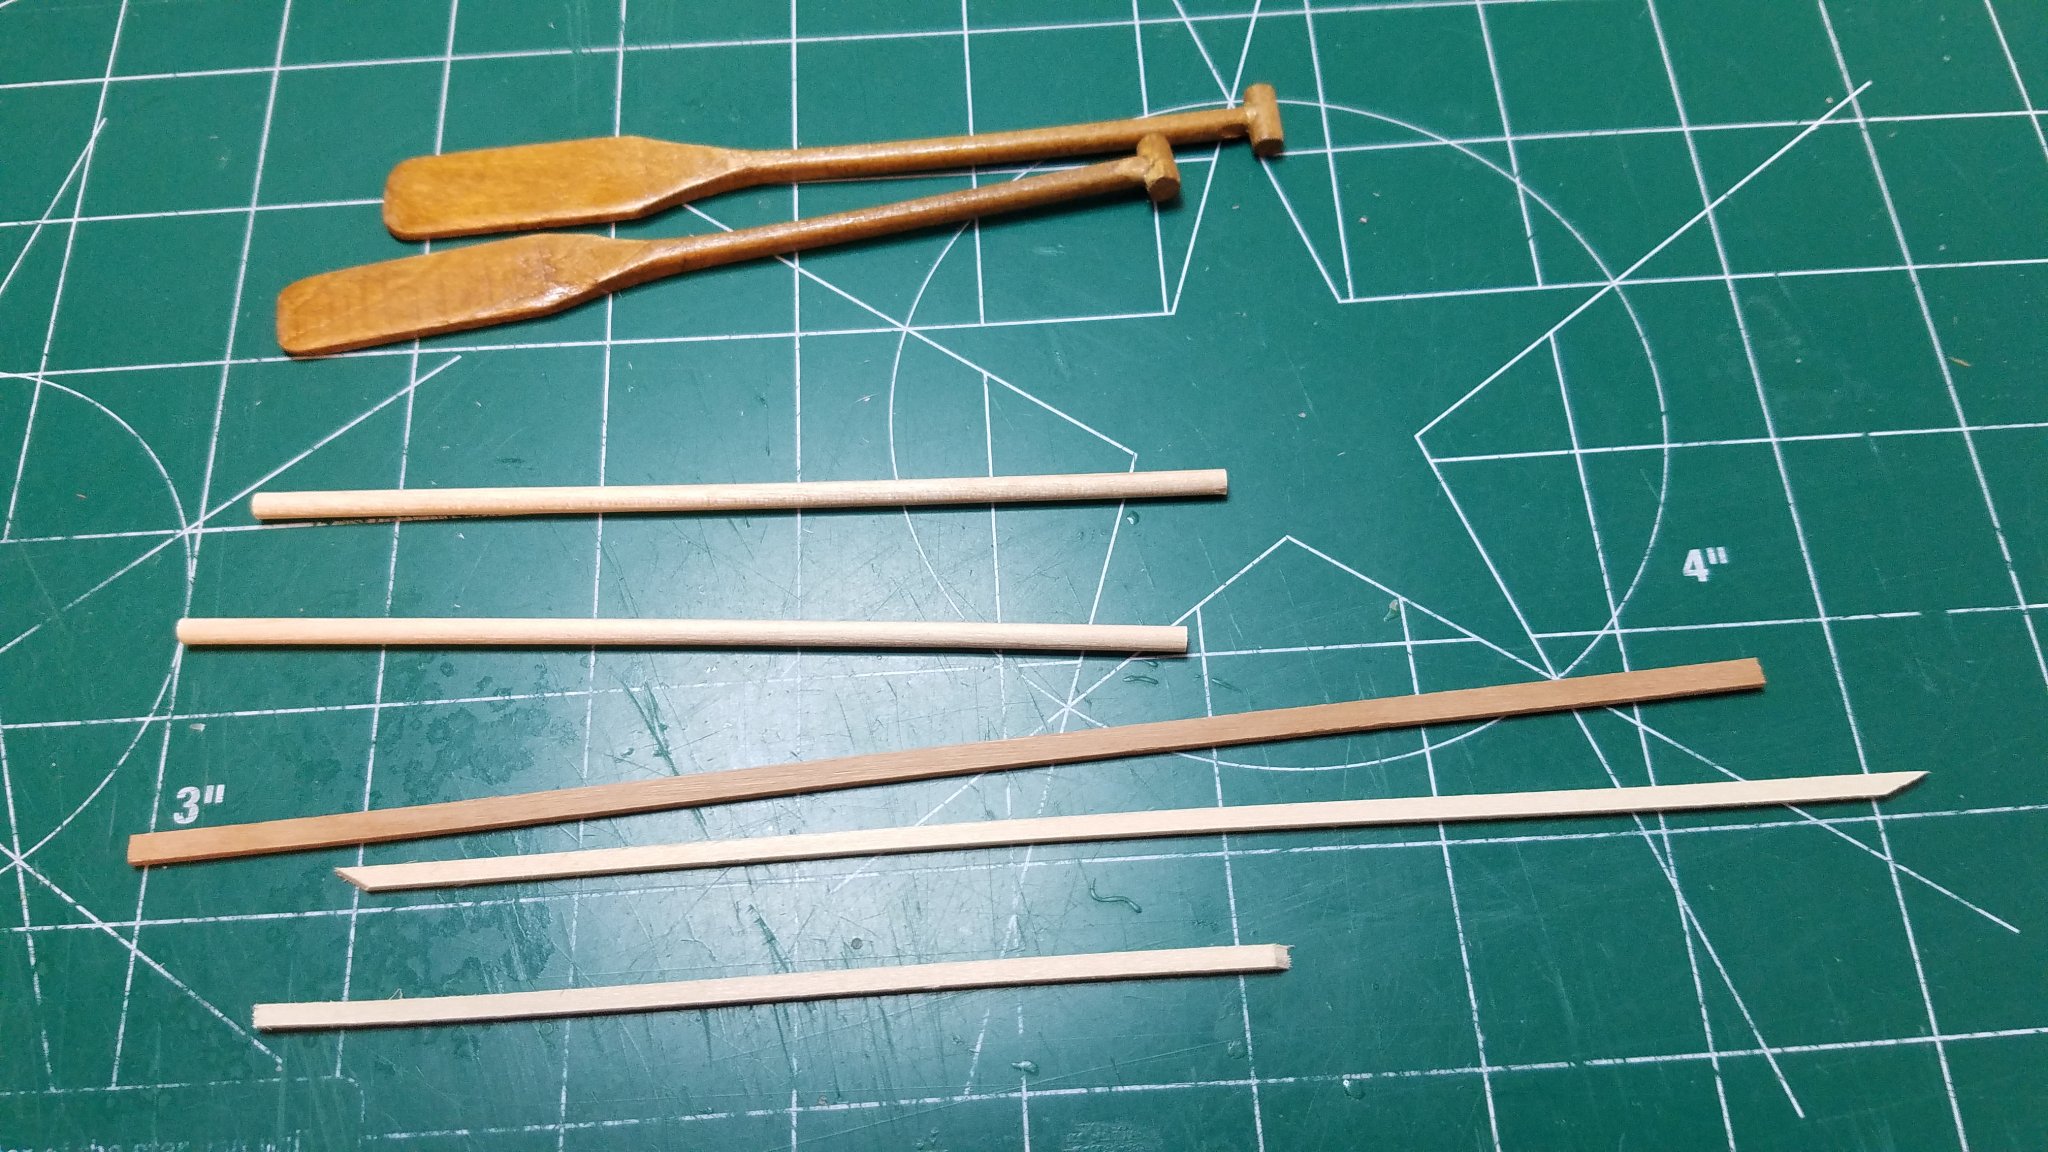
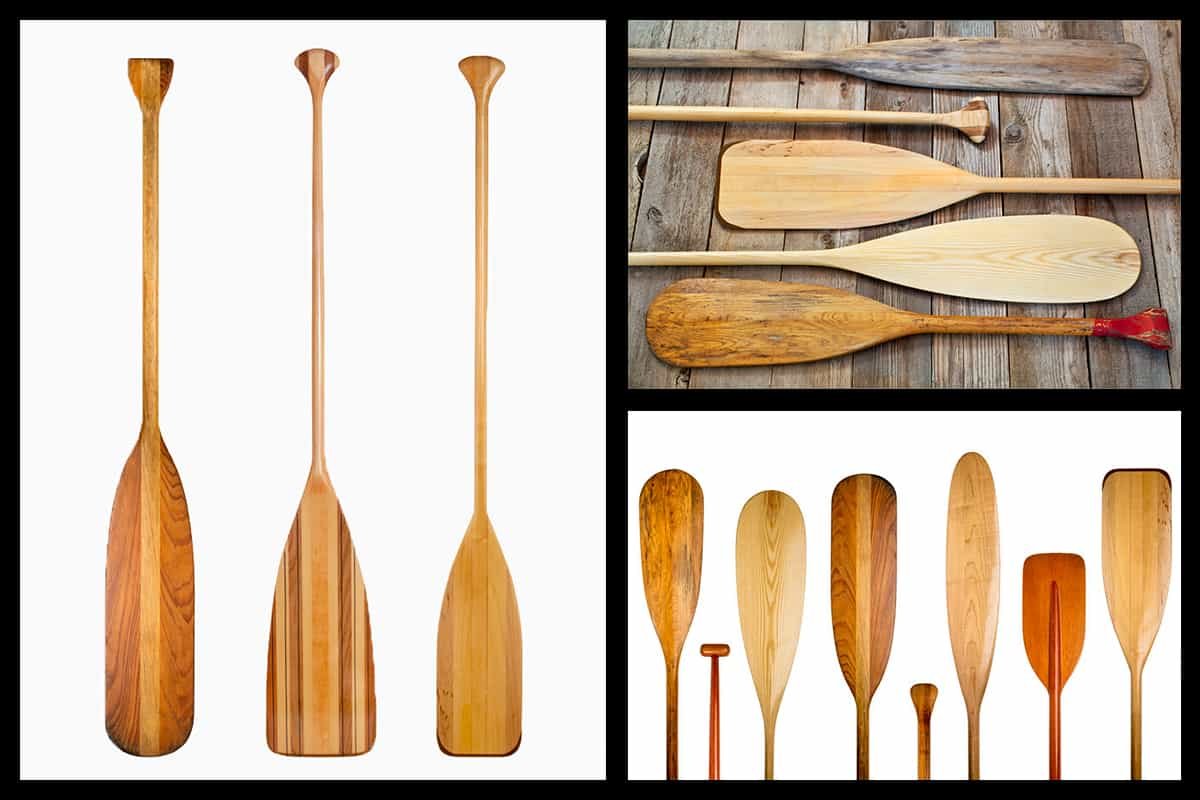
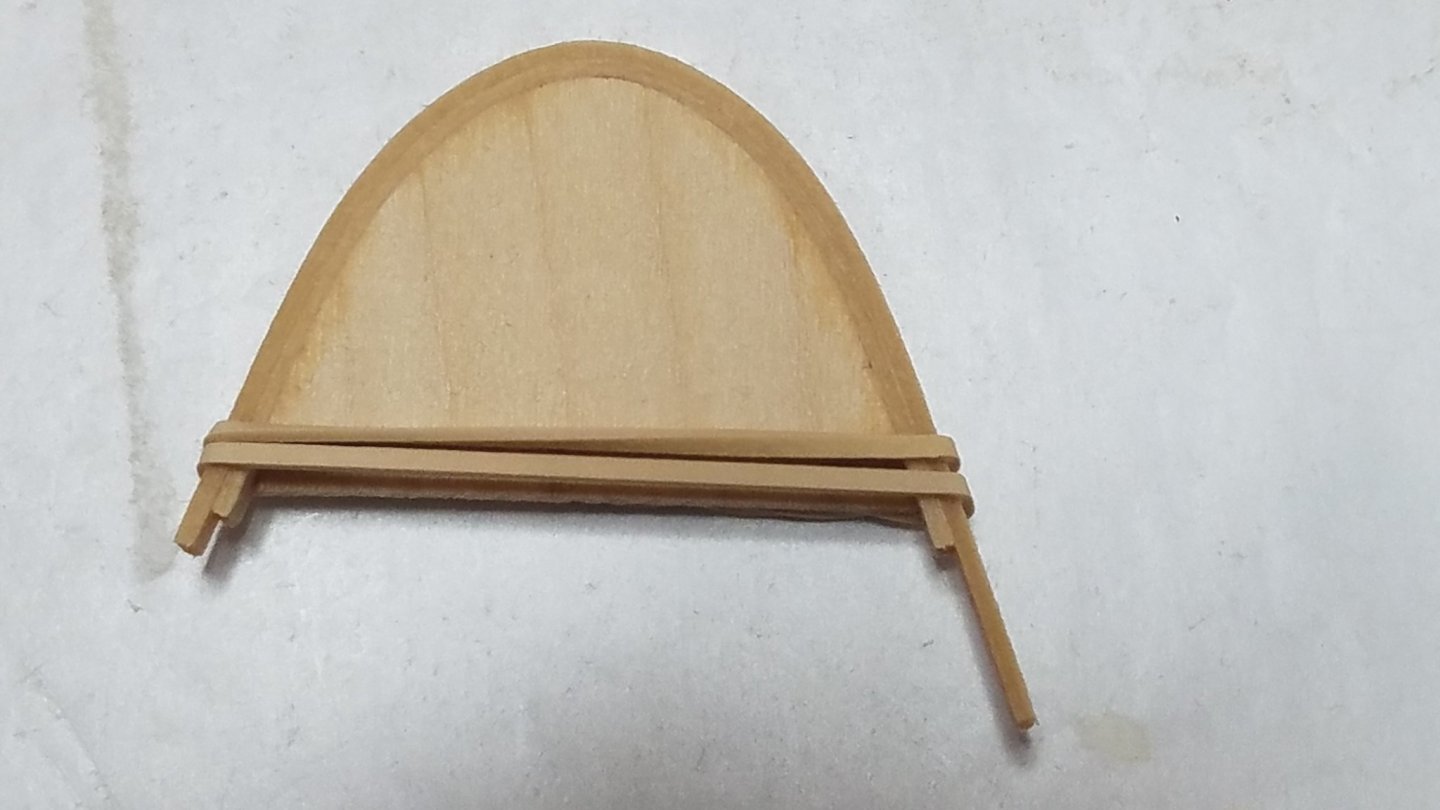
Just a few of the choices I found for making canoe paddles.
- 84 replies
-
- 5
-
-
- peterboro canoe
- Finished
- (and 1 more)
-
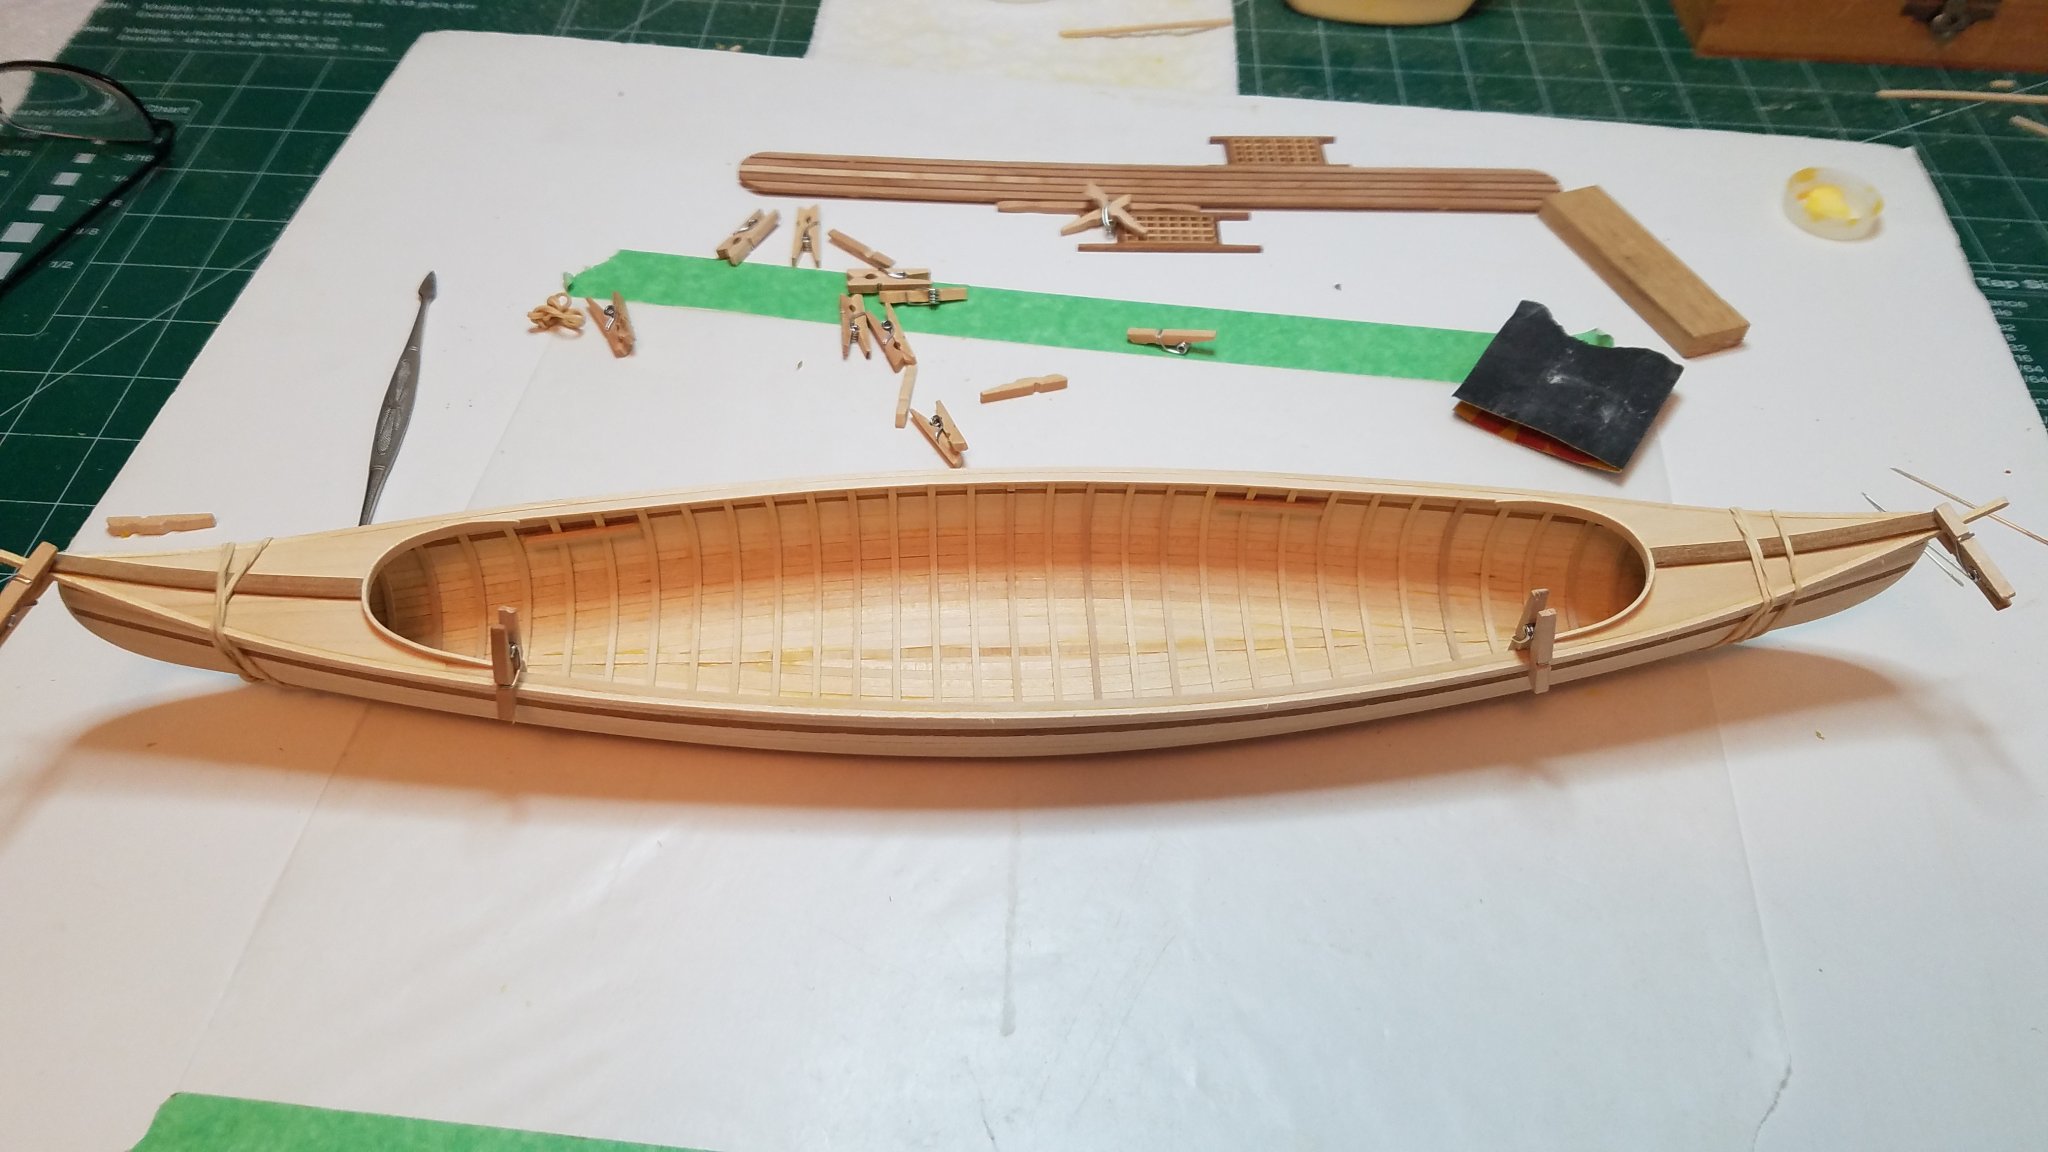
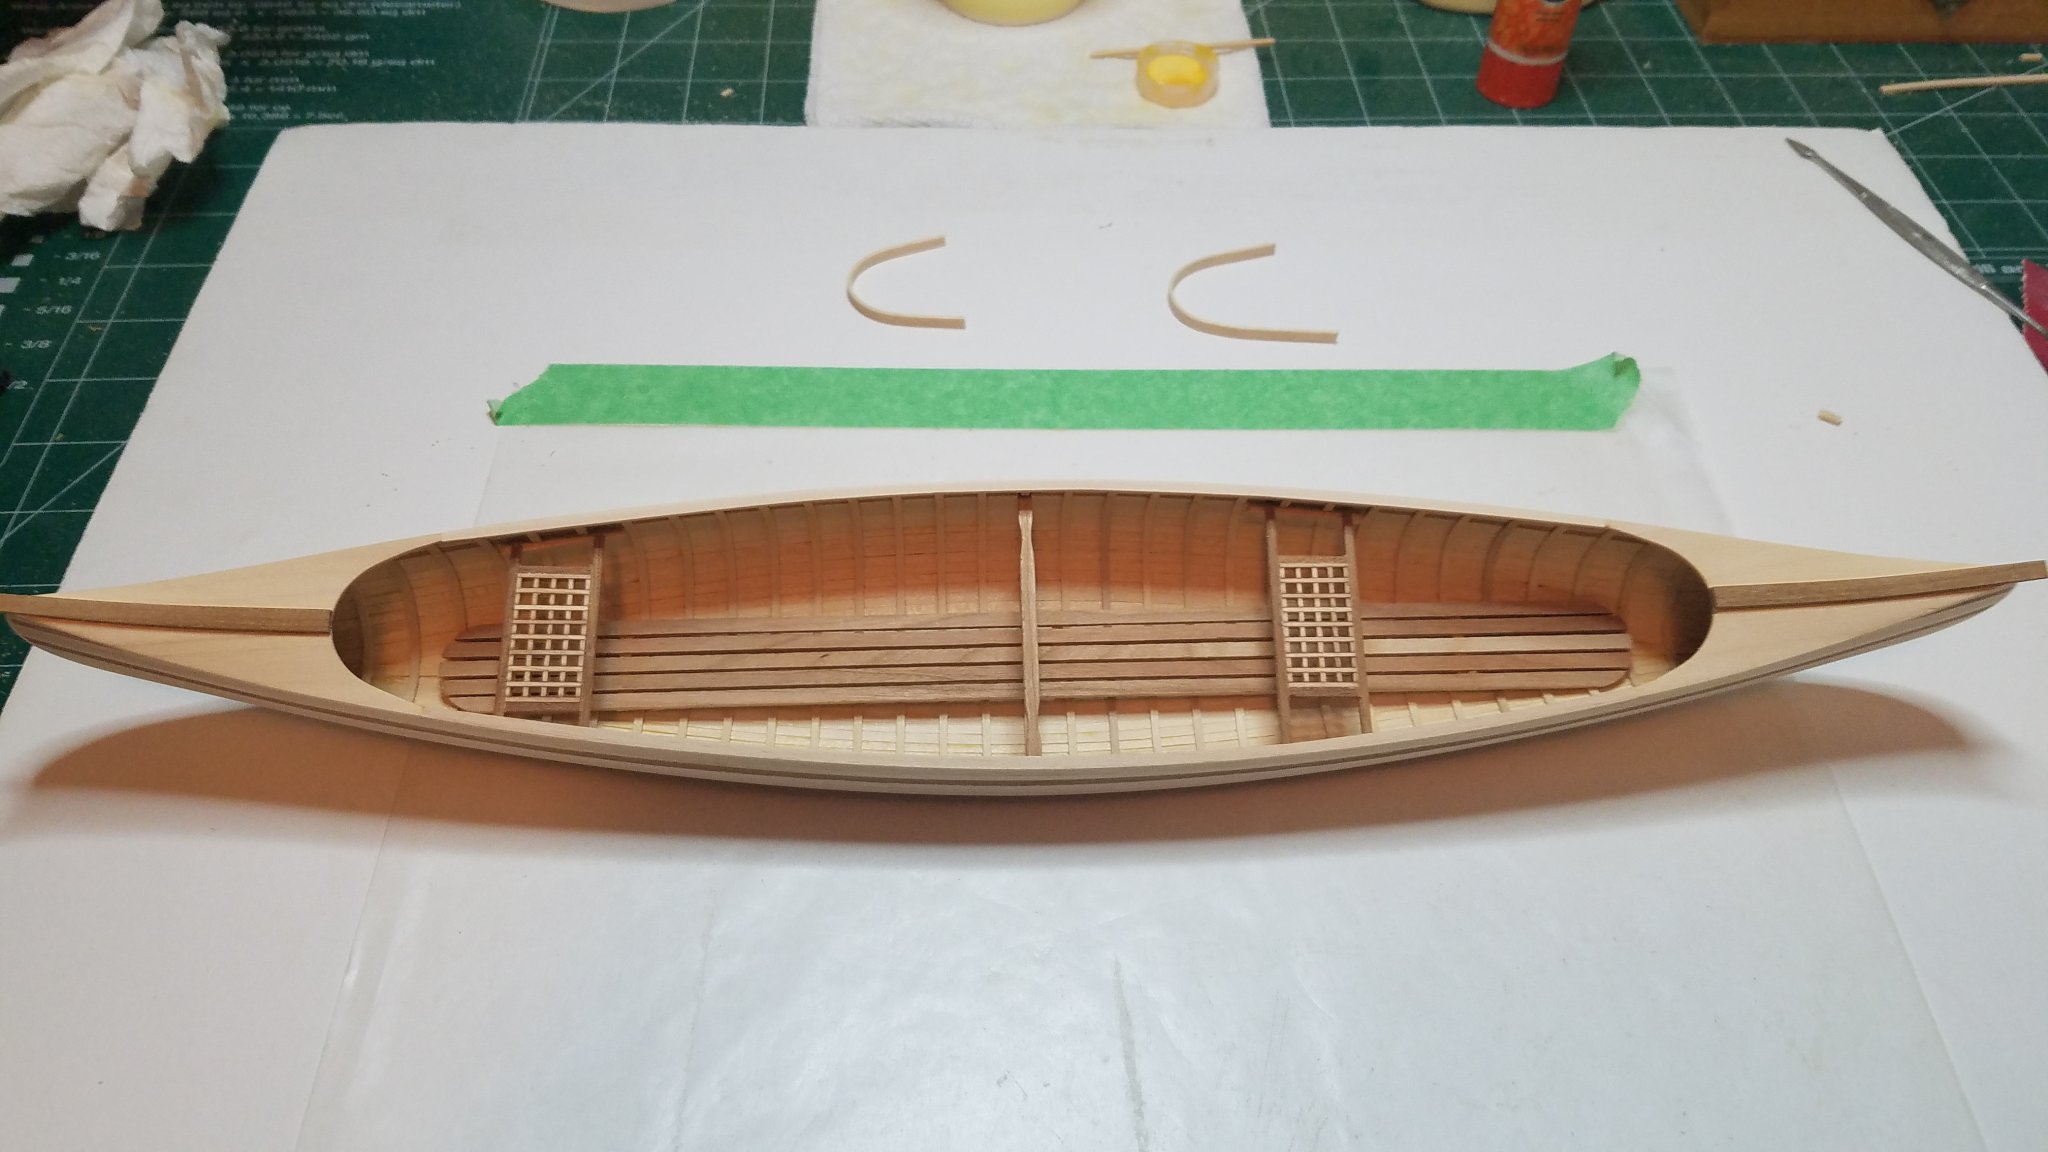
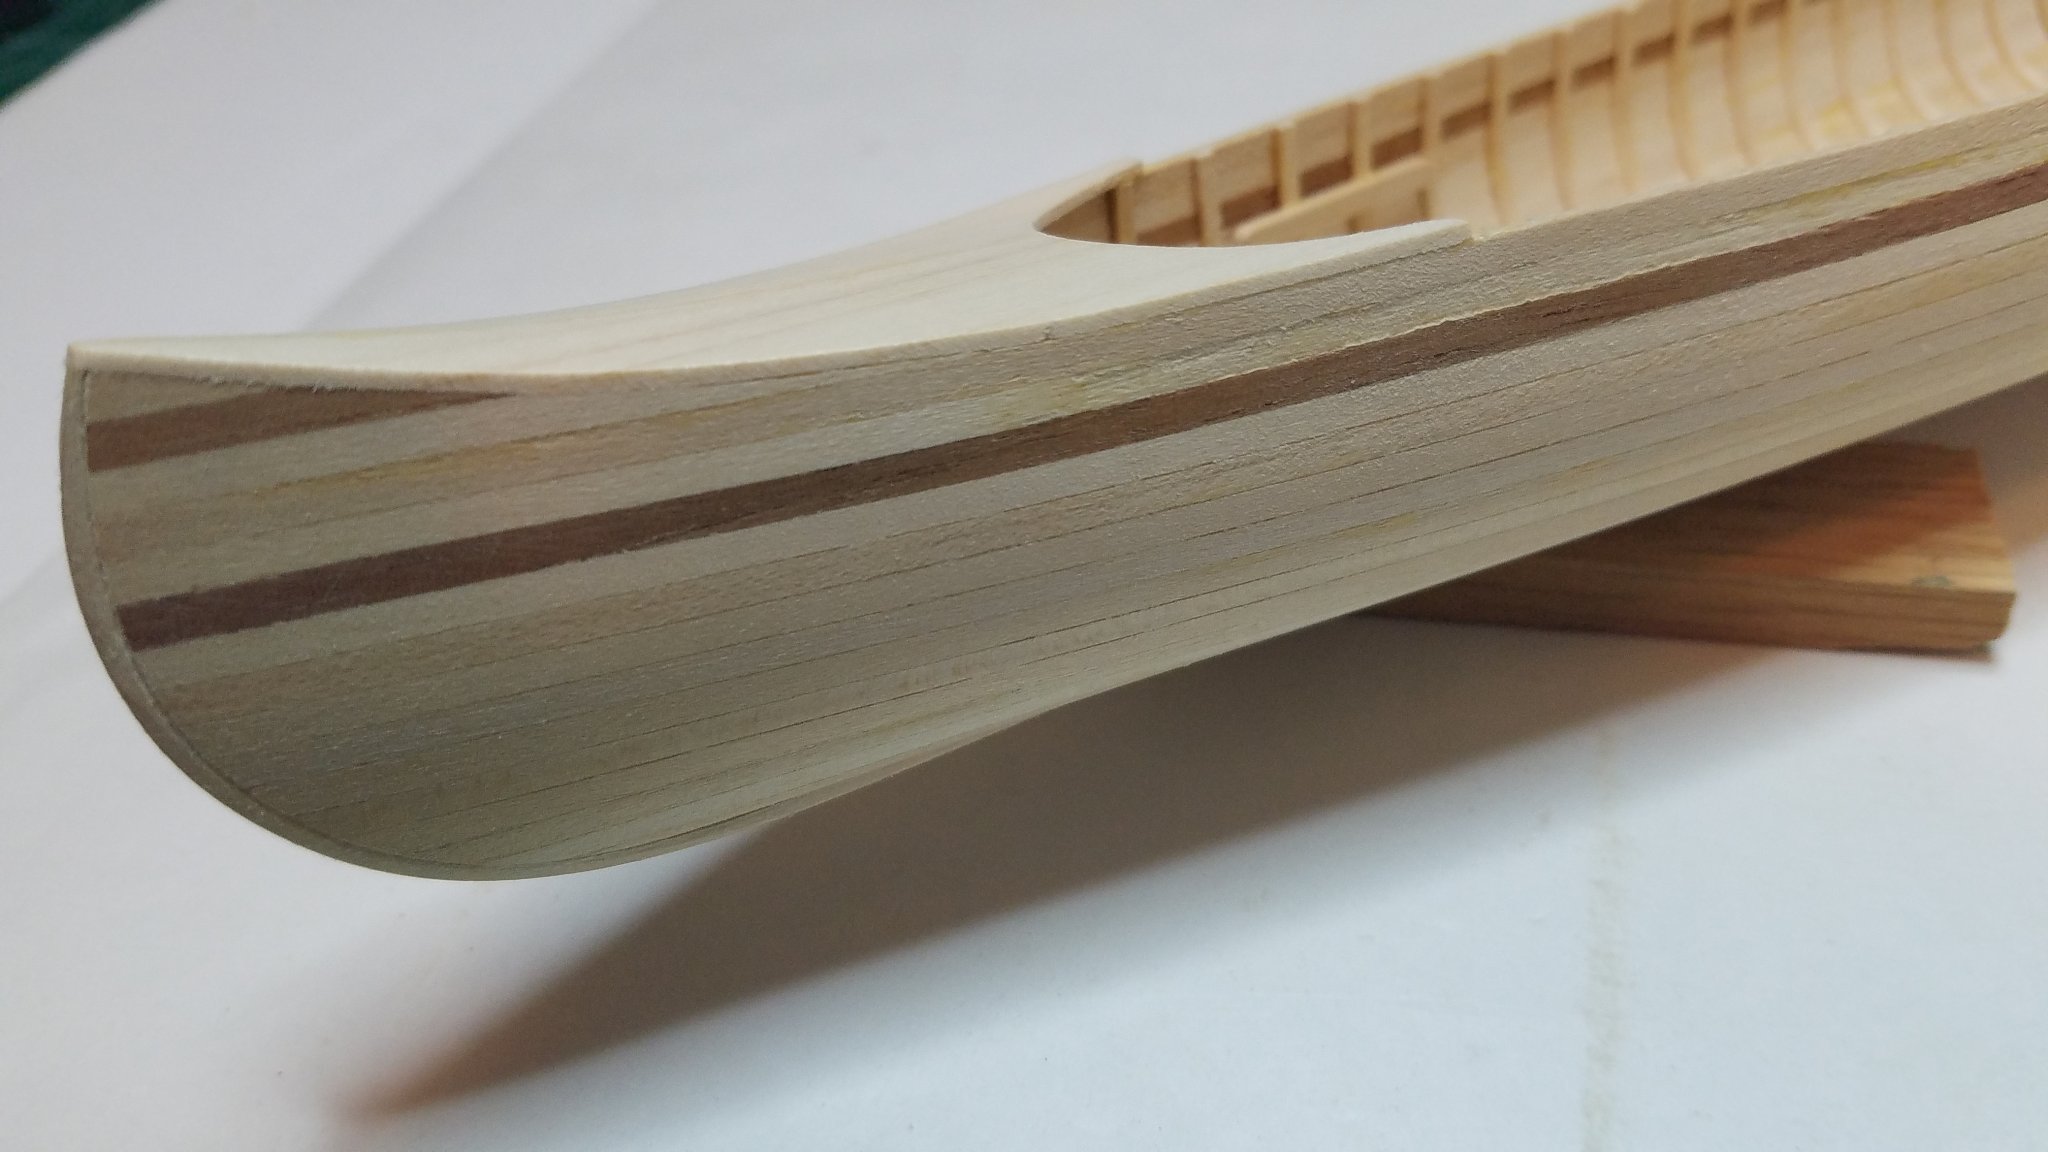
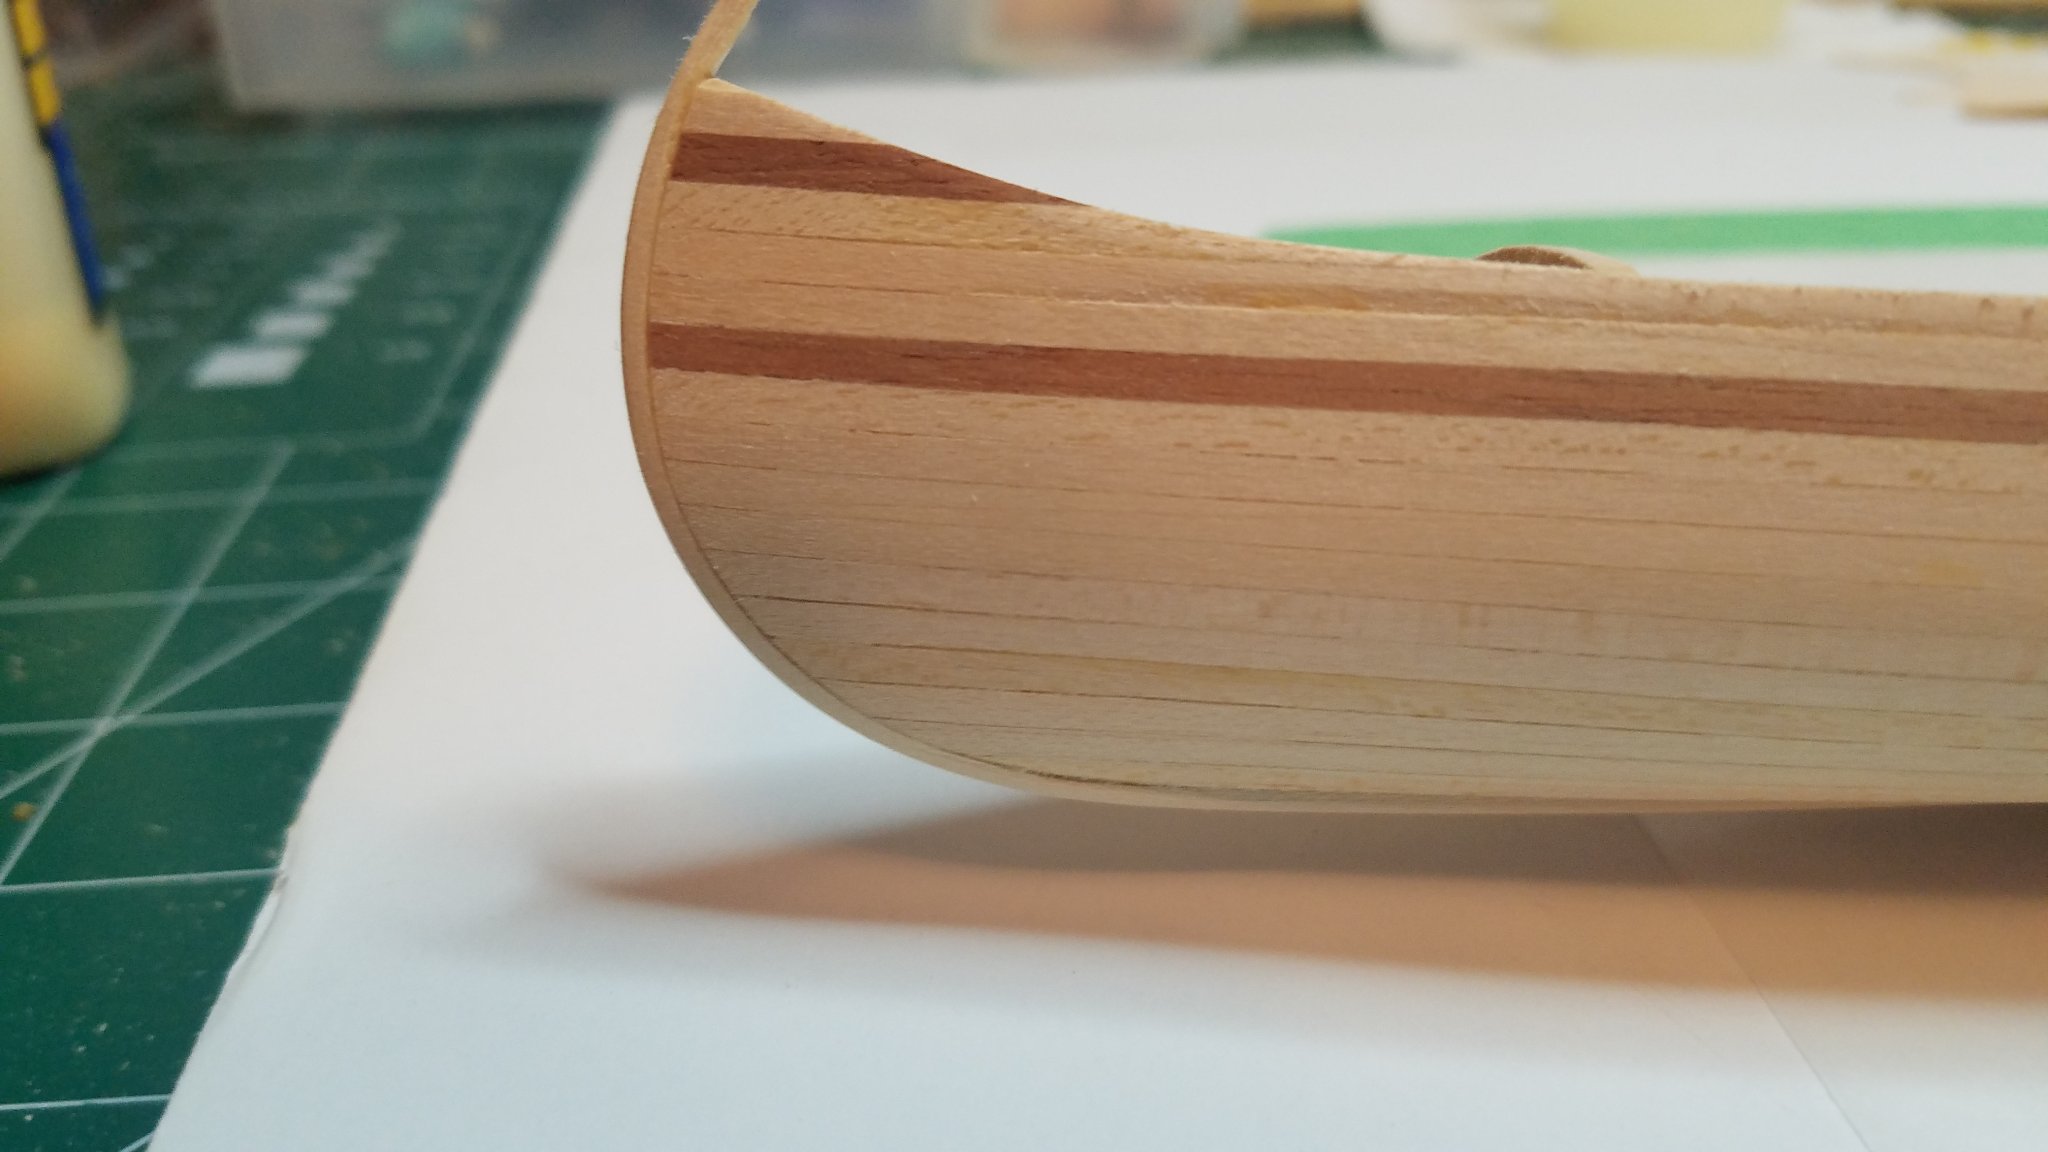
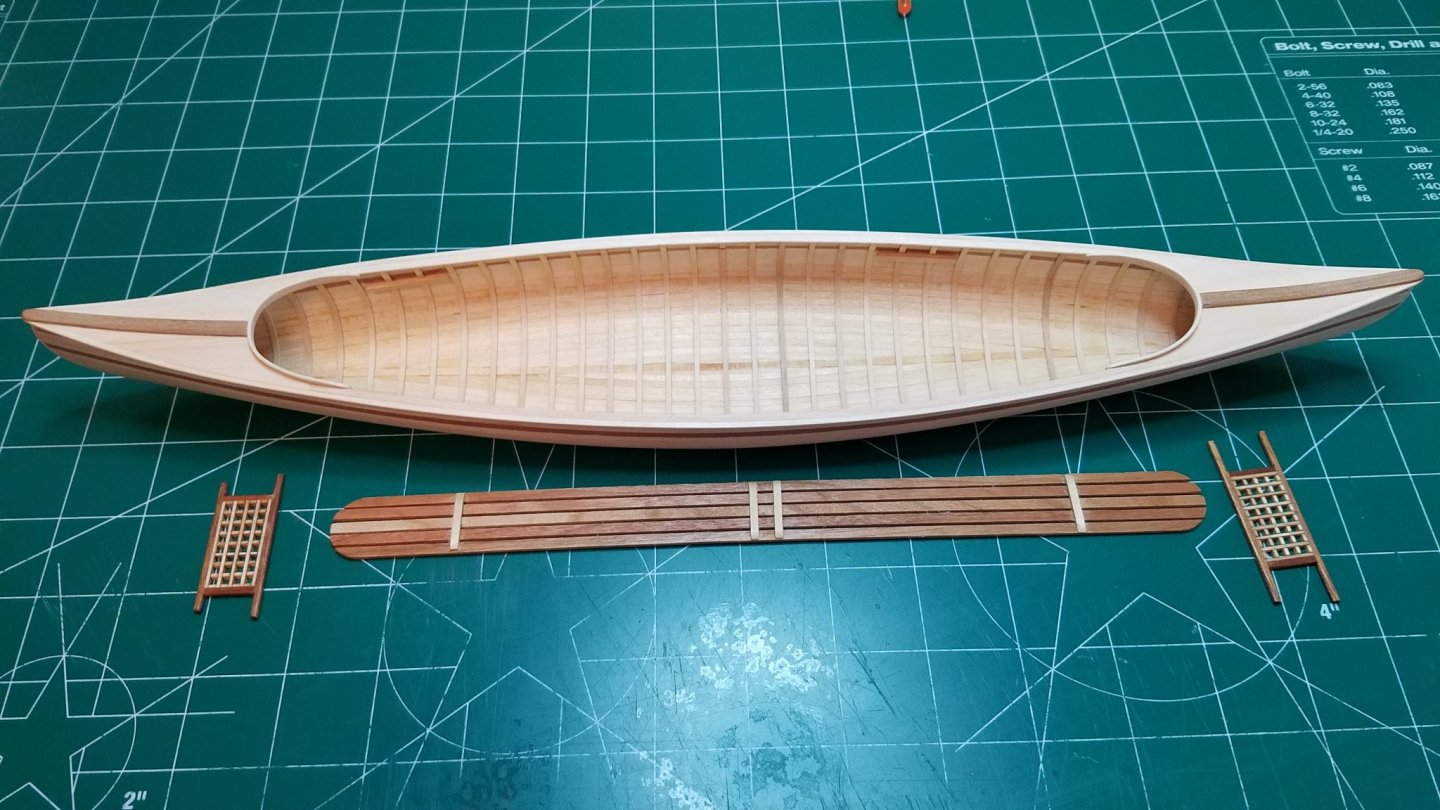
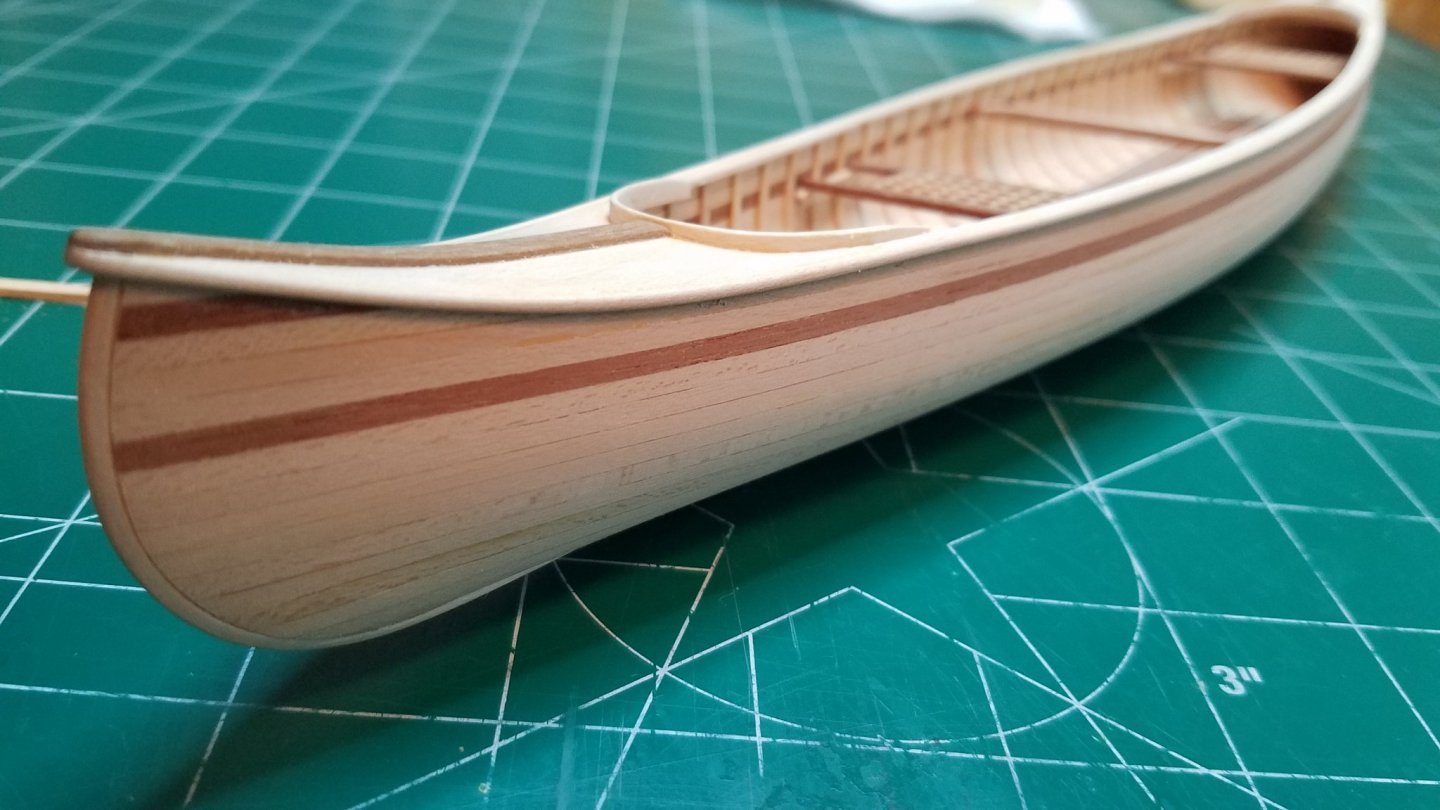
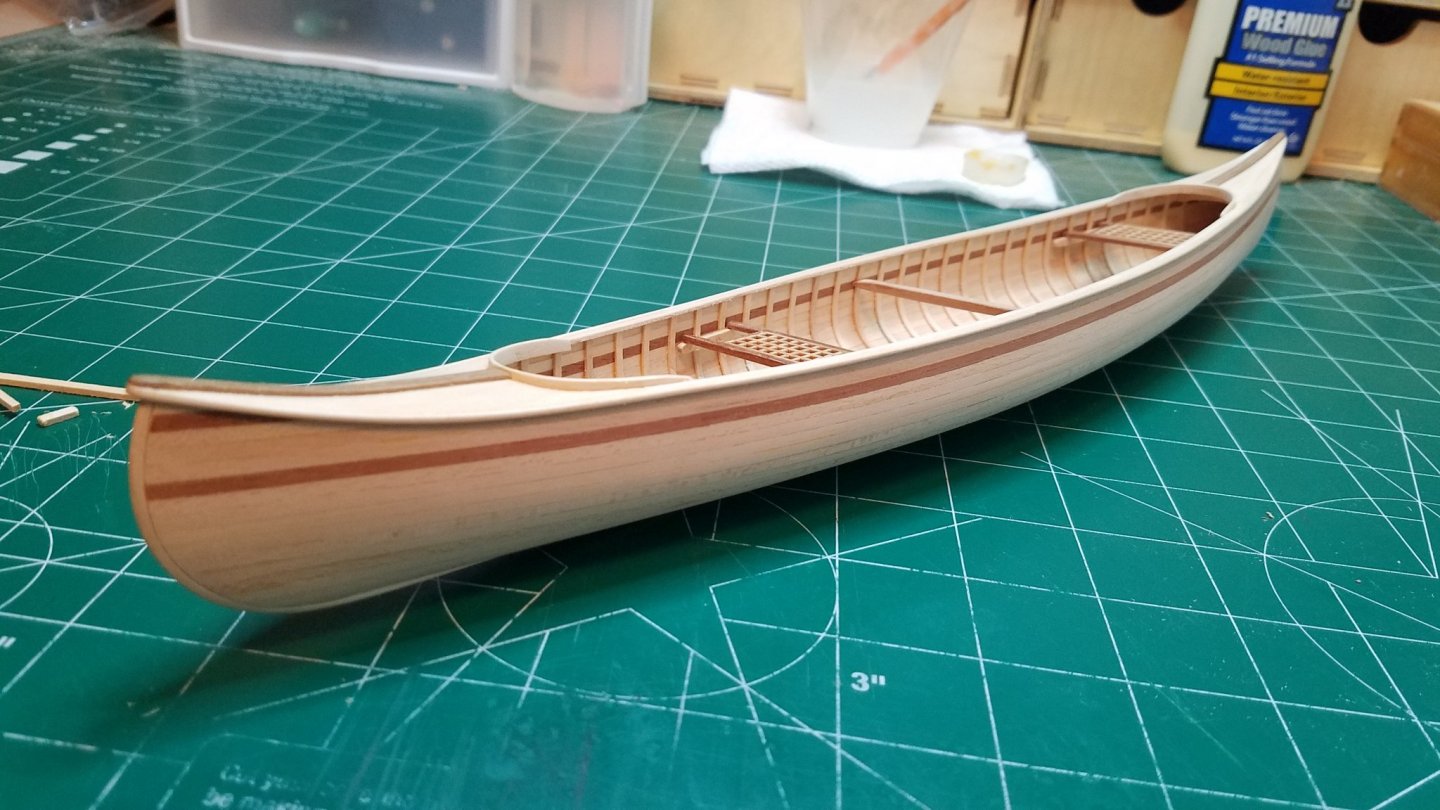
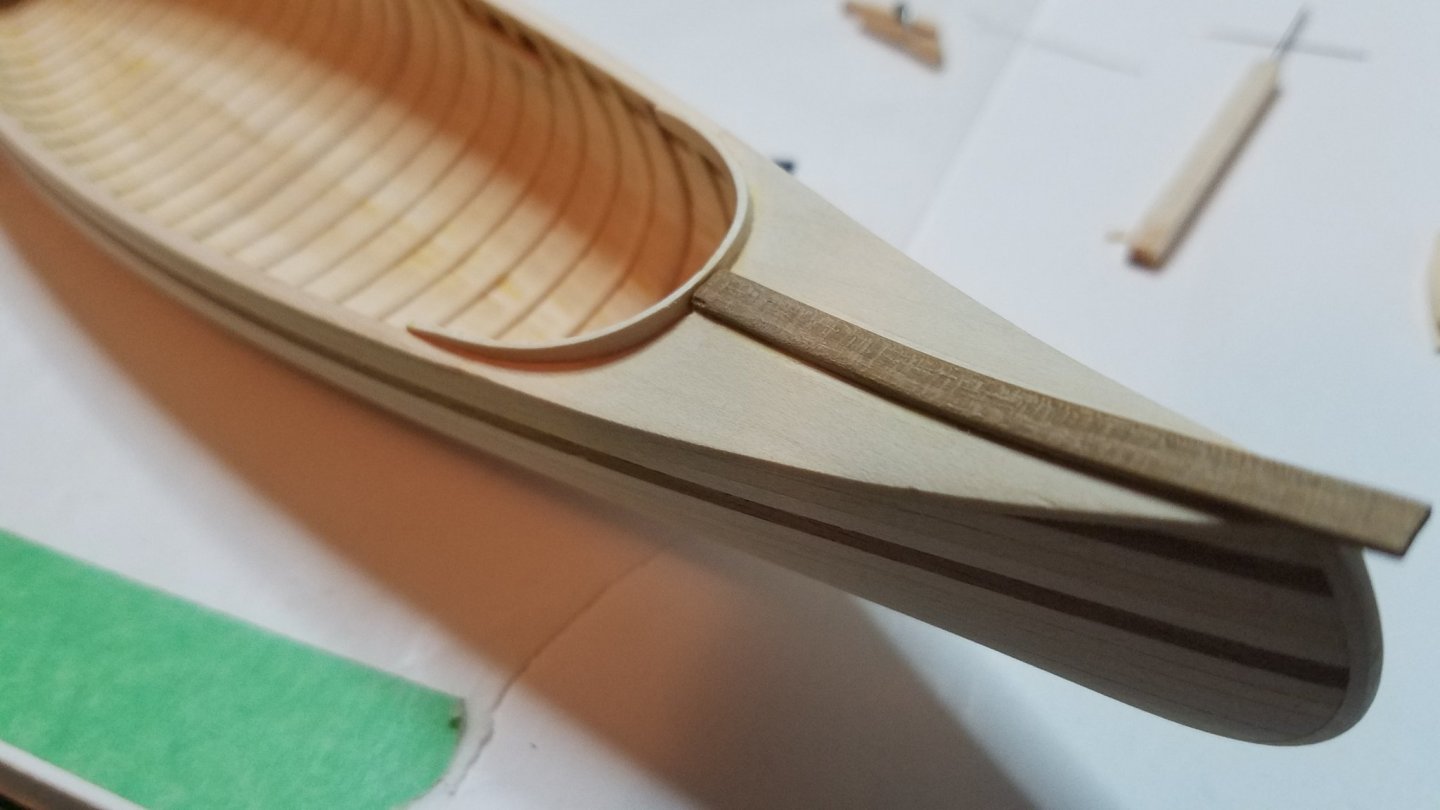
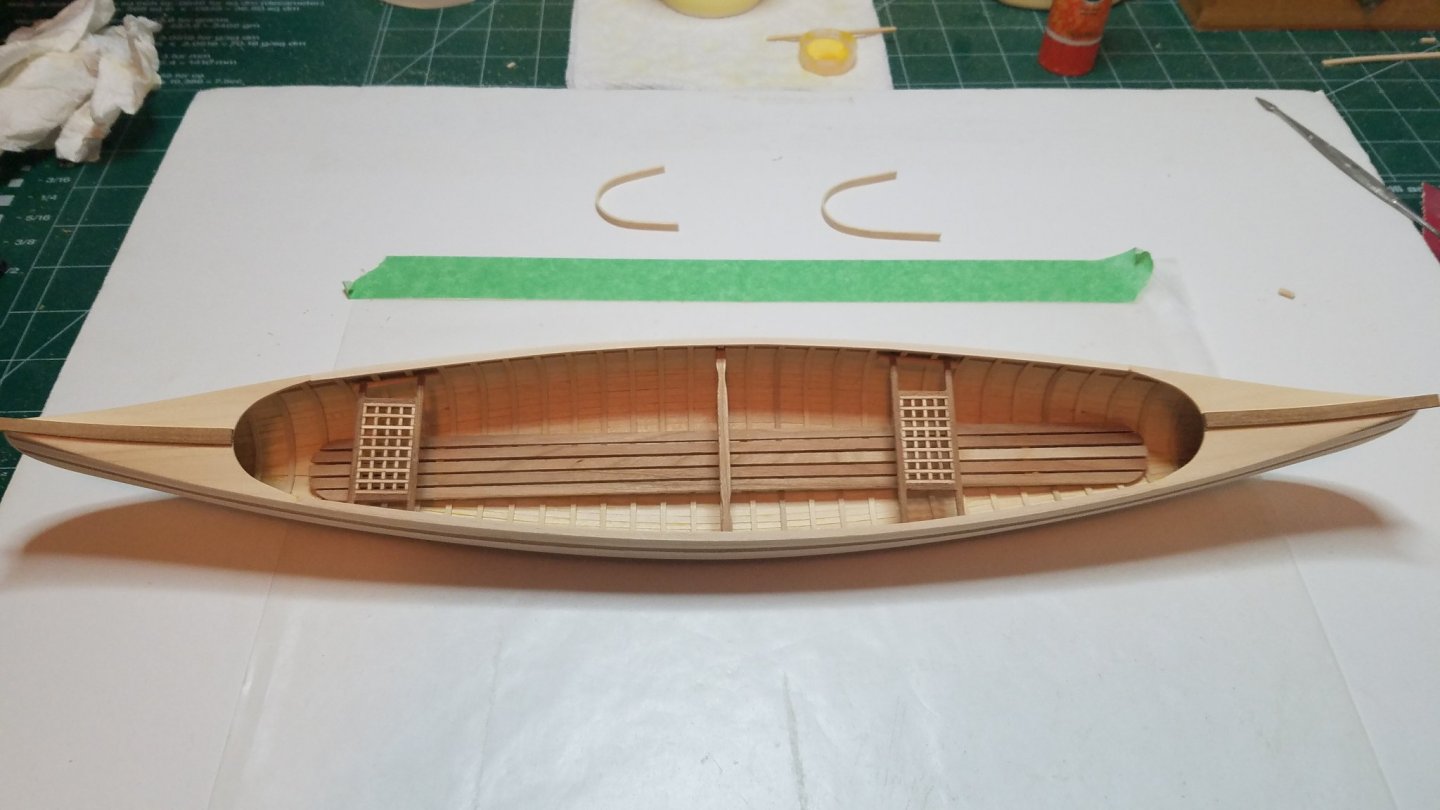
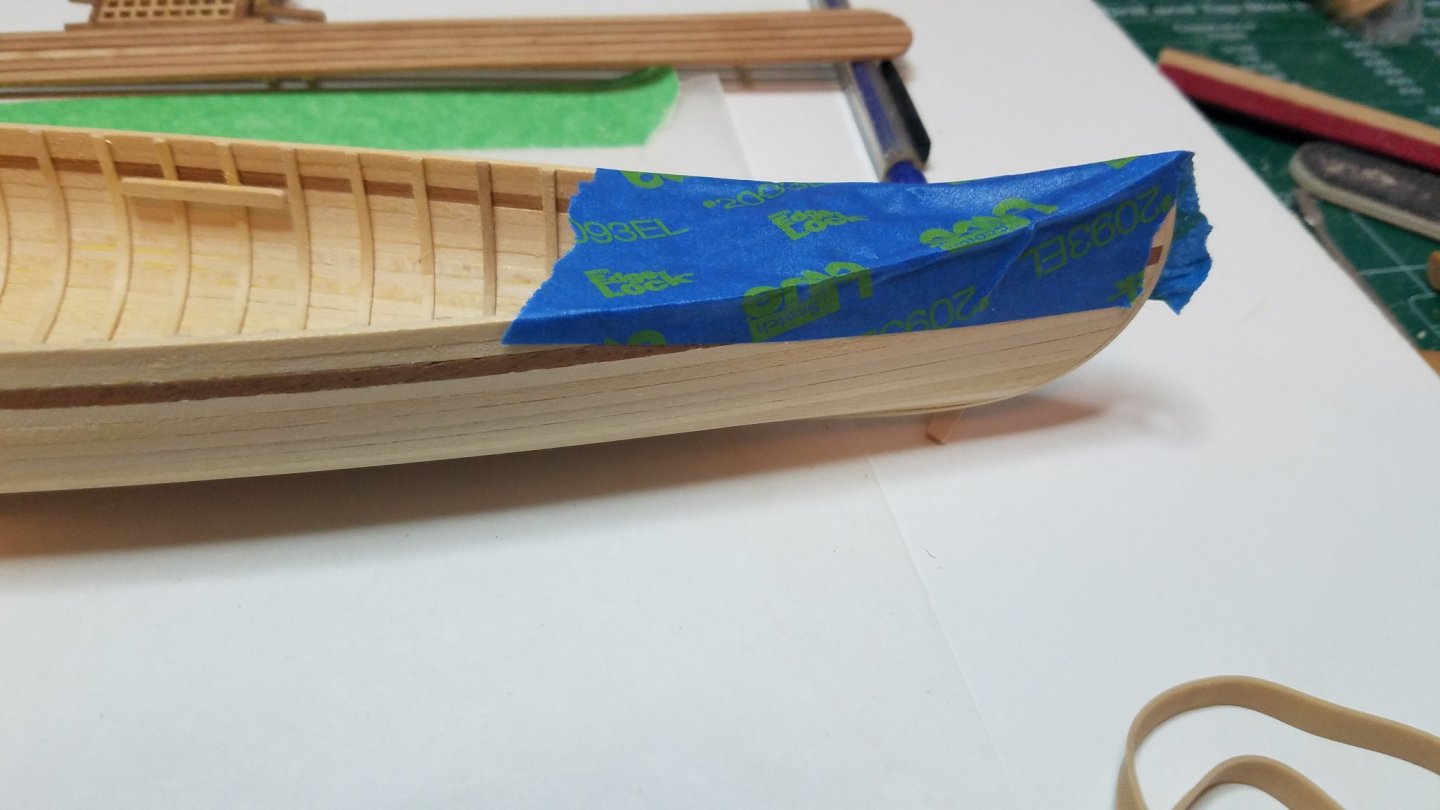
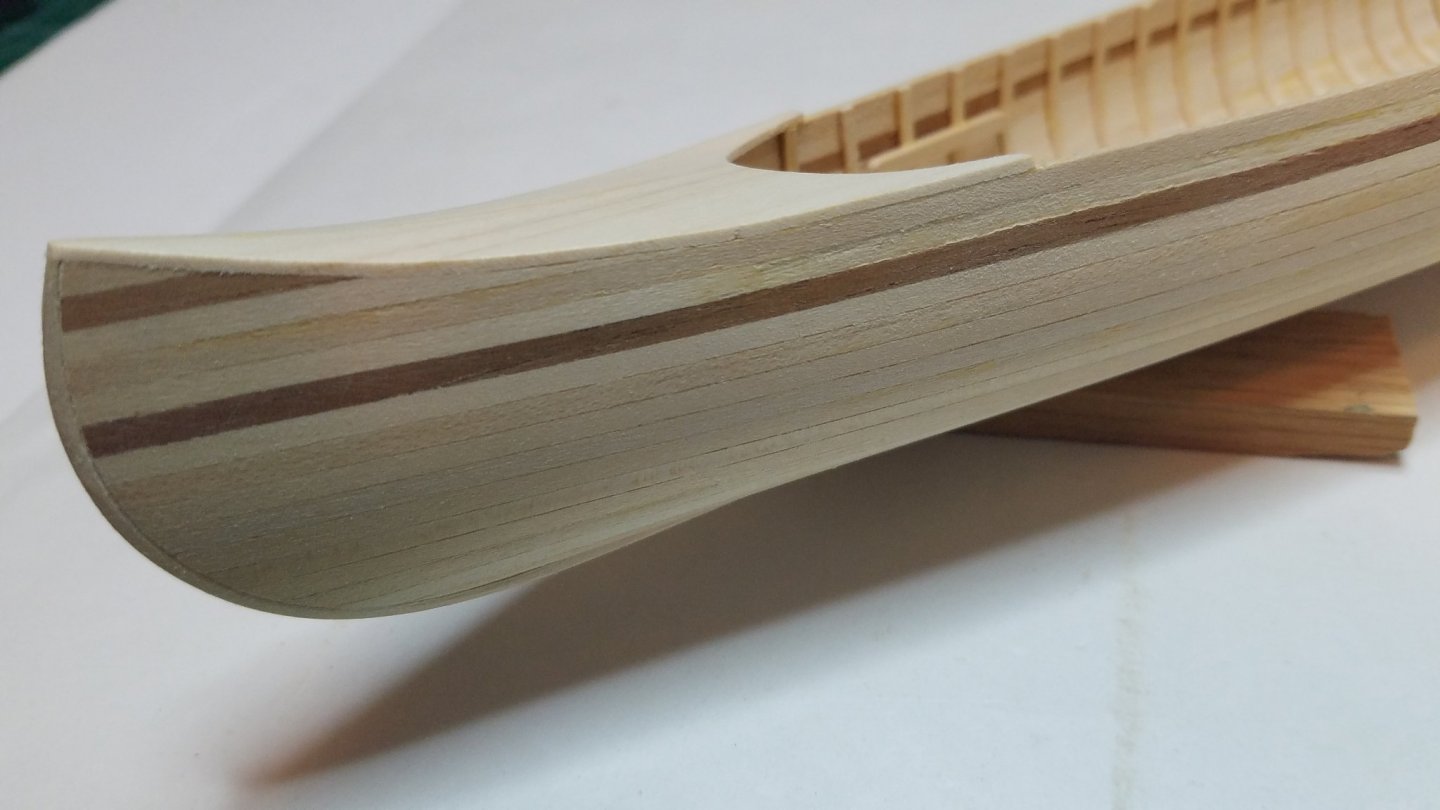
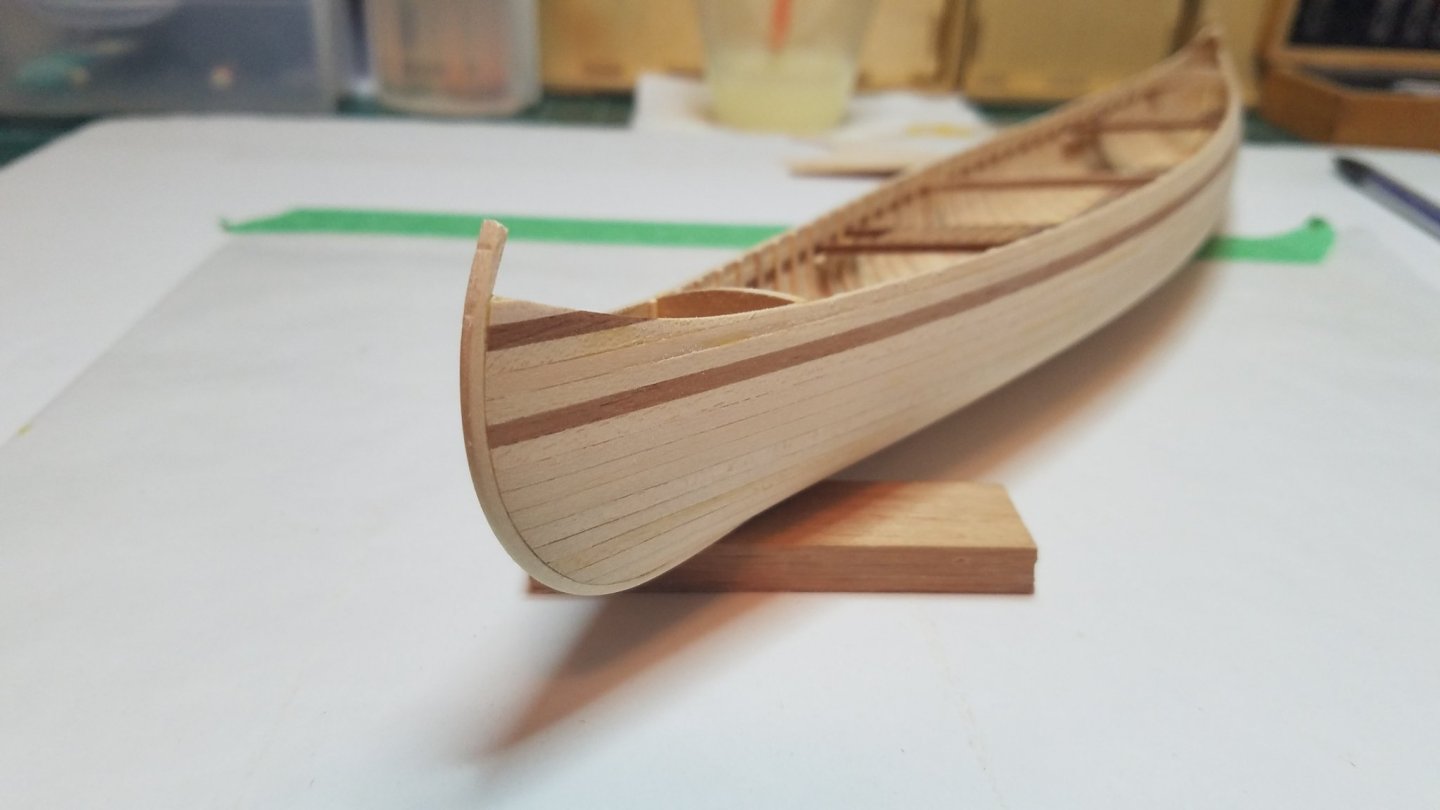
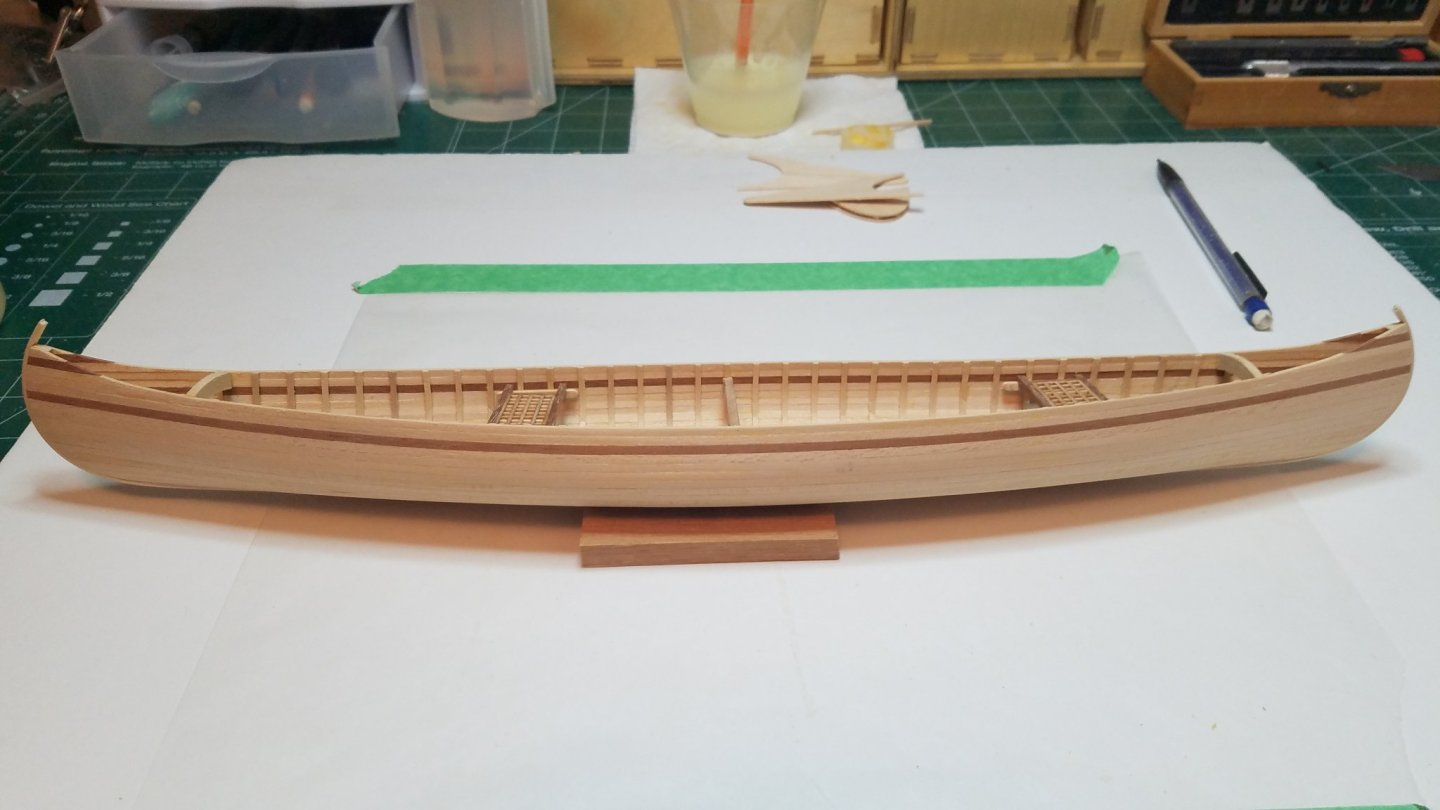
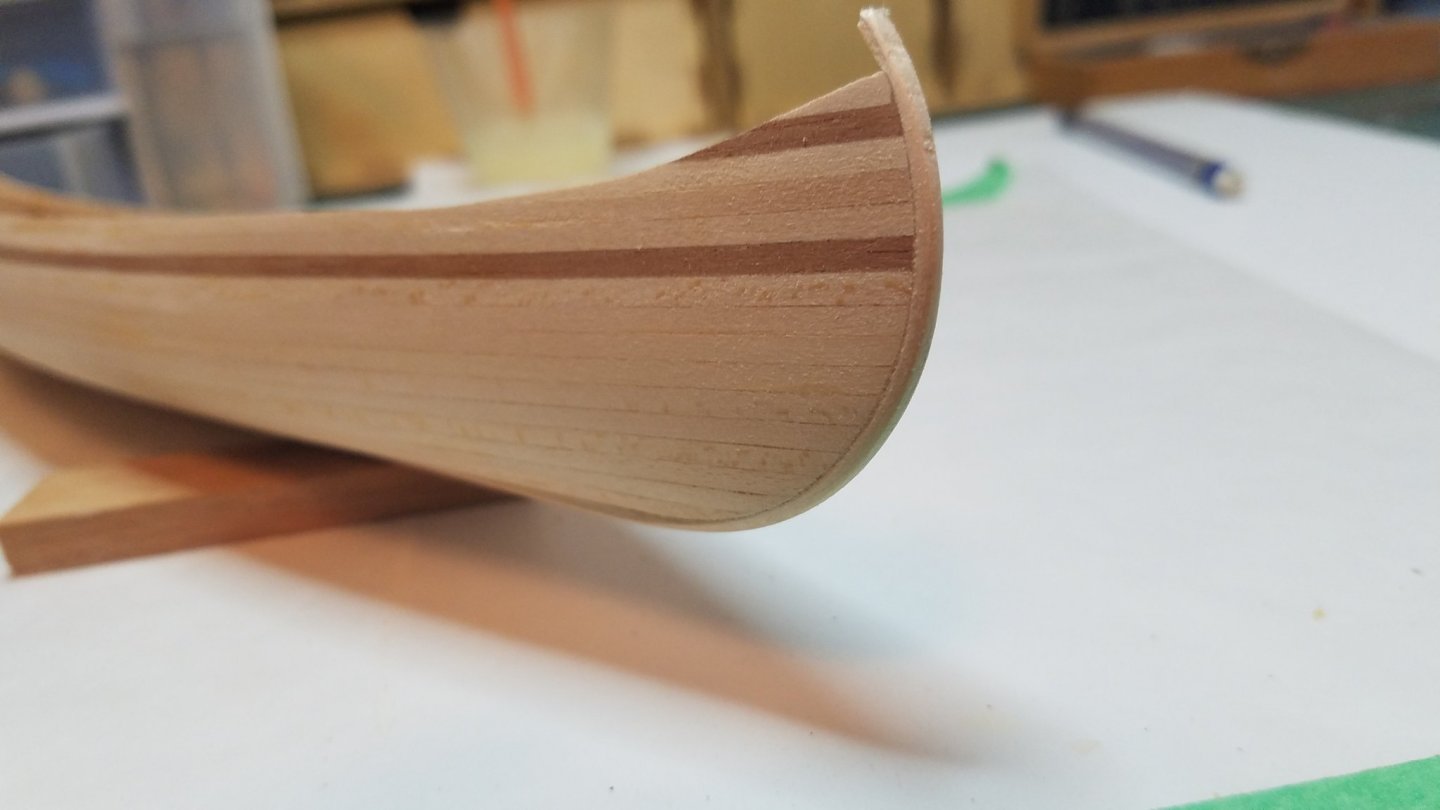
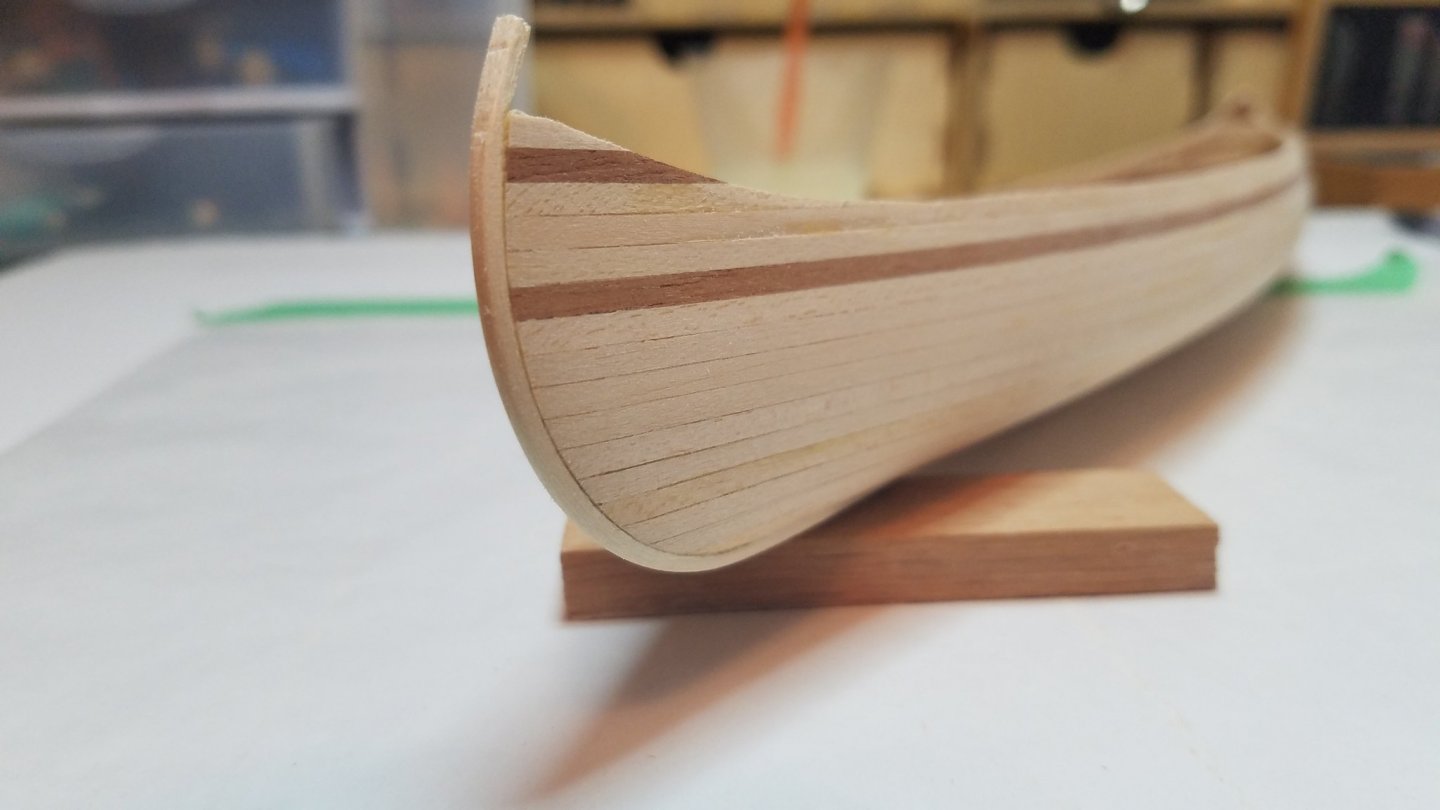
Thanks for the likes. I just about have this one wrapped up. I decided to go with the rub rails and started installing them last night. There was a gap left at both pointy ends that needed to be filled in. I was not too concerned about completely filling the void as most of this material is going to be sanded away anyway. And here it is just a little final sanding. I thought I was done but the high res pictures really show the spots I missed. Am I the only one who saves EVERY scrap of wood until a project is finished. This is just what was laying on my work bench the good stuff is still in the box. I will get started on the paddles tonight and then do all the final sanding in the morning. Then the final assembly I still need to glue in the seats, deck and thwart. Hopefully if the weather cooperates I will be able to get a couple coats of wipe on poly applied tomorrow. I still need to decide on a display stand but I have a few ideas floating around in my head. Best Regards


- 84 replies
-
- 6
-
-
- peterboro canoe
- Finished
- (and 1 more)
-
Really nice work Justin. I like the contrast also it adds some depth to the overall picture. I feel your pain about the sawdust I would have lost my mind by now trying to get rid of it.
- 77 replies
-
- 5
-
-
- morel
- master korabel
- (and 1 more)
-
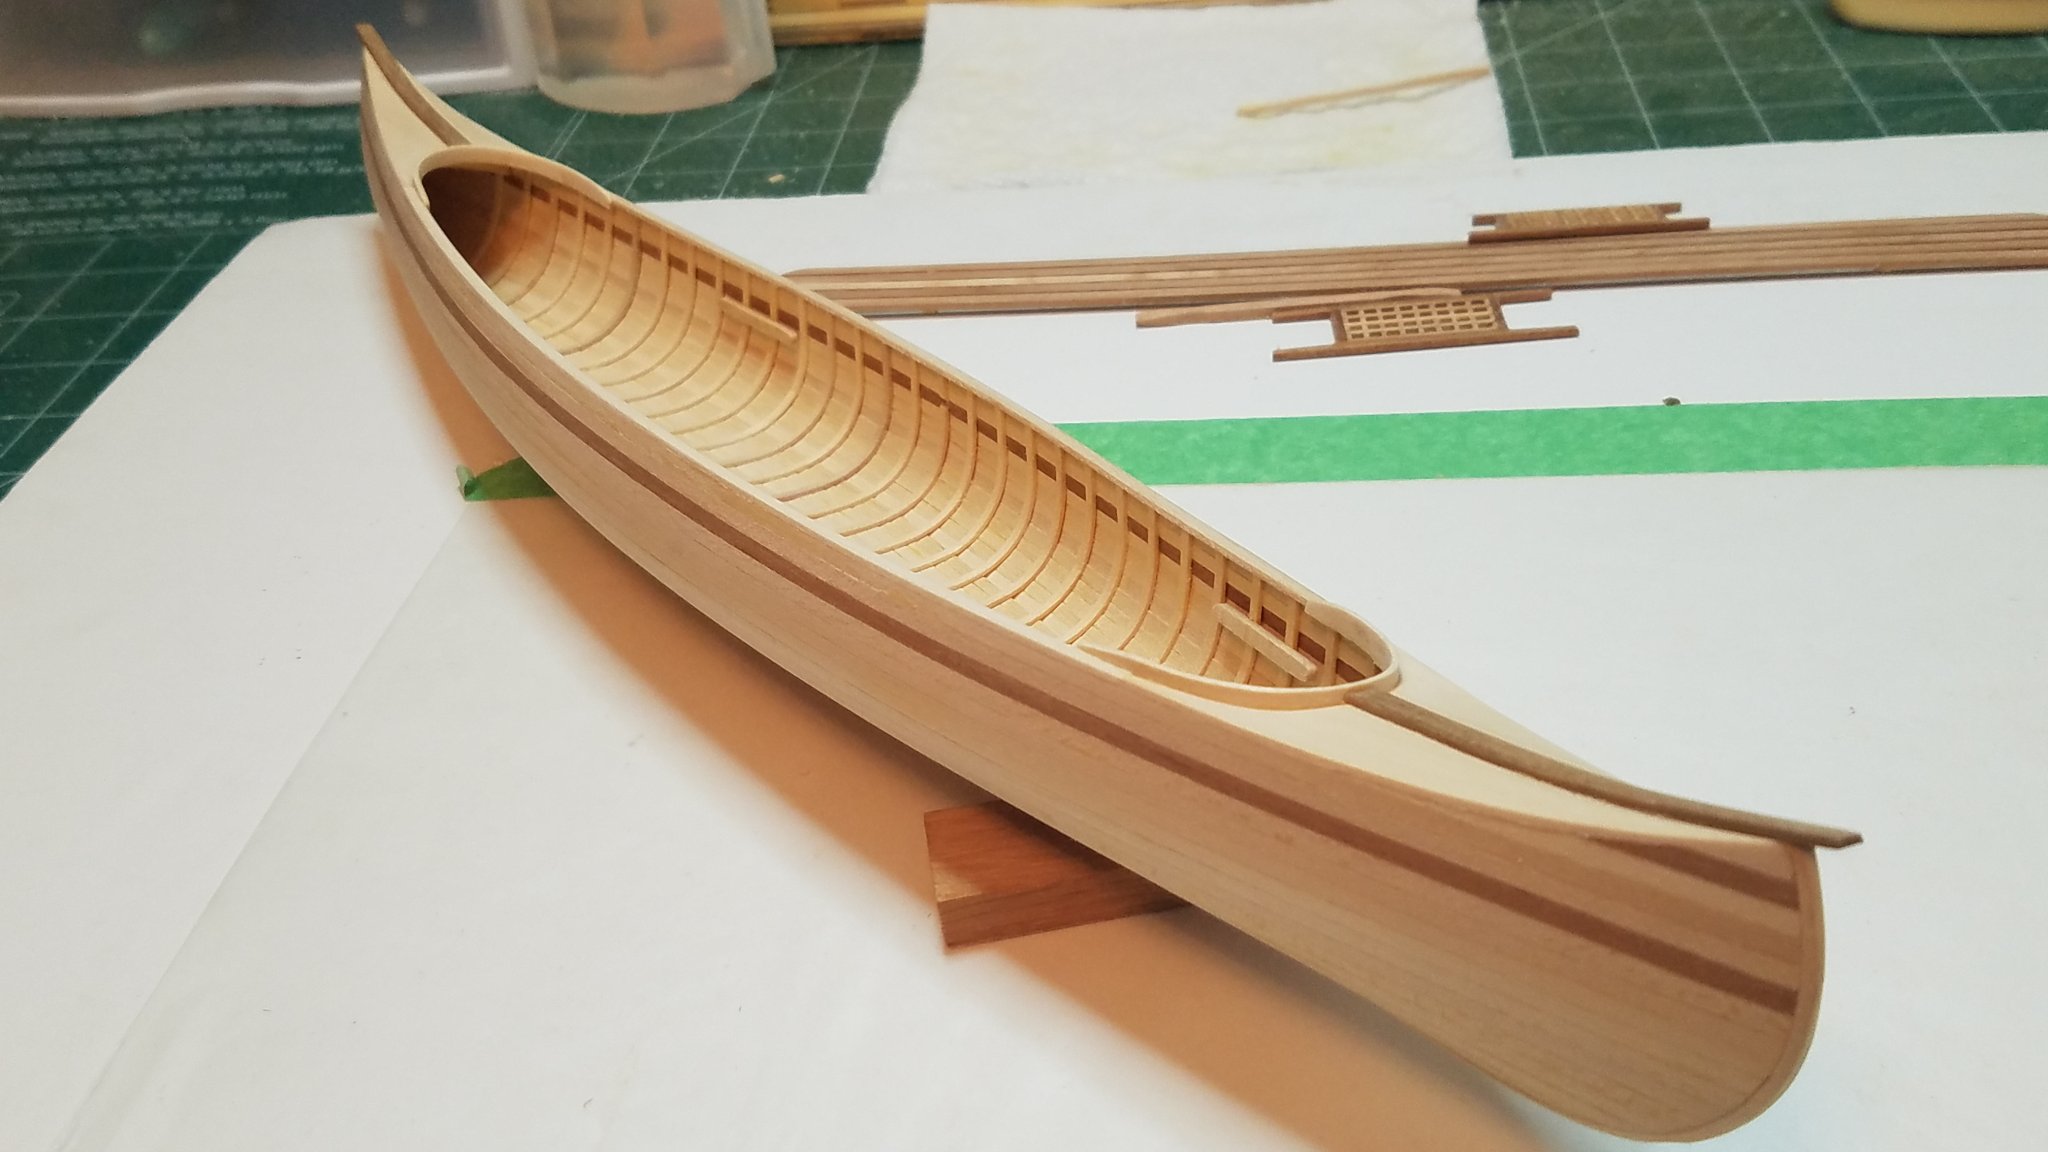
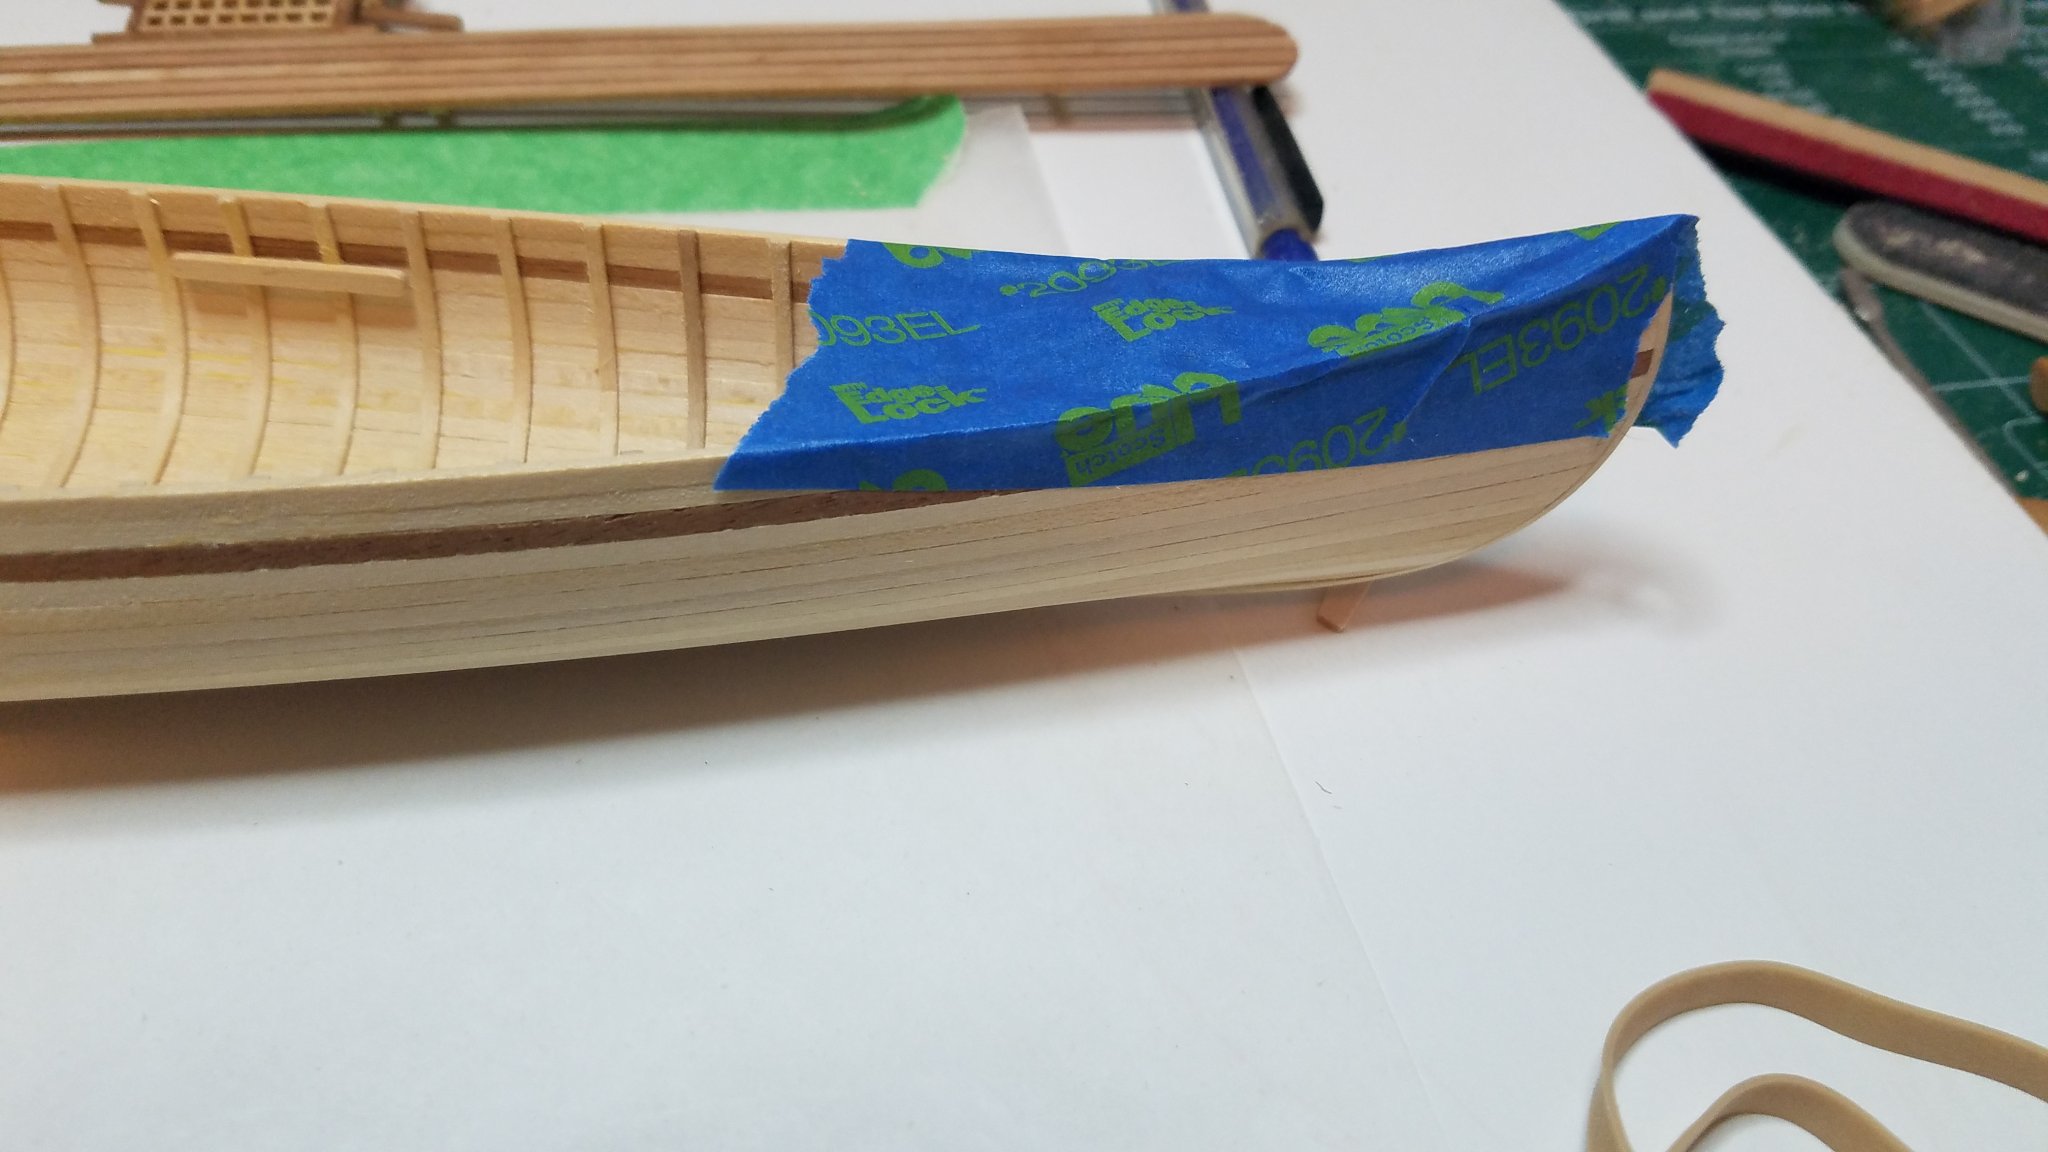
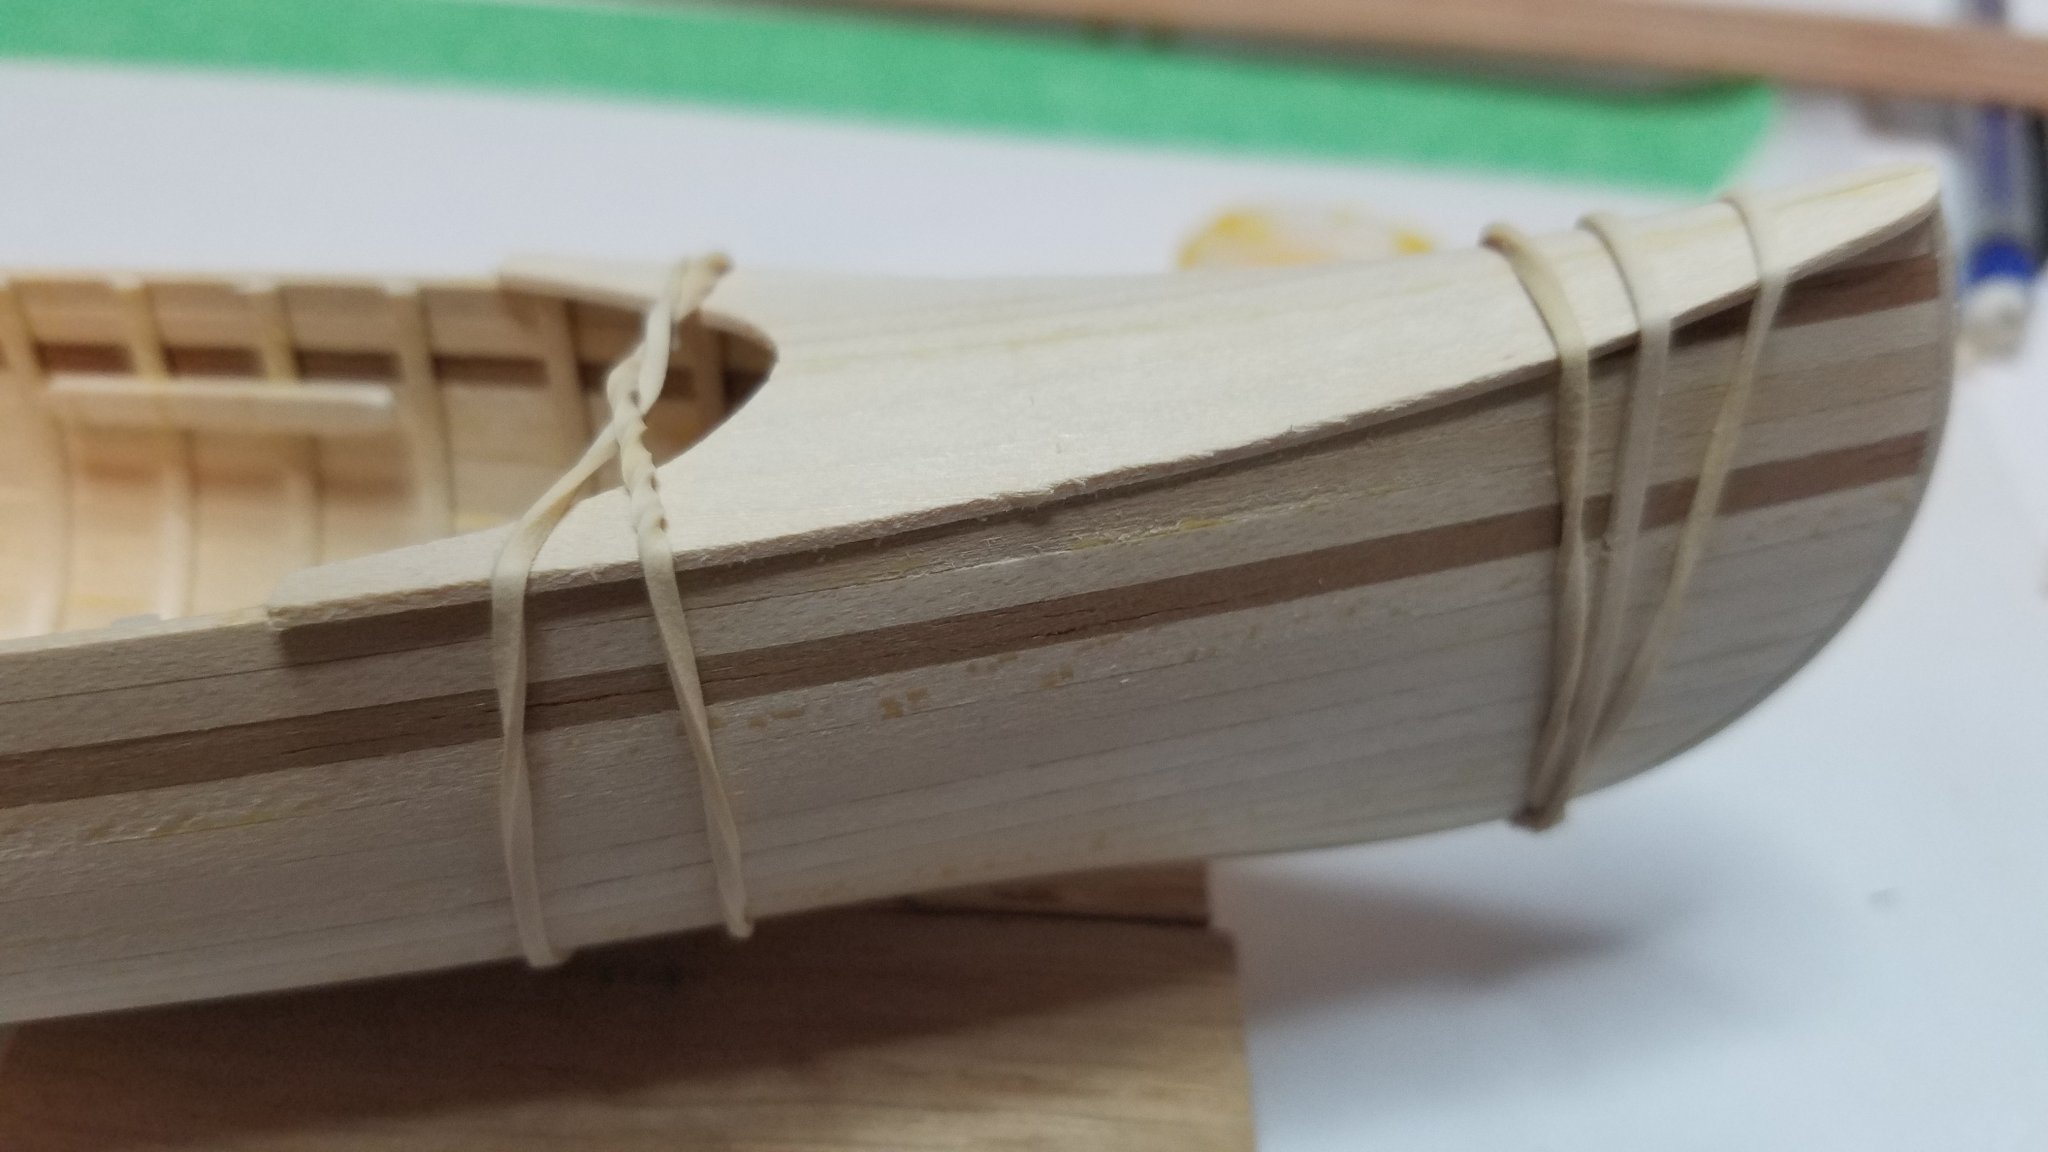
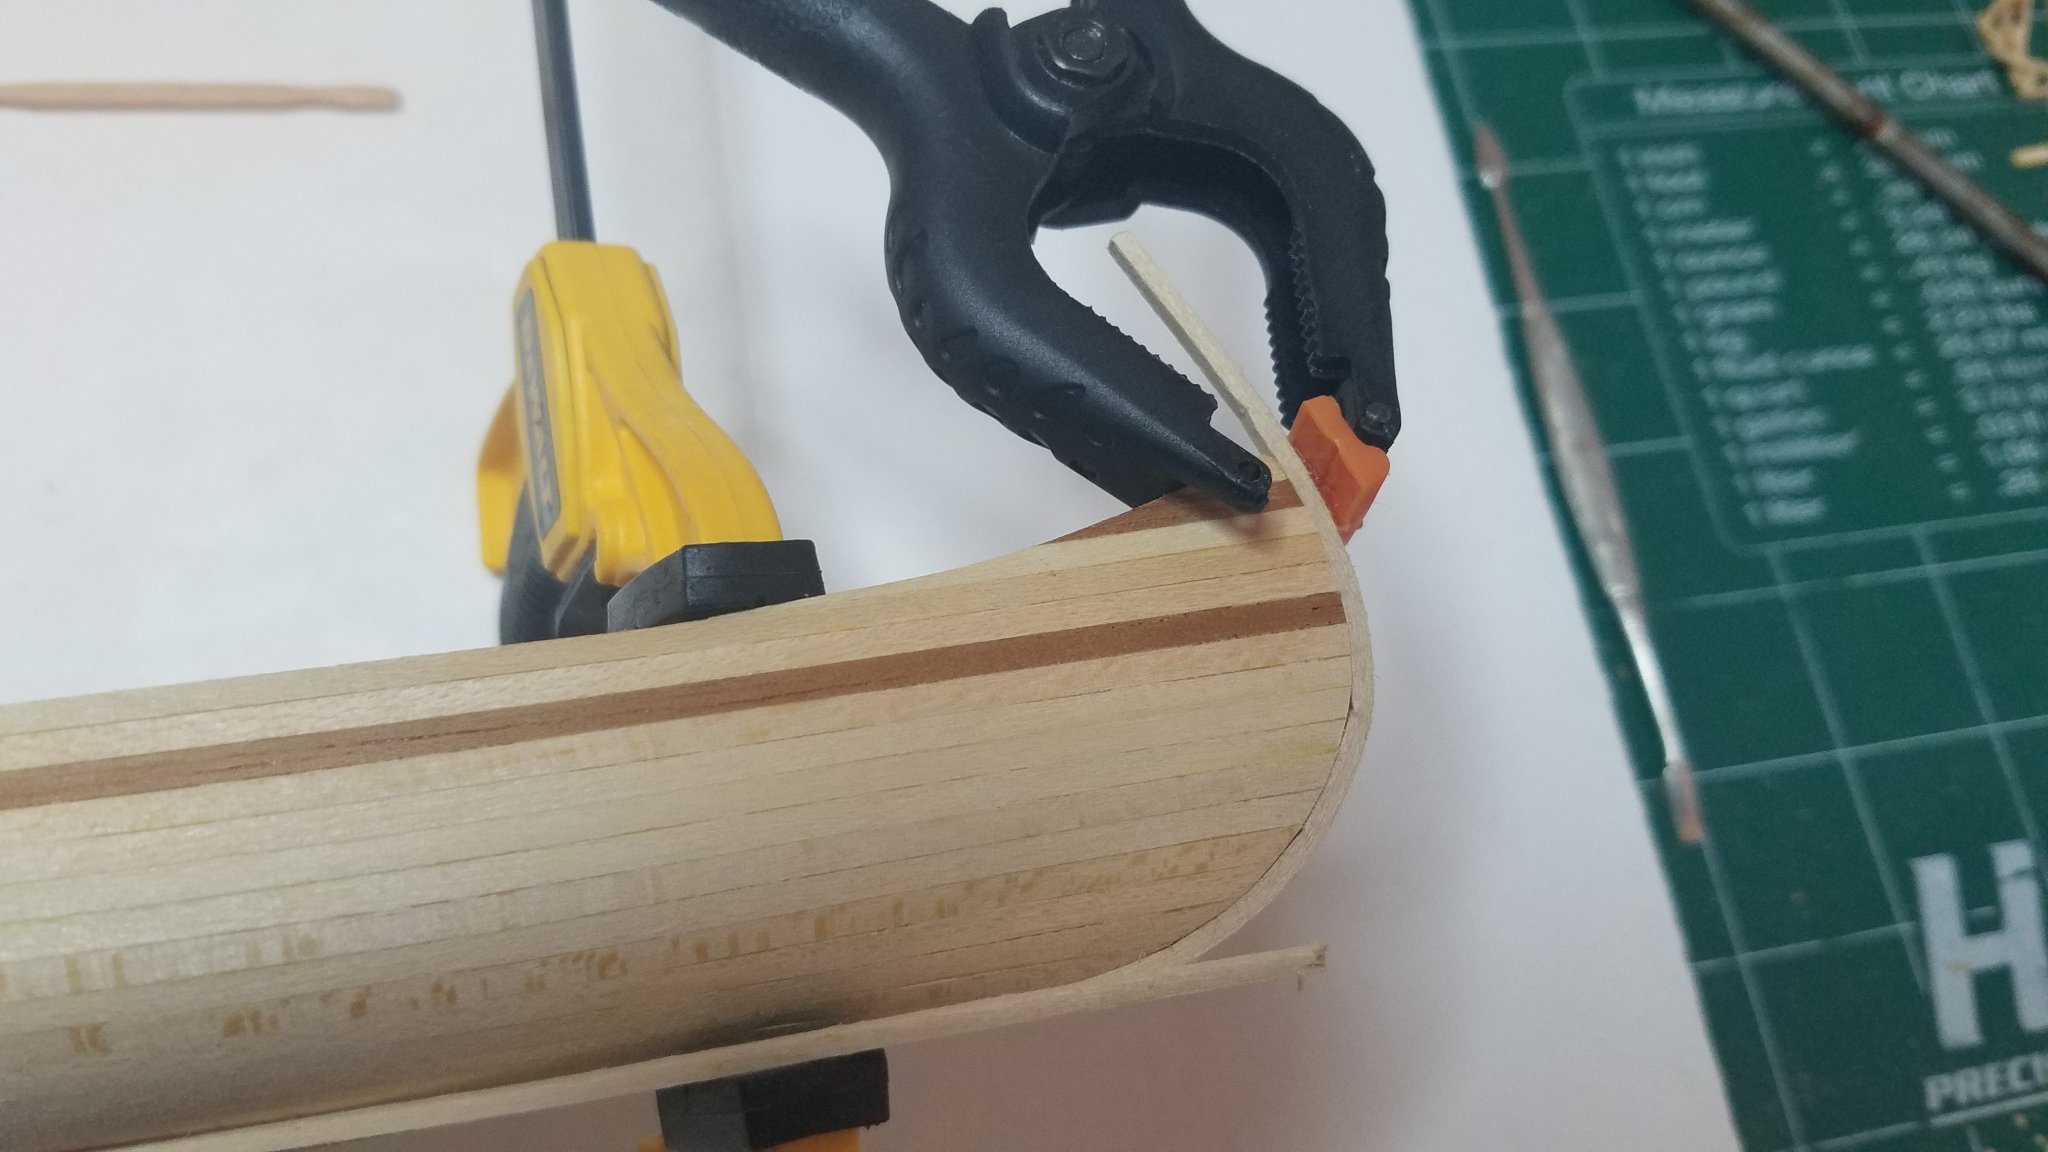
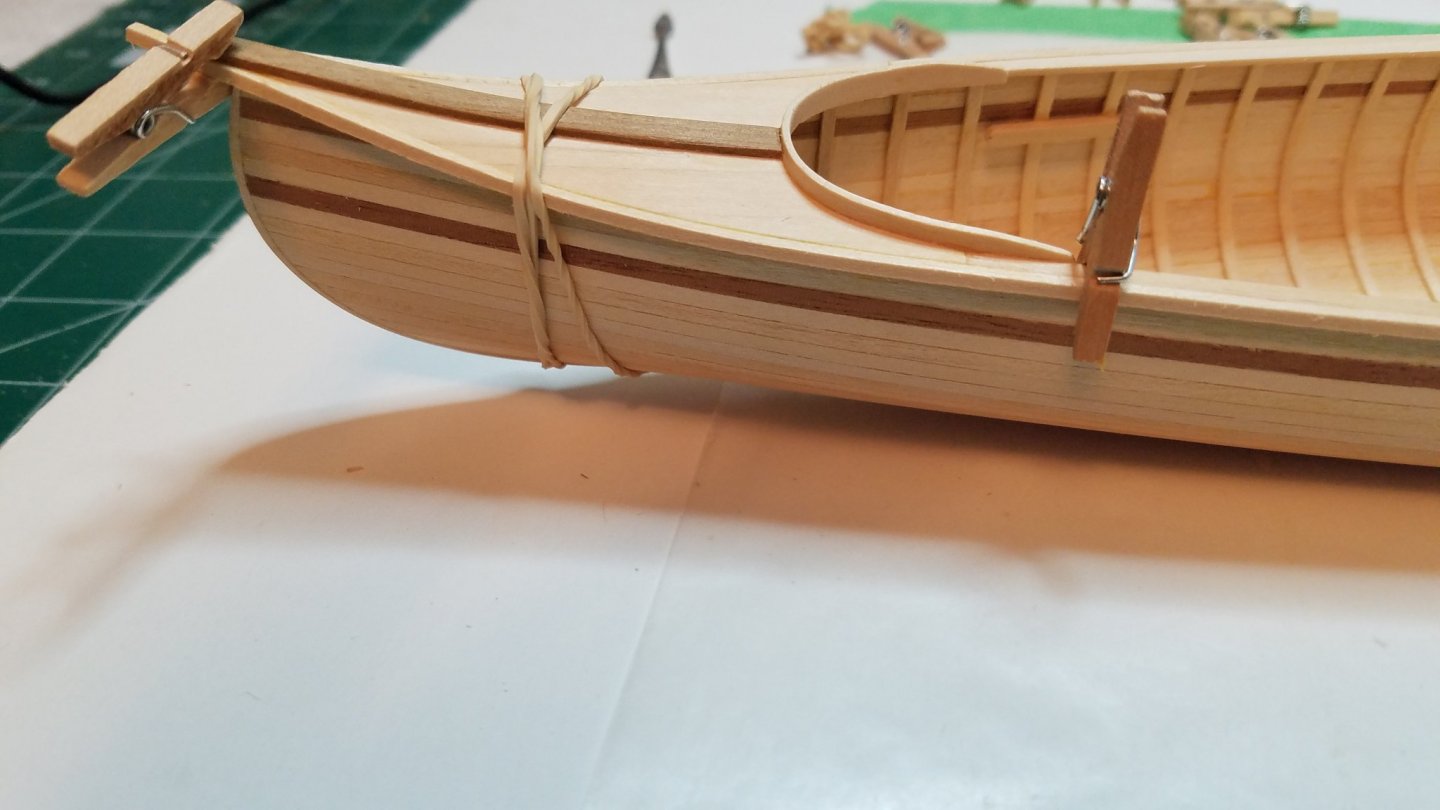
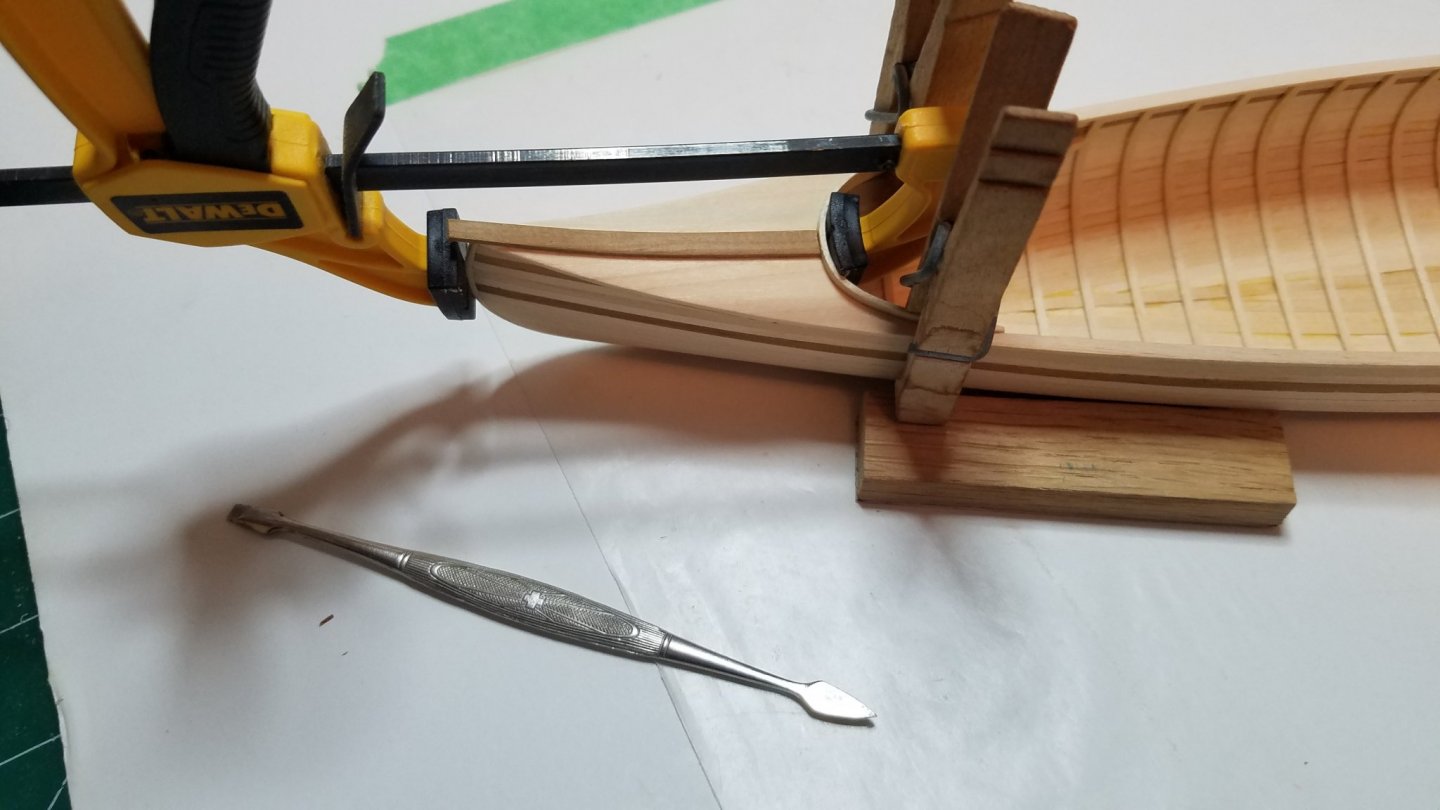
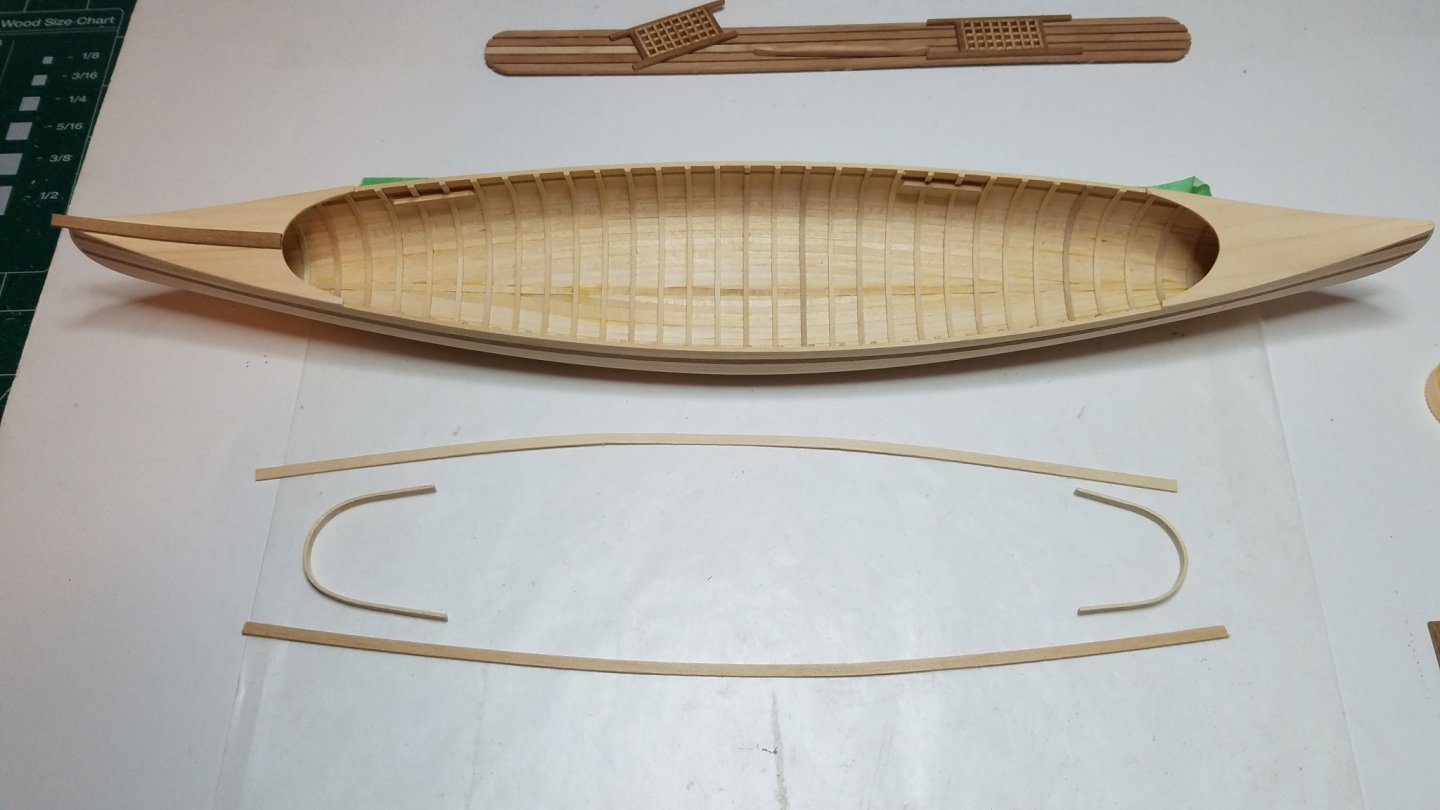
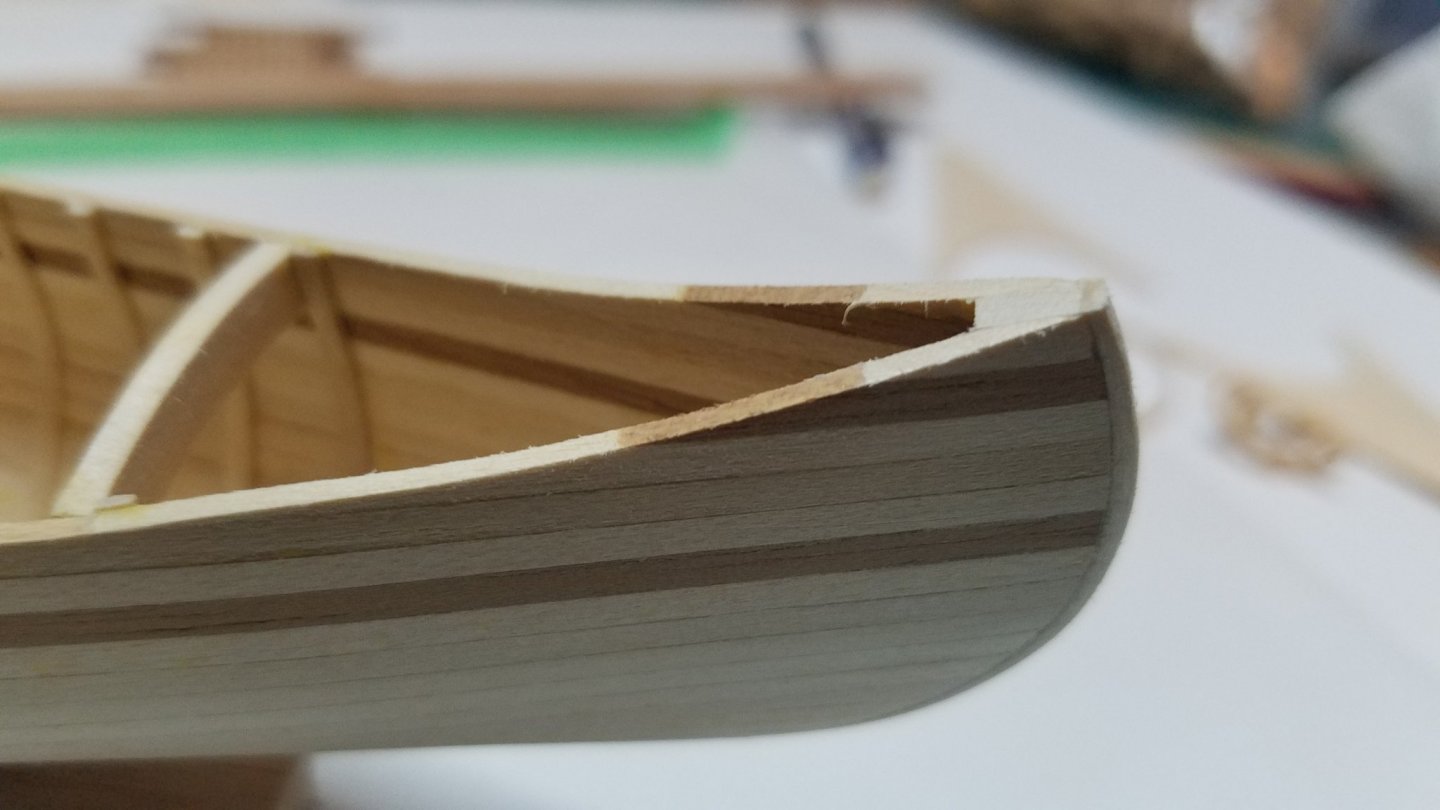
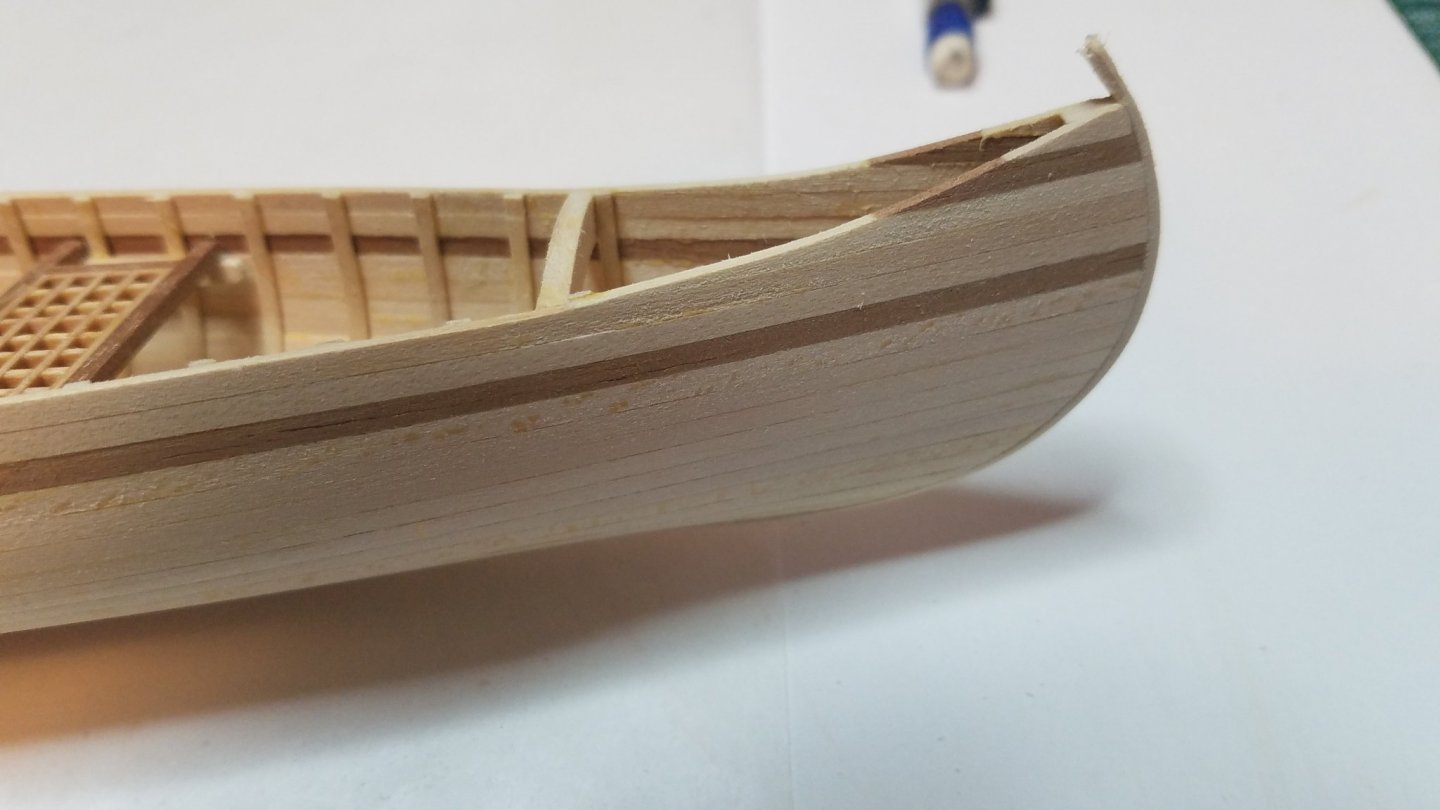
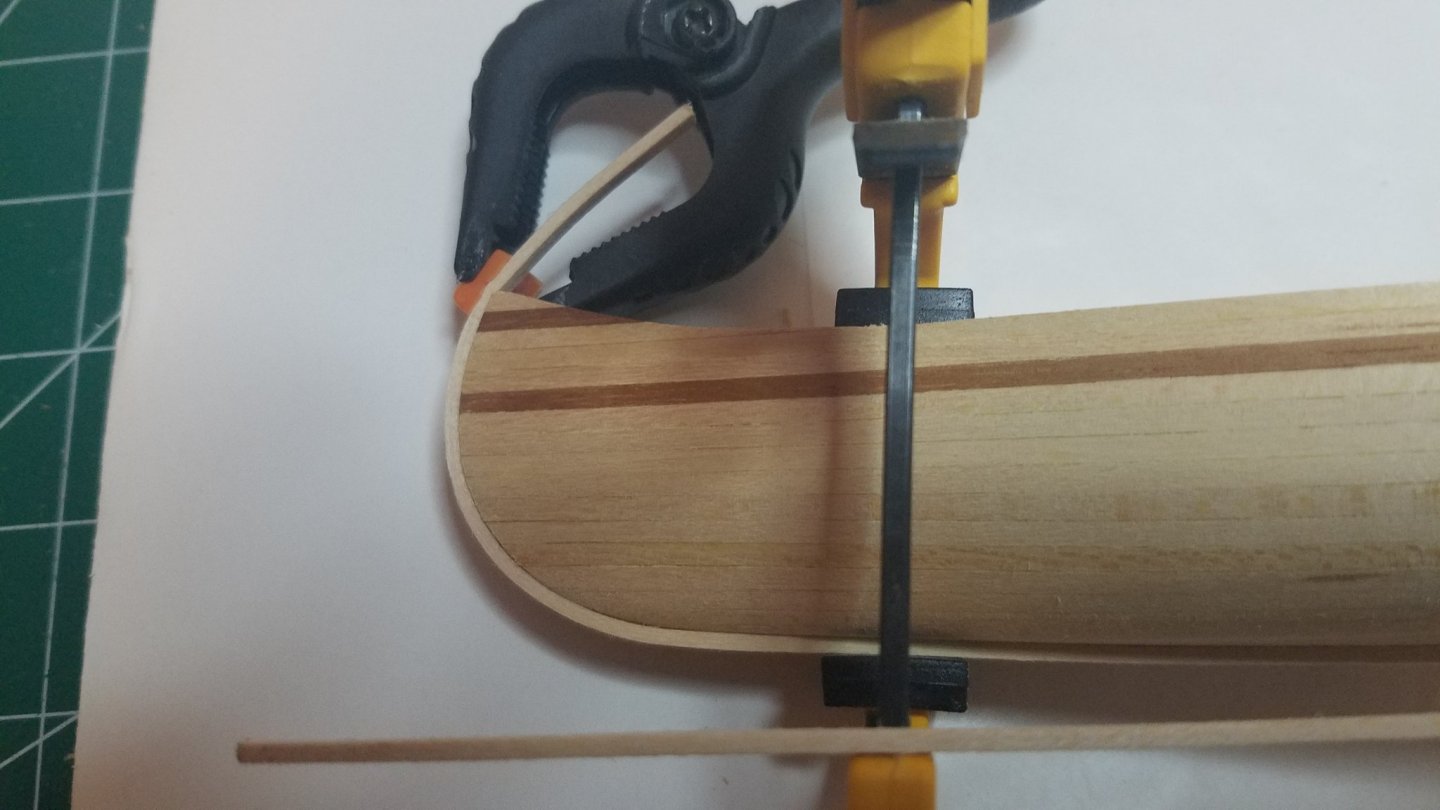
Good evening, I got the coamings in without too much trouble. Just a matter of finding the right combination of clamps/clothes pins and positioning them properly. The instructions would have you leave the decks and gunwales over hang the outside edge by 1/32" to simulate the rub rail. This would only scale up to 3/8" which seems small when you look at the pics I posted earlier. I have some 1/16" square bass wood stock that I think would look better so I think I will use that. Although I could just trim the deck caps and it would not look that bad without any rail at all. Opinions anyone? Best Regards

- 84 replies
-
- 7
-
-
- peterboro canoe
- Finished
- (and 1 more)
-
Wow! Bob I just found this build log and read it from beginning to end. This is one of my favorite MS kits and you are really knocking it out of the park.
-
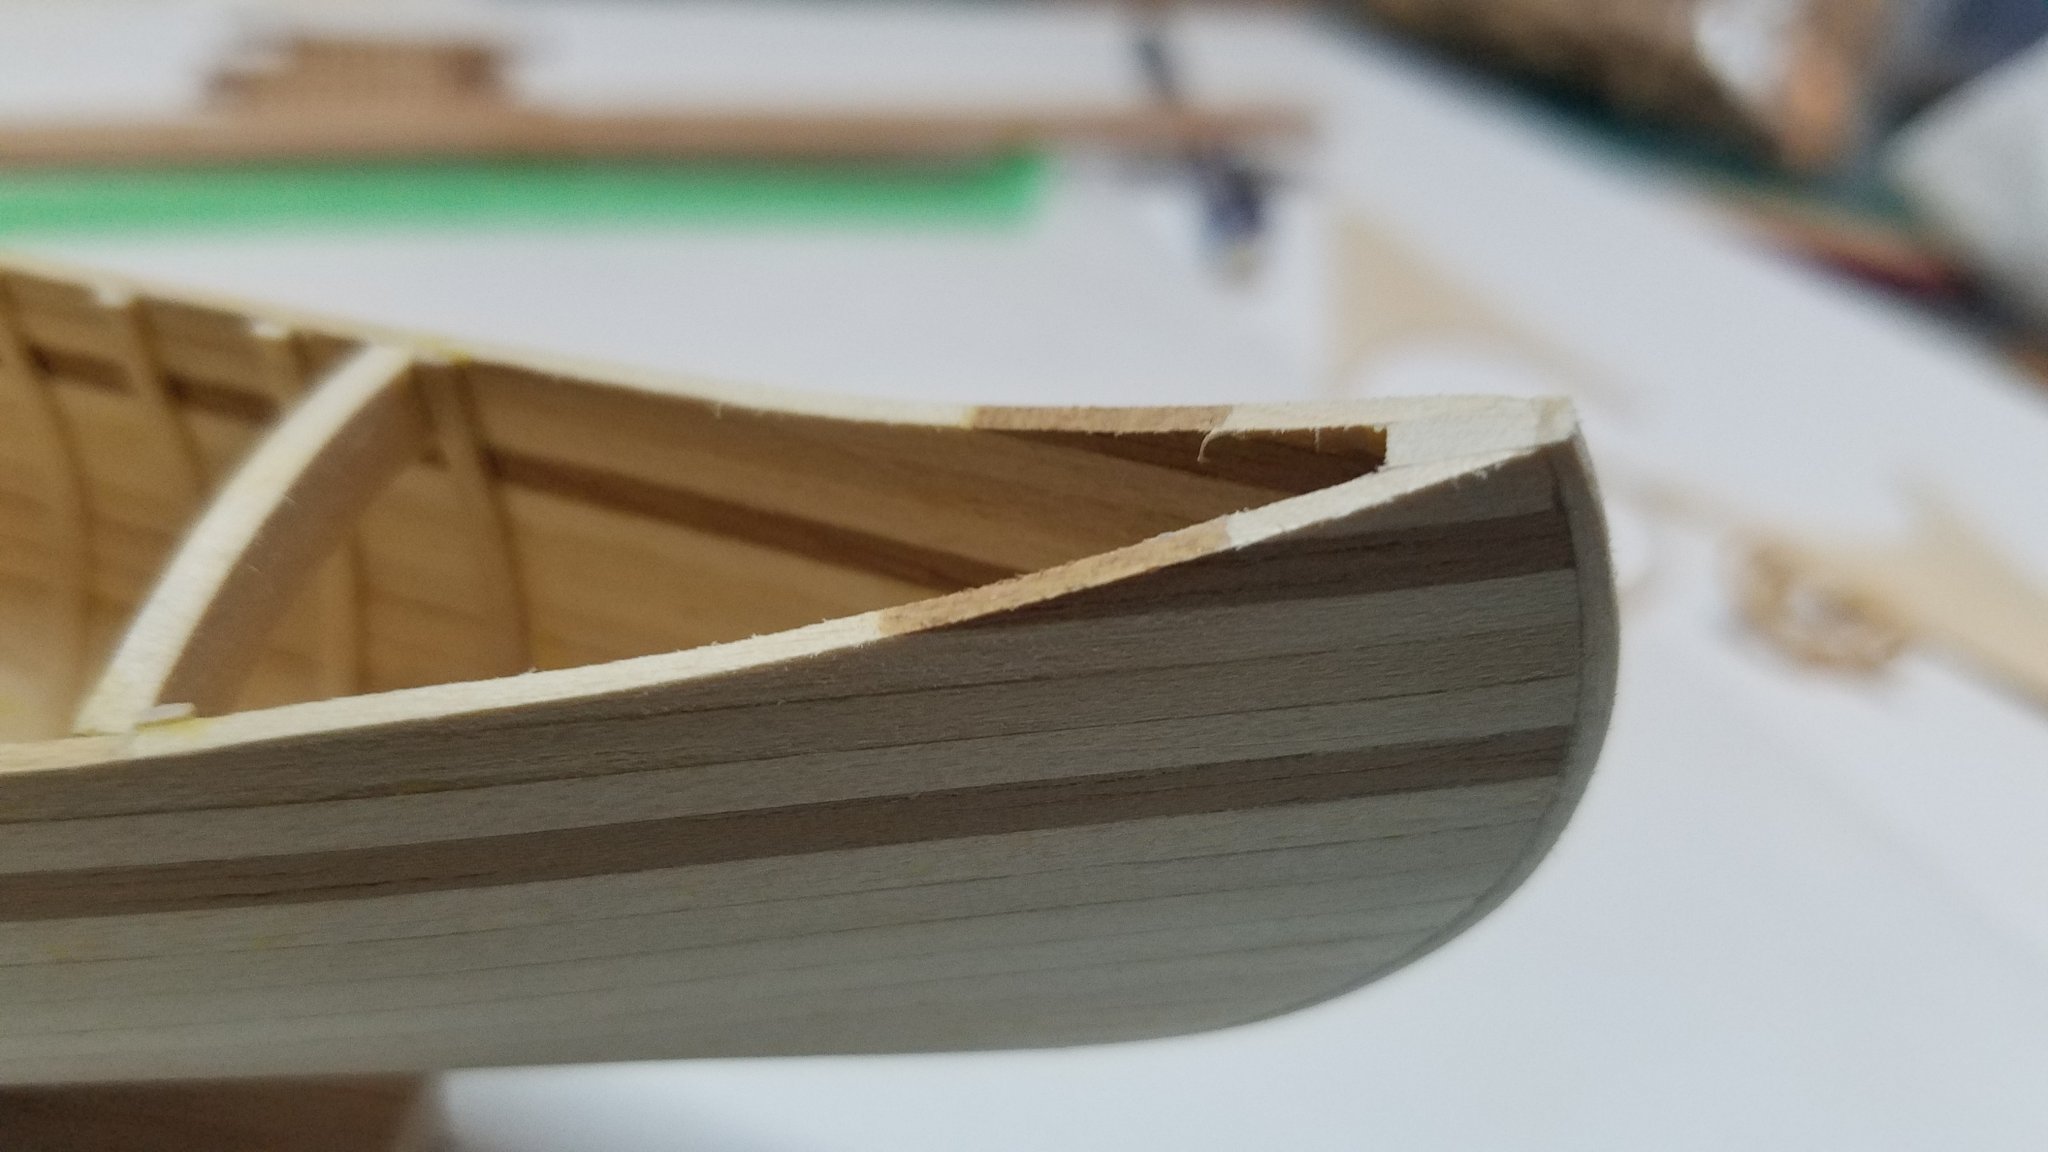
Thanks once again for all the likes. All I got done tonight is the other deck cap and the gunwales. I am going to have to sleep on the coamings. I have no idea how I an going to clamp them firmly enough in place to close all the gaps. They are without a doubt the most fiddly part of this build. After that all that is left is the rub rail and final assembly. That's it for tonight. Stay safe out there. Best Regards,
- 84 replies
-
- 5
-
-
- peterboro canoe
- Finished
- (and 1 more)
-
Hello Jeff and welcome aboard, I live down the road a piece but there are a few members up closer to you. But that is the beauty of a forum like this you have as many neighbors as there are members and the vast majority are happy to help. Good luck with you build and be sure to start a log. Best Regards
-
This just keeps getting better and better I don't know how you can keep topping yourself. But I am sure you will find a way. Keep up the great work.
-
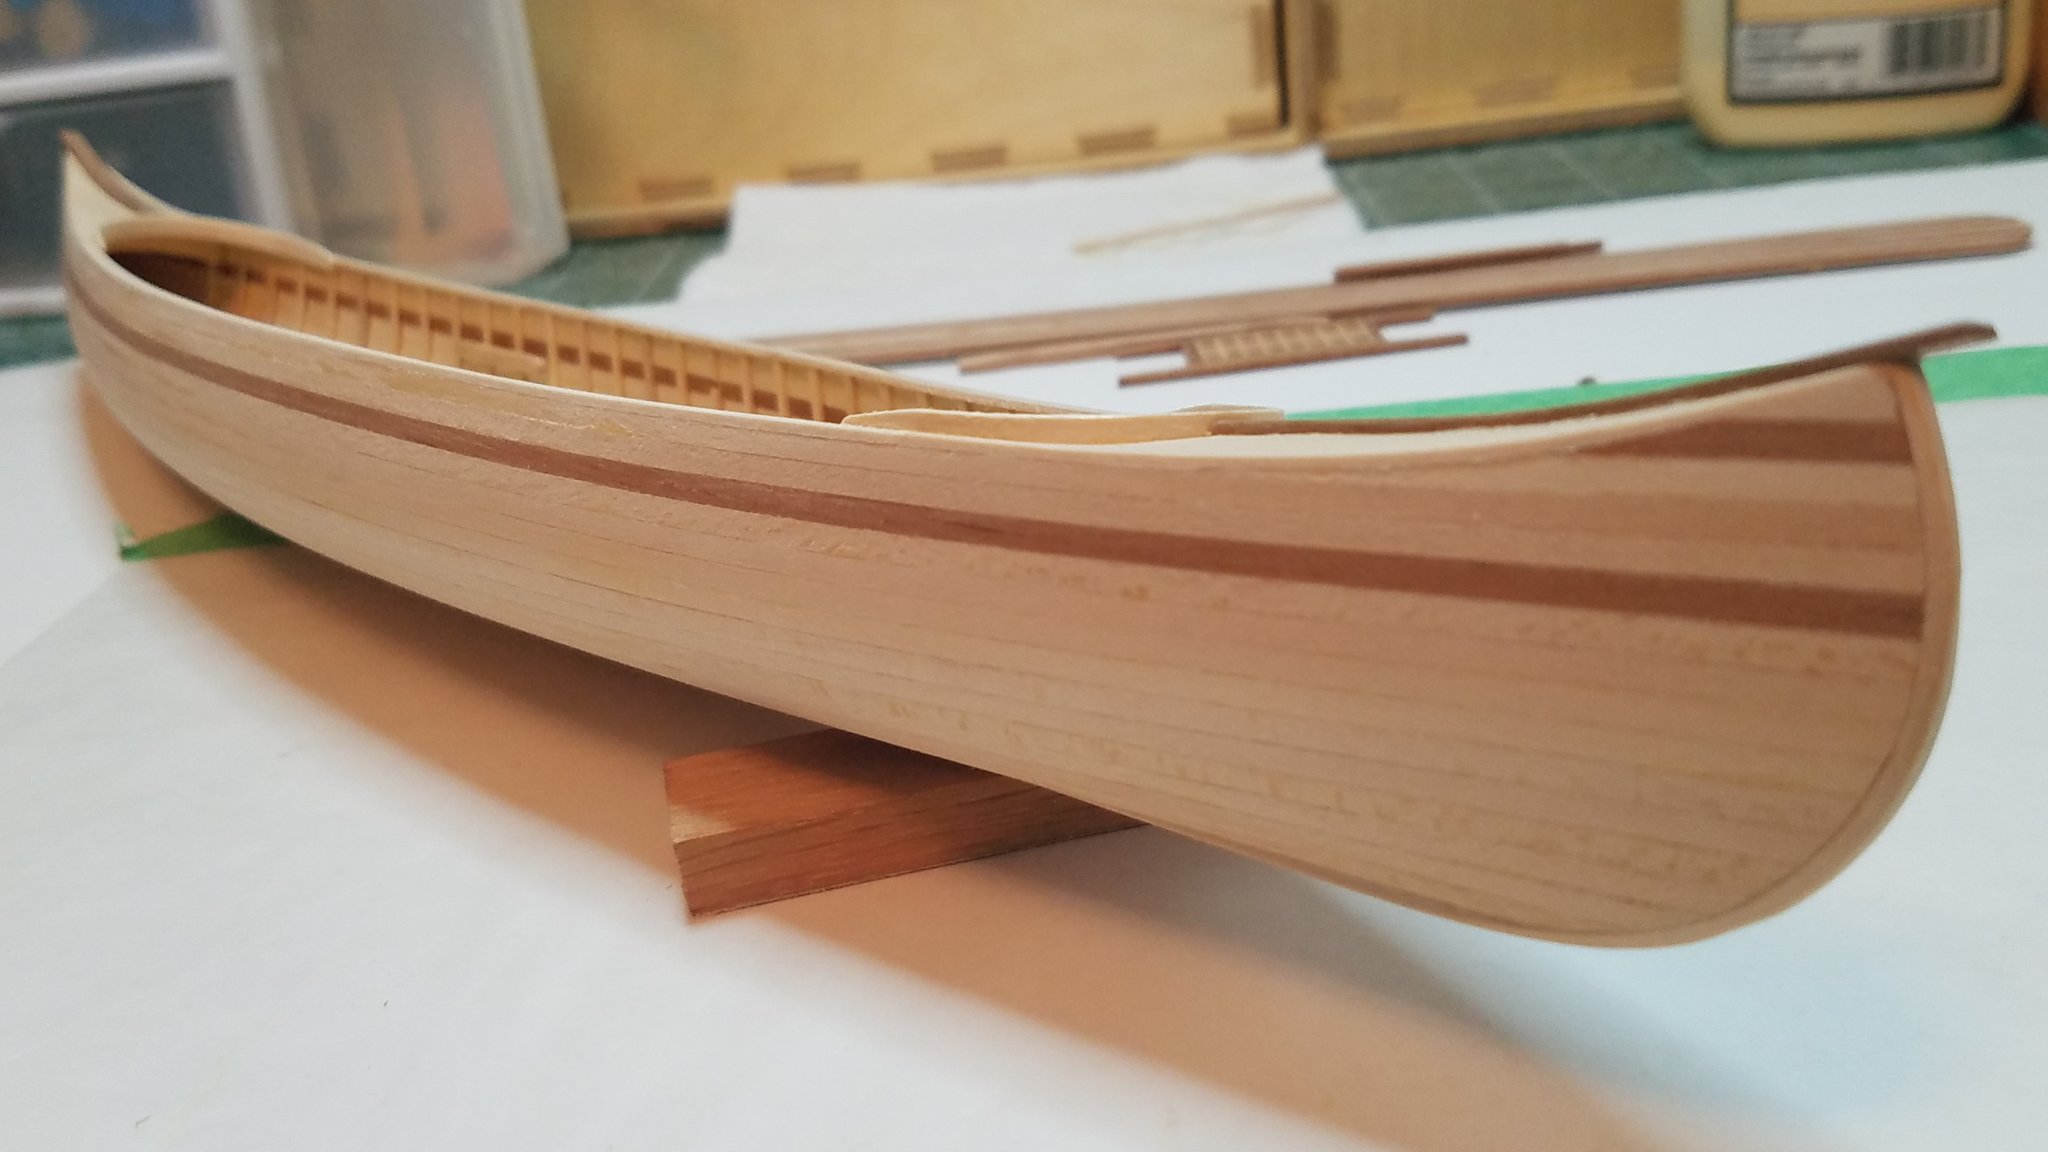
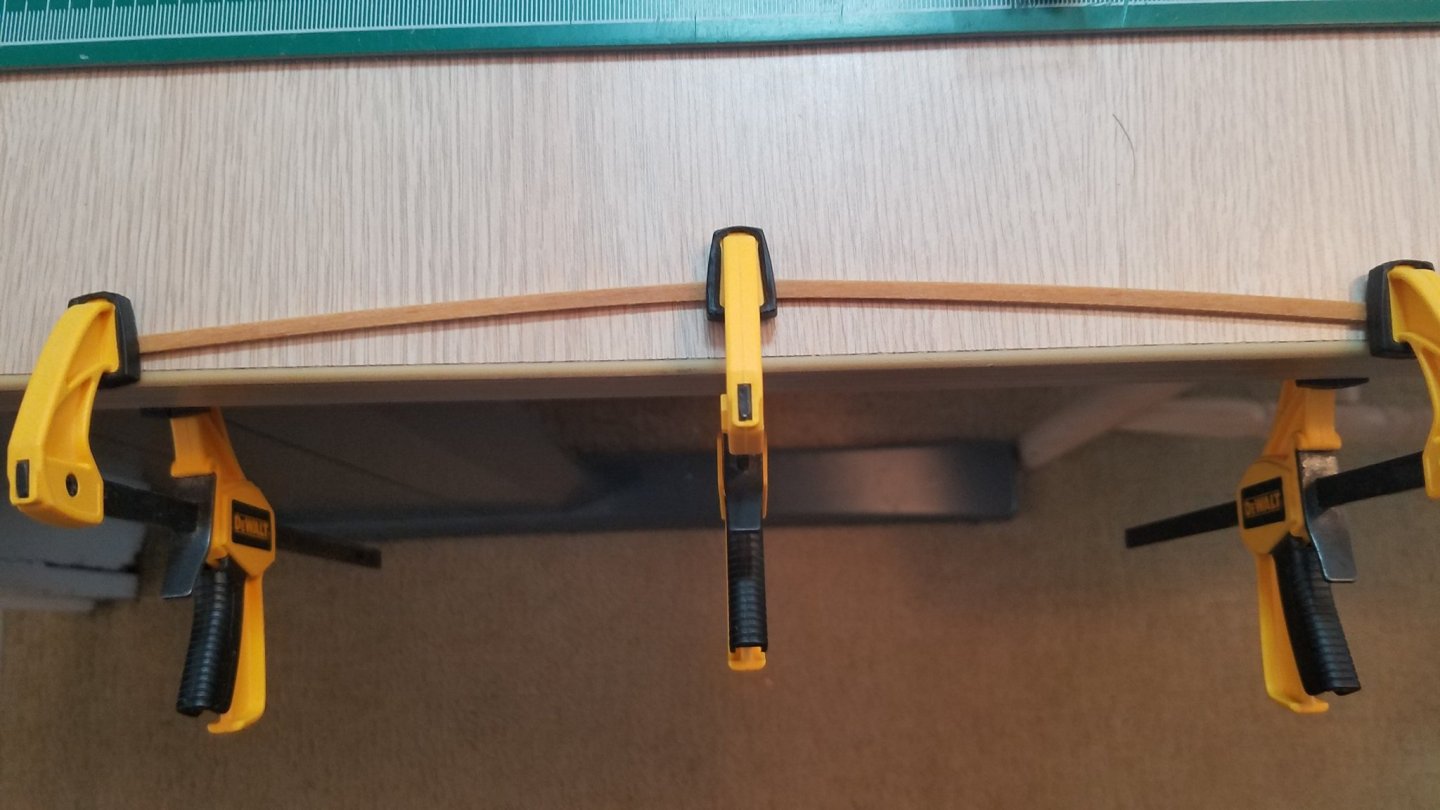
Thanks Jim. I have not taken the plunge into scratch building yet. And while I work with Autodesk 3d modeling software every day as part of my real job the skills required to loft ship plans is not in my skill set. Not much to report from last night. I did manage to do a little more bending. I got the gunwales and coamings all clamped up. Then I added one of the deck caps. The kit supplies basswood for this I decided on using some leftover mahogany for a little contrast. For some reason this turned out to be a real challenge to get clamped up. Then I realized I was feeling a little bit "off" so I thought I better call it a night before a real catastrophe happened. I let the wood sit clamped up overnight and it looked pretty good this morning. Hopefully I can get this all put together tonight but I am not going to rush it at this stage. I am coming down to the end of this build and I don't want to screw it up now.
- 84 replies
-
- 6
-
-
- peterboro canoe
- Finished
- (and 1 more)
-
Your perseverance is admirable and your recovery skills are too. Here is a link to a thread I started on another forum in regards to gluing mahogany. There is a link to an article in the woodworkers journal in there that really explains the dynamic better than I can. You may want to give it a look before taking out the trash. https://www.rcgroups.com/forums/showthread.php?2957898-Why-won-t-CA-work-on-Mahogany#post38291590
-
I did a similar thing on my Daysailer (link below in my signature). Or you might be able to remove the surrounding planking and make the necessary repairs.
- 155 replies
-
- 1
-
-
- opium smuggler
- Authentic Models
- (and 1 more)
-
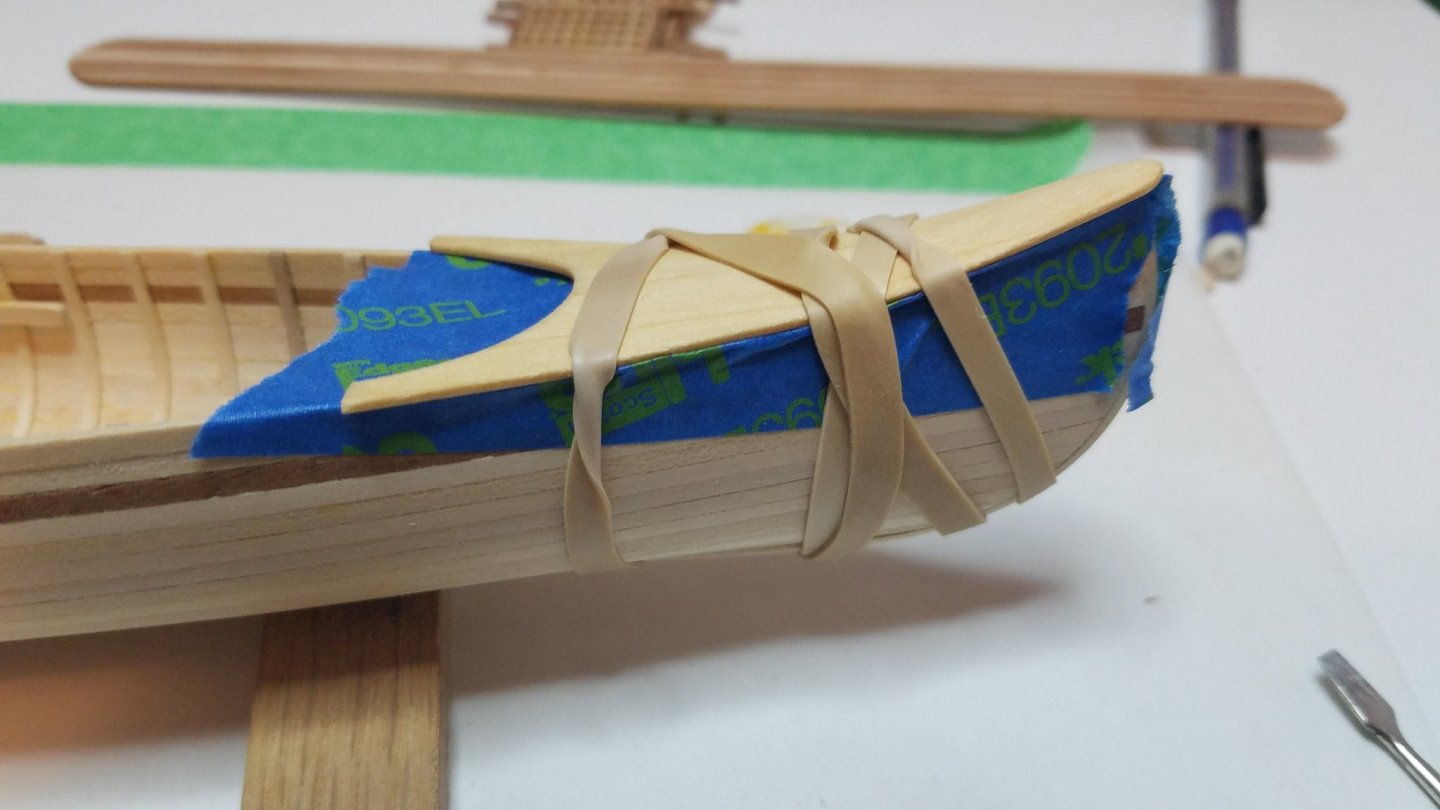
Thanks Bob, David and everyone else for all the encouraging and kind words and the likes. I just hope you can tell how much fun this build has been. I got home from work and dove right into it. I started by trimming the false keel all the way down to the stem. Then I did the final refinement of the shape of the upturn at the bow and stern. Funny up until I put the seats in there was no bow or stern. At least now I know which way it is pointing. Before ..... and after. Then I tried to come up with a clamping scheme to hold the fore and aft decks in place. No luck, the hull is so fragile I am afraid of squeezing to hard. I finally decided to soak the deck to soften it up a bit even though I used PVA to glue the two halves together. I put some masking tape on to prevent the rest of the boat from absorbing too much water. Then I soaked the deck pieces in hot tap water for about 2-3 minutes. Then I used rubber bands to hold them in place until dry about an hour. And to my surprise they took the shape very well. Next it was a simple matter of gluing them up. and rough sanding them to shape. That's it for tonight. Coamings and gunwales are next. Hooray! This is my 500th post. Regards to all and stay safe out there.

- 84 replies
-
- 6
-
-
- peterboro canoe
- Finished
- (and 1 more)
-
Nice save! Like Jim Lovell said "it looks like we just had our glitch for this mission". The rest of this build should be clear sailing for you.
-
Making Wood "Non-Stick"?
Osmosis replied to Osmosis's topic in Painting, finishing and weathering products and techniques
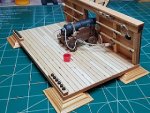
In the end I wound up applying a couple of coats of wipe on poly. As you can see the building frame stayed nice and clean. Clearly visible glue residue inside the hull but not a drop of glue on the frame.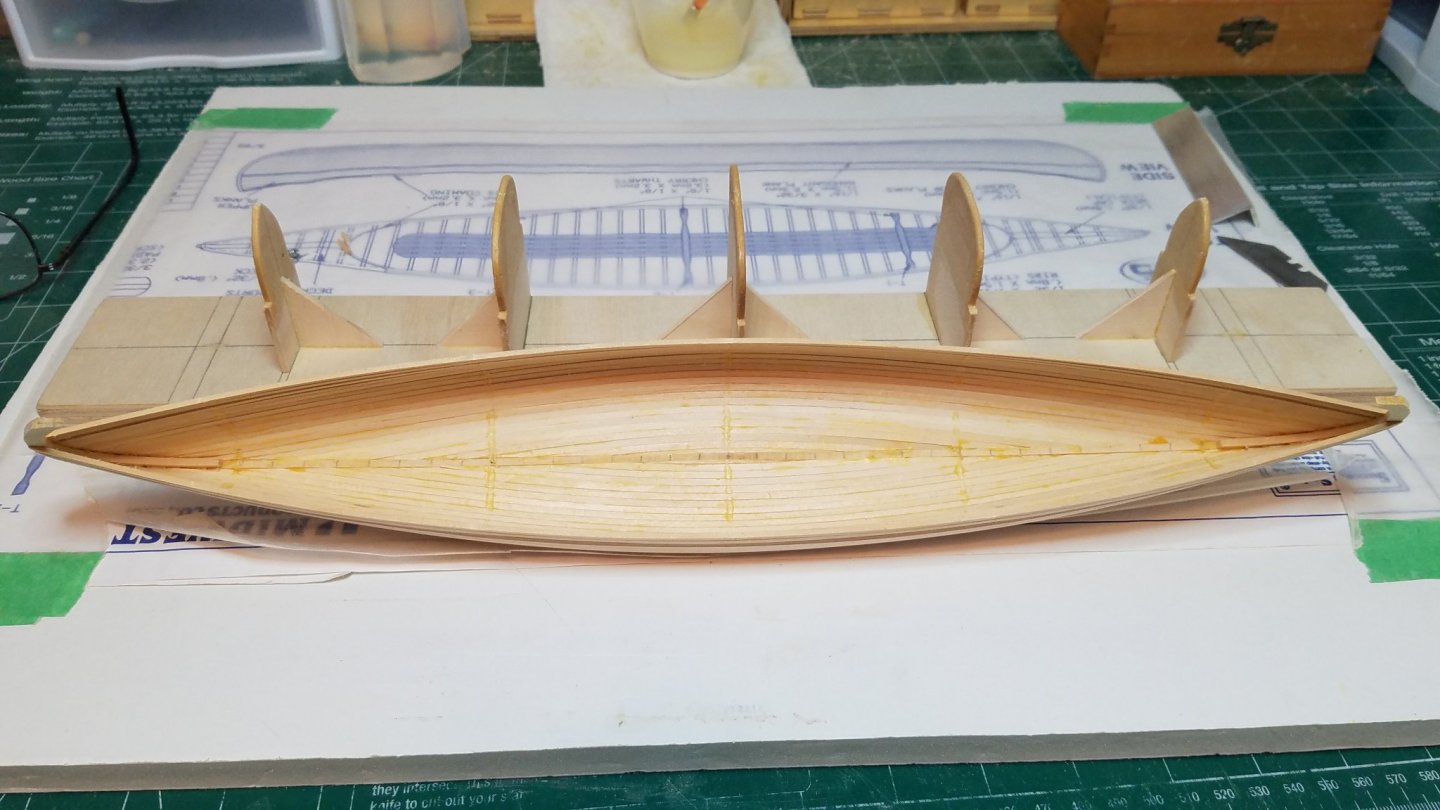
-
Welcome aboard Michael. Jump on in lots of friendly and helpful people around here.
-
Welcome aboard. My current build is a canoe so I think you have found the right place.
-
This one has been on my list for a while. I will be watching with interest.
- 20 replies
-
- 1
-
-
- panart
- battle station
- (and 2 more)
-
I think you mean Wally Cox but either way you are showing your age. And mine and anyone else that gets that reference. lol
- 175 replies
-
- 4
-
-
- hanse kogge
- shipyard
- (and 1 more)
-
Congratulations on your models progress and on your obvious skills as a parent. It is so nice when in spite of our best efforts our kids still turn out great.
-
Welcome aboard! Great start, on you first build. I had the same problem with the glue on my first build it turns out that CA does not like some woods. I know this now because this forum is a treasure trove of info. When you run into trouble just search the forum or ask there are lots of helpful people around here. Best Regards
-
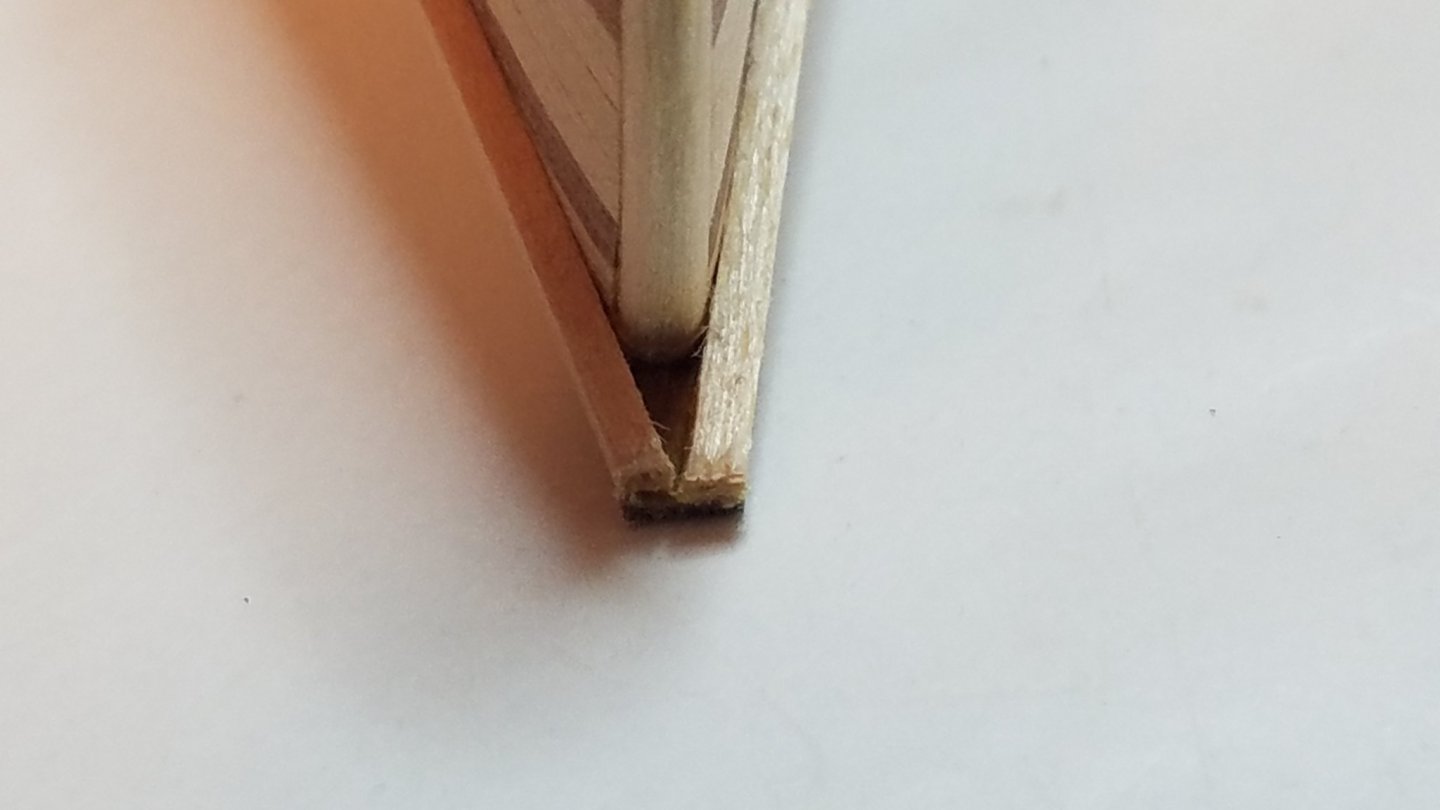
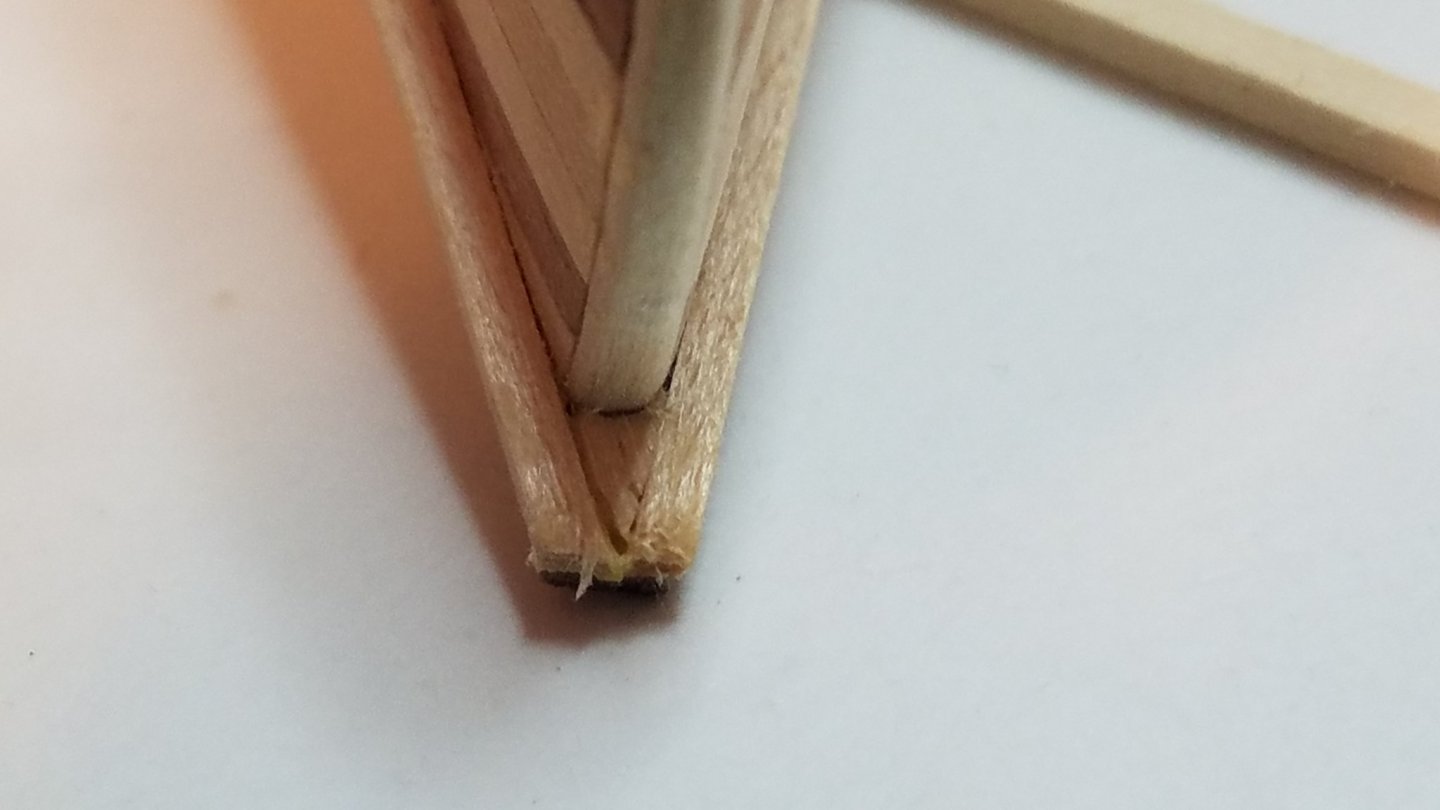
Thanks David. I am calling it an early night tonight since I am one of the lucky ones that can still go to work in the morning. It took me a couple of tries but I finally got two good bends for my false keel. Got this one on the first try. This was the first attempt on the other end. Had to trash this one. Got it on the second try though. Once they were glued on and trimmed up They looked pretty good. I deviated from the instructions by putting the false keel on now instead of very last. But I thought it would look better if the end grain of the false keel were covered by the decking. As you can see from the pictures I still have a lot of sanding to do. Hopefully the decks go on tomorrow. Best Regards


- 84 replies
-
- 5
-
-
- peterboro canoe
- Finished
- (and 1 more)
-
Just taking a little break while I build A Midwest Peterboro Canoe kit. I will be back at this one soon. Thanks for checking in though. Regards
- 139 replies
-
- 1
-
-
- san francisco
- artesania latina
- (and 1 more)