

Osmosis
-
Posts
626 -
Joined
-
Last visited
Content Type
Profiles
Forums
Gallery
Events
Everything posted by Osmosis
-
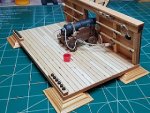
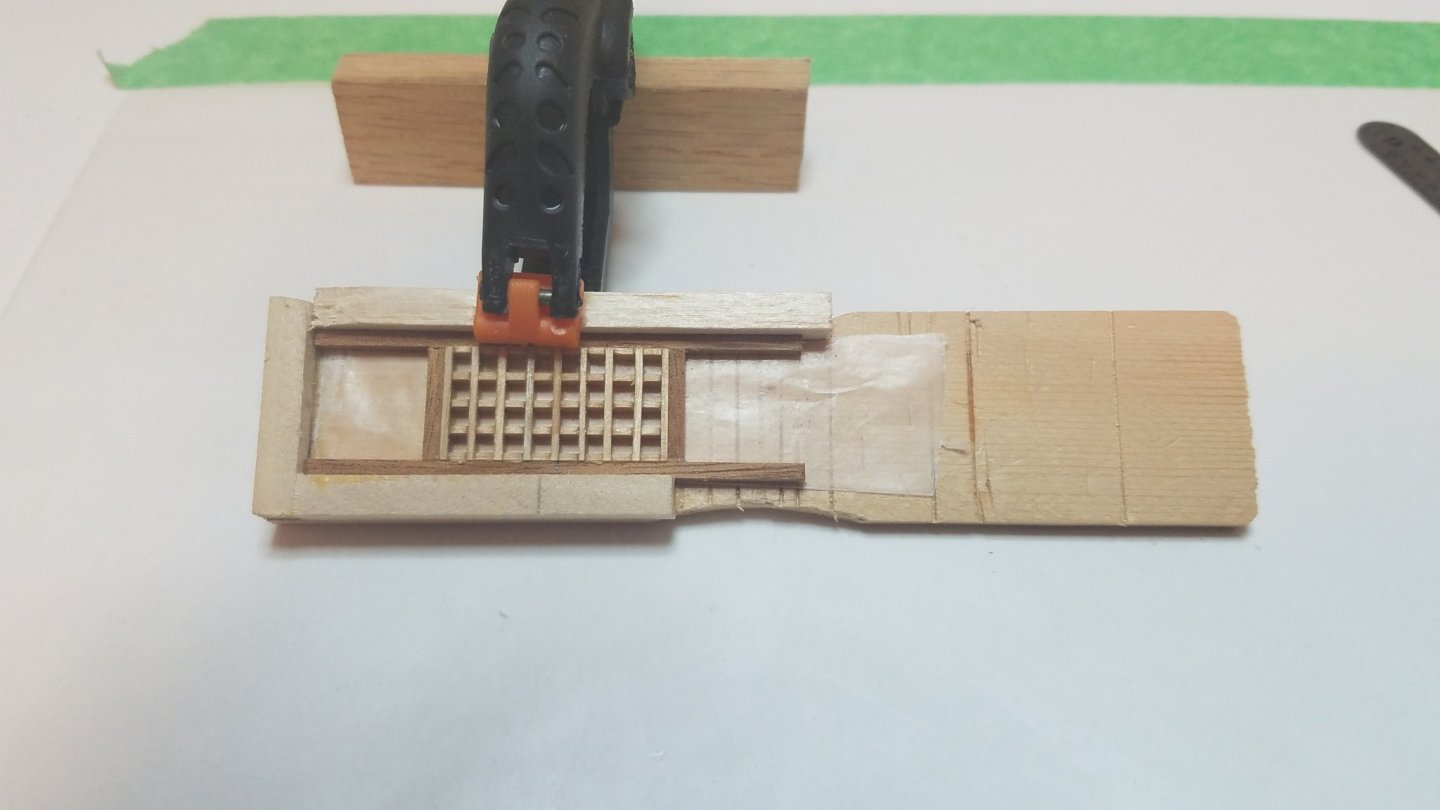
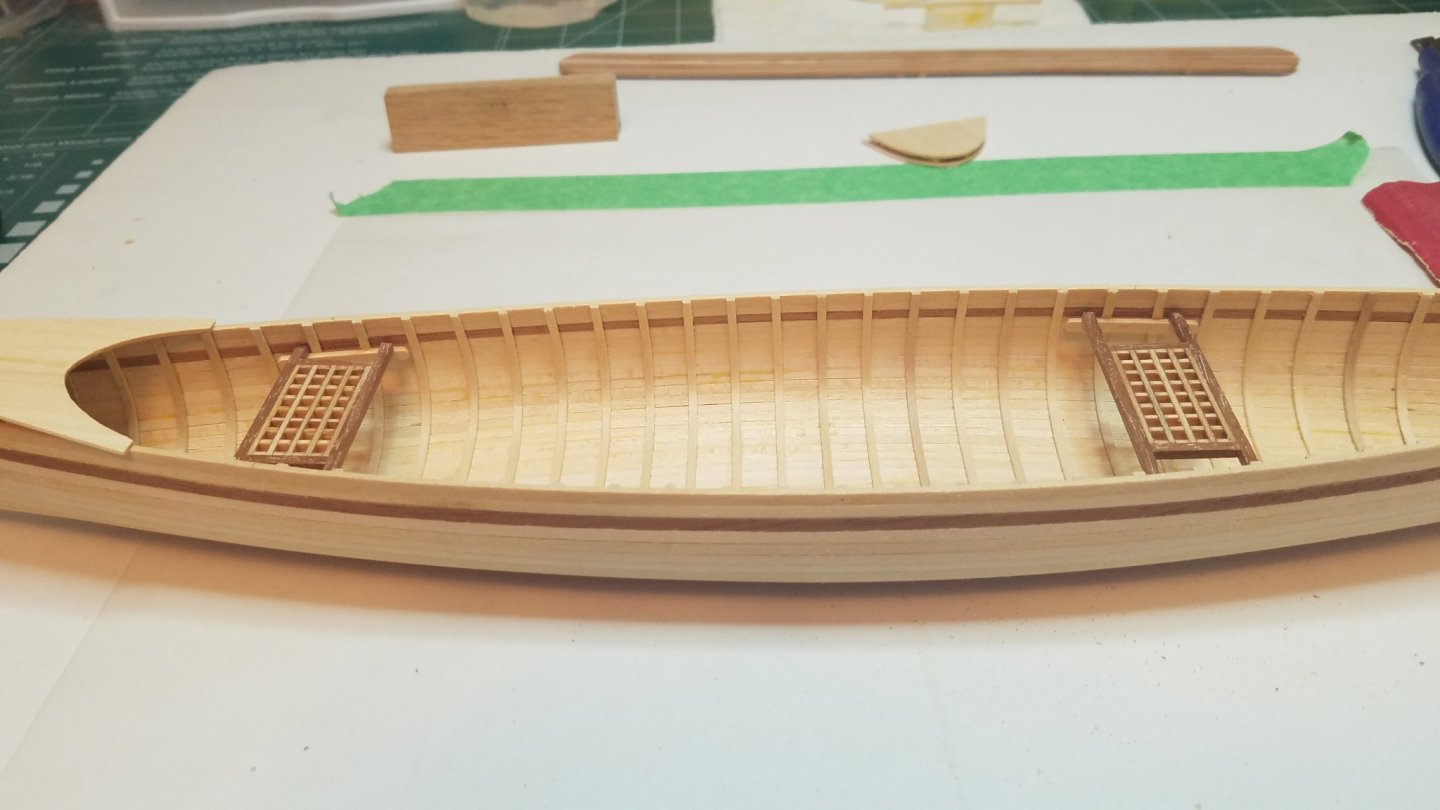
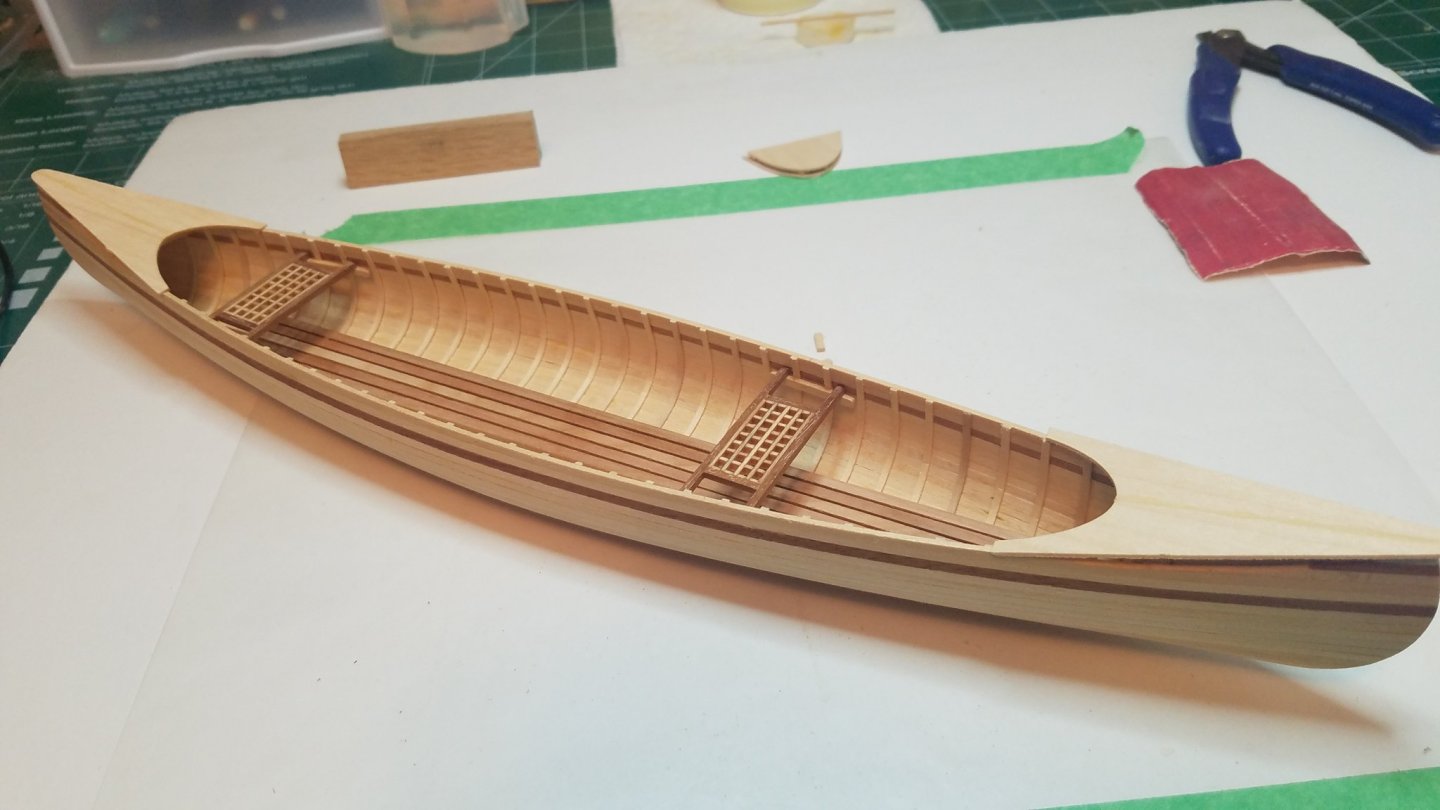
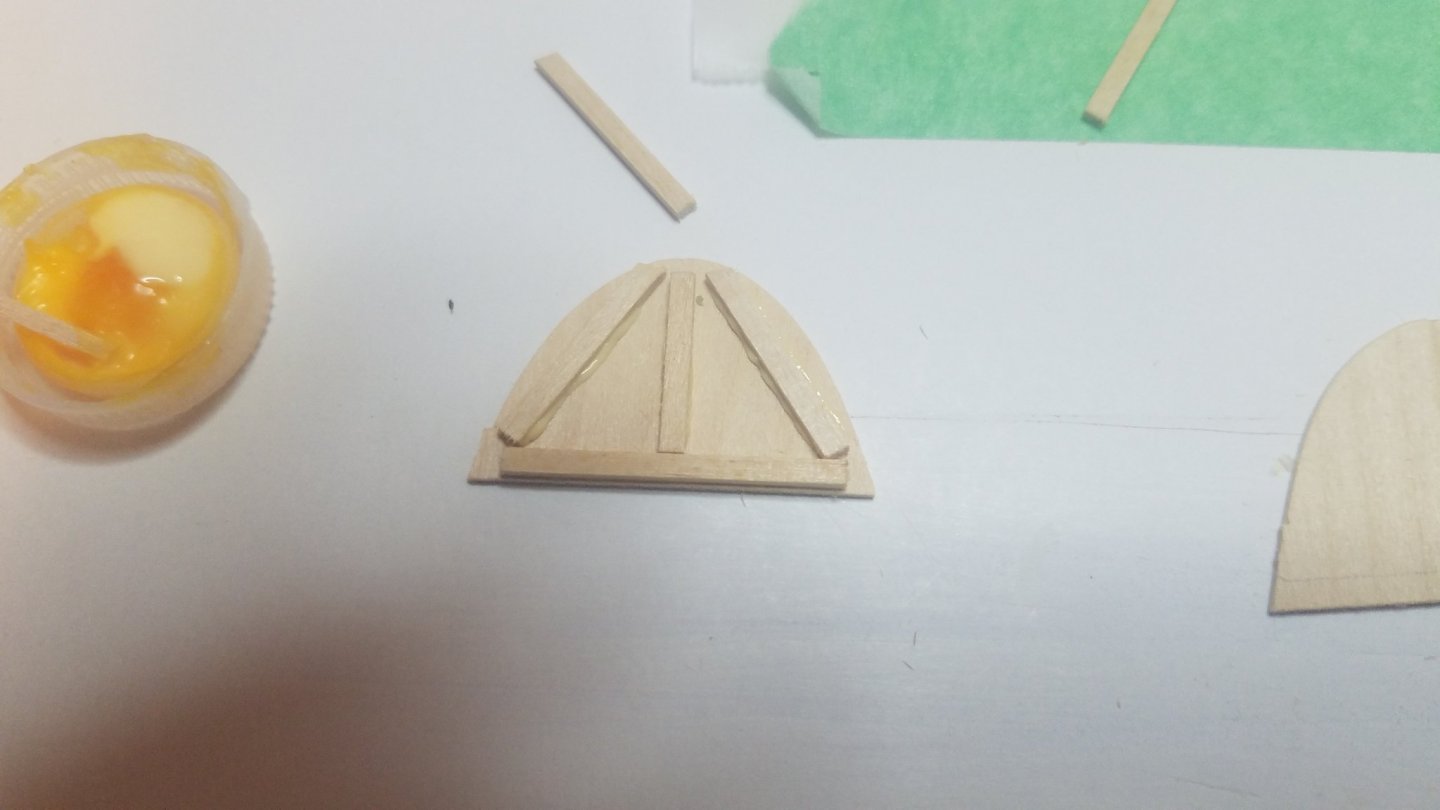
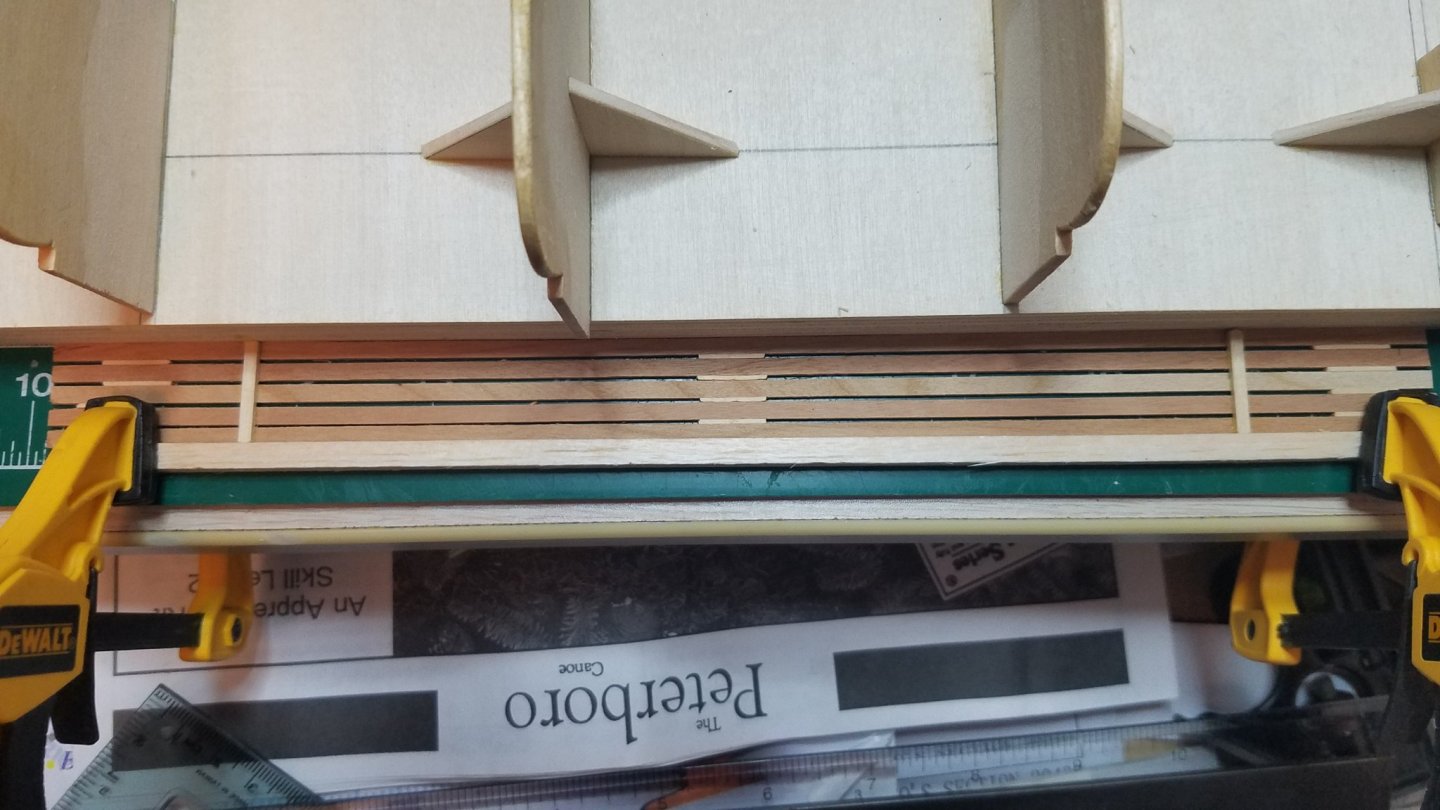
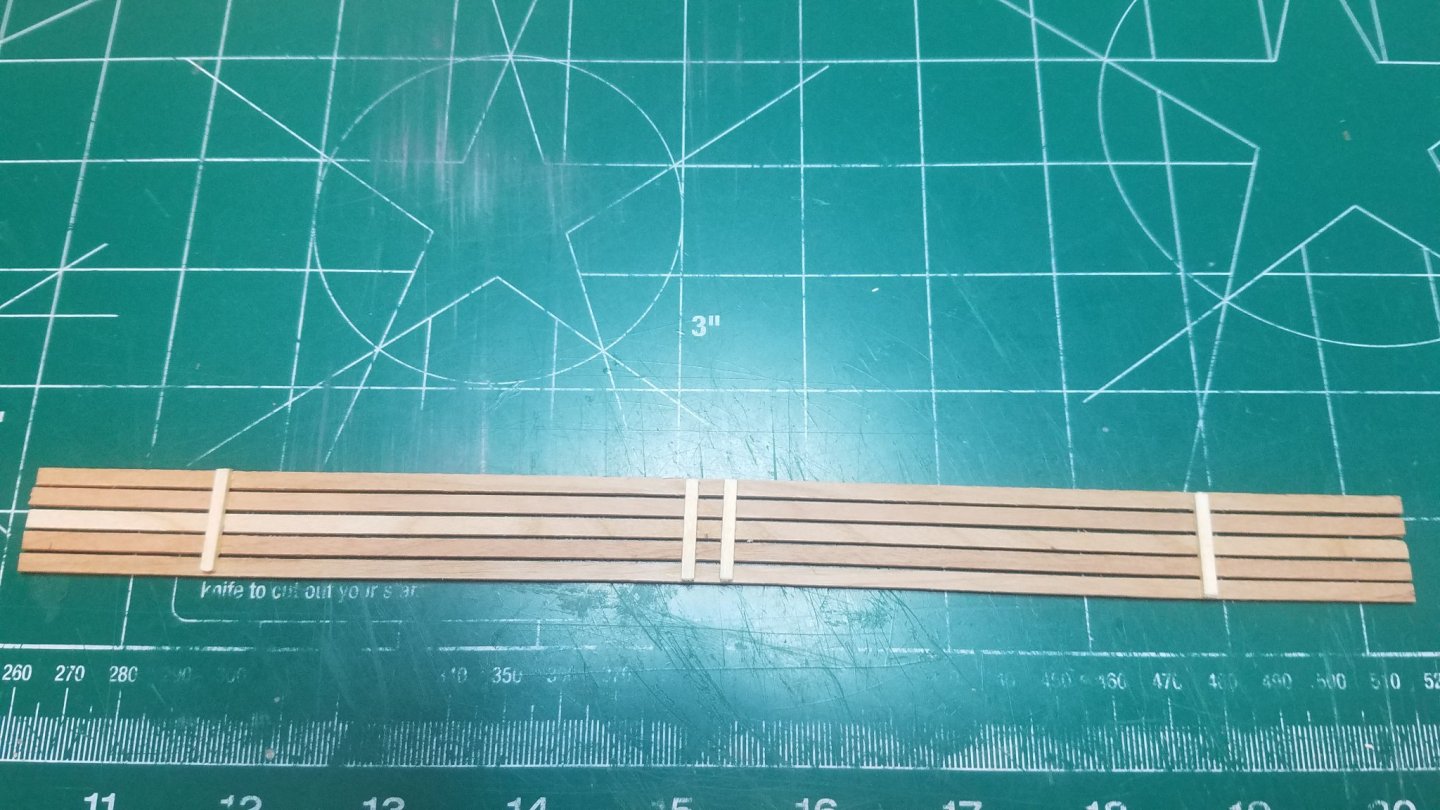
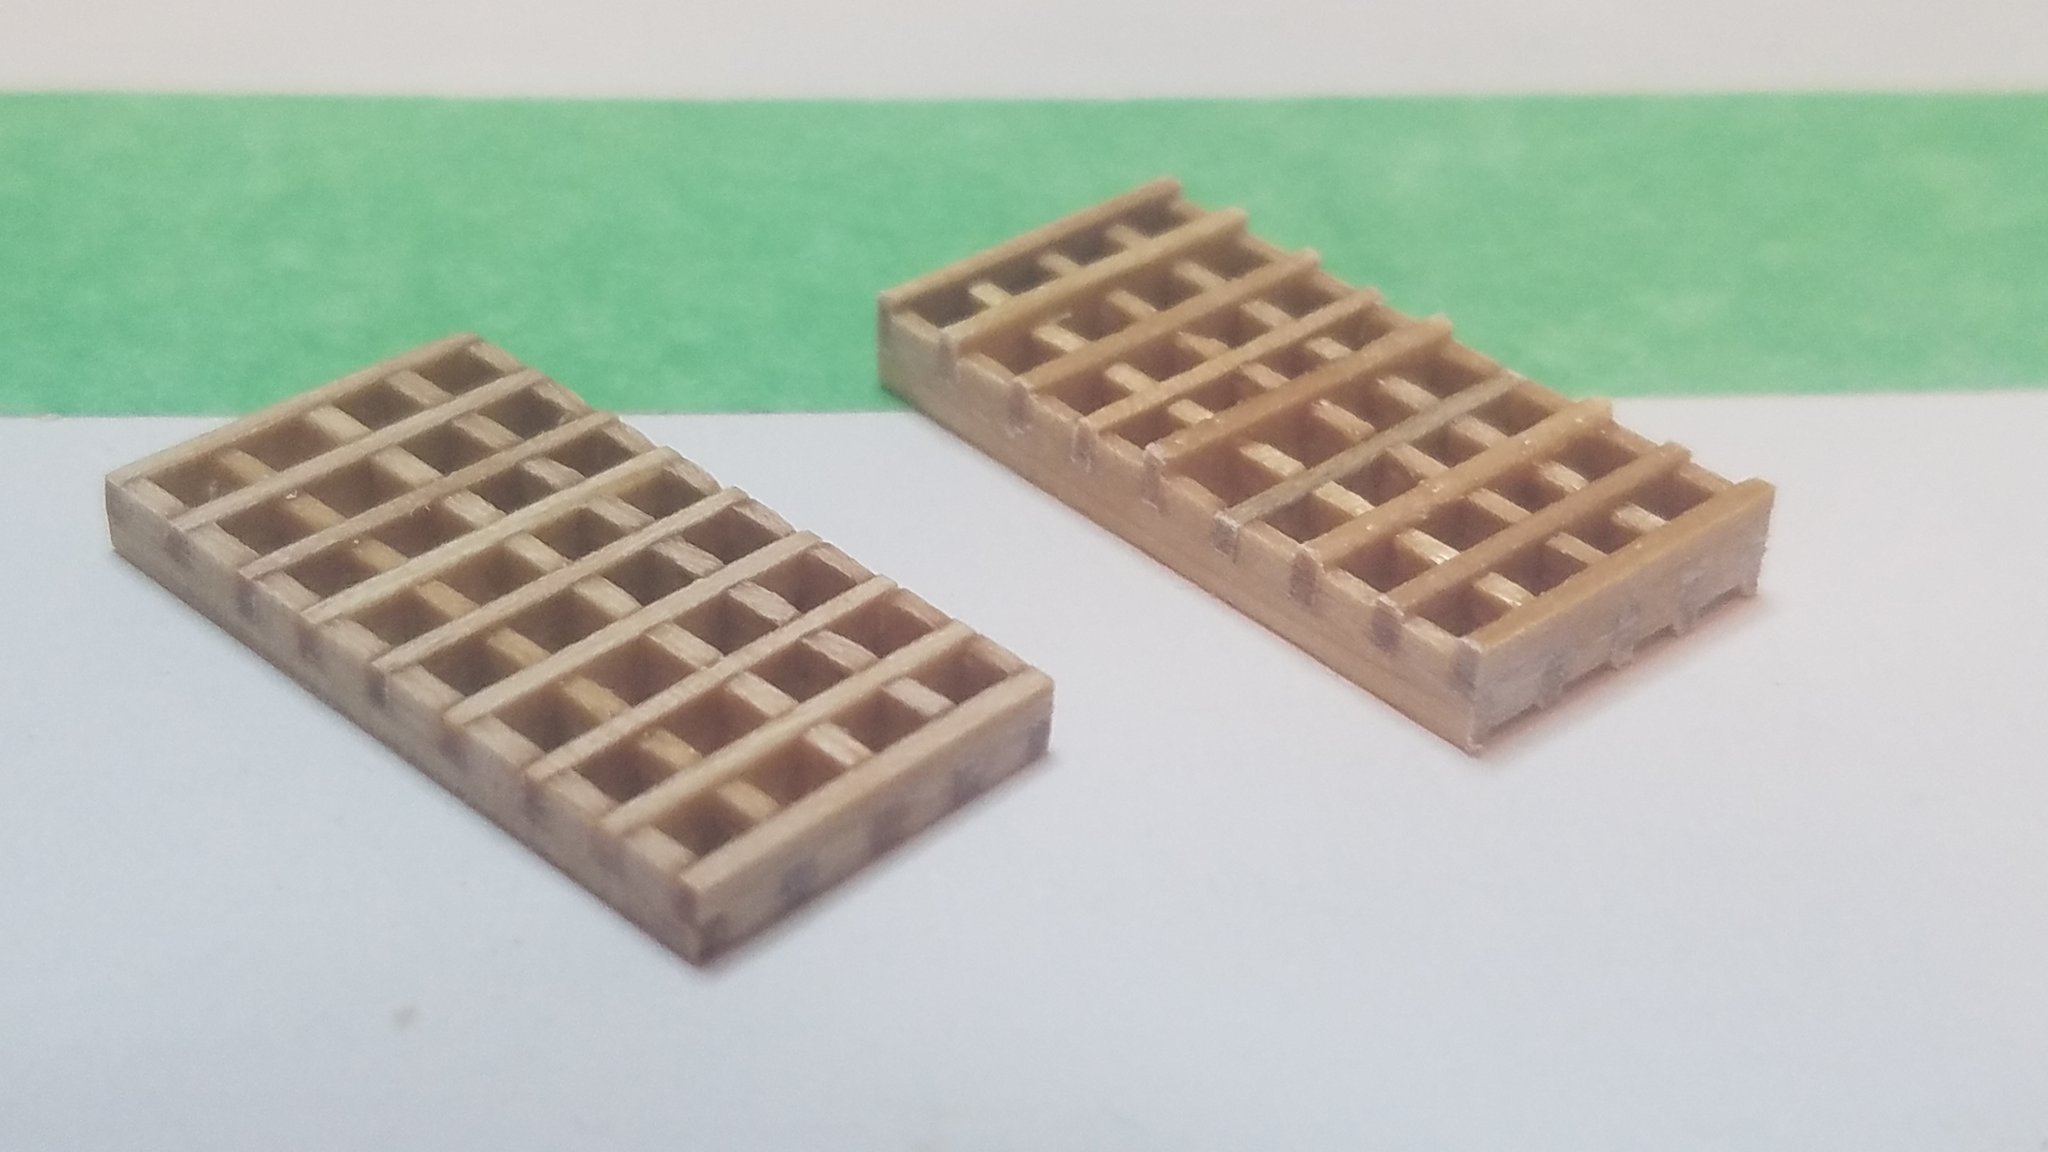
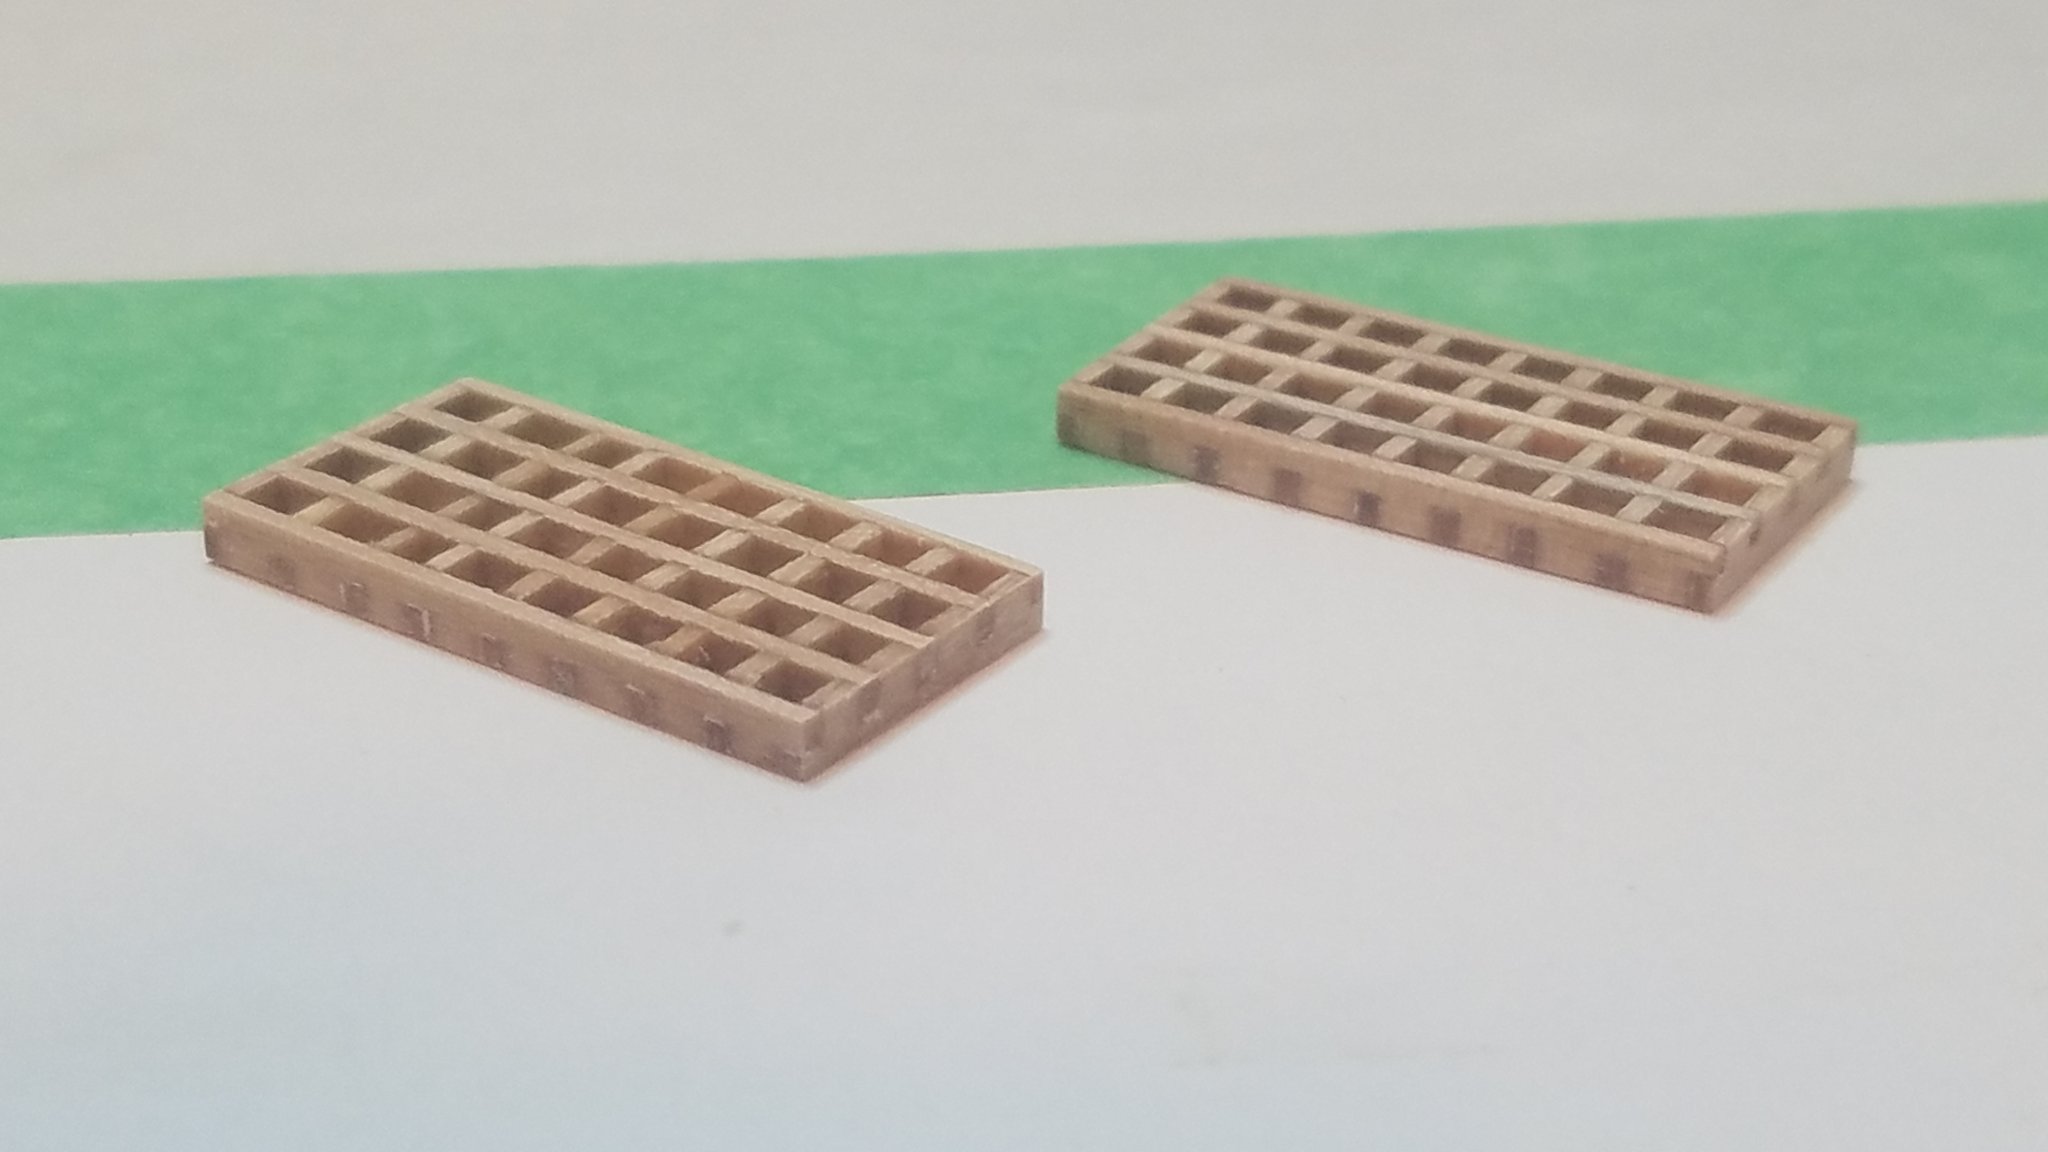
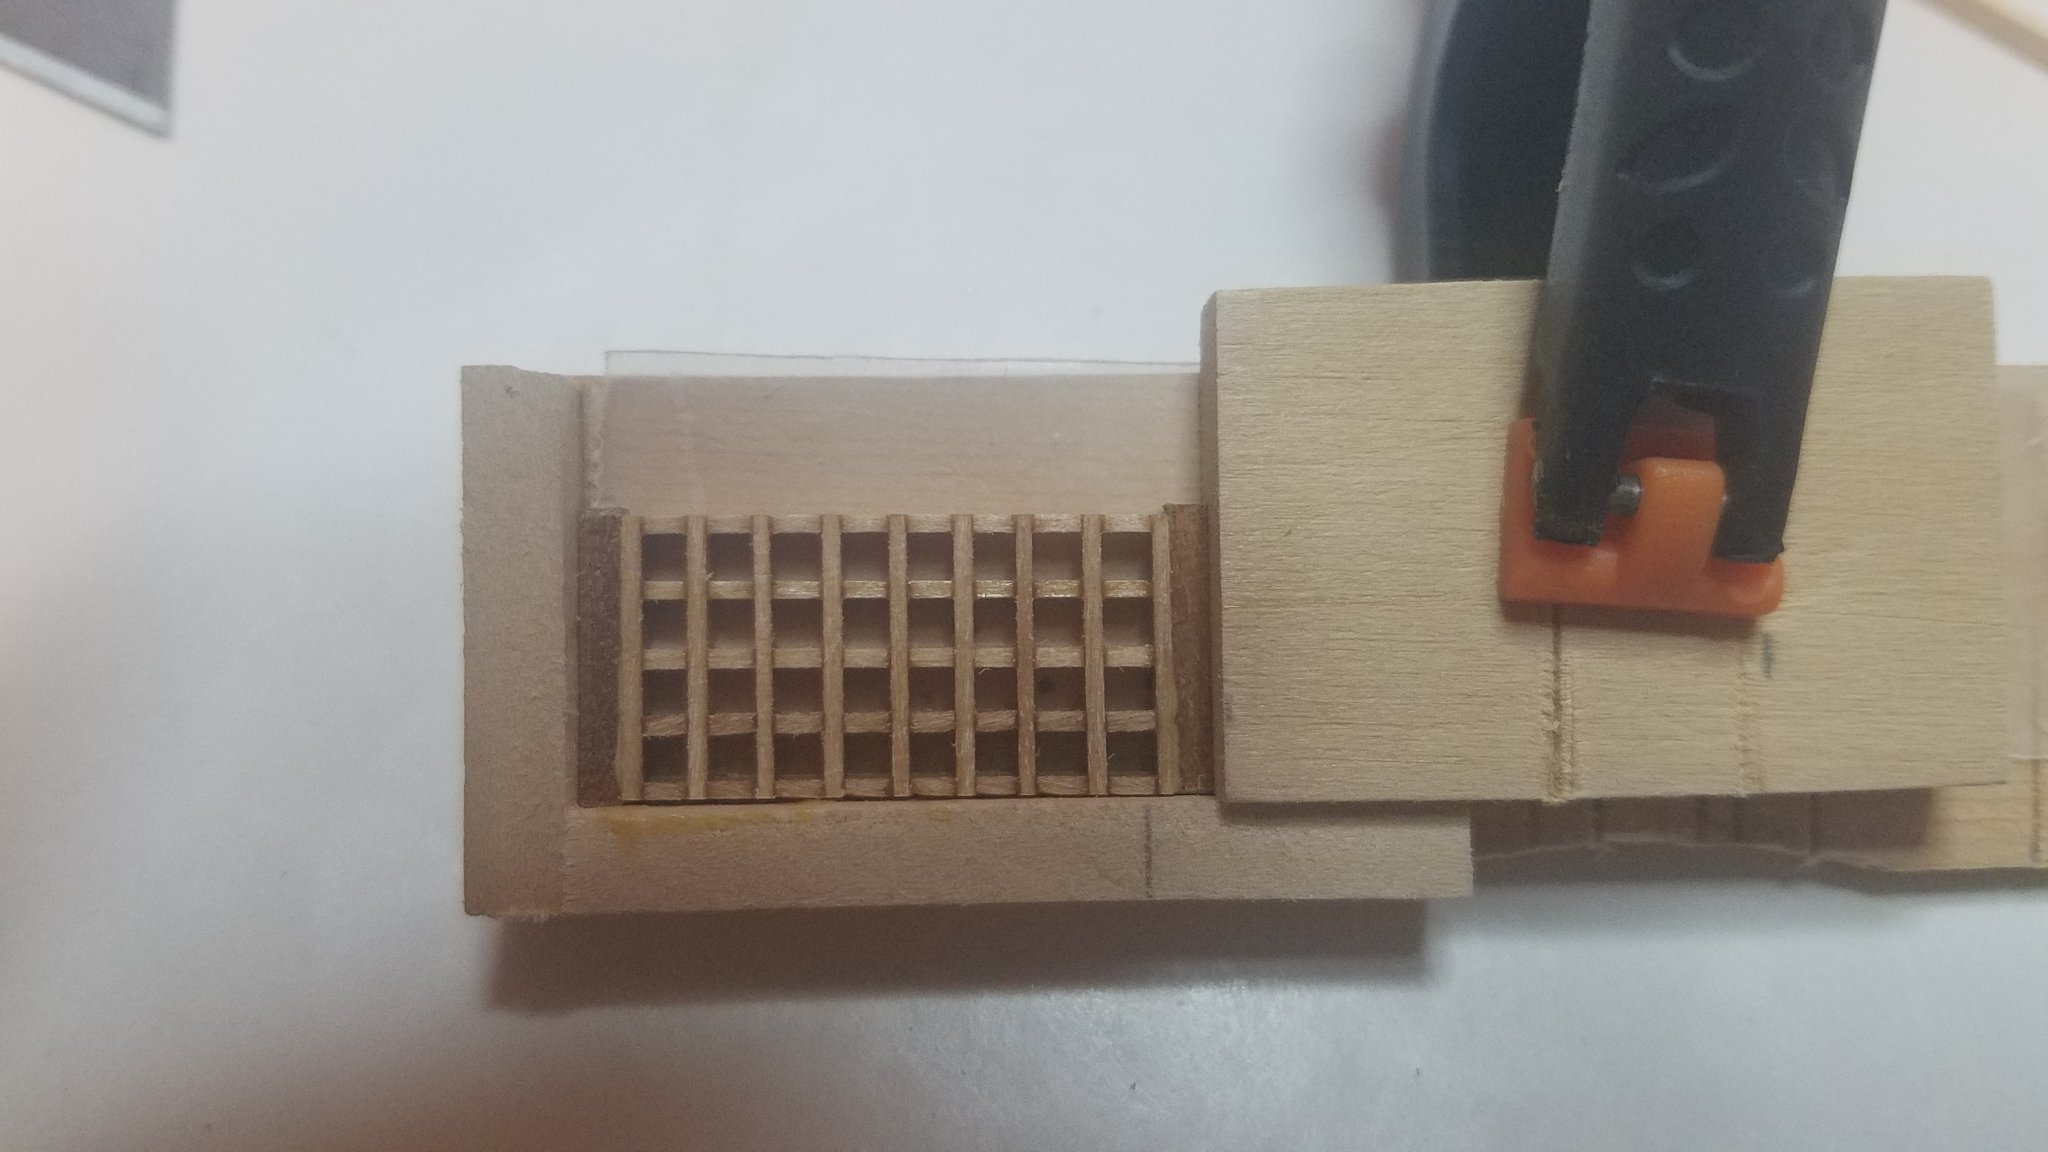
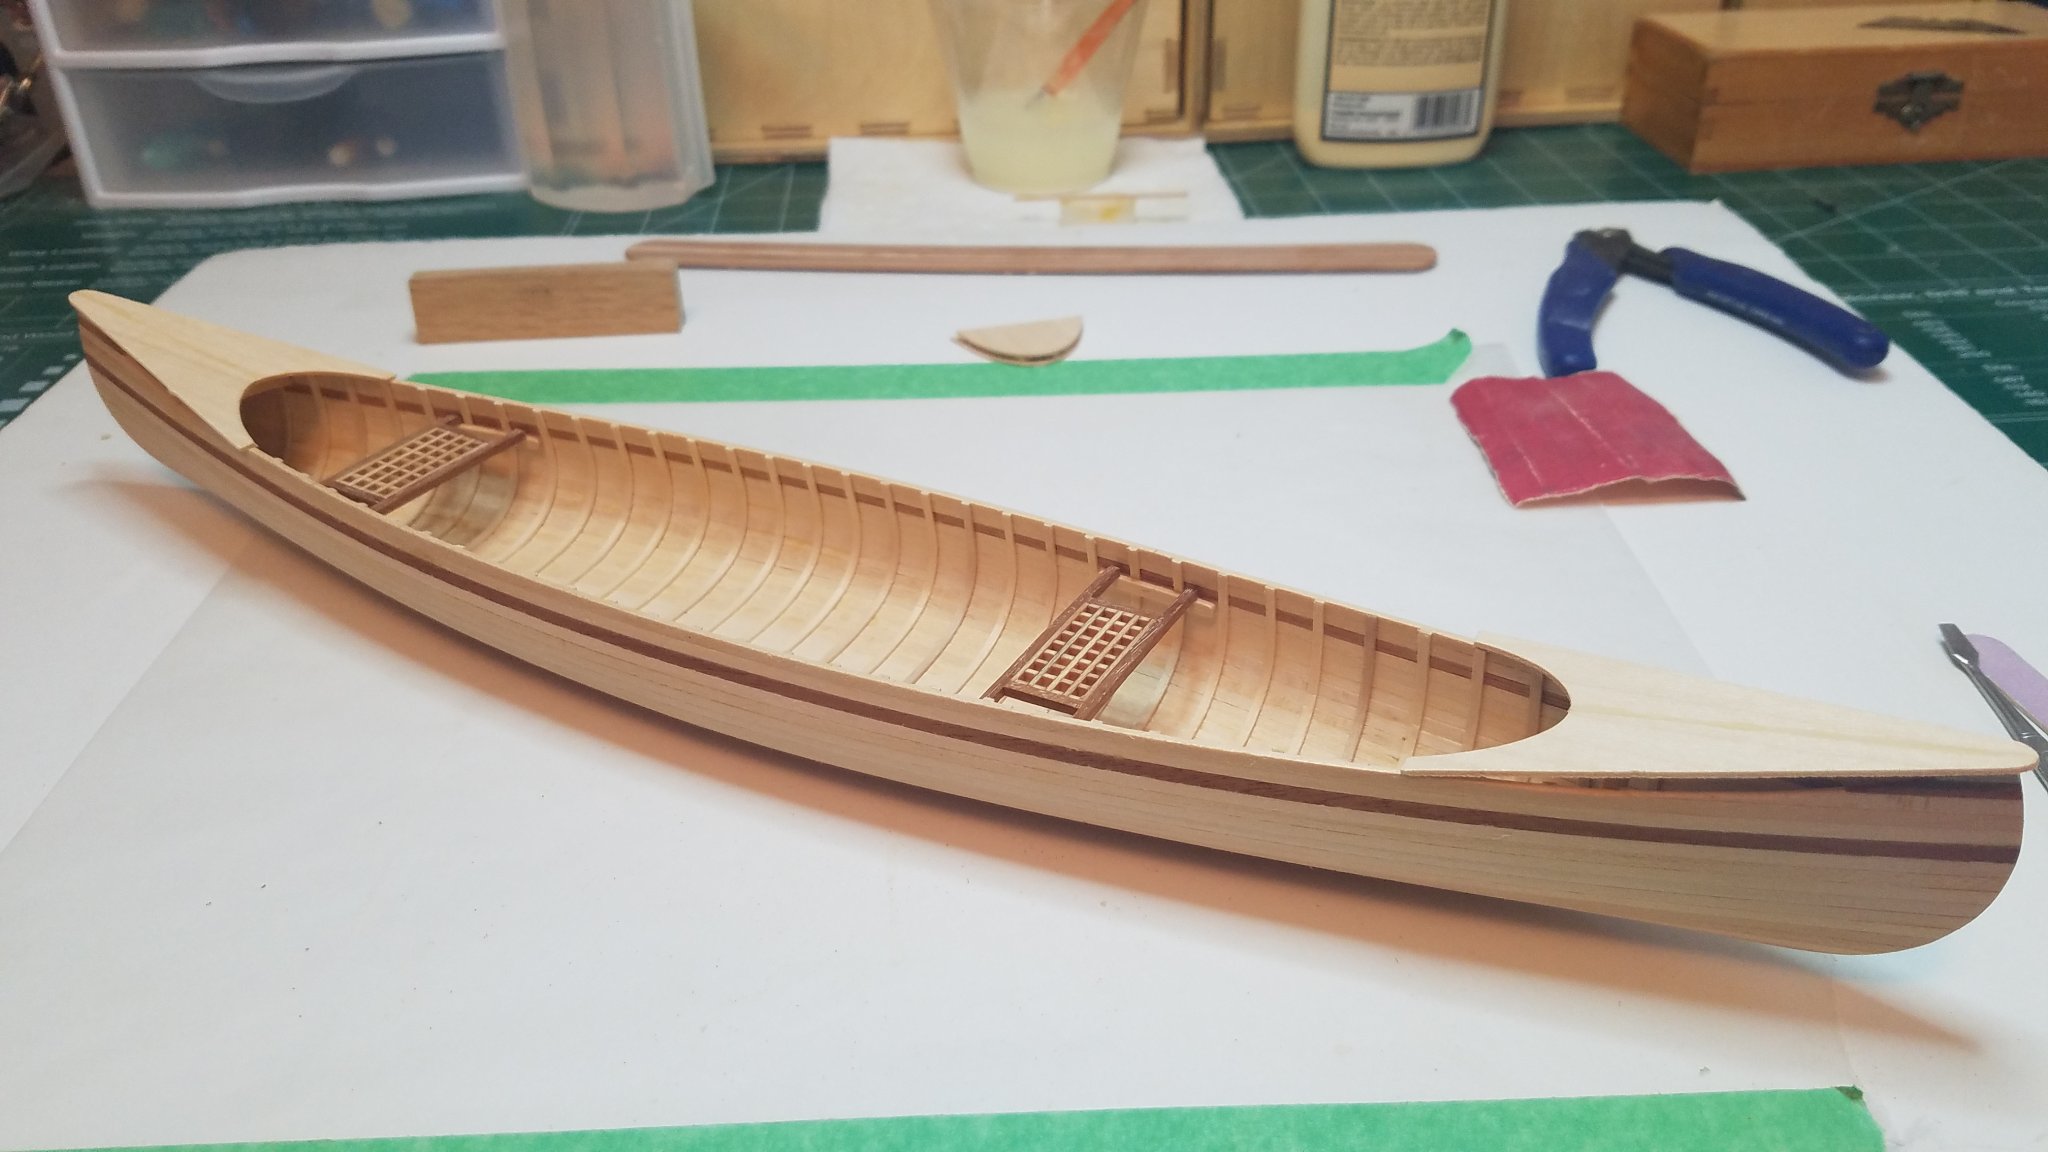
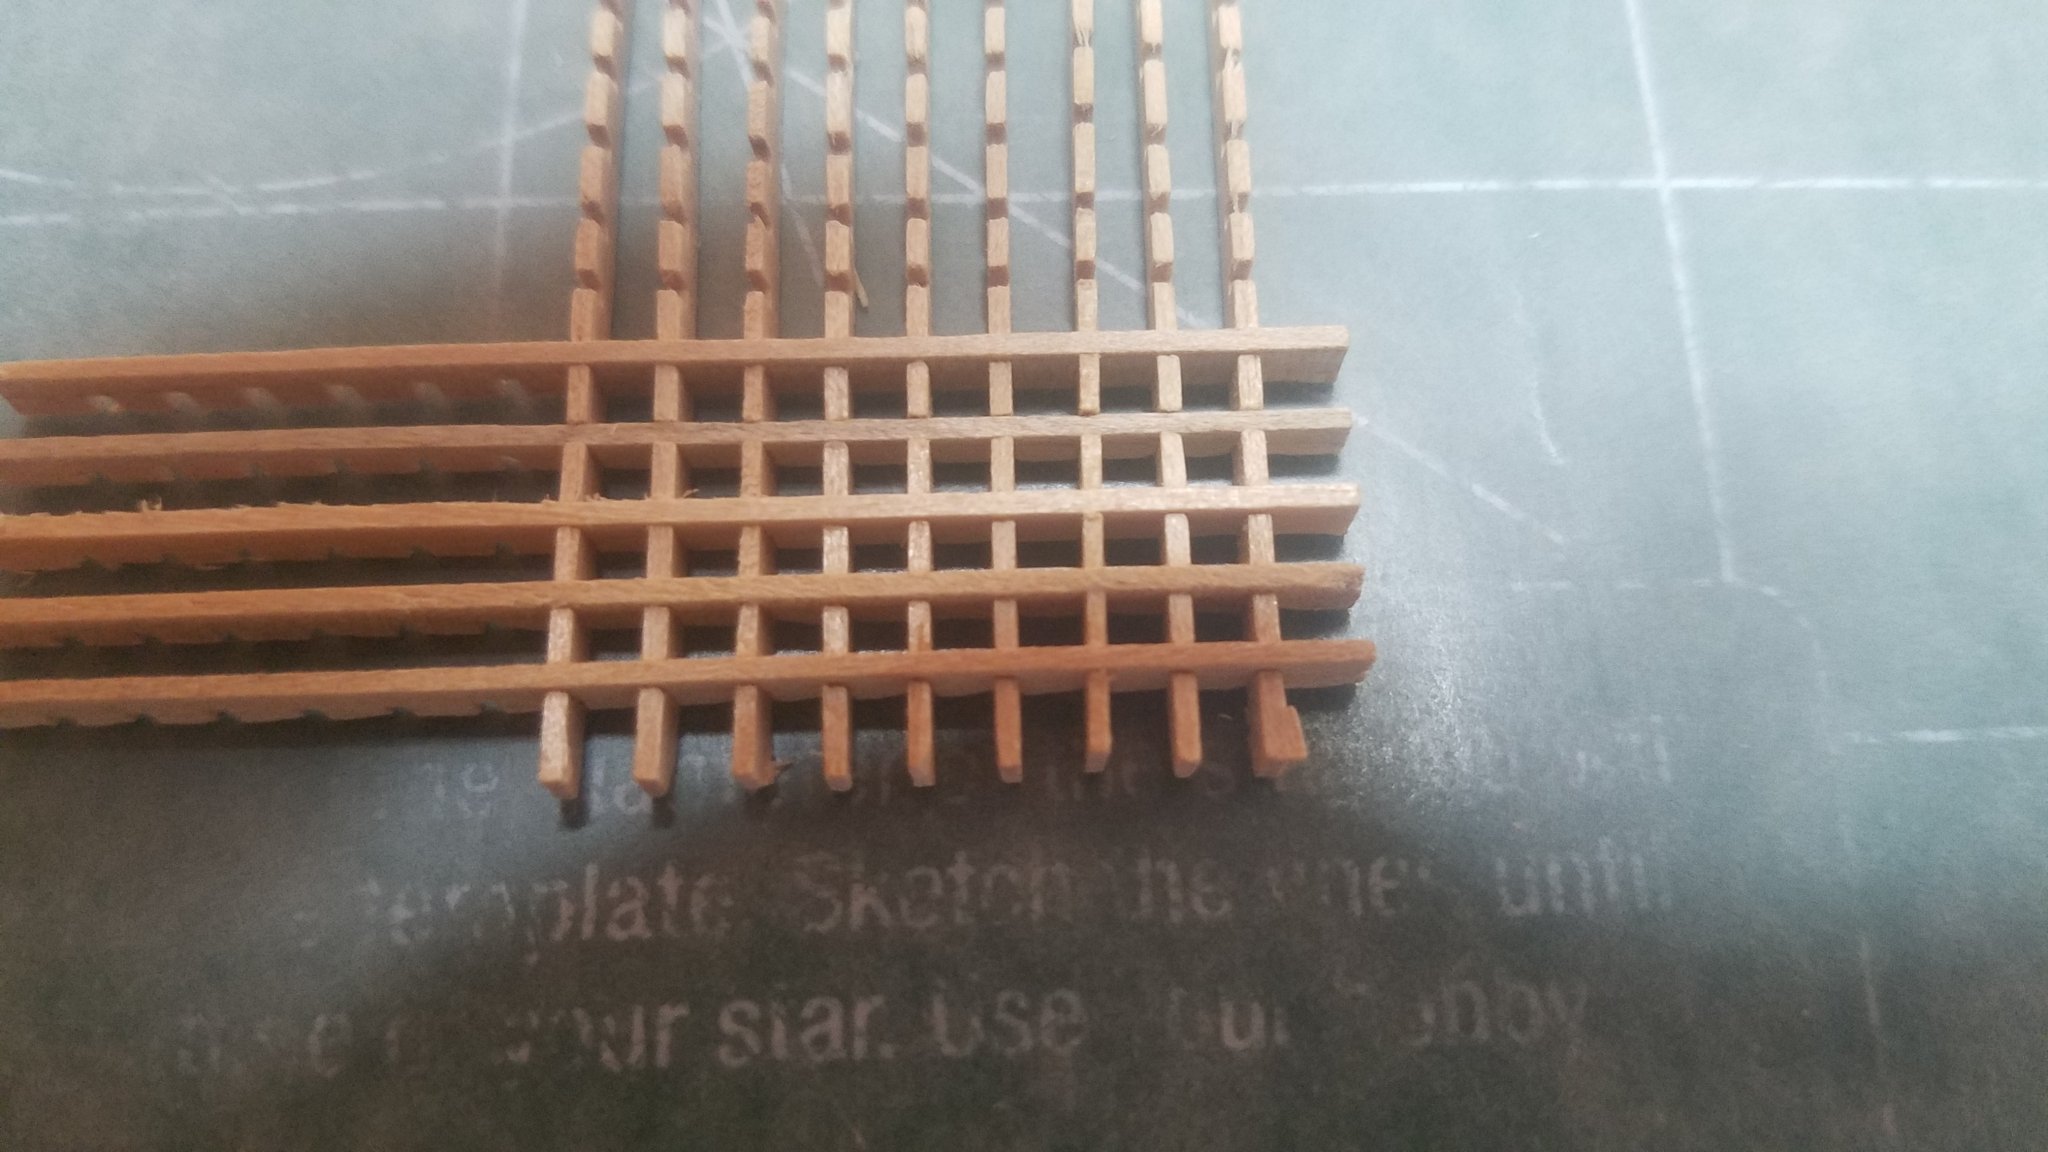
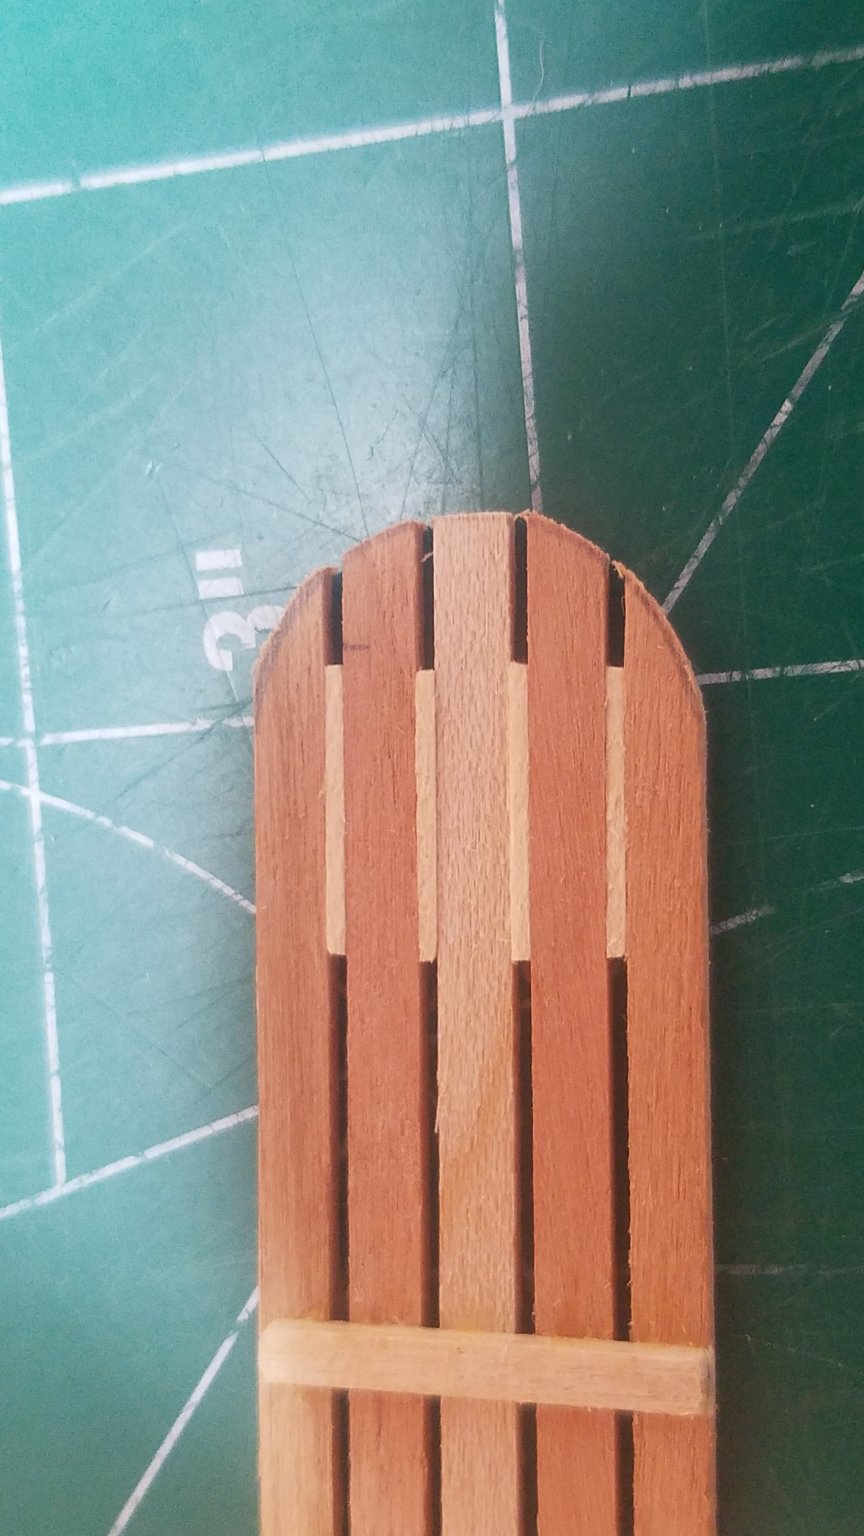
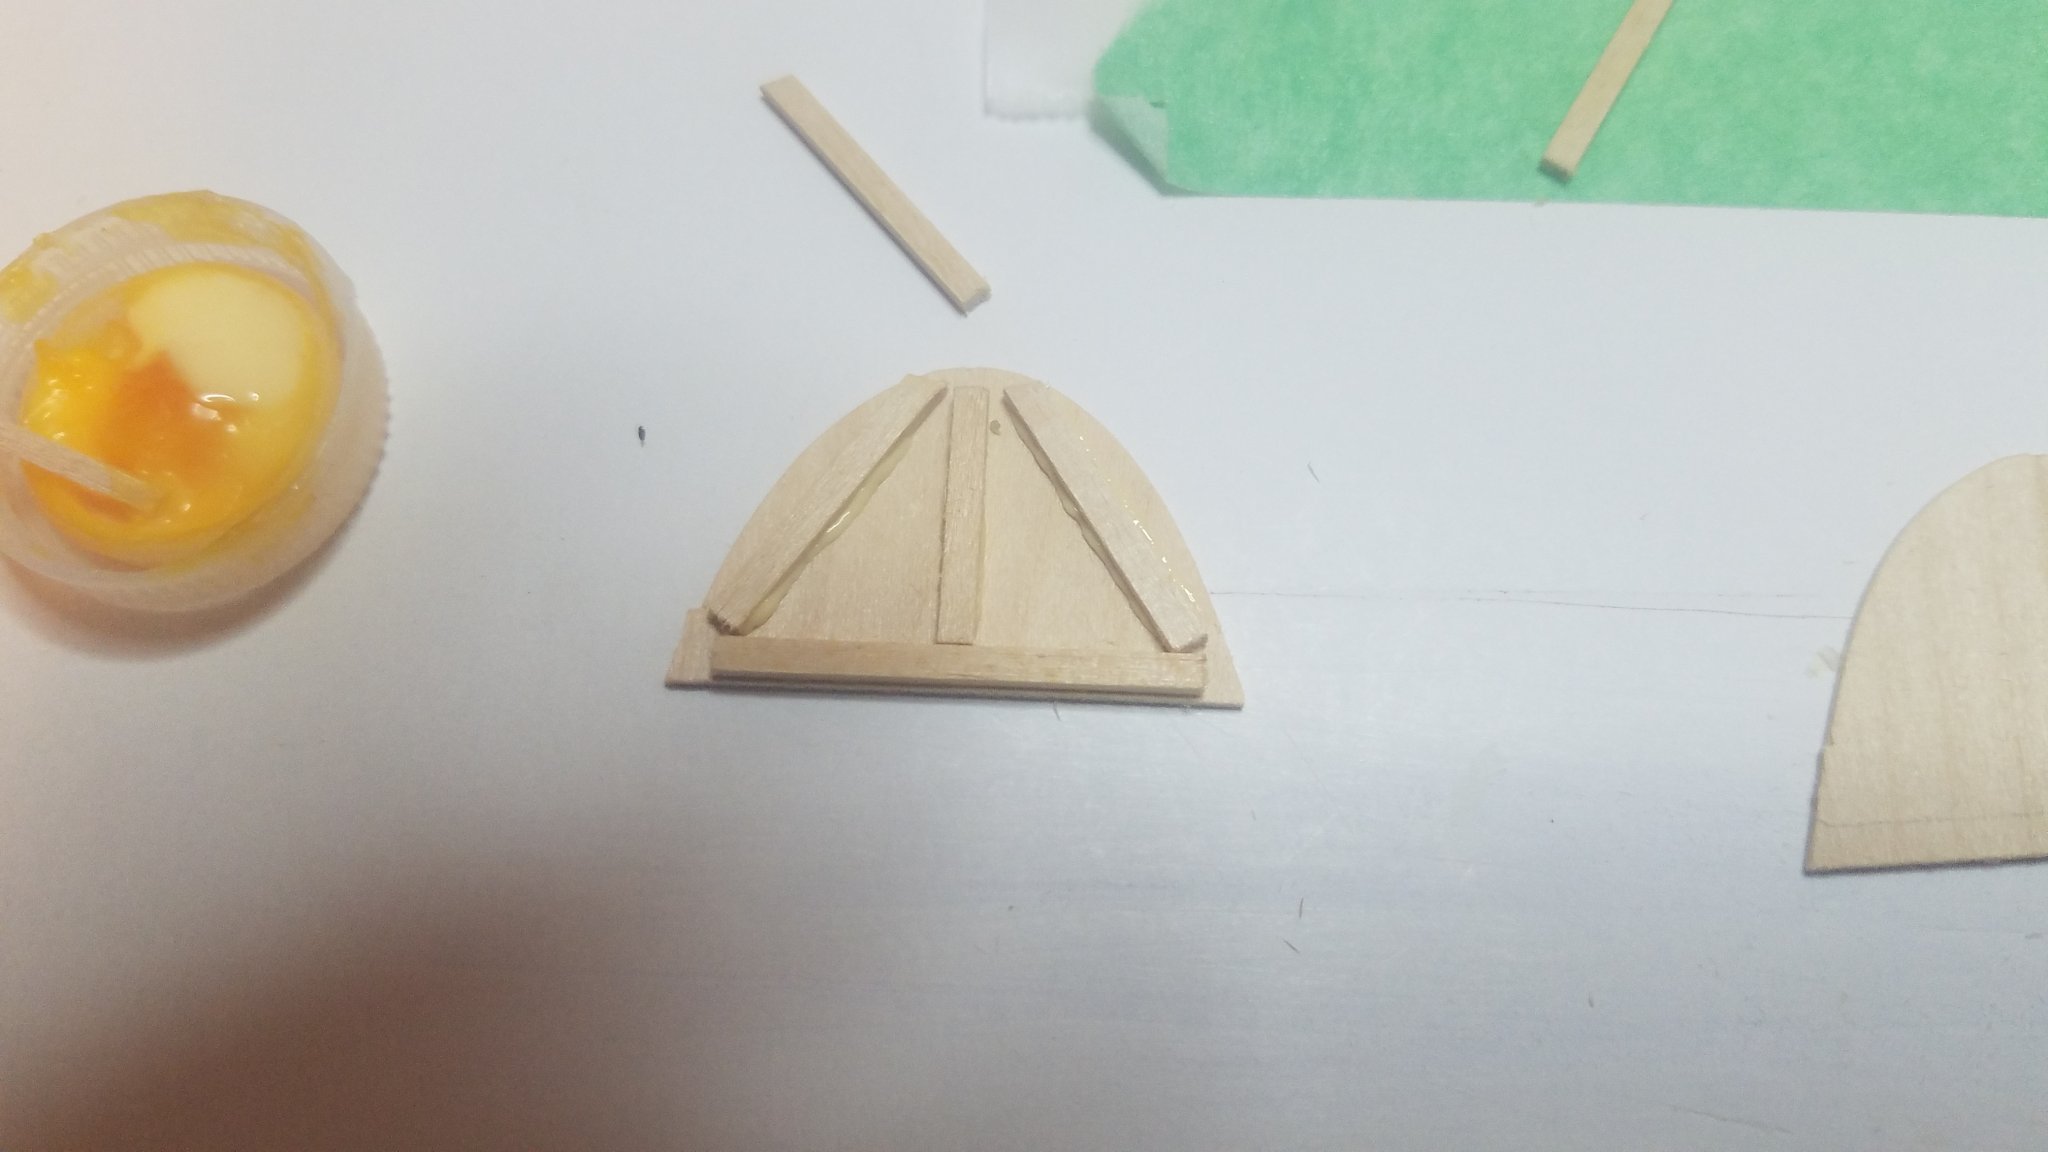
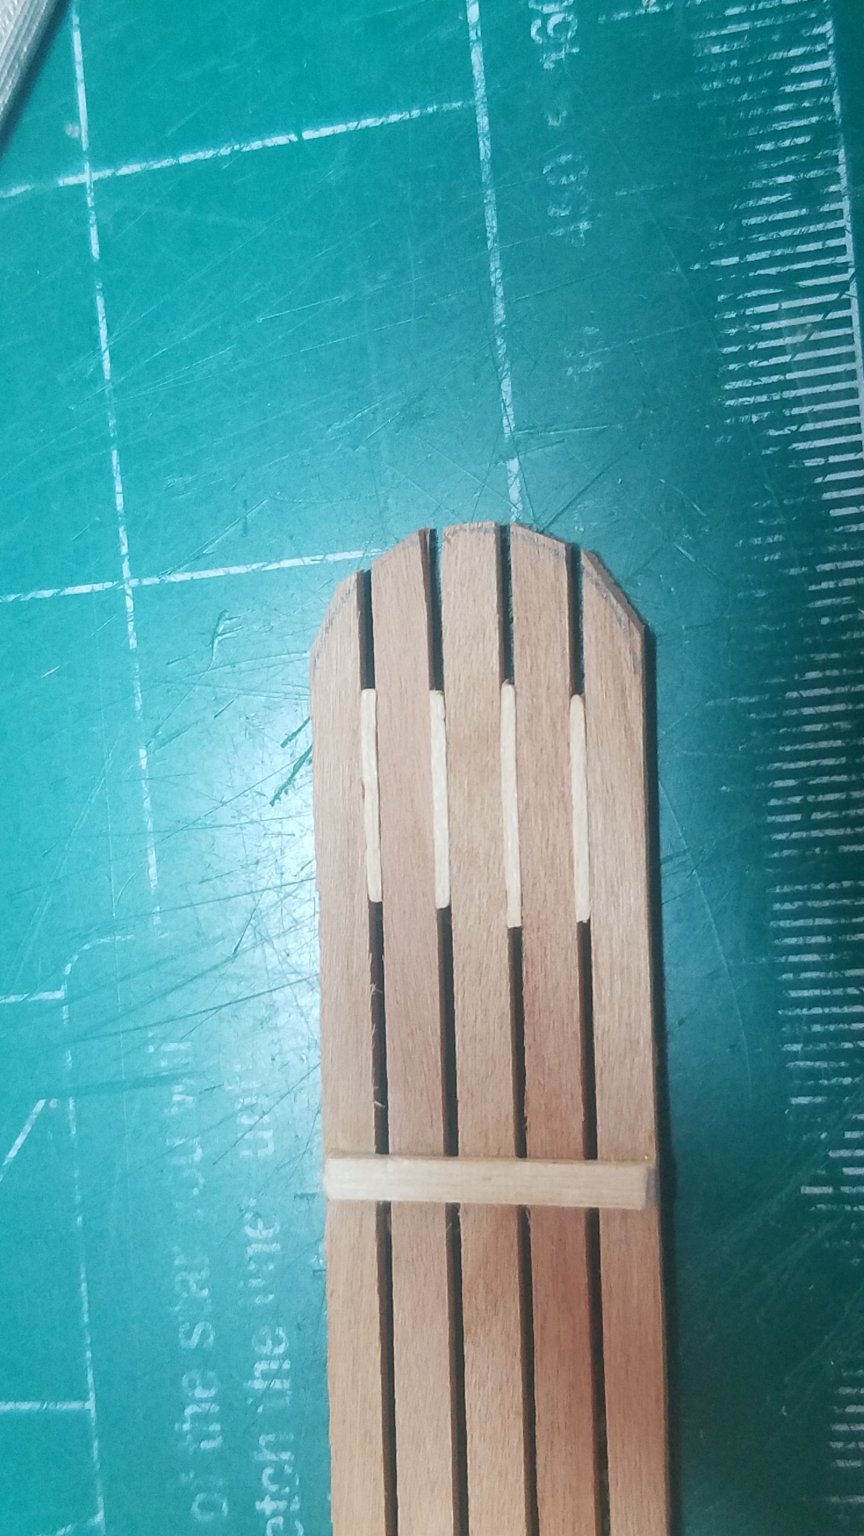
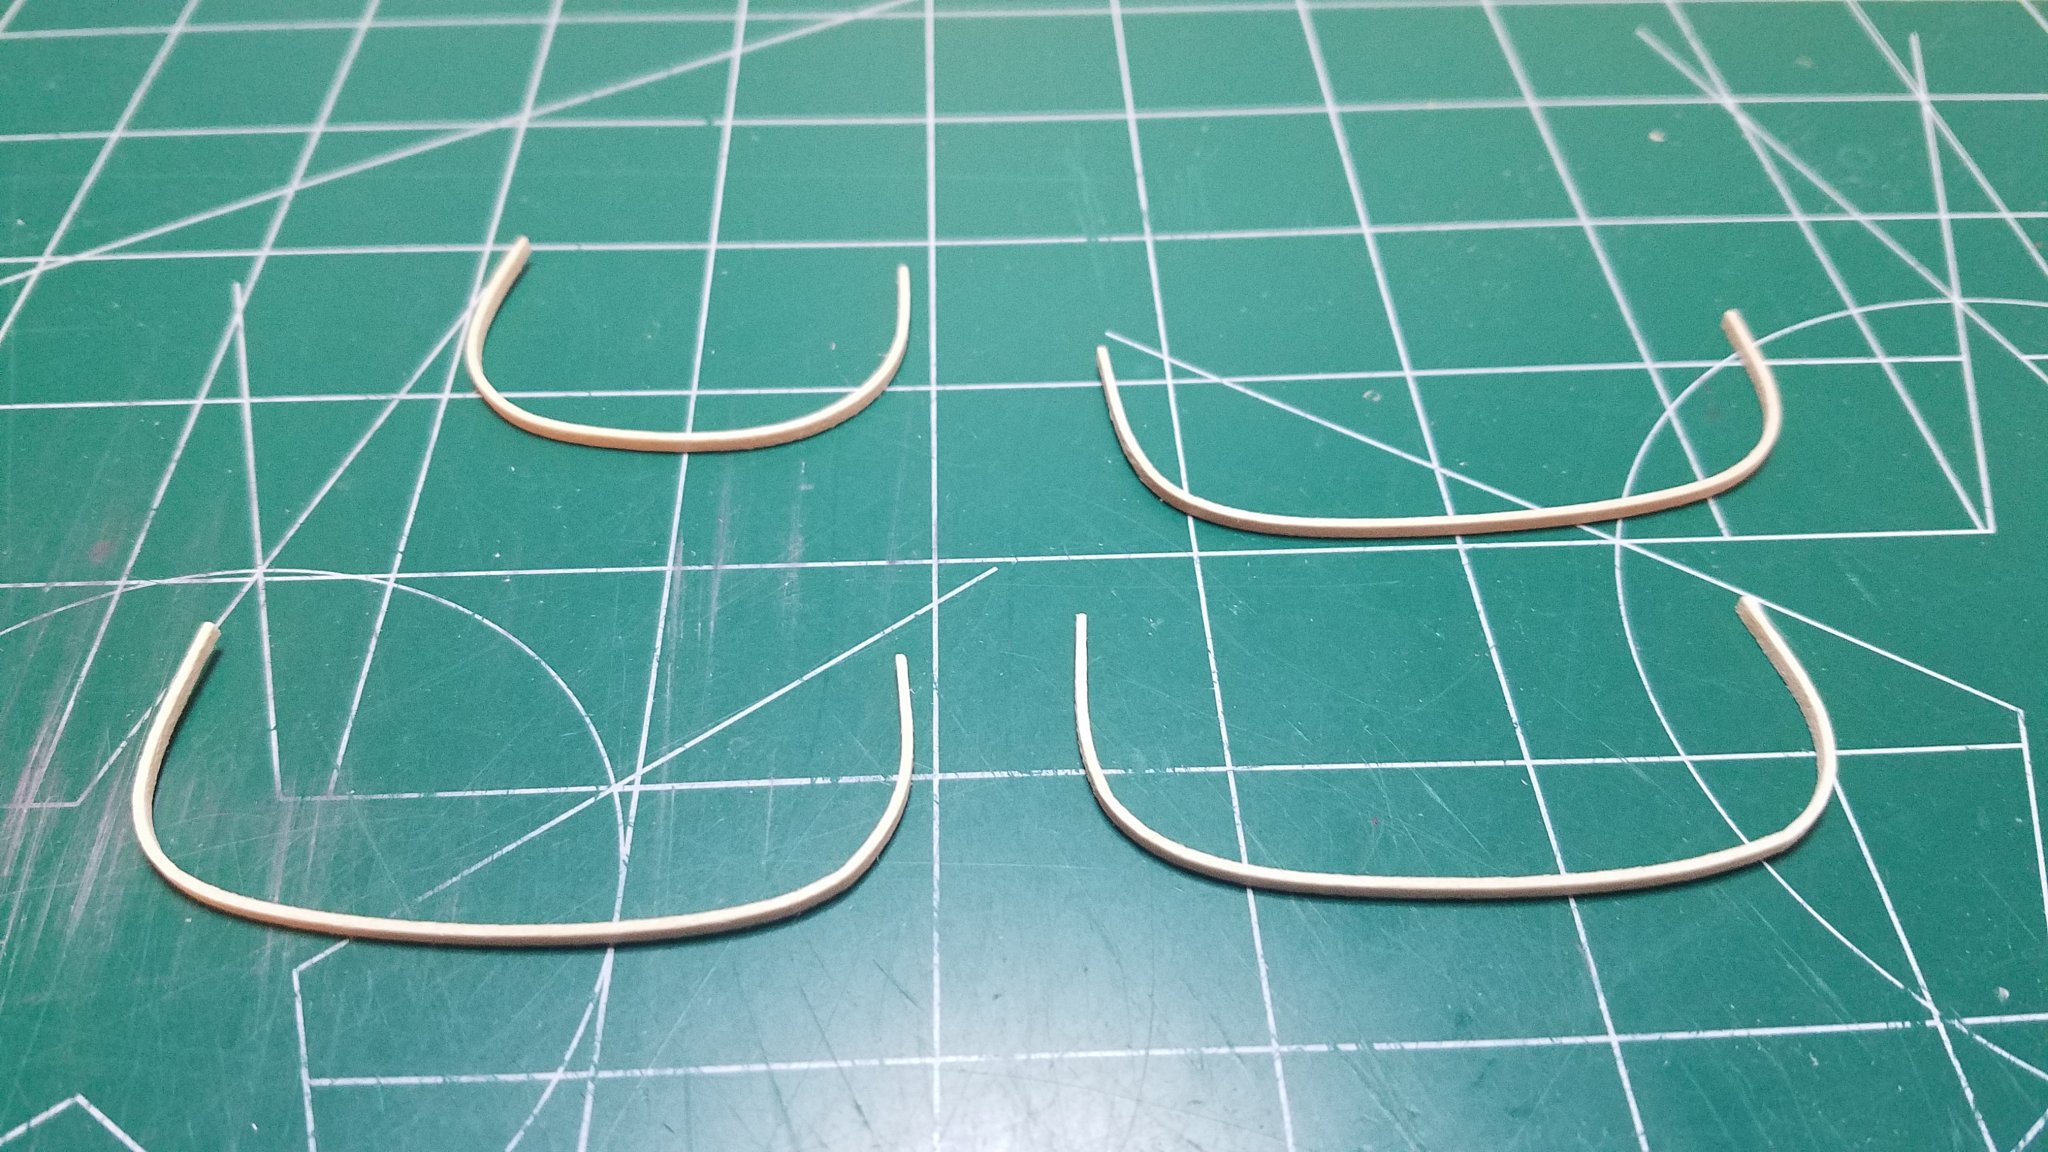
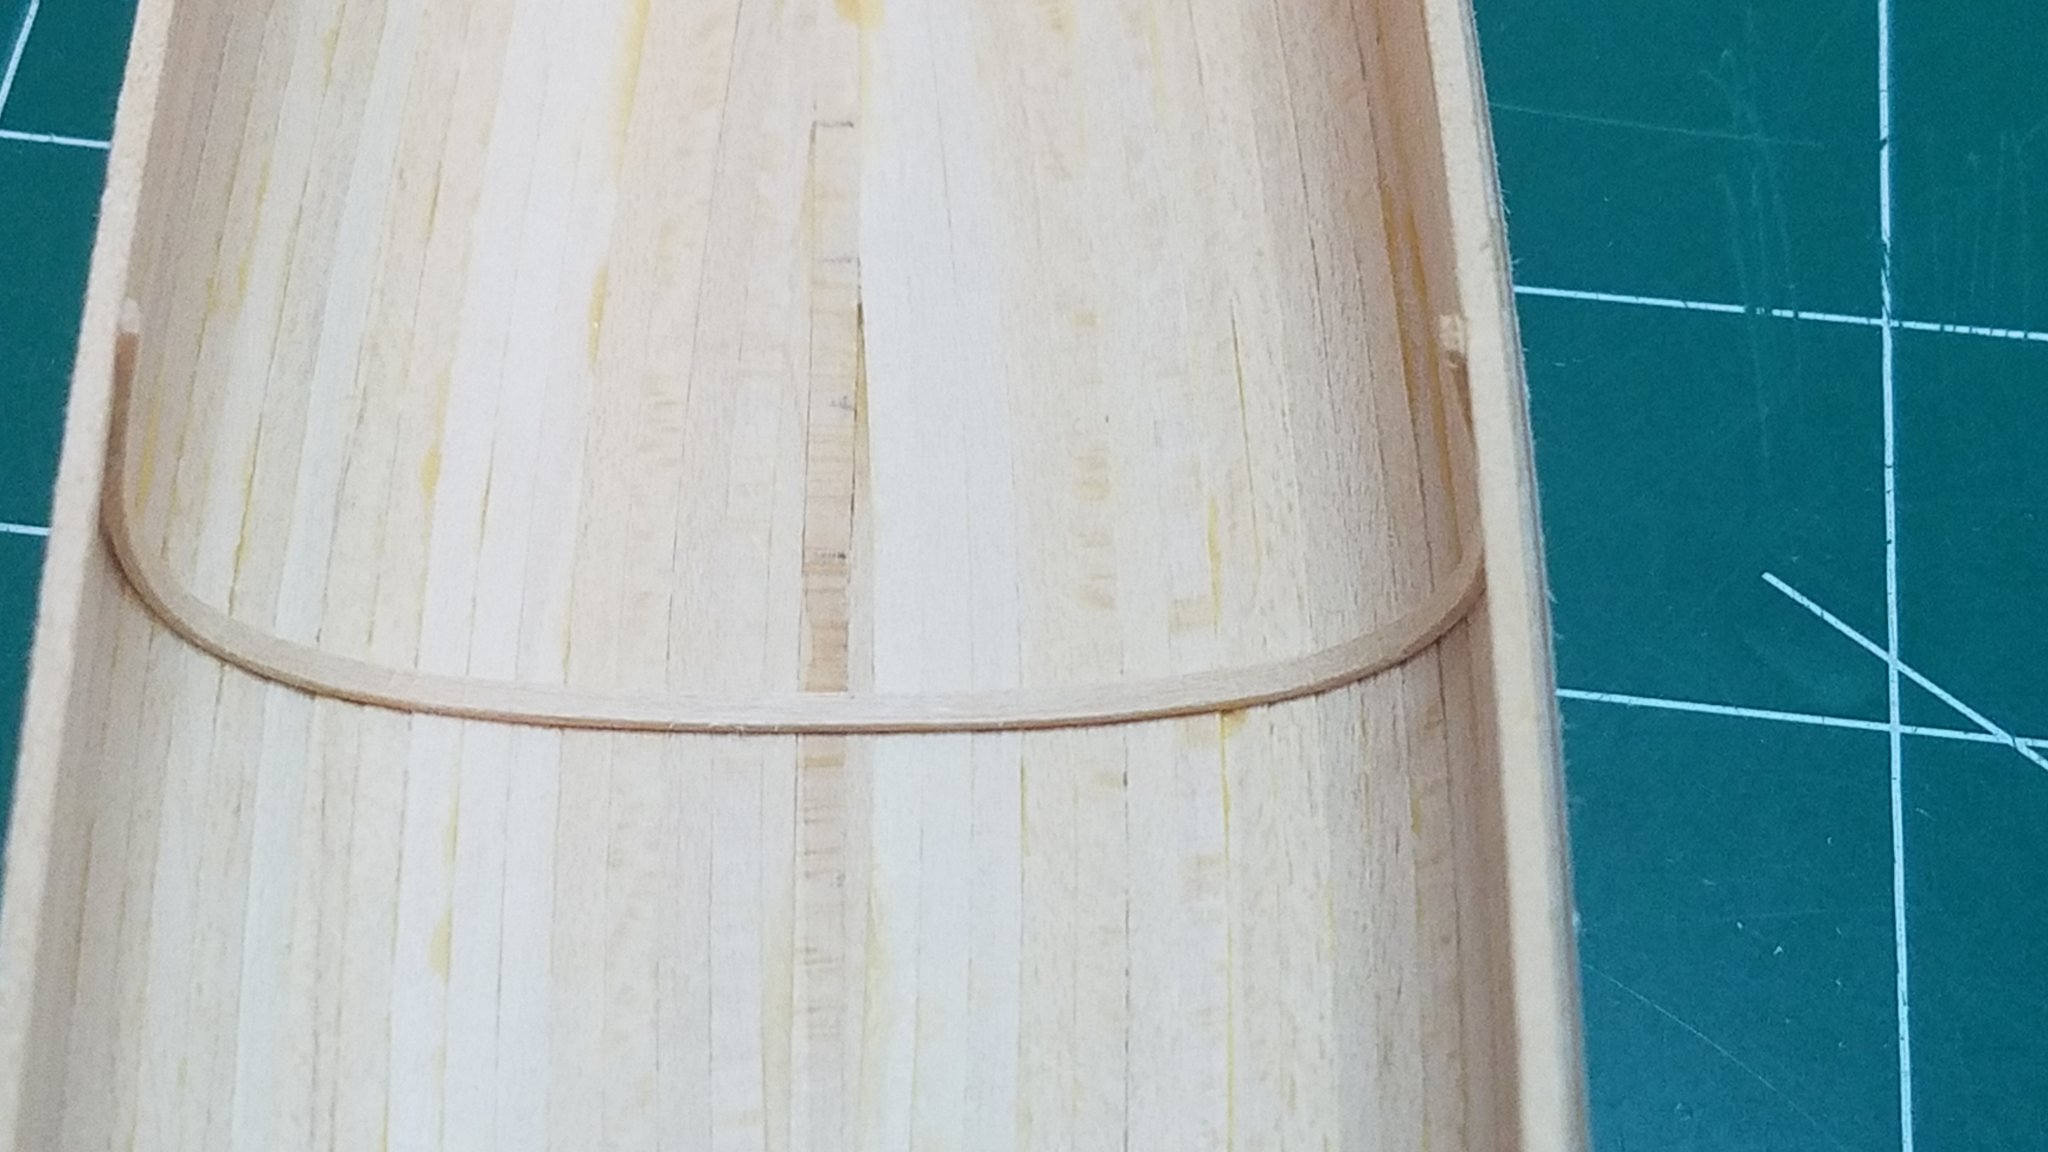
 Thanks Yves and Chris for the kind words. A little midday update. I had some grating slats left over from another project so I got started this morning gluing up a couple of small grates. After giving them a bath in some thin CA I nipped off the excess. Then I sanded the edges and thinned them down a bit. The thinning is subtle unless viewed with a normal one. Add a little mahogany framing. And presto after a couple of hours you have two canoe seats. The mounts are just more scrap planking bits. I obviously had no reference for this so I made them scale out at 9"x16" including the frame. That seemed about right for my butt anyway. Still time to get more done so back at it after lunch. Regards
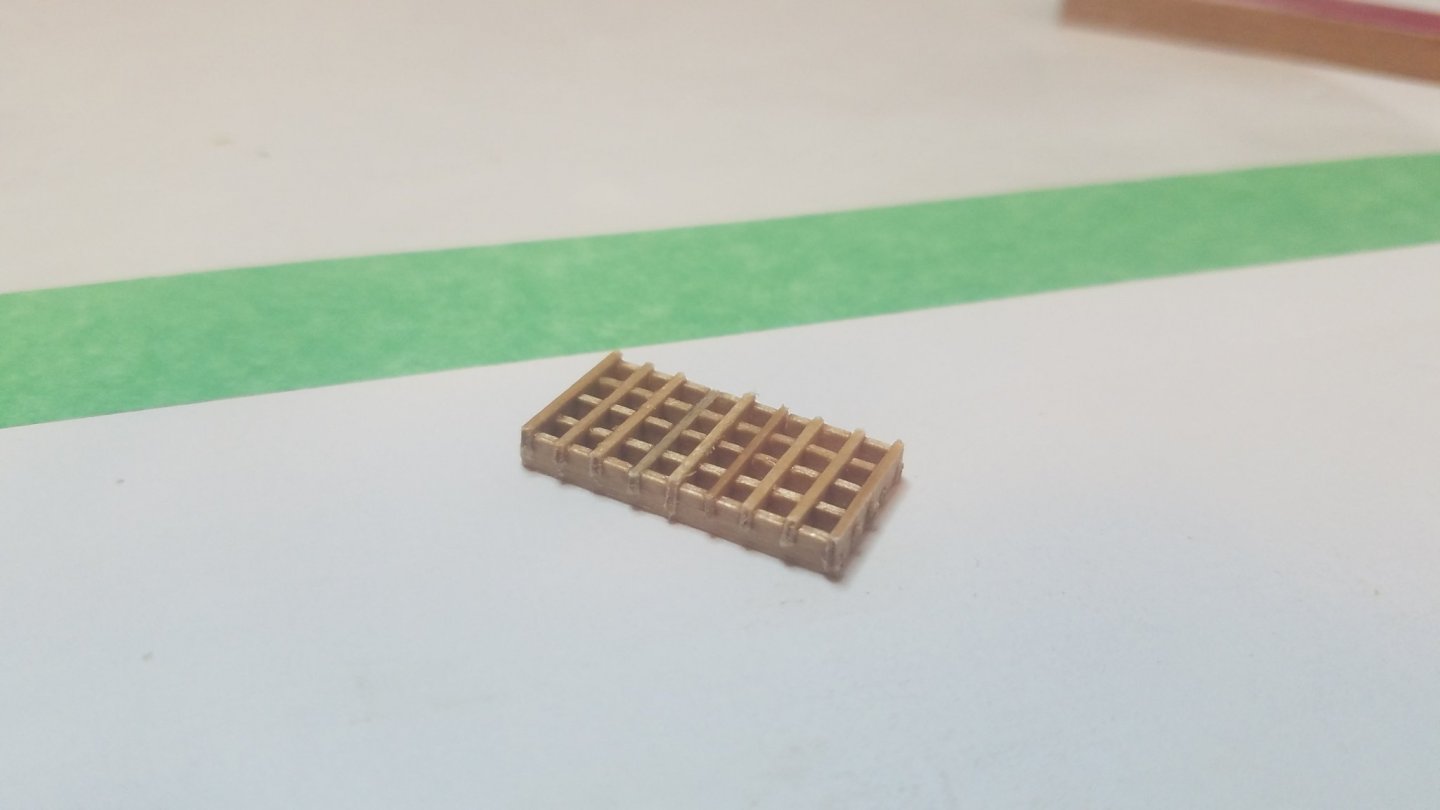


- 84 replies
-
- 8
-

-
- peterboro canoe
- Finished
- (and 1 more)
-
Yves, All of the hidden gems are great. Just knowing they are there even if no one can see them adds something to the build, don't you think? Kind of like when we were kids and had a secret and would say "I know something you don't know"! The real question is where on earth did you find so many "Nude Nazis"? Regards
-
Thanks Tom, Yes all is well so far. My Wife has had some pulmonary issues since the beginning of the year so I am keeping a close eye on her but otherwise same old same old. How about you? Voyager, Not much else to do lately considering the state of things. Until I started this project I never new there were so many different ways to build a canoe either. Well my glue should be dry by now so back to work, Regards.
-
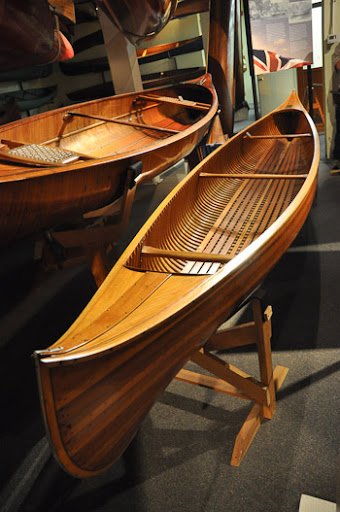
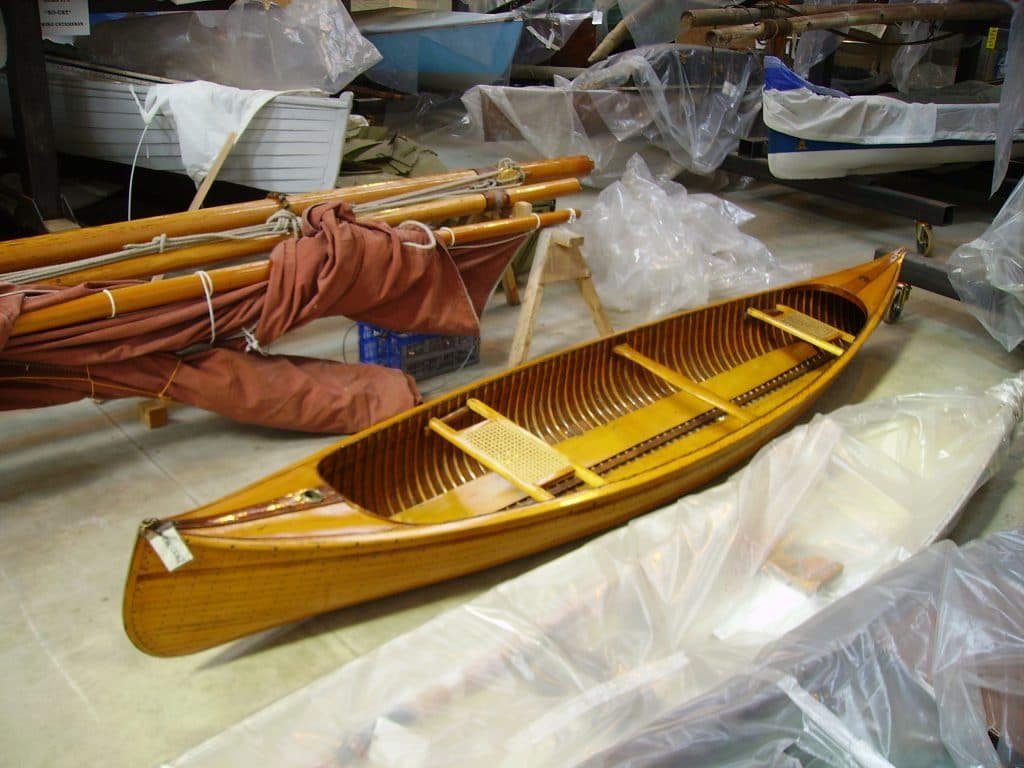
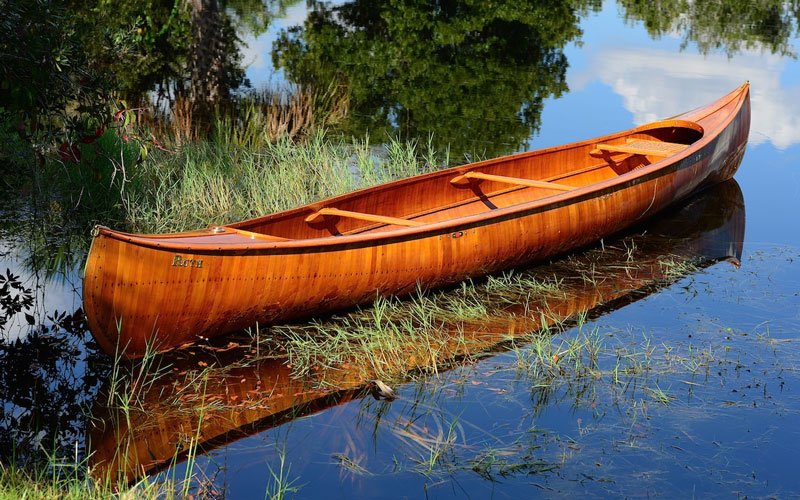
Getting an early start this morning. I did do a little research prior to starting this project. A simple google search of "peterboro canoe" is all that is needed to bring up tons of images and information. I believe the first picture above is the closest to the model canoe that the kit is based on. However I see a few details in all of them that I would like to try to incorporate into my version.
- 84 replies
-
- 5
-
-
- peterboro canoe
- Finished
- (and 1 more)
-
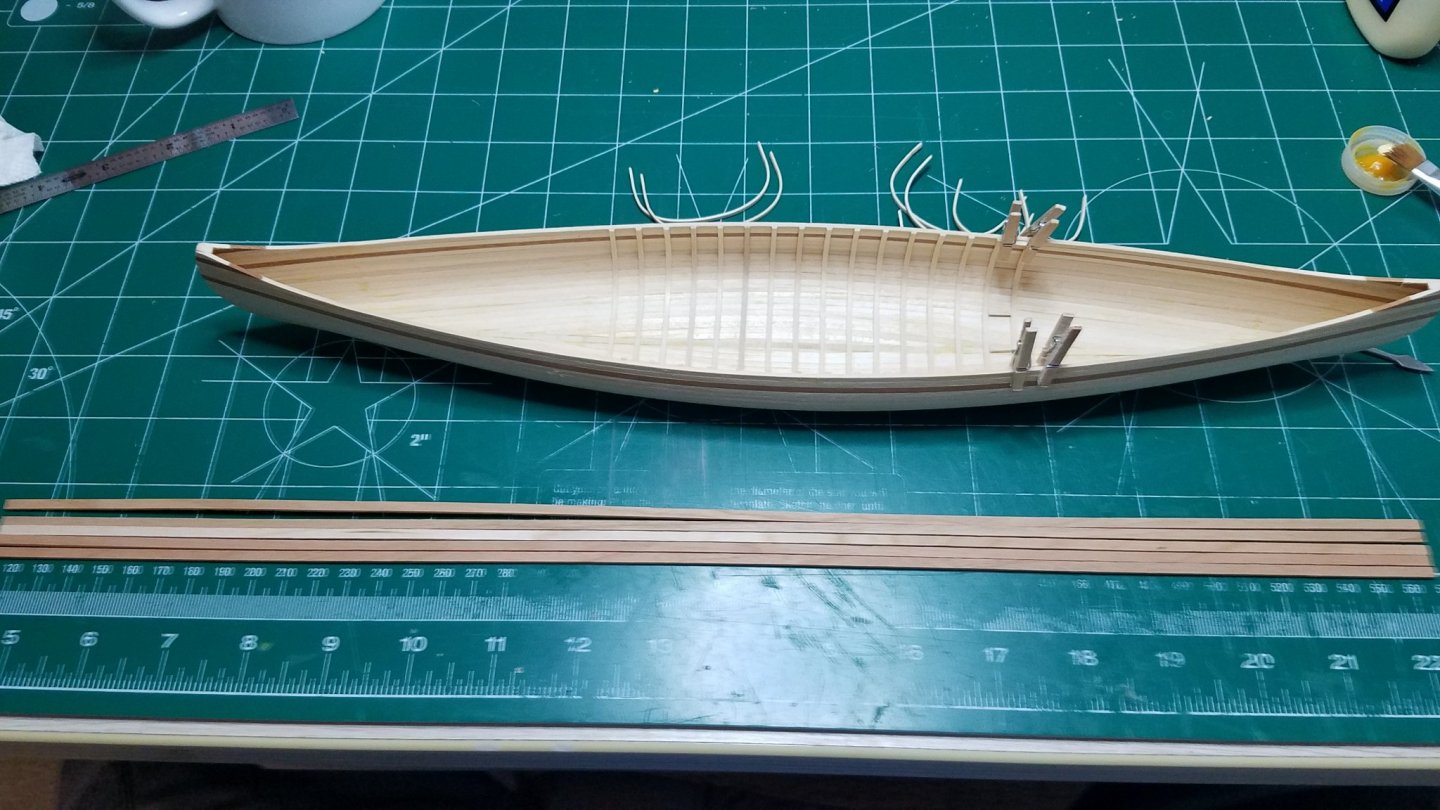
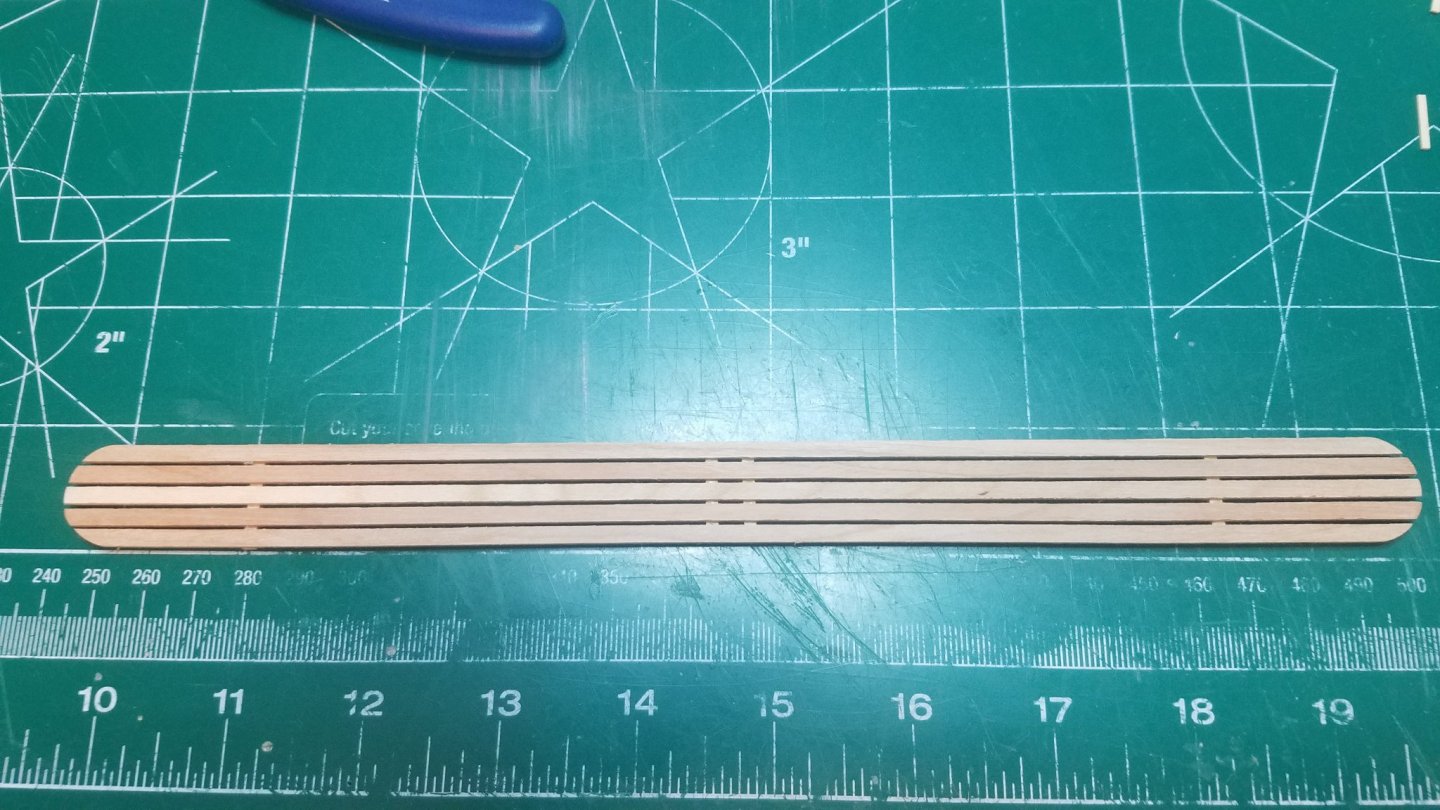
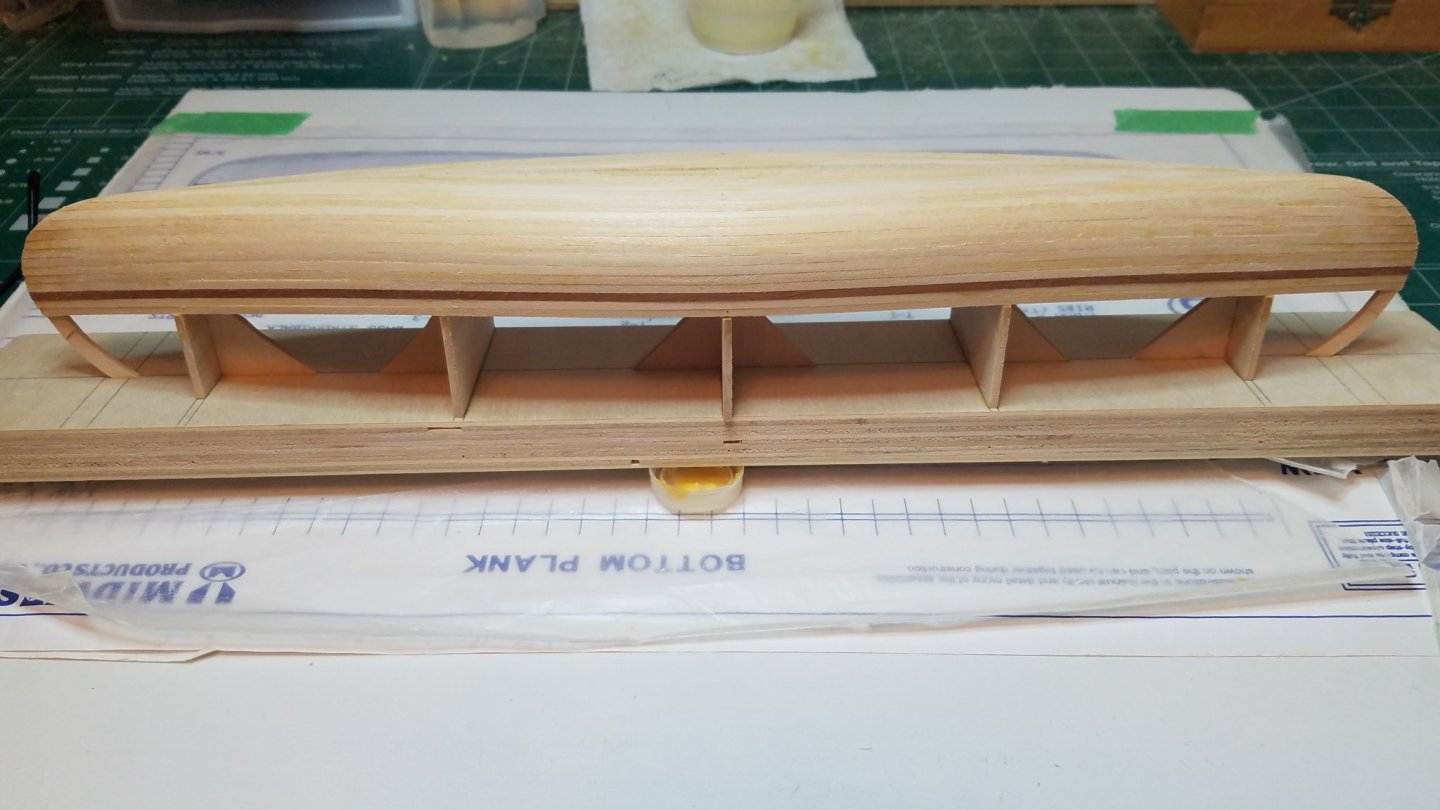
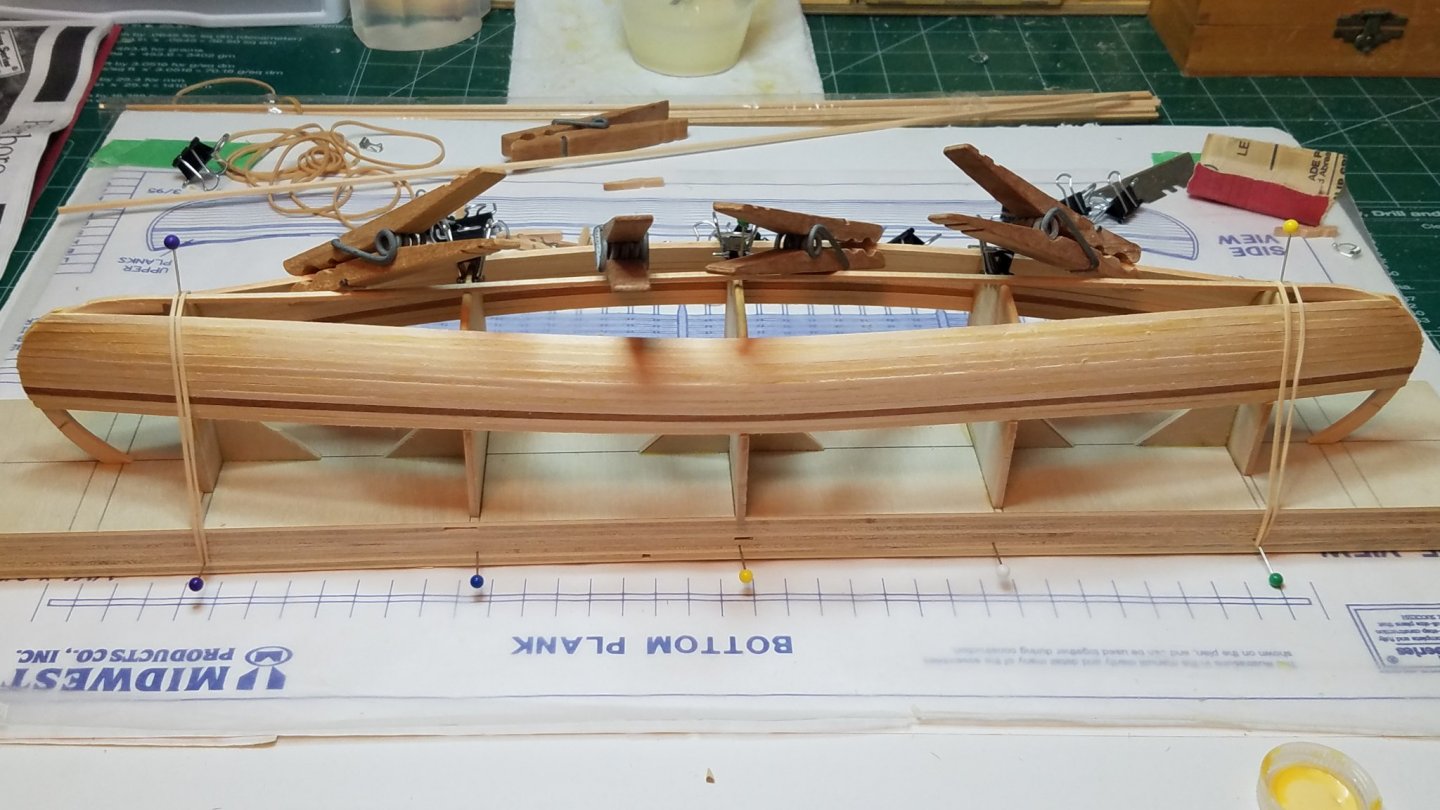
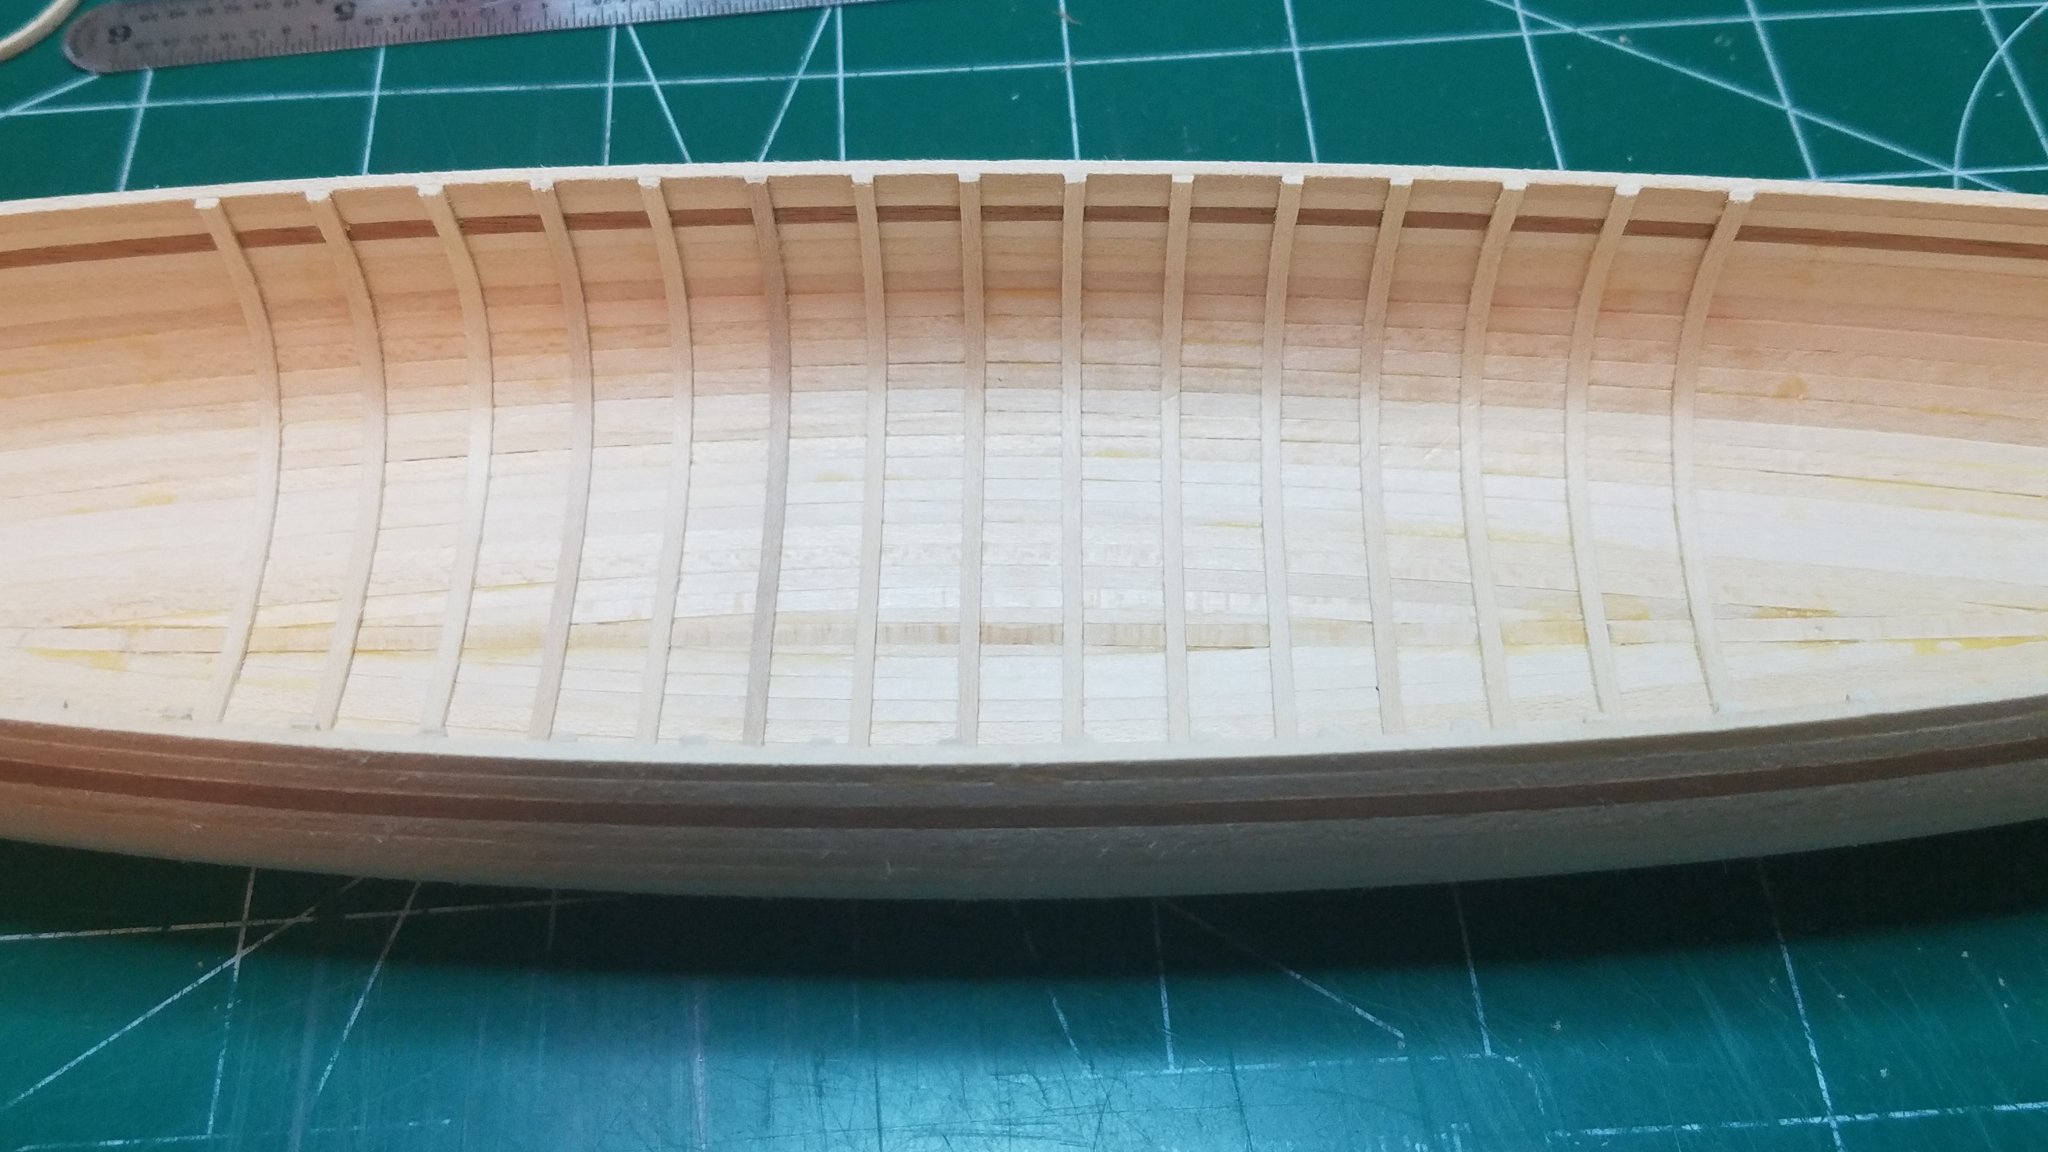
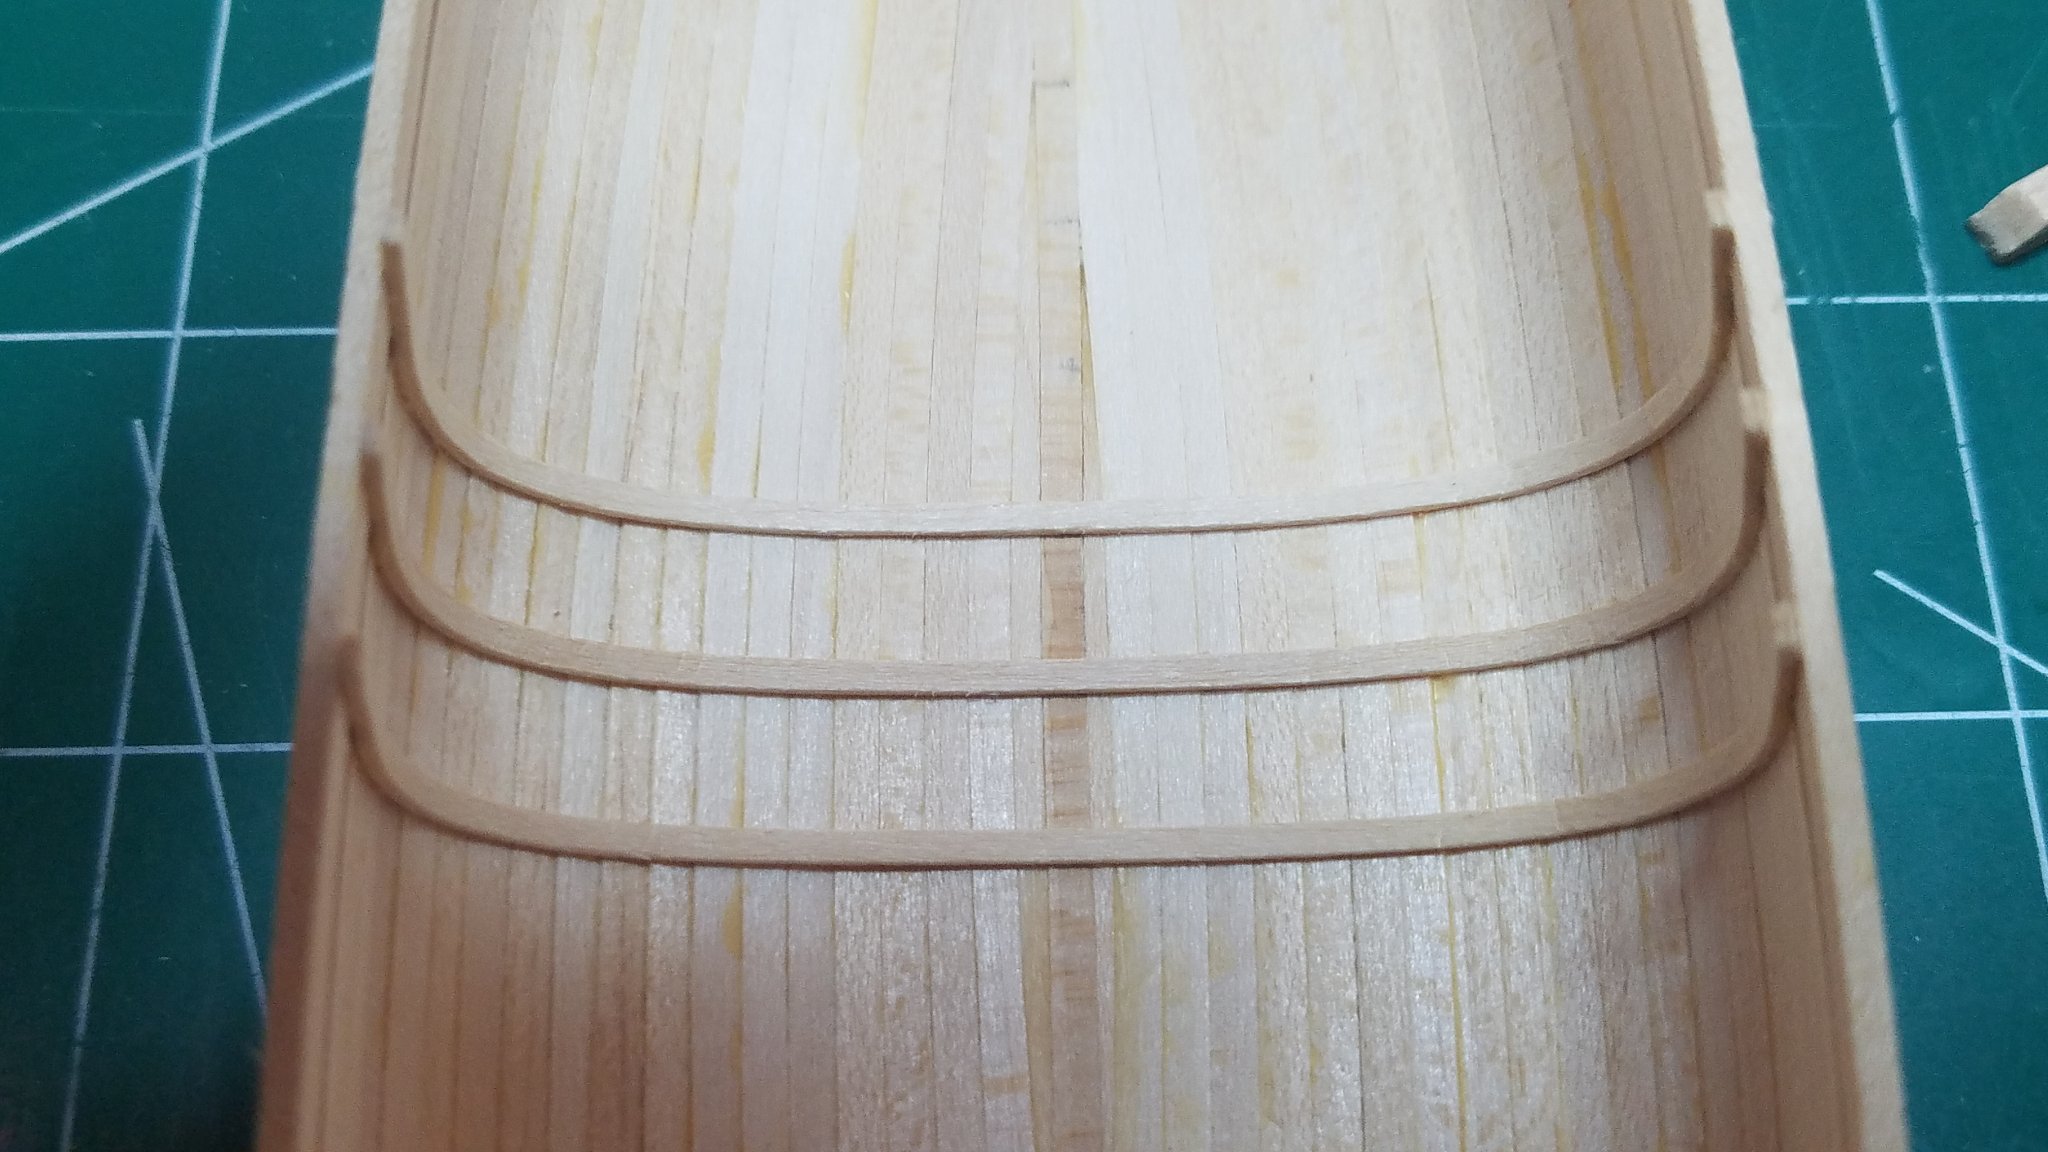
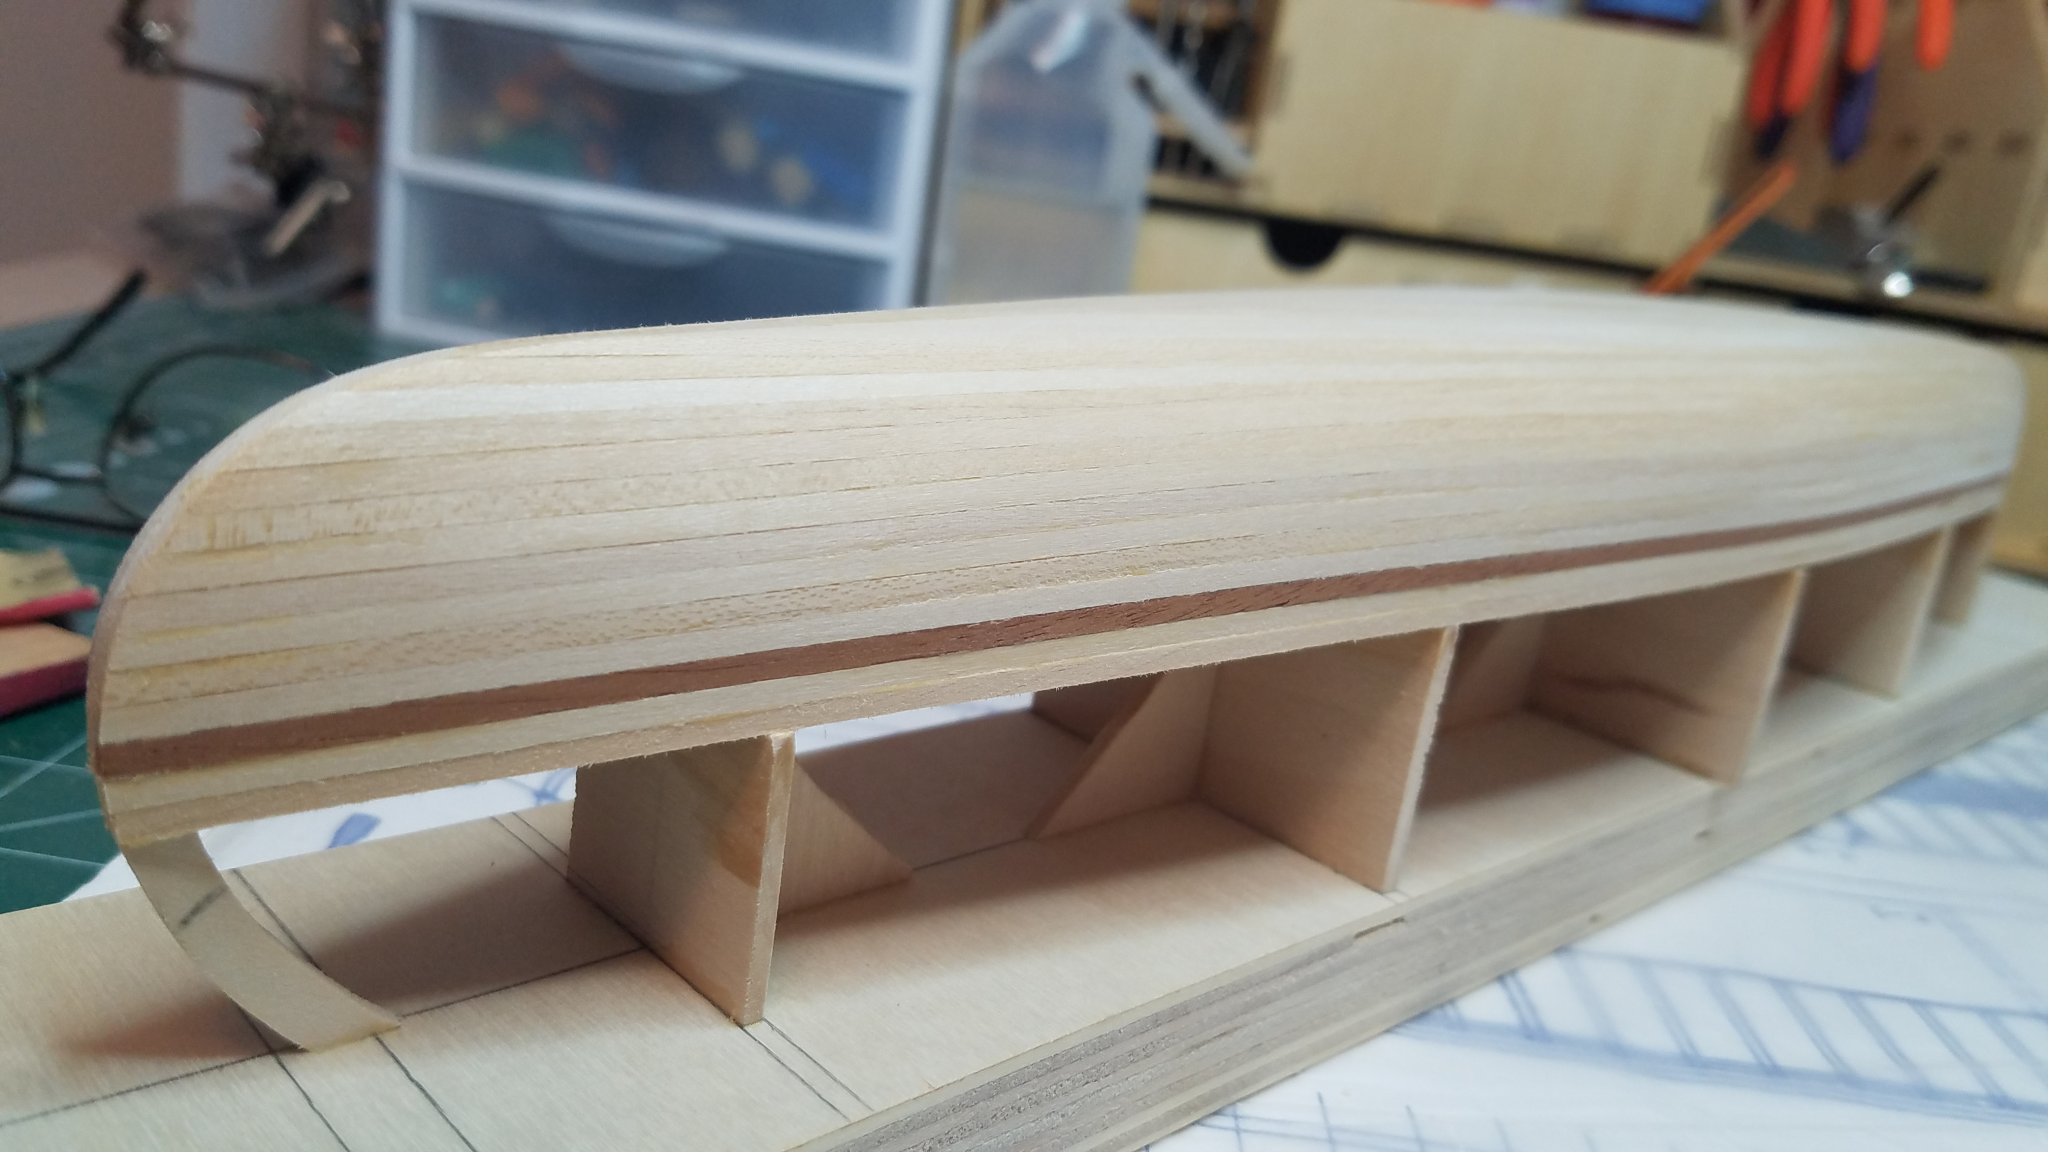
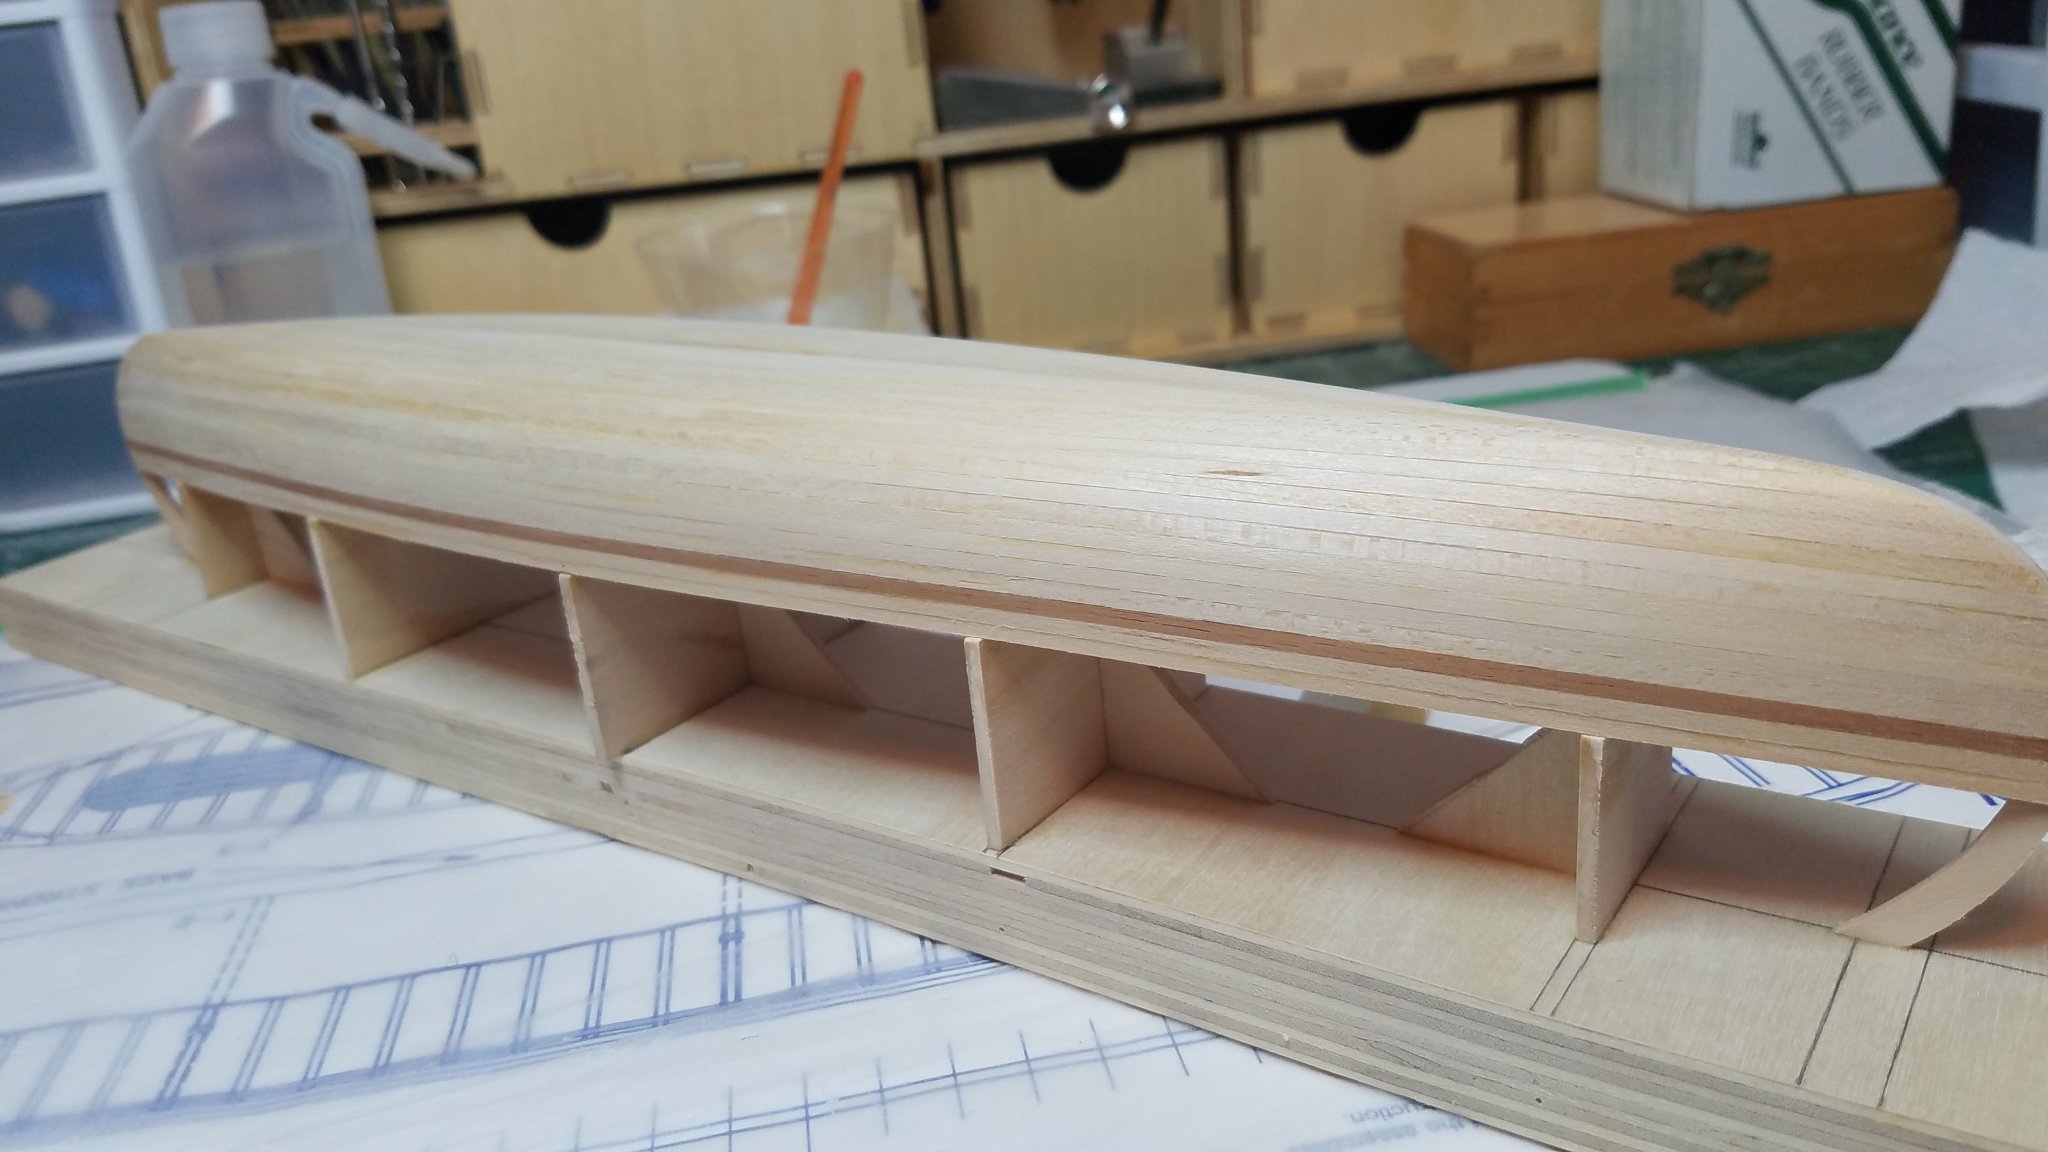
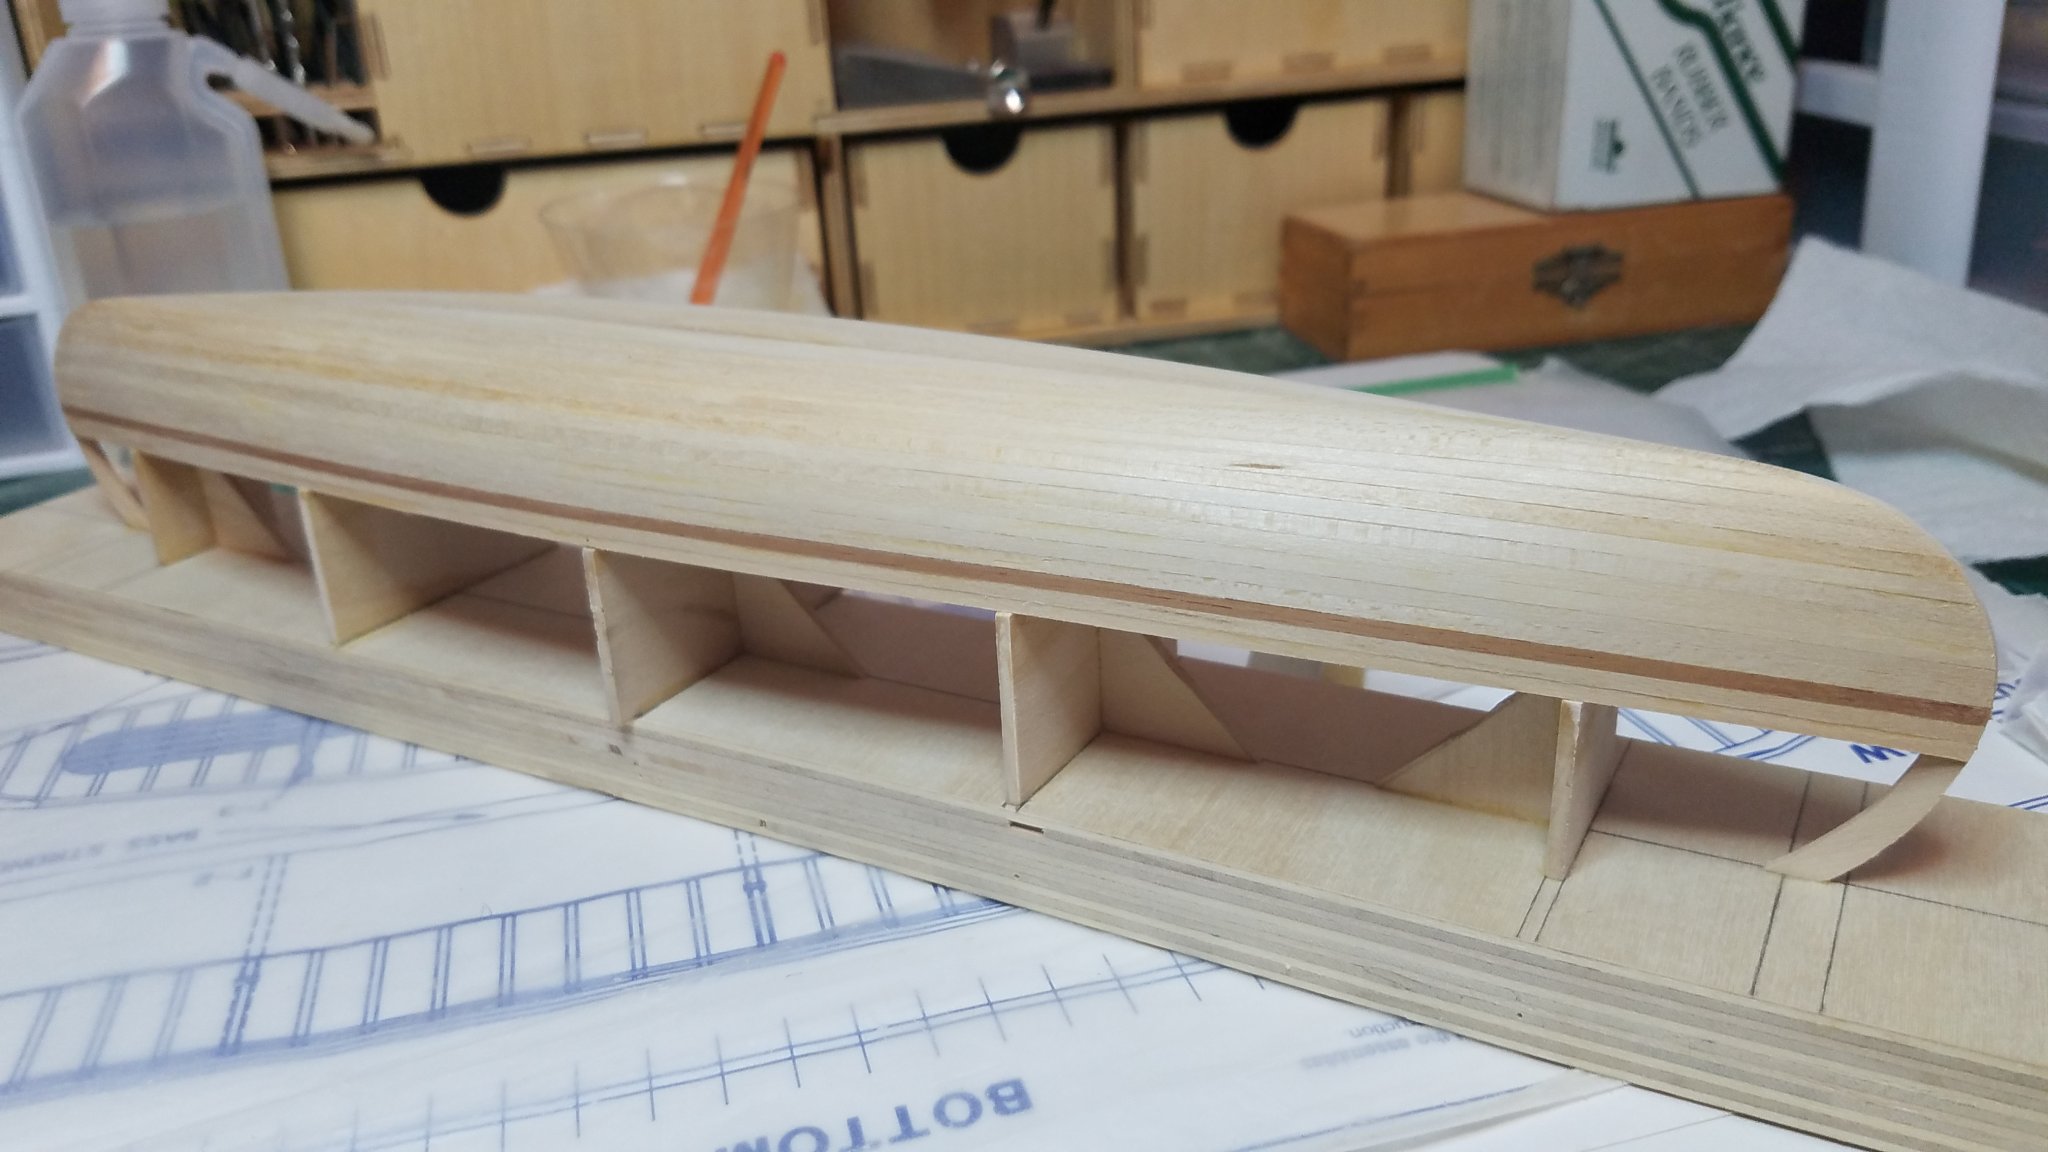
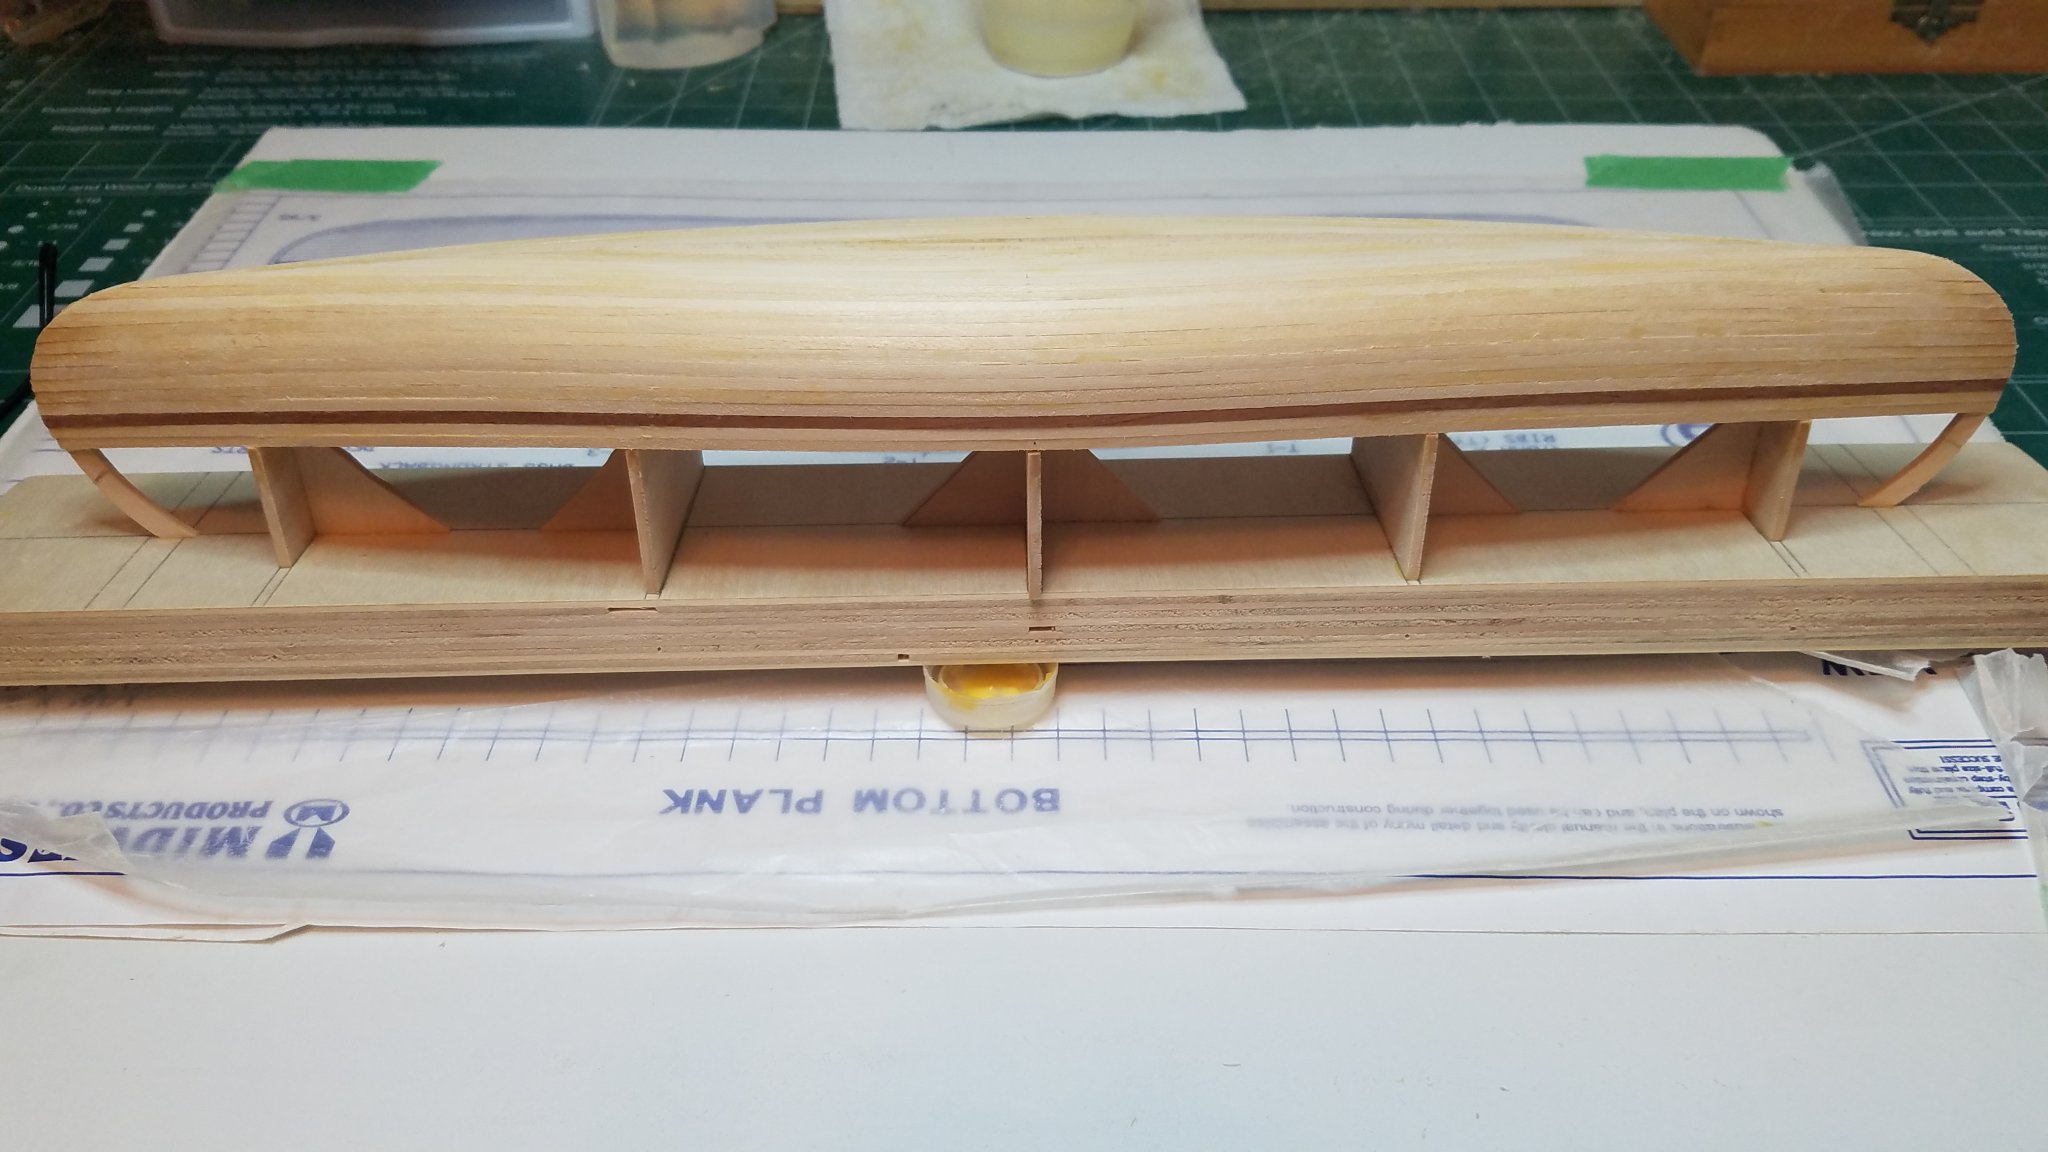
Thanks for all the likes and comments. Oh man today was a long one. And it does not look like I accomplished much but I sure feel like I worked my butt off. When I went to bed last night I decided that I was going to finish these dang ribs today no matter what. Soooo..........I rolled out of bed, grabbed a cup of coffee and got after it. Like I said in my previous post I wrapped 6 ribs before I quit last night so including my prototype that gave me a good start. I decided to use the time waiting for glue to dry and wood to get soft by building some other parts. I got started on the floor boards as you can see one of my pieces of cherry has a little bit of sapwood hence the color change. Since I don't have any cherry laying around it will have to do. The instructions would have you shape the planks individually then glue them to the ribs after. I decided to build the floor assembly out side the boat them install it later. First I cut the planks to length then cut some strong backs from some scraps of planking and some spacers from some leftover rib material. Then I laid out the planks and spacers, clamped them and glued the strong backs into position. By the way ribs are being installed and more are being made this whole time. Then I roughed out the radius on both ends. And then sanded it smooth. One prefabbed set of floor boards. Still more ribs going in. Then I thought I would make a form for bending the hatch coamings by gluing some stiffeners made from plank scraps between the leftover pieces of the sheet that held the deck parts. I also glue the deck halves together. So here it the sum total of my accomplishments for the day. Does not seem like much but at least the dang ribs are done. That is it for tonight. We shall see what tomorrow brings. Best Regards


- 84 replies
-
- 7
-
-
- peterboro canoe
- Finished
- (and 1 more)
-
And so the ribbing continues. 12 more done today 15 total not even half way done. 6 more soaking I will clamp them up to dry tonight and install them tomorrow. Very time consuming but worth it. Regards

- 84 replies
-
- 6
-
-
- peterboro canoe
- Finished
- (and 1 more)
-
Very nice work Bob. By looking at it it could have been your 1000th shroud Very nice indeed.
- 170 replies
-
- 1
-
-
- medway longboat
- Syren Ship Model Company
- (and 1 more)
-
I was also intrigued by this model when I first read the pre-release review here on MSW. I will certainly enjoy watching this one.
- 77 replies
-
- 4
-
-
- morel
- master korabel
- (and 1 more)
-
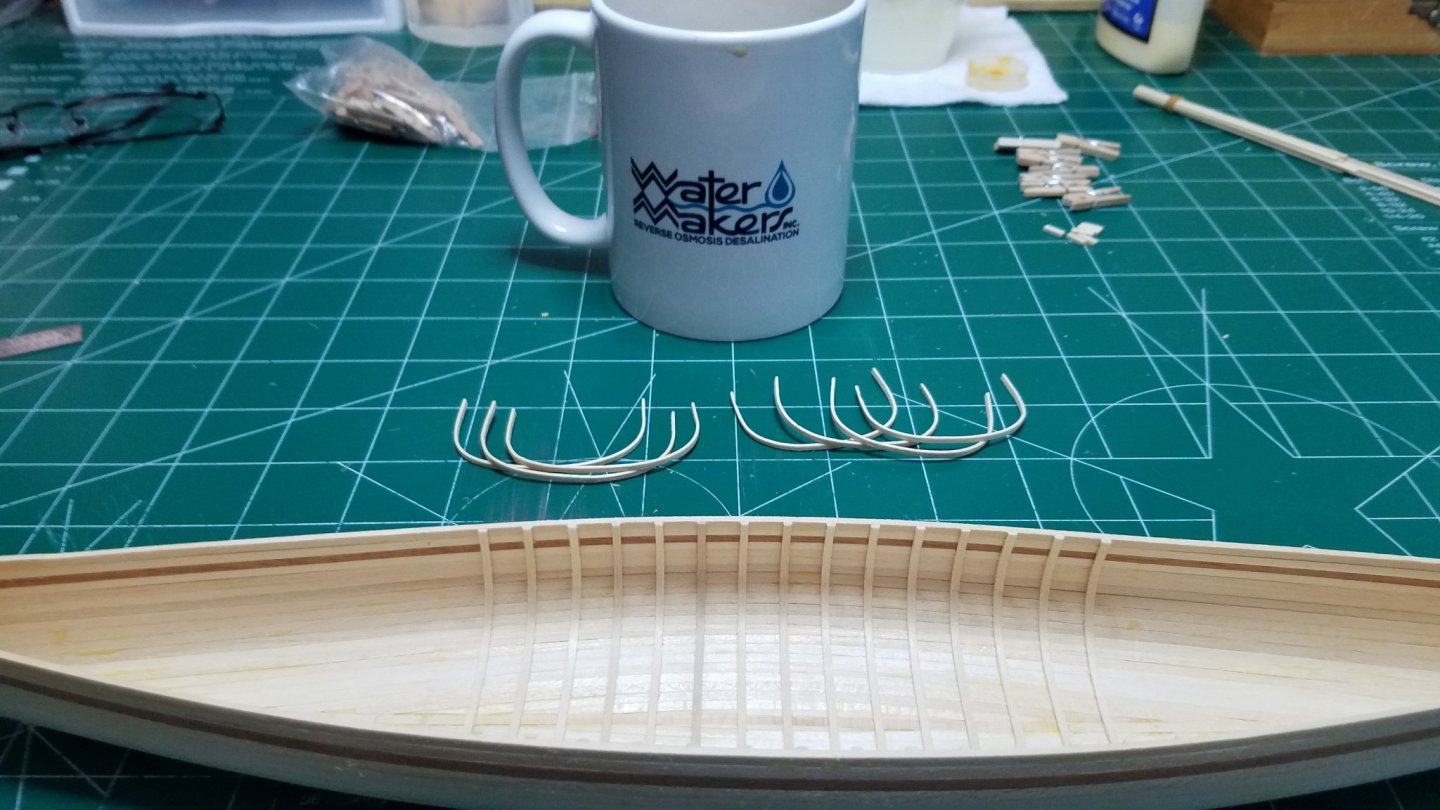
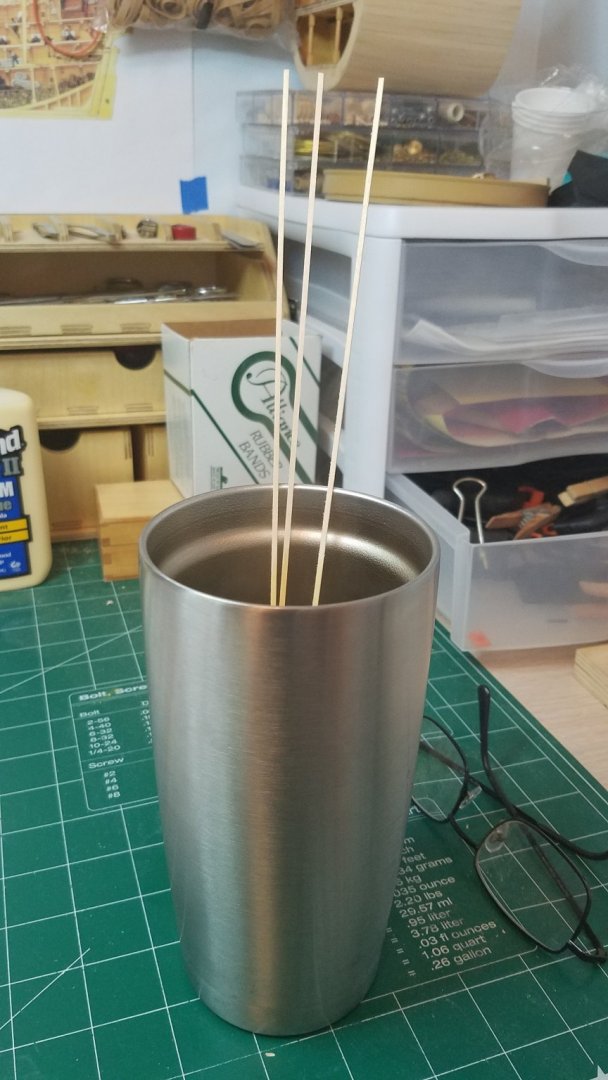
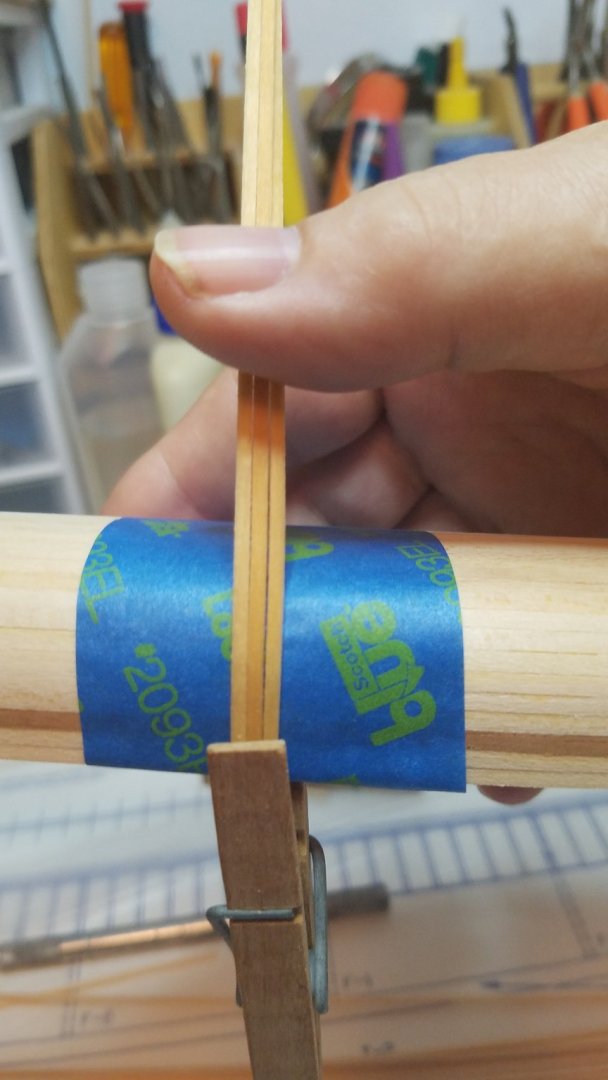
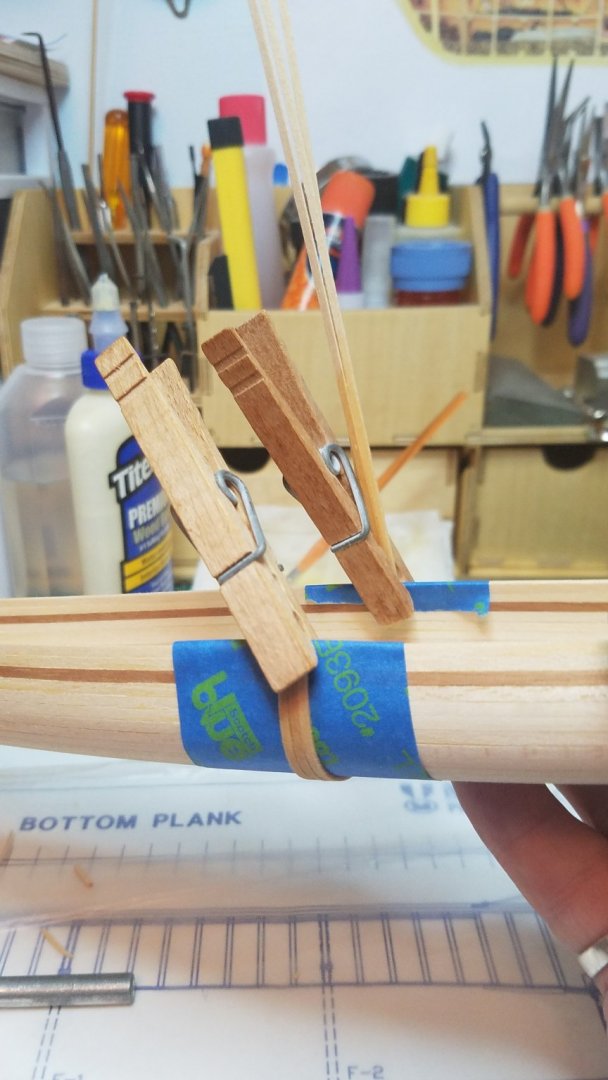
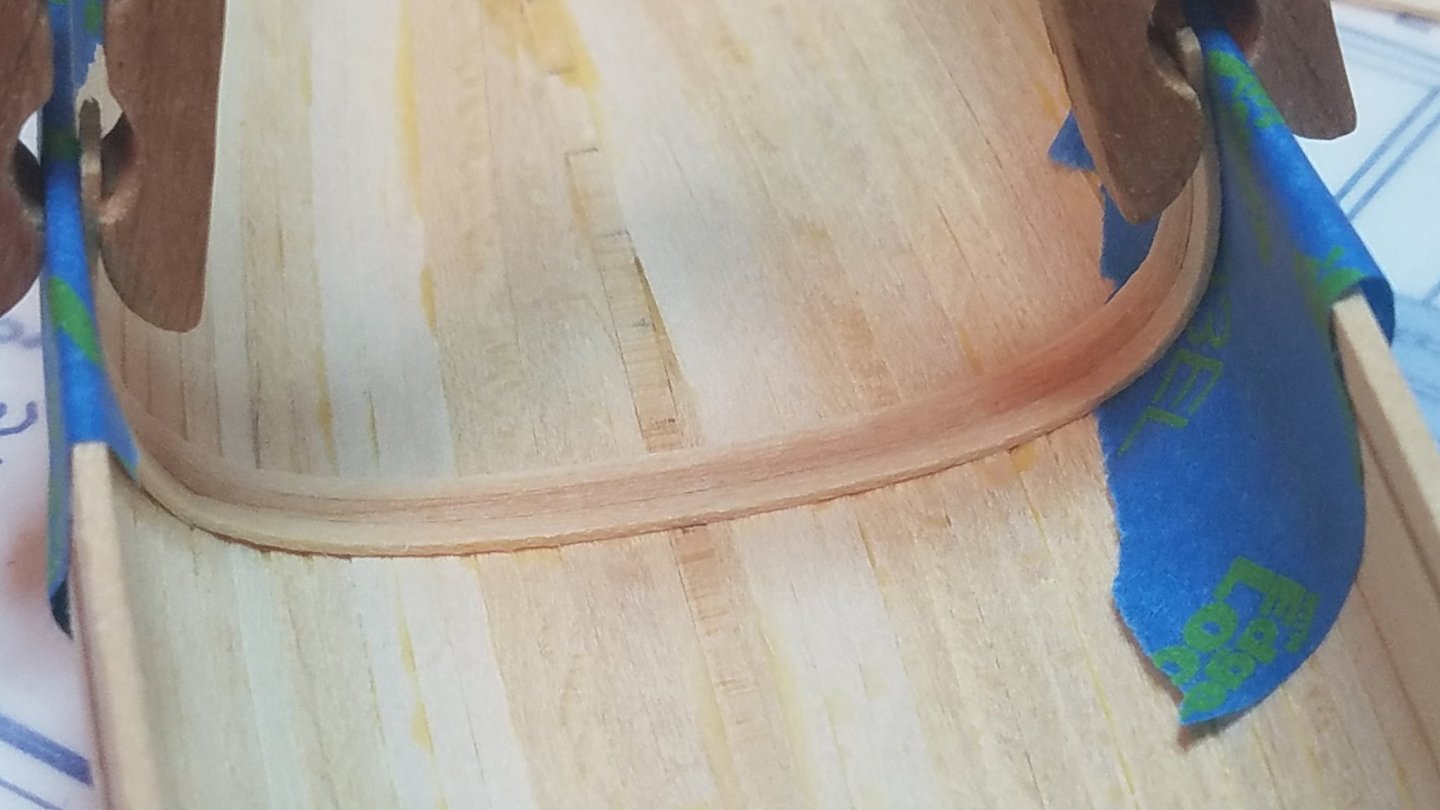
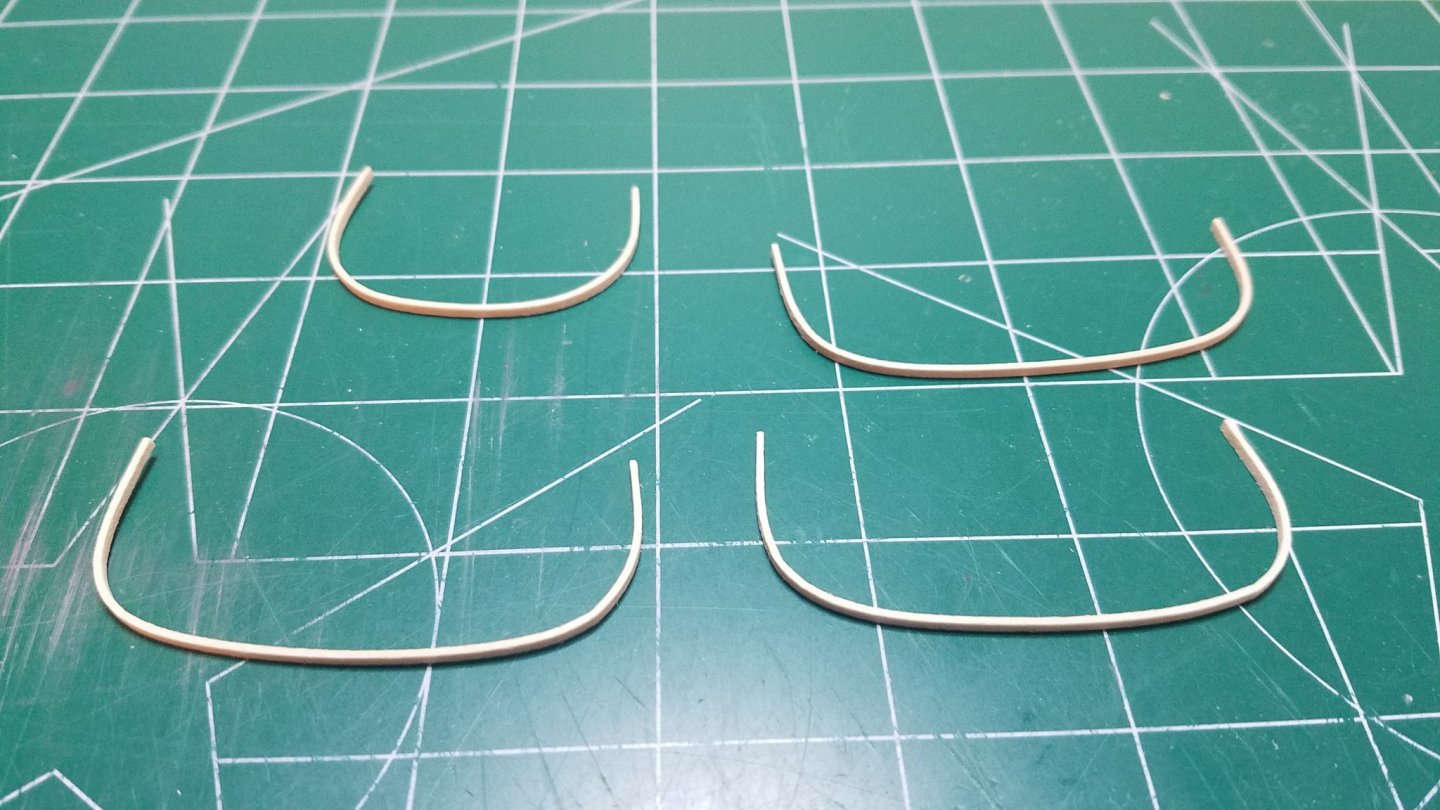
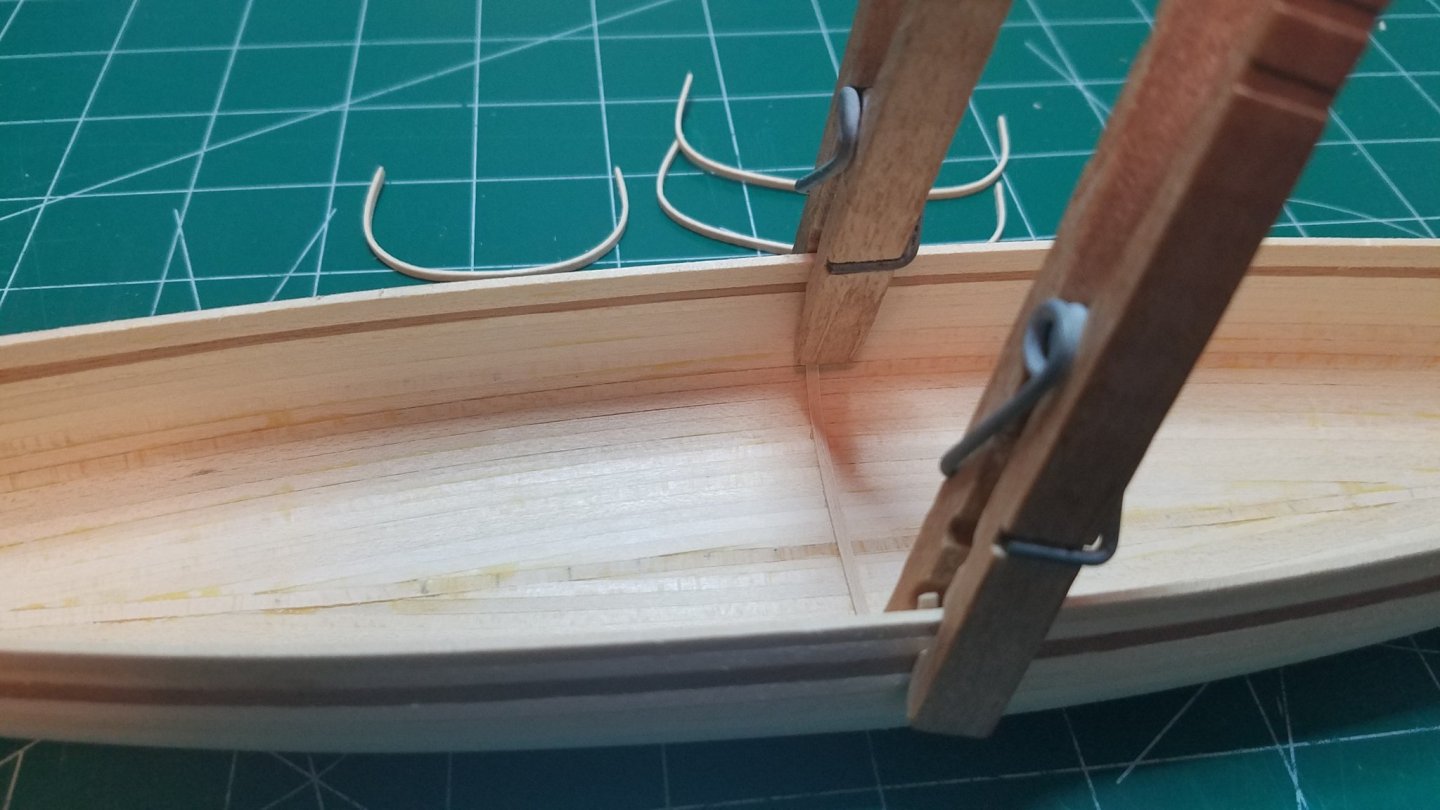
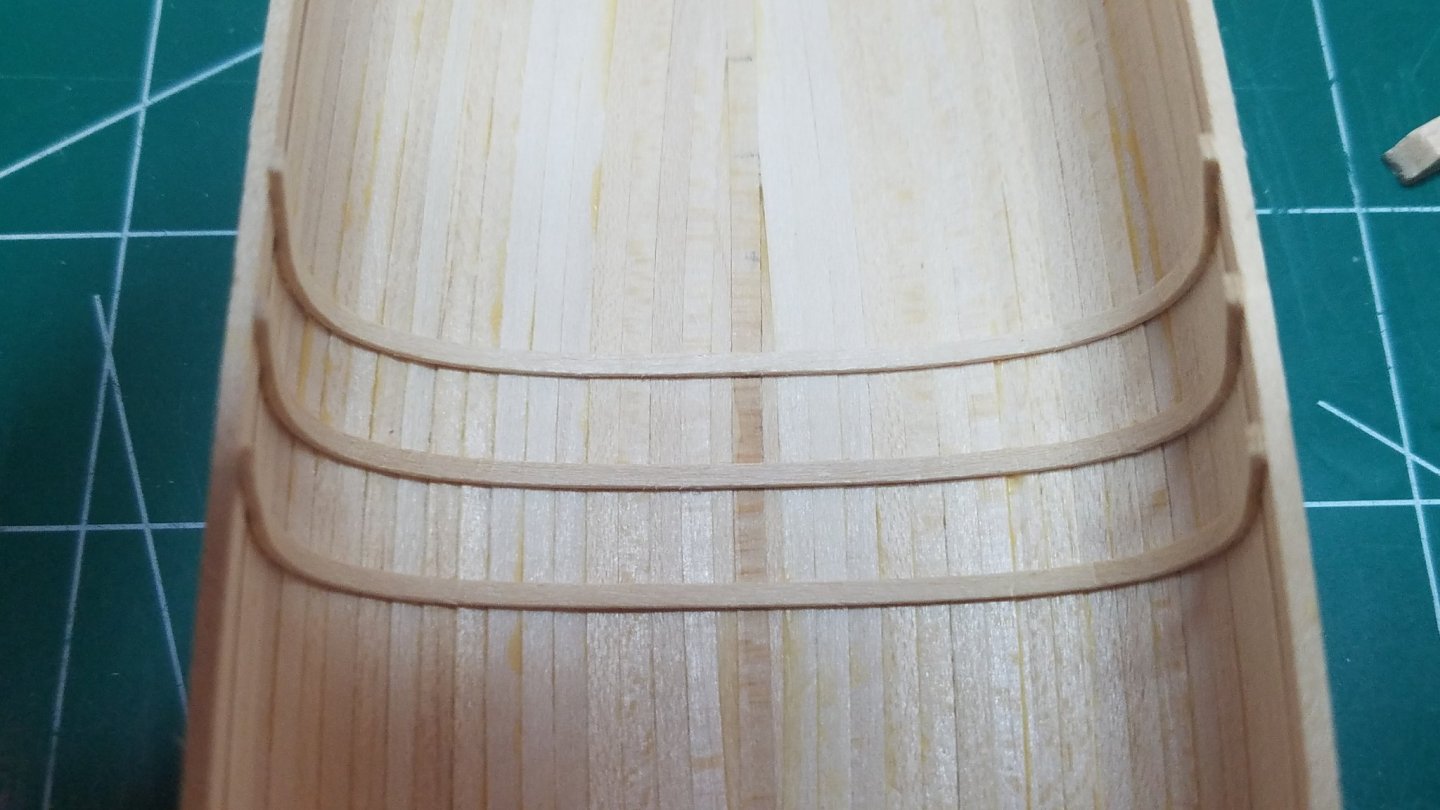
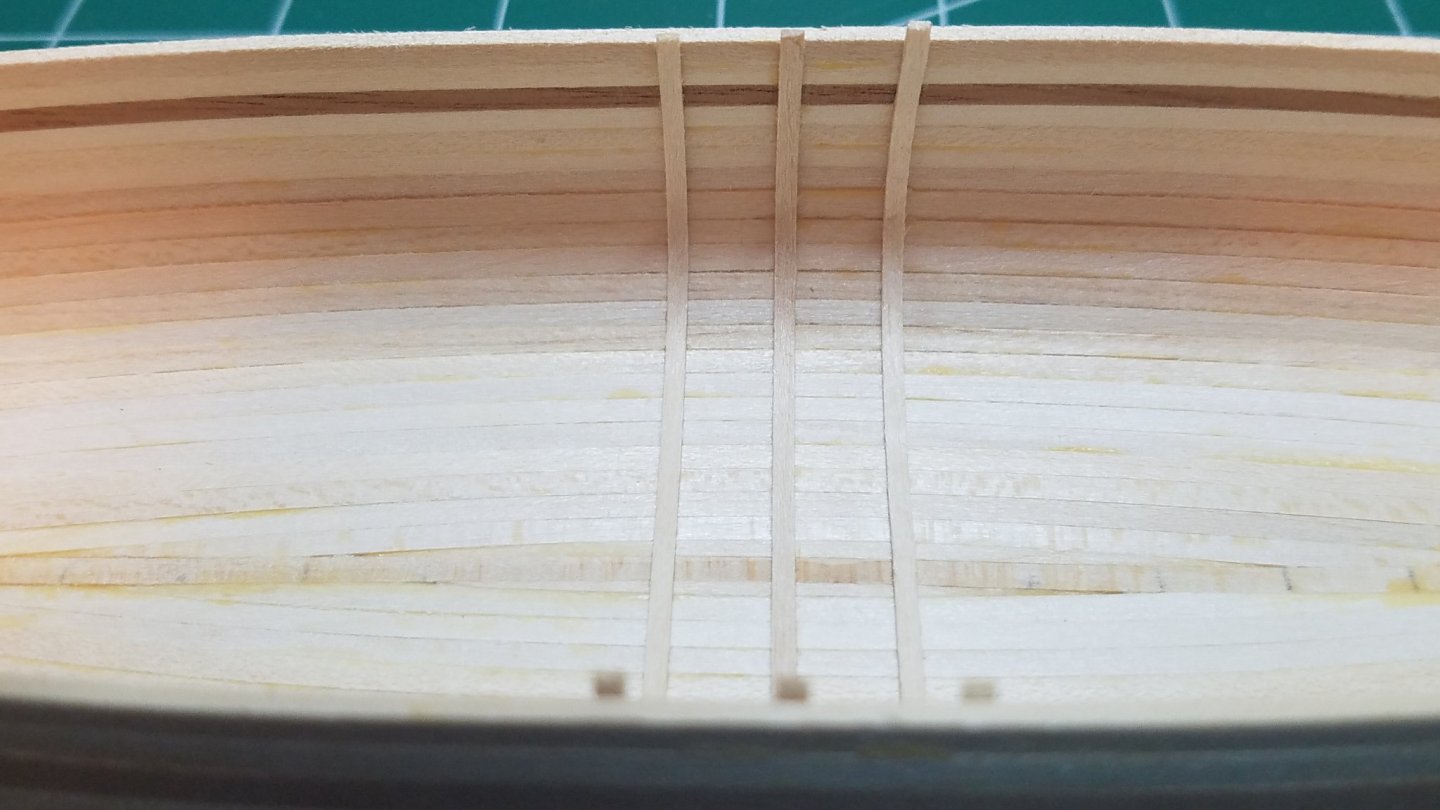
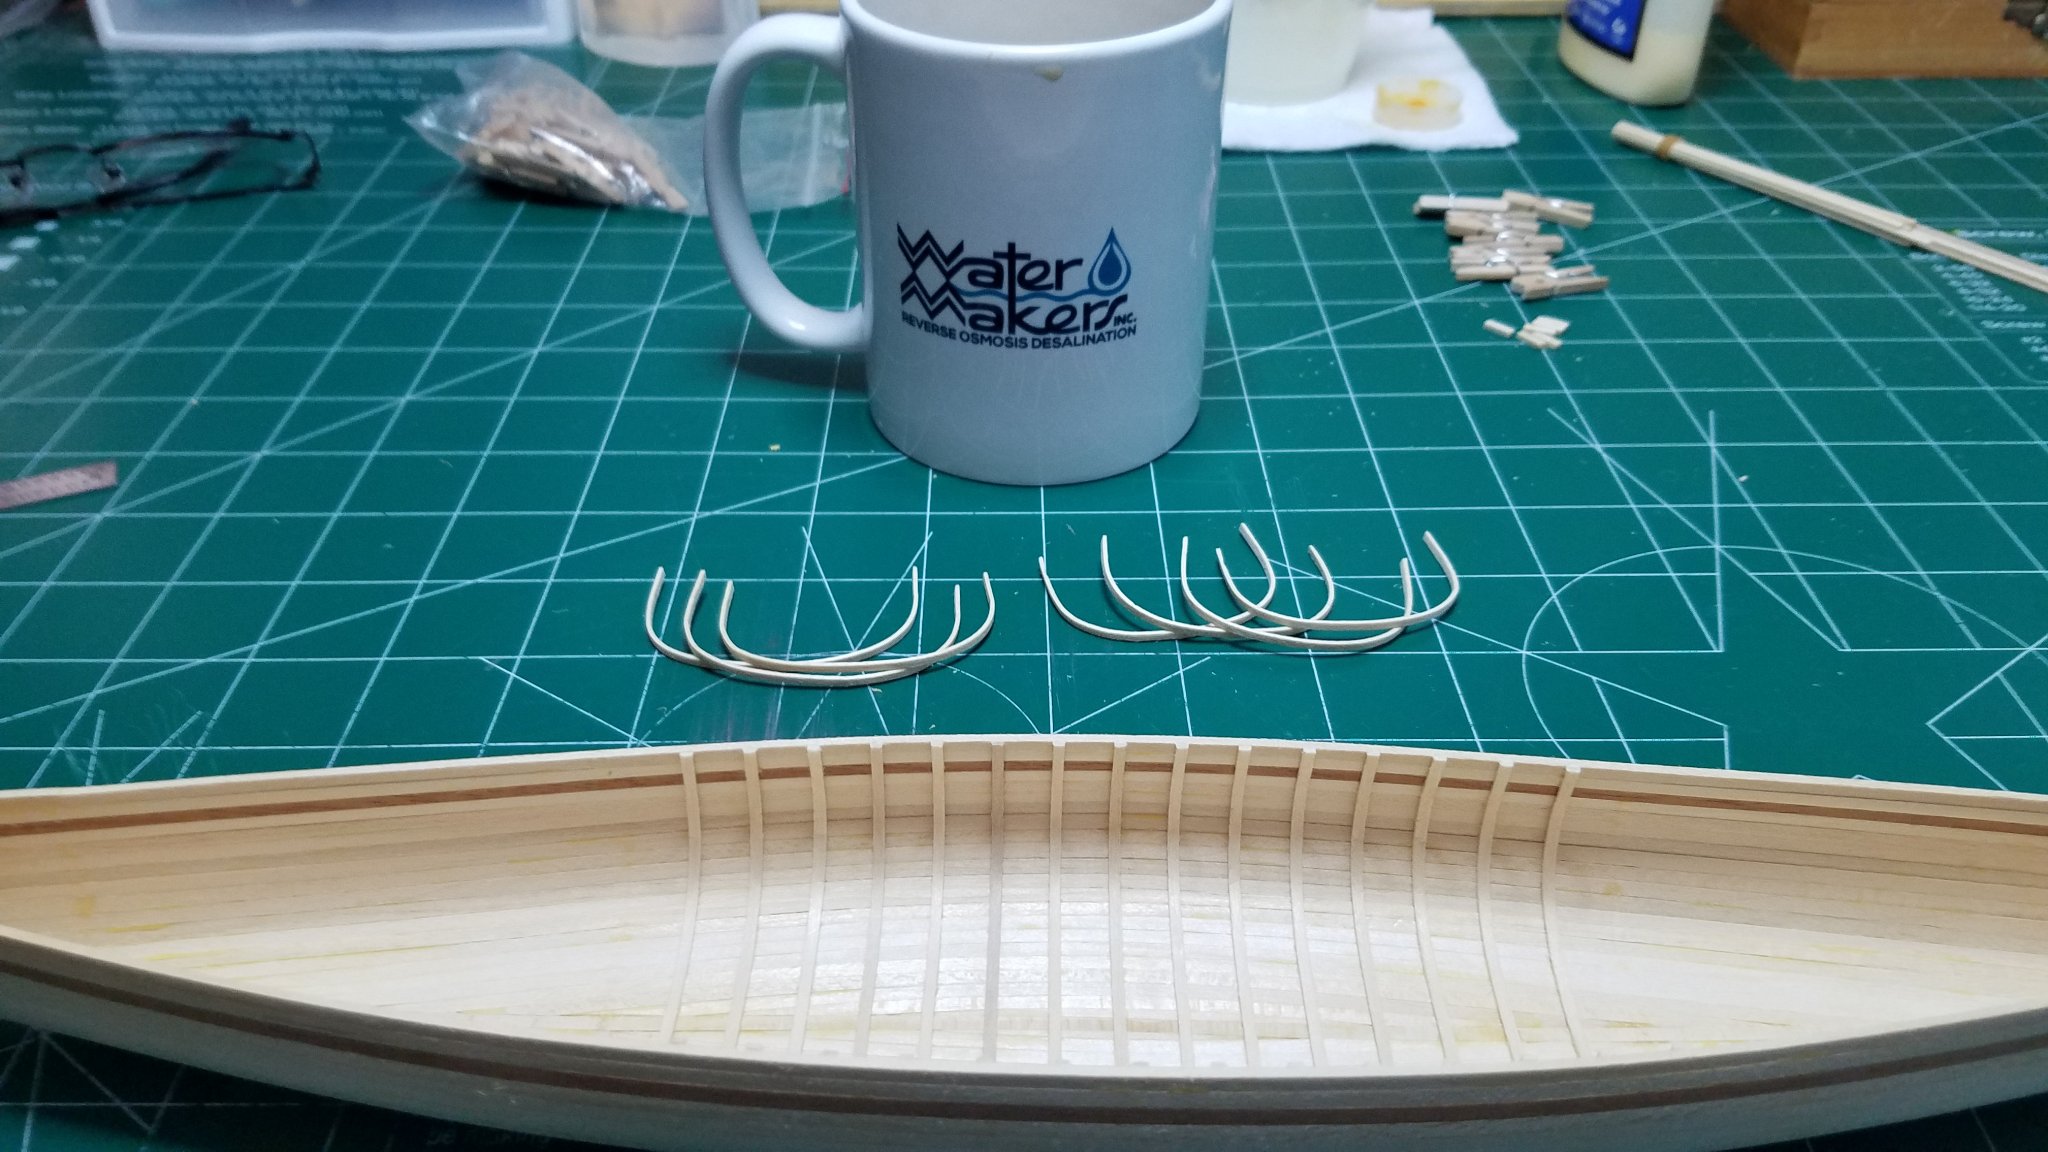
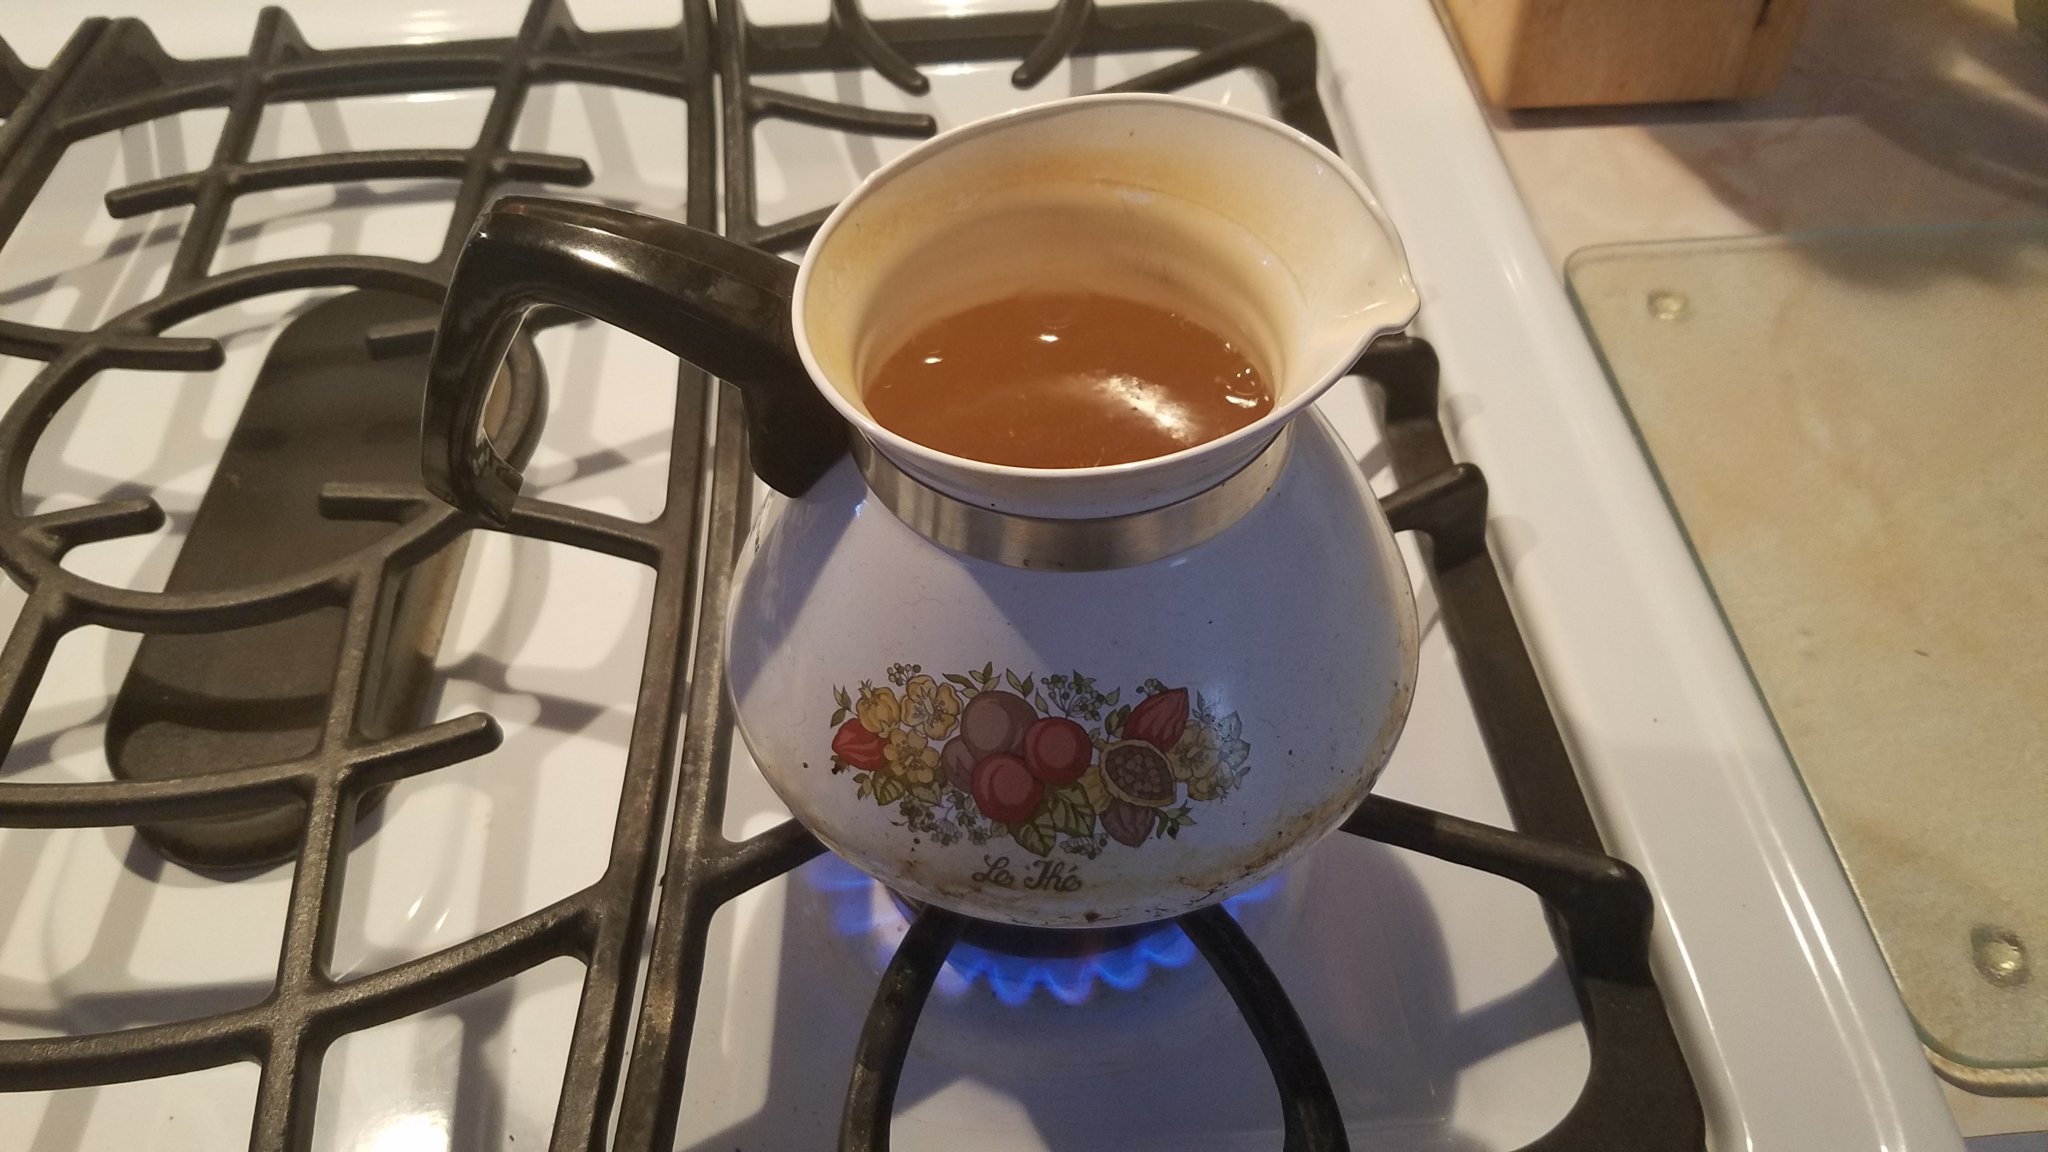
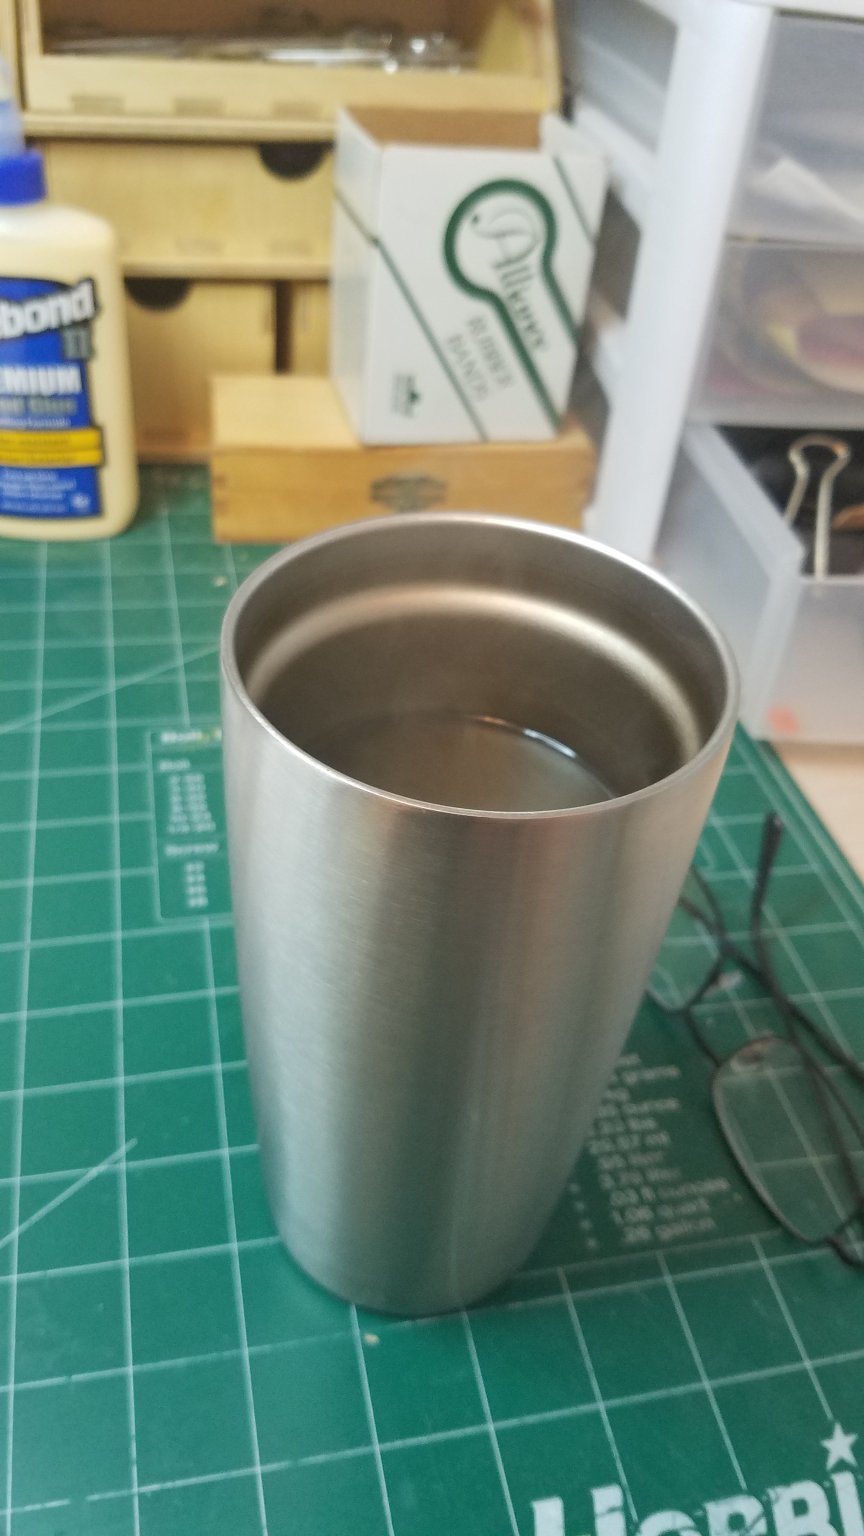
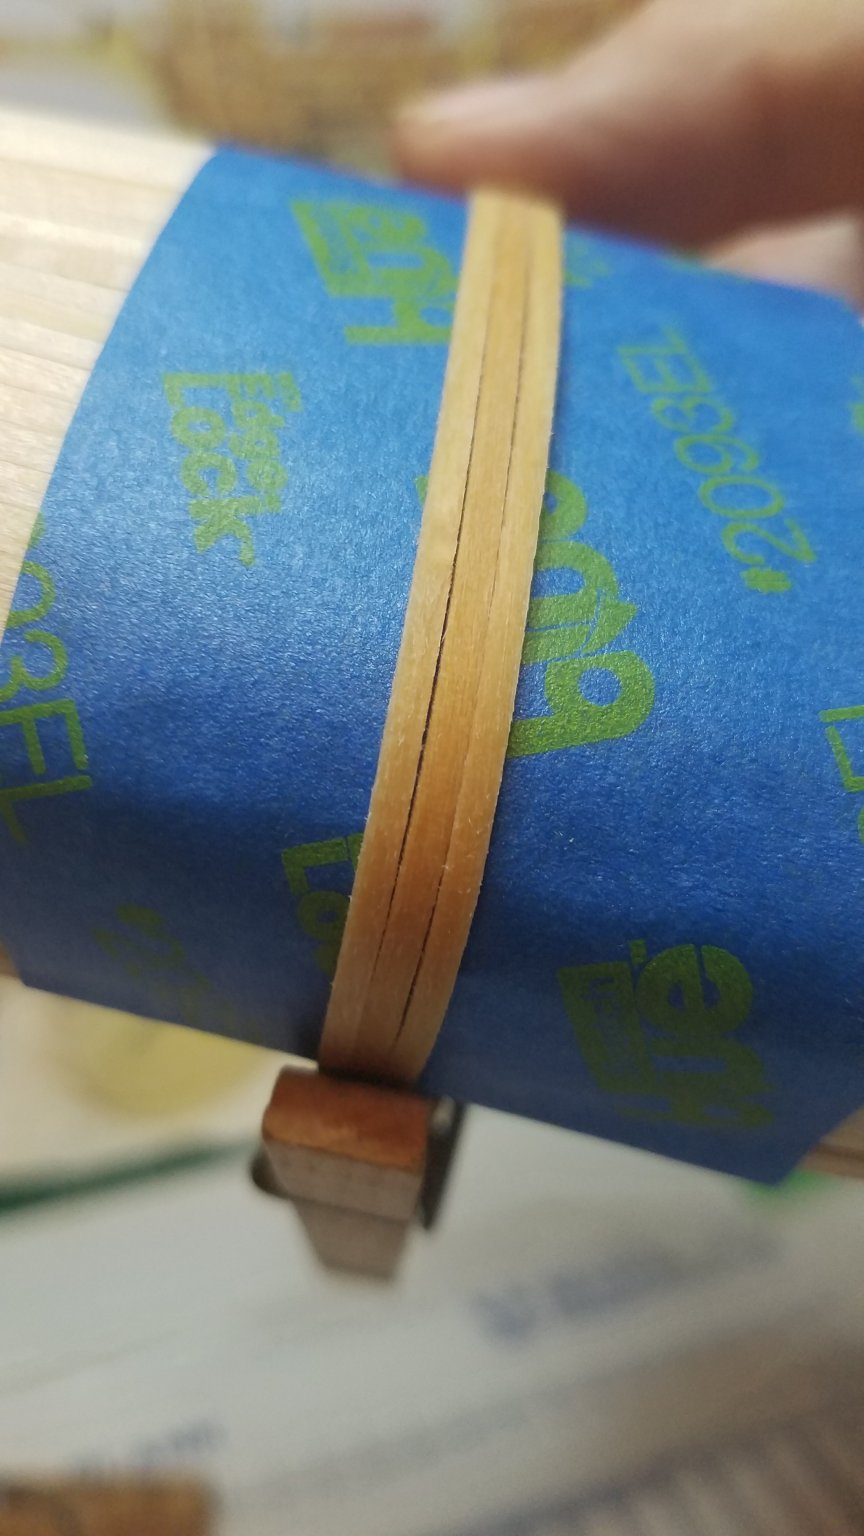
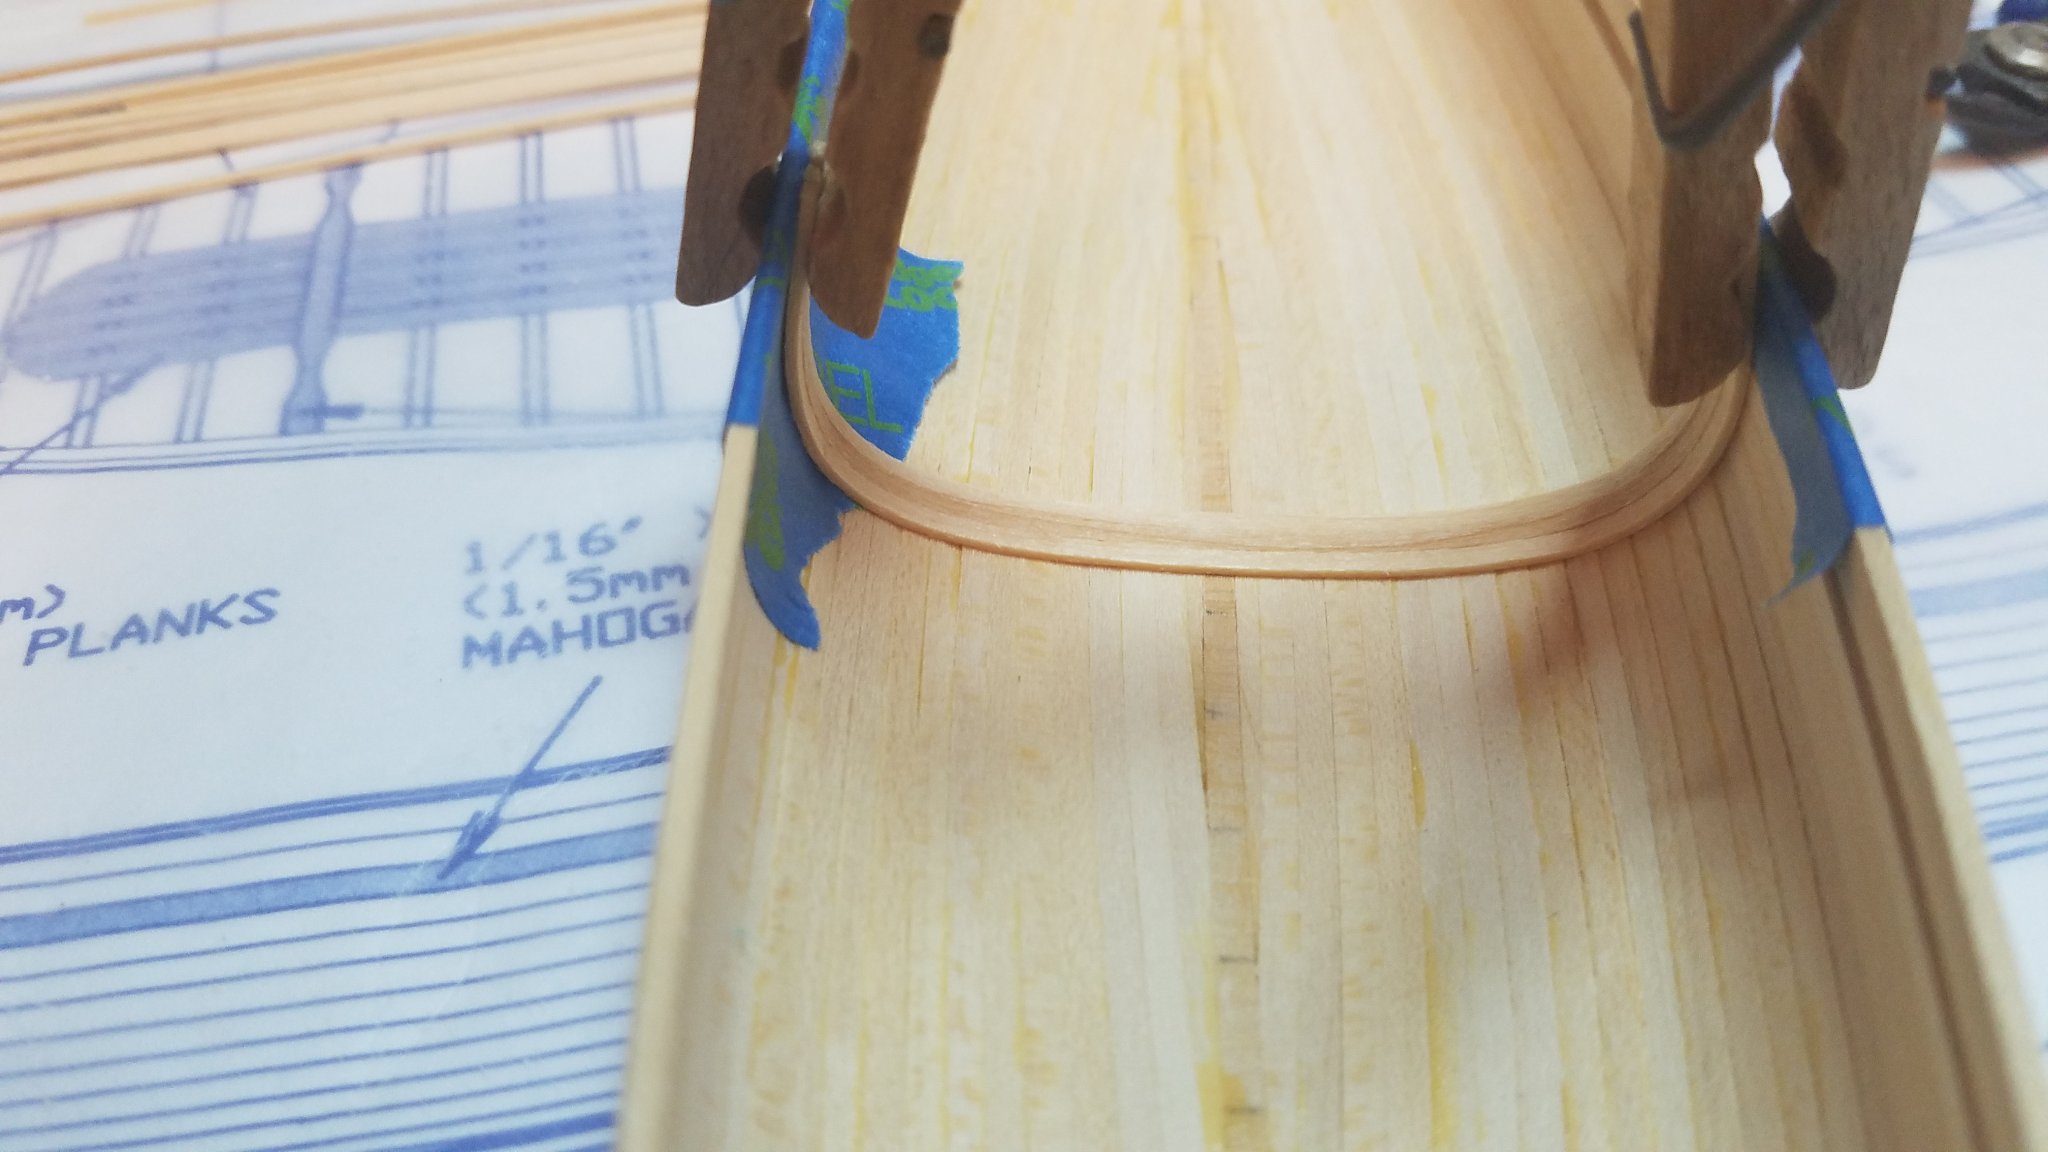
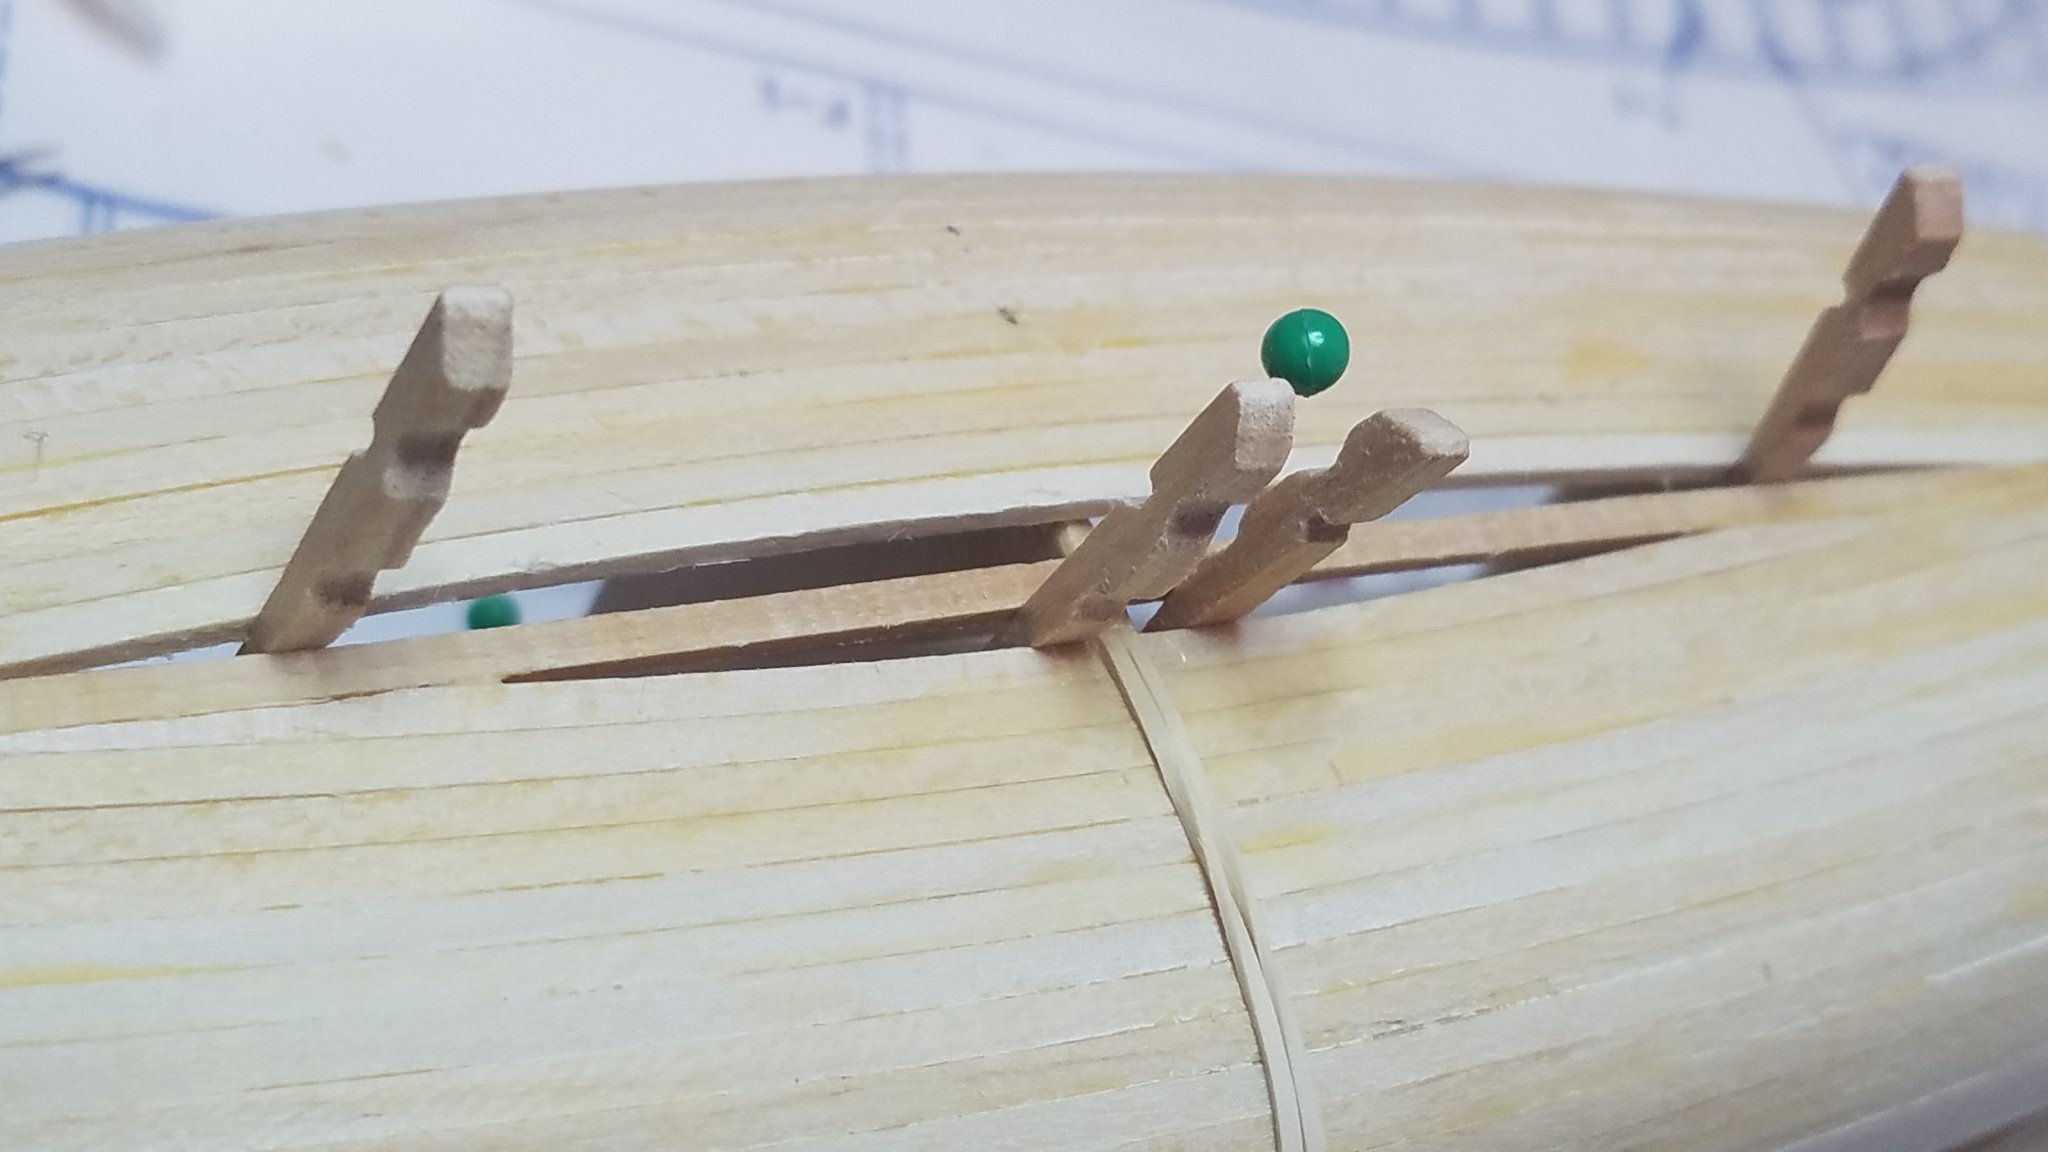
Well as usual I can and will over complicate even the simplest of tasks. I have never been able to bend wood to my complete satisfaction. I have sought the advise of others and tried to follow their methods but it just never happens for me. I tried the curling iron and ruined half a length of the ribbing material I hope there is enough extra. I then tried the process outlined for me by member duanelaker (thanks very much David) in his build log of the same kit. I added a few tweaks of my own and I think I have come up with a sufficiently complex method. So sit back cause this is gonna take a while but it works and maybe it will help someone else. I started out on the stove with the tea kettle boiling some water. Then I filled my coffee travel cup with about 6" of the hot water. In goes three pieces or ribbing. Let soak for about 15 minutes. After wrapping a piece of painters tape around the center of the hull I clamped one end of all three ribs to the hull aligning the ends with the gunwale. Next I very gently and slowly (no need to rush the wood stays hot and wet for quite a while) bent them around the hull. A And clamped the other end. Then went away and let them cool and dry for about 30 minutes. Then I unclamped them and was surprised how much they sprang back. But they remained soft and pliable and kept their basic shape so I did not panic but moved them to the inside and reclamped them for another 30 minutes. I could also trim them to length at this point. And after 30minutes they were pretty much dried and maintained their shape when removed. the smaller one was my prototype which I will use later. As you can see most of my tick marks that were applied before assembly began were removed by the sanding of the inside of the hull. However I did actually think that would happen so just in case I drilled three very small holes where the keel and the first planks met the center frame of the building jig. These will obviously be filled later. Using these for alignment I applied a very small amount of glue to the center portion of the rib where it meets the "bilge"and carefully got it clamped into place. After allowing the glue to dry I very gently pulled back the upper part of the rib on both sides and applied glue and clamped in place til dry. I then measured on the plans the distance between the ribs at 5/16" and cut a few scraps of the planking material to that length. Using the spacers as a guide I dry fitted the next rib. Once I was satisfied I glued it in the same way as the first. The third went in just like the second. Again I know it seems like a lot of work, but what else have I got to do? No really the most time is spent waiting for the wood to dry. I know I could probably speed that up with a blow dryer but I did not want to take a chance of melting the adhesive on the tape and making a big mess. Once they are made they go in rather quickly. Now that I know it will work I will most likely make them 6 at a time. That is it for tonight. Regards


.thumb.jpg.bb63cf5129091654be4633e678dca878.jpg)
- 84 replies
-
- 8
-
-
- peterboro canoe
- Finished
- (and 1 more)
-
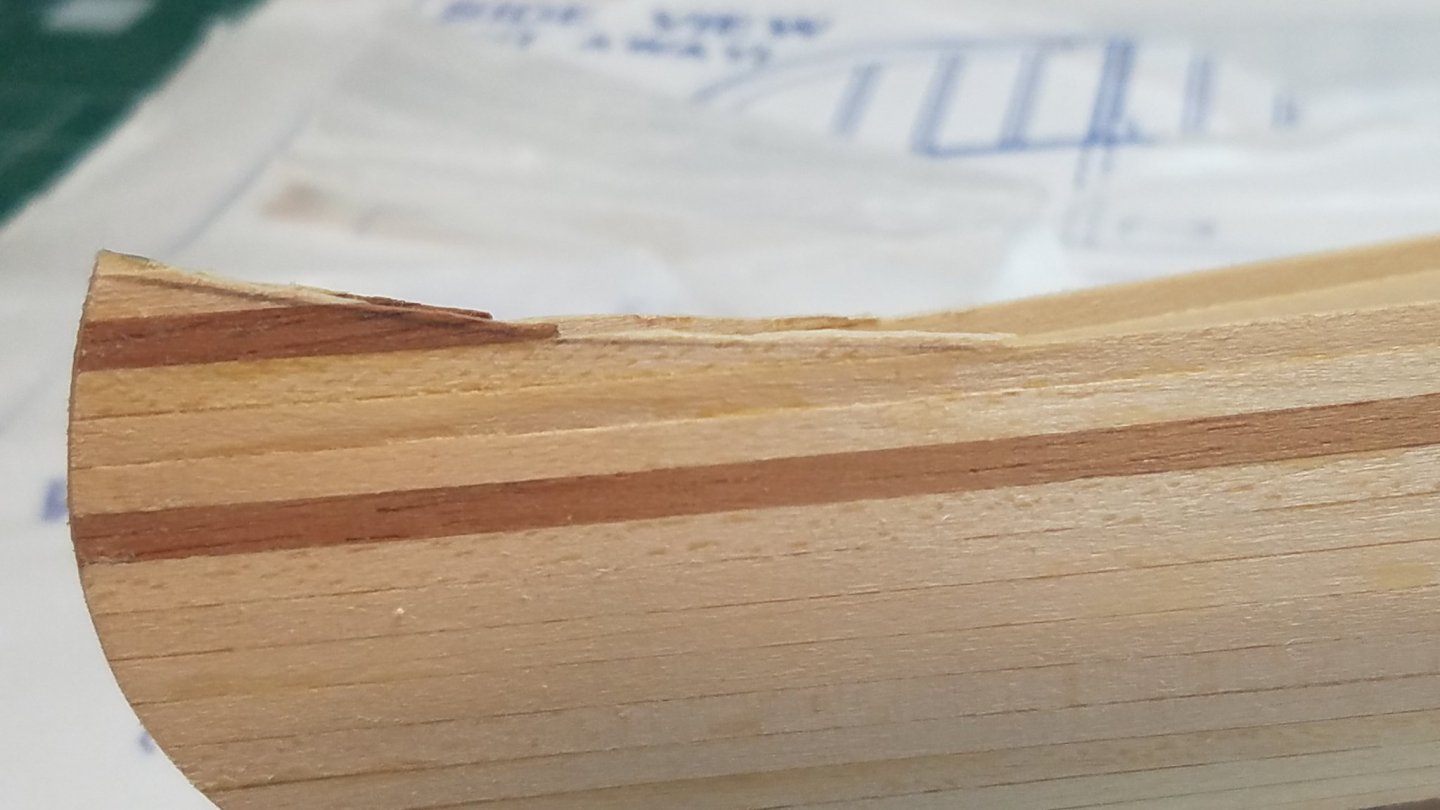
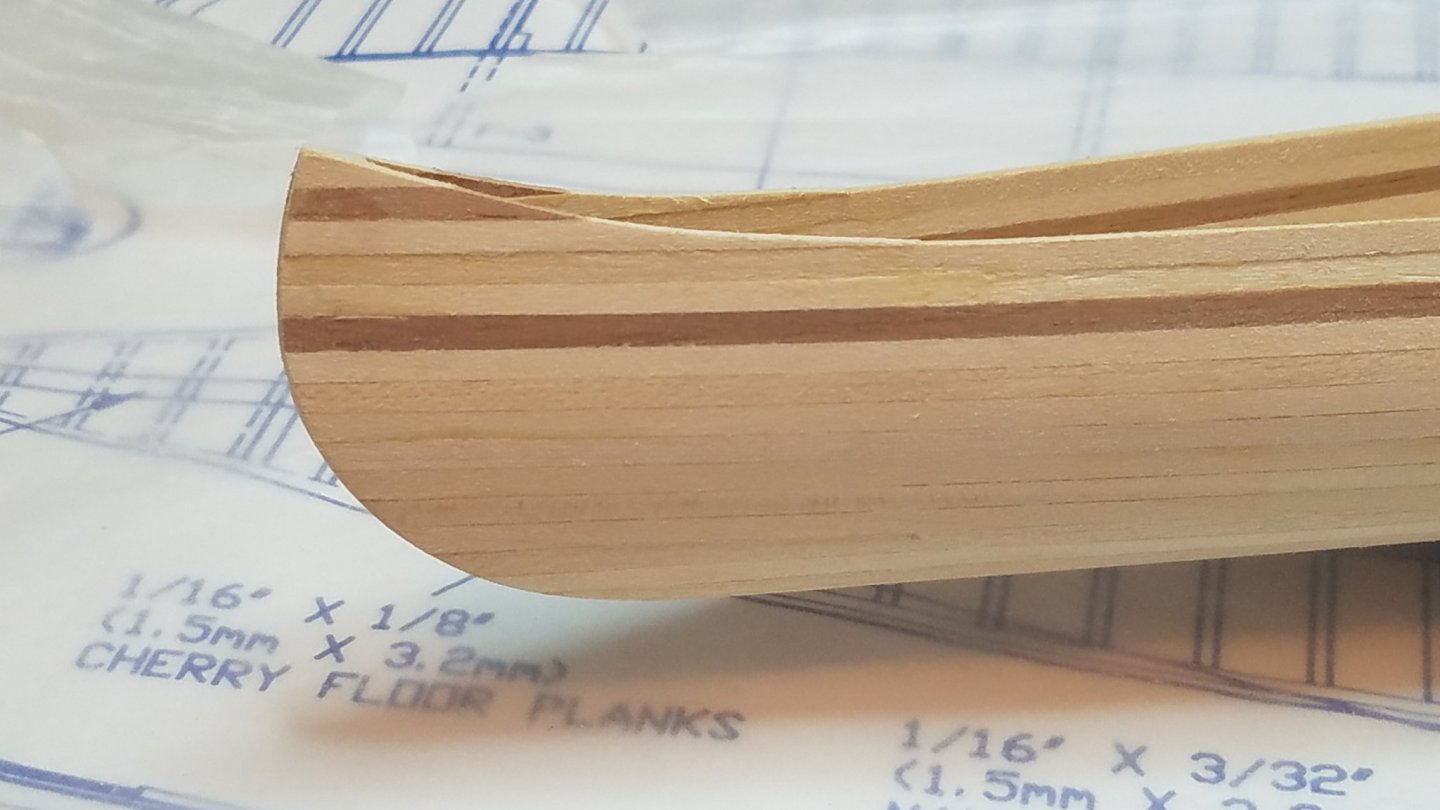
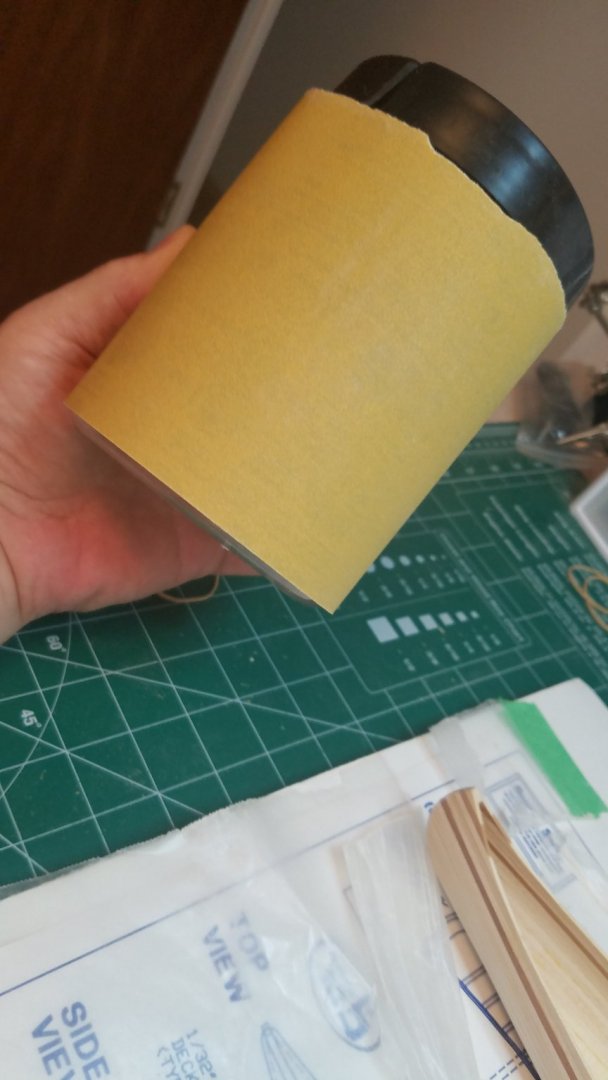
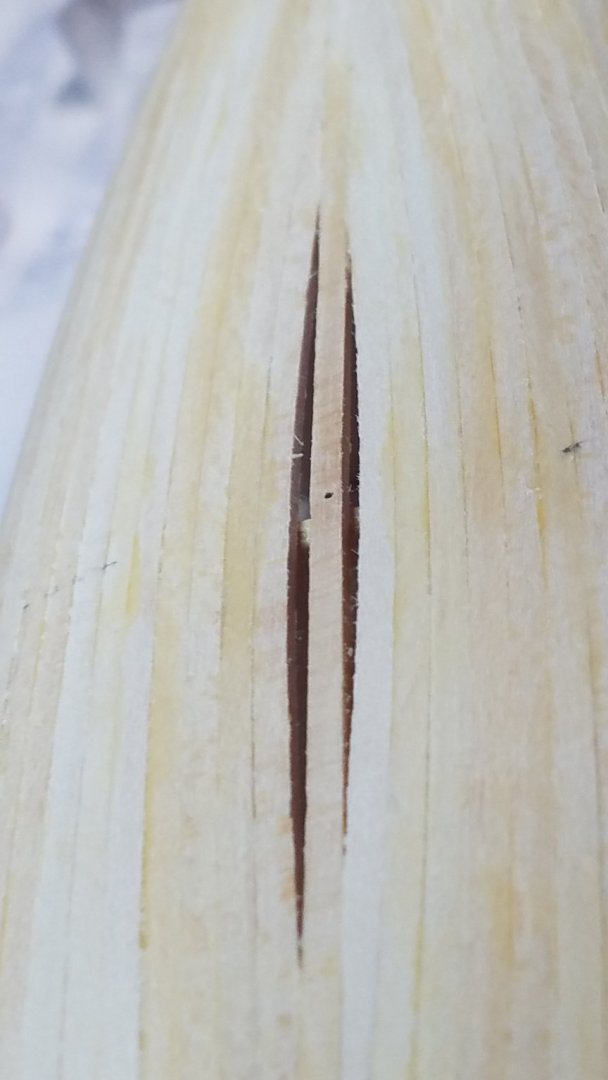
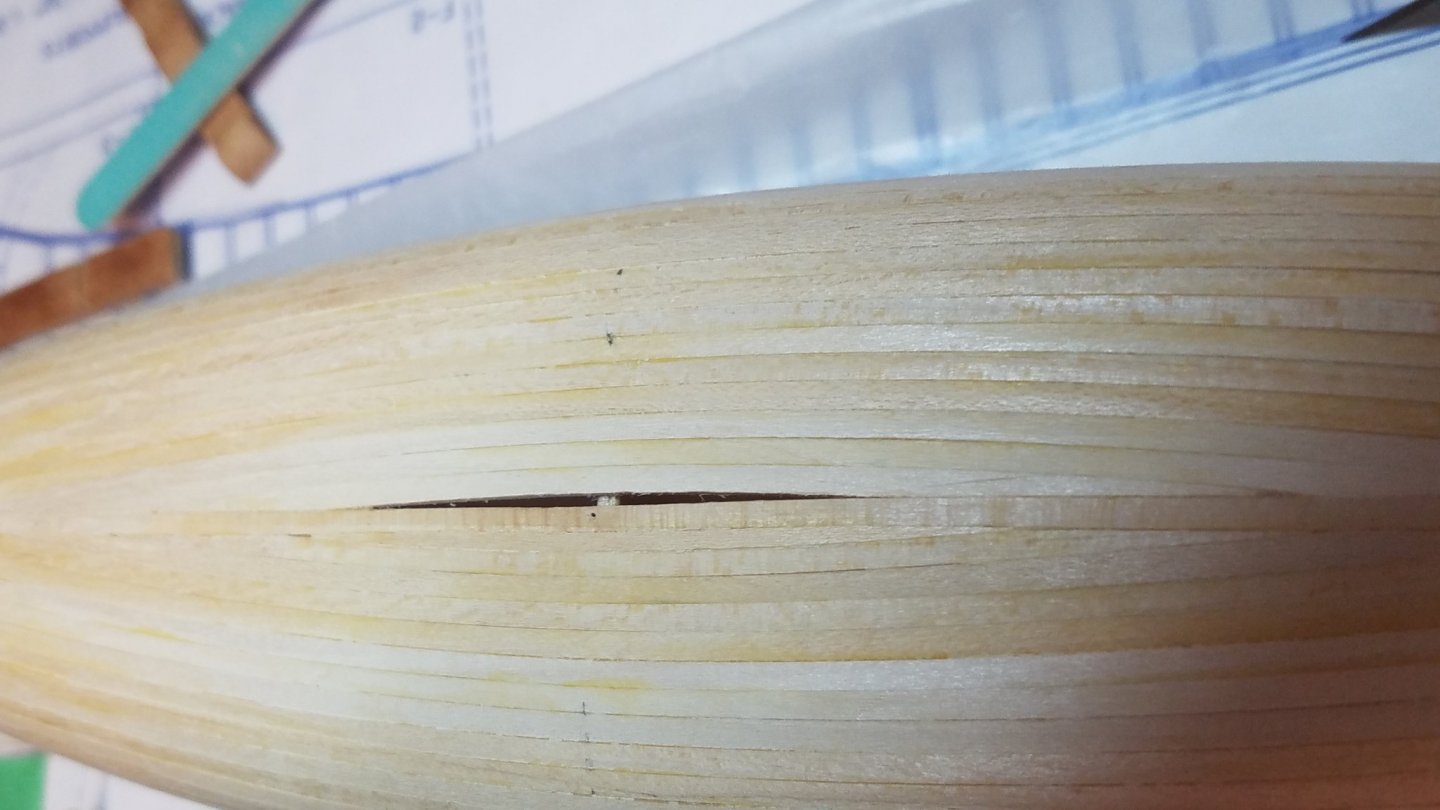
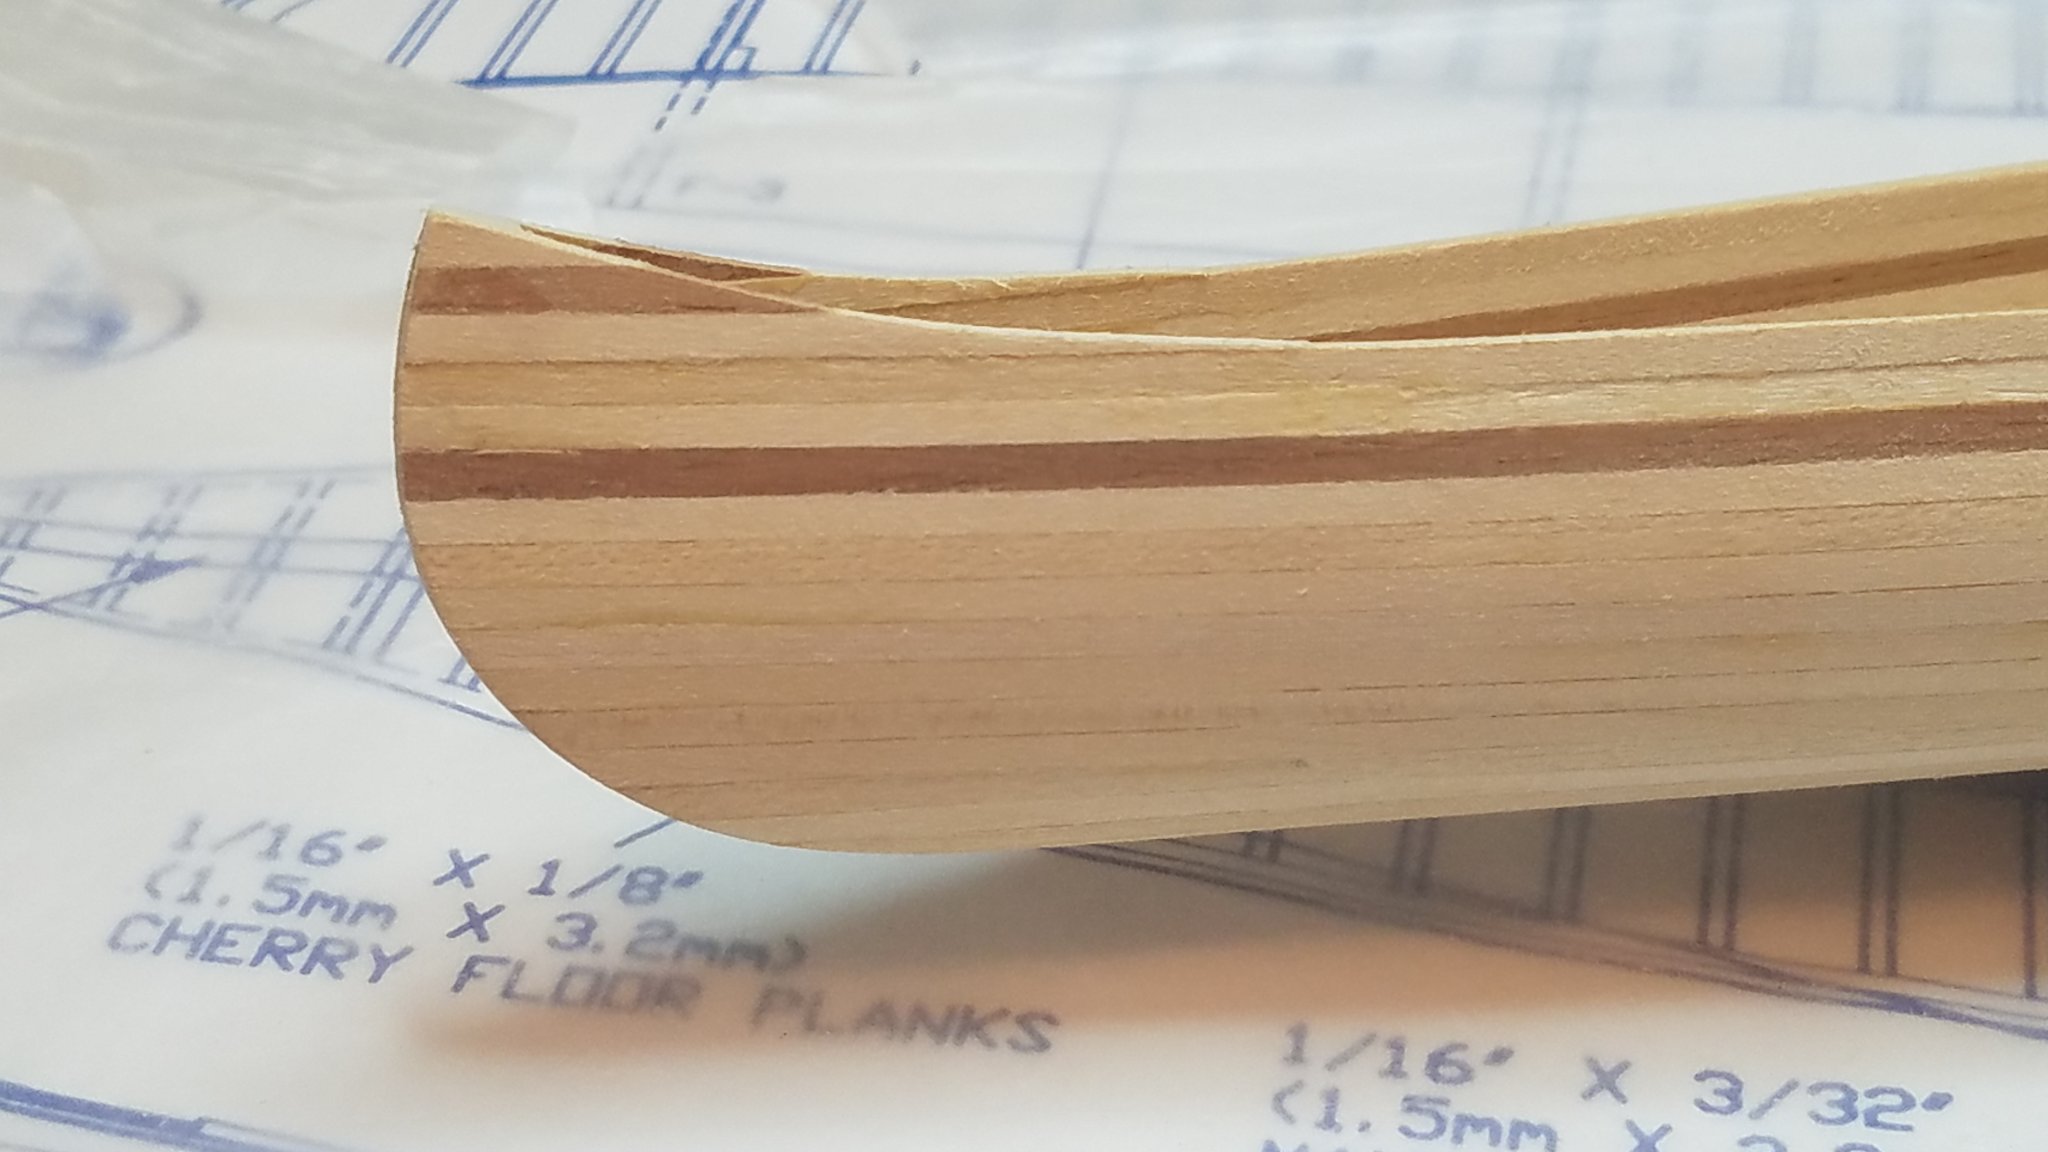
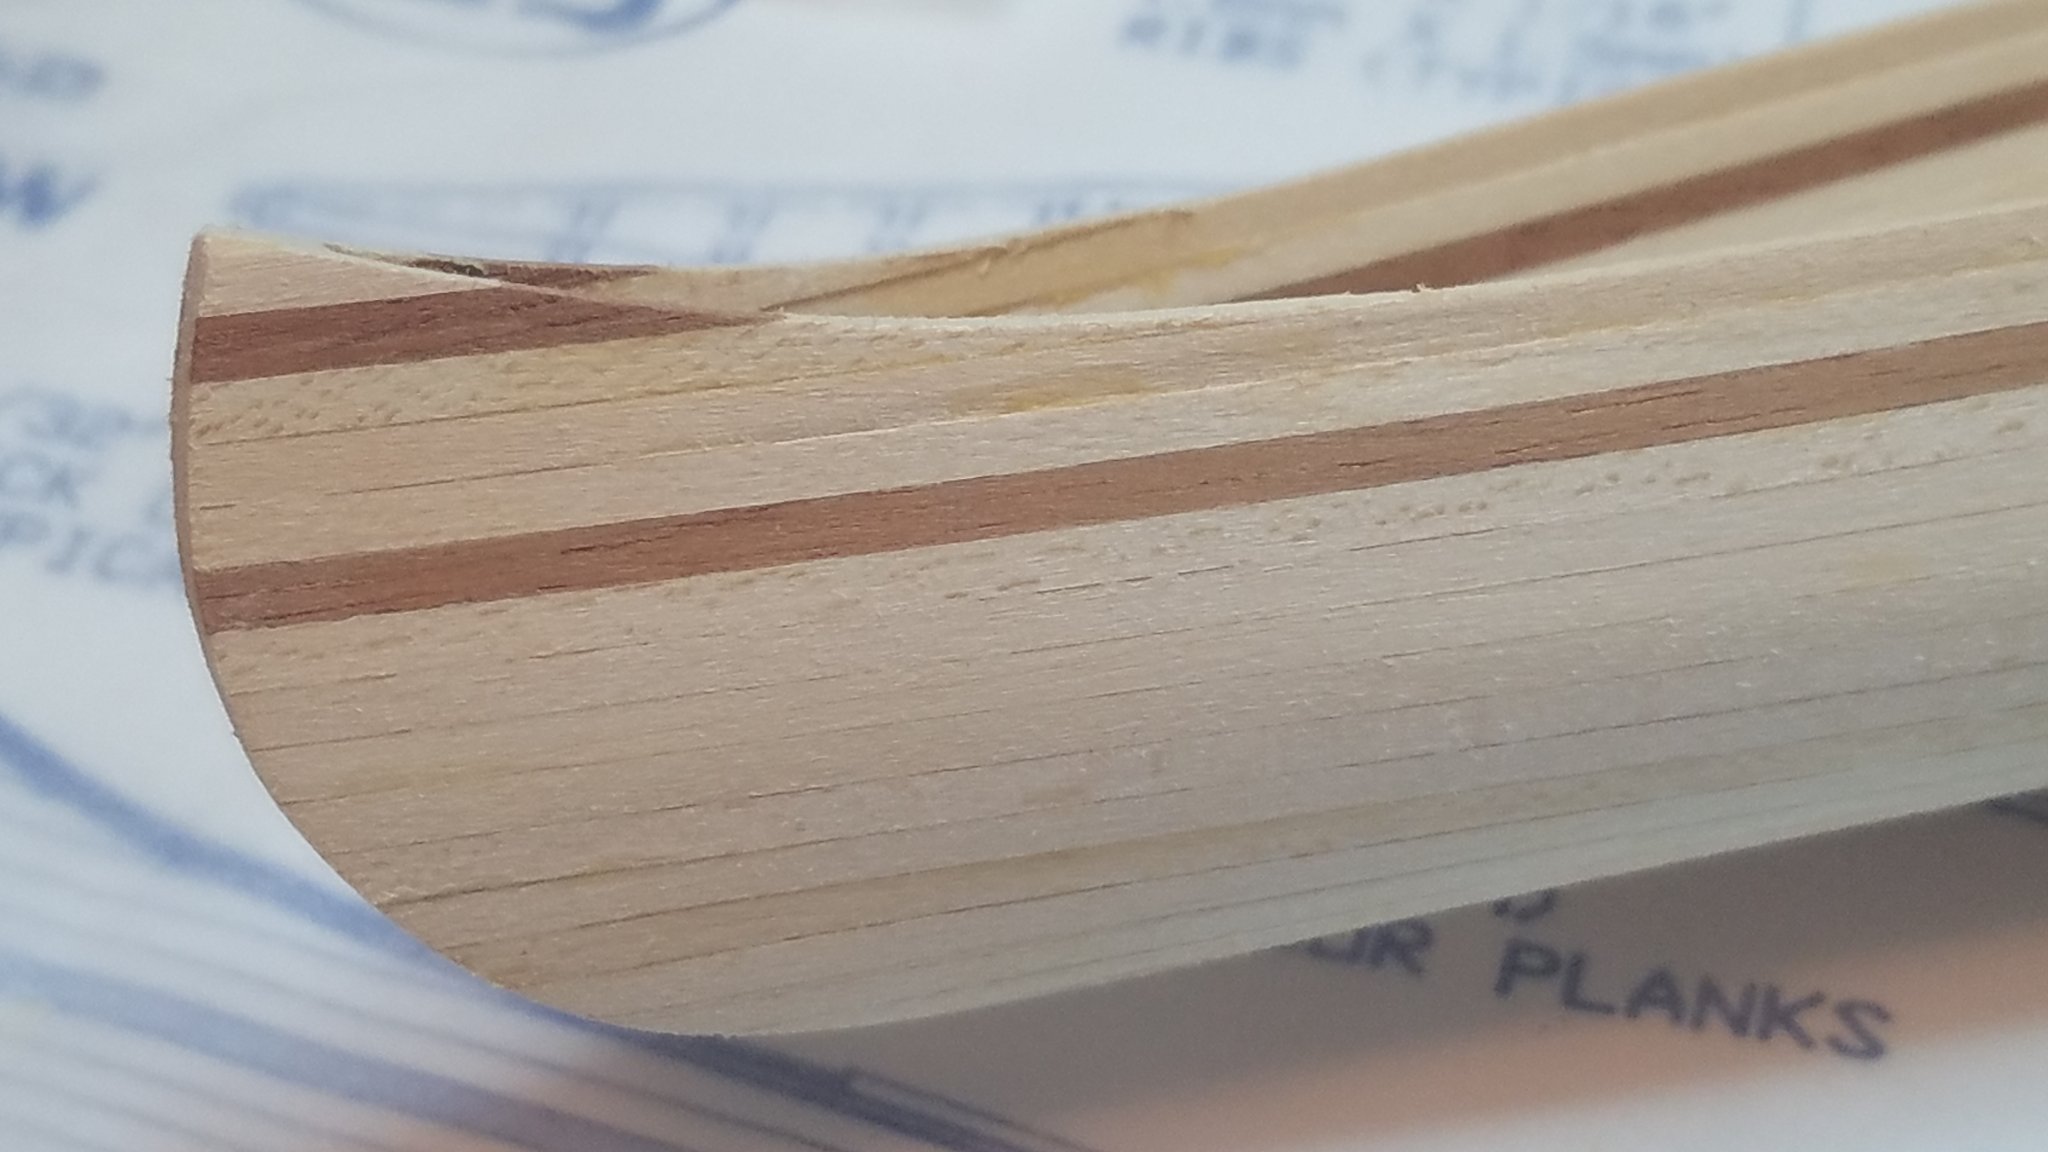
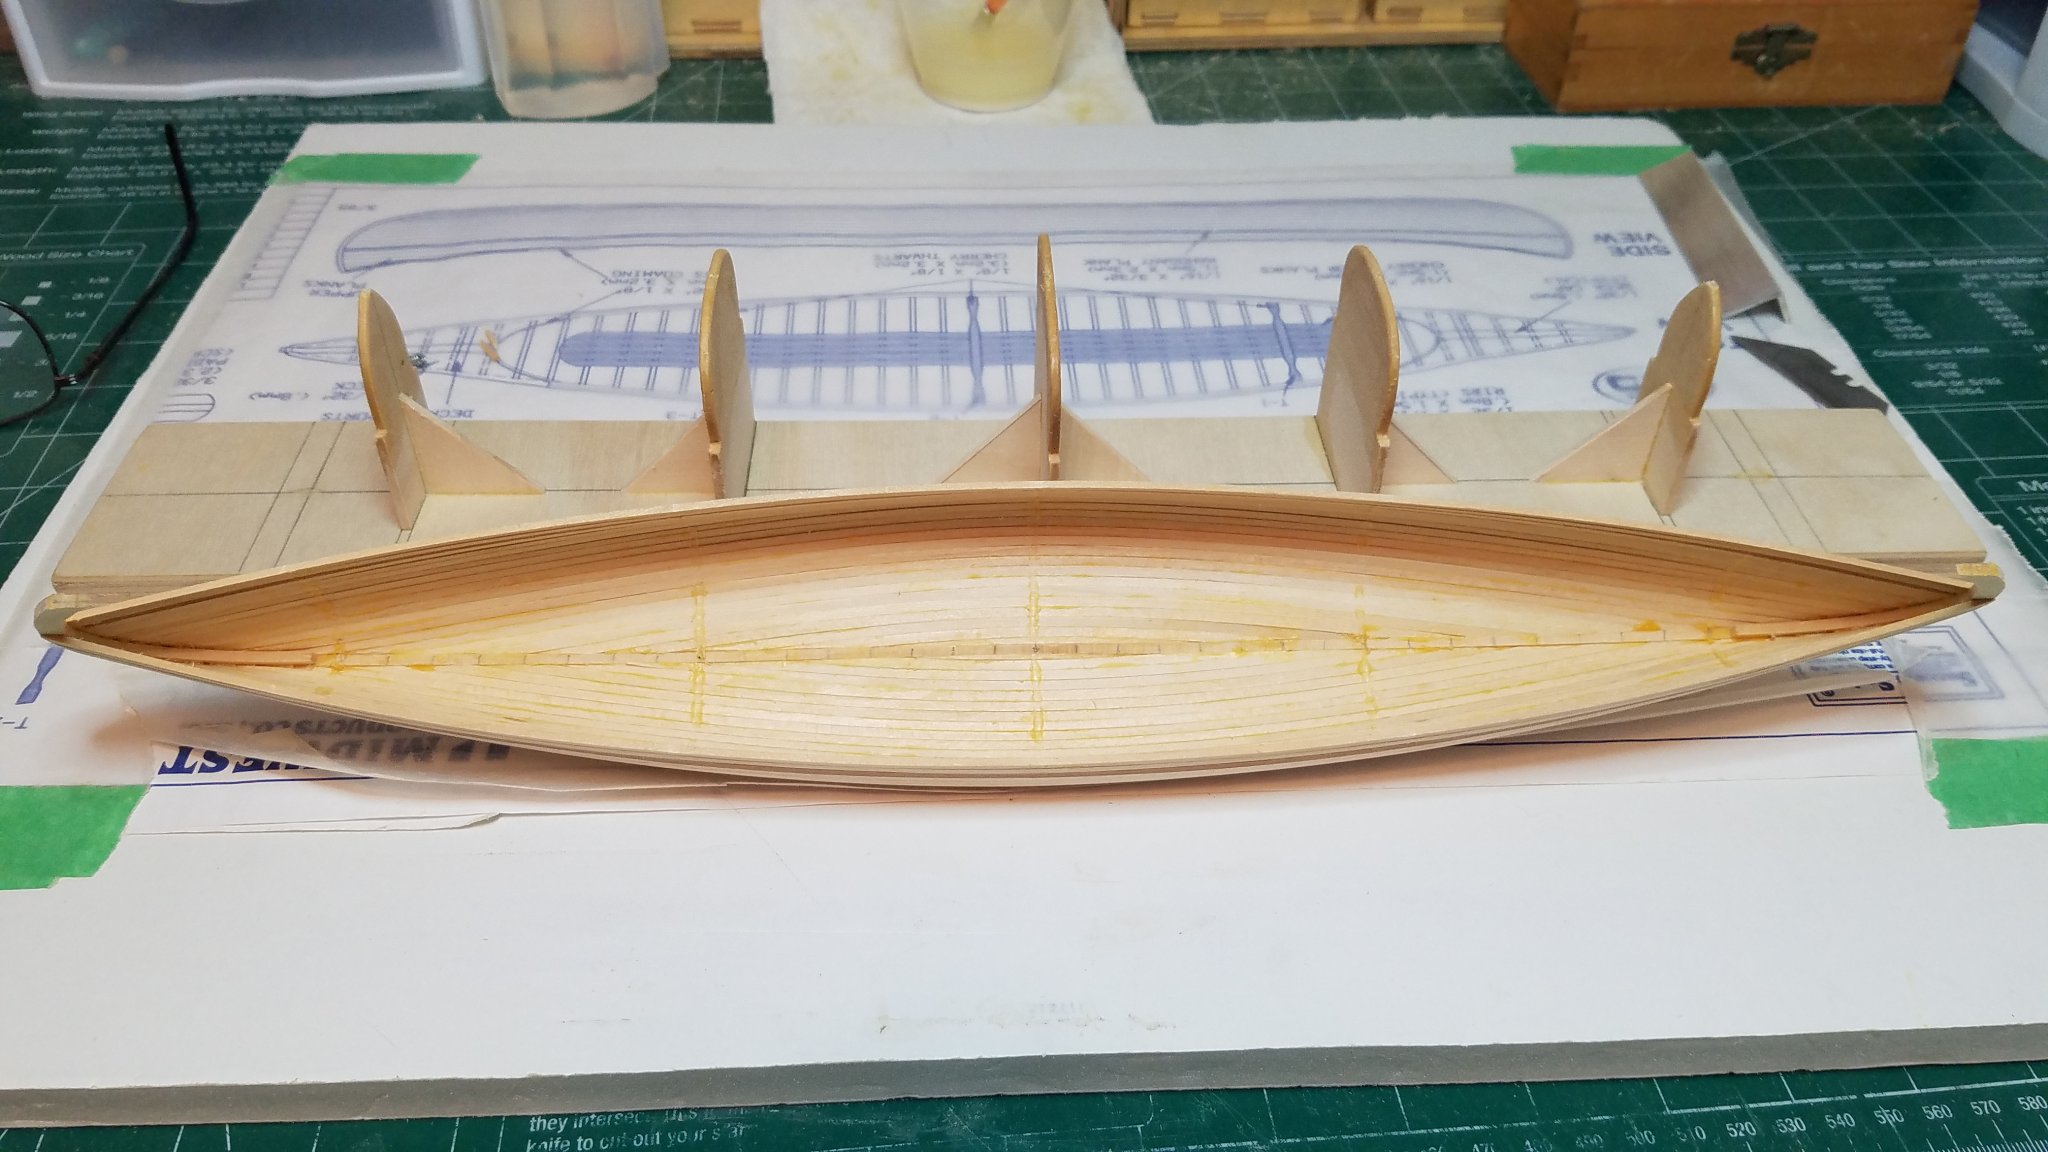
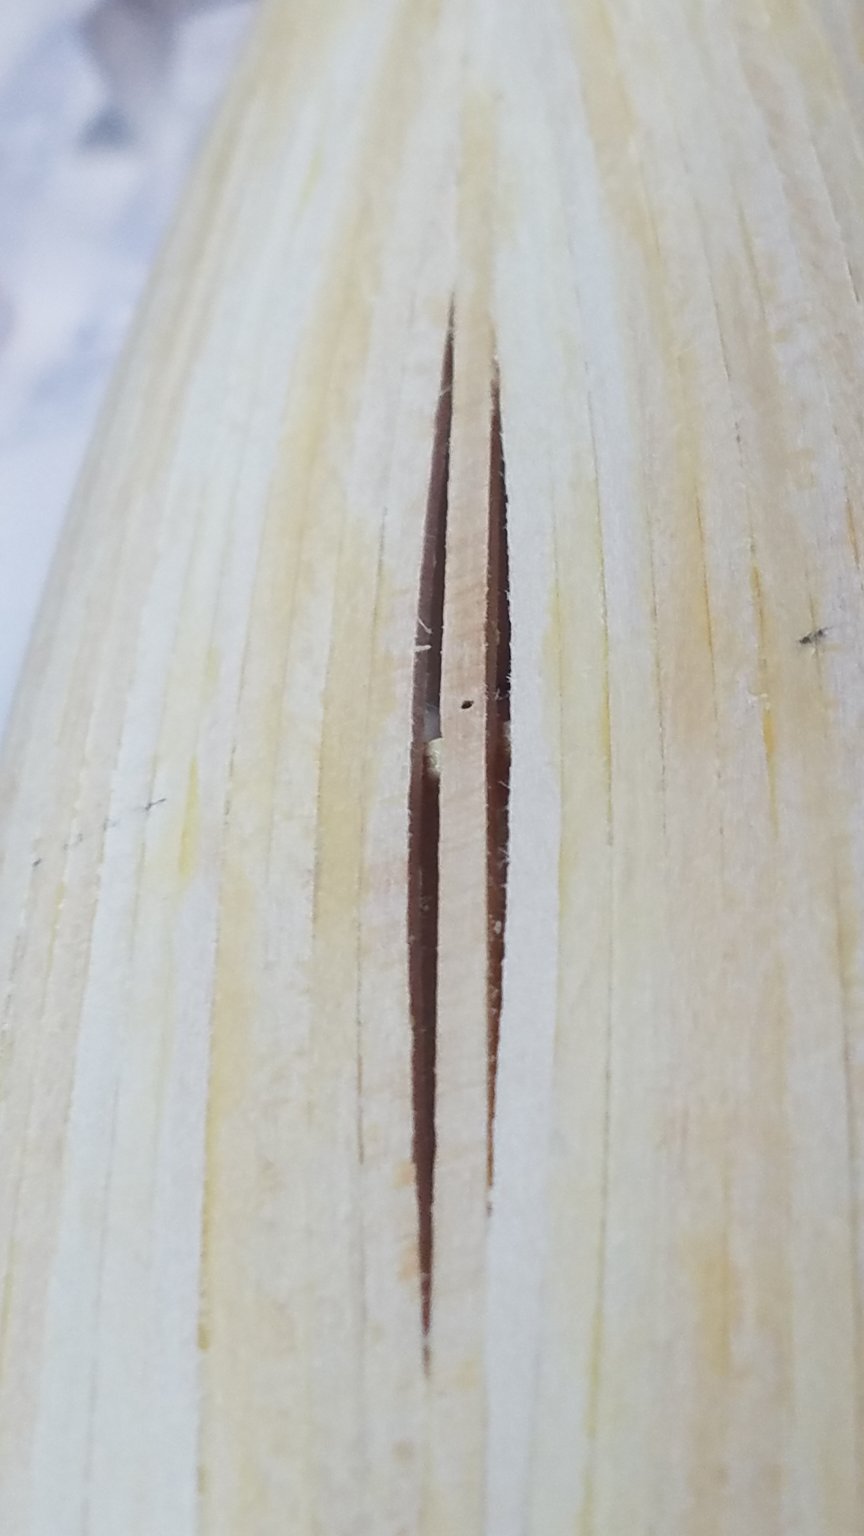
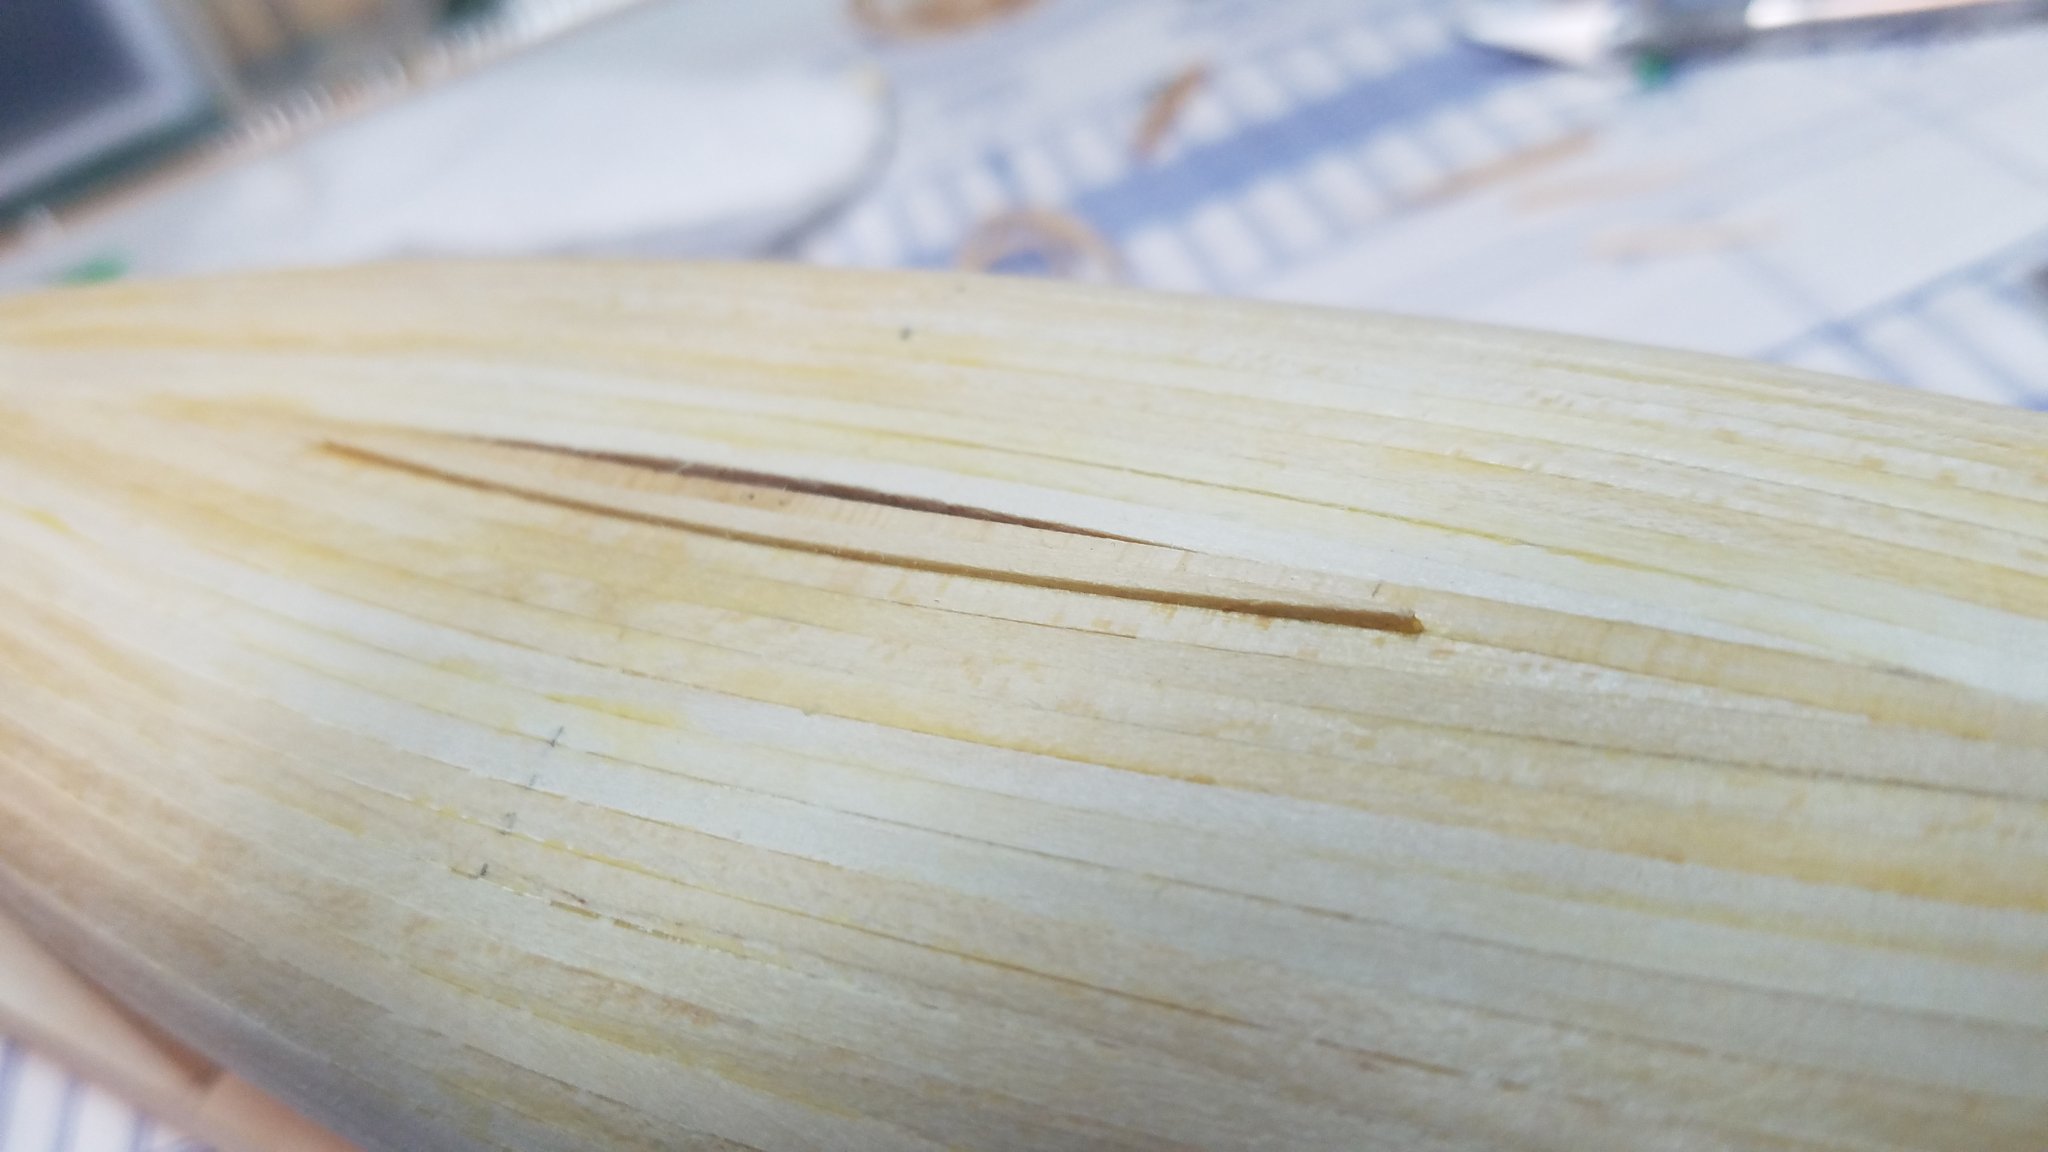
Thanks for all the likes and comments. Got an early start today. First a little repair work. After sanding the hull I noticed what seemed to be some gaps where some of the planks meet the keel. On closer inspection and probing with a razor blade only one was actually a thru and thru gap the rest were filled with glue. So I sliced a few slivers of wood. Then glued one into the slit. And before the glue was fully set I sanded it smooth again. All Better. Then I moved on to shaping the upper planks. I started out by sanding the edge where they meet the keel smooth with the rest of the curve. Then I connected the dots to form a go no go line. With saw and razor knife I trimmed to the line or there abouts. Then using my super high tech manually operated oscillating spindle sander. I sanded a radius by eye until it looked ok to me. Once I had a shape I liked I completed the rough sanding of the outside of the hull. Now it is on to the ribs. I think I am going to try the curling iron method for bending them first. I already have the admirals permission to raid her vanity for one of her old curling irons. We will see how that goes. Best Regards
.thumb.jpg.dd4c2730484ebe62ca04db86f3ead700.jpg)


- 84 replies
-
- 5
-
-
- peterboro canoe
- Finished
- (and 1 more)
-
Thanks Bob, I decided to spend a little time before going to bed building up the "upper planks" so that they can set up over night and I will be able to shape them tomorrow. That's it for tonight. Will pick it up here tomorrow.

- 84 replies
-
- 6
-
-
- peterboro canoe
- Finished
- (and 1 more)
-
Yves, I just found this build log. What a fascinating project. I followed your Moebius build and look forward to following you throughout this one, even though I am a little late to the party. It will take me a couple of days to catch up as I plan to start at the beginning and read every word. Best regards
-
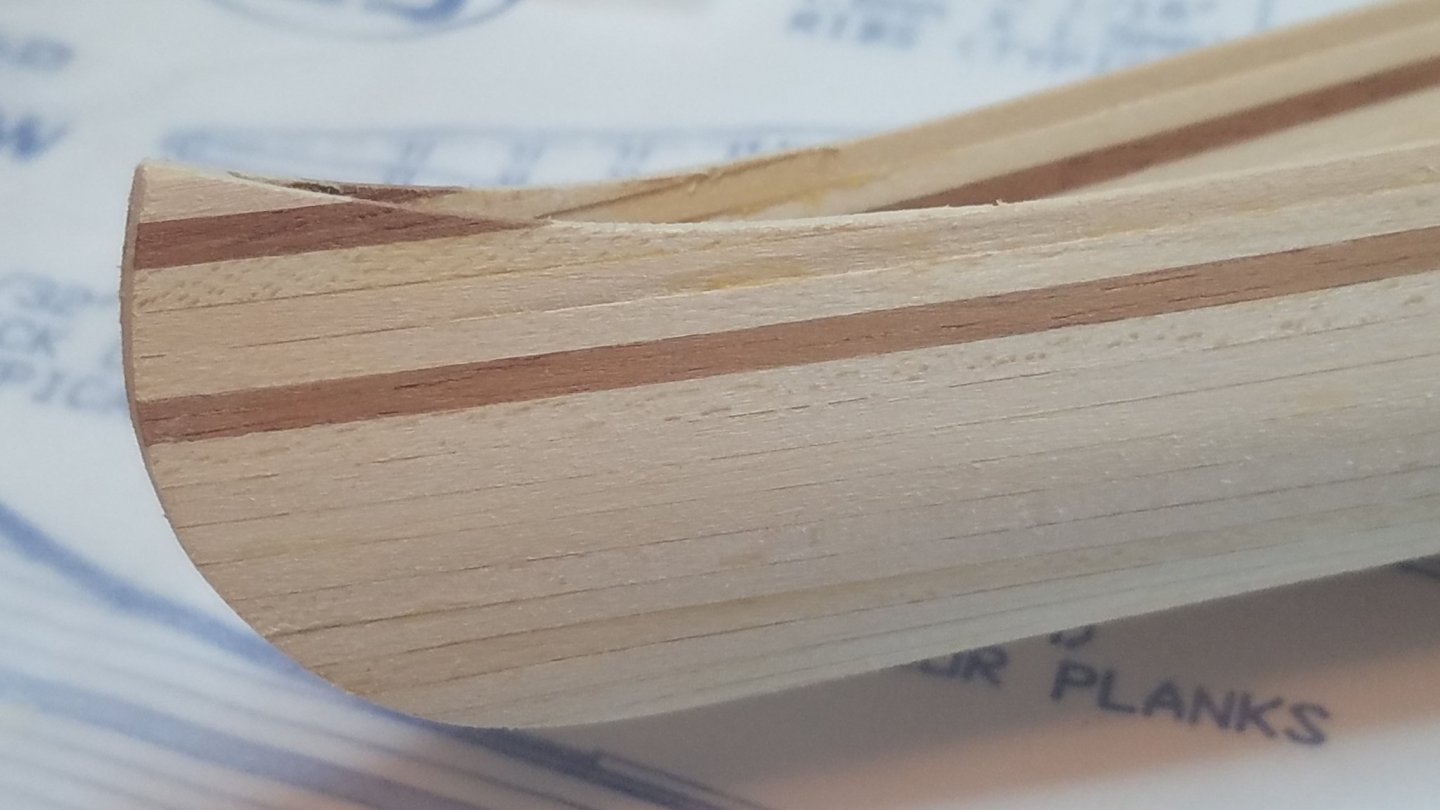
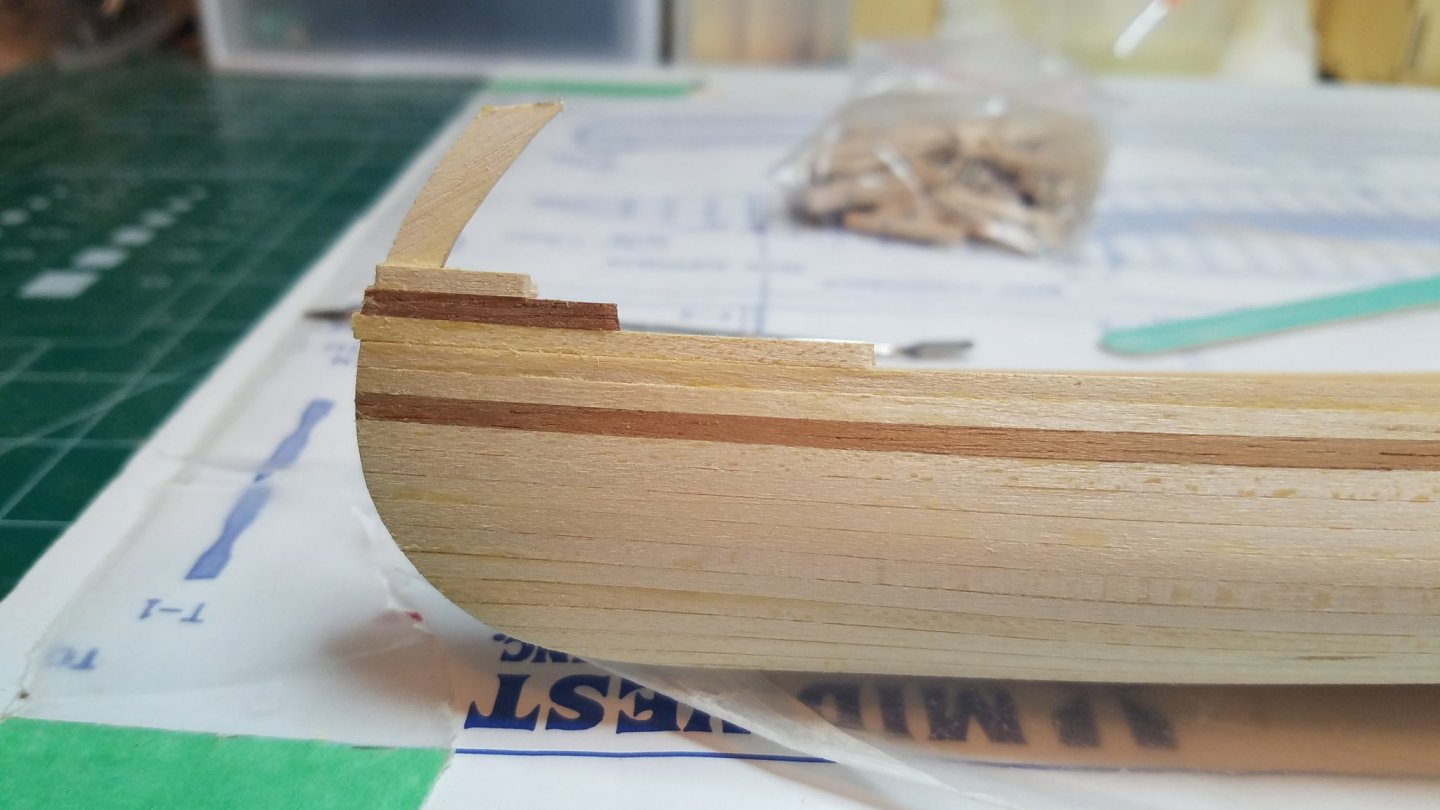
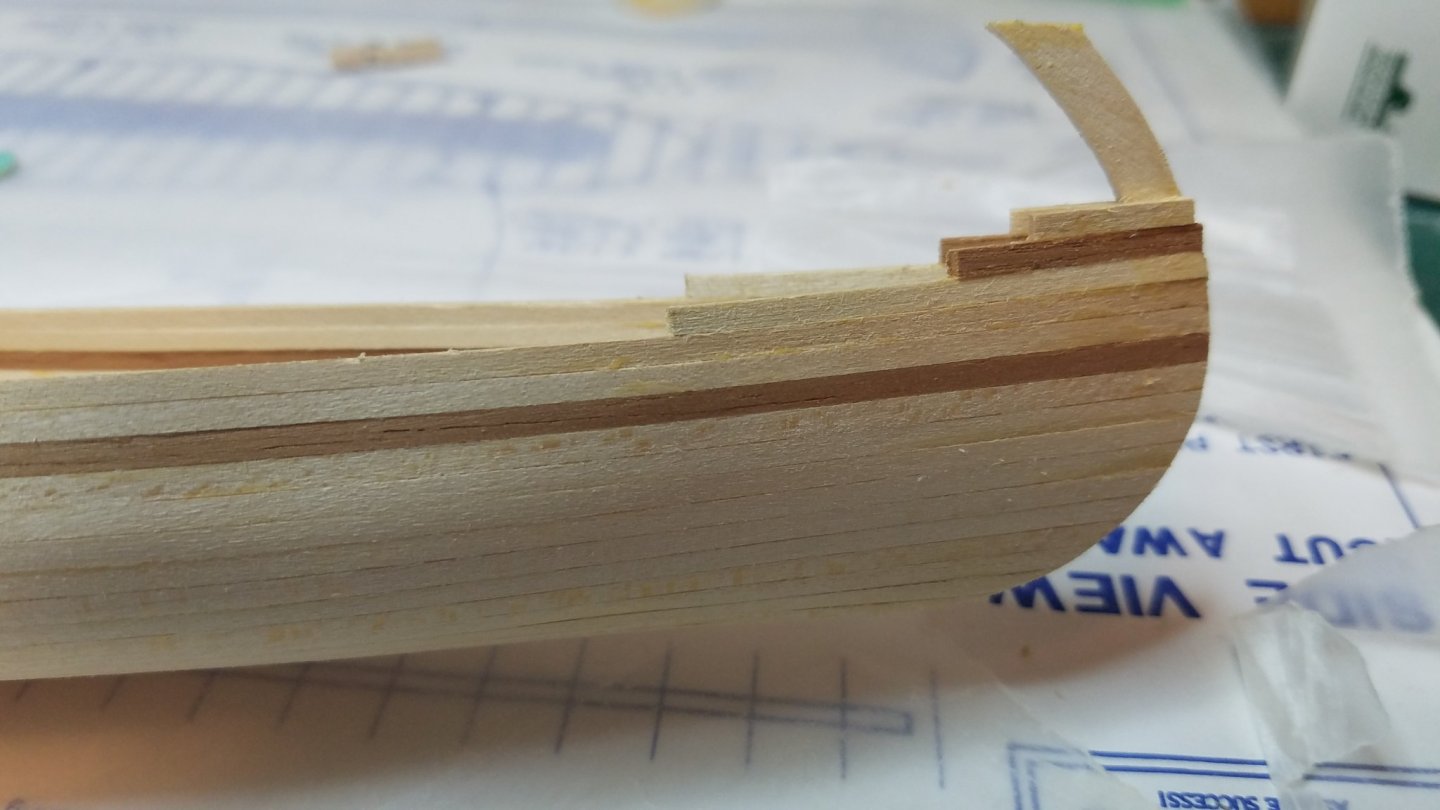
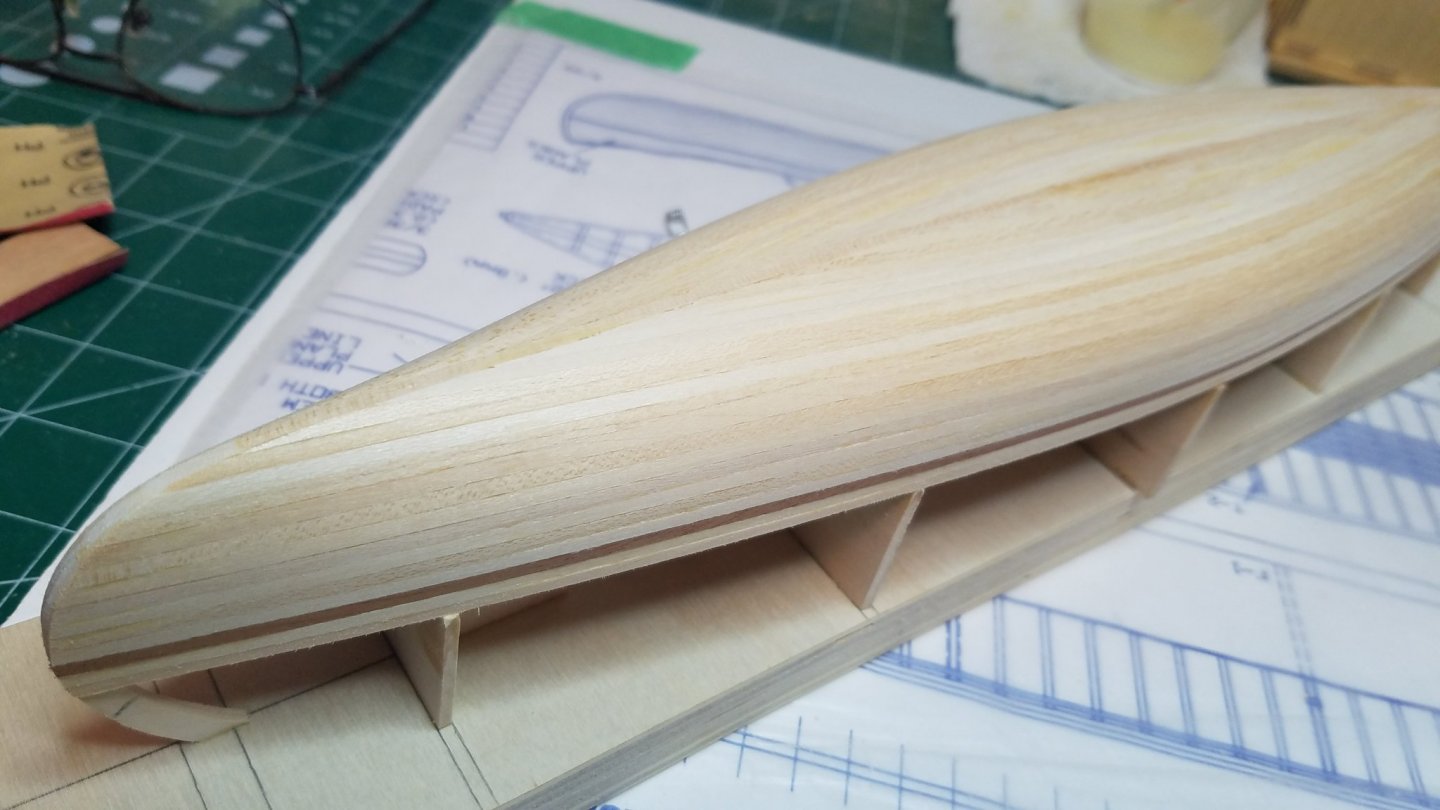
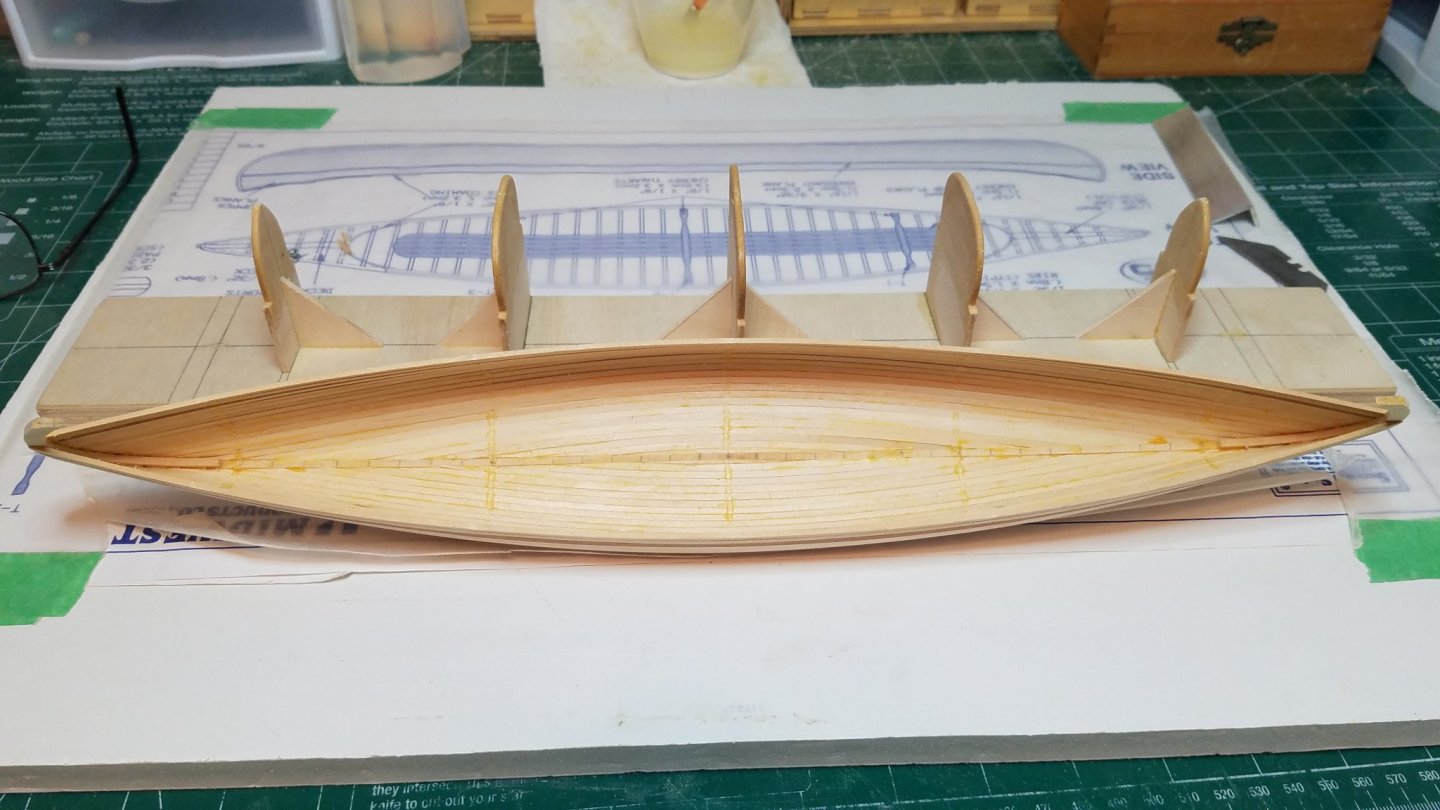
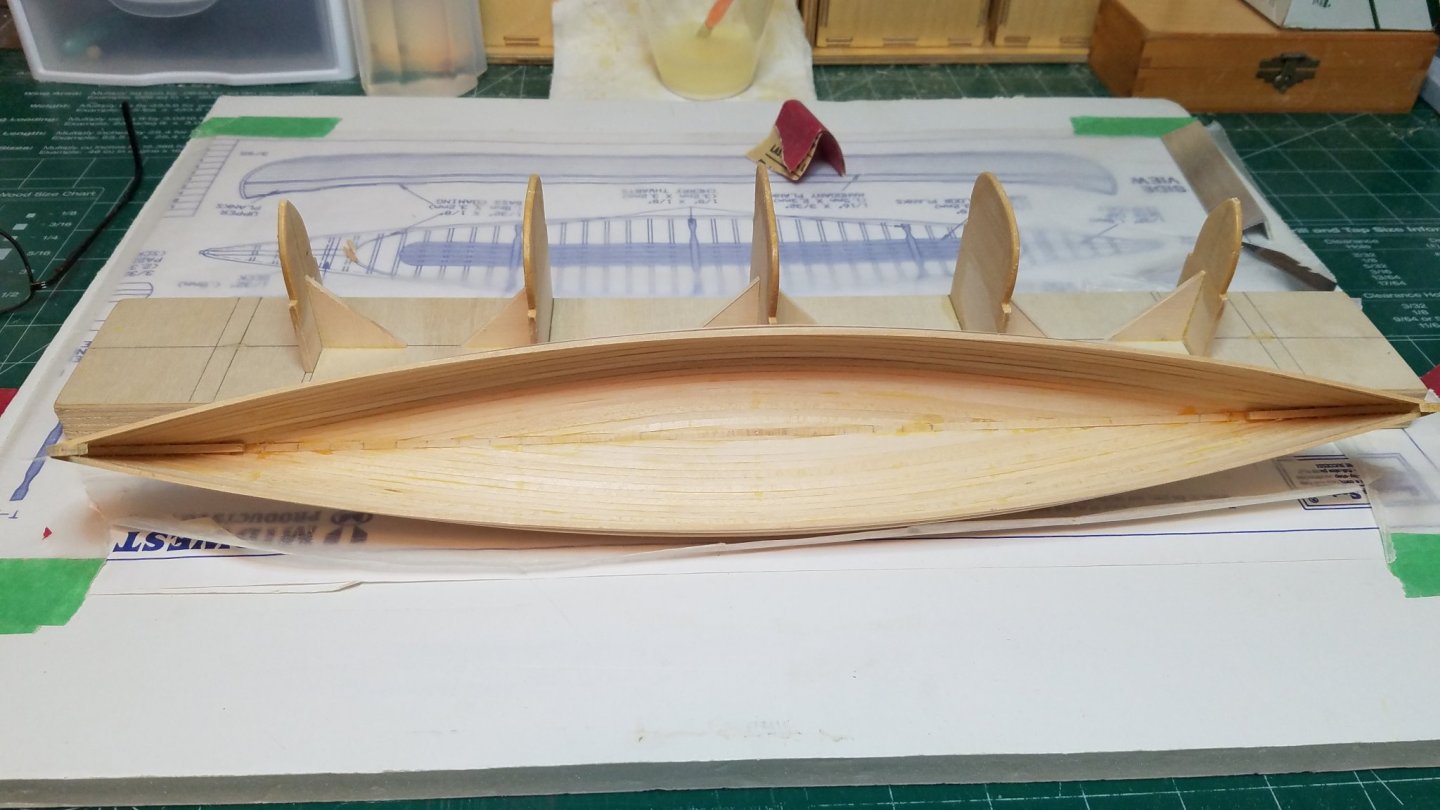
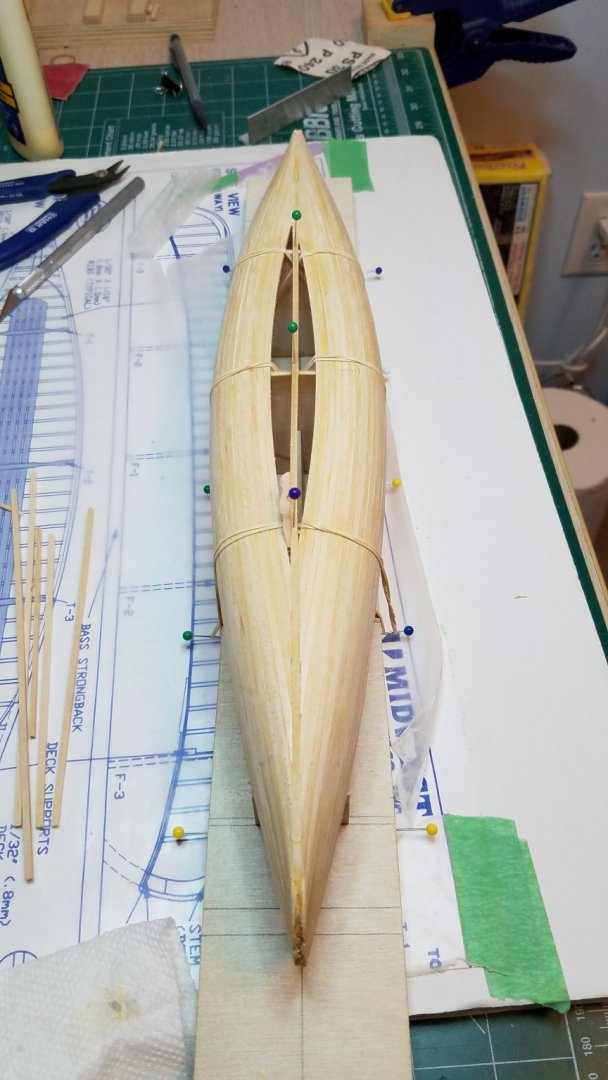
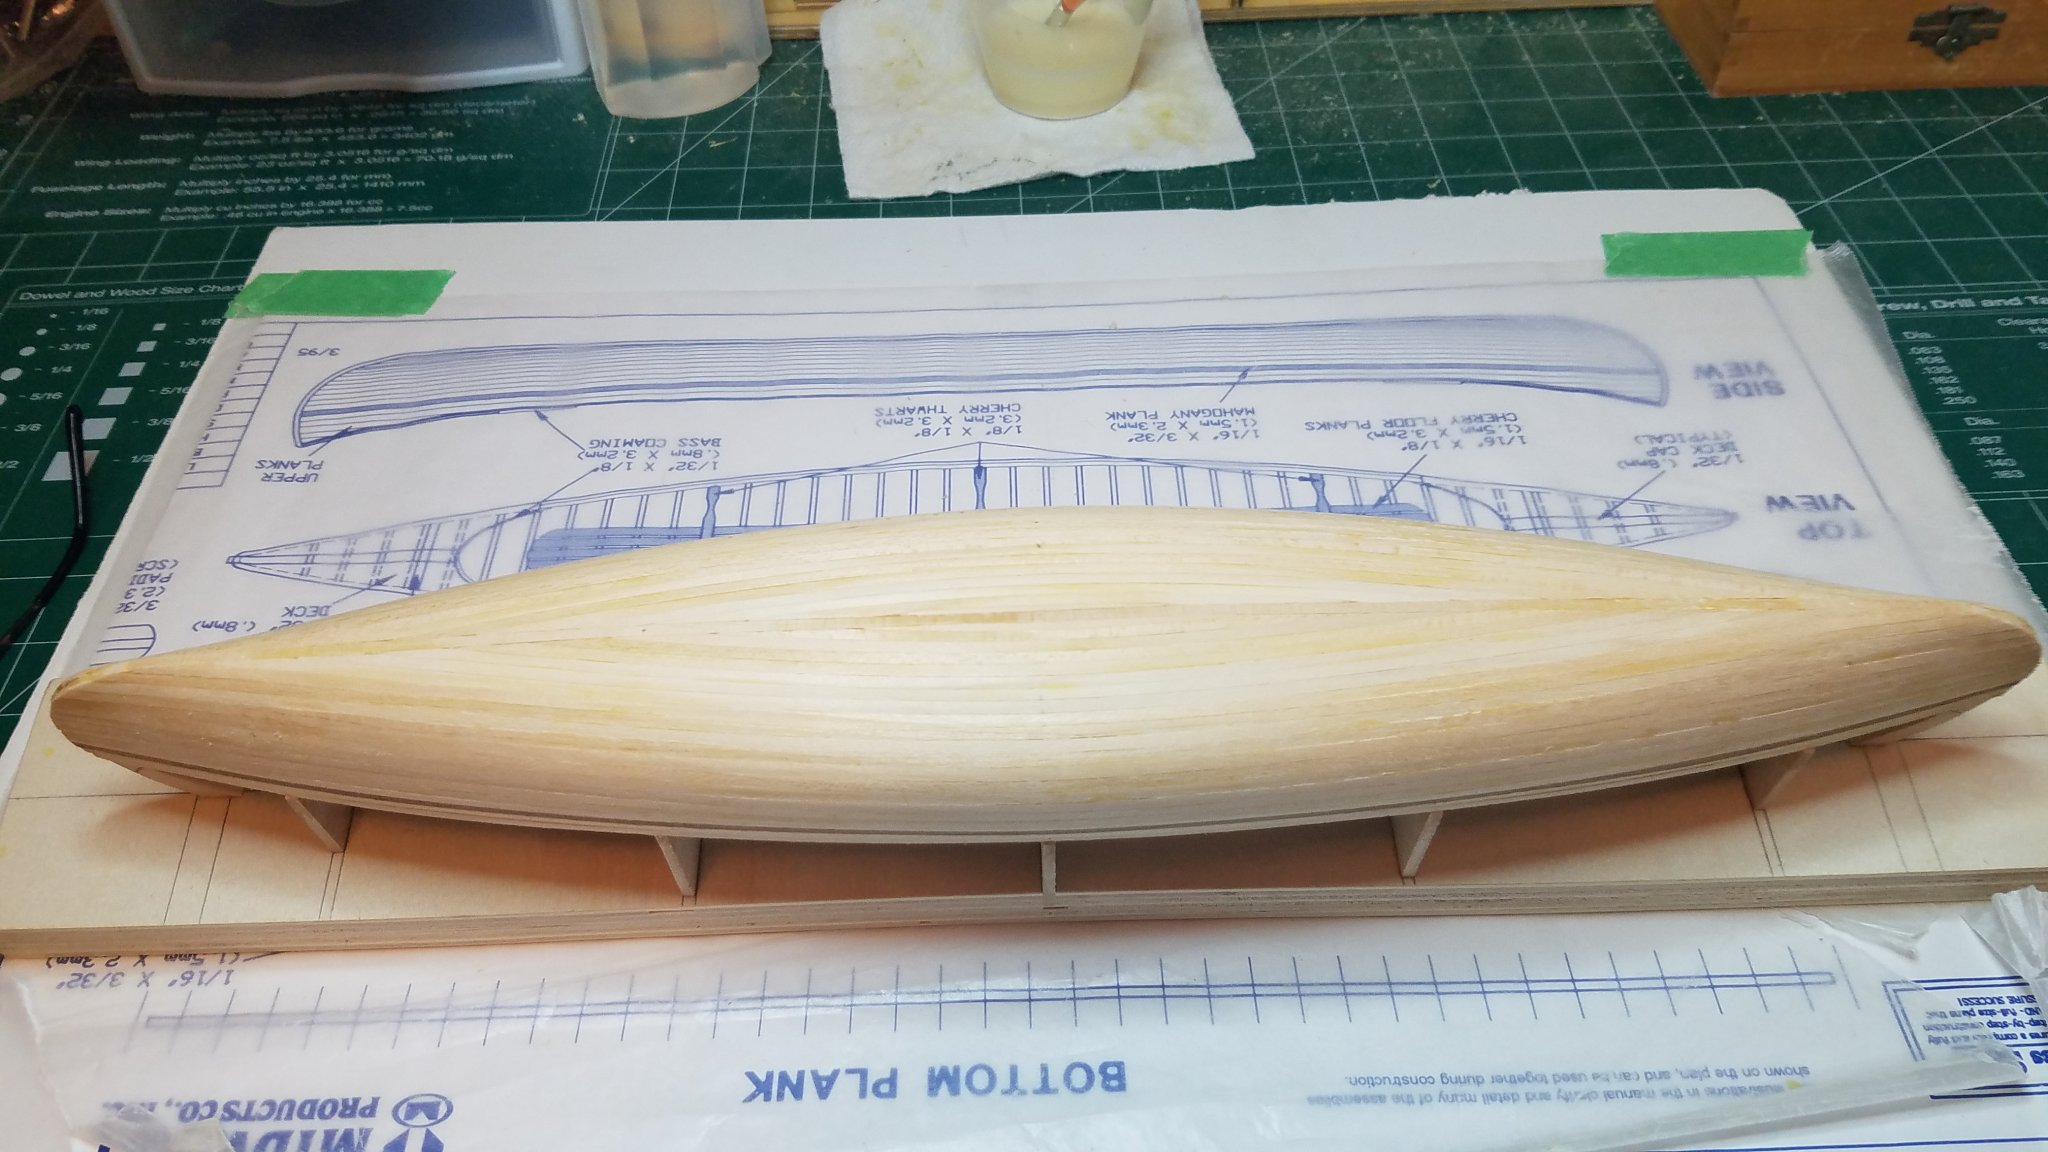
Thanks for the kind words and likes. I am having a lot of fun with this build I hope you all are enjoying it too. I did some initial sanding with 150 grit paper this afternoon. Being able to leave it on the building frame while I did this was a huge help. I was able to bear down a little more that I would have otherwise. It also acted as a handle sometimes. Allowing me to get the hull into positions like laying it on its side without fear of crushing the whole thing. I think it is starting to look pretty good. Then came to big moment. I was extra careful in slicing the stems off of the board in case I want to put it back on there for any reason. Lots of globs of glue. But it literally popped right off. The glue marks that you see were not stuck to the frame at all I guess that couple coats of poly helped after all. The building jig is completely intact. I will put it away and possibly build another one later on. After some sanding with 150 grit paper it cleaned up fairly well. I am satisfied with the actual planking. The extra time I spent aligning them as I went along seems to have paid off. However the glue blobs along the keel are a little annoying. This is just the first sanding though so we will see. Thanks again and best regards.


- 84 replies
-
- 4
-
-
- peterboro canoe
- Finished
- (and 1 more)
-
Hi Eric, Just found this log. She is coming along nicely. Looks like you are having fun with this one.
- 155 replies
-
- 2
-
-
- opium smuggler
- Authentic Models
- (and 1 more)
-
New Member and kind of new to wooden boats
Osmosis replied to Oldskiboat's topic in New member Introductions
Welcome aboard Gary. -
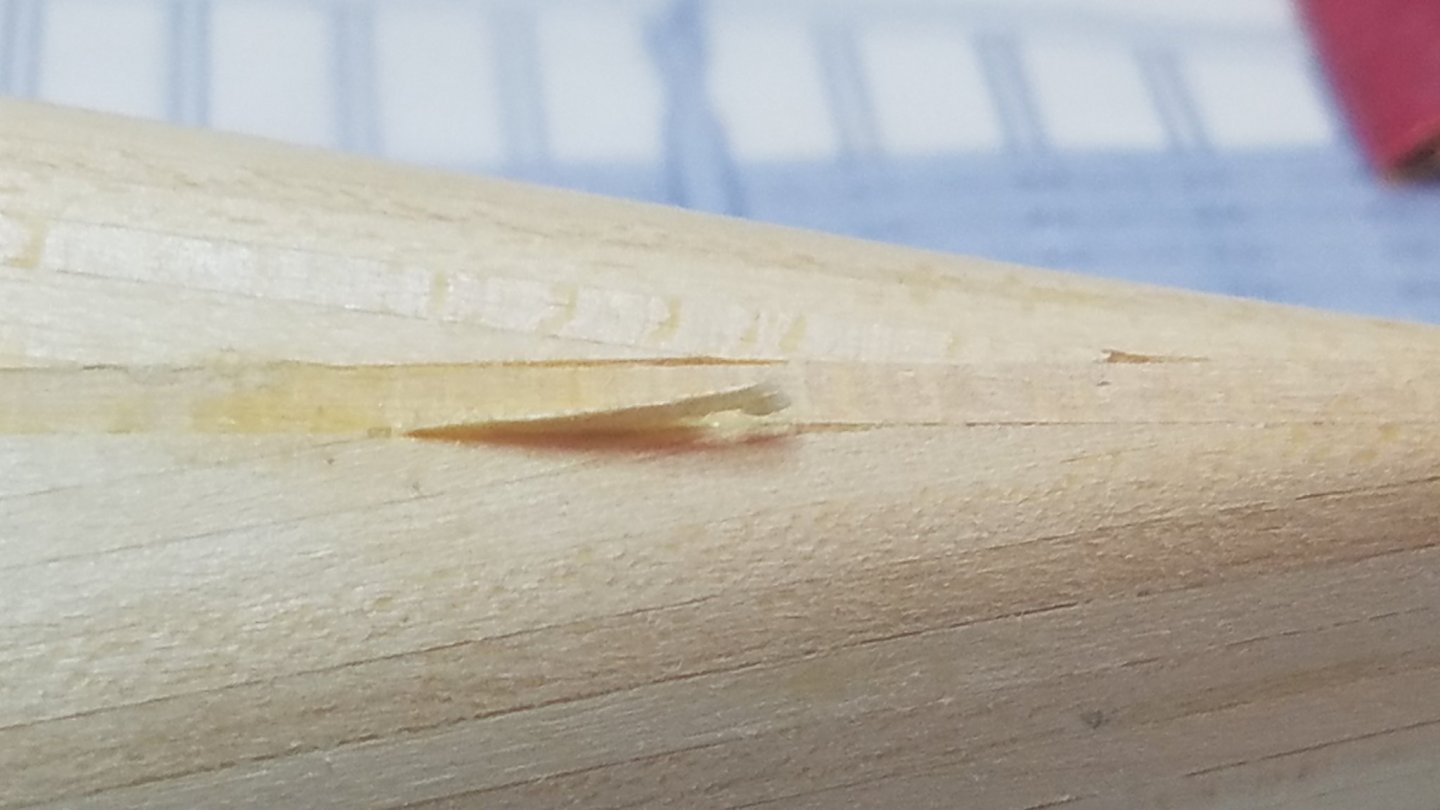
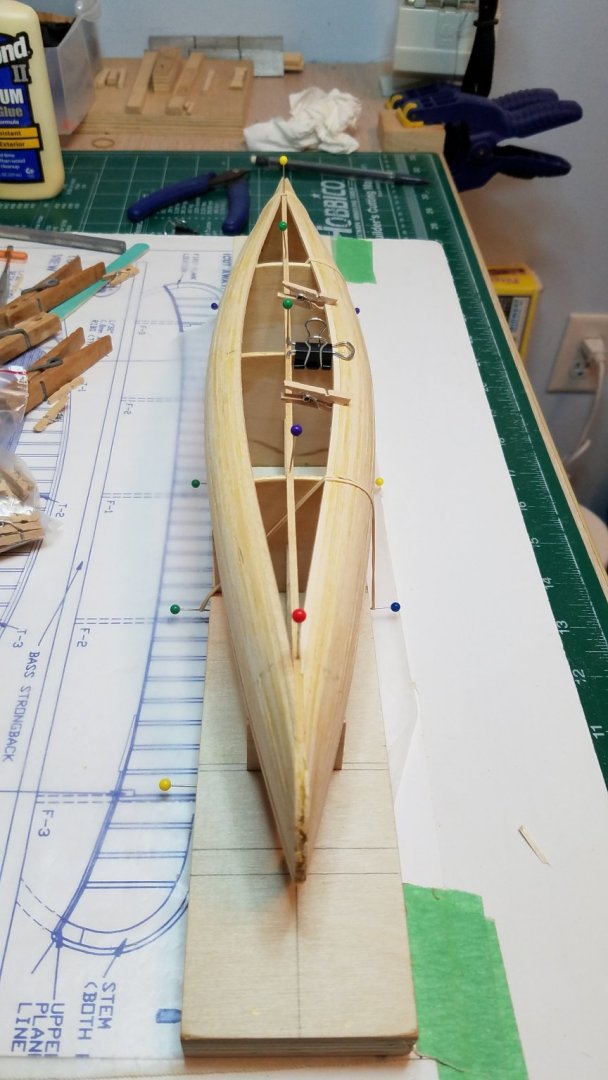
Thanks to all for the likes. Yahoo! The last sliver of planking is in. And I mean the last couple were slivers. When I got home tonight I only had 5 more strips to go and these were all flat on the bottom so I figured they would go fairly quickly. I got started as soon as I checked the corned beefs (2) that the Admiral was cooking in the galley. The first couple went quick and easy. The last two were a little more tricky. As you can see the next to last one was just the right width so that I could put the plank in sideways. Not too bad. A small gap you can see to the left I will need to fill. I will just glue a small sliver of wood in there and sand it flush before the glue is completely set. The last one went in after some real fancy fitting but wound up coming out pretty nice I think. Because I took the time to beef up the building platform by adding the extra gussets and the wider base board. I think I should be able to do the bulk of the heavy sanding while it is still attached. I will leave it for tonight then tomorrow move outside on the porch to make some real sawdust. Happy St Patty's Day to All


- 84 replies
-
- 8
-
-
- peterboro canoe
- Finished
- (and 1 more)
-
It is getting easier now. I laid as many planks in the last 2 hours as I did all weekend. I am not going to count my proverbial chickens quite yet but it should not be long now till I can start making some serious saw dust. Regards
- 84 replies
-
- 6
-
-
- peterboro canoe
- Finished
- (and 1 more)
-
Oh No! You started first you have to "finish" first. I am just going to clear coat mine. Not sure if it will be Wipe on Poly or I might give Tung oil a try I have never used it before.
- 114 replies
-
- 2
-
-
- small
- Peterboro Canoe
- (and 2 more)
-
I don't know where I got the idea that it would get easier on the bottom. But man was I wrong. I thought I would have this off the build board today. Maybe next weekend.
- 84 replies
-
- 6
-
-
- peterboro canoe
- Finished
- (and 1 more)
-
VAC-U-DUCK - Vac-U-Boat by Osmosis - FINISHED
Osmosis replied to Osmosis's topic in Non-ship/categorised builds
Thanks, We sort of had them pinned in a small corner and that was their only way out. Yes hof the local muscovy ducks are scruffy to put it mildly. They are more like very large feathered rats in my opinion. The ugliest ducks I have ever seen. -
VAC-U-DUCK - Vac-U-Boat by Osmosis - FINISHED
Osmosis replied to Osmosis's topic in Non-ship/categorised builds
We see them occasionally but I guess it is just a seasonal thing. -
VAC-U-DUCK - Vac-U-Boat by Osmosis - FINISHED
Osmosis replied to Osmosis's topic in Non-ship/categorised builds
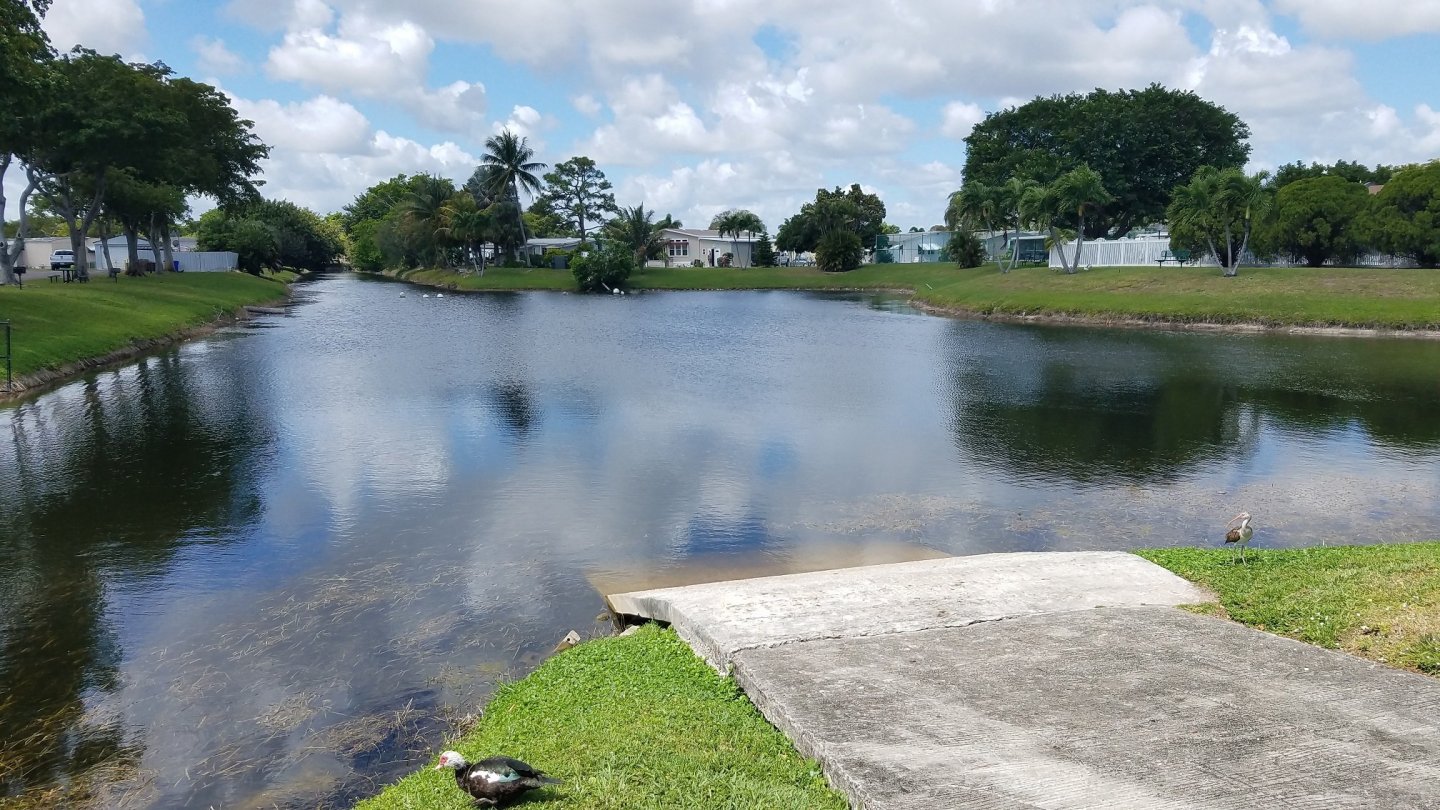
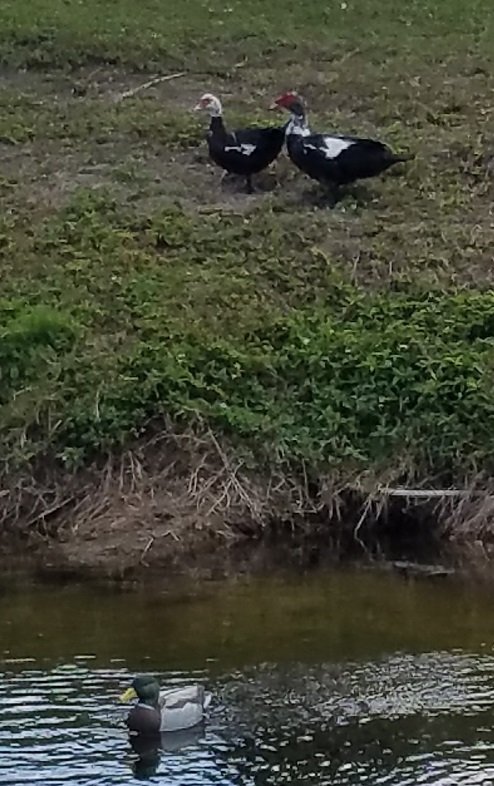
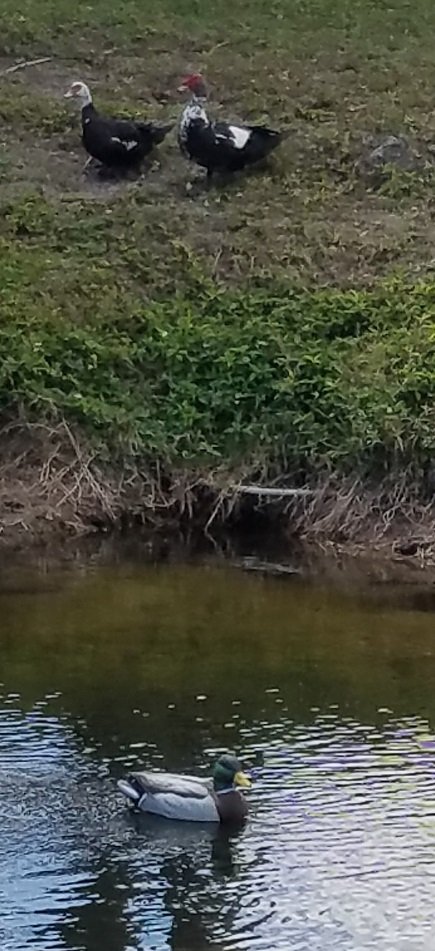
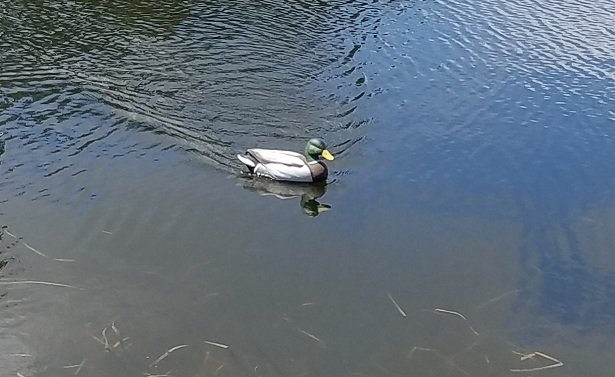
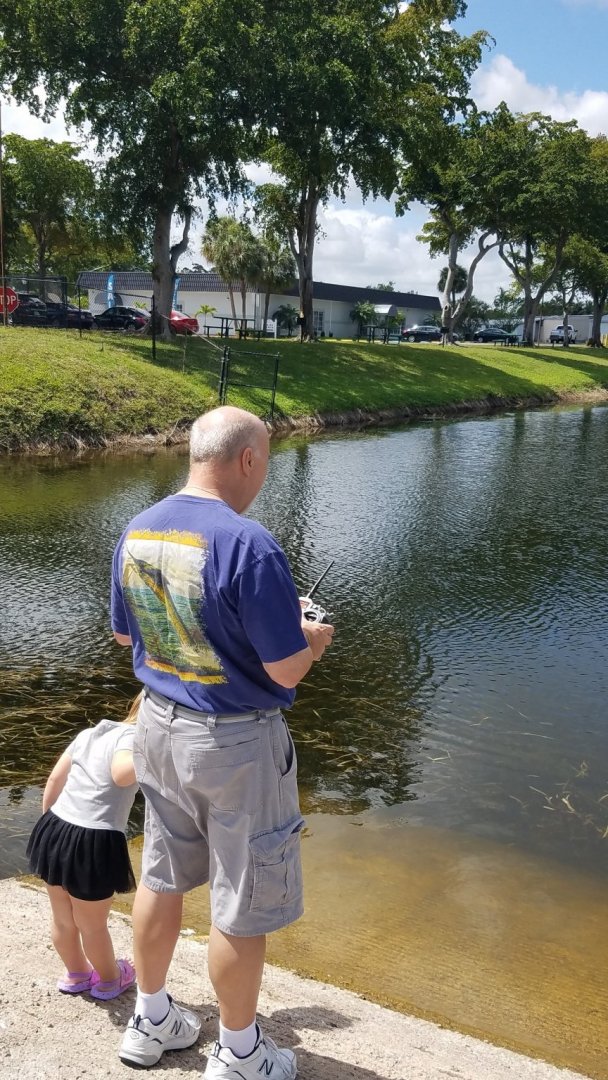
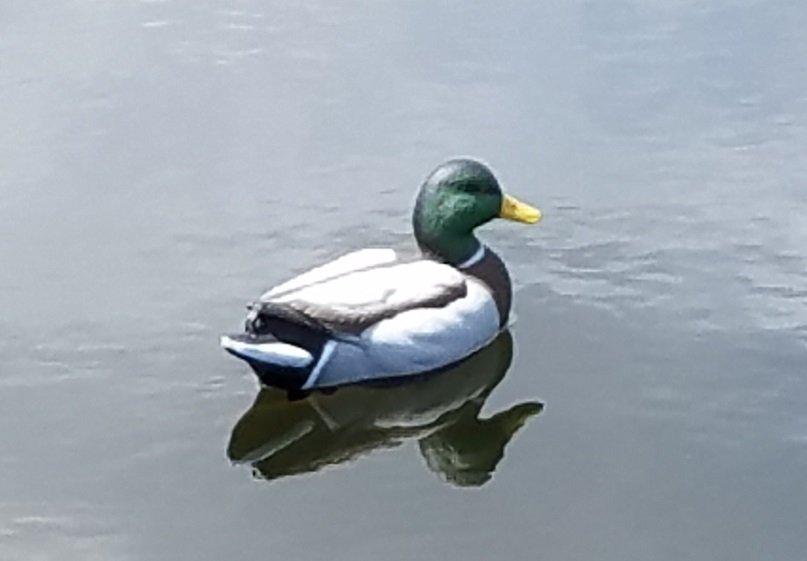
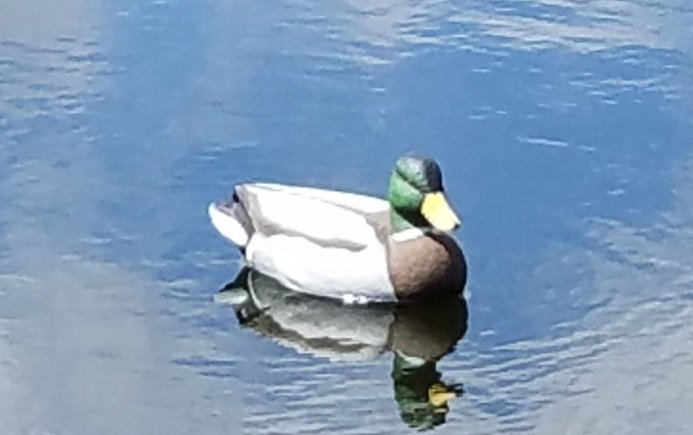
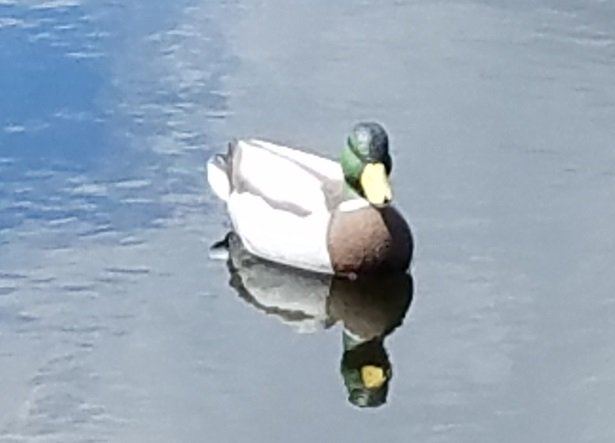
Well we finally got some decent duck weather so we took him out for "pond trials". Of course as soon as we walked up the freeloaders came swimming up for a handout. Not today though. This pond is directly across the street from my house. Really handy when I feel like sailing or fishing. The locals wanted nothing to do with him and got up on the bank as quick as they could. The Captain and First Mate at the helm. He really floats well. I did not need to adjust the ballast at all. Looks pretty natural. I had him going for about an hour and was a little worried about building up to much heat but when we got back home his insides were cool and bone dry. I asked to Admiral to shoot a short video but apparently she hit the wrong button. Well that about closes this one out I will label it finished. Thanks for all the comments and likes. Best regards and see you next time.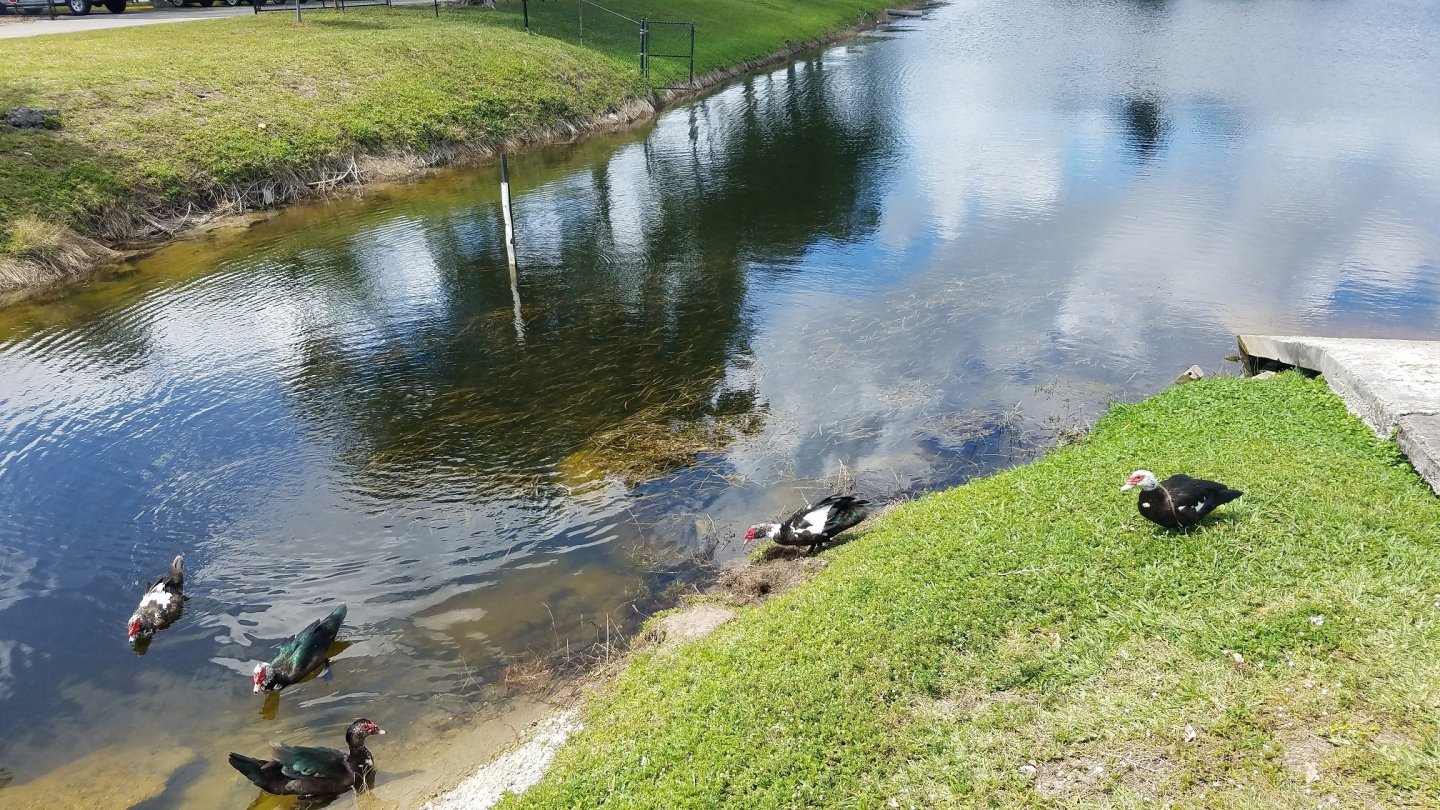
-
Thanks for the kind words of encouragement and the likes. I just realized that it has only been a week since I started this build. It seems like I have been planking this thing for a month and I am only half way done. 12 courses of planking and I am around the turn. These next couple of planks need to transition to the flat bottom and I have a feeling that feathering them in at the stem and stern is not going to be easy. I think this is where I will leave it for tonight and just sleep on it. Best regards
.thumb.jpg.379d9f780c37e11415f03143b0053b6f.jpg)
- 84 replies
-
- 6
-
-
- peterboro canoe
- Finished
- (and 1 more)
-
Looks like the start of another beauty. At this scale what are you using for netting? Is it a pre-made product or something you /create/modify yourself? Forgive my ignorance but I have to ask, are those acupuncture needles?


.jpg.3467e125eb1b04ae2540bf7056b43df7.jpg)

.jpg.15f7aef0157008bbdc57edfbde7efa96.jpg)


.jpg.0bee01f61a70af5e93e09ddfada19857.jpg)