HOLIDAY DONATION DRIVE - SUPPORT MSW - DO YOUR PART TO KEEP THIS GREAT FORUM GOING! (89 donations so far out of 49,000 members - C'mon guys!)
×


Heinrich der Seefahrer
-
Posts
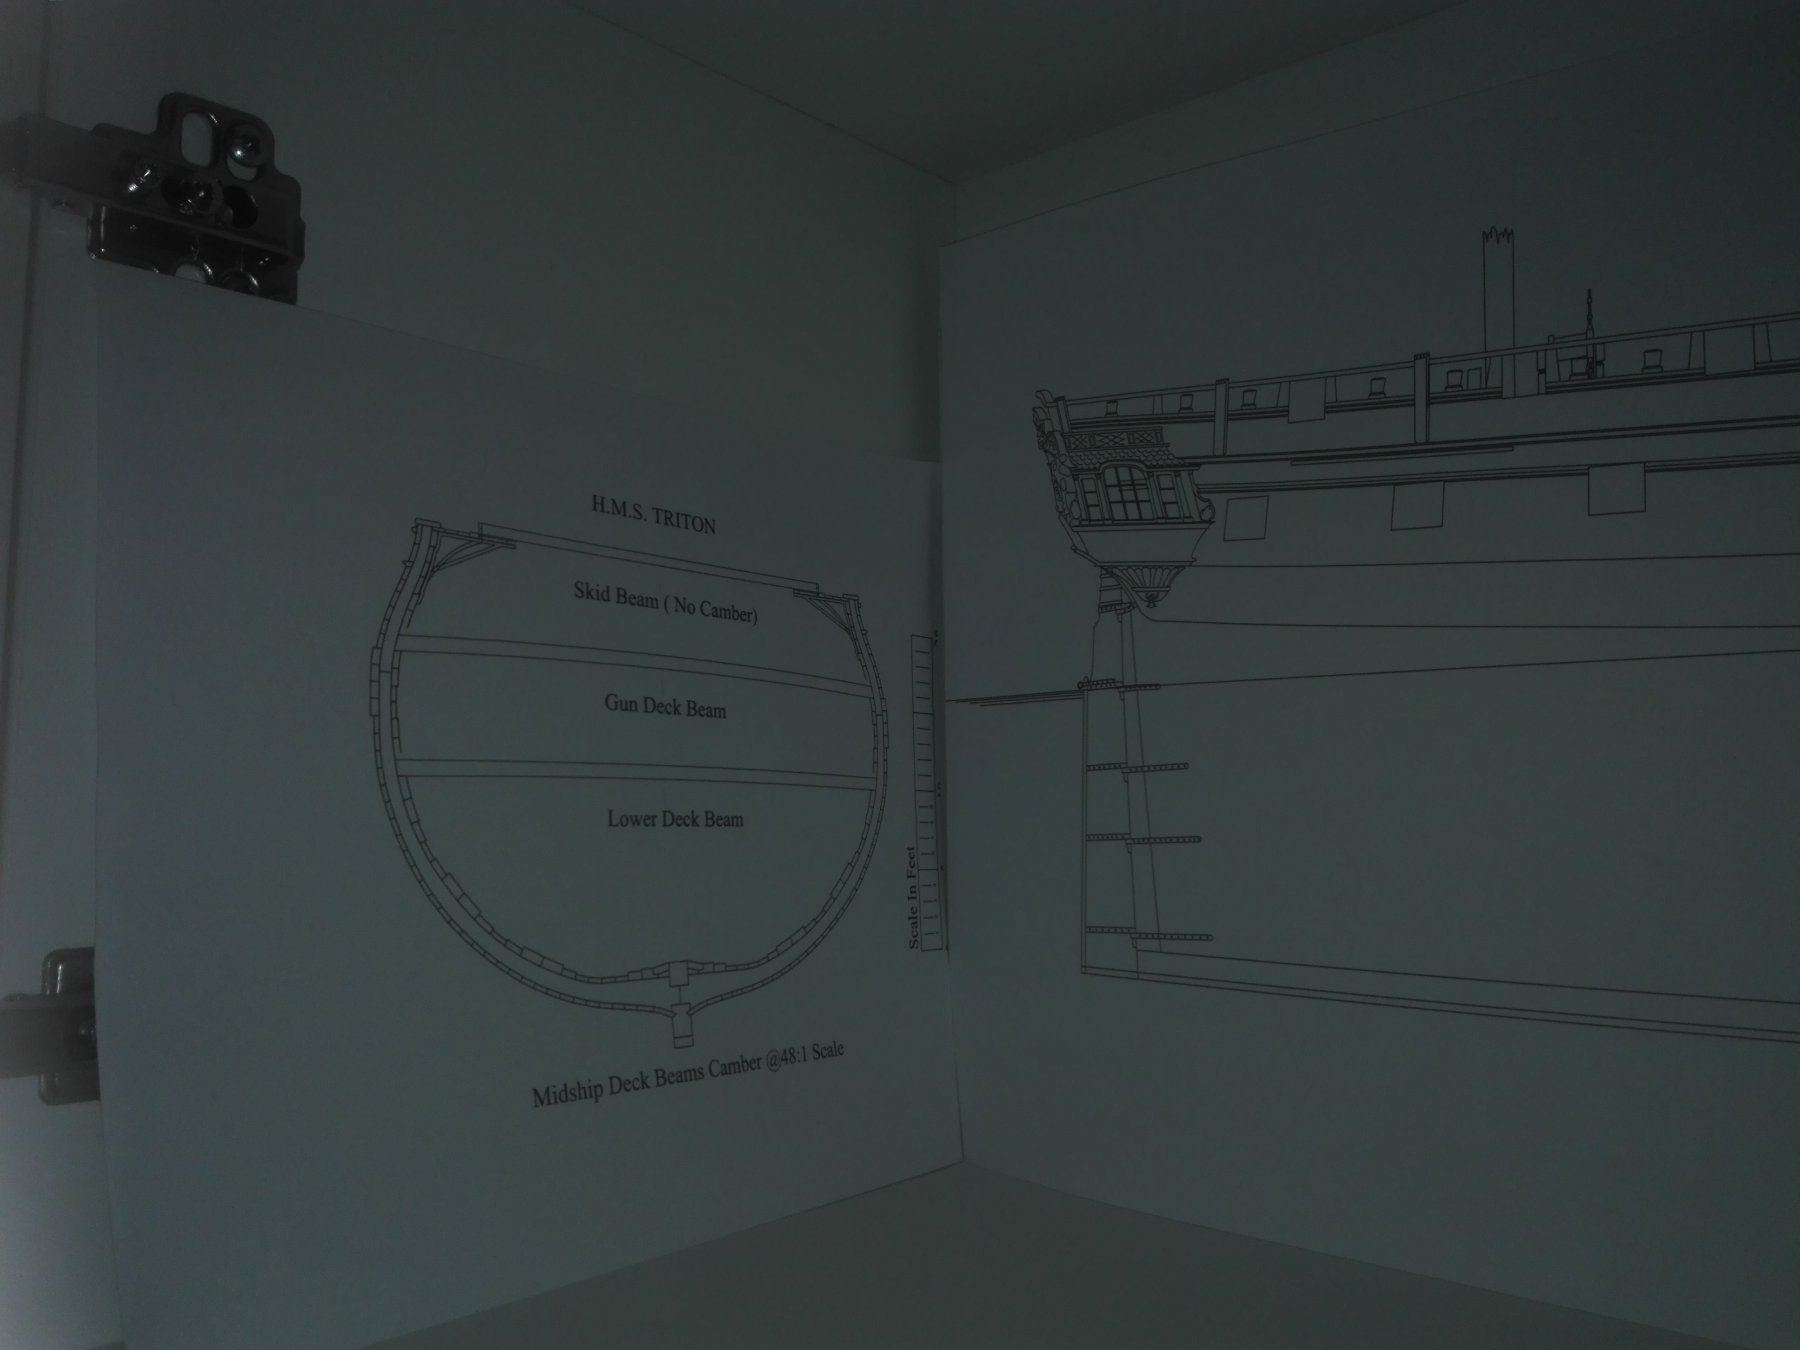
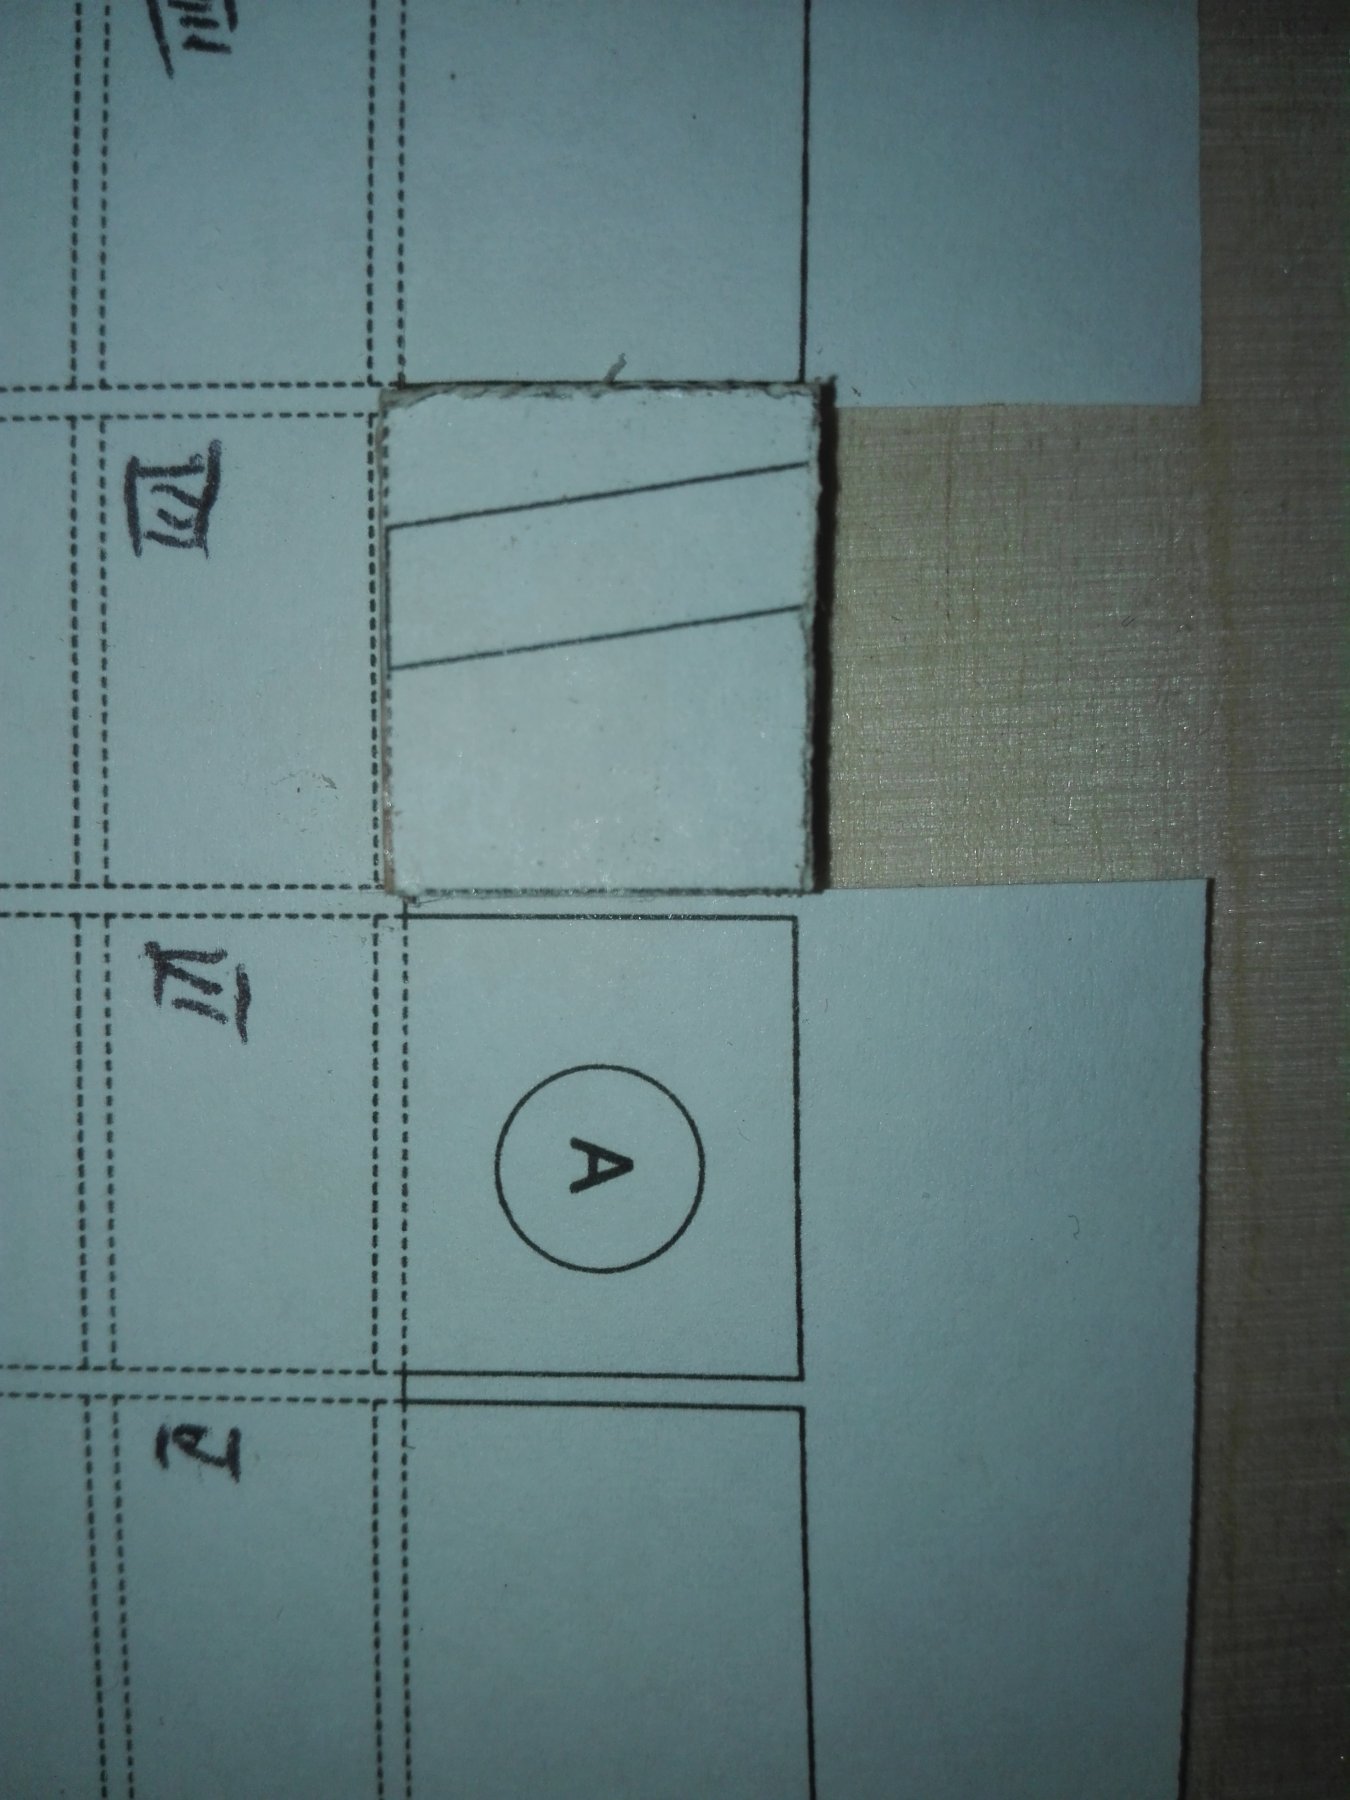
533 -
Joined
-
Last visited
Content Type
Profiles
Forums
Gallery
Events
Everything posted by Heinrich der Seefahrer
-
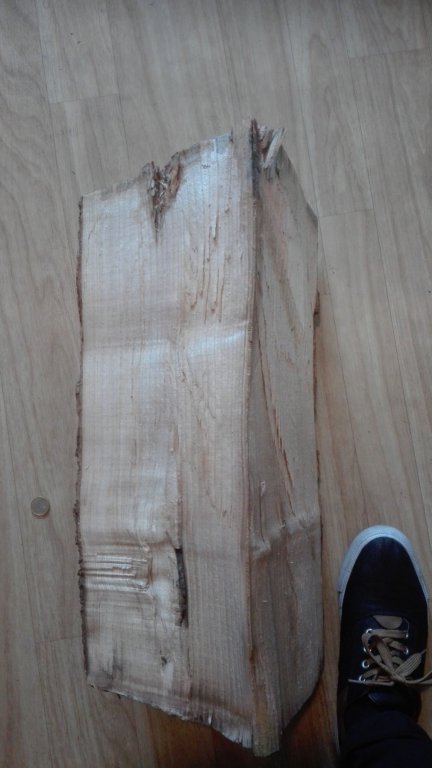
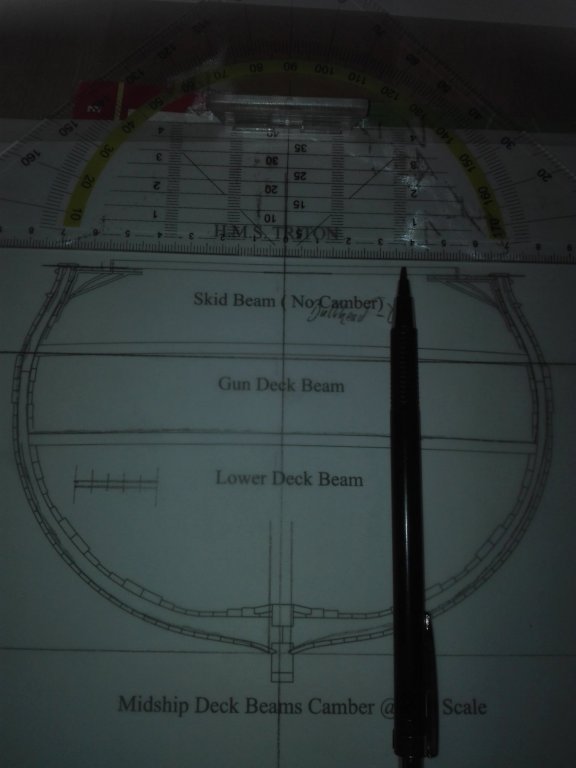
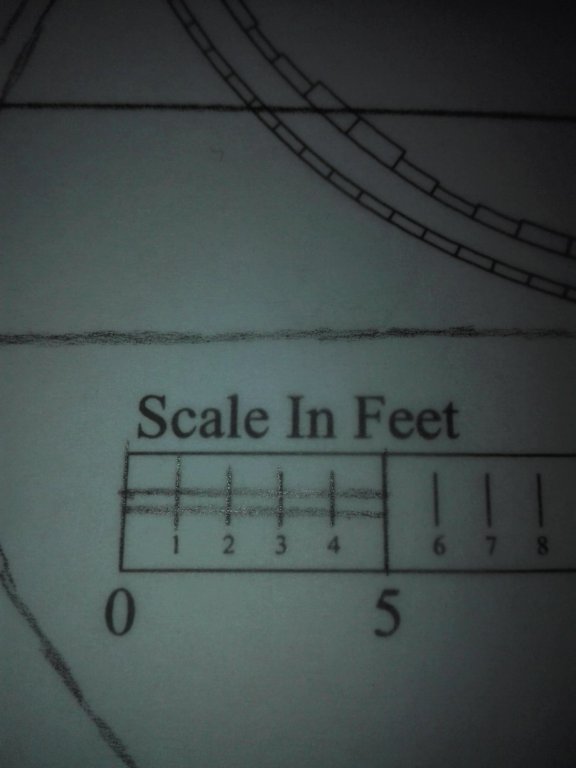
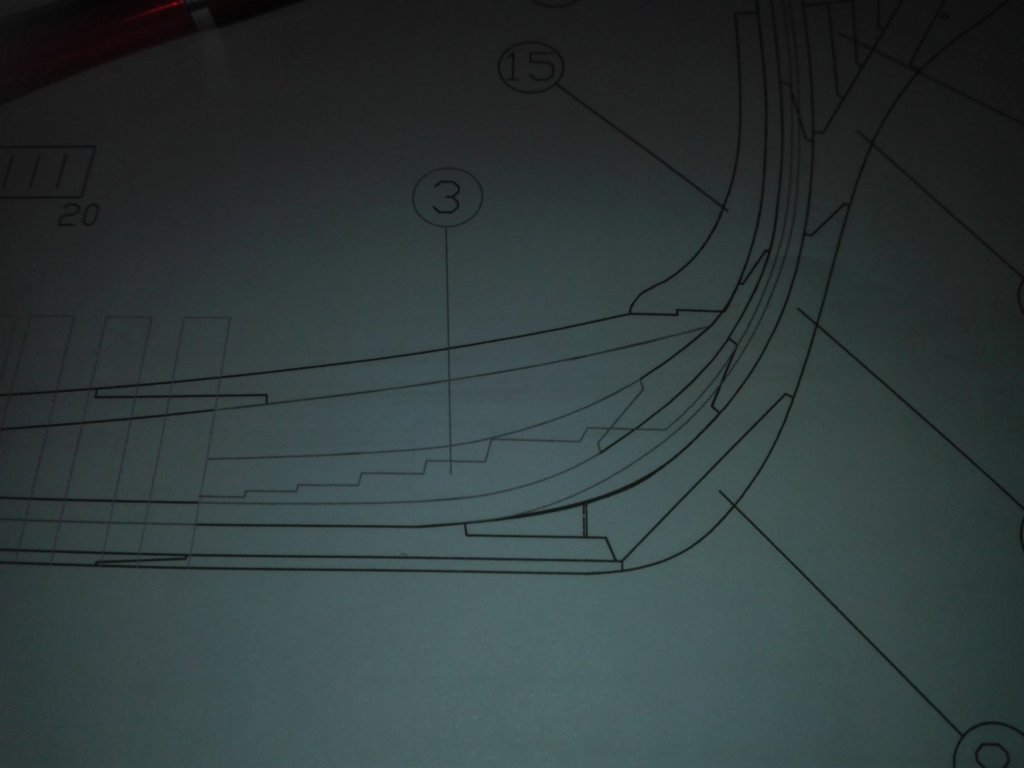
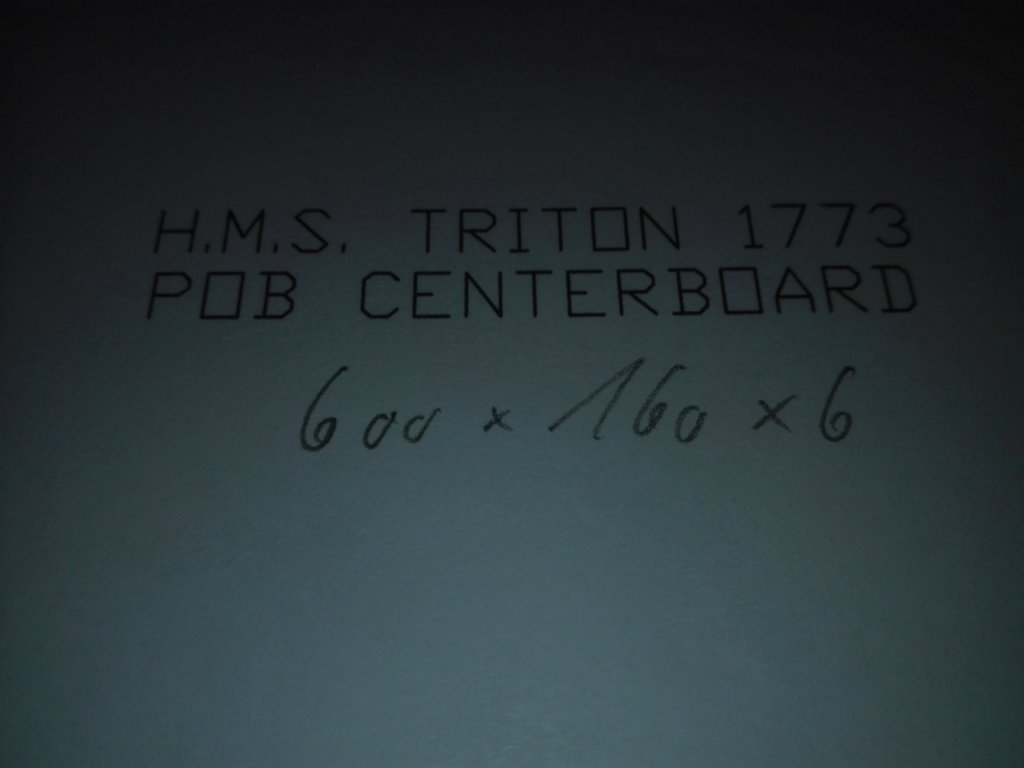
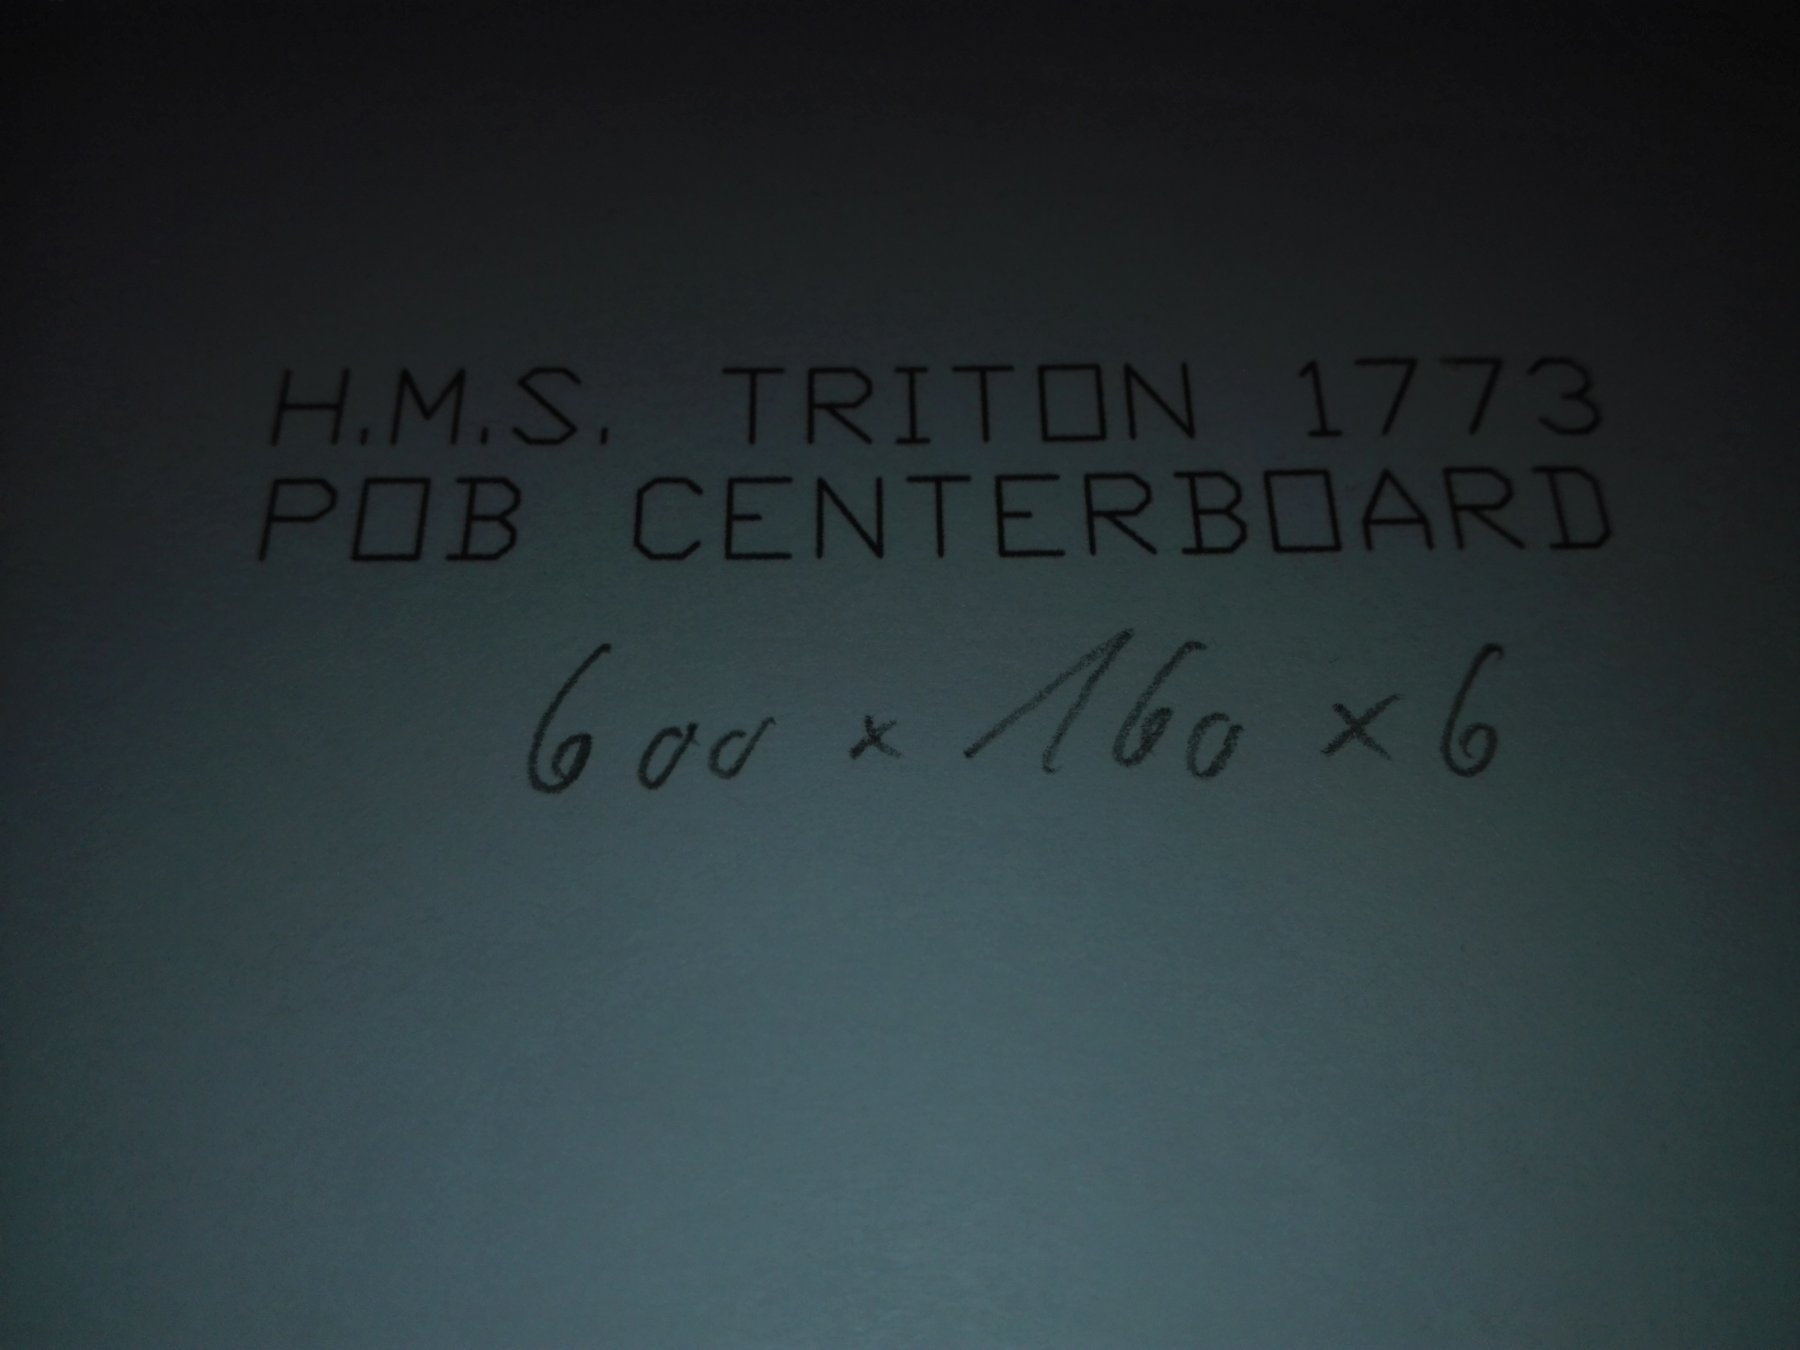
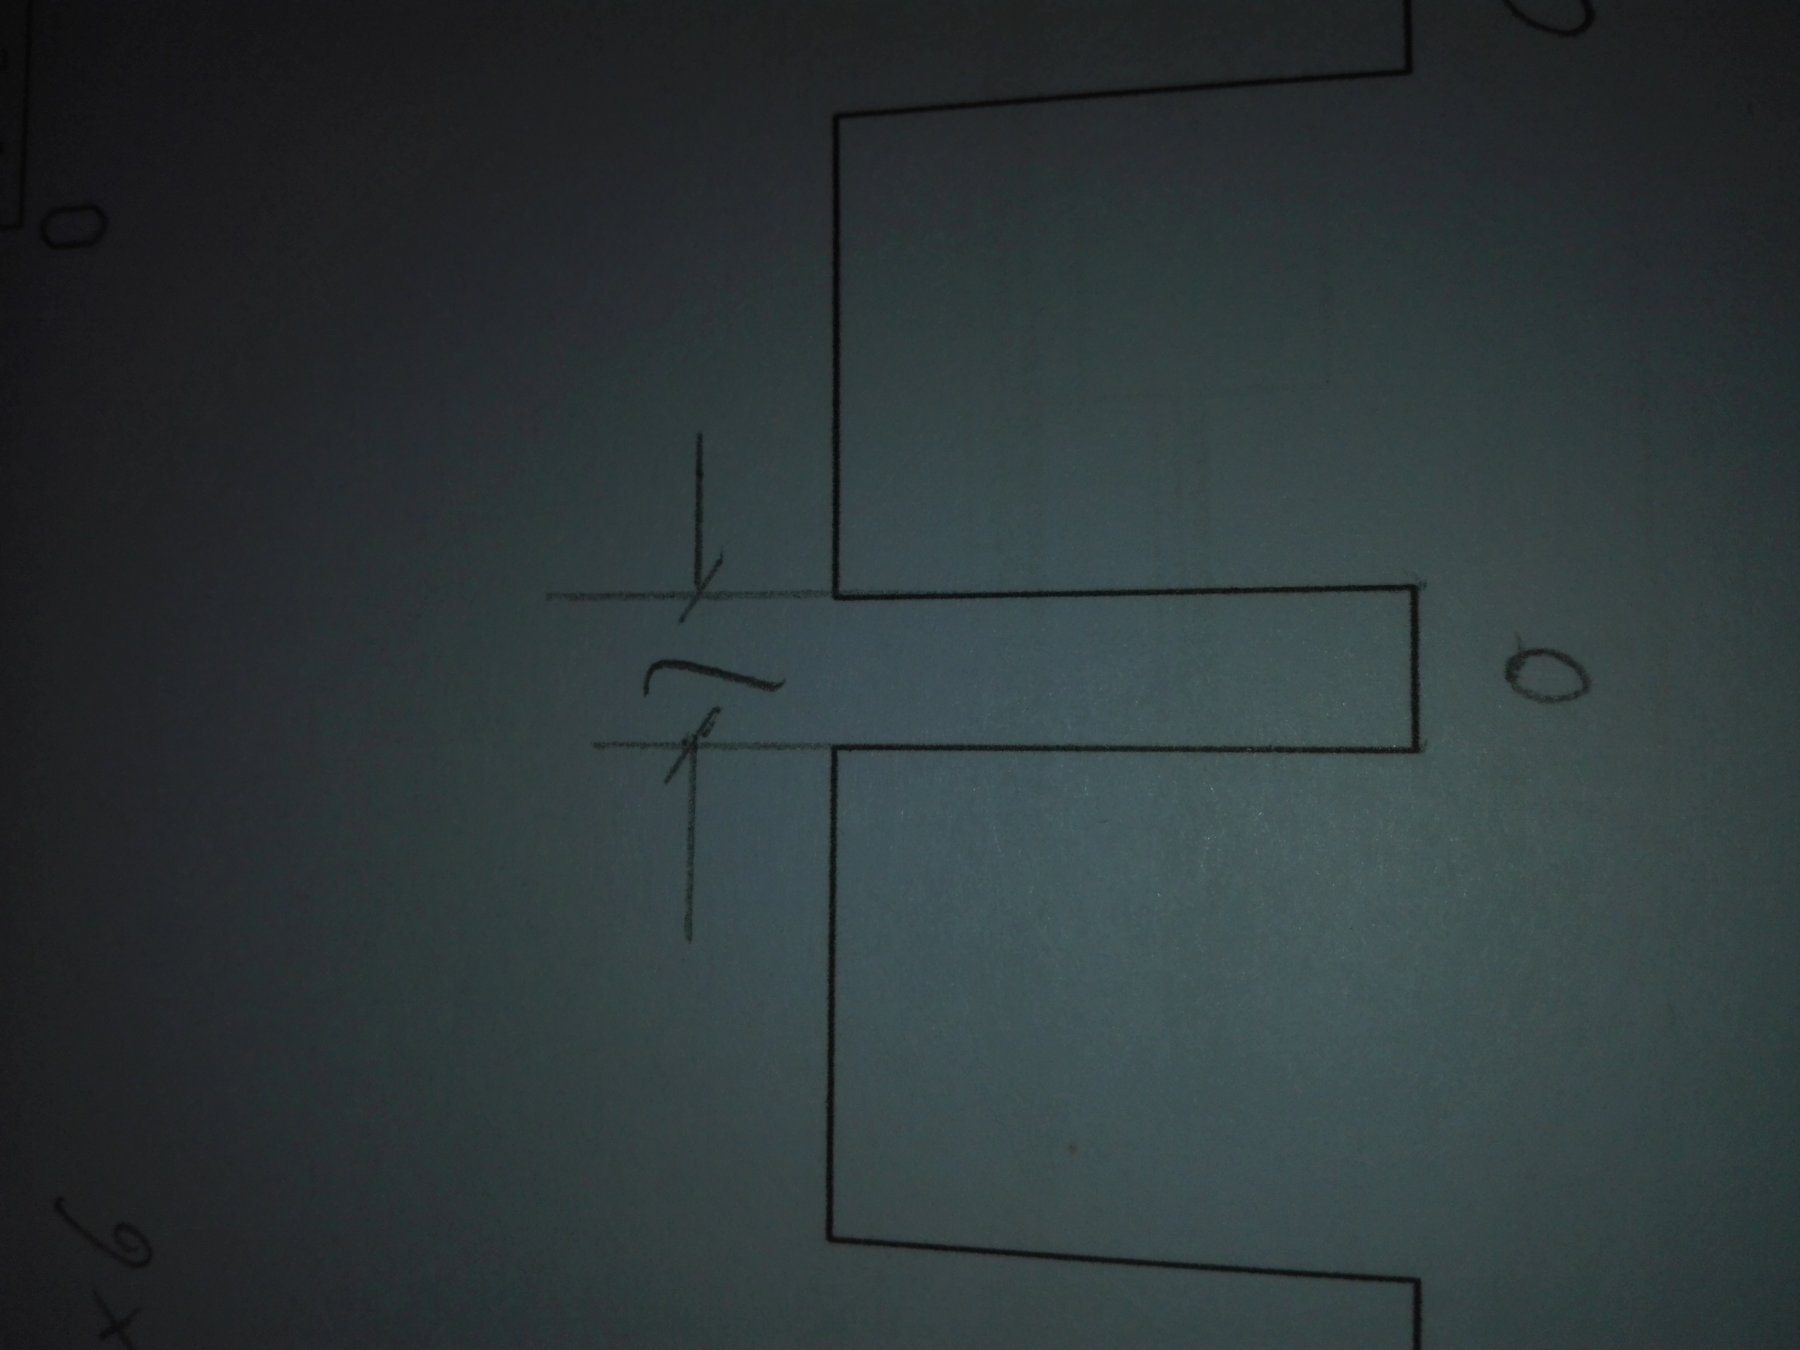
 Now I'm with a first problem - the centerboard is including the keel, stern and stem. As I see from the PoF threads alls these parts are built seperatly. normaly, so the vein is allways diffrend to the neighbour bits - what makes the interesting look of this very part. 0. Cutting along the rabbet? I think about cutting the centerboard along the inner line of the rabbet. By this I can add the slimmer rabbitplank easyly between centerboard and stem, keel and stern. But by this I'm forced to build a realwood keel stem and stern. As all this parts are 6mm breadth I can cut them from a block of ashwood I got as a present. Is this a good idea, as I want to build a partly painted hull model without equipment ? And by this the hullmodel will show the unpainted part of stermmand terns over the CWL? 1. Right wood chosen? Is ashwood a good choice for this scale? As far as I understood only n, 1'=1“ oak should, be used. And by this the oak's vein is to be deminimaliziced, too; isn't it? 2. Living with the deadwood: The after deadwood seems to be a complex fountain of trouble, as Annobium Punctatum shows how to deal with it. And also the frontpart seems to be a tricky beast. Do I have to built this complex parts also in such an elaborated matter when I do not want to clad the underwater part with copper? 3. Formers on bulkheads? I want to copy Alan's technique to fill the gaps between the bulkheads with softwood to get a smooth surface for the second ash-vaneer planking. Everything is easy he told me as long as Im with nearly parallel hullsides at midship. But when I come to the winding ends of the hull everything gets uneasy if not intrecately. So I've got the risqué idea to use the shape of the frames to interpolate the hull's inside curve. This because the f'cstl part fo the gundeck for example is mainly visible. In particular because of, the omitted guns and the (with out the very first pair at the stem) unexeptional lidfree gunports. Is it possible to combine the bulkheads with the formers? And what former is parellel to what bulkhead? 4. Copyright - using a copy wrong? The pictures of the plan as a detailpart to explain the particular problem ar okay in my way of showing it and the do not tresspas copyright standards? I tryed to camouflage the drawing by canting my smartphone camera. So the picturesvare worthless for everybody.But please tell me if I'm still on a good track. 5. Testify the copies scale: I copied the cross section on transparent paper and figured out that the bulkhead N° Zero and the crosssection fit perfectly... ...but I've forgotten to measure the given thickness of the vaneer of the second planking. Okayokayokay - don't over do it and keep a rest of work for the following day! 6. Literature: Some colleagues here deal with the AotS Diana, others with the Pandora issiue. What ship is closer to the Modified Meremaid Class? Thanks for all the intrest and help.
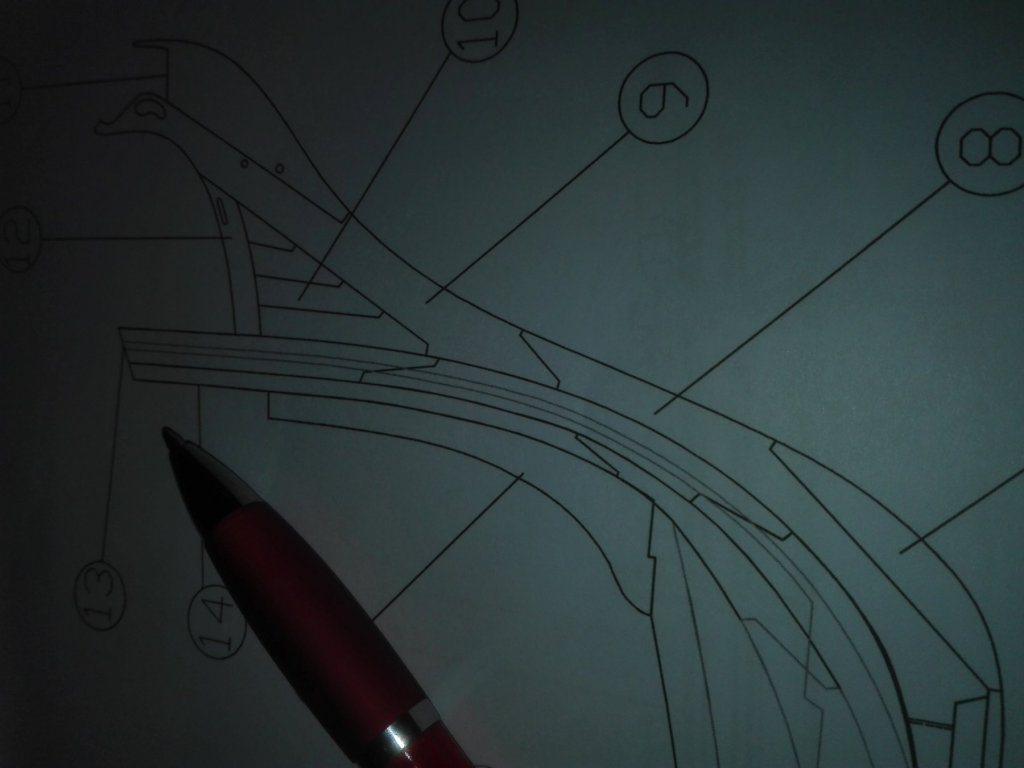
-
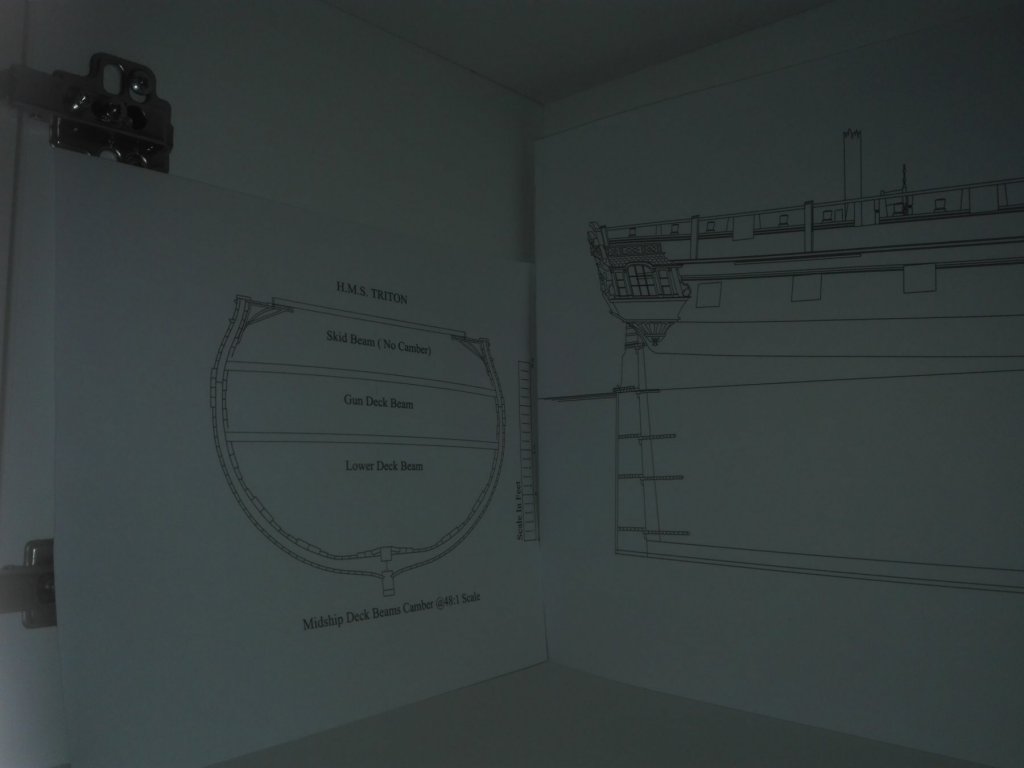
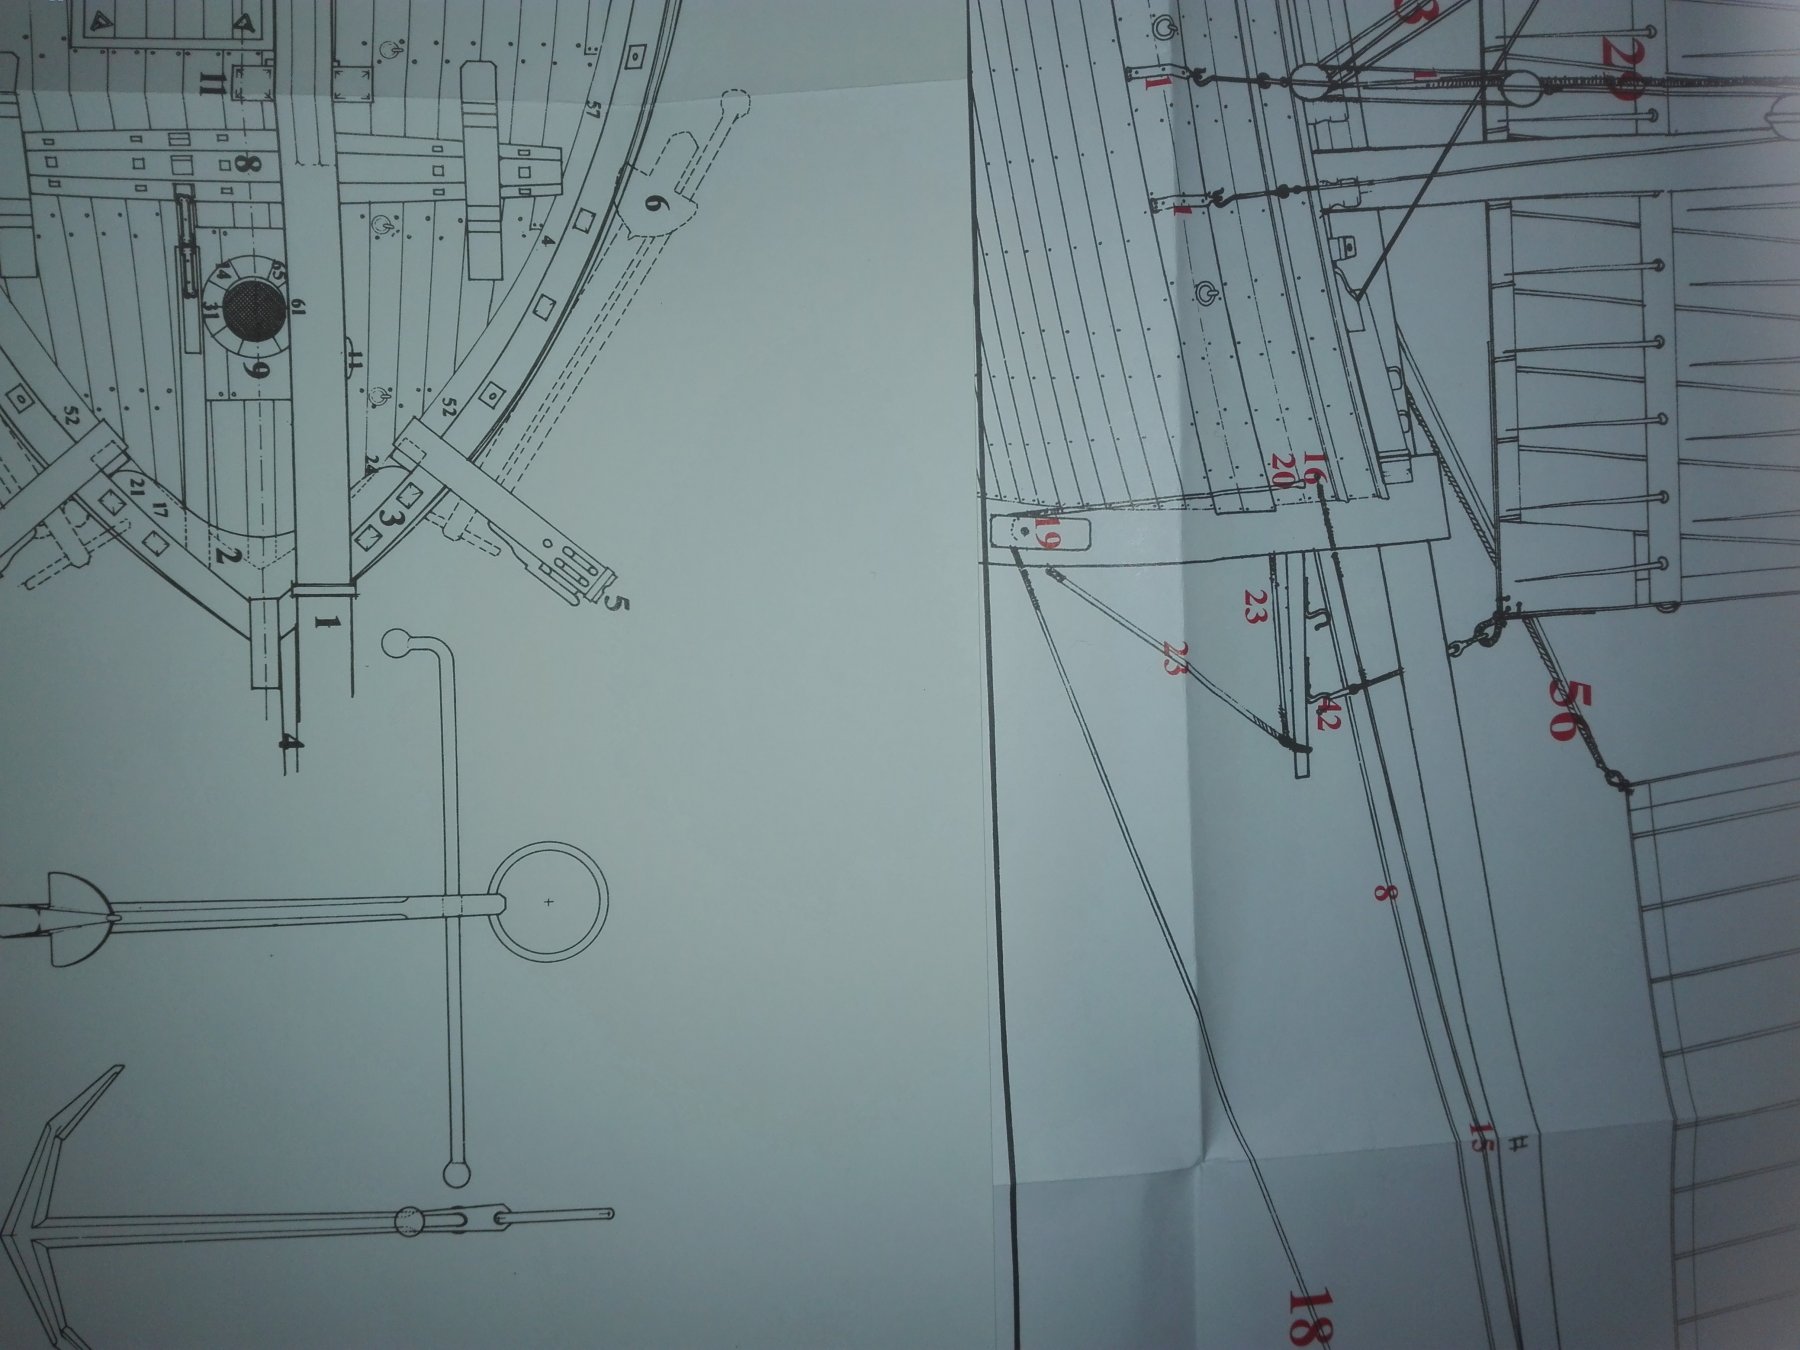
Thanks Alan, for your support. Back from the copyshop (where I payed nearly ninetimes the fee for the plans here) I started making myself acquaint with the Triton's plans. I started with the place where her majesty of the sea will rest - and what I measured really works. I really love it when some first idea works in reality. Astonishindly also the beadth is well. The thickness is also given beside every single bulkhead by the hatchinglines area on the right of the bulkhead's drawing. So itI is resized at copying into an other scale . Really well done draftsmen, very well done! My measurement works on the bulkheads says 7mm - in Gemany a nonstandard thickness for plywood. Due too this I'll buy the 6mm standard pine plywood adding a stripe of 1mm beech-plywood to fill the gape. But I'm happy that the thikness of the basebord comes exactly to the European 6mm standard. Sometimes luck is most important. Then I looked through the plan and strarted tohe get some ideas and questions.
-
Hy Allan, thank you very much for this detailled thead. I'm astonished about all the eecherche work you, did. And this looks very intersting and I learn a lot. I have to admit I haven't got your possibilities and abilitys but it looks very intetesting. In particular as it's the same scale as I'm going to built my Triton. So it's very important to see what at all is possible in this scale at scratch. And where is the border of handcrafted modeling, as I can't use a mill or lathe. I'm very impressed.
-
That looks fine, Alan! Thank you very much for the advise. I think I'll have to face the same problen at the gundeck's stemside end. Perhaps I'll cut the paperplan at the 5th bar from the stem and try to figure out the real shape with the aluminium foil glued on under sized plywood. Taking the Centerline and de sternside of the 5th bar as "borders" will give the rigth shape of the inner line of the hull and when I cut it from paaper I've got a shape for the cutting it from wood and redo the gundecks stemside end to my particular hull situation. (I've got this alu-idea from changing a T-34 tank from Tamiya kit one's to its correct hul breadth.) Hope this idea is a little help to you. Do you remember what size your rabbet-plank has had?
-
Hy Alan, I'll try to loose this “Game of Mistakes“. I suppose mine will be newish... So I can ask you for help. Here the very first three questions: 1.) What thickness of plywood do you use for the Bulkheads 3/4“ or 1/1“? 2.) Did you make use of the same wood for your bulkheads and filling pices? 3.) Do I need also this elaborated and complex to build deadwood in the edge between sternpost and keel? (I'm affraid I'll have to face his part because of the planking that certainly need to rest somewhere.) So I'm looking foreward to get the prints tomorrow.
-
Update: Due to illness I've to cancel my walk to the copyshop. Yes I have a headache, too.
-
Thanks Mark, that's something I have got during the last week in a preowned edition. So I'm on the right track I guess. But I'll habe to order an english issiue to get the right termici technici. Is there any more “fregat-special“ literature I shoud “throw an eye on“? Let's abuse a German idiom by translating it word by word... :-D
-
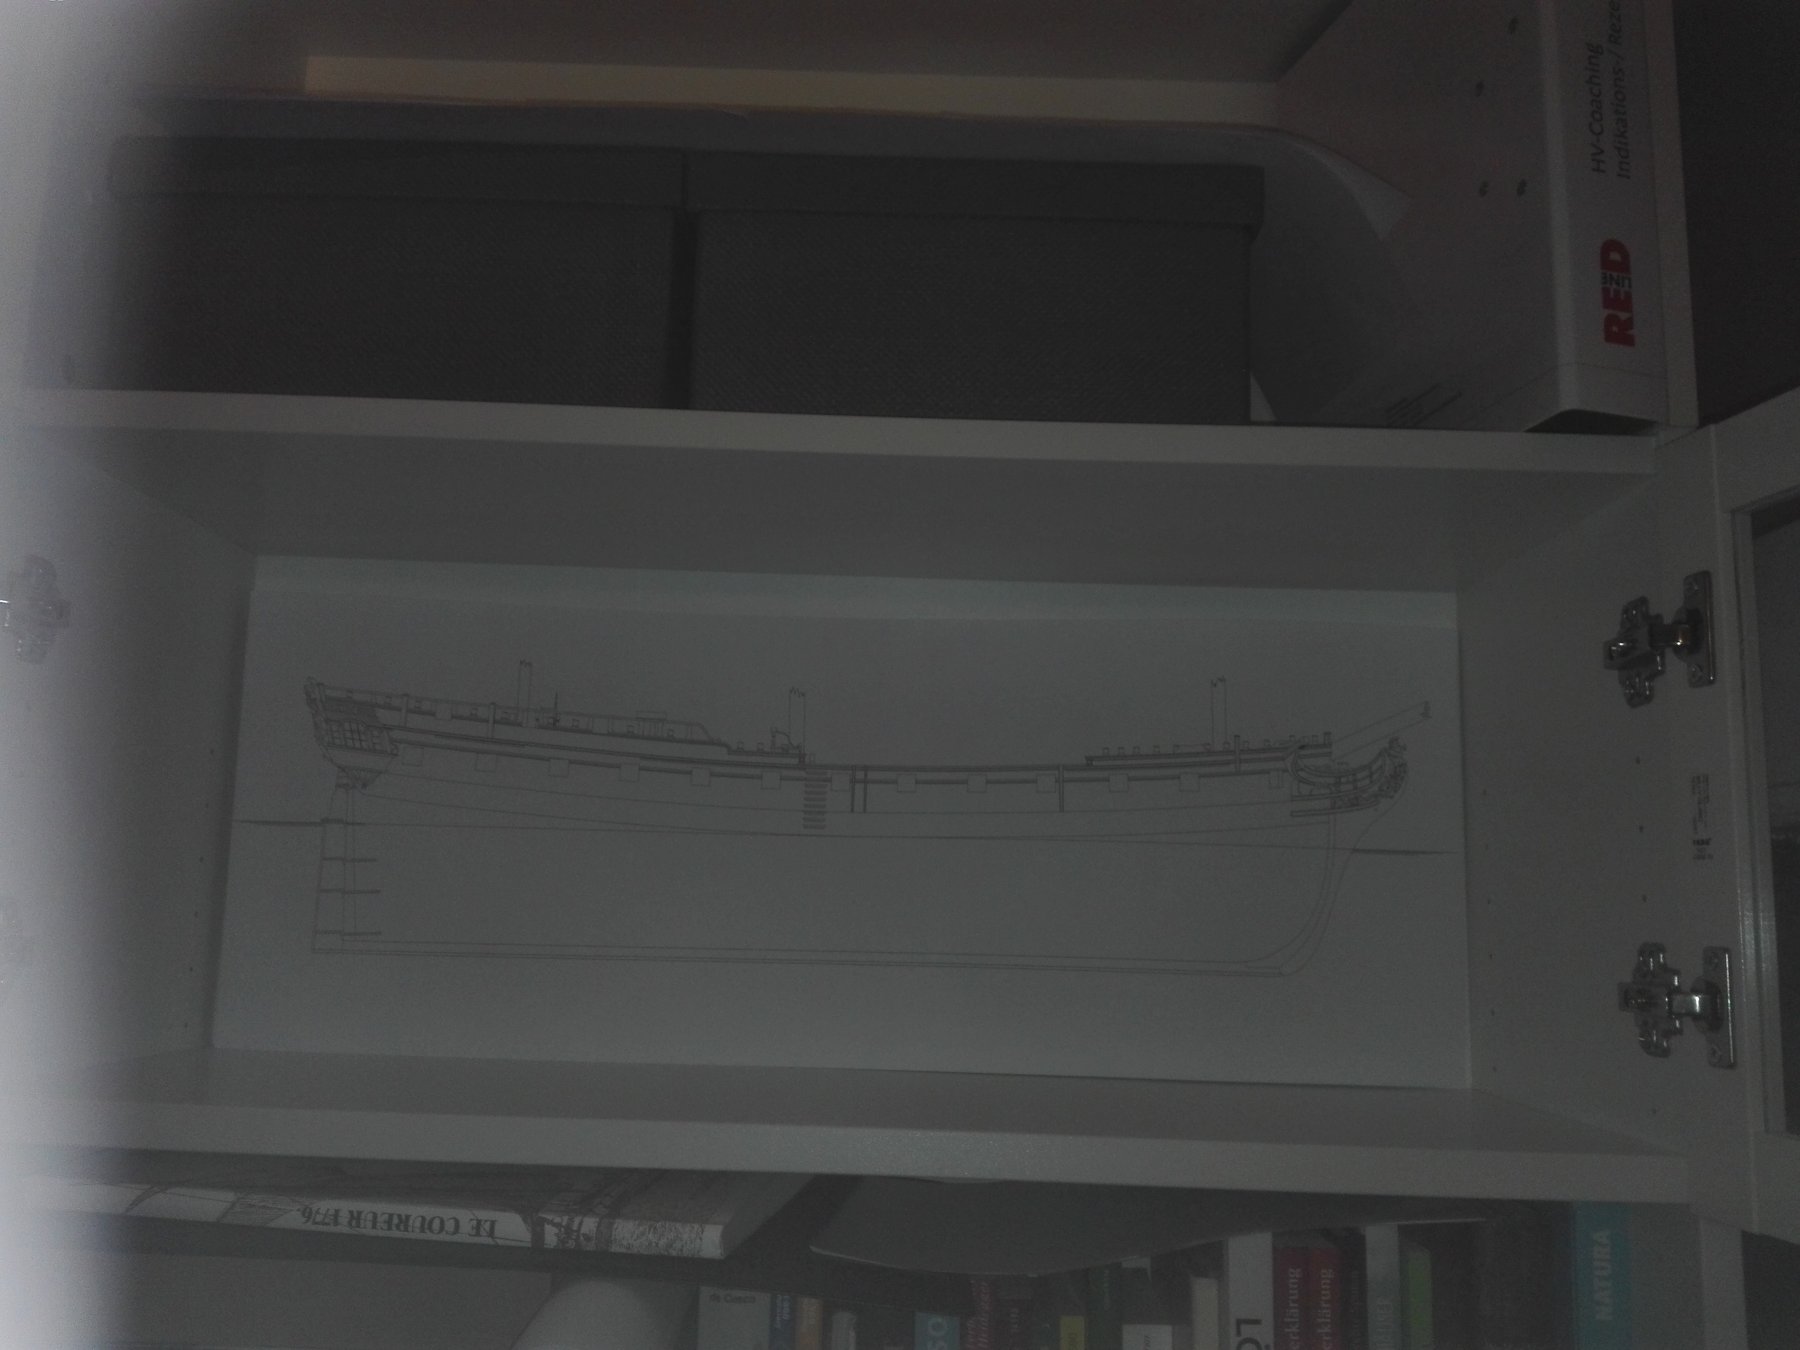
Hello, one guy more building the Triton - as same in here do scaled in 1/64. As I'm completly unfamiliar with the complexity of a ship's riggimg I decided to build a hull model. As I do not own a lyth I'll use the information from the Gardiner's book "The History of the Frigat" to be free to omit all the 28 guns ad the swielguns, too. Yes I'm a scaredy cat. Tomorrow Im going to print and copy my pile of files in the copyshop. Due to the interst in frigats and my wish to build in a group I decided to take the nice Triton of the Meremaid Class. So I'm going to share my ups, ops and downs with all of you. I decided to build her in 1/64 due to the size of my flat, as some others also do. So I don't expect to get a Museums-able model out of my bonsai workshop on the one hand and on the other hand I hope not to get something I'll have to hide for the public in an open fire place. So I'll try to build something intermedium. Before the very beginning I'd like to have some more literature beside the Gardiner. Is there some thing you would advise me to buy for this build aside the AotS book of Diana I've shot at Ebay and 'm waiting for? Thanks for your help and friendly intrest.

-
Thanks Patrick for showing your work. That's great. The Renomee is a graet love of mine but I'm much to unecperienced to try her even als a PoB project, I do fear the elaborated rokkoko decoration work, too.
-
Little paper builder
Heinrich der Seefahrer replied to Heinrich der Seefahrer's topic in New member Introductions
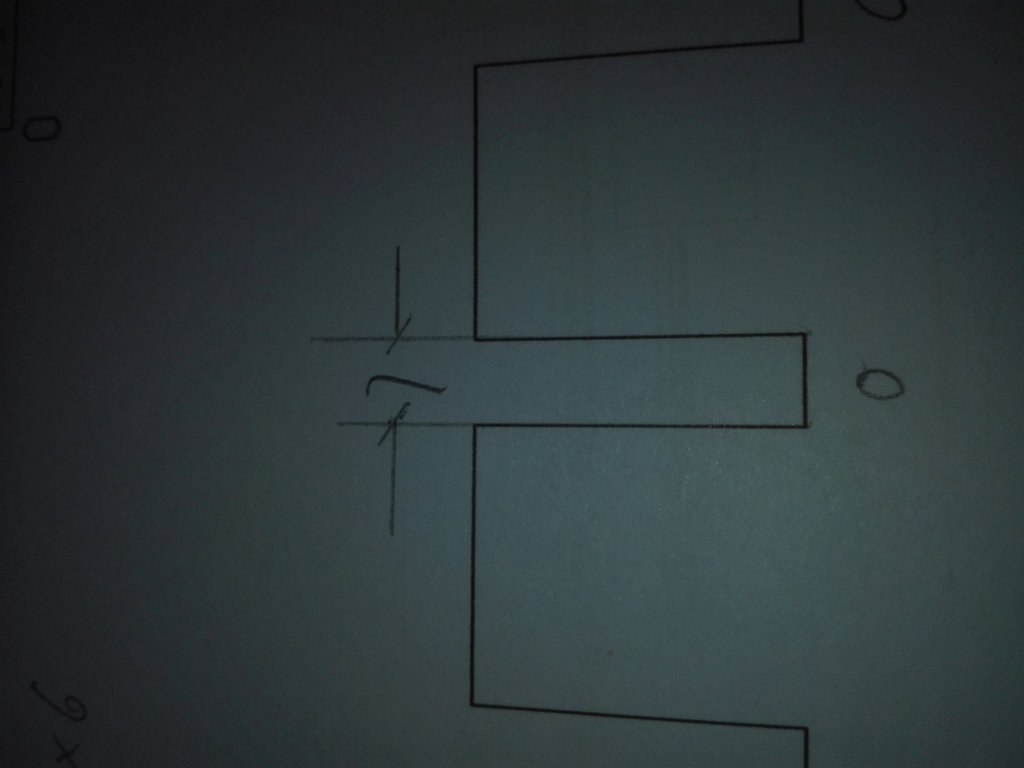
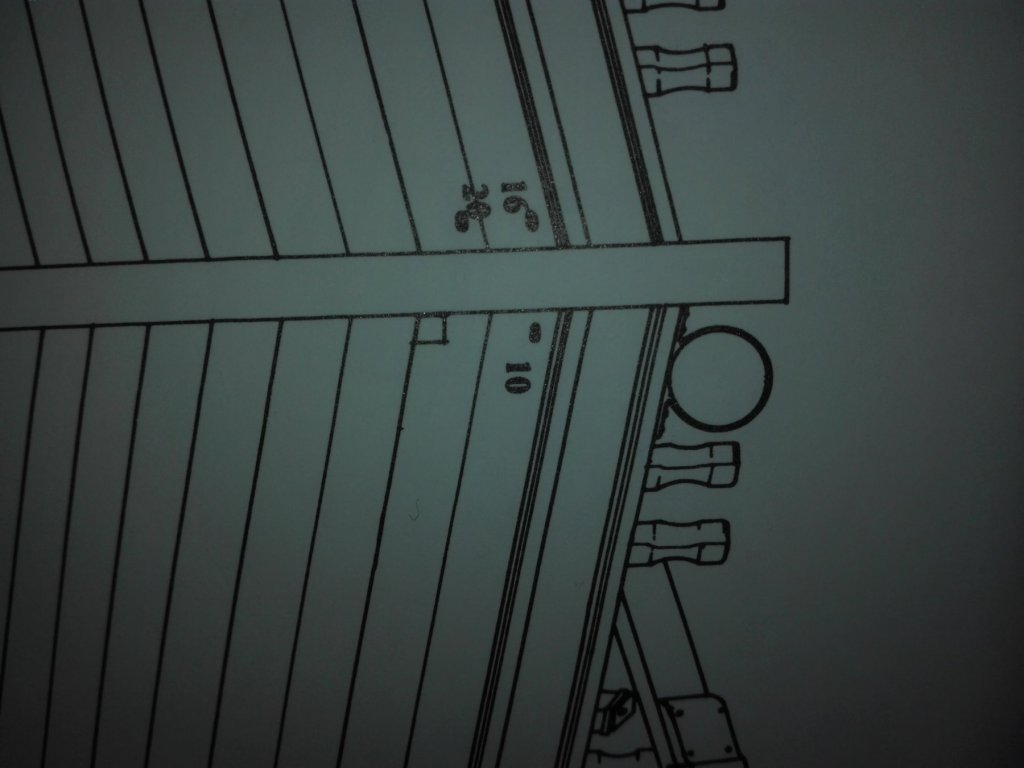
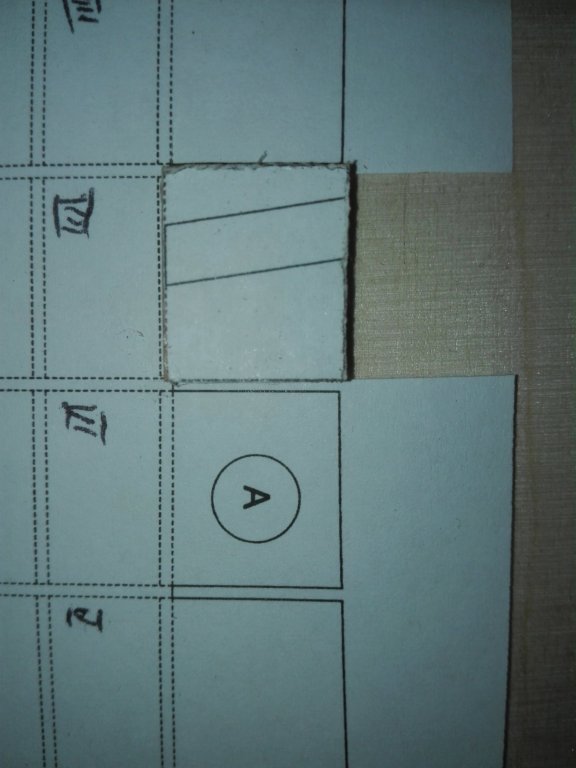
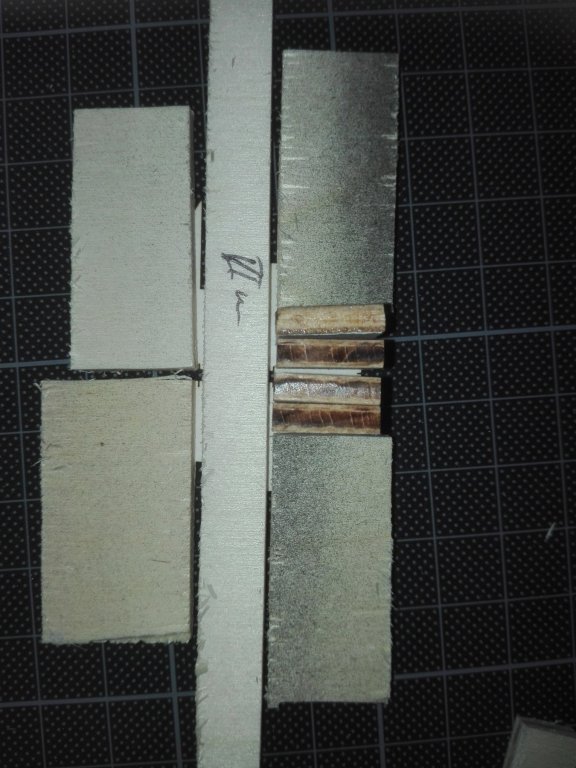
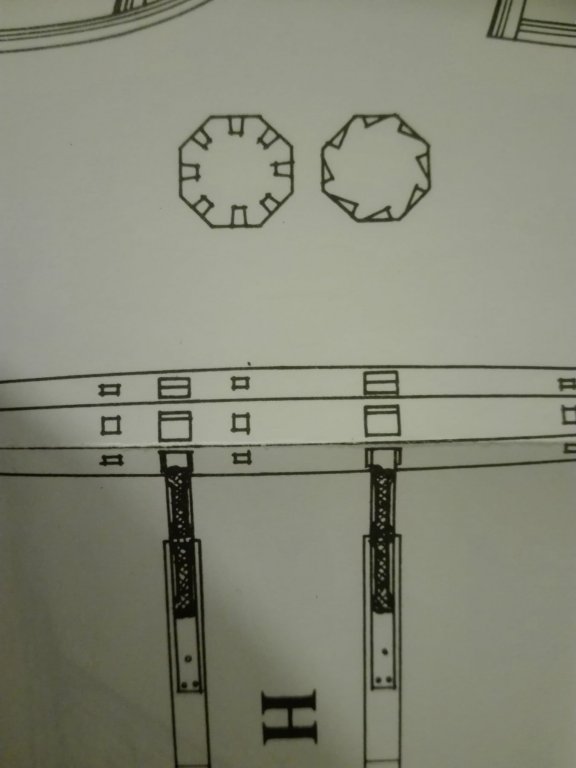
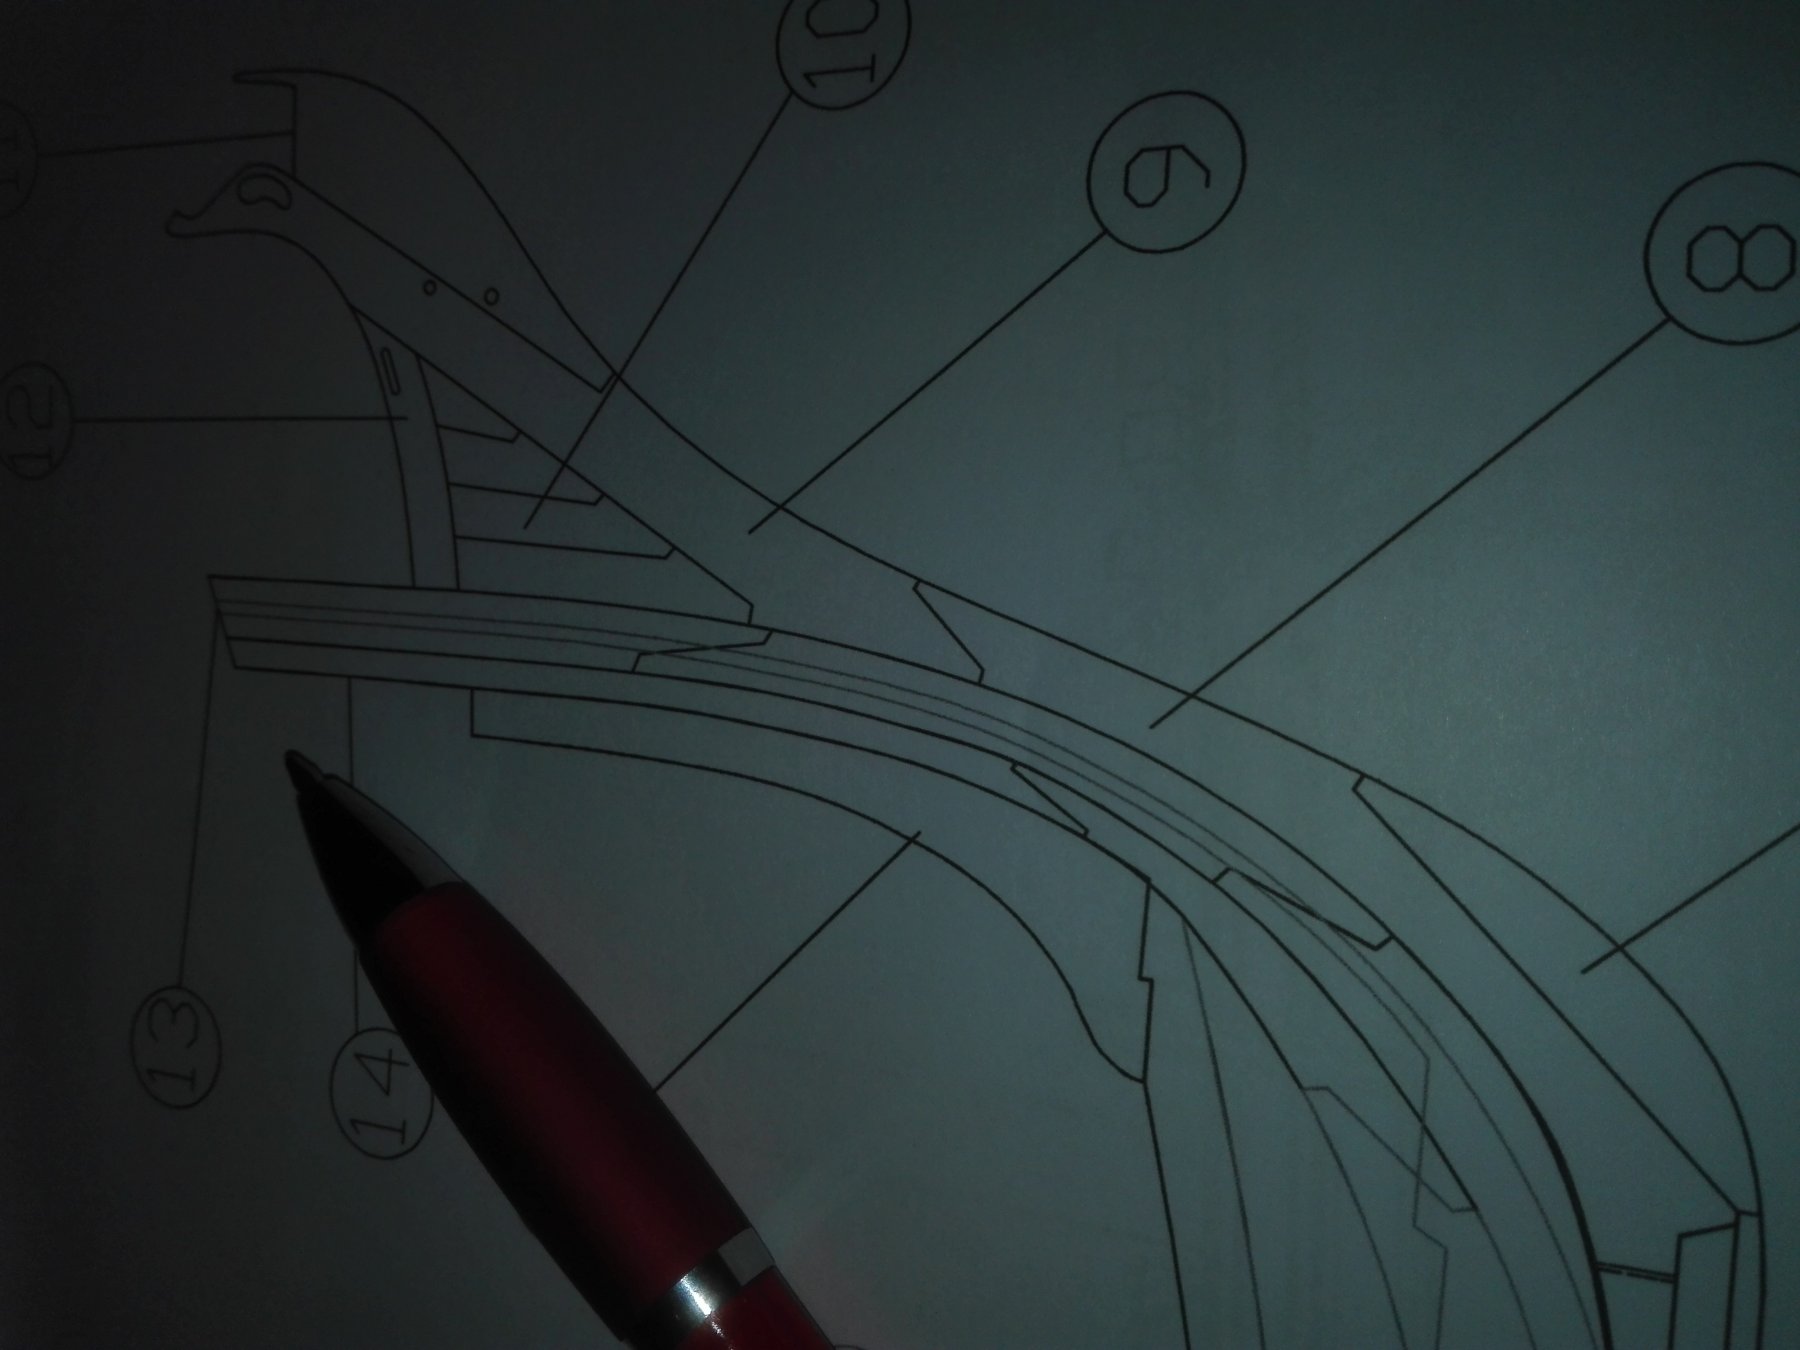
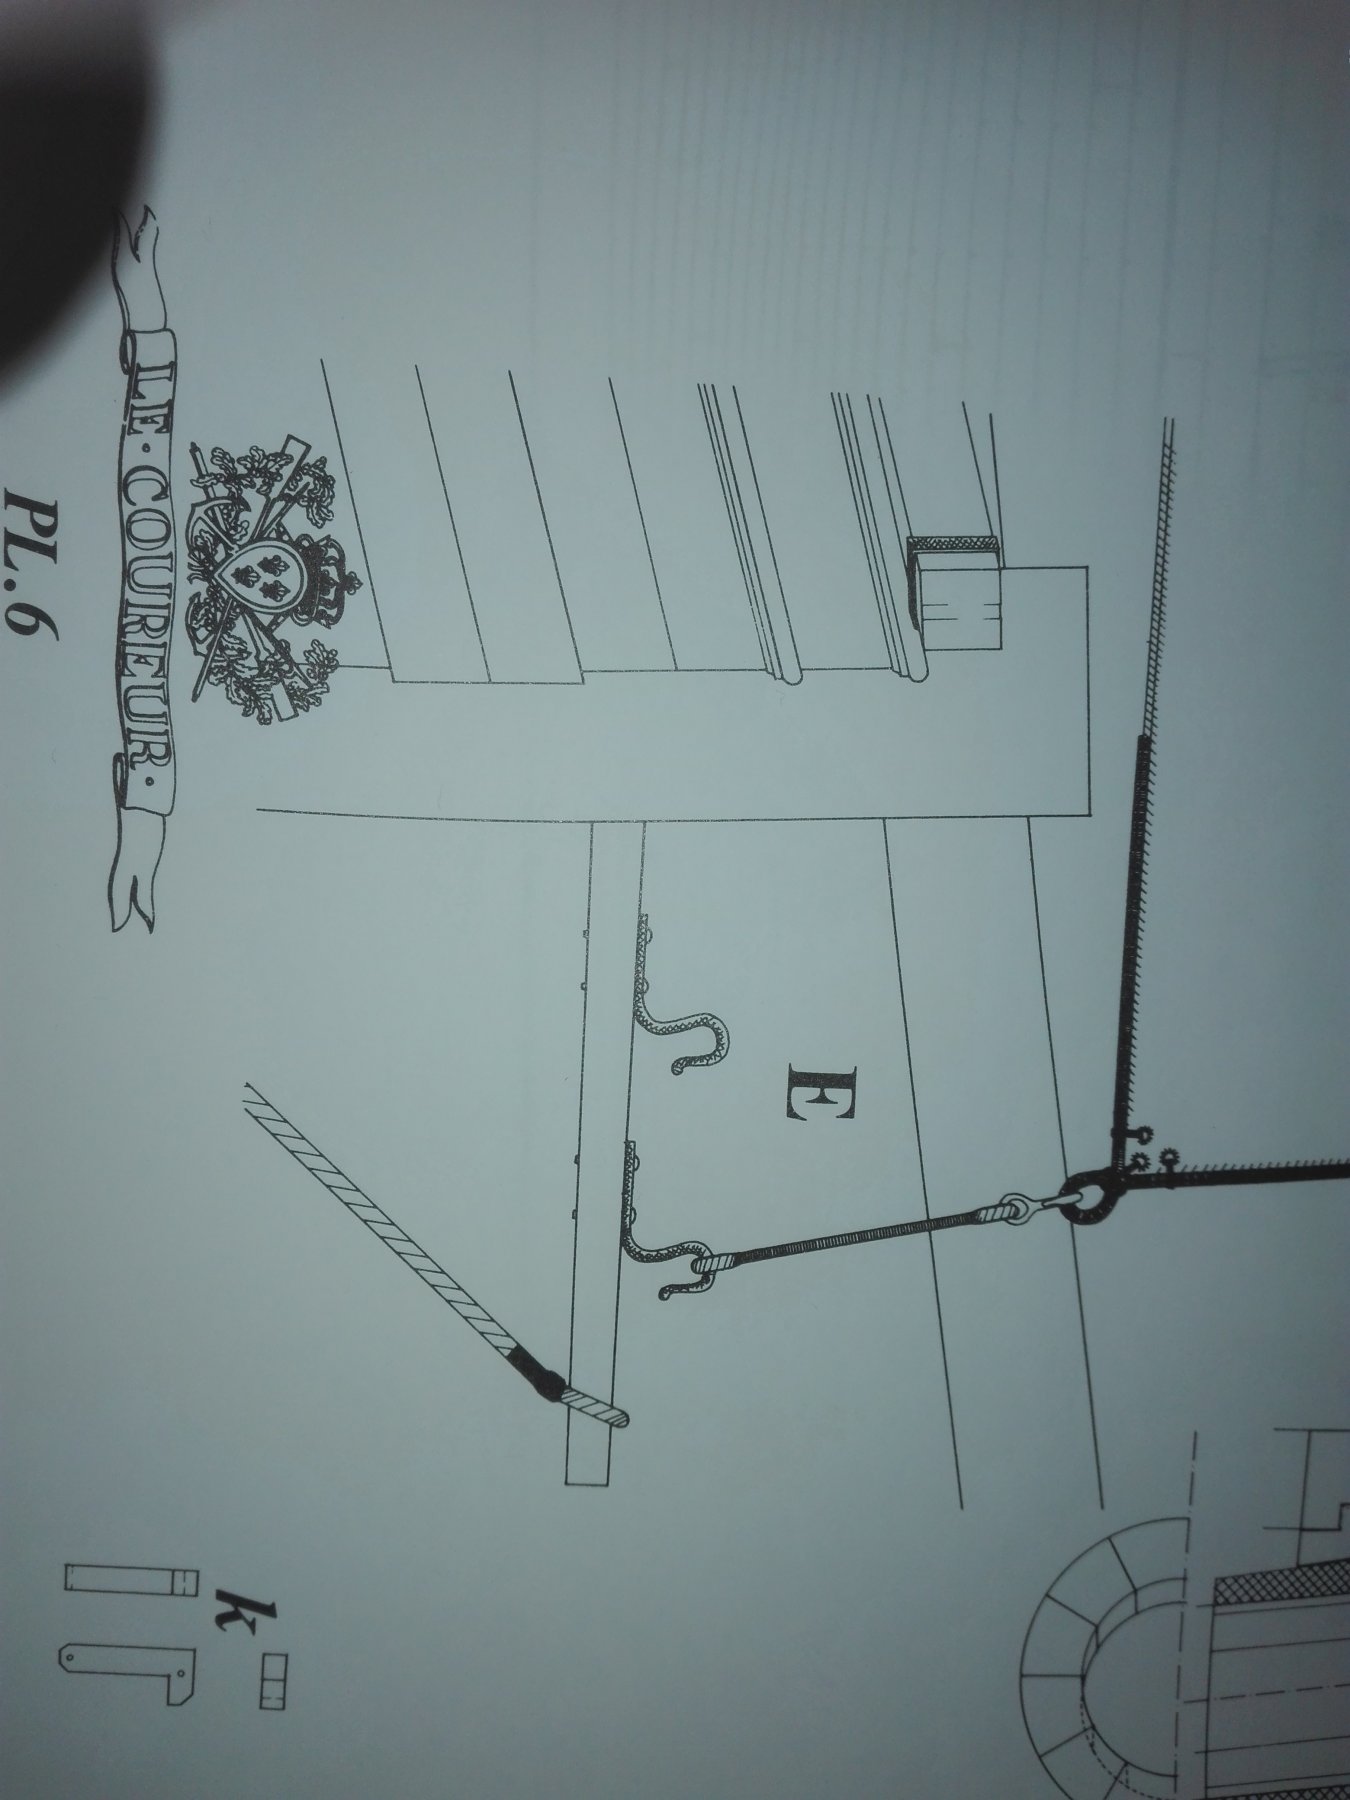
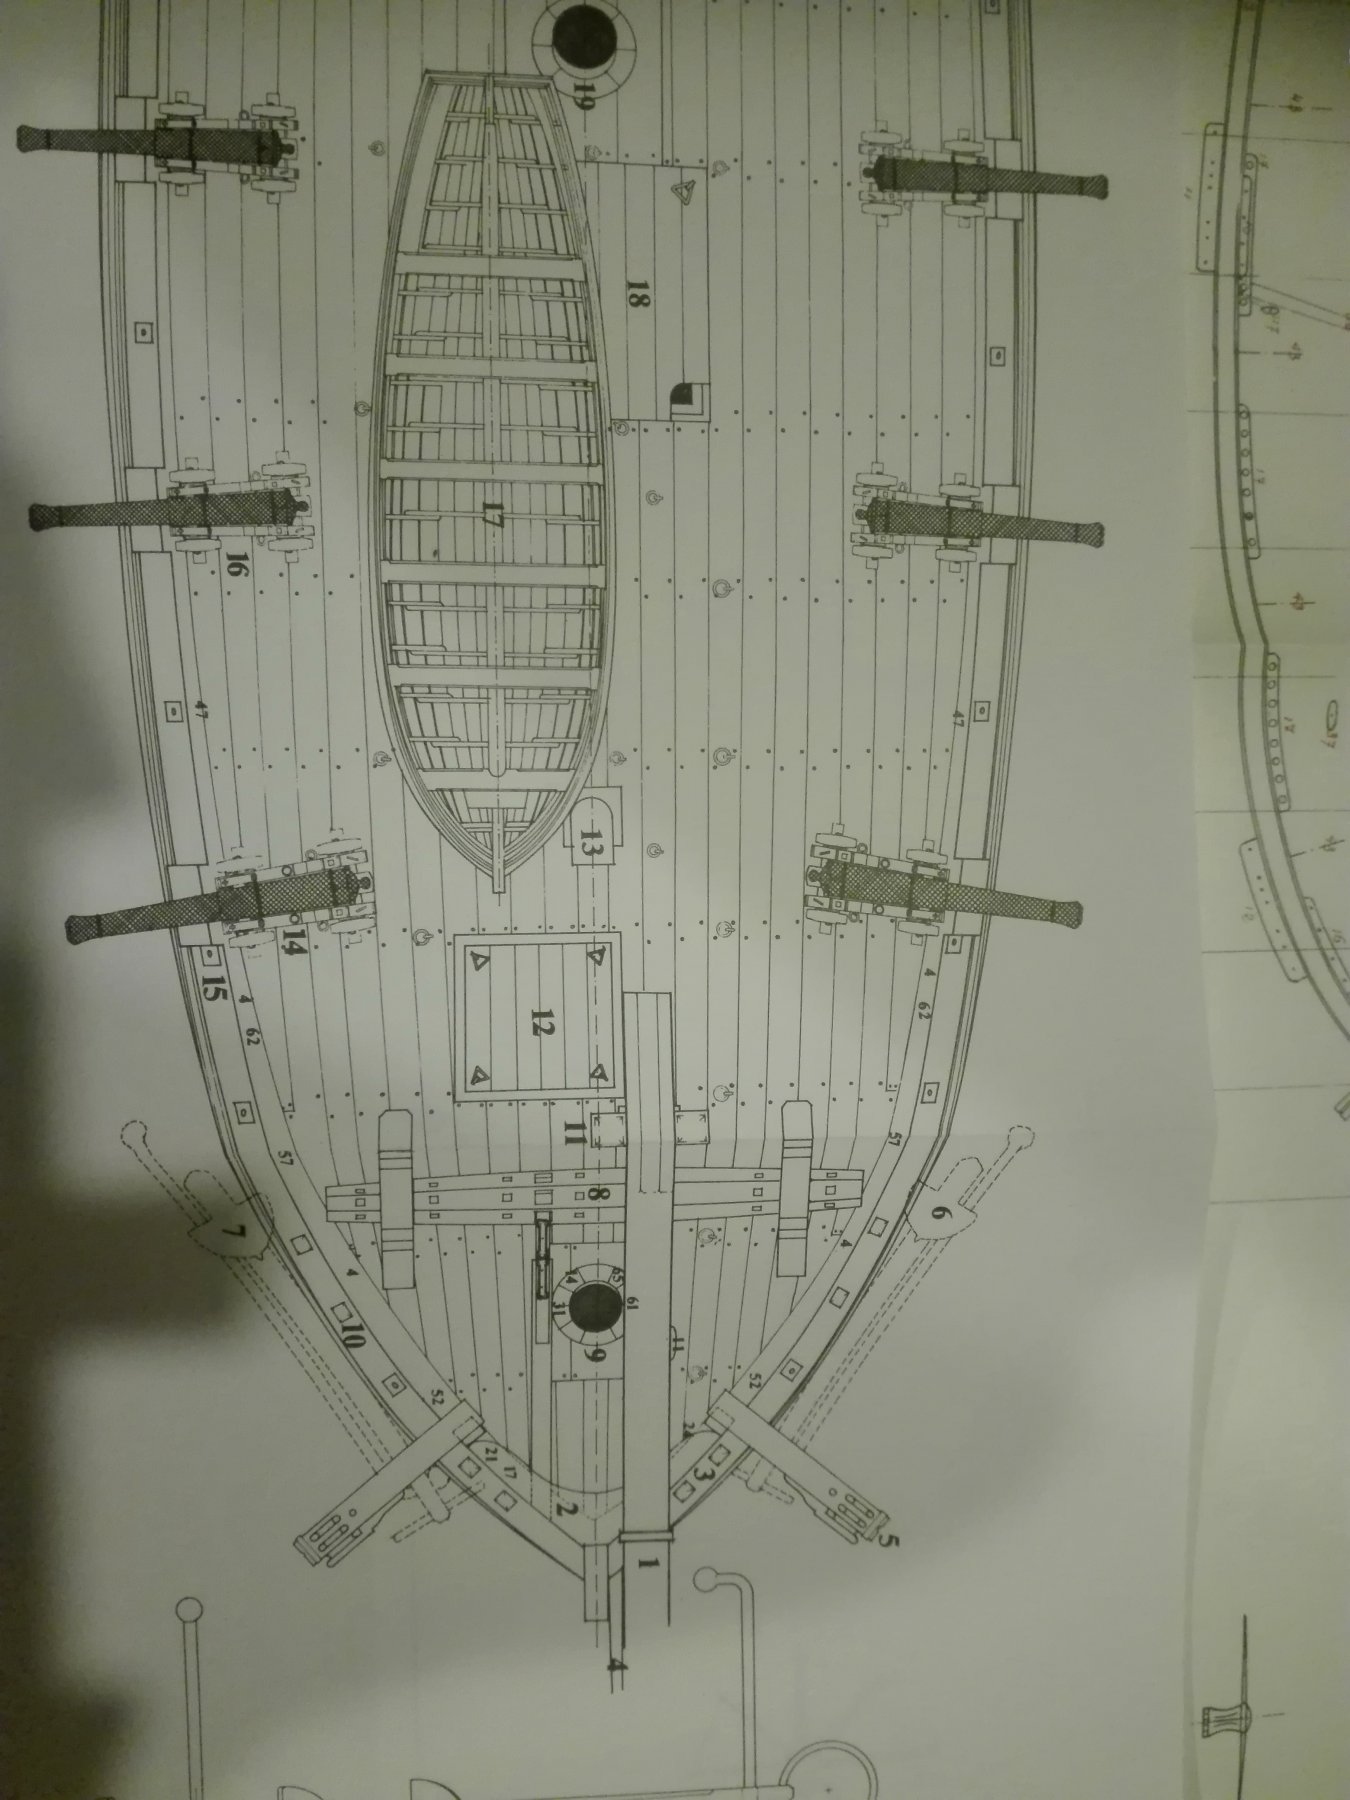
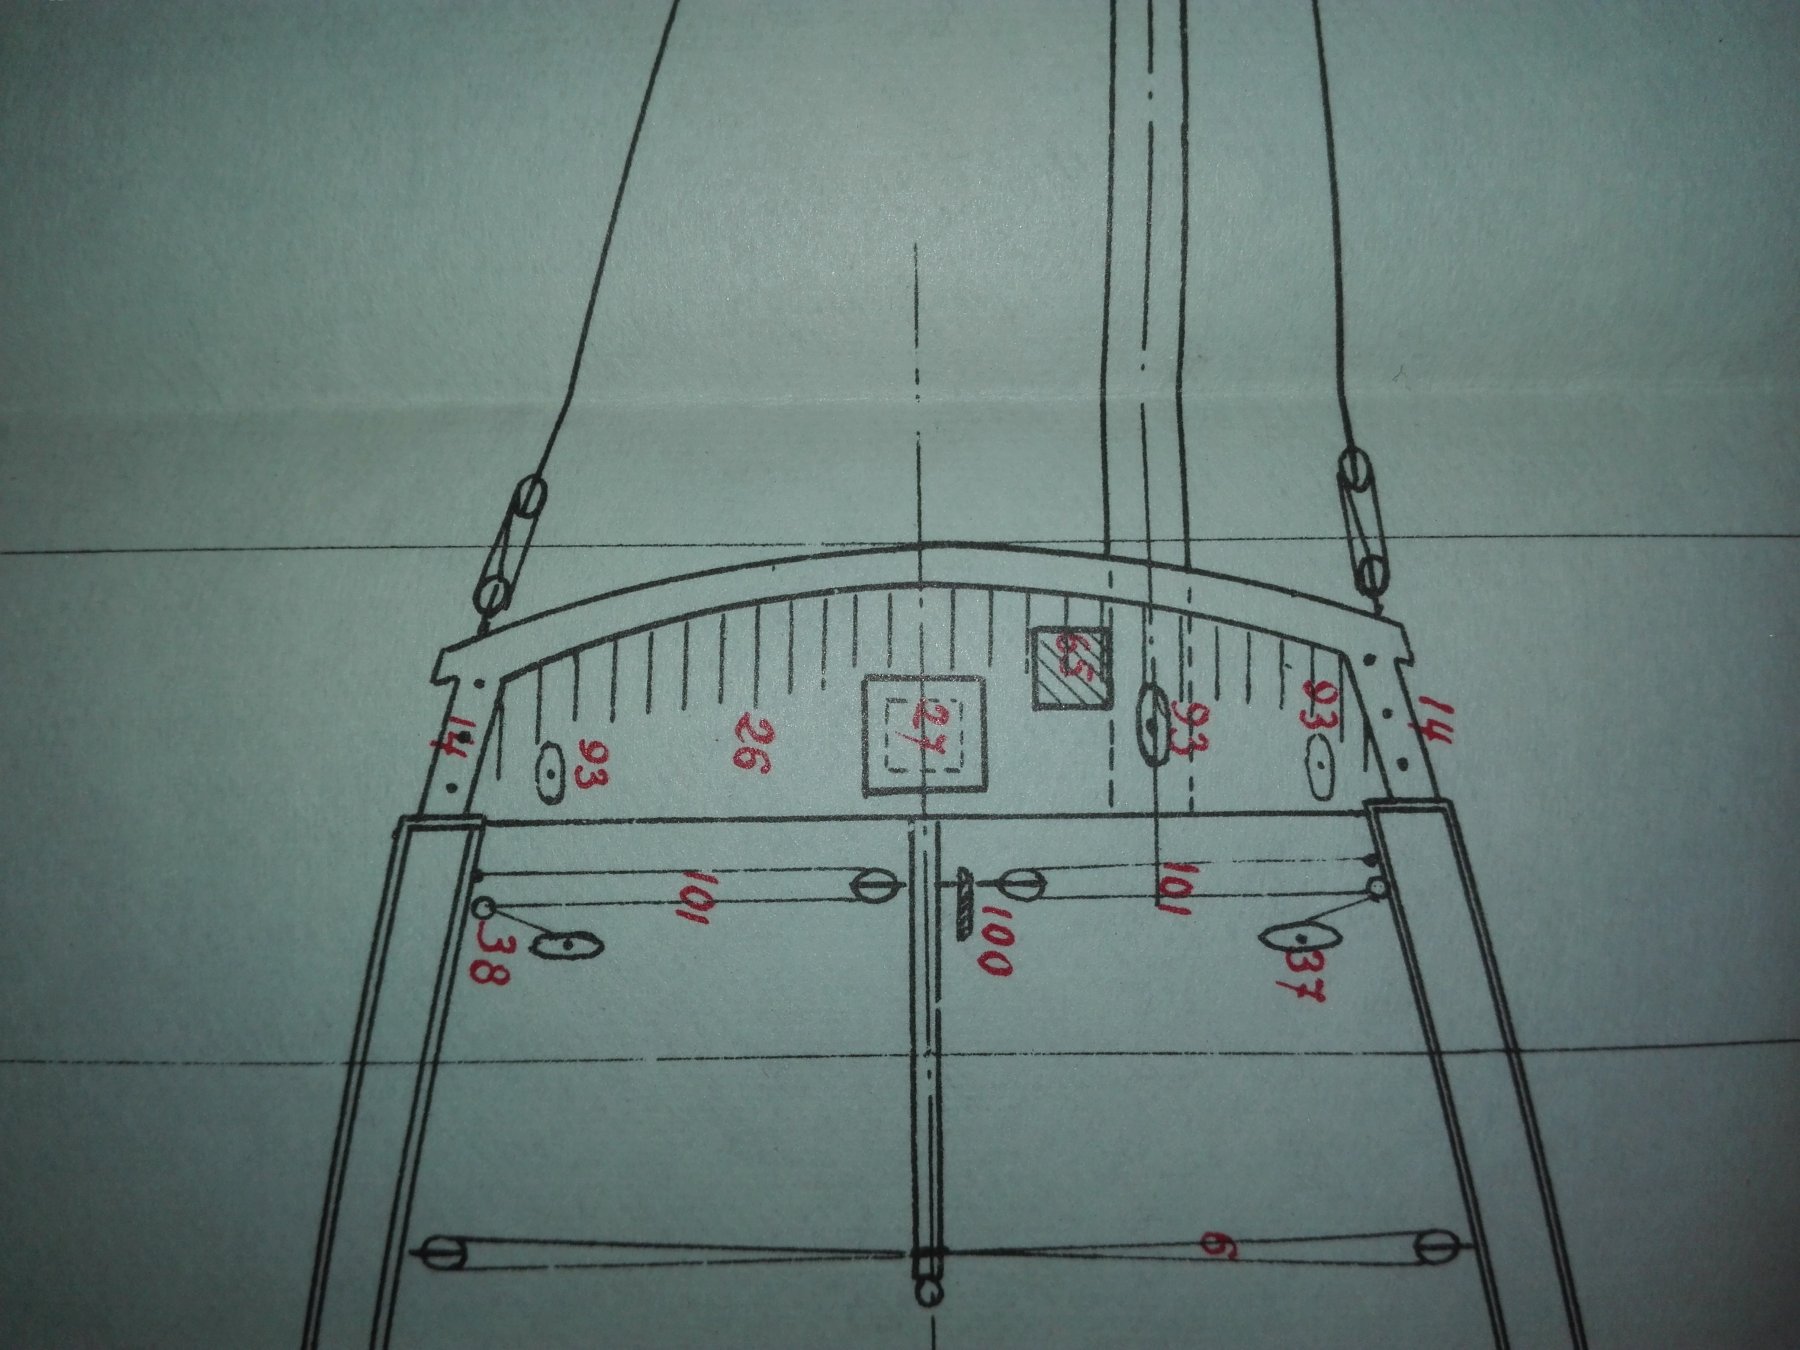
David, there is a lot of trouble in the manual - and for me in the inaccuraty of the kit . If you look like me from the historical point of view. The kit is easied ue to the lasercut parts. but there must be done a lot additivly ifst you want to, build a fine model. I've had got thr idea to copy all, the sheets in colour on cardboard. I ave to admit it isn't the cheap way but I habe got some rescue parts. I don't no if I'll scuttle the kit in my first trial - but as the Northgermans use to say: “Do not load everything on one ship.“ Here zhe pice of woor making the big difference between tje kit and the much more sophisticated Ancre plans: - in the top iew it's N°4 - in the enlarged detaildrawing it is E - the frontview doesn't tell us a name But in the frontview you see it isn't square and in the, other two drawings you find further information - does anybody know it's name?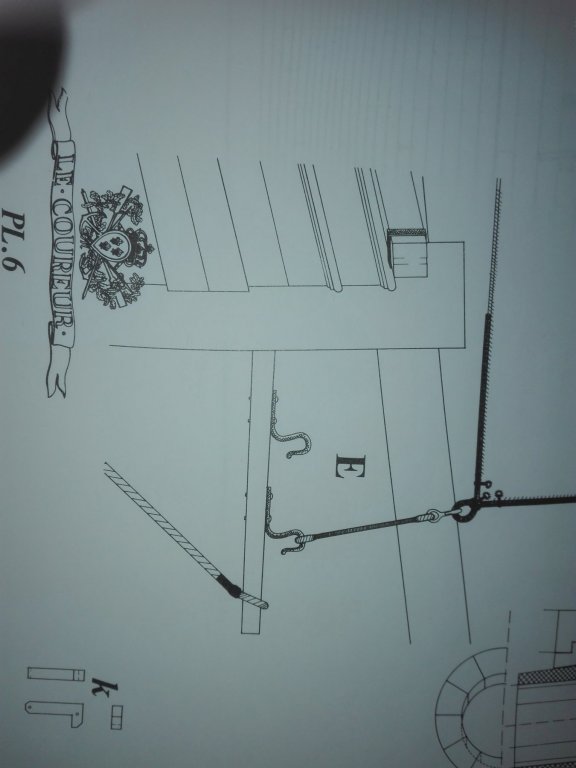

-
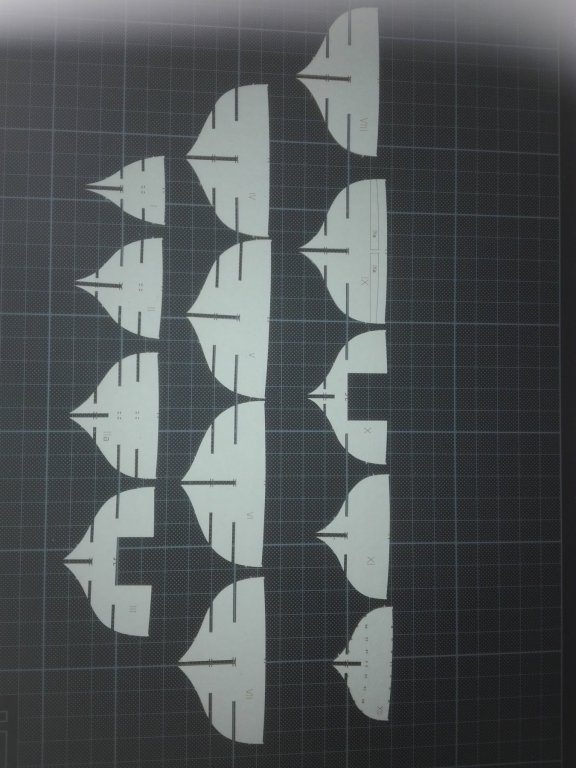
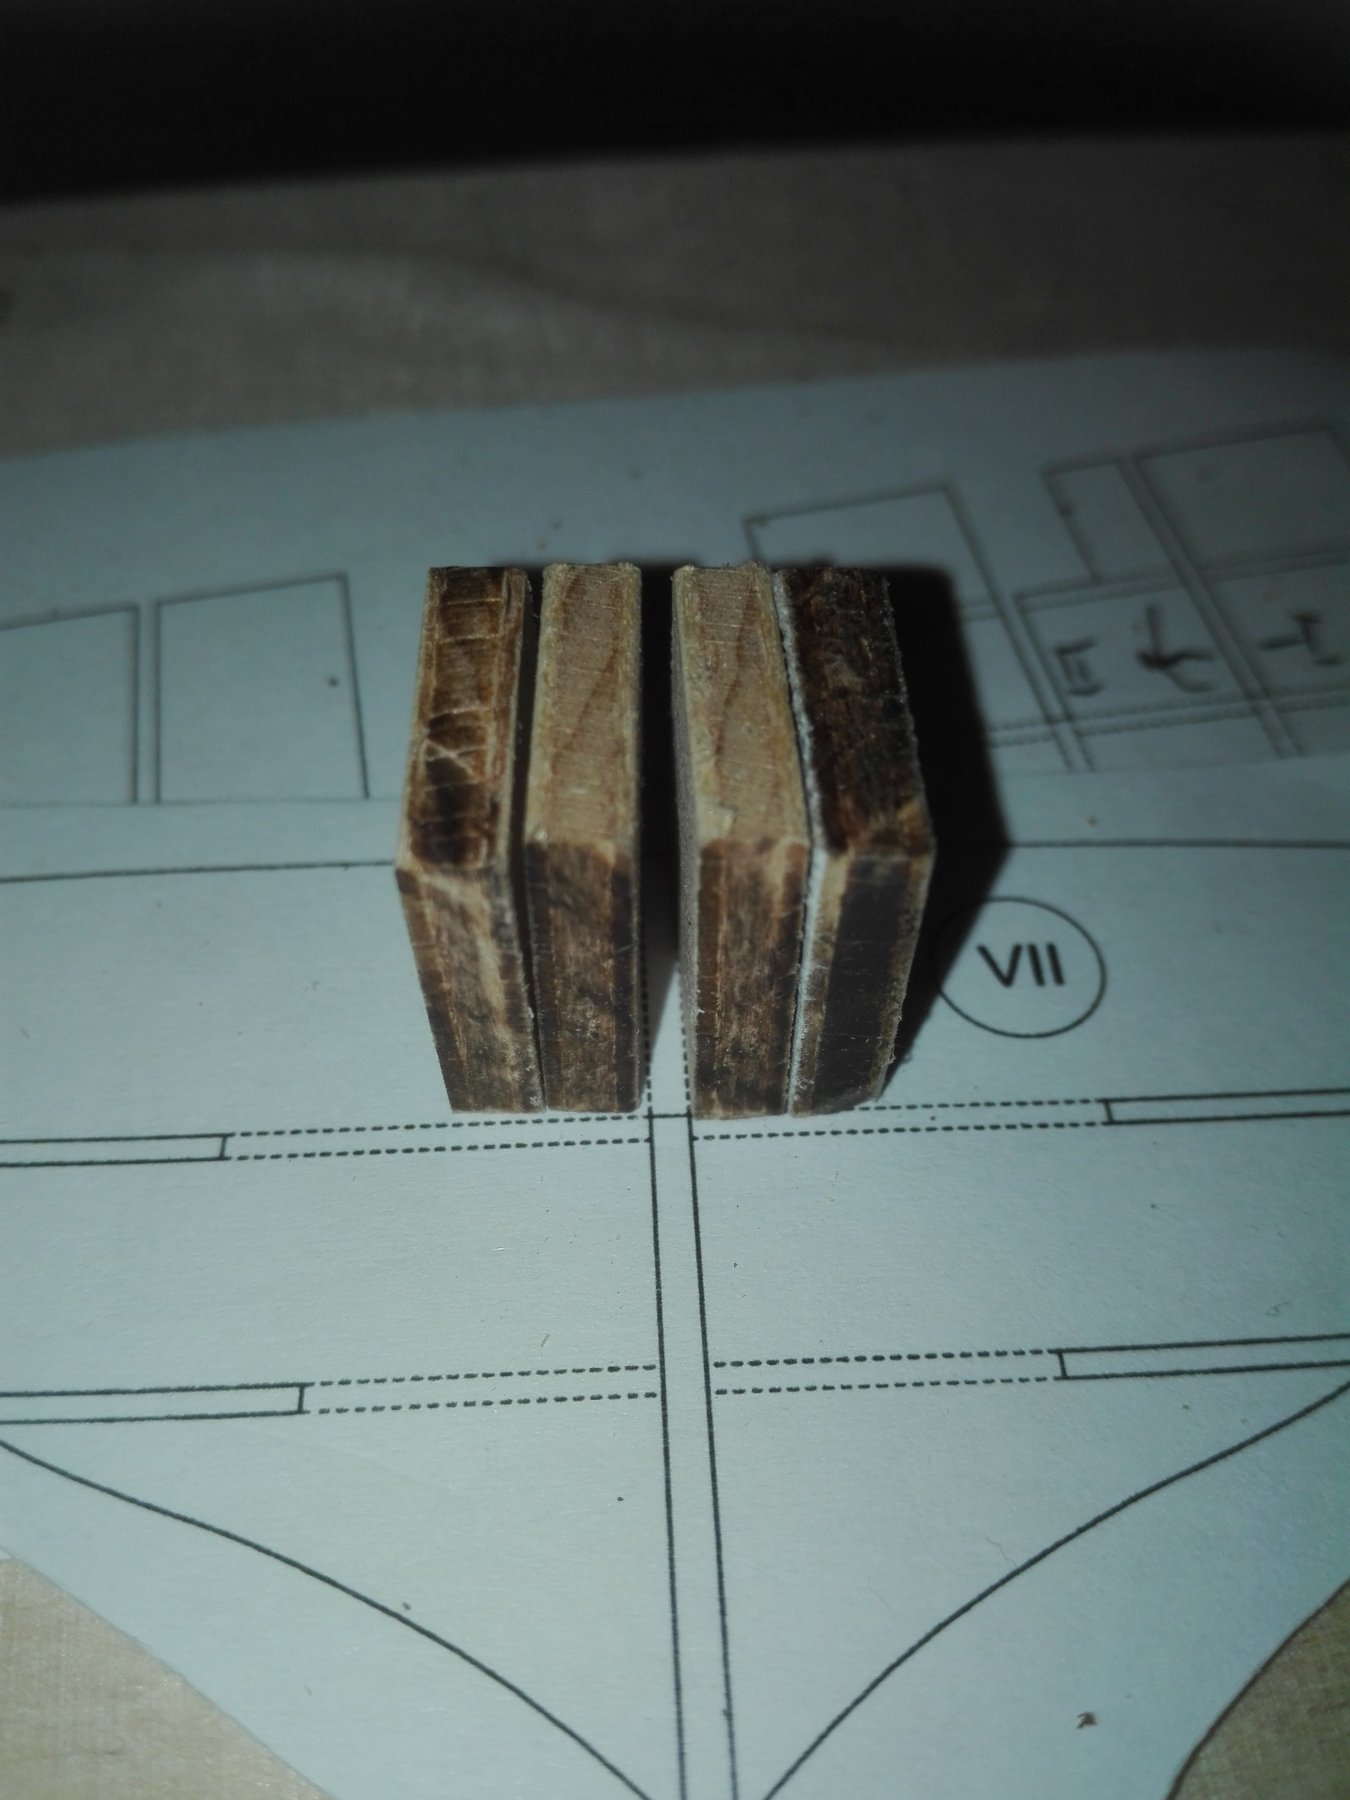
Here my progress on the kit. I cut the wood for the filling of the LC card parts. I have also to think about the drilling holes for the masts and how to, fis several parts onto the hull that will be under stress rom he rigging. There are rests of redwood plywood I use for the stressed areas. The layers of the plywood for the filling are cut. So now I can start to strenghten the hull. Next step: glueing the hullparts rectangular. Here the position of the mast at first. Hope you like it. Yours Heinrich

- 21 replies
-
- 2
-

-
- shipyard
- le coureur
- (and 1 more)
-
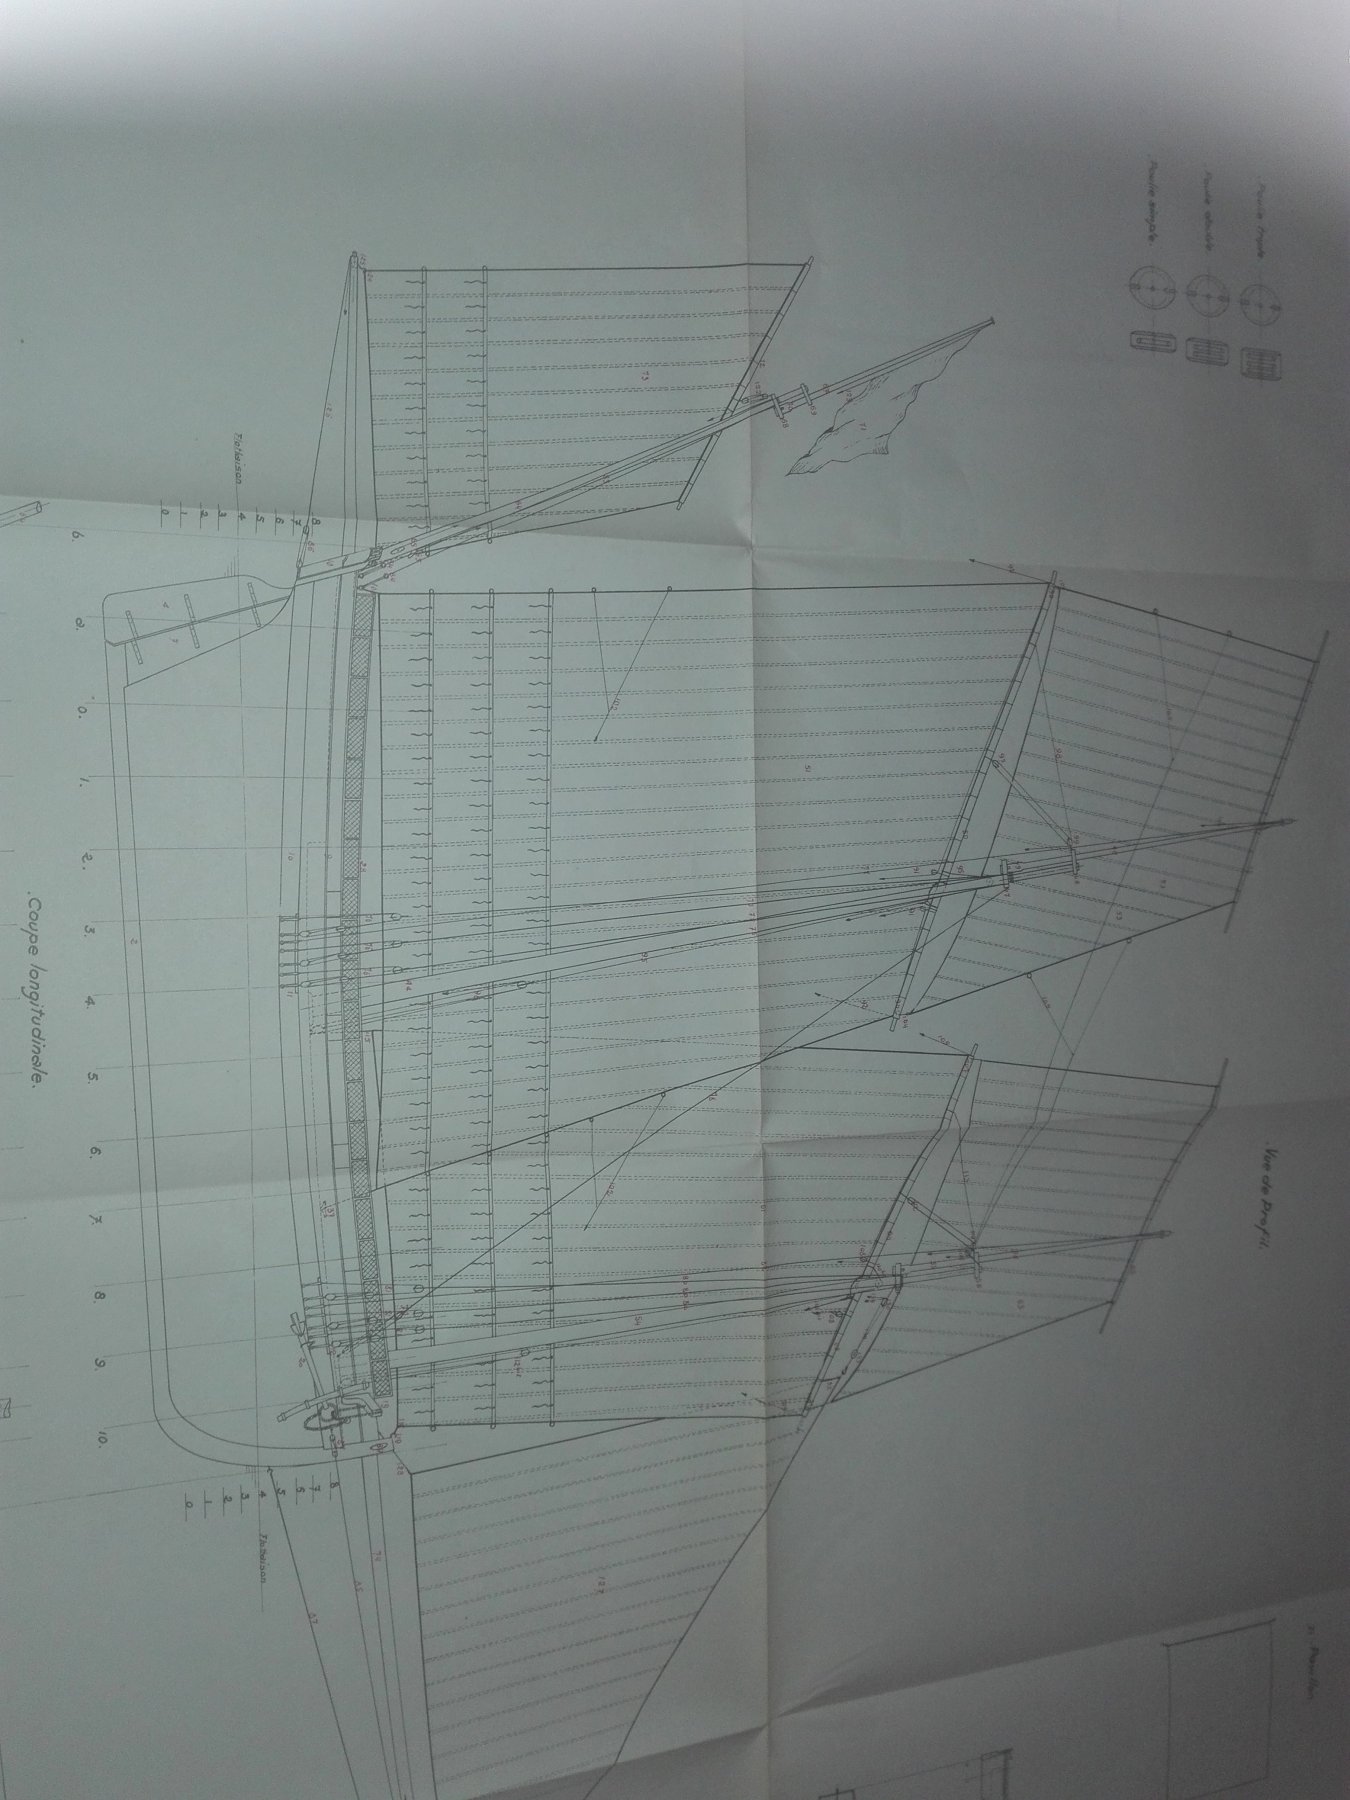
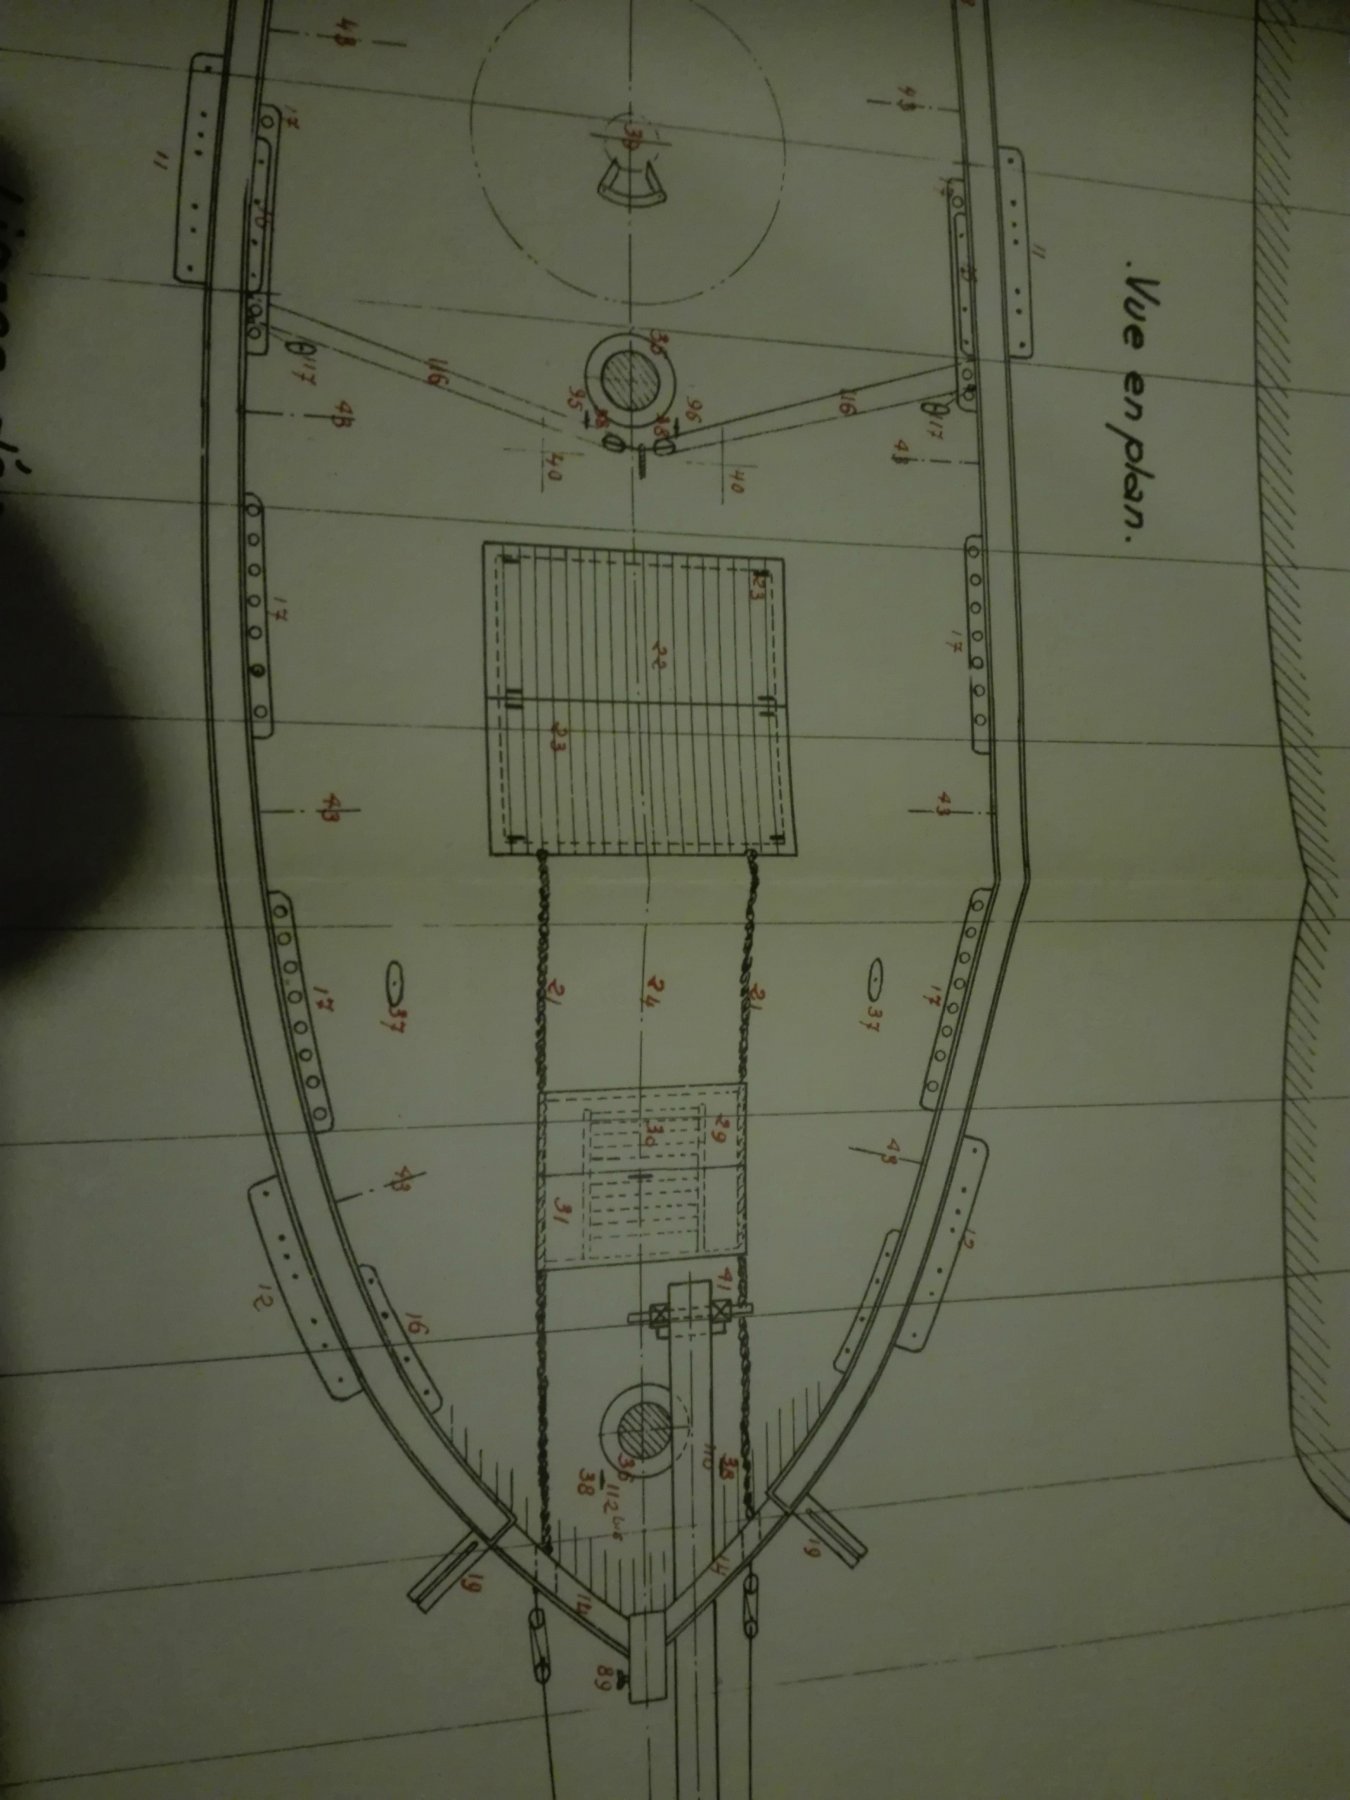
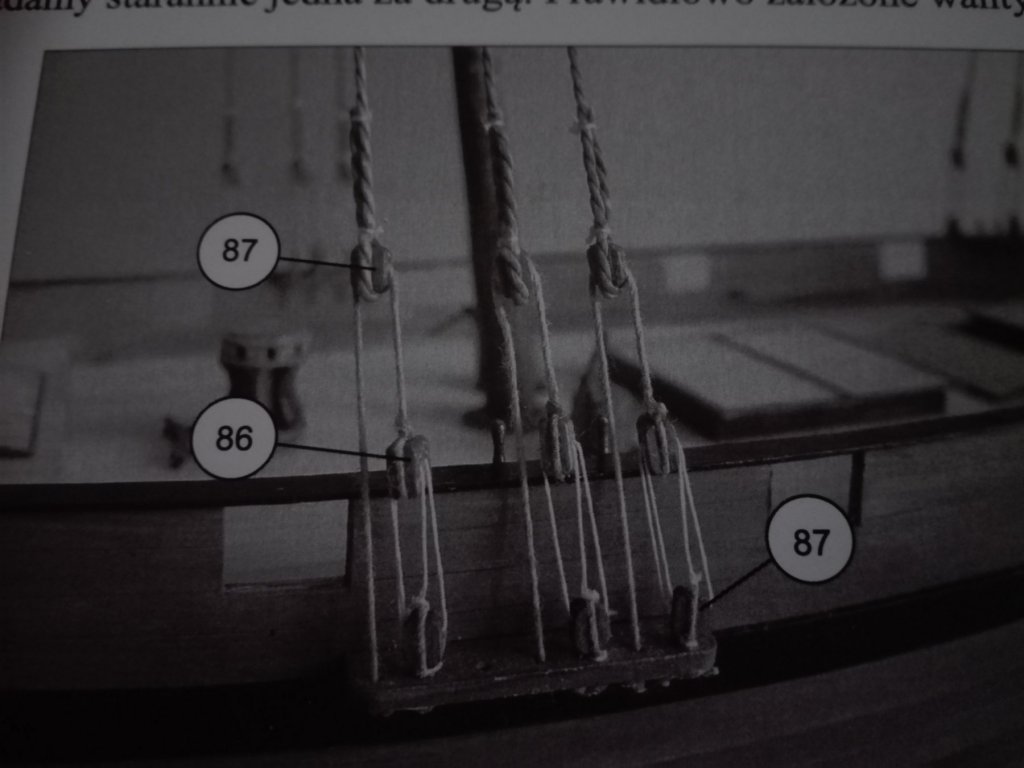
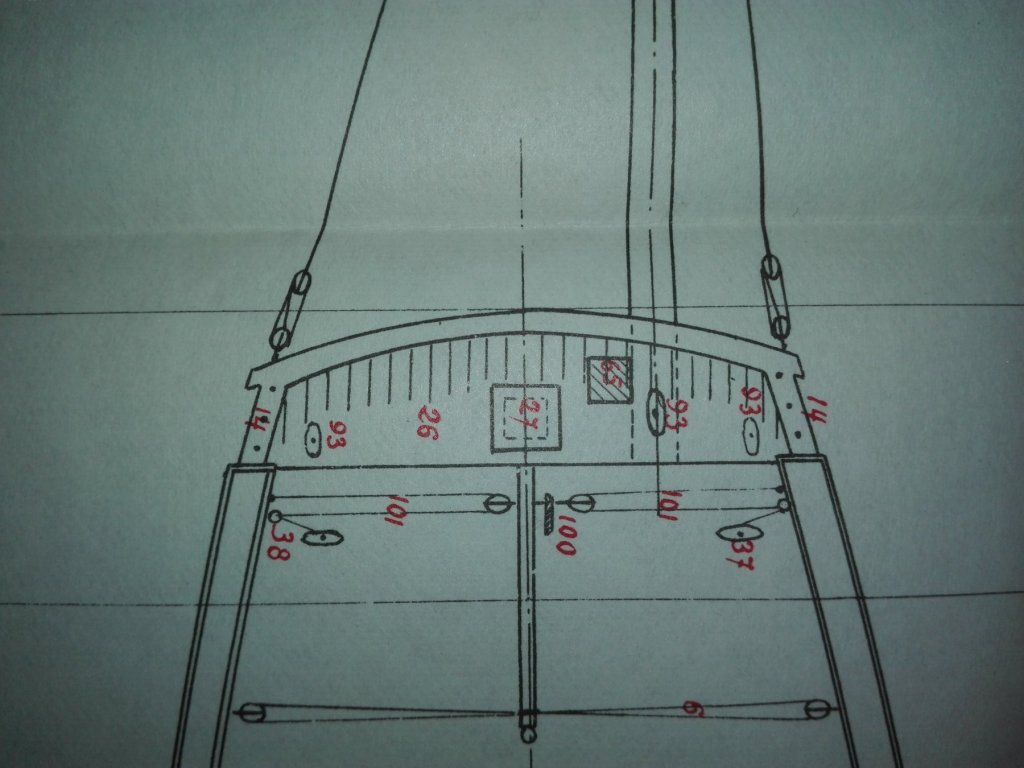
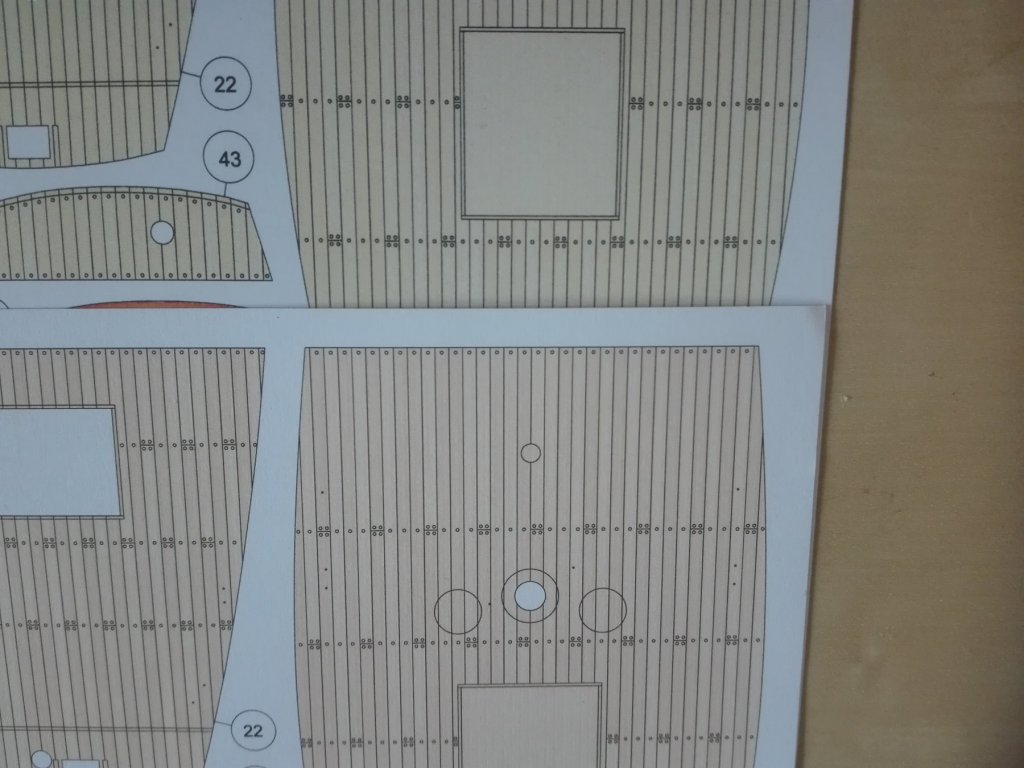
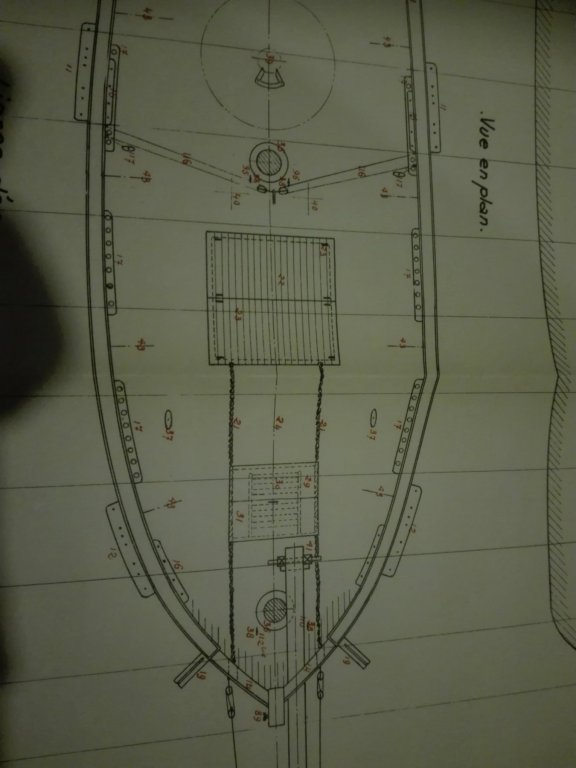
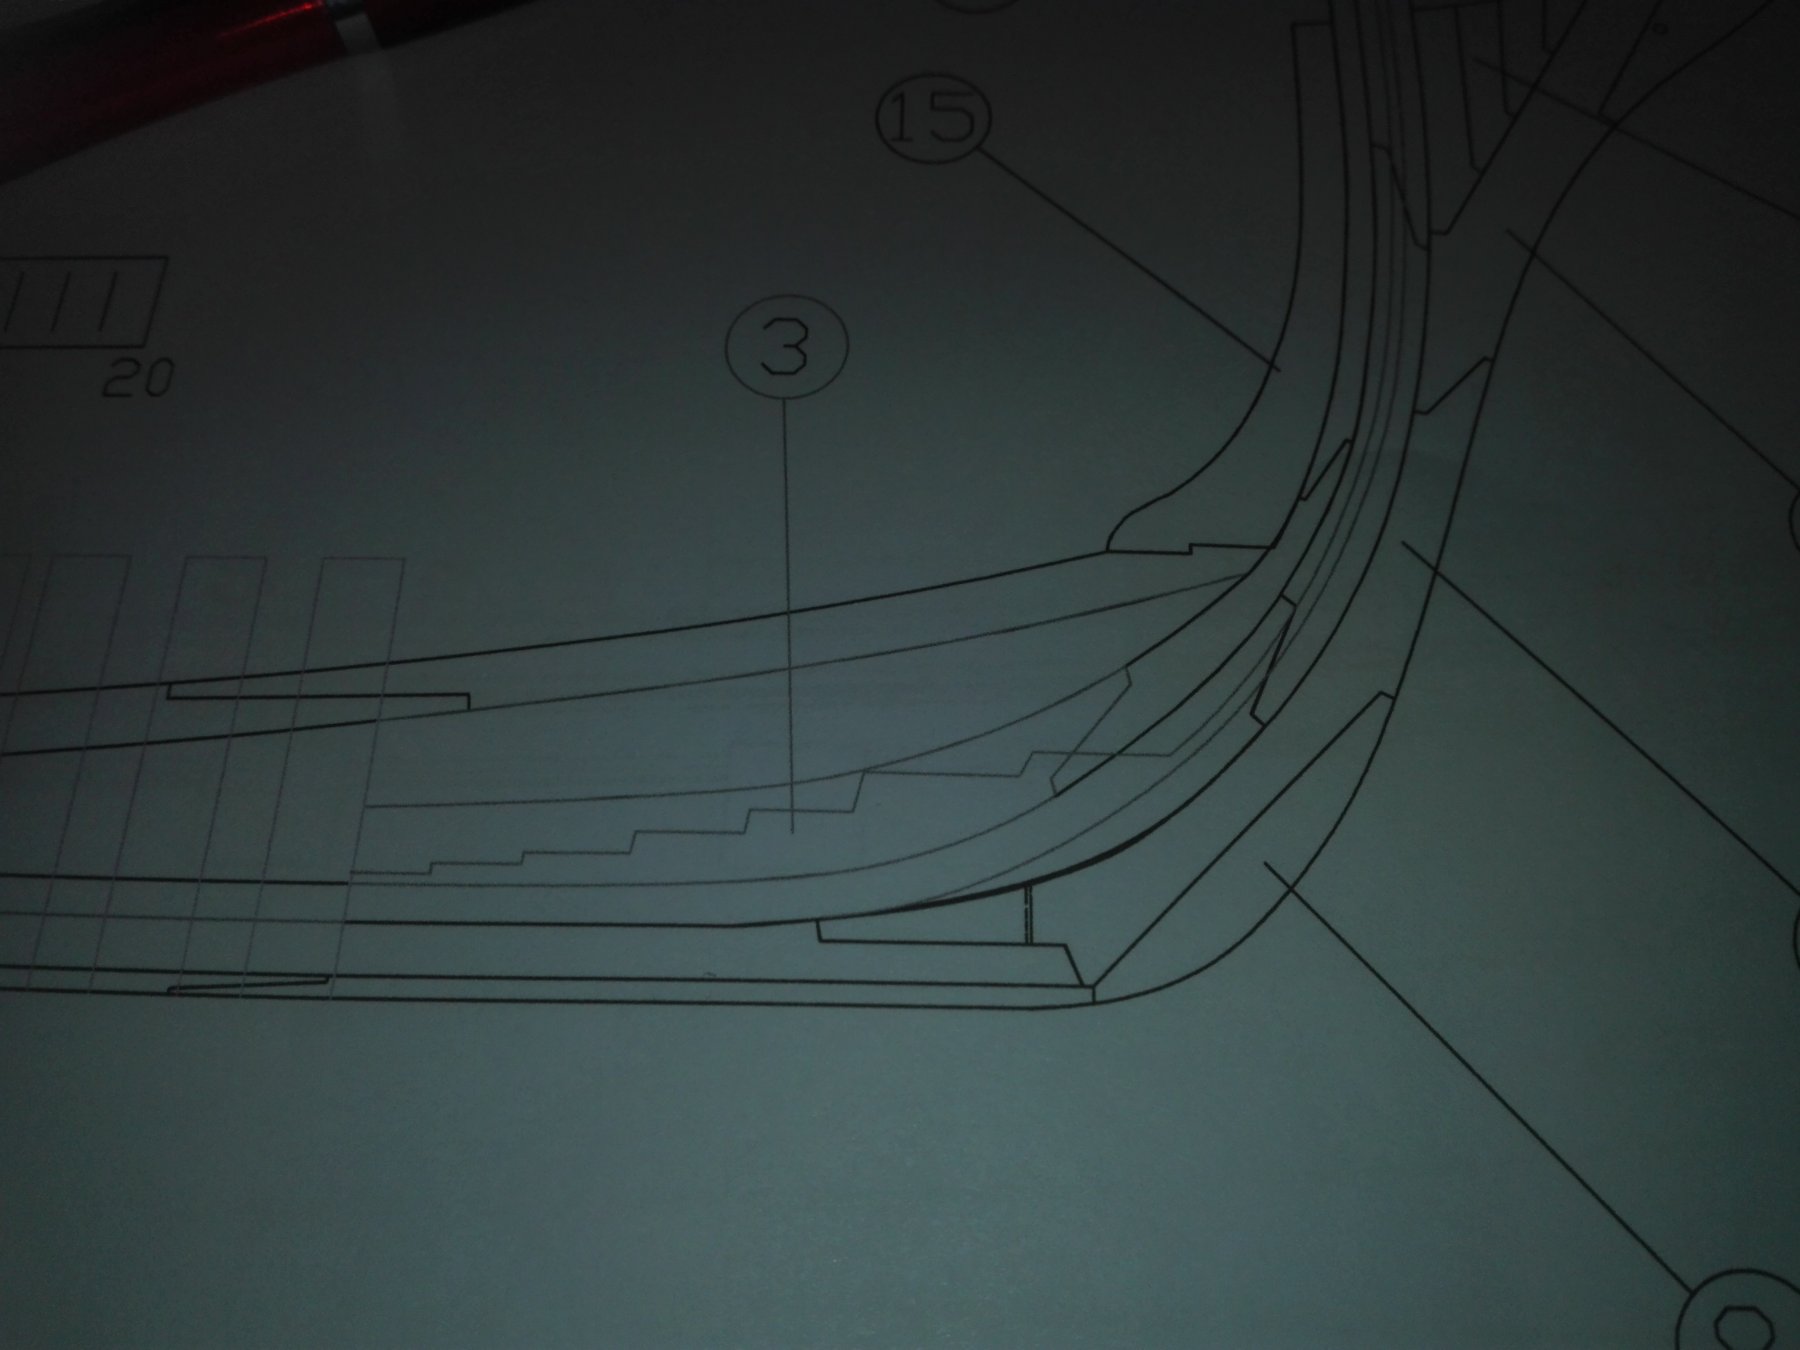
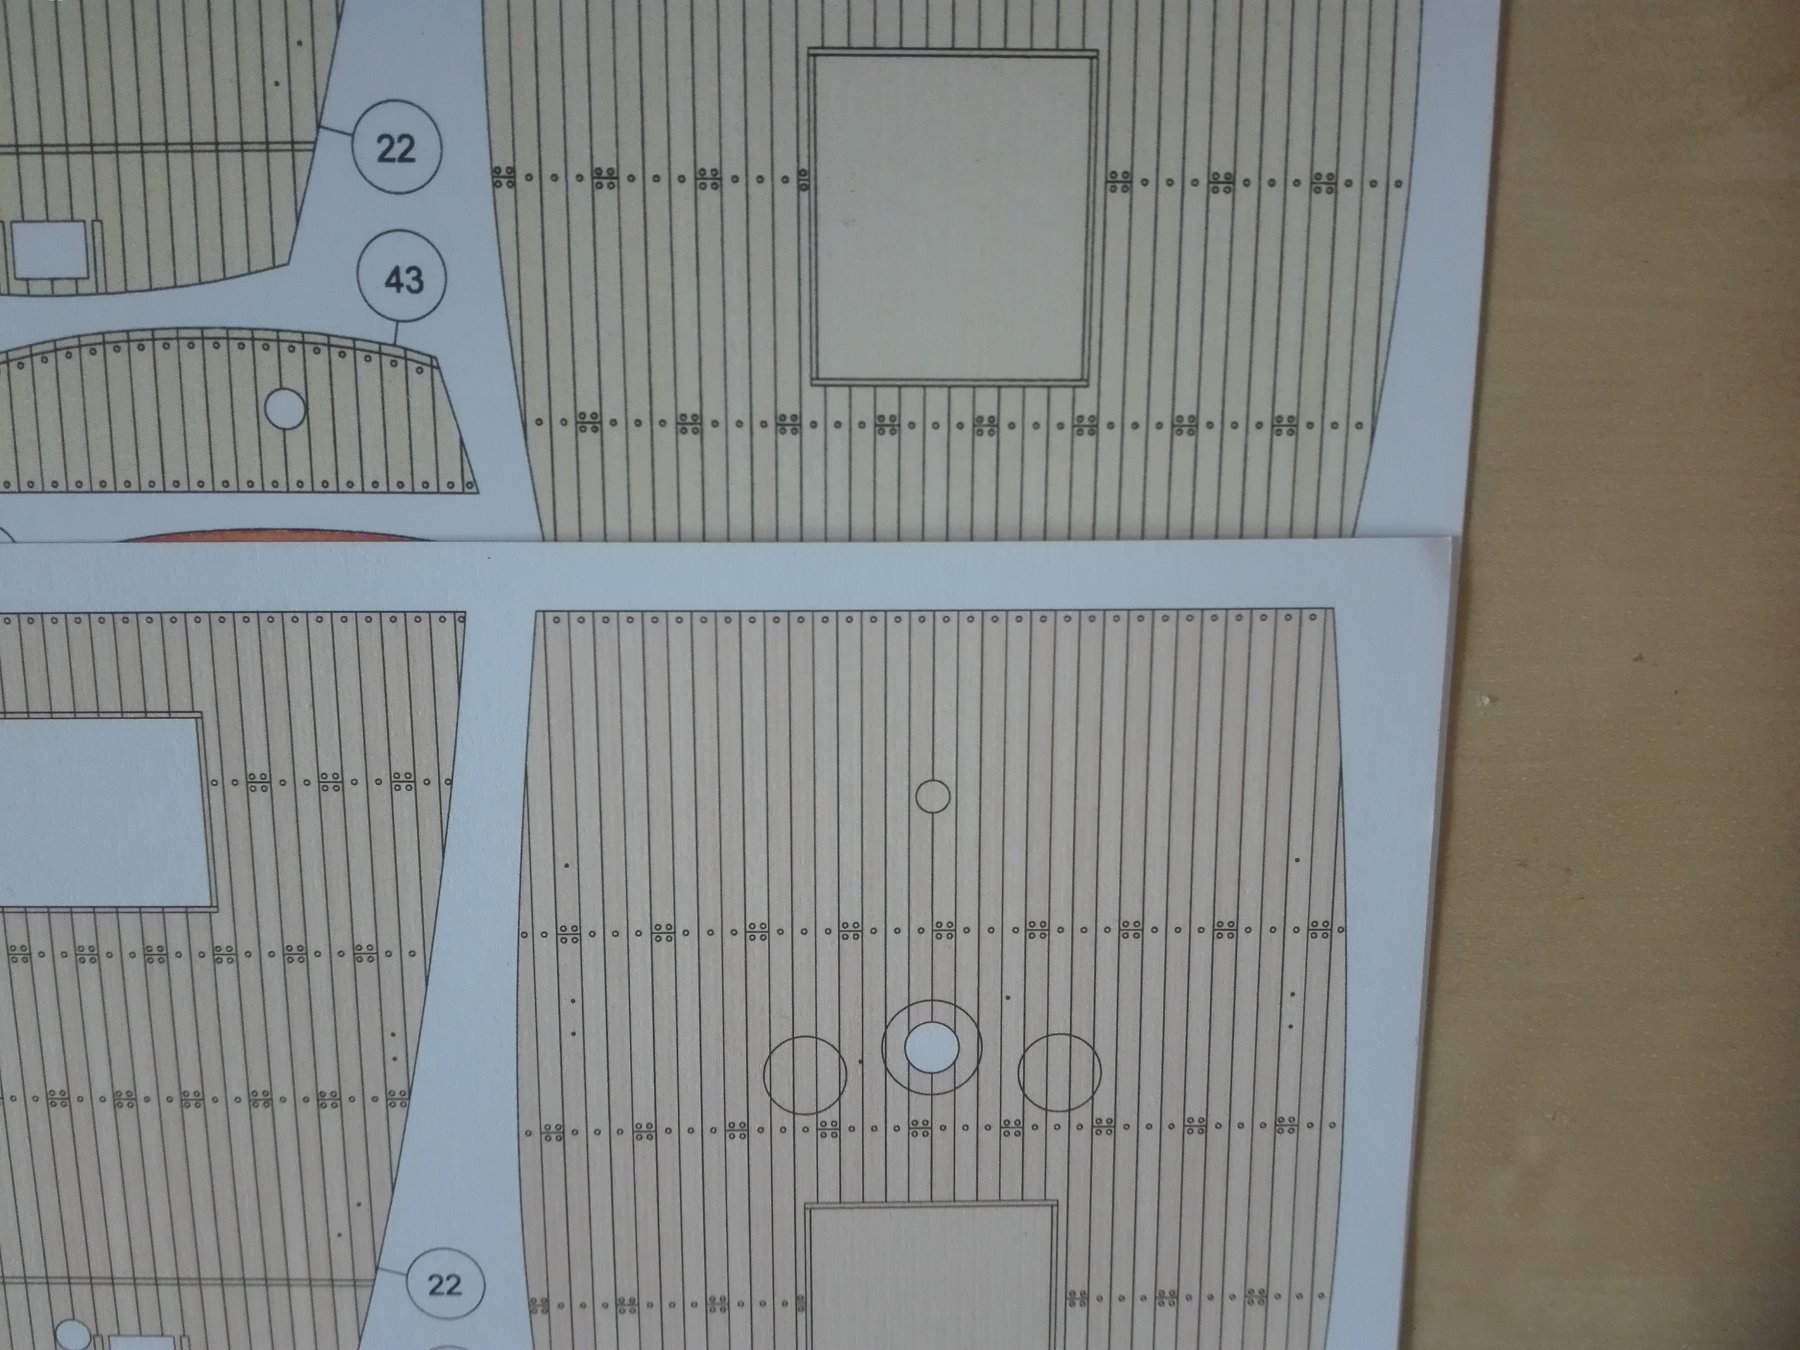
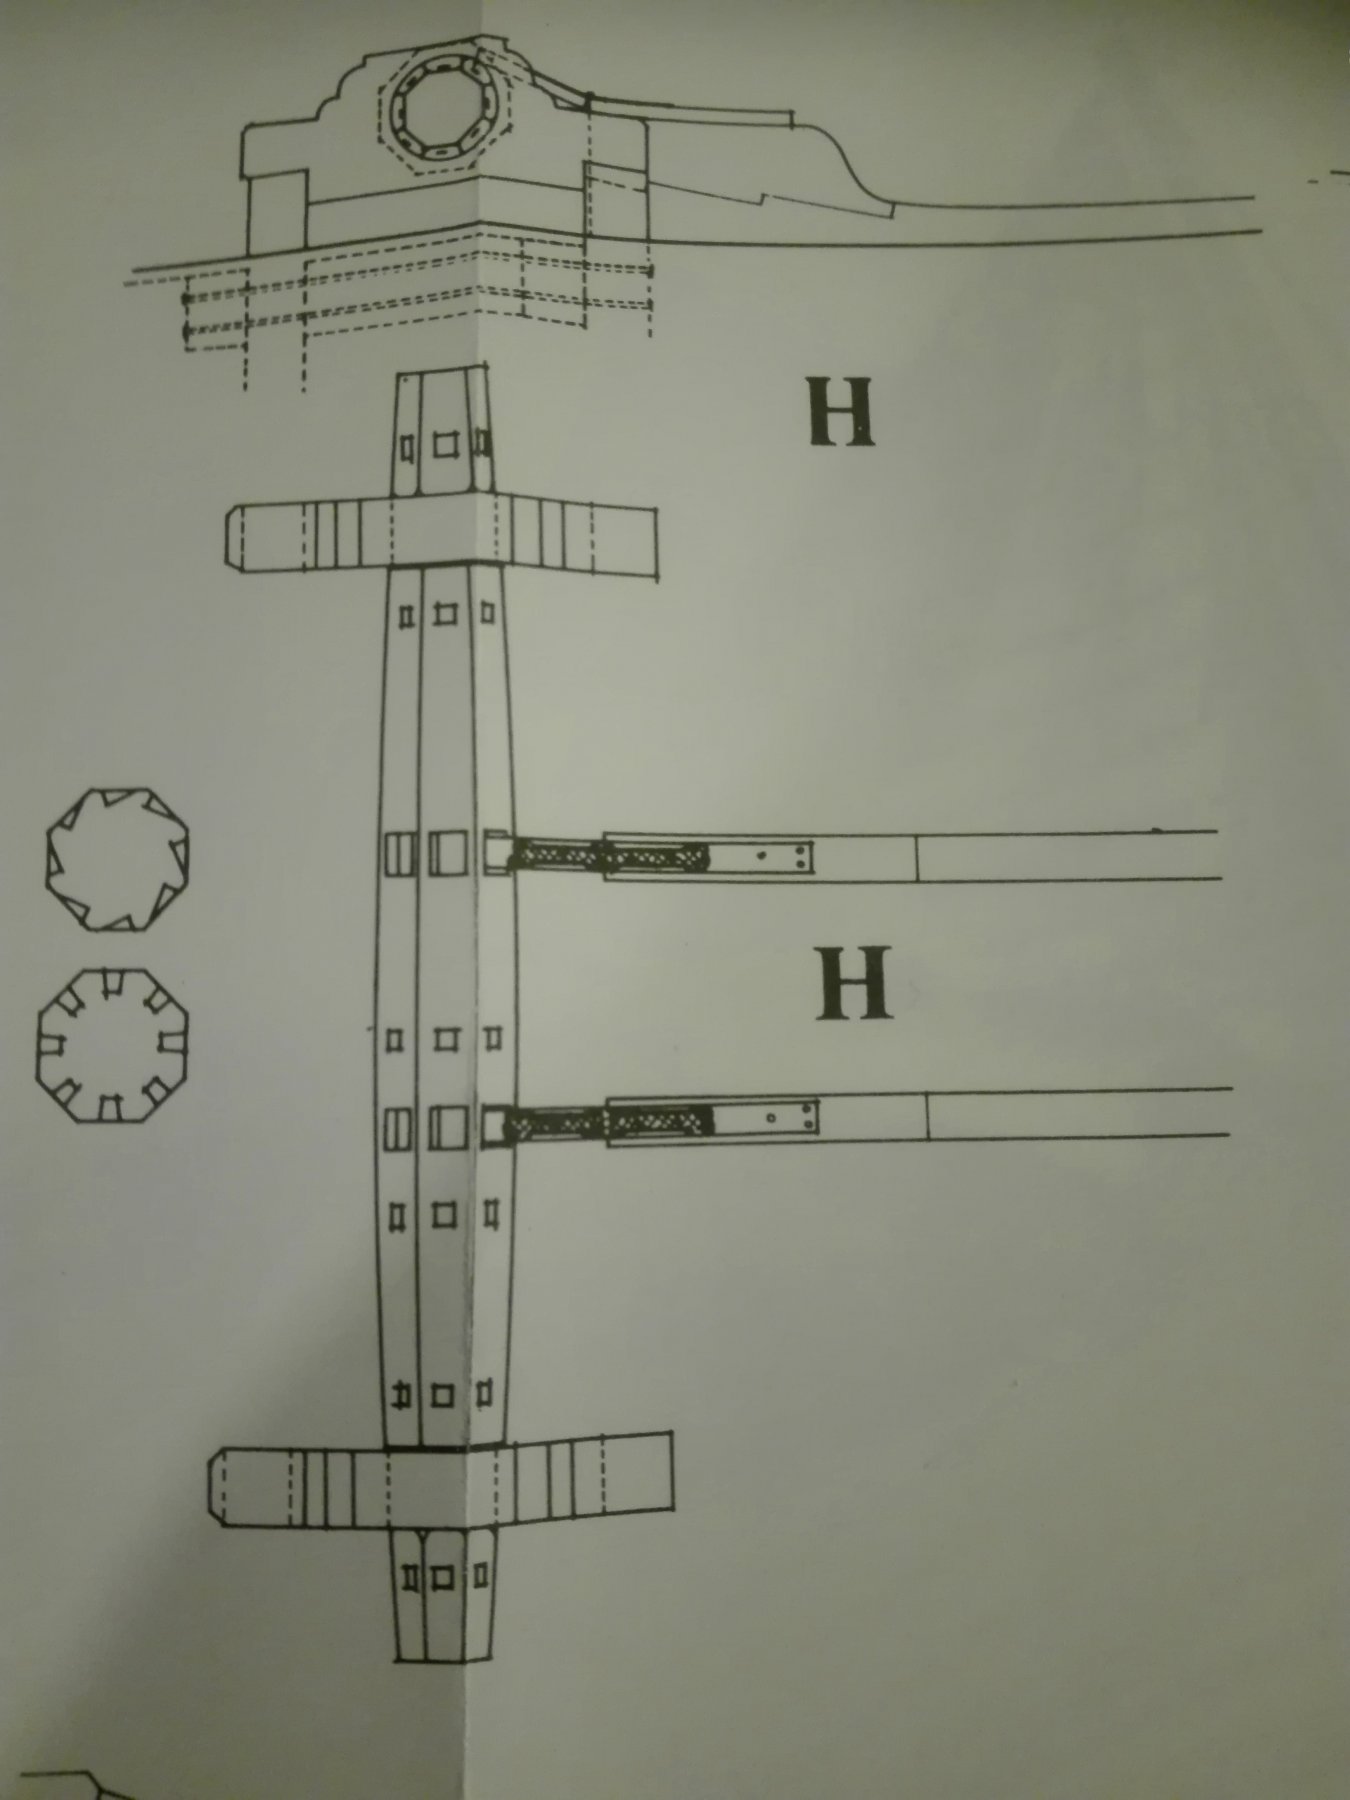
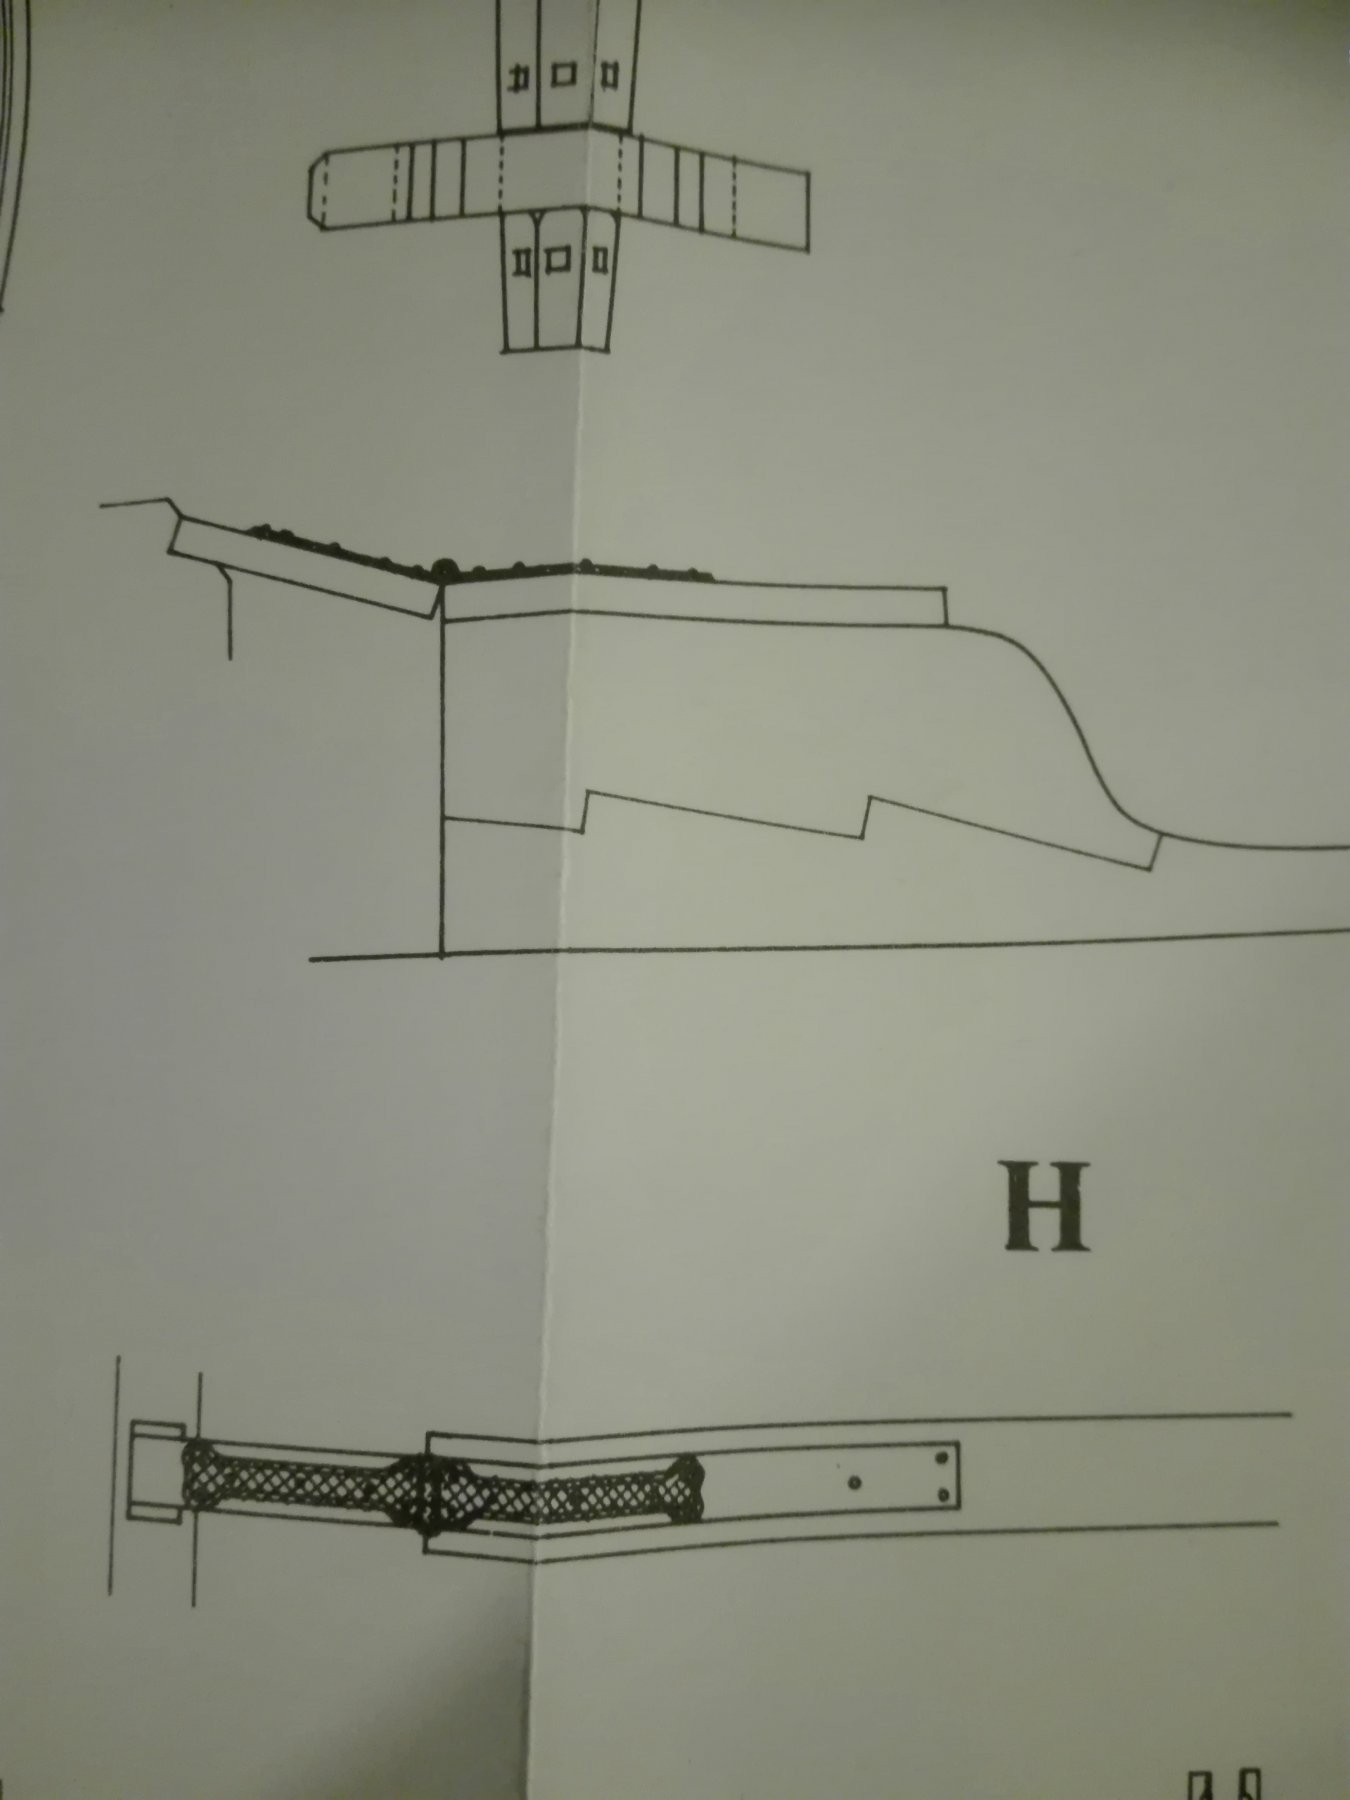
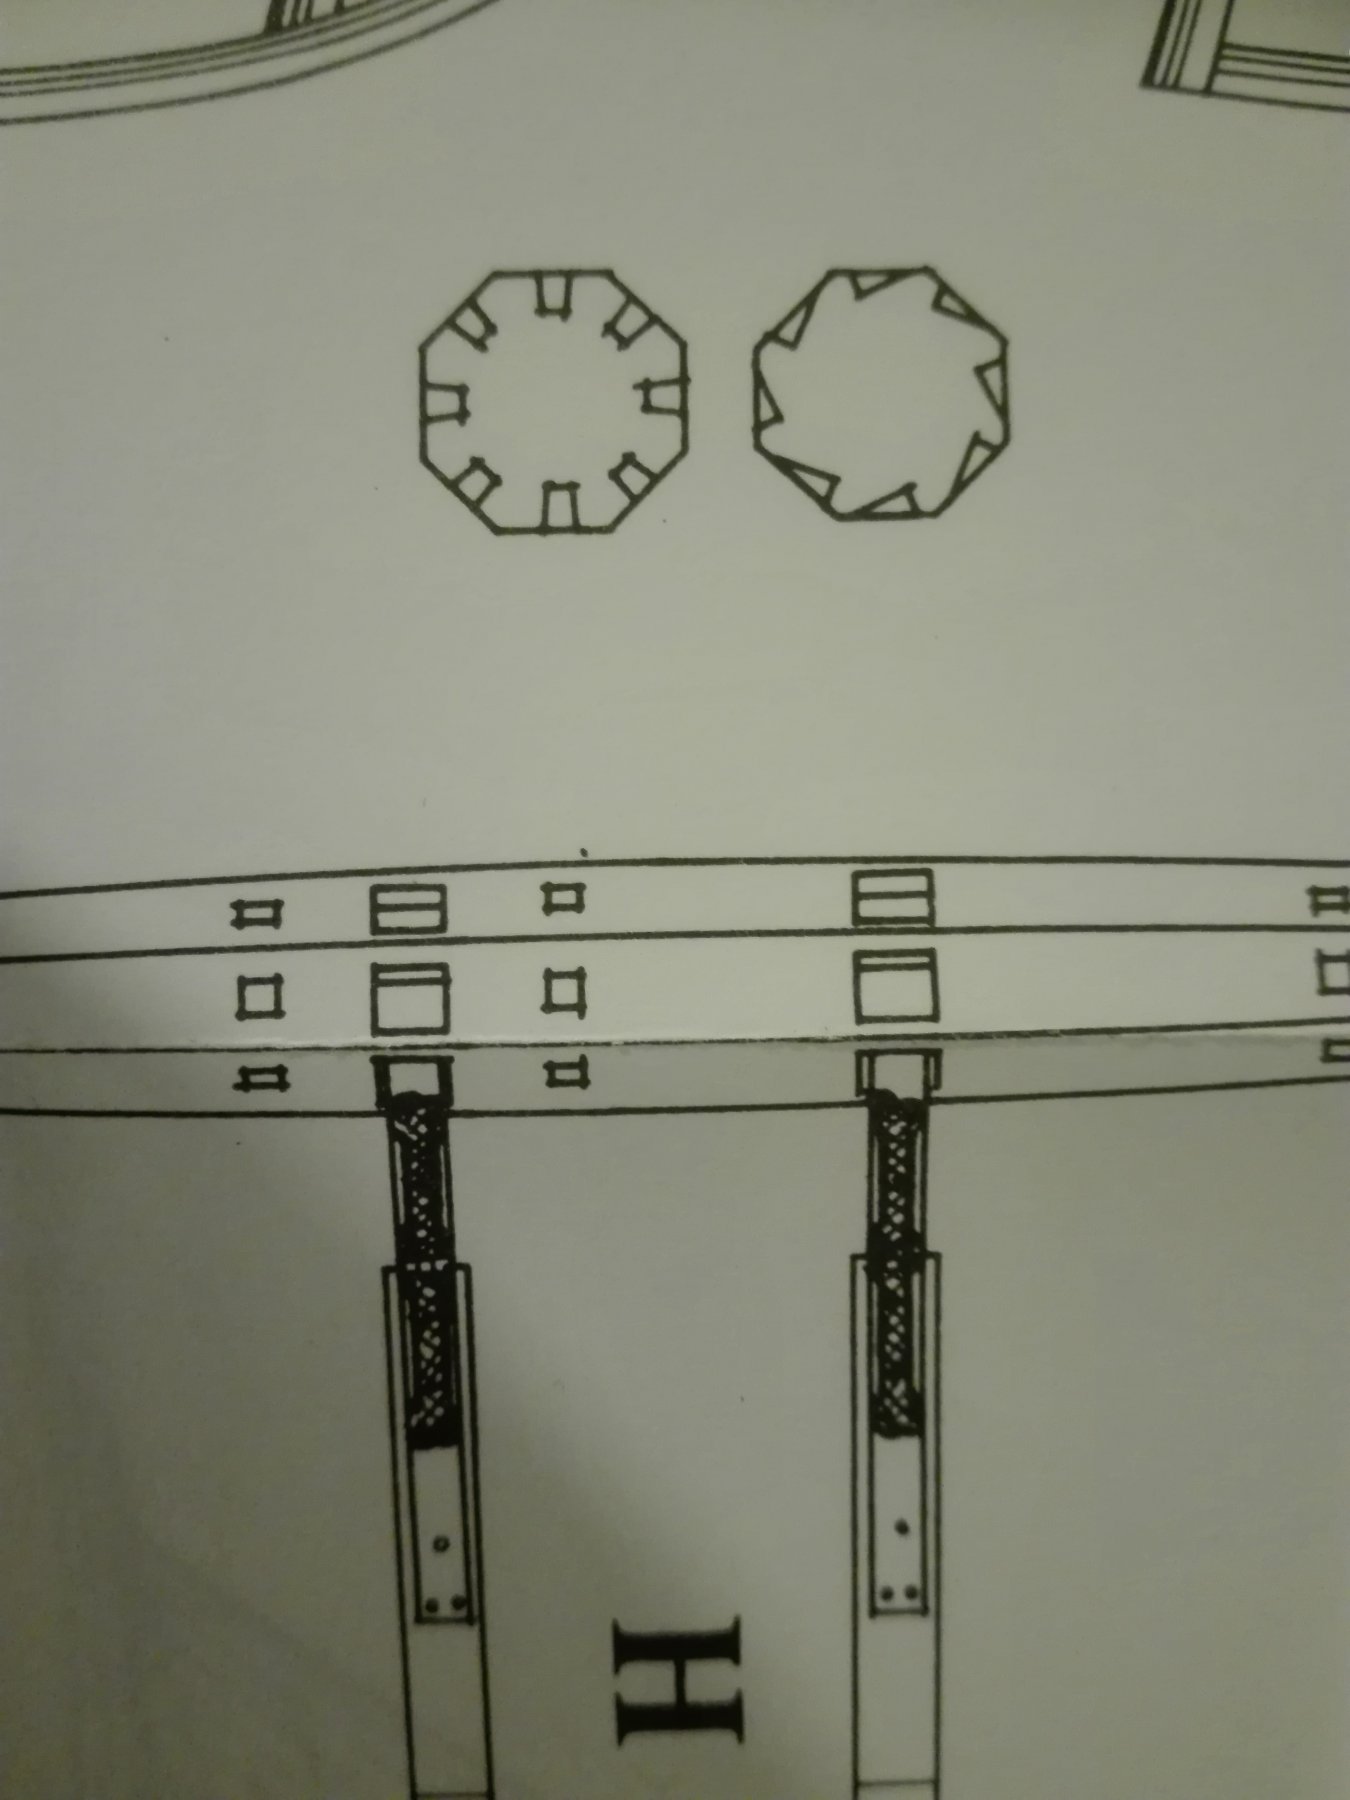
ThTIfe story of het spill: If you start fixing one problem a group of other is right then on hand starting to appear. On the Boudriot drawings we have got a lying spill - on the Shipyard plan one standing with a white markingpoint on the deck. Even if I change thethe colour anybody will ask “Isn't this the scuttling plug?“ Here the deck plans and all the rst. So if I'm following the Boudriot plan I'll have to reconstruct the deck. Coat scuttlement is given by the kit, but I've to deal with contra-bent stave to get the round of the deck. So there are wonderfull details of the lying spill. So there is a very interesting detailing to do with this part.


- 21 replies
-
- 3
-
-
- shipyard
- le coureur
- (and 1 more)
-
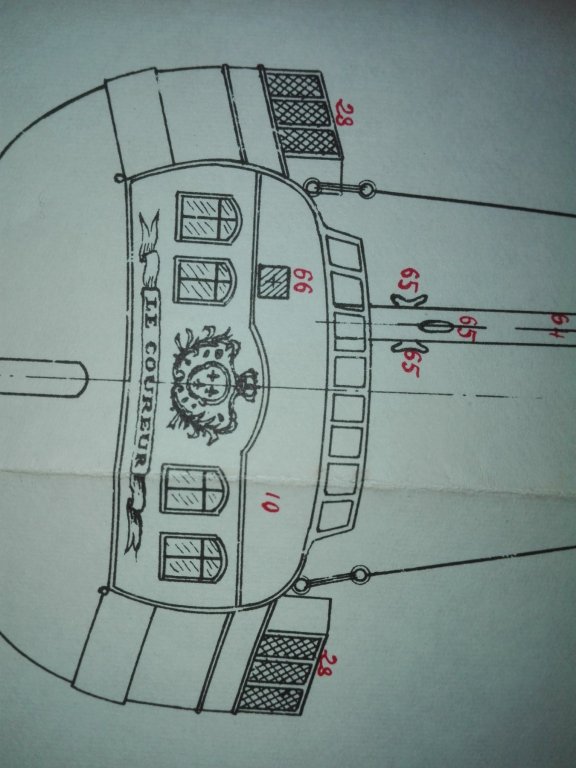
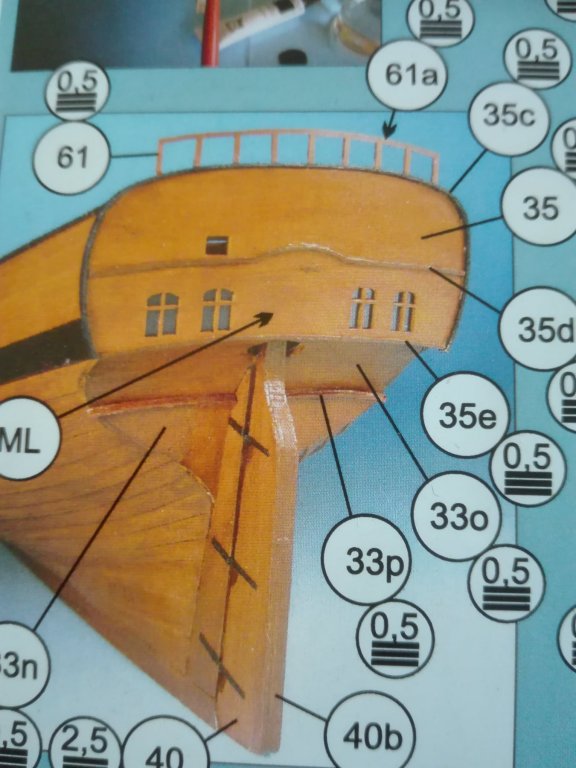
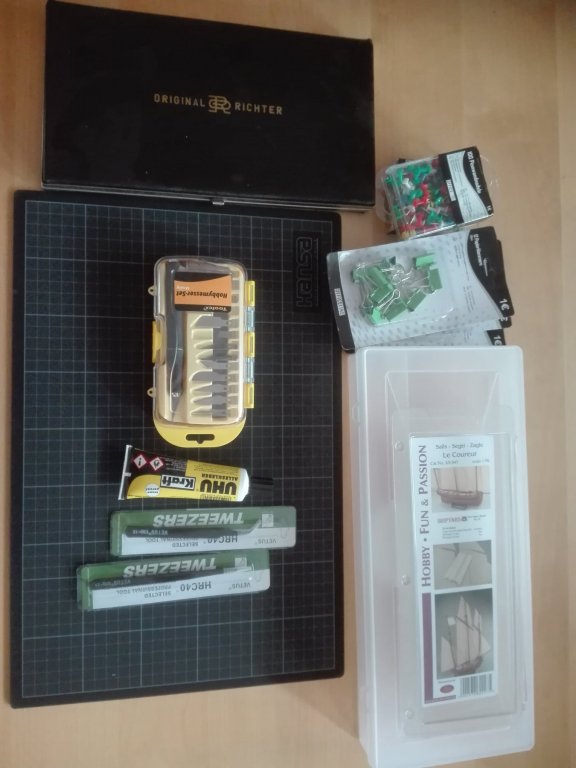
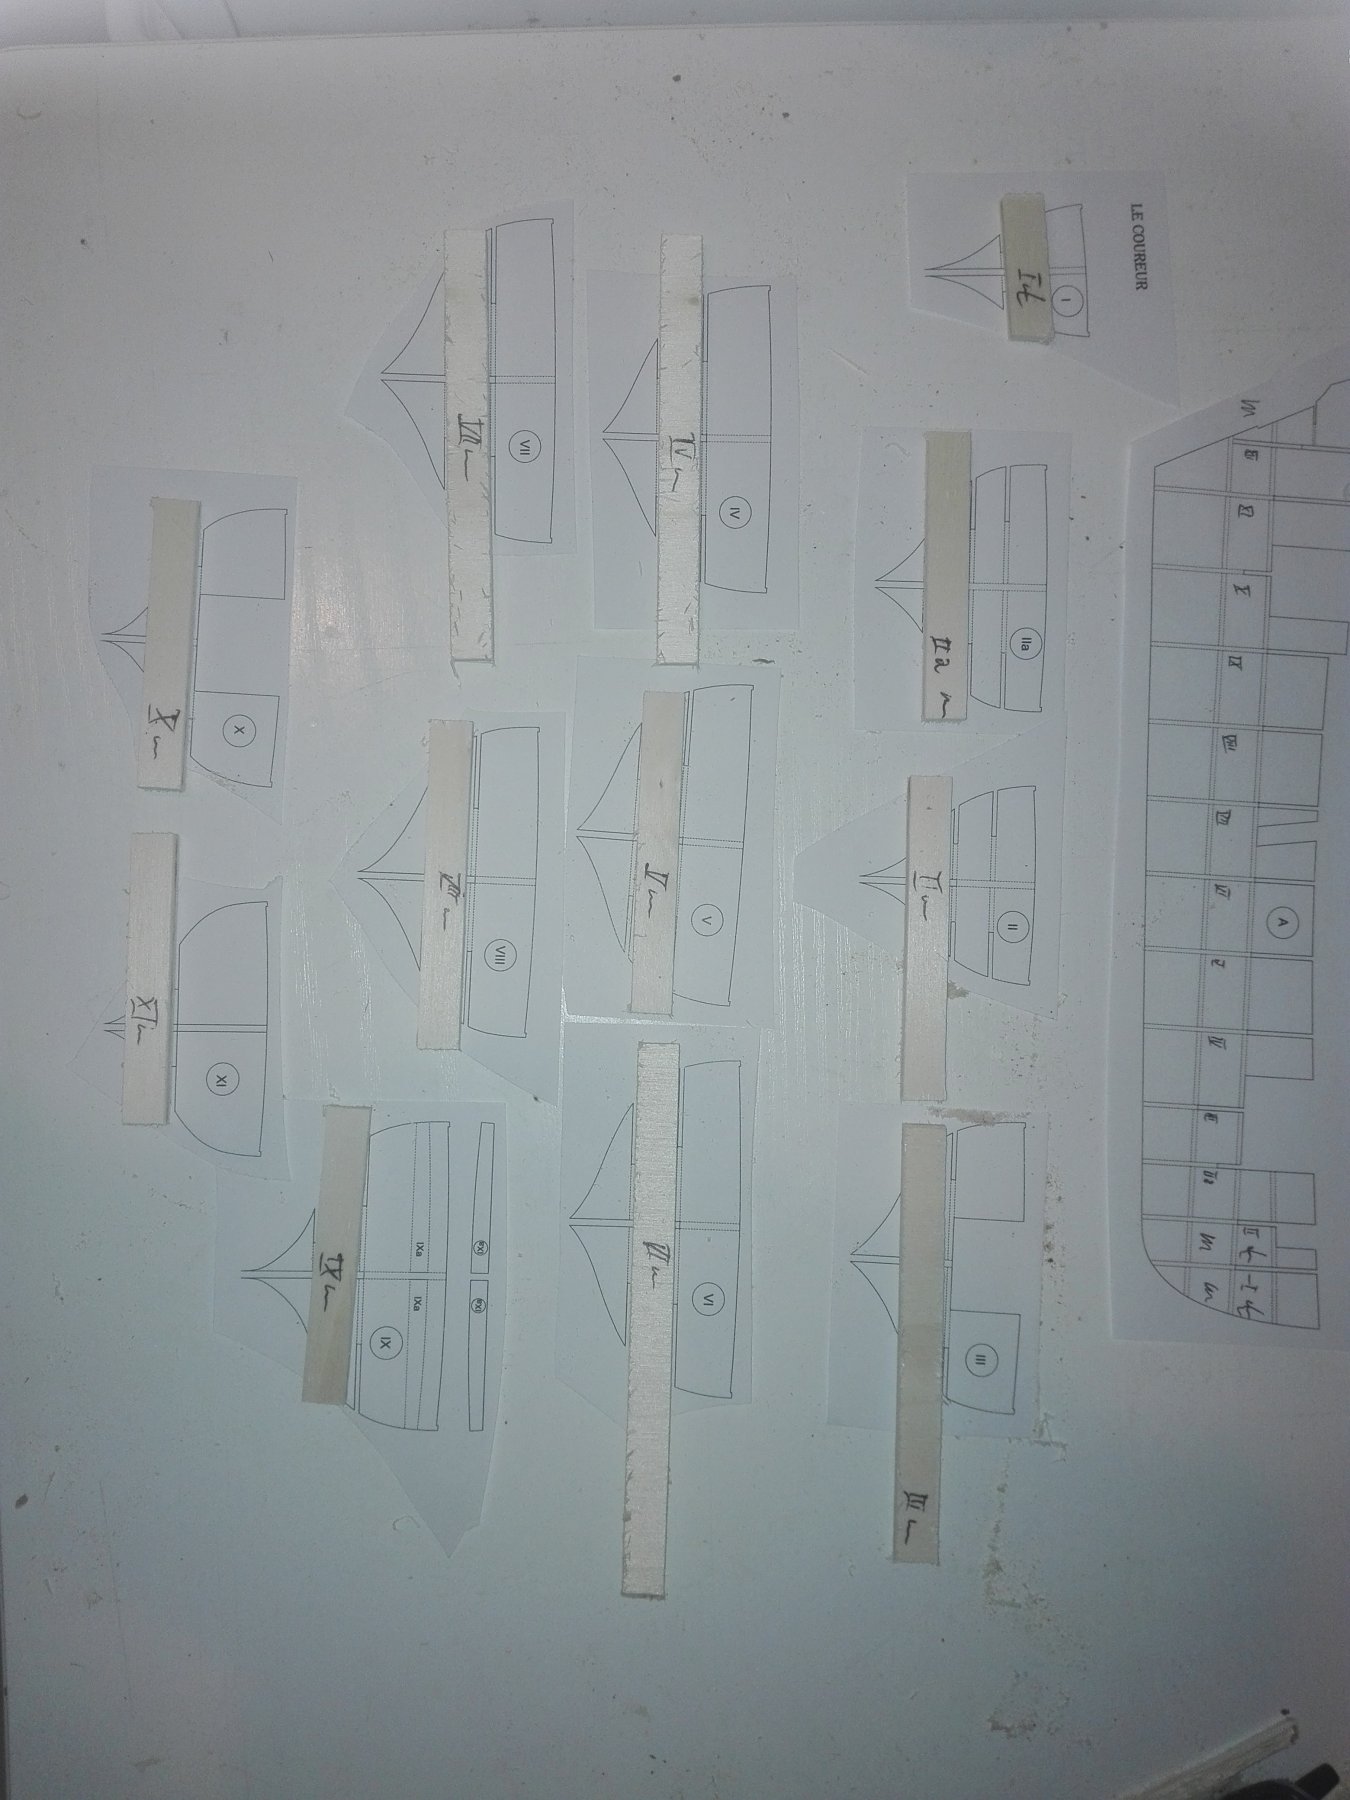
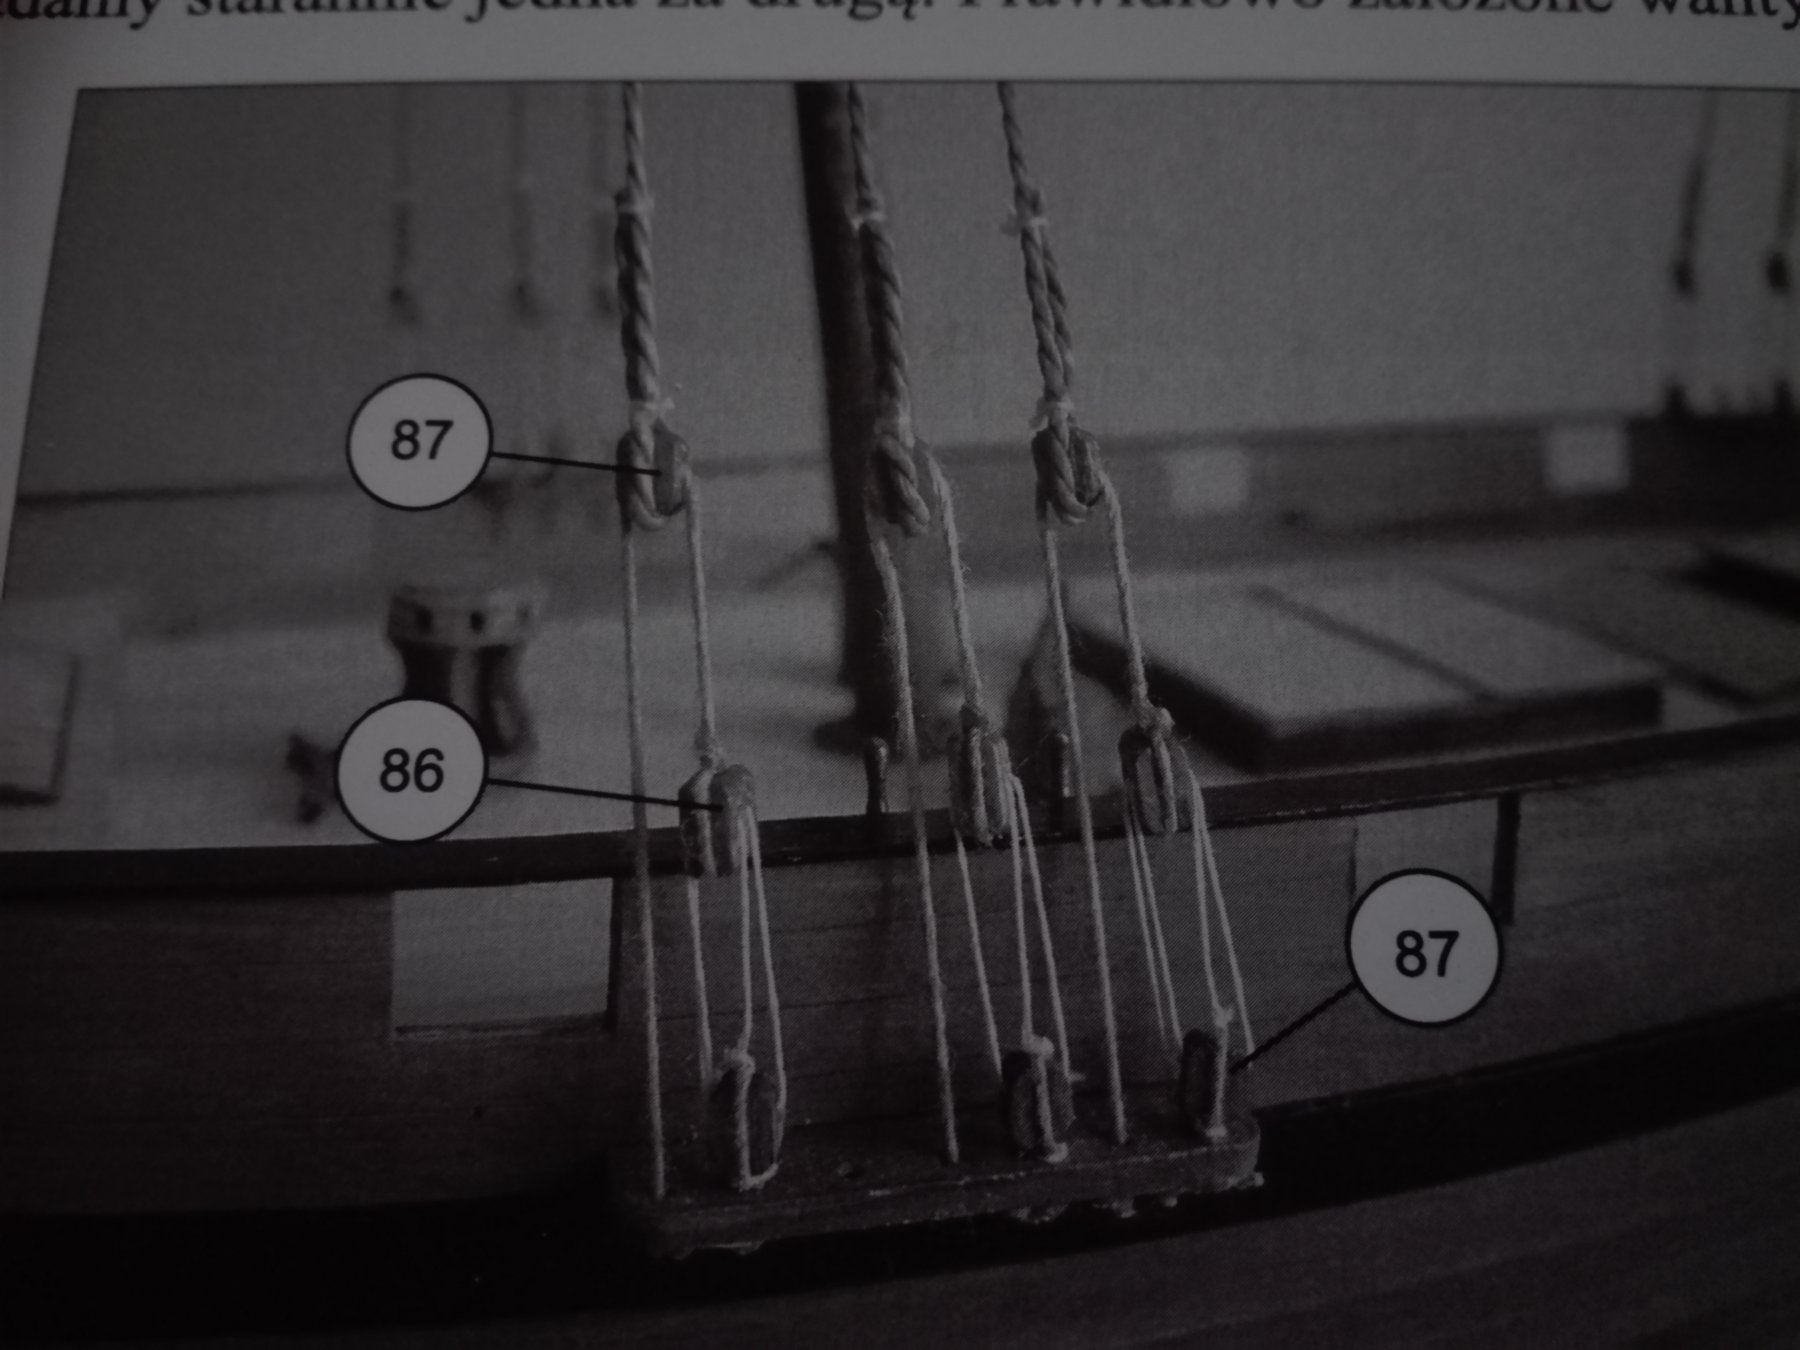
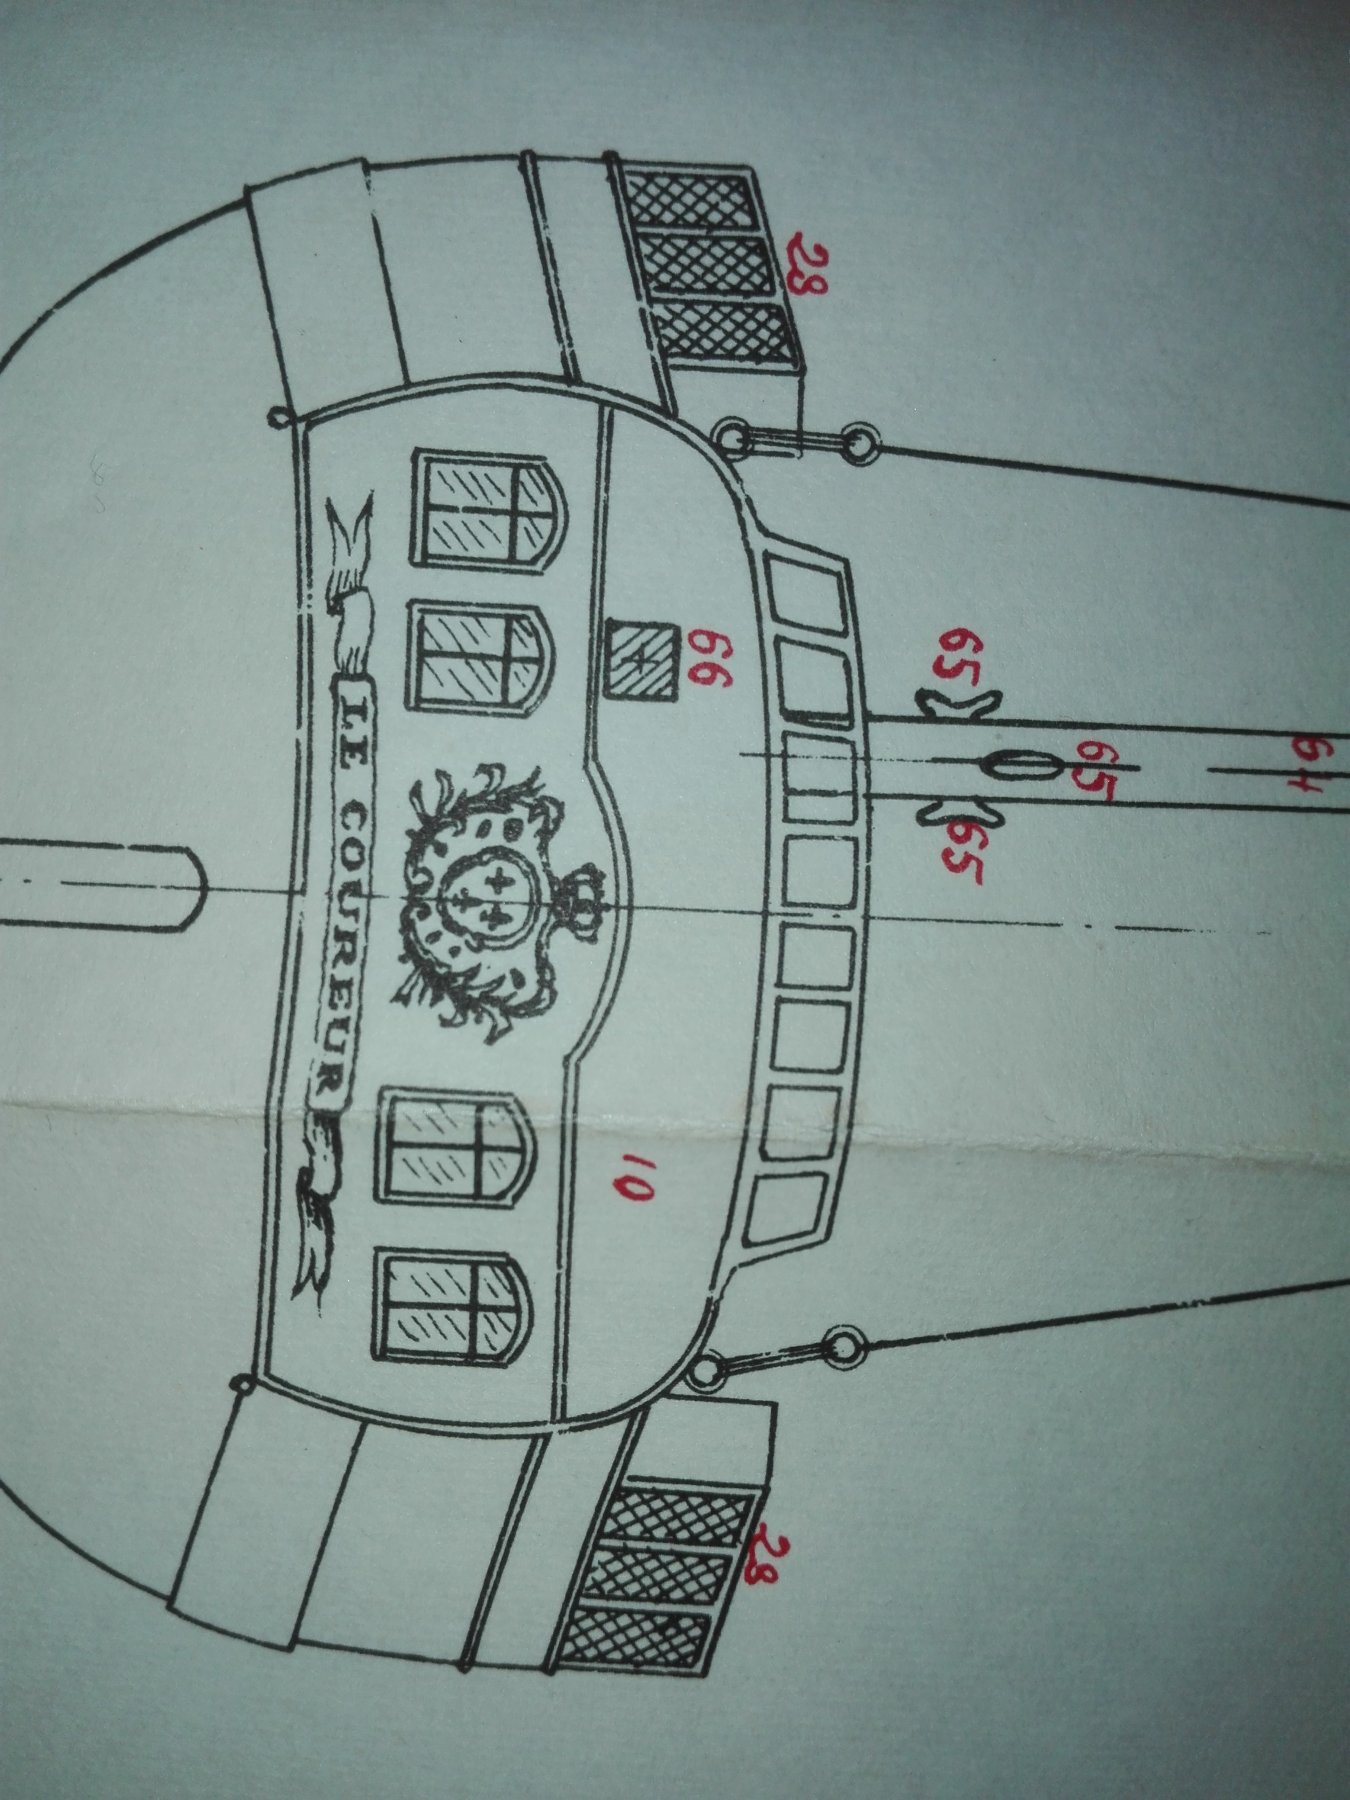
Hello friends, I'm starting a project here is mixture of research and building. As I came from the plastic kit bashing side of the modelling society I'm fed up with the chequebook modelling destroing any creativity. So as I'm in a new less payed job I changed my mind to a more creative and less expensive theater of the hobby: cardboard modelling. The scale fits to my flat's size. Sorry for my bad English - I'm not rearly far away from my school standards 30 years ago. Base of my project is the early Shipyard plan of Le Coureur the French lugger in 1/96. The little ship that was taken 1778 by HMCutter Alert - and what a nice and heartwarming thing it is that due to this find we have got the plans in the NMM. It is the basis of the Bourdriot monographie. The are three important sources of knowledge for me strating in the modelship's world: A. Petesson - Fore and After Rigging B. Bouriot - Le Coureur Monographie C. Friends of the Navy Museum - Plan (1960th?) (D. a www-copy if the NMM-plan) The Peterson shows the rigging of a bigger and in some details differing lugger from the same timeframe. The monographie is very good and well detailed - I decided to take the save route and ordered a new issiue at www.ancre.fr so the money was directly. with the drawer. And I was shure to get a complete set of plans. The Paris Museum's plan is based on the Admirals Pâris drawings and showing a simpler rigging with a diffrend decks layout. The NMM plan shows a superstructure in red on deck - the Shipyard kit shows hatches. Boudriot draws his particular part in dotted lines in one deck's sideview. I decided to trust in the NMM plan and in Ancre, too. So I've figured out the kitmakers at Shipyard followed the plan of the Paris Naval Museum. The similarity of the stern decorations are also evident. So the list of errors, carenesslesses and force to construct a buildable cardboard kit've born an intersting fundament of a nice little ship. As I'm not a francophone person, I have got my. problems with the texts in the monographie. But from all the three sourced it seems to be the one of the highest quality. So here some first impressions for you about the similarity of the kit and the Paris Plan. 1. The sternview of the ParisPlan 2. Some picture from the Shipyard manual showing the missing badge 3. The “KateWinslet leaving step“ in the topview 4. same area in the manual 5. my hobby ship yard. These as some first impressions for you. At the moment I'm struggling with the lasercut cardboard hull and its plywood filling I've get tip in a German forum.

- 21 replies
-
- 3
-
-
- shipyard
- le coureur
- (and 1 more)
-
Little paper builder
Heinrich der Seefahrer replied to Heinrich der Seefahrer's topic in New member Introductions
Thanks to all of you for the warm welcome. I'll start the kit building log when I did some more progress. -
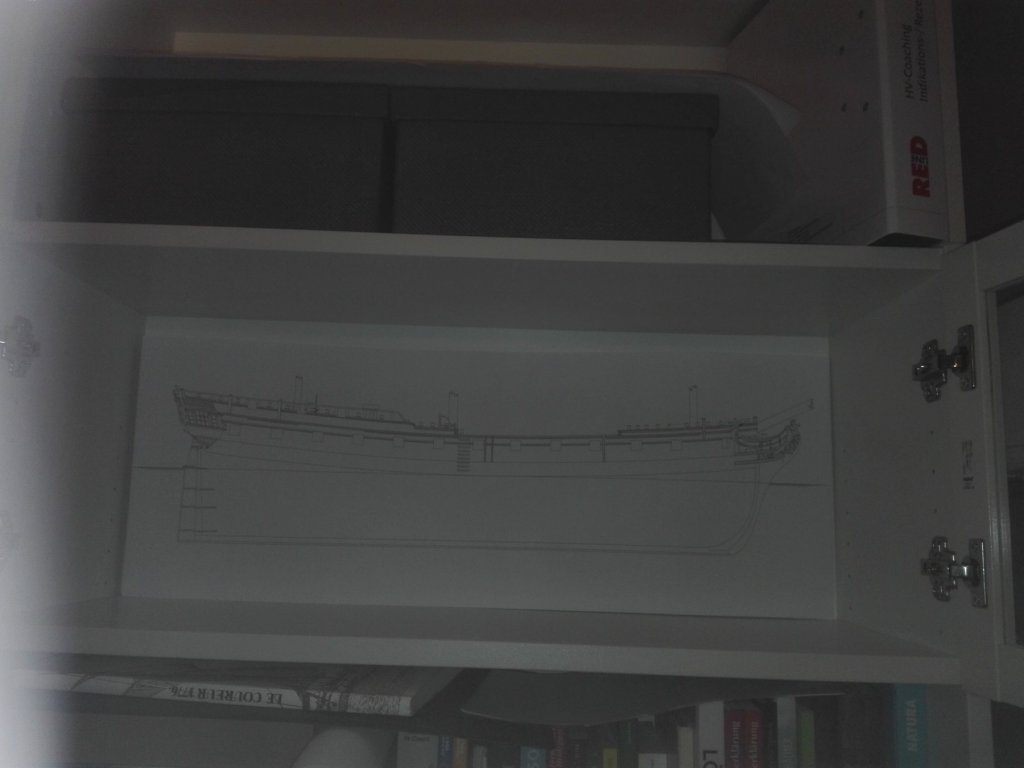
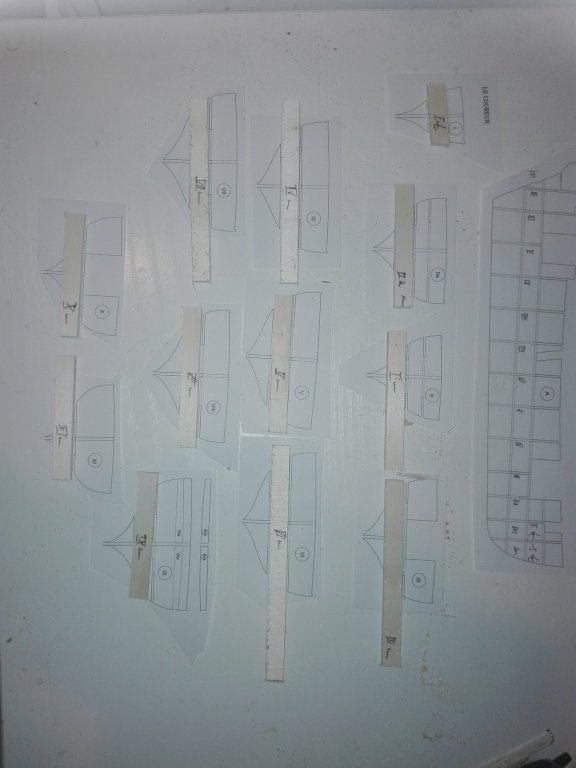
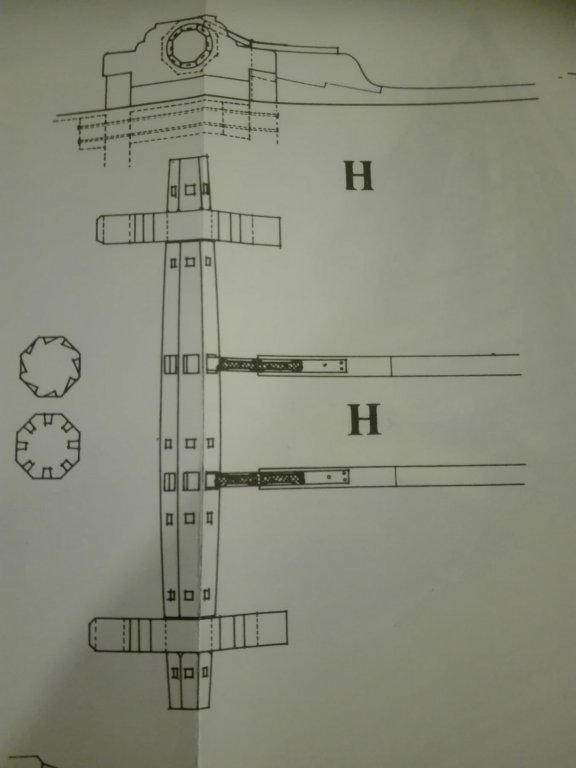
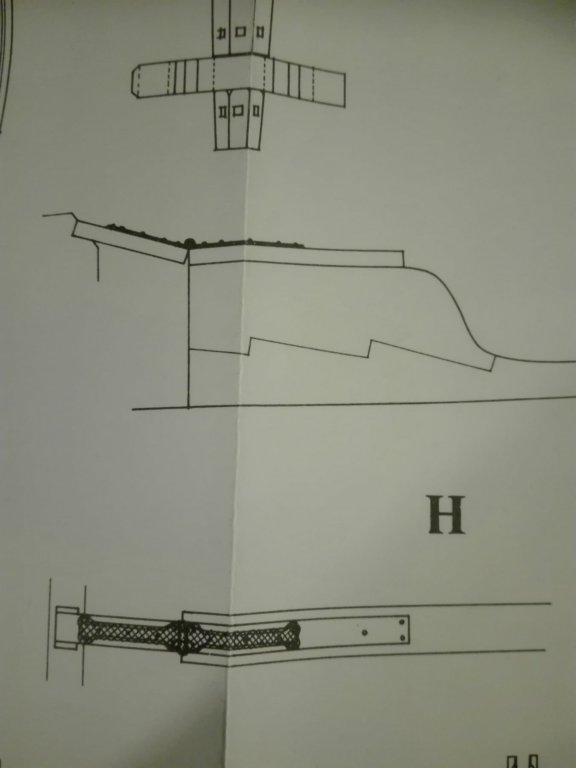
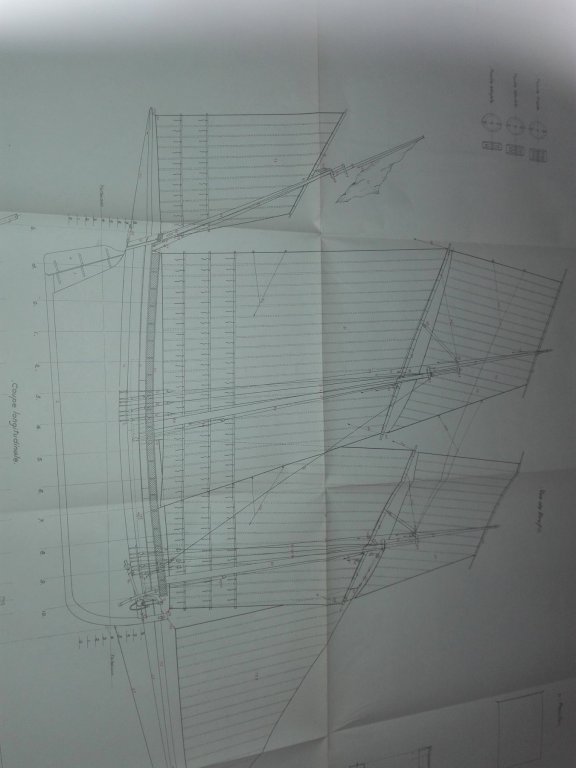
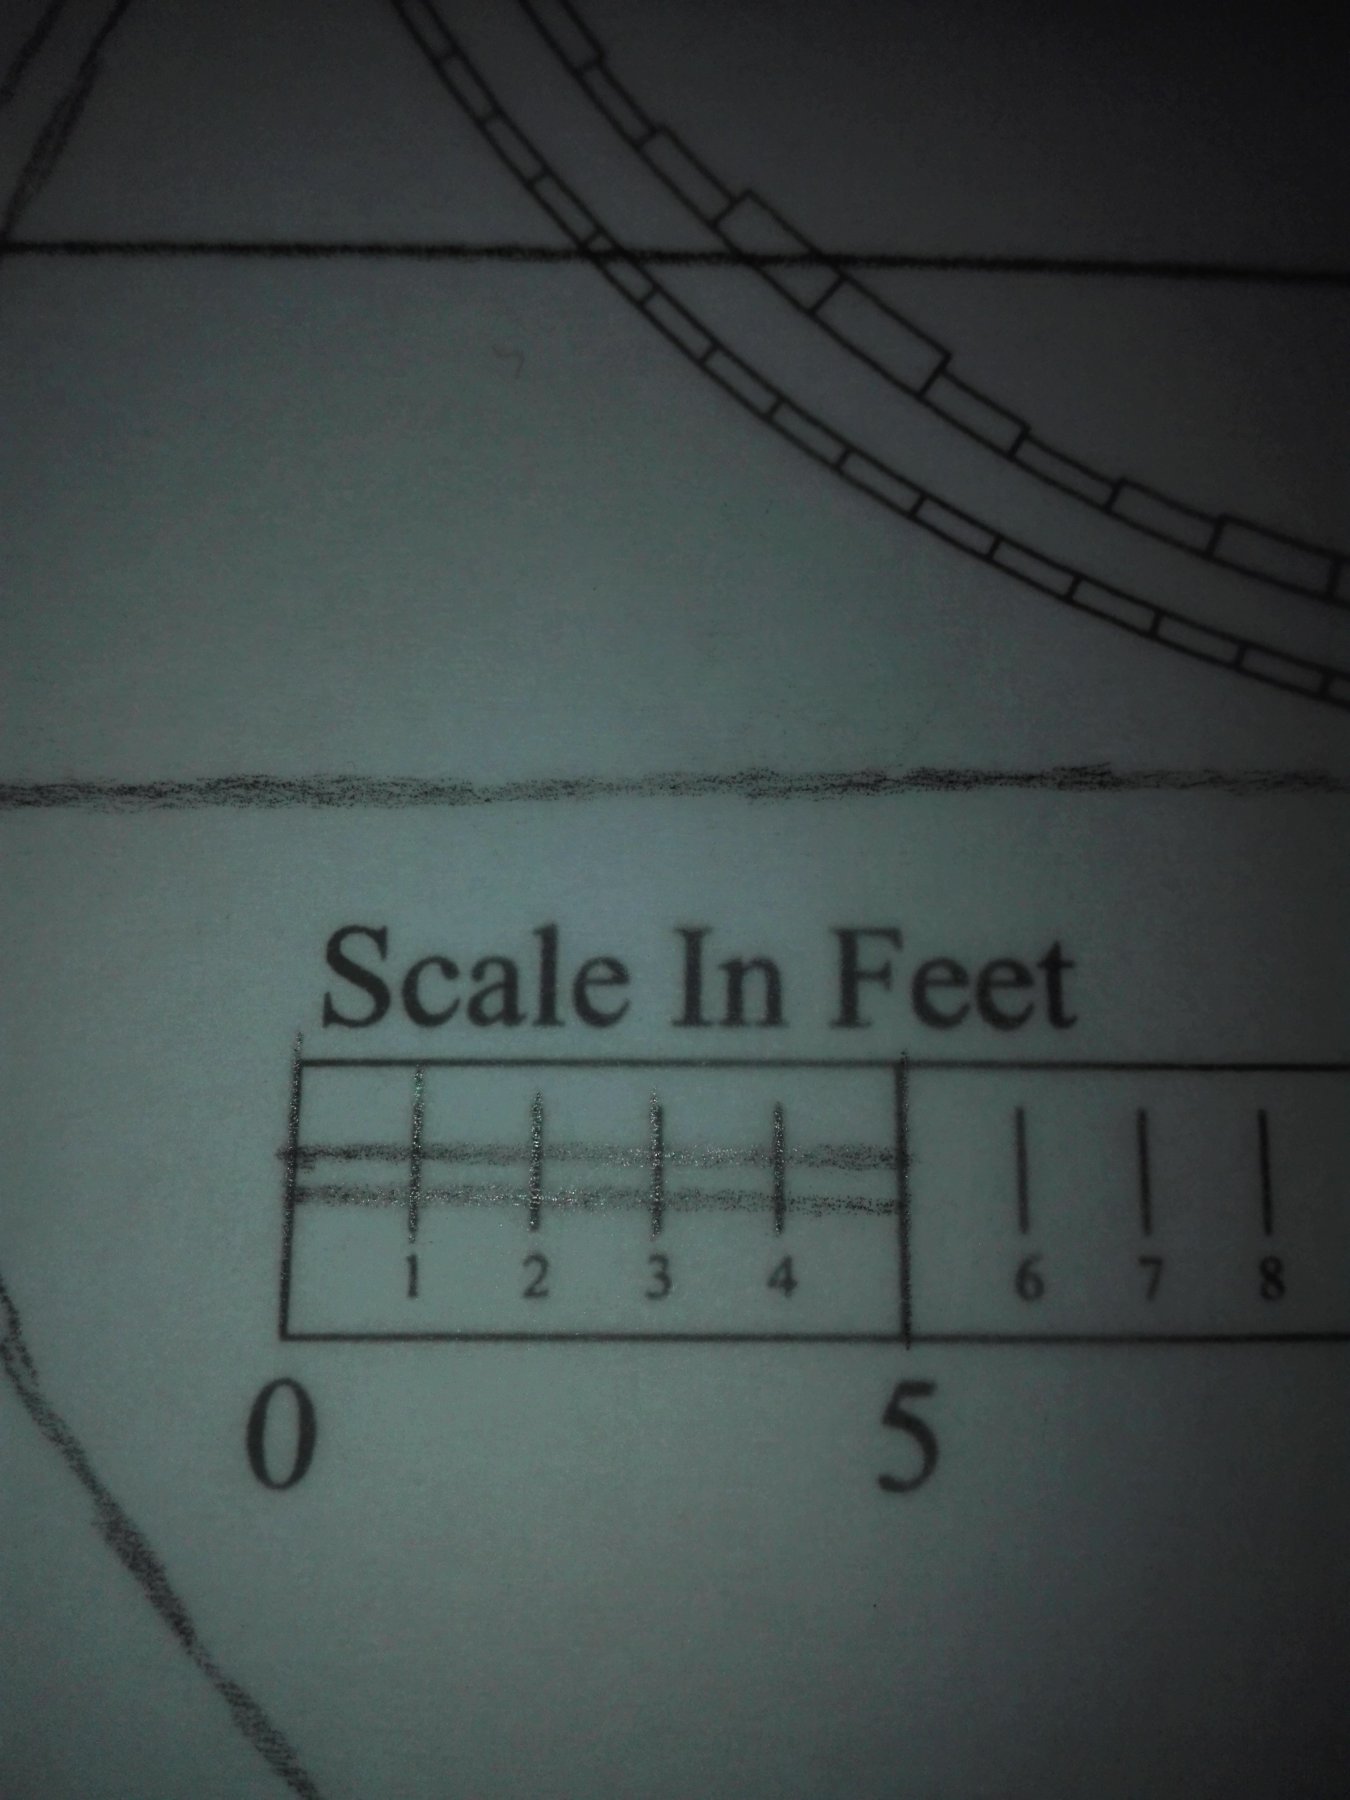
Hello from Germany, as a changing from the more and more expensive plasic modelbuilding swinging towards pure chequebook modeling I decided to build no more tanks and airplanes and figured out sailing ships seem to be, an intresting field of hobby and history. So I bought on the one hand the Shipyard plan of Le Coureur scaled to 1/96, added the Peterson Rigging book and ordered the navy museum's friends plan from Paris and on thevother hand the Ancre version drawn by Jean Boudriot. And the Mondfeld's book of model ship building. So researche and buildung are starting to go hand in hand both starts make fun. Here the sideview of the Le Coureur to give you a first impression of my little paper ship project by, showing bouth plans. The Shipyard plan is based on the Paris museum plan set. (The plan with the little scalebar wearing figure is the Boudriot plan.) As the deck of the kit is very empty and the ancre plan shows a plenty of superstructure to be added I'll try to boost the kit by adding details from the Ancre plan onto (into?) the Shipyard kit. One of the most importand duffrences is the spill - the Shipyard deck has a withe dot for a, standing spill, Jean Boudriot shows a lying one - detail with the letter H. When I'm right I'll have to change the hole deck. Best wishes, Heinrich
.thumb.png.dfbf4eddc01ad84e30a012af7404c425.png)


.png.bf168c83c39b6ccedc763e54c896442d.png)