Check out our new MSW Sponsor Innocraftsman
×


Heinrich der Seefahrer
-
Posts
533 -
Joined
-
Last visited
Content Type
Profiles
Forums
Gallery
Events
Everything posted by Heinrich der Seefahrer
-
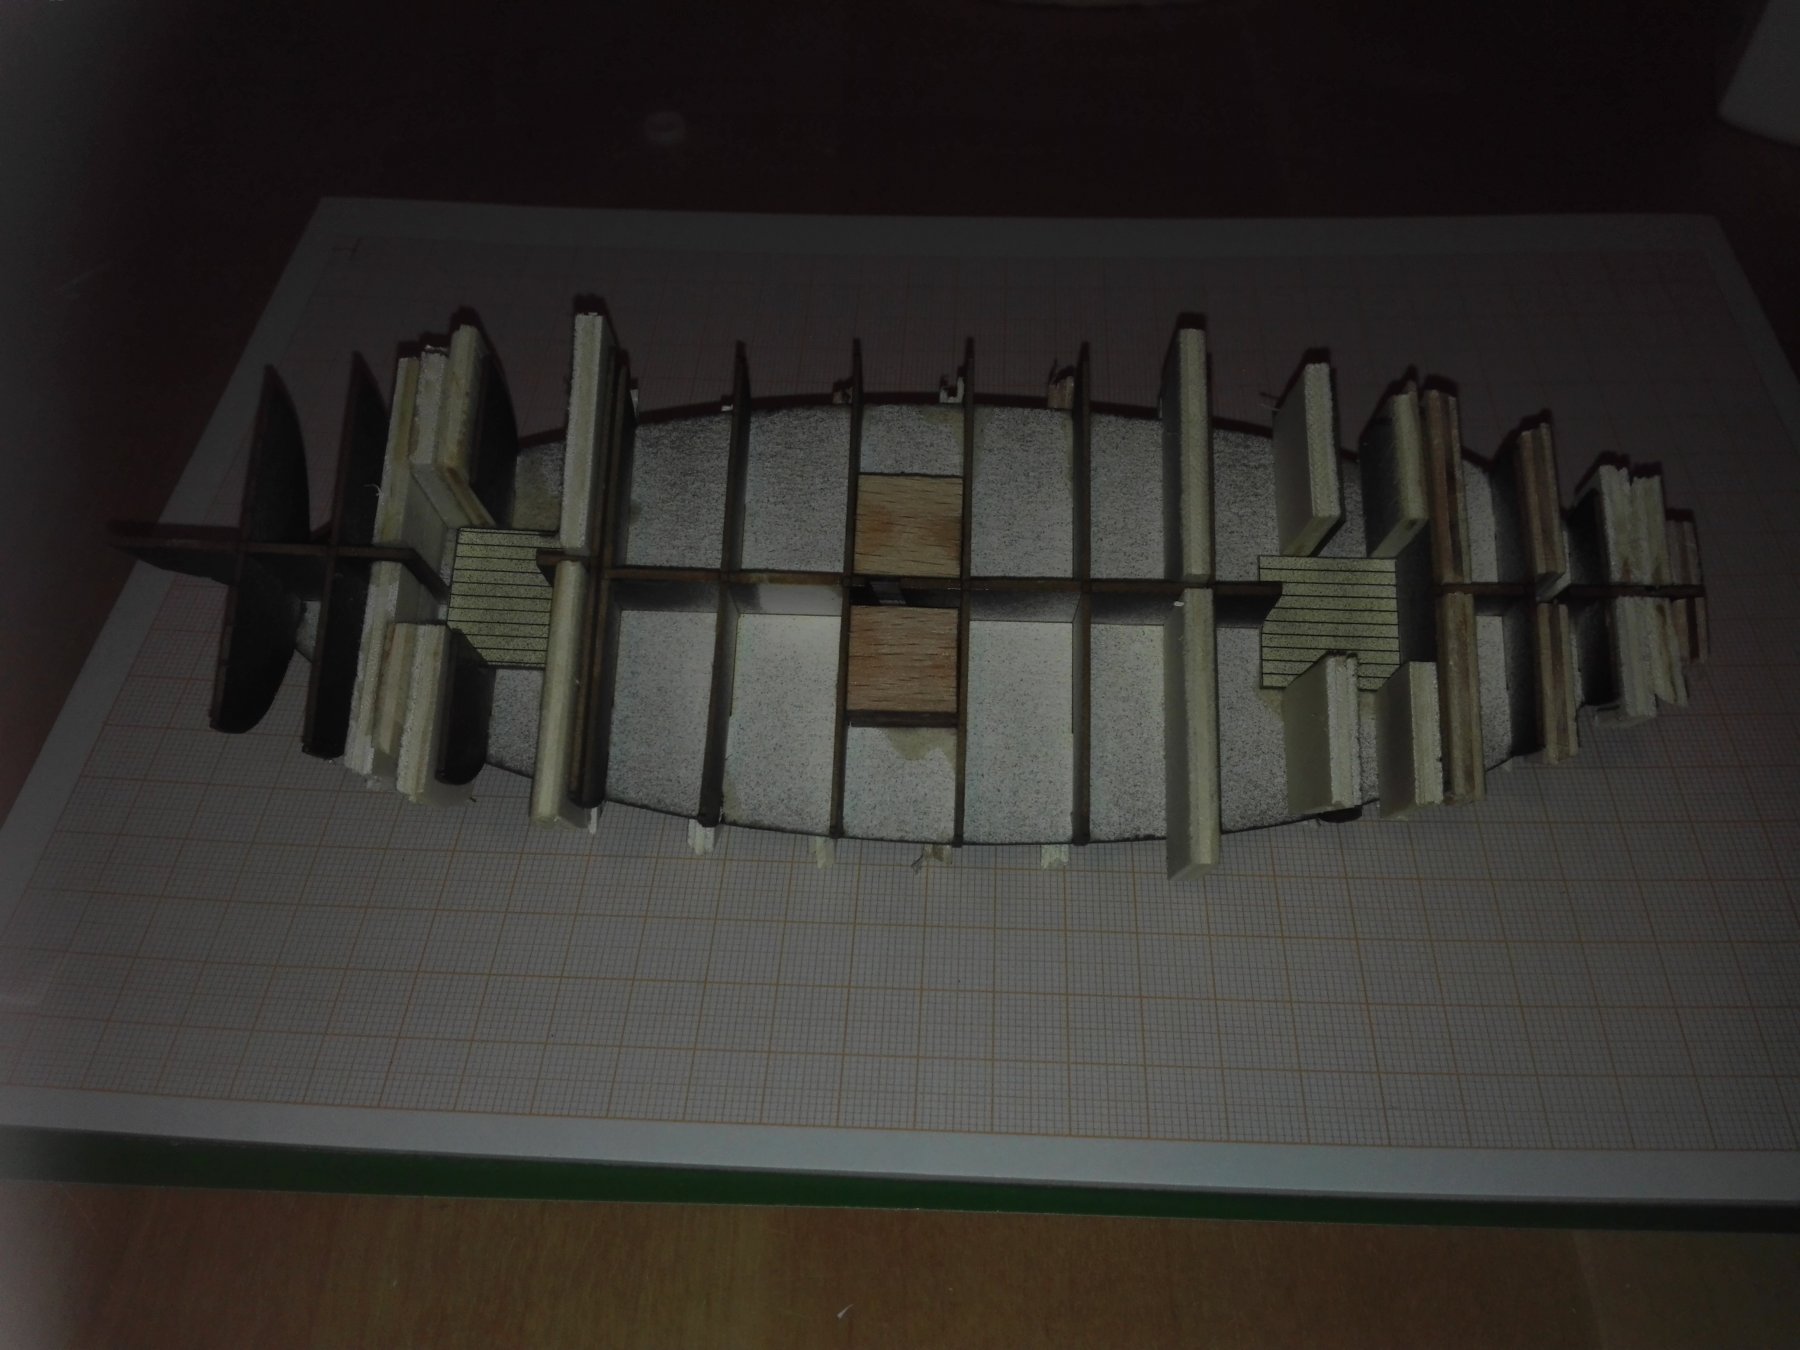
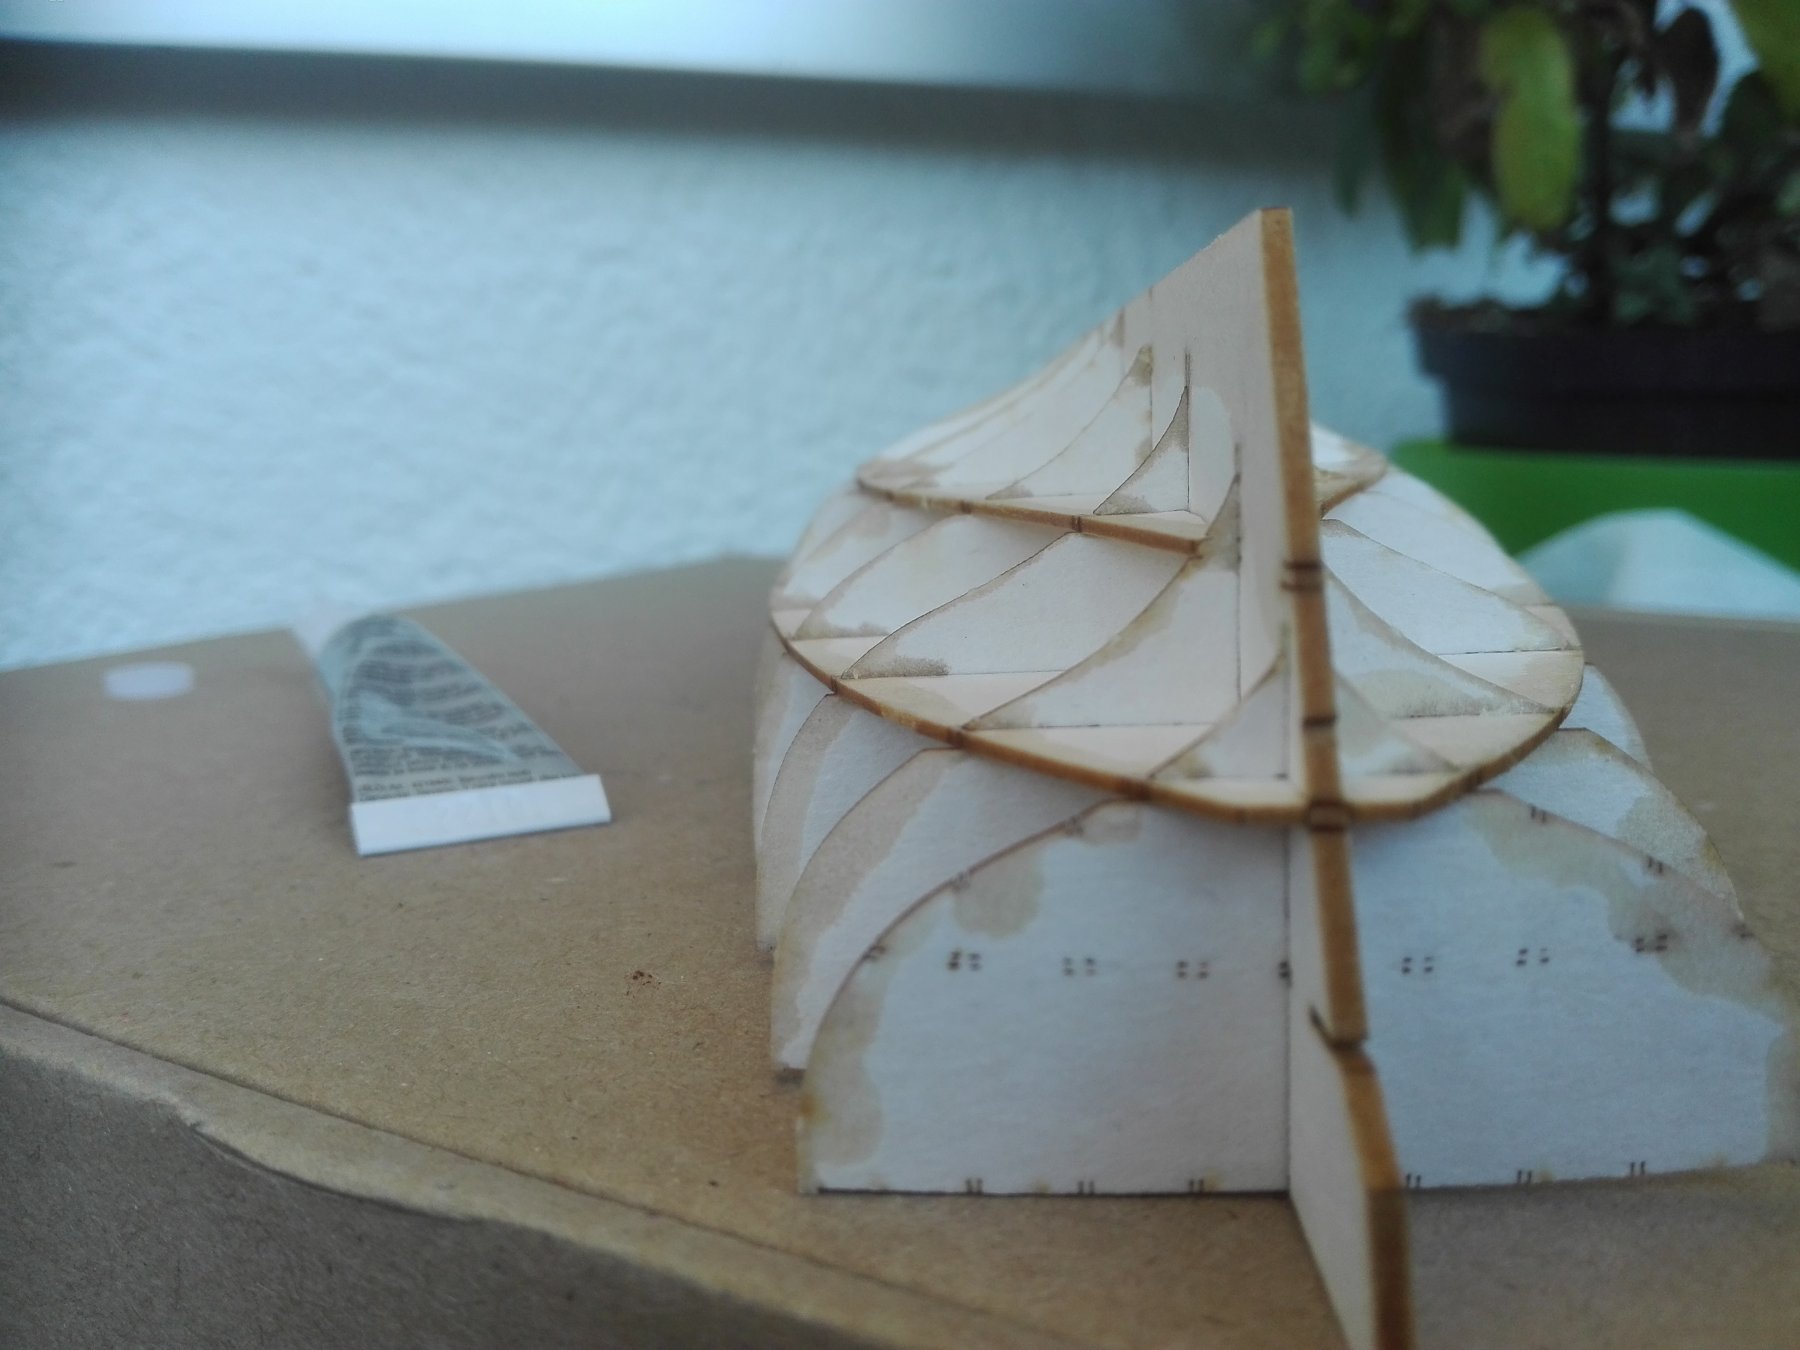
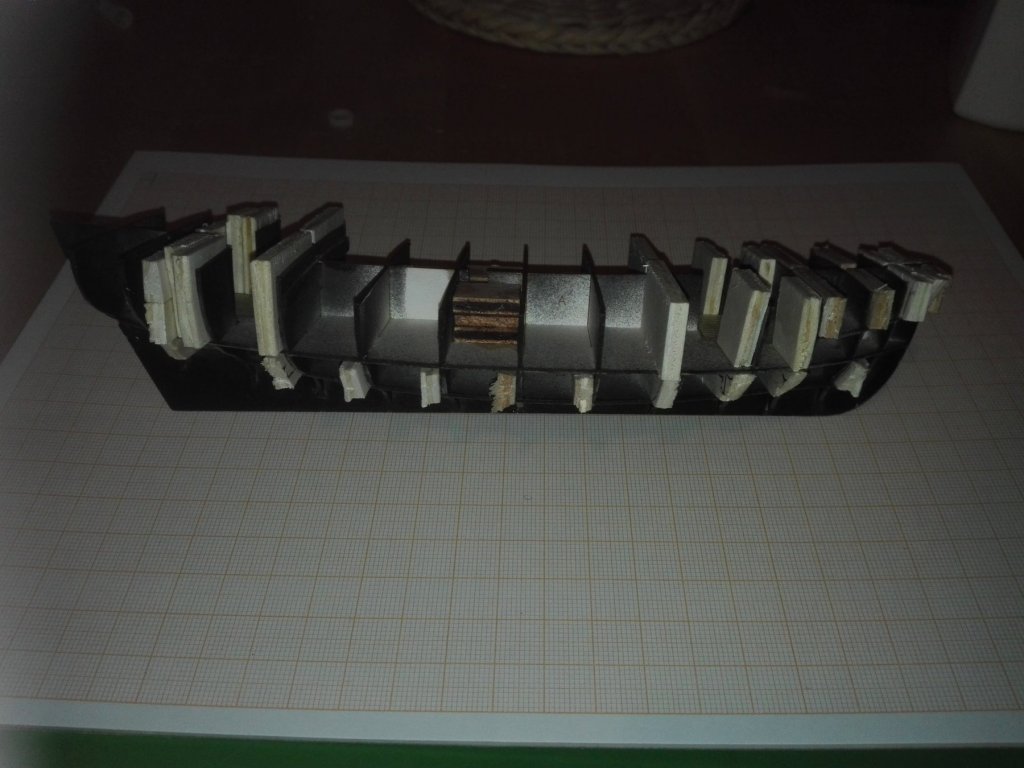
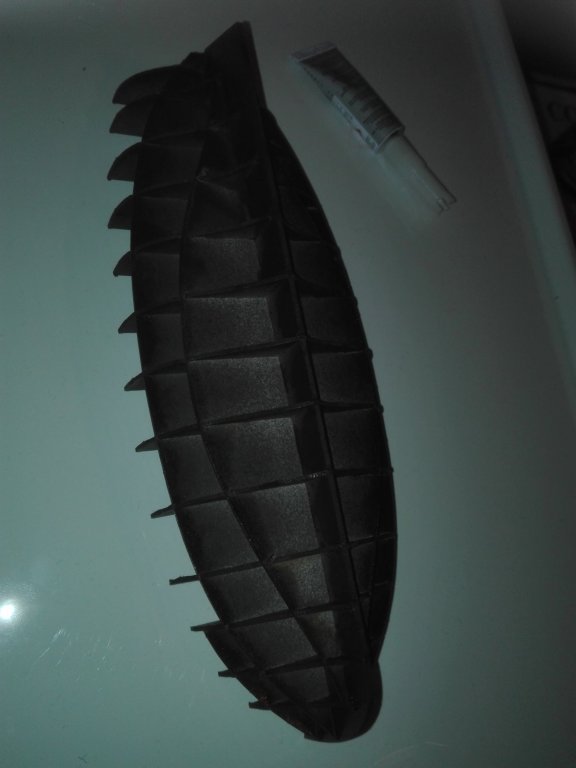
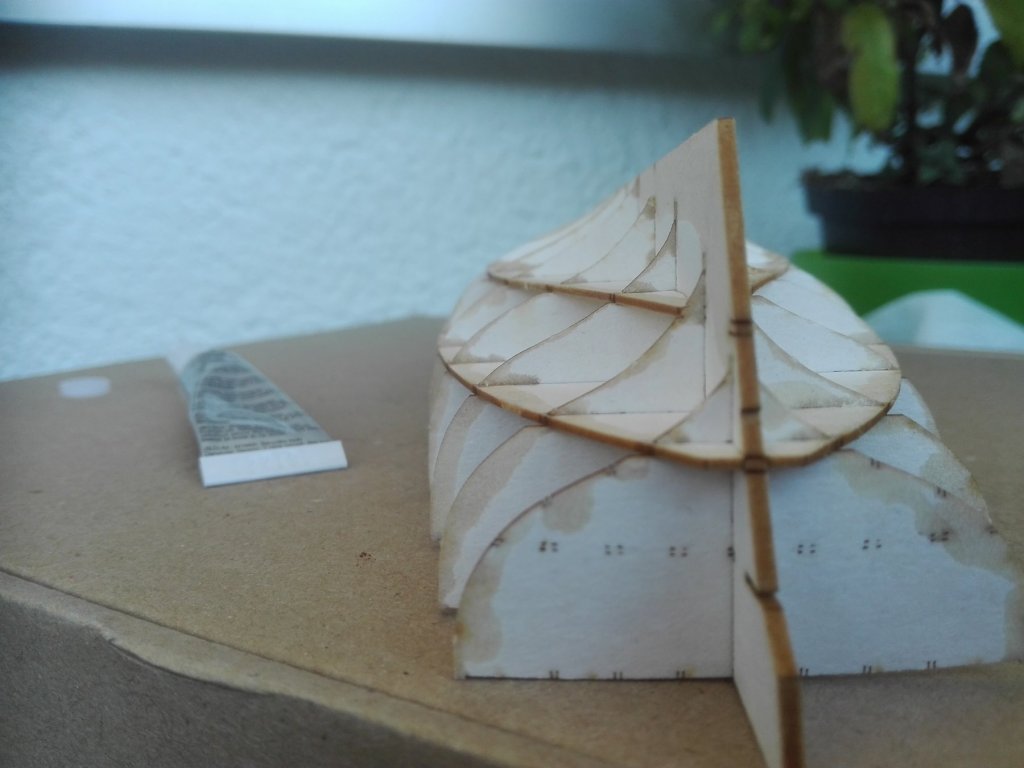
 Here the filling of g the hull a very rough start with soft plywood and cyan glue. I am not shure if I can show the real idea of the filling of the hull. I not shure if I can san the deck's basis so that I can rescue the tiny endingttops.
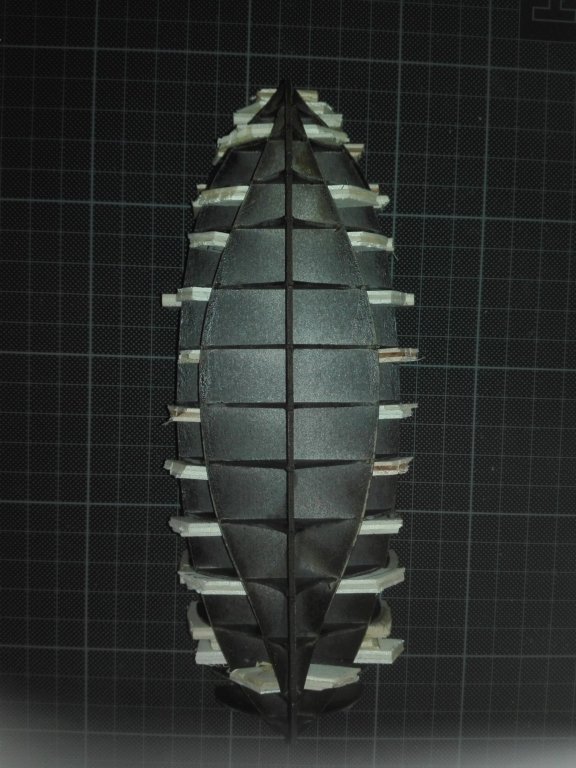

- 21 replies
-
- 4
-

-
- shipyard
- le coureur
- (and 1 more)
-
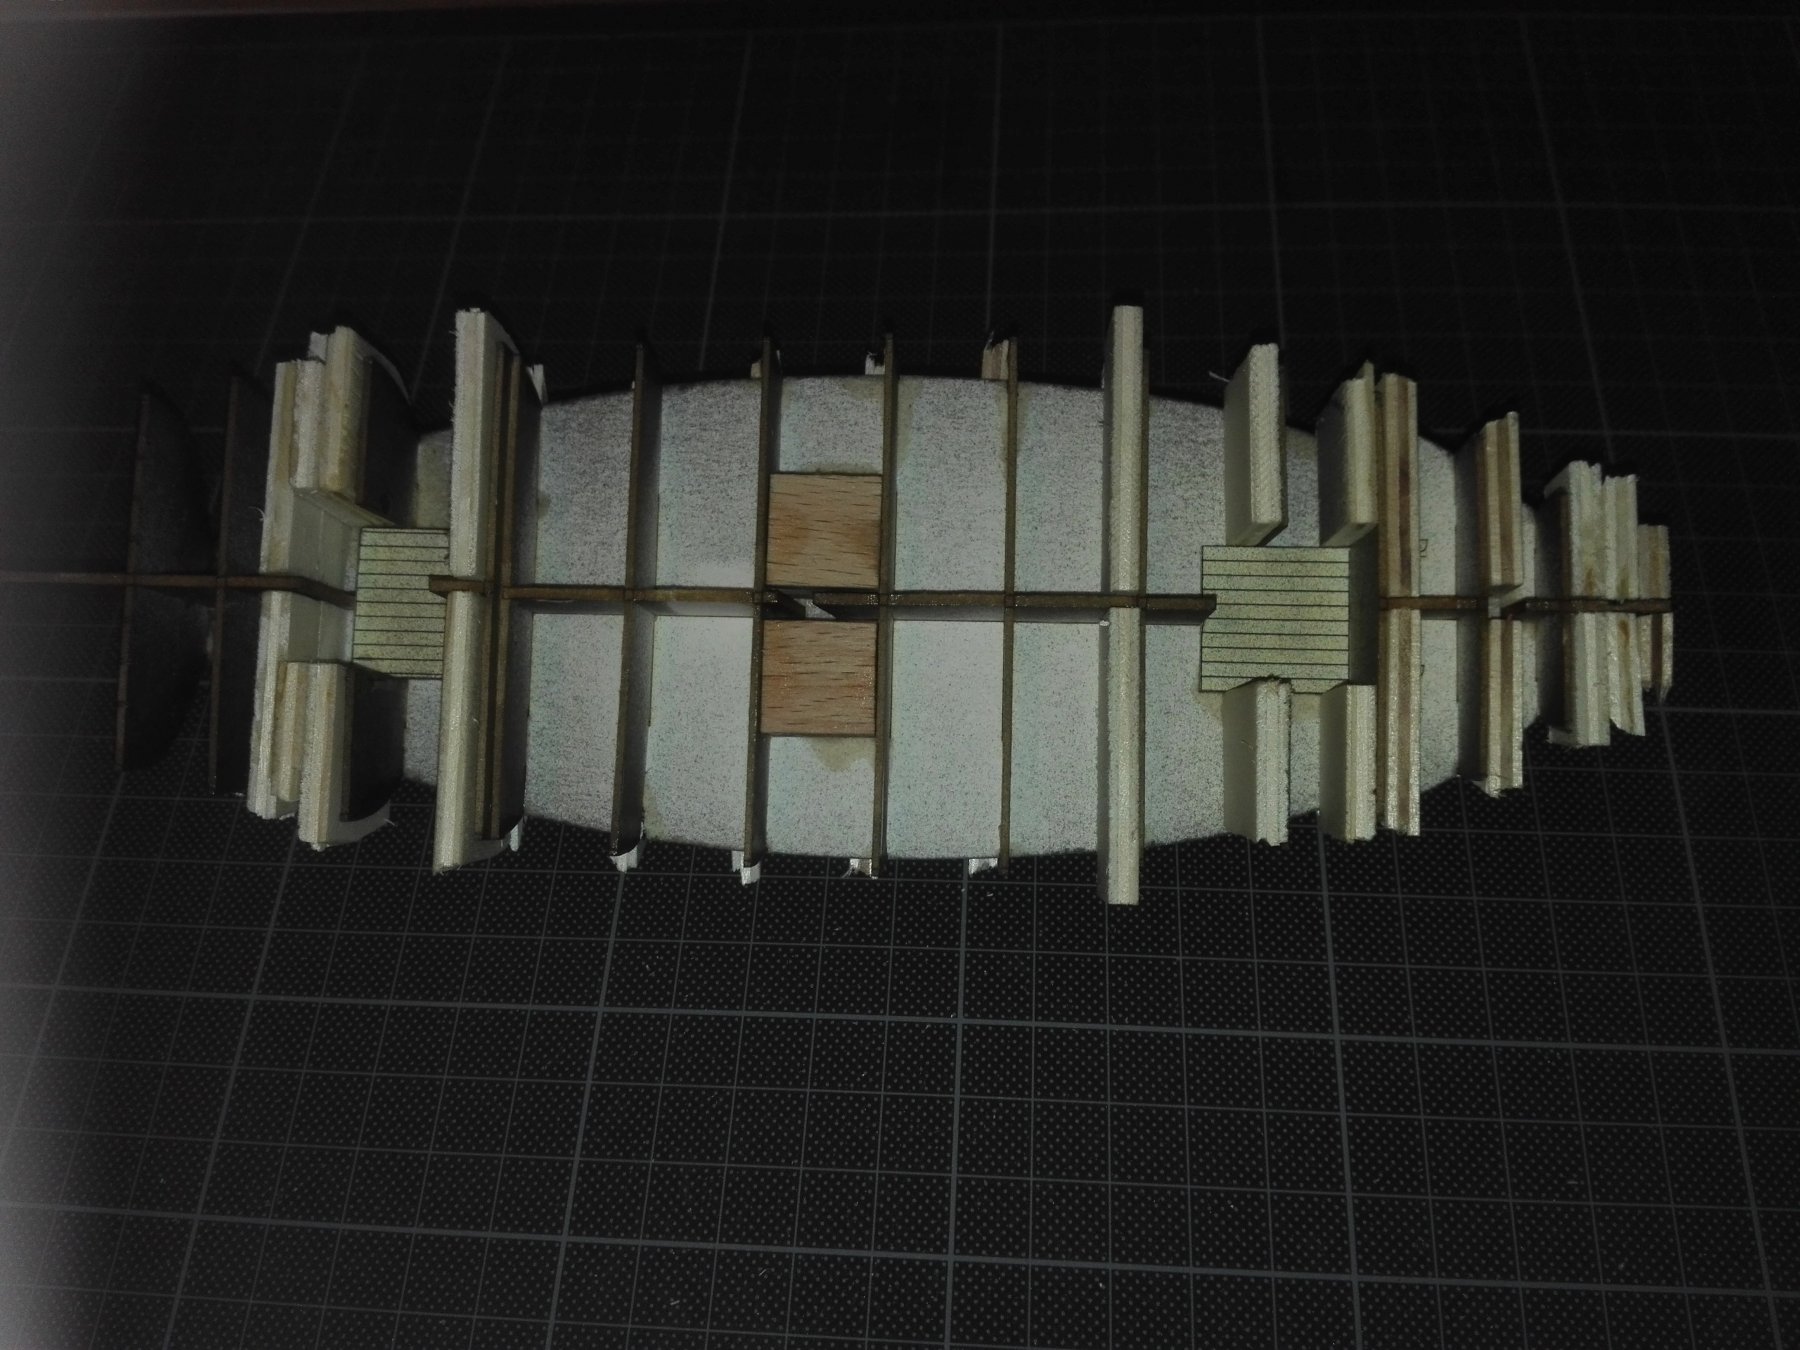
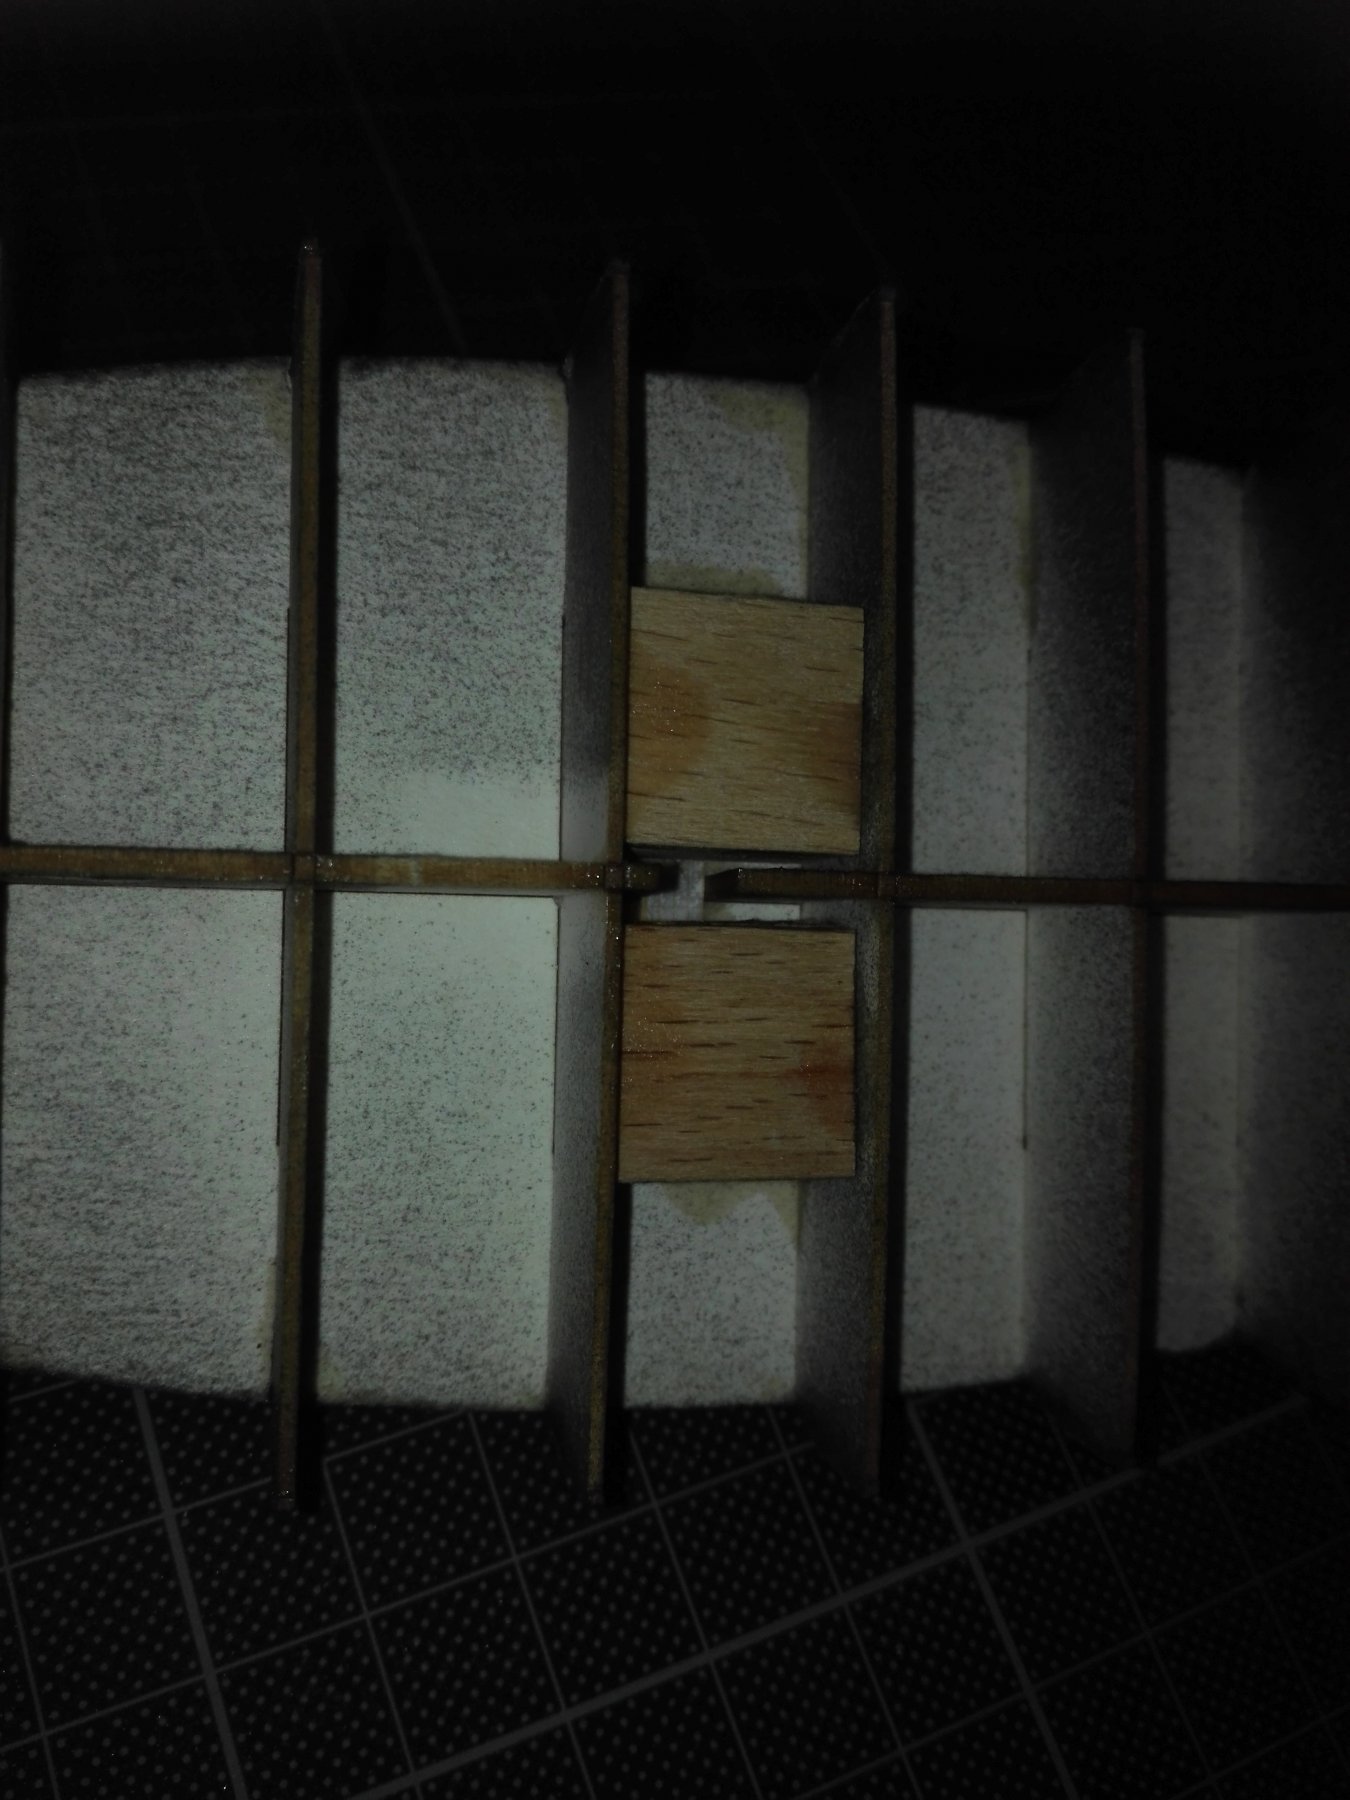
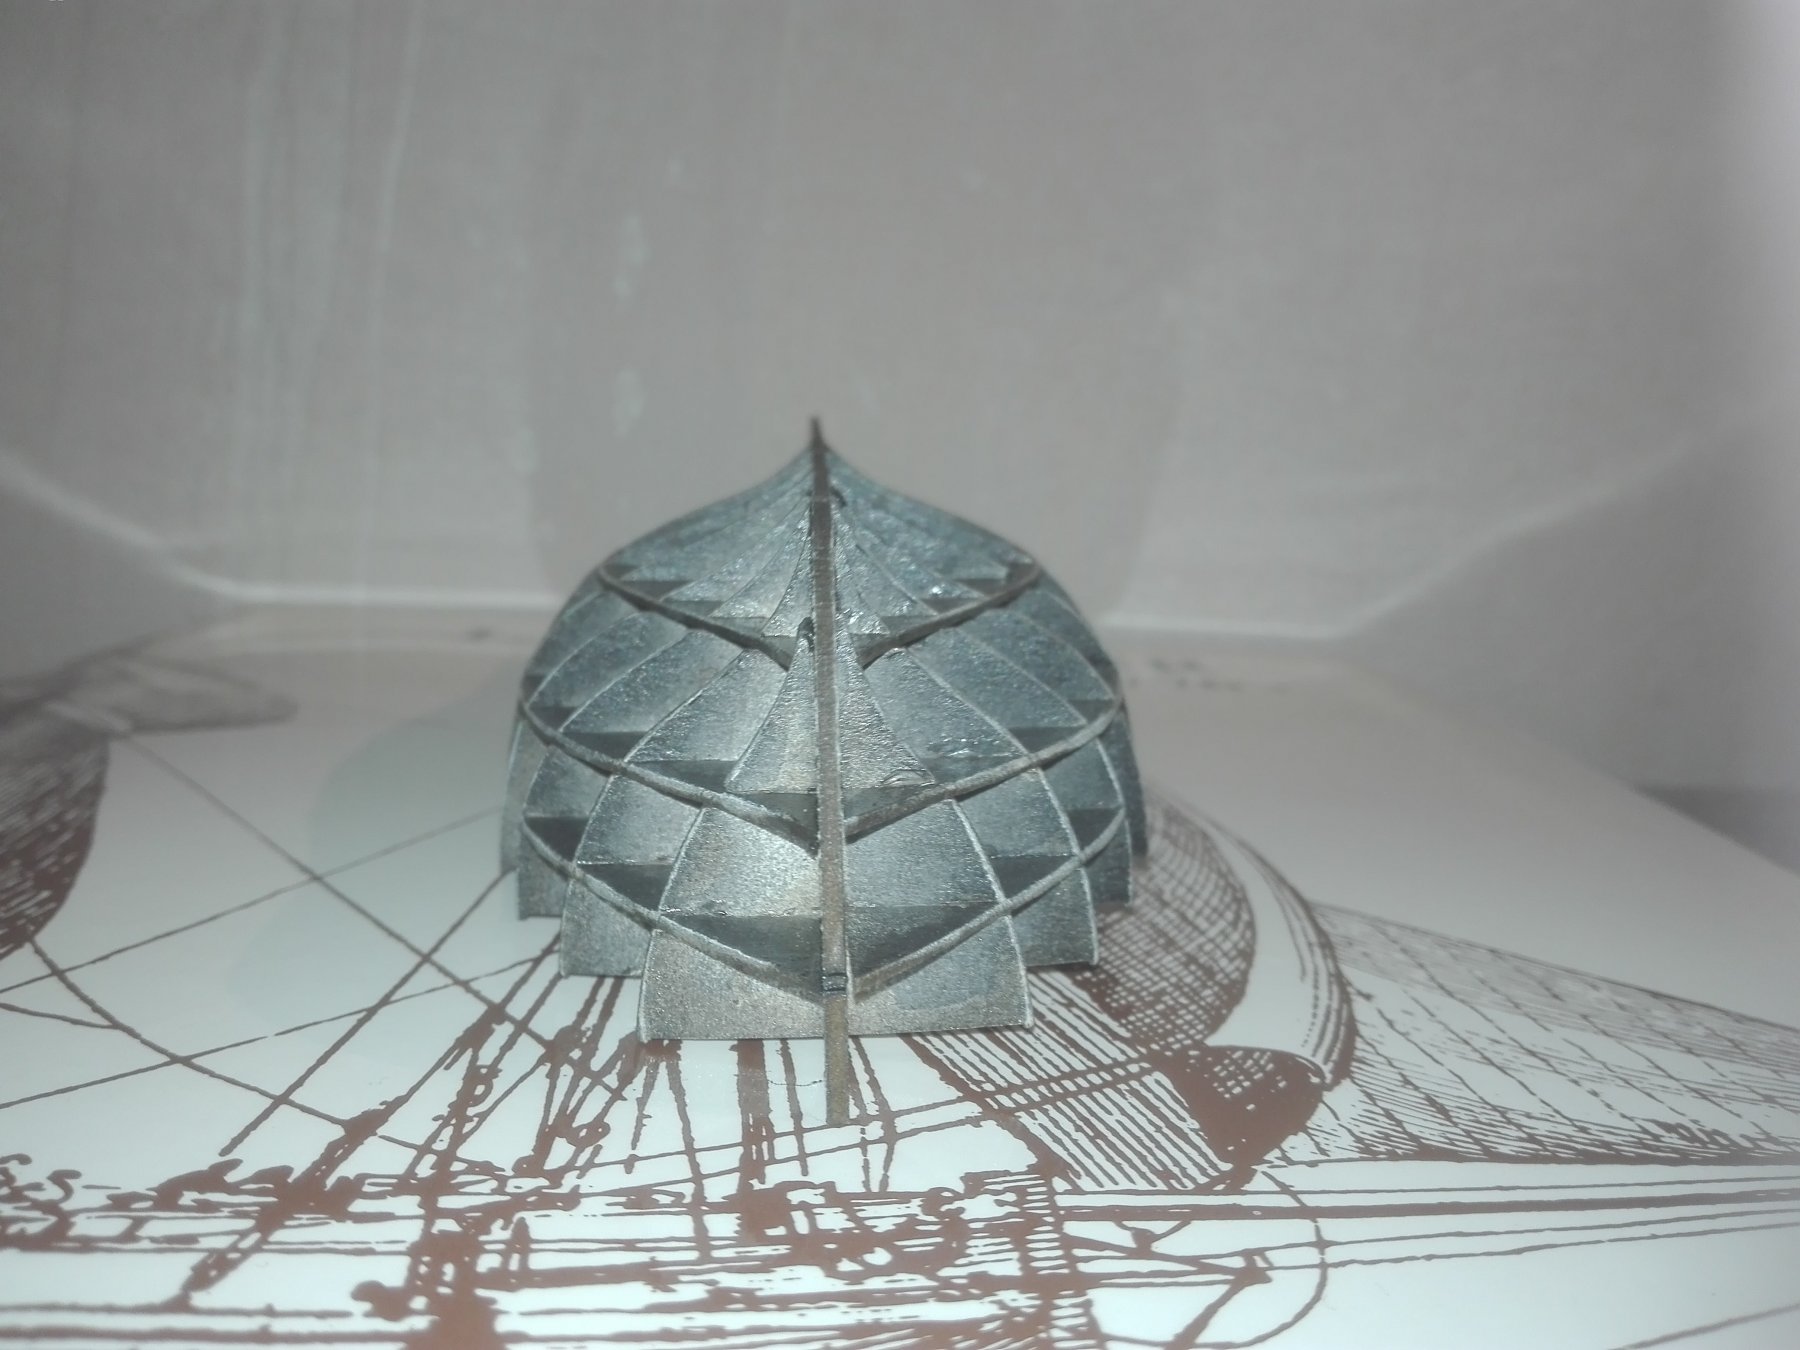
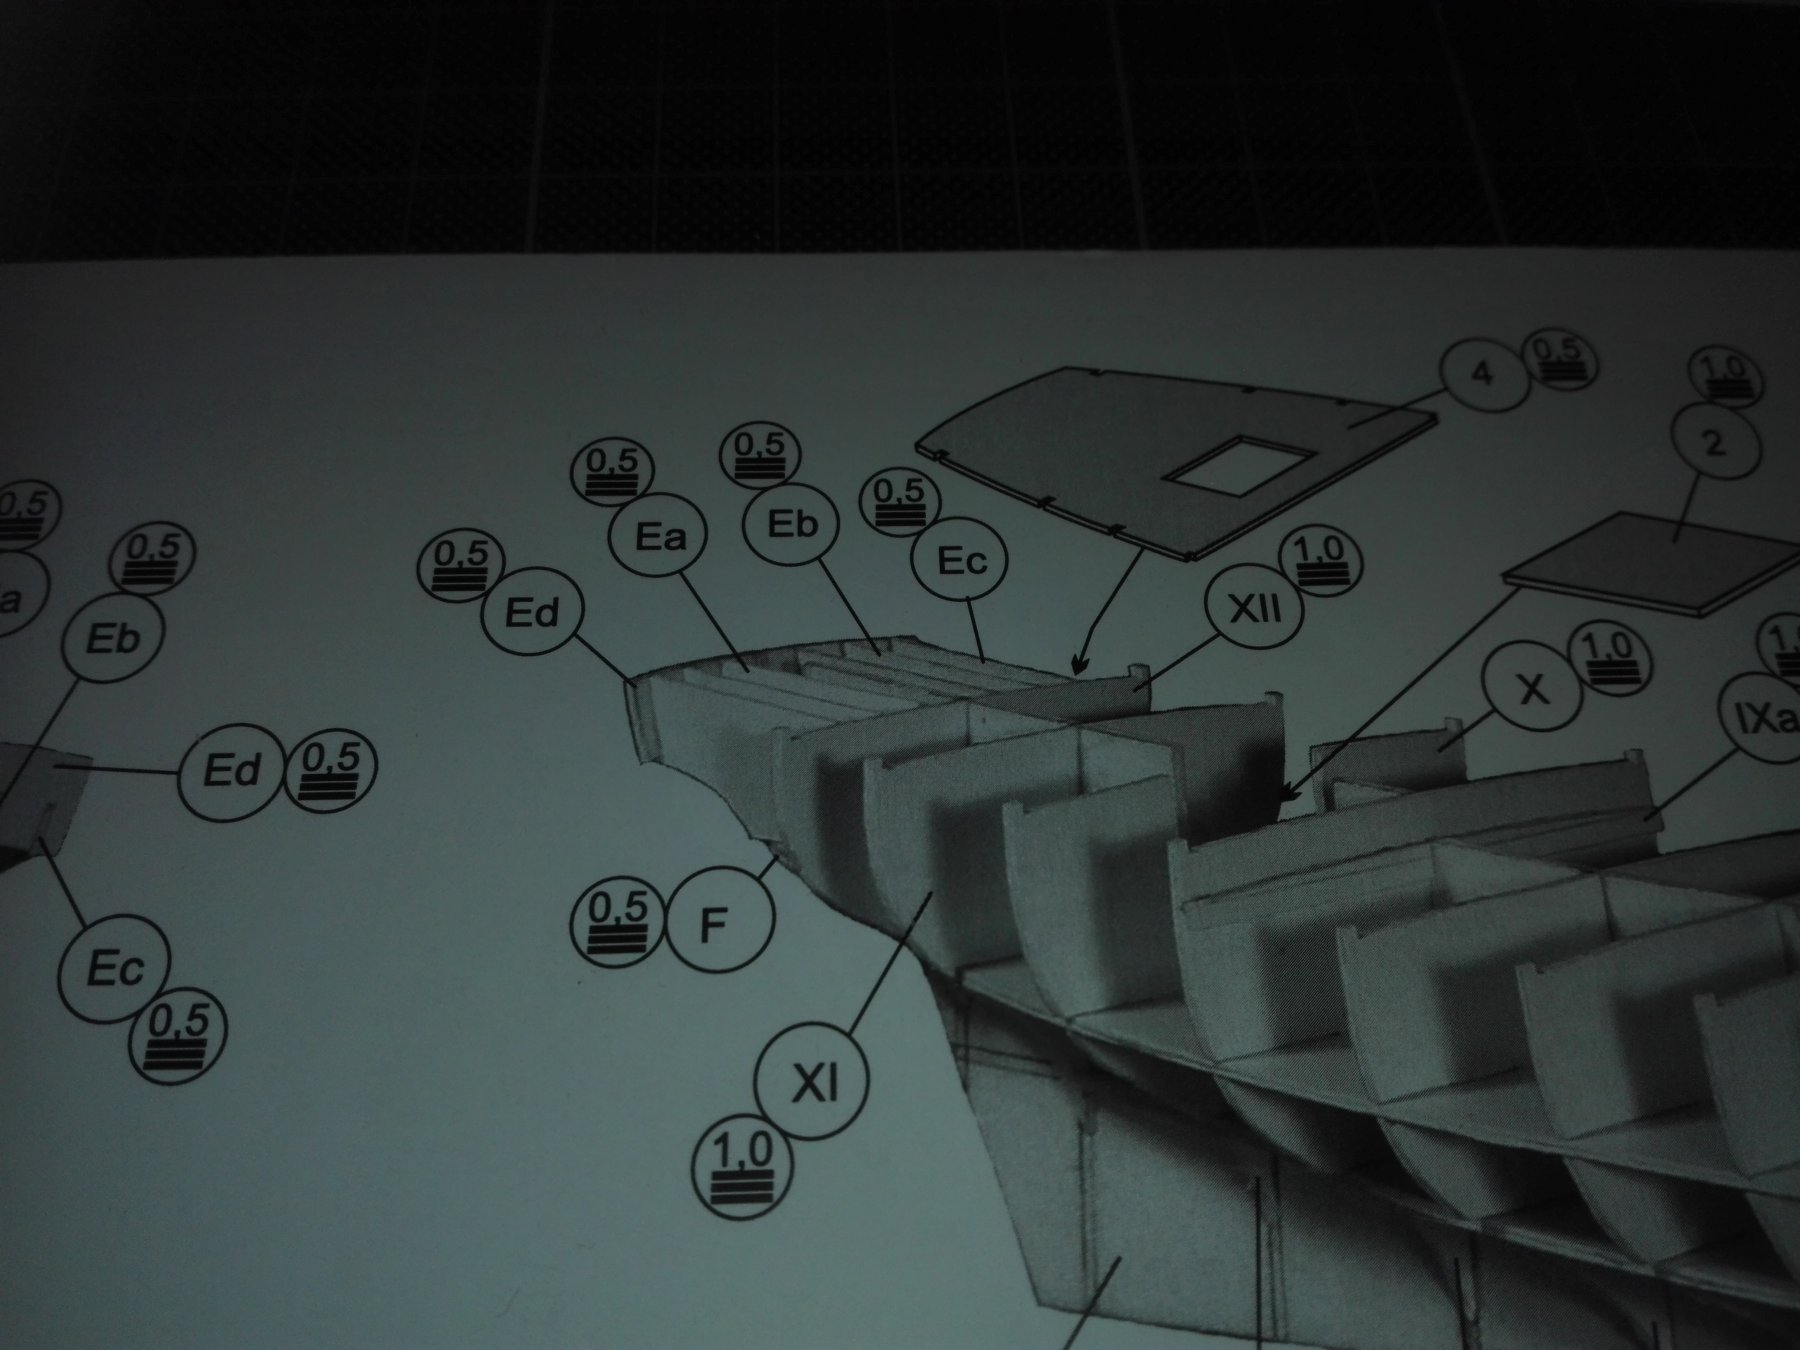
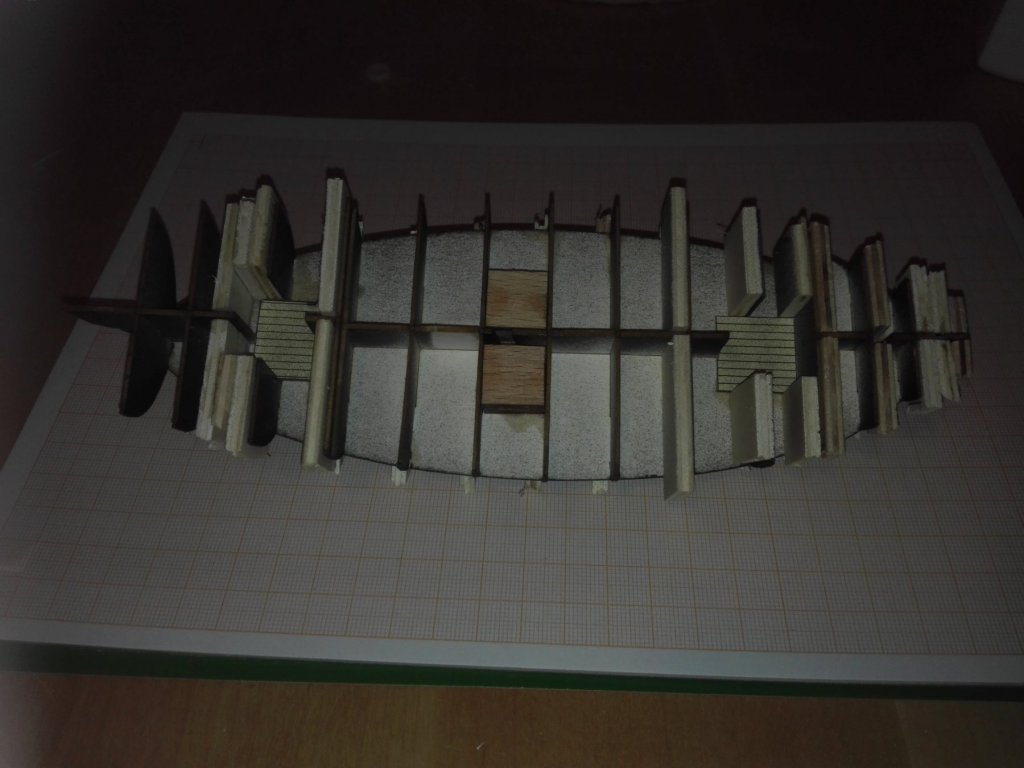
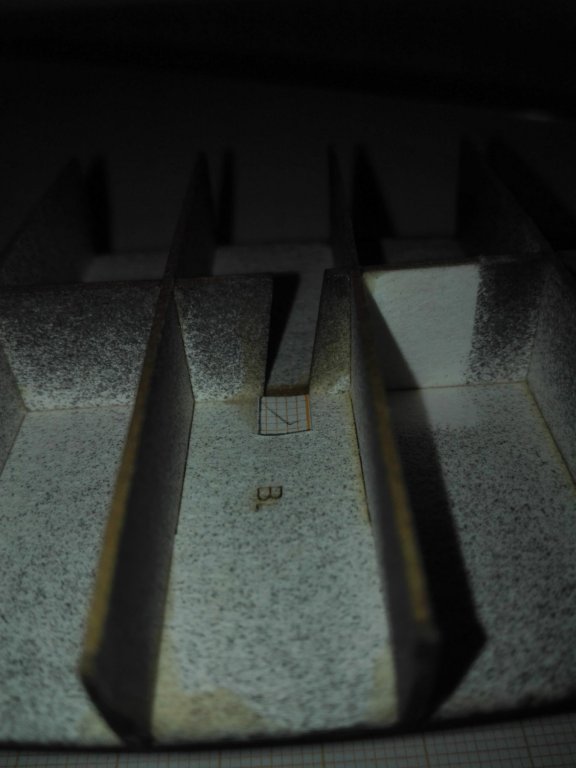
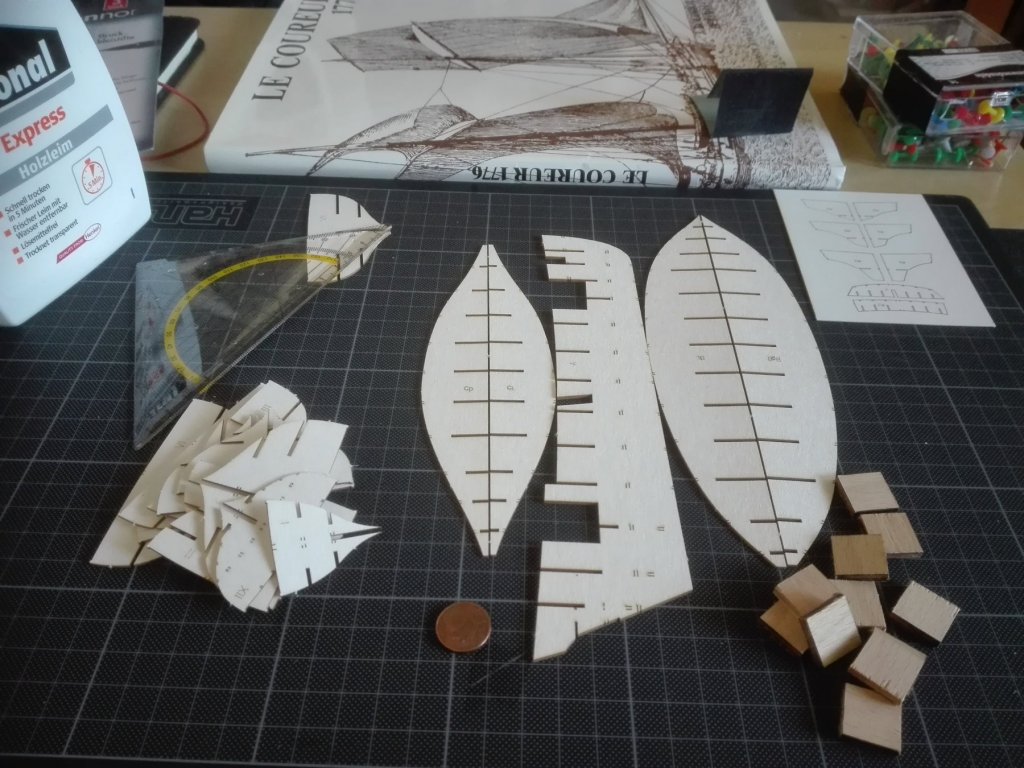
Hello friends, as I'm back from nearly a hole weekend in bed I started to fill the spaces in the LC-parts with soft plywood. Here thethe first pictires of this rough job I did this evening. I cut out the quare of the mast from “millimeterpaper and fixed it to the board. So I had a little edge to positionate the birchplywoodblocks fixing the mast. But zhe litzle pices of papervstarted to “swim“ on the cyanic glue and moved slightly. I repeted this for the foremast with superglue solken softwood plywood.

- 21 replies
-
- 2
-
-
- shipyard
- le coureur
- (and 1 more)
-
Hello Céderic, as I'm struggeling with the little Le Coureur kit by Shipyard and a connoisseur of Van de Veldes drawings I'm looking foreward to your further planings and progresses.
-
Hello Al, I'm going to join the audiance in here, too. Thanks for sharing your beauty.
-
Thanks Jaager for these helpfull informations. The walnut seems to be juglas regia or Persian/English Walnut. If I understood right I should so peel the wood and let it dry. So only AFTER that several years of drying I should saw it in billets, shouldn't I?
-
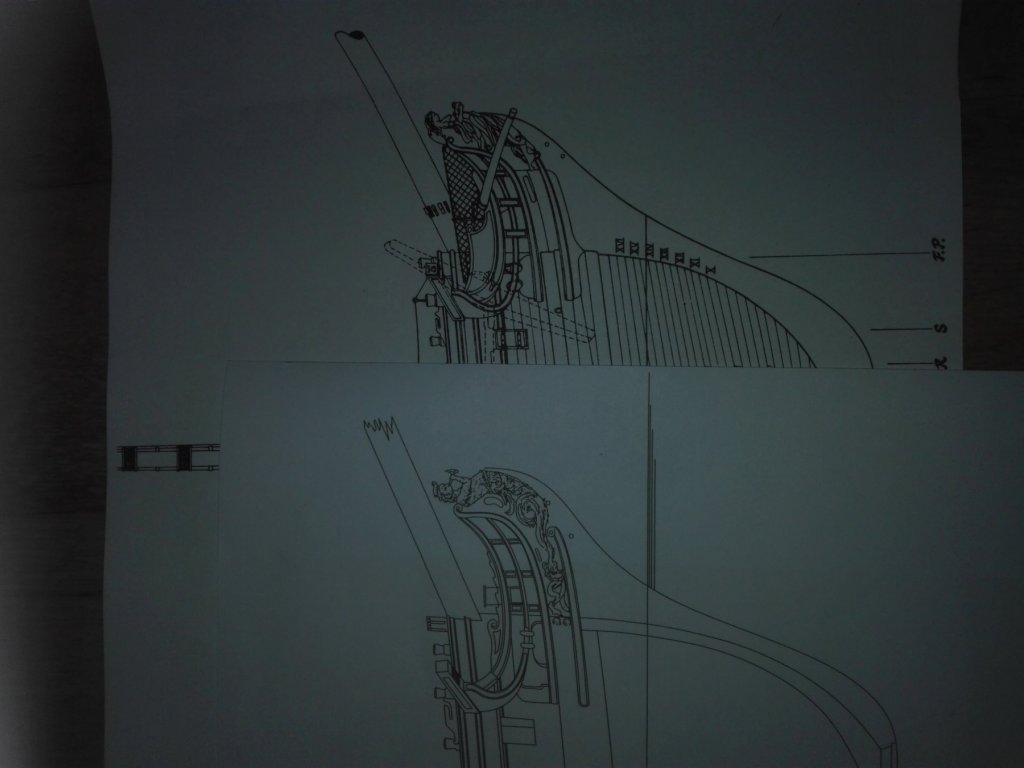
Hy Alan, I've figured out that the 1795 Triton has had oarports our 1773 Triton hasn't got oarports. What I thought were the oareports - were in real the bars of the decks by side/cross-section. Now I'm dealing with the centerboard. Some progress will come in a few days.
-
Wow, Graham, what a wounderfull workshop. Great to see this progress dedicated to our Triton.
-
On Tuesday we had a big storm in Germany in y neighbourhood a walnuttree was knocked down - today I can get some wood for helping to saw. So I'm going to help. For the work I'll be able to pick some of the wood. Due to the price of wood the do want to get for sawed wood in the internet I'm willing to invest a bit of time and sweat. But my question is how to handle the wood. I know it must lager for a timeof about two years to get dry. So that I can't use the wood imediatly. So I have to peel off the bark? Or shall I try to cut the branch in to quater or eightedge bar. They will be around 5-20cm / 2-9' diameter abd 30-50cm / 12'' - 18'' long. With a bit of good luck I'll get a bit thicker parts. I have only got a little table saw by Proxxon and an old scroll saw to cut. Hope you don't say after all this work: “Sorry fot you but just walnut has the wrong grain for 1/64 shipbuilding.“ Thanks for your intrest und help.
-
Maury, Maury! As allways that's exciting wonderfull work you do.
- 525 replies
-
- 2
-
-
- anchor hoy
- hoy
- (and 1 more)
-
Great work you do! Thanks a lot for sharing. I read the hole article in one big step and be very enthisiastic so I step in and write a bit. Some weeks ago I read in libary an article about your thema “accidentaly“ by leaving through some books and magazines: I figured out that it often if the oaes were too long and heavy to handel them easy - the simple solution was that counterwhights were added. In the Berlin German Technical Museum they have got the Templar Galley. showing this as eesult of a compleat reseach work about this task. It was reserched and built by the recently died Wolfram zu Mondfeld (known from is book about modelship, building). His model used hanging Pb-weights - but painting your bigger ends in mattish grey may also bring in the same effect - showing a countrewheigt keeping the heavy hole oare in balance. Due to your ram - you mustn't forget that this was ONE pice of solid bronze cast. (Those that were found, by archeligicans and divers.) So you may build it from balsa, filler and than you paint it with glue, stick it into chinchilla sand (from the petshop) to imitate the cast's mouldingsand and than you ando canspray the hole block in bronze acrylic. That's what is in my mind remembered about acient ship building. Hoping my interruption of your thread isn't too boring.
- 122 replies
-
- 2
-
-
- greek bireme
- scale-1/35
- (and 2 more)
-
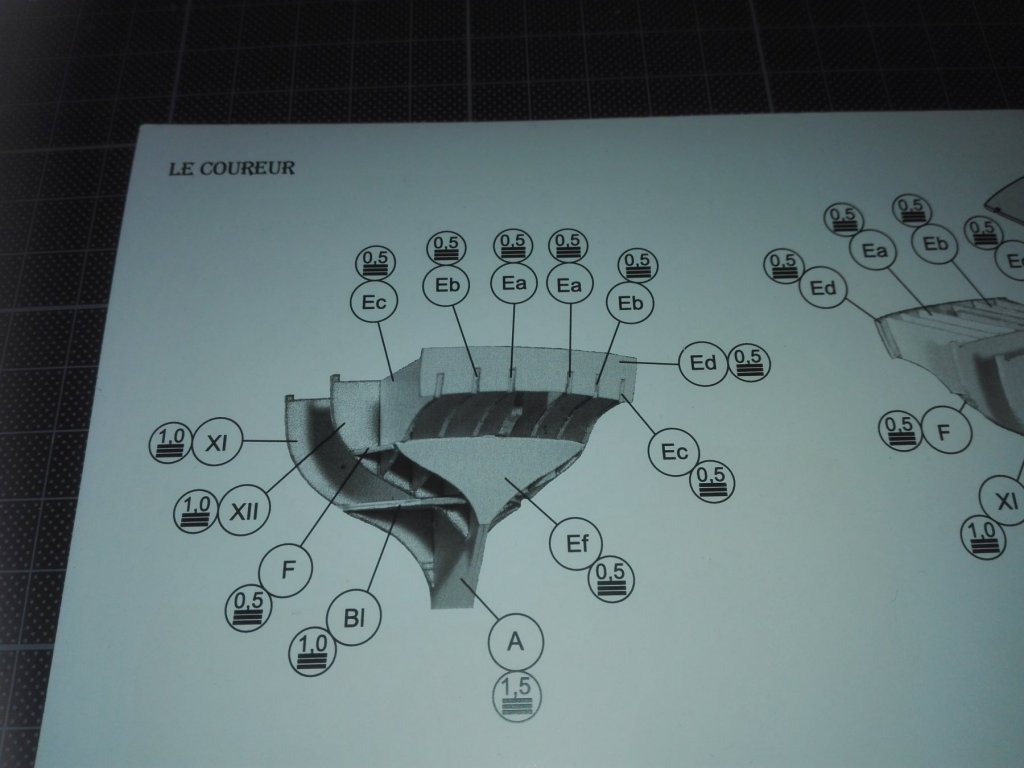
Next step filling the gaps with my precut softwood plywood. There will be some valleys ealsy to see here: on the very first mould at the middle horizontal board. But that's part off the yjob too get a solid hull - sanding, sanding and sanding again.
- 21 replies
-
- 4
-
-
- shipyard
- le coureur
- (and 1 more)
-
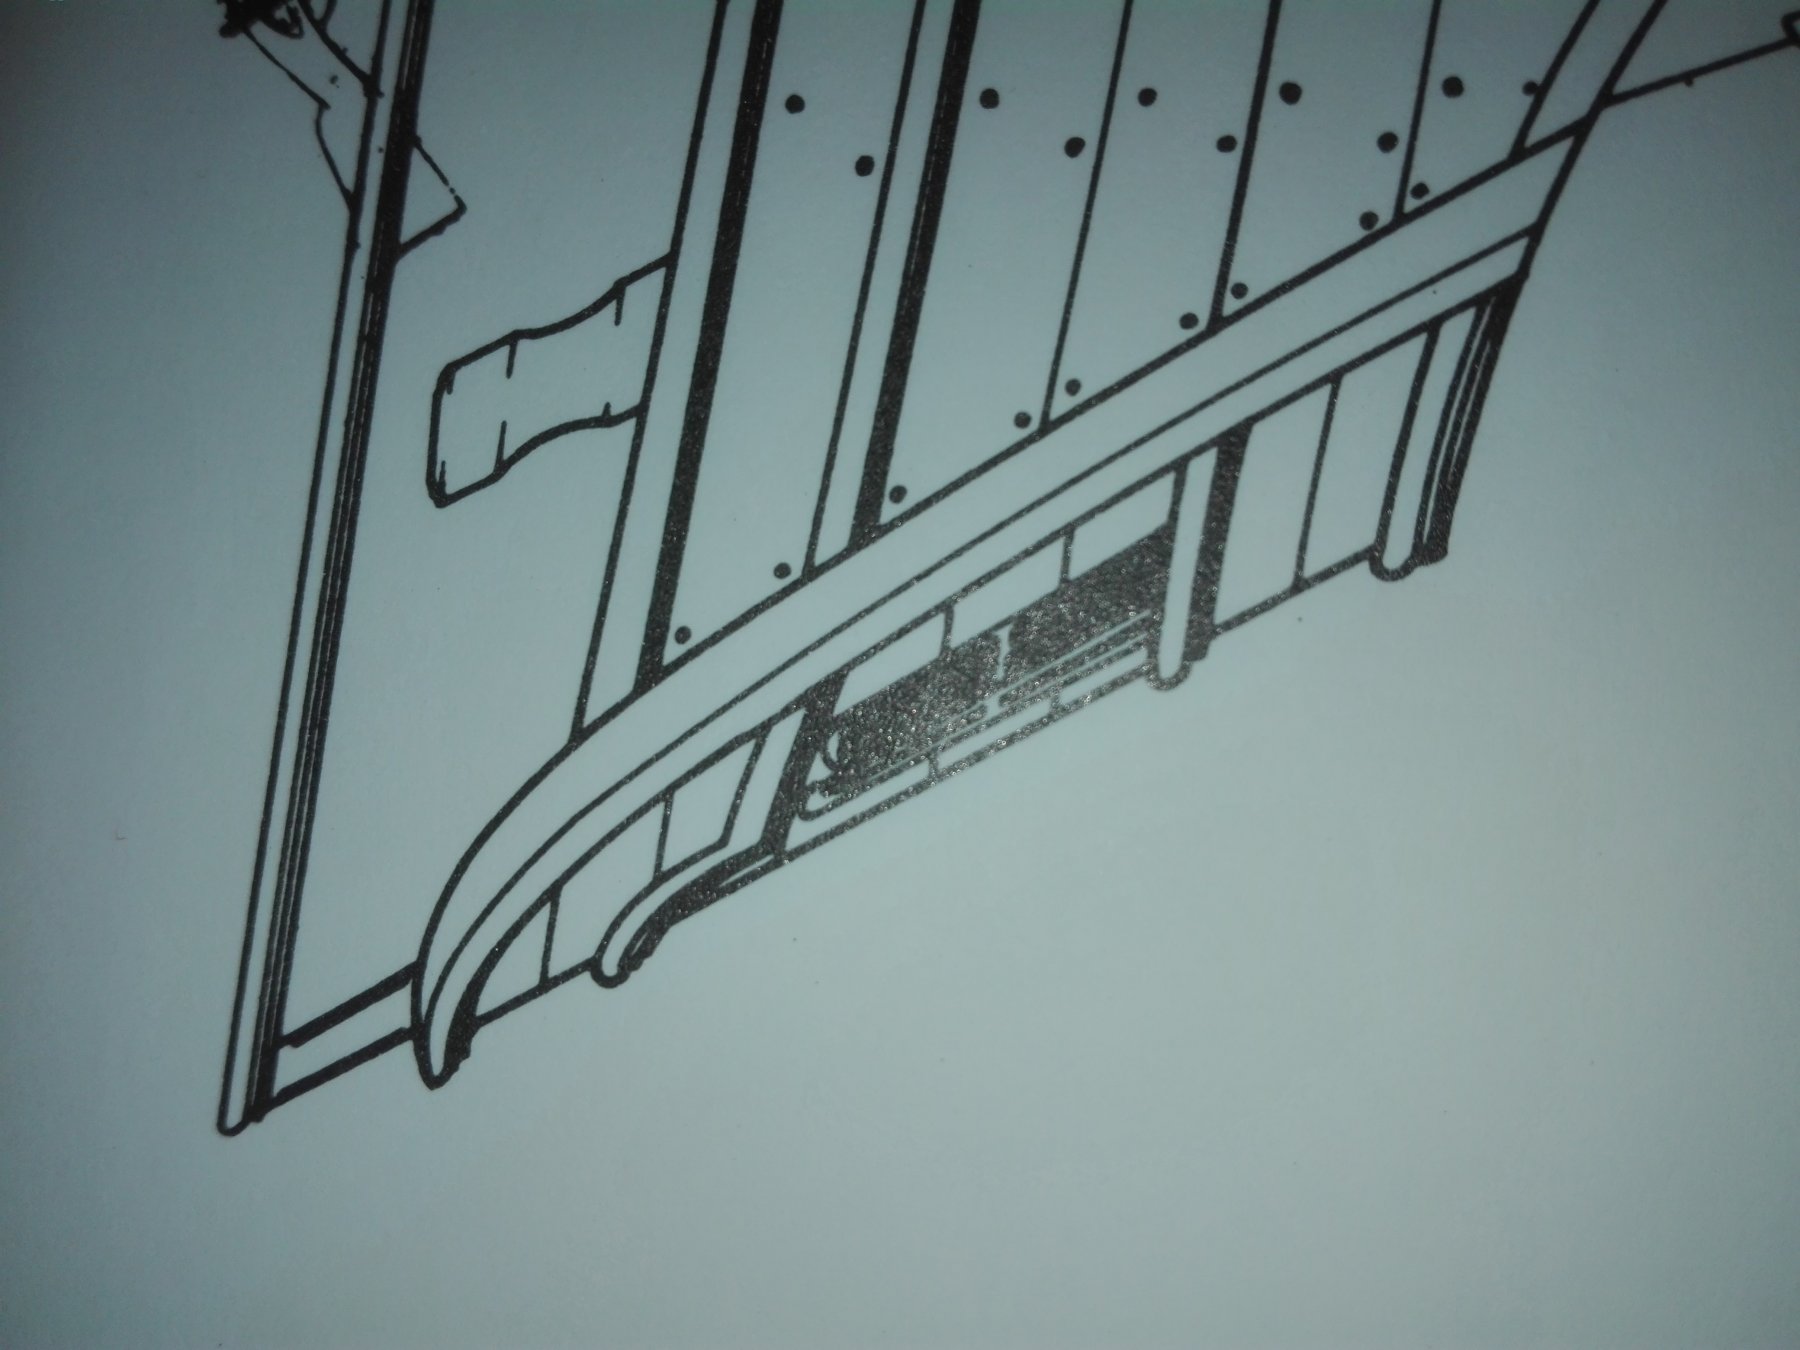
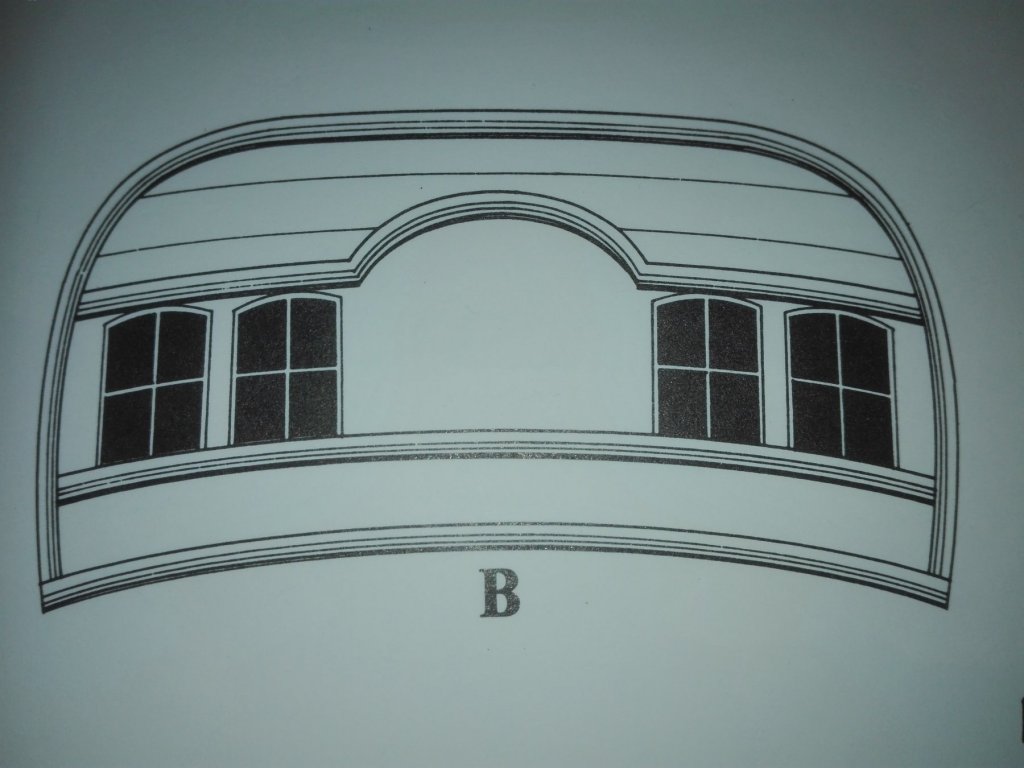
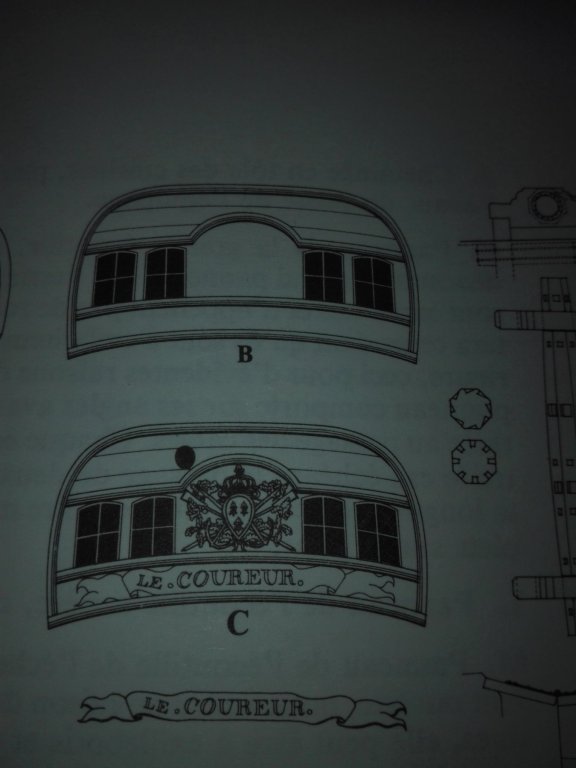
Thanks a lot, captgino! I'll try to put more detail in there - I found also pictures with oares stored outside. So I can try here a plenty of detailwork. So lets have a short view on the stern detailing that must be done to get a realistic looking result. Here all the drawings in side- and frontview (the topviews seen to be redundand). The moulding above the window imitates might be made from one pice of wood. The outside framing looks like it'll belock a bit more complex as the hole sternplate is convex - so it will be best to use a pice of thin plywood as fundament to be pöanked with vaneer from both sides laterally reversed. So in the quite simple looking stern is a plenty of work to be done. I'll see, what I could cheat for a drawing from the Sipyard former plan.

- 21 replies
-
- 2
-
-
- shipyard
- le coureur
- (and 1 more)
-
That looks great - two beers for the man in the workshop! Are you going to fill the spaces between the bulkheads to avoid swifting out of rectangular?
-
That looks fine, Fernando! You do a fine job. Have you got a picture from the stern side of the planking? That would be interesting. I saw a plenty of kits in this scale pimped by adding woodnails (to fix the planks on the formers). Are you going to go in such detailing? Is there any authentical drawing that would give the placing of the formers to you? So you will know where to drill the holes for the teethpicks? Go foreward it looks great!
-
Thanks for your intrest in this kit building. But in contrast to Alert the Coureur based on the plan of the Society “Friends of the Paris Naval Museum“. That plan does figure a model from the collection in Paris what is built from/behalf on a simplyfied rigging and a hull based on plans of Eduard Pâris which are outdated to our standards. Boudriot figured out, that Vizeadmiral Pâris might not have known the NMMplans of the captured Lugger. So a purchase of the Jean Boudliot monographie of Le Coureur and do the jumping in the unknown waters of scratchbuilding might be, your best way to come to a proper model of Le Coureur. The Sipyard kit is a pile of errata and my biildimg woll be also mass. This because the kit and the Boudriot plan are abke to come closer zhan they are by investing a plenty of time and minduse but is it worth it? I'm interested in my mini-building skills and in cardmodelbuilding so I will figure out if paper may be the right material for me.
- 21 replies
-
- 2
-
-
- shipyard
- le coureur
- (and 1 more)
-
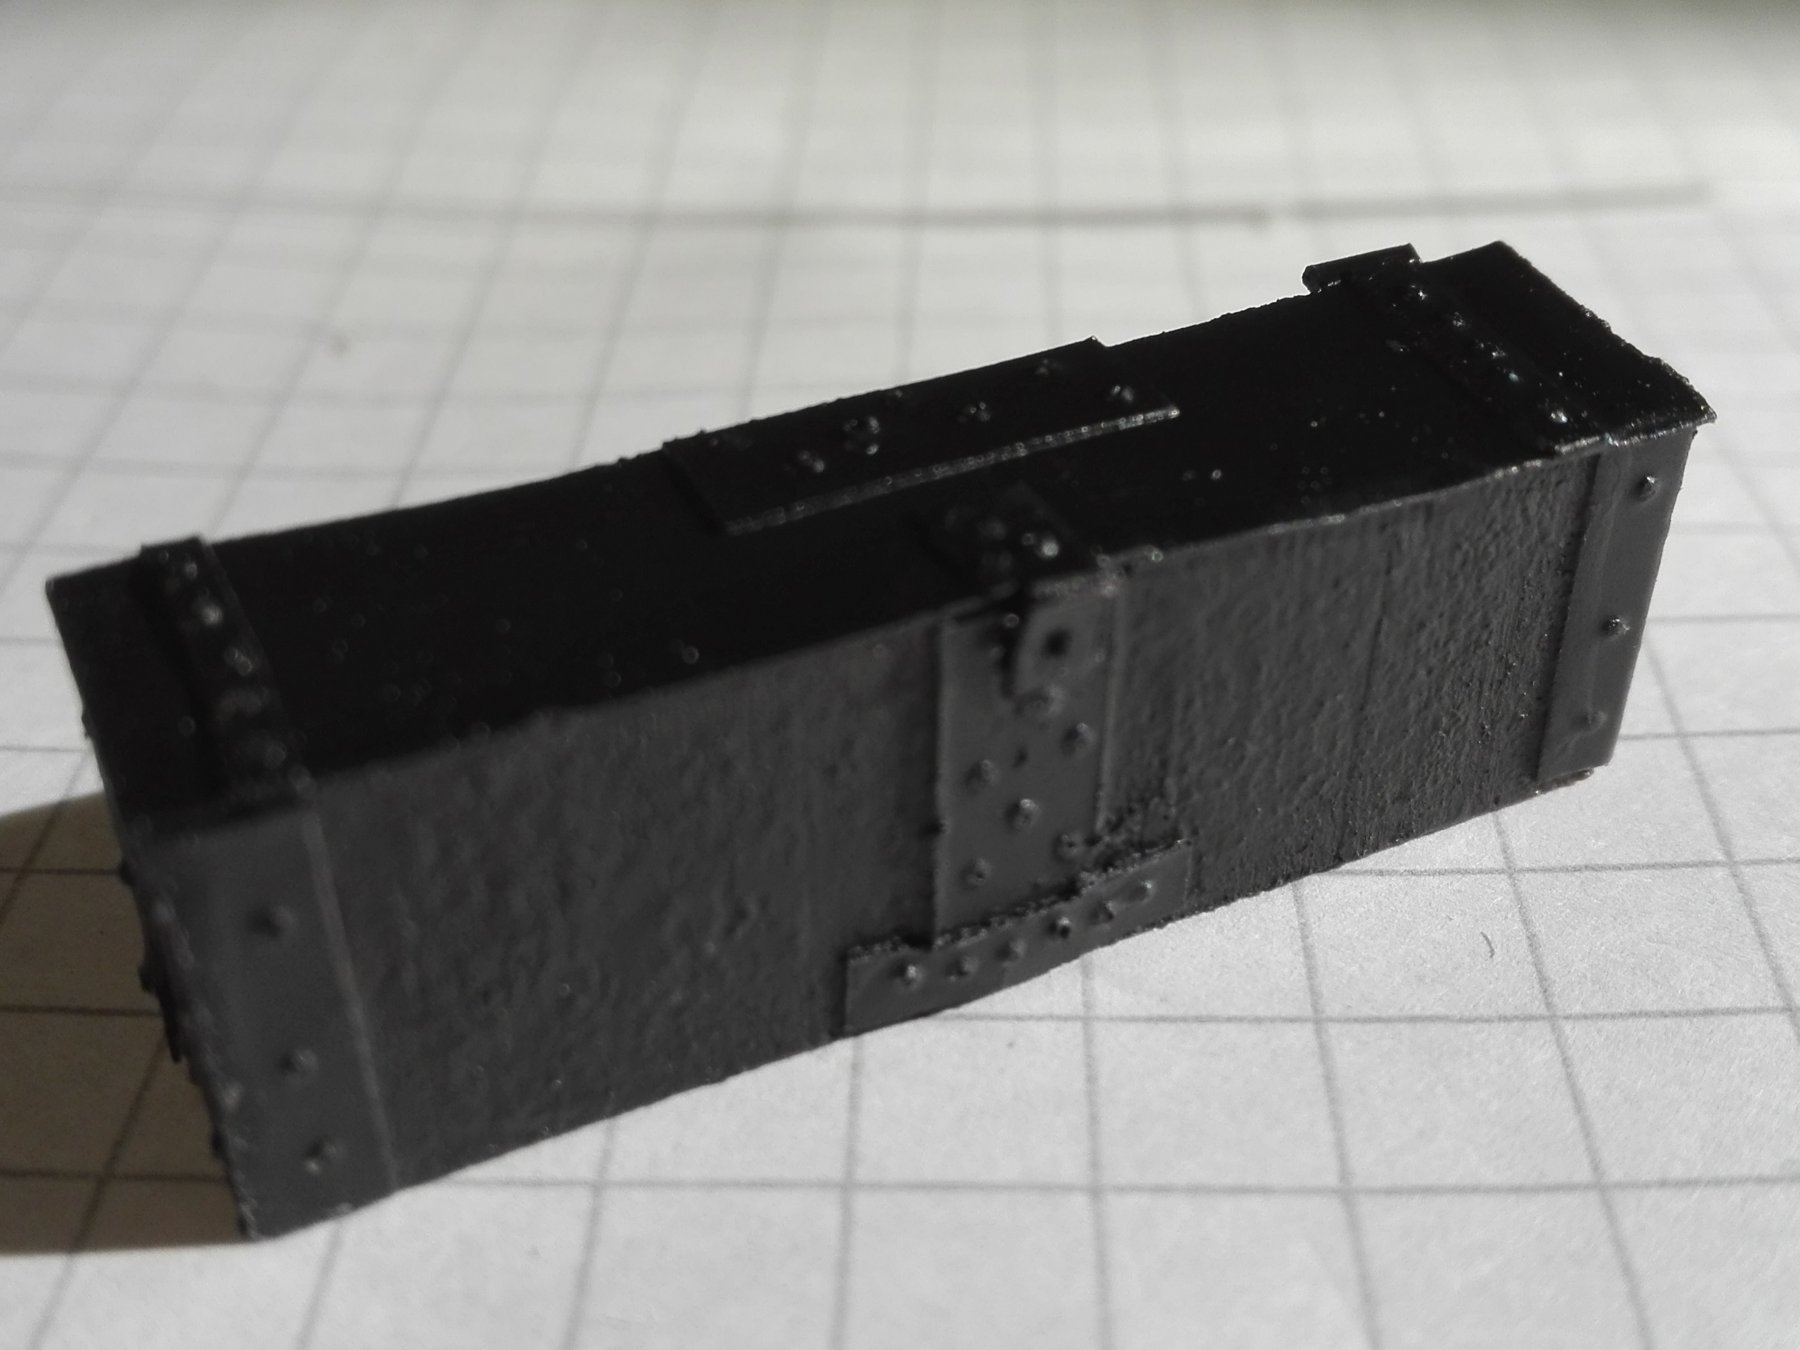
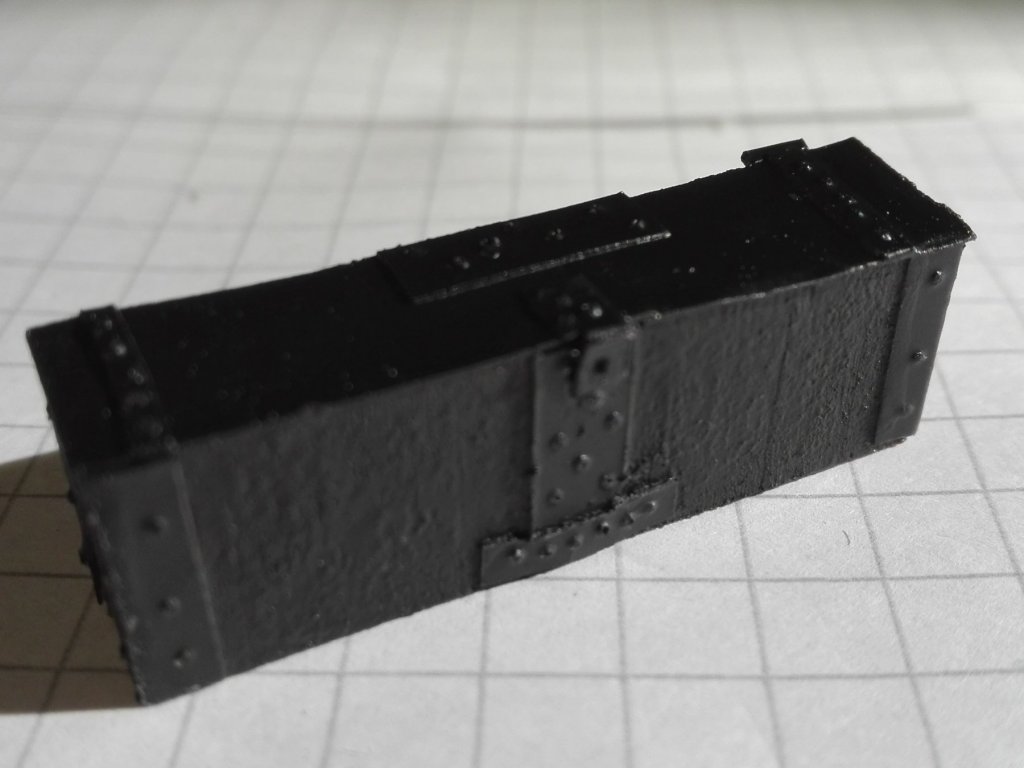
That amazing work you do. The idea with the heli fits in such a lovley detail. The kit offers a plenty of possibilitys to you to show amaising details. The hangar is a good example. If you look for the signs all over the, walls and thethe yellow-black spriping you need,: you can download a plenty from the web, arrange and resize them with MS paint ad after saving them ashalf pdf print them in your local copyshop. To get the right screw/rivet effect in this little scale pin in from backside with a needle first to imitate the screw then soak the hole sign with superglue to pick it on the wallright so you'll get a special surface a bit differing from the wall behind. Here I tryed the technic on a box scaled in 1/56 to imitare riviting. Oh I'm starting to share more time today with reading and leaving through threads han building my own little lugger. I'm looking forward to see more in here. Thanks for sharing. By the way “Mark“ is in German a pice of land like the old mark near Hamburg, but the ship Bismarck is baptisted after Duke Otto von Bismarck who united the several German King,-, Duke- and Townstates to the German Empire on 18.Jan.1871
-
Thanks CapTino, that's great I think it looks fine. Somewhere in the cellar I think I've got this kit, too. Bought on a secondhandmarket some 15 years ago - looked in and never got a chance to get started her. Removal, more interesting plastic kits, changing the job. It is very nice to see her put into action. Great job you did. I'm going to look for your progress.
- 131 replies
-
- 2
-
-
- finished
- artesania latina
- (and 1 more)
-
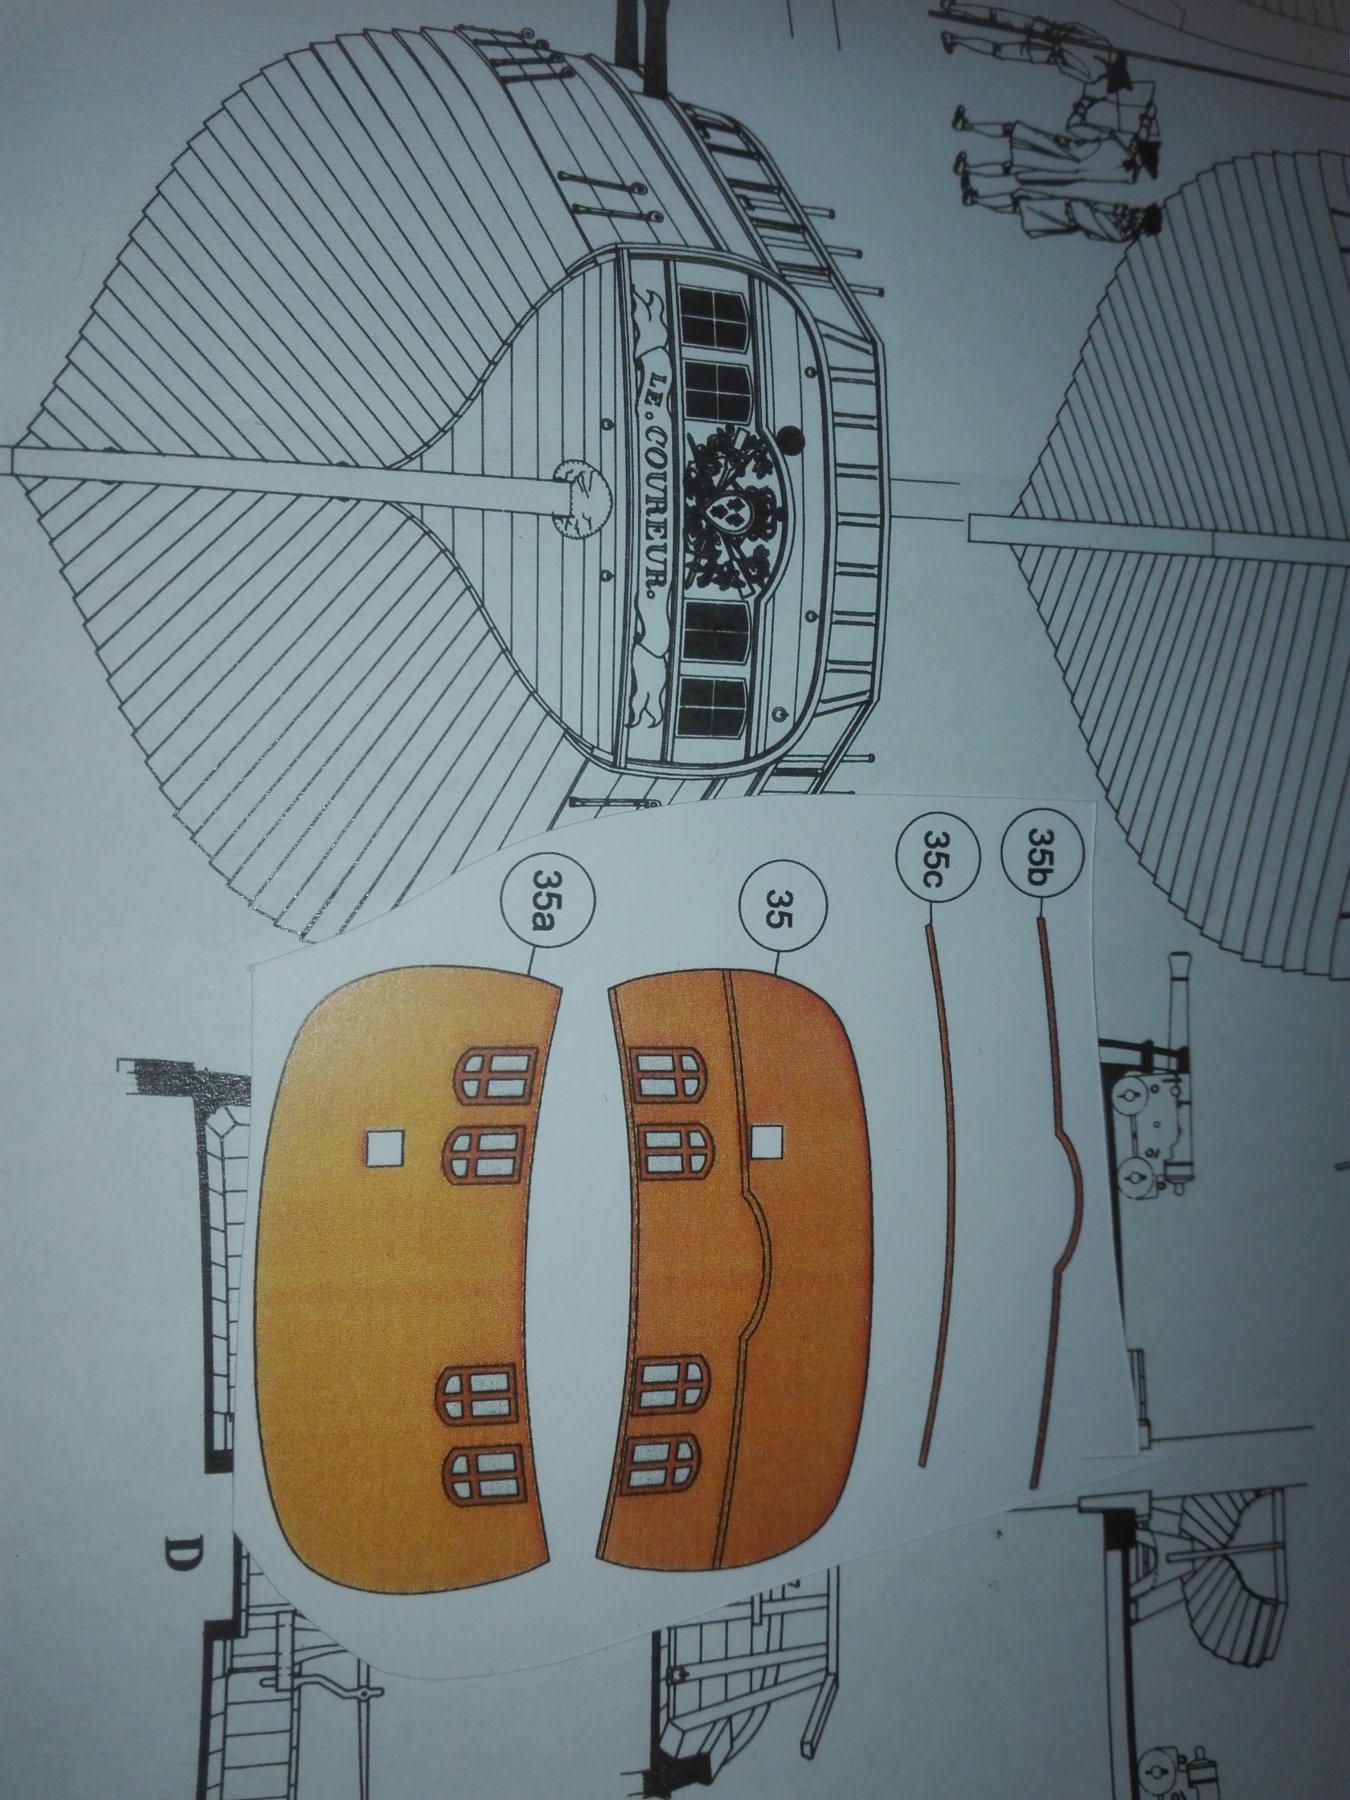
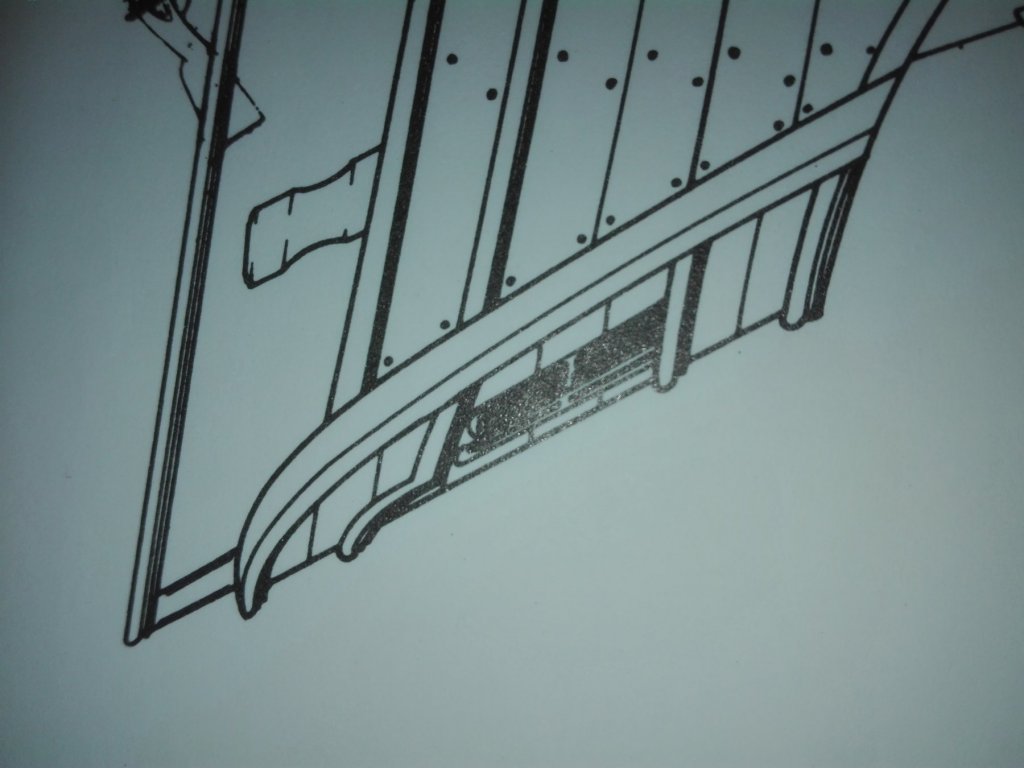
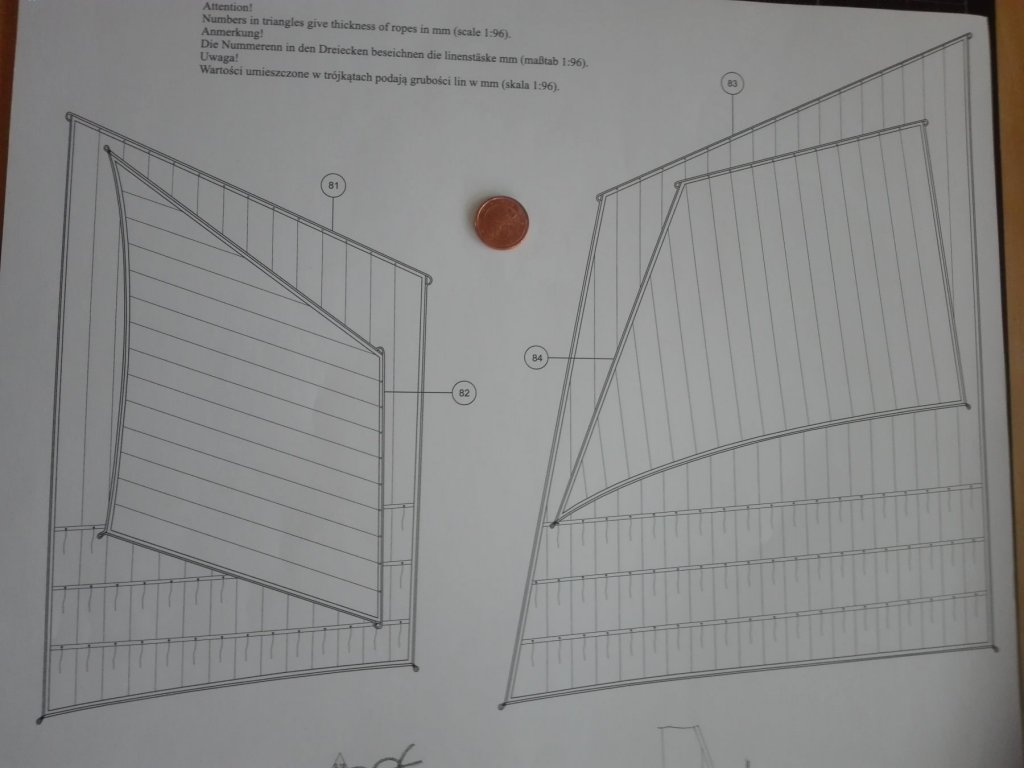
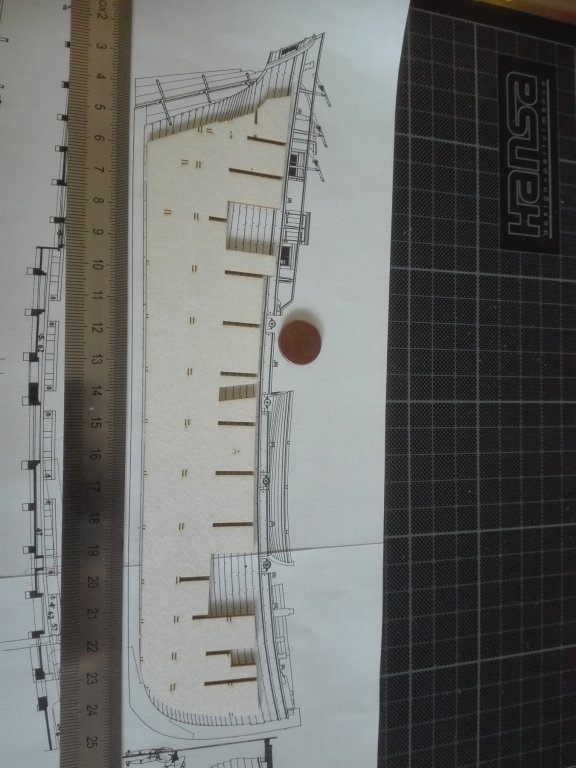
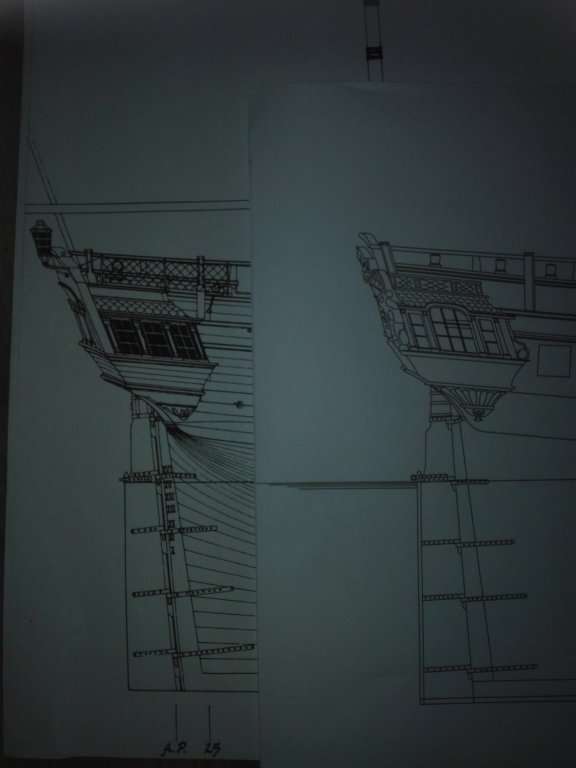
Here I collected the drawings related to construction and planking of the stern. So its not only the problem of adding the planks - the have also to be bent in the right way, too. Then I'll have to pick out the right coulor fot the painting what is to me the simplest task: Revell, brown matt N° 86
- 21 replies
-
- 4
-
-
- shipyard
- le coureur
- (and 1 more)
-
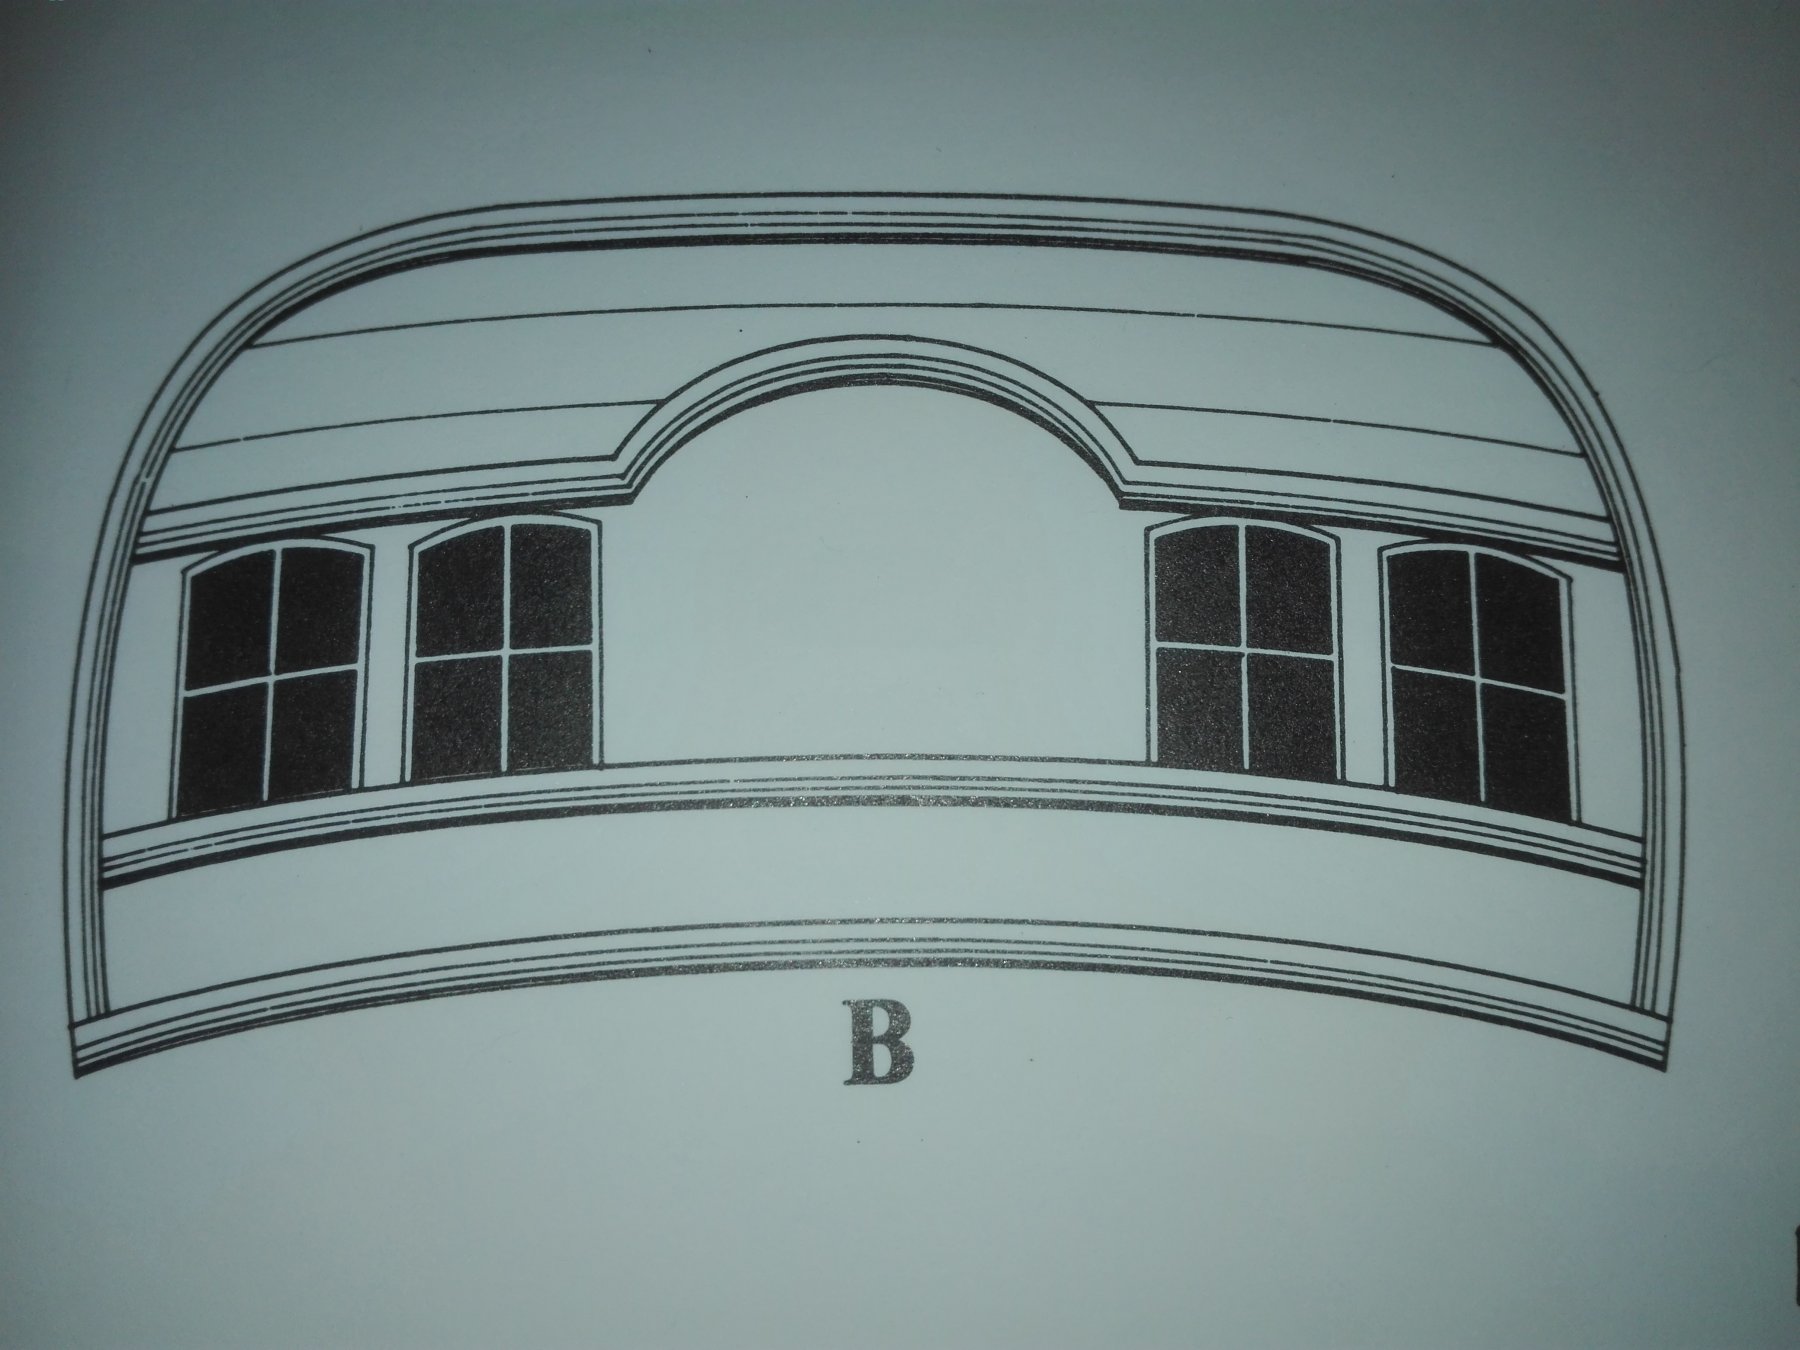
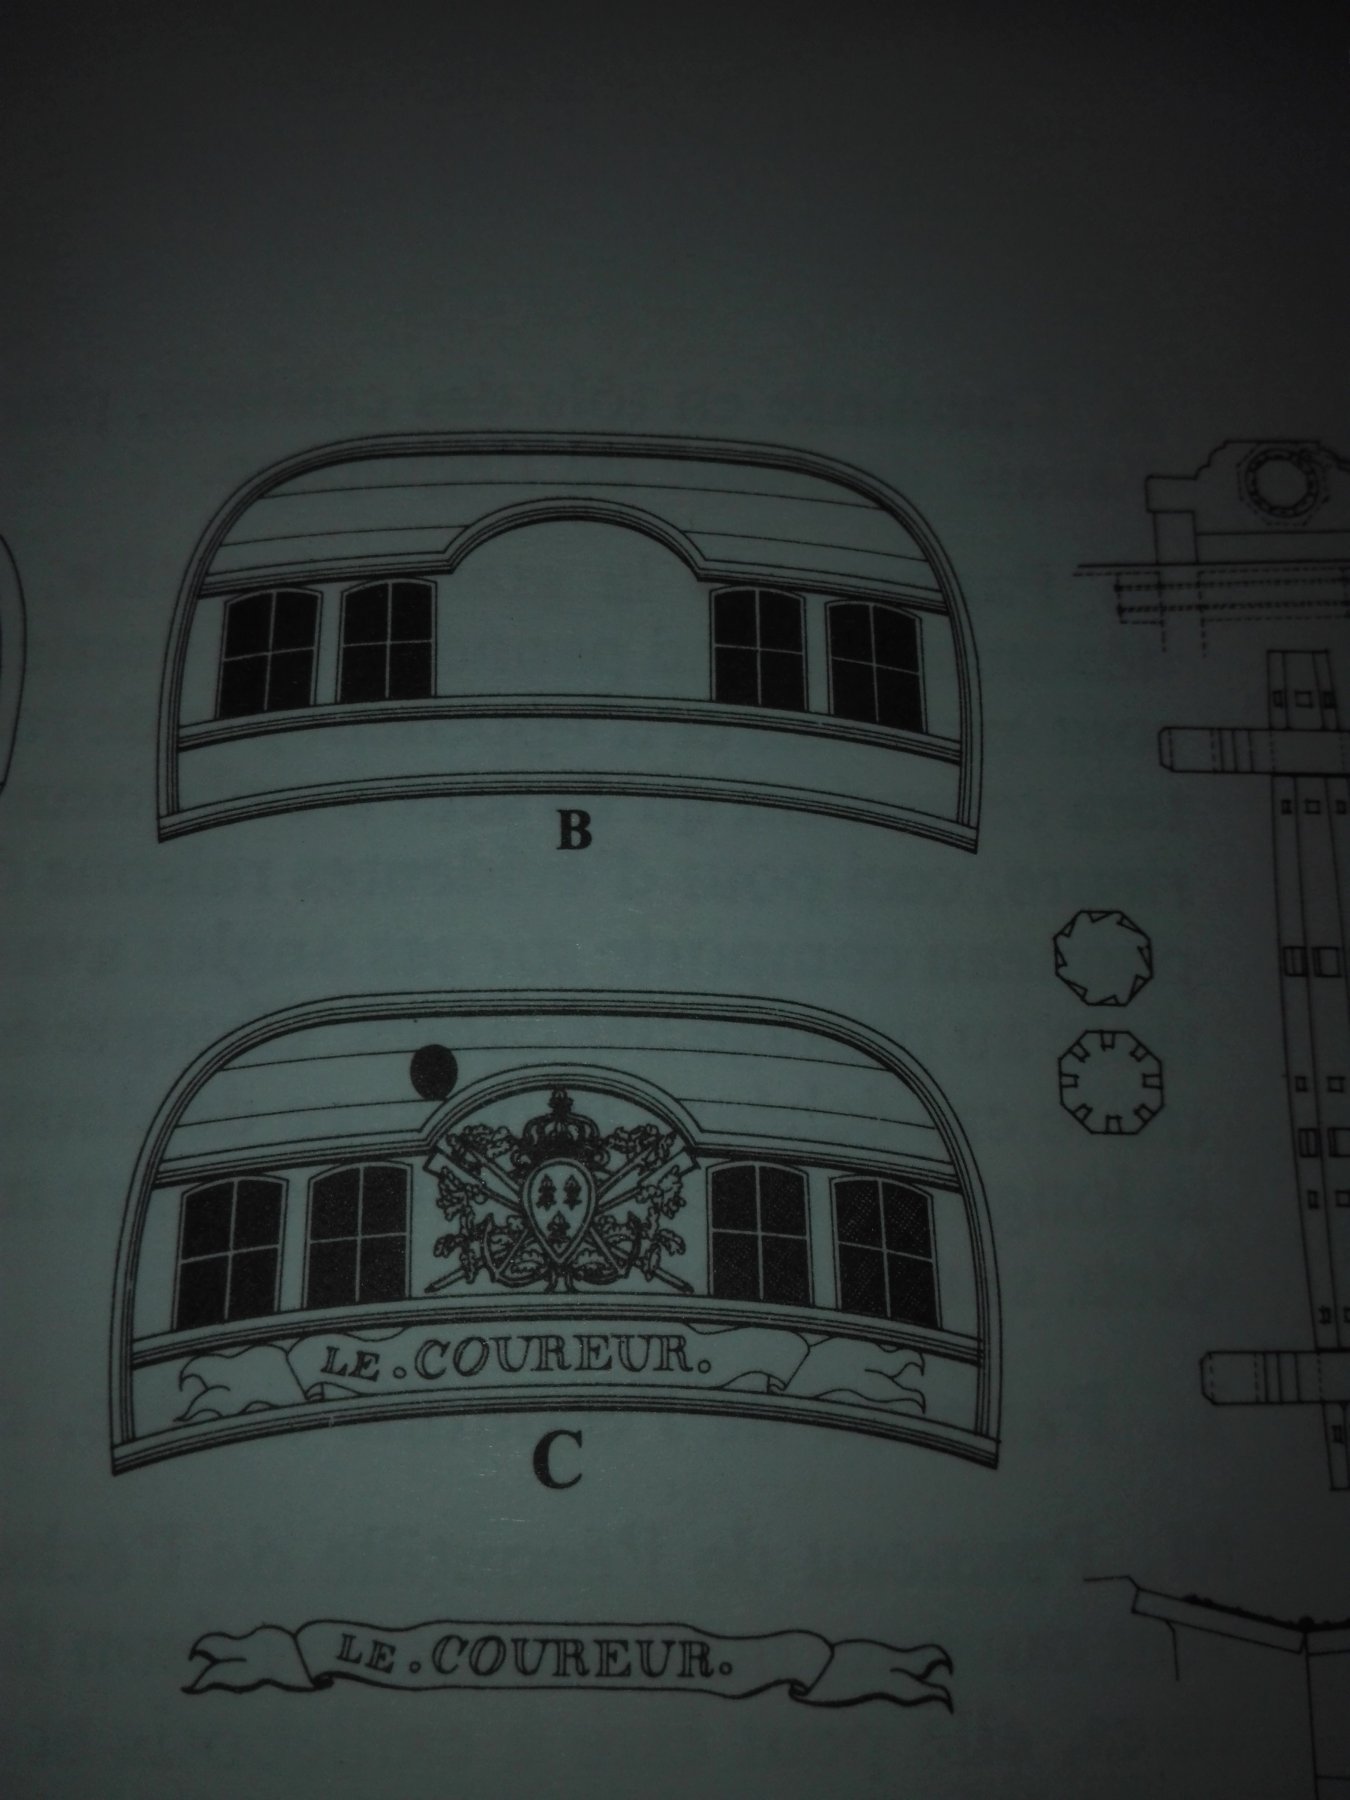
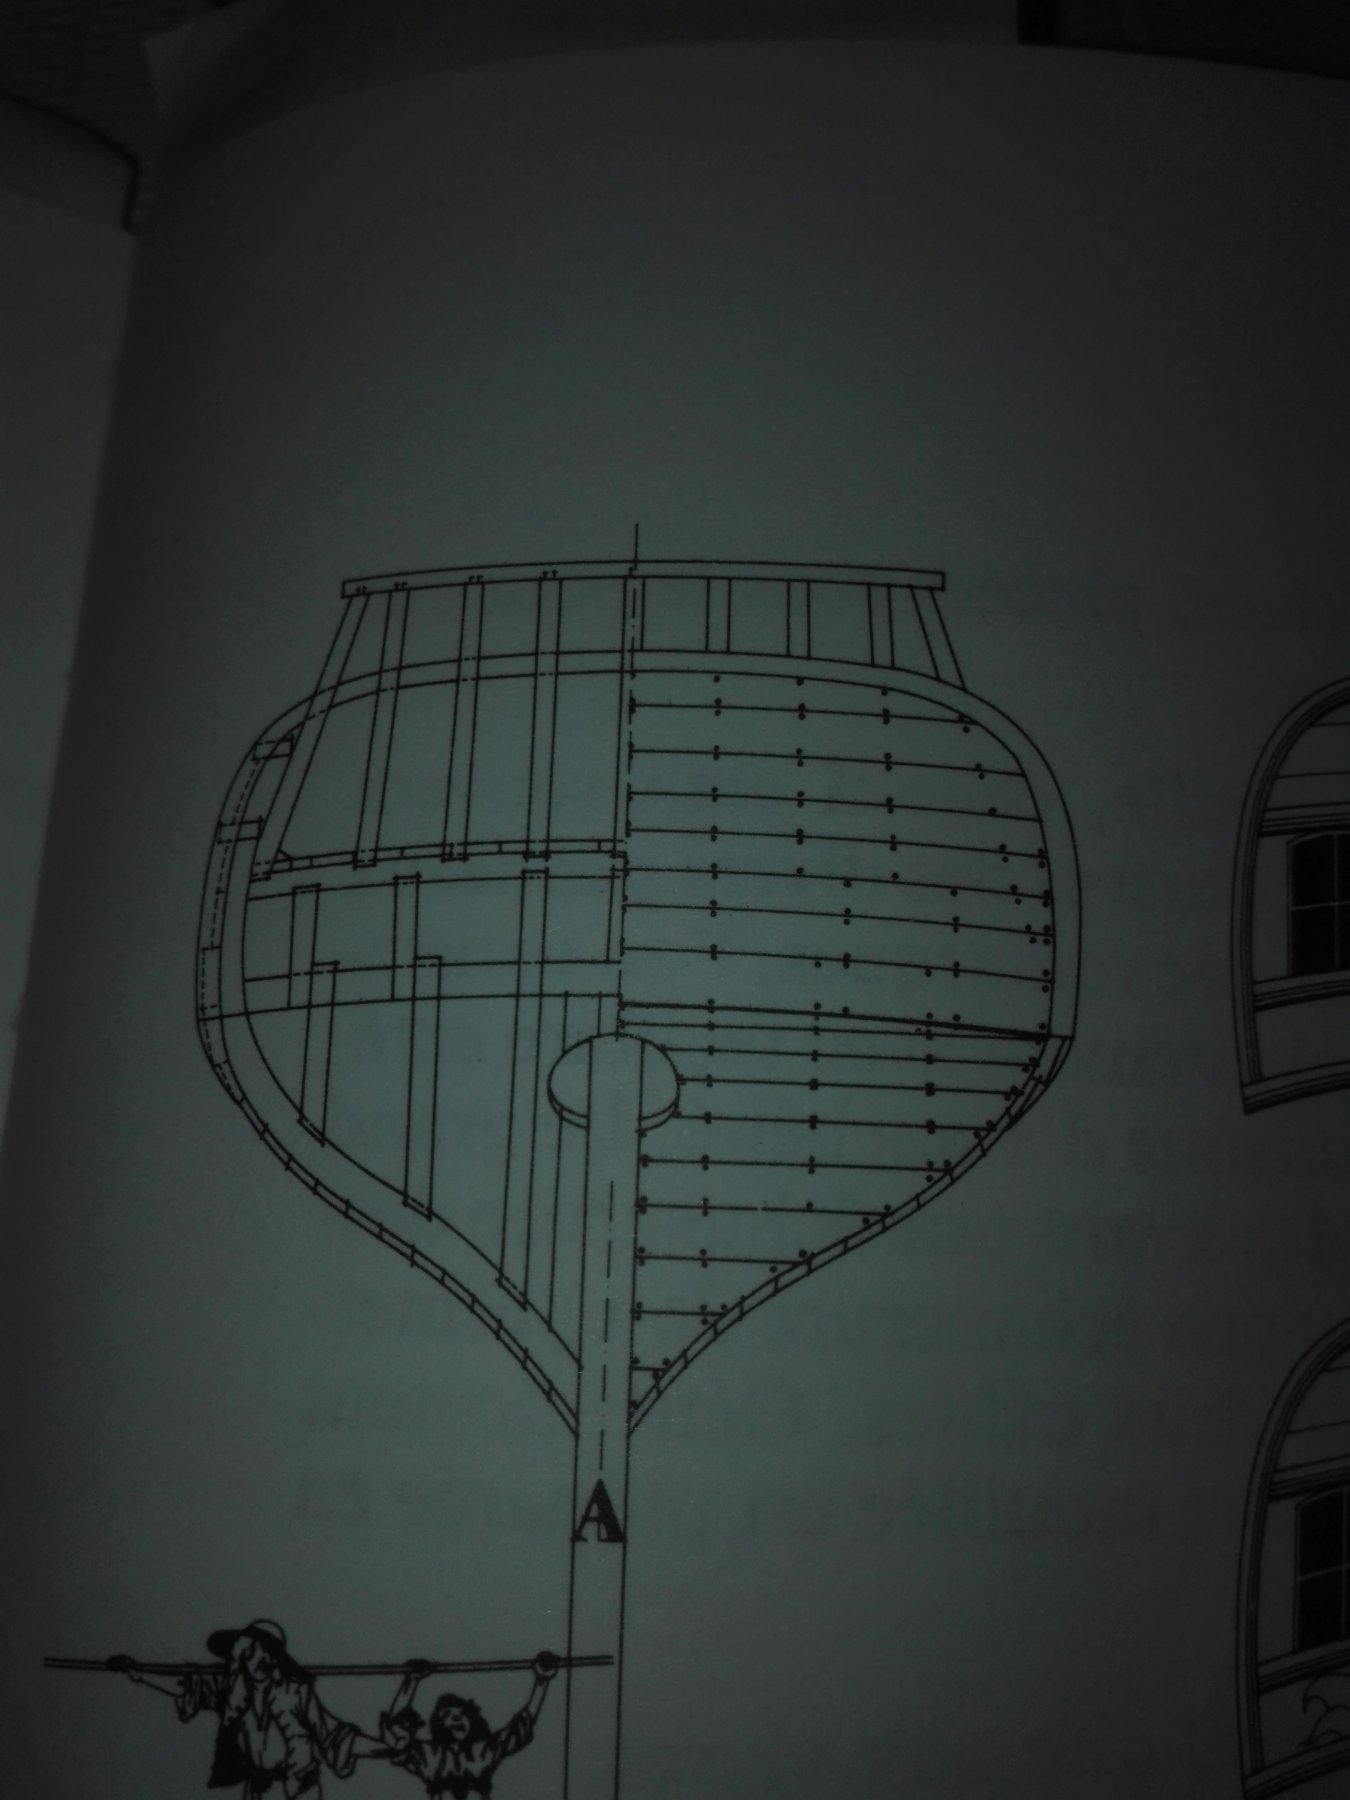
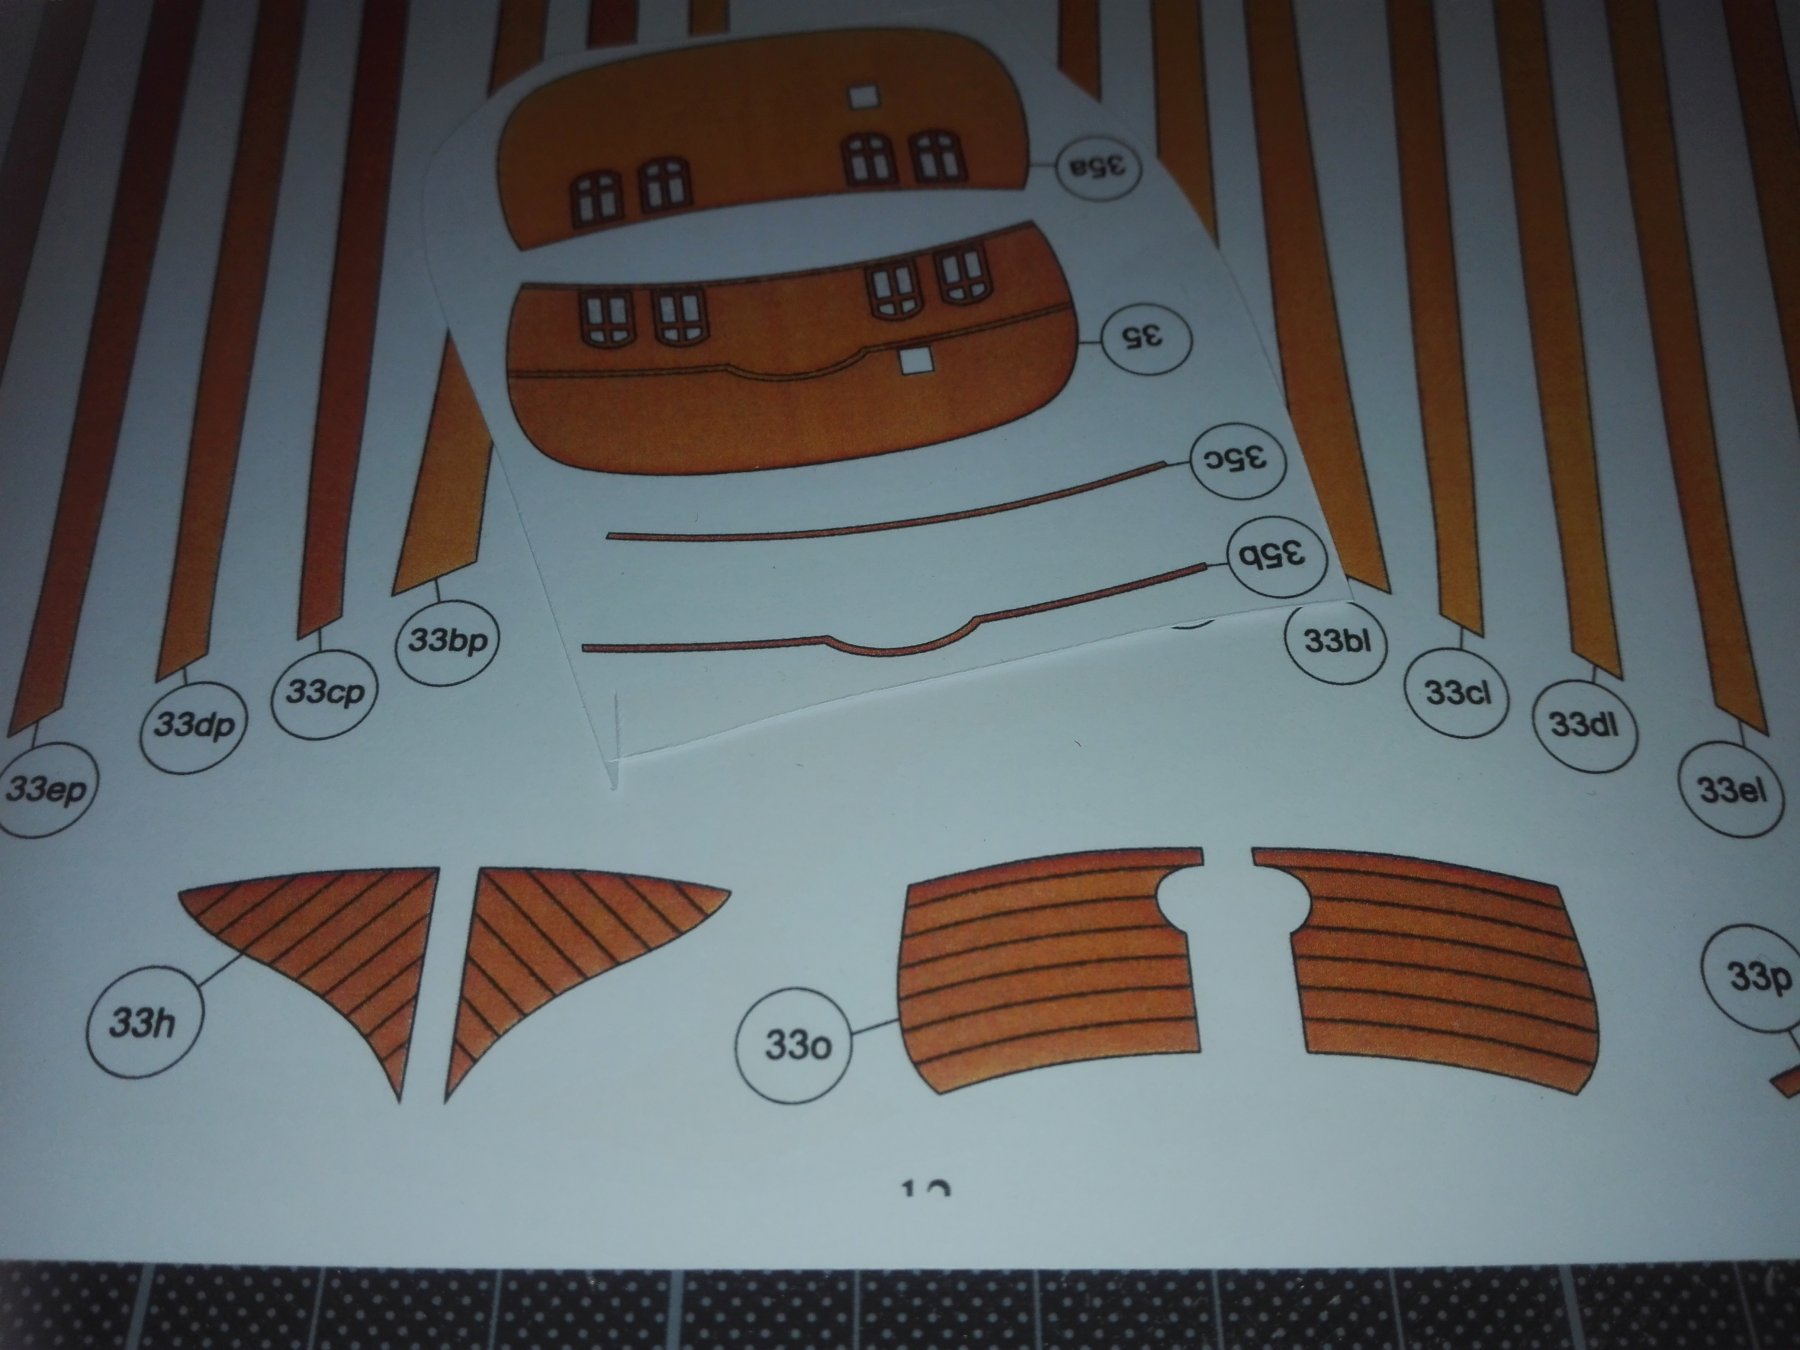
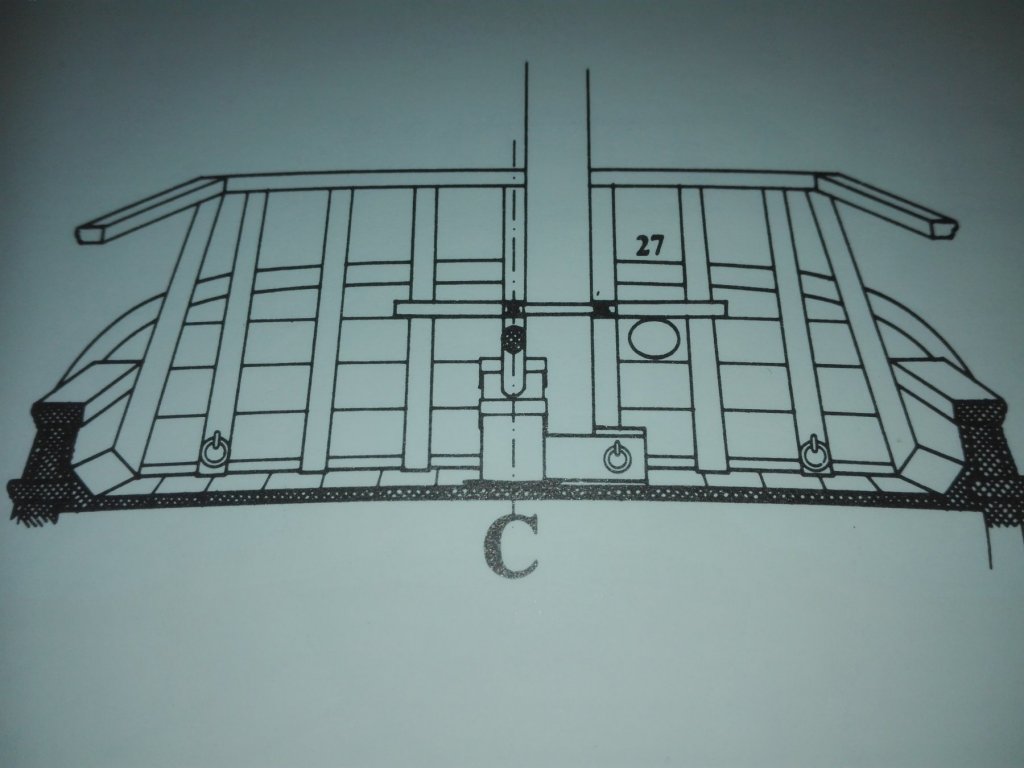
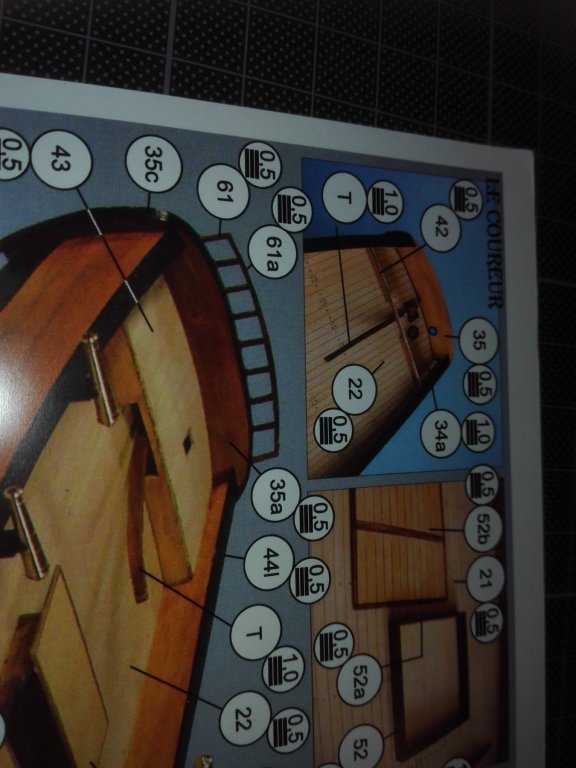
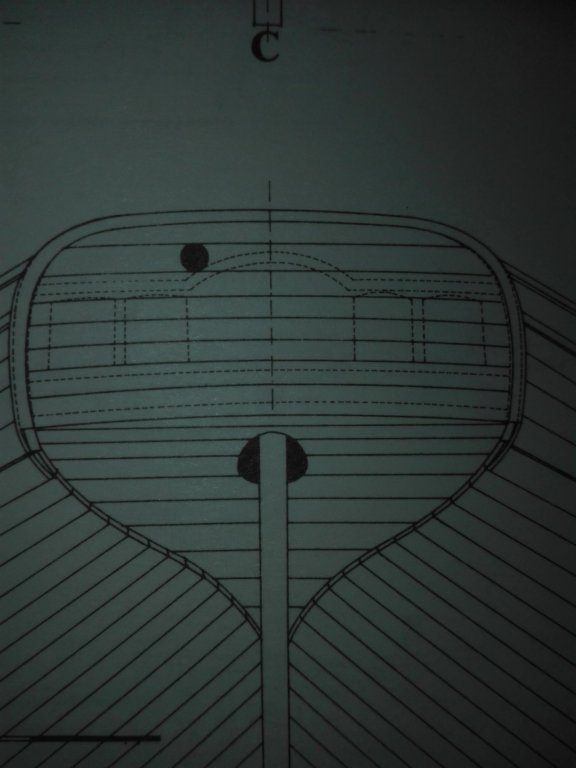
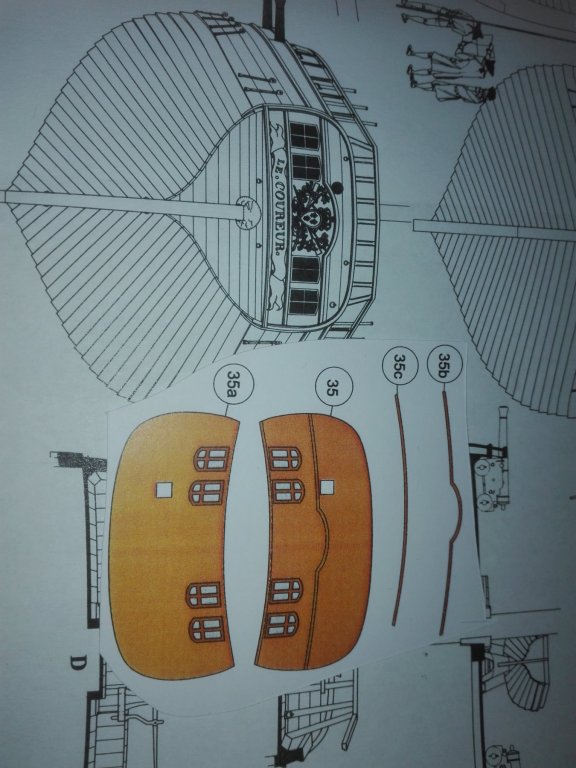
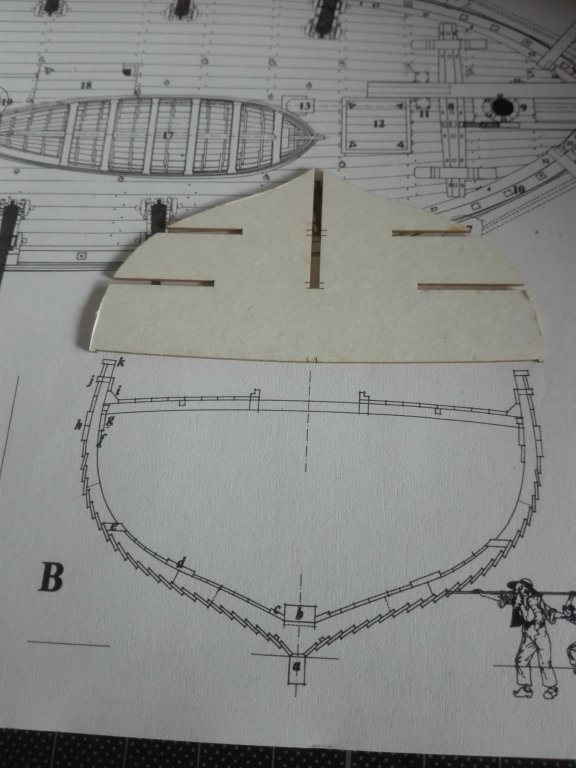
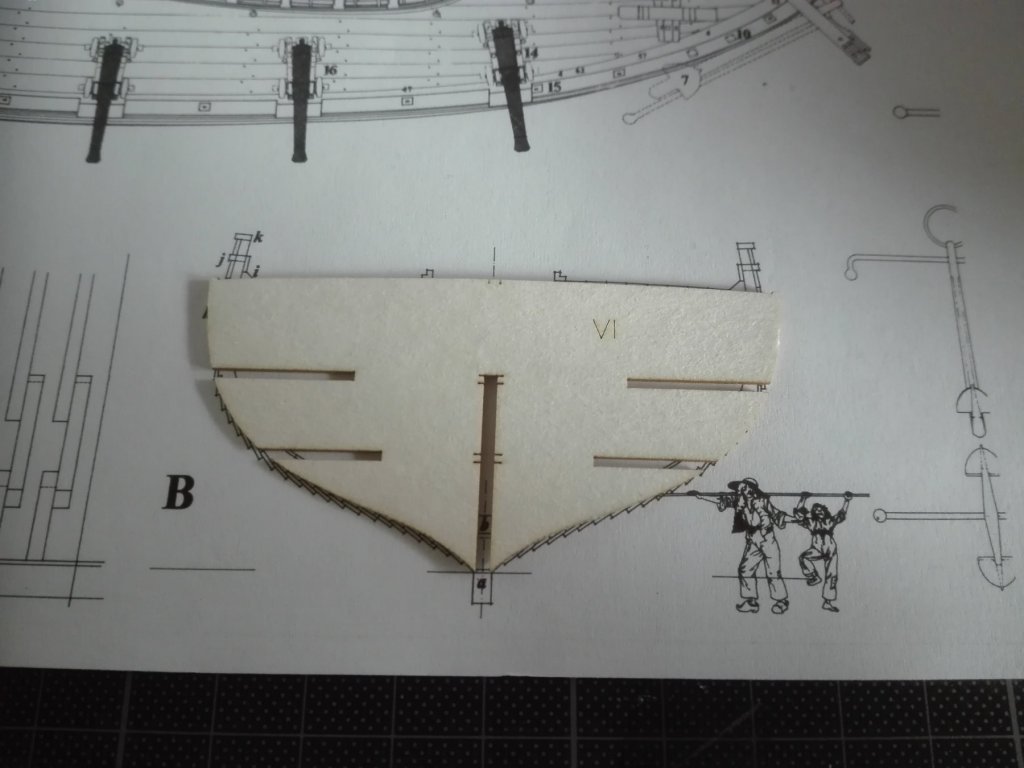
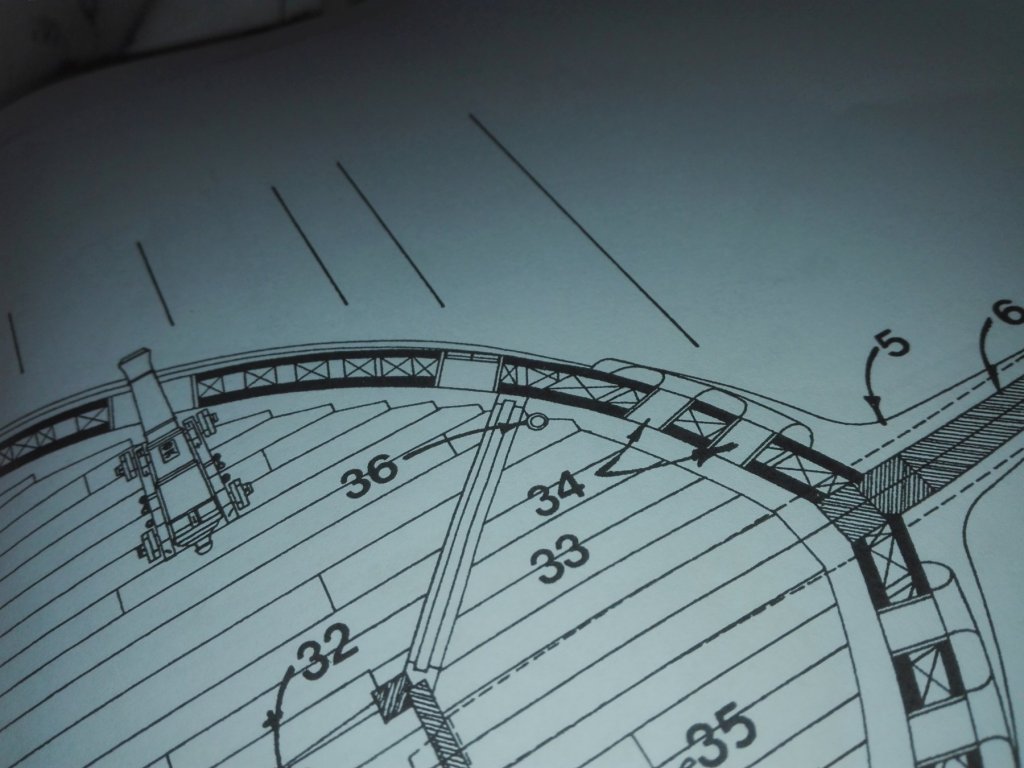
Here the diffrence between the stern at the Ancre plan and in the shipyard model. I have to think abput fixing this problem before I start to work on the alternation of the stern. I can leave away N° 34a and the “Kate Winslet stair“ but how to repair these stern part? Can I copy the outline of part 35 on cardboard, adding stripes of vaneere to a planking and rebuilt the right appearance here?


- 21 replies
-
- 3
-
-
- shipyard
- le coureur
- (and 1 more)
-
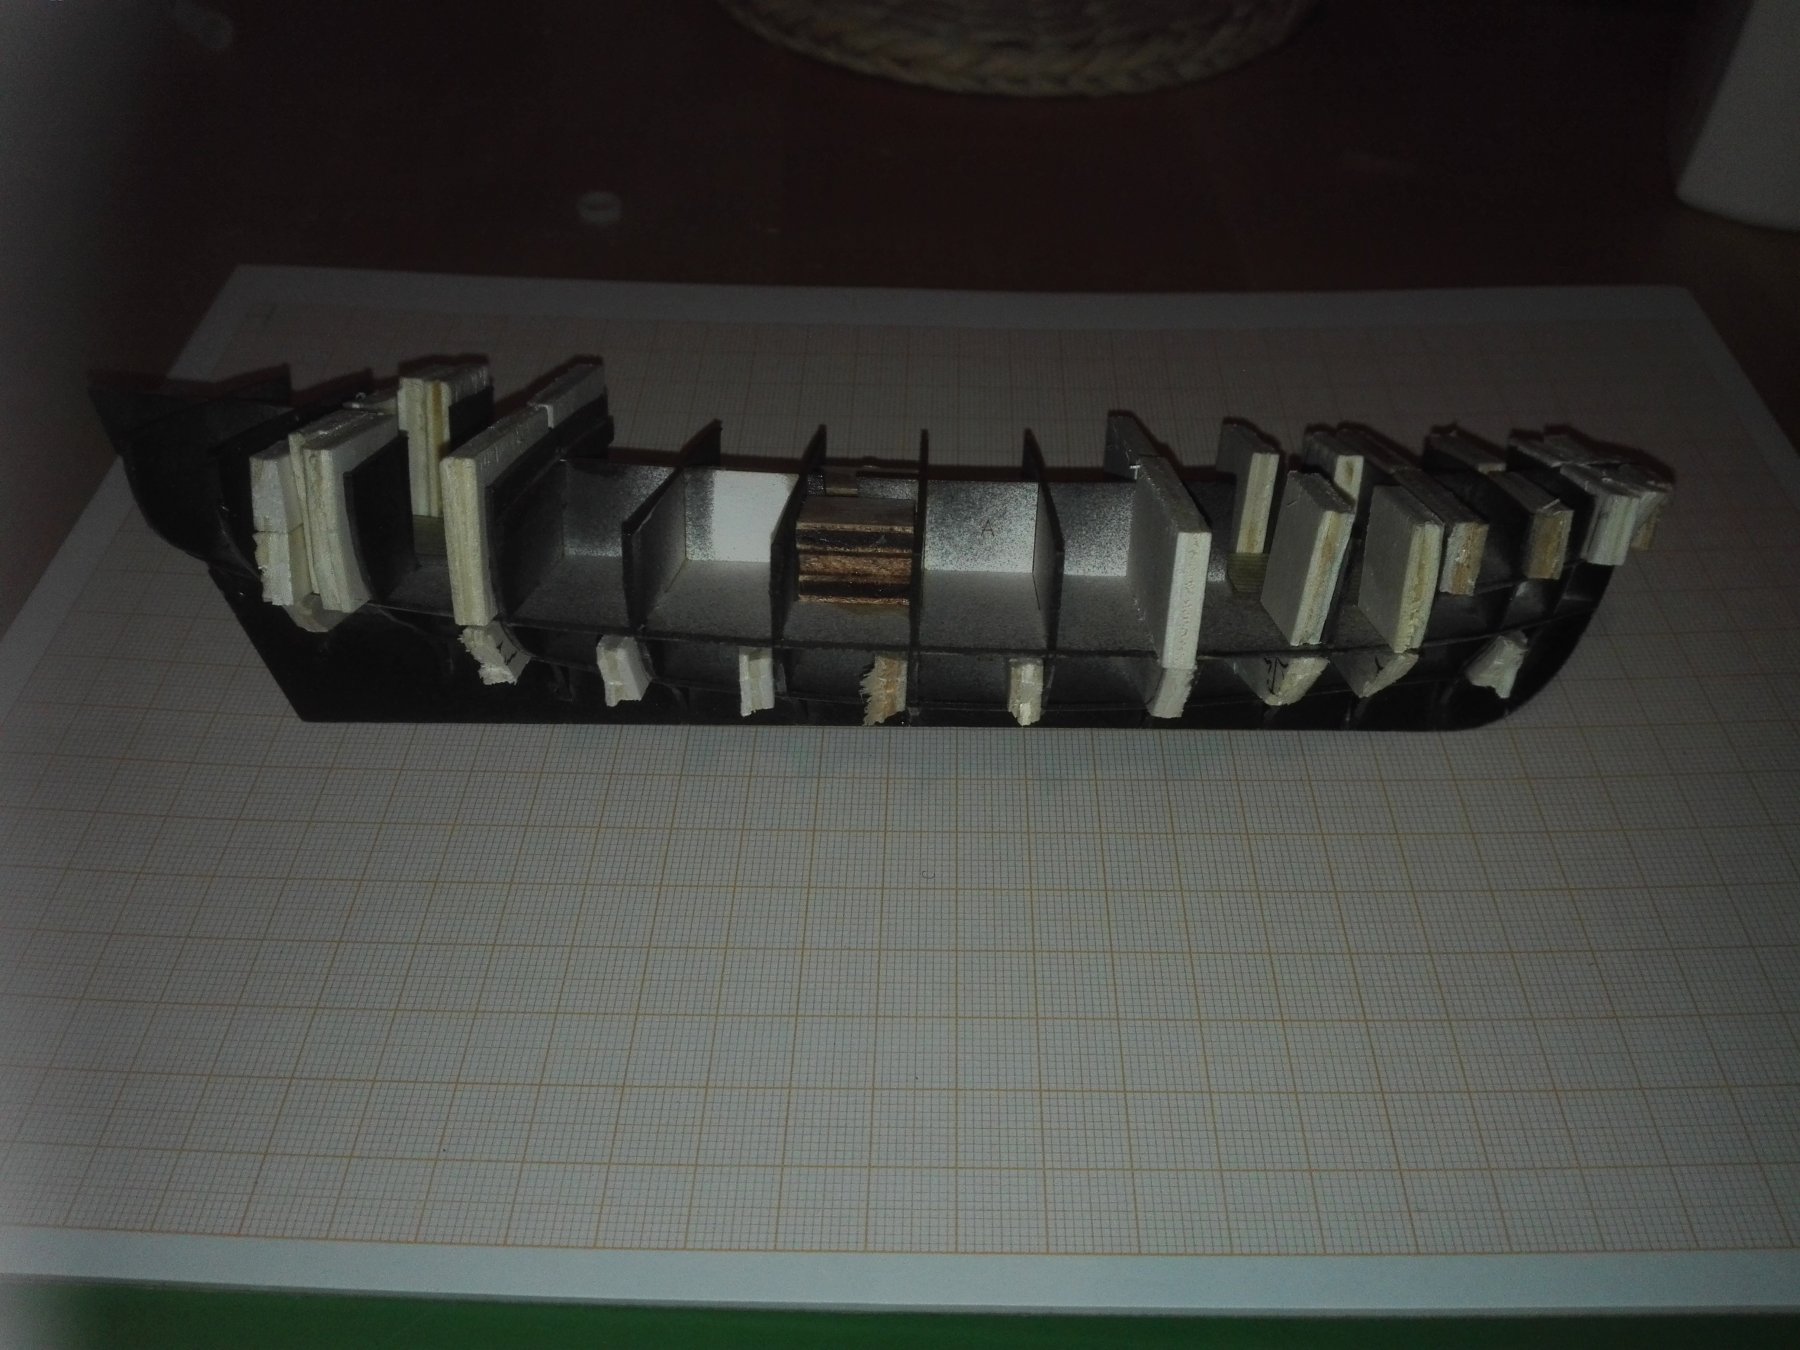
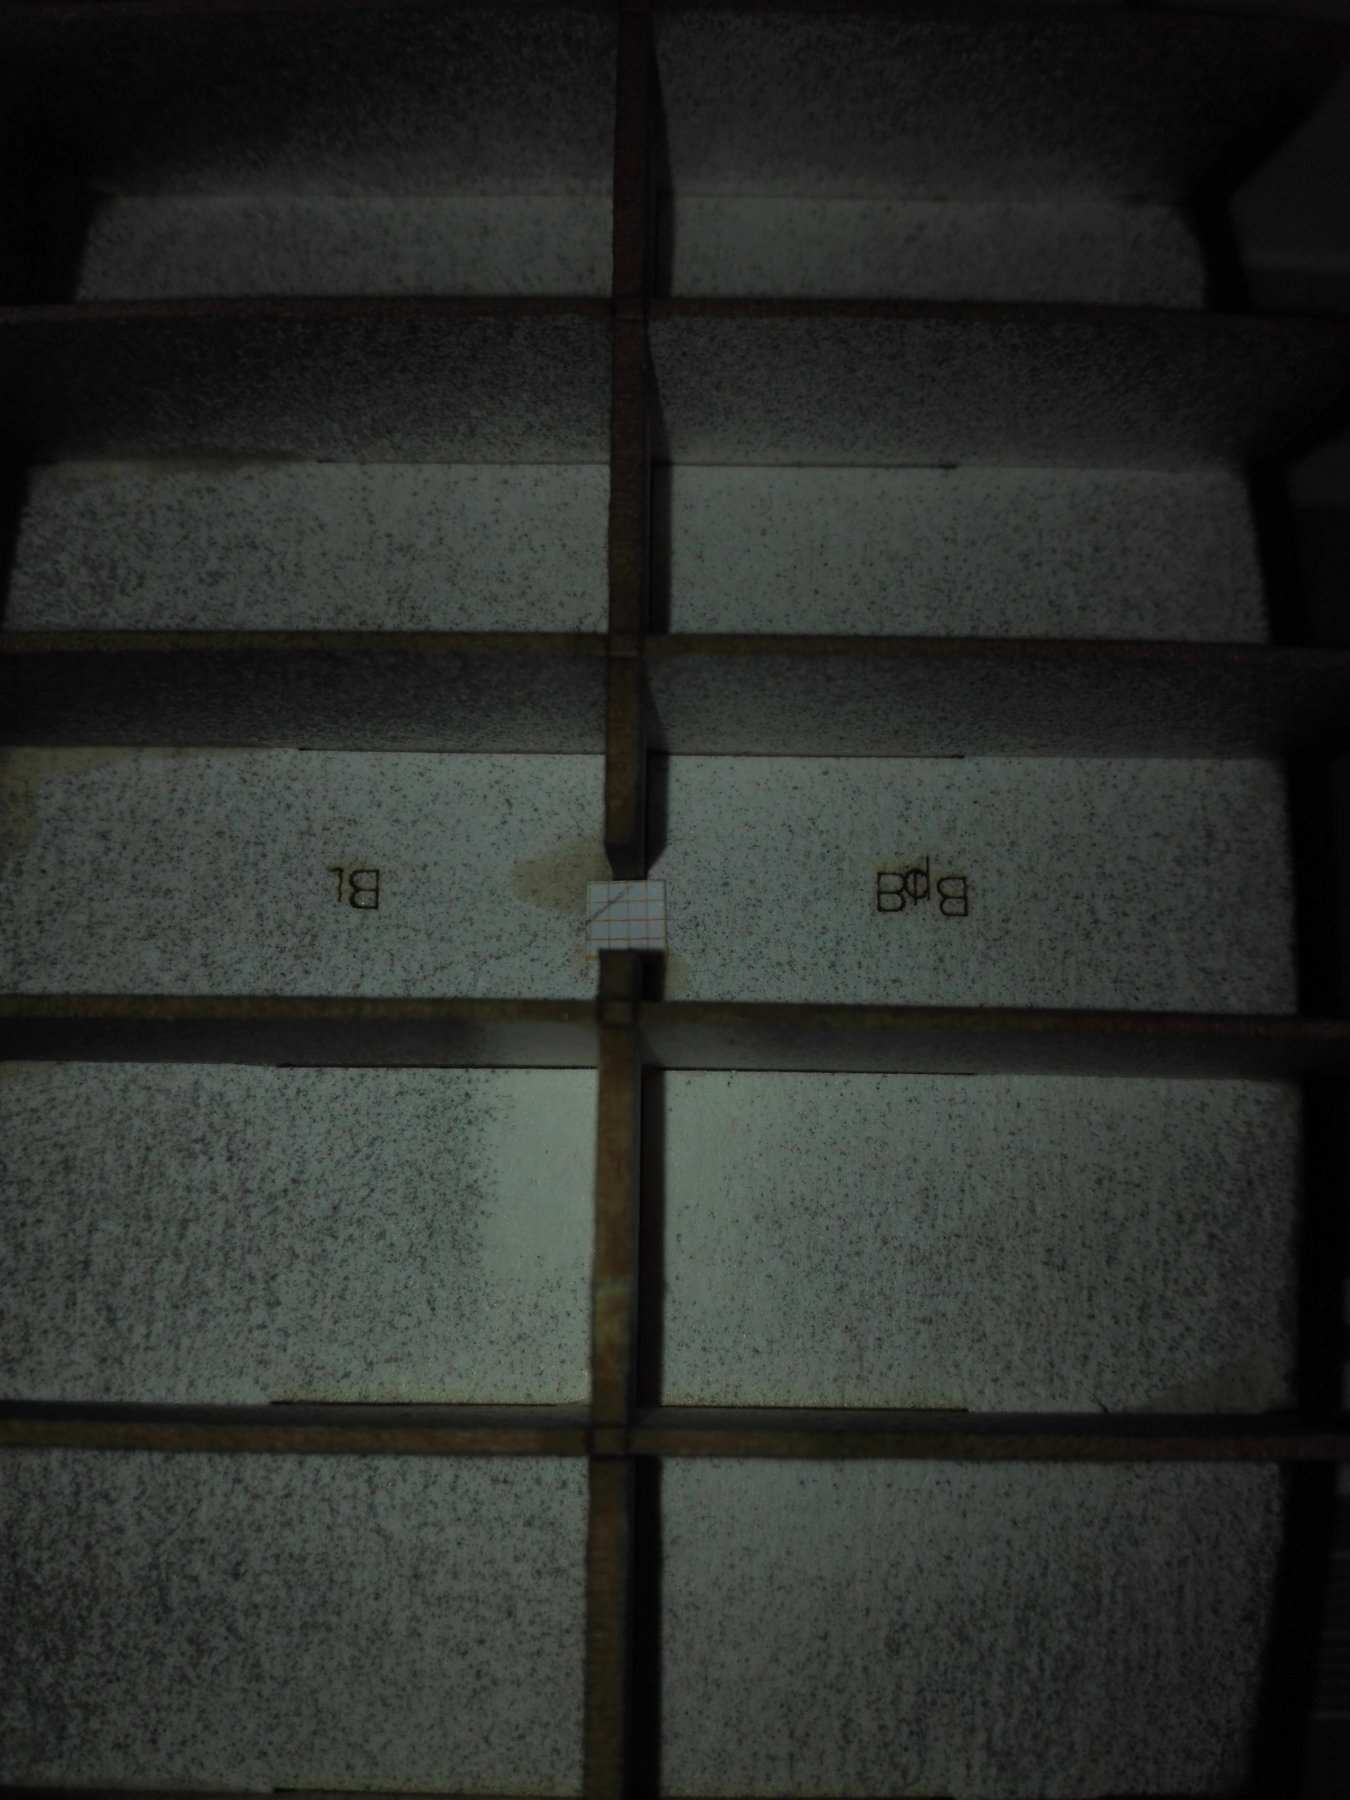
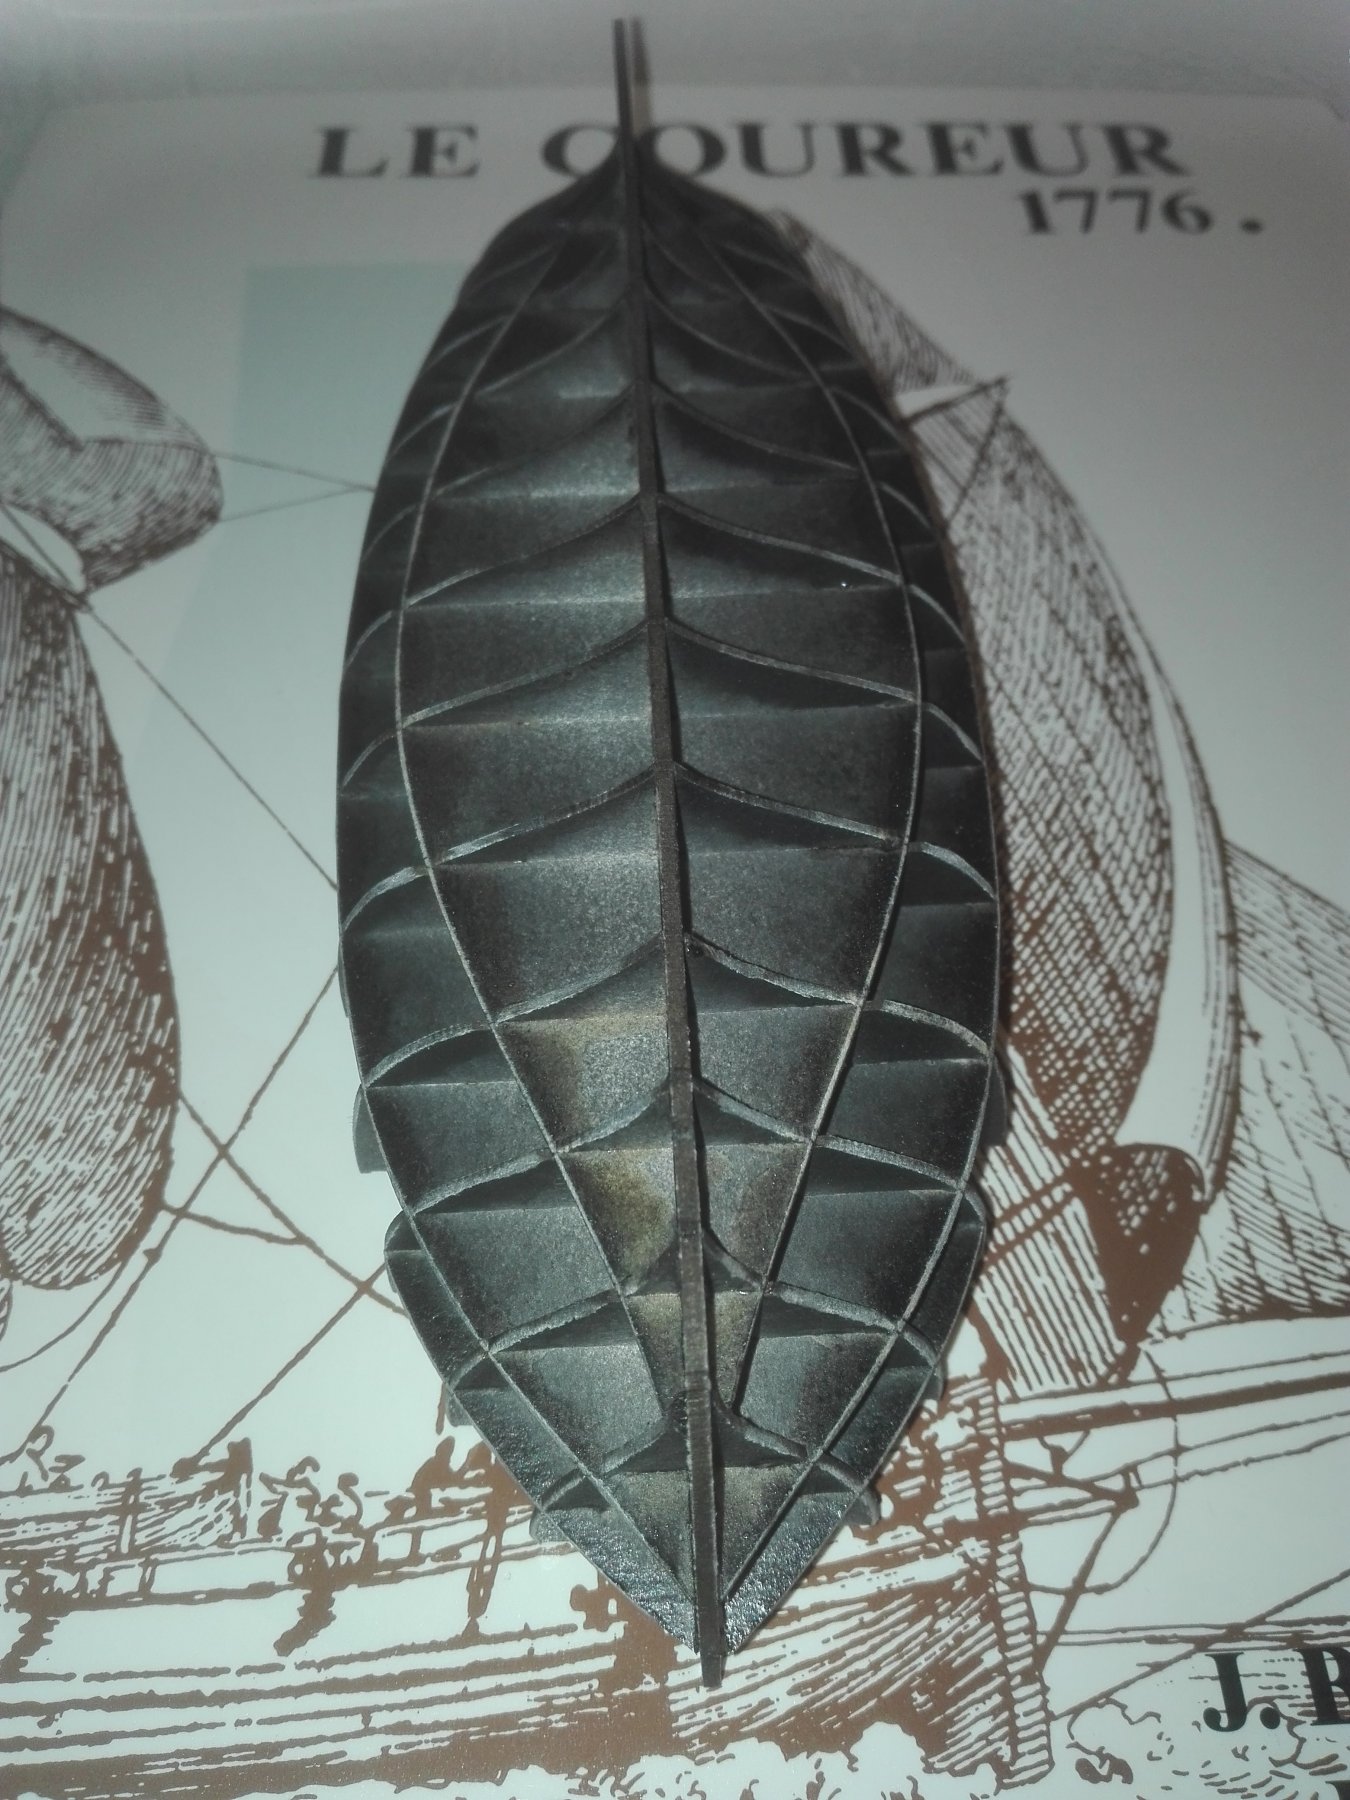
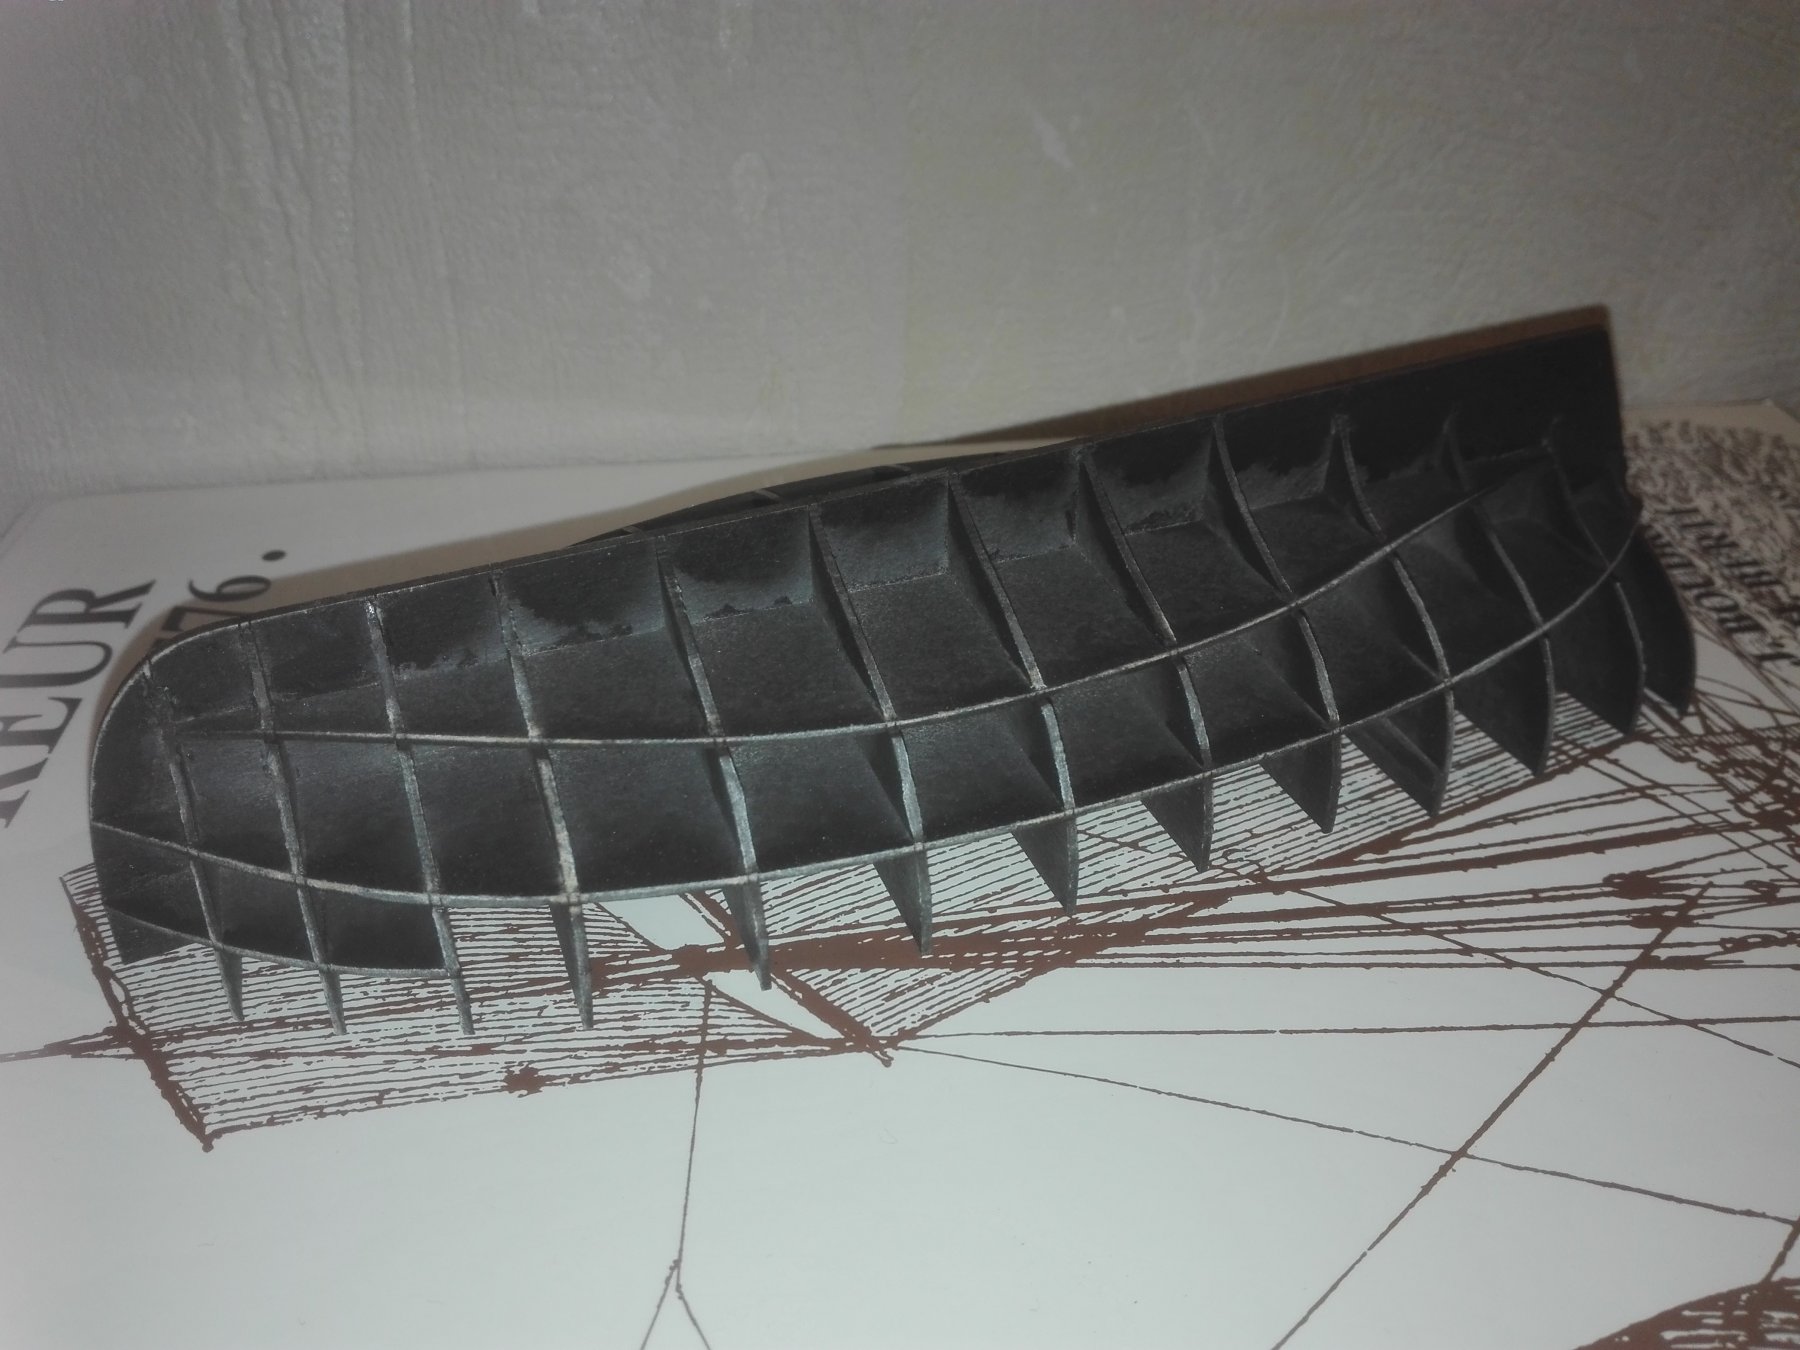
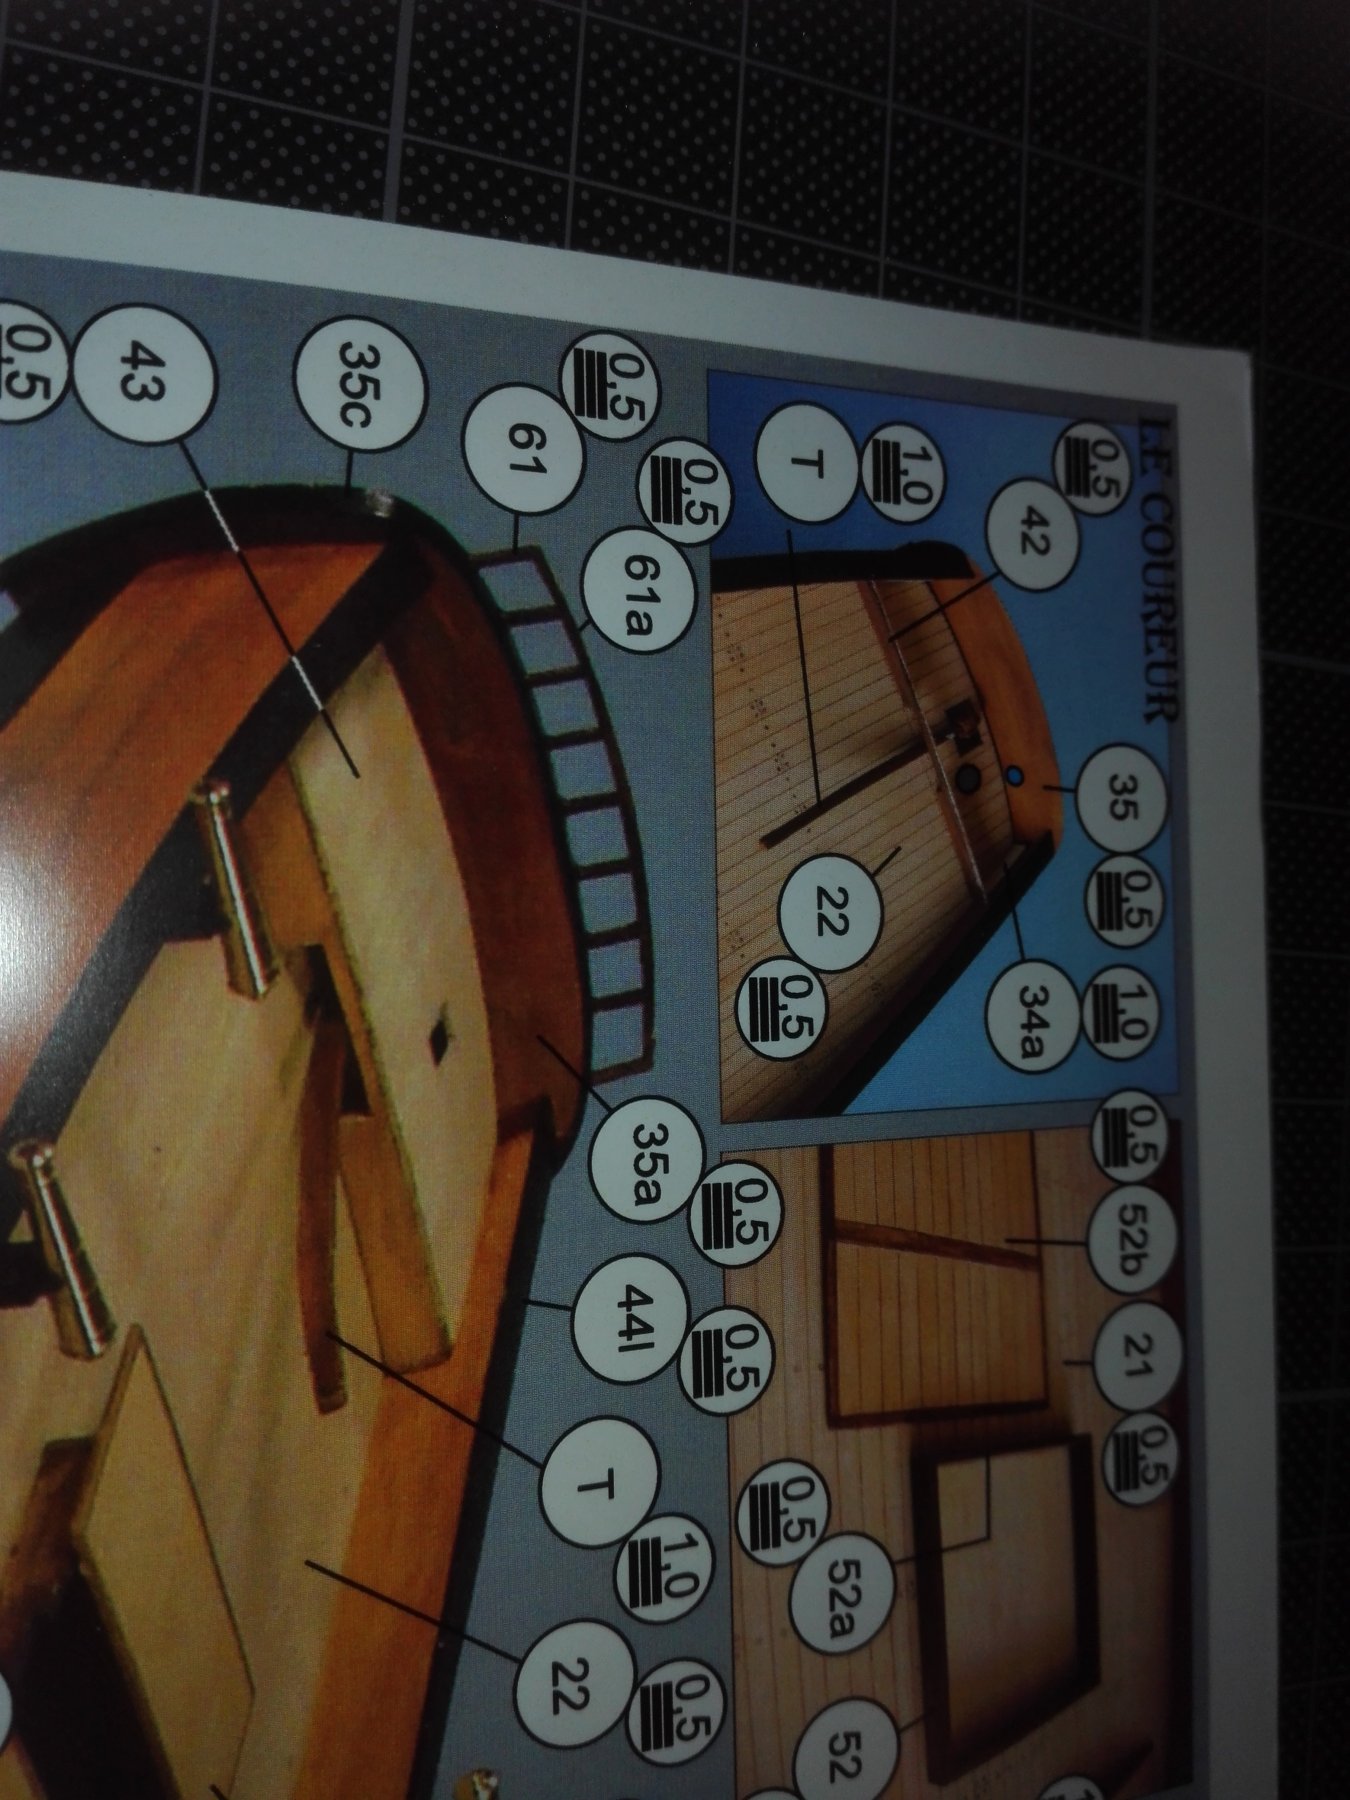
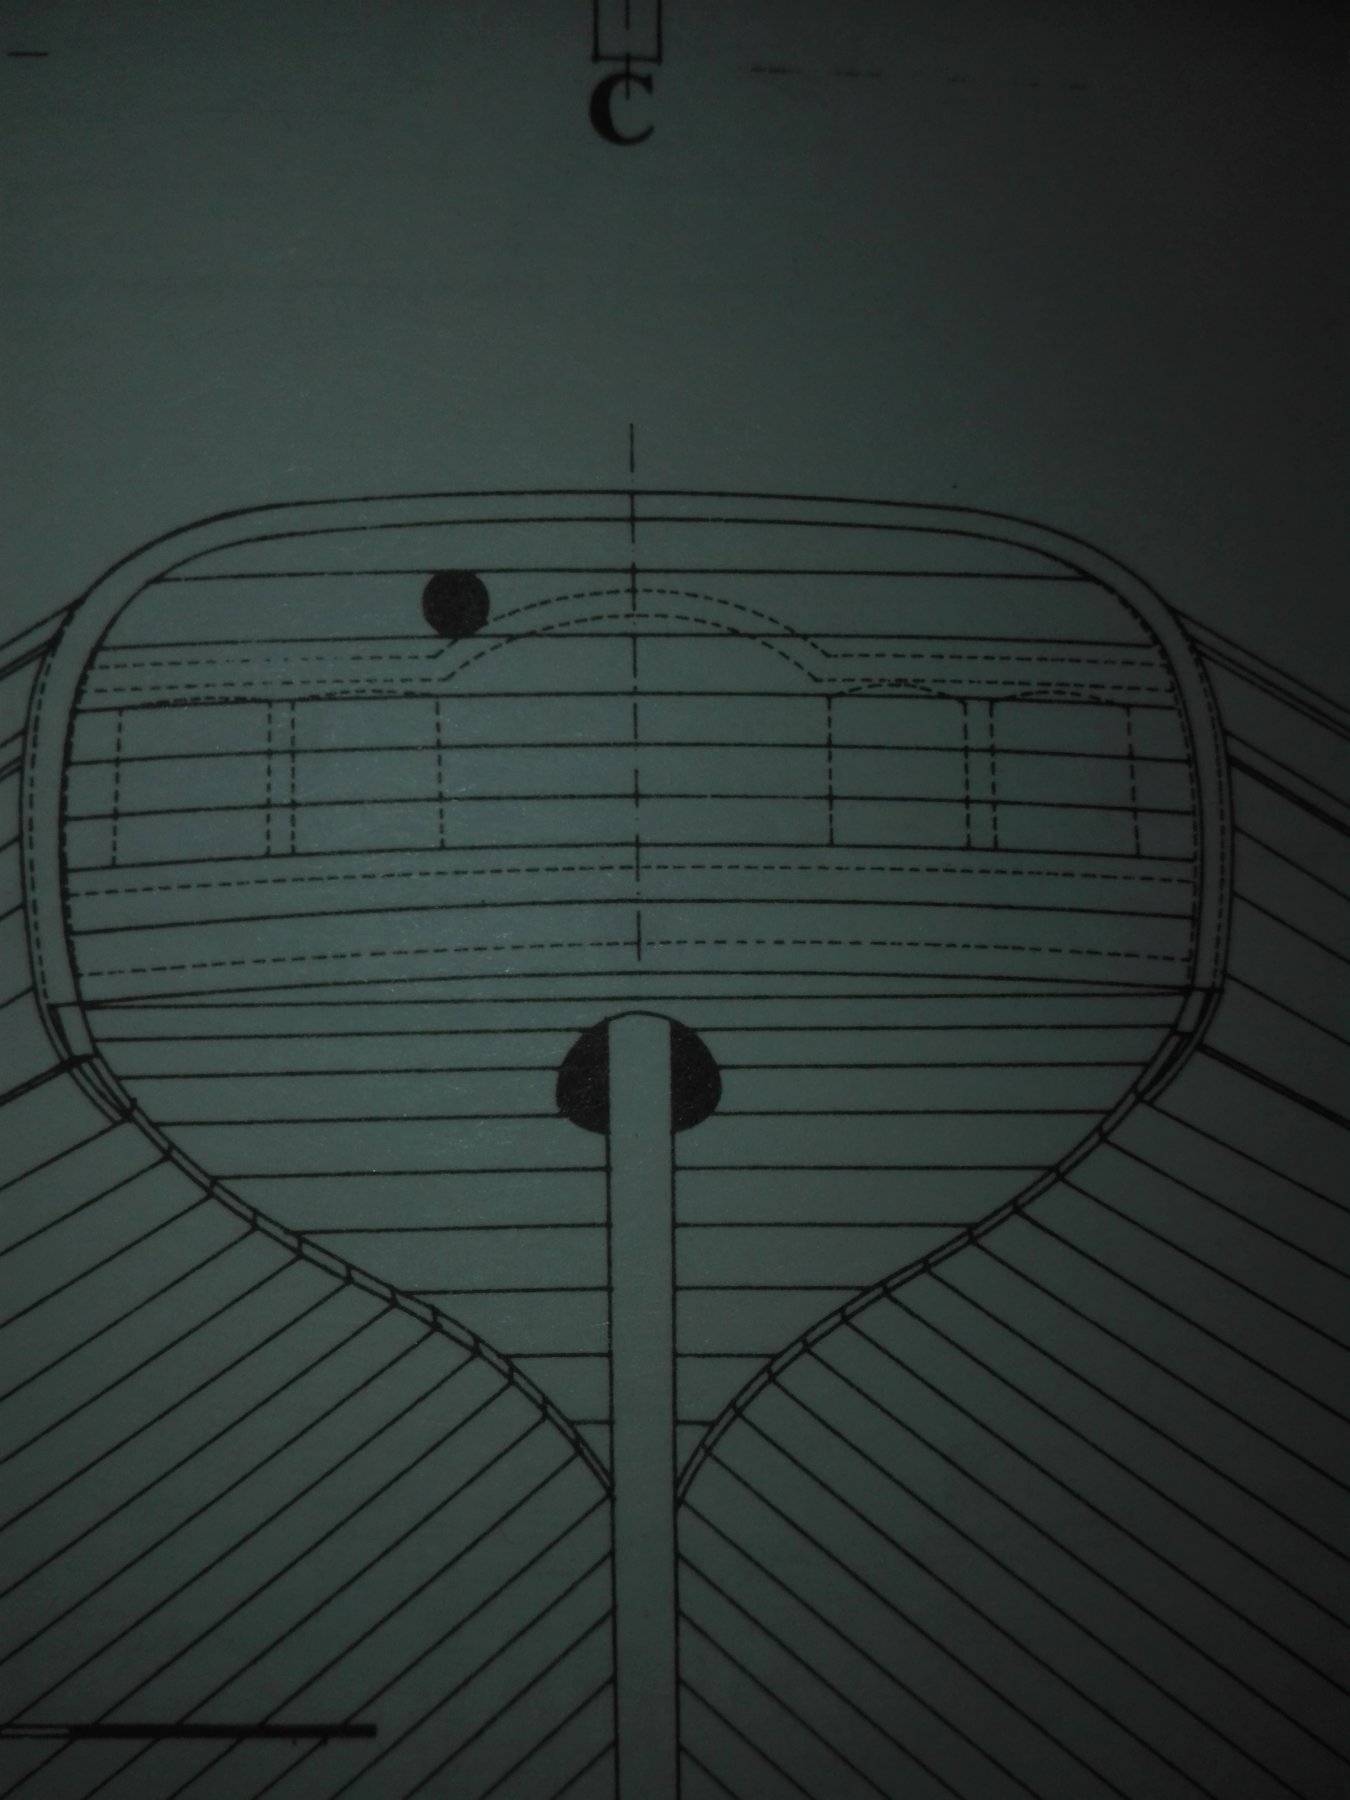
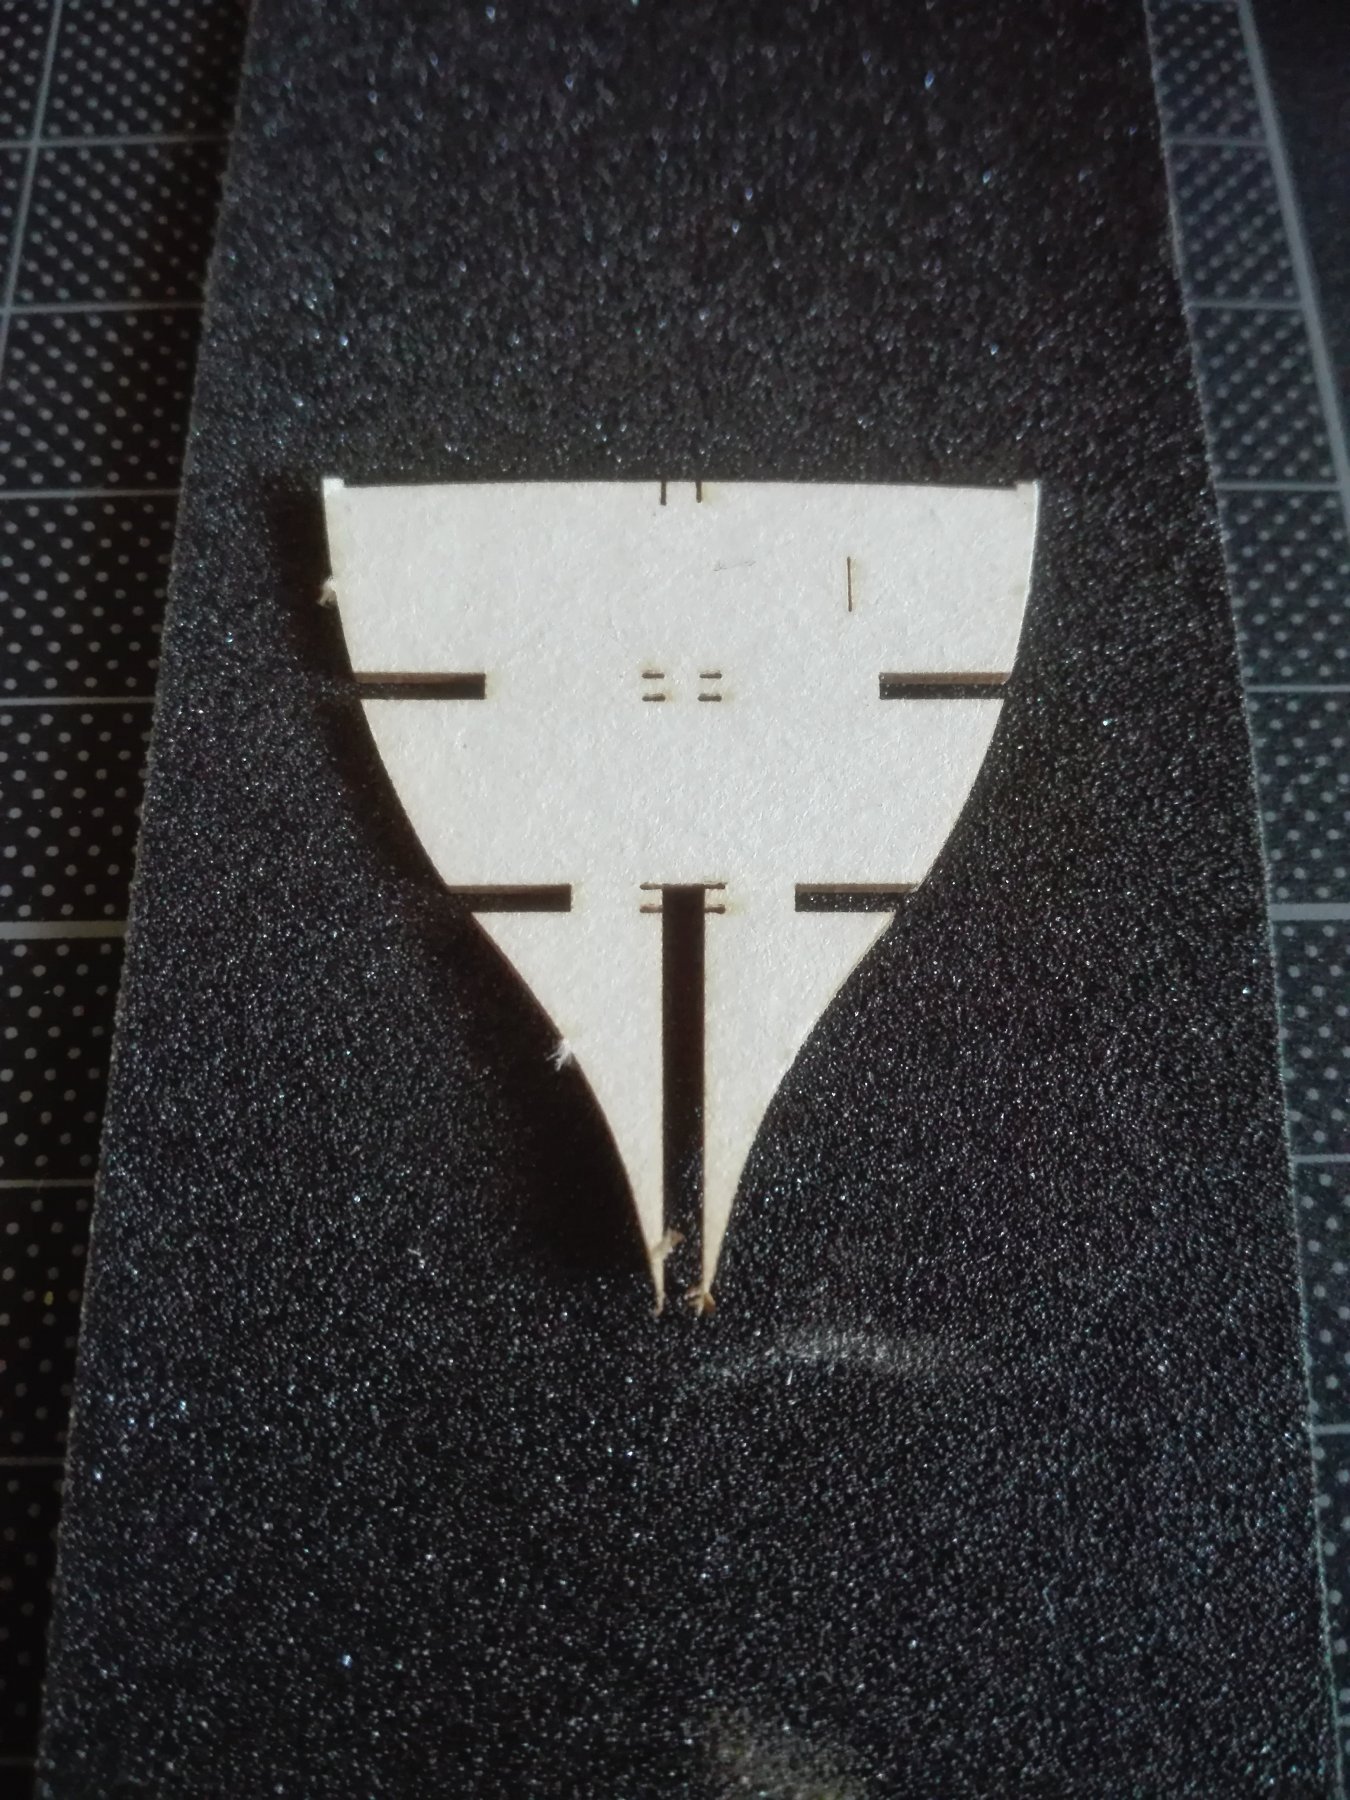
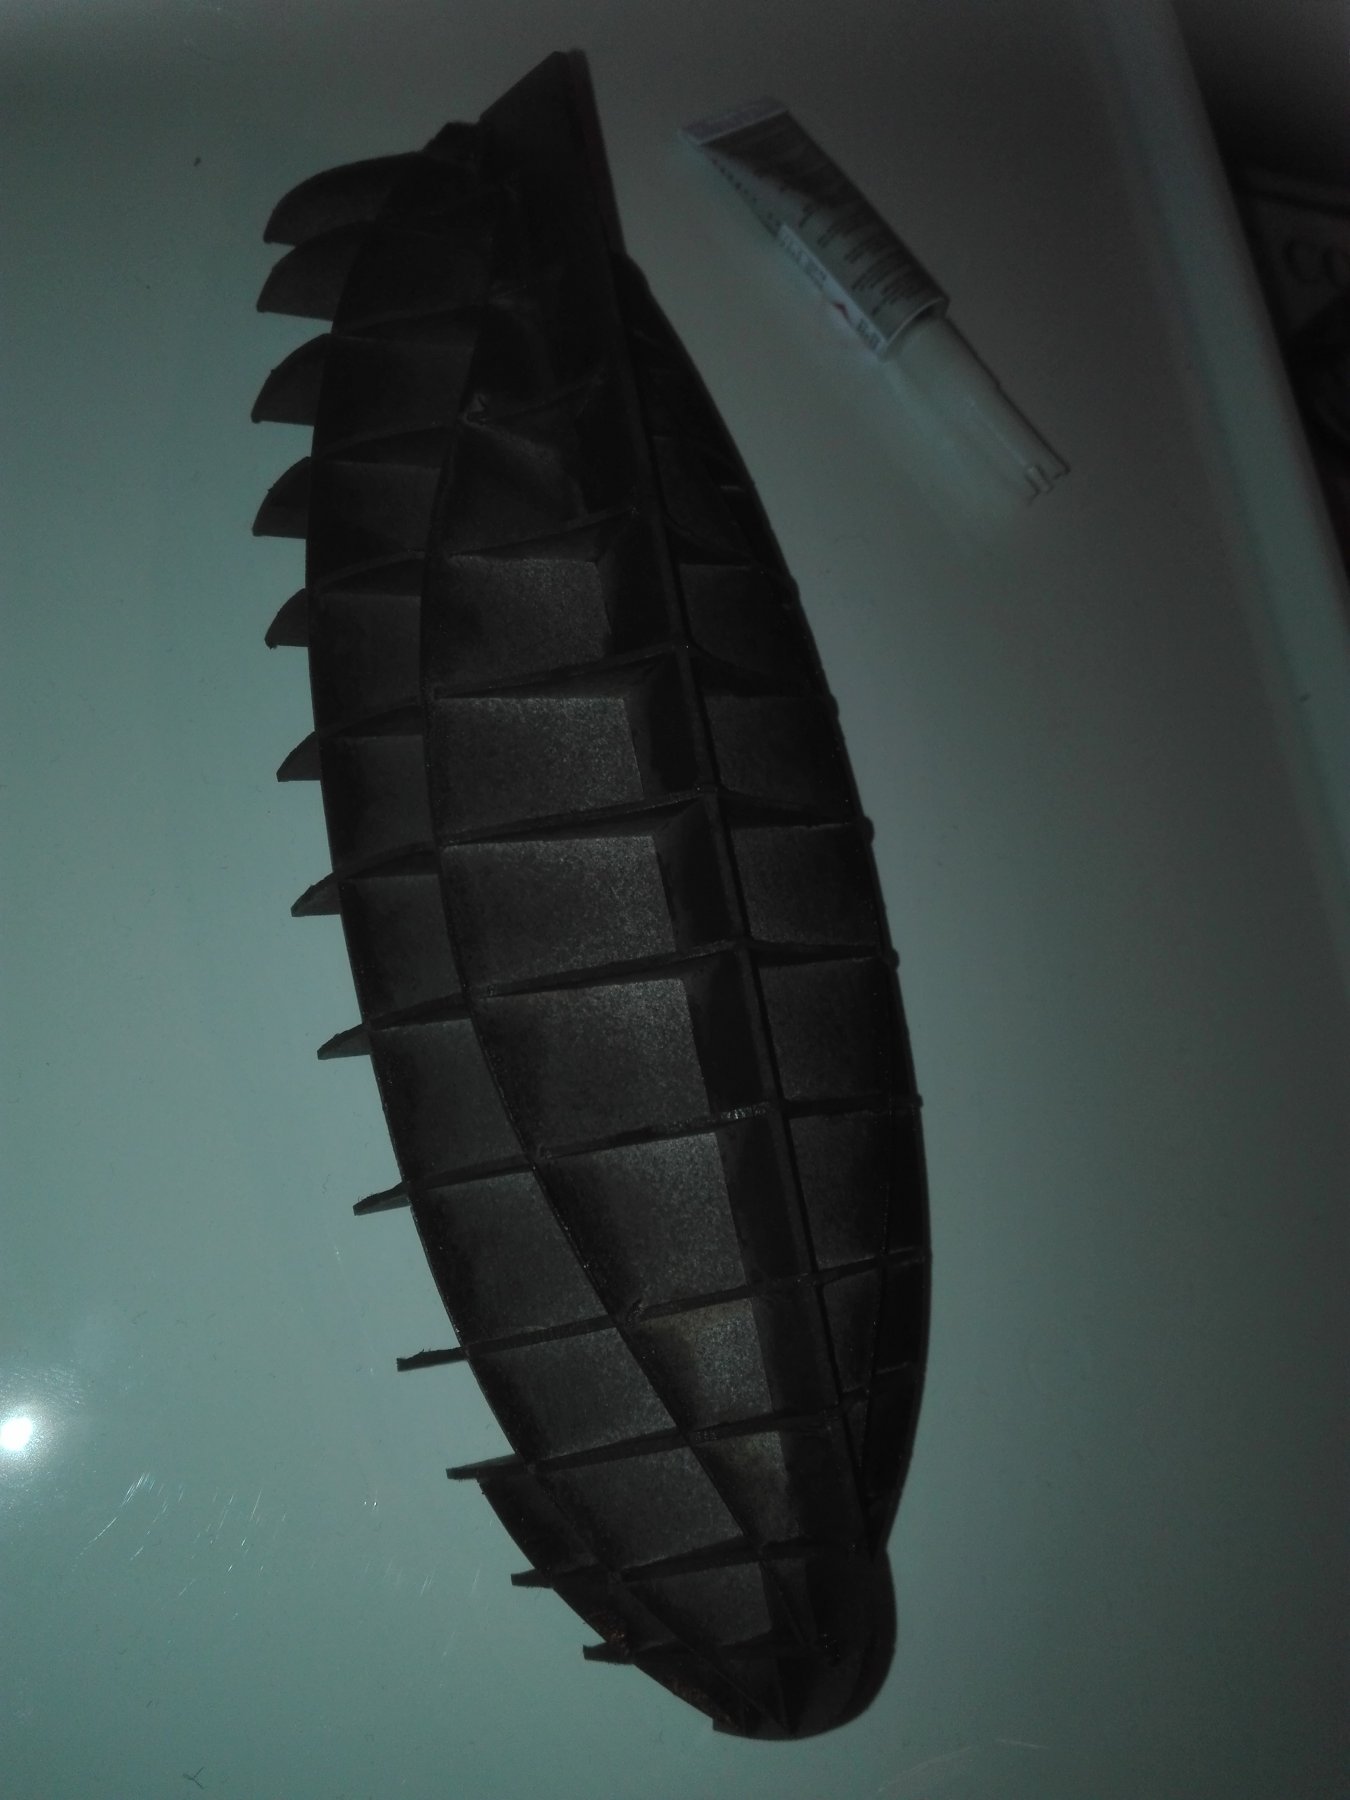
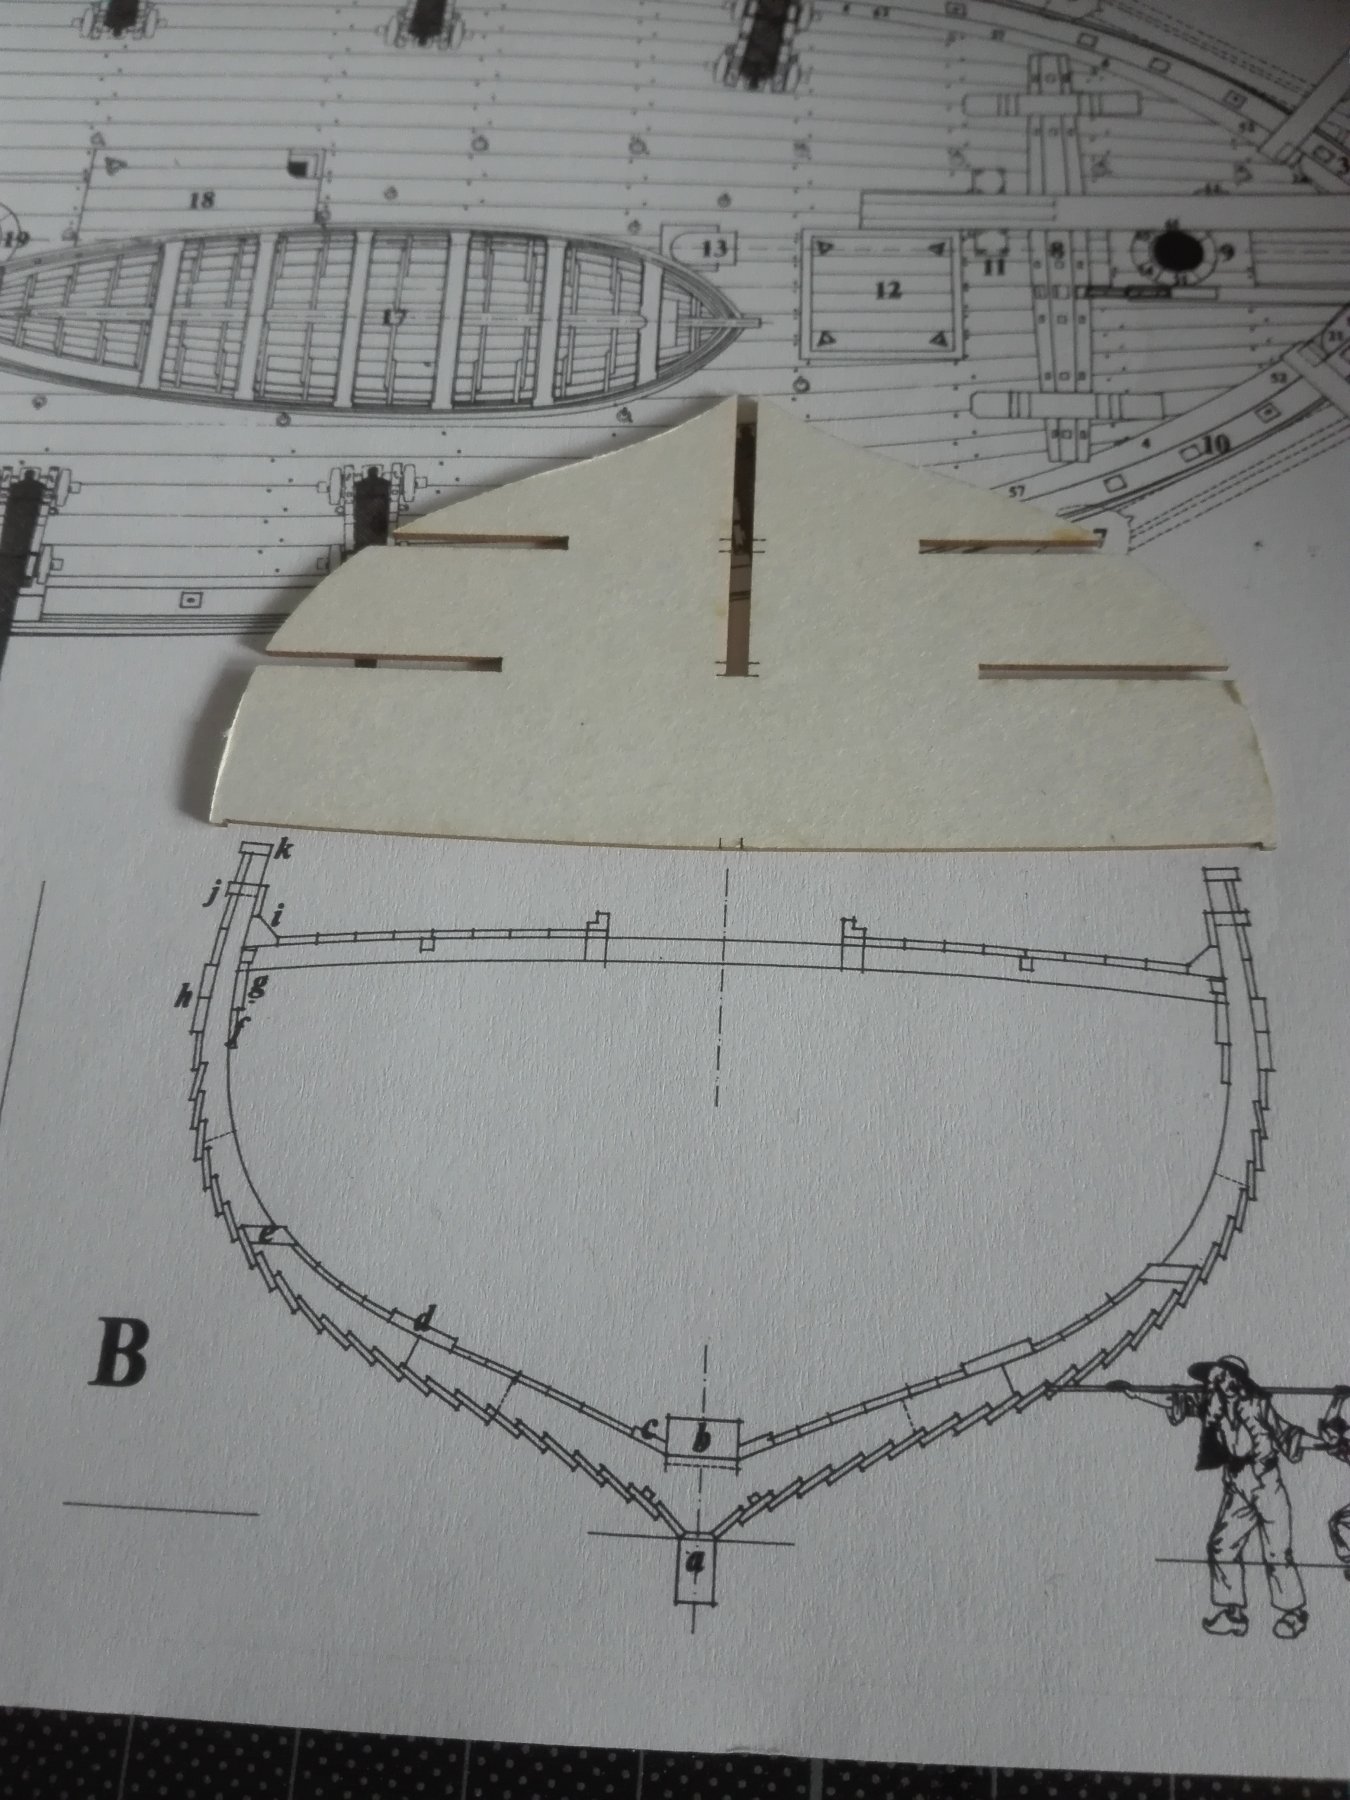
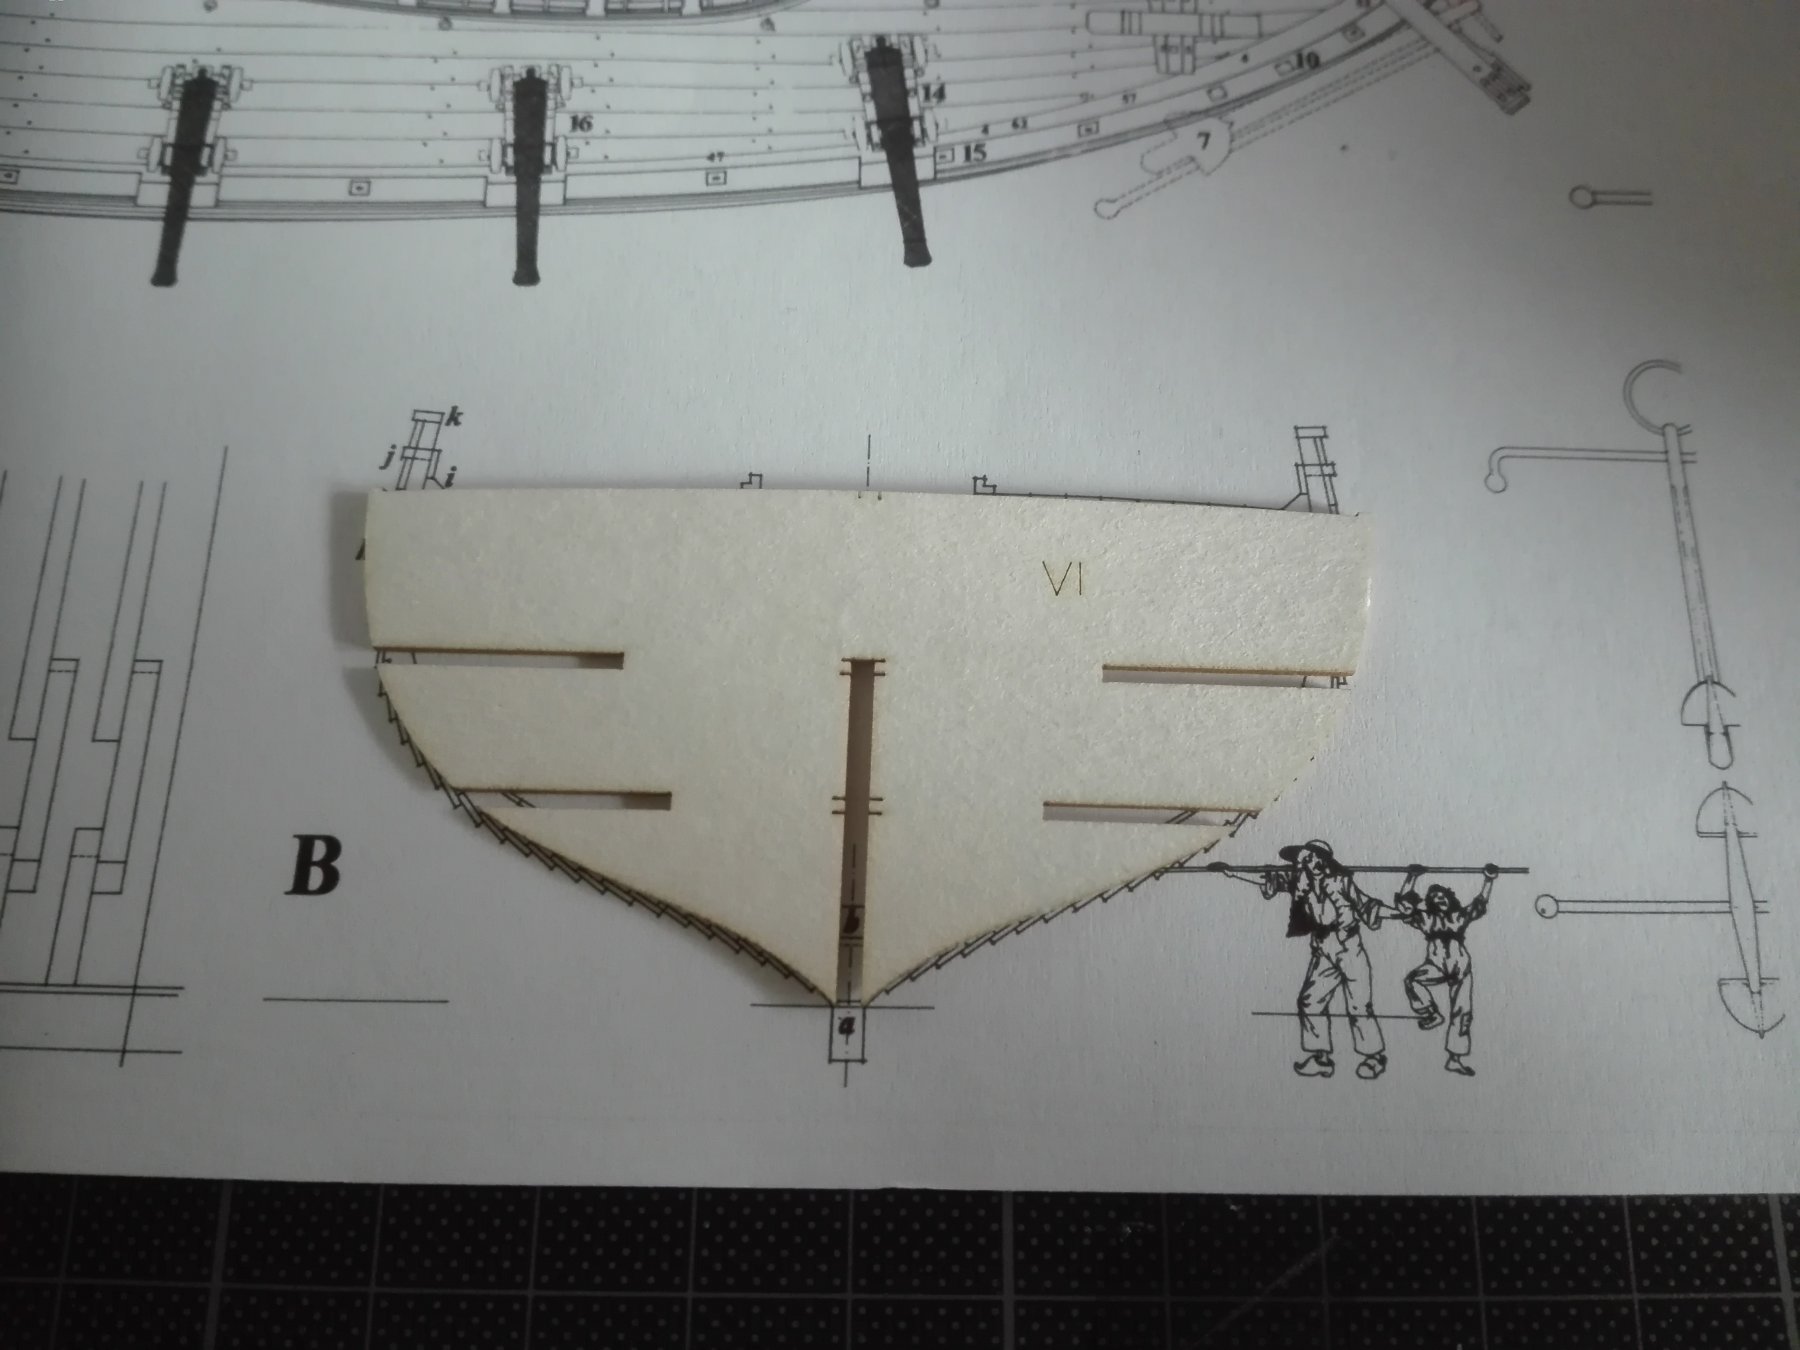
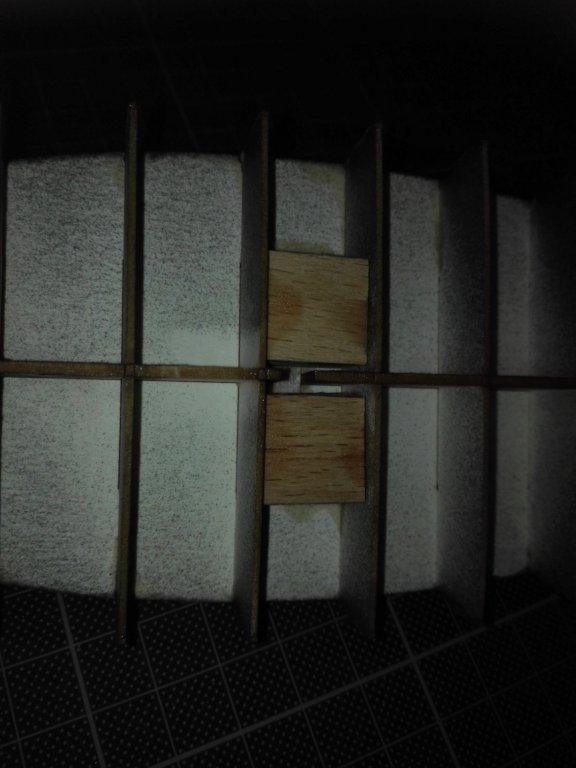
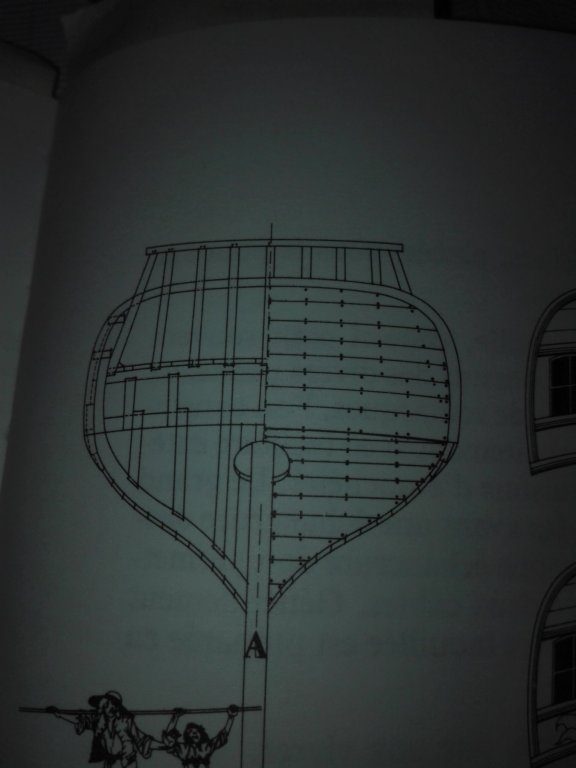
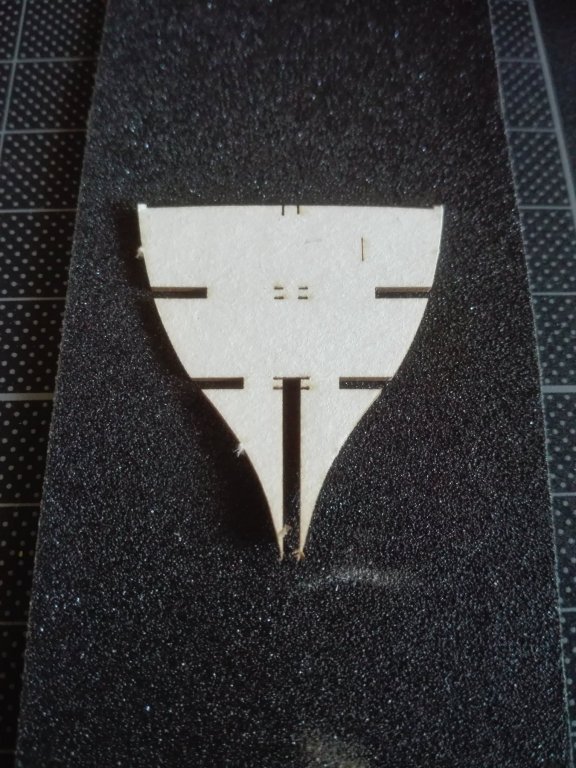
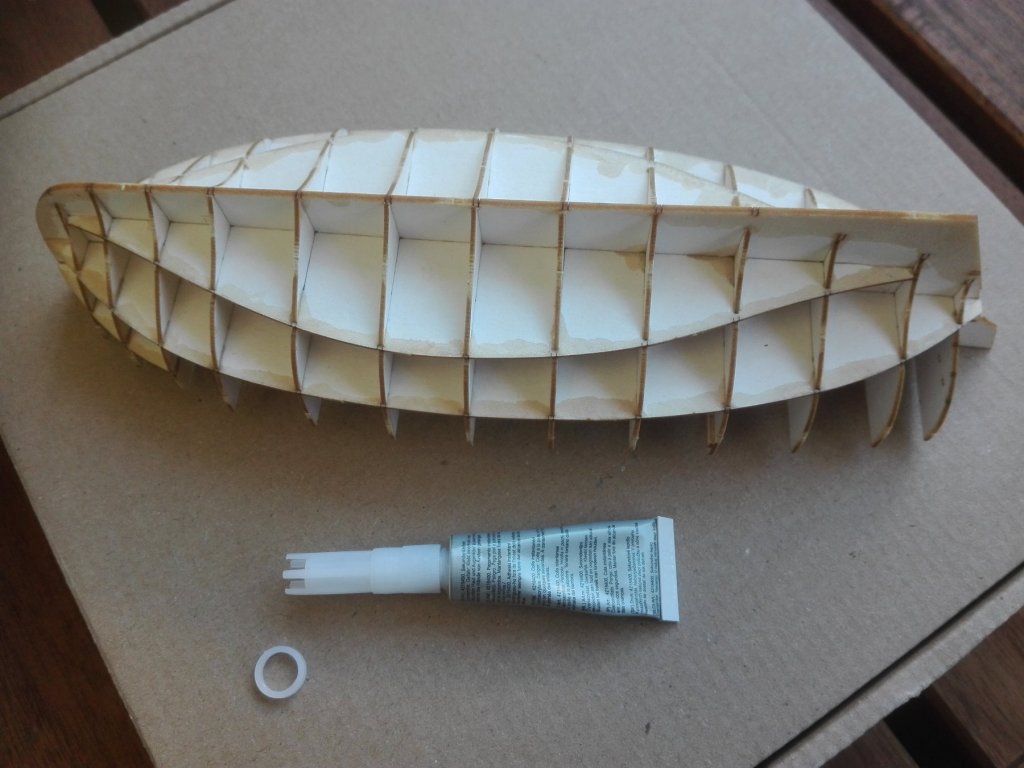
Hello, today I was able to sand the LCparts and take some pictures during the build. But I was able to copy the Boudroit plans to 1/96 and could compare the centerboard and the main frame and nothing fits!!! So it's evident I'll have a plenty of work in front of me and a hard road to travel - in particular with the stern. We will have a special meeting with this part in the next text block. At the bulkhead “I“ you can compare the unsanded left and sanded right side very well. The LCparts fit together very well and easily. The sides were glued together by Ponal Express with a shashlik pick. Then I added superglue on the edges of the bulkheads and horizontal parts to make them hard. So I've been told they could be sanded with better results. And knowing it form plastic modelbuilding a black layer is a good contrast for sanding. On the stern picture you can see how important the sanding of horicontal parts will be to get the smooth surface before adding in the wooden filling parts. These will give the hull those thick bulkhead sides that paper's first layer willnot have any valleys between the bulkheads missing support.
- 21 replies
-
- 2
-
-
- shipyard
- le coureur
- (and 1 more)
-
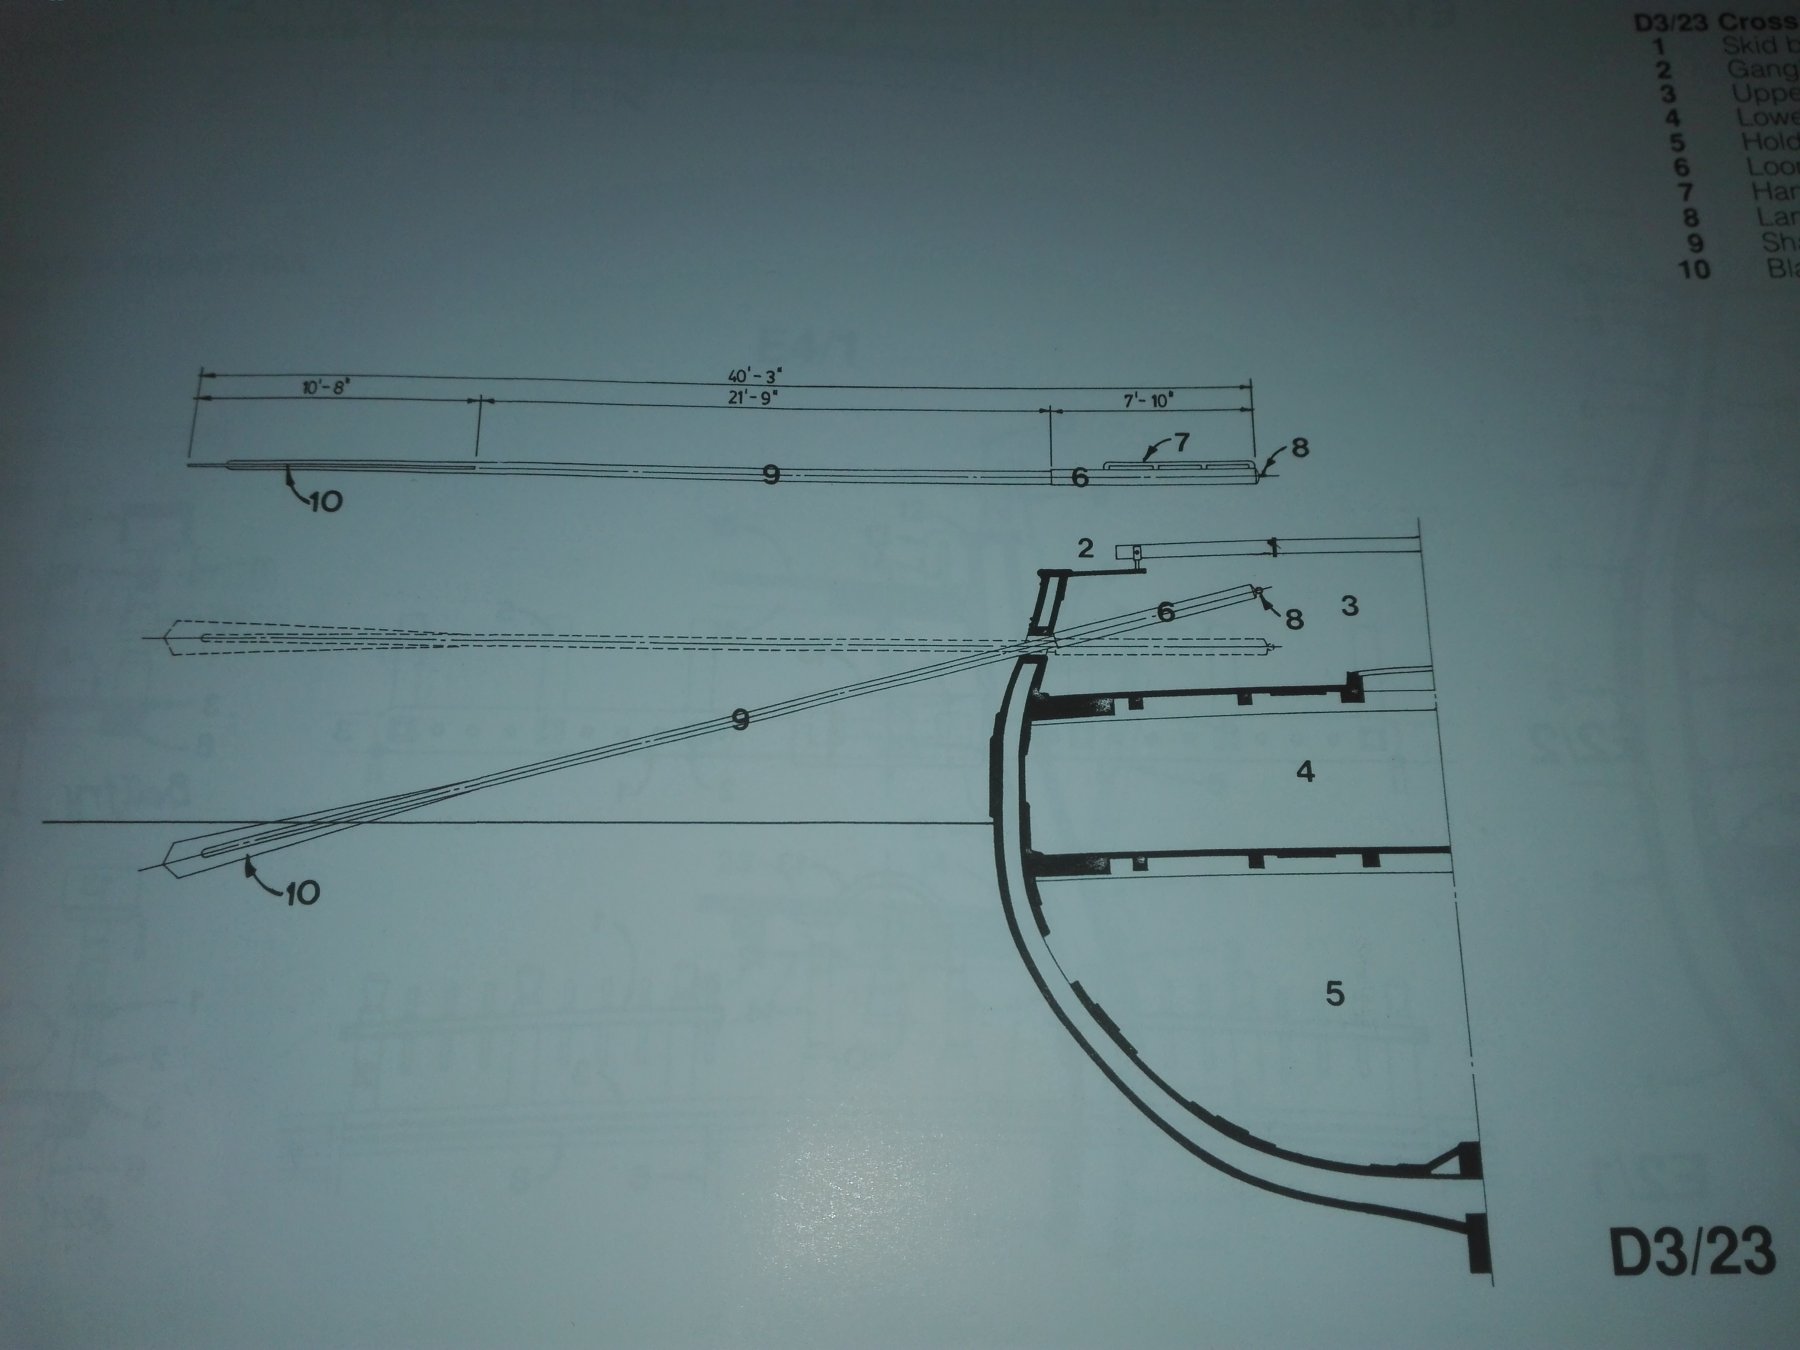
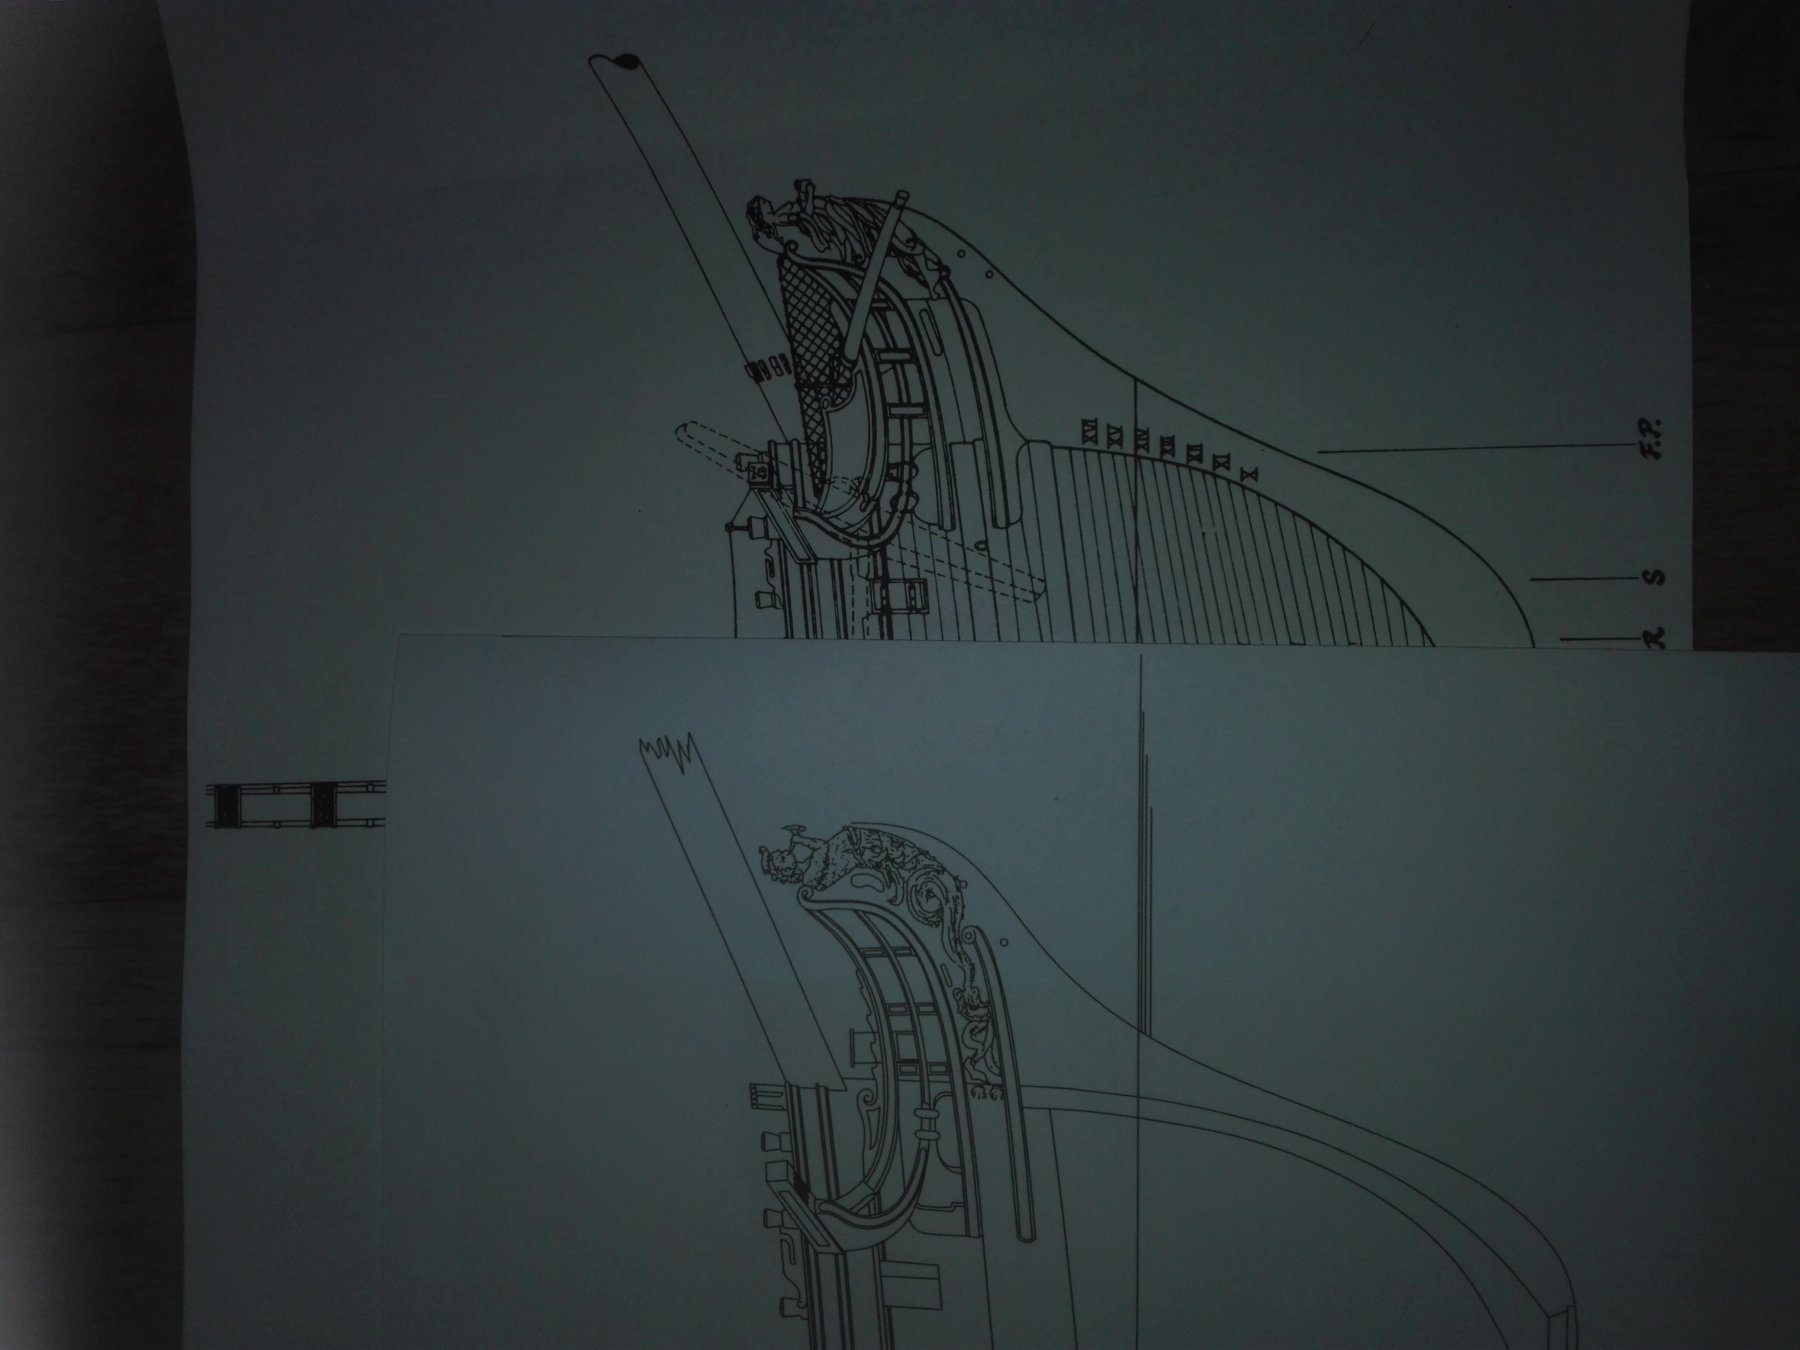
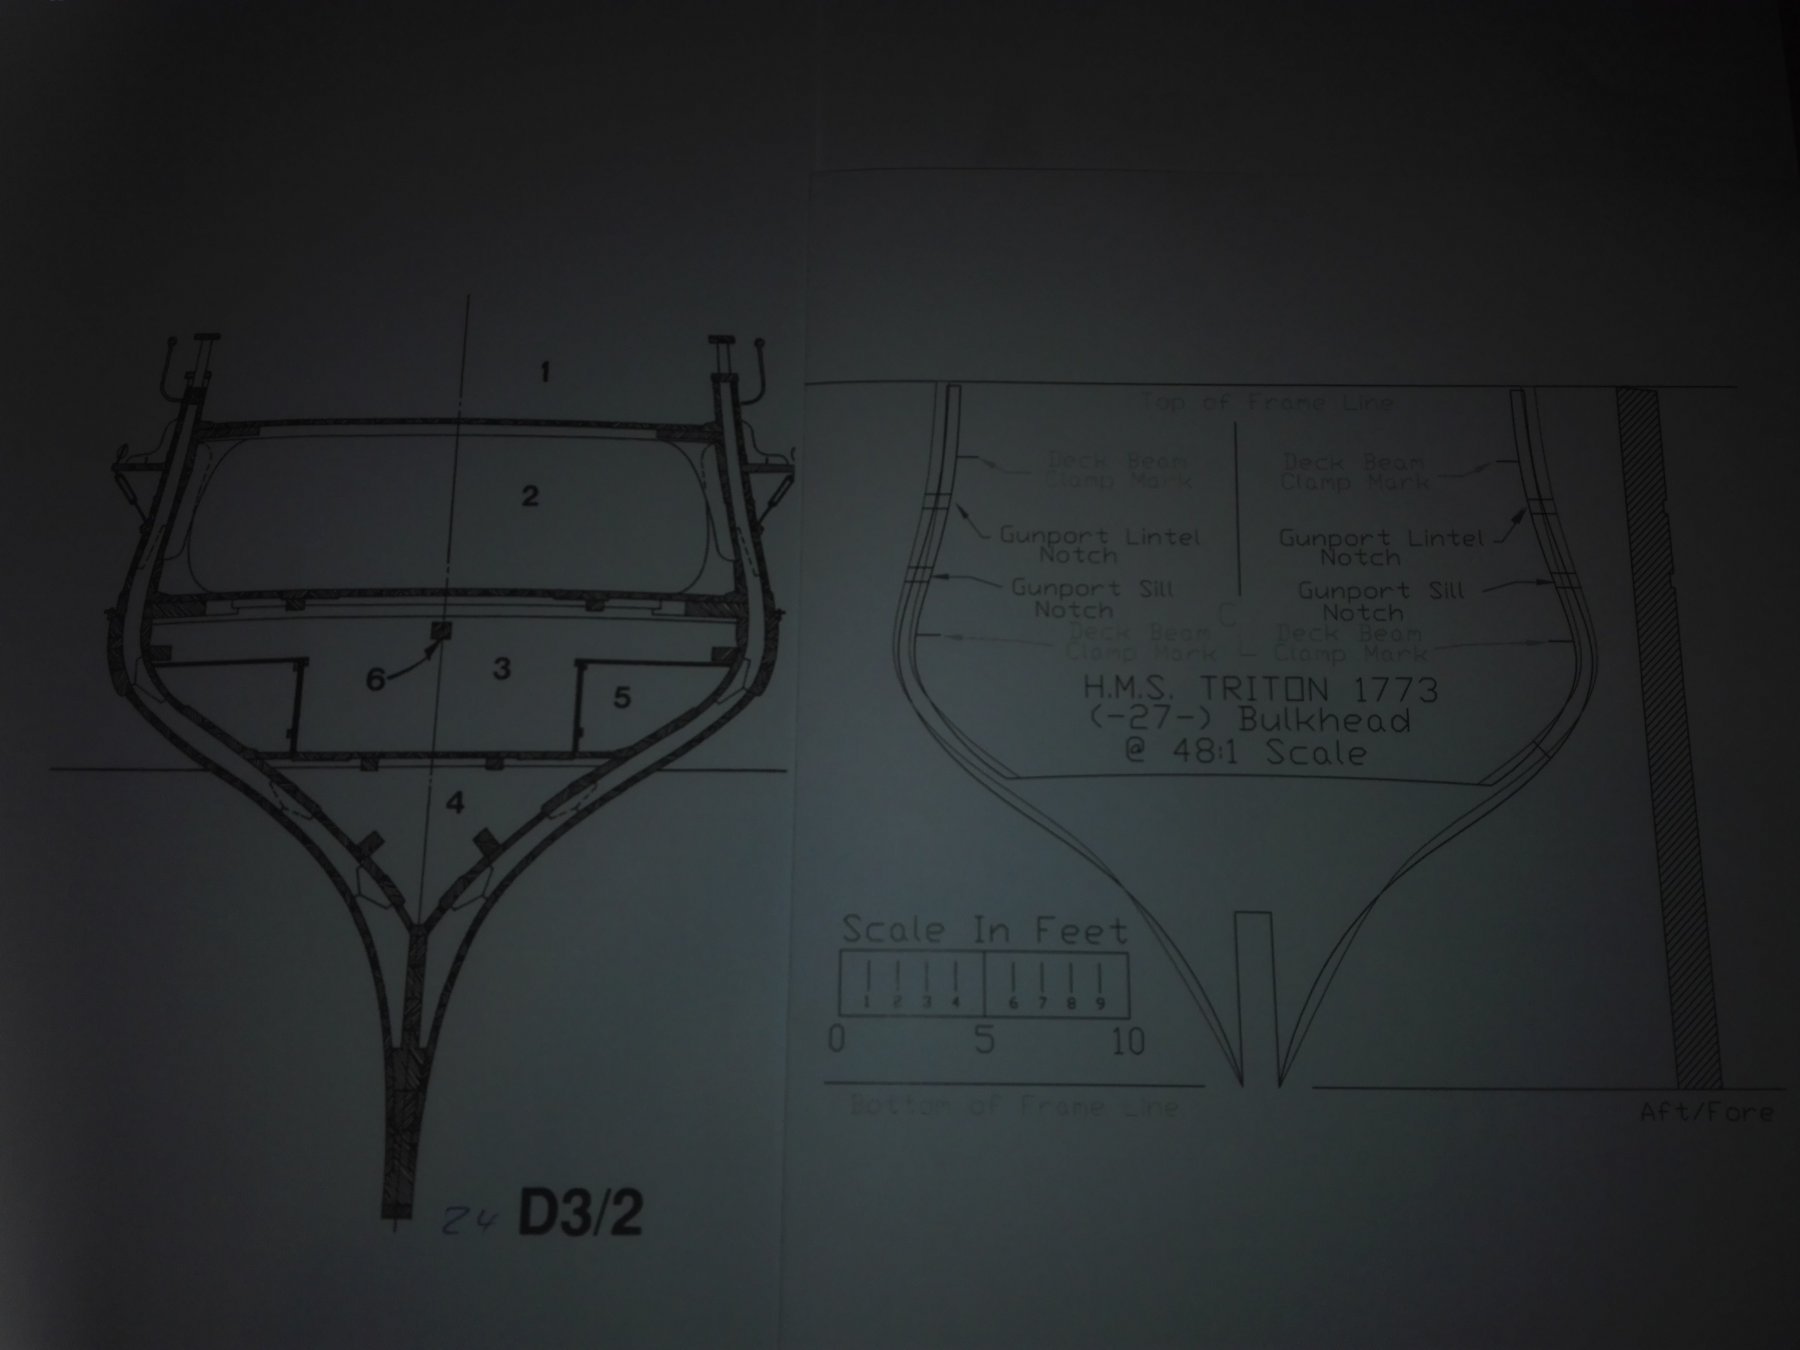
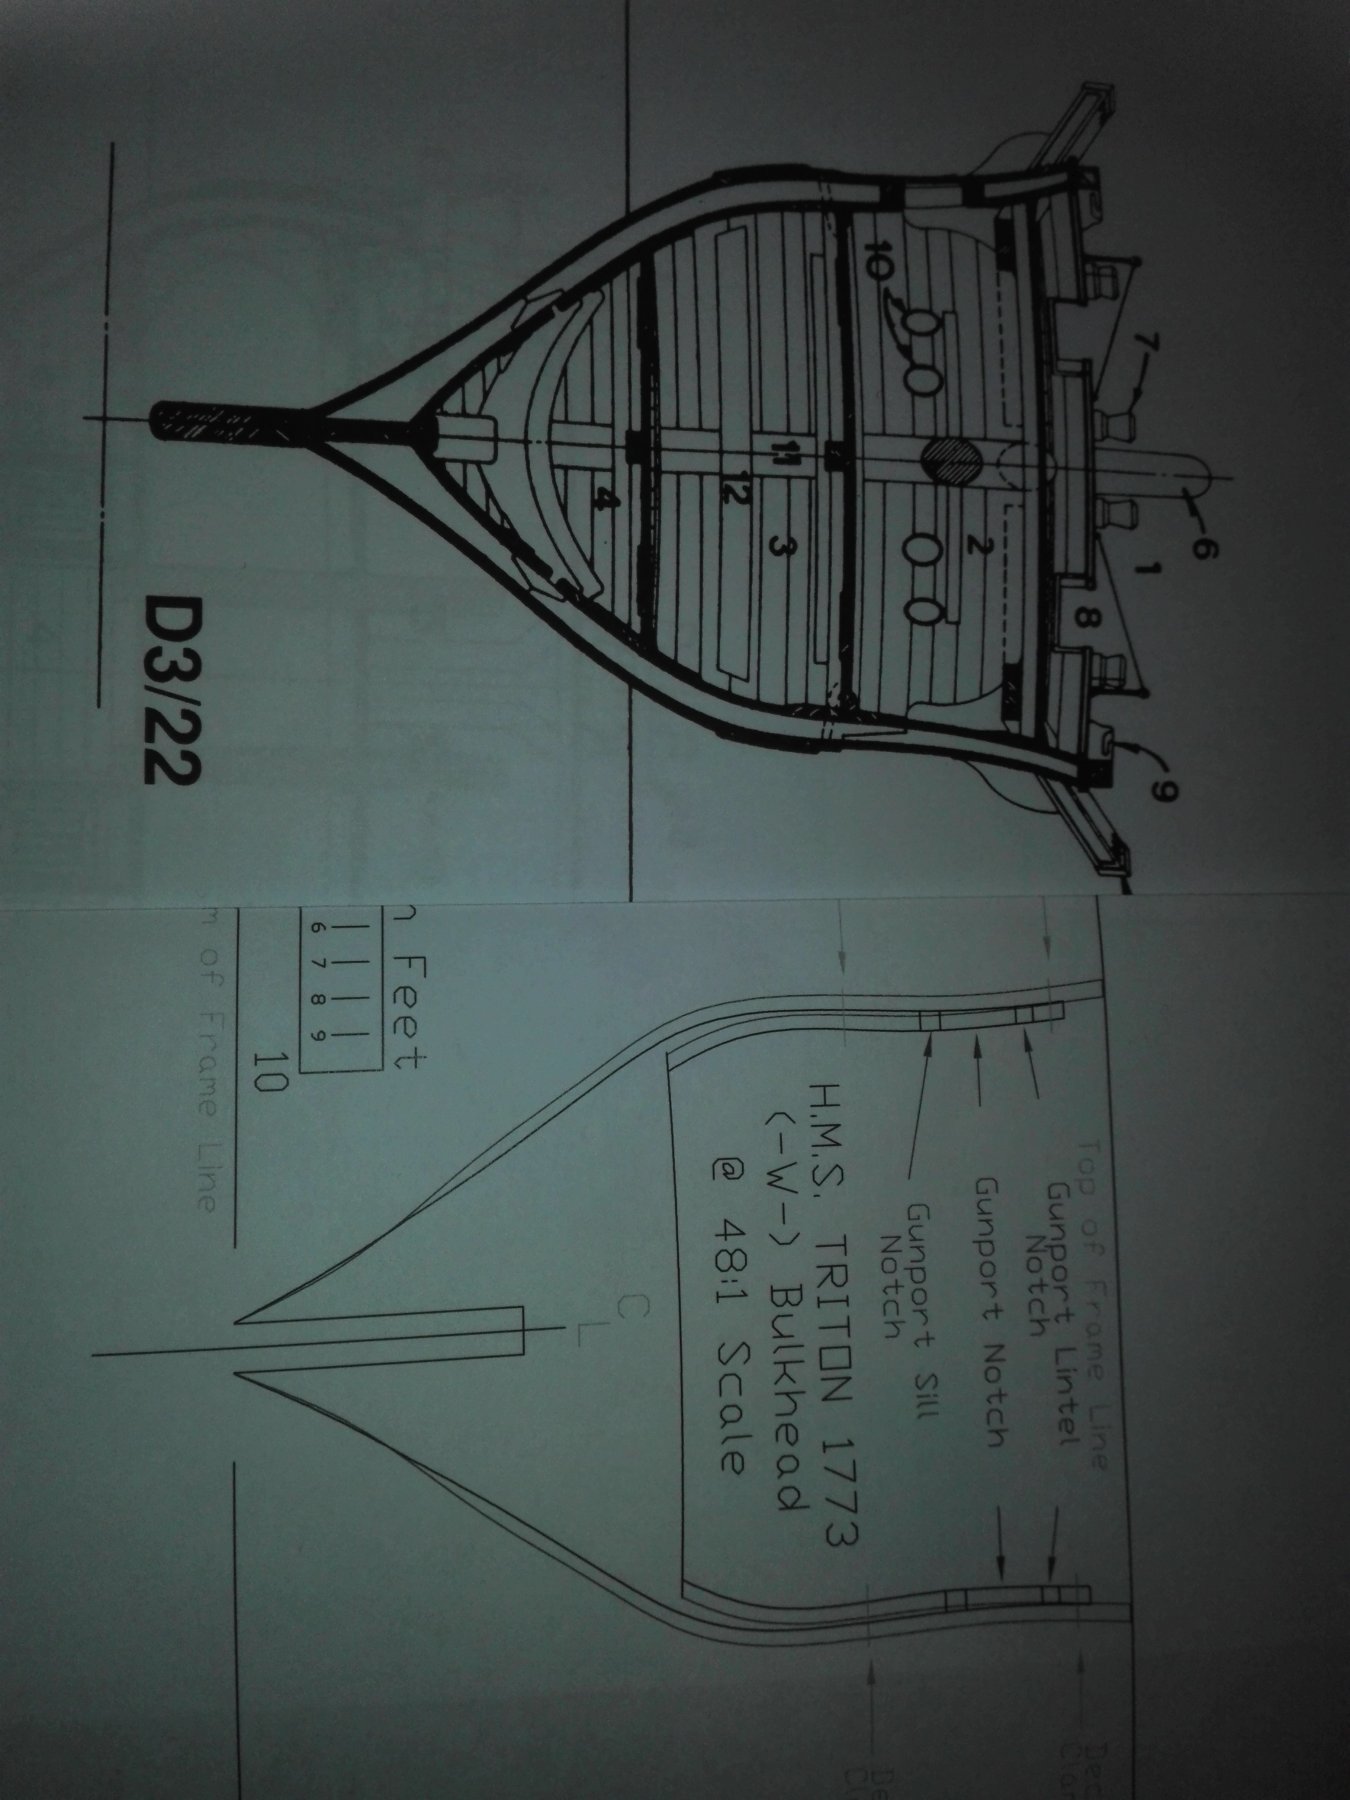
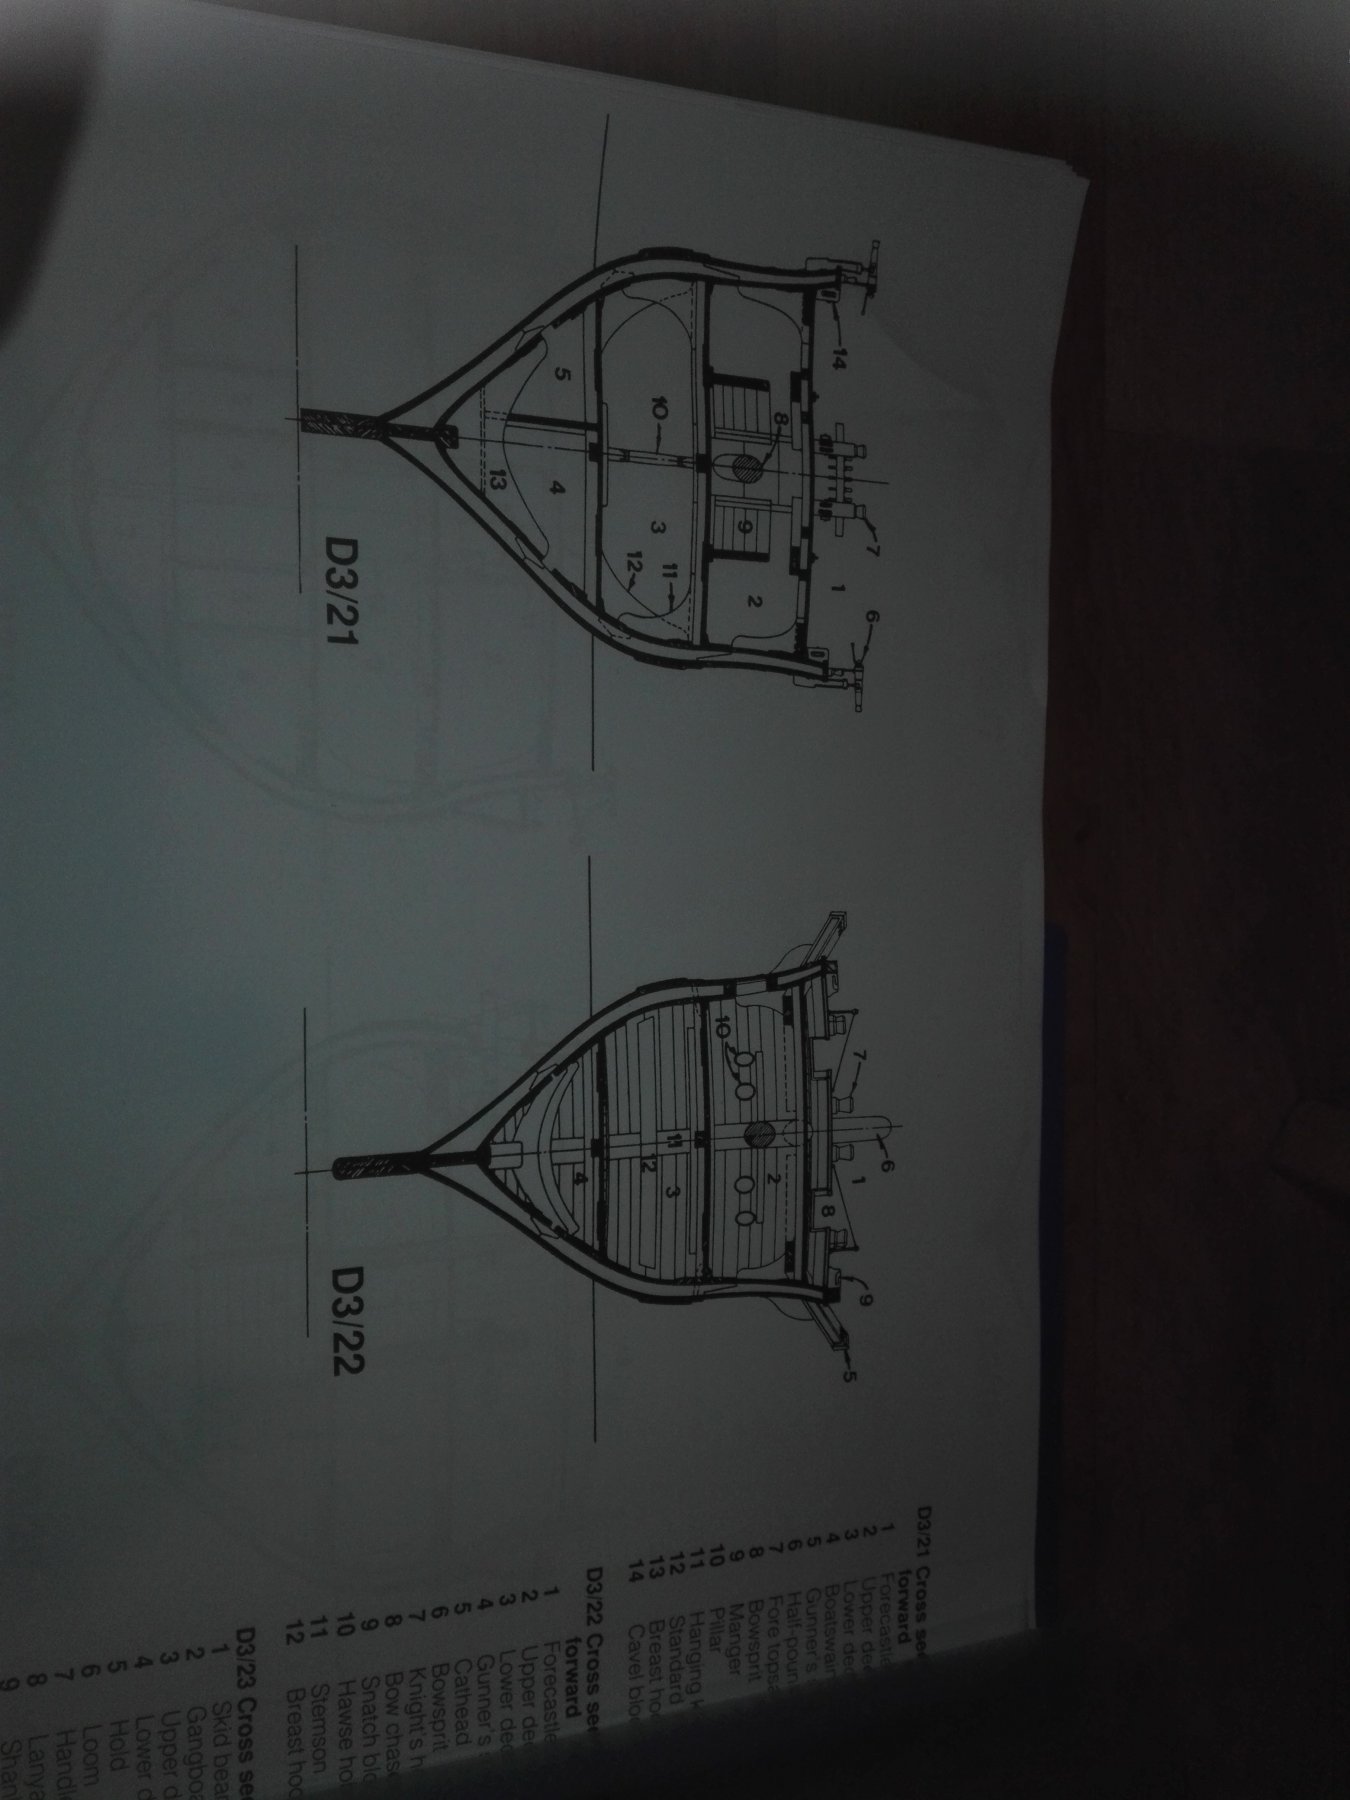
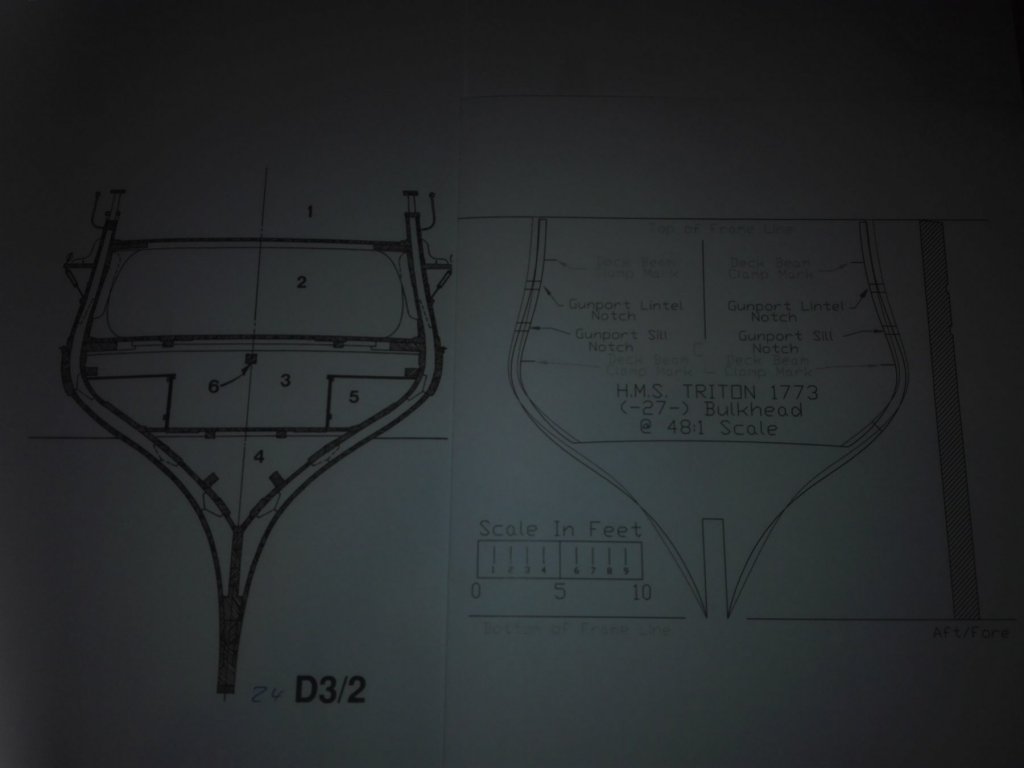
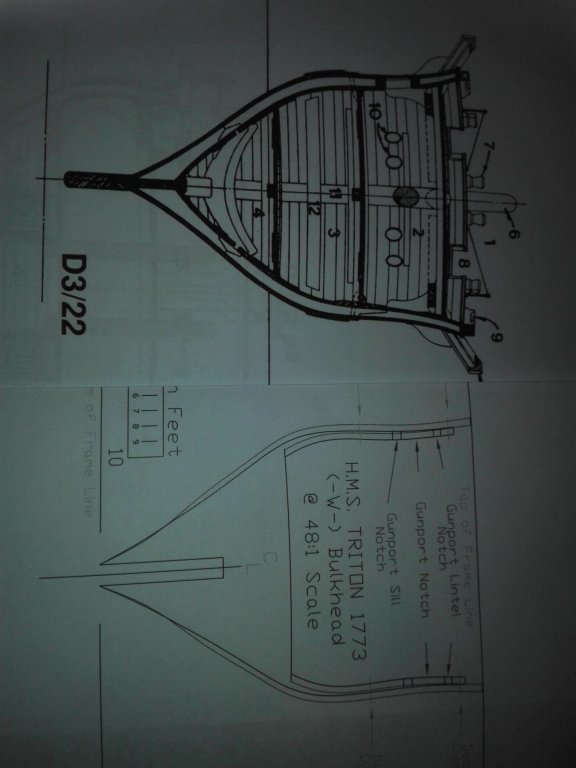
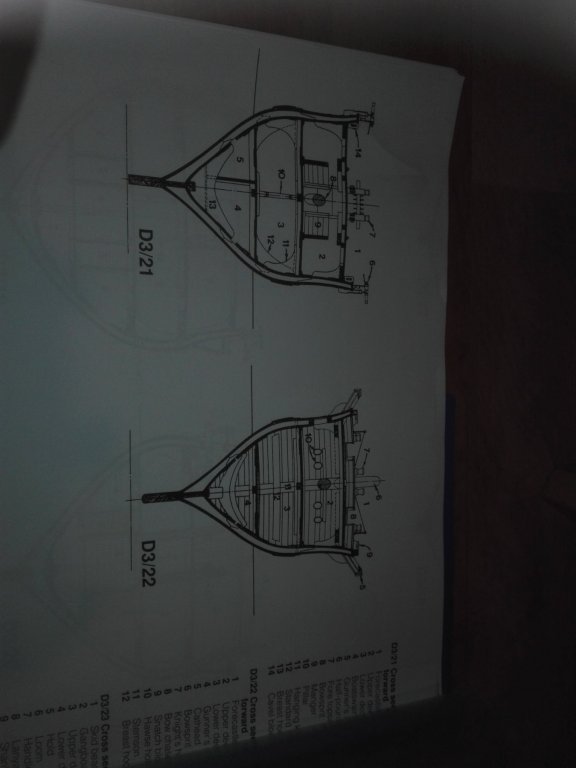
qOne basic question coming from the drawing D3/23 on page 67 and also the art on the dDustcover on AotS Pandora On thethe two MNNplans are once oreports and than none. Does Triton have got oars and oarports with lids?
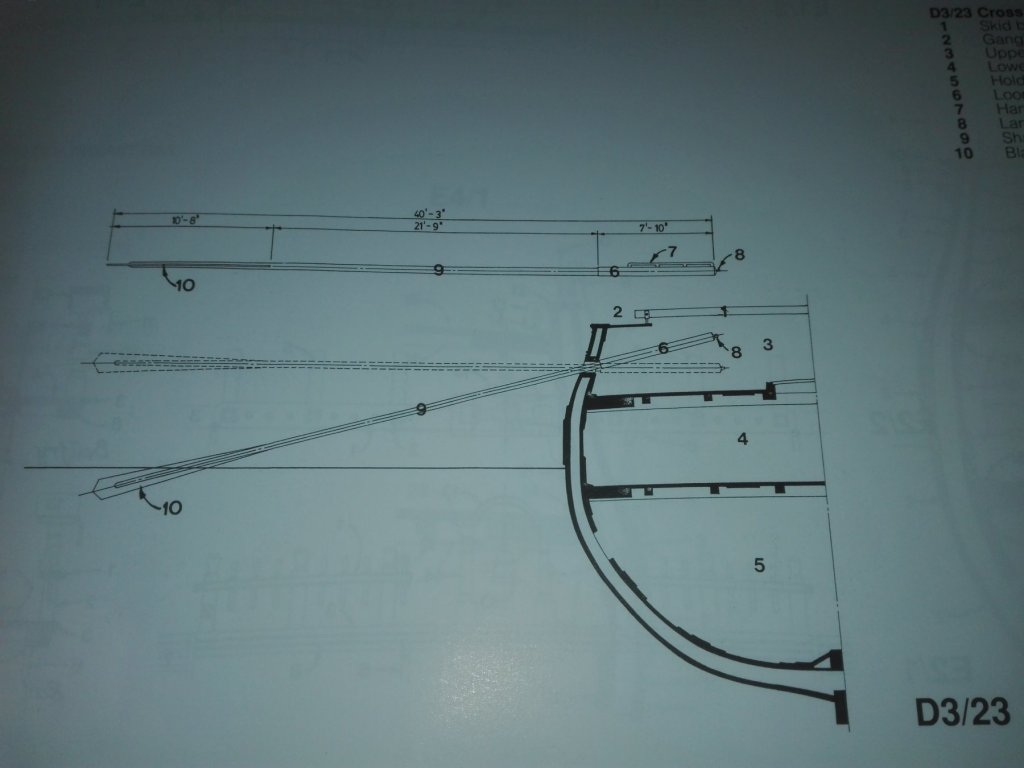

-
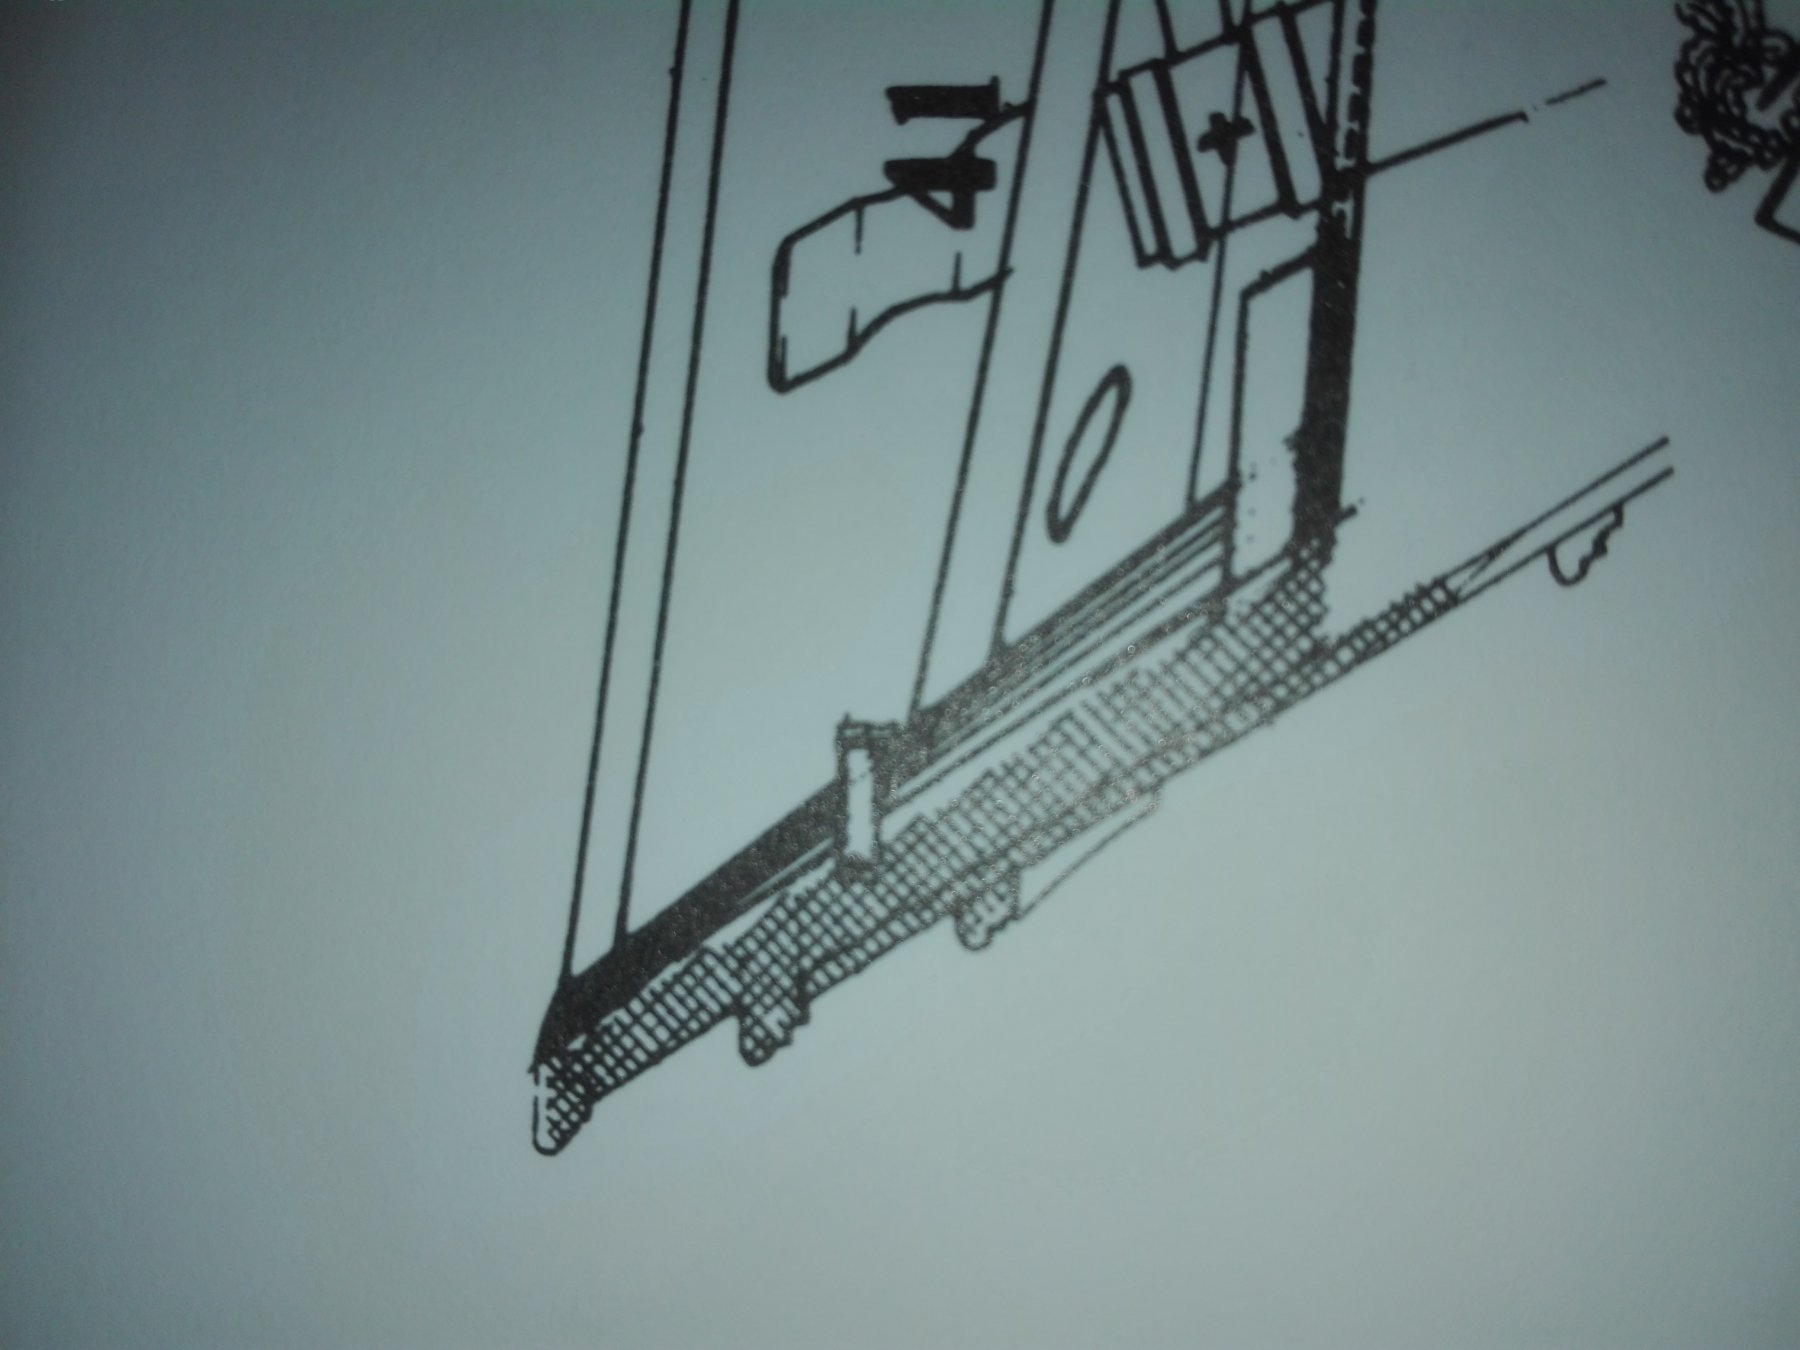
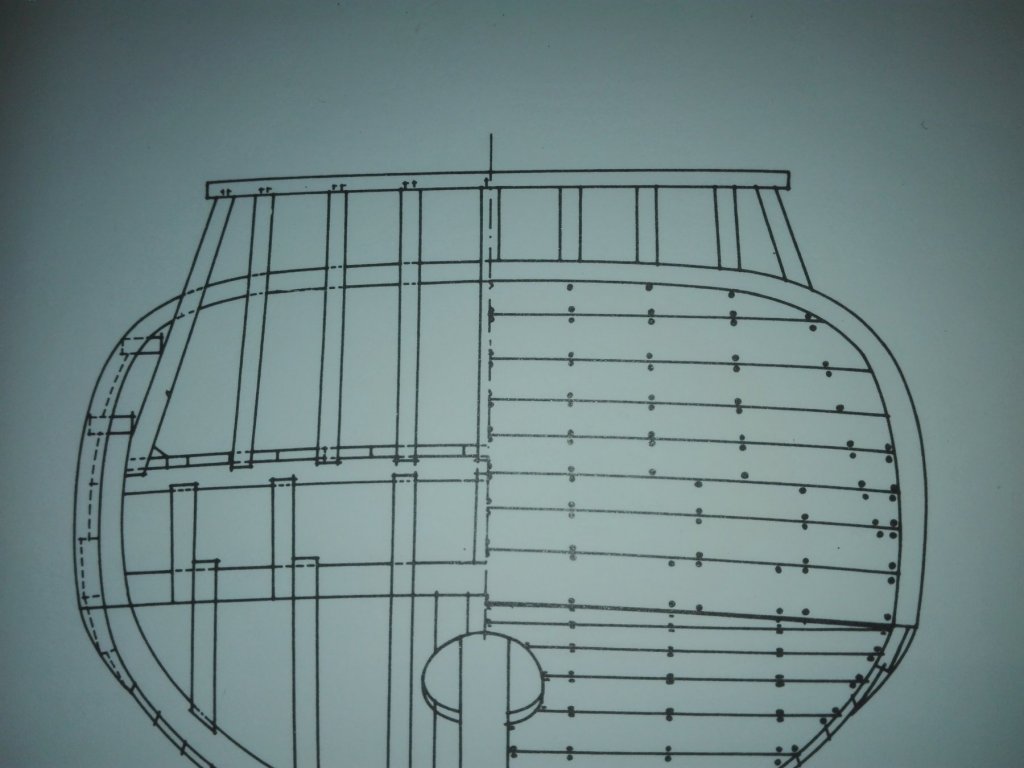
An other picturer from the plan may show better what I think about. Tis is a horicontal cut through Pandora in the ports high of the gundeck. I shows clearly that I'll have a plenty more of definited contactpoints for the rest of the inner hill planking. So it would be better than the hand full of points I would have using the inner side of he bulkheads “horns“. So how can I, get this points? I can try to build the area surrounding the f'c'stl a.) as “partly PoF“ by copying the PoF plan and figure out what frames are to be choosen and where they were to positionate; b.) I can take the thickness of the formers as the measurement of the distance of a parallel line to the outside hull, cutting this bow from plywood adding it with a second layer swiftet inboards, adding a slimmer layer swifting inboards repeating his untill the f'sc'stl deck is reached. Copying every layer for the other side makes life easier? Then glueing, sanding it and fitting it on the gundeck after adding thr inner planking easiyly before fixing the hole construction onto the gundeck. What does the specialist in here do say?
-
Hi Alan, I think you gave an importand advice to me. Well I'll have to work very precise in the inner part, so I think I can use the PoF formers to build the inner hullside and on this I have to add the inner planking. Systematical planning is the keyfeature here so I tried to find some help and I got the AotS book about the HMS Pandora (24 guns vs. 26 on HMS Triton). So I can get some details. I tried too assign the Triton bulkheads to the Pandora cutting profiles. And I compared the details.


-
Thanks Alan! How did you form your inside of the gundeck in the curved area near stem and stern?