

.jpg.af606bfc5a6a97d5ce8b0c6c6cde384b.jpg)
Mike Shea
-
Posts
49 -
Joined
-
Last visited
Content Type
Profiles
Forums
Gallery
Events
Posts posted by Mike Shea
-
-
Not sure if it will work but fly tying wax might be worth a try. I use it all the time to apply dubbing for my trout flies. You can find the stuff at nearly any sporting good store that sells fly tying materials. Usually just a few bucks and comes in little thumb-screw plastic container.
- Canute, thibaultron and mtaylor
-
 3
3
-
On 3/25/2024 at 2:59 PM, theoracle09 said:
Craig hit the nail on the head here. To be honest, I didn't consider changing the kennels so I never researched or thought about it. Here's another pic to toss in, though.

One thing which has been extensively discussed in my build log would be the deck extension when they refit in Buenos Aires. Which is also when they added the kennels. There are several pics, including a video on YouTube, which shows the kennels not just on the mizzen deck, but on the quarterdeck house (or bridge deck) as well.
I recall reading that the expedition had originally obtained somewhere in the order of a 100 dogs (hence the extra kennels), and in his book, Lansing documents that quite a few of the dogs succumbed to various ailments leaving 65 (?). With that being said it seems to make sense that the extra kennels would have been dismantled through their attrition to make room for other gear and supplies. Which leaves me in the dilemma of what stage of the expedition I want to model. Like you, I really like the two gangways that lead toward the main deck, however, I also want to stay as historically accurate as possible which might include the deck extension and foregoing the gangways altogether. The issues with going that route is what did it look like underneath? Was it fully enclosed or was it just simply a open deck overhang (exuse my lack of better terminology)? One interesting photograph of the recently discovered wreck seems to show the entire deck extension missing as if it was never there. It could be possible that it was either dismantled for lumber suppplies when she was trapped in the ice pack? Or, perhaps it was ripped away as she sank to her final resting place. I have to say that even though these differences can it present a headache to us modelers, it's still fun to play detective and eventually make our modeling decisions based on what we find through research. Plus, I am getting quite the history lesson!
Mike
- mtaylor and Keith Black
-
2
-
1 hour ago, iMustBeCrazy said:
Mike, I've always seen the dog kennels as recycled packing crates, pretty rough and ready. Built in sections of 3 and 4 dogs, sometimes the gap between two sections is roofed over for an extra dog. Probably 1/2 inch planks roughly sawn to length, butt jointed (I think that shingled look is just warped planks). Those forward seem rougher than the rest, possibly they used the best material aft?
The 'Bovril' shot probably the best guide to their construction.
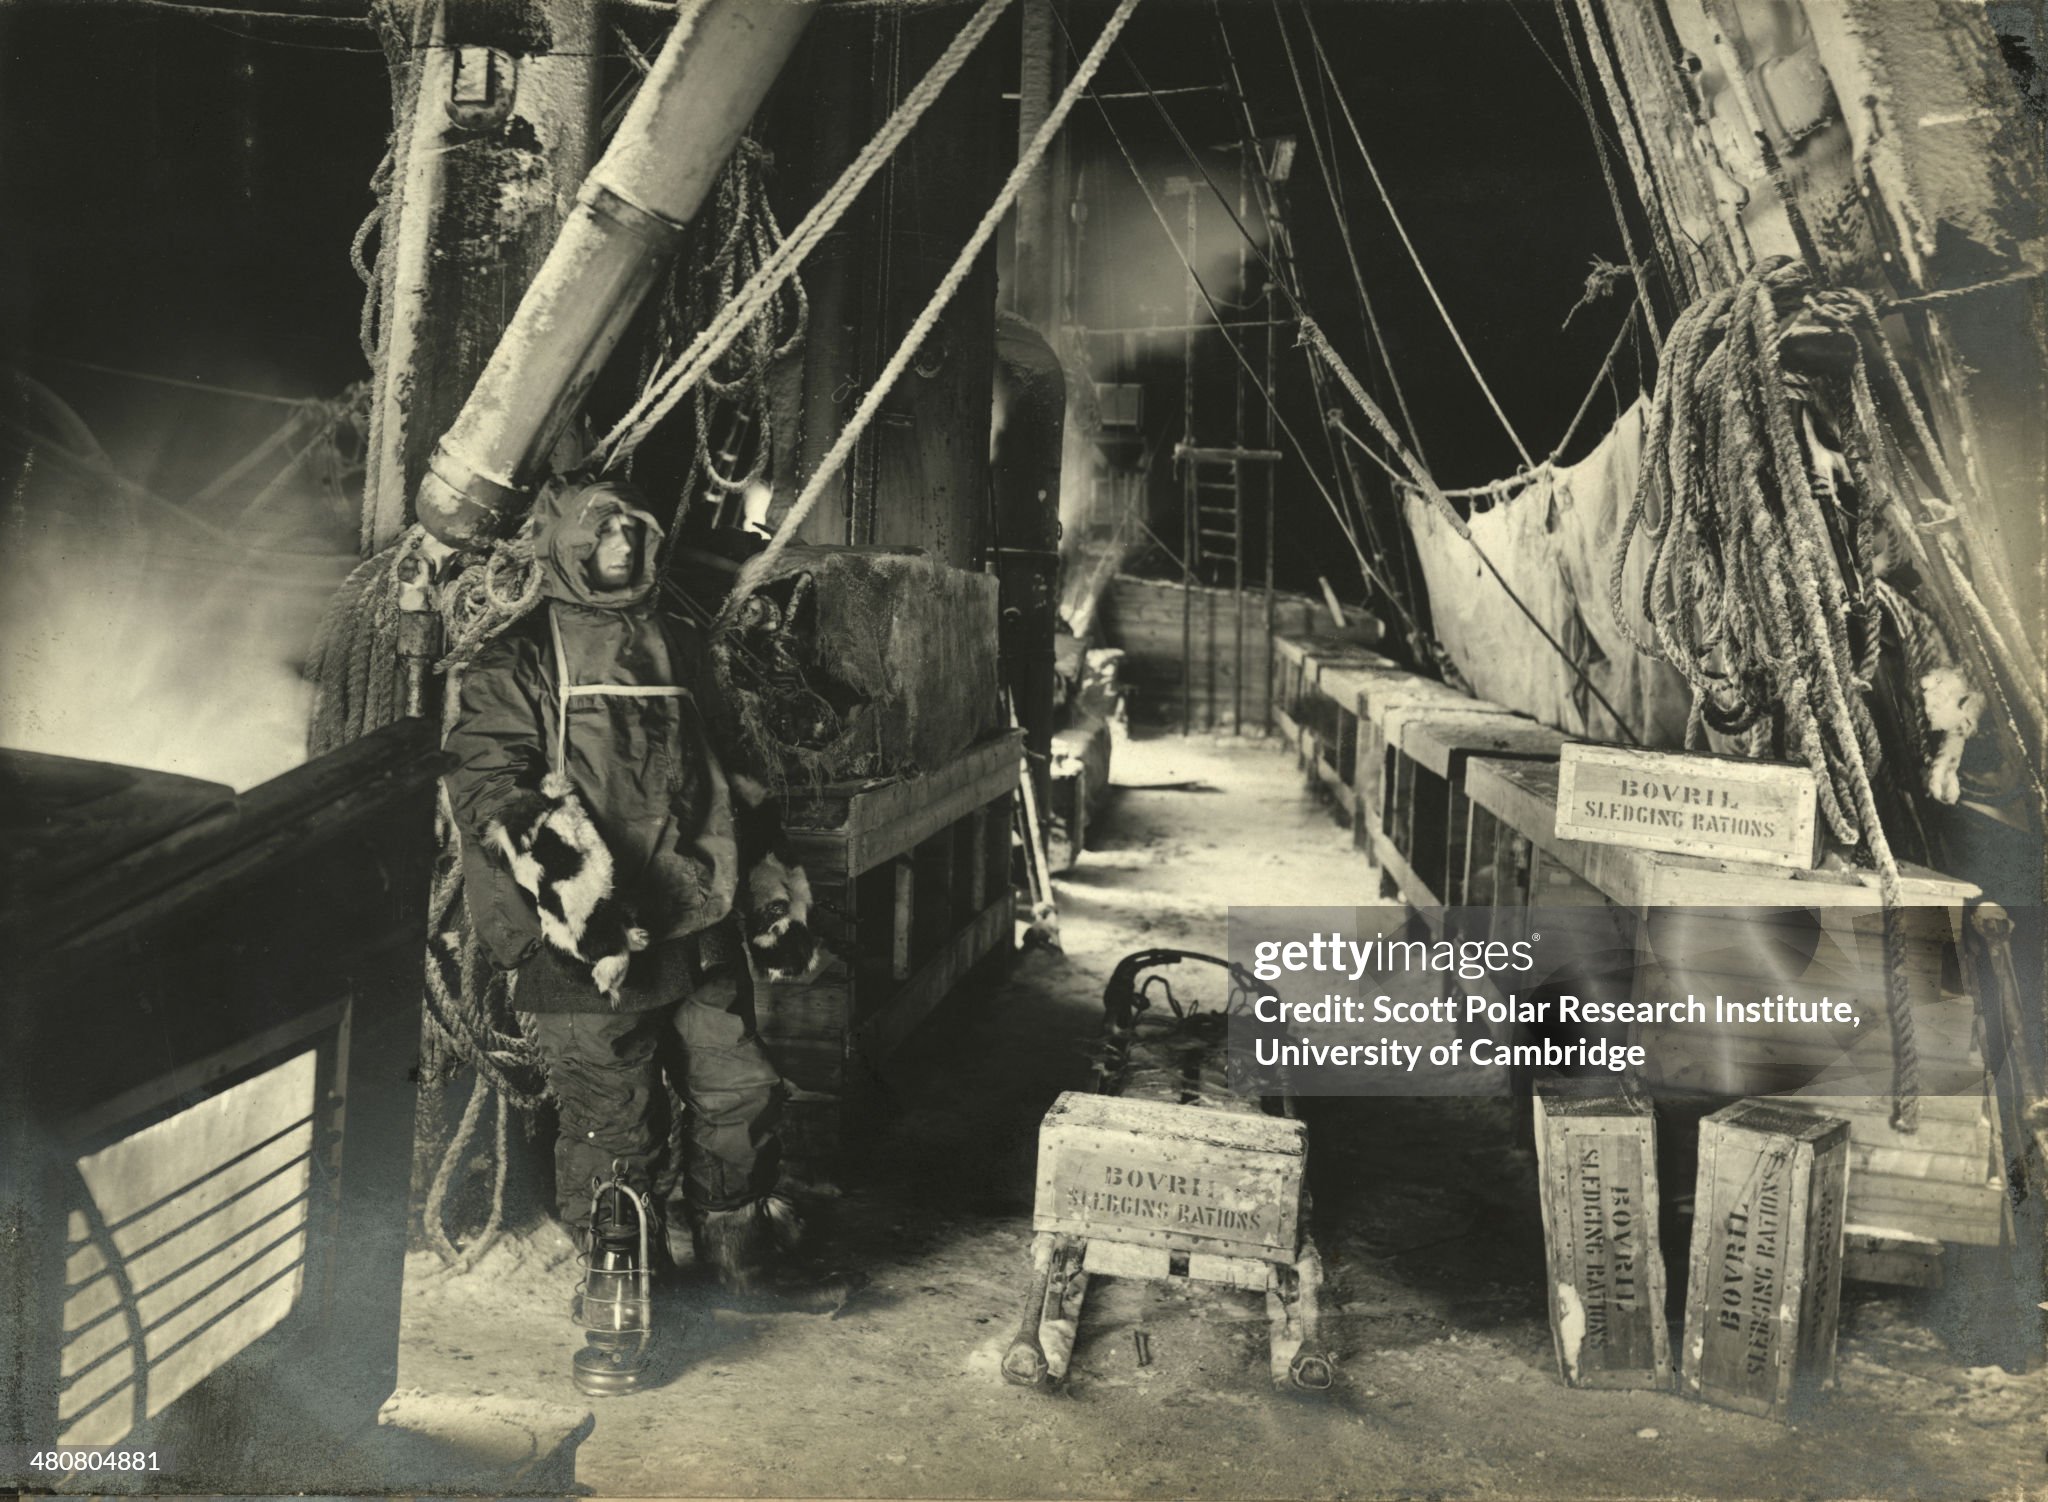

Fantastic input, Craig. Upon closer inspection I do believe you're correct about the roofs. On the bottom photo, where a crew member appears to be stepping up from below and just above the dog where the rope is strewn atop the kennel that definitely is 1/2" planking as you state. It appears to be overlayed giving it that "shingle-like" appearance. Good catch on the fresh lumber aft - something to consider it I go the scratch built option. Btw, the difference in height in those two ladders in the same photo will be modeled as well. Thanks again for your comments and for posting those photographs! Big help and much appreciated.
Mike
- iMustBeCrazy, mtaylor and Keith Black
-
3
-
Oh that's awesome! I'm heading over there now. Thank you.
Mike
- Keith Black and mtaylor
-
2
-
Hello all,
As I get ready to start my build of the Endurance I have been pouring over all the photographs from my personal library and the archival info that's available online. With that being said, and what OcCre supplies in the kit for the dog kennel builds, I'm thinking on some kitbashing - either building on the supplied OcCre kennels that come with the kit, or - foregoing the supplied kennels altogether and building them entirely from scratch. I really want to capture that beatup weathered as well as that scrap lumber look that ships carpenter, Harry McNish, seemed to use in their construction based on the photographs I've seen. The OcCre kennel bits look great and will certainly pass if used, however, they seem a bit out of scale on thickness and if I add on strip wood for that added scrap look they will be way out of scale. Regardless of the route I take my question is what material was used on the roof? One photo taken at the stern shows what appears to be overlaped shingle-like material running lengthwise (stern to bow) on the kennel roofs while another photo seems to suggest just wood; it's hard to make out as the kennel tops are smothred with tarps, rope, and gear (another great modeling idea!). The tar paper shingle-like roof seems logical to keep these dogs as dry as possible and while these dogs weren't by any means pampered their survival was probably a key focus for the expeditions survival. Any suggestions will be graciously appreciated. Thanks!
Mike
- Keith Black, mtaylor and BobG
-
3
-
Good morning all. Just a quick question: Since my knowledge of computer related stuff is pretty much nil does anyone have a good recommendation for a decent laptop computer? Sometime soon I want to get a decent laptop that isn't going to break the bank but yet can also be used in conjunction with photo uploads with a SLR digital camera and maybe even 3d printing or modeling software in the future. I'm currently using a borrowed game console for internet access as I don't have the room in my tiny place for a full blown computer setup. I also really don't want to go the smart phone route either.
-
For my wood
On 1/12/2024 at 6:38 AM, CPDDET said:While I have used CA in the past for hull planking, I currently use Titebond Thick and Quick. Have been very happy with this product with its quicker dry time. And it dries clear.
I second that. While I have yet to build a model ship this is what I use for my wood airplane builds. I use CA glue mostly for PE and smaller parts. When I do use CA I always make sure that I use it in a well ventilated area as the fumes are terrible for the eyes and lungs - especially with long term use. (Edit:) A tiny desk fan is what I use to keep CA fumes from wafting up toward my face.
- CPDDET, Scottish Guy, Canute and 2 others
-
5
-
-
Holee smokes! You and Josh's modeling skills are incredible. Love the way you lashed down the anchors. Little details like that really make that model pop. Can't wait to begin my model of this magnificent ship. I'm eager to start but I'm busy taking notes from you and Josh's logs to compile in a builders notebook.
-
On 2/23/2024 at 2:48 PM, ricky86 said:
Thank you all for taking the time to respond. I am aware, CA does have its drawbacks.
The convenience and speed vs clouding, stink and the ever present gluing of the fingers.
Thanks Guys.
One method I do for avoiding messes and the occasional finger (or arm - ha!) gluing while using CA cement is to use some 1/4" poster board cut into 2 by 2 inch squares with some double sided tape on the bottom. Just stick the little board down out of the way on your work bench and then place the desired amount of CA cement on the board as a palette. Once all the space on the board has been used up just toss it and repeat the process. Also, a fly tying bodkin as a CA applicator works great! Just swirl the tip of the bodkn into the drop of glue to pickup the desired amount. Burn off any globs of glue that start to accumulate with a cigarette lighter. The poster board method keeps things clean and organized.
- mtaylor, Canute and Keith Black
-
3
-
Looking great! Really like the weathering on the decks.
-
All you need now is about 65 1:70 scale dogs.
")
-
6 hours ago, allanyed said:
You are welcome Mike. Your comments on research are spot on! There are great articles here at MSW in the Articles Database that will be helpful. In addition to the great planking article by David Antscherl in the database, you may find the four part video series by Chuck Passaro on planking using strip materials (if that is what is in your kit) beneficial. https://www.youtube.com/watch?v=KCWooJ1o3cM
Allan
Hello, Allan. That vid link you sent on planking was a great help. Tried that method for practice for a few hours and I'm stunned how smooth that process was. The planking boogyman has been disposed of Ha!
- Knocklouder, allanyed, mtaylor and 1 other
-
4
-
On 8/19/2023 at 4:19 PM, iMustBeCrazy said:
A few more photos:
The interior of the 'ritz', obviously gutted during the fit-out and I think modified during the voyage. Note the door in the aft bulkhead (I'm happy to see it as it just had to be there), no ladder and no visible skylight (
but it's shown in exterior shotsactually I'm not sure about that now, I think we only see a canvas cover on the voyage which could be covering stores ??? Not sure.). Strangely it looks too wide but that must be an illusion.https://www.gettyimages.com.au/search/2/image?family=editorial&phrase=endurance ritz
A view forward along the bridge deck (is/has anybody added the skiff to their model?)
:

The galley door, port wing bridge and companionway:

I always get a chuckle everytime I read how stowaway Perce Blackborow was discovered by the crew and Shackleton's reaction. He turned out to be a good hand.
-
I'm looking forward to seeing it completed. Looks highly detailed.
- Canute, Johngr, Old Collingwood and 1 other
-
4
-
What a wonderful buid log. I am just starting on this kit and this thread wil be invaluable! I have always had a profound interest on the Imperial Trans-Antarctic Expedition. What an incredible story. While Shackleton was a legend in leadership much of their survival is also owed to Worsley's skills in navigation and Harry McNish's carpentry.
-
2 minutes ago, allanyed said:
You are welcome Mike. Your comments on research are spot on! There are great articles here at MSW in the Articles Database that will be helpful. In addition to the great planking article by David Antscherl in the database, you may find the four part video series by Chuck Passaro on planking using strip materials (if that is what is in your kit) beneficial. https://www.youtube.com/watch?v=KCWooJ1o3cM
Allan
That's great, Allan! Going there now. Thank you.
-
22 hours ago, allanyed said:
While you have an interesting kit, as this is your first build, you might want to consider setting it aside for now and get at least one or two high quality beginner kits such as the from the three vessel series at Model Shipways designed by master shipwright David Antscherl. They will teach you techniques and more that will last a lifetime.
Allan
Thanks for your friendly advice, Allan. I appreciate your recomendations but honestly I have to say that I feel pretty confident about tackling this model. While it is my first wood ship model I have built quite a few model airplanes over the years so I'm pretty familiar with working with and shaping wood, spars, struts, etc. I know that there are many building techniques not applicable to wood airplane models as compared with model ship building such as rigging, planking, etc., but I'll definitely do my research/practice before tackling something beyond my skill level. Ha!, if I get really stumped on something I'll for sure be asking you guys lots of questions for advice and techniques. I've also acquired quite a bit of reference material on the Endurance/ imperial Trans Antarctic Expedition (which I consider part of the enjoyment of the build project) so I won't be going in completely blind - Ha! I'm the knd of modeler who can put a project on hold and just spend days pouring over books and savoring just the plans alone. The OcCre plans for this particular build look pretty clear and user friendly for the beginner although the rigging techniques look a bit hokey as they show tying off the rigging with simple knots rather than properly seizing and securing a line. My fly tying vice will come in very handy for properly seizing rope, blocks, etc. Thanks again, Allan!
-
8 minutes ago, Landlubber Mike said:
I'm a big fan of the Amati Keel Klamper and the Hobbyzone Professional building slip. You can probably build something similar to the slip (I did using MDF board and angle brackets) as well.
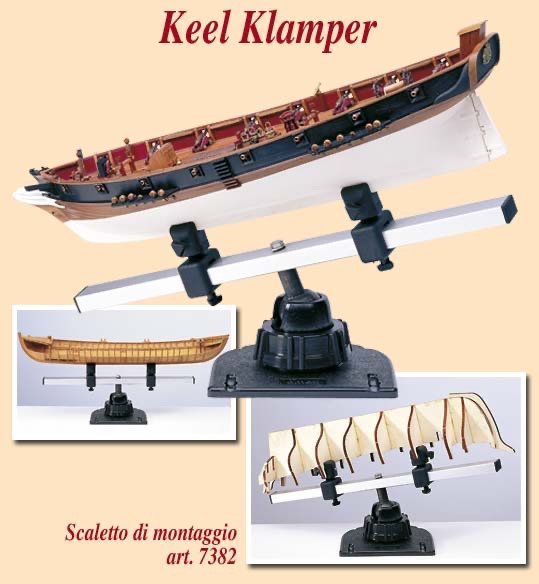
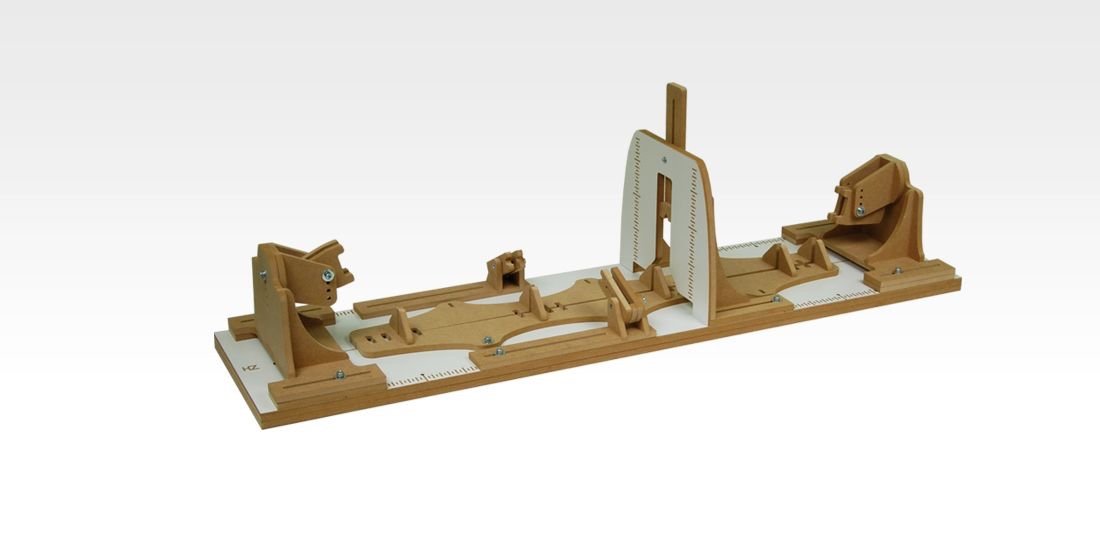
Ooo! I like the Amati clamp. Looks very sturdy and I especially like that it pivots allowing different construction positions. Thanks for your help!
- Landlubber Mike, Canute, mtaylor and 1 other
-
4
-
Good morning. Can you old salts and most awesome model builders steer me to some good keel holder/clamp tools. I'm getting ready to tackle OcCre's Edurance (my first wooden ship) and I definitely want the proper tools for the build. I see that Model Expo offers their "Fair-a-frame" tool and it looks lke a handy tool for bulkhead installation but not sure if it will double as a keel holder for general construction. Any recomendations will be greatly appreciated. Btw, as a side note, pretty cool that they discovered Endurance's resting place, huh? A great testament to Frank Worsley's superb navigation skills as they found it based on his navigation notes.
"Hey! I think somebody just shot a torpedo at us!"
-
Greetings Everyone,
Being very much into genealogy, I was going through the hundreds of personal letters from the children of my 2nd great-grandparents and I decided to take a closer look at an old letter that was written on ships stationary. I always knew about this letter, however, with the other endless genealogy research projects, I just never got around to take a closer inspection of this particular letter. The letter is addressed to my great aunt, May Ivory, from her future sister-in-law, Constance Randall, and was dated June 14, 1910, with an envelope postmarked "REC'D. June 24, 1910 Coalinga, CA." Seeing the flag emblem on both the letter and envelope it stood out as something I had seen before but I just couldn't remember the connection. . . ."Where had I seen this before?" Ha! Well, after doing a quick search of the R.M.S. Baltic online I couldn't believe my eyes! The emblem, of course, is the White Star Line and the Baltic was one of the ships that gave "ice warnings" to the R.M.S. Titanic as she sailed into history. Although the letter was written nearly 2 years before the terrible events of April 15, 1912, I was absolutely stunned at having this letter and a little piece of the Titanic history. It is also worth mentioning that this stationary was most likely the same as used on the Titanic as well. My hands are still shaking! Incredible!!
.thumb.JPG.760e9090225563262bafeff843627351.JPG)
.thumb.JPG.5ac53229f5a142dd10e7be5fe46ed198.JPG)
.thumb.JPG.ece3c680855c37359c5c5ecf95b3deac.JPG)
-
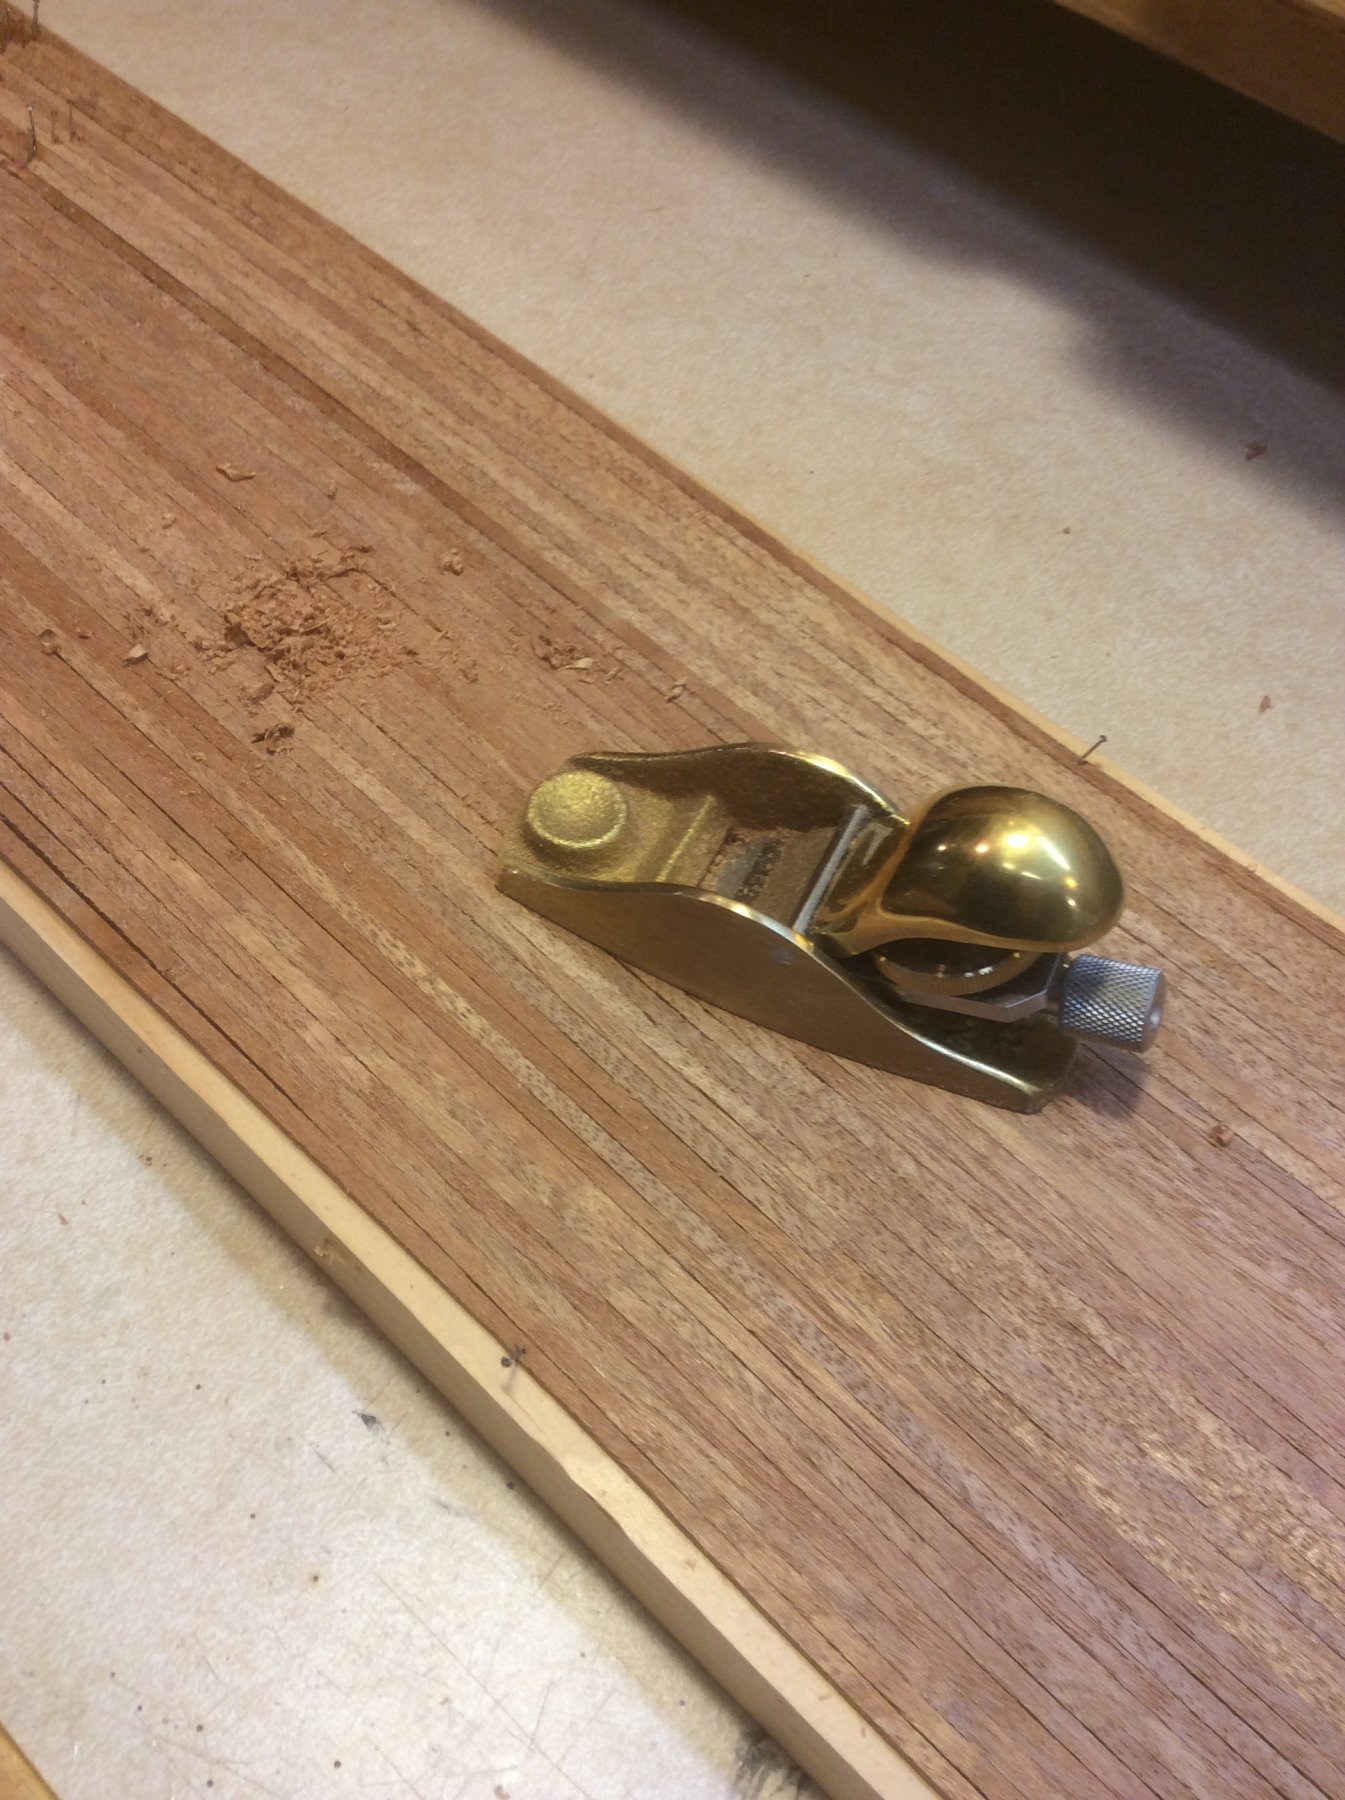
19 hours ago, Moab said:
I too have this plane and as with all Lie products it’s great. I do have one problem and would appreciate any feedback. Because the mouth is so small and fixed I have problems with it filling up and clogging almost immediately. I have set the blade to make an extremely small cut and it still clogs. All help is appreciated.....Moab/Allan
Allan, it does seem to have a tendency to clog with softer woods such as basswood, however, with each pass it should push out the shavings. It took me a couple adjustments to find a happy medium where it works the best depending on the softness/hardness of the wood. Even though it's designed for smaller delicate work I have noticed that being a bit more 'aggressive' with faster passes works good too. I primarily use this plane on edge work such as beginning my taper on masts and rabbets where the majority of the wood being planed is set more in the center of the blade rather than using the entire blade for a wider cuts. If that's the case, perhaps a slightly larger plane is in order. Hope that helps.
Mike
-
Can't wait for your next update! Great work indeed. I have this model as well and just finished the keel work and ready to 'dry fit' the bulkheads. Your build log and everyone's advice has been a great help. Btw, you mentioned that you're coming from railroading. Modeling or work? I work for a Class 1 railroad as a loco engineer.
-
2 hours ago, Srodbro said:
That little plane is great. I’ve been cutting my own planks for a scratch-build I’m working on and it’s great for taking saw blade marks off the planks.

Very nice! Great little tool indeed.
Mike
- thibaultron, Canute and mtaylor
-
3


.JPG.67e0203974060147056da6e7d1f09c10.JPG)
.JPG.06b4cd8bc5639bc27c7cba9b83fa5188.JPG)
.JPG.22e0034c02783e7b7007ce1f98c4ee55.JPG)
Endurance by Tomculb - OcCre - 1:70
in - Kit build logs for subjects built from 1901 - Present Day
Posted
Looking fantastic. The jig for those ladders worked perfect. Anchor deck looks great,too.