MORE HANDBOOKS ARE ON THEIR WAY! We will let you know when they get here.
×


hamilton
-
Posts
1,930 -
Joined
-
Last visited
Content Type
Profiles
Forums
Gallery
Events
Everything posted by hamilton
-
 Thanks Mark - it's the figurehead!! I'm going to stick a lump of metal on there sometime over the weekend and call it a day! hamilton
 -
Hi Meredith: Really impressive work! I'm about to start work on this kit, and had thought of building it out of the box (more out of exhaustion after a major kit bash of the Corel HMS Greyhound), but after seeing this I might have to push myself a little harder.... You answered here a question I was asking myself today as I was doing some prep work - would the hull not have been coppered below the waterline? Your coppering job is really excellent. Anyway, I'll be following with great interest and possibly asking you some questions as I start going with this one. Bye for now hamilton
-
Thank you Russ hamilton
-
Thank you Andy, BE, Bob, Ferit, Mike, Richard and Crackers! All comments much appreciated! It seemed to take forever at the end! But ultimately I'm very happy with the results, though as usual it does not completely match the picture in my head.... Mike - the Hannah will have to wait until next summer, I think - a quick little summer project. In the meantime, I'm moving on the OcCre Dos Amigos/Fair Rosamund and then Mamoli's Yacht America - both are gifts - the first for a friend's 8-year old who's been at me for a while for one of these and the second for an old friend of my wife's who's also been on my case.....As long as these people keep asking me to build model ships for them, I can always rationalise one more purchase to the Admiral..... I almost bought (but chickened out) the LSS Hannah that Floyd Kershner was advertising on this site last week....I'm now sincerely regretting that I didn't buy it.....these kits aren't being produced anymore it seems, and are apparently of very high quality.... Anyway, thanks again to all - expect a new build log for the Fair Rosamund to appear in the next week or so....hope to see you all there hamilton
-
Well she's done (mostly). I'll leave it to the keen-eyed among you to spot the one still-missing element, which I plan to add tomorrow after a bit of touching up.....just think of it as a little easter egg for you all to discover. General impressions of the kit - pretty bloody poor in many ways, though in others perfectly fine. I would NEVER recommend this kit as a first build or even a second or third....it was my twelfth and a lot of sweat and frustration (though not as much blood as you'd think) went into the 14 months spent building it. The plans and instructions were probably the worst I've seen. However, with good resource material (Goodwin and Lees) and the fine advice and encouragement of folks on this forum, it can be done even by the hopelessly butter-fingered! Despite the shortcomings of the kit, the challenge it provided was what made it compelling - not that I recommend to manufacturers that they make their kits worse just to provide some interest! But overall, though I wouldn't build it again, I would recommend it to anyone looking for a nice little kit to heavily bash. Of the three builds of this kit I've seen here - Harlequin's, Collingwood's and my own - I'm surprised to see how many unique interpretations of the kit there can be. All of our builds are very different - and though I haven't seen an update from Collingwood lately, I sincerely hope he'll start posting again because his bash of the kit was shaping up to be really great. Anyway, here are a couple of photos (others are in the completed build gallery) - thanks for all your help along the way, people - I hope you'll tune into the next one, which may wait a bit to start, depending on a variety of different things. In the meantime, I will finally get back to sitting around watching all of you work a bit! hamilton

- 594 replies
-
- 12
-

-
Hi Mike: I've just re-loaded the photos to the log - page 12. Check it out hamilton
-
Thanks Mike: I'll try to re-post this evening - the transom was a bit experimental - the approach I took might work for you on the structural level, though the aesthetic might either be a bit off for your Unicorn specifically or for its period - what year was the Unicorn? BE pointed out earlier that the diamond-shaped windows that I used for my transom are not accurate for the period - I was using the (later) Belonna transom as a guide here, though she was half a century later on.... I will see if I can't re-post the photos later this evening (Pacific Standard Time). Thanks again for dropping by. hamilton
-
Well my optimism has been defeated again....I've still not completed Blandford, though I'm so tantalisingly close that it's becoming painful. As of this evening, I've finished my courses for the semester, which means my schedule will be much more flexible - long hours of work still, but more reasonably paced than during the regular academic year.... However, before the modelling can continue, we're off to Maui (while we get our kitchen redone....I tried sneaking in some plans for a modelling nook to our contractors but the admiral wouldn't have it....) for some brief vacation time. When I get back my first priority (after washing my hair) is finishing this damnable model!! Hope you're all well....final stages to come and then it's on to OcCre's Dos Amigos/Fair Rosamund....a different kind of build....looking forward to something more or less straightforward... hamilton
-
Again with the astounding metal work - and fine all around craftsmanship - very well done Ian! hamilton
-
Hi Tim: I've built the Corel Sloop - it is plank-on-bulkhead. It's relatively large scale allows for a lot of detailing, though since it was my first pob build I stuck to building it out of the box. The wood that came with the kit was very nice, the plans were nice and clear and as long as you don't mind using plans instead of instructions you'll have fun making this one. Last I checked it was on sale through Model Expo for a really good price 60-something if memory serves.... Anyway, I think you'll enjoy building it. Here's a shot of mine - the only one I have apparently...... hamilton
-
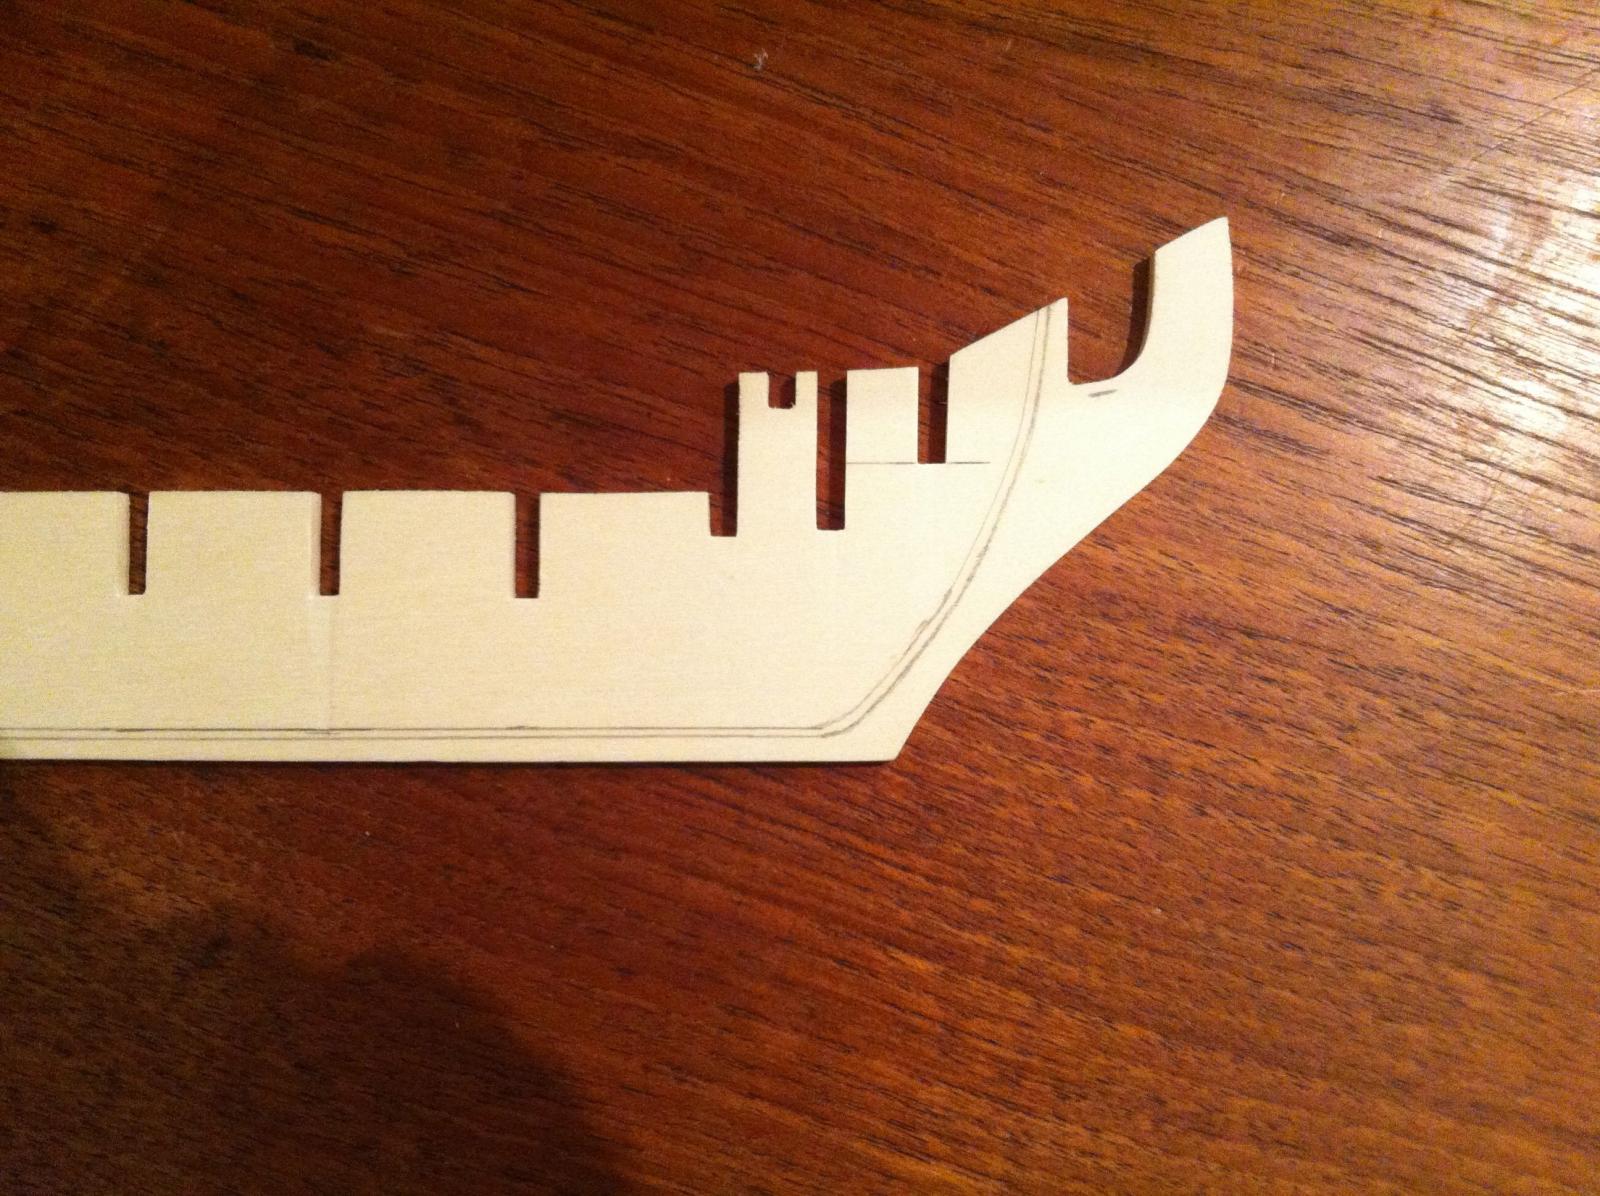
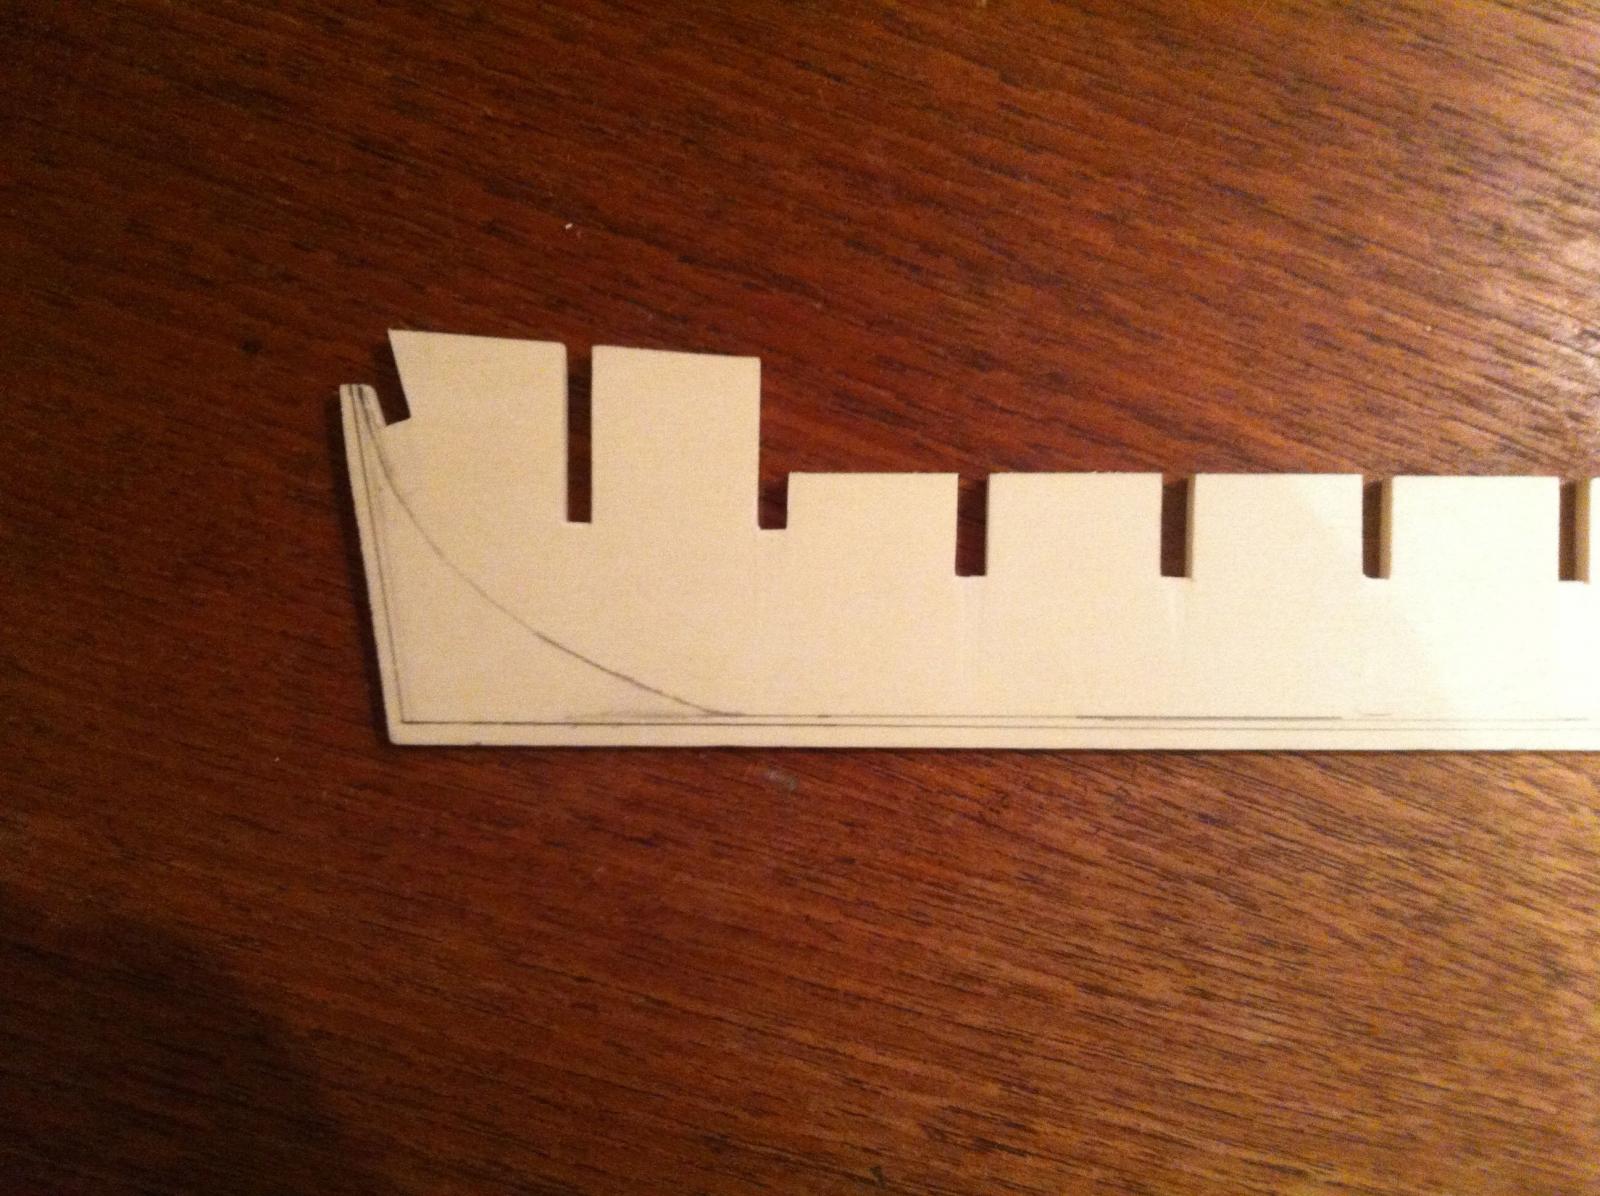
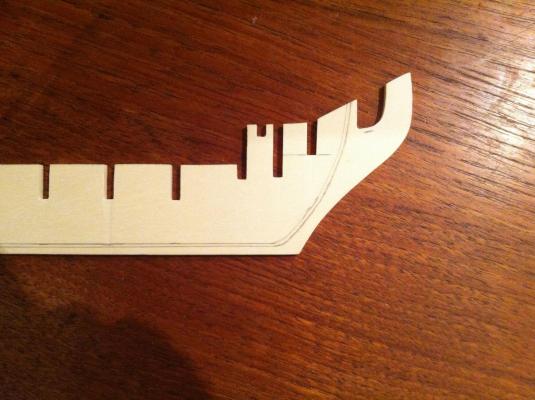
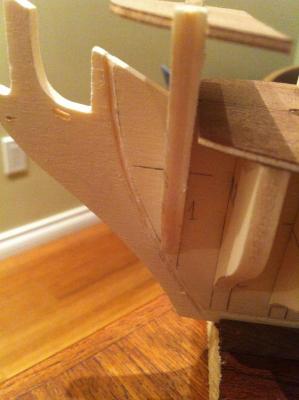
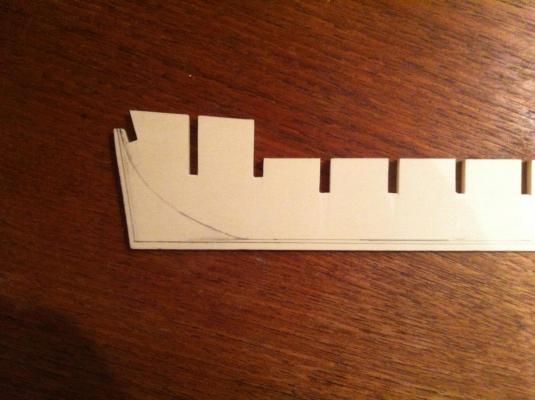
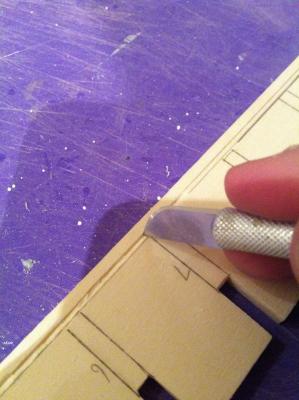
OK so here are some photos for you David - these show marking the bearding line and carving the rabbet on my build of the Corel Greyhound. Here are the bearding & rabbet lines drawn at the bow Here are the same at the stern The bearding line is normally marked on the hull profile plan (perhaps as a dotted line on the cross section drawing) - it runs along the bottom edge of the bulkhead frames where they meet the keel. The rabbet line runs below it. After scoring the lower rabbet line with a #11 blade, I then shave off wood starting from the bearding line until I hit the rabbet line and then scrape or carve the wood out to form the joint. This is the finished look Hope this helps hamilton
-
Hi David: Depending o the scale (and your commitment to accuracy), you could take a simplified approach to carving the rabbet. I usually draw the bearding line (which marks the inside edge of the planking along the keel) and then the rabbet line below it. I then score the rabbet line lightly with a #11 x-acto blade. I then use a #10 x-acto blade (the scalpel blade) to shave wood off the keel from the bearding line to the rabbet line. The #10 blade is also useful for scraping along the rabbet joint as you carve. I was trying to post some photos to go along with this, but for some reason my uploads keep failing.....I'll try again in a bit hamilton
-
Planking looks amazing! hamilton
-
Hi Mike - that is one big hull!! What's the overall length with the bowsprit? Anyway - she looks great hamilton
-
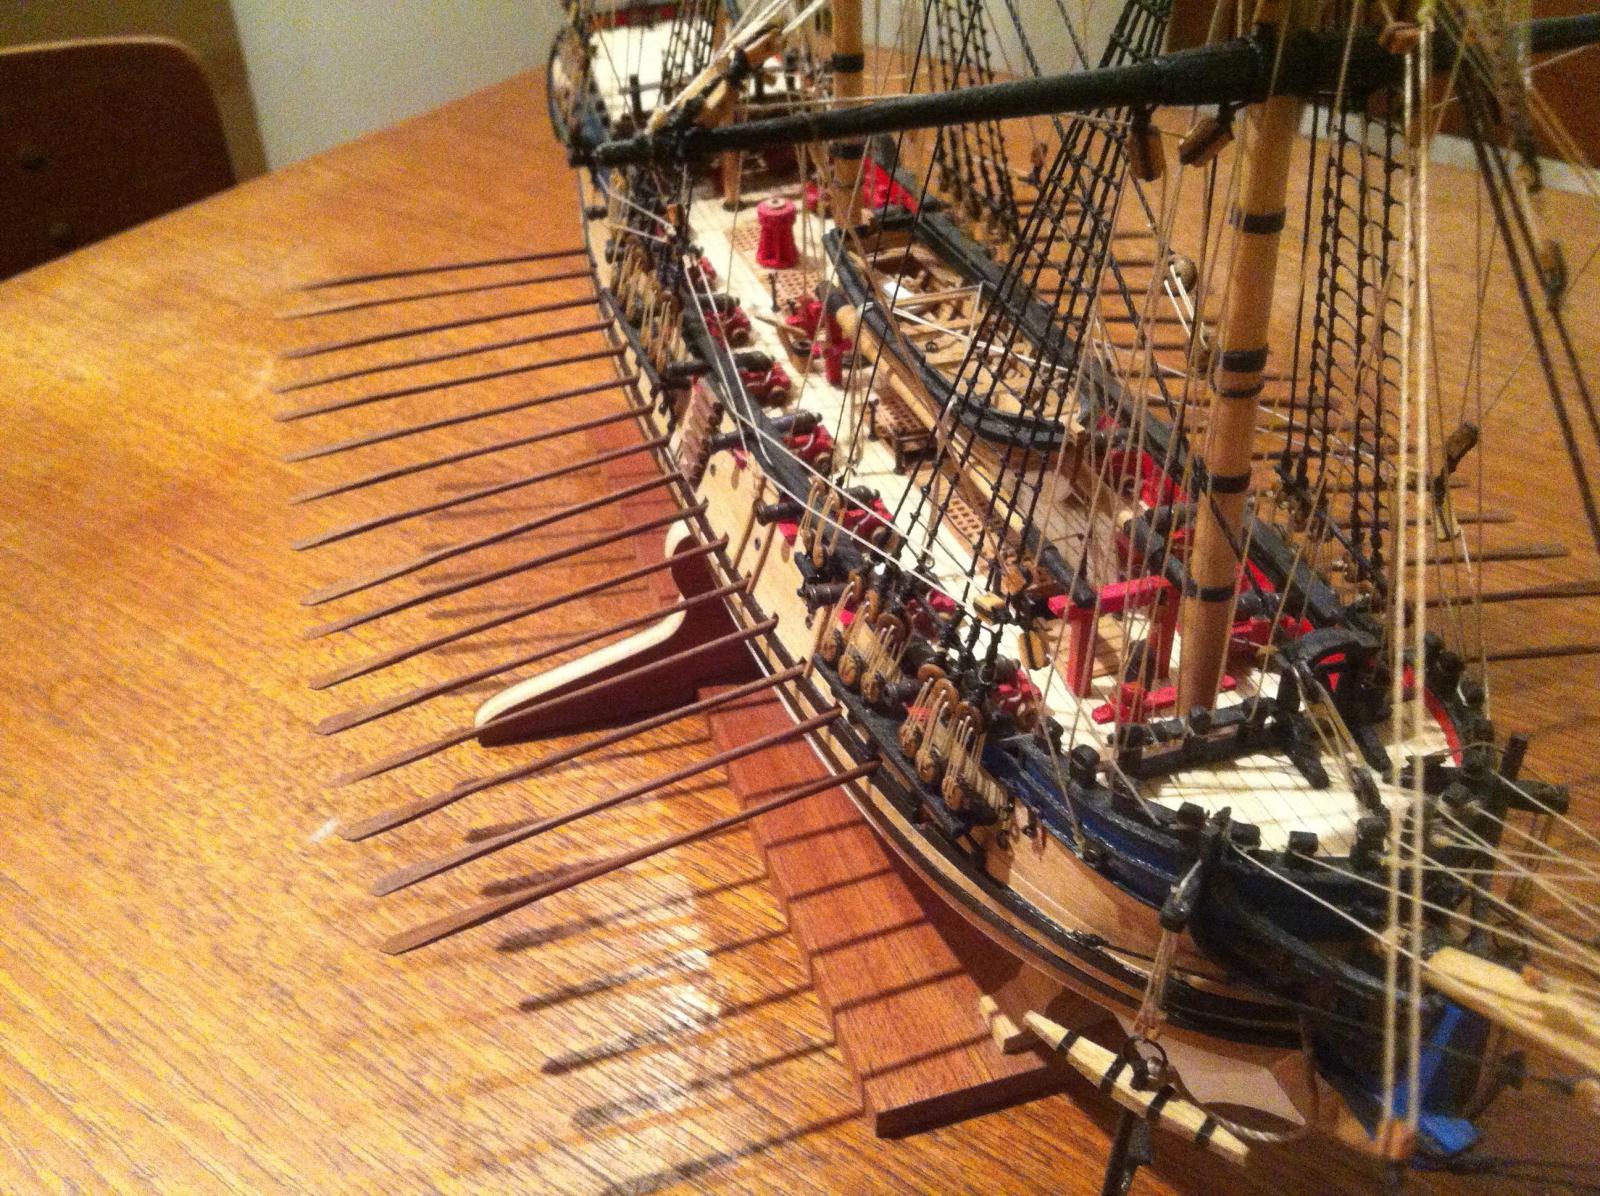
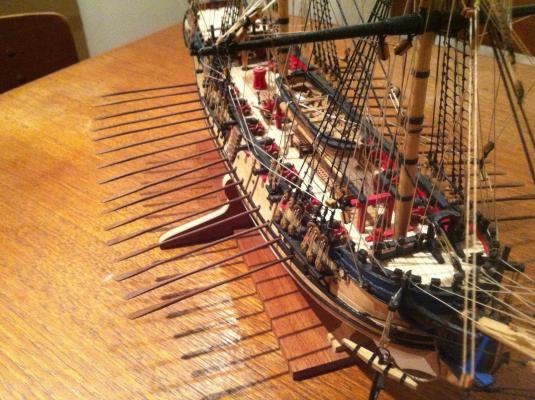
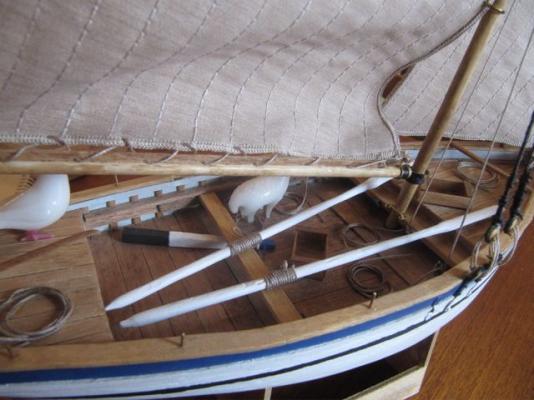
Well everyone, I'm on the home stretch. The rigging is complete and I installed the anchors over the last couple of nights. Now it's just making sweeps for the next week or so until I have 36. I made a prototype which needs detailing and finishing, but I think I've worked out a good process for carving them to a standard out of single 90mm strips of 2mm x 4mm walnut. The wood is hard enough to tolerate the work at a small scale and the darker tone of the walnut provides a good contrast. I will follow an early suggestion and finished the ends of the blades in white. The photo Ian posted above shows red sweeps - I was tempted to go this route, but in the end I think I like the natural wood tone better..... Photos to come soon. Bye for now hamilton
-
As I recall I did one strake per night, port & starboard....Took about 3 weeks...have fun! hamilton
-
From my memory that is the case Al, but the plans also have a graph to facilitate spiling the planks to suit the idiosynchracies of the builder. When I planked this model, I used the plank patterns as a reference for the garboard and the upper band. They worked well. For bands B & C I used the patterns cut slightly more oversized and tried my own spiling taking measurements off the bulkhead edges. It was a good learning experience and the planking turned out ok...still had to use some filler, though not too much..... hamilton
-
Ahhh I remember this planking! Lots of cutting, lots of rubber cementing but a good education in spiling planks! Have fun with it! hamilton
-
Thanks Ken and Mark: I have ordered a kit from the UK before from a small retailer - the kit price was good, but I hate hate hate paying UPS brokerage fees and that's who they shipped with. I understand that Cornwall Model Boats uses UPS as well, which is why I have been hesitant to order anything through them. My experience with ME has always been good - had a bit of a wait on my last order, but since I have 4 kits on the shelf waiting to be built it didn't exactly try my patience. Anyway, thanks both! hamilton
-
Hi there: When I first started ship modelling "way back" in 2009, ME carried a much more extensive variety of European manufactured kits (Mantua, Victory, Amati, as I recall - perhaps others I forget). Does anyone know whether there are any plans to reintroduce these lines? ME is by far (for us N. Americans at least) the most convenient and affordable source of ship kits...it would be great to see a wider variety of manufacturers represented - specifically Amati and Caldercraft. Perhaps there are barriers to carrying these lines that I don't see or understand....does anyone know? Thanks hamilton
-
The half-hull construction design is due to the scale of the model (1:25) - the instructions explain that the scale thickness of the centre keel was too thick for the laser cutter (1/4) so they halved it at 1/8. I was very nervous about this construction method (made the alignment a very tricky business times 2!) but it actually came off ok. hamilton
-
Looking at your build log I'd say you're doing a great job with the OcCre kit despite the differences hamilton
-
Thanks Adam, but the link doesn't work......try here hamilton
-
Wow! I've been out of it for a while, but I feel like it was just a couple of weeks ago that you were bashing your way through the framework construction - now look at this!! Really great results and fine craftsmanship Bob! hamilton