hamilton
-
Posts
1,933 -
Joined
-
Last visited
Content Type
Profiles
Forums
Gallery
Events
Everything posted by hamilton
-
 So far so good - I'm interested to see how the stern modifications work out as the kit develops. I also like your approach to the bow fillers - they might need quite a bit of fairing down to produce a smooth run, but installing them this way seems like a good way of getting a nice round bow. hamilton
- 455 replies
-
- 2
-

-
- slightly modified
- greyhound
- (and 1 more)
-
Hi Collingwood: It's hard to say how much extra the kit comes with as I have replaced a lot of the components - I only used the supplied stripwood for the 1st planking and that was more than adequate. But because of the finish I wanted to achieve, I used stock that I purchased myself. Also I found that some items supplied by corel (the eyebolts and split rings) were horribly out of scale. I scratch built most of the metal kit supplied parts, including the quarterbadges, head rails, capstan, forecastle timberheads/knightheads; forecastle & quarterdeck rails, etc. These metal parts I found to be woefully inadequate and though my own scratch building skills are minimal I think I achieved better results myself than by using the supplied parts. I've also replaced all of the kit supplied rigging line, which is also out of scale - .25mm is the smallest line supplied and is way too wide for some of the smaller lines (like the topgallant ties or the staysail rigging (which is also a feature I added). The blocks and deadeyes are adequate for the purpose, but they only supplied one size (5mm), and these are out of scale for the topmast shrouds and the bobstays/bowsprit shrouds and backstays, which I used 3mm replacements for (not supplied in the kit). I also received (thanks to another forum member) some 2mm blocks that I've used for the staysail rigging and for adding crowsfeet on the lower mast stays. Anyway, if you're trying to achieve a different vessel out of the kit supplied parts, you might need to replace many of the items supplied in the kit - though I imaging that they are adequate for building the kit as represented on the box. hamilton
- 455 replies
-
- 1
-
-
- slightly modified
- greyhound
- (and 1 more)
-
Hi Collingwood: Nice to see you have a start here. You might have already noticed that the keel does not fit the drawing of the CNC part provided on the plans. In fact, I recommend you leave Corel's plans and instructions behind almost entirely. They are vague and even deceptive. Check the bulkheads carefully - I had to shore up bulkheads 9 and 10 considerably (adding a good 8mm worth of .5mm veneers to create a fair hull). There are areas where you need to modify the bulkhead edges a lot to get a fair run of planking. Not sure how much ship modelling experience you have, so maybe these words are expended unnecessarily - and apologies if they are! It's a frustrating build to begin with but is quite a bit of fun in the offing. Keep in mind the fudges or structural modifications that might be necessary in order to achieve certain effects - like the open bulwarks as represented on the HMS Blandford, which I achieved at some cost to overall integrity because I did not foresee the structural modifications that would have been necessary in order to get a "perfect" look.... Anyway, bonne chance and let me know if my experience with the kit can benefit you at all hamilton
- 455 replies
-
- 3
-
-
- slightly modified
- greyhound
- (and 1 more)
-
Hi Collingwod: Thanks for clarifying hamilton
-
Great work Ron - I agree with Sam about it being a testament to patience! hamilton
-
Some good advice and great tips - thanks! hamilton
-
Great technique, Jason - I tried this same way of making octagonal sections for the heels of my topmasts as well as the topmast hounds on Blandford, but the scale is so small and my skills so poor, that the result was nowhere near as nice as yours! Very well done! hamilton
- 800 replies
-
- 1
-
-
- snake
- caldercraft
- (and 1 more)
-
Thanks Joss. hamilton
-
Exciting times! The planking looks to be coming together nicely Richard - she'll be a beauty hamilton
-
Thanks Ron! Much appreciate - I've been admiring your work on the Oneida! Hi Collingwood - perhaps this could work, but I think you might encounter problems since the Corel keel does not really correspond to the plans you've posted above - it is simply too short. You might get away with it with a different quarter gallery arrangement than the one depicted in the images you've posted - Goodwin depicts one with a single window that could accommodate a tenth gunport given Corel's design. I'm curious about the second image - the one marked "Blandford, Lynx & Scarborough". It's clearly taken from Goodwin's Anatomy of the Ship HMS Blandford - one of the primary sources I've been using. But I'm curious about the cyrillic characters in the bottom left....is this an image you found online? Or a scanning of a hard copy plan sheet that you have? hamilton
-
Hi Collingwood: You're right - there are definitely challenges in trying to realise an authentic Greyhound (or Blandford) out of this kit. The bulwark step is one issue that I had to fudge and that will remain a bit of a sore point with me. As for the gunports - Corel has chosen to make the foremost "bridle" port into a gunport, which results in the "missing" gunport aft that you notice. There really is no room on this kit for adding that aftmost port. I chose to represent the Blandford awkwardly as an "18-gun" ship, since putting cannons in the foremost port would have blocked the ladders to the forecastle - thus I figured them as "bridle ports" and of necessity had to drop the number of cannons.....I don't know how this could have been solved with this kit - it would have required a considerable elongation of the centre keel and the addition of another bulkhead piece...... hamilton
-
Still can't get over how good the trunnels look!! Looking good Bob hamilton
-
Thanks Collingwood - You should also check out (if you haven't already) Harlequin's log of the Greyhound. The kit has some issues, and I advise you to be patient with it. As noted earlier here, I've been relying heavily on Goodwin's Anatomy of the Ship HMS Blandford as well as Lees' Masting & Rigging of English Ships of War. Both have been useful, though they throw into harsher relief the deficiencies of the kit. I've made a lot of modifications, but I think that even if you follow the construction suggestions supplied by Corel it builds up into a very nice model - Harlequin's build is a case in point. Just go slow and do a lot of forward planning! You should start a log on MSW - I'll certainly follow with interest, and I'd be happy to provide any tips or suggestions along the way should you require them. Good luck! hamilton
-
What!! That puts your built in quite a bit of perspective for me!! Essentially this means the Aggy is well out of my price range - not because of the kit itself, but because I'd have to buy a larger house for it! And at Vancouver prices....forget it! hamilton
- 1,279 replies
-
- 2
-
-
- agamemnon
- caldercraft
- (and 1 more)
-
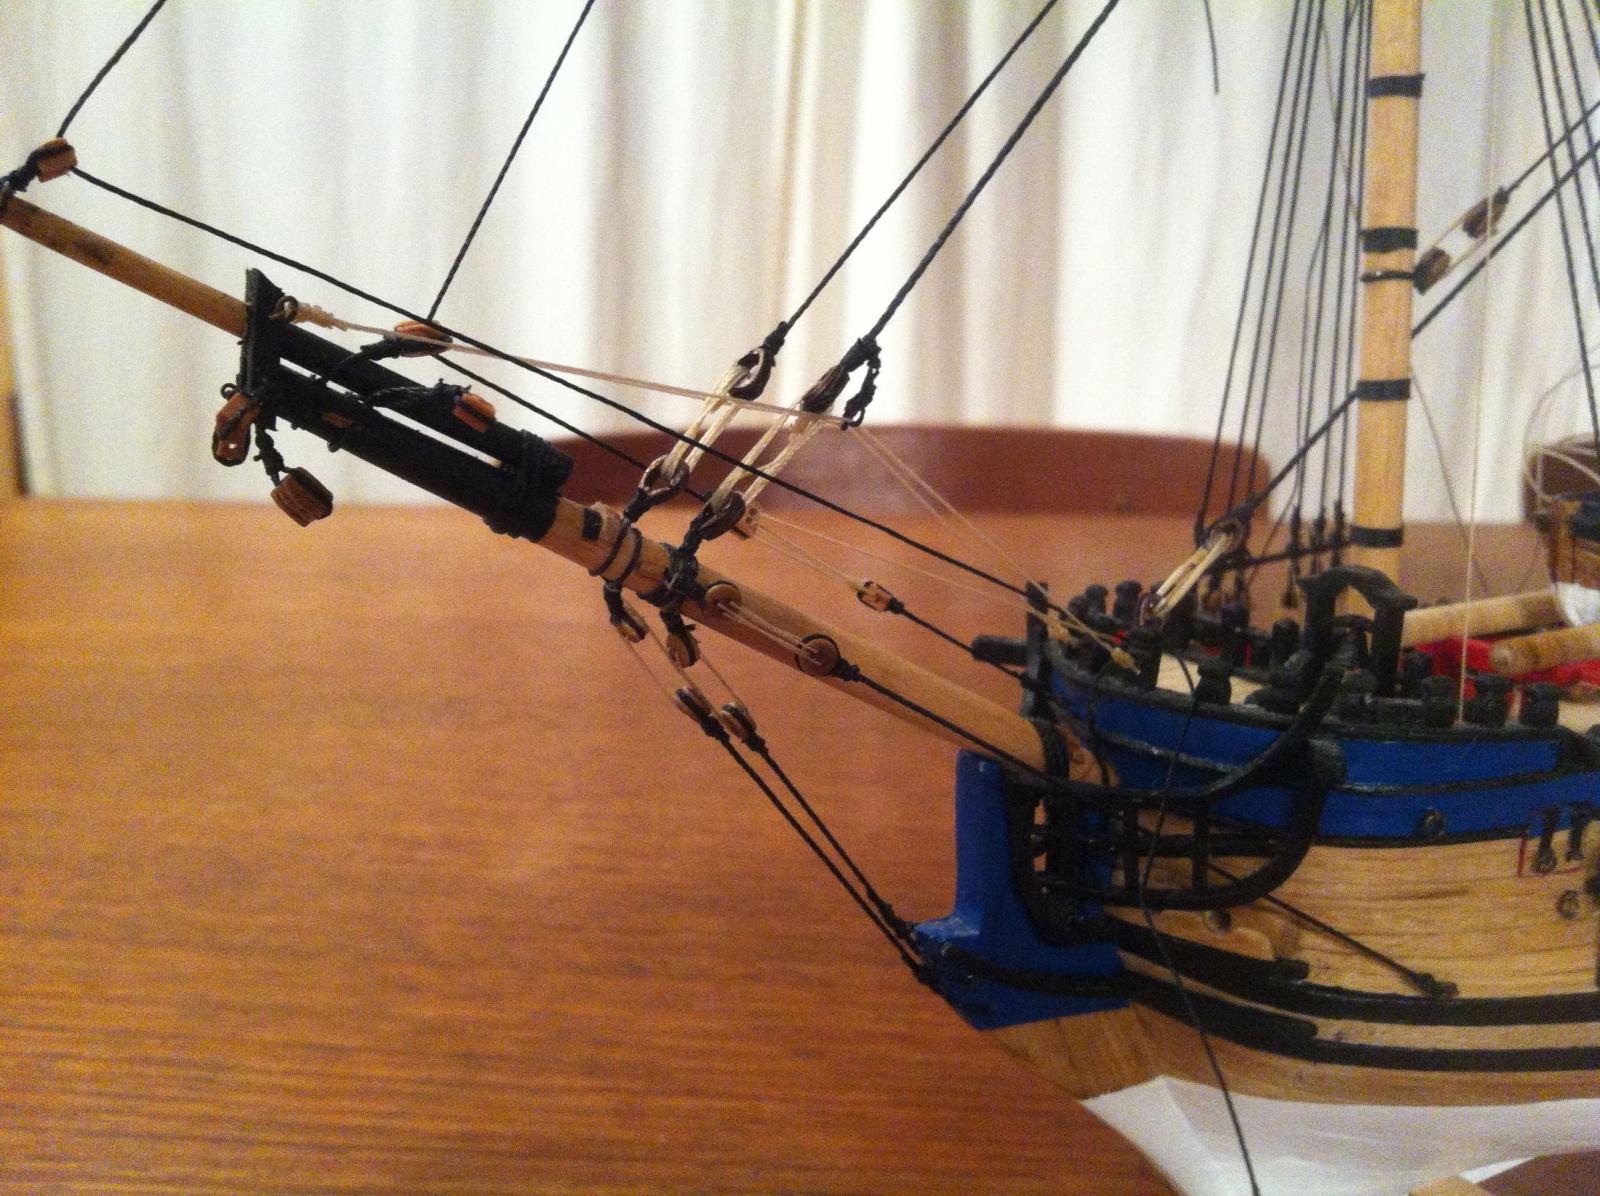
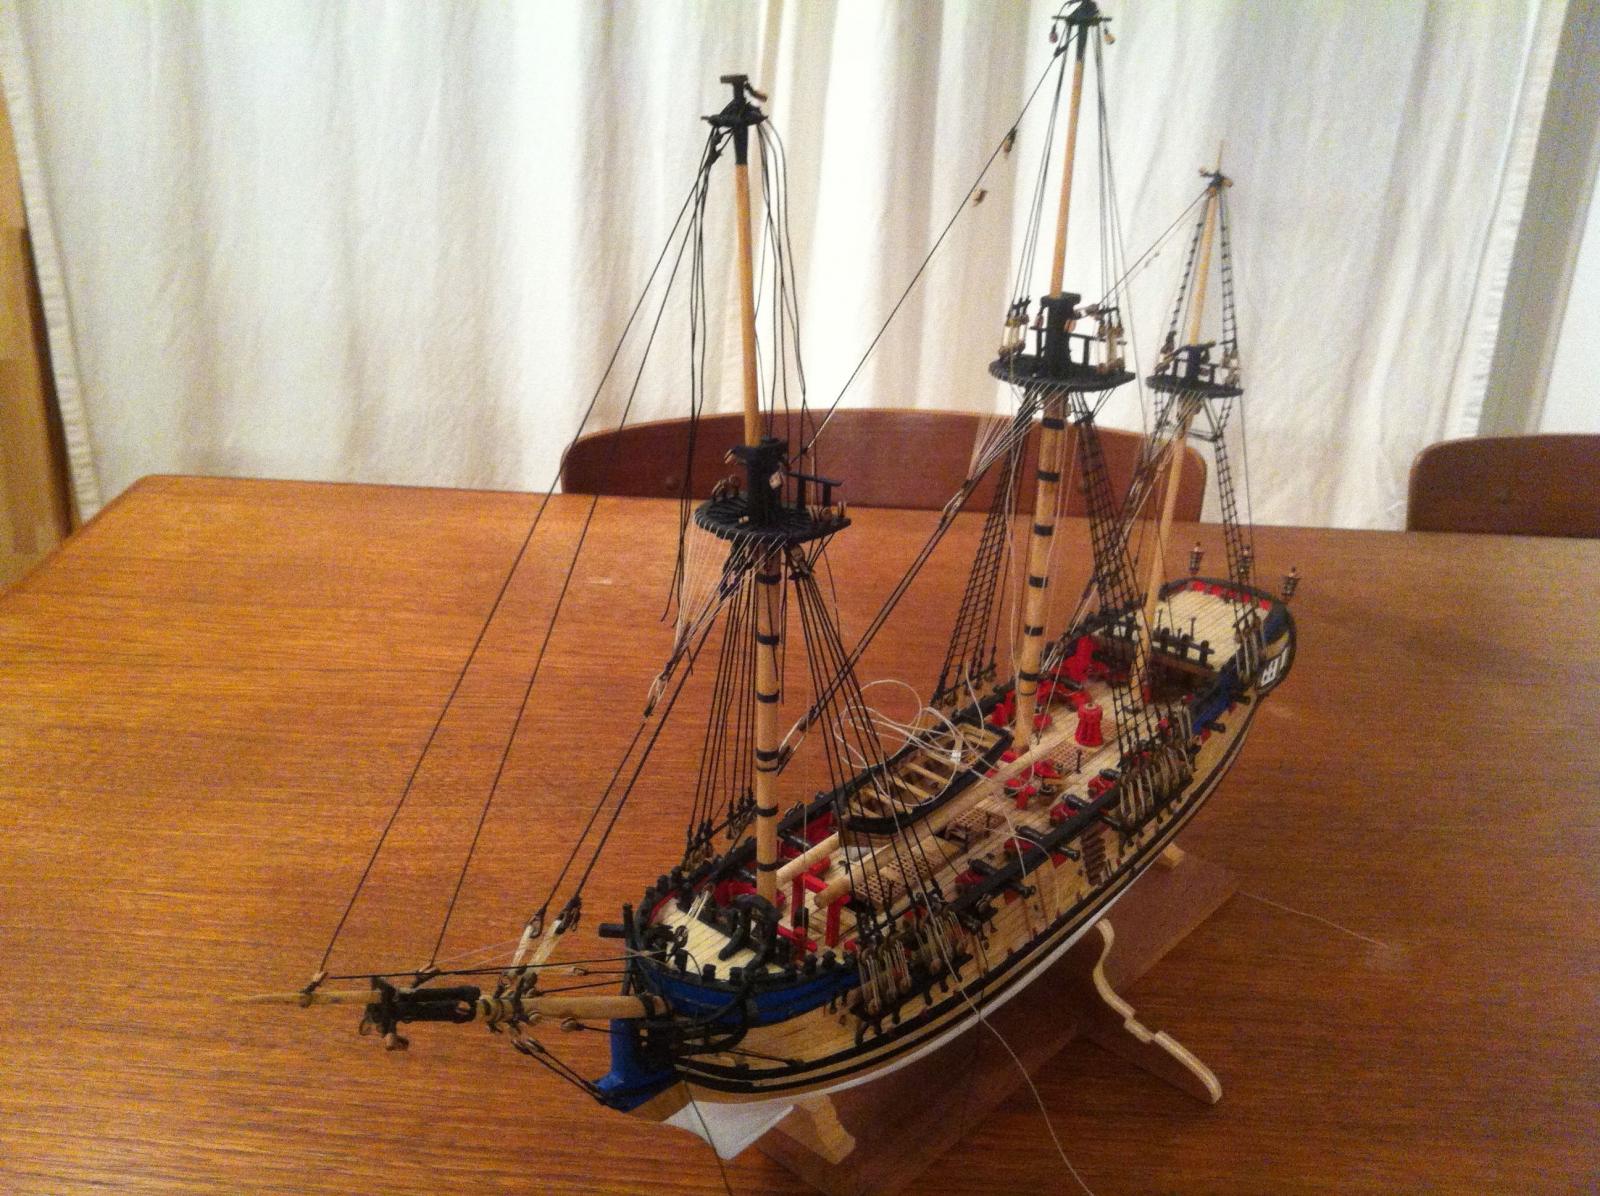
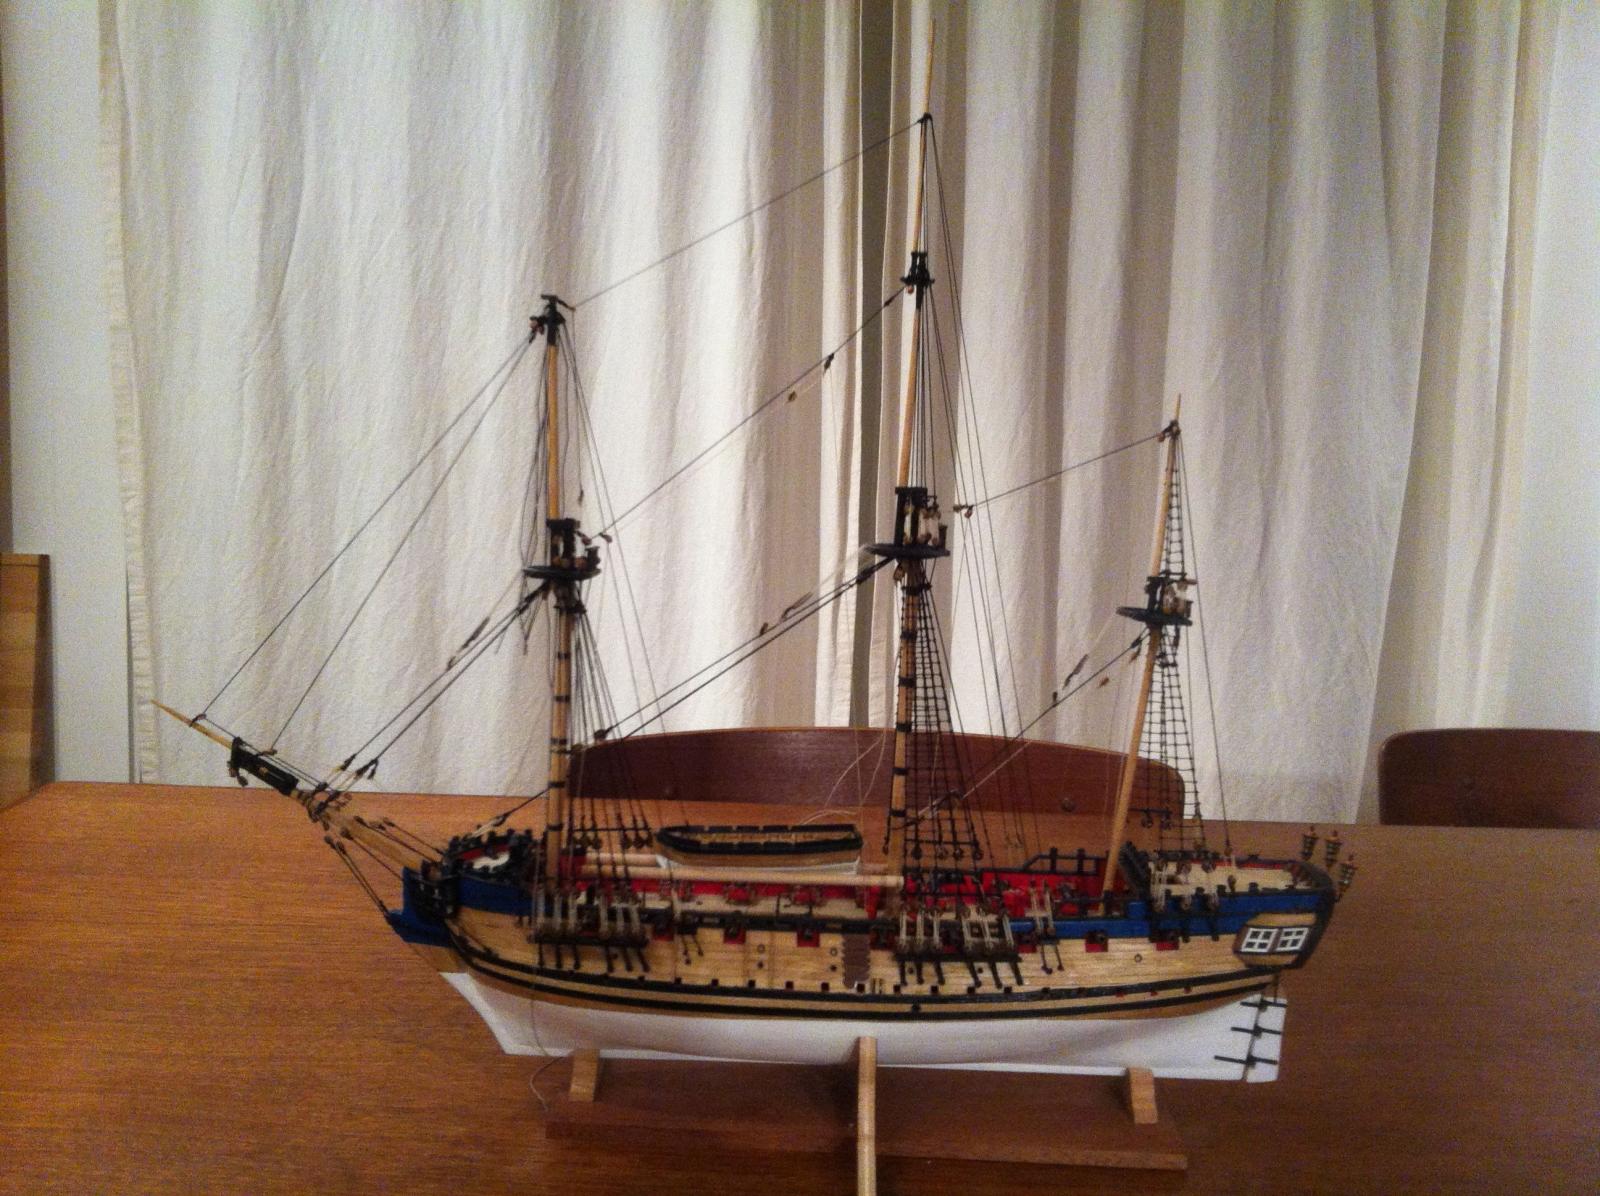
Well I see it's been over a week since my last update - October and November are always very busy times at work. Not a lot of time for modelling, I'm afraid. But in the small hours I've been able to carve out I've moved a little closer to completing the standing rigging. I can't think of all the things I've done since the last post, but definitely this has included the following -- constructing & outfitting the fore topmast -- constructing & outfitting the main topgallant mast -- rigging the fore topmast & jib stays & associated tackles -- rigging the main topgallant stay, topgallant backstays & topgallant shrouds -- rigging the fore topmast backstays -- rigging the bowsprit horses I still have the fore topmast shrouds & a lot of ratlines to install, plus rigging for the main topgallant staysail, the fore staysail, and the jib. Finally, I need to construct & outfit the fore topgallant mast, and install the associated rigging - the stay, backstays and shrouds...That will bring the standing rigging to a close..... Anyway, as mentioned before it's tough to get half decent photos on my iphone but here are a few shots - enjoy! hamilton Edit - Just tried uploading photos and again it's not working for some reason, so I'm going to put them in another post....
-
Ouch! Looked to have been a beautiful model - and will be again! hamilton
-
Impressive! - I mean the 2000 + posts! I know from what you've left on my build log that this is "all killer, no filler" as they used to say in the biz.... hamilton
-
And these small details add up in the end! Looking good Augie! hamilton
- 2,191 replies
-
- 1
-
-
- confederacy
- Model Shipways
- (and 1 more)
-
Very precise work Jason - looks great! hamilton
-
Hi Richard: The planking looks great so far! I wonder - what is the purpose of the 2mm planks? Is this a feature of the kit design? I've never seen a kit that uses two different thicknesses of planking for the first planking layer - just curious. hamilton
-
The ship's boats really bring her to life! Well done Mobbsie! hamilton
- 1,279 replies
-
- 1
-
-
- agamemnon
- caldercraft
- (and 1 more)
-
The ship's boats look great, Mobbsie! Great detail - can't wait to see them stowed on deck! hamilton
- 1,279 replies
-
- 1
-
-
- agamemnon
- caldercraft
- (and 1 more)
-
Welcome back John! Looking forward to more progress on the Morgan hamilton